1
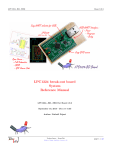
INNOV‐X SOIL QUICK START GUIDE INNOV‐X Systems, Inc. 10 Gill Street, Suite Q Woburn, MA 01801 THIS INSTRUMENT PRODUCES IONIZING RADIATION.
Only Users with Manufacturer Authorized Training should operate INNOV‐X Instruments Before use, read and understand instruction manual Review radiation safety– Chapter 3 in the Operator’s Manual Maintain Possession & Control of the Analyzer at all Times Never Point the Instrument at Yourself or Others Start‐up preparation for new units: • Charge main batteries for analyzer using Innov‐X battery charger. • Charge iPAQ. The iPAQ consumes battery power even when it is turned off. If the instrument is not used for a period of many days, the iPAQ may discharge completely, or may not have enough power to run a test. If instrument will not be used for several days, charge the iPAQ during down time. Daily Start up procedure: (More detailed information can be found in Section 5.1 of the User’s manual) 1. Place a battery in the analyzer. 2. Power on the Analyzer Main Power (On/Off switch located on base of handle) 3. Power on the iPAQ (Button located in upper right hand corner of iPAQ) 4. Select Innov‐X from the start menu located in the upper left hand corner of iPAQ screen. 5. Read the radiation safety notice and acknowledge that you are a certified user by pressing start 6. Select Soil Mode. 7. Analyzer will undergo a 60 second hardware initialization. 8. Place a standardization clip on the nose of the analyzer. Tap the button on the screen to standardize. 9. When standardization is complete, remove the standardization clip. (Manual section 4.4 Standardization) 10. Tap the “lock” icon in the lower right corner of the iPAQ screen to release software trigger lock 11. Test a soil standard to verify instrument performance. 12. Results will display on screen. Subsequent tests may be started from either Results or Analysis screens. • If necessary, tap the X in the upper right hand corner of the Results screen to return to the “Ready to test” Analysis screen at any time. • Test information can be entered from the analysis screen by tapping the Info button. (Manual 4.5.1) • Tests can be stopped by either pulling the trigger, or tapping Stop on the iPAQ screen. Compaq IPAQ Pocket PC® Basics: • Start menu is found in the upper left corner of screen. If “Start” icon is not visible, tap the screen in upper left corner. • Text is entered by tapping the keyboard icon in lower right to bring up the Virtual Keyboard or Character recognizer. • The File Toolbar is located at the bottom of the screen. • Pressing the right most button below the screen provides a list of applications currently running • To Reset the iPAQ, stick the tip of the stylus into the small hole located next to the connector. o Innov‐X software uses three main screens: Main, Analysis and Results: Users select mode to use via the Main Screen. Most edits to testing method are made via the Analysis screen, which typically says o
o
“Ready to test.” The Results screen shows all data. All data editing features are done from here. Always exit software completely when finished using analyzer! It may be necessary to close all three screens. Use File → Exit. Software will prompt for confirmation before closing. Removing iPAQ: Slide iPAQ towards nose of analyzer to clear connector before lifting upwards. Sample Preparation Considerations: • The degree of sample preparation will largely determine the accuracy obtained when using portable XRF! • EPA Method 6200 for portable XRF is written for in‐situ testing, as opposed to prepared‐sample testing. • Sample Preparation will depend on the goal of the analysis. For Quantitative Field Screening, it is often sufficient to analyze samples in plastic bags, or directly on the ground – in‐situ testing. In‐situ testing provides a high number of data points quickly in order to profile a site rapidly and find “hot spots.” • For more quantitative results, or for direct comparison to a laboratory analytical method such as AA or ICP, samples should be dried, homogenized and prepared in sample cups. For the best possible comparisons, it is best to have the laboratory analyze the same samples analyzed with the XRF. • Sample prep recommendations can be found in EPA Method 6200, Pg. 8 “Sample Preparation.” • For laboratory analysis, be sure to request a total digestion method. Exporting data: Exported data is saved as comma delimited (.csv) files. These files can be opened and formatted in MS Excel, or any other spreadsheet program. To transfer data to a PC, ActiveSync must be installed on the PC. From Results Screen 1. Choose File → Export Readings 2. Select readings to be exported. Tap OK. 3. Input Filename, folder, tap OK 4.
The results file will be stored in the My Documents Folder on the iPAQ. It can be copied to a PC using ActiveSync. If ActiveSync is set up to automatically synchronize files, this file will be copied when the iPAQ is connected to the PC. Changing Test Settings from Analysis screen: Test time: Select Options →Setup Testing • Min Time must elapse in a reading for results to be reported on screen. Tests stopped before Min Time will be considered to be aborted tests. • Max Test time is maximum length of test if a manual test end condition is selected. Turn live updates on/off: Select View → Live Updates Soil mode options and test end conditions Are described in section 5.2 of the users manual Erasing data: The software loads stored data when first result is taken in each mode after software is started. As more readings are stored, the analyzer will take longer to display the results of the first reading. If this period of time becomes too long, erase the data stored in memory. From Results Screen: 1. Select File →Erase Readings 2. Enter administrative password 3. Select readings to be deleted and tap OK. 4. Select “Yes” to confirm deletion. Manual: Section 4.6.3 Erasing readings Test end conditions: Select Options → Soil Mode Testing Setup • Manual: Test ends when test is stopped • Maximum Time: Test ends when Max time has elapsed • Rel. Std. Dev.: Must choose element and standard deviation. Test ends when error is within specified limits • Action Level: Must choose element and desired action level. Test ends when analyzer can determine if elements concentration is above or below action level. Innov-X Systems ● 10 Gill Street. Suite Q ● Woburn, MA 01801
Tel 781-938-5005 ● Fax 781-938-0128