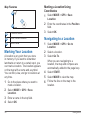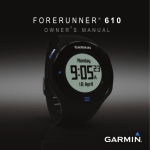
1
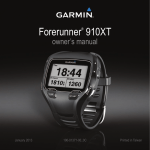
Forerunner 910XT ® owner’s manual May 2014 190-01371-00_0E Printed in Taiwan © 2011–2014 Garmin Ltd. or its subsidiaries All rights reserved. Under the copyright laws, this manual may not be copied, in whole or in part, without the written consent of Garmin. Garmin reserves the right to change or improve its products and to make changes in the content of this manual without obligation to notify any person or organization of such changes or improvements. Go to www.garmin.com for current updates and supplemental information concerning the use of this product. Garmin®, the Garmin logo, Auto Lap®, Auto Pause®, Forerunner®, and Virtual Partner® are trademarks of Garmin Ltd. or its subsidiaries, registered in the USA and other countries. ANT+™, ANT Agent™, Garmin Connect™, GSC™, USB ANT Stick™, Vector ™, and Virtual Racer™ are trademarks of Garmin Ltd. or its subsidiaries. These trademarks may not be used without the express permission of Garmin. Firstbeat and Analyzed by Firstbeat are registered or unregistered trademarks of Firstbeat Technologies Ltd. New Leaf® is a registered trademark of the Angeion Corporation. Other trademarks and trade names are those of their respective owners. Training Stress Score™ (TSS), Intensity Factor™ (IF), and Normalized Power™ (NP) are trademarks of Peaskware, LLC. This product is ANT+™ certified. Visit www.thisisant.com/directory for a list of compatible products and apps. Table of Contents Swim Features��������������������������������������� 19 Using the Countdown Timer������������������ 21 Introduction��������������������������������������3 ANT+ Sensors��������������������������������21 Training with Your Forerunner�������7 History��������������������������������������������29 Getting Started���������������������������������������� 3 Charging the Forerunner������������������������� 3 Turning on the Forerunner����������������������� 4 Using the Backlight���������������������������������� 4 Keys��������������������������������������������������������� 5 Icons�������������������������������������������������������� 5 About the Barometric Altimeter���������������� 6 Changing Sports�������������������������������������� 7 Running Basics���������������������������������������� 7 Multisport Workouts��������������������������������� 8 Alerts������������������������������������������������������� 9 Auto Lap������������������������������������������������ 10 Pausing Your Run Automatically������������ 12 Using Auto Scroll����������������������������������� 12 Running With a Virtual Partner�������������� 12 Virtual Racer������������������������������������������ 13 Interval Workouts����������������������������������� 14 Custom Workouts���������������������������������� 15 Courses������������������������������������������������� 16 Training Indoors������������������������������������� 18 Biking Options��������������������������������������� 18 Table of Contents Pairing Your ANT+ Sensors������������������� 22 Heart Rate Monitor�������������������������������� 22 Foot Pod������������������������������������������������ 24 Bike Sensors����������������������������������������� 26 Power Meters���������������������������������������� 26 Weight Scales���������������������������������������� 27 Fitness Equipment��������������������������������� 28 Viewing History�������������������������������������� 29 Deleting History������������������������������������� 30 Using Garmin Connect�������������������������� 30 Goals����������������������������������������������������� 31 Navigation��������������������������������������31 Adding the Map Page���������������������������� 31 Marking Your Location��������������������������� 32 Navigating to a Location������������������������ 32 Editing or Deleting a Location���������������� 33 Navigating Back to Start������������������������ 33 Stopping Navigation������������������������������ 33 Viewing GPS Information���������������������� 33 Customizing Your Device�������������34 1 System Settings������������������������������������� 34 User Profiles������������������������������������������ 35 Data Fields�������������������������������������������� 36 Device Information������������������������43 Caring for Your Device��������������������������� 43 Specifications���������������������������������������� 43 Heart Rate Monitor Battery�������������������� 44 Appendix����������������������������������������45 Registering Your Device������������������������ 45 Wheel Size and Circumference������������� 45 Troubleshooting ������������������������������������ 47 Software License Agreement����������������� 50 Index�����������������������������������������������51 2 Table of Contents Introduction warning Always consult your physician before you begin or modify any exercise program. See the Important Safety and Product Information guide in the product box for product warnings and other important information. Getting Started When using your Forerunner the first time, complete these tasks. 1 Charge the Forerunner (page 3). 2 Turn on the Forerunner (page 4). 3 Put on the optional heart rate monitor (page 22). 4 Go for a run (page 7). 5 Save your run (page 8). Introduction Charging the Forerunner warning This product contains a lithium-ion battery. See the Important Safety and Product Information guide in the product box for product warnings and other important information. notice To prevent corrosion, thoroughly dry the contacts and the surrounding area before charging. 1 Plug the USB connector on the charging clip cable into the AC adapter. 2 Plug the AC adapter into a standard wall outlet. 3 Align the charging clip posts with the contacts on the back of the Forerunner. 4 Clip the charger securely over the face of the Forerunner. 3 Using the Backlight 1 Select ENTER to turn on the backlight. 5 Charge the Forerunner completely. TIP: You can double-tap the device screen to turn on the backlight. This feature is only available in “Run” and “Other” sport modes. 2 Select , and use ▲ and ▼ to adjust the backlight level. A fully charged battery will last up to 20 hours, depending on usage. Turning on the Forerunner The first time you use the Forerunner, you are prompted to choose your system settings and enter user profile information. 1 Hold to turn on your Forerunner. 2 Follow the on-screen instructions. 3 Go outdoors to an open area. 4 Wait while the Forerunner searches for satellites. It may take 30–60 seconds to locate satellite signals. The time of day and date are set automatically. 4 This window also displays several status icons. Introduction Keys ➌ ➊ ➋ ➍ ➎ ➏ ➌ ➎ ➊ ➋ ▲▼ Introduction ➍ Hold to turn the device on and off. Select to adjust the backlight. Select to view status icons (page 5). Select to search for a compatible weight scale. Select to scroll through menus and settings. Hold to scroll quickly through the settings. Select to scroll through training pages during a workout. ➏ ENTER Select to turn on the backlight. Select to choose an option and to acknowledge a message. START/ Select to start and stop the STOP timer. LAP/ Select to mark a new lap. RESET Hold to save your activity and reset the timer. MODE Select to view the timer and the menu. The map and the compass also appear if they are active. Select to exit a menu or a page. Your settings are saved. Hold to switch sport modes. Icons A solid icon means the feature is active. A flashing icon means the device is searching. GPS is on. GPS is off. Timer is running. Multiple sport activity is in progress. Battery charge level. 5 Battery is charging. Heart rate monitor is active. Foot pod is active. Bike sensor is active. Power sensor is active. Fitness equipment is active. Run sport is active. Bike sport is active. Swim (open or pool) sport is active. Other sport is active. Locking the Keys You can lock the keys on your Forerunner. This decreases the chance of accidentally pressing a key when taking the device on and off. 1 Select MODE and ▲ simultaneously to lock the keys. 2 Select MODE and ▲ simultaneously to unlock the keys. 6 About the Barometric Altimeter NOTE: The barometric altimeter does not function in swim mode. Your Forerunner calculates elevation using the barometric altimeter. The barometric altimeter is sensitive to weather events and pressurized areas such as airplane cabins and cars. If the barometric altimeter starts to report false readings due to environmental conditions, the Forerunner will use GPS elevation data. You can customize your data fields to include elevation (page 36). Calibrating the Barometric Altimeter You can calibrate the barometric altimeter manually using a saved location. 1 Go to a location with a known elevation. 2 Select MODE > GPS > Save Location. 3 Enter the elevation in the Elevation field. 4 Select OK. Introduction The Forerunner will automatically calibrate the barometric altimeter if you are within 50 meters of a saved location with elevation data. Otherwise, the Forerunner calibrates the barometric altimeter using GPS elevation data. Training with Your Forerunner This section describes training features and settings for your device. Many of the tasks have instructions for run mode, but most of the training features can be used in all of the sport modes. • Changing sports (page 7) • Running basics (page 7) • Multisport workouts (page 8) • Alerts (page 9) • Auto Lap® (page 10) • Auto Pause® (page 12) • Auto scroll (page 12) • Virtual Partner® (page 12) • Virtual Racer™ (page 13) • Interval workouts (page 14) Training with Your Forerunner • • • • Custom workouts (page 15) Training indoors (page 18) Biking options (page 18) Countdown timer (page 21) Changing Sports • Hold MODE. • Use Auto Multisport (page 8). Running Basics Going for a Run Before you can record history, you must locate satellite signals (page 4) or pair your Forerunner with an optional foot pod (page 24). 1 Select START to start the timer ➊. ➊ ➋ ➌ History is recorded only while the timer is running. Your pace ➋ and distance ➌ appear on the timer page. 7 The data fields shown are the defaults. You can customize the data fields (page 36). 2 After completing your run, select STOP. sports in the workout. It also includes specific details for each sport. You can use multisport workouts manually, or you can preset multisport workouts for races and other events. Saving Your Run 1 Hold RESET to save your run and Creating a Manual Multisport Workout 1 Start a workout in any sport. 2 When you are ready to switch sport reset the timer. 2 Transfer saved activities to your computer (page 30). Multisport Workouts Triathletes, duathletes, and other multisport competitors can take advantage of the multisport workouts. When you set up a multisport workout, you can switch between sport modes and still view your total time and distance for all sports. For example, you can switch from biking mode to running mode and view your total time and distance for biking and running throughout your workout. The Forerunner stores multisport workouts in history and includes total time, distance, average heart rate (optional heart rate monitor required), and calories for all 8 modes, hold MODE. 3 Select another sport mode. The timer automatically resets for the new leg of your workout. 4 Use ▲ or ▼ to view the multisport timer. Creating an Auto Multisport Workout If you are participating in a triathlon, you can use Auto Multisport to quickly transition to each sport segment. You can also customize the sport segments. 1 Select MODE > Training > Auto Multisport. Training with Your Forerunner 2 If necessary, select Include Transition to record transition time separately from the sport segments. 3 Select Start Multisport > START. ➊ ➋ Your total event time ➊ and total event distance ➋ appear on the first page in the training page loop. You can use ▲ and ▼ to view additional training pages for each sport segment. 4 Select LAP when you complete a segment or transition. Stopping Auto Multisport • Select MODE > Training > Stop Multisport. • Select STOP, and hold RESET. Alerts NOTE: Alerts do not function during interval or custom workouts. Training with Your Forerunner You can use alerts to train toward specific time, distance, calorie, heart rate, cadence and power goals. NOTE: To turn on alert tones and vibrations, see page 34. Setting Time, Distance, and Calorie Alerts NOTE: Calorie alerts are not available in swim mode. 1 Select MODE > Training > Run Alerts. 2 Select Time Alert, Distance Alert, or Calorie Alert. 3 Select On. 4 Select Alert At, and enter a time, distance, or calorie amount. Each time you reach the alert amount, the device beeps or vibrates and displays a message. Setting Advanced Alerts If you have an optional heart rate monitor, foot pod, GSC™ 10, or power meter, you can set up advanced alerts for heart rate, cadence, and power. 9 NOTE: Advanced alerts are not available in swim mode. 1 Select MODE > Training > Run Alerts. 2 Select an option: • Select HR Alert to set the high and low heart rate values in beats per minute (bpm). NOTE: For more information about heart rate zones, see page 23. • Select Cadence to set the minimum and maximum cadence amounts in steps per minute (spm) or revolutions of the crank arm per minute (rpm). • Select Power Alert to set the minimum and maximum power in watts. NOTE: For more information about power zones, see page 27. 3 Set the parameters for your alerts. Each time you exceed or drop below the specified heart rate or cadence amount, the device beeps or vibrates and displays a message. 10 Setting Walk Break Alerts Some running programs use timed walking breaks at regular intervals. For example, during a long training run, the program may instruct you to run for four minutes, then walk for 1 minute, and repeat. Auto Lap functions correctly while you are usig the run/walk alerts. NOTE: Walk alerts are available only in run mode. 1 Select MODE > Training > Run Alerts. 2 Select Run/Walk Alert > On. 3 Select Run Alert, and enter a time. 4 Select Walk Alert, and enter a time. Each time you reach the alert amount, the device beeps or vibrates and displays a message. The run/walk alerts will repeat until you stop the timer. Auto Lap NOTE: Auto Lap does not function during interval or custom workouts or pool swim mode. Training with Your Forerunner Default Settings Sport Mode Default Distance Run 1 mile or 1 kilometer Bike 5 miles or 5 kilometers Open water swim Other 0.25 mile or 0.5 kilometer 1 mile or 1 kilometer Marking Laps by Distance You can use Auto Lap to automatically mark the lap at a specific distance. This feature is helpful for comparing your performance over different parts of a run. 1 Select MODE > Settings > Run Settings > Auto Lap. 2 Select Auto Lap Trigger > By Distance. 3 Select Lap At, and enter a distance. Marking Laps by Position You can use Auto Lap to automatically mark the lap at a specific position. This feature is helpful for comparing your performance over different parts of a run (for example, a long hill or training sprints). Training with Your Forerunner 1 Select MODE > Settings > Run Settings > Auto Lap. 2 Select Auto Lap Trigger > By Position > Lap At. • Select Lap Press Only to trigger the lap counter each time you select LAP and each time you pass any of those positions again. • Select Start and Lap to trigger the lap counter at the GPS location where you select START and at any location during the run where you select LAP. • Select Mark and Lap to trigger the lap counter at a specific GPS location marked before the run (use Mark Position) and at any location during the run where you select LAP. NOTE: When doing a course (page 16), use By Position to mark laps at all of the lap positions marked in the course. 11 Pausing Your Run Automatically You can use Auto Pause to pause the timer automatically when you stop moving or when your speed drops below a specified value. This feature is helpful if your run includes stop lights or other places where you need to slow down or stop. NOTE: The paused time is not saved with your history data. NOTE: Auto Pause does not function during interval or custom workouts or swim mode. 1 Select MODE > Settings > Run Settings > Auto Pause. 2 Select an option: • To pause the timer automatically when you stop moving, select When Stopped. • To pause the timer automatically when your speed drops below a specified value, select Custom Speed. 12 Using Auto Scroll You can use the auto scroll feature to automatically cycle through all of the training data pages while the timer is running. 1 Select MODE > Settings > Run Settings > Auto Scroll. 2 Select Slow, Medium, or Fast. Running With a Virtual Partner Your Virtual Partner is a training tool designed to help you meet your goals. NOTE: Virtual Partner is not available in swim mode. 1 Select MODE > Settings > Run Settings > Virtual Partner. 2 Select Virtual Partner > On. Changing the Virtual Partner Pace If you make changes to the Virtual Partner pace before you start the timer, those changes are saved. Changes made to the Virtual Partner pace after the timer has started are applied only to the current session, and are not saved when the timer is reset. If you make changes to Training with Your Forerunner the Virtual Partner during an activity, the Virtual Partner uses the new pace from your location. 1 Select MODE to view the training page. 2 Use ▲ or ▼ to view the Virtual Partner page. 3 Hold ▲ or ▼ to increase or decrease the Virtual Partner pace. Virtual Racer Your Virtual Racer is a training tool designed to help you improve your performance. You can race against your own activity or one transferred from your computer (page 14). For example, you can practice running the actual race route and save it to your Forerunner. On race day, you can race against that practice run. The Virtual Racer pushes you to beat your previous pace including hills where Training with Your Forerunner you might slow down and the final sprint to the finish line. NOTE: Virtual Racer is not available in swim mode. Running With a Virtual Racer Before you can create a race, you must have at least one saved activity. 1 Select MODE > Training > Virtual Racer. 2 Select New, and select an activity. 3 Select the race. 4 Select Do Race. Editing a Virtual Race 1 Select MODE > Training > Virtual Racer. 2 Select the race. 3 Select Edit Race to change the name and view statistics from the previous activity. Deleting a Virtual Race 1 Select MODE > Training > Virtual Racer. 2 Select the race. 3 Select Delete Race > Yes. 13 Racing Against an Activity From the Web You must have a Garmin Connect™ account, and you must pair the Forerunner with your computer using the USB ANT Stick™ (page 30). 1 Go to www.garminconnect.com, and find an activity. 2 Click Send to Device, and wait for ANT Agent™ to send the activity. 3 Select MODE > Training > Virtual Racer. 4 Select the race. 5 Select Do Race > START. Interval Workouts You can create interval workouts based on distance or time. Your custom interval workout is saved until you create another interval workout. Open intervals can be used for track workouts when you are running a known distance but want to keep track of how many intervals you have completed. NOTE: Interval workouts are not available in swim mode. 14 Creating and Doing an Interval Workout 1 Select MODE > Training > Workouts > Interval. 2 Select Type, and select Time or Distance. 3 Enter a distance or time interval value. 4 Select Rest Type, and select Time or Distance. 5 Enter a distance or time value for the rest interval. 6 Select More for additional options. 7 Select Reps and enter the number of repetitions. 8 If necessary, select Warm Up to add an open-ended warmup to your workout. 9 If necessary, select Cool Down to add an open-ended cooldown to your workout. 10 Select Do Workout > START. If your interval workout has a warm up, you must select LAP to begin the first interval. 11 Follow the on-screen instructions. Training with Your Forerunner When you complete all of the intervals, a message appears. Stopping a Workout • At any time, select LAP to end an interval or workout step. • At any time, select STOP to stop the timer. • If your interval workout has a cool down, you must select LAP to end the interval workout. Creating a Custom Workout 1 Select MODE > Training > Workouts 2 3 4 Custom Workouts Custom workouts can include goals for each workout step and varied distances, times, and calories. You can create custom workouts using Garmin Connect (page 30), and transfer them to the Forerunner. However, you can also create and save a custom workout directly on your Forerunner. You can also schedule custom workouts using Garmin Connect. You can plan workouts in advance and store them on your Forerunner. NOTE: Custom workouts are not available in swim mode. Training with Your Forerunner 5 6 7 > Custom > New. Enter a workout name in the top field. Select 1. Open No Target > Edit Step. Select Duration to specify how the step will be measured. For example, select Distance to end the step after a specific distance. If you select Open, you can end the step during your workout by selecting LAP. Below Duration, enter a value. Select Target to choose your goal during the step. For example, select Heart Rate to maintain a consistent heart rate during the step. If necessary, select a target zone or enter a custom range. For example, you can select a heart rate zone. Each time you exceed or drop below the specified heart rate, the device beeps and displays a message. 15 8 When you are finished with the step details, select MODE. 9 Complete an action: • To add another step, select <Add New Step> and repeat steps 4-8. • To mark any step as a rest step, select the step and select Mark as Rest Step. Rest steps are noted in your workout history. Repeating Steps Before you can repeat a workout step, you must create a workout with at least one step. 1 Select <Add New Step> > Duration. 2 Select an option: • Select Repeat to repeat a step one or more times. For example, you can repeat a 1-mile step 4 times. • Select Repeat Until to repeat a step for a specific duration. For example, you can repeat a 5-minute step for thirty minutes or until you reach heart rate zone 5. 16 3 Select Back to Step, and select a step to repeat. 4 Select MODE to continue. Starting a Custom Workout 1 Select MODE > Training > Workouts > Custom. 2 Select the workout. 3 Select Do Workout > START. Deleting a Custom Workout 1 Select MODE > Training > Workouts > Custom. 2 Select the workout. 3 Select Delete Workout > Yes. Courses Another way you can use the Forerunner for custom training is to follow courses based on a previously recorded activity. You can follow a saved course simply because it is a good route. For example, you can save a bike friendly commute to work. You can also follow a saved course, trying to match or exceed previously set performance goals. For example, if the original course was completed in 30 Training with Your Forerunner minutes, you will race against a Virtual Partner trying to complete the course in under 30 minutes. You can create a course from your own activity, or you can send a course from Garmin Connect to your device. NOTE: Courses are not available in swim mode. Starting a Course 1 Select MODE > Training > Courses. 2 Select the course. 3 Select Do Course > START. Creating Courses with Your Forerunner 1 Select MODE > Training > Courses > You must have a Garmin Connect account, and you must pair the Forerunner with your computer using the USB ANT Stick (page 30). 1 Go to www.garminconnect.com, and find an activity. 2 Click Send to Device, and wait for ANT Agent to send the activity. 3 Select MODE > Training > Courses. 4 Select the course. 5 Select Do Course > START. New. 2 From the History page, select an entry on which to base your course. 3 Select MODE to exit. Editing a Course 1 Select MODE > Training > Courses. 2 Select the course. 3 Select Edit Course to change the name and view statistics from the previous activity. Training with Your Forerunner History is recorded even if you are not on the course. Following a Course From the Web Tips for Training with Courses • If you include a warmup, select START to begin the course, and then warm up as normal. • Stay away from your course path as you warm up. When you are ready to 17 begin, head toward your course. When you are on any part of the course path, a message appears. NOTE: As soon as you select START, your Virtual Partner starts the course and does not wait for you to warm up. • Select MODE to view the course map or use the compass to find your way back to the course. Changing the Course Speed 1 Select MODE > Training > Courses. 2 Select the course. 3 Select Do Course. 4 Use ▲ or ▼ to view the Virtual Partner page. 5 Hold ▲ or ▼ to adjust the percentage of time to complete the course. For example, to improve your course time by 20%, enter a course speed of 120%. You will race against the Virtual Partner to finish a 30-minute course in 24 minutes. Stopping a Course Select MODE > Training > Courses > Stop Course. 18 Deleting a Course 1 Select MODE > Training > Courses. 2 Select the course. 3 Select Delete Course > Yes. Training Indoors If the Forerunner cannot locate satellites, a message appears asking if you are indoors. You can also manually turn off GPS when you are training indoors. While the Forerunner is trying to locate satellites, select ENTER > Yes. TIP: For more information about GPS settings, see page 33. Biking Options • For information about the GSC 10, see page 26. • For information about power meters, see page 26. Saving Your Bike Profiles You can customize up to five bike profiles. 1 In bike mode, select MODE > Settings > Bike Settings > Bikes. Training with Your Forerunner 2 Select up to five bikes, and select 3 4 5 6 7 Done. Select Bike 1 > Bike Details. Enter a name for the bike profile, the bike weight, and the odometer value. If you are using a speed and cadence sensor or power sensor, select Wheel Size. • Select Auto to calculate your wheel size using GPS distance. • Select Custom to enter your wheel size. For a table of wheel sizes and circumferences, see page 45. Hold MODE to switch bikes. Repeat steps 1–5 for additional bikes. Swim Features NOTICE The Forerunner is intended for surface swimming. Scuba diving with the Forerunner may damage the product and will void the warranty. Swimming in Open Water You can use the Forerunner for open water swimming. You can record your Training with Your Forerunner swim data including distance, pace, and stroke count. NOTE: The Forerunner cannot record heart rate data while swimming. 1 Hold MODE. 2 Select Swim > Open Water Swim. 3 If necessary, select MODE > Settings > Open Water Settings > Data Fields to customize the swim training pages. For a complete list of the available data fields, see page 36. 4 Select START. 5 After completing your swim, select STOP. 6 Hold RESET to save your data and reset the timer. Swimming in a Pool You can record your swim data including distance, pace, stroke count, and stroke type (pool swim only). NOTE: The Forerunner cannot record heart rate data while swimming. 1 Hold MODE. 2 Select Swim > Pool Swim. 19 3 Select your pool length or enter a Mixed 4 Swim Terminology 5 6 7 8 custom length. If necessary, select MODE > Settings > Pool Swim Settings > Data Fields to customize the swim training pages. For a complete list of the available data fields, see page 36. Select START. If you stop to rest, select LAP, and select LAP again when you resume swimming. This creates a rest interval separate from your swim interval. After completing your swim, select STOP. Hold RESET to save your data and reset the timer. Stroke Types Stroke type identification is available only in pool swim mode. Your stroke type is identified at the end of a length. Free Back Breast Fly 20 Freestyle Backstroke Breaststroke Butterfly More than one stroke type in an interval • A length is one trip down the pool. • An interval in swimming is like a lap in running. You can break your swim into swim intervals and rest intervals. • A stroke is counted every time your arm wearing the Forerunner completes a full cycle. • Your swolf score is the sum of the time for one length and the number of strokes for that length. For example, 30 seconds plus 15 strokes equals a swolf score of 45. Swolf is a measurement of swimming efficiency and, like golf, a lower score is better. • Your swim efficiency index is the sum of the time and the number of strokes that it takes to swim 25 meters. This allows you to compare your swim efficiency to another pool or an open water workout. A lower swim efficiency index is better. Training with Your Forerunner Swim Tips The Forerunner cannot record strokes or lengths during drill strokes or kick sets. Garmin recommends that you record drills as a separate swim interval using the LAP key. Similarly, use the LAP key to record rest intervals separately. This improves the accuracy of your swim data. If you do not use the LAP key for rest intervals or stop the timer, the Forerunner may take 7-8 seconds to display data for the last completed length. Using the Countdown Timer You can use the countdown timer to automatically start the Forerunner timer after a specified countdown. For example, you can use a 30-second countdown before you start a timed sprint. You can also set a 5-minute countdown before starting a boat race. During the countdown, history is not recorded. NOTE: The countdown timer is only available in “Other” sport mode. 1 Hold MODE > Other. ANT+ Sensors 2 Select MODE > Settings > Other Settings > Countdown Timer. 3 Select Countdown Timer > On. 4 Enter the countdown time. 5 Select START to begin the countdown timer. You will hear 5 beeps before the timer starts automatically. ANT+ Sensors The Forerunner is compatible with these ANT+ accessories. • Heart rate monitor (page 22) • Foot pod (page 24) • Bike sensors (page 26) • Power meters (page 26) • Weight scales (page 27) • Fitness equipment (page 28) For information about purchasing additional accessories, go to http://buy.garmin.com. 21 Pairing Your ANT+ Sensors Before you can pair, you must put on the heart rate monitor or install the sensor. See the quick start manual or the accessory instructions. If your Forerunner does not show data from the accessory, you may need to pair the accessory to your Forerunner. Pairing is the connecting of ANT+™ wireless sensors, for example, connecting your foot pod with a Forerunner. After you pair the first time, your Forerunner automatically recognizes your foot pod each time it is activated. • Make sure the ANT+ sensor is compatible with your Forerunner. • Bring the Forerunner within 3 m of the ANT+ sensor. • Stay 10 m away from other ANT+ sensors while pairing. • If is off, select MODE > Settings > Run Settings > Heart Rate > ANT+ HR > Yes > Restart Scan. • If is off, select MODE > Settings > Run Settings > Foot Pod > Yes > Restart Scan. 22 • If is off, select MODE > Settings > Bike Settings > bike name > ANT+ Spd/Cad > Yes > Restart Scan. • If is off, select MODE > Settings > Bike Settings > bike name > ANT+Power > Yes > Restart Scan. • If you still cannot pair the accessory, replace the accessory battery (see page 44 or accessory instructions). When the accessory is paired, a message appears, and the accessory icon (page 5) appears solid on the screen. Heart Rate Monitor NOTE: The Forerunner cannot record heart rate data while swimming. Putting on the Heart Rate Monitor NOTE: If you do not have a heart rate monitor, you can skip this task. Wear the heart rate monitor directly on your skin, just below your breastplate. It should be snug enough to stay in place during your run. 1 Snap the heart rate monitor ➊ onto the strap. ANT+ Sensors When the heart rate monitor is paired, a message appears, and appears solid on the screen. ➊ 2 Wet the electrodes ➋ on the back of the strap to create a strong connection between your chest and the transmitter. NOTE: Some heart rate monitors have a contact patch ➌. Wet the contact patch. ➍ ➌ ➋ ➋ 3 Wrap the strap around your chest, and connect the strap hook ➍ to the loop. The Garmin logo should be right-side up. 4 Bring the device within range (3 m) of the heart rate monitor. TIP: If the heart rate data is erratic or does not appear, you may have to tighten the strap on your chest or warm up for 5–10 minutes. After you put on the heart rate monitor, it is on standby and ready to send data. ANT+ Sensors Setting Your Heart Rate Zones Before you can customize your heart rate zones, you must enable the heart rate monitor. The Forerunner uses your user profile information from the initial setup to determine your heart rate zones. For the most accurate calorie data during your activity, set your maximum heart rate, resting heart rate, and heart rate zones. 1 Select MODE > Settings > Run Settings > Heart Rate > HR Zones. 2 Follow the on-screen instructions. 3 Repeat for each sport mode. About Heart Rate Zones Many athletes are using heart rate zones to measure and increase their cardiovascular strength and improve their level of fitness. A heart rate zone is a set range of heartbeats per minute. The five commonly accepted heart rate zones are numbered from 1 to 5 according to increasing intensity. Generally, heart 23 rate zones are calculated based on percentages of your maximum heart rate. Fitness Goals Knowing your heart rate zones can help you measure and improve your fitness by understanding and applying these principles. • Your heart rate is a good measure of exercise intensity. • Training in certain heart rate zones can help you improve cardiovascular capacity and strength. • Knowing your heart rate zones can prevent you from overtraining and can decrease your risk of injury. If you know your maximum heart rate, you can use the table (page 49) to determine the best heart rate zone for your fitness objectives. If you do not know your maximum heart rate, use one of the calculators available on the Internet. Some gyms and health centers can provide a test that measures maximum heart rate. More Heart Rate Options • Heart rate alerts (page 9) 24 • Heart rate zone calculations (page 49) • Heart rate data fields (page 36) • Heart rate troubleshooting (page 48) Foot Pod Your Forerunner is compatible with the foot pod. You can use the foot pod to send data to your Forerunner when training indoors, when your GPS signal is weak, or when you lose satellite signals. The foot pod is on standby and ready to send data as soon as you install it or start moving. You must pair the foot pod with your Forerunner (page 22). When the battery is low, a message appears on your Forerunner. Approximately five hours of battery life remain. Choosing Your Speed Source If you plan to train outdoors, you can set the Forerunner to use foot pod data to calculate pace rather than using GPS. 1 Select MODE > Settings > Run Settings > Foot Pod > Yes. ANT+ Sensors 2 Select Speed Source > Foot Pod. About Foot Pod Calibration Calibrating your foot pod is optional and can improve accuracy. There are three ways to adjust the calibration: distance, GPS, and manual. Calibrating Your Foot Pod by Distance For best results, the foot pod should be calibrated using the inside lane of a regulation track. A regulation track (2 laps = 800 m) is more accurate than a treadmill. 1 Select MODE > Settings > Run Settings > Foot Pod > Calibrate > Distance 2 Select a distance. 3 Select Continue > START to begin recording. 4 Run or walk the distance. 5 Select STOP. 1 Select MODE > Settings > Run Settings > Foot Pod > Calibrate > GPS. 2 Select Continue > START to begin recording. 3 Run or walk approximately 1000 m. The Forerunner informs you that you have traveled far enough. Calibrating Your Foot Pod Manually If your foot pod distance seems slightly high or low each time you run, you can manually adjust the calibration factor. 1 Select MODE > Settings > Run Settings > Foot Pod > Calibration Factor. 2 Adjust the calibration factor. • Increase the calibration factor if your distance is too low. • Decrease the calibration factor if your distance is too high. Calibrating Your Foot Pod by GPS You must have GPS signals to calibrate the foot pod using GPS. ANT+ Sensors 25 Bike Sensors Your Forerunner is compatible with the GSC 10 speed and cadence bike sensor. For a list of third-party ANT+ sensors that are compatible with the Forerunner, go to www.garmin.com/intosports. Training with a Bike Sensor Before you start training, you must be in bike sport mode, and you must pair the GSC 10 with your Forerunner. 1 Select MODE > Settings > Bike Settings > bike name > ANT+Spd/ Cad. 2 Select Yes in the Bike sensors present field. 3 If necessary, select More to select the sensor type. About the GSC 10 Cadence data from the GSC 10 is always recorded. If there is no GSC 10 paired, GPS data is used to calculate the speed and distance. Cadence is your rate of pedaling or “spinning” measured by the number of revolutions of the crank arm per minute (rpm). There are two sensors on the 26 GSC 10: one for cadence and one for speed. For information about cadence alerts, see page 9. Non-Zero Averaging for Cadence Data The non-zero data-averaging setting is available if you are training with an optional cadence sensor. The default setting is to include zero values that occur when you are not pedaling. To turn the non-zero averaging on or off, select MODE > Settings > Bike Settings > Data Averaging > Cadence. Power Meters For a list of third-party ANT+ sensors that are compatible with the Forerunner, go to www.garmin.com/intosports. Calibrating Your Power Meter Before you can calibrate your power meter, it must be properly installed and actively recording data. You must be in bike sport mode. ANT+ Sensors For calibration instructions specific to your power meter, refer to the manufacturer’s instructions. 1 Select MODE > Settings > Bike Settings > bike name > ANT+Power. 2 Select Yes in the Power meter present field. 3 Select Calibrate. 4 Keep your power meter active by pedaling until the message appears. Setting Your Power Zones Before you configure power zones, you must be in bike sport mode. You can set seven custom power zones (1=lowest, 7=highest). If you know your functional threshold power (FTP) value, you can enter it and allow the Forerunner to calculate your power zones automatically. 1 Select MODE > Settings > Bike Settings > bike name > Power Zones. 2 Select an option: • Select % FTP to view and edit the zones as a percentage of your functional threshold power. ANT+ Sensors • Select Watts to view and edit the zones in watts. Non-Zero Averaging for Power Data The non-zero data-averaging setting is available if you are training with an optional power meter. The default setting is to include zero values that occur when you are not pedaling. To turn the non-zero averaging on or off, select MODE > Settings > Bike Settings > Data Averaging > Power. Data Recording When a third-party power meter (page 26) is paired, the Forerunner records points every second. Recording points every second uses more of the available memory on the Forerunner, but creates a very accurate record of your ride. Weight Scales Using the Weight Scale If you have an ANT+ compatible weight scale, the Forerunner can read the data from the weight scale. 1 Select MODE > Settings > System > Weight Scale ANT+. 27 2 Select Yes in the Enabled field. 3 Select . A message appears when the weight scale is found. 4 Stand on the scale. NOTE: If using a body composition scale, remove shoes and socks to ensure that all body composition parameters are read and recorded. 5 Step off the scale. TIP: If an error occurs, step off the scale, and try again. Weight, body fat, and body hydration readings display on your device. Additional weight scale readings are stored on the device, and all readings are automatically sent to your computer when you transfer history (page 30). About Lifetime Athletes The lifetime athlete setting affects certain weight scale calculations. A lifetime athlete is an individual who has trained intensely for many years (with the exception of minor injuries) and has a resting heart rate of 60 beats per minute (bpm) or less. 28 Fitness Equipment ANT+ technology automatically links your Forerunner and heart rate monitor to fitness equipment so you can view your data on the equipment console. Look for the ANT+ Link Here logo on compatible fitness equipment. Go to www.garmin.com/antplus for more linking instructions. Pairing With Fitness Equipment 1 Select MODE > Settings > System > Fitness Equipment. 2 Select Yes in the Enabled field. 3 Select MODE to view timer page. The flashes indicating that pairing is ready. 4 Move the Forerunner near the ANT+ Link Here logo. A message appears. The is solid when your device is paired with the equipment. ANT+ Sensors 5 Start the timer on the fitness equipment to begin your workout. The timer on your Forerunner starts automatically. If you have trouble pairing, reset the Forerunner and fitness equipment and try again. History Your Forerunner stores data based on the type of activity, the accessories used, and your training settings. When the Forerunner memory is full, your oldest data is overwritten. A warning message appears on the Forerunner before any data is deleted. NOTE: History is not recorded while the timer is stopped or paused. Estimated Memory 220 hours 160 hours 48 hours History Activity Description Smart recording with no ANT+™ accessories Smart recording with ANT+ accessories Every second recording with no ANT+ accessories 42 hours Every second recording with ANT+ accessories Viewing History The history displays the date, time of day, distance, activity time, calories, and average and maximum pace or speed. Swim activities also display stroke and efficiency data. The history can also display heart rate, cadence, and power data if you are using the heart rate monitor, foot pod, cadence sensor, or power meter (optional accessories). 1 Select MODE > History > Activities. 2 Use ▲ and ▼ to view your saved activities. 3 Select an activity. 4 Select View More to view averages and maximums. 5 Select an option: • Select Show Map to view the activity on a map. • Select View Legs to view parts of a multisport activity. • Select View Laps to view lap details. 29 • Select View Ints. to view interval details. Select ▲ or ▼ to scroll through laps. 6 Viewing History Totals by Sport 1 Select MODE > History > Totals. 2 Select a sport. Viewing the Amount of Memory Used Select MODE > History > Memory Details. Deleting History 1 Select MODE > History > Delete > Individual Activities. 2 Use ▲ and ▼ to select an activity. 3 Select Delete Activity. Deleting Old Activities 1 Select MODE > History > Delete > Old Activities. 2 Select Yes to delete activities older than one month. 30 Using Garmin Connect Garmin Connect is web-based software for storing and analyzing your data. 1 Go to www.garminconnect.com/start. 2 Follow the on-screen instructions. Sending History to Your Computer 1 Plug the USB ANT Stick into a USB port on your computer. The USB ANT Stick drivers automatically install the Garmin ANT Agent. You can download the USB ANT Agent if the drivers do not automatically install. Go to www.garminconnect.com/start. 2 Bring your device within range (3 m) of your computer. 3 Follow the on-screen instructions. Sending All Your Forerunner Data By default, your Forerunner sends only new activities to your computer. You can send all of your saved activities to your computer. Select MODE > History > Transfer All. History Preventing Data Transfer You can prevent transferring data to and from any computer, even a paired computer. Select MODE > Settings > System > Data Transfer > Enabled > No. save locations you want to remember and find your way home. Adding the Map Page Goals Before you use the navigation features, you may want to configure the Forerunner to display the map. 1 Select MODE > Settings > System > Map. 2 Select Yes in the Show Map field. Sending Goals to your Forerunner Viewing Your Track During a Run 1 Select MODE until the map appears. 2 Select START. You can create training goals in Garmin Connect and send them to your Forerunner. You must have a Garmin Connect account, and you must pair the Forerunner with your computer using the USB ANT Stick (page 30). 1 Go to www.garminconnect.com, and create a goal. 2 Click Send to Device, and wait for ANT Agent to send the goal. 3 Select MODE > History > Goals. When you start the timer and begin to move, a dotted line appears on the map, showing you exactly where you have traveled. This dotted line is called a track. 3 Select ▲ or ▼ to zoom in or out on the map. Navigation Use the GPS navigation features on your Forerunner to view your path on a map, Navigation 31 Marking a Location Using Coordinates 1 Select MODE > GPS > Save Map Features ➊ ➌ ➊ ➋ ➌ ➋ Points to North Your current location Zoom level Marking Your Location A location is any point that you store in memory. If you want to remember landmarks or return to a certain spot, you can mark a location. The location appears on the map with a name and a symbol. You can find, view, and go to locations at any time. 1 Go to the place where you want to mark a location. 2 Select MODE > GPS > Save Location. 3 Enter a name in the top field. 4 Select OK. 32 Location. 2 Enter the coordinates in the Position field. 3 Select OK. Navigating to a Location 1 Select MODE > GPS > Go to Location. 2 Select a location. 3 Select Go To. When you are navigating to a location, the map and compass are automatically added to the page loop. 4 Select START. 5 Select MODE to view the map. 6 Follow the line on the map to the location. Navigation Compass Features On the compass, the arrow ➊ points toward the location. The compass also displays the distance ➋ and time ➌ to the location. ➊ ➋ ➌ Editing or Deleting a Location 1 Select MODE > GPS > Go to Location. 2 Select a location. 3 Edit the information or select Delete. Navigating Back to Start Before you can navigate to your starting location, you must be training with GPS, and you must start the timer. At any point during your run, you can return to your starting point. During your run, select MODE > GPS > Back to Start. Navigation NOTE: If you are using every second recording (page 34), it may take several seconds to determine your starting location. The map appears. A line appears on the map from your current location to your starting point. Stopping Navigation Select MODE > GPS > Stop Navigation. Viewing GPS Information 1 Select MODE > GPS > Satellites. The satellite strength information appears. The black bars represent the strength of each satellite signal received (the number of the satellite appears below each bar). 2 Select ▲ or ▼ to view the satellite page. The satellite page displays information about the GPS signals the Forerunner is currently receiving. For more information about GPS, go to www.garmin.com/aboutGPS. 33 Customizing Your Device You can customize your settings for each sport. 1 If necessary, hold MODE to change your sport. 2 Select MODE > Settings. 3 Select a setting based on your active sport. For example, if the Forerunner is set to bike, select Bike Settings. 4 Customize your settings. The settings are saved for the active sport. System Settings System settings apply to all sport modes. Select MODE > Settings > System. • Language—sets the device language. Changing the text language does not change the language of user-entered data, such as course names. • Tones and Vibration—sets the device to use audible tones for key presses and audible tones or vibration for messages. 34 • Display—page 35 • Map—page 35 • Time—sets the time format and time zones. NOTE: Each time you locate satellites, the device automatically detects your time zone and the current time of day. • Units—sets the units of measure for distance, elevation, weight and height, pace and speed, and position format. NOTE: When pool swimming, distance and speed are automatically changed to match the units of the pool length. The units for the other sport modes are preserved. • Weight Scale ANT+—page 27 • Fitness Equipment—page 28 • Data Recording—controls how the device records activity data. ◦◦ Smart Recording—records key points where you change direction, speed, or heart rate. ◦◦ Every Second—records points every second. It creates a very detailed record of your activity; however, it greatly increases the size of the activity. Customizing Your Device Data Transfer—page 30 Initial Setup—allows you to run the configuration wizard the next time you turn on the device. • User Locations—displays locations on the map. • Show Map—displays the map as part of the MODE page loop. Adjusting the Display 1 Select MODE > Settings > System > User Profiles Display. 2 Select an option: • To set the amount of time the backlight stays on, select Backlight Timeout. Use a short backlight setting to conserve battery power. • To set the amount of screen contrast, select Contrast. Map Settings Select MODE > Settings > System > Map. • Orientation ◦◦ North Up—orients the map with North at the top of the screen. ◦◦ Track Up—orients the map with your direction of travel at the top of the screen. Customizing Your Device Setting Your User Profile The Forerunner uses information that you enter about yourself to calculate accurate data. You can modify the following user profile information: gender, age, weight, and height. 1 Select MODE > Settings > User Profile. 2 Modify the settings. About Calories Calorie expenditure and heart rate analysis technology is provided and supported by Firstbeat Technologies Ltd. For more information, go to www.firstbeattechnologies.com. About Training Effect Training Effect measures the impact of an activity on your aerobic fitness. Training Effect accumulates during the activity. As the activity progresses successfully, the 35 Training Effect value increases, telling you how the activity has improved your fitness. Training Effect is determined by your user profile information, heart rate, duration, and intensity of your activity. It is important to know that your training effect numbers (1.0–5.0) may seem abnormally high during your first few runs. It takes several activities for the device to learn your aerobic fitness. Training Effect 1.0–1.9 2.0–2.9 3.0–3.9 4.0–4.9 36 Description Helps recovery (short activities). Improves endurance with longer activities (more than 40 minutes). Maintains your aerobic fitness. Improves your aerobic fitness if repeated as part of your weekly training program. Highly improves your aerobic fitness if repeated 1–2 times per week with adequate recovery time. 5.0 Causes temporary overload with high improvement. Train up to this number with extreme care. Requires additional recovery days. Training Effect technology is provided and supported by Firstbeat Technologies Ltd. For more information, go to www.firstbeattechnologies.com. Data Fields You can customize data fields on up to four training pages for each sport. The data fields you customize are saved for the active sport. Some data fields are not available because they are specific to a sport mode. Data fields with the * symbol display statute or metric units. Data fields with the ** symbol require an ANT+ sensor. Data Field Description Cadence ** For running, cadence is measured in steps per minute (spm). For cycling, cadence is measured in revolutions of the crank arm per minute (rpm). Customizing Your Device Data Field Description Cadence – Avg. ** Average cadence for the duration of your current activity. Cadence – Lap ** Average cadence during the current lap. Cadence – Last Average cadence during Lap ** the last completed lap. Calories Amount of total calories burned. Calories – Fat Amount of fat calories burned. Requires a New Leaf® assessment. Distance * Distance traveled during the current activity. Distance – Interval * Distance traveled during the current swim interval. Distance – Lap * Distance traveled during the current lap. Distance – Last Distance traveled during Interval * the last completed swim interval. Distance – Last Distance traveled during Lap * the last completed lap. Distance – Nautical Distance traveled * in nautical miles or nautical kilometers. Customizing Your Device Data Field Description Efficiency – Avg. Average swim efficiency index during the current activity (page 20). Efficiency – Interval Swim efficiency index during the current interval. Efficiency – Last Swim efficiency Interval index during the last completed interval. Efficiency – Last Average swim efficiency Length index during the last completed pool length. Elevation * Distance above or below sea level. GPS Accuracy * The margin of error for your exact location. For example, your GPS location is accurate to within +/- 12 feet. Grade Calculation of rise over run. For example, if for every 10 feet you climb (elevation) you travel 200 feet (distance), your grade is 5%. Heading The direction you are moving. 37 Data Field Description Data Field Heart Rate ** Heart rate in beats per minute (bpm). Percentage of heart rate reserve (maximum heart rate minus resting heart rate). Percentage of maximum heart rate. Average heart rate for the duration of your current activity. Average percentage of heart rate reserve (maximum heart rate minus resting heart rate) for the activity. Average percentage of maximum heart rate for the activity. Average heart rate in the current lap. Average percentage of heart rate reserve (maximum heart rate minus resting heart rate) for the lap. Heart Rate – Lap %Max. ** Heart Rate – %HRR ** Heart Rate – %Max. ** Heart Rate – Avg. ** Heart Rate – Avg. %HRR ** Heart Rate – Avg. %Max. ** Heart Rate – Lap ** Heart Rate – Lap %HRR ** 38 Description Average percentage of maximum heart rate for the lap. Heart Rate – Last Average heart rate Lap ** during the last completed lap. Heart Rate Graph ** Line graph showing your current heart rate zone (1 to 5). Heart Rate Zone ** Current range of heart rate (1 to 5). The default zones are based on your user profile, maximum heart rate, and resting heart rate. Laps Number of laps completed. Lengths Number of pool lengths completed. Lengths – Interval Number of pool lengths completed during the current interval. Lengths – Last Number of pool Interval lengths during the last completed interval. Pace Current pace. Customizing Your Device Data Field Description Data Field Description Pace – Average Average pace for the duration of your current activity. Average pace during the current swim interval. Average pace during the current lap. Average pace during the last completed lap. Average pace during the last completed pool length. Average pace during the last completed swim interval. Current power output in watts. Current power output as a percentage of functional threshold power. The 10-second moving average of power output. The 30-second moving average of power output. Power – 3s Avg. ** The three-second moving average of power output. Average power output for the duration of your current ride. Current left/right power balance. The 10-second moving average of the left/right power balance. The 30-second moving average of the left/right power balance. The three-second moving average of the left/right power balance. Average left/right power balance for the current activity. The Intensity Factor™ for the current activity. Total (cumulative) amount of power output in kilojoules. Average power output during the current lap. Pace – Interval Pace – Lap Pace – Last Lap Pace – Last Length Pace – Last Interval Power ** Power – %FTP ** Power – 10s Avg. ** Power – 30s Avg. ** Customizing Your Device Power – Avg. ** Power – Balance Power – Balance – 10s Avg. ** Power – Balance – 30s Avg. ** Power – Balance – 3s Avg. ** Power – Balance – Avg. ** Power – IF ** Power – Kilojoules ** Power – Lap ** 39 Data Field Description Power – Last Lap ** Average power output during the last completed lap. Power – Max. ** Top power achieved during the current activity. Power – Max. Top power achieved Lap ** during the current lap. Power – NP ** The Normalized Power™ for the current activity. Power – NP Lap ** Average Normalized Power for the current lap. Power – NP Last Average Normalized Lap ** Power for the last completed lap. Power – TSS ** The Training Stress Score™ for the current activity. Power – Watts/kg ** Amount of power output in watts per kilogram. Power Zone ** Current range of power output (1 to 7) based on your FTP or custom settings. Speed * Current speed. 40 Data Field Description Speed – Avg. * Average speed for the activity. Average speed during the current lap. Average speed during the last completed lap. Speed – Lap * Speed – Last Lap * Speed – Max. * Speed – Nautical Speed – Vertical * Speed – VS 30s * Sport Steps * Steps – Lap * Top speed achieved during the current activity. Current speed in knots. Rate of ascent or descent in feet/meters per hour. The 30-second moving average of vertical speed. Symbol for the current sport mode. Amount of steps for the duration of your current activity. Amount of steps during the current lap. Amount of steps during the last completed lap. Steps – Last Lap * Stroke Dist. – Avg. * Average distance traveled in one stroke. Customizing Your Device Data Field Description Data Field Description Stroke Dist. – Interval * Average stroke distance during the current interval. Average stroke distance during the last completed interval. Average strokes per minute (spm) for a swim activity. This is similar to cadence for running or biking. Stroke rate during the current interval. Stroke rate during the last completed interval. Strokes Amount of strokes for the duration of your current activity. Average number of strokes per length for the duration of your current activity. Amount of strokes during the current interval. Amount of strokes during the last completed interval. Amount of strokes during the last completed pool length. Average amount of strokes per pool length for the last completed interval. The time of sunrise based on your GPS position. The time of sunset based on your GPS position. Stroke Dist. – Last Int. Stroke Rate Stroke Rate – Interval Stroke Rate – Last Int. Stroke Rate – Last Length Stroke Type Stroke Type – Last Interval Stroke Type – Last Length Stroke rate during the last completed pool length. Stroke type determined during the current interval (page 20). Stroke type determined during the last completed interval. Stroke type during the last completed pool length. Customizing Your Device Strokes – Average Strokes – Interval Strokes – Last Interval Strokes – Last Length Strokes/Length – Last Interval Sunrise Sunset 41 Data Field Swolf – Average Description Swolf score is the sum of the time for one length plus the number of strokes for that length (page 20). The average score is for the entire activity. Swolf – Interval Swolf score during the current interval. Swolf – Last Interval Swolf score during the last completed interval. Swolf – Last Length Swolf score during the last completed pool length. Time Stopwatch time. Time – Avg. Lap Average time to complete the laps so far. Time – Elapsed Total time recorded. For example, if you run 10 minutes, then stop the timer for 5 minutes, then start the timer again and run for 20 minutes, your elapsed time is 35 minutes. Time – Interval Amount of time during the current swim interval. 42 Data Field Description Time – Lap Amount of time during the current lap. Time – Last Interval Amount of time during the last completed swim interval. Time – Last Lap Amount of time during the last completed lap. Time of Day Current time of day based on your time settings (format, time zone, and daylight saving time). Total Ascent Total elevation gain for the current activity. Total Decent Total elevation lost for the current activity. Training Effect Current impact (1.0 to (TE) ** 5.0) on your aerobic fitness (page 35). Customizing Your Device Device Information Caring for Your Device notice Do not store the device where prolonged exposure to extreme temperatures can occur, because it can cause permanent damage. Do not use a sharp object to clean the device. • Go to www.garmin.com/HRMcare for detailed washing instructions. • Rinse the strap after every use. • Wash the strap after every seven uses. The method of cleaning is determined by the symbols printed on the strap. Machine wash Hand wash Avoid chemical cleaners and solvents that can damage plastic components. Cleaning the Device 1 Use a cloth dampened with a mild detergent solution. 2 Wipe it dry. • Do not put the strap in a dryer. • To prolong the life of your heart rate monitor, unsnap the module when not in use. Caring for the Heart Rate Monitor notice You must unsnap the module before cleaning the strap. A buildup of sweat and salt on the strap can decrease the ability of the heart rate monitor to report accurate data. Device Information Specifications Forerunner Specifications Battery type 620 mAh prismatic, lithiumion battery 43 Battery life Water resistance Operating temperature range Radio frequency/ protocol Actual battery life depends on use of GPS, backlight, and ANT+ devices. With a fully charged battery, the Forerunner can operate up to 20 hours with GPS on. Water resistant to 164 ft. (50 m) From -4°F to 140°F (from -20°C to 60°C) 2.4 GHz ANT+ wireless communications protocol Heart Rate Monitor Specifications Battery type Battery life Water resistance User-replaceable CR2032, 3 volts (page 44) Approximately 4.5 years (1 hour per day) 98.4 ft. (30 m) This product does not transmit heart rate data to your GPS device while swimming. Operating temperature Radio frequency/ protocol From 23°F to 122°F (from -5°C to 50°C) Note: In cold conditions, wear appropriate clothing to keep the heart rate monitor near your body temperature. 2.4 GHz ANT+ wireless communications protocol USB ANT Stick Specifications Power source Operating temperature Radio frequency/ protocol Transmission range USB From 14°F to 122°F (from -10°C to 50°C) 2.4 GHz ANT+ wireless communications protocol Approximately 16.4 ft. (5 m) Heart Rate Monitor Battery warning Do not use a sharp object to remove user‑replaceable batteries. Contact your local waste disposal department to properly recycle the batteries. Perchlorate Material – special 44 Device Information Appendix handling may apply. See www.dtsc .ca.gov/hazardouswaste/perchlorate. Replacing the Heart Rate Monitor Battery 1 Use a small Phillips screwdriver to remove the four screws on the back of the module. 2 Remove the cover and battery. Registering Your Device Help us better support you by completing our online registration today. • Go to http://my.garmin.com. • Keep the original sales receipt, or a photocopy, in a safe place. Wheel Size and Circumference The wheel size is marked on both sides of the tire. To modify your bike profile, see page 18. 3 Wait 30 seconds. 4 Insert the new battery with the positive side facing up. NOTE: Do not damage or lose the O-ring gasket. 5 Replace the back cover and the four screws. After you replace the heart rate monitor battery, you must pair it with the device again (page 22). Appendix Wheel Size 12 × 1.75 L (mm) 935 14 × 1.5 14 × 1.75 16 × 1.5 16 × 1.75 18 × 1.5 18 × 1.75 20 × 1.75 20 × 1-3/8 1020 1055 1185 1195 1340 1350 1515 1615 45 Wheel Size 22 × 1-3/8 22 × 1-1/2 24 × 1 24 × 3/4 Tubular 24 × 1-1/8 24 × 1-1/4 24 × 1.75 24 × 2.00 24 × 2.125 26 × 7/8 26 × 1(59) 26 × 1(65) 26 × 1.25 26 × 1-1/8 26 × 1-3/8 26 × 1-1/2 26 × 1.40 26 × 1.50 26 × 1.75 26 × 1.95 26 × 2.00 26 × 2.10 26 × 2.125 46 L (mm) 1770 1785 1753 1785 1795 1905 1890 1925 1965 1920 1913 1952 1953 1970 2068 2100 2005 2010 2023 2050 2055 2068 2070 Wheel Size 26 × 2.35 26 × 3.00 27 × 1 27 × 1-1/8 27 × 1-1/4 27 × 1-3/8 650 × 35A 650 × 38A 650 × 38B 700 × 18C 700 × 19C 700 × 20C 700 × 23C 700 × 25C 700 × 28C 700 × 30C L (mm) 2083 2170 2145 2155 2161 2169 2090 2125 2105 2070 2080 2086 2096 2105 2136 2170 700 × 32C 700C Tubular 700 × 35C 700 × 38C 700 × 40C 2155 2130 2168 2180 2200 Appendix Troubleshooting Updating the Software Using Garmin Connect You must have a Garmin Connect account, and you must pair the Forerunner with your computer using the USB ANT Stick (page 30). 1 Go to www.garminconnect.com. If there is new software available, Garmin Connect alerts you to update the software. 2 Follow the on-screen instructions. 3 Keep your device in range (3 m) of the computer during the update process. Getting More Information You can find more information about this product on the Garmin web site. • Go to www.garmin.com/intosports. • Go to www.garmin.com/learningcenter. • Go to http://buy.garmin.com, or contact your Garmin dealer for information about optional accessories and replacement parts. Forerunner Troubleshooting Problem Solution The keys do not 1 Hold until the screen goes blank. respond. How do I reset 2 Hold until the screen turns on. the device? NOTE: This does not erase any of your data or settings. Where is the software Select MODE > Settings > About Forerunner to display important version information? software information and your unit ID. Appendix 47 Problem How do I reset the device to the original factory settings? My device does not locate satellite signals. Some of my data is missing from the history. I want to clear all the user data from my device. Solution 1 Hold MODE and ENTER, and then hold . 2 Release , and then release MODE and ENTER. 1 Take your device out of parking garages and away from tall buildings and trees. 2 Remain stationary for several minutes. When the device memory is full, your oldest data is overwritten. Transfer data to your computer regularly to avoid losing data. NOTE: This deletes all user‑entered information, but it does not delete your history. 1 Turn off the device. 2 While holding MODE, turn the device on. 3 Select Yes. How do I quickly change Hold MODE. sports? How do I get a New Leaf Go to www.newleaffitness.com. Some gyms and health centers can assessment? provide an assessment. ANT+ Sensor Troubleshooting Problem I have a third-party ANT+ sensor. I changed the battery in my accessory. 48 Solution Make sure that it is compatible with the Forerunner (www.garmin.com/intosports). You must pair the sensor to your Forerunner again (page 22). Appendix Problem The Vector™ data is inconsistent. The heart rate data is inaccurate or erratic. Solution To improve power data reliability, you can try wearing the device on the opposite wrist or the opposite side of your wrist, or you can use the optional quick release kit. • Make sure that the heart rate monitor is snug against your body. • Warm up for 5–10 minutes. • Reapply moisture to the electrodes and contact patch. Use water, saliva, or electrode gel. • Wash the strap after every seven uses (page 43). • Wear a cotton shirt or wet your shirt if suitable for your activity. Synthetic fabrics that rub or flap against the heart rate monitor can create static electricity that interferes with heart rate signals. • Move away from sources of strong electromagnetic fields and some 2.4 GHz wireless sensors, which can interfere with your heart rate monitor. Sources of interference may include highvoltage power lines, electric motors, microwave ovens, 2.4 GHz cordless phones, and wireless LAN access points. Heart Rate Zone Calculations Zone 1 % of Maximum Heart Rate 50–60% 2 60–70% 3 70–80% Appendix Perceived Exertion Benefits Relaxed, easy pace, rhythmic breathing Comfortable pace, slightly deeper breathing, conversation possible Moderate pace, more difficult to hold conversation Beginning-level aerobic training, reduces stress Basic cardiovascular training, good recovery pace Improved aerobic capacity, optimal cardiovascular training 49 4 80–90% 5 90–100% Fast pace and a bit uncomfortable, breathing forceful Sprinting pace, unsustainable for long period of time, labored breathing Improved anaerobic capacity and threshold, improved speed Anaerobic and muscular endurance, increased power Software License Agreement BY USING THE DEVICE, YOU AGREE TO BE BOUND BY THE TERMS AND CONDITIONS OF THE FOLLOWING SOFTWARE LICENSE AGREEMENT. PLEASE READ THIS AGREEMENT CAREFULLY. Garmin Ltd. and its subsidiaries (“Garmin”) grant you a limited license to use the software embedded in this device (the “Software”) in binary executable form in the normal operation of the product. Title, ownership rights, and intellectual property rights in and to the Software remain in Garmin and/or its third-party providers. You acknowledge that the Software is the property of Garmin and/or its third-party providers and is protected under the United States of America copyright laws and international copyright treaties. You further acknowledge that the structure, organization, and code of the Software, for which source code is not provided, are valuable trade secrets of Garmin and/or its third-party providers and that the Software in source code form remains a valuable trade secret of Garmin and/or its third-party providers. You agree not to decompile, disassemble, modify, reverse assemble, reverse engineer, or reduce to human readable form the Software or any part thereof or create any derivative works based on the Software. You agree not to export or reexport the Software to any country in violation of the export control laws of the United States of America or the export control laws of any other applicable country. 50 Appendix Index A alerts 9–10 ANT+ bike sensors 26 fitness equipment 28 foot pod 24 heart rate monitor 22 pairing 22 power meters 26 USB ANT Stick 30 weight scale 27 Auto Lap 11–12 Auto Pause 12 auto scroll 12 B backlight 4, 5, 35 back to start 33 barometric altimeter 6 battery 3, 43 heart rate monitor 45 bike sensors 26 C cadence alerts 9 data fields 36 sensors 26 training 26 Index calibrating barometric altimeter 6 foot pod 25–26 calorie alerts 9 data fields 37 expenditure 35 charging 3 cleaning 43 clearing user data 48 compass 33 coordinates 32 corrosion 3 countdown timer 21 courses 16–18 customizing data fields 36 settings 34 D data fields 36 data recording 27, 33, 34 distance alerts 9 data fields 37 drill strokes 21 E efficiency index 20 elevation barometric altimeter 6 data fields 37 F fitness equipment 28 foot pod 24, 25–26 G Garmin Connect 30, 47 goals 31 GPS 4, 18, 33 accuracy 37 navigation 31 grade 37 GSC 10 26 H heart rate alerts 9 data fields 38–39 zones 23–24 heart rate monitor 44 battery 45 cleaning 43 pairing 22 troubleshooting 48 history 29 missing 48 viewing 48 I icons 5 indoor training 18 intervals, swimming 20 interval workouts 14 51 K profile 35 keys 5 locking 6 tones 34 kick sets 21 R L language 34 lifetime athlete 28 locating satellite signals 48 locations 32, 35 M map 31, 35 memory in hours 29 multisport 8 N navigating back to start 33 New Leaf 37, 48 non-zero data-averaging 26, 27 P pace 38 pairing ANT+ sensors 22 power data averaging 27 data fields 39 meters 26 zones 27 52 registering your device 45 resetting the device 47 tracks 31 Training Effect 35, 42 transferring data 31 triathlon training 8 troubleshooting 47 ANT+ accessories 48 S U safety 3 satellite signals 48 saving activities 8 settings 34 smart recording 34 software updates 47 specifications 43 speed 24, 40 sport modes changing 7 stroke types 20 swimming 19 swolf score 20 T time alerts 9 data fields 42 zones 34 timer 7 countdown 21 tire size 45 tones keys 34 units of measure 34 USB ANT Stick 30, 44 user profile 35 V Virtual Partner 12 Virtual Racer 13 W walking breaks 10 water resistance 19, 44 weight scale 5, 27 wheel sizes 45 workouts custom 15 interval 14 multisport 8 Index www.garmin.com/support 913-397-8200 1-800-800-1020 0808 238 0000 +44 870 850 1242 1-866-429-9296 43 (0) 3133 3181 0 00 32 2 672 52 54 00 45 4810 5050 00 358 9 6937 9758 00 331 55 69 33 99 0180 5 / 42 76 46 - 880 00 39 02 3669 9699 0800-0233937 815 69 555 00800 4412 454 +44 2380 662 915 00 35 1214 447 460 00 34 902 007 097 00 46 7744 52020 Garmin International, Inc 1200 East 151st Street, Olathe, Kansas 66062, USA Garmin (Europe) Ltd. Liberty House, Hounsdown Business Park Southampton, Hampshire, SO40 9LR UK Garmin Corporation No. 68, Zhangshu 2nd Road, Xizhi Dist. New Taipei City, 221, Taiwan (R.O.C.) © 2011–2014 Garmin Ltd. or its subsidiaries