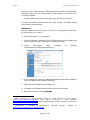
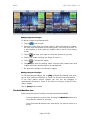
1
NXAMP Remote Control User Guide v1.3 © NEXO SA. Last revision: 24 February 2014 NEXO NeMo User Guide v1.3 Thanks for downloading NEXO NeMo for iOS. This manual presents the app’s functionalities and how to use it step by step. PRESENTATION NEXO NeMo is the remote control app for mobile terminals of a set of NEXO NXAMP powered TD-controllers. It allows you to control from an Apple iPad, iPhone or iPod Touch and through a Wi-Fi network one or many NXAMPs. Managing and positioning amplifiers, monitoring their parameters (levels, etc.), and setting new values (volume, delay, setup, etc.) is made possible thanks to an attractive and intuitive user interface. Its main functionalities include: Visualizing and positioning the connected NXAMPs within a 2D space. Quickly muting, soloing and monitoring the status, including peak and protect, for the entire network. Adding background pictures from your library. Grouping amplifiers for multi-device control, and visualizing groups on the 2D space. Muting and soloing, and monitoring the status of groups of NXAMPs. Quickly muting and soloing individual channels of a group of NXAMPs. Monitoring and controlling simultaneously parameters of several amplifiers, among which mute-solo, input and output levels, and volume, delay, gain, array-EQ and headroom of each output channel. Patching input channels to output channels. Selecting setups from the standard library, and building custom setups. Saving and recalling scenes. Undoing and redoing every control step. Copying and pasting parameters and scenes from one to many NXAMPs. Saving and sharing user configurations, thanks to Sessions (.nemo documents). A configurable way of managing alerts of different levels. Visualizing and exporting a log of all the values of the NXAMPs (including temperature, voltage, current…) that you can record when NeMo is connected. A fully configurable Live mode. A Demo mode to test the app. A use in portrait on iPhone and iPad, and in portrait or landscape mode on iPad. Requires AVS-Service and NXES104 or NXDT104 remote control cards in the NXAMPs. No theoretical limit on the supported numbers of NXAMPs, neither on the number of connected NeMos. Compatible with AVS-Monitor. What’s new v1.3 Ready for iOS 7! New improved style and performances. Introduction of .nemo, a new file format to save and share (mail, AirDrop…) your sessions. Page 2 of 50 NEXO NeMo User Guide v1.3 Undo/Redo: now, it is possible to undo and redo every control step you make. Copy/Paste: it is possible to copy parameters from one NXAMP to one or several NXAMPs. With Load 3.16, scenes can also be shared between NXAMPs. Improved log, introduction of Log Records: select the one you want to record on, and press [R]. As many Log Records as wanted can be created (e.g. one per session). New Events menu (prev. Alerts & Tasks), grouping alerts in sets, with improved tasks display, and with a System Status section. New way of accessing the Live mode (prev. long press gesture), with a button at the bottom left corner of the screen. Pull to Refresh functionality in the Groups & Devices menu. Smart Sliders in the control page: in case of multiple values, sliders become green and have marks for all the different values. Caution: NEXO NeMo usage Only use this application during a live event with an extreme care. In particular, you should activate the safe mode. Please equip your NXAMPs and iDevice with the latest firmware update, and your computer with the latest version of AVS-Service and AVS-Monitor. The good functioning of NeMo depends on the one of the wireless network and of AVS-Service. Caution: before updating Before updating NeMo, if need be, please export the log file (see Error! Reference ource not found.), since the internal log database is likely to be updated and all its items to be removed. As this version introduces a new way of handling sessions, your configuration will be lost. You can save the file savedParameters.plist (NeMo v1.0 to v1.2) not to lose it. Page 3 of 50 NEXO NeMo User Guide v1.3 Presentation........................................................................................................................ 2 What’s new v1.3......................................................................................................................... 2 Preliminary .......................................................................................................................... 6 Network .................................................................................................................................... 6 iDevice ...................................................................................................................................... 8 Getting started.................................................................................................................. 10 Starting a new session .............................................................................................................. 10 General points.......................................................................................................................... 11 The Network tab ............................................................................................................... 12 Map of the devices, map of the groups ........................................................................................ 12 Selection ................................................................................................................................. 12 Positioning cells ........................................................................................................................ 12 Groups .................................................................................................................................... 13 A device cell ............................................................................................................................ 13 A group cell ............................................................................................................................. 15 Zoom in and out ....................................................................................................................... 16 Scrolling .................................................................................................................................. 16 Locking the map ....................................................................................................................... 16 Background images .................................................................................................................. 16 The Quick Mute/Solo view ......................................................................................................... 17 The Groups & devices menu....................................................................................................... 18 The control tab ................................................................................................................. 22 Setting parameters ................................................................................................................... 22 Multiple values ......................................................................................................................... 24 Setting parameters of several channels ....................................................................................... 24 Copy/Paste .............................................................................................................................. 25 Undo/Redo .............................................................................................................................. 25 Reset all .................................................................................................................................. 25 The Setup tab ................................................................................................................... 27 Displaying the toolbar (iPhone users only) ................................................................................... 27 Loading standard and custom setups .......................................................................................... 27 Standard and custom setups ...................................................................................................... 27 Current setup........................................................................................................................... 27 Recalling a standard setup ......................................................................................................... 28 Building a custom setup ............................................................................................................ 28 Multiple values ......................................................................................................................... 29 Unknown value ........................................................................................................................ 29 The Scene tab ................................................................................................................... 30 Reading scenes ........................................................................................................................ 30 Current scene .......................................................................................................................... 30 Saving a scene ......................................................................................................................... 30 Recalling a scene ...................................................................................................................... 30 Page 4 of 50 NEXO NeMo User Guide v1.3 Multiple values ......................................................................................................................... 30 Copy/Paste .............................................................................................................................. 31 Deleting a scene ....................................................................................................................... 31 Closing a session .............................................................................................................. 32 Session .............................................................................................................................. 32 The Sessions menu ................................................................................................................... 32 Creating a session .................................................................................................................... 33 Editing a session ...................................................................................................................... 33 Exporting a session ................................................................................................................... 33 Importing a session .................................................................................................................. 34 Deleting a session .................................................................................................................... 34 Other saved data .............................................................................................................. 35 Setup libraries.......................................................................................................................... 35 AVS-Service settings ................................................................................................................. 36 Network update ................................................................................................................ 36 Security ............................................................................................................................. 37 Accessing the Live mode ........................................................................................................... 37 Configuring the Live Mode ......................................................................................................... 37 Log, alerts and tasks ........................................................................................................ 38 Log ......................................................................................................................................... 38 Alerts, Tasks and System Status ................................................................................................ 43 Red alerts ................................................................................................................................ 45 Error alerts ........................................................................................................................ 46 Appendix A: Accessible NXAMP’s parameters ................................................................ 47 Page 5 of 50 NEXO NeMo User Guide v1.3 PRELIMINARY Network NXAMPs Every NEXO NXAMP has to be equipped with an NXES104 or NXDT104 card, and has to be linked, directly or through other networking devices (switches, etc.), to a local network. The device(s) at the top of chain (called Primary Masters) should be connected to the network via the Primary or Remote port of the EtherSound™ or Dante™ card. It is highly recommended to keep the NXAMPs updated with the latest firmware version, available at: http://nexo-sa.com/en/support/software. Wi-Fi access point A Wi-Fi access point has to be connected to the NXAMPs' local network, and configured following the manufacturer’s instructions. The following points might help you to get an optimal configuration in terms of rapidity and robustness: Preferably choose a router that supports 802.11n. It is recommended to activate the support of all the modes (802.11n/a for the 5 GHz band, 802.11n/b/g for the 2.4 GHz band). The 5 GHz band is more robust to interferences than the 2.4 GHz band, but the range is generally shorter. Select a bandwidth of 20 MHz for the 2.4 GHz band, or of 20 and 40 MHz for the 5 GHz band. For a robust and large-coverage Wi-Fi network, preferably use professional routers with adaptive antennas and beam emitting (e.g. Ruckus Wireless). Use DHCP rather than static IP address assignation. There should be only one DHCP server on the network. In order to give a static address to one of the devices (e.g. the computer running AVS-Service), go to the settings interface of your router. Check that the firmware of the access point is up-to-date. Give the wireless network a unique SSID name. Choose a security mode, preferably WPA2-Personal (AES), or, at least, WPA/WPA2. Disable the parameter Hidden network of the Wi-Fi access point, and MAC (Media Access Control) address filtering, security being guaranteed by the point above. If possible, choose Auto Channel Selection, else, make sure that the chosen channel is free from other routers and potential interference sources (microwave ovens, cable of satellite dishes, power lines and other electrical Page 6 of 50 NEXO NeMo User Guide v1.3 sources, phones, video senders, wireless speakers and other wireless devices operating within the 2.4 or 5 GHz bands). To that purpose, you can use a WiFi scanner software. In case of high latency while using NeMo, you can reboot the router. For more information, please consult the router manual, and Apple articles about recommended settings1. AVS-Service AuviTran’s AVS-Service must run on a host PC (or Virtual Machine on a Mac). For this purpose, you need to: 1. Install AVS-Monitor2 on a computer; 2. Link this computer, preferably with an Ethernet link, to the NXAMPs and router’s network (a Wi-Fi connection is however possible); 3. Launch AVS-Control Panel (available Programs/AuviTran/EtherSound Monitor/); at Start/All 4. In the Status tab, select the adequate EtherSound and Dante Adapters (the ones leading to the NXAMPs’ network); 5. Select All in the Software client Adapter list; 6. If needed, check Enable Dante Control in the AVS-Service tab. 7. Start the service by pressing [Turn ON]. 1 Apple, iOS and OS X: Recommended settings for Wi-Fi routers and access points, http://support.apple.com/kb/HT4199, iPad: Issues connecting to Wi-Fi networks, http://support.apple.com/kb/TS3304, AirPort and Bluetooth: Potential sources of interference http://support.apple.com/kb/HT1365, 2 AVS-Service is included in AVS-Monitor's www.auvitran.com/www/index.php/downloads. Page 7 of 50 download package, available at NEXO NeMo User Guide v1.3 You can find more details in the documentation of AVS-Service and AVSMonitor. In case of high latency while using NeMo, you can: Go to the Status tab, and press [Turn OFF] then [Turn ON]; Try another value for the Network timeout (AVS-Service tab), 5 ms by default. Configuration The following figure shows the optimal configuration. It is possible to connect the Primary Master device directly to the computer (if this computer has two network adapters). It is possible to have several Primary Masters thanks to a switch. Other devices than NXAMPs can be connected to the network (consoles, toolboxes, Stage Boxes, etc.). It is strongly not recommended to have a wireless link between the host computer (where AVS-Service is running) and the NXAMPs. Generally speaking, mind separating the audio network and the network with the Wi-Fi access point. Also, you might need to separate other proprietary networks (Lake, etc.). Wi-Fi Ethernet Primary master Router iPad Wi-Fi Ethernet Ethernet Other devices iPhone AVS-ESService’s host iDevice The iDevice (iPhone, iPod Touch or iPad) should be equipped with iOS 7 or later, and with the NeMo app. Wi-Fi should be activated on the iDevice. For that purpose, go to Settings. Disable the Plane mode if needed. Select Wi-Fi, and choose the correct network. Authenticate yourself if the network is secured. If you are using static IP, tap on , choose Static, and type in an IP Address for the iDevice (similar to the router address, but with a different last number), a Subset Mask (generally 255.255.255.0.0), and the Router address (usually printed on the bottom of the router, or manually defined when setting the router up). But again, DHCP is preferred, since it ensures more stability. Page 8 of 50 NEXO NeMo User Guide v1.3 In case of frequent disconnections of NeMo, go to Settings>Wi-Fi, tap on near to your network, and then [Forget this Network]. Start again the operations above. If you are using DHCP (recommended), you can also press [Renew Lease]. If Wi-Fi signal is surprisingly low on old iDevices, you can disable automatic setting of luminosity and set luminosity to its maximum level, and avoid holding your iPad by the right (if portrait) or down (if landscape) part of the main button (« death grip »). Page 9 of 50 NEXO NeMo User Guide v1.3 GETTING STARTED Tip : import from AVS-Monitor If you are a user of AVS-Monitor, you can import your configuration (alias of the devices and groups). To do so, go to the section Import from AVS-Monitor. Starting a new session 1. Launch NeMo by tapping on the app icon. 2. You are invited to choose an IP address. It is the address of the Ethernet (or Wi-Fi if need be) network adapter of the host computer (where AVS-Service is running). You can find it using a Wi-Fi Scanner on your iDevice (e.g. Fing). Alternately, you can go to Windows' Control Panel>Network and Internet>Network and Sharing Center. There, choose your network (named for instance Local Area Connection). In the new window, press [Details…] and note the IPv4 Address. 3. Choose the session you want to open (cf. Sessions). When you launch NeMo for the first time, an empty session is created for you by default. 4. Tap on [Config] or [Live] to open the session, or on [Demo]. Connecting can take a few moments. You can cancel the connection at any time by tapping on [Cancel]. Config Mode Configuration mode. All settings are enabled. Live Mode Safe mode. This mode can be configured from the Settings menu. A setting can be disabled or enabled after confirmation. Cf. Security. Demo Mode This mode can be used without any network connection, to test the app on virtual amplifiers. It can be a good way to learn how to use it. 5. If the access to AVS-Service is restrained (see AVS-Control Panel, tab Security), you are invited to enter a login and password. 6. The status of the connection is displayed. When it is “Loading devices…”, the connection with AVS-Service is engaged, you may have to be patient! If an error message is displayed, maybe: Wi-Fi connection cannot be achieved. Please refer to the Preliminary section of this document to solve this problem. The given IP address is not the good one. AVS-Service is not working correctly. Page 10 of 50 NEXO NeMo User Guide v1.3 General points When a new session is opened, the view is made of: A navigation and tool bar, from where it is possible to trigger many actions on the main view. The Groups & devices menu to select objects to handle. A main view, where monitoring and controlling NXAMPs is achieved. A button to toggle Config and Live mode (long press). A button to record and view the Log. The Events menu, to view Alerts, Tasks, and System Status. A tab bar, to change the main view. There are five tabs, for each one of the main functionalities of the app: Network, the default tab: global view of the network; Control: control of the selected amplifiers' parameters and levels; Setup: control of the selected NXAMPs' setups; Scene: control of the selected NXAMPs' scenes; Disconnect: a simple button to close the session. Page 11 of 50 NEXO NeMo User Guide v1.3 THE NETWORK TAB iPhone users only On iPhone, the Network tab is made of the Groups & devices menu (see The Groups & devices menu). All the following paragraphs apply to iPad users only. iPad users only The main view shows the connected devices (NXAMPs and devices from other manufacturers), as rectangular cells. Blue links between cells represent the physical connections between EtherSound™ (only) devices. A link is oriented from a master to its slaves thanks to an arrow. To show or hide links, tap on or in the toolbar. Map of the devices, map of the groups The map of the main view can show either the devices (NXAMPs and other devices) or the groups (see further how to create groups). To activate the map of the devices or of the groups, tap on [Devices] or [Groups] in the toolbar. Selection The control of the NXAMPs3 (see following tabs) is achieved with a system of selection. Double tap to select a cell. Its color is then shinier. Double tap to deselect a cell. Its color is darker. To select all the cells, tap on To deselect all the cells, tap on in the toolbar. in the toolbar. A group cell (iPad only) can be partially selected, if only part of its devices is selected. If so, it has slanted strips of bright and dark color. The number of selected cells is displayed at the bottom of the main view. To locate the selected cells on the screen, tap on . It is also possible to select or deselect NXAMPs and groups from the menu [Groups & devices...] (see The Groups & devices menu below). Even if any cell can be selected, only NXAMPs are controllable. Positioning cells You can arrange cells as you like. To do so, tap and hold to drag one or many cells with your fingers. When two cells are close enough, magnets allow the constitution of stacks, like racks: you can reproduce the 3 From now on, « NXAMP » and « amplifier » are equally used. Page 12 of 50 NEXO NeMo User Guide v1.3 arrangement of devices as it is in reality. When two cells overlap each other, the lowermost is moved down to reach a better configuration. Two cells are completely tied when they share a full edge with each other. Then, if you move the one, the other will follow. To untie cells, put a finger on each cell, and move them away. To move simultaneously cells that are not tied, you have to select them. If you move a selected cell, all the other selected cells will move as well. If many cells are selected, and you drag a cell that is not selected, then only the later will move. To automatically place cells on the map, tap on in the toolbar. You can then choose between placing them hierarchically (masters above slaves, only for EtherSound) or as tiles. Tip: align on a grid You can align cells on a grid. To do so, go to the Preferences menu from the welcome page, and activate the switch Align on a grid. Groups NeMo makes it easy for you to manage NXAMPs, offering you the possibility of grouping them. For instance, if you want to perform an operation on several devices at once, you can group them together. Groups can also make it easy to identify amplifiers, for instance belonging to a same rack or dealing with the same cabinets. A group has a name, and is associated with a color. Cells from a same group are colored with the group's color. Creating a group: 1. Tap on [+] in the tool bar ; 2. In the displayed popover, tap on [Add] and select the devices of your choice. By default, the devices that are selected on the map are selected here. 3. Adding devices to a new group: NeMo suggests a name and a color for the new group. Tap on the “Group XX” text field to change its name. Tap on a color icon to change its color. Validate by pressing the [Done] button of the keyboard or the [Create group] button. Adding devices to an existing group: Locate the group of your choice in the list and tap on it. Groups can also be created and edited from the Groups & devices menu (see The Groups & devices menu). A device cell A cell has two sides. Tap on [ i ] to reveal the reverse side. To go back to Page 13 of 50 NEXO NeMo User Guide v1.3 the front, tap on the [Done] button. On the front, you will find: A mute button, to cut the output sound of an amplifier (function "overmute": mute all channels). When an NXAMP is effectively muted, the button is blue. A solo button, to mute all amplifiers, except the soloed ones. When solo is active, the button is blue. A label with the alias of the device, or the Dante ID (if applicable). Tap to display the one or the other. Four LEDs for the status of each channel. Here is the meaning of the LEDs: The channel is muted, or the NXAMP is over-muted if the four LEDs are on. The channel is in protection mode, or the NXAMP is in protection mode if the four LEDs are on. The channel is in peak limiter mode. There is current through the channel. Default LED. A green border surrounds a LED when there are multiple values (e.g. the LED is for ch. 1 of amp. A and ch. 1 of amp. B, and the first one is muted whereas the second one is not, or sense, peak, etc.). Remark: When the device is not an NXAMP or if a NXAMP is not responding, LEDs and mute/solo are not displayed. When an NXAMP is in stand-by mode or is not responding, a button allows you to awake it. On the reverse side, you will find: The alias of the device, by default the type of product and the end of the MAC address. When you change it in AVS-Monitor or in NeMo, the new name is not passed on. Tap on the field to edit it, and on [Done] when finished; The MAC address of the amplifier (that can be read on the network card of the device); The load of the amplifier (the version of the firmware and setup libraries); The current setup, denoted by its number or name (when library has been loaded); An icon telling whether the device has a Dante™ or an EtherSound™ card. In case of a Dante™ card, the Dante ID is Page 14 of 50 NEXO NeMo User Guide v1.3 displayed. A device that is not an NXAMP has a cell with the alias only. A group cell A group cell has three panes: In To monitor the levels of the inputs of the NXAMPs of the group. The displayed level for an input is the maximum of this input’s levels for the NXAMPs of the group. Out To monitor the output currents and voltages of the processing channels of the NXAMPs of the group. Again, the displayed levels are the maximum through the devices of the group. VU-Meters i To see some details about the group (setup, load, Dante or EtherSound), and change its name. And two buttons: XX device(s) Tapping on this button will display the Quick mute/solo view of the group (cf. The Quick Mute/Solo view). View alerts! Tapping on this button will display the Events menu, filtered so only the alerts about this group are displayed (cf. Alerts and tasks). VU-Meters A VU-meter displays: Hold of the maximum value (glowing) Short-term hold of the maximum displayed value Current value Hold of the minimum value (glowing) You can reset the hold values by tapping on any VU-meter. Page 15 of 50 NEXO NeMo User Guide v1.3 Important: latency Since there may be latency on the wireless network, commands are likely not to be taken immediately in account by a NXAMP. For instance, it is not abnormal to wait half a second from the moment you tap on a mute button and the one it is effectively blue. All displayed values are the one that are read from the NXAMPs (except when your finger is on the thumb of a slider for instance, and except if the link with the service is broken). An activity indicator is displayed at the bottom-left corner of the main view, when the value of a parameter is being sent and processed by NXAMPs. When it is hidden, you can be sure the value you expected has been taken in account. This indicator is also visible when network updates takes more time than usual (more than 5s). Zoom in and out You can change the scale of the main view with two fingers getting closer (zoom out), or opening (zoom in). You can reset the zoom scale by double-tapping anywhere except on a cell. Scrolling You can scroll the main view to reveal cells that may not be visible, simply by dragging a finger (anywhere but on a cell). In the editing mode (after tapping on [Edit]), if background images are too big, you can use two fingers to scroll. Locking the map You can lock the map of the devices or of the groups, by tapping on the toolbar. Tap again on be moved. in to unlock. When the map is locked, no cell can Background images You can add background images, taken from your iDevice's picture library. For instance, with the built-in camera of the iDevice, you can take a picture of the stage, or of NXAMPs racks, load it into NeMo as a background image, and place amplifier cells so that you find your way around. The background images are the same for the map of the devices as for the map of the groups. Page 16 of 50 NEXO NeMo User Guide v1.3 Adding background images: To add an image to the background: 1. Tap on in the toolbar; 2. Select an image from the picture library. Once the picture is loaded, the view that is displayed is the editing view, cells are greyed over. It is still possible to scroll (with two fingers) and to zoom in the editing mode; 3. Tap on and drag your finger to resize the picture as you like; 4. Tap on the image and drag you finger to move it ; 5. Tap on to remove the image ; 6. Tap [Done] to leave the editing mode. Cells get their aspect back and images are frozen and brought to the background. 7. Do again this operation to add other images. Editing background images: To edit background images, tap on [Edit] to display the editing view, and, as you wish, perform operations 3, 4 and 5 of the previous enumeration. If you have placed several images, the one you are dragging is automatically brought to front. If you want to bring an image to front, drag it slightly. Tap on [Done] when finished. The Quick Mute/Solo view There are several ways of muting or soloing channels and NXAMPs: From the devices or groups map, by using the [Mute/Solo] control of a cell (either for a device or a group); From the Groups & devices menu (see below), for either a device or a group; Page 17 of 50 NEXO NeMo User Guide v1.3 From the Control tab, for either a selection of devices or the channels of these devices; From the Quick Mute/Solo view. You can access the Quick Mute/Solo view from the map of the groups, by taping on the label “XX devices” of a group cell. The following form appears: You can then mute/solo either individual channels, or given channels for a whole group, or devices, etc. Tap on [Done] to dismiss the Quick Mute/Solo view. You can display or hide VU-meters by taping on [VU-Meters]. The Groups & devices menu iPad only: This menu is accessible from every tab, via the button [Groups & devices...], at the left-hand side of the navigation bar. iPhone only: This menu is accessible from the Network tab. A list shows all the groups that you have created, and a particular group: All devices. There is a [mute|solo] button for each group, whose action affects all the NXAMPs of a group. Tapping on displays a list of all its devices. Each NXAMP of the list has a [mute|solo] button, and four LEDs (see A device cell). Page 18 of 50 NEXO NeMo User Guide v1.3 To select a group or an amplifier, simply tap on its row. Selecting a group selects all its NXAMPs. When selected, a row is blue. Editing groups (creation, name, order and removal) 1. From the groups menu, tap on [Edit]; 2. You can change the name of a group by tapping on it. The keyboard appears. Edit the name and validate; 3. You can reorder groups by tapping on the area dragging it. of a row and 4. You can delete a group by tapping on , then on [Delete]. You can also delete a group when you are not in the editing view, by swiping your finger to the left. The button [Delete] appears. 5. You can create a group by tapping on . You can then choose a name and a color for the new group, and add devices to it. iPad and Network tab: A device that you select is circled on the Network map. 6. Tap on [Done] when finished. Remark: it is not possible to neither rename, reorder nor remove the All devices group (except prototypes without connected device, see below). Editing a group 1. From the Groups menu, tap on on the row of the group to edit; 2. Tap on [Edit]. The editing view is displayed; 3. You can change the name of the group by tapping on the field at the top of the list. The keyboard appears. 4. You can change the color of the group by selecting it in the list of suggested colors. 5. You can change the name of a device of the group by tapping on it. The keyboard appears, and the edited device is circled on the Network map (if iPad and Network tab is visible). 6. You can also reorder devices by tapping on the area Page 19 of 50 of a row and NEXO NeMo User Guide v1.3 dragging it. 7. You can remove a device from the group: tap on , then on [Delete]. You can also remove a device when you are not in the editing mode, by swiping your finger to the left. The button [Delete] appears. 8. You can add devices to the group: tap on , and select the devices of your choosing in the menu that is now visible. iPad and Network tab: A device that you select is circled on the Network map. 9. Tap on [Done] when finished. 10. Tap on <Groups] to pop back to the Groups menu. Remark: it is not possible to neither delete nor reorder devices from the All devices group. They are sorted by Dante ID (if applicable) and alias (if not). Not connected devices Groups remain the same within a session. Thus, a group can have devices that are not connected in the current session (those devices are called Prototypes without devices). Such a group is denoted with the icon in the Groups menu, and with the icon in the menu of its devices. To display the prototypes without connected device, tap on the footer of the list of the devices (where the warning icon is). They appear, but greyed over, and not selectable. Tap again on the footer to hide them. The prototypes without devices are the only items you can remove from the All devices group. Page 20 of 50 NEXO NeMo User Guide v1.3 Important: convention A button, a slider or an array's cell colored green means "multiple values". Follow some examples. Example 1: Here, some devices of the group Mains Left are muted and some are not. Example 2: If this slider rules the gain of the channel 1 of the two selected NXAMPs, the green color means that all the channel 1s do not have the same gain (for instance, ch.1 of the first one has its gain at -2dB, and ch.1 of another device at +3.5dB). The slider displays marks for each one of the different values, whereas the thumb is at the average. For VU-meters, the displayed value is the maximum of the multiple values. Important: selected devices In the next tabs, you are going to control the selected NXAMPs. Before performing any setting, make sure that they are really the ones you want to control. The title of the view may be a good indication, since it is: the alias of the selected device if it is the only one; the name of the selected group if it is the only one; the number of selected devices or groups, else. If a selected device is not controllable (not an NXAMP or not-responding NXAMP), it is not taken into account when controlling. The easiest way to check which devices are selected is to go to the [Groups & devices...] menu (available in all the tabs on iPad, or on the Network Tab on iPhone), and then to All devices or whatever group of your choice. Page 21 of 50 NEXO NeMo User Guide v1.3 THE CONTROL TAB Tap on the Control tab. The main view shows a desk where the parameters of the selected NXAMPs are monitored and controlled (see Important: selected above). In landscape mode: inputs are on the left-hand side (A to D: analog, E to H: digital from the network, EtherSound™ or Dante™), processing channels are on the right-hand side (1 to 4). In portrait mode: inputs are at the top, processing channels at the bottom. Each channel is associated with one or two VU-meters, current (A) or voltage (V). Setting parameters iPhone users only: Channel’s parameters (gain, volume, delay, etc.) cannot be set from the main view. To access the channel view, tap on a channel (several channels if you want to control them simultaneously). The title of the newly displayed view reminds you which channels have been selected. You can control 1 to 4 channels simultaneously. Tap on the return button to pop back to the main view. Before performing any setting, make sure that the selected channels are really the ones you want to control. All users: Parameters can be set the following way: Patching To link an input to a processing channel, simply drag your finger from the one to the other. To undo a link, drag again from an input to a channel or conversely. You can also undo several links by dragging your finger across them. Page 22 of 50 NEXO NeMo User Guide v1.3 Gain, Array EQ, Headroom, Volume Place your finger on the thumb of a slider and move it to the left or to the right. The value of the slider is displayed next to it. Sliders have a security against too fast gestures. The resolution of the slider is different depending how far your finger is: the further it is from the slider, the finer the resolution is. Remark: If, when you change the value of a slider, another one is also changing, the two channels are bridged under the current setup. Delay and unit Tap on the field where the delay value is displayed. The keyboard appears. Edit the value and validate. You can also tap on the field and drag your finger to the left or to the right to increase or decrease the delay value. Again, the further your finger is, the finer the resolution is. Delay can be displayed in milliseconds, meters or feet. Tap successively on the button where the unit is displayed to jump from [ms] to [m] to [ft] to [ms]. The delay unit is the same for the four channels. Overmute / solo See A device cell. This button is on the right-hand side of the navigation bar. It mutes or soloes all the channels of the selected NXAMPs. It preserves the channel’s mute status. The global mute button is pressed when the four channels are muted. Mute / Solo This button mutes or soloes a channel. It is not correlated with the overmute/solo button (it can be selected or deselected even if overmute is selected). Stand-by Tap on to shut down the selected NXAMPs. If one of the selected devices is in stand-by mode, no other parameter can be set and the button becomes . Page 23 of 50 NEXO NeMo User Guide v1.3 Cabinet It is a read-only value. To set it, go to the Setup tab. Multiple values If several devices are selected, then a channel represents this channel for all the selected NXAMPs. Therefore, multiple values are possible, for instance if channel 2 of a selected NXAMP is muted, and channel 2 of another selected NXAMP is not. Multiple values are displayed the following way: Patch: links are green. Dragging your finger along a green link provokes the removal of the link. Gain, Array EQ, Headroom, Volume: the slider is green. The displayed value is the average. Moving the slider to a value sets all the values to the slider's value if the Absolute Mode is active, or add the same amount to the different values if the Relative Mode is active. Delay: the displayed value is Mult.. Setting a new value sets all the values to the text field's value. Dragging your finger in case of multiple values have the same behavior as Gain, Array-EQ… Delay unit: the button's label is Mult.. Tapping on the button sets all the values to its new value. Mute-Solo, Overmute-solo, Stand-by: these buttons are green. Tapping on a green button selects the button. For instance: becomes . If multiple Stand-by, no other setting is accessible. VU-meters: VU-meters display the maximum value, but do not have a special color. Cabinet: the value Multiple is displayed. Setting parameters of several channels It is possible to change simultaneously the value of delay, volume, gain, headroom or array-EQ of 2 to 4 channels of the selected NXAMPs. iPhone users only: To change the value of a parameter of several channels simultaneously, tap on these channels, as explained above (Setting parameters). Modifications can be absolute or relative. iPad users only: Tap on the check boxes of the channels to edit simultaneously. Tip: You can select or deselect several channels with a single gesture, by taping on a check box , and then sliding your finger over the other Page 24 of 50 NEXO NeMo User Guide v1.3 channels. Absolute or Relative You can choose absolute (Abs.) or relative (Rel.) modification thanks to the button [Abs.|Rel.]: If you choose Abs., and if you change the parameter (volume, etc.) of a selected channel, its value is also given to the other selected channels. For instance, moving the volume slider of a selected channel to –6 will set the volume of all selected channels to –6 dB. If you choose Rel., and if you change the parameter (volume, etc.) of a selected channel, the same increase or decrease will be given to the other selected channels. For instance, if channels 1 & 2 are selected, where gain is respectively -1 and -6 dB, moving gain of ch. 1 to +2 dB will set the gain of ch. 2 to -3 dB (increase of 3 dB). A slider displays the added value when you handle it. Copy/Paste You can copy all the parameters (inpatch, over-mute, channel mute, delay, volume, gain, array-EQ, headroom and setup) of one NXAMP and paste them to one or many NXAMPs. To do so: 1. Select an NXAMP (e.g. from the Groups & devices menu). 2. From the Control tab, tap on (copy). 3. When the copying operation is completed, select the NXAMP(s) to paste parameters on. 4. From the Control tab, tap on (paste). Undo/Redo Every action can be undone, by pressing . An action sheet appears, letting you the choice to undo the previous step, or redo the last undone step. The undo action takes into account the number of channels and devices on which the action to undo had been performed. A Paste operation (see above) can be undone. Undo/Redo is also available for the Setup tab. Reset all To reset all parameters of an NXAMP (inpatch, over-mute, channel mute, delay, volume, gain, array-EQ, headroom), recall the FLAT setup (see below). Page 25 of 50 NEXO NeMo User Guide v1.3 Caution: view update You may observe a short before the parameters of the view are updated, particularly right after leaving the stand-by mode. Page 26 of 50 NEXO NeMo User Guide v1.3 THE SETUP TAB Tap on the Setup tab. This tab allows you to recall an existing setup (called Standard), or to build a setup channel by channel (called Custom). Before recalling a setup, make sure that the selected devices are really the ones you want to control. See Important: selected devices. Displaying the toolbar (iPhone users only) To display the toolbar, tap on [More]. Loading standard and custom setups The setup library is read from the NXAMPs. This operation is likely to take several minutes. There is one library per load. Reading the library of a load is done once, the library being saved in your iDevice once read, as a .nxload file. If the selected devices have different loads (for instance, LOAD3_14 and LOAD3_16), there will be several reading operations. A progress bar shows the status of these operations. To reload the setup library, if the loading operation has not been successfully achieved, go to the Preferences menu from the welcome page, choose Loads, and delete the row corresponding to the load to read again. NeMo includes the latest available libraries at the time the app is released, for which no reading phase is needed. It is impossible to read them again. Standard and custom setups You can display either a view for standard or custom setups. Tap on [Standard] or [Custom], at the right-hand side of the navigation bar, to display the Standard or the Custom view. Current setup The current setups are the ones that are active in the selected NXAMPs. Standard view The current setup's row is blue. If several NXAMPs are selected, with different current setups, the rows for these setups are green. To reach the current setups (to see where they are in the list), tap on in the toolbar. To display only the setups belonging to the same family as the current setup, tap on [Same family] in the toolbar. If one of the current setups is custom, an alert allows you to jump to the Custom view. Custom view Page 27 of 50 NEXO NeMo User Guide v1.3 The current cabinet and mode of each channel are displayed at the bottom of the view. If several amplifiers are selected, with different custom setups, the value Multiple is displayed. If channels are bridged, the value Bridged is displayed. To reach the current custom setups (to see where they are in the pickers), tap on in the toolbar. Recalling a standard setup 1. Go to the Standard view (see above). 2. Scroll the list to reach the setup you want to recall. You can use the index bar, on the right-hand side of the list. Tap on it or scroll to reach the index the closest of the setup you want to recall (e.g. index 170 for setup #176). 3. You can also enter a part of the name or the number of the setup into the search bar. 4. Tap on the row to recall a setup. You will have to confirm in an alert message. The row is blue when the setup is effectively recalled. Building a custom setup 1. Go to the Custom view (see above). iPhone users only: Go to the channel you want to change the setup by tapping on it. All users: 2. Do a swipe gesture (to the right or to the left) on pickers or scroll to select the right Series. 3. Do the same to choose the right Cabinet. 4. Do the same to choose the right Cabinet mode (iPhone: Cab. mode). 5. Do the same to choose the right Crossover mode (iPhone: XO mode). 6. Tap on if you want to bridge channels 1 & 2 or channels 3 & 4. 7. Tap on [Set] when the pickers' values suit you. You can then recall the custom setup only for the channel you pressed [Set], or recall the custom setups you chose for all the channels. Tip: you can copy and paste the configuration Series-Cabinet-Mode-XO from a channel to another, by tapping on Page 28 of 50 (copy) and (paste). NEXO NeMo User Guide v1.3 Multiple values Multiple loads The selected devices may have different loads, and thus different setup libraries. The displayed library is the intersection of all the libraries (i.e. a setup is displayed if and only if it belongs to all the loads). The current loads are displayed at the bottom of the view. Multiple current setups The selected devices may have different current setups (e.g. setup #1 for a device, #46 for another). Then, rows of current setups of the Standard view are selected in green. If case of multiple custom setups, the value Multiple is displayed at the bottom of the Custom view. Unknown value If the current setup is custom, you will not be able to see it in the Standard view, and will have to jump to the Custom view. If you tap on you will get an alert message suggesting showing the Custom view. If the value of a custom setup is unknown, due to an error while loading the library or because the current setup does not belong to the intersection of the current loads the value Unknown or --- is displayed. You can try to reload the setup library. Page 29 of 50 NEXO NeMo User Guide v1.3 THE SCENE TAB Tap on the Scene tab. The main view lists all the scenes of the selected NXAMPs (from 0 to 31). A scene allows you to store the settings and the current setup of a NXAMP. An empty scene is named --Empty--. If a scene is associated with a custom setup, cabinet and XO modes are displayed next to the name of the scene. Caution: scenes are not stored in NeMo, but directly in the NXAMP. Before saving or recalling a scene, make sure that the selected devices are really the ones you want to control. See Important: selected devices. Reading scenes The list of scenes is read from the selected NXAMPs. This operation is done once per NXAMP and per session. A progress bar shows the status. To read again the scenes of the selected NXAMPs, tap on . Current scene The row of the selected scene is blue. If several amplifiers are selected, with different scene numbers, the rows of the current scenes are green. To reach the current scene(s) in the list, tap on in the toolbar. Saving a scene To save settings and current setups of all the selected NXAMPs (warning: settings and current setups may differ from a NXAMP to another): 1. Tap on the row of the scene you want to save. Warning: saving a scene erase the data of the previous scene with that number. 2. Tap on the text field of the scene name. The keyboard appears. Enter the desired name and validate. 3. Tap on [Save] to save the scene, or on [Cancel]. Recalling a scene To recall a scene of all the selected devices (warning: a scene with a given number may differ from an amplifier to another): 1. Tap on the row of the scene to recall; 2. Tap on [Recall] to recall the scene, or on [Cancel]. Remark: saving and recalling scene are incompletely possible in the demo mode. Multiple values If selected amplifiers have different current scene numbers, rows of all Page 30 of 50 NEXO NeMo User Guide v1.3 the current scenes are selected in green. If then you recall a scene, there should be only one current scene, selected in blue. If the scenes of the selected amplifiers, with a same number, have different names, the displayed name is Multiple. If the scenes of the selected amplifiers, with a same number, have different saved cabinets, the displayed cabinets are Mult. Copy/Paste You can copy one or all the scene(s) from a NXAMP and paste them to one or many NXAMPs. To do so, make sure the NXAMPs are equipped with at least LOAD3_16, and: Copy/Paste all the scenes 1. Select an NXAMP (e.g. from the Groups & devices menu). 2. From the Scene tab, tap on (copy). 3. When the copying operation is completed, select the NXAMP(s) to paste scenes on. 4. From the Scene tab, tap on (paste). An alert appears asking you to confirm the operation, because it will erase all the previous scenes. Copy/Paste a scene 1. Select an NXAMP (e.g. from the Groups & devices menu). 2. From the Scene tab, tap on the row of the scene to copy, and then on (copy). 3. When the copying operation is completed, select the NXAMP(s) to paste scenes on (it is possible to paste the scene on the same NXAMP, at another number). 4. From the Scene tab, tap on (paste). This will cause the copied scene to be pasted at the same number it was on the device it has been copied from. 5. Or, from the Scene tab, tap on a row where to paste the copied scene, and then on . Deleting a scene To delete a scene, tap on the row of the scene to delete and tap on An alert appears to confirm the operation, which cannot be undone. Page 31 of 50 . NEXO NeMo User Guide v1.3 CLOSING A SESSION To close a session, tap on Disconnect, in the tab bar. You are brought to the index view. The session you were working on is automatically saved when closed. SESSION NeMo uses a document (with the .nemo extension) to save and load the data from a session. A session includes: Device aliases and locations on the network map; Group names, colors, constitutions, order, and locations on the map view; Background images; A name and a description. You can then work on several configurations with only one iDevice, and open a different session for each configuration. You can also create a session on one iDevice, and share it with another one so several iDevices word on the same session (e.g. Front of House and Monitor). Once a session is on several iDevices, changes on the one are not passed on the other. The sessions that are created by NeMo can be found in the file-sharing location in iTunes. The Sessions menu To go to the Sessions menu: 1. Go to the welcome page (the view when the app is launched, or after a tap on [Disconnect]). 2. Tap on [Preferences] to open the preferences menu. 3. Tap on Sessions. The Sessions menu displays all the sessions that are in the documents directory of NeMo. The one that is selected is the one that will be opened next time you press [Config] or [Live]. There is also a row for the Demo Session. This session is the one that is opened when you press [Demo]. Page 32 of 50 NEXO NeMo User Guide v1.3 Creating a session By default, a session is created by NeMo. To create other sessions: 1. Go to the Sessions menu (see above); 2. Tap on [+]. A new session is added to the list. Editing a session To edit a session: 1. Go to the Sessions menu (see above); 2. Tap on for the session you want to edit. 3. In the newly displayed view, you can edit the name and the description of the session. You can also view a preview of the session last time it was opened, as well as the number of groups, devices and images it contains. Exporting a session There are several ways of exporting a session: iTunes 1. Connect your iDevice to a computer. From iTunes, go to the interface to manage the iDevice. Press [Apps], and then in the File sharing section, press NEXO Nemo to display the documents directory. 2. Click on the session (.nemo document) of your choosing and press [Save as…]. Mail, AirDrop, Message 1. Go to the Sessions menu (see above); 2. Tap on and select the sessions you want to export, and tap on [Share (xx)] (or go to the detailed view of a session and tap on [Export]). 3. In the activity sheet that appears, choose the way you want to share the selected sessions. The corresponding .nemo documents are then attached to an email or a message, or sent via AirDrop. AVS-Monitor 1. Go to the Sessions menu (see above); 2. Tap on and select the sessions you want to export, and tap on [Share (xx)] (or go to the detailed view of a session and tap on [Export]). 3. In the activity sheet that appears, choose AVS-Monitor. 4. Connect your iDevice to a computer. From iTunes, go to the interface Page 33 of 50 NEXO NeMo User Guide v1.3 to manage the iDevice. Press [Apps], and then in the File sharing section, press NEXO Nemo to display the documents directory. 5. Click on the AVS-Monitor document(s) with the name of the session(s) you exported (.cfg document), and press [Save as…]. 6. From AVS-Monitor, choose File>Load… and select the .cfg document to open. You can then choose to import aliases and/or groups. Importing a session There are several ways importing a session: iTunes 1. Connect your iDevice to a computer. From iTunes, go to the interface to manage the iDevice. Press [Apps], and then in the File sharing section, press NEXO Nemo to display the document directory. 2. Press [Open…] or drag the sessions (.nemo documents) you want to import. 3. On your iDevice, go to the Sessions menu (see above). The session list now contains the imported session(s). 4. Select the session to open. Other apps of the iDevice 1. When you encounter a .nemo document in another app of your iDevice (e.g. DropBox, Mail, Message,…M), when tapping on it, iOS suggests you to open it in NeMo. 2. From NeMo, go to the Sessions menu (see above). The session list now contains the imported session. 3. Select the session to open. AVS-Monitor 1. From AVS-Monitor, choose File>Save as… and save the .cfg file. 2. Connect your iDevice to the computer. From iTunes, go to the interface to manage the iDevice. Press [Apps], and then in the File sharing section, press NEXO Nemo to display the documents directory. 3. Press [Open…], and choose the .cfg file. 4. From NeMo, go to the Sessions menu (see above), choose [Import], and select the .cfg file to import. The session list now contains the imported session. 5. Select the session to open. Deleting a session 1. Go to the Sessions menu (see above); Page 34 of 50 NEXO NeMo User Guide v1.3 2. Tap on , select the sessions you want to delete, and tap on [Clear (xx)] (or go to the detailed view of a session and tap on [Delete]). 3. You will be asked to confirm this action, since it cannot be undone. OTHER SAVED DATA Setup libraries NeMo automatically saves the setup libraries (loads) that have been read from the NXAMPs, into .nxload files. By default, NeMo includes .nxload files for the most recent loads. Warning: load files A .nxload file contains the list of all the setups the load of an NXAMP has got. But it does not contain the firmware that you can open from NXWin and load into an NXAMP! The Loads menu To go to the Loads menu: 1. Go to the welcome page (the view when the app is launched, or after a tap on [Disconnect]; 2. Tap on [Preferences] to open the preferences menu; 3. Tap on Loads. The newly displayed view contains the loads that have been read from the NXAMPs in the first section, and the loads that are included in NeMo in the second one. Reading a load again To read a load again: 1. Tap on from the Loads menu, and select the loads you want to read again, and tap on [Clear (xx)] (or swipe your finger to the left on the row of the load to read again and tap on [Delete]). 2. Connect to the Config mode so the load is read again. Sharing a load To avoid reading the same load on several iDevices, you can read it on one iDevice, and share the .nxload file. With iTunes: 1. Connect your first iDevice to a computer. From iTunes, go to the Page 35 of 50 NEXO NeMo User Guide v1.3 interface to manage the iDevice. Press [Apps], and then in the File sharing section, press NEXO Nemo to display the documents directory. 2. Click on the load(s) (.nxload document) of your choosing and press [Save as…]. 3. Connect your second iDevice to the computer. From iTunes, go to the interface to manage the iDevice. Press [Apps], and then in the File sharing section, press NEXO Nemo to display the documents directory. 4. Choose [Open…], or drag the .nxload file(s) previously saved. 5. Go to NeMo on the second iDevice. The Loads menu now contains the imported load(s). With Mail, Message or AirDrop: 1. Go to the Loads menu of the first iDevice. 2. Tap on [Share (xx)]. and select the load(s) you want to export, and tap on 3. In the activity sheet that appears, choose the way you want to share the selected loads. The corresponding .nxload documents are then attached to an email or a message, or sent via AirDrop. 4. When the .nxload file is received by the second iDevice, iOS will suggest you to open it in NeMo. 5. In NeMo, the Loads menu now contains the imported load(s). AVS-Service settings NeMo automatically save the IP of the network adapter used by AVSService, that you have entered in the welcome page. If AVS-Service is secured, NeMo remembers the login, but not the password. You can choose to remember the password by going to the Preferences menu and type in your login and password in the Security section. To stop remembering the password, simply empty the two text fields. NETWORK UPDATE You can freely plug or unplug a device while a session is opened. However, so they appear or disappear from NeMo, you have to go the Groups & devices menu, and pull down the table view. You may observe a delay between the moment you plug or unplug a device, and the moment it is available to control or disappears. You may also observe a reduction in control speed right after a device has been disconnected. NeMo performs a net reset (same function as the green button at the topleft corner of AVS-Monitor) every time the app connects for the first time Page 36 of 50 NEXO NeMo User Guide v1.3 and every time you press the [Config] or [Live] button. SECURITY There are three ways of ensuring NeMo security: The Wi-Fi network security, WPA2-Personal being recommended; AVS-Service security (go to AVS-Control Panel>Security to create users. Users are granted a different level of rights. A “Viewer” won’t be able to make any changes on NeMo); NeMo Live Mode, to modify the level of rights of use of control objects of the interface. Accessing the Live mode To access the Live Mode, the safe mode of NeMo, either: Tap on [Live] on the index view, prior to open a session; While a session is open, tap on in the main view for more than 2 seconds to access the Live Mode. Then, tap on seconds to go back to the Config Mode. for more than 2 NeMo forces you to stay in the Live mode if AVS-Service is secured and you are a Viewer. Configuring the Live Mode To configure the Live Mode: 1. Go to the welcome page (the view when the app is launched, or after a tap on [Disconnect]; 2. Tap on [Preferences] to open the preferences menu; 3. Locate the section Security and tap on Configure Live Mode>. 4. For the different control types (Mute/Solo, Control, Setup, Scene Tabs, and Undo/Redo), choose the level of security of your choice. No security This is the security level of the Config Mode: every change is allowed. Ask for confirmation Displays an alert message every time a change is expected. After confirmation, the change is passed on to the controlled NXAMP(s). Disable changes Changes are not allowed. Control objects are disabled. Page 37 of 50 NEXO NeMo User Guide v1.3 LOG, ALERTS AND TASKS NeMo warns you about the alerts that may occur on NXAMPs (e.g. a peak alert), and about the on-going writing tasks from NeMo to one or several NXAMPs (e.g. the writing of a new gain value), or other network activities. The application also records on demand all the parameters of a NXAMP in a log, which you can visualize and export. The various alert types are the followings: Log A lot of data is recorded in an internal database, which can be visualized and exported. Simple alert An alert is displayed in the Alerts & Tasks menu, with an orange background. Red alert A red alert is displayed as a pop-up. It is fully configurable: it is triggered if the value of a parameter (e.g. amp temperature) of a NXAMP is within a given range for a given duration. Log The log is recorded on a Log Record. You can create as many Log Records as you like, for instance one per show, and before starting recording, you have to select the one you want to record on. The list of the parameters whose value is recorded into a log record is given in Appendix A. For each parameter, NeMo records every minute the maximum, minimum and average of its observed value during the past minute. Viewing the log You can visualize the values recorded from the NXAMPs in a Log Record, either while recording or not, online or offline. To view, configure and record the log, either: Go to the Preferences menu (from the welcome page), locate the Alerts and Log section, and tap on View Log. Or, while a session is open, tap on (or when recording) in the bottom-left corner of the main view of the Network tab. The Log View appears: Page 38 of 50 NEXO NeMo User Guide v1.3 Selected Log Record Associated session (for NXAMPs names and groups) Record button NXAMPs whose log is displayed below Key Facts Reaching a parameter Log Graphs Navigation through time Create and select a Log Record Go to the Log view. The title indicates you the selected Log Record. Tap on it to open the Log Records menu. From there, press [+] to create a new Log Record, and/or select the row of the Log Record you want to record the log on. Recording the log To record the log, go to the Log view, select the Log Record of your choosing, and press to start recording parameter values. The header of the Log view displays the start and end date (only if not recording), and the effective record time of the selected Log Record. When recording, the record button becomes the Network tab becomes , and the Log button on . Key Facts The Key Facts are integrals of given parameter values (channel protect, peak limiter, sense, and amp protect) along time, displayed in percentage. For instance, if Ch.1 protect is 3%, it means the protection for Ch.1 was on during an average of 3% of the time. Key Facts are not updated real-time, since calculation on the database is resource consuming, but you can refresh it by tapping on . Log Graphs A log graph represents a parameter, and, if applicable, a channel number. Page 39 of 50 NEXO NeMo User Guide v1.3 The horizontal axis is the time, and the vertical axis the value of the parameter. NeMo adapts the scale of the latter depending on the actual values in the interval of time that is represented. Maximum Average Minimum Each graph contains three curves, one for the maxima, one for the minima, and one –thinner- for the average. The small gray spaces between curves are for the moments where the log was not being recorded (on the picture above, for instance, log was not recorded between Tuesday at 18:15 to Today at 10:10). Closest recorded point Recorded point Finger Put your finger near a curve. The recorded points are displayed in another color, and a bubble appears to give detail about the closest point to which your finger is. It contains the value, the date, and the NXAMPs realizing this value at that date. Slide your finger to see the details about other points. The resolution of recording is: Before the five latest minutes: NeMo saves the maximum, minimum and average over one minute into the Log Record. Five latest minutes: NeMo records the maximum, minimum and average over one second. Navigating through time To zoom in and out, put two fingers on the screen and move them closer to or away from each other. You can visualize from a few minutes to several days. To scroll through all the recorded points, put your finger on the blue area of the time slider, located in the header of the Log Graphs section, and drag it to the left (older) or to the right (more recent). Indicative dates are displayed in the time slider. Page 40 of 50 NEXO NeMo User Guide v1.3 Reaching parameters To quickly reach a parameter among all the log graphs, or to configure which log graph to display, tap on the Reach Parameter control, to the right of the time slider. In the newly displayed menu, select a row to reach its log graph. Tap on [Edit] to select the log graphs to visualize. Associating the Log Record to a Session NeMo’s Sessions provide a way for Log Records to display device names, Dante ID, and groups. By default, a Log Record is associated with the session that is currently open. But, off-line or on-line, you can associate it with another session. To do so, tap on [Associated with XXX] and choose a session in the newly displayed menu. Then, names and groups are passed on to the Log Record, and will remain even if you delete or change the session. If the associated session is the one that is currently open, names and groups will be automatically updated every time the Log view is displayed. If you delete a first session, and later on associate a Log Record that was associated with it with a second session, you will definitely lose the names and groups from the first session. Selecting devices You can choose the devices on which the log is displayed, by tapping on [View log on XXX] and select devices or groups in the newly displayed menu. The groups and names are the ones of the session the Log Record is associated with. Page 41 of 50 NEXO NeMo User Guide v1.3 Tip: selected parameters and devices You can choose to visualize the log only on a few devices and for only a few parameters. But this selection only for the visualization and the export: NeMo always record the values of all the parameters for all the connected NXAMPs. If, later, you select a device or a parameter that was deselected, its history will be available. Exporting the log A Log Record can be exported (with a resolution of one minute). To export it as a text file: 1. Go to the Log Records menu (either from the Preferences menu, or from the Log View, see above). 2. Tap on and select the Log Record(s) you want to export, and tap on [Share (xx)]. 3. In the activity sheet that appears, choose the way you want to share the selected Log Records. The corresponding .txt files are then exported to the File Sharing location, or attached to an email or a message, or sent via AirDrop. 4. If you have selected File Sharing, connect your iDevice to a computer. Go to its management interface in iTunes. Click on [Apps], and then in the section File sharing, the row of NEXO Nemo. 5. In the list of NeMo’s documents, click on the row corresponding to the Log Record you have exported, and then on [Save as…]. 6. Open this document from a spreadsheet software or a text editor. It is encoded as UTF-8, rows are separated by line breaks and columns by tabs. The text file looks like: Device Device 1 Device 2 Parameter Parameter 1 Date Ch. 1 Date 1 Min Max Min Max Min Max Min Max Ch. 2 Parameter 2 Ch. 3 Ch. 4 … Parameter 1 … … Date 2 … Note that a new export does not erase a previous one (since files have the date of the export as a suffix). Resetting and clearing a Log Record You can reset the database of a Log Record. You will be asked to do so anyway as soon as its size is too big (1 million of recorded dates). Page 42 of 50 NEXO NeMo User Guide v1.3 To reset a Log Record: 1. Go to the Log view and select the Log Record of your choosing. 2. Tap on [Empty]. To clear a Log Record: 1. Go to the Log Records menu (either from the Preferences menu, or from the Log View, see above). 2. Tap on and select the Log Record(s) you want to delete, and tap on [Clear (xx)] (or swipe your finger to the left over the row of the Log Record to delete and tap on [Delete]). Alerts, Tasks and System Status The Event menu lists all the alerts and tasks, and gives information about the system status. You can access this menu by tapping on: or These buttons are located in the bottom left corner of the main view (the first one only in the Network tab). Alerts: An alert is an event occurring on your system that requires your attention, like the connection or the loss of responsiveness or disconnection of an NXAMP. An alert is displayed with an orange row. Alerts of the same kind can be grouped together and appear as a single row. When an alert is displayed for the first time, there is a blue dot on its row. A badge over the Events menu icon, and another one over the Network tab icon, tell you the number of recent alerts. The list of the NXAMP’s parameters raising alerts is given in appendix A. Tasks: A task is an action more often triggered by the user that is ongoing. For instance, when you press a mute button, a task is indicated in the Event menu, the activity indicator of the Event menu button is animating, NeMo sends the new mute status to the NXAMP which processes the command, provides a feedback to NeMo, and the latter ends the task. Follow some example of tasks: Reading setups and scenes (no activity indicator); Synchronizing with NXAMPs (when a page is displayed and while NeMo has not received all the needed parameter values); User action (mute, volume, recall setup, paste, etc.) and undo/redo; Page 43 of 50 NEXO NeMo User Guide v1.3 Refreshing the network; Copying/pasting. A task is displayed with a blue and animated row. System Status: In the System Status section of the Event menu, you can find indication on the status of NeMo: if it is online or offline, if it is connected to AVSService, and if refreshing the network. There is also an indication on the quality of the connection (which can be good, passable or poor). This indication is computed by NeMo given the Wi-Fi connection, AVS-Service and NXAMPs responsiveness. If you observe a bad connection quality, you can turn-off and on AVSService, and check your Wi-Fi network. It is possible that the quality of the network decreases a few moments due to the disconnection of a device and operations like recalling a setup or a scene. Alerts file NeMo automatically stores all the alerts in a text file. To access this file: 1. Connect your iDevice to a computer. From iTunes, go to the interface to manage the iDevice. Press [Apps], and then in the File sharing section, press NEXO Nemo to display the documents directory. 2. Click on NEXO_Nemo-Alerts.txt, and then on [Save as…]. 3. Open this document from a spreadsheet software, or a text editor. The file is encoded as UTF-8, rows are delimited by line breaks and columns by tabs. The text file looks like: Start date End date MAC address Device’s alias Motive Date 1 Date 2 … Filtering alerts It is possible to filter the alerts and tasks by the NXAMP’s alias, MAC address, Dante ID, groups, motive or date. For that purpose, use the search field at the top of the Event menu. To filter by date, type “17:” to see the alerts that occurred between 17:00 and 17:59. Type “17:15” to see the alerts that occurred between 17:15:00 and 17:15:59. Clearing alerts There are two ways of clearing alerts: Page 44 of 50 NEXO NeMo User Guide v1.3 From the Event menu, tap on [Clear…]. An action sheet is displayed: All alerts & alert file Clears the content of the alerts file and resets the content of the Event menu. All alerts Resets the content of the Event menu. Does not affect the alerts file. Only solved alerts Only removes the alerts whose end date is not null from the Events menu. Does not affect the alerts file. Only non-recent alerts Only removes the alert without a blue dot from the Alerts & Tasks menu. Does not affect the alerts file. From the preference menu, locate the Alerts and log section, and tap on [Reset…], next to Reset alerts. An alert message asks for confirmation. This clears the content of the alerts file and resets the content of the Event menu. Configuring alerts It is possible to choose the parameters raising alerts: 1. Go to the preference menu, accessible from the welcome page. 2. In the section Alerts and log, tap on Configure alerts. 3. In the list, select the parameters raising alerts. If you deselect a parameter, no alert of this type will be raised in the Event menu and in the alerts file. Red alerts A red alerts is displayed as a pop-up, when some triggering conditions are met. To create and activate a red alert: 1. Go to the preference menu, accessible from the welcome page. 2. In the section Alerts and log, tap on Configure red alerts. 3. Tap on the switch for the parameter(s) of your choosing. If it is the first time you activate a red alert for a given parameter, you are brought to a view for configuring the red alert. Else, you have to tap on [Edit] and tap on a row to update the configuration of its red alert. 4. Configure the red alert as you like. You have to set: Upper and lower threshold We are in the red zone if the parameter’s value is within [lower thresh., upper thresh.]. If lower thresh.>upper thresh., we are in the red zone if its value is strictly outside of the above range. Page 45 of 50 NEXO NeMo User Guide v1.3 Time threshold and period If the time threshold equals the time period, the red alert is triggered if we are continuously in the red zone during more than the time threshold. If the threshold is lower than the period, the red alert is triggered if we are statistically in the red zone for at least the time threshold during the time period. Time before reminder Once the alert has been triggered, it will not be triggered again before this duration. For instance: Lower thresh. = 10; upper thresh. = 20; time thresh. = 2s; period = 10s. The red alert is triggered if the value is between 10 and 20 for at least 2s out of 10s. Lower thresh. = 20; upper thresh. = 10; time thresh. = 5s; period = 5s. The red alert is triggered if the value is strictly lower than 10 or greater than 10 for more than 5s in a row. ERROR MESSAGES Various errors can occur while using NeMo. An alert message is then displayed to you, suggesting you several possibilities to get round this error. Errors are mainly due to a loss of reactivity from part of the service, a device not responding, or a poor wireless connection. If it takes time communicating with AVS-Service, you can try to restart NeMo. If connection is still impossible, you can try to restart AVS-Service. You can also renew your lease or power cycle the Wi-Fi access point. If you have trouble controlling devices, or if connection is impossible, maybe your Wi-Fi connection is unstable, or your configuration is not optimal. You can refer to the Preliminary section of this manual. Non-responding devices When connected, NeMo can assess that a device is not responding, and automatically stop controlling it not to disturb the control of the other devices. This occurs for instance when the device is surprisingly busy and ignores NeMo request, or when it is in download mode. You can try to figure out the NXAMP problem, update its firmware, or turn it off. Sometimes, when NeMo finds it difficult to send a particular command to a given device, an alert message appears, and you can manually choose to consider the device as “non-responding”. If you think NeMo was wrong when it considered a device as not responding, you can press and NeMo will try to control it again. Page 46 of 50 NEXO NeMo User Guide v1.3 APPENDIX A: ACCESSIBLE NXAMP’S PARAMETERS Name Description Control in Nemo Load Version of the NXAMP’s firmware. Network and Setup tabs (read only) Inpatch (per ch.) Patching between analog (A to D) and network (E to H) inputs and processing channels (1 to 4). Control tab Volume (per ch.) Volume (in dB) of a channel. Control tab Delay (per ch.) Delay (in ms, s or ft) of a channel Control tab Gain (per ch.) Gain (in dB) of a channel. There is no difference between gain and volume setting. The amplifier automatically combines digital or analog gain to optimize the dynamic range. Control tab Array EQ (per ch.) Gain (in dB) of a low or high shelving filter whose cutoff frequency is fixed, depending on the current setup. You can use Array EQ to compensate ground/stacking or line array effects. Control tab Headroom (per ch.) Reduction (in dB) of the gain sensitivity range to enhance the analog to digital conversion, and thus improve background noise and reduce distortion. More often set to 0dB. You may want to reduce the headroom in case of quiet sound, if so mind to check the clipping. Control tab Cabinet (per ch.) Name of the cabinet associated to the channel. Control tab (read only), Setup tab Setup number Index of the current standard setup (preset adapted to a combination of cabinets). Setup tab (standard panel) Custom setup descriptors (per ch.) Set of series / cabinet / cabinet mode / crossover mode adapted to the loudspeaker associated with a channel (or a couple of channels if bridge). Setup tab (Custom panel) Scene number Index of the last scene that has been recalled (a scene is a saving of the settings of a NXAMP: patch, volume, delay,… and setup). Scene tab Stand-by Stand-by mode of the NXAMP: if on, the large power supplies used by the power amplifiers are turned off, and the controller is put in a low power mode. No control is then available in Nemo, except exiting the stand-by mode. Control tab Mute (per ch.) Mute status of a channel. Network and Control tab Overmute/Global mute Mute status of the four channels. If overmute is active, the channels’ mute status is preserved. In Nemo, overmute is active if the four channels are muted. Network and Control tab Input level (analog) Peak level (in dBFS) at the output of the analog to digital converter of an analog input (A to D). Given with an accuracy of ±3dB, and at a maximum rate of 25Hz. Network tab (map of the groups only) and Control tab Input level (network) Peak level (in dBFS) of a network (E to H) input. Given with an accuracy of ±3dB, and at a maximum rate of 25Hz. Network tab (map of the groups only) and Control tab Page 47 of 50 Log Alert NEXO NeMo User Guide v1.3 Output current (per ch.) Peak current (in dBFS, 0dBFS being the clip level of the current sense converter) of a channel (accuracy of ±3dB, and maximum rate of 25Hz). A non-null value informs you there is a load on the channel. Network tab (map of the groups only) and Control tab. Used diminutive: “A”. Output voltage (per ch.) Peak voltage (in dBFS, 0dBFS being the clip level of the voltage sense converter) of a channel (accuracy of ±3dB, and maximum rate of 25Hz). A non-null value informs you a signal is being sent to the output. Network tab (map of the groups only) and Control tab. Used diminutive: “V”. Mains 1 Voltage Mains voltage (in V) measured from the MAINS 1 plug at the back of the NXAMP in case of NXAMP4x4 (unused for NXAMP4x1). Mains 2 Voltage Mains voltage (in V) measured from the MAINS 2 plug at the back of the NXAMP in case of NXAMP4x4, MAINS plug in case of NXAMP4x1. Power Supply Voltage (per ch.) Output voltage (in V) of the power supply feeding power amplifier for a channel. Power Amp Temperature (per ch.) Temperature (in °C) of the amplifier for a channel. Low and High Load Alert (per ch.) Should be used in conjunction with the load monitoring function of the NXAMP (see user manual for details). This function allows sending a high frequency pilot tone into the NXAMP and thus monitoring the impedance of the load. If the measured impedance for a channel goes out of the user’s predefined limits, or if the NXAMP cannot measure the output impedance (no pilot tone, channel muted, and so on) these alerts are raised. Amplifier limiting output The amplifier has to reduce its output level for protection (if too hot). Output level is reduced by 3dB if one of the power amplifier’s heat sink reaches 70°C, then 3 more dB above 80°C. Amplifier muting output The amplifier has to mute its output for protection (if extremely hot –more than 90°C on the heat sink– or if a problem arises on a channel, e.g. DC output detected, low power supply’s output level,… see user manual for more detail). Power Supply Overtemperature (per ch.) Abnormal temperature has been detected by the temperature sensor on the heat sink of the power supply. Power Supply Mains Error (per ch.) The mains voltage is out of the limits (150V to 288V for the NXAMP “C” version or the “W” version started in 230V mode, and 60V to 150V for the “U” version or the “W” version started in 120V mode). Power Supply On/Off Status (per ch.) Equals 1 once the power supply has finished its soft starting and is ready, else equals 0. Power Supply Starting Status (per ch.) Equals 1 when the power supply is starting up (soft starting). Power Supply Output Voltage Error (per ch.) The output of the power supply is out of the limits (10V to 250V DC). Page 48 of 50 NEXO NeMo User Guide v1.3 Power Amp DC Output Alert (per ch.) The output DC value of a given amplifier channel is greater than 10V. Power Amp Overtemperature (per ch.) Over-temperature value of the power amplifier (no over-temperature, >70°C and reducing output by 3dB, >80°C and reducing by 6dB), >90° and muting output). Peak Limiter (per ch.) The peak limiter is working to protect the amplifier for the channel. Orange LED (Network and Control tabs) Protection (per ch.) Speaker thermal) Orange LED (Network and Control tabs) Amp protect Protection status of the amplifier. If protecting, it is reducing or muting one or several outputs due to malfunctions as overheating, output DC, short circuitry… See the user manual for more details about the meaning of combinations of LEDs indicator and LCD display. Orange LEDs (Network and Control tabs) Sense (per ch.) A certain level of current is detected on the output (a cabinet is connected and some sufficient signal is flowing to it). Green LED (Network tab) protection (displacement or Please refer to the NXAMP’s user manual for more details about these parameters. Page 49 of 50 NEXO NeMo User Guide v1.3 Bug reporting: [email protected]. Thanks for your cooperation! NEXO SA cannot be held responsible for damages caused by improper use of the devices, this software and its manual. This software and manual are the exclusive copyrights of NEXO SA. Copying and reproduction of the software or of its manual, even partly, are forbidden without the written consent of NEXO SA. The screenshots shown in this document may vary with the considered language and version. NEXO SA PARC D’ATIVITE DE LA DAME JEANNE F-60128 PLAILLY Phone: +33 3 44 99 00 70 Fax: +33 3 44 99 00 30 Email: [email protected] Web site: www.nexo-sa.com Page 50 of 50