1
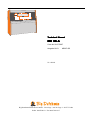
A Tec hnical Man ual echnical Manual MC 36 A Code Nr. 99 97 5007 Ausgabe 06 01 M5007 GB Nr.: 606181 Big Dutchman International GmbH · Calveslage · Auf der Lage 2 · 49377 Vechta Rufnr. 04447/801-0 · Fax 04447/801-237 Thank you very much for your confidence! We want to congratulate you on your Big Dutchman MC 36 A computer and we are convinced that you will be satisfied with it. EC Declaration of Conformity We declare that the design and model of the machine described above being placed on the market by ourselves complies with the relevant health and safety requirements of the EC Directive. Guarantee Declaration This machine is guaranteed in accordance with the Big Dutchman International GmbH General Conditions of Sale for customers resident in Germany and the Big Dutchman International GmbH International Conditions of Sale for customers not resident in Germany. Note In order to ensure that your new equipment will always work properly and efficiently and to ensure your personal safety, we would ask you the following: Please read through this User Manual thoroughly and take particular note of the warning and safety instructions before starting up the machine for the first time. Programme Version: The product described in this manual is computer based, and most functions are realised by software. This manual corresponds to: SOFTWARE VERSION 4.1 It was released in March 2001. Produkt and documentation revision: BIG DUTCHMAN reserve our rights to change this document and the product herein described without further notice. BIG DUTCHMAN cannot guarantee that you will receive information about changes of the product or the manual. In case of doubt, please contact BIG DUTCHMAN. Latest date of change appears from the front-page. The date is only changed on the pages included in the revision. NOTE All rights reserved. No part of this manual may be reproduced in any manner whatsoever without the expressed written permission of BIG DUTCHMAN in each case. The contents of this manual are subject to change without notice. BIG DUTCHMAN has made reasonable efforts to ensure the accuracy of the information contained herein. Should any mistakes or unprecise information occur, BIG DUTCHMAN would appreciate being notified hereof. Irrespective of the above, BIG DUTCHMAN shall not have any liability with respect to loss or damage caused or alleged to be caused by reliance on any information contained herein Copyright 2001 by BIG DUTCHMAN IMPORTANT NOTES CONCERNING THE ALARM SYSTEM Where climatic control is used in livestock buildings, break-downs, malfunctions or faulty settings may cause substantial damage and financial losses. It is therefore most important to install a separate, independent alarm system, which monitors the house concurrently with climatic control. Please note that the product liability clause of BIG DUTCHMAN A/Ss general terms and conditions of sale and delivery specify that an alarm system must be installed. We want to draw your attention to EU-directive No. 998 of 14/12-1993 concerning minimum requirements for domestic animals which specifies that an alarm system must be installed in any house which is mechanically ventilated. In addition to this, there must be a suitable emergency system. Page 4 CONTENTS Contents 1. INTRODUCTION .................................................................................................................................. 7 2. INSTALLATION ..................................................................................................................................... 8 2.1 Introduction .................................................................................................................................................... 8 2.1.1 Description of MultiStep® - Ventilation ......................................................................................................................... 8 2.1.2 Unpacking ..................................................................................................................................................................... 8 2.2 Mechanical Installation ................................................................................................................................... 9 2.2.1 2.2.2 2.2.3 2.2.4 Opening of MC 36 A ..................................................................................................................................................... 9 Mounting of MC 36 A .................................................................................................................................................... 9 Mounting of climate sensors ....................................................................................................................................... 10 Electric Charts ............................................................................................................................................................ 11 2.2.4.1 2.2.4.2 2.2.4.3 2.2.4.4 2.2.4.5 2.2.4.6 2.3 Standard Wiring Diagram. Systems without Emergency Opening ............................................................................................. 11 Standard Wiring Diagram. System with ON/OFF Emergency Opening ..................................................................................... 11 Standard Wiring Diagram. Systems with Temperature Controlled Emergency Opening .......................................................... 12 Wiring Diagram. Winch Motors ................................................................................................................................................... 13 Wiring Diagram. Fans, Heat, Cooling, 24-Hour Clock and Water Meter ................................................................................... 14 Wiring Diagram. MultiStep® ....................................................................................................................................................... 15 Electrical Installation .................................................................................................................................... 16 2.3.1 Setting of Mains Voltage ............................................................................................................................................. 16 2.3.1.1 2.3.1.2 2.3.1.3 2.3.2 2.3.3 2.3.4 2.3.5 2.3.6 Standard Wiring Diagram. Connection of Mains Voltage, Temperature Sensors and Alarm .................................................... 17 Standard Wiring Diagram. Connection of Mains Voltage, Temperature Sensors, Alarm and Emergency Opening ................................................................................................................................................................... 18 Standard Wiring Diagram. Connection of Mains Voltage, Temperature Sensors, Alarm, MC 78T A Temperature Controlled Emergency Opening ........................................................................................................... 19 Connection of Mains Voltage ...................................................................................................................................... 20 Setting of the computer .............................................................................................................................................. 20 Menu Survey Installation ............................................................................................................................................ 22 Connection of the Individual Components .................................................................................................................. 23 Fans ............................................................................................................................................................................ 23 2.3.6.1 2.3.6.2 2.3.6.3 2.3.6.4 2.3.6.5 2.3.6.6 Wiring Diagram. Connection of Fans to Internal Speed Controller ............................................................................................ Wiring Diagram. Connection of two Sequentially Controlled Fans to Internal Speed Controller. With more than one Fan an Auxiliary Contact is used ............................................................................................................................................................. Wiring Diagram. Connection of Fan to Internal Speed Controller .............................................................................................. Wiring Diagram. Connection of two Sequentially Controlled Fans to Internal Speed Controller .............................................. Wiring Diagram. Connection of MC 37 External Speed Controller ............................................................................................ Wiring Diagram. Connection of MC 23U External Speed Controller ......................................................................................... 23 2.3.7.1 Wiring Diagram. Connection of DOL 14 Humidity Sensor ......................................................................................................... 25 2.3.8.1 2.3.8.2 2.3.8.3 2.3.8.4 2.2.8.5 2.3.8.6 2.3.8.7 Wiring Diagram. Connection of 2 pcs. CL 75A 3D 24V R Decentralised Winch Motor for Air Inlet ........................................................................................................................................................................................ Wiring Diagram. Connection of CL 75A 24V R Winch Motor for Air Inlet .................................................................................. Wiring Diagram. Connection of CL 75A 230V Winch Motor for Air Inlet ................................................................................... Wiring Diagram. Connection of CL 20 Winch Motors for Air Inlet ............................................................................................. Wiring Diagram. Connection of CL 74A V Winch Motor for Air Outlet ....................................................................................... Wiring Diagram. Connection of CL 74A MultiStep® Winch Motors for air Outlet ...................................................................... Wiring Diagram. Connection of MultiStep® Gable Fan for Air Outlet ........................................................................................ 2.3.9.1 2.3.9.2 2.3.9.3 Wiring Diagram. Connection of 0-10V Analog Heat 1 and 2 ..................................................................................................... 31 Wiring Diagram. Connection of Heat 1 (Relay) .......................................................................................................................... 32 Wiring Diagram. Connection of Heat 1 (Relay) .......................................................................................................................... 32 2.3.10.1 2.3.10.2 2.3.10.3 2.3.10.4 2.3.10.5 2.3.10.6 2.3.10.7 2.2.10.8 Wiring Diagram. Connection of Extra Ventilation with 230V Fan ............................................................................................... Wiring Diagram. Connection of Extra Ventilation with 400V Fan ............................................................................................... Wiring Diagram. Connection of Internal Cooling/Humidification/Soaking .................................................................................. Wiring Diagram. Connection of External Cooling ....................................................................................................................... Wiring Diagram. Connection of 24-Hour Clock .......................................................................................................................... Wiring Diagram. Connection of Belimo GM 24-SR Winch Motors for Air Outlet ....................................................................... Wiring Diagram. Connection of DOL 90 Water Meter ................................................................................................................ Wiring Diagram. Connection of Relay for Free Range ............................................................................................................... 2.3.11.1 2.3.11.2 2.3.11.3 Wiring Diagram. Connection of CL 74A 24V Winch Motor for Emergency Air Intake ............................................................... 37 Wiring Diagram. Connection of CL 75A 24V Winch Motor for Emergency Air Intake ............................................................... 37 Wiring Diagram. Connection of Solenoid Valve 230V for Emergency Air Intake ...................................................................... 37 23 23 24 24 25 2.3.7 Humidity Sensor ......................................................................................................................................................... 25 2.3.8 Winch Motors .............................................................................................................................................................. 26 26 27 27 28 29 30 31 2.3.9 Heat ............................................................................................................................................................................ 31 2.3.10 Special Connections ................................................................................................................................................... 33 33 33 34 34 34 35 35 36 2.3.11 Emergency Ventilation ................................................................................................................................................ 37 Technical Manual MC 36 A Edition: 01.06.01 M5007 GB CONTENTS Page 5 2.4.2 Menu Survey, Adjustment of the System .................................................................................................................... 38 2.4 Adjustment of the System ............................................................................................................................ 38 2.4.1 2.4.3 2.4.4 2.4.5 2.4.6 2.4.7 2.4.8 2.4.9 2.4.10 2.4.11 2.4.12 2.4.13 2.4.14 2.4.15 2.3.16 2.4.17 2.4.18 2.4.19 2.5 The Control Key and its Functions ............................................................................................................................. 38 Sub Menu Adjustment of the System ....................................................................................................................... 39 Setting of Date and Time ............................................................................................................................................ 39 Setting of Production Form ......................................................................................................................................... 40 Kind of Animal ............................................................................................................................................................. 40 Adjustment of MultiStep® Output ............................................................................................................................... 41 Fan Adjustment ........................................................................................................................................................... 42 Setting of 24-Hour Clock ............................................................................................................................................ 42 Setting of Water Meter ................................................................................................................................................ 42 Adjustment of Winch Potentiometer 1 ........................................................................................................................ 43 Adjustment of Winch Potentiometer 1B ...................................................................................................................... 43 Adjustment of Winch Potentiometer 2 ........................................................................................................................ 43 Adjustment of Winch Potentiometer 2B ..................................................................................................................... 43 Flap Opening Reduction ............................................................................................................................................. 44 Temperature ................................................................................................................................................................ 44 Ventilation type of adjustment ..................................................................................................................................... 44 Access Code ............................................................................................................................................................... 45 New Access Code ...................................................................................................................................................... 45 Testing ......................................................................................................................................................... 46 2.5.1 2.5.2 2.5.3 2.5.4 2.5.5 2.5.6 2.5.7 2.5.8 2.5.9 2.5.10 2.5.11 2.5.12 2.5.13 2.5.14 2.5.15 2.5.16 2.5.17 2.5.18 2.5.19 2.5.20 2.5.21 2.5.22 2.5.23 2.5.24 2.5.25 2.5.26 Check of House Temperature and Humidity Sensors ................................................................................................ 46 Check of Outdoor Temperature Sensor ...................................................................................................................... 46 Check of Alarm ........................................................................................................................................................... 46 Check of MC 78M A Emergency Opening Unit .......................................................................................................... 47 Check of MC 78T A Temperature Controlled Emergency Opening ............................................................................ 47 Manual Control ........................................................................................................................................................... 47 Control of Flap 1 and possibly Flap 1B (AIR INLET) .................................................................................................. 48 Check of Shutter 2 and Possibly 2B (Air Output) ....................................................................................................... 49 Check of Fan 1 and possibly Fan 2 ....................................................................................................................... 49 Check of Emergency Switch AUT. / MAN. .................................................................................................................. 50 Check of Fan (External Stepless Speed Controller, e.g. MC 23U or MC 37) ............................................................. 50 Check of Free Range .................................................................................................................................................. 50 Check of MS-1 (MultiStep®-1) .................................................................................................................................... 51 Check of MS-2 (MultiStep®-2) .................................................................................................................................... 51 Check of MS-3 (MultiStep®-3) .................................................................................................................................... 51 Check of MS-4 (MultiStep®-4) .................................................................................................................................... 51 Check of MS-5 (MultiStep®-5) .................................................................................................................................... 51 Check of MS-6 (MultiStep®-6) .................................................................................................................................... 51 Check of Extra Vent. (Ventilation) ............................................................................................................................... 52 Check of Cooling Relay .............................................................................................................................................. 52 Check of Humidification Relay .................................................................................................................................... 52 Check of Soaking Relay ............................................................................................................................................. 52 Check of Heating-1 ..................................................................................................................................................... 52 Check of Heating-2 ..................................................................................................................................................... 52 Check of 24-Hour Clock ............................................................................................................................................. 53 Termination of Test of Components ............................................................................................................................ 53 2.6 Spare Parts and Accessories ....................................................................................................................... 54 2.7 Technical Data ............................................................................................................................................. 55 3. SERVICE ............................................................................................................................................. 56 3.1 Menu Survey/Service ................................................................................................................................... 56 3.1.1 Control Key Functions ................................................................................................................................................ 57 3.1.2 Sub Menu Service .................................................................................................................................................... 57 3.2 Automatic/Manual Control ............................................................................................................................ 58 3.3 Adjustment of Negative Pressure ................................................................................................................. 58 3.3.1 Example, Adjustment of Negative Pressure ............................................................................................................... 58 3.4 Adjustment of Stepless 1 Unit ...................................................................................................................... 60 3.4.1 Example ...................................................................................................................................................................... 60 3.5 Adjustment of Stepless 2 unit ...................................................................................................................... 61 Technical Manual MC 36 A Edition: 01.06.01 M5007 GB Page 6 CONTENTS 3.6 Winter Compensation .................................................................................................................................. 61 3.7 MultiStep® correction ................................................................................................................................... 61 3.8 Control Parameters ...................................................................................................................................... 62 3.8.1 3.8.2 3.8.4 3.8.5 3.8.6 3.8.7 3.8.8 3.8.9 3.8.10 3.9 Ventilation ................................................................................................................................................................... 62 Cycle Timer ................................................................................................................................................................. 62 Heating ....................................................................................................................................................................... 63 Analog Heating 1 ........................................................................................................................................................ 63 Analog Heating 2 ........................................................................................................................................................ 63 Comfort temperature ................................................................................................................................................... 63 Humidity Control ......................................................................................................................................................... 63 Cooling ........................................................................................................................................................................ 64 Humidification ............................................................................................................................................................. 64 Memory ........................................................................................................................................................ 64 3.9.1 Operation Log ............................................................................................................................................................. 64 3.9.2 Present Set-Up ........................................................................................................................................................... 64 3.10 Servicing ...................................................................................................................................................... 65 3.10.1 Maintenance ............................................................................................................................................................... 65 3.10.2 Hints on Errors ............................................................................................................................................................ 65 3.10.3 Temperature sensor control table ............................................................................................................................... 65 Technical Manual MC 36 A Edition: 01.06.01 M5007 GB INTRODUCTION Page 7 1. INTRODUCTION This manual describes installation and setting up of the Euro Matic MC 36 A climate computer. The MC 36 A climate computer has been developed to give complete climatic control of all types of livestock buildings where it can monitor and control the environment. MC 36 A consists of a basic unit into which optional equipment can be installed, if required. The MC 36 A has been designed to accept an Euro Matic data module to allow the connection of a number of individual MC 36 A computers to one PC. Facility is included for the connection of external emergency opening using the MC 78 A. Thanks to the high flexibility nature of the MC 36 A, the most productive climate control settings can be achieved at all times. For your convenience, a copy of Section 2 of this users guide is printed on a card. It should be inserted behind the opening panel of MC 36 A so it is always available. BIG DUTCHMAN congratulate you on your choice of a MC 36 A CLIMATE COMPUTER Technical Manual MC 36 A Edition: 01.06.01 M5007 GB Page 8 INSTALLATION 2. INSTALLATION 2.1 Introduction The installation section describes MultiStep® - ventilation, installation, setting and testing of MC 36 A climate computers. 2.1.1 Description of MultiStep® - Ventilation BIG DUTCHMAN has developed MultiStep®, a method to control a number of outlet units stepwise, however with stepless exhaust. The computer controls one or two outlet unit(s) steplessly from 0-100%, while the rest of the outlet units are connected stepwise as required. Thus power savings of 40-70% are obtained. Each outlet unit is equipped with a CL 74A swivel shutter motor to open and close the swivel shutter. CL 74A V is used for the stepless outlet unit(s). The internal speed controller of MC 34H A adjusts the fan revolutions. The fan must always be single phase otherwise an external MC 23U must be used. CL 74A ON/OFF is used for the outlet units in step 1 to 6. When the flaps open, the fans start via a built-in contact. These fans will then run in minimum. The fans could be single phase or three phase. If three phase is used, the CL 74A ON/OFF winch motors should be equipped with contactors controlled by a built-in contact. Furthermore, the system can work with air controlled flaps (gable fans). ON/OFF Outlet unit ON/OFF Outlet unit ON/OFF Outlet unit ON/OFF Outlet unit Gable Fan Steples outlet unit Step 1 Step 2 Step 3 Step 4 Step 5 Gable Fan Step 6 Figure 2.1.1-1 Example of MultiStep® exhaust 2.1.2 Unpacking The MC 36 A climate computer lies at the bottom of the box. Up top you will find bags holding the manual and the folded users guide, mounting screws/plugs, sensors and any accessory modules to be used together with this particular control unit. On the outside of the packaging there is a check list specifying the accessories enclosed. Technical Manual MC 36 A Edition: 01.06.01 M5007 GB INSTALLATION 2.2 Page 9 Mechanical Installation The mechanical installation section deals with installation of MC 36 A, installation of climate sensors and installation of accessory modules, if any. 2.2.1 Opening of MC 36 A 1) Open the lower cover plate by lifting at the bottom. 2) Remove the protective plate behind the cover plate. Loosen the screws but do not remove them. 3) Loosen the 2 screws in the control panel. Place the tilted panel on top of the computer during the electrical installation. Be careful, as the panel screws may fall off. 4) The lower cover plate can be removed during the electrical installation by removing one of the screws. 5) Having completed the electrical installation slide the folded Users Guide into the cover plate. Figure 2.2.1-1 Opening of MC 36 A 2.2.2 Mounting of MC 36 A Hold the MC 36 A up against the wall making sure that the display is at the daily operators eye level. Mark the location of the two mounting screws through the rear holes in the MC 36 A. Align the marks horizontally. Bit dimension 8 mm. Rubber washers are for sealing under the screw heads. Remember to leave sufficient space around the MC 36 A to allow for AUT/MAN operation of the emergency switches and for the control panel to be placed on top of the cabinet. Figure 2.2.2-1 - Mounting of MC 36 A Technical Manual MC 36 A Edition: 01.06.01 M5007 GB