1
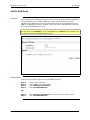
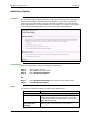
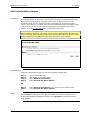
Blackboard Academic Suite User Manual Personal Information Overview Users manage personal data and privacy settings from the Personal Information page. The following functions are available to users: edit their account profile change their password identify a CD-ROM drive to the Blackboard Learning System define privacy settings enable the Text Box Editor Users may also access and make changes to their personal information from the Tools box in a common area. Changes to Personal Information are reflected system wide. For example, if an email address is changed in one course, the user’s email address will be changed in all of the courses he or she is enrolled in. Find this page Follow the steps below to open the Personal Information page. Step 1 Step 2 Open a course Web site for and click Tools on the Course Menu. Select Personal Information. OR Select Personal Information in the Tools box of a common area. © 2004 Blackboard Inc. Proprietary and Confidential Page 128 Blackboard Academic Suite Functions User Manual The following functions are available from the Personal Information page. Function Edit Personal Information Change Password Set CD-ROM Drive Set Privacy Options Set Text Box Editor Options Description Edit personal information as it is displayed to other users. Change your account password. Set the CD-ROM drive used to access content from your computer. Set the options to limit or increase the amount of personal information displayed to fellow Students and Instructors. Set the options to enable or disable the Text Box Editor. © 2004 Blackboard Inc. Proprietary and Confidential Page 129 Blackboard Academic Suite User Manual Edit Personal Information Overview Find this page The information that appears in a user’s account profile can be modified on the Edit Personal Information page. Users can change the values in fields, populate empty fields, or remove information from fields on this page. Follow the steps below to open the Edit Personal Information page. Step Step Step Step 1 2 3 4 Open a course Web site. Click Tools on the Course menu. Select Personal Information. Select Edit Personal Information. OR Step 1 Step 2 Fields Select Personal Information in the Tools box of a common area. Select Edit Personal Information. The table below details the entry fields on the Edit Personal Information page. Field Personal Information First Name [r] Edit Middle Name Edit Last Name [r] Edit Email [r] Edit Student ID Edit Other Information Description the first name. the middle name. last name. email address. Student ID as defined by the institution. © 2004 Blackboard Inc. Proprietary and Confidential Page 130 Blackboard Academic Suite Gender Birthdate Education Level Company Job Title Department Street 1 Street 2 City State/Province Zip/Postal Code Country Web Site Home Phone Work Phone Work Fax Mobile Phone User Manual Edit gender. Select birthday by clicking on the drop-down arrow and selecting date values. Edit education level. Edit company. Edit job title. Edit department. Edit address. Edit any additional address information. Edit city. Edit state or province. Edit ZIP code or postal code. Edit country. Edit the URL of the user’s personal Web site. When adding a URL, do so as http://www.blackboard.com, not www.blackboard.com or blackboard.com Edit the home phone number of the user. The phone number will display exactly as entered. Edit the work phone number of the user. The phone number will display exactly as entered. Edit the fax number of the user. The fax number will display exactly as entered. Edit the mobile phone of the user. The phone number will display exactly as entered. Tips and Tricks Changes made on the Edit Personal Information page will be reflected throughout the Blackboard Learning System. For example, if the user changes their first name, the new first name will appear in all courses they are enrolled in. © 2004 Blackboard Inc. Proprietary and Confidential Page 131 Blackboard Academic Suite User Manual Change Password Overview Find this page Account passwords can be changed from the Change Password page. The Change Password page is accessible through the Personal Information features. Each user must enter a user name and password to login to the system. Follow the steps below to open the Change Password page. Step Step Step Step 1 2 3 4 Open a course Web site. Click Tools on the Course menu. Select Personal Information. Select Change Password. OR Step 1 Step 2 Fields Select Personal Information in the Tools box of a common area. Select Change Password. The table below details the fields on the Change Password page. Field Reset Password Password [r] Verify Password [r] Description Enter a new password for the account. The password must be at least one character and contain no spaces or special characters. Enter the password again to ensure accuracy. © 2004 Blackboard Inc. Proprietary and Confidential Page 132 Blackboard Academic Suite User Manual Tips and Tricks Due to security, it is recommended that users do not use common personal information as their password, such as their name or nickname. It is recommended that users change their passwords periodically to ensure security. © 2004 Blackboard Inc. Proprietary and Confidential Page 133 Blackboard Academic Suite User Manual Set CD-ROM Drive Overview Users identify the CD-ROM drive location on the current workstation to the Blackboard Learning System from the Set CD-ROM Drive page. The CD-ROM drive must be identified to the Blackboard Learning System before files can be uploaded from a CDROM to the Blackboard Learning System. Users must set the CD-ROM drive each time they want to upload files from a CD. Note: A default value for the CD-ROM Drive will appear when this page is opened, but the user must select Submit to set the CD-ROM Drive. If Submit is not selected, then the value is null and a CD-ROM Drive is not set. Find this page Follow the steps below to open the Set CD-ROM Drive page. Step Step Step Step 1 2 3 4 Open a course Web site. Click Tools on the Course menu. Select Personal Information. Select Set CD-ROM Drive. OR Step 1 Step 2 Select Personal Information in the Tools box of a common area. Select Set CD-ROM Drive. © 2004 Blackboard Inc. Proprietary and Confidential Page 134 Blackboard Academic Suite Fields User Manual The table below details the fields on the Set CD-ROM Drive page. Field Description CD-ROM Drive Information CD-ROM (for PC): Click the drop-down arrow and select the drive letter that maps to the CD-ROM drive from the list. CD-ROM (for MAC): Enter the CD-ROM drive location. © 2004 Blackboard Inc. Proprietary and Confidential Page 135 Blackboard Academic Suite User Manual Set Privacy Options Overview Find this page The Set Privacy Options page allows users to choose the information they would like to make publicly available. This information will appear in course Rosters and Group pages. Users may also select to make this information available in the User Directory. If an email address is not made available it will not appear in the Roster, Group pages, User Directory, the Collaboration Tool or in any other part of the application. Follow the steps below to open the Set Privacy Options page. Step Step Step Step 1 2 3 4 Open a course Web site. Click Tools on the Course Menu. Select Personal Information. Select Set Privacy Options. OR Step 1 Step 2 Fields Select Personal Information in the Tools box of a common area. Select Set Privacy Options. The table below details the fields on the Set Privacy Options page. Field Contact Information Email address Address (Street, City, State, Zip, Country) Description Select this check box to make the email address visible to other users through the User Directory, and in other parts of the Blackboard Learning System, such as the Roster and Group pages. Select this check box to make address information visible to other users through the User Directory. © 2004 Blackboard Inc. Proprietary and Confidential Page 136 Blackboard Academic Suite Work Information (Company, Job Title, Work Phone, Work Fax) Additional Contact Information (Home Phone, Mobile Phone, Web Site) User Directory Status List my information in the user directory User Manual Select this check box to make work information visible to other users through the User Directory. Select this check box to make additional contact information visible to other users through the User Directory. Select this check box to list your profile information visible to other users through the User Directory. © 2004 Blackboard Inc. Proprietary and Confidential Page 137 Blackboard Academic Suite User Manual Set Text Box Editor Options Overview The Text Box Editor allows users to create content through a simple editor within the Blackboard Learning System. This page allows users to choose whether or not WYSIWYG (What You See Is What You Get) functionality will be enabled on their system. If this feature is enabled, users will have additional features available to them when entering content in many text boxes throughout the Blackboard Learning System. See the Text Box Editor topic for additional information. Note: The Text Box Editor is only available to Windows Operating System users with Internet Explorer Version 5.x or a later version. System Administrators also have the option of turning off the WYSIWYG features for the Text Box Editor for all users. Users without WYSIWYG functionality have access to alternate Text Box Options. Find this page Follow the steps below to open the Set Text Box Editor Options page. Step Step Step Step 1 2 3 4 Open a course Web site. Click Tools on the Course Menu. Select Personal Information. Select Set Text Box Editor Options. OR Step 1 Step 2 Fields Select Personal Information in the Tools box of a common area. Select Set Text Box Editor Options. Select Enable and text boxes throughout the Blackboard Learning System will be enabled with additional WYSIWYG features. Select Disable and text boxes include basic options. © 2004 Blackboard Inc. Proprietary and Confidential Page 138