1
DeploymentManager Ver6.2
Installation Guide
-First Edition-
Rev.001
Contents
Introduction ............................................................................................................................ 4
Target Audience and Purpose .............................................................................................................. 4
Document Structure .............................................................................................................................. 4
DeploymentManager Manual Organization .......................................................................................... 4
Documentation Guidelines .................................................................................................................... 5
1.
Before Installing DPM..................................................................................................... 8
1.1.
1.2.
DeploymentManager Ver6.2 DVD Configuration ..................................................................... 8
Check and Set the Installation Environment ............................................................................ 9
1.2.1.Installing Internet Information Services (IIS) ............................................................................................. 11
1.2.2.Setting Up the DHCP Server .................................................................................................................... 21
2.
Installing DPM ................................................................................................................. 24
2.1.
Installing the DPM Server ........................................................................................................ 24
2.1.1.Installing the DPM Server by Standard Installation................................................................................... 26
2.1.2.Installing the DPM Server by Custom Installation ..................................................................................... 39
2.2.
Installing the DPM Client .......................................................................................................... 41
2.2.1.Installing the Windows (x86/x64) Version ................................................................................................. 42
2.2.2.Installing the Linux (x86/x64) Version ....................................................................................................... 46
2.3.
2.4.
2.5.
3.
Installing Image Builder (Remote Console) ............................................................................. 49
Installing DPM Command Line ................................................................................................ 53
Installing PackageDescriber .................................................................................................... 56
Upgrading DPM ............................................................................................................... 60
3.1.
Before Upgrading DPM ............................................................................................................ 60
3.1.1.Upgrading Precautions ............................................................................................................................. 60
3.2.
3.3.
Upgrading the DPM Server ...................................................................................................... 61
Upgrading the DPM Client ....................................................................................................... 68
3.3.1.Automatically Upgrading the DPM Client .................................................................................................. 68
3.3.2.Manually Upgrading the DPM Client......................................................................................................... 70
3.4.
3.5.
3.6.
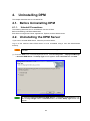
4.
Upgrading Image Builder (Remote Console) ........................................................................... 74
Upgrading DPM Command Line .............................................................................................. 77
Upgrading PackageDescriber .................................................................................................. 80
Uninstalling DPM ............................................................................................................ 83
4.1.
Before Uninstalling DPM .......................................................................................................... 83
4.1.1.Uninstall Precautions ................................................................................................................................ 83
4.2.
4.3.
Uninstalling the DPM Server .................................................................................................... 83
Uninstalling the DPM Client ..................................................................................................... 85
4.3.1.Uninstalling the Windows (x86/x64) Version ............................................................................................ 85
4.3.2.Uninstalling the Linux (x86/x64) Version .................................................................................................. 88
4.4.
4.5.
4.6.
5.
Uninstalling Image Builder (Remote Console) ......................................................................... 89
Uninstalling DPM Command Line ............................................................................................ 90
Uninstalling PackageDescriber ................................................................................................ 92
Preparing for DeploymentManager Operation ............................................................. 94
5.1.
Preparing for DPM Operation .................................................................................................. 94
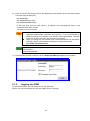
5.1.1.Starting the Web Console ......................................................................................................................... 94
5.1.2.Logging into DPM ..................................................................................................................................... 95
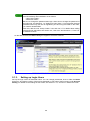
5.1.3.Setting up Login Users ............................................................................................................................. 96
5.1.4.Registering the License Key ..................................................................................................................... 97
Appendix A
Silent Installation ........................................................................................... 99
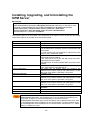
Installing, Upgrading, and Uninstalling the DPM Server....................................................................... 102
Installing, Upgrading, and Uninstalling the DPM Client ........................................................................ 104
2
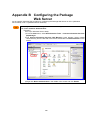
Appendix B
Configuring the Package Web Server.......................................................... 108
Appendix C
Configuring NFS Server ................................................................................ 115
Appendix D
Configuring Database Server ....................................................................... 116
Appendix E
Upgrading SQL Server .................................................................................. 119
Appendix F Configuring DPM Server and MasterScope Network Manager on
the Same Machine .......................................................................................................... 119
Appendix G
Revision History ............................................................................................ 123
3
Introduction
Target Audience and Purpose
This "Installation Guide" is intended for system administrators who perform DPM installation, upgrade
installation, uninstallation, and initial setup, and explains each method.
Document Structure
1
2
3
4
5
Before Installing DPM: Carefully read this section before installation.
Installing DPM: This section describes how to install DPM.
Upgrading DPM: This section describes how to upgrade DPM.
Uninstalling DPM: This section describes how to uninstall DPM.
Preparing for DeploymentManager Operation: This section describes how to configure the initial
setup for DPM.
Appendices
Appendix A
Appendix B
Appendix C
Appendix D
Appendix E
Appendix F
Appendix G
Silent Installation
Configuring the Package Web Server
Configuring NFS Server
Configuring Database Server
Upgrading SQL Server
Configuring DPM Server and MasterScope Network Manager on the Same Machine
Revision History
DeploymentManager Manual Organization
DPM manuals are structured as described below.
The name of each manual is described in this manual according to the "Name in this Manual".
Name of Manual
DeploymentManager
Ver6.2 First Step Guide
Name in this Manual
First Step Guide
DeploymentManager
Ver6.2 Installation Guide
Installation Guide
DeploymentManager
Ver6.2 Operation Guide
Operation Guide
DeploymentManager
Ver6.2 Reference Guide
Reference Guide
Role of Manual
Intended for DPM users. Provides a product
overview, and describes the various
functions, system design methods,
operating environment and so on.
Intended for system administrators who
install DPM. Describes tasks such as how to
install, upgrade, and uninstall DPM.
Intended for system administrators who
operate DPM. Describes the environment
setup procedure for the operation and the
operational procedure based on an actual
flow.
Intended for system administrators who
operate DPM. Describes DPM operations on
the screen, tools, maintenance-related
information, and troubleshooting. This guide
is a supplement to the Installation Guide and
the Operation Guide.
The latest information of DPM can be obtained from the following product site:
http://www.nec.com/masterscope/deploymentmanager/index.html
The Reference Guide is not included in the installation media, and is only available on the product
site.
4
Documentation Guidelines
The following describes important points regarding the notation used in this manual.
The notation used for DPM products is as follows:
Notation in this Manual
Product Name
DPM unbundled product
DeploymentManager Ver6.2
SSC product
DeploymentManager Ver6.2 for SSC(*1)
*1
This is a product that is bundled with SigmaSystemCenter and VirtualPCCenter.
The screen images in this manual are based on the DPM unbundled product. The license related
displays are only for the DPM unbundled product. They are not displayed for SSC products.
Product versions are expressed as follows.
Common description for DPM Ver6.2: DPM Ver6.2
Specific description for DPM Ver6.2x: DPM Ver6.2x
* x means revision number.
The installation media included with the DPM product is called "Installation media" in this manual.
IPv4 address is described as "IP address" and IPv6 address is described as "IPv6 address".
32bit OS is described as "x86" in this manual and 64bit OS is described as "x64".
In Windows OS, the folder path in which DPM is installed or the registry key is displayed by those
of x86. When you use x64, replace as the following if there is no notice in particular.
DPM installation folder
・ (x86):C:\Program Files\NEC\DeploymentManager
・ (x64):C:\Program Files (x86)\NEC\DeploymentManager
・ (x86):C:\Windows\system32
・ (x64):C:\Windows\SysWOW64
Registry key
・ (x86):HKEY_LOCAL_MACHINE\SOFTWARE\NEC\DeploymentManager
・ (x64):HKEY_LOCAL_MACHINE\SOFTWARE\Wow6432Node\NEC\DeploymentManager
5
The meaning of each icon used in this manual is as follows:
Icon
Explanation
Important items.
These are items you need to be careful when you operate DPM not depending on
the using environment.
Cautionary items.
These are items you need to be careful in the specific environment or operations.
Supplementary items.
These are informations to use DPM more conveniently.
The displays and procedures of DPM may differ according to the operating system used. In the
case of Windows OS, this document is based on Windows Server 2008 and Windows 7, in
principle. Replace when you use DPM on the OS except Windows Server 2008 and Windows 7.
(There are some descriptions based on the OS except Windows Server 2008 and Windows 7.)
Example)
The procedure for checking the DPM version differs by operating system as follows:
・For Windows Server 2012/Windows 8:
1) In Windows desktop, set the mouse pointer in the upper right (or the lower right) and select
Settings from the charm.
2) Settings screen appears. Select Control Panel -> Program -> Programs and Features.
・For Windows Server 2008/Windows 7/Windows Vista:
From the Start menu, click Control Panel -> Programs and Features.
* When "Version" is not displayed, perform the following procedure 1) and 2).
1) Right-click Name in the center of the screen, and select More.
2) In the Choose Details screen, select the Version check box and click OK.
・For an OS except than the above
1) From the Start menu, click Control Panel -> Add or Remove Programs. (or
Add/Remove Programs)
2) Select the applicable component, and click Click here for support information.
About Windows Server 2003 R2 or Windows Server 2008 R2, follow explanation of Windows
Server 2003 or Windows Server 2008 unless Windows Server 2003 R2 or Windows Server 2008
R2 is specified explicitly.
In descriptions of operation procedures, arbitrary names to be specified by the user(instance
name of the database and so on) are described in bold and italics as follows: Instance Name.
Example)
・ Restart the following service.
SQL Server(Instance Name)
・ In the tree view, click Resource icon -> Scenarios icon -> Scenario Group icon.
The description of SQL Server in this manual is based on SQL Server 2012 SP1 Express that is
included in the installation media. Replace it when you use the product except SQL Server 2012
SP1 Express.
Example)
DPM database path
•For SQL Server 2012 SP1 Express x86:
C:\Program Files\Microsoft SQL Server\MSSQL11.Instance Name\MSSQL\Binn
•For SQL Server 2008 R2 SP1 Express x86:
C:\Program Files\Microsoft SQL Server\MSSQL10_50.DPMDBI\MSSQL\Binn
•For SQL Server 2005 Express Edition x86:
C:\Program Files\Microsoft SQL Server\MSSQL.x\MSSQL\Binn
* x means the number of the instance.
6
Execute following procedures when Finish DPM related tasks appears in this document.
•If a scenario is running, wait until the scenario is completed.
•If an automatic update is in progress, wait until the automatic update is completed.
•If you are operating the Web Console or the DPM tools, end them.
1MByte is calculated as 1024KByte.
1GByte is calculated as 1024MByte.
7
1.
Before Installing DPM
This chapter describes how to read this manual and outlines the precautionary notes for DPM
installation.
1.1. DeploymentManager Ver6.2 DVD
Configuration
The DPM installer and software components are provided on the DPM Ver6.2 installation media DVD
as follows. The following is the DPM Ver6.2 unbundled product configuration.
DeploymentManager 6.2 DVD
|
|- dotNet Framework40
|
|
|- License
|
|
|- Linux
|
|
|- MANUAL
|
|
|- Setup
|
|
L TOOLS
Autorun.inf
autorun.exe
Launch.exe
.NET Framework 4 re-distributable package
Product license for the OSS module bundled with the product
Linux related module
User's guide
Setup module
Tools
Launcher execution module
8
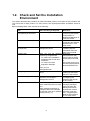
1.2. Check and Set the Installation
Environment
This section describes the procedure for DPM unbundled product. Some parts of this procedure will
vary from those for SSC product. For SSC product, see SigmaSystemCenter Installation Guide as
well.
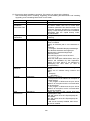
Before installing DPM, check and set up the following.
Item
When Checking Is Required
Reference
Check system configuration
and operating environment
Before installing DPM
Set up network environment
Before installing DPM
Installing Internet Information
Services (IIS)
When IIS is not installed on the
Management Server
Installing JRE
When you use the following
functions by Image Builder
・ To create Linux installation
parameter files for OS clear
installation
・ To create Linux disk
duplication data files
or
When you use
PackageDescriber
When you operate with a DHCP
server
See Section 2.1,
"Examining the System
Configuration of
DeploymentManager" in
First Step Guide.
See Section 2.2.1,
"Regarding the Network
Environment" in First
Step Guide.
See Section 1.2.1,
"Installing Internet
Information Services
(IIS)" in this manual.
Download
JRE7(Windows x86)
from the site of Oracle
Corporation and install
it.
http://www.oracle.com/t
echnetwork/java/javase/
downloads/index.html
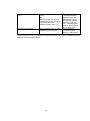
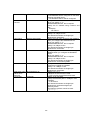
Configuring the DHCP Server
Set the Package Web Server
When you manage packages
collectively over multiple
Management Servers
Setting Up Multicast Protocol
In the following case:
•When multicast protocol is used
and
•When managed machines on
multiple subnets are managed
beyond the router and software
routing is done. (*1)
9
See Section 1.2.2,
"Setting Up the DHCP
Server" in this manual.
See Appendix B,
"Configuring the
Package Web Server"
in this manual.
See "Regarding
managing managed
machines when the
Management Server
exceeds the network
segment" in Section
2.2.1, "Regarding the
Network Environment"
in First Step Guide.
Setting Up the DHCP Relay
Agent
•When you operate with a DHCP
server
and
•When managed machines on
multiple subnets are managed
beyond the router and
software-routed is done. (*1)
Configuring NFS Server
When you perform the OS clear
installation (Linux) function
See "Regarding
managing managed
machines when the
Management Server
exceeds the network
segment" in Section
2.2.1, "Regarding the
Network Environment"
in First Step Guide.
See Appendix C,
"Configuring NFS
Server" in this manual.
*1
About setup when routing is performed using hardware devices (routers or switches), see the
manuals of the respective devices.
10
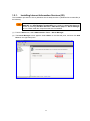
1.2.1.
Installing Internet Information Services (IIS)
The installation procedure of IIS7.0 (Windows Server 2008) and IIS7.5 (Windows Server 2008 R2) is
the following.
If Web Server (IIS) is already installed, please confirm whether Static Content,
ASP.NET and IIS 6 Metabase Compatibility are installed in Select Role Services
screen by selecting Add Role Services in Web Server (IIS) from Server Manager
of OS. Please install the components that are not installed.
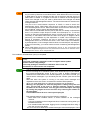
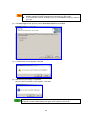
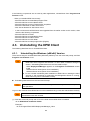
(1) From the Start menu, select Administrative Tools -> Server Manager.
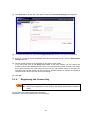
(2) The Server Manager screen appears. Select Roles on the left-hand pane, and then click Add
Roles on the right-hand pane.
11
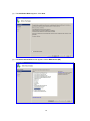
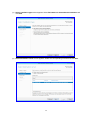
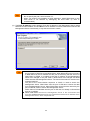
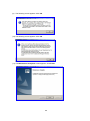
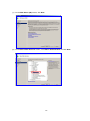
(3) The Add Roles Wizard appears. Click Next.
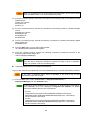
(4) The Select Server Roles screen appears. Select Web Server (IIS).
12
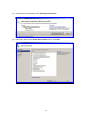
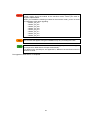
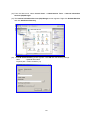
(5) The following screen appears. Click Add Required Features.
(6) The screen returns to the Select Server Roles screen. Click Next.
13
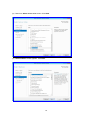
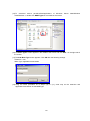
(7) On the Web Server (IIS) screen, click Next.
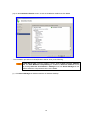
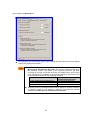
(8) On the Select Role Services screen, check Static Content, ASP.NET and IIS6 Metabase
Compatibility and click Next.
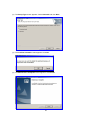
(9) On the Confirm Installation Selections screen, click Install.
14
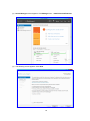
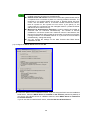
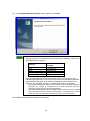
(10) On the Installation Results screen, check the installation details and click Close.
・ The installation procedure of IIS8.0(Windows Server 2012) is the following.
If Web Server (IIS) is already installed, confirm whether Static Content, ASP.NET
4.5, and IIS 6 Metabase Compatibility are installed in Selection Features screen
by clicking Add roles and features in Manage menu from Server Manager of OS.
Please install the components that are not installed.
(1) Click Server Manager in Windows task bar in Windows desktop.
15
(2) Server Manager screen appears. Click Manage menu -> Add Roles and Features.
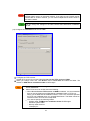
(3) The following screen appears. Click Next.
16
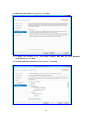
(4) Select installation type screen appears. Select Role-based or feature-based installation and
click Next.
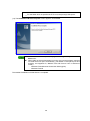
(5) Select destination server screen appears. Select the corresponding machine and click Next.
17
(6) Select server roles screen appears. Select Web Server (IIS).
(7) The following screen appears. Click Add Features.
18
(8) Returns to Select server roles screen. Click Next.
(9) Select features screen appears. Click Next.
19
(10) Web Server Role (IIS) screen appears. Click Next.
(11) In Select role services screen, select Static Content, ASP .NET 4.5, IIS 6 Metabase
Compatibility and click Next.
(12) Confirm installation selections screen appears. Click Install.
20
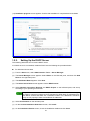
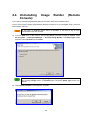
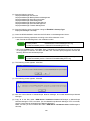
(13) Installation progress screen appears. Confirm that installation is completed and click Close.
1.2.2.
Setting Up the DHCP Server
The following describes how to install a DHCP server.
If a DHCP server is not installed, install the DHCP service following the procedure below.
For Windows Server 2008
(1) From the Start menu, select Administrative Tools -> Server Manager.
(2) The Server Manager screen appears. Select Roles on the left-hand pane, and then click Add
Roles on the right-hand pane.
(3) The Add Roles Wizard appears. Click Next.
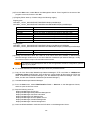
(4) The Select Server Roles screen appears. Select DHCP Server.
(5) Select Network Connection Bindings and DHCP Scopes on the left-hand pane, and set up
according to your operating environment.
Prepare IP addresses in an amount equivalent to the number of machines managed
by DPM. If machines except than those managed by DPM obtain IP addresses from
the DHCP, ensure that there are a sufficient number of IP addresses. Scenarios
may not run properly if there are insufficient IP addresses.
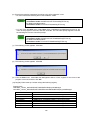
(6) Select Confirmation on the left-hand pane.
(7) On the Confirm Installation Selections screen, click Install.
(8) On the Installation Results screen, check the installation details and click Close.
21
Installation of the DHCP server is completed on Windows Server 2008.
For Windows Server 2012
(1) Click Server Manager in Windows task bar in Windows desktop.
(2) Server Manager screen appears. Click Manage menu -> Add roles and features.
(3) Before you begin screen appears. Click Next.
(4) Select installation type screen appears. Select Role-based or feature-based installation and
click Next.
(5) Select destination server screen appears. Select the corresponding machine and click Next.
(6) Select server roles screen appears. Select DHCP Server.
(7) Add features that are required for DHCP Server? screen appears. Click Add Features.
(8) Returns to Select server roles screen. Click Next.
(9) Select features screen appears. Click Next.
(10) DHCP Server screen appears. Click Next.
(11) Confirm installation selections screen appears. Click Install.
(12) Installation progress screen appears. Confirm that installation is completed and click Close.
(13) Returns to Server Manager screen. Select Tool menu -> DHCP.
(14) DHCP screen appears. Right-click IPv4 under the corresponding machine from the tree on the
left side of the screen and select New Scope.
(15) New Scope Wizard screen appears. Configure following the environment to use.
Prepare IP addresses in an amount equivalent to the number of machines managed
by DPM. If machines except those managed by DPM obtain IP addresses from the
DHCP, please ensure that there are a sufficient number of IP addresses. Scenarios
may not run properly if there are insufficient IP addresses.
(16) If Completing the New Scope Wizard screen appears, click Finish.
Installation of the DHCP server is completed on Windows Server 2012.
22
If you want to construct the DHCP server using a server except the DHCP server
included in Windows OS as standard, note the following:
・ You cannot install or use DHCP server software manufactured by a third party on the
same machine as DPM Server. When they are installed on the different machine,
confirm that DHCP server software leases the IP address correctly for the network
boot(PXE boot) in advance.
・ When the DHCP server is constructed using Linux, for example, you may need to
specify a fixed address in /etc/dhcpd.conf.
A fixed address refers to a mechanism wherein the MAC address of the managed
machine and the IP address to be leased are combined and registered in the
DHCP server in advance, and the DHCP server leases the fixed IP address in
response to an address request from the managed machine.
If there is no description of the fixed address, a response delay from the DHCP
server may occur. In that case, the PXE boot (network boot) will fail and DPM may
not behave properly due to the affect. For UNIX operating systems except Linux, a
fixed address may be similarly required.
The following shows an example of /etc/dhcpd.conf in a case where a fixed
address (192.168.0.32) is specified for the MAC address (12:34:56:78:9A:BC)
host.
subnet 192.168.0.0 netmask 255.255.255.0 {
...
...
host computer-name {
hardware ethernet 12:34:56:78:9A:BC;
fixed-address 192.168.0.32;
}
}
23
2.
Installing DPM
This chapter describes how to install DPM by standard or custom installation.
End all the running applications, Explorer, and the Web browser.
2.1. Installing the DPM Server
DPM Server is the component that is installed on the Management Server. When DPM Server is
installed, Image Builder and DPM Command Line are also simultaneously installed.
During DPM Server installation, note the following:
・ When "DPM Server" is installed by standard installation, ".NET Framework 4" and "DPM Server"
are installed.
In the case of Windows Server 2012, do not install .NET Framework 4 by the
installation media. Click Add roles and features in Manage menu from Server
Manager of OS, select .NET Framework 4.5 Feature in Selection Features
screen and install it. Also, it is not necessary to install .NET Framework 4 by
installing .NET Framework 4.5 Feature. Install DPM Server by seeing Section
2.1.2, "Installing the DPM Server by Custom Installation."
If .NET Framework 4 is already installed, install DPM Server by seeing Section
2.1.2, "Installing the DPM Server by Custom Installation."
For IIS 7.0 or 7.5, click Add Role Services in Web Server (IIS) from Server
Manager of OS, please confirm whether Static Content, ASP.NET and IIS 6
Management Compatibility are installed with Selection Role Service screen.
Please install the components that are not installed.
For IIS 8.0, confirm whether Static Content, ASP.NET 4.5 and IIS 6 Metabase
Compatibility are installed in Selection Role Service screen by clicking Add
Roles and Features in Manage menu from Server Manager of OS. Please
install the components that are not installed.
When you configure the database on the same machine as DPM Server, if you
install DPM Server, SQL Server 2012 SP1 Express and database files will be
installed.
When you use existing instance as SQL Server instance, the product in the
installation media(SQL Server 2012 SP1 Express) will not be installed and the
database files with the name "DPM" will be installed on the existing instance.
In the environment that that specified instance is not installed, even if SQL Server
except the product in the installation media(SQL Server 2012 SP1 Express) is
already installed, SQL Server 2012 SP1 Express will be installed newly and the
instance will be created.
When you configure the Database Server, install DPM Server after configuring
the Database Server.
About configuring the Database Server, see "Configuring the database" in
Appendix D, "Configuring Database Server."
When DPM Server and MasterScope Network Manager are installed on the same
machine, it is necessary to set MasterScope Network Manager's Trivial File
Transfer Protocol (TFTP) service to cooperate with DPM's TFTP service. Without
setting this, MasterScope Network Manager's TFTP service conflicts with DPM's
TFTP service, and each TFTP service might not work properly. For details, see
Appendix F, "Configuring DPM Server and MasterScope Network Manager on
the Same Machine."
When you use the following functions by Image Builder, install JRE.
・ When you create Linux installation parameter files for OS clear installation
・ When you create Linux disk duplication data files
There is no effect by the order of installing JRE and DPM Server.
24
When you install DPM Server just after installing JRE, install DPM Server after
waiting for few minutes.
・ Log on to the machine in which DPM Server is to be installed under Administrator authority, and
confirm that the required amount of disk space exists before installation.
Confirm that Windows Installer 4.5 or later has been installed.
Windows Installer 4.5 is included in the installation media.
[For Windows Server 2008 (x64)]
<Installation media>:\dotNet Framework40\Windows6.0-KB942288-v2-x64.msu
[For Windows Server 2008 (x86)]
<Installation media>:\dotNet Framework40\Windows6.0-KB942288-v2-x86.msu
[For Windows Server 2008 R2/Windows Server 2012]
Installed by default. Installation is not required.
Install and set up IIS in advance. For the installation and setup method, see
Section 1.2.1, "Installing Internet Information Services (IIS)."
When you install DPM Server, Microsoft SQL Server 2012 Native Client is also
installed. (If Microsoft SQL Server 2012 Native Client is already installed, SQL
Native Client is not overwritten).
・ Confirm that a machine with DPM Server installed does not exist within the network to be
managed by DPM. Existence of such a machine within the same network, even if the versions
are different, results in malfunction. Confirm that management is not performed from a DPM
Server located on a network of a different network segment.
It is recommended that you set up the DHCP server in advance before DPM Server
installation.
If you want to use an existing .NET Framework, see Section 2.1.2, "Installing the
DPM Server by Custom Installation."
・ The ODBC data source entitled "DPM" is added to the system where DPM Server is to be
installed. Do not install DPM Server on a system where the data source entitled "DPM" is already
installed by an application except DPM.
・ For details of the settings during installation, see Section 2.7, "Base Information about the
Management Server" in Reference Guide.
The port that will be used in DPM Server can be customized in advance when
installation is executed for the first time.
About the default port of DPM Server, see Appendix D, "Network Port and Protocol
List" in Reference Guide. About the method of customizing port to use, see Section
9.5, "Procedure to Change the Port Used by DPM" in Reference Guide.
・ Depending on the machine model of the managed machine, you may need to apply the module
for the machine model.
Contact your sales or support representative about whether you need to apply such a module.
If it is necessary to apply the module, after installing DPM Server, apply the module following the
procedure provided with the module for the machine model.
・ When you back up the data of DPM Server after you started operating DPM, see Section 9.4,
"Data Backup Plan" in Reference Guide.
Note the items set when you install DPM Server. They are necessary for recovering the data.
25
2.1.1.
Installing the DPM Server by Standard Installation
The following describes how to install DPM Server by standard installation.
Log on to the machine where DPM Server is to be installed using a user with Administrator authority.
In the case of Windows Server 2012, be sure to log on with Administrator user and
install.
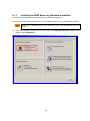
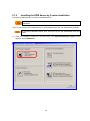
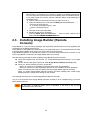
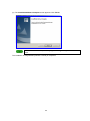
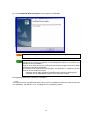
(1) Insert the installation media into the DVD drive. The DeploymentManager Setup screen
appears. Select DPM Server.
26
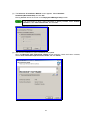
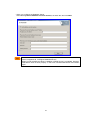
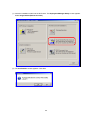
(2) The Selection of Installation Method screen appears. Select Standard
Installation(Recommended) and click OK.
Clicking Cancel returns the screen to the DeploymentManager Setup screen.
In an environment in which .NET Framework is already installed, select Custom
Installation, clear .NET Framework 4, and click OK.
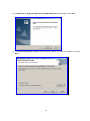
(3) Wait until the installation of .NET Framework is completed.
Next, the Microsoft .NET Framework 4 Setup screen appears. Check the license contents,
select I have read and accept the license terms. and click Install.
27
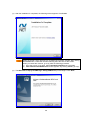
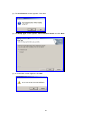
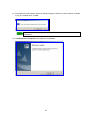
(4) After the installation is completed, the following screen appears. Click Finish.
When the screen, which prompts you to restart the machine, appears after clicking
the Finish button, restart the machine following the instruction on the screen.
When you restart the machine, go to (5) after the following procedure.
1) Go to the screen of (2) again. Select Standard Installation and click OK.
2) .NET Framework 4 Maintenance screen appears. By clicking Cancel, go to (5).
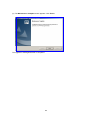
(5) The Welcome to DeploymentManager Setup (DPM Server) wizard begins. Click Next.
28
(6) The Choose Destination Location screen appears. Specify the folder for installation and click
Next.
Do not specify the path, which includes "%" in the destination folder.
When there is "Default Web Site" or "WebRDP" on IIS Web Site, the Web
components of DPM Server will be installed on the Web Site. If there is not the
above Web Site, the following screen appears. Select the install destination.
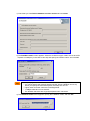
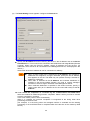
(7) The Set RemoteDB screen appears. Set each item, following the database environment to use.
・ When you configure the database(installing SQL Server 2012 SP1 Express) on the same
machine as DPM Server
29
1) Check that you clear Build a database on other machine and click Next.
2) The DataBase Install screen appears. Select the architecture type of SQL Server 2012 SP1
Express to install(Only in the case of x64 OS) and specify the instance name. And click OK.
About specifying the instance name, be careful about the following.
・ You cannot specify the reserved keyword of SQL Server.("Default" and so on)
When you specify the reserved keyword, the setup error occurs.
・ Upper cases and lower cases are not distinguished.
・ 1-16Byte characters can be entered.
・ The allowed characters are single-byte alphanumeric characters.
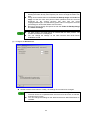
3) The Database Install screen appears. Specify the installation folder, and click OK.
30
・ When you configure the Database Server
After selecting Build a database on other machine, set each item and click Next.
About the instance name, user name, and password, set the same values as the
values in Appendix D, "Configure Database Server."
When you set the different values, installation of DPM Server is completed. However,
DPM Server does not work properly. In that case, uninstall DPM Server and install it
again.
31
(8) The Detail Setting screen appears. Configure the General tab.
Specify the IP Address that will be used by the server in the IP address area of the Server
Information box. This is used for the connection with DPM Client and Image Builder (Remote
Console). When using the fixed IP address, specify IP address from the list box. (IP
addresses, which are set in all LAN boards on the Management Server, are displayed in the
list box.)
Select ANY when the IP address to use for connections is arbitrary.
When a value except ANY is selected as the IP Address and multiple IP
addresses are assigned to a single LAN board, specify the first IP address
that appears on the OS. The DPM may not operate correctly if another IP
address is configured.
When ANY is selected as the IP Address and multicast distribution is
specified in the remote update scenario, you need to connect managed
machines to under a single LAN board of the Management Server.
When multicast distribution is specified in the restore scenario, specify a
value except ANY (an IP address set for the used LAN board) as the IP
Address.
Under Check the completion of a scenario by the communication with DPM Client,
select the method for determining scenario completion. Select it when you want to monitor
scenario completion in real-time.
In the case of SSC product, select it necessarily.
When it is checked, the scenario completion is recognized at the timing when other
processing can be done next.
(For example, it is the timing when the managed machine is restarted and the starting
processing of OS and DPM Client is completed after the instruction of the restart by DPM
Server.)
32
・ When you select it:
The scenario execution is completed at the timing of the communication with DPM Client.
Example)
Execution of a backup scenario
The completion of backup processing
PXE boot
OS start
Communication with DPM Client (At this timing, the scenario completion is
recognized.)
・ When you do not select it:
DPM Server does not wait for the communication with DPM Client. At the timing when
DPM Server executes the last processing/instruction or PXE boot is executed on the
managed machine(only when DHCP server is used), the scenario is completed.
Example)
Execution of a backup scenario
The completion of backup processing
PXE boot (At this timing, the scenario completion is recognized.)
If you select the Check the completion of a scenario by the communication
with DPM Client check box, confirm the items below. If these points are not met,
the scenario will not be completed.
・ Be sure to install DPM Client on the managed machine.
・ The network settings are set so that the managed machine and DPM Server
can communicate when the scenario is completed.
In Upgrade DPM Client automatically, select whether you want to upgrade DPM Client
automatically.
If you want to upgrade DPM Client automatically, select the check box.
In the case of SSC product, clear it necessarily.
For automatic upgrading, see Section 3.3.1, "Automatically Upgrading the DPM Client."
If you want to change the backup image storage folder, click Browse next to Folder for
Backup Image in the Image setting group box, and select the folder. The default is
C:\DeployBackup.
If you want to change the image storage folder, click Browse next to Folder for Image in the
Image Setting group box, and select the folder. For the "Folder for Image," specify a folder
name that stores service packs, applications, and the OS where OS clear installation is to be
performed with DPM. The default is <DPM Server installation drive>:\Deploy.
If you change the Folder for Backup Image, change the image file location
of already created backup and restore scenarios and the following scenarios
created by default:
・ System_Backup
・ System_Restore_Unicast
Folders such as the following cannot be specified as the Folder for Backup
Image or Folder for Image location:
・ A folder that serves as both the Folder for Backup Image and Folder for
Image
・ The location of Folder for Backup Image or Folder for Image that is
under the other folder (For example: The Folder for Backup Image
cannot be specified as a subfolder under the Folder for Image).
・ The Windows system folder
・ A folder used by another application
・ A folder directly under the drive
Example) "D:\"
・ A network drive
Do not change both the Folder for Backup Image and Folder for Image
33
following a procedure except that written in this manual (such as by editing or
deleting the folder directly from Explorer). Be sure to change the folder from
here.
Assign access authorization to the Folder for Backup Image and Folder for
Image so that the users who perform DPM operations and the accounts
employed by the various services that start with the name
"DeploymentManager" on DPM Server [preset value: local system accounts
(SYSTEM)] can access the folders with full control.
Be sure to secure enough free space for both the Folder for Backup Image
and Folder for Image.
For SSC product, the DPM license is included with the SSC product. The
number of licenses is not displayed.
You can change the settings on the Web Console after DPM Server
installation as well.
(9) Configure the Scenario tab.
Set the scenario timeout times. Usually the settings do not need to be changed.
The scenario timeout time is the timeout time when executing a scenario. If a
scenario cannot be completed within the set time for each item, a scenario
execution error occurs.
You can change the settings on the Web Console even after DPM Server is
installed.
34
(10) Configure the Network tab.
This tab allows you to set remote power control settings and set scenario execution settings.
Change the settings as necessary.
If scenario is executed on more machines than the number specified in
Machines for Simultaneous Execution, the scenario will be executed up to
the specified number. The action of the remaining machines will differ
according to the type of scenario as shown in the table below. At the timing
when the scenario is completed on an executing machine, the scenarios will
be sequentially executed on the remaining machines.
Scenario
Remaining Machines for
Simultaneous Execution
remote update(multicast distribution)
scenario execution error
remote update(unicast distribution)
standby
backup/restore
standby
When the power of a managed machine that is waiting for scenario execution
is manually turned on, the scenario is executed, exceeding the number
specified under Machines for Simultaneous Execution.
35
Remote Power ON Interval is the remote power activation interval when
multiple machines are turned on simultaneously.
Remote Power ON Timeout is the amount of time the system should wait for
a response from a machine at power on or during scenario execution. If a
response is not received within the set time, a Remote Power ON error
occurs. The set default value is 10 minutes. Please increase this value if
there is a power on, but a power on error occurs. If you specify "0", the
system waits for a response from the managed machine. (A Remote Power
ON timeout error does not occur).
Machines for Simultaneous Execution is used to specify the number of
machines that run scenarios simultaneously. The number of devices
available for concurrent control has a maximum value of 1000 devices, but
the load on the network will increase as the number of scenarios concurrently
running increases. The set default value is "5". If you want to run more than 5
simultaneously, change the setting.
You can change the settings on the Web Console after DPM Server
installation as well.
(11) Configure the DHCP Server tab and click OK.
Confirm the DHCP server installation location. If you are using the DHCP service installed on
DPM Server, select the DHCP Server is installed on the machine (selected by default). If
you want to use a DHCP server on a different machine, select DHCP Server is installed on
an another machine.
If you do not want to install a DHCP server, select Do Not Use A DHCP Server.
36
If you want to use a DHCP server constructed on DPM Server, do not install
another DHCP server on the same network. If you want to use a DHCP server
constructed on another machine, you can have multiple DHCP servers exist on
the same network.
You can change the settings on the Web Console after DPM Server installation
as well.
(12) Configure the TFTP Server tab and click OK.
Configure the TFTP service.
If DPM TFTP service is not used, select Do not use the TFTP service of DPM.
When you change TFTP root, click Browse next to TFTP Root and select the folder. The
default is <DPM Server installation folder>\PXE\Images.
You cannot change the settings on this tab from the Web Console after DPM
Server installation.
About TFTP Root, be careful about the following.
・ When Do not use the TFTP service of DPM is selected, it is recommended
that you set the folder except DPM Server installation folder in TFTP root.
When you set DPM Server installation folder in TFTP root, the folder specified
as TFTP root is deleted when you uninstall DPM Server. The folder cannot be
referenced from TFTP service except DPM.
・ You cannot specify the following folders.
- Folders under <DPM Server installation folder>\PXE\Images
- Windows system folder
- Directly under the drive
Example) D:\
37
- Network drive
・ For the folder which is specified as TFTP root, keep enough disk space.
(13) The InstallShield Wizard Complete screen appears. Click Finish.
After installation is completed, DeploymentManager is registered in the
Start menu.
When either of the services below is running, the port and program required
for DPM Server will open automatically. (For details on the opened port and
program, see Appendix D, "Network Port and Protocol List" in Reference
Guide.)
・ Windows Firewall/Internet Connection Sharing(ICS)
・ Windows Firewall
The standard installation of DPM Server is completed.
38
2.1.2.
Installing the DPM Server by Custom Installation
The following describes how to custom-install DPM Server.
If .NET Framework 4 is already installed, install required components by custom
installation.
Log on to the machine where DPM Server is to be installed using a user with Administrator authority.
In the case of Windows Server 2012, be sure to log on with Administrator user and
install.
(1) Insert the installation media into the DVD drive. The DeploymentManager Setup screen
appears. Select DPM Server.
39
(2) The Selection of Installation Method screen appears. Select Custom Installation and then
check the items to install and click OK.
Clicking Cancel returns the screen to the DeploymentManager Setup screen.
The messages displayed after this point differ according to the items you have selected. (The
checked items will be installed in their listed order). For details, see Section 2.1.1, "Installing the
DPM Server by Standard Installation."
The custom installation of DPM Server is completed.
40
2.2. Installing the DPM Client
DPM Client is the component installed on managed machines.
The installation method varies according to the OS of the managed machine. If you are using
Windows, see Section 2.2.1, "Installing the Windows (x86/x64) Version." If you are using Linux, see
Section 2.2.2, "Installing the Linux (x86/x64) Version."
During DPM Client installation, note the following:
For information on operating systems that permit installation, see Section 3.9, "Managed
Machines (Physical Machines)" in First Step Guide.
Log on to the machine in which DPM Client is to be installed under Administrator authority,
and confirm that the required disk space exists before installation.
On machines that Linux OS is installed by clear installation, DPM Client was installed
simultaneously with OS installation. There is no need to install it separately.
Always use a DPM Client that is of the same version/revision as DPM Server. If you
are using an older version/revision of a DPM Client, see Section 3.3, "Upgrading the
DPM Client" and upgrade the client.
Be sure to install DPM Client if you had selected Check the completion of a
scenario by the communication with DPM Client under Management view ->
DPM Server -> Detail Setting -> General tab. If you do not install it, the completion
of the scenario cannot be recognized and a scenario error occurs.
If it is difficult to install DPM Client on managed machines, you can also operate DPM
without installing DPM Client. (Some functions cannot be used.)
See Appendix C, "For Customers Who Cannot Easily Install DPM Client" in First Step
Guide for details.
41
2.2.1.
Installing the Windows (x86/x64) Version
This section describes how to install DPM Client (Windows).
Log on to the machine where DPM Client is to be installed using a user with Administrator authority.
In the case of Windows Server 2012 or Windows 8, be sure to log on with
Administrator user and install.
(1) Insert the installation media into the DVD drive. The DeploymentManager Setup screen
appears. Select DPM Client.
If you want to install DPM Client on Windows Server 2008 (Server Core installation)
or Windows Server 2012 (Server Core installation), execute the following file to
display the DeploymentManager Setup screen.
•For products for SSC: <Installation media>:\DPM\Launch.exe
•For DPM unbundled product: <Installation media>:\Launch.exe
42
(2) The Confirmation screen appears. Click Yes.
(3) The Welcome to DeploymentManager (DPM Client) Setup wizard begins. Click Next.
(4) The Choose Destination Location screen appears. Specify the installation folder and click
Next.
43
About the installation folder, be careful about the following.
・ Do not specify the path, which includes "%".
・ When you perform OS installation by disk duplication, install DPM Client on the
drive which is not affected by reassigning the drive letter. (C drive is
recommended.)
(5) The Enter IP Address screen appears. Enter the IP address of the Management Server where
DPM Server was installed, and click Next. If the IP address is omitted, DPM Client searches the
Management Server automatically. It may take some time to search.
DPM Client has the information of the IP address of the Management Server and
the port used by DPM Server and DPM Client. When DPM Client cannot connect
to DPM Server by the IP address and the port at the timing that the service of
DPM Client is started, it is judged as that the IP address of the Management
Server has changed or the port used by DPM Server has changed and DPM
Client searches the Management Server. The result of the search is saved on the
managed machine.
The part of the communication sequence of DHCP is used to search the
Management Server. DPM Client uses the port of UDP:68 to receive the data
from the Management Server. When DPM Client cannot bind the network by the
port of UDP:68, it fails to search the Management Server.
DHCP client of OS standard uses the port of UDP:68. It is already confirmed that
there is no problem.
When DPM Client searches the Management Server in the environment that
there are multiple Management Servers, DPM Client obtains the IP address of the
Management Server, which responded first.
44
(6) The InstallShield Wizard Complete screen appears. Click Finish.
-
If either the Windows Firewall Service or Windows Firewall/Internet Connection
Sharing (ICS) Service is started, the port and program required by DPM Client
will automatically be opened.
Protocol
ICMP
TCP
UDP
TCP
UDP
-
Port Number or
Program
8 (Echo incoming)
DepAgent.exe
DepAgent.exe
rupdsvc.exe
rupdsvc.exe
After installing DPM Client in Windows Server 2008 (excluding Server Core
installation)/Windows Server 2012 (excluding Server Core installation)/Windows
Vista/Windows 7/Windows 8, the following message may be outputted to the
event log. This message, however, is unproblematic in terms of operation.
・ The DeploymentManager Agent service is marked as an interactive service.
However, the system is configured not to allow interactive services.
Therefore, this service may not function properly.
・ The DeploymentManager Remote Update Service Client service is marked
as an interactive service. However, the system is configured not to allow
interactive services. Therefore, this service may not function properly.
The installation of DPM Client (Windows) is completed.
45
2.2.2.
Installing the Linux (x86/x64) Version
This section describes how to install DPM Client (Linux).
-
The installation folder of DPM Client(Linux) is /opt/dpmclient(Fixed).
The following libraries are needed for DPM Client to run.
・ libpthread.so.0
・ libc.so.*
・ ld-linux.so.2
* Indicates a numeric value.
In addition to the above, if OS is Red Hat Enterprise Linux 6(x64) or later and
ESX(x64), the following packages need to be installed. However, these need not
be installed if Compatibility libraries (libraries to operate x86 modules on an x64
OS environment) are installed.
・ glibc-*-*.i686.rpm
* Indicates a numeric value. (Version/release number)
Be careful if the ignore package dependencies option (--nodeps) is set at the time
of installation, because the necessary packages might not be installed.
- On Red Hat Enterprise Linux 6 or later, the following libraries are required to
execute OS installation by disk duplication.
・ libc.so.*
・ ld-linux.so.*
・ libcrypt.so.*
・ libfreebl3.so
* Indicates a numeric value.
In addition to the above, the following packages are required if the managed
machine is x64. However, these need not be installed if Compatibility libraries
(libraries to operate x86 modules on an x64 OS environment) are installed.
・ glibc-*-*.i686.rpm
・ nss-softokn-freebl-*-*.i686.rpm
* indicates a numeric value. (Version/release number)
Be careful if the ignore package dependencies option (--nodeps) is set at the time
of installation, because the necessary packages might not be installed.
- The following libraries are required for a managed machine that is x64 to perform a
remote update.
・ /lib/libgcc_s.so.1
This library is separately required even if a library with the same name exists
under "/lib/x64". Please install the following rpm package for the libraries.
・ libgcc-3.4.5-2.i386.rpm
- In order to install DPM Client on a managed machine that already has Linux OS
installed, please open the following ports that DPM Client will use.
Protocol
Port Number
UDP
68
TCP
26509
TCP
26510
TCP
26520
UDP
26529
46
Check the library, which is already installed by executing the following command.
If you execute the following command, the library information is displayed.
find / -name "library name"
Example)
find / -name libpthread.so.0
or
find / -name libpthread*
(* indicates the wildcard.)
In the case of the above command, the following information means that the
library is already installed.
/lib/libpthread.so.0
(1) Using a root account, log in to the machine on which DPM Client is to be installed.
(2) Insert the installation media into the DVD drive.
(3) Mount the installation media.
# mount <DVD drive to mount>
For more information about using the mount command, see the manual of used OS.
(4) Enter the following command to change the current directory.
・ For SSC product: # cd /mnt/dvd/DPM/Linux/ia32/bin/agent
・ For DPM unbundled product: # cd /mnt/dvd/Linux/ia32/bin/agent
(5) Execute depinst.sh.
#./depinst.sh
Depending on the execution environment, you may not have the authority to run
depinst.sh on the installation media.
In this case, copy DPM Client module in the Linux directory on the installation media
to the correct directory on the hard disk, then run a chmod command like in the
example below to grant authority for all of the files and then run depinst.sh.
Example)
# cd /mnt/copy destination directory/agent
# chmod 755 *
*The save location for DPM Client installer is as below.
・For SSC product: <Installation media>:/DPM/Linux/ia32/bin/agent
・For DPM unbundled product: <Installation media>:/Linux/ia32/bin/agent
(6) Entering the IP address of the Management Server is requested. Enter the value and press the
Enter key.
If IP address is omitted, DPM Client searches the Management Server automatically after the
completion of the installation. It may take some time to search.
Enter the IP address of the management server.
(If you omit the IP address, DPM Client service searches the management server
automatically, but it might take some time.)
>
47
DPM Client has the information of the IP address of the Management Server and
the port used by DPM Server and DPM Client. When DPM Client cannot connect
to DPM Server by the IP address and the port at the timing that the service of
DPM Client is started, it is judged as that the IP address of the Management
Server has changed or the port used by DPM Server has changed and DPM
Client searches the Management Server. The result of the search is saved on the
managed machine.
The part of the communication sequence of DHCP is used to search the
Management Server. DPM Client uses the port of UDP:68 to receive the data
from the Management Server. When DPM Client cannot bind the network by the
port of UDP:68, it fails to search the Management Server.
DHCP client of OS standard uses the port of UDP:68. It is already confirmed that
there is no problem except dhcpcd of SUSE Linux Enterprise 10. To use the
function of searching the Management Server in SUSE Linux Enterprise 10, it is
necessary to start DPM Client with the status that dhcpcd is stopped. When
performing OS installation by disk duplication in SUSE Linux Enterprise 10,
dhcpcd is necessary. Therefore, be sure to specify the IP address of the
Management Server not to search the server. In the case except OS installation
by disk duplication, if the managed machine does not need dhcpcd, stop dhcpcd.
If dhcpcd is necessary, you cannot use the function of searching the Management
Server.
When DPM Client searches the Management Server in the environment that
there are multiple Management Servers, DPM Client obtains the IP address of the
Management Server, which responded first.
The installation of DPM Client (Linux) is completed.
If unzip is not installed, the following message appears on the console. Please install
unzip.
The unzip command is required in order to support remote update.
Please install a unzip package.
The unzip package is attached to installation CD of Linux OS.
Installation of client service was completed.
-
-
You do not need to restart the system.
If Linux is running on an X window system, when DPM Client (Linux) is installed,
the console automatically opens at log-in in order to display messages of
shutdown from DPM Server or the remote updates. If you exit the console, you
cannot see the messages. If you accidently exit the console, open the console
again.
Note that when the system is running in txt mode, these messages are
outputted to the active screen. txt mode will not affect DPM operation.
When you install DPM Client, the following message may be displayed:
Warning: This program is a suid-root program or is being run by the root
user. The full text of the error or warning message cannot be safely
formatted in this environment. You may get a more descriptive message
by running the program as a non-root user or by removing the suid bit on
the executable.
/usr/X11R6/bin/xterm Xt error: Can't open display:%s
This message appears under one of the following conditions:
・ DPM Client was installed without X server installed on the managed
machine.
・ X server is installed on the managed machine, but was not running when you
installed DPM Client.
・ You installed DPM Client after logging into the managed machine using a
root user account from telnet.
This occurs because DPM Client related messages cannot be displayed. There
48
-
is no impact on actual operation.
With SUSE Linux Enterprise, the console for displaying messages outputted by
the Linux agent client service does not automatically open at X-Window startup.
If you need to open the console, edit the X-Window startup script following the
procedure below:
1) Open the /etc/X11/xinit/xinitrc file using an editor such as vi.
2) Insert the following lines under the line #Add your own lines here . . .: *
# Console for client service
if [ -x /etc/X11/xinit/xdpmmsg.sh ] ; then
/etc/X11/xinit/xdpmmsg.sh
fi
3) Save the file and close the editor.
4) Restart the machine or X-Window.
*If the line #Add your own lines here . . . does not exist, insert the line
before the exec $WINDOWSMANAGER line.
2.3. Installing Image Builder (Remote
Console)
Image Builder is a tool for creating package, disk duplication data files and so on and registering the
created files to the Management Server.
Image Builder is simultaneously installed when you install DPM Server, and therefore does not need
to be separately installed when used on the same machine as DPM Server.
Image Builder installation is required when used on a machine except DPM Server machine. In this
case, Image Builder is referred to as Image Builder (Remote Console).
Note the following precautions when installing Image Builder (Remote Console):
About the supported OS, see Section 3.5, "Image Builder(Remote Console)" in First Step
Guide.
Confirm that the disk space required to install Image Builder (Remote Console) is left.
When you use the following functions, install JRE.
・ When you create Linux installation parameter files for OS clear installation
・ When you create Linux disk duplication data files for OS installation by disk duplication
There is no effect by the order of installing JRE and Image Builder (Remote Console).
When you install Image Builder (Remote Console) just after installing JRE, install Image
Builder (Remote Console) after waiting for few minutes.
The following describes how to install Image Builder (Remote Console).
Log on to the machine where Image Builder (Remote Console) is to be installed using a user with
Administrator authority.
In the case of Windows Server 2012 or Windows 8, be sure to log on with
Administrator user and install.
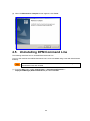
49
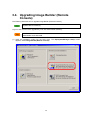
(1) Insert the installation media into the DVD drive. The DeploymentManager Setup screen appears.
Select Image Builder(Remote Console).
(2) The Confirmation screen appears. Click Yes.
50
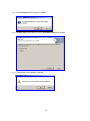
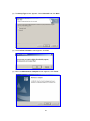
(3) The Welcome to DeploymentManager (ImageBuilder) Setup wizard begins. Click Next.
(4) The Choose Destination Location screen appears. Specify the folder for installation and click
Next.
51
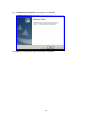
(5) The InstallShield Wizard Complete screen appears. Click Finish.
After the installation is completed, DeploymentManager is registered in the Start
menu.
The installation of Image Builder (Remote Console) is completed.
52
2.4. Installing DPM Command Line
DPM Command Line is a command line interface used to execute processing on managed machines
and check the execution status.
DPM Command Line is simultaneously installed when you install DPM Server, and therefore does not
need to be separately installed when used on the same machine as DPM Server. Installation of DPM
Command Line is required when used on a machine except DPM Server machine.
During DPM Command Line installation, note the following:
For information on operating systems that permit installation, see Section 3.6, "DPM
Command Line" in First Step Guide.
Confirm that the disk space required to install DPM Command Line exists.
The following describes how to install DPM Command Line.
Log on to the machine where DPM Command Line is to be installed using a user with Administrator
authority.
In the case of Windows Server 2012 or Windows 8, be sure to log on with
Administrator user and install.
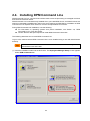
(1) Insert the installation media into the DVD drive. The DeploymentManager Setup screen appears.
Select DPM Command Line.
53
(2) The Confirmation screen appears. Click Yes.
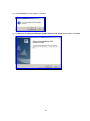
(3) The Welcome to DeploymentManager (DPM Command Line) Setup wizard begins. Click Next.
54
(4) The Choose Destination Location screen appears. Specify the folder for installation and click
Next.
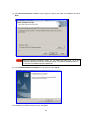
Note the specified installation folder. To use DPM Command Line, go to the
installation destination from the command prompt. The default installation folder is:
C:\Program Files\NEC\DeploymentManager.
(5) The InstallShield Wizard Complete screen appears. Click Finish.
The installation of DPM Command Line is completed.
55
For details on how to use DPM Command Line, see Section 8, "DPM Command
Line" in Reference Guide.
2.5. Installing PackageDescriber
PackageDescriber is a tool used to create packages and register them on the Package Web Server.
When you install PackageDescriber, note the following:
About the supported OS, see Section 3.8, "PackageDescriber" in First Step Guide.
Check the disk space required to install PackageDescriber.
Before installing PackageDescriber, install JRE.
The following describes how to install PackageDescriber.
Log on to the machine where PackageDescriber is to be installed using a user with Administrator
authority.
In the case of Windows Server 2012 or Windows 8, be sure to log on with
Administrator user and install.
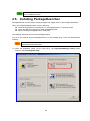
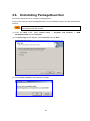
(1) Insert the installation media into the DVD drive. The DeploymentManager Setup screen
appears. Select PackageDescriber.
56
If you want to install PackageDescriber in an environment where UAC is enabled on
Windows Vista, be sure to follow the procedure below.
1) On the DeploymentManager Setup Screen, click Exit.
2) Using Explorer and so on, right-click the following files and select Run as
Administrator.
•For SSC product:<Installation media>:\DPM\Launch.exe
•For DPM unbundled product:<Installation media>:\Launch.exe
3) The DeploymentManager Setup screen appears again. Select
PackageDescriber.
(2) The Confirmation screen appears. Click Yes.
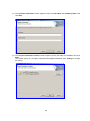
(3) The Welcome to DPM PackageDescriber Setup screen begins. Click Next.
57
(4) The Customer Information screen appears. Enter the User Name and Company Name, and
click Next.
(5) The Choose Destination Location screen appears. Specify the folder for installation and click
Next.
The default setting is C:\Program Files\NEC\PackageDescriberDPM. Click Change to change
the setting.
58
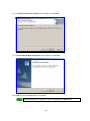
(6) The Ready to Install the Program screen appears. Click Install.
(7) The InstallShield Wizard Complete screen appears. Click Finish.
The installation of PackageDescriber is completed.
After the installation is completed, a shortcut is added to the Start menu.
59
3.
Upgrading DPM
This chapter describes how to upgrade the environment, in which DPM of old version (version earlier
than DPM Ver6.2) is installed, to DPM Ver6.2.
End all the running applications, Explorer, and the Web browser.
3.1. Before Upgrading DPM
3.1.1.
Upgrading Precautions
The following describes how to upgrade each function of DPM. Before upgrading, end DPM related
tasks. If Event Viewer is running, close Event Viewer as well.
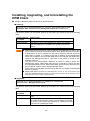
Only the following upgrading can be performed:
•From a Standard Edition product of DPM Ver5.1 or later to a DPM unbundled
product of this current version
•From a Enterprise Edition product of DPM Ver5.1 or later to a DPM unbundled
product of this current version
•From a SSC product of SSC2.0 (DPM Ver5.1) or later to a SSC product of this
current version
If you want to upgrade a DPM unbundled product from an older version, you need
to register the license key for this current version after upgrading. If you do not
register the license key, you cannot use DPM.
If you have a PP support service agreement, you can upgrade the version in
accordance with the media license free-of-charge. Apply for a version upgrade
through the PP support service.
You can use your license key as is for revision upgrades (when the upgrade is for a
DPM version of x.y with a different y only).
For the detail of the license registration, see Section 5.1.4, "Registering the License
Key."
(For SSC products, see SigmaSystemCenter Installation Guide).
Management Server for DPM, Web Server for DPM and Database which is earlier
than DPM Ver6.0 are integrated into DPM Server in DPM Ver6.0 and later. The
data of each component in the version earlier than DPM Ver6.0 will be handled as
follows at the time of the upgrade.
・ The data of the Management Server for DPM will be inherited at the time of
upgrade.
・ When you upgrade from DPM Ver5.1 or later to this version, the instance of
the database, which was used before the upgrade, is inherited and it can be
also used in this version after the upgrade.
・ Web server for DPM (DPM data used by Tomcat) is removed when upgrading
DPM Server to DPM Ver6.0 and later because it is not used any more.
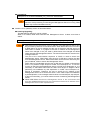
DPM Ver6.0 and later does not use Tomcat which was used in versions earlier than
DPM Ver6.0. Uninstall Tomcat as necessary. For the uninstallation method, see the
user's guide of the version you used.
[DPM Ver5.x or later]
Execute the following.
<Installation media>:\DPM\TOOLS\TomcatUninstall\Tomcat_Silent_Uninst_60.bat
The upgrade installation which DPM Ver5.x Management Server for DPM and the
database configured with different machines cannot be performed. Also, for
Management Server for DPM and Web server for DPM configured with different
machines, please perform an upgrade installation of DPM Server on the machine
that has installed Management Server for DPM. Web server for DPM does not use,
so please uninstall it. Uninstall Tomcat itself if necessary.
Before upgrading, confirm this version is supported by seeing Appendix A,
60
"Function Tables" in First Step Guide.
If you changed the port in the version before upgrading, the port will be inherited at
the time of the upgrade.
In the case of changing the port used by DPM after upgrading, see Section 9.5,
"Procedure to Change the Port Used by DPM" in Reference Guide.
You cannot perform upgrades from "Programs and Features".
Perform upgrades from the installation media.
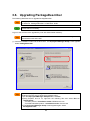
3.2. Upgrading the DPM Server
The following describes how to upgrade DPM Server.
Upgrade on the machine in which DPM Server (Management Server for DPM on versions earlier than
DPM Ver6.0) is installed.
The upgrade procedure varies depending on the version.
If Tomcat is installed, stop the "Apache Tomcat" service.
Confirm that Windows Installer 4.5 or later has been installed.
Windows Installer 4.5 is provided on the installation media.
[For Windows Server 2008 (x64)]
<Installation media>:\dotNet Framework40\Windows6.0-KB942288-v2-x64.msu
[For Windows Server 2008 (x86)]
<Installation media>:\dotNet Framework40\Windows6.0-KB942288-v2-x86.msu
[For Windows Server 2008 R2/Windows Server 2012]
Installed by default. Installation is not required.
If you want to upgrade from a version earlier than DPM Ver6.0, you will need to
install and set up IIS. See Section 1.2.1, "Installing Internet Information Services
(IIS)."
For backup image files created by DPM with a version earlier than DPM Ver6.0,
note the following:
・ Files are not automatically moved to the Folder for Backup Image set on the
Web Console of this version. Move the files to the Folder for Backup Image
manually.
・ If a backup image file is located in the Folder for Backup Image, the backup
image file appears as an image on the Image List screen of the Web Console,
but the information related to the image does not. To display the related
information, you will need to execute backup once again.
The OS clear installation function of Windows OS cannot be used from DPM
Ver6.0. If you used the OS clear installation function with a version earlier than
DPM Ver6.0, perform the following before upgrading.
・ Please delete scenarios that include Windows OS clear installation on the Web
Console.
・ Please delete the OS image used for OS clear installation (Windows) from
Image Builder -> Delete registered data -> Operating system.
About DPM Ver6.02 or later, "/"(slash) cannot be used as a machine group name
and a scenario group name. Therefore, when you upgrade from the version earlier
than DPM Ver6.02, if the group name includes "/", the "/" will be automatically
converted to "_"(underscore). If there are the same group names, the content of
two groups will be merged by this conversion.
61
Be sure to remove the service packs, hotfixes, and applications that you do not
plan to use in this version in advance.
About the database configuration procedure for each product of the SQL Server,
contact your sales or support representative.
Update JRE as necessary.
Log on to the machine to be upgraded using a user of Administrator authority.
In the case of Windows Server 2012, be sure to log on with Administrator user and
install.
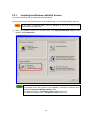
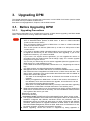
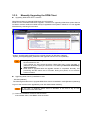
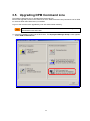
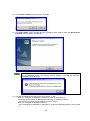
(1) Insert the installation media into the DVD drive. The DeploymentManager Setup screen
appears. Select DPM Server.
62
(2) The Selection of Installation Method screen appears. Select Standard Installation, and click
OK.
Clicking Cancel returns the screen to the DeploymentManager Setup screen.
The checked items will be installed in their listed order if Custom Installation is
selected.
In an environment in which .NET Framework is already installed, select
Custom Installation, clear .NET Framework 4, and click OK button.
In the case of Windows Server 2012, select Custom Installation, clear .NET
Framework 4, click OK, and go to (6).
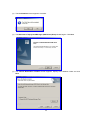
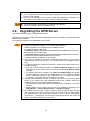
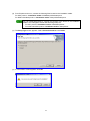
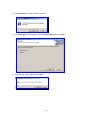
(3) The Confirmation screen appears. Click Yes.
63
(4) The .NET Framework 4 Maintenance screen appears. Select Repair .NET Framework 4 to its
original state and click Next.
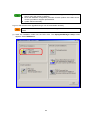
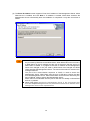
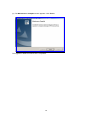
(5) The following screen appears. Click Finish.
64
If the screen prompting you to restart the machine appears after you click
Finish, restart the machine following the instructions on the screen.
If you restart the machine, do Steps (1) to (3), click Cancel in Step (4), and then
go to (6).
(6) The Setup Type screen appears. Select Overwrite Install and click Next.
(7) A confirmation screen appears. Click OK.
(8) Wait until the processing is completed.
Next, the IIS confirmation screen appears. Click Yes.
If you click No, it may fail to access IIS, and DeploymentManager Login screen may
not appear. Please install DPM Server again when it failed to access IIS.
65
(9) The following screen appears. Click OK.
(10) The following screen appears. Click OK.
(11) The Maintenance Complete screen appears. Click Finish.
66
If the module for the machine model was installed before upgrading, you need to
install it again. About the module for the machine model, contact your sales or
support representative.
When you installed the following modules for the machine model, you do not need
to install them again after upgrading.
・ DPM51_52_004
・ DPM51_52_007
・ DPM51_52_008
・ DPM51_52_009
・ DPM51_52_010
・ DPM51_52_011
・ DPM51_52_012
・ DPM51_52_013
The screens that appear during the installation may vary according to the OS.
If the Windows Firewall/Internet Connection Sharing (ICS) service is running, the
port required for DPM Server will open automatically.
For details on the opened port, see Appendix D, "Network Port and Protocol List" in
Reference Guide.
The upgrade of DPM Server is completed.
67
3.3. Upgrading the DPM Client
The following describes how to upgrade DPM Client.
Upgrade on the machine in which DPM Client (Client Service for DPM on versions earlier than DPM
Ver6.0) is installed.
DPM target versions to upgrade are DPM Ver4.0/4.1/4.2/4.3/5.0/5.1/5.2/6.0/6.1/6.2 and there are the
following ways to upgrade.
・ Automatic upgrading
If you upgrade DPM Server, DPM Client is automatically upgraded. For details, see Section 3.3.1,
"Automatically Upgrading the DPM Client."
・ Manual upgrading
As ways except the automatic upgrading, there are "Upgrading the DPM Client from a scenario"
and "Upgrading the DPM Client by installation media." For details, see Section 3.3.2, "Manually
Upgrading the DPM Client."
When you upgrade from DPM Client(Windows(x86/x64)) earlier than DPM Ver6.2 to
this version, DPM Client is installed under the system folder(%windir%\System32).
The size displayed in Programs and Features is less than the actual size of DPM
Client.
3.3.1.
Automatically Upgrading the DPM Client
What is Automatic DPM Client Upgrade?
Automatic upgrading of DPM Client is a function that automatically upgrades DPM Client(Client
Service for DPM in versions earlier than DPM Ver.6.0) when you upgrade DPM Server. This function
is convenient because it takes time to reinstall DPM Client of this current version one by one.
The automatic upgrading is executed when the machine with the installed DPM Client is started.
When the machine is started, DPM Client is started and communicates with DPM Server. If the
version/revision of DPM Client differs from that of DPM Server, automatic upgrade will be executed.
If DPM Client is not upgraded and the version is not matched with DPM Server,
scenarios and so on may not work properly. If you changed the port, old version
of DPM Client(earlier than DPM Ver6.2) cannot communicate, and
backup/restore/disk configuration check/OS installation by disk
duplication/scenario execution results and so on do not operate correctly. Be sure
to upgrade DPM Client to the same version/revision as DPM Server.
The system automatically upgrades DPM Client only when Upgrade DPM Client
automatically is checked on the General tab found by selecting Management
view on the Web Console and clicking DPM Server -> Detail Setting.
If you run a DPM Client automatic upgrading,
the "System_AgentUpgrade_Unicast" or "System_LinuxAgentUpgrade_Unicast"
scenario managed internally by DPM will be automatically assigned. If another
scenario was already assigned, that scenario is released.
The automatic upgrade scenario remains assigned after execution. If the
released scenario specified a schedule is needed, be sure to reassign it after the
automatic upgrading.
Note that an automatic upgrade scenario cannot be executed manually.
If DPM Client was automatically upgraded on a Linux client, do not execute
another scenario for a period of about two minutes after the scenario starts.
68
If the managed machine was started by scenario execution from a power
OFF state, automatic upgrading is not performed.
Automatic upgrading is treated as scenario execution, and thus the execution
results appear on the Scenario Execution Result List screen.
When the firewall service on the managed machine is set as automatic start,
all ports are closed from the start of managed machines to the start of the
firewall service regardless of that the firewall function is enabled or disabled.
(Automatic upgrade of DPM Client fails.) In this case, upgrade by scenario,
seeing Section 3.3.2, "Manually Upgrading the DPM Client."
After automatic upgrade execution, the service of DPM Client is restarted
after ten to twenty seconds. If you execute another scenario during this
scenario, a scenario execution error may occur.
This procedure is for upgrading DPM Client to the current version. The
procedure cannot be used to install DPM Client newly on a managed
machine in which DPM Client is not installed.
The following log is sometimes outputted to the event log of DPM Server:
depssvc: Agent Upgrade Error MAC : Sts = (MAC address)
This log means that it failed to install DPM Client automatically on the
displayed managed machine for some reason.
If this happens, execute the scenario for upgrading DPM Client.
If it is difficult to restart the managed machine on which DPM Client is
installed, restart the following services. Automatic upgrading can be
performed.
・ DPM Client(Windows)
- DeploymentManager Remote Update Service Client
・ DPM Client(Linux)
- Depagt
When either of the services below is running, the port and program required
for DPM Client will open automatically. (For details on the opened port and
program, see Appendix D, "Network Port and Protocol List" in Reference
Guide).
•Windows Firewall/Internet Connection Sharing (ICS)
•Windows Firewall
69
3.3.2.
Manually Upgrading the DPM Client
Upgrading DPM Client from a scenario
What Does It Mean to Upgrade DPM Client from a Scenario?
Aside from the automatic DPM Client upgrade, a scenario for upgrading DPM Client (Client Service
for DPM in versions earlier than DPM Ver6.0) is registered in the system in advance. You can upgrade
DPM Client by executing this scenario.
*System_AgentUpgrade_Multicast is the upgrade scenario for Windows (x86/x64).
System_LinuxAgentUpgrade_Multicast is the upgrade scenario for Linux (x86/x64).
Change the Maximum Targets and Maximum Waiting Time in accordance with
the environment to use.
If you change any item except the above, DPM Client may not be upgraded. In
particular, be sure to specify the Execution Time Setting as Execute Immediately
After Distribution.
DPM Client is upgraded after the upgrade scenario is completed. Normally, this
processing will take about tens of seconds. During this period, do not execute
another scenario.
Upgrading DPM Client by installation media
・ Windows(x86/x64)
The following describes how to upgrade DPM Client from the installation media [Windows (x86/x64)].
Log on to the machine to be upgraded by user with Administrator authority.
In the case of Windows Server 2012 or Windows 8, be sure to log on with
Administrator user and install.
(1) Insert the installation media into the DVD drive.
If the Installer starts, click Exit to close the screen.
70
(2) From Explorer and so on, execute the following files located on the installation media.
For SSC product: <Installation media>:\DPM\Setup\Client\setup.exe
For DPM unbundled product: <Installation media>:\Setup\Client\setup.exe
You can install DPM Client by copying the contents of the folders in the installation
media to the managed machine and executing setup.exe.
・ For SSC product:<Installation media>:\DPM\Setup\Client
・ For DPM unbundled product:<Installation media>:\Setup\Client
(3) The Setup Type screen appears. Select Overwrite Install and click Next.
(4) A confirmation screen appears. Click OK.
71
(5) The Enter IP Address screen appears. Enter the IP address of the Management Server where
DPM Server is installed, and click Next. If IP address is omitted, DPM Client searches the
Management Server automatically after the installation is completed. It may take some time to
search.
DPM Client has the information of the IP address of the Management Server and
the port used by DPM Server and DPM Client. When DPM Client cannot connect
to DPM Server by the IP address and the port at the timing that the service of
DPM Client is started, it is judged as that the IP address of the Management
Server has changed or the port used by DPM Server has changed and DPM
Client searches the Management Server. The result of the search is saved on the
managed machine.
The part of the communication sequence of DHCP is used to search the
Management Server. DPM Client uses the port of UDP:68 to receive the data
from the Management Server. When DPM Client cannot bind the network by the
port of UDP:68, it fails to search the Management Server.
DHCP client of OS standard uses the port of UDP:68. It is already confirmed that
there is no problem.
When DPM Client searches the Management Server in the environment that
there are multiple Management Servers, DPM Client obtains the IP address of the
Management Server which responded first.
72
(6) The InstallShield Wizard Complete screen appears. Click Finish.
The screens that appear during installation may vary, depending on the OS.
See Appendix A, "Silent Installation" to execute silent installation, which does not
require you to enter the IP address of the Management Server or to perform key
operations during installation.
If either of the services below is running, the port and the program required for DPM
Client will be opened automatically.
(For details on the opened port and program, see Appendix D, "Network Port and
Protocol List" in Reference Guide).
・ Windows Server 2003: Windows Firewall/Internet Connection Sharing(ICS)
・ Windows Server 2008/Windows Server 2012: Windows Firewall
The upgrade of DPM Client (x86/x64) is completed.
・ Linux
The method used to upgrade DPM Client (Linux) from the installation media is the same as that for a
new installation. See Section 2.2.2, "Installing the Linux (x86/x64) Version."
73
3.4. Upgrading Image Builder (Remote
Console)
The following describes how to upgrade Image Builder (Remote Console).
Update JRE as necessary.
Log on to the machine to be upgraded by user with Administrator authority.
In the case of Windows Server 2012 or Windows 8, be sure to log on with
Administrator user and install.
(1) Insert the installation media into the DVD drive. The DeploymentManager Setup screen
appears. Select Image Builder(Remote Console).
74
(2) The Confirmation screen appears. Click Yes.
(3) The Setup Type screen appears. Select Overwrite Install and click Next.
(4) A confirmation screen appears. Click OK.
75
(5) The Maintenance Complete screen appears. Click Finish.
The upgrade of Image Builder (Remote Console) is completed.
76
3.5. Upgrading DPM Command Line
The following describes how to upgrade DPM Command Line.
Perform the upgrade process on the machine in which DPM Command Line (Command Line for DPM
on versions earlier than DPM Ver6.0) is installed.
Log on to the machine to be upgraded by user with Administrator authority.
In the case of Windows Server 2012 or Windows 8, be sure to log on with
Administrator user and install.
(1) Insert the installation media into the DVD drive. The DeploymentManager Setup screen appears.
Select DPM Command Line.
77
(2) The Confirmation screen appears. Click Yes.
(3) The Setup Type screen appears. Select Overwrite Install and click Next.
(4) A confirmation screen appears. Click OK.
78
(5) The Maintenance Complete screen appears. Click Finish.
The upgrade of DPM Command Line is completed.
79
3.6. Upgrading PackageDescriber
The following describes how to upgrade PackageDescriber.
After you perform an upgrade installation, you need to re-do the initial setup as noted
in "Section 6. Package Describer" in Reference Guide.
Update JRE as necessary.
Log on to the machine to be upgraded by user with Administrator authority.
In the case of Windows Server 2012 or Windows 8, be sure to log on with
Administrator user and install.
(1) Insert the installation media into the DVD drive. The DeploymentManager Setup screen appears.
Select PackageDescriber.
If you want to upgrade PackageDescriber in an environment where UAC is enabled on
Windows Vista, be sure to follow the procedure below.
(1)On the DeploymentManager Setup Screen, click Exit.
(2)Using Explorer and so on, right-click the following files and select Run as
Administrator.
・ For SSC product: <Installation media>:\DPM\Launch.exe
・ For DPM unbundled product: <Installation media>:\Launch.exe
(3)The DeploymentManager Setup screen appears again. Select
PackageDescriber.
80
(2) The Confirmation screen appears. Click Yes.
(3) The Setup Type screen appears. Select Overwrite Install and click Next.
(4) A confirmation screen appears. Click OK.
81
(5) The Maintenance Complete screen appears. Click Finish.
The upgrade of PackageDescriber is completed.
82
4.
Uninstalling DPM
This chapter describes how to uninstall DPM.
4.1. Before Uninstalling DPM
4.1.1.
Uninstall Precautions
The following describes how to uninstall each function of DPM.
Before uninstalling, end DPM related tasks.
End all the running Event Viewer, applications, Explorer, and the Web browser.
4.2. Uninstalling the DPM Server
If you want to uninstall DPM Server, follow the procedure below.
Log on to the machine where DPM Server is to be uninstalled using a user with Administrator
authority.
In the case of Windows Server 2012, be sure to log on with Administrator user and
uninstall.
(1) From the Start menu of the Management Server, select All Programs -> DeploymentManager
-> Uninstall DPM Server. The Setup Type screen appears. Select Uninstall and click Next.
By selecting DeploymentManager(DPM Server) in Programs and Features of OS
and clicking Change button or Uninstall button, the above Setup Type screen can
appear.
83
(2) The Confirm Uninstall screen appears. Click OK.
(3) The Setup Status screen appears and the uninstall process begins. When the Maintenance
Complete screen appears, click Finish.
When you uninstall DPM Server after uninstalling the database which was configured
on the Database Server, the following screen appears. Click OK and complete
uninstalling of DPM Server.
(4) Uninstall the database according to the environment to use.
・ When you configure the database on the same machine as DPM Server
By seeing the information by Microsoft(the following), uninstall the instance.
http://technet.microsoft.com/en-us/library/ms143412.aspx
・ When you configure the Database Server
See "Uninstalling the database" in Appendix D, "Configuring Database Server" and uninstall
it.
84
If the following components are not used by other applications, uninstall them from Programs and
Features of OS.
・ When you installed DPM Ver6.2 newly
- Microsoft SQL Server 2008 Setup Support Files
- Microsoft SQL Server 2012 Native Client
- Microsoft SQL Server 2012 Transact-SQL ScriptDom
- Microsoft VSS Writer for SQL Server 2012
- SQL Server Browser for SQL Server 2012
・ In the environment that DPM Server was upgraded from the earlier version to this version, when
there are the following components
- Microsoft SQL Server 2005
- Microsoft SQL Server 2008 Native Client
- Microsoft SQL Server Native Client
- Microsoft SQL Server VSS Writer
- Microsoft SQL Server setup support files (English)
4.3. Uninstalling the DPM Client
The following describes how to uninstall DPM Client.
4.3.1.
Uninstalling the Windows (x86/x64) Version
There are two ways to uninstall DPM Client (Windows (x86/x64): from the command prompt, and from
Programs and Features of OS.
In the following cases, uninstall DPM Client seeing the section, "Uninstalling
DPM Client from Programs and Features." In other cases, uninstall it seeing the
section, "Uninstalling DPM Client from the Command Prompt."
•When DeploymentManager appears on the Programs and Features screen
of OS
•Windows Server 2008 (Server Core installation)
•Windows Server 2012 (Server Core installation)
Do not uninstall immediately after installation of DPM Client or starting the client
services. If the processing for searching the Management Server is running,
DPM Client may not be uninstalled correctly.
Uninstalling DPM Client from the Command Prompt
For the x64 architecture machine, read "system32" as "SysWOW64", and proceed
with operations.
Log on to the machine where DPM Client is to be uninstalled using a user with Administrator authority.
In the case of Windows Server 2012 or Windows 8, be sure to log on with
Administrator user and uninstall.
(1) Start the command prompt and move to the folder where DPM Client is installed.
cd /d <DPM Client installation folder>
Example>
cd /d %ProgramFiles%\NEC\DeploymentManager_Client
85
When you upgraded from the version earlier than DPM Ver6.2 to this version, DPM
Client installation folder is "%windir%\System32"(Fixed).
(2) From the command prompt, execute the commands in the following order to uninstall the remote
update service.
rupdsvc.exe -remove
del rupdsvc.exe
del clisvc.ini
(3) From the command prompt, execute the commands in the following order to uninstall the agent
service.
depagent.exe -remove
del depagent.exe
del depagent.dll
del depinfo.dll
(4) From the command prompt, execute the following commands to uninstall the automatic update
status display tool.
del DPMtray.exe
(5) From the Start menu, move to the Programs folder.
cd %allusersprofile%\Start Menu\Programs
(6) From the command prompt, execute the following command to delete the shortcut to the
automatic update status display tool.
rmdir /s /q DeploymentManager
If the shortcut of the Automatic Update Status Display tool has not been created,
when the above mentioned command is executed, though an error is displayed,
there is no problem. End the command prompt.
Uninstalling DPM Client from Programs and Features.
Log on to the machine where DPM Client is to be uninstalled using a user with Administrator authority.
In the case of Windows Server 2012 or Windows 8, be sure to log on with
Administrator user and uninstall.
(1) From the Start menu, select Control Panel -> Programs and Features ->
DeploymentManager and click Uninstall button.
For Windows Server 2008(Server Core installation) or Windows Server 2012(Server
Core installation), this is not displayed in Programs and Features, so please
execute the following file from the command line.
・ For x86:
"%SystemDrive%\Program Files\InstallShield Installation Information\
{6F68AC00-5FFD-42DE-B52E-D690D3DD4278}\setup.exe" -runfromtemp
-l0x0011uninstall -removeonly
・ For x64:
"%SystemDrive%\Program Files(x86)\InstallShield Installation Information\
{6F68AC00-5FFD-42DE-B52E-D690D3DD4278}\setup.exe" -runfromtemp
-l0x0011uninstall -removeonly
86
(2) The Setup Type screen appears. Select Uninstall and click Next.
(3) The Confirm Uninstall screen appears. Click OK.
(4) The Maintenance Complete screen appears. Click Finish.
87
4.3.2.
Uninstalling the Linux (x86/x64) Version
The following describes how to uninstall DPM Client [Linux (x86/x64) version].
(1) Log in to the machine where DPM Client (Linux) is installed as root account.
(2) Insert the installation media into the DVD drive.
(3) Mount the installation media.
# mount <DVD drive to mount>
For more information about using the mount command, please see the manual of
used OS.
(4) Enter the following command to change the current directory.
• For SSC product: # cd /mnt/dvd/DPM/Linux/ia32/bin/agent
• For DPM unbundled product: # cd /mnt/dvd/Linux/ia32/bin/agent
(5) Execute depuninst.sh.
#./depuninst.sh
Depending on the execution environment, if you do not have the execute permission
of depunist.sh on the installation media, you may not be able to execute it.
In this case, copy DPM Client module in the Linux directory on the installation media
to the correct directory on the hard disk, and then execute chmod command like the
example below to grant permission for all of the files and then run depuninst.sh.
Example)
# cd /mnt/copy destination directory/agent
# chmod 755 *
* The save location for DPM Client installer is as below.
For SSC product: <Installation media>:/DPM/Linux/ia32/bin/agent
For DPM unbundled product: <Installation media>:/Linux/ia32/bin/agent
88
4.4. Uninstalling
Console)
Image
Builder
(Remote
If you want to uninstall Image Builder (Remote Console), follow the procedure below.
Log on to the machine where Image Builder (Remote Console) is to be uninstalled using a user with
Administrator authority.
In the case of Windows Server 2012 or Windows 8, be sure to log on with
Administrator user and uninstall.
(1) From the Start menu of the machine where Image Builder (Remote Console) is installed, select
All Programs -> DeploymentManager -> Uninstall Image Builder. The Setup Type screen
appears. Select Uninstall and click Next.
By selecting DeploymentManager(Image Builder) in Programs and Features of OS
and clicking Change button or Uninstall button, the above Setup Type screen can
appear.
(2) The Confirm Uninstall screen appears. Click OK.
89
(3) When the Maintenance Complete screen appears, click Finish.
4.5. Uninstalling DPM Command Line
The following describes how to uninstall DPM Command Line.
Log on to the machine where DPM Command Line is to be uninstalled using a user with Administrator
authority.
In the case of Windows Server 2012 or Windows 8, be sure to log on with
Administrator user and uninstall.
(1) From the Start menu, select Control Panel -> Programs and Features ->
DeploymentManager (DPM command line) and click Uninstall.
90
(2) The Setup Type screen appears. Select Uninstall and click Next.
(3) The Confirm Uninstall screen appears. Click OK.
(4) When the Maintenance Complete screen appears, click Finish.
91
4.6. Uninstalling PackageDescriber
This section describes how to uninstall PackageDescriber.
Log on to the machine where PackageDescriber is to be uninstalled using a user with Administrator
authority.
In the case of Windows Server 2012 or Windows 8, be sure to log on with
Administrator user and uninstall.
(1) From the Start menu, select Control Panel -> Programs and Features -> DPM
PackageDescriber and click Uninstall.
(2) The Setup Type screen appears. Select Uninstall and click Next.
(3) The Confirm Uninstall screen appears. Click OK.
92
(4) The following screen appears. When you delete packages created in the local machine, click Yes.
If you do not delete them, click No.
If you click No, the Packages folder under PackageDescriber installation folder is
not deleted.
(5) The Maintenance Complete screen appears. Click Finish.
93
5.
Preparing for DeploymentManager
Operation
This chapter describes how to set initial DPM settings.
5.1. Preparing for DPM Operation
The following describes the setup required when using DPM for the first time. Be sure to read this
section carefully before operating.
5.1.1.
Starting the Web Console
Start the Web Console following the procedure below.
(1) Start the web browser.
Disable the browser cache settings as follows:
1) From the Tools menu of Internet Explorer, select Internet Options and, on
the General tab, click Settings under Browsing History.
2) The Temporary Internet Files and History Settings screen appears.
Under Check for newer versions of stored pages, select Every time I
visit the webpage and click OK.
Add DPM Server to Trusted sites and enable JavaScript settings in the browser
as follows:
1) From the Tools menu of Internet Explorer, select Internet Options and, on
the Security tab, click Sites under Trusted sites.
2) The Trusted sites screen appears, so enter URL of DPM Server. After
clearing Require server verification (https:) for all sites in this zone,
click Add and click Close.
3) Click Custom Level of Trusted sites on the Security tab.
4) After selecting "Enable" on following items, click OK.
・ Scripting
- Active Scripting
・ Downloads
- File download
- Automatic prompting for file downloads
If session timeout occurred on the Web Console, the screen is returned to the
DeploymentManager Login screen.
When you specify a value except 100% in Zoom of the Page menu of Internet
Explorer, the text on the screen may be misaligned.
94
(2) Enter the either of the following URL in the address bar of the browser to start the Web Console.
(The same page is displayed.)
http://Host/DPM/
http://Host/DPM/Login.aspx
http://Host/DPM/Default.aspx
In the Host area, enter the DNS name or IP address of the Management Server to be
connected on the Web Console.
The area is not case sensitive.
If the host name of DPM Server includes a character string (excluding
single-byte alphanumeric characters and hyphens "-") not recommended by
Windows, specify an IP address in the address area of the browser. The Web
Console may fail to start when the DNS name is specified.
When you change the port number used in Web Service(IIS) from the default
value(80), specify URL(as below) including the changed port number.
http://HOST:Port Number/DPM/
If you access from the same machine with DPM Server, localhost can be entered in
the Host area.
http://localhost/DPM/
(3) The DPM Web Console is started. Then the DeploymentManager Login screen appears.
5.1.2.
Logging into DPM
To use DPM functions, you will need to set up user authorities.
Enter a user name and password, and click Login. (Entry is required.)
95
The user name and password for the user with Administrator authority which can be
used immediately after installation are as follows:
・User name "admin"
・Password "admin"
Be sure to change the password after login. About how to change the password of
the login user, see Section 5.1.3, "Setting up Login Users." If you forget the changed
password when only this user is registered, you cannot log into DPM. In this case,
you need to reinstall DPM.
After this, add the user except "admin" user and use it. For details about adding
users and user authorities, see Section 2.2, "User Icon" and Section 2.3, "User List"
in Reference Guide.
On the Web Console, the Notice dialog box appears. Check the contents.
5.1.3.
Setting up Login Users
Set up the login users as described below. You can change passwords, show or hide the Notice
dialog box, and set the number of items to be displayed on one page of the list screen under Account
Setting. For details on the settings of this screen, see Section 1.1.2, "Account" in Reference Guide.
96
(1) Click Account on the title bar of the Web console and the Account Setting screen appears.
(2) To change the password, select the Change password check box, and enter the password.
(3) If you do not want to display the Notice dialog box that appears at login, clear the Show Notice
Dialog check box.
(4) Set the number of items to be displayed on one page of a list screen.
In the list screen such as the Group List screen on the main window, you can change the
number of items to be displayed on the screen. You can select the number of items in the combo
box of the list screen here. If the number is set to "20, 50, 100" (default value), for example, you
can select one of these values from the combo box. When the screen is opened, the number of
items will be 20, which is the first of the three settings.
(5) Click OK.
5.1.4.
Registering the License Key
Only users with Administrator authority can add or remove licenses.
About license registration of SSC product, see SigmaSystemCenter Installation
Guide.
To use DPM, you need to register the license key.
Register the license key following the procedure below.
97
The number of licenses is not the number of managed machines that can
execute scenarios simultaneously by DPM, but the total number of managed
machines which are introduced, operated, and managed by DPM.
You can only register managed machines up to the number of purchased
licenses.
There are two types of licenses: a server target license and a client target
license. About the license, see Section 2.3.2, "Product Configurations and
Licenses" in First Step Guide.
If you do not register the license key, up to 10 machines can be registered and
the trial period is 30 days. After 30 days, you cannot use DPM.
(1) On the Web Console, click Management in the title bar to switch to the Management view.
(2) Click License icon in the Management tree. License Information group box and Registration
License List group box appears.
(3) Click Add License Key in the Configuration menu. Add License Key screen appears.
(4) When a license key is entered in the Add License Key screen and you click OK, the entered
license key information is registered. If you want to register multiple license keys, repeat Steps (3)
to (4) according to the number of license keys.
License is case sensitive. Enter it correctly.
98
Appendix A Silent Installation
You can install DPM Server and DPM Client by silent installation.
In this section, the procedure for Windows is described. In the case of DPM Client(Linux(x86/x64)),
replace the folder path and so on.
End all the running applications, Explorer, and the Web browser.
Do not change the specified order of silent installation options.
Be sure to enter the input value inside double-quotation marks (").
(Excluding DPM Client for Linux (x86/x64))
Do not enter a space between the option and equal sign ("=").
When you enter an option you want to specify, the entry is not upper/lower case
sensitive.
Some options can be omitted.
(1) Insert the installation media into the DVD drive of the machine in which you want to install DPM
Server or DPM Client by silent installation.
(2) Start the command prompt, and move to the folder that stores the installer of the component you
want to install by silent installation.
The folder that stores the installer for each component is as below.
Component
DPM Server
DPM Client(Windows(x86/x64))
DPM Client(Linux(x86/x64))
Storage Folder
<Installation media>:\Setup\DPM
<Installation media>:\Setup\Client
<Installation media>:\Linux\ia32\bin\agent
Replace the folder that stores the installer as follows:
・ For SSC product: <Installation media>:\DPM
・ For DPM unbundled product: <Installation media>:\
(3) Copy the parameter files (extension: iss) for silent installation from the folder that stores the
installer of the component you want to install to the local HDD.
The following describes an example that the files are copied to C:\SilentInstall.
For silent installation parameter files, see the following section, "Creating the Parameter Files for
Silent Installation."
99
(4) Execute the silent installation command. The meaning of options is the following.
See the following section "Installing, Upgrading, and Uninstalling the DPM Server" and "Installing,
Upgrading, and Uninstalling DPM Client" for the detail.
Abbreviation
Silent Mode
Silent
Installation
Parameter Files
Option Name
/s
/f1
Log Output
Destination
Silent Mode
Installation Path
/f2
Management
Server IP
MANAGEMENTSERVERIP
Firewall
FIREWALL
SQL
Architecture
SQLARCH
SILENTDPM
INSTALLDIR
Meaning
Starts silent mode.
Parameter files for silent installation.
For further details, see how to create silent
installation parameter files described later. The
command examples described in the following
employ a case example where silent installation
parameters files are copied directly under
"C:\SilentInstall."
Specify the output destination for the Silent
Install log.
Silent Mode
Specify the path on which DPM Server or DPM
Client is installed.
Specify an absolute path in 100 characters or
less.
Example)
C:\Program Files\NEC\DeploymentManager
The allowed characters are single-byte
alphanumeric characters/single-byte
spaces/symbols.
The following symbols cannot be used.
/*?<>"|:%
About the install path of DPM Client, when you
perform OS installation by disk duplication,
specify the drive which is not affected by
reassigning the drive letter. (C drive is
recommended.)
Specify the IP address of the Management
Server.
Specify the IP address using numbers and
dots.
Example)
192.168.0.1
Specify 0, 1, or 2 in x.
0: The port will not be added to an exception in
firewall settings.
1: The program of DPM and the port will be
added to an exception and the communication
will be permitted.
2: The program of DPM and the port will be
added to an exception, but the communication
will not be permitted.
Specify the type of SQL Server 2012 SP1
Express(x64 or x86).
x86: SQL Server 2012 SP1 Express(x86) will
be installed.
x64: SQL Server 2012 SP1 Express(x64) will
be installed.
If SQL server is already installed, SQL Server
will not be installed.
100
Remote DB Flag
DBSRVREMOTEFLAG
IP Address to
connect
DBSRVIPADDRESS
Instance Name
DBINSTANCENAME
User Name
DBSRVUSERNAME
User Password
DBSRVPASSWORD
Web Site Name
WEBSITENAME
Flag when Using
Other TFTP
Services
TFTP Root
NOUSEDPMTFTP
TFTPDIR
Specify 0 or 1 in x.
0: The database will be configured on the same
machine with DPM Server.
1: The Database Server will be configured.
Specify the IP address of the Database Server.
When you specify "1" in
DBSRVREMOTEFLAG, this is required.
Specify the IP address using numbers and
dots.
Example)
192.168.0.1
Specify the instance name of the database.
Specify it in 16Byte or less.
The allowed characters are single-byte
alphanumeric characters.
Specify the user name accessing the database
when you configure the Database Server.
When you specify "1" in
DBSRVREMOTEFLAG, this is required.
Specify it in 30Byte or less.
The allowed characters are single-byte
alphanumeric characters.
Specify the password of the user accessing the
database when you configure the Database
Server.
When you specify "1" in
DBSRVREMOTEFLAG, this is required.
Specify it in 30Byte or less.
The allowed characters are single-byte
alphanumeric characters/symbols.
Specify the Web Site name of IIS on which Web
components of DPM are installed.
Specify it in 100Byte or less.
The allowed characters are single-byte
alphanumeric characters.
Specify 0 or 1 in x.
0: DPM TFTP service will be used.
1: TFTP service except DPM will be used.
Specify TFTP root path.
Specify the absolute path in 120Byte or less.
Example)
C:\TFTPRoot
The allowed characters are single-byte
alphanumeric characters/single-byte
spaces/symbols.
The following symbols cannot be used.
/*?<>"|:
101
Installing, Upgrading, and Uninstalling the
DPM Server
■ Installing
Setup.exe /s /f1"C:\SilentInstall\DPM_MNG_Setup.iss" SILENTDPM INSTALLDIR="Installation
Path" MANAGEMENTSERVERIP="Management Server IP" FIREWALL=x SQLARCH="SQL
Architecture" DBSRVREMOTEFLAG=x DBSRVIPADDRESS="IP Address to connect"
DBINSTANCENAME="Instance Name" DBSRVUSERNAME="User Name"
DBSRVPASSWORD="User Password" WEBSITENAME="Web Site Name"
NOUSEDPMTFTP=x TFTPDIR="TFTP Root"
The following options can be omitted. The conditions that the options can be omitted and the setting
values when options are omitted are as the following table.
Options that can be omitted
Setting value
INSTALLDIR
MANAGEMENTSERVERIP
FIREWALL
%ProgramFiles%\NEC\DeploymentManager
"ANY" is set as the IP address.
"1" is set. The program of DPM Server and the port used by
it will be added as an exception and the communication will
be permitted.
For a list of ports used, see Appendix D, "Network Port and
Protocol List" in Reference Guide.
In the case that the OS is x86, the SQL Server 2012 SP1
Express(x86) will be installed.
In the case that the OS is x64, the SQL Server 2012 SP1
Express(x64) will be installed.
If the SQL server is already installed, SQL Server will not be
installed.
"0" is set. SQL Server 2012 SP1 Express will be installed
on the same machine with DPM Server.
This option can be omitted when you configure the
database on the same machine with DPM Server. In that
case, even if this option is specified, it is ignored.
"DPMDBI" is set.
This option can be omitted when you configure the
database on the same machine with DPM Server. In that
case, even if this option is specified, it is ignored.
This option can be omitted when you configure the
database on the same machine with DPM Server. In that
case, even if this option is specified, it is ignored.
DPM site will be created in either of "Default Web Site" or
"WebRDP".
"0" is set. DPM TFTP service will be used.
"<DPM Server installation folder>\ PXE\Images" is set.
SQLARCH
DBSRVREMOTEFLAG
DBSRVIPADDRESS
DBINSTANCENAME
DBSRVUSERNAME
DBSRVPASSWORD
WEBSITENAME
NOUSEDPMTFTP
TFTPDIR
If you install DPM Server on a machine with multiple LAN board by omitting
MANAGEMENTSERVERIP, the IP address set on an unintended LAN board may be
recognized. Therefore, it is recommended that you should not omit the
MANAGEMENTSERVERIP option and should specify the IP address that is to be used
by the Management Server (DPM Server) for communication. For the IP address used
by the Management Server (DPM Server) for communication, see Section 2.7.1, "Detail
Setting" in Reference Guide.
102
■ Upgrade Installation
Setup.exe /s /f1"C:\SilentInstall\DPM_MNG_RESetup.iss" SILENTDPM FIREWALL=x
SQLARCH="SQL Architecture"
Upgrading DPM Server is possible if DPM Ver5.1 or later is installed.
The following options can be omitted. When they are omitted, the values are set as the following table.
Options that can be omitted
FIREWALL
SQLARCH
Setting value
"1" is set. The program of DPM Server and the port used by it
will be added as an exception and the communication will be
permitted.
For a list of ports used, see Appendix D, "Network Port and
Protocol List" in Reference Guide.
In the case that the OS is x86, the SQL Server 2012 SP1
Express(x86) will be installed.
In the case that the OS is x64, the SQL Server 2012 SP1
Express(x64) will be installed.
If the SQL server is already installed, SQL Server will not be
installed.
■ Uninstall
Setup.exe /s /f1"C:\SilentInstall\DPM_MNG_Uninst.iss" SILENTDPM
103
Installing, Upgrading, and Uninstalling the
DPM Client
■ Install the Windows (x86/x64) version as described below.
■ Installing
Setup.exe /s /f1"C:\SilentInstall\DPM_CLI_Setup.iss" SILENTDPM INSTALLDIR="
Installation Path" DPMSERVERIP="Management Server IP" FIREWALL=x
The following options can be omitted. When they are omitted, the values are set as the following
table.
Options that can
be omitted
INSTALLDIR
DPMSERVERIP
Setting value
%ProgramFiles%\NEC\DeploymentManager_Client
DPM Client searches the Management Server automatically
after the installation is completed. It may take some time to
search.
DPM Client has the information of the IP address of the Management Server and
the port used by DPM Server and DPM Client. When DPM Client cannot connect
to DPM Server by the IP address and the port at the timing that the service of
DPM Client is started, it is judged as that the IP address of the Management
Server has changed or the port used DPM Server has changed and DPM Client
searches the Management Server. The result of the search is saved on the
managed machine.
The part of the communication sequence of DHCP is used to search the
Management Server. DPM Client uses the port of UDP:68 to receive the data
from the Management Server. When DPM Client cannot bind the network by the
port of UDP:68, it fails to search the Management Server.
DHCP client of OS standard uses the port of UDP:68. It is already confirmed that
there is no problem.
When DPM Client searches the Management Server in the environment that
there are multiple Management Servers, DPM Client obtains the IP address of the
Management Server which responded first.
■ Upgrading
Setup.exe /s /f1"C:\SilentInstall\DPM_CLI_RESetup.iss" SILENTDPM
DPMSERVERIP="Management Server IP"
The following options can be omitted. When they are omitted, the values are set as the following
table.
Options that can
be omitted
DPMSERVERIP
FIREWALL
Setting value
The Management Server IP address set for the installed DPM
Client.
"1" is set. The program of DPM Client and the port used by it
are added as an exception and the communication is permitted.
For a list of ports used, see Appendix D, "Network Port and
Protocol List" in Reference Guide.
104
■ Uninstalling
Setup.exe /s /f1"C:\SilentInstall\DPM_CLI_Uninst.iss" SILENTDPM
Do not uninstall immediately after installation of DPM Client or starting the client
services. If the processing for searching the Management Server is running, DPM
Client may not be uninstalled correctly.
■ Install the Linux (x86/x64) version as described below.
■ Installing/Upgrading
The Management Server IP can be omitted.
When it is omitted, DPM Client searches the Management Server. It takes some time to
search.
depinst_silent.sh Management Server IP > /var/temp/Inst_DPM_Lin_Cli.log
DPM Client has the information of the IP address of the Management Server and
the port used by DPM Server and DPM Client. When DPM Client cannot connect
to DPM Server by the IP address and the port at the timing that the service of
DPM Client is started, it is judged as that the IP address of the Management
Server has changed or the port used by DPM Server has changed and DPM
Client searches the Management Server. The result of the search is saved on the
managed machine.
The part of the communication sequence of DHCP is used to search the
Management Server. DPM Client uses the port of UDP:68 to receive the data
from the Management Server. When DPM Client cannot bind the network by the
port of UDP:68, it fails to search the Management Server.
DHCP client of OS standard uses the port of UDP:68. It is already confirmed that
there is no problem except dhcpcd of SUSE Linux Enterprise 10. To use the
function of searching the Management Server in SUSE Linux Enterprise 10, it is
necessary to start DPM Client with the status that dhcpcd is stopped. When
performing OS installation by disk duplication in SUSE Linux Enterprise 10,
dhcpcd is necessary. Therefore, be sure to specify the IP address of the
Management Server not to search the server. In the case except OS installation
by disk duplication, if the managed machine does not need dhcpcd, stop dhcpcd.
If dhcpcd is necessary, you cannot use the function of searching the Management
Server.
When DPM Client searches the Management Server in the environment that
there are multiple Management Servers, DPM Client obtains the IP address of the
Management Server which responded first.
105
■ Uninstalling
depuninst.sh > /var/temp/Inst_DPM_Lin_Cli.log
■ DPM Client [Windows (x86/x64)] Parameter Creation Method and Silent Installation
About DPM Client [Windows (x86/x64)], you can also perform silent installation by preparing the
parameter files for silent installation following the procedure below.
Create a parameter file for silent installation
Prepare for installation
Perform silent installation
■ Creating the Parameter Files for Silent Installation
(1) Prepare the machine for creating the parameter files.
(2) Log on to the machine prepared in Step (1) using a user of Administrator authority.
(3) Insert the installation media into the DVD drive.
(4) From the Start menu, select Run, enter cmd in the open column, and click OK.
The command prompt appears. Execute the command below.
SSC product:
<Installation media>:\DPM\Setup\Client\setup.exe -r
DPM unbundled product:
<Installation media>:\Setup\Client\setup.exe -r
(5) The setup wizard starts. Enter the required values and perform setup. The entered values and
operations performed at this time are recorded as parameter files.
106
(6) The parameter file setup.iss for silent installation is created in the Windows system folder.
The Windows system folder by default is as follows:
Windows Server 2003/2008/2012: C:\WINDOWS
Windows 2000: C:\WINNT
For other operating systems, check the environment variable "%Systemroot%."
Prepare the Installer.
(1) Insert the installation media into the DVD drive, and copy the folder below located on the
installation media to an arbitrary location.
For SSC product: <Installation media>:\DPM\Setup\Client
For DPM unbundled product: <Installation media>:\Setup\Client
(2) Copy setup.iss that was created in advance to the folder copied in Step (1).
Preparation is completed.
Execute Silent Installation.
(1) From the Start menu, select Run, enter cmd in the open column, and click OK.
The command prompt appears. Execute the command below.
Example)
When the folder is copied directly under the C drive
C:\Client\setup.exe -s
The parameter files for silent installation need to be created for each OS.
It is recommended to check whether you can install properly with the created
parameter file.
The parameter files for installation can be used only with Windows (x86/x64).
Silent installation creates a log during installation in the folder where the installer is
stored. Thus, if the installer is stored on media such as a DVD that is not capable of
writing, the log files cannot be created, causing installation failure.
In such a case, specify the output destination of the log files using parameters as
follows:
Setup.exe -s -f2"c:\temp\clientsvc.log"
This ends the explanation of the silent installation execution procedure.
107
Appendix B Configuring the Package
Web Server
As an example, describes the procedure for configuring the Package Web Server on IIS 7.0(Windows
Server 2008) or IIS 7.5 (Windows Server 2008 R2)
If providing HTTP service or setting user authentication using IIS, enable Basic Authentication
and disable Common Authentication.
Example)
IIS 7.0 (For Windows Server 2008):
1) From the Start menu, select Administrative Tools -> Internet Information Services
(IIS) Manager.
2) The Internet Information Services (IIS) Manager screen appears. Select created
virtual directory from the left side of the screen and double-click Authentication on the
screen.
3) Right-click Basic Authentication in the middle of the screen and click Enable.
108
(1) From the Start menu, select Administrative Tools -> Server Manager.
(2) The Server Manager screen appears. Select Roles on the left-hand pane, and then click Add
Roles on the right-hand pane.
(3) The Add Roles Wizard appears. Click Next.
109
(4) The Select Server Roles screen appears. Enter a check by Web Server (IIS).
(5) The following screen appears. Click Add Required Features.
(6) The screen returns to the Select Server Roles screen. Click Next.
110
(7) On the Web Server (IIS) screen, click Next.
(8) On the Select Role Services screen, check Basic Authentication and click Next.
111
(9) On the Confirm Installation Selections screen, click Install.
(10) On the Installation Results screen, check the installation details and click Close.
(11) Create a folder that can be accessed from PackageDescriber.
If you want to specify a share folder of Windows machines in the network for the Web
shared folder, it is recommended that you assign the folder to the network drive in
advance. If the folder is not assigned to the network drive, it may fail to access to the
share folder of the network computer.
Confirm that the Web shared folder has read and write attributes.
The created package will be stored in the Web shared folder. Be sure to secure enough
free space.
You can install PackageDescriber on the same machine as the Package Web Server.
112
(12) From the Start menu, select Control Panel -> Administrative Tools -> Internet Information
Services (IIS) Manager.
(13) The Internet Information Services (IIS) Manager screen appears. Right-click Default Web Site
and click Add Virtual Directory.
(14) The Add Virtual Directory screen appears. Click OK after the following settings.
: Optional alias name
•Alias
•Physical path : Folder created in (11)
113
(15) To download service packs/hotfixes/applications of Windows
Vista/Windows 7, double-click MIME Types in the middle of the screen.
Server
2008/Windows
(16) The Mime Types screen appears in the middle of the screen and click Add... on the right side of
the screen.
(17) The Add Mime Type screen appears. Click OK after the following settings.
•Extension : msu
•Mime Type: application/octet-stream
(18) Using the same procedure as in Steps (16) to (17), enter msp as the extension and
application/octet-stream as the MIME type.
114
Appendix C Configuring NFS Server
The method described below is for constructing the NFS Server on DPM Server (Windows Server
2008).
For precautions when installing the NFS Server on a different machine, see Section 3.5.6,
"Precautions/Other" in Operation Guide.
(1) Install "Service for NFS (Network File System)" on the Management Server.
For installation, see the manual with the product. You will need to restart the machine after
installation.
(2) Set the exports folder under the Folder for Image set on the Web Console as an NFS shared
folder. (Shared name: exports)
To set the NFS shared folder (exports) on Windows Server 2008, the following
settings are required:
1) From the Start menu, select Administrative Tools -> Local Security
Policy -> Local Policies -> Security Options, enable Network access:
Let Everyone permissions apply to anonymous users, and restart the
Management Server.
(Note that when the machine participates in a domain and the domain
security policy option is disabled, even if the local security policy option is
enabled, the option will become disabled. For a domain controller, change
the domain controller security policy instead of the local security policy).
2) Open the Properties dialog box of the exports folder, click Security tab, add
Everyone, and select Read & Execute in the permissions area. Note that
the Read permission is unproblematic for only the ks folder under the
exports folder.
When you perform OS clear installation on Red Hat Enterprise Linux 6,
configure NFS Server except on Windows Server 2012. Also, see Section
10.4, "Notes for OS Clear Installation" in Reference Guide.
To create an NFS shared folder in Windows Server 2008 R2, configure as below.
1) Right-click exports folder properties.
2) The property of the folder is displayed. Click Manage NFS Sharing on NFS
Sharing tab
3) NFS Advanced Sharing screen appears. After configuring the following,
click OK.
・ Select the Share this folder checkbox and select Allow anonymous
access.
・ Click Permissions button and check Allow root access.
If you want to construct the NFS Server on Linux, see the following.
To start NFS server on Linux, execute the following commands:
# /etc/rc.d/init.d/portmap restart
# /etc/rc.d/init.d/nfs stop &> /dev/null
# /etc/rc.d/init.d/nfs start
To enable NFS services at startup, execute the following commands:
# /sbin/chkconfig --level 345 portmap on
# /sbin/chkconfig --level 345 nfs on
115
Appendix D Configuring Database Server
This chapter describes how to configure the Database Server(the different machine from the
Management Server).
Configuring the database.
(1) Log on to the Database Server by the user with Administrator authority.
In the case of Windows Server 2012 or Windows 8, be sure to log on with
Administrator user and install.
(2) Create an instance, seeing the page of Microsoft Corporation(the following).
http://technet.microsoft.com/en-us/library/ms143219.aspx
Be careful about the setting contents of SQL Server Installation Center.
・ The Feature Selection screen: Select Database Engine Services and
SQL Server Replication.
・ The Instance Configuration screen: Enter the instance name(Arbitrary).
・ The Server Configuration screen: Set in the startup type of SQL Server
Browser to disabled.
・ The Database Engine Configuration screen: Set the following in the
Server Configuration tab.
- Select Mixed Mode (SQL Server authentication and Windows
authentication) in Authentication Mode.
- Specify the password (Specify it in 30Byte or less. The allowed characters
are single-byte alphanumeric characters/symbols.) in Specify the
password for the SQL Server system administrator(sa) account.
- Specify SQL Server administrators by clicking Add Current User.
(3) Start the command prompt and execute the following command.
(The following command is described in two lines. Enter it by one line in the actual screen.)
SQLCMD.EXE -E -S ".\Instance Name" -Q "alter server role [sysadmin] add member [NT
AUTHORITY\SYSTEM]"
Example)
SQLCMD.EXE -E -S ".\DPMDBI" -Q "alter server role [sysadmin] add member
[NT AUTHORITY\SYSTEM]"
(4) Select Run from Start menu. Enter "regedit" in the name of the program to execute and click OK.
(5) Registry editor is started. Add the following registry keys.
・ Key:
- When OS is x86
HKEY_LOCAL_MACHINE¥SOFTWARE¥NEC¥DeploymentManager_DB
- When OS is x64
HKEY_LOCAL_MACHINE\SOFTWARE\Wow6432Node\NEC\DeploymentManager_DB
・ Name: DBInstallDir
・ Data: C:\Program Files\Microsoft SQL Server\MSSQL11.Instance Name\MSSQL\DATA
・ Name: VersionDatabase
・ Data: 6.20
・ Name: DBInstanceName
・ Data: Instance Name
116
If you mistake the use of Registry Editor, the serious problem may occur. Be
careful about editing the registry.
(6) Start the command prompt and execute the following command.
(The following command is described as two lines. Enter it by one line in the actual screen.)
SQLCMD.EXE -E -S ".\Instance Name" -i "<Installation media>\Setup\DPM\db_install.sql" -o
"Full Path of Log File"
Example)
SQLCMD.EXE -E -S ".\DPMDBI" -i "E:\Setup\DPM\db_install.sql" -o
"C:\temp\DBInst.log"
Specify the existing folder in Full Path of Log File.
For SSC product:<Installation media>:\DPM\Setup\DPM\db_install.sql
For DPM unbundled product:<Installation media>:\Setup\DPM\db_install.sql
(7) Check that the following information is output in the file, which is specified in Full Path of Log
File of (6).
-----------------------------NULL
(1 rows affected)
(1 rows affected)
Changed database context to 'DPM'.
----------------STATUS CODE:2101
RegOpenKeyEx() returned error 2, 'The system cannot find the file specified.'
Changed database context to 'DPM'.
Processed 400 pages for database 'DPM', file 'DPM' on file 1.
Processed 8 pages for database 'DPM', file 'DPM_LOG' on file 1.
BACKUP DATABASE successfully processed 408 pages in 0.846 seconds (3.761 MB/sec).
Changed database context to 'master'.
----------0
(8) Create a user who accesses the created instance.
When you access it by "sa" user of SQL Server, this procedure is not necessary. Go to (9).
When you access it by other users, start the command prompt and execute the following
command.
C:\>sqlcmd -E -S .\Instance Name
1> CREATE LOGIN User Name WITH PASSWORD='Password' ,DEFAULT_DATABASE=DPM
2> go
1> EXEC sp_addsrvrolemember 'User Name' , 'sysadmin'
2> go
1> exit
Example)
C:\>sqlcmd -E -S .\DPMDBI
117
1> CREATE LOGIN username WITH
PASSWORD='password123$%',DEFAULT_DATABASE=DPM
2> go
1> EXEC sp_addsrvrolemember 'username', 'sysadmin'
2> go
1> exit
Specify User Name in 30Byte or less. The allowed characters are
single-byte alphanumeric characters.
Specify Password in 30Byte or less. The allowed characters are single-byte
alphanumeric characters/symbols.
(9) From Start menu, select -> Microsoft SQL Server 2012 -> -> -> .
(10) Sql Server Configuration Manager appears. After clicking of Instance Name under
the tree view, right-click TCP/IP in the right side of the screen and select Property.
on
(11) TCP/IP Property screen appears. After setting the following, click OK.
・ Protocol tab: Set Yes in .
・ IP Address tab: Set "26512" in TCP Port under IPAll.
When you set the port number except TCP:26512(Default), change the port of
RemoteDBServer in Port.ini of DPM Server.
For details of the procedure, see Section 9.5, "Procedure to Change the Port
Used by DPM" in Reference Guide.
(12) From Start menu, select Administrative Tools -> Services. Services screen appears.
(13) Restart the following service.
SQL Server(Instance Name)
(14) Start the command prompt and execute the following command.
(The following command is described as two lines. Enter it by one line in the actual screen.)
C:\>netsh firewall set portopening
mode=ENABLE
scope=SUBNET profile=CURRENT
protocol=TCP
port=26512
name=DPM_SQLPort
Uninstalling the database.
(1) Log on to the Database Server by the user with Administrator authority.
In the case of Windows Server 2012 or Windows 8, be sure to log on with
Administrator user and uninstall.
(2) Uninstall the instance, seeing the page of Microsoft Corporation(the following).
http://technet.microsoft.com/en-us/library/ms143412.aspx
(3) Delete all files under the following folder.
C:\Program Files\Microsoft SQL Server\MSSQL11.Instance Name\MSSQL\Data
(4) Select Run from Start menu. Enter "regedit" in the name of the program to execute and click OK.
(5) Registry editor is started. Delete the following registry keys.
- When OS is x86
HKEY_LOCAL_MACHINE\SOFTWARE\NEC\DeploymentManager_DB
118
- When OS is x64
HKEY_LOCAL_MACHINE\SOFTWARE\Wow6432Node\NEC\DeploymentManager_DB
If you mistake the use of Registry Editor, the serious problem may occur. Be
careful about editing the registry.
Appendix E Upgrading SQL Server
About the procedure to upgrade SQL Server, contact your sales or support representative.
Appendix F Configuring DPM Server and
MasterScope Network
Manager on the Same
Machine
When you install DPM Server on the machine on which MasterScope Network Manager is installed,
TFTP services of MasterScope Network Manager and DPM are conflicted and each TFTP service
may not work properly.
In this case, you do not use TFTP service of DPM and need to set so that DPM cooperates with TFTP
service of MasterScope Network Manager.
For details on the cooperation and so on, see also the User's Manual of MasterScope Network
Manager.
Perform the following configuration only if the IP address of the MasterScope Network Manager
and DPM is duplicated.
To install DPM Server on the machine on which MasterScope Network Manager is installed,
follow the procedure below:
(1) From the Start menu, select Administrative Tools -> Services on the Management Server,
and then open the Service screen.
(2) Stop all services of MasterScope Network Manager.
(3) Install DPM Server.
For details, see Section 2.1 "Installing the DPM Server."
Set the following in TFTP Server tab in Detail Setting screen when installing DPM Server.
・ Select Do not use the TFTP service of DPM.
・ Specify TFTP root of MasterScope Network Manager in TFTP root.
(4) Seeing the information about the conflict of TFTP server with other software on MasterScope
Network Manager install server in the User's Manual of MasterScope Network Manager, modify
the contents of the nvrmap.ini file and reboot the machine.
To install MasterScope Network Manager on a machine on which DPM Server is installed, follow
the procedure below:
(1) From the Start menu, select Administrative Tools -> Services on the Management Server,
and then open the Service screen.
119
(2) Stop the following services:
DeploymentManager API Service
DeploymentManager Backup/Restore Management
DeploymentManager Get Client Information
DeploymentManager PXE Management
DeploymentManager Remote Update Service
DeploymentManager Schedule Management
DeploymentManager Transfer Management
(3) Stop the following service, and then change to Disabled in Startup Type.
DeploymentManager PXE Mtftp
(4) Insert the DPM installation media into the DVD drive on the Management Server.
(5) Execute the following operations according to the OS architecture in use.
• x86: Execute the following files in the installation media.
For SSC product
:\DPM\TOOLS\ TFTP\IA32\RegTFTP1.reg
For DPM unbundled product :\TOOLS\TFTP\IA32\RegTFTP1.reg
• x64: From the Start menu, select Run. Enter "%WINDIR%\SysWOW64\cmd.exe" for the name
of the program to execute, and then click OK. The command prompt appears. Execute the
following file from the command prompt.
For SSC product
:\DPM\TOOLS\TFTP\AMD64\RegTFTP1.reg
For DPM unbundled product :\TOOLS\TFTP\AMD64\RegTFTP1.reg
(6) The following screen appears. Click Yes.
(7) The following screen appears. Click OK.
(8) See the User's Manual of MasterScope Network Manager and install MasterScope Network
Manager.
(9) Copy all of the files under <DPM Server installation folder>\PXE\Images to MasterScope
Network Manager's TFTP root folder. (For the MasterScope Network Manager TFTP root folder,
see the User's Manual of MasterScope Network Manager.)
Make sure that you do not delete files under <DPM Server installation folder>\PXE\Images in
this step.
120
(10) From the Start menu, select Run on the Management Server. Enter "regedit" for the name of the
program to execute, and then click OK.
(11) Registry Editor starts up. Please change the following registry:
Registry path
x86:HKEY_LOCAL_MACHINE\SOFTWARE\NEC\DeploymentManager
x64:HKEY_LOCAL_MACHINE\SOFTWARE\Wow6432Node\NEC\DeploymentManager
Value name
GPxeLinuxCFGDir
PxeDosFdDir
PxeHwDir
PxeHW64Dir
PxeLinuxDir
PxeNbpDir
PxeNbpFdDir
Value data
<TFTP root folder of MasterScope Network Manager>
<TFTP root folder of MasterScope Network Manager>\DOSFD
<TFTP root folder of MasterScope Network Manager>\HW
<TFTP root folder of MasterScope Network Manager>\HW64
<TFTP root folder of MasterScope Network Manager>\pxelinux
<TFTP root folder of MasterScope Network Manager>r\NBP
<TFTP root folder of MasterScope Network Manager>NBP
Registry path
x86:HKEY_LOCAL_MACHINE\SOFTWARE\NEC\DeploymentManager\PXE\Mtftpd
x64:HKEY_LOCAL_MACHINE\SOFTWARE\Wow6432Node\NEC\DeploymentManager\PXE\Mtftpd
Value name
BASE_DIR
Value data
<TFTP root folder of MasterScope Network Manager>
(12) Seeing the information about the conflict of TFTP server with other software on MasterScope
Network Manager install server in the User's Manual of MasterScope Network Manager, modify
the contents of the nvrmap.ini file and reboot the machine.
If IP address of the Management Server was changed after the above configuration, perform
steps (4) to (7) again.
To uninstall MasterScope Network Manager, follow the procedures below.
(1) Copy all of the files under MasterScope Network Manager's TFTP root folder to <DPM Server
installation folder>\PXE\Images. After the files are copied, delete all files under the TFTP root
folder of MasterScope Network Manager. (For the MasterScope Network Manager TFTP root
folder, see the User's Manual of MasterScope Network Manager.)
(2) Uninstall MasterScope Network Manager.
(3) From the Start menu, select Administrative Tools -> Services on the Management Server,
and then open the Service screen.
(4) Stop the following services:
DeploymentManager API Service
DeploymentManager Backup/Restore Management
DeploymentManager Get Client Information
DeploymentManager PXE Management
DeploymentManager Remote Update Service
DeploymentManager Schedule Management
DeploymentManager Transfer Management
(5) Insert the DPM installation media into the DVD drive on the Management Server.
121
(6) Execute the following operations according to the OS architecture in use.
• For x86: Execute the following files in the installation media.
For SSC product:
<Installation media>:\DPM\TOOLS\TFTP\IA32\RegTFTP2.reg
For DPM unbundled product:
<Installation media>:\TOOLS\TFTP\IA32\RegTFTP2.reg
• For x64: From the Start menu, select Run. Enter "%WINDIR%\SysWOW64\cmd.exe" for the
name of the program to execute, and then click OK. The command prompt appears. Execute
the following file from the command prompt.
For SSC product:
<Installation media>:\DPM\TOOLS\TFTP\AMD64\RegTFTP2.reg
For DPM unbundled product:
<Installation media>:\TOOLS\TFTP\AMD64\RegTFTP2.reg
(7) The following screen appears. Click Yes.
(8) The following screen appears. Click OK.
(9) From the Start menu, select Run the Management Server. Enter "regedit" for the name of the
program to execute, and then click OK.
(10) Registry Editor starts up. Please change the following registry:
Registry path
x86:HKEY_LOCAL_MACHINE\SOFTWARE\NEC\DeploymentManager
x64:HKEY_LOCAL_MACHINE\SOFTWARE\Wow6432Node\NEC\DeploymentManager
Value name
GPxeLinuxCFGDir
PxeDosFdDir
PxeHwDir
PxeHW64Dir
PxeLinuxDir
PxeNbpDir
PxeNbpFdDir
Value data
<DPM Server installation folder>\PXE\Images
<DPM Server installation folder>\PXE\Images\DOSFD
<DPM Server installation folder>\PXE\Images\HW
<DPM Server installation folder>\PXE\Images\HW64
<DPM Server installation folder>\PXE\Images\pxelinux
<DPM Server installation folder>\PXE\Images\NBP
<DPM Server installation folder>\PXE\Images\NBP
122
Registry path
x86:HKEY_LOCAL_MACHINE\SOFTWARE\NEC\DeploymentManager\PXE\Mtftpd
x64:HKEY_LOCAL_MACHINE\SOFTWARE\Wow6432Node\NEC\DeploymentManager\PXE\Mtftpd
Value name
BASE_DIR
Value data
<DPM Server installation folder>\PXE\Images
(11) From the Start menu, select Administrative Tools -> Services on the Management Server,
and then open the Service screen.
(12) Set the Startup Type to Automatic for the following service, and then reboot the machine.
DeploymentManager PXE Mtftp
Appendix G Revision History
First Edition(Rev.001)(2013.10): New
123
Copyright © NEC 2002-2013. All rights reserved.
Disclaimers
All information disclosed in this document is protected by the copyrights of NEC.
Copying or reproducing this document, in whole or in part, without the prior written approval of NEC is
prohibited.
The contents of this document are subject to change without notice.
NEC assumes no responsibility for any technical or editorial errors or omissions that may exist in this
document.
NEC does not guarantee the accuracy, usefulness, or completeness of the content or any other
information provided in this document.
Trademarks and Copyrights
・
・
・
・
・
・
・
・
・
・
・
・
・
・
・
・
・
SigmaSystemCenter and VirtualPCCenter are trademarks or registered trademarks of NEC.
ESMPRO is a registered trademark of NEC.
EXPRESSBUILDER is a registered trademark of NEC.
Microsoft, Hyper-V, Windows, Windows Vista, Windows Media, Microsoft Internet Explorer and
Microsoft Office are trademarks or registered trademarks of Microsoft Corporation in the United
States and other countries.
Linux is the registered trademark or trademark of Linus Torvalds in the U.S. and/or other countries.
Red Hat is the registered trademark or trademark of Red Hat Inc. in the U.S. and/or other
countries.
SUSE is a trademark or registered trademark of Novell, Inc. and/or its subsidiaries in the U.S.
and/or other countries.
VMware, GSX Server, ESX Server, and VMotion are registered trademarks or trademarks of
VMware, Inc.
Xen, Citrix, XenServer, and XenCenter are registered trademarks or trademarks of Citrix Systems,
Inc.
Java and all Java related trademarks are registered trademarks of Oracle Corporation and its
affiliates.
This product includes software (Apache Ant) developed by the Apache Software Foundation.
Apache Ant is made available under the Apache Software License, Version 2.0.
http://www.apache.org/licenses/LICENSE-2.0.html
Tomcat is a trademark and registered trademark of Apache Software Foundation.
7zip is a registered trademark of Igor Pavlov.
Portions of this software were originally based on the following:
- software copyright (c) 1999, IBM Corporation., http://www.ibm.com.
Mylex is a registered trademark of LSI Logic Corporation in the U.S.
PXE Software Copyright (C) 1997 - 2000 Intel Corporation
Copyright (c) 1998-2004 Intel Corporation
Redistribution and use in source and binary forms, with or without modification, are permitted
provided that the following conditions are met:
Redistributions of source code must retain the above copyright notice, this list of conditions and
the following disclaimer.
Redistributions in binary form must reproduce the above copyright notice, this list of conditions
and the following disclaimer in the documentation and/or other materials provided with the
distribution.
THIS SOFTWARE IS PROVIDED ''AS IS'' AND ANY EXPRESS OR IMPLIED WARRANTIES,
INCLUDING, BUT NOT LIMITED TO, THE IMPLIED WARRANTIES OF MERCHANTABILITY AND
FITNESS FOR A PARTICULAR PURPOSE ARE DISCLAIMED. IN NO EVENT SHALL INTEL BE
LIABLE FOR ANY DIRECT, INDIRECT, INCIDENTAL, SPECIAL, EXEMPLARY, OR
124
CONSEQUENTIAL DAMAGES (INCLUDING, BUT NOT LIMITED TO, PROCUREMENT OF
SUBSTITUTE GOODS OR SERVICES; LOSS OF USE, DATA, OR PROFITS; OR BUSINESS
INTERRUPTION) HOWEVER CAUSED AND ON ANY THEORY OF LIABILITY, WHETHER IN
CONTRACT, STRICT LIABILITY, OR TORT (INCLUDING NEGLIGENCE OR OTHERWISE)
ARISING IN ANY WAY OUT OF THE USE OF THIS SOFTWARE, EVEN IF ADVISED OF THE
POSSIBILITY OF SUCH DAMAGE. THE EFI SPECIFICATION AND ALL OTHER INFORMATION
ON THIS WEB SITE ARE PROVIDED "AS IS" WITH NO WARRANTIES, AND ARE SUBJECT TO
CHANGE WITHOUT NOTICE.
You may not reverse-assemble, reverse-compile, or otherwise reverse-engineer any software
provided solely in binary form.
The foregoing license terms may be superseded or supplemented by additional specific license terms
found in the file headers of files in the EFI Application Toolkit.
GNU GENERAL PUBLIC LICENSE Version 2, June 1991
Copyright (C) 1989, 1991 Free Software Foundation, Inc. 51 Franklin St, Fifth Floor, Boston, MA
02110-1301 USA.
Everyone is permitted to copy and distribute verbatim copies of this license document, but changing it
is not allowed.
Preamble
The licenses for most software are designed to take away your freedom to share and change it.
By contrast, the GNU General Public License is intended to guarantee your freedom to share and
change free software--to make sure the software is free for all its users. This General Public License
applies to most of the Free Software Foundation's software and to any other program whose authors
commit to using it. (Some other Free Software Foundation software is covered by the GNU Library
General Public License instead.) You can apply it to your programs, too.
When we speak of free software, we are referring to freedom, not price. Our General Public
Licenses are designed to make sure that you have the freedom to distribute copies of free software
(and charge for this service if you wish), that you receive source code or can get it if you want it, that
you can change the software or use pieces of it in new free programs; and that you know you can do
these things.
To protect your rights, we need to make restrictions that forbid anyone to deny you these rights or to
ask you to surrender the rights. These restrictions translate to certain responsibilities for you if you
distribute copies of the software, or if you modify it.
For example, if you distribute copies of such a program, whether gratis or for a fee, you must give
the recipients all the rights that you have. You must make sure that they, too, receive or can get the
source code. And you must show them these terms so they know their rights.
We protect your rights with two steps: (1) copyright the software, and (2) offer you this license which
gives you legal permission to copy, distribute and/or modify the software.
Also, for each author's protection and ours, we want to make certain that everyone understands that
there is no warranty for this free software. If the software is modified by someone else and passed on,
we want its recipients to know that what they have is not the original, so that any problems introduced
by others will not reflect on the original authors' reputations.
Finally, any free program is threatened constantly by software patents. We wish to avoid the danger
that redistributors of a free program will individually obtain patent licenses, in effect making the
program proprietary. To prevent this, we have made it clear that any patent must be licensed for
everyone's free use or not licensed at all.
The precise terms and conditions for copying, distribution and modification follow.
GNU GENERAL PUBLIC LICENSE TERMS AND CONDITIONS FOR COPYING, DISTRIBUTION
AND MODIFICATION
0. This License applies to any program or other work which contains a notice placed by the copyright
holder saying it may be distributed under the terms of this General Public License. The "Program",
below, refers to any such program or work, and a "work based on the Program" means either the
Program or any derivative work under copyright law: that is to say, a work containing the Program or a
portion of it, either verbatim or with modifications and/or translated into another language.
(Hereinafter, translation is included without limitation in the term "modification".) Each licensee is
addressed as "you".
Activities other than copying, distribution and modification are not covered by this License; they are
outside its scope. The act of running the Program is not restricted, and the output from the Program is
125
covered only if its contents constitute a work based on the Program (independent of having been
made by running the Program). Whether that is true depends on what the Program does.
1. You may copy and distribute verbatim copies of the Program's source code as you receive it, in any
medium, provided that you conspicuously and appropriately publish on each copy an appropriate
copyright notice and disclaimer of warranty; keep intact all the notices that refer to this License and to
the absence of any warranty; and give any other recipients of the Program a copy of this License
along with the Program.
You may charge a fee for the physical act of transferring a copy, and you may at your option offer
warranty protection in exchange for a fee.
2. You may modify your copy or copies of the Program or any portion of it, thus forming a work based
on the Program, and copy and distribute such modifications or work under the terms of Section 1
above, provided that you also meet all of these conditions:
a) You must cause the modified files to carry prominent notices stating that you changed the files and
the date of any change.
b) You must cause any work that you distribute or publish, that in whole or in part contains or is
derived from the
Program or any part thereof, to be licensed as a whole at no charge to all third parties under the terms
of this License.
c) If the modified program normally reads commands interactively when run, you must cause it, when
started running for such interactive use in the most ordinary way, to print or display an announcement
including an appropriate copyright notice and a notice that there is no warranty (or else, saying that
you provide a warranty) and that users may redistribute the program under these conditions, and
telling the user how to view a copy of this License. (Exception: if the Program itself is interactive but
does not normally print such an announcement, your work based on the Program is not required to
print an announcement.)
These requirements apply to the modified work as a whole. If identifiable sections of that work are not
derived from the Program, and can be reasonably considered independent and separate works in
themselves, then this License, and its terms, do not apply to those sections when you distribute them
as separate works. But when you distribute the same sections as part of a whole which is a work
based on the Program, the distribution of the whole must be on the terms of this License, whose
permissions for other licensees extend to the entire whole, and thus to each and every part regardless
of who wrote it.
Thus, it is not the intent of this section to claim rights or contest your rights to work written entirely by
you; rather, the intent is to exercise the right to control the distribution of derivative or collective works
based on the Program.
In addition, mere aggregation of another work not based on the Program with the Program (or with a
work based on the Program) on a volume of a storage or distribution medium does not bring the other
work under the scope of this License.
3. You may copy and distribute the Program (or a work based on it, under Section 2) in object code or
executable form under the terms of Sections 1 and 2 above provided that you also do one of the
following:
a) Accompany it with the complete corresponding machine-readable source code, which must be
distributed under the terms of Sections 1 and 2 above on a medium customarily used for software
interchange; or,
b) Accompany it with a written offer, valid for at least three years, to give any third party, for a charge
no more than your cost of physically performing source distribution, a complete machine-readable
copy of the corresponding source code, to be distributed under the terms of Sections 1 and 2 above
on a medium customarily used for software interchange; or,
c) Accompany it with the information you received as to the offer to distribute corresponding source
code. (This alternative is allowed only for noncommercial distribution and only if you received the
program in object code or executable form with such an offer, in accord with Subsection b above.)
The source code for a work means the preferred form of the work for making modifications to it. For an
executable work, complete source code means all the source code for all modules it contains, plus
any associated interface definition files, plus the scripts used to control compilation and installation of
126
the executable. However, as a special exception, the source code distributed need not include
anything that is normally distributed (in either source or binary form) with the major components
(compiler, kernel, and so on) of the operating system on which the executable runs, unless that
component itself accompanies the executable.
If distribution of executable or object code is made by offering access to copy from a designated place,
then offering equivalent access to copy the source code from the same place counts as distribution of
the source code, even though third parties are not compelled to copy the source along with the object
code.
4. You may not copy, modify, sublicense, or distribute the Program except as expressly provided
under this License. Any attempt otherwise to copy, modify, sublicense or distribute the Program is
void, and will automatically terminate your rights under this License. However, parties who have
received copies, or rights, from you under this License will not have their licenses terminated so long
as such parties remain in full compliance.
5. You are not required to accept this License, since you have not signed it. However, nothing else
grants you permission to modify or distribute the Program or its derivative works. These actions are
prohibited by law if you do not accept this License. Therefore, by modifying or distributing the Program
(or any work based on the Program), you indicate your acceptance of this License to do so, and all its
terms and conditions for copying, distributing or modifying the Program or works based on it.
6. Each time you redistribute the Program (or any work based on the Program), the recipient
automatically receives a license from the original licensor to copy, distribute or modify the Program
subject to these terms and conditions. You may not impose any further restrictions on the recipients'
exercise of the rights granted herein. You are not responsible for enforcing compliance by third parties
to this License.
7. If, as a consequence of a court judgment or allegation of patent infringement or for any other reason
(not limited to patent issues), conditions are imposed on you (whether by court order, agreement or
otherwise) that contradict the conditions of this License, they do not excuse you from the conditions of
this License. If you cannot distribute so as to satisfy simultaneously your obligations under this
License and any other pertinent obligations, then as a consequence you may not distribute the
Program at all. For example, if a patent license would not permit royalty-free redistribution of the
Program by all those who receive copies directly or indirectly through you, then the only way you could
satisfy both it and this License would be to refrain entirely from distribution of the Program.
If any portion of this section is held invalid or unenforceable under any particular circumstance, the
balance of the section is intended to apply and the section as a whole is intended to apply in other
circumstances.
It is not the purpose of this section to induce you to infringe any patents or other property right claims
or to contest validity of any such claims; this section has the sole purpose of protecting the integrity of
the free software distribution system, which is implemented by public license practices. Many people
have made generous contributions to the wide range of software distributed through that system in
reliance on consistent application of that system; it is up to the author/donor to decide if he or she is
willing to distribute software through any other system and a licensee cannot impose that choice.
This section is intended to make thoroughly clear what is believed to be a consequence of the rest of
this License.
8. If the distribution and/or use of the Program is restricted in certain countries either by patents or by
copyrighted interfaces, the original copyright holder who places the Program under this License may
add an explicit geographical distribution limitation excluding those countries, so that distribution is
permitted only in or among countries not thus excluded. In such case, this License incorporates the
limitation as if written in the body of this License.
9. The Free Software Foundation may publish revised and/or new versions of the General Public
License from time to time. Such new versions will be similar in spirit to the present version, but may
differ in detail to address new problems or concerns.
Each version is given a distinguishing version number. If the Program specifies a version number of
this License which applies to it and "any later version", you have the option of following the terms and
conditions either of that version or of any later version published by the Free Software Foundation. If
127
the Program does not specify a version number of this License, you may choose any version ever
published by the Free Software Foundation.
10. If you wish to incorporate parts of the Program into other free programs whose distribution
conditions are different, write to the author to ask for permission. For software which is copyrighted by
the Free Software Foundation, write to the Free Software Foundation; we sometimes make
exceptions for this. Our decision will be guided by the two goals of preserving the free status of all
derivatives of our free software and of promoting the sharing and reuse of software generally.
NO WARRANTY
11. BECAUSE THE PROGRAM IS LICENSED FREE OF CHARGE, THERE IS NO WARRANTY
FOR THE PROGRAM, TO THE EXTENT PERMITTED BY APPLICABLE LAW. EXCEPT WHEN
OTHERWISE STATED IN WRITING THE COPYRIGHT HOLDERS AND/OR OTHER PARTIES
PROVIDE THE PROGRAM "AS IS" WITHOUT WARRANTY OF ANY KIND, EITHER EXPRESSED
OR IMPLIED, INCLUDING, BUT NOT LIMITED TO, THE IMPLIED WARRANTIES OF
MERCHANTABILITY AND FITNESS FOR A PARTICULAR PURPOSE. THE ENTIRE RISK AS TO
THE QUALITY AND PERFORMANCE OF THE PROGRAM IS WITH YOU. SHOULD THE
PROGRAM PROVE DEFECTIVE, YOU ASSUME THE COST OF ALL NECESSARY SERVICING,
REPAIR OR CORRECTION.
12. IN NO EVENT UNLESS REQUIRED BY APPLICABLE LAW OR AGREED TO IN WRITING
WILL ANY COPYRIGHT HOLDER, OR ANY OTHER PARTY WHO MAY MODIFY AND/OR
REDISTRIBUTE THE PROGRAM AS PERMITTED ABOVE, BE LIABLE TO YOU FOR DAMAGES,
INCLUDING ANY GENERAL, SPECIAL, INCIDENTAL OR CONSEQUENTIAL DAMAGES ARISING
OUT OF THE USE OR INABILITY TO USE THE PROGRAM (INCLUDING BUT NOT LIMITED TO
LOSS OF DATA OR DATA BEING RENDERED INACCURATE OR LOSSES SUSTAINED BY YOU
OR THIRD PARTIES OR A FAILURE OF THE PROGRAM TO OPERATE WITH ANY OTHER
PROGRAMS), EVEN IF SUCH HOLDER OR OTHER PARTY HAS BEEN ADVISED OF THE
POSSIBILITY OF SUCH DAMAGES.
END OF TERMS AND CONDITIONS
How to Apply These Terms to Your New Programs
If you develop a new program, and you want it to be of the greatest possible use to the public, the
best way to achieve this is to make it free software which everyone can redistribute and change under
these terms.
To do so, attach the following notices to the program. It is safest to attach them to the start of each
source file to most effectively convey the exclusion of warranty; and each file should have at least the
"copyright" line and a pointer to where the full notice is found.
<one line to give the program's name and a brief idea of what it does.>
Copyright (C) <year> <name of author>
This program is free software; you can redistribute it and/or modify it under the terms of the GNU
General Public License as published by the Free Software Foundation; either version 2 of the License,
or (at your option) any later version.
This program is distributed in the hope that it will be useful, but WITHOUT ANY WARRANTY;
without even the implied warranty of MERCHANTABILITY or FITNESS FOR A PARTICULAR
PURPOSE. See the GNU General Public License for more details.
You should have received a copy of the GNU General Public License along with this program; if
not, write to the Free Software Foundation, Inc., 51 Franklin St, Fifth Floor, Boston, MA 02110-1301
USA
Also add information on how to contact you by electronic and paper mail.
If the program is interactive, make it output a short notice like this when it starts in an interactive mode:
Gnomovision version 69, Copyright (C) year name of author Gnomovision comes with
ABSOLUTELY NO WARRANTY; for details type 'show w'. This is free software, and you are welcome
to redistribute it under certain conditions; type 'show c' for details.
The hypothetical commands 'show w' and 'show c' should show the appropriate parts of the General
Public License. Of course, the commands you use may be called something other than 'show w' and
128
'show c'; they could even be mouse-clicks or menu items--whatever suits your program.
You should also get your employer (if you work as a programmer) or your school, if any, to sign a
"copyright disclaimer" for the program, if necessary. Here is a sample; alter the names:
Yoyodyne, Inc., hereby disclaims all copyright interest in the program'
Gnomovision' (which makes passes at compilers) written by James Hacker.
<signature of Ty Coon>, 1 April 1989
Ty Coon, President of Vice
This General Public License does not permit incorporating your program into proprietary programs.
If your program is a subroutine library, you may consider it more useful to permit linking proprietary
applications with the library. If this is what you want to do, use the GNU Library General Public
License instead of this License.
・ Copyright (c) 1989 The Regents of the University of California.
All rights reserved.
Redistribution and use in source and binary forms, with or without modification, are permitted provided
that the following conditions are met:
1. Redistributions of source code must retain the above copyright
notice, this list of conditions and the following disclaimer.
2. Redistributions in binary form must reproduce the above copyright
notice, this list of conditions and the following disclaimer in the
documentation and/or other materials provided with the distribution.
3. All advertising materials mentioning features or use of this software
must display the following acknowledgement:
This product includes software developed by the University of
California, Berkeley and its contributors.
4. Neither the name of the University nor the names of its contributors
may be used to endorse or promote products derived from this software
without specific prior written permission.
THIS SOFTWARE IS PROVIDED BY THE REGENTS AND CONTRIBUTORS ''AS IS'' AND
ANY EXPRESS OR IMPLIED WARRANTIES, INCLUDING, BUT NOT LIMITED TO, THE
IMPLIED WARRANTIES OF MERCHANTABILITY AND FITNESS FOR A PARTICULAR
PURPOSE ARE DISCLAIMED. IN NO EVENT SHALL THE REGENTS OR CONTRIBUTORS BE
LIABLE FOR ANY DIRECT, INDIRECT, INCIDENTAL, SPECIAL, EXEMPLARY, OR
CONSEQUENTIAL DAMAGES (INCLUDING, BUT NOT LIMITED TO, PROCUREMENT OF
SUBSTITUTE GOODS OR SERVICES; LOSS OF USE, DATA, OR PROFITS; OR BUSINESS
INTERRUPTION) HOWEVER CAUSED AND ON ANY THEORY OF LIABILITY, WHETHER IN
CONTRACT, STRICT LIABILITY, OR TORT (INCLUDING NEGLIGENCE OR OTHERWISE)
ARISING IN ANY WAY OUT OF THE USE OF THIS SOFTWARE, EVEN IF ADVISED OF THE
POSSIBILITY OF SUCH DAMAGE.
•
This is version 2004-May-22 of the Info-ZIP copyright and license. The definitive version of this
document should be available at ftp://ftp.info-zip.org/pub/infozip/license.html indefinitely.
Copyright (c) 1990-2004 Info-ZIP. All rights reserved.
For the purposes of this copyright and license, "Info-ZIP" is defined as the following set of
individuals:
Mark Adler, John Bush, Karl Davis, Harald Denker, Jean-Michel Dubois, Jean-loup Gailly,
Hunter Goatley, Ian Gorman, Chris Herborth, Dirk Haase, Greg Hartwig, Robert Heath,
Jonathan Hudson, Paul Kienitz, David Kirschbaum, Johnny Lee, Onno van der Linden, Igor
Mandrichenko, Steve P. Miller, Sergio Monesi, Keith Owens, George Petrov, Greg Roelofs,
Kai Uwe Rommel, Steve Salisbury, Dave Smith, Christian Spieler, Antoine Verheijen, Paul
von Behren, Rich Wales, Mike White
This software is provided "as is," without warranty of any kind, express or implied. In no event
shall Info-ZIP or its contributors be held liable for any direct, indirect, incidental, special or
consequential damages arising out of the use of or inability to use this software.
129
Permission is granted to anyone to use this software for any purpose, including commercial
applications, and to alter it and redistribute it freely, subject to the following restrictions:
• Redistributions of source code must retain the above copyright notice, definition,
disclaimer, and this list of conditions.
•
•
•
Redistributions in binary form (compiled executables) must reproduce the above
copyright notice, definition, disclaimer, and this list of conditions in documentation and/or
other materials provided with the distribution. The sole exception to this condition is
redistribution of a standard UnZipSFX binary (including SFXWiz) as part of a
self-extracting archive; that is permitted without inclusion of this license, as long as the
normal SFX banner has not been removed from the binary or disabled.
Altered versions--including, but not limited to, ports to new operating systems, existing
ports with new graphical interfaces, and dynamic, shared, or static library versions--must
be plainly marked as such and must not be misrepresented as being the original source.
Such altered versions also must not be misrepresented as being Info-ZIP
releases--including, but not limited to, labeling of the altered versions with the names
"Info-ZIP" (or any variation thereof, including, but not limited to, different capitalizations),
"Pocket UnZip," "WiZ" or "MacZip" without the explicit permission of Info-ZIP. Such
altered versions are further prohibited from misrepresentative use of the Zip-Bugs or
Info-ZIP e-mail addresses or of the Info-ZIP URL(s).
Info-ZIP retains the right to use the names "Info-ZIP," "Zip," "UnZip," "UnZipSFX," "WiZ,"
"Pocket UnZip," "Pocket Zip," and "MacZip" for its own source and binary releases.
・ This product includes Zip which has been modified from Pocket Zip (Info-Zip).
・ This product includes software (Xerces-C++ Version 3.1.1) distributed free-of-charge from Apache
Software Foundation. We ask that you use these products upon agreement with the respective
license agreements. For details regarding copyrights and proprietary rights, refer to the license
files below:
Xerces-C++ Version 3.1.1: The Xerces-C++ Version 3.1.1 is available in both source distribution
and binary distribution. Xerces-C++ is made available under the Apache Software License,
Version 2.0.
http://www.apache.org/licenses/LICENSE-2.0.html
・ This product includes Microsoft SQL Server Express distributed for free by Microsoft Corporation.
We ask that you use these products upon agreement with the license agreement.
For details regarding copyrights and proprietary rights, refer to the LICENSE file below:
<Folder in which Microsoft SQL Server Express is installed>\License Terms
・ This product includes software distributed for free (log4net for .NET Framework 2.0 Version
1.2.10.0) by Apache Software Foundation.
For details regarding copyrights and proprietary rights, refer to the files below:
For SSC product, <Installation media>:\DPM\License\log4net for .NET Framework 2.0\
For DPM unbundled product, <Installation media>:\License\log4net for .NET Framework 2.0\
・ This product includes software distributed for free (Spring.Net Core functionality Version
1.2.0.20313) by SpringSource.
For details regarding copyrights and proprietary rights, refer to the files below:
For SSC product, <Installation media>:\DPM\License\Spring.Net Core functionality\
For DPM unbundled product, <Installation media>:\License\Spring.Net Core functionality\
・ This product includes software distributed for free (Prototype JavaScript framework, version
1.6.0.3) by Prototype Core Team.
For details regarding copyrights and proprietary rights, refer to the below:
==========================================================================
Prototype is freely distributable under the terms of an MIT-style license.
For details, see the Prototype web site: http://www.prototypejs.org/
==========================================================================
・ This product includes software distributed for free (Tree Container Library(TCL) Version 5.0.6) by
Datasoft Solutions.
・ It was downloaded from
130
ftp://ftp.ie.u-ryukyu.ac.jp/pub/software/kono/nkf171.shar
ftp://ftp.iij.ad.jp/pub/NetNews/fj.sources/volume98/Nov/981108.01.Z
Subject: nkf 1.7 (Network Kanji Filter w/Perl Extenstion)
Message-ID: <[email protected]>
Copyright:
Copyright (C) 1987, Fujitsu LTD. (Itaru ICHIKAWA)
(E-Mail Address: [email protected])
Copyright (C) 1996,1998 Kono, COW
(E-Mail Address: [email protected])
Everyone is permitted to do anything on this program
including copying, modifying, improving.
as long as you don't try to pretend that you wrote it.
i.e., the above copyright notice has to appear in all copies.
You don't have to ask before copying or publishing.
THE AUTHOR DISCLAIMS ALL WARRANTIES WITH REGARD TO THIS SOFTWARE.
・
ORIGINAL LICENSE:
This software is
(c) Copyright 1992 by Panagiotis Tsirigotis
The author (Panagiotis Tsirigotis) grants permission to use, copy,
and distribute this software and its documentation for any purpose
and without fee, provided that the above copyright notice extant in
files in this distribution is not removed from files included in any
redistribution and that this copyright notice is also included in any
redistribution.
Modifications to this software may be distributed, either by distributing
the modified software or by distributing patches to the original software,
under the following additional terms:
1. The version number will be modified as follows:
a. The first 3 components of the version number
(i.e <number>.<number>.<number>) will remain unchanged.
b. A new component will be appended to the version number to indicate
the modification level. The form of this component is up to the
author of the modifications.
2. The author of the modifications will include his/her name by appending it
along with the new version number to this file and will be responsible for
any wrong behavior of the modified software.
The author makes no representations about the suitability of this software for any purpose. It is
provided "as is" without any express or implied warranty.
Modifications:
Version: 2.1.8.7-current
Copyright 1998-2001 by Rob Braun
Sensor Addition
Version: 2.1.8.9pre14a
Copyright 2001 by Steve Grubb
This is an excerpt from an email I received from the original author, allowing
xinetd as maintained by me, to use the higher version numbers:
131
I appreciate your maintaining the version string guidelines as specified
in the copyright. But I did not mean them to last as long as they did.
So, if you want, you may use any 2.N.* (N >= 3) version string for future
xinetd versions that you release. Note that I am excluding the 2.2.* line;
using that would only create confusion. Naming the next release 2.3.0
would put to rest the confusion about 2.2.1 and 2.1.8.*.
•
•
•
•
•
•
Some icons used in this program are based on Silk Icons released by Mark James under a
Creative Commons Attribution 2.5 License. Visit http://www.famfamfam.com/lab/icons/silk/ for
more details.
The Cygwin DLL and utilities are Copyright © 2000, 2001, 2002, 2003, 2004, 2005, 2006, 2007,
2008, 2009, 2010, 2011 Red Hat, Inc. Other packages have other copyrights.
UNIX® is a registered trademark of the Open Group in the United States and other countries.
Copyright (C) 2001-2003 Hewlett-Packard Co.Contributed by Stephane Eranian
[email protected]
Copyright 1994-2008 H. Peter Anvin - All Rights Reserved
All other company names and product names mentioned in this document are trademarks or
registered trademarks of the respective companies.
Each source and binary file stored on the installation media is affiliated with the respective source
and binary file license.
132