1
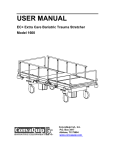
Food Guard Owners Manual
1) SHIPPING DAMAGE
All equipment should be thoroughly examined for shipping damage before and during unloading. This
equipment has been carefully inspected at our factory and the carrier has assumed responsibility for its
safe arrival. If the equipment is damaged, either apparent or concealed, a claim must be made to the carrier.
Apparent Loss or Damage
If there is obvious loss or damage, it must be noted on the freight bill and signed by the carrier’s agent;
otherwise, the carrier may refuse the claim. The carrier can supply the necessary forms.
Concealed Loss or Damage
When there is loss or damage that is not apparent until after equipment is uncrated, a claim for concealed damage will need to be filed with the carrier. Upon discovering damage, make a request in writing to the carrier for an inspection within 15 days from delivery. Retain all packaging. The carrier can
supply the required claim forms.
2) SNEEZEGUARD INSTALLATION
Move the sneezeguard as close as possible to its permanent location and then remove all packaging.
Check for damage before discarding packaging.
1. Start by checking that the counter is level and has adequate bracing or a suitable sub-base to
support the sneezeguard.
2. In order to function properly the sneezeguard must be mounted square and true to the counter
surface with the proper post-to-post spacing shown on the drawing provided.
3. For the convenience of the installer, a post level has been included with your order to ensure
that the posts are installed correctly. Use the mounting screws provided.
Silicone
The use of silicone is only recommended when ¼” glass is used and the glass is placed in channels
using glazing. Place a small bead of silicone between the channel and glazing, and also between the
glazing and the glass. Glazing is the gasket material used to protect the edge of glass in the channel.
Silicone must be used at the time of installation. The silicone is not applied at the factory because of
movement in shipping and handling.
Flip-Up Glass
If any of the sneezeguards have ¼” flip-up glass the glazing and channels will be glued to the glass at
the factory. Do not try to remove the channels from the glass or the flip-up glass will not work properly. If the flip-up glass should break, or require replacement, proceed as follows: Remove the glazing and all glue residue from the inside of the channel. Reinstall the new glass using new glazing and
a suitable adhesive designed for gluing plastic to glass. Kevry recommends 3M Scotch-Grip plastic
adhesive #1099.
Fully Assembled Sneezeguard
It is recommended that you have two or more people to adequately support the sneezeguard when lifting it from the crate to the counter.
1. Start by marking the counter for each post to ensure there are no interferences before drilling
any holes.
2. Mount the first post using the level provided to square and plumb the post to the counter.
Shim between the flange and the counter if necessary.
3. Mount the second post taking care that the post-to-post spacing is correct and that the post is
level and plumb. If the sneezeguard has moving components, ensure that the components are
still working properly before moving on to the next post.
4. Repeat step 3 until the remaining posts are mounted to the counter.
Disassembled Sneezeguard
It is recommended that you have two or more people to properly install glass in the sneezeguard.
1. Start by marking the counter for each post to ensure there are no interferences before drilling
any holes.
2. Mount the first post using the level provided to square and plumb the post to the counter.
Shim between the flange and the counter as necessary.
3. Loosely mount the second post taking care that the post-to-post spacing is correct.
4. (For 1/2” glass) Insert the glass into the channel of the first post using the glazing provided.
The use of soapy water will facilitate the assembly of the glass and glazing. Next insert the
other end of the glass in the channel of the second post using the rubber glazing and soapy
water.
5. (For 1/4” glass) see the previous section on silicone. Insert the glass into the channel of the
first post using the glazing provided. Next, insert the other end of the glass in the channel of
the second post using the glazing.
6. After installing the glass, finish mounting the second post making sure the post is level and
plumb. If the sneezeguard has moving components, ensure that the components work properly before moving onto the next post.
7. Repeat steps 3 thru 6 until the remaining posts are mounted to the counter.
SNEEZEGUARD INSTRUCTION/SERVICE MANUAL
3) ELECTRICAL
Sneezeguards are usually pre-wired to one post unless power requirements require the use of multiple
posts. All wiring done outside of Kevry’s factory must be in compliance with NEC and local electrical codes.
4) CARE AND CLEANING
Long life and satisfactory performance of any equipment is dependent upon the care it receives. To
ensure long life, proper sanitation, and minimum maintenance, the sneezeguards should be thoroughly
cleaned on a routine basis.
Powder coated and stainless surfaces
The surfaces must be cleaned with a mild detergent and warm water to protect and maintain their
attractive finish. Never use abrasive cleaners or scouring pads.
Glass
The glass should be cleaned with a mild detergent or window cleaner.
5) BULBS AND BULB REPLACEMENT
Sneezeguards with lights have been shipped complete with bulbs. However, it is the responsibility of
the end user for the replacement of the bulbs when they burn out. Halogen bulbs are rated for 2000
hours life, Xenon bulbs are rated for 10,000 hours life, and Fluorescent lamps are rated for 10,000 to
20,000 hours life.
Replacing Halogen Bulbs
Care must be taken when replacing halogen bulbs. Avoid any contact to the new bulb with your bare
skin. Use a clean cloth or paper towel to handle and replace the bulb. If contact is made to the new
bulb, or any oil gets on the bulb, the bulb must be cleaned with denatured alcohol before it can be used.
Failure to handle the bulb properly will cause the bulb to prematurely burn out.
LIMITED WARRANTY
STANDARD EQUIPMENT WARRANTY
• BSI warrants that its fabricated products shall be free from any defects in material and
workmanship for a period of one year from date of shipment.
• BSI guarantees parts furnished by suppliers to BSI only to the extent of the original manufacturer’s express warranty to BSI. Failure of the Original Purchaser to receive such manufacturer’s
warranty shall in no way create any warranty, express or implied, or any other obligation or liability
on BSI’s part in respects thereof.
• If shipment of a replacement part is requested prior to the arrival in the BSI factory of the part
claimed to be defective, the Original Purchaser must accept delivery of the replacement part on a
C.O.D. basis, with credit being issued after the part has been received and inspected at BSI’s plant
and determined by BSI to be within this Warranty.
• No claims can be made under this Warranty for spoilage of products for any reason, including system
failure.
• Warranty work not performed by BSI personnel must have prior written authorization. BSI
can decide to approve on site repairs, providing at no charge new replacement parts and also
paying reasonable labor charges for a period of 90 days from date of shipment. A Return Material
Authorization number to be accepted must accompany returned goods.
• This warranty does not apply to:
• Buyouts or purchased components, including but not limited to, faucets and drains as these
are covered by the original manufacturers’ warranties,
• Freight damaged material,
• Damage caused by improper installation, improper use, or abuse, or equipment modified
without factory authorization,
• Damaged caused by normal wear and tear,
• Control adjustment, switches and light bulbs,
• Customer furnished materials or buyouts.
• This warranty is the complete and only warranty, expressed or implied. BSI, LLC
liability is limited to the purchase price of the equipment. The customer’s sole and exclusive remedy
is the repair, replacement, or refund for the defective equipment.
BSI, LLC w
5125 .Race Court w
Denver , CO 80216 w Phone 303.331.8777