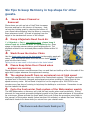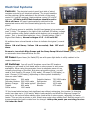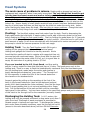
1
HARMONY
Owner’s Notes
Revised April 14, 2015
Table of Contents
Owner’s Comments ....................................................................................................... 1
Disclaimer .................................................................................................................... 2
Six Tips to keep Harmony in top shape for other guests. ..................................................... 3
Quick Start Procedures................................................................................................... 4
Dinghy Operation .......................................................................................................... 8
Electrical Systems ....................................................................................................... 11
Engine Systems .......................................................................................................... 16
Entertainment ............................................................................................................ 21
Flybridge and Cockpit .................................................................................................. 22
Galley, BBQ, Crab Equipment, Vacuum, and Windows ....................................................... 23
Head Systems ............................................................................................................ 26
Heating and Cooling the Cabins ..................................................................................... 28
Navigation, Radar and Autopilot Systems ........................................................................ 29
VHF Radio and Remote Access Mic (RAM) ........................................................................ 33
Weather Station .......................................................................................................... 33
Tackle and Mooring Equipment ...................................................................................... 34
Water Systems ........................................................................................................... 37
Appendix A: Spare Parts Inventory ................................................................................ 40
Appendix B: Emergency Equipment ................................................................................ 41
Appendix C: Schematic of the Through-hulls .................................................................... 42
Owner’s Comments
Welcome Aboard!
Harmony is a 2000 Californian 39 (built by Navigator). We purchased her in November 2013.
We are the third owners. She was in the San Juan fleet by the second owners and then dropped
out for a year or so. We acquired her with the intention of enjoying her ourselves and adding
her back to the San Juan Yachting charter fleet.
Harmony is a documented motor yacht. Her hailing port has always been Squalicum Harbor in
Bellingham, Washington. She has cruised much of the West coast of the U.S. and British
Columbia, as well as the Inside Passage to Alaska.
PLEASE TAKE TIME TO READ THIS MANUAL AND USE IT AS A REFERENCE SOURCE DURING
YOUR CHARTER CRUISE. Spending some time now will make your checkout a breeze and your
actual cruise through the San Juan Islands will be more enjoyable. And if you need more info,
Harmony carries a comprehensive set of the manuals for the installed equipments, kept in the
port side forward salon locker.
Please don’t be afraid to ask any question of the San Juan Yachting staff during your orientation
or at any time. The folks at San Juan are thorough, friendly and caring, so they appreciate
customers of the same ilk. No question is too insignificant.
We have enjoyed getting Harmony ready for your cruise. We hope you will sense our pride in her
and enjoy your time on her as much as we do. As you cruise, if you discover anything we could
do to enhance your experience with Harmony, please share that with the good folks at San Juan
Yachting or us at [email protected]
May you be blessed with blue skies and calm waters.
Bon Voyage,
Lothar and Donna Taylor
1
Disclaimer
These notes have been prepared to give the charter captain and crew a helpful resource for
information on Harmony. While the goal is to summarize information from multiple sources into
a single item, this document does not pretend to be the ultimate authority on the equipment and
systems on board. Consult the manuals provided by the various manufacturers.
Further, the captain accepts and is the ultimate person responsible for the safety of the crew,
passengers and the vessel. It is expected that he / she is qualified to operate a vessel the size,
type and complexity of Harmony and has become throughly familiar with Harmony prior to
leaving the dock. Good judgment and following all applicable laws during operation of Harmony
is fundamental to a safe and successful experience on board this vessel and in the maratime
environment.
No warranties are expressed or implied by this document.
2
Six Tips to keep Harmony in top shape for other
guests.
1.
Shore Shoes: Cleaned or
Removed
Shore shoes can pick up lots of ‘stuff’ that increases
the wear and tear on the interior of Harmony. Help
us keep her looking great by cleaning the bottom of
your shoes before stepping into the salon or removing
them whenever inside. A brush is hanging from the
spigot in the starboard aft corner of the cockpit.
2.
Damp Lifejackets Need Fresh Air
If a lifejacket or flag is even slightly damp, please hang it
where fresh air circulates until it’s completely dry. Snap
straps on flybridge canvas make a good hanging device. The
slightest moisture in an enclosed place creates mildew within 24
hours.
3.
Wash Down the Anchor Chain
Use the fresh water hose on the bow spigot to thoroughly wash salt
water, mud, and marine debris from the anchor chain BEFORE it
goes into the chain locker.
Failing to do so can result in foul odors in the chain locker!
4.
Please Keep Salon Door Closed when
engines are running
Diesel engines produce a soot whenever they run and that can build up a film in the cabin if the
salon door is open whenever the engines are running.
5.
The engines benefit from an occasional run at high speed
Harmony is equipped with two very reliable Volvo Penta diesel engines. The engines can build
up diesel soot in the turbo chargers and exhaust ports when cruising for many hours at low
speed economy cruise. We’ve found it helpful to run the engines up to 2000 RPM for ten
minutes every few days of cruising to help keep the buildup to a minimum. Remember to use
the trim tabs at this speed.
6.
Cycle the fresh water flush system of the Watermaker weekly
The HRO Watermaker on Harmony will yield the best results when used periodically. Sitting
dormant for long periods promotes biological growth in the filters and membrane of the system.
As a minimum, please activate the fresh water flush cycle (follow the procedure noted later in
this manual) of the system weekly (takes less than five minutes) or advise San Juan Yachting
staff that it needs to be done when you return from your charter week.
The Owners and other Guests thank you ☺
3
Quick Start Procedures
Before Starting Engines:
1. Dinghy and deck furniture secured? Grill cover secure?
2. Disconnect shore power; stow cord.
3. Power panel: Green breakers ON; Yellow breakers ON as needed; Red breakers always
OFF
4. VHF Radio, Nav System and Autopilot breakers are Off.
5. Close all hatches and portholes in staterooms and heads.
6. Open blinds and curtains in the salon for 360 degree visibility.
7. Remove the windshield sunscreen and stow on the port shelf in the forward stateroom
when dry.
8. Upper helm: Remove the upper helm canvas cover and stow in the port side of the aft
bench seat of the flybridge when dry. Remove bench seats canvas as appropriate.
Optional: open the center Strataglass and secure to straps (See detail section).
9. Upper helm: Install ignition keys, install the remote marine radio control and secure bow
thruster remote in upper helm holder (all of these items are kept at the lower helm when
not in use).
10.Check oil and coolant levels in engines and generator; add if necessary.
11.Conduct a visual check under and around the engines looking for any signs of abnormal
fluid spotting.
12.Confirm seacocks for the engines are open and seawater strainers are clear.
13.Confirm fuel strainer bowels are clear and no accumulation of water.
14.Check fuel gauges at lower helm (ignition keys must be on to check).
Starting Engines:
1. Close the salon door.
2. Ensure ignition keys at lower and upper helms are in place. The four keys are not
interchangeable, so please don’t remove them from the key rings with their floating
labels.
3. Ensure gear controls are in Neutral. If engine is cold, advance throttle levers about ½
inch. If warm, leave at Idle.
4. The Volvo Penta engines on Harmony don’t require any preheating.
5. Turn key to start, starboard engine first, then port engine is the preferred sequence.
Engine will normal ‘catch’ and begin running after just a second or two of starter
engagement. Allow about 15 seconds before the second engine start is a good habit. If
an engine starter doesn’t engage, be sure controls are in neutral (safety interlock) and
cycle the ignition key to the full counterclockwise ‘kill engine’ position, then try again to
engage the starter. Do not engage the starter for more than 30 seconds without a 2minute “rest” period.
6. Adjust throttles to warm up at 650-700 RPM, 2-3 minutes minimum to ensure stable
engines.
7. Check oil pressure, typically 90-100 psi when cold engines
8. Water running from both engine exhausts? (Go look)
9. Throttles all the way down to Idle before engaging transmission!
10.Keep salon door closed when engines are running to prevent diesel exhaust film from
settling on interior furnishings.
Electronics:
Be sure you start the engines before turning on electronics.
4
1.
2.
3.
4.
Stow sun covers in storage bin at lower helm.
Turn on the VHF Radio, Nav System and Autopilot breakers on DC power panel.
Radio: Check WX as appropriate and then monitor channel 16.
Nav System: MFD displays, acknowledge start-up message, set brightness by
momentarily pressing the power button and then adjusting the brightness with the rotary
knob, then OK. See detailed section in Owner’s Notes for recommended screen selections
and setup.
5. Garmin Portable GPS: hold power button on to start and acknowledge start-up message,
once GPS signals acquired, we recommend you use this device to monitor the tide chart,
select it by successively pressing the ‘Page’ button.
Before Leaving Dock:
1.
2.
3.
4.
Center the rudder.
Untie and stow mooring lines. (Use buckle latch straps or hang on the rail).
Close and latch the step-through door in the transom.
Once underway, stow the forward four fenders in fender racks at the bow. It is best to
clip fender holders on the railing for added security. The two stern fenders can be raised
and placed inside the cockpit at each stern corner. (Hint: Since the fender clips maintain
an expected line length for each fender, use a pattern of keeping the four fenders stowed
in the racks so that you return the same fender to the same location on each railing.)
Always use Upper Helm station for docking and leaving the dock as it provides
maximum visibility and communication with crew.
Underway:
1. Helmsperson “on watch” at all times. Be alert for logs or debris in water, it’s out there
with surprising regularity. Monitor the gauges and regularly validate your position and
water depth in the area.
2. Keep RPM under 1000 until engines warm to 125 degrees and below 1300 RPM until 150
degrees.
3. Always keep effects of your wake in mind.
4. Over 1600 RPM, level the boat by adjusting the trim tabs. A good rule of thumb is to
adjust trim to where the bow pulpit is somewhat above the horizon line when viewed from
the lower helm, then tweak to achieve maximum forward speed.
5. Remember to raise trim tabs (bow up) when you slow down or cruise at 1600 RPM or
below.
6. “Normal” readings:
a. Engine temp: 160-195, typically around 185; Oil pressure: 30-90 psi, varies with
temp and engine speed
b. Note that the lower helm port engine temp reads a bit lower (10- 15 degrees) than
the upper helm gauge, this is calibration error in the gauge.
Approaching Dock:
1. Put fenders on appropriate side or both sides as appropriate (At home port, both sides is
preferred).
2. Attach Bow line to cleat and run line OUTSIDE stanchion and OUTSIDE fender lines toward
amidships; blouse the line over the rail for someone on the dock to easily grab it.
3. Engines should be dead slow (Idle).
4. Mate ready to step off swim step (No leaping across water to dock!) and secure Stern first
(most circumstances), then Bow. In crosswind, best to secure mid-line first.
5
Upon Arrival at Dock in Marina:
1.
2.
3.
4.
5.
Secure all lines: Stern, Bow and Fwd / Aft Springlines as a minimum.
If bow-in, be sure anchor is not protruding over dock walkway.
Turn off defroster (if using it) and engines (see “Stopping Engines” below).
Turn off Raymarine electronics at both helm stations; replace sunscreen covers.
Once shore power is connected, make certain there is 110 voltage on the panel. (See
Electrical section of Owner’s Notes for details.)
Stopping Engines:
After operating at cruising speed, allow engines to idle a few minutes to cool down. (This
usually happens naturally while tying dock lines or setting the anchor.) Then turn keys to “Kill
Engine” fully counterclockwise position. Then check to be sure all keys are in the off position
(12 o’clock position). Remove keys from upper helm station and stow them at lower
helm station. Generally the lower helm keys are always left in place.
Tying up to a Mooring Buoy:
1. Skipper at Upper Helm, Mate on starboard side of cockpit with boathook and nylon
mooring line (stowed on hanger in the cockpit). Nylon line is less prone to fraying from
the rub of the buoy ring than the regular dock lines.
2. Mate secures one end of dock line to stern cleat.
3. Skipper puts starboard end of stern next to buoy.
4. From stern, standing inside the cockpit, mate pulls up buoy ring with boathook and loops
mooring line (single loop is best, it resists wandering but still allows slippage if wind /
wave conditions dictate weathervaning of the bow) through buoy ring.
5. Mate places boat hook in cockpit, releases dockline from stern cleat and holds two ends of
dock line while walking up side to bow. Skipper maneuvers bow close to buoy.
6. With buoy close to bow, secure one end of line to each front bow cleat. This allows for
“quick release” when you’re ready to cruise: Simply release one end of line from bow cleat
and pull through the buoy ring and you’re free to go.
7. Secure 2nd line as a safety if mooring overnight (straight feed thru the ring is best).
8. Turn off defroster (if using), engines and Raymarine electronics at both helm stations and
replace covers.
Mooring at Anchor:
1. Turn on Windlass power in power panel. Release safety loop that secures anchor.
2. Anchor is lowered with foot switches on bow deck or from remote controls at either helm
while boat is backed up slowly away from anchor. Be careful that anchor doesn’t swing
wildly and hit the bow. Better technique is to lower the anchor over the roller by hand
while feeding out a short burst of anchor rode.
3. Mate on bow to monitor length of chain going out and to troubleshoot if it gets tangled.
(Anchor line marked at 50 ft with a five foot yellow mark, 100 ft with a 10 foot yellow
mark, at 150, 200 and 250 ft with a 5 ft yellow mark, the last 10 ft of chain is marked
red. There is then a triple braid rode at the end that would allow the skipper to fully
deploy the chain and then cut it loose if emergency conditions warrant. Remember,
anchor and chain is an expensive investment, cut it loose only in an emergency and if
possible, attach a fender to the bitter end for future recovery of the anchor. We hope you
never encounter a situation that requires you to take this action.
6
4. When desired chain length is out, stop windlass. (See “Tackle” section for recommended
scope in NW waters, generally at least 4:1 but varies with conditions.)
5. Skipper to reverse one engine at a time gently to test the set of the anchor.
6. Attach “Snubber line” to anchor chain: Secure snubber line to windlass cleat. Attach hook
to anchor chain beyond anchor roller. Run out enough chain to form loop in chain so
tension is transferred to snubber line.
7. Turn off Windlass power at power panel.
8. Turn off engines. Turn off navigation electronics at both helms; replace covers.
9. See “Tackle” section of Owner’s Notes for instructions on hauling anchor and freshwater
washdown (very important!) of anchor chain.
Daily (Overnight) Checklist in Marina:
1. AC Input “On” for shore power.
2. Magnum Charger controller: Charger “On” – Be sure it is charging.
3. Cover electronics screens at both helm stations. Be sure ignition keys are not left at the
upper helm. Use flybridge canvas as appropriate to prevent rain / moisture from settling
on the gauges / seats.
4. Keep an eye on water tank gauge and holding tank gauge.
5. If during the cruise day you were experiencing a lot of salt spray onto the topsides of the
boat, take the opportunity to wash down the salt residue if permissible at the harbor.
Daily (Overnight) Checklist at Anchor or Buoy:
1. Anchor light: “On” during hours of darkness. How to turn on anchor light: Turn on “Nav
Lights” switch on electrical panel, then switch adjacent toggle to “Anchor Light.”
2. Turn off unnecessary electrical items.
3. Cover electronics screens at both helm stations. Be sure ignition keys are not left at the
upper helm. Use flybridge canvas as appropriate to prevent rain / moisture from settling
on the gauges / seats.
4. Keep an eye on water tank gauge and holding tank gauge.
5. If during the cruise day you were experiencing a lot of salt spray onto the topsides of the
boat, take the opportunity to wash down the salt residue if you have sufficient fresh water
in the tank.
First Thing Each Day:
1. If at anchor, turn off anchor light.
2. Setup flybridge for normal operation per prestart checklist.
3. Check Magnum Charger controller for battery reserve. If less than 12.2 volts or if amp
hours used exceeds 300, start generator to recharge the house batteries.
4. Check water tank level (gauge in electrical panel).
5. Check holding tank gauge (also at the electrical panel). If more than 2/3 full, pumping is
necessary.
Before Leaving Vessel:
1. Power panel: Turn fresh water pump “OFF”.
2. Reinstall front windshield sunscreen for UV protection and reducing the heat load
transferred to the salon.
3. Use blinds for theft deterrence and further UV / heat load management at your discretion.
4. Lock the salon door.
7
Dinghy Operation
The law requires everyone in the dinghy to
wear a lifejacket.
Lifejackets are located
in the forward flybridge seat.
Prevent Mildew!
Please be sure lifejackets are bone-dry
before stowing them under the seat.
Hanging them on the bimini snap straps
is a handy way to let them dry.
Launching:
1. Turn davit ON at power panel; find winch remote control in the aft portion of the salon
port cabinet.
2. Remove vinyl winch cover (keep one tie fastened to mount so it doesn’t blow overboard)
and connect remote control. Note that sturdy gloves are stored with the remote control,
use them when working with the winch.
3. MAKE CERTAIN BILGE PLUG IS IN THE DINGHY!! Then ensure the winch carabineer
is secured to the lift ring in the dinghy. Loosen “painter” (dinghy’s long bow line) and use
it to manage the bow of the dinghy. Remove tie-down straps from dinghy (lower the aft
portions away from the dinghy but leave them attached to cradle hooks and secure so
they don’t dangle in a breeze).
4. Using the power winch, lift dinghy free and manually rotate it over port side, then lower it
to the water, use the painter to help manage movement in the process.
5. Secure painter so dinghy won’t drift away once you release the winch cable.
6. Disconnect winch cable and secure it to the port stern docking line using a round turn
hitch through the carabineer or raise it up and secure it to the cradle if dinghy will stay in
the water overnight. Note: You will want to put some tension on the cable while raising it;
otherwise cable will wind too loosely and cause problems. And please note that the
winch can swing to starboard and hit the bottom of the flybridge arch unless you
keep it under some tension.
7. Disconnect and safely stow the remote control. Replace vinyl winch cover.
Starting the Outboard Motor:
1.
2.
3.
4.
Be certain fuel line is connected and air vent on fuel tank is open.
Lower motor with Up/Down lever on side of throttle.
Pull on choke, set throttle on fast idle and start outboard with pull rope.
Push in choke when the engine is warm and lower fast idle lever.
Bringing In:
1. BE SURE GRILL IS COVERED to avoid saltwater dripping on it and causing rust.
8
2. To hoist dinghy, reverse “Launching” procedure. Note: Be sure to raise the motor to
the full ‘out of water’ position to avoid contact with the upper deck structure
when hauling the dinghy aboard.
3. BE SURE TO SECURE DINGHY IN CRADLE WITH TIE- DOWN STRAPS.
If you don’t do it right away, it is easy to forget and dinghy will bounce out of cradle while
cruising. Not fun!
4. Alignment in the cradle can be a bit deceiving. Two tips: align the green tape on the port
pontoon with the same green tape on the aft bench seat rail, this will give you good
reference for positioning the dinghy left to right. Then view from below where the nylon
blocks are positioned on the dinghy hull, they should be symmetrical. When correctly
positioned, the port pontoon will be very close to the aft side of the rear bench seat on the
flybridge (a gap of no more than a couple inches especially the stern of the dinghy).
5. When finished with the winch, return remote control to salon port cabinet.
Securing Dinghy to Swim Step:
Two carabineers on the port side of the dinghy clip to
metal loops under the swim step. This stabilizes the
dinghy for safer embarking/disembarking as well as
securing it while at anchor. Do not cruise with the
dinghy in this position! A flat small fender tied to the
center handle on the port side protects the dinghy from
rubbing on the swim ladder and swim step. When using
the dinghy just flip the fender to the inside.
Outboard Fuel: Unleaded regular (87 octane), non ethanol if possible. NO oil mixture
needed for the 4-stroke motor. Please replace the fuel you use!
Dinghy Care:
Keep the dinghy clean and well inflated. There is a hand water pump in the dinghy and a
foot air pump in aft flybridge seat.
A spare fuel filter and spark plugs are kept in the spare parts bin under the forward side
of the master berth.
Dinghy toolkit is in the bow compartment in the dinghy.
If Dinghy doesn’t run:
Is the safety clip in place?
Is the tank vent open?
Is the fuel line connected?
Is there gas in the tank?
Did you choke it?
If it still won’t run or runs very rough, first suspect contaminated gas. If you can’t figure it out,
call the San Juan Yachting office or maintenance pro or the owner for advice.
Trimming the Dinghy and Balancing the Weight:
The dinghy is heavy in the
aft, so passengers should sit forward as much as possible and the engine should be trimmed all
the way down.
9
Anchoring the Dinghy:
There is a collapsible anchor in the dinghy that can be attached
to the end of the painter for anchoring the dinghy.
Going Ashore:
Estimate the change in tide during your time ashore and secure the dinghy
accordingly. The metal sand spike in the dinghy can be used to secure the painter on a sandy
beach. Otherwise, secure the painter to a log on the beach.
Cleaning Your Shoes:
Your shore shoes are likely to pick up gravel or dirt on shore.
Please clean them off or remove them before boarding Harmony. A brush is found hanging from
the spigot in the starboard aft corner of the cockpit.
Use of Swim Ladder:
The retractable swim ladder is mounted under the swim step. To
use it, undo the Velcro fastener and pull the ladder straight out horizontally all the way, then
drop it down. Put it away in the same fashion, being sure to secure it with the Velcro fastener.
If planning to use the ladder, securing a short line on the transom rail is useful to provide a grab
line for getting out of the water.
10
Electrical Systems
Controls: The electrical control panel (port side of salon)
contains controls for all electrical systems. The circuit breakers
act like switches. White switches on the left side of the panel
control 110 volt/AC systems; black switches control 12 volt/DC
systems. AC Main and DC Main breakers should be set to
ON at all times. AC input is automatically switched to the
appropriate source with the Genset taking priority over shore
power.
If no AC power source is available, the left hand gauge in top center will
read “0 volts.” The gauge to the right of this indicates DC battery voltage.
A multi-position rotary switch selects which battery set is sensed by the
meter: Port = House Main batteries; Aux = Genset battery; Stbd =
Engine Start Battery. Normal voltages: 12.5 – 14.0 volts DC.
All switches have colored bands on them to indicate the typical / normal
state:
Green: ON at all times; Yellow: ON as needed; Red: OFF at all
times
Be sure to leave both Bilge Pumps and the Sump Pump ON at all times (green); they are
on automatic when these switches are ON.
DC Fuses: Spare fuses (for Radio/CD) are with spare light bulbs in utility cabinet in the
master stateroom.
AC Switches:
You will use AC breakers more than DC breakers
because you will need to limit loads while on shore power to suit power
availability. When using the generator there is adequate power to run
virtually everything on the boat. But when using shore power, you will
need to limit loads to 30 amps (3,000 watts), 20 amps (2,000 watts), or
even 15 amps (1,500 watts), depending on shore power availability.
Here are some loads:
Water Heater
Defroster Heaters
Battery Charger
Toaster
Coffee maker
900 watts
500/1000 watts
250 watts typical*
800 watts
1000 watts
Portable Heaters
Refrigerator
Microwave
Blender
750/1500 watts
100 watts
1000 watts
475 watts
*If the house batteries have had significant use without recharging, the inverter (in charging
mode) can draw up to 1,000 watts. Watch loads carefully and allow the Magnum charger to
come up to full current before adding other loads while on shore power, especially the water
heater. This can take a minute or two. Watch amp meter when adding load. Multiply amps by 10
to approximate the load in watts from the charger. Add up the power you are using; be sure
it’s under the limit!
11
NOTE: It is necessary to wait until the Magnum meter reads “Absorb” or “Float” before turning
on the hot water heater. OPTION: If you need hot water and don’t want to run the Espar
diesel heating system or wait for batteries to charge, you can turn off the “Charge” button
temporarily to bypass the charging system. Be sure to turn it back on later or batteries won’t
charge.
Shore Power:
Power cords are stowed next to port fuel tank or on the port side of the
cockpit. 15 and 20 amp adapters and a Y-adapter hang on the engine room stair rail. Shore
power receptacle is on port side aft of the transom.
1) Connect the Smartplug 30 amp adapter to Harmony’s receptacle first and then into shore
power. If more length is needed, the second cord can be connected to the first.
2) After connection, the panel meter should read “110 volts” and green light labeled “AC
Power On” should be lit. If not, check that AC Main switch is ON and then check the supply
at the dock to make certain it is turned on.
3) Some Canadian public wharfs have only 15 amp supply. Use the adapter on Smartplug
and run non-marine extension cord (stowed next to port fuel tank) to the dock supply
box.
Inverter:
Breaker toggle switch labeled “MAGNUM” on main panel should be ON at all
times.
Inverter button in lower left corner of Magnum Interface should be turned on
(with INV light lit) when AC power is needed for outlets or TV/microwave and is
not available from shore power or genset. It is best not to leave it on through
the night or when leaving the boat, as it may drain the batteries more than
expected. (Note that the green LED lights on the Magnum controller will be off
after a period of non-use to conserve power but the settings are still active.)
The inverter allows you to use 110-volt appliances (hair dryer, coffee maker, etc.) while at
anchor or buoy without running the generator. It converts 12-volt DC power from the ship’s
house batteries to 110-volt AC current. It can supply up to 3,000 watts to the AC panel. The
only circuits that run off the Inverter are the TV/Microwave and cabin outlets. The water heater,
water maker or fridge will not run off the inverter.
Be aware that most small appliances (toaster, coffee maker) and electronics will draw a small
amount of power if plugged in, even while turned off. It is best to unplug them when not in use.
Here are some examples of average loads:
AC panel:
TV/Microwave, switch on but not in use
0.6 amps
DC panel:
Propane stove, switch on but not in use
0.6 amps
Stereo/Radio/CD switch on, not in use
0.5 amps
in use
0.9 amps
Tank monitor ON
0.1 amps
Engine room lights ON
0.2 amps
Refrigerator, running
8.0 amps
Be sure you do not have a portable heater plugged in when using
the inverter. These high-wattage items should only be used with
shore power or the generator.
Magnum Energy Interface:
The power monitor panel
(lower left corner of electrical panel) controls the Inverter and
12
Charger functions for the house batteries and monitors reserve power. It is necessary to charge
batteries when voltmeter indicates 12.2 volts or less; do not let voltage drop below 11.5 volts.
Magnum breaker (on electrical panel) should be ON at all times. Check it daily. The only
control you are likely to use would be the “Select” turn knob: Rotating the knob changes the
function which can be selected (entered) by pressing the knob. Function 01 INV/CHG meter
displays voltage of batteries and net current going into the batteries when charging. Pressing
“Select” and rotating knob to “02 BM (battery monitor): SOC (state of charge) will indicate the
percentage of full charge in the batteries at any given time. When connected to shore power the
batteries may be charged to 100%, but while cruising and charging from engines or genset, a
reasonable compromise is to discharge not below 50% and recharge to 85-90%. Pressing
“Select” and rotating to right will bring up 03BM:meters. Pressing the knob will first display
DC volts. Rotating to right displays DC amps, which represent the actual amount of current
going into or out of the house battery bank. Rotating again to the right will display total amphours consumed from the house batteries as a negative number. More details are in the Magnum
manuals in the binder labeled “Electrical Systems” in the sliding door cabinet on port side of
salon.
The House Battery capacity is 660 amp hours. If more than 330 amp hours are
consumed, the batteries may be permanently damaged.
Do the batteries automatically recharge while cruising?
Yes, they recharge at any cruising speed. The house batteries are recharged by the 150 amp
port engine alternator and the starter battery is recharged by the 50 amp starboard engine
alternator. The port engine alternator has an external voltage regulator. If it appears the
alternator is not charging the house batteries, try switching the toggle switch near the port
alternator on the forward bulkhead in the engine room from Balmer to INT which switches to the
internal regulator. Switching this configuration must only be done with the engine off.
GenSet:
Starting the generator is a 10-sec. sequence, using switches on
upper left of electrical panel or on the overhead panel in the engine
room adjacent to the generator:
1) Unless you have run the generator within the last hour, hold
the PREHEAT switch ON for 5 seconds. Continue holding it
up while you perform the next step.
2) Push ENGINE CONTROL switch up to START; hold 2 seconds
or until generator starts. Release START switch; continue
holding PREHEAT switch 5 more seconds.
3) Within a minute, you should see “110 volts” on voltmeter on the electrical panel.
4) Look over port side at generator exhaust. Water should be flowing from exhaust opening.
If not, stop the generator and check strainer and the through hull valve.
5) Put a load on the generator by switching on the hot water heater or an appliance. (Be
aware that switching on too many things at a time could trip a breaker switch.)
To stop the generator:
1) Remove the electrical load from the generator by turning off your elective loads.
2) Run the generator engine for a 2- to 3- minute cool-down period.
3) Move the generator toggle switch to the STOP (down) position and hold it there until the
unit stops completely.
13
Note: The generator will shut itself off if there is low oil pressure, low coolant level or high water
temperature.
Battery Switches:
There are four battery switches located in
the engine room and are used to manage connections between the
engine battery, genset battery and the main house batteries. The
general rule of thumb is don’t touch them unless there is a problem
or if specific maintenance action is required.
Aft of the port engine is the main isolation switch for the main house
batteries. It is red and has two basic positions, on and off. It is
normally in the On state and is used to totally isolate the house
batteries from the ship’s systems.
Aft of the starboard engine are the other three battery switches
mounted to a wallboard. One is labeled ‘Engine’ and is an isolation
switch for the engine start battery, it is either On or Off and is
normally in the On position. Above the Engine switch is the Genset
starter switch, it determines which onboard battery will be used to
start the Generator. It is clearly labeled and is normally in position 2,
the Genset battery. If the Genset battery has failed for some reason,
position 1 will enable the house battery to be the source for starting
the Genset.
Finally, the larger battery switch controls the battery source(s) for the main house circuits.
Normally this is in position 2 which connects just the house batteries to those circuits via the
main electrical panel in the salon. Position 1 would utilize the engine start battery to power
those circuits, something you would rarely if ever do as the engine start battery has much less
capacity and is critical to starting the engines. And the ‘Both’ position would parallel the house
and engine start batteries, an abnormal condition that you would use if the engine start battery
is run down or fails and you need to start the engines using the house battery bank.
Interior Lighting:
All lighting is 12-volt DC with the exception of the wall lamp in the
salon (which uses a 12V bulb) and table lamps in Master Stateroom (110V LED bulbs). Spare
bulbs are labeled and stored in a bin in the utility cabinet of the master state room.
Exterior Lighting:
“Arch Lights” switch on the electrical panel controls lights on flybridge. In addition to the panel
switch, these lights are turned on by pull knobs on the flybridge console: (1) “Arch Lights” and
(2) “Deck Lights” (floodlight above the dinghy).
“Cockpit Lights” (including courtesy lights on exterior steps) are controlled by the uppermost
switch beside the refrigerator.
“Nav Lights” switch must be on for “Running Lights” and “Anchor Light” which have a
toggle switch at the top right corner of the electrical panel.
Bow Thruster Battery:
The battery for the bow thruster is located underneath the
forward stateroom birth. It is charged automatically by a duo-charger that transfers charging
14
current from the house batteries to the bow thruster battery whenever needed. There is a
battery switch for isolating this battery, it is located on the port side of the forward berth below
the lower edge of the mattress.
Engine Battery:
During all normal operations and usage of Harmony, the engine battery
is recharged by the alternator of the starboard engine. In the event that the vessel will sit for a
significant period of time without usage, the engine battery will slowly discharge. To maintain
its charge level, an Echo Charger is installed and can be activated by turning on the guarded
circuit breaker at the electrical panel. This switch is designated as a normally off (Red) switch
and should only be used in this specific circumstance.
15
Engine Systems
Access:
Through hatch in cockpit deck. Engine room lights are controlled by a breaker on the
main panel, a light switch in the engine room on the ceiling near the fuel strainers and a
pressure switch on the engine room hatch. Under normal conditions, the breaker will be left on
(marked as a green breaker) and the light switch in the engine room will be on. In that
condition, the pressure switch will close the circuit and activate the engine room lights whenever
the hatch is open. The engine room lights are long life LED lights but if the hatch is expected to
be left open for a long time, please use the local switch in the engine room to turn off the lights.
General:
The twin 318hp, 6-cylinder turbocharged Volvo Penta engines drive the propeller
shafts directly through inline 2:1 reduction gear transmissions with dripless shaft seals. Spare
seal parts are kept with the engine spares under the forward side of the master stateroom
mattress.
Starting:
No preheating required. Be sure you check oil and coolant levels first. Turn
starboard and port keys on separately. You may start the engines at either helm station. Follow
the quick start procedure.
Keys:
The four ignition keys are not interchangeable. Do not remove keys from their
respective key chains with labels. Upper helm keys should be stowed at the lower helm with the
cabin door locked when you leave the boat. An emergency set of keys is stowed with spare parts
under the forward side of the master stateroom mattress.
Engine Alarms: Alarms on each engine sound for low oil pressure, high temperatures or
inadequate charging. If alarms should sound when you are underway, idle back the engine,
check the gauges, and shut down the offending engine promptly. A false battery alarm may
occur on the port engine if there is a temporary drop in voltage in the house system as a
function of the automatic circuit switching with shore power, generator power and the port
engine alternator / regulator. Normally it will stop after a few seconds.
Engine Warm-up / Normal Indications:
Start-up and initial running of the diesel
engines is when most of the wear occurs. Allowing the engines to reach normal operating temps
before putting them under heavy load is critical to ensuring long life and trouble-free
performance.
• Don’t plan to leave the dock until the engines have idled for at least 3 minutes and the
temp gauges have started to indicate an initial rise in temp.
• Idle out of the harbor / dock area.
• Keep engine speeds below 1000 RPM until temps are above 125 and below 1300 RPM until
engine temp reaches 150 degrees.
Normal Readings:
Oil pressure: 30-90 psi
Engine temp. 160-195
Note: Starboard engine temp. gauge normally reads slightly higher than Port engine at the
lower helm even though both engines are running at the same temperature.
Optimum RPM for low speed cruise efficiency: approx. 1100 - 1500
Optimum RPM for high speed cruise efficiency: approx. 1800-2300; Do not exceed 2600 RPM
16
Consult the guidance table at the lower helm for engine speed and approximate fuel flows at
that speed.
Shifting:
Shift gears only at idle RPM. Allow 2-3 seconds between shifts from forward to
reverse or vice-versa. Dockside maneuvering should be performed with the throttles at minimum
idle speed.
Bow Thruster:
The bow thruster is controlled from the upper helm using the remote. The
battery switch for the bow thruster on the port side of the forward berth should be set to “ON” at
all times. If bow thruster is not operating, check this switch first and then check the batteries in
the remote. (Note for Maintenance Pro: The main control box for the bow thruster is located
behind the mirror in the master head.)
Exhaust:
Please keep salon door closed while engines are running to prevent diesel exhaust
film from settling on interior furnishings.
Pumps:
The engines are dependent on several pumps to operate properly. Most important of
these is the sea water (raw water) pump on each engine, which circulates sea water through a
heat exchanger to cool the engine and its transmission, and then expels it through the exhaust
pipe to keep the pipe cool. If a pump fails, it could severely damage the engine; if left
unattended, a fire can result. If something smells “hot” or an alarm sounds, investigate at once!
There should be no steam or water spraying in the engine room. There should be water coming
out of each exhaust pipe.
If a pump seems to have failed, the usual causes are:
•
•
•
Plugged intake. Is there plastic wrap, seaweed, or other obstruction?
Clogged sea strainer. Is there debris in the sea water strainer on this engine?
Failed impeller in the pump itself, or broken fan belt.
Troubleshooting any of the above problems takes only a few minutes:
1. Turn off the seacock to the pump on the defective engine.
2. Take the top off the sea strainer. Save the gaskets!
3. Open the seacock valve to make sure it is clear (water won’t gush in but will start to
overflow the strainer, a plastic bag and / or towel is handy to capture the water while you
are confirming water flow).
4. If the strainer is clogged, rinse in a bucket with clear water and a hose if available. You
can also rinse it in the sea but don’t let go, it won’t float and operation without it in place
will damage the engine.
5. If seacock and strainer are clear, the problem is likely the pump impeller or a broken belt.
Replacing the pump impeller:
1. Find spare impeller and gasket with the engine spares under the forward side of the
master berth mattress.
2. Close the seacock for that engine.
3. Follow the hose from the strainer to the pump, the pump is on the starboard side of each
engine just behind and below the alternator of each engine.
4. Remove the cover plate (opposite end from the pulley). Use a trash bag under the area
to capture the small amount of seawater that will expel from the pump housing when the
cover is removed.
17
5. You’ll see the impeller, shaped like an asterisk, and it will likely have one or more broken
or damaged arms. (If no arms are broken, the problem isn’t the impeller – consult a
mechanic.)
6. If an arm is broken, slide impeller out. A small squirt of liquid soap may help ease
removal. If it doesn’t come out with reasonable effort, consult with a mechanic.
7. Clean out pump chamber, trying to get all the pieces out of the water system.
8. Lubricate the new impeller with hand soap or dishwashing detergent.
9. Aligning the spline shaft with the matching pattern on the impeller. Note that the impeller
spins in a clockwise direction when viewed from the access cover side, therefore bend the
blades of the impeller with this direction in mind.
10.Replace the cover with a new gasket and tighten the screws firmly but not overly tight.
11.To avoid “air lock” be sure sea strainers are full of water before you open the seacock.
Use the fresh water hose in the cockpit (starboard side). Normally they will be full if you
closed the seacock before starting and did not lose an excessive amount of seawater while
changing the impeller.
12.Open the seacock and check for leaks.
13.Start the engine and check for proper operation and no leaks.
Replacing a belt:
1. Find the spare belt with the engine spares under the forward side of the master berth.
2. Remove the broken belt.
3. Loosen the belt tensioner arm to provide slack. Install belt. Retighten the tensioner arm
to tension the belt.
Fuel:
Each engine has a “supply” and a “return” valve from the
fuel tank. Racor primary fuel filters are mounted inboard of the
starboard tank and do not require service unless the bowl is full of
sediment and / or the disposable filter is clogged. If the fuel filter
must be replaced, follow instructions in the service manual (salon
port cabinet). Each engine has another pair of secondary fuel
filters mounted forward on its port side. These are normally
serviced by the boat owner, but there are spares under the
forward side of the master berth mattress. Instructions can be
found in the service manual. Bleeding the fuel system will be
necessary after any servicing, consult a maintenance pro or the owner as necessary.
Shaft Logs:
Shaft logs are watertight fittings that prevent water coming into the boat
around the holes where the propeller shafts exit the hull. Harmony is fitted with PSS dripless
shaft seals. There should be no need to adjust these. If there is any doubt / concern, contact
the maintenance pro or owner.
Checking Engine and Genset Oil Levels:
The oil used in the engine and genset
is the same, 15W-40 weight and spare oil is found in Bin #2 of the engine room. Oil levels on
the engines and genset should be checked at the beginning of each day. For the engines, there
is a dipstick midway along the inboard side of each engine. Using a clean paper towel and with
the engines off for at least a few minutes, pull the dipstick and wipe it clean. Then reinsert it
fully and then pull it again. The oil level should be between the upper and lower marks on the
dipstick. If below the lower mark, add oil to the engine. You should also question why oil is
needed if it is a sudden change during your trip as these engines use very little oil, so if the oil
18
level is suddenly lower / low, the real question is why. Look for spotting or leakage. Call for
advice if in doubt.
• Note: diesel engines have some residue as part of the combustion process that ends up
accumulating in the oil, hence in part why the quantity of oil in a diesel engine is so much
more than a gasoline engine. A by-product of this process is that the engine oil will
appear very dark, almost black even after just a short time of operation. This is normal.
Similarly, the genset oil level can be checked. On the forward side of
the enclosure is a round access cover. The oil dipstick is behind this
cover. Using a clean paper towel and with the genset off for at least
a few minutes, pull the dipstick and wipe it clean. Then reinsert it
fully and pull it again. The oil level should be between the upper and
lower marks on the dipstick.
Oil Changing: Oil should be changed every 150 hours;
normally this is done by the owner or maintenance pro. However, if it is necessary for you to
change the oil, run the engines to warm up the oil before changing. Also, change the filters on
the engine at each oil change – spare filters are under the forward side of the master berth. A
“filter wrench” is in the lower bin (#2) in the engine room. To avoid a mess, enclose the filter in
a plastic bag before removing for easy disposal.
Oil Leaks:
Oil splatter or drips are virtually non-existent on these engines and the owner
has supplied oil absorbent drip pads to help detect any change to this normal condition. Any
significant spotting or developing trend of spotting is a warning sign. If the dipstick shows
excessive leaking, track it down! Remember, a little bit of oil makes a big spot: the dipsticks are
the best warning of excessive use! Other than drips from checking oil level, the engines are
clean running and the engine room will stay clean.
Coolant:
Engine coolant should be above “cold” level in the reservoirs on the forward
bulkhead of the engine room. There is spare coolant in a gallon container in the starboard side of
the aft bilge. Note that coolant added to the system is a 50/50 blend of red marine antifreeze
and distilled water. Always use this mix if the spare coolant on board is insufficient (normally
would not happen without some other underlying issue). Distilled water is stored on the
starboard side of the aft bilge in case you must purchase antifreeze locally and it is not prediluted.
Fueling Process:
Port and Starboard fillers are located on the cockpit deck. A cap key (on
a floating key ring) is in the drawer of the small cabinet aft of the main settee and another is in
the tool box in the engine room.
Estimating how much fuel you will need can prevent overfilling and spills:
Harmony carries 300 gallons of diesel (150 gallons on each side). Each tank has a fuel gauge at
the lower helm. Ignition key must be turned to ON position (without starting engine) to read
each gauge. These gauges are accurate but a more precise reading can be obtained by using the
metal yardstick (located on top of the port fuel tank). Wipe the yardstick clean prior to using as
dirt added to the tank is not a good thing! Holding the cork ball, lower yardstick into the tank
until it touches the bottom. The level of diesel indicated on the yardstick corresponds to the
chart on the engine room hatch. Caution: the yardstick has two scales, read the correct one,
19
the height of fuel in the tank. This is a good way to estimate how much fuel you need before
you begin filling.
While filling, be certain to form a “doughnut” around the filler hole with paper towels or
absorbent pads. As you fill, listen for a change in pitch as the air exits the tank. Another clue is
that marine diesel will also foam quite a bit while filling the tank so watch for that as it will start
to bubble up the fill tube as you get near the full point of the tank. When you get close to the
expected amount needed for the tank, that’s when to be particularly careful and reduce the flow
rate. You have filled the tank sufficiently when a number of short bursts of fuel added result in
immediate foam forming in the fill tube.
Remember: Protect the environment. Fuel spills are your responsibility and may need
to be reported to the Coast Guard.
Note: there is a crossfeed shutoff valve at the inboard, lower aft side of each tank. If you
temporarily close either one of these, it will prevent fuel added to the first tank from transferring
over to the other tank. Transfer is not immediate so it is not possible to refuel completely by
just filling one tank only. But some transfer will occur so if you’ve calculated the fuel to fill the
first tank, it will actually prove to be much more as some of the added fuel will transfer to the
other partially empty tank. Just remember to open the valve after filling the second tank!
Fuel consumption: Harmony uses 0.4 gal/nm at a cruising speed of 6 knots (2 gal/hr) and
approximately 1.0 gal/nm running at fast cruise.
Consult the table at the lower helm for further guidance when selecting a cruise speed.
As owners, we’ve found it most comfortable to cruise at 6-10 knots with an engine speed of
1100 – 1600 RPM. It allows time to enjoy the scenery and maintains a relatively quiet salon
noise level while being able to cover reasonable distances in a day.
Checking Transmission Oil Levels:
The oil used in the transmission of the engines
is different that the primary crankcase engine. For the transmissions, it is straight 30W oil and
spare oil can be found in Bin #2 (be sure to check the label to find the correct container). The
dipstick for the transmissions is found at the rear of each engine, down low and to starboard of
the drive shaft. It has a rubber cap with groves at the top which secure it in place.
Transmission oil is checked only after the engine has been started and with the engine operating
at idle speed and in neutral. This is best done during the morning warm-up of the engines. Oil
level should be checked once or twice per week assuming no spotting is observed in the bilge as
part of your daily engine room checks.
Using a clean paper towel and with the engines at idle and in neutral, pull the dipstick and wipe
it clean. Then reinsert it fully and then it pull again. The oil level should be between the upper
and lower marks on the dipstick. If the oil level is below the lower mark, shut down the engine,
use a funnel and the appropriate oil from Bin #2 to bring the level back into the range. It won’t
take much, the capacity of each transmission is 4 quarts in total. If oil is added, please make
note of it and mention it to San Juan staff as it is a potential indication of a more serious issue.
20
Entertainment
Salon TV
The TV/integral DVD player operates on 110 volts AC. Since it is on the same panel switch as the
microwave, be aware that they may not be able to run at the same time. The TV mount rotates
both vertically and horizontally. Tilting the screen vertically can improve the picture, depending
on your position and the lighting. Spare batteries for remote are in Utility Cabinet in the master
stateroom and the instruction manual is in the “Entertainment” service manual in salon port
cabinet.
Securing the TV in rough seas:
In rough water (3-ft. chop or more), please monitor the
stability of TV. Too much bouncing could damage the
swivel mount. Stabilize it by installing the designated
bungee cord (located in the round ottoman) as follows:
1. Hook one end of the bungee around the
extinguisher bracket.
2. Run it across front of TV and hook other end in
vent slot above the microwave.
3. When seas are calmer, please stow the bungee
where you found it. Thanks.
Stereo System - XM Radio/CD player:
The XM radio/CD player has its own switch on the panel as well as a Power On / Off button on
the instrument. You can plug your own portable music device into the Aux port on the front of
the radio. The remote is stored on a Velcro strip inside the cabinet door below the radio, along
with a listing of XM channels. The instruction manual is located in the salon port cabinet.
External speakers: Speakers in the cockpit and flybridge can be controlled separately with
push button switches on the end of the radio cabinet, above the lower helm seat. (In a moorage
area, please be considerate. Sound really travels over water!)
21
Flybridge and Cockpit
Flybridge
Lighting: “Arch Lights” switch on panel controls lights on flybridge. The breaker switch
enables power to the circuits and individual pull knobs on the flybridge activate the lighting
systems:
(1) Radar “Arch Lights” and (2) “Deck Lights” (floodlight above the dinghy).
Canvas and Strataglass Enclosure: Removing the canvas enclosure is not recommended,
unless done by SJY staff. On hot days, you can unzip the sides of the center window panel and
secure it parallel to the bimini top with the snap straps hanging from the rear support bar. Be
careful not to scratch the Strataglass with rings or long fingernails. Never fold the Strataglass;
always roll it. If you need to clean it, use only the cleaner/polisher in the plastic bottle
stowed in the forward flybridge seat (starboard side) with a soft cloth.
Be careful not to leave navigation electronics uncovered and exposed to weather or overnight
dew if Strataglass is rolled up or removed.
Stowage: The forward seat contains lifejackets. PLEASE TAKE CARE TO ALLOW THESE
ITEMS TO DRY BEFORE STOWING.
The aft seat contains extra mooring lines & fenders, spare anchor, and emergency flares, fog
horn, space for stowing the flybridge canvas covers. Again, don’t stow wet / damp items in
these seats, only dry items to prevent mildew formation. An additional ice chest cooler
can be stowed on the flybridge, either port or starboard side, whichever is more convenient.
Use bungee cords to secure it in place.
Cockpit
Lighting is controlled with the uppermost switch beside the refrigerator.
A bistro table and canvas chairs stow in the lazarette near port fuel tank.
BBQ: See the “Galley” section.
Exterior Speakers: Cockpit and flybridge speakers are controlled with switches above the
lower helm seat, on the end of the cabinet.
Flags: A U.S. flag on a metal flagstaff fits into the aft rail mount on the cockpit. An optional
Harmony logo pennant or San Juan Yachting pennant clips on to the bow staff. While cruising in
Canadian waters, fly the Canadian courtesy pennant on the bow staff. Please be sure flags and
pennants are completely dry before stowing them in the port salon cabinet.
Clothesline: Utility line and clothespins are in the Upper Bin (#1) in the engine room.
Cleaning Supplies: Boat soap, deck brush, etc. are stowed on the port side of the aft bilge or
engine room adjacent to the port fuel tank.
22
Galley, BBQ, Crab Equipment, Vacuum, and Windows
Cooktop: Turn the propane on in 3 steps:
1. Open valve on propane tank (in the box on swim step). Note the box has a stiff spring,
bend the spring manually to help relieve the tension and assist the top in closing when it
is time to do so.
2. Turn on propane switch on main control panel in salon.
3. Turn on propane switch to the right of refrigerator.
Burners are self-lighting, but it takes 30 seconds or so for the gas supply to fill the line before it
reaches the burners.
Beware: Keep large kettles on the left burner. If on the right, they may hold too much flame
heat under the kettle, which will begin to melt the control knob.
Steam: If cooking creates a lot of steam (such as the crab cooker), please open a window and
use a fan to prevent moisture buildup on upper cabinets.
Microwave/Convection Oven: See instruction manual (GALLEY service manual in
salon port cabinet). Because the microwave switch on the electrical panel is not ON at all times,
don’t expect the microwave clock to stay set. You may need to press “Clear” before beginning
your desired function. (We’re not sure if TV and Oven can run at the same time – you can give
us your feedback on this.)
Frig / Freezer:
The refrigerator / freezer was completely rebuilt with new components
sans the doors in 2014. It will run on either DC or AC and will default to AC when available.
Both switches at the electrical panel can be on and the power switching is automatic.
The compressor and cooling fan are very quiet but can be heard if you listen carefully.
Inside the frig at the top center is the temp control and on the left
side of that housing is a fan switch. The fan is integral to the frig
and runs at a low speed to simply circulate air to keep the temp in
the frig more balanced.
A setting of 4-5 on the temp control is a good starting point.
Thermometers are supplied in both compartments. The temps
achieved in each compartment will vary based on the frequency
you open the doors and the ambient temps. You can tweak the amount of cooling efficiency in
the frig to change this balance. On the back wall of the frig is a movable panel that slides up
and down. If you shift it up, a small plastic block will drop down and will keep the panel raised
about 1.25”. With this gap at the bottom of the panel, the chilling coils in the back wall of the
frig are more efficient and will achieve a cooler temp in the frig more quickly hence the freezer
will not be quite as cold. The opposite is true when the plastic block is pushed to the side
manually and the panel lowers to its resting position.
23
So we’ve found that in cooler temps or when access to the frig is infrequent, keep the panel in
the lower position. And in warmer periods of time, raise the panel to the upper position will
more effectively cool the frig and keep things frozen in the freezer.
Also, there is a small moisture collector bin in the bottom right of the frig. This will collect
condensation from the chiller wall. Monitor it and empty if it fills more than half is a good rule of
thumb. We’ve found that this container will need to be emptied every 2-3 days.
Disposal:
The disposal discharges waste over the side (under the water line) as “gray
water,” which is permissible in both U.S. and Canadian waters. Run tap water while running the
disposal. There is a disposal “wrench” stored under the galley sink for unjamming the disposal.
Consult the service manual. If the outlet hose becomes plugged, it may be cleaned out by
closing the seacock and disconnecting the hose outboard of the starboard engine. A drain snake
is stored at this location.
Countertops:
Corian sink covers provide extra counter work space. They are not cutting
boards! Please do not cut or chop on the Corian or the drop leaf cabinet surfaces!
Please do not put hot pans from the stove or oven directly on the countertop or table.
You will find a separate cutting board on the top shelf inside the drop leaf cabinet and heat-proof
trivets on the pull-out shelf under the galley stove. When using the sink, you can get the Corian
sink covers out of your way by standing them up between the drop leaf cabinet and the step.
Salon Settee: The salon settee is a distinctive element of
Harmony. From this seating area you have a very broad view of the
surrounding waters / landscape. Enjoy! And like the countertops it is
made of Corian so please exercise the same care. Please do not sit
or lean on the table top, it will stress the mounting of the table
stand.
Drying dishes: A dish strainer set is located under the galley
sink. Please take care to dry dishes and flatware thoroughly before putting away to prevent
mildew and rust.
Small Appliances: Using too many at a time may cause a circuit breaker to flip.
Unplugging them when not in use helps to conserve battery power while at anchor.
The vent behind the refrigerator needs some air space, so keep the toaster stowed in a manner
that allows air circulation to occur.
24
Bar-B-Q:
The Bar-B-Q is mounted on the aft rail. Please secure the lid and keep the canvas
cover on when cruising. Propane tanks and hoses are in the propane locker on the swim step. To
connect propane, screw hose from port tank to BBQ. Open BBQ lid and turn on gas by opening
valve on tank. The grill has an ignitor but we’ve found that it isn’t as reliable as a butane lighter
inserted at the starboard end access hole. The butane lighter is in galley utensil drawer. BBQ
cooking utensils are in the galley utensil drawer.
Cleaning the Grill:
Please keep the grill clean inside and out so that food stains won’t
build up and it will look good for the next charter guest. A good practice is to run the grill burner
on high with the lid closed for 10-15 minutes after all grilling is done, then use the cleaning
brush to remove the charred residue. There is a grill cleaning brush attached to the grill via a
long thin cable. The grease drip pan and the grates remove for cleaning. Beware! The
removable parts of the grill may go overboard if you’re not careful.
Crab Fishing and Cooking Equipment: A crab ring with line and buoy and a bait
box are located on top of the port fuel tank. The crab cooker is located in Bin #1 in the engine
room. When using the crab cooker on the propane stove, please place the cooker on the left
burner to prevent melting the control knobs on the stove. Please vent the steam out an open
window to protect the wood above the stove from moisture buildup.
Vacuum:
A hand vacuum with attachments is located in the utility cabinet in the Master
Stateroom. The dust reservoir twists off for emptying. An extension cord is in the Cabin Tools
box in the salon port cabinet.
A Note about Cleaning Windows:
Glass Windows: There is a spray bottle of vinegar based cleaning solution under the galley sink
and a squeegee hanging adjacent to the port side fuel tank in the lazarette. NO Ammonia-based
products, please, as they destroy the UV protection built into the glass.
Plastic Windows on Flybridge: There is a spray bottle of special cleaner at the upper helm
(labeled for this purpose). This is the only product you should use on the plastic windows.
Use a soft cloth to apply and dry, NO squeegee and NO abrasive material, please. The windows
MUST NOT BE FOLDED OR ROLLED TIGHTLY if removed. To open the front window, unsnap the
bottom and unzip both sides completely. Using the top zipper as a hinge lift window up to the
inside and secure corners by snapping to the straps on the bimini frame.
25
Head Systems
The main cause of problems is misuse.
Dealing with a stopped-up head is an
unpleasant task, especially when it can easily be avoided. The only things that should be put
into the head are human waste and marine toilet paper! Under no circumstances should
Kleenex® tissue, feminine hygiene products, or wads of hair be flushed down the heads. Use the
marine toilet paper supplied; do not use household toilet paper! Do not use excessive
paper. Four or five squares per flush is recommended maximum. You can also do what we the
owner’s do. Keep a supply of small plastic sandwich bags at each head as a dedicated disposal
bag for all toilet paper and then put that bag into the trash bin under the vanity sink, hence
never flushing any paper down the head. One less thing to cause problems. Change the trash
bin as needed to keep things fresh and the net result is no problems.
Flushing:
The Vacuflush system uses fresh water from the tank. Flush by depressing the
flush pedal beside the toilet bowl. If waste matter is solid, add a little extra water to the bowl
before flushing by lifting the flush pedal briefly. Flush by holding the pedal down for 2-3 seconds
and then allow the pedal to bounce back up to the center position. Allow the bowl to refill with a
small amount of water (it will do so automatically with the pedal at its center rest position) and
the pump to rebuild the vacuum pressure for the next usage.
Holding Tank:
Turn the Tank Monitor switch ON to get a
reading on the gauge at the bottom of the electrical panel.
Holding tank gauges don’t tend to be terribly accurate. We’ve
found that the needle will start to register with usage but then not
move as fast with continued usage. We’ve found that the tank will
be nearly full when the meter reads 3/4 full, so it is a good idea to
empty the tank when it is getting close to 2/3 full.
If you are boarded by the U.S. Coast Guard, and they ask to
see the Y-valve, explain to them that this boat has no Y-valve. The heads pump only to the
holding tank. There is no way to flush the heads directly overboard. Only the head waste goes
into the holding tank; waste water from sinks and showers is
legally discharged overboard as “gray water.” The Through-hull
for the macerator is under the floor in the forward stateroom –
blue handle on the starboard side.
Access is gained by pulling up the carpeting at the foot of the
berth in the forward stateroom (start at the starboard end and
gently fold it back towards the center walkway), then find the large
area of carpet padding that is cut out and separate with a finger
hole. Pull up that section of the pad and then pull the removable
hatch panel in the subfloor. You now have access to the vacu-flush pumps and just to starboard
of this hatch is the through hull for the macerator (normally closed).
Discharging the Holding Tank:
In U.S. waters, the
holding tank may be pumped overboard in deep water more than 3
miles from land. Discharge of waste overboard is permitted in
Canada except in harbors and near land. To discharge the holding
tank under these allowable conditions, open the through hull valve
(access to the valve described above) and turn ON the Macerator
26
switch on the DC panel until the tank gauge reads empty. The
Macerator switch has a safety cap which must be opened in order to
flip the switch. Be sure to turn the Macerator switch OFF and close
the through hull valve after the tank is emptied. As a precaution,
we recommend setting the timer on the microwave for 15 minutes
for a nearly full tank to remind you to turn the switch OFF, to avoid
burning out the pump. Note that discharge occurs below the water
line so be underway at a modest speed while discharging the tank.
To pump out at a Pumpout Station:
Pumpout access
is on the starboard walkway just aft of the fender rack. Follow instructions at the Pumpout
Station. SJY has provided a list of pumpout locations in the Charter
Guest Resource Manual.
Night Shut-off switch:
Both heads are equipped with
switches on the side wall of the vanity to turn the vacuum pump
OFF (switch down) while sleeping to prevent the chance of a small
break in the seal causing the pump to run unnecessarily for a long
time (not only disturbs your sleep, but risks burning out the pump
and running the battery down if not on shore power). Of course,
when the switch is in the OFF (down) position, you won’t be able to continue flushing.
Vacu-Flush Repair Parts are located under the sink in the master head.
27
Heating and Cooling the Cabins
Electric Space Heaters:
Space heaters are stowed in the utility cabinet in the Master
Stateroom. They use 750 watts on low and 1500 watts on high, so they can be used while on
shore power or with generator power. Be aware that their energy draw means you probably will
have to turn them off while running the coffeemaker, toaster, etc.
ESPAR Diesel Furnace:
When not on shore power,
diesel heat is a comfortable option. There is no panel switch for
it. Thermostats in each cabin operate independently, but the
salon thermostat must be on for the others to function. The red
light means the thermostat is turned on; the green light means it
is producing heat for the room in order to meet the temperature
setting you have chosen. The green light must be on in the salon
in order for the other cabins to produce heat.
It can take about 20 minutes for the system to heat up enough to start blowing warm air in the
cabin. If it still doesn’t blow warm air, check to make sure the “blower” switch on the unit itself
is turned on. Unit is located in the lazerette, on the transom, just to port of the centerline; the
“blower” switch is located directly below the sign that says “Hydronic 10.”
ESPAR Optional Hot Water Setting:
If you want to
heat water without consuming electricity when shore power is not
available, you can use the ESPAR system if the salon thermostat is
turned on to activate it. The green light must be on, but if you
don’t want cabin heat, find the Espar system in the lazerette (on
the transom, just port of center) and turn off the Espar “Blower”
switch, located directly below the sign that says “Hydronic 10.”
Cooling Fans:
Small summer fans are stowed in the utility
cabinet in the master stateroom. Using these with some windows open for a cross-ventilation
can make the cabins more comfortable on hot days.
Defrosters:
The Espar defrost blower (on forward side of helm console) is often inadequate
to clear the windows. Two small white heaters stored in the utility cabinet of the master
stateroom can be plugged into the outlet under the windshield and aimed at the center and
starboard windows. Usually the low setting (500 watts) will be adequate, without requiring you
to burn more amps than necessary. Be sure to unplug them when you finish your cruise. Use
either inverter power or the generator to power them.
28
Navigation, Radar and Autopilot Systems
Harmony is equipped with a comprehensive set of
multi-function navigation displays, sensors and an
autopilot. All the equipments work together to
provide a wealth of information and control in all
phases of operation of Harmony.
We don’t want to duplicate the information found
in the manuals so please utilize them for all
reference information. Manuals for the Raymarine
and Garmin systems are kept either at the lower
helm station or in the salon port cabinet.
What we will do here is summarize what’s on
board and the general nature of operation and
practices we’ve found that work for us, may they
will for you too.
Multifunction Displays (MFDs)
There are three multifunction displays (Raymarine E-series) that are networked together to
share data across the displays and from all available sources. The MFD is the central hub of the
‘action’, its where you will look the most for situational awareness of where you are, which
direction you are headed, how fast you are going, how deep is the water in the area and under
the ship, where are the adjacent land masses and navigation markers, what other reporting
vessels are in the area, what am I able to confirm via radar.
When we are cruising, we set the lower helm MFDs as depicted above. The 12” large display is
set to a format page that provide numeric data in the upper left quadrant, depth / sea floor data
in the lower left quadrant and the right half of the display is a map display with a wide range
setting to give an overall perspective of our position and the relative area, the strategic view of
the world.
Then on the 8” display, we dedicate the entire screen to navigation map data and keep the
range small, close in so we can monitor the sea depths in the area and especially ahead of the
ship in the next 2-3 minutes. We think of it as having the tactical view of the world.
Using those two page formats, we navigate the waters to our intended destination and either
setup an entire route or simply select a heading and monitor the green ‘track’ line on the display
to ensure we are making our desired course over the water. Engage the autopilot to reduce the
tedium of holding a heading and now you have a wealth of information and can focus your
attention on what’s floating in the water, what’s coming at you from the sides or behind and
periodic glances at the engine gauges and displays. Doing that in a pattern allows you plenty of
time to enjoy the scenery, monitor the radio, assess the weather and tide forecast and still have
time to be thankful for having a great time out on the water. Life is pretty good!
The flybridge has one MFD and a multi-sensor instrument and autopilot controller. Navigation /
cruising from that station requires a bit more multi-tasking of the MFD pages and they are setup
29
to step through the most common set that will be handy. The view from the flybridge is
amazing and great when the sea conditions are calm and the weather is warm. And it’s always
the place to be when maneuvering in the harbor.
Depth and Speed Sensors
Harmony is equipped with a DSM-300 digital sounder module which provides water speed over
the hull, digital depth sensing and fish finding / sea floor structure sensing. Data from the DSM
is networked and utilitized in various manners on each of the three MFDs.
GPS Sensor
The GPS antenna is mounted on the port side of the radar arch above the flybridge. It maintains
excellent reception of the satellite signals. Those signals are interfaced to the MFD on the
flybridge which converts them into a Lat / Long position and distributes that information to the
other MFDs at the lower helm. It is important to remember that if the flybridge MFD is off or
fails, all GPS data is lost. The Garmin Portable Chartplotter has an independent GPS sensor and
provides a backup source of position data and navigation if necessary.
Radar
The radar is a 24” analog system. Radar’s primary use is to sense sizeable objects and land
masses that are within a 10-15 mile radius of the vessel. Harmony’s radome is mounted
sufficiently high to allow for good visibility and minimal interference from other structures on the
boat. When used properly, it provides a useful tool in monitoring the performance of the
navigation and AIS systems by providing independent ‘painted’ images of other vessels and land
masses that should be depicted already. In reduced visibility conditions, it is another tool to
help the captain maintain situational awareness. Consult the manual for proper operation and
settings. We encourage you to practice using the radar during fair weather conditions so that it
is familiar and will be less daunting when conditions become more challenging.
AIS
Harmony is equipped with a Class B transceiver AIS system. It will transmit Harmony’s position
and identification data periodically to other vessels and receive AIS data from all other ships that
are broadcasting their ident information. Display of AIS-equipped vessels and their data is
visible on any of the MFDs. The MFDs have an alert feature that will sound (when enabled) that
an AIS target is too close and presents a possible danger. Enabling and disabling this alert
feature is accomplished by selecting ‘Menu / Alarm Setup / AIS Alarms Setup’.
Autopilot
The installed autopilot is the latest system introduced by Raymarine, the EVO-400. It has a
digital compass and turn rate sensor module that provides excellent performance in heading and
waypoint tracking under all sea conditions. An autopilot controller is mounted at each helm and
commands or changes at either station are echoed at the other station.
One word of caution: An autopilot is a great tool as it relieves the helmsman from
having to make frequent rudder inputs to hold a course or heading. But it is important to
be on alert at all times, never should the helm be left unattended. Logs have a way of
popping up when least expected and there is other pleasure and commercial traffic in our
waters. We urge you to use the autopilot as a tool to take the drudgery out of steering
the ship and allowing you to keep your eyes up and looking outside the ship. It’s called
maintaining situational awareness in the aviation world and is equally valid here.
30
Garmin GPS Chartplotter
At the lower helm station is the Garmin portable chartplotter. It can
run on internal batteries or off ships power from a local plug-in port
ahead of the helm. We recommend keeping the plotter here at the
lower helm station. We always run it with the screen displaying the
local tide chart. It’s just a handy reminder of what the tide waters
are doing and will be doing in the next hours. And in case there is a
major system failure or you need to run with reduced power, this
chartplotter is fully capable of being used for navigation, ie, it is a
useful backup if the need arises.
To summarize, the three MFD’s share information and settings to allow the operator to make a
change at one display and see it reflected at the other two displays. Each display is very flexible
and allows the operator to choose from a number various page formats, the scale the map
display for close-in or far out ranging, to show radar data overlayed on the moving map and to
show navigation waypoint data
A few key reminders:
START ENGINES BEFORE turning on the VHF Radio, Nav System and Autopilot
breakers on DC panel, which supplies power to the radio, all navigational equipments
and the autopilot system. Turning them on beforehand could result in a momentary
power spike that will confuse the electronics and result in erroneous operation.
The 12” MFD at the lower helm is the master
display. As such, it must be on whenever
the other MFDs wish to be used as it
coordinates distribution of system data to
the other MFDs. DO NOT elect to make
either of the 8” MFDs as the system master
even if a momentary system message pops
up suggesting that choice. It will only cause
problems with some data / functions no
longer working.
CAUTION: Please do not change MFD
settings randomly “by guess and by golly” –
getting this fixed later is time consuming and
could result in lost data! Follow manual instructions; call for help if you are confused. The
“quick version” of the manual is kept at the lower helm. More complete details are in the
burgundy canvas bag (at lower helm or in salon port cabinet).
The AIS alarm function will potentially give false warnings in the harbor area.
To disable it, select ‘Menu / Alarm Settings / AIS Alarm Setup / Off’. This will
silence the alarm itself and put an “X” thru the status symbol in the upper right portion of
each MFD screen. Always re-enable the alarm after leaving the harbor by
selecting ‘Menu / Alarm Settings / AIS Alarm Setup / On’.
Monitor the emergency calling frequency, channel 16, and have the RAM mic installed
at the flybridge whenever underway.
31
Nautical Charts and Tide Tables
Charts of San Juan Islands are kept in the aft portion of the port salon cabinet. Annotated paper
charts of Strait of Georgia and Gulf Islands are stored in a plastic tube there as well. Cruising
guides, current and tide tables are will be found either at the lower helm or with service manuals
in the forward half of the port salon cabinet. A set of dividers is in the “Cabin Tools” bin beside
service manuals.
32
VHF Radio and Remote Access Mic (RAM)
VHF Radio
Harmony is equipped with a modern VHF marine radio. The radio is interfaced with GPS data
from the AIS transceiver and in an emergency; it will broadcast a unique identifier code along
with GPS position. The identifier code is called an MMSI and is unique to Harmony. The MMSI
for Harmony is 367596920 and is registered in a database that is share by both the USA and
Canada. We hope it never becomes necessary to use it but if it does, we want you to know that
it will broadcast ‘who’ you are and your position so long as the radio and GPS signals are
functioning.
To activate that ‘Panic’ call, lift the red plastic cover in the lower left of the VHF Radio and press
and hold the Distress button. The radio’s display will count down (3-2-1) and then transmit the
distress call information. Consult the radio manual (page 49) in the port salon cabinet for
further detail on DSC Distress Call.
The primary radio is mounted at the lower helm. A remote access mic (RAM) connector is
provided at the upper helm. The RAM mic is generally kept in a small zippered pouch at the
lower helm and should be brought to the flybridge and plugged into the RAM connector before
leaving the dock. If you are on a trip and on the move each day, it is acceptable to leave the
RAM mic installed at the flybridge, please just use the flybridge canvas cover at nights to protect
it and the rest of the flybridge instrumentation. Instructions on how to use the RAM mic and
even use it in an intercom mode with the lower helm radio are provide in the instruction manual
kept in the port salon cabinet.
New for 2015, we’ve added an auxiliary speaker at the flybridge. This speaker is flush mounted
and has a built in power amplifier. You will find it easy to use and radio audio will be very easy
to adjust / hear even when underway with engine / wind noise.
Weather Station
Lacrosse Weather Station
This device is located above the microwave in the galley. It runs strictly on batteries in the base
unit and the remote temp sensor (which is mounted in the cockpit adjacent to the stairs leading
to the flybridge. We find this most useful in simply provide a digital clock and inside and outside
air temperatures.
If you chartered Harmony before, you might recall that we had a Radio Shack weather station
also on-board. That unit was problematic in that it would ‘eat’ through batteries in about 2-3
weeks if shore power wasn’t available most of the time. It’s primary benefit was a wind
indicator which the Lacrosse system doesn’t have.
We’ve removed the Radio Shack system and installed a Raymarine wind vane. It is much more
reliable and is integrated with the rest of the navigation electronics. You’ll find a new screen
format is available on the 4” multifunction instrument display on the flybridge that provides wind
indication, most useful while at the dock, at anchor or in the harbor.
33
Tackle and Mooring Equipment
Anchors & Rodes: Harmony carries a 45# plow anchor in a pulpit fitted with a roller and
270 feet of 5/16” high tensile chain lifted by an electric windlass. The secondary anchor
(Danforth) and spare rode are located under the aft flybridge seat.
Chain markings: Yellow marking 5’ long at 50 ft, 10’ long at 100 ft, then 5’ marking at 150,
200, and 250 ft, Red marking at the last 10’ prior to the end of the chain
After the end of the chain, there is triple braid line that will deploy thru the windlass. Under
normal conditions, one would never deploy the chain with any portion of the red chain exposed.
Always use the proper anchor rode ratio as noted below and seek appropriate anchorage water
depths to achieve that.
In an emergency, the captain may determine that personnel or the vessel are in significant
imminent danger and the only viable option is to quickly cut loose the anchor rode rather than
haul it in. Hopefully that situation will never happen but if it does, the rode can be let all the
way out and the triple braid line can be cut with a sharp knife. This is an expensive, last resort
option! If at all possible don’t do it and if you must, attach a fender to the bitter end of the rode
to allow for future retrieval of the anchor and the chain rode.
Rode Consideration for NW waters
Anchoring: In the Northwest, we usually do not have to follow Chapman’s “7:1 scope
minimum.” It is common for boats with chain rodes to use a 4:1 or 5:1 ratio (i.e., in a depth of
30 feet you let out approximately 120 to 150 feet of chain.) In addition, we have substantial
tides: 10-ft. tides and occasional “minus” tides below chart datum are not uncommon. Be sure
there will be sufficient water in your anchorage at low tide. Since the “depth sounders”
read the distance below the keel, and since there are tide tables aboard, there is no reason for
running aground when anchored.
Anchoring process:
1. Turn on Windlass power at the power panel. Release loop that secures anchor.
2. Anchor is lowered with foot switches on bow deck or from remote controls at either helm
while boat is backed up slowly away from anchor.
3. Undo the safety line securing the anchor to the windlass cleat and slowly let out the first
few feet of anchor rode taking care to not let the anchor abuse the pulpit tackle or the
bow area of the ship.
4. Mate on bow to monitor length of chain and to troubleshoot if it gets tangled.
5. Deploy the estimated length to initially hit the sea bottom and then continue to pay out
the anchor rode while the helmsman begins to slowly back down the vessel. When
desired chain length is out, stop windlass.
Skipper reverse one engine at a time gently to test the set of the anchor. Set the
anchor without excessive force! HARMONY weighs over 13 tons; take up the strain on
the anchor rode gently to avoid excessive strain or damage to the bow pulpit and
windlass.
6. Attach “Snubber line” to anchor chain: Secure snubber line to windlass cleat. Attach hook
to anchor chain beyond anchor roller. Run out enough chain to form loop in chain so that
tension is transferred to snubber line.
7. Turn off Windlass switch on the power panel.
8. Turn off engines and navigation electronics at both helms; replace covers.
34
See instructions below for hauling anchor and washdown of anchor and chain.
Raising the Anchor and Washdown:
1. Before raising the anchor, attach washdown hose to spigot on bow and make sure
windlass switch is on and fresh water pump is on. Start the engines so they can be
warming up during the process or used to inch the boat forward in heavier wind
conditions. Key is to recognize that the bow pulpit and windlass will be under strain as
you haul the anchor and you don’t want to use the windlass alone to pull the boat toward
the anchor in heavier sea conditions.
2. Press foot switch next to the windlass. Wash chain and anchor thoroughly as you
haul them in. This prevents unpleasant odors from sea water and marine growth in the
anchor locker and bilge.
3. SHUT OFF spigot when finished to avoid a slow leak of your water supply!!
4. Remove the snubber line as soon as you can reach the hook.
5. Please bring anchor up to the windlass carefully to protect the fiberglass around the roller
from gouges. Be sure anchor is stowed in its support and secured with the safety line
before getting underway at any speed other than idle.
6. Use the snubber line to secure the anchor to the windlass cleat taking care to not allow
the ‘devils claw’ to scrape the deck.
Troubleshooting during anchor raising: If the chain gets stuck, first check the
compartment in the bow (access door above the head of the forward berth). Sometimes
the chain tangles as it passes through this compartment. Straighten it out and continue. If
this doesn’t solve the problem, you can access the chain by lifting the mattress and
opening the hatch to the chain locker. We have found that 2 second bursts of windlass
operation followed by a short pause and then continuing in this manner results in few if
any tangles to the anchor rode during this process (and works well as you wash down the
rode in sections as it comes aboard).
Emergency Manual Winch
handle is located in the aft bench seat on the flybridge.
Warning: If you turn it counter-clockwise, it will release the anchor chain to run freely. Stop the
free run by engaging the winch handle in a clockwise turn.
Shore Lines (Stern Lines)
Why? It is common to use a stern line (but not a stern anchor) in protected bays (in most
Desolation Sound locations, Todd Inlet at Butchart Gardens, Inati Bay near Bellingham) where
there simply isn’t enough room to have your own “swinging space” and still share the anchorage
with other boats. In addition, the great water depths make anchoring very far from shore
impossible.
How? Set anchor 75-100 feet from shore, with the boat backing toward shore during anchor
setting. Be sure to keep clear of rocks near the shore and allow for Northwest tides, often 12 ft
in our area, and up to 20 ft farther north. Then a stern line is put out, passed around a tree, and
brought back to the boat, allowing you a “quick release” without having to go ashore when
you’re ready to untie. To get to shore, you will need to have the dinghy down, and have your
mate keep the boat toward shore with bursts of reverse gear. Sometimes a helpful boater
already anchored will help you by taking your line to shore for you with his dinghy---a neat
“good deed” that you might reciprocate. We have met some nice boaters this way!
35
Using Harmony’s Shore Line
1. Find the 275-foot shore line on a reel stowed on top of the engine battery housing in the
engine room, secured by a fixed bungee cord around the reel and around a securing hook
on the bulkhead aft of the water heater.
2. Mount reel on swim step by standing it up with flat board backing tight against starboard
end of propane box and securing strap around the propane box. The reel can turn freely
to pay out line and to reel line back in.
3. Once dinghy operator has run line to shore and back to the boat, secure both “ends” of
line on the two stern cleats, so that there is no pull on reel. Do not attempt to secure the
line to railing; it is not strong enough to withstand the potential force on the line.
When stowing the reel in the engine room, please keep the strap with it and be sure the
bungee runs around the post so the reel won’t bounce off.
Mooring Equipment
Dock lines are stowed in latch straps on the rails for regular use at docks:
• Two 20-ft., marked at the spliced end with one black stripe.
• Two 25-ft., marked at the spliced end with two black stripes.
• Two 35-ft., marked at the spliced end with three black stripes.
Stowed in the aft flybridge seat:
• Extra 40-ft. dock line
• Nylon line for use on a mooring buoy (less prone to fraying than dock lines), Instructions
for tying up to a buoy are in the QuickStart section.
EZ-Moor Dock throw line: Stowed in the cockpit. This works for throwing and hooking onto a
dock with a railing to pull the boat in.
Black Fenders:
When not in use, store black fenders in racks on bow rails and also secure the clips on the rails.
Never cruise with fenders down; it is hard on fenders and you risk losing them.
In preparation for docking, put fenders on the appropriate side and adjust the lines so the
fenders are barely above the water line. Typically, you will use 3 fenders for docking. When
placing the stern fender, check to see that it is not over the exhaust port on the side.
Boat Hook: A floating, telescoping boat hook hangs on the transom.
Remember that Harmony weighs over 13 tons; the boathook is not strong enough for
“hooking the dock” at docking time.
36
Water Systems
Fresh Water:
The 100-gallon fresh water tank (in engine room along the centerline of the
bilge) is filled through a deck plate on port side of swimstep. From the pump, water goes to an
accumulator/pressure tank, and then into the boat’s plumbing system. All plumbing is 15 mm.
and there is a pressure switch on the pump itself to regulate water pressure.
Turn off the circuit breaker switch when you are not on the boat so that if a leak
develops, you won’t lose all the fresh water.
Water gauge on electrical panel registers when “Tank
Monitor” switch is ON. Be aware that while cruising on a
plane, this gauge will not give an accurate reading. We have
also found that the gauge reads a bit low when first activated
and will be more accurate after 5-10 minutes while
stationary.
Dock water that is safe for consumption may also be connected
directly to Harmony. Doing so will bypass the water tank (ie, it won’t fill the tank). When using
this method, you can turn off the Fresh Water pump switch at the electrical panel as the
incoming pressure is regulated at the connection point and will pressurize the water system of
Harmony.
Connection is made thru the female water hose connection on the outboard transom just to
starboard of the transom gate and close to the swim step. Please remember to secure this
connection with the plug on a lanyard when no longer using this system.
Watermaker:
The HRO Watermaker converts sea water to
potable water. It is rated for 20 gal/hr in tropical waters. Expect
12-15 gal/hr in colder waters of the Pacific Northwest.
•
•
•
•
Use Watermaker only when underway in deep clear
water, not in a harbor!
The watermaker circuit goes directly from the genset, not
through the AC panel. The circuit breaker switch is
labeled and located on a post in the engine room.
Do not attempt to start Watermaker from the remote station above the microwave.
However, it is O.K. to stop it from this station.
Before attempting to start Watermaker, read the procedure below and locate
these modular units of the system (they are labeled) on aft wall of lazerette:
1. System Controller: A white box aft of the stairs to the lazerette. It has a black
START button and a “Running” light on it.
2. Product Flow Control: Located down a bit and to
your right (toward port side) just above a large blue
filter. It has a black control knob (labeled), a vertical
tube Flow Meter (gal/hr) and a round Pressure
Gauge (psi).
3. Vacuum Gauge: A bit to the left (starboard) of
the Product Flow Control, above two small blue
filters. It is a smaller round gauge.
37
Now you’re ready for the Procedure:
1. Turn on Gen-Set (instructions on electrical panel in salon).
2. Turn on Watermaker circuit switch on port side post of engine room.
3. Open the thru hull valve for the Watermaker and ensure the yellow maintenance diverter
valve is in the vertical (flow to the Watermaker) position as noted in the picture.
4. Before starting water production, Product Flow Control
knob must be turned counter-clockwise at least 1 full
turn. This opens valve and lessens initial startup load
on the system.
5. Start system by pressing and releasing START switch
on System Controller. “System Running” lamp will
light.
6. Check Vacuum Gauge: It should read between 1 and
6. If above 6, the two small blue filters below it need
to be cleaned. (See HRO service manual.)
7. Confirm
seawater is flowing
thru the system. Look for water flow thru the tube leading
to the high pressure pump below the stairs, feel the pump
valves on the high pressure pump (they will be notably
cool from the seawater flow) and look at the thru hull
outlet on the port side (above the water line directly below
the port stern cleat). With water flowing you are
essentially pumping seawater thru the system and then
dumping it back overboard as the system detects that it is
not suitable for diversion to the fresh water tank.
8. With the system now running, the Product Flow Control knob should be slowly rotated
clockwise until the associated round pressure gauge reads 700 psi. As the pressure
increases, water processing will begin thru the membrane in the long white tube. Now
continue to increase the system pressure slowly to achieve a target of 750-780 psi. There
is a bit of delay between adjustment of the knob and the pressure reading, but it gets
touchy as you approach 750 and above. Take it slow and easy from 750 up. After you let
go at 780-790, it will tend to creep up a bit on its own, probably to 800 psi, which is O.K.
You don’t want it to exceed 800 psi. If over 800 psi, transient surges in the system may
cause an auto shut-off.
9. Flow Meter (vertical tube above Product Flow Control knob) should read 12-15 gal/hr.
(This is the normal rate for cold NW waters.)
10.The “Safe Water” light on the system controller will come on while potable water is being
automatically routed to the fresh water tank.
11.Check Flow Meter occasionally and adjust Product Flow Controller if necessary to maintain
pressure between 750-800 psi and a normal flow.
12.To stop the system, press STOP on the System Controller or on the remote station (above
the microwave).
13.The HRO Watermaker system on Harmony has a fresh
water flush option that automatically flushes seawater
from all the components starting with the pre-filter stage.
This is an important final step as it helps preserve the live
of the internal components and significantly reduces the
onset of biological growth within the system. Activation
38
of the fresh water flush process is indicated by the red LED on the fresh water flush
controller (mounted to starboard of the main system controller).
14.Once the fresh water flush LED goes out, flip off Watermaker circuit switch in engine room
and shut down the genset if not needed for other reasons. Close the thru hull valve.
Open the high pressure valve to its fully counterclockwise position.
If the system does an auto shut-off, you need to start over from step #2.
The water tank will not overfill because excess fresh water will bypass the system and
discharge overboard.
Important: The Watermaker will produce the best results when used
periodically. If you will not need to use the system during your float plan, that’s
fine. But to help maintain the system for the next guest, it is still important to
conduct a fresh water flush on a weekly basis. This is simple to do. Follow steps
one and two of this procedure, ensure the fresh water circuit breaker is on to
pressurize the fresh water system and then simply push the Stop (not Start!)
button on the system controller. This will trigger the fresh water flush system to
cycle and will help maintain the health of the filters and the membrane. Water
will be expelling out the thru-hull on the port side down low below the aft cleat.
Monitor the LED light per step 14 of the procedure and follow that step once the
light goes out.
Washdown:
There are two freshwater washdown spigots: one in the cockpit and one by
the anchor windlass for washing mud and debris from the chain and anchor before they come
aboard. These spigots use fresh water from the tank. A white or blue coil hose can be found in
the starboard aft bilge and should be used for a short hose at either spigot. REMEMBER TO
SHUT OFF THE SPIGOT WHEN FINISHED to avoid a slow water leak from your fresh
water supply!!
Use of Shower:
MUST DO’s:
1. “Sump Pump” switch on electrical panel must stay ON at all times. This pump drains both
showers and the anchor chain locker.
2. After showering, please wipe up water spills on wood areas around shower.
3. Hang wet towels so they are not left up against wood surfaces. (Moisture turns wood
black and encourages mildew.)
TIPS:
1. To conserve your water supply, turn off the shower head while lathering.
2. While cruising, it is best to place the shower heads on the floor of the shower to prevent
them from bouncing out of the brackets.
Water System Repair Parts (Connectors and tubing) are located under the sink in the
master head.
39
Appendix A: Spare Parts Inventory
Antifreeze
Batteries for remotes & flashlights
Belts
Emergency helm keys
Filters - oil
Filters - fuel
Filters –water under sink and
watermaker
Fuses – Radio/CD
Fuses – Honda outboard motor
Head parts: Duck bill valves; Ball
assembly
Hose clamps
Impeller and gasket
Light bulbs
Oils
Props-Engine
Prop-Dinghy
Spark plugs for dinghy
Red antifreeze used by the engines,
genset and Espar cabin heater: spare
gallon containers are kept in the
starboard side bilge, aft near the
transom
Master stateroom, utility cabinet
Under master mattress – forward
side
Under master mattress – forward
side
Under master mattress – forward
side
Under master mattress – forward
side
Under master mattress – forward
side
Master stateroom, utility cabinet
In outboard cowling
Under master head vanity
Bin#1 in engine room, forward
bulkhead
Under master mattress – forward
side
Master stateroom, utility cabinet
Containers of various oils used are
kept in Bin#2 in the engine room,
forward bulkhead
Engine room, adjacent to port fuel
tank
Under master mattress – forward
side
Under master mattress – forward
side
40
Appendix B: Emergency Equipment
This vessel has passed a Coast Guard Safety Inspection for this season (sticker on
forward port window). But, if you are boarded by the Coast Guard for any reason, you
may be required to locate the following items:
•
•
•
•
•
•
Flares: Orange canister at lower helm station
Handheld Air horn: Aft bench seat on flybridge
Lifejackets: Forward bench seat on flybridge and forward stateroom closet
Lifesling Rescue System: Mounted on port side of cockpit
Fire Extinguishers:
o Engine Room: 1 by stairs
o Interior: 1 amidships in stairway, 2 aft in salon by refrigerator
Location of Placards (Waste Overboard & Oil Discharge): Engine Room on Starboard
fuel tank and on forward bulkhead.
Other Emergency Equipment:
Flashlights:
2 large flashlights: 1 in engine room (on floor); 1 below electrical panel in salon.
3 small flashlights: 1 at the lower helm; 1 in each stateroom.
All flashlights are labeled with locations; please return them to those stations when not in use.
Spare batteries for the floating flashlights are in the plastic “Cabin Tools” bin in the salon port
cabinet.
First-Aid Kit: Located in salon port cabinet, aft portion.
Tools: A fully equipped toolbox is located on the floor of the engine room. A few household tools
are in a bin in the salon port cabinet.
Through-hull Plugs are attached by each through-hull. A schematic of through-hulls is
included at the end of these Owner’s Notes.
A “Whale” Manual Bilge Pump is located in the lazerette in the aft bilge.
A Hand Pump is located on the port side of the engine room aft of the Genset.
Detectors: A smoke detector is located between the staterooms. Each stateroom has a carbon
monoxide detector. Piles of clothing, towels, etc. stashed too close to the carbon monoxide
detectors could elicit a false alarm.
41
Appendix C: Schematic of the Through-hulls
Port
Engine
Genset
Watermaker
Stbd
Engine
Galley
Macerator
Speed / Depth
Transducers (2 sets)
42