1
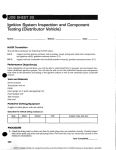
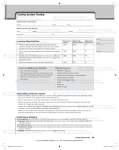
•
JOB SHEET 55
Testing the Charging System Output
Name: ---------------------------- Station: --------------------- Date: _ _ ___
NATEF Correlation
This Job Sheet addresses the following NATEF task(s):
Perform charging system output test; determine necessary action. (P-1)
Diagnose charging system for the cause of undercharge, no-charge, and overcharge
conditions. (P-1)
6.D.l
6.D.2
Performance Objective(s)
Upon completion of this Job Sheet, you will be able to understand how to properly test the alternator for
its output and determine if it is the cause of the charging system problem.
Tools and Materials
•
Service manual
Technician's tool set
Vehicle
Charging system tester
Protective Clothing/Equipment
Goggles or safety glasses with side shields
Describe the vehicle being worked on:
Year
Make
Model
VIN
Engine type and size
PROCEDURE
1. Identify the manufacturer and model of the alternator you are working on.
2. Using the service manual, locate the alternator electrical specifications.
Voltage output --------------------volts
•
Amperage output------------------- amps
Rated at --------------------- engine rpm
206
© 2012, Cengage Learning, Inc. Licensed for one-time use by the purchaser only; no additional copying or retransmission is permitted .
Job Sheet 55
•
207
3. Using job Sheet #46, test the battery. You will need a good battery to perform a charging system test.
Warning: Never attempt to remove the battery cables while the engine is running!
Task Completed _ _ __
4. If the battery cables were removed with the engine running, what could happen?
5. Connect the charging system tester to the vehicle.
Task Completed _ _ __
6. Start the engine and run it at the specified engine speed.
Note: Most manufacturers specify the maximum output availability of the alternator. In order to obtain this
you may need to tum on all of the accessories (do not turn on the wipers or turn signals).
Task Completed _ _ __
7. Observe the charging system tester. Record the meter's readings here.
Voltage o u t p u t - - - - - - - - - - volts
•
Amperage o u t p u t - - - - - - - - - - - amps
Rated a t - - - - - - - - - - - engine rpm
8. Based on your test results, is there anything wrong with the alternator?
9. Explain what could cause the alternator to undercharge the battery and how the test results would
reflect that.
10. Explain what could cause the alternator to overcharge the battery and how the test results would
reflect that.
Problems Encountered
•
© 2012, Cengage Learning, Inc. Licensed for one-time use by the purchaser only; no additional copying or retransmission is permitted.
208
Job Sheet 55
.INSTRUCTOR EVALUATION
0
0
0
0
0
4
3
2
1
0
Mastered Task
Able to Perform Task Independently; Some Additional Training Suggested
Able to Perform Task with Close Supervision; Requires Additional Training
Unable to Perform Task
Not Attempted
Comments
Instructor Name: - - - - - - - - - - - - - - - - - - - - - - - - Date: _ _ _ _ _ __
Instructor Signature: - - - - - - - - - - - - - - - - - - - - - - - - - - - - - - - - -
•
•
© 2012, Cengage Learning, Inc. Licensed for one-time use by the purchaser only; no additional copying or retransmission is permitted .
•
JOB SHEET 56
Performing a Charging System Voltage Test
Name: --------------------------- Station: ---------------------
Date: ________
NATEF Correlation
This Job Sheet addresses the following NATEF task(s):
6.D.5
Perform charging circuit voltage drop tests; determine necessary action. (P-1)
Performance Objective(s)
Upon completion of this Job Sheet, you will be able to understand how to properly test the charging
system circuit for voltage, voltage drop, and voltage regulation.
Tools and Materials
•
Service manual
Technician's tool set
Vehicle
DMM with alligator clips
Protective Clothing/Equipment
Goggles or safety glasses with side shields
Describe the vehicle being worked on:
Year
Make
Model
VIN
Engine type and size
PROCEDURE
1. Describe how the charging system in the vehicle you are working on. regulates its voltage. Include
whether or not a computer module is involved.
2. Using Job Sheet #46, test the battery. You will need a good battery to perform a charging system test.
•
Warning: Never attempt to remove the batte1y cables while the engine is nmning!
Task Completed _____
209
© 2012, Cengage Learning, Inc. Licensed for one-time use by the purchaser only; no additional copying or retransmission is permitted.
210
Job Sheet 56
Perform a visual inspection of the charging system connectors and wires on the back side of the
alternator. Are they corroded, broken, missing, etc.?
4. Obtain the wiring diagram for the charging system you are working on.
Task Completed _ _ __
5. Using the wiring diagram, identify the output, input, and ground wires for the alternator. Describe
the color and location of these wires by drawing them in the space below.
6. Is the charging system you are working on controlled by pulse width modulation?
Note: If your vehicle is controlled by pulse width modulation, add step 16.
Connect the voltmeter negative test lead alligator dips to the battery positive terminal and the positive test lead alligator clips to the output wire of the alternator.
Task Completed _ _ __
8. Turn the engine on and turn the high-beam headlights on.
Task Completed _ _ __
9. What is the voltage drop reading on the voltmeter?
10. Is that reading excessive?
11. Connect the voltmeter across the charging system's control wire, measure the voltage drop, andre-
cord your readings.
12. Connect the voltmeter across the charging system's ground wire, measure the voltage drop, and re-
cord your readings .
•
13. If any of your readings are outside of the specifications, refer to the service manual for the procedure
to full-field test the alternator.
Task Completed _ _ __
© 2012, Cengage Learning, Inc. Licensed for one-time use by the purchaser only; no additional copying or retransmission is permitted .
Job Sheet 56
•
211
14. Describe the manufacturer's procedure for full-field testing the alternator.
15. Explain what a full-field alternator test is.
16. For pulse modulated vehicles, set your DMM to read duty cycle and place the DMM positive lead on
the charging system control wire and the negative lead on ground. Compare your reading with that
in the service manual.
Problems Encountered
•
INSTRUCTOR EVALUATION
D
D
D
D
D
4
3
2
1
0
Mastered Task
Able to Perform Task Independently; Some Additional Training Suggested
Able to Perform Task with Close Supervision; Requires Additional Training
Unable to Perform Task
Not Attempted
Comments
Instructor Name: - - - - - - - - - - - - - - - - - - - - - - - - Date: _______
Instructor Signature: - - - - - - - - - - - - - - - - - - - - - - - - - - - - - - - - -
•
© 2012, Cengage Learning, Inc. Licensed for one-time use by the purchaser only; no additional copying or retransmission is permitted.
•
JOB SHEET 57
Remove and Reinstall an Alternator
Name: --------------------------- Station: ---------------------
Date: ________
NATEF Correlation
This Job Sheet addresses the following NATEF task(s):
Inspect, adjust, or replace generator (alternator) drive belts, pulleys, and tensioners; check
pulley and belt alignment. (P-1)
Remove, inspect, and install generator (alternator). (P-1)
6.D.3
6.D.4
Performance Objective(s)
Upon completion of this Job Sheet, you will be able to understand how to properly test the charging
system circuit for voltage, voltage drop, and voltage regulation.
Tools and Materials
•
Service manual
Technician's tool set
Vehicle
Hoist
Serpentine belt removal tool
Protective Clothing/Equipment
Goggles or safety glasses with side shields
Describe the vehicle being worked on:
Year
Make
Model
VIN
Engine type and size
PROCEDURE
1. Describe where the alternator is located.
•
2. Describe how the alternator (or serpentine) belt is tensioned .
212
© 2012, Cengage Learning, Inc. Licensed for one-time use by the purchaser only; no additional copying or retransmission is permitted.
Job Sheet 57
•
213
3. Locate the service procedures for alternator removal in the service manual.
Task Completed _ _ __
4. Following the manufacturer's service procedures, release the tension from the belt and remove it.
Task Completed _ _ __
5. Inspect the belt and the tensioner. Replace if needed.
Task Completed _ _ __
6. Do you need to use the hoist to remove the alternator?
7. What other components need to be removed before removing the alternator?
8. Disconnect the negative battery cable.
Task Completed _ _ __
9. Disconnect the positive battery cable.
Task Completed _ _ __
•
10. After removing the battery cables, describe the procedure you must use to remove the alternator.
11. After removing the alternator, inspect it for cracks and damage. Spin the pulley to check the bearing.
Task Completed _ _ __
12. Replace the alternator using the reverse procedure of removal.
Task Completed _ _ __
13. Reinstall the belt and tension it to specifications.
Task Completed _ _ __
14. Explain how an undertensioned belt may cause undercharging.
15. Using Job Sheet #SS, test the charging system's output to ensure that everything was put back
together correctly.
•
© 2012, Cengage Learning, Inc. Licensed for one-time use by the purchaser only; no additional copying or retransmission is permitted.
214
•
Job Sheet 57
Problems Encountered
INSTRUCTOR EVALUATION
0
0
0
0
0
4
3
2
1
0
Mastered Task
Able to Perform Task Independently; Some Additional Training Suggested
Able to Perform Task with Close Supervision; Requires Additional Training
Unable to Perform Task
Not Attempted
Comments
Instructor Name: - - - - - - - - - - - - - - - - - - - - - - - - Date: _ _ _ _ _ __
.InstructorSignature: - - - - - - - - - - - - - - - - - - - - - - - - - - - - - - - - -
•
© 2012, Cengage Learning, Inc. Licensed for one-time use by the purchaser only; no additional copying or retransmission is permitted.