1
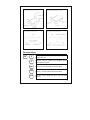
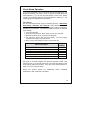
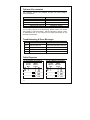
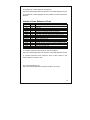
Easy Weigh ® OWNER’S MANUAL MODEL: PC-100 PRICE COMPUTING SCALE VER 2.20 TABLE OF CONTENTS SPECIFICATIONS .......................................................... NOMENCLATURE ......................................................... FUNCTION KEYS .......................................................... DISPLAY ........................................................................ UNPACKING & ASSEMBLY ........................................... SAFETY PRECAUTIONS ............................................... OPERATING THE SCALE .............................................. PROGRAM MODE ......................................................... CHECK STAND OPERATION ........................................ OPTIONS & ACCESSORIES ......................................... TROUBLESHOOTING & ERROR MESSAGES ............. CABLE DIAGRAMS ........................................................ INTERFACE CROSS REFERENCE CHART ................. WARRANTEE (Supplied as separate document.) 1 1 2 3 4 5 6 8 10 11 11 11 12 PREFACE ® Easy Weigh would like to thank you for purchasing our model PC-100 Advanced Price Computing scale. We are committed to creating high quality low maintenance products and supplying our customers with diligent customer service. This manual contains information on the proper assembly and use of the scale. Disclaimer: This company makes no representations or warranties, either expressed or implied, with respect to the contents hereof and specifically disclaims any warranties of merchantability or fitness for any particular purpose. Any software described in this manual is sold or licensed “as is”. Should the programs prove defective following their purchase, the buyer (and not this company, its distributors, or its dealers) assumes the entire cost of all necessary servicing, repair, and any incidental or consequential damages resulting from any defect in the software. Further, this company reserves the right to revise this publication and to make changes from time to time in the contents hereof without obligation to notify any person of such revision or changes. Brand and product names are trademarks and/or registered trademarks of their respective companies. Specifications Model: Maximum Capacity: Minimum Graduation: Maximum Tare: Internal Resolution: A/D Conversion Rate: Direct PLU Keys: Indirect PLUs: Vacuum Fluorescent Displays: Platter Size: Product Dimensions: Power Requirements: Operating Temp: Humidity Power consumption Fuse rating Nomenclature 1 PC-100 30 / 60 lb Dual Range Dual Range 0 to 30 lb x 0.01 lb / 30 to 60 lb x 0.02 lb Half Capacity 0 to 29.99 lb 60,000 Counts (minimum) 9 Updates / second Standard Display: Up to 6 Direct PLUs Pole Display: Up to 38 Direct PLUs 200 Indirect PLUs (Unit Price Data ONLY) OR 100 Indirect PLUs (BOTH Unit Price & Tare Data) Weight: 5 Digits, 999.99 (60 lb max) Unit Price: 6 Digits, 9999.99 max Total Price: 6 Digits, 9999.99 max Width: 350 mm / 13.8” Length: 270 mm / 10.6” Pole Display Standard Display Width: 365 mm / 14.4” Width: 365 mm / 14.4” Length: 365 mm / 14.4” Length: 365 mm / 14.4” Height: 470 mm / 18.5” Height: 160 mm / 6.3” 120 Volts AC @ 60 Hz −10° C ~ 40° C / 14° F ~ 104° F RH 35% ~ 85%(no condensation) Approx. 6 Watt 250V / 200mA, 20mm Function Keys 00 ~ 9 Numeric keys, used to enter pricing data, tare, programming, etc. C Clear key, used to release error conditions and to clear erroneous entries. ZERO Zero key, used to manually set the zero point. TARE Tare key, used to enter tares and clear tares. SAVE Save key, used to disable the price / tare auto-clear function. 2 MW Memory Write, used to program PLUs. MR Memory Read, used to call-up PLUs. 1/2 1/2 key, used to price items by the half pound. (This key is not allowed in some states.) 1/4 1/4 key, used to price items by the quarter pound. (This key is not allowed in some states.) ¿ ¿ key, reserved for future use. Direct PLU keys, these are the 6 light blue keys located on the upper right-side of all PC-100 scales. Direct PLU keys can also be found on the left-side keypad of the PC-100 Pole Display model. Display Zero lamp indicates that the scale is a gross zero. Stable lamp indicates that the weight on the scale is stable. Net lamp indicates that there is a tare set. Save lamp indicates that the auto-clear feature is disabled. 3 Unpacking & Assembly Your PC-100 scale should come with the following: NO 4-1 4-2 4-3 4-4 4-5 4-6 4-7 4-8 4-9 4-10 4-11 4-12 4-13 4-14 4-15 4-16 Parts Name IN CARTON BOX STYROFOAM BODY POLY BAG MANUAL POLY BAG AC CORD MANUAL PAN SCREWS, pole model only CAL SEALING BOLTS FUSE CAL PLATE AND SEAL BRACKET COVER, pole model only FUSE POLY BAG STYROFOAM PAD BOX PAD SILICA DESICANT POLE DISPLAY, pole model only Units EA EA EA EA EA EA EA EA EA EA EA EA EA EA EA EA QTY 1 2 1 1 1 1 4 2 1 1 1 1 2 1 2 1 4 Once you have unboxed your PC-100 you must determine whether you have a Pole or Standard display model. If you have a Standard display model, simply connect the power cord to the scale and then to a 110 VAC 60 Hz outlet. If you have Pole display model follow the instructions below on how to assemble it. Safety Precautions Place the scale on a flat and rigid surface Place the scale far from strong RF interference Level the scale using its adjustable feet Do not subject the platter to sudden impacts Do not spill the water or any other liquid on the scale Do not use any solvents to clean the scale Do not remove the safety ground on the power cord 5 Operating the Scale Make sure the platter is sitting properly on top of the platform and that there is nothing on top of the platter. Also, make sure that the scale is plugged into the proper outlet. Place the power switch into the ON position. The scale displays will run through a self test, count down to zero, and then beep. All of your displays should look as follows: Simple Weighing: 1. Enter a unit price using the numeric keys and press the 1/2, 1/4, or 100g keys if necessary 2. Place an item on the platter 3. Remove the item from the platter Steps 1 & 2 can be interchanged. After step 2 you will notice that the Total Price display will show the calculated Total Price. For example: After step 3 you will notice that the displays will return to there initial state of 0.00. Simple Weighing Using Known Tares: 1. Enter a tare weight using the numeric keys 2. Press TARE 3. Enter a unit price using the numeric keys and press the 1/2, 1/4, or 100g keys if necessary 4. Place an item on the platter 5. Remove the item from the platter 6 Steps 2 and 4 can be interchanged. Once you press the TARE key you will notice that the NET light will come on indicating to you that the weight shown is a net weight. For example: After you place an item on the scale and enter a price the displays may look like this: After step 5 you will notice that the displays will return to there initial state of 0.00. Simple Weighing Using Known Tares: 1. Enter a tare weight using the numeric keys 2. Press TARE 3. Enter a unit price using the numeric keys and press the 1/2, 1/4, or 100g keys if necessary 4. Place an item on the platter 5. Remove the item from the platter Steps 3 and 4 can be interchanged. Once you press the TARE key you will notice that the NET light will come on indicating to you that the weight shown is a net weight. The procedures for known and unknown tares is very similar Disabling the Auto-Clear Feature: If you press the SAVE key before any operations, the SAVE light will come on. This will prevent the Weight and Unit Price displays from auto-clearing which is very useful for pre-packing. 7 Weighing Using Direct PLUs: 1. Press the Direct PLU key on the keyboard and change the price if desired. 2. Place an item on the platter 3. Remove the item from the platter Steps 1 and 2 can be interchanged. You can learn how to program Direct PLUs in the next section. Weighing Using Indirect PLUs: 1. Type the PLU number and press the MR key and then change the price if desired. 2. Place an item on the platter 3. Remove the item from the platter Steps 1 and 2 can be interchanged. You can learn how to program Indirect PLUs in the next section. Program Mode Pressing the MW key enters program mode. If you ever get stuck in Program mode you can press the ¿ key which will allow you to ESCAPE back to normal mode. Programming PLUs: 1. Press the C key and then press the MW key. The displays will show: 2. You can now enter the Unit Price for the PLU that you are programming and then press the MW key. 8 3. You can now enter a Tare weight for this PLU. The displays will now show the following: 4. Once you have entered the Tare, press the MW key. Step 5 is Percent Tare programming. This feature can be disabled so if you do not see the following displays then go to step 6. (Only an Easy Weigh™ Authorized Dealer can change this option.) 5. At this point you can enter a Percent Tare value. Remember, if your scale does not show this please go on to step 6. Once you have entered a %Tare, press the MW key. The displays will next show: 6. At this point you may type the PLU number that you wish to assign the above data to and then press the MW key, or you can press one of the Direct PLU keys to assign the data directly to that key. Note that if you wish to program the speed keys located on the numeric keypad, you must refer to them as PLU number 1 thru 6. They cannot be programmed by pressing the actual key. You are now done! You can repeat this procedure for other PLUs. Remember, if you get stuck you can always press the ¿ key to escape back to regular mode. 9 Check Stand Operation If you have purchased your PC-100 scale with the RS-232 kit you will be able to interface your scale to a PC or virtually any ECR (Electronic Cash Register.) If you do not have this feature or aren’t sure, please contact your local Easy Weigh™ Authorized Dealer to assist you. The following page will explain the RS-232 setup. Type Setting: The PC-100 communicates using the following protocol: 9600 Baud, Even Parity, 7 Data Bits, and 1 Stop Bit. This is fixed and cannot be changed. However, there are different request codes and response data that can be selected. The following explains how set the different Type Settings. 1. Turn the scale OFF 2. Press and hold down the ¿ key while you turn the scale ON 3. Release the ¿ key once you hear the scale beep 4. You will see a value in the Unit Price display. You may change this value according to the chart below. 5. Once you are done setting the value, press the ¿ key Basic Description Disable RS-232 Port NCI General Interface (Most P.O.S. Systems) NCI ECR Interface (Most Cash Registers) Toledo 8213 (Many Cash Registers) Stream Mode Hand Shake Mode Type Setting 00 01 02 03 10 20 See page 12 for Cash Register and personal computer model cross reference chart. You will find that the PC-100 scale will interface to the most popular makes and models. There are some cable diagrams on page 11 that you may find useful. Brand and product names are trademarks trademarks of their respective companies. and/or registered 10 Options & Accessories The following options are available through your Easy Weigh™ Authorized dealer: Description Fish Pan Platter RS-232 Kit Spill-Proof Overlay (Wet cover) AC Power cord Adjusting feet (set of 4) Part Number 260-00001-020001 070-10001-020000 101-00001-020000 690-00001-02002M 4B0-00001-020000 For any type of service or troubleshooting, please contact your nearest Easy Weigh™ Authorized dealer. DO NOT attempt to service, repair, or disassemble this or any scale as this is legally permissible to only licensed professionals. Troubleshooting & Error Messages Description Error Solution Zero Initial zero range error Empty the platter, turn OFF and ON. If this occurs again then call service AdC EEP PArA Analog circuit failure Memory failure Parameter failure Call service Call service Call service Cable Diagrams PC-100 to IBM PC & Compatibles PC-100 DB-9 Pin Male TX 3 RX 2 SG 5 11 IBM PC DB-9 Pin Female 2 RX 3 TX 5 SG 4 DTR 6 DSR 7 RTS 8 CTS PC-100 to IBM PC & Compatibles PC-100 DB-9 Pin Male TX 3 RX 2 SG 5 IBM PC DB-25 Pin Female 3 RX 2 TX 7 SG 20 DTR 6 DSR 4 RTS 5 CTS A complete list of cable diagrams is located at: http://www.easyweighscales.com/ docs/PC-100 Cable Diagrams P.pdf/ A complete list of cable diagrams is also located in the PC-100 Service Manual. Interface Cross Reference Chart Make Casio CRS DataSym Esper IBM PC IBM PC NCR Omron Panasonic Samsung Samsung Sanyo Sharp Swintec Swintec Uniwell Type Setting 01 02 02 02 01 01 02 02 02 02 02 03 03 02 02 02 Models SA-3000 CRS-3000 DT-2000 and all newer models that follow 7810, 9700 IBM PCs and compatibles with 25 pin serial ports IBM PCs and compatibles with 9 pin serial ports 2170, 7452, 7453, 7445, and all newer models that follow RS-4841, Vantage 7000, and all newer models that follow Panasonic ECRs with serial interfaces ER-550, 650, 6500, 6540 ER-5100, 5140 ECR-425, and all newer models that follow ER-A880, 750, 650, 570, 470, and all newer models that follow 2250, with 25 pin serial ports 2250, with 9 pin serial ports UX-7500, 6000, 4001, 70, 60, and all newer models that follow A complete Interface Cross reference chart is located at: http://www.easyweighscales.com/ docs/PC-100 Cable Diagrams P.pdf/ A complete Interface Cross reference chart is also located in the Service Manual for the PC-100. For more information go to: http://www.easyweighscales.com/techs.htm#PC-100 Techs 12 Easy Weigh www.atronsystems.com Copyright 2005, All rights reserved. 800-20101-020000