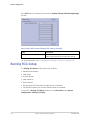
1
GE Healthcare
MAC™ 2000 ECG Analysis System
Operator's Manual
Software Version 1.1
2053535-002 Revision C
English
© 2013 General Electric Company.
All Rights Reserved.
Publication Information
The information in this manual applies only to MAC™ 2000 Version 1.1. It does not apply to earlier product versions. Due to continuing
product innovation, specifications in this manual are subject to change without notice.
MUSE, MAC IT, CASE/CardioSoft, 12SL, and EMR are trademarks owned by GE Medical Systems Information Technologies, Inc., a General
Electric Company going to market as GE Healthcare. All other trademarks contained herein are the property of their respective owners.
This program uses the SOA4D DPWSCore (C DPWS toolkit) library, © 2004–2010 Schneider Electric SA, licensed under the BSD License.
Part of the software embedded in this product is gSOAP software. Portions created by gSOAP are Copyright © 2001-2004 Robert A. van
Engelen, Genivia Inc. All Rights Reserved.
THE SOFTWARE IN THIS PRODUCT WAS IN PART PROVIDED BY GENIVIA INC AND ANY EXPRESS OR IMPLIED WARRANTIES, INCLUDING, BUT
NOT LIMITED TO, THE IMPLIED WARRANTIES OF MERCHANTABILITY AND FITNESS FOR A PARTICULAR PURPOSE ARE DISCLAIMED. IN NO EVENT
SHALL THE AUTHOR BE LIABLE FOR ANY DIRECT, INDIRECT, INCIDENTAL, SPECIAL, EXEMPLARY, OR CONSEQUENTIAL DAMAGES (INCLUDING,
BUT NOT LIMITED TO, PROCUREMENT OF SUBSTITUTE GOODS OR SERVICES; LOSS OF USE, DATA, OR PROFITS; OR BUSINESS INTERRUPTION)
HOWEVER CAUSED AND ON ANY THEORY OF LIABILITY, WHETHER IN CONTRACT, STRICT LIABILITY, OR TORT (INCLUDING NEGLIGENCE OR
OTHERWISE) ARISING IN ANYWAY OUT OF THE USE OF THIS SOFTWARE, EVEN IF ADVISED OF THE POSSIBILITY OF SUCH DAMAGE."
This product includes software developed by the OpenSSL Project for use in the OpenSSL Toolkit (http://www.openssl.org/). This product
includes cryptographic software written by Eric Young ([email protected]). This product includes software written by Tim Hudson
([email protected]).
This product complies with the requirements concerning medical devices from the following regulatory bodies:
The document part number and revision are on each page of the document. The revision identifies the document’s update level. The revision
history of this document is summarized in the following table.
Revision
Date
Comments
A
17 October 2012
Internal Release
B
24 April 2013
Customer Release
C
15July 2013
Revisions per SPR HCSDM00204349 relating to IEC 3rd Edition labeling, and
SPR HCSDM00222909.
To access other GE Healthcare Diagnostic Cardiology manuals, go to the Common Documentation Library (CDL), located at
www.gehealthcare.com/documents, and click Cardiology.
To access Original Equipment Manufacturer (OEM) manuals, go to the device manufacturer's Web site.
2
MAC™ 2000 ECG Analysis System
2053535-002C
15 July 2013
Contents
1
Introduction
Intended User of this Product ..................................................................... 9
Indications for Use ...................................................................................... 9
Contraindications ..................................................................................... 10
Prescription Device Statement ................................................................. 10
Regulatory and Safety Information........................................................... 10
Safety Conventions . . . . . . . . . . . . . . . . . . . . . . . . . . . . . . . . . . . . . . . . . . . . . . . . . . . . . . . . . . . . . . . . . . . . . . . . . . . . . . . . . . 10
Safety Hazards. . . . . . . . . . . . . . . . . . . . . . . . . . . . . . . . . . . . . . . . . . . . . . . . . . . . . . . . . . . . . . . . . . . . . . . . . . . . . . . . . . . . . . . . 11
Classification of Medical Device . . . . . . . . . . . . . . . . . . . . . . . . . . . . . . . . . . . . . . . . . . . . . . . . . . . . . . . . . . . . . . . . . . . 13
Certification Information . . . . . . . . . . . . . . . . . . . . . . . . . . . . . . . . . . . . . . . . . . . . . . . . . . . . . . . . . . . . . . . . . . . . . . . . . . . . 13
Recording ECGs During Defibrillation . . . . . . . . . . . . . . . . . . . . . . . . . . . . . . . . . . . . . . . . . . . . . . . . . . . . . . . . . . . . . 14
Accuracy of Input Signal Reproduction. . . . . . . . . . . . . . . . . . . . . . . . . . . . . . . . . . . . . . . . . . . . . . . . . . . . . . . . . . . 14
Modulating Effects in Digital Systems . . . . . . . . . . . . . . . . . . . . . . . . . . . . . . . . . . . . . . . . . . . . . . . . . . . . . . . . . . . . 14
EMI/EMC/RF Safety Information . . . . . . . . . . . . . . . . . . . . . . . . . . . . . . . . . . . . . . . . . . . . . . . . . . . . . . . . . . . . . . . . . . . 14
Biocompatibility. . . . . . . . . . . . . . . . . . . . . . . . . . . . . . . . . . . . . . . . . . . . . . . . . . . . . . . . . . . . . . . . . . . . . . . . . . . . . . . . . . . . . . . 15
Legal Notice . . . . . . . . . . . . . . . . . . . . . . . . . . . . . . . . . . . . . . . . . . . . . . . . . . . . . . . . . . . . . . . . . . . . . . . . . . . . . . . . . . . . . . . . . . . 15
Supplies and Accessories . . . . . . . . . . . . . . . . . . . . . . . . . . . . . . . . . . . . . . . . . . . . . . . . . . . . . . . . . . . . . . . . . . . . . . . . . . . 16
Responsibility of the Manufacturer. . . . . . . . . . . . . . . . . . . . . . . . . . . . . . . . . . . . . . . . . . . . . . . . . . . . . . . . . . . . . . . . 16
Responsibility of the Purchaser/Customer. . . . . . . . . . . . . . . . . . . . . . . . . . . . . . . . . . . . . . . . . . . . . . . . . . . . . . . 16
Product and Packaging Information . . . . . . . . . . . . . . . . . . . . . . . . . . . . . . . . . . . . . . . . . . . . . . . . . . . . . . . . . . . . . . 16
Equipment Identification........................................................................... 25
Product Label . . . . . . . . . . . . . . . . . . . . . . . . . . . . . . . . . . . . . . . . . . . . . . . . . . . . . . . . . . . . . . . . . . . . . . . . . . . . . . . . . . . . . . . . . 25
Serial Number Format . . . . . . . . . . . . . . . . . . . . . . . . . . . . . . . . . . . . . . . . . . . . . . . . . . . . . . . . . . . . . . . . . . . . . . . . . . . . . . . 25
Device Address Label and Rating Plate. . . . . . . . . . . . . . . . . . . . . . . . . . . . . . . . . . . . . . . . . . . . . . . . . . . . . . . . . . . 26
Product Codes . . . . . . . . . . . . . . . . . . . . . . . . . . . . . . . . . . . . . . . . . . . . . . . . . . . . . . . . . . . . . . . . . . . . . . . . . . . . . . . . . . . . . . . . 26
Service Information................................................................................... 27
Service Requirements . . . . . . . . . . . . . . . . . . . . . . . . . . . . . . . . . . . . . . . . . . . . . . . . . . . . . . . . . . . . . . . . . . . . . . . . . . . . . . . 27
Warranty Information . . . . . . . . . . . . . . . . . . . . . . . . . . . . . . . . . . . . . . . . . . . . . . . . . . . . . . . . . . . . . . . . . . . . . . . . . . . . . . . 27
Additional Assistance . . . . . . . . . . . . . . . . . . . . . . . . . . . . . . . . . . . . . . . . . . . . . . . . . . . . . . . . . . . . . . . . . . . . . . . . . . . . . . . . 27
Manual Information .................................................................................. 27
Manual Purpose . . . . . . . . . . . . . . . . . . . . . . . . . . . . . . . . . . . . . . . . . . . . . . . . . . . . . . . . . . . . . . . . . . . . . . . . . . . . . . . . . . . . . . 27
Document Conventions . . . . . . . . . . . . . . . . . . . . . . . . . . . . . . . . . . . . . . . . . . . . . . . . . . . . . . . . . . . . . . . . . . . . . . . . . . . . . 27
Related Documents................................................................................... 28
2
Product Overview
Product Description .................................................................................. 29
Product Specifications .............................................................................. 29
Hardware Descriptions . . . . . . . . . . . . . . . . . . . . . . . . . . . . . . . . . . . . . . . . . . . . . . . . . . . . . . . . . . . . . . . . . . . . . . . . . . . . . . 29
Optional Software Features . . . . . . . . . . . . . . . . . . . . . . . . . . . . . . . . . . . . . . . . . . . . . . . . . . . . . . . . . . . . . . . . . . . . . . . . 35
2053535-002C
MAC™ 2000 ECG Analysis System
3
Using the System . . . . . . . . . . . . . . . . . . . . . . . . . . . . . . . . . . . . . . . . . . . . . . . . . . . . . . . . . . . . . . . . . . . . . . . . . . . . . . . . . . . . . 35
Navigating the User Interface................................................................... 38
Resting ECG Power Up Mode . . . . . . . . . . . . . . . . . . . . . . . . . . . . . . . . . . . . . . . . . . . . . . . . . . . . . . . . . . . . . . . . . . . . . . . 39
Arrhythmia Power Up Mode . . . . . . . . . . . . . . . . . . . . . . . . . . . . . . . . . . . . . . . . . . . . . . . . . . . . . . . . . . . . . . . . . . . . . . . . 39
Main Screen Power Up Mode. . . . . . . . . . . . . . . . . . . . . . . . . . . . . . . . . . . . . . . . . . . . . . . . . . . . . . . . . . . . . . . . . . . . . . . 40
Stress ECG Power Up Mode. . . . . . . . . . . . . . . . . . . . . . . . . . . . . . . . . . . . . . . . . . . . . . . . . . . . . . . . . . . . . . . . . . . . . . . . . 40
Order Manager Power Up Mode . . . . . . . . . . . . . . . . . . . . . . . . . . . . . . . . . . . . . . . . . . . . . . . . . . . . . . . . . . . . . . . . . . . 41
3
Setting Up the Equipment
Inserting the Battery................................................................................. 43
Connecting the AC Power.......................................................................... 43
Connecting the Patient Cable ................................................................... 44
Connecting the Barcode Reader ............................................................... 46
Connecting the LAN Option....................................................................... 46
Connecting the WiFi Option ...................................................................... 46
Connecting External Devices (Stress Option) ............................................ 47
Connecting an Internal Modem ................................................................ 47
Inserting the Paper ................................................................................... 47
Turning on the System .............................................................................. 47
Configuring the Device.............................................................................. 47
Testing the Device..................................................................................... 48
4
Preparing the Patient
Preparing the Patient’s Skin ...................................................................... 49
Electrode Placement ................................................................................. 50
Resting ECG Placement . . . . . . . . . . . . . . . . . . . . . . . . . . . . . . . . . . . . . . . . . . . . . . . . . . . . . . . . . . . . . . . . . . . . . . . . . . . . . 50
Stress 12–Lead Placement. . . . . . . . . . . . . . . . . . . . . . . . . . . . . . . . . . . . . . . . . . . . . . . . . . . . . . . . . . . . . . . . . . . . . . . . . . 53
5
Entering Patient Information
Entering Patient Information With an Internal Keypad or External
Keyboard ................................................................................................... 55
Entering Patient Information with a Barcode Reader ............................... 56
Scanning the Barcode . . . . . . . . . . . . . . . . . . . . . . . . . . . . . . . . . . . . . . . . . . . . . . . . . . . . . . . . . . . . . . . . . . . . . . . . . . . . . . . 56
Downloading Patient Demographics ........................................................ 57
6
4
Order Manager
MAC™ 2000 ECG Analysis System
2053535-002C
Communication Media .............................................................................. 59
Simple Orders............................................................................................ 59
Advanced Order Manager ......................................................................... 60
Downloading Orders . . . . . . . . . . . . . . . . . . . . . . . . . . . . . . . . . . . . . . . . . . . . . . . . . . . . . . . . . . . . . . . . . . . . . . . . . . . . . . . . . 60
Selecting and Completing Orders . . . . . . . . . . . . . . . . . . . . . . . . . . . . . . . . . . . . . . . . . . . . . . . . . . . . . . . . . . . . . . . . . 61
Using the Order Manager Interface .......................................................... 62
Deleting Orders . . . . . . . . . . . . . . . . . . . . . . . . . . . . . . . . . . . . . . . . . . . . . . . . . . . . . . . . . . . . . . . . . . . . . . . . . . . . . . . . . . . . . . . 62
7
Recording a Resting ECG
Hookup Advisor ......................................................................................... 66
Resting ECGs ............................................................................................. 68
Recording a Resting ECG . . . . . . . . . . . . . . . . . . . . . . . . . . . . . . . . . . . . . . . . . . . . . . . . . . . . . . . . . . . . . . . . . . . . . . . . . . . . 68
ECG Options . . . . . . . . . . . . . . . . . . . . . . . . . . . . . . . . . . . . . . . . . . . . . . . . . . . . . . . . . . . . . . . . . . . . . . . . . . . . . . . . . . . . . . . . . . . 69
Post-Acquisition Options . . . . . . . . . . . . . . . . . . . . . . . . . . . . . . . . . . . . . . . . . . . . . . . . . . . . . . . . . . . . . . . . . . . . . . . . . . . . 71
Special Considerations.............................................................................. 73
Recording ECGs of Pacemaker Patients . . . . . . . . . . . . . . . . . . . . . . . . . . . . . . . . . . . . . . . . . . . . . . . . . . . . . . . . . . 73
Recording ECGs During Defibrillation . . . . . . . . . . . . . . . . . . . . . . . . . . . . . . . . . . . . . . . . . . . . . . . . . . . . . . . . . . . . . 74
Generating a Rhythm Report (Manual Recording) .................................... 74
8
Arrhythmia Mode Recording
Recording in Arrhythmia Mode ................................................................. 77
Recording Arrhythmia ECGs . . . . . . . . . . . . . . . . . . . . . . . . . . . . . . . . . . . . . . . . . . . . . . . . . . . . . . . . . . . . . . . . . . . . . . . . 77
Arrhythmia Recording Options. . . . . . . . . . . . . . . . . . . . . . . . . . . . . . . . . . . . . . . . . . . . . . . . . . . . . . . . . . . . . . . . . . . . . 78
Printing ..................................................................................................... 79
Printing an Arrhythmia Report . . . . . . . . . . . . . . . . . . . . . . . . . . . . . . . . . . . . . . . . . . . . . . . . . . . . . . . . . . . . . . . . . . . . . 79
Arrhythmia Printing Options. . . . . . . . . . . . . . . . . . . . . . . . . . . . . . . . . . . . . . . . . . . . . . . . . . . . . . . . . . . . . . . . . . . . . . . . 80
Arrhythmia Codes ..................................................................................... 80
9
RR Analysis
RR Analysis Mode ...................................................................................... 83
RR Analysis Setup. . . . . . . . . . . . . . . . . . . . . . . . . . . . . . . . . . . . . . . . . . . . . . . . . . . . . . . . . . . . . . . . . . . . . . . . . . . . . . . . . . . . . 83
Acquiring a Recording for an RR Analysis Report. . . . . . . . . . . . . . . . . . . . . . . . . . . . . . . . . . . . . . . . . . . . . . . 87
Output Options. . . . . . . . . . . . . . . . . . . . . . . . . . . . . . . . . . . . . . . . . . . . . . . . . . . . . . . . . . . . . . . . . . . . . . . . . . . . . . . . . . . . . . . . 87
10
Stress Testing
Stress Mode Interface ............................................................................... 90
Stress Test Information Bar. . . . . . . . . . . . . . . . . . . . . . . . . . . . . . . . . . . . . . . . . . . . . . . . . . . . . . . . . . . . . . . . . . . . . . . . . 90
Stress Test Keys. . . . . . . . . . . . . . . . . . . . . . . . . . . . . . . . . . . . . . . . . . . . . . . . . . . . . . . . . . . . . . . . . . . . . . . . . . . . . . . . . . . . . . . 92
Stress Options. . . . . . . . . . . . . . . . . . . . . . . . . . . . . . . . . . . . . . . . . . . . . . . . . . . . . . . . . . . . . . . . . . . . . . . . . . . . . . . . . . . . . . . . . 92
Conducting Stress Tests............................................................................ 94
Conducting a Stress Test with a Treadmill or Ergometer. . . . . . . . . . . . . . . . . . . . . . . . . . . . . . . . . . . . . . 94
Conducting a Stress Test with a Master’s Step Device . . . . . . . . . . . . . . . . . . . . . . . . . . . . . . . . . . . . . . . . 96
2053535-002C
MAC™ 2000 ECG Analysis System
5
11
Managing Internal Storage
Importing Records .................................................................................... 99
Printing the File Manager Directory........................................................ 100
Finding Records....................................................................................... 101
Editing Patient Data ................................................................................ 101
Previewing Records................................................................................. 102
Deleting Records ..................................................................................... 103
Printing Records...................................................................................... 103
Transmitting Records.............................................................................. 103
Exporting Records ................................................................................... 104
Setting Up Export Options . . . . . . . . . . . . . . . . . . . . . . . . . . . . . . . . . . . . . . . . . . . . . . . . . . . . . . . . . . . . . . . . . . . . . . . . 105
Exporting Records . . . . . . . . . . . . . . . . . . . . . . . . . . . . . . . . . . . . . . . . . . . . . . . . . . . . . . . . . . . . . . . . . . . . . . . . . . . . . . . . . . 105
12
System Configuration
Basic Setup.............................................................................................. 107
Resting ECG Setup................................................................................... 112
Arrhythmia Setup ................................................................................... 121
Stress ECG Setup ..................................................................................... 124
Stress ECG Settings. . . . . . . . . . . . . . . . . . . . . . . . . . . . . . . . . . . . . . . . . . . . . . . . . . . . . . . . . . . . . . . . . . . . . . . . . . . . . . . . . 124
Editing Stress Protocols . . . . . . . . . . . . . . . . . . . . . . . . . . . . . . . . . . . . . . . . . . . . . . . . . . . . . . . . . . . . . . . . . . . . . . . . . . . 128
Communication Setup............................................................................. 131
Country Setup ......................................................................................... 141
Print Setup Report................................................................................... 143
Patient Setup........................................................................................... 144
User Setup............................................................................................... 149
Select Setup............................................................................................. 151
Import Setup ........................................................................................... 152
Export Setup............................................................................................ 153
Options Setup.......................................................................................... 153
Service Setup........................................................................................... 155
6
MAC™ 2000 ECG Analysis System
2053535-002C
Date/Time Setup ..................................................................................... 155
Order Manager Setup.............................................................................. 156
RR Analysis Setup.................................................................................... 157
PDF File Naming Convention................................................................... 157
Default Naming Convention . . . . . . . . . . . . . . . . . . . . . . . . . . . . . . . . . . . . . . . . . . . . . . . . . . . . . . . . . . . . . . . . . . . . . . 157
Customizing the Naming Convention. . . . . . . . . . . . . . . . . . . . . . . . . . . . . . . . . . . . . . . . . . . . . . . . . . . . . . . . . . . 158
Retrieving Your Password ....................................................................... 159
Exporting the Audit Trail ......................................................................... 159
13
Maintenance
Equipment Cleaning and Storage ........................................................... 161
Inspecting the Equipment. . . . . . . . . . . . . . . . . . . . . . . . . . . . . . . . . . . . . . . . . . . . . . . . . . . . . . . . . . . . . . . . . . . . . . . . . 161
Cleaning the Device. . . . . . . . . . . . . . . . . . . . . . . . . . . . . . . . . . . . . . . . . . . . . . . . . . . . . . . . . . . . . . . . . . . . . . . . . . . . . . . . 162
Cleaning, Disinfecting, and Storing ECG Cables and Leadwires.............. 162
Cleaning Guidelines . . . . . . . . . . . . . . . . . . . . . . . . . . . . . . . . . . . . . . . . . . . . . . . . . . . . . . . . . . . . . . . . . . . . . . . . . . . . . . . . 163
Cleaning and Disinfecting Cables and Leadwires . . . . . . . . . . . . . . . . . . . . . . . . . . . . . . . . . . . . . . . . . . . . 163
Storing Cables and Leadwires . . . . . . . . . . . . . . . . . . . . . . . . . . . . . . . . . . . . . . . . . . . . . . . . . . . . . . . . . . . . . . . . . . . 165
Cleaning, Disinfecting, and Sterilizing Reusable Electrodes ................... 165
Replacing Leadwire Adapters ................................................................. 166
Paper Maintenance ................................................................................. 166
Replacing Paper . . . . . . . . . . . . . . . . . . . . . . . . . . . . . . . . . . . . . . . . . . . . . . . . . . . . . . . . . . . . . . . . . . . . . . . . . . . . . . . . . . . .
Adjusting the Tray for Paper Size . . . . . . . . . . . . . . . . . . . . . . . . . . . . . . . . . . . . . . . . . . . . . . . . . . . . . . . . . . . . . . . .
Removing the Paper Pack. . . . . . . . . . . . . . . . . . . . . . . . . . . . . . . . . . . . . . . . . . . . . . . . . . . . . . . . . . . . . . . . . . . . . . . . .
Storing Thermal Paper. . . . . . . . . . . . . . . . . . . . . . . . . . . . . . . . . . . . . . . . . . . . . . . . . . . . . . . . . . . . . . . . . . . . . . . . . . . . .
167
168
169
170
Battery Maintenance .............................................................................. 170
Replacing the Battery. . . . . . . . . . . . . . . . . . . . . . . . . . . . . . . . . . . . . . . . . . . . . . . . . . . . . . . . . . . . . . . . . . . . . . . . . . . . . . 171
Conditioning the Battery Pack . . . . . . . . . . . . . . . . . . . . . . . . . . . . . . . . . . . . . . . . . . . . . . . . . . . . . . . . . . . . . . . . . . . 172
Battery Status Indicator . . . . . . . . . . . . . . . . . . . . . . . . . . . . . . . . . . . . . . . . . . . . . . . . . . . . . . . . . . . . . . . . . . . . . . . . . . . 172
Supplies and Accessories ........................................................................ 173
14
Troubleshooting
General Troubleshooting Tips ................................................................. 175
Frequently Asked Questions (FAQ) .......................................................... 176
Equipment Problems ............................................................................... 176
System Does Not Power Up . . . . . . . . . . . . . . . . . . . . . . . . . . . . . . . . . . . . . . . . . . . . . . . . . . . . . . . . . . . . . . . . . . . . . .
ECG Data Contains Noise . . . . . . . . . . . . . . . . . . . . . . . . . . . . . . . . . . . . . . . . . . . . . . . . . . . . . . . . . . . . . . . . . . . . . . . . .
External Stress Equipment does not Move. . . . . . . . . . . . . . . . . . . . . . . . . . . . . . . . . . . . . . . . . . . . . . . . . . . . .
Paper Jams . . . . . . . . . . . . . . . . . . . . . . . . . . . . . . . . . . . . . . . . . . . . . . . . . . . . . . . . . . . . . . . . . . . . . . . . . . . . . . . . . . . . . . . . . .
176
177
177
178
Import/Export/Save Errors...................................................................... 178
SD Card Not Present . . . . . . . . . . . . . . . . . . . . . . . . . . . . . . . . . . . . . . . . . . . . . . . . . . . . . . . . . . . . . . . . . . . . . . . . . . . . . . . 178
Cannot Import or Transmit Records via Modem. . . . . . . . . . . . . . . . . . . . . . . . . . . . . . . . . . . . . . . . . . . . . . 178
2053535-002C
MAC™ 2000 ECG Analysis System
7
Cannot Transmit Records via LAN. . . . . . . . . . . . . . . . . . . . . . . . . . . . . . . . . . . . . . . . . . . . . . . . . . . . . . . . . . . . . . . 179
Cannot Transmit Records via WiFi . . . . . . . . . . . . . . . . . . . . . . . . . . . . . . . . . . . . . . . . . . . . . . . . . . . . . . . . . . . . . . 179
Cannot Export to Shared Directories. . . . . . . . . . . . . . . . . . . . . . . . . . . . . . . . . . . . . . . . . . . . . . . . . . . . . . . . . . . . 180
Acquisition/Printer Error Messages ........................................................ 180
Report Errors........................................................................................... 180
ACI-TIPI Statement is not Included on Report . . . . . . . . . . . . . . . . . . . . . . . . . . . . . . . . . . . . . . . . . . . . . . . . . 181
System Errors.......................................................................................... 181
A
Creating Barcodes
Setting Up the Patient Data Scheme....................................................... 185
Configuring the Barcode Reader............................................................. 186
Configuring the Barcode Reader Manually . . . . . . . . . . . . . . . . . . . . . . . . . . . . . . . . . . . . . . . . . . . . . . . . . . . . 186
Configuring the Barcode Reader Automatically . . . . . . . . . . . . . . . . . . . . . . . . . . . . . . . . . . . . . . . . . . . . . . 187
B
Master’s Step Data
Master's Step Table ................................................................................. 189
ST-T Changes .......................................................................................... 192
C
Technical Specifications
System Specifications ............................................................................. 193
Acquisition, Processing, and Performance.............................................. 195
Operating Modes, Features, and Options ............................................... 197
8
MAC™ 2000 ECG Analysis System
2053535-002C
1
Introduction
This document describes the MAC™ 2000 ECG Analysis System, also referred to
as the “product”, “system”, or “device”. The document is intended to be used by
clinical professionals who use, maintain, and/or troubleshoot the system. Clinical
professionals are expected to have a working knowledge of appropriate medical
procedures, practices, and terminology used in the treatment of patients.
This chapter provides general information required for the proper use of the system
and this manual. Familiarize yourself with this information before using the system.
Intended User of this Product
The MAC™ 2000 ECG Analysis System is a portable ECG acquisition, analysis, and
recording system that is intended for use by trained operators in a hospital or medical
professional’s facility environment, as well as used in clinics, physician offices,
outreach centers, or wherever ECG testing is performed.
Indications for Use
The MAC™2000 ECG Analysis System is a portable device intended to be used by
or under the direct supervision of a licensed healthcare practitioner using surface
electrodes to acquire, analyze, display, and record information for adult and pediatric
populations in a hospital, medical professional’s facility, clinics, physician’s office or
outreach centers.
NOTE:
Pediatric populations are defined as patients between the ages of 0 and 15 years.
The MAC™2000 ECG Analysis System provides the following modes of operation:
• Resting ECG mode
• Arrhythmia mode
• Exercise mode for exercise stress testing (optional)
• RR analysis mode for RR interval analysis (optional)
The basic system prints 6 or 12 leads of ECG and is upgradeable to provide software
options such as 12-lead ECG measurement and interpretive analysis.
2053535-002C
MAC™ 2000 ECG Analysis System
9
Introduction
Arrhythmia detection is provided for the convenience of automatic documentation.
Transmission and reception of ECG data to and from a central ECG cardiovascular
information system is optional.
Contraindications
This system is not intended for use in the following manner:
• During patient transport
• With high-frequency surgical units
• As an intra-cardiac application
• As a vital signs physiological monitor
Prescription Device Statement
CAUTION:
United States federal law restricts this device to sale by or on the order of a
physician.
Regulatory and Safety Information
This section provides information about the safe use and regulatory compliance of
this system. Familiarize yourself with this information, and read and understand all
instructions before attempting to use this system. The system software is considered
medical software. As such, it was designed and manufactured to the appropriate
medical regulations and controls.
NOTE:
Disregarding the safety information provided in this manual is considered
abnormal use of this system and could result in injury, data loss, or a voided
warranty.
Safety Conventions
A Hazard is a source of potential injury to a person, property, or the system.
This manual uses the terms DANGER, WARNING, CAUTION, and NOTICE to point out
hazards and to designate a degree or level of seriousness. Familiarize yourself with
the following definitions and their significance.
Definitions of Safety Conventions
10
Safety
Convention
Definition
DANGER
Indicates an imminent hazard, which, if not avoided, will result in death
or serious injury.
WARNING
Indicates a potential hazard or unsafe practice, which, if not avoided,
could result in death or serious injury.
MAC™ 2000 ECG Analysis System
2053535-002C
Introduction
Definitions of Safety Conventions (cont'd.)
Safety
Convention
Definition
CAUTION
Indicates a potential hazard or unsafe practice, which, if not avoided,
could result in moderate or minor injury.
NOTICE
Indicates a potential hazard or unsafe practice, which, if not avoided,
could result in the loss or destruction of property or data.
Safety Hazards
The following messages apply to the system as a whole. Specific messages may also
be provided elsewhere in the manual.
WARNING:
EQUIPMENT MALFUNCTION — Any attempt by unauthorized personnel to service
the device could result in equipment malfunction and void the warranty.
This equipment contains no user-serviceable parts. Refer servicing to authorized
service personnel.
WARNING:
PATIENT INJURY–STRANGULATION — Cables present a possible strangulation
hazard.
To avoid possible strangulation, route all cables away from the patient’s throat.
Use a short version of cable for pediatric patients.
WARNING:
PERSONAL INJURY–STUMBLING HAZARD— Patients can become entangled in the
cables and leadwires connected to the device, which could cause the patient
to stumble or trip.
Route cables and leadwires in a way to avoid creating a stumbling hazard: keep
them off the floor, and route leadwires away from the patient’s legs and the
healthcare provider’s work area.
WARNING:
MAGNETIC AND ELECTRICAL INTERFERENCE — Magnetic and electric fields can
interfere with the acquisition of ECG readings.
Make sure that all peripheral components operated in the vicinity of the device
comply with the relevant EMC requirements. X-ray equipment, MRI devices,
radio systems (cellular phones) and so forth, are possible sources of interference
because they may emit higher levels of electromagnetic radiation. Verify the
performance of the system before use.
WARNING:
EXPLOSION HAZARD — Using this device in the presence of anesthetic vapors or
liquids can cause explosions.
Do not use this device in the presence of anesthetic vapors or liquids. Only persons
with adequate training in the correct use of this device may use this device.
2053535-002C
MAC™ 2000 ECG Analysis System
11
Introduction
WARNING:
EQUIPMENT FAILURE — Polarizing electrodes (stainless steel or silver constructed)
may cause the electrodes to retain a residual charge after defibrillation. A residual
charge blocks acquisition of the ECG signal.
Whenever patient defibrillation is a possibility, use non-polarizing electrodes
(silver-silver chloride construction) for ECG monitoring.
WARNING:
PERSONAL INJURY — Contact with patients during defibrillation can cause serious
injury or death.
Do not contact patients during defibrillation. Patient signal inputs labeled with the
CF and BF symbols with paddles are protected against damage resulting from
defibrillation voltages.
To ensure proper defibrillator protection, use only GE Healthcare recommended
cables and leadwires. Proper placement of defibrillator paddles in relation to the
electrodes is required to ensure successful defibrillation.
WARNING:
INTERPRETATION HAZARD — Results of the automated QT analysis are not
considered a diagnosis.
A qualified physician or cardiologist must review and confirm the measurements
and waveforms recorded by the system. It should be used only as an adjunct to
the clinical history, symptoms, and results of other tests.
WARNING:
INTERPRETATION HAZARD — Computerized interpretation is only significant when
used in conjunction with clinical findings.
A qualified physician must overread all computer-generated tracings.
WARNING:
POOR SIGNAL QUALITY — Improper skin preparation can cause poor signal quality
during the ECG recording.
Careful skin preparation is the key to an interference-free ECG.
WARNING:
IMPROPER USE — This is a prescriptive device.
This equipment is intended for use by or under the direct supervision of a licensed
healthcare practitioner.
WARNING:
EXPLOSION HAZARD — Batteries may explode in fires
Do not dispose of the battery by fire. Follow local environmental guidelines
concerning disposal and recycling.
WARNING:
ELECTRIC SHOCK HAZARD/SYSTEM MALFUNCTION Liquids inside a device can
cause electric shock or system malfunction.
Do not allow liquids to enter the device. If liquids enter the device, turn it off and
inform your service technician. Do not use the device until it is checked by a
service technician.
12
MAC™ 2000 ECG Analysis System
2053535-002C
Introduction
WARNING:
ELECTRIC SHOCK — Improper connection of this equipment may cause electric
shock.
To avoid risk of electric shock, this equipment must only be connected to a supply
mains with protective earth.
NOTE:
Follow the instructions provided. Do not position equipment in a way that makes it
difficult to disconnect the device when using an appliance coupler, mains plug, or
other separable plug as a means of isolation.
Classification of Medical Device
The device is classified as follows, according to IEC 60601-1:
Medical Device Classifications
Category
Classification
Type of protection against electrical
shock
Class I internally powered equipment
Degree of protection against electrical
shock
Type CF defibrillation-proof applied part
Degree of protection against solids
The IP code for this device is IP20.
Protected against solid foreign objects with a
diameter of 12.5 mm and greater
The object probe, a sphere 12.5 mm diameter,
shall not fully penetrate. The jointed test finger
12 mm diameter, 80 mm length, shall have
adequate clearance from hazardous parts.
Degree of protection against harmful
ingress of liquids (IP20)
The IP code for this device is IP20.
Non-protected
This device is ordinary equipment (enclosed
equipment without protection against ingress
of liquids)
Degree of safety of application in the
presence of flammable anesthetic
mixture with air or with oxygen or with
nitrous oxide
Equipment is not suitable for use in the presence
of a flammable anesthetic mixture with air or
with oxygen or with nitrous oxide
Method(s) of sterilization or disinfection
recommended by the manufacturer
Not applicable
Mode of operation
Continuous operation
Certification Information
Medical Equipment
With respect to electric shock, fire, and mechanical hazards only in
accordance with UL 60601–1, and CAN/CSA C22.2 NO. 601.1.
2053535-002C
MAC™ 2000 ECG Analysis System
13
Introduction
Recording ECGs During Defibrillation
This equipment is protected against the effects of cardiac defibrillator discharge
to ensure recovery, as required by test standards. The patient signal input of the
acquisition module is defibrillation-proof. Therefore, it is not necessary to remove
the ECG electrodes prior to defibrillation.
When using stainless steel or silver electrodes, a defibrillator discharge current may
cause the electrodes to retain a residual charge causing a polarization or DC offset
voltage. This electrode polarization blocks acquisition of the ECG signal. To avoid this
condition, if there is a situation where a defibrillation procedure might be necessary,
use non-polarizing electrodes (which do not form a DC offset voltage when subjected
to a DC current) such as silver/silver-chloride types.
If you use polarizing electrodes, GE Healthcare recommends disconnecting the
leadwires from the patient before delivering the shock.
Electrode defibrillation recovery is the ability of the electrode to allow the ECG trace to
return after defibrillation. GE Healthcare recommends using non-polarizing disposable
electrodes with defibrillation recovery ratings as specified in AAMI EC12 5.2.2.4. AAMI
EC12 requires that the polarization potential of an electrode pair does not exceed 100
mV 5 seconds after a defibrillation discharge.
Refer to the supplies and accessories reference guide for this system for a list of
approved electrodes.
Accuracy of Input Signal Reproduction
• Overall System Error meets AAMI EC11 3.2.7.1 requirements. Overall System Error is
between or within ±5% or ±40 µV, whichever is greater.
• Frequency Response meets AAMI EC11 3.2.7.2 requirements, using testing methods
A and D. Frequency response is between or within ±10% between 0.67 and 40 Hz
and between +0 and -10% for 20 ms, 1.5 mV triangular input.
Modulating Effects in Digital Systems
This device uses digital sampling techniques that may produce some variation in
amplitudes of Q, R, and/or S waves from one heart beat to the next, which may be
particularly noticeable in pediatric recordings. If you observe this phenomenon,
be aware that the origin of amplitude variations is not entirely physiological. For
measuring voltages of Q, R, and S waves, GE Healthcare advises using the QRS
complexes with the largest deflection of the particular waves.
EMI/EMC/RF Safety Information
This system is designed and tested to comply with applicable regulations regarding
EMC and must be installed and put into service according to the EMC information
stated in the Electromagnetic Compatibility appendix of the Service and/or Operator’s
manual. Changes or modifications to this system not expressly approved by GE
Healthcare could cause EMC issues with this or other equipment.
14
MAC™ 2000 ECG Analysis System
2053535-002C
Introduction
Before installing or using the device or system, be aware of the proximity of known RF
sources, such as the following:
• Radio and TV stations
• Portable and mobile RF communication devices (cell phones, two-way radios)
• X-ray, CT, or MRI devices
These devices are also possible sources of interference as they may emit higher
levels of electromagnetic radiation.
WARNING:
EQUIPMENT MALFUNCTION/INTERFERENCE — Use of portable phones or other
radio frequency (RF) emitting equipment near the system may cause unexpected
or adverse operation.
Do not use portable phones or other electronic equipment that may emit radio
frequency (RF) near this system.
WARNING:
EQUIPMENT MALFUNCTION/INTERFERENCE — Do not use the equipment or system
adjacent to, or stacked with, other equipment.
If adjacent or stacked use is necessary, test the equipment or system to verify
normal operation in the configuration in which you are using it.
WARNING:
ACCESSORIES/COMPONENTS — Adding accessories or components, or modifying
the medical device or system, may result in increased EMISSIONS or decreased
IMMUNITY of the device or system.
Use the following resources for more information on EMI/EMC and RF concerns:
• The Supplies and Accessories Reference Guide for your system
• Qualified GE Healthcare or approved third-party personnel
• The Electromagnetic Compatibility appendix in your system service or operator’s
manual
Biocompatibility
The parts of the system described in this manual that come into contact with the
patient during the intended use, including all accessories, fulfill the biocompatibility
requirements of the applicable standards. If you have questions in this matter, contact
your GE Healthcare representative.
Legal Notice
GE Healthcare software contains several fields that can be filled in before performing
an ECG. Some of these fields are required, while others are optional and left to the
user to assess whether they are needed to perform the exam. The field Race is one
of these optional fields. Race has been acknowledged by the medical profession as
useful to analyze some pathologies. You should be aware that, in some jurisdictions,
the processing of data revealing an individual's racial origin is subject to legal
requirements, such as obtaining the patient's prior consent. If you elect to collect this
type of data, it is your responsibility to ensure that you comply with all applicable
legal requirements.
2053535-002C
MAC™ 2000 ECG Analysis System
15
Introduction
Supplies and Accessories
You should use only supplies and accessories that GE Healthcare recommends. For
a list of recommendations, refer to the supplies and accessories reference guide
for this system
Contact GE Healthcare before using anything that is not recommended for this system.
Responsibility of the Manufacturer
GE Healthcare is responsible for the safety, reliability, and performance of hardware
supplied by GE Healthcare only if the following conditions are met:
• Assembly operations, extensions, readjustments, modifications, or repairs are
performed by persons authorized by GE Healthcare.
• The electrical installation of the room where the device is used complies with the
requirements of the appropriate local, state, and other government regulations.
• The equipment is used in accordance with the instructions for use.
Responsibility of the Purchaser/Customer
The customer is responsible for providing appropriate desks, chairs, electrical wall
outlets, network connections, and analog phone lines, and for locating any of the
system components described in this manual in compliance with all local, state, and
national codes.
Product and Packaging Information
This section identifies the following:
• Hardware labels and their locations on page 16
• Symbol Descriptions on page 17
Hardware Label Locations
16
MAC™ 2000 ECG Analysis System
2053535-002C
Introduction
Label Descriptions on Hardware and Packaging
Item Label
Location
Description
1
Back of the device
Product Label
Identifies this device. See
“Product Label” on page 25
for a description of the label
contents.
2
Back of the device
Device Address Label and
Rating Plate
It provides regulatory and
cautionary information. See
“Device Address Label and
Rating Plate” on page 26 for
an explanation of the label.
3
Bottom cover of the
device
The Option Code label.
Use the option codes to setup
the purchased options in your
system.
See “Options Setup” on page
153 for an explanation of the
Option Codes.
4
On the shipping
package
Environmental symbols
required for shipping.
5
On the shipping
package
Battery Shipping Label.
FRAGILE—Lithium Ion
batteries can cause fire if
damaged.
6
On the shipping
package
The shipping label.
Symbol Descriptions
The following table describes symbols or icons that may be on the device or its
packaging. Not all of the symbols defined in the table apply to your device or its
packaging.
Symbols are used to convey warnings, cautions, prohibitions, mandatory actions,
or information. Any symbol on your device or packaging with markings in color
indicates there may be a danger, warning, or mandatory action. Any symbol on your
device or packaging that is in black and white provides additional information or may
2053535-002C
MAC™ 2000 ECG Analysis System
17
Introduction
indicate a caution. Familiarity with these symbols assists in the use and disposal
of the equipment.
For equipment symbols not shown, refer to the original equipment manufacturer
(OEM) manuals.
Symbol Descriptions
Symbol
Description
Catalog or Orderable Part Number
Indicates the manufacturer's catalog or part number.
Serial Number
Indicates the manufacturer's serial number.
Batch Code or Lot Number
Indicates the manufacturer's batch code or lot number.
Date of Manufacture (Year-Month)
Indicates the original manufacture date for this device.
Manufacturer
Indicates the name and address for the manufacturer of this device. It
may also include the date it was manufactured.
Authorized Representative in the European Community
Indicates the name and address of the authorized representative in the
European Community for this device.
Rx Only
US Federal law restricts this device to sale by or on the order of a
physician.
12SL
Indicates the device uses the Marquette™ 12SL ECG Analysis Program
to analyze and interpret ECG readings.
IPxy
IP Code (Ingress Protection Rating)
Classifies and rates the degree of protection provided against the
intrusion of solid objects (such as body parts like hands and fingers,
dust, accidental contact), and liquids.
The first numeral (x) represents the degree of protection against the
ingress of solid objects.
The second numeral (y) represents the degree of protection against the
ingress of liquids.
For products with an IPxy rating, see the Classification of Medical Device
in this chapter for a description of that rating. Not all products have
an IPxy rating.
Class II Equipment
Identifies equipment that meets the safety requirements specified for
class II equipment by IEC 60601–1.
This device was designed so that it does not require a safety connection
to electrical earth (US ground). No single failure results in dangerous
voltage becoming exposed and causing an electric shock. This is
achieved without relying on an earthed metal casing.
18
MAC™ 2000 ECG Analysis System
2053535-002C
Introduction
Symbol Descriptions (cont'd.)
Symbol
Description
Consult Instructions for Use
Consult the operating instructions.
Defibrillation-proof Type BF Applied Part
Identifies a defibrillation-proof type BF applied part on medical
equipment that complies with IEC 60601–1.
This device meets the requirements for protection against electric
shock for an earth-free (floating) applied part (one intended for contact
with patients).
Defibrillation-proof Type CF Applied Part
Identifies a defibrillation-proof type CF applied part on medical
equipment that complies with IEC 60601–1.
This device meets the requirements for protection against electric
shock for an earth-free (floating) applied part (one intended for contact
with patients) for cardiac application.
No User– or Field-serviceable Parts
Do not open or disassemble the device for any reason.
Protective Earth (ground)
Identifies the terminal of a protective earth (ground) electrode or any
terminal that is intended for connection to an external conductor for
protection against electric shock in case of a fault.
Non-ionizing Electromagnetic Radiation
Indicates that the equipment emits elevated, potentially hazardous,
levels of non-ionizing radiation (electromagnetic energy) for diagnosis
or treatment.
Follow Instructions For Use
Read and understand the operator's manual before using the device
or product.
As a mandatory action sign, this symbol is identified by a blue
background and white symbol.
CAUTION:
SAFETY GROUND PRECAUTION
Pulling on the cable can cause the cord to deteriorate resulting in
electrical problems.
Remove the power cord from the mains source by grasping the
plug. DO NOT pull on the cable.
CAUTION:
CONSULT ACCOMPANYING DOCUMENTS
There may be specific warnings or precautions associated with the
device that are not otherwise found on the label.
Consult the accompanying documentation for more information
about safely using this device.
2053535-002C
MAC™ 2000 ECG Analysis System
19
Introduction
Symbol Descriptions (cont'd.)
Symbol
Description
CAUTION:
ELECTRIC SHOCK
Indicates the presence of hazardous energy circuits or electric
shock hazards.
To reduce the risk of electric shock hazards, do not open this
enclosure. Refer servicing to qualified personnel.
CAUTION:
HOT SURFACE
Indicates that the marked item may be hot.
Take appropriate precautions before touching the item.
WARNING:
BODILY INJURY
Indicates the presence of mechanical parts that can result in
pinching, crushing, or other bodily injury.
To avoid risk of bodily injury, keep away from moving parts.
Disconnect power before reaching into area or servicing.
As a warning sign, this symbol is identified by a yellow background, black
triangular band, and a black symbol.
WARNING:
HAND CRUSHING HAZARD
This device contains moving parts that could crush the user's hand.
Keep hands clear of the device while it is in operation. Disconnect
power before reaching into or servicing the device.
As a warning sign, this symbol is identified by a yellow background, black
triangular band, and a black symbol.
WARNING:
BODILY INJURY
Indicates the presence of a sharp edge or object that can cause
cuts or other bodily injury.
To prevent cuts or other bodily injury, do not contact sharp edge of
object.
As a warning sign, this symbol is identified by a yellow background, black
triangular band, and a black symbol.
20
MAC™ 2000 ECG Analysis System
2053535-002C
Introduction
Symbol Descriptions (cont'd.)
Symbol
Description
WARNING:
BODILY INJURY
Indicates the presence of a potential tip-over hazard that can result
in bodily injury.
To avoid risk of bodily injury, follow all instructions for maintaining
the stability of the equipment during transport, installation, and
maintenance.
As a warning sign, this symbol is identified by a yellow background, black
triangular band, and a black symbol.
WARNING:
PINCH POINT
This device contains moving parts that could pinch body parts.
Keep hands clear of the device while it is in operation. Disconnect
the power before reaching into or servicing the device.
As a general prohibition sign, this symbol is identified by a white
background, red circular band and slash, and a black symbol.
WARNING:
PERSONAL INJURY DO NOT REACH IN
Reaching into the equipment can cause personal injury.
Do not place hands into any openings.
As a general prohibition sign, this symbol is identified by a white
background, red circular band and slash, and a black symbol.
WARNING:
ENVIRONMENTAL OR HEALTH HAZARD
Incinerating the device or product could present a risk to the
environment or human health.
Do not incinerate this device or product.
As a general prohibition sign, this symbol is identified by a white
background, red circular band and slash, and a black symbol.
WARNING:
BREAKAGE DUE TO HEAVY LOAD
Heavy objects on the surface may cause it to break.
Do not load objects heavier than the maximum permissible load
indicated for a safe working load.
As a general prohibition sign, this symbol is identified by a white
background, red circular band and slash, and a black symbol.
Can Be Recycled
Indicates you may recycle this material or device. Recycle or dispose of
in accordance with local, state, or country laws.
2053535-002C
MAC™ 2000 ECG Analysis System
21
Introduction
Symbol Descriptions (cont'd.)
Symbol
Description
Waste Electrical and Electronic Equipment (WEEE)
Indicates this equipment contains electrical or electronic components
that must not be disposed of as unsorted municipal waste but collected
separately. Contact an authorized representative of the manufacturer
for information concerning the decommissioning of your equipment.
Contains <heavy metal chemical symbol>
Indicates this equipment contains heavy metal and must not be
disposed of as unsorted municipal waste but collected separately.
The example shows Lithium Ion.
Environmental Friendly Use Period (EFUP)
Per Chinese standard SJ/T11363–2006, indicates the number of years
from the date of manufacture during which you can use the product
before any restricted substances are likely to leak, causing a possible
environmental or health hazard.
NOTE:
• If the device contains less than the maximum concentration of
restricted substances, the symbol contains a lowercase e
• This is also referred to as China RoHS.
Japan RoHS
Indicates the device or product meets the regulations limit or ban for
specific substances in new electronic and electric equipment in Japan.
The Green Mark (with the G) indicates the product is within the
tolerances of hazardous chemicals.
The Content Mark (with the R and letters below) indicates which
hazardous substance(s) was used during the manufacturing of the
electrical or electronic equipment that exceeds maximum tolerances.
Fragile
Indicates the contents are fragile. Handle with care.
This Way Up
Indicates the correct upright position of the package.
Do Not Stack
Indicates that you should not stack the container or place a load on
the container.
Keep Dry
Indicates that you need to keep the container away from rain and other
sources of moisture.
22
MAC™ 2000 ECG Analysis System
2053535-002C
Introduction
Symbol Descriptions (cont'd.)
Symbol
Description
Humidity Limits
Indicates upper and lower humidity limits for the transportation and
handling of this package. They are indicated next to the upper and
lower horizontal lines.
Atmospheric Limits
Indicates the upper and lower barometric pressure limitations for the
transportation and handling of this package. They are indicated next to
the upper and lower horizontal lines.
Upper Temperature Limit
Indicates the maximum temperature for transportation and handling of
this package. The limit is indicated next to the upper horizontal line.
Temperature Limits
Indicates the upper and lower temperature limits for the transportation
and handling of this package. They are indicated next to the upper
and lower horizontal lines.
The following table describes certification symbols that may be used on your device
or its packaging. The inclusion of a symbol in this table does not indicate that your
product was certified by that symbol’s governing body and is listed for reference
only. To identify which organizations have certified your device, refer to the labeling
on your device or its packaging.
Certification
Symbol
Description
UL Mark
Indicates compliance with applicable Underwriters Laboratories
requirements.
UL Listed Mark
Indicates compliance with international or regional standards for
Underwriters Laboratories safety requirements.
UL Listed, Canada/US
Indicates compliance with international or regional standards for
Underwriters Laboratories safety requirements in Canada and the
United States.
UL Classification Mark
Indicates this medical equipment is UL Classified with respect to
electric shock, fire, and mechanical hazards only in accordance with UL
60601-1, CAN/CSA C22.2 NO. 601.1, and IEC 60601-2-25.
UL Classification Mark, Canada/US
Indicates this medical equipment is UL Classified with respect to
electric shock, fire, and mechanical hazards only in accordance with
UL 60601-1, CAN/CSA C22.2 NO. 601.1, and IEC 60601-2-25 for the
US and Canada.
2053535-002C
MAC™ 2000 ECG Analysis System
23
Introduction
Certification
Symbol
Description
CE Mark
Indicates the device or product conforms with applicable EU (European
Union) directives.
PCT (GOST-R) Mark
Indicates the device or product conforms with applicable Russian
Gosstandart technical and safety standards.
NRTL Certification
Indicates the device or product has met the National Recognized
Testing Laboratories certification.
The NRTL certification attainted is added to the mark of the applicable
testing laboratory. The example displays the NRTL certification with
the MET Laboratories mark.
China Metrology Certification
Indicates the device or product complies with applicable China
Metrology Certification requirements.
TÜV Rheinland
Indicates the device or product complies with applicable technical
and safety requirements following testing by Technischer
Überwachungs-Verein, (Technical Inspections Organization).
Installation and Connection
If the installation of this equipment in the USA will use 240V rather than 120V, the
source must be a center-tapped, 240V, single-phase circuit.
Contact GE Healthcare for information before connecting any devices to this
equipment that are not recommended in this manual or the supplies and accessories
reference guide for this system.
Training
This manual is intended as a supplement to, not a substitute for, thorough product
training. If you have not received training on the use of the system, you should request
training assistance from GE Healthcare.
To see available training, go to the GE Healthcare training Web
site (www.gehealthcare.com/training). Select Education>Product
Education-Technical>Diagnostic Cardiology.
For more self-paced course offerings, tools, and reference guides you
may find useful, please visit the GE Healthcare Education Store at
www.gehealthcare.com/educationstore.
24
MAC™ 2000 ECG Analysis System
2053535-002C
Introduction
Equipment Identification
Every GE Healthcare product has a product label that identifies the product name,
part number, manufacturing information, and unique serial number. This information
is required when contacting GE Healthcare for support.
Product Label
The product label is laid out in the following format. Depending on the product, the
label may vary slightly in format, but it contains the same information.
Product Label Format
Item
Description
1
Product description
2
Product part number
3
Device serial number (See “Serial Number Format” on page 25 for more information.)
4
Product bar code
5
Date of manufacture in YYYY-MM format
Serial Number Format
Each device has a serial number that uniquely identifies it and provides important
information. You need the product code and the entire serial number before servicing
or requesting support for your product. The serial number format is shown in the
following illustration:
Serial Number Format
2053535-002C
Item
Name
Description
1
Product Code
Three-letter code that uniquely identifies the product line.
See “Product Codes” on page 26 for more information.
2
Year Manufactured
Two-digit code identifying the year the device was
manufactured. Values range from 00 to 99
For example: 00 = 2000, 04 = 2004, 05 = 2005 (and so on).
MAC™ 2000 ECG Analysis System
25
Introduction
Serial Number Format (cont'd.)
Item
Name
Description
3
Fiscal Week
Manufactured
Two-digit code identifying the week the device was
manufactured.
Values range from 01 to 52. GE Healthcare's fiscal weeks
correspond to the calendar week. For example, 01 = first
week in January.
4
Product Sequence
Four-digit number identifying the order in which this
device was manufactured. Values range from 0001 to
9999.
5
Manufacturing Site
One-letter code identifying the site where the device was
manufactured. For example, F = Milwaukee, N = Freiburg,
P = Bangalore
6
Miscellaneous
Characteristic
For example, P = device is a prototype, R = device was
refurbished, U = device was upgraded to meet the
specifications of another product code, A= device is in
production.
Device Address Label and Rating Plate
The Device Address label and Rating Plate is laid out in the following format.
Depending on the product, the label may vary slightly in format.
Item
Description
1
Product description
2
Country of origin
3
Symbols
See “Symbol Descriptions” on page 17 for a description of the symbols used on
this label.
4
Electrical rating of the device
5
Manufacturer name and address
Product Codes
The product code identifies specific system platforms.
You can identify the product code using the serial number listed on the product label
located in one of the following places:
• On the product label attached to the device.
• On the product label provided with the application CD.
For software application systems, you can view the serial number by launching the
system application and clicking Help > About.
26
MAC™ 2000 ECG Analysis System
2053535-002C
Introduction
For information on launching the application, refer to the service or operator's manual
for this system.
Service Information
This section provides information pertaining to the maintenance and servicing of the
system. Familiarize yourself with this information before requesting service from GE
Healthcare or its authorized representatives.
Service Requirements
For systems with hardware provided by GE Healthcare, failure on the part of the
responsible individual, hospital, or institution using this equipment to implement
a satisfactory maintenance schedule may result in equipment failure and possible
safety hazards.
For software only products, maintenance of the hardware and operating system on
which the software resides is the responsibility of the customer.
Regular maintenance, irrespective of usage, is essential to ensure that the components
of this system are always functional when required.
Warranty Information
This device is considered GE Healthcare-supplied hardware. Only authorized GE
Healthcare service personnel should service the device. Any unauthorized attempt to
repair equipment under warranty voids that warranty. It is the user's responsibility to
report the need for service to GE Healthcare or to one of their authorized agents.
Additional Assistance
GE Healthcare maintains a trained staff of application and technical experts to answer
questions and respond to issues and problems that may arise during the installation,
maintenance, and use of this system.
Contact your local GE Healthcare representative to request additional assistance.
Manual Information
This section provides information for the correct use of this manual.
Keep this manual with the equipment at all times and periodically review it. You
should request training assistance from GE Healthcare, if needed.
Manual Purpose
The purpose of this manual is to provide the operator with information concerning
the safety and use of their ECG system.
Document Conventions
This manual uses the following conventions.
2053535-002C
MAC™ 2000 ECG Analysis System
27
Introduction
Typographical Conventions
Convention
Description
Bold Text
Indicates keys on the keyboard, text to enter, or hardware items such as
buttons or switches on the equipment.
Italicized-Bold Indicates software terms that identify menu items, buttons or options in
Text
various windows.
CTRL+ESC
Indicates a keyboard operation. A plus (+) sign between the names of two
keys indicates that while holding the first key, you should press and release
the second key. For example, Press CTRL+ESC means to press and hold the
CTRL key and then press and release the ESC key.
<space>
Indicates that you must press the spacebar. When instructions are given
for typing a precise text string with one or more spaces, the point where
you must press the spacebar is indicated as <space>. This ensures that
the correct number of spaces is inserted in the correct positions within
the literal text string. The purpose of the < > brackets is to distinguish the
command from the literal text within the string.
Enter
Indicates that you must press the Enter or Return key on the keyboard. Do
not type Enter.
>
The greater than symbol, or right angle bracket, is a concise method to
indicate a sequence of menu selections.
For example, the statement “From the main menu, select System > Setup >
Options to open the Option Activation window” replaces the following:
1. From the main menu, select System to open the System menu.
2.
From the System menu, select Setup to open the Setup menu.
3.
From the Setup menu, select Options to open the Option Activation
window.
Illustrations
All illustrations in the manual are provided as examples only. Depending on system
configuration, screens in the manual may differ from the screens on your system.
All patient names and data are fictitious. Any similarity to actual persons is
coincidental.
Notes
Notes provide application tips or additional information that, while useful, are not
essential to the correct operation of the system. They are called out from the body
text through a flag word and indentation, as follows:
NOTE:
The tip or additional information is indented below the NOTE flag word.
Related Documents
For a complete list of related manuals, refer to the "Related Manuals" appendix in
the service manual.
28
MAC™ 2000 ECG Analysis System
2053535-002C
Product Overview
2
This chapter provides a description of the product, its features, and the requirements
necessary to operate this system.
Product Description
This system provides two basic modes of operation:
• Resting ECG
This mode is the standard mode for your system.
• Arrhythmia
This mode is provided for the convenience of automatically generating
documentation.
You can upgrade the basic system with two other modes of operation:
• Exercise
This mode is for exercise stress testing.
• RR Analysis
This mode is for RR intervals analysis.
The basic system prints 6 or 12 leads of ECG and provides optional transmission and
reception of ECG data to and from a central ECG cardiovascular information system.
You can also upgrade it with software options such as 12-lead ECG measurement
and interpretive analysis.
Product Specifications
This section describes the device’s hardware components and system specifications.
Familiarize yourself with this information before using the device.
Hardware Descriptions
This section identifies the key components of the system hardware. Familiarize
yourself with these components, their location, and their use before attempting
to use the equipment.
2053535-002C
MAC™ 2000 ECG Analysis System
29
Product Overview
Front View
Front View of Device
Item Name
Description
1
Display
Presents waveform and text data.
2
Function Keys
Selects menu options on the screen.
3
Keypad
Use to select menu options on the screen.
4
Printer door push button
Opens the printer door.
5
Printer/Printer door
Prints reports.
Rear View
Rear View of Device
30
Item Name
Description
1
SD card slot
Connection for Secure Digital (SD) card. This
system supports SD cards formatted for the FAT or
FAT16 file systems.
2
LAN connection
RJ45 network connector.
MAC™ 2000 ECG Analysis System
2053535-002C
Product Overview
Rear View of Device (cont'd.)
Item Name
Description
3
USB ports (2)
Standard Universal Serial Bus (USB) connector
for USB devices, such as the optional barcode
reader, optional USB WiFi Dongle, or an external
non-multimedia USB keyboard.
4
COMM A port
Serial connector for data communication with
CASE/CardioSoft or MUSE systems.
5
COMM B port
Serial connector for stress devices (bicycle,
ergometer, or treadmill).
6
Phone jack
RJ11 connector from the internal modem to an
analog phone line.
7
AC Power Cord connection
Standard connector for the AC power cable.
Side View
Side View of Device
2053535-002C
Item Name
Description
1
KISS connection
Connection port for the optional KISS Pump
system.
2
ECG Patient Cable connection
D-sub 15–pin female connector for the acquisition
cable.
MAC™ 2000 ECG Analysis System
31
Product Overview
Standard Keypad
Standard Keypad
Item
Name
Description
1
Power on/off
Turns the system on or off.
2
Battery LED
Indicates various battery states:
• Steady amber indicates the battery is charging
• Flashing amber indicates the battery is low
• No light indicates the battery is neither charging
nor low
32
3
Power LED
Indicates the unit is plugged in and receiving
power.
4
Leads key
Scrolls through the leads and allows you to select
the display formats for the lead sequence.
5
ECG key
Acquires and prints a 12–lead ECG.
6
Rhythm key
Prints real-time continuous rhythm.
7
Writer Stop
Stops the printing function.
8
Trimpad/Cursor Control keys
Provides movement through menus and windows.
For descriptions on using the trimpad and cursor
control keys, see “Using the Trimpad” on page 36.
MAC™ 2000 ECG Analysis System
2053535-002C
Product Overview
Standard Keypad (cont'd.)
Item
Name
Description
9
Function keys
Use to select menu options on the screen.
NOTE:
There is no marking on the keypad for the
function keys. Up to six menu options may be
available at any given time, and each option
corresponds to a function key directly below
the display.
10
Backspace key
Deletes characters.
11
Enter key
Use to advance the focus in a window or to select
items from the screen.
12
Alt key
Switches between different input methods for
Japanese and Korean keyboard languages.
13
Space bar
Enters a space in the text.
As a secondary function, it moves through the
menu lists.
14
Option key
Use to enter special characters on non-English
keyboards.
15
ESC (escape)
Closes a window on a screen.
16
Shift key
Use to enter a capital letter.
For example, press Shift + p to type a capital P.
Stress Keypad
The stress keypad has the same keys as a standard keypad with the addition of specific
stress keys. If you do not have the stress option, you do not have a stress keypad.
2053535-002C
MAC™ 2000 ECG Analysis System
33
Product Overview
Item
Name
Description
1
Stress keys
Controls stress equipment connected to the
system.
Stress Keys
Stress Keys
Item
Name
Description
1
Pretest stress key
Selects the pretest phase or advances to the next
stage within the phase.
2
Exercise stress key
Selects the exercise phase or advances to the next
stage within the phase
3
Recovery stress key
Selects the recovery phase or advances to the next
stage within the phase
4
Test End stress key
Selects the test end phase.
5
Hold Stage stress key
Remains at the current stage.
6
Speed W+ stress key
(Speed/Load up)
Manually increases the treadmill speed or
ergometer load.
7
Grade á stress key
(Grade up)
Increases the elevation of the treadmill.
8
Tmil
stress key
Tmil
stress key
9
34
Starts the treadmill during the test
Stops the treadmill during the test.
10
â stress key
Gradeâ
(Grade down)
Decreases the elevation of the treadmill.
11
Speed W- stress key
(Speed/Load down)
Manually decreases the treadmill speed or
ergometer load.
12
Enter BP stress key
Allows you to enter blood pressure values or start
a blood pressure measurement.
13
Comment stress key
Allows you to enter a comment during the stress
test.
14
Medians stress key
Prints a median report during the test.
15
12ld stress key
Prints a 12–lead report
16
Recall stress key
Prints the previous 10 seconds of ECG
MAC™ 2000 ECG Analysis System
2053535-002C
Product Overview
Hardware Specifications
See “Technical Specifications” on page 193 for a complete description of all hardware
and system specifications for this device.
Optional Software Features
Optional Software Features
Item
Description
QT Correction Formula
The system provides the following QT correction
formulas:
Bazett (default)
Framingham
Fridericia
Hookup Advisor
Hookup Advisor alerts users of poor lead quality based
on noise measurement and lead-off detection results.
ACI-TIPI
Acute Cardiac Ischemia Time-Insensitive Predictive
Instrument (ACI-TIPI) Option (K974199).
Clinical Trials (CT) Data Guard
and Audit Trail
CT Data Guard and Audit Trail supports 21 CFR part 11
compliance for the data generated using the device.
Option incudes password protection and time stamped
audit trails.
ECG Analysis/Interpretation
12SL ECG Analysis Program (V22) K042177.
HEART exercise
HEART exercise v5.2.2.1.
Using the System
This section describes the startup screen, keypad use, and ECG data acquisition.
Startup Screen
Depending on the options you selected for Power up mode in Basic Setup, one of the
following screens is your startup screen:
• Resting ECG
• Stress ECG
• Arrhythmia
• Main Screen
• Order Manager
• A window prompting you to enter your User ID and Password.
NOTE:
The password window is displayed only if you selected the High Security Mode
option in Basic Setup. You can use the system to take a STAT ECG without
logging into the system. Press the function key directly below the STAT ECG
tab to select it.
2053535-002C
MAC™ 2000 ECG Analysis System
35
Product Overview
Using the Keypad
You interact with the system by using the keypad. In addition to entering data as you
would on any keypad, you can also use it to do the following tasks:
• Select menu options
• Navigate through data entry fields
• Control optional stress equipment
Using the Function Keys
You can configure the device and initiate an ECG reading by selecting menu options
that are across the bottom of the display. Up to six menu options are available at any
given time, and each option corresponds to a function key directly below the display.
Press the function key below the corresponding menu option to select it. The following
table describes some of the possible options.
Using the Function Keys
Desired Action
Example Results
Take an ECG
Selecting the Resting ECG menu option opens the Resting ECG
function and displays additional menu items related to taking
a resting ECG.
Change a setting during
an ECG recording
During a resting ECG, selecting the 25 mm/s option changes the
speed of the waveform. Other options are available to change
different settings.
Open a window
Selecting the Patient Data option opens the Enter Patient
Data window.
Change menu options
Selecting the More option displays additional menu options.
Save your selections
Selecting the Save option allows you to save changes after
entering data or changing a configuration.
Using the Trimpad
Use the trimpad to navigate through data entry windows.
Press the arrows to move the cursor left, right, up and down through the data fields.
Press the center button to select the field in which the cursor is currently resting. If the
field is associated with a list of valid value, that list is displayed.
Using the Stress Keys
If you purchased the optional stress module, use the stress keys on the keypad to
control stress equipment connected to the system. For a description of the stress keys
and their function, see “Stress Keys” on page 34.
36
MAC™ 2000 ECG Analysis System
2053535-002C
Product Overview
ECG Data Acquisition
ECG Data Acquisition provides the following:
• Samples with a minimum 500 Hz or 1000 Hz to the ECG processing algorithms
and the application software
• Pace enhancement enable/disable through the user interface
• QRS detection and heart rate calculation
• Lead sequences with 6 or 12 leads, where each lead is an element of the set (I, II, III,
aVR, aVL, aVF, D, A, J, V1…V6) with an optional –aVR
ECG Data Acquisition supports the following:
• Default high pass filter (0.04 Hz), if ADS is on high pass filter (0.56 Hz)
• Selectable low pass filter (20, 40, 100, 150 Hz)
• Selectable mains filter (50 Hz, 60 Hz)
• Anti Drift System (ADS): Baseline shift correction with finite impulse response high
pass filter enable/disable through the user interface in Resting ECG, Stress, and
RR analysis modes
The following are selectable data formats for external ECG storage:
• DCAR XML, 500 Hz uncompressed
• DCAR XML, 1000 Hz uncompressed
• Hilltop, 500 Hz DVS
• PDF
External Storage
This system supports a Secure Digital High Capacity (SDHC) card with 4 GB capacity as
external storage.
2053535-002C
MAC™ 2000 ECG Analysis System
37
Product Overview
Navigating the User Interface
You can configure the system in a number of ways. The configuration choices you
make determine the actions you need to perform in order to proceed from the Power
up display to the Main Menu.
• The Power up mode selected in Basic Setup determines which window opens on
startup.
• If High Security Mode is enabled in Basic Setup, you are required to enter a user
ID and password.
• The BCRD option in the Option Code window indicates that the USB Barcode
Reader support is activated.
The following sections describe how to navigate from the Power up screen to the
Main Menu for the each possible logon configuration. Use the procedure that applies
to your logon configuration settings.
• If your system is configured to power up in the Resting ECG mode, go to “Resting
ECG Power Up Mode” on page 39.
• If your system is configured to power up in the Arrhythmia mode, go to “Arrhythmia
Power Up Mode” on page 39.
• If your system is configured to power up in the Main Screen mode, go to “Main
Screen Power Up Mode” on page 40.
• If your system is configured to power up in the Stress ECG mode, go to “Stress ECG
Power Up Mode” on page 40.
• If your system is configured to power up in the Order Manager mode, go to “Order
Manager Power Up Mode” on page 41.
38
MAC™ 2000 ECG Analysis System
2053535-002C
Product Overview
Resting ECG Power Up Mode
This procedure describes how to navigate to the Main Menu after powering on the
system when Resting ECG is selected for Power up mode in Basic Setup.
NOTE:
If you need to perform system setup functions, be sure you log in as a user who is
assigned setup editing privileges.
If the system is configured for Resting ECG Power Up Mode and High Security Mode
is not enabled, the Resting ECG screen opens on power up. To go to the Main Menu,
press More > Main Menu.
If High Security Mode is enabled, when the window opens prompting for a user ID and
password, use the following procedure:
1.
In the User ID field, enter your user ID.
2.
To move the cursor to the Password field, press Enter or the down arrow on
the Trimpad.
3.
In the Password field, enter your password.
4.
Press Login.
The Resting ECG screen is displayed.
If the Barcode Reader option is enabled, a window opens prompting you to
Scan the Patient barcode.
5.
If the barcode reader prompt is not displayed, press Cancel > More > Main Menu.
Arrhythmia Power Up Mode
This procedure describes how to navigate to the Main Menu after powering on the
system when Arrhythmia is selected for Power up mode in Basic Setup.
NOTE:
If you need to perform system setup functions, be sure you log in as a user who is
assigned setup editing privileges.
If the system is configured for Arrhythmia Power Up Mode, and High Security Mode
is not enabled, the Arrhythmia screen opens on Power up. To go to the Main Menu,
press Cancel > More > Main Menu.
If High Security Mode is enabled, when the window opens prompting for a user ID and
password, use the following procedure:
1.
In the User ID field, enter your user ID.
2.
To move the cursor to the Password field, press Enter or the down arrow on
the Trimpad.
3.
In the Password field, enter your password.
4.
Press Login.
The Arrhythmia screen is displayed.
If the Barcode Reader option is enabled, a window opens prompting you to
Scan the Patient barcode.
5.
2053535-002C
If the barcode reader prompt is not displayed, press Cancel > More > Main Menu.
MAC™ 2000 ECG Analysis System
39
Product Overview
Main Screen Power Up Mode
This procedure describes how to navigate to the Main Menu after powering on the
system when Main Screen is selected for Power up mode in Basic Setup.
NOTE:
If you need to perform system setup functions, be sure you log in as a user who is
assigned setup editing privileges.
If the system is configured for Main Screen Power up mode and does not have High
Security Mode enabled, the Main Menu is displayed after powering up the system.
You do not need to press any other keys in order to display the Main Menu.
If High Security Mode is enabled, when the window opens prompting for a user ID and
password, use the following procedure:
1.
In the User ID field, enter your user ID.
2.
To move the cursor to the Password field, press Enter or the down arrow on
the Trimpad.
3.
In the Password field, enter your password.
4.
Press Login.
The Main Menu is displayed.
Stress ECG Power Up Mode
This procedure describes how to navigate to the Main Menu after powering on the
system when Stress ECG is selected for Power up mode in Basic Setup.
NOTE:
If you need to perform system setup functions, be sure you log in as a user who is
assigned setup editing privileges.
If the system is configured for Stress ECG Power up mode and High Security Mode
is not enabled, the Stress ECG screen opens on power up. To go to the Main Menu,
press Cancel > More > Main Menu.
If High Security Mode is enabled, when the window opens prompting for a user ID and
password, use the following procedure:
1.
In the User ID field, enter your user ID.
2.
To move the cursor to the Password field, press Enter or the down arrow on
the Trimpad.
3.
In the Password field, enter your password.
4.
Press Login.
The Stress ECG screen is displayed.
If the Barcode Reader option is enabled, a window opens prompting you to
Scan the Patient barcode.
5.
40
If the barcode reader prompt is not displayed, press Cancel > More > Main Menu.
MAC™ 2000 ECG Analysis System
2053535-002C
Product Overview
Order Manager Power Up Mode
This procedure describes how to navigate to Main Menu after powering on the system
when Order Manager is selected for Power up mode in Basic Setup.
NOTE:
If you need to perform system setup functions, be sure you log in as a user who is
assigned setup editing privileges.
If the system is configured for Order Manager Power Up Mode and it does not
have High Security Mode enabled, press Main Menu. The Order Manager screen is
displayed after turning on the system.
If High Security Mode is enabled, when the window opens prompting for a user ID and
password, use the following procedure:
1.
In the User ID field, enter your user ID.
2.
To move the cursor to the Password field, press Enter or the down arrow on
the Trimpad.
3.
In the Password field, enter your password.
4.
Press Login.
The Order Manager screen is displayed.
5.
2053535-002C
Press Main Menu.
MAC™ 2000 ECG Analysis System
41
Product Overview
42
MAC™ 2000 ECG Analysis System
2053535-002C
Setting Up the Equipment
3
Setting up this system consists of the following steps:
1.
“Inserting the Battery”
2.
“Connecting the AC Power”
3.
“Connecting the Patient Cable”
4.
“Connecting the Barcode Reader”
5.
“Connecting the LAN Option”
6.
“Connecting the WiFi Option”
7.
“Connecting External Devices (Stress Option)”
8.
“Connecting an Internal Modem”
9.
“Inserting the Paper”
10. “Turning on the System”
11. “Configuring the Device”
12. “Testing the Device”
Each step is described in more detail in the following sections.
Inserting the Battery
The system is shipped with a lithium ion battery that is charged when inserted into the
system connected to AC power.
NOTE:
Do not use the system on battery power until the battery is fully charged, as
indicated by the battery charging LED on the keysheet. You may use the system
on AC power while the battery is charging.
Connecting the AC Power
This system can run using AC or battery power. When the device is plugged into an AC
outlet, it uses AC power and charges the installed battery.
2053535-002C
MAC™ 2000 ECG Analysis System
43
Setting Up the Equipment
Use the following instructions to connect the system to an AC power outlet.
Item
Description
1
Female end of the device’s power cord connected to the back of the device.
2
Male end of the device’s power cord connected to an AC outlet.
1.
Connect the female end of the device’s power cord (1) to the AC power connector
on the back of the device.
2.
Plug the male end of the device’s power cord (2) into an AC outlet.
NOTE:
It is recommended that you plug the device into an uninterruptible power
supply (UPS) or a surge suppressor.
3.
Check the Power LED to make sure the device is receiving power form the AC
outlet.
Connecting the Patient Cable
This system supports a variety of patient cables.
WARNING:
HIGH-FREQUENCY BURNS — Use of cables not supplied with this equipment can
lead to serious injury.
Use only the acquisition cable that ships with this equipment.
CAUTION:
INACCURACIES IN ECG Improper connection can cause inaccuracies in the ECG.
Trace each individual leadwire from its acquisition cable label to the colored
connector and then to the proper electrode to ensure that it is matched to the
correct label location.
44
MAC™ 2000 ECG Analysis System
2053535-002C
Setting Up the Equipment
Patient Cables
Item
Name
Description
1
D-Sub 15–pin male connector
Connects to the system’s ECG signal
input connector. One end of each
acquisition cable consists of a D-sub
15–pin male connector.
2
Multi-link Acquisition Cable Leads
The lead end of the multi-link
acquisition cable attaches to the
leadwire adapters and uses 10 or 12
leadwires.
3
NEHB Acquisition Cable Leads
The lead end of the NEHB acquisition
cable attaches to the leadwire
adapters and uses 12 leadwires.
4
Value Acquisition Cable leads
The lead end of the value acquisition
cable consists of 10 leadwires.
The leadwires require an adapter to connect to an electrode, as shown in the following
diagram.
2053535-002C
MAC™ 2000 ECG Analysis System
45
Setting Up the Equipment
Leadwire Adapters
Item
Description
1
Leadwire end
2
4 mm pin
3
Grabber
4
Mactrode clip
Use the following procedure to connect the patient cable:
1.
Assemble the leadwires and adapters.
See “Replacing Leadwire Adapters” on page 166.
2.
Connect the leadwires to the front of the patient cable.
3.
Connect the patient cable to the system.
Ensure the cable is seated securely.
Connecting the Barcode Reader
If the optional barcode reader was purchased with the device, connect it to the USB
port on the device.
NOTE:
The BCRD option to use the reader is activated at the factory when the barcode
reader is purchased with the device. However, you need to configure the barcode
settings for your site before you can use the reader, See Appendix A.
Connecting the LAN Option
If you purchased the LANC (LAN Communication to CardioSoft) or LANM (LAN
Communication to MUSE) options, connect an Ethernet cable to the RJ45 network
connector on the back of the device.
NOTE:
This applies only if you are using the device as a stationary device. If you are
using it as a mobile unit, do not connect the device to a LAN until you are ready
to import, transmit, or export records.
This system is compatible with MUSE v7.1.1 and v8.0.1, and with CardioSoft v6.51,
v6.61, and v6.71.
Connecting the WiFi Option
If you purchased a WiFi option, connect the WiFi dongle to the USB port available on
the back of the device.
WIFC is WiFi Communication to the CardioSoft system.
WIFM is WiFi Communication to the MUSE system.
This system is compatible with MUSE v7.1.1 and v8.0.1, and with CardioSoft v6.51,
v6.61, and v6.71.
46
MAC™ 2000 ECG Analysis System
2053535-002C
Setting Up the Equipment
Connecting External Devices (Stress Option)
If you purchased the stress option ERGO, connect the external stress device to the
system using a serial cable to the COMM B port on the back panel of the device.
This system works with any of the following devices:
• GE model T2100 treadmill
• GE model T2000 treadmill
• eBike ergometer
• Master’s Step (acoustic signal only)
Connecting an Internal Modem
If you purchased this system with the internal modem option, connect the modem to
an analog phone line using the RJ11 connector on the back of the device.
MODC is Modem Communication to the CardioSoft system.
MODM is Modem Communication to the MUSE system.
This system is compatible with MUSE v7.1.1 and v8.0.1 and with CardioSoft v6.51,
v6.61, and v6.71.
Inserting the Paper
Before you can print ECG reports, complete the following steps:
1.
Make sure the system is set up for the correct paper size.
This device can print on the following papers: A4, standard letter (8.5 x 11
inches), or modified letter (8.433 x 11 inches).
For information on adjusting the printer for the paper size, see “Adjusting the
Tray for Paper Size” on page 168.
2.
Insert the appropriately sized paper.
Turning on the System
1.
Press the power button to turn on the system.
2.
Verify the system welcome screen is displayed with no errors.
NOTE:
If you encounter any problems powering on the system, see “System Does
Not Power Up” on page 176 for further troubleshooting instructions.
Configuring the Device
When the device is ready for operation, configure the system settings using the
information in “System Configuration” on page 107.
2053535-002C
MAC™ 2000 ECG Analysis System
47
Setting Up the Equipment
If you are applying the same settings to multiple devices at the site, export the settings
to an SD card and use that card to import the settings to other systems.
Testing the Device
After you have set up and configured the device, test the device completely before
using it with patients. Use the following test scenarios:
• Conducting and printing a resting ECG
See “Recording a Resting ECG” on page 65 for instructions.
• Conducting and printing an arrhythmia ECG
See “Arrhythmia Mode Recording” on page 77 for instructions.
• Conducting and printing a stress ECG.
See “Stress Testing” on page 89 for instructions.
• Saving, importing, printing, deleting, transmitting, and exporting records.
See “Managing Internal Storage” on page 99 for instructions.
48
MAC™ 2000 ECG Analysis System
2053535-002C
Preparing the Patient
4
This chapter provides the procedures for preparing the patient's skin and properly
placing electrodes.
NOTE:
These instructions do not cover the application of electrodes for the KISS Electrode
Application System (not available in the United States). To use the KISS system, see
the KISS operator’s manual for instructions.
Preparing the Patient’s Skin
Careful skin preparation is the key to an interference-free ECG. Signal quality is
indicated on the device via the Hookup Advisor indicator.
1.
Select the electrode placement sites for ECG monitoring or diagnosis per the
protocol specified by the hospital or physician.
Refer to “Electrode Placement” on page 50 for diagrams and descriptions of
electrode placement for various protocols.
2.
Ensure that each site is dry, clean, and free of excessive hair.
NOTE:
Do not use solvents to clean the skin; solvents trapped under electrodes
may lead to abnormal skin reactions.
3.
2053535-002C
To prepare for a stress test, do the following:
a.
Mark each electrode site with a felt tip pen.
b.
Degrease each site with a skin preparation cream.
c.
Use a mild abrasion to remove the mark left by the felt tip pen.
MAC™ 2000 ECG Analysis System
49
Preparing the Patient
4.
Apply electrodes to the prepared sites.
Electrodes should be placed only by a physician or ECG technician.
WARNING:
SHOCK HAZARD — Touching the conductive elements cancels the protection
provided by the isolated signal input.
5.
Ensure that conductive parts of the electrodes or lead wires do not come in
contact with other conductive parts.
Look at the lead-check screen for indication of lead problems.
NOTE:
Use only electrodes and contact agents recommended by GE Healthcare.
The signal quality on the lead-check screen is not indicated until the RA/R
and RL/N electrodes are applied. If RA/R becomes disconnected, the system
reports that all electrodes are off the patient.
Electrode Placement
This section describes various methods for placing electrodes for both resting and
exercise ECGs.
CAUTION:
DELAYED DIAGNOSIS — Improper connection of the leadwires will cause
inaccuracies in the ECG.
Ensure the leadwires are connected properly. Trace each leadwire from its
acquisition module label to its colored connector and then to its electrode to
ensure that it is matched to the correct label leadwire connection location.
Resting ECG Placement
The following methods are applicable for resting ECGs.
Standard 12–Lead Placement
To acquire a standard 12–lead ECG, use the placement shown in the following diagram.
12–Lead Electrode Placement
50
AHA Label
IEC Label
Description
1
V1 red
C1 red
Fourth intercostal space at the right sternal border
2
V2 yellow
C2 yellow
Fourth intercostal space at the left sternal border
MAC™ 2000 ECG Analysis System
2053535-002C
Preparing the Patient
12–Lead Electrode Placement (cont'd.)
AHA Label
IEC Label
Description
3
V3 green
C3 green
Midway between location 2 and 4
4
V4 blue
C4 brown
Mid-clavicular line in the fifth intercostal space
5
V5 orange
C5 black
Anterior axillary line on the same horizontal level as 4
6
V6 purple
C6 purple
Mid-axillary line on the same horizontal level as 4 and 5
7
LA black
L yellow
Left deltoid
8
LL
F green
Above left ankle (Alternate placement, upper leg as
close to torso as possible)
9
RL green
N black
Above right ankle (Alternate placement, upper leg as
close to torso as possible)
R red
Right deltoid
10 RA white
2053535-002C
MAC™ 2000 ECG Analysis System
51
Preparing the Patient
NEHB Placement
To acquire a NEHB ECG, use the standard 12–lead electrode placement and items 1
and 2 as shown in the following diagram.
NEHB Electrode Placement
52
AHA Label
IEC Label
Description
1
A1 orange
Nst white
Attachment point of the second rib to the right sternal
edge
2
A2 orange
Nax white
Fifth intercostal space on the left posterior axillary line
(Same position as V7 or C7)
3
V4 blue
Nap white
Mid-clavicular line in the fifth intercostal space (Same
position as C4)
MAC™ 2000 ECG Analysis System
2053535-002C
Preparing the Patient
Stress 12–Lead Placement
To acquire a stress 12–lead ECG use the placement shown in the following diagram.
12–Lead Stress Electrode Placement
AHA Label
IEC Label
Description
1
V1 red
C1 red
Fourth intercostal space at the right sternal border
2
V2 yellow
C2 yellow
Fourth intercostal space at the left sternal border
3
V3 green
C3 green
Midway between location 2 and 4
4
V4 blue
C4 brown
Mid-clavicular line in the fifth intercostal space
5
V5 orange
C5 black
Anterior axillary line on the same horizontal level as 4
6
V6 purple
C6 purple
Mid-axillary line on the same horizontal level as 4 and 5
7
LA black
L yellow
Left deltoid
8
LL red
F green
Above left ankle (Alternate placement, upper leg as
close to torso as possible)
9
RL green
N black
Above right ankle (Alternate placement, upper leg as
close to torso as possible)
R red
Right deltoid
10 RA white
2053535-002C
MAC™ 2000 ECG Analysis System
53
Preparing the Patient
54
MAC™ 2000 ECG Analysis System
2053535-002C
Entering Patient Information
5
The following sections describe how to enter patient information using the following
methods:
• With an internal keypad or external keyboard
• With a barcode reader
Entering Patient Information With an Internal
Keypad or External Keyboard
Patient information should be entered for each new patient from whom readings
are taken. Use the following procedure to enter the information if you do not use
a barcode reader or if you want to modify or add to the patient data entered with
a barcode reader.
NOTE:
Patient information may be retained from a previous patient. Be sure to check
the patient information screen for each new patient. Data assigned to the wrong
patient causes erroneous patient information that can affect diagnosis and
treatment of the patient(s).
1.
Open the Enter Patient Data window.
For Resting ECG, press Main Menu > Resting ECG > Patient Data to open the
window.
For Arrhythmia or Stress, the window opens automatically when you initially
select the application.
For subsequent patients, you need to do one of the following to reopen the
Enter Patient Data window.
• In Arrhythmia mode, press Start Recording > New Patient.
• In Stress mode, press Patient Data.
2.
Enter the patient information, or press Patient List to select a patient from the
established list.
NOTE:
If you select a patient from the Patient List, only the first page of patient
information is reused; you need to manually enter all subsequent pages.
2053535-002C
MAC™ 2000 ECG Analysis System
55
Entering Patient Information
3.
Use the Page up and Page down keys to move through the patient data
windows.
NOTE:
If the CTDG (Clinical Trial Data Guard) option is activated, you enter clinical
trial data on the last window.
4.
When all the patient data has been entered, press Save to save the data.
Entering Patient Information with a Barcode
Reader
Using a barcode reader can simplify the entry of patient information and reduce
the chance of introducing errors. When you scan a patient’s barcode, it retrieves
the patient information encoded in the barcode. You can then verify or modify the
information as appropriate.
Before you can use the barcode scanner, you need to verify that it is connected to the
system and that the system is correctly configured to use the peripheral.
If it is not connected, follow the instructions for connecting and configuring the
barcode reader in the section “Connecting the Barcode Reader” on page 46 and
Appendix A “Creating Barcodes ” on page 185.
Scanning the Barcode
Use the following procedure to scan the patient’s barcode:
1.
When the following prompt is displayed on the screen, scan the patient’s
barcode:
Scan the Patient Barcode
The following message is displayed on the screen: Please wait.
The barcode reader beeps. The first Patient Data window opens with the data
from the patient’s barcode entered in the appropriate fields.
2.
56
Confirm that the data entered from the patient’s barcode is accurate.
MAC™ 2000 ECG Analysis System
2053535-002C
Entering Patient Information
3.
Enter or modify patient information as necessary.
Refer to “Entering Patient Information With an Internal Keypad or External
Keyboard” on page 55 for details.
4.
After verifying that the patient information is correct, press Save to save the
patient data.
Downloading Patient Demographics
The method for downloading patient demographics depends on the option you
purchased and the input method you selected.
You will use one of the following option codes:
• ADTF-ADT — Patient demographics download using the MUSE system or a
non-MUSE system
• ADTL-ADT — Patient demographics download using a non-MUSE system
You can download patient demographics using the following input methods. The one
you use depends on your system settings.
For information on setting this option, see “Basic Setup” on page 107.
• Internal keypad
• External keyboard
• Barcode Reader
Using the Barcode Reader
Use the following procedure to query the database and select the patient
demographics using a barcode reader.
1.
Navigate to Resting ECG.
2.
Select the Patient Data menu.
A dialog box opens instructing you to scan the patient barcode.
3.
Scan the patient barcode using the barcode reader.
A dialog box opens with the scanned Patient ID.
4.
Click OK to accept the selection.
The patient demographic data is downloaded and displayed.
Using the Internal Keypad or External Keyboard
Use the following procedure to query the database and select the patient
demographics using the internal keypad or external keyboard.
1.
Navigate to Resting ECG.
2.
Select the Patient Data menu.
A dialog box opens instructing you to enter the Patient ID.
2053535-002C
MAC™ 2000 ECG Analysis System
57
Entering Patient Information
3.
Enter the Patient ID using the internal keypad or external keyboard.
A dialog box opens with the Patient ID you entered.
4.
Click OK to accept the selection.
The patient demographic data is downloaded and displayed.
58
MAC™ 2000 ECG Analysis System
2053535-002C
Order Manager
6
The MAC 2000 system may retrieve orders from a Hospital Information System (HIS)
through MUSE or non-MUSE systems. There are two types of order managers: Simple
Orders and Advanced Order Manager.
You can complete orders using any of the communication media outlined in the
following section.
Communication Media
MUSE or non-MUSE systems can communicate with the MAC 2000 system in the
following ways:
• SD Card
If you are communicating to MUSE systems, this is only available with MUSE v7.1.1
or later.
• Modem
You can only connect to an internal modem.
• Local Area Network (LAN)
Connect the MAC system to the LAN through the communications port of the MAC
system.
• Direct Serial Connection
Connect the MAC system to the remote system using a standard serial cable.
• Wireless
Connect the MAC system to the remote system using a USB wireless module
connected to the MAC system.
This system is compatible with MUSE v7.1.1 and v8.0.1, and CardioSoft v6.51, v6.61,
and v6.71.
Simple Orders
Simple Orders provides an interface to quickly download and execute one order at
a time. To use Simple Orders, you need to enable either the SOML or SOMF option.
When the options are enabled, the Orders function key is available on the Resting
ECG screen.
When you select the Orders function key, this system queries for orders in the default
location you set in Communication Setup. As a response to this query, the system
2053535-002C
MAC™ 2000 ECG Analysis System
59
Order Manager
displays a list of available orders at the location specified. You can select a single
order from the list. The Patient Information screen of the Resting ECG application
opens with the information populated from the order.
Use the following procedure to execute orders in Simple Orders.
1.
Navigate to Resting ECG in the application.
2.
Select More > Orders.
The system displays a list of orders available at the default location.
3.
Select an order and press Load.
The selected single order is automatically downloaded from the remote system
and populated in the Patient Information screen.
You can also automatically execute a single order if the Auto Execute Single Order
setting is enabled in Resting ECG Setup and only one open order for the given location
is present in the remote system.
Use the following procedure to automatically execute a single order:
1.
Navigate to Resting ECG in the application.
2.
Select More > Orders.
The single order available at the default location is automatically downloaded
from the remote system and populated in the Patient Information screen.
Advanced Order Manager
Advanced Order Manager provides an interface to download and store multiple orders
on the system and execute them later. To use Advanced Order Manager, you need to
enable either the AOML or AOMF option.
Advanced Order Manager is available as a separate application named Order
Manager on the main menu of the system.
The Advanced Order Manager application has an interface that displays a list of orders
that are already downloaded to the system. The application allows you to query for
orders from the remote systems based on multiple locations. All matching orders
are displayed as the response to this query and you can download a single order or
multiple orders to the system. The downloaded orders are displayed as open resting
ECG orders in the application main screen.
Downloading Orders
Regardless of the method you use to communicate with the remote system, use the
following procedure to receive orders:
1.
From the Main Menu, select Order Manager.
The Order Manager window opens.
2.
Select Load Orders.
A pop-up window opens.
3.
Enter the location(s) from which you want to retrieve orders.
Locations must match the locations used on the remote system. Separate
multiple locations with commas (for example 1, 13, 55).
60
MAC™ 2000 ECG Analysis System
2053535-002C
Order Manager
4.
Press Enter.
The system connects to the remote system and retrieves a list of matching
orders.
5.
To select one order from the list, use the Select function key to select the order
you want and press Enter.
If you need to select multiple orders, use the trimpad and the Enter key to
highlight multiple orders.
6.
After you have selected all the orders you want to download, press the Load
Orders function key.
The system loads and stores the selected orders.
7.
Proceed to “Selecting and Completing Orders” on page 61.
The downloaded order list displays the Patient Name, Patient ID, Room, Time, Type,
Location, and Order Number. The list changes as you navigate the list. You can
select and execute only one order at a time from the list. When you select an order,
the resting ECG application opens and the Patient Information window is populated
with the patient demographics from the selected order.
An order is completed when the ECG record is saved or transmitted to the MUSE or
non-MUSE system. Completed orders are marked as completed.
Selecting and Completing Orders
After you have orders on the system, use the following procedure to select and
complete them.
1.
On the Order Manager window, choose Select.
The cursor moves to the list of available orders.
2.
Select the order you want to use and press Enter.
A window opens with the order details.
3.
Do one of the following:
• To select a different order, select Cancel.
The detail window closes and you return to the Order Manager window.
• To use the selected order, select Okay.
• If the TIPI option is activated, the Patent Information window opens with
the information from the order.
• If the TIPI option is not activated, select Patient Data to open the Patient
Information window.
4.
Enter or correct the patient data.
5.
Acquire an ECG for the order and save or transmit the acquired ECG.
6.
Select Main Menu to return to the Main Menu window.
7.
Select More > Order Manager to return to the Order Manager application.
An asterisk (*) on the left side of the Patient Name indicates that the order is
completed.
2053535-002C
MAC™ 2000 ECG Analysis System
61
Order Manager
Using the Order Manager Interface
You can do the following things with orders:
• Sort the list.
• Print the list.
• Delete single, multiple, completed, or all stored orders.
Order Manager Interface Options
Option
Description
Select
Selects the patient from the List of orders and displays the patient
information in an editable format.
Load Orders
Obtains the orders from the MUSE system and displays them on
the Order List Display screen.
Delete Orders
Provides the user a set of options to delete orders stored locally
on the device.
See “Deleting Orders” on page 62.
Sort Orders
Allows the user to sort the orders based on a user-selected field.
Print
Prints the selected order.
Main Menu
Returns the user to the Main Menu.
Deleting Orders
You can automatically delete a stored order when the associated ECG record is
automatically deleted, by enabling Auto Order Deletion in the Order Manager Setup
screen. See “Order Manager Setup” on page 156.
You can also configure automatic order deletion separately from automatic record
deletion. In this case, the system does not automatically delete a stored order when
the associated ECG record is manually deleted.
Use the following procedures to access the Delete Orders menu and delete orders
stored locally on the device.
62
MAC™ 2000 ECG Analysis System
2053535-002C
Order Manager
Accessing the Delete Orders Menu
Use the following procedure to access the Delete Orders menu.
1.
On the Main Menu, select Order Manager.
The Order Manager Interface window opens with a list of local orders displayed.
2.
Select Delete Orders.
The available options on the menu change.
3.
Do one of the following:
• To select orders to delete, proceed to “Deleting Specific Orders” on page 63.
• To delete all of the orders on the device, proceed to “Deleting All Orders”
on page 64.
• To delete all completed orders on the device, proceed to “Deleting Completed
Orders” on page 64.
4.
To cancel without deleting any order, select Cancel.
You return to the Delete Orders menu options.
Deleting Specific Orders
On the Delete Orders menu, use the following procedure to delete one or more
specific orders.
The cursor is placed at the first order in the list of orders.
1.
Select the order(s) you want to delete.
• Use Page Up, Page Down, and the trimpad to navigate through the list of
orders.
• To select an order, highlight it and press Enter.
2.
Select as many orders as necessary.
NOTE:
If you select an order that has not been processed, a window opens to ask
whether you want to delete the unprocessed order.
• Select Yes to continue deleting the unprocessed order.
• Select No to cancel the selection.
3.
After you have selected all of the orders to delete, select Delete Selected.
The following message is displayed: Are you sure you want to delete the
orders?
4.
Do one of the following:
• To delete the selected orders, select Yes.
The orders are deleted and you return to the Delete Orders menu options.
• To cancel the deletion, select No.
The orders are not deleted and you return to the Delete Orders menu options.
2053535-002C
MAC™ 2000 ECG Analysis System
63
Order Manager
Deleting All Orders
On the Delete Orders menu, use the following procedure to delete all of the orders.
1.
Select Delete All.
The following message is displayed: Are you sure you want to delete the
orders?
2.
Do one of the following:
• To delete all of the orders, select Yes.
The orders are deleted and you return to the Delete Orders menu options.
• To cancel the deletion, select No.
The orders are not deleted and you return to the Delete Orders menu options.
Deleting Completed Orders
On the Delete Orders menu. use the following procedure to delete all completed
orders:
1.
Select Del Completed.
The following message is displayed: Are you sure you want to delete all
completed orders?
2.
Do one of the following:
• To delete all of the completed orders, select Yes.
The orders are deleted and you return to the Delete Orders menu options.
• To cancel the deletion, select No.
The orders are not deleted and you return to the Delete Orders menu options.
NOTE:
Non-MUSE systems, such as EMR Gateway and Optima EMS, are GE Healthcare
proprietary systems.
64
MAC™ 2000 ECG Analysis System
2053535-002C
Recording a Resting ECG
7
The Resting ECG function is part of the basic ECG cart system. Resting ECG mode is
the default Power up mode. When the system is turned on, the Resting ECG display is
similar to the following screen. You can modify the default in the Basic Setup.
Resting ECG Display
Item
Name
Description
1
ECG Type
The following are valid types of ECGs:
• Resting ECG
• Arrhythmia
• Stress Test
2
2053535-002C
Display Format
Format of current waveforms. Press
Leads to cycle through all 12 leads.
MAC™ 2000 ECG Analysis System
65
Recording a Resting ECG
Resting ECG Display (cont'd.)
Item
Name
Description
3
Date
Current system date.
4
Time
Current system time.
5
Battery status indicator
Displays the current battery level.
For a description of the battery status
indicator see “Battery Status Indicator”
on page 172.
6
Internal storage indicator
This indicator is displayed only if the
internal storage option is enabled. It
displays the approximate number of
ECG records that you can store in the
remaining memory.
X represents the number of ECGs that
you can store in the remaining memory.
YY represents the total number of ECGs
that the system can store. YY can
be either 100 (if the M100 option is
activated) or 200 (if the M200 option is
activated). The difference equals the
number of ECGs currently stored in the
system.
7
Hookup Advisor Indicator
A tool for monitoring the quality of
ECG signals. For more information, see
“Hookup Advisor” on page 66.
8
Patient’s Heart Rate
Current patient heart rate measured in
beats per minute.
9
Menu Options
The list of available menu options
changes depending on the function
and the current location within that
function.
For more information, see “Using the
Function Keys” on page 36.
10
Lead Labels
Identifies each waveform and indicates
the waveform quality.
Yellow = a noisy lead
Red = disconnected lead
Hookup Advisor
This system offers the Hookup Advisor feature, which is a tool for monitoring the
quality of ECG signals, and is available in the Resting, Arrhythmia, and RR Analysis
applications. It can reduce or eliminate the occurrence of poor technical quality ECGs,
save time, and prevent the need for retakes.
66
MAC™ 2000 ECG Analysis System
2053535-002C
Recording a Resting ECG
The Hookup Advisor is displayed as a three-circle indicator in the upper right corner
of the screen.
The following table describes each of the indicator’s conditions.
Hookup Advisor Indicators
Indicator
Description
Red
Indicates a leadfail condition or extreme baseline shifts.
The red indicator is always the left-most circle of the of the indicator and
flashes when lit.
Yellow
Indicates muscle artifact, power line interference, baseline wander, or
electrode noise.
The yellow indicator is always the middle circle of the of the indicator.
NOTE:
In RR Analysis mode, the yellow indicator is not active. RR Analysis
supports only the red and green indicators of Hookup Advisor.
Green
Indicates acceptable signal quality.
The green indicator is always the right-most circle of the of the indicator.
When the lead quality is red or yellow, a message describing the lead problem or
status is displayed on the screen.
Hookup Advisor continuously reviews the ECG data for acceptable lead quality.
When an ECG is acquired, Hookup Advisor runs a complete and more comprehensive
assessment of the full 10 seconds of ECG data and possibly prompts the user
regarding any poor lead quality conditions.
• If Preview before analysis is turned off in the system setup, a lead quality message
and prompt may be displayed, depending on the current lead quality level and the
Prompt level in the system setup. If a message and prompt is displayed, the lead
quality indicator will reflect the overall 10-second lead quality.
• If Preview before analysis is enabled, the system setup Prompt level is disregarded
and the system immediately displays the Preview screen. Any lead quality
messages will be displayed in this screen along with the overall 10-second lead
quality indicator.
2053535-002C
MAC™ 2000 ECG Analysis System
67
Recording a Resting ECG
In either case, users may then do either of the following:
• Select Continue to continue (print the ECG).
• Select Cancel to cancel.
Resting ECGs
A resting ECG is the default mode of the ECG cart system, although you may change
this in the system configuration. This section describes how to record a resting ECG
and the available options.
Recording a Resting ECG
The following steps describe how to conduct a resting ECG.
NOTE:
To take a stat ECG, go directly to step 6.
1.
Prepare the patient as described in “Preparing the Patient” on page 49.
2.
Select Patient Data and enter the patient data as described in “Entering Patient
Information” on page 55.
3.
Adjust the Speed, Gain and Low pass filter until the waveforms are configured
as desired.
4.
If the patient has a pacemaker, turn on Pace Enhance.
For more information, see “ECG Options” on page 69.
5.
Select More > Printer Leads to scroll through the leads or change the lead
format.
6.
When the waveforms are configured, press ECG to begin the acquisition.
A progress bar indicates the percentage of the data acquired. When the
acquisition is complete, one of the following occurs, depending on the setting of
the Preview Before Analysis option on the Resting ECG Setup window.
• If the Preview Before Analysis option is enabled, a preview of the 10–second
ECG is displayed. Continue with step 7.
• If the Preview Before Analysis option is not enabled, the ECG data is analyzed
and printed after it is acquired. Proceed to step 8.
7.
While reviewing the preview, do one of the following:
• Discard the reading and press Cancel. Begin again from step 3.
• Wait for the menu options to change and then continue with step 8.
8.
Use the options to change patients, to print a copy of the ECG, or to save,
transmit, or reanalyze the data.
For more information on each option, see “Post-Acquisition Options” on page 71.
68
MAC™ 2000 ECG Analysis System
2053535-002C
Recording a Resting ECG
ECG Options
This system provides several options for configuring an ECG. The options, presented as
option keys across the bottom of the display, are listed in the following tables.
ECG Options–First Row
Option
Description
Patient Data
Opens the patient data entry window.
25 mm/s
Changes the speed of the waveform on the display and printout.
Changing the speed also changes the speed at which the wiper
bar moves across the display.
Measurement is in millimeters per second (mm/s) and includes the
following options:
• 25 mm/s
NOTE:
The initial
measurement
displayed is
set in System
Configuration
> Resting ECG
Setup.
• 50 mm/s
• 12.5 mm/s - 5 mm/s
• 12.5 mm/s
When the option includes two speeds (12.5 mm/s - 5 mm/s), the
first speed is for the display and the second speed is for the
printout.
Changing the measurement here does not change the
measurement set in System Configuration.
10 mm/mV.
NOTE:
The initial
measurement
displayed is
set in System
Configuration
> Resting ECG
Setup.
Changes the magnitude of the ECG signal on the display or in the
report. Measurement is in millimeters per millivolt (mm/mV) and
includes the following options:
• 5 mm/mV
• 10 mm/mV
• 20 mm/mV
• 40 mm/mV
• 2.5 mm/mV
• Automatic
The larger the selected measurement, the larger the waveform.
Only the representation of the waveform changes; signal strength
is not affected.
NOTE:
If Automatic is selected, the system calculates the best gain
based on the peak-to-peak amplitudes of all displayed leads
and the selected display format.
Changing the measurement here does not change the
measurement set in System Configuration.
2053535-002C
MAC™ 2000 ECG Analysis System
69
Recording a Resting ECG
ECG Options–First Row (cont'd.)
Option
150 Hz.
NOTE:
The initial
measurement
displayed is
set in System
Configuration
> Resting ECG
Setup.
Description
Eliminates noise in the waveform by restricting which frequencies
are included. Frequencies are measured in Hertz (Hz) and include
the following options:
• 20 Hz
• 40 Hz
• 100 Hz
• 150 Hz
Selecting a frequency eliminates signals that exceed that
frequency. The smaller the frequency selected, the more signal is
filtered out. For example, a filter of 40 Hz displays only signals at
40 Hz or less; signals greater than 40 Hz are ignored.
Changing the measurement here does not change the
measurement set in System Configuration.
Pace Enhance
Improves the readability of pacemaker ECGs. Options are On and
Off.
More
Toggles between the first row of options (previous) and the second
row of options (following).
ECG Options–Second Row
Option
Printer Leads
NOTE:
The initial
measurement
displayed is
set in System
Configuration
> Resting ECG
Setup.
70
Description
Selects which leads to include in the printout. Options are:
• First 6
• Second 6
• Rhythm 6
• 12
Use this option only when conducting rhythm ECGs. For more
information, see “Generating a Rhythm Report (Manual Recording)
” on page 74.
Changing the measurement here does not change the
measurement set in System Configuration.
ADS
Toggles the anti-drift system (ADS) on and off. ADS helps reduce
baseline drift.
Main Menu
Exits Resting ECG and returns you to the Main Menu.
More
Toggles between the first row of options (previous) and the second
row of options (following).
MAC™ 2000 ECG Analysis System
2053535-002C
Recording a Resting ECG
Post-Acquisition Options
In addition to setup options, the Resting ECG functionality offers additional options
after an ECG is acquired. The following screens and tables describe the option keys
across the bottom of the display.
Post-Acquisition Options—Screen One
Option
Next Patient
Description
Displays two new options:
• New Patient opens a blank Patient Information window.
• Same Patient opens the Patient Information window
populated with data from the previous patient.
2053535-002C
Print
Prints the ECG report.
Save
Stores the current ECG report. This option is available only if the
internal storage option is enabled.
Transmit
Sends the current ECG report to the location defined on the
Communication Setup window. This option applies only if a
valid LAN or Modem communication option is enabled.
Refer to “System Configuration” on page 107 for more
information.
RR Analysis
Allows you to enter into RR Analysis mode.
More
Returns to the setup options.
For more details, refer to “ECG Options” on page 69.
MAC™ 2000 ECG Analysis System
71
Recording a Resting ECG
Post Acquisition Options—Screen Two
72
Option
Description
Next Patient
Opens the patient entry window allowing you to enter or select
a new patient.
Speed
Changes the speed of the waveform on the display and
printout. Changing the speed also changes the speed the wiper
bar moves across the display.
Gain
Changes the magnitude of the ECG signal on the display or in
the report. Measurement is in millimeter per millivolt (mm/mV).
Filter
Eliminates noise in the waveform by restricting which
frequencies are included. Frequencies are measured in Hertz
(Hz).
Pace Enhance
Standardizes the pace spike. Options are On and Off.
More
Toggles between the second and third row of acquisition
options.
MAC™ 2000 ECG Analysis System
2053535-002C
Recording a Resting ECG
Post Acquisition Options—Screen Three
Options
Description
Printer Leads Rhythm
Selects which leads to include in the printout.
Reanalyze
Allows you to edit the global measurements and T-wave
dispersion. This option is available only if the Measurement
option is enabled and the Reanalysis option is selected in the
Resting ECG Setup window.
For more information, refer to “Resting ECG Setup” on page 112.
ADS
Toggles the anti-drift system (ADS) on and off. ADS helps reduce
baseline drift.
Main Menu
Exits the Resting ECG function and returns to the Main Menu.
More
Toggles between the second and third row of acquisition
options.
Special Considerations
When recording ECGs, you need to make special considerations for the following
situations:
• Recording ECGs of pacemaker patients
• Recording ECGs during defibrillation
Recording ECGs of Pacemaker Patients
Because of slow paper speed, pacer pulses cannot be displayed directly on the ECG
recording. For example, with a paper speed of 50 mm/s and a pulse duration of only
0.5 ms, the width of the recorded pacer pulse would be only 0.025 mm.
If Pace Enhance is enabled, the recorder reduces the pulse amplitude and expands
its width to make pacer pulses easier to identify. The system records the pulse with
the correct polarity, a width of 5 ms, and equal amplitude in all leads. Depending on
the polarity of the pacer pulse in leads I and II, the pacer pulse in lead III may be
suppressed. The following figure of an ECG recording with pacer pulses shows the
amplitude of the reverse current.
2053535-002C
MAC™ 2000 ECG Analysis System
73
Recording a Resting ECG
Recording ECGs During Defibrillation
NOTICE:
EQUIPMENT DAMAGE — Damaged cables can cause mechanical problems.
Before connecting the cable to the device, check it for signs of physical damage. Do
not use a damaged cable.
For patient safety, use only the original GE Healthcare patient cable.
WARNING:
SHOCK HAZARD — Touching the patient, electrodes, or leadwires during
defibrillation can cause a shock.
During defibrillation, do not touch the patient, the electrodes, or the leadwires.
Observe all defibrillator safety information.
This equipment is protected against the effects of cardiac defibrillator discharge to
allow the ECG trace to return after defibrillation, as required by test standards.
The patient signal input is defibrillation-proof; it is not necessary to remove the ECG
electrodes before defibrillating the patient if non-polarizing electrodes are being used.
When using stainless steel or silver electrodes, the defibrillator discharge current may
cause the electrodes to retain a residual charge, causing an electrode polarization or
DC offset voltage. This blocks ECG signal acquisition for several minutes. If polarizing
electrodes are used, GE Healthcare recommends that you disconnect the leadwires
from the patient before delivering the shock.
To prevent polarization, GE Healthcare recommends the use of non-polarizing
disposable electrodes with defibrillation recover ratings as specified in AAMI EC12
3.2.2.4 (MMS PN 9623-105 Silver MacTrodes, MMS spec TP9623-003), which requires
the polarization potential of an electrode pair not exceed 100 mV five seconds after a
defibrillation discharge.
Generating a Rhythm Report (Manual Recording)
The Resting ECG mode allows you to generate Rhythm Reports, which are printed
reports only. They do not have computer-generated interpretation or measurements,
and you cannot store them to internal memory or transmit them. Use the following
steps to generate a Rhythm Report.
1.
Prepare the patient as described in “Preparing the Patient” on page 49.
2.
Verify that the system is in Resting ECG mode.
If the system is not in Resting ECG mode, on the Main Menu press Resting ECG.
3.
Enter the patient data as described in “Entering Patient Information” on page 55.
4.
Adjust the Speed, Gain, and Low Pass Filter until the waveforms are configured
as desired.
For more information, see “ECG Options” on page 69.
5.
If the patient has a pacemaker, press Pace Enhance.
For more information, see “ECG Options” on page 69.
74
MAC™ 2000 ECG Analysis System
2053535-002C
Recording a Resting ECG
6.
Press Leads to scroll through all 12 leads.
For more information on display formats, see “Resting ECG Setup” on page 112.
7.
Press More > Printer Leads to select the appropriate option.
For more information on the Printer Leads option, see “ECG Options” on page 69.
8.
Press Rhythm to begin recording the ECG.
9.
Press Stop to stop the ECG recording.
If you press Rhythm after pressing Stop, the new report either begins printing
immediately on the current sheet of paper or advances to a new page, depending on
the setting of the field: Start rhythm report on a new page. This field is located on the
Resting ECG Setup window. See “Resting ECG Setup” on page 112 for details.
2053535-002C
MAC™ 2000 ECG Analysis System
75
Recording a Resting ECG
76
MAC™ 2000 ECG Analysis System
2053535-002C
Arrhythmia Mode Recording
8
The Arrhythmia mode is part of the basic ECG cart system. The interface of the
Arrhythmia mode is similar to the interface for the Resting ECG mode. For more
information on the Resting ECG interface, see “Recording a Resting ECG” on page 65.
Recording in Arrhythmia Mode
This section describes the process for recording an arrhythmia report, the waveform
options, and the printing options.
Recording Arrhythmia ECGs
1.
Prepare the patient as described in “Preparing the Patient” on page 49.
2.
Select Main Menu > Arrhythmia.
The Enter Patient Data window opens.
3.
Enter the patient data as described in “Entering Patient Information” on page 55.
4.
Adjust the gain, speed, filter, and pacemaker enhancement as necessary.
Refer to “Arrhythmia Recording Options” on page 78.
5.
After the settings are adjusted as required, select Start Recording to begin the
arrhythmia ECG.
6.
After you have recorded an adequate amount of information, press Stop
Recording.
Two new options become available: Confirm Stop and Continue Recording.
7.
Do one of the following:
• If you need to record additional information, press Continue Recording.
This returns to the recording mode. Repeat from step 6.
• If you have determined enough information was recorded, press Confirm
Stop.
Report options become available.
If you want to print the Arrhythmia recording, continue with “Printing an Arrhythmia
Report” on page 79.
2053535-002C
MAC™ 2000 ECG Analysis System
77
Arrhythmia Mode Recording
Arrhythmia Recording Options
Arrhythmia Options- first row
Option
Description
Start Recording
Starts the arrhythmia reading.
If you did not fill out the Patient Data to select a patient, you
receive the following message: No Patient Selected. Do you
want to continue without patient data?
1. Select the No tab to continue.
The Enter Patient Data window opens.
25 mm/s
NOTE:
The initial
measurement
displayed is
set in System
Configuration >
Arrhythmia Setup.
2.
Enter the information on each page and select Save.
3.
Select Start Recording.
Changes the speed of the waveform on the display and
printout. Changing the speed also changes the speed at which
the wiper bar moves across the display.
Measurement is in millimeters per second (mm/s) and includes
the following options:
• 25 mm/s
• 50 mm/s
• 12.5 mm/s - 5 mm/s
• 12.5 mm/s
When the option includes two speeds (12.5 mm/s - 5 mm/s),
the first speed is for the display and the second speed is for
the printout.
Changing the measurement here does not change the
measurement set in System Configuration.
5 mm/mV
NOTE:
The initial
measurement
displayed is
set in System
Configuration >
Arrhythmia Setup.
Changes the magnitude of the ECG signal on the display or in
the report. Measurement is in millimeters per millivolt (mm/mV)
and includes the following options:
• 5 mm/mV
• 10 mm/mV
• 20 mm/mV
• 40 mm/mV
• 2.5 mm/mV
• Automatic
The larger the selected measurement, the larger the waveform.
Only the representation of the waveform changes; signal
strength is not affected.
NOTE:
If Automatic is selected, the system calculates the best
gain based on the peak-to-peak amplitudes of all displayed
leads and the selected display format.
Changing the measurement here does not change the
measurement set in System Configuration.
78
MAC™ 2000 ECG Analysis System
2053535-002C
Arrhythmia Mode Recording
Arrhythmia Options- first row (cont'd.)
Option
Description
20 Hz
Eliminates noise in the waveform by restricting which
frequencies are included. Frequencies are measured in Hertz
(Hz) and include the following options:
• 20 Hz
NOTE:
The initial
measurement
displayed is
set in System
Configuration >
Arrhythmia Setup.
• 40 Hz
• 100 Hz
• 150 Hz
Selecting a frequency eliminates signals that exceed that
frequency. The smaller the frequency selected, the more signal
is filtered out. For example, a filter of 40 Hz displays only signals
at 40 Hz or less; signals greater than 40 Hz are ignored.
Changing the measurement here does not change the
measurement set in System Configuration.
More
Toggles between the first row of options (previous) and the
second row of options (following).
Arrhythmia Options second row
Option
Description
Pace Enhance
Improves the readability of pacemaker ECGs. Options are On
and Off.
Patient Data
Opens the Patient Data Entry window.
This tab is available only if you did not complete the Portent
Data Entry window earlier.
Main Menu
Exits the Arrhythmia function and returns to the Main Menu.
More
Toggles between the first row of options and the second row
of options
Printing
You can manually generate an arrhythmia printout in a table format, an episode
format, or a summary format.
Printing an Arrhythmia Report
Use the following procedure to print an Arrhythmia report.
1.
Select the type of Arrhythmia report you want to print and press the appropriate
function key.
• To print the summary report, press Print Summary.
• To print the table report, press Print Table.
• To print the arrhythmia episodes, press Print Episodes.
2053535-002C
MAC™ 2000 ECG Analysis System
79
Arrhythmia Mode Recording
Refer to “Arrhythmia Printing Options” on page 80 for details.
2.
Review the report as necessary.
For more information, refer to “Arrhythmia Codes” on page 80.
Arrhythmia Printing Options
When printing an arrhythmia report, you have the following options:
Arrhythmia Printing Options
Option
Description
Print Summary
Prints a combined report that includes both the Table and
Episode formats.
Print Table
Prints a breakdown of the recording in tabular format. The
report includes:
• the analysis duration in minutes and seconds
• the artifact duration in minutes and seconds
• a code for each event type recorded
• the number of each event type recorded
For a description of the possible event codes, refer to
“Arrhythmia Codes” on page 80.
Print Episodes
'Prints a standard waveform report of the recorded events.
The signal from all recorded leads is printed and each event is
marked with the corresponding arrhythmia code.
For a description of the possible event codes, see “Arrhythmia
Codes” on page 80 .
Main Menu
Exits the Arrhythmia function and returns to the Main Menu.
More
Toggles between the arrhythmia recording options and the
arrhythmia printing options.
Arrhythmia Codes
The following table identifies the codes used on the Arrhythmia reports and the
events they represent.
Code
A
ASYSTO
Artifact
Asystole, limit value 3s
CPLT
Ventricular couplet (2 PVCs)
ESC
Ventricular escape beat
L
80
Arrhythmia Event
Learn phase
PAU1
Pause of 1 missed beat
PAU2
Pause of 2 missed beats
PCAP
Pacemaker capture
MAC™ 2000 ECG Analysis System
2053535-002C
Arrhythmia Mode Recording
Code
PERR
Pacemaker error
PSVC
Premature supraventricular contraction
PVC
Premature ventricular contraction
QRSL
Learned QRS complex
RUN
Ventricular run (3 PVCs)
VBIG
Ventricular bigeminy
VFIB
Ventricular fibrillation/flutter
VTACH
2053535-002C
Arrhythmia Event
Ventricular tachycardia (>3 PVCs)
MAC™ 2000 ECG Analysis System
81
Arrhythmia Mode Recording
82
MAC™ 2000 ECG Analysis System
2053535-002C
9
RR Analysis
RR Analysis is an optional mode of the system. It detects hidden patterns underlying
the complex dynamic phenomena of heart rate variability (HRV) and measures the
cardiac RR intervals. This option is not available in the U.S.
RR Analysis Mode
This section outlines the procedure for generating an RR Analysis report and describes
the available setup, waveform, and output options.
RR Analysis Settings Window
Option
Description
Start Test
Starts the RR Analysis test.
Patient Data
Opens the Patient Data Entry window.
RR Analysis Setup
Configures the RR Analysis test. See “RR Analysis Setup”
on page 83 for details.
Main Menu
Exits the RR Analysis mode and returns to the Main Menu.
RR Analysis Setup
The RR Analysis Setup function allows you to configure the RR Analysis report,
including:
• Target
• Record lead
• Waveform parameters
• Report options
2053535-002C
1.
Prepare the patient as described in “Preparing the Patient” on page 49.
2.
From the device Main Menu, press RR Analysis.
3.
Press Patient Data and enter the patient data as described in “Entering Patient
Information” on page 55.
4.
Press RR Analysis Setup and adjust the setup options as necessary.
MAC™ 2000 ECG Analysis System
83
RR Analysis
84
MAC™ 2000 ECG Analysis System
2053535-002C
RR Analysis
RR Analysis Settings Window
Description
Field
Target
Selects the target of the test.
Available options are:
• 100 Beats
• 200 Beats
• 300 Beats
• 400 Beats
• 500 Beats
• 1 min
• 2 min
• 3 min
• 4 min
• 5 min
Record Lead
Selects which rhythm lead is displayed and stored.
Available options are:
• I
• II
• III
• aVR
• aVL
• aVF
• V1
• V2
• V3
• V4
• V5
• V6
2053535-002C
Line Filter
Enables/disables the line filter defined in Country
Setup. See “Country Setup” on page 141 for more
information.
Pace Enhancement
Improves the readability of pacemaker ECGs. Options
are On and Off.
MAC™ 2000 ECG Analysis System
85
RR Analysis
RR Analysis Settings Window (cont'd.)
Description
Field
Gain [mm/mV]
Sets the magnitude of the ECG signal. Measurement
is in millimeters per millivolt (mm/mV) and includes
the following options:
• 2.5 mm/mV
• 5 mm/mV
• 10 mm/mV
• 20 mm/mV
• 40 mm/mV
• Automatic
The larger the selected measurement, the larger the
waveform. Only the representation of the waveform
changes; signal strength is not affected.
NOTE:
If Automatic is selected, the system calculates
the best gain based on the peak-to-peak
amplitudes of all displayed leads and the selected
display format.
Speed [mm/s]
Changes the speed of the waveform on the display
and printout. Changing the speed also changes
the speed at which the wiper bar moves across the
display.
Measurement is in millimeters per second (mm/s) and
includes the following options:
• 12.5 mm/s
• 25 mm/s
• 50 mm/s
Low Pass Filter [Hz]
Eliminates noise in the waveform by restricting which
frequencies are included. Frequencies are measured
in Hertz (Hz) and include the following options:
• 20 Hz
• 40 Hz
• 100 Hz
• 150 Hz
Selecting a frequency eliminates signals that exceed
that frequency. The smaller the frequency selected,
the more signal is filtered out. For example, a filter of
40 Hz displays only signals at 40 Hz or less; signals
greater than 40 Hz will be ignored.
86
ADS
Enables or disables ADS (Anti Drift System).
Rhythm Record
Enables/disables the printing of the rhythm lead
waveform on the report.
RR Table
Enables/disables the printing of the RR table on the
report.
MAC™ 2000 ECG Analysis System
2053535-002C
RR Analysis
5.
Press Save to record your settings.
6.
Continue with “Acquiring a Recording for an RR Analysis Report” on page 87.
Acquiring a Recording for an RR Analysis Report
1.
Press Start Test.
The device begins to acquire the ECG. The target beats, acquired beats, and
acquired time are updated in real time on the screen.
2.
While the ECG is being acquired, you can do any of the following:
• Change the Speed.
• Change the Gain.
• Change Low Pass Filter.
• Toggle Pace Enhancement.
For more information on any of these options, see “RR Analysis Setup” on page
83.
When the target is achieved, the system automatically stops, and displays a
preview of the summary results, histogram, trendgram, and output options.
3.
While reviewing the preview, execute one of the output options described in
“Output Options” on page 87.
Output Options
The following options are available after the RR Analysis test completes:
Output Options
Option
2053535-002C
Description
Press Return.
Discards the reading and returns to pre-test status.
Repeat the steps in “Acquiring a Recording for an RR Analysis
Report” on page 87.
Press Main Menu.
Discards the reading, exits the RR Analysis mode, and returns to
the Main Menu.
Press Print.
Accept the reading and prints the RR Analysis Report on the
thermal printer.
PDF Export
Accepts the reading and exports the RR Analysis Report to a PDF
file.
MAC™ 2000 ECG Analysis System
87
RR Analysis
88
MAC™ 2000 ECG Analysis System
2053535-002C
10
Stress Testing
The Stress mode is an optional feature that allows you to conduct stress tests with any
of the following devices.
Stress Equipment
Description
Supported treadmills and
ergometers
Supported equipment connects to the ECG cart system through
the serial port labelled COMM A on the back of the device. You
can control the equipment through this connection. When a
test phase changes, a signal is sent from the system to the
equipment to change the speed, grade, or load, as appropriate.
You can also manually override the equipment from the ECG
cart keyboard. See “Stress Test Keys” on page 92, for more
information.
Supported equipment includes the following:
• T2000 and T2100
• eBike
Ergometers with remote
start
This equipment also connects to the ECG cart system through
the serial port labelled COMM A on the back of the device.
However, the system does not control the equipment. Instead,
when the equipment changes load, it signals the system, which
changes test stages accordingly.
Unsupported treadmills
and ergometers
Unsupported equipment does not connect to the ECG cart
system. Instead of signaling the equipment when a test phase
changes, the system notifies the operator, who manually
adjusts the equipment’s parameters.
Master Step
This equipment does not connect to the system. The system
emits a tone to instruct the patient when to take a step.
Stress tests include the following parameters:
• Patient data
• Waveform speed and gain
• Pacemaker enhancement
• Finite residual filter
• Printer leads
• Report format
2053535-002C
MAC™ 2000 ECG Analysis System
89
Stress Testing
• Target heart rate
• Test protocol
You cannot store the results of the test to internal storage or the external SD card.
Instead, you must print the results. You can select any of the following report formats:
• Summary Report
• Tabular Summary
• Trend Report
• ST Trend Report
• ST Summary Report
• Episode Report
To use the Stress ECG mode, you must meet the following conditions:
• You must purchase the ERGO option and add it to the system.
For more information, see “Options Setup” on page 153.
• You must select the correct equipment on the Basic System Setup.
For more information, see “Basic Setup” on page 107.
• You must configure the Stress ECG Setup correctly.
For more information, see “Stress ECG Settings” on page 124.
Stress Mode Interface
The Stress ECG mode uses two special features: a Stress Test Information Bar and
Stress Test Keys. It also offers several configuration options.
Stress Test Information Bar
The Stress ECG mode adds an information bar on the right side of the ECG cart
system display, as seen in the following illustration. Descriptions of the bar’s key
elements follow the illustration.
90
MAC™ 2000 ECG Analysis System
2053535-002C
Stress Testing
Stress Test Information Bar
Feature
Item
Number
2053535-002C
Description
1
Target Rate
The target heart rate and the current heart
rate’s percentage of that target.
2
VE/min
Ventricular ectopics per minute (also known
as premature ventricular contraction). This
is calculated as the sum of all Premature
Ventricular Contractions (PVCs) and Ventricular
Escape beats (ESCs) detected in the past
60-second interval.
3
Blood Pressure
Blood pressure in mmHg (millimeters of mercury)
or kPa (kilopascals), depending on the Blood
Pressure Unit setting on the Country Settings
window.
For more information, see “Country Setup” on
page 141.
4
RPP/100
The Rate-Pressure Product divided by 100.
The rate-pressure product is calculated by
multiplying the systolic blood pressure with the
current heart rate. The product is then divided
by one hundred. For example, an RPP of 10200
displays as 102.
5
Protocol
Name of the current test protocol and its total
duration in minutes and seconds.
MAC™ 2000 ECG Analysis System
91
Stress Testing
Stress Test Information Bar (cont'd.)
Feature
Item
Number
Description
6
Phase
Name of the current test phase and its total
duration in minutes and seconds.
7
Stage
Name of the current test stage and its total
duration in minutes and seconds. Displays in red
when the system is in manual mode.
8
Speed/Load
Speed of the treadmill or load of the ergometer.
Speed may be displayed as km/h (kilometers
per hour) or mph (miles per hour) depending on
the Speed Unit selected on the Country Settings
window.
Load is displayed in watts.
For more information, see “Country Setup” on
page 141.
9
Grade/RPM
The grade for a treadmill, in percent, or the
revolutions per minute for an ergometer.
10
METS
Metabolic equivalent of the current exercise
level.
Stress Test Keys
The Stress keys are described in “Stress Keys” on page 34.
Stress Options
This ECG cart system provides several options for configuring a Stress ECG. The
options, presented as option keys across the bottom of the display, are listed in the
following tables.
Stress Option Keys–First Row
Option
Description
Patient Data
Opens the patient data entry window.
Sweep Speed
Changes the speed of the waveform on the display and printout.
Changing the measurement also changes the speed of the wiper
bar on the display.
The measurement is in millimeters per second (mm/s) and includes
the following options:
• 25 mm/s
• 50 mm/s
• 12.5 mm/s - 5 mm/s
• 12.5 mm/s
When the option includes two measurements (12.5 mm/s - 5
mm/s), the first speed is for the display and the second speed is
for the printout.
92
MAC™ 2000 ECG Analysis System
2053535-002C
Stress Testing
Stress Option Keys–First Row (cont'd.)
Option
Description
Gain
Changes the magnitude of the ECG signal on the display or in the
report. The measurement is in millimeters per millivolt (mm/mV)
and includes the following options:
• 5 mm/mV
• 10 mm/mV
• 20 mm/mV
• 40 mm/mV
• 2.5 mm/mV
• Automatic
The larger the selected measurement, the larger the waveform.
Only the representation of the waveform changes; signal strength
is not affected.
NOTE:
If Automatic is selected, the system calculates the best gain
based on the peak-to-peak amplitudes of all the displayed
leads and the selected display format.
Low Pass Filter
Toggles through the Low Pass Filter options: 20 Hz, 40 Hz, 100 Hz,
and 150 Hz. It defaults to the setting selected on the Stress
Setup window. (See “Stress ECG Settings” on page 124 for more
information.)
If the ADS filter type was selected in Stress Setup, this softkey is
displayed regardless of whether the filter is on or off. If the FRF
filter type was selected in Stress Setup, this softkey is displayed
only if the filter is off.
ECG Filter Type
Toggles on and off the ECG filter type (ADS or FRF) selected on the
Stress Setup window. In addition, if the FRF filter type was selected,
toggling the filter off also displays the Low Pass Filter softkey.
More
Toggles between the first and second row of options.
Stress Text Option Keys—Second Row
Option
Description
Pace Enhance
Increases the readability of pacemaker ECGs. Options are On and
Off.
Printer Leads
Selects which leads to include in the printout. Options are:
• First Six
• Second Six
• Rhythm Six
• 12
Use this setting only when conducting rhythm ECGs. For more
information, see “Generating a Rhythm Report (Manual Recording)
” on page 74.
2053535-002C
MAC™ 2000 ECG Analysis System
93
Stress Testing
Stress Text Option Keys—Second Row (cont'd.)
Option
Description
Select Protocol
Selects a predefined set of test criteria. For more information, see
“Editing Stress Protocols” on page 128.
Report Format
Selects the components and episodes to include in the report.
Allows you to override the defaults set on the Stress ECG Setup
window. For more information, see “Stress ECG Settings” on page
124.
Target HR
Enter the maximum heart rate calculated for the patient based on
weight, gender, age, and condition. The ECG cart system monitors
the heart rate against this target.
More
Toggles between the first, second, and third row of options.
Stress Text Option Keys—Third Row
Option
Description
Main Menu
Exits the Stress ECG function and returns to the Main Menu.
More
Toggles between the first, second, and third row of options.
Conducting Stress Tests
There are two basic processes for conducting a stress test:
• Conducting a stress test with a treadmill or ergometer
• Conducting a stress test with a Master’s Step device
Each process is described in this section. For information on the Stress Mode interface,
see “Stress Mode Interface” on page 90.
Conducting a Stress Test with a Treadmill or Ergometer
Use the following instructions to conduct a stress test with a treadmill or ergometer.
The process is essentially identical for all devices with only minor differences between
supported equipment, unsupported equipment, and ergometers with remote start.
Deviations for specific accessories are noted where appropriate.
WARNING:
PATIENT INJURY — When on a moving treadmill, a patient could fall and sustain
an injury.
To minimize the possibility of a falling caused by the belt’s sudden movement,
have the patient step onto the belt only after it begins moving.
When conducting stress tests on a supported treadmill, press the Stop TM button
twice to immediately stop the belt in the case of an emergency (for example, if
the patient stumbles or falls while the belt is moving).
1.
Prepare the patient as described in “Preparing the Patient” on page 49.
2.
On the Main Menu press the Stress ECG option.
The Enter Patient Data window opens.
94
MAC™ 2000 ECG Analysis System
2053535-002C
Stress Testing
3.
Enter patient data as described in “Entering Patient Information” on page 55.
4.
Adjust the stress options as necessary:
This includes the speed and gain, finite residual filter, pacemaker enhancement,
printer leads, test protocol, report format, and target heart rate. For more
information on setting these options, see “Stress Options” on page 92.
5.
Record a preliminary ECG.
This may be a seated, standing, supine, or hyperventilating ECG, depending on
the requirements of the selected protocol.
6.
Begin the pretest phase.
a.
Have the patient get on the device.
b.
Press the Pretest key.
c.
Allow the patient to warm up before beginning the exercise phase of the
test.
NOTE:
On supported treadmills, press Start TM to start the belt.
7.
When the patient is ready to begin the stress test, press the Exercise key.
During the test, you can use the stress keys to hold the current stage, enter
blood pressure, add a comment, change the displayed leads, and toggle the
finite residual filter. With supported equipment, you can also use the stress keys
to adjust the equipment’s speed, grade, or load. With unsupported equipment,
the equipment must be adjusted manually at the equipment itself.
For more information on making these adjustments, see “Stress Test Keys” on
page 92.
8.
When the exercise phase is complete, press the Recovery key to begin the
recovery phase of the test.
NOTE:
When using an ergometer with remote start, you do not need to press the
Recovery key because the recovery phase begins automatically at the end
of the last stage. However, you can press the Recovery key to begin the
recovery phase before the last stage ends.
On supported treadmills, the belt begins to slow and the grade drops to 0%. On
supported ergometers, the load begins to lighten. On unsupported treadmills
and ergometers, these adjustments must be made manually.
Continue to monitor the patient and record the ECG until the device stops.
9.
When the recovery phase is over, press the Test End key.
The menu options at the bottom of the screen change to Confirm Test End and
Continue Test. Do one of the following:
• To return to the test, press Continue Test.
The previous menu options return. Continue to record the ECG as needed.
When you are done, repeat this step.
• To stop the test, press Confirm Test End.
2053535-002C
MAC™ 2000 ECG Analysis System
95
Stress Testing
The menu options change. Continue to step 10.
10.
Do any of the following, as necessary.
• Press Next Patient to test another patient.
You are warned that testing another patient discards the results of the
current test. Do one of the following:
• Press No to cancel the change in patients and return to the current test.
You can either print the current test report or change the report formats.
• Press Yes to erase the current test results and test a new patient.
Repeat from step 3 for the next patient.
• Press Print to print the test’s report.
The report prints with the selected format options.
• Press Report Format to modify the report format.
The Report Format window opens. Select the options you want to include in
the report and press Save. You can now print the test’s report.
Conducting a Stress Test with a Master’s Step Device
Use the following instructions to conduct a stress test with a Master’s Step device,
if it is selected in Basic Setup.
1.
Prepare the patient as described in “Preparing the Patient” on page 49.
2.
On the Main Menu press Stress ECG.
The Enter Patient Data window opens.
3.
Enter patient data as described in “Entering Patient Information” on page 55.
Be sure you enter accurate information for Date of Birth, Gender, and Weight.
The number of steps is determined by these three parameters.
For more information on using Master’s Step, see “Master’s Step Data” on page
189.
4.
Adjust the stress options as necessary:
This includes the speed and gain, finite residual filter, pacemaker enhancement,
printer leads, test protocol, report format, and target heart rate. For more
information on setting these options, see “Stress Options” on page 92.
5.
Record a preliminary ECG.
This may be seated, standing, supine, or hyperventilating, depending on the
requirements of the selected protocol.
6.
Begin the pretest phase to allow the patient to warm up.
a.
Remove the leadwires from the patient, but leave on the electrodes.
This prevents the patient from tripping on the leadwires during the test.
96
b.
Instruct the patient to take a step whenever the system beeps.
c.
Press the Pretest key.
MAC™ 2000 ECG Analysis System
2053535-002C
Stress Testing
7.
Press the Exercise key to begin the test.
The duration of the exercise phase is dependent on the selected protocol:
• SINGLE is 90 seconds
• DOUBLE is 180 seconds
• TRIPLE is 270 seconds
When the test is complete, the first POST EXER. stage begins and the ELECTR.ON
message is displayed.
8.
Reattach the leadwires to the electrodes.
The median report prints at pre-configured intervals during the post exercise
stages. When the last post exercise stage is complete, a summary report with
trends and tables prints.
2053535-002C
MAC™ 2000 ECG Analysis System
97
Stress Testing
98
MAC™ 2000 ECG Analysis System
2053535-002C
Managing Internal Storage
11
The File Manager provides an interface to the system’s optional internal storage.
It provides the tools to:
• Import records from an external source
• Print the internal storage directory
• Search stored records
• Edit a record’s patient data
• Delete records
• Print records
• Transmit records to an external device
• Export records to a secure digital card or shared directory
You can print resting ECGs or save them to internal storage. You can only print
arrhythmia and stress ECGs.
You can store resting ECGs automatically or manually:
• To save resting ECG records automatically, on the Resting ECG Settings window,
select the Auto Store ECG check box. For more information, see “Resting ECG
Setup” on page 112.
• To save resting ECG records manually, after the resting ECG is acquired, press Save.
For more information, see “Post-Acquisition Options” on page 71.
To enable internal storage, you must enable the M100 option, Internal Storage for 100
ECGs, or the M200 option, Internal Storage for 200 ECGs (at a 500 Hz sampling rate).
Importing Records
In addition to saving ECGs recorded with the system, you can also import ECG records
to internal storage from the following sources:
• Secure Digital (SD) cards
• CardioSoft systems connected via serial port or modem
• MUSE systems connected via modem
No additional set up is required to import from an SD card.
2053535-002C
MAC™ 2000 ECG Analysis System
99
Managing Internal Storage
To import data via serial port or modem you need to do the following:
• Purchase and activate the appropriate communications option.
For more information see “Options Setup” on page 153.
• Configure the system’s data communication settings.
For more information, see “Communication Setup” on page 131.
NOTE:
Imported records have a Sent status of Recv and you cannot edit, transmit or
export them.
Use the following instructions to import a record into internal storage:
1.
On the Main Menu press File Manager.
The File Manager window opens.
2.
Press Import.
The function keys change.
3.
Select the appropriate import source from the following options:
• To import ECGs via serial port, press Serial
The serial port opens. The system waits while the external device transmits
the records.
• To import ECGs via modem, press Modem.
The modem initializes. The system waits while the external device transmits
records.
• To import ECGs from an SD card, insert the SD card and press SD Card.
A list of the available ECGs on the card opens. Continue with step 4.
4.
Select the records you want to import from the SD card.
5.
When the correct records are selected, press Import.
Printing the File Manager Directory
Use the following instructions to print the directory of ECGs stored in internal memory:
1.
On the Main Menu press File Manager.
The File Manager window opens.
2.
Press Print Directory.
The directory prints on the writer.
100
MAC™ 2000 ECG Analysis System
2053535-002C
Managing Internal Storage
Finding Records
The File Manager may have up to 200 records to manage (if the M200 option is
enabled), making it difficult to find a specific record. To help you locate a record or a
group of records, use the following instructions.
1.
On the Main Menu, press File Manager.
The File Manager window opens.
2.
Press Search.
The Enter Search Criteria window opens.
3.
Enter your search criteria.
4.
Press Search.
The File Manager retrieves all the records that match your search criteria.
5.
To clear the search results, do one of the following:
• Press Main Menu > File Manager.
• Press Search > Return.
• Press Search > Clear All > Search.
Editing Patient Data
Use the following instructions to edit a record’s patient data:
1.
On the Main Menu press File Manager.
The File Manager window opens.
2.
Press Select.
This enters the File Manager into Select mode.
2053535-002C
MAC™ 2000 ECG Analysis System
101
Managing Internal Storage
3.
Use the trimpad to select the record you want to edit.
NOTE:
You cannot edit the patient data for records that were imported to internal
storage. Imported records have a Sent status of Recv.
4.
Press Edit.
The Enter Patient Data window opens.
5.
Edit the information as appropriate.
For instructions on editing patient information, see “Entering Patient
Information” on page 55.
6.
After the information is updated, press Save.
The updated information is saved, and you return to the File Manager window.
NOTE:
If you only edit demographic information, the record is still transmitted to the
MUSE system as an unconfirmed record.
Previewing Records
Use the following instructions to preview recorded patient data:
1.
From the Main Menu, press File Manager.
The File Manager window opens.
2.
Press Select and use the trimpad to select the record you want to preview.
3.
Press Preview.
A window opens with the record for you to review.
4.
102
After reviewing the record, press Return and return to the File Manager.
MAC™ 2000 ECG Analysis System
2053535-002C
Managing Internal Storage
Deleting Records
Use the following instructions to delete all records from internal storage:
1.
On the Main Menu, press File Manager.
The File Manager window opens.
2.
Do one of the following.
• To delete select records, press Select and use the trimpad to select the
record(s) you want to delete.
• To delete all the records in storage, press Select All.
3.
Press Delete.
A window opens and prompts you confirm that you want to delete the selected
record(s).
4.
Do one of the following:
• To cancel the deletion, press No.
• To delete the record(s), press Yes.
Printing Records
Use the following instructions to print records:
1.
On the Main Menu, press File Manager.
The File Manager window opens.
2.
Do one of the following:
• To print select records, press Select and use the trimpad to select the
record(s) you want to print.
• To print all the records in storage, press Select All.
3.
Press Print.
The selected records are printed on the writer.
Transmitting Records
Use the following instructions to transmit records from internal storage to an external
device.
Before transmitting a record, you must do the following:
• Purchase and activate a communication option.
See “Options Setup” on page 153 for more information.
• Configure data communications.
2053535-002C
MAC™ 2000 ECG Analysis System
103
Managing Internal Storage
See “Communication Setup” on page 131 for more information.
• Connect the device to the communication option.
• To set up a LAN connection to a CardioSoft system, see “Connecting the LAN
Option” on page 46.
• To set up a WiFi connection to a CardioSoft system, refer to “Connecting the
WiFi Option” on page 46.
• To set up a WiFi connection to a MUSE system, refer to “Connecting the WiFi
Option” on page 46 .
NOTE:
For more information on setting up a LAN or WiFi connection to a MUSE system,
refer to the LAN Option Installation and Troubleshooting Guide. To locate the part
number for this manual, refer to “Related Documents” in the service manual.
Use the following procedure to transmit records
1.
On the Main Menu, press File Manager.
The File Manager window opens.
2.
Do one of the following:
• To transmit select records, press Select and select the record(s) you want
to transmit.
NOTE:
You cannot transmit records that were imported to internal storage.
Imported records have a Sent status of Recv.
• To transmit all the records in storage, press Select All.
3.
Press Transmit.
One of two things happens, depending on the number of locations defined in
Communications Setup:
• If only one location is defined, the files are transmitted to the default location.
• If multiple locations are defined, a window listing the locations opens. Select
the correct location and press OK.
Exporting Records
You can export records from internal storage to a Secure Digital card or a shared
directory, in either a Hilltop/XML or PDF format. The maximum number of records you
can export in XML format is determined by which storage option is enabled:
• If M100 is enabled, the maximum is 100.
• If M200 is enabled, the maximum is 200 (with a sampling rate of 500 Hz).
• Records exported in PDF format have no maximum limit.
NOTE:
The SD card capacity and manufacturer determine data transfer rates and storage
space. This may affect the time required to read or write to the SD card. It may
also limit the number of records that you can store on the card. GE Healthcare
recommends you use Secure Digital High Capacity (SDHC) cards with a capacity of
4 GB, either supplied by GE Healthcare or manufactured by SanDisk.
104
MAC™ 2000 ECG Analysis System
2053535-002C
Managing Internal Storage
Setting Up Export Options
The requirements for setting up export differ depending on the export method:
• To export XML data to an SD card, you must first enable Export XML in
Communication Setup.
• To export PDF files to an SD card, you must first enable the PDFC (PDF Export)
system option. Refer to “Options Setup” on page 153 for details.
• To export either Hilltop/XML or PDF to a shared directory, you must do the following:
• Purchase and activate the LAN Communications to CardioSoft (LANC) option or
WiFi Communications to CardioSoft (WIFC) option.
Refer to “Options Setup” on page 153 for details.
• Define the shared directory setting on Communications Setup.
Refer to “Options Setup” on page 153 for details
Exporting Records
Once the necessary configurations are complete, use the following instructions to
export records from internal storage:
1.
On the Main Menu, press File Manager.
The File Manager window opens.
2.
Select the record(s) you want to export.
• To export select records, press Select and use the trimpad to select the
records you want to export.
NOTE:
Records that are imported to internal storage cannot be exported from
internal storage in Hilltop or XML formats; those records can be exported
in PDF format. Imported records have a Sent status of Recv.
• To export all records in storage, press Select All.
3.
Press More > Export.
The function keys change. Depending on which options were activated, the
function keys may include Hilltop XML, PDF, and Return.
4.
If you are exporting to an SD card, insert the card into the SD card slot.
Make sure the card has sufficient free space for the selected records and that it
is not write-protected.
NOTE:
If you do not enter the SD card into the SD card slot, you receive the
following warning when attempting to export data to the card:
SD Card is not present.
Refer to “SD Card Not Present” on page 178 for further instructions.
2053535-002C
MAC™ 2000 ECG Analysis System
105
Managing Internal Storage
5.
Press the appropriate function key:
• To export in both XML and Hilltop formats, press Hilltop XML.
• To export in PDF format, press PDF.
• To return to the previous set of function keys, press Return.
If you press Hilltop XML or PDF, one of two things happens, depending on your
system configuration:
• If a shared directory was configured, the Select Export Destination window
opens.
Go to step 6
• If a shared directory was not configured, the records are automatically
exported in the selected format to the SD card.
When the export is complete, one of two things happens, depending on the
selected format:
• For the Hilltop XML format, the screen clears and the function keys
change.
• For the PDF format, a summary window opens with the number of records
that exported successfully and the number that failed to export. Press
OK to close the summary window.
If you want to select additional records to export, return to step 2 or
continue to step 6.
6.
In the Select Export Destination window, select the appropriate export
destination:
• To export to an SD card, select SD Card.
• To export to the shared directory, select Shared Directory.
NOTE:
When exporting to a shared directory, the device logs on to the directory
with the user name and password defined on the Communications
Setup window. If either of those values are incorrect, you receive an error
message. Correct the user name and password on the Communications
Setup window and repeat the export process.
7.
106
Press OK.
MAC™ 2000 ECG Analysis System
2053535-002C
System Configuration
12
System Configuration provides access to functions that allow you to customize the
system settings and to utilities to help manage those settings. This chapter describes
the settings managed by each function and the process followed by each utility.
NOTE:
Configuration changes can cause data loss. After making configuration changes,
you MUST return to the Main Menu to ensure the changes are saved.
Depending on which options were activated, some of these functions may not be
available on your system.
Basic Setup
The Basic Setup function allows you to define the following information:
• Institutional identification
• Default physicians
• System settings
• Stress test accessory (if the ERGO stress test option is activated)
• System security
• Time servers
NOTE:
You must add physicians in User Setup before they can be picked as default
physicians. For more information, see “User Setup” on page 149.
For more information on the ERGO and CFRA options, see “Options Setup” on
page 153.
To access Basic Setup, on the Main Menu, press System Configuration> Basic Setup.
2053535-002C
MAC™ 2000 ECG Analysis System
107
System Configuration
The following tables describe each setting available on Basic Setup.
Basic Setup Fields—Page 1
Field
Description
Name
The name of the institution.
Street
The street address of the institution.
City
The city where the institution is located.
Ordering Physician
The physician who ordered the ECG.
Defaults on any patient records created on the system.
Referring Physician
The physician who referred the patient.
Defaults on any patient records created on the system.
Attending Physician
The physician who supervised the ECG.
Defaults on any patient records created on the system.
Technician
The technician who conducted the ECG.
Defaults on any patient records created on the system.
Location
Location ID where the device is located.
Defaults on any patient records created on the system.
Site #
This field is required to store ECG reports on a cardiology
information system such as the MUSE system.
Cart #
Unique cart number of the device.
Defaults on any patient records created on the system.
Test Patient
(temporary)
Enables/disables simulated ECGs. When enabled, simulated
waveforms are generated in the resting, arrhythmia, RR analysis,
or stress ECG functions. This is useful for demonstration, training,
or testing purposes.
NOTE:
This setting clears when the system is reset.
108
MAC™ 2000 ECG Analysis System
2053535-002C
System Configuration
Basic Setup Fields–System Settings
Field
Comment
Power up mode
Determines which screen is displayed when the
system is powered on. Available options are:
• Resting ECG (default)
• Arrhythmia
• Main Screen
• Stress ECG
• Order Manager
2053535-002C
Display Colors
Determines the appearance of the ECG display.
Select a color combination that is legible for you.
ECG Grid on Display
Determines whether a grid is displayed behind the
waveforms. A grid may make reading the ECG easier.
The default is on.
Anti-Aliasing of ECG Waveforms
Determines whether anti-aliasing is applied to
waveforms to reduce distortion caused by the video
display.
The default is on.
MAC™ 2000 ECG Analysis System
109
System Configuration
Basic Setup Fields–System Settings (cont'd.)
Field
Comment
Stress Test
Identifies the device used to perform the stress test.
Available options are:
• Internal Ergometer
• Ergometer eBike
• Internal Treadmill
• Treadmill T2000
• Treadmill T2100
• Master’s Step device
This field is only available if the Stress option is
enabled.
For information on enabling stress tests, see “Stress
ECG Setup” on page 124.
For information on conducting stress tests, see
“Stress Testing” on page 89.
Blood Pressure
Indicates whether the patient’s blood pressure
should be taken by the stress device. Available
options are:
• No
• In ergometer
This field is only available if the Stress option is
enabled.
110
MAC™ 2000 ECG Analysis System
2053535-002C
System Configuration
Basic Setup Fields–System Security Setup
Field
Comment
High Security Mode
When High Security Mode is enabled, users are
prompted to enter an ID and password when logging
on to the system. You must add each user in User
Setup.
Audit Trail
Copies the system audit trail in XML format to an SD
card and then clears the audit trial on the system.
For more information see “Exporting the Audit Trail”
on page 159.
Auto Logoff
Determines whether the system automatically logs
the user off after a predefined period of inactivity.
See also Auto Logoff Time. This is available only if
High Security Mode is enabled.
Auto Logoff Time (1–255 min)
Determines the length of inactivity, in minutes, before
the system logs off the user. This is available only if
High Security Mode is enabled.
Automatically synchronize with
Time Server
Enables/disables automatic synchronization with
an external time server either on the institution’s
network or the Internet. You must activate a LAN
option to set this option.
Time Server Name
Identifies the server with which the device
synchronizes its time. This can be a server on the
institution’s network or on the Internet. Contact your
server administrator for this information.
Last synchronization at
Display-only field that identifies when the last
synchronization occurred.
Last synchronized from Time Server Display-only field that identifies where the last
synchronization occurred.
Patient Data Input Device
Allows the user to select the input methods to
download patient demographics. The available
options are:
• Internal Keypad
• External keyboard
• Barcode Reader
Enable Data Retrieval
2053535-002C
If this option is enabled, the user can download
patient demographics.
MAC™ 2000 ECG Analysis System
111
System Configuration
If the PDFC option is enabled, you receive the System Settings–PDF Naming Settings
window.
Basic Setup Fields–System Settings (PDF Naming Settings)
Field
Description
Generate automatic file name
Select the checkbox; the numbered fields are enabled.
Use the drop-down arrow to select each setting.
For more information, see “Customizing the Naming Convention” on page 158.
Resting ECG Setup
The Resting ECG Setup window allows you to define:
• Waveform parameters
• Lead usage
• Analysis options
• Lead sequence
• Report options
• Storage options (if the internal storage option is activated)
• Transmission options (if a communications option is activated)
To access the Resting ECG Setup window, on the Main Menu press System
Configuration> Resting ECG Setup.
112
MAC™ 2000 ECG Analysis System
2053535-002C
System Configuration
The following tables describe each setting available on Resting ECG Setup.
Resting ECG Setup Fields–Page 1
Field
Comment
Gain
Sets the amplitude of the ECG signal. Measurement is
in millimeters per millivolt and includes the following
options:
• 2.5 mm/mV
• 5 mm/mV
• 10 mm/mV
• 20 mm/mV
• 40 mm/mV
• Automatic
The larger the selected measurement, the larger the
waveform. Only the representation of the waveform
changes; signal strength is not affected.
NOTE:
If Automatic is selected, the system calculates
the best gain based on the peak-to-peak
amplitudes of all displayed leads and the
selected display format.
Speed
Changes the speed of rhythm printing and the wiper
bar movement across the display.
Measurement is in millimeters per second (mm/s)
and includes the following options:
• 5 mm/s (rhythm) / 12.5 mm/s (display)
• 12.5 mm/s
• 25 mm/s
• 50 mm/s
2053535-002C
MAC™ 2000 ECG Analysis System
113
System Configuration
Resting ECG Setup Fields–Page 1 (cont'd.)
Field
Comment
Low Pass Filter
Sets the maximum frequency to include in the
waveform. Restricting frequencies can help eliminate
noise in the waveform. Frequencies are measured in
Hertz (Hz) and include the following options:
• 20 Hz
• 40 Hz
• 100 Hz
• 150 Hz
Selecting a frequency eliminates signals above that
frequency. For example, if you select 40, only signals
that have a frequency of 40 Hz or lower are included
in the waveform.
ADS
Toggles the anti-drift system (ADS) on and off. ADS
helps reduce baseline drift.
Line Filter
Enables/disables the line filter defined in Country
Setup.
6 leads: 1x6
Enables/disables a display option that shows one
six-waveform column.
6 leads: 2x3
Enables/disables a display option that shows two
three-waveform columns.
12 leads: 2x6
Enables/disables a display option that shows two
six-waveform columns.
12 leads: 4x3
Enables/disables a display option that shows four
three-waveform columns.
Display Format
Selects the display format of the resting ECG. The
default value is 3 leads: 1x3. Other values depend on
which of the previous two fields are set.
Display Lead Group
Determines which group of leads is displayed. The
available values depends on which Display Format
is selected. For example, if 3 Leads: 1x3 is selected,
the available values are:
• 3 rhythm leads
• 1st group
• 2nd group
• 3rd group
• 4th group
114
MAC™ 2000 ECG Analysis System
2053535-002C
System Configuration
Resting ECG Setup Fields–Page 2
Field
Comment
Printer Leads
Identifies the default set of leads to use for printing.
The values are:
• First 6
• Second 6
• Rhythm 6
• 12
Start rhythm report on new page
Determines whether the rhythm report prints on a
separate page.
Pace Enhancement
Increases the readability of pacemaker ECG either
by augmenting small pace pulses or by truncating
large pace pulses. If enabled, pace enhancement is
done in two steps:
1. Add a marker (1.5 mV amplitude, 6 ms duration)
to the electrode signal.
2.
Preview before Analysis
Limit the sum to 0.5 mV in the lead signal.
Determines waveform preview options. Values
include:
• No
Waveforms are never previewed.
• Always
Waveforms are always previewed.
• Yellow electrodes
Waveforms are previewed when the Hookup
Advisor indicator shows a yellow or red electrode.
• Red electrodes
Waveforms are previewed when the Hookup
Advisor indicator shows a red electrode.
For additional information, see “Hookup Advisor” on
page 66.
2053535-002C
MAC™ 2000 ECG Analysis System
115
System Configuration
Resting ECG Setup Fields–Page 2 (cont'd.)
Field
Comment
Reanalysis
Enables/disables the reanalysis feature, which allows
you to adjust the following ECG measurements:
• P Duration
• PR Interval
• QRS Duration
• QT Interval
This is available only if Audit Trail is disabled and one
of the following options is activated: ME12, MEHR,
MI12, or MIHR.
For more information on activating options, see
“Options Setup” on page 153.
QTC Calculation
Determines which formula is used to correct QT
calculations. Available options are:
• Bazett
QTc = QT √HR\60
Bazett is available only if the MEHR or MIHR option
is activated.
• Framingham
QTc = QT + 154 (1 — 60/HR)
Framingham is available only if the ME12 or MI12
option is activated.
• Fridericia
QTc = QT3 √HR/60
Fridericia is available only if the ME12 or MI12
option is activated.
NOTE:
In all formulas, HR = Heart Rate.
116
Screening Criteria
Enables/disables the inclusion of the screen criteria.
This setting is available only if the MI12 option is
activated.
Suppress normal statement
Enable/disables the inclusion of the normal
statement.
This setting is available only if the MI12 option is
activated.
Suppress abnormal/borderline
Enable/disables the inclusion of the
abnormal/borderline statements.
This setting is available only if the MI12 option is
activated.
Suppress all statements
Enable/disables the inclusion of all statements.
This setting is available only if the MI12 or MIHR
option is activated.
MAC™ 2000 ECG Analysis System
2053535-002C
System Configuration
Resting ECG Setup Fields–Page 2 (cont'd.)
Field
Comment
ACI-TIPI
Enables/disables the inclusion of the ACI-TIPI
(Acute Cardiac Ischemia Time Insensitive Predictive
Instrument) statement and enables the Chest Pain
field on the Patient Information window.
To include ACI-TIPI statements, the following
conditions must be met:
• MI12 or ME12 system option is activated
• TIPI system option is activated
• ACI-TIPI is enabled
• 10s ECG Report Format is enabled
• Print Interpretation is enabled
• Patient data includes: gender, date of birth, and
chest pain indication
• Patient cannot be a pediatric patient (15 years or
younger) as calculated form the date of birth
Sample Rate
2053535-002C
Determines the report frequency. Options are 500
Hz or 1000 Hz. 1000 HZ is supported only for XML
output.
MAC™ 2000 ECG Analysis System
117
System Configuration
Resting ECG Setup Fields–Page 3
Field
Description
Lead Sequence
Determines the lead sequence to use. Values are:
• Standard
• Cabrera
• NEHB
• SEQ4
SEQ4 allows you to configure a custom 12-lead
sequence using the following fields. If either 12SL
option (ME12 or MI12) is activated, you must select
leads I (-I), II (-II), V1, V2, V3, V4, V5, and V6 for a
correct 12SL analysis.
118
Sequence Name
Set the display name for a custom lead sequence.
Available only if SEQ4 is selected for the Lead
Sequence.
1–12 Lead
Twelve fields that allow you to define the sequence in
which the leads are displayed. Available only if SEQ4
is selected for the Lead Sequence.
1–12 Label
Twelve fields that allow you to define the labels
that are displayed/printed for the corresponding
leads. Available only if SEQ4 is selected for the Lead
Sequence.
1–6 Rhythm Leads
Six fields that allow you to define the rhythm leads
and their sequence. You can select the rhythm leads
for all four lead sequences.
MAC™ 2000 ECG Analysis System
2053535-002C
System Configuration
Resting ECG Setup Fields–Page 4
Field
Description
10s ECG Report Format
Determines how the 10s ECG report prints. If no
format is selected, the report does not print.
The values are:
• 1x10x12_25
• 1xx10x12_50
• 2x10x6_25
• 1x10x3_25
• 2x5x6_25
• 2x5x6_50
• 2x5x6_25_R1
• 4x2.5x3_25
• 4x2.5x3_25_R1
• 4x2.5x3_25_R3
• 4x2.5x3_25_R2_P
• H1
• H2
If the CTDG option is enabled, the report format is
4x2.5x3_25_R2_P.
Detailed Results Report Format
Determines how the Detailed Results report prints. If
no format is selected, the report does not print.
The values are:
• Median_25
• Median_50
Report Copies
Determines how many copies of the selected report
print.
The values are:
• 0
• 1
• 2
• 3
• 4
• 5
Print Interpretation
2053535-002C
Determines whether ECG interpretation prints on
the report. Available only if either the MI12 or MIHR
option is activated.
MAC™ 2000 ECG Analysis System
119
System Configuration
Resting ECG Setup Fields–Page 4 (cont'd.)
Field
Description
Auto Store ECG
Determines whether the ECG is automatically stored
on the internal storage.
This is available only if the M100 or M200 internal
storage option is activated.
For more information, see “Options Setup” on page
153.
File Manager Sort by
Determines the field by which the File Manager sorts
records in internal storage.
This is available only if the M100 or M200 internal
storage option is activated. Available options are:
• Patient Name
• Date
• Patient ID
• Order Number
120
Auto Transmit ECG
Determines whether the ECG is transmitted
automatically to an external device. Available only if
one of the communications options is activated.
For more information, see “Options Setup” on page
153.
Delete After Transmission
Determines whether the ECG is deleted from internal
storage after it is transmitted to an external device.
Available only if one of the communications options
is activated.
For more information, see “Options Setup” on page
153.
Print Transmission Log
Determines whether the transmission log prints
after an ECG is transmitted from File Manager to
an external device. Available only if one of the
communications options is activated.
For more information, see “Options Setup” on page
153.
Auto Export ECG
Determines whether the ECG is automatically
exported in Hilltop, Hilltop/XML, or PDF format to the
shared directory location. This is available only if the
user has configured and enabled shared directory
settings in the Communication Setup. Availability
of Hilltop/XML format depends on whether Export
XML option was enabled in Communication Setup.
Availability of PDF format depends on PDFC option
activation in Options Setup.
For more information, see “Communication Setup”
on page 131.
Auto Execute Singe Order
Determines whether the single order requested by
the user is automatically downloaded and executed.
This is available only if the SOML/SOMF simple order
manager options are activated in Options Setup.
MAC™ 2000 ECG Analysis System
2053535-002C
System Configuration
If the PDFC option is enabled, you receive the Resting ECG Settings–PDF Export
Setup window.
Resting ECG Setup Fields–Page 4 (PDF Export Setup)
Field
Description
10s ECG Report Format
Determines how the 10s ECG report prints to a PDF
file.
The options are:
• 4x2.5x3_25
• 4x2.5x3_25_R1
• 4x2.5x3_25_R3
• MUSE1
• MUSE2
• 1x10x12_25
NOTE:
Options MUSE1 and MUSE2 are not available in
the Chinese version.
Baseline Auto Adjust
Enables/disables the PDF export.
Available only when the 1x10x12_25 of 10s ECG
Report Format option is selected.
Arrhythmia Setup
The Arrhythmia Setup function allows you to define:
• Waveform parameters
• Lead usage
• Analysis options
• Lead sequence
• Report options
To access Arrhythmia Setup, on the Main Menu press System Configuration>
Arrhythmia Setup.
2053535-002C
MAC™ 2000 ECG Analysis System
121
System Configuration
Most of the fields on the Arrhythmia Setup windows are the same as those on Resting
ECG Setup. The following tables list the arrhythmia settings that are unique or differ
from resting ECG. For all other fields, see “Resting ECG Setup” on page 112.
Arrhythmia Setup Fields–Page 1
122
Field
Description
ADS
Enables/disables the Anti-Drift System, which helps reduce
baseline shift. In Arrhythmia mode, this setting is always
available.
MAC™ 2000 ECG Analysis System
2053535-002C
System Configuration
Arrhythmia Setup Fields–Page 2
Field
Description
Rhythm Printing
Determines whether the rhythm report starts
automatically when recording starts.
Arrhythmia Event Printing
Determines which events print on the Arrhythmia
Report:
• All events
• Unequal events
• No event printing
Episodes Printout in Summary
Report
Determines how arrhythmia events print. Options
are:
• Chronological order
• Priority order
• Only episodes with ventricular events
• No episodes
2053535-002C
MAC™ 2000 ECG Analysis System
123
System Configuration
Arrhythmia Setup Fields–Page 3
Field
Description
Lead Sequence
Determines the lead sequence to use. Arrhythmia
Setup includes the following options in addition to
the four options available in the Resting ECG Setup:
• STD_C
• STD_RED
• STD_LI
• CABR_LI
• NEHB_6
• HIGH_C
1–6 Rhythm Leads
Six fields that allow you to define the rhythm leads
and their sequence. You can select the rhythm leads
for all four lead sequences.
If you chose any of the following in Lead Sequence,
the rhythm leads are not displayed:
• STD_C
• STD_RED
• STD_LI
• CABR_LI
• NEHB_6
• HIGH_C
Stress ECG Setup
Stress ECG Setup is available only if the ERGO Stress Test option was activated. For
more information, see “Options Setup” on page 153.
The Stress ECG Setup differs from the resting or arrhythmia ECGs. In addition to
defining the stress ECG settings, you can create, edit, or delete test protocols.
Stress ECG Settings
The Stress ECG Setup function allows you to define:
• Waveform parameters
• Lead usage
• Analysis options
• Report options
• Lead sequence
To access the Stress ECG Setup, on the Main Menu press System Configuration >
Stress ECG Setup.
Many of the fields on the Stress ECG Setup windows are the same as those on the
Resting ECG Setup or the Arrhythmia Setup. The following tables list the settings that
124
MAC™ 2000 ECG Analysis System
2053535-002C
System Configuration
are unique or differ from the resting or arrhythmia setups. For all other fields, see
“Resting ECG Setup” on page 112 or “Arrhythmia Setup ” on page 121.
Stress ECG Setup Fields–Page 1
Field
Comment
ECG Filter Type
Determines which method to use to filter the ECG
signal. Options are:
• ADS
Anti-Drift System – reduces baseline shift
• FRF
Finite Residual Filter – reduces noise and artifacts
The selection also determines the behavior of the
Lower Pass Filter [Hz] and ADS/FRF fields.
ADS/FRF
2053535-002C
Enables/disables the selected ECG Filter Type. The
label for this field changes depending on the filter
type selected.
MAC™ 2000 ECG Analysis System
125
System Configuration
Stress ECG Setup Fields–Page 2
Comments
Field
Max Predicted HR Formula Determines the formula that predicts the patient’s maximum
heart rate. Options are:
• WHO
This formula, recommended by the World Health
Organization, subtracts the patient’s age from 220.
For example, a patient who is 50 years old has a maximum
predicted heart rate of 220 - 50 = 170.
• AHA
This formula, recommended by the American Heart
Association, varies depending on the age of the patient.
• < 25 years old = 160 bpm
• > 75 years old = 115 bpm
• 25—75 years old = 160 – (age – 25) * 0.9
For example, a patient who is 50 years old has a
maximum predicted heart rate of 160 - (50-25) * 0.9 =
138.
Target HR [%]
Determines the percentage of the maximum predicted heart
rate the stress test is targeting.
Protocol/Master’s Step
Mode
Determines which protocol conducts the stress test. The
protocol determines the test phases, stages, stage durations,
stage loads, and the times at which auto reports are printed
and blood pressure is recorded.
You can create custom protocols by selecting the Edit
Protocols button.
For more information, see “Editing Stress Protocols” on page
128.
NOTE:
If Master’s Step device is selected as the Stress Test
Device in Basic Setup (see “Basic Setup” on page 107), this
field is labeled Master’s Step Mode instead of Protocol.
126
MAC™ 2000 ECG Analysis System
2053535-002C
System Configuration
Stress ECG Setup Fields–Page 2 (cont'd.)
Field
Comments
J+x Point Formula
Determines the method that calculates the post J-Point.
Options are:
• 0 ms
• 10 ms
• 20 ms
• 40 ms
• 80 ms
• Rautaharju (default value)
• RR/16
The numeric values (0 ms—80 ms) add the selected number
of milliseconds to the J-point
Calculation (E, J point)
Determines when the select J+x point formula is used. Valid
options are:
• Single
The E and J points are calculated once in the beginning and
remain unchanged during the stress test.
• Continuous
The E and J points are continuously updated during the
PRETEST, EXERCISE, and RECOVERY phases of the stress test.
2053535-002C
MAC™ 2000 ECG Analysis System
127
System Configuration
Stress ECG Setup Fields–Page 3
Field
Comments
In-Test Reports
Determines the format of the report. Options are:
• Median Report
• Comparative Medians Report
Median Report
Speed [mm/s]
Determines the speed in millimeters per second at which the
waveforms are represented on the report. Options are:
• 25
• 50
12-lead Report
Determines the layout of a 12-lead report. Options are:
• 1x12
One column showing 10 seconds from all 12 leads.
• 2x6
Two columns each showing 5 seconds from 6 leads.
Summary Report
Determines whether the summary report format is included in
the stress report.
Tabular Summary
Determines whether the tabular report format is included in
the stress report.
Trend Report
Determines whether the trend report format is included in the
stress report.
ST Trend Report
Determines whether the ST trend report format is included in
the stress report.
ST Summary Report
Determines whether the ST summary report format is included
in the stress report.
Episodes Printout in
Summary Report
Determines how episodes are presented in the stress report.
Options are:
• Chronological Order
• Priority Order
• Only Episodes with Ventricular Events
• No Episodes
Editing Stress Protocols
The following pre-defined stress test protocols are available.
Pre-defined Stress Test Protocols
Device
Treadmills
Protocols
BRUCE
MODBRUCE
NAUGHTON
ELLESTAD
MODBALKE
USAFSAM
SLOWUSAFSAM
CORNELL
BALKEWARE
MODBALKEWARE
ADENOSINE
DOBUTAMINE
PERSANTINE
128
MAC™ 2000 ECG Analysis System
2053535-002C
System Configuration
Pre-defined Stress Test Protocols (cont'd.)
Device
Protocols
Ergometers
Master’s Step
WHO
WHO50
WHO75
HOLLMANN
BAL
STD.FRANCE
MODWHO
CONCONI
SINGLE
DOUBLE
TRIPLE
Most treadmill and ergometer protocols consist of three pre-defined phases: Pretest,
Exercise, and Recovery. Each phase can include multiple stages that define the
parameters of the test. The parameters differ slightly depending on the device, as
seen in the following table.
Stress Test Parameters
Parameter
Treadmill
Comment
Stage
ü
ü
The stage
name.
The stage name.
Stage Time
ü
ü
ü
The stage duration, in minutes.
Speed
ü
The treadmill
speed in
kilometers
or miles
per hour,
depending on
the Country
Setup.
The treadmill speed in kilometers
or miles per hour, depending on
the Country Setup.
Grade [%]
ü
The percentage of increase in the
treadmill’s elevation.
ü
Basic Load
(W)
2053535-002C
Ergometer Master’s Step
Store Median
First
ü
ü
Store Median
Repeat
ü
ü
The load at
which the
ergometer
operates, in
watts.
The load at which the ergometer
operates, in watts.
The interval at which the first
median reading is stored.
The interval
at which a
subsequent
median
reading is
stored.
MAC™ 2000 ECG Analysis System
The interval at which a subsequent
median reading is stored.
129
System Configuration
Stress Test Parameters (cont'd.)
Parameter
Treadmill
Ergometer Master’s Step
BP First
ü
ü
BP Repeat
ü
ü
Comment
The interval at which the first
blood pressure reading is stored.
The interval
at which
subsequent
blood
pressure
readings are
stored.
The interval at which subsequent
blood pressure readings are
stored.
You can modify the pre-defined protocols to create custom protocols. Use the
following instructions to create a custom protocol:
1.
On the Main Menu press System Configuration > Stress ECG Setup.
The Stress ECG Setup window opens.
2.
Press Page Down.
The second page opens.
3.
Select Edit Protocols and press either Enter or the trimpad.
For treadmills and ergometers, the Select Protocol window opens to display
applicable protocols. Perform step 4 through step 16.
For Master’s Step devices, the Edit Master Step Post-Exercise window opens to
display the display the post-exercise stages. Perform step 8 through step 12.
4.
Press Add.
A list of templates opens.
5.
Select the template on which you want to base the new protocol.
The templates are based on the existing protocols. An Empty Protocol is also
available.
6.
Press OK.
The Add Protocol window opens.
7.
Type a name for the new protocol and press OK.
The Protocol window opens with all the stages from the template. You can
now add, edit, or delete stages.
8.
To add a stage, do the following:
a.
Select the stage that precedes the new stage.
b.
Press Add Stage.
The selected stage is duplicated.
c.
Edit the duplicate stage as appropriate.
See step 9.
130
MAC™ 2000 ECG Analysis System
2053535-002C
System Configuration
9.
To edit a stage, do the following:
a.
Select the stage to edit.
b.
Press Edit.
The Edit Stage window opens.
c.
Modify the stage parameters as appropriate.
Refer to the table preceding these instructions for a description of each
parameter.
d.
When you are done, press OK.
The Edit Stage window closes.
10.
To delete a stage, do the following:
a.
Select the stage you want to delete.
b.
Press Delete Stage.
The selected stage is deleted.
11.
To remove custom Master’s Step stages, press Factory Defaults.
NOTE:
Reset treadmills and ergometers to factory defaults at the protocol level.
See step 15.
12.
Repeat steps 8 through 10 as necessary.
13.
To rename the protocol, do the following:
a.
Press Edit Name.
The Edit Name window opens.
NOTE:
This option is not available when editing a Master Step protocol.
b.
Change the name as appropriate.
c.
Press OK.
The protocol’s name is changed.
14.
When you are done with the stages, press Save.
This saves your changes and returns you to the previous window.
15.
To remove custom protocols, press Factory Defaults.
16.
When the protocol is done, press Return.
The protocol is saved and you return to the Select Protocol window.
Communication Setup
The Communication Setup function allows you to define the following settings:
• Basic communication settings
• Shared directory settings
• Destination location settings
• Modem settings (if a modem option is activated)
2053535-002C
MAC™ 2000 ECG Analysis System
131
System Configuration
• LAN settings (if a LAN option is activated)
• Wireless settings (if a WiFi option is activated)
NOTE:
This MAC device displays a signal strength indicator for WiFi.
• DCP settings
NOTE:
This system is compatible with MUSE v7.1.1 and v8.0.1, and CardioSoft V6.51,
V6.61, and V6.71.
To access the Communication Setup, on the Main Menu press System Configuration
> More > Communication Setup.
The following tables describe the settings on Communication Setup.
Communication Setup–Data Communication Settings Fields
Fields
Description
Default Location
Determines which of the four available
communication locations is the default. The locations
are defined on Page 2 of this Communication Setup
Fields table.
Export XML
Determines whether ECG records are transmitted as
XML. If this field is set, ECG records exported to an
SD card are stored in both XML and Hilltop formats.
If this field is not set, ECG records exported to an SD
card are stored only in Hilltop format.
NOTE:
This field is displayed only if the M100 or M200
(Internal storage) option is activated.
132
MAC™ 2000 ECG Analysis System
2053535-002C
System Configuration
Communication Setup–Data Communication Settings Fields (cont'd.)
Fields
Description
Serial Baud Rate
Determines the speed at which data is transmitted
across the serial communications port when using a
modem.
NOTE:
This field is displayed only if the Modem
Communications to CardioSoft (MODC) or
Modem Communications to MUSE (MODM)
option is activated.
Allow Export Using Shared
Directory
Determines whether ECG records can be exported to
a shared network drive.
NOTE:
This field is displayed only if the LAN
Communications to CardioSoft (LANC) or WiFi
Communications to CardioSoft (WIFC) option is
activated.
If this field is checked, the following five fields
become available (Share Name, Username,
Password, Confirm, and Domain).
2053535-002C
Share Name
Identifies the name of the shared network drive. It
must be the share drive’s name; IP addresses are
not supported. This field allows a maximum of 256
characters.
This field is available only if the Allow Export Using
Shared Directory field is checked.
Username
Identifies the user name that the system uses to log
on to the shared directory. The user must be set
up on the domain with the appropriate permissions
to access the shared directory. This field allows a
maximum of 30 characters.
This field is available only if the Allow Export Using
Shared Directory field is checked.
Password
Identifies the password that the system uses to log on
to the shared directory. This field allows a maximum
of 30 characters.
This field is available only if the Allow Export Using
Shared Directory field is checked.
MAC™ 2000 ECG Analysis System
133
System Configuration
Communication Setup–Data Communication Settings Fields (cont'd.)
Fields
Description
Confirm
Re-enter the password in this field to confirm that the
password was entered correctly.
This field is available only if the Allow Export Using
Shared Directory field is checked.
Domain
Identifies the user’s domain. This field allows a
maximum of 30 characters.
This field is available only if the Allow Export Using
Shared Directory field is checked.
Communication Setup–Data Communication Locations
Field
Description
Location
Identifies the name of a communication location that
receives the transmission from the system. You can
define up to four locations.
Device
Identifies the type of device to use to transmit data to
the location. Options are:
• Serial
• Modem
• LAN
Modem and LAN are available only if the
corresponding option was activated.
This field becomes active only after a corresponding
location is entered.
134
MAC™ 2000 ECG Analysis System
2053535-002C
System Configuration
Communication Setup–Data Communication Locations (cont'd.)
Field
Description
Phone Number
Identifies the location’s phone number. This field is
available only if the selected device is Modem.
Protocol
Determines the protocol to use to communicate with
the device. Options are:
• A5
• CSI
• DCP
Select CSI for MUSE connections and A5 for
CardioSoft connections.
DCP is available only if the selected device is LAN.
NOTE:
• When using DCP to connect to the MUSE 8.0.1
system and get orders, the MUSE system only
returns orders that have a location value.
• When using DCP to connect to the MUSE 8.0.1
system to get orders, the MUSE system does
not return the order priority (Normal, Preop,
Stat).
This system can use several protocols to communicate test data and retrieve patients
or orders. You should choose the protocol based on systems with which you want to
connect, the data you want to send and receive, and the connection type (LAN, WiFi,
modem, or serial).
• DCP
This is a newer protocol that is faster than CSI and A5. DCP does not require this
system to use a fixed IP address. It is currently compatible with the MUSE 8.0
system or later, and other GE Healthcare systems that support DCP. It supports
retrieving patient demographics and orders and sending patient tests. You can use
it with LAN or WiFi connections.
• CSI
This is a protocol that receives a connection from a server and requires a fixed
IP address. It is currently compatible with all versions of the MUSE system and
CardioSoft system v6.6 and later. It supports retrieving patient demographics and
orders and sending patient tests. You can use it with LAN, WiFi, modem, and serial
connections.
• A5
2053535-002C
MAC™ 2000 ECG Analysis System
135
System Configuration
This is a serial protocol that you can use for backward compatibility. It is compatible
with all versions of the CardioSoft system. It supports sending patient tests. You
can use it with modem or serial connections.
Communication Setup–Modem Settings Fields
136
Field
Description
Modem
Informs the user that the device is using the
internal modem.
Dialing Method
Determines whether the system uses a tone
or pulse to dial.
Dialtone Required
Determines whether the system must receive
a dial tone before dialing.
PIN Dialing
Identifies whether a personal identification
number (PIN) is required to dial out. If
this field is checked, you must complete
the following three fields (Delay, Service
Provider Number, and PIN Number).
Delay
Determines how long, in seconds, the system
should pause between dialing the Service
Provider Number and the PIN Number and
between dialing the PIN Number and the
Outside Line.
Service Provider Number
Identifies the service provider’s access
telephone number.
PIN Number
Identifies the personal identification number
to enter.
MAC™ 2000 ECG Analysis System
2053535-002C
System Configuration
Communication Setup–Modem Settings Fields (cont'd.)
Field
Description
Outside Line
Identifies any access numbers that must be
dialed to reach an outside line.
Manual Dialing
Determines whether the system
automatically dials. If this field is checked,
the connection must be made manually. If
this field is cleared, the system automatically
dials and you must complete the following
fields:
• Dialing Method
• Dialtone Required
• PIN Dialing
The following fields are only displayed if one or both of the following options is
activated:
• LAN communications to a CardioSoft system (LANC)
• LAN communications to a MUSE system (LANM)
2053535-002C
MAC™ 2000 ECG Analysis System
137
System Configuration
Communication Setup–Wired/Wireless LAN Settings Fields
138
Field
Description
Cardiograph Device Name
Identifies the name of the device on the
network. By default, the value is set to
GE_<serial number>. A valid network
device name contains between 1 and 20
alphanumeric and underscore characters.
The first character must be a letter.
This field is available only if a LAN or WIF
option was activated.
Serial/IP Redirector Listen Port
Identifies the port where the device should
listen for incoming serial/IP connections.
These communications must match the
values defined on the transmitting MUSE
system.
This setting only applies to the CSI protocol.
Obtain an IP address automatically (DHCP)
Determines whether the device automatically
receives an IP address from the network.
If this box is checked and LAN communication
to a MUSE system is enabled, you must
configure the DHCP server to reserve a static
IP address for the device. Contact your
network administrator for assistance.
If this field is checked, the IP Address,
Netmask, and Gateway fields are display
only. If this field is cleared, you must
complete those fields.
IP Address
Identifies the IP address of the device. If the
Obtain an IP address automatically (DHCP)
field is cleared, you must define a unique IP
address.
Netmask
Identifies the netmask of the device. If the
Obtain an IP address automatically (DHCP)
field is cleared, you must define a netmask.
Gateway
Identifies the IP address of the gateway for
the device to use. If the Obtain an IP address
automatically (DHCP) field is cleared, you
must enter the gateway’s IP address.
Obtain DNS service address automatically
(DHCP)
Determines whether the device automatically
obtains a DNS (Domain Name Server) IP
address. If this field is checked, the following
two fields are display-only. If this field is
cleared, you must define the IP address of
the DNS servers to use.
Preferred DNS Server
Identifies the IP address of the primary DNS
server used to resolve Internet domain
names.
Alternate DNS Server
Identifies the IP address of the secondary
DNS server used to resolve Internet domain
names.
MAC™ 2000 ECG Analysis System
2053535-002C
System Configuration
Communication Setup–Wired/Wireless LAN Settings Fields (cont'd.)
Field
Description
Preferred WINS Server
Identifies the IP address of the primary WINS
server used to resolve Windows host names.
You must have the correct WINS address
configured if you are using a shared folder
for communication.
Alternate WINS Server
Identifies the IP address of the secondary
WINS server used to resolve Windows host
names.
You must have the correct WINS address
configured if you are using a shared folder
for communication.
The following fields are only displayed if one or both of the following options is
activated:
• WiFi communications to a CardioSoft system (WIFC)
• WiFi communications to a MUSE system (WIFM)
2053535-002C
MAC™ 2000 ECG Analysis System
139
System Configuration
Communication Setup—Wireless Networking Settings
Field
Description
Enable Wireless LAN
Enables/disables wireless LAN connectivity (WiFi).
Check the field to enable WiFi. Clear the field to
disable WiFi. The field is cleared by default.
NOTE:
In order to connect to WiFi, please insert the USB
WiFi device after the device status indicates it
is working. Otherwise, WiFi is not connected
correctly.
Network Name (SSID)
Specifies the name of the wireless local area
network (WLAN). This filed allows a maximum of 32
characters.
NOTE:
When the Network name is empty, the system
connects to any available network.
The system uses Infrastructure Mode (Wireless
access point) to provide the connection with
Enterprise network or internet.
Authentication
Specifies the authentication protocol.
Values are:
• Open
• Shared
• WPA-PSK
• WPA2–PSK
Encryption
The user net configuration determines the encryption.
Values are:
• Disabled
• WEP
Key Index
This field depends on the user’s network
configuration.
This field is only available when the encryption is WEP.
Values are:
• 1
• 2
• 3
• 4
Key
140
ASCII or Hexadecimal characters (0-9, A-F) for
encryption.
This field depends on the user’s network
configuration.
MAC™ 2000 ECG Analysis System
2053535-002C
System Configuration
Communication Setup–DCP Settings Fields
Field
Description
Discover DCP Device
Allows you to discover GE Healthcare systems that
support DCP servers on the same network subnet as
this system.
This command returns a list of DCP servers and you
can select one of them for communication. Usually
there is only one server from which to choose. If no
servers are displayed, you can enter one manually.
DCP WS Address
Displays the address of the DCP server to use for
communication. You can locate this address using
Discover DCP Device or enter it manually.
A server address has the form http://
<server-name>:<port>/SendTest, where
<server-name> is the server name or IP address and
<port> is the server port number, usually 9240.
Test Device Connection
Allows you to test the connection to the selected DCP
server.
The status of the connection is displayed in the text
box.
Country Setup
The Country Setup function allows you to define the following:
• System language
• Date and time formats
• Measurement units
• Line filter
• Lead label
2053535-002C
MAC™ 2000 ECG Analysis System
141
System Configuration
To access the Country Setup, on the Main Menu press System Configuration > More
> Country Setup.
The following table identifies the settings on Country Setup.
Country Setup Fields
Comments
Field
Language
Determines the language the interface and
reports use.
Date Format
Determines the format in which dates are
displayed. Options are:
• DD.MM.YYYY
• MM/DD/YYYY
• YYYY-MM-DD
142
Time Format
Determines whether the system uses a
12–hour or a 24–hour format.
Height/Weight Unit
Determines whether the system uses
metric measurements (cm, kg) or American
measurements (in, lb) for patient weight and
height.
Speed Unit
Determines whether the speed of stress
devices is measured in kilometers per hour
(km/h) or miles per hour (mph).
ST Level Unit
Determines whether the ST segment is
measured in millivolts (mV) or millimeters
(mm).
Blood Pressure Unit
Determines whether blood pressure is
measured in millimeters of mercury (mmHg)
or kilopascals (kPa).
MAC™ 2000 ECG Analysis System
2053535-002C
System Configuration
Country Setup Fields (cont'd.)
Comments
Field
Line Filter
Determines the frequency of the line filter.
Options are 50 Hz and 60 Hz.
Lead Label
Determines whether the system labels leads
using the standards of the International
Electrotechnical Commission (IEC) or the
American Heart Association (AHA).
Print Setup Report
The Print Setup Report utility prints a report of individual settings or the complete
system settings. You may use the report to verify that all of your devices are
configured identically or as a reference if you need to re-configure a device.
Use the following instructions to print a setup report:
1.
On the Main Menu press System Configuration > More > Print Setup Report.
2.
On the Print Setup Report window, select the report you want to print.
• Basic Setup
• Resting Setup
• Arrhythmia Setup
• Stress Setup
• RR Analysis Setup
• Communication Setup
• Country Setup
2053535-002C
MAC™ 2000 ECG Analysis System
143
System Configuration
• Patient Setup
• User Setup
• Options Setup
• Order Manager Setup
• Complete Setup
3.
When you are done, press Return to return to the Main Menu.
Patient Setup
The Patient Setup function allows you to define the following information:
• Available and required patient information
• Available test information
• Available clinical trial information
This is available only if the CTDG CT Data Guard option is activated.
• Barcode reader settings
This is available only if the BCRD USB Barcode Reader option is activated
To access Patient Setup, on the Main Menu press System Configuration > More >
Patient Setup.
The following tables identify the settings on Patient Setup.
Patient Information Setup Fields
144
Field
Description
Patient ID
Determines whether the patient ID is required. On
reports, it is labelled ID.
Secondary ID
Determines whether a secondary patient ID is
available when entering patient data and whether it
is required. It can only be required if it is first enabled.
On reports, it is labelled ID 2.
MAC™ 2000 ECG Analysis System
2053535-002C
System Configuration
Patient Information Setup Fields (cont'd.)
Field
Description
Last Name
Determines whether the patient’s last name field is
available when entering patient data and whether it
is required. It can only be required if it is first enabled.
First Name
Determines whether the patient’s first name field is
available when entering patient data and whether it
is required. It can only be required if it is first enabled.
Kanji Name
Determines whether the Kanji name field is available
when entering patient data.
Date of Birth
Determines whether the date of birth field is available
when entering patient data.
Age
Determines whether the age field is available when
entering patient data.
Height
Determines whether the height field is available
when entering patient data.
Weight
Determines whether the weight field is available
when entering patient data.
Gender
Determines whether the gender field is available
when entering patient data.
Race
Determines whether the race field is available when
entering patient data.
Phone Number
Determines whether the phone number field is
available when entering patient data.
Pacemaker
Determines whether the pacemaker field is available
when entering patient data.
Enable Patient ID Check
Determines whether additional checks are performed
to ensure that the patient ID meets the requirements
of the national patient ID used in Scandinavian
countries. If this field is set, you must select the
appropriate Patient ID Type.
Patient ID Type
This field is available only if the Enable Patient ID
Check field is set. This field determines which type of
ID is used and, therefore, which checks to perform.
Options are:
• Swedish Patient ID
• Danish Patient ID
• Norwegian Patient ID
When a patient ID is entered, the system verifies its
format, extracts the patient’s gender and date of
birth, and populates those fields if they are enabled.
Patient ID Length (3-30)
2053535-002C
Defines the maximum length of the patient ID within
the range of 3 to 30 characters.
This field is available only if the Enable Patient ID
Check field is cleared.
MAC™ 2000 ECG Analysis System
145
System Configuration
Patient Information Setup Fields (cont'd.)
Field
Description
Patient ID with leading zeros
Determines whether the system should prefix the
Patient ID with zeroes to fill in the length of the
Patient ID specified in the field Patient ID Length.
For example, If the user selected the length of the
Patient ID field as 10 and entered the PID PID098, it
is displayed by the system as 0000PID098.
Sort Patient List by
Determines the field by which the patient list is
sorted. Options are:
• Patient ID
• Secondary ID
• Patient Name
Test Information Window
146
Fields
Comments
Systolic BP
Determines whether the systolic blood pressure field is
available when entering test information.
Diastolic BP
Determines whether the diastolic blood pressure field is
available when entering test information.
Location
Determines whether the location field is available when
entering test information.
Room
Determines whether the room field is available when entering
test information.
Order Number
Determines whether the order number field is available when
entering test information.
Indication
Determines whether the indication field is available when
entering test information.
Ordering Physician
Determines whether the ordering physician field is available
when entering test information.
MAC™ 2000 ECG Analysis System
2053535-002C
System Configuration
Test Information Window (cont'd.)
Fields
Comments
Referring Physician
Determines whether the referring physician field is available
when entering test information.
Attending Physician
Determines whether the attending physician field is available
when entering test information.
Technician
Determines whether the technician field is available when
entering test information and whether it is required. It is
required only if it is enabled.
Medications (0-3)
Determines the number of medications that you can enter into
the test information window.
Extra Questions…
Opens the Extra Questions window, which allows you to define
up to four custom fields. Each field consists of a Prompt and a
Type. The Prompt can be up to 10 characters. The Type can
be any of the following:
• Alphanumeric
• Numeric
• Yes/No/Unknown
Patient Setup—Clinical Trial Setup Window
2053535-002C
Field
Comments
Visit Number
Determines whether the visit number field
is available when entering clinical trial
information.
Visit Type
Determines whether the visit type field
is available when entering clinical trial
information.
Dose Type
Determines whether the Dose Type field
is available when entering clinical trial
information. If this field is set, use Dose List…
to define the types of doses that are available
when entering clinical trial information.
Investigator ID
Determines whether the investigator ID
field is available when entering clinical trial
information.
MAC™ 2000 ECG Analysis System
147
System Configuration
Patient Setup—Clinical Trial Setup Window (cont'd.)
Field
Comments
Extra Questions
Opens the Extra Questions window, which
allows you to define up to fie custom clinical
test fields.
Each field consists of a Prompt and a Type.
The Prompt can be up to 10 character. The
Type can be any of the following:
• Alphanumeric
• Numeric
• Yes/No/Unknown
Dose List
Opens the Dose List window, which allows
you to define the dose types that will
be available when entering clinical trial
information.
Doses are plain text up to 32 alphanumeric
characters.
The user can add up to 20 does.
Project Code and Trial ID
Identifies the Project Code and Trial ID that
are displayed when entering clinical trial
information.
Allows the user to define up to five sets of
Project Code and Trial ID.
Barcode Scanner Setup
148
Field
Comments
Auto Configure
Automatically configures the barcode reader. When you click
this link, you are prompted to scan a configuration barcode
created by the site’s IT department.
For more information on creating the barcodes, see “Creating
Barcodes ” on page 185.
Total number of bytes
Identifies the total number of bytes on the barcode.
MAC™ 2000 ECG Analysis System
2053535-002C
System Configuration
Barcode Scanner Setup (cont'd.)
Field
Comments
Offset
Identifies the position of the initial character of the
corresponding field.
Length
Identifies the number of characters for the corresponding field.
User Setup
The User Setup function allows you to define the following:
• User names
• User identification
• User roles
• User privileges
Users entered in setup can be selected for system defaults and patient information.
If High Security Mode is enabled, anyone who uses the system must be set up as a
user with a user ID, a password, and privileges to log on to the system. For more
information on setting system defaults and enabling High Security Mode, see “Basic
Setup” on page 107.
To access User Setup, on the Main Menu press System Configuration > More > User
Setup.
When you run User Setup, the Edit User Lists window opens to offer four choices:
• Ordering Physicians
• Referring Physicians
• Attending Physicians
• Technicians
When you select one of these roles, a list of existing users with that role opens. You
can now add, edit, and delete users.
2053535-002C
MAC™ 2000 ECG Analysis System
149
System Configuration
The following table identifies the settings on User Setup.
Comment
Field
Last Name
Identifies the user’s surname.
This field is required and allows a maximum of 40 alphanumeric
characters.
First Name
Identifies the user’s given name.
This field is optional, but if used, allows a maximum of 20
alphanumeric characters.
User ID
Defines a unique ID for the user.
If High Security Mode is enabled, the user needs to enter this ID
to log on to the system.
This field is required and allows a maximum of 30 alphanumeric
characters.
NOTE:
The system does not prevent duplicate IDs. If the same ID is
used more than once, only the first user created with the ID is
able to log on to the system.
150
MUSE ID
Defines the ID with which the user logs on to the MUSE system.
This field is used if reports from this system are transmitted to a
MUSE system.
Ordering
Determines whether the user fills the role of ordering physician. If
this is the role that was selected on the Edit User List window, this
field is checked by default. You may select multiple roles, but you
must select at least one role.
Referring
Determines whether the user fills the role of referring physician. If
this is the role that was selected on the Edit User List window, this
field is checked by default. You may select multiple roles, but you
must select at least one role.
Attending
Determines whether the user fills the role of attending physician. If
this is the role that was selected on the Edit User List window, this
field is checked by default. You may select multiple roles, but you
must select at least one role.
Technician
Determines whether the user fills the role of technician. If this is the
role that was selected on the Edit User List window, this field is
checked by default. You may select multiple roles, but you must
select at least one role.
Password
Defines the password the user must enter along with the User ID to
log on to the system if High Security Mode is enabled.
This field must be between 6 and 30 alphanumeric characters.
Retype Password
Confirms the password was entered correctly.
Edit Setup
Enables/disables the user’s ability to edit system setup information.
Edit Date and Time
Enables/disables the user’s ability to edit system date and time.
Edit Users
Enables/disables the user’s ability to edit user information.
Edit Record
Enables/disables the user’s ability to edit ECG records.
MAC™ 2000 ECG Analysis System
2053535-002C
System Configuration
Comment
Field
Delete Record
Enables/disables the user’s ability to delete ECG records.
Transmit Records
Enables/disables the user’s ability to transmit ECG records.
NOTE:
In the fields Edit Users and Edit Setup, privileges are required by the activated
user to activate High Security mode.
In the fields Edit Setup and Delete Record, privileges are required by the activated
user to export the system audit trail log.
Select Setup
The Select Setup utility allows you to save up to five system configurations and
switch between them. This is useful if the system is shared by departments or used
in multiple clinical trials.
Use the following instructions to save and load configuration files:
1.
On the Main Menu press System Configuration > More > More > Select Setup.
The Select Setup window opens. The name of the setup the system is using
currently is displayed in the Loaded Setup field.
2.
To save a copy of the current setup, do the following:
a.
Press Save As.
The Setup Name window opens.
b.
Type a name for the configuration and press Save.
The configuration is saved, and the Setup Name window closes.
3.
To load a different setup, do the following:
a.
Select the setup you want to load.
b.
Press Load Setup.
c.
Restart the system.
You must power the device off and then on for all setup changes to take
effect, especially if the new setup includes a change to the language
setting; the language does not change until the system restarts.
4.
To delete a setup file, do the following:
a.
Select the file you want to delete.
b.
Press Delete.
You are prompted to confirm the deletion.
c.
Press OK.
NOTE:
You cannot delete a configuration that is currently loaded.
2053535-002C
MAC™ 2000 ECG Analysis System
151
System Configuration
5.
To change the name of a system setup file, do the following:
a.
Select the setup file you want to change.
b.
Press Edit Name.
The Setup Name window opens.
c.
6.
7.
Type the new name and press Save.
To remove all custom settings, do the following:
a.
Select the setup file you want to reset.
b.
Press Factory Defaults.
c.
When prompted to confirm, press Save.
When you are done, press Return to exit.
Import Setup
The Import Setup utility allows you to import up to five system setup files from another
device that were exported to an SD card. This feature is useful to sites with multiple
systems that need to have the same or similar setups.
1.
Insert the SD card with the saved setup file.
If you do not have a valid SD card, you receive the following message:
2.
On the Main Menu press System Configuration > More > More > Import Setup.
The Select Setup for Import window opens.
All saved settings on the device are listed in the left column. All saved settings
on the SD card are listed in the right column.
3.
In the right pane, select the setup file you want to import.
4.
Press Import.
The selected file is copied to the device and is displayed in the left column.
152
5.
Repeat step 3 through step 4 for each saved configuration file you want to
import.
6.
When you are done, press Return.
MAC™ 2000 ECG Analysis System
2053535-002C
System Configuration
Export Setup
The Export Setup utility allows you to export saved settings from the device to an SD
card. You can then use the SD card to import the settings to another device, greatly
simplifying the installation and configuration of multiple devices.
1.
Insert an SD card into the SD card slot in the back panel, as shown in the
following illustration:
2.
Push the SD card into the slot to seat it in place.
3.
On the Main Menu press System Configuration > More > More > Export Setup.
The Select Setup for Export window opens. All saved settings on the device
are listed in the left column. All saved settings on the SD card are listed in the
right column.
4.
In the left pane, select the setup file you want to export.
5.
Press Export.
The selected file is copied to the SD card and is displayed in the right column.
6.
Repeat step 4 through step 5 for each saved configuration file you want to
export.
7.
When you are done, press Return.
Options Setup
The Options Setup function allows you to activate options by entering Option Codes,
which are generated for a specific serial number and can only activate options on the
device with that serial number.
2053535-002C
MAC™ 2000 ECG Analysis System
153
System Configuration
All purchased options are activated when the system ships. If you purchase a new
option or re-activate an option, use the following instructions:
1.
On the Main Menu press System Configuration > More > More > Options Setup.
2.
In the Option Code field, type the 12–digit activation code.
You can find activation codes for purchased options on the Active Code
Summary Sheet provided with the system or with additional purchased options.
3.
Press Enter.
The Option Activated message is displayed at the bottom of the window.
4.
Repeat step 2 through step 3 for any additional options you want to activate.
5.
Press Save to save the configuration options.
Option Codes
154
Option Code
Name
CTDG
CT Data Guard
R12L
12–Lead display for Resting ECG. This is always active.
ME12
12SL Measurement
MEHR
HEART Resting Measurement
MI12
12SL Measurement and Interpretation
MIHR
HEART Resting Measurement and Interpretation
M100
Storage for 100 ECGs
M200
Storage for 200 ECGs.
LANC
LAN Communication to the CardioSoft system
LANM
LAN Communication to the MUSE system
MODC
Modem or serial communication to the CardioSoft system
MODM
Modem or serial communication to the MUSE system
ERGO
Stress test with treadmill, bicycle, or Master’s Step test.
This is a 6–lead waveform display.
E12L
12–Lead display for Stress Test
MAC™ 2000 ECG Analysis System
2053535-002C
System Configuration
Option Codes (cont'd.)
Option Code
Name
CFRA
21 CFR Part 11 Audit Trail
BCRD
USB Barcode Reader
TIPI
ACI-TIPI (Acute Cardiac Ischemia — Time Insensitive Predictive
Instrument)
This option is disabled if MEHR or MIHR is enabled.
RRAN
RR analysis
PDFC
PDF file copy
WIFC
WiFi to the CardioSoft system
WIFM
WiFi to the MUSE system
SOML
Simple Orders from non-MUSE systems
SOMF
Simple Orders from MUSE and non-MUSE systems
AOMF
Order Manager for MUSE and non-MUSE systems
AOML
Order Manager for non-MUSE systems
ADTF
ADT (Patient Demographics) downloaded from MUSE and
non-MUSE systems
ADTL
ADT (Patient Demographics) downloaded from non-MUSE systems
Service Setup
The Service Setup option allows service personnel to configure the following:
• Device Settings
• Event Log
• System Diagnostics
• Software Update
• Format Flash
• Open Command Prompt
Service personnel need to enter the service password to gain access to the system.
Refer to the service manual for your system for more details.
Date/Time Setup
The Date/Time Setup function allows you to configure the system’s date and time
settings.
2053535-002C
MAC™ 2000 ECG Analysis System
155
System Configuration
To access Date/Time Setup, on the Main Menu press System Configuration > More >
More > More > Date/Time Setup.
The following table identifies the settings on Date/Time Setup.
Date and Time Setup Fields
Field
Description
Date
Sets the current system date. The format of the fields
depends on the date format selected on Country
Setup.
For more information, see “Country Setup” on page
141.
Time
Sets the current system time. If the Automatically
Synchronize with Time Server field is set on Basic
Setup, any changes made to the time are overwritten
during the next synchronization.
For more information, see “Basic Setup” on page 107.
NOTE:
Daylight Saving Time changes take effect only
after a restart.
Order Manager Setup
156
MAC™ 2000 ECG Analysis System
2053535-002C
System Configuration
Order Manager Setup Fields
Field
Comment
Initial sort value
Determines how the Order Manager initially sorts
the ECGs. Select one of the following values:
• Patient Name
• Patient ID
• Location
Auto Order Deletion
If enabled, the system deletes orders associated with
ECG files that were deleted automatically. Automatic
deletion of ECG files can happen in the following
conditions:
• Delete after Transmission field on the Resting
ECG Setup window is enabled and the associated
ECG file was successfully transmitted to a
receiving system.
• After the successful transmission of an ECG file
associated with an order, provided the ECG was
never saved on the system.
Default Order Location(s),
for example 1,13,65:
Identifies the locations displayed on the prompt
when downloading orders. This will typically be the
device's location (see “Basic Setup” on page 107).
If the device is used in multiple locations, enter
multiple locations and separate them with commas:
1,3,10, and so on.
RR Analysis Setup
The RR Analysis Setup function allows you to configure the RR Analysis report. For
details, see “RR Analysis Setup” on page 83.
PDF File Naming Convention
The device provides two types of naming conventions:
• Default Naming
• Customize Naming
Default Naming Convention
To help identify the exported PDF files, they are automatically named with the
following descriptive components:
product_version_serial_ECGmode_cartID_creationdata.pdf
For example:
GEMAC2000_1.0_SDS07410016WP_resting_1_2007-11-22T17-56-32.pdf
2053535-002C
MAC™ 2000 ECG Analysis System
157
System Configuration
The following table identifies each component in the example:
Components of the File Naming Convention
Value
Component Description
GEMAC2000
Product name: this is always GEMAC2000.
1.0
Software version: this varies based on the software version
installed.
SDS07410016WP
The device serial number: this varies from device to device.
resting
ECG mode: this is either resting (Resting ECG mode) or rrana
(RR Analysis mode).
1
Cart ID: this varies from device to device.
The Cart ID is the same as the Cart # field in Basic Setup. For
more information see “Basic Setup” on page 107.
2007-11-22T17-56-32
Creation data:. this consists of the following subcomponents:
• 2007 - Year the PDF was written.
• 11 - Month the PDF was written.
• 22 - Date the PDF was written.
• T - Indicates the following numbers are time.
• 17 - Hour, in 24 hour format, the PDF was written.
• 56 - Minute the PDF was written.
• 32 - Second the PDF was written.
Customizing the Naming Convention
Users can name the PDF files according to their own requirements by using given
elements:
1.
On the Main Menu, press System Configuration.
The System Configuration window opens.
2.
Press Basic Setup.
The Basic Setup window opens.
3.
Press Page Down to the PDF Naming Settings option.
4.
Select the Generate Automatic File Name check box.
The following elements are available:
• Patient ID
• Last Name
• First Name
• Date of Birth
158
MAC™ 2000 ECG Analysis System
2053535-002C
System Configuration
• Procedure
Procedure means ECG Mode. This is either resting (Resting ECG mode) or
rrana (RR Analysis mode).
• Date of Test
• Export Date
• Secondary ID
5.
Press Save and return to the System Configuration window.
Retrieving Your Password
If the system is set up for High Security Mode and you forget your password, use the
following procedure to access the system:
1.
Contact GE Healthcare Technical Support and provide the serial number of
the device you want to access.
GE Healthcare Technical Support generates a temporary, device-specific name
and password that you can use for 24 hours.
2.
Log in to the system with the user ID MACService and the password provided
by GE Healthcare Technical Support.
NOTE:
If the keypad on the device does not include the letters for the MACService
user ID, type 6227378423 for the user ID.
3.
Immediately after logging into the system, verify the name and password for
your device.
4.
Record this information and store it in a secure location for future reference.
Exporting the Audit Trail
The Audit Trail Export function copies the system audit trail in XML format to an SD
card and then clears the audit trail on the system. If a previous audit trail exists on the
SD card, it IS overwritten automatically by the new audit trail.
GE Healthcare recommends exporting the audit trail weekly to long term storage to
meet archive requirements. If the audit trail is not exported regularly, it consumes
storage space and reduces the number of ECGs that you can store on the device
To export an audit trail, the following conditions must be met:
• High Security Mode must be enabled.
To enable High Security Mode, see “Basic Setup” on page 107.
• Audit Trail must be enabled.
To enable Audit Trail, see “Basic Setup” on page 107.
• You must have Edit Setup and Delete Records permissions set.
To set permissions for Edit Setup and Delete Records, see “User Setup” on page 149.
2053535-002C
MAC™ 2000 ECG Analysis System
159
System Configuration
Use the following procedure to export the audit trail to an SD card:
1.
Insert an SD card into the device.
2.
On the Main Menu, press System Configuration > More > More > More > Export
Audit.
After the audit trail is copied to the SD card and cleared from the system a
message notifies you that the export was successful.
After the XML file is exported, you can review or print the audit trail as needed. For
more information on how to parse the XML file for viewing or printing, refer to the GE
Cardiology Open XML Reference Manual. To locate the part number for this manual,
refer to “Related Documents” in the service manual.
160
MAC™ 2000 ECG Analysis System
2053535-002C
13
Maintenance
Regular maintenance, irrespective of usage, is essential to ensure that the equipment
functions when required. This chapter provides basic maintenance information for the
following components:
• Device
• Cables and leadwires
• Paper
• Battery
See the documentation provided with your peripherals for additional maintenance
procedures.
This device does not require any calibration.
Equipment Cleaning and Storage
The device is designed to require little more than regular inspection and cleaning to
function properly. Qualified GE Healthcare service personnel should perform any
additional maintenance.
CAUTION:
ELECTRICAL HAZARD — Improper handling during inspection or cleaning could
result in electrical shock.
To avoid potential shock, observe the following guidelines at all times:
• Before inspecting or cleaning the device, turn it off, unplug it from AC power,
and remove the battery.
• Do NOT immerse any part of the equipment in water.
Inspecting the Equipment
Perform a visual inspection daily, preferably before the equipment’s first use each day.
During the inspection, verify that the device meets the following minimum conditions:
• The case and display screen are free of cracks and other damage.
• All plugs, cords, cables, and connectors are free of kinks, frays, and other damage.
• All cords and connectors are securely seated.
• All keys and controls operate properly.
2053535-002C
MAC™ 2000 ECG Analysis System
161
Maintenance
If you notice any items that need repair, contact an authorized service representative
to make the repairs. Discontinue using the device until the appropriate repairs can
be made.
Cleaning the Device
Clean the exterior surface of the device monthly, or more frequently if needed.
Cleaning Materials to Use
Use the following materials to clean the device:
• Mild dishwashing detergent
• Clean, soft cloth
• Water
Cleaning Materials to Avoid
DO NOT use any of the following materials to clean the device, because their use may
damage equipment surfaces.
• Organic solvents
• Ammonia-based solvents
• Abrasive cleaning agents
• Alcohol
• Virex
• Sani-Master
Cleaning the Device Surfaces
Use the following procedure to clean the surfaces of the device.
1.
Dilute mild dishwashing detergent in water to create a cleaning solution.
2.
Soak a clean cloth in the solution and wring out any excess.
3.
Thoroughly wipe the surface of the device with the damp cloth.
Do NOT drip the solution or any liquid on the writer assembly.
Avoid contact with open vents, plugs, or connectors.
4.
Repeat step 2 and step 3 as necessary until the surface is adequately cleaned.
5.
Wipe the surfaces with a dry, clean cloth or paper towel.
Cleaning, Disinfecting, and Storing ECG Cables
and Leadwires
In addition to keeping the system clean and in good repair, it is important to keep the
cables and leadwires clean and disinfected. This section provides instructions for
cleaning, disinfecting, and storing ECG cables and leadwires to extend their life and
162
MAC™ 2000 ECG Analysis System
2053535-002C
Maintenance
protect patients. Cables and leadwires come into contact with patients and should be
cleaned and disinfected after every use.
NOTE:
For devices with the KISS system, refer to the KISS operator's manual for cleaning
and disinfecting information.
Cleaning Guidelines
Observe the following guidelines when cleaning and disinfecting the cables, leadwires,
and electrodes for your system.
• Follow the cleaning instructions exactly.
• Wring excess disinfectant from the wipe before using it.
• Never immerse the device, cables, or leadwires in any liquid, as this may corrode
metal contacts and affect signal quality.
• Do not allow liquids to collect around the connection pins. If this happens, blot them
dry with a soft, lint-free cloth.
• Never use conductive solutions or solutions that contain chlorides, wax, or wax
compounds to clean the device, cables, or leadwires.
• Never use solutions or products that contain any type of Ammonium Chloride such
as, but not limited to:
•
•
•
•
•
•
•
•
Dimethyl Benzyl Ammonium Chloride
Quaternary Ammonium Chloride solutions
Abrasive cleaners or solvents of any kind
Acetone
Ketone
Betadine
Alcohol-based cleaning agents
Sodium salts
• Never autoclave or steam clean the device, cables, or leadwires.
• Do not use any of the accessories until thoroughly dry.
• Do NOT immerse either end of a cable or leadwire connector in any solution.
Immersing or soaking the connector ends may corrode metal contact ends and
affect signal quality.
• Do NOT let liquids collect around the connection pins.
If this happens, blot them dry with a soft, lint-free cloth.
Cleaning and Disinfecting Cables and Leadwires
Proper cleaning and disinfecting prolongs the life of the cables and leadwires. Failure
to use the proper cleaning solutions or to follow the proper procedures can result in
the following:
•
•
•
•
2053535-002C
Damage or corrosion
Diminished signal quality
Product discoloration
Metal part corrosion
MAC™ 2000 ECG Analysis System
163
Maintenance
• Brittle wires and connectors
• Reduced cables and leadwires life
• Device malfunction
• Voided warranty
Cleaning the Cables and Leadwires
Use the following procedure to clean the cables and leadwires:
NOTE:
• While performing the following procedure, use care in cleaning the leadwires
to prevent pulling the wires from the connector ends, because the metal
connections can be pulled away from the connectors.
• Cleaning removes dirt and marks but does not disinfect the cables and
leadwires.
1.
Remove the cables and leadwires from the device before cleaning.
2.
Wipe them with a cloth lightly moistened with a mild solution of soap and water.
Do not use any of the following cleaning products, or products that contain the
same active ingredients and solutions, which are known to cause the problems
previously listed:
• Sani-Cloth® Wipes
• Ascepti® Wipes
• HB Quat®
• Clorox® Wipes (they do not contain bleach)
• Over-the-counter detergents (such as Fantastic®, Tilex®, and so on)
3.
164
Wipe the cables and leadwires with a dry, clean cloth or paper towel and let
them air dry.
MAC™ 2000 ECG Analysis System
2053535-002C
Maintenance
Disinfecting the Cables and Leadwires
Use the following procedure to disinfect the cables and leadwires:
1.
Clean and dry the cables and leadwires before disinfecting them.
See “Cleaning the Cables and Leadwires” on page 164 for instructions.
2.
Wipe the cables and leadwires with a soft, lint-free cloth that is moistened with
an appropriate disinfectant.
Use the following solutions, as recommended in APIC Guidelines for Selection
and Use of Disinfectants (1996):
• Sodium hypochlorite (5.2% household bleach) minimum 1:500 dilution
(minimum 100 ppm free chlorine) and maximum 1:10 dilution.
• Any sodium hypochlorite wipe product that meets the previous guidelines.
3.
Dry the cables and leadwires with a clean cloth or paper towel and let them
air dry for at least 30 minutes.
NOTE:
• Drying times vary based on the environmental conditions.
• DO NOT use excessive drying techniques, such as ovens, forced heat, or
sun drying.
Storing Cables and Leadwires
To ensure that the cables and leadwires are in proper working order, use the following
guidelines to store them when not in use:
• Store cables and leadwires in a dry, well-ventilated area.
• Hang cables and leadwires vertically
• Do NOT coil cables or leadwires around the device.
Cleaning, Disinfecting, and Sterilizing Reusable
Electrodes
Clean reusable electrodes immediately after using them on a patient.
Cleaning and Disinfecting Reusable Electrodes
Use the following procedure to clean and disinfect the reusable electrodes:
1.
Use warm water and a small brush to remove any cream or gel from the
electrode.
Do not use pointed or sharp objects for cleaning.
2.
Disinfect the electrodes with alcohol-free disinfectant.
Ensure that the connectors and sockets do not get wet.
Sterilizing Reusable Electrodes
Use the following procedure to sterilize reusable electrodes:
2053535-002C
MAC™ 2000 ECG Analysis System
165
Maintenance
The only approved sterilization method is gas sterilization.
1.
Sterilize reusable electrodes with ethylene oxide gas (EtO) at a maximum
temperature of 50°C (122°F).
2.
After sterilization is complete, follow the manufacturer's recommendations for
required aeration.
Replacing Leadwire Adapters
Although proper cleaning and storage prolong the life of leadwires, you eventually
need to replace the leadwire adapters. The following illustration shows the proper
method for replacing adapters.
Paper Maintenance
For the proper handling of the device’s thermal writer, you need to know how to do
the following:
• Replace the paper
• Adjusting the tray for paper size
• Remove the paper pack
• Store the thermal paper
166
MAC™ 2000 ECG Analysis System
2053535-002C
Maintenance
Replacing Paper
Use the following procedure to add or replace paper:
1.
Press the push button on the top of the device (1) to open the printer door (2).
2.
Extend the top sheet of the pack of paper and insert the pack into the paper
compartment (3).
Align the top sheet of the paper to the line located on the near side of the
printer door.
3.
2053535-002C
Close the printer door (4) until it clicks into place (5).
MAC™ 2000 ECG Analysis System
167
Maintenance
Adjusting the Tray for Paper Size
Adjusting the Tray for 8.5 x 11 inches or A4
Use the following procedure to adjust the tray for the correct paper size if you are
using letter (8.5 x 11 inches) or A4 paper.
1.
Turn the device over so the bottom of the device is facing you.
2.
Loosen the length and width fasteners (2 and 4) situated close to the paper
spacers.
3.
Slide the spacers (1 and 3) to the appropriate position for the paper size that
you are using.
4.
Tighten the screws (2 and 4) in the selected position.
5.
Turn the device to the upright position and press the push button to open the
printer door (6).
6.
If you are using letter size (8.5 x 11 inches), remove the paper spacer post print (7).
NOTE:
If you are using A4 paper, the paper spacer post print should be snapped
on. By default, the tray is set to A4 paper and therefore the paper spacer
post print is in place.
168
MAC™ 2000 ECG Analysis System
2053535-002C
Maintenance
Adjusting the Tray for Modified Letter Paper (8.433 x 11 inches)
Use the following procedure to adjust the tray for modified letter paper (8.433 x 11
inches).
1.
Press the push button to open the printer door (6) and insert the modified letter
paper.
2.
Turn the device over so the bottom of the device is facing you.
3.
Loosen the screws for the paper tray spacer (4).
4.
Slide the spacer (3) until it presses the paper that is already loaded.
Ensure that the paper spacer (5) is positioned in between the letter and A4
symbol.
5.
Tighten the screws (4) with the spacer (5) at this position.
6.
Loosen the other set of screws for the paper spacer (2).
7.
Move the spacer (1) to the letter symbol.
8.
Tighten the screws (2) with the spacer (1) at this position.
Removing the Paper Pack
Use the following procedure and pictures to remove the pack of paper from the device.
Use the following procedure to remove the paper pack from the printer:
2053535-002C
1.
Press the push button on the top of the device to open the printer door (1).
2.
Lift up the pack of paper (2).
3.
Press the pack of paper against the top plate of the paper compartment (3).
4.
Pull the pack of paper out of the device (4).
MAC™ 2000 ECG Analysis System
169
Maintenance
Storing Thermal Paper
When imaged and stored properly, ECG tracings resist fading for several years. If your
retention requirements exceed five years, consider using GE Healthcare Archivist
paper.
To ensure the tracing is imaged properly, the device must be maintained in
accordance with its service manuals and technical memoranda.
To ensure the tracing lasts for the paper's expected lifespan, observe the following
guidelines when storing your printouts:
• Store in a cool, dark, and dry location.
• Standard paper
Temperature must be less than 27°C (80°F).
Relative humidity must be less than 65%.
• Archivist paper
Temperature must be less than 40°C (104°F).
Relative humidity must be between 40% and 60%.
• Avoid exposure to bright light or UV sources.
Sources of ultraviolet light include sunlight, fluorescent lights, halogen lights,
mercury vapor lamps, and germicidal lamps.
• Avoid contact with cleaning liquids and solvents.
Solvents to avoid include alcohols, ketones, esters, ether, and so forth.
• Store thermal paper separately in manila folders or polyester or polyimide
protectors.
Plastic document protectors, envelopes, or sheet separators made of polystyrene,
polypropylene, or polyethylene do not degrade thermal traces. However, these
materials afford no protection against fading from external causes.
• Do NOT store thermal papers with any of the following:
• carbon or carbonless forms
• document protectors, envelopes, and sheet separators containing polyvinyl
chloride or other vinyl chlorides.
• non-thermal chart papers or any other products containing tributyl phosphate,
dibutyl phthalate, or any other organic solvents
NOTE:
Many medical and industrial charts contain these chemicals.
• Do NOT use mounting forms, pressure-sensitive tapes, and labels that use
solvent-based adhesives.
Use only mounting forms and pressure-sensitive tapes made with starch or
water-based adhesives.
Battery Maintenance
The device uses a rechargeable battery containing lithium-ion cells. The battery
contains an integrated electronic fuel gauge and a safety protection circuit.
Because of the bias current needed to operate the integrated electronics, the battery
discharges even when it is not installed in the device. The rate at which it discharges
is dependent on the ambient temperature at which it is stored. The higher the
170
MAC™ 2000 ECG Analysis System
2053535-002C
Maintenance
temperature, the more quickly it discharges. To prolong the battery’s charge when not
in use, store the battery in a cool, dry location.
A new, fully-charged battery should last for approximately 3 hours of normal
operation. An on-screen LED indicates the condition and capacity of the battery’s
charge. (For more information on the battery gauge, refer to “Front View” on page 30
and “System Errors” on page 181). When the LED flashes amber, connect the device to
AC power to charge the battery to full capacity.
As the battery ages, the full charge capacity of the battery degrades and is
permanently lost. As a result, the amount of charge that is stored and available for
use is reduced. When the capacity is no longer sufficient for your daily operation,
you need to replace the battery.
Replacing the Battery
WARNING:
ENVIRONMENTAL HAZARD — Do NOT dispose of the battery by fire or burning.
Follow local environmental guidelines concerning disposal and recycling.
Use the following procedure to replace the battery:
2053535-002C
1.
Unplug the device from the AC adapter.
2.
Gently turn the device over and remove the screw holding the battery cover.
3.
Push the tab to remove the cover of the battery compartment.
4.
Gently lift the cover of the battery compartment.
5.
Remove the battery from the compartment.
MAC™ 2000 ECG Analysis System
171
Maintenance
6.
Place the new battery in the compartment and push until it clicks into place.
7.
Replace the cover on the battery compartment.
It should click into place.
8.
Tighten the screw to hold the cover in place.
Conditioning the Battery Pack
To maintain the storage capacity of the battery installed in the device, GE
Healthcare recommends that you condition the battery once every 6 months to
recalibrate its electronic fuel gauge. A condition cycle consists of an uninterrupted
“charge-discharge-charge” cycle.
Use the following instructions to condition the battery:
1.
Insert the battery into a device that is not recording patient tests.
For details, refer to “Replacing the Battery” on page 171.
2.
Disconnect the AC mains power from the device.
3.
Enter the Battery Status Service Diagnostic window.
For details on accessing the Battery Status Service Diagnostic window, refer to
this device’s service manual.
4.
Allow the battery to discharge until its Charge Level is less than 90%.
5.
Turn off the device and reconnect the AC mains power.
6.
Allow the battery to fully charge.
The Battery LED is steady amber while it is charging and turns off when
charging is complete.
7.
Remove the AC mains power and turn on the device.
8.
Allow the battery to discharge until the device shuts down.
9.
Reconnect the AC mains power to the device and leave the device turned off.
10.
Allow the battery to fully charge.
When the Battery LED indicator stops flashing and shines steadily, the battery
is fully charged and the conditioning cycle is complete.
Battery Status Indicator
The battery status indicator is located on the top of the screen. For the exact location,
see the screen in “Recording a Resting ECG” on page 65.
172
MAC™ 2000 ECG Analysis System
2053535-002C
Maintenance
The following diagram and table describe the battery status.
Battery Status
Item
Description
1
The battery is fully charged and above 75%.
2
The battery charge is above 50%.
3
The battery charge is above 25%.
4
The battery charge is below 25%.
This status is also used when the battery charge is unknown.
Supplies and Accessories
For a list of available supplies and accessories, refer to the supplies and accessories
reference guide for this device.
2053535-002C
MAC™ 2000 ECG Analysis System
173
Maintenance
174
MAC™ 2000 ECG Analysis System
2053535-002C
Troubleshooting
14
This section identifies some of the more common problems with the system and lists
their potential causes and solutions. If the information in this section cannot resolve
your issue, contact GE Healthcare Technical Support.
General Troubleshooting Tips
Use the following general troubleshooting tips to help diagnose problems not
specifically discussed elsewhere in this chapter.
• Thoroughly inspect the equipment.
Disconnected or loose cables, missing hardware, and damaged equipment can
cause what may seem to be unrelated symptoms or equipment failure.
For additional information, refer to “Inspecting the Equipment” on page 161.
• Verify the equipment was not modified.
Unauthorized modifications to the equipment may cause unexpected results, poor
performance, or system failure.
If the equipment has unauthorized modifications, contact GE Healthcare Technical
Support.
• Verify the software was not updated.
Updated software may change system functionality. If the user is unaware of the
changes, they may seem to be unexpected results.
If the software has been updated, refer to the revised Operator’s Manual to
determine whether the update changed features.
• Verify whether there were changes in the equipment’s location or environment that
could cause the failure.
For example, equipment that emits radio waves could cause interference during
acquisition.
If the environment or location has changed, try using the equipment in the original
location to determine whether the problem persists.
• Verify the problem was not caused by operator error.
Repeat the scenario and compare that to the operation as described in the manual.
If the operator deviated from the manual, repeat the task using the instructions
as written.
If these steps do not resolve the problem, refer to the following sections for specific
problems and solutions. If the problem still cannot be resolved, contact GE Healthcare
Technical Support.
2053535-002C
MAC™ 2000 ECG Analysis System
175
Troubleshooting
Frequently Asked Questions (FAQ)
This section addresses frequently asked questions concerning maintenance, system
setup, and clinical topics.
Question
Procedure
How do I save changes I have made to the
System Configuration?
Refer to “Export Setup” on page 153.
How do I restore system setups from the SD
card?
Refer to “Import Setup” on page 152
How do I obtain a printed record of the
System configuration file?
Refer to “Print Setup Report” on page 143.
I need to reactivate the options on my
system. Where can I find the Option Codes?
The codes are listed on the last page of your
printed setup report. Refer to “Print Setup
Report” on page 143.
They are also found on a label next to the
battery compartment.
Why won’t any of the ECGs I perform save
to the SD card?
Refer to “Exporting Records” on page 104.
Should I clean the device?
Refer to “Maintenance”. “Equipment Cleaning
and Storage” on page 161.
What is the capacity of the battery?
Refer to the Battery information in “Product
Overview”. “Hardware Specifications” on
page 35.
I need to provide the address of the device to
the network administrator to enable the LAN
communication option. How do I obtain the
address?
After the LANM/LANC option is enabled and
the network cable connected, you can obtain
the IP address from “Communication Setup”
on page 131 .
Equipment Problems
The following issues are discussed in this section:
• “System Does Not Power Up” on page 176
• “ECG Data Contains Noise” on page 177
• “External Stress Equipment does not Move” on page 177
• “Paper Jams” on page 178
System Does Not Power Up
If the system does not power up, do the following:
• Verify the device is turned on.
If it is not, turn the device on. Refer to “Turning on the System” on page 47 for
instructions.
• Verify the battery is installed and charged.
Refer to “System Errors” on page 181 for instructions on verifying whether the
battery is installed and charged.
176
MAC™ 2000 ECG Analysis System
2053535-002C
Troubleshooting
Refer to “Replacing the Battery” on page 171 for instructions on installing the
battery.
• Verify the device is connected to an AC power outlet.
Refer to “Connecting the AC Power” on page 43 for instructions.
• Verify the equipment is receiving power from the outlet.
If the device is receiving power, the Power LED is lit.
ECG Data Contains Noise
If the acquired ECG data displays unacceptable noise levels, do the following:
• Check the patient’s position.
The patient should remain motionless during the acquisition of a resting ECG.
• Use the Hookup Advisor indicator to help determine the cause of the noise.
For more information, refer to “Hookup Advisor” on page 66.
• Verify the electrodes are placed properly.
Refer to “Electrode Placement” on page 50 for information on proper electrode
placement.
• Verify the electrodes are applied correctly.
You must remove perspiration, excessive hair, lotions, and dead skin cells from
the electrode site.
Refer to “Preparing the Patient’s Skin” on page 49 for more information.
• Check for defective or expired electrodes.
Replace the electrodes if there are any questions about their effectiveness.
• Check for defective, broken, or disconnected leadwires.
Replace the leadwires if there are any questions about their effectiveness. Refer to
“Connecting the Patient Cable” on page 44.
• Consider using filters, ADS, and FRF to help eliminate or reduce ECG noise.
For more information, refer to “ECG Options” on page 69, “Arrhythmia Printing
Options” on page 80, or “Stress Options” on page 92.
External Stress Equipment does not Move
If the external stress equipment does not move automatically when expected, do
the following:
• Verify the correct stress equipment is selected in Basic Setup.
For more information, refer to “Basic Setup” on page 107.
• Verify the selected stress equipment is supported.
For a list of supported stress equipment, refer to “Connecting External Devices
(Stress Option)” on page 47.
• Verify the stress equipment is connected to the cart.
External stress equipment is connected to the cart through a serial cable. For more
information, refer to “Rear View” on page 30.
• Verify the protocol is set up to activate the stress equipment.
The protocol can set the stress equipment’s speed and grade or load. For more
information, refer to “Editing Stress Protocols” on page 128.
• Verify the Stop TM button is not depressed.
For more information, refer to “Stress Test Keys” on page 92.
2053535-002C
MAC™ 2000 ECG Analysis System
177
Troubleshooting
Paper Jams
If the paper jams while printing, do the following:
• Verify the paper was inserted correctly.
For details, refer to “Replacing Paper” on page 167.
• Verify the paper tray spacers are set appropriately for the paper size.
For details, refer to “Adjusting the Tray for Paper Size” on page 168.
Import/Export/Save Errors
The following issues are discussed in this section:
• “SD Card Not Present” on page 178
• “Cannot Import or Transmit Records via Modem” on page 178
• “Cannot Export to Shared Directories” on page 180
SD Card Not Present
If you receive an error message stating that the SD card is not present or cannot be
found, do the following:
• Verify an SD card is inserted into the card slot on the device.
For details, refer to “Rear View” on page 30.
• Verify the SD card is seated firmly.
The SD card clicks into place when seated firmly.
• Verify the SD card is formatted for a FAT or FAT16 file system.
To verify an SD card is formatted for the correct file system, do the following:
1.
Insert the card into an SD card reader attached to a PC.
2.
Copy any files you want to save from the SD card to a folder on the PC.
3.
Using the Windows Format command, specify either FAT or FAT16 for the file
system and format the card.
NOTE:
Formatting the SD card erases any existing files on the card.
4.
Copy the files from the folder on the PC to the newly formatted SD card.
Cannot Import or Transmit Records via Modem
If you receive an error while attempting to import or transmit ECG records via modem,
do the following:
• Verify the correct communication option was activated.
The system supports two options for communicating via modem: MODC (for
communicating with a CardioSoft system) and MODM (for communicating with a
MUSE system). For more information, refer to “Options Setup” on page 153.
• Verify the modem is connected to an analog telephone line using a standard
RJ11 phone jack.
For more information, refer to “Rear View” on page 30.
178
MAC™ 2000 ECG Analysis System
2053535-002C
Troubleshooting
• Check Communications Setup to verify the correct dialing method is selected and
configured accurately.
For details, refer to “Communication Setup” on page 131.
• If transmitting records, check the selected location to verify the following:
• Modem is the selected device.
• The Phone Number is correct.
• The correct Protocol is selected.
For details, refer to “Communication Setup” on page 131.
Cannot Transmit Records via LAN
If you receive an error while attempting to transport records via LAN, sue the following
procedure:
1.
Verify the correct communication option was activated.
The system supports two options for communicating via LAN:
• LANC (for communicating with a CardioSoft system)
• LANM (for communicating with a MUSE system
For more information on setting up LAN communication, see “Options Setup”
on page 153.
2.
Verify the LAN cable is connected properly to the LAN connection slot.
For information on where the LAN cable connects to the device, see “Rear View”
on page 30.
3.
Check communication setup to verify whether the IP, Netmask, Gateway, and
DNS addresses are all correct.
For details on checking addresses, see “Communication Setup” on page 131.
Cannot Transmit Records via WiFi
If you receive an error while attempting to transmit records via WiFi, use the following
procedure:
1.
Verify the correct communication option was activated.
The system supports two options for communicating via WiFi:
• WIFC (for communicating with a CardioSoft system
• WIFM (for communicating with a MUSE system.
For more information on setting up LAN communication, see “Options Setup”
on page 153.
2.
Verify the WiFi dongle is connected properly to the USB port on the rear of the
device.
If the WiFi dongle is not working, try changing the port.
For information on where the WiFi dongle connects to the device, see “Rear
View” on page 30.
2053535-002C
MAC™ 2000 ECG Analysis System
179
Troubleshooting
3.
Check communication setup to verify whether the IP, Netmask, Gateway, and
DNS addresses are all correct.
For details on checking addresses, see “Communication Setup” on page 131.
4.
Check whether the wireless LAN is enabled and the authentication details are
correct.
For information on the wireless LAN setup, see “Wireless Networking Settings” in
“Communication Setup” on page 131.
Cannot Export to Shared Directories
To resolve errors received while attempting to export ECG records to a shared
directory, do the following:
• Verify the LANC communication option was activated.
Refer to “Options Setup” on page 153 for information on activating options.
• Verify connectivity by checking the following:
• The network cables are connected.
• The IP, netmask, gateway, and DNS server addresses are all correct.
Refer to “Communication Setup” on page 131 for instructions on setting these
values.
• The two systems can communicate.
To verify this, ping the device from the file server.
• Verify the logon information is correct.
Check the user name, password, and domain information. Refer to “Communication
Setup” on page 131 for information on the log on information.
• Verify share and directory permissions.
Ensure that the account used to log on to the shared directory has read/write/create
permissions to both the share and the directory.
Refer to Microsoft Windows online help for instructions on how to set user
permissions.
Acquisition/Printer Error Messages
If you receive an acquisition/printer error message, along with an error code, use the
following table to determine what you need to do.
Message
Action
Message displays for a short duration and
then stops.
No action to take.
Message displays persistently.
Try rebooting the system.
Message displays persistently, even after
rebooting the system.
Contact GE Healthcare Service.
Report Errors
This section addresses the following report error: “ACI-TIPI Statement is not Included
on Report” on page 181.
180
MAC™ 2000 ECG Analysis System
2053535-002C
Troubleshooting
ACI-TIPI Statement is not Included on Report
If the ACI-TIPI statement is not displayed when expected, do the following:
• Verify the ACI-TIPI option is activated.
For information on activating the ACI-TIPI option, refer to “Options Setup” on page
153.
• Verify ACI-TIPI is enabled on the ECG.
For information, refer to“Resting ECG Setup” on page 112.
• Verify the information ACI-TIPI requires was entered.
The ACI-TIPI statement prints only if the patient’s gender, date of birth, and chest
pain indication are included in the patient information.
• Verify the patient is 16 years old or older.
The ACI-TIPI statement does not print for pediatric patients.
• Verify the original ECG was acquired in an electrocardiograph with the ACI-TIPI
option.
If you attempt to print an ECG that was imported from an external device, the
cart does not generate an ACI-TIPI statement; it prints only if the statement was
saved as part of the ECG.
System Errors
The following table identifies some potential errors that may occur while you are
operating the system, the possible causes, and a recommended course of action
to resolve the error.
If performing the recommended actions does not resolve the problem, contact
authorized GE Healthcare service personnel.
Problem
Cause
Solution
System is operating from
the battery and the battery
charge is low.
Connect the system to an AC
outlet to charge the battery.
System is operating from
AC power and battery is not
installed.
Install a battery.
Battery is fully discharged.
Connect the system to an AC
outlet to charge the battery
This icon is displayed and the
battery LED is flashing.
This icon is displayed and the
battery LED is not lit.
The system does not power
up while operating from
battery power.
2053535-002C
MAC™ 2000 ECG Analysis System
181
Troubleshooting
Problem
Cause
Solution
The system powers down
while operating from battery
power.
Battery is fully discharged
Connect the system to an AC
outlet to charge the battery
You are prompted to enter
User ID and/or Password
while attempting to export
records to a shared network
directory.
The User ID and/or
Password defined on
the Communication Setup
window (“Communication
Setup” on page 131) are
incorrect.
User cannot log on to the
system.
1.
Press Esc to close the
prompt.
2.
Exit the export program.
3.
Run Communication
Setup.
4.
Enter the correct User
ID and Password for the
shared directory and
save the new values.
5.
Export the records.
High Security Mode is
Try the following:
enabled and the user’s User • Verify the user is setup in
ID or Password were entered
the system.
incorrectly.
Refer to “User Setup” on
page 149.
• Verify the user typed the
User ID and Password
correctly.
• Contact the administrator
to reset the user’s User ID
or Password.
• Contact GE Healthcare
technical support to
obtain a temporary
supervisor password.
182
MAC™ 2000 ECG Analysis System
2053535-002C
Troubleshooting
Problem
Cause
Solution
The following error message
is displayed while printing:
Printer internal error –
Printing not possible
The printer encountered a
temporary condition that
caused it to stop printing the
current report.
To restart any of the following
reports, push the appropriate
button:
• Rhythm Report in Resting
ECG Mode
• Arrhythmia recording in
Arrhythmia Mode
• In-test Reports in Stress
Test Mode
All other reports restart
automatically.
The following error message
is displayed while printing:
Battery low – Printing not
possible
The battery is low and does
not have enough charge to
power the printer.
Try the following:
• Allow the battery to
charge to 50% before
printing again.
• Connect the device to an
AC outlet.
• Power down the device
then power it back on.
2053535-002C
MAC™ 2000 ECG Analysis System
183
Troubleshooting
184
MAC™ 2000 ECG Analysis System
2053535-002C
A
Creating Barcodes
The following sections provide the information you need to configure bar codes.
The barcode reader can read any of the following codes:
• 39
• 39EX
• 128
• PDF-417
• Interleaved Code 2 of 5
• Data Matrix
Regardless of which code is used, the site’s IT department must do the following:
• Set up the patient data scheme.
• Configure the barcode reader.
NOTE:
All data resides in fixed-width fields. The bar code must be programmed to add
“trailing spaces” after fields shorter than the fixed length of the fields your system
is using.
Setting Up the Patient Data Scheme
Use the following rules to set up a data scheme, including patient demographic data,
for your barcodes.
Patient Data Scheme
Item
2053535-002C
Byte Length
Patient ID
The Patient ID length should not exceed the
30–character maximum and should be equal to
the ID length set up on the system in the Patient
Setup window.
If the system is communicating with a MUSE
system, the length of the Patient ID should be the
same as the Patient ID that the MUSE system uses.
Last Name
40 (maximum)
First Name
20 (maximum)
MAC™ 2000 ECG Analysis System
185
Creating Barcodes
Patient Data Scheme (cont'd.)
Item
Byte Length
Year of birth
4
Month of birth
2
Day of birth
2
Gender
1
Configuring the Barcode Reader
Configure the barcode reader on the Patient Setup window. You can choose to
configure it manually or automatically. The requirements for each method are
described in the following sections.
Configuring the Barcode Reader Manually
The following table identifies the available fields for configuring your bar code reader.
Manual Bar Code Reader Configuration Fields
Field
Description and Byte Length
Total number of bytes
Enter the total number of bytes contained in the patient
bar code. This is usually the sum of the bytes listed in the
following fields.
Patient ID offset
Enter the Patient ID’s Offset.
Patient ID length
Enter the Patient ID’s Length.
Be aware of the following criteria when setting the length:
• Can be from 3 to 30
• Should equal the ID length set up on the Patient Question
window
• Should equal the patient ID length for the MUSE CV
system with which the MAC system communicates.
First name offset
The patient's first name Offset.
First name length
The patient's first name Length.
Be aware of the following criteria when setting the length:
• value can be from 0 to 20
• should equal the length from the MUSE CV system with
which the MAC system communicates.
NOTE:
The MAC system does not support “long” names; if the
MUSE system uses long names, this field should be set
to its maximum value.
Last name offset
186
The patient's last name Offset.
MAC™ 2000 ECG Analysis System
2053535-002C
Creating Barcodes
Manual Bar Code Reader Configuration Fields (cont'd.)
Field
Description and Byte Length
Last name length
The patient's last name Length.
Be aware of the following criteria when setting the length:
• value can be from 0 to 40
• should equal the length from the MUSE CV system with
which the MAC system communicates
NOTE:
The MAC system does not support “long” names; if the
MUSE system uses long names, this field should be set
to its maximum value.
Year of birth offset
The year the patient was born. Enter the field's Offset
Year of birth length
The year the patient was born. Enter the field's Length
The length must be set to 4.
Month of birth offset
The month the patient was born. Enter the field's Offset.
Month of birth length
The month the patient was born. Enter the field's Length.
The length must be set to 2.
Day of birth offset
The day the patient was born. Enter the field's Offset.
Gender offset
The patient's gender. Enter the field's Offset.
Gender length
The patient's gender. Enter the field's Length.
The length must be set to 1.
Configuring the Barcode Reader Automatically
You can configure the barcode reader automatically by scanning a barcode that has
been set up using the following information:
Automatic Bar Code Reader Configuration Fields
2053535-002C
Item
Character Used to Reserve Byte Space
Patient ID
9
First name
5
Last name
6
Year of birth
3
Month of birth
1
Day of birth
2
Gender
M or m for male
F or f or female
MAC™ 2000 ECG Analysis System
187
Creating Barcodes
188
MAC™ 2000 ECG Analysis System
2053535-002C
Master’s Step Data
B
The following sections provide the information you need to run a Master's Step stress
test.
Master's Step Table
The following table identifies the number of steps to set according to the patient's
age, gender, and weight.
2053535-002C
MAC™ 2000 ECG Analysis System
189
190
Weight (kg)
18–22
22–26
27–31
32–35
MAC™ 2000 ECG Analysis System
36–40
41–44
45–49
50–53
54–58
59–63
64–67
2053535-002C
68–72
Gender
Age (Years)
5–9
10–14 15–19 20–24 25–29 30–34 35–39 40–44 45–49 50–54 55–59 60–64 65–69 70–74 75–79
Male
35
36
Female
35
35
33
Male
33
35
32
Female
33
33
32
Male
31
33
31
Female
31
32
30
Male
28
32
30
Female
28
30
29
Male
26
30
29
29
29
28
27
27
26
25
25
24
23
23
22
Female
26
28
28
28
28
27
26
24
23
22
21
21
20
19
18
Male
24
29
28
28
28
27
27
26
25
24
23
22
22
21
22
Female
24
27
26
27
26
25
24
23
22
21
20
19
18
18
17
Male
22
27
27
28
28
27
26
25
25
24
23
22
22
21
20
Female
22
25
25
26
26
25
24
23
22
21
20
19
18
18
17
Male
20
26
26
27
27
26
25
25
24
23
22
22
22
21
20
Female
20
23
23
25
25
24
23
22
21
20
19
18
18
17
16
Male
18
24
25
26
27
26
25
24
23
22
22
21
21
20
19
Female
18
22
22
24
24
23
22
21
30
19
18
18
17
16
15
Male
16
23
24
25
26
25
24
23
23
22
21
20
20
19
18
Female
16
20
20
23
23
22
21
20
19
19
18
17
16
15
15
Male
21
23
24
25
24
24
23
22
21
20
20
19
18
18
Female
18
19
22
22
21
20
19
19
18
17
16
15
15
14
Male
20
22
24
25
24
23
22
21
20
20
19
18
18
17
Female
17
17
21
20
20
19
19
18
17
16
16
15
14
13
2053535-002C
Weight (kg)
73–76
77–81
82–85
86–90
MAC™ 2000 ECG Analysis System
91–93
94–99
100–104
Gender
Age (Years)
5–9
10–14 15–19 20–24 25–29 30–34 35–39 40–44 45–49 50–54 55–59 60–64 65–69 70–74 75–79
Male
18
21
23
24
23
22
22
21
20
19
18
18
17
17
Female
15
16
20
19
19
18
18
17
16
16
15
14
13
12
20
22
23
23
22
21
20
19
18
18
17
17
16
14
19
18
18
17
17
16
16
15
14
13
13
12
Male
19
21
23
22
21
20
19
19
18
17
16
16
15
Female
13
18
17
17
17
16
16
15
14
14
13
12
11
Male
18
29
22
21
21
29
18
17
17
16
15
15
14
Female
12
17
16
16
16
15
15
14
13
13
12
12
11
Male
19
21
21
20
19
18
17
16
16
15
14
14
Female
16
15
15
15
14
14
13
13
12
11
11
10
Male
18
21
20
19
18
17
17
16
15
14
14
13
Female
15
14
14
14
13
13
13
12
11
11
11
10
Male
17
20
20
19
18
17
16
15
14
13
13
12
Female
14
13
13
13
13
12
12
11
11
10
10
09
Male
Female
13
Master’s Step Data
191
Master’s Step Data
ST-T Changes
The existence of any ST-T change is assessed by classifying ST-T into three assessment
levels:
• Positive
One of the following criteria must be met on 2 or more leads:
• ST Depression ≥ 0.1 mV
• ST Elevation≥ 0.2 mV
• T wave change ≥ 1.0 mV
• Borderline
One of the following criteria must be met on any lead:
• ST Depression ≥ 0.05 mV
• ST Elevation ≥ 0.1 mV
• T wave change ≥ 0.5 mV
• Negative
This is assessed if neither the Positive nor Borderline criteria are met.
To following formulas are used to calculate the values in the previous criteria:
• ST depression = (rest ST - post J) - (post exercise ST - post J)
• ST depression = (rest ST - post J) - (post exercise ST - post J)
• T wave change = absolute value of (rest T wave amplitude - post-exercise T wave
amplitude)
• (ST - post J: amplitude at the post J point)
When the assessment is positive or borderline, the lead with the largest change prints.
192
MAC™ 2000 ECG Analysis System
2053535-002C
C
Technical Specifications
System Specifications
Hardware Device
Item
Specifications
Device type
Portable, integrated unit
Width
390 mm (15.4 in)
Depth
330 mm 13.0 in)
Height
200 mm (7.9 in)
Weight
approx. 5 kg (11.0 lb) (including battery, without paper)
CRT Interface
No CRT interface connector
USB Port
Two USB 2.0 ports available
Mechanical design
Housing with built-in graphics display
SW on mainboard
Environmental Conditions
Item
Operating Specifications
Transport/Storage
Specifications
Temperature
+10°C to +40°C (50°F to 104°F)
-40°C to +70°C (-40°F to 158°F)
Relative humidity
20% to 95% (RH
non-condensing)
15% to 95% (RH
non-condensing)
Pressure
700 hPa to 1060 hPa
(Altitude range: 3010.9m
to –381.9m [9878.28 ft. to
–1252.95 ft.])
500 hPa to 1060 hPa
(Altitude range 5570m to -380m
[18274.28 ft. to –1246.72 ft]).
Display
2053535-002C
Item
Specifications
Type
7–inch (177.8 mm) color TFT graphics display with support of
minimum 32K colors
Resolution
WVGA – 800 x 480 pixels
MAC™ 2000 ECG Analysis System
193
Technical Specifications
Display (cont'd.)
Item
Specifications
Data
Heart rate, patient ID, clock, battery power indicator, waveforms,
lead labels, speed, gain and filter settings, warning messages,
prompts, and help messages.
Standard display: 6 leads
Optional display: 12 leads
Traces
3, 6, 12
Sweep Speed
12.5, 25, and 50 mm/s
Filtered ECG
The raw or filtered ECG curves are displayed on the screen as
selected by the user.
Keypad
Item
Specifications
Pad
Membrane board with tactile feedback
Keys
Soft function keys
Full alphanumeric keyboard (Qwerty key set)
Writer controls
Trimpad cursor controls
Keypad
Standard keypad with additional function keys.
Keypad and lettering are water resistant and meet MDM4021
Cleaning and Chemical Resistance Performance Guidelines
Functions
Standard
Stress
Printer
194
Item
Specifications
Technology
Integrated thermal dot array
Paper Speed
5, 12.5 mm/s at ±10% accuracy
25, 50 mm/s at ±2% accuracy
Printer motor speed
Report printing within 25 seconds
Number of traces
Up to 12 ECG traces sampled at 500 or 1000 Hz
Sensitivity/gain
2.5, 5, 10, 20, 40 mm/mV with ±5% accuracy
Speed accuracy
5, 12.5 mm/s at ±5%
25, 50 mm/s at ±2%
Amplitude accuracy
±5%
Horizontal resolution
40 dots/mm at 25 mm/s in rhythm mode
Vertical resolution
8 dots/mm
Paper type
Z-fold thermal with pre-printed grid and perforation
Paper size
215 mm x 280 mm (8.5 in x 11 in) (letter)
210 mm x 295 mm (8.25 in x 11.6 in) (A4)
214.2 mm x 279.4 mm (8.43 in x 11 in) (modified letter)
Paper tray capacity
Holds up to 150 sheets
MAC™ 2000 ECG Analysis System
2053535-002C
Technical Specifications
Electrical
Item
Specifications
Power supply
Internal AC/DC or battery operation
Input voltage
100–240 VAC ±10%
Input current
(Maximum power
consumption)
1.5A at 115V to 230V AC
Input frequency
47–63 Hz
Safety requirement
IEC60601–1 protection class I
Fuse requirement
Phase and neutral meet UL/IEC requirements
Power inlet socket
IEC C14 type
Battery
Item
Specifications
Type
Replaceable and rechargeable, Lithium Ion
Capacity
14.4V, 2.2 AH ±10%
100 single page resting ECG recording or 3 hours (typical) of
continuous monitoring without printing (minimum)
Charge time
Approximately 3.5 hours from total discharge (with device off)
Acquisition, Processing, and Performance
LEDs
Item
Specifications
Battery charging
Steady amber: Battery charging
Flashing amber: battery low
Off: battery fully charged (when connected to AC Mains); neither
charging nor low (when running on battery)
External power
Steady green: external power connected
Off: no external power
ECG Data Acquisition
Item
Specification
ECG front end
Internal ECG front end with DSP
provides 10 simultaneously sampled electrode channels
Signal input
Type CF
Amplitude resolution
4.88 µV ±1% per LSB @ 500 SPS
Dynamic range
AC differential: ±5 mV
DC offset: ±300 mV
Frequency range
0.04 to 150 Hz
Common mode rejection >135 dB with 50/60 Hz filter on
2053535-002C
MAC™ 2000 ECG Analysis System
195
Technical Specifications
ECG Data Acquisition (cont'd.)
Item
Specification
Input impedance
>10 MΩ @ 10 Hz
Patient leakage current
<10 µA normal condition (NC)
<50 µA single fault condition (SFC)
Remote control
Advancing to the next stage can be initiated from the bicycle
ergometer.
Processing
Item
Specifications
Processor
Application: 32 bit ARM9 processor
Peripheral Management: 32 bit ARM Cortex-M3 processor
Signal Chain Processing: 400 MHz DSP
ECG Interpretation
Marquette 12SL™ ECG Analysis Program for adults and pediatrics
Heart Algorithm (Stress)
Computerized
measurements
12-lead analysis
ECG analysis frequency
500 or 1000 samples/second/channel
Digital sampling rate
16000 samples/second/channel for normal data acquisition
Pace sample rate
75K samples/second/channel
ECG on-screen preview
On-screen preview of acquired 10-second ECG waveform
Acquisition mode
Pre-acquisition or post acquisition, provides 10 seconds of
instantaneous ECG acquisition
Resolution
4.88 µV/LSB
Frequency range
0.04 to 150 Hz
Low cutoff frequency
0.04 Hz (-3 dB limits)
High cutoff frequency
Configurable at 20 Hz, 40 Hz, 100 Hz, 150 Hz
Common mode rejection >135 dB (with 50/60 Hz filter on)
Input impedance
>10 MΩ @ 10 Hz (defibrillator protected)
Patient leakage
<10 µA NC
<50 µA SFC
Electrodes monitored for Every electrode except RL and RA
disconnection
196
Heart rate meter
30 to 300 BPM
Operating system
Microsoft Windows CE 6.0
Startup time
Less than 30 seconds.
ECG transmission
Resting ECGs can be transferred via the serial interface, modem,
LAN, as well as SD-card from the MAC2000 system to other ECG
systems (CardioSoft/CardioSys, MUSE) for further processing and
archiving.
In addition, Resting ECG can be received via serial line, modem,
and SD Card.
MAC™ 2000 ECG Analysis System
2053535-002C
Technical Specifications
Processing (cont'd.)
Item
Specifications
Patient Data
Patient information entry: Patient ID, Secondary Patient ID,
Height, Weight, Gender, Race, Pacemaker Patient, Systolic BP,
Diastolic BP, Location#, Room, Order Number, Phone Number,
Medication, Ordering Physician, Referring Physician, Attending
Physician, Technician, Test indication, four user-definable fields.
Electrode connections
RA, RL, LA, LL, V1–V6, Nax, Nst
Detection of pacemaker
pulse
Lower scale: 0.2 ms duration, 0.5 mV amplitude
Higher scale: 2.0 ms duration, 250 mV amplitude
Archiving
ECG data is printed out
Internal memory is present on this system.
External Storage
SD Card available for storage
Input/Output Interface
RS232 port for connectivity to MUSE systems v7.1.1 and v8.0.1
and CASE/CardioSoft systems V6.51, V6.61, and CardioSoft V6.71,
and remote control signal from ergometers
Ethernet interface
RJ45 connector
Channels
6, 12
QRS detection
Available
Muscle filter
20 Hz, 40 Hz, 100 Hz, 150 Hz
Automatic baseline
correction
User-selectable
Operating Modes, Features, and Options
Operating Modes and Features
2053535-002C
Item
Specifications
Resting ECG Mode
Records and prints 12-lead resting ECGs with 10 seconds duration
as a standard feature.
Arrhythmia Mode
Continuously monitors ECG and prints report when arrhythmia
events of the user-selected class occur
Exercise/Stress Test
Mode
Exercise mode for exercise stress testing
RR Analysis Mode
RR Analysis for RR interval analysis
Hookup Advisor
Provides visual indication of signal quality
Multi-language support
User Interface supports 19 languages
User Manual supports 31 languages
Order Manager
Provides an interface for managing orders
MAC™ 2000 ECG Analysis System
197
Technical Specifications
Accessories
Item
Specification
Consumables
Electrodes, leadwires, cables, and so forth
For a complete list of all available supplies and accessories for
this system, refer to the MAC™ 2000 Supplies and Accessories
Reference Guide.
Barcode Scanner
Use to enter patient information from a patient barcode
Secure Digital High
Capacity (SDHC) Card
4 GB
Product Options
For a complete list of product options and codes, refer to “Options Setup” in the
operator’s manual.
198
MAC™ 2000 ECG Analysis System
2053535-002C
Index
12 Lead Display for Resting
ECG 154
12 Lead Display for Stress
Test 154
12ld stress key 34
12SL Measurement 154
12SL Measurement and
Interpretation 154
21 CFR Part 11 Audit Trail 155
A
A (artifact) 80
ACI-TIPI
option 155
optional software feature 35
Adenosine (protocol) 128
ADS
definition 125
on arrhythmia
setup 114, 122
on stress ECG setup 125
ADTF option 155
ADTL option 155
Allow Export Using Shared
Directory 133
alt key 33
AOMF option 155
AOML option 155
arrhythmia codes 80
Arrhythmia ECG
printing options 80
Arrhythmia Event
Printing 80, 123
Arrhythmia Setup
ADS 114, 122
episode printout 123
event printing 123
lead sequence 124
overview 121
arrow pad
using to navigate 36
artifact 80
Assistance 27
ASYSTO (asystole) 80
asystole 80
2053535-002C
MAC™ 2000 ECG Analysis System
Audit Trail 111
auto configuring a reader 148
Auto Logoff 111
B
backspace key 33
Bal (protocol) 129
Balkeware (protocol) 128
barcode
scanning 56
barcode reader
automatic configuration 187
configuring 148
entering patient
information 56
option 155
baseline shift, reducing 70
Basic Setup
audit trail 111
auto logoff 111
high security mode 111
overview 107
power up mode 109
time synchronization 111
battery
conditioning 172
maintenance 170
battery status indicator
resting ECG display 66
BCRD option 155
biocompatibility statement 15
Bruce (protocol) 128
C
cables
cleaning and disinfecting 163
storing 165
CardioSoft system
communication option 154
importing from 99
CFRA option 155
changing a setting
function key menu option 36
changing menu options
199
function key menu option 36
classification
medical device 13
cleaning
device exterior 162
guidelines 163
materials to avoid
device 162
materials to use
device 162
solutions not to use 163
cleaning and disinfecting
cables 163
electrodes 165
leadwires 163
cleaning, disinfecting, and
sterilizing
electrodes 165
clinical trials data guard and
audit trail
optional software feature 35
comment key 34
Common Documentation
Library (CDL) 2
communication protocol 135
Communication Setup
cardiograph device name 138
default location 132
device 134
DHCP settings 138
DNS settings 138
location 134
modem settings 136
overview 131
protocol 135
serial baud rate 133
shared directory settings 133
compliance 2, 10
CONCONI (protocol) 129
configurations, switching
between 151
configuring
barcode reader
automatically 187
contraindications 10
conventions
document 27
illustrations 28
Notes 28
safety 10
typographical 28
Cornell (protocol) 128
Country Setup
200
MAC™ 2000 ECG Analysis System
Blood Pressure Unit 142
date format 142
height/weight unit 142
language 142
overview 141
speed unit 142
ST Level Unit 142
time format 142
CPLT (ventricular couplet) 80
CT Data Guard 154
CTDG option 56, 154
cursor control keys 32
D
data acquisition
ECG 37
data formats
selectable 37
date
resting ECG display 66
date format 142
Date Setup 155
daylight savings time 155
Default Location 132
default naming conventions
PDF files 157
defibrillation
recording an ECG during 74
deleting records 103
device
front view 30
maintenance 161
rear view 30
side view 31
symbols 17
device exterior
cleaning 162
DHCP settings 138
disinfecting
guidelines 163
solutions not to use 163
display format
resting ECG display 65
Display Format 114
Display Lead Group 114
DNS settings 138
Dobutamine (protocol) 128
document
part number 2
revision 2
document conventions 27
Dose Type 147
2053535-002C
E
E12L option 154
ECG 65, 83, 89
See alsoResting ECG
, RR Analysis mode, Stress
ECG
deleting record 103
editing patient
information 101
exporting records 104105
finding records 101
importing records 99
previewing records 102
printing records 103
transmitting records 103
ECG analysis/interpretation
optional software feature 35
ECG Filter Type 125
ECG key 32
ECG records
previewing 102
ECG type
resting ECG display 65
editing patient information 101
electrodes
cleaning and disinfecting 165
cleaning, disinfecting,
and sterilizing 165
NEHB placement 52
placement 50
sterilizing 165
Ellestad (protocol) 128
EMC 14
EMI 14
Enable Patient ID Check 145
enter BP key 34
enter key 33
Episode Printout 123
equipment
identification 25
ERGO option 90, 107, 154
ergometer
conducting a stress test
with 94
supported models 89
unsupported models 89
with remote start 89
ESC (ventricular escape beat) 80
escape key 33
exercise stress key 34
Export Setup 153
export XML 132
exporting
2053535-002C
MAC™ 2000 ECG Analysis System
ECG records 104
exporting ECG records 105
exporting records
setting options 105
external devices
supported models 89
unsupported models 89
F
File Manager
deleting records 103
editing patient
information 101
exporting records 105
finding records 101
importing records 99
overview 99
printing directory 100
printing records 103
transmitting records 103
finding ECG records 101
Finite Residual Filter, See
FRF
FRF
definition 125
on stress ECG setup 125
front view 30
function keys 33
menu options 36
changing a setting 36
changing menu options 36
opening a window 36
saving your selections 36
taking an ECG 36
using for menu options 36
G
gain 86, 93, 113
GE Healthcare
Common Documentation
Library (CDL) 2
manuals 2
grade down key 34
grade up key 34
guidelines
when cleaning and
disinfecting 163
H
HEART exercise
optional software feature 35
201
HEART Resting
Measurement 154
HEART Resting
Measurement and
Interpretation 154
Height/Weight Unit 142
High Security Mode 111
hold stage key 34
Hollmann (protocol) 129
hookup advisor
indicators 67
optional software feature 35
Hookup Advisor
affected by skin
preparation 49
hookup advisor indicator
resting ECG display 66
I
identification
equipment 25
illustration conventions 28
Import Setup 152
Importing ECG records 99
indications for use 9
inspecting a device 161
intended user 9
internal storage, See File
Manager
internal storage indicator
resting ECG display 66
L
L (learn phase) 80
LAN Communication to
CardioSoft 154
LAN Communication to
MUSE 154
LANC option 154
LANM option 154
lead key 32
lead labels
resting ECG display 66
Lead Sequence 118, 124
leadwires
cleaning and disinfecting 163
replacing adapters 166
storing 165
learn phase 80
LED description
external power 195
LED descriptions
battery charging 195
Line Filter 85
Location 134
Low Pass Filter 114
M
J
J+x Point Formula 127
K
Kanji Name 145
keypad
standard 32
stress 34
keys
alt 33
backspace 33
cursor control 32
ECG 32
enter 33
escape 33
function 33
lead 32
on/off 32
option 33
202
power on 32
rhythm 32
shift 33
space bar 33
writer stop 32
MAC™ 2000 ECG Analysis System
M100 option 154
M200 option 154
maintenance
battery 170
cleaning device surfaces 162
cleaning materials to
avoid
device 162
cleaning materials to use
device 162
device 161
inspecting a device 161
overview 161
replacing leadwire
adapters 166
manufacturer
responsibilities 16
Master’s Step
mode 126
overview 89
2053535-002C
selecting 126
Maximum Predicted HR
Formula 126
ME12 option 154
medians stress key 34
medical device
classification 13
MEHR option 154
menu options
resting ECG display 66
MI12 option 154
MIHR option 154
ModBalke (protocol) 128
ModBalkeware (protocol) 128
ModBruce (protocol) 128
MODC 178
MODC option 154, 178
modem
settings 136
troubleshooting 178
Modem or serial
communication to
CardioSoft 154
Modem or serial
communication to MUSE 154
MODM 178
MODM option 154, 178
ModWHO (protocol) 129
MUSE system
communication setup 154
importing from 99
User ID 150
N
naming conventions
customizing 158
Naughton (protocol) 128
Notes conventions 28
O
OEM 2
on/off key 32
opening a window
function key menu option 36
option
ADTF 155
ADTL 155
AOMF 155
AOML 155
BCRD 155
CFRA 155
CTDG 56, 154
2053535-002C
MAC™ 2000 ECG Analysis System
E12L 154
ERGO 90, 154
LANC 154
LANM 154
M100 154
M200 154
ME12 154
MEHR 154
MI12 154
MIHR 154
MODC 154
MODM 154
PDFC 155
R12L 154
RRAN 155
setup 153
SOMF 155
SOML 155
TIPI 155
WIFC 155
WIFM 155
option key 33
optional features
software 35
optional software features
ACI-TIPI 35
clinical trials data guard
and audit trail 35
HEART exercise 35
hookup advisor 35
QT correction formula 35
options
setting for exporting
records 105
order manager 59
Original Equipment
Manufacturer (OEM) 2
P
Pace Enhancement 85
pacemaker
capture code 80
error 81
improving ECG
readability 70, 85,
115
recording ECGs of patient
with 73
packaging
symbols 17
paper
problems with 178
storing 170
203
troubleshooting problems
with 178
part number
document 2
patient
setup
auto configure 148
dose type 147
enabling ID check 145
extra questions 147
ID type 145
Kanji name 145
overview 144, 147
skin preparation 49
patient heart rate
resting ECG display 66
Patient ID Type 145
patient information
editing with File Manager 101
entering manually 55
entering with a barcode
reader 56
PAU1 (pause of 1 missed
beat) 80
PAU2 (pause of 2 missed
beats) 80
pause
1 missed beat 80
2 missed beats 80
PCAP (pacemaker capture) 80
PDF Export 87
PDF file copy 155
PDF file naming conventions
default 157
PDFC option 155
PERR (pacemaker
malfunction) 81
Persantine (protocol) 128
PIN Dialing 136
post-J point 127
power on key 32
Power Up Mode 109
prescription device
statement 10
pretest stress key 34
previewing records 102
printer leads 70
Printer Leads 115
printing
File Manager directory 100
printing ECG records 103
product
codes 26
204
MAC™ 2000 ECG Analysis System
description 29
features 29
protocol
communication 135
description 129
editing 128
list 128
selecting 126
PSVC (premature
supraventricular
contraction) 81
purchaser/customer
responsibilities 16
PVC (premature ventricular
contraction) 81
Q
QRSL (learned QRS complex) 81
QT correction formula
optional software feature 35
R
R12L option 154
Radio Frequency (RF)
cautions 15
devices 15
rear view 30
recall stress key 34
Record Lead 85
recording a resting ECG 68
recording during
defibrillation 74
recovery stress key 34
replacing
leadwire adapters 166
requirements
service 27
system 29
responsibilities
manufacturer 16
purchaser/customer 16
Resting ECG
deleting records 103
editing patient
information 101
exporting records 105
finding records 101
importing records 99
mode 65
options 69
post-acquisition options 71
printing records 103
2053535-002C
recording 68
rhythm report 74
saving automatically 99
saving manually 99
setup
display format 114
display lead group 114
gain 113
Lead Sequence 118
low pass filter 114
overview 112
pace enhancement 115
printer leads 115
speed 113
transmitting records 103
resting ECG display
battery status indicator 66
date 66
display format 65
ECG type 65
hookup advisor indicator 66
internal storage indicator 66
lead labels 66
menu options 66
patient heart rate 66
time 66
revision history 2
rhythm key 32
Rhythm Record 86
Rhythm Report 74
RR analysis
option 155
RR Analysis
post-test options 87
setup
anti drift system 86
gain 86
line filter 85
low pass filter 86
pace enhancement 85
record lead 85
rhythm record 86
RR table 86
sweep speed 86
target 85
RR Analysis mode 83
RR Table 86
RRAN option 155
RUN (ventricular run) 81
S
safety
conventions
2053535-002C
MAC™ 2000 ECG Analysis System
definitions 10
hazards 11
saving your selections
function key menu option 36
screens
startup 35
SD card 105, 152153, 178
selectable data formats 37
Serial Baud Rate 133
service
information 27
requirements 27
Service Setup, See the
Service Manual
Setup Report 143
shared directory 104, 133
shift key 33
side view 31
SlowUSAFSAM (protocol) 128
software
optional features 35
solutions
not to use when cleaning
or disinfecting 163
SOMF option 155
SOML option 155
space bar 33
speed 113
Speed Unit 142
speed/load down key 34
speed/load up key 34
standard keypad 32
start treadmill key 34
Std.France (protocol) 129
sterilizing
electrodes 165
stop treadmill key 34
storage
cables and leadwires 165
paper 170
Storage for 100 ECGs 154
Stress ECG
blood pressure 91
conducting with
ergometer 94
conducting with treadmill 94
mode 89
options 92
prerequisites 90
rate-pressure product 91
report formats 90
setup
ADS 125
205
ECG filter type 125
FRF 125
J+x Point Formula 127
Master’s Step Mode 126
maximum predicted
heart rate 126
overview 124
protocol 126
target heart rate 126
target heart rate 91
test information bar 90
VE/min 91
stress keypad 34
stress keys
12ld 34
comment 34
enter BP 34
exercise 34
grade down 34
grade up 34
hold stage 34
median 34
pretest 34
recall 34
recovery 34
speed/load down 34
speed/load up 34
start treadmill 34
stop treadmill 34
test end 34
using to control stress
equipment 36
stress test information bar 90
Stress Test option 154
supraventricular
premature contraction 81
sweep speed 86, 92
symbols
device 17
packaging 17
system
requirements 29
System Setup 83, 107, 112,
121, 124, 131, 141, 144,
149, 153, 157
See alsoArrhythmia
ECG
, Basic Setup,
Communication Setup,
Country Setup, Options
Setup, Patient Setup,
Resting ECG, RR Analysis
206
MAC™ 2000 ECG Analysis System
Setup, Stress ECG, User
Setup
Date/Time 155
exporting 153
importing 152
switching configurations 151
T
taking an ECG
function key menu option 36
Target 85
target heart rate 91, 126
test end key 34
time
resting ECG display 66
Time Format 142
Time Setup 155
time synchronization 111
TIPI option 155
training 24
transmitting ECG records 103
treadmill
conducting a stress test
with 94
supported models 89
unsupported models 89
troubleshooting
operator error 175
visual inspection 175
typographical conventions 28
U
USAFSAM (protocol) 128
User Setup
MUSE ID 150
overview 149
V
VBIG (ventricular bigeminy) 81
ventricular
bigeminy 81
couplet 80
ectopics per minute 91
escape beat 80
fibrillation/flutter 81
premature contraction 81
run 81
tachycardia 81
VFIB (ventricular fibrillation/
flutter) 81
visual inspection 175
2053535-002C
VTACH (ventricular
tachycardia) 81
W
warranty information 27
WHO (protocol) 129
WHO50 (protocol) 129
WHO75 (protocol) 129
WIFC option 155
WiFi to CardioSoft option 155
WiFi to MUSE option 155
WIFM option 155
writer stop key 32
X
XML export 132
2053535-002C
MAC™ 2000 ECG Analysis System
207
208
MAC™ 2000 ECG Analysis System
2053535-002C
Asia Headquarters
GE Medical Systems
Information Technologies, Inc.
8200 West Tower Avenue
Milwaukee, WI 53223 USA
Tel:
+1 414 355 5000
+1 800 558 7044 (US Only)
Fax: +1 414 355 3790
GE Medical Systems
Information Technologies GmbH
Munzinger Straße 5
D-79111 Freiburg Germany
Tel:
+49 761 45 43 -0
Fax: +49 761 45 43 -233
GE Medical Systems
Information Technologies, Inc.
Asia; GE (China) Co., Ltd.
1 Huatuo Road
Zhangjiang Hi-tech Park Pudong
Shanghai, People's Republic of China 201203
Tel:
+86 21 3877 7888
Fax: +86 21 3877 7451
GE Medical Systems Information Technologies, Inc., a General Electric Company, going to market as
GE Healthcare.
www.gehealthcare.com
0459