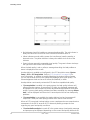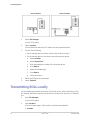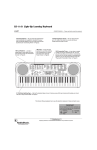
1
GE Healthcare
MAC® 3500
Resting ECG Analysis System
Operator's Manual
Software Version 10
2046275-018 Revision A
English
2010 General Electric Company.
All Rights Reserved.
Publication Information
The information in this manual only applies to MAC® 3500 system software version 10. It does not apply to earlier software versions. Due to
continuing product innovation, specifications in this manual are subject to change without notice.
MAC, MULTI-LINK, MUSE, MACTRODE, Ultra-Archivist, MobileLink, and 12SL are trademarks owned by GE Medical Systems Information
Technologies, Inc., a General Electric Company going to market as GE Healthcare. All other marks are the properties of their respective
owners.
This product complies with the regulatory requirements concerning medical devices from the following bodies:
The document part number and revision appear at the bottom of each page. The revision identifies the document’s update level. The
revision history of this document is summarized in the following table.
Revision History
Revision
Publication Date
Description
A
29 October 2010
Initial release of the document.
To access other GE Healthcare manuals, go to the Common Documentation Library (CDL), located at http://www.gehealthcare.com/usen/
service/biomed_tech_selfservice/services_user_doc/products/support.html and click Cardiology.
2
MAC® 3500
2046275-018A
29 October 2010
Contents
1
Introduction
Product Information.................................................................................... 9
Indications for Use . . . . . . . . . . . . . . . . . . . . . . . . . . . . . . . . . . . . . . . . . . . . . . . . . . . . . . . . . . . . . . . . . . . . . . . . . . . . . . . . . . . . 9
Prescription Device Statement. . . . . . . . . . . . . . . . . . . . . . . . . . . . . . . . . . . . . . . . . . . . . . . . . . . . . . . . . . . . . . . . . . . . . . 9
Recording ECGs During Defibrillation . . . . . . . . . . . . . . . . . . . . . . . . . . . . . . . . . . . . . . . . . . . . . . . . . . . . . . . . . . . . . . 9
Accuracy Of the Input Signal Reproduction . . . . . . . . . . . . . . . . . . . . . . . . . . . . . . . . . . . . . . . . . . . . . . . . . . . . . 10
Modulating Effects in Digital Systems . . . . . . . . . . . . . . . . . . . . . . . . . . . . . . . . . . . . . . . . . . . . . . . . . . . . . . . . . . . . 10
Installation and Connection . . . . . . . . . . . . . . . . . . . . . . . . . . . . . . . . . . . . . . . . . . . . . . . . . . . . . . . . . . . . . . . . . . . . . . . . 10
Parts and Accessories . . . . . . . . . . . . . . . . . . . . . . . . . . . . . . . . . . . . . . . . . . . . . . . . . . . . . . . . . . . . . . . . . . . . . . . . . . . . . . . 10
Equipment Symbols. . . . . . . . . . . . . . . . . . . . . . . . . . . . . . . . . . . . . . . . . . . . . . . . . . . . . . . . . . . . . . . . . . . . . . . . . . . . . . . . . . 17
Product and Packaging Labeling . . . . . . . . . . . . . . . . . . . . . . . . . . . . . . . . . . . . . . . . . . . . . . . . . . . . . . . . . . . . . . . . . . 18
Equipment Identification . . . . . . . . . . . . . . . . . . . . . . . . . . . . . . . . . . . . . . . . . . . . . . . . . . . . . . . . . . . . . . . . . . . . . . . . . . . . 20
Regulatory and Safety Information........................................................... 22
Safety Conventions . . . . . . . . . . . . . . . . . . . . . . . . . . . . . . . . . . . . . . . . . . . . . . . . . . . . . . . . . . . . . . . . . . . . . . . . . . . . . . . . . . 22
Safety Messages. . . . . . . . . . . . . . . . . . . . . . . . . . . . . . . . . . . . . . . . . . . . . . . . . . . . . . . . . . . . . . . . . . . . . . . . . . . . . . . . . . . . . . 22
Classification . . . . . . . . . . . . . . . . . . . . . . . . . . . . . . . . . . . . . . . . . . . . . . . . . . . . . . . . . . . . . . . . . . . . . . . . . . . . . . . . . . . . . . . . . . 26
Underwriters Laboratories, Inc. . . . . . . . . . . . . . . . . . . . . . . . . . . . . . . . . . . . . . . . . . . . . . . . . . . . . . . . . . . . . . . . . . . . 26
EMI/EMC Requirements . . . . . . . . . . . . . . . . . . . . . . . . . . . . . . . . . . . . . . . . . . . . . . . . . . . . . . . . . . . . . . . . . . . . . . . . . . . . . 26
Legal Notice . . . . . . . . . . . . . . . . . . . . . . . . . . . . . . . . . . . . . . . . . . . . . . . . . . . . . . . . . . . . . . . . . . . . . . . . . . . . . . . . . . . . . . . . . . . 27
Responsibility of the Manufacturer. . . . . . . . . . . . . . . . . . . . . . . . . . . . . . . . . . . . . . . . . . . . . . . . . . . . . . . . . . . . . . . . 27
Responsibility of the Purchaser/Customer. . . . . . . . . . . . . . . . . . . . . . . . . . . . . . . . . . . . . . . . . . . . . . . . . . . . . . . 27
Service Information................................................................................... 27
Service Requirements . . . . . . . . . . . . . . . . . . . . . . . . . . . . . . . . . . . . . . . . . . . . . . . . . . . . . . . . . . . . . . . . . . . . . . . . . . . . . . . 27
Additional Assistance . . . . . . . . . . . . . . . . . . . . . . . . . . . . . . . . . . . . . . . . . . . . . . . . . . . . . . . . . . . . . . . . . . . . . . . . . . . . . . . . 27
Manual Information .................................................................................. 28
Manual Purpose . . . . . . . . . . . . . . . . . . . . . . . . . . . . . . . . . . . . . . . . . . . . . . . . . . . . . . . . . . . . . . . . . . . . . . . . . . . . . . . . . . . . . . 28
Intended Audience . . . . . . . . . . . . . . . . . . . . . . . . . . . . . . . . . . . . . . . . . . . . . . . . . . . . . . . . . . . . . . . . . . . . . . . . . . . . . . . . . . . 28
Document Conventions . . . . . . . . . . . . . . . . . . . . . . . . . . . . . . . . . . . . . . . . . . . . . . . . . . . . . . . . . . . . . . . . . . . . . . . . . . . . . 28
Related Documentation . . . . . . . . . . . . . . . . . . . . . . . . . . . . . . . . . . . . . . . . . . . . . . . . . . . . . . . . . . . . . . . . . . . . . . . . . . . . . 29
Training. . . . . . . . . . . . . . . . . . . . . . . . . . . . . . . . . . . . . . . . . . . . . . . . . . . . . . . . . . . . . . . . . . . . . . . . . . . . . . . . . . . . . . . . . . . . . . . . . 29
2
System Overview
Hardware Description ............................................................................... 31
Front View . . . . . . . . . . . . . . . . . . . . . . . . . . . . . . . . . . . . . . . . . . . . . . . . . . . . . . . . . . . . . . . . . . . . . . . . . . . . . . . . . . . . . . . . . . . . . 31
Side View. . . . . . . . . . . . . . . . . . . . . . . . . . . . . . . . . . . . . . . . . . . . . . . . . . . . . . . . . . . . . . . . . . . . . . . . . . . . . . . . . . . . . . . . . . . . . . . 32
Back View . . . . . . . . . . . . . . . . . . . . . . . . . . . . . . . . . . . . . . . . . . . . . . . . . . . . . . . . . . . . . . . . . . . . . . . . . . . . . . . . . . . . . . . . . . . . . . 32
Internal View . . . . . . . . . . . . . . . . . . . . . . . . . . . . . . . . . . . . . . . . . . . . . . . . . . . . . . . . . . . . . . . . . . . . . . . . . . . . . . . . . . . . . . . . . . 33
Keyboard. . . . . . . . . . . . . . . . . . . . . . . . . . . . . . . . . . . . . . . . . . . . . . . . . . . . . . . . . . . . . . . . . . . . . . . . . . . . . . . . . . . . . . . . . . . . . . . 34
Acquisition Equipment .............................................................................. 35
Acquisition Module . . . . . . . . . . . . . . . . . . . . . . . . . . . . . . . . . . . . . . . . . . . . . . . . . . . . . . . . . . . . . . . . . . . . . . . . . . . . . . . . . . . 35
Leadwire Labels . . . . . . . . . . . . . . . . . . . . . . . . . . . . . . . . . . . . . . . . . . . . . . . . . . . . . . . . . . . . . . . . . . . . . . . . . . . . . . . . . . . . . . 36
Leadwire Adapters . . . . . . . . . . . . . . . . . . . . . . . . . . . . . . . . . . . . . . . . . . . . . . . . . . . . . . . . . . . . . . . . . . . . . . . . . . . . . . . . . . . 37
Connecting Peripherals............................................................................. 37
Connecting the Modem Option . . . . . . . . . . . . . . . . . . . . . . . . . . . . . . . . . . . . . . . . . . . . . . . . . . . . . . . . . . . . . . . . . . . . 37
Connecting the MobileLink Wireless Option . . . . . . . . . . . . . . . . . . . . . . . . . . . . . . . . . . . . . . . . . . . . . . . . . . . . . 37
2046275-018A
MAC® 3500
3
Connecting the LAN Option. . . . . . . . . . . . . . . . . . . . . . . . . . . . . . . . . . . . . . . . . . . . . . . . . . . . . . . . . . . . . . . . . . . . . . . . . 37
Connecting the Acquisition Device . . . . . . . . . . . . . . . . . . . . . . . . . . . . . . . . . . . . . . . . . . . . . . . . . . . . . . . . . . . . . . . . 38
Verifying Correct Operation. . . . . . . . . . . . . . . . . . . . . . . . . . . . . . . . . . . . . . . . . . . . . . . . . . . . . . . . . . . . . . . . . . . . . . . . . 38
Software Overview.................................................................................... 38
Start Up Screen . . . . . . . . . . . . . . . . . . . . . . . . . . . . . . . . . . . . . . . . . . . . . . . . . . . . . . . . . . . . . . . . . . . . . . . . . . . . . . . . . . . . . . . 39
Main Menu . . . . . . . . . . . . . . . . . . . . . . . . . . . . . . . . . . . . . . . . . . . . . . . . . . . . . . . . . . . . . . . . . . . . . . . . . . . . . . . . . . . . . . . . . . . . . 39
Report Layout . . . . . . . . . . . . . . . . . . . . . . . . . . . . . . . . . . . . . . . . . . . . . . . . . . . . . . . . . . . . . . . . . . . . . . . . . . . . . . . . . . . . . . . . . 42
Entering Data . . . . . . . . . . . . . . . . . . . . . . . . . . . . . . . . . . . . . . . . . . . . . . . . . . . . . . . . . . . . . . . . . . . . . . . . . . . . . . . . . . . . . . . . . 43
3
Preparing the Patient
Preparing the Patient's Skin ...................................................................... 48
Electrode Placement ................................................................................. 49
Resting ECG Placement . . . . . . . . . . . . . . . . . . . . . . . . . . . . . . . . . . . . . . . . . . . . . . . . . . . . . . . . . . . . . . . . . . . . . . . . . . . . . 49
Exercise ECG Placement . . . . . . . . . . . . . . . . . . . . . . . . . . . . . . . . . . . . . . . . . . . . . . . . . . . . . . . . . . . . . . . . . . . . . . . . . . . . 54
4
Entering Patient Information
Manually Entering Patient Information..................................................... 58
Reading a Patient Card (Option)................................................................ 58
Connecting the Card Reader . . . . . . . . . . . . . . . . . . . . . . . . . . . . . . . . . . . . . . . . . . . . . . . . . . . . . . . . . . . . . . . . . . . . . . . 59
Reading a Patient ID Card . . . . . . . . . . . . . . . . . . . . . . . . . . . . . . . . . . . . . . . . . . . . . . . . . . . . . . . . . . . . . . . . . . . . . . . . . . 59
Scanning a Bar Code (Option) ................................................................... 60
Connecting the Bar Code Scanner . . . . . . . . . . . . . . . . . . . . . . . . . . . . . . . . . . . . . . . . . . . . . . . . . . . . . . . . . . . . . . . . 60
Scanning the Bar Code . . . . . . . . . . . . . . . . . . . . . . . . . . . . . . . . . . . . . . . . . . . . . . . . . . . . . . . . . . . . . . . . . . . . . . . . . . . . . . 60
Entering Orders......................................................................................... 61
Receiving Orders from a MUSE CV System (Option) . . . . . . . . . . . . . . . . . . . . . . . . . . . . . . . . . . . . . . . . . . . . 61
Manually Entering Orders . . . . . . . . . . . . . . . . . . . . . . . . . . . . . . . . . . . . . . . . . . . . . . . . . . . . . . . . . . . . . . . . . . . . . . . . . . . 63
Selecting and Completing Orders . . . . . . . . . . . . . . . . . . . . . . . . . . . . . . . . . . . . . . . . . . . . . . . . . . . . . . . . . . . . . . . . . 63
5
Recording an ECG
Hookup Advisor ......................................................................................... 65
Resting ECGs ............................................................................................. 67
Master's Step ECGs ................................................................................... 68
6
Printing ECG Reports
Printing Another Report ............................................................................ 71
Printing Stored ECGs ................................................................................. 71
Storing Printouts....................................................................................... 72
7
Transmitting ECGs
Transmitting ECGs via Modem .................................................................. 73
4
MAC® 3500
2046275-018A
Transmitting ECGs Locally ........................................................................ 74
Transmitting ECGs Wirelessly ................................................................... 75
Transmitting ECGs in XML Format............................................................. 76
8
Receiving ECGs
Receiving ECGs via Modem ....................................................................... 77
Receiving ECGs Locally.............................................................................. 78
9
Editing ECGs
Editing Demographic Information ............................................................ 79
Editing ECG Measurements....................................................................... 80
Editing Interpretive Statements................................................................ 80
10
Deleting ECGs and Orders
Deleting ECGs............................................................................................ 83
Deleting Orders......................................................................................... 84
11
Using an SD Card
Supported SD Cards .................................................................................. 87
Preparing the SD Card............................................................................... 88
Locking and Unlocking the SD Card. . . . . . . . . . . . . . . . . . . . . . . . . . . . . . . . . . . . . . . . . . . . . . . . . . . . . . . . . . . . . . . 88
Inserting and Ejecting the SD Card. . . . . . . . . . . . . . . . . . . . . . . . . . . . . . . . . . . . . . . . . . . . . . . . . . . . . . . . . . . . . . . . 88
Formatting the SD Card . . . . . . . . . . . . . . . . . . . . . . . . . . . . . . . . . . . . . . . . . . . . . . . . . . . . . . . . . . . . . . . . . . . . . . . . . . . . . 88
Managing Files on the SD Card ................................................................. 89
Copying Files to the SD Card ..................................................................... 89
Restoring Files from the SD Card .............................................................. 89
Saving Files in XML Format ....................................................................... 90
Updating Software from the SD Card........................................................ 90
12
System Setup
System Setup Hierarchy............................................................................ 93
Process Overview...................................................................................... 94
Setting Up System Basics.......................................................................... 95
Miscellaneous Setup . . . . . . . . . . . . . . . . . . . . . . . . . . . . . . . . . . . . . . . . . . . . . . . . . . . . . . . . . . . . . . . . . . . . . . . . . . . . . . . . . 95
Patient Questions. . . . . . . . . . . . . . . . . . . . . . . . . . . . . . . . . . . . . . . . . . . . . . . . . . . . . . . . . . . . . . . . . . . . . . . . . . . . . . . . . . . . . 97
2046275-018A
MAC® 3500
5
Screen Colors. . . . . . . . . . . . . . . . . . . . . . . . . . . . . . . . . . . . . . . . . . . . . . . . . . . . . . . . . . . . . . . . . . . . . . . . . . . . . . . . . . . . . . . .
Transmission . . . . . . . . . . . . . . . . . . . . . . . . . . . . . . . . . . . . . . . . . . . . . . . . . . . . . . . . . . . . . . . . . . . . . . . . . . . . . . . . . . . . . . . .
Network Settings . . . . . . . . . . . . . . . . . . . . . . . . . . . . . . . . . . . . . . . . . . . . . . . . . . . . . . . . . . . . . . . . . . . . . . . . . . . . . . . . . . .
Option Activation . . . . . . . . . . . . . . . . . . . . . . . . . . . . . . . . . . . . . . . . . . . . . . . . . . . . . . . . . . . . . . . . . . . . . . . . . . . . . . . . . . .
Date and Time . . . . . . . . . . . . . . . . . . . . . . . . . . . . . . . . . . . . . . . . . . . . . . . . . . . . . . . . . . . . . . . . . . . . . . . . . . . . . . . . . . . . . .
Language . . . . . . . . . . . . . . . . . . . . . . . . . . . . . . . . . . . . . . . . . . . . . . . . . . . . . . . . . . . . . . . . . . . . . . . . . . . . . . . . . . . . . . . . . . . .
Power Up Options . . . . . . . . . . . . . . . . . . . . . . . . . . . . . . . . . . . . . . . . . . . . . . . . . . . . . . . . . . . . . . . . . . . . . . . . . . . . . . . . . .
Order Manager Interface . . . . . . . . . . . . . . . . . . . . . . . . . . . . . . . . . . . . . . . . . . . . . . . . . . . . . . . . . . . . . . . . . . . . . . . . .
Input Method . . . . . . . . . . . . . . . . . . . . . . . . . . . . . . . . . . . . . . . . . . . . . . . . . . . . . . . . . . . . . . . . . . . . . . . . . . . . . . . . . . . . . . . .
100
100
102
102
103
104
104
104
105
Setting Up ECGs ...................................................................................... 106
ECG Acquisition . . . . . . . . . . . . . . . . . . . . . . . . . . . . . . . . . . . . . . . . . . . . . . . . . . . . . . . . . . . . . . . . . . . . . . . . . . . . . . . . . . . . .
ECG Analysis. . . . . . . . . . . . . . . . . . . . . . . . . . . . . . . . . . . . . . . . . . . . . . . . . . . . . . . . . . . . . . . . . . . . . . . . . . . . . . . . . . . . . . . . .
Patient Questions. . . . . . . . . . . . . . . . . . . . . . . . . . . . . . . . . . . . . . . . . . . . . . . . . . . . . . . . . . . . . . . . . . . . . . . . . . . . . . . . . . .
Writer Setup . . . . . . . . . . . . . . . . . . . . . . . . . . . . . . . . . . . . . . . . . . . . . . . . . . . . . . . . . . . . . . . . . . . . . . . . . . . . . . . . . . . . . . . . .
Resting ECG Reports . . . . . . . . . . . . . . . . . . . . . . . . . . . . . . . . . . . . . . . . . . . . . . . . . . . . . . . . . . . . . . . . . . . . . . . . . . . . . . .
Analog Outputs . . . . . . . . . . . . . . . . . . . . . . . . . . . . . . . . . . . . . . . . . . . . . . . . . . . . . . . . . . . . . . . . . . . . . . . . . . . . . . . . . . . . .
CT Data Guard . . . . . . . . . . . . . . . . . . . . . . . . . . . . . . . . . . . . . . . . . . . . . . . . . . . . . . . . . . . . . . . . . . . . . . . . . . . . . . . . . . . . . .
Critical Values Setup . . . . . . . . . . . . . . . . . . . . . . . . . . . . . . . . . . . . . . . . . . . . . . . . . . . . . . . . . . . . . . . . . . . . . . . . . . . . . . .
106
108
109
110
110
113
114
115
Setting Up a Card Reader........................................................................ 118
Automatic Configuration. . . . . . . . . . . . . . . . . . . . . . . . . . . . . . . . . . . . . . . . . . . . . . . . . . . . . . . . . . . . . . . . . . . . . . . . . . 118
Manual Configuration . . . . . . . . . . . . . . . . . . . . . . . . . . . . . . . . . . . . . . . . . . . . . . . . . . . . . . . . . . . . . . . . . . . . . . . . . . . . . 118
Setting Up a Bar Code Reader ................................................................. 119
Automatic Configuration. . . . . . . . . . . . . . . . . . . . . . . . . . . . . . . . . . . . . . . . . . . . . . . . . . . . . . . . . . . . . . . . . . . . . . . . . . 119
Manual Configuration . . . . . . . . . . . . . . . . . . . . . . . . . . . . . . . . . . . . . . . . . . . . . . . . . . . . . . . . . . . . . . . . . . . . . . . . . . . . . 120
Setting Up Master's Step Test ................................................................. 120
Managing System Setup ......................................................................... 121
Printing System Setup . . . . . . . . . . . . . . . . . . . . . . . . . . . . . . . . . . . . . . . . . . . . . . . . . . . . . . . . . . . . . . . . . . . . . . . . . . . . . 121
Saving System Setup . . . . . . . . . . . . . . . . . . . . . . . . . . . . . . . . . . . . . . . . . . . . . . . . . . . . . . . . . . . . . . . . . . . . . . . . . . . . . . 121
Restoring System Setup . . . . . . . . . . . . . . . . . . . . . . . . . . . . . . . . . . . . . . . . . . . . . . . . . . . . . . . . . . . . . . . . . . . . . . . . . . . 121
A
Maintenance
Inspecting and Cleaning the MAC System............................................... 123
Inspecting the MAC System . . . . . . . . . . . . . . . . . . . . . . . . . . . . . . . . . . . . . . . . . . . . . . . . . . . . . . . . . . . . . . . . . . . . . .
Cleaning and Disinfecting Exterior Surfaces . . . . . . . . . . . . . . . . . . . . . . . . . . . . . . . . . . . . . . . . . . . . . . . . . .
Cleaning, Disinfecting, and Storing ECG Cables and Leadwires. . . . . . . . . . . . . . . . . . . . . . . . . . . .
Cleaning, Disinfecting, and Storing Handheld Devices . . . . . . . . . . . . . . . . . . . . . . . . . . . . . . . . . . . . . .
123
124
125
127
Paper Maintenance ................................................................................. 130
Setting the Correct Paper Size . . . . . . . . . . . . . . . . . . . . . . . . . . . . . . . . . . . . . . . . . . . . . . . . . . . . . . . . . . . . . . . . . . . 130
Loading the Paper. . . . . . . . . . . . . . . . . . . . . . . . . . . . . . . . . . . . . . . . . . . . . . . . . . . . . . . . . . . . . . . . . . . . . . . . . . . . . . . . . . 131
Battery Maintenance .............................................................................. 132
Charging the Battery. . . . . . . . . . . . . . . . . . . . . . . . . . . . . . . . . . . . . . . . . . . . . . . . . . . . . . . . . . . . . . . . . . . . . . . . . . . . . . . 132
Conditioning the Battery . . . . . . . . . . . . . . . . . . . . . . . . . . . . . . . . . . . . . . . . . . . . . . . . . . . . . . . . . . . . . . . . . . . . . . . . . . 133
Replacing the Battery. . . . . . . . . . . . . . . . . . . . . . . . . . . . . . . . . . . . . . . . . . . . . . . . . . . . . . . . . . . . . . . . . . . . . . . . . . . . . . 133
Replacing Leadwire Adapters ................................................................. 134
B
Troubleshooting
General Troubleshooting Guidelines....................................................... 137
Visual Inspection ..................................................................................... 137
6
MAC® 3500
2046275-018A
Unacceptable Noise Levels ..................................................................... 137
System Errors.......................................................................................... 138
Internal Storage ...................................................................................... 139
C
Report Formats
Numeric Reports ..................................................................................... 141
Additional Reports .................................................................................. 142
D
Master's Step Data
Master's Step Table ................................................................................. 145
ST-T Changes .......................................................................................... 148
E
Creating Bar Codes and Magnetic Cards
Manual Reader Configuration................................................................. 149
Automatic Reader Configuration ............................................................ 151
2046275-018A
MAC® 3500
7
8
MAC® 3500
2046275-018A
1
Introduction
This chapter provides information required for the proper use of the product and
manual. Familiarize yourself with this information before using the product.
Product Information
This section provides a general overview of the product. A detailed description of the
product can be found in Chapter 2, System Overview.
Indications for Use
The MAC 3500 ECG Analysis System is intended to acquire, analyze, display, and
record electrocardiographic information from adult and pediatric populations. Basic
systems deliver 3, 6, 12, or 15 lead ECGs, including interpretive analysis. Transmission
and reception of ECG data to and from a central ECG cardiovascular information
system is optional.
The MAC 3500 is intended to be used under the direct supervision of a licensed
healthcare practitioner, by trained operators in a hospital or medical professional’s
facility.
Prescription Device Statement
CAUTION: United States federal law restricts this device to sale by or on the order
of a physician.
Recording ECGs During Defibrillation
This equipment is protected against the effects of cardiac defibrillator discharge
to ensure recovery, as required by test standards. The patient signal input of the
acquisition module is defibrillation-proof. Therefore, it is not necessary to remove
the ECG electrodes prior to defibrillation.
When using stainless steel or silver electrodes a defibrillator discharge current may
cause the electrodes to retain a residual charge causing a polarization or dc offset
voltage. This electrode polarization will block acquisition of the ECG signal. To avoid
this condition, use non-polarizing electrodes (which will not form a dc offset voltage
when subjected to a dc current) such as silver/silver-chloride types if there is a
situation where there is a likelihood that a defibrillation procedure will be necessary.
2046275-018A
MAC® 3500
9
Introduction
If polarizing electrodes are used, we recommend disconnecting the leadwires from
the patient before delivering the shock.
Electrode defibrillation recovery is the ability of the electrode to allow the ECG trace to
return after defibrillation. We recommend using non-polarizing disposable electrodes
with defibrillation recovery ratings as specified in AAMI EC12 4.2.2.4. (Refer to “Parts
and Accessories” on page 10 for a list of approved electrodes.) AAMI EC12 requires
that the polarization potential of an electrode pair does not exceed 100mV, 5 seconds
after a defibrillation discharge.
Accuracy Of the Input Signal Reproduction
• Overall System Error meets AAMI EC11 3.2.7.1.
Overall System Error is between or within +/–5%.
• Frequency Response meets AAMI EC11 3.2.7.2 methods A and D.
Frequency response is between or within +/- 10% between 0.67 and 40 Hz and
between +0 and -10% for 20 ms, 1.5 mV triangular input.
Modulating Effects in Digital Systems
This device uses digital sampling techniques that may produce some variation in
amplitudes of Q, R, and/or S waves from one heart beat to the next, which may
be particularly noticeable in pediatric recordings. If this phenomenon is observed,
the clinician should be aware that the origin of amplitude variations is not entirely
physiologic. For measuring voltages of Q, R, and S waves, it is advisable to use the QRS
complexes with the largest deflection of the particular waves.
Installation and Connection
If the installation of this equipment, in the USA, will use 240 V rather than 120 V, the
source must be a center-tapped, 240 V, single-phase circuit.
Contact GE Healthcare for information before connecting any devices to this
equipment not recommended in this manual.
Parts and Accessories
To ensure patient safety, use only parts and accessories manufactured or
recommended by GE Healthcare.
Parts and accessories used must meet the requirements of the applicable IEC 601
series safety standards, and/or the system configuration must meet the requirements
of the IEC 60601-1-1 medical electrical systems standard.
The use of ACCESSORY equipment not complying with the equivalent safety
requirements of this equipment may lead to a reduced level of safety of the resulting
system. Consideration relating to the choice shall include:
• use of the accessory in the patient vicinity; and
• evidence that the safety certification of the accessories has been performed in
accordance to the appropriate IEC 60601-1 and/or IEC 60601-1-1 harmonized
national standard.
The following sections identify the parts and accessories approved for use with this
device. Not all items have been approved for use in all countries. Please check with
your local GE Healthcare representative for country availability.
10
MAC® 3500
2046275-018A
Introduction
Electrodes
The following non-polarizing electrodes have been approved for use with this device.
Electrodes
Part Number
Description
21714401
Suction Bulb Electrode, Thorax Electrode
42101600
Blue Suction Bulb
91920031
SilverTRACE ECG Electrodes, Soft P55MO, foam round, wet gel,
25/pouch, 200/box
2014780-001
SilverTRACE ECG Electrodes, Soft Stress PS50MO, foam round, wet gel,
30/pouch, 300/box
2014783-001
SilverTRACE ECG Electrodes, Window P50TR, clear tape round, solid
gel, 30/pouch, 300/box
2014784-001
SilverTRACE ECG Electrodes, Window P50TR, clear tape round, solid
gel, 5/strip, 300/box
2014785-001
SilverTRACE ECG Electrodes, Window P50TR, clear tape round, solid
gel, 7/strip, 350/box
2014786-001
SilverTRACE ECG Electrodes, First Carbon P28MOC, foam rectangle,
wet gel, carbon snap, 30/pouch, 300/box
2046545-001
ECG Electrode, Wet Gel P28 MOC, SilverTRACE Electrodes, 30/pack
402207-210
BabyMAC Electrodes, Resting ECG Electrodes, 10/card, 50/pack,
500/case
5608-003
GE Gray Suction Bulb
900703-205
SilverTRACE Ag/AgCl Electrodes, Adult Holter/Stress Electrode, Foam
Oval, Wet Gel, 5/pkg, 150/box, 600/case
900703-230
SilverTRACE Ag/AgCl Electrodes, Adult Holter/Stress Electrode, Foam
Oval, Wet Gel, 30/pouch, 300/case
9033-015
GE Suction Electrode & Gray Bulb
9623-003
Silver Mactrode Resting ECG Electrodes, 10/card, 100/pack,
1000/case
9623-003P
Silver Mactrode Plus Resting ECG Electrodes, 10/card, 100/pack,
1000/case
9623-103P
Silver Mactrode Plus Resting ECG Electrodes, 14/card, 140/pack,
1400/case
Leadwires
The following leadwires have been approved for use with this device.
Leadwires
2046275-018A
Part Number
Description
38401765
ECG Leadwire Set with Resistance, Banana, IEC, 10/set, mixed lengths
38401766
ECG Leadwire Set with Resistance, Banana, IEC, NST & NAX, 27 in
(70 cm)
MAC® 3500
11
Introduction
Leadwires (cont'd.)
12
Part Number
Description
2001925-003
CAM 14 ECG Leadwire, Universal, 40 in (102 cm)
2001925-004
CAM 14 ECG Leadwire, Universal, 51 in (130 cm)
2001925-005
CAM 14 ECG Leadwire, Universal,26 in (66 cm)
2001925-006
CAM 14 ECG Leadwire, Universal, 36 in (90 cm)
2016032-001
CAM 14 Leadwire Set, Dedicated Banana, AHA, 10/set, mixed lengths
2016032-002
CAM 14 Leadwire Set, Dedicated Banana, IEC, 10/set, mixed lengths
2016033-001
CAM 14 Leadwire Set, Dedicated Banana, AHA, 14/set, mixed lengths
2016033-002
CAM 14 Leadwire Set, Dedicated Banana, IEC, 14/set, mixed lengths
2020558-001
CAM 14 ECG Leadwire, Dedicated Banana, AHA, 36 in (90 cm), RA
2020558-002
CAM 14 ECG Leadwire, Dedicated Banana, AHA, 36 in (90 cm), LA
2020558-003
CAM 14 ECG Leadwire, Dedicated Banana, AHA, 40 in (102 cm), LL
2020558-004
CAM 14 ECG Leadwire, Dedicated Banana, AHA, 40 in (102 cm), RL
2020558-005
CAM 14 ECG Leadwire, Dedicated Banana, AHA, 26 in (66 cm), V1
2020558-006
CAM 14 ECG Leadwire, Dedicated Banana, AHA, 26 in (66 cm), V2
2020558-007
CAM 14 ECG Leadwire, Dedicated Banana, AHA, 26 in (66 cm), V3
2020558-008
CAM 14 ECG Leadwire, Dedicated Banana, AHA, 26 in (66 cm), V4
2020558-009
CAM 14 ECG Leadwire, Dedicated Banana, AHA, 26 in (66 cm), V5
2020558-010
CAM 14 ECG Leadwire, Dedicated Banana, AHA, 26 in (66 cm), V6
2020558-011
CAM 14 ECG Leadwire, Dedicated Banana, AHA, 26 in (66 cm), V3R
2020558-012
CAM 14 ECG Leadwire, Dedicated Banana, AHA, 26 in (66 cm), V4R
2020558-013
CAM 14 ECG Leadwire, Dedicated Banana, AHA, 26 in (66 cm), V7
2020558-014
CAM 14 ECG Leadwire, Dedicated Banana, AHA, 26 in (66 cm), E
2020558-015
CAM 14 ECG Leadwire, Dedicated Banana, AHA, 26 in (66 cm), H
2020558-016
CAM 14 ECG Leadwire, Dedicated Banana, AHA, 26 in (66 cm), I
2020559-017
CAM 14 ECG Leadwire, Dedicated Banana, IEC, 26 in (66 cm), C7
2020559-001
CAM 14 ECG Leadwire, Dedicated Banana, IEC, 36 in (90 cm), R
2020559-002
CAM 14 ECG Leadwire, Dedicated Banana, IEC, 36 in (90 cm), L
2020559-003
CAM 14 ECG Leadwire, Dedicated Banana, IEC, 40 in (102 cm), F
2020559-004
CAM 14 ECG Leadwire, Dedicated Banana, IEC, 40 in (102 cm), N
2020559-005
CAM 14 ECG Leadwire, Dedicated Banana, IEC, 26 in (66 cm), C1
2020559-006
CAM 14 ECG Leadwire, Dedicated Banana, IEC, 26 in (66 cm), C2
2020559-007
CAM 14 ECG Leadwire, Dedicated Banana, IEC, 26 in (66 cm), C3
2020559-008
CAM 14 ECG Leadwire, Dedicated Banana, IEC, 26 in (66 cm), C4
2020559-009
CAM 14 ECG Leadwire, Dedicated Banana, IEC, 26 in (66 cm), C5
MAC® 3500
2046275-018A
Introduction
Leadwires (cont'd.)
Part Number
Description
2020559-010
CAM 14 ECG Leadwire, Dedicated Banana, IEC, 26 in (66 cm), C6
2020559-011
CAM 14 ECG Leadwire, Dedicated Banana, IEC, 26 in (66 cm), E
2020559-012
CAM 14 ECG Leadwire, Dedicated Banana, IEC, 26 in (66 cm), H
2020559-013
CAM 14 ECG Leadwire, Dedicated Banana, IEC, 26 in (66 cm), I
2020559-014
CAM 14 ECG Leadwire, Dedicated Banana, IEC, 26 in (66 cm), M
2020559-015
CAM 14 ECG Leadwire, Dedicated Banana, IEC, 26 in (66 cm), C3R
2020559-016
CAM 14 ECG Leadwire, Dedicated Banana, IEC, 26 in (66 cm), C4R
2020559-017
CAM 14 ECG Leadwire, Dedicated Banana, IEC, 26 in (66 cm), C7
420101-001
CAM 14 ECG Leadwire Set, Universal, mixed length, 14/set
420101-002
CAM 14 ECG Leadwire Set, Universal, mixed length, 10/set
Leadwire Accessories
The following electrode accessories have been approved for use with this device.
Leadwire Accessories
Part Number
Description
2001926-001
Blank Plug Kit, CAM 14, 4/bag
401089-003
Leadwire Organizers, 4 3-L Separators, 2 4-L Separators
414763-002
Multi-Link Leadwire Separator, 3-L, 3/pack
Trunk Cables
The following trunk cables have been approved for use with this device.
Trunk Cables
Part Number
Description
22340305
ECG Cable, 14-L, IEC, 8 ft (2.5 m)
22341808
ECG Cable, Multi-Link, 10-L, IEC, 8 ft (2.5 m)
22341809
ECG Cable, Multi-Link, MAC 500/1200, 10-L, AHA, 10 ft (3 m)
ECG Adapters and Connectors
The following adapters and connectors have been approved for use with this device.
ECG Adapters and Connectors
2046275-018A
Part Number
Description
900178-001
CAM 14 ECG Connector Set, Banana, 10/set, AHA
900178-002
CAM 14 ECG Connector Set, Mactrode, 10/set, AHA
MAC® 3500
13
Introduction
ECG Adapters and Connectors (cont'd.)
Part Number
Description
900178-003
CAM 14 ECG Connector Set, Grabber, 10/set, AHA
900178-101
CAM 14 ECG Connector Set, Banana, 10/set, IEC
900178-102
CAM 14 ECG Connector Set, Mactrode, 10/set, IEC
900178-103
CAM 14 ECG Connector Set, Grabber, 10/set, IEC
900178-201
CAM 14 ECG Connector Set, Banana, 14/set, IEC
900178-202
CAM 14 ECG Connector Set, Mactrode, 14/set, IEC
900178-203
CAM 14 ECG Connector Set, Grabber, 14/set, IEC
900179-201
CAM 14 ECG Connector Set, Banana, 14/set, AHA
900179-202
CAM 14 ECG Connector Set, Mactrode, 14/set, AHA
900179-203
CAM 14 ECG Connector Set, Grabber, 14/set, AHA
9490-210
Electrode Adapter Set, 10/set
9490-214
Electrode Adapter Set, 14/set
KISS Aspiration System Accessories
The following KISS Aspiration System accessories have been approved for use with
this device.
KISS Aspiration System Accessories
14
Part Number
Description
21732801
Suction Electrode, KISS ES600
30344377
Swivel Attachment Arm for Kiss
30344419
Extension tube for KISS ES600 Pump, 5 ft (1.5 m)
30344427
Blind Plug for KISS
30344434
Leadwire, KISS, AHA, 50 in (127 cm), V1
30344435
Leadwire, KISS, AHA, 50 in (127 cm), V2
30344436
Leadwire, KISS, AHA, 50 in (127 cm), V3
30344437
Leadwire, KISS, AHA, 50 in (127 cm), V4
30344438
Leadwire, KISS, AHA, 50 in (127 cm), V5
30344439
Leadwire, KISS, AHA, 50 in (127 cm), V6
30344440
Leadwire, KISS, AHA, 57 in (147 cm), LL
30344441
Leadwire, KISS, AHA, 57 in (147 cm), LA
30344442
Leadwire, KISS, AHA, 57 in (147 cm), RA
30344443
Leadwire, KISS, AHA, 57 in (147 cm), RL
38401590
KISS Leadwire Set, IEC, 10/set, mixed lengths
93204775
KISS Electrode Filter Disc, 100/bag
MAC® 3500
2046275-018A
Introduction
KISS Aspiration System Accessories (cont'd.)
2046275-018A
Part Number
Description
2022862-001
ECG Leadwire, KISS Multilead, 50 in (127 cm), I
2022862-003
ECG Leadwire, KISS Multilead, 50 in (127 cm), E
2022862-004
ECG Leadwire, KISS Multilead, 50 in (127 cm), M
2022862-005
ECG Leadwire, KISS Multilead, 50 in (127 cm), H
2022862-006
ECG Leadwire, KISS Multilead, 50 in (127 cm), A1
2022862-007
ECG Leadwire, KISS Multilead, 50 in (127 cm), A2
2022862-008
ECG Leadwire, KISS Multilead, 50 in (127 cm), A3
2022862-009
ECG Leadwire, KISS Multilead, 50 in (127 cm), A4
2024037-001
KISS ES600 Electrodes & Leadwires, Standard, 10/set, mixed lengths
2024038-001
KISS Upgrade Electrodes & Leadwires, FRANK, 4/set, 50 in (127 cm),
H, E, I, M
2024039-001
KISS Upgrade Electrodes & Leadwires, NEHB, 2/set, 50 in (127 cm),
Nst, Nax
2024040-001
KISS Upgrade Electrodes & Leadwires, 4/set, 50 in (127 cm), A1 - A4
30344365
Leadwire, KISS, IEC, 50 in (127 cm), C1
30344366
Leadwire, KISS, IEC, 50 in (127 cm), C2
30344367
Leadwire, KISS, IEC, 50 in (127 cm), C3
30344368
Leadwire, KISS, IEC, 50 in (127 cm), C4
30344369
Leadwire, KISS, IEC, 50 in (127 cm), C5
30344370
Leadwire, KISS, IEC, 50 in (127 cm), C6
30344371
Leadwire, KISS, IEC, 57 in (147 cm), F
30344372
Leadwire, KISS, IEC, 57 in (147 cm), L
30344373
Leadwire, KISS, IEC, 57 in (147 cm), R
30344374
Leadwire, KISS, IEC, 57 in (147 cm), N
30344375
Leadwire, KISS, IEC, 50 in (127 cm), NST
30344376
Leadwire, KISS, IEC, 50 in (127 cm), NAX
43252125
Suction Dome, KISS
MAC® 3500
15
Introduction
Papers
The following thermal papers have been approved for use with this device.
Papers
Part Number
Description
9402-020
Premium Thermal-Sensitive Chart Paper, Full Page Red Grid, 8.5 in x
11 in. (216mm x 280mm) Sheet, Z-fold, Queue Hole, 300 sheets/pack,
8 packs/case, 2400 sheets/case
9402-021
Premium Thermal-Sensitive Chart Paper, Full Page Red Grid, A-4
Modified, 8.26 in x 11 in (210mm x 280mm) Sheet, Z-fold, Queue Hole,
300 sheets/pack, 8 packs/case, 2400 sheets/case
9402-024
Premium Thermal-Sensitive Chart Paper, Red Grid Blank Interpretation
Area, 8.5 in x 11 in. (216mm x 280mm) Sheet, Z-fold, Queue Hole, 300
sheets/pack, 8 packs/case, 2400 sheets/case
9402-034
Archivist 100 Thermal-Sensitive Chart Paper, Full Page Red Grid,
8.5 in x 11 in. (216mm x 280mm) Sheet, Z-fold, Queue Hole, 300
sheets/pack, 8 packs/case, 2400 sheets/case
9402-035
Archivist 100 Thermal-Sensitive Chart Paper, Full Page Red Grid, A-4
Modified, 8.26 in x 11 in (210mm x 280mm) Sheet, Z-fold, Queue Hole,
300 sheets/pack, 8 packs/case, 2400 sheets/case
9402-061
Premium Thermal-Sensitive Chart Paper, Red Grid Blank Interpretation
Area, 8.5 in x 11 in. (216mm x 280mm) Sheet, Z-fold, Queue Hole, 150
sheets/pack, 16 packs/case, 2400 sheets/case
Miscellaneous Accessories
The following miscellaneous accessories have been approved for use with this device.
Miscellaneous Accessories
16
Part Number
Description
21708318
Electrode Cream, 250ml bottle
21730701
Electrode Contact Spray, 200ml bottle
2034731-002
Electrode Gel, 250ml bottle, 4/case
2034741-002
Epicont Cream, 250ml bottle, 4/case
2046978-001
Electrode Cream, 250ml bottle, 4/case
21730702
Electrode Contact Spray, 200ml bottle, 10/box
21730705
Electrode Contact Spray, 2 L
401210-001
Signacreme® Electrode Cream, 5oz bottle, 12/case
2046978-001
Electrode Cream, 250ml bottle, 4/case
9812-014
Signagel® Electrode Gel, 250g tube, 12/box
MAC® 3500
2046275-018A
Introduction
Equipment Symbols
The following symbols may appear on the product or its packaging.
Symbol
Description
Type BF equipment. The acquisition module is protected from
defibrillation shocks.
Alternating Current
Equipotential
Charge the battery. The flashing amber LED next to this symbol
indicates you must connect the system to AC power to recharge the
battery.
Waste of electrical and electronic equipment must not be disposed
as unsorted municipal waste and must be collected separately.
Please contact an authorized representative of the manufacturer for
information concerning the decommissioning of your equipment.
Recycle the battery.
Consult the accompanying documentation.
Classified with respect to electric shock, fire, mechanical, and other
specified hazards only in accordance with applicable UL standards.
To reduce the risk of electric shock, do NOT remove cover (or back).
Refer servicing to qualified personnel.
This product consists of devices that may contain mercury, which
must be recycled or disposed of in accordance with local, state, or
country laws. (Within this system, the backlight lamps in the monitor
display contain mercury.)
Manufacturer name and address.
Authorized European representative.
PCT. GOST marking symbolizing conformity with applicable Russian
Gosstandart technical and safety standards.
2046275-018A
MAC® 3500
17
Introduction
Symbol
Description
USA Only: For use only on or by order of a physician.
CE Mark — Symbolizes conformity with applicable EU (European
Union) directives.
Product and Packaging Labeling
This section identifies the product labels and their locations on the product and
packaging.
18
MAC® 3500
2046275-018A
Introduction
Refer to the previous illustrations for the locations of the labels identified in the
following table.
No. Label
Description
1
Located on the back of the device, this label
provides regulatory and cautionary information.
Refer to “Equipment Symbols” on page 17 for
detailed descriptions of the symbols.
2
Located on the back of the device, this label
identifies the device's electrical ratings.
3
Located inside the battery compartment,
this label provides information about the
specifications and disposal of the battery. Refer
to “Equipment Symbols” on page 17 for detailed
descriptions of the symbols.
4
Located to the left of the display, this silk-screened
label identifies the model number.
5
Located to the right of the display, this
silk-screened label indicates the device uses the
Marquette™ 12SL™ ECG Analysis Program to
analyze and interpret ECG readings.
6
Located inside the writer compartment, this label
uniquely identifies this unit. Refer to “Product
Label” on page 20 for detailed information.
7
Located on the package, the shipping label
contains the following information:
• Product description
• Sales order number
• Configuration number
• Model number
• Serial number
• Storage conditions
• Regulatory compliance
• Country of Origin
• EC Representative information
2046275-018A
MAC® 3500
19
Introduction
Equipment Identification
Every GE Healthcare device has a product label that identifies the product name, part
number, manufacturing information, and unique serial number. This information is
required when contacting GE Healthcare for support.
Product Label
The product label is laid out in the following format. Depending on the product, the
label may vary slightly in format, but it contains the same information.
Product Label Format
Item
Description
1
Product part number
2
Product description
3
Date of manufacture in YYYY-MM format
4
Manufacturer name and address
5
Country of origin
6
Product bar code
7
Unit serial number (See “Serial Number Format” on page 20 for more
information.)
Serial Number Format
Each device has a serial number that uniquely identifies the device and provides
important information about the device. The serial number format is shown in the
following illustration:
20
MAC® 3500
2046275-018A
Introduction
Serial Number Format
Item
Name
Description
1
Product Code
Three-letter code that uniquely identifies the
product line. Refer to “Product Codes” on page
21 for more information.
2
Year Manufactured
Two-digit code identifying the year the device
was manufactured. Values range from 00 to 99
For example: 00 = 2000, 04 = 2004, 05 = 2005
(and so on).
3
Fiscal Week
Manufactured
Two-digit code identifying the week the device
was manufactured.
Values range from 01 to 52. GE Healthcare's fiscal
weeks correspond to the calendar week. For
example, 01 = first week in January.
4
Product Sequence
Four-digit number identifying the order in which
this device was manufactured. Values range from
000 to 9999.
5
Manufacturing Site
One-letter code identifying the site where the
device was manufactured. For example, F =
Milwaukee, N = Freiburg, P = Bangalore
6
Miscellaneous
Characteristic
For example, P = unit is a prototype, R = unit was
refurbished, U = unit was upgraded to meet the
specifications of another product code.
Product Codes
The product code identifies specific system platforms. You need the product code
before servicing or requesting support for your device.
You can identify the product code using the serial number listed on the product label
located in one of the following places:
• On the product label attached to the base the system.
• On the product label provided with the application CD.
• In the application:
• On IT systems:
Launch the system application and click Help > About to view the serial number.
For information on launching the application, refer to the product's service or
operator's manual.
• On MAC systems:
On the Service Only Setup window, select System Setup, press Shift+F2, and
enter the service password to view the serial number.
Contact GE Healthcare support if you do not know the service password.
2046275-018A
MAC® 3500
21
Introduction
Regulatory and Safety Information
This section provides information about the safe use and regulatory compliance of
this device. Familiarize yourself with this information and read and understand all
instructions before attempting to use this device. The system software is considered
medical software. As such, it was designed and manufactured to the appropriate
medical regulations and controls. Any exceptions are noted in the Compliance
Information - Exceptions section.
NOTE:
Disregarding the safety information provided is considered abnormal use of
this device and could result in injury, loss of data, and void any existing product
warranties.
Safety Conventions
A Hazard is a source of potential injury to a person, property, or the product.
This manual uses the terms DANGER, WARNING, and CAUTION to point out hazards
and to designate a degree or level of seriousness. Familiarize yourself with the
following definitions and their significance.
Definitions of Safety Conventions
Safety
Convention
Definition
DANGER
Indicates an imminent hazard, which, if not avoided, will result in death
or serious injury.
WARNING
Indicates a potential hazard or unsafe practice, which, if not avoided,
could result in death or serious injury.
CAUTION
Indicates a potential hazard or unsafe practice, which, if not avoided,
could result in minor personal injury or product/property damage.
Safety Messages
The following messages apply to the product as a whole. Specific messages may
also appear elsewhere in the manual.
WARNING:
ACCIDENTAL SPILLS — If liquids enter a device, take the device out of service and
have it checked by a service technician before it is used again.
To avoid electric shock or device malfunction, liquids must not be allowed to
enter the device.
WARNING:
BATTERY OPERATION — If the integrity of the protective earth conductor is in
doubt, operate the unit from its battery.
WARNING:
CABLES — To avoid possible strangulation, route all cables away from the patient's
throat.
22
MAC® 3500
2046275-018A
Introduction
WARNING:
CONNECTION TO MAINS — This is class I equipment.
The mains plug must be connected to an appropriate power supply.
WARNING:
DEFIBRILLATOR PRECAUTIONS — Do not come into contact with patients during
defibrillation. Otherwise, serious injury or death could result.
Patient signal inputs labeled with the CF and BF symbols with paddles are
protected against damage resulting from defibrillation voltages.
To ensure proper defibrillation protection, use only the recommended cables and
leadwires.
Proper placement of defibrillator paddles in relation to the electrodes is required to
ensure successful defibrillation.
WARNING:
ELECTRODES — Polarizing electrods (stainless steel or silver constructed) may
cause the electrodes to retain a residual charge after defibrillation. A residual
charge will block acquisition of the ECG signal.
Whenever patient defibrillation is a possibility, use non-polarizing electrodes (silver
or silver chloride construction) for ECG monitoring.
WARNING:
MAGNETIC AND ELECTRICAL INTERFERENCE — Magnetic and electrical fields are
capable of interfering with the proper performance of the device.
For this reason, make sure that all external devices operated in the vicinity of
the device comply with the relevant EMC requirements. X-ray equipment or MRI
devices are possible sources of interference as they may emit higher levels of
electromagnetic radiation.
WARNING:
EXPLOSION HAZARD — Do NOT use in the presence of flammable anesthetics
vapors or liquids.
WARNING:
INTERPRETATION HAZARD — Computerized interpretation is only significant when
used in conjunction with clinical findings.
A qualified physician must overread all computer-generated tracings.
WARNING:
OPERATOR — Medical technical equipment such as this system must be used
only by qualified and trained personnel.
2046275-018A
MAC® 3500
23
Introduction
WARNING:
SHOCK HAZARD — Improper use of this device presents a shock hazard. Strictly
observe the following guidelines. Failure to do so may endanger the lives of the
patient, user, and bystanders.
When disconnecting the device from the power line, remove the plug from the
wall outlet before disconnecting the cable from the device; otherwise, there is a
risk of coming into contact with line voltage by inadvertently introducing metal
parts in the sockets of the power cord.
Devices may be connected to other devices or to parts of systems only after
making certain that there is no danger to the patient, operators, or environment
as a result. Standards IEC 60601–1–1/EN60601–1–1 must be complied with in
all cases.
WARNING:
SITE REQUIREMENTS — Improper placement of the device and/or accessories may
result in a hazard to the patient, operator, or bystanders.
Do not route cables in a way that they may present a stumbling hazard.
For safety reasons, all connectors for patient cables and leadwires are designed to
prevent inadvertent disconnection, should someone pull on them.
For devices installed above the patient, adequate precautions must be taken to
prevent them from dropping on the patient.
WARNING:
TREADMILLS — Avoid rapid changes in treadmill speed and/or grade during a
stress test.
CAUTION:
PROPER LEADWIRE CONNECTION — Improper connection will cause inaccuracies
in the ECG.
Trace each individual leadwire from its acquisition module label to the colored
connector and then to the proper electrode to ensure that it is matched to the
correct label location.
CAUTION:
ACCESSORIES (SUPPLIES) — Parts and accessories used must meet the
requirements of the applicable IEC 60601 series safety standards and essential
performance standards, and/or the system configuration must meet the
requirements of the IEC 60601–1–1 medical electrical systems standards.
To ensure patient safety, use only parts and accessories manufactured or
recommended by GE Healthcare.
CAUTION:
ACCESSORIES (EQUIPMENT) — The use of accessory equipment that does not
comply with the equivalent safety requirements of this equipment may lead to a
reduced level of safety of the resulting system.
Consideration relating to the choice of equipment shall include:
• Use of the accessory in the patient vicinity, and
• Evidence that the safety certification of the accessory has been performed
in accordance with the appropriate IEC 60601–1 and/or IEC 60601–1–1
harmonized national standard.
24
MAC® 3500
2046275-018A
Introduction
CAUTION:
BATTERY POWER — If a device equipped with an optional battery pack will not be
used or connected to the power line for a period of over six months, remove the
battery.
CAUTION:
BEFORE INSTALLATION — Compatibility is critical to safe and effective use of
this device. Please contact your local sales or service representative prior to
installation to verify equipment compatibility.
CAUTION:
DISPOSABLES — Disposable devices are intended for single use only. They should
not be reused as performance may degrade or contamination could occur.
CAUTION:
DISPOSAL — At the end of its service life, the product described in this manual,
as well as its accessories, must be disposed of in compliance with local, state, or
federal guidelines regulating the disposal of such products.
If you have questions concerning the disposal of the product, please contact GE
Healthcare or its representative.
CAUTION:
EQUIPMENT DAMAGE — Devices intended for emergency application must not be
exposed to low temperatures during storage and transport to avoid moisture
condensation at the application site.
Wait until all moisture has vaporized before using the device.
CAUTION:
ELECTRIC SHOCK — To reduce the risk of electric shock, do not remove cover
or back.
Refer servicing to qualified personnel.
CAUTION:
OPERATOR — Medical technical equipment such as this electrocardiograph system
must only be used by persons who have received adequate training in the use of
such equipment and who are capable of applying it properly.
CAUTION:
POWER REQUIREMENTS — Before connecting the device to the power line, check
that the voltage and frequency ratings of the power line are the same as those
indicated on the unit's label. If this is not the case, do not connect the system to
the power line until you adjust the unit to match the power source.
In the USA, if the installation of this equipment will use 240V instead of 120V, the
source must be center-tapped, 240V single-phase circuit.
This equipment is suitable for connection to public mains as defined in CISPR 11.
CAUTION:
SERVICEABLE PARTS — This equipment contains no user serviceable parts.
Refer servicing to qualified service personnel.
CAUTION:
SUPERVISED USE — This equipment is intended for use under the direct supervision
of a licensed health care practioner.
2046275-018A
MAC® 3500
25
Introduction
Classification
This device is classified as follows, in accordance with IEC 60601–1:
Category
Classification
Type of protection against electric shock
Class I internally powered equipment.
Degree of protection against electric shock
Type BF defibrillation-proof applied part.
Degree of protection against harmful ingress
of water
Ordinary equipment (enclosed equipment
without protection against ingress of water).
Degree of safety of application in the
presence of a flammable anesthetic mixture
with air or with oxygen or nitrous oxide
Equipment not suitable fo use in the presence
of a flammable anesthetic mixture with air or
with oxygen or nitrous oxide.
Method(s) of sterilization or disinfection
recommended by the manufacturer
Not applicable.
Mode of operation
Continuous operation.
Underwriters Laboratories, Inc.
Medical Equipment
With respect to electric shock, fire, and mechanical hazards only in
accordance with applicable UL standards.
EMI/EMC Requirements
The device or system is labeled under the original equipment manufacturers label (for
example, USA FCC 47CFR15, CE EU EMC 2004/108/EC), and deemed sufficient by
GE Healthcare to be in compliance with EN/IEC 60601-1-2 when used according to
the device or system’s intended use. GE Healthcare-supplied hardware meets the
applicable country requirements.
Classification
Description
Class A
The device or system is suitable for use in all establishments other than
domestic and those directly connected to the public low-voltage power
supply network that supplies buildings used for domestic purposes.
Mains power should be a typical commercial or hospital environment.
NOTE:
Compliance provides reasonable protection against radio-frequency interference.
However, there is no guarantee that interference will not occur in a particular
installation. You can tell whether this device or system is causing interference by
turning it off. If the interference stops, it was probably caused by the device or
system.
For more information regarding the installation of this product in compliance with its
electromagnetic compatibility, refer to the service manual.
26
MAC® 3500
2046275-018A
Introduction
Legal Notice
Our equipment contains several fields that can be filled in before performing an ECG.
Some of these fields must be filled in before performing an exam; some are optional
and therefore left to the user to assess whether they are needed to perform the
exam. A field Race is one of these optional fields. Race has been acknowledged by
the medical profession as useful to analyze some pathologies. You should be aware
that, in some jurisdictions, the processing of data revealing an individual’s racial origin
is subject to legal requirements, such as obtaining the patient’s prior consent. If you
elect to collect this type of data, it is your responsibility to ensure that you comply
with all applicable legal requirements.
Responsibility of the Manufacturer
GE Healthcare is responsible for the effects of safety, reliability, and performance on
GE-supplied hardware only if the following conditions are met:
• Assembly operations, extensions, readjustments, modifications, or repairs are
carried out by persons authorized by GE Healthcare.
• The electrical installation of the relevant room complies with the requirements of
the appropriate local, state, and other government regulations.
• The equipment is used in accordance with the instructions for use.
Responsibility of the Purchaser/Customer
The customer is responsible for providing appropriate desks, chairs, electrical wall
outlets, network connections, analog phone lines, and for locating any of the system
components described in this manual in compliance with all local, state, and national
codes.
Service Information
This section provides information pertaining to the maintenance and servicing of the
device. Familiarize yourself with this information before requesting service from GE
Healthcare or its authorized representatives.
Service Requirements
Failure on the part of the responsible individual, hospital, or institution using this
equipment to implement a satisfactory maintenance schedule may cause undue
equipment failure and possible safety hazards.
Regular maintenance, irrespective of usage, is essential to ensure that the components
of this system are always functional when required.
Additional Assistance
GE Healthcare maintains a trained staff of application and technical experts to answer
questions and respond to issues and problems that may arise during the installation,
maintenance, and use of this product.
Contact your local GE Healthcare representative to request additional assistance.
2046275-018A
MAC® 3500
27
Introduction
Manual Information
This section provides information for the correct use of this manual.
Manual Purpose
This manual provides information necessary for the configuration and safe operation
of this equipment in accordance with its function and intended use. It is not intended
as a replacement for, but a supplement to, thorough product training. Keep it with
the equipment at all times. Additional manuals may be ordered by contacting GE
Healthcare.
Refer to the service manual for technical information related to the maintenance and
repair of the equipment.
Intended Audience
This manual is intended to be used by the person(s) responsible for the configuration
and operation of the equipment. It is expected that the user of this manual will
complete thorough product training as well as read and understand all instructions
in this manual before attempting to use the product.
Request training from GE Healthcare, if needed.
Document Conventions
This manual uses the following conventions.
Typographical Conventions
Convention
Description
Bold Text
Indicates keys on the keyboard, text to enter, or hardware items such as
buttons or switches on the equipment.
Italicized-Bold Indicates software terms that identify menu items, buttons or options in
Text
various windows.
28
CTRL+ESC
Indicates a keyboard operation. A plus (+) sign between the names of two
keys indicates that while holding the first key, you should press and release
the second key. For example, Press CTRL+ESC means to press and hold the
CTRL key and then press and release the ESC key.
<space>
Indicates that you must press the spacebar. When instructions are given
for typing a precise text string with one or more spaces, the point where
you must press the spacebar is indicated as: <space>. This ensures that
the correct number of spaces are inserted in the correct positions within
the literal text string. The purpose of the < > brackets is to distinguish the
command from the literal text within the string.
MAC® 3500
2046275-018A
Introduction
Convention
Description
Enter
Indicates that you must press the Enter or Return key on the keyboard. Do
not type Enter.
>
The greater than symbol, or right angle bracket, is a concise method to
indicate a sequence of menu selections.
For example, the statement “From the main menu, select System > Setup >
Options to open the Option Activation window” replaces the following:
1. From the main menu, select System to open the System menu.
2.
From the System menu, select Setup to open the Setup menu.
3.
From the Setup menu, select Options to open the Option Activation
window.
Illustrations
All illustrations in the manual are provided as examples only. Depending on system
configuration, screens that appear in the manual may differ from the screens as they
appear on your system.
All patient names and data are fictitious. Any similarity to actual persons is
coincidental.
Notes
Notes provide application tips or additional information that, while useful, are not
essential to the correct operation of the product. They are called out from the body
text through a flag word and indentation, as follows:
NOTE:
The tip or additional information appears indented below the NOTE flag word.
Related Documentation
The following documents are referenced in this manual and provide additional
information that may be helpful in the installation, configuration, maintenance, and
use of this product.
Part Number
Title
2036070-006
Marquette™ 12SL™ ECG Analysis Program Physician's Guide
2046275-019
MAC™ 3500 Resting ECG Analysis System Field Service Manual
2020299-021
MobileLink™ Wireless Communications Installation Manual
2025521-001
KISS™ Multilead Operator’s Manual
2020299-025
LAN Option for MAC™ Resting ECG Systems Installation and
Troubleshooting Guide
Training
This manual is intended as a supplement to, not a substitute for, thorough product
training. If you have not received training on the use of the device, you should request
training assistance from GE Healthcare.
2046275-018A
MAC® 3500
29
Introduction
To see available training, go to the GE Healthcare training website
(http://www.gehealthcare.com/usen/education/index.html) and select Diagnostic
Cardiology under the Technical Service Education section.
For more self-paced course offerings, tools, and reference guides you
may find useful, please visit the GE Healthcare Education Store at
www.gehealthcare.com/educationstore.
30
MAC® 3500
2046275-018A
2
System Overview
This chapter describes the device's hardware components, software screen
components, report layout, and basic navigation and data entry. Familiarize yourself
with this information before using the device.
Hardware Description
This section identifies the key components of the MAC system hardware. Familiarize
yourself with these components, their location, and their use before attempting
to use the equipment.
Front View
2046275-018A
Name
Description
1
Display Screen
View the waveform and text data.
2
Keyboard
Controls the system and enters data.
MAC® 3500
31
System Overview
Side View
Name
Description
1
ECG signal input connector
Connects to the acquisition module.
2
KISS pump connector
Optional feature that connects to the KISS pump.
3
LAN port
Connects to a local area network (LAN) via a cable.
LEDs provide information about the connection
status.
• The green LED indicates a good Ethernet link.
• The amber LED flashes to indicate network traffic.
4
Modem port
Connects to a telephone line.
Back View
WARNING:
CURRENT LEAKAGE — Keep current leakage within acceptable limits when
connecting auxiliary equipment to this device.
Total system current leakage must not exceed 100 microamperes.
32
MAC® 3500
2046275-018A
System Overview
Name
Description
1
A
Connects to an optional card reader, bar code reader,
or PS/2 keyboard for entering patient information.
2
1
Connects to a GE KISS pump.
When using the exercise option, connects to a T2000
treadmill or external blood pressure device.
NOTE:
Ergoline bicycle ergometers must be connected
to both this port and the ANA/TTL port.
3
2
Connects to a local transmission cable, serial line,
modem, or client bridge (wireless option).
4
ANA/TTL
Connects to a device requiring analog data or a TTL
trigger.
When using the exercise option, connects to an
analog treadmill, ergometer cable, or TTL trigger.
NOTE:
Ergoline bicycle ergometers must be connected
to both this port and port 1.
5
EXT.VID.
Connects to an external video display.
6
IR
Exchanges ECG data with a MAC system or MUSE CV
system via infrared transmission.
NOTE:
Depending on the age of your system, infrared
transmission may not be supported.
7
Card slot
Houses a system card for external data storage or
to update software.
8
Ground lug
Connects to non-grounded peripheral devices to
ensure equipotential.
9
Main AC Power
Connects the system to an AC power supply via
power cable.
Internal View
2046275-018A
MAC® 3500
33
System Overview
Name
Description
1
Latch
Opens the unit for access to the battery and paper
tray. Also contains two indicator lights: a green light
indicates when the unit is attached to AC power and
an amber light indicates the battery is charging.
2
Battery
Supplies power when unit is not connected to AC
power. Recharge the battery when the battery icon
flashes on-screen.
3
Paper tray
Contains the paper used to print ECGs.
4
Paper size selector
Adjusts the paper tray for STD (US Letter) or A4 paper
sizes.
5
Option activation code
label
List of all option activation codes for this device;
found underneath the paper in tray next to the black
front roller.
6
Serial number ID tag
Indicates the serial number of the device.
Name
Description
1
Function keys
Selects screen menu functions.
2
Power button
Powers the system on and off.
3
Delete key
Erases typed characters.
4
Leads key
Scrolls through a list of available leads on the screen.
5
ECG key
Acquires a 12SL resting ECG, including measurements
and interpretation.
Keyboard
34
MAC® 3500
2046275-018A
System Overview
Name
Description
6
Rhythm key
Prints continuous ECG data, which cannot be stored
or transmitted.
7
Stop key
Stops the writer from printing.
8
Arrow pad
Moves the cursor left, right, up, or down. Pressing the
center button selects the highlighted menu or screen
item.
9
Return key
Enters information into the system.
10
Information key
Provides additional user information.
11
Spacebar
Adds a space between typed characters or highlights
screen items.
12
Option key
Used to create special characters on non-English
keyboards.
13
Esc key
Returns to the previous menu.
14
Shift key
Creates capital letters. Press shift + p to type P.
Acquisition Equipment
This section provides an overview of the external equipment connected to the MAC
system for the acquisition of ECG data. Familiarize yourself with these components
before attempting to acquire ECG data.
Acquisition Module
2046275-018A
MAC® 3500
35
System Overview
Name
Description
1
ECG Trunk Cable
Connects the leadwires to the MAC system.
2
Leadwires
Attaches to the patient electrodes.
Leadwire Labels
One of the following set of labels may appear on the trunk cable.
CAUTION:
PROPER LEADWIRE CONNECTION — Improper connection causes inaccuracies in
the ECG.
Trace each individual leadwire from its acquisition module label to the color-coded
connector and proper electrode to ensure that it is matched to the correct label
location.
10 Leadwire IEC
10 Leadwire AHA
12 Leadwire IEC NEHB
36
MAC® 3500
2046275-018A
System Overview
Leadwire Adapters
MULTI-LINK leadwires require one of the following adapters to connect to electrodes.
1
4 mm pin
2
Grabber
3
MACTRODE clip
4
Leadwire end
Connecting Peripherals
You should connect any of the following peripheral devices to the MAC system before
powering it on:
Connecting the Modem Option
See the Field Service Manual for information about mounting and connecting the
modem option.
Connecting the MobileLink Wireless Option
See the MobileLink Installation and Troubleshooting Guide for information about
mounting, configuring, and connecting the wireless option.
Connecting the LAN Option
See the LAN Installation and Troubleshooting Guide for information about connecting
and configuring the LAN option.
2046275-018A
MAC® 3500
37
System Overview
Connecting the Acquisition Device
Use the following procedure to connect the acquisition device to the MAC system.
1.
Connect one end of the trunk cable to the MAC system.
2.
Connect the leadwires to the other end of the trunk cable.
Refer to “Acquisition Equipment” on page 35 for more information.
Verifying Correct Operation
To verify the correct operation of the MAC system, press the power button to turn
on the system.
• If the system starts up without displaying error messages, the system is operational.
• If the system displays error messages, turn the system power off, then on again. If
error messages persist, contact GE Healthcare Service.
Software Overview
This section provides an overview of the system software. It describes the basic
screen layout, main menu functions, and basic data entry and navigation techniques.
Familiarize yourself with these features before attempting to use the MAC system.
38
MAC® 3500
2046275-018A
System Overview
Start Up Screen
Name
Description
1
Software Version
Displays the system's software version during the
first few seconds of power up.
2
User Prompts
Provides additional information for the user.
3
Hookup Advisor
Displays the quality of the patient hookup. Can be
turned on or off.
4
Function Icon
Indicates the Main Menu function currently being
used. In this example, the Resting ECG function is
being used.
5
Battery Status Icon
Indicates the status of the battery charge.
6
Menu
Provides access to additional settings or functions.
Main Menu
This section provides information about the functions available on the Main Menu and
instructions on how to select functions from the Main Menu. Familiarize yourself with
this information before using the MAC system.
2046275-018A
MAC® 3500
39
System Overview
Main Menu Functions
The following table identifies the functions available on the Main Menu. The functions
displayed in your Main Menu may vary due to the installation of purchased software
options.
Icon
Description
Records a 12-lead ECG.
Resting ECG
Runs the Master’s Step exercise protocol. (Japan only.)
Master's Step
Prints, edits, displays, transmits, and deletes stored ECG data.
File Manager
Defines the operating parameters of the system.
System Setup
Receives and prints ECG data from other devices.
Receive
Acquires, prints, and stores ECG orders received from a MUSE system
with a Hospital Information System (HIS) interface.
Ord Mgr Int.
Returns to the previous screen.
Return
Selecting a Menu Function
You have two methods for selecting functions from the Main Menu:
• Function Keys
• Arrow Pad
40
MAC® 3500
2046275-018A
System Overview
Using Function Keys
1.
Press the function key directly below the menu function to be selected.
2.
To display more functions on the Main Menu, press the function key directly
below the More menu item.
Using the Arrow Pad
2046275-018A
1.
Press the arrow keys on the Arrow Pad until the desired menu item is highlighted.
2.
Press the middle button on the Arrow Pad to select the highlighted menu item.
MAC® 3500
41
System Overview
Report Layout
The following illustration and table describe the basic report layout. For more
information about reports, refer to “Resting ECG Reports” on page 110.
42
Name
Description
1
Patient Demographics
Displays information about the patient, including
patient name, birth date, gender, race, height,
weight, room, and location.
2
Vital Signs
Displays information about the patient's vital signs,
including heart rate, PR interval, QRS duration,
QT/QTc, P-R-T axes, and blood pressure.
3
ECG Header
Displays information about the ECG, including patient
ID, ECG date and time, and hospital name.
4
Messages
Displays system notifications, including 12SL
interpretation (if enabled), ACI-TIPI information (if
enabled), ACS information (if enabled), and critical
value notifications (if enabled).
5
Report Status
Displays the status of the report and physicians.
MAC® 3500
2046275-018A
System Overview
Name
Description
6
HD Status
Indicates whether high definition (HD) pacemaker
detection mode was used. HD mode is available only
on reports generated by a MAC5500 on which HD
is enabled and for ECGs acquired with a CAM HD
device, It will not appear if HD was not enabled, if the
ECG was not acquired with a CAM-HD, or if the report
was generated on a MAC3500.
7
12SL Version
Displays the version of 12SL used to analyze the ECG.
MAC version 10 uses 12SL version 22 and appears on
the report as 12SL v241
8
Product Model and
Software Version
Displays the product model (MAC55) and software
version (010x).
9
Report Format
Displays the title of the report.
10
Gain Setting
Displays the gain setting of the ECG. Refer to “Resting
ECGs” on page 67 for more information on the gain
setting.
11
Speed Settings
Displays the speed setting of the ECG. Refer to
“Resting ECGs” on page 67 for more information on
the speed setting.
12
Filter Setting
Displays the filter setting of the ECG. Refer to “Resting
ECGs” on page 67 for more information on the filter
setting.
13
Waveforms
Displays the ECG waveforms. The leads and
waveforms printed depend on the leads selected
when conducting the test. Refer to “Resting ECGs” on
page 67 for more information on the leads setting.
14
Clinical Trial Data
Displays the clinical trial data gathered during the
ECG test, if the CT Data Guard option was activated
and configured. Refer to “CT Data Guard” on page
114 for more information.
Entering Data
You have two methods for entering data into the MAC system:
• Typing data into a highlighted field
• Selecting data from a drop-down list
2046275-018A
MAC® 3500
43
System Overview
Typing Data into a Highlighted Field
1.
Using the Arrow Pad, press the arrow keys to highlight the desired field.
2.
Type the relevant data into the field.
3.
Press either the middle button of the Arrow Pad or the Return key to enter the
data into the field.
The cursor moves to the next data field.
44
MAC® 3500
2046275-018A
System Overview
Selecting Data from a Drop-down List
1.
Using the Arrow Pad, press the arrow keys to highlight the desired field.
2.
Press the middle button of the Arrow Pad.
A list of available values drops down.
3.
Using the Arrow Pad, press the arrow keys to highlight the desired value.
4.
Press the middle button of the Arrow Pad to select the desired value.
The value is entered into the field and the cursor moves to the next data field.
2046275-018A
MAC® 3500
45
System Overview
46
MAC® 3500
2046275-018A
Preparing the Patient
3
This chapter provides the procedures for preparing the patient's skin and properly
placing electrodes. Some of the procedures for placing electrodes may not apply in all
cases, depending on the system and options purchased.
NOTE:
These instructions do not cover the application of electrodes for the KISS Electrode
Application System (not available in the United States). To use the KISS system, see
the KISS operator’s manual for instructions.
2046275-018A
MAC® 3500
47
Preparing the Patient
Preparing the Patient's Skin
Careful skin preparation is the key to an interference-free ECG. Signal quality is
indicated on the device via the Hookup Advisor indicator.
1.
Select the electrode placement sites for ECG monitoring or diagnosis per the
protocol specified by the hospital or physician.
Refer to “Electrode Placement” on page 49 for diagrams and descriptions of
electrode placement for various protocols.
2.
Ensure that each site is dry, clean, and free of excessive hair.
NOTE:
Do not use solvents to clean the skin; solvents trapped under electrodes
may lead to abnormal skin reactions.
3.
4.
To prepare for a stress test, do the following:
a.
Mark each electrode site with a felt tip pen.
b.
Degrease each site with a skin preparation cream.
c.
Use a mild abrasion to remove the mark left by the felt tip pen.
Apply electrodes to the prepared sites.
Electrodes should be placed only by a physician or ECG technician.
WARNING:
SHOCK HAZARD — Touching the conductive elements cancels the protection
provided by the isolated signal input.
Ensure that conductive parts of the electrodes or lead wires do not come in
contact with other conductive parts.
5.
Look at the lead-check screen for indication of lead problems.
NOTE:
Use only electrodes and contact agents recommended by GE Healthcare.
The signal quality on the lead-check screen is not indicated until the RA/R
electrode is applied. If RA/R becomes disconnected, the system will report
that all electrodes are off the patient.
48
MAC® 3500
2046275-018A
Preparing the Patient
Electrode Placement
This section describes various methods for placing electrodes for both resting and
exercise ECGs.
CAUTION:
PROPER LEADWIRE CONNECTION — Improper connection will cause inaccuracies
in the ECG.
Trace each individual leadwire from its acquisition module label to the colored
connector and then to the proper electrode to ensure that it is matched to the
correct label location.
Resting ECG Placement
The following methods are applicable for resting ECGs.
Standard 12 Lead Placement
2046275-018A
AHA Label
IEC Label
Description
1
V1 Red
C1 Red
Fourth intercostal space at the right sternal border.
2
V2 yellow
C2 yellow
Fourth intercostal space at the left sternal border.
3
V3 green
C3 green
Midway between location 2 and 4.
4
V4 blue
C4 brown
Mid-clavicular line in the fifth intercostal space.
5
V5 orange
C5 black
Anterior axillary line on the same horizontal level as 4.
6
V6 purple
C6 purple
Mid-axillary line on the same horizontal level as 4 and 5.
7
LA black
L yellow
Left deltoid.
8
LL red
F green
Above left ankle. (Alternate placement, upper leg as close
to torso as possible.)
9
RL green
N black
Above right ankle. (Alternate placement, upper leg as
close to torso as possible.)
10
RA white
R red
Right deltoid.
MAC® 3500
49
Preparing the Patient
Standard 15 Lead Placement
50
AHA Label
IEC Label
Description
1
V1 red
C1 red
Fourth intercostal space at the right sternal border.
2
V2 yellow
C2 yellow
Fourth intercostal space at the left sternal border.
3
V3 green
C3 green
Midway between location 2 and 4.
4
V4 blue
C4 brown
Mid-clavicular line in the fifth intercostal space.
5
V5 orange
C5 black
Anterior axillary line on the same horizontal level as 4.
6
V6 purple
C6 purple
Mid-axillary line on the same horizontal level as 4 and 5.
7
LA black
L yellow
Left deltoid.
8
LL red
F green
Above left ankle. (Alternate placement, upper leg as close
to torso as possible.)
9
RL green
N black
Above right ankle. (Alternate placement, upper leg as
close to torso as possible.)
10
RA white
R red
Right deltoid.
11
V4R gray
C4R gray
Right anterior chest opposite of 4.
12
V8 gray
C8 gray
Under left midscapular line.
13
V9 gray
C9 gray
Left paraspinal border.
MAC® 3500
2046275-018A
Preparing the Patient
Frank X, Y, Z Placement
2046275-018A
AHA Label
IEC Label
Description
1
LA black
L yellow
Just below the clavicle of the left arm.
2
E orange
E light blue
Mid-sternum on the same horizontal level as 3 and 4.
3
V4 blue
C4 brown
Mid-clavicular line in the fifth intercostal space.
4
V6 purple
C6 purple
Mid-axillary line on the same horizontal level as 3.
5
LL red
F green
Left leg, lower abdominal quadrant.
6
RL green
N black
Right leg, lower abdominal quadrant.
7
I orange
I light blue
Right mid-axillary line on the same horizontal level as 3
and 4.
8
RA white
R red
Just below the clavicle of the right arm.
9
H orange
H light blue
Back of neck, avoid the carotid artery and jugular vein.
10
M orange
M light blue
Center of spine on the same horizontal level as 3 and 4.
MAC® 3500
51
Preparing the Patient
NEHB Placement
52
AHA Label
IEC Label
Description
1
A1 orange
Nst white
Attachment point of the second rib to the right sternal
edge.
2
A2 orange
Nax white
Fifth intercostal space on the left posterior axillary line.
(Same position as V8 or C8.)
3
V4 blue
Nap white
Mid-clavicular line in the fifth intercostal space. (Same
position as C4.)
MAC® 3500
2046275-018A
Preparing the Patient
Pediatric Placement
2046275-018A
AHA Label
IEC Label
Description
1
V1 red
C1 red
Fourth intercostal space at the right sternal border.
2
V2 yellow
C2 yellow
Fourth intercostal space at the left sternal border.
3
V3 green
C3 green
Midway between location 2 and 4.
4
V4 blue
C4 brown
Mid-clavicular line in the fifth intercostal space.
5
V5 orange
C5 black
Anterior axillary line on the same horizontal level as 4.
6
V6 purple
C6 purple
Mid-axillary line on the same horizontal level as 4 and 5.
7
LA black
LA black
Left deltoid.
8
LL red
F green
Above left ankle. (Alternate placement, upper leg as close
to torso as possible.)
9
RL green
N black
Above right ankle. (Alternate placement, upper leg as
close to torso as possible.)
10
RA white
R red
Right deltoid.
11
V4R gray
C4R gray
Mid-clavicular line in the fifth right intercostal space.
12
V3R gray
C3R gray
Halfway between 1 and 11.
13
V7 gray
C7 gray
Same horizontal level of 4 in the left posterior axillary line.
MAC® 3500
53
Preparing the Patient
Exercise ECG Placement
The following methods are applicable only if the Exercise option has been enabled.
In addition to the standard electrodes, apply one electrode on the sternum (A1) and
one in location V5R/C5R (A2). It is recommended that arm electrodes be placed on the
patient’s torso, just under the clavicles.
CM5, CC5, ML Lead Placement
54
Electrode
Description
1
A1
Mid-sternum at the second intercostal space
2
A2
In the fifth intercostal space in the right anterior axillary line
(V5R/C5R).
MAC® 3500
2046275-018A
Preparing the Patient
CM5, CC5, CH Lead Placement
2046275-018A
Electrode
Description
1
A1
Mid-sternum at the second intercostal space.
2
A2
In the fifth intercostal space in the right anterior axillary line
(V5R/C5R).
3
A3
On either side of the neck or anywhere above the shoulders.
MAC® 3500
55
Preparing the Patient
56
MAC® 3500
2046275-018A
Entering Patient Information
4
The first step in conducting any ECG test (resting, pediatric, 15-lead, vector loops, or
exercise) is to identify the patient. Patients can be identified by manually entering the
data, by bar code scanner or magnetic card reader, or by retrieving it from a MUSE CV
system. This chapter describes the available methods for entering patient information
and order information into the system:
• Manually entering patient information
• Reading a patient ID card
• Scanning a patient bar code
• Receiving orders from a MUSE CV system
• Manually entering orders
Some methods may not be available on all systems, depending on which options
have been purchased.
CAUTION:
INACCURATE PATIENT DATA — Patient data may be retained from a previous
patient. Check the patient info screen for each new patient. Data assigned to
the wrong patient causes erroneous patient data that can affect diagnosis and
treatment of the patient(s).
Make sure that you enter patient data for the correct patient.
NOTE:
The patient information you are required to enter depends on your system
configuration. Refer to “Patient Questions” on page 97 for a description of the
patient information you are requested to enter.
2046275-018A
MAC® 3500
57
Entering Patient Information
Manually Entering Patient Information
You can manually enter patient data on all MAC systems.
1.
For each new patient, select Patient Data.
The Patient Data entry window opens.
2.
Using the arrow pad, navigate from field to field and enter data as appropriate.
For more information on how to manually enter data in the MAC system, refer to
“Entering Data” on page 43.
NOTE:
Our equipment contains several fields that can be filled in before performing
an ECG. Some of these fields must be filled in before performing an exam;,
others are optional and therefore left to the user to assess whether they are
needed to perform the exam. The field Race is one of these optional fields.
It has been acknowledged by the medical profession as useful to analyze
some pathologies. You should be aware that, in some jurisdictions, the
processing of data revealing an individual’s racial origin is subject to legal
requirements, such as obtaining the patient's prior consent. If you elect to
collect this type of data, it is your responsibility to ensure that you comply
with all applicable legal requirements.
3.
If the optional Clinical Trial Data feature is enabled, do one of the following:
• If the patient is part of a clinical trial, select Yes in the Clinical Trial Data field
at the bottom of the Patient Data window.
A pop-up window opens. Enter the clinical trial information as appropriate.
• If the patient is not part of a clinical trial, select No in the Clinical Trial Data
field at the bottom of the Patient Data window.
See “CT Data Guard” on page 114 for information on enabling the Clinical Trial
Data feature.
4.
Select Return to save the patient data and return to the ECG window.
You can now begin the ECG test.
Reading a Patient Card (Option)
If the system includes the option to read a patient ID or visit card (depending on
configuration), you can enter patient information by sliding the patient's magnetic
card through the card reader. This section provides instructions for connecting and
using the card reader.
58
MAC® 3500
2046275-018A
Entering Patient Information
Connecting the Card Reader
Before you can use the card reader, it must be connected to the MAC system and the
system must be configured to correctly use the peripheral. Typically, this is done only
once and the card reader remains attached and ready for use.
1.
Connect the magnetic card reader to port A on the back panel of the system.
For information on the system ports, refer to “Back View” on page 32.
2.
Configure the card reader.
For information, refer to “Setting Up a Card Reader” on page 118.
Reading a Patient ID Card
After the card reader has been set up, use the following procedure to read a patient's
ID card.
1.
For each new patient, select Patient Data.
The message Slide the Patient ID card or Slide the Visit Number card opens,
depending on system configuration.
2.
Slide the magnetic card through the magnetic card reader, making sure the
magnetic strip is facing the correct direction.
What happens next depends on your system settings.
The system may be set up to simply load the patient data directly from the
card. Or, it may be set up to use either the card's Patient ID or Visit Number
to retrieve orders or ADT data. Orders may be retrieved from the local cart or
from the MUSE system, while ADT information is always retrieved from the MUSE
system. With this variety of options, several configuration combinations are
possible. However, even with all the potential configurations, only five responses
are possible:
• If the system is not configured to retrieve orders or ADT information, or if it
finds no matching records, the system loads the patient information from the
card and displays it in the Patient Data window.
Accept or modify the data as needed.
• If the system locates only one ADT record, it loads that record and displays it
in the Patient Data window.
Accept or modify the data as needed.
• If the system locates multiple matching ADT records, it displays a list of those
records.
Do one of the following:
• Select the correct record to load its ADT information.
You can then use or modify the patient information as needed.
• Select Cancel to load the patient information directly from the card.
You can then use or modify the patient information as needed.
• If the system locates one matching order, it retrieves that order.
You can then modify the order information or begin the test.
• If the system locates multiple matching orders, it displays a list of those
orders.
2046275-018A
MAC® 3500
59
Entering Patient Information
Do one of the following:
• Select the correct order to load it.
You can then modify the order information or begin the test.
• Select Cancel to load the patient information directly from the card.
You can then use or modify the patient information as needed.
For information on configuring your system, refer to Appendix E, “Creating Bar Codes
and Magnetic Cards”.
Scanning a Bar Code (Option)
If the system includes the option to scan a bar code, you can enter patient information
by scanning the bar code. This section provides instructions for connecting and using
the bar code scanner.
NOTE:
Do not use the bar code reader for scanning the bar code that appears on the
ECG printout. The bar code on the ECG printout is a different format and not
readable by the bar code reader.
Connecting the Bar Code Scanner
Before you can use the bar code scanner, it must be connected to the MAC system
and the system must be configured to correctly use the peripheral. Typically, this is
done only once and the scanner remains attached and ready for use.
1.
Connect the bar code scanner to port A on the back panel of the system.
For information on the system ports, refer to “Back View” on page 32.
2.
Configure the scanner.
For information, refer to “Setting Up a Bar Code Reader” on page 119.
Scanning the Bar Code
After the scanner has been set up, use the following procedure to scan the bar code.
1.
For each new patient, select Patient Data.
The message Scan the bar code opens.
2.
Scan the bar code.
What happens next depends on your system settings.
The system may be set up to simply load the patient data directly from the bar
code. Or, it may be set up to use either the bar code's Patient ID or Visit Number
to retrieve orders or ADT data. Orders may be retrieved from the local cart or
from the MUSE system, while ADT information is always retrieved from the MUSE
system. With this variety of options, several configuration combinations are
possible. However, even with all the potential configurations, only five responses
are possible:
• If the system is not configured to retrieve orders or ADT information, or if it
finds no matching records, the system loads the patient information from the
bar code and displays it in the Patient Data window.
60
MAC® 3500
2046275-018A
Entering Patient Information
Accept or modify the data as needed.
• If the system locates only one ADT record, it loads that record and displays it
in the Patient Data window.
Accept or modify the data as needed.
• If the system locates multiple matching ADT records, it displays a list of those
records.
Do one of the following:
• Select the correct record to load its ADT information.
You can then use or modify the patient information as needed.
• Select Cancel to load the patient information directly from the bar code.
You can then use or modify the patient information as needed.
• If the system locates one matching order, it retrieves that order.
You can then modify the order information or begin the test.
• If the system locates multiple matching orders, it displays a list of those
orders.
Do one of the following:
• Select the correct order to load it.
You can then modify the order information or begin the test.
• Select Cancel to load the patient information directly from the bar code.
You can then use or modify the patient information as needed.
For information on configuring your system, refer to Appendix E, “Creating Bar Codes
and Magnetic Cards”.
Entering Orders
The MAC system offers two methods for entering orders. This section describes both
methods for entering orders and provides instructions for selecting and completing
orders on the system.
Receiving Orders from a MUSE CV System (Option)
The MUSE CV System can communicate orders to this system in the following ways:
• SD card
This is only available with MUSE v005D or later
• Modem
This method works with both internal and external modems.
• Local area network
The MAC system must be connected to the LAN through the communications port
on the right side of the MAC system.
• Direct serial connection
The MAC system and MUSE system can be connected using a standard serial cable.
• Infrared
2046275-018A
MAC® 3500
61
Entering Patient Information
The MUSE system’s infrared device must be pointed directly at the MAC system’s IR
port with no obstruction, as shown in the following illustration.
• Wireless
This method works with MobileLink and MobileLink UHS wireless systems. For
instructions on mounting, configuring, and connecting the client bridge to the
system, refer to the MobileLink Installation and Troubleshooting Guide.
NOTE:
Performance of the MobileLink wireless system may vary due to changes
in RF (radio frequency) properties of your site or environmental conditions. If
you are experiencing intermittent connectivity in certain areas of your facility,
reinitiate the process of receiving from the MUSE system. Consult your hospital
IT department or your local GE Healthcare networking professional regarding
modification of your wireless LAN to improve system performance.
Regardless of which method(s) you use to communicate with the MUSE CV system, use
the following procedure to receive orders.
1.
Select Ord Mgr Int.
The Order Manager Interface opens.
2.
Select Load Orders.
A pop-up window opens.
3.
Enter the location(s) for which you want to retrieve orders.
Locations must match the locations used on the MUSE CV system. Multiple
locations must be separated by commas (1, 13, 55).
4.
Press Return
The system connects to the MUSE system and retrieves a list of matching orders.
5.
Select one or more orders and press Return.
The system loads and stores the selected orders.
6.
62
Proceed to “Selecting and Completing Orders ” on page 63.
MAC® 3500
2046275-018A
Entering Patient Information
Manually Entering Orders
If you do not have a MUSE CV system, or cannot connect to the MUSE CV system for
some reason, you can manually create the order directly on the MAC system using
the following procedure.
NOTE:
The option to add orders locally must be in System Setup. Refer to “Order Manager
Interface” on page 104.
1.
Select Ord Mgr Int.
The Order Manager Interface opens.
2.
Select More > Create Order.
The Create Order window opens.
3.
Enter the order information as appropriate.
Refer to “Entering Data” on page 43 for information on how to enter data.
4.
When you are done, press Return.
The order is saved, the entry window closes, and you return to the Order
Manager Interface window. The new order is now available.
5.
Proceed to “Selecting and Completing Orders ” on page 63.
Selecting and Completing Orders
After you have orders on the system, whether they were downloaded from a MUSE CV
system or created manually, use the following procedure to select and complete them.
1.
Choose Select.
The cursor moves to the list of available orders.
2.
Select the order you want to use and press Return.
A window opens with the order details.
3.
Do one of the following:
• To select a different order, select Cancel.
The detail window closes and you return to the Order Manager Interface.
• To use the selected order, select Continue.
The appropriate ECG test window opens with the selected order. The Patient
Information window opens with the information from the order.
4.
2046275-018A
Enter or correct the patient data.
MAC® 3500
63
Entering Patient Information
64
MAC® 3500
2046275-018A
Recording an ECG
5
The method for recording an ECG varies depending on the type of ECG to be recorded.
This chapter describes how to record the following ECG types:
• Resting ECGs
• Master's Step ECGs
To assist you in recording an interference-free ECG, the MAC system provides a
Hookup Advisor to alert you to troubles with the electrode connection.
NOTE:
The instructions in this chapter assume that the patient has been properly
prepared and the electrodes have been placed correctly for the selected ECG type.
Refer to Chapter 3, “Preparing the Patient” for details.
Hookup Advisor
The system offers the Hookup Advisor feature, which is a tool for monitoring the
quality of resting ECG signals, and is available in the resting, pediatric, 15-lead, vector
loops, and Master’s Step applications. It can reduce or eliminate the occurrence of
poor technical quality ECGs, save time, and prevent the need for retakes.
When enabled, the Hookup Advisor is displayed as a three-circle indicator in the upper
right corner of the screen.
2046275-018A
MAC® 3500
65
Recording an ECG
• Red indicates a lead-fail condition or extreme baseline shifts. The red indicator is
always the left-most circle of the of the indicator and flashes when lit.
• Yellow indicates muscle artifact, power line interference, baseline wander, or
electrode noise. The yellow indicator is always the middle circle of the of the
indicator.
• Green indicates generally acceptable signal quality. The green indicator is always
the right-most circle of the of the indicator.
When the lead quality is red or yellow, a message describing the lead problem or
status is displayed on the screen.
Hookup Advisor is enabled and configured in the ECG Acquisition menu (System
Setup > ECG > ECG Acquisition). Refer to “ECG Acquisition” on page 106 for
more information. In addition to enabling/disabling the Hookup Advisor feature,
you can set the level at which the system acknowledges poor signal quality. The
acknowledgement level can be set to Yellow, Red (default), or Never.
Hookup Advisor continuously reviews the ECG data for acceptable lead quality.
• If Pre-acquisition is enabled in the system setup, the lead quality indicator will
reflect the entire previous 10 seconds of ECG data. Any displayed messages will
be updated on a real-time basis to reflect adjustments/improvements to the lead
quality. Once any lead quality problems have been remedied, the message Please
wait... will be displayed until the entire 10-second period is free from lead quality
problems.
• If Pre-acquisition is not enabled, the Hookup Advisor level and messages will
respond to a fixed poor lead quality problem within two to three seconds.
When an ECG is acquired, Hookup Advisor runs a complete and more comprehensive
assessment of the full 10 seconds of ECG data and possibly prompts the user
regarding any poor lead quality conditions.
• If Preview before analysis is turned off in the system setup, a lead quality message
and prompt may be displayed, depending on the current lead quality level and the
66
MAC® 3500
2046275-018A
Recording an ECG
Prompt level in the system setup. If a message and prompt is displayed, the lead
quality indicator will reflect the overall 10-second lead quality.
• If Preview before analysis is enabled, the system setup Prompt level is disregarded
and the system immediately displays the Preview screen. Any lead quality
messages will be displayed in this screen along with the overall 10-second lead
quality indicator.
In either case, users may then do either of the following:
• Select Continue to continue (print the ECG).
• Select Cancel to cancel.
Resting ECGs
Use the following procedure to record a resting ECG.
1.
Select Resting ECG.
The Resting ECG Test window opens.
2.
Enter the correct patient information.
Refer to Chapter 4, “Entering Patient Information” for details.
3.
Adjust the ECG settings as appropriate:
• To select a different set of leads, press Leads.
A list of available leads opens. The contents of the list may change depending
on your system configuration.
• To adjust the speed with which the waveforms are displayed, press 25 mm/s.
This opens a list of available speeds. Options include 5 mm/s, 12.5 mm/s,
25 mm/s, and 50 mm/s. This affects only the speed of the waveform as it
appears on the screen and reports; it does not affect the actual speed with
which the ECG is recorded. The selected value appears on the function key
on the screen.
• To adjust the gain of the ECG, press 10 mm/mV.
This opens a list of available gains. Options include 2.5 mm/mV, 5 mm/mV, 10
mm/mV, 20 mm/mV, and 10/5. The selected value appears on the function
key on the screen.
• To adjust the filter of the printed ECG, press 150 Hz.
This opens a list of available filters. Options include 20 Hz, 40 Hz, 100 Hz, and
150 Hz. This affects only the printout; the screen filter is always set to 40 Hz.
The selected value is displayed on the function key.
• To change the pacemaker enhancement, press More > Pace Gain.
This opens the Pacemaker Enhancement window. Highlight Pacemaker
Enhancement, press Return, and select Yes.
• To turn on the Acute Coronary Syndrome algorithm, press More > ACS Off.
2046275-018A
MAC® 3500
67
Recording an ECG
This opens the ACS On/Off window. Select ACS On and press Return.
NOTE:
ACS is an optional feature. This function key is available only if the option
has been purchased and activated. Refer to “Option Activation” on page
102 for instructions on activating this option.
NOTE:
ACS is activated on a per-patient basis. Settings are not retained from
patient to patient; it must be activated for each patient.
4.
Once all the settings have been adjusted accordingly, press ECG.
Any of the following may occur, depending on your system settings:
• The message Acquiring data x sec is displayed in the upper left corner of the
screen.
This counts down as it acquires 10 seconds of ECG data.
• A Critical Test Result window opens.
This occurs only if (a) the optional Critical Values feature has been enabled
and configured and (b) one or more of the critical values has been met. Press
Continue to close the message and continue. See “Critical Values Setup” on
page 115 for more information on configuring Critical Values.
• The ECG report prints.
This occurs only if the report has been configured to print automatically. See
Chapter 12, “System Setup”, for more information.
• The Saving ECG window flashes on the screen.
This occurs only if a report has been set to save automatically. See Chapter
12, “System Setup”, for more information.
5.
6.
To print the ECG, press the Print.
To save the ECG, select Store.
This stores the ECG either to internal memory or to an external SD card,
depending on whether the SD Card Storage Only option is enabled in
Miscellaneous Setup.
NOTE:
This option is available only if the system was not configured to save the
file automatically.
After the ECG has been stored, it can be transmitted to a MUSE system. If the
system is set up to automatically transmit data, the message Establishing
network connection will be displayed on the screen. If the system is not
set up to automatically transmit data, you will need to manually initiate the
transmission. Refer to Chapter 7, “Transmitting ECGs”.
7.
Do one of the following:
• To take another ECG for the same patient, press Same Pat.
• To take an ECG for another patient, press Next Pat.
Master's Step ECGs
This is an optional test method that is available only in Japan. For information on
enabling the Master's Step Exercise option, refer to “Option Activation” on page 102.
68
MAC® 3500
2046275-018A
Recording an ECG
For information on configuring the Master's Step Exercise, refer to “Setting Up Master's
Step Test” on page 120.
1.
Select Master's Step.
2.
Enter the patient's information using the appropriate method.
Refer to Chapter 4, “Entering Patient Information” for more information.
3.
Select More > Setup, confirm the following parameters are correct, and press
Return.
• Number of steps
• Test type
• Post J (ms)
• Step Counter Display
• Sound Option
• Continuous Recording
• Post Exercise ECG Time
4.
Press the ECG button to record a pre-exercise ECG.
5.
Remove the leadwires but keep the electrodes on the patient.
This prevents the patient from tripping on the leadwires during the test.
6.
Press Continue to begin the exercise test.
7.
When the patient finishes the exercise, immediately reattach the leadwires
to the electrodes.
Check the waveform quality on the screen to confirm that all the leadwires were
correctly reattached.
8.
Press Continue.
The system records the ECG and prints a final report. If the system is set up to
automatically store ECGs, it will also automatically store the ECG.
9.
If the system is not set up to automatically store ECGs, or if it is unable to store
the ECG, select Store to store the ECG manually.
10.
You are now ready to transmit the ECG data to a MUSE system.
Refer to Chapter 7, “Transmitting ECGs” for details.
2046275-018A
MAC® 3500
69
Recording an ECG
70
MAC® 3500
2046275-018A
Printing ECG Reports
6
The MAC system can be configured to print a report automatically during an ECG test.
In addition, you can choose to reprint an ECG report in a different format during the
test. Finally, you can print ECG reports that are stored on the system. This chapter
explains how to print another report during the ECG test, how to print a stored ECG
report, and how to store the printouts after they print.
For information on how to configure the MAC system to automatically print a report,
refer to Chapter 12, “System Setup”.
Printing Another Report
Use the following procedure during an ECG test to print the ECG data in a different
report format.
1.
Run the test.
The system automatically prints a report as configured in System Setup.
2.
Select More to view the second screen of options.
3.
Select New Format.
4.
Highlight the additional report format(s) to print.
5.
Press Return.
6.
Select Print to print the selected reports.
NOTE:
Changes made here affect only the current ECG. Once another ECG is
recorded, the reports specified in System Setup are printed.
Printing Stored ECGs
Use the following procedure after an ECG test to print stored reports.
1.
Press File Manager.
A list of stored ECG reports opens.
2046275-018A
2.
Press Select.
3.
Select the ECG(s) to print.
4.
Press Print.
MAC® 3500
71
Printing ECG Reports
Storing Printouts
When imaged and stored properly, ECG tracings will resist fading for several years.
The expected lifespan depends on the paper. For example, GE Healthcare's Premium
Thermal Recording Papers resist fading for 5–7 years. By contrast, GE Healthcare's
Ultra-Archivst® Thermal Recording Papers are guaranteed to resist fading for 100
years. Refer to the documentation that accompanies your paper for its expected
lifespan.
To ensure the tracing is imaged properly, the equipment must be maintained in
accordance with its service manuals and technical memoranda.
To ensure the tracing lasts for the paper's expected lifespan, observe the following
precautions when storing your printouts:
• Store in a cool, dark, and dry location.
Temperature must be < 80°F (27°C). Relative humidity must be < 65%.
• Avoid exposure to bright light or UV sources.
Sources of ultraviolet light include sunlight, fluorescent lights, halogen lights,
mercury vapor lamps, and germicidal lamps.
• Avoid contact with cleaning fluids and solvents.
Solvents to avoid include alcohols, ketones, esters, ether, and so forth.
• Store thermal paper separately in manilla folders or polyester or polyimide
protectors.
Plastic document protectors, envelopes, or sheet separators made of polystyrene,
polypropylene, or polyethylene will not degrade thermal traces in themselves.
However, these materials afford no protection against fading from external causes.
• Do NOT store thermal papers with any of the following:
• carbon and carbonless forms
• document protectors, envelopes, and sheet separators containing polyvinyl
chloride or other vinyl chlorides
• non-thermal chart papers or any other products containing tributyl phosphate,
dibutyl phthalate, or any other organic solvents
NOTE:
Many medical and industrial charts contain these chemicals.
• Do NOT use mounting forms, pressure-sensitive tapes, or labels containing
solvent-based adhesives.
Use only mounting forms and pressure-sensitive tapes made with starch or
water-based adhesives.
If these precautions are followed, the ECG tracings should survive for the paper's
expected lifespan. If the tracings show any signs of fading or deterioration, the
customer must notify GE Healthcare promptly.
72
MAC® 3500
2046275-018A
Transmitting ECGs
7
The MAC system can transmit ECGs to other MAC systems or a PC using any of the
following methods, depending on which options have been purchased:
• Modem
• Manual Line
• Serial Line
• MUSE Network
• Ethernet Line
• Wireless
Most methods transmit ECGs in GE Healthcare's Hilltop format, but you can also
choose to transmit ECGs in XML format.
The MAC system can be configured to transmit ECGs during an ECG test. However,
you can also manually transmit stored ECGs at any time. This chapter explains how
to manually transmit ECGs. For information on how to configure the MAC system to
automatically print a report, refer to Chapter 12, “System Setup”.
NOTE:
When transmitting ECGs to another MAC system, the receiving MAC system must
be set up to receive the ECGs. Refer to Chapter 8, “Receiving ECGs”. for details.
Transmitting ECGs via Modem
If you purchased an optional modem, you can transmit ECGs via modem. Before using
the following procedure, make sure your modem is connected to an analog phone
line, as shown in the following illustrations.
2046275-018A
MAC® 3500
73
Transmitting ECGs
Internal Modem
1.
External Modem
Select File Manager.
A list of ECGs opens.
2.
Select Location.
A list of devices to which the ECG report can be transmitted opens.
3.
Do one of the following
• If the receiving device is shown, select it and continue to step 4.
• If the receiving device is not shown, manually enter the device:
a.
Select Location.
b.
Select Manual Dial.
c.
Enter the telephone number of the receiving device.
d.
Press Return.
e.
Select the modem type.
f.
Press Return.
g.
Continue to step 4.
4.
Select the ECG(s) to be transmitted.
5.
Select Transmit.
Transmitting ECGs Locally
Use the following procedure to transmit ECGs locally, that is, within the facility. Using
this method, the devices must be connected via a manual line, serial line, or Ethernet
line.
1.
Press File Manager.
A list of ECGs opens.
2.
Press Location.
A list of locations opens. Each location contains three elements:
• Location
74
MAC® 3500
2046275-018A
Transmitting ECGs
This identifies the connection method and includes the following:
• Manual Dial
• Serial Line
• MUSE Network
• Ethernet Line
• Phone Number
For predefined modem locations, this column will contain the location's
phone number. For Manual Dial locations, this column will contain a question
mark (?) and a phone number must be entered if the location is selected. For
Serial Line, MUSE Network, and Ethernet Line, this column will be blank.
• Type
This identifies the kind of location and includes the following:
• MUSE Network
• XML Output
• ASCII Output
3.
Highlight the desired location and press Select.
A list of ECGs opens.
4.
Select the ECG(s) to transmit.
5.
Press Transmit.
Transmitting ECGs Wirelessly
If you purchased the MobileLink option, you can transmit ECGs wirelessly.
NOTE:
Performance of the MobileLink wireless system may vary due to changes in RF
(radio frequency) properties of your site or environmental conditions. If you are
experiencing intermittent connectivity in certain areas of your facility, it may be
necessary to re-initiate the process of transmitting to the MUSE system. You may
also wish to consult your hospital IT department or your local GE Healthcare
networking professional regarding modification of your wireless LAN to improve
system performance.
Before using the following procedure, connect and configure the MobileLink wireless
device as described in the MobileLink Installation and Troubleshooting Guide.
1.
Press File Manager.
A list of ECGs opens.
2.
Press Location.
A list of locations opens.
3.
Highlight a Serial Line location with a Type of MUSE Network and press Select.
A list of ECGs opens.
2046275-018A
4.
Select the ECG(s) to transmit.
5.
Press Transmit.
MAC® 3500
75
Transmitting ECGs
Transmitting ECGs in XML Format
Most methods transmit ECGs in GE Healthcare's proprietary Hilltop format. You can,
however, use the following procedure to transmit ECGs in XML to a PC; the data can
then be extracted for analysis.
1.
Connect the serial port of the MAC system to the serial port of a PC running a
terminal emulation program.
2.
On the MAC system, press File Manager.
A list of ECGs opens.
3.
Press Location.
A list of available locations opens.
4.
Highlight a Serial Line location with a Type of XML Output and press Select.
A list of ECGs opens.
76
5.
Select the ECG(s) to transmit.
6.
Press Transmit.
MAC® 3500
2046275-018A
8
Receiving ECGs
Chapter 7, “Transmitting ECGs”, explains how to manually transmit ECGs from one
MAC system to another. However, in order to receive those ECGs on the other MAC
system, the receiving system must be set up to receive them. The following sections
explain how to set up the MAC system to receive ECGs from other MAC systems via
modem or locally.
Receiving ECGs via Modem
If the modem option was purchased, use the following procedure to set up your MAC
system to receive ECGs via the modem. Before using the following procedure, make
sure your modem is connect to an analog phone line, as shown in the following
illustrations.
Internal Modem
External Modem
1.
Select Receive to prepare the system for receiving ECG reports.
2.
Select Phone Line.
The system is now ready to receive ECGs. Refer to “Transmitting ECGs via
Modem” on page 73 for instructions on setting up the other MAC system to
transmit ECGs via modem.
2046275-018A
3.
After all the ECGs have been received, select Cancel to take the system out of
receiving mode.
4.
Select Main Menu.
MAC® 3500
77
Receiving ECGs
Receiving ECGs Locally
Use the following procedure to prepare the MAC system to receive ECGs locally,
that is, from within the facility. This method receives ECGs via infrared or direct
connection between the two systems. Before using this procedure, the MAC systems
must be connected via their serial ports or, if using infrared, positioned as shown in
the following illustration:
1.
Select Receive to prepare the system for receiving ECG reports.
2.
Select Local Line.
The system is now ready to receive ECGs. Refer to “Transmitting ECGs Locally”
on page 74 for instructions on setting up the other MAC system to transmit
ECGs locally.
78
3.
After all the ECGs have been received, select Cancel to take the system out of
receiving mode.
4.
Select Main Menu.
MAC® 3500
2046275-018A
9
Editing ECGs
While it usually not necessary to modify an ECG, the MAC system allows you to edit
an ECG's demographic information, ECG measurements, and interpretive statements.
After you have edited the ECG, you are prompted to save the updated file.
NOTE:
If you plan to store ECGs in XML format (see “Transmitting ECGs in XML Format”
on page 76), DO NOT edit the ECGs on the MAC system. Edits made to ECGs WILL
NOT BE SAVED in the XML file.
Editing Demographic Information
Anyone can edit an ECG’s demographic information. This includes the patient
information, medications, and test information. This allows anyone to correct or
update the information as necessary.
1.
Press File Manager.
A list of ECG reports opens.
2.
Press Select.
The cursor appears on the screen.
3.
Highlight the ECG report to edit.
4.
Press Edit to open a list of editing options.
5.
Select one of the following options:
• Patient Information
• Medication
• Test Information
The correct fields for the selected ECG open.
6.
Make the necessary corrections and press Return.
7.
Continue to edit demographic information as necessary.
8.
When you are done, press Return twice.
The following message is displayed:
2046275-018A
MAC® 3500
79
Editing ECGs
Select Store to save the edited file. This will replace the original file.
Select Cancel or press ‘Esc’ to discard the changes made to the current file.
9.
Select Store to save the edited file.
Editing ECG Measurements
Only overreaders can modify ECG measurements. You must enter an overreader's
password and reviewer information before you can edit the measurements. This
prevents unqualified persons from adjusting the ECG reading.
1.
Press File Manager.
A list of ECG reports opens.
2.
Press Select.
The cursor is displayed on the screen.
3.
Highlight the ECG report to edit.
4.
Press Edit to open a list of editing options.
5.
Select ECG Measurements.
You are prompted to enter the overreader password.
6.
Enter the overreader password and press Return.
The measurement fields open.
7.
Select the measurement(s) to be edited and type the appropriate value.
8.
When you are done, press Return.
9.
Continue to edit measurements as necessary.
10.
When you are done, press Return twice.
The following message is displayed:
Select Store to save the edited file. This will replace the original file.
Select Cancel or press ‘Esc’ to discard the changes made to the current file.
11.
Select Store to save the edited file.
Editing Interpretive Statements
The MAC system automatically adds interpretive statements to ECG reports. The
system allows you to edit these statements as you deem necessary. You can add,
modify, join, and delete statements. You must enter an overreader's password and
reviewer information before you can edit the statements. This prevents unqualified
persons from adjusting the statements.
1.
Press File Manager.
A list of ECG reports opens.
2.
Press Select.
The cursor is displayed on the screen.
80
MAC® 3500
2046275-018A
Editing ECGs
3.
Highlight the ECG report to edit.
4.
Press Edit to open a list of editing options.
5.
Select Diagnostic Statements.
You are prompted to enter the overreader password.
6.
Enter the overreader password and press Return.
The diagnostic statements open.
7.
Select the statement to edit.
8.
To add text to the beginning of the selected statement, do the following:
a.
Press Insert.
The following message is displayed:
The new statement will be inserted BEFORE the current statement.
Select statement type…
b.
Select the type of statement to insert.
The options are:
• Acronym
• Freetext
• Newline
c.
9.
Enter a 12SL library acronym or free form text and press Return.
To add text to the end of the selected statement, do the following:
a.
Press Append.
The following message is displayed:
The new statement will be inserted AFTER the current statement. Select
statement type…
b.
Select the type of statement to insert.
The options are:
• Acronym
• Freetext
• Newline
c.
Enter a 12SL library acronym or free form text and press Return.
10.
To join the selected statement with another statement, select the second
statement and press Join.
11.
To delete the selected statement, press Delete.
12.
Continue to edit statements as necessary.
13.
When you are done, press Return twice.
The following message is displayed:
Select Store to save the edited file. This will replace the original file.
Select Cancel or press ‘Esc’ to discard the changes made to the current file.
14.
2046275-018A
Select Store to save the edited file.
MAC® 3500
81
Editing ECGs
82
MAC® 3500
2046275-018A
Deleting ECGs and Orders
10
To free up storage space, the MAC system allows you to delete ECGs and uncompleted
orders. This chapter describes those procedures.
Deleting ECGs
To delete ECGs, you must enter a System or Overread password, if the passwords are
defined. You should only delete ECGs that have been transmitted to another ECG,
a MUSE CV system, or a PC for storage.
1.
Press File Manager.
A list of ECG reports opens.
2.
Press Select.
The cursor is displayed on the screen.
3.
Highlight the ECG report(s) to delete.
4.
Press Delete.
Depending on system setup, you may be prompted for a password.
5.
If prompted, enter the System or Overread password.
NOTE:
The System password should only be used by the system administrator
or qualified service personnel. All other users should use the Overread
password.
The following message is displayed:
Warning! You have selected files for delete. This is the only warning you will
receive! Do you want to delete these files?'
6.
Do one of the following:
• To delete the select ECG report(s), press Yes.
• To cancel the deletion and select different reports, press No.
2046275-018A
MAC® 3500
83
Deleting ECGs and Orders
Deleting Orders
Use the following procedure to delete orders stored locally on the device.
1.
From the Main Menu, select Ord Mgr Int.
NOTE:
Depending on the options enabled on your system, you may need to select
More to toggle through the menu until Ord Mgr Int is available.
The Order Manager Interface window opens with a list of local orders displayed.
2.
Select Delete Orders.
The available options on the menu change.
3.
To cancel without deleting any orders, select Cancel.
You return to the opening set of menu options.
4.
To delete one or more specific order, do the following:
a.
Press Select.
The cursor moves to the list of orders.
b.
Select the order(s) to delete.
To select an order, highlight it and press Return or the arrow pad button.
Select as many orders as necessary.
Use the Page Up function key, Page Down function key, and arrow pad to
navigate through the list of orders.
NOTE:
If you select an order that has not been processed, a window opens to
ask whether you want to delete the unprocessed order. Select Yes to
continue with the unprocessed order. Select No to cancel the selection.
c.
When all the orders are selected, select Delete.
The message Are you sure you want to delete the orders? opens.
d.
Do one of the following:
• To delete the selected orders, select Yes.
The orders are deleted and you return to the opening set of menu
options.
• To cancel the deletion, select No.
The orders are not deleted and you return to the opening set of menu
options.
5.
To delete all the orders, select Delete All.
The message Are you sure you want to delete the orders? opens.
Do one of the following:
• To delete all the orders, select Yes.
The orders are deleted and you return to the opening set of menu options.
• To cancel the deletion, select No.
84
MAC® 3500
2046275-018A
Deleting ECGs and Orders
The orders are not deleted and you return to the opening set of menu options.
6.
To delete all the completed orders, select Del Completed.
The message Are you sure you want to delete all completed orders? opens.
Do one of the following:
• To delete all the completed orders, select Yes.
The orders are deleted and you return to the opening set of menu options.
• To cancel the deletion, select No.
The orders are not deleted and you return to the opening set of menu options.
2046275-018A
MAC® 3500
85
Deleting ECGs and Orders
86
MAC® 3500
2046275-018A
11
Using an SD Card
The MAC system allows you to extend the device's storage capacity by using an
external Secure Digital (SD) card. The SD Card is also used to distribute and apply
software updates.
The following table compares the differences between internal storage and SD card
storage. Be aware of these differences when selecting your storage option.
Internal Storage vs SD Card Storage
Internal Storage
SD Card
No
Yes
70%..90%.. Full
SD Card Full
Copy/Restore ECG files to/from SD card
Yes
N/A
Ability to create XML file from File Manager
Yes
Yes
Save System Setup to SD Card
Yes
Yes
Ability to access orders on SD card
No
Yes
Delete XML file when deleting corresponding ECG
Memory Status Messaging
file1
1 System overwrites XML files with the same name.
Supported SD Cards
The system supports SD cards of the following capacity:
• 64 MB
• 128 MB
• 256 MB
• 512 MD
• 1 GB
• 2 GB
NOTE:
The system does NOT support SDHC (High Capacity) SD cards.
While cards from any manufacturer work with the system, GE Healthcare recommends
and provides cards from SanDisk Corporation.
2046275-018A
MAC® 3500
87
Using an SD Card
Preparing the SD Card
Before using the SD card, you must know how to lock, unlock, insert, eject, and format
the card.
Locking and Unlocking the SD Card
You can lock an SD card to secure the data. Before using the SD card, unlock it
by moving the lock tab into the unlocked position (1). This allows you to store data
on or delete data from the card.
To prevent accidental deletion of data, protect the SD card by moving the lock tab into
the locked position (2). The tab should remain in the locked position until you are ready
to copy data to or remove data from the card.
Inserting and Ejecting the SD Card
To use the card, insert it into the card reader on the back of the MAC system. When it
is properly inserted, it will snap into place.
To remove the SD card from the slot, press the card into the slot; the slot is
spring-loaded and will eject the SD card.
Formatting the SD Card
Most secure digital cards do not require formatting. In the event an unformatted SD
card is inserted into the system, the following message will be displayed:
This SD Card cannot be read and requires formatting. Formatting will destroy all
data on this SD Card. Are you sure you want to format?
88
MAC® 3500
2046275-018A
Using an SD Card
Select Yes to format the card.
Managing Files on the SD Card
To use the SD card for external storage, use the File Manager to copy files to the card,
restore files from the card, and save files in XML format to the card.
Copying Files to the SD Card
Use the following procedure to copy ECGs from internal memory to the SD card. To use
this option, the SD Card Storage Only setting must be set to No on the Miscellaneous
Setup screen.
NOTE:
Copying files from internal storage to external storage deletes any files on the SD
card. Be sure the SD card does not contain any files you need before continuing.
1.
Insert the SD card into the system's card slot.
Refer to “Inserting and Ejecting the SD Card” on page 88.
2.
Select File Manager to open the list of stored ECGs.
3.
Select Copy All.
The following message is displayed:
Existing records (if any) in SD card will be deleted. Continue?
4.
Do one of the following:
• To cancel the copy, select No.
• To continue copying the files, select Yes.
The following message is displayed:
Deleting existing records (if any) in SD card.... Please wait.
An indicator shows the progress/completion of the copying procedure.
Restoring Files from the SD Card
After files have been copied to an SD card, you can use the Restore All function to
copy files from the SD card to internal storage.
NOTE:
If CT Data Guard is enabled and its Prevent deleting of untransmitted records
field is set to Yes, you will receive the following warning if any of the records in
internal storage have not been transmitted:
The operation deletes existing records. This cannot be done since there are
untransmitted records!
If you receive this message, make sure that all records have been transmitted and try
Restore All again.
1.
Insert an SD card with ECGs into the system's card slot.
Refer to “Inserting and Ejecting the SD Card” on page 88.
2.
2046275-018A
Select File Manager to open the list of stored ECGs.
MAC® 3500
89
Using an SD Card
3.
Select Restore All.
The following message is displayed:
Existing records (if any) in memory will be deleted. Continue?
4.
Do one of the following:
• To cancel the copy, select No.
• To continue copying the files, select Yes.
The following message is displayed:
Deleting existing records (if any) in memory.... Please wait.
An indicator shows the progress/completion of the copying procedure.
Saving Files in XML Format
In addition to transmitting ECG records as XML files to a PC (see “Transmitting ECGs in
XML Format” on page 76), the MAC system can save ECG records as XML files on an
SD card.
1.
Insert an SD card into the system's card slot.
Refer to “Inserting and Ejecting the SD Card” on page 88.
2.
Select File Manager to open the list of stored ECGs.
3.
Highlight the record(s) to export as XML.
4.
Select Save XML.
The ECGs are converted to XML and saved to the SD card.
Updating Software from the SD Card
When a software update is made available for the MAC system, it is provided on an SD
card. Use the following procedure to apply the update.
NOTE:
Connect the system to AC power before you begin the software update. Keep the
system connected to AC power during the software update and do not power off
the system during the software update.
1.
Press Power to turn on the system.
2.
From the Main Menu, select System Setup.
3.
Enter the system password. and press Enter.
4.
Press Shift + F3.
The following message is displayed:
Please Insert SD Card
Press ‘Esc’ to cancel
5.
Insert the SD card.
The following message is displayed:
Current Version: xx.xx
New Software Version: yy.yy
Press 'Enter' to start update.
90
MAC® 3500
2046275-018A
Using an SD Card
6.
Press Enter.
NOTE:
If the system is not connected to AC power, the message Please switch to
AC Power is displayed. Connect the system to an AC outlet.
A series of messages flash on the screen to indicate the installation progress.
One of two things will happen:
• If the system does not need a boot code update, the following messages
are displayed:
Programming Over
System is Shutting Down
The system shuts down. Skip to step 8.
• If the system needs a boot code update, the following messages are
displayed:
Current Boot Version: xx.xx
New Boot Version: yy.yy
Press 'Enter' to start Installation
7.
Press Enter to update the boot code.
The following messages are displayed:
Programming Primary Boot
Programming Over
System is Shutting Down
The system shuts down.
2046275-018A
8.
Press Power to turn on the system.
9.
Verify the software version has been updated.
MAC® 3500
91
Using an SD Card
92
MAC® 3500
2046275-018A
12
System Setup
This chapter describes how to use System Setup to configure your system. It provides
an overview of the setup process and details on how to set up:
•
•
•
•
•
System basics
ECGs
Master's Step Tests
Card Readers
Bar Code Readers
In addition, the chapter provides an overview of the System Setup hierarchy and
instructions on how to print, save, and restore the system settings.
System Setup Hierarchy
The following lists shows the hierarchy of the System Setup menu. Use it to help you
locate the system settings to configure.
• Basic System
•
•
•
•
•
•
•
•
•
•
•
Miscellaneous Setup
Patient Questions
Screen Colors
Transmission
Network Setup
Option Activation
Date and Time
Language
Power Up Options
Order Manager Interface
PS/2 Port Select
• ECG
• ECG Acquisition
• ECG Analysis
• Patient Questions
2046275-018A
MAC® 3500
93
System Setup
• Writer Setup
• Resting ECG Reports
• Lead Sequence
• Report Leads
• Confirmed Reports
• Unconfirmed Reports
• Analog Outputs
• CT Data Guard Setup
• Critical Values Setup
• Print Setup
• Save Setup
• To System
• To SD Card
• Do Not Save Setup
• Restore Setup
• To Original Factory Settings
• From SD Card
• Do Not Restore Setup
Process Overview
The following procedure describes the basic flow and steps for using the System
Setup function. Use this process when configuring specific settings.
1.
Select System Setup.
You are prompted to enter the system setup password.
2.
Type the system setup password and press Return.
The System Setup window opens.
3.
Select the function to configure.
The selected function’s settings are displayed on the screen.
4.
Configure the settings as appropriate.
Refer to the corresponding function sections in this chapter for detailed
descriptions of the settings.
5.
When you are done configuring the section, select Save Setup.
A list of options is displayed.
6.
Do one of the following:
• To save the settings to internal storage, select To system.
Use this option to enable the changes on the system.
• To save the settings to external storage, select To SD Card.
94
MAC® 3500
2046275-018A
System Setup
Use this option if you want to use the settings to quickly configure other MAC
systems. Be sure that an SD card is inserted into the system's card slot.
• To cancel, select Do not save setup.
7.
Select Main Menu to exit System Setup.
Setting Up System Basics
This section describes the following basic system settings:
• Miscellaneous Setup
• Patient Questions
• Screen Colors
• Transmission
• Network Setup
• Option Activation
• Date and Time
• Language
• Order Manager Interface
• Input Method Select
Miscellaneous Setup
To configure the system's basic settings, log on to the System Setup screen, select
Basic System > Miscellaneous Setup, and complete the fields described in the
following table.
Miscellaneous Setup
Field
Description
Institution name
Enter the name of your hospital, clinic, and so on as you want it
to print on reports. On most reports the institution name prints at
the top.
Text entry
Determines how text will be entered in the system.
• Select Uppercase only to type text in uppercase letters.
• Select Upper and lowercase to type text in upper and lowercase
letters.
Speaker volume
Determines how loud the system speaker will be.
• Select Low to set the system’s speaker to low volume.
• Select High to set the system’s speaker to high volume.
External video port
To use an external monitor with the system, select one of the
following options.
• Select Option 1 for most remote monitors.
• Select Option 2 if your monitor does not work with Option 1.
2046275-018A
MAC® 3500
95
System Setup
Miscellaneous Setup (cont'd.)
Field
Description
Information line
Determines whether additional help will be displayed on the screen.
• Select Yes to display the Additional Information line on the screen.
• Select No to hide the Additional Information line.
Cart number
Distinguishes this unit from other MAC systems. Enter a unique
number.
Site number
Identifies the site where the unit is located. This corresponds with
a site number used by the MUSE CV system with which this unit
communicates. Valid values range from 1–254, inclusive.
Location number
Identifies the location where the unit is located. This corresponds
with the locations on the MUSE CV system with which this unit
communicates. Valid values range from 0–9999, inclusive.
File Manager sort
Determines the method the File Manager uses to sort ECGs.
Delete after transmit
Determines whether the system will automatically delete ECGs
after they are transmitted from File Manager to a receiving device.
It does not delete ECGs that are transmitted automatically after
acquisition. Select Yes to delete ECGs.
NOTE:
This setting does not apply when faxing ECGs. When an ECG is
faxed, it will NOT be deleted even if this field is set to Yes.
NOTE:
This is NOT associated with the Auto order delete field on the
Order Manager Interface Setup window, which deletes orders
after they have been successfully transmitted to a receiving
device.
Text on bottom
Determines whether the system will print ECG test information
on the bottom of the ECG reports. Select Yes to print the ECG
information on the report.
Print barcodes
Determines whether the system will print the patient information in
a barcode format on the report. Select Yes to print the bar code.
Automatic Shutdown
Determines whether the system will shut down automatically after a
set number of minutes if a key is not pressed.
• To disable automatic shutdown, enter 0 in the field.
• To enable automatic shutdown, enter the number of minutes to
wait before shutdown.
For example, if you enter 5, the system will shut down automatically
if a key is not pressed within 5 minutes.
96
Serial power always
on
Determines whether the serial port will receive continuous power.
Select Yes to continuously power the serial port.
KISS Pump Power On
Determines whether power is supplied to the internal KISS pump. To
enable power to the KISS pump, select Yes.
MAC® 3500
2046275-018A
System Setup
Miscellaneous Setup (cont'd.)
Field
Description
System password
Prevents unauthorized persons from accessing the System Setup
functions. The password must be entered to access the System
Setup menus.
Enter a 6–character password. The default password is SYSTEM.
Keep track of all assigned passwords.
Overread password
Prevents unauthorized persons from editing or deleting ECG
measurements. The password must be entered to access these
functions.
Enter a 6–character password. The default password is OVREAD.
Keep track of all assigned passwords.
Device password
Prevents unauthorized persons from accessing the system. The
password must be entered to use the system.
Enter a 6–character password. By default, the password is blank.
Keep track of all assigned passwords.
SD Card Storage
Only
Determines where the ECGs are automatically stored.
• To store to internal storage, select No.
• To store to an SD card, select Yes.
NOTE:
Any ECGs that are in internal memory storage will not be
accessible when switching to SD card storage. Be sure that
they have been printed and/or stored before switching to SD
card storage only.
When Yes is selected for this option, an SD card must be inserted
in the SD card slot before performing many of the procedures
described in this manual.
Data access speeds may vary, depending on the SD card
capacity and manufacturer. This may affect the time required to
read or write ECG records and other information to the SD card.
For more information on SD cards, refer to Chapter 11, “Using an
SD Card”.
Patient Questions
To configure the prompts that are displayed when you select Patient Data in the
Resting ECG application, log on to the System Setup screen, select Basic System >
Patient Questions, and complete the fields described in the following table.
2046275-018A
MAC® 3500
97
System Setup
Patient Questions
Field
Description
ID Required
Determines whether you must enter the Patient ID before an ECG
can be recorded.
• Select Yes to require the ID.
• Select No to make the ID optional.
ID length
Determines the maximum length of the Patient ID. It must match
the same length of the Patient ID in the MUSE CV system to which
the MAC system communicates.
Enter any number from 3 — 16.
Age
Determines the method the system uses to enter the patient's age.
Select one of the following values:
• Date of birth
Select this option to enter the patient's birth date in
day-month-year format. The system will calculate the patient's
age.
• Age in years
Select this option to enter the patient's age in years, months,
weeks, days, or hours.
Your selection also affects the way in which the patient's age is
printed on the report when data is transferred from a card reader
or order manager.
Gender
Determines whether the system will prompt you for the patient's
gender. Select Yes to prompt for gender.
Height
Determines whether the system will prompt you for the patient's
height. Select Yes to prompt for height.
Weight
Determines whether the system will prompt you for the patient's
weight. Select Yes to prompt for weight.
Height/Weight in
Determines the unit or measurement in which height and weight
are measured.
• Select in./lb. to measure the height in inches and weight in
pounds.
• Select cm./kg. to measure the height in centimeters and the
weight in kilograms.
Race
Determines whether the system will prompt for the patient's race.
Select Yes to prompt for race.
NOTE:
Race has been acknowledged by the medical profession as
useful to analyze some pathologies. You should be aware
that, in some jurisdictions, the processing of data revealing an
individual’s racial origin is subject to legal requirements, such as
obtaining the patient's prior consent. If you elect to collect this
type of data, it is your responsibility to ensure that you comply
with all applicable legal requirements.
Blood pressure
98
Determines whether the system will prompt for the patient's
systolic and diastolic blood pressure. Select Yes to prompt for blood
pressure.
MAC® 3500
2046275-018A
System Setup
Patient Questions (cont'd.)
Field
Description
Medications
Determines whether the system will prompt you to enter any
medications the patient is taking. Select Yes to prompt for
medications.
Referred by name
Determines whether the system will prompt you to enter the name
of the referring physician. Select Yes to prompt for this information.
Referred by number
Determines whether the system will prompt you to enter the ID
number of the referring physician. Select Yes to prompt for this
information. When entering the referring physician's number, enter
numbers that are compatible with the MUSE CV system to which
the MAC system communicates.
Test Indication
Determines whether the system will prompt for the test reason.
Select Yes to prompt for the reason.
Patient History
Determines whether the system will prompt for the patient's history.
Select Yes to prompt for the history.
Technician
Determines whether the system will prompt you to enter the name
of the technician conducting the test. Select Yes to prompt for this
information.
When entering the technician's ID, enter numbers that are
compatible with the MUSE CV system to which the MAC system
communicates.
Tech. Required
Determines whether the technician's name is required. Select Yes to
require the technician's name.
Location
Determines whether the system prompts for the test location. Select
Yes to prompt for location.
Enter numbers that corresponds with the locations on the MUSE CV
system with which this unit communicates.
Room number
Determines whether the system prompts for the room number
where the test was taken. Select Yes to prompt for room number.
Options
Determines whether the system prompts for the option number for
the ECG. Select Yes to prompt for the option number.
Option numbers are user-defined.
2046275-018A
Order number
Determines whether the system prompts for the order number for
the ECG. Select Yes to prompt for order number.
Secondary ID
Determines whether the system prompts for a second ID for the
ECG. Select Yes to prompt for secondary ID.
MAC® 3500
99
System Setup
Patient Questions (cont'd.)
Field
Description
Visit
Determines whether the system prompts for the Visit ID. Select Yes
to prompt for the Visit number.
Extra Questions
Allows you to define custom questions to prompt for. For each
question, select the type of information that can be entered:
• Numbers and letters
Allows the entry of any alphanumeric value.
• Numbers only
Allows the entry of numeric values only.
• Yes or No
Allows only Yes and No answers.
Screen Colors
To configure the system's screen colors, log on to the System Setup screen, select
Basic System > Screen Colors, and complete the field described in the following table.
Screen Colors
Field
Description
Screen Colors
Defines the system colors. Select the desired color scheme:
• Monochrome
Select this option to display white elements.
• Option 1
Select this option to view white, green, yellow, and red elements.
• Option 2
Select this option to view white, yellow, and red elements.
Transmission
To configure the settings for transmitting ECGs, log on to the System Setup screen,
select Basic System > Transmission, and complete the fields described in the
following table.
Transmission Settings
Field
Description
Modem Speaker
Determines whether the modem's tones are audible. Select the
appropriate value:
• Select On to hear modem tones.
• Select Off to silence modem tones.
• Select Dialing Only to hear the modem tones only when it is
dialing.
Dialtone required
100
Determines whether the system must be connected to a telephone
line that has a dial tone. Select Yes to require a dial tone.
MAC® 3500
2046275-018A
System Setup
Transmission Settings (cont'd.)
Field
Description
Dialing method
Determines the dialing method used by the telephone line.
Fax error correction
Determines whether the facsimile machine to which you transmit
ECGs uses an error correction factor. Select Yes if the machine uses
error correction.
Modem
Identifies the type of modem being used. Valid options are:
• Autodetect
• Internal
• External
, - Two second pause
Indicates you can create a two-second pause by entering a comma
in a telephone number. This will force the modem to wait for a dial
tone before dialing. This is useful when accessing an outside line;
the pause allows time to connect to the outside line before dialing
the telephone number. For example, if you enter have to dial 9 to
access an outside line, entering a phone number of 9,3216788 will
pause for two seconds after dialing 9 for the outside line and before
dialing the telephone number 3216788.
Phone number
Identifies the telephone numbers you most frequently transmit to.
Enter from one to six telephone numbers.
Location
Type a location name to identify each telephone number.
Type
Identifies the receiving device type. Valid options are:
• MUSE NETWORK
Select this option when transmitting to a MUSE CV system or
another MAC system.
• Fax Machine
Select this option when transmitting to a facsimile machine.
NOTE:
When faxing a batch of ECGs, the system does not transmit
all the ECGs in the batch in a single fax. Instead it faxes the
first ECG, hangs up, redials, and faxes the next ECG. This is its
normal mode of operation.
Use IR for serial line
Determines whether the system will use the serial port or infrared
port.
• To use the infrared port, select Yes.
• To use the serial port, select No.
2046275-018A
MAC® 3500
101
System Setup
Transmission Settings (cont'd.)
Field
Description
Serial line baud rate
Determines the speed to transmit data on the serial port.
Default Location
Determines the method and device to which ECGs are automatically
transmitted. Select one of the following values:
• To transmit by local infrared communication or by local cable,
select Serial line (MUSE).
• To transmit ASCII data to the serial port, select Serial line (ASCII
out).
• To transmit XML data to the serial port, select Serial line (XML
out).
• To transmit by LAN, select Ethernet (MUSE).
NOTE:
Infrared communication is not available on MAC 5500 HD
systems.
If transmitting ASCII or XML data, the PC that receives XML data
through the serial line must be running a terminal emulator
program (for example, HyperTerminal).
Network Settings
To configure the system's local area network settings, log on to the System Setup
screen, select Basic System > Network Setup, and complete the fields described in
the following table.
Network Settings
Field
Description
IP Address
Identifies the network's IP address.
Subnet Mask
Identifies the network's subnet mask.
Gateway
Identifies the network's gateway.
Port Number
Identifies the network's port number.
Option Activation
Use the following procedure to activate system options.
1.
Log into the System Setup function.
Refer to “Process Overview” on page 94.
2.
Select Basic System > Option Activation.
A list of the following options is displayed.
102
MAC® 3500
2046275-018A
System Setup
Option
Code
Description
AT Modem
MODM
Enables transmission and receipt of data over an
external AT modem.
FAX Modem
FAXM
Enables transmission and receipt of data over an
external FAX modem.
Interpretation
DIAG
Enables the printing of 12SL diagnosis on ECG
reports.
Color
COLR
Allows you select one of two color options for the
display screen.
Gen-12SL
GN12
Enables the use of gender and age specific
interpretation criteria when generating 12SL
diagnosis.
Wireless
WIFI
Enables the transmission of ECGs over a wireless
network.
Master’s Step
MAST
Enables the Master's Step stress test. Available only
in Japan.
Card Reader
MGRD
Enables collection of patient data via patient card
reader.
Bar Code
Reader
BCRD
Enables collection of patient data via bar code
reader.
Ethernet LAN
ELAN
Enables you to connect to an Ethernet local area
network.
CT Data Guard
CTDG
Enables the clinical trial and data guard features.
GE
Connectivity
CSIP
Allows you to connect to other devices via serial
lines, modems, wireless connectivity, LAN, and
infrared connections.
External
Storage
EXST
Allows you to save records to and restore records
from a secure digital (SD) card.
Critical Values
CRIT
Enables the critical value function, which allows you
to define custom alerts based on key ECG values. If
the Critical Values function is enabled, you must
configure the alerts. Refer to “Critical Values Setup”
on page 115 for more information.
HDMD Option
HDMD
Required option for use by the Critical Values option.
Date and Time
To configure the system's date and time, log on to the System Setup screen, select
Basic System > Date and Time, and complete the fields described in the following
table.
Date and Time Configuration
2046275-018A
Field
Description
Current date
Select the current date, month, and year.
Current time
Select the current hour and minute.
MAC® 3500
103
System Setup
Language
To configure the system's display and report language, log on to the System Setup
screen, select Basic System > Language, and complete the fields described in the
following table.
Language Selection
Field
Select new language
Description
Select the desired language.
The language changes when you reboot the system.
Power Up Options
To configure the system's power up application, log on to the System Setup screen,
select Basic System > Power Up Options, and complete the fields described in the
following table.
Power Up Options
Field
Description
Power Up
Application
Determines which screen opens when the system is turned on.
Currently, the only option is Resting ECG.
Order Manager Interface
To configure the system's Order Manager, log on to the System Setup screen, select
Basic System > Order Manager Interface, and complete the fields described in the
following table.
Order Manager Interface
Field
Description
Initial sort value
Determines how the Order Manager initially sorts the ECGs. Select
one of the following values:
• Patient name
• Patient ID
• Location
• Time
• Stat
Create orders locally
104
Determines whether you can manually create orders on the MAC
system. Select Yes to allow manual order creation.
MAC® 3500
2046275-018A
System Setup
Order Manager Interface (cont'd.)
Field
Description
Auto order delete
Determines whether the system will automatically delete orders
under the following conditions:
• the orders have been successfully transmitted to a receiving
device, and
• the associated ECGs have been transmitted and deleted.
This field is NOT dependent on the Delete after transmit field on the
Miscellaneous Setup window. Both fields operate independently.
Default order
locations
Identifies the locations displayed on the prompt when downloading
orders. This will typically be the device's location (see “Miscellaneous
Setup” on page 95).
If the device is used in multiple locations, enter multiple locations
and separate them with commas: 1,3,10, and so on.
Input Method
To configure the how the system's PS/2 port will be used, log on to the System Setup
screen, select Basic System > Input Method Select, and complete the fields described
in the following table.
Input Method
Field
Description
Patient Data Input
Device
Determines which device will be connected to the PS/2 port. Valid
options are:
• PS/2 Keyboard
• Card Reader
• Bard Code Reader
• Internal Keyboard
Query Configuration
Determines how the input device should be configured. Valid values
vary depending on the selected device.
If you select Card Reader or Bar Code Reader, the valid options are:
• Automatic
• Manual
• None
If you select Internal Keyboard, the valid options are:
• Manual
• None
For more information on configuring the card reader or the bar code
reader, refer to “Setting Up a Card Reader” on page 118 and “Setting
Up a Bar Code Reader” on page 119.
2046275-018A
MAC® 3500
105
System Setup
Setting Up ECGs
This section describes the following ECG settings:
• ECG Acquisition
• ECG Analysis
• Patient Questions
• Writer Setup
• ECG Reports
• Analog Outputs
• CT Data Guard
• Critical Values Setup
ECG Acquisition
To configure ECG acquisition, log on to the System Setup screen, select ECG > ECG
Acquisition, and complete the fields described in the following table.
ECG Acquisition
Field
Description
Baseline roll filter
Removes baseline sway. The higher the settings, the more the filter
smooths out wandering baseline. This filter does not distort the ST
segment displays on the ECG reports.
AC filter
Removes AC line artifacts.
Disable auto gain
check.
Disables the check for out of range ECG gain. Select No to enable
the auto gain check. If enabled, the system will display a prompt if
the gain of the recorded ECG is either too high or too low, allowing
the user to manually adjust the gain.
Disable lead off
check
Disables the check for leads that are disconnected. Select No to
enable the check. If enabled, the system will display a message if it
detects any disconnected leads.
Pacemaker pulse
enhancer
Enhances the system detection of small pacemaker pulses. When
enabled, the system is very sensitive and should NOT be placed
close to equipment that emits high frequency radiation. High
frequency radiation can interfere with pacemaker pulse detection
and normal ECG acquisition.
NOTE:
GE Healthcare recommends that this be set to No unless it is
known that the majority of this cardiograph usage will be on
patients with pacemakers. The pacemaker pulse enhancement
can always be enabled on a per-patient basis at the time of ECG
acquisition within the resting ECG programs.
106
Baseline wander
warning
Enables the display a message when the system detects a
wandering baseline.
Muscle tremor
warning
Enables the display of a message when the system detects a muscle
tremor.
MAC® 3500
2046275-018A
System Setup
ECG Acquisition (cont'd.)
Field
Description
AC noise level
warning
Enables the system to check for powerline interference when
recording ECGs.
Hookup Advisor
Enables the Hookup Advisor option, which monitors the quality of
ECG signals for resting, 15-lead, pediatric, vector loops, and Master's
Step measurements. When enabled, the system overrides the
settings for Baseline wander warning, Muscle tremor warning, and
AC noise level warning.
For more information, refer to “Hookup Advisor” on page 65.
Prompt Level
Determines the level at which the Hookup Advisor prompts users
regarding patient hookup quality. This field is available only if
Hookup Advisor is enabled.
There are three possible settings:
• Never
The system will not prompt the user when the signal quality
is poor. However, the statement ***Poor data quality,
interpretation may be adversely affected will print on reports
for red lead quality situations.
• Yellow
The system will prompt the user for both red and yellow signal
quality situations. The user can then choose to continue or cancel
the ECG. The statement ***Poor data quality, interpretation
may be adversely affected will print on reports.
• Red
The default value, the system will prompt the user for red signal
quality situations. The user can then choose to continue or cancel
the ECG. The statement ***Poor data quality, interpretation
may be adversely affected will print on reports.
NOTE:
If Hookup Advisor and Preview before analysis are both on,
this setting is disregarded because any lead quality message
will be displayed when the user is prompted to continue in the
preview screen.
The generation of the statement *** Poor data quality,
interpretation may be adversely affected is based on the
Hookup Advisor quality level as previously described even if
Hookup Advisor is not turned on. If Hookup Advisor is not
turned on, the statement will be generated based on what the
Hookup Advisor level would have been had it been enabled
Pre-acquisition
2046275-018A
Determines whether the system begins to acquire ECG data as soon
as the leadwires are connected to a patient. If set to Yes, the system
does not wait for the user to press ecg. The latest 10 seconds of ECG
data is ready for analysis when this setting is enabled.
MAC® 3500
107
System Setup
ECG Analysis
To configure the analysis of ECGs, log on to the System Setup screen, select ECG >
ECG Analysis, and complete the fields described in the following table.
ECG Analysis
Field
Description
Screening criteria
Prevents specific 12SL statements from appearing on ECG reports.
Refer to the 12SL Physician's Guide for more information on 12SL
statements.
Suppress NORMAL
statement
Prevents the Normal ECG 12SL analysis statement from appearing
on printed, stored, and transmitted ECG reports. Select Yes to
suppress the NORMAL statement.
Suppress
ABNORMAL and
BORDERLINE
statements
Prevents the Abnormal ECG and Borderline ECG 12SL statements
from appearing on the printed, stored, and transmitted ECGs. Select
Yes to suppress the statement.
Storage format
Determines the data compression format in which ECG data is
stored on the MUSE CV system. The appropriate value depends on
the version of the MUSE CV system:
• 500Hz (MUSE Network)
Select this option for systems running MUSE CV version 004A
or later.
• 500Hz DVS (MUSE Network)
Select this option for systems running MUSE CV version 5D.04
or later. This allows the ECGs to be reprinted at the original
resolution of the receiving device.
• 250Hz
This option is not available with the ACI-TIPI option.
Store XML format
Determines whether the system will automatically save ECGs in XML
format in addition to the proprietary GE Healthcare Hilltop format. If
this option is selected, the XML files are stored to the following path
on a blank SD Card Drive: \XML\*.XML.
Before setting this option, be aware of the following:
• If storing ECGs in XML format, DO NOT allow editing ECGs at
the system. Changes made to ECGs during editing WILL NOT
BE SAVED to the XML file
• Except for the XML suffix, the name of the XML file is the same as
the name of the ECG file.
• When this option is selected, the SD card will fill up more quickly
due to the size of the XML files.
• In XML files, waveform data is saved as numeric points.
108
MAC® 3500
2046275-018A
System Setup
ECG Analysis (cont'd.)
Field
Description
Auto ECG storage
Determines which ECGs are stored automatically:
• All ECGS
All ECGs are stored upon completion.
• No ECGS
No ECGs are stored automatically.
• Only ABNORMAL ECGs
Only ECGs that the 12SL interpretation mark as abnormal are
stored automatically.
Auto ECG
transmission
Determines which ECGs are transmitted automatically:
• All ECGS
All ECGs are transmitted upon completion.
• No ECGS
No ECGs are transmitted automatically.
• Only ABNORMAL ECGs
Only ECGs that the 12SL interpretation mark as abnormal are
transmitted automatically.
Patient Questions
To configure the custom patient questions to ask, log on to the System Setup screen,
select ECG > Patient Questions, and complete the fields described in the following
table.
Patient Questions
Field
Description
Prompt
Allows you to define custom patient questions.
Type
Allows you to set the type of response for the custom patient
question. Valid values are:
• Numbers and letters
Allows the entry of any alphanumeric value.
• Numbers only
Allows the entry of numeric values only.
• Yes or No
Allows only Yes and No answers.
2046275-018A
MAC® 3500
109
System Setup
Writer Setup
To configure the writer's behavior, log on to the System Setup screen, select ECG >
Writer Setup, and complete the fields described in the following table.
Writer Setup
Field
Description
Speed
Determines the writer's default speed in millimeters per second.
Gain
Determines the writer's default gain setting in millimeters per
millivolts. For example, the setting 10/5 displays limb leads at 10
mm/mV and precordial leads at 5 mm/mV.
Filter
Determines the writer's default filter setting. The default setting is
150 Hz.
Resting ECG Reports
This section explains the settings used to configure the reports generated for Resting
ECGs. You can configure the following values:
• Lead Sequence
• Report Leads
• Confirmed Reports
• Unconfirmed Reports
Lead Sequence
To configure the lead sequence used, log on to the System Setup screen, select ECG
> Resting ECG Reports > Lead Sequence, and complete the fields described in the
following tables.
Lead Sequence
Field
Description
Lead Sequence
Determines the method that will be used to place the ECG leads.
Options are:
• Standard
• Cabrera
• NEHB
Report Leads
The Report Leads settings allow you to configure the following values:
• the leads used for each standard channel
• the rhythm reporting method
• the leads used for each rhythm report lead group
• the autorhythm lead group
• the extra leads used by the CGR and RMR reports
• the leads used by the Swedish rhythm report
110
MAC® 3500
2046275-018A
System Setup
To configure the report leads, log on to the System Setup screen, select ECG > Resting
ECG Reports > Report Leads, and complete the fields described in the following tables.
Report Leads
Field
Description
Standard leads
Defines which leads will print for each channel. When you change
a channel's lead, the new lead prints on all ECG reports including
the channel.
Rhythm reports
Defines the data that will print on the rhythm reports:
• Real time
Prints the ECG data currently on the screen.
• 10 sec delayed
Delays the printing by 10 seconds.
Rhythm leads
Defines the lead option for each of the rhythm groups to determine
the rhythm leads that print when you select the rhythm key within
an application.
• Select 3 leads to define which three leads in a three-lead Rhythm
report print.
• Select 6 leads to define which six leads in a six-lead Rhythm
report print.
• Select 2x5s simult. to display and print 4 columns containing 6
leads with 5 seconds of data in each lead.
Autorhythm
Determines the group of rhythm leads to print on the Autorhythm
report.
RMR/CGR/extra
rhythm leads
Determines the rhythm lead(s) to print on the RMR and CGR reports.
Swedish format
rhythm leads
Sets the rhythm lead(s) to print in the Swedish Format reports.
When you change a rhythm lead, the new lead prints on all
reports that include the lead. For example, if you select V5 for
RMR/CGR/extra rhythm lead 1, then the V5 waveform prints on all
reports that include RMR/CGR/extra rhythm lead 1.
When you change a rhythm lead, the new lead prints on all reports
that include the lead. For example, if you select V5 for the Swedish
format rhythm lead 1, then the V5 waveform prints on all reports
that include Swedish format rhythm lead 1.
When printing or storing 3-lead median or trend reports, the first
three Swedish format rhythm leads are used. When printing or
storing 6-lead median reports, all six of the Swedish format rhythm
leads are used.
Confirmed Reports
The Confirmed Reports settings allow you to configure the following values:
• number of copies to print for each format
• whether to include tic marks on the Medians Report
• whether to increase the median by two on the Medians Report
• whether to include auto gain and auto shift on the 2 by 5s Simult.report
2046275-018A
MAC® 3500
111
System Setup
The following table identifies the available report settings for confirmed ECGs.
Confirmed Reports Settings
Field
Description
Interpretation with
Available for each report format, this field determines how many
copies of the report with 12SL interpretation will print. You can enter
any value from 0 to 10. If you enter 0, the report will not print.
Interpretation
without
Available for each report format except the Expanded Median
report, this field determines how many copies of the report without
12SL interpretation will print. You can enter any value from 0 to 10.
If you enter 0, the report will not print.
Tic marks
Available only for the Expanded Median report, this field determines
whether tic marks will print on the report. Select Yes to include tic
marks.
Medians times 2
Available only for the Expanded Median report, this field determines
whether the medians will be doubled. Select Yes to double the
medians.
Auto gain
Available only for the 2 by 5s Simult. report, this field determines
whether the report will apply the auto gain filter. Select Yes to apply
the auto gain filter.
Auto shift
Available only for the 2 by 5s Simult. report, this field determines
whether the report will apply the auto shift filter. Select Yes to apply
the auto shift filter.
Unconfirmed Reports
The Unconfirmed Reports settings allow you to configure the following values:
• number of copies to print for each format
• whether to include tic marks on the Medians Report
• whether to increase the median by two on the Medians Report
• whether to include auto gain and auto shift on the 2 by 5s Simult. report
• the confirmation text that will print on the reports
The following table identifies the available report settings for unconfirmed ECGs.
Unconfirmed Reports Settings
112
Field
Description
Interpretation with
Available for each report format, this field determines how many
copies of the report with 12SL interpretation will print. You can enter
any value from 0 to 10. If you enter 0, the report will not print.
Interpretation
without
Available for each report format except the Expanded Median
report, this field determines how many copies of the report without
12SL interpretation will print. You can enter any value from 0 to 10.
If you enter 0, the report will not print.
Tic marks
Available only for the Expanded Median report, this field determines
whether tic marks will print on the report. Select Yes to include tic
marks.
MAC® 3500
2046275-018A
System Setup
Unconfirmed Reports Settings (cont'd.)
Field
Description
Medians times 2
Available only for the Expanded Median report, this field determines
whether the medians will be doubled. Select Yes to double the
medians.
Auto gain
Available only for the 2 by 5s Simult. report, this field determines
whether the report will apply the auto gain filter. Select Yes to apply
the auto gain filter.
Auto shift
Available only for the 2 by 5s Simult. report, this field determines
whether the report will apply the auto shift filter. Select Yes to apply
the auto shift filter.
Confirmation text
Available only on the report for unconfirmed resting ECGs, this field
contains the text that prints on the report to identify the ECG as
unconfirmed. Options are Unconfirmed and Reviewed by.
Analog Outputs
To configure the output signals sent to additional equipment connected to the system,
log on to the System Setup screen, select ECG > Analog Outputs, and complete the
fields described in the following table.
Analog Outputs
Field
Description
Fast Analog Output
Determines the lead signals sent to the device. Options are:
• Not used
• I
• II
• V1–V6
TTL Output
Determines how the TTL output will be used. Options are:
• Not Used
• QRS Detect
Polarity
Determines the polarity of the TTL Output. Options are:
• Positive
• Negative
2046275-018A
Width
Defines the width of the TTL Output signal in milliseconds. Enter a
value from 4 to 48.
Delay
Defines the delay in milliseconds for the TTL Output QRS detector
signal. Enter a value from 0 to 100.
QRS Beep
Determines whether the system beeps for each QRS complex. Select
On to enable the beep.
MAC® 3500
113
System Setup
CT Data Guard
To configure the Clinical Trial Data Guard, log on to the System Setup screen, select
ECG > CT Data Guard Setup, and complete the fields described in the following tables.
NOTE:
These settings pertain only to clinical trial usage of the system.
CT Data Guard — Clinical Trial Setup
Field
Description
Enable Clinical Trial
Data
Enables the clinical trial features. Select Yes if you will use this
system for clinical trials.
Project Code
Enter the code identifying the project. It can be up to 32 characters
long.
Trial ID
Enter the ID of the trial. It can be up to 10 characters long.
Investigator ID
Determines whether the investigator's ID must be entered on each
test. The investigator's ID can be up to 16 characters long. Select
Yes to require the investigator's ID.
Visit Number
Determines whether the visit number is required on each test. Visit
number can be up to six characters long. Select Yes to require the
visit number.
Visit Type
Determines whether the visit type is required on each test. Select
Yes to require the visit type.
If you require visit type, you can edit the list of visit types. You can
have up to six types, including the following preconfigured types:
• Unknown
• Scheduled
• Unscheduled
• Repeat
• Early Termination
• Follow Up
114
MAC® 3500
2046275-018A
System Setup
CT Data Guard — Clinical Trial Setup (cont'd.)
Field
Description
Dose Type
Determines whether the dose type is required on each test. Select
Yes to require the dose type.
If you require dose type, you can edit the list of dose types. You can
have up to 20 types. Each type can be up to 32 characters long.
Additional Questions
Defines up to five additional patient questions for the test. Each
question consists of two fields:
• Prompt
Enter a question of up to 10 characters long. This prompt will
appear when entering CT Guard data.
• Response Type
Select the type of response allowed for each prompt. Valid
choices are:
• Numbers and letters
Allows the entry of any alphanumeric value up to 17
characters long.
• Numbers Only
Allows the entry of any numeric value.
• Yes or No
Allows only Yes and No answers.
CT Data Guard — Data Guard Features
Field
Description
Prevent editing of
records
Disables editing ECG files in File Manager. Select Yes to prevent
ECG editing.
Prevent deleting
of untransmitted
records
Disables the deletion of ECGs that have not been transmitted. Select
Yes to prevent the deletion of untransmitted ECGs.
Enable record
re-transmit
notification
Enables a notification if users attempt to retransmit records that
have already been transmitted to the MUSE CV system. Select Yes
to enable the notification.
Critical Values Setup
The optional Critical Values function allows you to set up custom notifications for
select ECG events. The notification is displayed after the ECG has been acquired, and
you must acknowledge it before proceeding. They also print on the ECG reports. You
can customize the notification text and select the events that trigger the notifications.
For some events, you can also select the specific values that trigger the notification.
After configuring your critical values, you can save the configuration to an SD card,
which you can use to restore the critical value configuration in the case of a system
failure or to quickly configure other systems.
NOTE:
The Critical Values option must be activated before you can configure the
notifications. Refer to “Option Activation” on page 102 for more information.
2046275-018A
MAC® 3500
115
System Setup
Notifications Setup
To configure the critical value notifications, log on to the System Setup screen, select
ECG > Critical Values Setup, and complete the fields described in the following tables.
Critical Values Notification Setup
Field
Description
Enabled
notifications
Enables or disables the critical value notifications. Select Yes to
enable the critical value notifications.
Critical values
password
Defines the password required to edit the critical values notifications.
Blank by default. Enter up to six characters to define the password.
Notification string
Defines the text that introduces the critical values notifications. The
string immediately precedes trigger values on-screen and in reports.
The default string is *** Critical Test Results:. Modify as necessary.
You can enter up to 29 characters.
NOTE:
This is a string from the 12SL Statement Library. If you modify
this string, you must make the same modification to the
statement in the 12SL Statement Library on the MUSE systems
that communicate with this device. This ensures that the
statements match when viewing the ECGs in the MUSE system.
Adult High HR / Value
Adult High HR enables the notification for ECGs that exceed a set
heart rate. Select Yes to enable Adult High HR notifications.
Value identifies the trigger value in beats per minute. Adult heart
rates that equal or exceed this value will trigger the notification.
Adult Low HR / Value
Adult Low HR enables the notification for ECGs that do not meet
or exceed a set heart rate. Select Yes to enable Adult Low HR
notifications.
Value identifies the trigger value in beats per minute. Adult heart
rates less than or equal to this value will trigger the notification.
Pediatric High HR /
Value
Pediatric High HR enables the notification for ECGs that exceed a
set heart rate. Select Yes to enable Pediatric High HR notifications.
Value identifies the trigger value in beats per minute. Pediatric heart
rates that meet or exceed this value will trigger the notification.
Pediatric Low HR /
Value
Pediatric Low HR enables the notification for ECGs that do not
meet or exceed a set heart rate. Select Yes to enable Pediatric Low
HR notifications.
Value identifies the trigger value in beats per minute. Pediatric heart
rates less than or equal to this value will trigger the notification.
High QTc / Value
High QTc enables the notification for ECGs where the corrected QT
interval exceeds a maximum duration. Select Yes to enable High
QTc notifications.
Value identifies the trigger value in milliseconds. Corrected QT
intervals whose duration meet or exceed this value will trigger the
notification.
STEMI detection
116
STEMI detection enables the notification for ECGs in which an ST
segment elevation myocardial infarction is detected. Select Yes to
enable STEMI notifications.
MAC® 3500
2046275-018A
System Setup
Critical Values Notification Setup (cont'd.)
Field
Description
Ischemia detection
Ischemia detection enables the notification for ECGs in which
ischemia is detected. Select Yes to enable ischemia notifications.
AV Block detection
AV Block detection enables the notification for ECGs in which an AV
block is detected. Select Yes to enable AV Block notifications.
Arrhythmia
detection
Arrhythmia detection enables the notification for ECGs in which
an arrhythmia is detected. Select Yes to enable arrhythmia
notifications.
NOTE:
For more information on the critical values for STEMI detection, ischemia detection,
AV block detection, or arrhythmia detection, refer to the 12SL Physician's Guide.
Saving Critical Values to SD Card
Use the following procedure to save your critical value notification settings to an
external SD card. You can use the card to restore the notification settings in the case
of a system failure. You can also use the card to quickly configure other systems.
1.
Configure your Critical Values Notifications.
Refer to “Notifications Setup” on page 116 for details.
2.
When you are done configuring your settings, select Return at the bottom of
the window.
This saves your settings to local memory and returns you to the Critical Values
Setup menu.
3.
Insert the SD card if necessary.
4.
Select Save to SD Card and press Return.
The settings are saved to the card.
5.
Eject the card and save it in a safe location or use it to configure other devices.
Restoring Critical Values from SD Card
Use the following procedure to restore your critical value notification settings from an
external SD card. You can use this procedure to restore the notification settings in the
case of a system failure. You can also use it to quickly configure other systems.
1.
Insert the SD card with your critical value notification settings.
Refer to “Saving Critical Values to SD Card” on page 117 for details and backing
up your settings to an SD card.
2.
From the Main Menu select System Setup > ECGs > Critical Values Setup >
Restore from SD Card.
The settings on the SD card overwrite any settings on the device.
3.
2046275-018A
Eject the card and save it in a safe location or use it to configure other devices.
MAC® 3500
117
System Setup
Setting Up a Card Reader
This section describes two methods for configuring the magnetic card reader:
• Automatic Configuration
• Manual Configuration
NOTE:
When configured for a card reader, the system will prompt you to slide the patient
card when you select Patient Information. If no patient card is available, press esc
to enter the patient information manually.
Automatic Configuration
Use the following procedure to automatically configure your magnetic card reader.
1.
Obtain a configuration card.
For information on creating magnetic patient ID cards, refer to Appendix E,
“Creating Bar Codes and Magnetic Cards”.
2.
With the card reader properly mounted, connect to port A on the back of the
system.
3.
From the Main Menu, select System Setup > Basic System > Input Method
Select > Patient Data Input Device > Card Reader > Return.
4.
When the Manual Card Reader Configuration window opens, press esc.
5.
When the Basic System menu opens, press esc.
6.
Select Save Setup > To System.
7.
Restart the device.
8.
From the Main Menu, select System Setup > Basic System > Input Method
Select > Card Reader Configuration > Automatic > Return.
The following message is displayed:
Slide the Configuration Card
9.
Slide the configuration card through the card reader.
The Manual Card Reader Configuration window opens with the values filled in.
10.
Press esc twice.
11.
Select Save Setup > To System.
Manual Configuration
Use the following procedure to manually configure your magnetic card reader.
1.
With the card reader properly mounted, connect to port A on the back of the
system.
2.
From the Main Menu, select System Setup > Basic System > Input Method
Select > Patient Data Input Device > Card Reader > Return.
The Manual Card Reader Configuration window opens.
118
MAC® 3500
2046275-018A
System Setup
3.
Enter the magnetic card code configuration information.
For information on creating magnetic patient ID cards, refer to Appendix E,
“Creating Bar Codes and Magnetic Cards”.
4.
Press esc twice.
5.
Select Save Setup > To System.
Setting Up a Bar Code Reader
This section describes two methods for configuring the bar code reader:
• Automatic Configuration
• Manual Configuration
NOTE:
When configured for a bar code reader, the system will prompt you to scan
the patient ID bar code when you select Patient Information. If no bar code is
available, press esc to enter the patient information manually.
Do not use the bar code reader for scanning the bar code that appears on the ECG
printout: that bar code format is not supported by the bar code reader.
Automatic Configuration
Use the following procedure to automatically configure your bar code reader.
1.
Obtain a configuration bar code.
For information on creating patient bar codes, refer to Appendix E, “Creating Bar
Codes and Magnetic Cards”.
2.
Connect the bar code reader to port A on the back of the system.
3.
From the Main Menu, select System Setup > Basic System > Input Method
Select > Patient Data Input Device > Bar Code Reader > Return.
4.
When the Manual Bar Code Reader Configuration window opens, press esc.
5.
When the Basic System menu opens, press esc.
6.
Select Save Setup > To System.
7.
Restart the device.
8.
From the Main Menu, select System Setup > Basic System > Input Method
Select > Bar Code Reader Configuration > Automatic > Return.
The following message is displayed:
Scan the Configuration Bar Card
9.
Scan the bar code.
The Manual Bar Code Reader Configuration window opens with the values
filled in.
2046275-018A
10.
Press esc twice.
11.
Select Save Setup > To System.
MAC® 3500
119
System Setup
Manual Configuration
Use the following procedure to manually configure your bar code reader.
1.
Connect the bar code reader to port A on the back of the system.
2.
From the Main Menu, select System Setup > Basic System > Input Method
Select > Patient Data Input Device > Bar Code Reader > Return.
The Manual Bar Code Reader Configuration window opens.
3.
Enter the bar code configuration information.
For information on creating bar codes, refer to Appendix E, “Creating Bar Codes
and Magnetic Cards”.
4.
Press esc twice.
5.
Select Save Setup > To System.
Setting Up Master's Step Test
To configure the Master's Step Test, log on to the System Setup screen, select
Master's Step, and complete the fields described in the following table.
NOTE:
This option is available only Japan.
Master's Step Setup
Field
Description
Number of Steps
Defines the default number of steps required by the Master's Step
test if the patient's weight, sex, and age are not entered. If the
patient's age weight, sex, and age are entered, the number of steps
is automatically calculated. For more information, refer to Appendix
D, “Master's Step Data”.
Test Type
Determines the test duration. Options are:
• Single
Sets the test for a 1.5 minute duration.
• Double
Sets the test for a 3 minute duration.
• Triple
Sets the test for a 4.5 minute duration.
Post J(ms)
Defines the location, in milliseconds, after the J point to determine
the ST measurement.
Step Counter Display
Determines whether the system displays the number of steps taken
or remaining. Options are:
• Up
Displays the number of steps taken so far.
• Down
Displays the number of steps remaining.
120
MAC® 3500
2046275-018A
System Setup
Master's Step Setup (cont'd.)
Field
Description
Sound Option
Sets the sound volume for the Master's Step Test. Select one of the
following options:
• 1
• 2
• 3
• Off
Continuous
Recording
Determines whether the rhythm is printed continuously between
post exercise ECGs.
Post Exercise ECG
Time
Defines the time, in minutes, after the first post exercise ECG when
an additional ECG should be taken. You can take up to nine ECGs.
Set any undesired tests to 0.
Managing System Setup
This section describes how to do the following:
• Print System Setup
• Save System Setup
• Restore System Setup
Printing System Setup
To print your system settings for future reference, select System Setup > Print Setup.
Place the printout in a secure location in case you need to manually restore the
settings at a later date.
Saving System Setup
To save the changes you make to your system settings, select System Setup > Save
Setup. You can choose to save the settings to local memory or to an SD card.
After saving your changes to local memory, you should also save the settings to an
SD card for use in restoring your settings at a later date. You can also use a saved
configuration to quickly configure subsequent systems.
NOTE:
Saving the system setup to an SD card does NOT save your Critical Values
configuration. You must manually save the Critical Values configuration. Refer to
“Saving Critical Values to SD Card” on page 117 for more information.
Restoring System Setup
Restore Setup allows you to revert your settings. You can use this option to return to
the default factory settings or to restore custom settings that were saved to an SD
card. If using an SD card, you can also use this feature to quickly configure other
MAC systems.
2046275-018A
MAC® 3500
121
System Setup
To restore your system settings, do the following:
1.
From the Main Menu, select System Setup > Restore Setup.
2.
Do one of the following:
• To restore the default settings, select To Original Factory Settings.
• To restore your custom settings, select From SD Card.
An SD card with the system settings must be inserted into the device's card
slot.
• To cancel the restore, select Do Not Restore Setup.
122
MAC® 3500
2046275-018A
A
Maintenance
Regular maintenance, irrespective of usage, is essential to ensure that the equipment
will be functional when required. For the MAC system, regular maintenance includes
the following:
•
•
•
•
Equipment Inspection and Cleaning
Paper Maintenance
Battery Maintenance
Leadwire Adapter Replacement
For the maintenance procedures for your peripheral equipment, refer to the
documentation provided with that equipment.
WARNING:
MAINTENANCE — Failure on the part of all responsible individuals, hospitals, or
institutions employing the use of this device to implement the recommended
maintenance schedule may cause equipment failure and possible health
hazards. The manufacturer does not in any manner, assume the responsibility
for performing the recommended maintenance schedule, unless an Equipment
Maintenance Agreement exists. The sole responsibility rests with the individuals,
hospitals, or institutions utilizing the device.
Inspecting and Cleaning the MAC System
When inspecting and cleaning your system, take the following precautions:
• Turn off the system.
• Do NOT immerse any part of the equipment in liquid.
• Do NOT use organic solvents, ammonia based solutions, or abrasive cleaning
agents. These may damage the equipment surfaces.
Inspecting the MAC System
Perform a visual inspection of all equipment and peripheral devices daily. If you notice
any items that need repair, do not use the equipment until an authorized service
person has completed the repairs.
• Check the case and display screen for cracks or other damage.
• Inspect all plugs, cords, cables, and connectors for fraying or other damage.
2046275-018A
MAC® 3500
123
Maintenance
• Verify that all cords and connectors are securely seated.
• Inspect keys and controls for proper operation:
• Toggle keys should not stick in one position.
• Knobs should rotate fully in both directions.
Cleaning and Disinfecting Exterior Surfaces
Clean and disinfect the exterior surfaces of all equipment and peripheral devices
monthly, or more frequently if needed.
Cleaning and Disinfecting the Surfaces
Proper cleaning and disinfecting prolongs the life of the product. Failure to use the
proper cleaning solutions or to follow proper procedures can result in the following:
• Damage or corrosion
• Product discoloration
• Metal part corrosion
• Unit malfunction
• Voided warranty
Use the following procedure to clean the equipment's exterior surfaces. Be sure to
observe all cautions when cleaning the device.
1.
To clean, wipe with a lightly moistened cloth.
Use a mild soap and water solution to moisten the cloth.
Do NOT use any of the following cleaning products, or products that contain the
same active ingredients and solutions, which are known to cause the problems
previously listed:
• Sani-Cloth® Wipes
• Ascepti® Wipes
• HB Quat®
• Clorox® Wipes (they do not contain bleach)
• Over-the-counter detergents (such as Fantastic®, Tilex®, and so on)
2.
To disinfect, wipe with a soft, lint-free cloth moistened with an appropriate
disinfectant.
Use the following solutions, as recommended in the APIC Guidelines for Selection
and Use of Disinfectants (1996):
• Sodium hypochlorite (5.2% household bleach) minimum 1:500 dilution
(minimum 100 ppm free chlorine) and maximum 1:10 dilution.
• Any sodium hypochlorite wipe product that meets the previous guidelines
can be used.
3.
124
Dry with a clean cloth or paper towel.
MAC® 3500
2046275-018A
Maintenance
Cautions
• Follow the cleaning instructions exactly.
• Wring excess disinfectant from wipe before using.
• Never immerse the device, cables, or leadwires in any liquid, as this may corrode
metal contacts and affect signal quality.
• Do not allow fluid to pool around connection pins. If this happens, blot dry with a
soft, lint-free cloth.
• Never use conductive solutions or solutions that contain chlorides, wax, or wax
compounds to clean the device, cables, or leadwires.
• Never use solutions or products that contain any type of Ammonium Chloride such
as, but not limited to:
•
•
•
•
•
•
•
•
Dimethyl Benzyl Ammonium Chloride
Quaternary Ammonium Chloride solutions
Abrasive cleaners or solvents of any kind
Acetone
Ketone
Betadine
Alcohol-based cleaning agents
Sodium salts
• Never autoclave or steam clean the device, cables, or leadwires.
• Do not use until thoroughly dry.
Cleaning, Disinfecting, and Storing ECG Cables and
Leadwires
In addition to keeping the MAC system clean and in good repair, it is important to keep
the leadwires clean and disinfected. This section provides instructions for cleaning,
disinfecting, and storing ECG cables and leadwires to extend their life and protect
patients.
NOTE:
This information applies to the Multi-Link cable and leadwires. For systems
with the optional KISS system, see the KISS operator’s manual for cleaning and
disinfecting information.
Cleaning and Disinfecting Leadwires
Proper cleaning and disinfecting prolongs the life of cables and leadwires. Failure to
use the proper cleaning solutions or to follow proper procedures can result in the
following:
•
•
•
•
•
•
2046275-018A
Damage or corrosion
Diminished signal quality
Product discoloration
Metal part corrosion
Brittle wires and connectors
Reduced cables and leadwires life
MAC® 3500
125
Maintenance
• Unit malfunction
• Voided warranty
Use the following procedure to clean and disinfect the cables and leadwires.
1.
Remove cables and leadwires from the device or system before cleaning.
2.
Use care in cleaning leadwires to prevent pulling the long wires from the
connector ends. Metal connections can be pulled away from the connectors.
3.
To clean, wipe with a lightly moistened cloth.
Use a mild soap and water solution to moisten the cloth.
Do NOT use any of the following cleaning products, or products that contain the
same active ingredients and solutions, which are known to cause the problems
previously listed:
• Sani-Cloth® Wipes
• Ascepti® Wipes
• HB Quat®
• Clorox® Wipes (they do not contain bleach)
• Over-the-counter detergents (such as Fantastic®, Tilex®, and so on)
4.
To disinfect, wipe with a soft, lint-free cloth moistened with an appropriate
disinfectant.
Use the following solutions, as recommended in the APIC Guidelines for Selection
and Use of Disinfectants (1996):
• Sodium hypochlorite (5.2% household bleach) minimum 1:500 dilution
(minimum 100 ppm free chlorine) and maximum 1:10 dilution.
• Any sodium hypochlorite wipe product that meets the previous guidelines
can be used.
5.
Observe the following guidelines when cleaning and disinfecting cables and
leadwires.
• Do NOT immerse either end of a cable or leadwire connector.
Immersing or “soaking” the connector ends may corrode metal contact ends
and affect signal quality.
• Do NOT let fluid “pool” around connection pins.
If this happens, blot dry with a soft, lint-free cloth.
6.
Dry the cable and leadwires thoroughly with a dry lint-free cloth and let air dry
for at least 30 minutes.
DO NOT use excessive drying techniques, such as oven, forced heat, or sun
drying.
NOTE:
Drying times may vary based on the environmental conditions.
Cautions
• Follow the cleaning instructions exactly.
• Wring excess disinfectant from wipe before using.
126
MAC® 3500
2046275-018A
Maintenance
• Never immerse the device, cables, or leadwires in any liquid, as this may corrode
metal contacts and affect signal quality.
• Do not allow fluid to pool around connection pins. If this happens, blot dry with a
soft, lint-free cloth.
• Never use conductive solutions or solutions that contain chlorides, wax, or wax
compounds to clean the device, cables, or leadwires.
• Never use solutions or products that contain any type of Ammonium Chloride such
as, but not limited to:
• Dimethyl Benzyl Ammonium Chloride
• Quaternary Ammonium Chloride solutions
• Abrasive cleaners or solvents of any kind
• Acetone
• Ketone
• Betadine
• Alcohol-based cleaning agents
• Sodium salts
• Never autoclave or steam clean the device, cables, or leadwires.
• Do not use until thoroughly dry.
Storage
Store cables and leadwires by hanging them vertically in a dry, well-ventilated area.
Do NOT coil leadwires or cables around the device.
Cleaning, Disinfecting, and Storing Handheld Devices
In addition to keeping the MAC system, leadwires, and cables clean and in good repair,
it is important to keep the associated acquisition modules clean and disinfected as
well. This section provides instructions for cleaning, disinfecting, and storing the
acquisition modules to extend their life and protect patients.
Cleaning and Disinfecting Acquisition Modules
Proper cleaning and disinfecting prolongs the life of acquisition devices. Failure to use
the proper cleaning solutions or to follow proper procedures can result in the following:
• Appearance of waveforms when not connected to a patient, resulting in false
alarms instead of lead failure alarms
• Brittle and cracked device case
• Melting, dulling, or distortion of the case
• Total device failure, requiring replacement
• Unit malfunction
• Voided warranty
2046275-018A
MAC® 3500
127
Maintenance
Use the following procedure to clean and disinfect the cables and leadwires.
1.
Remove cables, leadwires, and batteries from the device before cleaning.
Make sure to firmly close the battery door after removing the batteries.
2.
To clean, wipe with a lightly moistened cloth.
Use a mild soap and water solution to moisten the cloth.
Do NOT use any of the following cleaning products, or products that contain the
same active ingredients and solutions, which are known to cause the problems
previously listed:
• Sani-Cloth® Wipes
• Ascepti® Wipes
• HB Quat®
• Clorox® Wipes (they do not contain bleach)
• Over-the-counter detergents (such as Fantastic®, Tilex®, and so on)
3.
To disinfect, wipe with a soft, lint-free cloth moistened with an appropriate
disinfectant.
Use the following solutions, as recommended in the APIC Guidelines for Selection
and Use of Disinfectants (1996):
• Sodium hypochlorite (5.2% household bleach) minimum 1:500 dilution
(minimum 100 ppm free chlorine) and maximum 1:10 dilution.
• Any sodium hypochlorite wipe product that meets the previous guidelines
can be used.
4.
Allow the cleaning solution/disinfectant to remain on the device for a minimum
of one minute, or per hospital guidelines.
5.
Wipe off the cleaning solution/disinfectant with a clean, moistened cloth.
6.
Dry thoroughly with a dry, lint-free cloth and let air dry for a minimum of 30
minutes before use.
DO NOT use excessive drying techniques, such as oven, forced heat, or sun
drying.
NOTE:
Drying times may vary based on the environmental conditions.
Cautions
• Follow the cleaning instructions exactly.
• Wring excess disinfectant from wipe before using.
• Never immerse the device, cables, or leadwires in any liquid, as this may corrode
metal contacts and affect signal quality.
• Do not allow fluid to pool around connection pins. If this happens, blot dry with a
soft, lint-free cloth.
• Never use conductive solutions or solutions that contain chlorides, wax, or wax
compounds to clean the device, cables, or leadwires.
128
MAC® 3500
2046275-018A
Maintenance
• Never use solutions or products that contain any type of Ammonium Chloride such
as, but not limited to:
• Dimethyl Benzyl Ammonium Chloride
• Quaternary Ammonium Chloride solutions
• Abrasive cleaners or solvents of any kind
• Acetone
• Ketone
• Betadine
• Alcohol-based cleaning agents
• Sodium salts
• Never autoclave or steam clean the device, cables, or leadwires.
• Do not use until thoroughly dry.
Storage
Use the following guidelines when storing acquisition modules:
• Always remove the batteries when the device is not in use, even for short periods
of time.
• Store in a dry, well-ventilated area.
• Hang the device, using a holder if available.
• If leadwires are attached, they should hang straight.
• Do not coil leadwires or cables around the device.
Battery Compartment Cleaning
NOTE:
This procedure applies only for frequency hopping telemetry transceivers. It
should not be used for other devices.
Under normal operation, the battery compartment should not require cleaning. If the
battery compartment should require cleaning, use the following instructions.
CAUTION:
DEVICE MALFUNCTION — Cleaning the battery compartment in a manner other
than that described in the following procedure may cause the unit to malfunction
and void the warranty.
The battery compartment is not waterproof. Make certain fluids do not enter the
electronics through the air holes in the battery compartment floor.
1.
Remove the battery from the battery compartment.
2.
Clean the device with a gauze pad or cloth lightly moistened with one of the
following agents:
• Water
• Soap
2046275-018A
MAC® 3500
129
Maintenance
3.
Use a cloth lightly moistened with distilled water to rinse away the cleaning
solution. Make certain that moisture does not enter the electronics area below
the battery compartment floor.
4.
Dry thoroughly with a lint-free cloth and allow the battery compartment to air
dry completely prior to closing the compartment door.
Paper Maintenance
Proper paper maintenance ensures optimum ECG printouts. Paper maintenance
includes:
• Setting the correct paper size
• Loading the paper
Setting the Correct Paper Size
The MAC system can accommodate standard (US Letter) and A4 fanfold thermal ECG
paper. To ensure that the paper feeds correctly, you must adjust the paper guide
130
1.
Open the MAC writer drawer.
2.
To set the tray for A4 paper, slide the paper guide toward the rear of the device.
MAC® 3500
2046275-018A
Maintenance
3.
To set the tray for standard (US Letter) paper, slide the guide toward the front
of the device.
4.
You are now ready to load your paper.
Loading the Paper
Use the following instructions to load paper into the MAC system. Refer to the
following illustration.
2046275-018A
1.
Open the writer drawer.
2.
Place the pad of paper with the holes on the left.
MAC® 3500
131
Maintenance
3.
Advance the first sheet of paper.
4.
Close the writer drawer securely.
Battery Maintenance
Proper battery maintenance prolongs the battery life and ensures that the MAC
system will operate when needed. Proper maintenance consists of the following:
• Charging the battery
• Conditioning the battery
• Replacing the battery
Charging the Battery
A fully charged battery ensures that the MAC system will operate without being
connected to an AC outlet. The MAC system's battery should be charged at the
following times:
• Before initial use
• Between acquisitions
• When the battery is low
• When the battery is completely discharged
To determine when the battery is low, use the battery gauge icon that appears in the
upper right corner of the system screen.
Item
Description
1
Battery gauge icon position.
2
Battery fully charged.
3
Battery 1/2 charged.
4
Battery 1/4 charged.
5
Battery fully discharged.
NOTE:
The system may run for a long time after the fully-discharged icon appears. When
the battery is fully discharged, the system will power off. To operate your system
at that time, you must connect the system to an AC wall outlet.
132
MAC® 3500
2046275-018A
Maintenance
Use the following procedure to charge the battery:
1.
2.
Power off the system.
Connect the system to an AC wall outlet.
To indicate the battery is charging, the amber battery light glows (1) and the
charging battery icon is displayed on the screen (2).
3.
Charge the system for 4–5 hours or until the battery gauge icon indicates a full
charge.
NOTE:
If the battery is fully charged or exceeds safe charging temperature, the
system will not charge the battery.
Conditioning the Battery
In addition to normal system use, periodic deep discharge cycles may be required to
ensure consistent battery performance. A deep discharge cycle occurs when the
battery is discharged until the system shuts down and then recharged until it is full.
GE Healthcare recommends one deep discharge cycle once every three months, but
does not recommend over-exercising the battery with multiple deep discharge cycles.
Replacing the Battery
No matter how well you maintain your battery, you will eventually need to replace it.
Refer to the following illustration for instructions on how to replace the battery.
2046275-018A
MAC® 3500
133
Maintenance
WARNING:
BATTERY PACK DISPOSAL — Do NOT dispose of the battery pack by fire or burning.
Follow local environmental guidelines concerning disposal and recycling.
WARNING:
CHEMICAL BURN — If battery fluid contacts your skin, eyes, or clothing,
immediately wash the area with clean water and see a doctor.
Replacing Leadwire Adapters
The following diagram shows how to replace the acquisition leadwire adapters:
134
MAC® 3500
2046275-018A
Maintenance
2046275-018A
MAC® 3500
135
Maintenance
136
MAC® 3500
2046275-018A
B
Troubleshooting
The following sections identify some of the more common problems with the MAC
system and list their potential causes and solutions. If this information cannot resolve
your issue, contact GE Healthcare Technical Support.
General Troubleshooting Guidelines
If the system is not working properly, save time troubleshooting by asking these basic
questions:
• Is the unit turned on?
• Have there been any changes in the use, location, or environment of the equipment
that could cause the failure?
• Has the equipment’s hardware or software been modified?
• Is operator error the cause of the problem? Try to repeat the scenario exactly and
compare that to the proper operation of the equipment described in the manual.
• Is the battery installed?
• When connected to an AC wall outlet, does the green AC power light glow?
• Is the writer door closed?
Visual Inspection
A thorough visual inspection of the equipment can save time. Items such as
disconnected cables or missing hardware can frequently cause symptoms and
equipment failures that may appear to be unrelated and difficult to track. For
additional information, see Appendix A, “Maintenance”.
Unacceptable Noise Levels
If the acquired ECG data displays unacceptable noise levels, do the following:
• Verify proper electrode placement.
Slipped or misplaced electrodes can result in faulty readings. Refer to “Preparing
the Patient's Skin” on page 48.
• Verify proper electrode application.
Perspiration, excessive hair, lotions, and dead skin cells must be removed from the
electrode site. Refer to “Electrode Placement” on page 49.
• Check for defective or expired electrodes.
2046275-018A
MAC® 3500
137
Troubleshooting
Verify the electrodes have not exceeded their shelf life.
• Check for defective, broken, or disconnected leadwires.
Replace or reconnect leadwires as necessary.
• Check the patient's position.
The patient should remain motionless during the acquisition of a resting ECG.
System Errors
The following errors may occur while you are operating this system. You may be
required to perform some action. If you perform the recommended actions and the
condition still remains, contact authorized service personnel.
Problem
Cause
Solution
The following icon appears:
No battery is installed in the
system.
Install a battery and connect
the system to an AC wall outlet
to charge the battery. Refer to
“Battery Maintenance” on page
132.
The following icon flashes:
The battery charge is low.
Connect the system to an AC wall
outlet to charge the battery. Refer
to “Battery Maintenance” on page
132.
The following icon appears:
The writer door is open.
Close the writer door. Refer to
“Paper Maintenance” on page 130
The system does not power up
when operating from battery.
The battery is fully discharged.
Connect the system to an AC wall
outlet to charge the battery. Refer
to “Battery Maintenance” on page
132.
Battery is discharged.
Connect the system to an AC wall
outlet to charge the battery. Refer
to “Battery Maintenance” on page
132.
The Automatic Shutdown feature
is enabled.
Power up the unit. Adjust the
Automatic Shutdown settings if
necessary. Refer to Chapter 12,
“System Setup”.
Electrode(s) disconnected.
Reconnect the electrode(s). Refer
to Chapter 3, “Preparing the
Patient”.
Modem is not connected. (If using
the wireless option, the client
bridge is not connected or the
device is out of range.)
Connect the modem to a telephone
line and retry, or move back into
range.
(Wireless option only) The system
is not within range of an access
point.
Relocate the system to within
range of an access point and retry
transmission.
(Ethernet option only) Bad LAN
connection.
Verify that the LAN cable is
connected to the LAN port and
the Link LED (Green) lights up and
Activity LED (Yellow) blinks.
The system shuts down when
operating from battery.
The lead disconnected message
appears.
The following message appears:
MODEM ERROR. The remote device
is not responding. Would you like
to retry?
138
MAC® 3500
2046275-018A
Troubleshooting
Problem
Cause
Solution
Cannot use the system because
Device Password does not work.
Device Password has been
changed or has not been
adequately communicated to the
staff.
Contact your administrator for the
Device Password.
You are prompted to format to
recover the file system.
The internal storage has been
corrupted.
Format the internal storage to
restore the file system.
NOTE:
System recovery from internal
storage corruption will destroy
all ECG records in the system's
internal memory.
Internal Storage
If there is corruption to file system, the system will display a prompt for formatting to
recover the file system.
NOTE:
System recovery from internal storage corruption will destroy the ECG records
present in the system’s internal memory.
For systems which are set up for SD Card Storage Only, system recovery from
corruption of SD card file system will destroy the ECGs on the SD card.
2046275-018A
MAC® 3500
139
Troubleshooting
140
MAC® 3500
2046275-018A
C
Report Formats
The MAC system provides several report formats to provide the information you
need to analyze and evaluate the patient's ECG. The following sections describe the
available formats so you can choose the correct report for your needs.
Numeric Reports
Several reports use numeric titles that describe the way in which the data is presented.
For example, the report 4 by 2.5s + 1 rhythm ld presents the following information:
1
Four columns of data containing 3 leads with 2.5 seconds of data in each lead (4
by 2.5s).
2
One 10-second rhythm lead (1 rhythm ld).
The following numeric reports are available.
• 2 by 5
• 2.5s @ 50 mm/s (writer speed)
• 2 by 5s + 1 rhythm lead
2046275-018A
MAC® 3500
141
Report Formats
• 2 by 10s
• 3 by 5 @ 50mm/s
• 3 by 10s
• 4 by 2.5s
• 4 by 2.5s + 1 rhythm lead
• 4 by 2.5s + 3 rhythm leads
• 4 by 10s
• 5 by 2s
• 5 by 2s + 1 rhythm lead
• 5 by 2s + 3 rhythm leads
• 5 by 10s
Additional Reports
The following additional report formats are available.
142
Report
Description
12 Rhythm Leads
10 seconds of 12-lead rhythm.
Autorhythm
10 seconds of 3, 6, or 12 leads of rhythm.
CGR
One median complex for each of the 12 leads combined with 10
seconds of 3-lead rhythm.
Expanded Median
Doubles the speed and gain of the median complex.
Linked Median
A 4 x 2.5 with 1 rhythm lead format. The rhythm lead printed across
the bottom of the report is the first lead of the 'Swedish format rhythm
leads' group that is configured in Exercise Setups (Report Leads).
Medians and
Rhythm
A median complex for each of the standard 12 leads is displayed in
the upper portion of this report. Below the medians are three rhythm
strips. These rhythm leads are the first three leads of the 'Swedish
format rhythm leads' group that is configured in Exercise Setups
(Report Leads).
6 Lead
Comparative
Medians and
Rhythm
The baseline and current medians are compared side-by-side and
followed by real-time waveforms. The 6 leads used by this report
are the 'Swedish format rhythm leads' group that is configured in
Exercise Setups (Report Leads).
12 Lead
Comparative
Medians and
Rhythm
A one-page report for which the baseline and current medians are
compared side-by-side and followed by 2.5 seconds of real-time
rhythm for the standard 12 leads. ST level and ST slope are reported
for each lead.
Hi-Res or PHi-Res
Signal Averaged
Template
Hi-Res or PHi-Res Signal Averaged Template
Hi-Res or PHi-Res
Signal Averaged
Standard
Vector magnitudes of X,Y,Z.
Hi-Res or PHi-Res
Signal Averaged
Expanded
400mm/s of expanded X,Y,Z medians and a RMS voltage function/VM
plot.
MAC® 3500
2046275-018A
Report Formats
Report
Description
ACI-TIPI
The analysis of the acquired ECG data appears at the top of the report.
Hi-Res or PHi-Res
Signal Overlapped
X,Y,Z data at two different amplitudes.
RMR
One median complex for each of the 12 leads combined with 10
seconds of 3-lead rhythm.
Swedish Format 1
One median complex for each of the 12 leads at writer speed of
50mm/s combined with 5 seconds of 6-lead rhythm at half writer
speed. Text is on the bottom of the page.
Swedish Format 2
5 seconds for each of the 12 leads at writer speed 50mm/s. Text is on
the top of the page.
2 by 5s
Simultaneous
Displays and prints ECG data in a 2 x 5 second simultaneous format.
This report format allows you to enable Auto Gain and/or Auto Shift
features.
NOTE:
The Auto Shift feature automatically shifts the waveforms
vertically to avoid (or minimize) waveform overlap between rows.
If enabled, this feature affects only the printed 2x5-second report.
The Auto Gain feature adjusts the gain to minimize waveform
overlap. Depending on the amount of overlap, the Auto Gain
may be applied to all leads or only the chest leads. If enabled, this
feature affects the printed 2x5-second report.
If both Auto Shift and Auto Gain are selected, the 2x5-second
printed report will be a 2- or a 3-page report.
• The first page will be in the 2x5 format with the default system
gain and with Auto Shift applied.
• In most cases, if waveforms overlap on the first page, the
second page will be in the 2x5 format with Auto Shift and
Auto Gain applied. This page is only printed if the first page
had waveform overlap.
• The third page will be the 10-second rhythm strip for the
first extra lead defined in the resting ECG lead setup with the
default gain.
Select Yes for Auto Gain and/or Auto Shift to enable these features.
2046275-018A
Pharma 4 by 2.5s +
2 Rhythm Leads
Displays and prints clinical trial data in a 4 x 2.5s format with two
rhythm leads.
Vector Loops
Sagittal, horizontal, and frontal plane vectorgrams. Marks on sample
X,Y,Z complexes identify P onset and offset, Q onset and offset, and
T onset.
MAC® 3500
143
Report Formats
144
MAC® 3500
2046275-018A
Master's Step Data
D
The following sections provide the information you need to run a Master's Step stress
test.
NOTE:
The Master's Step is an option and is available only in Japan.
Master's Step Table
The following table identifies the number of steps to set according to the patient's
age, sex, and weight.
2046275-018A
MAC® 3500
145
146
Weight
(kg)
18–22
22–26
27–31
32–35
36–40
MAC® 3500
41–44
45–49
50–53
54–58
59–63
64–67
2046275-018A
68–72
Sex
Age (Years)
5–9
10–14 15–19 20–24 25–29 30–34 35–39 40–44 45–49 50–54 55–59 60–64 65–69 70–74 75–79
Male
35
36
Female
35
35
33
Male
33
35
32
Female
33
33
32
Male
31
33
31
Female
31
32
30
Male
28
32
30
Female
28
30
29
Male
26
30
29
29
29
28
27
27
26
25
25
24
23
23
22
Female
26
28
28
28
28
27
26
24
23
22
21
21
20
19
18
Male
24
29
28
28
28
27
27
26
25
24
23
22
22
21
22
Female
24
27
26
27
26
25
24
23
22
21
20
19
18
18
17
Male
22
27
27
28
28
27
26
25
25
24
23
22
22
21
20
Female
22
25
25
26
26
25
24
23
22
21
20
19
18
18
17
Male
20
26
26
27
27
26
25
25
24
23
22
22
22
21
20
Female
20
23
23
25
25
24
23
22
21
20
19
18
18
17
16
Male
18
24
25
26
27
26
25
24
23
22
22
21
21
20
19
Female
18
22
22
24
24
23
22
21
30
19
18
18
17
16
15
Male
16
23
24
25
26
25
24
23
23
22
21
20
20
19
18
Female
16
20
20
23
23
22
21
20
19
19
18
17
16
15
15
Male
21
23
24
25
24
24
23
22
21
20
20
19
18
18
Female
18
19
22
22
21
20
19
19
18
17
16
15
15
14
Male
20
22
24
25
24
23
22
21
20
20
19
18
18
17
Female
17
17
21
20
20
19
19
18
17
16
16
15
14
13
2046275-018A
Weight
(kg)
73–76
77–81
82–85
86–90
91–93
MAC® 3500
94–99
100–104
Sex
Age (Years)
5–9
10–14 15–19 20–24 25–29 30–34 35–39 40–44 45–49 50–54 55–59 60–64 65–69 70–74 75–79
Male
18
21
23
24
23
22
22
21
20
19
18
18
17
17
Female
15
16
20
19
19
18
18
17
16
16
15
14
13
12
20
22
23
23
22
21
20
19
18
18
17
17
16
14
19
18
18
17
17
16
16
15
14
13
13
12
Male
19
21
23
22
21
20
19
19
18
17
16
16
15
Female
13
18
17
17
17
16
16
15
14
14
13
12
11
Male
18
29
22
21
21
29
18
17
17
16
15
15
14
Female
12
17
16
16
16
15
15
14
13
13
12
12
11
Male
19
21
21
20
19
18
17
16
16
15
14
14
Female
16
15
15
15
14
14
13
13
12
11
11
10
Male
18
21
20
19
18
17
17
16
15
14
14
13
Female
15
14
14
14
13
13
13
12
11
11
11
10
Male
17
20
20
19
18
17
16
15
14
13
13
12
Female
14
13
13
13
13
12
12
11
11
10
10
09
Male
Female
13
Master's Step Data
147
Master's Step Data
ST-T Changes
The existence of any ST-T change is assessed by classifying ST-T into three assessment
levels:
• Positive
One of the following criteria must be met on 2 or more leads:
• ST Depression ≥ 0.1mV
• ST Elevation≥ 0.2mV
• T wave change ≥ 1.0mV
• Borderline
One of the following criteria must be met on any lead:
• ST Depression ≥ 0.05mV
• ST Elevation ≥ 0.1mV
• T wave change ≥ 0.5mV
• Negative
This is assessed if neither the Positive nor Borderline criteria are met.
To following formulas are used to calculate the values in the previous criteria:
• ST depression = (rest ST - post J) - (post exercise ST - post J)
• ST depression = (rest ST - post J) - (post exercise ST - post J)
• T wave change = absolute value of (rest T wave amplitude - post-exercise T wave
amplitude)
• (ST - post J: amplitude at the post J point)
When the assessment is positive or borderline, the lead with the largest change prints.
148
MAC® 3500
2046275-018A
Creating Bar Codes and Magnetic
Cards
E
The following sections provide the information you need to configure bar codes and
magnetic patient ID cards.
The bar code reader can read Code 39, 39EX, 128, PDF-417 (2-D), Interleaved Code 2
of 5, and Data Matrix bar codes.
The card reader can read magnetic cards that adhere to ISO 7810 and 7811.
NOTE:
All data resides in fixed-width fields. The bar code or card generator must be
programmed to add “trailing spaces” after fields shorter than the fixed length of
the fields being used by your system.
Manual Reader Configuration
The following table identifies the available fields for configuring your magnetic
card reader and bar code reader. Refer to “Setting Up a Card Reader” on page 118
and “Setting Up a Bar Code Reader” on page 119 for instructions on accessing the
configuration window.
When instructed to enter a field's Offset and Length, keep in mind the following
information:
• For Offset, enter the field's beginning position.
For the first field in the bar code or magnetic card, the offset will be 0. For the
subsequent fields, the offset is typically the sum of the previous field's offset and
length. However, this is not always the case; there may be cases where fields may
have gaps between them.
• For Length, enter the total number of bytes for this field.
Where appropriate, maximum or required lengths are noted, along with any other
recommendations or restrictions.
2046275-018A
MAC® 3500
149
Creating Bar Codes and Magnetic Cards
Bar Code Reader and Magnetic Card Reader Configuration Fields
Field
Byte Length
Total number of
bytes
Enter the total number of bytes contained in the magnetic patient card
or patient bar code. This is typically, but not necessarily, the sum of the
bytes listed in the following fields.
Patient ID
The patient's identification number. Enter the field's Offset and Length.
Be aware of the following criteria when setting the length:
• can be from 0 to 16
• should equal the ID length set up on the Patient Question window
• should equal the patient ID length for the MUSE CV system with
which the MAC system communicates.
Visit
The visit's identification number. Enter the field's Offset and Length.
Be aware of the following criteria when setting the length:
• value can be from 0 to 19
• should equal the visit length from the ADT system
First name
The patient's first name. Enter the field's Offset and Length.
Be aware of the following criteria when setting the length:
• value can be from 0 to 10
• should equal the length from the MUSE CV system with which the
MAC system communicates.
NOTE:
The MAC system does not support “long” names; if the MUSE
system uses long names, this field should be set to its maximum
value.
Last Name
The patient's last name. Enter the field's Offset and Length.
Be aware of the following criteria when setting the length:
• value can be from 0 to 16.
• should equal the length from the MUSE CV system with which the
MAC system communicates
NOTE:
The MAC system does not support “long” names; if the MUSE
system uses long names, this field should be set to its maximum
value.
Year of birth
The year the patient was born. Enter the field's Offset and Length.
The length must be set to 4.
Month of birth
The month the patient was born. Enter the field's Offset and Length.
The length must be set to 2.
Day of birth
The day the patient was born. Enter the field's Offset and Length.
The length must be set to 2.
Gender
The patient's gender. Enter the field's Offset and Length.
The length must be set to 1.
150
MAC® 3500
2046275-018A
Creating Bar Codes and Magnetic Cards
Bar Code Reader and Magnetic Card Reader Configuration Fields (cont'd.)
Field
Byte Length
Enable data
retrieval
Determines whether the system will issue a query for matching orders
or patient information when scanning the bard code or magnetic card.
To enable data retrieval, select Yes.
The following fields determine what information is used to conduct the
query, what information is retrieved, and where the information is
retrieved from.
Card Reader Value
to Use
Selects the criteria used to query for additional information. Options
are:
• Patient ID
This option uses the patient's ID number to retrieve order or ADT
information.
• Visit
This option uses the visit number to retrieve order or ADT
information.
SWEDEN ONLY: To enable support for Master Patient Index (MPI), you
MUST select Patient ID.
Data to Retrieve
Selects the information retrieved. Options are:
• Orders
This option retrieves orders from the MUSE system or cart,
depending on the setting of the Retrieve Orders From field.
• Orders then ADT if no orders
This option first attempts to retrieve matching orders. If no orders
are found, it then attempts to retrieve patient demographics.
• ADT (Patient Demographics)
This option retrieves patient demographics from the associated
ADT system.
SWEDEN ONLY: To enable support for Master Patient Index (MPI), you
MUST select ADT (Patient Demographics).
Retrieve Orders
From
Select the source from which to retrieve order information. Options are:
• MUSE only
This option retrieves orders from the associated MUSE CV system.
• CART only
This option retrieves orders that have already been downloaded
to the cart.
• Cart then MUSE
This option retrieves orders that have already been downloaded to
the cart. If it cannot find matching orders on the cart, it attempts to
download them from the associated MUSE CV system.
Automatic Reader Configuration
If you are using the automatic configuration feature, use the following information to
create a configuration bar code or card.
2046275-018A
MAC® 3500
151
Creating Bar Codes and Magnetic Cards
Automatic Configuration Settings
152
Field
Character used to reserve byte space
Patient ID
9
First name
5
Last Name
6
Year of birth
3
Month of birth
1
Day of birth
2
Gender
F
Visit Number
8
MAC® 3500
2046275-018A
Asia Headquarters
GE Medical Systems
Information Technologies, Inc.
8200 West Tower Avenue
Milwaukee, WI 53223 USA
Tel:
+1 414 355 5000
+1 800 558 7044 (US Only)
Fax: +1 414 355 3790
GE Medical Systems
Information Technologies GmbH
Munzinger Strae 5
D-79111 Freiburg Germany
Tel:
+49 761 45 43 -0
Fax: +49 761 45 43 -233
GE Medical Systems
Information Technologies, Inc.
Asia; GE (China) Co., Ltd.
No.1 Huatuo Road
Zhangjiang Hi-tech Park Pudong
Shanghai, People's Republic of China 201203
Tel:
+86 21 5257 4650
Fax: +86 21 5208 2008
GE Medical Systems Information Technologies, Inc., a General Electric Company, going to market as
GE Healthcare.
www.gehealthcare.com
0459