1
CYLINDER BLOCK
< UNIT DISASSEMBLY AND ASSEMBLY >
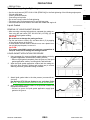
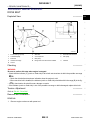
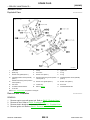
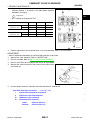
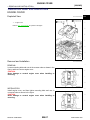
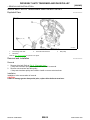
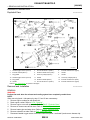
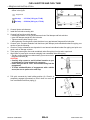
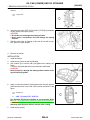
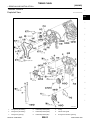
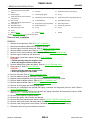
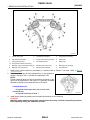
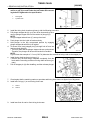
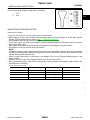
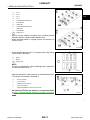
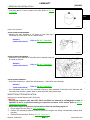
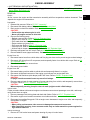
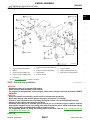
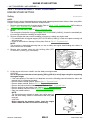
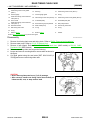
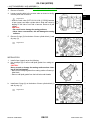
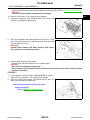
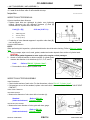
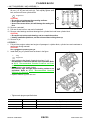
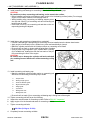
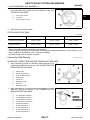
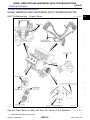
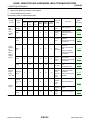
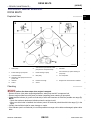
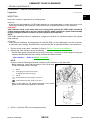
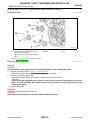
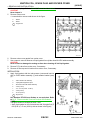
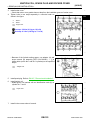
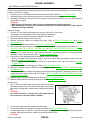
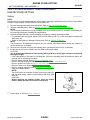
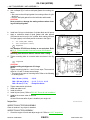
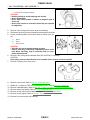
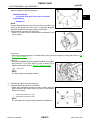
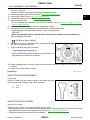
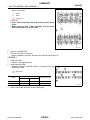
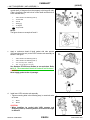
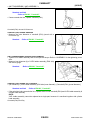
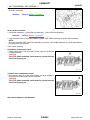
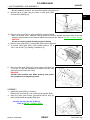
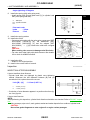
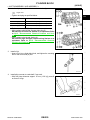
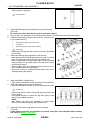
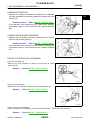
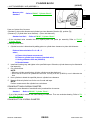
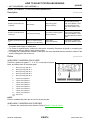
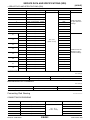
a. Apply new engine oil to threads and seat surfaces of main bearing cap bolts and sub bolts.
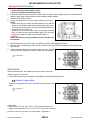
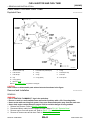
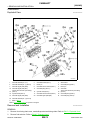
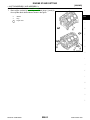
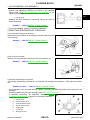
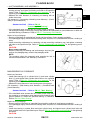
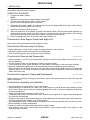
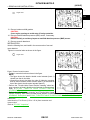
b. Tighten all bolts in order of (No. 1 - 30) temporarily.
[VK50VE]
A
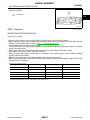
: Engine front
c.
EM
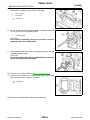
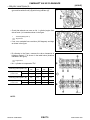
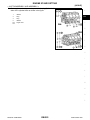
Tighten main bearing cap bolts (M12) in order of No. 1 - 10.
: 53.9 N·m (5.5 kg-m, 40 ft-lb)
d.
C
Tighten main bearing cap sub bolts (M9) in order of No. 11 - 20.
: 19.6 N·m (2.0 kg-m, 14 ft-lb)
e.
JPBIA2146ZZ
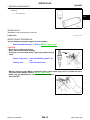
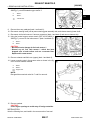
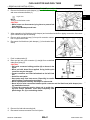
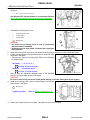
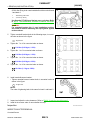
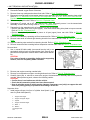
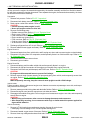
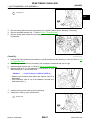
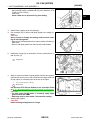
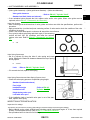
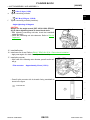
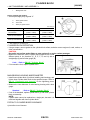
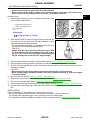
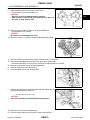
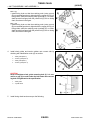
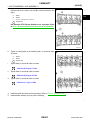
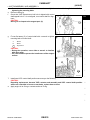
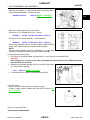
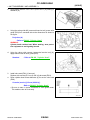
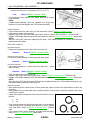
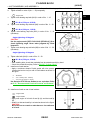
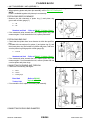
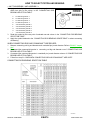
Tighten main bearing cap bolts (M12) in order of No. 1 - 10
(clockwise).
D
E
Angle tightening: 90 degrees
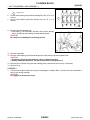
f.
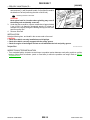
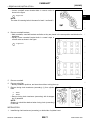
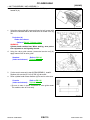
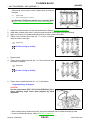
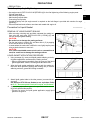
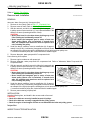
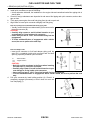
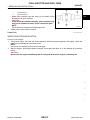
CAUTION:
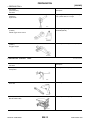
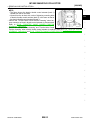
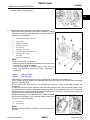
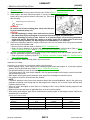
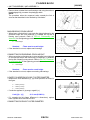
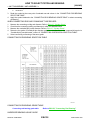
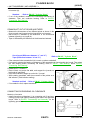
Use the angle wrench [SST: KV10112100 (BT8653-A)] (A) to
check tightening angle. Never make judgment by visual
inspection.
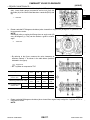
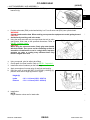
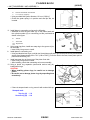
Tighten main bearing cap sub bolts (M9) in order of No. 11 - 20.
(clockwise)
F
G
JPBIA2149ZZ
H
Angle tightening: 90 degrees
g.
Tighten side bolts (M10) in order of No. 21 - 30.
I
: 49.0 N·m (5.0 kg-m, 36 ft-lb)
9.
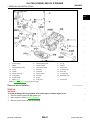
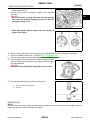
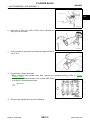
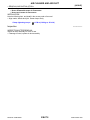
• After installing bolts, check that crankshaft can be rotated smoothly by hand.
• Check the crankshaft end play. Refer to EM-287, "Cylinder Block".
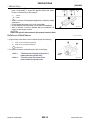
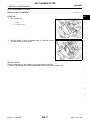
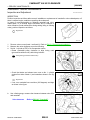
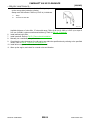
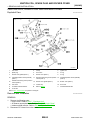
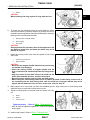
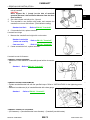
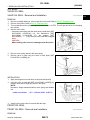
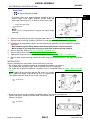
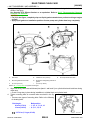
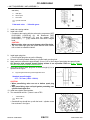
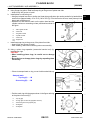
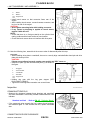
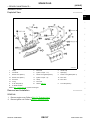
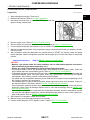
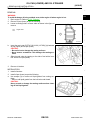
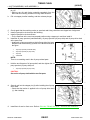
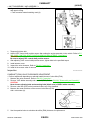
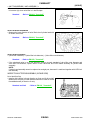
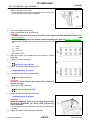
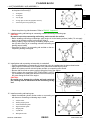
Install rear oil seal retainer.
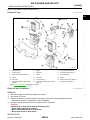
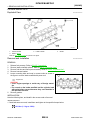
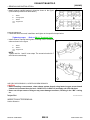
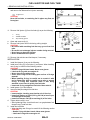
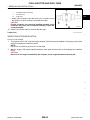
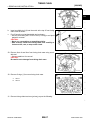
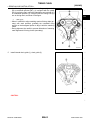
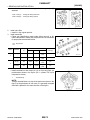
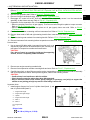
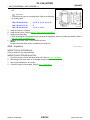
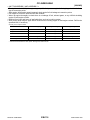
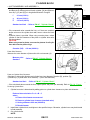
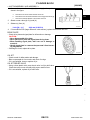
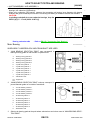
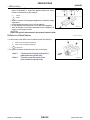
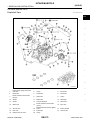
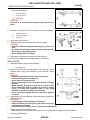
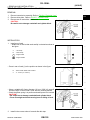
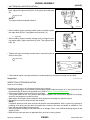
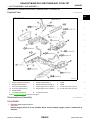
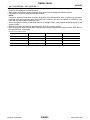
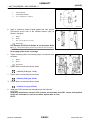
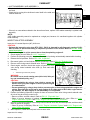
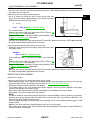
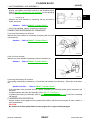
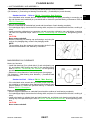
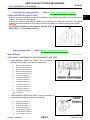
• Apply a continuous bead of liquid gasket with tube presser
(commercial service tool) to rear oil seal retainer as shown in
the figure.
A
: Protrusion
b
: 4.0 - 5.6 mm (0.157 - 0.220 in)
c
: φ3.4 - 4.4 mm (0.134 - 0.173 in)
J
K
L
Use Genuine RTV Silicone Sealant or an equivalent. Refer
to GI-15, "Recommended Chemical Products and Sealants".
M
JPBIA2102ZZ
N
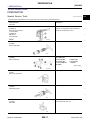
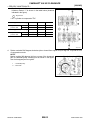
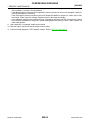
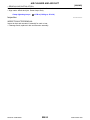
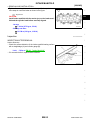
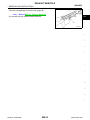
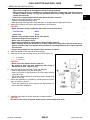
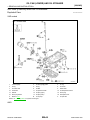
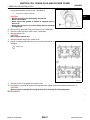
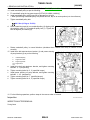
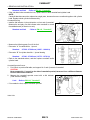
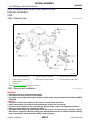
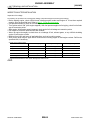
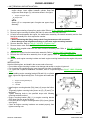
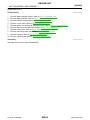
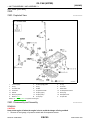
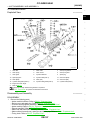
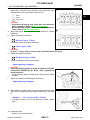
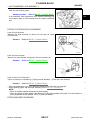
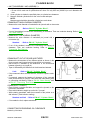
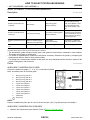
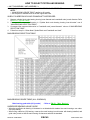
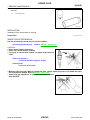
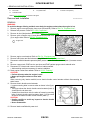
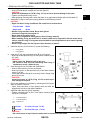
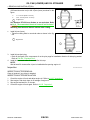
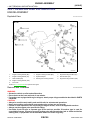
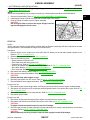
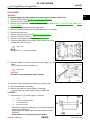
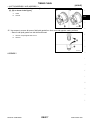
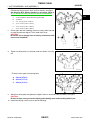
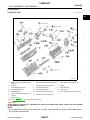
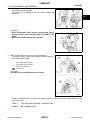
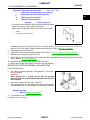
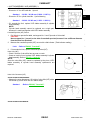
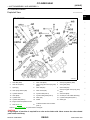
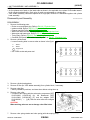
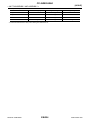
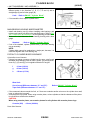
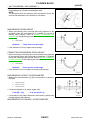
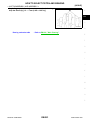
10. Install rear oil seal on rear oil seal retainer.
: Engine inside
O
: Engine outside
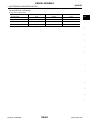
• Apply new engine oil to both oil seal lip (A) and dust seal lip
(B).
• Install it so that each seal lip is oriented as shown in the figure.
CAUTION:
Be careful not to scratch or make burrs on circumference
of oil seal.
Revision: 2009 March
EM-261
P
JPBIA0054ZZ
2009 FX35/FX50