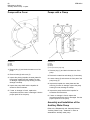
1
SAFETY.CAT.COM
3512C and 3516C MARINE
AUXILIARY ENGINES
Maintenance Intervals
Excerpted from Operation & Maintenance Manual (SEBU8224-00-01)
© 2007 Caterpillar
All Rights Reserved
52
Maintenance Section
Maintenance Interval Schedule
SEBU8224
i02616670
Maintenance Interval Schedule
SMCS Code: 1000; 4450; 7500
Factors that affect the oil change interval include
the following factors: operating conditions,
fuel type, oil type, and size of the oil sump .
Scheduled oil sampling analyzes used oil in order
to determine if the oil change interval is suitable
for your specific engine.
In the absence of scheduled oil sampling,
change the engine oil and filters according to the
following intervals.
Engines with Shallow Oil Sumps - Every 250
Service Hours
Engines with a Standard Oil Sump - Every 500
Service Hours
Engines with a Deep Oil Sump - Every 1000
Service Hours
Refer to this Operation and Maintenance Manual,
“Engine Oil and Filter - Change” in order to
determine the oil change interval that is suitable
for your specific engine.
Note: To determine the maintenance intervals for the
overhauls, refer to this Operation and Maintenance
Manual, “Maintenance Recommendations” .
Note: Ensure that the safety information, warnings,
and instructions are read and understood before
operation or maintenance procedures are performed.
Use the interval that occurs first in order to determine
the maintenance interval from fuel consumption,
service hours, or calendar time. Engines that operate
in severe operating conditions may require more
frequent maintenance.
Before each consecutive interval is performed, all
of the maintenance requirements from the previous
interval must also be performed.
When Required
Batteries - Replace ............................................... 61
Battery or Battery Cable - Disconnect .................. 62
Closed Crankcase Ventilation (CCV) Fumes Disposal
Filter - Replace .................................................... 63
Engine Air Cleaner Element (Dual Element) Clean/Replace .................................................... 74
Engine Air Cleaner Element (Single Element) Clean/Replace .................................................... 76
Fuel System - Prime ............................................. 88
Daily
Air Starting Motor Lubricator Oil Level - Check .... 58
Air Tank Moisture and Sediment - Drain ............... 59
Cooling System Coolant Level - Check ................ 68
Driven Equipment - Inspect/Replace/Lubricate ... 73
Engine Air Cleaner Service Indicator - Inspect ..... 79
Engine Oil Filter Differential Pressure - Check ..... 81
Engine Oil Level - Check ...................................... 81
Fuel Tank Water and Sediment - Drain ................. 92
Instrument Panel - Inspect .................................... 93
Walk-Around Inspection ...................................... 104
Initial 250 Service Hours
Engine Valve Lash - Inspect/Adjust ...................... 88
Fuel Injector - Inspect/Adjust ................................ 88
Speed Sensor - Clean/Inspect ............................ 101
Every 250 Service Hours
Battery Electrolyte Level - Check ..........................
Belts - Inspect/Adjust/Replace ..............................
Cooling System Coolant Sample (Level 1) Obtain .................................................................
Cooling System Supplemental Coolant Additive
(SCA) - Test/Add .................................................
Engine Oil Sample - Obtain ..................................
Fuel Injector - Inspect/Adjust ................................
Hoses and Clamps - Inspect/Replace ..................
61
62
69
70
82
88
92
Initial 500 Hours (for New Systems, Refilled
Systems, and Converted Systems)
Cooling System Coolant Sample (Level 2) Obtain ................................................................. 70
Every 500 Service Hours
Air Shutoff - Test ................................................... 56
Engine Oil and Filter - Change ............................. 83
Every 1000 Service Hours
Engine - Clean ......................................................
Engine Crankcase Breather - Clean .....................
Engine Oil and Filter - Change .............................
Engine Protective Devices - Check ......................
Fuel System Primary Filter - Clean/Inspect/
Replace ...............................................................
Fuel System Secondary Filter - Replace ..............
73
80
83
87
89
89
Every 2000 Service Hours
Air Starting Motor Lubricator Bowl - Clean ........... 57
Crankshaft Vibration Damper - Inspect ................. 72
Engine Mounts - Check ........................................ 81
Every Year
Cooling System Coolant Sample (Level 2) Obtain ................................................................. 70
SEBU8224
53
Maintenance Section
Maintenance Interval Schedule
Every 3000 Service Hours or 3 Years
Cooling System Coolant (DEAC) - Change .......... 64
Cooling System Coolant Extender (ELC) - Add .... 67
Every 4000 Service Hours
Auxiliary Water Pump - Inspect ............................. 59
Engine Valve Lash - Inspect/Adjust ...................... 88
Fuel Injector - Inspect/Adjust ................................ 88
Every 6000 Service Hours or 6 Years
Air Shutoff Damper - Remove/Check ................... 55
Alternator - Inspect ............................................... 59
Cooling System Water Temperature Regulator Replace ............................................................... 71
Prelube Pump - Inspect ...................................... 101
Speed Sensor - Clean/Inspect ............................ 101
Starting Motor - Inspect ...................................... 102
Turbocharger - Inspect ........................................ 103
Water Pump - Inspect ......................................... 105
Every 12 000 Service Hours or 6 Years
Cooling System Coolant (ELC) - Change ............. 66
Overhaul
Aftercooler Core - Inspect/Clean ..........................
Maintenance Recommendations ..........................
Overhaul (Major) ...................................................
Overhaul (Top End) ...............................................
Overhaul Considerations ......................................
54
94
95
97
99
54
Maintenance Section
Aftercooler Core - Inspect/Clean
SEBU8224
i02623956
Aftercooler Core Inspect/Clean
Personal injury can result from air pressure.
SMCS Code: 1063-040; 1064-571
Personal injury can result without following proper procedure. When using pressure air, wear a protective face shield and protective clothing.
1. Remove the core. Refer to the Disassembly and
Assembly Manual, “Aftercooler - Remove and
Install” for the procedure.
2. Turn the aftercooler core on one side in order
to remove debris. Remove the debris that is
accessible.
NOTICE
Do not use a high concentration of caustic cleaner to
clean the core. A high concentration of caustic cleaner
can attack the internal metals of the core and cause
leakage. Only use the recommended concentration of
cleaner.
3. Back flush the core with cleaner.
Caterpillar recommends the use of Hydrosolv
liquid cleaner. Table 15 lists Hydrosolv liquid
cleaners that are available from your Caterpillar
dealer.
Table 15
Hydrosolv Liquid Cleaners(1)
Part
Number
Description
1U-5490
Hydrosolv 4165
19 L (5 US gallon)
174-6854
Hydrosolv 100
19 L (5 US gallon)
(1)
Size
Use a two to five percent concentration of the cleaner
at temperatures up to 93°C (200°F). Refer to Application
Guide, NEHS0526 or consult your Caterpillar dealer for more
information.
4. Remove the drain plug.
5. Steam clean the core in order to remove any
residue. Flush the fins of the aftercooler core.
Remove any other trapped debris from the inside
and from the outside of the core.
Note: Do not use high pressure when the fins are
cleaned. High pressure can damage the fins.
6. Wash the core with hot, soapy water.
7. Flush the core thoroughly in order to remove
residue and remaining debris. Flush the core with
clean, fresh water until the water that is exiting the
core is clear and free of debris.
Maximum air pressure at the nozzle must be less
than 205 kPa (30 psi) for cleaning purposes.
8. Dry the core with compressed air. Direct the air in
the reverse direction of the normal flow.
9. Prior to installation, inspect any O-rings or seals
for damage. If necessary, replace the O-rings or
seals.
10. Inspect the core for trapped debris and
cleanliness. If it is necessary, remove the debris
and repeat the cleaning procedure.
11. Inspect the core for damage and perform a
pressure test in order to detect leaks. Many shops
that service radiators are equipped to perform
pressure tests.
12. Install the core. Refer to Disassembly and
Assembly Manual, “Aftercooler - Remove and
Install” for the procedure.
For more information on cleaning the core, consult
your Caterpillar dealer.
SEBU8224
55
Maintenance Section
Air Shutoff Damper - Remove/Check
i02622938
Air Shutoff Damper Remove/Check
(if equipped)
SMCS Code: 1078-011; 1078-535
1. The body of the damper should not be loosened or
removed from the air shutoff when the plunger is
removed. In order to remove the plunger without
loosening or removing the damper, unscrew the
plug with the following tools: a 6.35 mm (0.25 inch)
Allen wrench and an open end wrench .
2. Check the seal ring for damage or wear. If
necessary, replace the seal ring.
3. Inspect the internal parts of the vibration damper
for wear or damage. Clean the components with
138-8440 component cleaner.
Illustration 35
Illustration 33
g01286554
Typical air shutoff (back view)
(1) Air shutoff gate
(2) Damper assembly
The vibration damper on the air shutoff minimizes
the vibration of the air shutoff gate when the
engine is operating and the air shutoff gate is in the
latched position. The components of the damper
assembly must be removed in order to ensure correct
performance of the damper.
Illustration 34
Damper assembly
(3)
(4)
(5)
(6)
(7)
Plug
Seal ring
Housing
Spring
Plunger
g01286567
g01286606
Damper plunger
4. Remove the plunger from the spring. Visually
inspect the exposed end of the plunger for dirt,
fouling, damage, and wear. If distance “A” is less
than 18.3 mm (0.72 inch) or if a visual inspection
reveals dirt, fouling, damage, or wear on the active
end of the plunger, replace the plunger. Insert the
tapered end of a clean, undamaged plunger into
the spring. Install the open end of the spring into
the plug. Apply 9S-3263 thread lock or apply
9S-4030 thread lock onto the threads of the plug.
Screw the assembly into the damper body. The
thread lock should cure for a minimum of 1 hour
before the air shutoff is used.
56
Maintenance Section
Air Shutoff - Test
SEBU8224
i02624677
Air Shutoff - Test
(Engines That Are Equipped
with ADEM II or ADEM III
Engine Control Modules (If
equipped))
SMCS Code: 1078-081
Illustration 38
g01285610
Right hand side air shutoff in the OPEN position
Refer to the Troubleshooting Guide, “Air Shutoff
System” information in your Service Manual for
further information about the electrical system for the
air shutoff system.
Engines That Are Equipped with
ADEM II Engine Control Modules
Note: Do not start the engine. Ensure that the engine
control is in the “OFF” position.
1. Ensure that both air shutoff gates are latched in
the OPEN position and ensure that both air shutoff
switches are connected. Turn on the power to the
engine control panel. Both air shutoff gates should
remain open. If both air shutoff gates do not
remain open, check the wiring for the air shutoff
switches.
Illustration 36
g01285348
Typical air shutoffs on a 3500B engine
(1) Air shutoffs
Illustration 37
Left hand side air shutoff in the OPEN position
g01285609
2. With the power for the engine control panel in
the ON position, activate the “EMERGENCY
STOP” switch. Both of the air shutoff gates should
close. If both air shutoff gates close, proceed
to step 3. If both air shutoff gates do not close,
check the wiring for the air shutoff switches and
check the wiring for the solenoids. Activate the
“EMERGENCY STOP” switch again. When both
air shutoff gates close, proceed to step 3.
3. Turn the power to the engine control panel to the
OFF position. Ensure that the “EMERGENCY
STOP” switch is in the RUN position. Latch only
the right side air shutoff gate to the OPEN position.
Turn the power for the engine control panel to the
ON position. The right side air shutoff gate should
close. If the right side air shutoff closes, proceed
to step 4. If the right side air shutoff gate does not
close, check the air shutoff switch for the right side
air shutoff and check the wiring for the right side
air shutoff . When the right side air shutoff closes,
proceed to step 4.
SEBU8224
4. Turn the power for the engine control panel to the
OFF position. Latch only the left side air shutoff
gate to the OPEN position. Turn the power for the
engine control panel to the ON position. The left
side air shutoff gate should close. If the left side
air shutoff gate closes the test is complete. If the
left side air shutoff gate does not close, check the
switch and the wiring for the left side air shutoff .
Note: Testing is only complete when the engine
successfully passes step 1 through step 4.
5. Operate the engine normally. Ensure that the air
shutoff gates continue to be latched.
Engines That Are Equipped with
ADEM III Engine Control Modules
Note: Do not start the engine. Ensure that the engine
control is in the “OFF” position.
1. Ensure that both air shutoff gates are latched in
the OPEN position. Ensure that both air shutoff
switches are connected. Turn the power for the
engine control panel to the ON position. The
air shutoff gates should remain in the OPEN
positions. If the air shutoff gates do not remain
in the OPEN positions, check the wiring for the
air shutoffs. When step 1 has been successfully
completed, proceed to step 2.
2. While the power for the engine control panel is
in the ON position, activate the “EMERGENCY
STOP” switch . Both air shutoff gates should
close. If the air shutoff gates do not close, check
the wiring for the air shutoffs and the wiring for
the solenoids. Both air shutoff gates must close
before proceeding to step 3.
3. Turn the power for the engine control panel to the
OFF position. Reset the “EMERGENCY STOP”
switch to the RUN position. Reset the right side air
shutoff to the OPEN position. Turn the power for
the engine control panel to the ON position. Select
“Run/Start” on the engine control panel. The
engine should fail to start. If the engine does not
start, proceed to 4. If the engine starts, turn off the
engine. Check the right side air shutoff. Check the
wiring for the right side air shutoff. Retest the air
shutoff. When the procedure in 3 is followed and
the engine fails to start, proceed to 4.
57
Maintenance Section
Air Starting Motor Lubricator Bowl - Clean
4. Reset the “EMERGENCY STOP” switch to the
RUN position. Set the power for the engine
control panel to the ON position. Activate
the“EMERGENCY STOP” switch . Both air shutoff
gates should close. Set power for the engine
control panel to the OFF position. Reset the
“EMERGENCY STOP” switch to the RUN position.
Reset the left side air shutoff to the OPEN position.
Turn the power for the engine control panel to the
ON position. Select “START/RUN” on the engine
control panel. The engine should fail to start.
If the engine does not start, proceed to 5. If the
engine starts, turn off the engine. Check the left
side air shutoff. Check the wiring for the left side
air shutoff. Retest the left side air shutoff. When
the procedure in step 4 is followed and the engine
fails to start, proceed to 5.
5. Turn the power for the engine control panel to
the ON position. Reset both air shutoffs. Start
the engine. Disconnect only the right side air
shutoff. Both air shutoff gates should close. The
engine should shut down. If the engine does
not shut down, use the “EMERGENCY STOP”
switch to stop the engine. Check the wiring for
both air shutoffs. Use the above procedure in
order to retest the right side air shutoff. When the
procedure in step 5 is followed and results of the
test are successful, reconnect the right side air
shutoff. Reset both air shutoffs.
6. Turn the power for the engine control panel to the
ON position. Reset both air shutoffs. Start the
engine. Disconnect only the left side air shutoff.
Both air shutoff gates should close. The engine
should shut down. If the engine does not shut
down, use the “EMERGENCY STOP” switch to
stop the engine. Check the wiring for both air
shutoffs. Use the above procedure in order to
retest the left side air shutoff. When the procedure
in 6 is followed and the results of the test are
successful, reconnect the right side air shutoff.
Reset both air shutoffs.
7. Testing is complete only when the engine
successfully passes steps 1 through 6.
8. Reset both air shutoffs. Ensure that the
“EMERGENCY STOP” switch has been reset.
Operate the engine normally.
i02654935
Air Starting Motor Lubricator
Bowl - Clean
SMCS Code: 1451-070
If the engine is equipped with an air starting motor,
use the following procedure:
58
Maintenance Section
Air Starting Motor Lubricator Oil Level - Check
Personal injury can result from removing hoses or
fittings in a pressure system.
Failure to relieve pressure can cause personal injury.
Do not disconnect or remove hoses or fittings until all pressure in the system has been relieved.
SEBU8224
5. Dry the bowl. Inspect the bowl for cracks. If the
bowl is cracked, replace the damaged bowl with
a new bowl. Inspect the gasket. If the gasket is
damaged, replace the gasket.
6. Install the bowl.
7. Make sure that drain valve (3) is closed.
8. For instructions on filling the lubricator, see this
Operation and Maintenance Manual, “Air Starting
Motor Lubricator Oil Level - Check” topic.
1. Ensure that the air supply to the lubricator is OFF.
i02654969
Air Starting Motor Lubricator
Oil Level - Check
SMCS Code: 1451-535
NOTICE
Never allow the lubricator bowl to become empty. The
air starting motor will be damaged by a lack of lubrication. Ensure that sufficient oil is in the lubricator bowl.
Illustration 39
g01333332
(1) Filler plug
(2) Bowl
(3) Drain valve
2. Slowly loosen filler plug (1) in order to release the
pressure from the lubricator.
NOTICE
Care must be taken to ensure that fluids are contained
during performance of inspection, maintenance, testing, adjusting and repair of the product. Be prepared to
collect the fluid with suitable containers before opening any compartment or disassembling any component containing fluids.
Refer to Special Publication, NENG2500, “Caterpillar
Dealer Service Tool Catalog” for tools and supplies
suitable to collect and contain fluids on Caterpillar
products.
Dispose of all fluids according to local regulations and
mandates.
3. Place a suitable container under bowl (2) and
open drain valve (3) in order to drain the oil from
the bowl.
4. Remove bowl (2). Clean the bowl with warm water.
Illustration 40
g01333366
1. Observe the oil level in sight gauge (3). If the oil
level is less than 1/2, add oil to the lubricator bowl.
Personal injury can result from removing hoses or
fittings in a pressure system.
Failure to relieve pressure can cause personal injury.
Do not disconnect or remove hoses or fittings until all pressure in the system has been relieved.
2. Ensure that the air supply to the lubricator is OFF.
Slowly loosen filler plug (4) in order to release
pressure from the lubricator bowl.
SEBU8224
59
Maintenance Section
Air Tank Moisture and Sediment - Drain
3. Remove filler plug (4). Pour oil into the lubricator
bowl. Use nondetergent SAE 10W oil for
temperatures that are greater than 0 °C (32 °F).
Use air tool oil for temperatures that are below
0 °C (32 °F).
1. Open the drain valve that is on the bottom of the
air tank. Allow the moisture and sediment to drain.
2. Close the drain valve.
i02084374
4. Install filler plug (4).
Alternator - Inspect
Adjust the Lubricator
SMCS Code: 1405-040
Note: Adjust the lubricator with a constant rate of air
flow. After the adjustment, the lubricator will release
oil in proportion to variations of the air flow.
1. Ensure that the fuel supply to the engine is OFF.
NOTICE
Do not crank the engine continuously for more than
30 seconds. Allow the starting motor to cool for two
minutes before cranking the engine again.
2. Operate the air starting motor. Observe the drops
of oil that are released in dome (1).
Note: Some lubricators have an adjustment screw
rather than a knob.
3. If necessary, adjust the lubricator in order
to release from one to three drops of oil per
second. To increase the rate, turn knob (2)
counterclockwise. To decrease the rate, turn the
knob clockwise.
i00351324
Air Tank Moisture and
Sediment - Drain
SMCS Code: 1466-543-M&S
Moisture and sediment in the air starting system can
cause the following conditions:
• Freezing
• Corrosion of internal parts
• Malfunction of the air starting system
When opening the drain valve, wear protective
gloves, a protective face shield, protective clothing, and protective shoes. Pressurized air could
cause debris to be blown and result in personal
injury.
Inspect the alternator for the following conditions:
• Proper connections
• Clean ports for cooling airflow
• Proper charging of the battery
Observe the ammeter during engine operation in
order to ensure proper battery performance and/or
proper performance of the electrical system.
Make repairs, if necessary. See the Service Manual
for service procedures. Consult your Caterpillar
dealer for assistance.
i02619426
Auxiliary Water Pump - Inspect
(if equipped)
SMCS Code: 1371-040; 1371
Remove the auxiliary water pump from the engine.
Refer to the Disassembly and Assembly Manual,
“Auxiliary Water Pump - Remove” in order to remove
the auxiliary water pump.
Refer to the Disassembly and Assembly Manual,
“Auxiliary Water Pump - Disassemble” in order to
disassemble the auxiliary water pump.
Impellers and seals require periodic inspection.
Impellers have a service life that is limited. The
service life depends on the engine operating
conditions.
Inspect the components more frequently when the
pump is exposed to debris, sand, or other abrasive
materials. Inspect the components if the pump is
operating at a differential pressure of more than
103 kPa (15 psi).
There are different types of pumps. Some pumps will
have a cover that is bolted to the main pump body.
Some pumps will have a clamp that holds the front
part of the pump body to the main part of the pump
body. The cover or the front part of the pump body
must be removed in order to inspect the pump.
60
Maintenance Section
Auxiliary Water Pump - Inspect
SEBU8224
Pumps with a Cover
Illustration 41
Pumps with a Clamp
g01136356
(1) Plug
(2) Bolt
(3) Cover
1. Remove plug (1) and drain the water out of the
pump.
2. Remove bolts (2) and cover (3).
3. Inspect the priming impeller, the wear plates for
the priming impeller and the impeller for wear
or damage. Inspect the pump housing for wear,
damage or buildup.
4. Inspect the pump shaft and the impeller for
excessive axial movement.
5. If wear or damage is found, replace the
components which are worn or damaged. Use the
proper repair kit for the pump.
Illustration 42
(1)
(2)
(3)
(4)
g01136382
Plug
Clamp
Clamp
Front part of the pump body
1. Remove plug (1) and drain the water out of the
pump.
2. Remove the water line and clamp (2), if necessary.
3. Loosen clamp (3) and remove the front part of the
pump body (4).
4. Inspect the impeller, the wear plates and the
wear ring for wear or damage. Inspect the pump
housing for wear, damage or buildup.
5. Inspect the pump shaft and the impeller for
excessive axial movement.
6. If wear or damage is found, replace the
components which are worn or damaged. Use the
proper repair kit for the pump.
Assembly and Installation of the
Auxiliary Water Pump
Refer to the Disassembly and Assembly Manual,
“Auxiliary Water Pump - Assemble” in order to
assemble the auxiliary water pump.
SEBU8224
61
Maintenance Section
Batteries - Replace
Refer to the Disassembly and Assembly Manual,
“Auxiliary Water Pump - Install” in order to install the
auxiliary water pump onto the engine.
i01041029
Batteries - Replace
SMCS Code: 1401-510
Batteries give off combustible gases which can
explode. A spark can cause the combustible gases to ignite. This can result in severe personal injury or death.
Ensure proper ventilation for batteries that are in
an enclosure. Follow the proper procedures in order to help prevent electrical arcs and/or sparks
near batteries. Do not smoke when batteries are
serviced.
1. Turn the key start switch to the OFF position.
Remove the key and all electrical loads.
2. Turn OFF the battery charger. Disconnect the
charger.
3. The NEGATIVE “-” cable connects the NEGATIVE
“-” battery terminal to the ground plane. Disconnect
the cable from the NEGATIVE “-” battery terminal.
4. The POSITIVE “+” cable connects the POSITIVE
“+” battery terminal to the starting motor.
Disconnect the cable from the POSITIVE “+”
battery terminal.
Note: Always recycle a battery. Never discard a
battery. Return used batteries to an appropriate
recycling facility.
5. Remove the used battery.
6. Install the new battery.
Note: Before connecting the cables, ensure that the
key start switch is OFF.
7. Connect the cable from the starting motor to the
POSITIVE “+” battery terminal.
8. Connect the cable from the ground plane to the
NEGATIVE “-” battery terminal.
i02601752
Battery Electrolyte Level Check
SMCS Code: 1401-535-FLV
When the engine is not run for long periods of time or
when the engine is run for short periods, the batteries
may not fully recharge. Ensure a full charge in order
to help prevent the battery from freezing.
All lead-acid batteries contain sulfuric acid which
can burn the skin and clothing. Always wear a face
shield and protective clothing when working on or
near batteries.
1. Remove the filler caps. Maintain the electrolyte
level to the “FULL” mark on the battery.
If the addition of water is necessary, use distilled
water. If distilled water is not available use clean
water that is low in minerals. Do not use artificially
softened water.
2. Check the condition of the electrolyte with the
245-5829 Coolant Battery Tester Refractometer.
3. Keep the batteries clean.
Clean the battery case with one of the following
cleaning solutions:
• A mixture of 0.1 kg (0.2 lb) of baking soda and
1 L (1 qt) of clean water
• A mixture of 0.1 L (0.11 qt) of ammonia and 1 L
(1 qt) of clean water
Thoroughly rinse the battery case with clean water.
Use a fine grade of sandpaper to clean the
terminals and the cable clamps. Clean the items
until the surfaces are bright or shiny. DO NOT
remove material excessively. Excessive removal
of material can cause the clamps to not fit properly.
Coat the clamps and the terminals with 5N-5561
Silicone Lubricant, petroleum jelly or MPGM.
62
Maintenance Section
Battery or Battery Cable - Disconnect
SEBU8224
i01492654
Battery or Battery Cable Disconnect
If the belts are too tight, unnecessary stress is placed
on the components. This reduces the service life of
the components.
Replacement
SMCS Code: 1401; 1402-029
The battery cables or the batteries should not be
removed with the battery cover in place. The battery cover should be removed before any servicing is attempted.
Removing the battery cables or the batteries with
the cover in place may cause a battery explosion
resulting in personal injury.
For applications that require multiple drive belts,
replace the drive belts in matched sets. Replacing
one drive belt of a matched set will cause the new
drive belt to carry more load because the older drive
belts are stretched. The additional load on the new
drive belt could cause the new drive belt to fail.
Alternator Belt Adjustment
1. Turn the start switch to the OFF position. Turn the
ignition switch (if equipped) to the OFF position
and remove the key and all electrical loads.
2. Disconnect the negative battery terminal at the
battery that goes to the start switch. Ensure that
the cable cannot contact the terminal. When four
12 volt batteries are involved, the negative side of
two batteries must be disconnected.
3. Tape the leads in order to help prevent accidental
starting.
4. Proceed with necessary system repairs. Reverse
the steps in order to reconnect all of the cables.
i02229322
Belts - Inspect/Adjust/Replace
Illustration 43
SMCS Code: 1357-025; 1357-040; 1357-510
(1)
(2)
(3)
(4)
Inspection
1. Remove the drive belt guard.
Inspect the alternator belt and any accessory belts
for wear and for cracking. Replace the belts if the
belts are not in good condition.
2. Loosen mounting bolts (2), (3), and (4). Loosen
adjusting nuts (1).
Check the belt tension according to the information in
the Service Manual, “Specifications”.
Slippage of loose belts can reduce the efficiency
of the driven components. Vibration of loose belts
can cause unnecessary wear on the following
components:
•
Belts
• Pulleys
• Bearings
Adjusting
Mounting
Mounting
Mounting
g00960176
nuts
bolt
bolt
bolt
3. Turn adjusting nuts (1) in order to increase or
decrease the drive belt tension.
4. Tighten adjusting nuts (1). Tighten mounting bolts
(2), (3), and (4).
5. Reinstall the drive belt guard.
If new drive belts are installed, check the drive belt
tension again after 30 minutes of engine operation at
the rated rpm.
SEBU8224
63
Maintenance Section
Closed Crankcase Ventilation (CCV) Fumes Disposal Filter - Replace
i02657797
Resetting the Service Indicator
Closed Crankcase Ventilation
(CCV) Fumes Disposal Filter Replace
(If Equipped)
SMCS Code: 1317-510-FI
Illustration 45
g01292899
1. Remove plastic cover (4).
2. Push down on service indicator (5).
3. Replace cover (4).
Illustration 44
g01294089
Typical example of the Closed Crankcase Ventilation (CCV)
system
(1) Return to the air inlet system
(2) Fumes from crankcase breather
(3) Oil drain to crankcase
The Closed Crankcase Ventilation (CCV) system
requires the replacement of the fumes disposal filter.
The service interval of the CCV will be affected by
the following items:
• Engine load
• Concentration of soot
• Condition of the engine
4. Replace the fumes disposal filter by using the
following procedure:
Replacing the Fumes Disposal
Filter
Hot oil and hot components can cause personal
injury. Do not allow hot oil or hot components to
contact the skin.
Note: When possible, perform the maintenance while
the engine is off.
The CCV is equipped with a service indicator. If the
fumes disposal filter becomes plugged prior to the
normal service interval, increased restriction of the
filter will cause the vacuum to become positive. When
the pressure continues to rise, the service indicator
will show through the cap. The service indicator
indicates the need for the fumes disposal filter to be
changed. Reset the service indicator by using the
following procedure:
Illustration 46
g01292905
1. Release latches (7) that hold the canister to filter
base assembly (6).
64
Maintenance Section
Cooling System Coolant (DEAC) - Change
SEBU8224
Note: Removing canister (8) may be difficult while
the engine is operating. The canister has negative air
pressure while the engine is operating. This creates
a vacuum.
2. Lower the canister in order to expose the element.
There may be oil in the bottom of the canister.
Avoid spilling the oil.
3. Remove the filter element by pulling down.
Dispose of the used element properly.
4. Remove the O-ring assembly on the top end cap
of the used element.
5. Replace the O-ring seal on the bottom of the filter
base assembly.
Illustration 47
g00750410
(1) Coolant drain
6. Install the new O-ring on the top end cap of the
element. Install the element into the correct place.
7. Replace the canister and align the canister with
the boss on the filter base assembly.
8. Clamp the latches in the closed position.
i02417350
Cooling System Coolant
(DEAC) - Change
SMCS Code: 1350-044
Illustration 48
g00750411
Locations of the cooling system drain plugs
Clean the cooling system before the recommended
maintenance interval if the following conditions exist:
• The engine overheats frequently.
• The coolant is foaming.
(1) Oil cooler
(2) Jacket water pump
(3) Engine block
Note: If the engine has a jacket water heater, drain
the coolant from the heater.
• Oil or fuel has entered the cooling system and the
3. Open the coolant drain. Remove the cooling
system drain plugs. Allow the coolant to drain.
Drain the Cooling System
NOTICE
Dispose of used engine coolant properly or recycle.
Various methods have been proposed to reclaim used
coolant for reuse in engine cooling systems. The full
distillation procedure is the only method acceptable by
Caterpillar to reclaim the used coolant.
coolant is contaminated.
1. Stop the engine and allow the engine to cool.
Close the water inlet for the separate circuit
aftercooler (if equipped). Ensure that the engine
will not start when the cooling system is drained.
2. Loosen the radiator filler cap slowly in order to
relieve any pressure. Remove the radiator filler
cap.
For information regarding the disposal and the
recycling of used coolant, consult your Caterpillar
dealer or consult Caterpillar Dealer Service Tools
Group:
SEBU8224
Outside U.S.A.: (309) 675-6277
Inside U.S.A.: 1-800-542-TOOL
Inside Illinois: 1-800-541-TOOL
Canada: 1-800-523-TOOL
CSTG COSA Geneva, Switzerland:
41-22-849 40 56
Clean the Cooling System
NOTICE
Use of commercially available cooling system cleaners may cause damage to cooling system components. Use only cooling system cleaners that are approved for Caterpillar engines.
1. After the cooling system has been drained, flush
the cooling system with clean water in order to
remove any debris.
2. Close the cooling system drain. Clean the cooling
system drain plugs and install the cooling system
drain plugs.
NOTICE
Fill the cooling system no faster than 19 L (5 US gal)
per minute to avoid air locks.
3. Fill the cooling system with a mixture of clean
water and Caterpillar Fast Acting Cooling System
Cleaner. Add .5 L (1 pint) of cleaner per 15 L
(4 US gal) of the cooling system capacity. Install
the radiator filler cap.
4. Open the water inlet for the separate circuit
aftercooler (if equipped). Start the engine. Operate
the engine for a minimum of 30 minutes with a
coolant temperature of at least 82 °C (180 °F).
5. Stop the engine and allow the engine to cool.
Close the water inlet for the separate circuit
aftercooler (if equipped). Loosen the radiator
filler cap slowly in order to relieve any pressure.
Remove the radiator filler cap. Open the coolant
drain. Remove the cooling system drain plugs.
Allow the water to drain.
NOTICE
Improper or incomplete rinsing of the cooling system
can result in damage to copper and other metal components.
To avoid damage to the cooling system, make sure
to completely flush the cooling system with clear water. Continue to flush the system until all signs of the
cleaning agent are gone.
65
Maintenance Section
Cooling System Coolant (DEAC) - Change
6. Flush the cooling system with clean water until
the water that drains is clean. Close the coolant
drain. Clean the cooling system drain plugs and
install the cooling system drain plugs. Open the
water inlet for the separate circuit aftercooler (if
equipped).
Cleaning a Cooling System that
has Heavy Deposits or Plugging
Note: For the following procedure to be effective,
there must be an active flow through the cooling
system components.
1. After the cooling system has been drained, flush
the cooling system with clean water in order to
remove any debris.
2. Close the coolant drain. Clean the cooling system
drain plugs and install the cooling system drain
plugs.
3. Fill the cooling system with a mixture of clean
water and Caterpillar Fast Acting Cooling System
Cleaner. Add .5 L (1 pint) of cleaner per 3.8 to 7.6 L
(1 to 2 US gal) of the cooling system capacity.
Install the radiator filler cap.
4. Open the water inlet for the separate circuit
aftercooler (if equipped). Start the engine. Operate
the engine for a minimum of 90 minutes with a
coolant temperature of at least 82 °C (180 °F).
5. Stop the engine and allow the engine to cool.
Close the water inlet for the separate circuit
aftercooler (if equipped). Loosen the radiator
filler cap slowly in order to relieve any pressure.
Remove the radiator filler cap. Open the coolant
drain. Remove the cooling system drain plugs.
Allow the water to drain.
NOTICE
Improper or incomplete rinsing of the cooling system
can result in damage to copper and other metal components.
To avoid damage to the cooling system, make sure
to completely flush the cooling system with clear water. Continue to flush the system until all signs of the
cleaning agent are gone.
6. Flush the cooling system with clean water until
the water that drains is clean. Close the cooling
system drain. Clean the cooling system drain
plugs and install the cooling system drain plugs.
66
Maintenance Section
Cooling System Coolant (ELC) - Change
SEBU8224
Fill the Cooling System
Drain the Cooling System
Note: For information about the proper coolant to use,
see this Operation and Maintenance Manual, “Refill
Capacities and Recommendations” (Maintenance
Section). For the capacity of the cooling system,
see this Operation and Maintenance Manual, “Refill
Capacities and Recommendations” (Maintenance
Section).
1. Stop the engine and allow the engine to cool.
Close the water inlet for the separate circuit
aftercooler (if equipped). Ensure that the engine
will not start when the cooling system is drained.
2. Loosen the radiator filler cap slowly in order to
relieve any pressure. Remove the radiator filler
cap.
NOTICE
Fill the cooling system no faster than 19 L (5 US gal)
per minute to avoid air locks.
1. Fill the cooling system with coolant/antifreeze.
After filling the cooling system, do not install the
radiator filler cap.
2. Open the water inlet for the separate circuit
aftercooler (if equipped). Start the engine. Operate
the engine in order to purge the air from the
cavities of the engine block. Allow the coolant to
warm and allow the coolant level to stabilize. Stop
the engine.
Illustration 49
3. Check the coolant level. Maintain the coolant to
the proper level on the sight gauge (if equipped).
If a sight gauge is not equipped, maintain the
coolant within 13 mm (.5 inch) below the bottom of
the filler pipe.
4. Clean the radiator filler cap. Inspect the gaskets of
the radiator filler cap. If the gaskets of the radiator
filler cap are damaged, discard the old radiator
filler cap and install a new radiator filler cap. If the
gaskets of the radiator filler cap are not damaged,
use a 9S-8140 Pressurizing Pump in order to
pressure test the radiator filler cap. The correct
pressure is stamped on the face of the radiator
filler cap. If the radiator filler cap does not maintain
the correct pressure, install a new radiator filler
cap.
5. Start the engine. Inspect the cooling system for
leaks and for proper operating temperature.
i02417402
Cooling System Coolant (ELC)
- Change
SMCS Code: 1350-044-NL
Use only clean water to flush the cooling system
when ELC (Extended Life Coolant) is drained and
replaced.
g00750410
(1) Coolant drain
Illustration 50
g00750411
Locations of the cooling system drain plugs
(1) Oil cooler
(2) Jacket water pump
(3) Engine block
Note: If the engine has a jacket water heater, drain
the coolant from the heater.
3. Open the coolant drain. Remove the cooling
system drain plugs. Allow the coolant to drain.
NOTICE
Dispose of used engine coolant properly or recycle.
Various methods have been proposed to reclaim used
coolant for reuse in engine cooling systems. The full
distillation procedure is the only method acceptable by
Caterpillar to reclaim the used coolant.
SEBU8224
For information regarding the disposal and the
recycling of used coolant, consult your Caterpillar
dealer or consult Caterpillar Dealer Service Tools
Group:
Outside U.S.A.: (309) 675-6277
Inside U.S.A.: 1-800-542-TOOL
Inside Illinois: 1-800-541-TOOL
Canada: 1-800-523-TOOL
CSTG COSA Geneva, Switzerland:
41-22-849 40 56
Clean the Cooling System
1. After the cooling system has been drained, flush
the cooling system with clean water in order to
remove any debris.
2. Close the coolant drain. Clean the drain plugs and
install the drain plugs.
NOTICE
Fill the cooling system no faster than 19 L (5 US gal)
per minute to avoid air locks.
3. Open the water inlet for the separate circuit
aftercooler (if equipped). Fill the cooling system
with clean water. Install the radiator filler cap.
Operate the engine until the temperature reaches
49 °C (120 °F) to 66 °C (150 °F).
4. Stop the engine and allow the engine to cool.
Close the water inlet for the separate circuit
aftercooler (if equipped). Ensure that the engine
will not start when the cooling system is drained.
Loosen the radiator filler cap slowly in order to
relieve any pressure. Remove the radiator filler
cap.
5. Open the coolant drain. Remove the drain plugs.
Allow the coolant to drain. Flush the cooling
system with clean water. Close the coolant drain.
Install the drain plugs.
6. Repeat Steps 3, 4, and 5.
Fill the Cooling System
NOTICE
Fill the cooling system no faster than 19 L (5 US gal)
per minute to avoid air locks.
1. Fill the cooling system with ELC (Extended Life
Coolant). After filling the cooling system, do not
install the radiator filler cap.
67
Maintenance Section
Cooling System Coolant Extender (ELC) - Add
2. Open the water inlet for the separate circuit
aftercooler (if equipped). Start the engine. Operate
the engine in order to purge the air from the
cavities of the engine block. Allow the ELC to
warm and allow the coolant level to stabilize. Stop
the engine.
3. Check the coolant level. Maintain the coolant to
the proper level on the sight gauge (if equipped).
If a sight gauge is not equipped, maintain the
coolant within 13 mm (.5 inch) below the bottom of
the filler pipe.
4. Clean the radiator filler cap. Inspect the gaskets of
the radiator cap. If the gaskets of the radiator filler
cap are damaged, discard the old radiator filler cap
and install a new radiator filler cap. If the gaskets
of the radiator filler cap are not damaged, use a
9S-8140 Pressurizing Pump in order to pressure
test the radiator filler cap. The correct pressure is
stamped on the face of the radiator filler cap. If the
radiator filler cap does not maintain the correct
pressure, install a new radiator filler cap.
5. Start the engine. Inspect the cooling system for
leaks and for proper operating temperature.
i02482066
Cooling System Coolant
Extender (ELC) - Add
SMCS Code: 1352-544-NL
Cat ELC (Extended Life Coolant) does not require
the frequent additions of any supplemental cooling
additives which are associated with the present
conventional coolants. The Cat ELC Extender only
needs to be added once.
NOTICE
Use only Cat Extended Life Coolant (ELC) Extender
with Cat ELC.
Do NOT use conventional supplemental coolant additive (SCA) with Cat ELC. Mixing Cat ELC with conventional coolants and/or conventional SCA reduces the
Cat ELC service life.
Check the cooling system only when the engine is
stopped and cool.
68
Maintenance Section
Cooling System Coolant Level - Check
SEBU8224
i02158408
Personal injury can result from hot coolant, steam
and alkali.
At operating temperature, engine coolant is hot
and under pressure. The radiator and all lines
to heaters or the engine contain hot coolant or
steam. Any contact can cause severe burns.
Remove cooling system pressure cap slowly to
relieve pressure only when engine is stopped and
cooling system pressure cap is cool enough to
touch with your bare hand.
Do not attempt to tighten hose connections when
the coolant is hot, the hose can come off causing
burns.
Cooling System Coolant Level
- Check
SMCS Code: 1350-535-FLV
Climbing equipment may be required to access
this service point. Refer to the Operation and
Maintenance Manual, “Mounting and Dismounting” topic for safety information.
Engines That Are Equipped With a
Sight Gauge
Cooling System Coolant Additive contains alkali.
Avoid contact with skin and eyes.
NOTICE
Care must be taken to ensure that fluids are contained
during performance of inspection, maintenance, testing, adjusting and repair of the product. Be prepared to
collect the fluid with suitable containers before opening any compartment or disassembling any component containing fluids.
Refer to Special Publication, NENG2500, “Caterpillar
Dealer Service Tool Catalog” for tools and supplies
suitable to collect and contain fluids on Caterpillar
products.
Dispose of all fluids according to local regulations and
mandates.
1. Loosen the cooling system filler cap slowly in
order to relieve pressure. Remove the cooling
system filler cap.
2. It may be necessary to drain enough coolant from
the cooling system in order to add the Cat ELC
Extender.
3. Add Cat ELC Extender according to the
requirements for your engine’s cooling system
capacity. Refer to the Operation and Maintenance
Manual, “Refill Capacities and Recommendations”
article for more information.
4. Clean the cooling system filler cap. Inspect the
gaskets on the cooling system filler cap. Replace
the cooling system filler cap if the gaskets are
damaged. Install the cooling system filler cap.
Illustration 51
g00750429
(1) Filler cap
(2) Sight gauge
If the engine is equipped with a sight gauge, observe
the position of the coolant in the sight gauge. At
normal operating temperature, the proper coolant
level is in the upper half of the sight gauge. If the
coolant level is low, add the proper coolant mixture.
Engines That Are Not Equipped
With a Sight Gauge
Pressurized System: Hot coolant can cause serious burns. To open the cooling system filler cap,
stop the engine and wait until the cooling system
components are cool. Loosen the cooling system
pressure cap slowly in order to relieve the pressure.
Check the coolant level when the engine is stopped
and cool. Check the coolant level only after the
engine has been stopped and the cooling system
filler cap is cool enough to touch with your bare hand.
SEBU8224
69
Maintenance Section
Cooling System Coolant Sample (Level 1) - Obtain
Remove the cooling system filler cap slowly in order
to relieve any pressure. Maintain the coolant within
13 mm (0.5 inch) below the bottom of the filler pipe.
Add Coolant
Note: Obtain a Coolant Sample (Level 1) if the
cooling system is filled with any other coolant
instead of Cat ELC. This includes the following
types of coolants:
• Commercial long life coolants that meet the
Caterpillar Engine Coolant Specification -1
(Caterpillar EC-1)
Note: For the proper coolant mixture to use, see
this Operation and Maintenance Manual, “Refill
Capacities and Recommendations” (Maintenance
Section).
• Cat DEAC (Diesel Engine Antifreeze/Coolant)
1. Stop the engine. Allow the engine to cool.
• Commercial heavy-duty coolant/antifreeze
2. Remove the cooling system filler cap slowly in
order to relieve any pressure. Pour the proper
coolant mixture into the filler pipe.
Table 16
Recommended Interval
Type of Coolant
Level 1
Level 2
Cat DEAC
Every 250
Hours(1)
Yearly(1)(2)
Cat ELC
Optional(2)
Yearly(2)
(1)
This is the recommended interval for coolant samples for all
conventional heavy-duty coolant/antifreeze. This is also the
recommended interval for coolant samples of commercial
coolants that meet the Cat EC-1 specification for engine
coolant.
(2) The Level 2 Coolant Analysis should be performed sooner if a
problem is suspected or identified.
Illustration 52
g00103639
Gaskets
3. Clean the cooling system filler cap. Inspect the
gaskets of the cooling system filler cap. If the
gaskets are damaged, replace the old cooling
system filler cap with a new cooling system filler
cap. Install the cooling system filler cap.
4. Start the engine. Inspect the cooling system for
leaks.
i02603581
Cooling System Coolant
Sample (Level 1) - Obtain
SMCS Code: 1350-008; 1395-008; 1395-554; 7542
Note: Obtaining a Coolant Sample (Level 1) is
optional if the cooling system is filled with Cat
ELC (Extended Life Coolant). Cooling systems that
are filled with Cat ELC should have a Coolant Sample
(Level 2) that is obtained at the recommended interval
that is stated in the Maintenance Interval Schedule.
NOTICE
Always use a designated pump for oil sampling, and
use a separate designated pump for coolant sampling.
Using the same pump for both types of samples may
contaminate the samples that are being drawn. This
contaminate may cause a false analysis and an incorrect interpretation that could lead to concerns by both
dealers and customers.
Note: Level 1 results may indicate a need for
Level 2 Analysis.
Obtain the sample of the coolant as close as possible
to the recommended sampling interval. In order
to receive the full effect of S·O·S analysis, you
must establish a consistent trend of data. In order
to establish a pertinent history of data, perform
consistent samplings that are evenly spaced.
Supplies for collecting samples can be obtained from
your Caterpillar dealer.
Use the following guidelines for proper sampling of
the coolant:
• Complete the information on the label for the
sampling bottle before you begin to take the
samples.
• Keep the unused sampling bottles stored in plastic
bags.
70
Maintenance Section
Cooling System Coolant Sample (Level 2) - Obtain
SEBU8224
• Obtain coolant samples directly from the coolant
i02417522
sample port. You should not obtain the samples
from any other location.
• Keep the lids on empty sampling bottles until you
are ready to collect the sample.
Cooling System Supplemental
Coolant Additive (SCA) Test/Add
• Place the sample in the mailing tube immediately
SMCS Code: 1352-045; 1395-081
• Never collect samples from expansion bottles.
This maintenance procedure is required for
conventional coolants such as DEAC and for
mixtures of water and SCA. This maintenance is
NOT required for cooling systems that are filled
with Extended Life Coolant.
after obtaining the sample in order to avoid
contamination.
• Never collect samples from the drain for a system.
Submit the sample for Level 1 analysis.
For additional information about coolant analysis,
see Special Publication, SEBU6251, “Caterpillar
Commercial Diesel Engine Fluids Recommendations”
or consult your Caterpillar dealer.
i01987714
Cooling System Coolant
Sample (Level 2) - Obtain
SMCS Code: 1350-008; 1395-008; 1395-554; 7542
NOTICE
Always use a designated pump for oil sampling, and
use a separate designated pump for coolant sampling.
Using the same pump for both types of samples may
contaminate the samples that are being drawn. This
contaminate may cause a false analysis and an incorrect interpretation that could lead to concerns by both
dealers and customers.
Refer to Operation and Maintenance Manual,
“Cooling System Coolant Sample (Level 1) - Obtain”
for the guidelines for proper sampling of the coolant.
Cooling system coolant additive contains alkali.
To help prevent personal injury, avoid contact with
the skin and eyes. Do not drink cooling system
coolant additive.
Note: Caterpillar recommends an S·O·S coolant
analysis (Level 1).
Test the Concentration of the SCA
Coolant/Antifreeze and SCA
NOTICE
Do not exceed the recommended six percent supplemental coolant additive concentration.
Test the concentration of the SCA with the 8T-5296
Coolant Conditioner Test Kit.
Water and SCA
NOTICE
Do not exceed the recommended eight percent supplemental coolant additive concentration.
Submit the sample for Level 2 analysis.
For additional information about coolant
analysis, see Special Publication, SEBU6251,
“Caterpillar Commercial Diesel Engines Fluids
Recommendations” or consult your Caterpillar dealer.
Test the concentration of the SCA with the 8T-5296
Coolant Conditioner Test Kit. Use the instructions
that follow:
1. Fill the syringe to the “1.0 ml” mark with the
coolant.
2. Dispense the 1.0 mL coolant sample from the
syringe into the empty mixing bottle.
3. Add tap water to the mixing bottle in order to bring
the level up to the “10 ml” mark. Place the cap on
the bottle and shake the bottle.
SEBU8224
71
Maintenance Section
Cooling System Water Temperature Regulator - Replace
4. Add 2 to 3 drops of the “NITRITE INDICATOR
SOLUTION B” to the mixing bottle. Move the bottle
in a circular motion in order to mix the solution.
5. Add 1 drop of “NITRITE TEST SOLUTION A” to
the mixing bottle. Move the bottle in a circular
motion in order to mix the solution.
6. Repeat 5 until the solution changes color from red
to light gray, green, or blue. Record the number of
drops of “NITRITE TEST SOLUTION A” that were
required to cause the color change.
7. Use Table 17 to interpret the results.
NOTICE
Excessive supplemental coolant additive concentration can form deposits on the higher temperature surfaces of the cooling system, reducing the engine’s
heat transfer characteristics. Reduced heat transfer
could cause cracking of the cylinder head and other
high temperature components.
Excessive supplemental coolant additive concentration could also result in blockage of the heat exchanger, overheating, and/or accelerated wear of the water
pump seal.
Do not exceed the recommended amount of supplemental coolant additive concentration.
Table 17
Number of
Drops
Concentration
of SCA
Maintenance
Required
Less than 25
Less than the
recommended
concentration of
SCA
Add SCA.
Retest the
coolant.
25 to 30
The
recommended
concentration of
SCA
None
More than 30
More than the
recommended
concentration of
SCA
Remove the
coolant.
Replace with
water only
Retest the
coolant.
Add the SCA, If Necessary
3. Add the proper amount of SCA. For the
proper amount of SCA, refer to this Operation
and Maintenance Manual, “Refill Capacities
and Recommendations” topic. The proper
concentration of SCA depends on the type of
coolant that is used. For the proper concentration
of SCA, refer to Special Publication, SEBU6251,
“Caterpillar Commercial Diesel Engine Fluids
Recommendations”.
4. Clean the cooling system filler cap. Install the
cooling system filler cap.
i02623972
Cooling System Water
Temperature Regulator Replace
SMCS Code: 1355-510
Pressurized System: Hot coolant can cause serious burns. To open the cooling system filler cap,
stop the engine and wait until the cooling system
components are cool. Loosen the cooling system
pressure cap slowly in order to relieve the pressure.
Replace the water temperature regulator before
the water temperature regulator fails. This is a
recommended preventive maintenance practice.
Replacing the water temperature regulator reduces
the chances for unscheduled downtime.
1. Remove the cooling system filler cap slowly.
A water temperature regulator that fails in a
partially opened position can cause overheating or
overcooling of the engine.
Note: Always dispose of fluids according to local
regulations.
2. If necessary, drain some coolant in order to allow
space for the addition of the SCA.
A water temperature regulator that fails in the closed
position can cause excessive overheating. Excessive
overheating could result in cracking of the cylinder
head or piston seizure problems.
72
Maintenance Section
Crankshaft Vibration Damper - Inspect
SEBU8224
A water temperature regulator that fails in the open
position will cause the engine operating temperature
to be too low during partial load operation. Low
engine operating temperatures during partial loads
could cause an excessive carbon buildup inside the
cylinders. This excessive carbon buildup could result
in an accelerated wear of the piston rings and wear
of the cylinder liner.
NOTICE
Failure to replace your water temperature regulator
on a regularly scheduled basis could cause severe
engine damage.
Caterpillar engines incorporate a shunt design cooling
system and require operating the engine with a water
temperature regulator installed.
If the water temperature regulator is installed incorrectly, the engine may overheat, causing cylinder head
damage. Ensure that the new water temperature regulator is installed in the original position. Ensure that
the water temperature regulator vent hole is open.
Do not use liquid gasket material on the gasket or
cylinder head surface.
Refer to two articles in the Disassembly and
Assembly Manual, “Water Temperature Regulators
- Remove and Water Temperature Regulators Install” for the replacement procedure of the water
temperature regulator, or consult your Caterpillar
dealer.
Note: If only the water temperature regulators are
replaced, drain the coolant from the cooling system to
a level that is below the water temperature regulator
housing.
A damper that is hot may be the result of excessive
friction. This could be due to misalignment. Use an
infrared thermometer to monitor the temperature
of the damper during operation. If the temperature
reaches 93 °C (200 °F), consult your Caterpillar
dealer.
Inspect the damper for evidence of dents, cracks,
and leaks of the fluid.
If a fluid leak is found, determine the type of fluid.
The fluid in the damper is silicone. Silicone has the
following characteristics: transparent, viscous, and
smooth.
If the fluid leak is oil, inspect the crankshaft seals for
leaks. If a leak is observed, replace all of the seals.
Inspect the damper and repair or replace the damper
for any of the following reasons.
• The damper is dented, cracked, or leaking.
• The paint on the damper is discolored from heat.
• The engine has had a failure because of a broken
crankshaft.
• The crankshaft bearings are showing excessive
wear.
• There is a large amount of gear train wear that is
not caused by a lack of oil.
Dampers With Sampling Ports
i02623987
Crankshaft Vibration Damper
- Inspect
SMCS Code: 1205-040
The crankshaft vibration damper limits the torsional
vibration of the crankshaft. The visconic damper has
a weight that is located inside a fluid filled case.
Damage to the crankshaft vibration damper or failure
of the damper can increase torsional vibrations. This
can result in damage to the crankshaft and to other
engine components. A deteriorating damper can
cause excessive gear train noise at variable points
in the speed range.
Illustration 53
g00819045
SEBU8224
73
Maintenance Section
Driven Equipment - Inspect/Replace/Lubricate
Some dampers have ports for fluid samples. If the
damper has no external damage, collect a 2 to 5
mL sample of the damper fluid. The fluid should be
analyzed in order to check for a loss of viscosity. Use
the results of the analysis to determine if the damper
should be rebuilt or replaced. Kits for fluid samples
are available from the address that follows. Return
the kits to the same address for analysis.
• Replacement of components
• Requirements for ventilation
i01646701
Engine - Clean
SMCS Code: 1000-070
Hasse & Wrede GmbH
Mohriner Allee 30-42
D-12347 Berlin
Germany
Phone: 49 30 / 70 181 195
Fax: 49 30 / 70 09 08-11
Personal injury or death can result from high voltage.
Dampers Without Sampling Ports
Moisture can create paths of electrical conductivity.
Some dampers do not have a port for a fluid sample.
These dampers must be rebuilt or the dampers must
be replaced when one of the following criteria has
been met:
Make sure that the electrical system is OFF. Lock
out the starting controls and tag the controls “DO
NOT OPERATE”.
• the damper has reached 20,000 hours of operation.
Removal and Installation
NOTICE
Accumulated grease and oil on an engine is a fire hazard. Keep the engine clean. Remove debris and fluid
spills whenever a significant quantity accumulates on
the engine.
Refer to the Disassembly and Assembly Manual,
“Vibration Damper - Remove and Install” article or
consult your Caterpillar dealer for information about
damper replacement.
Periodic cleaning of the engine is recommended.
Steam cleaning the engine will remove accumulated
oil and grease. A clean engine provides the following
benefits:
• the engine is undergoing a major overhaul.
i00935098
• Easy detection of fluid leaks
Driven Equipment Inspect/Replace/Lubricate
• Maximum heat transfer characteristics
SMCS Code: 3279-040
Note: Caution must be used in order to prevent
electrical components from being damaged by
excessive water when you clean the engine. Avoid
electrical components such as the alternator, the
starter, and the ECM.
Observe the driven equipment during operation. Look
for the following items:
• Unusual noise and vibration
• Loose connections
• Damaged parts
Perform any maintenance that is recommended
by the OEM of the driven equipment. Refer to the
literature of the OEM of the driven equipment for the
following service instructions.
• Inspection
• Lubricating grease and lubricating oil requirements
• Specifications for adjustment
• Ease of maintenance
74
Maintenance Section
Engine Air Cleaner Element (Dual Element) - Clean/Replace
i01553486
Engine Air Cleaner Element
(Dual Element) - Clean/Replace
SMCS Code: 1051; 1054-037
NOTICE
Never run the engine without an air cleaner element
installed. Never run the engine with a damaged air
cleaner element. Do not use air cleaner elements with
damaged pleats, gaskets or seals. Dirt entering the
engine causes premature wear and damage to engine
components. Air cleaner elements help to prevent airborne debris from entering the air inlet.
NOTICE
Never service the air cleaner element with the engine
running since this will allow dirt to enter the engine.
SEBU8224
Dual Element Air Cleaners
The dual element air cleaner contains a primary
air cleaner element and a secondary air cleaner
element. The primary air cleaner element can be
used up to six times if the element is properly cleaned
and inspected. The primary air cleaner element
should be replaced at least one time per year. This
replacement should be performed regardless of the
number of cleanings.
The secondary air cleaner element is not serviceable
or washable. The secondary air cleaner element
should be removed and discarded for every three
cleanings of the primary air cleaner element. When
the engine is operating in environments that are
dusty or dirty, air cleaner elements may require more
frequent replacement.
Servicing the Air Cleaner Elements
If the air cleaner element becomes plugged, the air
can split the material of the air cleaner element.
Unfiltered air will drastically accelerate internal engine
wear. Your Caterpillar dealer has the proper air
cleaner elements for your application. Consult your
Caterpillar dealer for the correct air cleaner element.
• Check the precleaner (if equipped) daily for
accumulation of dirt and debris. Remove any dirt
and debris, as needed.
• Operating conditions (dust, dirt and debris) may
require more frequent service of the air cleaner
element.
Illustration 54
(1)
(2)
(3)
(4)
g00736431
Cover
Primary air cleaner element
Secondary air cleaner element
Turbocharger air inlet
• The air cleaner element may be cleaned up to
1. Remove the cover. Remove the primary air
cleaner element.
• The air cleaner element should be replaced at least
2. The secondary air cleaner element should be
removed and discarded for every three cleanings
of the primary air cleaner element.
six times if the element is properly cleaned and
inspected.
one time per year. This replacement should be
performed regardless of the number of cleanings.
Replace the dirty paper air cleaner elements with
clean air cleaner elements. Before installation, the
air cleaner elements should be thoroughly checked
for tears and/or holes in the filter material. Inspect
the gasket or the seal of the air cleaner element for
damage. Maintain a supply of suitable air cleaner
elements for replacement purposes.
Note: Refer to “Cleaning the Primary Air Cleaner
Elements”.
3. Cover the turbocharger air inlet with tape in order
to keep dirt out.
4. Clean the inside of the air cleaner cover and body
with a clean, dry cloth.
5. Remove the tape for the turbocharger air inlet.
Install the secondary air cleaner element. Install a
primary air cleaner element that is new or cleaned.
6. Install the air cleaner cover.
7. Reset the air cleaner service indicator.
SEBU8224
Cleaning the Primary Air Cleaner
Elements
NOTICE
Caterpillar recommends certified air filter cleaning services that are available at Caterpillar dealers. The
Caterpillar cleaning process uses proven procedures
to assure consistent quality and sufficient filter life.
75
Maintenance Section
Engine Air Cleaner Element (Dual Element) - Clean/Replace
Pressurized Air
Pressurized air can be used to clean primary air
cleaner elements that have not been cleaned more
than two times. Pressurized air will not remove
deposits of carbon and oil. Use filtered, dry air with a
maximum pressure of 207 kPa (30 psi).
Observe the following guidelines if you attempt to
clean the filter element:
Do not tap or strike the filter element in order to remove dust.
Do not wash the filter element.
Use low pressure compressed air in order to remove
the dust from the filter element. Air pressure must not
exceed 207 kPa (30 psi). Direct the air flow up the
pleats and down the pleats from the inside of the filter
element. Take extreme care in order to avoid damage
to the pleats.
Do not use air filters with damaged pleats, gaskets, or
seals. Dirt entering the engine will cause damage to
engine components.
The primary air cleaner element can be used up
to six times if the element is properly cleaned and
inspected. When the primary air cleaner element is
cleaned, check for rips or tears in the filter material.
The primary air cleaner element should be replaced
at least one time per year. This replacement should
be performed regardless of the number of cleanings.
Use clean primary air cleaner elements while dirty
elements are being cleaned.
NOTICE
Do not clean the air cleaner elements by bumping or
tapping. This could damage the seals. Do not use elements with damaged pleats, gaskets or seals. Damaged elements will allow dirt to pass through. Engine
damage could result.
Visually inspect the primary air cleaner elements
before cleaning. Inspect the air cleaner elements for
damage to the seal, the gaskets, and the outer cover.
Discard any damaged air cleaner elements.
There are two common methods that are used to
clean primary air cleaner elements:
• Pressurized air
• Vacuum cleaning
Illustration 55
g00281692
Note: When the primary air cleaner elements are
cleaned, always begin with the clean side (inside)
in order to force dirt particles toward the dirty side
(outside).
Aim the hose so that the air flows inside the element
along the length of the filter in order to help prevent
damage to the paper pleats. Do not aim the stream
of air directly at the primary air cleaner element. Dirt
could be forced further into the pleats.
Note: Refer to “Inspecting the Primary Air Cleaner
Elements”.
Vacuum Cleaning
Vacuum cleaning is a good method for cleaning
primary air cleaner elements which require daily
cleaning because of a dry, dusty environment.
Cleaning with pressurized air is recommended prior
to vacuum cleaning. Vacuum cleaning will not remove
deposits of carbon and oil.
Note: Refer to “Inspecting the Primary Air Cleaner
Elements”.
76
Maintenance Section
Engine Air Cleaner Element (Single Element) - Clean/Replace
Inspecting the Primary Air Cleaner
Elements
SEBU8224
Do not use paint, a waterproof cover, or plastic as a
protective covering for storage. An airflow restriction
may result. To protect against dirt and damage, wrap
the primary air cleaner elements in Volatile Corrosion
Inhibited (VCI) paper.
Place the primary air cleaner element into a box
for storage. For identification, mark the outside of
the box and mark the primary air cleaner element.
Include the following information:
• Date of cleaning
• Number of cleanings
Store the box in a dry location.
Illustration 56
g00281693
i01553508
Inspect the clean, dry primary air cleaner element.
Use a 60 watt blue light in a dark room or in a similar
facility. Place the blue light in the primary air cleaner
element. Rotate the primary air cleaner element.
Inspect the primary air cleaner element for tears
and/or holes. Inspect the primary air cleaner element
for light that may show through the filter material. If it
is necessary in order to confirm the result, compare
the primary air cleaner element to a new primary air
cleaner element that has the same part number.
Do not use a primary air cleaner element that has
any tears and/or holes in the filter material. Do not
use a primary air cleaner element with damaged
pleats, gaskets or seals. Discard damaged primary
air cleaner elements.
Storing Primary Air Cleaner Elements
If a primary air cleaner element that passes inspection
will not be used, the primary air cleaner element can
be stored for future use.
Engine Air Cleaner
Element (Single Element) Clean/Replace
SMCS Code: 1051; 1054-037
NOTICE
Never run the engine without an air cleaner element
installed. Never run the engine with a damaged air
cleaner element. Do not use air cleaner elements with
damaged pleats, gaskets or seals. Dirt entering the
engine causes premature wear and damage to engine
components. Air cleaner elements help to prevent airborne debris from entering the air inlet.
NOTICE
Never service the air cleaner element with the engine
running since this will allow dirt to enter the engine.
Servicing the Air Cleaner Elements
If the air cleaner element becomes plugged, the air
can split the material of the air cleaner element.
Unfiltered air will drastically accelerate internal engine
wear. Your Caterpillar dealer has the proper air
cleaner elements for your application. Consult your
Caterpillar dealer for the correct air cleaner element.
• Check the precleaner (if equipped) daily for
accumulation of dirt and debris. Remove any dirt
and debris, as needed.
• Operating conditions (dust, dirt and debris) may
Illustration 57
g00281694
require more frequent service of the air cleaner
element.
• The air cleaner element may be cleaned up to
six times if the element is properly cleaned and
inspected.
SEBU8224
77
Maintenance Section
Engine Air Cleaner Element (Single Element) - Clean/Replace
• The air cleaner element should be replaced at least
one time per year. This replacement should be
performed regardless of the number of cleanings.
Replace the dirty paper air cleaner elements with
clean air cleaner elements. Before installation, the
air cleaner elements should be thoroughly checked
for tears and/or holes in the filter material. Inspect
the gasket or the seal of the air cleaner element for
damage. Maintain a supply of suitable air cleaner
elements for replacement purposes.
Cleaning the Air Cleaner Elements
NOTICE
Caterpillar recommends certified air filter cleaning services that are available at Caterpillar dealers. The
Caterpillar cleaning process uses proven procedures
to assure consistent quality and sufficient filter life.
Observe the following guidelines if you attempt to
clean the filter element:
Do not tap or strike the filter element in order to remove dust.
Do not wash the filter element.
Use low pressure compressed air in order to remove
the dust from the filter element. Air pressure must not
exceed 207 kPa (30 psi). Direct the air flow up the
pleats and down the pleats from the inside of the filter
element. Take extreme care in order to avoid damage
to the pleats.
Illustration 58
g00735127
(1) Cover
(2) Air cleaner element
(3) Turbocharger air inlet
Do not use air filters with damaged pleats, gaskets, or
seals. Dirt entering the engine will cause damage to
engine components.
Note: Refer to “Cleaning the Air Cleaner Elements”.
The air cleaner element can be used up to six times if
the element is properly cleaned and inspected. When
the air cleaner element is cleaned, check for rips or
tears in the filter material. The air cleaner element
should be replaced at least one time per year. This
replacement should be performed regardless of the
number of cleanings.
2. Cover the air inlet with tape in order to keep dirt
out.
Use clean air cleaner elements while dirty elements
are being cleaned.
1. Remove the air cleaner cover. Remove the air
cleaner element.
3. Clean the inside of the air cleaner cover and body
with a clean, dry cloth.
4. Remove the tape for the air inlet. Install an air
cleaner element that is new or cleaned.
5. Install the air cleaner cover.
6. Reset the air cleaner service indicator.
NOTICE
Do not clean the air cleaner elements by bumping or
tapping. This could damage the seals. Do not use elements with damaged pleats, gaskets or seals. Damaged elements will allow dirt to pass through. Engine
damage could result.
Visually inspect the air cleaner elements before
cleaning. Inspect the air cleaner elements for damage
to the seal, the gaskets, and the outer cover. Discard
any damaged air cleaner elements.
There are two common methods that are used to
clean air cleaner elements:
• Pressurized air
• Vacuum cleaning
78
Maintenance Section
Engine Air Cleaner Element (Single Element) - Clean/Replace
Pressurized Air
SEBU8224
Inspecting the Air Cleaner Elements
Pressurized air can be used to clean air cleaner
elements that have not been cleaned more than two
times. Pressurized air will not remove deposits of
carbon and oil. Use filtered, dry air with a maximum
pressure of 207 kPa (30 psi).
Illustration 60
Illustration 59
g00281692
Note: When the air cleaner elements are cleaned,
always begin with the clean side (inside) in order to
force dirt particles toward the dirty side (outside).
Aim the hose so that the air flows inside the element
along the length of the filter in order to help prevent
damage to the paper pleats. Do not aim the stream
of air directly at the air cleaner element. Dirt could be
forced further into the pleats.
Note: Refer to “Inspecting the Air Cleaner Elements”.
Vacuum Cleaning
Vacuum cleaning is a good method for cleaning
air cleaner elements which require daily cleaning
because of a dry, dusty environment. Cleaning with
pressurized air is recommended prior to vacuum
cleaning. Vacuum cleaning will not remove deposits
of carbon and oil.
g00281693
Inspect the clean, dry air cleaner element. Use a 60
watt blue light in a dark room or in a similar facility.
Place the blue light in the air cleaner element. Rotate
the air cleaner element. Inspect the air cleaner
element for tears and/or holes. Inspect the air cleaner
element for light that may show through the filter
material. If it is necessary in order to confirm the
result, compare the air cleaner element to a new air
cleaner element that has the same part number.
Do not use an air cleaner element that has any tears
and/or holes in the filter material. Do not use an air
cleaner element with damaged pleats, gaskets or
seals. Discard damaged air cleaner elements.
Storing Air Cleaner Elements
If an air cleaner element that passes inspection will
not be used, the air cleaner element can be stored
for future use.
Note: Refer to “Inspecting the Air Cleaner Elements”.
Illustration 61
g00281694
Do not use paint, a waterproof cover, or plastic as a
protective covering for storage. An airflow restriction
may result. To protect against dirt and damage,
wrap the air cleaner elements in Volatile Corrosion
Inhibited (VCI) paper.
SEBU8224
79
Maintenance Section
Engine Air Cleaner Service Indicator - Inspect
Place the air cleaner element into a box for storage.
For identification, mark the outside of the box and
mark the air cleaner element. Include the following
information:
• Date of cleaning
• Number of cleanings
Store the box in a dry location.
i00641711
Engine Air Cleaner Service
Indicator - Inspect
SMCS Code: 7452-040
Illustration 63
g00103777
Typical Air Cleaner Service Indicator
Observe the air cleaner service indicator. You should
clean the air cleaner element, or you should replace
the air cleaner element under two conditions:
• The yellow diaphragm enters the red zone.
• The service indicator displays the red color at any
time.
• The red piston locks in the visible position.
Test the Air Cleaner Service
Indicator
Illustration 62
g00291942
Typical air cleaner service indicator that is mounted on the air
cleaner housing
Air cleaner service indicators are important,
inexpensive instruments. Two methods can be used
to test the service indicator.
An air cleaner service indicator may be mounted on
the air cleaner element or in a remote location.
• Check for ease of resetting. The service indicator
Some vessels are equipped with a low air pressure
indicator that monitors the inlet air pressure. This
indicator measures air pressure before the air is
drawn through the air cleaner element. Then, the
indicator monitors the pressure level after the air
has passed through the air cleaner element. As the
air cleaner element becomes dirty, this air cleaner
pressure differential rises.
• Check the movement of the yellow core when the
Some vessels may be equipped with a different air
cleaner indicator.
If your vessel is equipped with a different type of air
cleaner indicator, follow the recommendations for the
vessel. You can also follow the recommendations in
the air cleaner OEM in order to service the air cleaner
element.
should reset in less than three pushes.
engine is accelerated to the engine rated rpm.
The yellow core should latch at the approximate
greatest vacuum that is attained.
The air cleaner service indicator should be replaced
under certain conditions and at certain times:
• The service indicator does not reset easily.
• The yellow core does not latch at the greatest
vacuum.
• The engine is used for a year.
• The engine is overhauled.
• Major engine components are replaced.
Note: Replace the air cleaner service indicator
often whenever you operate in a severely dusty
environment.
80
Maintenance Section
Engine Crankcase Breather - Clean
SEBU8224
If the new service indicator will not reset, the hole for
the service indicator may be plugged.
Note: When a new service indicator is installed,
excessive force may crack the top of the service
indicator. Tighten the service indicator to a torque
of 2 N·m (18 lb in).
Service the Air Cleaner Service
Indicator
NOTICE
Never run the engine without an air cleaner element
installed. Never run the engine with a damaged air
cleaner element. Do not use air cleaner elements with
damaged pleats, gaskets or seals. Dirt entering the
engine causes premature wear and damage to engine
components. Air cleaner elements help to prevent airborne debris from entering the air inlet.
Illustration 64
g00597463
1. Loosen clamp (1). Slide the clamp down on tube
(2).
2. Loosen clamps (3). Remove both breathers as a
unit.
NOTICE
Never service the air cleaner element with the engine
running since this will allow dirt to enter the engine.
If the air cleaner element becomes plugged, the
air can split the filter material. Unfiltered air will
drastically accelerate internal engine wear. Your
Caterpillar dealer has air filter elements for this unit.
Consult your Caterpillar dealer for the correct air
cleaner element.
If the air cleaner service indicator appears red at any
time, clean the air cleaner element or install a new air
cleaner element. At 250 hour intervals, clean the air
cleaner element or replace the air cleaner element .
Illustration 65
Refer to the Operation and Maintenance Manual
(Maintenance Section) for more information on
servicing the air cleaner element.
3. Remove O-ring seals (4) from the valve covers.
Inspect the O-ring seals for good condition. Obtain
new O-ring seals, if necessary.
g00597465
i01225429
Engine Crankcase Breather Clean
SMCS Code: 1317-070
If the crankcase breather is not maintained on a
regular basis, the crankcase breather will become
plugged. A plugged crankcase breather will cause
excessive crankcase pressure that may cause
crankshaft seal leakage.
Illustration 66
g00597466
4. Remove two clamps (6). Remove both breathers
(5) from hose tee (7).
SEBU8224
81
Maintenance Section
Engine Mounts - Check
Inspect the hose tee for cracks. If the tee is
cracked, discard the old tee and obtain a new tee
for installation.
5. Turn the breathers upside-down in order to inspect
the condition of the breather elements.
Clean the breather elements with clean,
nonflammable solvent. If the breather elements
remain contaminated after the cleaning, discard
the breathers and obtain new breathers. Do not
attempt to disassemble the breathers.
Allow the breather elements to dry before
installation.
Note: Coat the rubber parts with clean engine oil or
petroleum jelly in order to make installation easier.
6. Place clamps (6) over the parts of hose tee (7)
that will receive breathers (5). Install the breathers
into the tee. Tighten the clamps to the torque that
is listed in the Service Manual, “Specifications”.
7. Coat O-ring seals (4) with clean engine oil. Place
the O-ring seals on the valve covers.
8. Place clamps (3) around the parts of the breathers
that will be attached to the valve covers. Install
both breathers as a unit. Tighten the clamps.
9. Place clamp (1) on the part of the hose tee that
will receive tube (2). Install the tube into the hose
tee. Tighten the clamp to the torque that is listed
in the Service Manual, “Specifications”.
i01786814
Engine Mounts - Check
Ensure that the isolators are free of oil and
contamination. Inspect the isolators for deterioration.
Ensure that the bolts for the isolators are tightened to
the proper torque.
Replace any isolator that shows deterioration. For
more information, see the literature that is provided
by the OEM of the isolators. Also see the Application
and Installation Guide for the engine. Consult your
Caterpillar dealer for assistance.
i02110431
Engine Oil Filter Differential
Pressure - Check
SMCS Code: 1308-535
Observe the oil filter differential pressure frequently
during engine operation.
Oil Filter Differential Pressure
(Restriction) – This gauge indicates the
difference in pressure between the inlet
side and the outlet side of the engine oil filters.
As the oil filter elements become plugged, oil filter
differential pressure will increase.
The nominal oil filter differential pressure during
normal engine operation is approximately 60 kPa
(9 psi).
Replace the oil filter elements when the oil filter
differential pressure reaches 103 kPa (15 psi).
For instructions on replacement of the oil filter
elements, see this Operation and Maintenance
Manual, “Engine Oil and Filter - Change” topic.
SMCS Code: 1152-535
Misalignment of the engine and the driven equipment
will cause extensive damage. Excessive vibration
can lead to misalignment. Excessive vibration of the
engine and the driven equipment can be caused by
the following conditions:
• Improper mounting
• Loose bolts
• Deterioration of the isolators
Ensure that the mounting bolts are tightened
to the proper torque. For standard torques, see
Specifications, SENR3130, “Torque Specifications”.
i02418058
Engine Oil Level - Check
SMCS Code: 1348-535-FLV
The most accurate check of the engine oil level is
obtained when the engine is stopped.
82
Maintenance Section
Engine Oil Sample - Obtain
SEBU8224
NOTICE
Engine damage can occur if the crankcase is filled
above the “FULL” mark on the oil level gauge (dipstick).
An overfull crankcase can cause the crankshaft to dip
into the oil. This will reduce the power that is developed and also force air bubbles into the oil. These
bubbles (foam) can cause the following problems: reduction of the oil’s ability to lubricate, reduction of oil
pressure, inadequate cooling, oil blowing out of the
crankcase breathers, and excessive oil consumption.
Illustration 67
g01208341
(1) Filler cap
(2) Engine oil level gauge (dipstick)
1. Remove filler cap (1) in order to ensure that the
crankcase pressure is equal to the atmospheric
pressure.
Excess pressure or a slight vacuum will affect
engine oil level that is measured.
2. Ensure that engine oil level gauge (2) is seated.
Excessive oil consumption will cause deposits to form
on the pistons and in the combustion chamber. Deposits in the combustion chamber lead to the following
problems: guttering of the valves, packing of carbon
under the piston rings, and wear of the cylinder liner.
If the oil level is above the “FULL” mark on the oil level
gauge, drain some of the oil immediately.
3. If necessary, add engine oil. For the correct engine
oil to use, refer to this Operation and Maintenance
Manual, “Refill Capacities and Recommendations”
topic (Maintenance Section). Do not fill the
crankcase above the “FULL” mark on the engine
oil level gauge. Clean the filler cap (1). Install the
filler cap.
4. Record the amount of engine oil that is added. For
the next engine oil sample and analysis, include
the total amount of engine oil that has been added
since the previous oil change. This will help to
provide the most accurate analysis.
i01928733
Engine Oil Sample - Obtain
Illustration 68
g00735162
(3) “ENGINE STOPPED WITH OIL COLD” side
(4) “ENGINE AT LOW IDLE WITH WARM OIL” side
(5) “ADD” mark
(6) “FULL” mark
a. If the engine is stopped, remove the engine oil
level gauge. Observe the engine oil level on
“ENGINE STOPPED WITH OIL COLD” side
(3).
b. If the engine is operating, reduce the engine
speed to low idle. Remove the engine oil level
gauge and observe the engine oil level on
“ENGINE AT LOW IDLE WITH WARM OIL”
side (4).
The engine oil level should be between “ADD”
mark (5) and “FULL” mark (6).
SMCS Code: 1348-554-SM
In addition to a good preventive maintenance
program, Caterpillar recommends using S·O·S oil
analysis at regularly scheduled intervals in order
to monitor the condition of the engine and the
maintenance requirements of the engine.
Obtain the Sample and the Analysis
Hot oil and hot components can cause personal
injury. Do not allow hot oil or hot components to
contact the skin.
SEBU8224
83
Maintenance Section
Engine Oil and Filter - Change
Before you take the oil sample, complete the Label,
PEEP5031 for identification of the sample. In order
to help obtain the most accurate analysis, provide
the following information:
• Engine model
• Service hours on the engine
• The number of hours that have accumulated since
the last oil change
• The amount of oil that has been added since the
last oil change
To ensure that the sample is representative of the
oil in the crankcase, obtain a warm, well mixed oil
sample.
To avoid contamination of the oil samples, the tools
and the supplies that are used for obtaining oil
samples must be clean.
NOTICE
Do not use the same vacuum sampling pump for extracting oil samples that is used for extracting coolant
samples.
A small residue of either type sample may remain in
the pump and may cause a false positive analysis for
the sample being taken.
Always use a designated pump for oil sampling and a
designated pump for coolant sampling.
Failure to do so may cause a false analysis which
could lead to customer and dealer concerns.
If the engine is not equipped with a sampling valve,
use the 1U-5718 Vacuum Pump. The pump is
designed to accept sampling bottles. Disposable
tubing must be attached to the pump for insertion
into the sump.
For instructions, see Special Publication, PEHP6001,
“How To Take A Good Oil Sample”. Consult your
Caterpillar dealer for complete information and
assistance in establishing an S·O·S program for your
engine.
i02622330
Engine Oil and Filter - Change
SMCS Code: 1318-510
If the engine is equipped with duplex oil filters, the
engine oil filter elements can be changed while the
engine is in operation. This is useful if the oil filter
elements require more frequent replacement than the
engine oil. Refer to “Replacing the Engine Oil Filters
During Engine Operation”.
Illustration 69
g01003274
The engine oil sampling valve (if equipped) is located on the
engine oil cooler.
Caterpillar recommends using the sampling valve
in order to obtain oil samples. The quality and the
consistency of the samples are better when the
sampling valve is used. The location of the sampling
valve allows oil that is flowing under pressure to be
obtained during normal engine operation.
The 169-8373 Fluid Sampling Bottle is
recommended for use with the sampling valve. The
fluid sampling bottle includes the parts that are
needed for obtaining oil samples. Instructions are
also provided.
The oil change interval can be affected by several
factors:
• Air/fuel ratio
• Ambient air conditions
• Engine application
• Fuel type
• Oil type
• Size of the oil sump
The S·O·S oil analysis program analyzes used oil in
order to determine if the oil change interval is suitable
for your specific engine. In the absence of S·O·S oil
analysis, change the engine oil and filters according
to the interval that is listed in Table 18.
84
Maintenance Section
Engine Oil and Filter - Change
SEBU8224
Table 18
Engine Oil Change Intervals
Engine
Sump Capacity
Oil Change
Interval
Engines With a Shallow Sump
3508C
104 L (27 US gal)
3512C
152 L (40 US gal)
3516C
204 L (53 US gal)
Every 250 Service
Hours
Engines With a Standard Sump
3508C
227 L (60 US gal)
3512C
318 L (84 US gal)
3516C
405 L (107 US gal)
Every 500 Service
Hours
Illustration 70
Oil drain plug
Engines With a Deep Sump
3508C
443 L (117 US gal)
3512C
625 L (165 US gal)
3516C
807 L (213 US gal)
g00574534
Every 1000
Service Hours
Drain the Oil
Hot oil and components can cause personal injury.
Do not allow hot oil or components to contact
skin.
Do not drain the oil when the engine is cold. As the
oil cools, waste particles settle on the bottom of the
oil pan. The waste particles are not removed when
the cold oil is drained. Drain the crankcase when the
oil is warm. This method allows proper draining of the
waste particles that are suspended in the oil.
Failure to follow this recommended procedure will
allow the waste particles to be recirculated through
the engine lubrication system with the new oil.
Note: If a suction device is used in order to remove
the oil from the oil pan, ensure that the suction device
is clean. This will prevent dirt from entering into the
oil pan. Be careful not to strike the engine oil suction
tubes or the piston cooling jets.
a. If the engine does not have a drain valve or a
pump, remove an oil drain plug. Allow the oil to
drain. After the oil has drained, clean the drain
plug and clean the fitting for the drain plug.
Install the drain plug. Tighten the drain plug to
145 ± 15 N·m (105 ± 10 lb ft).
b. If the engine has an oil drain valve, open the
valve. After the oil has drained, close the valve.
c. If the engine has a pump for removing dirty oil,
connect a hose to the outlet of the pump. Place
the hose in a suitable container. Open the valve
for the drain line. The two marks on the valve
must be turned so that one mark points to the
pump and the second mark points to the drain
line. Operate the pump until the crankcase
is empty. Close the valve to the drain line.
Disconnect the hose.
1. After the engine has been operated at normal
operating temperature, STOP the engine.
d. If the oil drain valve has a “quick connect”
coupling, attach the coupling. Open the drain
valve in order to drain the crankcase. After
the oil has drained, close the drain valve.
Disconnect the coupling.
2. Drain the oil according to the equipment on the
engine.
3. Replace the engine oil filter elements before filling
the crankcase with new oil.
Note: Drain the oil into a suitable container. DO NOT
drain the oil into the bilge sump. Dispose of the oil
according to local regulations.
Replace the Oil Filter Elements
Replace the engine oil filters when any of the
following conditions occur:
• Every oil change
SEBU8224
85
Maintenance Section
Engine Oil and Filter - Change
• The engine oil filter differential pressure reaches
103 kPa (15 psi).
• The oil filter elements have been used for 1000
service hours.
Note: Do not attempt to clean the used oil filters.
Used oil filters will retain waste particles. The used oil
filters would not filter the oil properly.
Service tools are available to aid in the service of oil
filters. Consult your Caterpillar dealer for the part
names and the part numbers. Follow the instructions
that are supplied with the service tools. If the service
tools are not used, perform the following appropriate
procedure.
Replacing the Engine Oil Filters With the
Engine Stopped
2. Open drain valve (4). Remove plug (3). Allow the
oil to drain. Clean the plug and install the plug.
Close the drain valve. Remove the hose from the
drain.
Note: Some oil will remain in the housing after the oil
has been drained. This oil will pour out of the housing
when cover (2) is removed. Prepare to catch the oil
in a suitable container. Clean up any spilled oil with
absorbent pillows or towels. DO NOT use absorbent
particles to clean up the oil.
Personal injury can result from parts and/or covers under spring pressure.
Spring force will be released when covers are removed.
Be prepared to hold spring loaded covers as the
bolts are loosened.
Hot oil and components can cause personal injury.
Do not allow hot oil or components to contact
skin.
3. Be alert to the spring force. Gradually loosen but
do not remove bolts (1). Before removing the bolts,
pry cover (2) loose or tap the cover with a rubber
mallet in order to relieve any spring pressure.
Section view of the engine oil filter
Perform the following procedure after the oil has
been drained.
Note: Use this procedure if the engine oil filters do
not have a control valve.
Illustration 72
Illustration 71
(1)
(2)
(3)
(4)
(5)
g00799719
Bolts
Cover
Plug
Drain valve
Drain
Note: Drain the oil into a suitable container. Dispose
of the oil according to local regulations.
1. Connect a hose to drain (5). Place the other end
of the hose into a suitable container in order to
collect the oil.
(2)
(6)
(7)
(8)
(9)
g00799721
Cover
O-ring seal
Spring
Retainer
Oil filter element
4. Remove cover (2) and spring (7). Remove O-ring
seal (6), retainer (8), and oil filter elements (9).
5. Clean cover (2), spring (7), O-ring seal (6), and
retainer (8). Clean the inside of the oil filter
housing.
86
Maintenance Section
Engine Oil and Filter - Change
NOTICE
Caterpillar oil filters are built to Caterpillar specifications. Use of an oil filter not recommended by
Caterpillar could result in severe engine damage to
the engine bearings, crankshaft, etc., as a result of
the larger waste particles from unfiltered oil entering
the engine lubricating system. Only use oil filters
recommended by Caterpillar.
6. Ensure that the new oil filter elements are in good
condition. Install the new oil filter elements.
7. Inspect the O-ring seal. Ensure that the surfaces
for the O-ring seal are clean. Install a new
O-ring seal if the old O-ring seal is damaged or
deteriorated.
8. Install retainer (8), spring (7) and cover (2). Ensure
that the retainer and the spring are properly seated
between the oil filter elements and the cover.
9. Start the engine according to this Operation
and Maintenance Manual, “Starting The Engine”
procedure (Operation Section). Check for oil leaks.
Replacing the Engine Oil Filters During
Engine Operation
If the engine is equipped with duplex oil filters, the
engine oil filter elements can be changed while the
engine is in operation. This is useful if the oil filter
elements require more frequent replacement than
the engine oil.
This filter contains hot, pressurized oil that can
cause burns and fire hazards, which may result
in bodily injury or death. Follow the instructions
given in this Operation and Maintenance Manual
and stop the engine if rapid air movement exists
to blow the oil.
1. Open the “FILL” valve for a minimum of five
minutes in order to fill the oil filter elements that
will not be serviced. The oil filters that will not be
serviced must be full of engine oil. Close the FILL
valve.
2. Move the control valve to the “AUX RUN” position
in order to change the main oil filter elements.
Move the selector valve to the “MAIN RUN”
position in order to change the auxiliary oil filter
elements.
3. Allow the oil pressure gauge for the oil filter that
is being changed to reach a “ZERO” pressure
reading.
SEBU8224
4. Perform Step 1 through Step 8 of “Replacing the
Engine Oil Filters With the Engine Stopped”.
5. Open the “FILL” valve for a minimum of five
minutes in order to fill the new oil filter elements.
6. Close the “FILL” valve. Rotate the control valve
to the “RUN” position for the oil filter that was
serviced.
Fill the Crankcase
NOTICE
Only use oils that are recommended by Caterpillar.
For the proper oil to use, refer to this Operation and
Maintenance Manual, “Refill Capacities and Recommendations” topic (Maintenance Section).
NOTICE
If the engine is equipped with an auxiliary oil filter
system, extra oil must be added when filling the
crankcase. If equipped with an auxiliary oil filter
system that is not supplied by Caterpillar, follow the
recommendations of the OEM.
NOTICE
Engine damage can occur if the crankcase is filled
above the “FULL” mark on the oil level gauge (dipstick).
An overfull crankcase can cause the crankshaft to dip
into the oil. This will reduce the power that is developed and also force air bubbles into the oil. These
bubbles (foam) can cause the following problems: reduction of the oil’s ability to lubricate, reduction of oil
pressure, inadequate cooling, oil blowing out of the
crankcase breathers, and excessive oil consumption.
Excessive oil consumption will cause deposits to form
on the pistons and in the combustion chamber. Deposits in the combustion chamber lead to the following
problems: guttering of the valves, packing of carbon
under the piston rings, and wear of the cylinder liner.
If the oil level is above the “FULL” mark on the oil level
gauge, drain some of the oil immediately.
Use the following procedure in order to fill the
crankcase if the engine oil filters were replaced
during engine operation.
1. If the engine oil filters were replaced during engine
operation operate the engine at low idle. Ensure
that the oil level is at the “FULL” mark on the
“LOW IDLE” side of the oil level gauge.
2. Add oil, if necessary. Remove the oil filler cap. Fill
the crankcase through the oil filler tube only.
SEBU8224
Use the following procedure in order to fill the
crankcase if the engine oil filters were replaced with
the engine stopped.
1. Remove the oil filler cap. Fill the crankcase
through the oil filler tube only. For the amount of
oil to use, see this Operation and Maintenance
Manual, “Refill Capacities and Recommendations”
topic (Maintenance Section). Clean the oil filler
cap. Install the oil filler cap.
NOTICE
To prevent crankshaft or bearing damage, crank engine with fuel off to fill all filters before starting.
Do Not crank engine for more than 30 seconds.
87
Maintenance Section
Engine Protective Devices - Check
Aluminum debris may indicate problems with the
bearings of the front gears. If you find aluminum
debris, inspect the crankshaft vibration damper and
the idler gear bearings.
Due to normal wear and friction, it is not uncommon
to find small amounts of debris in the oil filter element.
If an excessive amount of debris is found in the oil
filter element, consult your Caterpillar dealer in order
to arrange for further oil analysis.
i00626013
Engine Protective Devices Check
SMCS Code: 7400-535
2. Close the fuel supply line and crank the engine
until the oil pressure gauge indicates 70 kPa
(10 psi). Open the fuel supply line. Allow the
starting motor to cool for two minutes before
cranking again.
3. Start the engine according to this Operation
and Maintenance Manual, “Starting The Engine”
procedure (Operation Section). Operate the
engine at low idle for two minutes. This will ensure
that the lubrication system has oil and that the oil
filters are filled with oil. Inspect the engine for oil
leaks. Ensure that the oil level is at the “FULL”
mark on the “LOW IDLE” side of the oil level
gauge.
4. Stop the engine and allow the oil to drain back into
the sump for a minimum of ten minutes.
5. Remove the oil level gauge and check the oil level.
Maintain the oil level to the “FULL” mark on the
“ENGINE STOPPED” side of the oil level gauge.
Inspect the Used Oil Filter Elements
Cut the used oil filter element open with a utility knife.
Remove the metal wrap. Cut the filter element free
from the end caps. Spread apart the pleats and
inspect the element for metal debris. An excessive
amount of debris in the element may indicate early
wear or a pending failure.
Use a magnet to differentiate between the ferrous
metals and the nonferrous metals that are found
in the element. Ferrous metals may indicate wear
on the steel and the cast iron parts of the engine.
Nonferrous metals may indicate wear on the
aluminum parts, the brass parts, or the bronze parts
of the engine. Parts that may be affected include the
following components: main bearings, rod bearings,
turbocharger bearings, and cylinder heads.
Alarms and shutoffs must function properly. Alarms
provide timely warning to the operator. Shutoffs help
to prevent damage to the engine. It is impossible
to determine if the engine protective devices are
in good working order during normal operation.
Malfunctions must be simulated in order to test the
engine protective devices.
A calibration check of the engine protective devices
will ensure that the alarms and shutoffs activate
at the setpoints. Ensure that the engine protective
devices are functioning properly.
NOTICE
During testing, abnormal operating conditions must be
simulated.
The tests must be performed correctly in order to prevent possible damage to the engine.
To prevent damage to the engine, only authorized
service personnel or your Caterpillar dealer should
perform the tests.
Visual Inspection
Visually check the condition of all gauges, sensors
and wiring. Look for wiring and components that
are loose, broken, or damaged. Damaged wiring
or components should be repaired or replaced
immediately.
88
Maintenance Section
Engine Valve Lash - Inspect/Adjust
SEBU8224
i02623997
Engine Valve Lash Inspect/Adjust
Inspect the adjustment of the lash for the fuel injector
according to the Systems Operation/Testing And
Adjusting, “Fuel System” topic. Adjust the lash for the
fuel injector, if necessary.
SMCS Code: 1102-025
i01398238
Note: For procedures on adjusting the valve lash and
for the correct valve lash settings, see the Systems
Operation/Testing and Adjusting Manual, “Valve Lash
and Valve Bridge Adjustment”. You may also consult
your Caterpillar dealer for assistance.
NOTICE
Only qualified service personnel should perform this
maintenance. Refer to the Systems Operation/Testing
and Adjusting Manual, “Valve Lash and Valve Bridge
Adjustment”article or consult your Caterpillar dealer
for the complete valve lash adjustment procedure.
Fuel System - Prime
SMCS Code: 1250-548; 1258-548
1. Open the fuel supply valve. Ensure that the engine
will not start during the priming procedure. Turn
the start switch to the OFF position.
Operation of Caterpillar engines with improper valve
adjustments can reduce engine efficiency. This reduced efficiency could result in excessive fuel usage
and/or shortened engine component life.
Perform the valve lash setting when the engine is
cold. After the engine has been shut down and the
valve covers are removed, the engine is considered
cold. Before performing maintenance, prevent the
entry of foreign matter into the top of the cylinder
head and the valve mechanism. Thoroughly clean
the area around the valve mechanism covers.
i01225237
Fuel Injector - Inspect/Adjust
SMCS Code: 1290-025
Note: Perform this procedure when the engine valve
lash is inspected.
The Electronic Control module produces high
voltage. To prevent personal injury make sure the
Electronic Control Module is not powered and the
unit injector solenoids are disconnected.
NOTICE
The camshafts must be correctly timed with the crankshaft before an adjustment of the lash for the fuel injector is made. The timing pins must be removed from
the camshafts before the crankshaft is turned or damage to the cylinder block will be the result.
Illustration 73
g00736817
(1) Fuel priming pump plunger
2. Turn the fuel priming pump plunger
counterclockwise in order to release the
lock plate from the retainer.
3. Operate the fuel priming pump until the air in the
fuel system has been pumped through the fuel
return line back to the fuel tank.
4. Press the fuel priming pump plunger to the locking
position. Turn the fuel priming pump plunger
clockwise in order to engage the lock plate in the
retainer.
Note: Enable the starting system only after all
maintenance has been completed.
Priming Procedure for Dry Starting
If the air cannot be completely purged from the fuel
system and the engine will not start, see Special
Instruction, SEHS9586, “3500 EUI Fuel Priming
Procedure”.
SEBU8224
89
Maintenance Section
Fuel System Primary Filter - Clean/Inspect/Replace
i01398258
Fuel System Primary Filter Clean/Inspect/Replace
SMCS Code: 1260-510; 1260-571
Fuel leaked or spilled onto hot surfaces or electrical components can cause a fire. To help prevent possible injury, turn the start switch off when
changing fuel filters or water separator elements.
Clean up fuel spills immediately.
1. Stop the engine. Ensure that the engine will not
start during this procedure.
2. Shut off the fuel supply valve to the engine.
NOTICE
Do not allow dirt to enter the fuel system. Thoroughly
clean the area around a fuel system component that
will be disconnected. Fit a suitable cover over disconnected fuel system component.
NOTICE
Use a suitable container to catch any fuel that might
spill. Clean up any spilled fuel immediately.
5. Clean the inside of the filter case. Allow the filter
case to dry.
6. Inspect the O-ring seals. Obtain new seal rings if
the old seal rings are damaged or deteriorated.
Ensure that the sealing surfaces for the seals are
clean. Install the seals.
NOTICE
Do not fill the fuel filters with fuel before installing them.
The fuel would not be filtered and could be contaminated. Contaminated fuel will cause accelerated wear
to fuel system parts.
7. Place the element in the filter case. Slide the filter
case over the mounting bolt.
8. Install the nut.
9. Open the fuel supply valve.
10. Prime the fuel system. See this Operation and
Maintenance Manual, “Fuel System - Prime” topic.
i01970987
Fuel System Secondary Filter Replace
SMCS Code: 1261-510-SE
Note: If the engine is equipped with duplex fuel
filters, the fuel filter elements can be changed while
the engine is in operation. Refer to “Replacing the
Fuel Filter Elements During Engine Operation”.
Fuel leaked or spilled onto hot surfaces or electrical components can cause a fire. To help prevent possible injury, turn the start switch off when
changing fuel filters or water separator elements.
Clean up fuel spills immediately.
Illustration 74
g00736845
(1) Filter case
(2) Nut
3. Loosen nut (2). Hold filter case (1) and remove nut
(2). Prepare to catch the fuel that is inside of the
filter case with a suitable container. Remove the
filter case from the mounting bolt.
4. Remove the element and wash the element in
clean, nonflammable solvent. Allow the element to
dry. Inspect the element. Install a new element if
the old element is damaged or deteriorated.
Replace the secondary fuel filter elements whenever
the following conditions occur:
• The fuel filter differential pressure gauge registers
103 kPa (15 psi).
• The fuel filters have been used for 1000 service
hours.
90
Maintenance Section
Fuel System Secondary Filter - Replace
SEBU8224
Replacing the Fuel Filter Elements
with the Engine Stopped
Canister
Personal injury can result from parts and/or covers under spring pressure.
1. Stop the engine. Ensure that the engine will not
start during this procedure.
Spring force will be released when covers are removed.
2. Shut off the fuel supply valve to the engine.
Be prepared to hold spring loaded covers as the
bolts are loosened.
NOTICE
Do not allow dirt to enter the fuel system. Thoroughly
clean the area around a fuel system component that
will be disconnected. Fit a suitable cover over disconnected fuel system component.
NOTICE
Use a suitable container to catch any fuel that might
spill. Clean up any spilled fuel immediately.
5. Be alert to the spring force. Gradually loosen but
do not remove bolts (4). Before removing bolts (4),
pry cover (5) loose in order to relieve any spring
pressure. Remove cover (5). Remove the O-ring
seal on the inside of the cover. Remove the fuel
filter elements.
6. Clean cover (5) and clean the O-ring seal. Clean
the inside of the fuel filter housing.
7. Install new fuel filter elements.
8. Inspect the O-ring seal. Ensure that the surfaces
for the O-ring seal are clean. Install a new
O-ring seal if the old O-ring seal is damaged or
deteriorated.
9. Install cover (5). Ensure that the springs are
seated properly between the cover and the fuel
filter elements.
10. Open the fuel supply valve. Reconnect the
battery.
Illustration 75
(1)
(2)
(3)
(4)
(5)
g00329184
Drain
Drain valve
Plug
Bolts
Cover
3. Connect a hose to drain (1). Place the other end
of the hose into a suitable container in order to
collect the fuel.
4. Open drain valve (2). Remove plug (3). Allow the
fuel to drain. Clean the plug and install the plug.
Close the drain valve. Remove the hose from the
drain.
Note: Some fuel will remain in the housing after the
fuel has been drained. This fuel will pour out of the
housing when cover (5) is removed. Prepare to catch
the fuel in a suitable container. Clean up any spilled
fuel with absorbent towels or pillows. DO NOT use
absorbent particles to clean up the fuel.
11. Prime the fuel system. Refer to this Operation and
Maintenance Manual, “Fuel System - Prime” topic
(Maintenance Section).
Spin-On Filter
NOTICE
Do not allow dirt to enter the fuel system. Thoroughly
clean the area around a fuel system component that
will be disconnected. Fit a suitable cover over disconnected fuel system component.
SEBU8224
91
Maintenance Section
Fuel System Secondary Filter - Replace
This filter contains pressurized fuel that can cause
a fire hazard, which may result in bodily injury or
death. Follow the instructions given in this Operation and Maintenance Manual and stop the engine
if rapid air movement exists to blow the fuel.
Duplex Fuel Filters
Illustration 76
g00425598
Secondary fuel filters
1. Remove the used fuel filter with a 1U-8760 Chain
Wrench. Discard the used fuel filter.
2. Clean the gasket sealing surface of the fuel filter
base.
Ensure that all of the old gasket is removed.
3. Apply clean diesel fuel to the new fuel filter gasket.
Illustration 77
g00657535
(1) Fill valve
(2) Control valve
NOTICE
Do not fill the fuel filters with fuel before installing the
fuel filters. The fuel will not be filtered and could be
contaminated. Contaminated fuel will cause accelerated wear to fuel system parts.
1. Open FILL valve (1) for a minimum of five minutes
in order to fill the fuel filters that will not be
serviced. The fuel filters that will not be serviced
must be full of fuel. Close the FILL valve.
4. Install the new fuel filter.
2. If the main filter will be serviced, rotate control
valve (2) to the “AUX RUN” position.
Spin the new fuel filter onto the fuel filter base until
the gasket contacts the base. Tighten the fuel filter
by hand by one full turn. Do not overtighten the
fuel filter. Use the rotation index marks that are on
the fuel filter as a guide for proper tightening.
5. Prime the fuel system.
See this Operation and Maintenance Manual,
“Fuel System - Prime” topic (Maintenance
Section).
Replacing the Fuel Filter Elements
During Engine Operation
If the engine is equipped with duplex fuel filters, the
fuel filters can be changed while the engine is in
operation.
If the auxiliary filters will be serviced, rotate control
valve (2) to the “MAIN RUN” position.
NOTICE
Do not allow dirt to enter the fuel system. Thoroughly
clean the area around a fuel system component that
will be disconnected. Fit a suitable cover over disconnected fuel system component.
NOTICE
Use a suitable container to catch any fuel that might
spill. Clean up any spilled fuel immediately.
3. See “Replacing the Fuel Filter Elements with the
Engine Stopped”. Perform Step 3 through Step 9
from the “Canister” instructions.
4. Open fill valve (1) for a minimum of five minutes in
order to fill the new elements. Close the fill valve.
After the new filter elements are full of fuel, either
the main filter or the auxiliary filter may be used.
92
Maintenance Section
Fuel Tank Water and Sediment - Drain
SEBU8224
i02571779
Fuel Tank Water and Sediment
- Drain
SMCS Code: 1273-543-M&S
NOTICE
Care must be taken to ensure that fluids are contained
during performance of inspection, maintenance, testing, adjusting and repair of the product. Be prepared to
collect the fluid with suitable containers before opening any compartment or disassembling any component containing fluids.
Refer to Special Publication, NENG2500, “Caterpillar
Dealer Service Tool Catalog” for tools and supplies
suitable to collect and contain fluids on Caterpillar
products.
Dispose of all fluids according to local regulations and
mandates.
Fuel Tank
Fuel quality is critical to the performance and to the
service life of the engine. Water in the fuel can cause
excessive wear to the fuel system. Condensation
occurs during the heating and cooling of fuel. The
condensation occurs as the fuel passes through the
fuel system and the fuel returns to the fuel tank. This
causes water to accumulate in fuel tanks. Draining
the fuel tank regularly and obtaining fuel from reliable
sources can help to eliminate water in the fuel.
Drain the Water and the Sediment
Fuel tanks should contain some provision for draining
water and draining sediment from the bottom of the
fuel tanks.
Open the drain valve on the bottom of the fuel tank
in order to drain the water and the sediment. Close
the drain valve.
Check the fuel daily. Drain the water and sediment
from the fuel tank after operating the engine or drain
the water and sediment from the fuel tank after the
fuel tank has been filled. Allow five to ten minutes
before performing this procedure.
Fill the fuel tank after operating the engine in
order to drive out moist air. This will help prevent
condensation. Do not fill the tank to the top. The
fuel expands as the fuel gets warm. The tank may
overflow.
Some fuel tanks use supply pipes that allow water
and sediment to settle below the end of the fuel
supply pipe. Some fuel tanks use supply lines that
take fuel directly from the bottom of the tank. If
the engine is equipped with this system, regular
maintenance of the fuel system filter is important.
Fuel Storage Tanks
Drain the water and the sediment from the fuel
storage tank during the following conditions:
• Weekly
• Oil change
• Refill of the tank
This will help prevent water or sediment from being
pumped from the storage tank into the engine fuel
tank. A 4 micron [c] filter for the breather vent on
the fuel tank is also recommended. Refer to Special
Publication, SENR9620, “Improving Fuel System
Durablity”.
If a bulk storage tank has been refilled or moved
recently, allow adequate time for the sediment to
settle before filling the engine fuel tank. Internal
baffles in the bulk storage tank will also help trap
sediment. Filtering fuel that is pumped from the
storage tank helps to ensure the quality of the fuel.
When possible, water separators should be used.
i02121526
Hoses and Clamps Inspect/Replace
SMCS Code: 7554-040; 7554-510
Inspect all hoses for leaks that are caused by the
following conditions:
• Cracking
• Softness
• Loose clamps
Replace hoses that are cracked or soft. Tighten any
loose clamps.
NOTICE
Do not bend or strike high pressure lines. Do not install bent or damaged lines, tubes or hoses. Repair
any loose or damaged fuel and oil lines, tubes and
hoses. Leaks can cause fires. Inspect all lines, tubes
and hoses carefully. Tighten all connections to the recommended torque.
SEBU8224
93
Maintenance Section
Instrument Panel - Inspect
Check for the following conditions:
5. Disconnect the old hose.
• End fittings that are damaged or leaking
6. Replace the old hose with a new hose.
• Outer covering that is chafed or cut
7. Install the hose clamps with a torque wrench.
• Exposed wire that is used for reinforcement
• Outer covering that is ballooning locally
Note: Refer to the Specifications, SENR3130,
“Torque Specifications” in order to locate the proper
torques.
• Flexible part of the hose that is kinked or crushed
8. Refill the cooling system.
• Armoring that is embedded in the outer covering
9. Clean the cooling system filler cap. Inspect the
cooling system filler cap’s gaskets. Replace
the cooling system filler cap if the gaskets are
damaged. Install the cooling system filler cap.
A constant torque hose clamp can be used in place
of any standard hose clamp. Ensure that the constant
torque hose clamp is the same size as the standard
clamp.
Due to extreme temperature changes, the hose will
heat set. Heat setting causes hose clamps to loosen.
This can result in leaks. A constant torque hose
clamp will help to prevent loose hose clamps.
Each installation application can be different. The
differences depend on the following factors:
• Type of hose
• Type of fitting material
• Anticipated expansion and contraction of the hose
• Anticipated expansion and contraction of the
fittings
Replace the Hoses and the Clamps
Pressurized System: Hot coolant can cause serious burns. To open the cooling system filler cap,
stop the engine and wait until the cooling system
components are cool. Loosen the cooling system
pressure cap slowly in order to relieve the pressure.
1. Stop the engine. Allow the engine to cool.
2. Loosen the cooling system filler cap slowly in
order to relieve any pressure. Remove the cooling
system filler cap.
Note: Drain the coolant into a suitable, clean
container. The coolant can be reused.
3. Drain the coolant from the cooling system to a
level that is below the hose that is being replaced.
4. Remove the hose clamps.
10. Start the engine. Inspect the cooling system for
leaks.
i01048507
Instrument Panel - Inspect
SMCS Code: 7451-040
Inspect the instrument panel for good condition.
Perform the self-test. All of the warning lamps should
illuminate. If a warning lamp does not illuminate,
replace the bulb immediately. If the alarm does
not sound, investigate the problem and correct the
problem.
Check the condition of all of the gauges. If a gauge
is broken, repair the gauge or replace the gauge
immediately.
Frequently monitor the gauges during normal
operation.
Record the data in a log. Compare the new data to
the data that was previously recorded. Comparing
the new data to the recorded data will help to
establish the trends of engine performance. A gauge
reading that is abnormal may indicate a problem with
operation or a problem with the gauge.
94
Maintenance Section
Maintenance Recommendations
SEBU8224
i02624673
Maintenance
Recommendations
SMCS Code: 1000
Experience has shown that maintenance intervals
are most accurately based on fuel consumption.
Fuel consumption corresponds more accurately to
the engine load. Table 19 lists average ranges of
fuel consumption and service hours for a load factor
of approximately 60 percent. Use the range of fuel
consumption only as a guideline.
Table 19
Maintenance Interval Schedule
Service Hours and Fuel Consumption for 3512C
and 3516C Engines (1)
Overhaul Type
Top End
Overhaul
3512CEngines
3516CEngines
7500 Service Hours
976,000 L
(257,830 US gal)
1,298,000 L
(342,893 US gal)
22,500 Service Hours
Major Overhaul
(1)
2,928,000 L
(773,490 US gal)
3,894,240 L
(1,028,741 US
gal)
Fuel consumption is based on a load factor of approximately
60 percent.
Severe Operation
Severe operation is the use of an engine that
exceeds current published standards for that engine.
Caterpillar maintains standards for the following
engine parameters:
• Horsepower
• Range of rpm
• Fuel consumption
• Fuel quality
• Altitude
• Maintenance intervals
• Selection of oil
• Selection of coolant
• Environmental qualities
• Installation
Refer to the standards for your engine or consult your
Caterpillar dealer in order to determine if your engine
is operating within the defined parameters.
Severe operation can accelerate component wear.
Engines that are operating under severe conditions
may need more frequent maintenance intervals for
the following reasons:
• Maximum reliability
• Retention of full service life
Because of individual applications, it is not possible
to identify all of the factors which can contribute to
severe operation. Consult your Caterpillar dealer
about the maintenance that is needed for your
specific engine.
The following factors can contribute to severe
operation: environment, improper operating
procedures, and improper maintenance practices.
Environmental Factors
Extreme Ambient Temperatures
Extended operation in environments that are
extremely cold or hot can damage components. Valve
components can be damaged by carbon buildup if
the engine is frequently started and stopped in very
cold temperatures. Extremely hot inlet air reduces
the performance capabilities of the engine.
Note: See this Operation and Maintenance Manual,
“Cold Weather Operation” topic (Operation Section),
or see Supplement, SEBU5898, “Cold Weather
Recommendations”.
Cleanliness
Unless the equipment is cleaned regularly, extended
operation in a dirty environment and in a dusty
environment can damage components. Built up mud,
dirt, and dust can encase components. This can
make maintenance difficult. The buildup can contain
corrosive chemicals. Corrosive chemicals and salt
can damage some components.
Improper Operating Procedures
• Extended operation at low idle
• Minimum cool down periods after high load factor
operation
• Operating the engine beyond the guidelines for the
engine rating
• Operating the engine at loads that are greater than
the rated load
SEBU8224
95
Maintenance Section
Overhaul (Major)
• Operating the engine at speeds that are greater
than the rated speed
• Use of the engine for an application that is not
approved
Improper Maintenance Practices
• Extension of maintenance intervals
• Not using recommended fuel, lubricants, and
coolant/antifreeze
i02624456
Overhaul (Major)
SMCS Code: 7595-020-MJ
A major overhaul includes all of the work that is done
for the top end overhaul. A major overhaul includes
additional parts and labor. Additional parts and labor
are required in order to completely rebuild the engine.
For the major overhaul, all of the bearings,
seals, gaskets, and components that wear are
disassembled. The parts are cleaned and inspected.
If necessary, the parts are replaced. The crankshaft
is measured for wear. The crankshaft may require
regrinding. Alternatively, the crankshaft may be
replaced with a Caterpillar replacement part.
Your Caterpillar dealer can provide these services
and components. Your Caterpillar dealer can ensure
that the components are operating within the
appropriate specifications.
Replacement of Components
Refer to this Operation and Maintenance Manual,
“Maintenance Recommendations” in order to
determine the maintenance interval for a major
overhaul.
Replace the following components during the major
overhaul:
The need for a major overhaul is determined by
several factors.
• Connecting rod bearings
• An increase of oil consumption
• Crankshaft seals
• An increase of crankcase blowby
• Crankshaft thrust washers
• The total amount of fuel consumption
• Electronic unit injectors
• The service hours of the engine
• Gear train bushings
• The wear metal analysis of the lube oil
• Gear train bearings
• An increase in the levels of noise and vibration
• Main bearings
An increase of wear metals in the lube oil indicates
that the bearings and the surfaces that wear may
need to be serviced. An increase in the levels of
noise and vibration indicates that rotating parts
require service.
• Piston rings
Note: It is possible for oil analysis to indicate a
decrease of wear metals in the lube oil. The cylinder
liners may be worn so that polishing of the bore
occurs. Also, the increased use of lube oil will dilute
the wear metals.
Inspect the following components according to
the instructions that are in Caterpillar reusability
publications. Refer to Guidelines for Reusable
Parts and Salvage Operations, SEBF8029, “Index
of Publications on Reusability or Salvage of Used
Parts”.
Monitor the engine as the engine accumulates
service hours. Consult your Caterpillar dealer about
scheduling a major overhaul.
Note: The driven equipment may also require service
when the engine is overhauled. Refer to the literature
that is provided by the OEM of the driven equipment.
• Camshaft bearings
Inspection, Reconditioning or
Exchanging of Components
Recondition the worn components or exchange the
components, if necessary. Your Caterpillar dealer can
provide these services and components.
• Camshaft followers
• Camshaft thrust washers
• Connecting rods
96
Maintenance Section
Overhaul (Major)
SEBU8224
• Crankshaft vibration damper
• Driven equipment (alignment)
• Cylinder head assembly
• Engine cylinder block
• Cylinder liners
• Engine control module
• Engine mounts
• Exhaust bellow shields
• Scavenge oil pump
• Flywheel
• Engine wiring harness
• Front gear train (gears)
• Exhaust manifold seals
• Oil suction screen
• Exhaust manifold bellows
• Rear gear train
• Fuel pressure regulating valve
Inspect the camshaft for damage to the journals and
the lobes.
• Fuel priming pump
• Fuel transfer pump
Inspect the crankshaft for any of the following
conditions:
• Inlet manifold gaskets
• Deflection
• Inlet manifold seals
• Damage to the journals
• Oil cooler core
• Bearing material that has seized to the journals
• Oil pump
Check the journal taper and the profile of the
crankshaft journals. Check these components by
interpreting the wear patterns on the following
components:
• Pistons
• Piston pins
• Prelube pump
• Pushrods
• Rocker arms
• Spacer plate
• Rod bearing
• Main bearings
Note: If the crankshaft or the camshaft are removed
for any reason, use the magnetic particle inspection
process to check for cracks.
• Software update
Replace the crankshaft vibration damper if any of the
following conditions occur:
• Turbocharger
• Engine failure due to a broken crankshaft
Inspection of Components
• Excessive wear of the front bearing for the
Inspect the following components according to
the instructions that are in Caterpillar reusability
publications. Refer to Guidelines for Reusable
Parts and Salvage Operations, SEBF8029, “Index
of Publications on Reusability or Salvage of Used
Parts”.
crankshaft
• Excessive wear of the gear train that is not caused
by a lack of lubrication
Inspect the gears of the gear train and inspect the
gear train bushings for the following conditions:
• Aftercooler core
• Worn gear teeth
• Camshaft
• Unusual fit
• Crankshaft
• Unusual wear
SEBU8224
97
Maintenance Section
Overhaul (Top End)
In addition to the inspection of components, inspect
the alignment of the driven equipment. See the
Application and Installation Guide for the engine or
see the literature that is provided by the OEM of the
driven equipment.
• Identification of buildup of the impurities that cause
Cleaning of Components
• Determination of possible electrolysis within the
Clean the oil cooler core and the aftercooler core.
Then, pressure test both of these cores. For
instructions on cleaning the cores, see this Operation
and Maintenance Manual, “Aftercooler Core Inspect/Clean” topic.
Clean the oil suction screen. Also, remove side
covers in order to clean the oil sump. For instructions
on removal and installation of components, see
the Service Manual, “Disassembly and Assembly”
module.
Obtain a Coolant Analysis
For conventional heavy-duty coolant/antifreeze,
check the concentration of supplemental coolant
additive (SCA) regularly. The concentration of SCA
can be checked with an S·O·S coolant analysis (Level
I). A more detailed coolant analysis is recommended
periodically.
For example, considerable deposits are found in the
water jacket areas on the external cooling system,
but the concentrations of coolant additives were
carefully maintained. The coolant water probably
contained minerals which were deposited on the
engine over time.
corrosion
• Identification of buildup of the impurities that cause
scaling
engines’ cooling system
A report of the results of the analysis is provided.
Maintenance recommendations are based on the
results.
For more information about S·O·S coolant analysis,
consult your Caterpillar dealer.
i02668438
Overhaul (Top End)
SMCS Code: 7595-020-TE
Refer to this Operation and Maintenance Manual,
“Maintenance Recommendations” in order to
determine the maintenance interval for a top end
overhaul.
A top end overhaul involves the removal, the
inspection, and the rework of the cylinder head
components. Some additional components are
replaced and serviced.
Your Caterpillar dealer can provide these services
and components. Your Caterpillar dealer can ensure
that the components are operating within the
appropriate specifications.
A coolant analysis can be conducted in order to verify
the condition of the water that is being used in the
cooling system. A full water analysis may be obtained
from the following sources:
Note: The driven equipment may also require service
when the engine is overhauled. Refer to the literature
that is provided by the OEM of the driven equipment.
• Caterpillar dealer
If you elect to perform an overhaul without the
services of a Caterpillar dealer, be aware of the
following recommendations.
• Local water utility company
• Agricultural agent
Cylinder Head Assembly
• Independent laboratory
Inspect the cylinder head assembly according to
the instructions that are in Caterpillar reusability
publications. Refer to Guidelines for Reusable
Parts and Salvage Operations, SEBF8029, “Index
of Publications on Reusability or Salvage of Used
Parts”.
Caterpillar recommends an S·O·S coolant analysis
(Level II). This is a comprehensive chemical
evaluation of the coolant. This analysis is also a
check of the overall condition of the inside of the
cooling system. The following services are provided:
• Full Level I analysis
• Identification of the source of metal corrosion and
of contaminants
Your Caterpillar dealer can provide these services
and components. Your Caterpillar dealer can ensure
that the components are operating within the
appropriate specifications.
The use of out-of-spec parts will cause unscheduled
downtime and/or costly repairs.
98
Maintenance Section
Overhaul (Top End)
Unit Injectors
Replace the unit injectors. Consult your Caterpillar
dealer about exchanging the unit injectors. Your
Caterpillar dealer can provide these services and
components.
SEBU8224
3. Remove side covers in order to gain access to
the sump. Clean the bottom of the sump with
absorbent towels or pillows. When the bottom of
the sump is clean, install the side covers.
The wear of unit injectors is affected by the following
considerations:
4. Inspect the screen assembly for good condition.
Obtain a new screen assembly, if necessary.
Install the screen assembly. Install new O-ring
seals.
• Quality of the fuel
Replacement of Components
• Quality of the filtration of the fuel
The wear of the unit injectors can result in elevated
levels of exhaust emissions and/or poor engine
performance. The misfire of a single cylinder is not
typically attributed to normal wear. This condition can
be repaired by replacing the faulty unit injector.
The following list of circumstances indicate that the
unit injectors should be inspected more frequently:
• Use of fuels that are not recommended in this
Operation and Maintenance Manual, “Refill
Capacities and Recommendations”
• Extreme ambient temperatures that reduce the
ability of the fuel to provide lubrication
Replace the following components during the top
end overhaul:
• Electronic unit injectors
Inspection, Reconditioning or
Exchanging of Components
Inspect the following components according to
the instructions that are in Caterpillar reusability
publications. Refer to Guidelines for Reusable
Parts and Salvage Operations, SEBF8029, “Index
of Publications on Reusability or Salvage of Used
Parts”.
• Frequent plugging of the fuel filters
Recondition the worn components or exchange the
components, if necessary. Your Caterpillar dealer can
provide these services and components.
• Insufficient maintenance of the fuel tank or the
• Camshaft followers
fuel storage tank that can allow excessive water,
sediment, etc.
• Cylinder head assembly
• Insufficient maintenance of the fuel filters
• Scavenge oil pump
Oil Suction Screen
• Engine wiring harness
Clean the oil suction screen after the oil has been
drained.
• Exhaust manifold seals
Note: Approximately 1 L (1 qt) of oil will remain in the
housing after the sump has been completely drained.
This oil will pour out of the housing when cover (1) is
removed. Prepare to catch the oil in a pan. Clean up
any spilled oil with absorbent towels or pillows. DO
NOT use absorbent particles to clean up the oil.
1. Remove the screen assembly according to the
instructions in the Service Manual, “Disassembly
and Assembly” module. Discard the used O-ring
seals.
2. Wash the screen assembly in clean nonflammable
solvent. Allow the screen assembly to dry before
installation.
• Exhaust manifold bellows
• Fuel pressure regulating valve
• Fuel priming pump
• Fuel transfer pump
• Inlet manifold gaskets
• Inlet manifold seals
• Oil pump
• Prelube pump
• Pushrods
• Rocker arms
SEBU8224
99
Maintenance Section
Overhaul Considerations
• Spacer plate
Refer to the standards for your engine or consult your
Caterpillar dealer in order to determine if your engine
is operating within the defined parameters.
• Software update
• Turbocharger
Severe operation can accelerate component wear.
Engines that are operating under severe conditions
may need more frequent maintenance intervals for
the following reasons:
Inspection of Components
Inspect the following components according to
the instructions that are in Caterpillar reusability
publications. Refer to Guidelines for Reusable
Parts and Salvage Operations, SEBF8029, “Index
of Publications on Reusability or Salvage of Used
Parts”.
• Aftercooler core
• Camshaft
• Maximum reliability
• Retention of full service life
Because of individual applications, it is not possible
to identify all of the factors which can contribute to
severe operation. Consult your Caterpillar dealer
about the maintenance that is needed for your
specific engine.
The following factors can contribute to severe
operation: environment, improper operating
procedures, and improper maintenance practices.
• Driven equipment (alignment)
• Engine control module
• Exhaust bellow shields
Environmental Factors
• Oil suction screen
Extreme Ambient Temperatures
i02565333
Overhaul Considerations
SMCS Code: 7595-043
Severe Operation
Severe operation is the use of an engine that
exceeds current published standards for that engine.
Caterpillar maintains standards for the following
engine parameters:
• Horsepower
Extended operation in environments that are
extremely cold or hot can damage components. Valve
components can be damaged by carbon buildup if
the engine is frequently started and stopped in very
cold temperatures. Extremely hot inlet air reduces
the performance capabilities of the engine.
Note: See this Operation and Maintenance Manual,
“Cold Weather Operation” topic (Operation Section),
or see Supplement, SEBU5898, “Cold Weather
Recommendations”.
Cleanliness
• Fuel quality
Unless the equipment is cleaned regularly, extended
operation in a dirty environment and in a dusty
environment can damage components. Built up mud,
dirt, and dust can encase components. This can
make maintenance difficult. The buildup can contain
corrosive chemicals. Corrosive chemicals and salt
can damage some components.
• Altitude
Improper Operating Procedures
• Maintenance intervals
• Extended operation at low idle
• Selection of oil
• Minimum cool down periods after high load factor
• Range of rpm
• Fuel consumption
• Selection of coolant
• Environmental qualities
• Installation
operation
• Operating the engine beyond the guidelines for the
engine rating
• Operating the engine at loads that are greater than
the rated load
100
Maintenance Section
Overhaul Considerations
SEBU8224
• Operating the engine at speeds that are greater
Improper Maintenance Practices
Line (2) represents the maintenance and repair
costs for an owner that chose to operate beyond
the recommended intervals. The initial cost of the
“repair-after-failure” philosophy is lower. Also, the
first overhaul was delayed. However, the peaks are
significantly higher than the peaks for the customer
that used the “repair-before-failure” philosophy.
• Extension of maintenance intervals
The higher peaks result from two key factors:
• Not using recommended fuel, lubricants, and
• Delaying an overhaul until a breakdown increases
Overhaul Information
• Excessive wear means that fewer components
than the rated speed
• Use of the engine for an application that is not
approved
coolant/antifreeze
An overhaul is replacing the major worn components
of the engine. An overhaul interval is a maintenance
interval that is planned. The engine is rebuilt with
certain rebuilt parts or new parts that replace the
worn parts.
An overhaul also includes the following maintenance:
the chance of a catastrophic failure. This type of
failure requires more parts, labor, and cleanup.
will be reusable. More labor may be required for
salvage or repair of the components.
When all of the costs are considered,
“repair-before-failure” is the least expensive
alternative for most components and engines.
• Inspection of all the parts that are visible during
It is not practical to wait until the engine exhibits
symptoms of excessive wear or failure. It is not less
costly to wait. A planned overhaul before failure may
be the best value for the following reasons:
• Replacement of the seals and gaskets that are
• Costly unplanned downtime can be avoided.
the disassembly
removed
• Cleaning of the internal passages of the engine
and the engine block
Most owners will save money by overhauling the
engine at the intervals that are recommended in this
Operation and Maintenance Manual. Consider the
graph in Illustration 78.
• Many original parts can be reused according to the
guidelines for reusable parts.
• The service life of the engine can be extended
without the risk of a major catastrophe due to
engine failure.
• Achieve the best cost/value relationship per hour
of extended service life.
Overhaul Inspection
Refer to the Service Manual for the disassembly and
assembly procedures that are necessary in order
to perform the required maintenance on the items
that are listed. Consult your Caterpillar dealer for
assistance.
g00745964
To determine the reusability publications that are
needed to inspect the engine, refer to Guidelines for
Reusable Parts and Salvage Operations, SEBF8029,
“Index of Publications on Reusability or Salvage of
Used Parts”.
In Illustration 78, line (1) represents the maintenance
and repair costs for an owner that followed the
recommendations for inspection, maintenance, and
repair. The peaks represent overhauls.
The Guidelines For Reusable Parts and Salvage
Operations is part of an established Caterpillar
parts reusability program. These guidelines were
developed in order to assist Caterpillar dealers and
customers reduce costs by avoiding unnecessary
expenditures for new parts. If the engine parts comply
with the established inspection specifications, the
parts can be reused.
Illustration 78
(Y) Cost
(X) Time
(1) Cost of maintenance and repair that is planned
(2) Cost of maintenance and repair that is not planned
SEBU8224
The use of out-of-spec parts could result in
unscheduled downtime and/or costly repairs. The use
of out-of-spec parts can also contribute to increased
fuel consumption and reduction of engine efficiency.
New parts are not necessary if the old parts can be
reused, repaired, or salvaged. Otherwise, the old
parts can be replaced or exchanged.
101
Maintenance Section
Prelube Pump - Inspect
i01879911
Prelube Pump - Inspect
SMCS Code: 1319-040
Inspect the prelube pump for the following conditions:
Your Caterpillar dealer can provide the parts that are
needed to rebuild the engine at the least possible
cost.
• Cracks
Overhaul Programs
• Proper operation
An economical way to obtain most of the parts
that are needed for overhauls is to use Caterpillar
remanufactured parts. Caterpillar remanufactured
parts are available at a fraction of the cost of new
parts. These parts have been rebuilt by Caterpillar
and certified for use. The following components are
examples of the remanufactured parts:
• Cylinder heads
• Pin holes
• Wear
Perform a pressure check on the prelube pump.
Inspect the hoses and the fittings for leaks.
Inspect the prelube pump for leaks. Replace all of the
seals if a leak is observed.
Inspect the wiring for the following conditions:
• Oil Pumps
• Damage
• Turbochargers
• Fraying
• Water pumps
Consult your Caterpillar dealer for details and for a
list of the remanufactured parts that are available.
Your Caterpillar dealer may be offering a variety of
overhaul options.
A Flat Rate Overhaul guarantees the maximum price
that you will pay for an overhaul. Flat rate prices on
preventive maintenance programs or major repair
options are available from many servicing dealers
for all Caterpillar engines. Consult your Caterpillar
dealer in order to schedule a before failure overhaul.
Overhaul Recommendation
Caterpillar recommends a scheduled overhaul in
order to minimize downtime. A scheduled overhaul
will provide the lowest cost and the greatest value.
Schedule an overhaul with your Caterpillar dealer.
Overhaul programs vary between dealers. To obtain
specific information about the types of overhaul
programs and services, consult your Caterpillar
dealer.
Ensure that the wiring is in good condition.
Inspect the electrical connections. Ensure that the
electrical connections are secure.
Inspect the brushes. Replace the brushes, if
necessary.
If repair or replacement is necessary, see the Service
Manual or see literature that is provided by the OEM
of the pump. Consult your Caterpillar dealer for
assistance.
i02623059
Speed Sensor - Clean/Inspect
SMCS Code: 1907-040; 1907-070
An engine speed/timing sensor is mounted in the
flywheel housing. The speed/timing sensor provides
information about engine speed and the position of
the crankshaft to the engine control module (ECM).
102
Maintenance Section
Starting Motor - Inspect
SEBU8224
c. Coat the threads of the sensor with 4C-5597
Anti-Seize Compound.
Note: The sliphead is designed to contact a tooth
during the first revolution of the speed-timing wheel.
For the maximum allowable clearance between the
sliphead and the tooth, refer to the Specifications
Manual.
d. Install the sensor. Tighten the locknut to
40 ± 5 N·m (30 ± 4 lb ft).
i02618737
Illustration 79
g00760464
1. Remove engine speed/timing sensor (1). Inspect
the condition of the end of the magnet. Look for
signs of wear and contaminants.
2. Clean any debris from the face of the magnet.
Starting Motor - Inspect
(If equipped)
SMCS Code: 1451-040; 1453-040
Air Starting Motor
If the starting motor fails, the engine may not start in
an emergency situation. A scheduled inspection of
the starting motor is recommended.
Illustration 80
g01115363
3. Check the tension of the sliphead. Gently extend
sliphead (2) for a minimum of 4 mm (0.16 inch).
Then push back the sliphead.
When the sliphead has the correct tension, at
least 22 N (5 lb) of force is required to push in the
sliphead from the extended position.
NOTICE
The sliphead must be fully extended when the speed/
timing sensor is installed so that the sensor maintains
the correct clearance with the speed-timing wheel.
If the correct clearance is not maintained, the signal
from the sensor will not be generated.
The starting motor pinion and the flywheel ring gear
must be in good condition in order for the engine
to start properly. The engine will not start if the
starting motor pinion does not engage the flywheel
ring gear. The teeth of the starting motor pinion and
the flywheel ring gear can be damaged because of
irregular engagement.
Inspect the starting motor for proper operation. Listen
for grinding when the engine is started. Inspect the
teeth of the starting motor pinion and the flywheel
ring gear. Look for patterns of wear on the teeth. Look
for teeth that are broken or chipped. If damaged teeth
are found, the starting motor pinion and the flywheel
ring gear must be replaced.
Personal injury or death can result from improperly checking for a leak.
Do not install the sensor between the teeth of the
speed-timing wheel. Damage to the sensor would result. Before installing the sensor, ensure that a tooth
of the wheel is visible in the mounting hole for the sensor.
Always use a board or cardboard when checking
for a leak. Escaping air or fluid under pressure,
even a pin-hole size leak, can penetrate body tissue causing serious injury, and possible death.
4. Install the engine speed/timing sensor.
If fluid is injected into your skin, it must be treated
immediately by a doctor familiar with this type of
injury.
a. Ensure that a tooth on the speed-timing wheel
is visible in the mounting hole for the sensor.
b. Extend sliphead (2) by a minimum of 4 mm
(0.16 inch).
Inspect all of the components in the air circuit for
the starting motor. Inspect all of the air lines and
connections for leaks.
SEBU8224
103
Maintenance Section
Turbocharger - Inspect
If damaged teeth are found, the air circuit for
the starting motor must be examined in order to
determine the cause of the problem.
Fouling of the compressor can contribute to loss of
engine power, increased black smoke and overall
loss of engine efficiency.
Electric Starting Motor
If the turbocharger fails during engine operation,
damage to the turbocharger compressor wheel
and/or to the engine may occur. Damage to the
turbocharger compressor wheel could allow parts
from the compressor wheel to enter an engine
cylinder. This can cause additional damage to the
pistons, the valves, and the cylinder head.
If the starting motor fails, the engine may not start in
an emergency situation. A scheduled inspection of
the starting motor is recommended.
The starting motor pinion and the flywheel ring gear
must be in good condition in order for the engine
to start properly. The engine will not start if the
starting motor pinion does not engage the flywheel
ring gear. The teeth of the starting motor pinion and
the flywheel ring gear can be damaged because of
irregular engagement.
Inspect the starting motor for proper operation. Listen
for grinding when the engine is started. Inspect the
teeth of the starting motor pinion and the flywheel
ring gear. Look for patterns of wear on the teeth. Look
for teeth that are broken or chipped. If damaged teeth
are found, the starting motor pinion and the flywheel
ring gear must be replaced.
Problems with the electric starting motor can be
caused by the following conditions: malfunction of
the solenoid and malfunction of the electric starting
system.
Inspect the electrical system for the following
conditions:
• Loose connections
NOTICE
Turbocharger bearing failures can cause large quantities of oil to enter the air inlet and exhaust systems.
Loss of engine lubricant can result in serious engine
damage.
Minor leakage of a turbocharger housing under extended low idle operation should not cause problems
as long as a turbocharger bearing failure has not occurred.
When a turbocharger bearing failure is accompanied
by a significant engine performance loss (exhaust
smoke or engine rpm up at no load), do not continue
engine operation until the turbocharger is repaired or
replaced.
An inspection of the turbocharger can minimize
unscheduled downtime. An inspection of the
turbocharger can also reduce the chance for potential
damage to other engine parts.
Note: Turbocharger components require clearances
that are precise. The turbocharger cartridge
must be balanced due to high rpm. Severe
service applications can accelerate the wear of the
components. Severe service applications may require
more frequent inspections of the turbocharger.
• Corrosion
• Wires that are worn or frayed
• Cleanliness
Removal and Installation of the
Starting Motor
Removal and Installation
Refer to the Service Manual, “Disassembly and
Assembly” module for information on removing the
starting motor and installing the starting motor.
For options regarding the removal, installation,
repair and replacement, consult your Caterpillar
dealer. Refer to the Service Manual for this engine
or consult your Caterpillar dealer for the procedure
and specifications.
Consult your Caterpillar dealer for assistance and/or
for options on replacement of the starting motor.
Cleaning and Inspecting
i01261768
Turbocharger - Inspect
SMCS Code: 1052-040
Periodic inspection and cleaning is recommended for
the turbocharger compressor housing (inlet side).
1. Remove the exhaust outlet piping and remove
the air inlet piping from the turbocharger. Visually
inspect the piping for the presence of oil.
104
Maintenance Section
Walk-Around Inspection
SEBU8224
2. Turn the compressor wheel and the turbine wheel
by hand. The assembly should turn freely. Inspect
the compressor wheel and the turbine wheel for
contact with the turbocharger housing. There
should not be any visible signs of contact between
the turbine wheel or compressor wheel and the
turbocharger housing. If there is any indication
of contact between the rotating turbine wheel
or the turbocharger wheel and the turbocharger
housing, the turbocharger should be reconditioned
or replaced.
3. Check the compressor wheel for cleanliness.
If only the blade side of the wheel is dirty, dirt
and/or moisture is passing through the air filtering
system. If oil is found only on the back side of the
wheel, there is a possibility of a failed turbocharger
oil seal.
The presence of oil may be the result of extended
engine operation at low idle. The presence of oil
may also be the result of a restriction of the line for
the inlet air (plugged air filters), which causes the
turbocharger to slobber.
4. Inspect the bore of the turbine housing for
corrosion.
5. Clean the turbocharger housing with standard
shop solvents and a soft bristle brush.
6. Fasten the air inlet piping and the exhaust outlet
piping to the turbocharger housing.
i02622549
Walk-Around Inspection
SMCS Code: 1000-040
Inspect the Engine for Leaks and
for Loose Connections
A walk-around inspection should only take a few
minutes. When the time is taken to perform these
checks, costly repairs and accidents can be avoided.
For maximum engine service life, thoroughly inspect
the engine compartment before starting the engine.
Look for items such as leaks, loose bolts, loose
connections and trash buildup. Make repairs, as
needed.
• The guards must be in the proper place. Repair
damaged guards or replace missing guards.
• Wipe all caps and plugs before the engine is
serviced in order to reduce the chance of system
contamination.
NOTICE
For any type of leak (coolant, lube, or fuel) clean up the
fluid. If leaking is observed, find the source and correct
the leak. If leaking is suspected, check the fluid levels
more often than recommended until the leak is found
or fixed, or until the suspicion of a leak is proved to be
unwarranted.
NOTICE
Accumulated grease and/or oil on an engine or deck is
a fire hazard. Remove this debris with steam cleaning
or high pressure water.
Note: Use care when you use steam cleaning. Use
care when you use high pressure water. Direct spray
to rotating electrics or electronic components can
cause nonfixable damage.
NOTICE
Water and/or condensation can cause damage to
electrical components. Protect all electrical components from exposure to water.
• Ensure that the cooling lines are clamped properly
and ensure that the cooling lines are tight. Check
for leaks. Check the condition of all pipes.
• Inspect the water pumps for coolant leaks.
Note: The water pump seal is lubricated by coolant
in the cooling system. It is normal for a small amount
of leakage to occur when the engine cools and the
parts contract.
Excessive coolant leakage may indicate the need
to replace the water pump seal. For the removal of
water pumps and the installation of water pumps
and/or seals, refer to two articles in the Disassembly
and Assembly Manual, “Water Pump - Remove and
Water Pump - Install” or consult your Caterpillar
dealer.
• Inspect the lubrication system for leaks at the
following locations: front crankshaft seal, rear
crankshaft seal, oil pan, oil filters, valve cover,
turbocharger, external oil lines, and connections.
• Inspect the fuel system for leaks. Look for loose
fuel line clamps or connections.
• Inspect the piping for the air inlet system and the
elbows for cracks and for loose clamps.
• Drain the water and the sediment from fuel tanks
on a daily basis in order to ensure that only clean
fuel enters the fuel system.
SEBU8224
105
Maintenance Section
Water Pump - Inspect
• Inspect the wiring and the wiring harnesses for
loose connections and for worn wires or frayed
wires.
• Inspect the ground strap for a good connection and
for good condition.
• Inspect the closed crankcase ventillation (CCV)
filter, if equipped. If the restriction indicator is
visible, service the CCV.
• Check the condition of the gauges. Replace any
gauge that is damaged. Replace any gauge that
can not be calibrated.
• Inspect the exhaust system for leaks. Inspect the
gaskets and the exhaust bellows joint. If a leak is
found, make repairs.
i02624237
Water Pump - Inspect
SMCS Code: 1361-040
A failed water pump might cause severe engine
overheating problems that could result in cracks in
the cylinder head, a piston seizure or other potential
damage to the engine.
Visually inspect the water pump for leaks. If leaking
of the water pump seals is observed, replace all of
the water pump seals. Refer to two articles in the
Disassembly and Assembly Manual, “Water Pump
- Disassemble and Water Pump - Assemble” for
the disassembly and assembly procedure. If it is
necessary to remove the water pump, refer to two
articles in the Disassembly and Assembly Manual,
“Water Pump - Remove and Water Pump - Install”.
Inspect the water pump for wear, cracks, pin holes
and proper operation. Refer to the Parts Manual
for the correct part numbers for your engine or
consult your Caterpillar dealer if repair is needed or
replacement is needed.