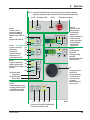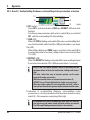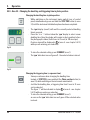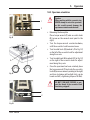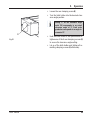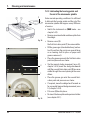
1
Leica SM2500
Heavy-duty
sliding microtome
Instruction manual
Leica SM2500
V1.3 English - 10/2007
Always keep this manual near the instrument.
Read carefully prior to operating the instrument.
NOTE
The information, numerical data, notes and value
judgments contained in this manual represent the
current state of scientific knowledge and stateof-the-art technology as we understand it following thorough investigation in this field.
We are under no obligation to update the present
manual according to the latest technical developments, nor to provide our customers with additional copies, updates etc. of this manual.
For erroneous statements, drawings, technical
illustrations etc. contained in this manual we exclude liability as far as permissible according to
the national legal system applicable in each individual case. In particular, no liability whatsoever
is accepted for any financial loss or consequential damage caused by or related to compliance
with statements or other information in this manual.
Statements, drawings, illustrations and other information as regards contents or technical details of the present manual are not to be considered as warranted characteristics of our
products.
These are determined only by the contract provisions agreed between ourselves and our customers.
Leica reserves the right to change technical
specifications as well as manufacturing processes without prior notice. Only in this way is it possible to continuously improve the technology and
manufacturing techniques used in our products.
This document is protected under copyright laws.
Any copyrights of this document are retained by
Leica Biosystems Nussloch GmbH.
Any reproduction of text and illustrations (or of
any parts thereof) by means of print, photocopy,
microfiche, web cam or other methods – including any electronic systems and media – requires
express prior permission in writing by Leica Biosystems Nussloch GmbH.
For the instrument serial number and year of
manufacture, please refer to the name plate at
the back of the instrument.
© Leica Biosystems Nussloch GmbH
Published by:
Leica Biosystems Nussloch GmbH
Heidelberger Str. 17 - 19
D-69226 Nussloch
Germany
Telephone: +49 (0)6224 143-0
Facsimile: +49 (0)6224 143-200
Internet: http://www.histo-solutions.com
Leica SM2500
3
Table of contents
1.
Important information ................................................................................................................ 6
1.1
1.2
1.3
Symbols used in the text and their meanings ............................................................................................ 6
Designated use ............................................................................................................................................... 6
Information on this instruction manual ....................................................................................................... 7
2.
Safety ............................................................................................................................................ 8
2.1
2.2
2.3
Safety regulations .......................................................................................................................................... 8
Built-in safety devices ................................................................................................................................... 9
Safety instructions ....................................................................................................................................... 10
3.
4.
Technical data ............................................................................................................................ 13
Setup ............................................................................................................................................. 14
4.1
4.2
4.3
4.4
4.5
4.5.1
4.5.2
4.5.3
Overview - instrument parts / functions ................................................................................................... 14
Site requirements ......................................................................................................................................... 14
Standard delivery Leica SM2500 ............................................................................................................... 15
Unpacking, transport, installation .............................................................................................................. 16
Electrical connection ................................................................................................................................... 17
Verifying and adjusting the voltage selector ........................................................................................... 17
Installing power cord, accessory cords and connecting cable to the microtome ............................ 18
Connecting a remote alarm device or remote camera shutter ............................................................. 19
5.
Operation ................................................................................................................................... 20
5.1
5.2
5.3
5.4
5.4.1
5.4.2
5.4.3
5.4.4
5.4.5
5.4.6
5.4.7
5.4.8
5.4.9
5.4.10
5.4.11
5.4.12
5.4.13
5.4.14
Overview of chapter 5 ‘Operation’ ............................................................................................................. 20
Switching the instrument on ....................................................................................................................... 21
Overview control panel - by functional areas .......................................................................................... 22
Description of each individual control element ....................................................................................... 24
Foot switch .................................................................................................................................................... 24
Area 1 - Standby on/off; emergency stop ................................................................................................. 25
Area 2.1 - Modes of operation .................................................................................................................... 26
Rotary-type selector switch in area 2 ....................................................................................................... 27
Area 2.2 - Section/milling thickness, section/milling stroke preselection, retraction ....................... 28
Area 2.3 - Sectioning / milling modes ........................................................................................................ 29
Area 2.4 - Sledge speed .............................................................................................................................. 30
Area 2.5 - Setting the stop or photo position ............................................................................................ 31
Area 2.5 - Changing the dwelling and triggering time in photo position .............................................. 32
Area 2.6 - Start / stop sectioning / milling ................................................................................................. 33
Area 3 - Operating optional supplementary instruments ....................................................................... 34
Area 4 - Section/milling stroke counter and thickness totalizer and reset buttons .......................... 35
Area 5.1 - Manual movement of knife / miller .......................................................................................... 36
Area 5.2 - Manual movement of the sledge ............................................................................................. 37
4
Instruction manual V 1.3 – 10/2007
Table of contents
5.5.1
5.5.2
5.5.3
5.5.4
5.5.5
5.5.6
5.5.7
5.5.8
5.5.9
5.5.10
5.5.11
5.5.12
5.5.13
5.5.14
5.6
5.6.1
5.6.2
5.6.3
5.7
Mounting the base plates ........................................................................................................................... 38
Clamping specimens or specimen stages in the base plate with vise clamp .................................... 40
Mountable jaws for vise .............................................................................................................................. 42
Mounting specimen holders onto the base plate with dovetail guide ................................................ 42
Specimen orientation ................................................................................................................................... 45
Mounting the knife holders ......................................................................................................................... 46
Inserting knives into the holders ................................................................................................................ 46
Mounting knife holder A .............................................................................................................................. 47
Mounting knife holder B .............................................................................................................................. 50
Mounting knife holder C .............................................................................................................................. 52
Fixed-setting declination blocks (45°) and knife holder A or C ............................................................. 55
Working with fixed-setting (45°) declination blocks and knife holder B ............................................. 58
Inserting the disposable blade rail (only in knife holder B) ................................................................... 59
Working with distance blocks for sectioning very high specimen blocks .......................................... 59
Working with the instrument ...................................................................................................................... 60
Switching the instrument on / selecting parameters ............................................................................. 60
Trimming ........................................................................................................................................................ 61
Sectioning ...................................................................................................................................................... 62
Switching the instrument off ...................................................................................................................... 63
6.
Trouble shooting ...................................................................................................................... 64
6.1
6.2
6.3
Error codes .................................................................................................................................................... 64
Instrument / accessories not working ...................................................................................................... 64
Power failure ................................................................................................................................................. 64
7.
Cleaning, disinfection and maintenance ............................................................................ 65
7.1
7.2
7.2.1
7.2.2
7.2.3
Cleaning / disinfection ................................................................................................................................. 65
Maintenance ................................................................................................................................................. 67
General maintenance steps ........................................................................................................................ 67
Replacing the fuses ...................................................................................................................................... 68
Lubricating the bearing points and the nut of the micrometer spindle ............................................... 70
8.
Overview - accessories .......................................................................................................... 71
8.1
8.2
Knife holders, specimen holders, additional accessories ..................................................................... 71
Overview - which knife to be used in which knife holder ...................................................................... 73
9.
10.
11.
Warranty and service .............................................................................................................. 74
EC Declaration of Conformity ................................................................................................. 75
Peoples Republic of China ..................................................................................................... 76
Leica SM2500
5
1.
Important information
1.1
Symbols used in the text and their
meanings
Warnings and cautions appear in a
grey box and are marked by a warning
triangle.
Failure to comply with these warnings/
cautions can lead to accidents, bodily
injury and damage to instrument and/
or accessories.
Notes, i.e. important information for the
user, appear in a grey box and are
marked by an information sign.
(5)
Figures in brackets refer to item numbers in illustrations or to the illustrations themselves.
ENTER
Function keys that need to be pressed
on the control unit are printed in bold
and capital letters.
1.2
Designated use
Fig. 1
The Leica SM 2500 is a microprocessor-controlled, electrically driven heavy-duty sliding microtome, designated to produce thin sections of
industrial materials and paraffin-, celloidin- and
plastic-embedded samples in medicine, biology
and industry.
In connection with the Leica SP 2600 ultramilling
device, the unit is used for surface milling of plastic, metal and organic-material specimens (such
as bones, teeth). - The Leica SP2600 is described
in a separate instruction manual.
The Leica SM 2500 may be used only in conjunction with accessories and supplementary instruments made by Leica.
If the instrument is used for any other than
the designated application, this will be
considered an improper use of the product!
6
Instruction manual V 1.3 – 10/2007
1.
1.3
Important information
Information on this instruction manual
Instrument type
All information provided in this instruction manual applies only to the instrument type indicated on the title page.
Name plates indicating the instrument type and serial number are attached
to the right side of the microtome and to the left side of the control unit.
Microtome
Fig. 2
Control unit
Fig. 3
Working with this instruction manual
This manual contains important instructions and information related to the
operating safety and maintenance of the instrument.
It is an important part of the product, which must be read carefully prior to
setting up and operating the instrument and it should be kept near the instrument at all times.
If additional requirements on accident prevention and environmental protection exist in the country of operation, this instruction
manual must be supplemented by appropriate instructions to ensure compliance with such requirements.
Leica SM2500
7
2.
Safety
2.1
Safety regulations
This instrument has been built in accordance with the German version of the
following directives and standards:
1. Council Directive 98/37/EC - Machinery
•
•
•
•
•
•
•
DIN EN 292-1 - Part 1
DIN EN 292-2 and A1 - Part 2
DIN EN 294
DIN EN 349
DIN EN 418
DIN EN 1037
DIN EN 1050
2. Council Directive 73/23/EEC - Low voltage
• DIN EN 61010-1
• DIN EN 61010-1/A2 - Part 1
3. Council Directive 89/336/EEC - Electromagnetic compatibility
•
•
•
•
•
DIN EN 61326 - Amendment A1
DIN EN 61326/A1 - Amendment A1
DIN EN 61000-3-2 - Part 3 - Main section 2
DIN EN 6100-3-2 - Part 3-2
DIN EN 6100-3-3 - Part 3-3 - Main section 3
In order to maintain this condition and to ensure safe operation, the operator
must observe the instructions and warnings contained in this instruction
manual.
8
Instruction manual V 1.3 – 10/2007
2.
2.2
Safety
Built-in safety devices
The instrument is equipped with the following safety features and devices:
Emergency stop button located on the control panel:
• For a detailed functional description of the emergency stop switch
please refer to chapter 5.4.2, page 23.
Emergency stop function of the foot switch:
• For a detailed functional description of the foot switch and the emergency stop function integrated into the foot switch, please refer to chapter 5.4.1, page 22.
Integrated knife guards of the different knife holders
• Detailed descriptions of the knife guards integrated into each knife
holder are provided in chapter 5.5.
The safety devices provided by the manufacturer constitute only a basis for
accident prevention.
Major responsibility for accident prevention during the use of the instrument
rests with the employer who has the operating authority for the instrument
and, in addition, with the persons, designated by him, who operate, service
and repair the instrument.
To ensure safe and trouble-free operation of the instrument, be sure to
comply with all instructions, warning and cautions in the following chapters!
Leica SM2500
9
2.
Safety
2.3
Safety instructions
Be sure to read and comply with the
safety instructions, warnings and cautions in this chapter, even if you are already familiar with the operation and
use of other Leica products.
Safety instructions:
Transport and installation
Be sure to follow the unpacking instructions (attached to the outside of
the instrument shipping crate)!
When transporting the instrument, always lock the extendible handles in
place by attaching the transport safety
devices (white plastic blocks) - for details on how to secure the extendible
handles, please refer to chapter 4.3
‘Unpacking, transport, installation’.
The instrument may only be transported in an upright position!
Two people are required to lift and/or
carry the instrument (instrument
weight!)
Be sure to comply with the site requirements (chapter 4.2)!
Never remove or modify any of the
safety devices installed on the instrument and/or accessories!
10
Verify the voltage selector setting:
The voltage selector comes factoryadjusted to a setting of 230 V.
Prior to connecting the instrument to
mains, verify whether the voltage setting is correct for the mains electricity
in your laboratory!
Incorrect voltage selector settings can
lead to severe damage to the instrument!
Prior to adjusting the voltage selector,
disconnect the instrument from mains!
For details on verification and adjustment of the voltage selector, please refer to chapter 4.4.1 ‘Verifying and adjusting the voltage selector’.
The instrument may be connected to
mains only with one of the power
cords supplied and only to grounded
sockets!
The instrument may not be operated in
hazardous locations where risk of explosion exists!
Extreme temperature fluctuations and
high air humidity (e.g. transport, storage) may cause condensation inside
the instrument.
In this case, wait at least two hours
before switching the instrument on.
Failure to comply with this waiting period may cause severe damage to the
instrument!
Instruction manual V 1.3 – 10/2007
2.
Safety
Safety instructions:
Operating the instrument
The instrument may only be operated
by skilled laboratory personnel. It may
only be used for the designated application and operated in accordance
with the instructions contained in this
manual!
Before mounting the knife holder make
sure the bearing blocks of the microtome supporting the knife holder are
clean.
Carefully place the preassembled
knife holder onto the microtome bearing blocks from above. Do not slide the
knife holder onto the bearings to prevent the bearing surface from getting
scratched.
Handle microtome knives and blades
with utmost care. Knife and blade
edges are extremely sharp and can
cause severe injuries!
Wear cut-resistant safety gloves when
inserting/removing the knife (see also
chapter 8.1 ‘Additional accessories’).
Prior to inserting the knife, always
tighten one of the knife clamping
screws of the knife holder to secure
the knife holder in position!
Make sure not to misalign the knife
when tightening the knife clamping
screws as this will negatively affect
sectioning results!
Leica SM2500
Never leave knives/disposable blades
or knife holders with a knife/disposable blade inserted lying around!
Always store knives in the knife case
when not in use!
Never place a knife on a bench with
the edge facing upwards!
Never try to catch a falling knife or
disposable blade!
Always clamp the specimen first and
the knife second!
Always wear protective glasses when
sectioning brittle specimens! - Risk of
splintering!
No liquids may enter the interior of the
instrument during operation!
Always cover the knife edge with the
knife guard during work breaks!
Always remove the knife from the
knife holder when finishing work!
When working with the eccentric ring,
NEVER try to orient the specimen - this
will cause severe damage to the
specimen orientation mechanism!
When knife holder A or C is combined
with the declination blocks, the knife
guard cannot be placed over the knife
edge. Therefore, use extreme caution
when working with this configuration
- wear cut-resistant gloves!
11
2.
Safety
Safety instructions:
Cleaning, disinfection and maintenance
Only authorized service technicians
may access the internal components of
the instrument for service and repair!
Prior to any cleaning, disinfection or
maintenance work, the instrument
must be switched off and disconnected from mains!
Exception:
Cleaning or disinfection procedures
which require the sledge to be moved.
Remove both knife and specimen prior
to any cleaning, disinfection or maintenance work!
Wear cut-resistant safety gloves to remove the knife (see chapter 8.1 ‘Additional accessories’).
No liquids may enter the interior of the
instrument during cleaning, disinfection or maintenance!
Clean only with a slightly moistened
cleaning cloth!
Disinfection only with disinfectants
that allow application with a slightly
moistened cloth!
Do not use any solvents (e.g. xylene,
acetone), any cleaners containing
solvents or scouring powders for
cleaning!
Appropriate cleaners for the control
unit / control panel and all painted surfaces: mild laboratory detergent
(slightly moistened cloth)!
12
Clean the control panel only in
standby mode or when the instrument
is switched off.
Appropriate cleaners for non-varnished metal parts (knife holders,
base plates, specimen clamps):
xylene substitutes, alcohol - apply
with an only slightly moistened cleaning cloth!
Use cleaners and disinfectants according to the safety instructions of
the manufacturer and in compliance
with the regulations applicable in
your laboratory!
Regularly check and empty the section waste trays located below the extendible carrying handles.
Prior to exchanging any fuse, always
switch the instrument off and unplug
the mains plug.
Replace defective fuses only with
fuses of identical specification!
Be sure to follow the instructions in
chapter 7.2.2 (selecting the correct replacement fuse for each fuse holder).
After replacing the line fuses doublecheck whether the correct voltage selector setting is visible.
Users may carry out only the maintenance work described in chapter 7.2!
Any other maintenance work must be
carried out by authorized Leica service technicians.
Instruction manual V 1.3 – 10/2007
3.
Technical data
Microtome
Section thickness range ...........................................................0 μm to 1.000 μm, adjustable in 1-μm steps
Total horizontal specimen stroke ....................................................................................... maximum 275 mm
Total vertical knife feed ........................................................................................................................... 70 mm
Knife retraction (during specimen return stroke) ...................................................................... 0 - 1,000 μm
Clearance angle adjustment ............................................................................................................. 0 ° to 17 °
Knife declination - fixed setting (declination blocks = optional accessory) ....................................... 45 °
Maximum specimen size (L x W x H) ........................................................................................ 25 x 20 x 7 cm
Specimen orientation (along x / y axis) ..................................................................... 4,8 ° along each axis
Specimen orientation (rotability) ................................................................................. approx. +/- 3 and 90 °
Sectioning speed ................................................................... 0.5 - 100 mm/s, adjustable in 0.1-mm steps
Return speed
................................................................... 0.5 - 100 mm/s, adjustable in 0.1-mm steps
Manual knife movement (slow / fast) ......................................................................... 37 mm/s and 74 mm/s
Manual specimen movement (slow / fast) ................................................................. 37 mm/s and 74 mm/s
Electrical connections
Nominal voltage .............................................................................................................. 100 / 120 / 230 / 240 V
Nominal frequency ................................................................................................................... 50 Hz and 60 Hz
Maximum power draw ......................................................................................................................... 1,400 VA
Main fuses, type MDA, Fa. Bussmann .............................................................................................. 2 x T10A
Protective class .................................................................................................................................................. I
Overvoltage installation category ................................................................................................................... II
Vacuum cleaner ........................................................................ 100 / 120 V - maximum power draw 500 VA
Vacuum cleaner ..................................................................... 230 / 240 V - maximum power draw 1,200 VA
Lamp .......................................................................................... 100 / 120 V - maximum power draw 100 W
Lamp .......................................................................................... 230 / 240 V - maximum power draw 200 W
Dimensions and weights
Microtome (H x W x L) ....................................................................................................... 250 x 390 x 750 mm
Control unit (H x W x D) ...................................................................................................... 220 x 385 x 510 mm
Required bench top space for microtome and control unit ................................................ 1,000 x 950 mm
Microtome ..................................................................................................................................... approx. 75 kg
Control unit .................................................................................................................................... approx. 23 kg
Leica SM2500
13
4.
4.1
Setup
Overview - instrument parts / functions
1.3
1.2
1.1
1
2
2.1
2.2
Fig. 3a
1.4
1. Leica SM2500 - Microtome
1.1 Knife holder system (not part of standard delivery)
1.2 Specimen holder system (not part of standard delivery)
1.3 Carrying handle, rear (extendible - not visible in Fig. 3a)
1.4 Carrying handle, front (extendible)
4.2
2. Leica SM2500 - control unit
2.1 Control unit
2.2 Emergency stop button
3. Foot switch (not visible in Fig. 3a see chapter 5.4.1 for details)
Site requirements
• Bench top surface for microtome and control unit sized approx. 1,000 x 950 mm
• Stable laboratory bench (total weight of microtome and control unit approx. 100 kg), exactly horizontal or horizontally adjustable.
• At least 15 cm space on all sides of both instruments to ensure that air can circulate freely around
the instruments.
• Virtually vibration-free floor.
• Stable ambient temperature between +18 °C and +35 °C.
• Relative air humidity of maximum 60 %, non-condensing.
• Do not place near sources of vibration, avoid exposure to direct sunlight and marked temperature
fluctuations.
14
Instruction manual V 1.3 – 10/2007
4.
4.2
Setup
Standard delivery Leica SM 2500
1 Basic instrument
1 Separate control unit ............................................................................. 0405 42863
1 Connecting cable for control unit ........................................................ 0405 35685
1 Foot switch (0505 33888)
1 Set of power cords:
-1 Power cord “D” ............................................................................... 0411 13558
-1 Power cord “USA-C-J” .................................................................. 0411 13559
-1 Power cord “UK” ST/BU F-5A ....................................................... 0411 27822
1 Set of adapter cables:
-2 Adapter cables “USA” ................................................................... 0411 36234
-2 Adpater cables “EU” ...................................................................... 0411 36235
1 Set of replacement fuses:
-2 x T 1.0 A ............................................................................................ 6943 01001
-2 x T 6.25A ........................................................................................... 6943 06251
-2 x T 10.0 A .......................................................................................... 6943 10001
1 Tool set:
-1 Allen key, size 2.5 ............................................................................ 0194 13195
-1 Allen key, size 3.0 ............................................................................ 0194 04764
-1 Allen key, size 4.0 ............................................................................ 0194 04782
-1 Allen key, size 5.0 ............................................................................ 0194 04760
-1 Allen key, size 8.0 ............................................................................ 0194 04792
-1 Torque wrench, size 32 .................................................................. 0383 11934
-1 Single-head wrench, size 13 ......................................................... 0330 11936
-1 Screw driver .................................................................................... 0170 12988
-1 Clamping device .............................................................................. 0383 32392
-1 Remote alarm jack 6.3 mm ............................................................. 6844 01005
-1 Jack connector 3-contact ............................................................. 6844 01008
1 Brush ........................................................................................................ 0183 04477
1 Grease gun .............................................................................................. 0383 11896
1 Dust cover for microtome ..................................................................... 0212 11725
1 Dust cover for control unit .................................................................... 0212 36428
1 Rubber mat .............................................................................................. 0405 36405
1 Instruction manual for Leica SM2500 ................................................. 0701 35100
Specimen and knife holder systems are not included in the instrument standard delivery. They
have to be ordered separately, in accordance with each user’s specific application(s).
Mounting instructions for all accessories can be found in chapter 5.5 of this instruction
manual.
Leica SM2500
15
4.
Setup
4.4
Unpacking, transport, installation
Be sure to follow the unpacking instructions (attached to the outside of the instrument shipping crate)!
2
2
1
When transporting the instrument, always lock the extendible
carrying handles in place by attaching the transport safety devices (white plastic blocks)!
1
3
Fig. 4
4
• Pull out the carrying handles (1) at the front and rear of the instrument.
• Remove the upper housing parts (2) at the front and rear.
• Secure the carrying handles (1) placing the white plastic blocks (3) on
the telescopic bars (4).
Two persons are needed to lift and/or carry the instrument (instrument weight!).
The instrument may only be transported in an upright position!
• Once the instrument has been placed onto the bench, remove the two
plastic blocks (3) from the telescopic bars (4) and put them back into
their storage place in the instrument housing.
• Put the upper housing parts (2) back in place and push the carrying
handles (1) inwards as far they will go.
Fig. 5
Prior to connecting the instrument to mains, verify whether the
voltage setting is correct for the mains electricity in your lab
(please refer to chapter 4.4.1 ‘Verifying and adjusting the voltage
selector’)!
The instrument may not be operated in hazardous locations where
risk of explosion exists!
Never remove or modify any of the safety devices installed on the
instrument and/or accessories!
3
16
4
Fig. 6
Instruction manual V 1.3 – 10/2007
4.
4.5
Setup
Electrical connection
4.5.1 Verifying and adjusting the voltage selector
The voltage selector comes factory-adjusted to a setting of 230 V.
Prior to connecting the instrument to mains, verify whether the
voltage setting is correct for the mains electricity in your lab!
Incorrect voltage selector settings can lead to severe damage to
the instrument!
Prior to adjusting the voltage selector, disconnect the instrument
from mains!
1
3 4 2
1
Checking the voltage selector setting:
The voltage selector is located above the mains switch, on the rear left of
the control unit.
• Does the selected setting (1) correspond to the nominal voltage in your
laboratory?
• If yes: --> proceed to chapter 4.4.2 on the following page.
• If no: --> the voltage selector must be changed to the correct setting as
follows:
• Insert a small screw driver into the notch at the lower end of the voltage
selector housing and carefully remove the housing, using the screwdriver as a lever.
• Remove housing (2) together with fuses (3) and the voltage selector
block (4) (white color).
• Remove the fuses.
• Remove the voltage selector block and re-insert it so that the correct
setting, corresponding to the mains voltage in your lab, is visible in window (1). (Selectable voltage settings: 100, 120, 230 and 240 V).
• Re-insert the fuses.
• Re-insert the housing together with the voltage selector block and the
fuses into the instrument and push slightly inwards until the voltage selector housing locks in place (audible click).
• Verify once again, whether the setting that shows in window (1) is appropriate for the mains voltage in your lab.
Fig.7
Leica SM2500
17
4.
Setup
4.5.2 Installing power cord, accessory cords and connecting cable to the microtome
At the rear of the control unit, set up the following connections:
• Remove the tape from the mains inlet for the power cord (8).
• From the set of power cords delivered (the instrument is delivered with
several, country-specific power cords), select the one that is appropriate
for your lab; connect the power cord.
Fig. 8
Do not yet plug the power cord into the mains outlet.
Connect the remaining cables:
5
1
2
3 4
6
7
8
Fig.
9• Install the connecting cable (1) leading to the microtome and tighten the
fixing screws.
• Connect the other end of cable (1) to the right side of the microtome and
tighten the fixing screws.
• The connecting cable to the ultramiller (2) needs to be installed only
when working with the Leica SP2600 --> see separate instruction manual
Leica SP2600.
• Connect photo camera (3) (optional).
• Connect remote alarm (4) (optional).
• Connect foot switch (5) (NOT optional).
The foot switch must be connected - otherwise the instrument will
not be operational.
• Connect the vacuum cleaner (6) (optional with Leica SM2500 - necessary
when working with Leica SP2600).
• Connect the lamp (7) (optional).
18
Instruction manual V 1.3 – 10/2007
4.
Setup
4.5.3 Connecting a remote alarm device or remote camera shutter
Connecting a remote alarm device:
A remote alarm device can be connected to the Leica SM2500 via a 6.3 mmdiameter jack connector (optional accessory).
• For details on how to connect a remote alarm device to the Leica
SM2500, please contact your local Leica office or the manufacturer
Leica Biosystems Nussloch directly.
Connecting a camera shutter:
The Leica SM2500 offers the option to automatically trigger a photocamera
shutter each time the specimen sledge reaches a preselected photo position.
The connecting cable leading from the camera to the Leica SM2500 must be
configured individually, depending on the type of camera used.
• For on this option, please contact your local Leica office or the manufacturer Leica Biosystems Nussloch directly.
Leica SM2500
19
5.
Operation
5.1
Overview of chapter 5 ‘Operation’
Chapter 5 ‘Operation’ is structured as follows:
Chapter 5.1 Structural description of chapter 5.
Chapter 5.2 Switching the instrument on.
Chapter 5.3 Overview - control panel.
Chapter 5.4 Detailed description of each individual control element
(controls numbered from 1 to 62;
control panel divided into functional areas 1 to 5).
Chapter 5.5 Mounting the accessories (specimen holders,
knife holders, knives).
Chapter 5.6 Working with the instrument:
short description of a typical application, including
references to detailed descriptions of individual steps
given in other chapters.
Chapter 5.7 Switching the instrument off
Initial operation:
The first time you operate the instrument we recommend you work through
chapters 5.1, 5.2, 5.4 and 5.5, in that order.
Pay particular attention to the safety instructions.
Once you are familiar with the control panel functions and know how to install the accessories, proceed to chapters 5.6 / 5.7.
Daily routine work:
The control panel overview (chapter 5.3 on pages 20/21) will be a useful tool
for your daily routine work.
20
Instruction manual V 1.3 – 10/2007
5.
5.2
Operation
Switching the instrument on
Caution:
Did you verify whether the voltage selector is set correctly? If not, please refer to chapter 4.4.1!
Incorrect voltage selector settings can lead to severe damage to
the instrument!
The instrument may be connected to mains only with one of the
power cords supplied and only to grounded sockets!
The instrument may not be operated in hazardous locations where
risk of explosion exists!
Extreme temperature fluctuations and high air humidity (transport,
storage) may cause condensation inside the instrument.
In this case, wait at least two hours before switching the instrument on.
Failure to comply with this waiting period may cause severe damage to the instrument!
• Switch on the mains switch (0/I) located at the rear side of the control
panel (On = switch position ‘I’):
All control elements on the control unit will emit light for about 2 secs.
Next, the software version is displayed in the section counter (no. 44,
upper display in functional area 4 - chapter 5.4.12).
Fig. 10
After switching on the mains switch, the instrument will go to standby mode
(mains voltage is supplied to the control unit, the control panel is, however,
deactivated).
• To activate the control panel, press and hold the STANDBY button for
approx. 3 secs:
the control elements are activated.
Control parameters stored prior to switching the instrument off
will still be available when the instrument is switched on again.
Leica SM2500
21
5.
Operation
5.3
Overview control panel - by functional areas
Area 3 - includes the controls for the supplementary instruments
and accessories that can be attached to the Leica SM 2500,
(ultramilling attachment, vacuum cleaner, lamp).
(41) Rotational speed of miller (RPM)
(33/34) Lamp On/Off
(35/36) Vacuum cleaner
On/Off
Fig. 11
(40, 39) to set rotational
speed of miller
(40)
(37/38) Miller rotation On/Off
(39)
(44) Section / milling stroke
counter
Area 4 contains two displays:
-Section counter (total number of
sections / milling strokes)
-Section thickness totalizer (total
thickness of sections / milling strokes)
Contains two reset buttons,
one for each display.
(42) Reset for counter (44)
(43) Reset for counter (45)
(45/46) Section thickness /
milling stroke
thickness totalizer
Area 5.1 contains all display elements and
control buttons for manual
movement of knife / miller
(operational in manual mode of
operation ‘MAN’).
(47) - LED
(53) - LED
(54) - LED
(55) - LED
(48) - Knife/miller fast upwards
(56)
(49) - Knife/miller slow upwards
(57)
(50) - Knife/miller slow downwards
(58)
(51) - Knife/miller fast downwards
(59)
(52) - LED
(61/62) - Sectioning / milling
stroke limit
(56 - 59) - Manual sledge
movement
(forward/backward
/ fast / slow)
(60) - LED
Area 5.2 contains the display and
control elements for
manual movement of the
specimen (in manual mode
of operation ‘MAN’) and
for limiting the sectioning
/ milling stroke length
(‘Sectioning window’).
Fig. 12
22
Instruction manual V 1.3 – 10/2007
5.
Operation
Area 1 - to switch from standby mode to active mode (control panel activated) and back.
Emergency stop button, stops all instrument functions immediately when pressed.
(1) LED
(2) Standby On/Off
Area 2.1to select a mode of
operation via button (5):
manual mode ‘MAN’ (6)
automatic mode ‘AUTO’ (7) (5)
and
(6)
program mode ‘PROG’ (8)
(7)
(8)
Area 2.3(15)
to select a sectioning /
milling mode
via button (15):
continuous mode (16)
single mode (17) or
step-by-step mode (18)
(16)
(17)
(18)
Area 2.5 to select a stop position
(24/25) or photo position
(27/28), where the sledge
will stop.
(24)
(3) LED
(4) Emergency stop button
(12) (11) (13) (10)
(14)
(20)
(22)
(21)
(19)
Area 2.2selection (10) and
indication (14) of
section/milling
thickness (11),
preselected number of
sections / milling
strokes (12) (in mode
of operation PROG
only) and knife
retraction (13).
Area 2.4to select (19) and
indicate (22)
sectioning / milling
speed (20)
and return stroke speed
(21) of the sledge
(25)
(27)
(9)
(28)
Rotary-type selector
switch (9) for
entering parameters
(11), (12) and( 13) in
area 2.2 as well as
for entering
parameters (20) and
(21) in area 2.4.
(23) Selector button
‘Stop position’
(26) Selector button
‘Photo position’
Area 2.6 contains the buttons to start
and stop sectioning / milling
and the LEDs that indicate
sectioning / milling status.
(29)
(30)
(32)
(31)
Fig. 13
To start: press (29) and (30) simultaneously
To stop: press either (29) or (30)
Leica SM2500
23
5.
Operation
5.4
Description of each individual control element
5.4.1 Foot switch
Fig. 14
The foot switch has two different functions:
1 Start / stop sectioning / milling.
The foot switch can be used as an alternative to the RUN STOP + RUN
ENABLE buttons (--> see area 2.6, chapter 5.4.10) so start / stop sectioning / milling.
- To start, lightly press the foot switch.
- To stop, once again lightly press the foot switch.
2 Emergency stop.
In addition to the emergency stop button (see area 1, chapter 5.4.2), the
emergency stop can be activated via the foot switch:
- Press foot switch once forcefully: emergency stop function is activated.
POWER (green) and E-STOP (red) on the control emit light.
As soon as the foot switch is released the emergency lock is automatically unlocked and the instrument can be restarted.
E-STOP (red) on the control panel goes off.
24
Instruction manual V 1.3 – 10/2007
5.
Operation
5.4.2 Area 1 - Standby on/off; emergency stop
1
2
3
4
Fig. 15
1 POWER (LED)
Emits light (green) when the instrument mains switch in ON.
2 STANDBY (button)
Pressing this button switches the standby mode on/off.
Press and hold button for approx. 3 secs to switch from standby mode to
active mode and vice versa.
3 E-STOP (LED)
Emits light (red), when the emergency stop button has been pressed or if
the foot switch is not connected at all / not properly connected.
4 Emergency stop (button)
Pressing this button immediately stops all instrument functions and
movements. LEDs ‘E-STOP’ and ‘POWER’ start emitting light.
All settings (modes of operation, set values and counter readings) remain
stored and can be reaccessed when the instrument is switched back on.
Unlocking the emergency stop / switching the instrument back on:
1. Turn the red button in direction of the arrow until it unlocks:
LED E-STOP goes off.
2 Select a mode of operation (MAN / AUTO / PROG) --> see area 2.1,
chapter 5.4.3.
3. If mode of operation = AUTO: select also a sectioning / milling mode
--> see area 2.3, chapter 5.4.6.
Leica SM2500
25
5.
Operation
5.4.3 Area 2.1 - Modes of operation
5 RUN MODE (button)
Press RUN MODE to select one of the operation modes below.
6
5
Fig. 16
7
8
6 MAN (LED)
Emits light, when manual mode of operation MAN has been selected.
In MAN mode, area 5 is activated:
- Knife (or miller) and sledge can be moved manually (e.g. for bringing the knife closer to the specimen).
- Sectioning / milling stroke limit (‘window’) can be defined.
- Section / milling thickness, retraction (area 2.2), sectioning / milling
speed as well as sledge return speed (area 2.4) can be selected.
7 AUTO (LED)
Emits light, when automatic mode of operation AUTO has been selected.
- Sectioning / milling mode (area 2.3) can be selected.
- Parameter selection in areas 2.2 and 2.4 as in MAN.
- Pressing RUN/STOP + RUN/ENABLE (or lightly pressing the foot
switch) in AUTO mode starts sectioning / milling (push to start /
push to stop).
8 PROG (LED)
Emits light, when program mode of operation PROG has been selected.
- Parameter selection in areas 2.2 and 2.4 as in AUTO and MAN.
Additional features of PROG mode:
Preselection of a specific number ‘n’ of sections / milling strokes to be
done (LED (12) in area 2.2).
- Sectioning / milling in PROG mode (press RUN/STOP + RUN/ENABLE or activate foot switch):
the preselected number of sections / milling strokes is carried out as
per the parameters defined (number of sections, section thickness
etc.); then the sledge stops in the defined stop position (area 2.5) and
an acoustic signal indicates the end of the sectioning program.
Parameters selected always remain stored until new parameters
are entered (also when the instrument mains switch (0/I) is
switched off).
26
Instruction manual V 1.3 – 10/2007
5.
Operation
5.4.4 Rotary-type selector switch in area 2
9
9 The parameters in areas 2.2 and 2.4 are entered via the rotary selector
switch no. 9:
- Sectioning / milling thickness in μm
(section / milling feed via knife / miller)
- Preselection of number of sections / milling strokes
(to be carried out in ‘PROG’ mode)
Fig. 17
- Retraction in μm
(= knife / miller retraction during specimen return stroke)
- Sledge speed - forward
(= sectioning / milling speed)
- Sledge speed - backward
(= return stroke speed)
Leica SM2500
27
5.
Operation
5.4.5 Area 2.2 - Section/milling thickness, section/milling stroke preselection, retraction
12
11
14
10
Fig. 18
13
10 SET (button)
Press SET to activate indication of FEED, n or RETRACT: LED starts emitting light.
For entering new parameters with selector switch (9), press and hold
SET until the corresponding LED starts blinking.
11 FEED (LED)
When LED FEED is blinking: rotate switch (9) to enter a section/milling thickness from 0 μm (knife / miller feed off) to 1,000 μm (selectable in 1-μm steps).
12 n (LED)
When LED n is blinking and PROG mode is activated: rotate switch (9) to
preselect the number of sections / milling strokes to be carried out (from
1 to 1,000).
13 RETRACT (LED)
When LED RETRACT is blinking: rotate switch (9) to enter a setting between
0 μm (retraction switched off) to 1,000 μm (selectable in 1-μm steps).
In AUTO and PROG mode, the knife / miller is lifted away from the
specimen surface at the end of each section / milling stroke (retraction).
The knife / miller then stays in retraction position over the entire
length of the sledge return stroke.
When the retraction feature is activated (retraction value >0),
RETRACT in area 5.2 emits light while the sledge is in return stroke.
When the sledge reaches the front end position, the knife / miller is
lowered back towards the specimen by the selected retraction value.
14 Indication of section/milling thickness, section/milling stroke
preselection or retraction parameters that have been entered via rotary
switch (9). - All parameters are displayed flush right.
All parameters are stored automatically upon entry (no confirmation necessary) and remain stored until new settings are entered.
The LEDs stop blinking automatically after a few seconds.
28
Instruction manual V 1.3 – 10/2007
5.
Operation
5.4.6 Area 2.3 - Sectioning / milling modes
To be able to select a sectioning / milling mode, mode of operation
AUTO (area 2.1) must be activated first.
16
15 CUT MODE (button)
Press button (15) to select a sectioning / milling mode.
Fig. 19
17
18
15
16 CONT (LED)
Emits light, when continuous mode of operation ‘CONT’ has been selected:
In continuous mode, sectioning / milling starts when RUN STOP + RUN
ENABLE or the foot switch are pressed and continues until RUN STOP or
RUN ENABLE or the foot switch are pressed once again.
17 SINGLE (LED)
Emits light, when single-stroke mode of operation ‘SINGLE’ has been selected:
When RUN STOP + RUN ENABLE or the foot switch are pressed in
single-stroke mode of operation, the instrument carries out one section /
milling stroke and then stops in the preselected stop position.
18 STEP (LED)
Emits light, when step-by-step mode of operation ‘STEP’ has been selected:
in step-by-step mode, the instrument will section / mill only as long as
RUN STOP + RUN ENABLE are pressed and held.
Leica SM2500
29
5.
Operation
5.4.7 Area 2.4 - Sledge speed
20
22
19
Fig. 20
21
19 SPEED (button)
To set the cutting or return speed, press and hold the SPEED button until
the corresponding LED blinks. Enter speed using the rotary button (9).
20 CUT (LED)
Press and hold SPEED until the LED CUT starts blinking. Then enter the
desired sectioning / milling speed of the sledge via selector switch (9)
(selectable speeds: 0.5 - 100 mm/sec, in 0.1-mm steps).
21 RETURN (LED)
Press and hold SPEED until the LED RETURN starts blinking. Then enter
the desired return stroke speed of the sledge via selector switch (9) (selectable speeds: 0.5 - 100 mm/sec, in 0.1-mm steps).
22 Speed indication
Indicates sledge speed during sectioning / milling stroke and return
stroke.
CUT and RETURN can be changed while sectioning / milling is in
progress.
All settings entered are automatically stored upon entry.
No additional confirmation is required.
The LEDs stop blinking automatically after a few seconds.
30
Instruction manual V 1.3 – 10/2007
5.
Operation
5.4.8 Area 2.5 - Setting the stop or photo position
23 STOP POS (button)
Press STOP POS to select one of the two stop positions available.
23
24 FRONT (LED)
Starts emitting light when the sledge stops in the front stop position.
24
25
27
25 REAR (LED)
Starts emitting light when the sledge stops in the rear stop position.
28
Fig. 21
26
26 Photo position (button)
Press the Photo position button to select one of the two photo positions
available.
27 PHOTO F (LED)
Starts emitting light when the sledge stops in the front photo position.
28 PHOTO R (LED)
Starts emitting light when the sledge stops in the rear photo position.
You may either select a stop position or a photo position.
When a photo position has been selected, there cannot be selected a stop position and vice versa.
Leica SM2500
31
5.
Operation
5.4.9 Area 2.5 - Changing the dwelling and triggering time in photo position
Changing the dwelling time in photo position:
- While switching on the instrument mains switch (rear of control
panel) simultaneously press and hold the STOP POS button (in area
2.5) until the instrument initialization phase has been completed.
- The ‘rpm’ display (area 3) will read the currently selected dwelling
time in seconds.
- Press the ‘+’ or ‘-’ buttons below the ‘rpm’ display to select a new
dwelling time (time the sledge will remain in photo position before
the photograph is taken) from 0 secs to 25 secs (in 100-ms steps).
(A minus sign will be displayed in ∑ n (area 4 - see chapter 5.4.12)
while you are entering your selection).
Fig. 22
- To store the selected setting, press STANDBY (area 1):
The ‘rpm’ indication in area 3 goes off - the selected value is stored.
Fig. 23
Changing the triggering time (= exposure time):
- Same procedure as when changing the dwelling time.
Instead of STOP POS, press and hold the Photo position button (in
area 2.5) while switching on the instrument mains switch.
- Just like the dwelling time, a triggering time from 0 secs to 25 secs
can be selected.
The figure ‘1’ will be indicated in display ∑ n (area 4 - see chapter
5.4.12) while you enter your selection.
- To store the selected setting, press STANDBY (area 1):
as soon as the ‘rpm’ indication in area 3 goes off the selected value
is stored.
32
Instruction manual V 1.3 – 10/2007
5.
Operation
5.4.10 Area 2.6 - Start / stop sectioning / milling
31
32
29
30
Fig. 24
29 RUN STOP (button)
30 RUN ENABLE (button)
31 RUN (LED)
32 STOP (LED)
Start:
Press RUN STOP and RUN ENABLE simultaneously:
- sectioning / milling is activated.
LED RUN will be emitting light while sectioning / milling is in
progress.
+
Stop:
or
Press either RUN STOP or RUN ENABLE:
- sectioning / milling movement is stopped.
LED STOP will start emitting light, once sectioning / milling has
stopped.
After you have pressed RUN STOP or RUN ENABLE or the foot
switch, the instrument will complete the sectioning/milling stroke
in progress before stopping in the stop (or photo) position selected.
Instead of using the RUN STOP / RUN ENABLE buttons, sectioning /
milling may be started / stopped as well via the foot switch (see
chapter 5.4.1 ‘Foot switch’).
Leica SM2500
33
5.
Operation
5.4.11 Area 3 - Operating optional supplementary instruments
34
41
33
36
40
39
37 38
35
Fig. 25
33 Lamp (button)
Switching the lamp on/off
(lamp is not part of standard delivery).
34 LED - starts emitting light when lamp button is switched on.
35 Vacuum cleaner (button)
Switching the vacuum cleaner on/off
(vacuum cleaner is not part of standard delivery).
36 LED - starts emitting light when vacuum cleaner button is switched on.
37 Miller (button)
Switching the rotational movement of the ultramilling attachment Leica
SP2600 on/off (separate supplementary instrument - not part of Leica
SM 2500 standard delivery).
38 LED - starts emitting light when ultramiller button is switched on.
39 ‘+’ button (rotational speed of miller in RPM)
Press ‘+’ to increase the rotational speed of the ultramiller in steps of 100
(from 500 to 3.000 RPM).
40 ‘-’ button (rotational speed of miller in RPM)
Press ‘-’ to decrease the rotational speed of the ultramiller in steps of 100
(from 500 to 3.000 RPM).
41 Rotational speed of miller (display)
Shows the currently selected rotational speed of the ultramiller.
34
Instruction manual V 1.3 – 10/2007
5.
Operation
5.4.12 Area 4 - Section/milling stroke counter and thickness totalizer and reset buttons
44
45
46
42
43
Fig. 26
42 CLEAR (button) - reset button for the section / milling stroke counter.
Pressing CLEAR resets counter (44) to ‘0’.
44 ∑ n Section / milling stroke counter.
Displays the total number of sections (or milling strokes) made since the
last reset.
43 CLEAR (button) - reset button for the section / milling thickness totalizer.
Pressing CLEAR resets counter (45) to ‘0’.
By resetting the totalizer (45) to ‘0’ you can define any level of the
specimen as ‘zero’ thickness (e.g. after a specimen has been
milled until it is exactly horizontal).
This feature gives you exact control on how much specimen material (thickness) is removed from a defined point ‘zero’ onwards.
In addition, it enables you to go back to exactly the same vertical
knife / miller position after a manual upward movement (see area
5.1, chapter 5.4.13) of the knife / miller, i.e. after moving to a vertical position of knife / miller < 0.
Vertical position < 0
45 Display ∑ μm - section / milling thickness totalizer.
Shows the total thickness of all sections / milling strokes carried out
since the last reset.
Knife
‘0’
123456789012
123456789012
123456789012
123456789012
Specimen
123456789012
block
123456789012
123456789012
Vertical position > 0
46 LED - indicates vertical position of knife/miller, relative to the selected
‘zero’ point, during manual movement (see area 5.1, chapter 5.4.13):
• Knife / miller in vertical position > 0
= knife / miller moving from ‘zero’ downwards, towards the specimen surface: LED does not emit light.
• Knife / miller in vertical position < 0
= knife / miller moving from ‘zero’ upwards, away from the specimen surface: LED emitting light.
Fig. 27
Leica SM2500
35
5.
Operation
5.4.13 Area 5.1 - Manual movement of knife / miller
47 UP (LED)
Flashing during fast upward movement of the knife / miller.
LED stays lit as soon as the upper end position has been reached.
47
48 Knife / miller fast upwards (button)
Press button (48) for fast upward movement of the knife / miller:
The knife / miller will keep moving upwards until reaching the upper limit
stop or until button (48) is pressed once again.
48
49
49 Knife / miller slow upwards (button)
Press button (49) for slow upward movement of the knife / miller.
Knife / miller will move upwards only as long as button (49) is held.
50
50 Knife / miller slow downwards (button)
Press button (50) for slow downward movement of the knife / miller.
Knife / miller will move downwards only as long as button (50) is held.
51
52
Fig. 28
51 Knife / miller fast downwards (button)
Press button (51) for fast downward movement of the knife / miller.
Knife / miller will move downwards only as long as button (51) is held.
52 DOWN (LED)
Starts emitting light, when knife / miller has reached the lower limit stop
position.
36
Instruction manual V 1.3 – 10/2007
5.
Operation
5.4.14 Area 5.2 - Manual movement of the sledge
57
55
56
58 60 59
53 MAN (LED)
Lit in manual mode of operation. - LED MAN must be on in order to be able
to access/activate the control buttons in area 5.
54 RETRACT (LED)
Lit (also when retraction = 0) while the specimen sledge is in return stroke 54
see also area 2.2 ‘Setting the retraction parameters’.
53
55 CUT (LED)
Starts emitting light when the sledge reaches the rear limit position (sledge
being moved via buttons (56/57)).
56 Sledge fast forward (button)
Sledge moves only while the button is being held.
57 Sledge slow forward (button)
Sledge moves only while the button is being held.
58 Sledge slow backward (button)
Sledge moves only while the button is being held.
59 Sledge fast backward (button)
Sledge moves only while the button is being held.
60 RETURN (LED)
Starts emitting light when the sledge reaches the front limit position (sledge
being moved via buttons (58/59)).
61 Sectioning/milling window (limitation of the sectioning/milling stroke)
Setting the sectioning window:
- Move the sledge to the first limit position you wish to set (use buttons
56 - 59).
- Press and hold button (61) until LED (62) starts flashing - then move the
sledge on to the second desired limit position.
- Press and hold button (61) once again, until LED (62) stays lit, thus indicating that both positions have been stored.
Fig. 29
Deleting the sectioning window:
Press and hold button (61) just once until the LED starts flashing - the
61 62
instrument will return to maximum sledge stroke length as soon as the
LED stops flashing after a few seconds.
62 LED ‘Sectioning / milling window’ in button (61):
- Flashes - while the sectioning window is being set.
- Stays lit - when a sectioning window has been defined.
- Off - when no sectioning window has been defined.
The sectioning window settings cannot be changed while sectioning/milling is in progress; changes are possible only in MAN mode.
Leica SM2500
37
5.
Operation
5.5
Mounting the accessories
Always clamp the specimen first and
the knife second!
5.5.1 Mounting the base plates
Base plate with vise and base plate
with dovetail guide are mounted the
same way. Shown here is the base
plate with vise.
Preparing the base plate
• Insert the clamping device (1) into the two
notches on the underside of the base plate
(base plate and clamping device are delivered
separately).
• Turn approx. 45° while pressing slightly downwards - until the clamping device locks in
place.
The clamping device can be turned 90° to a second locking position, so that the base plate can
be mounted onto the sledge in two positions:
• with the dovetail guide or vise at right angles
to the sledge direction;
• with the dovetail guide or vise in longitudinal
direction.
• To turn, press the clamping device slightly
downwards, turn 90° and let go - it will lock in
place automatically.
1
Fig. 30
1
Fig. 31
Fig. 32
1
Fig. 33
38
Instruction manual V 1.3 – 10/2007
5.
Mounting the base plate onto the sledge
• Remove the lid (1) from the sledge.
• Position the sledge about 3 cm away from the
front limit position:
In front, there must be enough space to easily
place torque wrench (8) on eccentric bush (2).
The microtome spindle must not be visible in
opening (3).
• Pull eccentric bush (2) forward until the red ring
becomes visible and the red line is on top.
• If desired, insert eccentric ring (4) (plane side
facing upwards!).
1
Fig. 34
3
The eccentric ring blocks the orientation mechanism to ensure the sectioning plane is not altered.
2
Fig. 34a
Eccentric ring - optional!
Caution!
When working with the eccentric ring,
NEVER attempt to orient the specimen,
as this would severely damage the
specimen orientation mechanism! - See
also chapt. 5 ‘Specimen orientation’.
4
Fig. 35
5
•
6
7
•
•
•
2
•
Fig. 36
•
8
Operation
Insert clamping device (6) of base plate (5) vertically into opening (3).
Lock centering pin (7) into place (tilt slightly).
Push eccentric bush (2) inwards as far as it will
go (red line must be on top).
Turn eccentric bush (2) clockwise until the
green line is on top.
Place torque wrench (8) (size 32) on the eccentric bush (with the arrow pointing to the right).
Turn torque wrench clockwise until a slight
click can be heard and felt (= tightening torque
of 45 Nm).
DO NOT TURN ANY FURTHER, to prevent the thread of the eccentric bush
from being stripped!
Fig. 37
Leica SM2500
39
5.
Operation
5.5.2 Clamping specimens or specimen
stages in the base plate
with vise clamp
In the base plate with vise you can either directly clamp specimen blocks or
specimen stages holding specimen
embeddings.
2
1
Fig. 38
5
5
4
3
Clamping square specimen blocks
The vise is equipped with two clamping jaws: a
fixed jaw (1) and a movable jaw (2) the position of
which can be changed. Both have a V-notch on
one side.
• The fixed jaw (1) remains in its standard position (V-notch facing outwards, i.e. away from
the specimen).
• Insert the movable jaw (2) in a position that is
appropriate for the specimen size to be
clamped, also with the V-notch facing outwards (away from the specimen).
• Insert the specimen block.
• Tighten the movable clamping jaw via clamping screw (3), using an Allen key, size 8 or a
single-head wrench, size 13.
Important - for square as well as for
cylindrical specimen blocks:
When the specimen block is tightly
clamped, the front edge of block (4)
must not have moved beyond the two
lateral markings (5).
40
Instruction manual V 1.3 – 10/2007
5.
2
6
7
1
Fig. 39
7
5
4
5
3
Operation
Clamping cylinder-shaped specimen blocks
• Remove screws (6) holding the fixed clamping jaw (1) (Allen key, size 5).
• Turn the jaw and re-insert with the V-notch
facing inwards, towards the specimen.
• Re-insert and tighten screws (6) of clamping
jaw (1).
• Insert the movable jaw, (2) in a position that is
appropriate for the specimen size to be
clamped and with the V-notch facing inwards
(towards the specimen).
• Tighten the movable jaw via clamping screw
(3), using an Allen key size 8 or a single-head
wrench, size 13.
Important - for square as well as for
cylindrical specimen blocks:
When the specimen block is tightly
clamped, the front edge of block (4)
must not have moved beyond the two
lateral markings (5).
8
Fig. 40
9
Leica SM2500
Fig. 41
Clamping specimen stages
• The fixed clamping jaw (1) remains in standard
position (V-notch facing outwards, i.e. away
from the specimen stage).
All specimen stage sizes (plastic and metal specimen stages) have a clamping block of identical
size and are clamped as follows:
• Insert the movable jaw (2) with its front edge
(i.e. the edge facing the specimen) flush with
marking (7).
• Insert the specimen stage (e.g. 8, 9).
• Tighten the movable jaw via clamping screw
(3), using an Allen key size 8 or a single-head
wrench, size 13.
41
5.
Operation
Embedding frame for specimen stages
The embedding frame (Fig. 42) is adjustable in
size, so that it fits all specimen stage sizes available. It is fitted onto the specimen stage for subsequent specimen embedding in paraffin or celloidin.
Fig. 42
5.5.3 Mountable jaws for vise
1
For sectioning very high specimens, there are
two mountable jaws available, which can be inserted into bores (1) and (2).
1
2
2
The mountable jaws are part of the
standard delivery ‘knife holder B’.
Their use is required with knife holder
B, as with knife holder B the knife
edge is located at a considerable distance from the specimen surface.
Fig. 43
5.5.4 Mounting specimen holders onto
the base plate with dovetail guide
KNIFE
2
123456
123456
1
Fig. 45
Specimen clamp 44 x 58 mm mounted onto the dovetail
guide located at right angles to the sledge direction.
42
Mounting the specimen clamp 44 x 58 mm with
the dovetail guide located at right angles to the
direction of the sledge movement
• Slide the clamp onto the dovetail guide, so that
the three clamping screws (1) are located in
front (if necessary, relocate the three clamping screws - see next page).
• With the Allen key, size 4, tighten the two Allen
screws (2) located at the rear side of the
clamp.
• Insert the specimen block and clamp the 3
clamping screws (1) with an Allen key, size 4.
Instruction manual V 1.3 – 10/2007
5.
KNIFE
2
12
12
12
12
12
1234567
12
4
3
1
Specimen clamp 44 x 58 mm mounted correctly onto the
dovetail guide installed in longitudinal direction
Fig. 45
5
4
3
1
Fig. 46
Specimen clamp 44 x 58 mm - with clamping screws
located correctly for installation on dovetail guide
located in
longitudinal direction
Leica SM2500
Operation
Mounting the specimen clamp 44 x 58 mm with
the dovetail guide located in longitudinal direction
• Slide the clamp onto the dovetail guide so that
the three clamping screws (1) are located in
front (if necessary, relocate the three clamping screws - see below).
• With the Allen key, size 4, tighten the two Allen
screws (2) located on the left (2).
• Insert the specimen block and tighten the
three clamping screws (1) with the Allen key,
size 4.
Relocating the clamping screws
• Remove the two outer clamping screws (1)
completely.
• Use the miniature Allen key (size 1.5 - delivered together with clamp) to open Allen screw
(3).
• Remove pressure plate (4).
• Unscrew center clamping screw (1).
• Insert center clamping screw (1) into the bore
(5) from the outside inwards.
• Insert pressure plate (4) and slide onto center
clamping screw.
• Fasten Allen screw (3) just slightly.
• Re-insert the outer screws (1).
43
5.
Operation
12345
12345
12345
12345
12345
wrong
correct
1234
1234
1234
1234
1
2
Fig. 47
3
Fig. 48
Fig. 49
Round specimen holder clamping lever released
Round specimen holder clamping lever tightened
Fig. 50
44
Clamping the round specimen holder
• Prior to sliding the holder onto the dovetail
guide turn clamping lever (1) until the edge of
the clamping lever (1) is parallel to the edge of
the clamp (2) (Fig. 47 on the left shows underside of round specimen holder).
• Slide the round specimen holder (3) onto the
dovetail guide (Fig. 48).
• Clamp the lever (Fig. 49).
If the clamping lever is not yet tightened once
turned backwards as far as it will go, it has to be
relocated:
• Pull the lever outwards and turn it clockwise
into the desired position.
• Let go of the lever - it will automatically lock in
place in the position selected.
• Clamp the lever once again.
Clamping specimen blocks in the round specimen holder
The round specimen holder comes with three inserts of 6, 15 and 25 mm diameter.
• To clamp one of the inserts (2, 3 or 4) remove
clamping ring (1) turning it counterclockwise.
• Place insert (2), (3) or (4) into clamping ring (1),
place the clamping ring onto the specimen
holder and fasten it (turn clockwise).
• To insert a specimen, turn clamping ring (1)
counterclockwise, until the specimen can be
inserted.
• Insert the specimen (5) and rotate clamping
ring (1) clockwise to clamp.
• To rotate a specimen that is already clamped,
insert pin (6) into bore (7) and turn counterclockwise.
• Rotate the specimen into the desired position.
• To retighten, insert pin (6) into bore (7) once
again and turn clockwise until tight.
Instruction manual V 1.3 – 10/2007
5.
Operation
5.5.5 Specimen orientation
1
2
Caution:
When working with the eccentric ring,
NEVER attempt to orient the specimen,
as this would severely damage the
specimen orientation mechanism!
• Releasing the base plate:
Place torque wrench (1) onto eccentric bush
(2) (arrow on the wrench must point to the
right).
• Turn the torque wrench counterclockwise,
until the eccentric bush becomes loose.
• Turn knurled knob (3) (marked L/R in Fig. 52)
on the left of the eccentric bush for adjustment
along the x-axis.
• Turn knurled knob (4) (marked H/V) in Fig. 52)
on the right of the eccentric bush for adjustment along the y-axis.
• Once the specimen has been oriented, place
the torque wrench (1) back onto the eccentric
bush (2) (arrow on wrench pointing to the right)
and turn clockwise until a slight click can be
heard and felt (= tightening torque of 45 Nm).
Fig. 51
4
4
Fig. 52
DO NOT TURN ANY FURTHER, to prevent the thread of the eccentric bush
from being stripped!
1
2
Fig. 53
Leica SM2500
45
5.
Operation
5.5.6 Mounting the knife holders
Handle microtome knives and blades with utmost care. Knife and
blade edges are extremely sharp and can cause severe injuries!
Wear cut-resistant safety gloves when inserting / removing the
knife (see also chapter 8.1 ‘Additional accessories’).
Never leave knives / disposable blades or knife holders with a
knife / disposable blade inserted lying around!
Always store knives in the knife case when not in use!
Never place a knife on a bench with the edge facing upwards!
Never try to catch a falling knife or disposable blade!
Always clamp the specimen first and the knife second!
5.5.7 Inserting knives into the holders
For a detailed overview on which types of knives are appropriate
for which knife holder, please refer also to chapter 8.2 on page 66.
The knives are inserted into the different knife holders as follows:
Knife holder A:
Clamp the knives with the writing facing upwards, i.e. with the wedge angle
pointing downward, towards the specimen surface.
Knife holder C:
Clamp the knives with the writing facing upwards.
Knife holder B:
c-profile knives may be clamped with either surface facing upwards.
b-profile knives must be clamped with the facet pointing backwards when
inserting the knife, i.e. pointing away from the specimen once the knife has
been turned into sectioning position.
46
Instruction manual V 1.3 – 10/2007
5.
Operation
5.5.8 Mounting knife holder A
6
6 4
7
4 5
5
3
3
2
1
Fig. 54
8
Knife holder A consists of 3 components:
Two clamping blocks that hold the knife holder
on the microtome bearing blocks and the knife
holder itself.
• Preassemble the three components prior to
mounting them onto the microtome:
Slide the clamping blocks (1, 2) onto the pins
(3) of the knife holder.
Block 1 (bearing the clearance angle scale)
must be on the left, block (2) on the right.
The slot in each clamping block must point
backwards.
Secure the knife holder with slotted screws (4).
The bearing blocks of the microtome
supporting the knife holder must be
clean. - Clean them, if necessary.
Place the preassembled knife holder
onto the bearing blocks from above.
Do not slide the knife holder onto the
bearing blocks to prevent the bearing
surface from getting scratched.
• Place the knife holder onto the bearing blocks.
The pin on the underside of each clamping block
must be fit into the bore in each bearing block.
The knife holder is secured with a total of 8
clamping screws: each clamping block is held
down by two front (5) and two rear screws (6).
• With an Allen key, size 8, lightly tighten all 8
clamping screws (tighten them alternately to
prevent misalignment).
• Next, the 4 rear screws (6) have to be loosened again.
Tightening first all 8 screws followed
by releasing the 4 rear screws is important to prevent the knife holder
from being misaligned!
Leica SM2500
47
5.
Operation
• Turn the knife holder upwards into the correct
position for inserting the knife (--> see Fig. 55).
9
Fig. 55
If the knife holder cannot be turned, it
has been misaligned. - In that case,
loosen all 8 clamping screws and retighten as described on page 45.
• Re-tighten at least one of the 4 rear clamping
screws (6) to secure the knife holder in that
position.
Prior to inserting the knife, always
tighten one of the rear clamping
screws to secure the knife holder in
position!
Put on cut-resistant gloves (see also
chapter. 8.1 ‘Additional accessories’).
Fig. 56
• Insert the knife:
The knife back (base of knife) must fit against
the bearing surface inside the knife holder.
The wedge angle (9) must point downwards.
• Tighten the 6 knife clamping screws (7, Fig. 54)
(Allen key size 8), starting with the center
screws and working your way outwards and
from side to side to prevent any misalignment
of the knife.
When clamping a short knife, only tighten as
many screws as the knife is actually wide.
Make sure not to misalign the knife
when tightening the knife clamping
screws (7) as this will negatively affect sectioning results!
• Place the knife guard over the knife edge.
48
Instruction manual V 1.3 – 10/2007
5.
Operation
• Loosen the rear clamping screw (6).
• Turn the knife holder into the desired clearance angle position.
Setting ‘0’ on the clearance angle
scale (10) corresponds to an actual
clearance angle of 5°. Each scale
graduation corresponds to an angle increment of 2°.
10
Fig. 57
Leica SM2500
• Hold the knife holder in that position and retighten one of the 4 rear clamping screws (6)
to secure the clearance angle setting.
• Let go of the knife holder and tighten all remaining clamping screws (6) alternately.
49
5.
Operation
5.5.9 Mounting knife holder B
Knife holder B consists of four components:
2 cylindrical holders (3) with integrated knife
guards and 2 clamping blocks (1, 2) fixing the
knife holder to the microtome.
1. Mount the two clamping blocks onto the bearing blocks of the microtome:
4
2
1
4
The bearing blocks of the microtome
must be clean. - Clean, if necessary.
Place the clamping blocks onto the
bearing blocks from above. Do not
slide them onto the bearing blocks to
prevent the bearing surface from getting scratched.
5
Fig. 58
6
3 6
6
7
6
7
Fig. 59
The slot in each of the two clamping blocks
must point forward. The left clamping block (1)
bears the clearance angle scale (5).
2. Tighten the rear clamping screws (4) of both
clamping blocks (Allen key, size 8).
Each cylindrical holder is equipped with two
locking pins (6) to prevent the cylindrical holders
from sliding out of the clamping blocks.
3. Insert the left cylindrical holder (3) into the left
clamping block (1) from the inside outwards,
until the outer locking pin (6) is released.
Inserting knives of up to 22 cm length
4. Insert right cylindrical holder (3) into the right
clamping block (2) from the inside outwards,
until outer locking pin (6) is released.
5. Pull both cylindrical holders (3) far enough
outwards so that the knife can be inserted
easily from the center.
6. Turn the clamping slots (7) upwards to the top.
Put on cut-resistant gloves (see also
chapter. 8.1 ‘Additional accessories’).
50
Instruction manual V 1.3 – 10/2007
5.
3
11
Fig. 60
7. Insert the knife (11), from the center outwards,
into the left cylindrical holder (3).
d-Profile knives: facet must point backwards.
c-Profile knives: can be inserted either way.
8. Slide the right cylindrical holder (3) over the
knife - support the back of the knife from below with one of your hands.
9. Slide both knife guards (10) over the knife edge.
10. Turn the knife forward far enough to be able
to easily access knife clamping screws (9).
11. Secure the knife holder in that position tightening one of knife clamping screws (8).
12. Tighten knife clamping screws (9) on both sides
(with Allen key size 8; tighten screws alternately
and only as many as the knife is actually wide).
13. Release clamping screw (8).
14. Select the desired clearance angle (5) (see
page 47 for details on clearance angle scale).
15. Sustain the knife holder in the desired clearance angle position and tighten front clamping screws (8) alternately (Allen key size 8).
3
8
8
9
11
10
5
Inserting knives of 30 cm length
Fig. 61
Fig. 62
Leica SM2500
Operation
Put on cut-resistant gloves (see also
chapter. 8.1 ‘Additional accessories’).
2
3
4. Pull the left cylindrical holder (3) all the way
outwards and turn the clamping slot (7, Fig. 59)
upwards to the top.
Right cylindrical holder (3) is not yet inserted.
5. Guide the knife through the right clamping
block (2) from the outside inwards.
6. Support the knife from below.
7. Slide the right cylindrical holder (3) onto the
knife, from the outside inwards through the
right clamping block (2).
8. Continue from point 9 above onwards.
51
5.
Operation
5.5.10 Mounting knife holder C
5
3
3a 5
4 6
4
6
3a
2
1
Fig. 63
8
7
5
Knife holder C consists of 3 components:
The knife holder with integrated knife guard and
two clamping blocks to fasten the knife holder to
the microtome.
1. Preassemble the three components prior to
mounting them onto the microtome:
Slide the clamping blocks (1, 2) onto the pins
(3a) of the knife holder (3).
Clamping block 1 (bearing the clearance angle
scale) must be on the left, clamping block (2)
on the right; the slots in each clamping block
must point backwards.
Secure with two slotted screws (4).
The bearing blocks of the microtome
must be clean. - Clean, if necessary.
Place the preassembled knife holder
onto the bearing blocks from above. Do
not slide the knife holder onto the
bearing blocks to prevent the bearing
surface from getting scratched.
2. Place the knife holder onto the two bearing
blocks of the microtome, fitting the two pins
(one on the underside of each clamping block)
into the bores in the bearing blocks.
3. With an Allen key, size 8, tighten all 8 clamping screws (5, 6) lightly and alternately.
4. Next, loosen the 4 rear screws (5) again.
Fig. 64
Tightening first all 8 screws followed
by releasing the 4 rear screws is important to prevent the knife holder from
being misaligned!
5. Turn the knife holder (3) upwards/backwards
until the knife clamping slot is in the position
shown in Fig. 64 and the 6 knife clamping
screws (8) are easily accessible.
52
Instruction manual V 1.3 – 10/2007
5.
5
8
Operation
If the knife holder cannot be turned, it
has been misaligned. - In that case,
loosen all 8 clamping screws and retighten as described on page 50.
6. Retighten any one of the rear clamping screws
(5) to secure the knife holder in that position.
Prior to inserting the knife always
tighten one of the rear clamping screws
to secure the knife holder position!
Put on cut-resistant gloves (see also
chapter. 8.1 ‘Additional accessories’).
7
7. Insert the knife with the writing pointing upwards (i.e. pointing backwards when being
inserted).
8. Tighten knife clamping screws (8) with an Allen
key size 8 starting with the center screws and
working your way outwards from side to side.
Only tighten as many screws as the knife is
actually wide.
Do not misalign the knife when tightening the knife clamping screws (8).
This will negatively affect sectioning
results!
9. Place knife guard (7) over the knife edge.
10. Loosen rear clamping screw (5).
11. Turn the knife holder into the desired clearance
angle position (see p. 47 for details on the clearance scale) and hold it in that position.
12. Lightly retighten one of the rear clamping
screws and let go of the knife holder.
13. Tighten remaining clamping screws (5) alternately and lightly.
14. Tighten all clamping screws (5, 6) alternately.
Leica SM2500
53
5.
Operation
Adjusting the knife level (knife holder C)
With each resharpening procedure the overall
height of the knife diminishes.
Therefore, the adjusting screws (12) may have to
be readjusted from time to time to ensure the
knife is always situated at the correct level.
10
11
8
12
Fig. 66
5
8
Fig. 67
54
12
12
Correct knife level:
There has to be a 3-mm distance between the
lower edge (10) of the wedge angle and the upper edge (11) of the pressure plate of the knife
holder.
To adjust the knife level:
• Insert knife into holder and clamp.
• Turn the knife holder so that the knife edge
points upwards.
• Tighten one of the rear clamping screws (5) to
secure the knife holder in that position.
• Release the knife clamping screws (8).
• Readjust the adjusting screws (12) using an
Allen key, size 4, until the distance between
lower edge (10) and upper edge (11) is 3 mm.
• Retighten the knife clamping screws (8) with
an Allen key size 8 starting with the center
screws and working your way outwards from
side to side.
Only tighten as many screws as the knife is
actually wide.
• Continue from point 9 (page 51) onwards.
Instruction manual V 1.3 – 10/2007
5.
Operation
5.5.11 Fixed-setting declination blocks
(45°) and knife holder A or C
When knife holder A or C is combined
with the declination blocks, the knife
guard (9) cannot be placed over the
knife edge. Therefore, use extreme
caution when working with this configuration - wear cut-resistant gloves!
6
9
4
5
3
6
3a
The bearing surfaces must be clean.
Place the declination blocks onto the
bearing blocks from above. Do not
slide them onto the blocks to prevent
the bearing surface from getting
scratched.
2
1 3a
Installing knife holder A
• Place left declination block (1) (bearing the
clearance angle scale (7)) onto the left bearing block of the microtome and secure with 3
screws (4) (Allen key size 8) .
7
8
Fig. 68
• Slide the left pin (3a) of knife holder A into the
declination block (1).
• Slide right declination block (2) onto right pin
(3a) of the knife holder and fasten to the microtome with 4 screws (5) (Allen key size 8).
Tighten one of the Allen screws (6)
with an Allen key size 8 to secure the
knife holder in position!
Put on cut-resistant gloves (see also
chapter. 8.1 ‘Additional accessories’).
• Insert the knife into the holder from below
(with the facet pointing downwards).
The combination ‘Declination blocks /
knife holder A’ can only be used for
knives up to max. 22 cm length.
Leica SM2500
55
5.
Operation
• Clamping the knife:
Tighten the clamping screws (8, Fig. 68) (Allen
key size 8) starting with the center screws and
working your way outwards from side to side.
Only tighten as many screws as the knife is
actually wide.
Make sure not to misalign the knife
when tightening the knife clamping
screws (8, Fig. 68) as this will negatively affect sectioning results!
• Loosen Allen screw (6) (Allen key, size 8).
• Turn the knife holder into the desired clearance angle position (7).
• Hold the knife holder in that position an tighten
both Allen screws (6) (Allen key, size 8).
4
9
6
3a
Installing knife holder C
• Place left declination block (1) (bearing the
clearance angle scale (7)) onto left bearing
block of the microtome and secure with 3
screws (4) (Allen key size 8) .
5
The bearing surfaces must be clean.
Place the declination blocks onto the
bearing blocks from above. Do not slide
them onto the blocks to prevent the
bearing surface from getting scratched.
3a 7 6 1
2
Fig. 69
56
• Slide the left pin (3a) of knife holder C into the
declination block (1).
• Slide right declination block (2) onto right pin
(3a) of knife holder C and fasten to the microtome with 4 screws (5) (Allen key size 8).
Instruction manual V 1.3 – 10/2007
5.
8
Operation
• Turn the knife holder (3) upwards/backwards
until the clamping slot is in the position shown
in Fig. 70 and the 6 knife clamping screws (8)
are easily accessible.
• Tighten one Allen screw (6, Fig. 69) (Allen key
size 8) to secure the knife holder in that position.
Prior to inserting the knife, always
tighten one of the two Allen screws (6,
Fig. 69) to secure the knife holder in
position!
Fig. 70
Put on cut-resistant gloves (see also
chapter. 8.1 ‘Additional accessories’).
• Insert the knife into the knife holder from
above, with the writing pointing upwards (i.e.
pointing backwards when being inserted).
The knife back (base of the knife) must fit
against the bearing surface inside the knife
holder.
• Tighten the clamping screws (8) with an Allen
key size 8, starting with the center screws and
working your way outwards from side to side.
Only tighten as many screws as the knife is
actually wide.
Do not to misalign the knife when
tightening knife clamping screws (8)!
• Loosen Allen screw (6).
• Select the desired clearance angle (7) turning the knife holder (to turn, hold the knife
holder by the cylindrical pins, not by the knife
edge!)
• Hold the knife holder in that position and
tighten both Allen screws (6).
Leica SM2500
57
5.
Operation
5.5.12 Working with fixed-setting (45°) declination blocks and knife holder B
Steps 1 - 4 for all knife lengths:
1. Place left declination block (1) (with clearance angle scale (5)) onto left
microtome bearing block and secure with 3 screws (6) (Allen key size 8).
3
9
10
The bearing surfaces must be clean. Place declination blocks onto
bearing blocks from above - do not slide them onto the bearing
blocks to prevent the bearing surfaces from getting scratched.
12
6
11
2. Insert the left cylindrical holder (3) (marked by a black line) from the inside outwards through declination block (1) until the left locking pin (10)
is released.
3. Pull the left cylindrical holder (3) outwards as far as it will go and turn it
upwards until clamping slot (12) is located at the top; secure with Allen
screw (8) using an Allen key size 8.
4. Place the right declination block (2) onto the right bearing block of the
microtome and fasten with 4 screws (7) (Allen key size 8).
8
5 1
Fig. 71
Inserting knives up to a length of 22 cm:
5. Insert the right cylindrical holder (4) from the inside outwards through
the right declination block (2) until the right locking pin (10) is released.
6. Pull cylindrical holder (4) outwards as far as it will go.
8
7
Put on cut-resistant safety gloves (see also chapter 8.1 ‘Additional
accessories’).
4
10
2
9
11
12
58
Fig. 72
7. Insert the knife, from the center outwards, into the left cylindrical holder (3).
8. Slide the right cylindrical holder (4) onto the knife - support the knife from
below with one of your hands.
9. Slide knife guards (11) right and left over the knife edge.
10. Loosen Allen screw (8) on the left declination block.
11. Turn the knife forward until screws (9) are easily accessible.
12. Re-tighten Allen screw (8) on the left declination block (Allen key size 8).
13. Tighten the knife clamping screws (9) on both cylindrical holders with an
Allen key size 8 (alternately and only as many as the knife is wide).
14. Loosen Allen screw (8).
15. Turn the knife holder into desired clearance angle position (5), sustain it
in that position and tighten both Allen screws (8) (Allen key size 8).
Instruction manual V 1.3 – 10/2007
5.
Operation
Inserting knives up to a length of 30 cm
Put on cut-resistant safety gloves (see also chapter 8.1 ‘Additional
accessories’).
Steps 1 through 4 - see previous page.
5. Insert the knife into the left cylindrical holder (3) guiding it through the
right declination block (2) from the outside inwards.
6 Slide the right cylindrical holder (4) from the outside inwards through the
right declination block (2) and onto the knife - support the knife from below with one of your hands.
7. Slide knife guards (11) right and left over the knife edge.
8. Loosen Allen screw (8) on the left declination block (Allen key size 8).
9. Turn the knife forward until the knife clamping screws (9) are easily accessible.
10. Re-tighten Allen screw (8) on the left declination block (Allen key size 8).
11. Tighten the knife clamping screws (9) on both cylindrical holders with an
Allen key size 8 (alternately and only as many as the knife is wide).
12. Loosen Allen screw (8).
13. Turn the cylindrical holders into the desired clearance angle positon (5).
14. Sustain the knife holder in that position and tighten both Allen screws (8)
(Allen key size 8).
5.5.13 Inserting the disposable blade rail (only in knife holder B)
• Insert the blade rail into knife holder B as described for knives up to
22 cm length.
• Open the clamping screws on the blade rail (Allen key size 3).
• Insert the disposable blade; tighten the blade clamping screws, starting
from the center and working your way outwards from side to side.
5.5.14 Working with distance blocks for sectioning very high specimen blocks
• Place the distance blocks onto the bearing surfaces of the microtome,
then place the regular clamping blocks on top.
• Insert the extra-long fitting bolts through both blocks and tighten with an
Allen key, size 8.
Leica SM2500
59
5.
Operation
5.6
Working with the instrument
The instrument may only be operated by skilled laboratory personnel. It may only be used for the designated application and operated in accordance with the instructions contained in this manual!
Always wear protective glasses when sectioning brittle specimens! - Risk of splintering!
No liquids may enter the interior of the instrument during operation!
Always cover the knife edge with the knife guard during work
breaks!
Always remove the knife from the knife holder when finishing
work!
5.6.1 Switching the instrument on / selecting parameters
• Switch the instrument on (see chapter 5.2).
• Select manual mode of operation ‘MAN’ (see chapter 5.4.3).
• Mount accessories (specimen, knife holder, knife) (see chapter 5.5).
Be sure to comply with all safety instructions provided in chapter
5.5.6 on how to handle microtome knives properly!
• Orient the specimen, if needed (see chapter 5.5.5).
• Select the sectioning / milling window (see chapter 5.4.14).
• Select a stop or photo position (see chapter 5.4.8).
60
Instruction manual V 1.3 – 10/2007
5.
Operation
5.6.2 Trimming
Trimming can be done in modes of operation AUTO or PROG.
Trimming in AUTO mode of operation:
Preparatory steps:
•
•
•
•
•
Activate AUTO mode of operation (see chapter 5.4.3).
Select the desired section thickness (see chapter 5.4.5).
Activate retraction / select retraction setting as needed (chapter 5.4.5).
Select sectioning / milling and return stroke speed (see chapter 5.4.7).
Select a sectioning mode (see chapter 5.4.6) (for trimming usually
CONT).
• Turn the knife guard away from the knife edge.
Start the trimming procedure:
Press RUN STOP + RUN ENABLE (see chapter 5.4.10) or press the foot
switch (see chapter 5.4.1).
• Trim the specimen down to the desired level.
• Press RUN STOP or RUN ENABLE or once again press the foot switch to
stop trimming.
Trimming in PROG mode of operation
Preparatory steps:
• Activate PROG mode of operation.
The difference between PROG and AUTO is that in PROG none of
the three sectioning modes (area 2.3, chapter 5.4.6) is selected, but
a programmed number of sections is carried out.
• Select section thickness, retraction (if needed) and speed as described
for AUTO mode of operation.
• Select the desired number of sections ‘n’ you wish to be carried out
(area 2.2 chapter 5.4.5).
Start the trimming procedure:
• Press RUN STOP + RUN ENABLE or press the foot switch:
the instrument carries out the preselected number of sections and then
stops in the selected stop or photo position.
Leica SM2500
61
5.
Operation
5.6.3 Sectioning
Sectioning can be done in modes of operation AUTO or PROG.
Sectioning in AUTO mode of operation:
Preparatory steps:
As described for trimming (see page 59).
• Select section thickness and speed according to the type of specimen being
sectioned.
• Select a sectioning mode (see chapter 5.4.6). Sectioning can be done in
either CONT, SINGLE or STEP mode of operation.
Starting sectioning:
• Press RUN STOP + RUN ENABLE or press the foot switch.
• In SINGLE mode, the instrument will carry out one single step and then
stop in the stop or photo position selected.
• In STEP mode, the instrument will continue sectioning as long as RUN
STOP + RUN ENABLE or the foot switch are being held.
• To stop sectioning in CONT mode:
Press RUN STOP or RUN ENABLE or press the foot switch once again.
Sectioning in PROG mode:
Preparatory steps:
Proceed as described for trimming.
• If necessary, select sectioning thickness and speed appropriate for the type
of specimen being sectioned.
• Enter the desired number of sections ‘n’ you wish to be carried out (area
2.2 chapter 5.4.5).
Start sectioning:
• Press RUN STOP + RUN ENABLE or press the foot switch:
The instrument will carry out the number of sections programmed and
then stop in the defined stop or photo position.
62
Instruction manual V 1.3 – 10/2007
5.
5.7
Operation
Switching the instrument off
• Wait for the sectioning procedure to be finished (in PROG mode) or stop
sectioning by pressing RUN STOP or RUN ENABLE or the foot switch.
• If necessary, activate MAN mode of operation and move the sledge to
the resting position desired.
Wear cut-resistant safety gloves when inserting / removing the
knife (see also chapter 8.1 ‘Additional accessories’).
• Remove the knife.
Always remove the knife from the knife holder when finishing
work!
Handle microtome knives and blades with utmost care. Knife and
blade edges are extremely sharp and can cause severe injuries!
Never leave knives / disposable blades or knife holder with a
knife / disposable blade inserted lying around!
Always store knives in the knife case when not in use!
Never place a knife on a bench with the edge facing upwards!
Never try to catch a falling knife or disposable blade!
• Remove the specimen.
• Switch off the mains switch (I/0 - located at rear of control unit, position
‘0’ = Off).
Leica SM2500
63
6.
Trouble shooting
6.1
Error codes
• In the event of malfunctions, the instrument displays corresponding error
codes, described below.
• The error codes are shown in the lower display in area 4 (see chap. 5.4.12).
• Press any button to acknowledge / delete the error code displayed.
Error code
E 001
Cause
Connection to limit
switches interrupted.
E 002
RAM error.
6.2
Instrument / accessories not working
Error
Instrument not working.
Cause
Connecting cables / power cord
not connected / not correctly
connected.
Line fuses defective.
Lamp not working.
Cable not properly connected.
Lamp fuse (in control unit)
defective.
Vacuum cleaner not
working (SP2600).
Cable not properly connected.
Vacuum cleaner fuse
(in control unit) defective.
6.3
Corrective action
Verify if plug screws of connecting cable ‘microtome to control
unit’ are properly tightened.
Call Leica Technical Service.
Corrective action
Verify if connecting cable ‘microtome to control unit’ and/or mains
cable are properly connected.
Replace line fuses.
(see chapters 7.2.2 and 4.5.1).
Check lamp connecting cable.
Replace lamp fuse.
(see chapter 7.2.2).
Check vacuum cleaner connecting cable.
Replace vacuum cleaner fuse.
(see chapter 7.2.2).
Power failure
• If there is a power failure while the microtome is in motion, the microtome will stop in the position where the power failure occurred.
• Once power has been restored, the instrument will automatically go to
STANDBY mode:
press the STANDBY button to change from standby to active mode.
64
Instruction manual V 1.3 – 10/2007
7.
7.1
Cleaning, disinfection and maintenance
Cleaning / disinfection
Prior to any cleaning, disinfection or maintenance work, the instrument must be switched off and disconnected from mains!
Exception:
Cleaning or disinfection procedures which require the sledge to
be moved.
Remove both knife and specimen prior to any cleaning, disinfection or maintenance work!
Wear cut-resistant safety gloves to remove the knife (see chapter
8.1 ‘Additional accessories’).
No liquids may enter the interior of the instrument during cleaning, disinfection or maintenance!
Cleaning only with a slightly moistened cleaning cloth!
Disinfection only with disinfectants that allow application with a
slightly moistened cloth!
Do not use solvents (e.g. xylene, acetone), cleaners containing
solvents or scouring powders for cleaning!
Appropriate cleaners for the control unit / control panel and all
painted surfaces:
mild laboratory detergent (slightly moistened cloth)!
Clean the control panel only in standby mode or when the instrument is switched off.
Appropriate cleaners for non-varnished metal parts (knife holders,
base plates, specimen clamps):
xylene substitutes, alcohol - apply with an only slightly moistened
cleaning cloth!
Use cleaners and disinfectants according to the safety instructions of the manufacturer and in compliance with the applicable
regulations in your laboratory!
Regularly check and empty the section waste trays located below
the extendible carrying handles.
Leica SM2500
65
7.
Cleaning, disinfection and maintenance
2
1
Fig. 73
1
Cleaning steps:
• Use a brush to remove all loose sectioning waste from the instrument
and dispose of.
• Pull out the sectioning waste trays (1) located below the extendible carrying handles at the front and rear of the instrument.
The microtome housing consists of several plastic panels.
The front and rear panel are spring-held and can be removed easily when necessary.
The waste trays, located below the extendible carrying handles at
the front and rear of the housing, gather the sectioning waste
which is transferred to the trays via the cover ribbon.
The trays must be emptied before they are filled to the brim - otherwise the cover ribbon could be damaged or get dirty.
Check the waste trays daily and empty as required.
• Remove the knife holder. Clean the bearing surfaces of the bearing
blocks and the knife holder itself.
• Remove the upper front panel (2).
• Switch the instrument on.
• With a brush and/or a cleaning cloth slightly moistened with laboratory
cleaner, clean the cover ribbon in the area where it is supported by the
deflection roller:
Move the ribbon step by step (via buttons 56 - 59, see area 5.2, chapter
5.4.14) until the entire ribbon has been cleaned.
If possible, clean the cover ribbon only in the area where it is supported from below by the deflection roller.
Only very light pressure may be applied to the horizontal part of the
ribbon - otherwise it might slip out of the lateral guides.
Should that happen, immediately re-insert the ribbon into the
guide(s) to prevent sectioning waste from entering the interior of
the instrument!
• Put the upper front panel (2) back in place.
• If required, wipe down the housing surfaces with a cleaning cloth slightly
moistened with laboratory cleaner.
66
Instruction manual V 1.3 – 10/2007
7.
Cleaning, disinfection and maintenance
Disinfection
• If you work with potentially infectious material the instrument must be
disinfected accordingly.
• Slightly moisten a cleaning cloth with disinfectant and disinfect the instrument as per the instructions of the manufacturer of the disinfectant
used.
7.2
Maintenance
Only authorized service technicians may access the internal components of the instrument for service and repair!
Prior to any cleaning, disinfection or maintenance work, the instrument must be switched off and disconnected from mains!
Users may only carry out the maintenance work described in
chapters 7.2.1 and 7.2.2! Any other maintenance work must be carried out by authorized
Leica service technicians.
No liquids may enter the interior of the instrument during cleaning,
disinfection or maintenance!
7.2.1 General maintenance steps
• At least once a year, have the instrument inspected by an authorized
Leica technical service engineer.
• Enter into a service contract once the warranty period has expired.
• Clean the instrument daily (or every time after use).
• Regularly remove dust from the air ducts at the rear of the instrument
using a brush or a vacuum cleaner.
Leica SM2500
67
7.
Cleaning, disinfection and maintenance
7.2.2 Replacing the fuses
Prior to exchanging any fuse, always switch the instrument off and unplug the mains plug.
Defective fuses may be replaced only with the replacement fuses supplied together with the
instrument or with other replacement fuses of exactly the same type / specification!
Important!
Follow the instructions below to make sure you select the correct replacement fuse for each
fuse holder.
Selecting the correct replacement fuse
The amp value (here 10A) printed on the fuse and the
amp value next to the fuse holder on the rear panel of
the instrument MUST be identical!
Fig. 74
Fuse values are shown on the metal caps of the
replacement fuses - the fuse imprint looking
more or less as shown on the left (may vary
slightly depending on fuse type).
Amperage (A) is the parameter that is important
for allocating fuses correctly to the corresponding fuse holders (shown in the example on the
left: line fuse 2xT10A ).
Two fuse holders are located on the rear panel of
the instrument - see Fig. 76 on the left. The top
imprint ‘line fuse’ refers to the line fuses (2xT10A)
in the voltage selector (Fig. 77).
Check the instrument malfunction table (chap. 6.2
‘Instrument / accessories not working’) to find out
which fuse needs to be replaced.
Example:
Instrument not working --> possibly the line fuses 2xT10A (Fig. 77) need to be exchanged; i.e.
select the correct replacement fuses (10A) as per
the instructions on this page.
Replacing the fuses: --> proceed to next page.
Fig. 75
68
Instruction manual V 1.3 – 10/2007
7.
Cleaning, disinfection and maintenance
Replacing the vacuum cleaner or lamp fuse
3
1
2
2
Fig. 76
Fig. 77
• Insert a screwdriver into slot (1); push fuse
holder (2) slightly inwards turning at the same
time by 1/4 turn to the left.
• The fuse holder is released and can be removed.
• Remove the defective fuse (3) from the fuse
holder (2) and replace by a replacement fuse
of correct specification.
• Reinsert the fuse holder / fuse into the instrument. Use the screwdriver to push slightly inwards, turning at the same time by 1/4 turn to
the right.
Replacing the line fuses
• To replace the line fuses, proceed exactly as
per chapter 4.5.1 ‘Verifying and adjusting the
voltage selector’.
• Do not, however, change the orientation of the
voltage selector, but simply replace the defective fuses by new ones of correct specification.
Leica SM2500
Caution!
After replacing the line fuses and reinserting the voltage selector housing
into the instrument, double-check
whether the correct voltage selector
setting is visible.
69
7.
Cleaning and maintenance
7.2.3 Lubricating the bearing points and
the nut of the micrometer spindle
3
Fig. 78
2
1
Fig. 79
70
Under normal operating conditions it is sufficient
to lubricate the bearing points and the nut of the
micrometer spindle after approx. every 250 hours
of service:
• Switch the instrument on (MAN mode - see
chapter 5.4.3).
• Remove specimen holder and base plate from
the sledge.
• Remove cover (3):
the first lubrication point (1) becomes visible.
• Fill the grease gun (standard delivery) and extract the air from the gun (press several times
on a cleaning cloth or piece of paper until
grease comes out).
• Place the grease gun onto the first lubrication
point and press once or twice.
• Via the manual sledge movement (area 5.2,
chapter 5.4.14) move the sledge backwards
until the second lubrication point (2) becomes
visible through the round opening in the cover
ribbon.
• Place the grease gun onto the second lubrication point and press once or twice.
• If required, move the sledge back forward as
far as needed (manual sledge movement, area
5.2, chapter 5.4.14).
• Put cover (3) back in place.
• Re-insert the base plate and specimen holder
(see chapter 5.5.1).
Instruction manual V 1.3 – 10/2007
8.
8.1
Overview - accessories
Knife holders, specimen holders, additional accessories
Knife holders and knife holder accessories
• Knife holder A
• Knife holder B
• Knife holder C
• Pair of declination blocks - fixed declination angle of 45°,
for knife holders A, B and C
• Pair of distance blocks including set of extra-long fitting bolts, block
height 62 mm; usable with knife holders A, B and C
Specimen holders (base plates, specimen and specimen stage holders)
• Base plate with vise, 80 x 100 mm
• Mountable jaws for vise 80 x 100 mm, for sectioning very high specimen
blocks
• Base plate with dovetail guide (including eccentric ring).
• Eccentric ring for base plate (part of standard delivery of ‘base plate with
dovetail guide’; to be ordered separately for use with ‘base plate with
vise’)
The eccentric ring blocks the orientation mechanism to ensure the
sectioning plane is not altered.
However, when using the eccentric ring the specimens CANNOT
be oriented.
• Specimen clamp, 44 x 58 mm (to be fastened on base plate with dovetail
guide)
• Round specimen holder for specimens of 6, 15 and 25 mm diameter (to
be fastened on base plate with dovetail guide)
• Vacuum stage adapter (to be fastened on base plate with dovetail guide)
The vacuum stages are above all used for milling applications
(Leica SP2600 Ultramilling Attachment), though in some cases,
vacuum stages might be suitable for Leica SM 2500 sectioning applications. - Please contact your Leica representative if you need
any further information.
Leica SM2500
71
8.
Overview - accessories
Preconfigured specimen holder sets
• Base plate with dovetail guide, including eccentric ring and specimen
clamp 44 x 58 mm
• Base plate with dovetail guide, including eccentric ring and holder for
round specimens of 6, 15 and 25 mm diameter.
Specimen stages
• Metal specimen stages with special surface texture for paraffin
embeddings, available in the following sizes:
- 8 x 6.5 cm
- 12 x 8 cm
- 16 x 12 cm
- 25 x 20 cm
• Plastic specimen stages for celloidin embeddings, available in the following sizes:
- 8 x 6.5 cm
- 12 x 8 cm
- 20 x 12 cm
- 25.5 x 19 cm
Embedding frame
• Aluminum embedding frame, adjustable in size, fits all specimen stage
sizes available, for block sizes up to 200 x 260 mm.
Additional accessories
• Safety gloves, cut-resistant - for safe handling of the knives.
72
Instruction manual V 1.3 – 10/2007
8.
8.2
Overview - accessories
Overview - which knife to be used in which knife holder
Übersicht - Messer für SM2500
Messertyp
Hartmetallmesser
Stahlmesser
Einwegklingenschienen
Teilenummer
Messerhalter A
12 cm Länge, Keilwinkel 40°
0216 12477
x
12 cm Länge, Keilwinkel 50°
0216 12478
x
12 cm Länge, Keilwinkel 60°
0216 11736
x
12 cm Länge, Keilwinkel 70°
0216 117378
x
x
Messerhalter B
Messerhalter C
16 cm Länge, Keilwinkel 40°
0216 11739
16 cm Länge, Keilwinkel 50°
0216 11740
x
16 cm Länge, Keilwinkel 60°
0216 11741
x
12 cm Länge, Profil Cc
0216 60114
x
12 cm Länge, Profil Cd
0216 60125
x
16 cm Länge, Profil Cc
0216 60113
x
16 cm Länge, Profil Cd
0216 60115
x
12 cm Länge, Keilwinkel 40°
0216 11727
x
12 cm Länge, Keilwinkel 50°
0216 11728
x
16 cm Länge, Keilwinkel 40°
0216 11730
x
16 cm Länge, 40°, Keilwinkel 50°
0216 11731
x
22 cm Länge, 40°, Keilwinkel 40°
0216 11733
x
22 cm Länge, Keilwinkel 50°
0216 11734
x
12 cm Länge Profil Cc
0216 60128
x
12 cm Länge Profil Cd
0216 60127
x
16 cm Länge, Profil Cc
0216 60076
x
16 cm Länge, Profil Cd
0216 60078
x
22 cm Länge, Profil Cc
0216 60077
x
22 cm Länge, Profil Cd
0216 60079
22 cm Länge, Profil b
0216 07114
x
x
22 cm Länge, Profil c
0216 07116
x
22 cm Länge, Profil d
0216 07136
x
30 cm Länge, Profil b
0216 07126
x
30 cm Länge, Profil c
0216 07128
x
30 cm Länge, Profil d
0216 07139
x
Einwegklingenhalter mit zentraler
Andruckplatte, für Schmalband-Einwegklingen
0368 32775
x
All knives are delivered in a special knife storage case.
Leica SM2500
73
9.
Warranty and service
Warranty
Leica Biosystems Nussloch GmbH guarantees that the contractual product
delivered has been subjected to a comprehensive quality control procedure
based on the Leica in-house testing standards, and that the product is faultless and complies with all technical specifications and/or agreed characteristics warranted.
The scope of the warranty is based on the content of the concluded agreement. The warranty terms of your Leica sales organization or the organization from which you have purchased the contractual product shall apply
exclusively.
Service information
If you are in need of technical customer service or spare parts, please contact your Leica representative or the Leica dealer where you purchased the
instrument.
Please provide the following information:
•
•
•
•
Model name and serial number of the instrument.
Location of the instrument and name of the person to contact.
Reason for the service call.
Delivery date.
Decommissioning and disposal
The instrument or parts of the instrument must be disposed of according to
existing local applicable regulations.
Special attention should be paid to the lithium cell of the electronic circuit
board!
74
Instruction manual V 1.3 – 10/2007
10. EC Declaration of Conformity
EC Declaration of Conformity
We herewith declare, in exclusive responsibility, that the instrument
Leica SM2500 – Sliding Microtome
with and without SP2600 – Ultramiller Attatchment
was developed, designed and manufactured to conform with the
• Council Directive 73/23/EEC, (Low Voltage) and
• Council Directive 89/336/EEC, Appendix I (Electromagnetic Compatibility),
including their amendments up to the date mentioned below.
The following harmonized standards were applied:
• EN 61010-1: 2001
Safety requirements for electrical equipment for measurement, control and laboratory use Part 1: General requirements
• EN 61326-1:1997 + EN 61326/1:1998
Electrical equipmentl for measurement, control and laboratory use - EMC requirements Part 1: General requirements
• EN 61000-3-2:1995 + A1:1998 + A2:1998 + A14:2000
Electromagnetic compatibility (EMC)
Part 3-2: Limits - Limits for harmonic current emissions
• EN 61000-3-3:1995
Electromagnetic compatibility (EMC)
Part 3: Limits Section 3: Limitation of voltage fluctuations and flicker in low-voltage supply systems for equirement
with rated current £ 16 A
• EN 418:1992
Emergency stop equipment.
Principles for design.
• EN 1037:1995
Safety of machinery.
Prevention of unexpected start-up.
In addition, the following in-house standards were applied:
• DIN EN ISO 9001: 2000.
Leica Biosystems Nussloch GmbH
Postfach 1120
D-69222 Nussloch
October 11, 2007
............................
Anne De Greef-Safft
President Biosystems Division
11.
76
Peoples Republic of China
Instruction manual V 1.3 – 10/2007