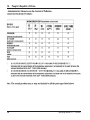
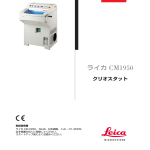
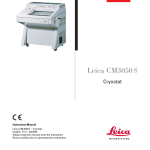
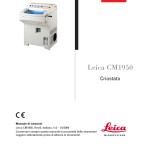
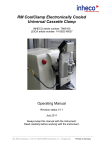
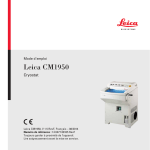
1
Leica CM1950
Cryostat
Operating Manual
Leica CM1950 , V 1.1 English – 05/2007
Always keep this manual near the instrument.
Read carefully prior to working with the instrument!
1. NOTE
The information, numerical data, notes and value
judgments contained in this manual represent the
current state of scientific knowledge and stateof-the-art technology as we understand it following thorough investigation in this field. We are
under no obligation to update the present manual periodically and on an ongoing basis according to the latest technical developments, nor to
provide our customers with additional copies,
updates etc. of this manual.
For erroneous statements, drawings, technical
illustrations etc. contained in this manual we exclude liability as far as permissible according to
the national legal system applicable in each individual case. In particular, no liability whatsoever
is accepted for any financial loss or consequential damage caused by or related to compliance
with statements or other information in this
manual.
Statements, drawings, illustrations and other
information as regards contents or technical
details of the present manual are not to be
considered as warranted characteristics of our
products.
These are determined only by the contract provisions agreed between ourselves and our
customers.
Leica reserves the right to change technical specifications as well as manufacturing processes
without prior notice. Only in this way is it possible
to continuously improve the technology and manufacturing techniques used in our products.
This document is protected under copyright laws.
All copyrights to this documentation are held by
Leica Biosystems Nussloch GmbH.
Any reproduction of text and illustrations (or of
any parts thereof) by means of print, photocopy,
microfiche, web cam or other methods – including any electronic systems and media – requires
express prior permission in writing by
Leica Biosystems Nussloch GmbH.
For the instrument serial number and year of manufacture, please refer to the name plate at the
back of the instrument.
© Leica Biosystems Nussloch GmbH
Published by:
Leica Biosystems Nussloch GmbH
Heidelberger Str. 17 - 19
D-69226 Nussloch
Germany
Phone: +49 (62 24) 143-0
Fax:
+49 (62 24) 143-200
eMail: [email protected]
Internet: http://www.histo-solutions.com
Leica CM1950 – Cryostat
3
Table of contents
1.
Important Information ......................................................................................................................... 6
1.1
1.2
1.3
1.4
2.
Symbols Used in This Manual and Their Meaning ................................................................
Qualification of Personnel ..........................................................................................................
Designated Use............................................................................................................................
Instrument Type ...........................................................................................................................
6
6
6
6
Safety and Design ................................................................................................................................ 7
2.1
2.2
2.3
2.4
2.5
2.6
2.7
2.8
General Safety Instructions ....................................................................................................... 7
Unpacking and Installation ........................................................................................................ 7
Safety Features .......................................................................................................................... 10
Securing/Locking the Handwheel .......................................................................................... 11
Cleaning, Disinfection – Turning the Instrument Back On .................................................. 12
Handling Specimens – Defrosting .......................................................................................... 13
Removal of the Microtome ....................................................................................................... 13
Maintenance .............................................................................................................................. 13
3.
4.
5.
Technical Data ................................................................................................................................... 14
Standard Delivery .............................................................................................................................. 16
General Overview .............................................................................................................................. 18
6.
Installation ........................................................................................................................................... 20
5.1
6.1
6.2
6.3
6.3.1
6.3.2
6.4
6.5
6.5.1
6.5.2
6.5.4
6.5.3
6.5.5
6.5.6
4
Control Panel Fields and Cryostat Chamber .......................................................................... 19
Site Requirements ..................................................................................................................... 20
Transport to the Site ................................................................................................................. 21
Assembling the Handwheel, Centering the Handwheel (Optional) ................................... 22
Locking/Unlocking the Handwheel ......................................................................................... 23
Installing the Footswitch Dummy (Instruments with Cutting Motor) ................................ 23
Connection to Power Supply System ..................................................................................... 24
Installing Accessories/Inserting Chamber Accessories .................................................... 25
Installing the Adjustable Footrest (Optional) ........................................................................ 25
Installing the Storage Systems (Optional) ............................................................................. 26
Inserting the Section Waste Tray ........................................................................................... 26
Shelf, Movable (Optional) ......................................................................................................... 26
Installing the Heat Conductor Block, Stationary (Optional) ............................................... 27
Installing the Knife/Blade Holder and Adjusting the Clearance Angle ............................. 27
Operating Manual V 1.1 – 05/2007
7.
Instrument Controls ........................................................................................................................... 30
7.1
8.
Control Panel Fields on the CM1950 – Control Panel Field 1 .............................................. 30
Control Panel Field 2 – Electric Coarse Feed, Sectioning
and Trimming Thickness Display ............................................................................................ 32
Control panel 3 – Motorized sectioning (optional) ............................................................... 34
Working with the Instrument ......................................................................................................... 36
8.1
8.2
8.3
8.4
8.4.1
8.4.2
8.4.3
9.
10.
11.
12.
13.
14.
15.
16.
Preparing Cutting Tools, Specimen Discs and Preparation Aids ...................................... 36
Turning the Instrument On ....................................................................................................... 36
Configuring the Parameters ..................................................................................................... 37
Working with the Precooled Cryostat .................................................................................... 42
Preparatory Work ...................................................................................................................... 42
Trimming with Extraction – Anti-roll Guide Installed ........................................................... 43
Cutting with Extraction – Anti-roll Guide Installed ............................................................... 45
Troubleshooting ................................................................................................................................. 48
9.1 Problems During Work ............................................................................................................. 48
Temperature Selection Chart (in minus °C) .............................................................................. 52
Optional Accessories ....................................................................................................................... 53
11.1 Ordering Information ................................................................................................................. 53
Maintenance and Cleaning ............................................................................................................ 66
12.1 General Maintenance ............................................................................................................... 66
12.2 Changing Fuses.......................................................................................................................... 67
12.3 Replacement of the Lamp/UVC Lamp ..................................................................................... 68
Decontamination Certificate (master) ........................................................................................ 70
EC Declaration of Conformity ........................................................................................................ 72
Warranty and Service ...................................................................................................................... 73
Peoles Republic of China ................................................................................................................ 74
Leica CM1950 – Cryostat
5
1.
Important Information
1.1
Symbols Used in This Manual and
Their Meaning
Warnings
appear in a gray box and are marked
by a warning
triangle.
Notes
i.e. important user information appear
in a gray box and are marked by an information
symbol.
Caution – UVC radiation!
(5)
(Fig.5)
Figures in brackets refer to item numbers in drawings or to the drawings
themselves.
1.3
The CM1950 is a high-performance cryostat with
an encapsulated microtome and separate specimen cooling. It features a UV disinfection system,
an (optional) integrated extraction system for section waste and an (optional) motor for motorized
sectioning.
The cryostat is designed to produce frozen sections
for biological, medical and industrial applications.
The CM1950 is suitable for in-vitro diagnostic
(IVD) applications.
The instrument may only be operated within the
scope of its designated use as described above
and as per the instructions given in this manual.
Any other use of this instrument is considered
as improper operation.
1.4
1.2
Qualification of Personnel
The Leica CM1950 may be operated by trained
laboratory personnel only.
All laboratory personnel designated to operate
the instrument must carefully read the present
instruction manual prior to starting work with the
instrument.
Designated Use
Instrument Type
All information given in this instruction manual
applies only to the instrument type indicated on
the title page.
A name plate, indicating the instrument serial
number, is attached to the back of the instrument.
Despite chemical and/or UV-light disinfection, personal safety precautions
as per the applicable laboratory regulations must still be taken (i.e. safety
goggles, gloves, laboratory coat and
mask must be worn).
This type of disinfection reduces the
number of germs by at least 99.99 %.
Fig. 1
6
Operating Manual V 1.1 – 05/2007
2.
2.1
Safety and Design
General Safety Instructions
The CM1950 is a cryostat with an encapsulated microtome and separate
specimen cooling. It is primarily used for work in the area of fast-cut diagnostics. The displays and instrument controls are easy to operate due to
their largely self-explanatory symbols. LED displays make it easy to read.
The cryochamber is made of seamlessly welded, high-quality stainless steel
that is free of difficult-to-access corners and thus easy to clean and disinfect.
This instrument has been built and tested in accordance with the following
safety regulations on electrical measuring, control, regulating and laboratory devices. In order to maintain this condition and to ensure safe operation, the operator must observe the instructions and warnings contained in
this instruction manual.
For current information about applicable standards, please refer to the
CE declaration of conformity on our Internet site:
www.histo-solutions.com
2.2
Unpacking and Installation
• To ensure proper function of the instrument, it must be set up with a
minimum distance on all sides from walls and furniture (see ‘Site
Requirements’, p. 20)
• The instrument may only be transported in an upright or slightly inclined
position.
• To ensure a safe transport with a fork lift 3 people are required: one operating the fork lift, and the other 2 holding the instrument on either
side to prevent it from sliding down.
• Before connecting to the power supply system, please check if the local
voltage complies with the power rating specified on the name plate of
the instrument (see also ‘Technical data’)!
• Never connect the instrument to a power socket that does not have a
protective conductor terminal.
Length of power cable: up to 3.5 m
extension possible: no
After transporting, wait at least 4 hours before turning the instrument on. This waiting period is
necessary to allow the compressor oil, which may have been displaced during transport, to return
into its original position. Any condensation on electrical parts that has formed due to temperature differences during transport must be allowed to dry completely. Failure to comply with this
can cause severe damage to the instrument!
Leica CM1950 – Cryostat
7
2.
Safety and Design
When the instrument is delivered, check the tilt indicators on the
packaging.
If the arrowhead is blue, the shipment was transported laying flat,
was tilted at too great an angle or fell over during transport.
Note this on the shipping documents and check the shipment for
possible damage.
Fig. 2
1
2
3
2
5
8
5
8
9
8
7
5
8
8
10
11
4
11
4
Opening the packaging
1. Remove the 3 screws (1) on each of the two sides of the
box (7) at the top.
2. Remove the 2 screws on each of the 4 hinges (2) on the
front and rear side of the box.
9
Do NOT remove the screws of the hinges on the top
lid!
14
17
Cover = ramp
3. Remove 1 screw (3) between the two hinges on the front
and rear side of the box.
4. Remove the 3 screws (4) at the bottom on all four sides
of the box.
5. Of the two vertical rows of screws (5), remove one on
either side (which side does not matter) entirely.
Fig. 3
8
Operating Manual V 1.1 – 05/2007
2.
Safety and Design
Removing the packaging
6
1. Remove the cover (17) and place it on the floor with the foam parts facing
downwards. - The cover will be used as a ramp later.
2. Remove the 4 foam parts (6) by pulling them upwards.
3. Open the box (7) on its side hinges like an accordion partition and remove
it.
4. Remove the accessories carton (8) and operating manual on the front of
the instrument.
5. Pull off the dust cover (9) by pulling upwards.
6. Take off the foam strip (10) on the bottom rear.
6
6
6
Fig. 4
Ramp assembly
1. After the foam strip (10) is removed, 2 screws (12) are visible on the
baseplate.
2. Swing out the cover hinges (2) at the front and rear.
3. Attach the cover (17) from the rear on the transport pallet (11).
The notches (13) of the hinges (2) must be pointing towards the instrument.
4. Move the cover towards the left so that the notches (13) of the hinges
slide beneath the heads of the screws (12).
13
12
Fig. 5
Transport to the Installation Location
The instrument must be transported in an upright position.
15
16
The cover (17) now forms a ramp on which the instrument can now be rolled
down off the transport pallet.
2
14
2
Do not push the device by its hood (16). Use the transport grip
points (15 ).
The rollers (14) must run over the cover hinges (2) at the front and
rear. Danger of tipping!
17
Fig. 6
Leica CM1950 Cryostat
1. Carefully roll the instrument backwards from the pallet.
2. Push the instrument to the installation location on the castors (14).
9
2.
Safety and Design
2.3
Safety Features
The instruction manual includes important information related to the operating
safety and maintenance of the instrument.
The Operating Manual is an important part of the product, and must be read
carefully before startup and use and must always be kept near the instrument.
If additional requirements on accident prevention and environmental
protection apply in the country of operation, this Operating Manual must be
supplemented by appropriate instructions to ensure compliance with such
requirements.
The instrument is equipped with the following safety devices: an emergency stop switch (motorized instruments only), a handwheel lock and centering system (motorized instruments only), knife guard on the blade and knife
holder, and a blade ejector.
To prevent adverse health effects from UV radiation, the UV disinfection cycle can be started only after the sliding window has been properly closed. Closing the window activates the corresponding safety
features.
The consistent use of these safety features and strict observation of the warnings and cautions in this manual, will safeguard the operator from accidents
and/or personal injury to a great extent.
Microtome knives
• Take care when handling microtome knives/disposable blades. The
cutting edge is extremely sharp and can cause severe injury!
• Never leave knives and dismounted knife holders with a knife/blade
mounted lying around!
• Do not place a knife on a table with the cutting edge facing upwards!
We strongly recommend using the safety gloves included with the
standard delivery!
• Never try to catch a falling knife!
• Prior to manipulating the knife and specimen or changing the specimen,
always lock the handwheel and cover the cutting edge with the knife
guard!
• Avoid contact with cold parts of the instrument as this can cause frostbite!
10
Operating Manual V 1.1 – 05/2007
2.
Safety and Design
Knife guard
Prior to manipulating the knife and specimen, changing the specimen or knife, or taking a break, always lock the handwheel and
cover the cutting edge with the knife guard.
The CE, CN and CN-Z knife holders feature knife guards; the glass anti-roll
plate of the CE knife holder also serves as a knife guard.
2.4
Securing/Locking the Handwheel
12 o’clock
position
6 o’clock
position
Fig. 7
Always lock the handwheel and cover the cutting edge with the
knife guard prior to manipulating the knife or specimen, changing
the specimen, or taking a break.
To lock the handwheel, press the lever (1) outward. Continue turning the
handwheel slowly until the grip is in the upper or lower position and the
handwheel is locked. Press the lever fully outward; gently rock the handwheel until the locking mechanism clicks into place noticeably.
To release the handwheel, press the lever (2) on the handwheel toward the
cryostat housing.
1
2
Fig. 8
Centering of the handwheel (motorized instruments only)
Pull out the handwheel’s handle and position it in the middle of the
handwheel. The handle automatically engages in this position.
An important safety device on the cryostat is the centering of the
handwheel for motorized instruments.
Fig. 9
Leica CM1950 – Cryostat
Rotate the handwheel only if the refrigeration system is on and the
cryochamber is cold.
11
2.
Safety and Design
2.5
Cleaning, Disinfection – Turning the Instrument Back On
It is not necessary to remove the microtome for disinfection.
• The instrument has been designed for UV disinfection! Spray disinfection with Leica Cryofect is also possible, thanks to the special insulation
of the microtome. (Cryofect is not available in all countries!)
Remove section waste after EVERY sectioning operation and BEFORE changing specimens. Remove the section waste using a paper towel soaked in Cryofect or an alcohol-based disinfectant) or
remove the waste using the extraction nozzle (optional). Do not
start the disinfection until after folding the section stretcher to the
side! Each new specimen is a potential source of contamination.
• When disinfecting the instrument, take appropriate protective measures
(gloves, mask, protective clothing, etc.).
• When using detergents and disinfectants please comply with the safety
precautions of the disinfectant manufacturer.
• The integrated glass anti-roll guide of the blade holder CE, CN and CN-Z
can be cleaned either with acetone or alcohol.
• Dispose of waste liquid according to the waste disposal regulations!
• Do not use external heaters for drying the cryochamber. This can cause
damage to the cooling system!
• Do not turn the instrument on before the cryochamber is completely dry!
Frost formation!
• All components removed from the cryostat must be carefully dried before returning them to the cryochamber!
• The front panel and the slit cover of the microtome must be completely
dry before turning on the instrument!
For more detailed information about disinfection, visit the Leica
Microsystems website at
www.histo-solutions.com
12
Operating Manual V 1.1 – 05/2007
2.
2.6
Safety and Design
Handling Specimens – Defrosting
• When working with contaminated or infected material, the general safety
guidelines for laboratories must be applied.
• Before defrosting the cryochamber remove all samples!
• Before defrosting the specimen head, remove all samples!
Never leave samples in the cryochamber! - The instrument is not
suitable for storing frozen specimens, as the refrigeration dehydrates the specimens!
The quick freeze shelf can become very hot during the defrosting
process. Do not touch it during defrosting.
2.7
Removal of the Microtome
• The microtome is encapsulated and therefore does not require removal
by the user.
2.8
Maintenance
Replacing the fuses
• Turn the instrument off and disconnect the power plug before replacing
the fuses.
• Use only the fuse types specified in chapter 3, "Technical Data." Failure
to comply with this can cause severe damage to the instrument!
Replacing the fluorescent lamp/UVC lamp
• Turn the instrument off and disconnect the power plug before replacing
the lamps.
It is possible to break the UVC lamp during replacement. If this
happens, the lamp change must be completed by Technical Service. If any metallic mercury is released, handle it carefully and
dispose of it properly.
If both disinfection indicator lights are blinking alternately, the
UV tube must be replaced!
Leica CM1950 Cryostat
13
3.
Technical Data
All specifications related to temperature are valid only up to an ambient temperature of 18 °C
to 35 °C and a relative humidity of no more than 60%.
Type
Nominal voltage (±10 %)
Nominal frequency
Power draw
Max. start-up current for 5 sec.
Protective class
Circuit breaker:
(MDA made by Schurter)
Pollution degree②
Overvoltage installation category
Heat emission (max.)
Approval
-1
-2
-3
100 V AC
50/60 Hz
1900 VA
35 A eff.
I
15A M3
120 V AC
60 Hz
1900 VA
35 A eff.
I
15A M3
230 V AC
50 Hz
1900 VA
25 A eff.
I
15A M3
2
II
1900 J/s
CE/c_CSA_us
2
II
1900 J/s
CE/c_CSA_us
2
II
1900 J/s
CE/c_CSA_us
② according to IEC-1010; UL 3101
Microtome
Cryostat
Type:
Section thickness range
Trimming range:
Clinic
Research
Total specimen feed
Vertical stroke
Specimen retraction
Maximum specimen size
Cutting speed
Specimen orientation
Rotary microtome,
encapsulated
1 to 100 μm
10 - 40 μm ③
1 - 600 μm ③
25 mm + 1 mm
59 mm ±0.5 mm
20μm (can be deactivated)
50 x 80 mm
Slow: 0-50 strokes/min
Fast: 0-85 strokes/min
Vmax: 85-90 strokes/min
8° (x, y-axis)
③ For additional details, see p. 32
Electric coarse feed
Slow
Fast
300 μm/s
900 μm/s
Lamp
14
Weight:
Weight (w/motor and suct.)
Weight (w/motor, w/o suct.)
Weight (w/o motor, w/ suct.)
Weight (w/o motor, w/o suct.)
Weight (w/ specimen head cool.)
Weight (w/o specimen head cool.)
700 mm
835 mm
850 mm
1215 mm
1025 mm
193 kg
185 kg
183 kg
175 kg
165 kg
145 kg
General information
For "Site Requirements," refer to item 6.1
(page 20).
50/60 Hz-Version:
Dimensions:
Width (w/o handwheel)
Width (with handwheel)
Depth (cabinet only)
Height (total)
Working height (armrest)
Operating temperature range: 18 °C to 35 °C
Temperature range
during storage:
+5 °C to +55 °C
Relative humidity:
max. 60 %,
non-condensing
Storage humidity:
< 60 %
Osram DULUX L 18 W/840
Operating Manual V 1.1 – 05/2007
3. Technical Data
Refrigeration system
Cryochamber
Temperature range
CM1950 , 50 Hz
CM1950 , 60 Hz
0°C to -35°C ± 5 K, adjustable in 1K increments,
at ambient temperature of 20 °C
approx. 5 h
approx. 8 h
690 W
25 bar
3
300 g (± 5 g) refrigerant R -404A*
0.6 l EMKARATE RL22S, ICI*
0°C to -35°C ± 5 K, adjustable in 1K increments
ambient temperature of 20 °C
approx. 5 h
approx. 8 h
690 W
25 bar
3
300 g (± 5 g) refrigerant R -404A*
0.6 l EMKARATE RL22S, ICI*
Defrost time:
Automatic shutoff Defrost:
Yes (hot gas defrost) Selectable time
1 defrost in 24 h
or manual hot gas defrost
12 minutes
at -5 °C chamber temperature
Yes (hot gas defrost) Selectable time
1 defrost in 24 h
or manual hot gas defrost
12 minutes
at -5 °C chamber temperature
Quick-freeze shelf
Minimum temperature:
Number of freezing stations:
Defrost
- 42 °C (+ 5 K), at chamber temp. -35°C
15+2
Manual hot-gas defrost
- 42 °C (+ 5 K), at chamber temp. -35°C
15+2
Manual hot-gas defrost
Peltier element
Number of freezing stations:
Max. temperature difference:
2
17 K, at chamber temp. of -35 °C
2
17 K, at chamber temp. of -35 °C
Specimen cooling
Temperature range
-10 to -50 °C ± 3 K
-10 to -50 °C ± 3 K
320 W
25 bar
3
at 230 V/50 Hz 140 g (± 5 g), refrigerant R-404A*
at 100 V/50/60 Hz 110 g (± 5 g), refrigerant R-404A*
320 W
25 bar
3
at 120 V/60 Hz 110 g (± 5 g), refrigerant R-404A*
0.4 l alpha 22, Kyodo*
0.4 l alpha 22, Kyodo*
No
No
15 min.
15 min.
Cooling time to -25°C
Cooling time to -35°C
Refrigeration capacity ①
Cut-out pressure
Safety factor
Refrigerant*
Compressor oil*
Defrosting of cryochamber
Automatic defrosting
Programmable:
Defrosting intervals
Refrigeration capacity①
Cut-out pressure
Safety factor
Refrigerant and quantity
Compressor oil*
Defrosting of specimen head
Automatic defrost:
Manual defrost
Defrost time
*) Refrigerant and compressor oil must be replaced by qualified, authorized service personnel only.
① acc. to CECOMAF: liquid temperature 45 °C, evaporation temperature: -25 °C
Leica CM1950 – Cryostat
15
4.
Standard Delivery
Basic instrument WITHOUT motor/WITHOUT extraction, in the specific voltage variant
1 handwheel, manual ......................................................................................... 0477 41346
5 specimen discs, 30 mm ................................................................................... 0477 40044
1 section waste tray ........................................................................................... 0477 40062
1 position holder for freeze shelf ..................................................................... 0477 40080
1 freeze shelf cover ............................................................................................ 0477 43763
1 tool set ............................................................................................................... 0436 43463
- 1 brush, fine ................................................................................................ 0183 28642
- 1 Leica brush w/magnet ........................................................................... 0183 40426
- 1 Allen key, No. 1.5 ..................................................................................... 0222 10050
- 1 Allen key, No. 2.5 ..................................................................................... 0222 04137
- 1 Allen key, No. 3.0 ..................................................................................... 0222 04138
- 1 Allen key, No. 4.0 ..................................................................................... 0222 04139
- 1 Allen key with dome head, No. 4.0 ....................................................... 0222 32131
- 1 Allen key, No. 5.0 ..................................................................................... 0222 04140
- 1 key with handle, No. 5.0 ......................................................................... 0194 04760
- 1 Allen key, No. 6.0 ..................................................................................... 0222 04141
- 1 Single-head wrench, No. 13 ................................................................. 0330 33149
- 1 Single-head wrench, No. 16 ................................................................. 0330 18595
1 power cable .........................................................................................................................
1 bottle of cryostat oil, type 407, 50 ml ............................................................ 0336 06098
1 bottle of OCT freezing compound, 125 ml .................................................... 0201 08926
1 pair of safety gloves, size M, * for cryosectioning .................................... 0340 29011
1 user manual plus language CD ..................................................................... 0708 37115
* Note: for the Japanese version: 100V, 50/60 Hz; 1 pair of safety gloves, size S
(0340 40859) is included.
Basic instrument WITHOUT motor and WITH extraction,
Standard scope of delivery as above,
plus:
1 accessory set (extraction) ............................................................................. 0477 43300
- Hose adapter 1 ........................................................................................... 0477 40293
- Hose adapter 2 ........................................................................................... 0477 40294
- Suction nozzle ............................................................................................ 0477 40295
- Silicone hose .............................................................................................. 0477 43302
- Silicone stopper ......................................................................................... 0477 43304
- Chamber suction nozzle ........................................................................... 0477 43779
- Set of filters (5 pieces) .............................................................................. 0477 43792
Compare the delivered components with the parts list and your order. Should you
find any discrepancies, please contact your Leica sales office without delay.
A choice of different knife holders is available for the CM1950 .
16
Operating Manual V 1.1 – 05/2007
4. Standard Delivery
Basic instrument WITH motor/WITHOUT extraction, in the specific voltage variant
1 handwheel, motorized .................................................................................... 0477 41347
5 specimen discs, 30 mm ................................................................................... 0477 40044
1 section waste tray ........................................................................................... 0477 40062
1 position holder for freeze shelf ..................................................................... 0477 40080
1 freeze shelf cover ............................................................................................ 0477 43763
1 tool set ............................................................................................................... 0436 43463
- 1 brush, fine ................................................................................................ 0183 28642
- 1 Leica brush w/magnet ........................................................................... 0183 40426
- 1 Allen key, No. 1.5 ..................................................................................... 0222 10050
- 1 Allen key, No. 2.5 ..................................................................................... 0222 04137
- 1 Allen key, No. 3.0 ..................................................................................... 0222 04138
- 1 Allen key, No. 4.0 ..................................................................................... 0222 04139
- 1 Allen key with dome head, No. 4.0 ....................................................... 0222 32131
- 1 Allen key, No. 5.0 ..................................................................................... 0222 04140
- 1 key with handle, No. 5.0 ......................................................................... 0194 04760
- 1 Allen key, No. 6.0 ..................................................................................... 0222 04141
- 1 Single-head wrench, No. 13 ................................................................. 0330 33149
- 1 Single-head wrench, No. 16 ................................................................. 0330 18595
1 power cable .........................................................................................................................
1 bottle of cryostat oil, type 407, 50 ml ............................................................ 0336 06098
1 footswitch dummy ........................................................................................... 0443 30420
1 bottle of OCT freezing compound, 125 ml .................................................... 0201 08926
1 pair of safety gloves, size M, * for cryosectioning .................................... 0340 29011
1 operating instructions plus language CD .................................................... 0708 37115
* Note: for the Japanese version: 100V, 50/60 Hz; 1 pair of safety gloves,
size S (0340 40859) is included.
Basic instrument WITH and WITH extraction, in the specific voltage variant
Standard scope of delivery as above,
plus:
1 accessory set (extraction) ............................................................................. 0477 43300
- Hose adapter 1 ........................................................................................... 0477 40293
- Hose adapter 2 ........................................................................................... 0477 40294
- Suction nozzle ............................................................................................ 0477 40295
- Silicone hose .............................................................................................. 0477 43302
- Silicone stopper ......................................................................................... 0477 43304
- Chamber suction nozzle ........................................................................... 0477 43779
- Set of filters (5 pieces) .............................................................................. 0477 43792
Compare the delivered components with the parts list and your order. Should you
find any discrepancies, please contact your Leica sales office without delay.
A choice of different knife holders is available for the CM1950 .
Leica CM1950 – Cryostat
17
5.
General Overview
Emergency-stop
switch (motorized
instruments only)
On/off switch, also circuit
breaker
Footswitch dummy
(motorized
instruments only)
Cryostat chamber
(with activated
UV disinfection)
Handwheel in
12 o’clock
position
Bacterial filter
(optional, only for
instruments with filter)
Unscrew and align
adjusting feet after
transport
Catch tank for
condensate
Fig. 10
Castors for safe transport
over short distances
Align adjusting feet for secure
upright position
18
Operating Manual V 1.1 – 05/2007
5. General Overview
5.1
Control Panel Fields and Cryostat Chamber
1 - Control panel field 1: Extraction, temperature and time control, illumination, UV disinfection
2 - Control panel field 2: Electric coarse feed (sectioning and trimming thickness adjustment)
3 - Control panel field 3: Motorized sectioning cutting, optional (adjustment of stroke type, cutting speed etc.)
1
7
6
4
15
16
10
5
10b
10c
10a
14
11
2
3
9
13
12
8
Fig. 11
4 - Heat conductor block, stationary (optional)
5 - Peltier element (with 2 stations)
6 - Freeze shelf, 15 positions
7 - Position holder on freeze shelf
8 - Heat and cold extractor, mobile (opt.)
9 - Shelf, movable (optional)
10 - Blade holder CE with blade ejector (a)
10b- Finger rest on the blade holder CE
Leica CM1950 – Cryostat
10c- Knife guard on the blade holder CE
11 - Extraction nozzle on the extraction hose
12 - Extraction hose for section waste
13 - Brush shelf (optional)
14 - Adapter piece for extraction hose
(the coarse filter insert is behind it)
15 - Object head, directional
16 - Waste tray
19
6.
Installation
6.1
Site Requirements
The place of installation must meet the following requirements:
• No direct sunlight.
• Power supply at a distance no greater than approx. 3 m.
• No drafts (air condition outlets etc.).
• Even floor.
• Vibration-free floor.
• The instrument is designed for indoor use only.
• Obstruction-free access to the handwheel.
• The power switch/circuit breaker must be freely and easily accessible.
• Room temperature always approx. 22 °C.
• The relative humidity must not exceed 60 %.
To ensure proper function of the instrument, it must be set up while
maintaining a minimum distance from walls and furniture.
• Distance to walls and furniture, calculated from the cabinet:
- rear:
15 cm
- right side:
30 cm
- left side:
15 cm
• No heat dissipating appliances around.
High room temperatures and excessive air humidity affect the
cooling capacity of the cryostat and lead to ice forming in the
instrument!
• Plug the instrument into power sockets with ground only.
Power cable length:
up to 3.5 m
Extendable:
no
20
Operating Manual V 1.1 – 05/2007
6. Installation
6.2
Transport to the Site
• First, check if the location meets the conditions specified in "Site
requirements".
• Transport the instrument to the desired location.
• Observe the following:
The instrument must be transported in an upright position or slightly tilted (max. 30°)!
When tilting the instrument 2 people must counterbalance from the
front side to prevent the instrument from falling down and causing
severe injury!
• When transporting the instrument on wheels
(2) grip the cabinet only at the marked locations ( ).
• To do so, unscrew the adjustable feet using
the No. 13 open-end wrench (when subsequently transporting the instrument on castors, screw the feet back in as far as they will
go). To ensure a secure upright position at its
intended location, align both adjusting feet (1).
1
Before transport or relocation, remove
the filter bag from the chamber. If you
fail to do this, the filter bag will thaw,
then freeze solid when the instrument
is reconnected. When subsequently
removed, the filter will be destroyed,
causing section waste to get into the
bacteria filter. (Refer to p. 26.)
2
Fig. 12
2
1
2 (covered)
Leica CM1950 – Cryostat
When not using the extraction for a long
period, tightly close the opening for the
extraction hose using the silicone stopper (5, page 28) included in the scope of
delivery.
21
6.
Installation
Transport with a fork lift
• The instrument can be transported with a fork lift.
To ensure a safe transport with a fork lift 3 people are required:
one operating the fork lift, and the other 2 holding the instrument
on either side to prevent it from sliding down.
• At the installation site, unscrew the adjustable feet (1) with the openend wrench No. 13 (see Fig. 12). This is absolutely necessary for a stable
stand.
Total width with handwheel
Fig. 13
6.3
Assembling the Handwheel
Rotate the handwheel only if the
refrigeration system is on and the
cryochamber is cold.
2
4
1
Fig. 14
22
• Insert the pin (1) of the handwheel shaft into
the hole (2) of the handwheel.
• Tighten the screw (4) using the No. 6 Allen key.
• Place the protective cap on the screw (4).
To dismount, proceed in reverse order.
Operating Manual V 1.1 – 05/2007
6. Installation
6.3.1 Locking/Unlocking the Handwheel
12 o’clock
position
6 o’clock
position
Fig. 15
1
Only rotate the handwheel when the refrigeration system is on and
the cryochamber is cold!
Always lock the handwheel prior to manipulating the knife or
specimen, changing the specimen, or taking a break.
To lock the handwheel, move its handle to the 12 or 6 o’clock position. Press
the lever (1) fully outward; gently rock the handwheel until the locking mechanism clicks into place noticeably.
To release the handwheel, press the lever (2) on the handwheel toward the
cryostat housing.
2
Fig. 16
Centering the Handwheel (Optional)
An important safety device on the cryostat is the feature for centering the handwheel in motorized sectioning mode.
To do so, pull out the handwheel’s handle and position it in the middle of the
handwheel. The handle automatically engages in this position.
Fig. 17
6.3.2 Installing the Footswitch Dummy (Instruments with Cutting Motor)
• The footswitch dummy must be installed on the outer right side of the
instrument (see page 16, General overview) if no footswitch (optional) is
used.
If the red LED in the E-STOP field in control panel field 3 is illuminated, either:
• emergency-stop function active, or
• footswitch dummy (optional footswitch) connected incorrectly or not at all.
Fig. 18
Leica CM1950 Cryostat
23
6.
Installation
6.4
Connection to Power Supply System
After transporting, wait at least 4 hours before turning the instrument on. This waiting period is
necessary to allow the compressor oil, which may have been displaced during transport, to return into its original position. Furthermore, any condensation that has formed during this time
due to temperature fluctuations must be allowed to dry completely.
Failure to comply with this can cause severe damage to the instrument!
During the start-up of the compressor the nominal voltage must not drop below the values
specified in the "Technical Data".
Please note that the compressor requires a start-up current between 25 and 35 A.
Therefore, the electric circuit at the installation site must be inspected by an electrical
engineer to ensure that it meets the requirements for a smooth operation of the instrument.
Failure to comply with the above will cause severe damage to the instrument!
• Check mains voltage and mains frequency to comply with the specification on the type plate.
• Do not connect any other consumers to this electric circuit.
Never connect the instrument to a power socket that does not have a protective conductor
terminal.
Only for instruments sold in Japan
Selecting the frequency
1
• After unpacking the instrument and setting it up at its intended location,
use the lever (1) to select the frequency corresponding to the conditions of
the existing power system.
Power plug
Fig. 19
24
Operating Manual V 1.1 – 05/2007
6. Installation
6.5
Installing Accessories/Inserting Chamber Accessories
6.5.1 Installing the Adjustable Footrest (Optional)
• To install the optional footrest, unscrew the
screws (1) using the No. 3 Allen key provided.
When installing the holder (2), ensure
that the cutout faces downwards so that
the support (3) can be hooked in.
1
• Attach the holders (2) for the footrest on the
left and right to the front wall of the housing.
To do so, use the Allen screws you used earlier. Ensure that the screws are tight.
• Hook the footrest (3) into the installed holder
according to individual requirements (height).
• Once installed, the user can adjust the height
of the footrest at any time by relocating it (3)
to the desired height on both sides in the
holder (2).
2
3
Fig. 20
Leica CM1950 – Cryostat
25
6.
Installation
6.5.2 Installing the Storage Systems (Optional)
1
For reasons of
accessibility, the
(optional) storage
system must always
be installed first.
2
Fig. 21
To do so, remove the insert (1), place the frame
(2) in front of the bore and tighten the screws/
washers on the cryostat housing using the No. 4
Allen key. Afterwards, insert the insert (1) into the
frame and fold it up.
6.5.3 Shelf, Movable (Optional)
Attach the rod for the shelf to the inner front side
of the cryostat housing using the provided screws
(1) and the No. 3 Allen key, then attach the caps
(3). (The rear side of the movable shelf has white
plastic screws (2) that prevent the interior of the
chamber from being scratched.) Now hook the
movable shelf into the guide rod.
1
2
3
Fig. 22
6.5.4 Inserting the Section Waste Tray
a
Before installing the knife/
blade holder base, insert the
section waste tray with the
cutout (a) facing the user.
Fig. 23
26
Operating Manual V 1.1 – 05/2007
6. Installation
6.5.5 Installing the Heat Conductor Block, Stationary (Optional)
The holder (1, Fig. 24) of the heat conductor block
is screwed to the left housing wall using the
No. 4 Allen key provided. (Preferably, begin with
the bottom screw. Then, rotate the holder
upwards (see arrow) and insert and tighten the
top screw).
1
Fig. 24
6.5.6 Installing the Knife/Blade Holder
and Adjusting the Clearance Angle
Now, attach the cover for the quick
freeze shelf to protect the shelf from
frost.
For temperature reasons, install the
knife/blade holder on an appropriate
base.
3
1
2
5
4
2
Leica CM1950 – Cryostat
a
Fig. 25
• Set the knife or blade holder (1, Fig. 25) on the
base (2), adjust the clearance angle (on the
left of the knife/blade holder) to approx. 2°-5°
and secure it in the bore (3) on the base (2)
using the No. 4 Allen key.
• Push the knife holder base (2) on the dovetail
guide (4) from the front and tighten it using the
clamping lever (5). To move the base, open the
clamping lever only a little to prevent accidental sliding in the direction of the specimen
head.
• If the clamping distance is not sufficient, the
clamping lever (3) can be moved. To do so, pull
the lever out and move it to the next position.
When removing the knife holder base
(2) from the refrigerated cryostat
chamber, hold it by the grip points
(a – front and rear) to keep your
fingers from freezing.
27
6.
Installation
6.5.7 Inserting/Changing the Bacteria Filter
The holder for the bacterial filter (optional) is
visible in the front of the instrument.
• To insert the filter, hold it with one hand, press
on the right of the socket, then guide the filter
into the tube from the left.
• To change the filter, follow the opposite procedure: press the filter to the right, then pull it to
the left and out of the tube.
• The filter must be changed approx. every
3 months (we recommend writing the date on
the filter using a marker).
Fig. 26
The filter must be disposed of according to valid laboratory specifications.
6.5.8 Assembling the Filter Bag
1
• Set the mark (A) of the extraction opening (1)
and pull it out. Plug the filter (3) into the extraction hose connecting piece (3a) until there
is an audible click.
Now push the connected parts back into the
opening in the cryostat chamber (filter first) and
set it to the "closed" mark (2, Fig. 27).
2
A
L
3a
3
Fig. 27
When not using the extraction, tightly
close the opening for the extraction
hose using the silicone stopper (E) included in the scope of delivery.
E
Fig. 28
28
Reasons:
1. To prevent section waste from falling into the
opening.
2. To prevent cold from escaping from the
chamber.
3. To prevent moisture from penetrating into the
chamber.
Operating Manual V 1.1 – 05/2007
6. Installation
6.5.9 Installing the Section Extraction (Optional) – Use with Blade Holder CE Only
A
C
D
B
G
Ensure that the hose with the nozzle is
not installed against its "natural" curvature on the pressure plate of the
blade holder.
F
E
H
Fig. 29
•
•
•
•
•
When the suction nozzles are changed, the adapter (white) remains in the silicone hose. Pull off
the nozzle by rotating and pulling it gently and
firmly plug in the desired nozzle.
Silicone hose (A) with hose adapter 1 (B, to the filter
in the instrument), hose adapter 2 (C, for suction
nozzle D or F) and suction nozzle (D) – factory preassembled
Silicone stopper (E)
Chamber suction nozzle (F)
Filter (G)
Plastic clip (H), for parking the chamber suction
nozzle.
The tension acting on the hose can be minimized
by turning the red ring (Fig. 31, top right) clockwise so that the suction nozzle presses against
the pressure plate (I, Fig. 31).
Afterwards, fold the anti-roll guide (K) back onto
the pressure plate.
• The scope of delivery also includes 2 plastic
clips (H). These enable comfortable "parking"
of the chamber suction nozzle (F) during sectioning.
Mark for
suction
nozzle
The clip must be glued in before switching on the
refrigeration. Before doing so, briefly degrease
the surface to ensure a secure hold.
Preferably, the clip should be attached outside
the working area, e.g. on the left inside wall of
the instrument.
Fig. 30
B
K
C
D
I
A
Fig. 31
If the extraction nozzle (D) is not being
used, it can be "parked" on one of the
two magnetic surfaces indicated in the
interior of the instrument.
If the extraction is not used for a long time, it is absolutely necessary to clean the extraction hose in order
to ensure maximum extraction capacity. To do so, place the hose in commercially available disinfectant or
alcohol. After several cleanings, the hose must be replaced (see order information on p. 49)!
Leica CM1950 – Cryostat
29
7.
Instrument Controls
7.1
Control Panel Fields on the CM1950 – Control Panel Field 1
Display of actual and target chamber
temperatures
Display of actual and target specimen
head temperatures
Display of real time, defrost time
and error messages
Fig. 32
Button to
enable/disable
vacuum
extractor,
Extraction
force intensity
selectable
from 1-5 (see
following page
for more
information)
Button to
enable/disable
the Peltier
element
+/- buttons to
select
chamber
temperature
+/- buttons to
select
specimen
head
temperature
Max-Cool button to
select the maximum
low temperature of
the specimen head
directly (-50 °C)
+/- buttons to
select real
time
UVC
"Melting
disinfection,
Snowflake"
(short time 30 min,
button to
long time 180 min)
activate manual
+/- buttons to defrost
select defrost
time
ON/OFF button of
illumination
Press the key button to
lock/unlock the entire
keypad.
(Refer to following page
for activation of the
specimen head)
EMERGENCY STOP switch to the right of control panel field 1 (motorized
instruments only)
For danger situations during motorized sectioning.
• Immediate stop of the sectioning process – motor stops – LED in E-Stop is
illuminated in red.
• Turning in direction of arrow cancels the stop – LED in E-Stop goes out.
• Select single stroke (Single) or continuous stroke (Cont.) operating
mode again.
30
Operating Manual V 1.1 – 05/2007
7. Instrument Controls
A
B 12 o’clock
Position
6 o’clock
• Press the "VAC" button to enable the vacuum extractor. The LED in the
"VAC" button is lit while the extractor is on. Press the button again to
disable it.
• Use the knob to adjust the intensity of the vacuum.
A Optimal area for trimming and sectioning
• Trimming: Handwheel position 12 - 6 o’clock, valve open
Handwheel position 6 - 12 o’clock, valve closed
• Cutting: Handwheel position 12 - 3 o’clock, valve open all the way
Handwheel position 3 - 6 o’clock, valve half open
Handwheel position 6 - 12 o’clock, valve closed
B Optimal area for extraction from the chamber
• To clean the chamber, turn the knob to the red range.
The strength of the required extraction force depends on the following:
• Size of the specimen
• Sectioning speed
• Section thickness used
• The Peltier element provides additional cooling for the freezing stations.
After the
button is pressed, the display changes from "PE" to 10",
indicating an additional cooling period of 10 minutes. The remaining cooling time is always shown in the display. Once only 4 minutes are remaining, a dot will appear after the "4". As of this time, the Peltier element may
be switched off early by pressing the
button again.
Caution:
The specimen head and Peltier do not switch on until the chamber
temperature reaches -5 °C, in order to prevent icing.
If the condenser (resting phase) is off and the Peltier is activated,
the digit 10 flashes until the condenser switches on again to prevent the Peltier from being destroyed when the condenser is not
running. When the condenser starts up, the flashing starts and the
10 minutes are counted down.
(For exact instructions for using the chamber, specimen head and
real time display fields, refer to the chapter on "Working with the
Instrument" on page 37 of this Operating Manual.)
Leica CM1950 Cryostat
31
7.
Instrument Controls
Control Panel Field 2 – Electric Coarse Feed, Sectioning and Trimming Thickness Display
Illuminates in
yellow when the
specimen is in
retraction.
LED for trim
and section
thickness
display
Toggle TRIM and
SECT (LED
active).
Press approx. 3 sec.; "on" or
"off" appears (for the
retraction). Toggle using the
"+" or "-" key
Retraction:
For trimming values above a section thickness of 200 μm, the display flashes to expressly notify
the user of thick sections!
Rocking mode – only in manual mode;
in rear area, i.e. approx. 12 - 3 o’clock position of
the handwheel (rock handwheel back and forth
a short distance)
1
Move specimen head backwards
quickly to home position (latched)
off = 0
on = 20 μm
In manual mode.
Move specimen head backwards slowly – pressing
briefly retracts the specimen 20 μm
For motorized sectioning, the retraction value is fixed and cannot
be changed (see page 39 - lower
infobox).
Specimen head forwards – pressing briefly
advances the specimen 20 μm
In the "off" setting, there is
no retraction in manual,
automatic or rocking mode.
2
Specimen head fast
feed
Fig. 33
Setting section/trim thickness
Use the - keys on control panel 2.
Range of section thickness: 1 - 100 μm
Values: 1.0 μm - 5.0 μm
in 0.5 μm steps
5.0 μm - 20.0 μm
in 1.0 μm steps
20.0 μm - 60.0 μm
in 5.0 μm steps
60.0 μm -100.0 μm
in 10.0 μm steps
Range of trim thickness: 1 - 600 μm
(Recommended for research applications)
Values: 1.0 μm - 10.0 μm
in 1.0 μm steps
10.0 μm - 20.0 μm
in 2.0 μm steps
20.0 μm - 50.0 μm
in 5.0 μm steps
50.0 μm - 100.0 μm in 10.0 μm steps
100.0 μm - 600.0 μm in 50.0 μm steps
Trimming section thickness setting range:
(Recommended for clinical applications)
Values: 10 μm, 20 μm, 30 μm, 40 μm,
32
Operating Manual V 1.1 – 05/2007
7. Instrument Controls
Coarse feed functions
The two-speed electric coarse feed is designed to quickly position the specimen in relation to the knife. The buttons with double arrows move the specimen at 900 μm/s; the buttons with single arrows move it at 300 μm/s.
Retracting the specimen head from the knife
• Pressing once starts the rapid backwards movement to the rear end
position (Home position).
1
The LED (1) flashes while the specimen head is in motion.
The LED (1) lights up when the rear end position (Hp.) has been reached.
fast
• The retraction can be stopped by pressing one of the coarse drive buttons.
• The rapid backwards movement to the rear end position (Hp.) starts.
The motion continues as long as the button is held.
• A brief press of the button retracts the specimen by 20 μm.
slow
Advancing the specimen toward the knife
• Start the slow forwards movement to the knife.
To feed the specimen, press and hold the button.
• Pressing the button briefly results in a feed motion of 20 μm.
slow
• Start the fast forwards movement to the knife.
2
• The LED (2) flashes while the specimen head is in motion.
The LED (2) lights up when the forward end position has been reached.
fast
Manual sectioning mode
Select ROCK operating mode (LED active) – retraction must be enabled!
• For sectioning, turn the handwheel a short distance (approx. 1/4 turn)
forwards and back (rocking mode) – only possible at rear (handwheel in
approx. 12 - 3 o'clock position).
Every change in rotation direction is electronically detected and automatically translated into a specimen feed or retraction movement.
Leica CM1950 – Cryostat
33
7.
Instrument Controls
Control panel 3 – Motorized sectioning (optional)
Switching the sectioning mode
("CUT MODE") from continuous
stroke ("CONT") to single stroke
("SINGLE") (active)
If emergency stop has been activated, the cutting mode must be selected again.
The red LED in the E-STOP field indicates
either:
• emergency-stop function active, or
• footswitch dummy (optional footswitch)
connected incorrectly or not at all.
Motor speed controller (0-100%)
The mechanical handwheel brake is enabled
when the yellow LED is lit in the M-STOP field.
The handwheel must also be locked
when working on the specimen head.
Hold the button to section
at maximum speed.
Release the button to continue sectioning at the previously selected speed
(see controller, above).
Press to brake the handwheel electronically
(LED lit) – specimen stops in lower (6 o’clock)
position.
Can be used in any position.
Switch from slow speed
range to fast speed range:
while switching on the instrument, press and hold
down the Vmax button.
Fig. 34
Speed ranges
Slow:
0-50 strokes/min
Fast:
0-85 strokes/min
Vmax: 85-90 strokes/min
Sectioning modes
1. Press the buttons at the same time to start
motorized sectioning.
2. To end the sectioning process, press RUN/STOP,
ENABLE or BRAKE.
- Specimen head stops at bottom (for BRAKE,
automatic electronic braking takes place).
3. For motorized sectioning, does not have to be
unlocked; continue working by pressing both
the RUN/STOP and ENABLE keys.
4. If, during manual work using handwheel, you have
braked using BRAKE also use BRAKE to release!
The instrument can be used in manual and motorized modes.
The following settings are available:
• Single stroke (SINGLE) or continuous stroke (CONT.) in automatic mode,
as well as
• ROCK (sectioning using handwheel) in manual mode.
When switching the instrument on, no operating mode is active for
safety reasons.
34
Operating Manual V 1.1 – 05/2007
7. Instrument Controls
Disinfection
Duration - 30min
Duration - 180 min
Fig. 35
UVC key - to activate / deactivate the disinfection cycle
and/or to acknowledge interruption of a disinfection
cycle.
To start disinfection the sliding window must be
completely closed.
• Press UVC key once briefly to start the
30 min. mode
• Press UVC key once for a longer time
(approx. 4 sec.) to start the 180 min. mode
The germicidal UV lamp is a simple and safe disinfection device
which considerably reduces the risk of infection.
Nevertheless, UV light disinfection cannot replace chemical
disinfection of the cryochamber at regular intervals.
UV light disinfection is effective only on those surfaces that are
directly illuminated.
Specimens and section waste must be thoroughly removed from
the cryochamber first (e. g. using the optional vacuum extractor, or
a paper towel soaked with Cryofect or alcoholic disinfectant).
Before UV disinfection, move the anti-roll guide to the side to
allow complete disinfection.
• Leica Cryofect is not available in all countries.
Opening the sliding window cancels the disinfection cycle. Press
the UVC key to acknowledge this.
When the keypad lock is activated (via the key button) the UV lamp
can be shut off only by opening the glass, as the UV keys are
locked.
The cancellation can be acknowledged only if the keypad lock is
disabled. Only then can the UV lamp be switched back on.
Leica CM1950 – Cryostat
35
8.
Working with the Instrument
8.1
Preparing Cutting Tools, Specimen Discs and Preparation Aids
The knives are extremely sharp! Handle with care!
Never try to catch a falling knife!
• Place working materials such as the blade box or knives (in the knife case), brush, pincers or
preparation needles and, where applicable, specimen discs into the cryostat chamber.
• The necessary tools and preparation aids can
be precooled on the (optional) movable shelf,
making them available at all times in a convenient position for the user.
• In addition, specimen discs can be precooled
and stored in the storage system (see page 26,
Fig. 21).
Fig. 36
8.2
For installation of knife/blade holder
and installation in the chamber, refer
to optional accessories on page 50).
Turning the Instrument On
The instrument must be switched on at least 5 hours before the
planned use.
The circuit breaker is used as power switch. The switch must be in the top
position for switching on and in the bottom position for switching off. The
switch must be accessible without obstruction.
• Close the sliding window.
Fig. 37
To avoid frost formation always put the cover on the quick freeze
shelf.
Always cover the quick freeze shelf during breaks and overnight.
36
Operating Manual V 1.1 – 05/2007
8.
8.3
Working with the Instrument
Configuring the Parameters
The instrument must be switched on at least 5 hours before the
planned use.
• Turn the lamp on or off.
• This button activates or deactivates the manual defrost of the cooling
chamber, specimen head or freeze shelf. (For more detailed handling
instructions, refer to the chapter on "Working with the Instrument" on
p. 39 of this Operating Manual.)
• Pressing the key button for approx. 5 sec. locks the entire keyboard
(the LEDs in the clock go out).
• Pressing the key button briefly, then the "-" key in the specimen head
control panel field, switches off the specimen head.
• Pressing the key button briefly, then the "+" key in the specimen head
control panel field, switches the specimen head back on.
Programming the temperature of the cryochamber
• The temperature of the cryochamber is set and indicated on the control
panel marked with the cryostat symbol.
The actual temperature is the standard indication.
Briefly pressing the "+" or "-" button displays the target temperature.
Set the desired value via the "+" / "-" buttons. Pushing the "+" or "-" button
for more than 1 sec. increases or decreases the chamber temperature
continuously.
The actual value will be indicated 5 seconds after finishing the programming.
Refer to page 52 for a table with guide values. The temperature
values given there are based on long-term experience, but are
intended solely as guide values, as any tissue may require particular adjustments.
Leica CM1950 Cryostat
37
8.
Working with the Instrument
Programming the specimen temperature
• Select the desired temperature of the specimen.
• The specimen temperature is set and indicated on the control panel
marked with the specimen head symbol.
The actual temperature is the standard indication.
Briefly pressing the "+" or "-" button displays the target temperature.
Set the desired value via the "+" / "-" buttons. Pushing the "+" or "-" button
for more than 1 sec. increases or decreases the specimen temperature
continuously.
The actual value will be indicated 5 seconds after finishing the programming.
Caution:
The specimen head and Peltier do not switch on until the chamber
temperature reaches -5 °C, in order to prevent icing.
Specimen temperature - "Max-Cool" function
• The snowflake button for the Max-Cool function is in the panel with the
specimen head symbol.
Pressing the
button sets the lowest possible specimen head temperature (-50 °C) as the target temperature. The instrument adjusts the
maximum low temperature of the specimen head, i.e. -50 °C.
• Push the snowflake button again to stop the "Max-Cool" function.
The temperature adjusts to the value programmed prior to activating the
"Max-Cool"-function.
• Alternate flashing of "LL" and the actual temperature indicates activation of the Max-Cool function.
Setting the time
• The clock time is set with the +/- buttons in the control panel marked
with the clock symbol.
To do so, set the current time using the "+" or "-" button below the small
clock symbol.
Pushing the "+" or "-" button for more than 1 sec. increases or decreases
the time continuously (auto-repeat function).
38
Operating Manual V 1.1 – 05/2007
8.
Working with the Instrument
Programming the defrost cycle
• Set the beginning of the automatic defrost cycle.
The automatic defrost cycle takes place once within 24 hours.
It is set with the "+"/"-" buttons on the right of the panel with the clock
.
symbol. The two buttons are marked by a melting snowflake
• Briefly press the "+" or "-" button for indication of the beginning of the
defrost cycle which has actually been set. At the same time, the LEDs
between the indication of hours and minutes are flashing.
• To change the beginning of the defrost cycle in steps of 15 minutes, push
the "+" or "-" key. When the "+" or "-" button is pushed for more than 1 s,
the defrost time value increases or decreases continuously.
Before starting the defrost cycle remove all samples from the
cryochamber!
• When the automatic defrost cycle begins, the specimen head temperature adjusts to a temperature between - 10 °C and - 5 °C (reduction of ice
formation). The specimen head cooling turns off. This is confirmed by the
flashing of the decimal points on the panel for the specimen cooling. The
specimen cooling (controlled to set value) automatically turns back on
after 4 hours, once the chamber temperature varies by less than 5 K from
the target temperature.
• If you want to turn the specimen cooling back on manually before the
automatic activation sets in, push the "+" or "-" button on the panel for the
specimen cooling and then the key button.
• The temperature of the specimen cooling first raises to +10 °C and then
adjusts to the programmed specimen temperature.
Manual defrost for the freeze shelf (including Peltier element)
• Press the key for manual defrost
The manual defrost takes 12 min.
• Push the button and then the
, then the
key.
key again to stop the manual defrost.
After defrosting the freeze shelf, carefully wipe it out, as otherwise
a lot of water collects in the channel. Ice does not melt during
normal defrosting.
Leica CM1950 Cryostat
39
8.
Working with the Instrument
Manual defrosting of the cryochamber
• Push the manual defrost button (with the melting snowflake) on the left
over the key button to activate the defrost cycle of the cryochamber on
demand.
• Activation is confirmed by an audible signal.
• Then, push the "+" or "-" button on the panel for the cryochamber temperature.
• The manual defrost cycle (12 min.) is activated.
• There is a flashing indication of the temperature of the cryochamber
during the whole defrost cycle.
• If necessary, push the manual defrost button again to deactivate the
manual defrost cycle.
• When the manual defrost begins, the specimen head adjusts to a temperature between -10 °C and -5 °C (reduction of ice formation). The
specimen head cooling turns off. This is confirmed by the flashing of the
decimal points on the panel for the specimen cooling.
• Ten seconds after the manual defrost cycle has been completed, the
specimen cooling turns back on.
Before starting the defrost cycle, remove all specimens from the
cryochamber!
Manual defrosting of the specimen cooling
• Push the manual defrost button (with the melting snowflake) on the left
over the key button to activate the defrost cycle of the specimen head.
• Activation is confirmed by an audible signal.
• Then, push the "+" or "-" button on the panel for the specimen temperature.
• There is a flashing indication of the specimen temperature during the
defrost cycle.
• For 15 minutes, the specimen head is adjusted to a temperature of 45 °C.
• Subsequently, the instrument adjusts to the specimen temperature which
has been programmed prior to the manual defrost cycle.
• If necessary, push the manual defrost button again to deactivate the
manual defrost cycle.
Press the key button, then the "+" button = specimen head on
Press the key button, then the "-" button = specimen head off
40
Operating Manual V 1.1 – 05/2007
8.
Working with the Instrument
Entering the trimming thickness
To switch from a trimming section thickness for research applications (1-600 μm) to a thickness for clinical applications (10, 20,
30 or 40 μm), press and hold down the TRIM/SECT key while
switching on the instrument.
• Press the TRIM/SECT button. TRIM mode is active if the LED at the top
right is illuminated.
• Set the desired trimming thickness using the "+" or "-" button in control
panel field 2. (Refer to page 32 for adjustable sequence of steps)
Entering the section thickness
• Press the TRIM/SECT button. SECT mode is active if the LED at the bottom right is illuminated.
• Set the desired section thickness using the "+" or "-" button in control
panel field 2. (Refer to page 32 for adjustable sequence of steps)
Switching the retraction on or off in manual sectioning mode
• Press the TRIM/SECT button for approx. 3 sec. The LED in control panel
field 2 displays on
or oFF
.
• You can switch by pressing the "+" or "-" button.
• "Retraction on" means a specimen retraction of 20 μm in manual mode.
During motorized sectioning, the retraction value is speeddependent and cannot be changed by the user.
Leica CM1950 Cryostat
41
8.
Working with the Instrument
8.4
Working with the Precooled Cryostat
8.4.1 Preparatory Work
• Lock the handwheel in the top (12 o’clock) position.
• Cut the specimen to size outside of the cryostat.
• Select the precooled specimen disc, cover it with freezing compound,
then attach and orient the specimen.
• Attach the specimen disc and specimen to the Peltier position on the
freeze shelf. Activate the Peltier element and wait until the specimen is
completely frozen.
Specimens that have been frozen on the Peltier element are often
too cold and split apart during sectioning. Allow time for the specimens to become acclimated.
• Insert the specimen disc into the specimen head.
• Fold the anti-roll guide away and to the side. Insert a precooled knife or
blade.
Before using them for the first time, degrease new knives using
acetone or alcohol.
• Approach the specimen with the knife or blade holder:
• To do so, open the clamping lever of the base, approach the
specimen and close the lever again.
• Open the lever of the orientation. Orient the specimen (move it into
a favorable position relative to the knife/blade) and close the lever again.
• Approach the knife or blade holder using the coarse feed buttons and
gentle movements of the handwheel.
If the sections are cracked, the specimen head temperature is too
cold. Set a warmer temperature.
If the sections smear, the specimen head temperature is too warm.
Set a colder temperature.
42
Operating Manual V 1.1 – 05/2007
8.
Working with the Instrument
8.4.2 Trimming with Extraction – Anti-roll Guide Installed
• Remove the silicone stopper from the filter cover (and keep it in a safe
place).
• Insert the extraction hose with the black adapter.
• Fold the anti-roll guide to the side and fasten the suction nozzle to the
pressure plate – see mark Fig. 39a - (using 4 magnets on the rear side of
the nozzle).
• Fold the anti-roll guide back into position.
E
Fig. 38
Fig. 39a
C
Fig. 39c
Ensure that the hose with the nozzle is
not installed against its "natural" curvature on the pressure plate of the
blade holder.
B
K
Fig. 39b
D
I
The tension acting on the hose can be minimized
by turning the red ring (Fig. 39, top right) clockwise so that the suction nozzle presses against
the pressure plate (I, Fig. 39).
A
Fig. 40
• Check that the anti-roll guide is parallel and correctly adjusted.
Readjust if necessary (see page 58).
• Activate trimming mode.
• Select the trimming thickness.
• Switch on the VAC and select a low extraction level (between 1 and 2).
• Start trimming by manually moving the handwheel or press the
RUN/STOP and ENABLE keys simultaneously to start motorized sectioning.
Leica CM1950 – Cryostat
43
8.
Working with the Instrument
For motorized sectioning, always begin at low speed for safety
reasons.
• Optimize the vacuum settings if necessary.
A
B
• Press the "VAC" button to enable the vacuum extractor. The LED in the
"VAC" button is lit while the extractor is on. Press the button again to
disable it.
• Use the knob to adjust the intensity of the vacuum.
A Optimal area for trimming and sectioning
• Trimming: Handwheel position 12 - 6 o’clock, valve open
Handwheel position 6 - 12 o’clock, valve closed
• Cutting:
Handwheel position 12 - 3 o’clock, valve open all the way
Handwheel position 3 - 6 o’clock, valve half open
Handwheel position 6 - 12 o’clock, valve closed
B Optimal area for extraction from the chamber
• To clean the chamber, turn the knob to the red range.
If the handwheel is not moved for approx. 5 sec, the valves close and the fan remains on.
If the handwheel is moved for approx. 1 min, the valves close, the fan shuts off (the LED in the
VAC switch goes off to prevent icing).
To continue working, you now have to reactivate the VAC.
2. Trimming with Extraction – Brush Technique, finger rest installed
E
• Remove the silicone stopper (E) from the filter cover (and keep it in a safe
place).
• Insert the extraction hose with the black adapter.
• Fasten the suction nozzle to the pressure plate (using 4 magnets on the
rear side of the nozzle) as far as possible towards the blade.
Ensure that the hose with the nozzle is not installed against its "natural" curvature on the
pressure plate of the blade holder.
The tension acting on the hose can be minimized by turning the red ring
(Fig. 28 on page 28) clockwise so that the suction nozzle presses against the
pressure plate.
• Check that the suction nozzle is seated optimally (by gently turning the
handwheel)
44
Operating Manual V 1.1 – 05/2007
8.
•
•
•
•
•
•
•
•
Working with the Instrument
Activate trimming mode.
Select the trimming thickness.
Switch on the VAC and select a low extraction level (between 1 and 2).
Start trimming by manually moving the handwheel or press the
RUN/STOP and ENABLE buttons simultaneously to start motorized
sectioning.
Use a brush to apply the section to a precooled specimen slide, then
warm it from below using your finger.
Move the knife guard forward after removing the section.
Remove the knife or disposable blade (using the blade ejector!).
Insert the knife into the knife case.
8.4.3 Cutting with Extraction – Anti-roll Guide installed
• Shut off VAC (LED in VAC button goes out).
• Switch from trimming to sectioning mode (important for section stretching, as the valves work differently than in trimming mode.)
• Set the desired section thickness.
• Switch on the VAC and begin at level 1. If the section does not stretch
correctly, turn the VAC knob higher in small increments.
• Once the desired section is on the pressure plate, switch off the VAC!
Carefully fold the anti-roll guide to the side and remove the section from
the side.
After removing the section, wipe off moisture/condensate from the
pressure plate – otherwise, the next sections will become
jammed.
Cutting with extraction without anti-roll guide (brush technique) is
not possible, as the position of the pressure plate means that no
suitable air flow is obtained.
Leica CM1950 Cryostat
45
8.
Working with the Instrument
A few rules:
•
•
•
•
Always begin at a low extraction level, then slowly increase it.
Do not use high extraction levels unless absolutely necessary.
Different specimen sizes require different extraction levels.
The faster the trimming or sectioning speed, the lower the extraction
level
should be.
• The larger and/or thicker the specimen to be trimmed, the lower the
extraction value.
• When section specimens with a diameter of 0.5 cm, the anti-roll guide
stretches the section adequately. For larger specimens, we recommend
using the vacuum function.
Trimming, 1 x 1cm specimen
Trimming thickness Speed
Extract. value
Trimming, 1 x 1cm specimen
Trimming thickness Speed Extract. value
10 μm
10 μm
10 μm
10 μm
40%
60%
80%
100%
1.5
1.5
1
1
1 μm - 5 μm
40%
60%
80%
100%
2.5
2
1.5
1.5
20 μm
20 μm
20 μm
20 μm
40%
60%
80%
100%
2
2
1.5
1
10 μm
40%
60%
80%
100%
2.5
2
2
1.5
30 μm
30 μm
30 μm
30 μm
40%
60%
80%
100%
2.5
2.5
2
1.5
40 μm
40 μm
40 μm
40 μm
40%
60%
80%
100%
3
3
2.5
2
46
The values listed here are possible
settings that depend on the tissue
type, specimen size, section thickness and section speed, and are intended for orientation purposes only.
These settings can also vary when using
different anti-roll plate!
Operating Manual V 1.1 – 05/2007
8.
Working with the Instrument
After trimming or sectioning:
Specimen:
• Unclamp and thaw.
• Immerse in fixative for further processing.
Cleaning
• Use the brush to sweep up the section waste (section waste tray) and
remove it from the cryostat (follow applicable laboratory regulations for
disposal).
Or:
• Clean the cryostat chamber using the chamber suction nozzle:
• To do so, turn the (flat) suction nozzle of the extraction hose by
holding the hose on the white adapter and removing it with a quick
twist. "Park" the flat suction nozzle in a designated place in the
chamber, e.g. on the right inside wall of the cryogenic chamber.
• Remove the chamber suction nozzle from the plastic clip and
attach it firmly to the white adapter.
• Check the remaining capacity of the filter (in the interior of the chamber)
and change the filter if necessary (see page 28).
• Check the bacterial filter (in the front of the unit, see page 28), change it
at least every 3 months.
• Move the anti-roll guide to the side.
• Spray the cryostat chamber using Cryofect.
• Activate the UVC disinfection.
Leica CM1950 Cryostat
47
9.
Troubleshooting
9.1
Problems During Work
Problem
Causes
Remedies
Frost on chamber walls and
microtome
Cryostat is exposed to air currents
(open windows and doors, air
conditioning).
Frost built-up by breathing into the
cryochamber.
Change place of installation for the
cryostat.
Sections smear
Specimen not cold enough.
Anti-roll plate not yet cold enough,
thus warming the section.
Select lower temperature.
Wait until knife and/or anti-roll
plate have reached chamber
temperature.
Sections splinter
Specimen too cold.
Select higher temperature.
Sections not properly
flattened
Static electricity/air currents.
Specimen not cold enough.
Large area specimen.
Remove cause.
Select lower temperature.
Trim the specimen parallel,
increase section thickness.
Reposition anti-roll plate.
Align correctly.
Anti-roll plate poorly positioned.
Anti-roll plate poorly aligned with knife
edge.
Incorrect clearance angle.
Blunt knife.
Wear mouth protection.
Set correct angle.
Use different part of the knife.
Sections not properly
flattened despite correct
temperature and correctly
aligned anti-roll plate
Dirt on knife and/or anti-roll plate.
Edge of anti-roll plate damaged.
Blunt knife.
Clean with dry cloth or brush.
Replace anti-roll plate.
Use different part of the knife.
Sections curl on anti-roll
plate
Anti-roll plate does not protrude far
enough beyond the knife edge.
Readjust correctly.
Scraping noise during
sectioning and specimen
return movement
Anti-roll plate protrudes too far beyond
the knife edge and is scraping against
the specimen.
Readjust correctly.
48
Operating Manual V1.1 – 05/2007
9. Troubleshooting
Problem
Causes
Remedies
Ridged sections
Knife damaged.
Edge of anti-roll plate damaged.
Use different part of the knife.
Replace anti-roll plate.
Chatter during sectioning
Specimen insufficiently frozen onto
the specimen disc.
Specimen disc not clamped tightly.
Knife not clamped tightly enough.
Specimen has been sectioned too
thickly and has detached from disc.
Very hard, inhomogenous specimen.
Refreeze specimen onto the disc.
Blunt knife.
Knife profile inappropriate for
specimen cut.
Incorrect clearance angle.
Check disc clamping.
Check knife clamping.
Refreeze specimen onto the disc.
Increase section thickness; reduce
specimen surface area if ecessary.
Use different part of the knife.
Use knife with different profile.
Set correct angle.
Condensation on anti-roll
plate and knife during
cleaning
Brush, forceps and/or cloth too warm.
Store all tools on storage shelf in
the cryochamber.
Anti-roll plate damaged
after adjustment
Anti-roll plate too high above the knife
edge. The adjustment was carried out
in the direction of the knife.
Replace anti-roll plate.
Be more careful next time!
Thick-thin sections
Temperature incorrect for the
tissue cut.
Knife profile inappropriate for the
specimen cut.
Ice buildup on the knife back.
Handwheel speed not uniform.
Knife not clamped tightly enough.
Specimen disc not clamped tightly
enough.
Cryocompound applied to cold
specimen disc; specimen detached
from disc after freezing.
Select correct temperature.
Leica CM1950 Cryostat
Use knife with different profile
(c or d).
Remove ice.
Adapt speed.
Check knife clamping.
Check disc clamping.
Apply cryocompound to warm disc,
mount specimen and freeze.
49
9. Troubleshooting
Problem
Causes
Remedies
Blunt knife.
Inappropriate section thickness.
Incorrect clearance angle.
Microtome not dried thoroughly
enough.
Dried specimen.
Use different part of the knife.
Select correct section thickness.
Set correct angle.
Dry microtome.
Anti-roll plate is too warm or
incorrectly positioned.
Fat on the corner or edge of anti-roll
plate.
Anti-roll plate not correctly fixed.
Rust on the knife.
Cool down anti-roll plate, or
reposition correctly.
Remove fat from anti-roll plate.
Flattened sections curl up
when anti-roll plate is
folded up
Anti-roll plate too warm.
Cool down anti-roll plate.
Sections tear
Temperature too low for the tissue cut.
Blunt part, dirt, dust, frost or rust on
the knife.
Top edge of the anti-roll plate
damaged.
Hard particles in the tissue.
Dirt on knife back.
Increase temperature and wait.
Remove cause.
Cryostat non-operational
Power plug not properly connected.
Defective fuses, or circuit breaker has
triggered.
Check if properly connected.
Replace fuses, or switch circuit
breaker back on. If not possible,
call technical service.
Specimen disc cannot be
removed
Moisture on the underside cause the
specimen to freeze to the freezing
shelf or specimen head.
Apply concentrated alcohol to the
contact point.
Tissue sticks to the anti-roll
plate
50
Prepare new specimen.
Fix correctly.
Remove rust.
Replace anti-roll plate.
--Clean.
Operating Manual V1.1 – 05/2007
9. Troubleshooting
Problem
Causes
Remedies
No or insufficient
refrigeration of the
cryochamber
Cooling system or electronic drive
defective.
Call technical service.
Sliding window collects
condensation
Air humidity and room temperature
too high.
Comply with the requirements
for the installation site.
No or insufficient
refrigeration of the
specimen
Cooling system or electronic drive
defective.
Call technical service.
Lamp does not work
Lamp defective.
Switch defective.
Check lamp and replace it, if
necessary.
Call technical service.
UV radiation provided by UV tube no
longer sufficient.
Replace UV tube following the
manufacturer’s instructions.
Image of an open-ended wrench
appears due to fault to be rectified.
Contact technical service and
follow the instructions given.
Both disinfection LEDs flash
alternately
Leica CM1950 Cryostat
51
10.
Temperature Selection Chart (in minus °C)
Tissue type
Chamber temperature
Specimen head temperature
Spleen
-15 °C to -20 °C
-11 °C
Liver
-10 °C
-20 °C
-15 °C
off to -15 °C
-10°C
-20 °C
-15 °C
A*: off to -20 °C
Intestine
E*: -20 °C
Heart
-10 °C
A: -20 °C
E: -20 °C to -30 °C
-15 °C
off to -20 °C
-10 °C
E: -20 °C
-15 °C
off to -15 °C
-10 °
E: -20 °C
-15 °C
off to -15 °C
-10 °C
-20 °C
-15 °C
A: off to -15 °C
-20 °C
-20 °C
Muscle
-18 °C to -20 °C
-15 °C
Skin with fat
-19 °C
-32 °C to -40 °C
Hard fat
-19 °C
-21 °C to -25 °C
Stomach
-10 °C
-20 °C
-15 °C
off to -15 °C
-15 °C
-10 °C, *E
Ovaries
Fallopian tubes
Kidney
Brain
*A = blocked, *E = complete
The temperature values given above are based on long-term experience, however, these are only approximate
values, as any tissue may require particular adjustments.
52
Operating Manual V 1.1 – 05/2007
11. Optional Accessories
11.1 Ordering Information
Specimen disc ø 20mm assembly .................................................... 0477 43739
Specimen disc ø 30 mm assembly .................................................... 0477 40044
Specimen disc ø 40 mm assembly .................................................... 0477 40045
Specimen disc ø 55 mm assembly .................................................... 0477 40046
Specimen disc 80 x 50 mm, assembly ............................................... 0477 43714
O-ring blue (10 pieces), 20 mm .......................................................... 0477 43247
O-ring red (10 pieces), 20 mm ........................................................... 0477 43248
O-ring blue (10 pieces), 30 mm .......................................................... 0477 43247
O-ring red (10 pieces), 30 mm ........................................................... 0477 43248
O-ring blue (10 pieces), 40 mm .......................................................... 0477 43249
O-ring red (10 pieces), 40 mm ........................................................... 0477 43250
O-ring blue (10 pieces), 55 mm .......................................................... 0477 43251
O-ring red (10 pieces), 55 mm ........................................................... 0477 43252
Blade holder base complete.............................................................. 0477 40351
Blade holderextension CE-BB, complete ........................................ 0477 43005
Insert for low-profile blades for blade holder CE, complete ........ 0477 42488
Finger rest, complete ........................................................................... 047740387
Anti-roll plate 70 mm - 50 μm spacer ................................................ 0477 42491
Anti-roll plate 70 mm -100μm spacer ................................................ 0477 42492
Anti-roll plate 70 mm -150μm spacer ................................................ 0477 42493
Glass insert 70 mm, polished .............................................................. 0477 42497
Knife holder base assembly............................................................... 0477 42359
Knife holder CN assembly .................................................................. 0477 42358
Knife support CN short ....................................................................... 0477 42380
Knife support CN ................................................................................. 0477 42370
Knife holder attachment CNZ, assembly ......................................... 0477 42363
Anti-roll plate assembly glass 50mm ................................................ 0419 33981
Heat and cold extractor, assembly ................................................... 0477 41039
Cold extractor, assembly.................................................................... 0477 43737
Heat extractor, assembly ................................................................... 0477 43126
Leica CM1950 – Cryostat
53
11.
Optional Accessories
Section waste tray .............................................................................. 0477 40062
Brush shelf ........................................................................................... 0477 43036
Storage system, assembly ................................................................. 0477 42618
Shelf, movable ..................................................................................... 0477 43037
Retaining device .................................................................................. 0477 40080
Cover freezing shelf ............................................................................ 0477 43763
Specimen disc 37x37mm .................................................................... 0477 42603
Specimen disc 28x28mm .................................................................... 0477 42604
Bar, large .............................................................................................. 0477 42600
Bar, medium size ................................................................................. 0477 42601
Bar, small .............................................................................................. 0477 42602
Heat extractor, Dr. Peters, assembly ............................................... 0477 41338
Freezing griddle/block elevator......................................................... 0201 39119
Dispensing slides 8 pieces................................................................. 0201 39127
Foot rest assembly .............................................................................. 0477 42832
Accessory kit extraction .................................................................... 0477 43300
Bactericidal filter 350/5865 ................................................................. 0477 40296
Hose set, silicon 5 pieces ................................................................... 0477 44469
Filter assembly 25 pieces ................................................................... 0477 44307
Cryofect, VPE Leica Cryofect 4x 350ml,
low-temp. disinfectant to -20°C ......................................................... 0387 42801
Safety gloves size M ........................................................................... 0340 29011
Safety gloves size S ............................................................................ 0340 40859
Footswitch, dummy plug CM 3050 .................................................... 0443 30420
Laboratory chair on sliders (8030442) .............................................. 0710 34911
Footswitch assembly .......................................................................... 0481 43397
Easy Dip staining container white ................................................... 0712 40150
Easy Dip staining container pink ....................................................... 0712 40151
Easy Dip staining container green .................................................... 0712 40152
Easy Dip staining container yellow .................................................. 0712 40153
Easy Dip staining container blue ...................................................... 0712 40154
Easy Dip staining rack gray ............................................................... 0712 40161
54
Operating Manual V 1.1 – 05/2007
11. Optional Accessories
Blade holder CE with anti-roll guide for low-profile (NB) and high-profile (BB)
1
4
6
7
4
•
•
•
•
12
3
2
8
•
•
•
•
9
•
•
Fig. 41a
5
With blade ejector (1)
With knife guard (2)
Integrated lateral shift and stable base
Clearance angle adjustment (5) with 3 mm
Allen key (see detail image 5, to left at knife
holder) - recommended angle from 2° to 5°.
With anti-roll guide (4)
Lever (6) for the lateral shift
Lever (7) for clamping the blade
Lever (8) for clamping the base (9) to the
dovetail guide in the chamber
Pressure plate (3) for section extraction
When using low-profile blades, the ruler
(7, Fig. ) must be inserted.
Fig. 41
Assembling the anti-roll guide system
(for the blade holder CE)
10
10
6
11
14
13
1. Insert the glare-minimizing glass insert into the
interchangeable frame and tighten it evenly
using the knurled screw (10).
2. Insert the shaft (11) of the metal frame for
exchangeable glass inserts from above into
the bore of the swinging arm (12) in such a way
that the pin rests in the notch.
3. Push the white plastic plate (14) from below
onto the shaft (11).
4. Screw the knurled nut (13) from below onto
the shaft (11).
Fig. 42
The glass of the anti-roll guide can be
used from all 4 sides when replacement is necessary (the glass stage
plate can be reordered).
Leica CM1950 – Cryostat
55
11. Optional Accessories
4
1
6
The anti-roll guide and
pressure plate must be
parallel to each other.
Red elements on the blade or knife
holders, such as the knife guard and
ejector, are protective devices that
may not be removed.
7
3
8
2
Fig. 43
5
Blade holder CE with finger rest (for NB + BB)
Blade rest (ruler) for low-profile
blades
7
The knife guard is folded
away in the detail view.
Knife guard folded away
Four possible
settings
• Blade ejector (1) and knife guard (2)
• Integrated lateral shift and stable base
• Clearance angle adjustment using size 3 Allen
key (recommended angle between 2° and 5°)
• With finger rest (6) for brush specimen
• Clamping lever (8) for lateral shift must point
downward to permit unhindered shifting of
finger rest.
• when using BB knives, remove the knife
support (7).
Conversion of blade holder with anti-roll guide
to blade holder with finger rest
• Screw off the anti-roll guide.
• Unscrew left Allen screw using 2.5 mm Allen
key and remove base of anti-roll guide.
• Attach the finger rest (6) from the left, tighten
the hexagon-head screw using the No. 2.5
key – be careful of the blade ejector!
1
6
2
If you are working with the brush
technique, the knife guard must be
folded upwards.
Fig. 44
56
Operating Manual V 1.1 – 05/2007
11. Optional Accessories
Inserting the blade into knife holder CE
4
9
7
8
11
10
Fig. 45
Anti-roll guide system functions as a
knife guard here!
1. Fold the anti-roll guide system (4) to the left –
while doing so, hold the lever (11) (not the
adjusting screw of the anti-roll guide) so that
the height of the anti-roll guide remains
unchanged.
2. Open the clamping lever (10) by turning it counterclockwise.
3. Carefully insert the blade (9) from above or
from the side between the pressure plate and
the blade rest. Ensure that the blade is inserted so that it is centered.
4. Rotate lever (10) clockwise to clamp.
5. Fold the anti-roll guide system (4) back to the
side using the lever (11).
Lateral shift for Blade Holder CE
If the sectioning results are not satisfactory, the
knife holder can be shifted sideways in order to
use another part of the blade.
To do so, follow these steps:
1. Release the clamping lever (8) by folding it
back and move the knife holder back until the
desired position is reached (3-point click stop
enables you to accurately find a new cutting
position).
2. Fold the clamping lever (8) forwards for
clamping.
8
Fig. 46
Leica CM1950 – Cryostat
57
11. Optional Accessories
Adjusting the Knife Holder with Anti-roll Guide
You can adjust the height of the anti-roll guide
system using the knurled nut (1):
• If you turn the nut counterclockwise, the antiroll guide system moves toward the blade.
• If you turn the nut clockwise, the anti-roll guide
system moves away from the blade.
1
If the anti-roll guide system is in the wrong position relative to the cutter, the following problems
will result:
Blade holder CE with glass anti-roll guide
Fig. 47
Fig. I: The section rolls over the glass insert of the anti-roll guide system.
Error: Glass insert not high enough.
Remedy: Turn the knurled nut counterclockwise until the section is pushed between the
blade and anti-roll guide as shown in Fig. III.
I
II
Fig. II: Section tears and block hits the glass insert after sectioning. The section rolls
over the glass insert of the anti-roll guide system.
Error: Anti-roll guide system is set too high.
Remedy: Turn the knurled nut clockwise until the section is pushed between the blade
and anti-roll guide as shown in Fig. III.
Generally, we recommend pre-adjusting the anti-roll guide system at a high section thickness (e.g. 10 μm). Start from there and work your way down to the desired
section thickness in small increments, readjusting the anti-roll guide system at
each increment using the knurled nut.
III
Fig. 48,
Knife holder CN with glass anti-roll guide
58
Operating Manual V 1.1 – 05/2007
11. Optional Accessories
35
Cleaning the knife holder CE
Daily cleaning
1. Fold the anti-roll guide system (33) to the left
while holding it down by the lever (34).
2. Unscrew the bolts (35) of the pressure plate.
3. Afterwards, the pressure plate (36) can be removed for cleaning (with alcohol or acetone).
33
34
35
36
For disinfection, commercially available, mild cleaners and disinfectants
can be used – we recommend Leica Cryofect.
Fig. 49
Cleaning the knife holder CN
Daily cleaning
For daily cleaning, it is enough to fold the
anti-roll guide system forwards and remove
the section waste from the knife holder using
a dry brush. Please use a cold brush, as
otherwise the section waste will thaw and
stick to the knife holder.
It is not necessary to oil the parts, such
as the T-piece on the microtome base
plate, clamping lever etc.
Fig. 50
Disinfection (e.g. with Leica Cryofect)
Spray contaminated surfaces with a uniform coat of concentrate or wipe
them down with a rag soaked in it, allow it to make contact for 15 minutes,
then wipe it off.
Leica CM1950 – Cryostat
59
11. Optional Accessories
Knife holder CN with anti-roll guide – Moving
the clamping chucks
The specimen disc 50x80mm is suitable
only for section thicknesses up to approx.
5μm (due to the large specimen size).
1
3a
3a
2
not
visible
3
4
4
5
6
Fig. 51
The large specimen disc (80 x 50 mm) should preferably be used with knife holder CN and the 16 cm
C-profile steel knife.
The clamping jaws are factory-installed in the
knife holder with a clearance of 64 mm. If necessary, both clamping chucks can be offset with a
clearance of 84 mm.
Perform the following steps:
• Use a 3 mm Allen key to loosen the screw over
the clearance angle adjustment (1) and
remove the segment arch (2) from the knife
holder base.
• Use a 3 mm Allen key to loosen the screws (4)
on the underside of the segment arch.
• Carefully pull the clamping jaw (5) on the right
upward and insert it in the neighboring hole
(6). Tighten the screws from the underside of
the segment arch. Repeat on the left side.
• Insert the long knife support (3) on the side
over the knurled screw (3a) so that the recess
faces the user – turn the height adjustment
knurled screws until the lower stop is reached.
• The knife can now be inserted from the side
and its height adjusted via the knurled screws
(3a).
Never work with only one clamping jaw, as this does not ensure the stability required for the
sectioning process. Also, a long knife will not be sufficiently protected by the knife guard in this
instance.
60
Operating Manual V 1.1 – 05/2007
11. Optional Accessories
19
18
19
17
16
Fig. 52
Knife guard/lateral movement for knife
holder CN
The knife guard (18) is fixed and integrated into
the clamping jaws. The knife guard has handles
(19) that allow it to be moved. The knife guard is
adequate for knives up to 22 cm in length. Always
cover exposed parts of the knife blade after
sectioning.
The anti-roll guide system can be moved sideways (only for the 84 mm variant). To better find
the mid position, a groove (17) is provided in the
shaft (16).
Knife holder CNZ with anti-roll guide
• Pressure plate permits the full length of the
knife to be utilized.
• Use hard metal and steel knives here.
Fig. 53
The height of resharpened knives must be adjusted using knurled
screws (3) (approx. 1 mm under the edge of the clamping jaw).
Ensure that the knife is adjusted in parallel vertically.
Leica CM1950 – Cryostat
61
11.
Optional accessories
70
Anti-roll guide system
Anti-roll plate (with glass stage plate)
Available with various spacers:
• 70 mm - 50 μm, for section thickness: < 20 μm
• 70 mm -100 μm, for section thickness: 20 μm 100 μm
• 70 mm -150 μm, for section thickness: > 100 μm
mm
Fig. 54
The 50 μm and 100 μm anti-roll plates
are included in the standard scope of
delivery of the blade holder CE.
Straightedge (blade rest)
Insert for low-profile blades for blade holder CE
(0477 43005) - replacement
Fig. 55
When using low-profile blades, the blade rest (7)
must be inserted into the blade holder first, then
the low-profile blade (see page 50, Fig. 40).
The blade rest is also included in the
standard scope of delivery of the
blade holder CE.
Bacterial filter
• Bactericidal filter 350/5865, pack of 1 unit. Recommendation: replace bactericidal filter every
three months.
(note date on filter when installing it)
Filter bags and bacteria filter must be
disposed of according to applicable
laboratory regulations for infectious
material. Filters must be replaced, not
cleaned.
Fig. 56
62
Operating Manual V 1.1 – 05/2007
11. Optional Accessories
Replacement filters for extraction system
(pack of 25)
• Change when vacuum power is impaired.
• When using the cryostat frequently, check the
filter bag daily and replace as required.
Fig. 57
Vacuum extraction system
A - Hose
B - Hose adapter, black (for the filter
bag in the instrument)
C - Hose adapter, white (for suction nozzle D
or extraction nozzle F)
D - Suction nozzle – with 4 magnets (E) on
knife holder
G - Plastic clip (for parking the suction
nozzle)
B
A
E
G
D
F
C
Fig. 58
Storage system, complete ("hidden")
• for installation in rear area of cryostat - for cold
storage of specimen discs and sectioning accessories
(For assembly, refer to page 26)
Fig. 59
Leica CM1950 – Cryostat
63
11. Optional Accessories
• Specimen discs in various dimensions
The specimen disc 50x80mm is suitable
only for section thicknesses up to approx.
5μm (due to the large specimen size).
50 x80 mm
ø 55
ø 40
ø 20 mm
ø 30
O-rings in various colors
• for plate Ø 20 mm (red or blue), 10x each
• for plate Ø 30 mm (red or blue), 10x each
• for plate Ø 40 mm (red or blue), 10x each
• for plate Ø 55 mm (red or blue), 10x each
for color-marking of pecimen disc
Fig. 60
A Heat extractor with parking station, stationary
• for installation in the cryostat - consisting of:
support device, heat extractor and parking station
B Heat and cold extractor
• suitable for two different applications: extracts
cold when stored in warm environment; extracts heat, when stored in cold environment.
A
B
Fig. 61
Dr. Peters
specimen discs
C
D
Underside
28 x 28 mm
37x 37 mm
64
Fig. 62
Shelves
• The specimen discs of the Dr. Peters cooling
system can be conveniently removed from the
shelf using the underside of the heat extractor (removal aid D). Slide the underside over
the specimen disc in the direction of the arrow so that the disc remains in the slot and
can be removed from the rack.
Embedding well bar, large, with 3 wells, LxWxH: 30 x 30 x 7 mm
Embedding well bar, medium, with 4 wells, LxWxH: 24 x 24 x 6 mm
Embedding well bar, small,with 4 wells, LxWxH: 18 x 18 x 6 mm
Operating Manual V 1.1 – 05/2007
11. Optional Accessories
Footswitch,
for use with motorized instruments only
Fig. 63
Adjustable support,
individually height-adjustable foot rest with 5 settings.
Fig. 64
Brush shelf,
for use with blade holder CE
Fig. 65
Storage system, movable
for installation in front area of cryostat - for cold
storage of preparation tools
Fig. 66
Leica CM1950 – Cryostat
65
12.
Maintenance and Cleaning
12.1 General Maintenance
The microtome is virtually maintenance-free. To ensure a smooth operation
of the instrument over several years we recommend the following:
• At least once a year, have the instrument inspected by a qualified service
engineer authorized by Leica.
• Enter into a service contract at the end of the warranty period. For further
information, please contact your local Leica service center.
• Clean the instrument daily.
• Every day, remove frozen section waste from the cryostat using a cold
brush or use the (optional) extraction device.
• Remove the section waste tray for emptying.
• Remove the storage shelves and the brush shelf for cleaning.
• Remove the closed sliding window from the front by gently lifting it
(see p. 63, "Replacing the Fluorescent Lamp").
Do not use organic solvents or any other aggressive substances for
cleaning and disinfecting!
Use only disinfectants listed in this manual such as Leica Cryofect
(alcohol or other common alcohol-based disinfectants).
• Drain the cleaning liquid through the hose after the prescribed reagent
time is over and collect it in the waste container (1).
Emptying the condensate bottle
Check the fill level of the condensate bottle (1) visible in the front panel of
the instrument at regular intervals.
• The bottle collects the condensate that accumulates during defrosting.
Dispose of the contents of the bottle in accordance with laboratory
regulations.
1
Fig. 67
66
Operating Manual V 1.1 – 05/2007
12. Maintenance and Cleaning
Basically, we recommend UV disinfection (see page 35 for detailed
instructions).
For easy-to-use spray disinfection we recommend Leica Cryofect. (Cryofect
is not available in all countries!)
The cryostat has to be disinfected after each daily use.
Comply with the instructions for use!
The glass anti-roll plate can remain in place during disinfection.
It is not necessary to oil the parts, such as the T-piece on the
microtome base plate, clamping lever etc.
• In case of visible pollution (such as dust), clean the air inlet opening
(Fig. 10, p. 18) of the condenser on the bottom right-hand side of the
instrument using a brush, broom or extraction cleaner in the direction of
the louvers.
Do not turn the instrument on before the cryochamber is
completely dry!
Frost formation!
The front panel and the slit cover of the microtome must be completely dry before turning on the instrument!
Dry all parts completely before reinserting them in the cryochamber!
12.2 Changing Fuses
• In case of power supply faults, please contact an authorized Leica service
technician immediately.
Do not carry out any repairs on your own as this will invalidate the
warranty.
Repairs may only be carried out by qualified service engineers
authorized by Leica.
Leica CM1950 Cryostat
67
12.
Maintenance and Cleaning
12.3 Replacement of the Lamp/UVC Lamp
Turn the instrument off with the automatic power fuse and pull the
power plug, before replacing the lamp!
If the lamp is broken, it must be replaced by the technical service,
as the replacement involves a high risk of injury. Beware of the
metallic mercury in the UV lamp; handle it carefully and dispose of
it properly.
A UVC lamp has an estimated service life of approx. 9,000 hours.
Each on/off switching cycle reduces the lamp life by approx. one hour plus
burning time (30 minutes or 180 minutes respectively).
When both disinfection indicator lights are blinking alternately in control
panel field 1, the UVC lamp must be replaced.
Instructions on how to replace the UVC lamp are provided together
with the replacement lamp (spare part).
68
Operating Manual V 1.1 – 05/2007
12. Maintenance and Cleaning
• Slightly lift the sliding window (1) holding it by
the grip (2) and pull it out to the front.
1
Removal of the lamp
• The lamp is mounted behind a glare shield and
therefore not visible.
• Touch the lamp for better orientation.
• Lightly tilt the fluorescent tube down to the left
and pull it out of the clip (3).
• Hold the lamp with both hands and pull it to
the left out of the holder (4).
2
Fig. 68
Only use lamps of the same specification!
Fig. 69
4
Installation of the new lamp
Type:
OSRAM DULUX L 18W/ 840.
3
• Hold the lamp in the correct mounting position as shown and push it to the left until it
engages in the holder.
Fig. 70
Leica CM1950 – Cryostat
69
13. Decontamination Certificate (master)
Dear Customer,
Any product which is to be returned to Leica Microsystems or serviced on site, must be cleaned
and decontaminated in the appropriate manner. Leica accepts that it is not possible to decontaminate for CJD and its variants and in this instance following current customer safety guidelines is
acceptable. Equipment exposed to CJD samples cannot be returned to Leica Microsystems for
repair.
This certificate, duly completed, must be placed in the unit prior to packaging or handed over to the
service engineer. Packages will not be opened nor servicing commenced until the Company or
service engineer have received a satisfactory certificate. Should returned goods be considered a
hazard by the Company, they will be returned immediately to the customer at his/her expense.
NB: Microtome knives must be in boxes.
Description
Name/Model
Fabr. No.
KAT No.
Quantity
Tick Box A if applicable. Otherwise please complete all parts of B, providing
further information as requested or appropriate.
A
B
This equipment has not been in contact with unfixed biological samples.
Yes
1
Yes No
This equipment has been exposed internally or externally to hazardous materials as
indicated below:
Please provide further detail here:
Blood, body fluids, pathological samples
Other biohazards
Chemicals/substances hazardous to health
Other hazards
2
Yes No
This equipment has been cleaned and decontaminated:
If yes, give details of the method:
Please provide further detail here:
If no*, please indicate why not:
* Such equipment must not be returned without the written agreement of Leica Microsystems.
70
Operating Manual V 1.1 – 05/2007
13. Decontamination Certificate (master)
3
Yes No
The equipment has been prepared to ensure safe handling/transportation.
Whenever possible, please use the original transportation case/box.
Important - to avoid refusal of shipment:
Place one copy in the unit prior to packaging or hand it over to the service engineer. Customer assumes
all responsibility for the immediate return shipment of articles sent to Leica without proper decontamination documentation.
If you have any further questions, please call your local Leica organization.
Leica Internal Use: If applicable, note corresponding Job and RAN-/RGA-Number:
Job Sheet No.:
____________________
SU Return Goods Authorisation: ____________________
BU Return Authorization Number: ____________________
Signature/Date
Institute
Department
Name
Address
Position
eMail
Phone
Facsimile
Leica Biosystems Nussloch GmbH
Heidelberger Str. 17-19
69226 Nussloch, Germany
Phone: ++49 (0) 6224 143 0
Fax:
++49 (0) 6224 143 200
www.leica-microsystems.com
Leica CM1950 – Cryostat
71
14.
EC Declaration of Conformity
EC Declaration of Conformity
We herewith declare, in exclusive responsibility, that the
Leica CM1950 Cryostat
was developed, designed and manufactured to conform with the
• Council Directive 2006/95/EC (Low Voltage),
• Council Directive 89/336/EEC, Appendix I (Electromagnetic Compatibility) and
• European council Directive 98/79/EC (IVD)
including their amendments up to the date mentioned below.
The following harmonized standards were applied:
• EN 61010-1: 2001
Safety requirements for electrical equipment for measurement, control and laboratory use Part 1: General requirements
•
EN 61010-2-101: 2002
Safety requirements for electrical equipment for measurement, control and laboratory use Part 2-101: Particular requirements for in vitro diagnostic (IVD) medical equipment
•
EN 591: 2001
Instruction for use for in vitro diagnostic instruments for professional use
•
EN 61326-1: 2006
Electrical equipment for measurement, control and laboratory use - EMC requirements Part 1: General requirements
•
EN 61326-2-6: 2006
Electrical equipment for measurement, control and laboratory use - EMC requirements
•
EN 61000-3-2: 2000
Electromagnetic compatibility (EMC)
Part 3-2: Limits - Limits for harmonic current emissions
•
EN 61000-3-3: 1995 + A1: 2001
Part 3: Limits Section 3: Limitation of voltage changes, voltage fluctuations and flicker in public low-voltage
supply systems, for equipment with rated current ≤ 16 A per phase
Electromagnetic compatibility (EMC)
•
EN 418: 1992
Emergency stop equipment.
Principles for design.
•
EN 1037: 1995
Safety of machinery.
Prevention of unexpected start-up.
In addition, the following in-house standards were applied:
• DIN EN ISO 9001: 2000
Quality management system - requirements.
Leica Biosystems Nussloch GmbH
Postfach 1120
D-69222 Nussloch
October 11, 2007
............................
Anne De Greef-Safft
President Biosystems Division
15.
Warranty and Service
Warranty
Leica Biosystems Nussloch GmbH guarantees that the contractual product
delivered has been subjected to a comprehensive quality control procedure based on the Leica in-house testing standards, and that the product is
faultless and complies with all technical specifications and/or agreed
characteristics warranted.
The scope of the warranty is based on the content of the concluded agreement. The warranty terms of your Leica sales organization or the organization from which you have purchased the contractual product shall apply
exclusively.
Technical service information
If you require technical service or replacement parts, please contact your
Leica sales representative or dealer who sold the product.
Please provide the following information:
•
•
•
•
Model name and serial number of the instrument.
Location of the instrument and name of the person to contact.
Reason for the service call.
Date of delivery.
Shutdown and disposal of the instrument
The instrument or parts of the instrument must be disposed of in compliance with the local laws.
Dispose of UV tube separately.
Leica CM1950 Cryostat
73
16.
74
People's Republic of China
Operating Manual V 1.1 – 05/2007