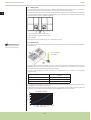
1
I NC K-MINC-1000 From Serial No. A803560 User Manual Please familiarise yourself with the safety instructions before using the device. This device may only be used by physicians and medical assistants with the appropriate technical qualification. MEDICAL www.cookmedical.com U B ATI O N K-MINC-1000 Instructions for Use Language Index Section English ..................................................................................................................................................................................................... 1 Kapitola Česky .................................................................................................................................................................................................................................... K-MINC-1000 Od sériového čísla A803560 - Uživatelská příručka Než začnete toto zařízení používat, prostudujte si prosím bezpečnostní pokyny. Toto zařízení smějí používat pouze lékaři a zdravotničtí pracovníci s odpovídající technickou kvalifikací. Afsnit Dansk.................................................................................................................................................................................................................................... K-MINC-1000 Fra serienr. A803560 - Brugervejledning Du bedes gøre dig bekendt med sikkerhedsanvisningerne, inden enheden tages i brug. Denne enhed må kun anvendes af læger og sygeplejepersonale med de rette tekniske kvalifikationer. K-MINC-1000 С серийного № A803560 - Руководство по эксплуатации Перед применением устройства изучите инструкции по технике безопасности. Данное устройство может применяться исключительно врачами и помощниками врача с соответствующей технической квалификацией. K-MINC-1000 Od sériového čísla A803560 - Používateľská príručka Pred použitím tohto zariadenia sa oboznámte s bezpečnostnými pokynmi. Toto zariadenie môžu používať len lekári a zdravotní asistenti s príslušnou technickou kvalifikáciou. 13 Luku Suomi ................................................................................................................................................................................................................................... 14 Avsnitt Svenska ............................................................................................................................................................................................................................... 15 Bölüm Türkçe ................................................................................................................................................................................................................................... K-MINC-1000 Seri No. A803560 ve sonrası - Kullanıcı El Kitabı Lütfen cihazı kullanmadan önce güvenlik talimatını öğrenin. Bu cihaz sadece uygun teknik vasıflara sahip doktorlar ve tıbbi yardımcılar tarafından kullanılabilir. 12 Časť Slovenčina .......................................................................................................................................................................................................................... K-MINC-1000 Från serienr A803560 - Användarhandbok Gör dig förtrogen med säkerhetsinstruktionerna innan apparaten används. Endast läkare och sjukvårdspersonal med lämpliga tekniska kvalifikationer får använda denna apparat. 11 Раздел Русский ............................................................................................................................................................................................................................... K-MINC-1000 Sarjanumerosta A803560 lähtien - Käyttöopas Perehdy turvaohjeisiin ennen laitteen käyttöä. Laitetta saavat käyttää vain sellaiset lääkärit ja avustajat, joilla on asianmukainen tekninen asiantuntemus. 10 Secção Português ........................................................................................................................................................................................................................... K-MINC-1000 Desde o n.º de série A803560 - Manual do Utilizador Antes de utilizar este dispositivo, familiarize-se com as instruções de segurança. Este dispositivo apenas pode ser utilizado por médicos e auxiliares com a formação técnica apropriada. 9 Rozdział Polski .................................................................................................................................................................................................................................... K-MINC-1000 Z nr serii A803560 - Podręcznik użytkownika Przed użyciem tego urządzenia należy zapoznać się z instrukcjami dotyczącymi bezpieczeństwa. Niniejszego urządzenia mogą używać tylko lekarze i personel medyczny posiadający odpowiednie kwalifikacje techniczne. 8 Gedeelte Nederlands ........................................................................................................................................................................................................................ K-MINC-1000 Vanaf serienummer A803560 - Gebruikshandleiding Vóór gebruik van dit instrument dient u zich vertrouwd te maken met de veiligheidsinstructies. Dit instrument mag uitsluitend worden gebruikt door artsen en medisch personeel met de juiste technische kwalificatie. 7 Sezione Italiano................................................................................................................................................................................................................................. K-MINC-1000 Dal n. di serie A803560 - Manuale d’uso Prima di usare il dispositivo leggere con attenzione le istruzioni di sicurezza. Il presente dispositivo deve essere usato esclusivamente da medici e assistenti medici in possesso delle qualifiche appropriate. 6 Ενότητα Ελληνικά .............................................................................................................................................................................................................................. K-MINC-1000 Από το σειριακό αριθμό A803560 - Εγχειρίδιο χρήσης Παρακαλούμε εξοικειωθείτε με τις οδηγίες ασφαλείας πριν τη χρήση της συσκευής. Αυτή η συσκευή μπορεί να χρησιμοποιηθεί μόνο από ιατρούς ή από βοηθούς ιατρών οι οποίοι διαθέτουν την κατάλληλη τεχνική εκπαίδευση. 5 Chapitre Français ............................................................................................................................................................................................................................... K-MINC-1000 Du no de série A803560 - Manuel d’utilisation L’utilisateur doit se familiariser aux directives de sécurité avant d’utiliser l’appareil. L’utilisation de cet appareil est réservée aux médecins et au personnel médical ayant les compétences techniques appropriées. 4 Apartado Español ................................................................................................................................................................................................................................ K-MINC-1000 A partir del N.º de serie A803560 - Manual del usuario Familiarícese con las instrucciones de seguridad antes de utilizar el dispositivo. Este dispositivo sólo pueden utilizarlo médicos y personal de enfermería con la cualificación técnica adecuada. 3 Abschnitt Deutsch ............................................................................................................................................................................................................................... K-MINC-1000 Ab Seriennummer A803560 - Benutzerhandbuch Vor der Anwendung des Geräts bitte die Sicherheitsanweisungen lesen. Dieses Gerät darf nur von Ärzten und medizinischen Assistenten mit angemessener technischer Qualifikation verwendet werden. 2 16 K-MINC-1000 Instructions for Use English General information 1 WARNING: READ THIS MANUAL. Please familiarise yourself with the contents of the manual before using the device. Failure to comply with these instructions may result in damage to device, device contents, and/or patient or user injury. This device should only be used by qualified personnel. Copyright This manual contains information that is subject to copyright. All rights reserved. This manual should not be photocopied, duplicated on microfilm or otherwise copied or distributed, completely or in part, without the approval of William A. Cook Australia Pty. Ltd. Some of the parts and equipment referred to in this manual bear registered trademarks but are not identified as such. It should therefore not be assumed that the absence of the trademark indicates that any given designation is not subject to trademark protection. Users of William A. Cook Australia Pty. Ltd. products should not hesitate to contact us if there are any unclear points or ambiguities in this manual. WARNING: ELECTRIC SHOCK HAZARD. The equipment is to be used only with electrical systems complying with all IEC, CEC and NEC requirements. WARNING: Any adjustment, modification or repairs to the equipment should be carried out by persons authorised to perform them. Disposal of this product must be undertaken with regard to the WEEE directive (2002/96/EC). This symbol indicates that this product may not be treated as municipal waste. Please ensure that this product is properly disposed of as inappropriate waste handling of this product may cause potential hazards to the environment and human health. For more detailed information about disposal of this product, please contact your local city office or Cook Medical Representative. Cook fulfills its legal obligations with regards to WEEE and Waste Packaging compliance through our own takeback initiatives and through national takeback schemes. Please see http://www.cookmedical.com/businessPractice.do?id=Environmental_Recycling for details on how to properly recycle WEEE or waste packaging in your country. © COOK 2013 Document No: IFU-MINC2/9 Service address: Please refer to your local Cook Medical distributor for details of your nearest authorised service agent. 1-1 K-MINC-1000 Instructions for Use English Table of contents EXPLANATION OF PICTOGRAMS . . . . . . . . . . . . . . . . . . . . . . . . . . . . . . . . . . . . . . . . . . . . . . . . . . . . . . . . . . . . . . . . . . . . . . . . . . . . . . . . . . . . . . . . . . . . . . . . . . . . . . . . . . . . . . . . . . . . . . . . . 1-3 HOW TO USE THIS MANUAL . . . . . . . . . . . . . . . . . . . . . . . . . . . . . . . . . . . . . . . . . . . . . . . . . . . . . . . . . . . . . . . . . . . . . . . . . . . . . . . . . . . . . . . . . . . . . . . . . . . . . . . . . . . . . . . . . . . . . . . . . . . . . . 1-3 Warnings and Important Notes . . . . . . . . . . . . . . . . . . . . . . . . . . . . . . . . . . . . . . . . . . . . . . . . . . . . . . . . . . . . . . . . . . . . . . . . . . . . . . . . . . . . . . . . . . . . . . . . . . . . . . . . . . . . . . . . . . . . . . . . . . . . . 1-3 Manual Structure . . . . . . . . . . . . . . . . . . . . . . . . . . . . . . . . . . . . . . . . . . . . . . . . . . . . . . . . . . . . . . . . . . . . . . . . . . . . . . . . . . . . . . . . . . . . . . . . . . . . . . . . . . . . . . . . . . . . . . . . . . . . . . . . . . . . . . . . . . . 1-3 1. SAFETY INSTRUCTIONS . . . . . . . . . . . . . . . . . . . . . . . . . . . . . . . . . . . . . . . . . . . . . . . . . . . . . . . . . . . . . . . . . . . . . . . . . . . . . . . . . . . . . . . . . . . . . . . . . . . . . . . . . . . . . . . . . . . . . . . . . . . . . . . . 1-4 2. ABOUT THE MINC BENCHTOP INCUBATOR. . . . . . . . . . . . . . . . . . . . . . . . . . . . . . . . . . . . . . . . . . . . . . . . . . . . . . . . . . . . . . . . . . . . . . . . . . . . . . . . . . . . . . . . . . . . . . . . . . . . . . . . . . . . 1-4 2.1 Intended use. . . . . . . . . . . . . . . . . . . . . . . . . . . . . . . . . . . . . . . . . . . . . . . . . . . . . . . . . . . . . . . . . . . . . . . . . . . . . . . . . . . . . . . . . . . . . . . . . . . . . . . . . . . . . . . . . . . . . . . . . . . . . . . . . . . . . . . . . . . . 1-4 2.2 Device description . . . . . . . . . . . . . . . . . . . . . . . . . . . . . . . . . . . . . . . . . . . . . . . . . . . . . . . . . . . . . . . . . . . . . . . . . . . . . . . . . . . . . . . . . . . . . . . . . . . . . . . . . . . . . . . . . . . . . . . . . . . . . . . . . . . . . . 1-4 2.3 Precautions for device use . . . . . . . . . . . . . . . . . . . . . . . . . . . . . . . . . . . . . . . . . . . . . . . . . . . . . . . . . . . . . . . . . . . . . . . . . . . . . . . . . . . . . . . . . . . . . . . . . . . . . . . . . . . . . . . . . . . . . . . . . . . . . . 1-4 3. INSTALLATION AND SET-UP . . . . . . . . . . . . . . . . . . . . . . . . . . . . . . . . . . . . . . . . . . . . . . . . . . . . . . . . . . . . . . . . . . . . . . . . . . . . . . . . . . . . . . . . . . . . . . . . . . . . . . . . . . . . . . . . . . . . . . . . . . . 1-5 3.1 Unpacking . . . . . . . . . . . . . . . . . . . . . . . . . . . . . . . . . . . . . . . . . . . . . . . . . . . . . . . . . . . . . . . . . . . . . . . . . . . . . . . . . . . . . . . . . . . . . . . . . . . . . . . . . . . . . . . . . . . . . . . . . . . . . . . . . . . . . . . . . . . . . . 1-5 3.2 You need to supply . . . . . . . . . . . . . . . . . . . . . . . . . . . . . . . . . . . . . . . . . . . . . . . . . . . . . . . . . . . . . . . . . . . . . . . . . . . . . . . . . . . . . . . . . . . . . . . . . . . . . . . . . . . . . . . . . . . . . . . . . . . . . . . . . . . . . 1-5 3.3 Front of the device . . . . . . . . . . . . . . . . . . . . . . . . . . . . . . . . . . . . . . . . . . . . . . . . . . . . . . . . . . . . . . . . . . . . . . . . . . . . . . . . . . . . . . . . . . . . . . . . . . . . . . . . . . . . . . . . . . . . . . . . . . . . . . . . . . . . . . 1-6 3.4 Rear of the device . . . . . . . . . . . . . . . . . . . . . . . . . . . . . . . . . . . . . . . . . . . . . . . . . . . . . . . . . . . . . . . . . . . . . . . . . . . . . . . . . . . . . . . . . . . . . . . . . . . . . . . . . . . . . . . . . . . . . . . . . . . . . . . . . . . . . . . 1-7 3.5 Electromagnetic compatibility . . . . . . . . . . . . . . . . . . . . . . . . . . . . . . . . . . . . . . . . . . . . . . . . . . . . . . . . . . . . . . . . . . . . . . . . . . . . . . . . . . . . . . . . . . . . . . . . . . . . . . . . . . . . . . . . . . . . . . . . . . 1-7 3.6 Device placement. . . . . . . . . . . . . . . . . . . . . . . . . . . . . . . . . . . . . . . . . . . . . . . . . . . . . . . . . . . . . . . . . . . . . . . . . . . . . . . . . . . . . . . . . . . . . . . . . . . . . . . . . . . . . . . . . . . . . . . . . . . . . . . . . . . . . . . 1-8 3.7 Gas supply . . . . . . . . . . . . . . . . . . . . . . . . . . . . . . . . . . . . . . . . . . . . . . . . . . . . . . . . . . . . . . . . . . . . . . . . . . . . . . . . . . . . . . . . . . . . . . . . . . . . . . . . . . . . . . . . . . . . . . . . . . . . . . . . . . . . . . . . . . . . . . 1-8 3.8 Humidification flask . . . . . . . . . . . . . . . . . . . . . . . . . . . . . . . . . . . . . . . . . . . . . . . . . . . . . . . . . . . . . . . . . . . . . . . . . . . . . . . . . . . . . . . . . . . . . . . . . . . . . . . . . . . . . . . . . . . . . . . . . . . . . . . . . . . . 1-11 3.9 K-MINC-1000 Benchtop Incubator Logger Software . . . . . . . . . . . . . . . . . . . . . . . . . . . . . . . . . . . . . . . . . . . . . . . . . . . . . . . . . . . . . . . . . . . . . . . . . . . . . . . . . . . . . . . . . . . . . . . . . . . . 1-11 3.10 Activating the device . . . . . . . . . . . . . . . . . . . . . . . . . . . . . . . . . . . . . . . . . . . . . . . . . . . . . . . . . . . . . . . . . . . . . . . . . . . . . . . . . . . . . . . . . . . . . . . . . . . . . . . . . . . . . . . . . . . . . . . . . . . . . . . . . 1-12 3.11 Chamber temperature selection . . . . . . . . . . . . . . . . . . . . . . . . . . . . . . . . . . . . . . . . . . . . . . . . . . . . . . . . . . . . . . . . . . . . . . . . . . . . . . . . . . . . . . . . . . . . . . . . . . . . . . . . . . . . . . . . . . . . . . 1-12 3.12 Gas flow rate selection . . . . . . . . . . . . . . . . . . . . . . . . . . . . . . . . . . . . . . . . . . . . . . . . . . . . . . . . . . . . . . . . . . . . . . . . . . . . . . . . . . . . . . . . . . . . . . . . . . . . . . . . . . . . . . . . . . . . . . . . . . . . . . . . 1-13 3.13 First time use . . . . . . . . . . . . . . . . . . . . . . . . . . . . . . . . . . . . . . . . . . . . . . . . . . . . . . . . . . . . . . . . . . . . . . . . . . . . . . . . . . . . . . . . . . . . . . . . . . . . . . . . . . . . . . . . . . . . . . . . . . . . . . . . . . . . . . . . . 1-13 3.14 Alarm conditions . . . . . . . . . . . . . . . . . . . . . . . . . . . . . . . . . . . . . . . . . . . . . . . . . . . . . . . . . . . . . . . . . . . . . . . . . . . . . . . . . . . . . . . . . . . . . . . . . . . . . . . . . . . . . . . . . . . . . . . . . . . . . . . . . . . . . 1-13 4. INSTALLATION AND SET-UP CHECKLIST . . . . . . . . . . . . . . . . . . . . . . . . . . . . . . . . . . . . . . . . . . . . . . . . . . . . . . . . . . . . . . . . . . . . . . . . . . . . . . . . . . . . . . . . . . . . . . . . . . . . . . . . . . . . . 1-14 5. OPERATION OF THE DEVICE . . . . . . . . . . . . . . . . . . . . . . . . . . . . . . . . . . . . . . . . . . . . . . . . . . . . . . . . . . . . . . . . . . . . . . . . . . . . . . . . . . . . . . . . . . . . . . . . . . . . . . . . . . . . . . . . . . . . . . . . . . 1-15 5.1 Before use . . . . . . . . . . . . . . . . . . . . . . . . . . . . . . . . . . . . . . . . . . . . . . . . . . . . . . . . . . . . . . . . . . . . . . . . . . . . . . . . . . . . . . . . . . . . . . . . . . . . . . . . . . . . . . . . . . . . . . . . . . . . . . . . . . . . . . . . . . . . . 1-15 5.2 Insertion of the culture dishes. . . . . . . . . . . . . . . . . . . . . . . . . . . . . . . . . . . . . . . . . . . . . . . . . . . . . . . . . . . . . . . . . . . . . . . . . . . . . . . . . . . . . . . . . . . . . . . . . . . . . . . . . . . . . . . . . . . . . . . . . . 1-15 5.3 Patient identification plates . . . . . . . . . . . . . . . . . . . . . . . . . . . . . . . . . . . . . . . . . . . . . . . . . . . . . . . . . . . . . . . . . . . . . . . . . . . . . . . . . . . . . . . . . . . . . . . . . . . . . . . . . . . . . . . . . . . . . . . . . . . . 1-15 5.4 Possible condensate formation . . . . . . . . . . . . . . . . . . . . . . . . . . . . . . . . . . . . . . . . . . . . . . . . . . . . . . . . . . . . . . . . . . . . . . . . . . . . . . . . . . . . . . . . . . . . . . . . . . . . . . . . . . . . . . . . . . . . . . . . 1-15 5.5 Starting the Logger Software . . . . . . . . . . . . . . . . . . . . . . . . . . . . . . . . . . . . . . . . . . . . . . . . . . . . . . . . . . . . . . . . . . . . . . . . . . . . . . . . . . . . . . . . . . . . . . . . . . . . . . . . . . . . . . . . . . . . . . . . . 1-16 5.6 Using the Logger Software . . . . . . . . . . . . . . . . . . . . . . . . . . . . . . . . . . . . . . . . . . . . . . . . . . . . . . . . . . . . . . . . . . . . . . . . . . . . . . . . . . . . . . . . . . . . . . . . . . . . . . . . . . . . . . . . . . . . . . . . . . . . 1-16 5.7 After Use . . . . . . . . . . . . . . . . . . . . . . . . . . . . . . . . . . . . . . . . . . . . . . . . . . . . . . . . . . . . . . . . . . . . . . . . . . . . . . . . . . . . . . . . . . . . . . . . . . . . . . . . . . . . . . . . . . . . . . . . . . . . . . . . . . . . . . . . . . . . . . 1-19 6. SERVICE AND MAINTENANCE . . . . . . . . . . . . . . . . . . . . . . . . . . . . . . . . . . . . . . . . . . . . . . . . . . . . . . . . . . . . . . . . . . . . . . . . . . . . . . . . . . . . . . . . . . . . . . . . . . . . . . . . . . . . . . . . . . . . . . . . 1-20 6.1 Changing filter, gas lines & humidification flask . . . . . . . . . . . . . . . . . . . . . . . . . . . . . . . . . . . . . . . . . . . . . . . . . . . . . . . . . . . . . . . . . . . . . . . . . . . . . . . . . . . . . . . . . . . . . . . . . . . . . . . . 1-20 6.2 Cleaning the device . . . . . . . . . . . . . . . . . . . . . . . . . . . . . . . . . . . . . . . . . . . . . . . . . . . . . . . . . . . . . . . . . . . . . . . . . . . . . . . . . . . . . . . . . . . . . . . . . . . . . . . . . . . . . . . . . . . . . . . . . . . . . . . . . . . . 1-20 6.3 Biannual functionality testing . . . . . . . . . . . . . . . . . . . . . . . . . . . . . . . . . . . . . . . . . . . . . . . . . . . . . . . . . . . . . . . . . . . . . . . . . . . . . . . . . . . . . . . . . . . . . . . . . . . . . . . . . . . . . . . . . . . . . . . . . . 1-20 6.4 Inspection by an authorised service agent . . . . . . . . . . . . . . . . . . . . . . . . . . . . . . . . . . . . . . . . . . . . . . . . . . . . . . . . . . . . . . . . . . . . . . . . . . . . . . . . . . . . . . . . . . . . . . . . . . . . . . . . . . . . . 1-22 6.5 Return procedure . . . . . . . . . . . . . . . . . . . . . . . . . . . . . . . . . . . . . . . . . . . . . . . . . . . . . . . . . . . . . . . . . . . . . . . . . . . . . . . . . . . . . . . . . . . . . . . . . . . . . . . . . . . . . . . . . . . . . . . . . . . . . . . . . . . . . . 1-22 7. DISPOSABLES . . . . . . . . . . . . . . . . . . . . . . . . . . . . . . . . . . . . . . . . . . . . . . . . . . . . . . . . . . . . . . . . . . . . . . . . . . . . . . . . . . . . . . . . . . . . . . . . . . . . . . . . . . . . . . . . . . . . . . . . . . . . . . . . . . . . . . . . . 1-22 8. TECHNICAL DATA. . . . . . . . . . . . . . . . . . . . . . . . . . . . . . . . . . . . . . . . . . . . . . . . . . . . . . . . . . . . . . . . . . . . . . . . . . . . . . . . . . . . . . . . . . . . . . . . . . . . . . . . . . . . . . . . . . . . . . . . . . . . . . . . . . . . . . 1-23 9. TROUBLESHOOTING . . . . . . . . . . . . . . . . . . . . . . . . . . . . . . . . . . . . . . . . . . . . . . . . . . . . . . . . . . . . . . . . . . . . . . . . . . . . . . . . . . . . . . . . . . . . . . . . . . . . . . . . . . . . . . . . . . . . . . . . . . . . . . . . . . 1-25 10. LIMITED WARRANTY . . . . . . . . . . . . . . . . . . . . . . . . . . . . . . . . . . . . . . . . . . . . . . . . . . . . . . . . . . . . . . . . . . . . . . . . . . . . . . . . . . . . . . . . . . . . . . . . . . . . . . . . . . . . . . . . . . . . . . . . . . . . . . . . . 1-27 10.1 Liability . . . . . . . . . . . . . . . . . . . . . . . . . . . . . . . . . . . . . . . . . . . . . . . . . . . . . . . . . . . . . . . . . . . . . . . . . . . . . . . . . . . . . . . . . . . . . . . . . . . . . . . . . . . . . . . . . . . . . . . . . . . . . . . . . . . . . . . . . . . . . . . 1-27 10.2 Life of product . . . . . . . . . . . . . . . . . . . . . . . . . . . . . . . . . . . . . . . . . . . . . . . . . . . . . . . . . . . . . . . . . . . . . . . . . . . . . . . . . . . . . . . . . . . . . . . . . . . . . . . . . . . . . . . . . . . . . . . . . . . . . . . . . . . . . . . . 1-27 11. INDEX . . . . . . . . . . . . . . . . . . . . . . . . . . . . . . . . . . . . . . . . . . . . . . . . . . . . . . . . . . . . . . . . . . . . . . . . . . . . . . . . . . . . . . . . . . . . . . . . . . . . . . . . . . . . . . . . . . . . . . . . . . . . . . . . . . . . . . . . . . . . . . . . 1-27 1-2 1 K-MINC-1000 Instructions for Use English Explanation of pictograms 1 The following pictograms appear on the MINC Benchtop Incubator and the Sterile Disposable Humidification Flask packaging Before connection, read the manual! CE – Mark Approval Consult the operating instructions for information needed for the proper use of the device IP31 Degree of enclosure protection from solid objects and liquids UL – Approval Marking Standby/On RoHS Compliance Mark Start/Stop Dispose of in accordance with WEEE directive (2002/96/EC) Increase/Decrease Set-Point Manufacturer Heater EC REP EC Representative Gas Flow Status Gas Flow Meter Temperature Outlet Gas Cylinder Inlet Contacts REF Catalogue Code SN Serial Number (1) Do not use if packaging is damaged (1) Keep away from sunlight (1) Keep dry (1) Batch code Note (1): Symbols are on Sterile Disposable Humidification Flask packaging only. USB Connections How to use this manual Warnings and Important Notes Throughout these Instructions for Use, blocks of text may be accompanied by a pictogram and/or printed in bold type. These blocks are WARNINGS and IMPORTANT NOTES and they are used as follows: WARNING: The personal safety of the patient may be involved. Disregarding this information could result in injury to the operator, device or the contents! WARNING: Biological hazard WARNING: Electric shock hazard WARNING: Explosion hazard WARNING: Radio Frequency Interference IMPORTANT NOTE: This provides special information that facilitates maintenance or clarifies important instructions. Please pay particular attention to the Safety Instructions (see §1). Manual Structure This manual has a table of contents (page 2) to help you find section titles quickly. Additionally, an index can be found on page 27. A list of error messages and warning indications can be found on page 14 and there is a troubleshooting guide on page 25. 1-3 K-MINC-1000 Instructions for Use English 1. Safety instructions WARNING: Please familiarise yourself with the safety instructions before using the MINC. This manual describes the operation and intended use of the MINC Benchtop Incubator (MINC) for devices with serial numbers from A803560 onwards. It is essential to use this manual to familiarise yourself with the functions and the operation of the MINC before use. Not following these instructions can result in damage or breakdown of the device. WARNING: ELECTRIC SHOCK HAZARD. WARNING: Do not sterilise the device. Internal circuitry is energised whenever the MINC is connected to mains power, irrespective of whether or not the displays are illuminated. Always disconnect the device from mains power before cord replacement or cleaning. Should any power cord or plug associated with the incubator become cracked, frayed, broken or damaged it must be replaced immediately. WARNING: No user serviceable parts inside. To reduce the risk of electric shock, do not remove covers. Please refer all servicing to the manufacturer’s authorised service agent. WARNING: This device should only be operated by appropriately qualified personnel Protect the MINC from being splashed by liquid. Should any liquid enter the device, discontinue use immediately. WARNING: EXPLOSION HAZARD. Device can cause explosion in presence of flammable gases. Do not use the MINC in an area where flammable gases are present. WARNING: Use the correct gas connecting hose. Use only the Braided PTFE lined gas connecting hose supplied with the MINC Benchtop Incubator to connect it to a gas supply. The use of another tubing type may result in the loss of desired gas concentrations. WARNING: Use only original disposables. For your own safety, use only original disposables (see § 7). 2. About the MINC Benchtop Incubator 2.1 Intended use The MINC Benchtop Incubator (MINC) is a microprocessor controlled, gassed, humidified, incubator intended for use in cell culture. 2.2 Device description The MINC is designed to maintain temperature accurately at a user specified temperature within the range of 35 to 40°C, and to maintain accurate gas flow at a user specified flow rate within the range of 15 to 25 mL/min. The MINC utilises premixed gas to maintain optimum culture conditions within the incubation chambers. All components in contact with the gas flow, including external and internal gas lines, have undergone rigorous testing to ensure a toxin free environment. The MINC has the ability to accept NUNC® four well culture dishes, or NUNC® and FALCON® 35 mm and 60 mm single round culture dishes in two separate chambers. The two chambers have individual temperature control whilst the single gas flow control applies commonly to both chambers. The heater blocks under each culture dish are in direct contact with the bottom surface of the dish. Whenever the chamber lid is opened and closed, a rapid purge with the gas mix occurs to re-establish the required environment. The MINC enhances safety by continuously monitoring the critical functions. Deviation from normal operation is immediately detected and the user is alerted to the detected fault. The device can be connected to an external remote alarm to alert staff out of normal working hours to any problems that the device is unable to self-correct in the allotted time. The K-MINC-1000 Logger Software is a PC based program that is used to continuously record the operating state of up to 10 devices. The software monitors the behaviour of the MINC, but will not control the device. This software can only be used with MINC’s with serial numbers from A803560 onward. 2.3 Precautions for device use Should any electrical or mechanical fault occur while using the MINC, stop using the device until it has been checked by an authorised service agent. 1-4 1 K-MINC-1000 Instructions for Use English 3. Installation and set-up 1 IMPORTANT NOTE: To reduce the risk of damage to the MINC, the use of an Uninterruptible Power Supply (UPS) with power conditioning capabilities is strongly recommended. An installation and set-up checklist has been included at the end of this section (see §4). This may be used to help ensure correct preparation. 3.1 Unpacking Please find the following items supplied: Furthermore, to ensure uninterrupted device functionality, the use of the following is also strongly recommended: 3 t"OBVUPNBUJDHBTDZMJOEFSDIBOHFPWFS unit that can maintain a minimum pressure of 135 kPa. t"SFNPUFBMBSNUPBMFSUTUBòUPBOZ failures in the gas or power supply. 1 2 IMPORTANT NOTE: It is important to retain packaging for future use. (Refer to §6.5 - Return Procedure) 9 6 5 IMPORTANT NOTE: This device has been certified by an independent testing authority for use with USB and Remote Alarm Cables of less than 3 metres in length. 10 4 8 7 1. User manual 2. MINC Benchtop Incubator 3. Patient identification plates (8 plates) 4. Disposable Humidification Flask (K-MINC-CTS-S) 5. Medical grade mains power cord 6. External alarm connector (on rear of device) 7. Braided Connecting Hose (3 metre length) (K-MINC-BCT-10-300) 8. USB A-B cable (2 metre length) 9. K-MINC-1000 Benchtop Incubator Logger Software installation CD WARNING: If connecting the MINC Benchtop Incubator to the External Electrical System via the USB cable, ensure that the External Electrical System complies with the IEC 60601-1 safety standard or equivalent. 10.MINC Introduction DVD IMPORTANT NOTE: Items required but not supplied are listed here. 3.2 You need to supply Check the MINC and all items immediately upon receipt to make sure the contents are complete and that nothing is damaged. The manufacturer will only honour claims for compensation which are forwarded immediately to the sales representative or the authorised service agent. Remove all items from plastic covers except the Disposable Humidification Flask which needs to be handled under sterile conditions (refer to § 3.8). t"DMFBOTPVSDFPGNBJOTQPXFSUPTVQQMZUIF.*/$$PPL.FEJDBMTUSPOHMZSFDPNNFOETUIFVTFPGB614XJUI power conditioning capabilities suitable for your local power supply system. t1SFNJYFENFEJDBMHSBEFHBTDZMJOEFST"MMHBTDPODFOUSBUJPOTTIPVMECFXJUIJOBOEDZMJOEFSTTIPVMECF supplied with a certificate of analysis, refer to § 3.7.1. t"TJOHMFTUBHFIJHIQVSJUZHBTSFHVMBUPSDBQBCMFPGTVQQMZJOHUIFHBTMJTUFEBCPWFBUL1BCBSQTJ UP the MINC inlet, refer to § 3.7.2. t"VUPNBUJDHBTDZMJOEFSDIBOHFPWFSVOJU$PPL.FEJDBMTUSPOHMZSFDPNNFOETUIFVTFPGBVUPNBUJDDIBOHFPWFS units to ensure continuity of gas supply. t"TPVSDFPGTUFSJMFEJTUJMMFEXBUFS t"QSFTTVSFNBOPNFUFSUPNFBTVSFUIFEFWJDFJOQVUHBTTVQQMZQSFTTVSF 5IJTJUFNJTOPUSFRVJSFEJGUIFSFHVMBUPS has gas output display gauges. t"wTQBOOFS IMPORTANT NOTE: A nonpowered USB hub is suitable to connect multiple devices. t*GBMPOHFSHBTDPOOFDUJOHIPTFJTSFRVJSFEDPOUBDUZPVS$PPL.FEJDBMSFQSFTFOUBUJWF t"DPNQVUFSTVJUBCMFUPJOTUBMMBOESVOUIF,.*/$-PHHFS4PGUXBSFPO t"64#IVCGPSDPOOFDUJOHNVMUJQMFVQUPBNBYJNVNPG .*/$TUPBTJOHMFDPNQVUFS 1-5 K-MINC-1000 Instructions for Use English 3.3 Front of the device 1 12 12 11 11 3 7 2 1 Symbol 3 5 4 6 9 8 10 5 4 6 Description 1. Standby touch-pad Toggles the device between Active and Standby State. 2. Power indicator Green = Indicates the power is connected to the device, Off = Power is disconnected. 3. Temperature display (heater chambers). 4. Heating status indicator (heater chambers) Flashing Orange = Below Set point, Solid Green = Set Point Reached, Flashing Red = Above Set Point. 5. Temperature selection touch-pads (heater chambers) Adjust Set Point from 35.0°C to 40.0°C. 6. Heating start/stop touch-pad (heater chambers). 7. Gas flow rate display. 8. Gas flow status indicator Flashing Orange = Purge Cycle, Flashing Red = Outside Set Point, Solid Green = Set Point Reached. 9. Gas flow rate selection touch-pads Adjust Set Point from 15 to 25 mL/min. 10. Gas flow start/stop touch-pad Activates Gas Flow when one or both heater chambers are active. 11. – Gas vent holes. 12. – Patient identification plates. 1-6 K-MINC-1000 Instructions for Use English 3.4 Rear of the device 1 2 3 4 1 5 Description 1. Mains power inlet Connect the appropriate power cord to this point. 2. Gas inlet Connect gas supply to this point. 3. Gas outlet Blanking plug shown. 4. External alarm contacts Connect to external alarm if required. 5. USB connector Type B socket provided. External alarm connection: Use only with suitable alarm transmitters activated by means of contact closure. Battery or Safety Extra Low Voltage powered alarm equipment, not exceeding stated contact ratings may be connected to the external alarm terminals. Refer to Technical Specifications (§8) for alarm contact rating. USB connection: Use only with Laptop or Desktop PC standard USB connections (USB 1.1 and USB 2.0 compliant). Gas connections: Refer to Gas Supply (§ 3.7) for details. WARNING: ELECTRIC SHOCK HAZARD. Determine if the available voltage corresponds to the device. Connecting to the wrong voltage will cause the MINC to malfunction or may permanently damage the device! The power cord must be equipped with a safety plug. Use the enclosed power cord for the connection between the power plug and the device socket! WITHIN CANADA & U.S.A – Use only a listed detachable power supply cable, type SJT, minimum 18AWGx30, 3 conductors, one end configured for NEMA 5-15, other end for IEC 320/CEE22! 3.5 Electromagnetic compatibility The MINC Benchtop Incubator has been tested and found to comply with the electromagnetic compatibility (EMC) limits for medical devices as specified by IEC 60601-1-2:2007. These limits are designed to provide reasonable protection against harmful interference in a typical medical installation. Medical electrical equipment requires special precautions regarding EMC and must be installed and operated according to these instructions. It is possible that high levels of radiated or conducted radio-frequency electromagnetic interference (EMI) from portable and mobile RF communications equipment or other strong or nearby radio-frequency sources could result in performance disruption of the MINC. Evidence of disruption may include erratic readings, equipment ceasing to operate, or other incorrect functioning. If this occurs cease using the MINC and contact your Cook Medical authorised service agent. For guidance and manufacturer’s declaration on electromagnetic emissions and immunity of the MINC, refer to § 8. To avoid the risk of electric shock, this equipment must only be connected to a supply mains with protective earth. 1-7 K-MINC-1000 Instructions for Use WARNING: The MINC should not be used adjacent to or stacked with other equipment. If adjacent or stacked use is necessary, the device should be monitored to verify normal operation in the configuration in which it will be used. WARNING: EXPLOSION HAZARD. Do not use the device in the presence of flammable gases! English 3.6 Device placement The MINC should be placed on a level secure surface, away from heaters, coolers, air-conditioning outlets, mists, splashes and exposure to direct sunlight. It must not be placed in the presence of flammable gases. Position the MINC such that quick and easy disconnection of the power supply plug is not impeded. It is recommended to allow a reasonable amount of space around each MINC to allow for natural air circulation. A clearance of at least 10 cm is recommended around each device. The ambient temperature range should be between +20°C and +28°C to maintain a device set point between the ranges of 35°C to 40°C. At a device set point of 37°C, the ambient temperature range can be extended from +18°C to +32°C. 3.7 Gas supply 3.7.1 Gas mixture required WARNING: Ensure that the appropriate high purity gas mixture is selected to suit the altitude above sea level of use and the culture media being used! IMPORTANT NOTE: When using the Cook Culture System at sea level a 6% CO2 , 5% O2 , and 89% N2 blend high purity gas mixture is recommended. To maintain the correct operating pH of 7.2 to 7.4 in bicarbonate buffered media the concentration of CO2 in the atmosphere in contact with the media must be strictly controlled. The concentration of CO2 (expressed as a percentage) required to maintain the correct operating pH is dependent on the chemical composition and concentration of the media, the altitude at which the MINC is being operated and the humidification status of the atmosphere in contact with the media. The correct percentage CO2 for the desired pH can be determined from the graph provided. "UTFBMFWFMUIF$PPL$VMUVSF4ZTUFNSBOHFPGNFEJBXJMMHJWFBOBQQSPYJNBUFQ)PGJG$02 is used and 7.3 JG$02 is used in the gas mixture. $PPL.FEJDBMSFDPNNFOETUIFVTFPG$02 as it promotes a more rapid recovery to an acceptable pH. Cook Medical recommends a reduced oxygen concentration from the normal atmospheric concentration, UP B NPSF QIZTJPMPHJDBM WBMVF PG JO UIF BUNPTQIFSF JO DPOUBDU XJUI UIF NFEJB BT UIJT NBZ SFEVDF reactive oxygen species formation. If using the MINC at an altitude other than sea level, the following graph may be used to find the approximate CO2 percentage to achieve a pH of 7.3. % CO2 required to maintain pH 7.3 vs altitude 15 14 13 12 $02 in dry gas WARNING: ELECTRIC SHOCK HAZARD. Do not immerse the device! 11 10 9 8 7 6 5 0 1000 2000 3000 4000 5000 6000 Metres above sea level If a different medium is used or a different pH is required, then the end user will need to determine the appropriate gas mix for connection to the MINC. 1-8 1 K-MINC-1000 Instructions for Use English 3.7.2 Gas cylinder regulator recommendations 1 WARNING: The gas inlet must be connected to a regulated pressure source set to 150 kPa (tolerance of ±15 kPa) at the MINC to operate correctly! IMPORTANT NOTE: Cook Medical strongly recommends the use of automatic gas cylinder change over units to ensure continuity of gas supply. The following information is a recommended guide for the selection of a gas cylinder regulator used with the MINC. Following these guidelines will provide a reliable gas connection between a gas cylinder and the device. The gas regulator chosen in conjunction with the MINC is an important part of the gas delivery system and must be designed and manufactured to carry medical gases. As the gas specified to be used with the MINC is of high purity and accuracy it is important that the regulator used does not contaminate the gas stream. Please specify the information below when ordering your gas regulator: t4JOHMFTUBHFIJHIQVSJUZSFHVMBUPS t.FUBMUPNFUBMEJBQISBHNTFBM t4UBJOMFTT4UFFMEJBQISBHNXIJDIEPFTOUDPOUBNJOBUFIJHIQVSJUZHBTTUSFBNT t%VBMTDBMFHBVHFTPQUJPOBM t'VMMZDPOöHVSFEGPSBTQFDJBMCMFOENFEJDBMHSBEFHBTDZMJOEFS t%FMJWFSZQSFTTVSFPGL1BL1BBUUIF.*/$HBTJOMFU t"NJOJNVNøPXXJUIPVUVOEVFTVQQMZQSFTTVSFTBH DBQBCJMJUZPGN-NJOQFS.*/$JTSFRVJSFEEVSJOHUIF purge cycle. t5IFPVUMFUöUUJOHPGUIFSFHVMBUPSJTUPCFB4XBHFMPL¥4435öUUJOHUPöUUIFDPOOFDUJOHIPTFTVQQMJFE with the MINC. 3.7.3 Connection to gas cylinder WARNING Use only a suitable medical gas grade pressure regulator set to a nominal 150 kPa. Do not use flow restrictors or flow regulators in the gas stream. WARNING: Silicone tubing must not be used in the connection between gas cylinder and the MINC , or in series connections of multiple devices. Connection of the MINC to gas cylinder is achieved by use of the supplied braided connecting hose. It has a nontoxic, low permeability PTFE lining which prevents the loss of CO2 content associated with high pressure use of more permeable materials such as silicone and PVC. Silicone tubing is relatively porous to pressurised CO2 and must not be used anywhere in the connection from the gas cylinder as the correct gas concentrations may not reach the MINC chambers. 5IF .*/$ BOE DPOOFDUJOH IPTF BSF öUUFE XJUI 4XBHFMPL¥ w TFSJFT UVCF öUUJOHT 5IF TUBOEBSE IPTF MFOHUI JT 3 meters. Alternative lengths are available in 60 cm, 100 cm, 6 m, 10 m or 20 m. A union fitting is available to connect gas hoses. Refer to your local Cook Medical representative for more information. A pressure regulator with these fittings should also be used. These fittings use a tapered ferrule to provide a leak-free seal upon connection. Ferrule Backnut The ferrules on the connecting hose have been pre-swaged before shipping. Therefore, any ferrule and backnut on the cylinder mounted regulator will be surplus to requirements. 1-9 K-MINC-1000 Instructions for Use IMPORTANT NOTE: Firmly tighten the connecting hose(s) to the MINC fitting and ensure that the blanking plug is also firmly tightened (if used). English It will be necessary to connect the hose to the regulator outlet fitting and also to the MINC inlet fitting. The instructions below must therefore be performed on each end of the connecting hose. Following these instructions should ensure a reliable leak-proof seal every time the connection is made. To connect the hose to a fitting: 1. Ensure that the fitting body, tube end and ferrules are free of any foreign materials. 2. Insert the tube adaptor with pre-swaged ferrules into the fitting body until the front ferrule seats. 5JHIUFOUIFCBDLOVUöSNMZCZIBOE6TJOHBwTQBOOFSUJHIUFOUIFOVUTMJHIUMZVTVBMMZUVSOPSMFTT Check the seal is gas tight by covering with soapy water and looking for the presence of bubbles. If bubbles are observed, disconnect and repeat from step 1, tightening the nut further if no foreign material is found in the fitting. The blanking plug, shown above, must be tightened onto the unused gas connection. IMPORTANT NOTE: Keep your unused blanking plugs securely stored in the event that independent operation of the units is required in the future. 3.7.4 Series connection of devices In situations where multiple MINCs are to be operated from a single gas supply point, sequential connection of the units is possible. Ensure that your pressure regulator is capable of flowing sufficiently for your needs. If in doubt, check the regulated pressure is still a nominal 150 kPa with all series connected MINCs purging. Silicone tubing must not be used in the connections of multiple devices. To connect units in series: 1. Remove the blanking plugs from the second gas connection point of all but the last unit in the sequence. 2. Connect the hose of the last unit to the second gas connection point of the previous unit. 3. Repeat step 2 until all units are linked. The gas connecting hose can be ordered in different lengths to suit individual installation requirements. Contact your Cook Medical Representative for further details. 3.7.5 Other gas connections For other gas connections or existing gas delivery systems, (e.g. gas cylinder change-over units or permanently installed gas supply systems) it is recommended that the user contact the relevant gas equipment supply centre for installation advice, e.g. BOC Gases or Air Liquide. For gas connection information, contact your Swagelok® distributor (www.swagelok.com). 1-10 1 K-MINC-1000 Instructions for Use 1 WARNING: BIOLOGICAL HAZARD. Do not use a contaminated humidification flask in the MINC. It is recommended that the sterile humidification flask be replaced each time the sterile water needs replacing, or regularly with a maximum period of use being 4 weeks. Used sets are classed as infectious waste. All infectious waste must be disposed of in a suitable biohazard container or bag. No sharps shall be placed into biohazard bags. All sharps should be disposed of in suitable puncture proof containers. IMPORTANT NOTE: During the filling process do not overfill the flask above the limit line and ensure that no water gets through to the bacterial filter. If this occurs, the filter will be blocked and no CO2 flow will be possible. In such case replace the whole humidification flask assembly (K-MINC-CTS-S). To avoid bacterial filter blockage and/or spillage of water inside the unit, remove the humidification flask assembly from the bay before moving the MINC. English 3.8 Humidification flask The MINC uses a disposable humidification flask, gas line and filter set (re-order code K-MINC-CTS-S). To prepare and install the humidification flask:1. Under laminar flow conditions and using aseptic techniques, fill the humidification flask with 170 mL of sterile water. Ensure the flask cap is pushed on in the correct orientation. Failure to seal the cap may result in loss of gas flow to the chambers. 5 1 4 2 1. Bacterial filter 2. Gas outlet 3. Disposable Humidification Flask 4. Front of device 5. Bay 3 2. Insert the flask into the appropriate position in the bay. The tubing exiting the flask should face the rear of the MINC. Connect the filter with the Luer fitting to the gas outlet as shown above. Rotate the filter and tubing anticlockwise 180° before pressing onto the Luer fitting and rotating clockwise to lock the filter in place. This will ensure no kinking or twisting of the tubing occurs. 3. Insert the gas lines into the centre slots on each side of the bay as per the diagram below. Check to ensure that the gas lines are not kinked and are seated correctly into the slots to ensure they are not crimped when the lid is closed. 1 1. Centre slot with gas lines inserted 3.9 K-MINC-1000 Benchtop Incubator Logger Software The K-MINC-1000 Benchtop Incubator Logger Software is a PC based program that monitors the operating state of up to 10 MINC incubators. You may use this software to monitor the behaviour of the MINC over the incubation period. The software cannot be used to control the device and does not affect the normal operation of the MINC. Key features are: t3FHVMBS NJOVUF MPHHJOH PG BDUVBM UFNQFSBUVSF UFNQFSBUVSF TFUQPJOUT BDUVBM HBT øPX BOE HBT set-point. t*NNFEJBUFMPHHJOHPGFWFOUTBOEFSSPSTTVDIBTMJEPQFOJOHBOEDMPTJOHFWFOUTTFUQPJOUDIBOHFTBDUJWBUJPOPG chambers and gas flow, activation of the device, gas flow/supply errors and temperature errors. t(SBQIJDBMQSFTFOUBUJPOPGBMMEBUBPOTDSFFO t%BUBJTMPHHFEUPB$47öMFGPSFBTZBOBMZTJTXJUITQSFBETIFFUQBDLBHFT IMPORTANT NOTE: Refer to § 5.5 for limitations when running Windows 2000 operating system. t"CJMJUZUPIPUTXBQDPOOFDUJPOTPGVQUP.*/$T t"CJMJUZUPOBNFJOEJWJEVBMEFWJDFTGPSFBTZJEFOUJöDBUJPO 1-11 K-MINC-1000 Instructions for Use English 3.9.1 Software installation IMPORTANT NOTE: Users must have Administrator privileges to install software. Note: The Logger Software and drivers should be installed before connecting the MINC to the PC. To install this software: *OTFSUUIF$%NBSLFEi,.*/$#FODIUPQ*ODVCBUPS-PHHFS4PGUXBSFw 2. Run KMINC1000-setup.exe from the root directory of the CD. For installation on Windows 2000, use KMINC1000-FHBDZTFUVQFYFMPDBUFEJOUIFi-FHBDZ*OTUBMMFSwEJSFDUPSZ Follow the instructions on-screen to complete the installation. 3.9.2 Connecting USB cables For connection of multiple MINC’s, it is recommended that a USB hub be used (not supplied). USB HUB 2m USB A–B cables Computer Once connected, the software will automatically detect the connected MINCs. The MINC does not consume any power from the USB port, so un-powered USB hubs are suitable for connecting up to 10 devices. Daisy chaining of USB hubs is not recommended. Each hub should be connected to a separate USB port on the computer. The MINC has been successfully tested with the following USB Hubs: Make Model Description D-Link DUB-H7 7-Port USB 2.0 Hub Belkin FSU407 Hi-Speed USB 2.0 4-Port Ultra-Mini Hub 3.10 Activating the device WARNING: ELECTRIC SHOCK HAZARD. Internal circuitry is energised whenever the MINC is connected to mains power irrespective of whether the device is on or in standby. t$POOFDUUIFQPXFSDPSEUPUIFNBJOTQPXFSJOMFUBOETXJUDIQPXFSPOBUUIFNBJOT t5IF .*/$T TFSJBM OVNCFS TIPVME CF EJTQMBZFE JO UIF MFGU BOE SJHIU UFNQFSBUVSF EJTQMBZT GPS BQQSPYJNBUFMZ 2 seconds. t5IFHBTøPXSBUFEJTQMBZTIPVMEEJTQMBZUIFTPGUXBSFWFSTJPOOVNCFSGPSBQQSPYJNBUFMZTFDPOET t5IFEFWJDFQFSGPSNTBTFMGUFTU IMPORTANT NOTE: Ensure that gas supply is available to the MINC. IMPORTANT NOTE: For the gas flow to be active, one or both of the chambers must be active. t5IFEFWJDFXJMMUIFOSFUVSOUPJUTMBTUNBJOTQPXFSFETUBUFFJUIFSJOTUBOECZPSOPSNBMPQFSBUJPO t*G UIF .*/$ XBT BDUJWF CFGPSF UIF NBJOT QPXFS XBT EJTDPOOFDUFE UIFO UIF EFWJDF XJMM UIFO SFDPNNFODF operation, using the previous temperature and gas flow rate settings. When either lid is opened and closed or gas flow is started, the chambers are automatically purged to re-establish the appropriate gaseous environment quickly. The automatic purge flow rate is preset and operates independently of the set flow rate. When the MINC has just been turned on or when the temperature has been adjusted, the temperature alarm is deactivated for 120 minutes to allow the device to reach stable conditions without constantly alarming. The MINC will not be interrupted by a temporary loss of mains power. The device can be placed in standby mode by pressing the standby touch-pad. 3.11 Chamber temperature selection When first turned on, the MINC will default to a temperature of 37.0°C. The front panel displays will show actual temperatures of each chamber in degrees Celsius (°C). 3.11.1 Turn the chamber on or off t1SFTTBOESFMFBTFUIFIFBUJOHTUBSUTUPQUPVDIQBE t5IJTXJMMUVSOUIFDIBNCFSPOPSPòEFQFOEJOHPOUIFDVSSFOUTUBUF 3.11.2 Display the temperature set point t1SFTTBOESFMFBTFPOFPGUIFUFNQFSBUVSFTFMFDUJPOUPVDIQBET t5IF.*/$XJMMCFFQBOEEJTQMBZUIFUFNQFSBUVSFTFUQPJOUGPSUIBUDIBNCFS t"GUFSBQQSPYJNBUFMZPOFTFDPOEUIFUFNQFSBUVSFEJTQMBZXJMMSFWFSUUPUIFBDUVBMDIBNCFSUFNQFSBUVSFTUBUVT 1-12 1 K-MINC-1000 Instructions for Use English 3.11.3 Adjust the temperature set point t1SFTTBOEIPMEPOFPGUIFUFNQFSBUVSFTFMFDUJPOUPVDIQBET5IF.*/$XJMMCFFQ t5IFUFNQFSBUVSFXJMMBEKVTUJO¡$JODSFNFOUTGSPN¡$UP¡$ 1 t5IFTFMFDUFEWBMVFBQQFBSTJOUIFUFNQFSBUVSFEJTQMBZGPSUIBUDIBNCFS t8IFOUIFEFTJSFEUFNQFSBUVSFTFUUJOHJTSFBDIFESFMFBTFUIFUPVDIQBE t"GUFS BQQSPYJNBUFMZ POF TFDPOE UIF EFWJDF XJMM CFFQ BOE UIF UFNQFSBUVSF EJTQMBZ XJMM SFWFSU UP UIF BDUVBM chamber temperature. The new temperature set point will be saved. 3.11.4 Open lid IMPORTANT NOTE: For the MINC to maintain an appropriate environment in the chambers, the lid must be securely latched when it is closed. instead of the t0QFOJOH UIF MJE XJMM DBVTF UIF UFNQFSBUVSF EJTQMBZ GPS UIBU DIBNCFS UP EJTQMBZ chamber temperature. A ‘beep’ will be emitted from the MINC approximately every 30 seconds to alert the user to an open lid. t$MPTJOHUIFMJEXJMMDBVTFUIFUFNQFSBUVSFEJTQMBZUPSFWFSUUPUIFBDUVBMDIBNCFSUFNQFSBUVSFBOEUIFCFFQJOH will cease. 3.12 Gas flow rate selection When first turned on the MINC will default to a gas flow set point of 15 mL/min per chamber. The front panel display will show actual gas flow per chamber in millilitres per minute (mL/min). 3.12.1 Turn the gas flow on t1SFTTBOESFMFBTFUIFHBTøPXTUBSUTUPQUPVDIQBE t5IF.*/$XJMMCFHJOQVSHJOHGPSBQQSPYJNBUFMZNJOVUFTBOEUIFOHPJOUPOPSNBMøPXPQFSBUJPO 3.12.2 Turn the gas flow off IMPORTANT NOTE: For the gas flow to be active, one or both of the chambers must be active (See §3.11.1). t1SFTTBOESFMFBTFUIFHBTøPXTUBSUTUPQUPVDIQBE t5IFHBTøPXXJMMUVSOPò 3.12.3 Display the gas flow rate set point t1SFTTBOESFMFBTFPOFPGUIFHBTøPXSBUFTFMFDUJPOUPVDIQBET t5IF.*/$XJMMCFFQBOEEJTQMBZUIFHBTøPXSBUFTFUQPJOU t"GUFSBQQSPYJNBUFMZPOFTFDPOEUIFHBTøPXSBUFEJTQMBZXJMMSFWFSUUPTIPXUIFHBTøPXTUBUVT 3.12.4 Adjust the gas flow rate set point IMPORTANT NOTE: Follow these steps the first time the MINC is used to ensure reliable performance. t1SFTTBOEIPMEPOFPGUIFHBTøPXSBUFTFMFDUJPOUPVDIQBETUIF.*/$XJMMCFFQ t5IFHBTøPXSBUFXJMMBEKVTUJON-NJOJODSFNFOUTGSPNN-NJOUPN-NJO t5IFTFMFDUFEWBMVFBQQFBSTJOUIFHBTøPXSBUFEJTQMBZ t8IFOUIFEFTJSFEHBTøPXSBUFTFUUJOHJTSFBDIFESFMFBTFUIFUPVDIQBE t"GUFSBQQSPYJNBUFMZPOFTFDPOEUIF.*/$XJMMCFFQBOEUIFHBTøPXSBUFEJTQMBZXJMMTXJUDICBDLUPTIPXUIFHBT flow rate. The new gas flow rate set point will be saved. 3.13 First time use Leave the MINC to operate with both heater chambers at 37°C and gas flow at 15 mL/min for a minimum of 24 hours to ensure that any residual out-gassing of components is complete. Test each chamber for pH maintenance using culture media containing phenol red indicator (15 µg/mL). Adjust the gas flow to 15 mL/min and place the culture media in culture wells in both incubation chambers. After overnight incubation observe that the phenol red indicator is the correct colour (salmon pink). The MINC is now successfully installed and commissioned. 3.14 Alarm conditions 3.14.1 External alarm The MINC has the facility to connect to an external alarm monitor that will alert staff of activated alarms out-ofIPVST5IJTFYUFSOBMBMBSNJTOPSNBMMZBOiPQFODJSDVJUwUIBUDBOiDMPTFwVOEFSUIFGPMMPXJOHDPOEJUJPOT t-PTTPGNBJOTQPXFS t-PXJOMFUHBTQSFTTVSF t/PHBTøPXPSHBTøPXPVUPGSBOHF t5FNQFSBUVSFPVUPGSBOHF See § 8 Technical Data for the alarm contact rating. Customer requirements for the external alarm monitor should be referred to a company that specialises in this type of equipment. 1-13 K-MINC-1000 Instructions for Use English 3.14.2 Loss of mains power t*GUIF.*/$JTTXJUDIFEPOBOEPOFPSCPUIIFBUFSDIBNCFSTBSFBDUJWFMPTTPGNBJOTQPXFSXJMMDBVTFUIFFYUFSOBM alarm to activate if the power is still off after 2 minutes. t*GNBJOTQPXFSJTSFTUPSFEXJUIJOUIFNJOVUFTUIFFYUFSOBMBMBSNXJMMOPUBDUJWBUFBOEUIF.*/$XJMMSFDPNNFODF normal operation. t*GNBJOTQPXFSJTSFTUPSFEBGUFSUIFNJOVUFTUIFFYUFSOBMBMBSNXJMMEFBDUJWBUFBOEUIF.*/$XJMMSFDPNNFODF normal operation. t"MTPJGUIFHBTøPXXBTBDUJWFCFGPSFUIFQPXFSXBTMPTUUIFOUIF.*/$XJMMSFTUBSUUIFøPXTFRVFODFJOQVSHF mode when power is restored. 3.14.3 Low inlet pressure 5IFHBTøPXEJTQMBZXJMMTIPXBi$0wEJTQMBZBOEFNJUBOBVEJCMFBMBSNJGUIFHBTJOMFUQSFTTVSFJT too low to maintain flow, the nominal inlet pressure to trigger this alarm is <50 kPa. The external alarm contacts will close 15 minutes later if the correct inlet pressure is not restored. The alarm will reset when a gas inlet pressure >60 kPa is restored. 3.14.4 No gas flow or gas flow out of range 5IFHBTøPXEJTQMBZXJMMTIPXBOi&SSwEJTQMBZBOEFNJUBOBVEJCMFBMBSNJGUIFHBTøPXEJòFST from the set point by greater than 4 mL/min (including no gas flow) for longer than 10 minutes. The external alarm contacts will close 5 minutes later. To reset alarm, after rectification of cause of alarm condition, toggle the gas flow start/stop touch pad. Allow at least 3 seconds between toggled off then on again. 3.14.5 Temperature out of range When the MINC has just been turned on or the set temperature has been adjusted, the temperature alarm is deactivated for 120 minutes to allow the device to reach stable conditions without constantly alarming. "GUFSUIJTUJNFUIFUFNQFSBUVSFEJTQMBZXJMMTIPXi&SSwFNJUBOBVEJCMFBMBSNBOEUIFFYUFSOBM BMBSN XJMM CF BDUJWBUFE JG UIF TFU UFNQFSBUVSF EJòFST CZ HSFBUFS UIBO ¡$ GPS MPOHFS UIBO minutes. To reset alarm, toggle heater chamber start/stop touch pad. Note: This will deactivate alarm for 120 minutes. If any alarm condition is unable to be rectified, contact your local Cook Medical representative or authorised service agent. 4. Installation and set-up checklist Check the following for installation of the MINC:- !"All items have been supplied. !""The packaging has been safely stored for future use. !""All non-sterile items have been removed from plastic covers. !"The power cord is correct for your region. !"The MINC has been placed in a suitable location. !""The appropriate gas mixture has been !""The chamber temperatures and flow rate have been adjusted to desired values. !""The MINC has been left to operate for 24 hours to ensure any residual out-gassing of components is complete. Check the following for installing the K-MINC-1000 Logger Software (optional):- !""The installation CD and USB cable has been supplied. !""A computer with the the appropriate specification determined. !"An appropriate gas regulator has been sourced. !"The gas regulator has been set to 150 kPa. !""The gas connections have been made and checked. !"The Humidification Flask has been filled and fitted. !"The MINC has been activated. 1-14 is available to run the Logger application on. !"The Logger Software has been installed. !""The USB connections have been made and checked using USB hubs where required for multiple MINC connections. !"The MINC’s have been activated. 1 K-MINC-1000 Instructions for Use English 5. Operation of the device 1 WARNING: To guarantee safe operation, it is necessary to carry out proper care and maintenance of the device and disposables. Regular checks to confirm correct functioning of the device are recommended! New and repaired products must be prepared and tested according to the manual instructions before use. This section provides general information about the use of the MINC and Logger Software. Only the clinician/ embryologist can evaluate the clinical factors involved with each patient and determine if the use of this device is indicated. The clinician/embryologist must decide on the specific technique and procedure that will accomplish the desired outcome. 5.1 Before use Prior to commencing the culturing procedure, carry out the following steps: t6TFUIFUFNQFSBUVSFTFMFDUJPOUPVDIQBETUPTFMFDUUIFEFTJSFEDIBNCFSUFNQFSBUVSFTFFf t*OTUBMMUIFIVNJEJöDBUJPOøBTLöMMFEXJUITUFSJMFXBUFSBTEFUBJMFEJOf t$POöSNIVNJEJöDBUJPOøBTLBOEHBTMJOFTBSFDPSSFDUMZJOTUBMMFE t"DUJWBUFUIFSFRVJSFEDIBNCFSTBTQFSf IMPORTANT NOTE: The MINC measures gas flow internally prior to the gas entering the humidification bay. There is no mechanism to verify correct gas flow into each chamber. The user must visually ensure the correct installation of the humidification flask and gas lines to ensure unobstructed delivery of gas to each chamber. WARNING: BIOLOGICAL HAZARD. Do not use a contaminated humidification flask in the MINC. It is recommended that the sterile humidification flask be replaced each time the sterile water needs refilling, or replaced regularly with a maximum period of use being 4 weeks, in order to avoid bacterial contamination of contents. t6TFUIFHBTøPXTFMFDUJPOUPVDIQBETUPTFMFDUUIFEFTJSFEHBTøPXTFFf t"DUJWBUFUIFHBTøPXTFFf &OTVSFUIBUHBTCVCCMFTBSFPCTFSWFEJOUIFøBTLEVSJOHCPUIUIFQVSHFDZDMF and normal flow. t8BJUBNJOJNVNPGIPVSTCFGPSFVTJOHUPBMMPXGPSFRVJMJCSBUJPO 5.2 Insertion of the culture dishes The MINC has been designed to be used with NUNC® four-well dishes, or NUNC® and FALCON® 35 mm and 60 mm single round culture dishes. Four-well dishes or single round dishes may be placed on the chamber base. Ensure that they sit securely in the grooves designed to accept them. There should be direct contact between the base of the dish and the surface of the chamber base. 5.3 Patient identification plates Use the magnetic Patient Identification Plates on the chamber lids to record culture dish contents with a marking pen. Pen markings can be removed using an alcohol solution. 5.4 Possible condensate formation During the normal usage of the humidification flask, some condensation may naturally form in the tubing. Normal Excessive Blockage There are several factors that can cause the formation of condensation: t3FQFBUFEPQFOJOHBOEDMPTJOHPGUIFIVNJEJöFSDIBNCFSMJE t-FBWJOHUIFIVNJEJöFSDIBNCFSMJEPQFO t'MVDUVBUJOHBNCJFOUDPOEJUJPOT t%SBVHIUT It is not recommended to obstruct any tubing in any manner. 1-15 K-MINC-1000 Instructions for Use IMPORTANT NOTE: It is recommended that no other applications be running while the Logger Software is being used. Other processor or memory intensive applications may prevent the proper operation of the Logger Software. English 5.5 Starting the Logger Software Once the software has been installed, it can be run from the K-MINC-1000 Logger icon on the desktop: 1 The program can also be started from the Start Menu under – Program Files › Cook Australia › K-MINC-1000 Logger. After starting the Logger Software, any MINC that is connected to the USB ports will be identified, after a short delay, then logging will commence. The program continuously scans the USB port for connected devices. The MINCs can be connected at any time. Note: For users running Windows 2000, the logger software must be closed before disconnecting any of the devices from the USB port. Failure to do so may result in a system crash due to deficiencies in the way Windows 2000 handles USB devices. For users running Windows XP, Vista, 7 or 8, the devices may be disconnected and reconnected at any time. It is recommended to upgrade to Windows XP, Vista, 7 or 8, if the selected computer is running Windows 2000. 5.6 Using the Logger Software 5.6.1 Logger working screen When the Logger Software detects a connected MINC, three graphs will be shown for each device. The first and last graph displays the left and right hand chamber temperatures respectively while the middle graph shows the gas flow. The graph data is continuously updated approximately once a second and both the actual measurement and the set-point are displayed. The graphs will rescale as new data is collected. A maximum of 3 days of logging information can be displayed on the screen. After this, the old data will be truncated from the end of the graph and cannot be viewed again in the Logger program. All data logged may be reviewed via the CSV file - refer to § 5.6.3 1-16 K-MINC-1000 Instructions for Use English An area of the graph can be zoomed in by clicking and dragging a rectangular region using the left mouse button. 1 Holding the right mouse button will pan the graph around. To return to the original graph scale, double click the left mouse button. Use the View menu to select the timescale of the graphs. There is a choice of displaying the last 6 hours, 12 hours, 24 hours or 3 days of data on the scrolling graphs. The last 12 hours of data will be shown by default. The items in the Window menu can be used to arrange the graph windows as desired. The program will first arrange the graphs by tiling them horizontally. If the application window is resized, select this option again to refit the graphs to the main window. 5.6.2 Selecting and naming devices If there is more than one MINC connected, the set of graphs for a specific device can be displayed by choosing the desired device icon, shown below, located in the banner area along the top of the window. Only one MINC can be selected at a time. The icons are arranged in alphabetical order according to their name. 5PSF OBNFUIFTFMFDUFE.*/$TFMFDUi.*/$/BNFwGSPNUIF&EJUNFOV The name must be less than 128 characters and must not contain: \ / : * ? “ < > or |. The MINC’s name is used to construct the CSV filename so it must contain valid filename characters. 1-17 K-MINC-1000 Instructions for Use English 5.6.3 Logging data Logging of the data to a CSV file begins as soon as a MINC is detected. The logging function cannot be turned off. A separate data file is written for each connected device and these files are created in the data file folder. To view the DVSSFOUGPMEFSDIPPTFi4FMFDU%BUB'JMF'PMEFSwGSPNUIF'JMFNFOV From here, a new data file folder may be selected or created. The files are named with the MINC’s name followed by its serial number. The data in these files is appended so that UIFZNBZDPOUBJOEBUBGSPNTFWFSBMEJòFSFOUSVOT5PDMFBSUIFEBUBTFMFDUi$MFBS-PHHFE%BUBwGSPNUIF'JMFNFOV Data is cleared only from the actively displayed MINC. If data files are to be kept for individual cycles, it is recommended to copy the specific MINC data file to an archiving area and rename the copied file prior to clearing logged data files. The copied file will contain all logged data from start-up, or the last time the file was cleared, to the time the file was copied. If the MINC is not disconnected, and the logged data is cleared, subsequent data will continue to be written to the cleared file. The files may also be deleted or renamed with the Windows File Manager. By default, measurements are logged to file at an interval of 5 minutes. Each line of the file is time and date stamped. Alarms and other events are logged immediately. The logging interval may be set from 1 to 10 minutes by selecting i4FU-PHHJOH*OUFSWBMwGSPNUIF'JMFNFOV 1-18 1 K-MINC-1000 Instructions for Use English The CSV data files may be opened in any text editor or in Microsoft Excel. The log files may also be opened in read only mode while logging is in progress but might not have the most recent data. Disconnect the MINC and close the Logger to flush and close the log files. 1 IMPORTANT NOTE: User will require Administrator privileges to remove programs. 5.6.4 Un-installation of Logger Software t4FMFDUUIFSFMFWBOUQSPHSBNNBOBHFNFOUBQQMJDBUJPOUPVOJOTUBMMUIFTPGUXBSF t*OUIFMJTUPGDVSSFOUMZJOTUBMMFEQSPHSBNTTFMFDUi,.*/$#FODIUPQ*ODVCBUPS-PHHFSwBOEUIFODMJDLUIF appropriate icon to uninstall and follow the instructions. 5.7 After Use 1. Use the Standby Touch-Pad to place the MINC in standby mode. 2. Remove the humidification flask, gas supply and power cord. 1-19 K-MINC-1000 Instructions for Use English 6. Service and maintenance WARNING: To guarantee safe operation, it is necessary to carry out proper care and maintenance of the MINC and disposables. Regular checks to confirm correct functioning of the device are recommended! New and repaired products must be prepared and tested according to the user manual before use. 6.1 Changing filter, gas lines & humidification flask Proper service, maintenance and storage must be provided to preserve the MINC and ensure its proper functioning. To protect the patient from infection, all disposable items that come into contact with human tissue (such as test tubes and tubing) must be sterile. Disposables must be discarded after each patient use. To change the filter, gas lines and humidification flask: 1. Ensure the gas flow is turned off. 2. Lift both heater chamber lids, and the centre chamber lid. Detach and remove the old filter, gas lines and humidification flask. 3. It is recommended to clean the entire device prior to installing a new filter, gas line and humidification flask. Refer to § 6.2. 4. Prepare and insert a new flask as detailed in § 3.8. 5. To recommence operation of the MINC: WARNING: BIOLOGICAL HAZARD. Do not use a contaminated humidification flask in the MINC. It is recommended that the sterile humidification flask be replaced each time the sterile water needs refilling, or replaced regularly with a maximum period of use being 4 weeks, in order to avoid bacterial contamination of contents. a. Turn the gas flow on. b. Check that bubbles can be observed in the humidification flask. c. Check that the gas line supplying each chamber is not kinked or pinched. d. Close the lid of the centre chamber and adjust the flow rate if required. 6. Allow 4 hours for the water to heat and saturate with CO2. This process can be accelerated by: 1. Pre-heating the aseptically prepared humidification flask to 35°C in step 4, and 2. Purging the system at least 3 times in quick succession as in step 5. This will allow immediate use of the device. 6.2 Cleaning the device Before periodic cleaning of the MINC, remove the contents of the incubation chambers. Shut down device. Refer to § 5.7. *UJTSFDPNNFOEFEUIBUUIF.*/$CFDMFBOFEXJUIBRVFPVTBMDPIPMFUIBOPMPSJTPQSPQZM .PJTUFOBDMPUIBOE wipe all internal and external surfaces of the device. Do not immerse the device in the cleaning solution. Clean the gas vents located in the centre of the front of the chamber lids by scrubbing the hole with a small “pipeDMFBOFSwXFUUFEXJUIUIFBRVFPVTBMDPIPMTPMVUJPO WARNING: ELECTRIC SHOCK HAZARD. Do not immerse the MINC! Following cleaning, leave the lids of the unit open to allow sufficient time to ensure that all alcohol fumes have dissipated. Purified water may be used to wipe device surfaces at times when the use of alcohol solution is not appropriate. 6.3 Biannual functionality testing In order to preserve the MINC and maintain its safety, regular inspections are necessary for early detection of possible malfunctions. The user or a qualified technician must regularly test the device to assess its functionality. IMPORTANT NOTE: This functionality testing must be performed every six months. The following must be tested on a biannual basis: t5FNQFSBUVSF t(BT'MPX3BUF t&YUFSOBM"MBSN$POUBDUT 1-20 1 K-MINC-1000 Instructions for Use English 6.3.1 Temperature Set each chamber temperature to 37°C. Place a NUNC® four-well dish into the front inner corner of each chamber. Fill the front inner well of each dish with 0.8 mL of media culture and thermally equilibrate. 1 To measure the temperature, immerse the tips of calibrated thermocouples into the culture media as shown below, ensuring that the each thermocouple tip sits on the bottom of each well. Close the chamber lid and allow enough time for the thermocouples to thermally equilibrate. 1 2 3 1. Left chamber thermocouple well position 2. Right chamber thermocouple well position 3. Front of MINC 5IFUFNQFSBUVSFTNFBTVSFEXJMMCFUIFVTFSTFUUFNQFSBUVSF¡$ 6.3.2 Gas flow rate To test flow rate, use an air calibrated gas flow meter connected to the Luer lock outlet beneath the bacterial filter as shown below. 1. Luer Lock Outlet 1 2. Flow Meter 2 The gas flow meter should have no further restriction on the outlet and be open to atmospheric pressure. Start the HBTøPXJOH5IFHBTøPXNFUFSTIPVMEJOEJDBUFUXJDFUIFVTFSTFUQPJOUWBMVF5XJDFUIFVTFSTFUQPJOUJT observed because the display shows gas flow rate per chamber. At each of the following set points, check that the measured flow rate is within the corresponding acceptable range: Flow Rate Set Point (mL/min) Measured Flow Rate Range (mL/min) 15 25.5 to 34.5 20 34 to 46 25 42.5 to 57.5 If measurements lie outside the acceptable ranges then contact your Cook Medical representative. Gas flow rates for the MINC are calibrated at 22°C at sea level. Temperature and atmospheric pressure must be taken into account when calculating the expected gas flow. The table below shows the flow obtained with altitude when the MINC has been set at 15 mL/min. Flow variation vs altitude Flow (mL/min) IMPORTANT NOTE: This functionality testing must be performed every six months. Metres above sea level 1-21 K-MINC-1000 Instructions for Use English 6.3.3 External alarm contacts To test the external alarm contacts, ensure at least one heater chamber is active and then disconnect the MINC from mains power. The contacts should close approximately 2 minutes later. Once the contacts close reconnect the device to mains power and allow to operate for 150 minutes. Open an active chamber lid and mist the chamber with cold water. During this period the temperature display TIPVMEEJTQMBZi-JEwBOEBACFFQTIPVMECFFNJUUFEGSPNUIF.*/$BQQSPYJNBUFMZFWFSZTFDPOET5IFDPOUBDUT should close approximately 2 minutes later. If the contacts fail to close then contact your Cook representative. WARNING: No user serviceable parts inside! WARNING: BIOLOGICAL HAZARD. The returned product must be clearly marked with a contamination warning and should be sealed in a plastic bag and sealed within a second plastic bag. When shipping the MINC ensure that the humidification flask and all chamber contents are removed prior to transport. 6.4 Inspection by an authorised service agent Inspections at least once a year For ongoing operational safety of the MINC, an authorised service agent must maintain the device annually as per Service Manual SMA30002. The service agent will asses the operational functionality of the gas and temperature control systems and external alarm contacts. Authorised service agents All services such as alterations, repairs, calibrations etc., may only be performed by the manufacturer or by service agents who are authorised by the manufacturer as per Service Manual SMA30002. Liability The manufacturer is free from all liability for the operational safety of the MINC if the device has been wilfully opened and unauthorised persons have performed repairs or alterations on it during the warranty period. Certification The MINC owner will receive a signed certificate from the service agent for all inspections or repairs. This certificate states the type and scope of the services rendered, the service date and the name of the service company. Technical documentation If the manufacturer provides technical documentation, this does not authorise the user to perform repairs, adjustments or alterations to the MINC or disposables. 6.5 Return procedure All devices or disposables that are returned must be prepared as described below for the protection of the service agent and for safety during transportation. 1. Clean as detailed in §6.2. 2. Seal in a plastic bag and seal within a second plastic bag. 3. Place in the original packaging. 4. Enclose the following information: t0XOFSTOBNF IMPORTANT NOTE: When returning goods, use the original packaging. The manufacturer does not take responsibility for damage that has occurred during transportation if the damage was caused by inadequate transport packaging. t0XOFSTBEESFTT t.PEFMUZQF t4FSJBMOVNCFSPGUIFFRVJQNFOUTFFJEFOUJöDBUJPOQMBUF t%FTDSJQUJPOPGUIFEBNBHFPSGBVMU The manufacturer has the right to refuse to carry out repairs if the products it receives are contaminated. 7. Disposables IMPORTANT NOTE: For optimal functioning of the incubator, use only original disposables Order No. Description K-MINC-CTS-S Disposable Humidification Flask, gas tubing and filter set supplied. 1-22 1 K-MINC-1000 Instructions for Use English 8. Technical data 1 Classification according to IEC 60601-1 Type of protection against electric shock: Class I equipment Degree of protection against harmful ingress of solids and water: IP31 General specifications Power Supply: 100 - 240 VAC Frequency: 50 - 60 Hz Maximum power consumption: 140 VA Alarm contact rating: 2 A / 30 VDC +18°C to +32°C UP3) 700 hPa to 1060 hPa +5°C to +40°C UP3) IEC 60601-1: 1988 + A1: 1991 + A2: 1995 IEC 60601-1: 2005 IEC 60601-1-2: 2007 IEC 61010-1: 2001, EN 61010-2: 010: 2003 UL 61010-1 2ED CSA C22.2 No. 61010-1 2ED CSA C22.2 No. 61010-2-010 2ED Environmental operating conditions: Storage and transport directions: Manufactured and tested to the following standards: Dimensions: Door closed: 405 mm wide x 190 mm high x 265 mm deep Door opened: 405 mm wide x 400 mm high x 315 mm deep Weight: 11 kg (24.3 lb) Gas supply type: #MFOEPG$0202/2 (Cook Culture System at sea-level) or high QVSJUZ$02JOBJSSFDPNNFOEFEUPMFSBODFT Gas supply pressure: L1BL1BQTJQTJ NCBSNCBS Gas flow rate capability : 15 mL/min to 25 mL/min per chamber in 5 mL/min increments Purge at 175 mL/min per chamber for 3 minutes Gas flow rate accuracy: PGøPXQFSDIBNCFSOPSNBMøPX N-NJOQFSDIBNCFSQVSHF Chamber temperature capability: 35.0°C to 40.0°C in 0.1°C increments in an ambient temperature range of +20°C to +28°C. At set point of 37°C, the ambient temperature range is extended to +18°C to +32°C. Chamber temperature accuracy: ¡$BUDBMJCSBUJPOQPJOU Computer requirements for K-MINC-1000 Benchtop Incubator Logger Software Operating system Windows Vista, Windows XP, Windows NT, Windows 7, Windows 8 or Windows 2000 (1) RAM 256 Mb minimum Free hard disc space 10 Gb minimum Processor Pentium 4, 1.6 GHz or better Display 1024 x 768, 256 colour or better I/O ports: USB port, 1.1 or 2.0 compliant K-MINC-1000 Benchtop Incubator logger software specifications Maximum connected MINC’s 10 Logging interval range Adjustable from 1 to 10 minutes Maximum logging time period Only limited by free disc space Log file format Comma-Separated Values (CSV) Graph Update Interval 1 second Maximum displayed time period on screen 3 days Temperature resolution 0.1 deg. C Gas flow resolution 5 mL/min Note (1): Not recommended 1-23 K-MINC-1000 Instructions for Use English Guidance and manufacturer’s declaration – electromagnetic emissions The MINC Benchtop Incubator is intended for use in the electromagnetic environment specified below. The customer or the end user of the MINC Benchtop Incubator should assure that it is used in such an environment. Emissions Test Compliance Electromagnetic Environment Guidance The MINC Benchtop Incubator uses RF energy only for its internal function. Therefore, its RF RF emissions Group 1 emissions are very low and are not likely to cause any interference in nearby electronic equipment. CISPR 11 RF emissions Class B CISPR 11 Harmonic emissions Class A The MINC Benchtop Incubator is suitable for use in all establishments, including domestic establishments IEC 61000-3-2 and those directly connected to the public low voltage power supply network that supplies buildings used Voltage for domestic purposes. fluctuations/flicker Complies emissions IEC 61000-3-3 Guidance and manufacturer’s declaration – electromagnetic immunity The MINC Benchtop Incubator is intended for use in the electromagnetic environment specified below. The customer or the end user of the MINC Benchtop Incubator should assure that it is used in such an environment. Immunity Test IEC 60601 Test Level Compliance Level Electromagnetic Environment Guidance Electrostatic L7DPOUBDU L7DPOUBDU Floors should be wood, concrete or ceramic tile. If floors are covered with synthetic discharge (ESD) IEC NBUFSJBMUIFSFMBUJWFIVNJEJUZTIPVMECFBUMFBTU L7BJS L7BJS 61000-4-2 L7GPSQPXFS L7GPSQPXFS Electrical fast supply lines supply lines Mains power quality should be that of a typical commercial or hospital transient/burst IEC environment. L7GPSJOQVU L7GPSJOQVU 61000-4-4 output lines output lines L7EJGGFSFOUJBM L7EJGGFSFOUJBM Mains power quality should be that of a typical commercial or hospital Surge mode mode environment. IEC 61000-4-5 L7DPNNPONPEF L7DPNNPONPEF 65EJQJO 65EJQJO UT) for 0.5 cycles UT) for 0.5 cycles Voltage dips, short 65EJQJO 65EJQJO Mains power quality should be that of a typical commercial or hospital interruptions and UT) for 0.5 cycles UT) for 0.5 cycles environment. If the user of the MINC Benchtop Incubator requires continued voltage variations operation during power mains interruptions, it is recommended that the MINC on power supply 65EJQJO 65EJQJO Benchtop Incubator be powered from an uninterruptible power supply or a battery. input lines IEC UT) for 25 cycles UT) for 25 cycles 61000-4-11 65EJQJO 65EJQJO UT) for 5 seconds UT) for 5 seconds Power frequency Power frequency magnetic fields should be at levels characteristic of a typical 3 A/m (50/60Hz) magnetic 3 A/m location in a typical commercial or hospital environment. field IEC 61000-4-5 Portable and mobile RF communications equipment should be used no closer to any part of the MINC Benchtop Incubator, including cables, than the 3 Vrms recommended separation distance calculated from the equation applicable to the Conducted RF 150 kHz to 3 Vrms frequency of the transmitter. IEC 61000-4-6 80 MHz Recommend separation distance d = 1.2 √P Radiated RF IEC 61000-4-3 3 V/m 80 MHz to 2.5 GHz 3 V/m Recommend separation distance d = 1.2 √P 80 MHz to 800 MHz d = 2.3 √P 800 MHz to 2.5 GHz where P is the maximum output power rating of the transmitter in watts (W) according to the transmitter manufacturer and d is the recommended separation distance in metres (m). Field strengths from fixed RF transmitters, as determined by an electromagnetic site surveya should be less than the compliance level in each frequency rangeb Interference may occur in the vicinity of equipment marked with the following symbol: Note: At 80 MHz and 800 MHz, the higher frequency range applies. Note: These guidelines may not apply in all situations. Electromagnetic propagation is affected by absorption and reflection from structures, objects and people. a Field strengths from fixed transmitters, such as base stations for radio (cellular/cordless) telephones and land mobile radios, amateur radio, AM and FM radio broadcast and TV broadcast cannot be predicted theoretically with accuracy. To assess the electromagnetic environment due to fixed RF transmitters, an electromagnetic site survey should be considered. If the measured field strength in the location in which the MINC Benchtop Incubator is used exceeds the applicable RF compliance level above, the MINC Benchtop Incubator should be observed to verify normal operation. If abnormal performance is observed, additional measures may be necessary, such as reorienting or relocating the MINC Benchtop Incubator. b Over the frequency range 150 kHz to 80MHz, field strengths should be less than 3 V/m. 1-24 1 K-MINC-1000 Instructions for Use English Recommended separation distance between portable and mobile RF communications equipment and the MINC Benchtop Incubator 1 The MINC Benchtop Incubator is intended for use in an electromagnetic environment in which radiated RF disturbances are controlled. The customer or the user of the MINC Benchtop Incubator can help prevent electromagnetic interference by maintaining a minimum distance between portable and mobile RF communications equipment (transmitters) and the MINC Benchtop Incubator as recommended below, according to the maximum output power of the communications equipment. Separation distance according to frequency of transmitter Rated maximum output power m of transmitter 150 kHz to 80 MHz 80 MHz to 800 MHz 800 MHz to 2.5 GHz W d = 1.2 √P d = 1.2 √P d = 2.3 √P 0.01 0.12 0.12 0.23 0.1 0.38 0.38 0.73 1 1.2 1.2 2.3 10 3.8 3.8 7.3 100 12 12 23 For transmitters rated at a maximum output power not listed above, the recommended separation distance d in metres (m) can be estimated using the equation applicable to the frequency of the transmitter, where P is the maximum output power rating of the transmitter in watts (W) according to the transmitter manufacturer. Note 1: At 80 MHz and 800 MHz, the separation distance for the higher frequency range applies. Note 2: These guidelines may not apply in all situations. Electromagnetic propagation is affected by absorption and reflection from structures, objects, and people 9. Troubleshooting IMPORTANT NOTE: Should any errors persist, contact your Cook Medical representative. Error and alarm indicator Source of error Elimination of error MINC will not turn on. Power supply cord is not connected. Mains power is not turned on. Check the power supply connection. Turn on the mains power. (Refer to §3.10). Displays do not illuminate. The device is in standby. Check that the Standby Indicator is illuminated green. Press the Standby touch-pad. (Refer to §3.10). MINC will not heat to correct temperature. Temperature settings not entered correctly. Enter correct temperature settings. (Refer to §3.11.3). ‘Temperature out of range’ alarm. Set temperature not achieved in time. Turn heater bay off and on again. (Refer to §3.11.1). i&SSwEJTQMBZFE Lids open for extended periods. Do not leave lids open for extended periods. Turn heater bay off and on again. (Refer to §3.11.1). Device is not operating in functional environmental conditions. Evaluate device placement. (Refer to §3.6). ‘Low inlet pressure’ alarm. Gas supply not connected. “CO2wEJTQMBZFE Check gas supply connection. (Refer to §3.7.3). The gas flow should recommence in purge mode when the gas supply is reconnected. Gas supply empty. Check available remaining volume. The gas flow should recommence in purge mode when the gas supply is re-connected. Gas lines are kinked. Check that gas lines are not obstructed. The gas flow should recommence in purge mode when the gas supply is reconnected. Gas cylinder change over unit incompatible with the MINC. Ensure that the inlet pressure to the MINC does not fall below 135 kPa. The gas flow should recommence in purge mode when the gas supply is reconnected. ‘No gas flow or gas flow out of range’ alarm. i&SSwEJTQMBZFE Resistance to gas flow from series connection of multiple devices is too high to allow multi-unit purging. Check the regulated pressure is still a nominal 150kPa with all series connected devices purging. (Refer to § 3.7.4). Disposable gas lines, flask and filter are incorrectly connected or occluded. Check connections to Luer fitting in central chamber and check that disposable lines are not kinked (Refer to § 3.8). Turn flow off and on again. (Refer to § 3.12.1). Disposable filter occlusion due to moisture. Replace the Disposable Humidification Flask, gas tubing and filter set - K-MINC-CTS-S. (Refer to § 3.8). Turn flow off and on again. (Refer to § 3.12.1). Disposable gas lines are kinked or blocked. Check that gas lines are not kinked or obstructed (Refer to § 3.8). Turn flow off and on again. (Refer to § 3.12.1). 1-25 K-MINC-1000 Instructions for Use English Error and alarm indicator Source of error Elimination of error Low or no gas flow from disposable gas lines without alarm present. Disposable flask and filter are incorrectly connected. Check connections to Luer fitting in central chamber. (Refer to § 3.8). Disposable flask lid seal. Check flask lid is tight and flask is not cracked or damaged. (Refer to § 3.8). High supply pressure. Ensure that the inlet pressure to the MINC does not rise above 165 kPa. Gas connections not secure or damaged. Ensure all gas fittings from the cylinder to the MINC gas inlet are tight. If error persists, inspect all fittings for damage to seal surfaces, and replace as necessary. Gas line damaged. Replace the gas line. A lid is opened. Close the lid, this feature is provided to help prevent the chamber from being left open for longer than is required. (Refer to § 3.11.4). Excessive gas consumption. i-JEwEJTQMBZFEBOEEFWJDFFNJUUJOHCFFQFWFSZ 30 seconds. Logger software fails to recognise a device. MINC is not powered. Ensure that the MINC has mains power present. MINC is not connected. Connect the MINC to the PC using the supplied USB cable. If connecting multiple devices use the approved USB hubs. Start by connecting one MINC at a time to isolate the fault. If the USB drivers have installed correctly, the MINC will appear in Windows Device Manager under “Universal 4FSJBM#VTDPOUSPMMFSTwBTi64#9QSFTT%FWJDFwXIFO connected. Invalid filename. Ensure the file name of the MINC is a valid filename. (Refer to §5.6.2). Incorrect or invalid log directory. Check that the log file directory is correct. (Refer to §5.6.3). Name recently changed. If the name of the MINC is changed, the data is not logged to the new filename until the software is started again. Disc full. Free up some disc space by deleting unnecessary files. Many events or errors occurring in a short period. Zoom in to spread the labels apart. (Refer to §5.6.1). Gas purge event. Pan the graph up using the right mouse button. The flow axis is scaled to give satisfactory viewing of normal flow rates. (Refer to §5.6.1). Extended logging period. Pan the graph sideways using the right mouse button or use a longer time period on the ‘View’ menu. (Refer to §5.6.1). The log directory is invalid or does not exists. Create the directory if it doesn’t already exist. (Refer to §5.6.3). The file is already open in another application. Close the other application and start the logger again. The user doesn’t have sufficient privileges to append to a file that was created by another user. Change the logging directory to begin writing a new log file. (Refer to §5.6.3). “Invalid MINC Name! The MINC’s name DBOOPUDPOUBJO= iPS]wNFTTBHF The name of the MINC is used as part of the log filename so none of these characters can be used. Remove the offending characters from the MINC name. (Refer to §5.6.1). “File: filename.csv exceeds 10 MB. Consider archiving and deleting“ message. The specified log file is greater than 10 MB in size. Large log files can slow the system down. Archive the specified log file and move it to another folder. (Refer to §5.6.3). No logged data. Obscured event labels or graph trace. Data extends beyond normal range of graph. “File Open Error! Cannot Open: filename.csvw message. 1-26 Alternately, load the CSV file and scroll down to the time in question. (Refer to §5.6.3). 1 K-MINC-1000 Instructions for Use English 10. Limited warranty 1 Cook Australia warrants to the purchasers of this device that at time of manufacture, the product was prepared and tested in accordance with good manufacturing practices and guidelines specified by the Australian Therapeutic Goods Administration or relevant competent authority. In the event of product failure under normal use, due to defects in material or workmanship, within a period of one (1) year from the date of purchase, the product will be repaired, or at Cook’s option, replaced, at no charge. This limited warranty does not apply to products subjected to abnormal use or conditions, improper storage, damaged by accident, misuse or abuse, improper line voltage or to products altered or serviced by anyone other than Cook Australia or its authorised agent. The foregoing limited warranty is exclusive and in lieu of all other warranties whether written, oral, expressed or implied. In particular, Cook Australia does not warrant that the product is suitable for the needs of the purchaser and there are no warranties given as to merchantability or fitness for a particular purpose. Cook Australia’s representations concerning fitness for purpose or suitability for use by any purchaser does not extend beyond those representations set out in the Cook Australia literature that accompanies the product. Cook Australia assumes that the purchaser is experienced in the use of this device and is able to judge from his/her own expertise the suitability or otherwise of the product for the intended use. Cook Australia conducts a technical advisory service, which can be consulted by a purchaser or intended purchaser on an advisory basis. After one (1) year from the date of purchase, this device will be repaired for a repair charge equal to the cost of parts, labour and transport. Before returning a product for any reason, please contact your nearest Cook distributor for assistance and instructions. Cook Australia reserves the right to change or discontinue this product without notice. 10.1 Liability Because Cook Australia has no control or influence over the conditions under which this device is used, over its method of use or administration, or on handling of the product after it leaves its possession, Cook Australia takes no responsibility for the results, use and/or performance of the product. Cook Australia expects that use of the product will be confined to trained and expert users. In no event will Cook Australia be liable for any direct or indirect damages including incidental, consequential or special damages, arising out of or in connection with the use or performance of the product. If the manufacturer provides you with technical documentation, this does not authorise you to perform repairs, adjustments or alterations on the device or disposables. No representative of Cook Australia and no vendor or lessor of the product is authorised to change any of the foregoing terms and conditions, and the purchaser accepts the product subject to all terms and conditions herein, subject always to any contrary provisions which are necessarily implied by stature or law notwithstanding the within terms and conditions. 10.2 Life of product The life of this product is deemed to be seven (7) years. After this time Cook Australia will no longer be responsible for this product. 11. Index A Activating the device . . . . . . . . . . . . . . . . . . . . . . . . . . . . . . . . . . . . . . . . . . . . . . . . . . . Alarm conditions . . . . . . . . . . . . . . . . . . . . . . . . . . . . . . . . . . . . . . . . . . . . . . . . . . . . . . . Alarm contact rating. . . . . . . . . . . . . . . . . . . . . . . . . . . . . . . . . . . . . . . . . . . . . . . . . . . . Alarm Indicator . . . . . . . . . . . . . . . . . . . . . . . . . . . . . . . . . . . . . . . . . . . . . . . . . . . . . . . . . Authorised service agent . . . . . . . . . . . . . . . . . . . . . . . . . . . . . . . . . . . . . . . . . . . . . . . Automatic purge . . . . . . . . . . . . . . . . . . . . . . . . . . . . . . . . . . . . . . . . . . . . . . . . . . . . . . . D 12 13 23 25 22 12 Device description . . . . . . . . . . . . . . . . . . . . . . . . . . . . . . . . . . . . . . . . . . . . . . . . . . . . . . 4 Device placement . . . . . . . . . . . . . . . . . . . . . . . . . . . . . . . . . . . . . . . . . . . . . . . . . . . . . . . 8 Dimensions . . . . . . . . . . . . . . . . . . . . . . . . . . . . . . . . . . . . . . . . . . . . . . . . . . . . . . . . . . . . 23 Disposable Humidification Flask . . . . . . . . . . . . . . . . . . . . . . . . . . . . . . . . . . . . . . . . 11 Disposables . . . . . . . . . . . . . . . . . . . . . . . . . . . . . . . . . . . . . . . . . . . . . . . . . . . . . . . . . . . . 22 E B Electric shock hazard . . . . . . . . . . . . . . . . . . . . . . . . . . . . . . . . . . . . . . . . . . . . . . . . . . . . 3 Electric shock protection . . . . . . . . . . . . . . . . . . . . . . . . . . . . . . . . . . . . . . . . . . . . . . . 23 Electromagnetic compatibility . . . . . . . . . . . . . . . . . . . . . . . . . . . . . . . . . . . . . . . . 7, 24 Electromagnetic emissions guidance . . . . . . . . . . . . . . . . . . . . . . . . . . . . . . . . . . . 24 Electromagnetic immunity guidance . . . . . . . . . . . . . . . . . . . . . . . . . . . . . . . . . . . 24 Elimination of error . . . . . . . . . . . . . . . . . . . . . . . . . . . . . . . . . . . . . . . . . . . . . . . . . . . . . 25 Environmental operating conditions. . . . . . . . . . . . . . . . . . . . . . . . . . . . . . . . . . . . 23 Err display gas flow . . . . . . . . . . . . . . . . . . . . . . . . . . . . . . . . . . . . . . . . . . . . . . . . . . . . . 25 Err display temperature. . . . . . . . . . . . . . . . . . . . . . . . . . . . . . . . . . . . . . . . . . . . . . . . . 25 Explanation of pictograms . . . . . . . . . . . . . . . . . . . . . . . . . . . . . . . . . . . . . . . . . . . . . . . 3 Explosion hazard . . . . . . . . . . . . . . . . . . . . . . . . . . . . . . . . . . . . . . . . . . . . . . . . . . . . . . . . 4 External alarm . . . . . . . . . . . . . . . . . . . . . . . . . . . . . . . . . . . . . . . . . . . . . . . . . . . . . . . . . . 13 External alarm contacts . . . . . . . . . . . . . . . . . . . . . . . . . . . . . . . . . . . . . . . . . . . . . . . . . . 7 External alarm contacts test . . . . . . . . . . . . . . . . . . . . . . . . . . . . . . . . . . . . . . . . . . . . 22 External alarm monitor . . . . . . . . . . . . . . . . . . . . . . . . . . . . . . . . . . . . . . . . . . . . . . . . . 13 Biannual functionality testing . . . . . . . . . . . . . . . . . . . . . . . . . . . . . . . . . . . . . . . . . . 20 Before use . . . . . . . . . . . . . . . . . . . . . . . . . . . . . . . . . . . . . . . . . . . . . . . . . . . . . . . . . . . . . . 15 Blanking plug . . . . . . . . . . . . . . . . . . . . . . . . . . . . . . . . . . . . . . . . . . . . . . . . . . . . . . . . . . 10 C Certification . . . . . . . . . . . . . . . . . . . . . . . . . . . . . . . . . . . . . . . . . . . . . . . . . . . . . . . . . . . . 22 Chamber temperature capability . . . . . . . . . . . . . . . . . . . . . . . . . . . . . . . . . . . . . . . 23 Chamber temperature selection . . . . . . . . . . . . . . . . . . . . . . . . . . . . . . . . . . . . . . . . 12 Change over units . . . . . . . . . . . . . . . . . . . . . . . . . . . . . . . . . . . . . . . . . . . . . . . . . . . . . . 10 Changing internal filter, gas lines and humidification flask . . . . . . . . . . . . . . 20 Classification . . . . . . . . . . . . . . . . . . . . . . . . . . . . . . . . . . . . . . . . . . . . . . . . . . . . . . . . . . . 23 Cleaning the device . . . . . . . . . . . . . . . . . . . . . . . . . . . . . . . . . . . . . . . . . . . . . . . . . . . . 20 CO2 display . . . . . . . . . . . . . . . . . . . . . . . . . . . . . . . . . . . . . . . . . . . . . . . . . . . . . . . . . . 14, 25 Condensate formation. . . . . . . . . . . . . . . . . . . . . . . . . . . . . . . . . . . . . . . . . . . . . . . . . . 15 Concentration of CO2 . . . . . . . . . . . . . . . . . . . . . . . . . . . . . . . . . . . . . . . . . . . . . . . . . . . . 8 Connecting gas hose . . . . . . . . . . . . . . . . . . . . . . . . . . . . . . . . . . . . . . . . . . . . . . . . . . . . 9 Connecting USB cables . . . . . . . . . . . . . . . . . . . . . . . . . . . . . . . . . . . . . . . . . . . . . . . . . 12 Culture dishes . . . . . . . . . . . . . . . . . . . . . . . . . . . . . . . . . . . . . . . . . . . . . . . . . . . . . . . . . . 15 1-27 K-MINC-1000 Instructions for Use English F O Filter . . . . . . . . . . . . . . . . . . . . . . . . . . . . . . . . . . . . . . . . . . . . . . . . . . . . . . . . . . . . . . . . . . . 11 First time use . . . . . . . . . . . . . . . . . . . . . . . . . . . . . . . . . . . . . . . . . . . . . . . . . . . . . . . . . . . 13 Flow rate capability . . . . . . . . . . . . . . . . . . . . . . . . . . . . . . . . . . . . . . . . . . . . . . . . . . . . . 23 Flow rate test . . . . . . . . . . . . . . . . . . . . . . . . . . . . . . . . . . . . . . . . . . . . . . . . . . . . . . . . . . . 21 Four-well dishes . . . . . . . . . . . . . . . . . . . . . . . . . . . . . . . . . . . . . . . . . . . . . . . . . . . . . . . . 15 Frequency . . . . . . . . . . . . . . . . . . . . . . . . . . . . . . . . . . . . . . . . . . . . . . . . . . . . . . . . . . . . . . 23 Front of the device . . . . . . . . . . . . . . . . . . . . . . . . . . . . . . . . . . . . . . . . . . . . . . . . . . . . . . 6 Operation of the device . . . . . . . . . . . . . . . . . . . . . . . . . . . . . . . . . . . . . . . . . . . . . . . . 15 Original disposables . . . . . . . . . . . . . . . . . . . . . . . . . . . . . . . . . . . . . . . . . . . . . . . . . . 4, 22 Oxygen concentration . . . . . . . . . . . . . . . . . . . . . . . . . . . . . . . . . . . . . . . . . . . . . . . . . . . 8 P Patient identification plates. . . . . . . . . . . . . . . . . . . . . . . . . . . . . . . . . . . . . . . . . . . 6, 15 Petri dishes . . . . . . . . . . . . . . . . . . . . . . . . . . . . . . . . . . . . . . . . . . . . . . . . . . . . . . . . . . . . . 15 Power consumption . . . . . . . . . . . . . . . . . . . . . . . . . . . . . . . . . . . . . . . . . . . . . . . . . . . . 23 Power indicator . . . . . . . . . . . . . . . . . . . . . . . . . . . . . . . . . . . . . . . . . . . . . . . . . . . . . . . . . 6 Power supply . . . . . . . . . . . . . . . . . . . . . . . . . . . . . . . . . . . . . . . . . . . . . . . . . . . . . . . . . . . 23 Precautions for device . . . . . . . . . . . . . . . . . . . . . . . . . . . . . . . . . . . . . . . . . . . . . . . . . . . 4 G Gas connections, other . . . . . . . . . . . . . . . . . . . . . . . . . . . . . . . . . . . . . . . . . . . . . . . . . 10 Gas cylinder regulator recommendations . . . . . . . . . . . . . . . . . . . . . . . . . . . . . . . . 9 Gas cylinder, connection to . . . . . . . . . . . . . . . . . . . . . . . . . . . . . . . . . . . . . . . . . . . . . . 9 Gas flow out of range . . . . . . . . . . . . . . . . . . . . . . . . . . . . . . . . . . . . . . . . . . . . . . . . 14, 25 Gas flow rate adjustment . . . . . . . . . . . . . . . . . . . . . . . . . . . . . . . . . . . . . . . . . . . . . . . 13 Gas flow rate display. . . . . . . . . . . . . . . . . . . . . . . . . . . . . . . . . . . . . . . . . . . . . . . . . . . . . 6 Gas flow rate selection. . . . . . . . . . . . . . . . . . . . . . . . . . . . . . . . . . . . . . . . . . . . . . . . . . 13 Gas flow rate set point, display. . . . . . . . . . . . . . . . . . . . . . . . . . . . . . . . . . . . . . . . . . 13 Gas flow selection touch-pad . . . . . . . . . . . . . . . . . . . . . . . . . . . . . . . . . . . . . . . . . . . . 6 Gas flow start / stop touch-pad . . . . . . . . . . . . . . . . . . . . . . . . . . . . . . . . . . . . . . . . . . 6 Gas flow status indicator. . . . . . . . . . . . . . . . . . . . . . . . . . . . . . . . . . . . . . . . . . . . . . . . . 6 Gas inlet . . . . . . . . . . . . . . . . . . . . . . . . . . . . . . . . . . . . . . . . . . . . . . . . . . . . . . . . . . . . . . . . . 7 Gas line . . . . . . . . . . . . . . . . . . . . . . . . . . . . . . . . . . . . . . . . . . . . . . . . . . . . . . . . . . . . . . . . 11 Gas mixture required . . . . . . . . . . . . . . . . . . . . . . . . . . . . . . . . . . . . . . . . . . . . . . . . . . . . 8 Gas outlet . . . . . . . . . . . . . . . . . . . . . . . . . . . . . . . . . . . . . . . . . . . . . . . . . . . . . . . . . . . . . . 11 Gas regulator . . . . . . . . . . . . . . . . . . . . . . . . . . . . . . . . . . . . . . . . . . . . . . . . . . . . . . . . . . . . 9 Gas supply . . . . . . . . . . . . . . . . . . . . . . . . . . . . . . . . . . . . . . . . . . . . . . . . . . . . . . . . . . . . . . 8 Gas supply pressure . . . . . . . . . . . . . . . . . . . . . . . . . . . . . . . . . . . . . . . . . . . . . . . . . . . . 23 Gas supply type . . . . . . . . . . . . . . . . . . . . . . . . . . . . . . . . . . . . . . . . . . . . . . . . . . . . . . . . 23 Gas vent holes . . . . . . . . . . . . . . . . . . . . . . . . . . . . . . . . . . . . . . . . . . . . . . . . . . . . . . . . . . . 6 Grounding . . . . . . . . . . . . . . . . . . . . . . . . . . . . . . . . . . . . . . . . . . . . . . . . . . . . . . . . . . . . . . 7 R Rear of the device . . . . . . . . . . . . . . . . . . . . . . . . . . . . . . . . . . . . . . . . . . . . . . . . . . . . . . . 7 Regular inspections . . . . . . . . . . . . . . . . . . . . . . . . . . . . . . . . . . . . . . . . . . . . . . . . . . . . 20 Return procedure. . . . . . . . . . . . . . . . . . . . . . . . . . . . . . . . . . . . . . . . . . . . . . . . . . . . . . . 22 S Safety instructions . . . . . . . . . . . . . . . . . . . . . . . . . . . . . . . . . . . . . . . . . . . . . . . . . . . . . . . 4 Safety plug . . . . . . . . . . . . . . . . . . . . . . . . . . . . . . . . . . . . . . . . . . . . . . . . . . . . . . . . . . . . . . 7 Sequential connection . . . . . . . . . . . . . . . . . . . . . . . . . . . . . . . . . . . . . . . . . . . . . . . . . 10 Series connections of devices. . . . . . . . . . . . . . . . . . . . . . . . . . . . . . . . . . . . . . . . . . . 10 Service and maintenance . . . . . . . . . . . . . . . . . . . . . . . . . . . . . . . . . . . . . . . . . . . . . . . 20 Set-up . . . . . . . . . . . . . . . . . . . . . . . . . . . . . . . . . . . . . . . . . . . . . . . . . . . . . . . . . . . . . . . . . . . 5 Software installation. . . . . . . . . . . . . . . . . . . . . . . . . . . . . . . . . . . . . . . . . . . . . . . . . . . . 12 Specifications . . . . . . . . . . . . . . . . . . . . . . . . . . . . . . . . . . . . . . . . . . . . . . . . . . . . . . . . . . 23 Standards, manufacturing and testing . . . . . . . . . . . . . . . . . . . . . . . . . . . . . . . . . . 23 Standby touch-pad . . . . . . . . . . . . . . . . . . . . . . . . . . . . . . . . . . . . . . . . . . . . . . . . . . . . . . 6 Starting Logger Software . . . . . . . . . . . . . . . . . . . . . . . . . . . . . . . . . . . . . . . . . . . . . . . 16 Storage and transport directions . . . . . . . . . . . . . . . . . . . . . . . . . . . . . . . . . . . . . . . 23 4XBHFMPL¥wTFSJFTUVCFöUUJOHT . . . . . . . . . . . . . . . . . . . . . . . . . . . . . . . . . . . . . . . . 9 H T Heating start / stop touch-pad . . . . . . . . . . . . . . . . . . . . . . . . . . . . . . . . . . . . . . . . . . . 6 Heating status indicator . . . . . . . . . . . . . . . . . . . . . . . . . . . . . . . . . . . . . . . . . . . . . . . . . 6 How to use this manual. . . . . . . . . . . . . . . . . . . . . . . . . . . . . . . . . . . . . . . . . . . . . . . . . . 3 Humidification Flask . . . . . . . . . . . . . . . . . . . . . . . . . . . . . . . . . . . . . . . . . . . . . . . . . 11, 22 Technical data . . . . . . . . . . . . . . . . . . . . . . . . . . . . . . . . . . . . . . . . . . . . . . . . . . . . . . . . . . 23 Technical documentation. . . . . . . . . . . . . . . . . . . . . . . . . . . . . . . . . . . . . . . . . . . . . . . 22 Temperature display . . . . . . . . . . . . . . . . . . . . . . . . . . . . . . . . . . . . . . . . . . . . . . . . . . . . . 6 Temperature out of range . . . . . . . . . . . . . . . . . . . . . . . . . . . . . . . . . . . . . . . . . . . 14, 25 Temperature selection . . . . . . . . . . . . . . . . . . . . . . . . . . . . . . . . . . . . . . . . . . . . . . . . . . 12 Temperature selection touch-pads . . . . . . . . . . . . . . . . . . . . . . . . . . . . . . . . . . . . . . 6 Temperature set point, display . . . . . . . . . . . . . . . . . . . . . . . . . . . . . . . . . . . . . . . . . . 12 Temperature test . . . . . . . . . . . . . . . . . . . . . . . . . . . . . . . . . . . . . . . . . . . . . . . . . . . . . . . 21 Thermocouple positioning . . . . . . . . . . . . . . . . . . . . . . . . . . . . . . . . . . . . . . . . . . . . . 21 Troubleshooting. . . . . . . . . . . . . . . . . . . . . . . . . . . . . . . . . . . . . . . . . . . . . . . . . . . . . . . . 25 I Insertion of the culture dishes . . . . . . . . . . . . . . . . . . . . . . . . . . . . . . . . . . . . . . . . . . 15 Inspection by an authorised service technician . . . . . . . . . . . . . . . . . . . . . . . . . 22 Installation and set-up . . . . . . . . . . . . . . . . . . . . . . . . . . . . . . . . . . . . . . . . . . . . . . . . . . . 5 Installation and set-up checklist . . . . . . . . . . . . . . . . . . . . . . . . . . . . . . . . . . . . . . . . 14 Intended use . . . . . . . . . . . . . . . . . . . . . . . . . . . . . . . . . . . . . . . . . . . . . . . . . . . . . . . . . . . . 4 U L Uninstall Logger Software . . . . . . . . . . . . . . . . . . . . . . . . . . . . . . . . . . . . . . . . . . . . . . 19 Unpacking . . . . . . . . . . . . . . . . . . . . . . . . . . . . . . . . . . . . . . . . . . . . . . . . . . . . . . . . . . . . . . 5 Using Logger Software . . . . . . . . . . . . . . . . . . . . . . . . . . . . . . . . . . . . . . . . . . . . . . . . . 16 USB . . . . . . . . . . . . . . . . . . . . . . . . . . . . . . . . . . . . . . . . . . . . . . . . . . . . . . . . . . . . . . . . . . . . . 7 Liability . . . . . . . . . . . . . . . . . . . . . . . . . . . . . . . . . . . . . . . . . . . . . . . . . . . . . . . . . . . . . 22, 27 Lid display . . . . . . . . . . . . . . . . . . . . . . . . . . . . . . . . . . . . . . . . . . . . . . . . . . . . . . . . . . . 13, 26 Life of product. . . . . . . . . . . . . . . . . . . . . . . . . . . . . . . . . . . . . . . . . . . . . . . . . . . . . . . . . . 27 Logger Software . . . . . . . . . . . . . . . . . . . . . . . . . . . . . . . . . . . . . . . . . . . . . . . . . . . . . . . . 11 Logger Software working screen . . . . . . . . . . . . . . . . . . . . . . . . . . . . . . . . . . . . . . . 16 Logging data . . . . . . . . . . . . . . . . . . . . . . . . . . . . . . . . . . . . . . . . . . . . . . . . . . . . . . . . . . . 18 Low inlet pressure . . . . . . . . . . . . . . . . . . . . . . . . . . . . . . . . . . . . . . . . . . . . . . . . . . . 14, 25 Low or no gas flow . . . . . . . . . . . . . . . . . . . . . . . . . . . . . . . . . . . . . . . . . . . . . . . . . . . . . 25 W Warnings and important notes . . . . . . . . . . . . . . . . . . . . . . . . . . . . . . . . . . . . . . . . . . 3 Warranty, limited . . . . . . . . . . . . . . . . . . . . . . . . . . . . . . . . . . . . . . . . . . . . . . . . . . . . . . . 27 Weight . . . . . . . . . . . . . . . . . . . . . . . . . . . . . . . . . . . . . . . . . . . . . . . . . . . . . . . . . . . . . . . . . 23 Within the U.S.A . . . . . . . . . . . . . . . . . . . . . . . . . . . . . . . . . . . . . . . . . . . . . . . . . . . . . . . . . 7 M Y Mains power inlet . . . . . . . . . . . . . . . . . . . . . . . . . . . . . . . . . . . . . . . . . . . . . . . . . . . . . . . 7 Manual structure . . . . . . . . . . . . . . . . . . . . . . . . . . . . . . . . . . . . . . . . . . . . . . . . . . . . . . . . 3 Media . . . . . . . . . . . . . . . . . . . . . . . . . . . . . . . . . . . . . . . . . . . . . . . . . . . . . . . . . . . . . . . . . . . 8 Multiple K-MINC-1000 devices . . . . . . . . . . . . . . . . . . . . . . . . . . . . . . . . . . . . . . . . . . 10 You need to supply . . . . . . . . . . . . . . . . . . . . . . . . . . . . . . . . . . . . . . . . . . . . . . . . . . . . . . 5 N NUNC® four-well dishes . . . . . . . . . . . . . . . . . . . . . . . . . . . . . . . . . . . . . . . . . . . . . . . . 15 1-28 1 Customer Service EMEA: EDI – www.cookmedical.com/edi.do Distributors: +353 61239240, [email protected] Austria: +43 179567121, [email protected] Belgium: +32 27001633, [email protected] Denmark: +45 38487607, [email protected] Finland: +358 972519996, [email protected] France: +33 171230269, [email protected] Germany: +49 6950072804, [email protected] Hungary: +36 17779199, [email protected] Ireland: +353 61239252, [email protected] Italy: +39 0269682853, [email protected] Netherlands: +31 202013367, [email protected] Norway: +47 23162968, [email protected] Spain: +34 912702691, [email protected] Sweden: +46 858769468, [email protected] Switzerland – French: +41 448009609, [email protected] Switzerland – Italian: +41 448009609, [email protected] Switzerland – German: +41 448009609, [email protected] United Kingdom: +44 2073654183, [email protected] MEDICAL Americas: EDI – www.cookmedical.com/edi.do Phone: +1 812.339.2235, 800.457.4500, Fax: 800.554.8335 E-mail: [email protected] Australia: Phone: +61 734346000, 1800777222, Fax: +61 734346001, 1800077283 E-mail: [email protected] Manufacturer WILLIAM A. COOK AUSTRALIA PTY. LTD. 95 Brandl Street, Brisbane Technology Park, Eight Mile Plains, Brisbane QLD 4113, AUSTRALIA EC Representative COOK IRELAND LTD. O’Halloran Road, National Technology Park, Limerick, IRELAND w w w.co o k m e d ic a l .co m © COOK 2013 IFU-MINC2/9