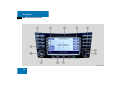
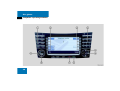
1
Bild in der Größe
215x70 mm einfügen
Order No. 6515 6785 13 Part No. 219 584 12 83 USA Edition A 2008
COMAND Operator's Manual E-Class / CLS-Class
COMAND Operator's Manual
Welcome to COMAND!
Please make yourself familiar with your
COMAND control unit and read the instructions in this manual before operating the
COMAND system. This will help you derive
a greater benefit from the system. Please
also follow the instructions and warnings
contained in this manual. Ignoring them
could result in damage to the vehicle or
personal injury to you or others.
The asterisk* identifies optional equipment. Depending on model, version and
configuration, your COMAND system
equipment may differ. Therefore, you may
find explanations for optional equipment
not installed in your vehicle. If you have
any questions about the operation of any
equipment, your authorized MercedesBenz Center will be glad to demonstrate
the proper procedures.
We continuously strive to improve our
product and ask for your understanding
that we reserve the right to make changes
in design and equipment. Therefore, information, illustrations and descriptions in
this manual might differ from the equipment installed in your vehicle. As such, the
information, illustrations and descriptions
contained in this manual may not be reasonably relied upon in making any claims
with respect to the actual performance of
the product.
These operating instructions form an integral part of the vehicle and should therefore always be kept inside the vehicle and
passed on to the new owner if the vehicle
is sold.
We extend our best wishes for many miles
of safe, pleasurable driving.
Mercedes-Benz USA, LLC
A DaimlerChrysler Company
Contents
Introduction . . . . . . . . . . . . . . . . . . . . .
Where to find it . . . . . . . . . . . . . . . . . . .
Symbols . . . . . . . . . . . . . . . . . . . . . . . . .
Operating safety. . . . . . . . . . . . . . . . . . .
At a glance . . . . . . . . . . . . . . . . . . . . .
Radio operating elements . . . . . . . . . .
Single CD operating elements . . . . . . .
MP3 operating elements . . . . . . . . . . .
CD changer* operating elements. . . . .
Telephone* operating elements . . . . .
Navigation* operating elements . . . . .
Multifunction steering wheel . . . . . . . .
Selecting the multifunction display
Audio search function. . . . . . . . . . .
Menu system . . . . . . . . . . . . . . . . . . . .
Quick reference COMAND . . . . . . . . . .
Switching ON/OFF . . . . . . . . . . . . .
Volume . . . . . . . . . . . . . . . . . . . . . .
Balance and fader. . . . . . . . . . . . . .
Bass and treble . . . . . . . . . . . . . . .
Sound functions* . . . . . . . . . . . . . .
7
7
8
9
11
12
14
16
18
20
22
24
25
26
27
29
29
29
30
31
32
Audio . . . . . . . . . . . . . . . . . . . . . . . . . .
Audio main menu . . . . . . . . . . . . . . . . .
Opening the Audio main menu . . . .
Selectable soft keys . . . . . . . . . . . .
Mute function . . . . . . . . . . . . . . . . .
Radio operation . . . . . . . . . . . . . . . . . .
Safety Instructions . . . . . . . . . . . . .
Switching to radio mode. . . . . . . . .
Switching wavebands . . . . . . . . . .
Tuning to a FM/AM station . . . . . .
Tuning to a station on
Weather Band . . . . . . . . . . . . . . . . .
Storing FM/AM stations. . . . . . . . .
Single CD operation . . . . . . . . . . . . . . .
Safety Instructions . . . . . . . . . . . . .
Tips on caring for your CDs . . . . . .
Switching to Single CD mode . . . . .
Loading a CD . . . . . . . . . . . . . . . . .
Ejecting a CD . . . . . . . . . . . . . . . . .
Single CD main menu . . . . . . . . . . .
Selecting a track . . . . . . . . . . . . . .
Fast forward/reverse . . . . . . . . . .
Playback options . . . . . . . . . . . . . .
MP3 operation . . . . . . . . . . . . . . . . . . .
Safety Instructions . . . . . . . . . . . . .
35
36
36
36
36
37
37
37
37
38
42
43
45
45
45
45
45
46
46
47
49
49
51
51
Tips on data storage media . . . . . .
Tips on caring for your MP3 CDs . .
Tips on creating MP3 CDs . . . . . . .
Tips on creating MP3 tracks . . . . .
Tips on copyright . . . . . . . . . . . . . .
Switching to MP3 mode . . . . . . . . .
Loading an MP3 CD . . . . . . . . . . . .
Ejecting an MP3 CD . . . . . . . . . . . .
MP3 main menu . . . . . . . . . . . . . . .
Selecting folders . . . . . . . . . . . . . .
Selecting a track . . . . . . . . . . . . . .
Fast forward/reverse . . . . . . . . . . .
Playback options. . . . . . . . . . . . . . .
CD changer* operation . . . . . . . . . . . .
Safety Instructions . . . . . . . . . . . . .
Tips on caring for your CDs . . . . . .
Switching to CD changer mode . . .
MP3 CDs. . . . . . . . . . . . . . . . . . . . .
Accessing the CD changer . . . . . . .
Retracting the CD changer . . . . . .
Loading CDs . . . . . . . . . . . . . . . . . .
Ejecting CDs . . . . . . . . . . . . . . . . .
CD changer main menu . . . . . . . . .
Selecting CDs . . . . . . . . . . . . . . . . .
Selecting a track . . . . . . . . . . . . . .
Fast forward/reverse . . . . . . . . . . .
51
52
52
53
54
54
54
55
55
56
57
59
59
61
61
61
61
61
62
63
63
65
66
67
69
70
Contents
Playback options. . . . . . . . . . . . . . . 70
Audio AUX operation . . . . . . . . . . . . . . 72
Satellite radio* . . . . . . . . . . . . . . . . . .
General information . . . . . . . . . . . . . . .
Introduction to Satellite radio . . . . .
Satellite radio operation . . . . . . . . . . . .
Switching to Satellite radio mode. .
SAT main menu. . . . . . . . . . . . . . . .
Selecting a station . . . . . . . . . . . . .
Obtaining additional text
information . . . . . . . . . . . . . . . . . . .
Storing stations . . . . . . . . . . . . . . .
Calling the Sirius Service Center . .
73
74
74
75
75
76
76
Telephone* . . . . . . . . . . . . . . . . . . . . .
Important notes . . . . . . . . . . . . . . . . . .
Safety Instructions . . . . . . . . . . . . .
Tips on telephone operation . . . . .
Telephone operation. . . . . . . . . . . . . . .
Switching the phone ON/OFF . . . .
911 emergency calls. . . . . . . . . . . .
Entering the PIN (only GSM) . . . . .
Entering the unlock code . . . . . . . .
81
82
82
82
85
85
85
87
88
79
80
80
Switching to telephone mode . . . . 88
Telephone main menu. . . . . . . . . . . 89
Answering an incoming call . . . . . . 90
Placing an outgoing call . . . . . . . . . 91
Accepted and missed calls . . . . . . . 92
Dialed calls . . . . . . . . . . . . . . . . . . . 94
Active call . . . . . . . . . . . . . . . . . . . . 95
Phone book . . . . . . . . . . . . . . . . . . . . . 97
Opening the phone book. . . . . . . . . 97
Selecting a phone book entry and establishing a connection . . . . . . . . . 98
Adding spoken names to a phone book
entry . . . . . . . . . . . . . . . . . . . . . . . . 99
Deleting a phone book entry . . . . . 99
SMS (Mail) . . . . . . . . . . . . . . . . . . . . . 100
SMS inbox. . . . . . . . . . . . . . . . . . . 100
Reading a message . . . . . . . . . . . . 101
Deleting a message . . . . . . . . . . . 102
Exiting from the SMS menu . . . . . 102
Navigation*. . . . . . . . . . . . . . . . . . . . 103
Important notes . . . . . . . . . . . . . . . . . 104
Safety Instructions . . . . . . . . . . . . 104
Navigation DVD. . . . . . . . . . . . . . . 105
Loading/ejecting the DVD . . . . . . 105
Travelling abroad. . . . . . . . . . . . . . 105
Route guidance with GPS . . . . . . . 106
Route guidance after
vehicle transport . . . . . . . . . . . . . . 106
Trip interruption during
route guidance . . . . . . . . . . . . . . . 106
Selection lists . . . . . . . . . . . . . . . . 107
Navigation main menu . . . . . . . . . . . . 108
Calling up the Navigation
main menu . . . . . . . . . . . . . . . . . . 108
Avoiding certain road types . . . . . 109
Adjusting the acoustics for
navigation announcements . . . . . . 109
Destination entry . . . . . . . . . . . . . . . . 112
Entering data. . . . . . . . . . . . . . . . . 112
Destination entry menu. . . . . . . . . 114
Entering a destination . . . . . . . . . . 115
Selecting the region . . . . . . . . . . . 115
Entering a city . . . . . . . . . . . . . . . . 116
Narrowing of the destination
after selecting city . . . . . . . . . . . . 117
Entering a city center . . . . . . . . . . 118
Entering a street in the
destination city . . . . . . . . . . . . . . . 119
Narrowing of the destination
after selecting street. . . . . . . . . . . 120
Contents
Entering an intersection . . . . . . . .
Entering a house number . . . . . . .
Entering a destination using
the map . . . . . . . . . . . . . . . . . . . .
Entering a destination via
geo coordinates . . . . . . . . . . . . . .
Storing map location . . . . . . . . . .
Route guidance . . . . . . . . . . . . . . . . .
Start route guidance menu. . . . . .
Route calculation . . . . . . . . . . . . .
Route re-calculation . . . . . . . . . . .
Navigation announcements . . . . .
Navigation displays. . . . . . . . . . . .
Destination reached . . . . . . . . . . .
Cancelling route guidance . . . . . .
Partially digitized areas. . . . . . . . .
Off-road and off-map . . . . . . . . . .
During route guidance . . . . . . . . . . . .
Showing soft key displays . . . . . .
Info menu . . . . . . . . . . . . . . . . . . .
Displaying the route on the map .
Displaying the route list . . . . . . . .
Detour function . . . . . . . . . . . . . .
Stop-over . . . . . . . . . . . . . . . . . . .
Defining route guidance displays .
Setting symbols displays . . . . . . .
121
122
123
125
126
128
128
128
128
129
129
132
132
132
134
136
136
136
137
138
138
140
143
143
Setting map orientation . . . . . . . .
Map display menu. . . . . . . . . . . . .
Automatic map toggling . . . . . . . .
Scales for full-screen and
split-screen map display . . . . . . . .
Last destinations and
destination memory . . . . . . . . . . . . . .
Last destinations memory . . . . . .
Destination memory . . . . . . . . . . .
POIs (Points of Interest) . . . . . . . . . . .
Entering POIs . . . . . . . . . . . . . . . .
Selecting POI in the local area
of the current position . . . . . . . . .
Selecting POI for a selected city. .
Selecting POI for a long-distance
destination . . . . . . . . . . . . . . . . . .
Selecting a POI using the map . . .
144
145
146
Service . . . . . . . . . . . . . . . . . . . . . . .
Tele Aid* . . . . . . . . . . . . . . . . . . . . . .
Emergency call system . . . . . . . . .
Roadside Assistance. . . . . . . . . . .
Information . . . . . . . . . . . . . . . . . .
159
160
160
160
161
148
148
149
152
152
System . . . . . . . . . . . . . . . . . . . . . . .
System settings . . . . . . . . . . . . . . . . .
Calling up the System menu . . . . .
Setting the date/time. . . . . . . . . .
Setting the language. . . . . . . . . . .
Switching confirmation beeps and
acoustic signals ON/OFF . . . . . . .
Display settings . . . . . . . . . . . . . .
Voice control settings* . . . . . . . . .
Reset function. . . . . . . . . . . . . . . .
153
154
Glossary . . . . . . . . . . . . . . . . . . . . . . 173
154
156
Index . . . . . . . . . . . . . . . . . . . . . . . . . 177
146
163
164
164
164
166
167
167
168
171
Introduction
Where to find it
Where to find it
This Operator's Manual is designed to provide support for you, the COMAND operator. Each chapter has its own guide color to
provide fast access to information.
Satellite radio*
Service
This chapter contains all information related to the satellite radio system.
This chapter contains information concerning Tele Aid*.
At a glance
Telephone*
System
Here you will find an overview of all
COMAND control elements and system
components. If you are operating
COMAND for the first time, or if you have
rented or borrowed the vehicle, this is the
chapter you should read first.
Here you can learn in detail about the
many functions of the telephone, SMS,
how to initiate an emergency call and use
service numbers.
This chapter provides information on how
to adjust COMAND system settings.
Directories
Navigation*
Audio
Here you will find all the information on
how to use the audio system and its radio
and CD components.
This chapter provides detailed information
covering the following topics:
Destination entry
Route selection and calculation
Route guidance
Destination memory
The glossary explains the most important
technical terms.
The table of contents and index directory
will help you quickly locate the information
you need.
7
Introduction
Symbols
The following symbols are used in this
Operator’s Manual:
Warning
*
G
Warning notices draw your attention to hazards that may endanger your health or life,
or the health or life of others.
!
Highlights hazards that may result in
damage to your COMAND.
i
Helpful hints or further information you
may find useful.
8
The asterisk identifies optional
equipment. Since not all models
have the same standard equipment, your COMAND system’s
equipment may deviate from
some descriptions and illustrations.
This symbol points to instructions for you to follow.
A number of these symbols appearing in succession indicates
a multiple-step procedure.
This continuation symbol marks
an interrupted procedure which
will be continued on the next
page.
page
This symbol tells you where to
look for further information on
this subject.
->
This symbol is used in the glossary. It indicates that the term
immediately following the symbol is also explained in the glossary.
Display
Words appearing on the
COMAND display or the multifunction display are printed in
the type shown here.
Introduction
Operating safety
Operating safety
Warning
G
Any alterations made to electronic components and the software can cause malfunctions.
The radio, amplifier, satellite radio*,
CD changer*, navigation module*, telephone* and voice control system* are interconnected. Therefore, when one of the
components is not operational or has not
been removed/ replaced properly, the function of other components may be impaired.
This condition might seriously impair the
operating safety of your vehicle.
We recommend that you have any service
work on electronic components carried out
by an authorized Mercedes-Benz Center.
Warning
G
In order to avoid distraction which could
lead to an accident, the driver should enter
system settings with the vehicle at a standstill and operate the system only when road,
weather and traffic conditions permit.
Bear in mind that at a speed of just 30 mph
(approximately 50 km/h), your vehicle is
covering a distance of 44 feet (approximately 14 m) every second.
COMAND supplies you with information to
help you select your route more easily and
guide you conveniently and safely to your
destination. For safety reasons, we encourage the driver to stop the vehicle in a safe
place before answering or placing a call, or
consulting the COMAND screen to read navigational maps, instructions, or downloaded
information.
Warning
G
While the navigation system provides directional assistance, the driver must remain
focused on safe driving behavior, including
attention to traffic and street signs, and
should utilize the system's audio cues while
driving.
The navigation system does not supply any
information on stop signs, yield signs, traffic
regulations or traffic safety rules. This always remains your personal responsibility
when you drive. DVD maps do not cover all
areas nor all routes within an area.
9
10
At a glance
Radio operating elements
Single CD operating elements
MP3 operating elements
CD changer* operating elements
Telephone* operating elements
Navigation* operating elements
Multifunction steering wheel
Menu system
Quick reference COMAND
11
At a glance
Radio operating elements
12
At a glance
Radio operating elements
Function
1
Audio main menu
2
Soft keys
(multifunction buttons)
3
3-"
Page
36
Entering frequency manually
41
Storing stations
43
Requesting station presets
Function
4
5
Page
, , , 7
Tuning stations FM / AM
38
Station memory,
selecting presets
43
39
1
Mute function
29
4
Volume adjustment
9
Page
.
Switching ON/OFF
8
Confirmation
6
Function
29
- and ,
Station search
38
Manual tuning
41
36
13
At a glance
Single CD operating elements
14
At a glance
Single CD operating elements
Function
1
Page
Audio main menu
2
Soft keys
(multifunction buttons)
3
CD slot
4
2 and 3 - "
Entering track numbers
Function
5
36
and Selecting tracks
6
Page
Function
8
48
Confirmation
46
7
a
46
29
4
Volume adjustment
b
36
.
Switching ON/OFF
7
CD ejection
48
1
Mute function
9
Page
29
-and ,
Track skip forward/
reverse
47
Forward/reverse
49
15
At a glance
MP3 operating elements
16
At a glance
MP3 operating elements
Function
1
Page
Audio main menu
2
Soft keys
(multifunction buttons)
3
MP3 CD slot
4
2 and 3 - "
Entering track numbers
Function
5
36
Page
and Selecting tracks
8
57
and Selecting folders
54
6
Function
a
7
7
MP3 CD ejection
b
55
29
4
Volume adjustment
Confirmation
58
36
.
Switching ON/OFF
56
1
Mute function
9
Page
29
-and ,
Track skip forward/
reverse
57
Forward/reverse
59
17
At a glance
CD changer* operating elements
18
At a glance
CD changer* operating elements
Function
1
Page
Audio main menu
2
Soft keys
(multifunction buttons)
3
2 and 3 - "
Entering track numbers
4
36
Page
and Selecting CDs
Selecting tracks
5
69
67
68
9
1
Mute function
36
29
4
Volume adjustment
69
Page
.
Switching ON/OFF
8
Confirmation
6
Function
7
and 3-
Selecting CDs
Function
29
-and ,
Track skip forward/
reverse
69
Forward/reverse
70
19
At a glance
Telephone* operating elements
20
At a glance
Telephone* operating elements
Function
1
2
Page
3
Telephone main menu
89
Switching the telephone
ON
85
Switching the telephone
OFF
85
Soft keys
(multifunction buttons)
Function
4
Function
Page
6 0
3-"
Entering PIN
87
Answering calls
90
Entering unlock code
88
Redialing
92
Entering phone number
91
Speed dial
95
, , , Selection buttons
5
Page
Confirmation
7 /
Ending or refusing a call
91
8 .
Switching ON/OFF
29
9 4
Volume adjustment
29
21
At a glance
Navigation* operating elements
22
At a glance
Navigation* operating elements
Function
1
2
Page
5
Navigation main menu
108
Cancelling route
guidance
132
%
Switching map display
3
Soft keys
(multifunction buttons)
4
, , , ,+,
(
Selecting options
Selecting characters for
text entry
Function
Page
Function
a
Confirmation
Navigation computer
105
7
Navigation DVD slot
105
8
1
131
Switching navigation announcements OFF
9
Ejecting navigation DVDs
6
b
105
.
Switching ON/OFF
c
Page
29
4
Volume adjustment
29
129
6
Current navigation announcement
129
Switching navigation announcements ON
129
Scrolling map
23
At a glance
Multifunction steering wheel
Function
1
Multifunction display
2
Volume setting:
ç Volume down
æ Volume up
3
Page
E-Class illustrated
24
k Previous station
Making calls:
s Answering calls
90
Redialing
92
t Ending or refusing
calls
91
t Deleting the entire
entry
Page
Radio mode:
j Next station
29
29
Entering a phone number:
4
Function
5
5
5
91
5
Multifunction display
menu change:
è forward
25
ÿ back
25
via station search
38
via station presets
39
Single CD, CD changer*
and MP3 mode:
j Next track
69
k Previous track
69
Satellite radio* mode:
j Next station
79
k Previous station
79
Telephone* mode:
j Next list entry
94
k Previous list entry
94
At a glance
Multifunction steering wheel
Switch the multifunction display to the respective system if you wish to operate the
system using the buttons on the multifunction steering wheel.
Single CD operation
MP3 operation
1 Single CD operation
2 Current track
1 MP3 operation
2 Current track
Selecting the multifunction display
On the multifunction steering wheel,
press è or ÿ repeatedly until
one of the following, Radio, Single CD,
MP3, CD changer*, Satellite radio* or
Telephone* display appears in the multifunction display of the instrument
cluster.
CD changer* operation
Radio operation
1 Current CD
2 Current track
1 Waveband and position in Preset menu
2 Station frequency
25
At a glance
Multifunction steering wheel
Satellite radio* operation
In the list screen, instead of the READY message, either a phone book entry or one of
the last 10 outgoing calls will be displayed.
In order to close the list display,
press t .
This switches to the telephone main
display.
1 SAT and position in Preset menu
2 Channel name
Telephone* operation
Audio search function
Press æ or ç and select the
Vehicle menu.
Press j and select Audio Search
Function.
By pressing æ or ç, select
Freq. or Memory.
i
Memory is set at the factory.
Freq. function:
You can tune to stations via the station
search ( page 38).
Memory function:
You can tune to stations via the station
presets ( page 39).
Setting audio search function
26
Press j and switch to the submenu
options.
The following functions are available:
Either the main display, or a list appears on
display.
Telephone main display:
On the multifunction steering wheel,
press è or ÿ repeatedly until
the Settings... menu appears in the
multifunction display in the instrument
cluster.
At a glance
Menu system
Menu system
The menu system allows for easy operation of COMAND.
Each of the following main functions has a
main menu:
Audio
(Radio, Single CD, CD changer* and
AUX mode)
Satellite radio*
Telephone*
Navigation*
Service
Service ( page 159):
Press .
Menu display
Audio ( page 36):
Press .
Satellite radio* ( page 73):
Press 5.
Telephone* ( page 89):
Press .
Navigation* ( page 108):
Press .
A maximum of five soft keys may be
displayed on each side of the main area
2.
A display can be composed of 3 sections.
Example: Radio main menu
Messages or settings are displayed in the
main area 2.
The settings can be changed by operating
controls accordingly.
The status bar 3 is divided into three areas.
Left side:
The selected operating mode is given. In
this example: Radio
Opening main menus
i
1 Soft key sections
2 Main area
3 Status bar
The functions currently assigned to the
soft keys are displayed in the soft key sections 1.
Center:
Indication of the selected operating mode.
In this example:
FM = selected waveband
1 = selected station is stored on
preset 1
27
At a glance
Menu system
Right side:
General status information is displayed, regardless of the selected operating mode.
In this example:
ROAMING = telephone* is logged into a
mobile communications network outside your home network.
= telephone* signal strength
i
This information is also displayed in
Navigation* mode (only in map displays).
The Scan soft key switches the scan
search ON or OFF.
The Autost. soft key opens the submenu for the Autostore settings.
Menu functions and submenus
Using the soft keys, you can switch functions ON or OFF, or open submenus.
Example: Radio main menu:
In some situations, soft keys may not have
any function and thus not be available.
Should a soft key not be available, it will
appear shaded out, its characters will appear white.
Example:
Presets, Scan and Autost. soft key.
28
Exiting from submenus
You can exit the current submenu by
pressing the Back soft key. The display
switches to the next higher menu level.
The system does not accept setting modifications which have not been stored.
There are exceptions where pressing the
Back soft key will also store new settings.
These exceptions, whenever applicable,
are referenced on the following pages.
At a glance
Quick reference COMAND
Quick reference COMAND
i
The system can be operated as follows:
from COMAND itself, or
from the multifunction steering
wheel
This operating manual describes operation from COMAND and from the multifunction steering wheel.
Unless otherwise specified, the descriptions and the displays illustrated
relate to the COMAND control unit.
Press ..
i
COMAND switches on the last active
system and displays the corresponding
menu.
If a telephone call is in progress (handsfree) you cannot switch the COMAND
OFF, . is disabled.
i
Without the key in position 1 or 2 of the
steering lock, the system automatically
switches OFF again after approx. 30
minutes of inactivity.
Switching OFF
Switching ON/OFF
Turn the key in the steering lock to position 0 and remove it,
or
Switching ON
Turn the key in the steering lock to position 1 or 2,
Press ..
Volume
Different volume settings are possible for
Navigation*, Telephone*, or Voice control*.
A common volume setting is provided for
Radio, Single CD, MP3, CD changer*, AUX
and Satellite radio* operating modes.
When setting the volume, the system automatically stores the setting for the currently active operating mode. The volume of
navigation announcements can be
changed only during an actual announcement.
or
29
At a glance
Quick reference COMAND
Setting the volume
Turn the rotary control 4 located on
the COMAND control unit,
or
This could be the case if:
the system was switched OFF for more
than 15 minutes, and
A common balance and fader setting applies to the following operating modes:
the volume had been set to a value in a
certain range at the time the device
was switched OFF.
Radio
Single CD
MP3
CD changer*
AUX
Satellite radio*
Press æ or ç on the multifunction steering wheel
The volume changes up or down, depending on the direction of rotation or
which button was pressed.
The system stores the volume settings
when the device is switched OFF.
After switching the system back on again,
the volume may be lower than at the time
when the system was switched OFF.
Automatic volume control
The automatic volume control adjusts the
volume depending on
the vehicle’s speed (only in vehicles
without Sound-system*),
or on
the interior ambient noises of the vehicle (only in vehicles with Sound-system*)
30
Balance and fader
other parameters (e.g. windows open
or closed)
i
For Navigation* a different balance/
fader setting is possible. You find the
description under “Adjusting the
acoustics for navigation announcements” ( page 109).
When adjusting the balance or the fader,
the system automatically stores the setting for the currently active operating
mode.
At a glance
Quick reference COMAND
Setting balance/fader
Open the main menu of the appropriate
operating mode ( page 27).
Press the Bal/Fad soft key.
or
The Balance/Fader menu is displayed.
Now you can set the balance and the
fader ( page 31).
Press or :
For the following operating modes, different settings for bass and treble can be selected:
Press or :
Radio (FM waveband)
The cursor moves vertically, adjusting
the fader.
Radio (AM waveband)
Radio (Weather Band)
i
Single CD
Using + and (, the cursor can be
moved simultaneously in vertical and
horizontal direction (diagonally).
MP3
CD changer*
AUX
Satellite radio*
Navigation*
Storing new settings:
Press or the Back soft key,
or
A cross-hair cursor appears. The vertical line indicates the balance setting.
The horizontal line indicates the fader
setting.
Bass and treble
The cursor moves horizontally, adjusting the desired balance,
wait until the display changes.
Bass and treble settings for navigation announcements are found under “Adjusting
the acoustics for navigation announcements” ( page 109).
31
At a glance
Quick reference COMAND
When adjusting bass or treble, the system
automatically stores the setting for the
currently active operating mode.
Storing new settings
Press or the Back soft key,
or
Setting bass and treble
Open the main menu of the appropriate
operating mode ( page 27).
Press the Bass or Treble soft key.
The Bass or Treble menu appears.
Press or .
The cursor moves horizontally, adjusting bass or treble accordingly.
32
The following sound functions are available:
Resets the sound functions to the factory setting.
wait until the display changes.
Sound functions*
If the vehicle is equipped with a sound system*, the sound functions are available for
the following operating modes:
Radio
Single CD
MP3
CD changer*
AUX
Satellite radio*
Default Settings:
Standard:
Normal stereo playback.
Speech:
Playback optimized for speech comprehension.
LOGIC7 Surround:
7-channel-surround playback (not for
mono-sources like AM waveband or
Weather Band in radio mode).
Different sound functions can be activated
for each one of the operating modes listed
above.
At a glance
Quick reference COMAND
Example:
For CD mode: the LOGIC7 Surround function,
for Satellite radio* mode: the Speech function.
Switching sound functions
Open the main menu of the appropriate
operating mode ( page 27).
Press the Sound soft key.
Use or to select the desired
function.
Press .
The system switches to the selected
function.
i
Your harman/kardon® audio system
features the innovative LOGIC7® multichannel surround sound technology
developed for the professional recording industry.
By selecting the “LOGIC7 Surround”
function, LOGIC7® will be activated.
LOGIC7® converts any 2-channel material into breathtaking multi-channel
surround sound and that without the
unnatural interpretation of many of today’s surround sound techniques.
The Sound menu appears.
i
LOGIC7® is not an artificial “effects”
button. It automatically adapts itself to
the incoming source material, adjusting the seven outputs based on the
original acoustic intent of the studio
master.
harman/kardon LOGIC7® creates a
true 360-degree “enveloping” soundfield with a maximum “audio sweetspot” for all passengers.
harman/kardon LOGIC7® sets a new
benchmark in musical clarity and separation, giving the listener the impression of actually “being there”.
LOGIC7® playback works with all conventional stereo audio sources (e.g.
stereo CD or stereo radio).
If the radio reception is poor, the system should be switched back to Standard stereo playback. Switching back
to Standard stereo playback may improve reception quality.
33
34
Audio
Audio main menu
Radio operation
Single CD operation
MP3 operation
CD changer* operation
Audio AUX operation
35
Audio
Audio main menu
Opening the Audio main menu
Press .
Selectable soft keys
The Audio main menu appears.
If one of the Audio submenus appears:
Press the Back soft key as often as
necessary until the Audio main
menu appears,
or
Radio soft key
Switching the mute function ON:
Station settings for WB, FM, and AM
wavebands appear ( page 37)
CDC soft key
The CD changer main menu appears
( page 66)
Press again.
AUX soft key
Facilitates operation of an external audio source ( page 72)
i
The Satellite Radio menu is accessed
by pressing 5 ( page 75).
Press 1.
The system is switched to mute.
CD soft key or MP3 soft key
The Single CD main menu ( page 46)
or the MP3 main menu ( page 55) appears
Mute function
Switching the mute function OFF:
Press 1again,
or
Turn the rotary control 4 located on
the COMAND control unit,
or
Press æ or ç on the multifunction steering wheel.
The audio source heard is the one selected before the mute function was
activated.
i
Various audio sources can be selected in
the Audio main menu.
36
The mute function is still activated if
the system is switched off and then on
again.
Audio
Radio operation
Radio operation
In this example:
Safety Instructions
Warning
G
Weather Band
Channel 1 = current station
In order to avoid distraction which could
lead to an accident, the driver should enter
system settings with the vehicle at a standstill and operate the audio system only when
road, weather and traffic conditions permit.
Bear in mind that at a speed of just 30 mph
(approximately 50 km/h), your vehicle is
covering a distance of 44 feet (approximately 14 m) every second.
Switching to radio mode
Open the Audio main menu
( page 36).
Press the Radio soft key.
The Radio main menu appears. The station last tuned to will begin to play.
The waveband is indicated in the center
of the status bar.
In this example:
Switching wavebands
Press the FM/AM soft key in the Radio
main menu.
FM = FM waveband
1 = selected station is stored on
preset 1
Alternatingly the Radio main menu for
the FM or AM wavebands appears. The
station last tuned to will begin to play.
37
Audio
Radio operation
i
Tuning to a FM/AM station
The wavebands cover different frequency ranges.
FM broadcast band:
FM (VHF = very high frequency)
87.7 - 107.9 MHz
Tuning increments 0.2 MHz
Tuning via station search ( page 38).
Tuning via station presets ( page 39).
Tuning via Autostore presets
( page 40).
Tuning via scan search ( page 40).
AM broadcast band:
Manual tuning ( page 41).
MW (medium wave)
530 - 1710 kHz
Tuning via direct frequency input
( page 41).
Tuning increments 10 kHz
WB (Weather Band)
162.400 - 162.550 MHz
Tuning increments = 1 channel
or
Press , or :
The next receivable descending frequency is tuned in and begins to play.
On multifunction steering wheel
i
Audio search function Freq. must be
set in the multifunction display
( page 26).
Tuning via station search
On COMAND control unit
Press - or :
The next receivable ascending frequency is tuned in and begins to play,
The following options are available:
WB waveband:
Switch the multifunction display in the
instrument cluster to the Radio display
( page 25).
Press j:
Switch to the desired FM or AM waveband ( page 37).
The next receivable ascending frequency is tuned in and begins to play,
or
38
Audio
Radio operation
Press k:
The next receivable descending frequency is tuned in and begins to play.
Press the Presets soft key.
On multifunction steering wheel
The Presets menu appears.
i
Audio search function Memory must be
set in the multifunction display
( page 26).
Tuning via station presets
Ten presets each are available for FM and
AM.
Switch the multifunction display in the
instrument cluster to the Radio display
( page 25).
Press j.
On COMAND control unit
The presets are accessed using the number keypad, or via the Presets menu.
Accessing via number keypad:
Switch to the desired waveband
( page 37).
Press one of the number keys
3 - ":
The system tunes to the station stored
under this number.
Accessing via Presets menu:
Use , , or to choose a
preset and press ,
or
The system tunes to the next station
stored in the station presets;
or
Press one of the number keys
3 - ".
Press k.
The system tunes to the previous station stored in the station presets.
The system tunes to the station stored
under this number.
Switch to the desired waveband
( page 37).
39
Audio
Radio operation
Tuning via Autostore presets
Tuning via scan search
The Autostore function allows placing of
stations into the presets sorted by reception quality ( page 43).
Scan search is characterized as follows:
Scan search performs two runs.
During the first run, stations with extremely good reception are played.
During the second run, stations with
weaker reception are played.
Scan search plays each receivable station for approx. 8 seconds.
Scan search can be ended manually.
Scan search automatically stops at the
station listened to before the scan
search was started.
The system will store the station with the
strongest signal in preset 1.
Ten presets each are available for FM and
AM.
Switch to the desired waveband
( page 37).
Press the Autost. soft key.
The Autostore preset list appears. It
can take several seconds until all frequencies are displayed.
Use , , or to choose a
preset and press .
or
Press one of the number keys
3 - ".
The system tunes to the station stored
under this number.
Starting scan search
Switch to the desired waveband
( page 37).
Press the Scan soft key.
Scanning begins.
40
Audio
Radio operation
Keep the button pressed or release it
and keep tapping - or , in
quick succession.
The frequency will change by the tuning
increments for the respective waveband each time one of the buttons is
pressed or for as long as a button is
pressed and held.
Manual tuning is deactivated if no button is pressed for approx. 3 seconds.
Ending Scan search manually
Press the Scan soft key again.
Manual tuning
Switch to the desired waveband
( page 37).
Press and hold - or , for at
least 2 seconds to tune up or down.
Manual tuning is activated.
Tuning via direct frequency input
Entry example:
98.5 MHz in FM waveband
Switch to the FM waveband
( page 37).
Press 2.
The frequency input display appears.
The frequency range of the FM waveband is shown.
i
Manual tuning is also possible in all
wavebands by pressing or .
The frequency will change by the tuning
increments for the respective waveband each time one of the buttons is
pressed.
Frequency increments for manual
tuning:
FM
0.2 MHz
AM
10 kHz
41
Audio
Radio operation
Press the number buttons in
succession: !,
, and .
Tuning to a station on Weather Band
Each number entered appears in the
display.
The system tunes to the frequency entered (in this example: 98.5 Mhz) and
switches back to the FM menu.
Tuning via station search
i
Seven channels are available on the
Weather Band.
On COMAND control unit
Entries outside the frequency range are
not possible.
Within the AM waveband, the input is
restricted to frequencies within the respective frequency increment, which
is10 kHz.
The system will select the nearest valid
frequency if a frequency outside the
frequency increment is entered.
42
Switch to the WB waveband by pressing the WB soft key in the Radio main
menu ( page 37).
The system will tune to the strongest
receivable station.
Press - or ,.
Search begins in ascending or
descending frequency.
The search stops at the next receivable
station.
On multifunction steering wheel
Switch the multifunction display in the
instrument cluster to Radio display
( page 25).
Press j or k.
The search stops at the next receivable
station.
Tuning via station presets
The seven strongest channels are sorted in
prest 1 to 7 each time you press the WB soft
key. They are accessed using the number
keypad.
Press one of the number keys
3 - .
The system tunes to the station stored
under this number.
Audio
Radio operation
Storing FM/AM stations
Ten presets each are available for the
FM and AM waveband.
Storing manually using the Presets
menu
Tune to the station to be stored
( page 38).
Press the Presets soft key.
The following options are available:
Storing manually using number keys
Storing manually using the Presets
menu
Storing using Autostore
Storing using Autostore
The Autostore function places stations into
the Autostore memory sorted by reception
quality.
The system stores the station with the
strongest signal in preset 1.
The Presets menu appears.
i
The Autostore feature stores presets in
a separate memory, not in the regular
presets seen under the Presets soft
key. As such, the Autostore memory is
only temporary.
Storing manually using the number
keys 3 - "
Tune to the station to be stored
( page 38).
Press a number key between 3 and
" and hold it for more than 2 seconds.
Use , , or to select a
preset.
The station is now stored in the respective memory location.
Press for more than 2 seconds.
Switch to the desired waveband
( page 37).
Press the Autost. soft key.
The Autostore preset list appears.
The station will be stored in the respective memory location.
43
Audio
Radio operation
Use to select the
Reprogram Autostore header entry.
Press .
The Autostore search starts. After a delay the new preset assignment appears. The system tunes to the station
stored on preset 1.
44
To tune-in another station from the
Autostore preset list ( page 40).
Audio
Single CD operation
Single CD operation
Safety Instructions
Warning
Tips on caring for your CDs
G
In order to avoid distraction which could
lead to an accident, the driver should insert
CDs with the vehicle at a standstill and
operate the audio system only when road,
weather and traffic conditions permit.
Bear in mind that at a speed of just 30 mph
(approximately 50 km/h), your vehicle is
covering a distance of 44 feet (approximately 14 m) every second.
The CD drive is a Class 1 laser product.
There is a danger of invisible laser radiation
when you open or damage the cover.
Do not remove the cover. The CD drive does
not contain any parts serviceable by the user. For safety reasons, have any necessary
service work performed by qualified personnel.
Only touch the CD on the edges.
Clean the CD with a dry, lint-free cloth.
Wipe the CD a straight line from the
center. Never wipe the CD in a circular
motion.
Do not use rubbing alcohol or solvents
to clean CDs.
Do not expose the CDs to heat or direct
sunlight.
Do not write or put labels on CDs
Loading a CD
Warning
G
In order to avoid distraction which could
lead to an accident, the driver should insert
CDs with the vehicle at a standstill and operate the audio system only when road, weather and traffic conditions permit.
Bear in mind that at a speed of just 30 mph
(approximately 50 km/h), your vehicle is
covering a distance of 44 feet (approximately 14 m) every second.
Switching to Single CD mode
Open the Single CD main menu
( page 46).
or
Load an audio CD into the COMAND
CD drive.
!
Do not attach labels of any type to the
CD. They may become detached and
damgage the drive.
45
Audio
Single CD operation
!
Only use CDs, which bear the label
shown and that conform to the compact digital audio standard
(IEC 60908).
46
i
The COMAND CD drive may not be able
to play audio CDs with copy protection.
If the CD is an MP3 CD, the system
switches to MP3 mode ( page 54).
The COMAND CD drive holds one CD. The
slot for inserting a CD is located above the
display ( page 15).
!
If a CD is already loaded, it must be
ejected before inserting the new CD.
Inserting a second CD in the slot with
another CD still loaded will cause damage to the CD drive not covered by the
Mercedes-Benz Limited Warranty.
Do not play single-CDs (80 mm) with an
adapter. Only use round, 12 cm diameter CDs.
Your CD drive has been designed to
play CDs which correspond to the IEC
60908 standard. Therefore only CDs
not exceeding a thickness of 1.3 mm
can be used.
If you insert thicker data carriers, e.g.
ones that have data on both sides (one
side with DVD data, the other side with
audio data), they cannot be ejected
and will damage the drive.
i
Insert a CD into the CD slot while
COMAND is switched ON. Insert the
CD face up.
COMAND pulls in the CD. If the CD is
an audio CD, the system switches to
Single CD mode.
Ejecting a CD
Press 7.
COMAND ejects the CD.
Remove the CD from the slot.
The CD will be pulled in again if it is not
removed from the slot within approx. 7
seconds.
Single CD main menu
Open the Audio main menu
( page 36).
Press the CD soft key.
The system switches to Single CD
mode.
Audio
Single CD operation
i
Selecting a track
The CD soft key is shaded out if no audio
CD is loaded. The system will not
switch to Single CD mode.
Load an audio CD into the
COMAND CD drive ( page 45).
The MP3 soft key instead of the CD soft
key is visible when a MP3 CD has been
loaded.
The center of the status bar shows:
The following options are available:
The track number and total number
of tracks
The elapsed playing time of the
track
Selecting via track skip
Selecting via track list
Selecting via manual entry of the track
number ( page 48)
Selecting via scan search ( page 49)
1 Track title or track number
2 Elapsed track playing time
3 Track number/total tracks
Selecting via track skip
The Single CD main menu shows the track
title in the center if the CD contains corresponding CD text data.
Open the Single CD main menu
( page 46).
Press -for forward skipping.
If the CD does not contain any CD text data, the track number is displayed instead of
the track title.
On the COMAND control unit
or
Press , for backward skipping.
47
Audio
Single CD operation
On the multifunction steering wheel
Selecting via track list
The track list contains all tracks of the current CD. Only one list entry is visible at a
time, it is the track currently playing.
Switch the multifunction display in the
instrument cluster to the Single CD display ( page 25).
Press j for forward skipping.
or
i
Forward skipping:
The next track is played.
48
Open the Single CD main menu
( page 46).
Press 2.
The Manual track input display appears. The number of tracks on the CD
is displayed.
Press k for backward skipping.
Backward skipping:
The system skips back to the beginning
of the track if more than approx. 10
seconds playing time of the track currently playing have elapsed.
The system skips back to the beginning
of the previous track if less than 10
seconds playing time of the track currently playing have elapsed.
Selecting via manual entry of the track
number
Use or to select another track
from the list.
Press , or wait approx. 3 seconds
without changing the selection.
The selected track is played.
Audio
Single CD operation
Entry example: Track 1
Scan search automatically stops at the
track listened to before the scan
search was started.
Press 3.
Entry example: Track 12
Press 3 and in quick succession.
i
When you start the scan search, playback option Normal Sequence is activated automatically.
Ending scan search manually
Press the Scan soft key.
Scan serach is charcterised as follows:
Scan search plays each track on the
current CD for approx. 8 seconds.
Scan search can be ended manually.
The last track is followed by the first
track of the CD.
Fast forward/reverse
Open the Single CD main menu
( page 46).
Press and hold - or ,.
To stop release - or ,.
Repeat track
The current track will be repeated until
this function is deactivated.
Random track
The tracks are played in random order
(e.g. track 3, 8, 5 etc.).
The track playing at the time the scan
is ended remains playing.
Selecting via scan search
Normal sequence
The tracks are played in the normal sequence (e.g. track 1, 2, 3 etc.).
Press the Scan soft key.
i
Wait approx. 3 seconds after entering
the number.
The selected track is played. The CD
main menu appears.
The following options are available:
Starting scan search
Entries beyond the number of available
tracks on the CD are not possible.
Playback options
Changing the playback option
In the Single CD main menu
( page 46) press the Setting soft key.
The settings menu is displayed.
49
Audio
Single CD operation
The solid circle indicates which option is currently selected.
Use or to select a different option.
Press .
The option is activated. A corresponding display will appear in the status bar
for all options except Normal sequence.
An option will remain activated even if
the COMAND is switched OFF and then
ON again.
50
Audio
MP3 operation
MP3 operation
Safety Instructions
Warning
Warning
G
In order to avoid distraction which could
lead to an accident, the driver should insert
CDs with the vehicle at a standstill and operate the audio system only when road, weather and traffic conditions permit.
Bear in mind that at a speed of just 30 mph
(approximately 50 km/h), your vehicle is
covering a distance of 44 feet (approximately 14 m) every second.
G
The CD drive is a Class 1 laser product.
There is a danger of invisible laser radiation
when you open or damage the cover.
Do not remove the cover. The CD drive does
not contain any parts serviceable by the user. For safety reasons, have any necessary
service work performed by qualified personnel.
Tips on data storage media
!
Do not attach labels of any type to the
CD. They may become detached and
damage the drive.
!
Your CD drive has been designed to
play CDs which correspond to the IEC
60908 standard. Therefore only CDs
not exceeding a thickness of 1.3 mm
can be used.
If you insert thicker data carriers, e.g.
ones that have data on both sides (one
side with DVD data, the other side with
audio data), they cannot be ejected
and will damage the drive.
Data carriers which contain data on
both sides can cause playback problems because the storage layers are
thinner than one-sided data carriers.
Do not play single-CDs (80 mm) with an
adapter. Only use 12 cm diameter CDs.
51
Audio
MP3 operation
Tips on caring for your MP3 CDs
Only touch the CD on the edges.
Clean the CD with a dry, lint-free cloth.
Wipe the CD a straight line from the
center. Never wipe the CD in a circular
motion.
Do not use rubbing alcohol or solvents
to clean CDs.
Do not expose the CDs to heat or direct
sunlight.
Do not write or put labels on CDs
Tips on creating MP3 CDs
i
CDs, software and hardware for writing
audio data to CDs are widely available.
Therefore, we cannot guarantee that
COMAND will be able to play every
user-written CD.
52
i
Problems may be encountered during
playback of user-written CDs with a
storage capacity of more than 700 MB.
These CDs do not meet valid standards
as of this printing.
Permissible MP3 CDs
In MP3 mode COMAND can read CD-R and
CD-RW CDs.
Permissible file systems
The permitted file system is
ISO9660/Joliet for CD-R and CD-RW.
Multi session discs
With multi session discs, the content of the
first session determines how COMAND
treats the CD.
For example, if the first session contains
data in audio CD format and the second
session contains data in MP3 format,
COMAND will treat the CD as a conventional audio CD.
File structure
When creating an MP3 CD, you can organize MP3 tracks into folders. A folder can
also contain additional folders.
The root directory may have a maximum of
255 entries in total (folders or tracks).
A CD may have a maximum of 255 folders
in total. A maximum of 255 tracks are permissible per folder.
Mathematically a maximum of 65025
tracks would result. However, this amount
is usually not reached since MP3 requires
approx. 1 MB storage per minute recorded.
Audio
MP3 operation
Track names and folder names
When creating an MP3 CD, you can assign
names to the MP3 tracks and folders.
COMAND uses these names in MP3-mode
for the corresponding display.
Please note the following when assigning
track and folder names:
Per folder a maximum of 1800 characters are available for title and folder
names combined.
Exceeding this number, COMAND cannot display all titles and folders.
Track and folder names must contain
at least 1 character.
Track names may contain up to fifty
characters. If a track name exceeds
this character limit, COMAND will not
be able to display it in full.
Track names must have the file extension “mp3”.
A period must appear between the
track name and the file extension.
i
In everyday speech, this format has
been replaced by the designation
“MP3”.
Example of a correct track name:
Track1.mp3
Empty folders or folders containing data
other than MP3 tracks will not be displayed by COMAND.
If MP3 files are stored in the root directory
itself, the root directory also counts as a
folder. COMAND will then display the root
directory name as a folder name.
i
COMAND does not support ID3 tags.
Tips on creating MP3 tracks
Permissible MP3 formats
Permissible bit and scan rates
Fixed and variable bit rates up to
320 kbps
Scan rates from 24 kHz - 48 kHz
i
It is recommended to use MP3 tracks
with a bit rate of 128 kbps or higher
and with a scan rate of 44.1 kHz or
higher. Lower rates may impair quality.
This is particularly true if the Sound
function* LOGIC7 Surround has been
activated.
COMAND supports the
MPEG1 Audio Layer 3 format.
53
Audio
MP3 operation
Tips on copyright
The music tracks that you can create for
play back in MP3 mode are generally copyright-protected under applicable international and national laws.
In many countries, the reproduction of
copyrighted material is not permitted,
even if only for personal use, without the
express prior consent of the copyright
holder.
Please check the current copyright laws
for your country and comply with them.
These restrictions do not apply for example to your own compositions and recordings, or for recordings for which
authorization has been obtained from the
copyright holder.
The COMAND CD drive holds one CD. The
slot for inserting a CD is located above the
display ( page 17).
Switching to MP3 mode
Call up the MP3 main menu
( page 55).
!
or
Insert an MP3 CD into COMAND.
Loading an MP3 CD
Warning
G
In order to avoid distraction which could
lead to an accident, the driver should insert
CDs with the vehicle at a standstill and operate the audio system only when road, weather and traffic conditions permit.
Warning
G
Bear in mind that at a speed of just 30 mph
(approximately 50 km/h), your vehicle is
covering a distance of 44 feet (approximately 14 m) every second.
54
If a CD is already loaded, it must be
ejected before inserting the new CD.
Inserting a second CD in the slot with
another CD still loaded will cause damage to the CD drive not covered by the
Mercedes-Benz Limited Warranty.
Audio
MP3 operation
Insert a CD into the CD slot while
COMAND is switched ON. Insert the
CD face up.
Once the data has been loaded, the
MP3 main menu appears. You will hear
the last track played.
COMAND pulls the CD in and loads the
data. It may take a while to load the data, depending on the number of folders
and tracks.
After loading, COMAND plays the CD.
Ejecting an MP3 CD
Press 7.
Press the MP3 soft key.
COMAND ejects the CD.
i
Remove the CD from the slot.
The MP3 soft key will only appear if an
MP3 CD has been loaded.
The CD will be pulled in again if it is not
removed from the slot within approx. 7
seconds.
MP3 main menu
COMAND loads the data on the CD.
It may take a while to load the data, depending on the number of folders and
tracks contained on the CD.
1 Current folder
2 Current track
3 Elapsed track playing time
4 Track number within the current folder/number of tracks in current folder
Open the Audio main menu
( page 36).
55
Audio
MP3 operation
i
Only one folder can be viewed at a time.
Selecting via extended folder list
On MP3 tracks with variable bit rates,
the elapsed track playing time displayed may deviate from the actual
time elapsed.
i
The extended folder list only contains
folders in which MP3 tracks are stored.
Selecting folders
If the MP3 tracks are organized into folders
on the disc, you can select a folder from
the COMAND control unit.
The following options are available:
Selecting via folder list
Selecting via extended folder list
Selecting via folder list
i
The folder list only contains folders in
which MP3 tracks are stored.
56
In the MP3 main menu ( page 55)
press the Folder soft key.
The extended folder list appears.
1 Current folder
Press or to select a folder.
Wait approx. 3 seconds without changing the selection.
The COMAND changes the folder and
loads the data from the new folder.
It may take a while to load the data, depending on the number of folders and
tracks.
Use or to select a folder.
Audio
MP3 operation
Press .
The COMAND changes the folder and
loads the data from the new folder.
It may take a while to load the data, depending on the number of folders and
tracks.
Selecting via track skip
On the COMAND control unit
Open the MP3 main menu ( page 55).
Press -for forward skipping.
or
Selecting a track
You may select a track in the current folder.
The following options are available:
Press , for backward skipping.
On the multifunction steering wheel
Selecting via manual entry of the track
number ( page 58)
Selecting via scan search ( page 58)
Selecting via track skip
or
Selecting via track list
Switch the multifunction display in the
instrument cluster to the audio display
( page 25).
Press j for forward skipping.
i
Backward skipping:
The system skips back to the beginning
of the track if more than approx. 10
seconds playing time of the track currently playing have elapsed.
The system skips back to the beginning
of the previous track if less than 10
seconds playing time of the track currently playing have elapsed.
Selecting via track list
The track list contains all tracks in the current folder. Only one track can be viewed
at a time.
Press k for backward skipping.
i
Forward skipping:
The next track is played.
57
Audio
MP3 operation
Press 2.
i
The Manual track input display appears.
Entries beyond the number of available
tracks in the current folder are not possible.
Wait approx. 3 seconds after entering
the number.
The selected track is played.
Selecting via scan search
1 Current track
Scan search plays each track in the
current folder for approx. 8 seconds.
Press , or wait approx. 3 seconds
without changing the selection.
1 Number of tracks in the current folder
(10 tracks)
Scan search can be ended manually.
The selected track is played.
Entry example: Track 1
Scan search automatically stops at the
track listened to before the scan
search was started.
Selecting via manual entry of the track
number
Scan search is characterised as follows:
Use or to select another track
from the list.
Open the MP3 main menu ( page 55).
58
Press 3.
Entry example: Track 10
Press 3 and " in quick succession.
Audio
MP3 operation
Starting scan search
In the MP3 main menu ( page 55)
press the Scan soft key.
The scan search starts.
Fast forward/reverse
Open the MP3 main menu ( page 55).
Press and hold - or ,.
To stop release - or ,.
i
The scan search will not function if the
current folder only contains one track.
When you start the scan search, playback option Normal sequence is activated automatically. Therein scan search
is restricted to the current folder.
Playback options
The following options are available:
Press the Scan soft key.
The track playing at the time the scan
is ended remains playing.
Repeat track
The current track will be repeated until
this function is deactivated.
Repeat folder
The tracks in the current folder will be
repeated until this function is deactivated.
The track sequence is the same as the
Normal sequence option.
Random track
This option is restricted to the tracks in the
current folder. The tracks are played in random order.
Normal sequence
The COMAND plays tracks in a folder in
succession.
Once all the tracks in a folder have
been played, COMAND begins playing
the track(s) in the next folder on the
disc.
Ending scan search manually
Random folder
All tracks on the CD are played in random
order.
Switching the playback option
In the MP3 main menu ( page 55)
press the Setting soft key.
The Setting menu appears.
The solid circle indicates which op
tion is currently selected.
59
Audio
MP3 operation
Use or to select a different option.
Press .
The option is switched on.
A corresponding display will appear in
the status bar for all options except
Normal sequence.
An option will remain activated even if
the COMAND is switched OFF and then
ON again.
60
Audio
CD changer* operation
CD changer* operation
Safety Instructions
Warning
Tips on caring for your CDs
G
In order to avoid distraction which could
lead to an accident, the driver should insert
CDs with the vehicle at a standstill and
operate the audio system only when road,
weather and traffic conditions permit.
Bear in mind that at a speed of just 30 mph
(approximately 50 km/h), your vehicle is
covering a distance of 44 feet (approximately 14 m) every second.
The CD changer is a Class 1 laser product.
There is a danger of invisible laser radiation
when you open or damage the cover.
Do not remove the cover. The CD changer
does not contain any parts serviceable by
the user. For safety reasons, have any necessary service work performed by qualified
personnel.
Only touch the CD on the edges.
Clean the CD with a dry, lint-free cloth.
Wipe the CD a straight line from the
center. Never wipe the CD in a circular
motion.
Do not use rubbing alcohol or solvents
to clean CDs.
Do not expose the CDs to heat or direct
sunlight.
Do not write or put labels on CDs
Switching to CD changer mode
Open the CD changer main menu
( page 66).
CD changer
The CD changer can play audio and MP3
CDs.
The CD changer is concealed behind the
control panel faceplate in the center console.
MP3 CDs
Permissible MP3 CDs
The CD changer can read CD-R and CD-RW
CDs.
Permissible file system
The permitted file system is Joliet for
CD-R and CD-RW.
or
Load an audio CD into the CD changer
( page 63).
Permissible MP3 formats
The CD changer supports the following file
formats:
MPEG1 Audio Layer 3
61
Audio
CD changer* operation
MPEG2 Audio Layer 3
i
i
MPEG 2.5 Audio Layer 3
It is recommended to use MP3 tracks
with a bit rate of128 kbps or higher and
with a scan rate of 44.1 kHz or higher.
Lower rates may impair quality. This is
particularly true if the sound function
LOGIC7 Surround has been activated.
Depending on the complexity of the directory structure, playback of the first
track may in some cases be delayed.
i
In everyday speech, the MPEG1 Audio
Layer 3 format has been replaced by
the designation “MP3”.
Permissible bit and scan rates
Tips on copyright
Fixed and variable bit rates up to 320 kbps
are permissible.
Please also refer to the tips on copyright
( page 54).
The permissible scan rates can be found in
the table below.
Playing MP3 CDs
File format
Scan rate
MPEG1
Audio Layer 3
32 kHz, 44.1 kHz,
48 kHz
MPEG2
Audio Layer 3
16 kHz, 22.5 kHz,
24 kHz
MPEG2.5
Audio Layer 3
8 kHz, 11.025 kHz,
12 kHz
62
Accessing the CD changer
The CD changer can play MP3 CDs as well
as audio CDs. All the CD changer functions
listed below also apply to the playing of
MP3 CDs.
When playing MP3 CDs, only the first 99
tracks will be played back in successive order. After that, playback will begin with
track 1of the MP3 CD if Repeat CD is selected ( page 71). Folder selection is not possible.
1 Opening/closing button
2 Control panel faceplate
Press button 1 to open.
The control panel faceplate 2 pivots
up; the CD changer extends and becomes accessible.
Audio
CD changer* operation
!
Retracting the CD changer
The CD changer may not be able to play
audio CDs with copy protection.
Press button 1 to close.
The CD changer retracts; the control
panel faceplate 2 pivots down.
Loading CDs
Warning
G
In order to avoid distraction which could
lead to an accident, the driver should insert
CDs with the vehicle at a standstill and operate the audio system only when road, weather and traffic conditions permit.
Bear in mind that at a speed of just 30 mph
(approximately 50 km/h), your vehicle is
covering a distance of 44 feet (approximately 14 m) every second.
!
Do not attach labels of any type to the
CD. They may become detached and
damage the drive.
i
Only use CDs, which bear the label
shown and that conform to the compact disc digital audio standard
(IEC 60908).
In order to insert CDs, you will need to first
access the CD changer ( page 61).
Do not play single-CDs (80 mm) with an
adapter. Only use round, 12 cm diameter CDs.
Your CD changer has been designed to
play CDs which correspond to the IEC
60908 standard. Therefore only CDs
not exceeding a thickness of 1.3 mm
can be used.
If you insert thicker data carriers, e.g.
ones that have data on both sides (one
side with DVD data, the other side with
audio data), they cannot be ejected
and will damage the CD changer.
1 CD slot
2 Magazine compartment buttons
63
Audio
CD changer* operation
The CD changer has a built-in magazine
which can hold up to six CDs.
The CD changer has six magazine compartment buttons 2 for controlling the loading
procedure. LEDs in the buttons indicate
the status of the corresponding magazine
compartment.
Button LED off:
Magazine compartment empty
Button LED continuously red:
Magazine compartment loaded with a
CD
Loading a single magazine compartment
i
Loading a magazine slot will stop the
playback of a CD in the changer.
Loading options:
Loading a single magazine compartment
Loading all six magazine compartments
64
Retract the CD changer ( page 63).
Loading all six magazine compartments
Initial situation: all magazine compartments empty.
Access the CD changer ( page 62).
The CD changer loads all magazine compartments beginning with compartment 1.
Briefly press the button 2 of the empty magazine compartment to be loaded.
Wait until the LED in the button 2
flashes green.
The status of a magazine compartment can
also be seen when selecting a CD in the CD
Selection menu ( page 68).
The CD slot 1 for loading CDs into the CD
changer is located above the buttons 2.
Access the CD changer ( page 62).
This indicates that the CD changer requests a CD.
Insert an audio CD into the CD slot 1
within approx. 15 seconds. Insert the
CD face up.
The CD is pulled in. The red LED in the
corresponding magazine compartment
button 2 lights up continuously. The
system starts playing the CD. The loading procedure is completed.
1 CD slot
2 Magazine compartment buttons
Audio
CD changer* operation
Press and hold the button 2 of an
empty magazine compartment for
more than 2 seconds.
Wait until the LED in the first magazine
compartment button 2 flashes green.
The loading procedure is completed.
If, for example, only compartments 1
through 4 are to be loaded instead of
all six compartments, simply do not insert the a fifth CD into the slot 1. The
CD changer attempts to load the fifth
CD, yet aborts the loading procedure.
The system automatically plays the last
(fourth) CD.
Insert an audio CD into the CD slot 1
within approx. 15 seconds. Insert the
CD face up.
The CD is pulled in; the magazine compartment is loaded.
The red LED in the corresponding magazine compartment button 2 lights up
continuously.
The CD changer then requests insertion of the next CD. The LED in the corresponding magazine compartment
button 2 flashes green.
Retract the CD changer ( page 63).
i
This indicates that the CD changer requests a CD.
Ejecting one CD
The system plays the sixth CD. The
LEDs in all magazine compartment buttons 2 light up red continuously.
The LEDs of all magazine compartment
buttons 2 briefly light up green several times.
Repeat the last step until all six magazine compartments are loaded.
Ejecting CDs
The following options are available:
Ejecting one CD
Ejecting all CDs ( page 66)
1 CD slot
2 Magazine compartment buttons
Access the CD changer ( page 62).
Briefly press the appropriate magazine
compartment button 2.
The button LED 2 flashes red. The CD
changer ejects the CD.
65
Audio
CD changer* operation
Within 15 seconds, remove the CD
from the slot 1.
If you eject the CD you are currently listening to:
The CD will be pulled in again if it is not
removed from the slot within approx.
15 seconds. The system starts playing
the CD again.
The ejection procedure is completed.
Retract the CD changer ( page 63).
i
If you are listening to a CD in the CD
changer and you eject another CD from
the changer:
While ejecting the CD, the system
interrupts CD playback.
The CD you were last listening to
starts from the beginning once the
ejection procedure is completed.
i
The next available audio CD is
played.
If there are no other CDs available,
the system switches to the audio
source listened to before CD changer mode.
Ejecting all CDs
Access the CD changer ( page 62).
Press and hold the button of a loaded
magazine compartment 2 for more
than 2 seconds.
The button LEDs of all loaded magazine
compartments will briefly flash red,
several times.
The CD changer ejects the CDs one after another.
Within 15 seconds, remove each CD
from the slot 1.
The CD will be pulled in again if it is not
removed from the slot within approx.
15 seconds. The system starts playing
the CD again.
The ejection procedure is completed
when all CDs are removed, or when the
procedure is aborted by the CD changer.
Retract the CD changer ( page 63).
CD changer main menu
Open the Audio main menu
( page 36).
Press the CDC soft key.
i
The CDC soft key is shaded out if no CD
is loaded. The system will not switch to
CD changer mode.
66
Load an audio CD into the
CD changer ( page 63).
Audio
CD changer* operation
i
Selecting CDs
The CDC soft key will only be visible if a
CD changer is connected.
The numbers 1 through 6 are assigned to
the CD compartments of the CD changer.
The following options are available:
The CD changer main menu appears.
You will hear the CD listened to last. If
the CD listened to last is no longer
available, the unit plays the next available audio CD.
If the CD contains CD text data, the CD
changer main menu will show the name
of the CD and the title of the track currently playing.
1 CD name or CD number
2 Track title or track number
3 Elapsed track playing time
4 Track number/Total tracks
The status bar also contains:
The CD changer menu shows the
CD title at the top and track title in the center of the main area if the CD contains corresponding text data.
The track number and total number
of tracks
The elapsed playing time of the
track
If the CD does not contain any CD text data, the number of the CD and the track
number are displayed instead of the name
of the CD and the track title.
Selecting via CD list
Selecting via direct entry of the CD
number ( page 68)
Selecting via CD Selection menu
( page 68)
Selecting via CD list
i
This selection is possible only if two or
more audio CDs are loaded.
The CD list contains all loaded CDs. Only
one entry is visible at a time. Its name or
number is shown at top of the CD changer
main menu (here CD 5).
67
Audio
CD changer* operation
The entry appears above the track display.
It shows the number of the current CD.
Selecting via direct entry of the CD
number
Press one of the 3 - keys.
The CD changer switches to the CD
loaded in the appropriate CD changer
compartment.
i
The CD fails to be changed if you select
an empty compartment.
Use or to select another CD
from the list.
i
An entry shows the CD title if the CD
contains corresponding CD text data.
Selecting via CD Selection menu
No text displayed with a CD symbol indicates that the corresponding CD
does not contain any CD text data
Press the Magaz. soft key.
The CD Selection menu appears. You
see the list of all six compartments.
An entry shaded out indicates an empty CD changer compartment.
The system will skip empty CD changer
compartments.
Wait approx. 3 seconds without changing the selection.
The CD is changed. The newly selected
CD is played.
Use or to select a CD.
The system will skip empty CD
changer compartments
Press .
The newly selected CD is played.
68
Audio
CD changer* operation
Selecting a track
Press j for forward skipping.
The following options are available:
or
Selecting via track skip
Selecting via track list ( page 69)
i
Selecting via manual entry of the track
number ( page 69)
Forward skipping:
The next track is played.
Selecting via scan search ( page 70)
Backward skipping:
The system skips back to the beginning
of the track if more than approx. 10
seconds playing time of the track currently playing have elapsed.
The system skips back to the beginning
of the previous track if less than 10
seconds playing time of the track currently playing have elapsed.
Selecting via track skip
On the COMAND control unit
Open the CD changer main menu
( page 66).
Press -for forward skipping.
or
Press , for backward skipping.
On the multifunction steering wheel
Switch the multifunction display in the
instrument cluster to the CD changer
display ( page 25).
Press k for backward skipping.
Selecting via track list
The track list contains all tracks of the current CD. Only one list entry is visible at a
time, it is the track currently playing.
Use or to select another track
from the list.
Press or wait approx. 3 seconds
without changing the selection.
The selected track is played.
Selecting via manual entry of the track
number
Open the CD changer main menu
( page 66).
Press 2.
The Manual track input display appears. The number of tracks on the CD
is displayed.
69
Audio
CD changer* operation
Selecting via scan search
Scan search is characterised as follows:
Fast forward/reverse
Scan search plays each track on the
current CD for approx. 8 seconds.
Open the CD changer main menu
( page 66).
Press and hold - or ,.
Scan search can be ended manually.
To stop release - or ,.
Scan search automatically stops at the
track listened to before the scan
search was started.
The following options are available:
Playback options
Entry example: Track 1
Press 3.
Starting scan search
Entry example: Track 12
When you start the scan search, playback option Normal sequence is activated automatically. Therein scan search
is restricted to the current CD.
i
Entries beyond the number of available
tracks on the CD are not possible.
The tracks are played in the normal sequence (e.g. track 1, 2, 3 etc.).
If only one CD is loaded, the last track is
followed by again playing the first track.
If several CDs are loaded in the CD changer, the last track on a CD in the changer
will be followed by the first track of the
next CD in the changer.
The CDs are changed in their normal sequence (e.g. CD 1, 2, 3 etc.).
Press the Scan soft key.
i
Press 3 and in quick succession.
Ending scan search manually
Wait approx. 3 seconds after entering
the number.
The selected track is played. The CD
main menu appears.
70
Press the Scan soft key.
The track playing at the time the scan
is ended remains playing.
Normal sequence
Repeat track
The current track will be repeated until
this function is deactivated.
Audio
CD changer* operation
Repeat CD
i
i
It is only possible to select this function
if at least two audio CDs are loaded in
the CD changer.
This selection is only available if at
least two audio CDs are loaded.
At least 4 tracks on one CD are played
in random order (e.g. track 5, 7, 3, 9).
Then, the next CD will be played.
The CDs are changed in random
order (e.g. CD 4, 1, 5, etc.).
The current CD will be repeated until
this function is deactivated.
Random CD
Random track
The tracks are played in random order
(e.g. track 3, 8, 5 etc.).
If several CDs are loaded in the CD
changer, the last track on a CD in the
changer will be followed by the first
track of the next CD in the changer.
The CDs are changed in their normal
sequence (e.g. CD 1, 2, 3, etc.).
Switching the playback option
In the CD changer main menu
( page 66) press the Setting soft key.
The Setting menu appears.
The solid circle indicates which option is currently selected.
Use or to select a different option.
Press .
The option is activated. A corresponding display will appear in the status bar
for all options except Normal sequence.
An option will remain activated even if
the COMAND is switched OFF and then
ON again.
71
Audio
Audio AUX operation
i
In AUX mode, you can adjust the following:
An external audio source, for example a
tape player, can be connected to
COMAND.
For further information, please contact
your Mercedes-Benz Center.
Volume ( page 29)
Fader and balance ( page 30)
Bass and treble ( page 31)
Sound functions ( page 32)
Switching to AUX mode
Open the Audio main menu
( page 36).
Press the AUX soft key.
The AUX menu appears.
The external audio source is made audible, provided it is connected and
switched to playback.
72
i
Please refer to the appropriate operating manual for the operation of the external audio source.
Satellite radio*
General information
Satellite radio operation
73
Satellite radio*
General information
Introduction to Satellite radio
Sirius Satellite Radio provides 100 channels, so called streams, of digital-quality
radio, among others music, sports, news,
and entertainment free of commercials.
Sirius Satellite Radio uses a fleet of highpower satellites to broadcast 24 hours per
day, coast-to-coast, in the contiguous US.
This diverse, satellite-delivered programming is available for a monthly subscription fee.
For more information and service availability call the Sirius Service Center
( page 80), or contact
www.siriusradio.com
Program categories
The channels are categorized. Categories
allow you to tune to stations broadcasting
a certain type of program (category mode)
( page 77).
74
Category selection ALL contains the station list of all receivable channels (channel
mode) ( page 77).
i
Additional optional satellite radio
equipment and a subscription to satellite radio service provider are required
for the satellite radio operation described in this chapter.
Contact your authorized MercedesBenz Center for details and availability
for your vehicle.
Note that categories and channels
shown in illustrations are dependent on
programming content delivered by the
service provider. Programming content
is subject to change. Therefore, channel and categories shown in illustrations and descriptions contained in this
manual may differ from the channels
and categories delivered by the service
provider.
i
Satellite radio service may be unavailable or interrupted from time to time
for a variety of reasons, such as environmental or topographic conditions
and other things we can't control. Service might also not be available in certain places (e.g., in tunnels, parking
garages, or within or next to buildings)
or near other technologies.
Satellite radio*
Satellite radio operation
Satellite radio operation
Switching to Satellite radio mode
Press 5.
This information is required to call the Sirius Service Center for an activation request.
Different menus appear depending on
Satellite radio service activation.
Prior to activation of the Satellite
radio service,
After Satellite radio service was activated.
Subscribing to satellite radio
Press the Service soft key to display
the Service Information display.
Credit card information is also required
for your application.
The activation process takes approximately 5 to 10 minutes after calling the
Sirius Service Center.
After activation of the Satellite radio
service
The SAT main menu appears.
The radio station selected last is audible,
provided it can be received.
Prior to activation of the Satellite radio
service
The Satellite radio main menu will appear
and displays the Weather channel. You
cannot select any other station.
i
Contact the Sirius Service Center at
the telephone number displayed in the
screen.
After the connection is made:
i
The system will tune to a default station if no station had been selected
previously.
Follow the instructions given by the operator.
The telephone number of the Sirius
Service Center and the twelve-digit
electronic serial number (ESN) of the
particular receiver are displayed.
75
Satellite radio*
Satellite radio operation
SAT main menu
Station information is displayed on the
main screen and in the center of the status
bar.
SAT5 = location in the program
You can also adjust the following:
memory, if the current channel is prestored
Ch16 = number of the current channel
Selectable soft keys
Presets
shows channels pre-stored in the program memory (up to 10 channels). You
can store stations ( page 80) and request stored stations ( page 76).
Main area, in this example:
ROCK = selected category ( page 77)
Vault = name of the selected station
Status bar, in this example:
SAT (on the left) = the selected mode
76
Bass and treble ( page 31)
Balance and fader ( page 30)
Sound functions ( page 32)
Volume (not on soft keys)
( page 29)
Selecting a station
The following options are available:
Tuning via station presets ( page 77)
shows additional text information related to the current channel.
Tuning via manual channel input
( page 77)
Scan
is used to start and stop the scan
search ( page 79).
Tuning via the program category list
( page 77)
Tuning a station within the selected
category ( page 78)
Tuning via scan search ( page 79)
Info
Service
displays a screen showing the telephone number of the Sirius Service
Center and electronic serial number
(ESN) of the particular receiver.
Satellite radio*
Satellite radio operation
Tuning via station presets
Ten Satellite radio station presets are
available.
You can access the presets via number
keys or via the Presets menu.
The system tunes to channel 12.
i
If an entry is made and such a channel
is not available, the message Channel
unavailable appears. The channel selected last continues playing.
i
The Presets memory is empty at firsttime activation of the system.
Accessing via number keys
Press one of the number keys
3 - ".
The system will tune to the station
stored under this number.
Press the Presets soft key.
The Presets list appears.
Use or to choose a preset and
press ,
or
Accessing via Presets menu.
Press 3 and .
The category list contains all currently receivable categories of programs. It is sorted alphabetically.
Press one of the number keys
3 - ".
Only one entry is visible at a time. The entry appears at the top of the main screen.
The system tunes to the station stored
under this number.
Selecting a category
Tuning via manual channel input
Example: Tuning in channel 12
Tuning via the program category list
Press 2.
Example 1: category ALL
The station list of category ALL contains all
receivable channels (channel mode).
Use or to select the category
All from the list.
77
Satellite radio*
Satellite radio operation
Tuning a station within the selected
category
The channels identified for the currently
selected category are sorted numerically
by channel number, which appear in the
status bar one at a time.
Tuning using COMAND control unit
The station listened to before remains
tuned.
Example 2: category POP
In the station list, only channels of category POP are available (category mode).
Use or to select the category
POP from the list.
78
If the station listened to before was of
POP category, the channel remains
tuned. Otherwise the system switches
to the station of POP category that was
selected last in this category.
The system will automatically switch to
a station of POP category if the currently
selected station is not of the POP category. Otherwise, the currently selected
station remains tuned.
Press - or .
The search proceeds in ascending order.
or
Press , or .
The search proceeds in descending order and stops at the first receivable
station.
Satellite radio*
Satellite radio operation
i
Tuning via scan search
Using or is followed by a short
delay before the change occurs. Using
- and , changes the channel
immediately.
Scan search is characterized as follows:
Scan search plays a channel for
approx. 8 seconds and then skips to
the next channel within the current
category.
Tuning using the multifunction steering
wheel
Scan search can be ended manually.
Switch the multifunction display in the
instrument cluster to Satellite radio
display ( page 25).
Scan search stops automatically at the
station that was playing when scan
search was started.
Press k.
Press the Scan soft key.
The search proceeds in ascending order.
or
Press j.
Obtaining additional text
information
Additional text information (artist and title)
related to the current broadcast can be
displayed.
Press the Info soft key.
The scan search starts.
Press the Scan soft key again.
The scan search ends.
The search proceeds in descending order and stops at the first receivable
station.
79
Satellite radio*
Satellite radio operation
Storing stations
Calling the Sirius Service Center
Two options are available:
Storing using the number keys
Storing using the Presets menu
Press the Service soft key.
Storing via number keys
Press and hold a number key between
3 and " for more than 2 seconds.
The currently selected station is stored
in the corresponding preset location.
i
When storing a station out of the category All, later selection of this channel
does not lead into the category mode.
Use or to select a preset location.
Press for more than 2 seconds.
The telephone number of the Sirius
Service Center and the twelve-digit
electronic serial number (ESN) of the
particular receiver appear.
The currently selected station is stored
in the corresponding preset location.
Resetting Presets menu
Press the Presets soft key.
The Presets soft key is active indicated by
its color changed.
It may be necessary to call the Sirius Service Center if, for example:
The Preset list appears.
Press the Presets soft key.
All channels in the Preset list are deleted.
you want to cancel the subscription or
to re-subscribe at a later date,
you forget to pay the bill, or
you sell the car to another person.
Storing via Presets menu
80
Telephone*
Important notes
Telephone operation
Phone book
SMS (Mail)
81
Telephone*
Important notes
Safety Instructions
Warning
Warning
G
Some jurisdictions prohibit the driver from
using a cellular telephone while driving.
Whether or not prohibited by law, for safety
reasons, the driver should not use the cellular telephone while the vehicle is in motion.
Stop the vehicle in a safe location before
placing or answering a call.
If you nonetheless choose to use the cellular
phone while driving, please use the handsfree device and be sure to pay attention to
the traffic situation at all times. Use the cellular phone1 only when road, weather and
traffic conditions permit.
Bear in mind that at a speed of just 30 mph
(approximately 50 km/h), your vehicle is
covering a distance of 44 feet (approximately 14 m) every second.
1 Observe all legal requirements
82
G
Never operate radio transmitters provided
with a built-in or attached antenna (i.e. without being connected to an external antenna)
from inside the vehicle while the engine is
running. Doing so could lead to malfunction
of the vehicle's electronic system, possibly
resulting in an accident and/or personal
injury.
Tips on telephone operation
i
Once the cellular phone is inserted into
the telephone cradle, it can be operated:
using the cellular phone itself,
using the COMAND control unit,
using the multifunction steering
wheel, or
using the voice control system*.
Descriptions in this Operator’s Manual
presume that the cellular phone is inserted into the telephone cradle.
!
Radio transmitters, such as a portable
telephone or a citizens band unit,
should only be used inside the vehicle if
they are connected to a separate exterior antenna approved by MercedesBenz.
Telephone*
Important notes
i
This Operator's Manual describes operation of the telephone using the
COMAND control unit and the multifunction steering wheel. Unless otherwise specified, the descriptions and
the illustrated displays refer to the
COMAND control unit.
Operation of the cellular phone and
voice control system* are explained in
separate operation guides.
Always drive with extreme caution
when operating the telephone handsfree.
For safety reasons, the cellular phone
handset should not be used to place or
receive a call while driving.
If the signal is very weak (display in the
status bar):
Wait until reception improves before
placing a call.
Close the windows and reduce all external noise as much as possible when
using hands-free operation.
Make sure that the air vents are not
pointed in the direction of the microphones located in the overhead control
panel near the rear view mirror. Adjust
air vents and/or reduce blower speed
if necessary.
A brief disconnection from the cellular
network is not a malfunction, as this
can occur when the network switches
areas. The phone automatically attempts to again sign on with a network.
If the message Enter unlock code is
displayed, enter the unlock code
( page 88). Only then will you be able
to use all the telephone functions.
The telephone is already unlocked, but
it is not yet registered with the network.
The message NO SERV. appears in the
status bar. The telephone automatically attempts to register with a network.
If there is no network available, “911”
emergency calls can NOT be placed.
If you try to place an outgoing call, the
message Call not possible is displayed temporarily.
If the message Telephone being
activated, please wait is displayed,
If the message Please insert phone is
displayed.
Insert the cellular phone into the
telephone cradle.
You will still be able to make 911 emergency calls ( page 85) if the telephone is locked.
The telephone cannot, or not yet, be used
in the following situations:
83
Telephone*
Important notes
Notes about COMAND telephone features using a Bluetooth® connection
Many of the Mercedes-Benz approved mobile phones, cradles and adaptors available for use in your vehicle utilize
Bluetooth® technology to communicate
with each other and the vehicle. Depending on your phone brand and model, the
number of in-vehicle or on-display COMAND telephone features supported via
Bluetooth® communication, and thus
available for your use, may vary.
The descriptions and illustrations in this
section are based on the use of fully compatible Mercedes-Benz approved mobile
phones and cradles that do not utilize Bluetooth® technology to communicate with
each other. If your vehicle is equipped with
integrated Bluetooth® functionality, a
Bluetooth® capable mobile phone, headset, Laptop, PDA, etc. is required to utilize
those features.
84
For additional information about Mercedes-Benz approved Bluetooth® mobile
phones and related accessories please
contact the Mercedes-Benz Customer Assistance Center at 1-800-FOR-MERCedes
or your nearest authorized Mercedes-Benz
Center.
Telephone*
Telephone operation
Telephone operation
Switching the phone ON/OFF
Switching ON
The telephone is switched ON automatically when COMAND is activated. The cellular
phone must be readily inserted into the
cradle.
If COMAND is switched ON, the switched
OFF telephone can also be switched ON
manually:
Press and hold for a few seconds
until the telephone is switched ON.
The Telephone main menu appears
( page 89).
One of the following messages could also
appear:
Please insert phone
Insert the cellular phone into the
cradle.
Phone not installed
i
Your vehicle is not configured for cellular telephone operation.
If a call is in progress (handsfree) you
cannot switch the COMAND OFF, . is
disabled.
Please insert SIM card
This message appears only when using
a GSM cellular phone.
911 emergency calls
Insert a SIM card ( Telephone Operation Guide).
Warning
The “911” emergency call system is a
public service. Using it without due
cause is a criminal offense.
Switching OFF
In the Telephone main menu
( page 89), press and hold for
longer than 2 seconds.
or
G
The following conditions must be met for a
“911” emergency call:
Switch COMAND OFF ( page 29).
cellular phone readily inserted
The telephone switches OFF after a
one-minute delay. If a call is in progress
during this time, the telephone switches OFF approx. one minute after the
call is ended.
telephone switched ON
available cellular phone network
85
Telephone*
Telephone operation
i
If you cannot make an emergeny call,
you will have to initiate rescue measures yourself.
Using the COMAND control unit during
PIN or unlock code entry
Placing an emergency call
Press to select No when the inquiry
menu appears.
Press to confirm No.
Using the COMAND control unit after
PIN and unlock code entry
Press the 911 soft key.
The system opens an inquiry menu
prompting you if you want to dial a
911 call.
Using the cellular phone
( Telephone Operation Guide).
If necessary, press to select Yes.
Press to confirm Yes if you want to
place the 911 emergency call.
The telephone establishes the connection, a ringing tone is audible.
86
Wait until the emergency call center
answers, then describe the emergency.
If you do not want to place the emergency
call:
The 911 emergency call will also function if
the telephone is locked.
An emergency call can be placed using the
cellular phone or the COMAND control
unit.
Press repeatedly until the Telephone main menu appears.
Telephone*
Telephone operation
Commit your PIN to memory.
Most telephone functions are not available
before entering the PIN.
Once all digits have been entered,
press the OK soft key.
In succession, press the number keys
!, 3 and 3.
Press 0.
If the input is correct, the telephone
will log itself into the network.
The telephone establishes the connection, the ringing tone is audible.
i
The telephone cannot be used before it
is logged- in.
Wait until the emergency call center
answers, then describe the emergency.
If the input is incorrect, message
Entering the PIN (only GSM)
Wrong PIN number will appear briefly.
i
If a GSM cellular phone is used, a PIN
may also have to be entered.
The PIN may be entered on the cellular
phone itself ( Telephone Operation
Guide).
The PIN protects the telephone against unauthorized use. Your PIN is found in the
telephone service provider's documentation.
Press the corresponding number key
3 - " for each digit.
In case of erroneous entry, you can delete the last or more digits:
Press the Delete soft key as often
as required.
Re-enter the PIN.
After three incorrect entries, the SIM
card is blocked. Message SIM card
blocked will appear briefly.
The PUK has to be entered.
( Telephone Operation Guide)
87
Telephone*
Telephone operation
Entering the unlock code
The unlock code protects the telephone
against unauthorized use. The unlock code
can be activated on the telephone
( Telephone Operation Guide).
Commit your unlock code to memory.
The telephone functions are available only
after entering the unlock code.
i
The system switches back to last mode
if the unlock code is not entered within
8 seconds after you are prompted to do
so.
Example: unlock code 2307
In sequence, press the number
keys , ," and .
In case of erroneous entry, delete the
last or more digits:
Press the Delete soft key as often
as required.
When COMAND is switched ON, switching
to telephone mode from any other operation mode is made as follows.
On the COMAND control unit
Press .
After entering all digits, press or the
OK soft key.
The Telephone main menu opens
( page 89).
All telephone functions are available if
the correct number has been entered.
On the multifunction steering wheel
After registering, Information referring
to the telephone signal appears at the
right end of the status bar.
The unlock code has to be entered
again if the entry was incorrect.
88
Switching to telephone mode
See ( page 25)
Telephone*
Telephone operation
Telephone main menu
Warning
Press .
Some jurisdictions prohibit the driver from
using a cellular telephone while driving.
Whether or not prohibited by law, for safety
reasons, the driver should not use the cellular telephone while the vehicle is in motion.
Stop the vehicle in a safe location before
placing or answering a call.
ROAMING = telephone is logged into a
cellular phone network outside your
home network,
The Telephone main menu appears.
G
If you nonetheless choose to use the cellular
phone while driving, please use the handsfree device and be sure to pay attention to
the traffic situation at all times. Use the cellular phone1 only when road, weather and
traffic conditions permit.
NO SERV. = no network available,
= telephone signal strength,
= call active ( page 95).
Other messages could also appear:
If the message
Please insert phone,
Phone not installed or Please insert
SIM card appears, see chapter “Switch-
Telephone status information is displayed
on the right end of the status bar.
1 Observe all legal requirements
ing the phone ON / OFF” ( page 85)
If the message
i
Please Enter PIN: appears, see “En-
The information is also displayed in
Navigation* mode (only in map displays).
tering the PIN” ( page 87)
If the message
Enter unlock code: appears, see “En-
tering unlock code” ( page 88)
The following displays are possible:
READY = telephone is logged into your
cellular phone home network and
ready for use,
89
Telephone*
Telephone operation
Selectable soft keys and options
soft key
Opens the phone book ( page 97),
Recvd.# soft key
Answering an incoming call
The ringing tone is audible in the event of
an incoming call. The call screen pops up
on the current display.
Opens the accepted and missed calls
list ( page 93),
i
Dialed # soft key
The caller’s number appears only if it is
transmitted.
The caller’s name only appears if, in addition, the number and the name are
stored in the phone book ( page 97).
Opens dialed calls list ( page 94),
SMS soft key
Provides access to the SMS menu
( page 100),
Entry of a phone number ( page 91).
i
If a list is empty, the corresponding soft
key is without function. This is indicated by the corresponding soft key display being shaded out.
90
Answering calls
If the multifunction display in the instrument cluster is set to telephone mode, the
call screen also appears in the multifunction display.
On the COMAND control unit
Press 0.
Telephone*
Telephone operation
On the multifunction steering wheel
Press s .
In both cases the call is active. Communication is conducted via the hands-free
system. The call volume can be adjusted
( page 29).
For other user functions, see
“Active call” ( page 95).
Ending or refusing a call
On the COMAND control unit
The desired phone number has to be entered when placing an outgoing call.
entering a phone number directly
( page 91)
initiating redial ( page 92)
selecting an entry in the accepted and
missed calls list ( page 93)
selecting an entry in the dialed calls list
( page 94)
using speed dial ( page 95)
opening the phone book and selecting
an entry ( page 98)
Press t .
i
Entering a phone number
It is also possible to accept, refuse or
end a call from the cellular phone
( Telephone Operation Guide).
Open the Telephone main menu
( page 89).
Use " - ! to enter the phone number.
In case of erroneous entry, you can delete the last or more digits.
The following options are available:
Press /.
On the multifunction steering wheel
Placing an outgoing call
Press the Delete soft key as often
as required.
or
Press / on the COMAND control unit or t on the multifunction steering wheel.
This deletes the entire entry.
After entering the phone number,
press 0.
The telephone dials the entered number. The call is activated the moment
the other party answers the call. Communication is conducted via the handsfree system. The volume can be adjusted ( page 29).
For other user functions, see
“Active call” ( page 95).
91
Telephone*
Telephone operation
Initiating redial
On the COMAND control unit
Immediate re-dialing of the number dialed
last can be initiated:
Press 0 in the Telephone main
menu twice.
The telephone establishes the connection with the number dialed last.
On the multifunction steering wheel
Switch the multifunction display in the
instrument cluster to the Telephone
main display ( page 25).
Press s twice.
The telephone establishes the connection with the number dialed last.
92
i
When pressing s only once, the dialed calls list appears in the multifunction display ( page 94).
In both cases the telephone initiates the
call. The call is activated the moment the
other party answers the call. Communication is conducted via the hands-free system. The volume can be adjusted
( page 29).
For other user functions, see
“Active call” ( page 95).
Accepted and missed calls
After switching to telephone operation,
COMAND can display the number of
missed calls in the status bar.
COMAND automatically creates a list of
accepted and missed calls. This list can
contain 10 entries max.
The accepted and missed calls list can be
opened, an entry can be selected, and the
call can be returned.
Telephone*
Telephone operation
Selecting an entry from the list of accepted and missed calls.
Switching between number and names
This switches the list to number display.
Opening of list
Press the 123 soft key.
Press the Recvd.# soft key in the Telephone main menu ( page 89).
or
i
If no calls have been received yet the
Recvd.# soft key is shaded out and
without function.
i
The list appears with the last call highlighted.
The list is sorted chronologically, the
last accepted or missed call is displayed at the top of the list.
The list shows up to ten calls you received last. It is a combined listing of
both accepted and missed calls. The
list does not show or specify which
calls were accepted and which ones
were missed.
Press the ABC soft key.
This switches the list to name display.
The number in the phone book that belongs to the highlighted name is shown
in the status bar.
Selecting a list entry and establishing
the connection
Use or to select the desired
entry.
Press 0.
The telephone initiates the call to the
selected number.
93
Telephone*
Telephone operation
Selecting a list entry and establishing the
connection:
Dialed calls
Selecting an entry from the list of dialed calls
Use or to select the desired
entry.
COMAND automatically creates a list of dialed calls. This list can contain 10 entries
max. The list is sorted chronologically, the
last dialed call is displayed at the top of the
list.
Press 0.
On the COMAND control unit
Opening the list:
The telephone initiates the call to the
selected number.
On the multifunction steering wheel
Switching between number and names:
This switches the list to number display.
Press the Dialed # soft key in the Telephone main menu ( page 89).
If a name in the phonebook is stored
with the number of the highlighted call
it is shown in the status bar.
The list appears.
i
If no calls have been placed yet the
Dialed # soft is shaded out and without function.
94
Press the 123 soft key.
Press the ABC soft key.
This switches the list to name display.
The number in the phone book that belongs to the highlighted name is shown
in the status bar.
Opening the list:
Switch the multifunction display in the
instrument cluster to the Telephone
main display ( page 25).
Press s once.
i
If you press s twice, the telephone
will immediately establish a connection
with the phone number dialed last.
The last dialed call is displayed on the
multifunction display.
Telephone*
Telephone operation
Selecting a list entry and establishing the
connection:
Press j or k repeatedly until
the desired entry is shown on the multifunction display.
Press s .
Active call
The call is activated the moment the other
party answers the call. The call display appears. The duration of the call is displayed
in the status bar.
The following functions are available during a call:
The telephone initiates the call to the
selected number.
Speed dial
On the cellular phone, telephone numbers
can be stored in a speed dial memory
( Telephone Operation Guide).
You can retrieve the entries of the speed
dial memory via COMAND.
Open the Telephone main menu
( page 89).
Press a number key between 3 and
! and hold it for more than approx.
2 seconds.
On the multifunction steering wheel a call
screen is displayed if the multifunction display in the instrument cluster is switched
to Telephone main display ( page 26).
Ending the active call ( page 95)
Switching the hands-free microphone
ON/OFF ( page 96)
Transmitting number sequences
( page 96)
Ending the active call
On the COMAND control unit
Press /.
The telephone establishes the connection with the stored number.
95
Telephone*
Telephone operation
On the multifunction steering wheel
Press t .
Switching the hands-free microphone
ON/OFF
The soft key Mic Off shows the status of
the microphone.
Microphone OFF: soft key =
Microphone ON: soft key =
Press the Mic Off soft key.
This switches the microphone OFF or
ON. The display of the soft key changes
accordingly.
The other party cannot hear you if the
microphone is switched OFF; however,
you can hear the other party.
96
Transmitting number sequences
Answering machines or other devices
could possibly be controlled through number sequences (e.g. remote query functions).
With an open connection, press one of
the appropriate number keys " - !
for each digit.
You can also transmit the
characters 2 and $ (#).
The phone book contains all entries of the
cellular phone memory.
i
If a GSM phone is used, the phone book
contains all entries of the telephone
phone book.
Telephone*
Phone book
Phone book
Opening the phone book
Phone Book menu
i
Various icons may be assigned to the
phone numbers, depending on the entry made on the telephone:
On the COMAND control unit
Press the
soft key in the Telephone
main menu ( page 89).
Home number
Work number
Fax number
Main number
Mobile number
Pager number
The Phone Book menu appears on the
display. The first list entry is highlighted
automatically.
i
If no numbers are stored in the phone
book, the soft key
is shaded out
and without function.
On the multifunction steering wheel
Switch the multifunction display in the
instrument cluster to the Telephone
main display ( page 26).
Press j or k.
A phone book entry appears on the
multifunction display; scroll up or down
as required.
An example for the Phone Book menu is
shown above. It shows a list of the phone
book entries whose names start with the
letter B. Displayed in the status bar is the
number of the highlighted name, in this example 18005551212.
In the instrument cluster the name of
the category assigned to the phone
number, e.g. Home, appears in the multifunction display.
The following options are now available:
Switching between number and
name( page 98).
Selecting a phone book entry and estsablishing a connection( page 98). 97
Telephone*
Phone book
Adding spoken names to a phone book
entry ( page 99). This option is only
available for vehicles with voice control
system*.
Deleting a phone book entry
( page 99).
Selecting an entry
Selecting a phone book entry and establishing a connection
On the COMAND control unit
Open the phone book from COMAND
( page 97).
Press the 123 soft key.
This switches the display to number
display. The name of the highlighted
entry is shown in the status bar;
or
Press the ABC soft key.
This switches the display to name display. The number of the highlighted entry is shown in the status bar.
98
Changing initials
If necessary, change the initial letter
( page 98).
Select an entry using or .
Open the phone book ( page 97).
A list of phone book entries appears,
beginning with a specific first letter (initial).
Switching between number and name
If you press and hold either one of the
buttons, the scrolling up or down accelerates.
Establishing a connection
Press or once or repeatedly.
Each time you press the button, the
display changes to the next letter up or
down.
At the end of the list of letters is the
category Other. This category combines all entries without a name, or entries whose names start with a special
character (e.g. * or #).
Press 0.
The telephone initiates the connection
with the appropriate number.
On the multifunction steering wheel
Switch the multifunction display in the
instrument cluster to the Telephone
main display ( page 89).
Press j or k repeatedly until
the desired entry is shown in the multifunction display.
Telephone*
Phone book
Press s .
The telephone initiates the connection
with the selected number.
Deleting a phone book entry
Select the phone book entry to be deleted from COMAND ( page 98).
Press the Delete soft key.
Adding spoken names to a phone
book entry
If your vehicle is equipped with voice control system* you can add up to 20 spoken
names to each phone book entry.
Via the voice control system* you can dial
a number by speaking the name.
( Voice control system* Operator's manual).
Select a phone book entry ( page 98).
Press the New soft key.
The voice control system* prompts you
to speak a name.
Speak the name.
The delete prompt is displayed.
Use to select the menu item Yes.
Press .
The entry is deleted.
The voice control system* prompts you
to speak the name again.
Repeat the name.
The name is stored.
99
Telephone*
SMS (Mail)
SMS messages can be received if your vehicle is equipped with a telephone and
SMS messaging is available from your carrier.
Received messages are saved in the folder
SMS inbox.
i
Incoming new messages are indicated
by the symbol in the status bar.
Symbol appears in the status bar if
the SMS memory is full.
In addition, a corresponding message
is displayed when the folder is opened.
SMS inbox
Open the Telephone main menu
( page 89).
100
Press the SMS soft key.
i
The SMS inbox shows the list of received messages. The list is sorted
chronologically, the last message received is displayed at the top of the list.
If no SMS messages have been received the SMS soft key is without function and therefore shaded out.
The corresponding date and time appears in the status bar when the selected message has been received.
The folder SMS inbox appears.
Use or to select another message.
Telephone*
SMS (Mail)
i
Press the Sender soft key.
The name(s) or phone number(s) of the
message sender(s) appear(s).
The symbol at the beginning of a list
entry indicates that the message has
not been read.
i
The SMS inbox offers the following options:
The sender’s number only appears if it
has been transmitted.
Switching between subject and sender.
Reading a message ( page 101).
The sender’s name only appears if, in
addition, the number and the name are
stored in the phone book ( page 97).
Deleting a message ( page 102).
Switching between subject and sender
The SMS messages can be displayed with
the sender or the subject. In the SMS inbox
( page 100) you can either see the
Subject soft key or the Sender soft key.
To scroll through the message text,
press or as required.
Reading a message
In the SMS inbox ( page 100),
use or to select a message.
Switching between content and sender
Press .
You can either see the Sender soft key or
the Contents soft key.
The message text appears.
Press the Sender soft key.
The sender’s name appears if it is
saved in the phone book. If not, only
the phone number appears.
Press the Subject soft key.
The first characters of the message
texts appears;
or
or
101
Telephone*
SMS (Mail)
Press the Contents soft key.
The message text appears;
To return to the SMS inbox press the
Back soft key.
Deleting a message
In the SMS inbox ( page 100),
use or to select the message
to be deleted.
Press the Delete soft key.
A delete prompt is displayed.
Use to select the menu item Yes.
Press .
The message is now deleted.
102
Exiting from the SMS menu
Press the Back soft key.
This returns you to the Telephone main
menu.
Navigation*
Important notes
Navigation main menu
Destination entry
Route guidance
During route guidance
Last destinations and destination memory
POIs (Points of Interest)
103
Navigation*
Important notes
Safety Instructions
Warning
G
For safety reasons, you should only enter a
destination when the vehicle is stationary.
When the vehicle is in motion, a passenger
should enter the destination. Study manual
and select route before driving.
Do not watch display screen or operate buttons while the vehicle is in motion - let navigation announcements guide you. Stop at a
safe location before using buttons or making corrections.
Traffic regulations always have priority over
any route recommendations given.
Bear in mind that at a speed of just 30 mph
(approximately 50 km/h), your vehicle is
covering a distance of 44 feet (approximately 14 m) every second.
104
The route calculated by COMAND is a recommendation on how to best reach your selected destination.
During route guidance, you will not receive
any information on
Traffic lights
Stop and yield signs
Parking or stopping zones
One-way streets
Narrow bridges
Similar traffic regulation data
You should therefore always strictly observe
traffic regulations while driving. Drive carefully and always obey traffic laws and road
signs even if they contradict COMAND instructions.
Warning
G
The Navigation DVD module contains a
Class 1 laser product. There is a danger of
invisible laser radiation if the cover is
opened or damaged.
Do not remove the cover. The Navigation
DVD module does not contain any parts
which can be serviced by the user. For safety reasons, have any service work which
may be necessary performed only by qualified personnel.
Navigation*
Important notes
Navigation DVD
COMAND calculates the route with the
help of data that is stored on the navigation DVD.
Only use Mercedes-Benz navigation DVDs
designed for the E-Class (211) COMAND
system. No other CDs or DVDs will work.
Using other navigation CDs or DVDs might
lead to malfunctions.
Because of changes in local traffic patterns
(e.g. road works) and/or incomplete data,
errors in calculation may occur.
As a result, the recommended route may
deviate from the ideal route. The data
stored on the DVD only reflects local conditions at the time of DVD production. DVD
maps do not cover all areas nor all routes
within an area.
Loading/ejecting the DVD
The DVD is loaded into (and ejected from)
the navigation module.
The navigation module is mounted on the
left-hand side of the trunk.
Loading
Insert the DVD into the DVD slot 2
with the label facing up.
The navigation computer pulls the DVD
in.
Ejecting
Press and wait until the navigation
computer ejects the DVD.
Travelling abroad
1 Ejecting DVDs
2 DVD slot
i
Your Navigation DVD drive has been
designed to play DVDs which correspond to the IEC 60908 standard.
If you insert thicker data carriers, e.g.
ones that have data on both sides (one
side with DVD data, the other side with
audio data), they cannot be ejected
and will damage the drive.
The navigation DVD covers the continental
U.S., Hawaii and Canada.
Contact your Mercedes-Benz Center or the
Customer Assistance Center in the U.S. at
1-800-FOR-MERCedes (1-800-367-6372)
or in Canada at 1-800-387-0100 for other
DVDs that may be available.
Change the navigation DVD
( page 105).
105
Navigation*
Important notes
Route guidance with GPS
i
GPS (Global Positioning System) signals received make it possible to determine the current vehicle position.
COMAND may issue navigation announcements not suited to your actual position.
Moving the vehicle a few yards is typically
enough to remedy the situation.
i
Deviations from the actual position
may occur
if the reception of GPS signals is
disturbed e. g. in parking garages
and tunnels
if road conditions are bad
depending on the vehicle’s condition
T
Route guidance after vehicle transport
If your vehicle has been transported by a
car, train or ferry, COMAND may require
some time to find its exact position.
106
Trip interruption during route guidance
i
i
Trip interruption means parking the vehicle and switching COMAND OFF.
The navigation DVD must be loaded in
the navigation computer ( page 105).
Trip continuation means trip continuation with COMAND switched ON.
While determining the exact position ,
route guidance is subject to the following
restrictions:
The following instructions have to be followed when interrupting a trip during route
guidance, and later continuation:
COMAND does not output navigation
announcements.
The display OFF ROAD and an arrow indicating the direction of the destination
appear instead of the detailed navigation displays.
Once the system is correctly repositioned,
route guidance continues with navigation
announcements and detailed navigation
displays.
Continuation of the trip within 2 hours
after interruption:
The system automatically resumes
route guidance.
Continuation of the trip between
2 and 12 hours after interruption:
Continue route guidance manually
in the Navigation main menu
( page 108).
Navigation*
Important notes
Continuation of the trip more than 12
hours after interruption:
Route guidance must be restarted.
Select the destination from the
Last destinations memory
( page 148),
or
You can select a list item using or .
If, as shown in the example, you can see
the Page soft keys, then you can use the
soft keys to scroll up or down the list, page
by page.
As soon as you reach the beginning or end
of a list, the appropriate soft key is deactivated.
Re-enter the destination
( page 114).
Selection lists
Some menus provide lists from which you
can select an item.
Example: Menu to select a street
107
Navigation*
Navigation main menu
Calling up the Navigation main menu
i
This menu item only appears:
i
or
If route guidance is active, a prompt is
displayed instead, asking if route guidance is to be cancelled ( page 132).
Use or to select a menu item
and press ;
or
108
if the route guidance had previously
been interrupted ( page 132), and
less than 30 minutes have expired
since the interruption,
if the trip was interrupted and is to
be continued 2 - 12 hours after interruption ( page 106).
Destination memory
Destinations can be selected from the
Destination memory ( page 149),
Last destinations
You can select from the list of last destinations ( page 148),
Continue route guidance
Continues a cancelled route guidance,
Destination entry
Provides access to the Destination entry menu ( page 114),
Selectable menu items
The selected menu or the selected soft
key function appears.
Press .
The Navigation main menu appears, if
no route guidance is active.
Press one of the soft keys.
POIs
(Points of Interest)
Provides access to POIs input
( page 152). POIs include stops at
gas stations, airports, rest areas, hospitals, etc.
i
Destination memory and Last
destinations can only selected only if
destinations are already stored in the
system.
Navigation*
Navigation main menu
Selectable soft keys
Adjusting the acoustics for
navigation announcements
Home soft key
Provides access to the input of a home
address ( page 113).
The following acoustics criteria for navigation announcements can be adjusted:
Mode soft key
Bass / Treble ( page 110).
Balance / Fader ( page 110).
Volume ( page 110).
Press the Setting soft key in the Navigation main menu ( page 108).
Provides access to the route mode setting for certain road types to be avoided ( page 109).
Setting soft key
Provides access to settings adjusting
the acoustics of navigation announcements (treble, bass, volume, balance
and fader)
( page 109).
Use or to select an option.
Press .
This will switch the option ON or OFF.
i
Empty square = option OFF
Solid square = option ON
Avoiding certain road types
Certain road types to be avoided can be
defined for the system’s route calculation.
Press the Mode soft key in the Navigation main menu ( page 108).
The Setting menu appears.
Several options can be activated.
Upon completion, press the Back soft
key.
The Setting Mode menu for road types
to be avoided appears.
109
Navigation*
Navigation main menu
Setting bass/treble
Press the Bass or Treble soft key in the
Setting menu.
Press or .
or
The cursor moves horizontally, adjusting bass or treble accordingly.
Adjusting the volume
The vertical line moves, adjusting the
balance accordingly,
Automatically generated navigation announcements are superimposed over any
other active audio source. The volume difference is adjustable. This setting serves
to lower the volume of the currently active
audio source while the announcement is
being made.
Press or .
The horizontal line moves, adjusting
the fader accordingly.
Press or the Back soft key,
or
Press or .
i
Wait until the display changes.
The new setting is stored and activated.
The lines can be moved simultaneously
using + and (.
Setting balance and fader
or
Press the Bal/Fad soft key in the Setting menu.
A cross-hair cursor appears. The vertical line represents the balance setting.
The horizontal line represents the fader
setting.
110
Press or the Back soft key,
Wait until the display changes.
The new setting is stored and activated.
In the Setting menu ( page 109),
press the Nav.Vol. soft key.
Use this menu to set the volume difference.
Navigation*
Navigation main menu
i
The solid circle
setting.
. shows the current
Press the or key to select the
desired setting.
Press or the Back soft key.
The new setting is stored and activated.
111
Navigation*
Destination entry
Entering data
Entering a character via keypad menu
After pressing the first time, the character display 1 appears.
Entering characters
For character entry, the 12 button keypad
or the keypad menu can be used.
i
For more convenient entry, COMAND
offers only available characters from
the character set based on your selections and the data stored on the navigation DVD.
The character selected appears magnified or black.
The system will complete the entry if
the input matches data stored on the
navigation DVD.
Use , , ,,( or +to
select a character
1 Character display
Press .
You can see which characters can be
entered when using the keys.
Each additional depression moves you
to the next available character. The
character selected appears black.
The character is entered.
Entering a character via 12 button keypad
Use the 3 - " keys to enter a character.
A key must be pressed once or several
times in quick succession.
112
Wait until the character display disappears, or press .
The character is entered.
Navigation*
Destination entry
Deleting a character
Press the Delete soft key, if necessary.
The character last accepted by the system is deleted.
Entering a home address
One frequently used destination address
can be established as the Home address.
or
Call up the Navigation main menu
( page 108).
Press the Home soft key.
i
Do not confuse the Delete soft key (deletion of the last character) with the
Back soft key (deletion of the complete
entry).
Confirming the data entry
A message No home address stored appears or if a home address has already
been established, the home address
appears.
To start route guidance to the established home address press .
To enter or change the home address,
press the Change soft key.
The Navigation main menu with menu
items to change the home address appears.
After entering all the characters data entry
must be confirmed.
Press and hold for approx. 2 seconds to confirm the entry;
or
Use or to select the ok symbol and press .
i
The ok symbol can only be selected if
the system has recognized data entry.
113
Navigation*
Destination entry
Selectable menu items
Destination memory
You can select destinations from the
Destination memory ( page 149) only
if destinations have alreday been
stored.
Storing current location as home
address
Use or to select the
Current location menu item and
press .
Press the Map soft key.
Proceed as described under “Moving
the map and selecting a destination”
( page 124).
Or, to store the selected destination as
home adress, press .
Destination entry
Destination entry menu
You can enter a destination manually
via the Destination entry menu
( page 114).
Last destinations
You can select from the list of last destinations ( page 148) only if the system has already stored destinations.
press .
The Destination entry menu appears.
You can input POIs (points of interest),
for example gas stations, airports or
hospitals.
Select a home address using the map
Current location
114
Use or to select the
Destination entry menu item and
POIs
Provides access to store the current location as home address ( page 114)
or select a home address using the
map ( page 114).
Call up the Navigation main menu
( page 108).
To store the displayed address as
home address, press .
Use or to select the
Current location menu item and
press .
Navigation*
Destination entry
Entering a destination
Call up the Destination entry menu. The
Destination entry menu represents the
starting point.
POIs soft key
Provides access to the input of a POI
(Point of interest) ( page 152).
List soft key
Allows selecting a destination city from
a city list ( page 117).
Besides entering the name of a city
( page 116), the following soft keys are
available for selecting a destination:
The destination displayed last can now
be adopted ( page 116), or another
location can be entered ( page 116).
i
The Street, CityCtr, and POIs soft key
functions refer to the city on display.
Map soft key
Provides access to destination input directly via road map ( page 123).
Region soft key
Provides access to the region input
( page 115).
Street soft key
Provides access to input of the destination street ( page 119).
If you wish to choose global POIs not
referring to a city ( page 152).
CityCtr soft key
Provides access to the input of a city
section (center) ( page 118).
Selecting the region
In the Destination entry menu
( page 114) the region currently selected
is indicated by the characters in parenthesis in the status bar.
To change the region press the Region
soft key.
The region list appears.
115
Navigation*
Destination entry
Entering a different city
Use the keypad menu or the 12 buttton
keypad to enter the data of the city
( page 112).
After entering the city a selection list of
cities appears. Now continue with selecting a city.
Switching to a selection list is possible at
any time while entering a city.
Use or to select a region.
Enter city (USA) appears in the status
Press .
bar. The characters in parenthesis indicate
the selected region.
Selecting a different region deletes the
city last entered. The first city of the
newly selected region appears (in alphabetical order).
Accepting the displayed destination
Entering a city
The Destination entry menu ( page 114)
represents the starting point.
116
Press and hold for approx. 2 seconds.
i
Do not confuse the button with the
ok symbol in the main screen.
Press the List soft key.
The selection list appears. Now continue with selecting a city.
Navigation*
Destination entry
Selecting a city
Use or to select the destination city. The Page soft keys allow
scrolling through the list page by page.
i
The selection is cancelled if the Back
soft key is pressed.
Press .
After selecting the desired city, one of
the following menus appears:
For larger cities with more than 15
streets:
Enter Street menu ( page 119).
For smaller cities with up to
15 streets:
Select Street menu ( page 119).
If no streets are registered for the
selected city:
Select City Center menu
( page 118).
The appropriate menu can be identified
from the display in the status bar.
Narrowing of the destination after
selecting city
.
Besides entering a street name
( page 119), the following soft keys are
available for narrowing the destination:
Map soft key
Provides access to further destination
input directly via road map
( page 123).
117
Navigation*
Destination entry
CityCtr soft key
Switching to a selection list is possible at
any time while entering a center.
.
Provides access to the selection of a
section of the city (center)
( page 118).
Press the List soft key.
The selection list appears. Now continue with selecting a center.
POIs soft
key
Provides access to the input of a POI
referring to the destination city
( page 153).
Selecting a city center
.
Entering a city center
After the destination city ( page 116) has
been entered, the associated city center
(section of the city) can be selected.
Accepting the destination displayed
Press and hold for approx. 2 seconds.
Press the CityCtr soft key.
Enter center is displayed in the status
Entering a center
bar.
Use the keypad menu or the 12 buttton
keypad to enter the data of the center
( page 112).
After entering the center a selection
list of centers appears. Now continue
with selecting a center.
118
Use or to select a city center.
The Page soft keys allow scrolling
through the list page by page.
Navigation*
Destination entry
Press .
Entering a street
Selecting a street
Use the keypad menu or the 12 buttton
keypad to enter the data of the street
( page 112).
Use or to select a street. The
Page soft keys allow scrolling through
the list page by page.
After entering the street a selection list
of streets appears. Now continue with
selecting a street.
Press .
The Start Route Guidance menu
( page 128) appears.
Entering a street in the destination
city
The system accesses one of the following
menus after entering of a destination city
( page 116):
For larger cities with more than 15
streets:
Enter Street menu.
For smaller cities with up to 15 streets:
Select Street menu ( page 119).
If no streets are registered for the selected city, or if a street extends
through several city centers:
Select City Center menu ( page 118).
The appropriate menu can be identified
from the display in the status bar.
Switching to a selection list is possible at
any time while entering a street.
Press the List soft key.
The selection list appears. Now continue with selecting a street.
The Start Route Guidance menu with
the selected destination information
appears;
or
If the street extends through several
city centers, the list of city centers referring to the street selected appears.
119
Navigation*
Destination entry
Selecting the city center referring to
the street selected
The Start Route Guidance menu with
the selected destination information
appears.
The system distinguishes between streets
with the same name in a city by specifying
the center. After selecting a street, a list of
city centers may appear.
Narrowing of the destination after
selecting street
Intrsct. soft key
An intersection with the destination
street can be entered ( page 121).
Hse. no. soft key
A house number on the destination
street can be entered ( page 122).
The status bar shows how many times the
system found the same street name within
a given city.
i
Only the entry of either an intersecting
road or a house number is possible.
POIs soft key
A POI on or near the destination street
can be entered ( page 153).
The following soft keys are available to
continue narrowing the destination after
entering the street:
Use or to select a center and
press .
120
The following soft keys can also be selected:
For setting the route mode
( page 109).
Map soft key
Provides access to further destination
input directly via road map
( page 123).
Mode soft key
Save soft key
Stores the entered destination in the
destination memory ( page 150).
Navigation*
Destination entry
Entering an intersection
Enter Intersection menu
List of intersecting streets
Use or to select an intersection. The Page soft keys allow scrolling
through the list page by page.
Press .
After entering a street ( page 119), a
street intersecting with this street can be
entered.
Press the Intrsct. soft key.
The Enter Intersection menu or a list of
all intersecting streets appears.
i
The Intrsct. soft key is only available
if streets intersecting the destination
street are stored as intersections on
the navigation DVD.
Proceed the same as when entering a
street ( page 119).
The Start Route Guidance menu
( page 128) appears.
121
Navigation*
Destination entry
Entering a house number
A house number can be entered after entering the destination street ( page 119).
i
An intersection instead of a house
number can be entered ( page 121).
Entry of both is not possible.
The Enter House Number menu appears ( page 122), or the house number list appears. Now a house number
range can be selected ( page 123).
i
i
The Hse. no. soft key is only available
when registered house numbers are
stored on the navigation DVD for the
selected street.
Use , , ,,( or +to
select the numbers. Press after
each selection.
Symbol “ ” represents a space.
or
Press 3 - " to enter the numbers.
Press the Delete soft key if necessary.
Enter House Number menu
The number last accepted by the system is deleted.
i
Do not confuse the Delete soft key (deletion of the last number) with the Back
soft key (deletion of the complete entry).
Press the Hse. no. soft key.
or
122
Press and hold for approx. 2 seconds to confirm the input;
Navigation*
Destination entry
Use or to select the ok symbol and press .
The house number list appears. Now a
house number range can be selected.
i
The ok symbol can only be selected if
the system recognized the house number.
Selecting a house number range
Use or to select the desired
range of house numbers. The Page soft
keys allow scrolling through the list
page by page.
i
If no soft key is selected within
approx. 8 seconds, the soft key displays will disappear.
Press .
The Start Route Guidance menu
( page 128) appears.
Entering a destination using the map
Calling up the map display
Press %;
or
Press the Map soft key if it appears in a
menu.
The map appears in full-screen display.
Selectable soft keys
If the soft key displays are hidden,
press any soft key.
The soft key displays appear.
Coord. soft key
Allows entering a destination via geo
coordinates ( page 125).
Symbol soft key
Provides access to setting the symbols
display ( page 143)
123
Navigation*
Destination entry
Memory soft key
The current map location is stored
( page 126).
i
The soft keys Coord., Memory and Display are visible only if the map has
been called up using %.
Move the cursor using , , ,
,( or + to select the desired
destination.
Release the button.
Display soft key
You can select which POIs will appear
as symbols on the map ( page 143).
Moving the map and selecting a destination
soft key
The map scale will change to display a
more detailed map.
soft key
The map scale will change to display a
map that shows a wider area.
If the system finds a street name at the
location the cursor is pointing to, the
corresponding street name is shown in
the status bar.
In this example: WATER ST
i
The destination selection will be lost
when pressing the Back soft key.
The system reverses to the details of
the previously entered destination.
Start route guidance to the selected
destination
Press .
The Start Route Guidance menu appears if route guidance has not yet
been activated.
Press .
Route calculation begins.
If route guidance is already active, you
will be prompted to confirm that you
wish to accept the new destination.
Press to select Yes.
Press .
Route calculation begins.
124
Navigation*
Destination entry
Entering a destination via geo coordinates
Destination input via coordinates (longitude and latitude) will only be possible if
the map display is visible and if the Coord.
soft key is displayed.
Press %.
Press any soft key if the soft key displays are hidden.
Press the Coord. soft key.
The menu for entering coordinates appears. You can set the individual values
for the longitude and latitude in this
menu.
Press or to select the value you
wish to set.
Select the desired value using or
.
Keep repeating the last two steps until
you have set the required longitude and
latitude.
Press .
If the coordinates entered are located
in the digital map range, the display will
switch to map display with cursor. The
center point of the cursor indicates the
position of the coordinates entered on
the map.
The soft key displays appear.
1 “Hours” longitude value
2 “Minutes” longitude value
3 “Seconds” longitude value
4 “Seconds” latitude value
5 “Minutes” latitude value
6 “Hours” latitude value
125
Navigation*
Destination entry
Storing map location
You can store the current vehicle position
or a location selected via the map as an entry in the Last Destinations memory.
Therein such entries are marked with
( page 148).
Press .
The Start Route Guidance menu appears.
Press .
Route calculation begins.
i
Route guidance is only possible to coordinates within the digital map range.
126
If you wish to store such entries for later
retrieval or repeat usage, you can store
them in the standard destination memory
( page 149).
Storing current vehicle position
Press %.
Press any soft key if the soft key displays are hidden.
The soft key displays appear.
1 Symbol
= current vehicle location
Press the Memory soft key.
The system stores the current vehicle
position.
While storage takes place, the Memory
soft key display changes its color for a
short period of time.
Navigation*
Destination entry
Storing locations selected via the map
Press %.
Move the map and select a location
( page 124).
Press the Memory soft key.
The system stores the current cursor
position.
While storage takes place, the Memory
soft key display changes its color for a
short period of time.
127
Navigation*
Route guidance
Start route guidance menu
You can start route guidance when the
destination input is complete and
Start Route Guidance is displayed at the
bottom of the main area.
Save soft key
Stores the entered destination in the
destination memory ( page 149).
To start route guidance, press .
The route is calculated and route guidance begins.
As a result, the recommended route may
deviate from the ideal route. The data
stored on the DVD only reflects local conditions at the time of DVD production. DVD
maps may not cover all areas nor all routes
within an area.
Route re-calculation
Route calculation
Depending on the distance to the destination, route calculation can take some time.
While the route is being calculated,
Reading Navi DVD... Please Wait and an
arrow pointing towards the destination are
displayed. Once route calculation is complete, route guidance begins.
Besides starting route guidance following
soft keys are available:
Mode soft key
Provides access to the route mode setting for certain road types to be avoided ( page 109).
128
The system will calculate a new route during active route guidance if the driver fails
to follow the route guidance.
Because of changes in local traffic patterns
(e.g. road works) and/or incomplete data,
errors in calculation may occur.
During recalculation, NEW RTE is displayed.
The arrow is not solid.
Navigation*
Route guidance
Switching navigation announcements
ON/OFF
Navigation announcements
Warning
G
Navigation announcements are intended to
direct you while driving without diverting
your attention from the road and driving.
Display example 1
Switching OFF
Current navigation announcements
If a navigation announcement is not readily
understood, it can be repeated at any time.
Press 6.
The current navigation announcement
is repeated.
During a navigation announcement,
press 1.
For a short period of time, the message
Voice announcements muted is displayed.
Please always use this feature instead of
consulting the map display for directions.
Consulting the symbols or map display for
directions may cause you to divert your attention from driving and increase your risk
of an accident.
After route calculation, the system assists
route guidance using pictorial displays and
navigation announcements.
Two display examples are shown below.
Now further route guidance takes
place using only the symbols in the display. If a new route guidance cycle is
started, the announcements are automatically switched ON again.
Switching ON manually
Press 6.
Navigation displays
The navigation displays are visible only
with activated route guidance.
To switch to the navigation display
from another display, e.g. from CD
mode, press or %.
The road currently travelled on is indicated
in the status bar at the bottom, in this example I-80 E (Interstate 80 East).
The information 1.2 mi indicates the distance to the next driving maneuver.
i
The display unit can be changed to km
or miles using the control system (see
your vehicle Operator's Manual).
129
Navigation*
Route guidance
i
Display example 2
Changing map scale
On the right-hand side of the display the
symbol for the next driving maneuver is indicated (here left turn).
On the very right is a distance bar. The
dark blue part of the bar and the information 700ft, in this example, indicate the
distance to the next driving maneuver.
The currently selected map scale is shown
in the left-hand corner of the bottom status
bar
.
When the display unit is set to miles,
the COMAND will indicate distances in
miles (mi) or feet (ft).
When the display unit is set to km, the
COMAND will indicate distances in kilometers (km) and meters (m).
The circle shows the current vehicle location. The arrow in the circle designates
the current driving direction.
The remaining route is highlighted in color.
i
The colored highlight only appears
when the system has completed the
route calculation.
If available, the street following the driving
maneuver with its name is shown in the top
status bar (here CHESTNUT RIDGE RD).
The destination is marked with a flag on
the map, any stop-over destination is
marked with a flag s .
130
i
The display unit can be changed to km
or miles using the control system (see
your vehicle Operator's Manual).
When the display unit is set to miles,
COMAND will indicate distances in
miles (mi) or feet (ft).
When the display unit is set to km,
COMAND will indicate distances in kilometers (km) and meters (m).
Navigation*
Route guidance
Press any soft key.
The soft key displays appear.
i
or
If no soft key is selected within
approx. 8 seconds, the soft key display
will disappear.
Press the
North symbol :
Fixed map orientation, north is always
pointing up;
or
soft key.
Depending on your selection, the map
will zoom in and display greater detail
or zoom out and show a wider area.
The map scale bar in the status bar will
show the map scale currently selected.
Map orientation
Compass symbol :
Dynamic map orientation, driving direction is always pointing up.
Map orientation can be set manually
( page 144).
Changing map display
The map display can be switched between
split-screen mode and full-screen mode
manually or automatically.
During route guidance, a symbol will appear on the left of the bottom status bar if
map display is switched ON:
Split-screen mode
The map is shown on the left, while information concerning the next driving
maneuver is shown on the right.
Switching manually
Press %.
Each time % is pressed, the system
alternates between split-screen and
full-screen display mode.
Switching automatically
See “Automatic map toggling”
( page 146).
i
Depending on the map display setting
( page 145), in the full-screen mode
the status bar will be display:
the estimated time of arrival/remaining distance to the destination
or stopover destination
the position display
Full-screen mode
The map covers the entire screen.
131
Navigation*
Route guidance
Destination reached
Press .
Route guidance is cancelled. After a
short time, the Navigation main menu
appears.
i
Route guidance can be continued again
in the Navigation main menu
( page 108).
Partially digitized areas
Route guidance ends when the selected
destination is reached.
Cancelling route guidance
In navigation mode, press .
A prompt as to whether or not route
guidance is to be cancelled appears.
Use to select the menu item Yes.
i
The digital map may contain areas that
are only partially digitized although
they are within a digitized region.
Warning
G
Due to incomplete digitization, the route
shown on the map may differ from the actual
road/traffic situation.
132
Warning
G
If you follow the route shown on the map, for
example, it is possible that you could drive
the wrong way down a one-way street or
that a street cannot be driven on.
When using route guidance in a partially digitized area, you must therefore be sure to
observe all relevant traffic regulations and
the course of the road.
All relevant traffic regulations and the
course of the road always take priority over
the route shown on the map.
If the destination is within a partially
digitized area
COMAND guides you through fully digitized
areas for as long as possible. Route guidance is conducted in the usual manner, i.e.
with navigation announcements and route
guidance displays.
Navigation*
Route guidance
Before the vehicle reaches a partially digitized area, COMAND notifies you of this
with the following announcements:
“Be prepared to enter an area where
turn by turn guidance cannot be provided.”
“In 700 feet you will enter an area
where turn by turn guidance cannot be
provided.”
i
The indicated distance can be seen
here by way of example. In reality, it
may be different.
“You are about to enter an area where
turn by turn guidance cannot be provided.”
i
When you call up the info menu to this
type of destination, ( page 136) the
following data shown there may differ
from the actual situation:
Estimated time of arrival
Remaining driving time to the destination
Remaining distance to the destination
Route guidance within a partially digitized area
If you start route guidance in this type of
area, you will hear the following announcement: “You are currently in an area where
turn by turn guidance cannot be provided.”
Route guidance is provided by means of a
direction arrow showing the compass
heading to the destination. COMAND will
not generate automatic navigation announcements.
If you try to call up or repeat an announcement manually, ( page 129) you will hear
the announcement “You are currently in an
area where turn by turn guidance cannot be
provided.“.
During route guidance, the display is divided. On the right-hand side you will see the
direction arrow showing the compass
heading to the destination.
On the left-hand side of the display you will
see the map with the suggested route. The
suggested route is highlighted blue. However, it may not be possible to follow the
suggested route because, for example, the
road is closed or not open for car traffic.
If, during route guidance, COMAND leads
you back into a fully digitized area, route
guidance will simply continue in the usual
manner.
133
Navigation*
Route guidance
Off-road and off-map
Route guidance to an off-road destination
Warning
G
The COMAND navigation system may direct
you to off-road routes that your vehicle may
not be capable of traversing through without
damaging your tires, wheels or vehicle. It is
the driver’s sole responsibility to determine
the suitability of the route. Off-road routes
may be of varying conditions and their appropriateness for use may be affected by
various factors such as time of day, time of
year and immediate weather conditions that
cannot be judged or taken into consideration by the COMAND system.
134
COMAND can guide you to destinations
within the area covered by the digital map,
even if a destination is not located at a
road known to the system.
These destinations are shown as off-road
destinations, which you can enter using
the map, for example.
In these cases, COMAND guides you for as
long as possible with navigation announcements and displays on roads known to the
system.
Shortly before you reach the last known
point in the digitized road network, you will
hear the announcement “The destination is
nearby. Follow the arrow on the display”.
You will then see an arrow that indicates
the direction to the off-road destination.
When the off-road destination is close to
the road, Area of dest. reached appears
in addition below the arrow.
When you leave the last known point in the
digitized road network, direction arrows
showing the compass heading to the destination guide you. You will also see the Direction to destination display.
Route guidance from an off-road location to a destination
If there is no road available on map at current position of the car, vehicle is off road.
COMAND is also able to guide you to a destination from such a location.
At the start of the route guidance, you will
see the Off Road message and a direction
arrow. The direction arrow shows the compass heading to the actual destination.
The route is highlighted blue from the nearest road known to the system.
As soon as the vehicle is back on a road
known to the system, route guidance continues in the usual way.
Navigation*
Route guidance
Route guidance from an off-map location to a destination
If the vehicle position is outside the area
covered by the digital map, then the vehicle is in an off-map location.
COMAND is also able to guide you to a destination from such a location.
At the start of the route guidance, you will
see the Off Map message and a direction
arrow. The direction arrow shows the compass heading to the actual destination.
The route is highlighted blue from the nearest road known to the system.
As soon as the vehicle is back on a road
known to the system, route guidance continues in the usual way.
Off-road during route guidance
The road layout may differ from the data on
the digital map, due to road construction
measures, for example.
In such cases, the system cannot allocate
the vehicle’s position to the digital map
and the vehicle is therefore in an off-road
position.
The Off Road message and an arrow showing the compass heading to the destination appear on the display.
As soon as the system can allocate the vehicle position’s to the map again, route
guidance continues in the usual way.
135
Navigation*
During route guidance
Using the soft keys, diverse menus or displays can be requested, and settings can
be adjusted during route guidance.
Selectable soft keys
COMAND automatically hides the soft key
displays after a certain period of time.
Press any soft key while route guidance
is active
St-over soft-key
Provides access to the stop-over function ( page 140).
The soft key displays appear.
Symbol soft key
Provides access to setting the symbols
display ( page 143)
Memory soft key
The map position is stored
( page 126).
Display soft key
Provides access to the Display menu
( page 143).
136
soft key
The map scale will change to display a
map that shows a wider area.
Detour soft key
Provides access to the Detour function
( page 138).
soft key
The map scale will change to display a
more detailed map.
Info soft key
Provides access to the Info menu
( page 136).
Showing soft key displays
Info menu
If the soft key displays are shown
( page 136), press the Info soft key.
The Info menu appears. This shows you
the main destination and a stopover
destination s that may have been entered.
Navigation*
During route guidance
i
The estimated time of arrival does not
refer to the time zone of destination,
but always refers to the time zone of
the vehicle's current location. For a
correct calculation, make sure that the
system clock is set correctly
( page 164).
1 Estimated time of arrival
2 Remaining driving time in hours and
minutes
3 Remaining journey (distance)
Points 1, 2 and 3 refer to the stopover destination. You'll only see the details for the final destination when you
arrive at your stopover and the system
has calculated the route to the main
destination.
Selectable soft keys:
Route soft key
Provides access to the display of the
route on the map ( page 137).
Mode soft key
Provides access to the route mode setting for certain road types to be avoided ( page 109).
Displaying the route on the map
The map appears. The route remaining
is highlighted in blue color.
The destination is marked with a flag
, any stop-over destination is marked
with a flag s . The current vehicle position is identified with the symbol.
Depending on the distance to the destination, it may take some time before
the route display appears.
In the Info menu ( page 136), press
the Route soft key.
137
Navigation*
During route guidance
In the Info menu ( page 136), press
the Route soft key.
Depending on the distance to the destination, it may take a few moments before the route list is completed.
The list is completed only when the
route calculation is completed. Dest.
is displayed before the last list entry.
The route appears on the map.
Detour function is not active
i
Displaying the route list
Press the List soft key.
Detour function
The Detour function blocks a route segment ahead.
The length of this route segment can be
entered. The system then calculates a detour route, if possible.
The list of road/route sections remaining appears. The road currently travelled on appears at the top.
Use or to scroll through the
list. The Page soft keys allow scrolling
through the list page by page.
138
You can activate the function and set the
length of a route segment to be blocked
( page 138).
Detour function is already active
You can change the length of the route
segment to be blocked ( page 139), or
switch off the Detour function by deleting
the detour ( page 139).
Activating detour function and setting
length of route segment to be blocked
Show the soft key displays
( page 136).
Show the soft key displays
( page 136).
The Detour soft key display indicates
whether the Detour function is active.
Press the Detour soft key.
= not active
= active
The system gives you a full-screen map
and freezes the map and screen showing the position of the vehicle. You can
now set the distance of the route segment to be blocked.
Navigation*
During route guidance
Continue to press the soft key More or
Less until the desired distance for the
route segment to be blocked is
reached.
The length of the route segment
blocked ahead appears in the status
bar. The section of the road that is
blocked appears as a red and white
dotted line on the map.
Changing detour
Show the soft key displays
( page 136).
Press the Detour soft key.
Use to select the Change detour
menu item.
Press .
= current position
Press .
The system calculates a new route
avoiding the blocked road segment.
Press the Detour soft key.
Use to select the Delete detour
menu item.
Press .
You can now enter the length of the
road segment to be blocked.
Continue to press the More or Less soft
key until the desired distance for the
route segment to be blocked is set.
Press .
The system calculates a new route
avoiding the blocked segment, if possible.
1 Symbol
If a Detour is already active, the Detour
soft key is displayed in no color.
Deleting detour
The blocked road segment or detour requirement is cancelled. The system recalculates the route.
Show the soft key displays
( page 136).
139
Navigation*
During route guidance
The St-over soft key display indicates
whether the stop-over function is active.
Stop-over
This function offers the option of selecting
a stop-over destination while route guidance is active.
A stop-over destination can be, for example, a gas station, a rest area, or a hospital.
Once the stop-over destination has been
reached, the system automatically calculates the route to the final destination.
Show the soft key displays
( page 136).
= not active
= active
Route guidance to a stop-over destination
is not active:
You can enter a stop-over destination
( page 140).
Route guidance to a stop-over destination
is already active:
You can change the stop-over destination
or cancel the route guidance to it by deleting the stop-over ( page 142).
Selectable soft keys
soft key:
Provides access to a list of MercedesBenz Centers in the area.
soft key:
Provides access to a list of gas stations
in the area.
soft key:
Provides access to a list of parking areas
and multi-story car parks in the area.
Entering an stop-over destination
Show the soft key displays
( page 136).
Press the St-over soft key.
The full-screen map display appears.
140
Navigation*
During route guidance
soft key:
Provides access to a list of restaurants
in the area.
soft key:
Provides access to a list of hospitals in
the area.
Other soft key:
Allows access to the Destination entry
menu ( page 114).
Press one of the soft keys, for example
the
soft key.
One of several food categories can be
chosen (if available).
Use or to select a category
from the list. The Page soft keys allow
scrolling through the list page by page.
i
The arrows point in the direction of the
destination.
Distance information specifies the direct distance to the destination.
Press .
If appropriate destinations are available, a list with restaurants in the area
appears.
Use or to select a destination
from the list. The Page soft keys allow
scrolling through the list page by page.
141
Navigation*
During route guidance
Press the Details soft key, if you want
to see details of the selected destination.
i
If no route guidance to a stop-over destination is active yet ( page 140).
The details disappear again after
approx. 3 seconds, or when pressing
the Details soft key again.
Press to confirm the selection of a
destination.
The system begins to calculate the
route to the selected stop-over destination.
Changing/deleting stop-over destinations
.
Show the soft key displays
( page 136).
i
A stop-over destination can be
changed or deleted only while the route
guidance to this stop-over is active (indicated by
).
142
This will delete the stop-over. The system calculates the route to the final
destination;
Press the St-over soft key.
The menu for deleting or changing the
stop-over destination appears.
or
Use to select the
Replace active stopover entry.
Use to select the
Delete active stopover entry.
Press .
Press .
The stop-over is deleted, a new stopover destination can be entered
( page 140).
Navigation*
During route guidance
Defining route guidance displays
Show the soft key displays
( page 136).
Press the Display soft key.
Map soft key
Provides access to the Map Display
menu ( page 145).
In the Display menu ( page 143)
press the Symbols soft key.
The available options appear.
Auto soft key
Provides access to the Automatic Map
Switching menu ( page 146).
The Display menu appears.
Zoom soft key
Provides access to the definition of the
scales for full-screen and split-screen
map display ( page 146).
Setting symbols displays
You can select which POIs will appear as
symbols on the map.
i
Selectable soft keys:
Symbols soft key
Provides access to setting the symbols
display ( page 143).
View soft key
Provides access to setting the map orientation ( page 144).
The symbols are on display only if the
map scale is set at 0.05 mi (50 m),
0.1 mi (100 m), 0.2 mi (200 m), or
0.5 mi (500 m).
To set the map scale ( page 130).
Use or to select an option.
Press .
The selected option is activated. A solid
circle designates an activated option.
Standard option:
The symbols for the system default
setting are displayed on the map. 143
Navigation*
During route guidance
Personal option:
Use or to select a list entry.
The symbols to be displayed can be
selected from a list ( page 144).
Press to activate or deactivate the
symbol depending on its previous
state.
Finally, press the Back soft key or wait
for the screen to change.
None option:
No symbols will be displayed on the
map.
i
The Change soft key is only available if
the Personal option is selected. Otherwise, it will appear shaded out.
Setting personal symbol display
The setting is stored.
Setting map orientation
After activating the Personal option,
press the Change soft key.
The list of available symbols will
appear.
i
Empty square = symbol deactivated
Solid square = symbol activated
Any number of symbols can be activated.
144
i
One of the following orientations can be
selected:
Fixed map orientation, north is always
pointing up,
Changing map orientation
2D Heading up
Use or to select the deactivated option.
Press .
Dynamic map orientation, driving direction is always pointing up.
Empty circle = deactivated
Solid circle = activated
2D North up
In the Display menu ( page 143),
press the View soft key.
Both options appear.
The orientation changes.
Finally, press the Back soft key or wait
for the screen to change.
Navigation*
During route guidance
i
North symbol :
Fixed map orientation, north is always pointing up,
Compass symbol :
Dynamic map orientation, driving
direction is always pointing up.
The current position as coordinates.
The number of satellites that can
currently be received.
The current elevation (ALT = altitude) above sea level.
In the Display menu ( page 143),
press the Map soft key.
The possible options appear.
i
The COMAND uses GPS to calculate
the elevation above sea level. For reasons of tolerance, this value may deviate from the actual value.
Map display menu
You can set the following to be displayed in
the status bar:
If the full-screen map display is activated ( page 131), the following data will
be displayed:
During route guidance, a symbol will
appear on the left-hand side of the bottom status bar if map display is
switched ON.
Current-Location display
i
The solid circle
setting.
shows the current
Time of arrival/Dist. to Dest.
If the full-screen map display is activated ( page 131), the estimated time of
arrival and the remaining distance to
the destination will be displayed. If you
have entered a stopover destination
( page 140), the corresponding data
will be displayed.
No display
The name of the current road is displayed.
Use or to select the desired
option.
Press .
The map display is switched.
Finally, press the Back soft key or wait
for the screen to change.
145
Navigation*
During route guidance
Automatic map toggling
If you have set the map view to full screen
( page 131) and the automatic map toggling function is activated, then the following happens:
The system automatically switches to
the split-screen map display when a
driving maneuver is announced.
As soon as the driving maneuver is
completed, the system automatically
returns to full-screen map display.
Scales for full-screen and
split-screen map display
You can select whether the full-screen and
split-screen map scales are to be set together (default setting) or individually.
The Options On and Off appear.
In the Display menu ( page 143),
press the Auto soft key.
The solid circle
setting.
shows the current
Use or to select the desired
option.
Press .
Depending on the previous setting, automatic map toggling will be switched
ON or OFF.
146
In the Display menu, press the
( page 143) Zoom soft key.
i
Switching automatic toggling ON/OFF
Finally, press the Back soft key or wait
for the screen to change.
The Standard setting and Manual options appear.
Navigation*
During route guidance
i
The solid circle
setting.
Press .
Depending on the previous setting, the
shows the current
Standard (identical scale) or Manual (in-
dividual scale) option is activated.
Standard setting option:
The scales for full-screen and splitscreen map display are always
identical. Changing the scale
( page 130) on one map changes
the scale of the other.
Finally, press the Back soft key or wait
for the screen to change.
Manual option:
The scales can be different. Changing the scale on one map has no effect on the current scale of the
other map.
Use or to select the desired option.
147
Navigation*
Last destinations and destination memory
Last destinations memory
The Last destinations memory automatically stores the last destination for which
route guidance had been started.
Use to select the Last
destinations menu item.
Press .
The list of last destinations is displayed. The most recently stored destination is at the top of the list.
The current vehicle position and positions
selected via the map can also be stored as
a destination in this memory ( page 126).
Such destinations are marked with the
symbol.
Selectable soft keys and options
Save soft key
Stores the selected destination in the
standard destination memory
( page 149).
Details soft key
Displays details on the selected destination (if available).
Delete soft key
Allows to delete the selected destination ( page 149).
Altogether amaximum of 50 destinations
can be stored.
Calling up the Last destinations memory and selecting a destination
Starting route guidance to a destination of the Last destination memory
Select a destination.
Press .
Call up the Navigation main menu
( page 108).
148
Use or to select a destination.
The Page soft keys allow scrolling
through the list page by page.
The full destination appears.
Navigation*
Last destinations and destination memory
Use to select the menu item Yes.
Press .
The destination is deleted.
Destination memory
Calling up the destination memory and
selecting a destination
Press if you want to start route
guidance, otherwise press the Back soft
key.
Deleting a destination from the last
destinations memory
Select a destination ( page 148)
Press the Delete soft key.
You are prompted to confirm whether
or not the destination is to be deleted.
Call up the Navigation main menu
( page 108).
Use or to select the
Destination memory menu item.
Press .
The destination memory appears. This
is indicated by Destination memory in
the status bar.
Use , , , or to select the
desired entry.
Selectable soft keys and options
Details soft key
Displays details on the selected destination (if available).
Delete soft key
Allows to delete the selected destination ( page 150).
149
Navigation*
Last destinations and destination memory
Starting route guidance to a destination stored in the destination memory
Storing a destination
Select a destination.
Press .
or
The Start Route Guidance menu appears.
Press if you want to start route
guidance, otherwise press the Back soft
key.
Select a destination ( page 149).
Press the Delete soft key.
A delete entry prompt appears.
Use to select the menu item Yes.
Press .
The system deletes the entry from the
destination memory.
150
In the Start Route Guidance menu
( page 128), press the Save soft key;
Select a destination from the Last
destinations memory ( page 148)
and press the Save soft key.
The system automatically shows a default name (the city if applicable) as
Destination name; however a different
name can be entered.
Deleting a destination from the destination memory
Storing under the default name
Press and hold for approx. 2 seconds;
or
Storing under a different name
Use or to select the ok symbol and press .
The system will store the address under the default name.
i
The name must have at least one character.
Press the Delete soft key to delete the
default name.
Upper and lower case characters, accented characters, special characters and
numbers can be entered.
To select lower or upper case or to select
special characters, the following shift symbols on the display are available:
ABC = upper case
abc
= lower case
...
= special characters
i
Symbol “ ” represents a space.
Navigation*
Last destinations and destination memory
If necessary, use , or to select one of the shift fields.
Press .
The characters are shifted.
Use , , , , ( or + to
select the characters. Press after
each selection.
If necessary, press the Delete soft key
to delete the character last entered.
i
Do not confuse the Delete soft key (deletion of the last character) with the
Back soft key (deletion of the complete
entry).
Upon completion of the name entry
press and hold for approx. 2 seconds;
or
Use or to select the ok symbol and press .
The system will store the address.
151
Navigation*
POIs (Points of Interest)
Entering POIs
i
Use to select the POIs menu item.
Press .
The POIs main menu appears
( page 153).
POIs include gas stations, airports,
parking areas, rest stops, hospitals,
etc.
Via the map
Via Navigation main menu
Call up the Navigation main menu
( page 108).
The Navigation main menu appears.
152
A POI shown on the map can be selected
( page 156).
Via Destination entry menu
Open the Destination entry menu
( page 115).
A POI in the vicinity of a city can now be
selected;
or
If a further location detail, e.g. a street,
is to be entered:
A POI in the vicinity of this detailed location can be selected.
Enter the desired details of a destination ( page 115).
Press the POIs soft key.
Proceed as described in the “Selecting POI in the local area of the
current position” section under
“Selecting a POI category”
( page 153).
Navigation*
POIs (Points of Interest)
POIs main menu
Global destinations
Selecting a POI category
A POI from global categories can be selected ( page 154). The selection is
restricted to the region entered last;
however, the region selection can be
changed.
Selecting POI in the local area of the
current position
Selection of one of the following menu
items is possible:
Current position
Selecting a POI in the local area
( page 153).
Select city
Selecting a POI in any city to be
selected( page 154).
In the POIs main menu, ( page 153)
select the Current position menu
item.
Press .
A list of POI categories appears for the
selection of a category.
Use or to select a category.
The Page soft keys allow scrolling
through the list page by page.
Press .
If you have selected the Restaurant
category, another list will be displayed
from which you can select a sub-category, e.g. Chinese food.
If you have selected any other category, this will take you straight to the list
of POIs.
153
Navigation*
POIs (Points of Interest)
Selecting a POI
Press to start route guidance.
Selecting POI for a selected city
In the POIs main menu, ( page 153),
select the Select city menu item.
Enter a city as described in the Destination entry section ( page 115).
Proceed with “Selecting a POI category” ( page 153) and “Selecting a POI”
( page 154).
Selecting POI for a long-distance
destination
In the POIs main menu ( page 153),
select the Global destinations menu
item.
The list of long-distance POI categories
appears.
Use or to select a POI. The
Page soft keys allow scrolling through
the list page by page.
Press the Details soft key if you want
to see details of a selected POI.
The details disappear again after
approx. 3 seconds, or when pressing
the Details soft key again.
Press .
The Start Route Guidance menu appears.
154
I
.
After entering the city, press .
A list of POI categories appears for the
selection of a category.
Navigation*
POIs (Points of Interest)
The following options are now available:
Entering POI names
Selecting another region
I
Selecting a POI category
Selecting a POI
Selecting another region
Press the Region soft key.
The region list appears. Please see “Selecting the region” ( page 115).
Selecting a POI category
Use or to select a category.
Press .
Depending on the number of POIs in
the selected category, a POI name can
be entered ( page 155) or a POI can
be selected from a list ( page 155).
Proceed the same way as if you would
enter a city ( page 116).
The entry can be bypassed if the POI
name is not known.
i
Press and hold for more than
approx. 2 seconds.
After entering the POI name, or after
bypassing the entry, a POI can be selected.
Use or to select a POI. The
Page soft keys allow scrolling through
the list page by page.
The list also includes the distance “as
the crow flies” (as opposed to road distance), and the direction to the POI.
Press the Details soft key if you want
to see details of a selected POI.
155
Navigation*
POIs (Points of Interest)
The details disappear after approx.
3 seconds, or when pressing the Details soft key again.
Press .
The Start Route Guidance menu appears.
Selecting a POI using the map
If required, use , , , , +,
or ( to move the map.
If the soft key displays are hidden,
press any soft key.
Press %
or
In the Destination entry menu
( page 115), press the Map soft key.
The soft key displays appear.
.
The full-screen map appears. Symbols
indicate the POIs.
i
The POI symbols to be displayed can be
selected ( page 143).
Symbols are indicated only if the map
scale is set to 0.05 mi (50 m), 0.1 mi
(100 m), 0.2 mi (200 m), or 0.5 mi
(500 m).
Press to start route guidance.
156
To change the map scale ( page 130).
Press the Symbol soft key.
A POI is selected and highlighted in color. Its name appears in the status bar.
Navigation*
POIs (Points of Interest)
Use to select the menu item Yes.
Press .
The Start Route Guidance menu appears.
Press the Prev. or Next soft key to select the desired POI.
Press the Details soft key if you want
to see details of a selected POI.
Press to start route guidance.
The details disappear again after
approx. 3 seconds, or when pressing
the Details soft key again.
Press .
You are prompted to confirm the selected POI as the destination.
157
158
Service
Tele Aid*
159
Service
Tele Aid*
Tele Aid incorporates the following functions:
Emergency call system
Roadside Assistance
Information
Emergency call system
Roadside Assistance
Mercedes-Benz Roadside Assistance will
assist if technical problems with your vehicle are experienced.
Roadside Assistance can be requested
manually. Refer to your vehicle Operator's
Manual for additional information.
For certain emergency situations, the system automatically triggers an emergency
call. An emergency call can also be triggered manually. Refer to your vehicle Operator's Manual for additional information.
Upon request of Roadside Assistance the
system initiates the call to the MercedesBenz Response Center.
Connecting appears on the display.
If the system initiates an emergency call,
Connecting appears on the display.
Call Connected appears on the display.
During the emergency call Call Connected
appears on the display. No operation from
COMAND is possible.
160
If the connection is made, the message
Even after ending of the connection, the
service may remain active for up to another 5 minutes in order to transmit any required data. During this time, phone calls
cannot be made, nor can SMS messages
be received.
During activation of a roadside assistance
call, it is not possible to switch to another
application.
The transmitted data can contain, e.g., text
messages or address details of a
Mercedes-Benz Center.
Cancelling text messages
Press after you have read the message.
The message disappears.
Starting route guidance
You are prompted to confirm if route guidance to the address is to be started.
Use to select the Yes menu item
and confirm with .
The system starts the route calculation, and subsequently the route guidance to the defined address
( page 128).
Service
Tele Aid*
Ending the connection
On the COMAND control unit
Press /.
On the multifunction steering wheel
Press t .
COMAND reverts to the system last active before Tele Aid was activated.
Information
A call to the Mercedes-Benz Response
Center will be initiated. Information regarding the operation of your vehicle, the
nearest authorized Mercedes-Benz Center
or Mercedes-Benz USA products and services is available to you. Refer to your vehicle Operator's Manual for additional
information.
When a call to the Mercedes-Benz Response Center is initiated, Connecting appears on the display.
When the connection is made, the message Call Connected appears on the display.
Even after the connection has been ended,
the service will remain active for 5 minutes
in order to transmit any required data. During this time, phone calls can not be made,
nor can SMS messages be received.
The transmitted data can contain, e.g., text
messages or address details of a Mercedes-Benz Center.
Cancelling text messages
Press after you have read the message.
The message disappears.
Starting route guidance
You are prompted to confirm if route guidance to the address is to be started.
Use to select the Yes menu item
and confirm with .
The system starts the route calculation, and subsequently the route guidance to the defined address
( page 128).
161
162
System
System settings
163
System
System settings
Calling up the System menu
Tones soft key
For switching confirmation beeps
and acoustic signals ON and OFF
( page 167).
Press .
The System menu appears.
Setting the date/time
In the System menu, press the Time
soft key.
The Date/Time settings menu appears.
Display soft key
For changing the display settings
( page 167).
VC tips soft key
To call up the Voice control settings*
( page 168).
Reset soft key
For reversing COMAND to the factory
settings ( page 171).
Selectable soft keys
Time soft key
For setting the date and time.
Lang. soft key
For setting the language ( page 166).
164
The following options are now available:
Setting the time
Setting the date
Setting the date/time format
System
System settings
Setting the time
The UTC time transmitted by the GPS satellites has to be set to the local time zone.
This enhances
Setting the minutes:
With GPS reception, each time you
press or changes the time in increments of 30 minutes. Without GPS
reception, the time is changed in 1
minute increments.
correct calculation of the estimated
time of arrival.
i
When you change the time zone, the
clock time also changes automatically.
If you enter an incorrect time, the time
difference remains unchanged when
you change time zone.
Use or to select the hours or
the minutes.
Setting the date
Depending on the selection, hours or
minutes are set.
correct navigation for routes with timedependent traffic guidance, and
There is no automatic change from daylight saving time to standard time.
This has to be changed manually.
Press or .
Setting the hours:
Each time you press or , the
hours change in increments of 1 hour.
i
The date can be set only if GPS reception is available.
Use or to select the day, the
month or the year.
Press or .
Depending on the selection, the day,
the month, or the year is set.
The new setting is stored.
Press the Back soft key.
The new setting is stored.
Press the Back soft key.
Setting the date/Time format
Press the Format soft key.
You will see the date and time following
the currently selected format, as well
as a list of possible formats.
165
System
System settings
i
Setting the format:
List entry 1-3: Date formats
Use or to select a format.
List entry 4 and 5: Time formats
(Entry 5 is not visible on the display example below.)
Press .
Solid circle : format set
Empty circle : format not set
Press the Back soft key or wait for the
screen to change.
Setting the language
The language setting changes the display
language as well as the language used for
voice instructions in navigation announcements.
In the System menu ( page 164),
press the Lang. soft key.
The language list is displayed.
Instr. cluster settings:
The system switches to the language already set in the vehicle instrument cluster ( Vehicle
Operator’s manual).
The appropriate format is selected.
The new setting is stored.
166
The following options are available:
All other options:
The system switches to the requested language.
System
System settings
Use or to select an entry.
Use or to select an entry.
Press .
Press .
Press the Back soft key or wait for
screen to change.
The requested sounds are switched ON
or OFF.
The new setting is stored.
i
The square next to a list entry shows
the status.
Switching confirmation beeps and
acoustic signals ON/OFF
Empty square = sound OFF
Solid square = sound ON
In the System menu ( page 164),
press the Tones soft key.
The list of available sounds is displayed.
Press the Back soft key or wait for
screen to change.
The following soft key and option are available:
Provides access to adjusting the display brightness ( page 168).
The System menu appears. The new
setting is stored.
Display settings
Bright. soft key
Switching the display dimming characteristics ( page 168).
In the System menu ( page 164),
press the Display soft key.
The Display Settings menu appears.
167
System
System settings
Switching the display dimming
characteristics
Adjusting display brightness
You can select from 3 display dimming
modes:
Use this function to:
The Brightness display appears.
Start or delete voice control individualization ( page 169)
Activate/deactivate the voice control
help window
Day mode
The display is constantly set to daytime
design.
Voice control settings*
Press the Bright. soft key.
Night mode
Activate/deactivate the help window
The display is constantly set to nighttime design.
Open the System menu ( page 164).
Press the VC tips soft key.
Automatic
The display will change depending on
the illumination of the instrument cluster.
Use or to select an entry.
Press .
The Voice control menu appears.
Press or .
The brightness changes accordingly.
Press the Back soft key or wait for
screen to change.
The new setting is stored.
168
System
System settings
Press the key to select the Help
Window menu item.
Press or to select the menu
item with the empty circle .
Press to select menu item
Individualization.
The status bar shows you whether the
help window is activated or deactivated.
Press .
Press .
This will activate or deactivate the help
window.
The Individualization menu appears.
Press .
The menu to activate or deactivate the
help window appears. The solid circle
shows whether the help window is
activated or deactivated.
In the following display example, the
help window is activated.
Voice control individualization
The individualization function is used to
adapt the voice control to your own voice
and to therefore improve speech recognition. This does not affect speech recognition of other users.
Individualization consists of two stages.
The first stage involves training digits,
whilst the second stage trains specific
commands.
From the System menu ( page 164),
press the VC tips soft key.
The Voice control menu appears.
169
System
System settings
Starting individualization
i
Individualization is cancelled,
You can only activate the individualization function when the car is stationary. If the car is moving, the following
message appears: Individualization
Data from an existing first stage remains unchanged.
only possible when car is stationary.
If you save the first stage:
Press to select menu item Start
new individualization.
If you don’t save the first stage:
Press .
If you don’t start the second stage:
The individualization process starts.
The system now guides you through
the individualization process using a dialog, all operations are voice inputs.
After completion of the first stage, the system prompts you to save the data from the
first stage.
170
Data from an existing first stage is
over-written but is not saved until the
second stage is started.
Data from the first stage remains unchanged,
The individualization process is finished.
i
If you later decide to start the second
stage, you must restart the individualization process from the beginning of
the first stage.
After completion of the second stage, the
system prompts you to save the data of the
second stage.
If you don’t save the second stage:
Individualization is cancelled,
Data from an existing second stage remains unchanged.
If you save the second stage:
Data from an existing second stage is
deleted and all new data is saved,
Individualization is finished.
System
System settings
Canceling individualization
Reset function
You can cancel individualization at any
time during either the first or second
stage. All existing data remains unchanged.
Actuating the Reset function resets
COMAND to the factory settings.
In addition, it deletes:
During any individualization stage,
press the Cancel soft key.
SMS: All SMS messages.
Navigation*: All entries in the Destination memory and in the Last destination memory.
Individualization is cancelled.
Deleting individualization
A prompt appears, which asks if you really want to delete the data.
i
This function is not available if no individualization data has been saved.
From the Individualization menu,
press to select menu item Delete
individualization.
Press .
Press to select Yes.
Press .
Reset activation
Call up the System menu ( page 164).
Press the Reset soft key.
The individualization is deleted.
171
System
System settings
Use to select the menu item Yes.
Press .
This resets the entire system.
i
If you do not want to reset the system
and not delete the data:
A prompt appears asking if resetting
the system and deleting the data is really intended.
Use to select the menu item Yes.
Press .
You are prompted again to confirm if
you really want to reset the system and
delete the data.
172
Use to select the menu item No.
Press .
You will exit the reset screen.
Glossary
Glossary
Autostore
Enters the stations with the best reception (signal strength) into the autostore
memory in order of their reception
quality (from strong to weak).
Balance
Volume adjustment between left and
right speakers.
Bit
(Binary digit)
The smallest unit of digital information.
Bit rate
Measurement of transmission speed.
Indicates the number of ->bits transmitted per time unit.
Bluetooth®
Wireless personal area networks that
provide a way to connect and exchange
information between devices such as
mobile phones, laptops, PCs, etc. over
a short-range radio frequency.
CD
(Compact Disc)
Digital storage medium in disc form.
CD-R
(CD Recordable)
->CD which can be read and written but
not deleted.
Fader
(Fader control)
Volume control between front and rear
speakers.
CD-RW
(CD Rewriteable)
->CD which can be read, written and
deleted.
Folder
Alternative designation for directories.
Data saved on a storage medium can
be organized into directories for improved clarity. Can be likened to a filing
cabinet containing a number of folders,
each of which holds a number of documents.
COMAND
(Cockpit Management and Data System)
Information and operating center for
vehicle sound and communication systems, including the radio and CD player, as well as for other optional
equipment (CD changer*, telephone*,
satellite radio*, navigation*).
Coordinates
Indicate the geographical position on
the earth's surface.
DVD
(Digital Versatile Disc)
Digital storage medium in disc form for
storing large volumes of data.
Greenwich meridian
A specific north-south line running
through Greenwich, England.
GPS
(Global Positioning System)
Satellite-based system for relaying
geographic location information to and
from vehicles equipped with special receivers. Employs DVD digital maps for
navigation.
173
Glossary
GSM
(Global System for Mobile Communication)
Set of standards used for cellular communication; widely used in Europe.
ID3 tag
Additional information which may be
included in MP3 files (e.g. title, artist,
album).
ISO9660
Standard for recording data on CDs.
Joliet
Standard for recording data on CDs.
Latitude
One of the two -> coordinates that indicate the geographical position on the
earth's surface. The latitude indicates
the north-south position in relation to
the equator.
174
LOGIC7®
A 7-channel surround matrix that converts any 2-channel material into
breathtaking multi-channel surround
sound, creating a natural, 360-degree
“enveloping” soundfield with a maximum “audio sweetspot” for all passengers.
Longitude
One of the two -> coordinates that indicate the geographical position on the
earth's surface. The longitude indicates
the east-west position in relation to the
-> Greenwich meridian.
MP3
The term used in everyday speech for >MPEG1 Audio Layer 3.
MPEG1 Audio Layer 3
A means of compressing audio data.
Multi session
A method for recording data, e.g. for
CDs. Data is written to the CD in a number of sessions.
PIN
(Personal Identification Number)
Personal identification number, must
be entered to activate the telephone.
POI
(Point of Interest)
Points of Interest include service stations, rest areas, parking lots, hospitals, sight-seeing points, etc.
Provider
Service provider offering access to a
mobile communication network or other services within the network.
PUK
(Personal Unblocking Key)
Personal unblocking code, must be entered if the wrong PIN was entered
three consecutive times.
Glossary
Root directory
The uppermost directory on a storage
medium.
Scan rate (MP3)
Indicates the frequency at which voltage samples are taken during the conversion of an analog signal into a digital
signal. The analog-to-digital converter
converts the samples into digital signals.
SCAN search
Plays receivable radio stations, or CD
tracks in succession, each for approx.
8 seconds.
SIM
(Subscriber Identity Module)
Card provided by the GSM telephone
service provider. Necessary for accessing a mobile communication network.
SMS
(Short Message Service)
With this function, you can receive,
read and delete short text messages
(if SMS service is provided by your service provider).
Soft keys
Keys to activate different functions,
depending on the selected operating
mode.
Tele Aid
(Telematic Alarm Identification on Demand)
The Tele Aid system consists of three
types of response: automatic and manual emergency, roadside assistance
and information. Tele Aid is initially
activated by completing a subscriber
agreement and placing an acquaintance call.
The Tele Aid system is operational provided the vehicle's battery is charged,
properly connected, not damaged and
cellular and GPS coverage are available.
Telematics
Compound word made up of the terms
Telecommunication and Informatics.
Unlock code
Your unlock code prevents unauthorized persons from using your telephone. The unlock code is a number
string, which you have to enter when
switching on the telephone.
UTC
(Universal Time Coordinated)
The mean sun time associated with longitude zero (world time). It functions as
basis for the time zones.
WB
Weatherband
175
176
Index
Index
A
Accepted calls (telephone) . . . . . . . . 93
Accessing CD changer. . . . . . . . . . . . 62
Adding spoken names to a phone book
entry . . . . . . . . . . . . . . . . . . . . . . . . . . 99
Answering call (telephone) . . . . . . . . 90
Audio AUX mode . . . . . . . . . . . . . . . . 72
switching to . . . . . . . . . . . . . . . . . . . 72
Automatic volume control . . . . . . . . 30
Autostore (in Radio mode) . 40, 43, 173
B
Balance . . . . . . . . . . . . . . . . . . . . 30, 173
for navigation announcements . . . . 110
Bass. . . . . . . . . . . . . . . . . . . . . . . . . . . 31
for navigation announcements . . . . 110
Bit . . . . . . . . . . . . . . . . . . . . . . . . . . . 173
Bit rate (MP3) . . . . . . . . . . . . . . . . . . 173
permissible rates . . . . . . . . . . . . 53, 62
Bluetooth®
notes about. . . . . . . . . . . . . . . . . . . . 84
C
Call (Telephone)
answering . . . . . . . . . . . . . . . . . . . . . 90
ending . . . . . . . . . . . . . . . . . . . . . 91, 95
outgoing calls . . . . . . . . . . . . . . . . . . 94
placing an outgoing call . . . . . . . . . . 91
refusing . . . . . . . . . . . . . . . . . . . . . . . 91
CALL NOT POSSIBLE . . . . . . . . . . . . . 83
Calling up Destination memory . . . 149
Cancelling
route guidance . . . . . . . . . . . . . . . . 132
Caring for CDs . . . . . . . . . . . . 45, 52, 61
Category list (satellite radio) . . . . . . 77
CD . . . . . . . . . . . . . . . . . . . . . . . . . . . 173
see also MP3 CD
copy protection. . . . . . . . . . . . . . 46, 63
ejecting . . . . . . . . . . . . . . . . . . . . 46, 65
loading . . . . . . . . . . . . . . . . . . . . 45, 63
random CD (CD changer mode) . . . . 71
repeat (CD changer mode) . . . . . . . . 71
selecting . . . . . . . . . . . . . . . . . . . . . . 67
CD changer
accessing . . . . . . . . . . . . . . . . . . . . . 62
retracting . . . . . . . . . . . . . . . . . . . . . 63
CD changer mode. . . . . . . . . . . . . . . . 61
controls. . . . . . . . . . . . . . . . . . . . . . . 18
permissible file system (MP3) . . . . . . 61
permissible MP3 CDs . . . . . . . . . . . . 61
permissible MP3 formats . . . . . . . . . 61
Safety Instructions . . . . . . . . . . . . . . 61
switching to. . . . . . . . . . . . . . . . . . . . 61
CD slot
CD changer . . . . . . . . . . . . . . 63, 64, 65
MP3. . . . . . . . . . . . . . . . . . . . . . . . . . 17
single CD. . . . . . . . . . . . . . . . . . . . . . 15
CD-R . . . . . . . . . . . . . . . . . . . . . . . 52, 173
CD-RW . . . . . . . . . . . . . . . . . . . . . 52, 173
Changing
detour (navigation) . . . . . . . . . . . . . 139
map scale . . . . . . . . . . . . . . . . . . . . 130
stop-over destination . . . . . . . . . . . 142
CHANNEL UNAVAILABLE. . . . . . . . . . 77
COMAND . . . . . . . . . . . . . . . . . . . . . . 173
switching ON/OFF . . . . . . . . . . . . . . 29
system settings. . . . . . . . . . . . . . . . 164
177
Index
Controls
CD changer mode . . . . . . . . . . . . . . . 18
MP3 mode. . . . . . . . . . . . . . . . . . . . . 16
Multifunction steering wheel. . . . . . . 24
Navigation mode . . . . . . . . . . . . . . . . 22
Radio mode . . . . . . . . . . . . . . . . . . . . 12
Single CD mode . . . . . . . . . . . . . . . . 14
Telephone mode . . . . . . . . . . . . . . . . 20
Coordinates . . . . . . . . . . . . . . . . . . . 173
entering destination via . . . . . . . . . 125
Copy protection . . . . . . . . . . . . . . 46, 63
Copyright (MP3) . . . . . . . . . . . . . . 54, 62
Current navigation announcement 129
repeating. . . . . . . . . . . . . . . . . . . . . 129
D
Deleting
destination
from Destination memory . . . . . . 150
from Last destinations. . . . . . . . . 149
detour (navigation) . . . . . . . . . . . . . 139
phone book entry . . . . . . . . . . . . . . . 99
SMS. . . . . . . . . . . . . . . . . . . . . . . . . 102
stop-over destination . . . . . . . . . . . 142
178
Destination
deleting
from Destination memory . . . . . . 150
from Last destinations . . . . . . . . . 149
Last destinations. . . . . . . . . . . . . . . 148
special. . . . . . . . . . . . . . . . . . . . . . . 152
storing in Destination memory . . . . 150
Destination memory . . . . . . . . . . . . 149
calling up. . . . . . . . . . . . . . . . . . . . . 149
selecting destination . . . . . . . . . . . . 149
starting route guidance to a stored destination . . . . . . . . . . . . . . . . . . . . . . 150
storing destination . . . . . . . . . . . . . 150
Detour (navigation) . . . . . . . . . . . . . 138
changing . . . . . . . . . . . . . . . . . . . . . 139
deleting . . . . . . . . . . . . . . . . . . . . . . 139
setting . . . . . . . . . . . . . . . . . . . . . . . 138
Display
adjusting brightness . . . . . . . . . . . . 168
switching design . . . . . . . . . . . . . . . 168
Displaying route (navigation) . . . . . 137
DVD (navigation) . . . . . . . . . . 105, 173
E
Ejecting CD
in CD changer mode . . . . . . . . . . . . . 65
in MP3 mode . . . . . . . . . . . . . . . . . . . 55
in Single CD mode. . . . . . . . . . . . . . . 46
Ejecting navigation DVD . . . . . . . . . 105
Emergency call system . . . . . . . . . . 160
Emergency calls “911”. . . . . . . . . . . . 85
Ending
call (telephone) . . . . . . . . . . . . . . 91, 95
ENTER UNLOCK CODE . . . . . . . . . . . . 83
Entering
destination . . . . . . . . . . . . . . . . . . . 115
frequency (radio) . . . . . . . . . . . . . . . . 41
home address . . . . . . . . . . . . . . . . . 113
phone number . . . . . . . . . . . . . . . . . . 91
PIN. . . . . . . . . . . . . . . . . . . . . . . . . . . 87
unlock code. . . . . . . . . . . . . . . . . . . . 88
F
Fader . . . . . . . . . . . . . . . . . . . . . 30, 173
for navigation announcements . . . . 110
File structure (MP3 CD) . . . . . . . . . . . 52
Index
Folder . . . . . . . . . . . . . . . . . . . . . . . . 173
random (MP3 mode) . . . . . . . . . . . . . 59
repeat (MP3 mode) . . . . . . . . . . . . . . 59
selecting (MP3 mode) . . . . . . . . . . . . 56
Forward
in CD changer mode . . . . . . . . . . . . . 70
in MP3 mode. . . . . . . . . . . . . . . . . . . 59
in Single CD mode . . . . . . . . . . . . . . 49
Frequency input (in Radio mode) . . . 41
G
Global Positioning System
see GPS
GPS . . . . . . . . . . . . . . . . . . . . . . 106, 173
Greenwich meridian . . . . . . . . . . . . 173
GSM . . . . . . . . . . . . . . . . . . . . 85, 87, 174
H
Hands-free microphone
switching ON/OFF . . . . . . . . . . . . . . 96
Home address
entering . . . . . . . . . . . . . . . . . . . . . 113
I
ID3 tag. . . . . . . . . . . . . . . . . . . . . 53, 174
ISO9660 . . . . . . . . . . . . . . . . . . . 52, 174
J
Joliet . . . . . . . . . . . . . . . . . . . . . . 52, 174
L
Language setting . . . . . . . . . . . . . . . 166
Last destinations memory . . . . . . . 148
selecting destination. . . . . . . . . . . . 148
starting route guidance to Last
destination . . . . . . . . . . . . . . . . . . . 148
Latitude. . . . . . . . . . . . . . . . . . . 125, 174
List (Satellite radio mode)
program categories. . . . . . . . . . . . . . 77
program category list . . . . . . . . . . . . 77
List (Telephone mode)
accepted calls. . . . . . . . . . . . . . . . . . 93
missed calls . . . . . . . . . . . . . . . . . . . 93
outgoing calls . . . . . . . . . . . . . . . . . . 94
Loading CD
in CD changer mode . . . . . . . . . . . . . 63
in MP3 mode. . . . . . . . . . . . . . . . . . . 54
in Single CD mode . . . . . . . . . . . . . . 45
Loading navigation DVD . . . . . . . . . 105
LOGIC7® . . . . . . . . . . . . . . . . . . . 33, 174
Longitude . . . . . . . . . . . . . . . . . 125, 174
M
Manual tuning (in Radio mode). . . . . 41
Memory
destination . . . . . . . . . . . . . . . . . . . 149
Last destinations. . . . . . . . . . . . . . . 148
radio station . . . . . . . . . . . . . . . . 39, 43
Menu system . . . . . . . . . . . . . . . . . . . 27
Mercedes-Benz Information . . . . . . 161
Missed calls (telephone) . . . . . . . 92, 93
MPEG1 Audio Layer 3 . . . . 53, 61, 174
MPEG2 Audio Layer 3 . . . . . . . . . . . . 62
MPEG2.5 Audio Layer 3 . . . . . . . . . . . 62
MP3 . . . . . . . . . . . . . . . . . . . . . . . . . . 174
tips on creating MP3 CDs . . . . . . . . . 52
tips on creating MP3 tracks . . . . . . . 53
tips on data storage media . . . . . . . . 51
MP3 CD
ejecting . . . . . . . . . . . . . . . . . . . . . . . 55
file structure . . . . . . . . . . . . . . . . . . . 52
loading . . . . . . . . . . . . . . . . . . . . . . . 54
MP3 formats . . . . . . . . . . . . . . . . . 53, 61
179
Index
MP3 mode . . . . . . . . . . . . . . . . . . . . . . 51
controls . . . . . . . . . . . . . . . . . . . . . . . 16
multi session CDs . . . . . . . . . . . . . . . 52
permissible CDs . . . . . . . . . . . . . . . . 52
permissible file systems . . . . . . . . . . 52
permissible MP3 formats . . . . . . . . . 53
safety Instructions . . . . . . . . . . . . . . 51
switching to. . . . . . . . . . . . . . . . . . . . 54
Multi session . . . . . . . . . . . . . . . . . . 174
CDs (MP3). . . . . . . . . . . . . . . . . . . . . 52
Multifunction steering wheel
controls . . . . . . . . . . . . . . . . . . . . . . . 24
Mute function . . . . . . . . . . . . . . . . . . . 36
N
Navigation announcements
see also current navigation announcement
after vehicle transport. . . . . . . . . . . 106
switching ON/OFF . . . . . . . . . . . . . 129
Navigation displays . . . . . . . . . . . . . 129
Navigation DVD . . . . . . . . . . . . . . . . 105
ejecting . . . . . . . . . . . . . . . . . . . . . . 105
loading . . . . . . . . . . . . . . . . . . . . . . 105
Navigation mode . . . . . . . . . . . . . . . 108
controls . . . . . . . . . . . . . . . . . . . . . . . 22
180
Navigation soft key displays
show . . . . . . . . . . . . . . . . . . . . . . . . 136
NO HOME ADDRESS STORED . . . . . 113
NO SERV.. . . . . . . . . . . . . . . . . . . . 83, 89
O
Outgoing calls. . . . . . . . . . . . . . . . . . . 94
P
Permissible
bit rates (MP3) . . . . . . . . . . . . . . 53, 62
file system (MP3) . . . . . . . . . . . . . . . 61
file systems (MP3). . . . . . . . . . . . . . . 52
MP3 CDs . . . . . . . . . . . . . . . . . . . 52, 61
MP3 formats . . . . . . . . . . . . . . . . 53, 61
Personal Identification Number
see PIN
Personal Unblocking Key
see PUK
Phone book . . . . . . . . . . . . . . . . . . . . . 97
adding spoken names . . . . . . . . . . . . 99
deleting entry . . . . . . . . . . . . . . . . . . 99
selecting entry . . . . . . . . . . . . . . . . . 98
switching display between number and
name . . . . . . . . . . . . . . . . . . . . . . . . . 98
PHONE NOT INSTALLED . . . . . . . . . . 85
PIN . . . . . . . . . . . . . . . . . . . . . . . . . . . 174
entering . . . . . . . . . . . . . . . . . . . . . . . 87
PLEASE INSERT PHONE . . . . . . . . 83, 85
PLEASE INSERT SIM CARD. . . . . . . . . 85
POI . . . . . . . . . . . . . . . . . . . . . . 152, 174
Points of interest
see POI
Presets (Satellite radio mode) . . . . . 77
Program categories . . . . . . . . . . . . . . 74
Program category list . . . . . . . . . . . . 77
Program type list
see program category list
Provider . . . . . . . . . . . . . . . . . . . 87, 174
PUK . . . . . . . . . . . . . . . . . . . . . . 87, 174
R
Radio mode . . . . . . . . . . . . . . . . . . . . . 37
controls . . . . . . . . . . . . . . . . . . . . . . . 12
switching to. . . . . . . . . . . . . . . . . . . . 37
Random
CD (CD changer) . . . . . . . . . . . . . . . . 71
folder (MP3) . . . . . . . . . . . . . . . . . . . 59
track
in CD changer mode . . . . . . . . . . . 71
in MP3 mode . . . . . . . . . . . . . . . . . 59
in Single CD mode . . . . . . . . . . . . . 49
Index
Reading SMS . . . . . . . . . . . . . . . . . . 101
READY . . . . . . . . . . . . . . . . . . . . . . . . . 89
Redial . . . . . . . . . . . . . . . . . . . . . . . . . 92
Refusing call (telephone) . . . . . . . . . 91
Repeat
CD (CD changer mode) . . . . . . . . . . . 71
folder (MP3 mode) . . . . . . . . . . . . . . 59
track
in CD changer mode . . . . . . . . . . . 70
in MP3 mode . . . . . . . . . . . . . . . . . 59
in Single CD mode. . . . . . . . . . . . . 49
Reset function . . . . . . . . . . . . . . . . . 171
Retracting CD changer . . . . . . . . . . . 63
Reverse
in CD changer mode . . . . . . . . . . . . . 70
in MP3 mode. . . . . . . . . . . . . . . . . . . 59
in Single CD mode . . . . . . . . . . . . . . 49
Roadside Assistance . . . . . . . . . . . . 160
ROAMING . . . . . . . . . . . . . . . . . . . . . . 89
Root directory . . . . . . . . . . . . . . . . . 175
Route display (Navigation mode) . . 137
Route guidance
after vehicle transport . . . . . . . . . .
cancelling . . . . . . . . . . . . . . . . . . . .
Info menu . . . . . . . . . . . . . . . . . . . .
interrupting journey . . . . . . . . . . . .
starting to a destination
of Destination memory . . . . . . . .
of Last Destinations. . . . . . . . . . .
with GPS . . . . . . . . . . . . . . . . . . . . .
Route guidance info menu . . . . . . .
Route mode . . . . . . . . . . . . . . . . . . .
106
132
136
106
150
148
106
136
109
S
Safety Instructions
for CD changer operation . . . . . . . . . 61
for MP3 operation. . . . . . . . . . . . . . . 51
for navigation . . . . . . . . . . . . . . . . . 104
for radio operation . . . . . . . . . . . . . . 37
for single CD operation . . . . . . . . . . . 45
for telephone operation . . . . . . . . . . 82
Satellite radio operation . . . . . . . . . . 75
Scan rate (MP3) . . . . . . . . . . . . . . . . 175
permissible rates . . . . . . . . . . . . 53, 62
Scan search . . . . . . . . . . . . . . . . . . . 175
in CD changer mode . . . . . . . . . . . . . 70
in MP3 mode. . . . . . . . . . . . . . . . . . . 58
in Radio mode . . . . . . . . . . . . . . . . . . 40
in Satellite radio mode . . . . . . . . . . . 79
in Single CD mode . . . . . . . . . . . . . . 49
Search radio station . . . . . . . . . . 38, 42
Selecting
CD . . . . . . . . . . . . . . . . . . . . . . . . . . . 67
destination
of destination memory. . . . . . . . . 149
of Last destinations . . . . . . . . . . . 148
folder (MP3 mode) . . . . . . . . . . . . . . 56
POIs. . . . . . . . . . . . . . . . . . . . . . . . . 152
satellite radio station . . . . . . . . . . . . 76
telephone book entry . . . . . . . . . . . . 98
track
in CD changer mode . . . . . . . . . . . 69
in MP3 mode . . . . . . . . . . . . . . . . . 57
in Single CD mode . . . . . . . . . . . . . 47
181
Index
Setting
balance . . . . . . . . . . . . . . . . . . . . . . . 30
for navigation announcements . . 110
bass. . . . . . . . . . . . . . . . . . . . . . . . . . 31
for navigation announcements . . 110
date. . . . . . . . . . . . . . . . . . . . . . . . . 164
date format . . . . . . . . . . . . . . . . . . . 164
display brightness . . . . . . . . . . . . . . 168
fader . . . . . . . . . . . . . . . . . . . . . . . . . 30
for navigation announcements . . 110
language . . . . . . . . . . . . . . . . . . . . . 166
map orientation. . . . . . . . . . . . . . . . 144
radio station . . . . . . . . . . . . . . . . 38, 42
route mode . . . . . . . . . . . . . . . . . . . 109
time. . . . . . . . . . . . . . . . . . . . . . . . . 164
time format . . . . . . . . . . . . . . . . . . . 164
treble. . . . . . . . . . . . . . . . . . . . . . . . . 31
for navigation announcements . . 110
volume . . . . . . . . . . . . . . . . . . . . . . . 30
for navigation announcements . . 110
Showing soft key displays (Navigation
mode) . . . . . . . . . . . . . . . . . . . . . . . . 136
SIM card . . . . . . . . . . . . . . . 85, 87, 175
SIM CARD BLOCKED. . . . . . . . . . . . . . 87
182
Single CD mode . . . . . . . . . . . . . . . . . 45
controls . . . . . . . . . . . . . . . . . . . . . . . 14
safety Instructions . . . . . . . . . . . 37, 45
switching to. . . . . . . . . . . . . . . . . . . . 45
Sirius Satellite Radio . . . . . . . . . . . . . 74
Sirius Service Center
calling the . . . . . . . . . . . . . . . . . . . . . 80
SMS . . . . . . . . . . . . . . . . . . . . . . . . . . 175
deleting . . . . . . . . . . . . . . . . . . . . . . 102
reading . . . . . . . . . . . . . . . . . . . . . . 101
Soft key displays
showing in Navigation mode . . . . . . 136
Soft keys . . . . . . . . . . . . . . . . . . . 28, 175
Sound functions . . . . . . . . . . . . . . . . . 32
switching . . . . . . . . . . . . . . . . . . . . . . 33
Speed dial . . . . . . . . . . . . . . . . . . . . . . 95
Spoken names to a phone book entry .
99
Starting route guidance. . . . . . . . . . 128
Station (radio)
presets . . . . . . . . . . . . . . . . . . . . 39, 42
search . . . . . . . . . . . . . . . . . . . . . 38, 42
setting . . . . . . . . . . . . . . . . . . . . . 38, 42
storing . . . . . . . . . . . . . . . . . . . . . . . . 43
Station (satellite radio)
presets . . . . . . . . . . . . . . . . . . . . . . . 77
scan search . . . . . . . . . . . . . . . . . . . . 79
selecting . . . . . . . . . . . . . . . . . . . . . . 76
storing . . . . . . . . . . . . . . . . . . . . . . . . 80
Stop-over destination
changing . . . . . . . . . . . . . . . . . . . . . 142
deleting . . . . . . . . . . . . . . . . . . . . . . 142
Storing
current vehicle position. . . . . . . . . . 126
destination in Destination memory . 150
location selected via the map . . . . . 127
radio station . . . . . . . . . . . . . . . . . . . 43
satellite radio station. . . . . . . . . . . . . 80
Subscriber Identity Module
see SIM card
Index
Switching
display dimming characteristics . . . 168
map scale . . . . . . . . . . . . . . . . . . . . 130
Multifunction display . . . . . . . . . . . . 25
phone book display between
number and name. . . . . . . . . . . . . . . 98
sound functions . . . . . . . . . . . . . . . . 33
to Audio AUX mode. . . . . . . . . . . . . . 72
to CD changer mode. . . . . . . . . . . . . 61
to MP3 mode . . . . . . . . . . . . . . . . . . 54
to Navigation mode. . . . . . . . . . . . . 108
to Radio mode . . . . . . . . . . . . . . . . . 37
to Single CD mode . . . . . . . . . . . . . . 45
to Telephone mode . . . . . . . . . . . . . . 88
waveband (radio) . . . . . . . . . . . . . . . 37
Switching ON/OFF
COMAND . . . . . . . . . . . . . . . . . . . . . 29
hands-free microphone. . . . . . . . . . . 96
mute function . . . . . . . . . . . . . . . . . . 36
navigation announcements. . . . . . . 129
telephone . . . . . . . . . . . . . . . . . . . . . 85
System settings . . . . . . . . . . . . . . . . 164
T
Tele Aid . . . . . . . . . . . . . . . . . . . 160, 175
Telematics . . . . . . . . . . . . . . . . . . . . 175
Telephone mode. . . . . . . . . . . . . . . . . 85
controls. . . . . . . . . . . . . . . . . . . . . . . 20
switching to . . . . . . . . . . . . . . . . . . . 88
Tips . . . . . . . . . . . . . . . . . . . . . . . . . . 82
Telephone switching ON/OFF . . . . . 85
Tips
on caring of CDs . . . . . . . . . . . . . 45, 61
on caring of MP3 CDs . . . . . . . . . . . . 52
on copyright (MP3) . . . . . . . . . . . 54, 62
on creating MP3 CDs . . . . . . . . . . . . 52
on creating MP3 tracks. . . . . . . . . . . 53
on data storage media (MP3) . . . . . . 51
on telephone operation. . . . . . . . . . . 82
Track
forward
in CD changer mode . . . . . . . . . . .
in MP3 mode . . . . . . . . . . . . . . . . .
in Single CD mode . . . . . . . . . . . . .
random
in CD changer mode . . . . . . . . . . .
in MP3 mode . . . . . . . . . . . . . . . . .
in Single CD mode . . . . . . . . . . . . .
repeat
in CD changer mode . . . . . . . . . . .
in MP3 mode . . . . . . . . . . . . . . . . .
in Single CD mode . . . . . . . . . . . . .
reverse
in CD changer mode . . . . . . . . . . .
in MP3 mode . . . . . . . . . . . . . . . . .
in Single CD mode . . . . . . . . . . . . .
selecting
in CD changer mode . . . . . . . . . . .
in MP3 mode . . . . . . . . . . . . . . . . .
in Single CD mode . . . . . . . . . . . . .
70
59
49
71
59
49
70
59
49
70
59
49
69
57
47
183
Index
Transmitting number sequences (telephone) . . . . . . . . . . . . . . . . . . . . . . . . . 96
Travelling abroad . . . . . . . . . . . . . . . 105
Treble . . . . . . . . . . . . . . . . . . . . . . . . . 31
for navigation announcements . . . . 110
Trip interruption. . . . . . . . . . . . . . . . 106
U
Universal Time Coordinated
see UTC
Unlock code . . . . . . . . . . . . . . . . . . . 175
entering. . . . . . . . . . . . . . . . . . . . . . . 88
UTC . . . . . . . . . . . . . . . . . . . . . . 165, 175
V
Vehicle transport . . . . . . . . . . . . . . . 106
VOICE ANNOUNCEMENTS MUTED . 129
Volume
automatic volume control . . . . . . . . . 30
setting . . . . . . . . . . . . . . . . . . . . . . . . 30
for navigation announcements . . 110
184
W
Warning . . 37, 45, 51, 54, 61, 63, 82, 89,
104, 134
WB . . . . . . . . . . . . . . . . . 36, 38, 42, 175
WRONG PIN NUMBER . . . . . . . . . . . . 87
We reserve the right to modify the technical details of the COMAND system as given
in the data and illustrations of this Operator's Manual.
Reprinting, translation and copying, even
of excerpts, is not permitted without prior
authorization in writing.
Press time: 04/19/2007
Printed in Germany
Bild in der Größe
215x70 mm einfügen
Order No. 6515 6785 13 Part No. 219 584 12 83 USA Edition A 2008
COMAND Operator's Manual E-Class / CLS-Class
COMAND Operator's Manual