1
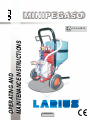
OPERATING AND
MAINTENANCE INSTRUCTIONS
II 2 G c IIB T4
ENGLISH
Ed. 001
05 - 09
MINIPEGASO
English
PNEUMATIC DOUBLE DIAPHRAGM PUMP
WARNING............................................................. p.2
I PROBLEMS AND SOLUTIONS............................ p.14
L DESCRIPTION FOR EXPLOSIVE AREAS........... p.14
WORKING PRINCIPLE......................................... p.3
Technical features.................................................. p.15
TECHNICAL DATA................................................ p.4
Marking.................................................................. p.15
DESCRIPTION OF THE EQUIPMENT................. p.5
Safety instructioins for onstallations in hazardous
TRANSPORT AND UNPACKING......................... p.6
areas...................................................................... p.16
SAFETY RULES.................................................... p.6
Example of installation........................................... p.16
SETTING-UP......................................................... p.7
Declaration of conformity....................................... p.16
INTRODUCTION................................................... p.1
A
B
C
D
E
F
M
N
O
P
Q
Connection of the flexible hose to the gun........ p.7
Washing of the new equipment......................... p.8
Preparing the product to be applied.................. p.9
G WORKING............................................................. p.10
Starting the spraying operations....................... p.11
COMPLETE HYDRAULIC BODY.......................... p.18
FRAME UNIT REF. 20850..................................... p.20
DELIVERY UNIT REF. 20851................................ p.22
CONTROL UNIT REF. 20852................................ p.23
GUN UNIT REF. 20853.......................................... p.24
R ACCESSORIES..................................................... p.25
S VERSIONS............................................................ p.26
Spray adjustment.............................................. p.11
H MAINTENANCE.................................................... p.11
Cleaning after spray painting or a product change.p.11
WE ADVISE THE USE OF THIS EQUIPMENT ONLY BY PROFESSIONAL OPERATORS.
ONLY USE THIS MACHINE FOR USAGE SPECIFICALLY MENTIONED IN THIS MANUAL.
Thank you for choosing a LARIUS S.R.L. product.
As well as the product purchased,
you will receive a range of support services
enabling you to achieve the results desired,
quickly and professionally.
1
MINIPEGASO
WARNINGS
The table below provides the meaning of the symbols used in this manual in relation to using, earthing,
operating, maintaining, and repairing of this equipment.
English
Read this operator’s manual carefully before using the equipment.
An improper use of this machine can cause injuries to people or things.
Do not use this machine when under the influence of drugs or alcohol.
Do not modify the equipment under any circumstances.
Use products and solvents that are compatible with the various parts of the equipment, and read the manufacturer’s warnings carefully.
See the Technical Details for the equipment given in the Manual.
Check the equipment for worn parts once a day. If any worn parts are found, replace them using ONLY original spare parts.
Keep children and animals away from work area.
Comply with all safety standards.
It indicates an accident risk or serious damage to equipment if this warning is not followed.
FIRE AND DANGER OF EXPLOSIONS
Flammable fumes, such as solvent and paint fumes, may burst into flames or explode.
To prevent the risks of fire or explosion:
- ONLY use this equipment in a well ventilated area. Earth all the equipment located in the work area.
- Eliminate all sources of sparks, such as pilot flames, cigarettes, portable electric torches, synthetic clothing (potential static arc) etc.
- Connect the equipment and all the conductive devices in the working area to ground.
- Use only conductive airless hoses and connect them to ground.
- Do not use tricloroethane, methylene chloride, other halogenated hydrocarbon solvents or fluids containing such solvents in pressurised
aluminium equipment. Using these substances may cause a dangerous chemical reaction with the possibility of explosion.
- Do not form connections or switch light switches on or off if the air contains inflammable fumes.
If electrical shocks or discharges are encountered the operation being carried out using the equipment must be stopped immediately.
Keep a fire extinguisher at hand in the immediate vicinity of the work area.
It indicates wound and finger squashing risk due to movable parts in the equipment.
Tenersi lontano dalle parti in movimento.
Do not use the equipment without the proper protection.
Before any inspection or maintenance of the equipment, carry out the decompression procedure explained in this manual, and prevent
any risk of the equipment starting unexpectedly.
Report any risk of chemical reaction or explosion if this warning has not been given.
There is a risk of injury or serious lesion related to contact with the jet from the spray gun. If this should occur, IMMEDIATELY contact
a doctor, indicating the type of product injected.
Do not spray before the guard has been placed over the nozzle and the trigger on the spray gun.
Do not put your fingers in the spray gun nozzle.
Once work has been completed, before carrying out any maintenance, complete the decompression procedure explained in this
manual.
It indicates important recommendations about disposal and recycling process of products in accordance with the environmental
regulations.
0 BAR
0 PSI
Mark any clamps attached to earth cables.
Use ONLY 3-wire extension cords and grounded electrical outlets.
Before starting work make sure that the electrical system is earthed and that it complies with safety standards.
The high-pressure fluid that comes out of the gun or from possible leaks may cause injections into the body.
To prevent the risks of fire or injection:
- Use the safety lock of the gun trigger when you are not spraying.
- Do not place your hands or fingers on the gun nozzle. Do not attempt to stop leaks with your hands, body or anything else.
- Do not aim the gun at yourself or anyone else.
- Do not spray without the special nozzle protection.
- Release the system pressure after spraying and before any maintenance operation.
- Do not use components whose operating pressure is lower than the maximum system pressure.
- Do not allow children to use the equipment.
- Pay the utmost attention to possible recoil when pulling the gun trigger.
If the high-pressure fluid penetrates the skin, the wound may appear to be just a “simple cut”, but may actually be a very
serious injury. Immediately medicate the injured part.
It is obligatory to wear suitable clothing as gloves, goggles and face shield.
Wear clothing that complies with the safety standards in force in the country in which the equipment is used.
Do not wear bracelets, earrings, rings, chains, or anything else that may hinder the operator’s work.
Do not wear clothing with wide sleeves, scarves, ties, or any other piece of clothing that could get tangled up in moving parts of the
equipment during the work, inspection, or maintenance cycles.
2
MINIPEGASO
A WORKING PRINCIPLE
removable from the carriage without having to use any tools).
-Funnel-shaped hopper: facilitates the filling operations, dropping
of the material into the pump and maintaining the material flow
in the pump.
-Hopper constructed of non-stick material to facilitate the cleaning
and maintenance operations.
-Gentle start of material flow: pulling the gun trigger the pump
flow and pressure start and as soon as the trigger is released
they stop.
-Atomization air is delivered only when the trigger is pulled.
-No risk of product contamination since isolated from the pumping
device.
- Excellent uniformity of finish: no sudden material charges.
ADVANTAGES OF USING MINIPEGASO
-Higher productivity and maximum capacity to convey the product
(hoses up to 30 metres in length).
-Powerful and ultra silent compressor.
-The pumping hose is easy to replace in just a few minutes without
having to use any tools (large material hopper of 50-litre capacity,
Application materials
Application materials
Acoustics
Cement sealants
Stucco
Cement adhesives
Fibre coatings
Granular plasters
Fillers
Cement plasters
Water proofing
Filling plasters
Soundproofing mortars
Silicate paints
3
English
The LARIUS MINIPEGASO double-membrane pneumatic pump
is composed of two chambers, which are alternately in suction
and delivery through the action of the two Teflon membranes. The
alternate movement is obtained by means of an inversion device
fed with compressed air.
The MINIPEGASO pump is used in all processes requiring a high
rate of productivity, the use of dense materials and aggregates,
and when the treated fluid must not come into contact with the
pump components.
MINIPEGASO
MINIPEGASO
Supply
Material hose lenght
Material hose sizes
Maximum water flow rate
Weight
Lenght
Width
Total height
Loading height
Maximum fluid pressure
Maximum air pressure
Acoustic level
Tank capacity
Gunes:
Turbo gun
Tex gun
Hopper gun
Main water-based application
materials
Compressed air
from 0 to 30 mt (based on the viscosity and density of the materials used)
ø19X25 Standard
40 L/m
47 Kg with hose and gun
(A) 100 cm
(B) 55 cm
(C) 95 cm
(D) 80 cm
7 bar
7 bar
Max. 50 db (A)
50 l
Max. air pressure
8 bar/ 116 psi
8 bar/ 116 psi
8 bar/ 116 psi
Max. fluid pressure
*Set of nozzles
20 bar/ 290 psi
3-4-6-8-10-12 mm
10 bar/ 145 psi
4-6-8 mm
10 bar/ 145 psi
4-6-8 mm
.
Products with grain size up to 2-3 mm Acoustics, stucco, fibre coatings, cement adhesives and sealants, cement plasters and filling
plasters, etc.
Spray gun air consumption
Max 300 lt/min
Pump air consumption
Max 190 lt/min
D
*The maximum nozzle sizes are approximately: they vary based on the viscosity and density of the product.
CEMENT MATERIALS USABLE WITH RESIN-BASED BINDERS
C
English
B TECHNICAL DATA
B
A
4
MINIPEGASO
C DESCRIPTION OF THE EQUIPMENT
8
English
9
1
10
2
3
11
4
12
5
6
7
8
2
12
6
11
5
3
7
4
POS.
1
2
3
4
5
6
POS.
Description
7
8
9
10
11
12
Trolley
Air pressure gauge for pump
Manometer low pressure
Air intake for pump feed
Gun air pressure gauge
Product delivery valve
5
Description
Recirculation valve
Gun pressure adjustment knob
Cover
Tank
Product recycling hose
Gun
MINIPEGASO
English
D TRANSPORT AND
UNPACKING
•
• The packed parts should be handled as indicated in the
symbols and markings on the outside of the packing.
•
Read carefully and entirely the following instructions before using the product.
Please save these instructions in a safe place.
Before installing the equipment, ensure that the area to
be used is large enough for such purposes, is properly
lit and has a clean, smooth floor surface.
The unauthorised tampering/replacement of one
or more parts composing the machine, the use
of accessories, tools, expendable materials other
than those recommended by the manufacturer can
be a danger of accident.
The manufacturer will be relieved from tort and
criminal liability.
The user is responsible for the operations of unloading and handling and should use the maximum
care so as not to damage the individual parts or
injure anyone.
To perform the unloading operation, use only
qualified and trained personnel (truck and crane
operators, etc.) and also suitable hoisting equipment
for the weight of the installation or its parts.
Follow carefully all the safety rules.
The personnel must be equipped with the necessary
safety clothing.
• The manufacturer will not be responsible for the unloading
operations and transport to the workplace of the machine.
• Check the packing is undamaged on receipt of the equipment. Unpack the machine and verify if there has been
any damage due to transportation.
In case of damage, call immediately LARIUS and the
Shipping Agent. All the notices about possible damage or
anomalies must arrive timely within 8 days at least from
the date of receipt of the plant through Registered Letter
to the Shipping Agent and to LARIUS.
The disposal of packaging materials is a customer’s
competence and must be performed in accordance
with the regulations in force in the country where the
plant is installed and used.It is nevertheless sound
practice to recycle packaging materials in an environment-friendly manner as much as possible.
•
KEEP YOUR WORK PLACE CLEAN AND TIDY. DISORDER
WHERE YOU ARE WORKING CREATES A POTENTIAL
RISK OF ACCIDENTS.
•
ALWAYS KEEP PROPER BALANCE AVOIDING UNUSUAL
STANCE.
•
BEFORE USING THE TOOL, ENSURE THERE ARE NOT
DAMAGED PARTS AND THE MACHINE CAN WORK PROPERLY.
•
ALWAYS FOLLOW THE INSTRUCTIONS ABOUT SAFETY
AND THE REGULATIONS IN FORCE.
•
Keep those who are not responsible for the
equipment out of the work area.
•
NEVER exceed the maximum working pressure
indicated.
•
NEVER point the spray gun at yourselves or at
other people.THE CONTACT WITH THE CASTING CAN
CAUSE SERIOUS INJURIES.
•
In case of injuries caused by the gun casting,
seek immediate medical advice specifying the
type of the product injected. Never undervalue a wound caused by the injection of a
fluid.
•
Always to stop engine AND release the pressure in the circuit before performing any check
or part replacement of the equipment.
•
NEVER MODIFY ANY PART IN THE EQUIPMENT. CHECK
REGULARLY THE COMPONENTS OF THE SYSTEM.
REPLACE THE PARTS DAMAGED OR WORN.
E SAFETY RULES
•
The behaviour of the employees shall strictly
comply with the Accident prevention AND
ALSO ENVIRONMENTAL regulations in force in
the country where the plant is installed and
used.
The employer shall train its employees
about all those risks stemming from accidents, about the use of safety devices for
their own safety and about the general
rules for accident prevention in compliance with international regulations and with
the laws of the country where the plant
is used.
6
MINIPEGASO
Tighten and check all the fittings for
connection between pump, flexible hose and
spray gun before using the equipment.
•
Always use the flexible hose supplied with
standard kit. THE USE OF ANY ACCESSORIES OR
TOOLING OTHER THAN THOSE RECOMMENDED IN
THIS MANUAL, MAY CAUSE DAMAGE OR INJURE THE
OPERATOR.
•
The fluid contained in the flexible hose can
be very dangerous. Handle the flexible hose
carefully. Do not pull the flexible hose to
move the equipment. Never use a damaged or
a repaired flexible HOSE.
•
MAKE SURE THAT YOU KNOW HOW TO STOP THE MACHINE IN CASE OF NEED. WE ALSO RECOMMENDED
THAT INEXPERT USERS ARE TRAINED ON PROPER
AND SAFE USE BEFORE STARTING.
•
KEEP UNAUTHORISED PERSONNEL AWAY FROM THE
MACHINE, ESPECIALLY IF THE PRODUCT TO BE USED
IS TOXIC.
•
IF NECESSARY, USE WARNING SIGNALS TO KEEP ANY
PERSONS PRESENT AT A SAFE DISTANCE.
•
CHECK THAT THERE IS SOMEBODY CLOSE BY WHO
CAN HEAR YOU IN THE EVENT OF ANY ACCIDENT.
F SETTING-UP
CONNECTION OF THE FLEXIBLE HOSE TO THE GUN
The high speed of travel of the product in the hose
can create static electricity through discharges and
sparks. It is suggested to earth the equipment.
•
NEVER SPRAY OVER FLAMMABLE PRODUCTS OR
SOLVENTS IN CLOSED PLACES.
•
NEVER USE THE TOOLING IN PRESENCE OF POTENTIALLY EXPLOSIVE GAS.
•
Always check the product is compatible with
the materials composing the equipment (pump,
spray gun, flexible hose and accessories) with
which it can come into contact. Never use paints
or solvents containing Halogen Hydrocarbons (as
the Methylene Chloride).
If these products come into contact with aluminium
parts can provoke dangerous chemical reactions
with risk of corrosion and explosion.
Connect the flexible hose (F1) to the gun air pressure gauge
coupling (F2) of the pump.
F2
F1
•
Connect the flexible hose (F1) to the gun coupling (F3).
IF THE PRODUCT TO BE USED IS TOXIC,
AVOID INHALATION AND CONTACT BY USING
PROTECTION GLOVES, GOGGLES AND PROPER
FACE SHIELDS.
TAKE PROPER SAFETY MEASURES FOR THE
PROTECTION OF HEARING IN CASE OF WORK
NEAR THE PLANT.
F3
7
F1
English
•
MINIPEGASO
•
Connect the flexible product delivery hose (F4) to the delivery
coupling (F5) of the pump. Tighten the metal clamp(F6).
English
F4
Never use sealants on fittings’ threads.
It is recommended to use the hose provided with the
standard kit.
NEVER use a damaged or a repaired flexible hose.
F5
WASHING OF THE NEW EQUIPMENT
•
The equipment has already been adjusted at our factory with
light mineral oil left inside the pumping group as protection.
Therefore, wash with diluent before sucking the product.
•
Clean the hoses (F8) and (F9) with a blast of compressed
air before connecting them.
F6
F8
•
Connect the flexible product delivery hose (F4) to the gun
(F7).
F7
F9
•
Check that the atomization air is open.
•
Turn the atomization air delivery adjustment knob (F10)
clockwise.
F4
Open
F10
8
MINIPEGASO
•
Rotate the pressure setting knob (F11) slightly clockwise so
that the machine operates at minimum power.
F11
Never use products containing halogen hydrocarbons (as
methylene chloride). If these products come into contact with
aluminium parts of the equipment, can provoke dangerous
chemical reactions with risk of explosion.
•
Introduce the ready mixed product into the tank (F13).
• Point the spray gun into the collection container and hold the
trigger down (in order to expel the oil contained) until clean
liquid flows out.
Now, release the trigger.
•
Aim the gun against the cleaning liquid bucket and pull the
trigger to recover the left-over solvent.
• Close the pressure setting knob (F11).
Do not set the pump to work without product,
because this could spoil its gaskets.
F12
Absolutely do not spray cleaning liquids in closed
environments and stand with the gun away from
the pump in order to prevent contact with the
cleaning liquid vapours.
•
F13
Now the machine is ready. When water-based paint has
been used, in addition to washing using the cleaning liquid,
we recommend washing with soapy water and then clean
water.
PREPARING THE PRODUCT TO BE APPLIED
• Make sure the product is suitable to be used with a spray
gun.
• Mix the product in a container (F12) before introducing it into
the tank (F13).
9
English
Make sure the product to be used is compatible
with the materials employed for manufacturing the
equipment (stainless steel, aluminium and carbon
steel). Because of that, please contact the supplier
of the product.
MINIPEGASO
English
•
F16
After introducing the product into the tank (F13), close the
product delivery valve (F14) on the gun and open the recirculation valve (F15).
F14
Closed
Open
G WORKING
F15
•
Before starting the pump, it is important to send
a small amount of atomization air to the gun.
Turn the pressure adjustment knob (F11) clockwise to start
the pump.
F11
•
Hold the cock (G1) slightly open, thus preventing
the product from returning to the atomization
air delivery circuit and clogging the gun and
the air delivery hose.
Insert the block (G2) to allow the air to escape
when filling the delivery hose with product for
the first time.
If the product has properly been mixed, you should see it
come out of the recirculation hose (F16). If the product does
not recirculate it means that it is too dense and it must be
further diluted until obtaining the correct recirculation flow;
let the product recirculate for a short time. At this point, the
machine is ready to start working.
10
MINIPEGASO
SPRAY ADJUSTMENT
•
G2
G1
STARTING THE SPRAYING OPERATIONS
•
Use the tooling after performing all the SETTING UP operations
above described.
•
Open the product delivery valve (G3) to the gun and close
the recirculation valve (G4).
•
At this point, the product will flow until reaching the gun and
you can start working.
G5
G6
Never point the spray gun at yourselves or at
other people. The contact with the casting can
cause serious injuries.
In case of injuries caused by the gun casting, seek
immediate medical advice specifying the type of
the product injected.
H MAINTENANCE
CLEANING AFTER SPRAY PAINTING OR A PRODUCT CHANGE
G3
Before cleaning the pump it is important to send
a small amount of atomization air to the gun.
Hold the cock slightly open, thus preventing
the product from returning to the atomization
air delivery circuit and clogging the gun and
the air delivery hose.
Insert the block to allow the air to escape when
filling the delivery hose with product for the
first time.
G4
11
English
The product application nozzle can be adjusted according
to need by varying the pump operating pressure (G5) and
the atomization pressure (G6) until reaching the necessary
operating conditions.
English
MINIPEGASO
•
Introduce water into the pump tank.
•
Close the delivery valve (H1) and open the recirculation valve
(H2).
•
Insert the recirculation hose (H4) in the product collection
receptacle.
H4
H1
Closed
Open
H2
•
•
Turn the pressure adjustment knob (H3) clockwise to start
the pump.
•
Slowly start the pump until all the liquid in the tank and the
pump has drained out.
Repeat this operation several times until complete cleaning.
Close the recirculation valve (H1) and open the delivery valve
(H2).
H3
H1
Open
Closed
H2
12
•
Place the recirculation hose back into the tank.
•
Slowly start the pump.
MINIPEGASO
•
Spray into a receptacle to clean the hose (H5) and the gun
(H6). Repeat this operation several times until complete
cleaning.
Detach the hose from the gun.
•
Dismantle the gun and clean the nozzles.
•
In case of long storage, we recommend you to suck and
to leave light mineral oil inside the pumping group and the
flexible hose.
English
•
H6
H5
•
If necessary, change the cleaning liquid and repeat the
operation several times until all the product residues have
been removed.
•
Clean the outside of the hose and the gun.
Follow the washing procedure before using again
the equipment.
13
MINIPEGASO
English
I PROBLEMS AND SOLUTIONS
Problem
•
The equipment does not start
Solution
Cause
• The feed air is insufficient;
• Check the air supply line. Increase
the feed hose diameter;
• The product outfeed line is clogged;
• Clean. Detach the product outfeed
hose Power the pump at minimum
pressure and check if the pump starts
without the outfeed hose;
• The product infeed line is clogged;
•
•
•
The membrane has ruptured;
The drive valve has locked;
•
•
Check the hose and the intake filter.
Clean;
Replace the membrane;
Press the reset buttons located at
the sides of the valve;
•
The pump operates at accelerated
speed and does not aspirate the
product
•
•
•
Lack of product;
The equipment sucks air;
The “balls” do not close perfectly;
•
•
•
Add the product;
Check the suction pipe;
Remove and clean and/or replace
the balls and ball seats;
•
The pump keeps on stalling
•
The feed air is insufficient.
•
Check the air supply line. Increase
the feed hose diameter;
Check that the parts of the air feed
circuit guarantee a sufficient flow rate
(the quick-couplings cause pressure
drops).
•
For proper removal and refitting of the pump parts, refer to the exploded diagrams according to the model.
Always close the compressed air supply and release the pressure in the system before checking or replacing the
pump parts.
L DESCRIPTION FOR
EXPLOSIVE AREAS
The Larius 2 and Larius 4 series membrane pumps
are Class II equipment for use in areas with the
presence of gas or vapours (Category 2 G, Class
IIB). They have been designed and constructed in
accordance with ATEX Directive 94/9/EC and the
European standards: EN 1127-1, EN 13463-1ed
EN 13463-5.
These safety instructions refer to installation, use and maintenance
of low-pressure transfer membrane pumps of the Larius 2 and
Larius 4 series for use in potentially explosive areas with the
presence of gas or vapours (area 1).
These instructions must be followed in addition to
the warnings given in the user and maintenance
manual.
14
MINIPEGASO
TECHNICAL FEATURES
Low pressure transfer double diaphragm pumps series Larius 2 and Larius 4.
LOW PRESSURE TRANSFER DOUBLE
DIAPHRAGM PUMPS
SERIE 2 LARIUS
SERIE 4 LARIUS
PRESSURE RATIO
1:1
1:1
PUMP FEEDING AIR PRESSURE
[bar]
1÷7
2÷8
1/4" GAS
1/4" GAS
MAX. FLUID DELIVERY [l/min.]
21
40
MAX. AIR CONSUMPTION [l/min.]
120
190
PUMP FEEDING AIR INLET
MARKING
Low pressure double diaphragm transfer pumps series Larius 2 and Larius 4.
3
X
II 2 G c IIB T4
Tamb: -10°C ÷ + 50°C
Tmax. fluido: 60°C
Tech. File: LARIUS 2-4/ATEX/05
II =
Group II ( surface)
2=
Category 2 (zone 1)
G=
Explosion hazardous environment with presence of gas, fog and vapour
c=
Manufacturing safety "c"
T4 =
Class of temperature T5
- 10°C ÷ + 50°C
Environment temperature
60°C
Maximum fluid temperature
xxxxx/AA
Serial number xxxxx = PROGRESSIVE/ year = AA
Relation between hazardous areas, products and categories
DANGEROUS AREA
CATEGORIES AS PER RULES
94/9/CE
Gas, vapour or fog
Zone 0
1G
Gas, vapour or fog
Zone 1
2G or 1G
Gas, vapour or fog
Zone 2
3G, 2G or 1G
15
English
Environment temperature: -10°C÷+50°C
Max. fluid temperature [°C]: 60°C
Max. air temperature [°C]: 30°C
MINIPEGASO
SAFETY INSTRUCTIOINS FOR ONSTALLATIONS IN HAZARDOUS AREAS
DECLARATION OF CONFORMITY
We
English
Before proceeding with the installation carefully
read the use and service manual. All the service
operations must be carried out as stated in the
manual.
•
Larius S.r.l.
Via Stoppani, 21
24032 Calolziocorte (LC)
declare under our sole responsibility that the product
The low pressure double diaphragm transfer pumps series
Larius 2 and Larius 4 must be connected to the ground
with a suitable connector anti-release and anti-rotation.
Low pressure transfer double diaphragm pumps - series Larius 2 and Larius 4.
• Gas and vapour of flammable liquids must belong to the
group IIB and compatible with class temperature T4.
to which this declaration relates complies with the
following Directives:
• According with the nature of the operations and products, the
operator must regularly check the presence of deposit, the
cleaning, the wearing and the correct pump’s functioning.
- Directive 94/9/EC
(ATEX)
• It is advisable that a filter will be placed at the suction of the
material to prevent solid parts entering the pump.
The conformity are under observance of the following standards or standards documents:
• The pipes used to connect suction and delivery must be
metallic, or plastic with metallic braid or plastic with fabric
braid with suitable earthing cable.
•
According to duties it is recommended the control of diaphragms and replacement.
Marking
•
The air feeling the pump needs to be filtered and originated
by a safe area.
X II 2 G c IIB T4 Tamb.: - 10°C ÷ 50°C Tmax. fluido: 60°C
Tech. File: LARIUS 2-4/ATEX /05
Technical file c/o: INERIS (0080)
- EN 1127-1
- EN 13463-1
-
EN 13463-5
3
The low pressure double diaphragm transfer
pumps series Larius 2 and Larius 4 must not work
empty of material.
Calolziocorte- LC
All the operations, installation and service, must
be carried out by qualified operators.
EXAMPLE OF INSTALLATION
The picture shows a typical example of installation of a Larius
double diaphragm pump.
16
Signature
SPARE PARTS
unit
O Frame
N
page 20
unit
O Delivey
page 22
hydraulic body
O Complete
M
page 18
unit
O Gun
Q
page 24
17
English
Control unit
PO page 23
7
6
5
2
7
6
5
18
27
28
29
8
10
9
11
34
31
15
12
30
26
18
19
1
11
34
12
14
15
17
20
21
16
21
24
23
22
13
21
24
4
5
7
6
9
8
2
10
23
22
21
24
21
24
23
22
26
25
23
22
27
23
22
32
35
32
33
3
7
6
5
4
33
English
MINIPEGASO
M COMPLETE HYDRAULIC BODY
MINIPEGASO
Aluminium
LARIUS 4
LARIUS 4
Inox
Description
Q.ty
1
2
3
4
*5
*6
*7
8
9
10
**11
**12
**13
14
15
16
17
**18
*
19
20
21
**22
*
**23
*
24
25
**26
*
27
28
29
30
31
32
33
34
35
8350
8351
8385
8352
3326
8404
8379
8386
8387
8388
8353
91008
8403
8399
8410
8402
8409
8363
8364
8365
8362
96840
4026
8361
8360
8369
8368
54004
4004
3354
96205
8406
8407
8388
8371
8350
8355
8385
8356
3326
8404
8379
8357
8358
8359
8353
91008
8403
8399
8410
8402
8409
8363
8364
8365
8362
96840
4026
8361
8360
8369
8374
54004
4004
3354
96205
8406
8373
8388
8371
Pump body
Fluid passage cover
Screw
Fluid passage sleeve
Inox ball
O Ring
Seat valve
Screw
Washer
External membrane presser disc
Membrane
O Ring
O Ring
Membrane push rod
Tightening ring nut
O Ring
Insert for machine body
Gasket
Piston
Piston rod
Washer
O Ring
O Ring
Spacer ring
Spacer ring
Gasket
Bracket
Screw
Ball valve
Fitting
Plug
Washer
Nipple
Internal membrane presser disc
Screw
1
2
16
2
4
4
4
2
2
2
2
2
5
1
2
4
1
1
1
1
5
5
5
4
1
2
2
8
1
1
1
2
2
2
8
* Kit 40336: Balls and ball seat kit
** Kit 40337: Membrane kit
**
* Kit 40332: Motor gasket kit
19
English
Pos.
MINIPEGASO
English
N FRAME UNIT rEf.20850
7
14
1
15
16
5
8
14
15
16
15
14
9
14
15
10
6
12
11
16
16
4
3
12
2
20
17
18
13
18
MINIPEGASO
Code
-
20850
1
16271/1
.
SS4
2
16272/1
.
SS4
3
Description
Q.ty
Frame unit
-
Trolley handle
1
.
.
Carriage body
1
.
.
37238
Wheel
2
4
91047
Flexible washers
4
5
84007
Split pin
2
6
30530
Support plate l4
1
7
18249/1
Cover tank
1
8
18249
Tank 50 l
1
9
18246
Support rack
1
10
20833
Elbow F-F
1
11
20807
Hose tail
1
12
8406
Washer
2
13
30592
Suction tube
14
39405
Screw
12
15
34009
Washer
24
16
52017
Nuts
12
17
20807/1
Short hose tail
1
18
30552
Hose clamp
2
21
0.30mt
English
Pos.
MINIPEGASO
English
O DELIVERY UNIT REF.20851
7
8
7
6
5
4
3
10
2
7
1
6
5
3
Pos.
Code
1
2
3
4
5
20851
20817
20813
20810
20812
8071
Description
Delivery unit
Reduction M-M
Union T
Reduction M-M
Tap F-F
Washer
4
9
Q.ty
Pos.
Code
1
1
2
2
2
6
7
8
9
10
20809
30553
20835
20811
30528
22
Description
Fitting
Tightening clamp
Delivery hose
Union a L M-F
Recirculation hose
Q.ty
2
3
10mt
1
2,5mt
MINIPEGASO
P CONTROL UNIT REF.20852
English
2
8
7
6
12
1
14
10
5
11
8
15
13
4
7
6
3
16
9
Pos.
Code
1
2
3
4
5
6
7
8
20852
30531
510510
510088
91736
3344
54003
8037
8042
Description
Control unit
Support plate
Pressure regulating support
Union
Regulator
Gun regulator
Washer
Screw
Self-braking nut
Q.ty
Pos.
Code
1
1
1
1
1
4
4
4
9
10
11
12
13
14
15
16
96259
8167
3354
8063
3358
8055/1
3338
3560
23
Description
Manometer
Gun pressure gauge
Union M-M
Union M-F
Union T FFF
Connector M-F
Quick connection M
Union M-M
Q.ty
1
1
2
2
1
1
1
1
MINIPEGASO
English
Q Gun UNIT REF. 20853
4
3
2
1
Pos.
Code
Description
-
20853
Gun unit
-
1
5313
Quick-coupling M
1
2
9902
Valvula F-F
1
3
4004
Tap M-F
1
4
3563
Union M-M
1
24
Q.ty
MINIPEGASO
R ACCESSORIES
PLA 1/4”
+ FAST-CLEAN
REVERSIBLE TIP INCLUDED
Code 11420-11425-11430: cm 130-180-240
PLA M16x1,5
+ FAST-CLEAN REVERSIBLE TIP INCLUDED
Code 11421-11426-11431: cm 130-180-240
PAINT ROLLER TELESCOPIC
Code 16988: Roller cover for rough surfaces
Code 16997: Roller cover for smooth surfaces
Code 16998: Roller cover for very smooth surfaces
Code 16999: Roller cover for semi-rough surfaces
Code 16780: Extension 120 - 195 cm
MX 750
MX 1000 E
MX 1100 E
Code 217550: MX 750 - Code 217560: MX 1000 E - Code 217570: MX 1100 E
25
English
EXTENSION
Code 153: cm 30 - Code 155: cm 60 - Code 156: cm 100
MINIPEGASO
English
S VERSIONS
PEGASO
Pegaso with Pressure Tex gun Ref. 30581
Pegaso with Pressure Tex gun 110 V Ref. 30595
Pegaso with Turbo gun Ref. 30580
Pegaso with Turbo gun 110 V Ref. 30591
GHIBLI 10:1 TEXTURE TURBO GUN
Ref. 30592
26
Due to a constant product improvement programme, the factory reserves the right to modify
technical details mentioned in this manual without prior notice.
MANUFACTURER:
23801 CALOLZIOCORTE - LECCO - ITALY - Via Stoppani, 21
Tel. (39) 0341/62.11.52 - Fax (39) 0341/62.12.43
E-mail: [email protected] - Internet http://www.larius.com
DIRECT LINE
CUSTOMERS TECHNICAL SERVICE
Tel. (39) 0341/621256
Fax (39) 0341/621234