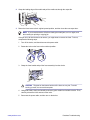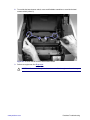
1
Troubleshooting
To better help our customers - this HP Laserjet 2820 series troubleshooting page is simply a
guide / additional information for your convenience, as you search for assistance in repairing your
machine. Although this information is provided for your convenience it is recommended, for the most
part, that a technician inspects your office equipment.
It is recommended to consult with a professional when ordering your printer part(s).
Chapter contents
Troubleshooting
Support strategy
Troubleshooting process
Control-panel messages
Clearing jams
Print problems
Scan problems
Copy problems
Fax problems
Memory card problems
Functional tests
Service-mode functions
Troubleshooting tools
Updating or recovering the firmware code
Shop with us while you troubleshoot.
* HP oem parts
* HP LaserJet maintenance kits
* Toners for your printer
* HP fuser assembly units
* HP fuser kit 110v & 220v
* Parts assemblies for printers
* Service maintenance parts
* Color laserJet printers
* LaserJet printers and parts
* Hard to find officejet parts
* Hard to find deskjet parts
User-friendly SmartSearch!
www.partshere.com
Partshere Troubleshooting
Support strategy
This device has a one-year limited warranty. Warranty service and support options might vary
depending on your country/region. Refer to the support flyer that came in your box for contact
information, or visit http://www.hp.com.
www.partshere.com
Partshere Troubleshooting
Troubleshooting process
Use the troubleshooting checklist to solve issues with the device.
Troubleshooting checklist
Follow the steps below when trying to solve a problem with the device.
NOTE The service CD-ROM contains sound files of normal device operations. Refer to
those files if you are in doubt of what a "normal" device should sound like.
Table 6-1 Troubleshooting checklist
Step
number
Verification step
Possible problems
Solutions
1
Is the power on?
No power due to failed power
source, cable, switch, or fuse.
1
Verify that the device is
plugged in.
2
Verify that the power cable is
functional and that the power
switch is on.
3
Check the power source by
plugging the device directly
into the wall or into a different
outlet.
1
If the device control panel
indicates a jam, verify that the
fuser shipping locks have
been removed.
2
Verify that the rear output
door is closed. See To clear
output area jams.
3
Verify that the print cartridges
and imaging drum are
properly installed. Look at the
control-panel messages and
follow the instructions to
remove and replace the
cartridges.
4
Verify that the top cover is
closed completely.
When the device is
connected to a
grounded power
source, the control
panel shows Hewlett
Packard with moving
cursors indicating that
the firmware code is
loading, and the print
engine motor rotates for
approximately 45 to 60
seconds. When the
firmware is done
loading, Scanner bulb
warming up appears in
the control panel, and
the scan head moves
back and forth for 10-15
seconds. If you lift the
scanner lid, you will see
that the scanner bulb is
lit. Near the end of this
time, the automatic
document feeder (ADF)
motor turns on for about
two seconds.
Print engine motor does not rotate.
ADF motor does not rotate.
Open the ADF cover and remove
any orange shipping tape inside
the ADF.
Verify that the ADF cable is
connected correctly to the scanner.
If the ADF motor still does not
rotate, verify that the cables from
the scanner to the formatter are
connected correctly. See
www.partshere.com
Partshere Troubleshooting
Table 6-1 Troubleshooting checklist (continued)
Step
number
Verification step
Possible problems
Solutions
Removing the scanning assembly.
If the problem persists replace
parts in the following order one at
a time: the ADF, the scanner, and
then finally the formatter.
2
Does Ready appear in
the device control
panel?
Scanner bulb does not light.
If the scanner bulb does not light,
verify that the cables from the
scanner to the formatter are
connected correctly. See
Removing the scanning assembly.
If the error persists, replace parts
one at a time in the following
order until the problem is
resolved: scanner assembly, and
finally the formatter (see
Removing the formatter
assemblies).
Control panel shows an error.
See Control-panel messages for a
list of common messages that will
help you correct the error.
The control panel
should function without
error messages.
3
Do information pages
print?
Print a Configuration
page.
4
Does the device copy?
If no display appears in the control
panel, verify that the control panel
cables are connected correctly.
See Removing the control panel.
Control panel displays an error
message.
See Control-panel messages for a
list of common messages that will
help you correct the error.
Media does not move smoothly
through the device paper path.
Clean the paper path.
Poor print quality.
See Print quality problems.
Poor copy quality from the ADF.
1
If the print quality from the
internal tests and the copy
from the flatbed were
acceptable, clean the ADF
scanning window. See To
clean the scanner glass.
2
If the ADF is damaged,
replace the ADF. See
Replacing the ADF.
1
Clean the ADF pick roller and
ADF separation pad.
2
If the problem persists,
replace the ADF pickup roller.
See Replacing the ADF
pickup-roller assembly.
3
If the problem persists,
replace the ADF. See
Replacing the ADF.
Place the Configuration
page into the ADF and
make a copy. The
report should feed
smoothly through the
ADF, and copies should
print without printquality problems. Make
a copy from the flatbed
as well.
Media does not move smoothly
through the ADF path.
www.partshere.com
Partshere Troubleshooting
Table 6-1 Troubleshooting checklist (continued)
Step
number
Verification step
Possible problems
Solutions
Poor copy quality from the flatbed.
1
If the print quality from the
internal tests and the copy
from the ADF were
acceptable, clean the flatbed
glass. See To clean the
scanner glass.
2
If, after performing the
maintenance, the problem
persists, see Copy problems.
If the problem persists,
replace the scanning
assembly. See Removing the
scanning assembly.
5
Does the device send
a fax?
(HP Color LaserJet
2830/2840 all-in-one
models only)
Connect the telephone
line and press START
FAX to verify that a dial
tone exists (using a
hand set, if necessary).
Attempt to send a fax.
6
The telephone cord is faulty or is
plugged into the wrong connector.
1
Try plugging the telephone
cord into the other connector.
2
Try a new telephone cord.
Review and reset the device fax
settings.
Sent fax is incomplete or of poor
quality.
See Fax problems.
Too many telephone devices are
plugged in, or telephone devices
are not connected in the correct
order.
Make sure that the HP Color
LaserJet 2830 all-in-one or
HP Color LaserJet 2840 all-in-one
is the only device on the
telephone line and try again to
receive the fax.
Use another fax
machine to send a fax
to the device.
The device fax settings are set
incorrectly.
Review and reset the device fax
settings.
Does the device print
from the computer?
Software is not installed correctly
or an error occurred during
software installation.
If the computer is connected to
the device by a USB cable,
disconnect the USB cable, and
then uninstall and reinstall the
system software using the device
installation CD-ROM. Reconnect
the USB cable when prompted to
do so by the installation procedure.
The cable is not connected
correctly.
Reconnect the cable.
An incorrect driver is selected.
Select the proper driver.
Other devices are connected to the
USB port.
Disconnect the other devices and
try again to print.
There might be a problem with the
network connection.
If printing through the network,
verify that the device has a valid
Does the device
receive a fax?
Connect the network
cable or USB cable to
the device and the
computer. Use a wordprocessing application
to send a print job to the
device.
www.partshere.com
Verify that the device is plugged
into a telephone line that you
know works.
The device fax settings are set
incorrectly.
(HP Color LaserJet
2830/2840 all-in-one
models only)
7
The telephone line is not
operational or the device is not
plugged into the telephone line.
Partshere Troubleshooting
Table 6-1 Troubleshooting checklist (continued)
Step
number
Verification step
Possible problems
Solutions
TCP/IP address by checking the
network configuration. If the issue
persists, verify that the green LED
on the network connector on the
back of the device is lit. If it is not
lit, there might be a bad network
connection, cable, or network
device (router or hub).
If the issue persists after verifying
the above, uninstall and then
reinstall the network driver
software from the device
installation CD. Print a
Configuration page for reference
to the TCP/IP address during
reinstallation.
If the problem still persists,
replace the formatter.
8
Does the device scan
back to the computer
when you use the SCAN
TO button on the device
control panel?
CAUTION
There is a port driver problem in
Microsoft Windows.
Uninstall and then reinstall the
device software. Verify that you
are using the correct installation
procedure and the correct port
setting.
If connected by a USB cable, the
USB cable might not be connected
correctly.
Reconnect the USB cable.
If connected by a USB cable, the
USB cable might be damaged.
Replace the USB cable with a HiSpeed USB cable.
Scan-to folder or scan-to-email
software application might not be
set up correctly.
Verify the settings for your scan-to
folder or scan-to-email software
application by using HP Toolbox.
See Scan to tab.
Network problems might exist.
Verify that the device functions on
network by sending a print job to
the device from the computer.
If the error persists, turn off the device and then turn on the device.
9
Does the device scan
from a software
application?
Software is not installed correctly
or an error occurred during
software installation.
Uninstall and then reinstall the
device software from the
installation CD-ROM. Verify that
you are using the correct
installation procedure and the
correct port setting.
The software application or the
computer operating system might
not be recognizing the scanner
driver.
1
Verify that the software
application is selected the
correct scanner driver.
2
Switch from the current driver
to the alternate driver. For
example, instead of using the
WIA scanner driver, select the
TWAIN driver for the 2800
series.
Initiate a scan from the
basic desktop software
at your computer.
www.partshere.com
Partshere Troubleshooting
Table 6-1 Troubleshooting checklist (continued)
Step
number
Verification step
Possible problems
Solutions
If the error persists, turn off the device and then turn on the device.
10
Does the device
recognize and print
from a memory card?
The device does not recognize the
card.
Insert a memory card
and print an index page.
Remove the card and reinsert it
into the memory-card slot. Verify
that the card is fully inserted into
the slot.
Verify that the memory-card type
is a supported type.
Verify that only one card is
inserted in the memory-card slots.
Verify that the memory-card
assembly ribbon cable is
connected correctly to the
formatter. See Replacing the
memory-card assembly (HP Color
LaserJet 2840 all-in-one only).
If the problem persists with
multiple types of memory cards,
replace the following parts one at
a time in the following order:
memory-card assembly, ribbon
cable, and then formatter.
The device does not print certain
images.
www.partshere.com
Verify that the files on the memory
card are in the correct format. The
device recognizes only SRGB
format .JPEG files.
Partshere Troubleshooting
Control-panel messages
The majority of the control-panel messages are intended to guide the user through typical operation.
The control-panel messages indicate the status of the current operation, and include a page count on
the second line of the display, if appropriate. When the device is receiving fax data, print data, or
scanning commands, control-panel messages indicate this status. In addition, alert messages,
warning messages, and critical error messages indicate situations that might require some action.
Alert and warning messages
Alert and warning messages appear temporarily and might require the user to acknowledge the
message by pressing ENTER to resume or by pressing CANCEL to cancel the job. With certain
warnings, the job might not complete or the print quality might be affected. If the alert or warning
message is related to printing and the auto-continue feature is on, the device will attempt to resume
the printing job after the warning has appeared for 10 seconds without acknowledgement.
Table 6-2 Alert and warning messages
Control panel message
Description
Recommended action
10.000x Supply error
E-label can’t be read or print cartridge is not
properly installed.
1
Reinstall print cartridge.
2
Power cycle device.
3
If the problem is not solved, replace the
cartridge.
ADF door is open
The ADF lid is open or a sensor is
malfunctioning.
Make sure that the ADF lid is closed.
Remove the ADF and reinstall it.
If the message persists, turn off the power
by using the power switch, wait at least 30
seconds, and then turn on the power and
wait for the device to initialize.
If the error persists, replace the ADF. See
Replacing the ADF.
Canceled copy. Clear document
The CANCEL button was pressed to cancel
the current job while pages were feeding
from the ADF. The cancel process does not
automatically clear the ADF.
Remove the jammed item. See Media jams
occur in the automatic document feeder
(ADF). Then, clear the items in the ADF
tray and start over.
If the error persists, turn off the device and
then turn on the device.
Canceled scan. Clear document
The CANCEL button was pressed to cancel
the current job while pages were feeding
from the ADF. The cancel process does not
automatically clear the ADF.
Remove the jammed item. See Media jams
occur in the automatic document feeder
(ADF). Then, clear the items in the ADF
tray and start over.
If the error persists, turn off the device and
then turn on the device.
Canceled send. Clear document
www.partshere.com
The CANCEL button was pressed to cancel
the current job while pages were feeding
from the ADF tray. The cancel process
does not automatically clear the ADF.
Remove the jammed item. See Media jams
occur in the automatic document feeder
(ADF). Then, clear the items in the ADF
tray and start over.
If the error persists, turn off the device and
then turn on the device.
If the error persists, turn off the device and
then turn on the device.
Partshere Troubleshooting
Table 6-2 Alert and warning messages (continued)
Control panel message
Description
Recommended action
Card is not fully inserted
The memory card has not been fully
inserted.
Verify that the memory card is inserted
completely.
If the card is fully inserted, try inserting
another memory card.
If more than one memory card type has the
same issue, verify that the LED glows when
the card inserted. If the LED does not glow,
verify that the flat cable that connects the
memory-card assembly to the formatter is
connected correctly. See Replacing the
memory-card assembly (HP Color LaserJet
2840 all-in-one only).
If the issue persists, replace the memorycard assembly.
Comm. error
A fax communication error occurred
between the device and the sender or
receiver.
Allow the device to retry sending the fax.
Unplug the device telephone cord from the
wall, plug in a telephone, and try making a
call. Plug the device phone cord into a jack
for another phone line.
Try a different phone cord.
If the error persists, check the flat flexible
cable between the LIU and the formatter.
Reseat or replace the cable. See Removing
the formatter and line interface unit (LIU).
Update the firmware. See Updating or
recovering the firmware code.
If the error persists, replace the LIU. See
Removing the formatter and line interface
unit (LIU).
Device error. [Enter] to cont.
An internal error occurred in the device.
Press ENTER to resume the job.
If the error persists:
Device is busy.
The device is currently in use.
Try again later
Doc feeder jam
1
Turn off the device and then turn on the
device.
2
If possible, print the error log from the
Secondary service menu, and then
troubleshoot the last error on the list.
3
If the error still persists and you cannot
print an error log, replace the
components in the following order: the
formatter and then the DC controller.
Wait for the device to finish the current job.
If the error persists, turn off the device and
then turn on the device.
A piece of media is jammed in the ADF tray.
Open the ADF cover, clear the jam, close
the ADF cover, and reload the paper into
Clear, Reload
www.partshere.com
Partshere Troubleshooting
Table 6-2 Alert and warning messages (continued)
Control panel message
Description
Recommended action
the ADF tray. See To clear a media jam
from the automatic document feeder (ADF).
If the error persists, replace the ADF
separation pad (see Removing the ADF
separation pad) and ADF pickup roller (see
Replacing the ADF pickup-roller assembly).
Document feeder mispick. Reload
Media in the ADF tray was not picked up.
Remove the media from the ADF tray, and
then reload it.
If the error persists, replace the ADF
separation pad (see Removing the ADF
separation pad) and ADF pickup roller (see
Replacing the ADF pickup-roller assembly).
Engine comm. error
The device experienced an internal
communication error.
This is a warning message only. Job output
might be affected.
If the error persists, turn off the device and
then turn on the device.
Fax delayed – send storage full
Fax memory is full.
Cancel the fax by pressing ENTER or
CANCEL. Resend the fax. You might need to
send the fax in multiple sections if the error
occurs again.
If the error persists, clear the fax memory:
Fax is busy
Canceled send
The fax line to which you were sending a
fax was busy. The device has canceled
sending the fax.
1
Press MENU, use the < or > button to
select Fax functions, and then press
ENTER.
2
Use the < or > button to select Clear
saved faxs, and then press ENTER.
Call the recipient to ensure that the fax
machine is on and ready.
Check that you are dialing the correct fax
number.
Check that the Redial if busy option is
enabled.
Check for a dial tone on the phone line by
pressing START FAX.
Make sure that the phone is working by
disconnecting the device, plugging in a
telephone to the phone line, and making a
voice call.
Plug the device phone cord into a jack for
another phone line, and then try sending
the fax again.
Try a different phone cord.
If the error persists, check the flat flexible
cable between the LIU and the formatter.
Reseat or replace the cable. If the error
www.partshere.com
Partshere Troubleshooting
Table 6-2 Alert and warning messages (continued)
Control panel message
Description
Recommended action
persists, replace the LIU. See Removing
the formatter and line interface unit (LIU).
Fax is busy
Redial pending
The fax line to which you were sending a
fax was busy. The device automatically
redials the busy number.
Allow the device to retry sending the fax.
Call the recipient to ensure that the fax
machine is on and ready.
Check that you are dialing the correct fax
number.
Check for a dial tone on the phone line by
pressing START FAX.
Make sure that the phone is working by
disconnecting the device, plugging in a
telephone to the phone line, and making a
voice call.
Plug the device phone cord into a jack for
another phone line, and try sending the fax
again.
Try a different phone cord.
If the error persists, check the flat flexible
cable between the LIU and the formatter.
Reseat or replace the cable. If the error
persists, replace the LIU. See Removing
the formatter and line interface unit (LIU).
Fax memory full
Canceling recv.
During the fax transmission, the device ran
out of memory. Only the pages that fit into
memory will be printed.
Print all of the faxes and have the sender
resend the fax. Cancel all fax jobs or clear
the faxes from memory.
NOTE Adding a memory DIMM
does not help resolve this issue.
Fax memory full
Canceling send
During the fax job, the memory filled. All
pages of the fax have to be in memory for a
fax job to work correctly. Only the pages
that fit into memory were sent.
Print all received faxes or wait until all
pending faxes are sent.
Ask the sender to send the fax again.
Cancel all fax jobs or clear the faxes from
memory.
Fax recv. error
An error occurred while trying to receive a
fax.
Ask the sender to resend the fax.
Try faxing back to the sender or another fax
machine.
Check for a dial tone on the phone line by
pressing START FAX.
Check that the telephone cord is securely
connected by unplugging and replugging
the cord.
Make sure that you are using the telephone
cord that came with the device.
www.partshere.com
Partshere Troubleshooting
Table 6-2 Alert and warning messages (continued)
Control panel message
Description
Recommended action
Make sure that the phone is working by
disconnecting the device, plugging in a
telephone to the phone line, and making a
voice call.
Make sure that the telephone cord
connects the device directly to the wall jack.
Remove any third-party devices, such as
an answering machine, that are connected
between the device and the wall jack.
Turn off error-correction mode (ECM), and
turn off V.34. Ask the sender to resend the
fax.
Connect the device to a different phone line.
If the error persists, check the flat flexible
cable between the LIU and the formatter.
Reseat or replace the cable. If the error
persists, replace the LIU. See Removing
the formatter and line interface unit (LIU).
Fax Send error
An error occurred while trying to send a fax.
Try resending the fax.
Try faxing to another fax number.
Check for a dial tone on the phone line by
pressing START FAX.
Check that the telephone cord is securely
connected by unplugging and replugging
the cord.
Make sure that you are using the telephone
cord that came with the device.
Make sure that the phone is working by
disconnecting the device, plugging in a
telephone to the phone line, and making a
voice call.
Make sure that the telephone cord
connects the device directly to the wall jack.
Remove any third-party devices, such as
an answering machine, that are connected
between the device and the wall jack.
Connect the device to a different phone line.
Set the fax resolution to Standard instead
of the default of Fine.
If the error persists, check the flat flexible
cable between the LIU and the formatter.
Reseat or replace the cable. If the error
persists, replace the LIU. See Removing
the formatter and line interface unit (LIU).
Fit to Page on
flatbed only
www.partshere.com
The copy reduce/enlarge feature (called
"Fit to Page") applies only to copies made
from the flatbed scanner.
Use the flatbed or select another reduction/
enlargement setting.
Partshere Troubleshooting
Table 6-2 Alert and warning messages (continued)
Control panel message
Description
Recommended action
Group dial not allowed in group
The speed-dial code that you typed is
programmed for a group. Adding a groupdial to another group-dial is not allowed.
Add one-touch buttons (programmed as an
individual speed dial) or speed-dial codes
to a group-dial.
Insert Memory Card
Card is not in memory slot or is not inserted
completely.
Insert card or verify that card is inserted
completely.
Invalid date
An invalid date was entered, such as June
35.
Re-enter the date.
Invalid driver
You are using the incorrect printer driver.
Reselect the printer driver appropriate for
your device.
Invalid entry
Invalid data or response.
Correct the entry.
Invalid Memory Card
The proof sheet does not match the files on
the memory card.
Remove the memory card and insert the
correct memory card.
Memory Card is in backwards
The memory card was inserted backwards
into the card slot.
Remove, turn, and reinsert the card.
Memory is low.
The device memory has been almost
completely filled.
Allow the device to finish the job, or press
ENTER to cancel the job.
Press [Enter]
If the error persists, turn off the device and
then turn on the device.
If the error persists, add memory to the
device.
Mem. low 1 copy
Press [cancel]
The device completed making one copy.
The remaining copies have been canceled
because of low device-memory.
Press CANCEL to clear the error. Break the
job into smaller jobs that contain fewer
pages.
If the error persists, turn off the device and
then turn on the device.
If the error persists, add memory to the
device.
Memory low
The device does not have enough memory
to complete the collated copy job.
Break the job into smaller jobs that contain
fewer pages.
Only 1 copy made
If the error persists, turn off the device and
then turn on the device.
If the error persists, add memory to the
device.
Memory is low
The device does not have enough memory
to start a new job.
Wait until the current job is finished before
starting a new job.
Try again later
If the error persists, turn off the device and
then turn on the device.
If the error persists, add memory to the
device.
No Dial Tone
The device could not detect a dial tone.
Check for a dial tone on the phone line by
pressing START FAX.
Unplug the telephone cord from both the
device and the wall and replug the cord.
www.partshere.com
Partshere Troubleshooting
Table 6-2 Alert and warning messages (continued)
Control panel message
Description
Recommended action
Make sure that you are using the telephone
cord that came with the device.
Unplug the device telephone cord from the
wall, plug in a telephone, and try making a
voice call.
Plug the device telephone cord into a jack
for another phone line.
Make sure that the telephone cord
connects the device directly to the wall jack.
Remove any third-party devices, such as
an answering machine, that are connected
between the device and the wall jack.
Update the firmware. See Updating or
recovering the firmware code.
If the error persists, check the flat flexible
cable between the LIU and the formatter.
Reseat or replace the cable. If the error
persists, replace the LIU. See Removing
the formatter and line interface unit (LIU).
No document sent
The device did not scan any pages, or it did
not receive any pages from the computer to
transmit a fax.
Try sending the fax again.
No fax answer.
Attempts to redial a fax number failed, or
Call the recipient to ensure that the fax
the “Redial-no answer” option was turned off. machine is on and ready.
Canceled send
Check that you are dialing the correct fax
number.
Check that the redial option is enabled.
Unplug the telephone cord from both the
device and the wall and replug the cord.
Unplug the device telephone cord from the
wall, plug in a telephone, and try making a
voice call.
Plug the device phone cord into a jack for
another phone line.
Make sure that the telephone cord
connects the device directly to the wall jack.
Remove any third-party devices, such as
an answering machine, that are connected
between the device and the wall jack.
If the error persists, check the flat flexible
cable between the LIU and the formatter.
Reseat or replace the cable. If the error
persists, replace the LIU. See Removing
the formatter and line interface unit (LIU).
No fax answer
Redial pending
www.partshere.com
The receiving fax line did not answer. The
Allow the device to retry sending the fax.
device attempts to redial after a few minutes.
Call the recipient to ensure that the fax
machine is on and ready.
Partshere Troubleshooting
Table 6-2 Alert and warning messages (continued)
Control panel message
Description
Recommended action
Check that you are dialing the correct fax
number.
If the device continues to redial, unplug the
device telephone cord from the wall, plug in
a telephone, and try making a voice call.
Plug the device phone cord into a jack for
another phone line.
Try a different phone cord.
Make sure that the telephone cord
connects the device directly to the wall jack.
Remove any third-party devices, such as
an answering machine, that are connected
between the device and the wall jack.
If the error persists, check the flat flexible
cable between the LIU and the formatter.
Reseat or replace the cable. If the error
persists, replace the LIU. See Removing
the formatter and line interface unit (LIU).
No fax detected
The device answered the incoming call but
Allow the device to retry receiving the fax.
did not detect that a fax machine was calling.
Try a different phone cord.
Plug the device phone cord into a jack for
another phone line.
Make sure that the telephone cord
connects the device directly to the wall jack.
Remove any third-party devices, such as
an answering machine, that are connected
between the device and the wall jack.
If the error persists, check the flat flexible
cable between the LIU and the formatter.
Reseat or replace the cable. If the error
persists, replace the LIU. See Removing
the formatter and line interface unit (LIU).
No image layout selected
An image layout might not be selected on
the proof sheet.
Verify that you have marked one of the
bubbles corresponding to an image layout.
No images selected
You might not have selected any images on
the proof sheet.
Verify that you have marked the bubbles
underneath the images you want to print.
No paper pickup
The print engine has failed to pick up a
piece of media.
In tray 1, verify that the media was inserted
far enough into the tray. In optional tray 2,
verify that the paper-length guide is in the
correct position for the media size that you
are using.
[Enter] to cont.
Reload the media in the input tray and
press ENTER to continue the job.
If the error persists, replace the pickup
roller. See Replacing the tray 1 pickup roller
and separation pad.
No paper type selected
www.partshere.com
A paper type might not be selected on the
proof sheet.
Verify that you have marked one of the
bubbles corresponding to a paper type.
Partshere Troubleshooting
Table 6-2 Alert and warning messages (continued)
Control panel message
Description
Recommended action
No Proof Sheet Found
The proof sheet is not on the scanner, is in
the wrong position, or is face up.
Verify that the proof sheet is in the scanner
and is properly positioned, face down in the
lower right corner.
Only 1 memory card at a time
More than one memory card has been
inserted.
Remove all but one memory card.
Page too complex
The device could not print the current page
because of its complexity.
Press ENTER to clear the message.
Allow the device to finish the job, or press
CANCEL to cancel the job.
[Enter] to cont.
Photo Job Pending
Second photo job was started prior to
completion of first job.
No action required. Message will cease
when first job completes.
Photos Not Found
An image has been selected that has been
deleted.
Reinsert the card and reselect the image.
The image checked on the bubble sheet
has been deleted.
Memory card has been removed from the
memory slot.
Printer jam
The device has detected a jam.
Clear paper path
Open the scanner assembly and the top
cover, and then clear the jam. See Clearing
jams. The job should continue to print. If it
does not, try reprinting the job.
If media jams frequently, see Maintenance.
ProofSheet Error Not Readable
The proof sheet cannot be read because
the bubbles have not been completely
filled, the proof sheet is wrinkled, the page
is skewed on the scanner, or the proof
sheet is face up. This feature has been
optimized and tested for use with Genuine
HP Toner Supplies (variations in color
shading can impact the performance of this
feature).
1
Verify that the proof sheet bubbles are
completely filled. Verify that the proof
sheet is face down and properly
positioned in the lower right corner.
2
Verify that the proof sheet was not
printed crookedly on the paper.
3
Verify that the proof sheet is not lying
crookedly on the scanner glass.
4
Verify that you are using genuine HP
toner.
Proof Sheet Flatbed Only
A document is in the ADF.
Remove the document from the ADF and
verify that the proof sheet is properly
positioned on the scanner.
Scanner reserved
A computer is using the device to create a
scan.
Wait until the computer scan has finished,
or cancel the scan from the computer
software, or press CANCEL.
The device cannot transmit scan
information to a computer.
Verify that the connection cable is not loose
or damaged. Replace the cable if
necessary, and try the scan again.
Settings cleared
The device has cleared job settings.
Re-enter any appropriate job settings.
Unauthorized <color>
A new supply has been installed that is not
made by HP. This message is displayed
If you believe you purchased an HP supply,
please call the HP fraud hotline at
1-877-219-3183. Service or repairs
for PC scan
Scanning error
Cannot connect
www.partshere.com
Partshere Troubleshooting
Table 6-2 Alert and warning messages (continued)
Control panel message
Description
Recommended action
until an HP supply is installed or ENTER is
pressed.
required as a result of using nonHP supplies is not covered under
HP warranty.
To continue printing, press ENTER. The first
pending job will be cancelled.
Unknown Memory Card Error
There is an issue with either the memory
card or the device memory-card reader.
Reinsert the card. If the error persists,
insert a different card.
Unsupported Memory Card
The memory card that you have inserted is
not a type that is supported.
Insert a card that is supported. The
HP Color LaserJet 2840 all-in-one supports
the following cards:
Ŷ
CompactFlash
Ŷ
Ultra CompactFlash
Ŷ
Smart Media
Ŷ
Memory Stick
Ŷ
Secure Digital
Ŷ
Multi Media Card
Ŷ
XD Card
Critical error messages
Critical error messages can indicate some kind of failure. Cycling the power might fix the problem. If
a critical error persists, the device might require service.
Table 6-3 Critical error messages
Control panel message
Description
Recommended action
50.x Fuser Error
The device has experienced an internal
hardware error.
Turn off the device, and then disconnect
the power cord. Remove the fuser (see To
clear output area jams), and then wait at
least 20 minutes. Reinstall the fuser, turn
on the device, and then wait for the device
to initialize.
CAUTION The parts on the
internal surface of the fuser are
very hot. To avoid burning yourself,
do not touch those parts.
Perform the heating-element check. See
Heating element test. If the error persists,
replace the fuser assembly. See Replacing
the fuser assembly.
If, after replacing the fuser assembly, the
error persists, replace the power supply.
See Removing the power supply cover plate.
www.partshere.com
Partshere Troubleshooting
Table 6-3 Critical error messages (continued)
Control panel message
Description
Recommended action
51 Laser Error
The device has experienced an internal
hardware error.
Turn off the power by using the power
switch, wait at least 30 seconds, and then
turn on the power and wait for the device to
initialize.
If the error persists, replace the laser/
scanner assembly. See Removing the laser/
scanner assembly.
52 Scanner Error
The device has experienced an internal
hardware error.
Turn off the power by using the power
switch, wait at least 30 seconds, and then
turn on the power and wait for the device to
initialize.
If the error persists, replace the scanning
assembly. See Removing the scanning
assembly.
54.2, 55.1, 59.16, 59.192, 59.4, 59.99 Errors The device has experienced an internal
hardware error.
Turn off the power by using the power
switch, wait at least 30 seconds, and then
turn on the power and wait for the device to
initialize.
54.2—Carousel rotation error: Replace
the carousel drive motor (see Removing the
carousel-engagement motor). If the error
persists, replace the DC controller (see
Removing the DC controller). If the error
still persists, inspect or replace the
engaging detection flag.
55.1—DC controller Memory Error:
Replace the DC controller. See Removing
the DC controller.
59.16—Main Motor rotation error: Check
the cable connections to the DC controller.
If the error persists, replace the DC
controller (seeRemoving the DC
controller ). If the error still persists, replace
the main motor.
59.192—Developer Motor rotation error:
Check the cable connections to the DC
controller. If the error persists, replace the
DC controller (seeRemoving the DC
controller ). If the error still persists, replace
the developer motor.
59.4—Fuser motor error: Verify that the
fuser is seated completely. If the error
persists, replace the fuser motor. If the
error still persists, replace the DC controller
(seeRemoving the DC controller ).
59.99—T2 Clutch error: Check the cable
connections to the DC controller. If the error
persists, remove the imaging drum and
check the clutch. If the error persists,
replace the T2 clutch. If the error still
persists, replace the DC controller
(seeRemoving the DC controller ).
www.partshere.com
Partshere Troubleshooting
Table 6-3 Critical error messages (continued)
Control panel message
Description
Recommended action
57 Fan Error
The device has experienced a problem with
its internal fan.
Turn off the power by using the power
switch, wait at least 30 seconds, and then
turn on the power and wait for the device to
initialize.
Turn off then on
If the error persists, replace the fan. See
Removing the air duct and fan.
If the error still persists, replace the DC
controller. See Removing the DC controller.
79 Error
The device has experienced an internal
firmware error.
Turn off then on
Turn off the power by using the power
switch, wait at least 30 seconds, and then
turn on the power and wait for the device to
initialize.
If you have recently installed a memory
DIMM in the device, turn off the device,
remove the memory DIMM, reinstall the
DIMM to verify that it is seated properly,
and then turn on the device.
If a surge protector is being used, remove
it. Plug the device directly into the wall
socket. Use the power switch to turn the
device on.
If the error persists, upgrade the firmware.
See Updating or recovering the firmware
code.
If the error persists, replace the formatter.
See Removing the formatter assemblies.
Engine error
The device has experienced an engine error. Turn off the power by using the power
switch, wait at least 30 seconds, and then
turn on the power and wait for the device to
initialize.
Sensor error
The device has experienced an internal
sensor error (most likely, the top-of-page
sensor).
Turn off the power by using the power
switch, wait at least 30 seconds, and then
turn on the power and wait for the device to
initialize.
If the error persists, check the top-of-page
sensor. See Removing the density sensor
and top-of-page sensor.
If the error persists, replace the DC
controller. See Removing the DC controller.
www.partshere.com
Partshere Troubleshooting
Clearing jams
This section contains instructions for clearing jams from the device.
Media jams occur in the device
Occasionally, paper or other print media can become jammed during a print job. Some causes
include the following events:
Ŷ
The input trays are loaded improperly or overfilled, or the media guides are not set properly.
Ŷ
Optional tray 2 is removed during a print job.
Ŷ
The top cover is opened during a print job.
Ŷ
Too many sheets have accumulated in an output area, or sheets are blocking an output area.
The top output bin should contain no more than 125 sheets. With the rear output door, pages
should be removed as soon as they exit the device.
Ŷ
The print media that is being used does not meet HP specifications. See Media specifications.
Ŷ
The media is damaged or has foreign objects attached to it, such as staples or paper clips.
Ŷ
The environment in which the print media was stored is too humid or too dry. See Printing and
storage environment.
Tips to avoid media jams
Ŷ
Verify that the input tray is not overfilled. The input tray capacity varies depending on the type of
print media that you are using.
Ŷ
Verify that the media guides are properly adjusted.
Ŷ
Check that the input tray is securely in place.
Ŷ
Do not add print media into the input tray while the device is printing.
Ŷ
Use only HP-recommended media types and sizes. See Media specifications for more
information about print media types.
Ŷ
Do not let print media stack up in the output bin. The print media type and the amount of toner
used affect the output bin capacity.
Ŷ
Check the power connection. Make sure that the power cord is firmly connected to both the
device and the power supply box. Plug the power cord into a grounded AC power outlet.
Where to look for jams
Jams can occur in these locations:
Ŷ
Inside the device—under the imaging drum or along the internal paper path
Ŷ
In output areas—either the top output bin or the rear output door
Ŷ
In the automatic document feeder (ADF)
www.partshere.com
Partshere Troubleshooting
Find and remove the jam by using the instructions on the following pages. If the location of the jam is
not obvious, first look inside the device.
Loose toner might remain in the device after a jam. This problem typically resolves itself after a few
sheets have been printed.
To clear a media jam inside the device
CAUTION Media jams might result in loose toner on the page. If toner gets on your clothing,
wipe the toner off with a clean cloth, wash the items in cold water, and air dry. Using hot water
or heat from a dryer will set the toner in the fabric. If you get any toner on your hands, wash
them in cold water.
Do not use a sharp object, such as a pencil or scissors, to remove jammed media.
1
On the back of the device, open the rear-output door, and then push down the fuser levers.
Releasing the fuser levers relieves tension on the device rollers, which allows you to remove the
jammed pages.
2
Push the scanner-release button to open the scanner assembly.
3
Open the top cover, and then remove the image drum and set it aside.
www.partshere.com
Partshere Troubleshooting
4
With both hands, grasp the side of the media that is most visible (this includes the middle), and
carefully pull it free from the device.
5
When you have removed the jammed media, replace the image drum, and close the top cover
and the scanner assembly.
6
Close the rear output door to return the fuser levers to their original upward position.
After clearing the media jam, you might need to turn the device off, and then turn it on again.
NOTE When you add new media, remove all of the media from the input tray, straighten the
stack after adding the new media, place the stack in the tray, and then adjust the media guides.
To clear output area jams
If the media has jammed where it exits the device, complete the following steps.
CAUTION Do not use a sharp object, such as a pencil or scissors, to remove jammed media.
1
On the back of the device, open the rear-output door, and then push down the fuser levers.
Releasing the fuser levers relieves tension on the device rollers, which allows you to remove the
jammed pages.
www.partshere.com
Partshere Troubleshooting
2
Grasp the leading edge of the media and pull the media out through the output bin.
3
Return the fuser levers to their original upward position, and then close the rear-output door.
NOTE If you turned the device off before clearing the media jam, turn it on again, and
then restart your printing or copying job.
If the jam is too far into the device to remove, you might have to remove the fuser. To do so,
complete the following steps.
1
Turn off the device, and then disconnect the power cable.
2
Rotate the locks on the fuser to the unlocked position.
3
Grasp the fuser handle and pull the fuser assembly from the device.
CAUTION The parts on the internal surface of the fuser are very hot. To avoid
burning yourself, do not touch those parts.
4
Using both hands, slowly and steadily remove any print media from inside the device. Then,
carefully reinsert the fuser and secure the locks.
5
Reconnect the power cable, and then turn on the device.
www.partshere.com
Partshere Troubleshooting
Media jams occur in the automatic document feeder (ADF)
Occasionally, media becomes jammed during a copy, scan, or fax job.
You are notified of a media jam by the Doc feeder jam Clear, Reload message that appears on the
device control-panel display. Possible problems include the following:
Ŷ
The ADF input tray is loaded incorrectly or is too full. See Loading documents to scan for more
information.
Ŷ
The media does not meet HP specifications, such as those for size or type. See Media
specifications for more information.
Ŷ
The media is not of good quality. If it is not free of cuts, nicks, tears, spots, loose particles, dust,
wrinkles, voids, staples, paper clips and curled or bent edges, replace it.
To clear a media jam from the automatic document feeder (ADF)
1
Open the ADF cover.
NOTE Verify that any shipping tape inside the ADF has been removed.
2
Remove the jam cleanout part. Using both hands, lift up on the two handles until the part
unsnaps. Rotate and lift out the cleanout part and set it aside.
3
Lifting the green lever, rotate the pick mechanism until it stays open.
www.partshere.com
Partshere Troubleshooting
4
Gently try to remove the page without tearing it. If you feel resistance, go to the next step.
5
Open the ADF lid and gently loosen the media by using both hands. Be careful that the ADF
input tray does not fall off while the ADF lid is open.
6
When the media is free, gently pull it out in the direction shown.
7
Close the lid to the flatbed scanner.
8
Lower the green lever.
www.partshere.com
Partshere Troubleshooting
9
Reinstall the cleanout part by inserting it as shown. Push down on the two tabs until the part
snaps into place. Install the cleanout part correctly, because future jamming might occur if the
cleanout part is not replaced correctly.
10 Close the ADF lid.
www.partshere.com
Partshere Troubleshooting
Print problems
Print quality problems
Occasionally, you might encounter problems with print quality. The information in the following
sections helps you identify and resolve these issues.
NOTE If you are having copy problems, see Copy problems.
Improving print quality
Use the print-quality settings to prevent print-quality problems.
Understanding print-quality settings
Print-quality settings affect how light or dark the print is on the page and the style in which the
graphics are printed. You can also use the print-quality settings to optimize the print quality for a
specific media type.
You can change the settings in the device properties to accommodate the types of jobs that you are
printing.
To temporarily change print-quality settings
To change the print-quality settings only for the current software program, open the properties
through the Print Setup menu in the program that you are using to print.
To change print-quality settings for all future jobs
NOTE For Macintosh instructions, see the device user guide for more information.
For Windows 98, Windows 2000, and Windows Me:
1
In the Windows system tray, click Start, select Settings, and then click Printers.
2
Right-click the device icon.
3
Click Properties (in Windows 2000, you can also click Printing Preferences).
4
Change the settings, and click OK.
For Windows XP (corporate version):
1
In the Windows system tray, click Start, and then click Printers and Faxes.
2
Right-click the device icon.
3
Click Properties, or click Printing Preferences.
4
Change the settings, and click OK.
Identifying and correcting print defects
Use the checklist and print-quality issues charts in this section to solve print-quality problems.
www.partshere.com
Partshere Troubleshooting
Print-quality checklist
General print-quality problems can be solved by using the following checklist:
1
Make sure that the paper or print media that you are using meets specifications. See Media
specifications. Generally, smoother paper provides better results.
Some paper reams are marked with an arrow on the label that indicates the smooth side of the
paper. Make sure that you are printing on the side indicated.
2
If you are using a special print media such as labels, transparencies, glossy, or letterhead,
ensure that you have printed by type.
3
Print a Configuration page and Supplies Status page at the device.
Ɣ
Check the Supplies Status page to see if any supplies are low or empty. No information is
provided for non-HP print cartridges.
Ɣ
If the pages do not print correctly, the problem is with the hardware.
To determine the hardware problem, lightly press the switch in the upper left corner of the
open multipurpose tray, toward the rear of the device frame, with at least three sheets of
paper in the multipurpose tray. The device should print a sheet with horizontal lines of all four
colors. If one or more colors are missing, inspect the device imaging system. If all colors are
printed, troubleshoot for a formatter issue.
4
Print a Demo page from HP Toolbox. If the page prints, the problem is with the printer driver. Try
printing from the other printer driver. For example, if you are using the PCL 6 printer driver, print
from the PS printer driver.
Ɣ
Use the Add Printer Wizard in the Printers (or Printers and Faxes in Windows XP) dialog
box to install the PS driver.
5
Try printing from a different program. If the page prints correctly, the problem is with the program
from which you were printing.
6
Restart the computer and the device and try printing again. If the problem is not resolved, choose
one of these options:
Ɣ
If you suspect the problem is with the engine print and paper path, perform an engine test.
See Engine test.
Ɣ
If the problem is affecting all printed pages, see General print quality issues.
Ɣ
If the problem is affecting only pages printed in color, see Solving issues with color documents.
www.partshere.com
Partshere Troubleshooting
General print quality issues
The following examples depict letter-size paper that has passed through the device short edge first.
These examples illustrate problems that would affect all of the pages that you print, whether you print
in color or in black only. The topics that follow list the typical cause and solution for each of these
examples.
Problem
Cause
Solution
Print is light or faded.
The media might not meet
HP specifications.
Use media that meets
HP specifications. See Media
specifications.
One or more print cartridges might be
low. If you are using non-HP print
cartridges, no messages appear on the
device control panel or in HP Toolbox.
Replace any low print cartridges. See
Replacing the print cartridges.
If you are using non-HP print
cartridges, replace them with HP
cartridges.
If none of the print cartridges or the
imaging drum is low or empty, remove
the print cartridges one at a time and
inspect the toner roller in each to see if
the roller is damaged. If so, replace the
print cartridge.
Toner specks appear.
Dropouts appear.
www.partshere.com
The imaging drum might be low or
damaged.
Print the Supplies Status page to check
the remaining life, and verify that the
imaging drum has not been exposed to
light for a long period of time. Replace
the imaging drum if it is low or
damaged. See Replacing the imaging
drum.
The device might not be calibrated
correctly.
Calibrate the device. See Printer
calibration.
If the light printing is on the left side of
the page, the carousel might be
dislocated.
Verify that the print-cartridge carousel
drive teeth are aligned correctly. If the
teeth are aligned correctly, replace the
print-cartridge carousel. See Removing
the print-cartridge carousel.
The media might not meet
HP specifications.
Use media that meets
HP specifications. See Media
specifications.
The paper path might need cleaning.
Clean the paper path. See Cleaning
the paper path, or see the HP Toolbox
online Help.
A single sheet of print media might be
defective.
Try reprinting the job.
The moisture content of the paper is
uneven or the paper has moist spots
on its surface.
Try different paper, such as highquality paper that is intended for color
laser printers. See Media specifications.
Partshere Troubleshooting
Problem
Vertical streaks or bands appear on the
page.
The amount of background toner
shading becomes unacceptable.
Toner smears appear on the media.
www.partshere.com
Cause
Solution
The paper lot is flawed. The
manufacturing processes can cause
some areas to reject toner.
Try different paper, such as highquality paper that is intended for color
laser printers. See Media specifications.
The imaging drum might be defective.
Replace the imaging drum. See
Replacing the imaging drum.
One or more print cartridges might be
low or defective. If you are using nonHP print cartridges, no messages
appear on the device control panel or
in the HP Toolbox.
Replace any low print cartridges. See
Replacing the print cartridges.
If the error occurs during copy jobs
only, the scanner glass of the ADF
window might be dirty.
Clean the scanner glass and the ADF
window. See .
The imaging drum might be low.
Replace the imaging drum. See
Replacing the imaging drum.
The media might not meet
HP specifications.
Use a different paper with a lighter
basis weight. See Media specifications.
Very dry (low humidity) conditions can
increase the amount of background
shading.
Check the device environment.
One or more print cartridges might be
low. If you are using non-HP print
cartridges, no messages appear on the
device control panel or in the
HP Toolbox.
Replace any low print cartridges. See
Replacing the print cartridges.
The imaging drum might be low.
Replace the imaging drum. See
Replacing the imaging drum.
The media might not meet
HP specifications.
Use media that meets
HP specifications. See Media
specifications.
If toner smears appear on the leading
edge of the paper, the media guides
are dirty, or debris has accumulated in
the print path.
Clean the media guides and the paper
path. See Cleaning the paper path.
The imaging drum might be low.
Replace the imaging drum. See
Replacing the imaging drum.
Partshere Troubleshooting
Problem
Cause
Solution
Media might be jammed in the imaging
drum.
Complete the following steps to clear
the jam:
1
Remove the imaging drum from
the device. See Replacing the
imaging drum.
2
Rotate the black dial (jam
clearance door lock), located on
the top, left-hand side of the
imaging drum, counterclockwise.
3
Lift upward to open the black jam
clearance door near the green
handle on the top of the imaging
drum.
4
Remove the media from inside the
imaging drum.
NOTE Do not touch the
white sleeve in the
imaging drum when
removing the media, as
fingerprints will cause printquality issues. If
necessary, use a lint-free
cloth to gently wipe any
fingerprints off the white
sleeve.
The toner smears easily when touched.
5
Close the jam clearance door, and
then rotate the locking mechanism
clockwise.
6
Reinstall the imaging drum in the
device.
The device is not set to print on the
type of media on which you want to
print.
In the printer driver, select the Paper
tab and set Type is to match the type
of media on which you are printing.
Print speed might be slower if you are
using heavy paper.
The media might not meet
HP specifications.
Use media that meets
HP specifications. See Media
specifications.
The paper path might need cleaning.
Clean the device. See Cleaning the
device.
If the error persists, verify that the fuser is working correctly. If it is not working
correctly, replace the fuser. See Removing the formatter assemblies. If the error
still persists, replace the DC controller. See Removing the DC controller.
Marks repeatedly appear at even
The device is not set to print on the
intervals on the printed side of the page. type of media on which you want to
print.
www.partshere.com
In the printer driver, select the Paper
tab and set Type is to match the type
of paper on which you are printing.
Print speed might be slower if you are
using heavy paper.
Partshere Troubleshooting
Problem
Marks repeatedly appear at even
intervals on the unprinted side of the
page.
The printed page contains misformed
characters.
The printed page is curled or wavy.
Text or graphics are skewed on the
printed page.
www.partshere.com
Cause
Solution
Internal parts might have toner on them.
The problem typically corrects itself
after a few more pages. Run a cleaning
page through the device. See Cleaning
the device.
The paper path might need cleaning.
Run a cleaning page through the
device. See Cleaning the device.
The imaging drum might be low.
Replace the imaging drum. See
Replacing the imaging drum.
The fuser might be damaged.
Replace the fuser. See Replacing the
fuser assembly.
The media might not meet
HP specifications.
Use a different paper, such as highquality paper that is intended for color
laser printers. See Media specifications.
If characters are incorrectly formed so
that they produce a wavy effect, the
laser/scanner assembly might need
service.
Verify that the problem also occurs on
the Configuration page. If so, replace
the laser/scanner assembly. See
Removing the laser/scanner assembly.
The device is not set to print on the
type of media on which you want to
print.
In the printer driver, select the Paper
tab and set Type is to match the type
of paper on which you are printing.
Print speed might be slower if you are
using heavy paper.
The paper path is curling the media.
Open the rear output door to print to
the straight-through paper path.
The media might not meet
HP specifications.
Use a different paper, such as highquality paper that is intended for color
laser printers. See Media specifications.
Both high temperature and humidity
can cause paper curl.
Check the device environment.
The media might be loaded incorrectly.
Make sure that the paper or other print
media is loaded correctly and that the
Partshere Troubleshooting
Problem
Cause
Solution
media guides are not too tight or too
loose against the stack. See Loading
media.
The printed page contains wrinkles or
creases.
If the error occurs using either tray 1 or
optional tray 2, the paper path might be
obstructed.
Remove any media jammed in the
paper path. See Clearing jams.
The media might not meet
HP specifications.
Use a different paper, such as highquality paper that is intended for color
laser printers. See Media specifications.
The laser scanner might be incorrectly
seated in the device.
Verify that the laser/scanner assembly
is correctly seated. See Removing the
laser/scanner assembly.
The media might be loaded incorrectly.
Turn over the stack of paper in the
input tray, or try rotating the paper 180°
in the input tray.
Verify that the media is loaded
correctly and that the media guides are
not too tight or too loose against the
stack. See Loading media.
Toner appears around the printed
characters.
An image that appears at the top of the
page (in solid black) repeats farther
down the page (in a gray field).
The media might not meet
HP specifications.
Use a different paper, such as highquality paper that is intended for color
laser printers. See Media specifications.
The paper path is curling the media.
Open the rear output door to print to
the straight-through paper path.
The media might be loaded incorrectly.
Turn over the stack of paper in the tray.
If large amounts of toner have
scattered around the characters, the
paper might have high resistivity.
Use a different paper, such as highquality paper that is intended for color
laser printers. See Media specifications.
The device might not be calibrated
correctly.
Calibrate the device. See Printer
calibration.
Software settings might affect image
printing.
In your software program, change the
tone (darkness) of the field in which the
repeated image appears.
In your software program, rotate the
whole page 180° to print the lighter
image first.
www.partshere.com
The device is not set to print on the
type of media on which you want to
print.
In the printer driver, select the Paper
tab and set Type is to match the type
of paper on which you are printing.
Print speed might be slower if you are
using heavy paper.
The order of images printed might
affect printing.
Change the order in which the images
are printed. For example, have the
Partshere Troubleshooting
Problem
Cause
Solution
lighter image at the top of the page,
and the darker image farther down the
page.
A power surge might have affected the
device.
www.partshere.com
If the defect occurs later in a print job,
turn the device off for 10 minutes, and
then turn on the device to restart the
print job.
Partshere Troubleshooting
Solving issues with color documents
This section describes issues that can occur when you print in color.
Problem
Cause
Solution
Only black is printing when the
document should be printing in color.
Color mode is not selected in your
program or printer driver.
Select color mode instead of grayscale
mode.
The correct printer driver might not be
selected in the program.
Select the correct printer driver.
The device might not be correctly
configured.
1
To determine if a hardware
problem exists, lightly press the
switch in the upper left corner of
the open multipurpose tray, toward
the rear of the device frame, with
at least three sheets of paper in
the multipurpose tray. The device
should print a sheet with horizontal
lines of all four colors. If one or
more colors are missing, inspect
the device imaging system. If all
colors are printed, inspect the
formatter.
2
Print a Configuration page. If no
color appears on the Configuration
page, replace the imaging drum.
See Replacing the imaging drum.
One or more colors are not printing, or
are inaccurate.
A color is printing inconsistently after
you load a new print cartridge.
www.partshere.com
Sealing tape might be on the print
cartridges.
Verify that the sealing tape has been
completely removed from the print
cartridges.
The media might not meet
HP specifications.
Use a different paper, such as highquality paper that is intended for color
laser printers. See Media specifications.
The device might be operating in
excessively humid conditions.
Verify that the device environment is
within humidity specifications.
One or more print cartridges might be
low. If you are using non-HP print
cartridges, no messages appear on the
device control panel or in the
HP Toolbox.
Replace any low print cartridges. See
Replacing the print cartridges.
Another print cartridge might be low. If
you are using a non-HP print cartridge,
it might be low or empty but you will
receive no indication.
Check the control-panel display or
HP Toolbox to see if a print cartridge is
low, and replace it if necessary.
Print cartridges might be incorrectly
installed.
Remove the print cartridge for the color
that is printing inconsistently and
reinstall it.
The device might have calibrated
incorrectly after you installed a print
cartridge.
Calibrate the device. See Printer
calibration.
Partshere Troubleshooting
Problem
Cause
Solution
The colors on the printed page do not
match the colors as they appear on the
screen.
The colors on your computer monitor
might differ from the device output.
Select Screen Match in the Color tab
of the printer driver.
The printer driver might affect color
printing.
Try printing from a different program or
one of the other printer drivers. For
example, if you are using the PCL 6
printer driver, try the PS printer driver.
If extremely light colors or extremely
dark colors on screen are not printing,
your software program might interpret
extremely light colors as white or
extremely dark colors as black.
If possible, avoid using extremely light
or extremely dark colors.
The media might not meet
HP specifications.
Use a different paper, such as highquality paper that is intended for color
laser printers. See Media specifications.
The media might be too rough.
Use a smooth paper or print media,
such as a high-quality paper that is
made for color laser printers.
Generally, smoother media produces
better the results. See Media
specifications.
The finish on the printed color page is
inconsistent.
Media-handling problems
Use the information in this section when the device experiences media-handling problems.
Print-media guidelines
Ŷ
For best results, make sure that the paper is of good quality, and free of cuts, nicks, tears, spots,
loose particles, dust, wrinkles, voids, staples, and curled or bent edges.
Ŷ
For best-quality color printing, use a smooth type of paper. Generally, smoother media produces
better results. For more information, see Media specifications.
Ŷ
If you are unsure what type of paper you are loading (such as bond or recycled), check the label
on the package of paper.
CAUTION Do not use media that is designed for Inkjet printers only. Use media that is
designed for color LaserJet printers.
Ŷ
Do not use letterhead paper that is printed with low-temperature inks, such as those used in
some types of thermography.
Ŷ
Do not use raised or embossed letterhead.
www.partshere.com
Partshere Troubleshooting
Ŷ
The device uses heat and pressure to fuse toner to the paper. Make sure that any colored paper
or preprinted forms use inks that are compatible with this fusing temperature (210°C or 410°F for
0.2 second).
CAUTION Failure to follow these guidelines could cause jams or damage to the device.
Solving print-media problems
The following problems with paper cause print quality deviations, jamming, or even damage to the
device.
Problem
Cause
Solution
Poor print quality or toner adhesion
The paper is too moist, too rough, too
heavy or too smooth, or it is embossed
or from a faulty paper lot.
Try another kind of paper, between 100
and 250 Sheffield, 4 to 6% moisture
content.
Dropouts, jamming, or curl
The paper has been stored incorrectly.
Store paper flat in its moisture-proof
wrapping.
The paper has variability from one side
to the other.
Turn the paper over.
The paper is too moist, has the wrong
grain direction, or is of short-grain
construction
Open the rear output bin, or use longgrain paper.
The paper varies from side-to-side.
Turn the paper over.
Jamming, damage to device
The paper has cutouts or perforations.
Use paper that is free of cutouts or
perforations.
Problems with feeding
The paper has ragged edges.
Use high-quality paper that is made for
color laser printers.
The paper varies from side-to-side.
Turn the paper over.
The paper is too moist, too rough, too
heavy or too smooth, has the wrong
grain direction, or is of short-grain
construction or it is embossed or from
a faulty paper lot.
Try another kind of paper, between 100
and 250 Sheffield, 4 to 6% moisture
content.
The media guides might be incorrectly
adjusted.
Remove all media from the input tray,
straighten the stack, and then load the
media in the input tray again. Adjust
the media guides to the width and
length of the media that you are using
and try printing again.
If the error occurs using either tray 1 or
optional tray 2, the paper path might be
obstructed
Remove any media jammed in the
paper path. See Clearing jams.
The media tray might be overloaded.
Remove some of the media from the
tray. See Loading media.
The media might be wrinkled, folded,
or damaged.
Verify that the media is not wrinkled,
folded, or damaged. Try printing on
media from a new or different package.
Excessive curl
Print is skewed (crooked).
More than one sheet feeds at one time.
www.partshere.com
Open the rear output bin, or use longgrain paper.
Partshere Troubleshooting
Problem
Cause
Solution
Device does not pull media from the
media input tray.
The device might be in manual feed
mode.
Ŷ
If Manual feed appears on the
device control-panel display, press
ENTER to print the job.
Ŷ
Verify that the device is not in
manual feed mode and print your
job again.
The pickup roller might be dirty or
damaged.
Clean or replace the pickup roller. See
Replacing the tray 1 pickup roller and
separation pad.
The paper-length adjustment control in
tray 2 (HP Color LaserJet 2840 all-inone only) is set at a length that is
greater than the media size.
Adjust the paper-length adjustment
control to the correct length.
Performance problems
Try the tips in this section if pages exit the device, but have nothing printed on them, or when the
device does not print any pages.
Problem
Cause
Solution
Pages print but are totally blank.
The sealing tape might still be in the
print cartridges.
Verify that the sealing tape has been
completely removed from the print
cartridges.
The document might contain blank
pages.
Check the document that you are
printing to see if content appears on all
of the pages.
The device might be malfunctioning.
To check the device, print a
Configuration page.
Printing in color can slow the print job.
If you do not need color for your print
job, set the driver to print in grayscale.
Certain media types can slow the print
job. See Table 1-15 Special media
print speeds.
Print on a different type of media.
The device might not be pulling media
correctly.
See Media-handling problems.
The media is jamming in the device.
Clear the jam. See Clearing jams.
The USB cable might be defective or
incorrectly connected.
Ŷ
Disconnect the USB cable at both
ends and reconnect it.
Ŷ
Try printing a job that has printed
in the past.
Ŷ
Try using a different USB cable.
Pages print very slowly.
Pages did not print.
Other devices are running on your
computer.
www.partshere.com
The device might not share a USB
port. If you have an external hard drive
or network switchbox that is connected
Partshere Troubleshooting
Problem
Cause
Solution
to the same port as the device, the
other device might be interfering. To
connect and use the device, you must
disconnect the other device or you
must use two USB ports on the
computer.
www.partshere.com
Partshere Troubleshooting
Scan problems
This section helps you identify and resolve scanning problems.
Solving scanned image problems
Use the table below to solve image-scan issues.
Problem
Cause
Solution
The scanned image is of poor quality.
The original might be a secondgeneration photo or picture.
Ŷ
To eliminate the patterns, try
reducing the size of the image after
scanning.
Ŷ
Print the scanned image to see if
the quality is better.
Ŷ
Verify that your resolution and
color settings are correct for the
type of scan job that you are
performing.
Ŷ
For best results, use the flatbed
scanner for scanning rather than
the automatic document feeder
(ADF).
If the scanned page has a background
but the original document does not, the
original might be too thin to scan or
copy cleanly.
On the flatbed scanner, place three
sheets of clean paper on top of the
original, close the flatbed scanner
cover, and then re-scan the original.
The image that appears on the screen
Ŷ
might not be an accurate
representation of the quality of the scan.
Ŷ
Part of the image did not scan.
www.partshere.com
Try adjusting your computer
monitor settings to use more colors
(or levels of gray). Typically, you
make this adjustment by opening
Display in Windows Control Panel.
Try adjusting the resolution and
color settings in the scanner
software.
The original might have been loaded
incorrectly.
Use the media guides when you load
the originals into the ADF. See Loading
documents to scan.
The scanner might be dirty.
Clean the scanner. See To clean the
scanner glass.
The graphics settings might not be
suitable for the type of scan job that
you are performing.
Try changing the graphics settings or
the scan mode.
The original might have been loaded
incorrectly.
Use the media guides when you load
the originals into the ADF. See Loading
documents to scan.
A colored background might be
causing images in the foreground to
blend into the background.
Try adjusting the settings before you
scan the original or enhancing the
image after you scan the original.
Partshere Troubleshooting
Problem
Cause
Solution
The original is longer than 381 mm (15
inches).
The maximum scannable length is 381
mm (15 in) when you use the
automatic document feeder (ADF)
input tray. If the page exceeds the
maximum length, the scanner stops.
(Copies can be longer.)
CAUTION Do not try to pull
the original from the ADF; you
might damage the scanner or
your original. See Media jams
occur in the automatic
document feeder (ADF).
The scan takes too long
The original is too small.
The minimum size that the flatbed
scanner supports is 25 by 25 mm (1 by
1 inches). The minimum size that the
ADF supports is 127 by 127 mm (5 by
5 inches). The original might be
jammed. See Media jams occur in the
automatic document feeder (ADF).
The media size is incorrect.
In Scan settings, make sure that the
input media size is large enough for the
document that you are scanning.
The resolution or color level is set too
high.
Change the resolution and color level
settings to the correct settings for your
job.
The software is set to scan in color.
The system default is color, which
takes longer to scan even when
scanning a monochrome original. If you
acquire an image through TWAIN or
WIA, you can change the settings so
that the original scans in grayscale or
black-and-white. See the device
software Help for details.
A print job or copy job was sent before
you tried to scan.
If someone sent a print job or copy job
before you tried to scan, the scan will
start if the scanner is not busy.
However, because the printer and
scanner share memory, the scan might
be slower.
Scan quality problems
This section provides information about improving scan quality by preventing or correcting problems.
Preventing problems
The following are a few simple steps you can take to improve copy and scan quality.
Ŷ
Use the flatbed scanner, rather than the automatic document feeder (ADF) input tray, to scan.
Ŷ
Use high-quality originals.
www.partshere.com
Partshere Troubleshooting
Ŷ
Load the media correctly. If the media is loaded incorrectly, it might skew, which causes unclear
images. See Loading media for instructions.
Ŷ
Adjust the software settings according to how you plan to use the scanned page.
Ŷ
Use the Text setting for items that contain mostly text.
Ŷ
Use the Photo setting when you are making a copy of a photo or graphic.
Ŷ
Use the Mixed setting for documents that include both text and graphics.
Ŷ
Use the Draft setting if you want to conserve toner or if the copy quality is not as important.
Ŷ
If your device frequently feeds more than one page at a time, the separation pad might need to
be replaced. See Replacing the tray 1 pickup roller and separation pad.
Ŷ
Use or make a carrier sheet to protect your originals.
Solving scan-quality problems
Problem
Cause
Solution
Blank pages
The original might have been loaded
upside down.
In the automatic document feeder
(ADF), put the top end of the stack of
originals into the ADF input tray, with
the media stack face-up and the first
page to be scanned on top of the stack.
On the flatbed scanner, place the
original document face-down with the
upper-left corner of the document at
the lower-right corner of the glass.
Too light or dark
www.partshere.com
The scanner bulb might not be working.
If the scanner bulb does not light, verify
that the cables from the scanner to the
formatter are connected correctly. See
Removing the scanning assembly. If
the error persists, replace parts one at
a time in the following order until the
problem is resolved: scanner
assembly, and finally the formatter (see
Removing the formatter assemblies).
The resolution and color levels may be
set incorrectly.
Verify that you have the correct
resolution and color settings.
Ŷ
Use the Text setting for items that
contain mostly text.
Ŷ
Use the Photo setting when you
are making a copy of a photo or
graphic.
Ŷ
Use the Mixed setting for
documents that include both text
and graphics.
Ŷ
Use the Draft setting if you want to
conserve toner or if the copy
quality is not as important.
Partshere Troubleshooting
Problem
Cause
Solution
Unwanted lines
Ink, glue, correction fluid, or an
unwanted substance might be on the
glass.
Clean the flatbed scanner surface. See
To clean the scanner glass.
The ADF glass might be dirty.
Clean the ADF glass. See To clean the
scanner glass.
Black dots or streaks
Ink, glue, correction fluid, or an
unwanted substance might be on the
glass.
Clean the flatbed scanner surface. See
To clean the scanner glass.
Unclear text
The resolution and color levels may be
set incorrectly.
Verify that you have the correct
resolution and color settings.
The scanned page has a background
but the original document does not.
The original might be too thin to scan
cleanly.
On the flatbed scanner, place three
sheets of clean paper on top of the
original, close the flatbed scanner
cover, and then re-scan the original.
Scan-specific error messages
Table 6-4
Message
Description
Solution
BulbWarmupFromCoarse
The lamp light level might be too low, or the
lamp stability criteria might not be met.
1
Power cycle the device.
2
BulbWarmupFromOff
The scanner might not be meeting the
threshold light level.
Replace the scanning assembly. See
Removing the scanning assembly.
3
CalLabelFind
Find cal label black/white transition and
then find cal label black squares.
Replace the formatter. See Removing
the formatter assemblies.
CalLabelFindAfterScan
Find cal label after a scan or copy return-tohome.
DarkFind
The bulb will not light, and the scanner
moves to the right. The CCD might not be
able to find a suitable dark spot in the
scanning assembly to warm up.
DocOriginFind
Find bezel notch.
LMWFinalFind
Scanner sets final LMW window.
LMWTempFind
Scanner sets temporary LMW window.
www.partshere.com
Partshere Troubleshooting
Copy problems
This section helps you identify and resolve copying problems.
Preventing problems
The following are a few simple steps you can take to improve copy quality:
Ŷ
Copy from the flatbed scanner. This will produce a higher quality copy than copying from the
automatic document feeder (ADF).
Ŷ
Use quality originals.
Ŷ
Load the media correctly. If the media is loaded incorrectly, it might skew, causing unclear
images and problems with the OCR application. See Loading documents to scan for instructions.
Ŷ
Use or make a carrier sheet to protect your originals.
NOTE Verify that the media meets HP specifications. If the media meets HP specifications,
recurring feed problems indicate the separation pad is worn and needs to be replaced. See
Replacing the tray 1 pickup roller and separation pad.
Image problems
Problem
Cause
Solution
Images are missing or faded.
One or more print cartridges might be
low.
Replace any low print cartridges. See
Replacing the print cartridges.
The device might have calibrated
incorrectly after you installed a print
cartridge.
Calibrate the device. See Printer
calibration.
The original might be of poor quality.
If your original is too light or damaged,
the copy might not be able to
compensate, even if you adjust the
contrast. If possible, find an original
document in better condition.
The original might have a colored
background.
Colored backgrounds might cause
images in the foreground to blend into
the background, or the background
might appear in a different shade. If
possible, use an original document
without a colored background.
The media might not meet
HP specifications.
Use media that meets
HP specifications. See Media
specifications.
One or more print cartridges might be
low.
Replace any low print cartridges. See
Replacing the print cartridges. If the
error persists, inspect the print
cartridges for defects in the printing
area.
Vertical white or faded stripes appear
on the copy.
If the error persists, inspect the image drum for damage. See Replacing the
imaging drum. If the error persists, inspect the transfer roller for contamination or
damage. See Removing the transfer roller. If error persists, inspect the laser/
www.partshere.com
Partshere Troubleshooting
Problem
Cause
Solution
scanner for contamination (paper dust or fibers) on the window. See Removing
the laser/scanner assembly.
If the error occurs only on copy jobs, clean the ADF scanning window (see To
clean the scanner glass). If the error still persists, replace the scanning assembly.
See Removing the scanning assembly.
Unwanted lines appear on the copy.
Tray 1 might not be placed correctly.
Verify that tray 1 is in place.
The flatbed scanner or the ADF
scanning window might be dirty.
Clean the flatbed scanner or the ADF
scanning window. See To clean the
scanner glass.
The imaging drum might have been
scratched.
Replace the imaging drum. See
Replacing the imaging drum.
An image exists on the back of the
original, or defects exist on the scanner
cover.
On the flatbed scanner, place three
sheets of clean paper on top of the
original, close the flatbed scanner
cover, and then re-scan the original.
If the error persists, a print a document from the computer. If the printed page is
free of the unwanted lines, and if the flatbed glass and ADF scanning window are
clean, replace the scanning assembly. See Removing the scanning assembly.
Black dots or streaks appear on the
copy.
Ink, glue, correction fluid, or an
unwanted substance might be on the
automatic document feeder (ADF) or
flatbed scanner.
Clean the device. See Cleaning the
device.
The imaging drum might be damaged
or contaminated.
Inspect the imaging drum, and replace
it if necessary. See Replacing the
imaging drum.
The fuser rollers might be contaminated. Inspect the fuser rollers, and clean
them if necessary.
Copies are too light or dark.
The device settings may be incorrect.
Verify that the quality settings are
correct on the device control panel.
See the device software Help for more
information about changing the settings.
Text is unclear.
The device might not be calibrated
correctly.
Calibrate the device. See Printer
calibration.
The device settings may be incorrect.
Verify that the quality settings are
correct on the device control panel.
See the device software Help for more
information about changing the settings.
The device might not be calibrated
correctly.
www.partshere.com
Calibrate the device. See Printer
calibration.
Partshere Troubleshooting
Problem
Cause
Solution
The original is of poor quality.
Try copying another document. If the
copy is free of defects, obtain a betterquality original.
If the error persists, a print a document from the computer. If the printed page is
free of unclear text, and if the flatbed glass and ADF scanning window are clean,
replace the scanning assembly. See Removing the scanning assembly.
Media-handling problems
Problem
Cause
Solution
Poor print quality or toner adhesion
The paper is too moist, too rough, too
heavy or too smooth, or it is embossed
or from a faulty paper lot.
Try another kind of paper, between 100
and 250 Sheffield, 4 to 6% moisture
content.
The device settings are not compatible
with the media you are using.
Change the device settings to reflect
the media that you are using.
The paper has been stored incorrectly.
Store paper flat in its moisture-proof
wrapping.
The paper has variability from one side
to the other.
Turn the paper over.
The paper is too moist, has the wrong
grain direction, or is of short-grain
construction
Open the rear output bin, or use longgrain paper.
The paper varies from side-to-side.
Turn the paper over.
The paper has cutouts or perforations.
Use paper that is free of cutouts or
perforations.
The paper has staples or paper clips.
Remove any staples or paper clips
from the original document.
The paper has ragged edges.
Use high-quality paper that is made for
color laser printers.
The paper varies from side-to-side.
Turn the paper over.
The paper is too moist, too rough, too
heavy or too smooth, has the wrong
grain direction, or is of short-grain
construction or it is embossed or from
a faulty paper lot.
Try another kind of paper, between 100
and 250 Sheffield, 4 to 6% moisture
content.
Print is skewed (crooked).
The media guides might be incorrectly
adjusted.
Remove all media from the input tray,
straighten the stack, and then load the
media in the input tray again. Adjust
the media guides to the width and
length of the media that you are using
and try printing again.
More than one sheet feeds at one time.
The media tray might be overloaded.
Remove some of the media from the
tray. See Loading media.
The media might be wrinkled, folded,
or damaged.
Verify that the media is not wrinkled,
folded, or damaged. Try printing on
media from a new or different package.
Dropouts, jamming, or curl
Excessive curl
Jamming, damage to device
Problems with feeding
www.partshere.com
Open the rear output bin, or use longgrain paper.
Partshere Troubleshooting
Problem
Cause
Solution
Device does not pull media from the
media input tray.
The device might be in manual feed
mode.
Ŷ
If Manual feed appears on the
device control-panel display, press
ENTER to print the job.
Ŷ
Verify that the device is not in
manual feed mode and print your
job again.
The device does not detect media in
the tray.
Verify that there is media in the tray. If
the error persists, inspect the sensor.
See Removing the density sensor and
top-of-page sensor.
The pickup roller might be dirty or
damaged.
Clean or replace the pickup roller. See
Replacing the tray 1 pickup roller and
separation pad.
The paper-length adjustment control in
tray 2 (HP Color LaserJet 2840 all-inone only) is set at a length that is
greater than the media size.
Adjust the paper-length adjustment
control to the correct length.
Problem
Cause
Solution
No copy came out.
The input tray might be empty.
Load media in the device. See Loading
documents to scan for more information.
The original might have been loaded
incorrectly.
In the automatic document feeder
(ADF), load the original with the narrow
side forward and the side to be
scanned facing up.
Performance problems
On the flatbed scanner, place the
original document face-down with the
upper-left corner of the document at
the lower-right corner of the glass.
If the error persists, determine if a hardware problem exists. Lightly press the
switch in the upper left corner of the open multipurpose tray, toward the rear of
the device frame, with at least three sheets of paper in the multipurpose tray. The
device should print a sheet with horizontal lines of all four colors. If one or more
colors are missing, inspect the device imaging system.
Copies are blank.
The sealing tape might not have been
removed from the print cartridges.
Remove the print cartridges from the
device, pull out the sealing tape, and
reinstall the print cartridges.
The original might have been loaded
incorrectly.
In the ADF, load the original with the
narrow side forward and the side to be
scanned facing up.
On the flatbed scanner, make sure that
the original document is placed facedown with the upper-left corner of the
document at the lower-right corner of
the glass.
www.partshere.com
Partshere Troubleshooting
Problem
Cause
Solution
The media might not meet
HP specifications.
Use media that meets
HP specifications. See Media
specifications.
One or more print cartridges might be
low.
Replace any low print cartridges. See
Replacing the print cartridges.
If the error persists, determine if a hardware problem exists. Lightly press the
switch in the upper left corner of the open multipurpose tray, toward the rear of
the device frame, with at least three sheets of paper in the multipurpose tray. The
device should print a sheet with horizontal lines of all four colors. If one or more
colors are missing, inspect the device imaging system.
The wrong original was copied.
The ADF might be loaded.
Make sure that the ADF is empty.
Copies are reduced in size.
The device software settings might be
set to reduce the scanned image.
See the HP Toolbox Help for more
information about changing the settings.
www.partshere.com
Partshere Troubleshooting
Fax problems
This section helps you identify and resolve fax problems.
Problems receiving faxes
Use the table in this section to solve problems that might occur when receiving faxes.
NOTE You must use the fax cord that came with the device in order to ensure that the
device functions correctly.
Problem
Cause
Solution
The device cannot receive faxes from
an extension telephone.
The extension-telephone setting might
be disabled.
Change the setting to allow faxes from
an extension telephone.
The fax cord might not be securely
connected.
Verify that the fax cord is securely
connected between the telephone jack
and the device (or another device that
is connected to the device). Press
1-2-3 in sequence (tone-dial mode
only), wait for three seconds, and then
hang up.
The device dialing mode might be
incorrectly set, or the extension phone
might be incorrectly set.
Verify that the device dialing mode is
set to Tone. Verify that the extension
phone is set up for tone dialing as well.
The answer mode might be set to
Manual.
If the answer mode is set to Manual,
the device does not answer calls. You
have to start the fax-receiving process
manually.
The rings-to-answer setting might not
be set correctly.
Check the rings-to-answer setting for
your configuration.
The answer-ring pattern feature might
be turned on, but you do not have the
service, or you do have the service and
the feature is not set correctly.
Check the answer-ring pattern feature
to verify that it is set properly.
The fax cord might not be correctly
connected, or the fax cord is not
working.
See the device getting started guide to
check the installation. Verify that you
are using the fax cord that came with
the device.
The device might not be able to detect
incoming fax tones because the
answering machine is playing a voice
message.
Re-record your answering machine
message, leaving at least two seconds
of silence at the beginning of the
message.
Too many devices might be connected
to the telephone line.
You should not have more than three
devices attached to the line. Try
removing the last device that was
connected and determine whether the
device works. If not, continue removing
devices one at a time and retry after
removing each one.
Incoming fax calls are not being
answered by the device.
www.partshere.com
Partshere Troubleshooting
Problem
Cause
Solution
The telephone line might not be working. Do one of the following:
Incoming fax calls are not being
answered by the device.
A voice-messaging service might be
interfering with the device as it
attempts to answer calls.
The device might be out of paper and
the memory is full.
Ŷ
Increase the volume on the device,
and then press START FAX on the
control panel. If you hear a dial
tone, the telephone line is working.
Ŷ
Disconnect the device from the
telephone jack, and then connect a
telephone. Try to make a
telephone call to verify that the
telephone line is working.
Do one of the following:
Ŷ
Disable the messaging service.
Ŷ
Get a telephone line that is
dedicated to fax calls.
Ŷ
Set the device answer mode to
Manual. In manual mode, you
must start the fax-receive process
yourself.
Ŷ
Leave the device set to automatic
mode and lower the rings-toanswer setting for the device to a
number less than the rings-toanswer setting for the voice mail.
The device will answer all incoming
calls.
Refill the media input tray. Press
ENTER. The device prints all of the faxes
it has saved in memory and then
resumes answering fax calls.
If the error persists, verify that the flat cable that connects the formatter to the line
interface unit (LIU) is connected correctly. If the error still persists, replace the
LIU. See Removing the formatter and line interface unit (LIU).
Faxes are not printing.
Faxes are printing on two pages
instead of one.
Received faxes are too light or are
printing only on half of the page.
www.partshere.com
The media input tray is empty.
Load media. Any faxes that are
received while the input tray is empty
are stored in memory and will print
after the tray has been refilled.
The receive-to-PC option might be
selected, and faxes are being received
by the computer.
Check to determine whether the
computer is receiving faxes.
The autoreduction setting might not be
set correctly.
Turn on the autoreduction setting.
The incoming faxes might have been
sent on larger media.
Turn on the autoreduction setting to
allow larger pages to be printed on one
page.
The device ran out of toner while
printing a fax.
The device stores the most recently
printed faxes. (The amount of memory
that is available determines the actual
Partshere Troubleshooting
Problem
Cause
Solution
number of faxes stored for reprinting.)
As soon as possible, replace the print
cartridge, and then reprint the fax.
The fax that was sent was too light.
Contact the sender and have the
sender resend the fax after altering the
settings.
Problems sending faxes
Use the information in this table to solve problems that might occur when sending faxes.
Problem
Cause
Solution
The document stops feeding in the
middle of faxing.
The maximum length of a page that
you can load is 381 mm (15 inches).
Faxing of a longer page stops at 381
mm (15 inches).
Print the document on shorter media.
If the item is too small, it can jam inside
the automatic document feeder (ADF).
If no jam exists and less than one
minute has elapsed, wait a moment
before pressing CANCEL. If a jam exists,
see Clearing jams. Then, resend the job.
Use the flatbed scanner. The minimum
page size for the ADF is 127 by 127
mm (5 by 5 inches).
If a jam exists, see Clearing jams.
Then, resend the job.
Faxes stop during sending.
The device is receiving faxes but is not
sending them.
www.partshere.com
The fax machine to which you are
sending might be malfunctioning.
Try sending to another fax machine.
Your telephone line might not be
working.
Do one of the following:
Ŷ
Turn up the volume on the device,
and then press START FAX on the
control panel. If you hear a dial
tone, the telephone line is working.
Ŷ
Disconnect the device from the
jack in the wall, and then connect a
telephone to the jack. Try to make
a telephone call to verify that the
telephone line is working.
A communication error might be
interrupting the fax job.
Change the redial-on-communicationerror setting to On.
If your device is on a PBX system, the
PBX system might be generating a dial
tone that the device cannot detect.
Disable the detect-dial-tone setting.
A poor telephone connection might
exist.
Try again later.
The fax machine to which you are
sending might be malfunctioning.
Try sending to another fax machine.
Partshere Troubleshooting
Problem
Cause
Solution
Your telephone line might not be
working.
Do one of the following:
Ŷ
Turn up the volume on the device
and press START FAX on the control
panel. If you hear a dial tone, the
telephone line is working.
Ŷ
Disconnect the device from the
telephone jack and connect a
telephone. Try to make a
telephone call to verify that the
telephone line is working.
Outgoing fax calls continue to be dialed.
The device automatically redials a fax
To stop the redials while the device is
number if the redial options are set to On. dialing, press CANCEL. Change the
redial setting.
Faxes that you send are not arriving at
the receiving fax machine.
The receiving fax machine might be off
or might have an error condition, such
as being out of paper.
Call the recipient to verify that the fax
machine is on and ready to receive
faxes.
The originals might be incorrectly
loaded.
Verify that the original documents are
correctly loaded into the ADF input tray
or flatbed scanner. See Loading media
A fax might be in memory because it is
waiting to redial a busy number, other
jobs that are ahead of it are waiting to
be sent, or the fax is set up for a
delayed send.
If a fax job is in memory for any of
these reasons, an entry for the job
appears in the fax log. Print the fax
activity log and check the Status
column for jobs that show a Pending
designation.
Faxes you send include a block of gray
shading at the end of each page.
You might be sending a fax from the
flatbed scanner with the glass-fax size
set incorrectly.
Verify that the setting is correct.
Faxes you send have data missing
from the end of each page.
You might be sending a fax from the
flatbed scanner with the glass-fax size
set incorrectly.
Verify that the setting is correct.
Problem
Cause
Solution
Voice calls are not being received by
the telephone or answering machine
that is connected to the line.
The fax cord might not be correctly
connected.
See the device getting started guide to
check the installation. The device must
be the first device connected to the
telephone line.
The answer mode or rings-to-answer
settings might not be correctly set.
Verify that the rings-to-answer setting
is set higher than the answering
machine setting.
The answering machine or telephone
might not be functioning.
Connect the telephone or answering
machine directly to the telephone line
and determine if it works by itself.
Voice call problems
www.partshere.com
Partshere Troubleshooting
Media-handling problems
Use the information in this table to solve problems that involve print media.
NOTE For information about removing jams, see Clearing jams.
Problem
Cause
Solution
Print is skewed.
The media input tray might be
overloaded.
Remove some of the media from the
input tray.
The media guides might be incorrectly
set, broken, or missing.
Verify that the guides are not adjusted
too tightly or too loosely against the
paper. Check for broken or missing
guides, and replace them if necessary.
The media might not meet
HP specifications.
Use media that meets
HP specifications. See Media
specifications.
The media might not meet
HP specifications.
Use media that meets
HP specifications. See Media
specifications.
The paper path might be affecting the
pages.
Open the straight-through output door
on the back of the device and use this
paper path.
The media is not stored properly.
When possible, store media in its
sealed ream at room temperature.
The media has been in the input tray
too long.
Turn over the stack of media in the tray
or rotate the media 180° in the paper
tray.
Problem
Cause
Solution
Faxes are transmitting or being
received very slowly.
The fax might be very complex, such
as one with many graphics.
Complex faxes take longer to be sent
or received. Breaking longer faxes into
multiple jobs and decreasing the
resolution can increase the
transmission speed.
The receiving fax machine might have
a slow modem speed.
The device only sends the fax at the
fastest modem speed that the receiving
fax machine can accept.
The resolution at which the fax was
sent or is being received might be very
high.
If you are receiving the fax, call and
ask the sender to lower the resolution
and resend the fax. If you are sending
the fax, lower the resolution and
resend the fax.
Your telephone line might not be
working.
Hang up and resend the fax. Have the
telephone company check the
telephone line.
You are sending a fax via an
international call.
You must allow more time to transmit
fax jobs internationally.
Pages are curled or wrinkled.
Performance problems
www.partshere.com
Partshere Troubleshooting
Problem
Cause
Solution
The fax activity logs or fax call reports
are printing at inappropriate times.
The fax activity log or fax call reports
settings are not correct.
Print a Configuration page and check
when the reports print.
The device sounds are too loud or too
soft.
The volume setting might not be
adjusted correctly.
Adjust the volume setting to the correct
volume level.
www.partshere.com
Partshere Troubleshooting
Memory card problems
This section helps you identify and resolve memory card-related problems.
NOTE For help with control-panel error messages while printing from a memory card, see
Control-panel messages.
Missing or wrong files
Use the table in this section to solve problems with memory-card files.
Problem
Cause
Solution
Device cannot detect files on the
memory card.
The memory card might be missing or
inserted incorrectly.
Verify that the memory card is inserted
correctly.
If the card is correctly inserted, use
another memory card. If more than one
memory type card has the same issue,
verify that the LED lights when a card
inserted. If the LED does not light,
verify that the flat cable from the
formatter is connected correctly to the
memory-card assembly. If the error
persists, replace the memory-card
assembly. See Replacing the memorycard assembly (HP Color LaserJet
2840 all-in-one only).
The files might not be in the correct
format.
To print from the device control panel,
the files must be in the sRGB JPEG
format. To print other formats, you
must use a software program on your
computer.
You might have inserted more than
one memory card.
Only one card slot can be occupied for
the device to detect JPEG files. Verify
that only one card is inserted.
Index page not printing
Use the table in this section to solve problems with index-page printing.
Problem
Cause
Solution
The index page will not print.
The memory card might have been
removed before the device could print
the page, or the memory card might
have been inserted incorrectly.
Reinsert the card and reprint the index
page.
www.partshere.com
If the card is correctly inserted, use
another memory card. If more than one
memory type card has the same issue,
verify that the LED lights when a card
inserted. If the LED does not light,
verify that the flat cable from the
formatter is connected correctly to the
memory-card assembly. If the error
persists, replace the memory-card
Partshere Troubleshooting
Problem
Cause
Solution
assembly. See Replacing the memorycard assembly (HP Color LaserJet
2840 all-in-one only).
You might have inserted more than
one memory card.
Only one card slot can be occupied for
the device to detect JPEG files. Verify
that only one card is inserted.
One or more print cartridges might be
low.
Replace any low print cartridges. See
Replacing the print cartridges.
Proof sheet not printing
Use the table in this section to solve problems with proof-sheet printing.
Problem
Cause
Solution
The proof sheet will not print.
The memory card might have been
removed before the device could print
the page, or the memory card might
have been inserted incorrectly.
Reinsert the card and reprint the proof
sheet.
You might have inserted more than
one memory card.
Only one card slot can be occupied for
the device to detect JPEG files. Verify
that only one card is inserted.
One or more print cartridges might be
low.
Replace any low print cartridges. See
Replacing the print cartridges.
If the card is correctly inserted, use
another memory card. If more than one
memory type card has the same issue,
verify that the LED lights when a card
inserted. If the LED does not light,
verify that the flat cable from the
formatter is connected correctly to the
memory-card assembly. If the error
persists, replace the memory-card
assembly. See Replacing the memorycard assembly (HP Color LaserJet
2840 all-in-one only).
Proof sheet not scanning
Use the table in this section to solve problems with proof-sheet scanning.
Problem
Cause
The proof sheet will not scan correctly.
The flatbed scanner glass might be dirty. Clean the flatbed scanner glass. See
To clean the scanner glass.
www.partshere.com
Solution
The automatic document feeder (ADF)
might be loaded.
Remove any media from the ADF.
The scanner might not be able to read
the photo selections. This feature has
been optimized and tested for use with
Genuine HP Toner Supplies (variations
in color shading can impact the
performance of this feature).
Verify that you have colored the
bubbles darkly enough for the scanner
to read.
Partshere Troubleshooting
Problem
Cause
Solution
The proof sheet might be loaded
incorrectly.
On the flatbed scanner, place the
original document face-down with the
upper-left corner of the document at
the lower-right corner of the glass.
The device will not scan a proof sheet
from the ADF.
The proof sheet might be skewed on
the paper.
Reprint the proof sheet and verify that
it is not skewed on the page.
Issues with photo printing
Use the table in this section to solve problems with photo printing.
NOTE The HP Color LaserJet 2840 all-in-one memory card reader recognizes only files
in .JPEG file and sRGB color format when printing from the device control panel.
Problem
Cause
Solution
The wrong photo printed.
An incorrect memory card might be
inserted.
Verify that the correct memory card is
inserted.
You might have selected the wrong
number from the memory card.
If you cannot remember the number of
the photo that you wish to print, print
an index page to verify the file number.
The media input tray might be empty.
Load media into the input tray.
The memory card might have been
removed before the device could print
the page, or the memory card might
have been inserted incorrectly.
Reinsert the card and reprint the photo.
The photo did not print.
The photo quality is unacceptable.
The photo is the wrong size.
www.partshere.com
If the card is correctly inserted, use
another memory card. If more than one
memory type card has the same issue,
verify that the LED lights when a card
inserted. If the LED does not light,
verify that the flat cable from the
formatter is connected correctly to the
memory-card assembly. If the error
persists, replace the memory-card
assembly. See Replacing the memorycard assembly (HP Color LaserJet
2840 all-in-one only).
The original photo quality might be poor. Use a software program to enhance
photo quality, and then print the photo
from your computer.
The default settings on the device
might not produce the desired quality.
Use a software program to print the
photo at the desired settings.
The appropriate job size might not be
available from the device control panel.
Use a software program to resize the
photo at the desired settings, and then
print the photo from your computer.
You might have selected an incorrect
job size.
Verify that the correct setting is
selected at the device control panel.
Partshere Troubleshooting
Problem
Cause
Solution
Cannot edit, save, or delete images on
the memory card.
The device cannot read the memory
card.
Verify that the memory card is properly
inserted and that the card is one that is
supported.
NOTE You cannot edit
memory-card files from the
device control panel. Use a
software program to edit,
delete, or save images.
Scanner did not read proof sheet.
The device is using non-HP supplies.
This feature has been optimized and
tested for use with Genuine HP Toner
Supplies (variations in color shading
can impact the performance of this
feature).
Use a software program to print the
photo from your computer.
Print photos directly from the memory
card by using the control panel.
Install HP supplies in the device and
reprint the proof sheet.
The proof sheet might be skewed on
the paper.
www.partshere.com
Reprint the proof sheet and verify that
it is not skewed on the page.
Partshere Troubleshooting
Functional tests
Engine test
The purpose of the engine test is to determine which image-formation process is malfunctioning. The
image-formation process can be divided into the following stages:
Ŷ
Conditioning stage (charges the drum)
Ŷ
Writing stage (writes a latent image to the drum with the laser)
Ŷ
Development stage (forms a toner image on the drum)
Ŷ
Transfer stage (transfers the image to paper)
Ŷ
Separation stage (separates the media from the drum)
Ŷ
Fusing stage (applies heat and pressure to make the image on paper permanent)
Ŷ
Cleaning stage (removes excess toner from the drum)
The engine test switch is inside tray 1, on the left side, just below the front cover.
To print an engine test:
1
Turn off the device.
2
Turn on the device.
3
Open tray 1 and load paper.
NOTE If tray 1 is empty, the device will not perform an engine test. You cannot perform
an engine test from optional tray 2.
4
Press the engine-test switch (shown below).
NOTE The formatter must be connected to the power supply cover plate to perform an
engine test. Otherwise, the device does not print the engine test.
Figure 6-1 Location of the engine-test switch
The device prints an engine-test page that contains four columns of horizontal lines, with each
column corresponding to one of the print cartridge colors.
www.partshere.com
Partshere Troubleshooting
Half self-test check
If an engine test reveals a problem with the image-formation process, the half self-test check allows
you to narrow down the area in which the problem exists.
To perform a half self-test check, complete the following steps:
1
Perform an engine test. See Engine test.
2
During the engine test, open the cartridge door after the paper advances halfway through the
device (about five seconds after the motor begins rotation). The leading edge of the paper should
have advanced past the imaging drum.
3
Remove the imaging drum.
4
Open the imaging drum shield to view the drum surface. If a dark and distinct toner image is
present on the drum surface, assume that the first three functions of the image-formation
process (see the list at the beginning of Engine test) are functioning (through the development
stage). Troubleshoot the failure as a transfer or fusing problem.
If, during the half self-test check, no image is present on the imaging drum, perform these checks:
1
Make sure that you removed the entire length of the sealing tape from the print cartridge before
you installed the cartridge.
2
Perform a cartridge high-voltage contact test. (See Cartridge high-voltage contact test.)
Heating element test
Paper passes between the heating element and a soft pressure roller to fuse toner to the paper.
1
Unplug the device for at least ten minutes, and then remove the fuser. See Replacing the fuser
assembly.
www.partshere.com
Partshere Troubleshooting
2
Measure the fuser heating element resistance.
NOTE Normal resistance is 14 ohms +/- 10 ohms for the 110 V device and 50 ohms
+/- 20 ohms for the 220 V device.
Figure 6-2 Measure the resistance for the heating element
www.partshere.com
Partshere Troubleshooting
3
Measure the thermistor resistance.
NOTE Normal resistance is 1.5 ohms.
Figure 6-3 Measure the thermistor resistance
If no resistance is measured, replace the fuser.
www.partshere.com
Partshere Troubleshooting
Cartridge high-voltage contact test
To check the print cartridge connection points, complete the following steps:
1
Turn the print cartridge over and visually inspect the two connection points on the ends of the
print cartridge. If they are dirty or corroded, clean the connections. If they are damaged, replace
the print cartridge.
Figure 6-4 Print cartridge high-voltage contacts
2
If the connection points are dirty or corroded, then clean the connections. If they are damaged,
then replace the print cartridge.
NOTE Use only isopropyl alcohol to clean the connections.
Paper-path test
If media is not being picked up or is not moving through the paper path, you might want to observe
all of the paper-motion activities. Override the door interlock (SW301) and the laser/scanner switch to
observe the following actions:
Ŷ
Motor rotation
Ŷ
Solenoid action
Ŷ
Pickup-roller motion
Ŷ
Drive-roller, transfer-roller, fuser-roller and gear, and delivery-roller motion
1
To override the door interlock (SW301), push a piece of heavy paper into the slot in the top cover
(callout 1) to override SW301.
www.partshere.com
Partshere Troubleshooting
2
To override the laser/scanner switch, use a small flatblade screwdriver to override the laser/
scanner switch (callout 2).
Figure 6-5 Override SW301 and the laser/scanner switch
3
Perform an engine test. See Engine test.
CAUTION Do not look directly at the laser/scanner while the engine test is under way.
www.partshere.com
Partshere Troubleshooting
Service-mode functions
Use the following information to perform system-wide reset procedures and to adjust certain global
settings such as the country/region. Users do not have access to this information.
NVRAM initialization
An NVRAM initialization will return the device settings to the factory-set defaults, including:
Ŷ
All menu settings, including the fax header and company name
Ŷ
Fax numbers and names that are associated with one-touch keys and speed-dial codes
Additionally, all faxes stored in memory are cleared.
1
Turn off the device.
2
Simultaneously press and hold the ENTER button and the * button, and then turn on the device.
3
Wait until the message Permanent storage init. appears, and then release the ENTER and *
buttons.
When the NVRAM initialization process has been completed, the device control panel shows the
Ready message.
Secondary service menu
Use the secondary service menu to perform various tests and print service reports. The following is a
hierarchical diagram of the secondary service menu.
Table 6-5 Secondary service menu
Main menu
Submenu
Submenu
2ndary Service
Service Reports
Cont. Self-Test
Extended Keymap
Error Report
Location
USA
1=Yes 2=No
www.partshere.com
Display test
(none)
Show FW Version
(none)
Partshere Troubleshooting
Table 6-5 Secondary service menu (continued)
Main menu
Submenu
Submenu
Memory Cards
Enabled
(HP Color LaserJet 2840 all-in-one only) Disabled
Color Cal.
Adjust color
Ŷ
Ŷ
Ŷ
Ŷ
Contrasts
Ŷ
Cyan density
Ŷ
Magenta density
Ŷ
Yellow density
Ŷ
Black density
Highlights
Ŷ
Cyan density
Ŷ
Magenta density
Ŷ
Yellow density
Ŷ
Black density
Midtones
Ŷ
Cyan density
Ŷ
Magenta density
Ŷ
Yellow density
Ŷ
Black density
Shadows
Ŷ
Cyan density
Ŷ
Magenta density
Ŷ
Yellow density
Ŷ
Black density
Timing
www.partshere.com
Ŷ
Off
Ŷ
12 hours
Ŷ
24 hours
Ŷ
48 hours
Ŷ
96 hours
Ŷ
128 hours
Ŷ
168 hours
Partshere Troubleshooting
To print secondary service reports
1
Make sure that the control-panel display reads Ready.
2
Press MENU.
3
Press 2 on the keypad.
NOTE You can gain access to the secondary service menu from any other menu by
pressing 2.
4
Use the < or > button to select Service Reports, and then press Enter.
5
Use the < or > button to select one of the following reports:
Ɣ
Cont. Self-Test
Ɣ
Extended Keymap
Ɣ
Error Report (see Error log)
6
Press Enter to print the report.
7
To exit the secondary service menu and remove it from the menu tree, press CANCEL to return to
the Ready display, and then press CANCEL again.
To reset the device location
The device location setting affects telecom (fax) and other settings, depending on the country/region
in which the device is used. To change the device location setting, complete the following steps.
1
Make sure that the control-panel display reads Ready.
2
Press MENU.
3
Press 2 on the keypad.
NOTE You can gain access to the secondary service menu from any other menu by
pressing 2.
4
Use the < or > button to select Location, and then press Enter.
5
Use the < or > button to select the country/region in which the device is operating, and then
press Enter.
6
Press 1 to select Yes.
The device turns off and then turns on. When the device returns to the Ready state, it reflects
the new location setting.
www.partshere.com
Partshere Troubleshooting
To test the control-panel display
To test the control-panel display and ensure that all characters are working correctly, complete the
following steps.
1
Make sure that the control-panel display reads Ready.
2
Press MENU.
3
Press 2 on the keypad.
NOTE You can gain access to the secondary service menu from any other menu by
pressing 2.
4
Use the < or > button to select Display test, and then press Enter.
The device cycles through 15 characters at a time until the test is complete.
To view the firmware version
Use the secondary service menu to determine the device firmware version.
1
Make sure that the control-panel display reads Ready.
2
Press MENU.
3
Press 2 on the keypad.
NOTE You can gain access to the secondary service menu from any other menu by
pressing 2.
4
Use the < or > button to select Show FW Version, and then press Enter.
The control panel shows the device firmware version number.
To enable or disable the memory-card slots
NOTE This procedure applies to the HP Color LaserJet 2840 all-in-one only.
1
Make sure that the control-panel display reads Ready.
2
Press MENU.
3
Press 2 on the keypad.
NOTE You can gain access to the secondary service menu from any other menu by
pressing 2.
4
Use the < or > button to select Memory Cards, and then press Enter.
5
Use the < or > button to select Enabled or Disabled, and then press Enter.
To calibrate the color
1
Make sure that the control-panel display reads Ready.
2
Press MENU.
www.partshere.com
Partshere Troubleshooting
3
Press 2 on the keypad.
NOTE You can gain access to the secondary service menu from any other menu by
pressing 2.
4
Use the < or > button to select Color Cal., and then press Enter.
5
Use the < or > button to select one of the following settings:
Ɣ
Contrasts
Ɣ
Highlights
Ɣ
Midtones
Ɣ
Shadows
Press Enter.
6
Use the < or > button to select one of the following color settings:
Ɣ
Cyan density
Ɣ
Magenta density
Ɣ
Yellow density
Ɣ
Black density
Press Enter.
7
Use the < or > button to adjust the density setting. Increasing the setting darkens the density,
while decreasing the setting lightens the density.
8
Press Enter to save the setting.
www.partshere.com
Partshere Troubleshooting
Troubleshooting tools
The section describes the tools that can help you solve problems with your device.
Device pages and reports
This section describes the pages and reports that help you diagnose and solve problems with the
device.
Demo page
To print the Demo page, complete the following steps.
1
On the device control panel, press MENU until the Reports menu appears, and then press ENTER.
2
Use the < or the > button until Demo Page appears, and then press ENTER.
Configuration page
The Configuration page lists the current settings and properties of the device. You can print a
Configuration page from the device or HP Toolbox. To print the Configuration page from the device,
complete the following steps.
1
On the device control panel, press MENU.
2
Use the < or the > button to select Reports, and then press ENTER.
3
Use the < or the > button to select Config report, and then press ENTER.
Supplies Status page
The Supplies Status page lists the remaining life of the HP print cartridges and the HP imaging
drums. It also lists the estimated pages remaining, number of pages printed, and other supplies
information. You can print a Supplies Status page from the device or HP Toolbox. To print from the
device, complete the following steps.
1
On the control-panel menu, press MENU.
2
Use the < or the > button to select Reports, and then press ENTER.
3
Use the < or the > button to select Supplies Status, and then press ENTER.
Usage page
The Usage page displays usage statistics, such as the number of copies made from the flatbed
scanner or the automatic document feeder, the number of faxes sent or received (HP Color LaserJet
2830/2840 all-in-one models only), the number of pages printed, or the number of pages jammed in
the scanner engine.
You can print a Usage page from the device or HP Toolbox. To print a Usage page from the device,
complete the following steps.
1
On the device control panel, press MENU.
2
Use the < or the > button to select Reports, and then press ENTER.
3
Use the < or the > button to select Usage page, and then press ENTER.
www.partshere.com
Partshere Troubleshooting
Engine-test page
The engine-test page is printed when you perform an engine test. See Engine test.
Error log
A small error log appears on the Configuration page (see Configuration page). However, a more
detailed report is available from the secondary service menu.
1
Make sure that the control-panel display reads Ready.
2
Press MENU.
3
Press 2 on the keypad.
NOTE You can gain access to the secondary service menu from any other menu by
pressing 2.
4
Use the < or > button to select Service Reports, and then press Enter.
5
Use the < or > button to select Error Report, and then press Enter.
The device prints an error log that shows the most recent device errors.
Fax reports
This section describes the fax reports that help you diagnose and solve problems with the device.
Fax activity log
The fax activity log provides a chronological history of the last 40 faxes that were received, sent, or
deleted, and any errors that occurred.
1
On the device control panel, press MENU.
2
Use the < or the > button to select Reports, and then press ENTER.
3
Use the < or the > button to select Fax Activity log, and then press ENTER.
4
Press ENTER to select Print log now. The device exits the menu settings and prints the log.
Fax call report
A fax call report is a brief report that indicates the status of the last fax that was sent or received.
1
On the device control panel, press MENU.
2
Use the < or the > button to select Reports, and then press ENTER.
3
Use the < or the > button to select Fax Call report, and then press ENTER.
4
Press ENTER to select Print report now. The device exits the menu settings and prints the report.
www.partshere.com
Partshere Troubleshooting
T.30 protocol trace
Use a T.30 protocol trace report to troubleshoot fax transmission issues.
Send a fax from the device or receive a fax to the device from another fax machine, and then print a
T.30 trace report after the fax prints.
1
On the device control panel, press MENU.
2
Use the < or the > button to select Service, and then press ENTER.
3
Use the < or the > button to select Print T.30, and then press ENTER.
The device exits the menu settings and prints the reports.
Explanations of some of the report’s column headings follow:
Ɣ
Date and Time identify when the fax begins.
Ɣ
Type is the type of fax activity: send or receive.
Ɣ
Identification is the phone number to which a fax is sent.
Ɣ
Result explains the status of the fax:
Ŷ
“OK” means that the fax was successful.
Ŷ
“Pending” faxes are in memory or are printing.
Ŷ
An error code means that your device might need service. The following tables, Table
6-6 Fax receive error codes and Table 6-7 Fax send error codes, define the error codes.
NOTE These codes also appear in the fax call report and the fax activity log.
Table 6-6 Fax receive error codes
Error code
Description
Solution
200
The fax session has completed without errors.
N/A
221
User has pressed CANCEL button, causing the fax
session to be prematurely halted.
Have sender resend the fax.
222
The receiving device has answered a call but has
been unable to detect the presence of a calling
fax device for one of the following reasons:
1
Confirm that the sender is a fax device and
not a voice caller - typically you must rely on
the sender informing the caller that the fax
session is failing.
2
If the sending device ends the call just as the
receiving device starts reception, reduce the
ring count after which the receiving device
answers. Alternatively suggest that the
sender manually dials to the receiving device
and then manually starts the fax session, by
pressing theSTART FAX button once fax tones
have been heard from the receiving device.
3
Confirm that the sender is not inadvertently
attempting to poll transmit from the receiving
Ɣ
www.partshere.com
Typically this will be due to the receiving fax
device answering a voice call.
Ɣ
The sender canceled the fax transmission by
pressing the CANCEL button immediately prior
to, or just as the receiving device answered
the call.
Ɣ
The sending device automatically ended the
call immediately prior to, or just as the
receiving device answered the call.
Partshere Troubleshooting
Table 6-6 Fax receive error codes (continued)
Error code
Description
Ɣ
The sending (sending) fax device determined
there was a feature incompatibility between
the two and disconnected immediately before
transmitting any further fax tones or T.30
frames. (This is very rare.)
Solution
device, instead of transmitting to the
receiving device.
4
Reconfigure the receiving fax device to use
different configuration settings, toggle the
ECM state, and/or select a slower reception
speed.
The receiving device has been unable to receive
an entire page even after multiple attempts to rereceive the parts of the page that contain errors.
This is usually due to extremely poor line
conditions.
1
Reattempt the fax reception at a different
time when telephone line conditions have
improved.
2
If the error persists, disable ECM. Errors may
still occur, and may result in degraded image
quality on the received page. However, the
ability to receive the entire document will be
improved.
224
The receiving device has received one or more
pages with excessive errors. This is usually due
to extremely poor line conditions. Error correction
is not used during this session so errors are not
corrected.
Reattempt the fax reception at a different time
when telephone line conditions have improved.
225
The sending device has attempted to initiate a
sending diagnostic session with this device even
though sending diagnostic access is receivingly
disabled.
Enable the sending diagnostics capability on the
receiving device.
226
The sending device has attempted to initiate a
sending diagnostic session with this device but
the sending diagnostic versions supported by the
two devices are incompatible.
None. sending diagnostics cannot occur between
devices with incompatible sending versions.
227
The sending device has attempted to initiate a
fax session at a speed and modulation that is not
supported by the receiving device.
Reconfigure the receiving device to receive at a
slower speed.
228
The sending device has attempted to initiate a
poll transmission from the receiving device even
though the receiving device is not configured for
poll transmission.
1
Confirm that polling by the sender is desired.
It is possible that the sender has
inadvertently attempted to poll. If this is the
case reattempt a normal transmission from
the sending device.
2
If polling by the remote user was desired,
confirm that the receiving device was
correctly configured for poll transmission.
223 (ECM error)
229
The sending device has attempted to initiate a
secure poll transmission from the receiving
device but has not provided a valid password.
If the sender is the desired recipient for the polled
document, confirm that the sender has the
correct password, and that the receiving device is
configured with the same password.
230
The sending device has attempted to initiate an
operation that requires error correction but has
not selected error correction for the session.
Enable ECM on both the receiving device and the
sending device.
231
The sending device has attempted to initiate a
transmission to the receiving device even though
Ensure that the receiving device is capable of
receiving a document. Check that paper is
correctly loaded, paper is not jammed within the
www.partshere.com
Partshere Troubleshooting
Table 6-6 Fax receive error codes (continued)
Error code
Description
Solution
the capability to receive is disabled at the
receiving device.
device, and any other system abnormalities have
been cleared.
232
One of the following has occurred:
1
233 and 234
Ɣ
A communication failure has occurred
between the two devices.
Re-attempt the fax reception at a different
time when telephone line conditions have
improved.
235 and 236 (ECM
error)
2
Ɣ
The user at the remote device may have
pressed the CANCEL button.
If the error persists, and error correction is in
use for the fax session, disable ECM.
Ɣ
The power at the remote device has been
interrupted or deliberately turned off, causing
the fax session to be interrupted.
237
238
The sending fax device sent an unexpected
communication. This is a defect in the sending
device.
N/A
242
The sending fax device is attempting to receive
instead of send. Both devices have attempted to
start a reception at the same time. It is possible
to accidentally initiate a fax reception after dialing
on many devices, if there is no paper in the
device or if the paper is not correctly loaded and
cannot be sensed by the appropriate document
sensor.
Ensure that a document is ready and correctly
loaded in the sending fax device and that the
sending device is attempting to initiate a
transmission and not a reception.
243 and 244
One of the following has occurred:
1
Confirm that the sender is not inadvertently
attempting to poll transmit from the receiving
device, instead of transmitting to the
receiving device. This mode of operation
must be specially configured on the receiving
device. If poll transmission from the receiving
device is the desired mode of operation,
confirm that the receiving device has been
configured for this operation.
2
2. Reconfigure the receiving fax device to
use different configuration settings, toggle
the ECM state, and/or select a slower
reception speed.
The user of the sending device has pressed that
device's CANCEL button, causing the session to be
prematurely terminated. The receiving device has
been "holding off" the remote device during
reception of a large and/or complex document
due to lack of available memory. This hold-off
time has exceeded the timeout (typically 60
seconds) used by the sending device, and it has
terminated the session.
1
If the document was large, ask the sender to
retransmit the document as two or more
smaller documents.
2
Disable ECM and reattempt the fax reception.
The sending device appears to be "stuck on."
N/A
239–241
245 and 246 (ECM
error)
247-251
www.partshere.com
Ɣ
The user of the remote device has pressed
that device's CANCEL button, causing the
session to be prematurely terminated.
Ɣ
The sending fax device determined there
was a feature incompatibility between the
two devices and has terminated the session.
An example would be when the receiving
device wanted to initiate polling, but the
sending device did not support this mode of
operation.
Partshere Troubleshooting
Table 6-6 Fax receive error codes (continued)
Error code
Description
Solution
252
Telephone line conditions were too poor to
receive a fax.
1
Reattempt the fax reception at a later time
when line conditions may have improved.
2
Configure the receiving device to start
reception at a lower speed.
3
If the receiving device received successfully
several pages of a larger document, ask the
sender to transmit the document in several
smaller parts.
253
The sending device has attempted to initiate a
page transmission using a page width that is not
supported by the receiving device.
Ask the sender to reconfigure the fax device to
transmit using a "normal" (letter/A4) page width.
281
The receiving device has not received any data
at the start of a page during non-ECM reception,
although the modem has not detected a sending
disconnect. The sending device is probably
transmitting fill bytes instead of data and has
either jammed or broken.
Reattempt the fax reception after first requesting
that the sender check the sending device.
282
The receiving device has not received any data
at the start of a page during ECM reception
although the modem has not detected a sending
disconnect. The sending device is probably
transmitting sync frames instead of data and has
either jammed or broken.
283
The receiving device has detected that the
modem carrier has stopped. Either the line has
been disconnected or the sending device has
aborted the transmission.
284
The receiving device has not received any data
during non-ECM page reception and a timeout
failure has occurred. The sending device is
probably transmitting fill bytes instead of data and
has either jammed or broken.
285
The receiving device has stopped receiving any
data during an ECM page reception although the
modem has not detected a sending disconnect.
The sending device is probably transmitting sync
frames instead of data and has either jammed or
broken.
286
The sending device has transmitted invalid data.
The receiving device has received frames with
errors during an ECM reception and requested
retransmission of the errored frames. The data
that is resent does not correspond to the data
that was requested. This is an implementation
error from the sending device.
Disable ECM and reattempt the reception.
290
The sending device has attempted to renegotiate
the session mode from ECM to non-ECM
between pages. This operation is not supported
and the session has been abandoned.
Reattempt the fax reception and split the
document into two portions corresponding to the
ECM and non-ECM portions. Some devices will
attempt to use non-ECM for photo mode, so this
may be associated with a between-page
encoding change to support photo mode.
www.partshere.com
Partshere Troubleshooting
Table 6-6 Fax receive error codes (continued)
Error code
Description
Solution
291
This is not a communication error and it is not
expected that this error will occur under nondevelopment scenarios. Reception has failed
because the receiving device is unable to open a
file to receive data into. May be associated with
low memory, although low memory should be
handle more gracefully than this.
If the error persists, reinitialize the device.
292
The sending device has attempted to renegotiate
the encoding mode from non-JPEG to JPEG.
This operation is not supported and the session
has been abandoned.
Reattempt the fax reception and split the
document into two portions corresponding to the
JPEG and non-JPEG portions. Some devices will
attempt to use JPEG for photo mode, so this may
be associated with a between-page encoding
change to support photo mode.
Table 6-7 Fax send error codes
Error code
Description
Solution
300
Fax session has completed without errors
N/A
311
The user of the receiving device has pressed the
CANCEL button, causing the session to be
prematurely halted before all pages have been
transmitted.
Resend the fax.
312
A sending fax device has failed to answer the
call. Specifically fax tones or the fax handshake
from a sending device has not been detected.
Typically this is due to the user calling the wrong
number, the correct number has been called but
the device has been configured not to answer, or
the sending device has temporarily disabled
answering due to a condition such as lack of
paper or a paper jam.
Confirm the sending fax device is ready to
receive a document and reattempt the
transmission.
313
A busy signal has been detected each time the
receiving device has attempted to call the
sending device.
Reattempt the fax transmission at a later time
when the line is no longer busy.
314
The receiving device has attempted to initiate a
sending diagnostic session but has detected that
sending diagnostics are disabled at the sending
device.
Enable sending diagnostics on the sending device.
315
The receiving device has attempted to initiate a
sending diagnostic session but has detected that
the sending diagnostic version supported by the
sending device is incompatible.
No solution. Sending diagnostics cannot occur
between devices with incompatible sending
versions.
316
The receiving device is setup to initiate document
transmission, but it has detected that the sending
device is not able to receive a document. This
error should be very rare since normally a
sending device will not answer if it cannot receive
a document. On of the few exceptions to this
would occur if the sending device was configured
to poll transmit a document but was unable to
receive.
Configure the sending device for reception.
Typically the sender should ensure paper is
loaded in the device, paper jams are fixed, and
any other system abnormalities are cleared.
www.partshere.com
Partshere Troubleshooting
Table 6-7 Fax send error codes (continued)
Error code
Description
Solution
317
The sending device cannot support a fax
reception at any speed or modulation that is
supported by the receiving device.
N/A
318
The sending device cannot support a fax
reception at the page width selected by the
receiving device.
N/A
319
The receiving device has attempted to initiate a
binary file transfer (BFT) but has detected that
the sending device does not support this mode of
operation.
Do one of the following:
320
The receiving device is set up to initiate poll
reception with a sending device, but it has
detected that the sending device is not
configured to do this. Poll transmission from a
sending device is typically configured on a
session-by-session basis.
Ɣ
Enable the BFT capability on the sending
device if it is supported.
Ɣ
Retransmit the document as a normal fax,
rather than attempting a BFT transfer.
Do one of the following:
Ɣ
Confirm that the receiver really wants to
attempt a poll reception. If not, reconfigure
the receiving device for a normal fax
transmission
Ɣ
Configure the sending device for poll
transmission. The sender must load a
document to transmit and then configure the
device for polling.
321
There was a communication error with the
receiving fax device due to poor telephone line
conditions.
Reattempt the fax transmission at a different time
when telephone line conditions have improved.
322–324
Telephone line conditions were too poor to send
a fax.
1
Reattempt the fax transmission at a different
time when telephone line conditions have
improved.
2
If the session fails after transmitting several
pages of a large document, retransmit the
document as several smaller documents.
1
Reattempt the fax transmission at a different
time when telephone line conditions have
improved.
2
If the error persists, disable ECM. Errors may
still occur, and may result in a degraded
image quality on the received page.
However, the ability to transmit the entire
document will be improved.
The sending device has reported that one or
more pages have been received (non-ECM
mode) with excessive errors. This error does not
result in the session being terminated
immediately. Subsequent page transmission can
still occur and later pages may be received
without error.
1
Reattempt the fax transmission at a different
time when telephone line conditions have
improved.
2
If the error persists, select a lower speed for
the initial transmission speed.
There is a defect in the sending fax device.
Send from another device.
325-328 (ECM
error)
329–331
332–337
www.partshere.com
Telephone line conditions were very poor.
Partshere Troubleshooting
Table 6-7 Fax send error codes (continued)
Error code
Description
Solution
344–348
One of the following has occurred:
1
349-353 (ECM
error)
Ɣ
Reattempt the fax transmission at a different
time when telephone line conditions have
improved.
2
fax session was using error correction,
disable ECM.
1
Configure the sending device for document
reception by clearing any paper jams,
loading sufficient paper, and clearing any
other system errors.
2
Configure the receiving fax device to use
different configurations, toggle the ECM
state, or select a slower reception speed.
338–342 (ECM
error)
343
The sending device has failed to respond to
a fax command from the receiving device
due to the connection being interrupted.
354 and 355
Ɣ
The sender has pressed the CANCEL button
while the reception was in progress.
Ɣ
In rare conditions, incompatibility between
the two devices may cause the sending
device to abandon the call.
356-361
One of the following has occurred:
362-366 (ECM
error)
Ɣ
The sender has pressed the CANCEL button,
causing the session to be aborted.
Ɣ
The sending device has encountered a
system problem such as no paper or a paper
jam, which has inhibited it from receiving any
more pages, and which has caused it to
terminate the session prematurely.
Ɣ
A feature incompatibility has been
encountered by the sending device, causing
it to terminate the session.
367-372
The sending device appears to be "stuck on".
N/A
380
The sending device has failed to issue a valid
response to a CTC frame. This occurs during
ECM transmission after multiple retransmissions
of erred data.
Send from another device.
381
One of the following has occurred:
1
Reattempt the fax transmission at a different
time when telephone line conditions have
improved.
2
If the error persists, disable ECM.
1
Resend the document as two or more
separate fax transmissions. Wait several
minutes between the end of one
transmission and the start of the next
transmission.
2
If the error persists, disable ECM.
373-377 (ECM
error)
378 and 379
Ɣ
Ɣ
382
www.partshere.com
The sending device has failed to respond to
a fax command from the receiving device
due to the connection being interrupted.
The sender has pressed the CANCEL button
while the reception was in progress.
The sending fax device has been "holding off" the
receiving fax device from continuing the ongoing
transmission due to a temporary low memory
condition at the sending device. If this "hold-off"
period exceeds a device's specific timeout value,
the session will terminate.
Partshere Troubleshooting
Table 6-7 Fax send error codes (continued)
Error code
Description
Solution
383
One of the following has occurred:
1
Reattempt the fax transmission at a different
time when telephone line conditions have
improved.
2
If the error persists, disable ECM.
Ɣ
Ɣ
The sending device has failed to respond to
a fax command from the receiving device
due to the connection being interrupted
The sender has pressed the CANCEL button
while the reception was in progress.
384
The receiving device has attempted a black
JPEG transmission to a device that does not
support this mode.
Reattempt the fax transmission using a different
mode.
385
The receiving device has failed to complete the
third phase of the initial V.34 handshake after
originating a fax session. This is usually due to
poor line conditions although it may be a
compatibility issue with certain devices and/or
line conditions.
1
Reattempt the fax transmission at a different
time when telephone line conditions have
improved.
2
Disable V.34 on the receiving device and
attempt the transmission using the V.17 mode.
387
The receiving device has failed to successfully
negotiate the initial V.8 handshake with the
sending device after originating a fax session.
Typically this will occur when the sending device
is not fax capable or has disabled reception. It
may also be a compatibility issue with certain
devices and/or line conditions.
388
The receiving device has originated a fax session
and detected a sending fax device but has been
unable to detect any T30 frames. If the device is
in V.17 mode it is likely that the connection has
been interrupted. In V.34 mode is also possible
for this error to occur due to compatibility
problems with certain devices and/or line
conditions.
389
The receiving device has originated a fax session
and has reattempted V.8 negotiations multiple
times without success.
390
The receiving device has originated a fax session
using error correction (either V.34 or V.17).
Transmission of an image has been abandoned
after a timeout when no data has become ready
for transmission. This is most likely due to a low
memory condition although it could be due to
other internal problems that cause generation of
data for transmission to stall.
391
The receiving device has originated a fax session
without error correction (not V.34 ). Transmission
of an image has been abandoned after a timeout
when no data has become ready for
transmission. This is most likely due to a low
memory condition although it could be due to
other internal problems that cause generation of
data for transmission to stall.
www.partshere.com
Reattempt the transmission after making sure
documents stored in memory are printed and the
device has paper ready for printing. If the
problem persists reinitialize permanent storage.
Partshere Troubleshooting
Table 6-7 Fax send error codes (continued)
Error code
Description
Solution
392
The receiving device has answered a fax session
and completed the initial V.34 handshake but has
been to detect any T30 frames. This failure is
either a compatibility problems with certain
devices or is due to line conditions.
1
Reattempt the fax reception at a different
time when telephone line conditions have
improved.
2
Disable V.34 on the receiving device and
attempt the transmission using the V.17 mode.
393
The receiving device has failed to complete the
third phase of the initial V.34 handshake after
answering a fax session. This is usually due to
poor line conditions although it may be a
compatibility issue with certain devices and/or
line conditions.
394
The receiving device has failed to successfully
negotiate the initial V.8 handshake with the
sending device after answering a fax session.
Typically this will occur when the calling device is
not fax capable. It may also be a compatibility
issue with certain devices and/or line conditions.
395
An unexpected T.30 frame has been received
between pages during a multipage V.34
reception. This is almost certainly a compatibility
problem with the sending device and may be due
to an error with the implementation of the sending
device.
1
Reattempt the fax reception. If transmission
errors are not encountered because line
conditions have improved, then this error will
probably be avoided.
2
Disable V.34 on the receiving device and
attempt the transmission using the V.17 mode.
396–409
An error occurred during a V.34 transmission
when the receiving device was unable to
correctly handshake with the sending device and
was consequently unable to transmit a T30
frame. This occurs when the line was
disconnected or if line conditions degrade during
the session.
Reattempt the fax transmission at a different time
when telephone line conditions have improved.
410–419
An error occurred during a V.34 reception when
the receiving device was unable to correctly
handshake with the sending device and was
consequently unable to transmit a T30 frame.
This occurs when the line is disconnected or if
line conditions degrade during the session.
420
V.34 negotiations have failed from the originating
device during phase four, which occurs after V.8
and before the first T.30 frames are exchanged.
Compatibility problems have been observed in
this area when sending to non-HP units.
421
V.34 negotiations have failed from the originating
device during phase three, which occurs after
V.8, before phase four, and before the first T.30
frames are exchanged. Compatibility problems
have been observed in this area when sending to
non-HP units.
422
V.34 negotiations have failed from the answering
device during phase four, which occurs after V.8
and before the first T.30 frames are exchanged.
423
V.34 negotiations have failed from the answering
device during phase three, which occurs after
www.partshere.com
Partshere Troubleshooting
Table 6-7 Fax send error codes (continued)
Error code
Description
Solution
V.8, before phase4, and before the first T.30
frames are exchanged.
430
The transmitting device is unable to send
continuous ones at the end of the control channel
prior to starting the primary channel. This is a
V.34 error. This error may be associated with line
conditions although it is more likely to be due to
internal problems with the modem.
431
The transmitting device has not received a
response after aborting a transmission.
Depending upon when the session is aborted,
some sending devices may not respond. It should
be noted that the receiving unit always attempts
to abort the session in a way that allows the
sending device to respond to the final PPS_EOP.
N/A
440–444
An error occurred during a V.34 transmission
after one or more partial pages (image data)
were transmitted using the primary channel. The
transmitting device was unable to restart the
control channel in order to resume the T30
handshake. This typically occurs when the
receiving device prematurely disconnects during
partial page reception, although it is possible it
may also be due to compatibility issues.
Reattempt the fax reception at a different time
when telephone line conditions have improved.
HP Toolbox
HP Toolbox is a Web application that you can use for troubleshooting tasks.
To view HP Toolbox
Open HP Toolbox in one of these ways:
Ŷ
On the Windows desktop, double-click the HP Toolbox icon.
Ŷ
On the Windows Start menu, click Programs (All Programs in Windows XP), and then click
HP Toolbox.
Troubleshooting tab
HP Toolbox includes a Troubleshooting tab that contains links to the following main pages:
Ŷ
Control Panel Messages. View descriptions of device control-panel messages.
Ŷ
Clearing Jams. View information about locating and clearing jams.
Ŷ
Print Problems. View Help topics that can help you solve print problems.
Ŷ
Scan Problems. View Help topics that can help you solve scan problems.
Ŷ
Copy Problems. View Help topics that can help you solve copy problems.
Ŷ
Fax Problems. View Help topics that can help you solve fax problems.
www.partshere.com
Partshere Troubleshooting
Ŷ
Memory Card Problems. View Help topics that can help you solve memory-card problems.
Ŷ
Connectivity Problems. View Help topics that can help you solve networking problems.
Ŷ
Troubleshooting Tools. Employ such troubleshooting tools as a cleaning page or a color
troubleshooting page to maintain the device.
Ŷ
Animated Demonstrations. View animated Help demonstrations for the device.
NOTE Other tabs on HP Toolbox might be helpful in troubleshooting device problems. For
information about the other tabs on HP Toolbox, see HP Toolbox.
Service menu
Use the control-panel Service menu to troubleshoot device problems.
Restoring the factory-set defaults
Restoring the factory-set defaults returns all of the settings to the factory defaults, and it also clears
the fax header name and phone number.
CAUTION This procedure clears fax numbers and names that are associated with one-touch
keys and speed-dial codes, and deletes any pages that are stored in the memory. The
procedure then automatically restarts the device.
1
On the device control panel, press MENU.
2
Use the < or the > button to select Service, and then press ENTER.
3
Use the < or the > button to select Restore defaults, and then press ENTER.
The device automatically restarts.
NOTE If the Receive to PC setting is turned on, you also must delete a folder on your
computer to completely restore the factory-default settings. Navigate to C:\Program Files
\Hewlett-Packard\Toolbox\Apache Tomcat4.0\webapps\Toolbox4.0\products
\hp_color_LaserJet_2800_all_in_one\ directory and delete the FaxData folder.
NOTE You also can restore the default settings from HP Toolbox. Open HP Toolbox, click
Device Settings, on the System Settings tab click the Service page, and then in the Resets
section click Restore.
NOTE You can save system settings before restoring the default settings from HP Toolbox.
Open HP Toolbox, click Device Settings, on the System Settings tab click the Save /
Restore page, and then click Save. After resetting the settings, you can restore the previous
settings by using the same page in HP Toolbox.
Cleaning the paper path
The device features a special cleaning mode to clean the paper path.
www.partshere.com
Partshere Troubleshooting
NOTE If you have access to HP Toolbox, HP recommends cleaning the paper path by using
HP Toolbox. See To clean the paper path from HP Toolbox.
1
On the device control panel, press MENU.
2
Use the < or the > button to select Service, and then press ENTER.
3
Use the < or the > button to select Cleaning Mode, and then press ENTER.
A page feeds through the device slowly. Discard the page when the process is completed.
4
Load plain letter or A4 paper when you are prompted.
5
Press ENTER again to confirm and begin the cleaning process.
A page feeds through the device slowly. Discard the page when the process is completed.
Setting the scanner bulb power save time
The PowerSave time setting allows you to set the amount of time that the scanner bulb is on before
entering the power save mode. The bulb is automatically turned on when the device is turned on, or
when a scanner feature is started.
1
On the device control panel, press MENU.
2
Use the < or the > button to select Service, and then press ENTER.
3
Use the < or the > button to select PowerSave time, and then press ENTER.
4
Use the < or the > button to select one of the following menu items:
5
Ɣ
8 hours
Ɣ
12 hours
Ɣ
2 hours
Ɣ
4 hours
Press ENTER to save the setting.
NOTE You also can change this setting from HP Toolbox. Open HP Toolbox, click
Device Settings, on the System Settings tab click the Service page, and then in the
Power save time section use the drop-down box to set the power save time and click
Apply.
Reducing paper curl
The Less paper curl setting reduces paper curl by reducing the fuser temperature.
1
On the device control panel, press MENU.
2
Use the < or the > button to select Service, and then press ENTER.
3
Use the < or the > button to select Less paper curl, and then press ENTER.
4
Use the < or the > button to select Off or On, and then press ENTER.
www.partshere.com
Partshere Troubleshooting
Service-only tools
Timing charts
Figure 6-6 General timing chart—WAIT period
www.partshere.com
Partshere Troubleshooting
Figure 6-7 General timing chart—one page, full-color, normal speed
www.partshere.com
Partshere Troubleshooting
Locations of connectors
Figure 6-8 Locations of device connectors (1 of 3)
www.partshere.com
Partshere Troubleshooting
Figure 6-9 Locations of device connectors (2 of 3)
www.partshere.com
Partshere Troubleshooting
Figure 6-10 Locations of device connectors (3 of 3)
Figure 6-11 Locations of 250-sheet tray connectors
www.partshere.com
Partshere Troubleshooting
DC controller connections
Figure 6-12 DC controller connections
www.partshere.com
Partshere Troubleshooting
Printer calibration
You can set the device to calibrate the printer manually or automatically each time the device is
turned on. To calibrate the printer or to set up an automatic calibration process, complete the
following steps:
1
On the device control panel, press MENU.
2
Use the < or the > button to select System setup, and then press ENTER.
3
Use the < or the > button to select Print quality, and then press ENTER.
4
Use the < or the > button to select Calibrate color, and then press ENTER.
5
Use the < or the > button to select Calibrate now or After power on, and then press ENTER.
Ɣ
Selecting Calibrate now starts the calibration process immediately. The control panel
displays Calibrating until the process is complete and the device returns to the Ready state.
Ɣ
Selecting After power on opens a menu that allows you to set the time period following the
device being turned on in which you want the calibration process performed. Use the < or the
> button to select one of the following menu items:
Ŷ
Immediately
Ŷ
5 minutes
Ŷ
15 minutes
Ŷ
30 minutes
Ŷ
60 minutes
Ŷ
Never
Press ENTER to save the selection.
NOTE Calibration must be performed when the device is in the Ready state. If the
device is processing a job or if it is displaying an error message, the device will not
calibrate.
NOTE You also can perform a calibration or change the calibration settings from
HP Toolbox. Open HP Toolbox, click Device Settings, on the System Settings tab click
the Print Quality page, and then in the Color Calibration section change the settings
and click Apply.
www.partshere.com
Partshere Troubleshooting
Repetitive image defect ruler
Use a ruler to measure occurrences of repetitive image defects to help solve image quality problems.
Place the ruler next to the first occurrence of the defect on the page. Find the distance between
identical defects and use Figure 6-13 Repetitive image defect ruler to identify the component that is
causing the defect.
Figure 6-13 Repetitive image defect ruler
NOTE Due to differences in printing mechanisms and letter/A4 media size issues, HP
recommends that you use only the measurements and not a printed sheet to judge banding
issues.
www.partshere.com
Partshere Troubleshooting
Main wiring diagram
Figure 6-14 Main wiring (1 of 2)
www.partshere.com
Partshere Troubleshooting
Figure 6-15 Main wiring (2 of 2)
www.partshere.com
Partshere Troubleshooting
Updating or recovering the firmware code
The device has a flash-memory-based formatter that enables the firmware code to be updated in the
event that new firmware is released for the device. Using flash memory also provides a way to
recover the firmware in the event of code corruption or failure.
Firmware update by using flash executable
The Configuration page lists the firmware version of the device. On flash-memory-based devices,
you can update the firmware code by downloading the latest flash executable for the device and
running the program according to the readme instructions that come with it. Turn the device off and
then on before running the executable file. If the firmware becomes corrupted or fails (usually
because of an interruption when attempting to update the firmware), the device no longer functions.
In this case, a firmware-recovery DIMM is available from HP.
Firmware-recovery DIMM
A firmware-recovery DIMM can be obtained from HP in the rare event that the firmware in flash
memory becomes corrupted. When the DIMM is installed in the DIMM slot on the formatter and the
device is turned on, the DIMM loads the latest firmware code into the device.
1
Order a firmware-recovery DIMM (RDIMM) from HP.
2
Turn off the device.
3
Open the memory cover on the right side of the device, and then open the formatter cage
memory door.
www.partshere.com
Partshere Troubleshooting
4
Install the firmware-recovery DIMM into the DIMM slot (callout 1).
Figure 6-16 Install the firmware-recovery DIMM
5
Turn on the device. The firmware-recovery DIMM takes a few minutes to automatically restore
both blocks of firmware code. Wait until the message Complete appears on the control-panel
display.
6
Turn off the device and remove the recovery DIMM.
7
Turn on the device. It should start up normally. If the device does not start up normally, repeat
the recovery process.
www.partshere.com
Partshere Troubleshooting