1
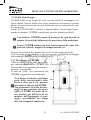
Manual
ed’
us
o
I
t
al
i
ano
© 2011 Ocean Signal Ltd
The©technical
data, information
2012 Ocean
Signal Ltd and illustrations contained in this manual were believed to
beI correct
at
the
time
of print. Ocean
Signal
Ltd reserve
the right in
to change
dati tecnici, le informazioni
e le
illustrazioni
contenute
questo specifications
manuale si
and other information contained in this manual as part of our continual improvement
ritengono corrette al momento della stampa. Ocean Signal Ltd. si riserva il diritprocess.
to di cambiare le specifiche e le altre informazioni contenute in questo manuale
del nostro
di continuo
miglioramento.
Nocome
part ofparte
this manual
mayprocesso
be reproduced,
stored in
a retrieval system or transmitted in
Nessuna
parte dior questo
manuale
essere
riprodotta,
memorizzata
any
form, electronic
otherwise,
without può
the prior
permission
of Ocean
Signal Ltd.in un
sistema di back-up o trasmessa in qualsiasi forma, elettronica o altro, senza la
Noprevia
liabilityautorizzazione
can be accepteddifor
any inaccuracies
Ocean
Signal Ltd.or omissions in this manual.
Nessuna responsabilità può essere imputata per eventuali inesattezze od omis-
Ocean
and nel
SafeSea®
are manuale.
registered trademarks of Ocean Signal Ltd.
sioniSignal®
contenute
presente
Ocean Signal ® e SafeSea ® sono marchi registrati di Ocean Signal Ltd. registrati
2
No. articolo
912S-00624
Part No.
912S-00624
INCASE
CASOOF
DI EMERGENZA
IN
EMERGENCY
ATTENZIONE: utilizzare solo in situazioni
WARNING: USE ONLY IN SITUATIONS
di grave
pericolo
OF GRAVE
AND IMMINENT
DANGER
• REMOVE
THE EPIRB
FROMdal
ITS suo
MOUNTING
OR HOUSING
Rimuovere
l’EPIRB
supporto
o alloggio
• TO MANUALLY ACTIVATE THE EPIRB:
1
2
Break iloffcoperchio
the protective
cover
1. 1.Togliere
di protezione
2. 2.Far
scorrere
verso
sinistra
il
Slide and hold the Greenpulsante
VERDE
premuto,
quindi
switch to tenendolo
the left, then
slide the
far
scorrere
il
pulsante
ROSSO
verso
Red switch into the down position
il basso
e rilasciare
quello
verde.
and
release
the Green
switch.
• REMOVE
THE LANYARD
COVER DELL’EPIRB:
ATTIVAZIONE
MANUALE
• TOGLIERE IL COPERCHIO ED ESTRARRE LA CIMETTA
• HOLDING ON TO THE FREE END OF THE LANYARD, THROW THE
•EPIRB
LEGARE
ZATTERA L’ESTREMITÀ LIBERA DELLA
INTOALLA
THE WATER
CIMETTA E GETTARE L’EPIRB IN ACQUA.
NOTE: Refer to section 4.3 for deactivation instructions.
NOTA: Per le istruzioni di disattivazione fare riferimento alla sezione 4.3.
3
Versione
01.20
16/03/2012
Version
01.01
11/05/2011
MANUALE
UTENTE
SAFESEA
E100/E100G
SAFESEA
E100/E100G
USER
MANUAL
INDICE
CONTENTS
1 Generale...............................................................................................5
1 1.1
General
.........................................................5
Introduzione......................................................................................5
Introduction . . . . . . . . . . . . . . . . . . . . . . . . . . . . . . . . . . . . . . . . . . . . . . . . . . . . . . . . . . . . . 5
....................................................................................5
1.2 1.1
Registrazione.
1.2 Registration . . . . . . . . . . . . . . . . . . . . . . . . . . . . . . . . . . . . . . . . . . . . . . . . . . . . . . . . . . . . . .5
1.3 1.3
Informazioni
di
programmazione.....................................................6
Programming Details
. . . . . . . . . . . . . . . . . . . . . . . . . . . . . . . . . . . . . . . . . . . . . . . . . . . . . .6
2 Panoramica di E100/E100G...............................................................7
2 3 E100/E100G
Overview
............................................7
Installazione.
........................................................................................8
3.1 Posizione...........................................................................................8
3 3.2
Installation
. . . . . . . . . . . . gratuita.
. . . . . . . ...........................................................8
.................................8
Custodia galleggiante
3.1 Location . . . . . . . . . . . . . . . . . . . . . . . . . . . . . . . . . . . . . . . . . . . . . . . . . . . . . . . . . . . . . . . . .8
3.2.1
Caricamento dell’EPIRB...............................................................9
3.2 Float Free Housing . . . . . . . . . . . . . . . . . . . . . . . . . . . . . . . . . . . . . . . . . . . . . . . . . . . . . . . .8
........................................................................10
3.3 Staffa
di montaggio.
3.2.1
Loading the EPIRB
. . . . . . . . . . . . . . . . . . . . . . . . . . . . . . . . . . . . . . . . . . . . . . . . .9
3.3Caricamento
Mounting Bracket
. . . . . . . . . . . . . . . . . . . . . . . . . . . . . . . . . . . . . . . . . . . . . . . . . . . . . . . .10
3.3.1
dell’EPIRB.............................................................10
3.3.1 Loading the EPIRB . . . . . . . . . . . . . . . . . . . . . . . . . . . . . . . . . . . . . . . . . . . . . . . .10
4 Funzionamento.
................................................................................. 11
4.1
Attivazione
manuale.
....................................................................... 11
4 Operation . . . . . . . . . . . . . . . . . . . . . . . . . . . . . . . . . . . . . . . . . . . . . . . . . . . . . . 11
4.1.1
Rimozione
dalla
custodia.
............................................................ 11
4.1 Manual Activation . . . . . . . . . . . . . . . . . . . . . . . . . . . . . . . . . . . . . . . . . . . . . . . . . . . . . . . .11
4.1.2 Rimozione
dalla
staffa.................................................................12
4.1.1 Deployment From an Enclosure . . . . . . . . . . . . . . . . . . . . . . . . . . . . . . . . . . . . .11
4.1.2 Deployment
From
a Bracket . . . . . . . . . . . . . . . . . . . . . . . . . . . . . . . . . . . . . . . .12
4.1.3 Attivazione
manuale.
....................................................................12
4.1.3 Manual
Activation...................................................................13
. . . . . . . . . . . . . . . . . . . . . . . . . . . . . . . . . . . . . . . . . . . . . . . . .12
4.2 Attivazione
automatica.
Automatic Activation . . . . . . . . . . . . . . . . . . . . . . . . . . . . . . . . . . . . . . . . . . . . . . . . . . . . .13
4.3 4.2
Disattivazione.................................................................................14
4.3 Deactivation . . . . . . . . . . . . . . . . . . . . . . . . . . . . . . . . . . . . . . . . . . . . . . . . . . . . . . . . . . . . .14
4.3.1 Disattivazione
di attivazione
manuale.........................................14
4.3.1 Deactivation
from Manual Activation
. . . . . . . . . . . . . . . . . . . . . . . . . . . . . . . . . .14
4.3.2 Deactivation
from Automaticautomatica.....................................14
Activation . . . . . . . . . . . . . . . . . . . . . . . . . . . . . . .14
4.3.2 Disattivazione
di attivazione
5 Falsi allarmi...................................................................................... 15
5 5.1
False
Alerts . . . l’EPIRB.......................................................................15
. . . . . . . . . . . . . . . . . . . . . . . . . . . . . . . . . . . . . . . . . . . . . . . . . .15
Disabilitare
5.1 Disabling the EPIRB . . . . . . . . . . . . . . . . . . . . . . . . . . . . . . . . . . . . . . . . . . . . . . . . . . . . . .15
6 Manutenzione....................................................................................16
6 6.1
Maintenance
. . . . . . . . . . . . . . . . . . . . . . . . . . . . . . . . . . . . . . . . . . . . . . . . . . . .16
Test..................................................................................................16
6.1Modalità
Testing . Auto
. . . . . . .Test
. . . . . .. ....................................................................16
. . . . . . . . . . . . . . . . . . . . . . . . . . . . . . . . . . . . . . . . . . . . . . . . . . .16
6.1.1
6.1.1 Self
TestGPS.......................................................................17
Mode . . . . . . . . . . . . . . . . . . . . . . . . . . . . . . . . . . . . . . . . . . . . . . . . . . . .16
6.1.2 Modalità
Test
6.1.2 GPS Test Mode . . . . . . . . . . . . . . . . . . . . . . . . . . . . . . . . . . . . . . . . . . . . . . . . . . . .17
6.2 6.2
Ispezione.........................................................................................18
Inspection . . . . . . . . . . . . . . . . . . . . . . . . . . . . . . . . . . . . . . . . . . . . . . . . . . . . . . . . . . . . . .18
6.3 6.3
Sostituzione
della batteria...............................................................19
Battery Replacement
. . . . . . . . . . . . . . . . . . . . . . . . . . . . . . . . . . . . . . . . . . . . . . . . . . . . .19
HRU Replacement
. . . . . . . di
. . . sblocco
. . . . . . . . . .idrostatico
. . . . . . . . . . . . .(HRU)..................20
. . . . . . . . . . . . . . . . . . . . . .20
6.4 6.4
Sostituzione
del modulo
7 Appendice..........................................................................................21
7 Appendix . . . . . . . . . . . . . . . . . . . . . . . . . . . . . . . . . . . . . . . . . . . . . . . . . . . . . . .21
7.1 7.1
Descrizione
generale del sistema....................................................21
System Overview . . . . . . . . . . . . . . . . . . . . . . . . . . . . . . . . . . . . . . . . . . . . . . . . . . . . . . . . .21
7.1.1 COSPAS
/ SARSAT.....................................................................21
7.1.1 COSPAS/SARSAT
System . . . . . . . . . . . . . . . . . . . . . . . . . . . . . . . . . . . . . . . . . . .21
7.1.2 Sistema
GPS................................................................................21
7.1.2 GPS
System . . . . . . . . . . . . . . . . . . . . . . . . . . . . . . . . . . . . . . . . . . . . . . . . . . . . . .21
Specifications
. . . . . . . . . . . . . . . . . . . . . . . . . . . . . . . . . . . . . . . . . . . . . . . . . . . . . . . . . . 22
7.2 7.2
Specifiche.
.......................................................................................22
7.3 Accessories . . . . . . . . . . . . . . . . . . . . . . . . . . . . . . . . . . . . . . . . . . . . . . . . . . . . . . . . . . . . 23
7.3 7.4
Accessori.........................................................................................23
Approvals . . . . . . . . . . . . . . . . . . . . . . . . . . . . . . . . . . . . . . . . . . . . . . . . . . . . . . . . . . . . . . 23
7.4 7.5
Approvazioni.
..................................................................................23
Service & Warranty
. . . . . . . . . . . . . . . . . . . . . . . . . . . . . . . . . . . . . . . . . . . . . . . . . . . . . 24
7.5 7.6
Assistenza
Garanzia.....................................................................24
Record ofeProgramming
Details . . . . . . . . . . . . . . . . . . . . . . . . . . . . . . . . . . . . . . . . . . . .25
7.6 Registro dei dati di programmazione..............................................25
4
No. articolo
Part 912S-00624
No. 912S-00624
MANUALE
UTENTE
SAFESEA
E100/E100G
SAFESEA
E100/E100G
USER
MANUAL
1 1 GENERALE
GENERAL
1.1 Introduzione
1.1
Introduction
Questo
manuale fornisce informazioni preziose per l’installazione, il funThis
manual
provides
valuable information
for the installation,
zionamento
e la routine
di manutenzione
sia del operation and routine
maintenance of both the:
SafeSea EPIRB E100
che
delEPIRB
SafeSea
E100
SafeSea E100G &EPIRB con GPS.
SafeSea E100G questo
EPIRB with
GPS prima di utilizzare il
Si prega di leggere completamente
manuale
vostro EPIRB.
Please read this manual completely before using your EPIRB. Parts of this manual apply
Alcune parti di questo manuale si applicano soltanto all’E100G.
to the E100G only.
1.2
1.2
Registrazione
Registration
IL
DI QUESTO
EPIRB
406MHZ
DEVE
THEPROPRIETARIO
OWNER OF THIS 406MHz
EPIRB MUST
REGISTER
IT WITH
THE REGIAPPROPRIATE
NATIONAL
AUTHORITY. NAZIONALE PREPOSTA
STRARLO
PRESSO
L’AUTORITÀ
LA
MANCATA
REGISTRAZIONE
DELL’EPIRB
PROVOFAILURE
TO REGISTER
THIS EPIRB MAY RESULT
IN A FINE,PUÒ
SLOWING
CARE
DANNO,
RALLENTANDO
ILLIFE.
PROCESSO DI SALVATAGTHE RESCUE
PROCESS
OR EVEN LOSS OF
GIO, O ANCHE LA PERDITA DELLA VITA.
All 406MHz EPIRBs are programmed with a unique identity number (UIN), which is based
Tutti
EPIRB
406MHzThis
sono
programmati
conto un
numero
identificaupon
the gli
country
of registration.
is normally
the country
which
the vessel
is flagged.
Registration
provides
the Search
Rescue
with the correct emergency
contact
tivo univoco
(UIN),
che siand
basa
sul authorities
paese di immatricolazione.
Questo
è
details,
which will speed
up the
rescue
process.
normalmente
il paese
di cui
l’imbarcazione
batte la bandiera.
La registrazione fornisce alle Autorità di Ricerca e Soccorso i corretti dettagli per i contatti di emergenza, accelerando le operazioni di salvataggio.
www.dft.gov.uk/mca/mcga07-home/emergencyresponse/mcga-searchandrescue/epirb/mcga-sar-epirb-online.htm
Una volta che la registrazione sia stata eseguita si dovrebbe ricevere una
For
US registrations goadesiva
to:
“decalcomania”
da attaccare sullo spazio dell’EPIRB marcato
https://beaconregistration.noaa.gov/rgdb/
“Attaccare la prova della registrazione in questo settore”. Questa decalcomania è la prova di registrazione.
Once registration has been performed you should receive a “decal” sticker which must be
Contatti
perthelaEPIRB
registrazione
:
affixed
to the utili
area on
marked “Attach
proof of registration in this area”. This
decal
is
your
proof
of
registration.
UK EPIRB Registry
HMregistration
Coastguard
(Southern)
Useful
contacts
are:
Pendennis Point
US EPIRB Registry
UKCastle
EPIRBDrive
Registry
NOAA/SARSAT
HM Coastguard (Southern)
Falmouth
NSOF, E/SP3
Pendennis
Point
4231 Suitland Road
Castle
Drive
TR11
4WZ
For UK registrations go to:
Suitland, MD 20746
USA
Falmouth
TR11 4WZ
5
Versione
01.20
16/03/2012
Version
01.01
11/05/2011
MANUALE
UTENTE
SAFESEA
E100/E100G
SAFESEA
E100/E100G
USER
MANUAL
This
EPIRB is è
a radio
transmitter - as
such,e,your
must beannotato
updated to
L’EPIRB
un trasmettitore
radio
in existing
quantoradio
tale,license
deve essere
include
EPIRB.
sullathis
licenza
radio dell’imbarcazione.
Quando un EPIRB viene trasferito su un’altra imbarcazione, deve essere
When
an EPIRB is transferred
to a newlevessel,
the EPIRB must
be re-programmed
to
riprogrammato
per includere
informazioni
pertinenti,
come richiesto
include the relevant information as required by the country controlling the new vessel.
dal paese di bandiera della nuova nave.
Negli Stati Uniti, gli armatori dovranno avvisare la NOAA per iscritto al
In the US, Vessel owners should advise NOAA in writing upon change of vessel or EPIRB
momento
di modifiche
della
proprietà
dell’EPIRB,
di trasfeownership,
transfer
of EPIRB to
another
vessel, della
or anynave
other o
change
in registration
rimento
dell’EPIRB
ad
un’altra
nave,
o
di
qualsiasi
altro
cambiamento.
information.
Il cambio di bandiera dell’imbarcazione su cui è installato, richiederà
Changing
the country to which
the vessel is flagged
in thecontiene
EPIRB needing
to be
la riprogrammazione
dell’EPIRB,
perchèwill
il result
suo UIN
anche
il
re-programmed,
as the EPIRB UIN also contains the country code.
codice del paese.
ÈIt ismolto
importante che l’EPIRB sia registrato alla sua
very important that your EPIRB is registered with your National
Autorità
Nazionale.
informazioni
dithat
registrazione
Authority. The
registrationLe
information
will ensure
the rescue
faranno
in
modo
che
l’Autorità
di
Soccorso
identifichi
authorities quickly identify the type of vessel they are searching
for
rapidamente
il totipo
di nave
cheis si
cercando
e la conand make contact
ensure
the alert
notsta
a false
alarm. Although
tatti
per
assicurarsi
che non
si tratti
dibeing
un falso
allarme.
failure
to register
your beacon
will not
stop you
rescued,
it may
cause unnecessary
delays and effort
in the rescuedell’EPIRB
centre.
Nonostante
la mancata
registrazione
non
impedisca di essere salvato, può causare inutili ritardi e
problemi al Centro di Soccorso.
1.3
Programming Details
1.3 Dati di programmazione
Your
is supplied
with a label
contains
areas
Il EPIRB
tuo EPIRB
è fornito
contitled
una“Programming
etichetta dalDetails”,
titolo this
“Dati
di programwhere
the
programming
details
of
the
EPIRB
can
be
marked.
This
information
includes:
mazione”, sulla quale possono essere scritti i dati di programmazione
dell’EPIRB. Queste informazioni includono:
1.
UIN (Unique Identity Number).
1. UIN
Identity
2. (Unique
Vessel
Name. Number).
2. Nome
della
nave.
3.
MMSI.
4.
Country.
3. MMSI.
5.
Call Sign.
4. Paese.
5. Nominativo Internazionale
If this label has not been provided with the EPIRB information pre-inserted then the user
Se questa
etichetta
è stata
fornita
senza
le stable
informazioni
EPIRB
preinseshould
write this
information
on the
label using
a UV
indelible pen.
The UIN
(15digit
rite,
l’utente
scriverle
sull’etichetta
HEX
code)
can bedovrebbe
found on the
programming
certificate. utilizzando una penna indelebile resistente ai raggi UV. L’UIN (Codice HEX di 15 caratteri) può
Affix
the label
to thesul
leftcertificato
side of the EPIRB
in the area provided, then place the clear
essere
trovato
di programmazione.
protective
label
provided
over
the
first
label.
Applicare l’etichetta sul lato sinistro dell’EPIRB, nell’apposito spazio,
quindi posizionarvi sopra l‘etichetta trasparente di protezione fornita.
It is recommended that this information is also copied into the section provided at the back
Si raccomanda di copiare i dati di programmazione anche nella terza di
of this manual.
copertina di questo manuale.
6
No. articolo
Part 912S-00624
No. 912S-00624
MANUALE
UTENTE
SAFESEA
E100/E100G
SAFESEA
E100/E100G
USER
MANUAL
DELL’E100/E100G
2 2. PANORAMICA
E100/E100G OVERVIEW
1.
2.
3.
4.
5.
Luci stroboscopiche
1. Strobe Lights
Punto
di attacco
al supporto
2. Lanyard
Attachment
Point
Etichetta
Dati di programmazione
3. Programming
Details Label
4. Battery
Compartment
Vano
batteria
5.
Test
Switch
Interruttore di prova
6.
7.
8.
9.
Indicatore LED
6. Indicator LED
Etichetta
strappare
7.
Tear offda
tag
Interruttore
interblocco
8. Interlock di
Switch
9. ActivationdiSwitch
Interruttore
attivazione
1
5
2
6
3
4
7
7
8
9
Versione
01.20
16/03/2012
Version
01.01
11/05/2011
MANUALE
UTENTE
SAFESEA
E100/E100G
SAFESEA
E100/E100G
USER
MANUAL
3 3. INSTALLAZIONE
INSTALLATION
Failure
to follow the
following installation
guidelines
may cause di
theinstallaLa mancata
osservanza
delle seguenti
istruzioni
EPIRB
to
operate
incorrectly.
zione può causare malfunzionamenti dell’EPIRB.
Non
montare
l’EPIRB
meno
di un
metro
da qualsiasi
Do
not mount
the EPIRB
closerathan
1 metre
to any
steering
compass bussola
in
quanto
ciò
potrebbe
influenzare
la
precisione
della
as this may affect the accuracy of the compass.
medesima.
Keep
the E100
away lontano
from any strong
magnetic
such as
Tenere
l’E100
da forti
fontisources
magnetiche
loudspeakers,
compass
compensation
magnets,
etc.
parlanti, bussola, magneti di compensazione, ecc
come alto-
3.1 Posizionamento
Location
Il posizionamento selezionato deve essere sufficientemente robusto per
sostenere
il pesomust
di tutto
il gruppo.robust to support the weight of the entire unit.
The
location selected
be sufficiently
L’esposizione
agli elementi
e a pericoli
insieme
vibrazioni
Exposure
to the elements
and surrounding
hazards vicini,
along with
vibrationalle
should
also be
taken
into consideration
when choosing
the location.
Ensure that
the mounting
location
devono
essere attentamente
valutate.
Assicurarsi,
inoltre,
che il posizioallows
easy access
to the EPIRB
for maintenance
servicing.
namento
di montaggio
assicuri
un facile and
accesso
all’EPIRB per la manutenzione e l’assistenza.
To ensure that the EPIRB will always float free from the sinking vessel ensure that the
Per garantire che l’EPIRB galleggi libero dall’imbarcazione che stia affloat free housing is located high up on the superstructure, free from any obstructions
fondando, verificare che la custodia galleggiante si trovi in alto, sulla
and located in a position that it will not be trapped, regardless of the angle the sinking
sovrastruttura,
vessel
may be in. libera da qualsiasi ostacolo e situata in una posizione tale
da non restare intrappolata, qualsiasi angolo di affondamento assuma
l’imbarcazione
Ensure
the EPIRB it is mounted with the antenna facing upwards.
Controllare che l’EPIRB sia montato con l’antenna rivolta verso l’alto.
3.1
3.2 Custodia galleggiante
Fissare
la custodia galleggiante alla
3.2
Float Free Housing
struttura prescelta, utilizzando le
quattro
viti 10 x 1”
in dotazione,
Using
the dimensions
shown,
use the foure le
misure
indicate
nella
figura
No10 x 1” screws supplied to secureaccanto.
the
float free housing to the chosen structure.
8
No. articolo
912S-00624
Part No.
912S-00624
MANUALE
UTENTE
SAFESEAUSER
E100/E100G
SAFESEA
E100/E100G
MANUAL
3.2.1
Loading the EPIRB
3.2.1 Caricamento
dell’EPIRB
Quando
si sostituisce
When replacing
the EPIRBl’EPIRB
in the
nella
custodia
galleggiante
assiFloat Free
Housing
please ensure
curarsi
cheisl’unità
siadry.
pulita
that the unit
clean and
The e
asciutta.
Anche
l’area controls
intorno
area around
the activation
ai
dishould
attivazione
e la
andcomandi
the lanyard
be free from
cimetta
devono
esserereliable
asciutti e
water and
dirt to ensure
puliti
per garantire affidabilità
operation.
di funzionamento
The EPIRB is held in place inside the Float
L'EPIRB
è tenuto
posizione,
all'interFree
Housing
by the in
Hydrostatic
Release
no della
custodia
dal MoModule
(HRU)
whichgalleggiante,
locks into position
dulo adispring.
rilascio idrostatico (HRU), che
using
lo blocca in posizione con una molla.
IfSe
it is
to replace
the EPIRB
into
sinecessary
deve rimettere
l’EPRB
nella
cuthe
Floatgalleggiante
Free Housing (dopo
(after maintenance
stodia
la manutenor
testing
etc):
zione
o collaudo,
ecc):
1. Tirare l’HRU indietro come mostra-
1.toPull
the HRU back as shown (right).
a destra.
2. Appoggiare l'EPIRB, rivolto verso
2.l'alto,
Load nel
the EPIRB,
controls facing piegando
up, into
suo alloggiamento,
the
location
seat,
ensuring
to
carefully
fold
con cura l’antenna dietro il medesimo.
the antenna back behind the EPIRB.
3. Abbassare delicatamente l’HRU nella posizione di blocco, con ciò fissando
3. Gently lower the HRU back into the
anche l’EPIRB
locked position - this also holds the EPIRB
4. Mettere il coperchio, posizionando i
in place.
fori sopra le clip.
5. Spingere e ruotare a destra la mano4. Place the housing cover over the back, by
pola di rilascio della custodia, nella poplacing the locating holes (on the side of
sizione di blocco
the housing) over the clips.
6.Completare l'etichetta d’identificaziocon and
un pennarello
indelebile
e stabile
5.nePush
rotate the housing
release
ai
raggi
UV.
Attaccare
l’etichetta
knob into the locked position (right). sul lato
sinistro del coperchio dell’ARH100, in
posizione
facilmente
visibile e uti6.una
Complete
the provided
identification
lizzare
l’etichetta
protettiva
label using a UV stable indelible trasparente
pen. Fit to
perside
coprirla.
la data
scadenza
the
of the Segnare
ARH100 cover
leftdihand
side
sull’apposita
etichetta,
insull’HR1E
an easily visible
position and
use the utilizzando
una label
pennato indelebile.
Fissare
clear
protective
cover it. Clearly
questa
etichetta
nell'incavo
rettangolare
mark the expiry date on the HR1E
della
e coprirla
con l'etichetta
and
on custodia
to the separate
label provided
using
trasparente
indelible
pen. di
Fixprotezione.
the label to the housing in
the rectangular recess and cover with the
clear protective label.
99
Versione
01.20
16/03/2012
Version
01.01
11/05/2011
MANUALE
UTENTE
SAFESEAUSER
E100/E100G
SAFESEA
E100/E100G
MANUAL
3.33.3 Staffa
Mounting
Bracket
di montaggio
L’E100/E100G
viene as
fornito
di with
serie
con release
una staffa
di montaggio
The
E100/E100G is supplied
standard
a quick
mounting
bracket. Thisa ribracket
be mounted
a suitable
or bulkhead
in asu
position
where ito can
easily
lascioshould
rapido.
Questa on
staffa
devewall
essere
montata
una parete
paratia
beadatta,
retrievedininuna
an emergency.
posizione da cui può facilmente essere recuperata in caso
di emergenza.
Although
is rugged
and waterproof,
Ocean SignalOcean
recommends
Anchethe
se E100/E100G
l’E100/E100G
è robusto
e impermeabile,
Signalmounting
raccothe EPIRB in a protected position whenever possible.
manda di montare l’EPIRB in posizione protetta, quando possibile.
Do notmontare
mount thel’EPIRB
EPIRB closer
than 1 metre
any steering
compass
Non
a meno
di untometro
da ogni
bussola, in
as
this
may
affect
the
accuracy
of
the
compass.
quanto ciò potrebbe influenzare la precisione della medesima.
Keep the l’EPIRB
EPIRB awaylontano
from any strong
magnetic
such as come altoTenere
da forti
fontisources
magnetiche
loudspeakers,
compass
compensation
magnets, etc.
parlanti,
bussole,
magneti
di compensazione,
ecc.
Segnare la posizione dei quattro fori per le viti sul punto prescelto.
Mark
location ofprima
the fourpraticare
screw holes
onto the
the holes
Se the
necessario,
i fori,
poimounting
avvitareposition.
la staffaPre-drill
di montaggio
if required then screw the mounting bracket to the surface using the four No6 x 5/8”
utilizzando le quattro viti in dotazione.6 x 5/8 “.
screws supplied.
3.3.1 Montaggio dell’EPIRB
Allineare il retro della zona di stoccag3.3.1
Loading the EPIRB
gio cimetta,
situata dietro l’EPIRB, con
il
meccanismo
aggancio
automatico
e
Align the back of thedi
lanyard
storage
area,
premere
in
posizione.
situated at the rear of the EPIRB with the
Cimechanism
sarà un “click”
cheand
confermerà
clip
of the cradle
push into che
l’EPIRB
è agganciato
correttamente.
place.
There will
be an audible
“click” indicating that the EPIRB is now secured in
place. Non fissare la cimetta a qualsiasi
parte della sovrastruttura della
Do not attach
the lanyard
to anypossano
barca
o altre
parti che
part of the vessel superstructure or
ostacolare
il rilascio dell’EPIRB.
other part that will hinder the
Non
posizionare
release of the EPIRB.la staffa di montaggio in una posizione che possa
esporre l’EPIRB al rischio di essere buttato giù dall’urto di un
membro dell’equipaggio di passaggio, specialmente con tempi
duri (ad esempio il tambuccio).
10
No. articolo
912S-00624
Part No.
912S-00624
MANUALE
UTENTE
SAFESEAUSER
E100/E100G
SAFESEA
E100/E100G
MANUAL
4 4. FUNZIONAMENTO
OPERATION
WARNING:
USE UTILIZZARE
ONLY IN SITUATIONS
ATTENZIONE:
SOLO
OFINGRAVE
AND IMMINENT
DANGER
SITUAZIONI
DI PERICOLO
MISUSEGRAVE
MAY RESULT
IN A SEVERE PENALTY
ED IMMINENTE
l’uso improprio può causare gravi danni
The EPIRB is designed for best operation while floating in water. If used in other situations
L’EPIRB
è progettato
per un
funzionamento
acensure
that the
EPIRB is placed
in the
open, clear of ottimale
any cover quando
and kept galleggia
upright. Doinnot
qua.
Se
usato
in
altre
situazioni
assicurarsi
che
sia
collocato
a
cielo
aperto,
senza
place the EPIRB close to large structures or under cover.
nessuna copertura e mantenuto in posizione verticale. Non posizionarlo vicino a
diabandoning
grandi dimensioni.
In strutture
the case of
ship, if possible, recover the EPIRB and tie to the survival craft
caso using
di abbandono
della
prendere
l’EPIRB
e legarlo con
la the
cimetta
orIn
person
the lanyard.
For nave
optimum
operation,
it is recommended
that
EPIRBalbe
mezzo
di
salvataggio
o
a
una
persona.
Per
un
funzionamento
ottimale
legatelo
tied to the raft with the lanyard and floated in the sea.
alla zattera con la cimetta e lasciatelo galleggiare in mare.
4.1
Manual Activation
4.1 Attivazione
manuale
4.1.1
Deployment From an Enclosure
4.1.1 Rimozione dalla custodia
1. Push in and then rotate the housing release knob anti1. Premere e poi ruotare la manopola di sblocco
clockwise to release the housing cover.
in senso antiorario per liberare il coperchio della
custodia.
2. Far scivolare di lato il coper-
2. To remove the housing cover, tilt it, slide
chio della custodia, per liberarlo
it sideways to free the cover from the base
clips dalla
and liftbase
off. e poi sollevarlo.
3. Sollevare il meccanismo di rilascio
3. Lift the hydrostatic release mechanism
idrostatico
e rimuovere l’EPIRB
and remove the EPIRB.
11
Versione
01.20
16/03/2012
Version
01.01
11/05/2011
MANUALE
UTENTE
SAFESEA
E100/E100G
SAFESEA
E100/E100G
USER
MANUAL
4.1.2
Deployment From
a Bracket
4.1.2 Rimozione
dalla
staffa
Premere il tasto di rilascio grigio
sulla destra della staffa e rimuovere
Press the Grey release key on the right
l’EPIRB.
hand
side of the bracket and remove
EPIRB.
4.1.3 Attivazione manuale
Rompere il coperchio di protezione trasparente
sopra gli interruttori
4.1.3
Manual Activation
Verden e Rosso.
Tenendo
l’interruttore
verBreak
off the premuto
clear protective
cover over the
Green
Red switches.
de aand
sinistra,
spingere in basso l’interruttore rosso e tenerlo premuto.
Holding the Green switch to the left, push
Tenendo il tasto rosso premuto, rilathe Red switch down and hold.
sciare l’interruttore verde per bloccareholding
l’interruttore
rosso.down, release
While
the Red switch
theL’EPIRB
Green switch
lockoperativo.
the Red switch
saràtoora
Leinluci
thestroboscopiche
active position. inizieranno a lampeggiare al ritmo di una volta ogni
The EPIRB will now be operational. The
2,5 secondi
attivata.
strobe
lights willappena
begin to l’unità
flash at aèrate
of
Perevery
ottenere
prestazioni
once
2.5 seconds
as soon asottimali,
the unit è
che l’EPIRB sia in posiis importante
activated.
zione verticale con una chiara visioFor
it islontano
importantpossibile
that
nebest
delperformance
cielo e il più
the EPIRB is in an upright position with a
da eventuali strutture metalliche.
clear view of the sky and as far away from
Se l’EPIRB contiene un ricevitore
any metallic structures as is possible.
GPS, assicurarsi che l’antenna GPS
If the
contains ea GPS
receiver,
ensure
nonEPIRB
sia ostruita
abbia
una complethat
GPS antenna
is not obstructed
and
ta the
visuale
del cielo,
come indicato
has
a
complete,
unobstructed
view
of
the
sulla parte superiore dell’EPIRB.
sky
as indicateduna
on the
top of the
EPIRB.
È– prevista
cimetta
per
legare
l’EPIRB
alla scialuppa
di EPIRB
salvatagA lanyard
is provided
to tether the
to
o all’autogonfiabile
farthegio
lifeboat
or life raft to ensureper
thatnon
it does
allontanare.
Assicurarsi
che sia
notlodrift
away. Make sure
this is firmly
attached.
legata saldamente.
12
No. articolo
912S-00624
Part No.
912S-00624
MANUALE
UTENTE
SAFESEAUSER
E100/E100G
SAFESEA
E100/E100G
MANUAL
EPIRB
EPIRBmodalità
Mode
2 secondi
Attivazione
Initial EPIRB activation
dell’EPIRB
Posizione GPS
Acquiring
GPS position
in acquisizione
**
Green
SpiaIndicator
Verde
Red
Indicator
Spia
Rossa
Accesa
per
1 secondo
On for
1 second
1 Flash ogni
every 5
5 seconds
1 lampo
secondi
Posizione GPS
GPS position
acquired
acquisita
* *
Flashper
for 11second
Lampo
secondo
1 lampo
1 flash, stroboscopico
with strobe light,
ogni
secondi
every2,5
2.5 seconds
121.5MHz
** **
121,5
MHzTxTx
406MHz
Tx Tx
406
MHz
406 MHz
Tx,GPS
406MHz
Tx, with
con posizione
position * GPS *
Flash for
Lampo
per2 2seconds
secondi
Lampo
per2 2seconds
secondi
Flash for
406
MHz
senza
406MHz
Tx,Tx
without
valid
position* GPS *
validaGPS
posizione
Lampo
per 2 secondi
Flash for 2 seconds
* Solo SafeSea
E100G
* SafeSea
E100G only
121.5MHz
nonnot
inizia
trasmissioneuntil
finoafter
a dopo
prima
trasmissione
406MHz
****
TheL’homer
121.5MHz
homer does
beginlatransmission
the la
first
406MHz
transmission
–
circa 50 secondi.
approximately
50 seconds.
4.2
Automatic Operation
4.2 Funzionamento automatico
The EPIRB will sense when it has been placed in water and automatically begin to operate,
L’EPIRB percepisce quando è messo in acqua e inizia automaticamente
after a short delay, in the same manner as described above
. ad operare, dopo un breve ritardo, come descritto sopra.
Note: If the EPIRB is mounted in the float free housing or on the bracket this function is
Nota: Se l’EPIRB è montato nella custodia galleggiante o sulla staffa,
disabled until the EPIRB has been removed from either fixture.
questa funzione è disabilitata fino a quando l’EPIRB non è stato rimosso
If da
the entrambe.
EPIRB is mounted in a float free housing, in the event that the vessel sinks the
Se
è montato
nellafrom
custodia
galleggiante,
casotodi
EPIRBl’EPIRB
will automatically
be ejected
the housing
allowing it in
to float
thenaufragio
surface and
saràtransmission.
automaticamente espulso e potrà risalire in superficie e iniziare a
begin
trasmettere.
13
Versione
01.20
16/03/2012
Version
01.01
11/05/2011
MANUALE
UTENTE
SAFESEAUSER
E100/E100G
SAFESEA
E100/E100G
MANUAL
4.34.3. Disattivazione
Deactivation
4.3.1 Disattivazione
manuale
4.3.1
Deactivation if Manually
Activated
Se
l’EPIRB
è
stato
inavvertitamente
If the EPIRB has been inadvertently activated attivato
situazione
di emergenza
cessata, può
or othelaemergency
situation
has passed, èit can
spento
semplicemente
invertendo il
beessere
turned off
simply by
reversing the activation
process.
processo di attivazione.
Slide
the Green
switch tol’interruttore
the left - the Red
Facendo
scorrere
verde a siniswitch will return to the off position. Release
stra,
quello
rosso
ritorna
in
posizione
“spenthe Green switch.
to”. Rilasciare quindi l’interruttore verde.
It is not possible for the user to replace the
Non
è possibile
l’utente
sostituire
clear
protective
cover. per
Return
the EPIRB
to an
pertura
protettiva
trasparente.
Ocean Signal authorised service centre for
replacement.
la co-
Riportare, per la sostituzione, l’EPIRB a un
centro di assistenza autorizzato Ocean Signal.
4.3.2
Deactivation if Automatically Activated
If the
EPIRB
was automatically
activated, by placing in water, remove from the water and
4.3.2,
Disattivazione
automaica
dry.
EPIRB will
automatically
off after approximately
30 seconds.
SeThe
l’EPIRB
è stato
attivatoswitch
mettendolo
in acqua, toglierlo
dall’acqua ed
asciugarlo. Si spegnerà automaticamente dopo circa 30 secondi.
14
No. articolo
912S-00624
Part No.
912S-00624
MANUALE
UTENTE
SAFESEAUSER
E100/E100G
SAFESEA
E100/E100G
MANUAL
allarmi
5 5. Falsi
FALSE
ALERTS
I falsi
allarmi
sono un
problema
serio,valuable
perchéresources
causano tolobespostamento
False
alerts
are a serious
problem
- they cause
diverted away di
from
real emergency
If a false
alert emergenza.
is initiated, by Se
any parte
means,un
it is
important
preziose
risorse situations.
da situazioni
di reale
falso
allarto me
contact
the nearest search
and rescue
authority and
informlathem
the false
alert. di
è importante
contattare,
con qualsiasi
mezzo,
più ofvicina
autorità
ricerca e soccorso e comunicargli il falso allarme.
Report the following information:
Segnala le seguenti informazioni:
1.
EPIRB UIN.
1. EPIRB
UIN.
2.
Date, time and duration.
2. Data,
durata.
3. ora eCause
of activation.
4.
Location
when the alert was activated.
3. Causa di attivazione.
5.
Location at time of deactivation.
4. Luogo in cui è stato attivato l'avviso.
If the
was activated
by mistake
turn it off. The first emergency transmission
5. EPIRB
Posizione
al momento
dellathen
disattivazione.
will not occur for approximately 50 seconds, if the unit is turned off within this time then
Se l’EPIRB
è stato
attivato
per distress.
errore, spegnerlo. La prima trasmissione
EPIRB
will not have
sent an
emergency
di emergenza non si verifica prima di circa 50 secondi, se l’unità viene unit
spenta
questointo
tempo,
l’EPIRB
non avrà
inviato
di
If the
has entro
been dropped
the water
then remove
from the
wateralcun
and dryavviso
the case,
wait
approximately 30 seconds for the water contacts to de-activate. If the unit is still
emergenza.
flashing
after this
period,incheck
that
the unit has not
been manually
activated;
if so30
then
Se l’unità
è caduta
acqua
recuperarla,
asciugarla
e attendere
circa
sefollow the procedure to manually switch the EPIRB off. The EPIRB should now be switched
condi
che
si
disattivi.
Se,
dopo
questo
periodo,
ancora
lampeggia,
verificaoff, replace the EPIRB on to the cradle or into the float free housing.
re che non sia stata attivata manualmente, in tal caso seguire la procedura
per
disattivarla
manualmente.
Una activation
volta spento
l’EIPRB,
riposizionarlo
The
SafeSea
E100/E100G
is fitted with water
contacts.
Although
the mounting
nella and
custodia
galleggiante
o sulla staffa.
bracket
float free
housing are designed
to prevent accidental activation due to heavy
sea
weatherE100/E100G
conditions, if the
correctly
in it’s mounting
it is Sebbepossible
Il or
SafeSea
è EPIRB
dotatoisdinot
contatti
difitted
attivazione
in acqua.
that
may cause a false
situation.
nethis
il montaggio
sullaalert
staffa
e nella custodia galleggiante siano progettati
per prevenire attivazioni accidentali dovute a cattive condizioni del mare
o del tempo,
se l’EPIRB non è inserito correttamente nel suo alloggiamen5.1
Disabling the EPIRB
to
si
può
verficare
una situazione di falso allarme
In the unlikely event that your EPIRB develops a fault and does not switch off then
completely
disable the unit
by removing the battery, as described in section 6.3.
5.1. Disabilitare
l’EPIRB
Nel caso improbabile che il vostro EPIRB abbia un guasto e non si spenga, disabilitare completamente l’unità rimuovendo la batteria, come descritto nella sezione 6.3.
15
Versione
01.20
16/03/2012
Version
01.01
11/05/2011
MANUALE
UTENTE
SAFESEAUSER
E100/E100G
SAFESEA
E100/E100G
MANUAL
6 6. MANUTENZIONE
MAINTENANCE
6.1 Test
6.1
Testing Auto Test
6.1.1 Modalità
6.1.1
Self Test Mode
ATTENZIONE:
TRASMISSIONI
TEST SULLA
WARNING:LE
TEST
TRANSMISSIONS
ON THEFREQUENZA DI 121.5MHz SONO LIMITATE DAI REGOHOMER FREQUENCY
OF 121.5MHZ
LIMITED
LAMENTI
INTERNAZIONALI
RADIO ARE
AI PRIMI
CINQUE
DI OGNI ORA
BY MINUTI
INTERNATIONAL
RADIO REGULATIONS TO
WITHIN
THE FIRST
FIVEnon
MINUTES
AN
HOUR
Si raccomanda
che l’EPIRB
sia testato
più di una OF
volta
al mese.
Attivare la modalità di test ruotando l’interruttore di prova grigio in senso orario,
It tenendolo
is recommended
that the
EPIRB isfino
tested
no more il
than
a month.
in quella
posizione
a quando
ledonce
verde
inizia a lampeggiare
velocemente, quindi rilasciarlo
Activate Test Mode by rotating the grey test
Durante
l’autoand
test,
contare
switch
clockwise
holding
for il1 numero
second, di lampi del
LED
terminebegins
del test
until
thefino
LEDal
indicator
to rapidly
flash
Green,
release
test switch.
L’auto
testthen
controlla
lathe
potenza
della RF 121.5MHz,
avvia una trasmissione satellitare per misurare
controlla la
il voltaggio
sotto carico di blocco e batteria. Il messaggio di
auto-test
progettato
per impedire
The
self test è
monitors
the 121.5MHz
homer l’inoltro dal
satellite
di
un
messaggio
di
avviso,
RF power, initiates a satellite transmission durante l’aul’invio,
la luce stroboscopica lampegin totest.
order toDopo
measure
key performance
gia, indicando
che l’EPIRB
è in funzione.
parameters,
will monitor
the 406MHz
RF
This will initiate a self test - be prepared to
i parametri delle prestazioni chiave,
monitor the number of LED indicator flashdella RFof 406MHz
espotenza
upon completion
the test. e registra
power,
synthesiser
lockèand
batterydavoltage
La riuscita
del test
indicata
una seunder
load.
The
self
test
message
is ripetuti
rie di lampi verdi (da uno a sei)
designed
to intervallo
prevent thedi
satellite
forwarding
dopo un
2 secondi.
an alert message during self test. After the
Un guasto
è invecethe
indicato
da una
satellite
transmission
strobe light
is serie
di lampi
rossi (da uno
a cinque) ripetuti
flashed,
demonstrating
operation.
Green
Indicator
1 Flash
A successful test is determined by a series
I lampi verdi indicano le ore di utilizzo
of Green LED flashes – between one and six
della batteria dell’EPIRB.
flashes, this sequence is repeated after a 2
second
delay.
A failure
is determined
by aguaI lampi
rossi
indicano
gli eventuali
series
of Red
flashes – between one
sti per
ogniLED
settore.
and five flashes, this sequence is repeated
La a mancata
osservanza della corretta
after
2 second delay.
dopo un intervallo di 2 secondi.
procedura di attivazione del test può
comportare
la non
sia il
The
Green LED sia
shows
how attivazione,
many hours of
lampeggio
del
LED
rosso
/
verde.
Riuse the EPIRB has undergone on the
lasciare
l’interruttore
e
riprovare
dopo
current battery. The Red indicator shows
breve
pausa.
theuna
failure
condition.
16
No of
No
di
Flashes
Lampi
Red
Indicator
No
Oreof
Hours
Use
di uso
No of
No
di
Flashes
Lampi
Type di
of
Tipo
Failure
errore
0 to
1hr 59min
1 Flash
121.5MHz
homer
2 Flashes
2hrs to
3hrs 59min
2 Flashes
406MHz
generation
3 Flashes
4 hrs to
5hrs 59min
3 Flashes
406MHz
power amp
4 Flashes
6hrs to
7hrs 59min
4 Flashes
Replace
battery
5 Flashes
8hrs to
9hrs 59min
5 Flashes
Other
failure
6 Flashes
10hrs +
No. articolo
912S-00624
Part No.
912S-00624
MANUALE
UTENTE
SAFESEAUSER
E100/E100G
SAFESEA
E100/E100G
MANUAL
6.1.2. GPS
Modalità
test
6.1.2
Test Mode
GPS
ATTENZIONE: IL TEST DEL RICEVITORE GPS PUÒ
WARNING
: TESTING
THE GPS
RECEIVER
IS LIMITED
TO 5 TESTS
FARSI
SOLO
5 VOLTE
NELLA
VITA
DI UNA
BATTEOVER THE LIFETIME OF THE BATTERY. TESTING THE GPS RECEIVER
RIA,
PERCHÉ
SPENDE
NOTEVOLI
QUANTITÀ
DI
EXPENDS SIGNIFICANT AMOUNTS OF BATTERY ENERGY AND MAY
ENERGIA E TAKE
PUÒUPRICHIEDERE
FINO
A
10
MINUTI.
TO 10 MINUTES TO COMPLETE.
IL TEST DEVE ESSERE ESEGUITO SOLO DOVE
THIS TEST
MUST ONLY
PERFORMED
WHERE
THE EPIRB
HAS A E
L’EPIRB
ABBIA
UNABEVISIONE
DEL
CIELO
CHIARA
CLEAR AND UNOBSTRUCTED VIEW OF THE SKY. THIS IS REQUIRED TO
SENZA
OSTACOLI, PER POTER ACQUISIRE UN NUALLOW THE GPS RECEIVER TO ACQUIRE A SIGNAL FROM SUFFICIENT
MERO SATELLITES
DI SATELLITI
SUFFICIENTI A DETERMINATO ALLOW IT TO DETERMINE A POSITION
RE LA POSIZIONE
Sirecommended
raccomanda that
di non
test inalla
luce
direttaasdel
solebeinmake
quanto
It is
this eseguire
test is notquesto
performed
direct
sunlight
it may
potrebbe
essere
difficile
contare
i
lampi
del
LED
al
termine
della
prova.
Controlcounting the LED flashes at the end of the test difficult. The EPIRB must remain under
lare l’EPIRB
perwhole
tutta of
lathe
prova
assicurarsi
che sia completata
correttamente.
observation
for the
testper
to ensure
the completion
of the test is
not missed.
Per entrare nella modalità di test automatico del GPS, eseguire la seguente pro-
Tocedura:
enter the GPS self test mode, perform the following procedure:
1. Ruotare
l’interruttore
grigio
in clockwise
senso orario,
fino for
a quando
led verde
1. Rotate
the grey test
switch
and hold
1 secondil until
the inizia
a lampeggiare
.
indicator LED begins to rapidly flash Green.
2. Rilasciare
l’interruttore
grigio
poi riattivarlo
mentrethe
il LED
sta ancora lam2. Release
the test switch
ande then
quickly reactivate
test switch
peggiando.
whilst the LED is still rapidly flashing.
3. Tenere
premuto
l’interruttore
fino aflashing
quandoGreen
il LED
a lampeggiare
3. Hold
the switch
until the grigio
LED begins
at ainizia
slower
rate;
verde ad
un
ritmo
più
lento;
tenere
premuto
il
tasto
di
prova
per
5 secondi.
continue to hold the test key for 5 seconds.
4. Rilasciare
l’interruttore
quando
LED
passa from
da verde
lampeggiante
4. Release
the switch when
theilLED
changes
flashing
Green to a a rosso
fisso constant Red.
Durante il test il led rimarrà rosso con lampi verdi ogni 5 secondi.
During
the test the LED
will remain
Red
flash Green
onceverde
every lampeggiante
5 seconds.
La conclusione
positiva
del test
è and
indicata
dal LED
per 10
Successful
is indicated by
the LED flashing
for 10 seconds, with the
secondi, test
con completion
la luce stroboscopica
lampeggiante
ogniGreen
2,5 secondi.
strobe
light flashing
every
2.5 seconds.
test rosso
failurelampeggiante
is indicated by the
flashing Red
Il fallimento
del test
è indicato
dal ALED
perLED
10 secondi,
con
forla10luce
seconds
with the strobe
light flashing
seconds.
stroboscopica
lampeggiante
ognievery
2,5 2.5
secondi.
Il test può essere interrotto in qualsiasi
The test can be cancelled at any time by
Strobe
momento attivando l’interruttore grigio GPS Tests Green LED
activating the Grey test switch and holding
Remaining
Flashes
Flashes
acceso per 5 secondi.
it eontenendolo
for 5 seconds.
4 (and then
L’EPIRB è limitato a 5 auto test GPS, e
4
2
The
EPIRB
is limited
to 5aGPS
self tests,
repeated)
non
ne farà
altri fino
quando
la batteria
the
unit
will
not
perform
any
more
than
non sarà sostituita.
3 (and then
this until the battery is replaced. If the
3
2
Se self
si tenterà
di fare un
test, il has
LED
repeated)
GPS
test is initiated
andaltro
the EPIRB
lampeggerà
rosso
per
5
secondi
e
poi
si
already performed 5 GPS self tests, the
2 (and then
spegnerà.
si Red
terràfor
premuto
l’interrutindicator
will Se
flash
5 seconds
and
2
2
repeated)
torepower
grigio
dopoIf che
il LED
è is
spento,
then
down.
the Grey
testsi
key
esso
lampeggiare,
alternativaheld
oninizierà
after theaindicator
has finished
1 (and then
1
2
mente
rosso
e
verde,
per
indicare
flashing Red, it will then begin to rapidly che
repeated)
l’EPIRB
è
ancora
acceso,
e
sta
consuflash between Red and Green to indicate
mando
inutilmente
batteria.
Flashes for 5
2
that
the EPIRB
power islabeing
held on and
0
is needlessly draining the battery reserves.
17
17
seconds
Versione
01.20
16/03/2012
Version
01.01
11/05/2011
MANUALE
UTENTE
SAFESEA
E100/E100G
SAFESEA
E100/E100G
USER
MANUAL
6.2
6.2
Inspection
Ispezione
Durante l’auto-test mensile dell’EPIRB si consiglia di effettuare i seguenti
During the monthly EPIRB self test it is advised that the following inspection is performed.
controlli.
1. Ispezionare
l’EPIRB
per
evidenti
di danneggiamento,
incluso
lo
1. Inspect the
EPIRB for
obvious
signssegni
of damage
– including the state
of
antenna any creases
in the
antenna
may cause the
operation
of the
statothe
dell’antenna.
Eventuali
pieghe
dell’antenna
possono
pregiudicare
EPIRB funzionamento
to be impaired. dell’EPIRB.
il corretto
2. Verificareare
chethe
l’EPIRB
saldamente
allaorstaffa
2. Confirm that
EPIRB is sia
securely
mounted assicurato
on the bracket
in the o nella
custodia
galleggiante.
float free housing.
3. Ispezionare la cimetta per assicurarsi che non sia attaccata ad alcuna
3. Inspect the lanyard to ensure it is not attached to any structures.
struttura.
4. Verificare
che la batteria non sia scaduta.
4. Confirm the battery is within the specified expiry date.
5. Se l’EPIRB è inserito nella custodia galleggiante verificare che il mo5. Ifdi
thesblocco
EPIRB is idrostatico
housed in a float
free housing
the HRU
is within
dulo
(HRU)
non siaconfirm
scaduto
(Scade
due anni
expiry date (Two years after the installation date).
dopothe
la specified
data di installazione).
6. Pulire
l’EPIRB utilizzado esclusivamente un panno umido.
6. Clean the EPIRB and mounting, it is recommended that the EPIRB is
cleaned only using a damp cloth.
Oltre
la batteria
sono
altreparts
partiinside
riparabiOther than
the batterynon
packcithere
arenell’EPIRB
no user serviceable
NON
farlo
annulla la GAEPIRB. DO NOT
OPENAPRIRE
THE EPIRB,L’EPIRB:
DOING SO WILL
INVALIDATE
? lithedall’utente.
THE WARRANTY
MAY CAUSE
ALERTS
RANZIA
e puòAND
causare
falsiFALSE
allarmi
18
No. articolo
912S-00624
Part No.
912S-00624
MANUALE
UTENTE
SAFESEA
E100/E100G
SAFESEA
E100/E100G
USER
MANUAL
6.36.3 Sostituzione
Battery Replacement
della batteria
L’EPIRB
è fornitowith
con
una innocua 9V
batteria
litio da
9V.It Si
raccomanda
The
EPIRB is supplied
a non-hazardous
Lithiumalbattery
pack.
is recommended
di
sostituirla
ogni
5
anni,
ipotizzando
che
l’EPIRB
non
sia
stato
utilizzato
that this pack be replaced every 5 years, assuming that the EPIRB has not been
used for
per
nessunause
emergenza,
seisl’EPIRB
viene
utilizzatoOTHER
per scopi
DIVERSI
any
emergency
- if the EPIRB
operated for
any purposes
than the
self tests,
quello
dell’auto-test,
laensure
batteria
essere
sostituita
per
garantire
theda
battery
should
be replaced to
thedeve
correct
operating
life of the
EPIRB
during la
an
emergency
durata disituation.
funzionamento dell’EPIRB in caso di emergenza.
Se la data di scadenza indicata sulla batteria è stata raggiunta, allora,
If the
expiry
date sostituita
marked on the
pack has
been reached
then it must be replaced
deve
essere
perbattery
assicurare
la durata
di funzionamento
duranteto
ensure correct operating life of the EPIRB during an emergency situation. Always use an
un’emergenza. Utilizzare sempre una batteria Ocean Signal LB2E per soOcean Signal LB2E battery to replace the existing battery. Failure to use the correct batstituire la batteria esistente. Il mancato utilizzo della corretta batteria può
tery may result in the EPIRB failing to perform correctly.
pregiudicare il corretto funzionamento dell’EPIRB.
Per
le navi
SOLAS
si consiglia
lathe
sostituzione
della batteria
alofmomento
For
SOLAS
vessels
it is recommended
that
battery is replaced
at the time
the Shore
dellaMaintenance.
manutenzione
a terra.
Leonly
batterie
devono
essere
sostituite
Based
Batteries
should
be replaced
by trained
personnel
with solo
accessda
to
addestrato
le correct
apparecchiature
prescritte,
garantire il
thepersonale
required test
equipment etocon
ensure
operation after
the batteryper
exchange.
corretto funzionamento dopo la sostituzione della batteria.
For
non-SOLAS
includingcomprese
recreational
user mayl’utente
replace the
battery
Per
le navi vessels,
non SOLAS,
levessels,
navi dathediporto,
può
sostithemselves,
or
use
an
approved
service
agent.
Detailed
battery
replacement
instructions
tuire personalmente la batteria, o utilizzare un centro di assistenza autoare provided with each new battery.
rizzato. Dettagliate istruzioni per la sostituzione sono fornite con la nuova
batteria.
The
replacement della
of the batteria
battery may
be performed
by dell’utente
the end user finale
sostituzione
puòonly
essere
effettuata
? La
where
it is èallowed
by thedalle
local autorità
or national
maritime authorities.
solo
dove
permesso
marittime
locali o nazionali.
Dispose of exhausted
batteries
by al
returning
to your
service
le batterie
esauste
vostro them
centro
di assistenza.
Le bat? Rimandare
agent.
batteries require
specialist
methods
terie
alLithium
litio richiedono
procedure
speciali
perfor
lo disposal.
smaltimento.
DO NOT
INCINERATE!
? NON
BRUCIARE!
DO NOT
DISPOSE OF IN
AT SEA!
? NON
GETTARE
MARE!
19
Versione
01.20
16/03/2012
Version
01.01
11/05/2011
MANUALE
UTENTE
SAFESEA
E100/E100G
SAFESEA
E100/E100G
USER
MANUAL
6.4
HRU Replacement
6.4 Sostituzione
del modula di sblocco idrostatico (HRU)
Se si dispone di un EPIRB montato in una custodia galleggiante, questa
If conterrà
you have ananche
EPIRBun
mounted
in agancio
float freeidrostatico
housing, this(HRU).
will also L’unità
contain aHRU
HR1E deve
HR1E,
Hydrostatic
Release Unit
(HRU).
HRU
be replaced
years sulla
after installation
essere sostituita
ogni
due The
anni,
la unit
datamust
di scadenza
è two
segnata
HRU e
- the
expiry
dateanteriore
is markeddella
on thecustodia.
HRU and on
the frontdeve
of theessere
housing.
If this date
hasun
sulla
parte
L’HRU
sostituita
con
been
reached
then the
HRU must
be replaced
withl’HRU
an Oceanpotrebbe
Signal HR1E,
to do so
Ocean
Signal
HR1E,
in caso
contrario
nonfailure
funzionare
may
result in the HRU
not operating
correctly
during an emergency situation.
correttamente
in una
situazione
di emergenza.
meccanismo
di rila1. 1.
LiftSollevare
the releaseilmechanism
by pulling
scio premendo
la molla
rimuovere
against
the spring and
removeethe
EPIRB
l’EPIRB
dalla custodia
from
the housing.
2.2.Spingere
HRU
contro
la molla
e riPush the la
HRU
down
against
the spring
muovere
il perno
di blocco.
Rimuovere
and remove
the locking
pin. Carefully
con
attenzione
l’HRU
dalla
molla.
remove
the HRU
from the
spring.
3.Utilizzando la nuova HRU, inse-
4. Spingere l’HRU in posizione come
mostrato
in HRU
figura.
Spingere
perno
4. Push the
into position
as il
shown.
diPush
bloccaggio
in pin
sede,
conwith
la clip
di tethe locking
home
the retainnuta
verso pointing
il basso.down.
Inserirere
l’EPIRB
ing flange
Load the
EPIRB
nell’alloggiamento
into the housing.
i due
perni
di ritegno
(sul
3. rire
Using
the new
HRU,
locate the
twofondo
del’HRU)
sulla
molla.
Spingere
con
retaining
ridges
(at the
bottom
of the HRU)
cautela
l’HRUCarefully
contro la
molla.
onto
the spring.
push
the HRU
against the spring.
Vista laterale
Vista posteriore
20
No. articolo
912S-00624
Part No.
912S-00624
MANUALE
UTENTE
SAFESEA E100/E100G
SAFESEA
E100/E100G
USER MANUAL
7.7 APPENDICE
APPENDIX
7.1 Panoramica del sistema
7.1
System Overview
7.1.1
COSPAS
/ SARSAT
7.1.1
COSPAS/SARSAT System
Il sistema COSPAS/SARSAT utilizza
il segnale di system
due satelliti
per
The COSPAS/SARSAT
utilises two
inviare
di soccorso
locasatellite chiamate
arrays to provide
distress e
alert
and location alle
data to
search and
lizzazione
autorità
di rescue
ricerca e
authorities.
soccorso.
IlThe
sistema
GEOSAR può fornire un
GEOSAR system can provide near
avviso
quasi
immediato, all’interno
immediate alerting within the coverage of
della
copertura
del satellite ricevente.
the receiving satellite.
Il sistema LEOSAR prevede la coThe LEOSAR
system
provides
coverage
of
pertura
della
regione
polare,
oltre
the
polar
region
beyond
the
range
of
the
quella del Sistema GEOSAR.
GEOSAR system. It can calculate the
GEOSAR – Geostationary Earth Orbit
Può
localizzare segnali di pericolo
LEOSAR – Low-altitude Earth Orbit
location of distress events using Doppler
utilizzando
tecnicheandDoppler
processing techniques
is less ed è
meno
suscettibile
a
ostacoli
susceptible to obstructions which che
couldpotrebbero
bloccare
il
segnale
block a signal in a given direction. in una
data direzione.
system is
instruments
on aboard
the dei
satellites
whichche
detect
the signals
IlThe
sistema
è comprised
compostoofda
strumenti
bordo
satelliti
rilevano
il
from the distress beacons. Ground receiving stations, referred to as Local Users Terminals
segnale
di
pericolo
dagli
EPIRB.
Le
stazioni
riceventi
a
terra,
denominate
(LUTs) receive and process the satellite downlink signal to generate the distress alerts. The
Utenti
Localiby(LUT)
ricevono
elaborano
il segnale
distressTerminali
alerts, generated
the LUTs,
are thened
received
by Mission
Controlsatellitare
Centres
per
generare
gli
avvisi
di
soccorso.
Le
richieste
di
soccorso,
dalleand
(MCCs) which then forward the alert to Rescue Co-ordination Centresgenerate
(RCCs), Search
LUT,
vengono
poi
ricevute
dai
Centri
di
Controllo
Missione
(MCC),
che
Rescue Points of Contacts (SPOCs) and other MCCs.
inoltrano l’avviso ai Centri di Coordinamento Salvataggio (RCC), ai Punti
di Contatto Ricerca e Soccorso (SPOC) e ad altri MCC.
7.1.2
GPS System
7.1.2.
Sistema
GPS
IlThe
sistema
GPS
è auna
seriearray
di satelliti
che consente
ad unto ricevitore
GPS
di
GPS system is
satellite
that enables
a GPS receiver
determine its
position
determinare
la sua
posizione
in tutto
il satellites
mondo. orbiting
Ci sonotheunEarth
minimo
di 24
around the globe.
There
are a minimum
of 24
providing
accurate position,
velocity
and time
information.
satelliti
in orbita
intorno
alla
Terra che forniscono accurate informazioni
su posizione, velocità e orario.
The SafeSea E100G has a built in 50 channel GPS receiver and antenna allowing reception
Ilof SafeSea
E100G è dotato di un ricevitore GPS a 50 canali e antenna
this positional data. The received position is then coded into the EPIRB emergency
che
permettono
la ricezione
di teams
posizione.
La the
posizione
ricevuta
transmission thus enabling
searchdei
anddati
rescue
to narrow
search area
and
viene
poi
codificata,
nell’EPIRB,
in
trasmissione
di
emergenza,
permetincrease the effectiveness of the rescue operation.
tendo così a squadre di ricerca e soccorso di restringere l’area di ricerca e
aumentare l’efficacia delle operazioni di soccorso.
21 21
VersioneVersion
01.20 01.01
16/03/2012
11/05/2011
MANUALE
UTENTE
SAFESEA
E100/E100G
SAFESEA
E100/E100G
USER
MANUAL
7.27.2 Specifiche
Specifications
Trasmettitore
406MHz
406Mhz Transmitter
Frequenza.
.
.
. . . . MHz
. 406.037
Frequency . ... . .. . .. . .. . .. . .. . .. . .. . .. . .. . .. . .. . .. . .. . .. . .406.037
±1KHz MHz ± 1KHz
Potenza
di
uscita.
.
.
.
.
.
.
.
.
.
.
.
.
.
.
.
.
.
.
.
.
. . . . . .5 W tipico
Output Power . . . . . . . . . . . . . . . . . . . . . . . . . . . . . . .5W Typical
Modulation ... ... .. . .. . .. ... ... .. . .. . .. . .. ... .. . .. . .. . .Fase
. . . . .Phase
±1.1
Radians Pk
Pk (16K0G1D)
Modulazione.
± 1.1
radianti
(16K0G1D)
Codifica.
.
.
.
.
.
.
.
.
.
.
.
.
.
.
.
.
.
.
.
.
.
.
.
.
.
.
.
.
. . . .Bifase L
Encoding . . . . . . . . . . . . . . . . . . . . . . . . . . . . . . . . . .Biphase L
Durata.
.
.
.
.
.
.
.
.
.
.
.
.
.
.
.
.
.
.
.
.
.
.
.
.
.
.
.
.
.
.
. . . 520 MS
Duration . . . . . . . . . . . . . . . . . . . . . . . . . . . . . . . . . . .520mS
Stabilità
di
frequenza.
.
.
.
.
.
.
.
.
.
.
.
.
.
.
2
parti
per
miliardo
Frequency Stability . . . . . . . . . . . . . . . . . . . . . . . . . .2 parts per billion / 100mS / 100 ms
Rate . . ... ... ... ... .. . .. . .. . .. . .. . .. . .. . .. . .. . .. . .. . .. ... ... .400
Frequenza.
. . bps
. . . . . . . . . . . 400 Bps
Trasmettitore
121.5MHz
121.5MHz Transmitter
Frequenza.
. .. ... ... ... ... .. . .. . .. . .. . .. . .. . .. . .. . .. . .. . .. . .. .121.5
. . . MHz
. . . . . . . . 121.5 MHz
Frequency
Output
Power . . . .. ... ... ... ... .. . .. . .. . .. . .. . .. . .. . .. ... ...25-100mW
Potenza
di uscita.
. . . . . PEP
. . . 25-100mW PEP
Modulation ... ... .. . .. . .. . .. . .. ... ... .. . .. . .. . .. ... ... .. . .. . ..Swept
Tone AM
(3K20A3X)
Modulazione.
AM
Tono
indotto
(3K20A3X)
Sweep Range / Rate . . . . . . . . . . . . . . . . . . . . . . . . .375-1125 Hz
Campo
indotto/
Frequenza.
.
.
.
.
.
.
.
.
.
.
.
.
.
.
.
.
.
.
.
.
375-1125
Hz
Modulation Depth . . . . . . . . . . . . . . . . . . . . . . . . . . .96%
Profondità
di
modulazione.
.
.
.
.
.
.
.
.
.
.
.
.
.
.
.
.
.
.
.
.
.
.
.
.
96%
Frequency Stability . . . . . . . . . . . . . . . . . . . . . . . . . .±50ppm
Dutydi
Cycle
. . . . . . . . . . .. . .. ... ... ... ... .. . .. . .. . .. . .. . .. .40%
Stabilità
frequenza.
. . . . . . . . . . . . . ± 50ppm
CicloLow
di lavoro.
.
.
.
.
.
.
.
.
.
.
.
.
.
.
.
.
. . . . . . . . . . . . . . .40%
Duty Cycle Strobe
CicloLight
leggero
stroboscopico
Type . . . . . . . . . . . . . . . . . . . . . . . . . . . . . . . . .Two High Intensity LEDs
Light Colour
Tipo luce.
. . . . .. . .. ... ... ... ... ... .. . .. . .. . .. . .. ... ... ... ... .White
. . . Due LED ad alta intensità
Output
. . . .. . .. . .. ... ... ... ... .. . .. . .. . .. . .. . .. . .. . ..0.75
Colore
dellaPower
luce.
. . dc. effective
. . . . candela
. . . . . . .Bianca
Flash Rate . . . . . . . . . . . . . . . . . . . . . . . . . . . . . . . . .20-30 per minute
Potenza
di uscita. . . . . . . . . . . . . . . . . . . . 0.75 dc efficace candela
Batterylampo. . . . . . . . . . . . . . . . . . . . . . .0,20-30 per minuto
Frequenza
Type . . . . . . . . . . . . . . . . . . . . . . . . . . . . . . . . . . . . . .Lithium Manganese Dioxide
Batteria
(LiMnO2)
Tipo. Operating
. . . . ... ... . .. . .. . .. . .. . ... ... ... ... . ... Diossido
Lithio Manganese (LiMnO2)
. . . . . . . . . .Typically 96Hours
Operativo.
.
.
.
.
.
.
.
.
.
.
.
.
.
.
.
.
.
.
. . . Tipicamente 96 Ore
Replacement Interval . . . . . . . . . . . . . . . . . . . . . . . .5 years
Intervallo di sostituzione. . . . . . . . . . . . . . . . . . . . . . . 5 anni
GPS Receiver (Safesea E100G only)
Ricevitore
GPS (SafeSea solo E100G)
Satellites Tracked . . . . . . . . . . . . . . . . . . . . . . . . . . .50 Channel Engine
Satelliti
tracciati.
. . . . . . . . . . . .50 Canali
Sensitivity . . . . . ... ... . .. . .. . .. . .. . .. . ... ... ... . .. . .. . .. . .-146dBm
Sensibilità.
.
.
.
.
.
.
.
.
.
.
.
.
.
.
.
.
.
. . . . . . . . . . .-146dBm
Cold Start Re-acquisition . . . . . . . . . . . . . . . . . . . .-162dBm
Frequency
. . . . . . . . . . . . . . . . .. . .. . .. . ... ... .1.57524
AvvioCentre
a freddo
Re-acquisizione.
. . . .GHz
. . . . . . . -162dBm
GPS Antenna . . . . . . . . . . . . . . . . . . . . . . . . . . . . . . .Microstrip Patch
Frequenza
centrale. . . . . . . . . . . . . . . . . . . . . . 1.57524 GHz
Antenna
GPS. . . . . . . . . . . . . . . . . . . . . . . Microstrip patch
General
Height of Body . . . . . . . . . . . . . . . . . . . . . . . . . . . . . .212mm
Generale
Maximum
Body diameter
Altezza
del corpo.
. . . ... ... ... ... . .. . .. . .. . .. . ... ...110mm
. . . . . . . . 212 millimetri
Weight . . . . . . . . . . . . . . . . . . . . . . . . . . . . . . . . . . . .735grams
Diametro
massimo del corpo. . . . . . . . . . . . . . . . 110 millimetri
Peso. Environmental
. . . . . . . . . . . . . . . . . . . . . . . . . . . . . 735 grammi
IEC60945 Category . . . . . . . . . . . . . . . . . . . . . . . . . .Portable
Ambientale
Operating Temperature . . . . . . . . . . . . . . . . . . . . . .Class 2 -20C to +55C
IEC60945
Categoria. . . . . . . . . . . . . . . . . . . . . . . . Portable
Storage Temperature . . . . . . . . . . . . . . . . . . . . . . . .Class 2 -30C to +70C
Temperatura
esercizio.
. . . maximum
Classe 2-20C a +55 C
Automatic di
release
depth . . .. . .. . .. . ... ... ... . .. . .. . .. .4. metres
Waterproofdi. . conservazione.
. . . . . . . . . . . . . . . . . . .. . .. . ... ... ... . .. .Exceeds
at 20°C2-30C a +70 C
Temperatura
. . . . 10m
.Classe
Profondità di rilascio automatico. . . . . . . . . . . . . 4 metri massimo
Impermeabile. . . . . . . . . . . . . . . . . . . . . Supera 10m a 20 ° C
22
No. articolo
912S-00624
Part No.
912S-00624
MANUALE
UTENTE
SAFESEAUSER
E100/E100G
SAFESEA
E100/E100G
MANUAL
7.37.3 Accessori
Accessories
Replacement
Lithium
Battery
E100/E100G . ... ... .. . .. . .. . ..LB2E
Sostituzione
batteria
al litio
perfor
E100/E100G.
. . . . . LB2E
7.4. Approvazioni
Approvals
Cospas-Sarsat.
. . . . . . . . T.001/T.007
Europa.
. . . . . . . .. . .. . .. ... ... ..Marine
Equipment Directive MED A.1/5.6
Cospas-Sarsat
. . . .T.001/T.007
IEC 61097-2
Europe . . . . . . . . . . . . . . . . . . IEC
. . . .Marine
60945Equipment Directive MED A.1/5.6
IEC 61097-2
Stati Uniti d’America. . . . .USCG
/ FCC approvato
IEC 60945
FCC ID: XYEE100
USA . . . . . . . . . . . . . . . . . . . . . . . .USCG/FCC Approved
In tutto il mondo. . . . . . . IECFCC
61097-2
ID: XYEE100
Regolamenti IMO. . . . . . .A.662 (16)
Worldwide . . . . . . . . . . . . . . .A.694
. . . .IEC(17)
61097-2
A.810 (19)
IMO Regulations . . . . . . . . . . . . . .A.662(16)
A.814
(19)
A.694(17)
7.4
A.810(19)
A.814(19)
23
Versione
01.20
16/03/2012
Version
01.01
11/05/2011
MANUALE
UTENTE
SAFESEA
E100/E100G
SAFESEA
E100/E100G
USER
MANUAL
7.57.5 Servizi
Servicee &
Warranty
garanzia
Tutte le riparazioni o la manutenzione di questo EPIRB devono essere
Alleffettuate
servicing orda
repairs
of this di
EPIRB
must beautorizzato.
carried out by an approved service agent.
un centro
assistenza
Si prega di conservare l’imballo originale del vostro EPIRB. Se, per qual-
Please retain the original packaging for your EPIRB. If the EPIRB has to be returned, for
motivo,
l’EPIRB
dovesse
essere
restituito, si deve utilizzare la conanysiasi
reason,
the original
packaging
should
be used.
fezione originale.
Lebattery
batterie
diused
questo
sono
classificate,
a norme IATA,
come
The
packs
withEPIRB
this EPIRB
are classed
as non-hazardous
under IATA
pericolose
Hazardous
Transport Regulation.
non
Regolamento di trasporti pericolosi.
Batteries should be shipped as category 3090, packing instruction 968:
• Le •batterie
devono essere spedite come categoria 3090, istruzione di
part 2.
imballaggio
968: parte 2.
• EPIRBs with batteries should be shipped as category 3091, packing
• Gli instruction
EPIRB con
devono
come
969:batterie
part 2. (The
batteryessere
shouldspediti
be removed
fromcategoria
the EPIRB3091,
istruzione
di imballaggio
(La batteria deve essere rimosbefore packing,
but can be969:
in theparte
same2.
box.)
sa dall’EPIRB prima del confezionamento, ma può essere nella stessa
scatola.)
Your SafeSea
E100/E100G EPIRB is warranted against manufacturing defects in materials
and
a period of twoEPIRB
years from
date of purchase.
Ocean
Ltd will,
Ilworkmanship
tuo SafeSeaforE100/E100G
è garantito,
dai difetti
diSignal
fabbricazioat its discretion, repair or replace a faulty product free of charge, including return carriage
ne nei materiali e di lavorazione, per un periodo di due anni dalla data
costs to the owner.
di acquisto. Sarà a discrezione di Ocean Signal Ltd, riparare o sostituire
un please
prodotto
difettoso,
compreso
trasporto di ritorno al
Forgratuitamente
further assistance,
contact
our Technical
Service il
Department:
proprietario.
Email:
Per [email protected]
ulteriore assistenza, si prega di contattare il nostro Servizio Tecnico:
e.mail: [email protected]
Accidental damage and misuse or non-approved modifications are not covered by this
Danni This
accidentali
e dinot
uso
improprio
o modifiche
non autorizzate non
warranty.
warranty does
affect
your statutory
rights.
sono coperti da questa garanzia. La presente garanzia non pregiudica i
diritti legali.
Timbro
Dealer
Stamp:
del
Rivenditore
Date of
Data
diPurchase:
acquisto. . . . . . . . . . . . . . . . . . . . . . . . . . . . . . . . . . . . . . . . . . . . . . . . . . . . . . . . . . . . .
24
Part No.
912S-00624
No. articolo
912S-00624
MANUALE
UTENTE
SAFESEAUSER
E100/E100G
SAFESEA
E100/E100G
MANUAL
7.6
Record of
Programming
Details
7.6. Registro
dei
dati di programmazione
Si raccomanda che le informazioni inserite sull’etichetta dei dati di pro-
It is recommended that the information entered on the Programming Details label on the
grammazione
sull’EPIRB
vengano
copiati anche per riferimenti futuri
EPIRB
is also copied
here for future
reference.
UIN
UIN:
..............................................
(Unique Identity Number)
NOME
VESSEL NAME:
DELLA NAVE
..............................................
MMSI:
MMSI
..............................................
COUNTRY:
PAESE
..............................................
NOMINATIVO
CALL SIGN:
..............................................
INTERNAZIONALE
25
Version
01.01
11/05/2011
Versione
01.20
16/03/2012
26