1
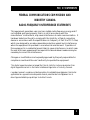
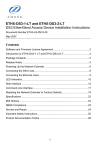
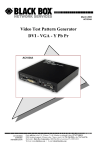
NOVEMBER 2002
LR0020A-KIT-R2
SDSL Network Extender 2000
der
xten
rk E
two r Unit
e
N
L
de
SDS Provi
Lnk
Tx tion
c
Rx C onne
t
n
isio therne
ll
o
C
E
Pow
er
le
ilab tion
Avaonnec
LC
SDS
er
d
xten
rk E
two er Unit
e
N
L
rib
SDSSubsc
Lnk
Tx tion
c
Rx C onne
ion ernet
is
ll
Co
Eth
Pow
er
le
ilab tion
Avaonnec
LC
SDS
CUSTOMER SUPPORT INFORMATION
Order toll-free in the U.S.: Call 877-877-BBOX (outside U.S. call 724-746-5500)
FREE technical support 24 hours a day, 7 days a week: Call 724-746-5500 or fax 724-746-0746
Mailing address: Black Box Corporation, 1000 Park Drive, Lawrence, PA 15055-1018
Web site: www.blackbox.com • E-mail: [email protected]
FCC/IC STATEMENTS
FEDERAL COMMUNICATIONS COMMISSION AND
INDUSTRY CANADA
RADIO-FREQUENCY INTERFERENCE STATEMENTS
This equipment generates, uses, and can radiate radio-frequency energy and if
not installed and used properly, that is, in strict accordance with the
manufacturer’s instructions, may cause interference to radio communication. It
has been tested and found to comply with the limits for a Class A computing
device in accordance with the specifications in Subpart J of Part 15 of FCC rules,
which are designed to provide reasonable protection against such interference
when the equipment is operated in a commercial environment. Operation of
this equipment in a residential area is likely to cause interference, in which case
the user at his own expense will be required to take whatever measures may be
necessary to correct the interference.
Changes or modifications not expressly approved by the party responsible for
compliance could void the user’s authority to operate the equipment.
This digital apparatus does not exceed the Class A limits for radio noise emission from
digital apparatus set out in the Radio Interference Regulation of Industry Canada.
Le présent appareil numérique n’émet pas de bruits radioélectriques dépassant les limites
applicables aux appareils numériques de classe A prescrites dans le Règlement sur le
brouillage radioélectrique publié par Industrie Canada.
1
SDSL NETWORK EXTENDER 2000
EUROPEAN UNION DECLARATION OF CONFORMITY
This equipment complies with the requirements of the European EMC directive
89/336/EEC.
TRADEMARKS USED IN THIS MANUAL
BLACK BOX and the
Corporation.
logo are registered trademarks of Black Box
Any other trademarks mentioned in this manual are acknowledged to be the property of the
trademark owners.
2
NOM STATEMENT
NORMAS OFICIALES MEXICANAS (NOM)
ELECTRICAL SAFETY STATEMENT
INSTRUCCIONES DE SEGURIDAD
1. Todas las instrucciones de seguridad y operación deberán ser leídas antes
de que el aparato eléctrico sea operado.
2. Las instrucciones de seguridad y operación deberán ser guardadas para
referencia futura.
3. Todas las advertencias en el aparato eléctrico y en sus instrucciones de
operación deben ser respetadas.
4. Todas las instrucciones de operación y uso deben ser seguidas.
5. El aparato eléctrico no deberá ser usado cerca del agua—por ejemplo,
cerca de la tina de baño, lavabo, sótano mojado o cerca de una alberca,
etc..
6. El aparato eléctrico debe ser usado únicamente con carritos o pedestales
que sean recomendados por el fabricante.
7. El aparato eléctrico debe ser montado a la pared o al techo sólo como sea
recomendado por el fabricante.
8. Servicio—El usuario no debe intentar dar servicio al equipo eléctrico más
allá a lo descrito en las instrucciones de operación. Todo otro servicio
deberá ser referido a personal de servicio calificado.
9. El aparato eléctrico debe ser situado de tal manera que su posición no
interfiera su uso. La colocación del aparato eléctrico sobre una cama,
sofá, alfombra o superficie similar puede bloquea la ventilación, no se
debe colocar en libreros o gabinetes que impidan el flujo de aire por los
orificios de ventilación.
3
SDSL NETWORK EXTENDER 2000
10. El equipo eléctrico deber ser situado fuera del alcance de fuentes de calor
como radiadores, registros de calor, estufas u otros aparatos (incluyendo
amplificadores) que producen calor.
11. El aparato eléctrico deberá ser connectado a una fuente de poder sólo del
tipo descrito en el instructivo de operación, o como se indique en el
aparato.
12. Precaución debe ser tomada de tal manera que la tierra fisica y la
polarización del equipo no sea eliminada.
13. Los cables de la fuente de poder deben ser guiados de tal manera que no
sean pisados ni pellizcados por objetos colocados sobre o contra ellos,
poniendo particular atención a los contactos y receptáculos donde salen
del aparato.
14. El equipo eléctrico debe ser limpiado únicamente de acuerdo a las
recomendaciones del fabricante.
15. En caso de existir, una antena externa deberá ser localizada lejos de las
lineas de energia.
16. El cable de corriente deberá ser desconectado del cuando el equipo no
sea usado por un largo periodo de tiempo.
17. Cuidado debe ser tomado de tal manera que objectos liquidos no sean
derramados sobre la cubierta u orificios de ventilación.
18. Servicio por personal calificado deberá ser provisto cuando:
4
A:
El cable de poder o el contacto ha sido dañado; u
B:
Objectos han caído o líquido ha sido derramado dentro del
aparato; o
C:
El aparato ha sido expuesto a la lluvia; o
D:
El aparato parece no operar normalmente o muestra un cambio en
su desempeño; o
E:
El aparato ha sido tirado o su cubierta ha sido dañada.
TABLE OF CONTENTS
Contents
Chapter
Page
1.
Specifications ......................................................................... 6
2.
Introduction .......................................................................... 9
3.
Installation ........................................................................... 10
3.1 The Complete Package .............................................. 10
3.2 The Installation Procedure ........................................ 10
4.
Operation ............................................................................. 16
5.
Troubleshooting .................................................................. 18
5.1 Calling Black Box ........................................................ 18
5.2 Shipping and Packaging ............................................. 19
5
SDSL NETWORK EXTENDER 2000
1. Specifications
Compliance —
EMI/RFI: CE (EN 55022), FCC Part 15
Subpart J Class A, IC Class/classe A, CSA
C108.8
Safety: UL® 1950, CSA C22.2 No. 950,
EN 60950, IEC 950
Standard —
IEEE 802.3 Ethernet v2
Interfaces —
10BASE-T, SDSL
SDSL Encoding — G.SHDSL (TC-PAM)
Maximum
Bandwidth —
Is a function of the distance (length) of
standard 26-AWG telephone wire between
the Provider and Subscriber Units, and is
user-configurable to any of these settings:
2.32 Mbps at up to 11,300 ft. (3444 m);
2.064 Mbps at up to 12,200 ft. (3719 m);
1.552 Mbps at up to 12,800 ft. (3901 m);
1.04 Mbps at up to 16,000 ft. (4877 m);
784 kbps at up to 16,800 ft. (5121 m);
528 kbps at up to 18,400 ft. (5608 m);
400 kbps at up to 19,400 ft. (5913 m);
272 kbps at up to 20,200 ft. (6157 m)
6
CHAPTER 1: Specifications
User Controls –
On Provider Unit: (1) Rear-mounted
3-position DIP switch for data rate
Indicators —
(6) Front-mounted LEDs on each Provider or
Subscriber Unit: SDSL Connection, Power,
Ethernet Collision, Ethernet Rx, Ethernet
Tx, and Ethernet Link
Connectors —
Rear-mounted on each Provider or
Subscriber Unit:
(1) RJ-45 female for Ethernet,
(1) RJ-45 female, designed to accept both
RJ-45 and RJ-11 plugs, for SDSL
Altitude
Tolerance —
Temperature
Tolerance —
–200 to +16,400 ft. (–60 to +5000 m)
Operating: 32 to 122˚F (0 to 50˚C);
Storage: –40 to +158˚F (–40 to +70˚C)
Humidity
Tolerance —
5 to 95% noncondensing
Enclosure —
Steel
7
SDSL NETWORK EXTENDER 2000
Power —
For each Provider or Subscriber Unit: From
utility-power (mains) outlet, through
detachable input cord and external
wallmount power supply:
Input: 100 to 125 VAC (1 amp) at 47 to
63 Hz;
Output: 5 VDC at a maximum of 1.5 amps;
Consumption: 7.5 watts maximum
Size —
Each Provider or Subscriber Unit:
1.25"H x 5.5"W x 4.5"D (3.2 x 14 x 11.5 cm)
Weight —
Each Provider or Subscriber Unit:
0.6 lb. (0.3 kg)
8
CHAPTER 2: Introduction
2. Introduction
With the SDSL Network Extender 2000, you can create a
long-distance Ethernet connection over your own
private telephone wiring using Symmetric Digital
Subscriber Line (SDSL) technology, which is far faster
than regular dialup, leased-line, or even ISDN links.
Here’s how it works: If you can run (or have already
run) telephone cabling between the sites you want to
connect, put the Extender’s Provider Unit on one end
of this cabling and its Subscriber Unit on the other, then
attach them to your Ethernet networks at each site. The
two Units will send each other all of the data going
either direction on the Ethernet bus, at speeds up to
2.32 Mbps (the data rate depends on the length of the
cabling between the Units).
All you have to do is set the DIP switch once, cable the
units, and plug them in. No configuration-—no muss,
no fuss. Just a reliable, high-speed connection that’s
always on.
9
SDSL NETWORK EXTENDER 2000
3. Installation
3.1 The Complete Package
The SDSL Network Extender 2000 comes with a
Provider Unit, a Subscriber Unit, a power supply for
each Unit, and this manual. (The power supplies are
identical; you can use either one with either unit.) If you
didn’t receive everything, or if anything arrived
damaged, contact Black Box right away.
3.2 The Installation Procedure
Take these steps to install your Extender:
1. Referring to Table 3-1 on the next page, set the
DIP switch on the Provider Unit for the maximum
data rate that the Extender can support, given how
long the cable will be between the Provider and
Subscriber Units. If you don’t know how long the
cabling is, start at the setting for the shortest
distance/highest data rate; if the units can’t link
up at that speed when you interconnect them
later, try settings for progressively higher
distances/lower data rates until the link succeeds.
10
CHAPTER 3: Installation
Table 3-1. Available DIP-switch settings and the corresponding
maximum distances and data rates.
Pos.
#1
Pos.
#2
Pos.
#3
Maximum Maximum
Bandwidth Distance
Down Down Down 2.32 Mbps
Down Down Up
11,300 ft. (3444 m);
2.064 Mbps 12,200 ft. (3719 m);
Down Up
Down 1.552 Mbps 12,800 ft. (3901 m);
Down Up
Up
1.04 Mbps
16,000 ft. (4877 m);
Up
Down Down 784 kbps
16,800 ft. (5121 m);
Up
Down Up
528 kbps
18,400 ft. (5608 m);
Up
Up
Down 400 kbps
19,400 ft. (5913 m);
Up
Up
Up
20,200 ft. (6157 m)
272 kbps
NOTE
This table assumes 26 AWG cable. You might be able to
achieve better data rates or distances if you use cable with
thicker wires (22 or 24 AWG).
2. Set DIP switch position #4 Down for half-duplex,
and Up for full-duplex. Set this switch for both
Provider and Subscriber Units.
11
SDSL NETWORK EXTENDER 2000
NOTE
While both ends of the Ethernet connection must have the
same duplex mode configuration, partner Provider Units
and Subscriber Units don’t have to be configured the same.
Duplex mode does not apply to the SDSL connection.
In half-duplex mode, Switch #4 is down. Receive and
transmit functions are mutally exclusive; data transmission
occurs in only one direction at a time. Packet collisions are
not uncommon.
In full-duplex mode, Switch #4 is up. The Ethernet line can
receive and transmit simultaneously, preventing packet
collisions and increasing aggregate bandwidth from 10
Mbps to 20 Mbps.
3. Plug the output cord of the Provider Unit’s power
supply into the barrel jack on the Unit’s rear panel.
4. Plug the power supply’s input cord into a working
AC outlet. Make sure that the Power, Link, Tx,
and Rx LEDs light up.
12
CHAPTER 3: Installation
5. Plug your SDSL cable into the RJ-45 jack marked
“SDSL” on the Unit’s rear panel. (This jack is
designed to accept either RJ-45 or RJ-11 plugs. The
SDSL cable should be 22 to 26 AWG telephone
cable with Ring and Tip on the center two pins: If
it has RJ-45 connectors, Ring should be on Pin 4
and Tip should be on Pin 5. If it uses RJ-11
connectors, Ring should be on Pin 2 and Tip
should be on Pin 3.)
6. Perform steps 3 through 5 at the other site with
your Subscriber Unit. Please note that the LED
operation described in Step 4, above, does not
apply to the Subscriber Unit. The only LED that
should light is the Power LED.
7. Once the SDSL cable is connected to both the
Provider and Subscriber Units, the Connection
LED on each Unit should begin pulsing steadily
(once per second) to indicate that the SDSL link
has been established and is operating. When the
Connection LED starts doing this, the Link, Tx,
and Rx LEDs should go dark until you plug in the
Ethernet cable and an Ethernet connection is
established.
13
SDSL NETWORK EXTENDER 2000
NOTES
The length and quality of the cabling between the Units
directly affects the process by which they establish an
SDSL link with each other. Depending on these cable
characteristics, it might take anywhere from one to five
minutes for the Units to establish the link. If the cabling is
too long to support the data rate set on the Provider Unit,
the Units will not be able to link up at all. If this happens,
simply set the Provider Unit’s DIP switch for the next-lower
data rate and the Units will automatically try to link again.
Whenever an Extender Unit boots up without an SDSL
connection, its Link, Tx, and Rx LEDs will be steadily lit until
the SDSL connection is established or the Unit is powered
down. (These LEDs won’t light back up, however, if an
SDSL connection is lost after having been established.)
When a Provider Unit loses the SDSL connection, it will
drop its Ethernet link signal (no matter what state the Link
LED is in!) so that, if the attached Ethernet device is
capable of generating SNMP traps or other remote alerts,
your network-administration team can be notified that the
link has gone down.
8. Run Ethernet cable from an Ethernet hub, router,
switch, etc., to the RJ-45 jack marked “Ethernet”
on the Provider Unit’s rear panel. (This cable
should be standard 10BASE-T cable with RX+ on
Pin 1, RX– on Pin 2, TX+ on Pin 3, and TX– on
Pin 6.) When you do this, the Provider Unit’s Link
LED should come back ON, verifying the physical
Ethernet link, and any or all of the Tx, Rx, and
Collision LEDs might begin flashing.
14
CHAPTER 4: Operation
NOTE
For most applications, a straight-through-pinned cable is
used to attach an Extender Unit to a DTE “destination
device” such as a PC, while a cross-pinned cable is used to
attach an Extender unit to a DCE “communication device”
such as a hub or router. If you’re not sure which type of
cable to use with a device, consult its manual and/or check
the pinout of its port(s); if these aren’t available or you’re
still not sure, call Black Box Technical Support.
9. Perform step 8 at the other site with your
Subscriber Unit.
Once the two Units have established both DSL and
Ethernet link at their sites, data will flow normally
between the Units, essentially creating a very long
Ethernet connection at SDSL speeds. The Extender
should now operate continuously without requiring
operator intervention.
15
SDSL NETWORK EXTENDER 2000
4. Operation
While the SDSL Network Extender 2000 is operating,
you can inspect the front-panel LEDs on its Units at any
time for status information:
LED
Meaning
Connection Pulses green once per second to show that
the SDSL connection is operational and the
Unit is receiving either valid data packets or
status packets from the other Unit.
Power
Steadily lit green to show that the Unit is
receiving AC power.
Collision
Flashes red every time there’s a collision on
the attached Ethernet segment.
Rx
Flashes amber every time a data packet is
received from the attached Ethernet
segment. Steadily lit amber to show that no
SDSL connection is present.
Tx
Flashes amber every time a data packet is
sent to the attached Ethernet segment.
Steadily lit amber to show that no SDSL
connection is present.
16
CHAPTER 4: Operation
LED
Meaning
Link
While Rx and Tx flash, steadily lit green to
show that an Ethernet link is in place. While
Rx and Tx are steadily lit, steadily lit green to
show that no SDSL connection is present.
17
SDSL NETWORK EXTENDER 2000
5. Troubleshooting
5.1 Calling Black Box
If you determine that your SDSL Network Extender
2000 is malfunctioning, do not attempt to alter or repair it.
None of its components contain user-serviceable parts.
Contact Black Box Technical Support at 724-746-5500.
Before you do, make a record of the history of the
problem. We will be able to provide more efficient and
accurate assistance if you have a complete description,
including:
• the nature and duration of the problem;
• when the problem occurs;
• the components involved in the problem (devices,
cables, etc.);
• any particular application that, when used, appears
to create the problem or make it worse; and
• the results of any testing you’ve already done.
18
2/02
© Copyright 2002. Black Box Corporation. All rights reserved.
1000 Park Drive
•
Lawrence, PA 15055-1018
•
724-746-5500
•
Fax 724-746-0746
CHAPTER 5: Troubleshooting
5.2 Shipping and Packaging
If you need to transport or ship an Extender Unit:
• Package it carefully. We recommend that you use
the original container.
• Before you ship it back to Black Box for repair or
return, contact us to get a Return Authorization
(RA) number.
19
2/02
© Copyright 2002. Black Box Corporation. All rights reserved.
1000 Park Drive
•
Lawrence, PA 15055-1018
•
724-746-5500
•
Fax 724-746-0746