1
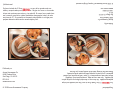
Model ABT-419DN
Instruction Manual
Horno de convección
de 21 litros
21 Liter
Convection Oven
Manual de Instrucciones
Modelo ABT-419DN
Congratulations!
Your
21-Liter Toaster Oven is one of the most versatile and unique
appliances available. No other oven on the market offers more cooking options
and usability. Your new oven can bake, convection bake, broil, dehydrate,
defrost, toast and accommodates a 12” pizza. It will become the most utilized
appliance in your home for preparing delicious meals quickly and easily.
Please read the following instructions carefully before your first use.
© 2005 Aroma Housewares Company
Aroma Housewares Co.
6469 Flanders Drive
San Diego, CA 92121
EE.UU.A.
www.aromaco.com
Publicado por:
Published By:
Aroma Housewares Co.
6469 Flanders Drive
San Diego, CA 92121
U.S.A.
1-800-276-6286
www.aromaco.com
© 2005 Aroma Housewares Company All rights reserved.
Su horno tostador de 21 litros
es uno de los aparatos más versátiles y excepcionales que hay disponibles. Ningún otro horno en el mercado
ofrece más opciones para cocinar y ni es más útil. Su nuevo horno puede hornear, hornear a convección, rostizar, deshidratar, descongelar, tostar y le cabe
una pizza de 12". Se convertirá en el aparato más utilizado en su hogar para
preparar alimentos deliciosos de manera rápida y fácil.
¡Felicitaciones!
IMPORTANTES INSTRUCCIONES DE SEGURIDAD
1
Siempre se deben seguir las precauciones de seguridad básicas al usar electrodomésticos, incluidas las siguientes:
1. Antes de usar esta unidad, lea todas las instrucciones.
2. No toque las superficies calientes. Utilice las asas o manijas. Las superficies metálicas se calientan mucho.
3. Cuando un aparato electrodoméstico es utilizado por niños, o cerca de ellos, es
necesaria una atenta supervisión.
4. Para protegerse y evitar un choque eléctrico, no sumerja en agua o en cualquier otro
líquido el cordón, la clavija o el aparato mismo.
5. No permita que el cable cuelgue del borde de la mesa o mostrador, ni que toque
superficies calientes.
6. No opere ningún aparato electrodoméstico cuyo cable o enchufe estén dañados, que
haya dejado de funcionar correctamente, que se haya caído o que se encuentre
dañado de cualquier manera. Lleve el aparato a un centro de servicio autorizado
para su revisión, reparación o ajuste eléctrico o mecánico.
7. No se recomienda el uso de accesorios no aprobados por el fabricante del aparato
electrodoméstico, ya que podrían ocurrir lesiones.
8. No coloque el aparato sobre o cerca de una rejilla de gas o eléctrica encendidas ni
dentro de un horno caliente.
9. Cuando opere el horno, mantenga al menos cuatro pulgadas de espacio en todos
los lados para permitir que el aire circule en forma adecuada.
10. Desenchufe la unidad cuando no esté en uso y antes de limpiarla.
11. Para desconectarlo, presione dos veces el botón Stop/Cancel (Detener/Cancelar) y
luego desconecte el enchufe. Siempre desconecte desde la base de la tomacorriente de
la pared. Nunca jale del cordón.
12. Se deberán tomar precauciones extremas al mover el aparato cuando contenga arroz
u otros líquidos calientes.
13. No cubra la bandeja para migajas ni ninguna otra parte del horno con papel aluminio. Esto podría causar que el horno se sobrecaliente.
14. Tenga extrema precaución cuando retire la bandeja para migajas o cuando elimine
grasa caliente u otros líquidos calientes.
15. No limpie con fibras para tallar metal. Se pueden romper pedazos de la almohadilla y
tocar las partes eléctricas, creando un riesgo de una descarga eléctrica.
16. No coloque porciones demasiado grandes de alimentos, envolturas de papel de aluminio o utensilios en la tostadora, ya que podrían incendiarse o provocar un choque
eléctrico.
17. El aparato puede causar un incendio si se utiliza cuando está tapada o en contacto
con materiales inflamables, como cortinas, telas y paredes.
1
1. Read all instructions before first use.
2. Do not touch hot surfaces. Use handles or knobs.
3. Close supervision is necessary when any appliance is used by or near children.
4. To protect against electric shock, do not immerse cord, plug, or any other parts of the
oven in water or other liquids.
5. Do not let cord hang over the edge of tables and counters, or touch hot surfaces.
6. Do not operate appliance with damaged cord or plug or after the appliance
malfunctions. If the oven has been damaged in any manner, return the appliance to
the nearest Authorized Service Center for examination, repair or adjustment.
7. The use of accessory attachments not recommended by the appliance manufacturer
may cause hazard or injury.
8. Do not place on or near a hot gas or electric burner, or in a heated oven or
microwave oven.
9. When operating the oven, keep at least four inches of space on all sides to allow for
adequate air circulation.
10. Unplug from outlet when not in use, or before cleaning. Let the unit cool completely
before putting on or taking parts off, or before cleaning.
11. To disconnect, press the Stop/Cancel button twice, then unplug the plug. Always hold
the plug. Never pull the cord.
12. Extreme caution must be used when moving an appliance containing hot oil or other
hot liquids.
13. Do not cover the crumb tray or any part of the oven with foil. This may cause the
oven to overheat.
14. Use extreme caution when removing crumb tray or disposing of hot grease or other
hot liquids.
15. Do not clean with metal scouring pads. Pieces of the pad can break off and touch
electrical parts, creating a risk of electric shock.
16. Oversized foods or metal utensils must not be inserted in a toaster oven as they may
create a fire or risk of electric shock.
17. A fire may occur if the oven is covered or touching flammable material, including curtains, draperies, walls and things of the sort, while in operation. Do not store any
item on top of the oven during operation.
Basic safety precautions should always be followed when using electrical appliances,
including the following:
IMPORTANT SAFEGUARDS
26.
27.
23.
24.
25.
22.
21.
20.
19.
18.
IMPORTANT SAFEGUARDS
2
Extreme caution should be exercised when using containers constructed of anything
other than metal or glass inside the unit.
Do not place any of the following materials in the oven: cardboard, plastic, paper or
anything similar.
Do not store any materials other than manufacturer's recommended accessories in
this oven when not in use.
Always wear protective, insulated oven mitts when inserting or removing items from
the hot oven.
This appliance uses a tempered, safety glass door. The glass is stronger than
ordinary glass and more resistant to breakage. Tempered glass can break, but the
pieces will not have sharp edges. Avoid scratching door surface or nicking edges. If
the door has a scratch or chip, contact customer service before using the oven.
Do not use outdoors.
Do not use the appliance for anything other than its intended use.
The temperature of the door and the outer surface will be hot when the appliance
is working. Please exercise caution.
Temperature of accessible surfaces will be high when the appliance is operating.
Do not rest food on the tempered glass door at any time. It will not support the
weight and can possibly be chipped or scratched.
CAUTION: Surfaces are hot during and after use. Always wear protective, insulated
oven mitts when touching hot oven or hot dishes and food, or when inserting or
removing racks, pans or baking dishes.
GUARDE ESTAS INSTRUCCIONES
SAVE THESE INSTRUCTIONS
18. Deberá tener extremo cuidado cuando use recipientes hechos de cualquier otro
material que no sea metal o vidrio dentro de la unidad.
19. No coloque ninguno de los siguientes materiales en el horno: cartón, plástico, papel
o cualquier material similar.
20. No almacene ningún material que no sea los accesorios recomendados por el fabricante en este horno cuando no esté en uso.
21. Utilice siempre guantes aislantes protectores para horno cuando inserte o saque
cosas del horno caliente.
22. Este aparato cuenta con una puerta de vidrio templado de seguridad. El vidrio es
más fuerte que el vidrio ordinario y más resistente a las roturas. El vidrio templado
se puede romper, pero los pedazos no tendrán orillas filosas. Evite tallar la superficie de la puerta o despostillar las orillas. Si la puerta tiene una ralladura o despostilladura, contacte a servicio al cliente antes de utilizar el horno.
23.No lo utilice en exteriores.
24. No utilice la tostadora para ningún otro fin que el indicado.
25. La temperatura de la puerta y de la superficie exterior estarán calientes cuando el
aparato esté funcionando. Por favor tenga cuidado.
26. La temperatura de las superficies accesibles será alta cuando el aparato esté en
operación.
27. No coloque alimentos sobre la puerta de vidrio templado en ningún momento. No
soportará el peso y es posible que se despostille o se ralle.
PRECAUCIÓN: Las superficies estarán calientes durante y después de su uso.
Utilice siempre guantes aislantes protectores para horno cuando toque el horno
caliente o platos y alimentos calientes o cuando inserte o retire parrillas, recipientes
o platos para hornear.
2
IMPORTANTES INSTRUCCIONES DE SEGURIDAD
INSTRUCCIONES PARA USAR EL CABLE CORTO
1. Se proporciona un cable eléctrico corto con el propósito de reducir el riesgo
de tropezarse o enredarse con un cable más largo.
2. Hay cables de extensión más largos disponibles y deben ser usados co
sumo cuidado.
3. Si se usa un cable de extensión más largo:
a. La clasificación eléctrica marcada en el cable de extensión debe ser
por lo menos igual que la clasificación eléctrica del aparato.
b. El cable más largo debe ser colocado de manera que no cuelgu
por el borde del mostrador o mesa en donde pudiera ser jalado por
un niño o alguien pudiera tropezarse con el cable sin querer.
3
This appliance is for household use only.
CLAVIJA POLARIZADA
Este aparato cuenta con una clavija polarizada (una espiga es más ancha que la
otra); siga las siguientes instrucciones:
Para reducir el riesgo de choque eléctrico, esta clavija debe ser conectada a una salida
o enchufe eléctrico polarizado solamente de una manera. Si la clavija no entra completamente en el enchufe, voltee la clavija.
Si aún no queda bien en el enchufe, póngase en contacto con un electricista especializado. No trate
de modificar la
¡NO DEJE QUE EL CABLE CUELGUE!
clavija.
To reduce the risk of electric shock, this plug is intended to fit into a polarized outlet
only one way. If the plug does not fit fully into the outlet, reverse the plug. If it still does
not fit, contact a qualified electrician. Do not attempt to modify the plug in any way.
This appliance has a polarized plug (one blade is wider than the other); follow the
instructions below:
POLARIZED PLUG
¡MANTÉNGASE
LEJOS DE LOS
NIÑOS!
Este aparato fue diseñado
Solamente para Uso Doméstico.
3
1. A short power-supply cord is provided to reduce risks that result from becoming
entangled in or tripping over a longer cord.
2. Longer extension cords are available and may be used if care is exercised in their
use.
3. If a longer extension cord is used:
a. The marked electrical rating of the extension cord should be at least as great as
the electrical rating of the appliance.
b. The longer cord should be arranged so that it will not drape over the counter top
or tabletop where it can be pulled by children or tripped over unintentionally.
SHORT CORD INSTRUCTION
4
2.
4.
6.
8.
Digital Control Panel
2 Baking Pans
Rack Handle
Baking Racks
8
Convection Fan
Removable Crumb Tray
Broil Pan
Pizza Pan
Tempered Glass Door
1
1.
3.
5.
7.
9.
IDENTIFICACIÓN DE LAS REFACCIONES
2
9
6
5
3
7
4
4
7
3
5
6
9
2
Ventilador de convección
Bandeja para migajas desmontable
Recipiente para rostizar
Bandeja para pizza
Puerta de vidrio templado
2.
4.
6.
8.
Panel de control digital
2 Recipientes para hornear
Agarradera de parrillas
Parrillas para hornear
8
1
4
PARTS IDENTIFICATION
1.
3.
5.
7.
9.
5
CÓMO USAR SU APARATO
Antes de usarla por primera vez:
1. Lea todas las instrucciones y medidas importantes de seguridad.
2. Desempaque el horno tostador y retire todos los materiales de empaque.
3. Verifique los contenidos con la lista de accesorios.
4. Retire todas las etiquetas incluyendo la película protectora sobre el panel de control.
5. Seleccione una posición adecuada para la unidad sobre una superficie plana cerca de
una toma de corriente eléctrica pero lejos de cualquier otro aparato que produzca calor.
Asegúrese de que haya al menos 4" de espacio entre el horno de convección y las paredes de la cocina.
6. Conéctelo a una toma de corriente eléctrica adecuada.
Operaciones del panel de control:
1. DISPLAY WINDOW (VENTANA DE PANTALLA) - Indica el programa que está en uso y
el tiempo restante hasta que el proceso se ha completado.
2. OVEN FUNCTION (FUNCIÓN DE HORNO) - Presione una vez para seleccionar
Horneado, dos veces para seleccionar Horneado con Ventilador o tres veces para seleccionar Rostizado con Ventilador.
a. Horneado: La configuración de temperatura por defecto es a 300 grados. El tiempo por
defecto es de 30 minutos. El tiempo máximo es de 1 hora con 30 minutos. El elemento
de calor más bajo y el elemento de calor al cuadrado más alto funcionan durante el
horneado. La temperatura máxima es de 400 grados.
b. Horneado con ventilador: La configuración de temperatura por defecto es a 300 grados.
El tiempo por defecto es de 30 minutos. El tiempo máximo es de 1 hora con 30 minutos.
El elemento de calor más bajo y el elemento de calor al cuadrado más alto funcionan
junto con el ventilador de convección. La temperatura máxima es de 400 grados. (Para
mayores informes sobre el horneado y el horneado con ventilador consulte la página 10)
c. Rostizado con ventilador: La configuración de temperatura fija a 450 grados. El tiempo
por defecto es de 30 minutos. El tiempo máximo es de 1 hora con 30 minutos. El elemento de calor más bajo y el elemento de calor al cuadrado más alto funcionan junto con el
ventilador de convección. La temperatura máxima es de 450 grados.
3. TOAST FUNCTION (FUNCIÓN DE TOSTADOR) - Use los botones de ajuste para seleccionar el color del tostado. Hay seis niveles para escoger, los cuales hacen el tostado progresivamente más oscuro.
5
3. TOAST FUNCTION - Use the Adjustment Buttons to select toast color. There are six levels to choose from, each making the toast progressively darker. (For more information on
toasting see page 7)
2. OVEN FUNCTION - Press once to select Bake, twice to select Fan Bake or three times to
select Fan Broil.
a. Bake: Default temperature setting is at 300 degrees. Default time is 30 minutes.
Maximum Time is 1 hour and 30 minutes. The lower heating element and upper square
heating element are working during bake. Maximum temperature is 400 degrees.
b. Fan Bake: Default temperature setting is at 300 degrees. Default time is 30 minutes.
Maximum Time is 1 hour and 30 minutes. The lower heating element and upper square
heating element are working along with the convection fan. Maxiumum temperature is 400
degrees. (For more information on bake and fan bake see page 10)
c. Fan Broil: Fixed temperature setting is at 450 degrees. Default time is 30 minutes.
Maximum Time is 1 hour 30 minutes. The lower heating element and upper square heating element are working along with the convection fan. Maximum temperature is 450
degrees. (For more information on fan broil see page 11)
1. DISPLAY WINDOW - Indicates program currently in use and time remaining until process
is completed.
Control Panel Operations:
Before first use:
1. Read all instructions and important safeguards.
2. Unpack the toaster oven and remove all packaging materials.
3. Check the contents against the accessories list.
4. Remove all labels including the protective film on the control panel.
5. Select a suitable position for the unit on a flat surface close to a power socket but far away
from another heat producing appliance. Make sure there is at least 4” of space between
the convection oven and kitchen walls.
6. Plug into a suitable power outlet.
HOW TO USE
HOW TO USE
6
4. PIZZA FUNCTION - Press the Pizza button once and the display will show "A-9". This
is the browning selector for a 9”-12” pizza. There are three levels to choose from. Use
the Adjustment Buttons to set your browning control to light, medium or dark crust settings. (2 red squares for light, 4 red squares for medium and 6 red squares for dark)
Press the PIZZA button twice, and the display will show "b-12". This is the timer selector for a 9”-12” pizza. There is no darkness setting and temperature is set by default.
Press the TIME/TEMP button and use the Adjustment Buttons to set your preferred
cooking time. The back of the appliance is shaped specifically to accommodate a 12”
pizza pan. (For more information on the pizza function see pages 8-9)
11. START (INICIO) - Después de seleccionar la función, la temperatura y el tiempo, presione "Start" (inicio) para comenzar el proceso de cocción.
5. DEHYDRATE - Press to select dehydrate program. (For more information see page 12)
10. STOP/CANCEL (DETENER/CANCELAR) - Presione una vez para poner una pausa
al contador de tiempo o presione dos veces para cancelar el proceso de cocción.
(Excepto para la función de tostador. Consulte la página 7).
6. DEFROST - Press to select defrost program. (For more information see page 12)
9. LAMP (LÁMPARA) - Presione para encender la luz interior. Presione de nuevo para
apagarla.
7. ADJUSTMENT BUTTONS - Press to adjust temperature, time or to adjust color of the
toast or any cooking that has multiple levels of baking or toasting.
8. CLOCK (RELOJ) - Presione para que aparezca el reloj. Use las teclas de ajuste para
programar la hora.
8. CLOCK - Press to display the clock. Use the Adjustment Keys to adjust time. (For
more information see page 13)
7. ADJUSTMENT BUTTONS (BOTONES DE AJUSTE) - Presione para ajustar la temperatura, el tiempo o para ajustar el color del tostado o cualquier cocción que tenga
niveles múltiples de horneado o tostado.
9. LAMP - Press to turn on the interior light. Press again to turn off.
6. DEFROST (DESCONGELADO) - Presione para seleccionar el programa para
descongelar.
10. STOP/CANCEL - Press once to pause the timer or press twice to cancel the cooking
process. (Except for the toasting function. See page 7.
5. DEHYDRATE (DESHIDRATADO) - Presione para seleccionar el programa para
deshidratar.
11. START - After selecting the function, temperature and time, press Start to begin the
cooking process.
4. PIZZA FUNCTION (FUNCIÓN DE PIZZA) - Presione el botón de pizza una vez y la
pantalla mostrará "A-9". Este es el selector para dorar una pizza de 9" a 12". Hay tres
niveles para escoger. Use los botones de ajuste para configurar el control de dorado
para la costra en ligero, medio u oscuro. (2 cuadros rojos para ligero, 4 cuadros rojos
para medio y 6 cuadros rojos para oscuro). Presione el botón de pizza dos veces y la
pantalla mostrará "b-12". Este es el selector del tiempo para una pizza de 9" a 12".
No hay configuración para oscuro y la temperatura está configurada por defecto.
Presione el botón TIME/TEMP (TIEMPO/TEMPERATURA) y use los botones de
ajuste para configurar el tiempo de cocción preferido. La parte trasera del aparato
está hecha específicamente para que quepa un recipiente para pizza de 12".
6
CÓMO USAR SU APARATO
7
CÓMO USAR SU APARATO
Función de tostador:
1. Coloque una rejilla para hornear en la
posición de la rejilla de en medio y
coloque la cantidad deseada para tostar
sobre la rejilla.
2. Presione el botón "Toast" (tostar).
• Presione el botón "Toast" (tostar) una
vez para una cantidad de hasta dos
rebanadas de pan (la pantalla mostrará
un número 2, representando dos
rebanadas de pan).
• Presione el botón "Toast" (tostar) dos
veces para una cantidad de hasta seis
rebanadas de pan (la pantalla mostrará
un número 4, representando de cuatro a
seis rebanadas de pan).
3. Note que bajo el número de rebanadas
seleccionado (2 ó 4) habrá tres cuadros
rojos pequeños representando el nivel
de tostado, de ligero a oscuro. El horno
está configurado por defecto en tres
cuadros, lo que representa un tostado
"ligero medio". Ajuste con las flechas de
ajuste hacia arriba y hacia abajo para
obtener un tostado oscuro o ligero.
4. Presione el botón "Start" (inicio) y el
indicador de tiempo comenzará su conteo en retroceso. Para pausar el programa, presione una vez el botón
PAUSE/CANCEL (PAUSAR/CANCELAR). Para reiniciar el programa, presione "Start". Para cancelar el programa presione y sostenga el botón
PAUSE/CANCEL (PAUSAR/CANCELAR) durante 2 segundos.
5. Cuando el programa se haya completado, la unidad emitirá un sonido continuo.
7
Tostado muy ligero
Tostado ligero
Tostado ligero medio
(configuración por
defecto)
Tostado medio
Tostado oscuro
medio
Tostado oscuro
Tabla de tostado
1
2
3
4
5
6
cuadro
cuadros
cuadros
cuadros
cuadros
cuadros
Muy Ligero
Ligero
Ligero Medio
Medio
Oscuro Medio
Oscuo
5. When program is complete, the unit will
beep continually.
4. Press the start button and the timer will
begin its countdown. To pause the program, press the PAUSE/CANCEL button
once. To restart the program, press start.
To cancel the program press and hold the
PAUSE/CANCEL button for 2 seconds
3. Note that under the number of toast
selected (2 or 4) there will be three
small red squares representing the level
of toasting - light to dark. Oven is set by
default to three squares, which represents “medium light” toast. Adjust with
the up and down adjust arrows for
desired toast darkness or lightness.
• Press “Toast” button twice for four to six
slices of bread (screen will display a
number 4, representing four to six slices
of bread.)
2. Press the “Toast” button:
• Press “Toast” button once for up to two
slices of bread (screen will display a number 2, representing two slices of bread.)
1. Place a baking rack in the middle rack
position and place the desired amount
of toast on rack.
1 square
2 squares
3 squares
4 squares
5 squares
6 squares
Very Light
Light
Medium Light
Medium
Medium Dark
Dark
Toasting Chart
Medium dark toast
Medium light toast
(default setting)
Very light toast
Toast Function:
HOW TO USE
Dark toast
Medium toast
Light toast
8
CÓMO USAR SU APARATO
Función de pizza:
Modo "A-9" para una pizza de 9" a 12"
a. Conecte a una toma de corriente eléctrica.
b. Presione el botón de pizza una vez y la pantalla mostrará "A-9".
c. Para seleccionar el dorado de pizza deseado presione las teclas de ajuste. La configuración por defecto para dorado ligero se muestra en la ventana de la pantalla. Presione el
botón de aumento para cambiar a una configuración de dorado más oscuro. Presione el
botón de disminución para cambiar a una configuración de dorado más ligero. Abra la
puerta, coloque su pizza en el horno y presione "Start" (inicio). Para cancelar presione
dos veces el botón Pause/Cancel (Pausa/Cancelar).
d. Cuando el programa se haya completado, la unidad emitirá un sonido continuo.
a. Connect to power supply.
b. Press Pizza button once and the display will show "A-9".
c. To select the desired Pizza browning press adjustment keys. The light default setting
shows in the display window. Press the increase button to move to a darker setting. Press
the decrease button to move to a lighter setting. Open the door and place your pizza in the
oven and press Start . To cancel press the Pause/Cancel button twice.
d. When the program is complete, the unit will beep continually.
e. Unplug the unit and allow it to cool completely before cleaning.
e. Desenchufe la unidad cuando no esté en uso y antes de limpiarla.
9”-12” Pizza
6 Red Squares
Dark Crust
21-Minute Cooking
Time
Pizza de 9" a 12"
6 Red Squares
Costra con dorado
oscuro
Tiempo de cocción
de 21 minutos
9”-12” Pizza
4 Red Squares
Medium Crust
18-Minute Cooking
Time
Pizza de 9" a 12"
4 cuadros rojos
Costra con dorado
medio
Tiempo de cocción
de 18 minutos
9”-12” Pizza
2 Red Squares
Light Crust
15-Minute Cooking
Time
"A-9" Mode for 9”- 12” Pizza
Pizza Function:
8
HOW TO USE
Pizza de 9" a 12"
2 cuadros rojos
Costra con dorado
ligero
Tiempo de cocción de
15 minutos
CÓMO USAR SU APARATO
9
Modo "b-12" para una pizza de 9" a 12"
a. Conecte a una toma de corriente eléctrica.
b. Presione el botón de pizza dos veces y la pantalla mostrará "b-12".
c. Este es el selector del tiempo para una pizza de 9" a 12". No hay configuración para oscuro y la
temperatura está configurada por defecto. Presione el botón TIME/TEMP (TIEMPO/TEMPERATURA) y use los botones de ajuste para configurar el tiempo de cocción preferido.
d. Cuando el programa se haya completado, la unidad emitirá un sonido continuo durante diez
segundos.
e. Desconecte la unidad y deje que se enfríe por completo antes de limpiarla.
NOTA: RETIRE SIEMPRE LOS ALIMENTOS DEL HORNO CON GUANTES PROTECTORES
PARA HORNO.
EL HORNO, LOS ALIMENTOS Y LA PUERTA DEL HORNO SE PONDRÁN MUY CALIENTES
CON EL USO.
Sugerencias para cocinar pizza:
1. Coloque la rejilla para hornear a la altura deseada. Se recomienda ampliamente usar la
rejilla central para lograr una cocción y un dorado uniformes.
** Cuando cocine una pizza congelada de marca por primera vez, vigile con cuidado el
proceso de cocción para obtener los resultados deseados.
2. Precaliente el horno en la función "Bake with Fan" (Horneado con ventilador) durante 10
minutos a 400°F, después siga las instrucciones de cocción para la función de pizza indicadas arriba.
3. Tipo de costra:
• Para una costra más suave use el recipiente para pizza provisto con el horno.
• Para una costra más crujiente coloque la pizza directamente sobre la rejilla del horno.
NOTA: Para costras hechas en casa o de masa necesitará usar el recipiente para pizza.
Hay dos configuraciones para pizza en su horno: A-9 y b-12. Siga cualquiera de las
instrucciones de arriba que apliquen al tamaño y a las preferencias de su pizza.
NOTE: For homemade or dough crusts, you will need to use the pizza pan. There are
two pizza settings on your oven, A-9 and b-12. Follow whichever directions above apply
to your pizza size and preference.
3. Crust type:
• For a softer crust use the pizza pan supplied with your oven.
• For a crispier crust, place the pizza directly on the oven rack.
2. Preheat the oven on the “Bake with Fan” function for 10 minutes at 400°F, then follow
cooking instructions for pizza functions above.
1. Place a baking rack to the desired height. It is strongly recommended that the center rack
be used for even cooking and browning results.
** When cooking a name brand frozen pizza for the first time, carefully monitor cooking
process to get the desired results.
Pizza Cooking Suggestions:
NOTE: ALWAYS REMOVE FOOD FROM OVEN WITH PROTECTIVE OVEN MITTS.
OVEN, FOOD AND OVEN DOOR WILL BECOME VERY HOT WITH USE.
a. Connect to power supply.
b. Press Pizza button twice and the display will show "b-12".
c. This is the timer selector for a 9”-12” pizza. There is no darkness setting and temperature is set
by default. Press the TIME/TEMP button and use the Adjustment Buttons to set your preferred cooking time.
d. When the program is complete, the unit will beep ten seconds continually.
e. Unplug the unit and allow it to cool completely before cleaning.
"b-12" Mode for 9”- 12” Pizza
9
HOW TO USE
10
CÓMO USAR SU APARATO
1. USO DE LA FUNCIÓN DE HORNO:
e.
f.
g.
h.
A. Using the Bake Function
a. Connect to power supply.
b. Press the Oven button to activate the oven program. Press once for the bake function. The words “Oven Bake” should appear in the display window.
c. Press Time button and set the time by pressing the increase or decrease button. The timer
will change for each press. Holding the button will cause the time to change rapidly.
d. Press the TEMP button. The default temperature is 300 degree (this can be
adjusted). To change this temperature, press the increase or decrease button to
move to the desired temperature. The temperature will increase or decrease in 50
degree increments until your desired level is reached. Maximum temperature is 400
degrees for the bake function.
Open the door and place your food in the oven and press the Start button to begin.
When the program is complete, the unit will beep continually.
Unplug the unit and allow it to cool completely before cleaning.
To cancel during the cooking process press the Pause/Cancel button twice.
B. Uso de la función de horneado con ventilador (Calor por convección)
a. Conecte a una toma de corriente eléctrica.
b. Presione el botón "Oven" (horno) dos veces en el programa de "Fan Bake" (horneado con ventilador). Las palabras "Oven" (horno), "Fan" (ventilador) y "Bake" (horneado) aparecerán en la ventana de la pantalla.
c. Presione el botón "Time" y configure el tiempo presionando el botón de aumento o disminución. El indicador de tiempo cambiará cada vez que lo presione. Sostener el botón
causará que el tiempo cambie con rapidez.
d. Presione el botón TEMP (TEMPERATURA). La temperatura por defecto es de 300
grados (esto se puede ajustar). Para cambiar esta temperatura, presione el botón de
aumento o disminución para seleccionar la temperatura deseada. La temperatura
aumentará o disminuirá en incrementos de 50 grados hasta que se alcance el nivel
deseado. La temperatura máxima es de 400 grados para la función de horno.
e. Abra la puerta, coloque su alimento en el horno y presione "Start" (inicio).
f. Para cancelar durante el proceso de cocción presione dos veces el botón
Pause/Cancel (Pausa/Cancelar).
B. Using the Fan Bake Function (Convection Heating)
a. Connect to power supply.
b. Press Oven button two times into the Fan Bake program. The words “Oven”, “Fan”
and “Bake” will appear in the display window.
c. Press Time button. Set the time by pressing the increase or decrease button. The timer
will change for each press. Holding the button will cause the time to change rapidly.
d. Press the Temp button. The default temperature is 300 degrees (this can be adjusted).
To change this temperature, press the increase or decrease buttons to move to the
desired temperature. The temperature will increase or decrease in 50 degree increments. The maximum temperature is 400 degrees for the fan bake function.
e. Open the door and place your food in the oven and press Start.
f. To cancel during the cooking process press the Pause/Cancel button twice.
A. Uso de la función de horno
a. Conecte a una toma de corriente eléctrica.
b. Presione el botón Oven (horno) para activar el programa del horno. Presione una
vez para la función de horno. Las palabras "Oven Bake" deberán aparecer en la
ventana de la pantalla.
c. Presione el botón "Time" y configure el tiempo presionando el botón de aumento o disminución. El indicador de tiempo cambiará cada vez que lo presione. Sostener el botón
causará que el tiempo cambie con rapidez.
d. Presione el botón TEMP (TEMPERATURA). La temperatura por defecto es de 300
grados (esto se puede ajustar). Para cambiar esta temperatura, presione el botón de
aumento o disminución para seleccionar la temperatura deseada. La temperatura
aumentará o disminuirá en incrementos de 50 grados hasta que se alcance el nivel
deseado. La temperatura máxima es de 400 grados para la función de horno.
e. Abra la puerta, coloque su alimento en el horno y presione "Start" (inicio).
f. Cuando el programa se haya completado, la unidad emitirá un sonido continuo.
g. Desenchufe la unidad cuando no esté en uso y antes de limpiarla.
h. Para cancelar durante el proceso de cocción presione dos veces el botón
Pause/Cancel (Pausa/Cancelar).
1. USING THE OVEN FUNCTION:
HOW TO USE
10
z
CÓMO USAR SU APARATO
11
C. Using the Fan Broil Function (Broil with Convection Heating)
a. Conecte a una toma de corriente eléctrica.
b. Presione el botón "Oven" (horno) tres veces en el programa de "Fan Broil" (rostizado
con ventilador).
c. Presione el botón "Time" y configure el tiempo presionando el botón de aumento o disminución. El indicador de tiempo cambiará cada vez que lo presione. Sostener el botón
causará que el tiempo cambie con rapidez.
d. La temperatura por defecto es de 450 grados.
e. Coloque su alimento sobre el recipiente para rostizar y el recipiente para rostizar
sobre el recipiente para hornear. Abra la puerta y deslice la bandeja en la posición
media o superior del horno dependiendo del grosor del alimento. Cierre la puerta y
presione "Start". El indicador de tiempo comenzará su conteo en retroceso.
f. Cuando el programa se haya completado, la unidad emitirá un sonido continuo.
g. Desenchufe la unidad cuando no esté en uso y antes de limpiarla.
h. Para cancelar durante el proceso de cocción presione dos veces el botón
Pause/Cancel (Pausa/Cancelar).
Nota: Los alimentos que tienen una forma irregular, como el pescado o las pechugas de
pollo, se llevan más tiempo para cocinarse en las partes más gruesas. Para ayudar
a que se cocinen de manera uniforme, coloque las partes más gruesas hacia el
borde exterior de la bandeja, donde recibirán más calor.
Note: Foods that are irregular in shape, like fish or chicken breasts, take longer to cook
in the thicker parts. To help them cook evenly, place the thickest parts to the outer
rim of the food tray where they will receive more heat.
C. Using the Fan Broil Function (Broil with Convection Heating)
a. Connect to power supply.
b. Press Oven button three times into the Fan Broil program.
c. Press Time button. Set the time by pressing the increase or decrease button. The time
will change for each press. Holding the button will cause the time to change rapidly.
d. The temperature is fixed at 450 degrees.
e. Place your food on the broil pan, and the broil pan on the bake pan. Open the door
and slide the tray into the middle or top oven position depending on thickness of
food. Close the door, press Start . The timer will begin its countdown.
f. When the program is complete, the unit will beep continually.
g. Unplug the unit and allow it to cool completely before cleaning.
h. To cancel during the cooking process press the Pause/Cancel button twice.
11
z
HOW TO USE
12
CÓMO USAR SU APARATO
2. USING THE DEHYDRATE FUNCTION
a. Conecte a una toma de corriente eléctrica.
b. Presione el botón "Dehydrate" (deshidratar) para seleccionar el programa para deshidratar.
c. Presione el botón "Time" y configure el tiempo presionando el botón de aumento o
disminución. El indicador de tiempo cambiará cada vez que lo presione. Sostener el
botón causará que el tiempo cambie con rapidez.
d. La temperatura por defecto es de 185 grados. (La temperatura no se mostrará en
la pantalla).
e. Abra la puerta, coloque su alimento en el horno y presione "Start" (inicio).
f. Cuando el programa se haya completado, la unidad emitirá un sonido continuo.
g. Desenchufe la unidad cuando no esté en uso y antes de limpiarla.
h. Para cancelar durante el proceso de cocción presione dos veces el botón
Pause/Cancel (Pausa/Cancelar).
a. Connect to power supply.
b. Press the defrost button to enter the defrost program.
c. Press the time button. Set the time by pressing the increase or decrease button. The
timer will change for each press. Holding the button will cause the time to change rapidly.
The temperature default is 150 degrees (the temp. will not show in the display).
Open the door and place your food in the oven and press Start .
When the program is complete, the unit will beep continually.
Unplug the unit and allow it to cool completely before cleaning.
To cancel during the cooking process press the Pause/Cancel button twice.
3. USING THE DEFROST FUNCTION
d.
e.
f.
g.
h.
a. Connect to power supply.
b. Press the Dehydrate button to enter the dehydrate program.
c. Press the time button. Set the time by pressing the increase or decrease button. The
time will change for each press. Holding the button will cause the time to change rapidly.
The default temperature is 185 degrees (temp. will not show in display).
Open the door and place your food in the oven and press Start.
When the program is complete, the unit will beep continually.
Unplug the unit and allow it to cool completely before cleaning.
To cancel during the cooking process press the Pause/Cancel button twice.
a. Conecte a una toma de corriente eléctrica.
b. Presione el botón "Defrost" (descongelar) para seleccionar el programa para descongelar.
c. Presione el botón "Time" y configure el tiempo presionando el botón de aumento o
disminución. El indicador de tiempo cambiará cada vez que lo presione. Sostener el
botón causará que el tiempo cambie con rapidez.
d. La temperatura por defecto es de 150 grados. (La temperatura no se mostrará en
la pantalla).
e. Abra la puerta, coloque su alimento en el horno y presione "Start" (inicio).
f. Cuando el programa se haya completado, la unidad emitirá un sonido continuo.
g. Desenchufe la unidad cuando no esté en uso y antes de limpiarla.
h. Para cancelar durante el proceso de cocción presione dos veces el botón
Pause/Cancel (Pausa/Cancelar).
d.
e.
f.
g.
h.
3. USO DE LA FUNCIÓN DE DESCONGELADO:
2. USING THE DEHYDRATE FUNCTION
HOW TO USE
12
13
CÓMO USAR SU APARATO
1. Your oven features a non-stick interior coating for easier cleaning. If desired, wipe the
walls with a damp sponge, cloth or nylon scouring pad and mild detergent.
2. Do not use abrasive scouring pads, abrasive cleaners or scrape interior with metal
utensils. This could damage the non-stick interior coating.
3. Wash all accessories in hot soapy water or in the dishwasher.
4. Wipe the door clean with a damp sponge and wipe dry with a paper towel or cloth.
5. Clean exterior with damp sponge. Do not use an abrasive cleaner or steel wool
scouring pad as it may damage the exterior finish.
6. Wipe baking trays and broiling pan with a damp sponge, cloth or nylon scouring pad. Do
not use an abrasive cleaner or steel wool scouring pad as it may damage the porcelain
enamel finish.
7. Empty crumb try and wipe clean with damp cloth or sponge.
8. Always dry ALL parts and surfaces thoroughly prior to usage.
4. CONFIGURACIÓN DEL RELOJ
1. Presione el botón "Clock" (reloj) y manténgalo presionado durante 1 segundo. La
pantalla mostrará "Hr24" y "Clock" parpadeará en forma continua.
2. Si desea usar el modo de 12 horas, presione de nuevo el botón "Clock". La pantalla
mostrará "Hr12". Si prefiere usar el modo de 24 horas, sáltese a (a).
a. Comience por configurar la hora presionando el botón de aumento o disminución. La
hora cambiará cada vez que lo presione.
b. Presione de nuevo el botón "Clock" (reloj). Seleccione los minutos presionando el
botón de aumento o disminución.
c. Por último, presione el botón "Clock" una vez más para confirmar la hora.
5. USO DE LA FUNCIÓN PAUSE/CANCEL (PAUSA/CANCELAR)
Presione el botón "Pause/Cancel" (Pausa/Cancelar) una vez para poner una pausa.
Para reiniciar, presione el botón "Start" (inicio) una vez y el tiempo comenzará de nuevo
su conteo en retroceso.
6. USO DE LA FUNCIÓN TIMER/TEMP (TIEMPO TEMPERATURA)
Presione le botón "Timer/Temp (Tiempo/Temperatura) una vez mientras el horno está en
operación para ver el tiempo restante. Presione de nuevo el mismo botón para ver la
temperatura. El tiempo restante también se puede ajustar a la mitad del ciclo.
CÓMO LIMPIAR EL APARATO
Desenchufe la unidad cuando no esté en uso y antes de limpiarla.
1. Su horno tiene un recubrimiento interior antiadherente para facilitar la limpieza. Si lo
desea, limpie las paredes con una esponja, un paño o una fibra para tallar de nailon
húmeda y detergente suave.
2. No use fibras para tallar abrasivas, limpiadores abrasivos ni talle el interior con utensilios de metal. Esto podría dañar el recubrimiento interior antiadherente.
3. Lave todos los accesorios con agua jabonosa caliente o en la lavaplatos.
4. Limpie la puerta con una esponja húmeda y séquela con una toalla de papel o un paño.
5. Limpie el exterior con una esponja húmeda. No use un limpiador abrasivo ni fibras
de metal para tallar porque podría dañar el acabado exterior.
6. Limpie las bandejas para hornear y el recipiente para rostizar con una esponja, un paño o
una fibra de nailon para tallar húmeda. No use un limpiador abrasivo ni fibras de metal
para tallar porque podría dañar el acabado de esmalte de porcelana.
7. Vacíe la bandeja para migajas y límpiela con un paño o una esponja húmeda.
8. Seque siempre TODAS las partes y las superficies perfectamente antes de usarlas.
13
Always unplug unit and allow to cool before cleaning.
HOW TO CLEAN
6. USING THE TIMER/TEMP. FUNCTION
Press the Timer/Temp. button once while the oven is in operation to display the time
remaining. Press the same button again to display the temperature. The time remaining
can also be adjusted mid-cycle.
5. USING THE PAUSE/CANCEL FUNCTION
Press the “Pause/Cancel” button once to pause. To restart, press the “Start” button
once and the time will begin to count down again. Press the “Pause/Cancel” button
twice to cancel cooking setting.
4. SETTING THE CLOCK
1. Press the “Clock” button and hold for 1 second. The display will show "Hr24" and
"Clock" will flash continually.
2. If you would like to use 12 hour time, press the “Clock” button again. Display will
show “Hr12”. If you prefer 24 hour time, skip to (a).
a. Start off by setting the hour by pressing the increase or decrease button. The time
will change for each press.
b. Press the “Clock” button again. Set the minutes by pressing the increase or
decrease button.
c. Finally, press the “Clock” button one last time to confirm time.
HOW TO USE
GARANTÍA LIMITADA
Aroma Housewares Company garantiza que este producto no tenga defectos en
sus materiales y fabricación durante un período de un año a partir de la fecha
comprobada de compra dentro de la parte continental de los Estados Unidos.
Within this warranty period, Aroma Housewares Company will repair or replace, at
its option, defective parts at no charge, provided the product is returned, freight
prepaid with proof of purchase and U.S. $8.00 for shipping and handling charges,
payable to Aroma Housewares Company. Before returning an item, please call the
toll free number below for a return authorization number. Allow 2-4 weeks for
return shipping.
Aroma Housewares Company warrants this product free from defects in material
and workmanship for one year from provable date of purchase in the continental
United States.
LIMITED WARRANTY
AROMA HOUSEWARES COMPANY
6469 Flanders Drive
San Diego, California 92121
1-800-276-6286
L-V, 8:30 AM - 5:00 PM, Tiempo del Pacífico
Sitio Web: www.aromaco.com
This warranty does not cover improper installation, misuse, abuse or neglect on the
part of the owner. Warranty is also invalid in any case that the product is taken
apart or serviced by an unauthorized service station.
Esta garantía le da derechos legales específicos los cuales podrán variar de un
estado a otro y no cubre áreas fuera de los Estados Unidos.
This warranty gives you specific legal rights which may vary from state to state, and
does not cover areas outside the United States.
Esta garantía no cubre la instalación incorrecta, el uso indebido, maltrato o negligencia por parte del usuario. La garantía también es inválida en caso de que el
aparato sea desarmado o se le dé mantenimiento en un centro de servicio no
autorizado.
AROMA HOUSEWARES COMPANY
6469 Flanders Drive
San Diego, California 92121
1-800-276-6286
M-F, 8:30 AM - 5:00 PM, Pacific Time
Website: www.aromaco.com
Dentro de este período de garantía, Aroma Housewares Company reparará o
reemplazará, a su opción, las partes defectuosas sin ningún costo, siempre y
cuando el producto sea devuelto, con el flete prepagado, con comprobación de
compra y $6.00 dólares para cargos de envío y manejo a favor de Aroma
Housewares Company. Antes de devolver un producto, sírvase llamar al número
telefónico gratuito que está más abajo para obtener un número de autorización de
devolución. Espere entre 2-4 semanas para recibir el aparato nuevamente.