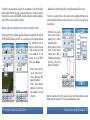
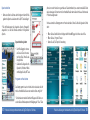
1
Plug &
survey
Elsô lépések a
szoftver használatához
Initial steps to use
software
Primii paói în utilizarea aplicaûiei
Praktische Anleitung zur Inbetriebnahme der
Premiers pas Pour utiliser le logiciel
Primeros Pasos Para Usar
Software
Plug
Plug
Plug
Plug
Plug
Plug
&
&
&
&
&
&
Survey
Survey
Survey
Survey
Survey
Survey
–
–
–
–
–
–
Tedd be a kártyát és mérj!
Insert your card and start surveying
Introduceûi cardul ói môsuraûi!
Karte einlegen und vermessen!
Introduisez la carte et mesurez.
Inserte su tarjeta e inicie su trabajo
Tartalomjegyzék / Table of contents / Cuprins / Inhaltsverzeichnis / Table des matières /
Tabla de Contenido:
Magyar . . . . . . . . . . . . . . . . . . . . . . . . . . . . . . . . . . . . . . . . . . . . . . . . . . . . . . . . . . . . . . . . . . . . . . . . .5
English . . . . . . . . . . . . . . . . . . . . . . . . . . . . . . . . . . . . . . . . . . . . . . . . . . . . . . . . . . . . . . . . . . . . . . . .29
Românô . . . . . . . . . . . . . . . . . . . . . . . . . . . . . . . . . . . . . . . . . . . . . . . . . . . . . . . . . . . . . . . . . . . . . . .53
Deutsch . . . . . . . . . . . . . . . . . . . . . . . . . . . . . . . . . . . . . . . . . . . . . . . . . . . . . . . . . . . . . . . . . . . . . . .77
Français . . . . . . . . . . . . . . . . . . . . . . . . . . . . . . . . . . . . . . . . . . . . . . . . . . . . . . . . . . . . . . . . . . . . . .101
Español . . . . . . . . . . . . . . . . . . . . . . . . . . . . . . . . . . . . . . . . . . . . . . . . . . . . . . . . . . . . . . . . . . . . . .125
Plug &
survey
Elsô lépések
a
szoftver használatához
5
Plug & Survey – Tedd be a kártyát és mérj!
Tartalomjegyzék
Mit tartalmaz a doboz? . . . . . . . . . . . . . . . . . . . . . . . . . . . . . . . . . . . . . . . . . . . . . . . . . . . . . . . . . . . . 8
Mit tartalmaz az SD kártya? . . . . . . . . . . . . . . . . . . . . . . . . . . . . . . . . . . . . . . . . . . . . . . . . . . . . . . . . 8
A program elsô indítása . . . . . . . . . . . . . . . . . . . . . . . . . . . . . . . . . . . . . . . . . . . . . . . . . . . . . . . . . . . 9
Nyelv beállítása . . . . . . . . . . . . . . . . . . . . . . . . . . . . . . . . . . . . . . . . . . . . . . . . . . . . . . . . . . . . . . . . . 10
A program kézi indítása. . . . . . . . . . . . . . . . . . . . . . . . . . . . . . . . . . . . . . . . . . . . . . . . . . . . . . . . . . . 10
Kilépés a programból. . . . . . . . . . . . . . . . . . . . . . . . . . . . . . . . . . . . . . . . . . . . . . . . . . . . . . . . . . . . . 14
GPS kapcsolat beállítása . . . . . . . . . . . . . . . . . . . . . . . . . . . . . . . . . . . . . . . . . . . . . . . . . . . . . . . . . 15
Automatikus GPS felismertetés . . . . . . . . . . . . . . . . . . . . . . . . . . . . . . . . . . . . . . . . . . . . . . . . . 16
GPS kapcsolat kézi beállítása . . . . . . . . . . . . . . . . . . . . . . . . . . . . . . . . . . . . . . . . . . . . . . . . . . 20
Térképezés, felmérés elôkészítése . . . . . . . . . . . . . . . . . . . . . . . . . . . . . . . . . . . . . . . . . . . . . . . . . . 22
Területmérés egyszerûen (folyamatos területmérés körbejárással) . . . . . . . . . . . . . . . . . . . . . . . . . 24
A program telepítése és üzembe helyezése asztali számítógépen . . . . . . . . . . . . . . . . . . . . . . . . . 26
Fontos tudnivalók. . . . . . . . . . . . . . . . . . . . . . . . . . . . . . . . . . . . . . . . . . . . . . . . . . . . . . . . . . . . . . . . 27
Mit tartalmaz a doboz?
A DigiTerra Explorer 5 dobozban egy elôretelepített SD kártyát és ezt a nyomtatott Használati útmutatót találja, amely a szoftver beüzemelésének elsô lépéseit tartalmazza. Csak ezekre lesz szüksége
a szoftver elsôindításához.
• a program használatához szükséges részletes Felhasználói kézikönyv
”User_Manual_XXX.pdf” (magyar, angol nyelven)
• DigiTerra Explorer 5 asztali számítógépre telepíthetô Desktop verzió
”DTEXPV5Setup.exe”
Mit tartalmaz az SD kártya?
A program elsô indítása
Az SD kártya tartalmazza a DigiTerra Explorer 5 szoftvert, amelynek üzembe helyezéséhez nem lesz
szüksége installálásra és Interneten keresztül történô regisztrációra, a térképezési munkáját azonnal
megkezdheti.
Az SD kártya tartalma:
• DigiTerra Explorer 5 mobil térinformatikai és terepi adatgyûjtô
szoftver
”Bin”
• automatikus futtató segédprogram, hogy a DigiTerra Explorer 5
magától elinduljon, amint behelyezte az SD kártyát a kézi számítógépbe
”2577”
• A program elsajátításához, a Felhasználói kézikönyv oktatóanyagaihoz használható mintaállományok, háttér térképek
”Maps”
• az elsô elindulást segítô Használati útmutató elektronikus változata
”Getting_Started.pdf” (magyar, angol, román, spanyol, francia,
német nyelven)
8
Elsô lépések a Digiterra Explorer 5 szoftver használatához
A DigiTerra Explorer 5 beüzemelése rendkívül egyszerû. Csak be kell helyezni az SD kártyát a kézi
számítógépbe és az automatikus futtató segédprogram önmûködôen elindul*, és elvégez minden
szükséges beállítást, ami a program elindításához szükséges. Ezt csak egyszer kell megtennie minden olyan kézi számítógéppel, amellyel használni kívánja a programot. Az SD kártya elsô behelyezést követôen a késôbbiekben ezeken a készülékeken a program automatikusan elindul vagy
kilép, amennyiben az SD kártyát behelyezi a készülékbe, illetve kiveszi a készülékbôl.
* Egyes kézi számítógépek nem indítják önmûködôen a DigiTerra Explorer 5 programot. Ha ezt
tapasztalja, kérjük, kövesse ”A DigiTerra Explorer 5 program kézi indítása”címû fejezet utasításait!
Elsô lépések a Digiterra Explorer 5 szoftver használatához
9
Nyelv beállítása
• A szoftver elsô indításakor megjelenô nyelvválasztó ablakban
mutasson a tollal a kívánt nyelv nevére, majd nyomja meg a nyelvválasztó ablak alján az ”OK” nyomógombot.*
* Amennyiben elsôre nem indulna el automatikusan a DigiTerra Explorer 5 szoftver az SD kártya
behelyezésével, akkor a ”Reset” gomb (vagy az újraindításhoz szükséges billentyûkombináció) megnyomásával újra kell indítani az operációs rendszert, majd ismét be kell helyezni az SD kártyát, mert
idônként (géptípustól függôen) az operációs rendszer letiltja az automatikus futtatás opciót. Ha ezzel
sikerül elindítani a programot, akkor ez a fejezet kihagyható.
* Megjegyezzük, hogy a DigiTerra Explorer 5 szoftver nyelvének
beállítására akkor van szükség, ha az operációs rendszerben a
területi beállításoknál nem a ”Magyar” (”Hungarian”) opció van
kiválasztva.
Az automatikus futtató segédprogram kézi indításához sorrendben a következôket kell tenni:
• Nyissa le a kézi számítógép bal felsô sarkában található Windows® zászlóra mutatással a Start menüt.
• Nyissa ki a Programok (Programs) ablakot.
• Indítsa el az Intézô (File Explorer) alkalmazást.
Nyelvbeállítás módosítása a
késôbbiekben
• Nyissa meg DigiTerra Explorer 5
program bal oldali elsô felgördülô menüjét a felfele mutató kis háromszögre mutatva a bal alsó
sarokban.
• Mutasson a Szótár menüpontra, válassza ki a használni kívánt
nyelvet, majd nyomja meg az OK nyomógombot.
A program kézi indítása
Az automatikus futtató segédprogramot kézzel is egyszerû elindítani, amennyiben a kézi számítógép nem futtatná önmûködôen.*
10
Elsô lépések a Digiterra Explorer 5 szoftver használatához
Elsô lépések a Digiterra Explorer 5 szoftver használatához
11
Program indítása parancsikonról
A sikeres automatikus vagy kézi indítás után az önmûködô futtató segédprogram létrehozza a
DigiTerra Explorer 5 szoftver parancsikonjait, amelyrôl késôbbiekben a program elindítható lesz az
SD kártya ki-be helyezése nélkül is, ha az SD kártya a kézi számítógépben található.
• Nyissa le a kézi számítógép bal felsô sarkában található Windows® zászlóra mutatással a Start menüt.
• Nyissa ki a Programok (Programs) ablakot.
• Mutasson a tollal a DigiTerra Explorer 5 alkalmazás parancsikonjára.*
* Késôbbiekben a DigiTerra
Explorer 5 alkalmazás parancsikonja a Start menü közepén
elhelyezkedô utoljára használt
programok között általában megtalálható lesz.
• Nyissa ki az SD kártya könyvtárát (a mappa neve készülékfüggô, szokásos nevek: ”Storage Card”,
”SD Card”, ”My Flash Disk” stb.)
• Nyissa ki a SD kártya könyvtárán belül a ”2577” nevû könyvtárat.
• Futtassa az ”autorun” programot.
Windows® CE operációs rendszernél a fájlkezelô alkalmazás megfelelôje általában a ”Sajátgép” (My
Device) parancsikon az asztalon. Az ”autorun” program megkeresése hasonló a fentiekben leírtakhoz.
12
Elsô lépések a Digiterra Explorer 5 szoftver használatához
Windows® CE operációs rendszernél a program parancsikonja
közvetlenül megtalálható lesz az
elsô indítást követôen az Asztalon, illetve a Start menu >
Programs > DigiTerra Explorer v5
útvonalon is.
Elsô lépések a Digiterra Explorer 5 szoftver használatához
13
Kilépés a programból
Megjegyzés: Az elindított program jobb felsô sarkában található
”x” -re mutatva a program ablaka
csupán bezáródik, de a háttérben
futni fog! Ilyenkor az indító képernyô jobb alsó sarkában található
ikonról (Windows CE operációs
rendszernél a tálcáról) a program
ablaka ismét megjeleníthetô.
• Nyissa meg DigiTerra Explorer 5 program bal oldali elsô felgördülô menüjét a felfele mutató kis háromszögre mutatva.
• Majd mutasson a legalsó ”Kilépés” menüpontra és nyomja meg az ”Igen” (Yes) nyomógombot a
megjelenô panelen.
GPS kapcsolat beállítása
A GPS kapcsolat beállításánál a GPS vevôt és a DigiTerra Explorer 5 programot kapcsoljuk össze.
Ezt a beállítást minden olyan kézi számítógépnél szükséges elvégezni, amelyen a DigiTerra Explorer
5 programot SD kártyán használjuk, de csupán egyszer lesz rá szükség, mivel a beállítások a GPShez történô sikeres kapcsolódást követôen elmentôdnek.
A DigiTerra Explorer 5 szoftverrel NMEA kompatibilis GPS vevôkhöz lehet csatlakozni. A piacon kapható kézi számítógépbe épített, CF, SD kártyafoglalatba helyezhetô, illetve Bluetooth vevôk szinte
kivétel nélkül megfelelnek ennek a követelménynek.
14
Elsô lépések a Digiterra Explorer 5 szoftver használatához
Elsô lépések a Digiterra Explorer 5 szoftver használatához
15
Megjegyzés: Bluetooth kapcsolattal rendelkezô külsô GPS-nél elôbb felismertetni, csatlakoztatni,
majd párosítani kell az eszközt a kézi számítógép Bluetooth-kezelô programjával.
Automatikus GPS felismertetés
• Nyissa fel a DigiTerra Explorer 5 program bal oldali második felgördülô menüjét a felfele mutató kis
háromszögre mutatva.
• A menüben mutasson a ”GPS beállít” menüpontra.
• A megjelenô ”GPS állapot” ablak bal alsó részén nyomja meg a ”Beállít” nyomógombot.
• A ”GPS Beállítások” ablakban nyomja meg a ”Port keresés” nyomógombot, a kommunikációs port és
az adatátviteli sebesség automatikus beállításához.
• A keresés elindításához nyomja meg az ”Igen” (Yes) nyomógombot.
• A port és az adatátviteli sebesség beállítása sikerült, ha a ”Figyelem! Port keresése sikeres.” ablak
megjelenik.
• Nyomja meg az ”ok” gombot ennek az ablaknak a jobb felsô sarkán a beállítások elfogadásához.
• Nyomja meg az ”ok” gombot* a ”GPS beállítások” ablak jobb felsô sarkán a beállítások elmentéséhez.
16
Elsô lépések a Digiterra Explorer 5 szoftver használatához
Elsô lépések a Digiterra Explorer 5 szoftver használatához
17
* Megjegyezzük, hogy Windows Mobile operációs rendszernél egyik ablakról a másikra váltva nem
mindig látható a jobb felsô sarokban a beállításokat elmentô ”ok” gomb, mert az ablak nem aktív. Az
ablak aktiválásához egyszerûen mutassunk az ablakra egy semleges, csupán feliratokat tartalmazó
helyen, melynek eredményeként az ”ok” gomb ismét látszani fog.
A kapcsolat sikerességét többek között a ”GPS állapot” ablak jobb felsô részén, a jobb oldalán jeleket
kibocsátó kis mûhold ikon jelzi, másrészt az ”Nmea” nyomógombra mutatva megjelenô ablakban a
GPS vevôbôl érkezô folyamatosan váltakozó NMEA mondatok látszódnak. Ismét az ”Nmea” nyomógombra mutatva ez az ablak bezárható.
• A ”GPS állapot” ablak bezárásához nyomja meg a jobb felsô
sarokban az ”ok” nyomógombot.
A sikeres csatlakozást követôen
a szoftver folyamatosan elkezdi
lekérdezni az NMEA jelmondatokat a GPS vevôbôl, majd minimum 3 mûholdra való folyamatos rálátás után fix pozíciót
határoz meg a WGS-84 ellipszoid (ideális földalak) felületén.
Attól függôen, hogy mennyire
régen használtuk a GPS vevônket, illetve milyen távol vagyunk
az utolsó használat helyétôl föld-
18
Elsô lépések a Digiterra Explorer 5 szoftver használatához
rajzilag, ez az INICIALIZÁLÁS 2-3mp-tôl akár 5 percig is eltarthat, de folyamatos használatnál
általában rövidebb idôn belül inicializál a GPS vevô.
A térkép megjelenítô ablak jobb
alsó sarkában a GPS pozíció
minôségét mutató adatok háttere
mindaddig piros, amíg a GPS
pozíció nem megfelelô pontosságú, ebben az esetben nem fog
tudni GPS pozíciókat rögzíteni a
szoftverrel.
Rögzítésre akkor válik alkalmassá a GPS pozíció, ha az említett
háttér zöldre, DGPS korrekció
megléte esetén kékre változik.*
* Amennyiben részletesebben érdeklik a ”GPS beállítások” és a rögzíthetô pozíció közötti összefüggések, kérjük, tanulmányozza a DigiTerra Explorer 5 szoftver Felhasználói kézikönyvét!
Elsô lépések a Digiterra Explorer 5 szoftver használatához
19
GPS kapcsolat kézi beállítása
A kommunikációs port (COM1,2…) és a pontos adatátviteli sebesség (Baud érték) ismeretében
lehetôség van a GPS kapcsolat kézzel történô beállítására.*
* Megjegyezzük, hogy a kommunikációs port száma, illetve az adatátviteli sebesség mértéke GPSfüggô. A pontos értékeket általában megtalálja a GPS vevôhöz tartozó mûszaki leírásban vagy kérdezze meg a gyártótól.
• Az ”Automatikus GPS felismertetés” résznél leírtak szerint
nyissa meg a ”GPS beállítások”
ablakot.
• Mutasson a tollal a ”Port” felirat
után elhelyezkedô legördülô listára és válassza ki a GPS vevôhöz használható kommunikációs portot. Sikeres port
beállítás után hibaüzenet nem
jelenik meg.
• A port beállításhoz hasonlóan mutasson a tollal a ”Baud” felirat után elhelyezkedô legördülô listára
és válassza ki a GPS vevôhöz használható adatátviteli sebességet. Sikeres adatátviteli sebesség
kiválasztása után hibaüzenet nem jelenik meg.
Sikertelen port vagy adatátviteli sebesség (Baud) beállítás után a ”Port megnyitás: Sikertelen kapcsolódás!” hibaüzenet jelenik meg. Amíg ezt az üzenetet látja, nem sikerült a csatlakozás.
Sikeres csatlakozást követôen végezze el az ”Automatikus GPS felismertetés” résznél leírtakat a
”GPS beállítások” ablak bezárásához és a kapcsolat sikerességének ellenôrzéséhez.
20
Elsô lépések a Digiterra Explorer 5 szoftver használatához
Elsô lépések a Digiterra Explorer 5 szoftver használatához
21
Térképezés, felmérés elôkészítése
A GPS vevô sikeres inicializálását követôen nincs más hátra, mint kiválasztani egy meglévô (geometriai elemeket tartalmazó) térképi réteget vagy létrehozni egy új (üres) réteget, amelybe a GPS pozíciót rögzíteni szeretnénk pont, vonal vagy terület formájában.*
* Ebben a fejezetben feltételezzük, hogy a szoftver és a GPS kapcsolat beállítása sikeresen
megtörtént. Amennyiben még nem végezte volna el ezt a feladatot, tanulmányozza a vonatkozó fejezetet (fejezeteket).
A térképezés, felmérés elôkészítésének lépései sorrendben
• Indítsa el a DigiTerra Explorer 5
programot, mutasson a tollal a
”Rétegek” nyomógombra a keret bal oldalán felül a ”Rétegek”
ablak megnyitásához.
• A ”Rétegek” ablak bal felsô sarkában nyomja meg az ”Új réteg
létrehozása” nyomógombot,
hogy létrehozzon egy új, üres
réteget, amelybe a GPS–bôl
jövô pozíciókat rögzíteni fogja
pont, vonal vagy terület formájában.
22
Elsô lépések a Digiterra Explorer 5 szoftver használatához
• A ”Réteg létrehozás” ablakban mutasson a ”Név:” adatbeviteli mezôre a tollal és írja be a létrehozandó új térképi réteg nevét, (pl.: Teruletmeres) majd nyomja meg az ”OK nyomógombot”.
• A ”Rétegek” ablakban nyomja meg az ”OK nyomógombot.
• A térkép-megjelenítô ablak jobb felsô sarkában nyomja meg a ”GPS mérôpanel” nyomógombját.
A program kapcsolódik a GPS vevôhöz és megkezdi a pozíció adatok kiolvasását. Az ”Automatikus GPS felismertetés” fejezetben leírtak szerint – amint megtörténik az inicializálás – a GPS pozíciórögzítésre (mérésre) kész a program.*
Elsô lépések a Digiterra Explorer 5 szoftver használatához
23
* Megjegyezzük, hogy a pont, vonal, terület típusú objektumok típusonként külön rétegekben
helyezkedhetnek el. Vagyis pl. terület objektumokat tartalmazó rétegen belül nem lehetnek pontok,
vonalak. A fenti néhány kezdô lépés a különbözô GPS pozíciórögzítési módszereknél az inicializálási lépésig megegyezik.
• Nyomja meg a pozíciórögzítést indító piros körlappal jelölt (Rec) nyomógombot, majd járja körbe a
területet.
* Amennyiben terület objektumokat tartalmazó réteget választ ki a méréshez (pl. a késôbbiekben folytatja a mérést ugyanebben a rétegben), nem lesz szüksége a Típus kiválasztására.
Területmérés egyszerûen (folyamatos területmérés körbejárással)
Végezze el a ”Térképezés, felmérés elôkészítése” fejezetben leírtakat, várja meg amíg a GPS vevô
INICIALIZÁL. A pozíciórögzítéshez (méréshez) általában megfelelô a GPS pozíció, ha a térkép megjelenítô ablak jobb alsó sarkában
a GPS pozíció minôségét mutató
adatok háttere zöld, DGPS korrekció megléte esetén kék színnel jelenik meg.
• Üres (méréseket, vagyis objektumokat nem tartalmazó) térképi réteg esetén a ”GPS mérôpanelen” a típusnál válassza
ki a ”Terület” típust.*
• A pozíciórögzítés megkezdéséhez álljon a felmérendô terület egy tetszôleges kerületi
pontjára.
• Amikor visszaért a kiindulási
helyre, nyomja meg a pozíciórögzítést befejezô – kék négyzettel jelölt – (Stop) nyomógombot.
• A program megjeleníti a mért
objektumhoz tartozó ûrlapot,
töltse ki a hiányzó adatokat,
majd zárja be a jobb felsô sarokban az ablakot az ”ok” gomb
megnyomásával.
Megjegyezzük, hogy a program alapértelmezetten automatikusan menti a felmért geometriai elemet
a hozzá tartozó leíró adatokkal együtt, a mérés mentésére külön nem lesz szüksége.
24
Elsô lépések a Digiterra Explorer 5 szoftver használatához
Elsô lépések a Digiterra Explorer 5 szoftver használatához
25
A program telepítése és üzembe helyezése asztali számítógépen
Fontos tudnivalók
A DigiTerra Explorer 5 asztali számítógépre telepíthetô verziójához a telepítôt megtalálja az SD
kártya gyökerében ”DTEXPV5Setup.exe” néven.*
A szoftver használatára vonatkozó részletes ismereteket megtalálja a Felhasználói kézikönyvben,
amelyet megtalál az SD kártyán, illetve a www.digiterra.hu honlapon különbözô nyelveken
(User_Manual.pdf). A kézikönyv megtekintéséhez Adobe Acrobat Reader szükséges, melyet letölthet
a http://www.adobe.com/products/acrobat/readstep2.html oldalról.
•
•
•
Helyezze a DigiTerra Explorer 5 SD kártyát kézi számítógépébe,
majd csatlakoztassa kézi számítógépét az asztali számítógéphez (pl. USB kábellel).
Másolja át a ”DTEXPV5Setup.exe” telepítôt asztali számítógépére a Microsoft ActiveSync, Windows Vista operációs rendszer
esetében a Windows Mobile Device Center szoftver segítségével. Amennyiben rendelkezik SD kártyaolvasóval, természetesen azt is használhatja.
Sikeres átmásolást követôen indítsa el a telepítôt asztali számítógépén, kövesse a telepítô utasításait.
A DigiTerra Explorer 5 asztali verziója tetszôleges számú asztali számítógépre telepíthetô. A szoftver teljes funkcionalitása
– DigiTerra Explorer SD kártyát tartalmazó – csatlakoztatott** kézi
számítógéppel használható.
A DigiTerra Explorer 5 szoftver gyártója, a DigiTerra Kft. a vásárlás napjától számított egy év idôtartamig cseregaranciát vállal az SD kártyára. A nem rendeltetésszerû használatból eredô károkért sem
a gyártó, sem a szoftver forgalmazói nem vállalnak felelôsséget. Az SD kártya elvesztése, ellopása
esetén nem áll módunkban az SD kártyát a szoftverrel együtt pótolni.
További információkért forduljon a DigiTerra Explorer 5 forgalmazókhoz.
Elérhetôségeinket megtalálja a www.digiterra.hu honlapon.
DigiTerra Informatikai Szolgáltató Kft.
1025 Budapest, Csévi u. 6.
* A DigiTerra Explorer 5 asztali számítógépre telepíthetô verzióból a www.digiterra.hu honlapon találja meg a legfrissebb verziót, ennek használatát javasoljuk!
** Mûködô Microsoft ActiveSync, Windows Vista operációs rendszer esetében a Windows Mobile
Device Center kapcsolat szükséges! Amennyiben nem sikerült felépíteni a kapcsolatot kézi és asztali
számítógépe között, forduljon rendszergazdájához!
26
Elsô lépések a Digiterra Explorer 5 szoftver használatához
Elsô lépések a Digiterra Explorer 5 szoftver használatához
27
Plug &
survey
Initial steps
28
to use
software
29
Plug & Survey – Insert your card and start surveying
Table of contents:
What does the box contain? . . . . . . . . . . . . . . . . . . . . . . . . . . . . . . . . . . . . . . . . . . . . . . . . . . . . . . .32
What does the SD card include? . . . . . . . . . . . . . . . . . . . . . . . . . . . . . . . . . . . . . . . . . . . . . . . . . . .32
How to start the program initially? . . . . . . . . . . . . . . . . . . . . . . . . . . . . . . . . . . . . . . . . . . . . . . . . . .33
Setting languages . . . . . . . . . . . . . . . . . . . . . . . . . . . . . . . . . . . . . . . . . . . . . . . . . . . . . . . . . . . . . . .34
How to start the program manually? . . . . . . . . . . . . . . . . . . . . . . . . . . . . . . . . . . . . . . . . . . . . . . . . .34
How to start the program from shortcut? . . . . . . . . . . . . . . . . . . . . . . . . . . . . . . . . . . . . . . . . . . . . .37
How to exit the program? . . . . . . . . . . . . . . . . . . . . . . . . . . . . . . . . . . . . . . . . . . . . . . . . . . . . . . . . .38
How to set GPS connection? . . . . . . . . . . . . . . . . . . . . . . . . . . . . . . . . . . . . . . . . . . . . . . . . . . . . . .39
Automatic GPS recognition . . . . . . . . . . . . . . . . . . . . . . . . . . . . . . . . . . . . . . . . . . . . . . . . . . . .40
How to set GPS connection manually? . . . . . . . . . . . . . . . . . . . . . . . . . . . . . . . . . . . . . . . . . . .44
Preparation for mapping and surveying . . . . . . . . . . . . . . . . . . . . . . . . . . . . . . . . . . . . . . . . . . . . . .46
Simple measuring (continuous measuring by getting an area around) . . . . . . . . . . . . . . . . . . . . . .48
Installation and putting the program into operation on desktop PCs . . . . . . . . . . . . . . . . . . . . . . . .50
30
Important information . . . . . . . . . . . . . . . . . . . . . . . . . . . . . . . . . . . . . . . . . . . . . . . . . . . . . . . . . . . .51
What does the box contain?
Your DigiTerra Explorer 5 box contains a pre-installed SD card and a printed version of this Getting
Started Manual that includes the initial steps of putting the software in operation. That is all you will
need to run your software initially.
• A detailed Users’ Manual (in Hungarian and English) to facilitate program application
’User_Manual_XXX.pfd’
• A DigiTerra Explorer 5 desktop version for installation on desktop PCs
’DTEXPV5Setup.exe’
What does the SD card include?
How to start the program initially?
The SD card includes your DigiTerra Explorer 5 software that requires neither installation nor registration through the Internet before use. You can start mapping right away.
Putting DigiTerra Explorer 5 into operation is remarkably simple. By inserting the SD card into your
mobile device for the first time its Autorun utility program will start running automatically* and will do
all the necessary settings to start the program. This has to be performed only once with any mobile
device you want to run the program on. The program then will start running automatically and exit
automatically on such devices once you insert or remove your SD card.
Contents of the SD card:
• A DigiTerra Explorer 5 mobile geographical information and field
data collection software
’Bin’
• An autorun utility program to start DigiTerra Explorer 5 automatically as soon as your SD card is inserted into your mobile device
’2577’
• Sample data and digital background maps applicable to learn to
use the program and the teaching material in Users’ Manual
’Maps’
• A digital Users’Guide (in Hungarian, English, Romanian, Spanish,
French and German) to help first program running
’Getting_Started.pdf’
32
Initial steps to use Digiterra Explorer 5 software
* Some mobile devices will not start running the DigiTerra Explorer 5 program automatically. Should
that happen to your device, please follow the instructions in the chapter titled ’How to start the program manually?’.
Initial steps to use Digiterra Explorer 5 software
33
Setting languages
• Just tap on the required language that appears on the ’Select
Language’ option when running the software for the first time and
press ’OK’ at the bottom of the panel*
* Please note that setting the language of your DigiTerra Explorer 5
software is required only if it is not ’Hungarian’ that has been selected in the ‘Regional settings’ menu of your operation system.
Explorer 5 software does not start automatically by inserting your SD card, the operating system must
be re-started by pressing ”Reset” (or reset by the manufacturers recommended solution). Then insert
your SD card again. If you have managed to start the program by using its autorun function disregard
the following steps.
To start your Autorun utility program manually you are to take the following steps:
• Tap on the Windows® flag in the top left corner of the screen to open Start Menu.
• Open the ’Programs’ window.
• Start the ’File Explorer’ application.
Setting of languages later on
•
•
Open up the first pop-up menu
of DigiTerra Explorer 5 on the
left by selecting the small triangle that is pointing upwards
in the bottom left corner.
Tap on ’Dictionary’, select the language you need, then press ’OK’.
How to start the program manually?
Should your mobile device be unable to run automatically, the
Autorun utility program is easy to start manually.*
*The operating system may (depending on the type of PC) disable
the function of running the program automatically. If your DigiTerra
34
Initial steps to use Digiterra Explorer 5 software
Initial steps to use Digiterra Explorer 5 software
35
How to start the program from shortcut?
After starting the program successfully either automatically or manually, its Autorun utility program will
create the shortcut icons for your DigiTerra Explorer 5 software. After this setup starting your program
is done by selecting the DigiTerra Explorer 5 program, provided the SD Card is in the mobile device.
• Tap on the Windows® flag in the top left corner of your PDA screen to open Start Menu.
• Open the ’Programs’ window.
• Tap on the shortcut of DigiTerra Explorer 5 application* with your stylus.
* The shortcut icon of DigiTerra
Explorer 5 application will usually be found amongst the most
recently used programs in the
centre of Start Menu.
• Open the SD Card directory (file label varies from device to device, the most common are: ’Storage
Card’, ’SD Card’, ’My Flash Disk’ etc.)
• Open the ’2577’ directory within the ’SD Card’ directory.
• Run program ’Autorun’.
36
Initial steps to use Digiterra Explorer 5 software
After installation the shortcut icon
of the program is found in the
Desktop window or by following
the route: Start Menu > Programs
> DigiTerra Explorer v5.
Initial steps to use Digiterra Explorer 5 software
37
How to exit the program?
Please note: By tapping on ’X’ in
the top right corner of the screen
when the program is running the
working window will close, but the
program will still be running in the
background. The window of the
program can be opened again by
tapping on the icon in the bottom
right corner of the starting screen
(or from the Desktop with Windows
CE operation system).
• Open up the first pop-up menu of DigiTerra Explorer 5 on the left by selecting the small triangle
that is pointing upwards in the bottom left corner.
• Then tap on ’Exit’ and press ’Yes’ on the panel that appears.
How to set GPS connection?
To connect your GPS receiver and DigiTerra Explorer 5, this procedure is performed on any mobile
device where DigiTerra Explorer 5 is installed. This is a one off procedure as after the initial setup the
GPS, settings are saved.
Your DigiTerra Explorer 5 software will make it possible for you to connect to NMEA compatible GPS
receivers. Almost all receivers that are available on the market (receivers with built in mobile devices,
receivers that can be inserted into CF and SD card sockets or Bluetooth receivers) can meet these
requirements.
38
Initial steps to use Digiterra Explorer 5 software
Initial steps to use Digiterra Explorer 5 software
39
Please note: If you want to use an external GPS receiver connected by Bluetooth, you must first pair
your device using the Bluetooth Manager, then connect and match your device with the Bluetooth
Manager program.
Automatic GPS recognition
• Open up the second pop-up menu of DigiTerra Explorer 5 on the left by tapping on the small triangle that is pointing upwards.
• Tap on ’GPS state’ in the menu.
• Tap on the ’Settings’ button in the bottom left corner of the window that pops up on ’GPS State’.
• Press ’Port Search’ in the ’GPS Settings’ window to set communication port and data transfer rate
automatically.
• To start searching press ’Yes’ button.
• Port and data transfer rate have been set properly if a window that reads ’Listen! GPS port was
found!’ pops up.
• To approve settings press the button ’OK’ in the top right corner.
• To save settings press ’OK’ in the top right corner of the ’GPS settings’ window*.
40
Initial steps to use Digiterra Explorer 5 software
Initial steps to use Digiterra Explorer 5 software
41
* Please note: When switching from one window to another in the Windows Mobile operation system,
The ’OK’ button is not always visible because its window is not active. To activate the window again
simply tap on the window at the top of its frame. The ’OK’ button will show up again as a result.
Proper connection is, indicated by a small icon of a satellite that is sending out signals on its right in
the top right corner of the ’GPS State’ window and, also, by the constantly changing ’NMEA’ data
string that come from the GPS receiver. These information is made visible by a window that appears
when you select the ’NMEA’ button. This window is closed by selecting the ’NMEA’ button again.
• To close ’GPS State’ window press ’OK’ in the top right corner.
Once the GPS connection has
been established the software will
receive NMEA data from the GPS
receiver. Then, having established
a constant link with a minimum of
3 satellites, it defines a fixed position on the WGS-84 ellipsoid surface (i.e. the ideal surface of the
Earth). Initialising the device may
take 2-3 seconds or up to 5 minutes depending on the length of
time that has passed since the last
use of your GPS receiver and also
on the geographical distance from
the position of its last use. Regular
use, however, results in a shorter
initialisation time.
42
Initial steps to use Digiterra Explorer 5 software
The background data indicating
the quality of your GPS position
in the bottom right corner of the
map window will remain red until
the accuracy of your GPS position reaches the required level.
Before this happens, processing
of data is not possible. The GPS
position is ready for location if the
above background turns green
or, after receiving a DGPS correction, blue.*
* For more information on ’GPS Settings’ please see the Users’ Manual of DigiTerra Explorer 5 software.
Initial steps to use Digiterra Explorer 5 software
43
How to set GPS connection manually?
To Set the GPS connection manually if the communication ports (COM1,2…) and Baud rates are
known.*
* Please note that the number of communication ports and data transfer rate values depend on the
technical features of your GPS receiver. Accurate values are usually provided in the technical description of your GPS receiver or may be obtained from the manufacturer.
• The improper setting of ‘Port’ or data transfer speed rate will lead to an error message that reads
’Opening Port: Connection failed!’ If you see this notice, consult your GPS manual for the correct
information.
Once a the GPS connection has been established take the steps as described under the topic
’Automatic GPS recognition’ to close ’GPS Settings’ window and to check the quality of the connection.
• Open the ’GPS Settings’ window as described under the
topic ’Automatic GPS recognition’.
• Tap on the drop-down list next
to the ’Port’ and select the communication port that matches
your GPS receiver. If the correct port is selected no error
message will appear.
• Tap on the drop-down list next
to ’Baud’ as described in setting
port above and select the data
transfer rate of your GPS receiver. If the data transfer rate is
correctly selected no error message will appear.
44
Initial steps to use Digiterra Explorer 5 software
Initial steps to use Digiterra Explorer 5 software
45
Preparation for Mapping and Surveying
Having initialised your GPS receiver you are required either to select an already existing DigiTerra map
layer (containing geometric entities) or to create a new (blank) DigiTerra map layer where you can
record your GPS position in either points, lines or polygons. *
* When you have set your software and GPS connection properly, you are ready to record your data
and position.
Steps of preparation for mapping
and surveying
• Start DigiTerra Explorer 5. Tap
on the ’Layers’ button on the
top left-hand side frame to open
’Layers’ window.
• Tap on ’Create Layer’ button in
the top left-hand side corner of
the window to create a new
(blank) layer where you can
record your GPS position in
either points, lines or polygons.
• Tap on the ’Name’ text box within ’Create Layer’ window and enter the name of the map layer (eg.
‘AreaSurveying’) you want to create. Press ’OK’.
• Press ’OK’ in ’Layers’ window.
• Tap on the ’GPS Surveying Panel’ button in the top right-hand side corner of the map window. The
program then links up with the GPS receiver and starts reading position data. As soon as Initialisation (as described in topic ’Automatic GPS recognition’) takes place the program is ready for
locating (measuring) positions.*
* Please note that point, line and polygon objects are to be created in separate layers. (Example: if
you are collecting data in a polygon layer points or lines cannot be recorded.)
46
Initial steps to use Digiterra Explorer 5 software
Initial steps to use Digiterra Explorer 5 software
47
Simple measuring (continuous measuring of an area)
Perform the tasks as described under the topic ’Preparation for mapping and surveying’. Wait until your
GPS receiver initialises, and the GPS position is considered good for locating a position (if the background colour of the quality of GPS position is green). It may also turn blue after DGPS correction.
• With blank map layers (layers with no measurements or objects) select ’Polygon’ on the ’GPS
Surveying Panel.*
• Before you start collecting the
boundary of a field or area in
DigiTerra stand at a point on the
boundary of the field or area.
• Press the (Record) button (the
red dot) to start recording and
walk around the area. (The red
dot will change to a blue square
when walk around the field or
area )
• When you get back to your starting point press the (Stop button
which is the Blue Square) this
will stop the surveying of the
area and close the polygon.
• The program then displays a
form that is attached to the area
which has been surveyed. Fill
in the necessary data records
and close the window by pressing ’OK’ in the top right-hand
side corner.
Please note that the program will automatically save the measured geometrical entities together with
their descriptive attributes by default. You do not need to save the data of your measurements.
* If you continue to record area
information in the area layer you
will not need to select ‘Type’ as it
will automatically select Area.
48
Initial steps to use Digiterra Explorer 5 software
Initial steps to use Digiterra Explorer 5 software
49
Installation and putting the program into operation on desktop PCs
Important information
The installer called ”DTEXPV5Setup.exe” for the desktop version of DigiTerra Explorer 5 can be found
in the root library of the SD card.*
You will find detailed information as to how to use the software in the Users’ Manual on the SD Card
(in various languages) and on www.digiterra.hu website (User_Manual.pdf). To read the Users’
Manual you will need Adobe Acrobat Reader that you can download from http://www.adobe.com/
products/acrobat/readstep2.html.
• After inserting your DigiTerra Explorer 5 SD card into your mobile
device, connect it to your desktop PC (with USB-cable for example).
• Copy ”DTEXPV5Setup.exe” installer to your desktop PC by
using Microsoft ActiveSync - or in case of Windows Vista operation system Windows Mobile Device Center – software. If your
desktop PC is equipped with an SD card reader, feel free to use it.
• Run the installer on your desktop PC and follow the instructions.
Desktop version of DigiTerra Explorer 5 can be installed on
unlimited number of desktop PC’s. However, full functionality
of the software is available only if a mobile device – containing
DigiTerra Explorer SD card – is connected** .
DigiTerra Information Services Ltd. as the producer of DigiTerra Explorer 5 software guarantees to
replace SD Cards within the period of one year from the date of purchase. Neither the producer nor
the distributors of the software will take responsibility of whatsoever for damage caused by improper
use. Nor does it lie in our power to replace SD Cards with the software in the event of their being lost
or stolen.
For further information please turn to the distributors of DigiTerra Explorer 5 or contact us at
www.digiterra.hu website.
DigiTerra Information Services Ltd.
1025 Budapest, Csévi u. 6.
* The latest desktop version of DigiTerra Explorer 5 you can always
find on the website www.digiterra.hu, it is recommended to download and use this!
** Provided that Microsoft ActiveSync - or in case of Windows Vista operation system Windows Mobile
Device Center - connection works properly. In case you have difficulties with setting up connection
between your mobile device and desktop PC, please contact your system administrator!
50
Initial steps to use Digiterra Explorer 5 software
Initial steps to use Digiterra Explorer 5 software
51
Plug &
survey
Primii paói
în utilizarea aplicaûiei
53
Plug & Survey – Introduceûi cardul ói môsuraûi!
Cuprins:
Conûinutul pachetului . . . . . . . . . . . . . . . . . . . . . . . . . . . . . . . . . . . . . . . . . . . . . . . . . . . . . . . . . . . . . 56
Conûinutul cardului SD. . . . . . . . . . . . . . . . . . . . . . . . . . . . . . . . . . . . . . . . . . . . . . . . . . . . . . . . . . . . 56
Prima pornire a aplicaûiei . . . . . . . . . . . . . . . . . . . . . . . . . . . . . . . . . . . . . . . . . . . . . . . . . . . . . . . . . . 57
Setarea limbii . . . . . . . . . . . . . . . . . . . . . . . . . . . . . . . . . . . . . . . . . . . . . . . . . . . . . . . . . . . . . . . . . . . 58
Pornirea manualô a aplicaûiei . . . . . . . . . . . . . . . . . . . . . . . . . . . . . . . . . . . . . . . . . . . . . . . . . . . . . . 58
Închiderea aplicaûiei . . . . . . . . . . . . . . . . . . . . . . . . . . . . . . . . . . . . . . . . . . . . . . . . . . . . . . . . . . . . . . 62
Setarea conexiunii GPS . . . . . . . . . . . . . . . . . . . . . . . . . . . . . . . . . . . . . . . . . . . . . . . . . . . . . . . . . . 63
Setarea automatô a conexiunii GPS . . . . . . . . . . . . . . . . . . . . . . . . . . . . . . . . . . . . . . . . . . . . . 64
Setarea manualô a conexiunii GPS . . . . . . . . . . . . . . . . . . . . . . . . . . . . . . . . . . . . . . . . . . . . . . 68
Pregôtirea aplicaûiei pentru môsurare . . . . . . . . . . . . . . . . . . . . . . . . . . . . . . . . . . . . . . . . . . . . . . . . 70
Môsurarea simplô a unei suprafeûe (masurare continuô prin parcurgerea conturului) . . . . . . . . . . . 72
Instalarea ói pornirea aplicaûiei pe calculatorul de birou . . . . . . . . . . . . . . . . . . . . . . . . . . . . . . . . . . 74
54
Informaûii importante . . . . . . . . . . . . . . . . . . . . . . . . . . . . . . . . . . . . . . . . . . . . . . . . . . . . . . . . . . . . . 75
Conûinutul pachetului
Pachetul conûine un card SD cu aplicaûia DigiTerra Explorer 5 preinstalatô ói acest manual de
utilizare, care conûine primii paói pentru folosirea aplicaûiei. Acestea sunt toate componentele de care
aveûi nevoie la prima pornire a aplicaûiei.
• Manualul de utilizare detaliat al aplicaûiei.
”User_Manual_XXX.pdf” (în versiunile englezô, românô, maghiarô)
• Versiunea Desktop a aplicaûiei DigiTerra Explorer 5, care poate fi instalatô pe un calculator PC.
”DTEXPV5Setup.exe”
Conûinutul cardului SD
Prima pornire a aplicaûiei
Cardul SD conûine aplicaûia DigiTerra Explorer 5, care funcûioneazô de la prima pornire, nu este
necesarô instalarea ói înregistrarea prin Internet.
Pornirea aplicaûiei DigiTerra Explorer 5 este foarte simplô. Trebuie doar sô introduceûi cardul SD în
calculatorul de teren (PDA), aplicaûia porneóte în mod automat* ói opereazô toate setôrile necesare
pentru rularea programului. Acest procedeu se executô doar o singurô datô la fiecare calculator de
teren în care utilizaûi aplicaûia. La urmôtoarele introduceri ale cardului SD aplicaûia va porni în mod
automat, respectiv se va opri la scoaterea cardului SD.
Conûinutul cardului SD:
• Aplicaûia geoinformaticô pentru môsurôtori ói colectare de date
în teren DigiTerra Explorer 5
”Bin”
• Un program tip Autorun, pentru pornirea automatô a aplicaûiei
DigiTerra Explorer în momentul în care introduceûi cardul SD în
calculatorul de teren.
”2577”
• Hôrûi ói fióiere care pot fi folosite pentru învôûarea utilizôrii
aplicaûiei ói pentru exerciûiile prezentate în manualul de utilizare.
”Maps”
• Versiunea electronicô a manualului care vô ajutô la prima pornire
a aplicaûiei.
”Getting_Started.pdf” (în versiunile englezô, românô, maghiarô,
spaniolô, francezô, germanô)
56
Primii paói în utilizarea aplicaûiei DigiTerra Explorer
* La unele calculatoare de teren aplicaûia DigiTerra Explorer 5 nu porneóte în mod automat. În acest
caz, vô rugôm urmôriûi instrucûiunile din capitolul ”Pornirea manualô a aplicaûiei DigiTerra Explorer 5”.
Primii paói în utilizarea aplicaûiei DigiTerra Explorer
57
Setarea limbii
• În fereastra de dialog care apare la prima pornire a aplicaûiei,
alegeûi limba doritô cu ajutorul stiloului (stylus), ói apôsaûi butonul
”OK” .*
* Menûionôm, ca setarea limbii aplicaûiei DigiTerra Explorer este
necesarô doar în cazul în care setôrile regionale ale sistemului de
operare nu sunt setate la „Românô” („Romanian”).
* În eventualitatea în care aplicaûia DigiTerra Explorer nu porneóte în mod automat la întroducerea
cardului SD, încercaûi sô resetaûi sistemul de operare prin apôsarea butonului „Reset” (sau prin
combinaûia de taste necesarô) ói introduceûi cardul SD din nou. În unele cazuri sistemul de nu permite
pornirea automatô a aplicaûiilor din motive de siguranûô. Dacô prin aceastô metodô reuóiûi sô porniûi
aplicaûia, nu trebuie sô parcurgeûi acest capitol.
Pentru pornirea utilitarului de lansare automatô a aplicaûiei parcurgeûi urmôtorii paói:
• Deschideûi meniul Start prin apôsarea pe steguleûul Windows®.
• Deschideûi fereastra Programe (Programs).
• Porniûi aplicaûia File explorer.
Modificarea setôrii limbii
• Intraûi în primul meniu din
stânga în fereastra de lucru a
aplicaûiei DigiTerra Explorer 5
arôtând cu stiloul pe triunghiul
negru din dreptul primului buton
din colûul de stânga jos a ecranului.
• Apôsaûi pe butonul „Dicûionar” ói alegeûi limba doritô din listô.
Apôsaûi butonul OK.
Pornirea manualô a aplicaûiei
Utilitarul pentru lansarea automatô a aplicaûiei poate fi pornit ói
manual, în cazul în care calculatorul de teren nu face acest lucru în
mod automat.*
58
Primii paói în utilizarea aplicaûiei DigiTerra Explorer
Primii paói în utilizarea aplicaûiei DigiTerra Explorer
59
Pornirea programului cu ajutorul pictogramei
Dupô lansarea utilitarului „autorun” în mod automat sau manual, aceasta va crea pictogramele aplicaûiei
DigiTerra Explorer 5, cu ajutorul côrora puteûi lansa aplicaûia oricând, fôrô a fi necesarô operaûia de
scoatere ói reintroducere a cardului SD, dacô aceasta se aflô în mod permanent în calculatorul de teren.
• Deschideûi meniul Start prin apôsarea pe steguleûul Windows® din partea de stânga sus (jos) a ecranului.
• Deschideûi fereastra Programe (Programs).
• Arôtaûi cu stiloul pe pictograma aplicaûiei DigiTerra Explorer 5.*
* De obicei pictograma aplicaûiei
DigiTerra Explorer 5 va fi accesibil
ói din meniul Start, în lista ultimelor
5 aplicaûii pornite.
• Deschideûi directorul cardului SD (poate avea diferite denumiri în funcûie de aparat, de exemplu:
”Storage Card”, ”SD Card”, ”My Flash Disk” etc.)
• Deschideûi directorul ”2577” de pe cardul SD.
• Lansaûi utilitarul ”autorun”.
La sistemul de operare Windows®
CE pictograma aplicaûiei va fi
prezentô pe Desktop respectiv pe
calea: Start menu > Programs >
DigiTerra Explorer v5.
În cazul sistemului de operare Windows® CE în loc de File Explorer trebuie sô deschideûi pictograma
”Calculatorul meu” (My Device) de pe Desktop. Côutarea utilitarului ”autorun” se face în modul descris
mai sus.
60
Primii paói în utilizarea aplicaûiei DigiTerra Explorer
Primii paói în utilizarea aplicaûiei DigiTerra Explorer
61
Închiderea aplicaûiei
Observaûii: Prin apôsarea pe
butonul „x” din partea de dreapta
sus a aplicaûiei, fereastra de lucru
se închide, dar aplicaûia rômâne
încôrcatô în memorie! În acest
caz fereastra aplicaûiei poate fi
reafióatô apôsând pe pictograma
din partea de dreapta jos a
ecranului (În cazul sistemului de
operare Windows CE din System
tray).
• Intraûi în primul meniu din stânga în fereastra de lucru a aplicaûiei DigiTerra Explorer 5 arôtând cu
stiloul pe triunghiul negru din dreptul primului buton din colûul de stânga jos a ecranului.
• Arôtaûi pe ultimul punct de meniu „Ieóire” ói apôsaûi butonul „Da” (Yes) în fereastra de dialog care
apare.
Setarea conexiunii GPS
La setarea conexiunii GPS se configureazô comunicarea între receptorul GPS ói aplicaûia DigiTerra
Explorer 5. Aceastô configurare trebuie executatô la toate PDA –urile în care folosim aplicaûia
DigiTerra Explorer 5, dupô o conectare reuóitô la receptorul GPS, aceste setôri vor fi salvate, astfel
paóii de mai jos trebuie sô fie parcurói o singurô datô.
Aplicaûia DigiTerra Explorer 5 poate comunica cu receptoarele GPS care folosesc protocolul NMEA.
Receptoarele GPS comercializate în România, de tip Bluetooth, cu conectoare CF, SD sau cele
încorporate PDA-uri, corespund, aproape fôrô excepûii acestei cerinûe.
62
Primii paói în utilizarea aplicaûiei DigiTerra Explorer
Primii paói în utilizarea aplicaûiei DigiTerra Explorer
63
Observaûie: la GPS –uri tip Bluetooth va trebui mai întâi sô setaûi conexiunea Bluetooth cu calculatorul
PDA.
Setarea automatô a conexiunii GPS
• Intraûi în primul meniu din stânga în fereastra de lucru a aplicaûiei DigiTerra Explorer 5 arôtând cu
stiloul pe triunghiul negru din dreptul primului buton din colûul de stânga jos a ecranului.
• Arôtaûi la punctul de meniu „Setare GPS”.
• În partea de dreapta jos a ferestrei „Stare GPS”, apôsaûi butonul „Setare”.
• În fereastra „Setôri” apôsaûi butonul „Côutare Port” pentru setarea automatô a portului de
comunicare ói a vitezei de transfer pentru date.
• Pentru pornirea côutôrii apôsaûi butonul „Da” (Yes).
• Dacô setarea portului ói a vitezei de transfer s-a executat cu succes, apare fereastra de dialog
„Atenûie! Côutare port reuóitô”.
• Apôsaûi butonul „ok” din colûul de dreapta sus a acestei ferestre pentru acceptarea setôrilor.
• Apôsaûi butonul „ok” din colûul de dreapta sus a ferstrei Setôri pentru salvarea setôrilor*.
64
Primii paói în utilizarea aplicaûiei DigiTerra Explorer
Primii paói în utilizarea aplicaûiei DigiTerra Explorer
65
* Observaûie: în sistemul de operare Windows Mobile, la trecerea de la o fereastrô la alta, butonul „ok”
nu este întotdeauna vizibil, deoarece fereastra poate sô nu fie activô. Pentru activarea ferestrei
apôsaûi pe o zonô neutrô din cadrul ferestrei, ca urmare, butonul „ok” va fi afióat din nou.
Funcûionarea conexiunii este confirmatô ói de apariûia pictogramei unui satelit care emite semnale în
partea de dreapta sus a ferestrei „Stare GPS”, respectiv, prin apôsarea pe butonul „NMEA” va fi
afióatô o fereastrô cu propoziûiile NMEA, care se schimbô tot timpul. Aceastô fereastrô poate fi închisô
prin apôsarea încô odatô pe butonul „NMEA”
• Pentru închiderea ferestrei
„Stare GPS”, apôsaûi butonul
„ok” din colûul de dreapta sus a
ferestrei.
Dupô o conexiune reuóitô aplicaûia
începe sô primeascô propoziûiile
NMEA din receptorul GPS, iar dupô
ce realizeazô un flux continuu de
informaûii continue de la cel puûin 3
sateliûi, se determinô poziûia fixô pe
suprafaûa elipsoidului WGS-84
(modelul matematic ideal a formei
Pômântului). În funcûie de timpul
trecut de când am folosit receptorul
GPS pentru ultima oarô, sau de
distanûa unde ne aflôm de la ultima
66
Primii paói în utilizarea aplicaûiei DigiTerra Explorer
locaûie unde am folosit receptorul GPS, aceastô INIÛIALIZARE poate dura de la 2-3 secunde pânô la 5
minute. La o folosire frecventô receptorul GPS iniûializeazô într-un timp mai scurt.
În partea de dreapta jos a ferestrei
de afiare a hôrûii apar informaûii
privind calitatea semnalului ói a
poziûiei GPS determinate. Dacô
aceste informaûii apar pe un fond
roóu, poziûia GPS nu are precizia
corespunzôtoare, în acest caz nu
veûi putea înregistra poziûii GPS
cu ajutorul aplicaûiei.
O poziûie GPS corespunzôtoare
este semnalatô de culoarea verde
a fundalului, în cazul recepûionôrii
unei corecûii DGPS, fundalul va
avea o culoare albastrô.*
* Pentru informaûii mai detaliate privind setôrile GPS ói efectul acestora asupra poziûiei determinate,
vô rugôm consultaûi manualul de utilizare a aplicaûiei DigiTerra Explorer 5!
Primii paói în utilizarea aplicaûiei DigiTerra Explorer
67
Setarea manualô a conexiunii GPS
În cazul în care cunoaótem numôrul portulului de comunicaûii (COM1,2…) ói a vitezei de transfer
(valoarea Baud) avem posibilitatea sô setôm conexiunea GPS în mod manual.*
* Menûionôm ca numôrul portului ói viteza de transfer este diferit în funcûie de modelul receptorului
GPS. Aceste informaûii le puteûi gôsi în documentaûia tehnicô a receptorului GPS. În cazul în care nu
puteûi afla aceste informaûii, contactaûi producôtorul aparatului.
• Deschideûi fereastra „Setôri
GPS în modul descris la
„Setarea manualô a conexiunii
GPS”.
• Arôtaûi cu stiloul la lista derulantô
în dreapta etichetei ”Port:” ói
alegeûi portul de comunicaûii
aferente receptorului GPS.
Dacô setarea este corectô, nu
va apare nici un mesaj de
eroare.
• Pentru setarea vitezei de transfer arôtaûi la lista derulantô în dreapta eticheti ”Baud:” ói alegeûi
viteza de transfer utilizabilô pentru receptorul GPS. Dacô setarea este corectô, nu va apare nici un
mesaj de eroare.
În cazul în care una dintre valorile setate este incorectô dupô setarea vitezei (Baud), apare mesajul
de eroare „Deschidere port: Conexiune nereuóitô!”. Încercaûi sô setaûi alte valori, pânô în momentul
când nu mai apare acest mesaj.
Dupô o conexiune reuóitô executaûi operaûiile descrise în partea „Setarea automatô a conexiunii GPS”
pentru închiderea ferestrei „Setare GPS” ói testarea funcûionôrii conexiunii.
68
Primii paói în utilizarea aplicaûiei DigiTerra Explorer
Primii paói în utilizarea aplicaûiei DigiTerra Explorer
69
Pregôtirea aplicaûiei pentru môsurare
Dupô iniûializarea receptorului GPS, trebuie sô alegem un strat de hartô existent (care conûine deja
unele elemente geometrice) sau sô creôm un strat nou (gol), în care vom stoca poziûiile GPS în forma
unor obiecte de tip punct, linie sau suprafaûô. *
* În acest capitol presupunem cô setôrile aplicaûiei ói conexiunea GPS au fost executate cu succes.
În cazul în care nu aûi parcurs aceste setôri, vô rugôm sô citiûi capitolele referitoare la aceste operaûii.
Pregôtirea môsurôrii, pas cu pas
• Porniûi aplicaûia DigiTerra
Explorer 5, arôtaûi cu stiloul pe
butonul „Straturi” din partea de
dreapta sus a ferestrei de
afióare a hôrûii, pentru deschiderea ferestrei „Straturi”.
• În colûul de stânga sus a
ferestrei „Straturi” apôsaûi
butonul „Creare strat nou”
pentru a crea un strat nou, în
care veûi putea înregistra
poziûiile GPS môsurate în
forma unor obiecte geometrice
de tip punct, linie sau suprafaûô.
70
Primii paói în utilizarea aplicaûiei DigiTerra Explorer
• În fereastra „Creare strat” arôtaûi pe câmpul „Nume” ói introduceûi numele stratului pe care vreûi sô
creaûi (exemplu: Suprafete), apôsaûi butonul „OK”.
• În fereastra straturi apôsaûi butonul „OK”.
• În colûul de dreapta sus a ferestrei de afióare a hôrûii (fereastra principalô) apôsaûi butonul
„Môsurare GPS”. Aplicaûia se conecteazô la receptorul GPS ói începe citirea informaûiilor de
poziûie. Conform celor descrise în capitolul „Setarea automatô a conexiunii GPS” se executô
INIÛIALIZAREA, aplicaûia este pregôtitô pentru înregistrarea poziûiilor (môsurare).*
Primii paói în utilizarea aplicaûiei DigiTerra Explorer
71
* Menûionôm ca obiectele geometrice de tip punct, linie sau suprafaûô pot fi create în straturi diferite,
astfel de exemplu într-un strat care conûine obiecte de tip suprafaûô nu pot fi create linii sau puncte.
Paóii descriói mai sus, pânô la INIÛIALIZARE, sunt identice indiferent de metoda de înregistrare a
poziûiilor GPS pe care vrem sô aplicôm în continuare.
• Apôsaûi butonul cu simbol rotund roóu (Rec) ói parcurgeûi limita suprafeûei (linia de contur).
* În cazul în care alegeûi un strat care conûine deja obiecte de tip suprafaûô pentru môsurare, (de
exemplu efectuaûi alte môsurôtori noi în stratul creat mai sus), nu va fi nevoie sô alegeûi Tipul de
obiect de môsurat.
Môsurarea simplô a unei suprafeûe (môsurare continuô prin parcurgerea conturului)
Parcurgeûi paóii din capitolul „Pregôtirea aplicaûiei pentru môsurare”, aóteptaûi pânô când receptorul
GPS INIÛIALIZEAZÔ. Calitatea poziûiei GPS este corespunzôtoare pentru înregistrare (môsurare)
dacô informaûiile din colûul de
dreapta jos a ferestrei de afióare
a hôrûii sunt afióate pe fond de
culoare verde sau, în cazul
existenûei unei corecûii DGPS,
fond de culoare albastrô.
• Pentru un strat de hartô gol
(care nu conûine obiecte) în
fereastra „Môsurôtori GPS”
alegeûi tipul „Suprafaûô”.*
• Pentru a începe môsurarea
staûionaûi pe un punct de pe
limita suprafeûei pe care vreûi
sô môsuraûi.
72
Primii paói în utilizarea aplicaûiei DigiTerra Explorer
• În momentul în care aûi ajuns
înapoi la punctul de pornire,
apôsaûi butonul cu simbolul
pôtrat albastru (Stop).
• Aplicaûia afióeazô formularul
aferent obiectului môsurat,
completaûi datele atribut ói
închideûi dialogul prin apôsarea
pe butonul „ok” din colûul de
dreapta sus a formularului.
Menûionôm cô aplicaûia, în mod implicit, salveazô obiectul geometric môsurat împreunô cu datele
atribut aferente în mod automat, nu va fi necesarô salvarea manualô a acestuia.
Primii paói în utilizarea aplicaûiei DigiTerra Explorer
73
Instalarea ói pornirea aplicaûiei pe calculatorul de birou
Informaûii importante
Pentru instalarea versiunii PC a aplicaûiei DigiTerra Explorer 5. folosiûi fióierul ”DTEXPV5Setup.exe”
de pe cardul SD.*
Informaûii detaliate privind utilizarea aplicaûiei veûi gôsi pe cardul SD ói pe site-ul www.digiterra.ro în
diferite limbi (User_Manual.pdf). Pentru vizualizarea manualului veûi avea nevoie de aplicaûia Adobe
Acorbat Reader, care poate fi descôrcat de pe pagina: http://www.adobe.com/products/acrobat/
readstep2.html.
• Introduceûi cardul SD care conûine aplicaûia DigiTerra Explorer 5.
în PDA ói conectaûi PDA-ul la calculatorul de birou (de exemplu
folosind cablul USB).
• Copiaûi fióierul ”DTEXPV5Setup.exe” pe calculatorul de birou cu
ajutorul aplicaûiei Microsoft ActiveSync sau cu ajutorul aplicaûiei
Windows Mobile Device Center în cazul sistemului de operare
Windows Vista. Pentru acest scop puteûi folosi ói un Card reader.
• Dupô ce aûi copiat pe calculatorul de birou, porniûi fióierul. Urmôriûi
instrucûiunile de instalare.
Versiunea de birou a aplicaûiei DigiTerra Explorer 5 poate fi
instalat pe un numôr nelimitat de calculatoare PC. Aplicaûia are
funcûionalitate completô numai în cazul în care calculatorul de
teren – cu cardul SD introdus - este conectat la calculatorul de
birou**.
Producôtorul aplicaûiei DigiTerra Explorer 5, DigiTerra Information Services Ltd., asigurô garanûie de
1 an de la data cumpôrôrii, prin înlocuire, pentru cardul SD. Producôtorul ói distribuitorii software-ului
nu asigurô garanûia în cazul daunelor ivite ca urmare a utilizôrii incorecte sau în alte scopuri decât cel
pentru care a fost creat aplicaûia. Nu asigurôm SD card ói Software nou în cazul pierderii sau furtului.
Aplicaûia DigiTerra Explorer nu este destinat môsurôtorilor, trasôrilor de mare precizie (cadastrale,
topografice, geodezice) ói nu poate fi folositô în domenii unde prin folosirea aplicaûiei ar putea fi pusô
în pericol viaûa unor persoane (de exemplu: aviaûie etc.)
Pentru informaûii suplimentare vô rugôm sô contactaûi distribuitorii sau reprezentanûii teritoriali ai
DigiTerra Information Services Ltd. pentru contact accesaûi www.digiterra.ro.
DigiTerra Information Services Ltd.
1025 Budapesta, Csévi u. 6.
* Versiunea cea mai nouô a versiunii de PC a aplicaûiei DigiTerra Explorer 5 va fi accesibilô pe pagina
www.digiterra.ro vô recomandôm sô folosiûi aceastô versiune!
** Este nevoie de o conexiune activô Microsoft ActiveSync, sau Windows Mobile Device Center în
cazul sistemului de operare Windows Vista! În cazul în care nu reuóiûi sô realizaûi aceastô conexiune,
apelaûi la administratorul de sistem!
74
Primii paói în utilizarea aplicaûiei DigiTerra Explorer
Primii paói în utilizarea aplicaûiei DigiTerra Explorer
75
Plug &
survey
Praktische Anleitung
zur Inbetriebnahme der
Software
77
Plug & Survey – Karte einlegen und vermessen!
Inhaltsverzeichnis:
Inhalt der Verpackung . . . . . . . . . . . . . . . . . . . . . . . . . . . . . . . . . . . . . . . . . . . . . . . . . . . . . . . . . . . .80
Inhalt der SD Karte . . . . . . . . . . . . . . . . . . . . . . . . . . . . . . . . . . . . . . . . . . . . . . . . . . . . . . . . . . . . . .80
Programmstart . . . . . . . . . . . . . . . . . . . . . . . . . . . . . . . . . . . . . . . . . . . . . . . . . . . . . . . . . . . . . . . . . .81
Sprache einstellen . . . . . . . . . . . . . . . . . . . . . . . . . . . . . . . . . . . . . . . . . . . . . . . . . . . . . . . . . . . . . . .82
Programm von Hand starten . . . . . . . . . . . . . . . . . . . . . . . . . . . . . . . . . . . . . . . . . . . . . . . . . . . . . . .82
Programm schließen . . . . . . . . . . . . . . . . . . . . . . . . . . . . . . . . . . . . . . . . . . . . . . . . . . . . . . . . . . . . .86
GPS Verbindung einstellen . . . . . . . . . . . . . . . . . . . . . . . . . . . . . . . . . . . . . . . . . . . . . . . . . . . . . . . .87
Automatische GPS Erkennung . . . . . . . . . . . . . . . . . . . . . . . . . . . . . . . . . . . . . . . . . . . . . . . . . .88
GPS Verbindung von Hand einstellen . . . . . . . . . . . . . . . . . . . . . . . . . . . . . . . . . . . . . . . . . . . .92
Kartographische Funktionen, Vorbereitung der Vermessung . . . . . . . . . . . . . . . . . . . . . . . . . . . . . .94
Einfache Polygonvermessung (stufenlose Vermessung bei Herumlaufen) . . . . . . . . . . . . . . . . . . .96
Programm auf Arbeitsplatzrechner installieren . . . . . . . . . . . . . . . . . . . . . . . . . . . . . . . . . . . . . . . . .98
78
Wichtiger Hinweis . . . . . . . . . . . . . . . . . . . . . . . . . . . . . . . . . . . . . . . . . . . . . . . . . . . . . . . . . . . . . . .99
Inhalt der Verpackung
In der Verpackung von DigiTerra Explorer befindet sich eine SD Karte mit der installierten Software
sowie die Bedienungsanleitung, die die ersten Schritte der Benutzung der Software beschreibt.
Darüber hinaus brauchen Sie nichts, um mit dem Programm arbeiten zu können.
• Ausführliches Benutzerhandbuch
”User_Manual_XXX.pdf” (in Ungarischer und Englischer Sprache)
• DigiTerra Explorer 5 Desktop Version für den Arbeitsplatzrechner
”DTEXPV5Setup.exe”
Inhalt der SD Karte
Programmstart
Die SD Karte dient als Träger der DigiTerra Explorer 5 Software. Damit ersparen Sie sich die zeitaufwändige Installation und Registrierung übers Internet. Nachdem die
Karte in das mobile Handheld Gerät eingelegt wird, Sie können
sofort mit der kartographischen Arbeit beginnen.
DigiTerra Explorer 5 zu starten ist äußerst einfach. Es reicht aus, die SD Karte in das mobile
Handheld Gerät einzulegen, und das Dienstprogramm startet automatisch die Anwendung*, wobei
jede nötige Einstellung durchgeführt wird. Der automatische Start erfolgt später ebenso, falls die SD
Karte neu eingelegt wird.
Folgende Dateien sind auf der SD Karte zu finden:
• DigiTerra Explorer 5 - mobile Geoinformations-Software zur Felddatenerfassung
”Bin”
• Dienstprogramm zum automatischen Start der Software, nachdem die SD Karte in das mobile Handheld Gerät eingelegt wurde
”2577”
• Musterdatenbank und Karten zum leichteren Verständnis des
Benutzerhandbuchs
”Maps”
• Elektronische Version dieser Praktischen Anleitung
”Getting_Started.pdf” (in Ungarischer, Englischer, Rumänischer,
Spanischer, Französischer und Deutscher Sprache)
* Manche mobile Handheld Geräte können DigiTerra Explorer 5 Programm nicht automatisch starten.
Machen Sie diese Erfahrung, so folgen Sie bitte den Anweisungen im Kapitel ”Programm von Hand
starten”.
80
Praktische Anleitung zur Inbetriebnahme der DigiTerra Explorer 5 Software
Praktische Anleitung zur Inbetriebnahme der DigiTerra Explorer 5 Software
81
Sprache einstellen
• Beim ersten Start der Software durch Antippen mit dem Stift die
gewünschte Sprache selektieren und die „OK” Taste betätigen.*
* Falls im Betriebssystem die Ungarische Sprache („Hungarian”)
eingestellt ist, so läuft die Software automatisch in Ungarischer
Sprache.
Spracheinstellung ändern
•
•
(bzw. der von dem Hersteller vorgeschriebenen Tastenkombination) neu zu starten und die SD Karte
wieder einzulegen. Bei manchen mobilen Handheld Geräten kann allein durch dieses Verfahren das
Problem beseitigt werden.
Um das automatische Startprogramm von Hand zu betreiben, führen Sie bitte die folgenden Schritte
durch:
• Öffnen Sie das Start-Menü durch Antippen der Windows® Flagge in der linken oberen Ecke.
• Öffnen Sie das „Programs” Fenster.
• Starten Sie die „File Explorer” Anwendung.
Durch Betätigung der schwarzen Dreieck-Taste in der unteren linken Ecke, öffnen Sie das
Drop-Up Menü.
Selektieren Sie die gewünschte
Sprache im „Wörterbuch“ Menü
und betätigen Sie die „OK” Taste.
Programm von Hand starten
Das Startprogramm ist auch von Hand einfach zu betreiben, falls Ihr
mobiles Handheld Gerät keinen automatischen Start ermöglicht.*
* Scheitert der automatische Start beim Einlegen der SD Karte, versuchen Sie das Betriebssystem durch Betätigung der ”Reset” Taste
82
Praktische Anleitung zur Inbetriebnahme der DigiTerra Explorer 5 Software
Praktische Anleitung zur Inbetriebnahme der DigiTerra Explorer 5 Software
83
Programm mit Schnelltaste starten
Nach einem erfolgreichen automatischen oder manuellen Start erstellt das Dienstprogramm eine
Schnelltaste für DigiTerra Explorer 5 Software, damit man das Programm starten kann, vorausgesetzt, daß sich die SD Karte im mobilen Handheld Gerät befindet.
• Öffnen Sie das Start durch Antippen der Windows® Flagge in der linken oberen Ecke.
• Öffnen Sie das „Programs” Fenster.
• Tippen Sie an die Schnelltaste DigiTerra Explorer 5.*
* Weiterhin finden Sie die Schnelltaste DigiTerra Explorer 5 unter
den neulich benutzten Programmen in der Mitte des Start Menüs.
• Öffnen Sie das Datenverzeichnis der SD Karte (Verzeichnisname ist unterschiedlich, übliche Namen: ”Storage Card”, ”SD Card”, ”My Flash Disk” usw.)
• Öffnen Sie das Datenverzeichnis ”2577”.
• Lassen Sie das Programm ”autorun” laufen.
Im Falle von Windows® CE Betriebssystem ist die Schnelltaste
auch auf der Arbeitsoberfläche
und dem folgenden Pfad zu finden: Start Menu > Programs >
DigiTerra Explorer v5.
Im Falle von Windows® CE Betriebssystem erreicht man die File Explorer Anwendung üblicherweise
durch die „My Device” Schnelltaste. Dadurch kann das ”autorun” Programm, wie oben erklärt, gefunden werden.
84
Praktische Anleitung zur Inbetriebnahme der DigiTerra Explorer 5 Software
Praktische Anleitung zur Inbetriebnahme der DigiTerra Explorer 5 Software
85
Hinweis: Tippen Sie in der oberen
rechten Ecke die ”x” Taste an, so
wird das Bildschirmfenster zwar
geschlossen, aber das Programm
läuft weiter im Hintergrund. Sie
können in diesem Fall das
Programm durch Antippen des
Piktogramms in der unteren rechten Ecke (bzw. bei Windows CE
Betriebssystem in der Arbeitsfläche) wieder anzeigen.
Programm schließen
• Durch Betätigung der schwarzen Dreieck-Taste in der unteren linken Ecke, öffnen Sie das vorrollende
Menü.
• Tippen Sie ganz unten die „Beenden” Taste an und bestätigen Sie mit der „JA” (Yes) Taste.
GPS Verbindung einstellen
Durch diese Einstellungen wird der GPS Empfänger der DigiTerra Explorer 5 Software angeschlossen.
Das Verfahren ist bei der Inbetriebnahme jedes mobilen Handheld Gerätes durchzuführen, in dem
DigiTerra Explorer 5 verwendet wird. Da die Einstellungen gespeichert werden, ist eine wiederholtes
Verfahren später nicht nötig.
DigiTerra Explorer 5 Software kann mit NMEA-kompatiblen GPS Empfängern verbunden werden.
Sowohl eingebaute, als auch durch CF oder SD Kartenschlitz sowie Bluetooth angeschlossene
Empfänger erfüllen dieses Kriterium.
86
Praktische Anleitung zur Inbetriebnahme der DigiTerra Explorer 5 Software
Praktische Anleitung zur Inbetriebnahme der DigiTerra Explorer 5 Software
87
Hinweis: kommuniziert der GPS Empfänger durch Bluetooth Protokoll mit dem mobilen Handheld
Gerät, so muß man zuerst mit Hilfe der Bluetooth-Manager Software die beiden Geräte erkennen
lassen, paaren und verbinden.
Automatische GPS Erkennung
• Durch Betätigung der zweiten Dreieck-Taste unten in der Symbolleiste, öffnen Sie das vorrollende
Menü.
• Tippen Sie die ”GPS Einstellung” Taste an.
• Tippen Sie im ”GPS Zustand” Fenster rechts unten die ”Einstellen” Taste an.
• Tippen Sie im ”GPS Einstellungen” Fenster die ”Suche” Taste an, um den Kommunikationsport und
die Datenübertragungsgeschwindigkeit automatisch einzustellen.
• Bestätigen Sie mit der „Ja” (Yes) Taste, um die Suche zu starten.
• Falles der Port und die Übertragungsgeschwindigkeit erfolgreich eingestellt wurde, erscheint das
Fenster ”Achtung! GPS Port gefunden”.
• Betätigen Sie die ”ok” Taste in der oberen rechten Ecke dieses Fensters, um die Einstellungen zu
akzeptieren.
• Betätigen Sie die ”ok” Taste* in der oberen rechten Ecke des ”GPS Einstellungen” Fensters, damit
die Einstellungen gespeichert werden.
88
Praktische Anleitung zur Inbetriebnahme der DigiTerra Explorer 5 Software
Praktische Anleitung zur Inbetriebnahme der DigiTerra Explorer 5 Software
89
* Hinweis: Bei Umschaltung zwischen verschiedenen Fenstern im Falle von Windows Mobile
Betriebssystem ist die „ok” Taste zum Speichern der Einstellungen nicht zu sehen, wenn das Fenster
inaktiv ist. Um das Fenster zu aktivieren, bitte einfach irgendwo das Fenster antippen.
Eine erfolgreiche Verbindung wird einerseits rechts oben im „GPS Zustand” Fenster durch ein kleines
Satellitensymbol gekennzeichnet, andererseits können die sich ständig verändernden NMEA Daten
durch Antippen der „Nmea” Taste veranschaulicht werden. Betätigen Sie erneut die ”Nmea” Taste,
schließt sich dieses Fenster.
• Um das ”GPS Zustand” Fenster zu schließen, betätigen Sie die „ok” Taste in der oberen rechten Ecke.
Nach einer erfolgreichen Verbindung fragt die Software die NMEA
Daten von dem GPS Empfänger
ab, und bestimmt eine fixe Position auf der Oberfläche des WGS84 Ellipsoids (ideale Oberfläche
der Erde), vorausgesetzt, daß
Signale von mindestens 3 Satelliten fortlaufend empfangen werden
können. Die Initialisierung des
GPS Empfängers erfolgt innerhalb
von 2-3 Sekunden bis maximal 5
Minuten, je nach dem Zeitpunkt
sowie der geographischen Entfernung der letzten Benutzung des
Gerätes. Die regelmäßige Benut-
90
Praktische Anleitung zur Inbetriebnahme der DigiTerra Explorer 5 Software
zung des Empfängers verringert
wesentlich den Zeitaufwand für
Initialisierung.
In der unteren rechten Ecke des
Kartenfensters bleibt der Hintergrund rot markiert, solange die
Qualität des GPS Empfangs und
der GPS Position nicht ausreichend ist. In diesem Fall können
Sie mit der Software keine GPS
Position erfassen.
Bei grünem Hintergrund kann
man GPS Position erfassen, bei
blauem Hintergrund ist sogar
DGPS Korrektion vorhanden.*
* Zur ausführlichen Beschreibung des Zusammenhanges zwischen ”GPS Einstellungen” und erfassbarer Position schlagen Sie bitte im Benutzerhandbuch von DigiTerra Explorer 5 nach.
Praktische Anleitung zur Inbetriebnahme der DigiTerra Explorer 5 Software
91
GPS Verbindung von Hand einstellen
Ist Ihnen der Kommunikationsport (COM1,2…) und die genaue Datenübertragungsrate (Baud Wert)
bekannt, so können Sie die GPS Verbindung auch von Hand einstellen.*
Bei verfehlter Einstellung des Kommunikationsports oder der Datenübertragungsrate (Baud)
erscheint der Fehlerhinweis ”Port eröffnen: Fehler bei Verbindung!” Solange dieser Hinweis angezeigt
wird, ist der GPS Empfänger mit der Software nicht verbunden.
Nach erfolgreicher Verbindung schließen Sie das Fenster „GPS Einstellungen” wie oben im Kapitel
„Automatische GPS Erkennung“ beschrieben.
* Hinweis: die Nummer des Kommunikationsports sowie die Datenübertragungsrate hängt von dem
GPS Empfänger ab. Die genauen Daten sind üblicherweise im Benutzerhandbuch des jeweiligen
Gerätes aufzufinden.
• Öffnen Sie das „GPS Einstellungen” Fenster wie beschrieben
oben im Kapitel „Automatische
GPS Erkennung”.
• Selektieren Sie den verwendbaren Port aus der Liste bei ”Port”.
Bei erfolgreicher Porteinstellung
erscheint kein Fehlerhinweis.
• Selektieren Sie die verwendbare Datenübertragungsrate aus
der Liste bei „Baud”. Bei erfolgreicher Einstellung der Datenübertragungsrate erscheint kein
Fehlerhinweis.
92
Praktische Anleitung zur Inbetriebnahme der DigiTerra Explorer 5 Software
Praktische Anleitung zur Inbetriebnahme der DigiTerra Explorer 5 Software
93
Kartographische Funktionen, Vorbereitung der Vermessung
Nach erfolgreicher Einstellung des GPS Empfängers Sie können einen existierenden Kartenlayer mit
geometrischen Elementen selektieren bzw. einen neuen leeren herstellen, wo die GPS Positionen in
Form von Punkt, Linie oder Polygon eingetragen werden können.*
* Vorausgesetzt, daß die in den früheren Kapiteln erwähnten Software und GPS Einstellungen richtig
durchgeführt wurden.
Vorbereitung der Kartierung und
Vermessung
• Starten Sie das DigiTerra Explorer 5 Programm und öffnen Sie
das „Layers” Fenster durch Betätigung der ”Layers” Taste links
oben im Rahmen.
• Tippen Sie links oben im ”Layers” Fenster die Taste ”Neue
Layer herstellen” an. Danach
können Sie einen neuen, leeren
Layer herstellen, wo die GPS
Positionen in Form von Punkt,
Linie oder Polygon eingetragen
werden können.
94
Praktische Anleitung zur Inbetriebnahme der DigiTerra Explorer 5 Software
• Im ”Layer herstellen” Fenster tippen Sie das Datenfeld ”Name” an und geben Sie den Namen des
neuen Layers ein, (z.B.: Feldvermessung), anschließend bestätigen Sie mit der ”OK” Taste.
• Im ”Layers” Fenster bestätigen Sie mit der ”OK” Taste.
• In der oberen rechten Ecke des Kartenfensters tippen Sie die Taste „GPS Vermessung” an. Dadurch werden die Positionsdaten dem GPS Empfänger entnommen. Sobald die Initialisierung
durchgeführt wurde (wie oben im Kapitel ”Automatische GPS Erkennung” beschrieben), ist die
Software bereit, GPS Positionen einzutragen.*
* Hinweis: Unterschiedliche Objekte wie Punkte, Linien oder Polygone werden in getrennten Layers
gespeichert. Das heißt, ein Polygonlayer darf z.B. keine Punkte oder Linien enthalten. Das oben beschriebene Verfahren ist unabhängig davon, mit welcher Methode die GPS Positionen erfasst werden.
Praktische Anleitung zur Inbetriebnahme der DigiTerra Explorer 5 Software
95
Einfache Polygonvermessung (stufenlose Vermessung bei Herumlaufen)
Nachdem der GPS Empfänger initialisiert wurde und in der unteren rechten Ecke des Kartenfensters
die GPS-Anzeige in grünem, bzw. bei vorhandener DGPS Korrektion in blauem Hintergrund
erscheint, man kann durch die folgenden Schritte GPS Positionen erfassen.
• Bei leerem Kartenlayer (ohne Vermessungen und Objekte) im „GPS Vermessung” Fenster selektieren Sie den Typ ”Polygon”.*
• Um die Positionserfassung zu
beginnen, stellen Sie sich an
einen beliebigen Punkt der
Grenzlinie des Gebietes.
• Starten Sie die Positionserfassung durch Drücken der mit grünem Kreis markierten Aufnahmetaste (Rec) und laufen Sie
das Gebiet herum.
• Nachdem Sie zum Ausgangspunkt zurückgekehrt haben, beenden Sie die Positionserfassung durch Drücken der mit
blauem Quadrat markierten
Stopptaste (Stop).
• Nach der Vermessung wird ein
Formular mit den Objektdaten
angezeigt, wo Sie die fehlenden
Daten ergänzen und danach
das Fenster durch Drücken der
„ok” Taste schließen können.
Bitte beachten Sie, daß die Software die vermessenen geometrischen Elemente und die verknüpften
beschreibenden Begriffe automatisch speichert, daher ist ein manuelles Speichern nicht nötig.
* Falls Sie einen Layer mit Polygon
Objekten selektieren, und die Vermessung hier fortsetzen, es ist
nicht nötig den Typ zu selektieren.
96
Praktische Anleitung zur Inbetriebnahme der DigiTerra Explorer 5 Software
Praktische Anleitung zur Inbetriebnahme der DigiTerra Explorer 5 Software
97
Programm auf Arbeitsplatzrechner installieren
Wichtiger Hinweis
DigiTerra Explorer 5 können Sie auf den Arbeitsplatzrechner durch die Datei ”DTEXPV5Setup.exe”
installieren, die im Hauptverzeichnis der SD Karte aufzufinden ist.*
Ausführliche Beschreibung der Software befinden Sie im Benutzerhandbuch, das einerseits auf der
SD Karte, andererseits auf der Homepage www.digiterra.hu in verschiedenen Sprachen aufzufinden
ist (User_Manual.pdf). Das Benutzerhandbuch kann man mit Hilfe der Anwendung Adobe Acrobat
Reader anschauen, die von der Homepage http://www.adobe.com/products/acrobat/readstep2.html
heruntergeladen werden kann.
• Legen Sie die DigiTerra Explorer 5 SD Karte in das mobile Handheld Gerät ein, dann verbinden Sie dieses mit dem Arbeitsplatzrechner (z.B. durch ein USB Kabel).
• Kopieren Sie die Datei ”DTEXPV5Setup.exe” auf ihren Arbeitsplatzrechner mit Hilfe von Microsoft ActiveSync, oder im Falle von
Windows Vista Betriebssystem mit Hilfe von Windows Mobile Device Center Software. Ist Ihr Rechner mit einem SD Kartenleser
versehen, so können Sie diesen ebenfalls benutzen.
• Nachdem die Datei erfolgreich kopiert wurde, öffnen Sie bitte die
Datei und befolgen Sie die Anweisungen.
Die Arbeitsplatzrechner-Version von DigiTerra Explorer 5 kann
auf beliebige Anzahl von Rechnern installiert werden. Die vollständige Funktionalität ist jedoch nur durch ein angeschlossenes** mobiles Handheld Gerät – mit DigiTerra Explorer auf der
SD Karte – erreichbar.
Der Hersteller von DigiTerra Explorer 5 Software, die DigiTerra GmbH, garantiert, daß die defekte SD
Karte innerhalb von einem Jahr nach dem Kaufdatum ersetzt wird. Weder der Hersteller, noch die
Verkäufer übernehmen jedoch Verantwortung für Schaden, der sich aus missbräuchlicher Benutzung
der SD Karte ergibt. Bitte beachten Sie, daß bei Verlust oder Entwendung der SD Karte keine ErsatzSoftware bereitgestellt wird.
Für weitere Informationen wenden Sie sich bitte an die Verkäufer von DigiTerra Explorer 5, deren
Kontaktdetails auf der Homepage www.digiterra.hu zu finden sind.
DigiTerra Informationservice GmbH.
H-1025 Budapest, Csévi u. 6.
* Die neueste Arbeitsplatzrechner-Version von DigiTerra Explorer 5 befindet sich auf der Homepage
www.digiterra.hu, bitte die Datei herunterladen und aktualisieren!
** Benötigt funktionierende Microsoft ActiveSync, oder im Falle von Windows Vista Betriebssystem Windows
Mobile Device Center Verbindung! Haben Sie Schwierigkeiten mit dem Aufbau der Verbindung zwischen
dem Arbeitsplatzrechner und dem mobilen Handheld Gerät, fragen Sie bitte Ihren Systemadministrator!
98
Praktische Anleitung zur Inbetriebnahme der DigiTerra Explorer 5 Software
Praktische Anleitung zur Inbetriebnahme der DigiTerra Explorer 5 Software
99
Plug &
survey
Premiers pas
Pour utiliser le logiciel
101
Plug & Survey – Introduisez la carte et mesurez.
Table des matières:
Quel est le contenu de la boîte? . . . . . . . . . . . . . . . . . . . . . . . . . . . . . . . . . . . . . . . . . . . . . . . . . . . 104
Qu’est-ce que la carte SD contient? . . . . . . . . . . . . . . . . . . . . . . . . . . . . . . . . . . . . . . . . . . . . . . . . 104
Premier démarrage du logiciel. . . . . . . . . . . . . . . . . . . . . . . . . . . . . . . . . . . . . . . . . . . . . . . . . . . . . 105
Configuration de la langue. . . . . . . . . . . . . . . . . . . . . . . . . . . . . . . . . . . . . . . . . . . . . . . . . . . . . . . . 106
Démarrage manuel du logiciel. . . . . . . . . . . . . . . . . . . . . . . . . . . . . . . . . . . . . . . . . . . . . . . . . . . . . 106
Quitter le programme. . . . . . . . . . . . . . . . . . . . . . . . . . . . . . . . . . . . . . . . . . . . . . . . . . . . . . . . . . . . 110
Configuration de la connexion GPS . . . . . . . . . . . . . . . . . . . . . . . . . . . . . . . . . . . . . . . . . . . . . . . . 111
Détection automatique de GPS . . . . . . . . . . . . . . . . . . . . . . . . . . . . . . . . . . . . . . . . . . . . . . . . 112
Configuration manuelle de la connexion GPS . . . . . . . . . . . . . . . . . . . . . . . . . . . . . . . . . . . . . 116
Préparer la cartographie et le levé . . . . . . . . . . . . . . . . . . . . . . . . . . . . . . . . . . . . . . . . . . . . . . . . . 118
Arpentage simple (arpentage continu en parcourant la surface) . . . . . . . . . . . . . . . . . . . . . . . . . . 120
Installer et initialiser le programme sur PC . . . . . . . . . . . . . . . . . . . . . . . . . . . . . . . . . . . . . . . . . . . 122
Informations importantes . . . . . . . . . . . . . . . . . . . . . . . . . . . . . . . . . . . . . . . . . . . . . . . . . . . . . . . . . 123
Quel est le contenu de la boîte?
Dans la boîte DigiTerra Explorer 5 on trouve une carte SD pré-installée et ce Manuel Utilisateur
imprimé qui contient les premiers pas de la mise en service du logiciel: Vous n’aurez besoin que de
ceux-ci.
• (En hongrois, en anglais) Manuel Utilisateur détaillé qui est nécessaire pour pouvoir utiliser le
logiciel
”User_Manual_XXX.pdf”
• Version Desktop pouvant être installée sur un PC DigiTerra Explorer 5.
”DTEXPV5Setup.exe”
Qu’est-ce que la carte SD contient?
Premier démarrage du logiciel
La carte SD contient le logiciel DigiTerra Explorer 5 dont vous n’aurez pas besoin d’installer et d’enregistrer la mise en service sur l’Internet. Vous pouvez immédiatement commencer votre travail de cartographie.
Contenu de la carte SD:
• Logiciel de GPS mobile et de collecte de données DigiTerra
Explorer 5
”Bin”
• Utilitaire qui permet une exploitation automatique de DigiTerra
Explorer 5 après l’introduction de la carte SD dans le PC
”2577”
• Les fichiers modèles et les cartes de fond pour apprendre à
utiliser le programme à l’aide du Manuel Utilisateur
”Maps”
• La vesion électronique du Guide du démarrage qui aide à démarrer lors de la première utilisation (en hongrois, en anglais, en roumain,
en espagnol, en français, en allemand)
”Getting_Started.pdf”
104
Premiers pas pour utiliser le logiciel DigiTerra Explorer 5
L’initialisation de DigiTerra Explorer 5 est très simple. Il faut seulement introduire la carte SD dans le
PDA, et l’utilitaire qui fait l’exploitation automatique démarre tout seul, et exécute toutes les configurations nécessaires pour faire démarrer le logiciel. Ce processus doit être exécuté une seule fois sur
chaque PDA où vous voulez utiliser le logiciel. Après la première introduction de la carte SD dans ces
appareils, le logiciel démarre ou s’arrête automatiquement* lorsqu’on introduit ou qu'on retire la carte
SD de l’appareil.
* Certains PDA ne font pas démarrer automatiquement le logiciel DigiTerra Explorer 5. Si c’est votre
cas, veuillez suivre la procédure décrite dans le chapitre ”Démarrage manuel du logiciel DigiTerra
Explorer 5”!
Premiers pas pour utiliser le logiciel DigiTerra Explorer 5
105
Configuration de la langue
• Dans la fenêtre Choisir la langue qui apparaît lors du premier
démarrage du logiciel, cliquez avec le stylet sur le nom de la
langue choisie, puis appuyez sur le bouton ”OK” en bas de la
fenêtre Choisir la langue.*
* A noter que vous aurez besoin de configurer la langue du logiciel
DigiTerra Explorer 5 dans le seul cas où, à l’intérieur du système
d’exploitation, dans la configuration des régions, l’option de votre
langue n’est pas sélectionnée.
* Si le logiciel DigiTerra Explorer 5 ne démarre pas automatiquement après que vous avez introduit
la carte SD, appuyez sur le bouton ”Reset” (ou les boutons de redémarrage) avec lequel vous devez
redémarrer le système d’exploitation puis réintroduire la carte SD, car quelquefois (en fonction du
type d’appareil) le système d’exploitation interdit l’option „exploitation automatique”. Si le logiciel
démarre d’une telle façon, vous pouvez passer au chapitre suivant.
Pour démarrer manuellement l’Utilitaire d’exploitation automatique il faut suivre les étapes suivantes:
• Ouvrez le menu Start en cliquant sur le symbole Windows® qui se trouve dans le coin supérieur
gauche de votre PDA.
• Ouvrez la fenêtre Programmes (Programs).
• Démarrez l’application Gestionnaire de Fichier (File Explorer).
Modifier la configuration de la
langue par la suite
• Ouvrez le premier menu déroulant à gauche du logiciel DigiTerra
Explorer 5 en cliquant sur la petite flèche Haut dans le coin
inférieur gauche. Cliquez sur l’option Dictionnaire, sélectionnez la
langue que vous souhaitez utiliser, puis appuyez sur le bouton OK.
Démarrage manuel du logiciel
L’Utilitaire qui permet une exploitation automatique peut être facilement démarré, même manuellement, dans le cas où le PDA ne le
ferait pas automatiqeument.*
106
Premiers pas pour utiliser le logiciel DigiTerra Explorer 5
Premiers pas pour utiliser le logiciel DigiTerra Explorer 5
107
Démarrage du logiciel à partir du raccourci
Après un démarrage – automatique ou manuel – réussi, l’Utilitaire d’exploitation automatique crée les
raccourcis du logiciel DigiTerra Explorer 5, à partir desquels le logiciel pourra être démarré sans introduire et retirer la carte SD, si la carte SD se trouve dans l’ordinateur.
• Ouvrez le menu Start en cliquant sur le symbole Windows® qui se trouve dans le coin supérieur
gauche de votre PDA.
• Ouvrez la fenêtre Programmes (Programs).
• Cliquez avec le stylet sur le raccourci de l’application de DigiTerra Explorer 5.*
• Ouvrez la bibliothèque de la carte SD (le nom du dossier dépend de l’appareil, noms habituels :
”Storage Card”, ”SD Card”, ”My Flash Disk” etc.)
• Ouvrez la bibliothèque intitulée ”2577” à l’intérieur de la bibliothèque de la carte SD.
• Exécutez le programme d’exploitation automatique.
Avec le système d’exploitation Windows® CE, l’application du gestionnaire de fichier est en général
accessible par le raccourci ”Mon ordinateur” (My Device) sur le bureau. Pour trouver l’utilitaire d’exploitation automatique consultez les descriptions ci-dessus.
108
Premiers pas pour utiliser le logiciel DigiTerra Explorer 5
* Par la suite, le raccourci de
l’application de DigiTerra Explorer 5 se trouvera en général
parmi les programmes récemment utilisés qui apparaissent
dans le menu Start.
Avec le système d’exploitation
Windows® CE, le raccourci du
logiciel se trouvera directement
sur le bureau – après le premier
démarrage, ainsi qu’en appuyant
sur: Menu Start > Programs >
DigiTerra Explorer v5.
Premiers pas pour utiliser le logiciel DigiTerra Explorer 5
109
Note: Bien que vous fermiez la
fenêtre du programme en cliquant
sur ”x” qui se trouve dans le coin
supérieur droit à l’intérieur du logiciel démarré, le programme continue à foctionner en tâche de
fond! Si c’est le cas, vous pouvez
de nouveau afficher la fenêtre du
programme à partir du raccourci
se trouvant dans le coin inférieur
droit de l’écran de démarrage
(avec le système d’exploitation
Windows CE sur le bureau).
Quitter le programme
• Ouvrez le premier menu déroulant à gauche du logiciel DigiTerra Explorer 5, en cliquant sur la
petite flèche Haut.
• Puis cliquez sur l’option „Quitter” dans le menu en bas, et appuyez sur le bouton „Oui” (Yes) dans
la boîte de dialogue qui apparaît.
Configuration de la connexion GPS
Avec la configuration de la connexion GPS le récepteur GPS est connecté au logiciel DigiTerra
Explorer 5. Vous devez effectuer cette configuration sur tous les PDA où vous utilisez le logiciel
DigiTerra Explorer 5 sur carte SD, mais vous en aurez besoin une seule fois, car les configurations
sont sauvegardées dans le récepteur GPS une fois la connexion réussie.
Le logiciel DigiTerra Explorer 5 permet une connexion aux récepteurs GPS compatibles NMEA. La
quasi-totalité des récepteurs que vous pouvez acheter sur marché: les récepteurs CF, inclus dans un
PDA et ceux qui peuvent être introduits dans un lecteur de carte SD, ainsi que les récepteurs
Bluetooth remplissent toutes ces exigences.
110
Premiers pas pour utiliser le logiciel DigiTerra Explorer 5
Premiers pas pour utiliser le logiciel DigiTerra Explorer 5
111
Note: S’il s’agit d’un récepteur GPS externe connecté au Bluetooth, il faut d’abord détecter, connecter
puis apparier l’appareil au gestionnaire Bluetooth du PDA.
Détection automatique de GPS
• Ouvrez le deuxième menu déroulant à gauche dans le logiciel DigiTerra Explorer en cliquant sur
la petite flèche Haut.
• A l’intérieur du menu, cliquez sur l’option ”Configurer GPS”.
• Dans la partie inférieure de la fenêtre ”Etat GPS” qui apparaît, appuyez sur le bouton ”Configurer”.
• Dans la fenêtre "Configurer GPS” appuyez le bouton "Recherche de port” pour configurer automatiquement le port de communication et la vitesse de transfert.
• Pour démarrer la recherche, appuyez sur le bouton "Oui” (Yes).
• La configuration du port et de la vitesse de transfert a réussi si la fenêtre "Attention, recherche de
port réussie” apparaît.
• Appuyez sur le bouton "ok” dans le coin de droite de cette fenêtre pour accepter les configurations.
• Appuyez sur le bouton « ok »* dans le coin supérieur droit de la fenêtre pour sauver les configurations.
112
Premiers pas pour utiliser le logiciel DigiTerra Explorer 5
Premiers pas pour utiliser le logiciel DigiTerra Explorer 5
113
* Il faut noter qu’avec le système d’exploitation Windows Mobile, en changeant de fenêtre, vous ne
voyez pas toujours – dans le coin supérieur droit - le bouton "ok” qui sauvegarde les configurations,
car la fenêtre n’est pas active. Pour activer la fenêtre, il faut simplement cliquer sur la fenêtre sur un
point neutre (où il n’y a que des inscriptions), et le bouton ”ok” réapparaîtra.
Dans la partie supérieure droite de la fenêtre "Etat GPS”, la petite icône satellite émettant des signaux indique, elle aussi, si la connexion est réussie. Si vous cliquez sur la touche ”Nmea” dans la
fenêtre qui apparaît, vous voyez des phrases NMEA arriver successivement les unes après les autres
du récepteur GPS. Vous pouvez fermer cette fenêtre en cliquant de nouveau sur la touche ”Nmea”.
• Pour fermer la fenêtre ”Etat
GPS” appuyez sur le bouton
„ok” dans le coin supérieur droit.
Une fois la connexion réussie, le
logiciel commence à demander les
phrases NMEA au récepteur GPS,
puis détermine – après avoir trouvé au minimum 3 satellites – une
position fixe à la surface de l’ellipsoïde WGS-84 (forme idéale de
Terre). Suivant le temps écoulé
depuis la dernière utilisation de
votre récepteur GPS, et aussi du
lieu géographique de cette dernière
utilisation, l’initialisation peut durer
114
Premiers pas pour utiliser le logiciel DigiTerra Explorer 5
de 2-3 secondes à 5 minutes,
mais avec une utilisation continue
le récepteur GPS s'initialise en
général plus vite.
Dans le coin inférieur droit de la
fenêtre Afficher la carte, la couleur
de fond des indices de qualité de
la position GPS reste rouge tant
que la position GPS n'est pas précise. Dans ce cas, vous ne pouvez pas enregistrer de positions
avec le logiciel.
Vous pourrez enregistrer la position GPS, si cette couleur de fond
devient verte, ou bleue en cas de
corrections DGPS *
* Si vous voulez connaître en détail le rapport entre les "Configurations GPS” et la position enregistrée, veuillez consulter le Manuel Utilisateur du logiciel DigiTerra Explorer 5!
Premiers pas pour utiliser le logiciel DigiTerra Explorer 5
115
Configuration manuelle de la connexion GPS
Il est possible de configurer manuellement la connexion GPS si vous connaissez le port de communication (COM1,2…) et la vitesse de transfert exacte (valeur en Bauds).*
* A noter que le numéro du port de communication et la vitesse du transfert de données dépendent
du récepteur GPS. Vous pouvez lire les valeurs exactes dans la description technique du récepteur
GPS, sinon demandez-les au fabricant de l’appareil.
• Cliquez avec le stylet sur la liste déroulante qui se trouve après le mot ”Baud” – tout comme avec
la configuration du port – et sélectionnez la vitesse du tranfert de données correspondant au récepteur GPS. Après la sélection de la vitesse du transfert de données, aucun message d’erreur n’apparaît.
Si la configuration du port ou de la vitesse de transfert (Baud) n’a pas réussi, le message suivant
apparaît: „Ouverture du port: connexion sans succès”. Tant que ce message est visible, la connexion
reste inopérante.
Une fois la connexion réussie, suivez les instructions décrites dans le chapitre „Détection automatique
du récepteur GPS”.
• Ouvrez la fenêtre „Configurations GPS” en suivant les instructions du chapitre „Détection
automatique du récepteur GPS”.
• Cliquez avec le stylet sur la
liste déroulante qui se trouve
après le mot „Port” et sélectionnez le port approprié pour
la communication avec le récepteur GPS. La configuration sera
réussie si aucun message d’erreur n’apparaît suite à cette
sélection.
116
Premiers pas pour utiliser le logiciel DigiTerra Explorer 5
Premiers pas pour utiliser le logiciel DigiTerra Explorer 5
117
Préparer la cartographie et le levé
Une fois l’initialisation du récepteur GPS réussie, il est temps de choisir une couche cartographique
déjà existante (contenant des éléments géométriques) ou bien d’en créer une nouvelle (vide) pour
enregistrer une position GPS sous forme d’entité point, ligne ou surface.*
* Dans ce chapitre, supposons que la configuration de la connexion entre le logiciel et le récepteur GPS
a été effectuée avec succès. Dans le cas contraire, veuillez consulter le(s) chapitre(s) correspondant(s).
Les étapes de la préparation de
la cartographie et du levé
• Démarrez le logiciel DigiTerra
Explorer 5, et pour ouvrir la
fenêtre „Couche”, cliquez avec
le stylet sur le bouton ”Couches”
qui se trouve dans la partie
supérieure du cadre de gauche.
• Pour enregistrer – sous forme
d’entité point, ligne ou surface –
les positions arrivant du récepteur GPS, appuyez sur le bouton „Créer une nouvelle couche”,
dans le haut du coin de la fenêtre
„Couches” .
118
Premiers pas pour utiliser le logiciel DigiTerra Explorer 5
• Dans la fenêtre ”Créer une couche” , cliquez avec le stylet sur le panneau „Nom”, et entrez le nom
de la nouvelle couche cartographique à créer, (ex.: Arpentage), puis appuyez sur le bouton ”OK”.
• Dans la fenêtre ”Couches” appuyez sur le bouton ”OK”.
• Dans le coin supérieur droit de la fenêtre Afficher la carte, appuyez sur le bouton ”Panneau de levé
GPS”. Le logiciel se connecte au récepteur GPS et commence à lire les données de position.
D’après les instructions décrites dans le chapitre „Détection automatique du récepteur GPS”, le
logiciel est prêt à enregistrer (lever) des positions GPS au moment où l’initialisation est effectuée.*
* Il est à noter que chaque type d’entité: entité point, ligne et surface a sa couche à part. C’est-à-dire, par
exemple, dans une couche qui contient des entités de surface, il ne peut pas y avoir de points ou de lignes.
Les premières étapes pour enregistrer des positions GPS sont identiques jusqu’à l’étape de l’initialisation.
Premiers pas pour utiliser le logiciel DigiTerra Explorer 5
119
Arpentage simple (arpentage continu autour d’une surface)
Suivez les instructions décrites dans le chapitre ”Préparer la cartographie et le levé”, et attendez que
le récepteur GPS S’INITIALISE. La position GPS est appropriée pour enregistrer (lever) une position,
si la couleur de fond des indices de la qualité de position GPS est verte dans coin inférieur droit de
la fenêtre Afficher la carte, ou si elle est bleue dans le cas de corrections DGPS .
• En cas de couche géographique vide (qui ne contient pas de mesures, c’est-à-dire pas d’entités),
dans le „panneau de mesure GPS” sélectionnez le type „Surface”.*
• Pour commencer à enregistrer
la position, se placer sur un point
quelconque du périmètre de la
surface à mesurer.
• Appuyez sur le bouton rouge
(Rec) pour démarrer l’enregistrement de la position, puis
marchez sur le contour de la
surface.
• Pour arrêter l’enregistrement de
la position, une fois revenu au
point de départ, appuyez sur le
bouton bleu carré (Stop).
• Le programme affiche le formulaire approprié de l’entité
mesurée, entrez les données
manquantes, puis fermez la
fenêtre en appuyant sur le bouton ”ok” dans le coin supérieur
droit.
Il est à noter que vous n’aurez pas à sauvegarder la mesure, car, par défaut, le programme sauvegarde automatiquement l’élément géométrique mesuré avec les données correspondantes.
* Si vous choisissez une couche
contenant des entités de surface
pour effectuer le levé, (par exemple,
si vous continuez le levé plus tard
dans cette même couche), vous
n’aurez pas à sélectionner le Type.
120
Premiers pas pour utiliser le logiciel DigiTerra Explorer 5
Premiers pas pour utiliser le logiciel DigiTerra Explorer 5
121
Installer et initialiser le programme sur PC
Informations importantes
Vous trouvez le programme d’installation pour la version PC du logiciel DigiTerra Explorer 5 dans la
bibliothèque de la carte SD sous le nom ”DTEXPV5Setup.exe”.*
Vous pouvez lire en détail sur l’utilisation du logiciel dans le Manuel Utilisateur qui se trouve sur la
carte SD et sur le site www.digiterra.hu en langues différentes (User_Manual_XXX.pdf). Pour consulter ce manuel vous avez besoin du programme Adobe Acrobat Reader qui peut être chargé du site
http://www.adobe.com/products/acrobat/readstep2.html.
• Insérez la carte SD de DigiTerra Explorer 5 dans votre PDA, puis
connectez votre PDA à l’ordinateur de bureau (par exemple à
l’aide d’un câble USB).
• Recopiez le programme d’installation ”DTEXPV5Setup.exe” sur
votre PC, dans le cas des systèmes d’exploitation Microsoft ActiveSync, Windows Vista, à l’aide du logiciel Windows Mobile Device
Center. Dans le cas où vous disposez d’un lecteur de carte SD,
vous pouvez l’utiliser bien sûr.
• Une fois le programme recopié avec succès, démarrez le programme d’installation sur votre PC, suivez les instructions de l’installation.
La version PC de DigiTerra Explorer 5 peut être installée sur un
nombre illimité de PC. L’intégralité des fonctions du logiciel
DigiTerra Explorer peut être utilisée avec un PDA connecté** –
qui dispose d’un lecteur de carte SD DigiTerra Explorer.
Le fabricant du logiciel DigiTerra Explorer 5, DigiTerra Kft. (SA) se porte garant pour remplacer la
carte SD en cas d’anomalie. Ni le fabricant, ni les vendeurs du logiciel ne peuvent être tenus responsables des dommages survenus lors d’un usage inhabituel. Nous ne sommes pas en mesure de remplacer la carte SD et logiciel en cas de perte ou de vol.
Pour trouver plus d’informations, veuillez consulter les vendeurs du logiciel DigiTerra Explorer 5. Vous
pouvez nous contacter sur le site www.digiterra.hu.
DigiTerra Informatikai Szolgáltató Kft. (Société Anonyme Services Informatique)
1025 Budapest, Csévi u. 6.
* Nous vous recommandons l’utilisation de la version PC la plus récente de DigiTerra Explorer 5 que
vous trouvez sur le site www.digiterra.hu!
** Dans le cas des systèmes d’exploitation Microsoft ActiveSync, Windows Vista, en cours de fonctionnement, une connexion de Windows Mobile Device Center est nécessaire ! Si la connexion entre
votre PDA et PC a échoué, veuillez consulter votre administrateur!
122
Premiers pas pour utiliser le logiciel DigiTerra Explorer 5
Premiers pas pour utiliser le logiciel DigiTerra Explorer 5
123
Plug &
survey
Primeros Pasos
Para Usar
125
Plug & Survey – Inserte su tarjeta e inicie su trabajo
Tabla de Contenido:
Que contiene la caja? . . . . . . . . . . . . . . . . . . . . . . . . . . . . . . . . . . . . . . . . . . . . . . . . . . . . . . . . . . .128
Que incluye la tarjeta SD? . . . . . . . . . . . . . . . . . . . . . . . . . . . . . . . . . . . . . . . . . . . . . . . . . . . . . . . .128
Como comenzar a usar su programa? . . . . . . . . . . . . . . . . . . . . . . . . . . . . . . . . . . . . . . . . . . . . . .129
Elija su Idioma . . . . . . . . . . . . . . . . . . . . . . . . . . . . . . . . . . . . . . . . . . . . . . . . . . . . . . . . . . . . . . . . .130
Como iniciar manualmente su programa? . . . . . . . . . . . . . . . . . . . . . . . . . . . . . . . . . . . . . . . . . . .130
Cómo iniciar el programa con un acceso directo? . . . . . . . . . . . . . . . . . . . . . . . . . . . . . . . . . . . . .133
Cómo salir del programa? . . . . . . . . . . . . . . . . . . . . . . . . . . . . . . . . . . . . . . . . . . . . . . . . . . . . . . . .134
Como configurar la conexión con el GPS? . . . . . . . . . . . . . . . . . . . . . . . . . . . . . . . . . . . . . . . . . . .135
Reconocimiento automático del GPS . . . . . . . . . . . . . . . . . . . . . . . . . . . . . . . . . . . . . . . . . . .136
Cómo establecer manualmente una conexión a su GPS? . . . . . . . . . . . . . . . . . . . . . . . . . . .140
Preparación para captura de datos cartográficos y Topográficos . . . . . . . . . . . . . . . . . . . . . . . . . .142
Medición simple (medición continua, recorriendo un área) . . . . . . . . . . . . . . . . . . . . . . . . . . . . . . .144
Instalación y puesta en operación del programa sobre desktop PCs . . . . . . . . . . . . . . . . . . . . . . .146
Aspectos importantes . . . . . . . . . . . . . . . . . . . . . . . . . . . . . . . . . . . . . . . . . . . . . . . . . . . . . . . . . . .147
Que contiene la Caja?
La caja del software DigiTerra Explorer 5 contiene una tarjeta SD y una versión impresa del manual
Getting Started que incluye los pasos iniciales para poner en operación el software. Siendo esto todo
lo que usted necesita para comenzar a utilizarlo.
Un Manual detallado del usuario para facilitar el uso del software
’User_Manual_XXX.pdf’
Una versión de DigiTerra Explorer 5 para la instalación en desktop PCs
’DTEXPV5Setup.exe’
Que incluye la tarjeta SD?
Como comenzar a usar su programa?
La tarjeta SD incluye el software DigiTerra Explorer 5 que no requiere ni instalación ni registro por
internet antes de su uso. Usted puede iniciar su trabajo de manera inmediata.
Poner en operación el programa DigiTerra Explorer 5 es realmente sencillo. Al insertar por primera vez
la tarjeta SD en su dispositivo móvil, su utilitario de auto ejecución iniciara el programa de manera
automática y llevara a cabo toda la configuración necesaria para dar inicio al programa. Esto tendrá
que ser realizado una sola vez en cada dispositivo móvil que usted quiera utilizar el programa.
Contenido de la tarjeta SD:
Un software geográfico para recolección de datos de campo DigiTerra Explorer 5
’Bin’
Un Programa Utilitario para iniciar automáticamente DigiTerra Explorer 5 tan pronto la tarjeta SD sea insertada en el dispositivo móvil
’2577’
Datos de ejemplo y mapas digitales aplicados en el entrenamiento
de como usar el programa, también se incluye material de referencia en el manual de usuario.
‘Maps’
Una Guía del usuario en formato digital .Usado como ayuda la
primera vez que sea ejecutado el programa.
’Getting Started.pdf’
128
Primeros Pasos Para Usar DigiTerra Explorer 5
* Algunos dispositivos móviles no iniciaran automáticamente la ejecución del programa DigiTerra
Explorer 5. Si esto sucede en su dispositivo, por favor siga las instrucciones del capitulo titulado
“Como iniciar manualmente el programa?”
Primeros Pasos Para Usar DigiTerra Explorer 5
129
Elija su Idioma
• Solo seleccione el Idioma deseado que aparece en la opcin
’Select Language’ cuando se ejecuta el software por primera vez
presione ’Aceptar’ en la parte inferior del panel.
Configurando Idiomas Auxiliares.
• Abra el primer menú desplegable de DigiTerra Explorer 5 a la
izquierda seleccionando el pequeño triangulo que apunta hacia
arriba en la esquina inferior
izquierda.
• Elija ’Diccionario’, seleccione el
lenguaje requerido, luego presione ’Aceptar’
SD, el sistema operativo debe ser reiniciado con ”Reset”(o siga la indicación del fabricante ). Luego
inserte su tarjeta SD nuevamente. Si usted inicio el programa mediante el uso de su función de Auto
ejecución, omita los siguientes pasos.
Para iniciar la utilidad de auto ejecución manualmente usted debe seguir los siguientes pasos:
• Puntee sobre la bandera Windows® ubicada en la esquina superior derecha de la pantalla para
abrir el menú de inicio.
• Abra la ventana ’Programs’
• Inicie la aplicación ’File Explorer’
Como iniciar manualmente su programa?
Cuando su dispositivo móvil no pueda ejecutar de manera automática el programa, la utilidad de auto ejecución es fácil de iniciar manualmente.*
*El sistema operativo podrá inhabilitar (Dependiendo del tipo de PC)
la función de ejecución automática de programas. Si el software DigiTerra Explorer 5 no se inicia automáticamente al insertar la tarjeta
130
Primeros Pasos Para Usar DigiTerra Explorer 5
Primeros Pasos Para Usar DigiTerra Explorer 5
131
Como iniciar el programa con un acceso directo?
Después de iniciar correctamente el programa ya sea automática o manualmente, su utilitario de auto
ejecución creara los iconos de acceso directo para el software DigiTerra Explorer 5. Luego de esto,
su programa podrá ejecutarse seleccionando DigiTerra Explorer 5 en la tarjeta SD suministrada e
insertada en el dispositivo móvil.
• Puntee sobre la bandera Windows® ubicada en la esquina superior derecha de la pantalla para
abrir el menú de inicio.
• Abra la ventana ’Programs’
• Active con su stylus el Acceso
directo de la aplicación DigiTerra Explorer 5*
• Abra el directorio de la Tarjeta SD (puede variar según el dispositivo, los más comunes son:
’Storage Card’, ’SD Card’, ’My Flash Disk’ etc.)
• Abra el directorio ’2577’ contenido en la tarjeta SD.
• Inicie el programa ’Autorun’.
132
Primeros Pasos Para Usar DigiTerra Explorer 5
* El Icono del acceso directo de la
aplicación DigiTerra Explorer 5
usualmente se encuentra entre los
programas mas usados recientemente en la parte central del menú
de inicio.
Después de la instalación, el icono
de acceso directo del programa se
puede ubicar en la ventana del
escritorio de windows o siguiendo
la siguiente ruta: Start Menú >
Programs > DigiTerra Explorer v5.
Primeros Pasos Para Usar DigiTerra Explorer 5
133
NOTA: Seleccionando la ’X’en la
esquina superior derecha de la
pantalla cuando el programa este
en ejecución, la ventana de trabajo
se cerrara, pero el programa permanecerá en ejecución en modo
background. La ventana del programa puede abrirse nuevamente
mediante la selección del icono en
la esquina inferior derecha de la
pantalla de inicio. (o desde el
escritorio del sistema operativo).
Como Salir del Programa?
• Abra el primer menú desplegable de DigiTerra Explorer 5 a la izquierda por medio de la selección
del pequeño triangulo que apunta hacia arriba ubicado abajo en la esquina izquierda
• Luego puntee ’Salir’ y presione ’Si’ en el panel que aparece.
Como configurar la conexión con el GPS?
Para conectar su receptor GPS con DigiTerra Explorer 5. Este procedimiento se lleva a cabo en
cualquier dispositivo móvil donde este instalado DigiTerra Explorer 5. Se hace después de la configuración inicial del GPS .
El software DigiTerra Explorer 5 le permitirá conectarse a receptores GPS compatibles con formato
NMEA. La mayoría de receptores disponibles en el mercado (Dispositivos móviles con receptores GPS
incorporados, receptores insertables en ranuras CD y SD o receptores Bluetooth) pueden cumplir con
este requerimiento.
134
Primeros Pasos Para Usar DigiTerra Explorer 5
Primeros Pasos Para Usar DigiTerra Explorer 5
135
Tenga en Cuenta: Si usted desea usar un receptor GPS conectado mediante Bluetooth, usted debe
primero emparejar su dispositivo usando el Bluetooth Manager.
Reconocimiento automático del GPS
• Abra el segundo menú desplegable (A la izquierda) del DigiTerra Explorer 5 Activando el pequeño
triangulo que apunta hacia arriba.
• Active la opción ’Ajuste GPS’ del menú.
• Active el botón ’Ajuste’ en la esquina inferior izquierda de la ventana que se despliega al seleccionar
’GPS Estado’.
• Presione ’Buscar’ en la ventana ’Ajuste GPS’ para establecer automáticamente el puerto de comunicación y rata de transmisión de datos.
• Para iniciar la búsqueda presione el botón ’Si’.
• La rata de transferencia de datos y el puerto se habrán fijado correctamente si se despliega una
ventana con el siguiente mensaje:’Esuche! Puerto GPS Encontrado’
• Para aceptar esta configuración presione el botón ’OK’ en la esquina superior derecha.
• Para guardar su configuración presione ’OK’ en la esquina superior derecha de la ventana ’Ajuste
GPS’ *.
136
Primeros Pasos Para Usar DigiTerra Explorer 5
Primeros Pasos Para Usar DigiTerra Explorer 5
137
*Nota : Cuando se cambia de una ventana a otra durante la operación del windows mobile, el boton
’OK’ no siempre estará visible debido a que su ventana no esta activa. Para activar la ventana nuevamente simplemente puntee sobre la ventana en la parte superior de este marco. Como resultado
de esta operación El botón ’OK’ será mostrado nuevamente.
Una conexión adecuada se indica con un pequeño icono en forma de satélite, que esta enviando
señales hacia su derecha en la esquina superior derecha de la ventana ’GPS Estado’ y, también, por
el cambio continuo del flujo de datos ’NMEA’ provenientes del receptor GPS. Esta información puede
hacerse visible en una ventana que aparece cuando usted selecciona el botón ’NMEA’. Esta ventana
se cierra al seleccionar nuevamente el botón ’NMEA’.
• Para cerrar la ventana ’GPS
Estado’ presione ’OK’ en la
esquina superior derecha.
Una vez la conexión con el GPS
ha sido establecida ,el software
recibirá datos NMEA del receptor
GPS. Luego, cuando use de
manera constante por lo menos
tres (3) satélites, el fijara su posición tomando como referencia al
elipsoide WGS-84. Inicializando
el dispositivo podrá tomar de 2 a
3 segundos o hasta 5 minutos
138
Primeros Pasos Para Usar DigiTerra Explorer 5
dependiendo del tiempo transcurrido desde la ultima vez que
fue usado el GPS y también de la
distancia geográfica desde la ultima posición de uso. El indicador
de calidad de su posición GPS en
la esquina inferior derecha de la
ventana del mapa, permanecerá
rojo hasta que la precisión de su
posición GPS alcance el nivel
requerido. Antes de que esto
suceda, no será posible ningún
procesamiento de datos. La posición GPS estará lista para su
localización si el anterior indicador
se torna verde o, al recibir correcciones DGPS en azul.*
* Para mas información sobre “configuración GPS” por favor consulte el manual del usuario del software DigiTerra Explorer 5.
Primeros Pasos Para Usar DigiTerra Explorer 5
139
Cómo establecer manualmente una conexión a su GPS?
Establezca una conexión manual a su GPS si el puerto de comunicación (COM1,2…) y la velocidad
de transmisión (Baud Rate) se conocen previamente*
* Nótese que el numero de puertos de comunicación y valores de velocidad de transferencia de datos
dependen de las características técnicas de su receptor GPS. Valores específicos usualmente son
suministrados en la descripción técnica de su receptor GPS o pueden ser obtenidas de su fabricante.
• Puntee en la lista desplegable contigua a la opción ’Baud’ ,como se describe en la sección anterior de selección del puerto, y seleccione la velocidad de transferencia de datos de su receptor
GPS . Si es la correcta , no se mostrara ningún mensaje de error.
• Una configuración errónea de la velocidad de transferencia de datos desplegara un mensaje de
error ’Abrir puerto: Fallo Conexion!’ si usted observa este mensaje consulte el manual de su GPS
para obtener la información correcta.
Una vez establecida la conexión con su GPS siga los pasos descritos en la sección “Reconocimiento
automático del GPS” para cerrar la ventana de ’Ajuste GPS’ y revisar la calidad de la conexión.
• Abra la ventana ’Ajuste GPS’
como se describe en la sección
‘Reconocimiento automático del
GPS’.
• Elija Una opción de la lista desplegable al lado de ’Port’ y
seleccione el puerto de comu
nicaciones que corresponda con
su receptor GPS. Si es el correcto, no se mostrara mensaje
de error.
140
Primeros Pasos Para Usar DigiTerra Explorer 5
Primeros Pasos Para Usar DigiTerra Explorer 5
141
Preparación para captura de datos cartográficos y Topográficos
Ya inicializado su receptor GPS el programa requiere seleccionar un Map layer ya existente
(Conteniendo entidades geométricas) o crear uno nuevo en Blanco para registrar sus posiciones
GPS como puntos, líneas o Polígonos. *
* Cuando usted haya configurado correctamente su software y su conexión con el GPS, usted esta
listo para registrar sus datos de posición.
Pasos a seguir
• Iniciado DigiTerra Explorer 5.
Active el botón ’Layers’ en la
parte superior del borde izquierdo para desplegar la ventana
’Layers’.
• Use el botón ’Crear Layer’ de la
parte superior izquierda de la
ventana para crear un layer
nuevo (En blanco). En él usted
podrá registrar sus posiciones
GPS ya sea en puntos, líneas o
polígonos.
• Active y use la Caja de Texto ’Name’ perteneciente a la ventana ’Crear Layer’ y escriba el nombre
del map layer (Ej: ‘Medicion del terrano’) que usted desea crear. Presione ’OK’.
• Presione ’OK’. En la ventana ´Layers’.
• Use el botón ’GPS Surveying Panel’ de la esquina superior derecha de la ventana del mapa. El
programa se conectara con el receptor GPS e iniciara la lectura de datos de Posición. Tan pronto
se haya inicializado (Como se describe en “reconocimiento automático del GPS”) el programa,
estará listo para capturar posiciones.*
Nótese que los objetos de Punto, Línea y Polígono serán creados en layers separados. (Ejemplo: Si
usted esta recolectando datos en un layer de polígonos , puntos o líneas no podrán ser almacenados.
142
Primeros Pasos Para Usar DigiTerra Explorer 5
Primeros Pasos Para Usar DigiTerra Explorer 5
143
Medición simple (Medición continua de un área)
Siga el procedimiento descrito en ’Preparación para captura de datos cartográficos y Topográficos’.
Espere a que su receptor GPS se inicialice. Y que las posiciones GPS sean consideradas aceptables
(si el color de fondo del indicador de calidad de posición GPS es verde). También podrá ser de color
azul si esta usando corrección DGPS.
• Con map layers en blanco (Sin mediciones ni objetos) seleccione ’Polygon’ en ’GPS Surveying
Panel.*
• Antes de iniciar la recolección
del borde o perímetro de un terreno o área permanezca estático
sobre un punto del perímetro o
área.
• Presione el botón (Punto rojo)
para iniciar el registro y camine
alrededor del área. (El punto rojo
cambiara a un cuadro azul mientras recorra el área)
• Cuando regrese a su punto de
inicio presione el botón de parada (El cuadrado azul) y se
detendrá la captura de datos
del área y se cerrara el polígono.
• El programa entonces desplegara el formulario de datos que
pertenece al área que ha sido
capturada. Diligencie los registros necesarios y cierre la ventana mediante el botón ’OK’ ubicado en la esquina del lado
derecho.
El programa por defecto automáticamente almacena las entidades geométricas junto con sus atributos descriptivos . No siendo necesario salvar los datos de sus mediciones.
* Si usted continua registrando
información de áreas en el layer
área usted no necesitara seleccionar ‘Type’ ya que el programa
automáticamente lo hará.
144
Primeros Pasos Para Usar DigiTerra Explorer 5
Primeros Pasos Para Usar DigiTerra Explorer 5
145
Instalación y puesta en operación del programa en desktop PCs
Aspectos importantes
El instalador denominado ”DTEXPV5Setup.exe” para la versión desktop del DigiTerra Explorer 5
puede ser encontrado en el directorio raíz de la tarjeta SD.*
Usted podrá encontrar información detallada de cómo usar el programa en el manual de usuario disponible
en la tarjeta SD (esta en varios idiomas) y en Internet www.digiterra.hu (User_Manual_XXX.pdf).
Para leer el manual de usuario usted necesita Adobe Acrobat Reader que puede bajar de
http://www.adobe.com/products/acrobat/readstep2.html.
• Después de insertar la tarjeta SD del DigiTerra Explorer 5 en su
dispositivo móvil, conéctelo a su PC desktop (Por ejemplo con el
cable USB)
• Copie el instalador ”DTEXPV5Setup.exe” a su PC usando Microsoft ActiveSync o en caso de tener windows vista use el Windows
Mobile Device Center. Si su PC esta equipado con lector de tarjetas SD puede usarlo con libertad.
• Ejecute el instalador en su PC y siga las instrucciones.
La versión desktop de DigiTerra Explorer 5 puede ser instalada en un numero ilimitado de PC’s. Sin embargo, la funcionalidad completa del programa esta disponible únicamente para
dispositivos móviles – con la tarjeta SD – conectada** .
DigiTerra Kft. como productor del programa DigiTerra Explorer 5 garantiza el reemplazo de las tarjetas SD dentro del periodo de un año posterior a la compra. Ni el productor o el distribuidor del programa serán responsables de los daños causados por el uso inapropiado.
No podremos remplazar las tarjetas SD con el programa en el evento de perdida o hurto.
Para mayor información por favor contactar al distribuidor de DigiTerra Explorer 5. o contactarnos en
Internet www.digiterra.hu.
DigiTerra Informatikai Szolgáltató Kft.
H-1025 Budapest, Csévi u. 6.
* Usted podrá encontrar la ultima versión Desktop en el website
www.digiterra.hu, se recomienda que la descargue y la utilice!
146
Primeros Pasos Para Usar DigiTerra Explorer 5
Primeros Pasos Para Usar DigiTerra Explorer 5
147
www.digiterra.hu
DigiTerra ®
GIS solutions
DigiTerra Information Services Ltd. All rights reserved.