1
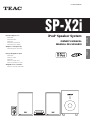
77-20SPX2I00220
Z
SP-X2i
OWNER’S MANUAL
MANUAL DEL USUARIO
ESPAÑOL
Incluye adaptadores para:
iPod nano
iPod con vídeo
iPod mini
iPod con rueda de clic
iPod con pantalla en color
Adaptadores no incluidos:
iPod con conector para base
iPod® Speaker System
ENGLISH
Includes adapters for:
iPod nano
iPod with video
iPod mini
iPod with Click Wheel
iPod with color display
Adapters sold separately:
iPod with dock connector
IMPORTANT SAFETY INSTRUCTIONS
1) Read these instructions.
2) Keep these instructions.
CAUTION: TO REDUCE THE RISK OF ELECTRIC SHOCK,
DO NOT REMOVE COVER (OR BACK). NO USERSERVICEABLE PARTS INSIDE. REFER SERVICING TO
QUALIFIED SERVICE PERSONNEL.
3) Heed all warnings.
4) Follow all instructions.
The lightning flash with arrowhead symbol, within an
equilateral triangle, is intended to alert the user to the
presence of uninsulated “dangerous voltage” within
the product’s enclosure that may be of sufficient
magnitude to constitute a risk of electric shock to
persons.
5) Do not use this apparatus near water.
The exclamation point within an equilateral triangle is
intended to alert the user to the presence of important
operating and maintenance (servicing) instructions in
the literature accompanying the appliance.
8) Do not install near any heat sources such as radiators, heat
registers, stoves, or other apparatus (including amplifiers) that
produce heat.
6) Clean only with dry cloth.
7) Do not block any ventilation openings. Install in accordance
with the manufacturer’s instructions.
9) Do not defeat the safety purpose of the polarized or
grounding-type plug. A polarized plug has two blades with
one wider than the other. A grounding type plug has two
blades and a third grounding prong. The wide blade or the
third prong are provided for your safety. If the provided plug
does not fit into your outlet, consult an electrician for
replacement of the obsolete outlet.
10) Protect the power cord from being walked on or pinched
particularly at plugs, convenience receptacles, and the point
where they exit from the apparatus.
11) Only use attachments/accessories specified by the
manufacturer.
12) Use only with the cart, stand, tripod,
bracket, or table specified by the
manufacturer, or sold with the apparatus.
When a cart is used, use caution when
moving the cart/apparatus combination to
avoid injury from tip-over.
13) Unplug this apparatus during lightning storms or when
unused for long periods of time.
14) Refer all servicing to qualified service personnel. Servicing is
required when the apparatus has been damaged in any way,
such as power-supply cord or plug is damaged, liquid has
been spilled or objects have fallen into the apparatus, the
apparatus has been exposed to rain or moisture, does not
operate normally, or has been dropped.
2
< Do not expose this apparatus to drips or splashes.
< Do not place any objects filled with liquids, such as vases, on
the apparatus.
< Do not install this apparatus in a confined space such as a
book case or similar unit.
< The apparatus draws nominal non-operating power from the
AC outlet with its POWER switch in the off position.
< The apparatus should be located close enough to the AC
outlet so that you can easily grasp the power cord plug at any
time.
< An apparatus with Class ! construction shall be connected to
an AC outlet with a protective grounding connection.
1. When this crossed-out wheeled bin
symbol is attached to a product it means
the product is covered by the European
Directive 2002/96/EC.
2. All electrical and electronic products
should be disposed of separately from
the municipal waste stream via designated collection
facilities appointed by the government or the local
authorities.
3. The correct disposal of your old appliance will help prevent
potential negative consequences for the environment and
human health.
4. For more detailed information about disposal of your old
appliance, please contact your city office, waste disposal
service or the shop where you purchased the product.
ENGLISH
< Batteries (battery pack or batteries installed) shall not be
exposed to excessive heat such as sunshine, fire or the like.
Disposal of your old appliance
< Excessive sound pressure from earphones and headphones
can cause hearing loss.
WARNING: TO PREVENT FIRE OR SHOCK
HAZARD, DO NOT EXPOSE THIS APPLIANCE
TO RAIN OR MOISTURE.
CAUTION
< DO NOT REMOVE THE EXTERNAL CASES OR CABINETS TO
EXPOSE THE ELECTRONICS. NO USER SERVICEABLE PARTS
ARE WITHIN!
< IF YOU ARE EXPERIENCING PROBLEMS WITH THIS PRODUCT,
CONTACT TEAC FOR A SERVICE REFERRAL. DO NOT USE THE
PRODUCT UNTIL IT HAS BEEN REPAIRED.
< USE OF CONTROLS OR ADJUSTMENTS OR PERFORMANCE OF
PROCEDURES OTHER THAN THOSE SPECIFIED HEREIN MAY
RESULT IN HAZARDOUS RADIATION EXPOSURE.
3
Contents
Thank you for choosing TEAC. Read this manual carefully
to get the best performance from this unit.
Important Safety Instructions . . . . . . . . . . . . . . . . . . . . . . . . . . 2
Before Using the Unit . . . . . . . . . . . . . . . . . . . . . . . . . . . . . . . . 4
Remote Control Unit. . . . . . . . . . . . . . . . . . . . . . . . . . . . . . . . . 5
Wall Mounting . . . . . . . . . . . . . . . . . . . . . . . . . . . . . . . . . . . . . 5
Connection. . . . . . . . . . . . . . . . . . . . . . . . . . . . . . . . . . . . . . . . 6
Before Using the Unit
Read this before operation
< As the subwoofer may become warm during operation,
always leave sufficient space around the subwoofer for
ventilation.
Make sure there is at least 5 cm of space on each side of the
subwoofer. Do NOT place anything on top of the subwoofer.
< The voltage supplied to the unit should match the voltage as
printed on the rear panel. If you are in any doubt regarding
this matter, consult an electrician.
Getting started . . . . . . . . . . . . . . . . . . . . . . . . . . . . . . . . . . . . . 8
Identifying the parts . . . . . . . . . . . . . . . . . . . . . . . . . . . . . . . . . 9
Basic Operation. . . . . . . . . . . . . . . . . . . . . . . . . . . . . . . . . . . . 10
Listening to iPod . . . . . . . . . . . . . . . . . . . . . . . . . . . . . . . . . . . 10
Listening to an External Source (AUX 1) . . . . . . . . . . . . . . . . . 12
< Choose the installation location of your unit carefully. Avoid
placing it in direct sunlight or close to a source of heat. Avoid
locations subject to vibrations and excessive dust, heat, cold
or moisture.
< Do not place the unit on any other electronic components.
Muting . . . . . . . . . . . . . . . . . . . . . . . . . . . . . . . . . . . . . . . . . . 12
Specifications . . . . . . . . . . . . . . . . . . . . . . . . . . . . . . . . . . . . . 13
Troubleshooting . . . . . . . . . . . . . . . . . . . . . . . . . . . . . . . . . . . 13
< Do not open the cabinet as this might result in damage to the
circuitry or electrical shock. If a foreign object should fall into
the unit, contact your dealer or service company as soon as
possible.
< When removing the power plug from a wall outlet, always
pull directly on the plug. Do not pull on the line cord.
< Do not attempt to clean the unit with chemical solvents as
this might damage the finish. Use a clean, dry, lint-free cloth.
< Keep this manual in a safe place for future reference.
Maintenance
If the surface of the unit gets dirty, wipe with a soft cloth or
use diluted mild liquid soap. Never spray liquid directly on this
unit. Apply your cleaner to your cleaning cloth and wipe
gently. Be sure to remove any excess completely. Do not use
thinner, benzene or alcohol as they may damage the surface
of the unit. Allow the surface of the unit to dry completely
before using.
NXT is a trademark of New Transducers Ltd.
4
Remote Control Unit
Wall Mounting
The provided Remote Control Unit allows the unit to be operated
from a distance.
When operating the remote control unit, point it towards the
remote sensor on the Dock.
You can mount the left and right speakers on a wall.
Precautions
< The length of the speaker cables is about 10 feet (3 m). Do
not attempt to mount the speakers too far from the
subwoofer.
< Even if the remote control unit is operated within the effective
range (16 ft./5 m), remote control operation may be
impossible if there are any obstacles between the unit and the
remote control.
< Drill holes into solid wall support, such as wooden frame or
concrete wall.
< If the remote control unit is operated near other products
which generate infrared rays, or if other remote control
devices using infrared rays are used near the unit, it may
operate incorrectly. Conversely, the other products may also
operate incorrectly.
< TEAC supplies these brackets as a convenience to the product
owner. Consult your local building codes and exercise all
necessary caution when mounting these brackets. If you are
unsure how to use the supplied brackets, consult with a local
tradesmen or building supply expert.
ENGLISH
To hook on the wall
1. Use the supplied guide sheet to mark the exact drilling
points on the wall.
Battery Installation
1
2
3
2. Secure the wall mount adapters on the wall using the
supplied screws.
< As a convenience, a set of tapered plastic anchors is supplied.
If you chose to use these anchors, drill a pilot hole using a 6
mm drill bit then tap the anchor into the pilot hole.
Only use these anchors if they are appropriate for the
materials onto which the unit is to be mounted. Consult your
local hardware store if you are uncertain.
3. Before going on, connect the speakers and the
subwoofer using the supplied speaker cables (see page
6-7).
4. Carefully hang the speakers onto the hooks.
1. Remove the battery compartment cover.
Note:
Ensure that the speaker locks onto the hooks and that the
wall is strong enough to support the weight before removing
your hands.
2. Put in the lithium battery (CR2032, 3V).
3. Close the cover.
Wall
Speaker
Hook
Battery Replacement
If the distance required between the remote control unit and
the Dock decreases, the battery is exhausted. In this case,
replace the battery with a new one.
Precautions concerning batteries
Do not heat or disassemble batteries and never dispose of old
batteries by throwing them in a fire.
Adapter
5
Connection
CAUTION
< Turn off the power of all the equipment before making connections.
< Read instructions of each component you intend to use with this unit.
< Be sure to insert each plug securely. To prevent hum and noise, do not bundle the connection
cords with the power cord.
Speaker (R)
Speaker (L)
A
Subwoofer
C
CAUTION:
Make sure to fasten the
Dock’s cable with this clip.
F
Dock
Use one of these
terminals.
B
H G
D
R
E
L
AUDIO
OUT
VIDEO
IN
DVD/CD player, cassette
tape deck, etc.
TV (monitor)
6
S-VIDEO
IN
A SPEAKERS
Connect the speakers using the supplied speaker cables.
Make sure to connect:
white plug q white jack (L: left channel)
red plug q red jack (R: right channel)
< If not using the included speakers, make sure the speakers
you use are at least 4 Ω impedance.
< Do not connect anything other than speakers to these
terminals.
F POWER switch of the Subwoofer
Use this switch to turn the system on or off.
G S-VIDEO OUT terminal
This terminal outputs video signal from iPod.
Use an S-Video cable to connect the Dock to the S-Video
input of a suitably equipped television or monitor. Use this
connection in preference to a composite video connection.
H VIDEO OUT terminal
Connect the Dock to the “TO DOCK” port, and fasten the
cable with the clip.
This terminal outputs video signal from iPod.
Use an RCA (pin) video cable to connect the Dock to the
composite video connector of a television or monitor.
ENGLISH
B Dock
< Securely insert the plug in the direction as figured.
C AUX 1 IN jack
You can connect a portable audio player to this jack.
Connect the LINE OUT or PHONES jack (audio output jack)
of the player using the supplied stereo mini plug cable.
When using the PHONES jack of your mini player, you must
adjust the volume of the mini-player or you may hear no
sound from your SP-X2i.
D AUX 2 IN jacks
Analog 2-channel audio signal is input from these jacks.
Connect a DVD/CD player, cassette tape deck etc. to these
jacks using a commercially-available RCA cable.
Make sure to connect:
white plug q white jack (L: left channel)
red plug q red jack (R: right channel)
E AC Power Cord
Be sure to connect the power cord to an AC outlet which
supplies the correct voltage.
Hold the power plug when plugging or unplugging the
power cord. Never pull or yank on the power cord.
7
Getting started
The SP-X2i comes mounted with an adapter for iPod with color
display (40GB, 60GB), “60GB (color) + Photo 40GB/60GB”. To
play your iPod through the SP-X2i, you have first to check if the
factory mounted adapter fits your model of iPod. If it does not,
you have to replace it with a correct one, as explained below.
1. Remove the adapter from the Dock.
Hold the left and right sides of the adapter and gently pull it
up.
3. Insert the adapter into the Dock.
Fit the front edge of the adapter into the Dock, and then
press the back edge of the adapter onto the Dock until a
slight “click” is heard indicating the adapter is inserted
correctly.
1
2
2. Choose the Dock adapter that fits your iPod mobile
digital device.
Dock
“Video 30GB” for iPod with video (30 GB).
“Video 60GB/80GB” for iPod with video (60 GB, 80 GB).
< When you need to remove the adapter, hold the left and
right sides of the adapter and gently pull it up.
“nano” for iPod nano.
“mini” for iPod mini.
< When you don’t use the Dock, use the supplied cover for the
Dock to prevent dust from settling on the Dock.
“20GB (color) + Photo 30GB” for iPod with color display
(20GB, 30GB, U2 Special Edition).
“60GB (color) + Photo 40GB/60GB” for iPod with color
display (40GB, 60GB).
“20GB + U2” for iPod with Click Wheel (20 GB, U2 Special
Edition).
Compatible iPod Software
In case your iPod will not work with the SP-X2i or with the
remote control unit, software update may solve the problem.
Visit the Apple website and download the latest iPod Software.
“40GB” for iPod with Click Wheel (40 GB).
< Use a commercially available adapter to play iPod with dock
connector (with four buttons under the display).
8
iPod is a trademark of Apple Computer, Inc., registered in the
U.S. and other countries.
Identifying the parts
Remote Control Unit
Dock
E
A
F
B
G
C
H
D
M
I
ENGLISH
J
K
N
R
L
A STANDBY/ON
Use this button to turn the Dock on or standby.
The Dock is powered via the subwoofer. You need to first
turn on the subwoofer.
When the Dock is in the standby mode, the power indicator
of the Subwoofer is orange.
When the Dock is turned on, the indicator turns blue.
B SCROLL
In iPod mode, use these buttons to scroll up and down the
menu.
H MENU
This button is equivalent to the MENU button on your iPod.
In iPod mode, use this button to go back to the previous
menu.
I SKIP (.//)
In iPod mode, momentarily press this button to skip tracks.
Hold down this button to search for a part of a track.
J PLAY/PAUSE (y/J)
In iPod mode, use this button to start or pause playback.
K iPod indicator
C MUTING
This indicator lights in iPod mode.
Use this button to mute the sound.
L Remote Sensor
D VOLUME
Press the up “+” or the down “–” button to adjust the
volume.
When operating the remote control unit, point it towards
here.
M Dock connector
E iPod
Use this button to select iPod mode.
Before use, insert an appropriate Dock adapter in the Dock
(see page 8).
Insert an iPod mobile digital device into this Dock.
F AUX 1/2
Use this button to select AUX 1 or AUX 2 mode.
G SELECT
N AUX 1/2 indicator
Green indicator lights in AUX 1 mode.
It turns yellow in AUX 2 mode.
This button is equivalent to the Center button on your iPod.
In iPod mode, use this button to confirm selection in menus.
9
Basic Operation
1 Turn on the subwoofer.
Listening to iPod
Insert the iPod into the Dock.
Then press the Play/Pause button (y/J) on the iPod. The
Dock will automatically turn on and start playback from
the iPod’s music list.
< If the iPod that is in playback mode is inserted into the Dock,
the Dock will automatically turn on and start playback of the
iPod.
2 Press the STANDBY/ON button of the remote control
unit to turn the Dock on.
< If you remove the iPod during playback, the Dock
automatically turns off.
< Make sure to use an appropriate Dock adapter (see “Getting
started” on page 8).
< The battery of the iPod is recharged to the full when the iPod
is docked and the POWER switch of the subwoofer is ON.
< When headphones are plugged into the iPod, sound comes
from both the speakers of the SP-X2i and the headphones.
3 Select a source by pressing the iPod button or the AUX
1/2 button.
To select iPod mode
4 Play the source and adjust the volume using the
VOLUME buttons.
Press the iPod button to select iPod mode. If an iPod is already
docked, playback will start.
In iPod mode, press the Play/Pause button (G/J) to start or
pause playback.
10
To suspend playback temporarily
(pause mode)
Press the Play/Pause button (G/J) during playback. Playback
stops at the current position. To resume playback, press the
Play/Pause button (G/J) again.
During playback, press the skip button (. or/ )
repeatedly until the desired track is found. The selected track
will be played from the beginning.
Press the MENU button to go back to the previous menu.
This button is equivalent to the MENU button on your iPod.
ENGLISH
To skip to the next or a previous track
To go back to the previous menu
Select the menu item
Press the SCROLL buttons (‡/°) to scroll to the menu item
you want, and then press the SELECT button.
< When the . button is pressed during playback, the track
being played will be played from the beginning. To return to
the beginning of the previous track, press the . button
twice.
Search for a part of a track
During playback, hold down the skip button (.or/) for
more than 2 seconds and release it when the part you want
to listen to is found.
11
Listening to an External Source (AUX 1)
1 Connect the PHONES jack (audio output jack) of a
portable audio player to the AUX 1 IN jack of the
subwoofer using the supplied stereo mini plug cable.
Muting
To mute the sound temporarily, press the MUTING button.
Press the MUTING button again to restore the sound.
The indicator (iPod or AUX 1/2) blinks during muting.
< If you change the volume during the muting, the muting will
be canceled.
2 Select “AUX 1” using the AUX 1/2 button.
The AUX 1/2 indicator turns green.
3 Play the source, and adjust the volume using the
VOLUME buttons of the SP-X2i and the audio player.
When using the PHONES jack of your mini player, you must
adjust the volume of the mini-player or you may hear no
sound from your SP-X2i.
12
Troubleshooting
Specifications
If you have problems with your system, look through this chart
and see if you can solve the problem yourself before calling your
dealer or TEAC service center.
AMPLIFIER section
Output Power (L+R) . . . . . . . . . . . . . . . . . . . . . . . 5 W + 5 W
Output Power (Subwoofer) . . . . . . . . . . . . . . . . . . . . . . 15 W
Input Sensitivity . . . . . . . . . . . . . . . . . . . . . . . . . . . . . 300 mV
Frequency Response . . . . . . . . . . . . . . . . . . . 50 to 20,000 Hz
General
No power
e Check the connection to the AC power supply. Check and
make sure the AC source is not a switched outlet and that,
if it is, the switch is turned on. Make sure there is power to
the AC outlet by plugging another item such as a lamp or
fan into the outlet.
SPEAKER
Type . . . . . . . . . . . . . . . . . . . . . . . . . . . . . Full range flat type
Impedance . . . . . . . . . . . . . . . . . . . . . . . . . . . . . . . . . 4 ohms
No sound from speakers.
e Select the source by pressing the iPod button or the AUX
1/2 button.
e Check the connection to the speakers.
e Adjust the volume.
e If the indicator on the Dock (iPod or AUX 1/2) is blinking,
press the MUTING button.
GENERAL
Power Requirements . . . . . . . . . . . . . . . . . . 230 V AC, 50 Hz
Power Consumption . . . . . . . . . . . . . . . . . . . . . . . . . . . 70 W
Remote control doesn’t work.
e Press the STANDBY/ON switch to turn the unit on.
e When the battery has run out, put in a new one.
e Use remote control unit within the range (16 ft. / 5 m) and
point at the front panel.
e Clear obstacles between the remote control unit and the
Dock.
e If a strong light is near the unit, turn it off.
iPod Player
Cannot insert the iPod.
e Check the dock adapter.
e Remove dust or obstacles from the Dock connector, and
insert the iPod again.
Will not play.
e Remove the iPod from the Dock, wait a few seconds, and
insert it again.
e Software update may solve the problem. Visit the Apple
website and download the latest iPod Software.
If normal operation cannot be recovered, unplug the
power cord from the outlet and plug it again.
ENGLISH
The sound is noisy.
e The unit is too close to a TV or similar appliances. Install the
unit apart from them, or turn them off.
SUBWOOFER
Impedance . . . . . . . . . . . . . . . . . . . . . . . . . . . . . . . . . 8 ohms
Dimension (W x H x D)
L & R Speakers . . . . . . . . . . . . . . . . . . 142 x 226 x 70 mm
Subwoofer. . . . . . . . . . . . . . . . . . . . . 160 x 245 x 335 mm
Dock (without cable). . . . . . . . . . . . . . 100 x 51 x 107 mm
Weight (Net)
L & R Speakers . . . . . . . . . . . . . . . . . . . . . . . . . 0.6 kg each
Subwoofer . . . . . . . . . . . . . . . . . . . . . . . . . . . . . . . 5.3 kg
Dock . . . . . . . . . . . . . . . . . . . . . . . . . . . . . . . . . . . . 0.5 kg
Standard Accessories
Remote control unit (RC-1121) x 1
Battery (CR2032) for remote control unit x 1
Speaker cable x 2
Stereo mini plug cable x 1
S-VIDEO/RCA video cable x 1
Dock adapter x 8
(adapter “60GB (color) + Photo 40GB/60GB” premounted)
Cover for the Dock x 1
Wall mount adapter x 2
Screw x 4
Tapered plastic wall anchor x 4
Guide sheet for wall mounting x 2
Owner’s manual x 1
Quick guide for connection x 1
Warranty card x 1
• Design and specifications are subject to change without
notice.
• Weight and dimensions are approximate.
• Illustrations may differ slightly from production models.
13
Índice
Gracias por confiar en TEAC. Lea atentamente este manual
para obtener el mejor rendimiento de la unidad.
Antes de uso. . . . . . . . . . . . . . . . . . . . . . . . . . . . . . . . . . . . . . 14
Mando a distancia . . . . . . . . . . . . . . . . . . . . . . . . . . . . . . . . . 15
Montaje mural . . . . . . . . . . . . . . . . . . . . . . . . . . . . . . . . . . . . 15
Conexión . . . . . . . . . . . . . . . . . . . . . . . . . . . . . . . . . . . . . . . . 16
Preparación. . . . . . . . . . . . . . . . . . . . . . . . . . . . . . . . . . . . . . . 18
Función de cada componente . . . . . . . . . . . . . . . . . . . . . . . . . 19
Funcionamiento básico . . . . . . . . . . . . . . . . . . . . . . . . . . . . . . 20
Escuchar el iPod . . . . . . . . . . . . . . . . . . . . . . . . . . . . . . . . . . . 20
Audición de una fuente externa (AUX 1) . . . . . . . . . . . . . . . . . 22
Silenciamiento . . . . . . . . . . . . . . . . . . . . . . . . . . . . . . . . . . . . 22
Solución de problemas . . . . . . . . . . . . . . . . . . . . . . . . . . . . . . 23
Antes de uso
Léase antes de continuar
< El subwoofer puede calentarse durante su funcionamiento,
por lo que habrá que dejar espacio suficiente alrededor para
su ventilación.
Los orificios de ventilación no deberán obstruirse. Deje al
menos 5 cm de espacio libre a cada lado del subwoofer. NO
coloque ningún objeto encima del subwoofer.
< La tensión suministrada a la unidad deberá coincidir con el
valor indicado en el panel posterior. En caso de duda,
consulte a un electricista.
< No coloque la unidad encima de otros componentes
electrónicos.
< No abra la carcasa de la unidad, ya que podrían dañarse los
circuitos o producirse descargas eléctricas. Si entra algún
cuerpo extraño en la unidad, póngase en contacto con su
distribuidor o empresa de servicios lo antes posible.
Especificaciones . . . . . . . . . . . . . . . . . . . . . . . . . . . . . . . . . . . 23
< Cuando desconecte el cable de la toma mural, sostenga
únicamente el conector y nunca el propio cable.
PRECAUCIÓN
< No permita que ningún líquido se derrame o salpique este
aparato.
< No coloque objetos que contengan líquidos, como jarrones,
encima de este aparato.
< No instale este aparato confinado en un espacio reducido,
como podría ser encastrado en una estantería o lugar
similar.
< Este aparato recibe corriente nominal no operativa de la
salida de corriente AC aun cuando su interruptor
STANDBY/ON esté en la posición STANDBY.
< No intente limpiar la unidad con disolventes químicos, ya que
podrían dañar el acabado. Utilice un paño limpio y seco que
no se deshilache.
< Conserve este manual en un lugar seguro para futuras
consultas.
Mantenimiento
Si se ensucia la superficie de la unidad, pase un paño suave o
utilice jabón líquido normal diluido. Limpie cualquier resto
líquido que pueda quedar en la unidad. No utilice aguarrás,
bencina ni alcohol, ya que podría dañar el acabado de la
unidad. Espere a que se seque por completo la superficie de
la unidad antes de utilizarla.
Reciclaje de su producto viejo
< El aparato debe estar colocado lo suficientemente cerca de
la salida de corriente como para poder acceder al enchufe
en cualquier momento.
< Conecte siempre los aparatos de clase ! como este a salidas
de corriente con toma de tierra.
< Las baterías (paquete de baterías o baterías instaladas) no se
deben exponer al calor excesivo tal como sol, fuego o
similares.
< Un exceso de presión de sonido desde los audífonos y
auriculares puede originar pérdida auditiva.
NXT es una marca comercial de New Transducers Ltd.
14
1. Cuando se adjunta a un producto este
símbolo tachado de un contenedor con
ruedas, significa que el producto está
cubierto por la Directiva Europea
2002/96/EC.
2. Todos los productos eléctricos y electrónicos se deben
reciclar de un modo separado del sistema municipal de
basura, a través de las instalaciones de recogida señaladas
por el gobierno o las autoridades locales.
3. El reciclaje correcto de su producto viejo ayudará a prevenir
las consecuencias negativas potenciales para el ambiente y
la salud humana.
4. Para una información más detallada sobre el reciclaje de su
producto viejo, contacte por favor con su ayuntamiento,
servicio de basuras o la tienda en donde usted compró el
producto.
Mando a distancia
Montaje mural
El mando a distancia suministrado permite el control remoto de
la unidad.
Cuando utilice el mando a distancia, apunte al sensor remoto
situado en el lado frontal de la base Dock
Los altavoces derecho e izquierdo se pueden montar en la pared.
< Aunque el mando a distancia se utilice dentro del radio de
acción adecuado (de 5 metros) , es posible que no funcione si
hay algún obstáculo entre la unidad y el mando.
< Si el mando a distancia se utiliza cerca de otros productos que
generen rayos infrarrojos, o se utilizan otros dispositivos de
control remoto que emitan rayos infrarrojos, es posible que no
funcione correctamente. Y a la inversa, los otros productos
también podrían funcionar de manera anómala.
Precauciones
< Tenga en cuenta que la longitud de los cables de altavoces es
aproximadamente de 3 metros. No intente montar los
altavoces demasiado lejos del subwoofer.
< Taladre los orificios en un material sólido y fiable (viga de
madera, muro de hormigón).
< TEAC suministra los soportes para facilitar la tarea al usuario.
Consulte los reglamentos de construcción y extreme las
precauciones cuando monte estos soportes. Si tiene alguna
duda sobre la forma de usar los soportes facilitados, consulte
en un establecimiento o tienda de materiales de su
zona.
Instalación de la pila
Anclaje a la pared
1
1. Emplee la plantilla suministrada para marcar en la pared
los puntos exactos para taladrar.
2
3
ESPAÑOL
2. Fije los adaptadores para montaje mural en la pared
usando los tornillos suministrados.
< Para mayor comodidad, se incluye un juego de anclajes
murales de plástico. Si decide usar estos anclajes, taladre los
orificios guía usando una broca de 6 mm e inserte un anclaje
en cada orificio.
Únicamente utilice estos anclajes si son apropiados para el
material sobre el que se va a montar los altavoces. En caso de
duda, consulte en una ferretería.
3. Conecte ahora los altavoces y el subwoofer con los
cables de altavoces suministrados (consulte las páginas
26-27).
1. Retire la tapa del compartimento de pila.
4. Cuelgue con cuidado los altavoces en los ganchos.
2. Introduzca la pila de litio (CR2032, 3 V).
Nota:
Antes de dejar de sostener los altavoces compruebe que los
altavoces están bien fijados en los ganchos y que la pared
pueden resistir el peso de los altavoces.
3. Cierre el compartimento.
Pared
Sustitución de la pila
Altavoz
Gancho
Si observa que cada vez tiene que acercar más el mando a la
base Dock para que reciba la orden, significa que la pila se
está agotando. En tal caso, sustituya la pila por una nueva.
Precauciones con las pilas
No caliente ni desarme las pilas, ni se deshaga de ellas
arrojándolas al fuego.
Adaptadore
15
Conexión
PRECAUCIONES
< Apague todos los equipos antes de realizar ninguna conexión.
< Lea las instrucciones de cada uno de los componentes que tiene intención de usar con esta unidad.
< Inserte correctamente los conectores. Para evitar zumbidos y ruidos, no tienda los cables de
conexión en el mismo mazo del cable de alimentación.
Altavoz derecho (R)
Altavoz izquierdo (L)
A
Subwoofer
C
PRECAUCIÓN:
Asegúrese de fijar el cable del
Dock en este clip.
F
Dock
Use uno de estos
terminales.
B
H G
D
R
E
L
AUDIO
OUT
VIDEO
IN
S-VIDEO
IN
Reproductor DVD/CD,
platina cassette, etc.
Televisor/Monitor
16
A SPEAKERS
E Cable de alimentación
Conecte los altavoces con los cables de altavoces
suministrados.
Asegúrese de conectar el cable de alimentación a una toma
de red que suministre la tensión adecuada.
Asegúrese de conectar:
Enchufe blanco q Jack blanco (L: canal izquierdo)
Enchufe rojo q Jack rojo (R: canal derecho)
Sostenga siempre el cable de alimentación por el conector.
No tire nunca del propio cable de corriente.
< Si va a usar unos altavoces distintos de los incluidos,
asegúrese de que su impedancia es como mínimo de 4 Ω.
< Estos terminales sólo están preparados para conectar
altavoces.
F Interruptor POWER del subwoofer
Use este interruptor para encender o apagar el sistema.
G S-VIDEO OUT
B Dock
Conecte la base Dock al puerto “TO DOCK” y fije el cable
en el clip.
< Bien inserte el enchufe al receptor en la dirección que se
muestra en la ilustración.
Esta toma de salida envía la señal de vídeo de un iPod.
Utilice un cable S-Vídeo para conectar la base Dock a la
entrada S-Vídeo de una televisión o de un monitor
convenientemente equipado. Utilice esta conexión
preferentemente a una conexión vídeo compuesto.
ESPAÑOL
H VIDEO OUT
C AUX 1 IN
En esta entrada puede conectar un reproductor de audio
portátil.
Conecte la salida de audio (LINE OUT o PHONES) del
reproductor utilizando el cable con miniconector estéreo
suministrado.
Esta toma de salida envía la señal de vídeo de un iPod.
Utilice un cable de vídeo RCA para conectar la base Dock a
la entrada Vídeo Compuesto de una televisión o de un
monitor.
Cuando conecte la salida PHONES del mini reproductor a la
toma AUX 1 IN, deberá ajustar su volumen o es posible que
no oiga el sonido del SP-X2i.
D AUX 2 IN
Estas tomas de entrada son para introducir la señal de audio
analógico de 2 canales: conecte aquí dispositovos tales
como reproductores DVD/CD y platinas cassette, utilizando
un cable RCA disponible en el comercio.
Asegúrese de conectar:
Enchufe blanco q Jack blanco (L: canal izquierdo)
Enchufe rojo q Jack rojo (R: canal derecho)
17
Preparación
El SP-X2i viene equipado con un adaptador para el iPod con
pantalla en color (40GB, 60GB), “60GB (color) + Photo
40GB/60GB”. Para reproducir su iPod con el SP-X2i, tiene que
comprobar
primero que el adaptador que viene de fábrica se adapta a su
modelo de iPod. Si no es así, deberá reemplazarlo por uno que
se ajuste a su modelo como se explica más adelante.
3. Coloque el adaptador en la base Dock.
Encaje el borde delantero del adaptador en la base Dock y,
después, presione el borde trasero del adaptador en la base
Dock hasta que se oiga un leve “clic” que indica que el
adaptador se ha insertado correctamente.
1
1. Retire el adaptador de la base Dock.
Sostenga el adaptador por los lados derecho e izquierdo y tire
de él hacia arriba con suavidad.
2
2. Elija el adaptador base Dock que se ajuste a su
dispositivo móvil digital iPod.
Base Dock
“Vídeo 30GB” para el iPod con vídeo (30 GB).
< Cuando necesite retirar el adaptador, sosténgalo por los lados
derecho e izquierdo y tire de él hacia arriba con suavidad.
“Vídeo 60GBL/80GB” para el iPod con vídeo (60 GB, 80 GB).
“nano” para el iPod nano.
< Cubra la base Dock con la funda que se suministra para que
no se acumule polvo cuando no la utilice.
“mini” para el iPod mini.
“20GB (color) + Photo 30GB” para el iPod con pantalla en
color (20GB, 30GB, U2 Special Edition).
“60GB (color) + Photo 40GB/60GB” para el iPod con pantalla
en color (40GB, 60GB).
“20GB + U2” para el iPod con rueda de clic (20 GB, U2
Special Edition).
“40GB” para el iPod con rueda de clic (40 GB).
< Utilice un adaptador disponible en el comercio para
reproducir el iPod con conector para Base Dock (con cuatro
botones debajo de la pantalla).
18
Software compatible con el iPod
Si su iPod no funciona con el SP-X2i o con el mando a distancia
es posible que una actualización del software resuelva el
problema.
Visite la página Web de Apple y descargue la última versión del
software para iPod.
iPod es una marca registrada de Apple Computer, Inc. para los
EE.UU. y otros países.
Función de cada componente
Mando a distancia
Base Dock
E
A
F
B
G
C
H
D
M
I
J
K
N
R
L
Pulse este botón para encender la base Dock o para ponerla
en en modo de espera (Standby).
La base Dock se alimenta por medio del subwoofer. En primer
lugar necesita encender el subwoofer.
ESPAÑOL
A STANDBY/ON
H MENU
Este botón es equivalente al botón MENU del iPod.
Pulse este botón en el modo iPod para regresar al menú
anterior.
I Salto (.//)
Cuando la base Dock está en el modo de espera, el indicador
de alimentación del subwoofer se ilumina en amarillo.
El indicador se vuelve azul al encender la base Dock.
B SCROLL
En el modo iPod, pulse estos botones para desplazarse por el
menú.
C MUTING
Pulse este botón para silenciar el sonido.
D Ajuste de volumen
Pulse el botón “+” para subir el volumen, o el botón “–” para
bajarlo.
E iPod
Pulse este botón para entrar en el modo iPod.
F AUX 1/2
Pulse este botón para entrar en el modo AUX 1 o AUX 2.
G SELECT
Este botón es equivalente al botón Center del iPod.
Pulse este botón en el modo iPod para confirmar la selección
en los menús.
En el modo iPod, pulse brevemente estos botones para ir a la
siguiente o a la anterior pista. Manténgalo pulsado para
buscar una parte específica en una pista.
J Reproducción/Pausa (y/J)
En el modo iPod, pulse este botón para iniciar la reproducción
o entrar en modo de pausa.
K Indicador de iPod
Al entrar en modo iPod, este indicador se ilumina.
L Sensor a distancia
Cuando utilice el mando a distancia, oriéntelo hacia este
punto.
M Connector base Dock
Antes de usar su iPod, intorduzca en la base Dock un
adaptador adecuado (consulte la página 30).
Coloque despues el dispositivo móvil digital iPod en esta base
Dock.
N Indicador AUX 1/2
Este indicador se ilumina en verde al entrar en modo AUX 1.
Se ilumina en amarillo en modo AUX 2.
19
Funcionamiento básico
1 Encienda el subwoofer.
Escuchar el iPod
Coloque su iPod en la base Dock.
Pulse después el botón de Reproduccón/Pausa (y/J) del
iPod. La base Dock se encenderá automáticamente y se
iniciará la reproducción de su lista de música che haya
creado en el iPod.
2 Pulse el interruptor STANDBY/ON del mando a distancia
< Si se coloca en la base Dock un iPod que está en el modo
reproducción, la base Dock se encenderá automáticamente e
iniciará la reproducción del iPod.
para encender la base Dock.
< Si retire el iPod durante la reproducción, la base Dock se
apagará automáticamente.
< Compruebe que está empleando un adaptador base Dock
adecuado (consulte “Preparación” en la página 30).
< La batería del iPod se recarga totalmente si se coloca en la
base Dock cuando el interruptor POWER del subwoofer está
en posición ON.
3 Seleccione la fuente de sonido con el botón iPod o con
< Si se conectan los auriculares en el iPod, el sonido saldrá por
los altavoces del SP-X2i y por los auriculares.
el botón AUX 1/2.
Para entrar en modo iPod
4 Ponga en marcha la fuente y regule el volumen con los
botones “+” y “–”.
Seleccione “iPod” con el botón iPod. La reproducción se
iniciará si ya hay un iPod en la base Dock.
Una vez en modo iPod, pulse el botón de Reproducción/Pausa
(G/J) para iniciar o interrumpir la reproducción.
20
Para interrumpir momentáneamente la
reproducción (entrada en modo pausa)
Pulse el botón de reproducción/pausa (G/J) durante la
reproducción. La reproducción se interrumpe en la posición
actual. Pulse de nuevo el botón de reproducción/pausa (G/J)
para reiniciar la reproducción.
Para saltar a la anterior o a la siguiente
pista
Para regresar al menú anterior
Pulse el botón MENU para regresar al menú anterior.
Este botón es equivalente al botón MENU del iPod.
Para seleccionar un elemento del menú
ESPAÑOL
Durante la reproducción, pulse repetidamente el botón de
salto (.o/) hasta que encuentre la pista deseada. La
pista seleccionada así se reproducirá desde el principio.
Pulse los botones SCROLL (‡/°) para desplazarse por el
menú hasta el elemento que desea y, después, pulse el botón
SELECT.
< Si durante la reproducción se pulsa el botón de salto hacia
atrás (. ) , la pista que se está reproduciendo se
reproducirá de nuevo desde el principio. Pulse dos veces el
botón de salto hacia atrás (.) para regresar al comienzo de
la pista anterior.
Búsqueda de un fragmento de una pista
Durante la reproducción, mantenga pulsado el botón de salto
(.o/) durante más de 2 segundos y suéltelo cuando
encuentre el fragmento que está buscando.
21
Audición de una fuente externa (AUX 1)
1 Conecte la salida PHONES de un reproductor de audio
portátil a la entrada AUX 1 IN del subwoofer utilizando
el cable con miniconector estéreo suministrado.
Silenciamiento
Para silenciar el sonido momentáneamente, pulse el botón
MUTING. Pulse de nuevo el mismo botón para restablecer el
sonido.
El indicador (“iPod” o “AUX 1/2”) parpadeará cuando está
activado el silenciador.
< Tan pronto como pulse uno u otro botón de volumen cuando
el silenciador esté activado, esta función se cancelará.
2 Pulse el botón AUX 1/2 para entrar en modo AUX 1.
El indicador AUX 1/2 se iluminará en verde.
3 Ponga en marcha la fuente externa, y regule el volumen
con los botones “+” y “–” del SP-X2i y aunque del
reproductor de audio conectado.
Cuando la salida PHONES del reproductor externo está
conectada a la entrada AUX 1 IN, deberá ajustar su volumen
o es posible que no oiga el sonido del SP-X2i.
22
Solución de problemas
Especificaciones
Si tiene algún problema con el equipo, repase la siguiente lista
para ver si puede resolverlo por su cuenta antes de llamar a su
distribuidor o al centro de asistencia técnica de TEAC.
Sección de amplificador
Salida de potencia (I+D) . . . . . . . . . . . . . . . . . . . . 5 W + 5 W
Salida de potencia (subwoofer) . . . . . . . . . . . . . . . . . . . 15 W
Sensibilidad de entrada . . . . . . . . . . . . . . . . . . . . . . . 300 mV
Respuesta en frecuencia . . . . . . . . . . . . . . . . . 50 a 20.000 Hz
General
No hay corriente
e Revise la conexión a la toma de alimentación. Compruebe
que la alimentación no procede de una toma conmutada, y
en caso de que sea así, que el interruptor está activado.
Asegúrese de que la toma de corriente está activa
conectando otro dispositivo (lámpara, ventilador, etc.) para
ver si funciona.
No hay sonido en los altavoces.
e Seleccione la fuente de sonido con el botón iPod o con el
botón AUX 1/2.
e Compruebe la conexión de los altavoces.
e Ajuste el volumen.
e Si el indicador “iPod” o “AUX 1/2” parpadea en la base
Dock, pulse el botón MUTING.
No funciona el mando a distancia.
e Pulse el interruptor STANDBY/ON para encender la unidad.
e Si se ha agotado la batería, sustitúyala por una nueva.
e Utilice el mando a distancia dentro del radio de acción (5 m)
y apunte a la base Dock.
e Retire cualquier obstáculo existente entre el mando a
distancia y la base Dock.
e Apague cualquier fuente luminosa intensa que haya en las
proximidades de la unidad.
Reproductor iPod
No se puede colocar el iPod.
e Revise la base Dock del adaptador.
e Elimine las partículas de polvo y los obstáculos del conector
de la base Dock del SP-X2i y del iPod, y coloque de nuevo el
iPod en la base.
No reproduce.
e Retire el iPod de la base Dock, espere unos segundos y
vuelva a colocarlo de nuevo.
e Es posible que una actualización del software resuelva el
problema. Visite la página Web de Apple y descargue la
última versión del software para iPod.
Si no puede resolver el problema, desconecte el cable de
alimentación de la toma de red y vuélvalo a conectar.
Subwoofer
Impedancia . . . . . . . . . . . . . . . . . . . . . . . . . . . . . . . 8 ohmios
General
Alimentación . . . . . . . . . . . . . . . . . . . . . . . . 230 V c.a., 50 Hz
Consumo. . . . . . . . . . . . . . . . . . . . . . . . . . . . . . . . . . . . 70 W
Dimensiones (anch. x alt. x prof.)
Altavoces I y D . . . . . . . . . . . . . . . . . . . 142 x 226 x 70 mm
Subwoofer. . . . . . . . . . . . . . . . . . . . . 160 x 245 x 335 mm
Base Dock (sin cable) . . . . . . . . . . . . . . 100 x 51 x 107 mm
ESPAÑOL
Sonido con ruido.
e La unidad está demasiado cerca de un televisor o aparato
similar. Aleje la unidad o apague el dispositivo que interfiere.
Altavoz
Tipo . . . . . . . . . . . . . . . . . . . . . . . . . Plano de gama completa
Impedancia . . . . . . . . . . . . . . . . . . . . . . . . . . . . . . . 4 ohmios
Peso
Altavoces I y D . . . . . . . . . . . . . . . . . . . . . 0,6 kg cada uno
Subwoofer . . . . . . . . . . . . . . . . . . . . . . . . . . . . . . . . 5,3 kg
Dock . . . . . . . . . . . . . . . . . . . . . . . . . . . . . . . . . . . . 0,5 kg
Accesorios estándar
Mando a distancia (RC-1121) x 1
Batería (CR2032) del mando a distancia x 1
Cable de altavoz x 2
Cable con mini conector estéreo x 1
Cable vídeo S-Vídeo/RCA x 1
Adaptador de base Dock x 8
(adaptador “60GB (color) + Photo 40GB/60GB” preequipado)
Funda para la base Dock x 1
Adaptador para montaje mural x 2
Tornillos x 4
Tacos de plástico x 4
Plantilla para montaje mural x 2
Manual del usuario x 1
Tarjeta de garantía x 1
• El diseño y las especificaciones están sujetos a modificación
sin previo aviso.
• El peso y las dimensiones se expresan como valores
aproximados.
• Las ilustraciones pueden diferir ligeramente de los modelos
fabricados.
23
Z
TEAC CORPORATION
3-7-3, Nakacho, Musashino-shi, Tokyo 180-8550, Japan Phone: (0422) 52-5081
TEAC AMERICA, INC.
7733 Telegraph Road, Montebello, California 90640 Phone: (323) 726-0303
TEAC CANADA LTD.
5939 Wallace Street, Mississauga, Ontario L4Z 1Z8, Canada Phone: (905) 890-8008
TEAC MEXICO, S.A. De C.V
Campesinos N°184, Colonia Granjas Esmeralda, Delegacion Iztapalapa, CP 09810, México DF Phone: (525) 581-5500
TEAC UK LIMITED
Unit 19 & 20, The Courtyards, Hatters Lane, Watford, Hertfordshire, WD18 8TE, U.K. Phone: (0845) 130-2511
TEAC EUROPE GmbH
Bahnstrasse 12, 65205 Wiesbaden-Erbenheim, Germany Phone: 0611-71580
This appliance has a serial number located on the rear panel. Please record
the model number and serial number and retain them for your records.
Model number
Serial number
0807. MA-1264A