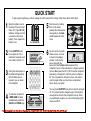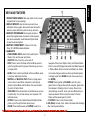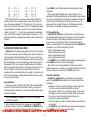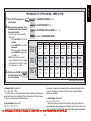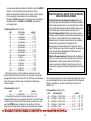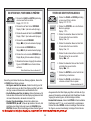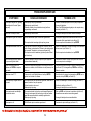
1
Chess Explorer Instructions Bedienungsanleitung Mode d’emploi Instrucciones de Funcionamiento Istruzioni d’uso Handleiding Pdf downloaded from http://www.thepdfportal.net/0d71f9df-8f27-4948-9469-8607446a2519_324239.pdf QUICK START To play a game right away, without reading the entire manual first, simply follow these Quick Start steps! 1 Open the battery cover in the base of the unit. Insert three “AA” (Type AM3/R6) batteries, making sure that you observe the correct polarity. Then, replace the battery cover. 2 Press GO/STOP to turn the computer on. If the unit doesn’t respond, reset it as noted in Section 7.1. 3 Set up the chess pieces in the initial starting position with the White pieces closest to you, as shown in this diagram. 4 To reset the computer for a NEW GAME of chess, simultaneously press the CLEAR and ENTER keys. 5 Enter moves by making them on the board, pressing the chess pieces down gently on the from and to squares for each move. 6 As soon as the computer makes a move, its move is shown in the display window. You’ll see the piece, along with the piece color and the from and to squares of the computer’s move. In this example, the computer wants to move its Black pawn from E7 to E5. Press the computer’s pawn down on Square E7, and then press it on Square E5. This completes the computer’s move, and now it’s your turn again. Make your next move as described above. Enjoy your game! 3 x AA/AM3/R6 go/stop ዛዒዓዔዕዖዘዙዜ ዑ尷尽尻就尯尹尿尵ዑ ዐ屁屃屁屃屁屃屁屃ዐ ዏ巀居巀居巀居巀居ዏ ዎ居巀居巀居巀居巀ዎ ው巀居巀居巀居巀居ው ዌ居巀居巀居巀居巀ዌ ዋ屄层屄层屄层屄层ዋ ዊ尶局尺尴尮尼尾尸ዊ ዝዒዓዔዕዖዘዙዞ new game clear You can press GO/STOP at any time to turn the computer off. Your current position and game (up to 30 individual moves) will be stored in the computer’s memory. When you switch back on again, you can continue playing right where you left off. enter Pdf downloaded from http://www.thepdfportal.net/0d71f9df-8f27-4948-9469-8607446a2519_324239.pdf ENGLISH KEYS AND FEATURES 1. PIECE STORAGE AREAS: Slide open sides of unit to reveal compartments for piece storage. 2. DISPLAY WINDOW: Used to show moves and move information during a game. Also used for level and option selection, piece verification, position set-up, and more. 3. SENSORY CHESSBOARD: Each square contains a sensor that registers piece movement. Certain squares can also be used within Level Mode and Option Mode to select levels and options. 4. BATTERY COMPARTMENT: In base of unit. Uses three “AA” (AM3/R6) alkaline batteries. 5. GAME KEYS • PIECE SYMBOL KEYS: Used in Verify and Position Modes. Also used for pawn promotions. • GO/STOP: Press to turn the unit on and off. • INFO: Press to enter Info Mode; within Info Mode, press to cycle through the main info groups. Press during your move to request a hint. • LEVEL: Press to enter Level Mode; within Level Mode, press to skip over eight levels at a time. • WHITE/< and BLACK/> KEYS: Press to change levels one at a time in Level Mode, and press to cycle through options in Option Mode and Info Mode. Also used to select the color in Position Mode. • TAKE BACK: Press to take back an individual move (a move for either side). You can take back up to a maximum of 30 individual moves. • OPTION: Press to enter Option Mode; within Option Mode, press to cycle through the main option groups. • CLEAR: Press simultaneously with ENTER to reset for a new game. Press to exit Option, Verify, and Position Modes. Press to clear Info Displays and cancel Clear Board requests in Position Mode. Press to cancel Level Mode if you decide not to make changes (unless you have used board squares to change levels; then CLEAR will enter the new level, just like ENTER). • ENTER: Press together with CLEAR to reset for a new game. Press to change sides with the computer; press while the computer is thinking to force it to move. Press to turn option settings on and off, and to exit Level Mode with your new level selected. Press to clear the board in Position Mode, and then press again to confirm. • POSITION: Press to enter Position Mode. 6. ACL (Reset): In base of unit. Used to eliminate static discharge after inserting new batteries. Pdf downloaded from http://www.thepdfportal.net/0d71f9df-8f27-4948-9469-8607446a2519_324239.pdf 3 TABLE OF CONTENTS INTRODUCTION 3.6 Mate Search Levels QUICK START Ready to enter the exciting world of computer chess? You’ve come to the right place! Your new computer offers so many game options, (Squares A6-H6) KEYS AND FEATURES playing levels, and special features—you’ll never look at chess the 3.7 Training Levels INTRODUCTION same way again. The Quick Start at the front of the manual will get you (Squares A7-H8) 1. LET’S GET STARTED! playing right away, and you’ll find more details on basic game operation 4. INFO MODE: WATCH AND 1.1 First, Install the Batteries in Section 1. Once you learn the basics, be sure to go on and explore LEARN 1.2 Ready to Play? Here’s How to the rest of this manual, even if you normally don’t like to read instruction Using Info Mode Move! booklets. You’ll discover that this chess computer has all kinds of other 4.1 Principal Variation 1.3 Now It’s the Computer’s Turn interesting and fun-filled features that will delight you—we guarantee it! 4.2 Search Information 1.4 Change Your Mind? Take Back Your new computer knows and follows all the rules of chess—you 4.3 Chess Clock Information 1.5 Game Over? Why Not Play Again can be sure that it will never cheat. For those of you who haven’t played before, we have included a short overview of the rules to get you 4.4 Move Count/Game Moves 1.6 Too Easy/Hard? Change the started. For more detailed information, why not visit your local library, 4.5 Want a Hint? Just Ask! Level where you’re sure to find lots of interesting chess books. 5. OPTIONS FOR FUN AND 2. MORE FEATURES TO EXPLORE VARIETY 2.1 Whose Move? Check the Display Selecting Game Options 2.2 Special Chess Moves 1. LET’S GET STARTED! 5.1 Operation Mode Options 2.3 Illegal Moves 1.1 First, Install the Batteries 5.2 Playing Mode Options 2.4 Check, Mate, and Draw Your computer runs on three “AA” (Type AM3/R6) batteries. Insert the 5.3 Rotating Display Options 2.5 Interrupting the Computer’s batteries into the compartment in the base of the unit, making sure to 6. VERIFYING/SETTING UP Search observe the correct polarity. Use fresh alkaline batteries for longer POSITIONS 2.6 Changing Sides with the battery life. 6.1 Verifying Positions Computer Turn the computer on by pressing GO/STOP, and a beep will signal 6.2 Changing and Setting Up 2.7 Built-In Openings that the game is ready to play. If the computer fails to respond (static Positions 2.8 Thinking on the Opponent’s Time discharge may cause it to lock up), use a paper clip or another sharp 7. TECHNICAL DETAILS 2.9 Game Memory object to press down into the hole marked ACL in the base of the unit 7.1 The ACL Function 3. THE PLAYING LEVELS for at least one second. This will reset the computer. 7.2 Care and Maintenance Setting a Playing Level Tip: To conserve energy and extend battery life, turn on the Auto 7.3 Technical Specifications 3.1 Normal Playing Levels Power Down option (see Section 5.1). TROUBLESHOOTING GUIDE (Squares A1-G2) 3.2 Infinite Level (Square H2) 1.2 Ready to Play? Here’s How to Move! 3.3 Tournament Levels Okay, now it’s time to start a game! It’s easy—just follow these steps: (Squares A3-H3) a. Press GO/STOP to turn the computer on, if you haven’t already 3.4 Blitz Levels (Squares A4-H4) done so. 3.5 Beginner Levels b. Press the CLEAR and ENTER keys together to reset the unit for (Squaresfrom A5-H5) Pdf downloaded http://www.thepdfportal.net/0d71f9df-8f27-4948-9469-8607446a2519_324239.pdf 4 MAKING THE COMPUTER’S MOVE: AN EXAMPLE After the computer displays its move, it’s up to you to make its move on the board. Here, the display indicates the computer wants to move its Black pawn (]!) from d7 to d5. Pick up the d7 pawn and press it down lightly on Square d7. Then, press the pawn down on Square d5. That’s it! d7-d5 ዛዒዓዔዕዖዘዙዜ ዑ尷尽尻就尯尹尿尵ዑ ዐ屁屃屁屃屁屃屁屃ዐ ዏ巀居巀居巀居巀居ዏ ዎ居巀居巀居巀居巀ዎ ው巀居巀层巀居巀居ው ዌ居巀居巀居巀居巀ዌ ዋ屄层屄居屄层屄层ዋ ዊ尶局尺尴尮尼尾尸ዊ ዝዒዓዔዕዖዘዙዞ 1.3 Now It’s the Computer’s Turn When the computer moves, it beeps and displays its move. Check out the display window—you’ll see the from and to squares of the computer’s move, along with the color and type of piece it is moving! Press the indicated piece down on the from square until you hear a beep. Move that same piece to the indicated to square and press it down to complete the computer’s move. And it’s your turn again… ዛዒዓዔዕዖዘዙዜ ዑ尷尽尻就尯尹尿尵ዑ ዐ屁屃屁巀屁屃屁屃ዐ ዏ巀居巀居巀居巀居ዏ ዎ居巀居屃居巀居巀ዎ ው巀居巀层巀居巀居ው ዌ居巀居巀居巀居巀ዌ ዋ屄层屄居屄层屄层ዋ ዊ尶局尺尴尮尼尾尸ዊ ዝዒዓዔዕዖዘዙዞ When castling, first follow the take-back steps as described above for the King, and then do the same for the Rook to complete the take-back. 1.4 Change Your Mind? Take Back When you’re playing chess against this computer, nothing is “set in 1.5 Game Over? Why Not Play Again stone”—you can change your mind or decide to play a different move Whenever you finish a game (or if you give up on your current game), whenever you want! When it’s your turn to move, simply press TAKE it’s easy to start over again! Reset the computer by pressing the BACK, and the display will show the move to be taken back. Press the CLEAR and ENTER keys together, and a New Game tone tells you that indicated piece down on the original to square, then press it down on the computer is ready for a new game. The same playing level will be in the original from square to complete the take-back. Repeat this as effect, but you can change it if you’d like, as explained in Section 3. often as you’d like, taking back up to 30 individual moves (or 15 moves IMPORTANT: Resetting the computer for a new game clears your for each side). To continue playing at any point, just make another move current game from the computer’s memory—be careful not to press on the board. these keys by mistake! After taking back a capture and/or pawn promotion, the computer will make sure that your board is still set up correctly by reminding you to 1.6 Too Easy/Hard? Change the Level put the captured piece and/or pawn back on the board! It does this by When you first turn your computer on, it’s automatically set to Normal displaying the piece symbol and its square location. Put the indicated Playing Level D1 (five seconds a move). However, you have 64 different piece back on the board and press down on that square to complete levels to choose from—you’ll want to try them all out! For descriptions the take-back. of the playing levels and how to change levels, see Section 3. Pdf downloaded from http://www.thepdfportal.net/0d71f9df-8f27-4948-9469-8607446a2519_324239.pdf 5 ENGLISH a new game of chess. Set up the pieces in their starting positions, with the White pieces nearest to you, as shown in the Quick Start. c. To make a move, lightly press down on the piece you want to move until you hear a beep—the sensory board will recognize your piece automatically. Don’t believe it? Just look at the display window, which is suddenly full of information—it shows your piece, along with the piece color and the square you just pressed. d. Take that piece and gently press it down on the square you are moving to. You’ll hear a second beep as the computer confirms your move. You’ve just made your first full move of the game. Next, it’s the computer’s turn. You’ll notice that the computer often moves instantly at the beginning of a game, instead of taking time to think. This is because it is playing from memory, using a built-in “book” of opening moves (for more information, see Section 2.7). to move its pawn from D7 to D5, for example, and you press down on D7 and then D6, the display shows Er:D5 briefly, pointing out your error. The display then returns to showing the move again (D7-D5), and the computer expects you to press down on D5 to complete its move. If you press down on a piece and the from square is displayed, but you decide not to make that move, simply press down on that same square again to cancel. Then make another move. If you change your mind after entering your whole move, take the move back as described in Section 1.4. 2. MORE FEATURES TO EXPLORE 2.1 Whose Move? Check the Display When the computer plays Black, it flashes a black square in the display while it is thinking. After it has moved, a white square shows that it is now White’s turn to move. You can tell at a glance if the computer is currently thinking, and which side is to move. 2.2 Special Chess Moves Captures: To capture, press down on the piece you want to move, remove the captured piece from the board, and press your piece down on the square of the captured piece. Captures are displayed as in E5•F6. En Passant Captures: In this type of capture, the computer continues to display your move until you press down on the captured pawn and remove it from the board. Castling: The computer automatically recognizes castling after the King is moved. After you have pressed the King down on its from and to squares, the computer continues to display your move until you press on the Rook’s from and to squares to complete the move. Note that Kingside castling is displayed as 0-0, and Queenside castling as 0-0-0. Pawn Promotions: When you promote a pawn, first make your move as usual, pressing your pawn down on its from and to squares. Next, press the PIECE SYMBOL KEY for your desired promotion piece (%, $, #, or @). The computer recognizes your new piece immediately, displays it briefly, and then begins thinking about its next move. Remember to change your piece on the board! When the computer promotes a pawn, the display shows both the pawn and the promoted piece. Don’t forget to replace the computer’s pawn with its new piece. 2.4 Check, Mate, and Draw When a King is in check, the computer first displays its move as usual. After the move is made, CHECK flashes in the display for a few seconds, along with the checking move. The display then goes back to showing the clock. If the computer discovers a forced mate against its opponent, it first displays its move as usual. After the move has been made on the board, the computer flashes a mate announcement along with the move for several seconds (e.g., =in 2 for a mate in two moves). The display then goes back to showing the clock. When a game ends in checkmate, the display flashes MATE (along with the mating move or with the clock display) for a short time after the move has been made. The display then goes back to showing the clock. The computer recognizes draws by stalemate, three-fold repetition, and the 50-move rule. After a draw has occurred, the display flashes EnD (along with the drawing move or with the clock display) for a brief time after the move has been made. The display then goes back to showing the clock. 2.5 Interrupting the Computer’s Search Think the computer is taking too long to move? You can interrupt it 2.3 Illegal Moves any time! Simply press ENTER while the computer is thinking, and it Your computer will never accept an illegal move! If you try to make will stop and play the best move it has found so far. This feature can be one, you’ll hear a low double beep, and the display will show the square handy on the higher levels, where the computer can take a long time to the piece came from. Either move that same piece to another square, move, and on the Infinite Level, where the computer thinks indefinitely or press the piece back down on its original from square and move a unless you stop it. different piece. On the Mate Search Levels, pressing ENTER won’t force the comIf you don’t make the computer’s move correctly, you’ll also get an puter to make a move. Instead, the computer will display – – – – – to error message. This means you are either moving the wrong piece, or indicate that it was interrupted before it found a mate. To continue play, moving the computer’s piece to the wrong square. If the computer wants switch to another level. Pdf downloaded from http://www.thepdfportal.net/0d71f9df-8f27-4948-9469-8607446a2519_324239.pdf 6 2.9 Game Memory You may interrupt a game at any time by pressing GO/STOP. Play is then suspended, and the computer stores your current game (up to 30 individual moves). When you switch back on again, you can continue right where you left off. 3. THE PLAYING LEVELS Your chess computer offers 64 different levels of play. When you set the level, keep in mind that when the computer has more time to think about its moves, it becomes stronger and plays better—just like a human chess player! For an overview of all the levels, refer to the Level Chart. The levels are also described individually in this section. 2.7 Built-In Openings At the beginning of a game, the computer will often move instantly on many levels. This is because it is playing from memory, using its own built-in “book” of opening chess moves. This book contains most major openings and many positions from grandmaster play. If the current board position is in its book, the computer plays a response to that position automatically, instead of having to think about the move! A special feature of this computer’s opening book is its ability to handle transpositions. A transposition occurs when a position reached by a certain set of moves can also be reached when those same moves occur in a different order. The computer’s integrated Automatic Transposition Manager handles these cases with ease. Also included is a unique user-selectable book feature, which lets you choose from different types of opening books, or even turn the book off, if desired. For complete details, see Section 5.2. Setting a Playing Level See “USE THIS CHART TO SELECT A PLAYING LEVEL!” for a look at how to set a level and a chart showing all the levels. There are two methods of setting levels—by using the game keys or the board squares. Whichever method you use, always press LEVEL first to enter Level Mode, and the computer will display the current playing level. When you enter Level Mode the first time, the computer is set on Normal Playing Level D1 (with an average response time of five seconds a move), and the display shows L0:05. • To select a level by using game keys: After entering Level Mode by pressing LEVEL, change levels one at a time by using the BLACK/> and WHITE/< keys. As a shortcut, press LEVEL repeatedly to skip over eight levels at a time. When the display 2.8 Thinking on the Opponent’s Time shows your desired level, press ENTER to enter your new level into As you play, you may notice that the computer sometimes replies to the computer and exit Level Mode. your moves immediately, even in the middle of games played on the • To select a level by pressing board squares: As indicated in the higher levels. This is because the computer thinks on your time, using Level Chart, each of the 64 squares corresponds to one level. After the time you are taking for your move to think ahead and plan its own entering Level Mode by pressing LEVEL, press the desired square strategies. It tries to guess the move you are likely to make, and then to activate a level, using the chart as a guide. When you press down calculates its responses for that particular move while you are still on the desired square and that level shows in the display, press thinking. If the computer has guessed right, there’s no reason for it to ENTER to enter your new level into the computer and exit Level keep on calculating—it immediately plays the move it has already found. Mode. When making your selection via the board squares, pressing To disable this feature, turn on the Easy Mode option, as described in CLEAR has the same effect as pressing ENTER—it enters your Section 5.2. level into the computer. Pdf downloaded from http://www.thepdfportal.net/0d71f9df-8f27-4948-9469-8607446a2519_324239.pdf 7 ENGLISH 2.6 Changing Sides with the Computer To change sides with the computer, simply press ENTER when it’s your turn—and the computer will make the next move for your side. Change sides as often as you wish. Want the computer to play the first move for White at the start of a new game? Press CLEAR and ENTER together to reset for a new game, and then press ENTER. Want to watch the computer play chess against itself? Press ENTER after each move—watch as it plays for both sides of the board, one move after another. Study its strategies, and you might improve your own game! 3.2 Infinite Level (Square H2) • To verify the level without changing it: If you press LEVEL to verify the level but you don’t want to actually change levels, press CLEAR. This returns you to normal play without changing the level or clock settings, even while the computer is thinking. Other important points to remember regarding levels: • Changing the level always resets the chess clocks. • We do not recommend changing levels while the computer is thinking. If you must do this, first press ENTER to abort the computer’s search, and make its move on the board. Then, take back the computer’s move and change the level. Finally, press ENTER to make the computer start thinking on the new level. • If you change the level while the computer is thinking, the clock is reset and the current search is aborted. • If you press LEVEL while the computer is thinking but the level is not changed (if you press CLEAR instead of ENTER), the computer will also abort its search. LEVEL TIME PER MOVE DISPLAY 3.3 Tournament Levels (Squares A3-H3) LEVEL MOVES/TOTAL TIME ALTERNATING DISPLAY A3 ..... 40 moves in 1 hr. 30 min. ................. tr40 1:30:00 B3 ..... 35 moves in 1 hr. 45 min. ................. tr35 1:45:00 C3 ..... 40 moves in 1 hr. 45 min. ................. tr40 1:45:00 D3 ..... 35 moves in 1 hr. 30 min. ................. tr35 1:30:00 E3 ..... 40 moves in 2 hrs. ............................. tr40 2:00:00 F3 ..... 45 moves in 2 hrs 30 min. ................. tr45 2:30:00 G3 .... 50 moves in 2 hrs. ............................. tr50 2:00:00 H3 ..... 40 moves in 3 hrs. ............................. tr40 3:00:00 The Tournament Levels require you to make a certain number of moves within a given amount of time. If a player exceeds the allotted time for a given number of moves, the computer flashes TImE along with the elapsed time to show that the game is over. If you wish, you can continue to play even after the time has run out. If you choose a Tournament Level, you may want to set the chess clocks to display countdown time instead of the elapsed time (see Section 5.1). When the game time runs out, the countdown clock automatically reverts back to the normal clock display. 3.1 Normal Playing Levels (Squares A1-G2) LEVEL TIME H2 ................. No time limit ................. 9:99:99 On the Infinite Level, the computer will search indefinitely, until it finds a forced mate or forced move; until it has fully searched the position to its maximum depth; or until you stop the search by pressing ENTER. If you halt the search, the computer makes the move it currently thinks is best. Try experimenting with this level—set up interesting board positions and let the computer analyze them for you! It will think for hours or even days on end, trying to come up with the best possible move. And don’t forget to watch the computer as it thinks— take advantage of the Rotating Display feature (see Section 5.3). DISPLAY A1 .................... 1 second .................... L 0:01 B1 .................... 2 seconds .................. L 0:02 C1 .................... 3 seconds .................. L 0:03 D1 .................... 5 seconds .................. L 0:05 E1 .................. 10 seconds .................. L 0:10 F1 .................. 15 seconds .................. L 0:15 G1 .................. 20 seconds .................. L 0:20 H1 .................. 30 seconds .................. L 0:30 A2 .................. 45 seconds .................. L 0:45 B2 .................... 1 minute .................... L 1:00 C2 .................... 1.5 minutes ............... L 1:30 D2 .................... 2 minutes ................... L 2:00 E2 .................... 3 minutes ................... L 3:00 F2 .................... 5 minutes ................... L 5:00 G2 .................. 10 minutes ................... L10:00 When you choose one of the Normal Playing Levels, you are selecting an average response time for the computer. Note that the times are averaged over a large number of moves. In the opening and endgame, the computer tends to play faster, but in complicated middlegame positions, it may take longer to move. 3.4 Blitz Levels (Squares A4-H4) LEVEL TIME PER GAME DISPLAY A4 .................... 5 minutes ................... bL: 5 B4 .................. 10 minutes ................... bL:10 C4 .................. 15 minutes ................... bL:15 D4 .................. 20 minutes ................... bL:20 Pdf downloaded from http://www.thepdfportal.net/0d71f9df-8f27-4948-9469-8607446a2519_324239.pdf 8 ENGLISH USE THIS CHART TO SELECT A PLAYING LEVEL! 1. Press LEVEL to enter 9 ply search PLY:9 level Level Mode. TRAINING LEVELS 2. Next, select your level, using the Level Chart. There are two ways to do this. • Cycle through the levels until your level is displayed: • Press BLACK/> to increase > levels by one. • Press WHITE/< to decrease < levels by one. • Press LEVEL to increase > levels by eight. • OR, simply locate your level square and press one of the pegged chess pieces down into the hole to display that level. A8 Mate in 1 move =in:1 A6 BEGINNER LEVELS 1 sec. per move bEG:1 A5 BLITZ LEVELS 5 min. per game bL: 5 A4 TOURNAMENT LEVELS 40 moves in 1:30 tr40 1:30:00 A3 3. Finally, press ENTER to exit Level Mode, using your new level! enter NORMAL PLAYING LEVELS + INFINITE LEVEL B8 1 ply search PLY:1 A7 MATE SEARCH LEVELS 10 ply search PLY:10 45 sec. per move L0:45 A2 1 sec. per move L0:01 A1 2 ply search PLY:2 B7 Mate in 2 moves =in:2 B6 2 sec. per move bEG:2 B5 10 min. per game bL:10 B4 35 moves in 1:45 tr35 1:45:00 B3 1 min. per move L1:00 B2 2 sec. per move L0:02 B1 11 ply search PLY:11 C8 3 ply search PLY:3 C7 Mate in 3 moves =in:3 C6 3 sec. per move bEG:3 C5 15 min. per game bL:15 C4 40 moves in 1:45 tr40 1:45:00 C3 1.5 min. per move L1:30 C2 3 sec. per move L0:03 C1 12 ply search PLY:12 D8 4 ply search PLY:4 D7 Mate in 4 moves =in:4 D6 4 sec. per move bEG:4 D5 20 min. per game bL:20 D4 35 moves in 1:30 tr35 1:30:00 D3 2 min. per move L2:00 D2 5 sec. per move L0:05 D1 13 ply search PLY:13 E8 14 ply search PLY:14 E7 6 ply search PLY:6 F7 Mate in 5 moves =in:5 E6 5 sec. per move bEG:5 E5 30 min. per game bL:30 E4 40 moves in 2:00 tr40 2:00:00 E3 3 min. per move L3:00 E2 10 sec. per move L0:10 E1 Mate in 6 moves =in:6 F6 6 sec. per move bEG:6 F5 45 min. per game bL:45 F4 45 moves in 2:30 tr45 2:30:00 F3 5 min. per move L5:00 F2 15 sec. per move L0:15 F1 For more details, see Section 3. Pdf downloaded from http://www.thepdfportal.net/0d71f9df-8f27-4948-9469-8607446a2519_324239.pdf 9 G8 F8 5 ply search PLY:5 15 ply search PLY:15 7 ply search PLY:7 G7 Mate in 7 moves =in:7 G6 7 sec. per move bEG:7 G5 60 min. per game bL:60 G4 50 moves in 2:00 tr50 2:00:00 G3 10 min. per move L10:00 G2 20 sec. per move L0:20 G1 16 ply search PLY:16 H8 8 ply search PLY:8 H7 Mate in 8 moves =in:8 H6 8 sec. per move bEG:8 H5 90 min. per game bL:90 H4 40 moves in 3:00 tr40 3:00:00 H3 Infinite Level 9:99:99 H2 30 sec. per move L0:30 H1 E4 .................. 30 minutes ................... bL:30 F4 .................. 45 minutes ................... bL:45 G4 .................. 60 minutes ................... bL:60 H4 .................. 90 minutes ................... bL:90 On the Blitz Levels (also called Speed Chess or “Sudden Death” Levels), you set the total time for the whole game. If the game time is exceeded, the computer flashes tImE along with the elapsed time to show that the game is over. If you select a Blitz Level, you may want to set the chess clocks to display countdown time instead of elapsed time (see Section 5.1). When game time runs out, the countdown clock automatically reverts back to the normal clock display. NEED HELP CHOOSING A LEVEL? SOME TIPS FOR YOU • Are you a beginning player? Start out with the Beginner Levels or lower Training Levels. These levels restrict the computer’s search depth, resulting in weaker play and giving you the chance to learn about the game and perhaps even win! For even more of a shot at winning, combine one of these levels with the Easy Mode option (Section 5.2), so the computer can’t think on your time. • Are you an intermediate or more advanced player? Try the Normal, Training, or Tournament Levels. The Normal Levels range from easy all the way up to a difficult 10-minute response time, and the Tournament Levels are extremely challenging. The Training Levels allow you to set your desired search depth—as you conquer each level, go on to the next! And don’t forget to try the Blitz Levels for some fast and exciting games of Speed Chess. • Want to experiment? Use the Mate Search Levels to solve problems up to mate in eight—try searching from a position in one of your own games, or set up an actual mate problem. Choose the Infinite Level to have the computer analyze complicated positions for hours or even days. 3.5 Beginner Levels (Squares A5-H5) LEVEL TIME PER MOVE DISPLAY A5 .................... 1 second .................... BEG:1 B5 .................... 2 seconds .................. BEG:2 C5 .................... 3 seconds .................. BEG:3 D5 .................... 4 seconds .................. BEG:4 E5 .................... 5 seconds .................. BEG:5 F5 .................... 6 seconds .................. BEG:6 G5 .................... 7 seconds .................. BEG:7 H5 .................... 8 seconds .................. BEG:8 Are you a novice or beginning chess player? If so, these levels are especially for you! Here, the computer restricts its search so that it deliberately plays weaker and gives you a better chance to win. The levels start out easy and gradually get a little harder—as you beat each one, go on to the next. like the computer to find it, set the computer on one of the Mate Search Levels. This computer can solve mates in up to eight moves. Mates in one to five are usually found quite quickly, whereas solutions taking six to eight moves may take quite some time. If there is no mate present or the computer can’t find a mate, it will display dashes (– – – – –). To continue play, simply switch to another level. 3.6 Mate Search Levels (Squares A6-H6) LEVEL PROBLEM DISPLAY A6 ................... Mate in 1 .................... =in:1 B6 ................... Mate in 2 .................... =in:2 C6 ................... Mate in 3 .................... =in:3 D6 ................... Mate in 4 .................... =in:4 3.7 Training Levels (Squares A7-H8) E6 ................... Mate in 5 .................... =in:5 LEVEL DISPLAY LEVEL F6 ................... Mate in 6 .................... =in:6 A7 .......... PLY: 1 A8 .......... G6 ................... Mate in 7 .................... =in:7 B7 .......... PLY: 2 B8 .......... H6 ................... Mate in 8 .................... =in:8 C7 .......... PLY: 3 C8 .......... Selecting one of these levels activates a special Mate Finder ProD7 .......... PLY: 4 D8 .......... If you have a position where there may be a mate and you would Pdf gram. downloaded from http://www.thepdfportal.net/0d71f9df-8f27-4948-9469-8607446a2519_324239.pdf 10 DISPLAY PLY: 9 PLY:10 PLY:11 PLY:12 Press CLEAR to exit Info Mode and go back to showing the normal chess clock. After learning about Info Mode, take a look at Section 5.3 for a description of the Rotating Display feature. Selecting this feature makes the computer automatically cycle through the requested information in one-second intervals every time it thinks about its move—you can actually watch the computer “think out loud”! Whenever requested information is not available, the display will show dashes (– – – – –). 4.1 Principal Variation Press INFO the first time to get information on the principal variation (the predicted line of play, or the sequence of moves the computer thinks will be made). The first display you will see is the move the computer is currently thinking of making. The principal variation is shown to a maximum depth of four individual moves. Press BLACK/> repeatedly to scroll forward through all the moves: • Move 1 (predicted line of play) • Move 2 (predicted line of play) • Move 3 (predicted line of play) • Move 4 (predicted line of play) Press WHITE/< to scroll backward and see previous displays again. Press CLEAR to return to the normal clock display. Since the first move of the predicted line of play is the move the computer assumes you will make, you can also consider this move as a hint! So—whenever you need help, press INFO on your turn. 4. INFO MODE: WATCH AND LEARN Imagine this: You’re playing chess against a friend, and it’s his move. You’d love to know what move he’s thinking about, and you’d really like to get his opinion of the board position. But, of course, you won’t ask— because that’s just not done. Well, guess what—when you play against this chess computer, you can ask anything you want, and you’ll get all the answers! In fact, you can get an incredible amount of information about the computer’s thought process. On request, it will show you the move it’s thinking of, the line of play it expects after that move, its evaluation of the current board position, how deeply it is searching, and more. As you can imagine, studying this information can help you learn so much more about chess. 4.2 Search Information Press INFO a second time to get information on the computer’s search! Press BLACK/> repeatedly to scroll forward through these Using Info Mode four displays: How do you access all this game information? By using Info Mode at • Evaluation of the current position (based on a pawn being worth any time! If you do this while the computer is thinking, you’ll see the 1.0 points; a positive number indicates White is ahead) information displays change as the computer considers different moves • Two numbers: The first is the current search depth, or the number and searches deeper! of individual moves the computer is looking ahead; the second is the number of moves the computer has examined so far See “INFO MODE AT A GLANCE!” for a chart summarizing all • The move currently being considered the Info Mode displays. • The search speed, or number of positions (nodes) being searched Game information is divided into four groups, and pressing INFO every second cycles from one group to another. The BLACK/> and WHITE/< keys Press WHITE/< to scroll backward and see previous displays again. can be used to cycle through the displays within each of the groups. Press CLEAR to return to the normal clock display. Pdf downloaded from http://www.thepdfportal.net/0d71f9df-8f27-4948-9469-8607446a2519_324239.pdf 11 ENGLISH E7 .......... PLY: 5 E8 .......... PLY:13 F7 .......... PLY: 6 F8 .......... PLY:14 G7 ......... PLY: 7 G8 ......... PLY:15 H7 .......... PLY: 8 H8 .......... PLY:16 On the Training Levels, the computer’s search depth is limited to a certain number of moves, as shown above. As you cycle through the levels, the computer displays PLY:# for each level. A “ply” is an individual move (a move for either side), and “#” is the number representing the search depth. For example, on Level A7, the computer searches to a depth of one ply (PLY:1), and thus looks ahead only one individual move. On this level, therefore, it will often overlook a mate in one. This produces weaker play, giving beginners a better chance of beating the computer. 4.3 Chess Clock Information Press INFO a third time for chess clock information. The chess clocks keep track of the time for both sides. Press BLACK/> repeatedly to scroll forward through the clock displays: • Elapsed time since the last move was made • Total elapsed time for the computer • Total elapsed time for the player • Remaining time for the computer (Blitz/Tournament Levels only) • Remaining time for the player (Blitz/Tournament Levels only) Press WHITE/< to scroll backward and see previous displays again. Press CLEAR to return to the normal clock display. The clocks stop whenever you take back a move, check level settings, select options, verify or set up a position, or turn the unit off. In all these cases, however, the times are retained in memory, and the clocks resume as soon as play is continued. Whenever you change levels or press CLEAR and ENTER together to reset for a new game, the chess clocks are always reset to 0:00:00. INFO MODE AT A GLANCE! PRINCIPAL VARIATION INFO: info x1 • Move 1 (predicted line of play) white/ black/ • Move 2 (predicted line of play) • Move 3 (predicted line of play) • Move 4 (predicted line of play) SEARCH INFO: info x2 • Evaluation of current position • 2 numbers: Search depth + number of moves examined so far black/ • Current move under consideration • Positions searched per second white/ 4.4 Move Count/Game Moves Press INFO a fourth time to show the move number in the game so far. You can then press WHITE/< repeatedly to scroll backward back through the moves of your game (up to 30 individual moves). • Number of White moves played so far • Moves of the current game Press BLACK/> to go forward through the moves again at any point. Press CLEAR to return to the normal clock display. CHESS CLOCK INFO: info x3 • Elapsed time since last move • Elapsed time for the computer • Elapsed time for the player black/ • Remaining time for the computer* • Remaining time for the player* white/ *Blitz/Tournament Levels only 4.5 Want a Hint? Just Ask! In case you missed this feature when it was mentioned in Section 4.1, we wanted to point it out again—if you ever need advice on a move, you can always ask the computer for a hint. Simply press INFO when it’s your turn to move, and the computer will show a suggested move for your side! MOVE COUNT INFO: info x4 • Number of White moves played so far white/ black/ Press clear • Moves of the current game at any time to exit Info Mode. For more details, see Section 4. Pdf downloaded from http://www.thepdfportal.net/0d71f9df-8f27-4948-9469-8607446a2519_324239.pdf 12 In addition to all the features you’ve learned about so far, your chess computer also offers many other exciting game options! All of these options are user-selectable at any time during a game. They are described individually in this section, and summarized in the Option Mode Chart. 5.1 Operation Mode Options (Squares A1-H1) These options affect how you operate your computer. Press OPTION once to select the Operation Mode Options. Then use the BLACK/> and WHITE/< keys to select options within this group, and press ENTER to turn options on (+) or off (–). Or, simply press the option squares to turn options on or off. Selecting Game Options There are two methods of setting options, as described below—by using the game keys or pressing board squares. a. Auto Answer Mode (Square A1) On:+AUt Off:-AUt Normally, the computer automatically answers with a countermove whenever you enter a move. If you turn Auto Answer off, however, you can enter any number of moves one by one, without allowing the computer to answer. You’ll see that there are many great ways to use this feature. • Play through master games. Press ENTER to see what the computer would do in any position! • Keep records of your own chess games. When a game is over, play to any position to see how other moves or different strategies might have affected the outcome. • Study opening lines by entering them manually. • Play against a friend, with the computer acting as referee. It will monitor your game, checking all moves for legality and keeping track of time for both sides! When playing against another person, if either side should need help, press INFO to see a suggested move. To see what the computer would do in a certain position, press ENTER and the computer will make the next move. After it has made its move, Auto Answer remains off, and you may continue your game. Also, note that this option will automatically go back to its default setting of ON whenever you use CLEAR and ENTER simultaneously to start a new game. See “THE BASICS OF OPTION MODE: HERE’S HOW” for a chart summarizing how to use Option Mode, and an overview of all the options. The Game Options are divided into three groups: Operation Mode, Playing Mode, and Rotating Display Mode. Pressing OPTION cycles from one group to another. Each group contains eight different options, and the BLACK/> and WHITE/< keys are used to cycle through the options within each of the groups. For each option, a plus (+) in the display indicates the displayed option is ON, and a minus (–) means the option is OFF. Press ENTER to turn each option on or off as it is displayed. Remember that pressing OPTION cycles through the three main groups, so you can switch to any of the groups at any time. After you have made all your option selections from any or all of the option groups, press CLEAR to return to normal game play. Another method of selecting game options is by pressing the option squares. As shown in the Options Chart, Squares A1-H1, A2-H2, and A3-H3 can be used to turn options on and off. First, press OPTION to enter Option Mode; then take a chess piece and press the desired square to access any option, using the chart as a guide. You’ll see that pressing a square repeatedly turns that option on and off again, with plus (+) for ON and minus (–) for OFF. Once you have made all your selections, press CLEAR to return to your game. When the computer is first powered on, certain default options are b. Sound with Keypress (Square B1) set. Options which are automatically in effect at the first startup are On:+SNd Off:-SNd shown in the chart with a plus, and options which are off are shown This option lets you turn off the sound that accompanies each with a minus. Whenever you reset the computer for a new game, most keypress. You will still hear beeps when the computer moves or when of your selected options are carried over to your next game. Some an illegal move or keypress is made. exceptions are Auto Answer, which is automatically set back to ON Pdf downloaded from http://www.thepdfportal.net/0d71f9df-8f27-4948-9469-8607446a2519_324239.pdf 13 ENGLISH when you start a new game, and Play White from the Top, which is automatically set back to OFF. 5. OPTIONS FOR FUN AND VARIETY option! Choose +tOP at the beginning of a new game, and set up the board with the Black pieces closest to you, as shown in the diagram in this section. Then, press ENTER to start the game. Watch as the computer makes the first move for White from the top of the board! c. Silent Mode (Square C1) On:+SIL Off:-SIL Normally, the computer always beeps when it has found its move. For completely silent operation, turn on Silent Mode. See “TRY BLACK FROM THE BOTTOM: HERE’S THE POSITION” for the correct board set-up when using this option. d. Ticking Clock (Square D1) On:+tICk Off:-tICk When you turn this option on, you activate a ticking sound that makes the computer’s clock sound like a real chess clock! Just imagine—you can create the atmosphere of a championship chess tournament in your own living room! When the computer plays White from the top, board notation is automatically reversed. Additionally, this option will go back to its default setting of OFF when you start a new game. 5.2 Playing Mode Options (Squares A2-H2) These options affect how the computer selects its moves. Press OPTION twice to select the Playing Mode Options. Then use the BLACK/> and WHITE/< keys to select options within this group, and press ENTER to turn options on (+) or off (–). Or, simply press the option squares to turn options on or off. e. Countdown Clock (Square E1) On:+cdn Off:-cdn Turning this option on causes the computer to display the countdown time instead of the elapsed time. Note that this option is only available in combination with the Tournament and Blitz Levels. f. System Test (Square F1) On:+tESt Off:-tESt The System Test is included primarily as a troubleshooting tool. After activating this option by selecting +tESt, pressing BLACK/> repeatedly will cycle through all the segments in the LCD display. To exit the test, press CLEAR and ENTER together to reset the computer. CAUTION: Be careful not to activate this option during a game, since resetting the computer is the only way to exit the test, and your current game will be lost. a. Selective Search (Square A2) On:+SEL Off:-SEL The program in this chess computer normally uses a Selective Search algorithm. This allows the computer to see combinations that would otherwise take much longer to compute. Turning this option off by choosing -SEL makes the program switch to a powerful Brute Force algorithm. This search method minimizes the risk of an occasional oversight. Note that the Mate Search Levels always use the Brute Force method. g. Auto Power Down (Square G1) On:+aPd Off:-aPd The Auto Power Down option is a battery-saving feature! With this option activated, the computer will automatically turn itself off if no keypresses or moves are made for about 15 minutes. To continue the game where you left off, press GO/STOP to turn the computer back on. Note that the computer will not turn itself off while it is thinking. b. Easy Mode (Square B2) On:+EASy Off:-EASy Want to win more games against the computer? Try turning on Easy Mode, which prevents the computer from thinking on your time! This weakens all the playing levels without affecting the computer’s time controls. Normally, as described in Section 2.8, the computer thinks on your time, using the time you are contemplating your next move to think h. Play White from the Top (Square H1) ahead and plan its strategies. This is part of what makes your computer On:+tOP Off:-tOP such a tough opponent! By using Easy Mode to make all the levels Want to depart from the usual standard and let the computer play the weaker, you effectively have many more levels to choose from. White pieces from the top of the board? Then try out this interesting Pdf downloaded from http://www.thepdfportal.net/0d71f9df-8f27-4948-9469-8607446a2519_324239.pdf 14 ENGLISH THE BASICS OF OPTION MODE: HERE’S HOW 1. Press OPTION repeatedly to select a Mode. 2. Next, select your option(s), using the Option Chart below. There are two ways to do this. • Cycle through the options within that mode: • Press BLACK/> to cycle > forward. • Press WHITE/< to cycle < backward. • When your option is displayed, press ENTER to toggle it on (+) or off (–). • OR, simply locate your option square and press one of the pegged pieces down into the hole to toggle that option on (+) or off (–). x1 = OPERATION MODE (AUt...) option x2 = PLAYING MODE (SEL...) option x3 = ROTATING DISPLAY MODE (rd:1...) option x4 = back to OPERATION MODE... A4 ROTATING DISPLAY OPTIONS PLAYING MODE OPTIONS clear B4 Variation to ply 1 -rd:2 B3 -EASY +SEL A2 B2 Auto Answer -rd:3 -RANd C2 +SNd B1 -rd:4 -SIL E4 -bk:P Ticking Clock -tICK D1 -rd:E E3 Depth & Moves -rd:d -bk:A E2 Countdown Clock -cdn Nodes Searched -rd:n G3 F3 Active Book E1 G4 F4 Position Evaluation Passive Book D2 Silent Mode C1 Variation to ply 4 D3 Random Play Sound with Keypress +AUT A1 Variation to ply 3 C3 Easy Mode Selective/ Brute Force Search D4 C4 Variation to ply 2 -rd:1 A3 OPERATION MODE OPTIONS 3. Finally, press CLEAR to exit Option Mode, using your new option(s). option H4 Time per Move -rd:t H3 Complete Tournament Book Book -bk:? F2 System Test -tESt F1 -bk:t G2 Book On/Off +bOOk H2 Auto Power Play White Down from Top -aPd G1 -tOP H1 For more details, see Section 5. c. Random Play (Square C2) On:+RaNd Off:-RaNd Turn this option on for greater variety of play. Instead of selecting one single best move, the computer will then choose one of the best moves to play by consulting its built-in Randomizer. preference to passive and closed positions when deciding which lines to play. If this option is selected, the Active and Tournament Book options are disabled. e. Active Book (Square E2) On:+bk:A Off:-bk:A d. Passive Book (Square D2) When this option is activated, the computer will give preference to active lines and open positions when deciding which lines to play. If this On:+bk:P Off:-bk:P option is selected, the Passive and Tournament Book options are disabled. Selecting the Passive Book option forces the computer to give Pdf downloaded from http://www.thepdfportal.net/0d71f9df-8f27-4948-9469-8607446a2519_324239.pdf 15 TRY BLACK FROM THE BOTTOM: HERE’S THE POSITION When the computer plays White from the top (Section 5.1, Option H1), be sure to set up the pieces correctly! Notice that the Kings and Queens are positioned differently, and the board notation is reversed. in book of openings. When you turn the book off, the computer is forced to take time to think of its moves from the very beginning of the game, rather than using moves contained in its memory. For more details on openings, see Section 2.7. If you turn the book completely off, all other book options are also automatically disabled. ዛዙዘዖዕዔዓዒዜ ዊ尸尾尼尮尴尺局尶ዊ ዋ层屄层屄层屄层屄ዋ ዌ巀居巀居巀居巀居ዌ ው居巀居巀居巀居巀ው ዎ巀居巀居巀居巀居ዎ ዏ居巀居巀居巀居巀ዏ ዐ屃屁屃屁屃屁屃屁ዐ ዑ尵尿尹尯就尻尽尷ዑ ዝዙዘዖዕዔዓዒዞ 5.3 Rotating Display Options (Squares A3-H3) IMPORTANT: The Rotating Display feature is only activated WHILE THE COMPUTER IS THINKING. Normally, the display shows the time for the player to move. However, the computer can also display other information, as noted in Section 4 For more details, see Section 5.1. (Info Mode). The Rotating Display feature works hand-in-hand with Info Mode, since it allows you to choose which of the Info Displays you want to see, and then cycles your choices in one-second increments. You may turn on any or all of the Rotating Display options, as desired. f. Complete Book (Square F2) Press OPTION three times to select the Rotating Display OpOn:+bk:? Off:-bk:? tions. Then use the BLACK/> and WHITE/< keys to select the Turning on the Complete Book option gives the computer the freeoptions you want to see rotated in the display. The options are dedom to choose any move from its built-in book of openings, so you’ll scribed below and summarized in the Option Mode Chart in this secsee a greater variety of opening lines being played. If this option is tion. Press ENTER to turn these options on (+) or off (–). Or, simply selected, the Passive, Active, and Tournament Book options are disabled. press the option squares to turn the options on or off. With this option on, you may see the computer make some questionIf you think the display information is changing too quickly when it able moves. This is because its built-in book of openings must contain rotates, press INFO to freeze the display. Successive presses of INFO responses to certain lines of play (even questionable lines), in case and the BLACK/> and WHITE/< keys will allow you to cycle through they are played. While the computer would not make these moves on its all the displays manually, as described in Section 4. To start the display own, it needs to know how to respond to them in the best way. Thererotation again, press OPTION followed by CLEAR. In any event, when fore, when you turn on the Complete Book, the computer could potenthe computer starts thinking about its next move, the display automatitially play one of these moves. cally starts rotating again. The game information you can see while the computer is thinking g. Tournament Book (Square G2) includes the following: On:+bk:t Off:-bk:t • rd:1 to rd:4 = the predicted line of play (up to four individual When you turn the Tournament Book option on, the computer is moves) forced to always select the best possible line of play in every opening. • rd:E = an evaluation of the current position While this results in the best chess play, it also narrows down the • rd:d = the computer’s search depth, and the number of moves computer’s choice of moves by limiting its available book lines. If this examined so far in the game option is selected, the Active and Passive Book options are disabled. • rd:n = the number of nodes searched per second • rd:t = the amount of time the move has taken so far h. Book On/Off (Square H2) When requested information is not available, the display will show a On:+bOOk Off:-bOOk series of dashes (– – – – –). Set this option to -BOOK to completely lock out the computer’s builtPdf downloaded from http://www.thepdfportal.net/0d71f9df-8f27-4948-9469-8607446a2519_324239.pdf 16 IT’S EASY TO VERIFY PIECES! new game 6. VERIFYING/SETTING UP POSITIONS clear 6.1 Verifying Positions enter 1. Press CLEAR and ENTER together to reset the computer for a new game. Display: [ 0:00:00. 2. Press the KNIGHT Key. Display: [,@,b1 (the first White Knight). See “IT’S EASY TO VERIFY PIECES!” for a step-by-step example of using Verify Mode. 3. Press KNIGHT again. Display: [,@,G1 (the second White Knight). If you should knock over the chess pieces or if you think your board position may be incorrect, the computer can verify all the piece locations for you! When it is your turn, press one of the PIECE SYMBOL KEYS (&, %, $, #, @, or !). The computer shows you where the first piece of that type is located on the board—the display shows the piece symbol, color indicator, and square designation. Press the same PIECE SYMBOL KEY again to see the location of the next piece of that same type. All the White pieces are shown first, then the Black pieces. When there are no more pieces of that type, only the piece symbol remains in the display. Want to verify more pieces? Simply repeat the above procedure using the other PIECE SYMBOL KEYS, verifying the entire board if desired! Press CLEAR to return to normal game play. 4. Press KNIGHT again. Display: ],@,b8 (the first Black Knight). 5. Press KNIGHT again. Display: ],@,g8 (the second Black Knight). 6. Press KNIGHT again. Display: @ (no more Knights on the board). clear 7. Repeat to verify any other piece! Press CLEAR to exit Verify Mode. For more details, see Section 6.1. 6.2 Changing and Setting Up Positions piece type and color, along with a minus sign (–) and the square location. • To move a piece from one square to another, press the piece down on its original square, pick it up, and then press it down on Position Mode is an exciting feature which lets you set up special the new square. As you do this, the display will show a minus sign board positions to play from, or problems you want the computer to (–) for the first square, and a plus sign (+) for the second square. solve! Caution: All previous moves in your current game will be erased • To add a piece to the board, first press the PIECE SYMBOL KEY from the computer’s memory if you make changes to the position during for that piece (&, %, $, #, @, or !). Make sure the display shows a game. the correct color symbol for the piece you want to add. If it does Press POSITION to enter Position Mode, and the display will show not, press BLACK/> or WHITE/< to change the color. When the -POS-. You can change or set up a position whenever it is your turn to display shows the correct piece type and color, place that piece move. After you have set up your new position, press CLEAR to exit onto the desired square and press down gently. The display shows Position Mode. a plus sign (+), along with the location for that square. To add • To remove a piece from the board, press the piece down on its another piece of the same type, simply press down onto another square andfrom thenhttp://www.thepdfportal.net/0d71f9df-8f27-4948-9469-8607446a2519_324239.pdf remove it. Notice that the display indicates the Pdf downloaded See “TRY OUT POSITION MODE” to get an idea of how this feature works. 17 ENGLISH For complete descriptions of these options and details on exactly how to interpret the displays, see Section 4. square. To add a different piece, press a different PIECE SYMBOL KEY and follow the same steps outlined above. • To clear the board, press ENTER while you are in Position Mode. The display will show _ to symbolize an empty chessboard. Press ENTER once more to confirm that you do want to clear the board. Then add pieces as described previously. If you decide not to clear the board, press CLEAR to cancel. This feature can be handy when you want to set up a position with only a few pieces, where it would be much easier to start out with an empty board! • Once you have changed the board position as described above, make sure the color indicator in the display is showing the correct color of the side to move. Change the color, if necessary, by pressing BLACK/> or WHITE/<. • To exit Position Mode, press CLEAR. You will return to normal game play, with your new board position! Note that any legal position can be set up using the above procedures. The computer will not permit you to set up an illegal position, such as one where there are more than the prescribed number of pieces for a normal game, or one where a King is in check and is not to move. In such cases, the computer will simply beep when you press CLEAR, and you will not be allowed to exit Position Mode. Check the position using the PIECE SYMBOL KEYS, if necessary, and correct the position (by adding a piece, removing a piece, or moving an incorrectly placed piece). Then press CLEAR to exit Position Mode. TRY OUT POSITION MODE new game clear enter position 1. Press CLEAR and ENTER together to reset the computer for a new game. Display: [ 0:00:00. 2. Press POSITION to enter Position Mode. Display: -POS-. E2 3. Press the White pawn down on Square E2, and remove it from the board. Display: [,!,-E2. E3 4. Press that same pawn down on Square E3 to add it to the board. Display: [,!,+E3. D8 5. Press the Black Queen down on Square D8, and remove it from the board. Display: ],%,-D8. H5 6. Press that same Queen down on Square H5 to add it to the board. Display: ],%,+H5. white/ 7. TECHNICAL DETAILS 7. Press WHITE/< to change the color to move next. 8. Press CLEAR to exit. 7.1 The ACL Function Computers sometimes “lock up” due to static discharge or various other electrical disturbances. If this should happen, take out the batteries and use a pin or another sharp object to press into the hole marked ACL in the base of the unit for at least one second. This resets the computer. clear For more details, see Section 6.2. damage the plastic. Weak batteries should be replaced promptly, since they can leak and 7.2 Care and Maintenance damage the computer. Please also note the following regarding the use Your chess computer is a precision electronic device, and should not of batteries. Warning: Use only alkaline or zinc carbon batteries. Do be subjected to rough handling or exposed to extreme temperatures or not mix different types of batteries or new and used batteries. Do moisture. Be sure to remove the batteries before cleaning the unit. Do not recharge non-rechargeable batteries. Use only the recomnot use chemical agents or liquids to clean the unit, as they may mended batteries or equivalent. Be sure to observe the correct Pdf downloaded from http://www.thepdfportal.net/0d71f9df-8f27-4948-9469-8607446a2519_324239.pdf 18 using the original packaging materials. Please also include an explanatory note. 6. IMPORTANT: To save yourself unnecessary cost and inconvenience, please check carefully that you have read and followed the instructions in this manual. 7. This warranty is in Lieu of all other expressed warranties, obligations or liabilities. ANY IMPLIED WARRANTIES, OBLIGATIONS, OR LIABILITIES, INCLUDING BUT NOT LIMITED TO THE IMPLIED WARRANTIES OF MERCHANTABILITY AND FITNESS FOR A PARTICULAR PURPOSE, SHALL BE LIMITED IN DURATION TO THE DURATION OF THIS WRITTEN LIMITED WARRANTY. Some states do not allow limitations on how long an implied warranty lasts, so the above limitations may not apply to you. IN NO EVENT SHALL WE BE LIABLE FOR ANY SPECIAL OR CONSEQUENTIAL DAMAGES FOR BREACH OF THIS OR ANY OTHER WARRANTY, EXPRESS OR IMPLIED, WHATSOEVER Some states do not allow the exclusion or limitation of special, incidental or consequential damages, so the above limitation may not apply to you. This warranty gives you specific legal rights, and you may also have other rights which vary from state to state. 7.3 Technical Specifications Keys: 16 LCD Display: 48-segment Batteries: 3 x AA/AM3/R6 (1.5V) cells Power Consumption: 330 mW maximum Dimensions: 335 x 302 x 35 mm Weight: 975 g (excluding batteries) Please retain this information for future reference. Saitek reserves the right to make technical changes without notice in the interest of progress. Information for Customers in the United States: FCC Compliance and Advisory Statement Warning: Changes or modifications to this unit not expressly approved by the CONDITIONS OF WARRANTY party responsible for compliance could void the user’s authority to operate the 1. Warranty period is 2 years from date of purchase with proof equipment. of purchase submitted. This device complies with Part 15 of the FCC Rules. Operation is subject to the 2. Operating instructions must be followed. following two conditions: 3. Product must not have been damaged as a result of de1. This device may not cause harmful interference, and facement, misuse, abuse, neglect, accident, destruction or 2. This device must accept any interference received, including interference alteration of the serial number, improper electrical voltages or that may cause undesired operation currents, repair, alteration or maintenance by any person or party NOTE: This equipment has been tested and found to comply with the limits for a other than our own service facility or an authorized service Class B digital device, pursuant to Part 15 of the FCC Rules. These limits are center, use or installation of non-Saitek replacement parts in the designed to provide reasonable protection against harmful interference in a product or the modification of this product in any way, or the incorporation of residential installation. This equipment generates, uses and can radiate radio this product into any other products, or damage to the product caused by frequency energy and, if not installed and used in accordance with the instrucaccident, fire, floods, lightning, or acts of God, or any use violative of instructions, may cause harmful interference to radio communications. However, there is tions furnished by Saitek plc. no guarantee that interference will not occur in a particular installation. If this 4. Obligations of Saitek shall be limited to repair or replacement with the same or equipment does cause harmful interference to radio or television reception, which similar unit, at our option. To obtain repairs under this warranty, present the can be determined by turning the equipment off and on, the user is encouraged product and proof of purchase (e.g., bill or invoice) to the authorized Saitek to try to correct the interference by one or more of the following measures: Technical Support Center (listed on the separate sheet packaged with this • Reorient or relocate the receiving antenna. product) transportation charges prepaid. Any requirements that conflict with • Increase the separation between the equipment and receiver. any state or Federal laws, rules and/or obligations shall not be enforceable in • Connect the equipment into an outlet on a circuit different from that to which that particular territory and Saitek will adhere to those laws, rules, and/or the receiver is connected. obligations. • Consult the dealer or an experienced radio/TV technician for help. When returning the product for repair, please pack it very carefully, preferably Pdf 5.downloaded from http://www.thepdfportal.net/0d71f9df-8f27-4948-9469-8607446a2519_324239.pdf Saitek Industries, 2295 Jefferson Street, Torrance, CA 90501, USA 19 ENGLISH polarity when inserting batteries. Worn out batteries should be removed from the unit promptly. Do not short circuit the supply terminals. TROUBLESHOOTING GUIDE SYMPTOMS POSSIBLE CAUSES ACTION TO TAKE • Batteries are not installed correctly. • Reinstall the batteries, observing the correct polarity. • Batteries are weak or bad. • Replace the batteries. • Static discharge or an electrical disturbance has caused a lock-up. • Press into the hole marked ACL to reset the computer (see Section 7.1). Display is difficult to read. • Batteries are weak or bad. • Replace the batteries with fresh alkalines. The computer will not make a move. • The Auto Answer option may be turned off. • The computer only responds automatically if Auto Answer is on (see Section 5.1). • The computer is thinking for a long time on a high level. • To interrupt the computer, press ENTER. • Is it your turn? Is your King in check? Will your move put your King into check? Are you trying to castle incorrectly? Are you moving to an illegal square? • The computer is thinking (its color symbol is flashing). • Review the rules. Verify the position to make sure it is correct (see Section 6.1). An error message shows when a square is pressed. • You have not entered the computer’s last move correctly (wrong from or to square). • Check the display, and press the correct square to complete the computer’s move. You can’t exit Position Mode with CLEAR—you only get beeps. • You have set up an illegal position. A King may be in check, too many pawns may be on the board, etc. • Check the position, and make changes (see Section 6.2). Press CLEAR again to exit Position Mode. The display is showing _. • You are in Position Mode, and have pressed ENTER to clear the board. • To clear the board, press ENTER once more; to cancel, press CLEAR (see Section 6.2). The computer seems to be making illegal moves. • The computer has made a special move, such as en passant, castling, or a pawn promotion. • Review the rules. Verify the position (see Section 6.1). • Your board position is incorrect. • Verify the position (see Section 6.1). • Batteries are running out. • Replace the batteries with fresh alkalines. • The computer may be on a low level where it moves quickly and plays weaker than normal, due to limited search depth. • Press LEVEL to check the level (see Section 3). Change to another level, if desired. • Batteries are running out. • Replace the batteries with fresh alkalines. • The Silent Mode option may be activated. • Check the option settings (see Section 5.1). The computer doesn’t react, behaves erratically, or “freezes” during a game. The computer will not accept your move. The computer is making instant or irrational moves. The computer is silent. • To interrupt the computer, press ENTER. Pdf downloaded from http://www.thepdfportal.net/0d71f9df-8f27-4948-9469-8607446a2519_324239.pdf 20 1 Öffnen Sie das Batteriefach und legen Sie 3 AAA (AM3/ R6) Batterien gemäß der eingezeichneten Polarität ein. Schließen Sie dann das Batteriefach wieder. 5 Zur Eingabe von Zügen, drücken Sie die gewünschte Figur zunächst auf ihr Ausgangs- dann auf ihr Zielfeld. Der Computer registriert so automatisch, welche Figur gezogen wurde. 6 Sobald der Computer einen Zug macht, wird dieser im Display angezeigt. Drücken Sie dann die gewünschte Figur auf ihr Ausgangsdann auf ihr Zielfeld. Hier im Beispiel würden Sie den schwarzen Bauern zunächst auf e7 dann auf e5 drücken. So einfach geht das! 3 x AA/AM3/R6 2 Drücken Sie GO/STOP um den Computer anzuschalten. Reagiert das Gerät nicht, lesen Sie bitte Abschnitt 7.1. 3 Stellen Sie die Schachfiguren wie in der Abbildung gezeigt auf. Die weißen Figuren sollten Ihnen am nächsten stehen. go/stop ዛዒዓዔዕዖዘዙዜ ዑ尷尽尻就尯尹尿尵ዑ ዐ屁屃屁屃屁屃屁屃ዐ ዏ巀居巀居巀居巀居ዏ ዎ居巀居巀居巀居巀ዎ ው巀居巀居巀居巀居ው ዌ居巀居巀居巀居巀ዌ ዋ屄层屄层屄层屄层ዋ ዊ尶局尺尴尮尼尾尸ዊ ዝዒዓዔዕዖዘዙዞ Geben Sie Ihren nächsten Zug auf die gleiche Weise ein. Drücken Sie GO/STOP, um den Computer auszuschalten. Die aktuelle Stellung wird gespeichert und kann später 4 Um den Computer für einen neue Partie einzustellen, drücken Sie CLEAR und ENTER gleichzeitig. fortgeführt werden. new game clear enter Pdf downloaded from http://www.thepdfportal.net/0d71f9df-8f27-4948-9469-8607446a2519_324239.pdf 21 DEUTSCH SCHNELLSTART TASTEN UND FUNKTIONEN 1. FIGURENAUFBEWAHRUNG: Hier können Sie Figuren aufbewahren oder geschlagene Figuren abstellen. 2. DISPLAY-ANZEIGE: Zeigt Züge und Informationen während einer Partie. Zusätzlich hilft es bei Auswahl von Spielstufen und Optionen, zur Stellungskontrolle/aufbau. 3. SENSORSCHACHBRETT: Jedes Feld enthält einen Sensor, der auf Druck reagiert. Dies ermöglicht die Zugeingabe und hilft auch bei der Auswahl von Spielstufen und Optionen. 4. BATTERIEFACH: Auf der Unterseite des Geräts. Für 3 “AA” (AM3/R6) alkaline Batterien. 5. SPIELTASTEN • FIGURENSYMBOLE: Wichtig bei Positionsaufbau und -kontrolle, sowie bei Bauernumwandlung. • GO/STOP: Hiermit schalten Sie den Computer an oder aus. • INFO: Hiermit aktivieren Sie den Informationsmodus. Innerhalb dieses Modus, können Sie mit dieser Taste zwischen einzelnen Gruppen blättern. Während eines Zuges hilft Ihnen diese Taste, Hinweise abzufragen. • LEVEL: Hiermit aktivieren Sie den Informationsmodus. Innerhalb dieses Modus, können Sie mit dieser Taste zwischen einzelnen Gruppen blättern. Während eines Zuges hilft Ihnen diese Taste, Hinweise abzufragen. • WHITE/< und BLACK/> TASTEN: Mit diesen Tasten können Sie Spielstufen, Optionen oder Informationen in Einzelschritten durchblättern. • TAKE BACK: Wird zur Rücknahme von Zügen eingesetzt. Insgesamt können Sie bis zu 30 Züge zurücknehmen. • OPTION: Hiermit aktivieren Sie den Optionsmodus. Innerhalb dieses Modus, können Sie mit dieser Taste zwischen einzelnen Gruppen blättern. • CLEAR: Gleichzeitig mit ENTER gedrückt, wird die Funktion NEW GAME aktiviert. Drücken Sie sie alleine, wird die Funktion “Abbruch” ausgelöst. So können Sie verschiedene Auswahlmodi verlassen, ohne die Einstellungen zu ändern (Options-, Positions-, Info- oder Kontrollmodus). • ENTER: Gleichzeitig mit CLEAR gedrückt, wird die Funktion NEW GAME aktiviert. Als Einzelfunktion gebräuchlich, um mit dem Computer die Seiten zu tauschen, Suchfunktionen abzubrechen, Optionseinstellungen zu aktivieren/deaktivieren, eine neue Spielstufe auszuwählen etc. • POSITION: Hiermit aktivieren Sie den Positionsmodus. 6. ACL (Reset): Auf der Unterseite des Geräts. Wichtig, um statische Aufladungen vom Computer zu nehmen. Pdf downloaded from http://www.thepdfportal.net/0d71f9df-8f27-4948-9469-8607446a2519_324239.pdf 22 EINLEITUNG SCHNELLSTART 4. INFO-MODUS: BEOBACHTEN Sind Sie bereit in die aufregende Welt des Computerschachs TASTEN UND FUNKTIONEN einzutreten? Dann liegen Sie richtig! Ihr neuer Computer bietet so viele UND LERNEN Info-Modus anwenden Optionen, Spielstufen und spezielle Funktionen - so haben Sie Schach EINLEITUNG noch nie erlebt. Mit Hilfe des Schnellstarts am Anfang können Sie sofort 4.1 Hauptvarianten 1. LOS GEHT’S! loslegen. Die Details finden Sie im Anschluß an diese Einleitung. Haben 4.2 Suchinformationen 1.1 Zuerst Batterien einlegen Sie einmal die Grundbegriffe gelernt, lohnt es sich, diese Anleitung zu 4.3 Schachuhr-Informationen 1.2 Spielbereit? So ziehen Sie..! lesen. So entdecken Sie alle Möglichkeiten dieses Schachcomputers 4.4 Zugzähler/Zuganzahl 1.3 Nun ist der Computer am Zug Spielspaß garantiert! 4.5 Wie wäre es mit einem 1.4 Sie haben Ihre Meinung Ihr neuer Schachcomputer kennt selbstverständlich alle SchachHinweis? Einfach fragen! geändert? Nehmen Sie Züge regeln und hält diese genauestens ein. Für alle Einsteiger, haben wir zurück 5. OPTIONEN FÜR SPIELSPASS eine kurze Regelübersicht integriert. So können Sie sofort spielen und 1.5 Spiel zu Ende? Auf ein Neues UND ABWECHSLUNG mit viel Spaß trainieren. 1.6 Zu einfach/schwer? Ändern Sie Optionen auswählen 5.1 Computereinstellungen die Spielstufe (Felder A1-H1) 2. MEHR FUNKTIONEN ENTDECKEN 1. LOS GEHT’S! 5.2 Spieleinstellungen 2.1 Wer ist am Zug? Prüfen Sie das (Felder A2-H2) Display 1.1 Zuerst Batterien einlegen Ihr Computer benötigt 3 AA (AM3/R6) Batterien. Legen Sie diese 5.3 Rotierende Anzeige 2.2 Spezielle Schachzüge Batterien in das entsprechende Fach auf der Unterseite des Geräts ein. (Felder A3-H3) 2.3 Ungültige Züge Achten Sie dabei auf die Polarität. Nutzen Sie bitte frische Batterien. 2.4 Schach, Matt und Remis 6. POSITIONEN PRÜFEN/ Schalten Sie den Computer durch Drücken von GO/STOP an. Ein 2.5 Die Computersuche AUFBAUEN “Beep” signalisiert die Spielbereitschaft. Reagiert das Gerät nicht 6.1 Positionen prüfen unterbrechen (aufgrund statischer Aufladung), drücken Sie mit einem spitzen 6.2 Positionen verändern und 2.6 Seitenwechsel mit dem Gegenstand ca. 1-2 sek. in die ACL-Vertiefung auf der Unterseite des aufbauen Computer Computers. So wird Ihr Computer zurückgesetzt. 2.7 Gespeicherte Eröffnungen 7. TECHNISCHE ANGABEN 7.1 Die ACL-Funktion 2.8 Rechnen wenn der Gegner am Tip: Um Energie zu sparen und das Leben Ihrer Batterien zu 7.2 Pflege und Wartung Zug ist verlängern, nutzen Sie die Abschaltautomatik (s. Abschnitt 5.1). 7.3 Technische Spezifikation 2.9 Spielstandspeicher PROBLEMLÖSUNGSHINWEISE 3. DIE SPIELSTUFEN 1.2 Spielbereit? So ziehen Sie..! Eine Spielstufe einstellen Okay, jetzt ist es Zeit, ein Spiel zu wagen. Dies ist ziemlich einfach 3.1 Normale Stufen (Felder A1-G2) folgen Sie nur diesen Schritten: 3.2 Analysestufe (Feld H2) a. Drücken Sie GO/STOP, um den Computer anzuschalten 3.3 Turnierstufen (Felder A3-H3) b. Drücken Sie CLEAR und ENTER gleichzeitig. So stellen Sie eine 3.4 Blitzschach (Felder A4-H4) neue Partie ein. Bauen Sie die Grundstellung auf! Die weißen 3.5 Spaßstufen (Felder A5-H5) Steine sollten Ihnen am nächsten stehen (siehe auch 3.6 Mattsuchstufen (Felder A6-H6) Schnellstart). 3.7 Trainingsstufen (Felder A7-H8) Pdf downloaded from http://www.thepdfportal.net/0d71f9df-8f27-4948-9469-8607446a2519_324239.pdf 23 DEUTSCH INHALT 1.5 Spiel zu Ende? Auf ein Neues c. Um einen Zug auszuführen, drücken Sie die gewünschte Figur auf ihr Ausgangsfeld bis Sie einen Ton hören - das Sensorbrett erkennt Ihre Figur automatisch. Sie glauben es nicht? Schauen Sie doch mal auf das Display, das plötzlich voll von Informationen ist - es zeigt Ihre Figur, die Farbe und das Feld, das Sie gerade gedrückt haben. d. Nehmen Sie diese Figur und stellen Sie sie auf das Zielfeld. Sie hören einen zweiten Ton - der Computer bestätigt so die Eingabe. Das war’s - Sie haben gerade Ihren ersten Zug ausgeführt. Nun ist der Computer am Zug. Sie werden bemerken, daß der Computer am Anfang einer Partie sofort antwortet, anstatt sich Zeit für Berechnungen zu nehmen. Das kommt, weil er aus seiner Bibliothek heraus spielt, in der Eröffnungszüge abgelegt sind (siehe auch Abschnitt 2.7). Immer wenn Sie ein Spiel beendet haben (oder die aktuelle Partie abbrechen wollen), können Sie einfach ein Neues starten. Drücken Sie CLEAR und ENTER gleichzeitig und der Computer signalisiert, daß er für eine neue Partie bereit ist. WICHTIG: Durch NEW GAME wird die alte Partie aus der Memory des Computers gelöscht - achten Sie darauf, diese Funktion nicht aus Versehen zu aktivieren! 1.6 Zu einfach/schwer? Ändern Sie die Spielstufe Schalten Sie Ihren Computer an, ist automatisch die Spielstufe D1 (5 Sek. pro Zug) aktiviert. Sie haben jedoch insgesamt 64 Stufen zur Auswahl, die Sie sicherlich ausprobieren möchten. Wie, das sehen Sie in Abschnitt 3. 1.3 Nun ist der Computer am Zug Zieht der Computer, wird sein Zug signalisiert und angezeigt. Prüfen Sie das Display - Sie sehen das Ausgangs- und Zielfeld, sowie die Farbe und das Symbol der gewünschten Figur. Drücken Sie diese auf das Ausgangs- und dann auf ihr Zielfeld. Der Computerzug ist ausgeführt und Sie sind wieder gefragt... 2. MEHR FUNKTIONEN ENTDECKEN 2.1 Wer ist am Zug? Prüfen Sie das Display Spielt der Computer mit Schwarz, blinkt ein schwarzes Quadrat im Display, während der Zug berechnet wird. Nachdem der Computerzug ausgeführt ist, erscheint ein weißes Quadrat - jetzt ist also Weiß an der Reihe. Sie sehen auf einen Blick, ob der Computer momentan rechnet bzw. welche Seite am Zug ist. 1.4 Sie haben Ihre Meinung geändert? Nehmen Sie Züge zurück Spielen Sie gegen einen Computer, ist nichts “endgültig” - Sie können Ihre Strategie wechseln oder entscheiden, einen anderen Zug zu spielen, wann Sie wollen! Sind Sie am Zug, drücken Sie dazu einfach TAKE BACK. Das Display zeigt dann den letzten Zug an. Drücken Sie die gezeigte Figur auf das Feld auf dem Sie steht und stellen Sie sie - wiederum durch andrücken - zurück auf ihr ursprüngliches Ausgangsfeld. Sie können dies bis zu 30 mal wiederholen. Wollen Sie normal weiterspielen, geben Sie einfach ganz normal wieder einen Zug ein. Nach Rücknahme eines Schlagzuges oder einer Bauernumwandlung, erinnert Sie der Computer daran, die geschlagene/umgewandelte Figur wieder zurückzustellen. Er zeigt die Figur und ihr aktuelles Feld an. Stellen Sie sie durch andrücken wieder auf das richtige Feld. So schließen Sie die Rücknahme korrekt ab. Nehmen Sie eine Rochade zurück, nehmen Sie zunächst den Königs- dann den Turmzug zurück. 2.2 Spezielle Schachzüge Schlagzüge: Um zu schlagen, drücken Sie Ihre Figur auf das Ausgangsfeld, nehmen die geschlagene vom Brett und drücken dann die Figur auf das Feld der geschlagenen. Schlagzüge werden wie folgt angezeigt: E5•F6. En Passant: Der Computer zeigt bei diesem Zug solange die Ausführung im Display an, bis Sie den geschlagenen Bauern auf sein Feld drücken und vom Brett nehmen. Rochade: Wird der Königszug zuerst gemacht, erkennt der Computer die Rochade automatisch. Nachdem Sie den König auf sein Ausgangs- und Zielfeld gedrückt haben, wird Ihr Zug angezeigt, bis Sie auch den Turmzug ausgeführt haben. Kurze Rochade wird als 0-0, lange als 0-0-0 angezeigt. Bauernumwandlung: Wandeln Sie einen Bauern um, führen Sie Ihren Zug zunächst wie üblich aus. Dann drücken Sie ein FIGURENSYMBOL, Pdf downloaded from http://www.thepdfportal.net/0d71f9df-8f27-4948-9469-8607446a2519_324239.pdf 24 COMPUTERZUG AUSFÜHREN: HIER SEHEN SIE EIN BEISPIEL Nachdem der Computer seinen Zug anzeigt, sollten Sie diesen am Brett eingeben. Hier zeigt das Display, daß der schwarze Bauer (]!) von d7 nach d5 gezogen werden soll. Drücken Sie den schwarzen Bauern also zuerst auf d7, dann nach d5. Das war's - Sie haben den Computerzug eingegeben! Jetzt sind Sie wieder an der Reihe. d7-d5 ዛዒዓዔዕዖዘዙዜ ዑ尷尽尻就尯尹尿尵ዑ ዐ屁屃屁屃屁屃屁屃ዐ ዏ巀居巀居巀居巀居ዏ ዎ居巀居巀居巀居巀ዎ ው巀居巀层巀居巀居ው ዌ居巀居巀居巀居巀ዌ ዋ屄层屄居屄层屄层ዋ ዊ尶局尺尴尮尼尾尸ዊ ዝዒዓዔዕዖዘዙዞ 2.4 Schach, Matt und Remis Steht ein König im Schach, zeigt der Computer seinen Zug zunächst wie gewöhnlich an. Nachdem der Zug gemacht wurde, blinkt CHECK einige Sekunden im Display. Dann zeigt das Display wieder die Uhr an. Erkennt der Computer eine Mattführung, zeigt er zunächst den Zug wie gewöhnlich an. Nachdem der Zug ausgeführt wurde, blinkt dann die Mattankündigung einige Sekunden im Display (z.B. =in 2 bedeutet Matt in 2 Zügen). Dann zeigt das Display wieder die Uhr an. Endet eine Partie Schachmatt, blinkt die Meldung MAtE im Display. Dann zeigt das Display wieder die Uhr an. Der Computer erkennt Remis durch Patt, 3-malige Wiederholung und 50-Züge Regel. Kam es zum Remis, blinkt EnD einige Sekunden. Dann zeigt das Display wieder die Uhr an. ዛዒዓዔዕዖዘዙዜ ዑ尷尽尻就尯尹尿尵ዑ ዐ屁屃屁巀屁屃屁屃ዐ ዏ巀居巀居巀居巀居ዏ ዎ居巀居屃居巀居巀ዎ ው巀居巀层巀居巀居ው ዌ居巀居巀居巀居巀ዌ ዋ屄层屄居屄层屄层ዋ ዊ尶局尺尴尮尼尾尸ዊ ዝዒዓዔዕዖዘዙዞ damit der Computer weiß, in welche Figur Sie umwandeln möchten(%, $, #, oder @). Der Computer erkennt dann die Figur und zeigt sie kurz an, bevor er seinen nächsten Zug berechnet. Vergessen Sie nicht, die Figur auch auf dem Brett umzutauschen. Wandelt der Computer eine Figur um, zeigt das Display sowohl den Bauern als auch die Figur, in die er sich umwandeln soll. Vergessen Sie wiederum nicht, den Bauern auch auf dem Feld in diese Figur zu tauschen! 2.5 Die Computersuche unterbrechen Sie denken, der Computer rechnet zu lange? Sie können ihn jederzeit unterbrechen! Drücken Sie einfach ENTER während der Computer nachdenkt. Er wird sofort stoppen und den besten bisher errechneten Zug spielen. Diese Funktion kann sehr praktisch bei höheren Stufen sein, wenn der Computer lange rechnen darf. Auch bei der Analysestufe kann manche Berechnung einfach zu langwierig sein und Sie sollten auch teilweise stoppen. Bei den Mattsuchstufen, zwingt ENTER den Computer nicht, einen Zug zu machen! Statt dessen zeigt der Computer – – – – – an. Dies bedeutet, daß er unterbrochen wurde, bevor er ein Matt errechnen konnte. Um weiterzuspielen, wählen Sie eine andere Stufe. 2.3 Ungültige Züge Ihr Computer wird niemals einen ungültigen Zug akzeptieren! Versuchen Sie, einen auszuführen, hören Sie einen doppelten Signalton und das Display zeigt das Ausgangsfeld an. Entweder stellen Sie nun die Figur zurück oder Sie führen einen regelkonformen Zug aus. Führen Sie den Computerzug nicht korrekt aus, hören Sie wieder den 2.6 Seitenwechsel mit dem Computer doppelten Ton. Sie bewegen entweder die falsche Figur oder die richtige Drücken Sie einfach ENTER wenn Sie am Zug sind. Der Computer Pdf downloaded from http://www.thepdfportal.net/0d71f9df-8f27-4948-9469-8607446a2519_324239.pdf 25 DEUTSCH Figur auf ein falsches Feld. Will der Computer seinen Bauern von d7 nach d5 ziehen, und Sie drücken d7 und dann d6, zeigt er Er:D5. Dann zeigt das Display nochmals den ganzen Zug an (D7-D5), und der Computer wartet bis Sie d5 gedrückt haben. Drücken Sie eine Figur auf Ihr Ausgangsfeld, wünschen jedoch, den Zug nicht zu machen, können Sie abbrechen, indem Sie die Figur wieder auf das gleiche setzen. Nun können Sie einen völlig anderen Zug eingeben. Ändern Sie Ihre Meinung nachdem der Zug schon eingegeben ist, können Sie die Rücknahme aktivieren (s. Abschnitt 1.4). startet sofort seine Berechnungen für Ihre Seite. Wechseln Sie sooft Sie wünschen! Sie wollen, daß der Computer den ersten Zug für Weiß am Anfang der Partie macht? Drücken Sie CLEAR und ENTER und dann nochmals ENTER. Sie wollen dem Computer zuschauen, wie er für beide Seiten spielt? Drücken Sie ENTER nach jedem Zug - so sehen Sie die optimale Zugfolge für beide Seiten. Sie können Strategien und Taktiken studieren und lernen. 3. DIE SPIELSTUFEN Ihr Computer bietet 64 unterschiedliche Spielstufen. Wählen Sie eine Stufe aus, sollten Sie sich bewußt sein, daß der Computer um so stärker spielt je länger er rechnen kann - genauso wie ein menschlicher Spieler! Den Überblick aller Stufen sehen Sie auf der nächsten Seite. Die Stufen sind auch einzeln in den folgenden Abschnitten erklärt. Eine Spielstufe einstellen 2.7 Gespeicherte Eröffnungen Am Anfang einer Partie, zieht der Computer auf vielen Stufen sofort. Dies ist möglich, weil er die Züge direkt aus einer Bibliothek holt, sie also nicht mehr berechnen muß. Diese Bibliothek enthält die wichtigsten Eröffnungen und viele Positionen aus Großmeisterpartien. Ist die aktuelle Stellung in seiner Bibliothek, antwortet der Computer automatisch anstatt zu rechnen. Zusätzlich haben Sie bei Chess Explorer die Auswahl aus verschiedenen Bibliotheken. Natürlich läßt sich die Bibliothek auf Wunsch auch abschalten. Details finden Sie unter Abschnitt 5.2. Siehe auch “NUTZEN SIE DIESE ÜBERSICHT ZUR WAHL EINER SPIELSTUFE!”. Sie sehen so auf einen Blick, welche Stufe Sie wie aufrufen können. Es gibt 2 Arten der Auswahl - Nutzung von Tasten oder Drücken von Feldern! Welche Art auch immer Sie anwenden, drücken Sie zunächst LEVEL, um in den Spielstufen-Modus zu gelangen. Der Computer zeigt die derzeitige Stufe. Chess Explorer ist auf Spielstufe D1 (durchschnittliche Rechenzeit 5 Sekunden) voreingestellt und das Display zeigt L0:05. • Um eine Spielstufe mit Hilfe von Tasten auszuwählen, drücken Sie LEVEL, um in den Spielstufenmodus zu gelangen. Mit LEVEL 2.8 Rechnen wenn der Gegner am Zug ist können Sie dann in 8er Schritten, mit WHITE/< bzw. BLACK/> in Haben Sie Ihren Zug eingegeben, kommt manchmal die Antwort des 1er Schritten blättern. Zeigt das Display die gewünschte Stufe an, Computers sofort - sogar bei höherer Spielstufe! Dies ist nur möglich, drücken Sie ENTER. Die Spielstufe ist aktiviert. wenn der Computer Ihre Denkzeit auch nutzt, um seine Rechnungen • Um eine Spielstufe mit Hilfe von Spielfeldern auszuwählen, durchzuführen. Er rechnet die Antwortzüge auf Ihre wahrscheinlichste drücken Sie wieder LEVEL. Sie sehen nun in der SpielstufenStrategie durch. Lag er richtig, kann er dann sofort ziehen. Übersicht, welche Spielfelder welche Stufen aktivieren. Drücken Um diese Funktion auszuschalten, lesen Sie Abschnitt 5.2. Sie das gewünschte Feld. Durch ENTER oder CLEAR bestätigen Sie Ihre Wahl. 2.9 Spielstandspeicher • Um eine Spielstufe zu überprüfen, drücken Sie wiederum Sie können Ihr Spiel jederzeit mit GO/STOP unterbrechen. Das Spiel LEVEL. Soll die aktuell gewählte Stufe nicht verändert werden, wird dann abgebrochen und der Computer speichert Ihre aktuelle verlassen Sie den Spielstufen-Modus mit CLEAR. Partie (bis zu 30 Züge). Schalten Sie wieder an, können Sie einfach Weitere wichtige Punkte, die Sie beachten sollten: weiterspielen. Um diese Funktion nicht auszuschalten, sollten Sie • Ändern Sie die Spielstufe, wird die Schachuhr immer zurückdarauf achten, Batterien im Gerät eingelegt zu lassen! gesetzt. • Sie sollten die Spielstufe nicht ändern, während der Computer rechnet. Sollte dies dennoch notwendig sein, drücken Sie zuerst ENTER, um das Rechnen abzubrechen und führen Sie den Computerzug aus. Dann können Sie diesen Zug zurücknehmen Pdf downloaded from http://www.thepdfportal.net/0d71f9df-8f27-4948-9469-8607446a2519_324239.pdf 26 und eine andere Spielstufe wählen. Schließlich müssen Sie ENTER drücken, um die Computerberechnung wieder zu starten. • Ändern Sie die Spielstufe während der Computer rechnet, wird die Uhr zurückgesetzt und die aktuelle Suche unterbrochen. • Drücken Sie LEVEL während der Computer rechnet und verlassen den Modus wieder mit CLEAR anstatt ENTER, wird die Suche auch abgebrochen. • Sind Sie Einsteiger oder Gelegenheitsspieler? Beginnen Sie mit den Spaß- oder Trainingsstufen. Diese Stufen schränken die Suchtiefe des Computers ein. Er spielt schwächer und Sie haben erhöhte Gewinnchancen! Noch einfacher wird es, wenn Sie zusätzlich den “einfachen Modus” aktivieren (s. 5.2). • Sie sind Fortgeschrittener? Starten Sie mit den normalen, Trainings- oder Turnierstufen. Die Normalen Stufen bieten von kurzer bis zu 10 min Rechenzeit für den Computer einige Abwechslung. Die Turnierstufen sind dann schon eine große Herausforderung, während die Trainingsstufen eine Begrenzung der Computer-Rechenzeit ermöglichen und so mehr Chancen geben, eine Partie zu gewinnen. Vergessen Sie nicht, die aufregenden Möglichkeiten mit Blitzschach und Schnellschach auszuprobieren! • Möchten Sie experimentieren? Verwenden Sie die Mattsuchstufen, um aus einer bestimmten Stellung heraus, die besten Möglichkeiten zu finden. Miami schafft es, Matt 8 Züge im voraus zu berechnen. Schließlich haben Sie auch noch die Analysestufe, die jederzeit die beste Zugmöglichkeit errechnen kann. 3.1 Normale Stufen (Felder A1-G2) STUFE ZEIT PRO ZUG ANZEIGE A1 .................... 1 Sekunde ................. L 0:01 B1 .................... 2 Sekunden ............... L 0:02 C1 .................... 3 Sekunden ............... L 0:03 D1 .................... 5 Sekunden ............... L 0:05 E1 .................. 10 Sekunden ............... L 0:10 F1 .................. 15 Sekunden ............... L 0:15 G1 .................. 20 Sekunden ............... L 0:20 H1 .................. 30 Sekunden ............... L 0:30 A2 .................. 45 Sekunden ............... L 0:45 B2 .................... 1 Minute .................... L 1:00 C2 .................... 1.5 Minuten ............... L 1:30 D2 .................... 2 Minuten .................. L 2:00 E2 .................... 3 Minuten .................. L 3:00 F2 .................... 5 Minuten .................. L 5:00 G2 .................. 10 Minuten .................. L10:00 Wählen Sie eine der normalen Spielstufen, bestimmen Sie eine durchschnittliche Rechenzeit pro Zug für den Computer. Achtung: die angegebene Zeit kann stark variieren! In der Eröffnung und im Endspiel spielt der Computer schneller, aber in komplizierten Mittelspielen rechnet er länger. vom Computer analysieren! Er kann Stunden oder sogar Tage rechnen, um den bestmöglichen Zug zu finden. Vergessen Sie nicht, dabei das Display zu beobachten - wie dies am Besten geht, sehen Sie in Abschnitt 5.3. 3.2 Analysestufe (Feld H2) 3.3 Turnierstufen (Felder A3-H3) ZEIT ANZEIGE STUFE ZÜGE/GESAMTZEIT ANZEIGE H2 ................. kein Zeitlimit ................ 9:99:99 A3 ..... 40 Züge in 1 Std. 30 min. .................. tr40 1:30:00 Auf dieser Stufe rechnet der Computer solange bis er ein B3 ..... 35 Züge in 1 Std. 45 min. .................. tr35 1:45:00 zwingendes Matt oder einen zwingenden Zug findet, bis er die Stellung C3 ..... 40 Züge in 1 Std. 45 min. .................. tr40 1:45:00 mit maximaler Suchtiefe berechnet hat oder bis er unterbrochen wird, D3 ..... 35 Züge in 1 Std. 30 min. .................. tr35 1:30:00 wenn Sie ENTER drücken. Unterbrechen Sie die Suche, führt der E3 ..... 40 Züge in 2 Std.. .............................. tr40 2:00:00 Computer den bislang besten Zug aus. Experimentieren Sie mit dieser F3 ..... 45 Züge in 2 Std. 30 min. .................. tr45 2:30:00 Stufe - bauen Sie interessante Stellungen auf und lassen Sie diese Pdf downloaded from http://www.thepdfportal.net/0d71f9df-8f27-4948-9469-8607446a2519_324239.pdf STUFE 27 DEUTSCH BRAUCHEN SIE HILFE, UM EINE STUFE ZU WÄHLEN? EINIGE HILFREICHE HINWEISE NUTZEN SIE DIESE ÜBERSICHT ZUR WAHL EINER SPIELSTUFE! 1. Drücken Sie LEVEL, um 9 Züge Suchtiefe PLY:9 level in den Level-Modus zu kommen. TRAININGSSTUFEN 2. Wählen Sie nun eine Spielstufe. Sie können dies auf 2 Arten tun. • Blättern Sie durch die einzelnen Stufen, bis die gewünschte gezeigt wird: • Drücken Sie BLACK/>, um in 1er Schritten vorwärts zu blättern. • Drücken Sie WHITE/<, um in 1er Schritten rückwärts zu blättern • Drücken Sie LEVEL, um in 8er Schritten zu blättern. • Oder - drücken Sie einfach ein Spielfeld, um eine Stufe auszuwählen. 1 Zug Suchtiefe PLY:1 A7 MATTSUCHSTUFEN Matt in 1 Zug =in:1 A6 SPAßSTUFEN 1 Sek. pro Zug bEG:1 A5 BLITZSTUFEN 5 min. pro Partie bL: 5 A4 TURNIERSTUFEN 40 Züge in 1:30 tr40 1:30:00 A3 3. Drücken Sie ENTER, um den Level-Modus zu verlassen. Ihre neue Spielstufe ist gewählt! A8 enter NORMALE STUFEN + ANALYSESTUFEN 45 Sek. pro Zug L0:45 A2 1 Sek. pro Zug L0:01 A1 10 Züge Suchtiefe PLY:10 B8 2 Züge Suchtiefe PLY:2 B7 Matt in 2 Zügen =in:2 B6 2 Sek. pro Zug bEG:2 B5 10 min. pro Partie bL:10 B4 35 Züge in 1:45 tr35 1:45:00 B3 1 min. pro Zug L1:00 B2 2 Sek. pro Zug L0:02 B1 11 Züge Suchtiefe PLY:11 C8 3 Züge Suchtiefe PLY:3 C7 Matt in 3 Zügen =in:3 C6 3 Sek. pro Zug bEG:3 C5 15 min. pro Partie bL:15 C4 40 Züge in 1:45 tr40 1:45:00 C3 1.5 min. pro Zug L1:30 C2 3 Sek. pro Zug L0:03 C1 12 Züge Suchtiefe PLY:12 D8 4 Züge Suchtiefe PLY:4 D7 Matt in 4 Zügen =in:4 D6 4 Sek. pro Zug bEG:4 D5 20 min. pro Partie bL:20 D4 35 Züge in 1:30 tr35 1:30:00 D3 2 min. pro Zug L2:00 D2 5 Sek. pro Zug L0:05 D1 13 Züge Suchtiefe PLY:13 E8 5 Züge Suchtiefe PLY:5 E7 14 Züge Suchtiefe PLY:14 F8 6 Züge Suchtiefe PLY:6 F7 Matt in 5 Zügen =in:5 E6 Matt in 6 Zügen =in:6 F6 5 Sek. pro Zug bEG:5 E5 30 min. pro Partie bL:30 E4 40 Züge in 2:00 tr40 2:00:00 E3 6 Sek. pro Zug bEG:6 F5 45 min. pro Partie bL:45 F4 45 Züge in 2:30 tr45 2:30:00 F3 3 min. pro Zug L3:00 E2 5 min. pro Zug L5:00 F2 10 Sek. pro Zug L0:10 E1 15 Sek. pro Zug L0:15 F1 Siehe auch Abschnitt 3. Pdf downloaded from http://www.thepdfportal.net/0d71f9df-8f27-4948-9469-8607446a2519_324239.pdf 28 15 Züge Suchtiefe PLY:15 G8 7 Züge Suchtiefe PLY:7 G7 Matt in 7 Zügen =in:7 G6 7 Sek. pro Zug bEG:7 G5 60 min. pro Partie bL:60 G4 50 Züge in 2:00 tr50 2:00:00 G3 10 min. pro Zug L10:00 G2 20 Sek. pro Zug L0:20 G1 16 Züge Suchtiefe PLY:16 H8 8 Züge Suchtiefe PLY:8 H7 Matt in 8 Zügen =in:8 H6 8 Sek. pro Zug bEG:8 H5 90 min. pro Partie bL:90 H4 40 Züge in 3:00 tr40 3:00:00 H3 Analyse 9:99:99 H2 30 Sek. pro Zug L0:30 H1 3.6 Mattsuchstufen (Felder A6-H6) STUFE 3.4 Blitzschach (Felder A4-H4) STUFE ZEIT PRO SPIEL MATTSUCHE ANZEIGE A6 ................... Matt in 1 ..................... =in:1 B6 ................... Matt in 2 ..................... =in:2 C6 ................... Matt in 3 ..................... =in:3 D6 ................... Matt in 4 ..................... =in:4 E6 ................... Matt in 5 ..................... =in:5 F6 ................... Matt in 6 ..................... =in:6 G6 ................... Matt in 7 ..................... =in:7 H6 ................... Matt in 8 ..................... =in:8 Haben Sie eine dieser Stufen aktiviert, ist ein Mattsuchprogramm eingestellt. Haben Sie eine Stellung, wo ein Matt gefunden werden kann, können Sie den Computer suchen lassen, indem Sie ihn in eine dieser Stufen schalten. Chess Explorer löst Ihre Mattprobleme bis zu 8 Züge im voraus. Matt in 1 bis 5 sind schnell gefunden, die anderen Lösungen brauchen Zeit. Wird kein Matt gefunden erscheint die Meldung (– – – – –). Um die Partie fortzusetzen wählen Sie einfach eine andere Spielstufe. ANZEIGE A4 .................... 5 Minuten ................... bL: 5 B4 .................. 10 Minuten ................... bL:10 C4 .................. 15 Minuten ................... bL:15 D4 .................. 20 Minuten ................... bL:20 E4 .................. 30 Minuten ................... bL:30 F4 .................. 45 Minuten ................... bL:45 G4 .................. 60 Minuten ................... bL:60 H4 .................. 90 Minuten ................... bL:90 In den Blitzschachstufen (auch Schnellschach genannt), sehen Sie die Gesamtzeit für eine Partie. Ist diese abgelaufen, blinkt tImE auf und das Spiel ist zu Ende. Haben Sie eine Blitzschachstufe ausgewählt, können Sie wählen, ob die Zeit als Countdown angezeigt werden soll (anstatt der bisher verstrichenen Zeit). Dazu sollten Sie kurz in Abschnitt 5.1 nachlesen. Ist die Zeit abgelaufen, endet auch der Countdown und die Uhr wird wieder normal angezeigt. 3.7 Trainingsstufen (Felder A7-H8) STUFE ANZEIGE STUFE ANZEIGE A7 .......... PLY: 1 A8 .......... PLY: 9 B7 .......... PLY: 2 B8 .......... PLY:10 C7 .......... PLY: 3 C8 .......... PLY:11 3.5 Spaßstufen (Felder A5-H5) D7 .......... PLY: 4 D8 .......... PLY:12 STUFE ZEIT PRO ZUG ANZEIGE E7 .......... PLY: 5 E8 .......... PLY:13 A5 .................... 1 Sekunden ............... BEG:1 F7 .......... PLY: 6 F8 .......... PLY:14 B5 .................... 2 Sekunden ............... BEG:2 G7 ......... PLY: 7 G8 ......... PLY:15 C5 .................... 3 Sekunden ............... BEG:3 H7 .......... PLY: 8 H8 .......... PLY:16 D5 .................... 4 Sekunden ............... BEG:4 In den Trainingsstufen, wird die Suchtiefe des Computers eingeE5 .................... 5 Sekunden ............... BEG:5 schränkt und durch eine bestimmte Zuganzahl begrenzt. Wenn Sie F5 .................... 6 Sekunden ............... BEG:6 durch diese Stufen blättern, erscheint PLY : # im Display. Ein “ply” ist Pdf downloaded from http://www.thepdfportal.net/0d71f9df-8f27-4948-9469-8607446a2519_324239.pdf 29 DEUTSCH G5 .................... 7 Sekunden ............... BEG:7 H5 .................... 8 Sekunden ............... BEG:8 Sie sind Einsteiger oder Gelegenheitsspieler? Wenn ja, dann sind diese Stufen genau für Sie gedacht! Hier beschränkt der Computer seine Suche und spielt schwächer. Der Vorteil - Ihre Gewinnchancen steigen und der Spielspaß auch! Sie können die Anforderungen langsam steigern und Ihr Schachwissen vergrößern. G3 .... 50 Züge in 2 Std.. .............................. tr50 2:00:00 H3 ..... 40 Züge in 3 Std.. .............................. tr40 3:00:00 In den Turnierstufen müssen Sie innerhalb einer vorgegebenen Zeit eine bestimmte Anzahl Züge ausführen. Überschreitet ein Spieler das Zeitlimit, blinkt TImE im Display zusammen mit der abgelaufenen Zeit. Die Partie ist zu Ende. Wenn Sie wollen, können Sie jetzt sogar zu Ende spielen, um Ihr Können zu testen. Haben Sie eine Turnierstufe ausgewählt, können Sie wählen, ob die Zeit als Countdown angezeigt werden soll (anstatt der bisher verstrichenen Zeit). Dazu sollten Sie kurz in Abschnitt 5.1 nachlesen. Ist die Zeit abgelaufen, endet auch der Countdown und die Uhr wird wieder normal angezeigt. ein einzelner Zug und “#” steht für die Anzahl Züge der Suchtiefe. Auf Stufe A7, z.B., begrenzt sich die Suche des Computers auf einen Zug (PLY:1), den er durchrechnet. Auf dieser Stufe übersieht er garantiert manche Mattführung. Er spielt schwächer und gibt vor allem Gelegenheitsspielern eine hohe Gewinnchance! verfügbar ist, erscheinen Bindestriche im Display (– – – – –). 4.1 Hauptvarianten Drücken Sie INFO 1mal, erscheinen Informationen über die wichtigste Variante (der wahrscheinlichste Zug mit den voraussichtlichen Antwortzügen). In der ersten Anzeige sehen Sie den aktuell berechneten Zug. Die Hauptvariante wird mit einer Suchtiefe von bis zu 4 Zügen angezeigt. Drücken Sie BLACK/> mehrmals, können Sie jeden dieser 4 anzeigen lassen: • Zug 1 (der Hauptvariante) • Zug 2 (der Hauptvariante) • Zug 3 (der Hauptvariante) • Zug 4 (der Hauptvariante) Mit WHITE/< können Sie zurückblättern und sich alles nochmals anschauen. Drücken Sie CLEAR, um zur normalen Anzeige zurückzukehren. Da der erste Zug der Hauptvariante, der Zug ist, den Sie am wahrscheinlichsten machen, können Sie ihn auch als Tip verwenden. Also immer wenn Sie Hilfe benötigen - einfach INFO drücken! 4. INFO-MODUS: BEOBACHTEN UND LERNEN Stellen Sie sich folgendes vor: Sie spielen Schach gegen einen Freund und er ist am Zug. Sie würden zu gerne wissen, welche Variante er durchrechnet und was er über die aktuelle Stellung denkt. Aber natürlich würden Sie niemals fragen - weil dies einfach nicht gemacht wird. Tja, mit dem Computer ist dies ganz anders. Sie können alles fragen, was Ihnen in den Sinn kommt - und die Antwort kommt ganz sicher! Tatsächlich erhalten Sie jede Menge Informationen über die Berechnungen des Computers. Auf Anfrage zeigt er Ihnen den Zug, über den er nachdenkt, die möglichen Antwortzüge, die Bewertung der aktuellen Stellung, die Rechentiefe und vieles mehr. Sie können sich vorstellen, wie sehr diese Funktionen Ihr eigenes Spiel verbessern werden. Dabei erfahren Sie weit mehr über Schach und seine Strategien. 4.2 Suchinformationen Drücken Sie INFO ein zweites Mal, um Informationen zur Suchtiefe zu erhalten! Mit BLACK/> können Sie dann wieder vorwärts durch 4 Anzeigen blättern: • Bewertung der aktuellen Stellung (basierend auf einem Bauernwert = 1.0; eine positive Zahl bedeutet, daß Weiß im Vorteil ist). • 2 Zahlen: die erste ist die Suchtiefe bzw. die Anzahl der Züge, die der Computer im voraus berechnet; die zweite steht für die bisher berechneten Züge. • Der aktuell zu rechnende Zug • Die Rechengeschwindigkeit bzw. -knoten pro Sekunde Mit WHITE/< können Sie auch hier wieder rückwärts blättern, mit CLEAR den Modus verlassen. Info-Modus anwenden Wie kommen Sie an all diese Spielinformationen? Indem Sie jederzeit in den Info-Modus umschalten können! Machen Sie dies während der Computer denkt, sehen Sie, wie er einzelne Züge und Antwortzüge durchrechnet. Siehe auch “INFO-MODUS AUF EINEN BLICK!”, wo Sie alle Möglichkeiten als Übersicht finden. Spielinformationen sind in 4 Gruppen unterteilt. Durch Drücken von INFO können Sie zu einzelnen Gruppen springen. Mit BLACK/> und WHITE/< blättern Sie in 1er Schritten. Wollen Sie den Info-Modus verlassen, drücken Sie einfach CLEAR und die Anzeige springt wieder auf die normale Schachuhr. 4.3 Schachuhr-Informationen Nachdem Sie nun alles über den Info-Modus wissen, lohnt es sich, in Drücken Sie INFO ein drittes Mal. Die Schachuhr mißt weiterhin die Abschnitt 5.3 die Funktion “rotierende Anzeige” nachzulesen. Ist diese Zeiten für beide Seiten. Mit BLACK/> können Sie blättern und treffen Funktion aktiviert, wechselt die Anzeige automatisch im 1 Sek.-Takt zu auf folgende Informationen: allen Zugberechnungen - Sie können tatsächlich beobachten, wie der • Verstrichene Zeit seit dem letzten Zug Computer “laut denkt”! Immer wenn die aufgerufene Funktion nicht • Gesamtzeit für den Computer Pdf downloaded from http://www.thepdfportal.net/0d71f9df-8f27-4948-9469-8607446a2519_324239.pdf 30 • Gesamtzeit des Menschen • Verbleibende Zeit für den Computer • Verbleibende Zeit für den Menschen Drücken Sie WHITE/< um zurückzublättern. Mit CLEAR können Sie den Modus verlassen. Die Uhr stoppt, sobald Sie einen Zug zurücknehmen, SpielstufenEinstellungen überprüfen, Optionen auswählen, Positionen aufbauen bzw. kontrollieren oder das Gerät ausschalten. In all diesen Fällen werden die Zeiten jedoch gespeichert. Immer wenn Sie die Spielstufe ändern oder CLEAR und ENTER gleichzeitig drücken, springt die Anzeige zurück auf 0:00:00. INFO-MODUS AUF EINEN BLICK! HAUPTVARIANTE: x1 • Zug 1 (der Hauptvariante) white/ black/ • Zug 2 (der Hauptvariante) • Zug 3 (der Hauptvariante) • Zug 4 (der Hauptvariante) SUCHINFORMATIONEN: 4.4 Zugzähler/Zuganzahl Drücken Sie INFO ein viertes Mal, um die Zuganzahl der Partie abzurufen. Mit WHITE/< können Sie dann alle Züge der Partie zurückverfolgen (bis zu 30). • Anzahl der bisher gespielten weißen Züge • Zuganzahl der Partie Mit BLACK/> können Sie wieder vorwärts blättern; mit CLEAR den Modus verlassen. info x2 • Bewertung der aktuellen Stellung • 2 Zahlen: die erste ist die Suchtiefe bzw. white/ die Anzahl der Züge, die der Computer im voraus berechnet; die zweite steht für die bisher berechneten Züge. black/ • Der aktuell zu rechnende Zug • Die Rechengeschwindigkeit bzw. -knoten pro Sekunde SCHACHUHR-INFORMATIONEN: info 4.5 Wie wäre es mit einem Hinweis? Einfach fragen! Falls Sie diese Funktion in Abschnitt 4.1 überlesen haben, weisen wir nochmals darauf hin - benötigen Sie Hilfe, dann können Sie Ihren Computer immer fragen. Einfach INFO drücken, wenn Sie am Zug sind und sofort schlägt Chess Explorer einen Zug für Ihre Seite vor. x3 • Verstrichene Zeit seit dem letzten Zug white/ black/ • • • • Gesamtzeit für den Computer Gesamtzeit des Menschen Verbleibende Zeit für den Computer* Verbleibende Zeit für den Menschen* *Nur bei Blitz/Turniesschach 5. OPTIONEN FÜR SPIELSPASS UND VIELFALT ZUGZÄHLER/ZUGANZAHL: Zusätzlich zu allen Möglichkeiten, die Sie bisher kennengelernt haben, bietet Chess Explorer Ihnen zahlreiche andere Spieloptionen. Alle können jederzeit während einer Partie eingestellt werden. Sie werden nacheinander im folgenden Abschnitt vorgestellt. Alles auf einen Blick finden Sie in der Abbildung “Das Wichtigste des OptionsModus: So geht’s”. info x4 • Anzahl der bisher gespielten weißen Züge white/ black/ clear • Zuganzahl der Partie Drücken Sie , um jederzeit den Info-Modus zu verlassen. Spieloptionen auswählen Es gibt 2 Methoden, Optionen einzustellen (wie bei Spielstufen), Details siehe Abschnitt 4. entweder über Tasten oder über Felder. Pdf downloaded from http://www.thepdfportal.net/0d71f9df-8f27-4948-9469-8607446a2519_324239.pdf 31 DEUTSCH info ab und zu durch ENTER zu, um zu beobachten, was er an bestimmten Stellen gespielt hätte. • Nachspielen eigener Partien. Spielen Sie eine Ihrer Partien nochmals nach und schalten Sie an kritischen Stellen den Computer zu. So analysieren Sie und lernen, welche Chancen Sie besser nutzen können. • Lernen Sie Eröffnungen, indem Sie diese nachspielen. • Spielen Sie gegen einen Freund. Der Computer ist dann sinnvoller Schiedsrichter, der keine Regelverstösse zuläßt! Spielen Sie gegen einen Menschen, können Sie jederzeit INFO zuschalten und Tips abrufen. Um zu sehen, was der Computer in bestimmten Situationen spielen würde, können Sie jederzeit ENTER drücken. Nachdem der Computerzug gemacht wurde, bleibt “automatische Antwort” auf AUS und Sie können wie zuvor weiterspielen. Immer wenn Sie NEW GAME wählen, wird diese Option zunächst wieder angeschaltet. Siehe auch “DAS WICHTIGSTE DES OPTIONS-MODUS: SO GEHT’S”. Die Spieloptionen sind in 3 Gruppen unterteilt: Computer-, Spiel- und Displayeinstellungen. Drücken Sie OPTION, blättern Sie von einer Gruppe zur anderen. Jede Gruppe enthält 8 verschiedene Optionen, die wieder mit BLACK/> und WHITE/< detailliert aufgerufen werden können. Jede Option läßt sich mit ENTER zu- (+) bzw. abschalten (-). Mit OPTION können Sie zu einzelnen Gruppen springen - so geht’s schneller und einfacher. Stimmen alle Einstellungen, können Sie mit CLEAR den Options-Modus verlassen. Sie können Optionen auch durch Drücken einzelner Felder auswählen. Wie Sie in der Options-Übersicht sehen, sind hierfür die Linien 1, 2 und 3 bestimmt. Zuerst bitte OPTION drücken, dann das Feld, das die gewünschte Einstellung aktiviert. Sie sehen, mehrmaliges Drücken auf das Feld, stellt die Option an und aus. Haben Sie alle Einstellungen getroffen, können Sie mit CLEAR den Modus verlassen. Wird Chess Explorer zum ersten Mal angeschaltet, sind einige Einstellungen vorgegeben. Alle, die im Übersichtschart mit + markiert sind, sind aktiv. Immer wenn Sie NEW GAME wählen werden die meisten Ihrer Einstellungen übernommen. Sinnvolle Ausnahmen sind “automatische Antwort” (wird automatisch wieder angestellt bei jeder neuen Partie) und “Weiß von Oben spielen” (automatisch auf Aus gestellt). b. Sound bei Zugeingabe (Feld B1) An:+SNd Aus:-SNd Mit dieser Option, können Sie den Sound bei Zugeingabe ausschalten. Sie werden dann immer noch Signale erhalten - wenn der Computer antwortet, Sie einen illegalen Zug machen oder eine Taste drücken. c. Stille (Feld C1) An:+SIL Aus:-SIL Wollen Sie absolut ohne Signale spielen? Kein Problem - stellen Sie diese Option einfach AN und Sie werden keinen Ton mehr hören. 5.1 Computereinstellungen (Felder A1-H1) Diese Einstellungen beeinflussen die äußeren Funktionen des Geräts. Drücken Sie OPTION 1mal, um zu den Computereinstellungen zu gelangen. Nutzen Sie BLACK/> und WHITE/< wieder zum Blättern und ENTER, um Optionen an- bzw. auszuschalten. Mit CLEAR können Sie den Modus verlassen. d. Uhrticken (Feld D1) An:+tICk Aus:-tICk Schalten Sie diese Option an, aktivieren Sie ein Uhrticken, wie es unter tatsächlichen Turnierbedingungen vorkommt. So schaffen Sie die eigene Turnierwirklichkeit im Wohnzimmer! a. Automatische Antwort (Feld A1) An:+AUt Aus:-AUt Normalerweise antwortet der Computer automatisch, sobald Sie den e. Countdown Uhr (Feld E1) weißen Zug eingegeben haben. Stellen Sie diese Option jedoch auf An:+cdn Aus:-cdn AUS, können Sie für beide Seiten spielen, ohne daß der Computer sich Schalten Sie diese Option zu, zeigt der Computer den Countdown einmischt. Dies kann für einige Fälle sehr praktisch sein: der Zeit an, anstatt der bisher verstrichenen Zeit. Achtung: diese Option • Nachspielen von Großmeisterpartien. Schalten Sie den Computer ist nur in Verbindung mit Turnier- oder Blitzstufen möglich. Pdf downloaded from http://www.thepdfportal.net/0d71f9df-8f27-4948-9469-8607446a2519_324239.pdf 32 1. Drücken Sie OPTION 2. mehrmals, um einen Modus auszuwählen. Nun können Sie Ihre Optionen, wie unten aufgeführt, auswählen. Sie können dies auf 2 Arten machen. • Blättern Sie sich durch die Optionen • Drücken Sie BLACK/>, um in 1er Schritten vorwärts zu blättern. • Drücken Sie WHITE/<, um in 1er Schritten rückwärts zu blättern. • Ist Ihre Option angezeigt, können Sie diese mit ENTER an- bzw. ausschalten. • ODER, Drücken Sie ein Spielfeld, das die gewünschte Option an- bzw. ausschaltet. x1 = COMPUTEREINSTELLUNGEN (AUt...) option x2 = SPIELEINSTELLUNGEN (SEL...) option x3 = ROTIERENDE ANZEIGE (rd:1...) option x4 = zurück zu COMPUTEREINSTELLUNGEN usw. A4 ROTIERENDE ANZEIGE clear Variante auf Zug 1 -rd:1 A3 SPIELEINSTELLUNGEN B4 +SEL -rd:2 B3 Variante auf Zug 3 -rd:3 -EASY B2 +AUT Zufalls Auswahl -RANd C2 +SNd B1 -rd:4 Passive Bibliothek -bk:P D2 Stille -SIL C1 Variante auf Zug 4 D3 C3 AutoSound bei matische Tastendruck Antwort A1 D4 C4 Variante auf Zug 2 Selektive/ Einfacher Modus Brute Force Suche A2 COMPUTEREINSTELLUNGEN 3. Drücken Sie CLEAR, um den Optionsmodus zu verlassen! option E4 DEUTSCH DAS WICHTIGSTE DES OPTIONS-MODUS: SO GEHT’S F4 Stellungsbewertung -rd:E E3 Suchtiefe und Züge -rd:d F3 -tICK Rechenknoten -rd:n G3 Aktive Vollständige TurnierBibliothek Bibliothek bibliothek -bk:A -bk:? F2 E2 Uhrticken Countdown Systemtest Uhr D1 G4 -cdn E1 -tESt F1 -bk:t G2 H4 Zeit pro Zug -rd:t H3 Bibliothek An/Aus +bOOk H2 AbschaltWeiß von automatik oben spielen -tOP -aPd G1 H1 Mehr Details finden Sie unter Abschnitt 5. f. Systemtest (Feld F1) An:+tESt Aus:-tESt Der Systemtest ist vor allem als Problemlösungs-Option gedacht. Sie können den Test aktivieren durch +tESt. Mit CLEAR und ENTER gleichzeitig brechen Sie ihn wieder ab. ACHTUNG: Sie sollten diese Option nicht während einer Partie aktivieren, sonst gehen die aktuellen Daten verloren. g. Abschaltautomatik (Feld G1) An:+aPd Aus:-aPd Die Abschaltautomatik ist eine Batteriespar-Funktion! Ist sie aktiviert, wird der Computer automatisch ausgeschaltet, wenn 15 min kein Zug erfolgt. Um die Partie fortzusetzen, müssen Sie dann nur GO/STOP drücken. Achtung: der Computer schaltet sich nicht aus, wenn er einen Zug errechnet! Pdf downloaded from http://www.thepdfportal.net/0d71f9df-8f27-4948-9469-8607446a2519_324239.pdf 33 h. Weiß von oben spielen (Feld H1) An:+tOP Aus:-tOP Sie wollen vom Standard abweichen und Weiß von oben spielen? Dann aktivieren Sie diese interessante Funktion! Wählen Sie +tOP am Anfang einer Partie und stellen Sie die schwarzen Figuren nach unten auf das Brett (siehe Abbildung dieser Seite). Dann können Sie mit ENTER die Partie starten. Der Computer macht den ersten weißen Zug! SCHWARZ VON UNTEN SPIELEN? ACHTEN SIE AUF DIE GRUNDSTELLUNG Spielt der Computer mit Weiß von oben (Abschnitt 5.1, h), müssen Sie auf die richtige Grundstellung achten. Die Damen und Könige sind vertauscht und die Brettnotation ist gedreht! Siehe auch “SCHWARZ VON UNTEN SPIELEN? ACHTEN SIE AUF DIE GRUNDSTELLUNG”. Genauso müssen Ihre Figuren zu Beginn aufgestellt sein. ዛዙዘዖዕዔዓዒዜ ዊ尸尾尼尮尴尺局尶ዊ ዋ层屄层屄层屄层屄ዋ ዌ巀居巀居巀居巀居ዌ ው居巀居巀居巀居巀ው ዎ巀居巀居巀居巀居ዎ ዏ居巀居巀居巀居巀ዏ ዐ屃屁屃屁屃屁屃屁ዐ ዑ尵尿尹尯就尻尽尷ዑ ዝዙዘዖዕዔዓዒዞ Mehr Details finden Sie unter Abschnitt 5.1. Spielt der Computer Weiß von oben, ist die Notation des Brettes automatisch gedreht. Diese Option wird bei NEW GAME wieder auf AUS gestellt. c. Zufallsauswahl (Feld C2) An:+RaNd Aus:-RaNd Schalten Sie diese Option an, um mehr Vielfalt ins Spiel zu bringen. Anstatt den besten Zug zu nehmen, spielt der Computer einen der besten Züge. 5.2 Spieleinstellungen (Felder A2-H2) Diese Einstellungen beeinflussen die Rechenweise des Computers. Drücken Sie OPTION 2mal, um zu den Spieleinstellungen zu gelangen. Nutzen Sie BLACK/> und WHITE/< wieder zum Blättern und ENTER, um Optionen an- bzw. auszuschalten. Mit CLEAR können Sie den Modus verlassen. d. Passive Bibliothek (Feld D2) An:+bk:P Aus:-bk:P Mit dieser Option, steuern Sie den Computer so, daß er sich auf passive Züge und geschlossene Positionen zurückzieht. Die Turnierund die Aktive Bibliothek sind dann automatisch ausgeschaltet. a. Selektive Suche (Feld A2) An:+SEL Aus:-SEL Normalerweise nutzt das Computerprogramm einen selektiven Suchalgorithmus. Dies hilft ihm, seine Suche wesentlich effektiver zu gestalten. Schalten Sie diese Suche aus -SEL, wird die Brute Force Methode aktiviert, die noch stärkere Ergebnisse liefert. Mattsuchstufen verwenden automatisch die Brute Force Methode. e. Aktive Bibliothek (Feld E2) An:+bk:A Aus:-bk:A Ist diese Option aktiv, treffen Sie auf einen offensiven Mitspieler, der durchaus Risiken eingeht. Die Turnier- und die Passive Bibliothek sind dann automatisch ausgeschaltet. b. Einfacher Modus (Feld B2) An:+EASy Aus:-EASy Sie wollen mehr Partien gegen den Computer gewinnen? Versuchen f. Vollständige Bibliothek (Feld F2) Sie es mit diesem Modus, welcher verhindert, daß der Computer Ihre An:+bk:? Aus:-bk:? Bedenkzeit für seine Rechnungen nutzt. Das schwächt ihn auf allen Mit dieser Option schöpft der Computer aus seiner ganzen EröffStufen ohne seine Zeitnahme zu beeinflussen. Normalerweise, siehe nungsbibliothek. So können Sie zahlreiche verschiedene Eröffnungen auch Abschnitt 2.8, nutzt der Computer Ihre Zeit auch, um zu rechnen beobachten. Die Turnier- , Aktive und die Passive Bibliothek sind dann und Strategien zu planen. Deshalb ist er auch ein ziemlich harter Gegner! automatisch ausgeschaltet. Pdf downloaded from http://www.thepdfportal.net/0d71f9df-8f27-4948-9469-8607446a2519_324239.pdf 34 Folgende Informationen ersehen Sie: • rd:1 to rd:4 = die wahrscheinlichste Variante (bis zu 4 Züge) • rd:E = eine aktuelle Stellungsbewertung • rd:d = die Suchtiefe des Computers und die Anzahl der bisher untersuchten Züge • rd:n = die Rechenknoten pro Sekunde • rd:t = die verstrichene Zeit für diesen Zug Ist die abgefragte Information nicht verfügbar, werden Bindestriche angezeigt (– – – – –). Genaues über die Displayanzeigen finden Sie in Abschnitt 4. g. Turnierbibliothek (Feld G2) An:+bk:t Aus:-bk:t Schalten Sie diese Option an, muß der Computer immer die beste Variante für jede Eröffnung spielen. Obwohl dies zu den besten Strategien führt, limitiert die Option doch die Bandbreite der möglichen Eröffnungen. Die Aktive und Passive Bibliothek sind dann automatisch ausgeschaltet. 6. POSITIONEN PRÜFEN/AUFBAUEN h. Bibliothek An/Aus (Feld H2) An:+bOOk Aus:-bOOk Um die Bibliothek auszuschalten, stellen Sie diese Option einfach auf -BOOK. So wird der Computer gezwungen, seine Eröffnungszüge zu berechnen anstatt sie sich einfach aus der Bibliothek zu holen. Details über Eröffnungen finden Sie auch in Abschnitt 2.7. Alle anderen Bibliotheken sind dann automatisch ausgeschaltet. 6.1 Positionen prüfen Siehe auch “ES IST EINFACH, POSITIONEN ZU PRÜFEN!”. Stoßen Sie aus Versehen die Schachfiguren um oder sind der Meinung, daß irgend etwas nicht stimmt, können Sie den Computer zur Überprüfung der Stellung hinzuziehen. Sind Sie am Zug, drücken Sie einfach eine FIGURENTASTE (&, %, $, #, @, und !). Der Computer zeigt dann, wo die erste Figur dieser Art auf dem Brett steht - das Display zeigt den Wert und die Farbe, sowie den Feldnamen. Drücken Sie die FIGURENTASTE erneut für die zweite Figur dieser Art etc. Zuerst werden alle weißen, dann alle schwarzen Figuren gezeigt. Gibt es keine Figur dieser Art mehr, bleibt nur der Wert in der Anzeige stehen. Sie wollen mehrere Figuren überprüfen? Wiederholen Sie einfach den Vorgang mit den anderen FIGURTASTEN. Mit CLEAR können Sie die Positionskontrolle verlassen. 5.3 Rotierende Anzeige (Felder A3-H3) WICHTIG: Diese Funktion ist nur aktiv SOLANGE DER COMPUTER RECHNET. Normalerweise zeigt das Display die Schachuhr für den Spieler. Aber der Computer kann auch Informationen aufzeigen (siehe Abschnitt 4). Die rotierende Anzeige geht einher mit dem Info-Modus, da diese Funktion erlaubt, einzelne Informationen einzusehen. Sie können einzelne oder alle Optionen dieser Funktion nutzen. Drücken Sie OPTION 3mal, um “rotierende Anzeige” zu wählen. 6.2 Positionen verändern und aufbauen Mit BLACK/> und WHITE/< können Sie blättern. Mit ENTER oder durch Drücken von Feldern schließlich, lassen sich die einzelnen Siehe auch “TESTEN SIE DEN POSITIONS-MODUS”. Möglichkeiten der Anzeige aktivieren. Der Positionsmodus ist eine spannende Funktion, die es Ihnen Denken Sie, daß die Anzeige zu schnell wechselt, drücken Sie INFO ermöglicht, verschiedenste Stellungen zur Problemlösung oder Analyse um zu stoppen. Durch anschließendes Drücken von INFO, BLACK/> aufzubauen. Achtung: Die aktuelle Partie wird gelöscht, wenn Sie die und WHITE/< können Sie Informationen einzeln abrufen. Um die Stellung verändern oder neu aufbauen. “rotierende Anzeige” wieder zu starten, drücken Sie OPTION und dann Drücken Sie POSITION, um den Positions-Modus zu aktivieren und CLEAR. In jedem Falle spult der Computer dann seine Berechnungen das Display zeigt POS-. Sie können eine Stellung immer ändern, wenn Ihren Augen ab....http://www.thepdfportal.net/0d71f9df-8f27-4948-9469-8607446a2519_324239.pdf Pdf vor downloaded from 35 DEUTSCH Bei dieser Option, kann es sein, daß der Computer fragwürdige Züge macht. Dies entsteht, weil die Bibliothek auf alle Varianten (auch auf unsinnige), Antwortzüge gespeichert hat. Obwohl er solche Varianten nie spielen würde, muß er doch wissen, wie man darauf antwortet. TESTEN SIE DEN POSITIONS-MODUS ES IST EINFACH, POSITIONEN ZU PRÜFEN! new game clear enter 1. Drücken Sie CLEAR und ENTER gleichzeitig, um eine neue Partie zu starten. Display: [ 0:00:00. new game clear 2. Drücken Sie die Taste für den SPRINGER. Display: [,@,b1 (der erste weiße Springer). 4. Drücken Sie wieder SPRINGER Display: ],@,b8 (der erste schwarze Springer). 5. Und nochmals die SPRINGER taste Display: ],@,g8 (der zweite schwarze Springer). 6. Drücken Sie noch einmal die SPRINGER taste Display: @ (es gibt keine weiteren Springer). 7. Wiederholen Sie diesen Vorgang für die anderen Figuren. Mit CLEAR können Sie den Modus verlassen. 1. Drücken Sie CLEAR und ENTER gleichzeitig, um eine neue Partie zu starten. Display: [ 0:00:00. E2 2. Drücken Sie POSITION, um in den PositionsModus zu gelangen. Display: -POS-. 3. Drücken Sie denselben Bauern auf das Feld E3 und stellen Sie ihn auch dorthin. Display: [,!,-E2. E3 4. Drücken Sie denselben Bauern auf das Feld E3 und stellen Sie ihn auch dorthin. Display: [,!,+E3. D8 5. Drücken Sie die schwarze Dame auf das Feld D8 und entfernen Sie sie vom Brett. Display: ],%,-D8. H5 6. Drücken Sie diesselbe Dame auf das Feld H5 und stellen Sie sie auch dorthin. Display: ],%,+H5. position 3. Drücken Sie wieder die Taste für den SPRINGER Display: [,@,G1 (der zweite weiße Springer). clear enter Mehr Details finden Sie unter Abschnitt 6.1. white/ 7. Drücken Sie WHITE/<, um die Farbe für den nächsten Zug zu bestimmen. 8. Drücken Sie CLEAR, um den Modus zu Sie am Zug sind. Haben Sie die neue Stellung aufgebaut, können Sie clear verlassen und eine Partie zu spielen. mit CLEAR diesen Modus verlassen. Details siehe Abschnitt 6.2. • Um Figuren vom Brett zu nehmen, drücken Sie die Figur auf ihr Feld und nehmen sie vom Brett. Das Display zeigt Wert und Farbe der Figur, sowie ein Minuszeichen und das aktuelle Feld. das gewünschte Feld. Das Display zeigt Wert und Farbe der Figur, • Um die Stellung einer Figur zu ändern, drücken Sie diese auf ihr sowie ein Pluszeichen und das aktuelle Feld. Wiederholen Sie den Feld und dann auf das neue Feld. Das Display zeigt das erste Feld Vorgang für weitere Figuren, die Sie hinzufügen möchten. mit einem Minuszeichen, das zweite mit einem Plus. • Um das Brett zu leeren, drücken Sie ENTER im Positions-Modus. • Um eine Figur hinzuzufügen, drücken Sie zunächst eine Das Display zeigt _ an, um ein leeres Brett zu symbolisieren. FIGURENTASTE (&, %, $, #, @, und !). Versichern Sie sich, daß Drücken Sie erneut ENTER, um dies zu bestätigen. Dann können das Display die richtige Farbe zeigt (wenn nicht BLACK/> bzw. Sie Figuren, wie zuvor beschrieben, hinzufügen. Wollen Sie das WHITE/< drücken). Stimmt die Anzeige, drücken Sie die Figur auf Pdf downloaded from http://www.thepdfportal.net/0d71f9df-8f27-4948-9469-8607446a2519_324239.pdf 36 7.3 Technische Spezifikationen Tasten: 16 LCD Display: 48-Segmente Batterien: 3 x AA/AM3/R6 (1,5V) Leistung: 330 mW max. Maße: 335 x 302 x 35 mm Gewicht: 975 g (ohne Batterien) Bewahren Sie diese Information unbedingt auf! Leisten Sie einen Beitrag zum Umweltschutz: - Verbrauchte Batterien und Akkumulatoren (Akkus) gehören nicht in den Hausmüll. 7. TECHNISCHE ANGABEN - Sie können sie bei einer Sammelstelle für Altbatterien bzw. Sondermüll abgeben. Informieren Sie sich bei Ihrer Gemeinde. Der Hersteller behält sich vor, jederzeit technische Änderungen im Interesse der Weiterentwicklung vorzunehmen. 7.1 Die ACL-Funktion Computer hängen sich manchmal auf. Dies ist auf statische Aufladung oder elektronische Störungen zurückzuführen und kann einfach behoben werden. Stecken Sie einen spitzen Gegenstand für 1-2 Sek. in die ACL-Vertiefung auf der Unterseite Ihres Geräts. Das setzt den Computer wieder zurück. 7.2 Pflege und Wartung Ihr Schachcomputer ist ein präzises, elektronisches Gerät. Setzen Sie es nicht extremen Temperaturen oder hoher Luftfeuchtigkeit aus. Vor Reinigen der Einheit, entnehmen Sie bitte die Batterien bzw. stecken Sie den Adapter aus. Verwenden Sie keine chemischen Mittel, da diese eventuell schädigen können. Schwache Batterien müssen sofort ersetzt werden, da sie auslaufen und den Computer schädigen können. Bitte achten Sie auch auf folgenden Warnhinweis: Achtung! Nutzen Sie Alkaline oder Zink Carbon Batterien. Verwenden Sie keine unterschiedlichen Arten oder neue und alte gleichzeitig! Versuchen Sie nicht, Batterien aufzuladen, die nicht wiederaufladbar sind. Verwenden Sie nur die empfohlenen BatPdf downloaded from http://www.thepdfportal.net/0d71f9df-8f27-4948-9469-8607446a2519_324239.pdf 37 DEUTSCH terien. Versichern Sie sich, daß die Batterien gemäß der Polaritätsvorgabe eingelegt sind. Leere Batterien müssen sofort aus dem Gerät entnommen werden. Schließen Sie die Anschlußklemmen nicht kurz! Brett nicht leeren, drücken Sie CLEAR. Die Funktion ist sehr praktisch, wenn Sie eine Position mit wenigen Figuren aufbauen möchten. • Haben Sie die Position wie gewünscht aufgebaut, versichern Sie sich, daß die Farbanzeige korrekt ist. Wenn nicht, können sie mit BLACK/> und WHITE/< ändern. • Um den Positions-Modus zu verlassen, drücken Sie CLEAR. Sie kehren zur normalen Partie zurück. Jede legale Stellung kann aufgebaut werden. Illegale Stellungen werden vom Computer nicht zugelassen, z.B. wenn der König im Schach steht, die Anzahl der Figuren überschritten wird usw. In solchen Fällen meldet sich der Computer, wenn Sie den Modus mit CLEAR verlassen möchten und wartet auf eine Veränderung der Stellung. Prüfen Sie die Position mit Hilfe der FIGURENTASTEN und, wenn nötig, verändern Sie die Stellung. Drücken Sie dann CLEAR, um den Modus zu verlassen. PROBLEMLÖSUNGEN SYMPTOME MÖGLICHE URSACHEN LÖSUNGEN Der Computer reagiert nicht oder stürzt während der Partie ab. • Batterien sind nicht korrekt installiert. • Batterien sind schwach oder leer. • Statische Aufladung oder elektronische Störung. • Batterien erneut einlegen; auf Polarität achten! • Batterien austauschen. • 1-2 Sek. mit einem spitzen Gegenstand in die ACL-Vertiefung drücken (siehe auch 7.1). Das Display läßt sich schlecht lesen. • Batterien sind schwach oder leer. • Ersetzen Sie die Batterien. Der Computer macht keinen Zug. • Möglicherweise ist die Option “automatische Antwort” abgeschaltet. • Sie haben eine Stufe gewählt, auf der der Computer lange rechnet. • Diese Option anschalten (siehe 5.1). Der Computer akzeptiert Ihren Zug nicht. • Sind Sie am Zug? Ist Ihr König im Schach? Wird der Zug den König ins Schach setzen? Rochieren Sie falsch? Ziehen Sie nicht regelkonform? • Der Computer rechnet (es blinkt das Farbzeichen im Display). • Schauen Sie sich die Situation genau an und lesen Sie auch nochmal die Schachregeln nach (siehe 6.1). Es kommt eine Error-Meldung, wenn ein Feld gedrückt wird. • Sie haben den letzten Computerzug nicht vollständig eingegeben. • Prüfen Sie die Anzeige und vervollständigen Sie den Computerzug. Sie können den Positions-Modus nicht mit CLEAR verlassen. • Die aufgebaute Position ist nicht regelkonform. • Bitte prüfen Sie die Position und ändern Sie die Aufstellung. Das Display zeigt _. • Sie sind im Positions-Modus und haben ENTER gedrückt, um das Brett zu leeren. • Um das Brett zu leeren, drücken Sie nochmals ENTER; um abzubrechen CLEAR. Der Computer scheint einen illegalen Zug zu machen. • Der Zug betrifft eine Sonderregel. • Die Brettstellung ist verschoben. • Batterien sind schwach. • Lernen Sie nochmals die Sonderregeln. • Prüfen Sie die Stellung (siehe 6.1). • Ersetzen Sie die Batterien. Der Computer macht sofortige oder unsinnige Züge. • Sie haben eine Spielstufe ausgewählt, wo er sehr schnell ziehen kann oder schwach spielt (Spaßstufe). • Batterien sind schwach. • Drücken Sie LEVEL und ändern Sie die Stufe, wenn Sie wollen (siehe 3). • Ersetzen Sie die Batterien. Der Computer gibt keinen Ton von sich. • Die Funktion “Stille” ist angeschaltet. • Prüfen Sie die Optionseinstellungen (siehe 5.1). • Drücken Sie ENTER, um abzubrechen. • Drücken Sie ENTER, um die Suche abzubrechen. Pdf downloaded from http://www.thepdfportal.net/0d71f9df-8f27-4948-9469-8607446a2519_324239.pdf 38 MISE EN ROUTE RAPIDE 2 5 Appuyez sur le sélecteur GO/STOP pour allumer l’ordinateur. Si l’appareil ne réagit pas, réinitialisezle de la manière indiquée à la Section 7.1. 3 Disposez les pièces sur leurs cases initiales, les Blancs de votre côté, comme illustré sur le diagramme ci-contre. 4 Pour réinitialiser l’ordinateur en prévision d’une NOUVELLE PARTIE d’échecs, appuyez simultanément sur les touches CLEAR et ENTER. 6 go/stop ዛዒዓዔዕዖዘዙዜ ዑ尷尽尻就尯尹尿尵ዑ ዐ屁屃屁屃屁屃屁屃ዐ ዏ巀居巀居巀居巀居ዏ ዎ居巀居巀居巀居巀ዎ ው巀居巀居巀居巀居ው ዌ居巀居巀居巀居巀ዌ ዋ屄层屄层屄层屄层ዋ ዊ尶局尺尴尮尼尾尸ዊ ዝዒዓዔዕዖዘዙዞ Vous pourrez à n’importe quel moment appuyer sur la touche GO/STOP pour éteindre l’ordinateur. Votre position et votre partie en cours (à concurrence de 30 demi-coups) seront conservées dans la mémoire de l’ordinateur et vous pourrez, lorsque vous rallumerez celui-ci, reprendre la partie exactement où vous l’avez laissée. new game clear Quand l’ordinateur joue, il affiche son coup à l’écran. Vous y verrez la pièce ainsi que sa couleur et les cases de départ et d’arrivée du coup de l’ordinateur. Dans le présent exemple, l’ordinateur souhaite déplacer son pion Noir de la case E7 à la case E5. Appuyez le pion de l’ordinateur sur la Case E7 et appuyez-le ensuite sur la Case E5. Ceci conclura le coup de l’ordinateur et ce sera de nouveau à vous de jouer. Faites vos coups suivants en procédant de la même manière. Bon amusement ! enter Pdf downloaded from http://www.thepdfportal.net/0d71f9df-8f27-4948-9469-8607446a2519_324239.pdf 39 FRANÇAIS 1 Pour entamer d’emblée une partie, sans avoir à lire intégralement le présent manuel, il suffira de suivre ces quelques étapes de mise en route rapide ! Ouvrez le volet du Enregistrez vos coups en logement des piles situé à les réalisant sur l’échiquier, la base de l’appareil et en poussant doucement insérez trois piles “AA” les pièces sur les cases (AM3/R6) en veillant à origine et destination respecter la polarité pour chaque coup. exacte. Remettez le volet 3 x AA/AM3/R6 à sa place. LES TOUCHES ET LEURS FONCTIONS 1. LE COMPARTIMENT DE RANGEMENT DES PIECES : destiné au rangement et aux pièces prises. 2. L’ECRAN D’AFFICHAGE : sert à afficher les coups et des informations sur les coups inhérents à la partie en cours. Il est utilisé également pour la sélection des niveaux et options, la vérification des pièces, l’établissement des positions et bien d’autres fonctions. 3. L’ECHIQUIER A PLATEAU SENSITIF : chaque case est munie d’un senseur qui détecte automatiquement les déplacements des pièces. En Mode Niveaux et en Mode Options, certaines cases pourront également servir à sélectionner les niveaux et les options. 4. LE LOGEMENT DES PILES : situé à la base de l’appareil. Utilisez trois piles “AA” alcalines (type AM3/R6). 5. LES TOUCHES DE JEU • LES TOUCHES-SYMBOLES DES PIECES : sont utilisées en Mode Vérification et Positions. Elles sont utilisées également pour la promotion des pions. • LA TOUCHE GO/STOP (démarrage/arrêt) : appuyez sur cette touche pour allumer et éteindre l’ordinateur. • LA TOUCHE INFO (informations) : appuyez sur cette touche pour accéder au Mode Info; en Mode Info, appuyez sur cette touche pour faire tourner dans une boucle les principales catégories d’informations. Appuyez sur cette touche pendant que vous jouez pour demander conseil à l’ordinateur. • LA TOUCHE LEVEL (niveaux) : appuyez sur cette touche pour accéder au Mode Niveaux. En Mode Niveaux, appuyez sur cette touche pour franchir plus de huit niveaux à la fois. • LES TOUCHES WHITE/< et BLACK/> (Blancs/< et Noirs/>) : en Mode Niveaux, appuyez sur ces touches pour changer de niveau, un à la fois et, en Modes Options et Info, pour faire tourner dans une boucle les options et les affichages. En Mode Positions, ces touches servent à choisir la couleur. • LA TOUCHE TAKE BACK (retour en arrière) : appuyez sur cette touche pour revenir en arrière sur un demi-coup (un coup pour l’un des deux camps). Il vous est possible de revenir en arrière sur 30 demicoups au maximum. • LA TOUCHE OPTION : appuyez sur cette touche pour accéder au Mode Options; en Mode Options, appuyez dessus pour faire tourner dans une boucle les principales catégories d’options. • LA TOUCHE CLEAR (effacement) : appuyez simultanément sur cette touche et sur la touche ENTER pour réinitialiser l’ordinateur en prévision d’une nouvelle partie. Appuyez dessus pour quitter les Modes Options, Vérification et Positions. Appuyez sur cette touche pour effacer l’affichage Info et, en Mode Positions, pour annuler les invitations de l’ordinateur à vider l’échiquier. Appuyez sur cette touche pour annuler le Mode Niveaux si vous décidez de n’apporter aucun changement. (à moins que vous n’ayez utilisé les cases de l’échiquier pour changer de niveau; dans ce cas la touche CLEAR validera le nouveau niveau, tout comme la touche ENTER.) • LA TOUCHE ENTER (validation) : appuyez simultanément sur cette touche et sur la touche CLEAR pour réinitialiser l’ordinateur en prévision d’une nouvelle partie. Appuyez dessus pour changer de camp avec l’ordinateur et appuyez pendant que l’ordinateur est en phase de réflexion pour le forcer à jouer. Appuyez sur cette touche pour activer ou désactiver les réglages d’options et pour quitter le Mode Niveaux au nouveau niveau choisi. En Mode Positions, appuyez sur cette touche pour vider l’échiquier et appuyez de nouveau pour confirmer. • LA TOUCHE POSITION : appuyez sur cette touche pour accéder au Mode Positions. 6. LA TOUCHE ACL (réinitialisation) : à la base de l’appareil. Cette touche sert à éliminer les décharges statiques après l’insertion de nouvelles piles. Pdf downloaded from http://www.thepdfportal.net/0d71f9df-8f27-4948-9469-8607446a2519_324239.pdf 40 INTRODUCTION 3.5 Les Niveaux Débutant MISE EN ROUTE RAPIDE Etes-vous prêt à vous aventurer dans l’univers passionnant des (Cases A5-H5) LES TOUCHES ET LEURS échecs informatiques ? Vous avez sonné à la bonne porte ! Votre 3.6. Les Niveaux Recherche FONCTIONS nouvel ordinateur vous présente une vaste gamme d’options de jeu, de de Mats INTRODUCTION niveaux de difficulté et de fonctions particulières — vous verrez (Cases A6-H6) 1. PREPARONS-NOUS A DEMARRER ! désormais les échecs sous un jour différent. La section Mise en Route 3.7 Les Niveaux Entraînement 1.1 Installation des piles Rapide figurant en début de ce manuel vous permettra instantanément (Cases A7-H8) 1.2 Prêt à jouer ? Voici comment ! de jouer et vous trouverez à la Section 1 des détails complémentaires 1.3 C’est maintenant à l’ordinateur de 4. LE MODE INFO : OBSERVEZ sur le fonctionnement fondamental du jeu. Une fois que vous aurez ET VOUS APPRENDREZ jouer assimilé l’essentiel, ne manquez pas de continuer et d’explorer le reste Utilisation du Mode Info 1.4 Vous changez d’avis ? Revenez du manuel quand bien même la lecture de manuels d’instructions vous 4.1 Variante principale en arrière rebuterait. Vous découvrirez que cet ordinateur d’échecs est doté d’un 4.2 Informations sur la 1.5 La partie est finie ? Pourquoi ne éventail de fonctions intéressantes et divertissantes, fonctions qui recherche pas en entamer une nouvelle nous vous le garantissons — vous plairont. 4.3 Informations inhérentes 1.6 Trop facile ou trop difficile ? Votre nouvel ordinateur connaît et respecte toutes les règles du jeu aux pendules d’échecs Changez de niveau d’échecs — soyez assuré qu’il ne trichera jamais. A l’intention des 4.4 Décompte des coups/ 2. EXPLOREZ D’AUTRES FONCTIONS débutants, nous avons inclus un résumé des règles, pour les mettre sur coups inhérents à la partie 2.1 A qui de jouer ? Vérifiez sur la voie. Nous espérons que celui-ci vous aidera à mieux comprendre le 4.5 Vous avez besoin d’un l’affichage jeu et à vous familiariser avec les stratégies qu’il comporte. Si vous conseil ? Interrogez 2.2 Coups spéciaux souhaitez des informations détaillées, visitez votre bibliothèque locale, l’ordinateur ! 2.3 Coups illégaux qui ne manquera pas de mettre à votre disposition une foison 2.4 Echec, mat et nul 5. DES OPTIONS d’ouvrages intéressants sur les échecs ! 2.5 Interruption de la recherche de DIVERTISSANTES ET l’ordinateur VARIEES 2.6 Changement de camp avec Sélection des options de jeu 5.1 Options Mode de l’ordinateur 1. PREPARONS-NOUS A DEMARRER ! Fonctionnement 2.7 Les ouvertures incorporées 5.2 Options Mode de Jeu 2.8 Réflexion sur le temps de 1.1 Installation des piles 5.3 Options Affichage l’adversaire Votre ordinateur fonctionne avec trois piles “AA” (de type AM3/R6). Cyclique 2.9 Mémorisation de la partie Insérez les piles dans le logement prévu à la base de l’appareil, en 6. VERIFICATION/MISE EN 3. LES NIVEAUX DE DIFFICULTE veillant à respecter la polarité exacte. Pour une plus longue autonomie PLACE DES POSITIONS Sélection des niveaux de difficulté des piles, utilisez des piles alcalines fraîches. 6.1 Vérification des positions 3.1 Les Niveaux Classiques Allumez l’ordinateur en appuyant sur la touche GO/STOP. Un bip 6.2 Modification et mise en (Cases A1-G2) sonore vous signalera que l’ordinateur est prêt à jouer. Si l’ordinateur place des positions 3.2 Le Niveau Infini ne réagit pas (une décharge électrostatique risque d’en avoir provoqué (Case H2) 7. DETAILS TECHNIQUES le verrouillage), réinitialisez-le en enfonçant pendant une seconde au 7.1 La Fonction ACL 3.3 Les Niveaux Tournoi moins un trombone ou tout autre objet pointu dans l’orifice ACL situé à (Cases A3-H3) 7.2 Entretien la base de l’appareil. 3.4 Les Niveaux Blitz 7.3 Fiche Technique (Cases A4-H4) GUIDE DE DEPANNAGE Pdf downloaded from http://www.thepdfportal.net/0d71f9df-8f27-4948-9469-8607446a2519_324239.pdf 41 FRANÇAIS TABLE DES MATIERES Un conseil : afin de conserver l’énergie des piles et prolonger leur autonomie, activez l’option de mise hors circuit automatique (voir Section 5.1). FAITES LE COUP DE L’ORDINATEUR ! EXEMPLE : Après que l’ordinateur ait joué, c’est à vous d’effectuer le coup sur l’échiquier. Ici, l’écran indique que l’ordinateur veut déplacer son pion Noir (] ! ) de d7 a d5. Prenez ce pion en d7 (indiqué par les lumières sur l’échiquier) et appuyez le doucement sur la Case d7. Les lumières de l’échiquier indiquent alors la Case d5. Appuyez le pion sur la Case d5 pour terminer le coup de l’ordinateur. Maintentant, c’est à vous de jouer ! 1.2 Prêt à jouer ? Voici comment ! Et voici venu le moment d’entamer une partie. C’est extrêmement simple — il suffit de suivre les étapes ci-dessous : a. Appuyez sur la touche GO/STOP pour allumer l’ordinateur si vous ne l’avez pas encore fait. b. Appuyez simultanément sur les touches CLEAR et ENTER pour réinitialiser l’ordinateur en prévision d’une nouvelle partie. Disposez les pièces en position de départ, les Blancs de votre côté, comme indiqué à la Section Mise en Route Rapide. c. Pour jouer, appuyez légèrement sur la pièce que vous souhaitez déplacer jusqu’à ce que vous entendiez un bip sonore - le plateau sensitif reconnaîtra automatiquement votre pièce. Vous en doutez ? Il suffit de regarder l’écran, qui se remplit soudain d’informations - il affiche votre pièce ainsi que sa couleur et la case sur laquelle vous venez d’appuyer. d. Prenez cette pièce et appuyez-la légèrement dans le trou de votre case d’arrivée. L’ordinateur émettra un second bip sonore pour confirmer votre coup. Et voilà - vous venez de faire la totalité de votre premier coup de la partie. C’est maintenant à l’ordinateur de jouer. Vous remarquerez qu’en début de partie, l’ordinateur joue de manière instantanée au lieu de prendre le temps de réfléchir. C’est parce qu’il joue des coups issus de sa mémoire en se servant d’une “bibliothèque” d’ouvertures incorporée (voir détails à la Section 2.7). d7-d5 ዛዒዓዔዕዖዘዙዜ ዑ尷尽尻就尯尹尿尵ዑ ዐ屁屃屁屃屁屃屁屃ዐ ዏ巀居巀居巀居巀居ዏ ዎ居巀居巀居巀居巀ዎ ው巀居巀层巀居巀居ው ዌ居巀居巀居巀居巀ዌ ዋ屄层屄居屄层屄层ዋ ዊ尶局尺尴尮尼尾尸ዊ ዝዒዓዔዕዖዘዙዞ ዛዒዓዔዕዖዘዙዜ ዑ尷尽尻就尯尹尿尵ዑ ዐ屁屃屁巀屁屃屁屃ዐ ዏ巀居巀居巀居巀居ዏ ዎ居巀居屃居巀居巀ዎ ው巀居巀层巀居巀居ው ዌ居巀居巀居巀居巀ዌ ዋ屄层屄居屄层屄层ዋ ዊ尶局尺尴尮尼尾尸ዊ ዝዒዓዔዕዖዘዙዞ 1.4 Vous changez d’avis ? Revenez en arrière ! Lorsque vous jouez aux échecs contre l’ordinateur, rien n’est jamais “règle immuable” - vous pouvez à votre gré changer d’avis ou décider de faire un autre coup ! Pour revenir en arrière, il suffit d’appuyer sur la 1.3 C’est maintenant à l’ordinateur de jouer touche TAKE BACK lorsque c’est à vous de jouer, et l’écran affiche le Lorsque l’ordinateur joue, il émet un bip sonore et affiche son coup. coup sur lequel il s’agit de revenir en arrière. Appuyez la pièce indiquée Vérifiez l’écran d’affichage - et vous verrez les cases de départ et sur la case d’arrivée initiale et appuyez-la ensuite sur la case de d’arrivée du coup de l’ordinateur, ainsi que la couleur et le type de la départ initiale pour conclure le retour en arrière. Recommencez ce pièce qu’il est en train de déplacer. Appuyez la pièce indiquée sur la processus aussi souvent que vous le souhaitez pour revenir en arrière case de départ jusqu’à ce que vous entendiez un bip sonore. Déplacez sur jusqu’à 30 demi-coups (ou 15 coups pour chaque camp). Pour cette même pièce vers la case d’arrivée indiquée et appuyez dessus reprendre la partie à n’importe quel point, il suffira de faire un autre pour conclure le coup de l’ordinateur. Et ce sera de nouveau à vous de coup sur l’échiquier. jouer. A l’issue d’un retour en arrière sur une prise ou/et d’une promotion de pion, l’ordinateur s’assurera que la disposition des pièces sur Pdf downloaded from http://www.thepdfportal.net/0d71f9df-8f27-4948-9469-8607446a2519_324239.pdf 42 2.2 Coups spéciaux Les prises : pour prendre une pièce, appuyez sur la pièce à déplacer, retirez la pièce prise de l’échiquier et appuyez votre pièce sur la case de la pièce prise. Les prises s’affichent en E5•F6. Les prises en passant : dans ce type de prise, l’ordinateur continuera à afficher votre coup jusqu’à ce que vous appuyiez sur le pion pris et le retiriez de l’échiquier. Le roque : l’ordinateur identifie automatiquement une manoeuvre de roque après le déplacement du Roi. Après que vous aurez appuyé le Roi sur sa case de départ puis sur sa case d’arrivée, l’ordinateur continuera à afficher votre coup jusqu’à ce que vous appuyiez sur les cases de départ et d’arrivée de la Tour pour conclure le coup. Il conviendra de noter que le petit roque présente l’affichage 0-0 et le grand roque l’affichage 0-0-0. Promotion des pions : vous décidez de promouvoir un pion faites d’abord votre coup comme à l’accoutumée en appuyant votre pion sur ses cases de départ et d’arrivée. Appuyez ensuite sur la touche-symbole de la pièce que vous souhaitez promouvoir (%, $, #, ou @). L’ordinateur reconnaît immédiatement votre nouvelle pièce, affiche brièvement celle-ci et commence ensuite à réfléchir à son prochain coup. Rappelez-vous d’échanger la pièce sur votre échiquier ! L’ordinateur décide de promouvoir un pion : l’écran affiche à la fois le pion et la pièce à promouvoir. N’oubliez pas de remplacer le pion de l’ordinateur par la nouvelle pièce. 1.5 La partie est finie ? Pourquoi ne pas en entamer une nouvelle Il est aisé de recommencer après avoir terminé une partie (ou abandonné la partie en cours). Réinitialisez l’ordinateur en appuyant simultanément sur les touches CLEAR et ENTER et la mélodie de Nouvelle Partie vous signalera que l’ordinateur est prêt à entamer la nouvelle partie. Le niveau de jeu en cours demeurera en vigueur mais vous pourrez changer de niveau en suivant la méthode exposée à la Section 3. IMPORTANT : la réinitialisation de l’ordinateur en prévision d’une nouvelle partie efface la partie en cours de la mémoire de l’ordinateur attention à ne pas appuyer sur ces touches par inadvertance ! 1.6 Trop facile ou trop difficile ? Changez de niveau L’ordinateur, lors de sa mise en marche initiale, est réglé au Niveau Classique D1 (cinq secondes par coup). Il vous est toutefois loisible de choisir parmi 64 niveaux de jeu différents. Voir description détaillée de tous les niveaux et instructions pour le changement de niveau à la Section 3. 2.3 Coups illégaux Votre ordinateur n’acceptera jamais de coups illégaux. Si vous tentez d’en faire un, vous entendrez un double bip sonore grave et l’écran affichera la case de départ de la pièce. Il vous faudra soit déplacer cette même pièce vers une autre case, soit appuyer de nouveau la pièce sur sa case de départ initiale et déplacer une autre pièce. Si vous n’effectuez pas correctement un coup de l’ordinateur, vous 2. EXPLOREZ D’AUTRES FONCTIONS recevrez également un message d’erreur. Cela signifie que vous avez 2.1 A qui de jouer ? Vérifiez sur l’affichage soit déplacé une pièce erronée, soit déplacé la pièce de l’ordinateur sur Lorsque l’ordinateur joue avec les Noirs, l’une des cases noires de la case erronée. Si l’ordinateur souhaite déplacer son pion de la case l’échiquier clignote à l’écran pendant qu’il est en phase de réflexion. D7 à la case D5, par exemple, et vous appuyez sur D7 puis sur D6, le Après avoir joué, une case blanche s’affiche pour indiquer que c’est message Er:D5 s’affichera brièvement pour vous signaler votre aux Blancs de jouer. Il vous est ainsi possible de reconnaître en un clin erreur. L’écran affichera ensuite de nouveau le coup (D7-D5) et d’oeil si l’ordinateur est en phase de réflexion et qui doit jouer ! l’ordinateur attendra que vous appuyiez sur la case D5 pour conclure son coup. Pdf downloaded from http://www.thepdfportal.net/0d71f9df-8f27-4948-9469-8607446a2519_324239.pdf 43 FRANÇAIS l’échiquier est toujours correcte en vous rappelant de remettre respectivement la pièce et/ou le pion pris sur l’échiquier ! Il le fait en affichant le symbole de la pièce ainsi que ses coordonnées, et en allumant les diodes de plateau de cette case. Remettez la pièce indiquée sur l’échiquier et appuyez sur cette case pour conclure le retour en arrière. Lorsque vous effectuez une manoeuvre de roque, suivez d’abord les étapes de retour en arrière décrites ci-dessous pour le Roi, et procédez ensuite de la même manière pour la Tour pour conclure le retour en arrière. trouvé un mat. Pour continuer la partie, passez à un autre niveau. Si vous avez appuyé sur une pièce et la case de départ s’est affichée à l’écran, et vous décidez ensuite de ne pas faire ce coup, il suffira d’appuyer de nouveau sur cette même case pour annuler l’entrée. Faites à présent un autre coup. Si vous changez d’avis après avoir entré la totalité du coup, vous pourrez revenir en arrière en suivant la méthode indiquée à la Section 1.4. 2.6 Changement de camp avec l’ordinateur Pour changer de camp avec l’ordinateur, appuyez sur la touche ENTER lorsque ce sera à vous de jouer et l’ordinateur fera le coup suivant pour votre camp. Changez de camp aussi souvent que vous le souhaitez. Souhaitez-vous qu’en début de partie l’ordinateur joue le premier coup pour les Blancs ? Appuyez simultanément sur les touches CLEAR et ENTER pour réinitialiser l’ordinateur en prévision d’une nouvelle partie, et appuyez ensuite sur la touche ENTER ! Souhaitez-vous voir l’ordinateur jouer contre lui-même ? Appuyez sur la touche ENTER après chaque coup — et observez-le jouer pour les deux camps de l’échiquier, un coup après l’autre. Etudiez ses stratégies - votre propre jeu pourrait fort bien s’améliorer. 2.4 Echec, mat et nul Lorsque votre Roi est en échec, l’ordinateur commence par faire son coup comme à l’accoutumée. Après l’accomplissement du coup, le message CHECK clignote à l’écran pendant quelques secondes, accompagné du coup de mise en échec. L’écran retourne ensuite à l’affichage de la pendule. Si l’ordinateur découvre un mat forcé contre son adversaire, il commence par afficher son coup comme d’habitude. Après l’accomplissement du coup sur l’échiquier, l’ordinateur affiche pendant plusieurs secondes en clignotant l’annonce du mat accompagnée du coup (par exemple : =in 2 pour un mat en deux coups. L’écran retourne ensuite à l’affichage de la pendule. Lorsqu’une partie s’achève en échec et mat, le message MATE(accompagné du coup de mise en mat ou de la pendule) s’affiche en clignotant pendant un bref instant après l’accomplissement du mat. L’écran retourne ensuite à l’affichage de la pendule. L’ordinateur reconnaît les matchs nuls par pat, par triple répétition et par la règle des 50 coups. En cas de match nul, le message EnD (accompagné du coup de mise en match nul ou de la pendule) s’affichera en clignotant pendant un bref instant après l’accomplissement du coup. L’écran retourne ensuite à l’affichage de la pendule. 2.7 Les ouvertures incorporées En début de partie, l’ordinateur jouera souvent de manière instantanée à plusieurs niveaux. C’est parce qu’il joue des coups issus de sa mémoire en se servant d’une “bibliothèque” d’ouvertures incorporée. Cette bibliothèque contient la plupart des ouvertures principales ainsi que de nombreuses positions tirées de parties de grands maîtres. Si la position en cours existe dans sa bibliothèque, l’ordinateur jouera automatiquement en réponse un coup directement issu de sa mémoire, sans avoir à réfléchir à son coup ! L’une des caractéristiques particulières de la bibliothèque d’ouvertures de cet ordinateur est sa faculté de traiter des transpositions. Une transposition se produit lorsqu’une position résultant d’un certain nombre de coups peut également être obtenue par un enchaînement différent de ces mêmes coups. Le système de transposition automatique de l’ordinateur traite aisément ces cas. L’ordinateur est doté également d’une exceptionnelle fonction de sélection d’ouvertures, permettant à son utilisateur de choisir différents types d’ouvertures, voire de fermer s’il le souhaite l’accès de cette bibliothèque. Voir détails complémentaires à la Section 5.2 2.5 Interruption de la recherche de l’ordinateur Vous estimez que l’ordinateur est trop long à jouer ? Vous pouvez l’interrompre à votre gré ! Il suffit d’appuyer sur la touche ENTER pendant que l’ordinateur est en phase de réflexion et il cessera de réfléchir pour faire le meilleur coup qu’il ait trouvé à ce stade. Cette fonction peut s’avérer utile aux niveaux supérieurs où l’ordinateur a le loisir de réfléchir longuement à ses coups, ainsi qu’au niveau Infini où il continuera indéfiniment à réfléchir à moins que vous ne l’arrêtiez. 2.8 Réflexion sur le temps de l’adversaire Aux Niveaux Recherche de Mats, la pression de la touche ENTER Vous remarquerez peut-être, pendant que vous jouez, que l’ordinan’oblige pas l’ordinateur à faire un coup. Au contraire, l’ordinateur teur répond parfois instantanément à vos coups, même au cours de affiche – – – – – pour indiquer qu’il a été interrompu avant d’avoir parties disputées aux niveaux supérieurs .Ceci est dû au fait que Pdf downloaded from http://www.thepdfportal.net/0d71f9df-8f27-4948-9469-8607446a2519_324239.pdf 44 secondes par coup) et l’écran affiche L0:05. • Pour sélectionner un niveau à l’aide des touches de jeu : après avoir accédé au Mode Niveaux en appuyant sur la touche LEVEL, changez de niveau, un à la fois, à l’aide des touches BLACK/> et WHITE/<. La méthode raccourcie consiste à appuyer à coups répétés sur la touche LEVEL pour franchir plus de huit niveaux à la fois. Lorsque le niveau requis s’affichera, appuyez sur la touche ENTER pour entrer votre nouveau niveau dans l’ordinateur et quitter le Mode Niveaux. 2.9 Mémorisation de la partie • Pour sélectionner un niveau en appuyant sur les cases de Vous pouvez interrompre une partie à tout moment en appuyant sur l’échiquier : comme indiqué au Tableau des Niveaux, chacune des la touche GO/STOP. Le jeu sera alors interrompu et l’ordinateur 64 cases de l’échiquier correspond à un niveau particulier. Après conservera dans sa mémoire votre partie en cours (à concurrence avoir accédé au Mode Niveaux en appuyant sur la touche LEVEL, d’environ 30 demi-coups). Lorsque vous rallumerez votre ordinateur, il prenez une pièce et appuyez sur la case requise pour activer un sera prêt à reprendre la partie là où vous l’avez laissée. niveau, en utilisant le tableau comme guide. Ayant appuyé sur la case requise, lorsque ce niveau s’affichera à l’écran, appuyez sur la touche ENTER pour entrer le nouveau niveau dans l’ordinateur et quitter le Mode Niveaux. Lorsque vous réalisez votre sélection 3. LES NIVEAUX DE DIFFICULTE par l’intermédiaire des cases de l’échiquier, la pression de la L’ordinateur d’échecs comporte 64 niveaux de difficulté différents. touche CLEAR produira un effet identique à la pression de la N’oubliez pas, lorsque vous sélectionnez votre niveau de jeu, que touche ENTER — elle entrera votre sélection du niveau dans quand l’ordinateur dispose de plus de temps pour réfléchir, il devient l’ordinateur. plus fort et joue mieux - exactement comme un joueur humain ! Le • Pour vérifier le niveau sans changer de niveau : si vous Tableau des Niveaux de Jeu vous offre une vue d’ensemble de tous les appuyez sur la touche LEVEL pour vérifier le niveau sans vraiment niveaux. Ces niveaux sont aussi décrits individuellement dans la souhaiter changer de niveau, appuyez sur la touche CLEAR. Ceci présente Section. vous ramènera au jeu normal sans changer de niveau ni modifier les réglages de la pendule, quand bien même l’ordinateur serait en Sélection des niveaux de difficulté phase de réflexion. Autres points importants à ne pas oublier en ce qui concerne les Le tableau “SELECTIONNEZ UN NIVEAU DE DIFFICULTE A niveaux de difficulté : L’AIDE DE CE TABLEAU !” vous offre un aperçu illustré de la • Le changement de niveau entraîne toujours la réinitialisation des méthode de sélection des niveaux et vous permet de voir en un pendules d’échecs. clin d’oeil tous les niveaux. • Il est déconseillé de changer de niveau pendant que l’ordinateur Il existe deux méthodes de choisir un niveau de jeu. Vous pouvez est en phase de réflexion. Si cela s’avérait nécessaire, appuyez sélectionner les niveaux en utilisant les touches de jeu ou en appuyant d’abord sur la touche ENTER pour obliger l’ordinateur à sur les cases de l’échiquier. Quelle que soit la méthode utilisée, vous abandonner sa recherche et à faire son coup sur l’échiquier. devriez toujours appuyer d’abord sur la touche LEVEL pour accéder au Revenez ensuite en arrière sur le coup de l’ordinateur et changez Mode Niveaux. L’ordinateur affichera le niveau de jeu en cours. de niveau. Appuyez enfin sur la touche ENTER pour obliger L’ordinateur, lors de sa mise en marche initiale, est réglé au Niveau l’ordinateur à reprendre sa réflexion au nouveau niveau. Classique D1 (comportant un temps de réponse moyen de cinq • Si vous changez de niveau pendant que l’ordinateur est en phase Pdf downloaded from http://www.thepdfportal.net/0d71f9df-8f27-4948-9469-8607446a2519_324239.pdf 45 FRANÇAIS l’ordinateur réfléchit sur votre temps et emploie le temps que vous passez à étudier votre prochain coup à réfléchir et à préparer sa stratégie. Il essaie de prévoir le coup que vous ferez probablement et calcule ses ripostes à ce coup particulier alors que vous réfléchissez encore. S’il a deviné juste, il n’a plus aucune raison de continuer à calculer - il fait immédiatement le coup qu’il a déjà découvert ! Pour désactiver cette fonction, activez l’option Mode de Jeu Facile, ainsi qu’il est décrit à la Section 5.2. de réflexion, la pendule sera réinitialisée et la recherche en cours abandonnée. • Si vous appuyez sur la touche LEVEL pendant que l’ordinateur est en phase de réflexion sans toutefois changer de niveau (vous avez appuyé sur la touche CLEAR plutôt que sur la touche ENTER), l’ordinateur abandonnera également sa recherche. laissez l’ordinateur les analyser pour vous ! Il réfléchira pendant des heures, voire des journées entières et essaiera de trouver le meilleur coup possible. Et n’oubliez pas de l’observer pendant qu’il réfléchit profitez de l’option Affichage Cyclique décrite à la Section 5.3. 3.3 Les Niveaux Tournoi (Cases A3-H3) NIVEAU 3.1 Les Niveaux Classiques (Cases A1-G2) NIVEAU TEMPS PAR COUP NOMBRE DE COUPS/TEMPS TOTAL AFFICHAGE ALTERNATIF A3 ..... 40 coups en 1 heure 30 minutes. ..... tr40 1:30:00 B3 ..... 35 coups en 1 heure 45 minutes. ..... tr35 1:45:00 C3 ..... 40 coups en 1 heure 45 minutes. ..... tr40 1:45:00 D3 ..... 35 coups en 1 heure 30 minutes ...... tr35 1:30:00 E3 ..... 40 coups en 2 heures. ...................... tr40 2:00:00 F3 ..... 45 coups en 2 heures 30 minutes. ... tr45 2:30:00 G3 .... 50 coups en 2 heures. ...................... tr50 2:00:00 H3 ..... 40 coups en 3 heures. ...................... tr40 3:00:00 Les Niveaux Tournoi exigent l’exécution d’un certain nombre de coups dans un laps de temps donné. Si un joueur excède le temps imparti pour un certain nombre de coups, l’ordinateur fera clignoter à l’écran le message TImE accompagné du temps écoulé, indiquant la fin de la partie. Vous pourrez, si vous le souhaitez, continuer à jouer même après que le délai aura été dépassé. Si vous choisissez un Niveau Tournoi, vous pourriez préférer l’affichage du compte à rebours à celui du temps écoulé (voir Section 5.1). Lorsque le temps imparti sera écoulé, le compte à rebours cédera automatiquement sa place à l’affichage normal de la pendule. AFFICHAGE A1 .................... 1 seconde .................. L 0:01 B1 .................... 2 secondes ................ L 0:02 C1 .................... 3 secondes ................ L 0:03 D1 .................... 5 secondes ................ L 0:05 E1 .................. 10 secondes ................ L 0:10 F1 .................. 15 secondes ................ L 0:15 G1 .................. 20 secondes ................ L 0:20 H1 .................. 30 secondes ................ L 0:30 A2 .................. 45 secondes ................ L 0:45 B2 .................... 1 minute .................... L 1:00 C2 .................... 1.5 minutes ............... L 1:30 D2 .................... 2 minutes ................... L 2:00 E2 .................... 3 minutes ................... L 3:00 F2 .................... 5 minutes ................... L 5:00 G2 .................. 10 minutes ................... L10:00 En sélectionnant un des Niveaux Classiques, vous sélectionnez un temps de réponse moyen de l’ordinateur. A noter que ces moyennes sont calculées sur un grand nombre de coups. Dans ses ouvertures et en fin de partie, l’ordinateur a tendance à jouer plus vite, mais dans des positions complexes de milieu de partie, il pourra prendre beaucoup plus longtemps pour jouer. 3.4 Les Niveaux Blitz (Cases A4-H4) NIVEAU TEMPS MOYEN PAR COUP AFFICHAGE A4 .................... 5 minutes ................... bL: 5 B4 .................. 10 minutes ................... bL:10 C4 .................. 15 minutes ................... bL:15 3.2 Le Niveau Infini (Case H2) D4 .................. 20 minutes ................... bL:20 NIVEAU TEMPS PAR COUP AFFICHAGE E4 .................. 30 minutes ................... bL:30 H2 ......... aucune limite de temps ........ 9:99:99 F4 .................. 45 minutes ................... bL:45 Au Niveau Infini, l’ordinateur cherche indéfiniment jusqu’à ce qu’il G4 .................. 60 minutes ................... bL:60 trouve un mat forcé ou un coup forcé, jusqu’à ce qu’il ait fouillé la H4 .................. 90 minutes ................... bL:90 position jusqu’au fin fond ou que vous arrêtiez la recherche en Aux Niveaux Blitz (également appelés Niveaux Echecs Rapides ou appuyant sur la touche ENTER. Si la recherche est interrompue, “Mort Subite”), vous réglez la durée totale de la partie. Si le temps l’ordinateur jouera le coup qu’il estime le meilleur à ce stade. Tentez imparti est dépassé, l’ordinateur fera clignoter à l’écran le message - établissez des positions intéressantes sur l’échiquier et tImE accompagné du temps écoulé, indiquant la fin de la partie. Pdf l’expérience downloaded from http://www.thepdfportal.net/0d71f9df-8f27-4948-9469-8607446a2519_324239.pdf 46 SELECTIONNEZ UN NIVEAU DE DIFFICULTE A L’AIDE DE CE TABLEAU ! Profondeur de Profondeur de Profondeur de Profondeur de Profondeur de Profondeur de Profondeur de Profondeur de recherche 9 recherche 10 recherche 11 recherche 12 recherche 13 recherche 14 recherche 15 recherche 16 demi-coups demi-coups demi-coups demi-coups demi-coups demi-coups demi-coups demi-coups level LEVEL pour accéder au Mode Niveaux. PLY:9 NIVEAUX ENTRAINEMENT 2. Choisissez ensuite votre niveau à l’aide du Tableau des Niveaux. Il existe deux méthodes de sélectionner les niveaux. • Faites tourner les niveaux dans une boucle, jusqu’à ce que s’affiche le niveau requis : • Appuyez sur la touche BLACK/> pour monter > d’un niveau. • Appuyez sur la touche WHITE/< pour descendre <d’un niveau. • Appuyez sur la touche LEVEL pour monter > de huit niveaux. • OU repérez simplement votre case de niveau et appuyez une des pièces chevillées sur le trou pour afficher ce niveau. 3. Enfin, appuyez sur la touche ENTER pour quitter le Mode Niveaux, en utilisant votre nouveau niveau ! enter A8 PLY:1 Mat en 1 coup =in:1 A6 NIVEAUX DEBUTANT 1 sec. par coup bEG:1 A5 NIVEAUX BLITZ 5 min. par partie bL: 5 A4 NIVEAUX TOURNOI 40 coups en 1:30 tr40 1:30:00 A3 NIVEAUX DE JEU CLASSIQUES + NIVEAUX INFINI PLY:11 C8 PLY:12 D8 PLY:13 E8 PLY:14 PLY:15 G8 F8 PLY:16 H8 Profondeur de Profondeur de Profondeur de Profondeur Profondeur de Profondeur de Profondeur de Profondeur de recherche 1 recherche 2 recherche 3 de recherche recherche 5 recherche 6 recherche 7 recherche 8 demi-coups demi-coups demi-coups 4 demi-coups demi-coups demi-coups demi-coups demi-coups A7 NIVEAUX RECHERCHE DE MATS PLY:10 B8 45 sec. par coup L0:45 A2 1 sec. par coup L0:01 A1 PLY:2 B7 Mat en 2 coups =in:2 B6 2 sec. par coup bEG:2 B5 10 min. par partie bL:10 B4 35 coups en 1:45 tr35 1:45:00 B3 1 min. par coup L1:00 B2 2 sec. par coup L0:02 B1 PLY:3 C7 Mat en 3 coups =in:3 C6 3 sec. par coup bEG:3 C5 15 min. par partie bL:15 C4 40 coups en 1:45 tr40 1:45:00 C3 1.5 min. par coup L1:30 C2 3 sec. par coup L0:03 C1 PLY:4 D7 Mat en 4 coups =in:4 D6 4 sec. par coup bEG:4 D5 20 min. par partie bL:20 D4 35 coups en 1:30 tr35 1:30:00 D3 2 min. par coup L2:00 D2 5 sec. par coup L0:05 D1 PLY:5 E7 PLY:6 F7 Mat en 5 coups =in:5 E6 Mat en 6 coups =in:6 F6 5 sec. par coup bEG:5 E5 30 min. par partie bL:30 E4 40 coups en 2:00 tr40 2:00:00 E3 6 sec. par coup bEG:6 F5 45 min. par partie bL:45 F4 45 coups en 2:30 tr45 2:30:00 F3 3 min. par coup L3:00 E2 5 min. par coup L5:00 F2 10 sec. par coup L0:10 E1 15 sec. par coup L0:15 F1 Voir détails complémentaires à la Section 3. Pdf downloaded from http://www.thepdfportal.net/0d71f9df-8f27-4948-9469-8607446a2519_324239.pdf 47 PLY:7 G7 Mat en 7 coups =in:7 G6 7 sec. par coup bEG:7 G5 60 min. par partie bL:60 G4 50 coups en 2:00 tr50 2:00:00 G3 10 min. par coup L10:00 G2 20 sec. par coup L0:20 G1 PLY:8 H7 Mat en 8 coups =in:8 H6 8 sec. par coup bEG:8 H5 90 min. par partie bL:90 H4 40 coups en 3:00 tr40 3:00:00 H3 Niveau Infini 9:99:99 H2 30 sec. par coup L0:30 H1 FRANÇAIS 1. Appuyez sur la touche Si vous choisissez un Niveau Blitz, vous pourriez préférer l’affichage du compte à rebours à celui du temps écoulé (voir Section 5.1). Lorsque le temps imparti sera écoulé, le compte à rebours cédera automatiquement sa place à l’affichage normal de la pendule. AVEZ-VOUS BESOIN D’AIDE POUR CHOISIR UN NIVEAU ? VOICI QUELQUES CONSEILS ! • Etes-vous un débutant ? Commencez par les Niveaux Débutant ou par les Niveaux Entraînement inférieurs. Ces niveaux limitent la profondeur de recherche de l’ordinateur, affaiblissant le jeu et vous offrant l’occasion d’en apprendre davantage sur le jeu et peut-être même de gagner ! Pour augmenter encore vos chances de gagner, combinez un de ces niveaux avec l’option Mode de Jeu Facile (Section 5.2) pour permettre à l’ordinateur de réfléchir sur votre temps. • Etes-vous un joueur moyen ou chevronné ? Essayez les Niveaux Classiques, Entraînement ou Tournoi. Les Niveaux Classiques s’échelonnent du niveau de jeu facile au plus difficile, où le temps de réponse est de 10 minutes et les Niveaux Tournoi sont pleins de défis. Les Niveaux Entraînement vous permettent de régler à votre guise la profondeur de la recherche - au fur et à mesure que vous aurez maîtrisé un niveau, passez au suivant ! Et n’oubliez pas d’essayer les Niveaux Blitz, pour quelques trépidantes parties d’échecs rapides. • Vous voulez tenter une expérience ? Utilisez, pour résoudre vos problèmes, les Niveaux Recherche de Mats jusqu’au mat en huit coups - lancez votre recherche à partir d’une position inhérente à l’une de vos propres parties, ou posez un problème réel de mise en mat. Choisissez le Niveau Infini et laissez l’ordinateur analyser les positions complexes pendant des heures, voire des journées entières. 3.5 Les Niveaux Débutant (Cases A5-H5) NIVEAU TEMPS PAR COUP AFFICHAGE A5 .................... 1 seconde .................. BEG:1 B5 .................... 2 secondes ................ BEG:2 C5 .................... 3 secondes ................ BEG:3 D5 .................... 4 secondes ................ BEG:4 E5 .................... 5 secondes ................ BEG:5 F5 .................... 6 secondes ................ BEG:6 G5 .................... 7 secondes ................ BEG:7 H5 .................... 8 secondes ................ BEG:8 Etes-vous un débutant ? Oui ? Ces niveaux vous sont particulièrement destinés. Ici, l’ordinateur limite exprès sa recherche pour jouer un jeu plus faible et vous offrir de meilleures chances de gagner ! Ces niveaux partent du jeu facile pour devenir graduellement plus difficiles - dès que vous en aurez maîtrisé un, passez au suivant. 3.6 Les Niveaux Recherche de Mats (Cases A6-H6) NIVEAU PROBLEME AFFICHAGE A6 ................... Mat en 1 coup ............ =in:1 B6 ................... Mat en 2 coups .......... =in:2 C6 ................... Mat en 3 coups .......... =in:3 D6 ................... Mat en 4 coups .......... =in:4 E6 ................... Mat en 5 coups .......... =in:5 F6 ................... Mat en 6 coups .......... =in:6 G6 ................... Mat en 7 coups .......... =in:7 H6 ................... Mat en 8 coups .......... =in:8 Le choix d’un de ces niveaux active un programme spécial de affichera une série de traits (– – – – –). Pour continuer à jouer, il vous recherche de mat. Si vous êtes dans une position qui pourrait mener à suffira de passer à un autre niveau. un mat et vous désirez que l’ordinateur le trouve, réglez celui-ci sur l’un des Niveaux Recherche de Mats. Cet ordinateur est capable de 3.7 Les Niveaux Entraînement (Cases A7-H8) résoudre des problèmes jusqu’au mat en 8 coups. Les mats en un à NIVEAU AFFICHAGE NIVEAU AFFICHAGE cinq coups sont en général résolus facilement tandis que la résolution A7 .......... PLY: 1 A8 .......... PLY: 9 des mats en six à huit coups pourrait prendre beaucoup plus de temps. B7 .......... PLY: 2 B8 .......... PLY:10 S’il n’y a pas de mat possible, ou si l’ordinateur n’en trouve pas, il C7 .......... PLY: 3 C8 .......... PLY:11 Pdf downloaded from http://www.thepdfportal.net/0d71f9df-8f27-4948-9469-8607446a2519_324239.pdf 48 D7 .......... PLY: 4 D8 .......... PLY:12 E7 .......... PLY: 5 E8 .......... PLY:13 F7 .......... PLY: 6 F8 .......... PLY:14 G7 ......... PLY: 7 G8 ......... PLY:15 H7 .......... PLY: 8 H8 .......... PLY:16 Aux Niveaux Entraînement, la profondeur de recherche de l’ordinateur est limitée à un certain nombre de coups, comme indiqué ci-dessus. Lorsque vous passez d’un niveau à l’autre, l’ordinateur affiche pour chaque niveau la mention PLY : #. Le mot “Ply” désigne un demi-coup (un coup pour l’un des camps) et le symbole “#” désigne la profondeur de la recherche. Par exemple, au Niveau A7, l’ordinateur effectue sa recherche jusqu’à une profondeur d’un demi-coup (PLY:1), se contentant alors de n’anticiper qu’un seul coup. Ainsi, à ce niveau, il lui arrivera de laisser passer un mat en un coup. Le jeu s’en trouvera affaibli, offrant ainsi au débutant l’occasion de battre l’ordinateur. différents coups et approfondit sa recherche. Les informations inhérentes à la partie se répartissent en quatre catégories principales et la pression de la touche INFO fera tourner dans une boucle ces catégories. Les touches BLACK/> et WHITE/< seront utilisées pour faire tourner dans une boucle les affichages de chaque catégorie. Appuyez sur la touche CLEAR pour quitter le Mode Info et retourner à l’affichage normal de la pendule d’échecs. Après vous être familiarisé avec le Mode Info, reportez-vous à la Section 5.3, qui vous présente une description de l’option Affichage Cyclique. La sélection de cette option chaque fois qu’il réfléchit à un coup, oblige l’ordinateur à faire automatiquement tourner dans une boucle les informations requises, à intervalles d’une seconde - vous pouvez en réalité observer votre ordinateur “penser tout haut” ! Si l’information requise n’est pas disponible, l’ordinateur affichera une série de traits (– – – – –). 4. LE MODE INFO : OBSERVEZ ET VOUS APPRENDREZ 4.1 Variante principale Appuyez une première fois sur la touche INFO pour obtenir des informations sur la variante principale (la variante prévue ou la séquence de coups que l’ordinateur s’attend à voir). Le coup que l’ordinateur envisage de faire s’affichera en premier lieu. La variante principale est indiquée à une profondeur maximale de quatre demicoups. Appuyez à coups répétés sur la touche BLACK/> pour faire défiler en avant tous les affichages. • 1er coup (Variante prévue) • 2ème coup (Variante prévue) • 3ème coup (Variante prévue) • 4ème coup (Variante prévue) Appuyez sur la touche WHITE/< pour faire défiler en arrière tous les affichages et revoir les affichages précédents. Appuyez sur la touche CLEAR pour retourner à l’affichage normal de la pendule. Le premier coup de la variante prévue étant le coup que l’ordinateur présume que vous ferez, vous pouvez également considérer ce coup comme un conseil ! Donc - chaque fois que vous aurez besoin d’aide, appuyez sur la touche INFO quand c’est à vous de jouer. Imaginez ce cas : vous êtes engagé dans une partie d’échecs contre un ami et c’est à lui de jouer. Vous aimeriez beaucoup connaître le coup qu’il envisage et vous aimeriez connaître aussi son avis sur la position en cours. Bien entendu, vous ne le lui demanderez pas simplement parce que cela ne se fait pas ! Eh bien, devinez - lorsque vous jouez contre cet ordinateur d’échecs, vous pouvez demander ce qu’il vous plaît, et vous recevrez toutes les réponses ! En réalité, vous pourrez récolter une foison de renseignements sur le cheminement de la pensée de l’ordinateur. Il vous indiquera sur demande le coup qu’il envisage, la variante prévue après ce coup, son évaluation de la position en cours, la profondeur de sa recherche, et bien d’autres informations. Il est aisé d’imaginer à quel point l’étude de ces informations vous aidera à approfondir vos connaissances en matière d’échecs. Utilisation du Mode Info Comment fait-on pour accéder à toutes ces informations ? En utilisant n’importe quand le Mode Info ! Si vous le faites alors que l’ordinateur est en phase de réflexion, vous verrez l’affichages des informations se modifier au fur et à mesure que l’ordinateur envisage Pdf downloaded from http://www.thepdfportal.net/0d71f9df-8f27-4948-9469-8607446a2519_324239.pdf 49 FRANÇAIS Le tableau “LE MODE INFO EN UN CLIN D’OEIL” présente un résumé des divers affichages du Mode Info. 4.2 Informations sur la recherche Appuyez une deuxième fois sur la touche INFO pour obtenir des informations sur la recherche de l’ordinateur. Appuyez à coups répétés sur la touche BLACK/> pour faire défiler en avant ces quatre affichages. • Evaluation de la position en cours (basée sur une valeur de 1,0 points pour les pions ; un chiffre positif indique que les Blancs ont l’avantage). • Deux chiffres : le premier représente la profondeur de la recherche en cours, ou le nombre de demi-coups que l’ordinateur envisage. Le second représente le nombre de coups que l’ordinateur a examinés à ce stade. • Le coup présentement envisagé. • La vitesse de recherche, ou le nombre de positions (noeuds) fouillées par seconde. Appuyez sur la touche WHITE/< pour faire défiler en arrière les affichages et revoir les affichages précédents. Appuyez sur la touche CLEAR pour retourner à l’affichage normal de la pendule. LE MODE INFO EN UN CLIN D’OEIL ! INFORMATIONS SUR LES VARIANTES PRINCIPALES : info x1 • 1er coup (variante prévue) white/ black/ • 2ème coup (variante prévue) • 3ème coup (variante prévue) • 4ème coup (variante prévue) INFORMATIONS SUR LA RECHERCHE : info x2 • Evaluation de la position en cours • 2 chiffres : profondeur de la recherche + nombre de coups examinés à ce stade black/ • Coup présentement envisagé • Nombre de positions fouillées par seconde white/ 4.3 Informations inhérentes aux pendules d’échecs INFORMATIONS INHERENTES AUX PENDULES D’ECHECS : Appuyez une troisième fois sur la touche INFO pour accéder aux informations inhérentes aux pendules d’échecs. Les pendules d’échecs info x3 • Temps écoulé depuis le dernier coup surveillent les temps des deux camps. Appuyez à coups répétés sur la white/ • Temps écoulé pour l’ordinateur touche BLACK/> pour faire défiler en avant les affichages des pendules. • Temps écoulé pour le joueu • Temps écoulé depuis l’exécution du dernier coup. black/ • Temps restant pour l’ordinateur* • Temps écoulé total pour l’ordinateur. • Temps restant pour le joueur* • Temps écoulé total pour le joueur. • Temps restant pour l’ordinateur (Niveaux Blitz/Tournoi uniquement). *Niveaux Blitz/Tournoi uniquement • Temps restant pour le joueur (Niveaux Blitz/Tournoi uniquement). Appuyez sur la touche WHITE/< pour faire défiler en arrière les INFORMATIONS SUR LES COUPS : affichages et revoir les affichages précédents. Appuyez sur la touche de coups des Blancs à ce stade de info x4 • laNombre partie. CLEAR pour retourner à l’affichage normal de la pendule. white/ Les pendules s’arrêtent chaque fois que vous revenez en arrière sur un coup, vérifiez les réglages de niveaux, choisissez une option, • Coups inhérents à la partie en cours. black/ vérifiez ou établissez une position, ou éteignez l’appareil. Dans tous ces cas, toutefois, les temps demeurent conservés dans la mémoire et les pendules se remettent en fonction aussitôt que vous reprenez la clear Appuyez sur à n’importe quel moment pour sortir du partie. Chaque fois que vous changerez de niveau ou appuierez Mode Info. simultanément sur les touches CLEAR et ENTER pour réinitialiser Voir détails complémentaires à la Section 4. l’ordinateur en prévision d’une nouvelle partie, les pendules d’échecs seront remises à 0:00:00. Pdf downloaded from http://www.thepdfportal.net/0d71f9df-8f27-4948-9469-8607446a2519_324239.pdf 50 BLACK/> et WHITE/< seront utilisées pour faire tourner dans une boucle les options de chaque catégorie. Pour chaque option, le signe (+) sur l’affichage indique que l’option affichée est ACTIVEE et le signe (–) indique qu’elle est DESACTIVEE. Appuyez sur la touche ENTER pour activer ou désactiver chacune des options au fur et à mesure de leur affichage. Souvenez-vous que la pression de la touche OPTION fera tourner dans une boucle les trois catégories principales, et vous pourrez donc à tout moment passer à l’une de ces catégories. Après avoir choisi vos options, appuyez sur la touche CLEAR pour retourner au jeu normal. Une autre méthode de sélectionner une option de jeu consiste à appuyer sur les cases à options. Comme illustré au Tableau des Options, les Cases A1-H1, A2-H2 et A3-H3 peuvent être utilisées pour activer ou désactiver les options. Appuyez d’abord sur la touche OPTION pour accéder au Mode Options et prenez ensuite une pièce et appuyez sur la case requise pour accéder à une quelconque option, en utilisant le tableau comme guide. Vous constaterez qu’en appuyant à coups répétés sur une case, cette option sera tour à tour activée et désactivée, les symboles plus (+) et moins (–) indiquant respectivement l’ACTIVATION et la DESACTIVATION. Lorsque vous aurez terminé toutes vos sélections, appuyez sur la touche CLEAR pour retourner à votre partie. L’ordinateur, lors de sa mise en marche initiale, présente certaines options réglées par défaut. Les options automatiquement en vigueur au moment du démarrage initial sont accompagnées sur le tableau par le symbole plus et les options désactivées par le symbole moins. Chaque fois que vous réinitialiserez l’ordinateur en prévision d’une nouvelle partie, la plupart de vos options se transporteront sur la nouvelle partie. Il y a cependant certaines exceptions, dont la Réponse Automatique, qui est automatiquement ACTIVEE lorsque vous entamez une nouvelle partie, et l’option Jouez les Blancs en partant du haut, qui est automatiquement DESACTIVEE. 4.5 Vous avez besoin d’un conseil ? Interrogez l’ordinateur ! Au cas où vous auriez négligé cette fonction lorsqu’il en a été question à la Section 4.1, nous aimerions la signaler de nouveau - si vous avez besoin du moindre conseil concernant un coup quelconque, vous pourrez toujours le demander à l’ordinateur. Il vous suffira d’appuyer sur la touche INFO lorsque c’est à vous de jouer et l’ordinateur affichera le coup qu’il suggère pour votre camp ! 5. DES OPTIONS DIVERTISSANTES ET VARIEES Outre toutes les fonctions qui vous ont été enseignées jusqu’à présent, votre ordinateur d’échecs propose bien d’autres fascinantes options de jeu. Il sera loisible au joueur de sélectionner ces options à tout moment au cours de la partie. Elles sont décrites individuellement dans cette section et résumées au Tableau du Mode Options. Sélection des options de jeu Il existe deux méthodes de sélectionner les options, comme il est décrit ci-dessous — en utilisant les touches de jeu ou en appuyant sur les cases de l’échiquier. Le tableau “L’ESSENTIEL SUR LE MODE OPTIONS” résume les méthodes d’utilisation du Mode Options et offre une vue d’ensemble de toutes les options. 5.1 Options Mode de Fonctionnement (Cases A1-H1) Ces options influencent la manière dont vous utilisez votre ordinateur. Les Options de Jeu se répartissent en trois catégories principales : le Appuyez une fois sur la touche OPTION pour choisir les Options Mode de Fonctionnement, le Mode de Jeu, et l’Affichage Cyclique. La Mode de Fonctionnement. Servez-vous ensuite des touches BLACK/ pression de la touche OPTION fera tourner dans une boucle ces > et WHITE/< pour choisir les options de cette catégorie, et appuyez catégories. Chaque catégorie contient huit options et les touches sur la touche ENTER pour activer (+) ou désactiver (–) les options. Ou Pdf downloaded from http://www.thepdfportal.net/0d71f9df-8f27-4948-9469-8607446a2519_324239.pdf 51 FRANÇAIS 4.4 Décompte des coups/coups inhérents à la partie Appuyez une quatrième fois sur la touche INFO pour afficher le nombre de coups à ce stade de la partie. Vous pourrez ensuite appuyer à coups répétés sur la touche WHITE/< pour faire défiler en arrière tous les coups inhérents à votre partie (à concurrence de 30 demi-coups). • Nombre de coups des Blancs à ce stade de la partie • Coups inhérents à la partie en cours Appuyez à coups répétés sur la touche BLACK/> à n’importe quel moment, pour refaire défiler les coups en avant. Appuyez sur la touche CLEAR pour retourner à l’affichage normal de la pendule. c. Mode Silencieux (Case C1) Etat activé :+SIL Etat désactivé :-SIL Normalement, l’ordinateur émet un bip sonore quand il a trouvé le coup qu’il doit jouer. Il est possible de supprimer complètement ce bip sonore en activant le Mode Silencieux. appuyez simplement sur les cases à options pour activer ou désactiver les options. a. Réponse automatique (Case A1) Activée :+AUt Désactivée :-AUt Normalement, chaque fois que vous entrez un coup, l’ordinateur riposte par un déplacement de pièce. Cependant, en désactivant l’option Réponse Automatique, il vous sera possible d’entrer un à la fois n’importe quel nombre de coups, sans permettre à l’ordinateur de répondre. Vous constaterez qu’il existe plusieurs splendides façons d’utiliser cette fonction: • Jouez des parties de maîtres. Appuyez sur la touche ENTER pour voir ce que l’ordinateur ferait dans n’importe quelle position ! • Tenez un registre de vos parties d’échecs. Une fois la partie terminée, jouez n’importe quelle position pour voir comment d’autres coups ou des stratégies différentes auraient influencé l’issue. • Etudiez les variantes d’ouvertures en les entrant manuellement ! • Jouez contre un ami, l’ordinateur faisant fonction d’arbitre. Il surveillera votre jeu, contrôlant la légalité des coups et surveillant le temps des deux camps ! Lorsque vous jouez contre un tiers, si l’un des deux camps a besoin d’aide, appuyez sur la touche INFO pour voir le coup suggéré par l’ordinateur. Pour voir ce que l’ordinateur ferait dans une certaine position, appuyez sur la touche ENTER et il fera le coup suivant. Après que l’ordinateur aura joué, l’option Réponse Automatique restera désactivée et vous pourrez poursuivre votre partie. Il convient de noter également que cette option retournera automatiquement au réglage par défaut, soit l’état ACTIVE, chaque fois que vous appuierez simultanément sur les touches CLEAR et ENTER pour entamer une nouvelle partie. d. Tic-tac de pendule (Case D1) Etat activé :+tICk Etat désactivé :-tICk En activant cette option, vous déclencherez un bruit de tic-tac qui fait ressembler l’ordinateur à une véritable pendule d’échecs ! Un peu d’imagination - et vous pourrez recréer l’ambiance d’un tournoi d’échecs international dans votre propre salon ! e. L’horloge régressive (Case E1) Etat activé :+cdn Etat désactivé :-cdn En activant cette option, vous demandez à l’ordinateur d’afficher le temps restant au lieu du temps écoulé. Il convient de noter que cette option n’est disponible que combinée aux Niveaux Tournoi et Blitz. f. Essai du système (Case F1) Etat activé :+tESt Etat désactivé :-tESt L’option Essai du Système a été incluse principalement comme instrument de dépannage. Après avoir activé cette option en sélectionnant l’état ++tESt, appuyez à coups répétés sur la touche BLACK/> pour faire tourner dans une boucle tous les segments de l’affichage. Pour abandonner l’essai, appuyez simultanément sur les touches CLEAR et ENTER pour réinitialiser l’ordinateur. ATTENTION : prenez soin de ne pas activer cette option pendant une partie car le seul moyen d’abandonner l’essai est de réinitialiser l’ordinateur, et votre partie en cours risque fort d’être perdue. g. Mise hors circuit automatique (Case G1) Etat activé :+aPd Etat désactivé :-aPd L’option de mise hors circuit automatique permet d’économiser l’énergie des piles. Lorsque cette option est activée, l’ordinateur s’éteint automatiquement au bout de 15 minutes si vous n’appuyez sur aucune touche ou si aucun coup n’intervient entre-temps. Afin de reprendre la partie là où vous l’avez laissée, appuyez sur la touche GO/STOP pour rallumer l’ordinateur. Il convient de noter que l’ordinateur ne s’éteint jamais pendant qu’il est en phase de réflexion. Pdf downloaded from http://www.thepdfportal.net/0d71f9df-8f27-4948-9469-8607446a2519_324239.pdf b. Signal sonore (Case B1) Etat activé :+SNd Etat désactivé :-SNd Cette option vous permet de désactiver le bip sonore accompagnant chaque pression de touche. Le bip sonore retentira cependant toujours lorsqu’il s’agira d’un coup de l’ordinateur, d’un coup illégal ou d’une pression de touche non autorisée. 52 h. Pièces blanches en haut (Case H1) Etat activé :+tOP Etat désactivé :-tOP Souhaitez-vous vous écarter de la norme habituelle et laisser l’ordinateur jouer avec les pièces blanches en partant du haut de l’échiquier ? Essayez donc cette option intéressante ! Sélectionnez l’état +tOP au début d’une nouvelle partie. Disposez les pièces sur l’échiquier en installant les Noirs de votre côté, comme illustré sur le schéma de la présente section. Appuyez ensuite sur la touche ENTER pour entamer la partie. Observez l’ordinateur jouer le premier coup pour les Blancs en partant du haut de l’échiquier. ESSAYEZ DE JOUER LES NOIRS EN PARTANT DU BAS: VOICI LA POSITION ዛዙዘዖዕዔዓዒዜ ዊ尸尾尼尮尴尺局尶ዊ ዋ层屄层屄层屄层屄ዋ ዌ巀居巀居巀居巀居ዌ ው居巀居巀居巀居巀ው ዎ巀居巀居巀居巀居ዎ ዏ居巀居巀居巀居巀ዏ ዐ屃屁屃屁屃屁屃屁ዐ ዑ尵尿尹尯就尻尽尷ዑ ዝዙዘዖዕዔዓዒዞ Le tableau “ESSAYEZ DE JOUER LES NOIRS EN PARTANT DU BAS: VOICI LA POSITION” vous montre la disposition correcte des pièces sur l’échiquier lorsque vous utilisez cette option. Lorsque l’ordinateur joue les Blancs en partant du haut, la notation de l’échiquier est automatiquement inversée. En outre, cette option retournera au réglage par défaut, à savoir l’état DESACTIVE, chaque fois que vous entamerez une nouvelle partie. b. Mode de Jeu Facile (Case B2) Etat activé :+EASy Etat désactivé :-EASy Souhaitez-vous gagner plus fréquemment contre l’ordinateur ? Essayez d’activer le Mode de Jeu Facile, qui empêche l’ordinateur de réfléchir sur votre temps ! Ceci a pour effet d’affaiblir tous les niveaux sans pour autant affecter les chronométrages de l’ordinateur. Normalement, ainsi qu’il a été exposé à la Section 2.8, l’ordinateur réfléchit sur votre temps, mettant ainsi à profit votre propre temps de réflexion pour prévoir et élaborer ses stratégies. Cette fonction contribue à faire de votre ordinateur le redoutable adversaire que vous connaissez ! En utilisant le Mode de Jeu Facile pour affaiblir tous les niveaux, vous en élargissez en réalité l’éventail. 5.2 Options Mode de Jeu (Cases A2-H2) Ces options influencent la manière dont l’ordinateur sélectionne ses coups. Appuyez deux fois sur la touche OPTION pour choisir les Options Mode de Jeu. Utilisez ensuite les touches BLACK/> et WHITE/< pour choisir les options contenues dans cette catégorie et appuyez sur la touche ENTER pour activer (+) ou désactiver (–) les options. Ou appuyez simplement sur les cases à options pour activer ou désactiver les options. c. Mode de Jeu Aléatoire (Case C2) Etat activé :+RaNd Etat désactivé :-RaNd a. La recherche sélective (Case A2) Sélectionnez l’état +RaNd pour obtenir une plus grande variété de Etat activé : +SEL Etat désactivé : -SEL jeu. Au lieu de choisir l’unique meilleur coup, l’ordinateur choisira parmi Le programme incorporé à cet ordinateur d’échecs utilise les meilleurs coups possibles après avoir consulté son répertoire de jeu normalement un algorithme de Recherche Sélective. Ceci permet à aléatoire. l’ordinateur de voir des combinaisons dont le calcul exigerait normalement beaucoup plus de temps. La désactivation de l’option en d. Bibliothèque d’ouvertures passive (Case D2) sélectionnant l’état -SEL fait passer le programme à un puissant Etat activé :+bk:P Etat désactivé :-bk:P algorithme de Force Brute. Cette méthode de recherche minimise le En sélectionnant l’état +bk:P, vous contraignez l’ordinateur à risque d’omissions occasionnelles. donner la préférence aux ouvertures passives et aux positions fermées Il convient de noter que les Niveaux Recherche de Mats utilisent lorsqu’il doit décider de son ouverture. La sélection de cette option toujours la méthode Force Brute. Pdf downloaded from http://www.thepdfportal.net/0d71f9df-8f27-4948-9469-8607446a2519_324239.pdf 53 FRANÇAIS Lorsque l’ordinateur joue les Blancs en partant du haut (Section 5.1, Option H1), il vous faut disposer correctement les pièces ! Vous remarquerez que les Rois et les Dames sont disposés différemment et que la notation de l’échiquier est inversée. Voir détails complémentaires à la Section 5.1. 1. Appuyez à coups répétés sur 2. 3. la touche OPTION pour choisir un Mode Sélectionnez ensuite votre(vos) option(s) à l’aide du Tableau des Options ci-dessous. Il existe deux méthodes de procéder. • Faites tourner les options de ce mode dans une boucle : • Appuyez sur la touche BLACK/> pour faire tourner les options en avant >. • Appuyez sur la touche WHITE/< pour faire tourner les options en arrière <. • Lorsque votre option s’affiche, appuyez sur la touche ENTER pour l’activer (+) ou la désactiver (–). • OU repérez simplement la case de votre option et appuyez une des pièces chevillées dans le trou pour activer (+) ou désactiver (–) cette option. Enfin, appuyez sur la touche CLEAR pour clear quitter le Mode Options, en utilisant votre(vos) nouvelle(s) option(s) ! L’ESSENTIEL SUR LE MODE OPTIONS option x1 = MODE DE FONCTIONNEMENT (AUt...) option x2 = MODE DE JEU (SEL...) option x3 = MODE AFFICHAGE CYCLIQUE (rd:1...) option x4 = retour au MODE DE FONCTIONNEMENT... A4 OPTIONS AFFICHAGE CYCLIQUE -rd:1 A3 OPTIONS MODE DE JEU C4 -rd:2 B3 +SEL Réponse automatique +AUT A1 -rd:3 C3 Mode Facile Recherche sélective/ Force brute A2 OPTIONS MODE DE FONCTIONEMENT B4 D4 F4 E4 Variante Variante 2 Variante 3 Variante 4 Evaluation 1 demi-coup demi-coups demi-coups demi-coups de position -EASY B2 -RANd C2 Signal sonore +SNd B1 Jeu aléatoire Mode Silencieux -SIL C1 -rd:4 D3 -rd:E E3 G4 Profondeur & coups -rd:d F3 Noeuds fouillés -rd:n G3 H4 Temps par coup -rd:t H3 Bibliothèque Bibliothèque Bibliothèque Bibliothèque Avec/sans passive active intégrale de tournoi Bibliothèque -bk:P D2 Tic-tac de pendule -tICK D1 -bk:A Horloge régressive -cdn E1 -bk:? F2 E2 Essai du système -tESt F1 -bk:t G2 +bOOk H2 Mise hors Pièces circuit blanches en automatique haut -aPd G1 -tOP H1 Voir détails complémentaires à la Section 5. désactivera les options Bibliothèque Active et Bibliothèque de Tournoi. doit décider de son ouverture. La sélection de cette option désactivera les options Bibliothèque Passive et Bibliothèque de Tournoi. e. Bibliothèque d’ouvertures active (Case E2) Etat activé :+bk:A Etat désactivé :-bk:A f. Bibliothèque d’ouvertures intégrale (Case F2) Lorsque cette option est activée, l’ordinateur est contraint de donner Etat activé :+bk:? Etat désactivé :-bk:? préférence aux ouvertures actives et aux positions ouvertes lorsqu’il En activant l’Option Bibliothèque Intégrale, vous donnerez à Pdf la downloaded from http://www.thepdfportal.net/0d71f9df-8f27-4948-9469-8607446a2519_324239.pdf 54 Normalement, l’affichage de l’ordinateur indique le temps de jeu de celui qui est en train de jouer. Toutefois, l’ordinateur peut également afficher d’autres informations, ainsi qu’il est décrit à la Section 4 (Mode Info). L’option Affichage Cyclique fonctionne conjointement avec le Mode Info puisqu’elle vous permet de choisir parmi les affichages Info celui que vous souhaitez voir, et qu’elle fait ensuite tourner vos choix dans une boucle, à intervalles d’une seconde. Vous pouvez à votre gré activer n’importe laquelle des options Affichage Cyclique, ou toutes. Appuyez trois fois sur la touche OPTION pour choisir les Options Affichage Cyclique. Utilisez ensuite les touches BLACK/> et WHITE/< pour choisir les options que vous souhaitez voir tourner sur l’écran. Les options sont décrites ci-dessous et résumées dans le Tableau du Mode Options de la présente section. Appuyez sur la touche ENTER pour ctiver (+) ou désactiver (–) ces options. Ou appuyez simplement sur les cases à options pour activer ou désactiver les options. Si vous estimez que l’affichage des différentes informations change trop rapidement pendant qu’il tourne, appuyez sur la touche INFO pour figer l’écran. Des pressions successives de la touche INFO et des touches BLACK/> et WHITE/< vous permettront de faire manuellement tourner dans une boucle toutes les informations affichées, comme indiqué à la Section 4. Pour retourner à l’affichage cyclique, appuyez sur la touche OPTION puis sur la touche CLEAR. Quoi qu’il en soit, dès que l’ordinateur commencera à réfléchir à son prochain coup, l’affichage retournera automatiquement au Mode Cyclique. Les informations inhérentes à la partie que vous pouvez voir pendant que l’ordinateur est en phase de réflexion comprennent : • rd:1 à rd:4 = la variante prévue (jusqu’à quatre demi-coups). • rd:E = une évaluation de la position en cours. • rd:d = la profondeur de recherche de l’ordinateur et le nombre de coups examinés jusqu’à ce stade de la partie. • rd:n = le nombre de noeuds fouillés par seconde • rd:t = le temps employé par le coup jusqu’à ce stade de la partie. Si les informations requises ne sont pas disponibles, l’ordinateur affichera une série de traits (– – – – –). Une description complète de ces options ainsi que des détails sur la manière d’interpréter ces affichages vous sont présentés à la Section 4. g. Bibliothèque de tournoi (Case G2) Etat activé :+bk:t Etat désactivé :-bk:t Lorsque l’Option Bibliothèque de Tournoi est activée, l’ordinateur est contraint de toujours jouer la meilleure variante de jeu dans toutes les positions d’ouvertures. Bien qu’il en résulte un meilleur jeu, cela restreint également le choix des coups de l’ordinateur en limitant les variantes disponibles de sa bibliothèque. La sélection de cette option désactivera les options Bibliothèque Active et Bibliothèque Passive. h. Avec/sans bibliothèque (Case H2) Etat activé :+bOOk Etat désactivé :-bOOk Pour verrouiller complètement la bibliothèque d’ouvertures incorporée à votre ordinateur, réglez cette option à l’état -BOOK. Lorsque la bibliothèque est désactivée de cette façon, l’ordinateur est contraint de prendre, dès le début de la partie, le temps de réflexion nécessaire à ses coups, au lieu d’utiliser des coups répertoriés. Pour tout détail complémentaire concernant les ouvertures, voir Section 2.7. La désactivation totale de la bibliothèque aura pour effet de désactiver automatiquement les autres options bibliothèques. 5.3 Options Affichage Cyclique (Cases A3-H3) IMPORTANT : l’option Affichage Cyclique n’est activée QUE PENDANT QUE L’ORDINATEUR EST EN PHASE DE REFLEXION. Pdf downloaded from http://www.thepdfportal.net/0d71f9df-8f27-4948-9469-8607446a2519_324239.pdf 55 FRANÇAIS l’ordinateur la liberté de choisir un coup dans toute sa bibliothèque d’ouvertures incorporée, ce qui vous permettra de le voir jouer un plus grand choix de variantes tirées de sa bibliothèque. La sélection de cette option désactivera les options Bibliothèque Passive, Bibliothèque Active et Bibliothèque de Tournoi. Lorsque cette option est activée, vous pourriez voir l’ordinateur jouer des coups discutables. Ceci parce que sa bibliothèque d’ouvertures incorporée contient des réponses à certaines variantes de jeu (voire des variantes discutables) au cas où elles seraient jouées. Bien que l’ordinateur ne jouerait pas de lui-même ces variantes, il doit toutefois savoir y répondre le mieux possible. Ainsi, lorsque vous activez la bibliothèque intégrale, il est possible que l’ordinateur joue l’un de ces coups. 6. VERIFICATION/MISE EN PLACE DES POSITIONS IL EST FACILE DE VERIFIER LES PIECES ! 6.1 Vérification des positions new game Le tableau “IL EST FACILE DE VERIFIER LES PIECES !” vous offre une illustration pas-à-pas du Mode Vérification. clear enter Si vous renversez les pièces sur l’échiquier ou si vous estimez que leur position est incorrecte, l’ordinateur peut vérifier pour vous les coordonnées de toutes les pièces ! Lorsque c’est à vous de jouer, appuyez sur une des TOUCHESSYMBOLES (&, %, $, #, @, ou !). L’ordinateur vous indique les coordonnées de la première pièce de ce type sur l’échiquier - l’écran affiche le symbole de la pièce, le voyant de la couleur et la case. Appuyez de nouveau sur cette même TOUCHE-SYMBOLE pour voir les coordonnées de la deuxième pièce de ce même type. Toutes les pièces blanches seront montrées d’abord, suivies des pièces Noires. Lorsqu’il n’y aura plus de pièces de ce type sur l’échiquier, le symbole de la pièce restera seul affiché. Souhaitez-vous vérifier d’autres pièces ? Il suffit de recommencer la procédure ci-dessus en utilisant les autres TOUCHES-SYMBOLES et vous pourrez, si vous le souhaitez, vérifier l’échiquier intégral. Appuyez sur la touche CLEAR pour retourner au mode de jeu normal. 1. Appuyez simultanément sur les touches CLEAR et ENTER pour réinitialiser l’ordinateur en prévision d’une nouvelle partie. Affichage : [ 0:00:00. 2. Appuyez sur le CAVALIER. Display: [,@,b1 (le premier Cavalier Blanc). 3. Appuyez de nouveau sur le CAVALIER. Affichage : [,@,G1 (le deuxième Cavalier Blanc). 4. Appuyez de nouveau sur le CAVALIER. Affichage : ],@,b8 (le premier Cavalier Noir). 5. Appuyez de nouveau sur le CAVALIER. Affichage : ],@,g8 (le deuxième Cavalier Noir). clear 6.2 Modification et mise en place des positions Le tableau “ESSAYEZ LE MODE POSITIONS” vous donne une idée du fonctionnement de cette fonction. 6. Appuyez de nouveau sur le CAVALIER. Affichage : @ (il n’y a plus de cavaliers sur l’échiquier). 7. Répétez cette procédure pour vérifier d’autres pièces! Appuyez sur la touche CLEAR pour quitter le Mode Vérification. Voir détails complémentaires à la Section 6.1. Le Mode Positions est une fascinante fonction qui vous permet l’écran affiche le type de pièce et sa couleur, accompagnés du d’établir des positions particulières à partir desquelles vous pouvez signe moins (–) et des coordonnées de la case. jouer, ou des problèmes que l’ordinateur doit résoudre. Attention : tous • Pour déplacer une pièce sur l’échiquier, appuyez la pièce sur sa les coups antérieurs de la partie en cours s’effaceront de la mémoire case d’origine, retirez-la, puis posez-la sur sa case de destination. de l’ordinateur si vous modifiez les positions pendant une partie. Un signe moins (–) apparaîtra pour la première case, et un signe Appuyez sur la touche POSITION pour accéder au Mode Positions. plus (+) pour la seconde. L’affichage indique -POS-. Vous pouvez modifier ou établir une posi• Pour ajouter une pièce sur l’échiquier, appuyez d’abord sur la tion chaque fois que c’est à vous de jouer. Après avoir établi votre TOUCHE-SYMBOLE de la pièce en question (&, %, $, #, @, ou nouvelle position, appuyez sur la touche CLEAR pour quitter le Mode !). Assurez-vous que l’écran affiche bien la couleur exacte pour la Positions. pièce que vous voulez ajouter. Sinon, appuyez sur les touches • Pour retirer une pièce de l’échiquier, appuyez cette pièce BLACK/> ou WHITE/< pour changer la couleur. Une fois que légèrementfrom sur sa case puis retirez-la. Vous remarquerez que Pdf downloaded http://www.thepdfportal.net/0d71f9df-8f27-4948-9469-8607446a2519_324239.pdf 56 l’écran affichera la pièce et la couleur requises, placez la pièce sur la case choisie et appuyez dessus légèrement. L’écran affiche alors un signe plus (+) et les coordonnées de cette case. Pour ajouter une autre pièce du même type, il suffit d’appuyer sur une autre TOUCHE-SYMBOLE et de suivre la procédure décrite ci-dessus. • Pour vider l’échiquier, appuyez sur la touche ENTER lorsque vous êtes en Mode Positions. L’écran affichera le symbole _ représentant l’échiquier vide. Appuyez de nouveau sur la touche ENTER pour confirmer votre décision de vider l’échiquier. Ajoutez ensuite les pièces de la manière décrite ci-dessus. Si vous ne souhaitez pas vider l’échiquier, appuyez sur la touche CLEAR pour refuser. Cette fonction peut s’avérer utile lorsque vous souhaitez établir une position avec quelques pièces seulement, où il serait plus facile de partir d’un échiquier vide ! • Une fois que vous aurez modifié les positions sur l’échiquier de la manière décrite ci-dessus, assurez-vous que la couleur affichée à l’écran soit bien celle du camp dont c’est le tour de jouer. Le cas échéant, changez de couleur en appuyant sur les touches BLACK/> ou WHITE/<. • Pour quitter le Mode Positions, appuyez sur la touche CLEAR. Vous retournerez au jeu normal, à partir de votre nouvelle position sur l’échiquier. Il convient de noter que la procédure décrite ci-dessus vous permettra d’établir n’importe quelle position autorisée. L’ordinateur ne vous permettra pas d’établir une position illégale, telle que, par exemple, celle où le nombre de pièce est supérieur au nombre prescrit pour une partie normale, ou celle où un Roi est en échec et il lui est interdit de bouger. Dans de tels cas, l’ordinateur émettra simplement un bip sonore lorsque vous appuierez sur la touche CLEAR et il ne vous sera pas permis de quitter le Mode Positions. Vérifiez éventuellement la position à l’aide des TOUCHES-SYMBOLES et corrigez la position (en ajoutant une pièce, en retirant une pièce ou en déplaçant une pièce disposée erronément). Appuyez ensuite sur la touche CLEAR pour quitter le Mode Positions. ESSAYEZ LE MODE POSITIONS clear enter 1. Appuyez simultanément sur les touches CLEAR et ENTER pour réinitialiser l’ordinateur en prévision d’une nouvelle partie. Affichage : [ 0:00:00 E2 2. Appuyez sur la touche POSITION pour accéder au Mode Positions. Affichage : -POS-. 3. Appuyez le pion Blanc sur la case E2 et retirezle de l’échiquier. Affichage : [,!,-E2. E3 4. Appuyez ce même pion sur la case E3 pour l’ajouter à l’échiquier. Affichage : [,!,+E3. D8 5. Appuyez la Dame Noire sur la case D8 et retirez-la de l’échiquier. Affichage : ],%,-D8. H5 6. Appuyez cette même Dame sur la case H5 pour l’ajouter à l’échiquier. Affichage : ],%,+H5. position white/ clear 7. Appuyez sur la touche WHITE/< pour changer de couleur en prévision du prochain coup. 8. Appuyez sur la touche CLEAR pour quitter le mode. Voir détails complémentaires à la Section 6.2. Pdf downloaded from http://www.thepdfportal.net/0d71f9df-8f27-4948-9469-8607446a2519_324239.pdf 57 FRANÇAIS new game 7.3 Fiche Technique Touches : Affichage LCD : Piles : Consommation d’énergie : Dimensions : Poids : 7. DETAILS TECHNIQUES 7.1 La Fonction ACL Les ordinateurs se “verrouillent” parfois sous l’effet d’une décharge d’électricité statique ou d’autres perturbations électriques. Si cela se produit, il conviendra d’ôter les piles et d’enfoncer pendant au moins une seconde, une épingle ou tout autre objet pointu dans l’orifice ACL situé à la base de l’appareil. Ceci réinitialisera l’appareil. 16 48 segments 3 piles “AA”/AM3/R6 (de 1,5V) 330 mW maximum 335 x 302 x 35 mm 975 g (sans piles) Conservez les présentes informations pour toute référence ultérieure. 7.2 Entretien Votre ordinateur d’échecs est un appareil électronique de précision. Il doit être manipulé avec précaution et ne doit pas être soumis à des températures extrêmes ou exposé à l’humidité. Veillez à ôter les piles avant de nettoyer l’appareil. N’utilisez aucun produit ou liquide chimique pour le nettoyer, car ceci risquerait d’endommager les surfaces en plastique. Les piles faibles doivent être remplacées au plus tôt, car elles risquent de fuir et d’endommager l’appareil. Il convient de noter également les consignes suivantes concernant l’utilisation de piles. Avertissement : utilisez exclusivement des piles alcalines ou au carbone-zinc. Ne mélangez pas des piles de types différents, ou des piles neuves et usagées. Ne rechargez pas de piles non rechargeables. Utilisez exclusivement des piles du même type que les piles recommandées ou de type équivalent. Veillez à respecter la polarité exacte lors de l’installation des piles. Les piles vides seront retirées sans tarder de l’appareil. Ne court-circuitez pas les bornes d’alimentation. Saitek se réserve le droit d’apporter, sans préavis, toute modification technique susceptible d’améliorer ses produits. Pdf downloaded from http://www.thepdfportal.net/0d71f9df-8f27-4948-9469-8607446a2519_324239.pdf 58 GUIDE DE DEPANNAGE CAUSES POSSIBLES QUE FAIRE ? • Les piles ne sont pas installées correctement. • Les piles sont faibles ou gâtées. • Une décharge électrostatique ou une perturbation électrique a provoqué le verrouillage. • Réinstallez les piles en veillant à respecter la polarité exacte. • Remplacez les piles. • Appuyez sur l’orifice ACL pour réinitialiser l’ordinateur (voir Section 7.1). L’affichage est difficile à lire. • Les piles sont faibles ou gâtées. • Remplacez les piles par des piles alcalines fraîches. L’ordinateur ne joue pas de coup. • L’option Réponse Automatique est peut-être désactivée. • L’ordinateur ne répondra automatiquement que si l’option Réponse Automatique est activée (voir Section 5.1.). • Pour interrompre l’ordinateur, appuyez sur la touche ENTER. • Le temps de réflexion de l’ordinateur est long à un niveau élevé. • Est-ce à vous de jouer ? Votre Roi est-il en échec ? Votre coup mettra-t-il votre Roi en échec ? Etes-vous engagé dans une manoeuvre de roque incorrecte? Etes-vous en train de vous déplacer vers une case illégale ? • L’ordinateur réfléchit (sa diode de couleur clignote). • Revoyez les règles du jeu d’échecs. Vérifiez les positions sur l’échiquier pour vous assurer qu’elles sont correctes (voir Section 6.1). Un message d’erreur s’affiche lorsque vous appuyez sur une case. • Vous n’avez pas correctement enregistré le dernier coup de l’ordinateur (case de départ ou d’arrivée erronée). • Vérifiez l’affichage et appuyez sur la case correcte pour conclure le coup de l’ordinateur. lI vous est impossible de quitter le Mode Positions en utilisant la touche CLEAR - l’ordinateur émet seulement un bip sonore. • Vous avez établi une position illégale. Un Roi est peut-être en échec, vous avez peut-être trop de pions sur l’échiquier, etc. • Vérifiez votre position et apportez les modifications qui s’imposent (voir Section 6.2). Appuyez ensuite de nouveau sur la touche CLEAR pour quitter le Mode Positions. L’écran affiche _. • Vous êtes en Mode Positions et vous avez appuyé sur la touche ENTER pour vider l’échiquier. • Pour vider l’échiquier, appuyez de nouveau sur la touche ENTER; pour annuler, appuyez sur la touche CLEAR (voir Section 6.2). L’ordinateur semble jouer des coups illégaux. • L’ordinateur a fait un coup spécial comme une prise en passant, une manoeuvre de roque ou une promotion de pion. • La position sur l’échiquier n’est pas correcte. • Les piles commencent à s’affaiblir. • Revoyez les règles. Vérifiez les positions (voir Section 6.1). L’ordinateur joue de manière instantanée ou irrationnelle. • L’ordinateur est peut-être réglé sur un des Niveaux Débutant ou Entraînement inférieurs, où il joue avec rapidité et joue un jeu plus faible qu’à l’accoutumée car sa profondeur de recherche est limitée. • Les piles commencent à s’affaiblir. • Appuyez sur la touche LEVEL pour voir le niveau choisi (voir Section 3). Passez à un niveau différent, si vous le souhaitez. L’ordinateur est muet. • Le Mode Silencieux est peut-être activé. • Vérifiez les réglages des options (voir Section 5.1). L’ordinateur n’accepte pas votre coup. • Pour interrompre l’ordinateur, appuyez sur la touche ENTER. • Vérifiez les positions de la manière décrite à la Section 6.1. • Remplacez les piles par des piles alcalines fraîches. • Remplacez les piles par des piles alcalines fraîches. Pdf downloaded from http://www.thepdfportal.net/0d71f9df-8f27-4948-9469-8607446a2519_324239.pdf 59 FRANÇAIS SYMPTOMES L’ordinateur ne réagit pas, se comporte de façon étrange ou se “verrouille” en cours de partie. INIZIO RAPIDO Per cominciare subito a giocare senza dover prima leggere tutto il manuale, seguite questi semplici passi di Inizio Rapido! 1 Aprite il comparto pile alla base dell’apparecchio e inserite 3 pile tipo “AA” (AM3/R6). Abbiate cura di osservare la corretta polarità. Reinserite il coperchio. 2 Premete GO/STOP per accendere il computer. Se il computer non risponde, riattivatelo come descritto nella Sezione 7.1. 3 Ponete i pezzi nella posizione iniziale di gioco, i pezzi Bianchi dalla vostra parte, come mostrato in questo diagramma. 4 Per azzerare il computer e prepararlo ad una NUOVA PARTITA di scacchi, premete simultaneamente i tasti CLEAR e ENTER. 5 Fate le mosse sulla scacchiera premendo i pezzi dolcemente verso il basso sia sul quadratino di origine che su quello di destinazione ad ogni mossa. 6 Appena il computer fa una mossa, questa viene segnalata sullo schermo. Vedrete il pezzo, insieme al suo colore ed alle due case di origine e di destinazione della mossa del computer. In questo esempio, il computer vuole muovere il suo pedone Nero da E7 a E5. Premete il pedone del computer sulla Casa E7, poi sulla Casa E5. Questo completa la mossa del computer, e ora tocca ancora a voi. Fate la vostra prossima mossa come descritto sopra. Divertitevi! 3 x AA/AM3/R6 go/stop ዛዒዓዔዕዖዘዙዜ ዑ尷尽尻就尯尹尿尵ዑ ዐ屁屃屁屃屁屃屁屃ዐ ዏ巀居巀居巀居巀居ዏ ዎ居巀居巀居巀居巀ዎ ው巀居巀居巀居巀居ው ዌ居巀居巀居巀居巀ዌ ዋ屄层屄层屄层屄层ዋ ዊ尶局尺尴尮尼尾尸ዊ ዝዒዓዔዕዖዘዙዞ Premete GO/STOP in qualsiasi momento se volete disattivare il computer. La vostra posizione del momento e la posizione di gioco (fino a 30 mosse singole) verrà memorizzata dal computer. Quando lo riaccenderete, potrete continuare a giocare dal punto in cui avevate interrotto. new game clear enter Pdf downloaded from http://www.thepdfportal.net/0d71f9df-8f27-4948-9469-8607446a2519_324239.pdf 60 1. COMPARTO DI DEPOSITO PEZZI: Per riporre i pezzi e depositarvi quelli catturati. 2. SCHERMO: Usato per mostrare le mosse e le informazioni di mossa durante una partita. Usato anche per la selezione di livelli ed opzioni, verifica dei pezzi, predisposizione di posizioni, ed altro. 3. SCACCHIERA SENSIBILE: Ogni casa contiene un sensore che registra il movimento del pezzo. Alcune case possono anche essere usate all’interno della Selezione Livello e Selezione Opzione per selezionare livelli ed opzioni. 4. COMPARTO PILE: Nella base dell’apparecchio. Usate tre pile “AA” (AM3/R6) alcaline. 5. TASTI DI GIOCO • TASTI DEI SIMBOLI DEI PEZZI: Usati in Stato Verifica e Posizione. Anche usati per la promozione dei pedoni. • GO/STOP: Premetelo per accendere e spegnere l’apparecchio. • INFO: Premetelo per entrare in Stato Info; quando si sia dentro questa condizione operativa, premetelo per passare tra i vari gruppi di informazione principali. Premetelo quando tocca a voi muovere per ricevere un suggerimento. • LEVEL: Premetelo per entrare in Selezione Livello; quando si sia dentro questa condizione operativa, premetelo per saltare otto livelli per volta. < e BLACK/> >: Premeteli per variare livello di • TASTI WHITE/< difficoltà uno per uno quando si sia in Selezione Livello, e per passare tra le varie opzioni quando si sia in Selezione Opzione ed in Stato Info. Anche usati per selezionare il colore quando in Stato Posizione. • TAKE BACK: Premetelo per ritirare una mossa singola (di qualunque dei due lati). Potete ritirare fino a 30 mosse singole. • OPTION: Premetelo per entrare in Selezione Opzione, quando si sia dentro questa condizione operativa, premetelo per passare tra i vari gruppi di opzioni principali. • CLEAR: Premetelo simultaneamente con ENTER per ricominciare una nuova partita. Premetelo per uscire dalla Selezione Opzioni e dagli Stati Verifica e Posizione. Premetelo per pulire una schermata Info e per cancellare una richiesta di Clear Board quando si sia in Stato Posizione. Premetelo per cancellare la Selezione Livello se decidete di non cambiare (ma non quando abbiate premuto le case per cambiare livello: in tal caso CLEAR attiverà il nuovo livello, così come farebbe ENTER). • ENTER: Premetelo insieme a CLEAR per ricominciare una nuova partita. Premetelo per scambiare lato di gioco con il computer, e premetelo quando il computer sta pensando per spingerlo a muovere. Premetelo per attivare o disattivare la selezione di opzioni, e per uscire dalla Selezione Livello dopo aver selezionato un nuovo livello di gioco. Premetelo per pulire la scacchiera quando in Stato Posizione, e premetelo nuovamente per confermare. • POSITION: Premetelo per entrare in Stato Posizione. 6. ACL (Riattivazione): Nella base dell’apparecchio. Usato per eliminare la scarica statica dopo l’inserimento di nuove pile. Pdf downloaded from http://www.thepdfportal.net/0d71f9df-8f27-4948-9469-8607446a2519_324239.pdf 61 ITALIANO TASTI E CARATTERISTICHE INDICE INIZIO RAPIDO TASTI E FUNZIONI INTRODUZIONE 1. COMINCIAMO! 1.1 Primo, Installate le Pile 1.2 Pronti a Giocare? Ecco come Muovere! 1.3 Ora Tocca al Computer 1.4 Avete Cambiato Idea? Ritirate la Mossa 1.5 La Partita è Terminata? Perché Non Farne Un’altra 1.6 Troppo Facile/Difficile? Cambiate il Livello 2. ULTERIORI FUNZIONI DA ESPLORARE 2.1 Chi Muove? Controllate lo Schermo 2.2 Mosse Speciali 2.3 Mosse Illecite 2.4 Scacco, Scaccomatto e Patta 2.5 Interrompere la Ricerca del Computer 2.6 Scambiare di Lato con il Computer 2.7 Aperture Incorporate 2.8 Pensare Durante il Tempo Dell’avversario 2.9 Memoria di Partita 3. I LIVELLI DI GIOCO Scegliere un Livello di Gioco 3.1 Livelli di Gioco Normali (Case A1-G2) 3.2 Livello Infinito (Casa H2) 3.3 Livelli di Torneo (Casa A3-H3) 3.4 Livelli Blitz (Case A4-H4) 3.5 Livelli per Principianti (Case A5-H5) INTRODUZIONE 3.6 Livelli di Ricerca del Matto (Case A6-H6) 3.7 Livelli di Allenamento (Case A7-H8) 4. STATO INFO: GUARDATE E IMPARATE Uso dello Stato Info 4.1 Variazione Principale 4.2 Informazione di Ricerca 4.3 Informazione di Orario 4.4 Conteggio Mosse/Mosse di Partita 4.5 Volete un Suggerimento? Basta Chiedere! 5. OPZIONI PER AVERE PIÜ DIVERTIMENTO E VARIETÀ Selezione delle Opzioni di Gioco 5.1 Opzioni di Stato Operativo 5.2 Opzioni di Gioco 5.3 Opzioni di Rotazione della Schermata 6. VERIFICARE/DECIDERE POSIZIONI 6.1 Verificare Posizioni 6.2 Cambiare e Decidere Posizioni 7. DETTAGLI TECNICI 7.1 La Funzione ACL 7.2 Cure e Manutenzione 7.3 Specifiche Tecniche GUIDA ALLA SOLUZIONE DI PROBLEMI Pronti ad entrare nell’eccitante mondo degli scacchi al computer? Siete nel posto giusto! Il vostro nuovo computer vi offre così tante opzioni di gioco, livelli di gioco, e funzioni speciali, che d’ora in poi non potrete più avere la stessa opinione del gioco degli scacchi! L’Inizio Rapido che trovate all’inizio del manuale vi permetterà di giocare subito, ed avrete più dettagli sui comandi di base nella Sezione 1. Dopo aver imparato le nozioni basilari, assicuratevi di andare avanti e leggere il resto del manuale, anche se di solito non vi piace troppo leggere questo tipo di cose. Scoprirete che questo computer scacchistico ha una bella varietà di altre funzioni interessanti e divertenti che vi lasceranno a bocca aperta - ve lo garantiamo! Il vostro nuovo computer conosce e applica tutte le regole degli scacchi, potete essere sicuri che non vi ingannerà. Per coloro che non hanno mai giocato prima abbiamo incluso una breve sintesi delle regole, così da farvi iniziare comunque. Per avere informazioni più dettagliate, potreste visitare la vostra biblioteca locale che avrà sicuramente molti libri sul gioco degli scacchi. 1. COMINCIAMO! 1.1 Primo, installate le pile Il vostro computer fa uso di tre pile “AA” (Tipo AM3/R6). Inserite le pile nel comparto situato nella base dell’apparecchio, osservando la corretta polarità. Usate pile alcaline nuove per assicurarne una vita utile più lunga. Accendete il computer premendo GO/STOP, un suono di avviso vi avvertirà che potete cominciare la partita. Se il computer non emette tale suono (una scarica statica può averne causato il blocco), utilizzate l’estremità di una graffetta o un altro oggetto appuntito per esercitare una pressione nel foro segnato ACL nella base dell’apparecchio per almeno un secondo. Questo riattiverà il computer. Un suggerimento: Per conservare l’energia ed estendere la vita utile delle pile, attivate l’Opzione di Spegnimento Automatico (vedere Sezione 5.1). Pdf downloaded from http://www.thepdfportal.net/0d71f9df-8f27-4948-9469-8607446a2519_324239.pdf 62 1.2 Pronti a giocare? Ecco come muovere! premetelo poi sulla casa di origine per completare il ritiro della mossa. Ripetete ciò quante volte volete, potete ritrattare fino a 30 mosse singole (o 15 per lato). Per ricominciare a giocare in qualunque punto, semplicemente fate una mossa. Dopo aver ritirato una cattura e/o una promozione di pedone, il computer controllerà che i pezzi siano stati messi sulla scacchiera correttamente, e vi ricorderà di mettere il pezzo catturato o il pedone promosso sulla scacchiera. Il simbolo del pezzo e la sua casa verranno mostrati, e la luce della casa interessata si accenderà. Ponete il pezzo indicato sulla scacchiera e premetelo sulla casa indicata per completare il ritiro. Nel corso di un Arrocco, seguite prima i passi del ritiro di una mossa descritti sopra, per il Re, poi fate lo stesso per la Torre per completare il ritiro. Bene, ora è il momento di iniziare una partita! Molto facile, seguite questi tre passi: a. Premete GO/STOP per accendere il computer, se non l’avete già fatto. b. Premete i tasti CLEAR e ENTER insieme per riattivare il computer per una nuova partita. Mettete i pezzi nella posizione di partenza, i Bianchi dalla vostra parte, come mostrato in Inizio Rapido. c. Per fare una mossa, premete dolcemente verso il basso il pezzo che volete muovere fino a che non sentite un suono. La tastiera sensibile riconosce il pezzo automaticamente. Non ci credete? Guardate lo schermo, che è improvvisamente pieno d’informazioni - mostra il vostro pezzo, il colore del pezzo e la casa che avete appena premuto. d. Prendete il pezzo e premetelo gentilmente verso il basso nel buco della casa dove volete muovere. Un secondo suono è la conferma del computer che ha riconosciuto la vostra mossa. Ecco fatto avete appena completato la vostra prima mossa della partita. La prossima tocca al computer. Vi accorgerete che all’inizio del gioco la risposta del computer è spesso istantanea, invece di richiedere tempo per pensare. Ciò accade perché esegue mosse che sono memorizzate in un libro incorporato di mosse d’apertura (per maggiori dettagli, vedere Sezione 2.7). Ogni qualvolta finiate una partita (o decidiate di interromperne una) è facile ricominciare da capo! Potete riattivare il computer premendo i tasti ENTER e CLEAR insieme. Un suono di Nuova Partita significa che il computer è pronto. Il computer userà il livello di difficoltà che era stato selezionato prima, ma potete cambiarlo, se lo volete, come spiegato nella Sezione 3. IMPORTANTE: Riattivare il computer per una nuova partita elimina la partita in corso dalla memoria - state attenti a non premere questi tasti per sbaglio! 1.3 Ora tocca al computer 1.6 Troppo facile/difficile? Cambiate il livello Quando il computer muove, suona e fa vedere la mossa. Controllatelo sullo schermo — vedrete le case di origine e di destinazione della mossa del computer, insieme al colore ed al tipo di pezzo da muovere. Premete il pezzo indicato sulla casa di origine fino a che non udite un suono. Muovete il pezzo fino alla casa indicata di destinazione e premetevelo sopra per completare la mossa del computer. E tocca di nuovo a voi… Quando il computer viene acceso, è sempre selezionato il Livello di Gioco Normale D1 (5 secondi per mossa). Ovviamente voi potete scegliere uno dei 64 livelli a disposizione - forse li vorrete provare tutti! Per una loro descrizione e per le indicazioni su come cambiare livello, vedete la Sezione 3. 1.4 Avete cambiato idea? Ritirate la mossa 2. ULTERIORI FUNZIONI DA ESPLORARE Quando giocate contro questo computer, niente è “fissato per 2.1 Chi muove? Controllate lo schermo sempre” - potete cambiare idea o decidere di giocare una mossa Quando il computer gioca col Nero, fa lampeggiare un quadratino differente quando volete! Ogni volta che tocca a voi muovere, nero sullo schermo mentre pensa. Dopo aver mosso, un quadratino semplicemente premete TAKE BACK, e lo schermo mostrerà la mossa bianco viene mostrato ad indicare che è ora il turno del Bianco. Questa da ritirare. Premete il pezzo indicato sulla casa di destinazione, Pdf downloaded from http://www.thepdfportal.net/0d71f9df-8f27-4948-9469-8607446a2519_324239.pdf 63 ITALIANO 1.5 La partita è terminata? Perché non farne un’altra Promozione del pedone: Quando promuovete un pedone, premete innanzitutto il pedone sulle case di origine e destinazione, come sempre. Poi, premete il TASTO DEL SIMBOLO DEL PEZZO corrispondente alla promozione desiderata (%, $, #, o @). Il computer riconoscerà immediatamente il vostro nuovo pezzo, lo mostrerà brevemente e comincerà subito a pensare una nuova mossa. Ricordate di sostituire il pezzo sulla scacchiera! Quando il computer promuove un pedone, lo schermo mostra insieme il pedone ed il pezzo promosso. Non dimenticate di sostituire il pedone del computer col suo nuovo pezzo. ESEGUIRE LA MOSSA DEL COMPUTER: UN ESEMPIO Dopo che il computer ha mostrato la propria mossa, tocca a voi metterla in atto sulla scacchiera! Qui, lo schermo indica che il computer vuole muovere il suo pedone Nero (]!) da d7 a d5. Sollevate il pedone d7 (indicato dalle luci di scacchiera) e premetelo dolcemente sulla Casa d7. Le luci di scacchiera mostrano ora la Casa d5. Premete il pedone sulla Casa d5 per completare la mossa del computer. Ora tocca di nuovo a voi! d7-d5 ዛዒዓዔዕዖዘዙዜ ዑ尷尽尻就尯尹尿尵ዑ ዐ屁屃屁屃屁屃屁屃ዐ ዏ巀居巀居巀居巀居ዏ ዎ居巀居巀居巀居巀ዎ ው巀居巀层巀居巀居ው ዌ居巀居巀居巀居巀ዌ ዋ屄层屄居屄层屄层ዋ ዊ尶局尺尴尮尼尾尸ዊ ዝዒዓዔዕዖዘዙዞ ዛዒዓዔዕዖዘዙዜ ዑ尷尽尻就尯尹尿尵ዑ ዐ屁屃屁巀屁屃屁屃ዐ ዏ巀居巀居巀居巀居ዏ ዎ居巀居屃居巀居巀ዎ ው巀居巀层巀居巀居ው ዌ居巀居巀居巀居巀ዌ ዋ屄层屄居屄层屄层ዋ ዊ尶局尺尴尮尼尾尸ዊ ዝዒዓዔዕዖዘዙዞ 2.3 Mosse illecite Il vostro computer non accetterebbe mai mosse illecite! Se tentate una simile mossa, il computer emetterà un doppio suono basso, e lo schermo indicherà la casa di origine del pezzo. Potete allora muovere lo stesso pezzo ad un’altra casa, oppure porre indietro il pezzo sulla casa di origine e muovere un altro pezzo. Se eseguite una mossa del computer in modo scorretto, vedrete un messaggio di errore. Ciò indica che voi state cercando di muovere il pezzo sbagliato o che state muovendo un pezzo del computer ad una casa sbagliata. Se il computer vuole muovere il suo Pedone da D7 a D5, per esempio, e voi lo premete su D7 e poi su D6, lo schermo mostrerà Er:d5 in modo conciso, mettendo in evidenza l’errore. Lo schermo tornerà poi a mostrare la mossa corretta (D7-D5) e attenderà che premiate su D5 e completiate la mossa. Se premete su di un pezzo e la casa di origine appare sullo schermo, ma voi decidete di non fare la mossa, premete semplicemente sulla stessa casa per cancellare la mossa. Fate poi un’altra mossa. Se cambiate idea dopo aver completato una mossa, potete ritirarla come descritto nella Sezione 1.4. funzione vi permette di capire immediatamente se il computer sta pensando e a chi tocca muovere. 2.2 Mosse speciali Catture: Per catturare un pezzo, premete sul pezzo che volete muovere, poi rimuovete dalla scacchiera il pezzo catturato, e premete successivamente il pezzo da voi mosso sulla casa, ora libera, del pezzo catturato. Le catture sono mostrate come in E5•F6. 2.4 Scacco, scaccomatto e patta Cattura En passant: Durante questo tipo di cattura, il computer Quando un Re è sotto scacco, il computer inizialmente mostra la continua a mostrare la vostra mossa fino a che non premete sul pedone mossa come di solito. Dopo che la mossa è stata effettuata, CHECK catturato in questione e lo rimuovete dalla scacchiera. lampeggia sullo schermo per pochi secondi, insieme alla mossa di Arrocco: Il computer riconosce automaticamente le manovre di scacco. Lo schermo tornerà poi a mostrare l’orologio. arrocco appena dopo il movimento del Re. Dopo che avete premuto sul Se il computer scopre un matto forzato contro il proprio avversario, Re sulle sue due case di origine e destinazione, il computer mostra la all’inizio muove come di solito. Dopo che la mossa è stata completata vostra mossa fino a che non premete la torre sulle sue case di origine sulla scacchiera il computer lampeggia un segnale di matto per diversi e destinazione per completare la mossa. Notate che un arrocco di Re secondi insieme alla mossa (ad es. =in 2 per un matto in due mosse). è mostrato come 0-0, ed uno di Regina come 0-0-0. Pdf downloaded from http://www.thepdfportal.net/0d71f9df-8f27-4948-9469-8607446a2519_324239.pdf 64 Lo schermo torna poi a mostrare l’orologio. Quando una partita termina in scaccomatto, lo schermo mostra il segnale MATE (insieme alla segnalazione della mossa di scaccomatto) per un po’ di tempo dopo che la mossa è stata fatta. Lo schermo torna poi all’orologio. Il computer riconosce patte da stallo, da tripla ripetizione, e la regola delle cinquanta mosse. Dopo che una patta è stata raggiunta, lo schermo mostra la scritta EnD (insieme alla mossa di patta o all’orologio) per poco tempo dopo che la mossa è stata fatta. Lo schermo torna poi all’orologio. 2.5 Interrompere la ricerca del computer Vi sembra che il computer impieghi troppo tempo per muovere? Potete interromperlo in ogni momento! Semplicemente premete ENTER mentre il computer pensa, e ciò lo bloccherà e porterà a compiere la migliore mossa che è stato capace di trovare fino a quel punto. Questa funzione può essere molto utile per i livelli più alti, quando il computer può richiedere molto tempo per pensare, e per il Livello Infinito, quando il computer pensa senza limiti di tempo a meno che voi non lo fermiate. Al livello di Ricerca del Matto, premere ENTER non obbliga il computer a fare una mossa. Se lo fate, il computer mostrerà – – – – – per indicare che è stato interrotto prima che potesse dire come dar matto. Per continuare il gioco, selezionate un altro livello. 2.8 Pensare durante il tempo dell’avversario Mentre giocate, potreste notare che a volte il computer risponde alle vostre mosse immediatamente, anche nel mezzo di una partita giocata a livelli alti. Questo accade perché il computer pensa mentre voi state pensando alla vostra mossa e pianifica la propria strategia. Cerca di indovinare la mossa che è più probabile che facciate, e calcola poi le proprie risposte per tale mossa mentre voi state ancora pensando. Se il computer ha indovinato, non c’è ragione per lui di continuare a pensare — fa immediatamente la mossa che ha già trovato! Per disattivare questa funzione, attivàte l’opzione Gioco Facile, come descritto nella Sezione 5.2. 2.6 Scambiare di lato con il computer Per scambiare lato con il computer basta che premiate ENTER quando è il vostro turno - il computer farà la prossima mossa dal vostro lato. Cambiate lato quante volte volete. Volete guardare il computer giocare a scacchi contro sé siesso? Premete CLEAR e ENTER insieme per iniziare una nuova partita, poi premete ENTER. Premete ENTER dopo ogni mossa — guardate mentre gioca per entrambi i lati della scacchiera, una mossa dopo l’altra. Studiate le sue strategie, e potrete migliorate il vostro stesso gioco. 2.9 Memoria di partita Potete interrompere una partita in qualunque momento premendo GO/STOP. La partita verrà allora sospesa, e il computer memorizzerà la vostra posizione ed il gioco (fino a 30 mosse singole). Quando tornate alla partita, potete riprenderla da dove avevate interrotto. 3. I LIVELLI DI GIOCO Il vostro computer scacchistico offre 64 livelli diversi di gioco. Quando scegliete un livello di gioco, ricordate che quando il computer ha più 2.7 Aperture incorporate tempo per pensare diventa più forte e gioca meglio, così come un All’inizio di una partita il computer risponde alle mosse quasi giocatore reale. Per un colpo d’occhio di tutti i livelli, fate riferimento alla istantaneamente in molti livelli. Questo accade perché usa mosse Tabella Livelli. I livelli vengono anche descritti individualmente in questa memorizzate nel suo “libro” incorporato di mosse d’apertura. Questo sezione. libro memorizza moltissime aperture e posizioni di grandi maestri degli Pdf downloaded from http://www.thepdfportal.net/0d71f9df-8f27-4948-9469-8607446a2519_324239.pdf 65 ITALIANO scacchi. Se la posizione nella quale siete è nel libro, il computer non pensa alla mossa ma usa direttamente una mossa memorizzata. Una caratteristica particolare del libro del vostro computer è la capacità di gestire trasposizioni. Una trasposizione ha luogo quando una posizione raggiunta con un certo numero di mosse può essere raggiunta anche con le stesse mosse fatte in un altro ordine. Il Gestore Automatico di Trasposizioni integrato del vostro computer si destreggia tra questi casi con facilità. È anche inclusa una selezione unica di libri a scelta dell’utente, che vi permette di scegliere tra diversi tipi di libri d’aperture, e anche di chiudere i libri se lo desiderate. Per maggiori dettagli vedete la Sezione 5.2. azzerato e la ricerca presente viene terminata. • Se premete LEVEL mentre il computer pensa ma il livello non viene cambiato (se premete CLEAR invece di ENTER), il computer terminerà di nuovo la ricerca. Scegliere un livello di gioco Vedete “USATE QUESTA TABELLA PER SELEZIONARE UN LIVELLO DI GIOCO!” per una veduta illustrata su come scegliere un livello, ed una veduta d’insieme di tutti i livelli. 3.1 Livelli di gioco Normali (Case A1-G2) Ci sono due metodi per impostare il livello di gioco - potete usare i LIVELLO TEMPO PER MOSSA SCHERMO tasti di gioco oppure le case della scacchiera. Qualunque sia il metodo A1 .................... 1 secondo .................. L 0:01 usato, dovete sempre premere LEVEL come prima cosa per entrare in B1 .................... 2 secondi ................... L 0:02 Selezione Livello, e il computer mostrerà il livello attuale. Quando C1 .................... 3 secondi ................... L 0:03 entrate nella Selezione Livello per la prima volta il computer è D1 .................... 5 secondi ................... L 0:05 predisposto sul Livello Normale D1 (tempo di risposta medio di 5 E1 .................. 10 secondi ................... L 0:10 secondi per una mossa), e lo schermo mostra il segnale L0:05. F1 .................. 15 secondi ................... L 0:15 • Per selezionare un livello usando i tasti di gioco: Dopo essere G1 .................. 20 secondi ................... L 0:20 entrati in Selezione Livello premendo LEVEL, cambiate livello di H1 .................. 30 secondi ................... L 0:30 > e WHITE/< <. Una scorciatoia uno in uno usando i tasti BLACK/> A2 .................. 45 secondi ................... L 0:45 esiste premendo LEVEL ripetutamente: si saltano fino a 8 livelli per B2 .................... 1 minuto .................... L 1:00 volta. Quando lo schermo mostra il livello desiderato, premete C2 .................... 1.5 minuti .................. L 1:30 ENTER per selezionarlo e uscire dalla Selezione Livello. D2 .................... 2 minuti ...................... L 2:00 • Per selezionare un livello premendo le case della scacchiera: E2 .................... 3 minuti ...................... L 3:00 Come indicato nella Tabella Livelli, ognuna delle 64 case F2 .................... 5 minuti ...................... L 5:00 corrisponde ad un livello. Dopo essere entrati in Selezione Livello G2 .................. 10 minuti ...................... L10:00 premendo LEVEL, premete una casa con un pezzo per attivare il Quando selezionate uno dei livelli di Gioco Normali selezionate un livello, utilizzando la tabella come guida. Quando premete verso il tempo di risposta medio del computer. I tempi sono calcolati in media basso la casa ed il livello desiderato viene allora mostrato sullo su un largo numero di mosse. All’inizio ed alla fine della partita il schermo, premete ENTER per selezionare tale livello e uscire dalla computer tende a giocare più velocemente, ma nel mezzo di situazioni Selezione Livello. Quando fate la vostra selezione dalla scacchiera, complesse può dover pensare ben più a lungo. la pressione di CLEAR ha lo stesso effetto della pressione di ENTER — fa accettare al computer tale livello. 3.2 Livello Infinito (Casa H2) • Per verificare il livello senza cambiarlo: Se premete LEVEL per verificare il livello ma senza volerlo cambiare, premete CLEAR. Ciò LIVELLO TEMPO PER MOSSA SCHERMO vi permette di uscire dalla Selezione Livello senza cambi di livello o H2 ............... No tempo limite .............. 9:99:99 variazioni dell’orologio, anche quando il computer sta pensando. Nel Livello Infinito il computer cerca indefinitamente fino a che non Alcuni altri punti importanti da ricordare a riguardo dei livelli di gioco: trova un matto forzato o una mossa forzata; fino a che non ha cercato • Un cambiamento di livello azzera sempre l’orologio. alla massima profondità; oppure fino a che non viene spinto a smettere • Non raccomandiamo di cambiare livello mentre il computer sta di pensare dalla vostra pressione del tasto ENTER. Se interrompete la pensando. Se dovete farlo, premete prima ENTER per terminare la ricerca, il computer fa la mossa che a quel punto ritiene migliore. ricerca del computer, e fate la sua mossa sulla scacchiera. Poi, Sperimentate questo livello - predisponete interessanti posizioni sulla ritirate la mossa del computer e cambiate il livello. Dopo, premete scacchiera e fatele analizzare per voi dal computer! Penserà per ore o ENTER per far iniziare a pensare il computer sul nuovo livello. anche per giorni, cercando di trovate la migliore mossa possibile. Non • Se cambiate il livello mentre il computer pensa, l’orologio viene dimenticare di seguire il computer mentre pensa - avvantaggiatevi della Pdf downloaded from http://www.thepdfportal.net/0d71f9df-8f27-4948-9469-8607446a2519_324239.pdf 66 USATE QUESTA TABELLA PER SELEZIONARE UN LIVELLO DI GIOCO! Ricerca 9 ply PLY:9 level entrare in Selezione Livello. LIVELLI DI ALLENAMENTO 2. Poi selezionate il vostro livello, usando la Tabella Livelli. Ci sono due modi di farlo. • Passare tra i livelli fino a che non vedete mostrato il vostro livello: • Premete BLACK/> per salire di livello > uno a uno. • Premete WHITE/< per scendere di livello < uno a uno. • Premete LEVEL per salire di livello > di otto in otto. • OPPURE, semplicemente trovate la casa corrispondente al livello e premetela infilando un pezzo nel suo foro per sceglierlo. 3. Alla fine, premete ENTER per uscire dalla selezione Livello, giocando sul nuovo livello! enter A8 Ricerca 1 ply PLY:1 A7 LIVELLI DI RICERCA DEL MATTO Matto in 1 mossa =in:1 A6 LIVELLI PER PRINCIPIANTI 40 mosse in 1:30 tr40 1:30:00 A3 LIVELLI DI GIOCO NORMALI + LIVELLO INFINITO Ricerca 2 ply PLY:2 B7 Matto in 2 mosse =in:2 B6 C8 Ricerca 3 ply PLY:3 C7 Matto in 3 mosse =in:3 C6 Ricerca 12 ply PLY:12 D8 Ricerca 4 ply PLY:4 D7 Matto in 4 mosse =in:4 D6 Ricerca 13 ply PLY:13 E8 Ricerca 14 ply PLY:14 F8 Ricerca 5 ply PLY:5 E7 Ricerca 6 ply PLY:6 F7 Matto in 5 mosse =in:5 E6 Matto in 6 mosse =in:6 F6 Ricerca 15 ply PLY:15 G8 Ricerca 7 ply PLY:7 G7 Matto in 7 mosse =in:7 G6 Ricerca 16 ply PLY:16 H8 Ricerca 8 ply PLY:8 H7 Matto in 8 mosse =in:8 H6 B5 C5 D5 E5 F5 G5 H5 10 min. 5 min. 15 min. 20 min. 30 min. 45 min. 60 min. 90 min. per partita per partita per partita per partita per partita per partita per partita per partita bL:10 bL: 5 bL:15 bL:20 bL:30 bL:45 bL:60 bL:90 A4 LIVELLI DI TORNEO B8 Ricerca 11 ply PLY:11 1 sec. 2 sec. 3 sec. 4 sec. 5 sec. 6 sec. 7 sec. 8 sec. per mossa per mossa per mossa per mossa per mossa per mossa per mossa per mossa bEG:1 bEG:2 bEG:3 bEG:4 bEG:5 bEG:6 bEG:7 bEG:8 A5 LIVELLI BLITZ Ricerca 10 ply PLY:10 B4 35 mosse in 1:45 tr35 1:45:00 B3 C4 40 mosse in 1:45 tr40 1:45:00 C3 D4 35 mosse in 1:30 tr35 1:30:00 D3 E4 40 mosse in 2:00 tr40 2:00:00 E3 F4 45 mosse in 2:30 tr45 2:30:00 F3 G4 50 mosse in 2:00 tr50 2:00:00 G3 H4 40 mosse in 3:00 tr40 3:00:00 H3 45 sec. 1 min. 1.5 min. 2 min. 3 min. 5 min. 10 min. Livello per mossa per mossa per mossa per mossa per mossa per mossa per mossa Infinito L0:45 L1:00 L1:30 L2:00 L3:00 L5:00 L10:00 9:99:99 A2 B2 C2 D2 E2 F2 G2 H2 1 sec. 2 sec. 3 sec. 5 sec. 10 sec. 15 sec. 30 sec. 20 sec. per mossa per mossa per mossa per mossa per mossa per mossa per mossa per mossa L0:01 L0:02 L0:03 L0:05 L0:10 L0:15 L0:30 L0:20 A1 B1 C1 D1 E1 F1 Per maggiori dettagli, vedete la Sezione 3. Pdf downloaded from http://www.thepdfportal.net/0d71f9df-8f27-4948-9469-8607446a2519_324239.pdf 67 G1 H1 ITALIANO 1. Premete LEVEL per Opzione di Rotazione della Schermata descritta nella Sezione 5.3. BISOGNO DI AIUTO PER LA SCELTA DI LIVELLO? ECCOVI ALCUNI SUGGERIMENTI! 3.3 Livelli di Torneo (Case A3-H3) LIVELLO MOSSE/TEMPO TOTALE SCHERMO A3 ..... 40 mosse in 1 ora 30 min. ................ tr40 1:30:00 B3 ..... 35 mosse in 1 ora 45 min. ................ tr35 1:45:00 C3 ..... 40 mosse in 1 ora 45 min. ................ tr40 1:45:00 D3 ..... 35 mosse in 1 ora 30 min. ................ tr35 1:30:00 E3 ..... 40 mosse in 2 ore .............................. tr40 2:00:00 F3 ..... 45 mosse in 2 ore 30 min. ................ tr45 2:30:00 G3 .... 50 mosse in 2 ore. ............................. tr50 2:00:00 H3 ..... 40 mosse in 3 ore. ............................. tr40 3:00:00 Il Livello di Torneo richiede che facciate un certo numero di mosse entro un certo lasso di tempo. Se un giocatore eccede il tempo assegnato per un certo numero di mosse, il computer segnala TImE lampeggiando insieme al tempo trascorso per dire che la partita è terminata. Se lo desiderate, potete continuare a giocare anche se il tempo è trascorso tutto. Quando abbiate scelto un Livello di Torneo potete voler vedere il tempo restante e non quello trascorso (Vedere Sezione 5.1). Quando il tempo a disposizione è trascorso tutto, l’orologio di Conto alla Rovescia cambia nell’orologio normale. • Siete un giocatore principiante? Cominciate con i Livelli per Principianti o i più bassi dei Livelli di Allenamento. Questi livelli restringono la profondità di ricerca del computer, col risultato di un gioco più debole e col vantaggio di permettervi di imparare sul gioco e, magari, anche di vincere. Per avere più possibilità di vincere, combinate uno di questi livelli con l’opzione Gioco Facile (Sezione 5.2), così il computer non può pensare sul vostro tempo. • Siete un giocatore di livello intermedio o più avanzato? Provate i Livelli Normali, di Allenamento o di Torneo. I Livelli Normali variano da facili a difficili, col massimo a 10 minuti di tempo di risposta, mentre i livelli di Torneo sono decisamente esigenti. I Livelli di Allenamento vi permettono di scegliere la profondità di ricerca desiderata — appena conquistate un livello, passate a quello successivo! E non dimenticare di provare i Livelli Blitz per alcune partite rapide ed eccitanti di Scacchi Veloci. • Volete fare esperimenti? Usate i Livelli di Ricerca del Matto per risolvere problemi fino al matto in otto mosse — provate a cercare da una posizione di una delle vostre partite, o definite un problema di matto. Scegliete il Livello Infinito per far analizzare al computer posizioni complicate per ore o anche giorni. 3.4 Livelli Blitz (Case A4-H4) LIVELLO TEMPO PER PARTITA SCHERMO A4 .................... 5 minuti ...................... bL: 5 B4 .................. 10 minuti ...................... bL:10 C4 .................. 15 minuti ...................... bL:15 D4 .................. 20 minuti ...................... bL:20 E4 .................. 30 minuti ...................... bL:30 F4 .................. 45 minuti ...................... bL:45 3.5 Livelli per Principianti (Case A5-H5) G4 .................. 60 minuti ...................... bL:60 LIVELLO TEMPO PER MOSSA SCHERMO H4 .................. 90 minuti ...................... bL:90 A5 .................... 1 secondo .................. BEG:1 Nei Livelli Blitz (chiamati anche Gioco Veloce o livelli di “Morte B5 .................... 2 secondi ................... BEG:2 Istantanea”) voi decidete il tempo totale per tutta la partita. Se si C5 .................... 3 secondi ................... BEG:3 eccede il limite fissato il computer segnala tImE, e mostra il tempo D5 .................... 4 secondi ................... BEG:4 consumato per avvertire che la partita è ultimata. Se selezionate un E5 .................... 5 secondi ................... BEG:5 Livello Blitz potreste voler vedere l’orologio che segna il tempo che F5 .................... 6 secondi ................... BEG:6 resta invece di quello trascorso (vedere Sezione 5.1). Quando il tempo G5 .................... 7 secondi ................... BEG:7 di gioco è trascorso, l’orologio di conto alla rovescia torna al tipo di H5 .................... 8 secondi ................... BEG:8 normale. Pdf conteggio downloaded from http://www.thepdfportal.net/0d71f9df-8f27-4948-9469-8607446a2519_324239.pdf 68 Siete nuovo al gioco o siete un principiante? Se è così, questi livelli sono stati pensati apposta per voi! Qui il computer restringe la sua ricerca cosicché gioca deliberatamente in maniera debole e vi permette di vincere più facilmente. Il Livello per Principianti inizia molto facile e gradualmente diventa più difficile - appena vincete un livello, passate al prossimo. limitata ad un certo numero di mosse, come mostrato qui sopra. Passando tra i livelli, il computer mostra PLY: # per ogni livello. Un “ply” è una singola mossa (di una o dell’altra parte), e “#” è il numero che rappresenta la profondità di ricerca. Per esempio, al livello A7, il computer ricerca alla profondità di 1 “ply” (PLY:1), che vuol dire che guarda avanti di una sola mossa. A questo livello quindi, facilmente non potrà vedere un matto in una mossa. Ciò produce un avversario debole e dà ai principianti una maggiore possibilità di battere il computer. 3.6 Livelli di Ricerca del Matto (Case A6-H6) PROBLEMA SCHERMO A6 ................... Matto in 1 ................... =in:1 B6 ................... Matto in 2 ................... =in:2 C6 ................... Matto in 3 ................... =in:3 D6 ................... Matto in 4 ................... =in:4 E6 ................... Matto in 5 ................... =in:5 F6 ................... Matto in 6 ................... =in:6 G6 ................... Matto in 7 ................... =in:7 H6 ................... Matto in 8 ................... =in:8 Selezionare uno di questi livelli attiverà uno speciale programma di Ricerca di Soluzioni di Matto. Se avete una posizione dalla quale vorreste che il computer trovi una via per il matto, istruite il computer perché operi su un certo Livello di Ricerca di Matto. Il vostro computer scacchistico risolverà il problema fino ad un massimo di matto in otto mosse. Matto da uno a cinque mosse è generalmente trovato velocemente, mentre problemi riguardanti da sei a otto mosse possono richiedere un tempo abbastanza lungo. Se non c’è matto presente o se, ad ogni modo, il computer non lo trova, manderà allo schermo una serie di trattini (– – – – –). Potete allora continuare a giocare selezionando un altro livello. 4. STATO INFO: GUARDATE E IMPARATE Immaginate: state giocando a scacchi con un amico e tocca a lui muovere. Vorreste sapere quale mossa sta pensando di fare, e davvero vorreste avere la sua opinione sull’attuale posizione di gioco. Ovviamente, non potete chiedere, perché non si può fare. Invece, indovinate un po’, giocando contro questo computer scacchistico potrete chiedere quello che volete ed avrete le risposte! Potete infatti ottenere una grande quantità d’informazioni sul suo processo di pensiero. Dietro vostra richiesta vi mostra la mossa che sta considerando, che cosa pensa di fare dopo, la sua valutazione sulla posizione attuale, la profondità di ricerca ed altro. Come potete immaginare, studiare queste informazioni vi può insegnare molto sugli scacchi! Uso dello Stato Info Come accedere a queste informazioni? Usando lo Stato Info ogni qualvolta lo vogliate! Se lo fate quando il computer sta pensando vedrete le varie mosse considerate succedersi e cambiare in ragione del pensare e della diversa profondità di ricerca. 3.7 Livelli di Allenamento (Case A7-H8) LIVELLO SCHERMO LIVELLO SCHERMO Vedete “LO STATO INFO A COLPO D’OCCHIO” per una tabella A7 .......... PLY: 1 A8 .......... PLY: 9 che sintetizza tutte le schermate di Stato Info. B7 .......... PLY: 2 B8 .......... PLY:10 Le informazioni sul gioco sono divise in quattro gruppi, e premere C7 .......... PLY: 3 C8 .......... PLY:11 > e WHITE/ INFO fa passare da un gruppo ad un altro. I tasti BLACK/> D7 .......... PLY: 4 D8 .......... PLY:12 < possono essere usati per passare tra le informazioni di ogni gruppo. E7 .......... PLY: 5 E8 .......... PLY:13 Premete CLEAR per uscire dallo Stato Info e tornare al normale F7 .......... PLY: 6 F8 .......... PLY:14 orologio. G7 ......... PLY: 7 G8 ......... PLY:15 Quando sappiate usare bene lo Stato Info, consultate la Sezione 5.3 H7 .......... PLY: 8 H8 .......... PLY:16 per una descrizione della funzione di Rotazione della Schermata. Nei Livelli di from Allenamento la profondità di ricerca del computer è Pdf downloaded http://www.thepdfportal.net/0d71f9df-8f27-4948-9469-8607446a2519_324239.pdf 69 ITALIANO LIVELLO Selezionare questa funzione fa passare il computer automaticamente tra le informazioni descritte qui sotto ad intervalli di un secondo, ogni volta che pensa alla propria mossa — in certo modo, potete vedere il computer “pensare a voce alta”! Può accadere che qualche informazione sulla partita non sia disponibile. In tal caso, il display mostrerà una serie di trattini (– – – – –). LO STATO INFO A COLPO D’OCCHIO INFO VARIAZIONE PRINCIPALE: info x1 • Mossa 1 (linea di gioco prevista) white/ 4.1 Variazione Principale Premere INFO la prima volta fa mostrare la prima mossa delle principali variazioni (secondo la linea di gioco prevista, o la sequenza di mosse che il computer pensa verranno fatte). La prima schermata è relativa alla prima mossa che il computer pensa di fare. La variazione principale è mostrata fino ad una massima profondità di 4 mosse > ripetutamente potete vedere il resto delle singole. Usando BLACK/> mosse. • Mossa 1 (linea di gioco prevista) • Mossa 2 (linea di gioco prevista) • Mossa 3 (linea di gioco prevista) • Mossa 4 (linea di gioco prevista) < per passare all’indietro tra le mosse e rivedere Premete WHITE/< schermate precedenti. Premete CLEAR per tornare al normale orologio. Visto che la prima mossa della linea di gioco prevista è la mossa che il computer pensa voi farete, potete anche considerare tale mossa come un suggerimento! Dunque, se avete bisogno di aiuto, premete INFO quando tocca a voi. black/ • Mossa 2 (linea di gioco prevista) • Mossa 3 (linea di gioco prevista) • Mossa 4 (linea di gioco prevista) INFO RICERCA: info x2 • Valutazione della posizione attuale • 2 numeri: Profondità attuale di ricerca + numero di mosse black/ esaminate a quel punto • Mossa che viene ora considerata • Numero di posizioni esaminate al secondo white/ INFO OROLOGIO: info x3 • Tempo trascorso dall’ultima mossa eseguita • Tempo trascorso per il computer • Tempo trascorso per il giocatore black/ • Tempo rimasto per il computer* • Tempo rimasto per il giocatore* white/ 4.2 Informazione di Ricerca *Solo per i Livelli Blitz e di Torneo Premere INFO una seconda volta fa apparire informazioni sulla > ricerca effettuata dal computer! Usando il tasto BLACK/> INFO CONTEGGIO DELLE MOSSE: ripetutamente si può viaggiare tra queste quattro schermate: info x4 • Numero di mosse giocate dal Bianco a quel • Valutazione della posizione attuale, basandosi su un valore punto assegnato al pedone = 1 punto (un numero positivo indica che il white/ Bianco è avanti) • Due numeri: il primo è la profondità attuale di ricerca, o numero di • Mosse della partita attuale black/ mosse singole che il computer prevede; il secondo è il numero di mosse esaminate fino a quel punto. • La mossa che viene ora considerata. Premete clear in qualunque momento per uscire dallo Stato Info. • La velocità di ricerca, o numero di posizioni (nodi) esaminate al Per maggiori dettagli, vedete la Sezione 4. secondo. Pdf downloaded from http://www.thepdfportal.net/0d71f9df-8f27-4948-9469-8607446a2519_324239.pdf 70 < per passare all’indietro tra le mosse e rivedere Premete WHITE/< schermate precedenti. Premete CLEAR per tornare al normale orologio. il computer vi mostrerà la mossa che suggerisce per il vostro lato. 5. OPZIONI PER AVERE PIÙ DIVERTIMENTO E VARIETÀ 4.3 Informazione di Orario Premere INFO una terza volta vi permette di accedere agli orologi. > ripetutamente potete passare tra i Utilizzando il tasto BLACK/> differenti orologi: • Tempo trascorso dall’ultima mossa eseguita • Tempo totale trascorso per il computer • Tempo totale trascorso per il giocatore • Tempo rimasto per il computer (Solo per i Livelli Blitz e di Torneo) • Tempo rimasto per il giocatore (Solo per i Livelli Blitz e di Torneo) < per passare all’indietro tra le mosse e rivedere Premete WHITE/< schermate precedenti. Premete CLEAR per tornare al normale orologio. Gli orologi si fermano ogni volta che voi ritirate una mossa, controllate i livelli di gioco, selezionate opzioni, verificate o predisponete una posizione, o quando spegnete l’apparecchio. In tutti questi casi, i tempi vengono registrati nella memoria e l’orologio riparte da lì quando si ricomincia il gioco. Ogni qualvolta cambiate livello o premete CLEAR e ENTER insieme per riattivare ad una nuova partita, gli orologi vengono riportati a 0:00:00. In aggiunta a tutte le funzioni descritte fin’ora, il vostro computer scacchistico offre anche molte altre eccitanti opzioni di gioco! Tali opzioni sono tutte selezionabili dall’utente in ogni momento durante il gioco. Sono descritte individualmente in questa sezione, e sintetizzate nella Tabella Opzioni. Selezione delle Opzioni di Gioco Ci sono due metodi di selezionare opzioni, come descritto qui sotto usando i tasti di gioco o premendo le case della scacchiera. La Selezione Opzione è divisa in tre gruppi: Stato Operativo, Opzioni di Gioco, Opzione di Rotazione della Schermata. Premendo OPTION si passa da un gruppo ad un altro. Ogni gruppo contiene otto opzioni > e WHITE/< < vengono usati per passare tra diverse, e i tasti BLACK/> le opzioni di ogni gruppo. Per ogni opzione, un segno più (+) sullo schermo indica che la funzione in schermo è attivata, ed un segno meno (–) che è invece disattivata. Premete ENTER per attivare, 4.4 Conteggio mosse/Mosse di Partita disattivare o selezionare altri fattori come mostrato sullo schermo. Premere INFO per la quarta volta mostra il numero di mosse Ricordate che la pressione di OPTION vi fa passare tra i tre gruppi giocate fino al momento attuale. A questo punto, potete usare il tasto principali, così potete passare dall’uno all’altro quando lo vogliate. Dopo < ripetutamente per passare all’indietro tra le mosse di questa WHITE/< che avete fatto tutte le vostre scelte tra ognuno dei gruppi, premete partita (fino a 30 mosse singole). CLEAR per tornare alla partita. • Numero di mosse giocate dal Bianco a quel punto Un altro metodo per scegliere opzioni di gioco è premendo alcune • Mosse della partita attuale case di opzione sulla scacchiera. Come mostrato nella Tabella > per passare avanti tra le mosse e rivederle Premete BLACK/> Opzioni, le case A1-H1, A2-H2, A3-H3 possono essere usate per ancora quando lo vogliate. Premete CLEAR per tornare al normale attivare o disattivare opzioni. Premete OPTION per entrare nella orologio. Selezione Opzione. Premete poi la casa desiderata con un pezzo per entrare nel gruppo di opzioni voluto, usando la tabella come guida. 4.5 Volete un suggerimento? Basta chiedere! Sappiate che la pressione ripetuta di una casa attiva o disattiva Qualora non abbiate visto questa funzione quando ne abbiamo ripetutamente, mostrando un segno più (+) per attivazione e meno (–) parlato nella Sezione 4.1, abbiamo voluto ricordarvela qui - se per disattivazione. Premete CLEAR per tornare alla partita dopo aver desiderate un consiglio su una particolare mossa, il computer può fatto le vostre selezioni. darvelo. Premete semplicemente INFO quando tocca a voi muovere, e Pdf downloaded from http://www.thepdfportal.net/0d71f9df-8f27-4948-9469-8607446a2519_324239.pdf 71 ITALIANO Vedete “NOZIONI BASILARI SULLE OPZIONI: ECCO COME!” per una tabella che vi sintetizza come usare la Selezione Opzione, ed una veduta d’insieme di tutte le opzioni. Quando il computer viene acceso per la prima volta alcune opzioni di default vengono caricate. Le opzioni che sono automaticamente attive alla prima accensione vengono mostrate nel diagramma con un segno più, quelle non attive con un segno meno. Quando riattivate il computer per una nuova partita molte delle opzioni da voi selezionate vengono mantenute nella partita successiva. Alcune eccezioni sono la Risposta Automatica, che è automaticamente attivata quando iniziate una nuova partita, e Giocare col Bianco dal Lato Superiore, che è automaticamente disattivato. automaticamente attivata come default quando premiate CLEAR e ENTER simultaneamente per riattivare il computer. 5.1 Opzioni di Stato Operativo (Case A1-H1) Queste opzioni influenzano il modo col quale usate il computer. Premete OPTION una volta per entrare in Stato Operativo, e > e WHITE/< < per selezionare le opzioni usate poi i tasti BLACK/> entro questo gruppo. Premete ENTER per attivarle (+) o disattivarle (–). Oppure, semplicemente premete le case di opzione per attivarle o disattivarle. c. Stato Silenzioso (Casa C1) Attiva:+SIL Disattiva:-SIL Normalmente il computer suona sempre quando ha trovato la mossa da fare. Si fa agire il computer silenziosamente attivando questa funzione di Stato Silenzioso. b. Suono con Pressione di Tasto (Casa B1) Attiva:+SNd Disattiva:-SNd Questa opzione vi permette di disattivare il suono che accompagna di solito ogni pressione di tasto. Continuerete ad udire i suoni quando è il computer a muovere, o quando una mossa illecita o pressione illecita vengono fatte. d. Orologio che Ticchetta (Casa D1) Attiva:+tICk Disattiva:-tICk Quando attivate questa opzione, voi attivate un suono ticchettante che fa suonare l’orologio del computer similmente ad un vero orologio. Immaginate, potete creare la vera atmosfera di un torneo nella vostra camera! a. Risposta automatica (Casa A1) Attiva:+AUt Disattiva:-AUt Il computer di solito risponde automaticamente con una contromossa ogni volta che voi avete fatto una mossa. Se disattivate l’opzione di Risposta Automatica, potete fare varie mosse una dopo l’altra senza che il computer risponda. Vedrete che ci sono molti bei modi di usare e. Orologio di Conto alla Rovescia (Casa E1) questa funzione. Attiva:+cdn Disattiva:-cdn • Giocate partite di maestri. Premete ENTER per vedere ciò che il Attivando questa opzione si forza il computer a mostrare il tempo che computer farebbe in ogni posizione. resta invece di quello trascorso. Notate che questa opzione è dispon• Mantenete una registrazione delle vostre partite. Quando una ibile solo quando in combinazione con il Livello di Torneo ed il Livello Blitz. partita è finita, giocate da una certa posizione per vedere come altre mosse o differenti strategie avrebbero influenzato il risultato. f. Controllo del Sistema (Casa F1) • Studiate linee di apertura inserendole manualmente. Attiva:+tESt Disattiva:-tESt • Giocate contro un amico, con il computer che fa da arbitro. Il Il Controllo del Sistema è stato incluso fondamentalmente come uno computer controllerà il vostro gioco, controllando la liceità delle strumento di soluzione di problemi. Dopo aver attivato questa opzione > ripetutamente vi mosse e seguendo il tempo per entrambi i lati! con la selezione di +tESt, la pressione di BLACK/> Quando si giochi contro un’altra persona, qualora una delle due parti farà passare tra tutti i segmenti dello schermo LCD e tutte le luci di desiderasse l’aiuto del computer, premete INFO per vedere la mossa scacchiera, in sequenza. Per uscire dal test premete CLEAR e ENTER suggerita. Se volete sapere ciò che il computer farebbe in una certa simultaneamente per riattivare il computer. ATTENZIONE: State attenti a non attivare questa opzione durante posizione, premete ENTER ed il computer farà la prossima mossa. una partita, poiché a quel punto l’unico modo per uscirne è di riattivare Dopo averla fatta, il computer resterà con la Risposta Automatica il computer, e la vostra partita in corso andrebbe persa. disattivata e voi potrete continuare la partita. Questa opzione viene Pdf downloaded from http://www.thepdfportal.net/0d71f9df-8f27-4948-9469-8607446a2519_324239.pdf 72 NOZIONI BASILARI SULLE OPZIONI: ECCO COME per selezionare uno Stato. 2. Poi, selezionate la vostra/e opzione/i, option x1 = STATO OPERATIVO (AUt...) option x2 = STATO DI GIOCO (SEL...) usando la Tabella Opzioni sotto. Ci option x3 = OPZIONE DI ROTAZIONE DELLA SCHERMATA (rd:1...) sono due modi di farlo. • Passate tra le opzioni entro uno option x4 = ritorno a STATO OPERATIVO... stesso stato: • Premete BLACK/> per andare > avanti. B4 G4 D4 E4 F4 C4 A4 • Premete WHITE/< per Variazione Variazione Variazione Variazione Valutazione Profondit Nodi andare < indietro. OPZIONI DI a ply 1 a ply 2 cercati a ply 3 a4 Posizione à e Mosse ROTAZIONE • Quando vedete la vostra -rd:1 -rd:2 -rd:3 -rd:4 -rd:E -rd:d -rd:n opzione, premete ENTER per SCHERMATA B3 G3 E3 F3 D3 C3 A3 selezionare on (+) o off (–). Gioco Libro Libro Libro Libro di Ricerca Gioco • OPPURE, semplicemente cercate Facile Passivo Attivo Completo Torneo selettiva/a Casuale STATO DI la casa di tale opzione e premetevi forza bruta GIOCO +SEL -EASY -RANd -bk:P -bk:A -bk:? -bk:t su un pezzo nel foro per B2 F2 G2 E2 C2 D2 A2 selezionarla on (+) o off (–). 3. Alla fine, premete CLEAR per uscire dallo Selezione Opzione, usando la nuova opzione/i. STATO OPERATIVO clear Risposta autom +AUT A1 H4 Tempo per mossa -rd:t H3 Libro attivo/ disattivo +bOOk H2 Suono con Stato Orologio Orologio di Controllo Spegnimento Giocare col pressione di Silenzioso che ticchetta conto alla del sistema automatico Bianco dal L. S. tasto rovescia +SNd B1 -SIL C1 -tICK D1 -cdn E1 -tESt F1 -aPd G1 -tOP H1 Per maggiori dettagli, vedete la Sezione 5. g. Spegnimento automatico (Casa G1) h. Giocare col Bianco dal Lato Superiore (Casa H1) Attiva:+aPd Disattiva:-aPd Attiva:+tOP Disattiva:-tOP L’opzione di Spegnimento Automatico è una funzione salva-pile. Volete staccarvi dallo standard normale di gioco ed avere il computer Quando la si seleziona, il computer si spegne automaticamente dopo che gioca col Bianco dalla parte superiore della scacchiera? Provate 15 minuti se nessuna pressione sui tasti o nessuna mossa è fatta allora quest’interessante funzione! Attivatela scegliendo +tOP durante tale lasso di tempo. Per continuare dopo che lo spegnimento è all’inizio di una nuova partita. Preparate la scacchiera con i pezzi Neri avvenuto, premete GO/STOP per riattivare il computer. Notate che il dalla vostra parte, come illustrato nel diagramma di questa sezione. computer comunque non si spegne automaticamente quando stia Premete poi ENTER per iniziare la partita. Guardate il computer fare la pensando. prima mossa col Bianco dal lato superiore della scacchiera. Pdf downloaded from http://www.thepdfportal.net/0d71f9df-8f27-4948-9469-8607446a2519_324239.pdf 73 ITALIANO 1. Premete OPTION ripetutamente GIOCARE COL NERO DAL LATO INFERIORE? ECCO LA POSIZIONE Quando il computer gioca col Bianco dal Lato Superiore (Sezione 5.1, opzione H1), assicuratevi di posizionare i pezzi correttamente! Notate che Re e Regine sono posizionati differentemente, e che la notazione di scacchiera è invertita. Questo metodo di ricerca minimizza il rischio di un’eventuale svista. Notate che i Livelli di Ricerca del Matto usano sempre il Metodo di Forza Bruta. ዛዙዘዖዕዔዓዒዜ ዊ尸尾尼尮尴尺局尶ዊ ዋ层屄层屄层屄层屄ዋ ዌ巀居巀居巀居巀居ዌ ው居巀居巀居巀居巀ው ዎ巀居巀居巀居巀居ዎ ዏ居巀居巀居巀居巀ዏ ዐ屃屁屃屁屃屁屃屁ዐ ዑ尵尿尹尯就尻尽尷ዑ ዝዙዘዖዕዔዓዒዞ b. Gioco Facile (Casa B2) Attiva:+EASy Disattiva:-EASy Volete vincere più partite contro il computer? Provate ad attivare il Gioco Facile, che previene il computer dal pensare durante il vostro tempo. Ciò indebolisce tutti i livelli di gioco senza influenzare i controlli del tempo. Normalmente, come descritto nella Sezione 2.8, il computer pensa durante il vostro tempo, programmando le sue strategie mentre voi pensate alla vostra mossa. Questa funzione è una delle caratteristiche che contribuiscono a fare di questo computer un avversario potente. L’uso del Gioco Facile vi permette però di rendere tutti i livelli più deboli, offrendovi in pratica più livelli di gioco tra i quali scegliere! Per maggiori dettagli, vedete la Sezione 5.1. Vedete “GIOCARE COL NERO DAL LATO INFERIORE? ECCO LA POSIZIONE” per un corretto posizionamento dei pezzi usando questa opzione. c. Gioco Casuale (Casa C2) Attiva:+RaNd Disattiva:-RaNd Attivate questa funzione per una più grande varietà di gioco. Invece di selezionare una singola mossa considerata migliore, il computer sceglierà la mossa tra varie fornite dal suo randomizzatore interno. Quando il computer gioca col Bianco dal lato superiore, la notazione di scacchiera viene automaticamente invertita. Inoltre, questa opzione viene disattivata e posta quindi OFF in default quando iniziate una nuova partita. d. Libro Passivo (Casa D2) Attiva:+bk:P Disattiva:-bk:P La scelta di Libro Passivo forza il computer a dare una preferenza ad aperture passive e posizioni chiuse quando deve decidere un’apertura di gioco. Attivare questa opzione disattiverà il Libro Attivo ed il Libro di Torneo. 5.2 Opzioni di Gioco (Case A2-H2) Queste opzioni influenzano il modo con il quale il computer seleziona le proprie mosse. Premete OPTION due volte per scegliere Opzioni di Gioco, e > e WHITE/< < per selezionare l’opzione voluta usate poi BLACK/> entro il gruppo. Premete ENTER per attivare (+) o disattivare (–) l’opzione, o semplicemente premete la casa corrispondente all’opzione per attivarla o disattivarla. e. Libro Attivo (Casa E2) Attiva:+bk:A Disattiva:-bk:A Quando si attiva questa opzione, il computer darà la preferenza a linee attive di gioco e posizioni aperte quando deve decidere l’apertura di partita. Se l’opzione è attivata, il libro Passivo ed il Libro di Torneo sono disattivati. a. Ricerca Selettiva (Casa A2) Attiva:+SEL Disattiva:-SEL Il programma di questo computer scacchistico utilizza normalmente f. Libro Completo (Casa F2) un Algoritmo di Ricerca Selettiva. Ciò fa sì che il computer possa Attiva:+bk:? Disattiva:-bk:? vedere delle combinazioni che altrimenti richiederebbero un tempo di Attivando la funzione di Libro Completo si dà al computer la libertà di eleborazione più lungo. Disattivando questa opzione con la selezione scegliere la mossa dal suo libro di aperture, per cui potrete vedere una si porta il from computer ad agire col potente Algoritmo di Forza Bruta. Pdf SEL downloaded http://www.thepdfportal.net/0d71f9df-8f27-4948-9469-8607446a2519_324239.pdf 74 volte per selezionare Le Opzioni Di Rotazione della Schermata. Poi > e WHITE/< < per selezionare le opzioni che volete usate BLACK/> vedere in rotazione. Le opzioni sono descritte qui sotto e sintetizzate nella Tabella dello Stato Opzioni in questa sezione. Premete ENTER per attivarle (+) o disattivarle (–), o semplicemente premete la casa corrispondente all’opzione per attivarla o disattivarla. Se pensate che le informazioni si avvicendino sullo schermo troppo rapidamente, premete INFO per bloccare l’informazione sullo schermo. > e WHITE/< < vi permettono Seguenti pressioni di INFO e di BLACK/> di passare tra le varie informazioni manualmente, come descritto nella Sezione 4. Per far ripartire la rotazione, premete OPTION seguito da CLEAR. Il computer riattiva comunque la rotazione quando ricomincia a pensare alla mossa successiva. Le informazioni di gioco che potete vedere mentre il computer sta pensando includono le seguenti: • rd:1 a rd:4 = la linea di gioco prevista (fino a quattro mosse singole) • rd:E = valutazione della posizione corrente • rd:d = profondità di ricerca del computer e il numero di mosse fatte fino a quel momento • rd:n = nodi cercati al secondo • rd:t = tempo che la mossa ha richiesto fin’ora Quando l’informazione richiesta non è disponibile, lo schermo mostrerà una serie di trattini (– – – – –). Per una descrizione completa di queste opzioni e dettagli sulla loro esatta interpretazione da schermo, vedete la Sezione 4. g. Libro di Torneo (Casa G2) Attiva:+bk:t Disattiva:-bk:t Quando selezionate il Libro di Torneo, il computer viene forzato a scegliere la migliore linea di gioco in ogni posizione di apertura. Seppure ciò porti ad un migliore gioco, questo limita anche le scelte che il computer ha di linee di libro disponibili. Se questa opzione è selezionata, i Libri Attivo e Passivo sono disattivati. h. Libro Attivo/Disattivo (Casa D2) Attiva:+bOOk Disattiva:-bOOk Usate questa opzione per poter bloccare del tutto il libro di aperture del computer, attivandola scegliendo-BOOK. Quando il libro è disattivo il computer è forzato ad usare tempo per pensare alle sue mosse dall’inizio del gioco, invece di usare mosse dalla memoria. Per più dettagli sulle aperture vedete la Sezione 2.7. Se disattivate del tutto il libro, le altre funzioni di libro (descritte prima) verranno automaticamente disattivate. 5.3 Opzioni di rotazione della schermata (Case A3-H3) 6. VERIFICARE/DECIDERE POSIZIONI 6.1 Verificare Posizioni IMPORTANTE: L’opzione di Rotazione della Schermata è attiva solo QUANDO IL COMPUTER STA PENSANDO. Vedete “È FACILE VERIFICARE I PEZZI!” per un esempio Di solito il computer mostra sullo schermo il tempo che il giocatore guidato su come usare lo Stato di Verifica. ha per muovere. Il computer può però anche mostrare altre Se avete fatto cadere dei pezzi o se pensate che la posizione sulla informazioni, come descritto nella Sezione 4 (Stato Info). L’opzione di scacchiera non sia corretta, il computer può verificare la posizione per voi. Rotazione della Schermata lavora insieme allo Stato Info, e vi permette Quando tocca a voi, premete uno dei TASTI DEI SIMBOLI DEI di scegliere quale delle Informazioni su Schermo volete vedere, e le PEZZI (&, %, $, #, @, o !). Il computer mostra qual è la casa del mostra ad intervalli di un secondo. Potete attivare alcune o tutte le primo pezzo di quel tipo sulla scacchiera. Lo schermo illustra il simbolo, opzioni di Rotazione della Schermata, a vostro piacimento. il colore, e l’indicazione di casa designata. Premere lo stesso TASTO Per definirefrom le opzioni della rotazione, premete prima OPTION tre Pdf downloaded http://www.thepdfportal.net/0d71f9df-8f27-4948-9469-8607446a2519_324239.pdf 75 ITALIANO grande varietà di aperture di gioco messe in atto. Attivare questa opzione disattiverà le opzioni di Libro di Torneo, Attivo e Passivo. Quando questa opzione è selezionata, il computer può fare delle mosse che appaiono discutibili. Ciò accade perché il suo libro aperto contiene delle risposte a certe linee di gioco (magari discutibili) che possono venir giocate. Seppure il computer non farebbe tali mosse, ha comunque bisogno di sapere come rispondere ad esse nel modo migliore. Quando attivate il Libro Completo, il computer potrebbe fare una di queste mosse. PROVATE LO STATO DI VERIFICA È FACILE VERIFICARE I PEZZI! new game clear enter 1. Premete CLEAR e ENTER simultaneamente per far ripartire il computer. Schermo: [ 0:00:00. 2. Premete il tasto KNIGHT. Schermo: [,@,b1 (Il primo Cavallo Bianco). new game clear enter position 3. Premete KNIGHT ancora. Schermo: [,@,G1 (Il secondo Cavallo Bianco). 4. Premete KNIGHT ancora. Schermo: ],@,b8 (Il primo Cavallo Nero). 5. Premete KNIGHT ancora. Schermo: ],@,g8 (Il secondo Cavallo Nero). clear 6. Premete KNIGHT ancora. Schermo: @ (Non ci sono altri Cavalli sulla scacchiera). 7. Ripetete per ogni pezzo che vogliate verificare! Infine, premete CLEAR per uscire dallo Stato di Verifica. Per maggiori dettagli, vedete la Sezione 6.1. 2. Premete POSITION per entrare nello Stato Posizione. Schermo: -POS-. E2 3. Premete il Pedone Bianco sulla Casa E2, e toglietelo dalla scacchiera. Schermo: [,!,-E2. E3 4. Premete lo stesso Pedone sulla Casa E3 per aggiungerlo sulla scacchiera. Schermo: [,!,+E3. D8 5. Premete la Regina Nera sulla Casa D8, e toglietela dalla scacchiera. Schermo: ],%,-D8. H5 6. Premete la stessa Regina sulla Casa H5 e aggiungetela sulla scacchiera. Schermo: ],%,+H5. white/ DEI SIMBOLI DEI PEZZI ancora mostra la posizione del secondo pezzo di quello stesso tipo. Tutti i pezzi Bianchi vengono mostrati all’inizio, poi i Neri. Quando non ci sono più pezzi di un certo tipo da localizzare, le luci si spengono e solo il simbolo del pezzo resta sullo schermo. Volete verificare più pezzi? Ripetete la stessa procedura usando gli altri TASTI DEI SIMBOLI DEI PEZZI, verificando tutta la scacchiera se lo volete. Premere CLEAR per tornare alla partita. 1. Premete CLEAR e ENTER insieme per riattivare il computer ad una nuova partita. Schermo: [ 0:00:00. 7. Premete WHITE/< per cambiare il colore che muove successivamente. 8. Premete CLEAR per uscire. clear Per maggiori dettagli, vedete la Sezione 6.2. predisporre speciali posizioni sulla scacchiera come partenza, o problemi che volete far risolvere al computer! Attenzione: tutte le mosse precedenti ad una variazione di posizione fatta durante una partita vengono rimosse dalla memoria. 6.2 Cambiare e decidere posizioni Premere POSITION per entrare nello Stato Posizione, lo schermo mostrerà -POS-. Potete cambiare o decidere una posizione sulla Vedete “PROVATE LO STATO DI VERIFICA” per un’idea sul scacchiera in qualunque momento durante una partita, quando tocchi a come lavora questa funzione. voi muovere. Dopo aver sistemato i pezzi nella posizione voluta, Pdf downloaded from http://www.thepdfportal.net/0d71f9df-8f27-4948-9469-8607446a2519_324239.pdf premete CLEAR per uscire dallo Stato Posizione. Lo Stato Posizione è un’eccitante funzione che vi permette di 76 77 ITALIANO • Per rimuovere un pezzo dalla scacchiera, premere il pezzo pezzo posizionato erroneamente). Poi premete CLEAR per uscire dallo dolcemente sulla sua casa e poi rimuoverlo. Notate che lo schermo Stato Posizione. indica il tipo di pezzo ed il colore, insieme al segno meno (–) e la posizione per quella casa. • Per muovere un pezzo da una casa ad un’altra, premete il pezzo 7. DETTAGLI TECNICI sulla sua casa d’origine, sollevatelo, e premetelo sulla sua nuova 7.1 La funzione ACL casa. Mentre lo fate, lo schermo mostrerà un segno meno (–) per la Certe volte il computer “si chiude” a causa di una scarica statica o prima casa ed un segno più (+) per la seconda casa. altri disturbi elettrici. Se ciò accade, togliete le pile e usate un oggetto • Per aggiungere un pezzo sulla scacchiera, premete prima il appuntito per premere dentro il foro segnato con ACL che è presente TASTO DEI SIMBOLI DEI PEZZI per quel pezzo (&, %, $, #, @, o alla base dell’apparecchio: la pressione va esercitata per almeno un !). Assicuratevi che lo schermo mostri il colore corretto per il secondo. Ciò riattiva il computer e ne ripulisce la memoria. pezzo che volete aggiungere. Se non è così, premete i tasti > e WHITE/< < per cambiare il colore. Quando lo schermo BLACK/> 7.2 Cure e Manutenzione mostra il colore ed il tipo di pezzo corretti, sistemate quel pezzo Il vostro computer scacchistico è un apparecchio elettronico di sulla casa desiderata e premete dolcemente. Lo Schermo mostrerà precisione, e non dovrebbe mai essere soggetto ad un brusco un segno più, insieme alla posizione per quella casa. Per aggiungere trattamento, così come non esposto a temperature eccessive o un altro pezzo dello stesso tipo, premere su un’altra casa. Per all’umidità. Assicuratevi di togliere le pile prima di pulire l’apparecchio. aggiungere un pezzo di tipo diverso, premete un diverso TASTO Non utilizzate sostanze chimiche per la pulizia dell’apparecchio, perché DEI SIMBOLI DEI PEZZI e seguite la procedura appena descritta. potrebbero danneggiarne la plastica. • Per pulire la tastiera, premete ENTER quando siete in Stato Batterie quasi esaurite vanno rimpiazzate subito, perché potrebbero Posizione. Lo Schermo mostrerà _ per simboleggiare la essere soggette a perdite e danneggiare l’apparecchio. Leggete anche scacchiera vuota. Premete ENTER ancora una volta per dire che le seguenti avvertenze sulle pile. Attenzione: usate solo pile alcaline volete davvero svuotare la scacchiera. Dopo aggiungete i pezzi o zinco-carbone. Non mescolate pile diverse o pile vecchie e usate come descritto sopra. Questa funzione può essere utile quando e nuove. Usate solo le pile raccomandate o loro equivalenti. vogliate preparare una posizione di soli pochi pezzi, e sarà molto Assicuratevi di osservare la corretta polarità quando inserite le più facile farlo cominciando da una scacchiera vuota! pile. Pile esaurite vanno immediatamente rimosse dall’apparec• Dopo aver cambiato la posizione sulla scacchiera come chio. Non esponete i terminali di contatto a corto circuito. descritto, assicuratevi che l’indicatore del colore sullo schermo stia mostrando il colore corretto del lato che muove. Cambiate il 7.3 Specifiche tecniche > e WHITE/< <. colore se necessario usando i tasti BLACK/> Tasti: 16 • Per uscire dallo Stato Posizione premete CLEAR. Tornerete al Schermo a cristalli liquidi: 48 segmenti normale stato di gioco, con la vostra nuova posizione di scacchiera. Pile: 3 AA/AM3/R6 (1.5 volts) Qualunque posizione lecita può essere raggiunta seguendo le Consumo d’energia: 330 mW massimo indicazioni date qui sopra. Il computer non vi permette di raggiungere Dimensioni: 335 x 302 x 35 mm posizioni illecite, come avere un numero di pezzi maggiore del consenPeso: 975 g (pile escluse) tito o come quando un Re è sotto scacco e non viene mosso. In tali casi il computer emetterà un suono quando premete CLEAR, e non vi Conservate sempre queste informazioni per futura consultazione. lascerà uscire dallo Stato Posizione. Controllate la posizione usando i TASTI DEI SIMBOLI DEI PEZZI se necessario, e correggete la posiSaitek si riserva il diritto di operare variazioni tecniche senza preavviso nell’interesse del miglioramento del progresso. zione (aggiungendo un pezzo, rimuovendone uno, o spostando un Pdf downloaded from http://www.thepdfportal.net/0d71f9df-8f27-4948-9469-8607446a2519_324239.pdf GUIDA ALLA SOLUZIONE DI PROBLEMI SINTOMI POSSIBILI CAUSE CHE COSA FARE Il computer non reagisce, risponde in modo sconnesso, oppure si “congela” durante il gioco. • Le pile non sono inserite nel modo corretto. • Le pile sono scariche o difettose. • Una scarica statica o un disturbo elettrico hanno causato la chiusura del computer. • Reinstallate le pile osservando la corretta polarità. • Rimpiazzate le pile. • Premete nel foro segnato con ACL, per riattivare il computer, (vedete nella Sezione 7.1). Lo schermo a cristalli liquidi si legge con difficoltà. • Le pile sono scariche o difettose. • Rimpiazzate le pile con nuove pile alcaline. Il computer non fa una mossa. • L’opzione di Risposta Automatica è stata disattivata. • Il computer risponde automaticamente solo se l’opzione di Risposta Automatica è attivata (vedere la sez. 5.1). • Potete interrompere il computer premendo ENTER. • Potreste essere in un livello nel quale il computer pensa per un lungo tempo. • E’ il vostro turno? Il vostro Re è forse sotto scacco? La vostra mossa pone il Re sotto scacco? State cercando di arroccare in modo scorretto? Vi state muovendo su una casa illecita? • Il computer sta pensando (il suo simbolo di colore lampeggia sullo schermo). • Assicuratevi di conoscere bene queste regole. Verificate che la posizione sulla scacchiera sia corretta (vedere la Sezione 6.1). Un messaggio di errore è mostrato quando si preme una casa. • Non avete eseguito correttamente l’ultima mossa fatta dal computer (casa di destinazione o di arrivo errata). • Controllate lo schermo e premete la casa indicata per completare la mossa del computer. Non potete uscire dallo Stato Posizione con CLEAR - il computer suona solamente. • Avete costituito una posizione illecita. Un Re può essere sotto scacco, potreste avere troppi pedoni sulla scacchiera, etc. • Controllate la vostra posizione e fate i cambiamenti necessari (Vedete la Sezione 6.2). Premete poi CLEAR ancora per uscire dallo Stato Posizione. Lo schermo mostra _. • Siete in Stato Posizione, e avete premuto ENTER per pulire la scacchiera. • Per pulire la scacchiera, premete ENTER una volta ancora: per ritirare la decisione, premete CLEAR (vedete la Sezione 6.2). Il computer sembra star compiendo delle mosse illecite. • Il computer ha fatto una mossa particolare, come un en passant, arrocco o promozione di pedone. • La vostra posizione non è corretta. • Le pile sono quasi esaurite. • Rivedete queste regole. Verificate la posizione sulla scacchiera (come descritto nella Sezione 6.1). • Verificate la posizione (Sezione 6.1). • Rimpiazzate le pile con nuove pile alcaline. Il computer fa mosse istantanee o irrazionali. • Il computer potrebbe essere impostato su uno dei più bassi livelli, nei quali gioca veloce ma con meno precisione perché ha una più limitata profondità di ricerca. • Le pile sono quasi esaurite. • Premete LEVEL per controllare il Livello impostato (vedere la Sezione 3). Cambiate ad un altro livello, se lo volete. • L’opzione di Stato Silenzioso può essere sta selezionata. • Controllate la selezione di Opzioni (Vedere Sezione 5.1) Il computer non accetta la vostra mossa. Il computer non emette suoni. • Per interrompere il computer premete ENTER. • Rimpiazzate le pile con nuove pile alcaline. Pdf downloaded from http://www.thepdfportal.net/0d71f9df-8f27-4948-9469-8607446a2519_324239.pdf 78 COMIENZO RAPIDO ¡Para aquellos que quieran empezar a jugar inmediatamente sin tener que leer primero todo el manual, aquí tienen un procedimiento de Comienzo Rápido! Abra la tapa del compartimento de baterías en la base de la unidad e inserte tres baterías AA (Tipo AM3/R6). Asegúrese de observar la polaridad correcta. Instale de nuevo la tapa de la batería. 2 Pulse las teclas GO/ STOP para encender el ordenador. Si el ordenador no responde, reinicialícelo como se anota en la Sección 7.1. 3 Coloque las piezas en sus posiciones de partida, con las blancas en su lado del tablero, como se muestra en este diagrama. 4 Para reinicializar el ordenador en un NEW GAME de ajedrez pulse simultáneamente las teclas CLEAR y ENTER. 5 Para registrar jugadas, hace falta ejecutarlas en el tablero, pulsando las piezas suavemente en las casillas de origen y de destino para cada jugada. 6 Tan pronto como el ordenador haga una jugada, su jugada queda reflejada en la pantalla. Verá la pieza así como su color y los cuadrados origen y destino de la jugada del ordenador. En este ejemplo, el ordenador quiere mover su peón Negro de E7 a E5. Pulse el peón del ordenador hacia abajo en el cuadrado E7 y a continuación pulse hacia abajo en el cuadrado E5. Esto da por completada la jugada del ordenador, y ahora es su turno otra vez. Haga su siguiente jugada como se describió arriba. ¡Disfrute su juego! 3 x AA/AM3/R6 go/stop ዛዒዓዔዕዖዘዙዜ ዑ尷尽尻就尯尹尿尵ዑ ዐ屁屃屁屃屁屃屁屃ዐ ዏ巀居巀居巀居巀居ዏ ዎ居巀居巀居巀居巀ዎ ው巀居巀居巀居巀居ው ዌ居巀居巀居巀居巀ዌ ዋ屄层屄层屄层屄层ዋ ዊ尶局尺尴尮尼尾尸ዊ ዝዒዓዔዕዖዘዙዞ Puede presionar GO/STOP en cualquier momento para apagar el ordenador. Su actual posición y partida (hasta 30 jugadas individuales) quedarán almacenadas en la memoria del ordenador. Cuando lo encienda de nuevo, puede seguir jugando exactamente allí donde lo dejó. new game clear enter Pdf downloaded from http://www.thepdfportal.net/0d71f9df-8f27-4948-9469-8607446a2519_324239.pdf 79 ESPAÑOL 1 TECLAS Y CARACTERISTICAS 1. AREA DE ALMACENAMIENTO DE PIEZAS: Para el almacenamiento de piezas y piezas capturadas. 2. PANTALLA DE AFICHAJE: Se utiliza para mostrar jugadas y más información sobre las jugadas durante el juego. También se utiliza para la selección de niveles y opciones, verificación de piezas e inicio de posiciones entre otras utilizaciones. 3. TABLERO DE AJEDREZ SENSIBLE: Cada cuadrado dispone de un sensor que registra el movimiento de las piezas. Algunos cuadrados pueden también ser usados dentro del Modo Nivel y del Modo Opción para seleccionar niveles y opciones. 4. COMPARTIMENTO DE BATERíAS: En la base de la unidad. Utiliza 3 baterías alcalinas AA (AM3/R6). 5. TECLAS DEL JUEGO • TECLAS DE SÍMBOLO DE PIEZAS: Utilizadas en los Modos de Verificación y Posición. También se utilizan para los ascensos de peón. • GO/STOP: Pulsar para encender y apagar la unidad. • INFO: Pulsar para entrar en el Modo Info; dentro del Modo Info, salir de los Modos de Opción, Verificación y de Posición. Púlsela pulse para rotar a través de los diferentes grupos de información. para borrar las Pantallas de Info y cancelar las peticiones de Pulse durante su jugada para solicitar una pista. Borrado de Tablero en el Modo de Posición. Pulse la tecla para • LEVEL: Pulse para entrar en el Modo Nivel; dentro del Modo cancelar el Modo Nivel si ha decidido no introducir cambios (a Nivel, pulse la tecla para saltar ocho niveles a la vez. menos que haya utilizado los cuadrados del tablero para cambiar < Y BLACK/> > (BLANCAS/< < Y NEGRAS/> >): Pulsar • WHITE/< de niveles; en ese caso CLEAR introduciría el nuevo nivel como para cambiar de niveles uno a la vez en el Modo Nivel y púlsela lo haría la tecla ENTER). para rotar por las diferentes opciones en el Modo Opción y en el • ENTER: Pulsarla con la tecla CLEAR para reinicializar un nuevo Modo Info. Se utiliza también para seleccionar el color en el juego. Pulse la tecla para cambiar bandos con el ordenador, Modo Posición. púlsela cuando el ordenador está pensando para forzarle a • TAKE BACK (RETROCEDER): Pulse para retroceder una mover. Púlsela para activar y desactivar las opciones de jugada individual (una jugada por ambos lados). Puede hacer instalación y para salir del Modo Nivel con su nuevo nivel retroceder hasta un máximo de 30 jugadas individuales. seleccionado. Púlsela para borrar el tablero en el Modo de • OPTION (OPCION): Pulse para entrar en el Modo Opción; Posición, luego vuelva a pulsarla para confirmar. dentro del Modo Opción, pulse para rotar a través de los grupos • POSITION (POSICION): Pulse para entrar en Modo Posición. de opciones principales. 6. ACL (Reset): En la base de la unidad. Se utiliza para eliminar • CLEAR: Pulsándolo simultáneamente con ENTER se descargas estáticas después de insertar baterías nuevas. reinicializará el ordenador para un nuevo juego. Púlselo para Pdf downloaded from http://www.thepdfportal.net/0d71f9df-8f27-4948-9469-8607446a2519_324239.pdf 80 INDICE INTRODUCCION 3.6 Niveles de Búsqueda del Mate (Cuadrados A6-H6) 3.7 Niveles de Entrenamiento (Cuadrados A7-H8) 4. MODO INFO: OBSERVAR Y APRENDER Utilizando el Modo Info 4.1 Variación Principal 4.2 Búsqueda de Información 4.3 Información del Reloj de Ajedrez 4.4 Contador de jugadas/ número de jugadas por partida 4.5 Quiere una pista? No tiene más que pedirla 5. OPCIONES PARA DIVERSION Y VARIEDAD Seleccionando las Opciones de juego 5.1 Opciones del Modo Operación 5.2 Opciones del Modo de Juego 5.3 Opciones de Rotación de Pantalla 6. VERIFICACION/COLOCACION DE POSICIONES 6.1 Verificando posiciones 6.2 Cambiando y colocando posiciones 7. DETALLES TECNICOS 7.1 La función ACL 7.2 Cuidado y Mantenimiento 7.3 Especificaciones Técnicas GUIA PARA LA SOLUCION DE PROBLEMAS Está preparado para entrar en el excitante mundo del ajedrez por ordenador? ¡Ha venido al lugar indicado! Su nuevo ordenador ofrece tantas opciones de juego, niveles de juego y características especiales que el ajedrez nunca volverá a ser lo mismo. El Comienzo Rápido al frente de este manual le llevará a empezar a jugar de inmediato y encontrará más detalles sobre operaciones básicas del juego en la Sección 1. Una vez haya aprendido lo básico continúe y explore el resto de este manual, aunque normalmente no le guste leer cuadernos de instrucciones. Descubrirá que este ordenador de ajedrez tiene todo tipo de otras características interesantes y llenas de diversión que le deleitarán. ¡Se lo garantizamos! Su nuevo ordenador conoce y sigue todas las reglas de ajedrez – puede estar seguro de que nunca le hará trampas. Para todos aquellos que no hayan jugando antes, hemos incluido un breve resumen de las reglas para que así pueden empezar a jugar. Para una información más detallada, porqué no visita su biblioteca lojal, donde estamos seguros encontrará muchos libros interesantes de ajedrez. 1. PARA EMPEZAR 1.1 Primero, Instalación de las baterías Su ordenador funciona con tres baterías AA (Tipo AM3/R6). Inserte las baterías en el compartimento de la base de la unidad asegurándose de que la polaridad es correcta. Utilice baterías alcalinas nuevas para que tengan una mayor duración. Encienda el ordenador pulsando GO/STOP, y un pitido señalará que la partida puede empezar. Si el ordenador no responde (una descarga eléctrica ha podido bloquearlo) utilice un clip o un objeto afilado para empujarlo hacia adentro en el agujero marcado ACL en la base de la unidad durante por lo menos un segundo. Esto reinicializará la unidad. Truco: Para conservar la energía y prolongar la vida de la batería, active la Opción Auto Power Down (ver Sección 5.1). 1.2 ¿Listo para jugar? ¡Aquí está cómo mover! Vale Ahora es el momento de empezar una partida. Es tan fácil no Pdf downloaded from http://www.thepdfportal.net/0d71f9df-8f27-4948-9469-8607446a2519_324239.pdf 81 ESPAÑOL COMIENZO RAPIDO TECLAS Y CARACTERISTICAS INTRODUCCION 1. PARA EMPEZAR 1.1 Primero, instalación de las baterías 1.2 ¿Listo para Jugar? ¡Aquí está cómo mover! 1.3 Turno del ordenador 1.4 ¿Cambio de opinión? Retroceso 1.5 ¿Partida Terminada? Por qué no jugar otra vez 1.6 ¿Demasiado fácil/Difícil? Cambie de nivel 2. MAS CARACTERISTICAS PARA EXPLORAR 2.1 ¿A quién le toca? Compruebe la pantalla 2.2 Movimientos especiales de ajedrez 2.3 Movimientos ilegales 2.4 Jaque, Mate y Tablas 2.5 Interrumpiendo la búsqueda del ordenador 2.6 Cambiando bandos con el ordenador 2.7 Aperturas incorporadas 2.8 Pensando durante el tiempo del oponente 2.9 Memoria de juego 3. NIVELES DE JUEGO Fijando un nivel de juego 3.1 Niveles Normales de Juego (Cuadrados A1-G2) 3.2 Nivel Infinito (Cuadrado H2) 3.3 Niveles de Torneo (Cuadrados A3-H3) 3.4 Niveles Relámpago (Cuadrados A4-H4) 3.5 Niveles para Principiantes (Cuadrados A5-H5) tiene más que seguir los siguientes pasos: a. Pulse GO/STOP para encender el ordenador si no lo ha hecho ya antes. b. Pulse las teclas CLEAR y ENTER a la vez para reinicializar el ordenador e iniciar una nueva partida de ajedrez. Coloque las piezas en sus posiciones de partida, con las piezas Blancas situadas más cerca de usted, como se indica en el Comienzo Rápido. c. Para hacer una jugada, pulse ligeramente la pieza que quiere mover hacia abajo hasta que oiga un pitido, - el tablero sensible reconocerá automáticamente su pieza. ¿No lo cree? Mire simplemente la pantalla, que está de repente llena de información- ¡enseña su pieza así como su color y el cuadrado que usted viine de pulsar! d. Coja la pieza y empújela ligeramente hacia abajo dentro del agujero del cuadrado al que está moviendo. Oirá un segundo pitido mientras el ordenador confirma su jugada. Acaba de realizar su primero movimiento completo de la partida. A continuación le toca al ordenador jugar. Notará que cuando mueve el ordenador lo hace instantáneamente al principio de una partida en vez de tomarse tiempo para pensar. Esto se debe a que está jugando de memoria, utilizando un “libro” de jugadas de apertura incorporado (para más información ver la Sección 2.7). para completar el retroceso. Puede repetirlo tantas veces como quiera, haciendo retroceder hasta 30 jugadas individuales (o 15 jugadas por cada lado). Para seguir jugando en cualquier momento, simplemente haga otra jugada en el tablero. Después de retroceder un peón capturado o/y coronado el ordenador se asegurará de que su tablero está correctamente instalado todavía recordándole que ponga la pieza capturada o/y el peón de nuevo en el tablero. Esto se indica mostrando el símbolo de pieza y su localización y encendiendo las luces del tablero para ese cuadrado. Para completar el retroceso, vuelva a poner la pieza indicada en el tablero y presione el cuadrado. Cuando corone en el caso del Rey, siga primero los pasos del retroceso como se describe anteriormente, haga lo mismo para el enroque para completar el retroceso. 1.5 ¿Partida Terminada? Por qué no jugar otra vez Siempre que termine una partida (o decida abandonar la partida que esta jugando), ¡es muy fácil volver a empezar! Reinicialice el ordenador pulsando las teclas CLEAR y ENTER a la vez y un sonido de New Game nos indica que el ordenador está listo para una nueva partida. El mismo sonido seguirá funcionando pero puede cambiarlo si así lo desea, como se explicó en la Sección 3. IMPORTANTE: Reincializar el ordenador para una nueva partida elimina los juegos que tenga abiertos en ese momento de la memoria del ordenador - tenga cuidado de no pulsar estas teclas por equivocación. 1.3 Ahora es el turno del ordenador Cuando el ordenador mueve, suena y enseña su jugada. Compruebe la pantalla—verá los cuadrados origen y destino de la jugada del ordenador, así como el color y el tipo de pieza que está moviendo. Presione hacia abajo la pieza en el cuadrado origen hasta que oiga un pitido. Mueva esa misma pieza al cuadrado destino indicado y presione hacia abajo para completar la jugada del ordenador. Y le toca a usted jugar otra vez… 1.6 ¿Demasiado Fácil/Difícil? Cambia de Nivel Cuando enciende su ordenador por primera vez, está automáticamente situado en el Nivel de Juego Normal D1 (cinco segundos por movimiento). Sin embargo, hay 64 diferentes niveles para escoger – intentará probarios todos. Para una descripción de los niveles de juego y de cómo se cambia de niveles ver Sección 3. 1.4 ¿Cambio de Opinión? Retroceso Mientras está jugando al ajedrez con su ordenador, nada “está 2. MAS CARACTERISTICAS PARA EXPLORAR escrito en piedra” puede cambiar de opinión o decidir jugar un movi2.1 ¿A quién le toca? Chequee la pantalla miento diferente siempre que quiera ! Cuando sea su turno de juego, Cuando el ordenador juega con las Negras, parpadea un cuadrado pulse simplemente TAKE BACK, y la pantalla indicará la jugada a negro en la pantalla mientras piensa. Una vez haya movido, aparece un cancelar. Pulse la pieza indicada hacia abajo en la casilla original de cuadrado blanco indicando que es el turno de juego de las Blancas. De destino y entonces púlsela hacia abajo en la casilla original de origen Pdf downloaded from http://www.thepdfportal.net/0d71f9df-8f27-4948-9469-8607446a2519_324239.pdf 82 Coronación de peones: Cuando corona un peón, primero haga su movimiento normalmente, presionando su peón hacia abajo en los cuadrados origen y destino. Después, presione la TECLA DE SÍMBOLO DE PIEZA para seleccionar su pieza a coronar (%, $, #, o @). El ordenador reconocerá su nueva pieza de inmediato, la mostrará por pantalla brevemente, y empezará a pensar en su próximo movimiento. No se dvide cambiar su pieza en el tablero. Cuando el ordenador corona un peón, la pantalla señala tanto el peón como la pieza coronada. No olvide sustituir el peón del ordenador por su nueva pieza. MOVIENDO PARA EL ORDENADOR: UN EJEMPLO Después de que el ordenador haya movido, tiene usted que realizar su jugada en el tablero. Aquí, la pantalla indica que el ordenador quiere mover su peón Negro (]!) de d7 a d5. Coja el peón d7 (indicado por las luces del tablero) y púlselo suavemente en la Casilla d7. Entonces las luces del tablero enseñan la Casilla d5. Pulse el peón en la Casilla d5 para completar la jugada del ordenador. ¡Ahora le toca jugar a usted otra vez! ዛዒዓዔዕዖዘዙዜ ዑ尷尽尻就尯尹尿尵ዑ ዐ屁屃屁巀屁屃屁屃ዐ ዏ巀居巀居巀居巀居ዏ ዎ居巀居屃居巀居巀ዎ ው巀居巀层巀居巀居ው ዌ居巀居巀居巀居巀ዌ ዋ屄层屄居屄层屄层ዋ ዊ尶局尺尴尮尼尾尸ዊ ዝዒዓዔዕዖዘዙዞ 2.3 Movimientos ilegales Su ordenador nunca aceptará una jugada ilegal. Si trata de hacer alguna, oirá un pitido doble bajo y la pantalla indicará el cuadrado de donde viene la pieza. O bien mueva esa misma pieza a otro cuadrado o bien vuelva a presionar hacia abajo la pieza en su cuadrado origen inicial y mueva una pieza diferente. Si no ejecuta el movimiento del ordenador correctamente, también recibirá un mensaje de error. Eso quiere indicar que o bien está moviendo una pieza equivocada o moviendo la pieza del ordenador a un cuadrado equivocado. Si el ordenador quiere mover su peón por ejemplo de D7 a D5, y que presiona usted hacia abajo en D7 y luego D6, la pantalla muestra Er:d5 brevemente, indicando su error. La pantalla vuelve entonces a enseñar el movimiento otra vez (d7-d5), y el ordenador espera que presione hacia abajo en D5 para completar su jugada. Si presiona hacia abajo una pieza y se muestra el cuadrado origen, pero decide no ejecutar ese movimiento, simplemente vuelva a presionar hacia abajo en ese mismo cuadrado para cancelar. Luego, haga otro movimiento. Si cambia de opinión después de registrar por completo su movimiento, retroceda la jugada como se describió en la Sección 1.4. un vistazo puede decir si el ordenador está pensando y a quién le toca mover. 2.2 Movimientos Especiales de Ajedrez Capturas: Para capturar, presione hacia abajo la pieza que quiere mover, quite la pieza capturada del tablero y presione su pieza hacia abajo en el cuadrado de la pieza capturada. Se muestran capturas como en E5•F6. Capturas en Passsant: En este tipo de capturas, el ordenador continúa mostrando su jugada hasta que presione hacia abajo el peón 2.4 Jaque, Mate y Tablas capturado y lo retire del tablero. Cuando un Rey está en Jaque, el ordenador muestra primero su Enroque: El ordenador automáticamente reconocerá un enroque jugada normalmente. Una vez se ha hecho el movimiento, CHECK después de que se haya movido el Rey. Una vez se ha presionado parpadea en la pantalla por unos pocos segundos, así como la jugada hacia abajo al Rey en sus cuadrados origen y destino, el ordenador de jaque. La pantalla vuelve después a mostrar el reloj. continúa mostrando su jugada hasta que presione sobre los cuadrados Si el ordenador descubre un Mate forzoso contra su oponente, origen y destino de la Torre para completar la jugada. Apunte que el primero realiza su jugada normalmente. Después de que el movimiento enroque corto se indica con 0-0 y que el enroque largo se indica con ha sido registrado en el tablero, el ordenador emite un mensaje de Pdf 0-0-0. downloaded from http://www.thepdfportal.net/0d71f9df-8f27-4948-9469-8607446a2519_324239.pdf 83 ESPAÑOL d7-d5 ዛዒዓዔዕዖዘዙዜ ዑ尷尽尻就尯尹尿尵ዑ ዐ屁屃屁屃屁屃屁屃ዐ ዏ巀居巀居巀居巀居ዏ ዎ居巀居巀居巀居巀ዎ ው巀居巀层巀居巀居ው ዌ居巀居巀居巀居巀ዌ ዋ屄层屄居屄层屄层ዋ ዊ尶局尺尴尮尼尾尸ዊ ዝዒዓዔዕዖዘዙዞ mate así como el número de jugadas durante varios segundos (e.j. =in 2 para un mate en dos jugadas). Luego la pantalla vuelve a mostrar el reloj. Cuando una partida acaba en jaque mate, la pantalla parpadea MATE (junto con la jugada de mate o con la pantalla del reloj) por un corto periodo de tiempo una vez se haya hecho la jugada. La pantalla vuelve entonces a mostrar el reloj. El ordenador reconoce tablas por ahogado, terceras repeticiones y la regla de los 50 movimientos. Después de que hayan ocurrido unas tablas la pantalla parpadea EnD (así como la jugada de tablas o la pantalla del reloj) brevemente una vez que se haya realizado el movimiento. La pantalla vuelve después a mostrar el reloj. 2.7 Aperturas Incorporadas Al principio de una partida, el ordenador jugará a menudo instantáneamente en muchos niveles. Esto es debido a que está jugando de memoria, utilizando su propio “libro” incorporado de aperturas de ajedrez. Este libro contiene las principales aperturas y muchas posiciones de grandes maestros del juego. Si la posición actual del tablero está en el libro, el ordenador da una respuesta a esa posición de una manera automática, en vez de tener que pensar en el movimiento. Una característica especial de este libro de aperturas del ordenador es su capacidad para tratar transposiciones. Una transposición ocurre cuando una posición alcanzada a través de un cierto conjunto de jugadas puede también ser alcanzada cuando esas mismas jugadas ocurren en un orden diferente. La Dirección integrada Automática de Transposición del ordenador permite tratar estos casos fácilmente. Se incluye también como característica única un libro seleccionable por el usuario, que le deja escoger entre los diferentes libros de aperturas, y hasta le permite apagarlo si así lo desea. Para detalles completos, ver Sección 5.2. 2.5 Interrumpiendo el proceso de Búsqueda del Ordenador ¿Piensa que el ordenador tarda demasiado en mover? Puede interrumpirlo en cualquier momento. Simplemente pulse ENTER mientras el ordenador está pensando, y se detendrá, jugando el mejor movimiento que haya encontrado hasta el momento. Esta característica es muy conveniente en niveles altos, donde el ordenador puede tomar mucho tiempo para mover, y en el Nivel Infinito donde el ordenador piensa indefinidamente si usted no lo para. En los Niveles de Búsqueda de Mate, el pulsar ENTER no forzará el ordenador a hacer un movimiento. Por el contrario, el ordenador indicará – – – – – para mostrar que ha sido interrumpido antes de encontrar un mate. Para seguir jugando, cambie a otro nivel. 2.8 Pensando durante el Tiempo del Oponente Mientras juega, notará que el ordenador algunas veces responde de inmediato a sus jugadas, incluso en mitad de partidas jugadas en niveles altos. Esto es debido a que el ordenador piensa durante su tiempo, utilizando el tiempo que usted tarda en mover para adelantarse y planear sus propias estrategias. Trata de adivinar el movimiento que probablemente usted vaya a hacer, y calcular sus respuestas a esa jugada en concreto mientras todavía usted está pensando. Si el ordenador ha acertado – no hay ninguna razón para que siga calculando – hará inmediatamente el movimiento que había ya encontrado. Para desactivar esta característica, encienda la Opción Modo Sencillo, como se describió en la Sección 5.2. 2.6 Cambiando de Bando con el Ordenador Para cambiar de bando con el ordenador, simplemente pulse ENTER cuando sea su turno-y el ordenador hará la siguiente jugada por su bando. Cambie de bando tantas veces como quiera. ¿Quiere que el ordenador juege la primera jugada con las Blancas al principio de una nueva partida? Pulse CLEAR y ENTER a la vez para reinicializarlo para una nueva partida, y entonces pulse ENTER. ¿Quiere ver el ordenador jugar al ajedrez contra sí mismo? Pulse ENTER después de cada jugada–mire como juega por cada bando del tablero, una jugada después de otra. ¡Estudie sus estrategias y puede mejorar su propio juego! 2.9 Memoria de la partida Puede interrumpir una partida en cualquier momento pulsando GO/ STOP. El juego se suspende y el ordenador almacena el juego actual (hasta 30 jugadas). Cuando vuelva a encender el ordenador, reanuda la partida donde se dejó. Pdf downloaded from http://www.thepdfportal.net/0d71f9df-8f27-4948-9469-8607446a2519_324239.pdf 84 Su ordenador de ajedrez ofrece 64 diferentes niveles de juego. ¡Cuando determine el nivel, tenga en cuenta que cuando el ordenador tiene más tiempo para pensar en sus jugadas, se hace más fuerte y juega mejor–justo como un jugador de ajedrez humano! Para un resumen de todos los niveles, diríjase al Gráfico de Niveles. Los niveles se describen también individualmente en esta sección. Fijando un Nivel de Juego Vea “¡USE ESTE DIAGRAMA PARA SELECCIONAR UN NIVEL DE JUEGO!” para una visión ilustrativa de cómo fijar un nivel y un gráfico enseñando todos los niveles de un vistazo. Hay dos métodos para fijar niveles–usando las teclas del juego o presionando los cuadrados del tablero. Cualquiera que sea el método que use, siempre pulse LEVEL primero para acceder al Modo Nivel, y 3.1 Niveles de Juego Normal (Cuadrados A1-G2) el ordenador mostrará el nivel de juego actual. Cuando accede al Modo NIVELES TIEMPO POR JUGADA PANTALLA Nivel por primera vez, el ordenador se halla en el Nivel de Juego A1 .................... 1 segundo ................. L 0:01 Normal D1 (con un tiempo medio de respuesta de 5 segundos por B1 .................... 2 segundos ................ L 0:02 movimiento) y la pantalla indica L0:05. C1 .................... 3 segundos ................ L 0:03 • Para seleccionar un nivel usando las teclas del juego: Después D1 .................... 5 segundos ................ L 0:05 de acceder al Modo Nivel pulsando LEVEL, cambie de niveles uno E1 .................. 10 segundos ............... L 0:10 > y WHITE/< < . Para abreviar, a la vez usando las teclas BLACK/> F1 .................. 15 segundos ............... L 0:15 pulse LEVEL varias veces para saltar ocho niveles de una vez. G1 .................. 20 segundos ............... L 0:20 Cuando la pantalla indica el nivel deseado, pulse ENTER para H1 .................. 30 segundos ............... L 0:30 registrar su nuevo nivel en el ordenador y salga del Modo Nivel. A2 .................. 45 segundos ............... L 0:45 • Para seleccionar un nivel presionando los cuadrados del B2 .................... 1 minuto .................... L 1:00 tablero: Como se indica en el Diagrama de Nivel, cada uno de los C2 .................... 1.5 minutos ............... L 1:30 64 cuadrados se corresponde con un nivel. Después de acceder al D2 .................... 2 minutos ................... L 2:00 Modo Nivel pulsando LEVEL, coja una pieza de ajedrez y presione E2 .................... 3 minutos ................... L 3:00 el cuadrado deseado para activar un nivel, usando el diagrama F2 .................... 5 minutos ................... L 5:00 como guía. Cuando presiona hacia abajo el cuadrado deseado y G2 .................. 10 minutos ................... L10:00 se muestra en la pantalla ese nivel, pulse ENTER para registrar su Cuando escoge uno de los Niveles Normales de Juego, está nuevo nivel en el ordenador y salir del Modo Nivel. Cuando haga escogiendo un tiempo medio de respuesta del ordenador. Hay que su selección vía los cuadrados del tablero, pulsar CLEAR tiene el destacar que los tiempos son promediados sobre un gran número de mismo efecto que pulsar ENTER registra su nivel en el ordenador. jugadas. Al principio y al final de la partida, el ordenador tiende a jugar • Para verificar el nivel sin cambiarlo: Si pulsa LEVEL para más rápido, pero en las posiciones complicadas a mitad de partida, verificar el nivel pero no quiere cambiar niveles en ese momento, puede tardar más en mover. Pdf downloaded from http://www.thepdfportal.net/0d71f9df-8f27-4948-9469-8607446a2519_324239.pdf 85 ESPAÑOL pulse CLEAR. Esto le devolverá al juego normal sin cambiar los parámetros de nivel o del reloj, aún mientras el ordenador esté pensando. Otros puntos importantes que recordar respecto a los niveles: • El cambiar de nivel siempre reinicializa los relojes del ajedrez. • No recomendamos cambiar de niveles mientras el ordenador está pensando. Si tiene que hacerlo, pulse primero ENTER para abortar la búsqueda del ordenador, y ejecutar su jugada en el tablero. Entonces, retrocesa la jugada del ordenador y cambie el nivel. Por último, pulse ENTER para que el ordenador empiece a pensar en el nuevo nivel. • Si cambia de nivel mientras el ordenador está pensando, el reloj se reinicializa y la búsqueda es cancelada. • Si pulsa LEVEL mientras el ordenador está pensando pero el nivel no se cambia (si pulsa CLEAR en vez de ENTER), el ordenador también abandonará la búsqueda. 3. NIVELES DE JUEGO ¡USE ESTE DIAGRAMA PARA SELECCIONAR UN NIVEL DE JUEGO! 1. Pulse LEVEL para 9 ply búsqueda PLY:9 level entrar en el Modo Nivel. NIVELES DE ENTRENAMIENTO 2. Después, seleccione su nivel usando el Diagrama de Niveles. Hay dos maneras para hacerlo. • Rote por los niveles hasta que su nivel aparezca: • Pulse BLACK/> para aumentar> niveles en uno. • Pulse WHITE/< para reducir< niveles en uno. • Pulse LEVEL para aumentar> niveles en ocho. • O simplemente localize su cuadrado de nivel y presione hacia abajo una de las piezas de ajedrez clavadas en el agujero para indicar ese nivel. enter 1 ply búsqueda PLY:1 A7 NIVELES DE BUSQUEDA DE MATE Mate en 1 jugada =in:1 A6 NIVELES DE PRINCIPIANTE B8 2 ply búsqueda PLY:2 B7 Mate en 2 jugadas =in:2 B6 11 ply búsqueda PLY:11 C8 3 ply búsqueda PLY:3 C7 Mate en 3 jugadas =in:3 C6 12 ply búsqueda PLY:12 D8 4 ply búsqueda PLY:4 D7 Mate en 4 jugadas =in:4 D6 13 ply búsqueda PLY:13 E8 5 ply búsqueda PLY:5 E7 Mate en 5 jugadas =in:5 E6 14 ply búsqueda PLY:14 15 ply búsqueda PLY:15 G8 F8 6 ply búsqueda PLY:6 7 ply búsqueda PLY:7 G7 F7 Mate en 6 jugadas =in:6 Mate en 7 jugadas =in:7 G6 F6 16 ply búsqueda PLY:16 H8 8 ply búsqueda PLY:8 H7 Mate en 8 jugadas =in:8 H6 1 segundo 2 segundos 3 segundos 4 segundos 5 segundos 6 segundos 7 segundos 8 segundos por jugada por jugada por jugada por jugada por jugada por jugada por jugada por jugada bEG:1 bEG:2 bEG:3 bEG:4 bEG:5 bEG:6 bEG:7 bEG:8 A5 B5 C5 D5 E5 G5 F5 H5 NIVELES DE RELAMPAGO 5 minutos 10 minutos 15 minutos 20 minutos 30 minutos 45 minutos 60 minutos 90 minutos por partida por partida por partida por partida por partida por partida por partida por partida bL:10 bL: 5 bL:15 bL:20 bL:30 bL:45 bL:60 bL:90 NIVELES DE TORNEO 40 jugadas 35 jugadas 40 jugadas 35 jugadas 40 jugadas 45 jugadas 50 jugadas 40 jugadas en 1:30 en 1:45 en 1:45 en 1:30 en 2:00 en 2:30 en 2:00 en 3:00 tr40 tr35 tr40 tr35 tr40 tr45 tr50 tr40 1:30:00 1:45:00 1:45:00 1:30:00 2:00:00 2:30:00 2:00:00 3:00:00 A4 A3 3. ¡Por último, pulse ENTER para salir del Modo de Nivel usando su nuevo nivel! A8 10 ply búsqueda PLY:10 B4 B3 C4 C3 D4 D3 E4 E3 G4 F4 G3 F3 45 segundos 1 minuto 1.5 minutos 2 minutos 3 minutos 5 minutos 10 minutos por jugada por jugada por jugada por jugada por jugada por jugada por jugada NIVELES DE JUEGO NORMAL + NIVEL INFINITO L0:45 A2 L1:00 B2 L1:30 C2 L2:00 D2 L3:00 E2 L5:00 F2 L10:00 G2 H4 H3 Nivel Infinito 9:99:99 H2 1 segundo 2 segundos 3 segundos 5 segundos 10 segundos15 segundos 20 segundos 30 segundos por jugada por jugada por jugada por jugada por jugada por jugada por jugada por jugada L0:01 L0:02 L0:03 L0:05 L0:10 L0:15 L0:30 L0:20 A1 B1 C1 D1 E1 F1 Para más detalles ver Sección 3. Pdf downloaded from http://www.thepdfportal.net/0d71f9df-8f27-4948-9469-8607446a2519_324239.pdf 86 G1 H1 3.2 Nivel Infinito (Cuadrado H2) TIEMPO PANTALLA ¿NECESITA AYUDA PARA ESCOGER UN NIVEL? ALGUNOS CONSEJOS PARA USTED H2 ............ No límite de tiempo ........... 9:99:99 En el Nivel Infinito, el ordenador buscará indefinidamente, hasta que encuentre un mate forzoso o una jugada forzosa; hasta que haya buscado por completo la posición hasta su máxima profundidad; o hasta que usted detenga su búsqueda pulsando ENTER. Si detiene la búsqueda, el ordenador ejecutará la jugada que hasta ese momento piensa es la mejor. Intenta experimentar con ese nivel - coloque interesantes posiciones en el tablero y deje que el ordenador las analice para usted. Pensará durante horas incluso durante días enteros, tratando de encontrar la mejor jugada posible. Y no olvide observar el ordenador mientras piensa - aprovéchese di la característica de Rotación de Pantalla descrita en la Sección 5.3. • ¿Es usted un principiante? Empiece con los Niveles de Principiante o los Niveles bajos de Entrenamiento. Estos niveles restringen la profundidad de búsqueda del ordenador, ocasionando un juego más débil y dándole la oportunidad de aprender sobre el juego y tal vez aun ganar. Para tener alguna oportunidad más de ganar, combine uno de estos niveles con la opción de Modo Sencillo (Sección 5.2), de tal manera que el ordenador no pueda pensar en su tiempo. • ¿Es usted un jugador intermedio o más avanzado? Pruebe los niveles Normal, de Entrenamiento o de Torneo. Los Niveles normales varían de sencillos hasta los difíciles con 10 minutos de tiempo de respuesta, y los Niveles de Torneo son sumamente desafiantes. Los Niveles de Entrenamiento le permiten fijar su profundidad de búsqueda deseada— conforme va ganando en cada nivel, pase al nivel superior. Y no olvide probar los Niveles de Muerte Súbita para rápidos y excitantes juegos de Ajedrez Rápido. • ¿Quiere experimentar? Use los Niveles de Búsqueda de Mates para solucionar problemas hasta el mate en ocho movimientos – intente buscar desde una posición en una de sus partidas, o poner un problema real de mate. Escoja el Nivel Infinito para que el ordenador analice complicadas posiciones durante horas y hasta días. 3.3 Niveles de Torneo (Cuadrados A3-H3) NIVELES JUGADAS/TIEMPO TOTAL MENSAJE ALTERNATIVO EN PANTALLA A3 ..... 40 Jugadas en 1 hr. 30 min. ............. tr40 1:30:00 B3 ..... 35 Jugadas en 1 hr. 45 min. ............. tr35 1:45:00 C3 ..... 40 Jugadas en 1 hr. 45 min. ............. tr40 1:45:00 D3 ..... 35 Jugadas en 1 hr. 30 min. ............. tr35 1:30:00 E3 ..... 40 Jugadas en 2 hrs. ........................ tr40 2:00:00 F3 ..... 45 Jugadas en 2 hrs 30 min. ............ tr45 2:30:00 G3 .... 50 Jugadas en 2 hrs. ........................ tr50 2:00:00 H3 ..... 40 Jugadas en 3 hrs. ........................ tr40 3:00:00 El Nivel de Torneo requiere que realice un cierto número de jugadas en un determinado tiempo. Si un jugador se excede del tiempo designado para un número determinado de jugadas, el ordenador parpadea TImE junto con el tiempo transcurrido indicando así que la partida ha terminado. Si lo desea, puede continuar jugando aunque el tiempo se haya agotado. Si escoge un Nivel de Torneo, puede querer fijar los relojes de ajedrez indicando la cuenta atrás del tiempo en vez de mostrar el tiempo transcurrido (ver Seccion 5.1). Cuando el reloj de juego se agota, el reloj de cuenta atrás automáticamente se convierte en un reloj normal. 3.4 Niveles Relámpago (Cuadrados A4-H4) NIVELES TIEMPO POR PARTIDA PANTALLA A4 .................... 5 minutos ................... bL: 5 B4 .................. 10 minutos ................... bL:10 C4 .................. 15 minutos ................... bL:15 D4 .................. 20 minutos ................... bL:20 E4 .................. 30 minutos ................... bL:30 F4 .................. 45 minutos ................... bL:45 G4 .................. 60 minutos ................... bL:60 H4 .................. 90 minutos ................... bL:90 En los Niveles Relámpago (también llamados “Niveles de Ajedrez Rápido” o “Muerte Súbita”), se determina el tiempo total para la partida completa. Si el tiempo de juego excede el determinado, el ordenador parpadea TImE junto con el tiempo transcurrido indicando que la Pdf downloaded from http://www.thepdfportal.net/0d71f9df-8f27-4948-9469-8607446a2519_324239.pdf partida se da por terminada. 87 ESPAÑOL NIVEL Si selecciona un Nivel Relámpago, puede querer fijar los relojes de ajedrez indicando la cuenta atrás del tiempo en vez de mostrar el tiempo transcurrido (ver Seccion 5.1). Cuando el reloj de juego se agota, el reloj de cuenta atrás automáticamente se convierte en un reloj normal. que supongan de 6 a 8 jugadas pueden tardar bastante más. Si no hay ningún mate o el ordenador no pudo encontrarlo, mostrará una serie de guiones (– – – – –). Para seguir jugando, simplemente cambie a otro nivel. 3.7 Niveles de Entrenamiento (Cuadrados A7-H8) 3.5 Niveles de Principiante (Cuadrados A5-H5) NIVELES TIEMPO POR JUGADA NIVELES A5 .................... 1 segundo ................. BEG:1 B5 .................... 2 segundos ................ BEG:2 C5 .................... 3 segundos ................ BEG:3 D5 .................... 4 segundos ................ BEG:4 E5 .................... 5 segundos ................ BEG:5 F5 .................... 6 segundos ................ BEG:6 G5 .................... 7 segundos ................ BEG:7 H5 .................... 8 segundos ................ BEG:8 ¿Es usted un jugador de ajedrez novato o principiante? Si es así, estos niveles están diseñados especialmente para usted! Aquí, el ordenador restringe su búsqueda de tal manera que deliberadamente juega con debilidad dándole una oportunidad para ganar. Los niveles empiezan fácilmente y se hacen más difíciles de manera gradual conforme vaya ganando en cada uno, siga avanzando hasta el siguiente. 3.6 Niveles de Búsqueda de Mate (Cuadrados A6-H6) NIVELES PROBLEMA PANTALLA NIVELES PANTALLA A7 .......... PLY: 1 A8 .......... PLY: 9 B7 .......... PLY: 2 B8 .......... PLY:10 C7 .......... PLY: 3 C8 .......... PLY:11 D7 .......... PLY: 4 D8 .......... PLY:12 E7 .......... PLY: 5 E8 .......... PLY:13 F7 .......... PLY: 6 F8 .......... PLY:14 G7 ......... PLY: 7 G8 ......... PLY:15 H7 .......... PLY: 8 H8 .......... PLY:16 En los Niveles de Entrenamiento, la profundidad de búsqueda del ordenador está limitada por un cierto número de jugadas, como se indica arriba. Al rotar por los niveles, el ordenador indica PLY:# para cada nivel. Un “ply” es una jugada individual una por cada bando, y el # es el número que representa la profundidad de la búsqueda. Por ejemplo, en el Nivel A7, el ordenador busca a una profundidad de un “ply” (PLY:1) y por lo tanto sólo se adelanta a una sola jugada individual. Por lo tanto, en este nivel, pasará a menudo por alto los mates en una sola jugada. ¡Esto produce un juego más débil, dando a los principiantes más oportunidades para batir el ordenador! PANTALLA PANTALLA A6 ................... Mate en 1 ................... =in:1 B6 ................... Mate en 2 ................... =in:2 4. MODO INFO: OBSERVAR Y APRENDER C6 ................... Mate en 3 ................... =in:3 Imagine: Está jugando con un amigo al ajedrez y le toca a él jugar. D6 ................... Mate en 4 ................... =in:4 Le encantaría saber en qué jugada está pensando, y le gustaría de E6 ................... Mate en 5 ................... =in:5 verdad conocer su opinión sobre la partida en el tablero. Pero por F6 ................... Mate en 6 ................... =in:6 supuesto no se lo preguntará –¡porque simplemente no se hace! – G6 ................... Mate en 7 ................... =in:7 Bien, adivine – cuando juegue contra este ordenador de ajedrez, podrá H6 ................... Mate en 8 ................... =in:8 preguntarle cuánto quiera y tendrá todas las respuestas. De hecho Seleccionando uno de estos niveles se activa un programa especial podrá conseguir una increíble cantidad de información sobre el proceso de Búsqueda de Mates. Si está en una posición en la que puede haber de pensamiento del ordenador. Si se lo pide, le enseñará la jugada en un mate y quiere que el ordenador lo encuentre, coloque el ordenador la que está pensando, la línea de juego que espera después de esta en uno de los Niveles de Búsqueda de Mate. El ordenador puede jugada, su evaluación de la situación actual en el tablero, cuál es la solucionar mates en hasta 8 jugadas. Mates de uno a cinco jugadas se profundidad de la búsqueda, y muchas otras cosas más. Como se normalmente bastante rápido, mientras que las soluciones Pdf encuentran downloaded from http://www.thepdfportal.net/0d71f9df-8f27-4948-9469-8607446a2519_324239.pdf 88 imaginará, estudiar esta información le ayudará a aprender mucho más sobre ajedrez. MODO INFO DE UN VISTAZO Utilizando el Modo Info ¿Cómo se accede a toda esta información de juego? Usando el Modo Info en cualquier momento. Si lo hace mientras el ordenador está pensando, verá que la información mostrada varía al considerar el ordenador diferentes jugadas y al buscar con más profundidad. INFO DE VARIACION PRINCIPAL: info x1 • Jugada 1 (Línea de juego prevista) white/ black/ Vea “MODO INFO DE UN VISTAZO” para un diagrama que resume todo sobre lo que indica el Modo Info. • Jugada 2 (Línea de juego prevista) • Jugada 3 (Línea de juego prevista) • Jugada 4 (Línea de juego prevista) INFO DE BUSQUEDA: La Información del Juego está dividida en cuatro grupos, y pulsando > y WHITE/< < se INFO se rota de un grupo a otro. Las teclas BLACK/> utilizan para rotar a través de los conjuntos, dentro de cada uno de los grupos. Pulse CLEAR para salir del Modo Info y volver al reloj de ajedrez normal. Después de aprender sobre el Modo Info, observe la Sección 5.3 para una descripción de la característica de Pantalla de Rotación. Al seleccionar esta característica, el ordenador automáticamente rota a través de la información solicitada a intervalos de un segundo cada vez que piensa en su jugada—puede propio mirar el ordenador en ese momento ¡“Pensar en voz alta”! Siempre que una información solicitada no este disponible, la pantalla indicará una línea de guiones (– – – – –). info x2 • Evaluación de la posición actual • 2 números: Profundidad de búsqueda + número de jugadas black/ examinadas hasta el momento • Jugadas corrientes bajo consideración • Número de posiciones buscadas por segundo white/ INFO DE RELOJ DE AJEDREZ: info x3 • Tiempo transcurrido desde la última jugada • Tiempo transcurrido para el 4.1 Variación Principal ordenador Pulse INFO la primera vez para conseguir información sobre la black/ • Tiempo transcurrido para el jugador variación principal (la línea de juego prevista, o la secuencia de • Tiempo restante para el ordenador* jugadas que el ordenador piensa se van a producir). La primera • Tiempo restante para el jugador* pantalla que verá, será la jugada que el ordenador está pensando en *Sólo para Niveles Relámpago/Torneo hacer. La variación principal se muestra en una profundidad máxima de > repetidamente para cuatro jugadas individuales. Pulse BLACK/> INFO DE NUMERO DE JUGADAS: saltar hacia adelante por todas las jugadas: info x4 • Número de jugadas por las Blancas • Jugada 1 (Línea de juego prevista) ejecutadas hasta el momento white/ • Jugada 2 (Línea de juego prevista) • Jugada 3 (Línea de juego prevista) • Jugadas de la presente partida black/ • Jugada 4 (Línea de juego prevista) < para retroceder y ver pantallas anteriores otra vez. Pulse WHITE/< Pulse CLEAR para volver a la pantalla de reloj normal. Pulse clear en cualquier momento para salir del Modo Info. Para más detalles, ver Sección 4. Al ser la primera jugada de la línea de juego prevista la que el asume usted va ha realizar, usted puede considerarla Pdf ordenador downloaded from http://www.thepdfportal.net/0d71f9df-8f27-4948-9469-8607446a2519_324239.pdf 89 ESPAÑOL white/ también como una pista. Por lo tanto—siempre que necesite ayuda, pulse INFO en su turno. 4.4 Contador de Jugadas/Jugadas de la Partida Pulse INFO por cuarta vez para enseñar el número de jugadas de < repetidas la partida hasta ahora. Puede pulsar entonces WHITE/< veces para paginar hacia atrás a través de las jugadas de su partida (hasta 30 jugadas individuales). • Número de movimientos Blancos hasta el momento • Jugadas de la partida actual > para avanzar a través de sus jugadas hasta Pulse BLACK/> cualquier punto. Pulse CLEAR para volver a la pantalla de reloj normal. 4.2 Información de Búsqueda Pulse INFO una segunda vez para conseguir información sobre la > repetidamente para pasar Búsqueda del ordenador. Pulse BLACK/> hacia adelante por estas cuatro pantallas: • Evaluación de la situación actual (basada en que un peón vale 1.0 punto; un número positivo indica que las Blancas van en cabeza). • Dos números: El primero es la profundidad de búsqueda actual, o el número de jugadas que el ordenador está anticipando; el segundo es el número de jugadas que el ordenador ha examinado hasta ahora. • La jugada actualmente considerada. • La rapidez de búsqueda, o el número de posiciones (nodos) que están siendo buscadas cada segundo. < para retroceder y ver pantallas anteriores otra vez. Pulse WHITE/< Pulse CLEAR para volver a la pantalla de reloj normal. 4.5 ¿Quiere una pista? ¡No tiene más que pedirla! Por si se le hubiera pasado esta característica cuando se mencionó en la Sección 4.1, queremos destacarla de nuevo—si alguna vez necesite consejo respecto a un movimiento, siempre puede pedir al ordenador que le dé una pista. Simplemente pulse INFO cuando le toca a usted jugar y el ordenador le sugerirá un movimiento por su bando. 5. OPCIONES PARA DIVERSION Y VARIEDAD 4.3 Informaciones sobre el Reloj de Ajedrez Sumándose a todas las características que ha aprendido hasta Pulse INFO una tercera vez para leer las informaciones dadas por ahora, su ordenador de ajedrez ofrece muchas otras excitantes el reloj. El reloj de ajedrez registra el tiempo para ambos lados. Pulse opciones de juego. Todas estas opciones son seleccionables por el > varias veces para mover adelante por las pantallas del BLACK/> usuario en cualquier momento durante una partida. Se describen en reloj: esta Sección individualmente, y de una forma resumida en el Diagrama • Tiempo transcurrido desde la última jugada de Modo de Opciones. • Tiempo transcurrido total para el ordenador • Tiempo transcurrido total para el jugador Seleccionando las Opciones de Juego • Tiempo restante para el ordenador (solo para los niveles Hay dos métodos para seleccionar opciones—usando las teclas del Relámpago y Torneo) juego como se describe abajo o bien pulsando los cuadrados del • Tiempo restante para el jugador (solo para los niveles Relámpago tablero. y Torneo) < para mover atrás y volver a ver pantallas anteriores. Pulse WHITE/< Vea “LO BASICO DEL MODO OPCION: ¡AQUI ESTA COMO!” Pulse CLEAR para volver a la pantalla de reloj normal. para un diagrama resumen sobre cómo usar el Modo Opciones, y El reloj se para cada vez que retrocede una jugada, comprueba una visión general de todas las opciones. niveles, selecciona opciones, verifica o coloca una posición, o apaga la Las Opciones de Juego se dividen en tres grupos: Modo Operación, unidad. En todos estos casos, sin embargo, los tiempos quedan en Modo de Juego, y Modo de Rotación de Pantalla. Pulsando OPCION se memoria, y los relojes reanudan en cuanto se vuelve a jugar. Siempre rota de un grupo a otro. Cada grupo contiene ocho diferentes opciones que cambie de niveles o pulse las teclas CLEAR y ENTER a la vez > y WHITE/< < se utilizan para rotar dentro de las y las teclas BLACK/> para reinicializar una nueva partida, los relojes de ajedrez siempre se opciones de cada grupo. Para cada opción, un plus (+) en la pantalla reinicializarán a 0:00:00. Pdf downloaded from http://www.thepdfportal.net/0d71f9df-8f27-4948-9469-8607446a2519_324239.pdf 90 jugadas una por una, sin permitir que el ordenador le conteste. ¡Verá que hay muchas maneras interesantes de usar esta característica! • Experimentar los juegos maestros. ¡Pulse ENTER y verá lo que haria el ordenador en cualquier posición! • Tenga almacenados sus propios juegos de ajedrez. Cuando se ha terminado un juego, juegue en cualquier posición a ver cómo otros movimientos o diferentes estrategias podrían haber influído en el resultado. • Estudie líneas de apertura introduciéndolas manualmente. • Juegue contra un amigo, con el ordenador como árbitro. Guiará la partida, comprobando la legalidad de las jugadas y controlando el tiempo por los dos bandos. Cuando juege contra otra persona, si cualquiera de los dos bandos necesita ayuda, pulse INFO para ver una jugada sugerida. Para ver lo que haría el ordenador en una determinada posición, pulse ENTER y el ordenador ejecutará la siguiente jugada. Después de haber hecho su jugada, el Contestador permanece apagado y usted puede continuar su partida. También anote que esta opción volverá automáticamente a su parámetro por defecto ACTIVAR siempre que use CLEAR y ENTER simultáneamente para empezar una nueva partida. indica que la opción está ACTIVADA y un menos (–) que la opción está DESACTIVADA. Pulse ENTER para activar y desactivar cada opción como se señala. Recuerde que pulsar OPCION rota por los tres grupos principales, con lo que puede cambiar a cualquiera de los grupos en cualquier momento. Una vez haya hecho toda su selección de opciones en cualquier o todos los grupos de opciones, pulse CLEAR para volver a un juego normal. Otro método de seleccionar opciones de juego es pulsando cuadrados de opción. Como se muestra en el Diagrama de Opciones, los Cuadrados A1-H1, A2-H2, y A3-H3 pueden utilizarse para activar o desactivar opciones. Primero, pulse OPCION para entrar en el Modo de Opciones; después coja una pieza de ajedrez y pulse el cuadrado deseado para acceder a cualquier opción, usando el diagrama como guía. Verá que pulsando repetidas veces un cuadrado activa y desactiva otra vez esa opción con un más (+) para ACTIVAR y un menos (–) para DESACTIVAR. Una vez haya hecho todas sus selecciones, pulse CLEAR para volver a su partida. Cuando el ordenador se enciende por primera vez, existen algunas opciones por defecto. Las opciones que están automáticamente en funcionamiento la primera vez que se enciende el ordenador aparecen en el diagrama con un más, y las que están desactivadas se muestran con un menos. Al inicializar el ordenador para una nueva partida, la mayoría de sus opciones se traspasan a su siguiente partida. Algunas excepciones son el Contestador, que automáticamente se coloca en ACTIVAR cuando empieza una nueva partida, y Jugando Blancas desde Arriba que automáticamente se coloca en DESACTIVAR. 5.1 Operación con el Modo de Opciones (Cuadrados A1-H1) Esta opciones afectarán a cómo maneja su ordenador. Pulse OPCION una vez para seleccionar las Opciones de Modo > y WHITE/< < de Operación. A continuación utilice las teclas BLACK/> para seleccionar opciones dentro de ese grupo, y pulse ENTER para encender (+) o apagar (–) las opciones. O simplemente, presione los cuadrados de opciones para encenderlas o apagarlas. c. Modo Silencioso (Cuadrado C1) Activado:+SIL Desactivado:-SIL Normalmente, el ordenador siempre pita cuando ha encontrado su jugada. Para un manejo en completo silencio, encienda el Modo Silencioso. d. Reloj con tic tac (Cuadrado D1) a. Modo Auto Contestador (Cuadrado A1) Activado:+tICk Desactivado:-tICk Activado:+AUt Desativado:-AUt Cuando enciende esta opción, se activa un sonido tic tac que hace Normalmente, el ordenador automáticamente contesta con una que el sonido del reloj del ordenador se oiga como el de un verdadero contra jugada siempre que usted ejecuta un movimiento. Sin embargo, reloj de ajedrez. ¡Imagínese que puede recrear el ambiente de un si apaga el Auto Contestador, puede registrar cualquier número de campeonato de ajedrez en su propia sala de estar! Pdf downloaded from http://www.thepdfportal.net/0d71f9df-8f27-4948-9469-8607446a2519_324239.pdf 91 ESPAÑOL b. Sonido con pulso de tecla (Cuadrado B1) Activado:+SNd Desativado:-SNd Esta opción le deja desactivar el sonido que acompaña cada tecla que pulsa. Seguirá oyendo pitidos cuando mueve el ordenador o cuando una jugada ilegal se ha producido o se ha dado una tecla de manera ilegal. LO BASICO DEL MODO DE OPCION: AQUI ESTA COMO 1. Pulse OPCION repetidamente para seleccionar un Modo. 2. A continuación, seleccione su(s) 3. option x1 = MODO DE OPERACION (AUt...) x2 = MODO DE JUEGO (SEL...) option opción(es), usando el Diagrama de Opciones de abajo. Hay dos maneras option x3 = MODO DE ROTACION DE PANTALLA (rd:1...) de hacer esto: • Rote por las diferentes opciones option x4 = vuelta al MODO DE OPERACION... dentro de ese Modo: • Pulse BLACK/> para rotar hacia > adelante. B4 G4 H4 D4 E4 F4 C4 A4 • Pulse WHITE/< para rotar Variación Variación Profundidad Nodos Variación Variación Posición Tiempo por hacia < atrás. OPCIONES ply 1 ply 2 y Buscados ply 3 ply 4 Evaluación Jugada DE • Cuando su opción aparece Movimientos -rd:d -rd:1 -rd:2 -rd:n -rd:t -rd:3 -rd:4 -rd:E pulse ENTER para componerla DEROTACIÓN PANTALLA B3 H3 G3 E3 F3 D3 C3 A3 en on (+) o descomponerla en Modo Libro Libro Libro Libro de Libro Selectiva/ Juego off (–). OPCIONES Sencillo Pasivo Activo Completo Torneo On/Off Búsqueda Aleatorio • O localice su cuadrado de opción DE MODO Fuerza Bruta y presione hacia abajo una de las DE JUEGO +SEL -EASY -RANd -bk:P -bk:A -bk:? -bk:t +bOOk B2 H2 F2 G2 E2 C2 D2 A2 piezas de ajedrez clavadas en el Apagado Jugando Auto Sonido con Modo Reloj Reloj con Test del agujero para componerlo en on (+) OPCIONES Contestador Teclas Silencioso Tic Tac cuenta atrás Sistema Automático Blancas DE MODO o descomponerlo en off (–). desde arriba DE Por último, pulse CLEAR -tOP -aPd +AUT +SNd -SIL -tICK -cdn -tESt OPERACIÓN B1 H1 D1 E1 F1 G1 C1 A1 para salir del Modo de clear Opción, usando su(s) nueva(s) opcion(es). Para más detalles ver Sección 5. e. Reloj con Cuenta Atrás (Cuadrado E1) Activado:+cdn Desactivado:-cdn El encender esta opción hará que el ordenador enseñe el tiempo restante en vez del tiempo que ya ha transcurrido. Anote que esta opción está disponible solamente en combinación con los niveles de Torneo y Relámpago. f. Test del Sistema (Cuadrado F1) Activado:+tESt Desactivado:-tESt El Test del Sistema se incluye fundamentalmente como un herramiento de solución de problemas. Después de activar esta opción > rotará repetidamente por seleccionando ++tESt, el pulsar BLACK/> todos los segmentos de la pantalla PCL. Para salir del test, pulse CLEAR y ENTER a la vez para reinicializar el ordenador. ATENCION: Tenga cuidado de no activar esta opción durante un Pdf downloaded from http://www.thepdfportal.net/0d71f9df-8f27-4948-9469-8607446a2519_324239.pdf 92 Cuando el ordenador juega Blancas por encima (Sección 5.1, Opción H1) asegúrese de colocar las piezas correctamente. Observe que los Reyes y Damas están posicionados de manera diferente, y la notación del tablero está invertida. Cuando el ordenador juega Blancas por encima, la notación del tablero esta automáticamente invertida. Es más, esta opción volverá a su opción por defecto DESACTIVADO cuando se empieze una nueva partida. 5.2 Las Opciones de Modo de Juego (Cuadrados A2-H2) Estas opciones afectan el ordenador en cómo selecciona sus movimientos. Pulse OPCION dos veces para seleccionar las Opciones de > y WHITE/< < para Modo de Juego. Luego, use las teclas BLACK/> seleccionar las opciones dentro de ese grupo y pulse ENTER para activar las opciones (+) o (–). O simplemente, pulse los cuadrados de opciones para activarlas las o desactivarlas. Para más detalles ver Sección 5.1. juego, ya que reinicializar el ordenador es la única manera de salir del test, con lo que perdería la partida que estuviese jugando. a. Búsqueda Selectiva (Cuadrado A2) Activado:+SEL Desactivado:-SEL El programa de este ordenador de ajedrez usa normalmente un algoritmo de Búsqueda Selectiva. Ello le permite al ordenador ver combinaciones que de otra manera tardaría mucho más en computar. Apagar esta opción seleccionando -SEL hace que el programa se cambie a un potente algoritmo de Fuerza Bruta. Este método de búsqueda minimiza el riesgo de un ocasional olvido. Apunte que los Niveles de Búsqueda de Mate siempre usan el método de Fuerza Bruta. g. Apagado Automático (Cuadrado G1) Activado:+aPd Desactivado:-aPd La opción de Apagado Automático es una característica de ahorro de batería. Cuando esta opción está activada, el ordenador se apagará automáticamente si no se pulsa ninguna tecla o no se efectúa ningún movimiento por un tiempo aproximado de 15 minutos. Para continuar la partida donde la dejó, pulse GO/STOP para volver a encender el ordenador. Fíjese que el ordenador no se apagará mientras está pensando. b. Modo Sencillo (Cuadrado B2) Activado:+EASy Desactivado:-EASy ¿Quiere ganar más partidas contra el ordenador? Trate de encender h. Juegue Blancas por Encima (Cuadrado H1) el Modo Sencillo, que impide al ordenador pensar durante el tiempo de Activado:+tOP Desactivado:-tOP usted. Esto adebiliza todos los niveles de juego sin afectar los controles ¿Quiere salirse del estandard normal y dejar que el ordenador de tiempo del ordenador. Normalmente, como se describe en la Secjuegue con las Blancas por encima del tablero? Pruebe entonces esta ción 2.8, el ordenador piensa durante su tiempo, usando el tiempo en interesante opción. Escoja +tOP al principio de una nueva partida, y el que usted contempla su próxima jugada para pensar por adelante y coloque las piezas Negras sobre el tablero de su lado, como se planificar sus estrategias. ¡Esta es una de las explicaciones de porqué muestra en el diagrama de esta sección. Luego, pulse ENTER para su ordenador es un oponente tan duro! Al utilizar el Modo Sencillo para empezar la partida. Observe cómo el ordenador ejecuta la primera que todos los niveles sean más débiles, tiene realmente muchos más jugada por las Blancas por encima del tablero. niveles entre los que escoger. Pdf downloaded from http://www.thepdfportal.net/0d71f9df-8f27-4948-9469-8607446a2519_324239.pdf 93 ESPAÑOL PRUEBE LAS NEGRAS DESDE EL FONDO: ESTA ES LA POSICION Vea “PRUEBE LAS NEGRAS DESDE EL FONDO: ESTA ES LA POSICION” para una correcta colocación del tablero usando esta opción. ዛዙዘዖዕዔዓዒዜ ዊ尸尾尼尮尴尺局尶ዊ ዋ层屄层屄层屄层屄ዋ ዌ巀居巀居巀居巀居ዌ ው居巀居巀居巀居巀ው ዎ巀居巀居巀居巀居ዎ ዏ居巀居巀居巀居巀ዏ ዐ屃屁屃屁屃屁屃屁ዐ ዑ尵尿尹尯就尻尽尷ዑ ዝዙዘዖዕዔዓዒዞ c. Juego Aleatorio (Cuadrado C2) Activado:+RaNd Desactivado:-RaNd Active esta opción para tener una mayor variedad de jugadas. En vez de seleccionar una sola de las mejores jugadas, el ordenador escogerá una de las mejores jugadas para jugar consultando con su Procesador Aleatorio incorporado. escoger siempre la mejor línea de juego posible para cada apertura. Mientras ello provoca el mejor juego de ajedrez, también reduce la selección de jugadas del ordenador limitando las líneas disponibles del libro. Si se escoge esta opción, las opciones de Libro Activo y Libro Pasivo están desactivadas. h. Libro ON/OFF (Cuadrado H2) Activado:+bOOk Desactivado:-bOOk Coloque esta opción en -BOOK para bloquear completamente el libro de aperturas incorporados en el ordenador. Cuando desactiva de esta forma el libro, se fuerza el ordenador a tomarse tiempo para pensar en sus jugadas desde el principio de la partida, en vez de usar jugadas contenidas en su memoria. Para más detalles sobre aperturas, ver Sección 2.7. Si desactiva completamente el libro, todas las demás opciones de libro quedan automáticamente desactivadas. d. Libro Pasivo (Cuadrado D2) Activado:+bk:P Desactivado:-bk:P Seleccionar la opción de Libro Pasivo fuerza el ordenador a dar preferencia a las posiciones pasivas o cerradas a la hora de decidir qué línea de juego seguir. Si se escoge esta opción, las opciones de Libro Activo y de Libro de Torneo son desactivadas. e. Libro Activo (Cuadrado E2) Activado:+bk:A Desactivado:-bk:A Seleccionar la opción de Libro Activo fuerza el ordenador a dar preferencia a las líneas activas o a posiciones abiertas a la hora de decidir qué línea de juego seguir. Si se escoge està opción, las opciones de Libro Pasivo y de Libro de Torneo son desactivadas. 5.3 Las Opciones de Rotación de Pantalla (Cuadrados A3-H3) IMPORTANTE: La opción de Rotación de Pantalla está activada solamente CUANDO EL ORDENADOR ESTA PENSANDO. Normalmente, la pantalla del ordenador indica el tiempo que tiene el jugador para mover. Sin embargo, la pantalla puede mostrar otra información también, como se describe en la Sección 4 (Modo Info). La opción de Rotación de Pantalla trabaja a la par con el Modo Info, ya que le permite escoger qué pantallas de Info quiere ver, y luego le permite rotar resultado de su elección en incrementos de un segundo. Puede encender alguna o todas las opciones de Rotación de Pantalla, si lo desea. Pulse OPCION tres veces para seleccionar las Opciones de > y WHITE/< < Rotación de Pantalla. Luego utilice las teclas BLACK/> para seleccionar las opciones que quiere ver rotar en la pantalla. Las opciones se describen a continuación y quedan resumidas en el Diagrama Modo de Opción de esta sección. Pulse ENTER para encender (+) o apagar (–) estas opciones. O bien simplemente presione los cuadrados de opción para activar o desactivar las opciones. Si piensa que la pantalla de información cambia demasiado rápido mientras rota, pulse INFO para congelar la pantalla. Pulsar sucesivag. Libro de Torneo (Cuadrado G2) > y WHITE/< < le permitirá rotar por mente las teclas INFO, BLACK/> Activado:+bk:t Desactivado:-bk:t todas las pantallas manualmente de pantalla, como se describió en la Cuando activa la opción de Libro de Torneo, fuerza el ordenador a Sección 4. Para empezar de nuevo la rotación de pantalla, pulse Pdf downloaded from http://www.thepdfportal.net/0d71f9df-8f27-4948-9469-8607446a2519_324239.pdf f. Libro Completo (Cuadrado F2) Activado:+bk:? Desactivado:-bk:? Activar la opción de Libro Completo da al ordenador libertad para escoger cualquier movimiento en su libro de aperturas incorporado, con lo que verá jugar una mayor variedad de líneas de apertura. Si se escoge esta opción, las opciones de Libro Pasivo, Activo y de Torneo están desactivadas. Cuando esta opción funciona, puede ver el ordenador ejecutar movimientos cuestionables. Ello es debido a que su libro de aperturas incorporado tendrá respuestas a ciertas líneas de juego (incluso las cuestionables), por si se jugasen. Aunque el ordenador por sí solo no ejecutaría ese tipo de movimientos, necesita saber cómo responder ante ellos de la mejor manera posible. Por lo tanto, cuando activa el Libro Completo, el ordenador puede potencialmente hacer uno de esos movimientos. 94 OPCION seguido de CLEAR. En todo caso, cuando el ordenador empiece a pensar en su próxima jugada, la pantalla empezará de nuevo a rotar automáticamente. La información que puede ver mientras el ordenador está pensando incluye lo siguiente: • rd:1 to rd:4 = línea prevista de juego (hasta cuatro jugadas invidivuales) • rd:E = una evaluación de la posición actual • rd:d = la profundidad de búsqueda del ordenador, y el número de jugadas examinadas hasta ahora durante la partida • rd:n = el número de nodos buscados por segundo • rd:t = cuánto tiempo ha tomado el movimiento hasta el momento. Cuando una información solicitada no está disponible, la pantalla mostrará una serie de guiones (– – – – –). Para una completa descripción de estas opciones y detalles sobre cómo interpretar exactamente las pantallas, ver Sección 4. volver al juego normal. 6.2 Cambiando y Colocando posiciones El Modo de Posición es una característica excitante que le deja colocar posiciones especiales en el tablero desde las que jugar, o plantear problemas que quiere que el ordenador solucione. Precaución: Todas las jugadas anteriores en el presente juego se borrarán de la memoria del ordenador si hace cambios en la posición durante una partida. Pulse POSITION para entrar en el Modo de Posición, y la pantalla indicará -POS-. Puede cambiar o introducir una posición siempre que sea su turno de juego. Una vez colocada su nueva posición, pulse CLEAR para salir del Modo de Posición. • Para quitar una pieza del tablero, presione la pieza hacia abajo en su cuadrado y qúitela. Vea cómo la pantalla indica el tipo de pieza y el color, así como un signo menos (–) y la localización del cuadrado. 6. VERIFICACION/COLOCACION DE POSICIONES • Para mover una pieza de un cuadrado a otro, presione la pieza 6.1 Verificando posiciones hacia abajo en su cuadrado de origen, cógela, y presione hacia abajo en el nuevo cuadrado. Mientras hace esto, la pantalla Vea “¡ES FACIL VERIFICAR PIEZAS!” para un ejemplo de indicará un signo menos (–) para el primer cuadrado, y un signo utilización paso a paso del Modo de Verificación. más (+) para el segundo. Si derrama las piezas de ajedrez o si piensa que su posición en el • Para añadir una pieza al tablero, primero pulse la TECLAS DE tablero puede ser incorrecta, el ordenador puede verificar la localizaSÍMBOLO DE PIEZA para esa pieza (&, %, $, #, @, o !). ción de todas las piezas para usted. Asegúrese que la pantalla muestra el símbolo de color correcto Cuando es su turno pulse uno de las TECLAS DE SÍMBOLO DE para la pieza que quiere añadir. Si no es así, pulse las teclas PIEZA (&, %, $, #, @, o !). El ordenador le enseña donde se > o WHITE/< < para cambiar el color. Cuando la pantalla BLACK/> encuentra la primera pieza de este tipo la pantalla indica el símbolo de muestra el tipo de pieza y el color correctos, coloque la pieza en el la pieza, el indicador de color y la designación del cuadrado. Pulse la cuadrado deseado y presione hacia abajo suavemente. La pantalla misma TECLAS DE SÍMBOLO DE PIEZA otra vez para ver dónde se indicará un signo (+) así como la localización de ese cuadrado. encuentra la siguiente pieza de ese mismo tipo. Todas las piezas Para añadir otra pieza del mismo tipo, simplemente presione hacia Blancas se muestran primero, después las piezas Negras. Cuando no abajo en otro cuadrado. Para añadir una pieza diferente, pulse una hay mas piezas de ese tipo, solo el símbolo de la pieza permanece en TECLAS DE SÍMBOLO DE PIEZA diferente y siga los mismos la pantalla. pasos descritos arriba. ¿Quiere verificar más piezas? Simplemente repita el procedimiento • Para limpiar el tablero, pulse ENTER mientras está en el Modo anterior usando las otras TECLAS DE SÍMBOLO DE PIEZA, Posición. La pantalla indicará _ como símbolo de un tablero de el tablero por completo si lo desea. Pulse CLEAR para ajedrez vacío. Pulse una vez más ENTER para confirmar que Pdf verificando downloaded from http://www.thepdfportal.net/0d71f9df-8f27-4948-9469-8607446a2519_324239.pdf 95 ESPAÑOL Vea “PRUEBE EL MODO DE POSICION” para tener una idea de cómo funciona esta característica. PRUEBE EL MODO DE POSICION ¡ES FACIL VERIFICAR PIEZAS! new game clear enter 1. Pulse CLEAR y ENTER a la vez para reinicializar el ordenador para una nueva partida. Pantalla : [ 0:00:00. new game clear 2. Pulse la tecla del CABALLO. Pantalla : [,@,b1 (el primer Caballo Blanco). position 3. Pulse la tecla del CABALLO otra vez. Pantalla : [,@,G1 (el segundo Caballo Blanco). 4. Pulse la tecla del CABALLO otra vez. Pantalla : ],@,b8 (el primer Caballo Negro). 5. Pulse la tecla del CABALLO otra vez. Pantalla : ],@,g8 (el segundo Caballo Negro). 6. Pulse la tecla del CABALLO otra vez. Pantalla : @ (no hay más Caballos en el tablero). clear enter 2. Pulse POSITION para entrar en el Modo Posición. Pantalla : -POS-. E2 3. Presione hacia abajo el peón Blanco en el cuadrado E2 y quítelo del tablero. Pantalla : [,!,-E2. E3 4. Presione hacia abajo ese mismo peón en el cuadrado E3 para añadirlo al tablero. Pantalla : [,!,+E3. D8 5. Presione hacia abajo la Dama Negra en el cuadrado D8 y quítela del tablero. Pantalla : ],%,-D8. H5 6. Presione hacia abajo esa misma Dama en el cuadrado H5 para añadirla al tablero. Pantalla : ],%,+H5. 7. Repita para verificar cualquier otra pieza. Pulse CLEAR para salir del Modo de Verificación. Para más detalles ver Sección 6.1. 1. Pulse CLEAR y ENTER a la vez para reinicializar el ordenador para una nueva partida. Pantalla : [ 0:00:00. white/ 7. Pulse WHITE/< para cambiar el color para mover a continuación. quiere limpiar el tablero. A continuación añada piezas como se ha 8. Pulse CLEAR para salir. descrito previamente. Si decide no vaciar el tablero, pulse CLEAR clear para cancelar. Esta característica puede ser muy cómoda para Para más detalles ver Sección 6.2. cuando quiere colocar una posición con solo unas pocas piezas, cuando seriá más sencillo empezar con un tablero vacío. • Una vez cambiada la posición del tablero como se menciona normal excede el número prescrito, o una en la que el Rey está en arriba, asegúrese que el indicador de color en la pantalla indica el jaque y no debe moverse. En estos casos el ordenador simplemente color correcto del bando que tiene que mover. Cambie el color, si pitará cuando pulse CLEAR y no se le permitirá salir del Modo de > o WHITE/< <. es necesario, pulsando BLACK/> Posición. Compruebe la posición con las TECLAS DE SÍMBOLO DE • Para salir del Modo de Posición, pulse CLEAR. Volverá al juego PIEZA, si es necesario, y corrija la posición (añadiendo o quitando una normal, con sus nuevas posiciones en el tablero. pieza o moviendo una pieza incorrectamente colocada). Seguidamente Note que cualquier posición legal puede introducirse utilizando los pulse CLEAR para salir del Modo de Posición. procedimientos anteriores. El ordenador no le permitirá introducir una ilegal,from comohttp://www.thepdfportal.net/0d71f9df-8f27-4948-9469-8607446a2519_324239.pdf una en la que el número de piezas para un juego Pdf posición downloaded 96 7.3 Especificaciones Técnicas Teclas : 16 Pantalla LCD : 48 segmentos Baterías : 3 x AA/AM3/R6 (1.5V) Células Consumo de Energía : 330 mW máximo Dimensiones: 335 x 302 x 35 mm Peso : 975 g (sin las baterías) 7. DETALLES TECNICOS 7.1 La función ACL Los ordenadores se quedan algunas veces “inertes” debido a descargas estáticas o otras perturbaciones eléctricas. Si ocurriera algo de esto, retire las baterías y utilice un alfiler o algún otro objeto punzante para empujar en el agujero marcado ACL en la base de la unidad por lo menos un segundo. Esto reinicializará el ordenador. Por favor guarde esta información para referencia futura. Saitek reserva el derecho a introducir cambios sin previo aviso en beneficio del progreso. ESPAÑOL 7.2 Mantenimiento y cuidado Su ordenador de ajedrez es un instrumento de precisión electrónico y no debe ser sometido a un brusco manejo o expuesto a temperaturas extremas o a la humedad. Asegúrese de retirar las baterías antes de limpiar la unidad. No use agentes químicos ni líquidos cuando limpie la unidad ya que pueden dañar el plástico. Baterías débiles deben ser sustituidas rápidamente ya que pueden presentar fugar y dañar el ordenador. Por favor tome nota también de lo siguiente respecto al uso de las baterías. Atención: Use solo baterías alcalinas o carbono zinc. No mezcle diferentes tipos de baterías o baterías nuevas con usadas. No recargue baterías no recargables. Utilice solamente las baterías recomendadas o equivalentes. Asegúrese de observar la polaridad correcta cuando inserte las baterías. Baterías viejas deben ser retiradas de la unidad de inmediato. No provoque el corto circuito de la alimentación de los terminales. Pdf downloaded from http://www.thepdfportal.net/0d71f9df-8f27-4948-9469-8607446a2519_324239.pdf 97 GUIA DE SOLUCION DE PROBLEMAS SINTOMAS POSIBLES CAUSAS ACCIONES QUE TOMAR El ordenador no reacciona, se comporta erráticamente o se congela durante la partida. • Baterías no instaladas correctamente. • Baterías débiles o malas. • Una descarga estática o una perturbación eléctrica ha causado el bloqueo del ordenador. • Reinstale las baterías, asegurándose de mantener la polaridad correcta. • Sustituya las baterías. • Presione en el agujero marcado ACL para reinicializar el ordenador (ver Sección 7.1). La pantalla es difícil de leer. • Baterías débiles o malas. • Sustituya las baterías por unas nuevas alcalinas. El ordenador no hace una jugada. • La opción Contestador puede estar apagada. • El ordenador sólo responde automáticamente si el Contestador está activado (ver Sección 5.1). El ordenador no acepta su jugada. • El ordenador está pensando durante mucho tiempo en un nivel alto. • ¿Es su turno? ¿Está su Rey en jaque? ¿Pone su jugada a su Rey en jaque? ¿Está tratando de coronar incorrectamente? ¿Está moviendo a un cuadrado ilegal? • Para interrumpir el ordenador, pulse ENTER. Aparece un mensaje de error cuando se presiona un cuadrado. • El ordenador está pensando (su símbolo de color está parpadeando). • Para interrumpir el ordenador, pulse ENTER. No puede salir del Modo Posición con CLEAR - el ordenador sólo emite pitidos. • Puede no haber introducido la última jugada del ordenador correctamente (cuadrado origen o destino equivocado). • Compruebe la pantalla y pulse el cuadrado correcto para completar la jugada del ordenador. La pantalla indica _. • Ha colocado una posición ilegal. Un Rey puede estar en jaque, se puede que haya demasiados peones en el tablero, etc. • Compruebe su posición e introduzca los cambios necesarios (ver Sección 6.2). Pulse CLEAR otra vez para salir del Modo de Posición. El ordenador parece estar introduciendo jugadas ilegales. • Está en el Modo Posición y ha pulsado ENTER para vaciar el tablero. • El ordenador ha realizado una jugada especial como en passant, coronación o un ascenso de peón. • Su posición en el tablero es incorrecta. • Para vaciar el tablero, pulse ENTER otra vez para cancelar pulse CLEAR (ver Sección 6.2). • Revise las reglas. Verifique la posición (ver Sección 6.1). El ordenador está haciendo jugadas instantáneas o irracionales. • Baterías a punto de agotarse. • El ordenador puede estar en un nivel bajo en el que mueve rápido pero juega más débil de lo normal debido a que su profundidad de búsqueda está limitada. • Baterías a punto de agotarse. • Sustituya las baterías por unas nuevas alcalinas. • Pulse LEVEL para comprobar el nivel (ver Sección 3). Cambie a otro nivel si lo desea. El ordenador está silencioso. • La opción de Modo Silencioso ha podido ser activado. • Compruebe los parámetros de las opciones (Sección 5.1). • Repase las reglas. Verifique la posición para estar seguro de que es correcta (ver Sección 6.1). • Verifique la posición (ver Sección 6.1). • Sustituya las baterías por unas nuevas alcalinas. Pdf downloaded from http://www.thepdfportal.net/0d71f9df-8f27-4948-9469-8607446a2519_324239.pdf 98 BLITZSTART Om onmiddellijk een partij te spelen zonder eerst de hele handleiding te lezen, volg eenvoudige deze Blitzstart stappen! 2 3 4 Open het batterij deksel aan de onderkant van het toestel en breng drie “AA” (type AM3/R6) batterijen aan. Zorg er voor de juiste polariteit in acht te nemen. Plaats het batterij deksel terug. Druk op GO/STOP om de computer aan te schakelen. Indien het toestel niet reageert, stel het toestel terug zoals vermeld in Sectie 7.1. Zet de stukken in hun beginstand op, met de Witte stukken het dichtst bij u, zoals getoond in deze diagram. Om de computer voor een NEW GAME (nieuw schaakspel) in te stellen, druk gelijktijdig op de CLEAR en ENTER toetsen. 5 Voer de zetten op het bord uit, door de schaakstukken zachtjes op de van en naar velden aan te drukken voor iedere zet. 6 Zodra de computer een zet uitvoert, wordt de zet op het beeldscherm getoond. U ziet het stuk tezamen met de kleur van het stuk en de van en naar velden van de zet van de computer. In dit voorbeeld wil de computer dat u zijn Zwarte pion van E7 naar E5 verplaatst. Druk de pion van de computer op Veld E7 en druk hem daarna op Veld E5. Dit vervolledigt de zet van de computer en nu is het weer aan uw beurt. Maak uw volgende zet zoals hierboven beschreven. Geniet van uw spel! 3 x AA/AM3/R6 go/stop ዛዒዓዔዕዖዘዙዜ ዑ尷尽尻就尯尹尿尵ዑ ዐ屁屃屁屃屁屃屁屃ዐ ዏ巀居巀居巀居巀居ዏ ዎ居巀居巀居巀居巀ዎ ው巀居巀居巀居巀居ው ዌ居巀居巀居巀居巀ዌ ዋ屄层屄层屄层屄层ዋ ዊ尶局尺尴尮尼尾尸ዊ ዝዒዓዔዕዖዘዙዞ U kunt om het even wanneer op GO/STOP drukken om de computer uit te schakelen. Uw huidige positie en partij (tot 30 individuele zetten) worden in het geheugen van de computer bewaard. Wanneer u de computer weer aanschakelt, kunt u dadelijk verder spelen van de positie waar u het laatst was. new game clear enter Pdf downloaded from http://www.thepdfportal.net/0d71f9df-8f27-4948-9469-8607446a2519_324239.pdf 99 NEDERLANDS 1 TOETSEN EN KENMERKEN 1. OPSLAGRUIMTE SCHAAKSTUKKEN: Voor het bewaren van stukken en geslagen stukken. 2. BEELDSCHERM: Gebruikt om de zetten en zet informatie tijdens het spel te tonen. Tevens gebruikt voor selectie van niveau en optie, stukken verificatie, opstelling en meer. 3. SENSOR SCHAAKBORD: Elk veld bezit een sensor die de verplaatsing van een stuk registreert. Bepaalde velden kunnen tevens in de Niveau Modus en Optie Modus gebruikt worden om niveau’s en opties te selecteren. 4. BATTERIJ VAK: In de onderkant van het toestel. Gebruikt drie “AA” (AM3/R6) alkalische batterijen. 5. SCHAAKSPEL TOETSEN • SCHAAKSTUK SYMBOOL TOETSEN: Gebruikt in Verifieer en Instelling Modi. Wordt tevens gebruikt om pionnen te promoveren. • GO/STOP: Indrukken om het toestel aan en uit te schakelen. • INFO: Drukken om naar Info Modus over te schakelen; in Info Modus, drukken om door de hoofd infogroepen te verrollen. Tijdens uw zet aanraken om een hint te verzoeken. • NIVEAU (LEVEL): Drukken om naar Niveau Modus over te schakelen; in Niveau Modus, drukken om tot acht niveau’s in één keer over te slaan. • WIT/< en ZWART/> TOETSEN (WHITE/< en BLACK/>): Drukken om de niveau’s één voor één in Niveau Modus te veranderen, en drukken om in de Optie Modus en Info Modus door de opties te verrollen. Tevens gebruikt om de kleur in de Stelling Modus te selecteren. • TERUGNEMEN (TAKE BACK): Drukken om een halfzet terug te nemen (een zet van één van beide spelers). U kan maxiaal tot 30 halfzetten terugnemen. • OPTIE (OPTION): Drukken om naar Optie Modus over te schakelen; in Optie modus, drukken om door de hoofd optiegroepen te verrollen. • UITWISSEN (CLEAR): Drukken tegelijkertijd met ENTER om voor een nieuwe partij in te stellen. Indrukken om de Optie, Verifieer en Stelling Modi te verlaten. Indrukken om de Info Displays uit te wissen en in de Stelling Modus de Bord Uitwissen vraag te cancelen. Indrukken om de Niveau Modus te cancelen indien u beslist geen veranderingen te maken (tenzij u velden heeft aangeraakt om niveau’s te veranderen, in welk geval CLEAR het nieuwe niveau zal oproepen, net zoals ENTER). • ENTER: Tegelijkertijd indrukken met CLEAR om voor een nieuwe partij terug te stellen. Indrukken om met de computer van zijde te verwisselen, en druk terwijl de computer aan het nadenken is om hem te dwingen een zet te maken. Indrukken om de optie instellingen aan of uit te schakelen en de Niveau Modus te verlaten met uw nieuw geselecteerde niveau. Drukken om het bord in de Stelling Modus uit te wissen en druk nogmaals om te bevestigen. • STELLING (POSITION): Drukken om naar Stelling Modus over te schakelen. 6. ACL (TERUGSTELLEN): Aan onderkant van toestel. Gebruikt om statische ontlading te elimineren na het aanbrengen van nieuwe batterijen. Pdf downloaded from http://www.thepdfportal.net/0d71f9df-8f27-4948-9469-8607446a2519_324239.pdf 100 INHOUDSTAFEL INTRODUCTIE 3.4 Blitz Niveau’s (Velden A4-H4) 3.5 Beginner Niveau’s (Velden A5-H5) 3.6 Mat Zoeken Niveau’s (Velden A6-H6) 3.7 Training Niveau’s (Velden A7-H8) 4. INFO MODUS: KIJKEN EN LEREN Info Modus Gebruiken 4.1 Voornaamste Variatie 4.2 Informatie Zoeken 4.3 Schaakklok Informatie 4.4 Zet Optelling/Partij Zetten 4.5 Wilt u een Hint? Vraag Eenvoudig! 5. OPTIES VOOR PLEZIER EN AFWISSELING Spel Opties Selecteren 5.1 Gebruik Modus Opties 5.2 Spel Modus Opties 5.3 Roterende Display Opties 6. VERIFIËREN/STELLINGEN OPZETTEN 6.1 Verifieer Stellingen 6.2 Stellingen Veranderen en Opstellen 7. TECHNISCHE DETAILS 7.1 De ACL Functie 7.2 Zorg en Onderhoud 7.3 Technische Specificaties PROBLEEMOPLOSSER GIDS Klaar om de opwindende wereld van computer schaak binnen te gaan? U bent op de juiste plaats! Uw nieuwe computer biedt zo veel spel opties, spel niveau’s en speciale kenmerken dat u nooit meer op dezelfde manier naar schaak gaat kijken. De Blitzstart in het begin van de handleiding stelt u in staat dadelijk te spelen en u zult verdere details over het basis spelgebruik in Sectie 1 vinden. Wanneer u de basis geleerd heeft, ga door en bestudeer de rest van deze handleiding, zelfs indien u normaal verkiest geen handleiding te lezen. U zult ontdekken dat deze schaakcomputer allerlei andere interessante en plezierige kenmerken bezit die u zullen verrassen. We garanderen het u! Uw nieuwe computer kent en volgt alle regels van het schaakspel, u kunt er zeker van zijn dat hij nooit vals speelt! Voor diegenen onder u die nog nooit schaak gespeeld hebben, hebben we een kort overzicht van de regels ingesloten om u te helpen starten. Voor meer gedetailleerde informatie, breng even een bezoek aan uw plaatselijke bibliotheek waar u zeker heel wat interessante schaakboeken zal vinden. 1. LATEN WE STARTEN! 1.1 Eerst, Installeer de Batterijen Uw computer werkt op drie “AA” (Type AM3/R6) batterijen. Breng de batterijen in het vak aan de onderkant van het toestel aan en zorg er voor de juiste polariteit in acht te nemen. Gebruik nieuwe alkalische batterijen voor een langere levensduur. Schakel de computer aan door op GO/STOP te drukken en een pieptoon duidt aan dat de partij klaar is om gespeeld te worden. Indien de computer niet reageert (statische ontlading kan het toestel vergrendelen), gebruik een papierklem of ander scherp voorwerp en druk gedurende minimum één seconde in het ACL gemarkeerde gaatje aan de onderkant van het toestel. Dit zal de computer terugstellen. Hint: Schakel de Auto Stroom Uit optie aan om stroom te bewaren en de batterij levensduur te verlengen (zie Sectie 5.1). 1.2 Klaar Om Te Spelen! Hier Is Hoe U Zet! OK, tijd om een partij te starten! Het is zo makkelijk –volg eenvoudig deze stappen: Pdf downloaded from http://www.thepdfportal.net/0d71f9df-8f27-4948-9469-8607446a2519_324239.pdf 101 NEDERLANDS BLITZSTART TOETSEN EN KENMERKEN INTRODUCTIE 1. LATEN WE STARTEN! 1.1 Eerst, Installeer de Batterijen 1.2 Klaar om te Spelen? Hier is Hoe u Zet! 1.3 Nu is het de Beurt van de Computer 1.4 Van Idee Veranderd? Neem Terug 1.5 Partij Gedaan? Waarom Niet Nog een Partij Spelen 1.6 Te Makkelijk/Moeilijk? Verander het Niveau 2. MEER KENMERKEN OM UIT TE PROBEREN 2.1 Wiens Zet? Kijk naar het beeldscherm 2.2 Speciale Schaakzetten 2.3 Illegale Zetten 2.4 Schaak, Mat en Remise 2.5 De Zoekfunctie van de Computer Onderbreken 2.6 Met de Computer van Zijde Veranderen 2.7 Ingebouwde Openingszetten 2.8 Denken in de Tijd van de Tegenstander 2.9 Partij Geheugen 3. DE SPEL NIVEAU’S Een Spel Niveau Instellen 3.1 Normaal Spel Niveau’s (Velden A1-G2) 3.2 Oneindig Niveau (Veld H2) 3.3 Toernooi Niveau’s (Velden A3-H3) a. Druk op GO/STOP om de computer aan te schakelen indien u dit nog niet gedaan heeft. b. Druk tegelijkertijd op de CLEAR en ENTER toetsen om de computer voor een nieuw schaakspel terug te stellen. Zet de stukken in hun beginstand, met de Witte stukken het dichtst bij u, zoals getoond in de Blitzstart. c. Om een zet uit te voeren, druk het schaakstuk dat u wenst te verzetten zachtjes neer tot u een piep hoort en het sensor bord zal uw stuk automatisch registreren. U gelooft het niet? Kijk eenvoudig naar het beeldscherm dat plots vol met informatie staat, het toont uw schaakstuk tezamen met de kleur van het stuk en het veld dat u net aangedrukt heeft! d. Neem dat stuk en druk het zachtjes in het gaatje van het veld waar u het naar verplaatst. U zal een tweede piep horen wanneer de computer uw zet bevestigt. U heeft net uw eerste volledige zet van de partij uitgevoerd. Vervolgens is het de beurt van de computer. U zult merken dat de computer bij het begin van een partij dikwijls dadelijk tegenzetten uitvoert zonder tijd te nemen om na te denken. Dit is omdat hij uit zijn geheugen speelt en een ingebouwd “boek” van openingszetten gebruikt (voor meer informatie, zie Sectie 2.7). VOER DE ZET VAN UW COMPUTER UIT: EEN VOORBEELD Als de computer een zet doet, is het aan u om deze zet op het bord uit te voeren. Hier geeft de display aan dat de computer zijn Zwarte pion (]!) van d7 naar d5 wil verzetten. Neem de d7 pion op (aangegeven door de bordlichten) en druk hem zachtjes aan op Veld d7. De bordlichten wijzen nu naar Veld d5. Druk de pion aan op Veld d5 om de zet van de computer af te maken. En nu bent u weer aan zet! d7-d5 ዛዒዓዔዕዖዘዙዜ ዑ尷尽尻就尯尹尿尵ዑ ዐ屁屃屁屃屁屃屁屃ዐ ዏ巀居巀居巀居巀居ዏ ዎ居巀居巀居巀居巀ዎ ው巀居巀层巀居巀居ው ዌ居巀居巀居巀居巀ዌ ዋ屄层屄居屄层屄层ዋ ዊ尶局尺尴尮尼尾尸ዊ ዝዒዓዔዕዖዘዙዞ ዛዒዓዔዕዖዘዙዜ ዑ尷尽尻就尯尹尿尵ዑ ዐ屁屃屁巀屁屃屁屃ዐ ዏ巀居巀居巀居巀居ዏ ዎ居巀居屃居巀居巀ዎ ው巀居巀层巀居巀居ው ዌ居巀居巀居巀居巀ዌ ዋ屄层屄居屄层屄层ዋ ዊ尶局尺尴尮尼尾尸ዊ ዝዒዓዔዕዖዘዙዞ 1.3 Nu is het de Beurt van de Computer Wanneer de computer een zet uitvoert, piept hij en toont zijn zet. Controleer het beeldscherm—De volledige zet wordt tevens op het beeldscherm getoond. Kijk het na, u zult de van en naar velden van de zet van de computer, tezamen met de kleur en het type stuk dat hij verplaatst, zien. Druk het aangegeven schaakstuk op het van veld tot u een pieptoon hoort. Plaats hetzelfde stuk op het aangegeven naar veld en druk het neer om de zet van de computer te vervolledigen. En nu is het weer uw beurt… wenst om tot 30 individuele zetten (of 15 zetten voor elke zijde) terug te nemen. Maak eenvoudig een nieuwe zet op het bord om op een gegeven punt verder te spelen. Na het terugnemen van een slag of/en een pion promotie, zal de computer er voor zorgen dat uw bord nog steeds juist ingesteld is door u er aan te herinneren om het geslagen stuk of/en pion respectievelijk terug op het bord te plaatsen! Hij doet dit door het symbool van het stuk en zijn positie op het scherm te tonen, en door de bordlichtjes voor dat veld te verlichten. Plaats het aangegeven stuk terug op het bord en druk op het veld om de terugname te vervolledigen. Bij een rokade, volg eerste de stappen hierboven beschreven voor een terugname voor de Koning en herhaal dit voor de Toren om de terugname te vervolledigen. 1.4 Van Idee Veranderd? Neem Terug Wanneer u tegen deze computer schaak speelt, is niets “in steen gegraveerd”. U kunt van gedachten veranderen of beslissen een andere zet te doen wanneer u ook wilt. Als het uw beurt is, druk eenvoudig op TAKE BACK, en het scherm zal de zet tonen die 1.5 Partij Gedaan? Waarom Niet Nog een Partij Spelen teruggenomen moet worden. Druk het aangegeven stuk neer op zijn Wanneer een partij gedaan is (of indien u uw huidige partij opgeeft), oorspronkelijke naar veld en druk het neer op zijn oorspronkelijke van is het makkelijk opnieuw te starten! Stel de computer terug door veld om de terugname te vervolledigen. Herhaal dit zo dikwijls als u Pdf downloaded from http://www.thepdfportal.net/0d71f9df-8f27-4948-9469-8607446a2519_324239.pdf 102 uw gewenste promotie stuk (%, $, # of @). De computer registreert dadelijk uw nieuwe stuk, toont het kortstondig en begint over zijn volgende zet na te denken. Vergeet niet uw stuk op uw bord te veranderen! Wanneer de computer een pion promoveert, toont het scherm zowel de pion als het gepromoveerde stuk. Vergeet niet de pion van de computer te vervangen door het nieuwe stuk. tegelijkertijd op de CLEAR en ENTER toetsen te drukken en een Nieuw Spel toon kondigt aan dat de computer klaar is voor een nieuwe partij. Hetzelfde spel niveau is in effect, maar u kunt, indien gewenst, veranderen zoals uitgelegd in Sectie 3. BELANGRIJK: Het terugstellen van de computer voor een nieuwe schaakpartij wist uw huidige spel uit het geheugen van de computer, wees voorzichtig niet per ongeluk op deze toetsen te drukken! Wanneer u voor het eerst uw computer aanschakelt, is hij automatisch ingesteld voor Normaal Spel Niveau D1 (vijf seconden per zet). U beschikt echter over 64 verschillende niveau’s om uit te kiezen, u zult ze allemaal willen uitproberen! Voor een beschrijving van de spel niveau’s en hoe de niveau’s te veranderen, zie Sectie 3. 2. MEER KENMERKEN OM UIT TE PROBEREN 2.1 Wiens Zet? Kijk naar het Beeldscherm Wanneer de computer Zwart speelt, flikkert er op het scherm een zwart vierkantje wanneer hij nadenkt. Nadat hij gezet heeft, verschijnt er een wit vierkantje om aan te duiden dat het de beurt van Wit is. U kunt in een oogopslag zeggen of de computer nu aan het denken is en wiens beurt het is om te zetten. 2.2 Speciale Schaakzetten Slagen: Om te slaan, druk op het stuk dat u wenst te verplaatsen, 2.4 Schaak, Mat en Remise verwijder het geslagen stuk van het bord en druk uw stuk op het veld Wanneer een Koning schaak staat, zal de computer eerst, zoals van het geslagen stuk. Slagen worden aangeduid als E5•F6. gewoonlijk, zijn zet tonen. Nadat de zet uitgevoerd werd, flikkert CHECK En Passant Slagen: Bij dit type van slagen blijft de computer uw zet gedurende enkele seconden op het scherm tezamen met de schaak tonen tot u op de geslagen pion drukt en hem van het bord verwijdert. zettende zet. Het scherm toont hierna weer de klok. Rokade: De computer herkent een rokade automatisch nadat de Indien de computer een gedwongen mat tegen zijn tegenstander Koning verzet is. Nadat u de Koning op zijn van en naar velden ontdekt, toont hij eerst zijn zet zoals gewoonlijk. Nadat de zet op het gedrukt heeft, blijft de computer uw zet verder tonen tot u tevens de bord is uitgevoerd, flikkert de computer gedurende verschillende Toren op zijn van en naar velden drukt om de zet te vervolledigen. seconden een mat aankondiging tezamen met de zet (bv. =in 2 voor Noteer dat een rokade aan de Koningszijde weergegeven wordt als een mat in twee zetten). Het scherm toont hierna weer de klok. 0-0, en aan de Koninginnenzijde als 0-0-0. Wanneer een partij in schaakmat eindigt, flikkert het beeldscherm Pion Promoties: Wanneer u een pion promoveert, voer de zet kortstondig MATE (tezamen met de mat zettende zet of met de klok eerst zoals gewoonlijk uit door uw pion op zijn van en naar velden te weergave) nadat de zet werd uitgevoerd. Het scherm toont hierna weer drukken. Druk daarna op de SCHAAKSTUK SYMBOOL TOETS voor de klok. Pdf downloaded from http://www.thepdfportal.net/0d71f9df-8f27-4948-9469-8607446a2519_324239.pdf 103 NEDERLANDS 2.3 Illegale Zetten Uw computer zal nooit een illegale zet aanvaarden! Indien u er één probeert uit te voeren, zult u een lage, dubbele pieptoon horen en het beeldscherm toont het veld waar het schaakstuk van kwam. Verplaats hetzelfde stuk naar een ander veld, of druk het weer op zijn originele van veld en verplaats een ander stuk. Indien u de zet van de computer niet juist uitvoert, verkrijgt u tevens een foutmelding. Dit betekent dat u ofwel het verkeerde stuk verplaatst, of het stuk naar een verkeerd veld verplaatst. Indien de computer wil dat u, bijvoorbeeld, zijn pion van D7 naar D5 verplaatst en u drukt op D7 en daarna op D6, zal het scherm kortstondig Er:D5 tonen om uw fout aan te duiden. Het beeldscherm zal de zet nogmaals tonen (D7-D5), en de computer verwacht dat u op D5 drukt om zijn zet te vervolledigen. Indien u op een stuk drukt en het van veld wordt getoond maar u beslist deze zet niet uit te voeren, druk eenvoudig opnieuw op hetzelfde veld om te cancelen. Maak hierna een andere zet. Indien u na het uitvoeren van de volledige zet van gedachten verandert, neem uw zet terug zoals beschreven in Sectie 1.4. 1.6 Te Makkelijk/Moeilijk? Verander het Niveau De computer herkent remise vanwege pat zetten, drievoudige herhaling en de 50-zetten regel. Nadat er zich een remise voordoet, flikkert het beeldscherm kortstondig EnD (tezamen met de remise makende zet of met de klok display) nadat de zet is uitgevoerd. Het scherm toont hierna weer de klok. positie doet zich voor wanneer een stelling, die via een bepaalde serie zetten bereikt wordt, ook bereikt kan worden met dezelfde zetten maar in een andere volgorde. De geïntegreerde Automatische Transpositie Manager van de computer behandelt deze gevallen met gemak. Een uniek gebruiker-selecteerbaar boek kenmerk is tevens inbegrepen, welk u toestaat verschillende typen van opening boeken te selecteren, of, indien gewenst, het boek uit te schakelen. Voor volledige details, zie Sectie 5.2. 2.5 De Zoekfunctie van de Computer Onderbreken U denkt dat de computer te lang over zijn zetten nadenkt? U kunt hem om het even wanneer onderbreken! Druk eenvoudig op ENTER terwijl de computer aan het nadenken is en hij stopt en voert de beste zet die hij zover gevonden heeft, uit. Deze functie kan op de hogere niveau’s handig zijn, waar de computer soms erg lang over zijn zet nadenkt, en op het Oneindig niveau, waar de computer oneindig lang nadenkt tenzij u hem stopt. In de Mat Zoeken Niveau’s, zal op ENTER drukken de computer niet dwingen om een zet uit te voeren. Integendeel, de computer zal – – – – – tonen om aan te duiden dat hij onderbroken werd alvorens een mat te vinden. Schakel naar een ander niveau over om verder te spelen. 2.8 Denken in de Tijd van de Tegenstander Terwijl u speelt, merkt u misschien dat de computer dadelijk op uw zetten reageert, zelfs in het midden van partijen op hogere niveau’s. Dit komt doordat de computer in uw tijd nadenkt, d.w.z. dat hij de tijd die u neemt om over uw volgende zet na te denken gebruikt om zijn eigen strategieën te plannen. Hij probeert uw meest waarschijnlijke zet te gissen en berekent zijn antwoord voor die bepaalde zet, terwijl u nog steeds aan het nadenken bent. Indien de computer juist gist, is er geen enkele reden voor hem om verder te berekenen –hij voert dadelijk de tegenzet uit die hij reeds gevonden heeft. Om dit kenmerk buiten werking te stellen, schakel de Makkelijk Modus Optie aan zoals beschreven in Sectie 5.2. 2.6 Met de Computer van Zijde Veranderen Om met de computer van zijde te veranderen, druk eenvoudig op ENTER wanneer het uw beurt is – en de computer maakt de volgende zet voor uw zijde. Verander zo dikwijls als u wenst van zijde! Wil u dat de computer de eerste zet voor Wit maakt bij het begin van een nieuwe partij? Druk tegelijkertijd op CLEAR en ENTER om voor een nieuwe partij terug te stellen en druk hierna op ENTER! U wilt de computer tegen zichzelf zien spelen? Druk na elke zet op ENTER en kijk terwijl hij voor beide zijden van het bord, zet na zet, speelt. Bestudeer zijn strategie om uw eigen spel te verbeteren! 2.9 Partij Geheugen U kunt een partij om het even wanneer onderbreken door op GO/ STOP te drukken. De partij wordt uitgesteld en de computer bewaart uw huidige spel (tot 30 individuele zetten) in het geheugen. Wanneer u het toestel opnieuw aanschakelt, kunt u terug beginnen van de positie waar u zich het laatst bevond! 2.7 Ingebouwde Openingszetten 3. DE SPEL NIVEAU’S Bij het begin van een partij zal de computer dikwijls op vele niveau’s Uw schaakcomputer beschikt over 64 verschillende spel niveau’s. dadelijk tegenzetten maken. Dit is omdat hij zetten uit zijn geheugen Wanneer u een niveau instelt, denk er aan dat wanneer de computer uitvoert, via het gebruik van zijn eigen ingebouwde “boek” openingsmeer tijd heeft om over zijn zetten na te denken, hij sterker wordt en zetten. Dit boek bevat de meest belangrijke openingen en vele beter speelt –net als een menselijke schaakspeler! stellingen van grootmeesters. Indien de huidige bordstelling zich in zijn Voor een overzicht van alle niveau’s, gelieve naar de Niveau Grafiek boek bevindt, speelt de computer automatisch een tegenzet op die te verwijzen. De niveau’s worden in deze sectie tevens afzonderlijk stelling in plaats van eerst over de zet te moeten nadenken. beschreven. Een speciaal kenmerk van het openingszetten boek van deze computer is zijn mogelijkheid om transposities te behandelen. Een transPdf downloaded from http://www.thepdfportal.net/0d71f9df-8f27-4948-9469-8607446a2519_324239.pdf 104 Zie ”GEBRUIK DEZE GRAFIEK OM EEN SPEL NIVEAU TE SELECTEREN!” voor een geïllustreerd overzicht over hoe een niveau in te stellen en een grafiek die alle niveau’s in één oogopslag toont. Er zijn twee manieren om niveau’s in te stellen –door gebruik van de spel toetsen of door op de bordvelden te drukken. Welke methode u ook gebruikt, druk eerst op LEVEL om naar de Niveau Modus over te schakelen en de computer toont het huidige spel niveau. Wanneer u voor het eerst naar de Niveau Modus overschakelt, is de computer ingesteld op Normaal Spel Niveau D1 (met een gemiddelde responstijd 3.1 Normaal Spel Niveau’s (Velden A1-G2) van vijf seconden per zet) en het scherm toont L0:05. NIVEAU TIJD PER ZET DISPLAY • Om met de spel toetsen een niveau te selecteren: Na het overA1 .................... 1 seconde .................. L 0:01 schakelen naar Niveau Modus door op LEVEL te drukken, B1 .................... 2 seconden ................ L 0:02 verander de niveau’s één na één met de ZWART/> en WIT/< C1 .................... 3 seconden ................ L 0:03 toetsen. Een kortere methode is herhaaldelijk op LEVEL drukken D1 .................... 5 seconden ................ L 0:05 om tot acht niveau’s in één keer over te slaan. Wanneer het beeldE1 .................. 10 seconden ............... L 0:10 scherm uw gewenste niveau toont, druk op ENTER om uw nieuwe F1 .................. 15 seconden ............... L 0:15 niveau in de computer in te voeren en de Niveau Modus te verlaten. G1 .................. 20 seconden ............... L 0:20 • Om een niveau te selecteren door op de bordvelden te H1 .................. 30 seconden ............... L 0:30 drukken: Zoals aangeduid op de Niveau Grafiek, stemt elk van de A2 .................. 45 seconden ............... L 0:45 64 velden overeen met een niveau. Na het overschakelen naar B2 .................... 1 minuut .................... L 1:00 Niveau Modus door op LEVEL te drukken, druk met een C2 .................... 1.5 minuten ............... L 1:30 schaakstuk op het gewenste veld om het niveau te activeren en D2 .................... 2 minuten .................. L 2:00 gebruik de grafiek als gids. Wanneer u op het gewenste veld drukt E2 .................... 3 minuten .................. L 3:00 en het niveau op het scherm verschijnt, druk op ENTER om uw F2 .................... 5 minuten .................. L 5:00 nieuwe niveau in de computer in te voeren en de Niveau Modus te G2 .................. 10 minuten .................. L10:00 verlaten. Op CLEAR drukken heeft hetzelfde effect als ENTER Wanneer u één van de Normaal Spel Niveau’s selecteert, selecteert wanneer u uw selectie via de bordvelden maakt –het voert uw u een gemiddelde responstijd voor de computer. Noteer dat het niveau in uw computer in. gemiddelde van de tijden berekent wordt over een groot aantal zetten. • Om het niveau te verifiëren zonder het te veranderen: Indien u In de opening en het eindspel speelt de computer over het algemeen op LEVEL drukt om het niveau te verifiëren maar u wilt het niet vlugger, maar in de ingewikkelde middenpartij stellingen, kan het langer echt veranderen, druk op CLEAR. Dit laat u naar normaal spel duren om een zet te maken. terugkeren zonder het niveau of de klok instellingen te veranderen, zelfs terwijl de computer aan het nadenken is. 3.2 Oneindig Niveau (Veld H2) Andere belangrijke punten om te herinneren betreffende niveau’s: • Het niveau veranderen zet de schaakklokken steeds terug op nul. NIVEAU TWD DISPLAY • We raden aan de niveau’s niet te veranderen terwijl de computer H2 ................. No time limit ................. 9:99:99 aan het nadenken is. Indien u dit moet doen, druk eerst op ENTER In het Oneindig Niveau, zal de computer oneindig lang zoeken tot hij Pdf downloaded from http://www.thepdfportal.net/0d71f9df-8f27-4948-9469-8607446a2519_324239.pdf 105 NEDERLANDS om het zoeken van de computer te onderbreken en hem een zet op het bord te laten maken. Neem hierna de zet van de computer terug en verander het niveau. Tenslotte, druk op ENTER om de computer opnieuw op het nieuwe niveau te laten nadenken. • Indien u het niveau verandert terwijl de computer aan het nadenken is, wordt de klok op nul gezet en de huidige zoekfunctie vroegtijdig onderbroken. • Indien u op LEVEL drukt terwijl de computer aan het nadenken is, maar het niveau niet verandert (indien u op CLEAR drukt in plaats van ENTER), zal de computer de zoekfunctie tevens vroegtijdig onderbreken. Een Spel Niveau Instellen G4 .................. 60 minuten .................. bL:60 H4 .................. 90 minuten .................. bL:90 In de Blitz Niveau’s (ook Snelschaak of “Plotse Dood” Niveau’s genoemd), kunt u de totale tijd voor de volledige partij instellen. Indien de toegewezen tijd overschreden wordt, flikkert de computer tImE tezamen met de voorbijgelopen tijd, om aan te duiden dat het spel gedaan is. Indien u een Blitz Niveau selecteert, wenst u misschien de klok zo in te stellen om de tijd af te tellen in plaats van de voorbijgelopen tijd op te meten (zie Sectie 5.1). Wanneer de speltijd verstreken is, zal de terug naar de normale klok weergave keren. een gedwongen mat of een gedwongen zet vindt; tot hij de stelling volledig onderzocht heeft tot zijn maximale diepte; of tot u de zoekfunctie stopt door op ENTER te drukken. Indien u de zoekfunctie stopt, voert de computer een zet uit die hij op dat ogenblik het best vindt. Probeer met dit niveau te experimenteren –zet een interessante bordstelling op en laat de computer ze voor u analyseren! Hij zal gedurende uren, zelfs dagen aan één stuk door nadenken en proberen met de best mogelijke zet op te komen. Vergeet niet te kijken terwijl de computer nadenkt –haal voordeel uit het Roterende Display kenmerk als beschreven in Sectie 5.3! 3.3 Toernooi Niveau’s (Velden A3-H3) NIVEAU ZETTEN/TOTALE TIJD 3.5 Beginner Niveau’s (Velden A5-H5) ALTERNERENDE DISPLAY A3 ............ 40 zetten in 1 u. 30 min. ............. tr40 1:30:00 B3 ............ 35 zetten in 1 u. 45 min. ............. tr35 1:45:00 C3 ............ 40 zetten in 1 u. 45 min. ............. tr40 1:45:00 D3 ............ 35 zetten in 1 u. 30 min. ............. tr35 1:30:00 E3 ............ 40 zetten in 2 u. .......................... tr40 2:00:00 F3 ............ 45 zetten in 2 u 30 min. .............. tr45 2:30:00 G3 ........... 50 zetten in 2 u. .......................... tr50 2:00:00 H3 ............ 40 zetten in 3 u. .......................... tr40 3:00:00 De Toernooi Niveau’s vereisen dat u een bepaald aantal zetten maakt binnen een gegeven tijd. Indien een speler de toegewezen tijd overschrijdt, flikkert de computer TImE tezamen met de voorbijgelopen tijd, om aan te duiden dat het spel gedaan is. Indien u wenst, kunt u zelfs nadat de tijd over is, verder doorspelen. Indien u een Toernooi Niveau selecteert, wenst u misschien de klok zo in te stellen om de tijd af te tellen in plaats van de voorbijgelopen tijd op te meten (zie Sectie 5.1). Wanneer de speltijd verstreken is, zal de aftellende klok automatisch terug naar de normale klok weergave keren. NIVEAU TIJD PER ZET DISPLAY A5 .................... 1 seconde .................. BEG:1 B5 .................... 2 seconden ................ BEG:2 C5 .................... 3 seconden ................ BEG:3 D5 .................... 4 seconden ................ BEG:4 E5 .................... 5 seconden ................ BEG:5 F5 .................... 6 seconden ................ BEG:6 G5 .................... 7 seconden ................ BEG:7 H5 .................... 8 seconden ................ BEG:8 Bent u een nieuwkomer of beginnend schaakspeler? Zoja, zijn deze niveau’s speciaal voor u! Hier beperkt de computer zijn zoekfunctie zodat hij opzettelijk zwakker speelt en u een betere kans geeft om te winnen! De niveau’s starten heel makkelijk en worden geleidelijk moeilijker –terwijl u elk overwint, ga naar het volgende niveau! 3.6 Mat Zoeken Niveau’s (Velden A6-H6) NIVEAU PROBLEEM DISPLAY A6 ................... Mat in 1 ...................... =in:1 B6 ................... Mat in 2 ...................... =in:2 3.4 Blitz Niveau’s (Velden A4-H4) C6 ................... Mat in 3 ...................... =in:3 NIVEAU TIJD PER SPEL DISPLAY D6 ................... Mat in 4 ...................... =in:4 A4 .................... 5 minuten .................. bL: 5 E6 ................... Mat in 5 ...................... =in:5 B4 .................. 10 minuten .................. bL:10 F6 ................... Mat in 6 ...................... =in:6 C4 .................. 15 minuten .................. bL:15 G6 ................... Mat in 7 ...................... =in:7 D4 .................. 20 minuten .................. bL:20 H6 ................... Mat in 8 ...................... =in:8 E4 .................. 30 minuten .................. bL:30 Door één van deze niveau’s te selecteren, activeert u een speciaal F4 .................. 45 minuten .................. bL:45 Mat Zoeken Programma. Indien u een stelling heeft waar zich een Pdf downloaded from http://www.thepdfportal.net/0d71f9df-8f27-4948-9469-8607446a2519_324239.pdf 106 GEBRUIK DEZE GRAFIEK OM EEN SPEL NIVEAU TE SELECTEREN! 9 halfzet zoeken PLY:9 level naar de Niveau Modus over te schakelen. TRAINING NIVEAU’S 2. Selecteer hierna uw niveau, gebruik makend van de Niveau Grafiek. Er zijn twee manieren om dit te doen. • Rol door de niveau’s tot uw gewenste niveau getoond wordt: • Druk op ZWART/> om de niveau’s met één te verhagen >. • Druk op WIT/< om de niveau’s met één te verlagen <. • Druk op LEVEL om met acht niveau’s te verhogen >. • OF, zoek eenvoudig naar uw niveau veld en druk één van de stukken met pinnen in het gaatje om dat niveau te tonen. enter 1 halfzet zoeken PLY:1 A7 MAT ZOEKEN NIVEAU’S Mat in 1 zet =in:1 A6 BEGINNER NIVEAU’S 1 sec. per zet bEG:1 A5 BLITS NIVEAU’S 5 min. per partij bL: 5 A4 TOERNOOI NIVEAU’S 40 zetten in 1:30 tr40 1:30:00 A3 3. Tenslotte, druk op ENTER om de Niveau Modus te verlaten met uw nieuwe niveau ingesteld! A8 NORMAL SPEL NIVEAU’S + ONEINDIG NIVEAU’S 45 sec. per zet L0:45 A2 1 sec. per zet L0:01 A1 10 halfzet zoeken PLY:10 B8 2 halfzet zoeken PLY:2 B7 Mat in 2 zetten =in:2 B6 2 sec. per zet bEG:2 B5 10 min. per partij bL:10 B4 35 zetten in 1:45 tr35 1:45:00 B3 1 min. per zet L1:00 B2 2 sec. per zet L0:02 B1 11 halfzet zoeken PLY:11 C8 3 halfzet zoeken PLY:3 C7 Mat in 3 zetten =in:3 C6 3 sec. per zet bEG:3 C5 15 min. per partij bL:15 C4 40 zetten in 1:45 tr40 1:45:00 C3 1.5 min. per zet L1:30 C2 3 sec. per zet L0:03 C1 12 halfzet zoeken PLY:12 D8 4 halfzet zoeken PLY:4 D7 Mat in 4 zetten =in:4 D6 4 sec. per zet bEG:4 D5 20 min. per partij bL:20 D4 35 zetten in 1:30 tr35 1:30:00 D3 2 min. per zet L2:00 D2 5 sec. per zet L0:05 D1 13 halfzet zoeken PLY:13 E8 14 halfzet zoeken PLY:14 E7 6 halfzet zoeken PLY:6 Mat in 6 zetten =in:6 E5 6 sec. per zet bEG:6 E4 40 zetten in 2:00 tr40 2:00:00 E3 45 min. per partij bL:45 E2 45 zetten in 2:30 tr45 2:30:00 E1 5 min. per zet L5:00 15 sec. per zet L0:15 Voor meer details, zie Sectie 3. Pdf downloaded from http://www.thepdfportal.net/0d71f9df-8f27-4948-9469-8607446a2519_324239.pdf 107 10 min. per zet L10:00 G2 F2 F1 50 zetten in 2:00 tr50 2:00:00 G3 F3 10 sec. per zet L0:10 60 min. per partij bL:60 G4 F4 3 min. per zet L3:00 7 sec. per zet bEG:7 G5 F5 30 min. per partij bL:30 Mat in 7 zetten =in:7 G6 F6 5 sec. per zet bEG:5 7 halfzet zoeken PLY:7 G7 F7 Mat in 5 zetten =in:5 E6 G8 F8 5 halfzet zoeken PLY:5 15 halfzet zoeken PLY:15 20 sec. per zet L0:20 G1 16 halfzet zoeken PLY:16 H8 8 halfzet zoeken PLY:8 H7 Mat in 8 zetten =in:8 H6 8 sec. per zet bEG:8 H5 90 min. per partij bL:90 H4 40 zetten in 3:00 tr40 3:00:00 H3 Oneindig Niveau 9:99:99 H2 30 sec. per zet L0:30 H1 NEDERLANDS 1. Druk op NIVEAU om schaakmat kan bevinden en u wilt dat de computer deze vindt, stel de computer in op één van de Mat Zoeken Niveau’s. Deze computer kan mat tot in acht zetten oplossen. Mat zetten in één tot vijf zetten worden normaal gezien vlug gevonden, terwijl oplossingen die zes to acht zetten vereisen wat tijd in beslag nemen. Indien er zich geen mat bevindt of de computer geen mat zet kan vinden, wordt er een reeks streepjes getoond (– – – – –). Om verder te spelen, schakel eenvoudig over naar een ander niveau. HULP NODIG BIJ HET SELECTEREN VAN EEN NIVEAU? ENKELE HINTS VOOR U • U bent een beginner? Start met de Beginner Niveau’s of lagere Training Niveau’s. Deze niveau’s beperken de diepte van de computer zoekfunctie, resulterend in een zwakker spel en geven u de kans om meer over het spel te leren en misschien zelfs te winnen! Voor een nog betere kans om te winnen, combineer één van deze niveau’s met de Makkelijk Modus optie (Sectie 5.2), zodat de computer tijdens uw tijd niet kan nadenken. • U bent een intermediaire of meer geavanceerde speler? Probeer de Normaal, Training, of Toernooi Niveau’s. De Normaal Niveau’s reiken van makkelijk tot en met een moeilijke 10-minuten responstijd, en de Toernooi Niveau’s zijn een grote uitdaging. De Training Niveau’s staan u toe uw gewenste zoekdiepte in te stellen –terwijl u elk niveau overwint, ga verder naar het volgende! En vergeet niet de Blitz Niveau’s uit te proberen voor vlugge en opwindende Snelschaakpartijen! • Wenst te experimenteren? Gebruik de Mat Zoeken Niveau’s om problemen op te lossen tot mat in acht zetten –probeer vanuit één van uw eigen partij instellingen te zoeken, of zet een echt mat probleem op. Selecteer de Oneindig Niveau’s om de computer de ingewikkelde stellingen gedurende uren, zelfs dagen te laten analyseren. 3.7 Training Niveau’s (Velden A7-H8) NIVEAU DISPLAY NIVEAU DISPLAY A7 .......... PLY: 1 A8 .......... PLY: 9 B7 .......... PLY: 2 B8 .......... PLY:10 C7 .......... PLY: 3 C8 .......... PLY:11 D7 .......... PLY: 4 D8 .......... PLY:12 E7 .......... PLY: 5 E8 .......... PLY:13 F7 .......... PLY: 6 F8 .......... PLY:14 G7 ......... PLY: 7 G8 ......... PLY:15 H7 .......... PLY: 8 H8 .......... PLY:16 Op de Training Niveau’s is de zoekdiepte van de computer gelimiteerd tot een bepaald aantal halfzetten zoals hierboven getoond. Terwijl u door de niveau’s verrolt, toont de computer “ply:#” voor elk niveau. Een “ply” is een halfzet (een zet voor elke zijde), en “#” is het nummer dat de zoekdiepte vertegenwoordigt. Bijvoorbeeld, op Niveau A7 zoekt de computer tot op een diepte van één halfzet (PLY:1) en kijkt dus slechts één enkele halfzet verder. Daarom zal hij op dit niveau dikwijls een mat zet over het hoofd zien. Dit geeft zwakker spel en biedt beginners een betere kans om de computer te verslaan! waar hij over aan het nadenken is, de lijn van spel die hij verwacht van die zet, zijn evaluatie van de huidige bordstelling, hoe ver hij zoekt en meer. Zoals u zich wel kunt voorstellen, door deze informatie te bestuderen kan het u helpen zeer veel over schaak te leren! 4. INFO MODUS: KIJKEN EN LEREN Stel u dit voor: U schaakt tegen een vriend en het is zijn beurt. U zou enorm graag weten aan welke zet hij aan het denken is, en u zou Info Modus Gebruiken graag zijn opinie over de bordstelling vernemen. Maar natuurlijk kunt u Hoe verkrijgt u toegang tot al deze spel informatie? Door om het hem dit niet vragen –dit wordt eenvoudigweg niet gedaan. Wel, denk even wanneer de Info Modus te gebruiken! Indien u dit doet terwijl de opnieuw –wanneer u tegen deze schaakcomputer speelt, kunt u om het computer aan het nadenken is, ziet u de informatie op het scherm even wat vragen en u zult bovendien alle antwoorden krijgen! Eigenlijk veranderen terwijl de computer verschillende zetten bestudeert en kunt u een ongelofelijke hoeveelheid aan informatie over het dieper zoekt. denkproces van de computer verkrijgen. Op aanvraag toont hij de zet Pdf downloaded from http://www.thepdfportal.net/0d71f9df-8f27-4948-9469-8607446a2519_324239.pdf 108 punten waard is; een positief nummer duidt aan dat Wit voor is) • Twee nummers: Het eerste is de huidige zoekdiepte of het aantal halfzetten dat de computer voorwaarts kijkt; het tweede is het aantal zetten dat de computer tot dusver reeds onderzocht heeft • De huidig in overweging zijnde zet • De zoek snelheid of aantal stellingen (knopen) die elke seconde onderzocht worden Druk op WIT/< om achterwaarts te verrollen en de voorgaande displays nogmaals te bekijken. Druk op CLEAR om terug naar de normale klok weergave te keren. Zie “INFO MODUS IN ÉÉN OOGOPSLAG!” voor een grafisch overzicht van alle Info Modus displays. De Spel informatie wordt verdeeld in vier groepen en door op INFO te drukken, gaat men van één groep naar een andere. De ZWART/> en WIT/< toetsen kunnen gebruikt worden om door de displays binnen elke groep te verrollen. Druk op CLEAR om de Info Modus te verlaten en terug naar de normale schaakklok weergave te keren. Na meer over de Info Modus te leren, bekijk even Sectie 5.3 voor een beschrijving van het Roterende Display kenmerk. Door dit kenmerk te selecteren, zal de computer automatisch door de gevraagde informatie in één-seconde intervallen verrollen telkens wanneer het over een zet nadenkt –u kunt de computer eigenlijk “luidop zien nadenken”! Wanneer de gevraagde informatie niet aanwezig is, toont het scherm streepjes (– – – – –). 4.1 Voornaamste Variatie Druk de eerste maal op INFO om informatie aangaande de voornaamste variatie te bekomen (de voorspelde richting van de partij of de volgorde van zetten die de computer denkt die gezet zullen worden). Het eerste beeld dat u ziet is de zet die de computer denkt te maken. De voornaamste variatie wordt getoond tot een maximum zoekdiepte van vier individuele zetten. Druk herhaaldelijk op ZWART/> om voorwaarts door de schaakzetten te verrollen: • Zet 1 (voorspelde richting van spel) • Zet 2 (voorspelde richting van spel) • Zet 3 (voorspelde richting van spel) • Zet 4 (voorspelde richting van spel) Druk op WIT/< om achterwaarts te verrollen en de voorafgaande displays nogmaals te bekijken. Druk op CLEAR om terug naar de normale klok weergave te keren. Daar de eerste zet van de voorspelde richting van het spel de zet is die de computer denkt dat u zal maken, kunt u deze zet tevens als hint beschouwen. Dus –telkens u hulp nodig heeft, druk bij uw beurt op INFO. 4.4 Zettentelling/Partij Zetten Druk een vierde maal op INFO om het aantal zetten tot dusver in een partij te tonen. U kunt daarna door herhaaldelijk op WIT/< te 4.2 Informatie Zoeken drukken achterwaarts door de zetten van het spel verrollen (tot 30 Druk een tweede maal op INFO om informatie over de zoekfunctie individuele zetten). van de computer te bekomen! Druk herhaaldelijk op ZWART/> om • Aantal zetten tot dusver door Wit gespeeld voorwaarts door de volgende vier displays te verrollen: • Zetten van het huidige spel • Evaluatie van de huidige stelling (gebaseerd op een pion die 1.0 Druk op ZWART/> om opeenvolgend opnieuw voorwaarts door de Pdf downloaded from http://www.thepdfportal.net/0d71f9df-8f27-4948-9469-8607446a2519_324239.pdf 109 NEDERLANDS 4.3 Schaakklok Informatie Druk een derde maal op INFO voor de schaakklok informatie. De schaakklok houdt de tijd voor beide zijden bij. Druk herhaaldelijk op ZWART/> om voorwaarts door de klok displays te verrollen: • Verstreken tijd sinds de laatste zet gemaakt werd • Totaal verstreken tijd voor de computer • Totaal verstreken tijd voor de speler • Resterende tijd voor de computer (enkel voor Blitz/Toernooi Niveau’s) • Resterende tijd voor de speler (enkel voor Blitz/Toernooi Niveau’s) Druk op WIT/< om achterwaarts te verrollen en de voorgaande displays nogmaals te bekijken. Druk op CLEAR om terug naar de normale klok weergave te keren. De klok stopt wanneer u een zet terugneemt, niveau instellingen controleert, opties selecteert, stellingen opzet of verifieert, of het toestel uitschakelt. Nochtans, in al deze gevallen wordt de tijd in het geheugen bewaard en de klok hervat zodra het spel verder doorgaat. Telkens wanneer u niveau’s verandert of tegelijkertijd op CLEAR en ENTER drukt om voor een nieuwe partij terug te stellen, worden de schaakklokken tevens terug op nul gezet 0:00:00. zetten te gaan. Druk op CLEAR om terug naar de normale klok weergave te keren. INFO MODUS IN ÉÉN OOGOPSLAG! 4.5 Wilt u een Hint! Vraag Eenvoudig! In geval u dit kenmerkt gemist heeft toen het in Sectie 4.1 vermeld werd, willen we u er nogmaals op wijzen indien u ooit advies nodig heeft in verband met een zet, kunt u steeds de computer om een hint vragen. Druk eenvoudig op INFO wanneer het uw beurt is om te zetten, en de computer toont de voorgestelde zet voor uw zijde. VOORNAAMSTE VARIATIE INFO: INFO x1 • Zet 1 (voorspelde richting van spel) WHITE /– BLACK /+ • Zet 2 (voorspelde richting van spel) • Zet 3 (voorspelde richting van spel) • Zet 4 (voorspelde richting van spel) ZOEK INFO: 5. OPTIES VOOR PLEZIER EN AFWISSELING INFO Bijkomend bij alle kenmerken die u zover reeds geleerd heeft, biedt uw schaakcomputer vele andere opwindende spel opties! Al deze opties zijn om het even wanneer gedurende het spel gebruiker-kiesbaar. Ze worden in deze sectie afzonderlijk beschreven en samengevat in de Optie Modus Grafiek. x2 • Evaluatie van huidge stelling • 2 nummers: Zoekdiepte + aantal zetten tot dusver onderzocht • Huidige zet onder overweging BLACK /+ • Aantal stellingen die per seconde onderzocht worden WHITE /– Spel Opties Selecteren Er zijn twee manieren om opties in te stellen, zoals hieronder beschreven –door de spel toetsen te gebruiken of door op de bordvelden te drukken. SCHAAKKLOK INFO: INFO x3 • Verstreken tijd sinds laatste zet • Verstreken tijd voor de computer • Verstreken tijd voor de speler BLACK /+ • Resterende tijd voor de computer* • Resterende tijd voor de speler* WHITE /– Zie “DE BASIS VAN OPTIE MODUS: HIER IS HOE!” voor een grafisch overzicht over hoe de Optie Modus te gebruiken en een overzicht van alle opties. *Enkel voor Blitz/Toernooi niveau’s. De Spel Opties worden in drie groepen onderverdeeld: Gebruik Modus, Spel Modus en Roterende Display Modus. Druk op OPTION en ZET OPTELLING INFO: u gaat van de ene naar de andere groep. Elke groep bevat acht INFO x4 • Aantal zetten tot dusver door Wit gespeeld verschillende opties en de ZWART/> en WIT/< toetsen worden WHITE /– gebruikt om binnen elke groep door de opties te verrollen. Voor elke optie betekent een plus (+) op het beeldscherm dat de getoonde optie • Zetten van het huidige spel BLACK /+ AAN is, en een minus (–) dat de optie UIT is. Druk op ENTER om elke optie aan of uit te schakelen wanneer ze getoond wordt. Vergeet niet dat door op OPTION te drukken u door de drie hoofdgroepen verrolt, CLEAR zodat u om het even wanneer naar een andere groep kunt Druk om het even wanneer op om de Info Modus te overschakelen. Nadat u alle optie selecties gemaakt heeft uit de verlaten. Voor details, zie Sectie 4. selecties van één of al de optie groepen, druk op CLEAR om terug naar het normale spel te keren. Pdf downloaded from http://www.thepdfportal.net/0d71f9df-8f27-4948-9469-8607446a2519_324239.pdf 110 Een andere manier om spel opties te selecteren, is door op de optie velden te drukken. Zoals getoond in de Opties Grafiek, kunnen Velden A1-H1, A2-H2 en A3-H3 gebruikt worden om opties aan en uit te schakelen. Druk eerst op OPTION om naar de Optie Modus over te schakelen; neem hierna een schaakstuk en druk op het gewenste veld om toegang te verkrijgen tot een optie met de grafiek als gids. U zult zien dat door herhaaldelijk op een veld te drukken, u de optie aan en uit schakelt, met plus (+) voor AAN en minus (–) voor UIT. Wanneer u al uw selecties gemaakt heeft, druk op CLEAR om terug naar uw spel te keren. Wanneer de computer voor het eerst aangeschakeld wordt, zijn er bepaalde standaard opties ingesteld. De opties die automatisch in werking treden bij de allereerste start, worden in de grafiek met een plus aangeduid, en opties die uitgeschakeld zijn, worden aangeduid met een minus. Wanneer u de computer voor een nieuwe partij terugstelt, worden de meeste van uw geselecteerde opties naar uw volgende spel overgedragen. Enkele uitzonderingen zijn Auto Antwoorden, wat automatisch UIT gezet wordt wanneer er een nieuwe partij start, en Speel Wit vanaf de Top, dat tevens automatisch UIT geschakeld wordt. andere zetten of een andere strategie het resultaat hadden kunnen beïnvloeden. • Bestudeer openingszetten door hen manueel in te voeren! • Speel tegen een vriend met de computer als scheidsrechter. Hij treedt tijdens de partij als monitor op, controleert de legaliteit van alle zetten en houdt de tijd voor beide zijden bij. Wanneer u tegen een andere persoon speelt en één of beide zijden hebben hulp nodig, druk op INFO om de voorgestelde zet te bekijken. Om te zien wat de computer op een bepaalde stelling zou doen, druk op ENTER en de computer voert de volgende zet uit. Nadat hij dit gedaan heeft, blijft Auto Antwoorden uitgeschakeld en kunt u de partij verder spelen. Noteer tevens dat deze optie automatisch terugkeert naar de default instelling van AAN wanneer u tegelijkertijd op CLEAR en ENTER drukt om een nieuwe partij te starten. b. Geluid met Toets indruk (Veld B1) Aan:+SNd Uit:-SNd Deze optie stelt u in staat de pieptoon, die elke toets indruk begeleidt, uit te schakelen. U zult de pieptoon nog steeds horen wanneer de computer een zet doet of wanneer er een illegale zet of toets indruk uitgevoerd wordt. 5.1 Gebruik Modus Opties (Velden A1-H1) Deze opties bepalen hoe u uw computer gebruikt. Druk eenmaal op OPTION om de Gebruik Modus Opties te selecteren. Gebruik hierna de ZWART/> en WIT/< toetsen om opties binnen deze groep te selecteren, en druk op ENTER om de opties aan (+) of uit (–) te schakelen. Of, druk eenvoudig op de optievelden om de opties aan of uit te schakelen. c. Stil Modus (Veld C1) Aan:+SIL Uit:-SIL De computer piept normaal steeds wanneer hij zijn zet gevonden heeft. Voor volledig stil gebruik, schakel de Stil Modus aan. a. Auto Antwoorden Modus (Veld A1) Aan:+AUt Uit:-AUt Wanneer u een zet uitvoert, beantwoordt de computer normaliter automatisch met een tegenzet. Indien u echter Auto Antwoorden uitschakelt, kunt u één voor één een aantal zetten uitvoeren zonder de computer toe te staan een tegenzet te maken. U zult zien dat er heel e. Aftellende Klok (Veld E1) wat manieren zijn om dit kenmerk te gebruiken. Aan:+cdn Uit:-cdn • Speel door grootmeester partijen. Druk op ENTER om te zien wat Deze optie inschakelen maakt dat het beeldscherm van de computer de computer op een bepaalde stelling zou doen. de resterende tijd in plaats van de verstreken tijd weergeeft. Noteer dat deze optie enkel voorhanden is in combinatie met de Toernooi en Blitz • Maak aantekeningen van uw persoonlijk schaakspel. Wanneer een Niveau’s. partij over is, speel tot een bepaalde instelling om te zien hoe Pdf downloaded from http://www.thepdfportal.net/0d71f9df-8f27-4948-9469-8607446a2519_324239.pdf 111 NEDERLANDS d. Tikkende Klok (Veld D1) Aan:+tICk Uit:-tICk Wanneer u deze optie inschakelt, activeert u een tikkend geluid dat de klok van de computer als een echte schaakklok laat klinken! Stel u voor –u kunt in uw eigen zitkamer de atmosfeer van een echt kampioenschap schaaktoernooi recreëren! f. Systeem Test (Veld F1) Aan:+tESt Uit:-tESt De Systeem Test is voornamelijk inbegrepen als een probleemoplosser instrument. Na het activeren van deze optie door +tESt te selecteren, zult u door herhaaldelijk op ZWART/> te drukken door alle segmenten van het LCD beeldscherm verrollen. Om de test te verlaten, druk tegelijkertijd op CLEAR en ENTER om de computer terug te stellen. WAARSCHUWING: Wees voorzichtig deze optie niet gedurende een partij te activeren of de huidige partij zal verloren gaan, daar het terugstellen van de computer de enige manier is om de test te verlaten. PROBEER ZWART VAN ONDERAAN: HIER IS DE STELLING Wanneer de computer Wit vanaf de top speelt (Sectie 5.1, Optie H1), draag er zorg voor de stukken juist op te stellen! Noteer dat de Koningen en de Koninginnen anders geplaatst zijn en de bord notatie omgekeerd is. g. Auto Stroom Uit (Veld G1) Aan:+aPd Uit:-aPd De Auto Stroom Uit optie is een batterij besparend kenmerk! Door deze optie te activeren, zal de computer automatisch uitschakelen indien er gedurende 15 minuten geen toetsen ingedrukt of zetten gemaakt worden. Om het spel op te nemen waar u zich laatst bevond, druk op GO/STOP om de computer terug aan te schakelen. Noteer dat de computer zichzelf niet uitschakelt wanneer hij aan het denken is. ዛዙዘዖዕዔዓዒዜ ዊ尸尾尼尮尴尺局尶ዊ ዋ层屄层屄层屄层屄ዋ ዌ巀居巀居巀居巀居ዌ ው居巀居巀居巀居巀ው ዎ巀居巀居巀居巀居ዎ ዏ居巀居巀居巀居巀ዏ ዐ屃屁屃屁屃屁屃屁ዐ ዑ尵尿尹尯就尻尽尷ዑ ዝዙዘዖዕዔዓዒዞ Voor meer details, zie Sectie 5.1. 5.2 Spel Modus Opties (Velden A2-H2) Deze opties beïnvloeden de manier waarop de computer zijn zetten selecteert. Druk tweemaal op OPTION om de Spel Modus Opties te selecteren. Gebruik hierna de ZWART/> en WIT/< toetsen om opties binnen deze groep te selecteren, en druk op ENTER om de opties aan (+) of uit (–) te schakelen. Of, druk eenvoudig op de optie Velden om de opties aan of uit te schakelen. h. Speel Wit vanaf de Top (Veld H1) Aan:+tOP Uit:-tOP Wilt u de normale norm verlaten en de computer met de Witte stukken van bovenaan het bord laten spelen? Probeer dan deze interessante optie! Selecteer +tOP bij het begin van een nieuwe partij en stel het bord op met de Zwarte stukken dichtst bij u, zoals getoond in de diagram in deze sectie. Druk hierna op ENTER om het spel te starten. Kijk terwijl de computer de eerste zet voor Wit vanaf de bovenkant van het bord uitvoert! a. Selectief Zoeken (Veld A2) Aan:+SEL Uit:-SEL Het programma in deze schaakcomputer gebruikt normaal gezien een Selectief Zoeken algoritme. Dit staat de computer toe combinaties te zien die hem anders langer zouden duren om te berekenen. Door deze optie uit schakelen door -SEL te selecteren, schakelt het programma over naar een zeer krachtig Brute Kracht algoritme. Deze zoekmethode minimaliseert het risico van een nu en dan voorkomende onoplettendheid. Noteer dat de Mat Zoeken Niveau’s steeds de Brute Kracht methode gebruiken. Zie “PROBEER ZWART VAN ONDERAAN: HIER IS DE STELLING” voor een juiste bordinstelling wanneer u deze optie gebruikt. Wanneer de computer Wit vanaf de top speelt, wordt de bord notatie automatisch omgekeerd. Bovendien zal deze optie terug naar de standaardinstelling UIT keren wanneer er een nieuwe partij gestart wordt. b. Makkelijk Modus (Veld B2) Aan:+EASy Uit:-EASy Wenst u meer partijen tegen de computer te winnen? Probeer de Makkelijk Modus aan te schakelen, welke voorkomt dat de computer in Pdf downloaded from http://www.thepdfportal.net/0d71f9df-8f27-4948-9469-8607446a2519_324239.pdf 112 1. Druk herhaaldelijk op OPTION om een Modus te selecteren 2. Vervolgens, selecteer uw optie(s), gebruik makend van de Optie Grafiek hieronder. Er zijn twee manieren om dit te doen. • Rol door de opties binnen dat gebruik: • Druk op ZWART/> om > voorwaarts te verrollen. • Druk op WIT/< om< achterwaarts te verrollen. • Wanneer uw optie getoond wordt, druk eenvoudig op ENTER om het aan (+) of uit (–) te schakelen. • OF, situeer eenvoudig uw optieveld en druk één van de stukken met pinnen in het gaatje om die optie aan (+) of uit (–) te schakelen. 3. Tenslotte, druk op CLEAR option x1 = GEBRUIK MODUS (AUt...) option x2 = SPEL MODUS (SEL...) option x3 = ROTERENDE DISPLAY MODUS (rd:1...) option x4 = terug naar GEBRUIK MODUS... A4 ROTERENDE DISPLAY OPTIES SPEL MODUS OPTIES -rd:1 A3 C4 -rd:2 B3 +SEL -EASY B2 +AUT +SNd B1 Willekeurig Spel -RANd C2 Auto Geluid bij Antwoorden Toets Indruk A1 -rd:3 C3 Makkelijk Selectief/ Modus Brute Kracht Zoeken A2 GEBRUIK MODUS OPTIES B4 D4 E4 Stil Gebruik -SIL C1 -rd:4 D3 -rd:E -bk:P D2 Tikkende Klok -tICK D1 Actief Boek -bk:A E2 Aftellende Klok -cdn E1 Diepte & Zetten -rd:d Volledig Boek -bk:? Systeem Test -tESt F1 -rd:n Toernooi Boek -bk:t G2 F2 H4 Knopen Onderzocht G3 F3 E3 Passief Boek G4 F4 Variatie voor Variatie voor Variatie voor Variatie voor Positie halfzet 1 halfzet 2 halfzet 3 halfzet 4 Evaluatie Tijd per Zet -rd:t H3 Boek Aan/Uit +bOOk H2 Auto Stroom Speel Wit Uit vanaf Top -aPd G1 -tOP H1 clear Voor meer details, zie Sectie 5. uw tijd nadenkt. Dit verzwakt alle spel niveau’s zonder de tijdcontrole van de computer te beïnvloeden. Zoals beschreven in Sectie 2.8, denkt de computer normaal na in uw tijd en gebruikt hij deze tijd om over zijn volgende zet na te denken en zijn strategieën op voorhand te plannen. Dit is onder andere wat de computer zulk een sterke tegenstander maakt. Door de Makkelijk Modus te gebruiken om alle niveau’s te verzwakken, heeft u effectief veel meer niveau’s om uit te kiezen! c. Willekeurig Spel (Veld C2) Aan:+RaNd Uit:-RaNd Schakel deze optie aan voor een grotere spel variëteit. In plaats van de beste zet te selecteren, zal de computer één van de beste zetten selecteren door een ingebouwde Randomisatie te raadplegen. Pdf downloaded from http://www.thepdfportal.net/0d71f9df-8f27-4948-9469-8607446a2519_324239.pdf 113 NEDERLANDS om de Optie Modus te verlaten en uw nieuwe optie(s) te gebruiken! DE BASIS VAN OPTIE MODUS: HIER IS HOE! d. Passief Boek (Veld D2) Aan:+bk:P Uit:-bk:P Door Passief Boek optie te kiezen, dwingt u de computer een voorkeur te geven aan passieve en gesloten stellingen wanneer hij beslist welke openingen te spelen. Indien deze optie geselecteerd is, zijn de Actief Boek en Toernooi Boek opties buiten werking gesteld. h. Boek Aan/Uit (Veld H2) An:+bOOk Uit:-bOOk Zet deze optie naar-BOOK om de ingebouwde boek openingen van de computer volledig uit te sluiten. Wanneer u het boek aldus uitschakelt, wordt de computer gedwongen vanaf het begin van de partij tijd te nemen om over zijn zetten na te denken, in plaats van zetten uit het geheugen te spelen. Voor details betreffende openingen, zie Sectie 2.7. Indien u het boek volledig uitschakelt, zijn alle andere boek opties tevens automatisch buiten werking gesteld. e. Actief Boek (Veld E2) Aan:+bk:A Uit:-bk:A Wanneer deze optie geactiveerd is, zal de computer voorkeur geven aan actieve openingszetten en open stellingen wanneer hij beslist welke opening te spelen. Indien deze optie geselecteerd is, zijn de Passief Boek en Toernooi Boek opties buiten werking gesteld. 5.3 Roterende Display Opties (Velden A3-H3) BELANGRIJK: Het Roterende Display kenmerk is enkel geactiveerd TERWIJL DE COMPUTER AAN HET DENKEN IS. f. Volledig Boek (Veld F2) Aan:+bk:? Uit:-bk:? Door de Volledig Boek optie aan te schakelen, geeft u de computer de vrijheid een zet te selecteren uit zijn ingebouwd openingen boek, zodat u hem een grotere variëteit van openingen ziet spelen. Indien deze optie geselecteerd is, zijn de Passief, Actief en Toernooi Boek opties buiten werking gesteld. Met deze optie aangeschakeld, zult u de computer enkele bedenkbare zetten zien uitvoeren. Dit is omdat het ingebouwde openingen boek antwoorden moet bevatten op bepaalde openingszettingen (zelfs bedenkbare openingen) wanneer ze gespeeld worden. Terwijl de computer zulke zetten niet zelf zou uitvoeren, moet hij weten hoe ze op de best mogelijke manier te beantwoorden. Daarom, wanneer u het Volledig boek aanschakelt, zal de computer eventueel één van deze zetten uitvoeren. Het computer beeldscherm toont normaliter de tijd voor de speler die zet. Nochtans, de computer kan tevens andere informatie tonen, zoals beschreven in Sectie 4 (Info Modus). Het Roterende Display kenmerk werkt hand in hand met de Info Modus, daar het u toelaat te kiezen welk van de Info Displays u wenst te bekijken, en dan in één seconde pauzes door uw keuze verrolt. U kunt zoveel Roterende Display opties aanschakelen als u wenst. Druk driemaal op OPTION om de Roterende Display Opties te selecteren. Gebruik hierna de ZWART/> en WIT/< toetsen om de opties te selecteren die u op het scherm wil bekijken. De opties worden hieronder beschreven en worden in de Optie Modus Grafiek in deze sectie samengevat. Druk op ENTER om deze opties aan (+) of uit (–) te schakelen. OF, druk eenvoudig op de optievelden om de opties aan of uit te schakelen. Indien u denkt dat de getoonde informatie te vlug verandert terwijl het verrolt, druk op INFO om het scherm te bevriezen. g. Toernooi Boek (Veld G2) Achtereenvolgens op INFO en de ZWART/> en WIT/< toetsen Aan:+bk:t Uit:-bk:t drukken, stelt u in staat manueel door alle displays te verrollen zoals Wanneer u de Toernooi Boek optie aanschakelt, is de computer beschreven in Sectie 4. Om het verrollen van het scherm nogmaals te verplicht steeds de best mogelijke manier van spelen in elke opening te starten, druk op OPTION gevolgd door CLEAR. Het scherm begint selecteren. Terwijl dit resulteert in het beste schaakspel, verkleint het automatisch weer te verrollen wanneer de computer over zijn volgende tevens de keuze van zetten voor de computer door de voorhanden zet begint na te denken. voortzettingen te limiteren. Indien deze optie geselecteerd is, zijn de De spel informatie die u, terwijl de computer aan het nadenken is, Actief Boek en Passief Boek opties buiten werking gesteld. kunt bekijken, is de volgende: • rd:1 tot rd:4 = de voorspelde richting van de partij (tot en met vier halfzetten) Pdf downloaded from http://www.thepdfportal.net/0d71f9df-8f27-4948-9469-8607446a2519_324239.pdf 114 • rd:E = een evaluatie van de huidige positie • rd:d = de zoekdiepte van de computer en het aantal zetten tot zover in de partij onderzocht • rd:n = het aantal knopen per seconde onderzocht • rd:t = de tijd welke de zet tot nu toe geduurd heeft Wanneer de gevraagde informatie niet voorhanden is, toont het scherm een serie streepjes (– – – – –). Voor een volledige beschrijving van deze opties en details aangaande hoe ze te interpreteren, zie Sectie 4. HET IS MAKKELIJK STUKKEN TE VERIFIËREN new game clear enter 1. Druk tegelijkertijd op CLEAR en ENTER om de computer voor een nieuwe partij terug te stellen. Display: [ 0:00:00. 2. Druk op de PAARD Toets. Display: [,@,b1 (het eerste Witte Paardt). 3. Druk nogmaals op de PAARD Toets. Display: [,@,G1 (het tweede Witte Paard). 6. VERIFIËREN/STELLINGEN OPZETTEN 4. Druk nogmaals op de PAARD Toets. Display: ],@,b8 (het eerste Zwarte Paard). 6.1 Verifieer Posities Zie ”HET IS MAKKELIJK STUKKEN TE VERIFIËREN!” voor een stap-voor-stap voorbeeld van hoe de Verifieer Modus te gebruiken. 5. Druk nogmaals op de PAARD Toets. Display: ],@,g8 (het tweede Zwarte Paard). 6. Druk nogmaals op de PAARD Toets. Display: @ (geen Paarden meer op het bord). Indien u de schaakstukken per ongeluk zou omver gooien of u denkt dat de bordstellingen verkeerd zijn, kan de computer de stellingen van de schaakstukken voor u controleren! Als het uw beurt is, druk op één van de SCHAAKSTUK SYMBOOL TOETSEN (&, %, $, #, @, of !). De computer toont u waar het eerste stuk van dat type op het bord gesitueerd is –het scherm toont het schaakstuk symbool, de kleur indicatie en veld aanwijzing. Druk nogmaals op dezelfde SCHAAKSTUK SYMBOOL TOETS om de positie van het volgende stuk van datzelfde type te bekijken. Al de Witte stukken worden eerst getoond, daarna de Zwarte stukken. Wanneer er zich geen verdere stukken van dat type op het bord bevinden, blijft enkel het stuk symbool op het scherm achter. Wenst u andere stukken te verifiëren? Herhaal eenvoudig de hierboven vermelde procedure en gebruik de andere SCHAAKSTUK SYMBOOL TOETSEN om het gehele bord te verifiëren indien gewenst! Druk op CLEAR om terug naar normaal spel te keren. clear 7. Herhaal om andere stukken te verifiëren! Druk op CLEAR om de Verifieer Modus te verlaten. speciale bordstellingen op te zetten of problemen die u de computer wenst laten oplossen, te spelen! Waarschuwing: Alle voorafgaande zetten van uw huidige partij zullen uit het geheugen van de computer gewist worden indien u gedurende de partij veranderingen aan de stellingen aanbrengt. Druk op POSITION om naar de Stelling Modus over te schakelen en het scherm toont -POS-. U kunt een stelling veranderen of opzetten wanneer het uw beurt is om te zetten. Nadat u een nieuwe stelling heeft opgezet, druk op CLEAR om de Stelling Modus te verlaten. 6.2 Stellingen Veranderen en Opstellen • Om een stuk van het bord te verwijderen, druk het stuk neer op zijn veld en verwijder het. Noteer dat het scherm het type en de Zie ”PROBEER STELLING MODUS UIT” om een idee te kleur van het stuk aangeeft, tezamen met een minus teken (–) en verkrijgen over hoe dit kenmerk werkt. de veld locatie. De Stelling Modus is een zeer opwindend kenmerk dat u toestaat • Om een stuk van één veld naar een ander te verplaatsen, druk Pdf downloaded from http://www.thepdfportal.net/0d71f9df-8f27-4948-9469-8607446a2519_324239.pdf 115 NEDERLANDS Voor meer details, zie Sectie 6.1. het stuk neer op zijn oorspronkelijke veld, neem het op en druk het neer op het nieuwe veld. Terwijl u dit doet, toont het scherm een PROBEER STELLING MODUS UIT minus teken (–) voor het eerste veld, en een plus teken (+) voor het tweede veld. 1. Druk tegelijkertijd op CLEAR en ENTER om new game • Om een stuk aan het bord toe te voegen, druk eerst de de computer voor een nieuwe partij terug te clear enter SCHAAKSTUK SYMBOOL TOETS voor dat stuk in (&, %, $, #, stellen. @, of !). Zorg ervoor dat het scherm het juiste kleursymbool voor Display: [ 0:00:00. het stuk dat u wenst toe te voegen toont. Indien niet zo, druk op 2. Druk op POSITION om naar Stelling Modus ZWART/> of WIT/< om de kleur te veranderen. Wanneer het position over te schakelen. scherm het juiste stuk type en kleur toont, plaats dat stuk op het Display: -POS-. gewenste veld en druk het zachtjes neer. Het scherm toont een 3. Druk de Witte pion neer op Veld E2 en verwijder plus teken (+) tezamen met de plaats voor dat veld. Om een ander het van het bord. stuk van hetzelfde type toe te voegen, druk eenvoudig op een E2 Display: [,!,-E2. ander veld. Om een ander stuk toe te voegen, druk op een andere SCHAAKSTUK SYMBOOL TOETS en volg dezelfde stappen zoals 4. Druk dezelfde pion neer op Veld E3 en voeg hierboven beschreven. het aan het bord toe. E3 • Om het bord uit te wissen, druk op ENTER terwijl u zich in de Display: [,!,+E3. Stelling Modus bevindt. Het scherm toont _ om een leeg 5. Druk de Zwarte Koningin neer op Veld D8 en schaakbord te representeren. Druk nog één keer op ENTER om te verwijder het van het bord. bevestigen dat u het bord wenst uit te wissen. Voeg hierna stukken D8 Display: ],%,-D8. toe zoals hierboven beschreven. Indien u beslist het bord toch niet uit te wissen, druk op CLEAR om te cancelen. Dit kenmerk kan 6. Druk dezelfde Koningin neer op Veld H5 en handig uitkomen wanneer u een stelling met slechts enkele stukken voeg het aan het bord toe. wenst op te zetten, en het veel makkelijker is van een leeg bord te H5 Display: ],%,+H5. starten! • Eens u de bordstellingen veranderd heeft zoals hierboven white/ 7. Druk op WIT/< om de kleur die vervolgens beschreven, let erop dat de kleur aanwijzing op het scherm de moet zetten te veranderen. juiste kleur is van de zijde die moet zetten. Indien noodzakelijk, 8. Druk op CLEAR om te verlaten. verander de kleur door op ZWART/> of WIT/< te drukken. clear • Om de Stelling Modus te verlaten, druk op CLEAR. U keert terug Voor meer details, zie Sectie 6.2. naar normaal spel met uw nieuwe bordstellingen. Noteer dat om het even welke legale stelling opgezet kan worden met één van de hierboven vermelde procedures. De computer zal u incorrecte plaats te verwijderen). Druk hierna op CLEAR om de Stelling niet toelaten een illegale stelling op te zetten, zoals bv. meer dan het Modus te verlaten. voorgeschreven aantal stukken voor een normale partij of een stelling waar de Koning mat staat en niet verzet mag worden. In zulke gevallen zal de computer eenvoudig piepen wanneer u CLEAR indrukt en laat hij u de Stelling Modus niet verlaten. Controleer indien noodzakelijk de stelling met de SCHAAKSTUK SYMBOOL TOETSEN en corrigeer de stelling (door een stuk toe te voegen, te verwijderen of van een Pdf downloaded from http://www.thepdfportal.net/0d71f9df-8f27-4948-9469-8607446a2519_324239.pdf 116 7.3 Technische Gegevens Toetsen: 16 LCD Display: 48-segmenten Batterijen: 3 x “AA”/AM3/R6 (1.5V) cellen Stroomverbruik: 330 mW maximum Afmetingen: 335 x 302 x 35 mm Gewicht: 975 g (zonder batterijen) 7. TECHNISCHE DETAILS 7.1 De ACL Functie Computers blijven soms “hangen” vanwege statische ontlading of andere elektrische storingen. Als dit gebeurt, verwijder de batterijen en gebruik een pen of een ander scherp voorwerp om in het ACL gemarkeerde gaatje aan de onderkant van het toestel gedurende minimum één seconde te drukken. Dit stelt de computer terug. Gelieve deze informatie te behouden voor latere referentie. 7.2 Zorg en Onderhoud Uw schaakcomputer is een elektronisch precisieapparaat en mag niet blootgesteld worden aan ruwe behandeling of extreme temperaturen en vocht. Zorg ervoor de batterijen te verwijderen alvorens het toestel te reinigen. Gebruik geen chemische middelen of vloeistoffen om het toestel te reinigen daar dit het plastic kan beschadigen. Zwakke batterijen moeten dadelijk vervangen worden daar ze kunnen lekken en de computer kunnen beschadigen. Gelieve tevens het volgende betreffende het gebruik van batterijen te noteren. Waarschuwing: Gebruik enkel alkalische of zink koolstof batterijen. Meng geen verschillende types van batterijen of nieuwe en gebruikte batterijen. Laad geen niet-oplaadbare batterijen op. Gebruik enkel de aanbevolen batterijen of equivalent. Zorg ervoor steeds op de juiste polariteit te letten tijdens het aanbrengen van de batterijen. Oude batterijen moeten steeds dadelijk uit het toestel verwijderd worden. Breng de voedingscontactpunten niet in kortsluiting. Pdf downloaded from http://www.thepdfportal.net/0d71f9df-8f27-4948-9469-8607446a2519_324239.pdf 117 NEDERLANDS Saitek behoudt zich het recht voor zonder voorafgaande kennisgeving veranderingen aan te brengen in het belang van de vooruitgang. PROBLEEMOPLOSSER GIDS SYMPTOMEN MOGELIJKE OORZAKEN TE NEMEN ACTIE De computer reageert niet, gedraagt zich afwijkend of “bevriest” tijdens een partij. • Batterijen zijn niet juist geïnstalleerd. • Batterijen zijn zwak of slecht. • Statische ontlading of een elektrische storing heeft een vergrendeling veroorzaakt. • Installeer de batterijen opnieuw en let op de juiste polariteit. • Vervang de batterijen. • Druk in het ACL gemarkeerde gaatje om de computer terug te stellen (zie Sectie 7.1). Het scherm is moeilijk te lezen. • Batterijen zijn zwak of slecht. • Vervang de batterijen met nieuwe alkalische batterijen. De computer wil geen zet uitvoeren. • De Auto Antwoorden Optie is misschien uitgeschakeld. • De computer reageert slechts automatisch indien de Auto Antwoorden Optie ingeschakeld is (zie Sectie 5.1). • Om de computer te onderbreken, druk op ENTER. • De computer denkt zeer lange tijd na op hoog niveau. • Is het uw beurt? Bevindt uw Koning zich in schaak? Zal uw zet de Koning in schaak zetten? Probeert u de rokade onjuist toe te passen? Verplaatst u zich naar een illegaal veld? • De computer is aan het nadenken (zijn kleur symbool flikkert op het scherm). • Herzie de schaakregels. Verifieer de stelling om te verzekeren dat ze correct is (zie Sectie 6.1). Een foutmelding verschijnt wanneer er op een veld gedrukt wordt. • U heeft de laatste zet van de computer niet juist ingevoerd (verkeerd van of naar veld). • Controleer het scherm en druk op het juiste veld om de zet van de computer te vervolledigen. U kunt de Stelling Modus niet verlaten met CLEAR de computer piept enkel. • U heeft een illegale stelling opgezet. Een Koning bevindt zich misschien in schaak, u heeft misschien te veel pionnen op het bord, enz. • Controleer uw positie en breng de nodige veranderingen aan (zie Sectie 6.2). Druk nogmaals op CLEAR om de Stelling Modus te verlaten. Het scherm toont _. • U bevindt zich in de Stelling Modus en heeft op ENTER gedrukt om het bord uit te wissen. • Om het bord uit te wissen, druk nogmaals op ENTER; om te cancelen, druk op CLEAR (zie Sectie 6.2). De computer blijkt illegale zetten uit te voeren. • De computer heeft een speciale zet uitgevoerd, zoals een en passant, rokade of een pion promotie. • Uw bord positie is niet correct. • Batterijen zijn bijna leeg. • Herzie de schaakregels. Verifieer de stelling (zie Sectie 6.1). • De computer bevindt zich op één van de laagste Beginner of Training niveau’s waar hij de zetten vlug uitvoert en zwakker speelt dan normaliter daar de zoekdiepte gelimiteerd is. • Batterijen zijn bijna leeg. • Druk op LEVEL om het niveau te controleren (zie Sectie 3). Verander naar een ander niveau indien gewenst. • De Stil Modus optie is misschien geactiveerd. • Controleer de optie instellingen (zie Sectie 5.1). De computer aanvaardt uw zet niet. De computer maakt onmiddellijke en irrationele zetten. De computer is stil. • Om de computer te onderbreken, druk op ENTER. • Verifieer de stelling (zie Sectie 6.1). • Vervang de batterijen door nieuwe alkalische. • Vervang de batterijen door nieuwe alkalische. Pdf downloaded from http://www.thepdfportal.net/0d71f9df-8f27-4948-9469-8607446a2519_324239.pdf 118 www.saitek.com ©2004 Saitek Ltd. Made and printed in China All trademarks are the property of their respective owners. 0204 Pdf CT09 downloaded fromP/N http://www.thepdfportal.net/0d71f9df-8f27-4948-9469-8607446a2519_324239.pdf