1
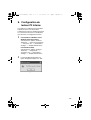
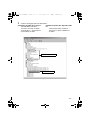
P2Installer(VQT2G26-1)_E.book 1 ページ
2010年2月19日 金曜日 午後2時9分
Install Manual
P2 Software
DEUTSCH
Für Erlauterungen in Deutsch, konsultieren
Sie bitte die mitgelieferte CD-ROM.
ITALIANO
Per le istruzioni in italiano, vedere il CDROM in dotazione.
ESPAÑOL
Para la explicación en español, consulte
el CD-ROM suministrado.
한국어
FJ0509AT1020 -FJ
Printed in Japan
한국어 설명은 부속품 CD-ROM 을 참조하여 주십시
오.
ENGLISH
VQT2G26-1
P2Installer(VQT2G26-1)_E.book 2 ページ
2010年2月19日 金曜日 午後2時9分
Contents
Operating Precautions
When Using Windows
1.
2.
3.
4.
5.
6.
7.
8.
9.
10.
11.
12.
13.
14.
Before Installing . . . . . . . . . . . . . . . . . . . . . . . . . . . . . . . . . . . . . . . . . . . . . . . . . . . 3
Precautions in Handling the P2 Card in the Personal Computer . . . . . . . . . . . . . . 4
Software to be Installed . . . . . . . . . . . . . . . . . . . . . . . . . . . . . . . . . . . . . . . . . . . . . 4
Installation of the P2 Software . . . . . . . . . . . . . . . . . . . . . . . . . . . . . . . . . . . . . . . . 5
Adding a New P2 Device . . . . . . . . . . . . . . . . . . . . . . . . . . . . . . . . . . . . . . . . . . . 11
Uninstallation of the P2 Software . . . . . . . . . . . . . . . . . . . . . . . . . . . . . . . . . . . . . 11
Checking the Installed Devices . . . . . . . . . . . . . . . . . . . . . . . . . . . . . . . . . . . . . . . 12
Setting the internal P2 drive . . . . . . . . . . . . . . . . . . . . . . . . . . . . . . . . . . . . . . . . . 13
Checking the Installation Status of the P2 Driver . . . . . . . . . . . . . . . . . . . . . . . . . 14
Checking the Version of the P2 Driver . . . . . . . . . . . . . . . . . . . . . . . . . . . . . . . . . 19
P2 Card Manager . . . . . . . . . . . . . . . . . . . . . . . . . . . . . . . . . . . . . . . . . . . . . . . . . 19
Software for each P2 device . . . . . . . . . . . . . . . . . . . . . . . . . . . . . . . . . . . . . . . . . 20
P2 Card Formatting . . . . . . . . . . . . . . . . . . . . . . . . . . . . . . . . . . . . . . . . . . . . . . . . 21
Using Windows 7 . . . . . . . . . . . . . . . . . . . . . . . . . . . . . . . . . . . . . . . . . . . . . . . . . 23
When Using Macintosh
PC card slot driver for Macintosh PowerBook . . . . . . . . . . . . . . . . . . . . . . . . . . . 24
P2 card formatter for the Macintosh . . . . . . . . . . . . . . . . . . . . . . . . . . . . . . . . . . . 25
Operating Precautions
It is prohibited to redistribute the software included with this supplied CD-ROM, regardless
of whether or not compensation is received. Use of the software stored on the supplied
CD-ROM without permission for the purposes of manufacturing and/or selling any kinds of
software and hardware shall be also prohibited. Furthermore, we will not be responsible
for any losses and/or damage that may arise from using or not being able to use this
system. This shall apply even if we have already been notified of the possibility of such
damage.
Microsoft, Windows and Windows Vista are trademarks of Microsoft Corporation of the
United States.
Macintosh, Mac OS and PowerBook are trademarks of Apple Inc. of the United States.
Other names of companies and products are trademarks or registered trademarks of the
respective companies.
zIn these instructions, Microsoft® Windows®, Windows® 2000, Windows® XP
Professional, Windows Vista® Business, Windows Vista® Ultimate, Windows® 7
Professional and Windows® 7 Ultimate are given as “Windows,” “Windows 2000,”
“Windows XP Professional,” “Windows Vista Business,” “Windows Vista Ultimate,”
“Windows 7 Professional,” and “Windows 7 Ultimate,” respectively.
zSimilarly, in these instructions, Macintosh®, Mac OS® X and PowerBook® are given
as “Macintosh,” “Mac OS X” and “PowerBook,” respectively.
2
P2Installer(VQT2G26-1)_E.book 3 ページ
2010年2月19日 金曜日 午後2時9分
When Using Windows
1. Before Installing
This supplied CD-ROM installs the software
for P2, used to reference on a personal
computer the content of Panasonic P2 cards.
A personal computer on which this software
will be installed needs to meet the following
conditions:
z OS
Windows 2000 SP4 or later
Windows XP Professional
(SP2 or SP3) 32 bit
Windows Vista Business (SP1),
Ultimate (SP1) 32/64 bit
Windows 7 Professional,
Ultimate 32/64 bit
z RAM 512MB or greater recommended
1GB or greater recommended for
Windows 7/Windows Vista
z CPU Pentium® 4 1.5GHz or greater
recommended
z The personal computer is equipped with
a drive in which CD-ROM can be read.
z If the OS is Windows 2000 SP4, SP4
patches must be installed.
SP4 patches are included on the supplied
CD-ROM, in a folder named
\Win2000SP4Patch.
The personal computer further needs to
meet the following conditions when actually
using the software or when connecting the
personal computer to the P2 card or P2
devices (P2 drive, P2 deck etc.).
When connecting the P2 devices to the
personal computer via USB2.0:
When using the software with the P2
card directly inserted into the card bus
of the personal computer:
z A Type 2 card bus slot is installed.
<Notes>
z Depending on the condition of the
personal computer, phenomena such as
dropping image frames and
disconnecting sound may occur when
playing back material.
z When connecting the P2 devices, be sure
to reserve more free drives than the
number of drives necessary for each P2
device which can be used by the
personal computer. (The number of
drives necessary for a P2 device should
include those necessary for the P2 card
slots and hard disks built into P2 device.)
z The following 3 types of cards only can
be used with the cardbus driver for
Windows 2000. Other types of cards
cannot be used.
AJ-P2C002SG
AJ-P2C004HG
AJ-P2C008HG
z If the OS is Windows 7 or Windows Vista,
the “User Account Control” dialogue box
may appear when installing, formatting
etc. In this case, click “Continue” and
continue the operation.
z For versions of 64-bit Windows 7/
Windows Vista, the installer is stored in
the folder \Win64 on the CD-ROM.
z A USB2.0 port is provided, and the
USB2.0 driver used is that supplied by
Microsoft.
If said OS is preinstalled in the personal
computer, the driver is already present in
the computer, so you do not need to
check it.
3
P2Installer(VQT2G26-1)_E.book 4 ページ
2010年2月19日 金曜日 午後2時9分
2. Precautions in Handling the P2 Card in the
Personal Computer
When using the software with the P2 card or P2 devices connected to the
personal computer, be sure to install the P2 driver on the personal
computer from the supplied CD-ROM.
If these devices are connected to a personal computer on which the P2 driver is not
installed, these devices may not operate properly.
During reading from or writing to the P2 card, do not:
z remove the P2 card
z proceed with P2 card removal
z insert or remove the USB cable or change the setting of USB connector
Otherwise, abnormal operation of the personal computer may result.
Also, perform the following operation before removing the P2 card from the card slot:
z If the P2 card is inserted directly into the card bus in the personal computer, execute
“Safely Remove Hardware” from the system tray on the Windows taskbar.
z If the P2 devices are connected to the personal computer via USB2.0, open My
Computer, then right-click on the particular hardware item into which the P2 card is
inserted, and select “Take Out”.
z Ensure that the personal computer system is set up in such a way that it will not go
into standby mode or hibernation mode during use of the P2 card. If the system is set
up to go into standby mode or hibernation mode while a P2 card is being accessed,
destruction of the files and/or data being executed may result.
3. Software to be Installed
The supplied CD-ROM installs the following
programs:
z P2 driver
z P2 card manager
z Software for each P2 device
When the programs are installed using the
supplied CD-ROM, you are able to format
the P2 card. For how to format, refer to “13.
P2 Card Formatting” (page 21).
The supplied CD-ROM also contains a set
of instruction manuals. Refer to the folder
named \Manuals.
To browse instruction manuals, you need
Adobe® Reader. If Adobe Reader is not
4
currently installed in the personal computer,
you will need to download this program
from the Adobe Web site.
P2Installer(VQT2G26-1)_E.book 5 ページ
2010年2月19日 金曜日 午後2時9分
4. Installation of the P2 Software
<Notes>
z Install the P2 software after logging into
the personal computer under a user
name that has administrator status.
z We recommend that installation of the
software be started with the P2 devices
to be used, connected to the personal
computer.
When the P2 devices are connected to
the personal computer, Windows
Explorer will additionally display the same
number of drives as device card slots for
these devices.
When no drive is displayed in Windows
Explorer, check that the USB2.0 driver
provided by Microsoft is installed in the
personal computer.
z The P2 card driver needs to be installed
for each card bus slots. If you are using a
personal computer that has two or more
card bus slots, insert the P2 card into
every slot.
The driver may not be installed for any slot
into which the P2 card is not inserted,
causing the P2 card to operate improperly.
If the PC does not recognize the inserted
P2 card, then try re-inserting it.
z If the OS is Windows 2000/Windows XP
Professional, installation of the software
may fail when the driver signature option
in Windows is set to “Block”.
If the installation fails, select the
Hardware tab in the “System Properties”
window in Control Panel and check that
the driver signature option for the driver is
not set to “Block”.
z If a dialogue box not described in this
manual appears during installation of
the software, click “Cancel” to close
the box.
z When a device such as the P2 card is
connected to the personal computer
before the driver is installed, the
following dialogue box appears. Be
sure to click “Cancel” to close the box.
Figure 1
(For Windows 2000/
Windows XP Professional)
Figure 2
(For Windows Vista)
5
P2Installer(VQT2G26-1)_E.book 6 ページ
2010年2月19日 金曜日 午後2時9分
z Users with a P2 driver version prior to
1.07.0048 already installed in Windows
2000/Windows XP Professional
Refer to “10. Checking the Version of the
P2 Driver” for the procedure to check the
version.
To install the new driver, you need to
uninstall the currently installed driver. If
you uninstall this driver, all the
information installed until now will be
deleted. Refer to “6. Uninstallation of the
P2 Software” for the uninstallation
procedure and notes.
Also, you can uninstall the old version of
the P2 driver during the procedure to
upgrade the P2 driver. For both
procedures, you may need to restart
Windows.
z If the OS of the personal computer is
Windows 7 or Windows Vista, the
dialogue box shown in Figure 3 may
appear when you upgrade the P2 driver.
In this case, click the “OK” button.
After checking each item in “1. Before
Installing”, use the following procedure to
install the P2 software in the personal
computer:
1
2
3
Close all applications, then connect
the P2 card or P2 devices to be used
to the personal computer.
When the devices are connected to
the personal computer, the Found
New Hardware Wizard box will
appear automatically, but click
“Cancel” to close the box.
Insert the supplied CD-ROM.
From “MY COMPUTER”, access the
drive containing the supplied CD-ROM
and execute setup.exe.
The window shown in Figure 4
appears, starting the setup process.
Click “Next”.
Figure 4
Figure 3
6
P2Installer(VQT2G26-1)_E.book 7 ページ
4
2010年2月19日 金曜日 午後2時9分
(Users with a P2 driver version prior
to 1.07.0048 already installed in
Windows 2000/Windows XP
Professional)
The box shown in Figure 5 is
displayed. To install the new driver,
you need to uninstall the currently
installed driver.
If you wish to continue with the
uninstallation, click the “OK” button.
If you wish to uninstall manually, click
“Cancel”. Refer to “6. Uninstallation of
the P2 Software” for information on
manual uninstallation.
6
As shown in Figure 7, the installation
destination folder setting window
appears. To change the installation
destination folder, click “Change”, and
then create a new folder. Once the
new installation destination folder is
set, click “Next”.
Figure 7
7
Figure 5
5
As shown in Figure 8, the installation
start window appears. Click “Install”.
As shown in Figure 6, the License
Agreement box appears. If you agree
to the terms of the License
Agreement, click “I accept the terms of
the license agreement”, then click
“Next”.
Figure 8
Figure 6
7
P2Installer(VQT2G26-1)_E.book 8 ページ
8
2010年2月19日 金曜日 午後2時9分
As shown in Figure 9, the status
display window appears, indicating
that installation is in progress.
Figure 9
9
As shown in Figure 10, the driver
installation selection window appears
with each device displayed. Select the
device to be installed and check the
appropriate box.
zInstallation of drivers for the
installed devices is not necessary.
For monitoring the installation
status, see Page 14.
10 After pressing the OK button, a
dialogue box appears to prompt for
connection with the P2 card or P2
device as shown in Figure 11. If you
need to install them, connect them,
then click “Install”. If you do not wish to
use them, just click “Cancel”.
If at some future time you want to add
a device that was skipped in the initial
setup, execute the installer again to
perform an overwrite installation of the
device. Please refer to “5. Adding a
New P2 Device” for more information.
<Note>
When the focus shifts to another
window during installation, this box
may be hidden behind that window. If
the box shown in Figure 9 remains
displayed and its status display does
not change, check whether the box
shown in Figure 11 is hidden behind
another window.
Figure 11
Figure 10
8
P2Installer(VQT2G26-1)_E.book 9 ページ
2010年2月19日 金曜日 午後2時9分
11 For Windows 2000/Windows XP
Professional,
The message window shown in Figure
12 may appear. Click “Continue
Anyway”. The message window may
appear several times.
Figure 12
For Windows 7/Windows Vista,
The message window shown in Figure
13 may appear. Click “Install this driver
software anyway”. The message
window may appear several times.
12 (Users with a P2 driver version prior to
1.07.0048 already installed in Windows
2000/Windows XP Professional)
The message window shown in
Figure 14 may appear. In this case,
uninstallation of the old version of
the P2 driver is completed, however
the new version of the driver is not
installed.
Click the “OK” button to close the
installer, restart Windows and then
start the installation operation
again from Step 1.
Figure 14
13 As shown in Figure 15, the installation
completion window appears, signifying
completion of the installation.
Figure 13
Figure 15
9
P2Installer(VQT2G26-1)_E.book 10 ページ
2010年2月19日 金曜日 午後2時9分
14 As shown in Figure 16, a dialogue box
appears, prompting you to restart the
personal computer. Click “Yes” to
restart.
When connecting two P2 drives to the
personal computer, install the P2 software
by following the steps below. (It is
assumed here that portA and portB are
used as the two USB2.0 ports.)
Use two USB2.0 ports exclusively for the
P2 drives.
1
2
Figure 16
3
4
5
6
With the personal computer running,
connect one of the P2 drives to portA
and then the other one to portB.
Install the P2 software. (See pages 5
to 9)
When the installation is completed
and the panel requesting that the
system be restarted (Figure 16 on
Page 10) has appeared, click “No”,
and disconnect each of the P2 drives
from the USB2.0 ports.
The P2 drives are now connected
again, but this time one of them is
connected to portB and then the
other one to portA.
After starting the installer again and
click the “Next” button (Page 6),
Figure 17 (on Page 11) appears.
Check the “Repair” check box, and
click the “Next” button.
After following the instructions
displayed on the screen, restart the
personal computer.
z Be sure to connect at least one P2
device to the personal computer. Up to
two P2 drives can be connected.
10
P2Installer(VQT2G26-1)_E.book 11 ページ
2010年2月19日 金曜日 午後2時9分
5. Adding a New P2
Device
6. Uninstallation of
the P2 Software
To connect a new P2 card or P2 device to a
personal computer in which P2 software is
already installed, use the procedure
described in “4. Installation of the P2
Software” to perform an overwrite
installation of the P2 software.
During the overwrite installation, the
window shown in Figure 17 appears, but
the License Agreement box shown in
Figure 6 does not reappear.
In this window, check “Repair”, then click
“Next”.
After following the instructions displayed on
the screen, restart the personal computer.
To uninstall the P2 software, use the
following procedure:
For Windows 7/Windows Vista,
in the “Programs and Features” window in
the “Programs” window in Control Panel,
select “Panasonic P2 Drivers”, then click
“Uninstall”.
For Windows XP Professional,
in the “Add or Remove Programs” window
in Control Panel, select “Panasonic P2
Drivers”, then click “Remove”.
For Windows 2000,
in the “Add/Delete Applications” window in
Control Panel, select “Panasonic P2
Drivers”, then click “Remove”.
After following the instructions displayed on
the screen to complete the uninstallation,
follow the on-screen instructions to restart
the personal computer.
Figure 17
<Note>
The above screen will be displayed when
the installed P2 software and the installer
have the same version.
11
P2Installer(VQT2G26-1)_E.book 12 ページ
2010年2月19日 金曜日 午後2時9分
<Notes>
z If you uninstall the software, all the
information installed until now will be
deleted so, if you install the software
again, you will need to install the drivers
for all the devices that you will use. We
recommend checking the current
information before uninstallation. Refer to
“7. Checking the Installed Devices” for
the procedure for checking.
z If the OS of the personal computer is
Windows 7 or Windows Vista, the
dialogue box shown in Figure 18 may
appear when you uninstall the P2 driver.
In this case, click the “OK” button.
7. Checking the
Installed Devices
To check which devices have a driver
installed, use an installer that is the same
version as the P2 software currently
installed and follow the procedure
described in “4. Installation of the P2
Software” to perform an overwrite
installation.
If you start the installation, then click “Next”,
the window shown in Figure 17 (on Page
11) appears. In this window, check “Repair”,
then click “Next”. If you follow the
instructions displayed on the screen, the
window shown in Figure 19 appears.
In this window, you can check which
devices have a driver installed by checking
if “Installed” is displayed.
After checking, click “Cancel” to close the
window.
Figure 18
Figure 19
12
P2Installer(VQT2G26-1)_E.book 13 ページ
2010年2月19日 金曜日 午後2時9分
8. Setting the internal
P2 drive
To use a personal computer in which the P2
drive is incorporated in the 5-inch bay,
install the P2 card software, connect the P2
drive to the personal computer, then
perform the following setting:
1
For Windows 7/Windows Vista/
Windows XP Professional,
select the following: “Start” > “All
Programs” > “Panasonic P2” > “Set
P2 Drive Settings” > “Enable Internal
Drive”.
For Windows 2000,
select the following: “Start” >
“Program” > “Panasonic P2” > “Set
P2 Drive Settings” > “Enable Internal
Drive”.
2
The box shown in Figure 20 appears.
Click “OK”.
Figure 20
13
P2Installer(VQT2G26-1)_E.book 14 ページ
2010年2月19日 金曜日 午後2時9分
9. Checking the Installation Status of the P2
Driver
When the standard driver is installed via the
Found New Hardware Wizard box (Figure
1), or when the P2 driver is uninstalled for
some reason, the P2 device does not
operate properly.
If any of the following events occurs, check
that the P2 driver is properly installed; if it is
not, reinstall it.
z P2 card or P2 device is not recognized.
z Reading from the P2 card or P2 device
cannot be performed.
z Writing to the P2 card or P2 device
cannot be performed.
z Image frame dropping occurs frequently
during playback from the P2 card or P2
device, indicating that there is a
performance problem.
How to check the P2 driver
<Note>
When checking that the P2 driver is
properly installed, be sure to connect the
appropriate device to the personal
computer. Devices not connected to the
personal computer cannot be checked
using the following method:
For Windows 7,
select “Start”, right-click “Computer”, and
select “Property”. The System Properties
window appears. Click on Device Manager
at the top left of the window.
For Windows Vista,
select: “Start” > “Control Panel” >
“System and Maintenance”. Click on Device
Manager.
For Windows XP Professional,
select: “Start” > “Control Panel” >
“System”. The System Properties window
appears. Select the Hardware tab, then
click on Device Manager.
For Windows 2000,
select: “Start” > “Settings” > “Control
Panel” > “System”. The System Properties
window appears. Select the Hardware tab,
then click on Device Manager.
14
P2Installer(VQT2G26-1)_E.book 15 ページ
1
2010年2月19日 金曜日 午後2時9分
Check the P2 device driver display.
Checking the P2 card driver
“IDE ATA/ATAPI controllers” “Panasonic P2 Card” is set.
“P2 Disk Drive” - “P2Card Series
Cached Disk” is set.
Checking the P2 USB devices drivers
“Universal Serial Bus controllers” “Panasonic P2 Series USB Device” is
set.
P2 card driver
P2 devices drivers
Figure 21
15
P2Installer(VQT2G26-1)_E.book 16 ページ
2010年2月19日 金曜日 午後2時9分
Checking the P2 card 1394b driver
For Windows XP Professional,
Click “MATSHITA AJ-PCD20 #1 IEEE 1394 SBP2 Device” listed under “Disk drives,”
then click on the “Driver” tab in the “MATSHITA AJ-PCD20 #5 IEEE 1394 SBP2
Device” property panel. “Provider” - “Panasonic” is set.
P2 devices 1394b
drivers
Figure 22
16
P2Installer(VQT2G26-1)_E.book 17 ページ
2010年2月19日 金曜日 午後2時9分
For Windows Vista,
Click “P2 SBP2 Device”. There are 5 items displayed from “MATSHITA AJ-PCD20 #1
IEEE 1394 SBP2 Device” to “MATSHITA AJ-PCD20 #5 IEEE 1394 SBP2 Device”.
P2 devices 1394b
drivers
Figure 23
17
P2Installer(VQT2G26-1)_E.book 18 ページ
2010年2月19日 金曜日 午後2時9分
For Windows 7,
Click “Driver” in the property panel of each of the five disk drives under “Disk drives”,
“Panasonic” is displayed as “Provider”.
P2 devices 1394b
drivers
Figure 24
<Note>
Depending on the environment, the “Disk drive” indication (five) may be replaced with
“MATSHITA AJ-PCD20 #1 IEEE1394 SBP2 Device” to “MATSHITA AJ-PCD20 #5
IEEE1394 SBP2 Device”, or with “Panasonic P2 Series SBP2 Device” (five).
18
P2Installer(VQT2G26-1)_E.book 19 ページ
2010年2月19日 金曜日 午後2時9分
10. Checking the
Version of the P2
Driver
For Windows 7,
select: “Control Panel” > “Program” >
“Uninstall a program”. A list screen that
displays the version appears.
For Windows Vista,
select: “Control Panel” > “Programs” >
“Programs and Features” > “View” >
“Details”. Press the “Alt” key to display the
menu, select “Display settings” in the “View”
menu, check the “Version” check box and
click the “OK” button to display the version.
For Windows XP Professional,
in the “Add or Remove Programs” window
in Control Panel, select “Panasonic P2
Drivers”, then refer to the support
information.
For Windows 2000,
in the “Add/Delete Applications” window in
Control Panel, select “Panasonic P2
Drivers”, then refer to the support
information.
11. P2 Card Manager
After P2 software installation, the “P2 Card
Manager” icon will be added to the control
panel and task bar.
Card names and passwords can be set for
the P2 cards by using the “P2 Card
Manager”.
Start the “P2 Card Manager” and select the
desired P2 card from the recognized P2
cards, the “Change Card Name” and
“Change Password” buttons will be
enabled. After clicking the “Refresh” button,
the latest information on the P2 card will be
determined and displayed.
(Card names and passwords for unused P2
cards are not set.)
<Note>
If the P2 card cannot be written to because
the write protect switch is set to
“PROTECT” etc, the card name and
password cannot be set.
<Change Card Name>
Card names can be changed from this
screen. A password is required for the
change.
No password is set when a new P2 card is
inserted. Be sure to use the required
password for P2 cards that are inserted and
use a password.
1) Click the “Change Card Name” button,
and enter the password and the card
name.
2) After clicking the “OK” button, the card
name can be changed. Pressing the
“Cancel” button returns the user to the
“P2 Card Manager” screen without
changing the card name.
19
P2Installer(VQT2G26-1)_E.book 20 ページ
2010年2月19日 金曜日 午後2時9分
<Change Password>
Passwords for protecting card names can
be controlled from this screen.
1) Click the “Change Password” button, and
enter the old and new passwords.
Enter the current password in the “Old
Password” column.
Enter a new password in the “New
Password” column, and enter the same
new password in the “New Password
Confirm” column.
2) Click the “OK” button to confirm the
change. Click the “OK” button when the
“Successfully changed. When you eject,
..... information may be shown.” message
is displayed.
3) Pressing the “Cancel” button returns the
user to the “P2 Card Manager” screen.
4) After the password change, the P2 card
information whose password has been
changed will disappear from the “P2
Card Manager” screen. Remove the P2
card.
<Notes>
z The “P2 Card Manager” icon will not
appear on the taskbar in the default state
of Windows 7. To access the “P2 Card
Manager” icon, click the 3 button on the
taskbar.
z In Windows 7 and Windows Vista, the
“Program Compatibility Assistant”
confirmation dialog box may appear after
closing the “P2 Card Manager” screen. In
such cases, select “This control panel
works correctly” and close the dialog box.
20
12. Software for each
P2 device
After installation of the P2 software,
software for each P2 device will be installed
simultaneously. For software for each
device, refer to the instruction manual of the
respective software.
P2Installer(VQT2G26-1)_E.book 21 ページ
2010年2月19日 金曜日 午後2時9分
13. P2 Card Formatting
Formatting procedure
1
3
In Windows Explorer, right-click on the
drive of the P2 card, and select
“Format…” from the displayed menu.
Set the volume label etc. and click
“Start”. For the AJ-P2E series cards,
the Remain life time shown Figure 27
will appear. Check the Remain life time
and click “OK”.
Figure 27
4
Figure 25
2
The P2 card formatting window shown
in Figure 26 appears.
When you have not checked the “Full
delete” checkbox of the window shown
in Figure 26, the warning window
shown in Figure 28 appears. If you are
sure you wish to format, click the “OK”
button to begin formatting.
a
b
c
d
e
f
Figure 26
a Displays capacity of the P2 card.
b Enter a desired volume label
name.
c Enter a checkmark to use the
serial number of the P2 card as the
volume label.
d Enter a checkmark to delete all
data from the P2 card.
e Closes the window.
f Begins the formatting.
Figure 28
When you have checked the “Full
delete” checkbox in the window of
Figure 26, the warning shown in
Figure 29 appears. If you are sure you
wish to format, click the “OK” button.
Figure 29
21
P2Installer(VQT2G26-1)_E.book 22 ページ
2010年2月19日 金曜日 午後2時9分
In this case, a further warning window
of the type shown in Figure 30
appears. If you are sure you wish to
format, click “OK” to begin.
Figure 30
5
During formatting, progress is
indicated by the progress bar shown in
Figure 31.
Figure 31
6
When the formatting is completed, the
window shown in Figure 32 appears.
Click the “OK” button to close the
window.
<Notes>
z You cannot recover data erased by
formatting. Always check the data before
formatting.
z For formatting, you should log in under a
user name with Administrator privileges.
z If you enter a checkmark in “Use serial
number for volume label”, the serial
number of the P2 card will be
automatically entered as the volume
label. If, however, you then change the
serial number to a different character
string, the new character string will be set
as the volume label.
z In the case of the AJ-P2E series card, the
Remain life time of the P2 card is
displayed as follows.
Remain Display
life time color
100% 61%
Blue
60% 21%
Green
20% 9%
Yellow
8%-1%
Red
0%
Red
Display
z When “RUN DOWN CARD” is displayed,
Figure 32
7
22
Click the “Close” button in the window
shown in Figure 26, to close the
window.
formatting cannot be performed correctly.
We recommend that you back up the
data on the card and change cards within
one week. If you continue using the old
card, normal recording and playback may
not be possible.
z The processing for fully erasing the P2
card is equivalent to a writing operation
and therefore reduces the Remain life
time.
z The Explorer display may not be updated
after formatting. In such cases, quit
Explorer and restart the personal
computer.
P2Installer(VQT2G26-1)_E.book 23 ページ
2010年2月19日 金曜日 午後2時9分
14. Using Windows 7
Drive display settings
Under the default settings of Windows 7, an
empty drive for which a P2 card is not
inserted will not appear in My Computer or
the tree view of Windows Explorer.
To display the drive at all times, change the
Windows “Folder Options” settings.
Drive name assignments
When a P2 drive is connected in Windows
7, the drive name may not be assigned
according to slot order.
If this occurs, change the drive name
assignments in Windows “Disk
Management”.
<Notes>
z When using the P2 drive with the
IEEE1394b interface, the drive name
cannot be changed.
z When installing the IEEE1394b driver for
the P2 drive during the P2 driver update,
a message indicating that the driver has
already been installed may appear. Even
if this happens, be sure to proceed with
installation of the IEEE1394b driver.
23
P2Installer(VQT2G26-1)_E.book 24 ページ
2010年2月19日 金曜日 午後2時9分
When Using Macintosh
PC card slot driver for Macintosh PowerBook
This driver software is for referencing the
content of a P2 card on a Macintosh
PowerBook with a PC card slot.
This driver software has been verified to
work in the following Macintosh
environment.
<Notes>
z Only the card slot driver will be installed.
z When removing the P2 card, drag the P2
card to the “Trash” and wait until the icon
disappears.
z Compatible models
PowerBook G4 Series
z OS
Mac OS X 10.4.11
Mac OS X 10.5.6
<Note>
This driver software does not support Mac
OS X 10.6.
<Installing the PC card slot driver for
Macintosh PowerBook>
1
2
3
Insert the supplied CD-ROM.
Double-click the Macintosh folder in
the CD-ROM.
For Mac OS X 10.4
Double-click the Tiger folder.
For Mac OS X 10.5
Double-click the Leopard folder.
4
5
24
Double-click P2PCCard Install.pkg.
The installation of the driver software
will begin. Follow the instructions on
the screen to complete the install.
The write-protect switch is not effective
when the P2 card is inserted in the PC
card slot.
Make sure you remove the P2 card from
the PC card slot, set the switch, then reinsert the card, in order to effect the
switch setting.
P2Installer(VQT2G26-1)_E.book 25 ページ
2010年2月19日 金曜日 午後2時9分
P2 card formatter for the Macintosh
This is the software to format a P2 card
using the PC card slot of the Macintosh
PowerBook or P2 drive (except AJ-PCD10).
<New installation of the P2 card
formatter>
1
2
3
<Formatting the P2 card>
1
When you double-click on the
Macintosh P2 card formatter icon, the
P2 card formatter window shown in
Figure 33 appears.
a
Insert the supplied CD-ROM.
b
c
d
e
f
g
h
Double-click the Macintosh folder in
the CD-ROM.
For Mac OS X 10.4
Double-click the Tiger folder.
For Mac OS X 10.5
Double-click the Leopard folder.
For Mac OS X 10.6
Double-click the SnowLeopard folder.
4
5
6
Double-click the P2Formatter folder.
Double-click P2Formatter.dmg to
open a new window.
Drag P2Formatter displayed in the
new window to an appropriate place
such as the Desktop.
<Uninstallation of the P2 card formatter>
1
2
Drag P2Formatter to the Trash and
then select “Empty Trash...” in “Finder”
menu.
Click “OK” in the confirmation window
to delete it.
i
j
Figure 33
a Select the slot in which the P2 card
has been inserted.
b Displays the selected slot.
c Displays the total capacity of the
P2 card.
d Displays the serial number of the
inserted P2 card.
e Displays the status of the write
protection switch.
f Enter the desired volume label
name.
g Enter a checkmark to use the
serial number of the P2 card as the
volume label.
h Enter a checkmark to delete all
data from the P2 card.
i Closes the P2 card formatter
window.
j Begins the formatting.
25
P2Installer(VQT2G26-1)_E.book 26 ページ
2
2010年2月19日 金曜日 午後2時9分
Set the volume label etc. and click
“Start”. For the AJ-P2E series card,
the Remain life time shown in Figure
34 appears. Check the Remain life
time and click “OK”.
In this case, a further warning window
of the type shown in Figure 37
appears. If you are sure you wish to
format, click the “OK” button to begin.
Figure 34
3
When you have not checked the “Full
delete” checkbox of the window shown
in Figure 33, the warning window
shown in Figure 35 appears. If you are
sure you wish to format, click the “OK”
button to begin formatting.
Figure 37
4
During formatting, progress is
indicated by the progress bar shown in
Figure 38.
Figure 38
5
Figure 35
When you have checked the “Full
delete” checkbox in the window of
Figure 33, the warning window shown
in Figure 36 appears. If you are sure
you wish to format, click the “OK”
button.
Figure 36
26
Click the “Quit” button in the window
shown in Figure 33 to end the
formatting operation.
P2Installer(VQT2G26-1)_E.book 27 ページ
2010年2月19日 金曜日 午後2時9分
<Notes>
z You cannot recover data erased by
formatting. Always check the data before
formatting.
z Do not remove P2 cards while the
formatter is in operation.
z When using the P2 drive (except AJPCD10), the status indicator will continue
to flash after formatting as it will also
access other P2 cards that were not
formatted. Do not remove P2 cards while
the status indicator is flashing.
z AJ-PCD35 does not operate with AJPCD20 formatter. Update to AJ-PCD35
formatter (Ver. 1.30 or later).
z If you enter a checkmark in “Use serial
number for volume label”, the serial
number of the P2 card will be
automatically entered as the volume
label. If, however, you then change the
serial number to a different character
string, the new character string will be set
as the volume label.
z In the case of the AJ-P2E series card, the
Remain life time of the P2 card is
displayed as follows.
Remain Display
life time color
100% 61%
Blue
60% 21%
Green
20% 9%
Yellow
8%-1%
Red
0%
Red
z The processing for fully erasing the P2
card is equivalent to a writing operation
and therefore reduces the Remain life
time.
Display
z When “RUN DOWN CARD” is displayed,
formatting cannot be performed correctly.
We recommend that you back up the
data on the card and change cards within
one week. If you continue using the old
card, normal recording and playback may
not be possible.
27
P2Installer(VQT2G26-1)_E.book 28 ページ
2010年2月19日 金曜日 午後2時9分
Web Site: http://panasonic.net
Panasonic Broadcast & Television Systems Co.
3 Panasonic Way, 2E-7 Secaucus, NJ 07094 Tel: 201-348-5300
http://www.panasonic.com/broadcast e-mail: [email protected]
Panasonic Canada Inc.
5770 Ambler Drive, Mississauga, Ontario L4W 2T3 Tel: 905-624-5010
Panasonic de México S.A. De C.V.
Casa Matriz: Moras No.313 Col. Tlacoquemecatl Del Valle Del.Benito Juárez México, D.F., C.P.03200
Tel: 55-5488-1000 Fax: 55-5575-6783
Panasonic Latin America, S.A.
P.O.Box 0816-03164 Panama, Republic of Panama Tel: +507-229-2955
Fax: 507-229-5352
Panasonic do Brasil Ltda.
Rua Cubatão, 320-6o andar-Paraíso CEP 04013-001- São Paulo -SP Tel: 11-3889-4000
Fax: 11-3889-4004
Professional & Broadcast IT Systems Business Unit Europe
Panasonic AVC Systems Europe a Division of Panasonic Marketing Europe GmbH
Hagenauer Str. 43, 65203 Wiesbaden-Biebrich Deutschland Tel: +49-611-235-481
Panasonic Systems Asia Pacific (Broadcast Regional Operation Center)
2 Jalan Kilang Barat, Panasonic Building, Singapore 159346 Tel: +65-6270-0110
©
2009
P2Installer(VQT2G26-1)_F.book 1 ページ
2010年2月12日 金曜日 午後1時29分
Manuel d'installation
Logiciel P2
FRENCH
P2Installer(VQT2G26-1)_F.book 2 ページ
2010年2月12日 金曜日 午後1時29分
Table des matières
Précautions d’utilisation
Avec Windows
1. Avant l’installation . . . . . . . . . . . . . . . . . . . . . . . . . . . . . . . . . . . . . . . . . . . . . . . . . . .3
2. Précautions à prendre lors de la manipulation de la carte P2
dans l’ordinateur personnel. . . . . . . . . . . . . . . . . . . . . . . . . . . . . . . . . . . . . . . . . . . .4
3. Logiciel à installer . . . . . . . . . . . . . . . . . . . . . . . . . . . . . . . . . . . . . . . . . . . . . . . . . . .4
4. Installation du logiciel P2 . . . . . . . . . . . . . . . . . . . . . . . . . . . . . . . . . . . . . . . . . . . . .5
5. Ajouter un nouveau dispositif P2 . . . . . . . . . . . . . . . . . . . . . . . . . . . . . . . . . . . . . .11
6. Désinstallation du logiciel P2 . . . . . . . . . . . . . . . . . . . . . . . . . . . . . . . . . . . . . . . . .11
7. Contrôler les dispositifs installés . . . . . . . . . . . . . . . . . . . . . . . . . . . . . . . . . . . . . . .12
8. Configuration du lecteur P2 interne . . . . . . . . . . . . . . . . . . . . . . . . . . . . . . . . . . . .13
9. Vérification de l’état de l’installation du Lecteur P2. . . . . . . . . . . . . . . . . . . . . . . . .14
10. Contrôler la version du pilote P2 . . . . . . . . . . . . . . . . . . . . . . . . . . . . . . . . . . . . . . .19
11. Gestionnaire de carte P2 . . . . . . . . . . . . . . . . . . . . . . . . . . . . . . . . . . . . . . . . . . . .19
12. Logiciel pour chaque dispositif P2 . . . . . . . . . . . . . . . . . . . . . . . . . . . . . . . . . . . . .20
13. Formatage de carte P2 . . . . . . . . . . . . . . . . . . . . . . . . . . . . . . . . . . . . . . . . . . . . . .21
14. Utilisation de Windows 7 . . . . . . . . . . . . . . . . . . . . . . . . . . . . . . . . . . . . . . . . . . . . .23
Avec Macintosh
Pilote pour emplacement de carte PC pour PowerBook de Macintosh . . . . . . . . .24
Formateur de carte P2 pour Macintosh. . . . . . . . . . . . . . . . . . . . . . . . . . . . . . . . . .25
Précautions d’utilisation
Il est interdit de redistribuer le logiciel contenu dans ce CD-ROM fourni, que ce soit en
échange d’une contrepartie ou non. Il est interdit d’utiliser sans autorisation le logiciel
mémorisé sur le CD-ROM fourni, quel que soit le but, qu’il s’agisse de fabrication et/ou de
vente de logiciels et de matériels quels qu’ils soient. De plus, nous ne pourrons pas être
tenus pour responsables de la perte et/ou des dommages survenus lors de l’utilisation de
ce système ou du fait de la capacité à utiliser celui-ci. Ces dispositions s’appliqueront
même si nous avons déjà été informés de l’éventualité d’un tel dommage.
Microsoft, Windows et Windows Vista sont des marques commerciales de Microsoft
Corporation aux États-Unis.
Macintosh, Mac OS et PowerBook sont des marques commerciales de Apple Inc. des
États-Unis.
Les autres noms de sociétés et de produits sont des marques commerciales ou marques
déposées des sociétés respectives.
zDans le cadre de ce manuel d’installation, Microsoft® Windows®, Windows® 2000,
Windows® XP Professionnel, Windows Vista® Professionnel, Windows Vista® Édition
Intégrale, Windows® 7 Professionnel et Windows® 7 Édition Intégrale sont appelés
“Windows”, “Windows 2000”, “Windows XP Professionnel”, “Windows Vista
Professionnel”, “Windows Vista Édition Intégrale”, “Windows 7 Professionnel” et
“Windows 7 Édition Intégrale” respectivement.
zDe même, dans ce manuel d’installation, Macintosh®, Mac OS® X et PowerBook®
sont appelés “Macintosh,” “Mac OS X” et “PowerBook,” respectivement.
-2-
P2Installer(VQT2G26-1)_F.book 3 ページ
2010年2月12日 金曜日 午後1時29分
Avec Windows
1. Avant l’installation
Le CD-ROM fourni installe le logiciel
associé à P2, utilisé pour référencer sur un
ordinateur personnel le contenu des cartes
P2 Panasonic
L’ordinateur sur lequel ce logiciel sera
installé doit satisfaire aux conditions
suivantes :
Lors de l’utilisation du logiciel avec la
carte P2 directement insérée dans
l’emplacement card bus de l’ordinateur
personnel :
z OS
<Remarques>
z En fonction de l’état de l’ordinateur
personnel, des phénomènes tels que des
sauts d’images ou une interruption du
son peuvent survenir lors de la lecture
d’informations.
z Lors de la connexion des dispositifs P2 ,
veillez à réserver plus de lecteurs libres
que le nombre de lecteurs nécessaire
pour chaque dispositif P2 qui peut être
utilize par l’ordinateur. (Le nombre de
lecteurs nécessaire pour un dispositif P2
doit comprendre les lecteurs nécessaires
pour les logements pour carte P2 et les
disques durs intégrés au dispositif P2)
z Seuls les 3 types de carte suivants
peuvent être utilisés avec le pilote pour
CardBus pour Windows 2000. Les autres
types de carte ne peuvent pas être
utilisés.
AJ-P2C002SG
AJ-P2C004HG
AJ-P2C008HG
z Si le S.E. est Windows 7 ou Windows
Vista, la boîte de dialogue “Commande
de compte d’utilisateur” pourrait
apparaître lors de l’installation, du
formatage etc. Dans ce cas, cliquez sur
“Continuer” et continuez l’opération.
z Pour les versions 64-bits de Windows 7/
Windows Vista, le logiciel d’installation
est mémorisé dans le dossier \Win64 du
CD-ROM.
Windows 2000 SP4 ou supérieur
Windows XP Professionnel (SP2
ou SP3) 32-bits
Windows Vista Professionnel (SP1)
ou Édition Intégrale (SP1) 32/64-bits
Windows 7 Professionnel ou
Édition Intégrale 32/64-bits
z RAM 512 Mo ou supérieur recommandé
1Go ou plus recommandé pour
Windows 7/Windows Vista
z CPU Pentium® 4 1,5 GHz ou
supérieur recommandé
z L’ordinateur personnel doit être équipé d’un
lecteur permettant de lire le CD-ROM.
z Si le système d’exploitation est Windows
2000 SP4, les patches SP4 doivent être
installés.
Les patches SP4 sont inclus dans le CDROM fourni, dans un dossier nommé
\Win2000SP4Patch.
De plus, l’ordinateur personnel doit
satisfaire aux conditions suivantes lors de
l’utilisation réelle du logiciel ou lors de la
connexion de l’ordinateur à la carte P2 ou
aux dispositifs P2 (lecteur P2, l’enregistreur
P2 etc.
Lors de la connexion des dispositifs P2
à l’ordinateur via USB2.0 :
z Un port USB2.0 est fourni et le lecteur
USB2.0 utilisé est celui fourni par Microsoft.
Si les systèmes d’exploitation sus-cités
sont installés sur l’ordinateur, le pilote est
intégré, vous n’avez donc pas besoin de
vérifier sa présence.
z Un emplacement card bus de type 2 est
installé.
-3-
P2Installer(VQT2G26-1)_F.book 4 ページ
2010年2月12日 金曜日 午後1時29分
2. Précautions à prendre lors de la manipulation
de la carte P2 dans l’ordinateur personnel
Lors de l’utilisation du logiciel avec la carte P2 ou les dispositifs P2
connectés à l’ordinateur personnel, assurez-vous que vous avez bien
installé, sur l’ordinateur, le pilote P2 à partir du CD-ROM fourni.
Si ces périphériques sont connectés à un ordinateur personnel sur lequel le pilote P2
n’est pas installé, ils risquent de ne pas fonctionner correctement.
Pendant la lecture de la carte P2 ou l’écriture sur celle-ci, veillez à ne pas:
z retirer la carte P2
z procéder au retrait de la carte P2
z brancher ou débrancher le câble USB ou changer les paramètres du
connecteur USB
Sinon, l’ordinateur personnel risque de fonctionner de façon anormale.
De plus, exécutez l’opération suivante avant de retirer la carte P2 de son emplacement :
z Si la carte P2 est directement insérée dans le card bus de l’ordinateur personnel,
exécutez le programme “Safely Remove Hardware” dans la barre d’état système de la
barre des tâches Windows.
z Si les dispositifs P2 sont connectés à l’ordinateur personnel USB2.0, ouvrez le Poste
de travail, puis cliquez du bouton droit sur l’élément matériel dans lequel la carte P2
est insérée, puis sélectionnez “Take Out”.
z Veillez à ce que les paramètres de l’ordinateur personnel ne soient pas réglés de
façon à passer en mode Attente ou Hibernation pendant l’utilisation de la carte P2. Si
les paramètres sont réglés de façon à passer en mode Attente ou Hibernation lors de
l’accès à la carte P2, cela pourrait provoquer la destruction des fichiers et/ou des
données en exécution.
3. Logiciel à installer
Le CD-ROM fourni installe les programmes
suivants :
z Pilote P2
z Gestionnaire carte P2
z Logiciel pour chaque dispositif P2
Lorsque vous installez les programmes à
l’aide du CD-ROM fourni, vous pouvez
formater la carte P2. Pour savoir comment
procéder au formatage, reportez-vous à
“13. Formatage de carte P2” (page 21).
-4-
Le CD-ROM fourni contient également un
ensemble de manuels d’instructions.
Reportez-vous au dossier nommé
\Manuals.
Pour lire les manuels d’instructions, vous
devez disposer d’Adobe® Reader. Si Adobe
Reader n’est pas installé sur votre
ordinateur personnel, vous devrez le
télécharger sur le site Web d’Adobe.
P2Installer(VQT2G26-1)_F.book 5 ページ
2010年2月12日 金曜日 午後1時29分
4. Installation du logiciel P2
<Remarques>
z Installez le logiciel P2 après vous être
connecté à votre ordinateur personnel en
tant qu’administrateur, à l’aide d’un nom
d’utilisateur.
z Il est conseillé de démarrer l’installation
du logiciel une fois que les dispositifs P2
à utiliser sont connectés à l’ordinateur
personnel.
Lorsque les dispositifs P2 sont connectés
à l’ordinateur, l’Explorateur Windows
affiche le nombre de lecteurs
correspondant aux emplacements de
cartes de ces périphériques.
Si aucun lecteur ne s’affiche dans
l’Explorateur Windows, vérifiez que le
pilote USB2.0 fourni par Microsoft est
bien installé sur votre ordinateur.
z Le pilote de carte P2 doit être installé
pour chaque emplacements de cartes. Si
votre ordinateur personnel est équipé de
deux emplacements de cartes ou plus,
insérez la carte P2 dans chaque
emplacement.
Il est possible que le pilote ne soit installé
sur aucun des emplacements dans
lesquels la carte P2 est installée, ce qui
entraîne un fonctionnement incorrect de
celle-ci. Si le PC ne reconnait pas la
carte P2 inseree, essayez de la reinserer.
z Si le S.E. est Windows 2000/Windows XP
Professionnel, l’installation du logiciel
pourrait échouer si l’option Signature du
pilote sous Windows est paramétrée sur
“Block”.
Si l’installation échoue, sélectionnez
l’onglet Matériel dans la fenêtre
“Propriétés Système” du Panneau de
configuration et assurez-vous que
l’option Signature du pilote n’est pas
paramétrée sur “Block”.
z Si une boîte de dialogue non décrite
dans ce manuel apparaît au cours de
l’installation du logiciel, cliquez sur
“Annuler” pour la fermer.
z Si un dispositif tel qu’une carte P2 est
connecté au PC avant l’installation du
pilote, la boîte de dialogue suivante
apparaît. Veillez à cliquer sur
“Annuler/Cancel” pour fermer la boîte.
Figure 1
(Pour Windows 2000/
Windows XP Professionnel)
Figure 2
(Pour Windows Vista)
-5-
P2Installer(VQT2G26-1)_F.book 6 ページ
2010年2月12日 金曜日 午後1時29分
z Utilisateurs ayant une version de
pilote P2 antérieure à 1.07.0048 déjà
installée sous Windows 2000/
Windows XP Professionnel
Voir “10. Contrôler la version du pilote
P2” pour la procédure de contrôle de la
version.
Pour installer le nouveau pilote, vous
devez désinstaller le pilote actuellement
installé. Si vous désinstallez ce pilote,
toutes les informations installées jusqu’à
présent seront effacées. Voir “6.
Désinstallation du logiciel P2” pour la
procédure de désinstallation et les notes.
En outre, vous pouvez désinstaller
l’ancienne version du pilote P2 pendant
la procédure de mise à niveau du pilote
P2. Pour les deux procédures, il pourrait
être nécessaire de redémarrer Windows.
z Si le S.E. du PC est Windows 7 ou
Windows Vista, la boîte de dialogue
présentée dans figure 3 pourrait
apparaître lors de la mise à niveau du
pilote P2. Dans ce cas, cliquez sur le
bouton “OK”.
Après avoir vérifié chaque élément de la
section “1. Avant l’installation”, utilisez la
procédure suivante pour installer le logiciel
P2 sur l’ordinateur personnel :
1
2
3
Fermez toutes les applications, puis
connectez la carte P2 ou les
dispositifs P2 à utiliser à l’ordinateur
personnel.
Lorsque les périphériques sont
connectés à l’ordinateur personnel,
l’assistant “Found New Hardware
Wizard” s’affiche automatiquement,
mais cliquez sur “Annuler” pour
fermer la boîte.
Insérez le CD-ROM fourni.
A partir de “Poste de travail”, accéder
au lecteur qui contient le CD-ROM
fourni et lancer setup.exe.
La fenêtre illustrée à la figure 4
s’affiche, permettant de démarrer le
processus d’installation. Cliquez sur
“Next”.
Figure 4
Figure 3
-6-
P2Installer(VQT2G26-1)_F.book 7 ページ
4
2010年2月12日 金曜日 午後1時29分
(Utilisateurs ayant une version de
pilote P2 antérieure à 1.07.0048 déjà
installée sous Windows 2000/
Windows XP Professionnel)
La boîte présentée en figure 5
s’affiche. Pour installer le nouveau
pilote, vous devez désinstaller le pilote
actuellement installé.
Si vous souhaitez continuer la
désinstallation, cliquez sur le bouton
“OK”.
Si vous souhaitez procéder à la
désinstallation manuellement, cliquez
sur “Cancel”. Voir “6. Désinstallation
du logiciel P2” pour plus d’informations
sur la désinstallation manuelle.
6
Comme illustré à la figure 7, la fenêtre
de configuration du dossier de
destination de l’installation apparaît.
Pour changer de dossier de
destination d’installation, cliquez sur
“Change” puis créez un nouveau
dossier. Une fois le dossier de
destination de l’installation défini,
cliquez sur “Next”.
Figure 7
7
Figure 5
5
Comme illustré à la figure 8, la fenêtre
de démarrage de l’installation
apparaît. Cliquez sur “Install”.
Comme illustré à la figure 6, la licence
d’utilisation apparaît. Si vous acceptez
les termes du Contrat de licence,
cliquez sur “I accept the terms in the
licence agreement”, puis cliquez sur
“Next”.
Figure 8
Figure 6
-7-
P2Installer(VQT2G26-1)_F.book 8 ページ
8
2010年2月12日 金曜日 午後1時29分
Comme illustré à la figure 9, la fenêtre
d’affichage de l’état apparaît,
indiquant que l’installation est en
cours.
Figure 9
9
Comme cela est indiqué dans la figure
10, la fenêtre de sélection de
l’installation du pilote apparaît avec
chaque dispositif affiché. Sélectionnez
le dispositif à installer et cochez la
case correspondante.
zL’installation des pilotes pour les
dispositifs installés n’est pas
nécessaire. Pour contrôler l’état de
l’installation, voir Page 14.
10 Après avoir appuyé sur le bouton OK,
une boîte de dialogue apparaît pour
inviter l’utilisateur à effectuer la
connextion avec la carte P2 ou le
dispositif P2 de la façon indiquée dans
la figure 11. Si vous devez les installer,
connectez-les, puis cliquez sur
“Install”. Si vous ne souhaitez pas les
utiliser, il suffit de cliquer sur “Cancel”.
Si vous souhaitez ajouter
ultérieurement un périphérique ignoré
lors de l’installation initiale, exécutez à
nouveau le programme d’installation
pour effectuer une nouvelle installation
du périphérique. Veuillez vous reporter
à la section “5. Ajouter un nouveau
dispositif P2” pour plus d’informations.
<Remarque>
Lorsque le focus passe sur une autre
fenêtre au cours de l’installation, cette
boîte de dialogue peut être masquée.
Si la boîte de dialogue illustrée à la
figure 9 reste affichée et que
l’affichage de l’état ne change pas,
vérifiez si la boîte de dialogue illustrée
à la figure 11 est masquée par une
autre fenêtre.
Figure 11
Figure 10
-8-
P2Installer(VQT2G26-1)_F.book 9 ページ
2010年2月12日 金曜日 午後1時29分
11 Pour Windows 2000/Windows XP
Professionnel,
La fenêtre de message présentée en
figure 12 pourrait apparaître. Cliquez
sur “Continuer”. La fenêtre de
message pourrait apparaître plusieurs
fois.
Figure 12
Pour Windows 7/Windows Vista,
La fenêtre de message présentée en
figure 13 pourrait apparaître. Cliquez
sur “Install this driver software
anyway”. La fenêtre de message
pourrait apparaître plusieurs fois.
12 (Utilisateurs ayant une version de
pilote P2 antérieure à 1.07.0048 déjà
installée sous Windows 2000/
Windows XP Professionnel)
La fenêtre de message présentée
en figure 14 pourrait apparaître.
Dans ce cas, la désinstallation de
l’ancienne version du pilote P2 est
terminée, mais la nouvelle version
du pilote n’est pas installée.
Cliquez sur le bouton “OK” pour
quitter le programme d’installation,
redémarrez Windows puis reprenez
la procédure d’installation depuis
l’étape 1.
Figure 14
13 Comme illustré à la figure 15, la
fenêtre de fin d’installation apparaît,
indiquant que l’installation est
terminée.
Figure 13
Figure 15
-9-
P2Installer(VQT2G26-1)_F.book 10 ページ
2010年2月12日 金曜日 午後1時29分
14 Comme illustré à la figure 16, une
boîte de dialogue vous invitant à
redémarrer votre ordinateur apparaît.
Cliquez sur “Yes” pour redémarrer.
Lorsque deux lecteurs P2 sont raccordes a
l’ordinateur personnel, installez le logiciel
P2 en effectuant les operations suivantes.
(Nous supposons que les deux ports
USB2.0 sont le port (A) et le port (B).)
Utilisez deux ports USB2.0 exclusivement
pour les lecteurs P2.
1
2
Figure 16
3
4
5
6
Lorsque l’ordinateur personnel
fonctionne, raccordez l’un des deux
lecteurs P2 au port (A), puis l’autre
au port (B).
Installez le logiciel P2. (Voir pages 5
a 9.)
Lorsque l’installation est terminee et
que l’ecran demandant que vous
redemarriez le systeme (Figure 16
de la page 10) apparait, cliquez sur
“No”, puis debranchez chaque
lecteur P2 des ports USB2.0.
Reraccordez les lecteurs P2, mais
cette fois raccordez le premier au
port (B), puis l’autre au port (A).
Après avoir redémarré l’installateur,
cliquez sur le bouton “Next” (Page 6),
la figure 17 (de la Page 11) apparaît.
Cochez la case “Repair”, puis cliquez
sur le bouton “Next”.
Après avoir suivi les instructions
affichées à l’écran, redémarrez
l’ordinateur personnel.
z Veillez à connecter au moins un
dispositif P2 à l’ordinateur. Jusqu’à
deux lecteurs peuvent être connectés.
- 10 -
P2Installer(VQT2G26-1)_F.book 11 ページ
2010年2月12日 金曜日 午後1時29分
5. Ajouter un nouveau
dispositif P2
6. Désinstallation du
logiciel P2
Pour connecter une nouvelle carte P2 ou
un dispositif P2 à un ordinateur personnel
sur lequel le logiciel est déjà installé,
utilisez la procédure décrite à la section “4.
Installation du logiciel P2” pour effectuer
une installation d’écrasement du logiciel
P2.
Au cours de l’installation d’écrasement, la
fenêtre illustrée à la figure 17 apparaît,
mais la boîte de dialogue Licence
d’utilisation illustrée à la figure 6 n’apparaît
pas.
Dans cette fenêtre, cochez la case
“Repair”, puis cliquez sur “Next”.
Après avoir suivi les instructions affichées à
l’écran, redémarrez l’ordinateur personnel.
Pour désinstaller le logiciel P2, utilisez la
procédure suivante :
Pour Windows 7/Windows Vista,
dans la fenêtre “Programmes et
fonctionnalités” de la fenêtre “Programmes”
du Panneau de configuration, sélectionnez
“Panasonic P2 Drivers”, puis cliquez sur
“Désinstaller”.
Pour Windows XP Professionnel,
dans la fenêtre “Ajouter ou supprimer des
programmes” du Panneau de configuration,
sélectionnez “Panasonic P2 Drivers”, puis
cliquez sur “Remove”.
Pour Windows 2000,
dans la fenêtre “Ajouter/Supprimer des
applications” du Panneau de configuration,
sélectionnez “Panasonic P2 Drivers”, puis
cliquez sur “Remove”.
Après avoir suivi les instructions affichées à
l’écran pour terminer la désinstallation,suivez
les instructions à l’écran pour redémarrer le
PC.
Figure 17
<Remarque>
L’écran ci-dessus d’affiche quand le logiciel
P2 installé et l’installateur ont la même
version.
- 11 -
P2Installer(VQT2G26-1)_F.book 12 ページ
2010年2月12日 金曜日 午後1時29分
<Remarques>
z Si vous désinstallez le logiciel, toutes les
informations installées jusqu’à présent
seront effacées, si bien que si vous
installez de nouveau le logiciel, vous
devrez installer tous les pilotes pour tous
les dispositifs à utiliser. Nous vous
conseillons de contrôler les informations
actuelles avant de procéder à la
désinstallation. Voir “7. Contrôler les
dispositifs installés” pour la procédure de
contrôle.
z Si le S.E. du PC est Windows 7 ou
Windows Vista, la boîte de dialogue
présentée dans figure 18 pourrait
apparaître lors de la désinstallation du
pilote P2. Dans ce cas, cliquez sur le
bouton “OK”.
7. Contrôler les
dispositifs installés
Pour contrôler les dispositifs dont le pilote
est installé, utilisez un programme
d’installation de la même version que le
logiciel P2 actuellement installé et suivez la
procédure décrite en “4. Installation du
logiciel P2” pour effectuer une installation
qui remplacera la version précédente.
Si vous démarrez l’installation, cliquez sur
“Next”, la fenêtre présentée en figure 17 (de
la Page 11) apparaît. Dans cette fenêtre,
cochez “Repair”, puis cliquez sur “Next”. Si
vous suivez les instructions affichées à
l’écran, la fenêtre présentée en figure 19
apparaît.
Dans cette fenêtre, vous pouvez contrôler
les dispositifs dont le pilote est installé en
contrôlant si “Installed” est affiché.
Après avoir contrôlé, cliquez sur “Cancel”
pour fermer la fenêtre.
Figure 18
Figure 19
- 12 -
P2Installer(VQT2G26-1)_F.book 13 ページ
2010年2月12日 金曜日 午後1時29分
8. Configuration du
lecteur P2 interne
Pour utiliser un ordinateur personnel dans
lequel le lecteur P2 est inséré dans
l’emplacement 5 pouces, installez le logiciel
P2, connectez le lecteur P2 à l’ordinateur,
puis effectuez la configuration suivante :
1
Pour Windows 7/Windows Vista/
Windows XP Professionnel,
sélectionnez les options suivantes :
“Démarrer” > “Tous les programmes”
> “Panasonic P2” > “Set P2 Drive
Settings” > “Enable Internal Drive”.
Pour Windows 2000,
sélectionnez les options suivantes :
“Démarrer” > “Programme” >
“Panasonic P2” > “Set P2 Drive
Settings” > “Enable Internal Drive”.
2
La boîte de dialogue illustrée à la
figure 20 apparaît. Cliquez sur “OK”.
Figure 20
- 13 -
P2Installer(VQT2G26-1)_F.book 14 ページ
2010年2月12日 金曜日 午後1時29分
9. Vérification de l’état de l’installation du
Lecteur P2
Lorsque le lecteur standard est installé via
la fenêtre de l’assistant “Found New
Hardware Wizard” (Figure 1) ou lorsque le
lecteur P2 est désinstallé pour une raison
quelconque, le périphérique P2 ne
fonctionne pas correctement.
Si l’un des événements suivants se produit,
vérifiez que le lecteur P2 est correctement
installé, sinon, réinstallez-le.
z La carte P2 ou le dispositif P2 ne sont
pas reconnus.
z Impossible de lire les données sur la
carte P2 ou le dispositif P2.
z Impossible d’écrire des données sur la
carte P2 ou le dispositif P2.
z Des sauts d’images se produisent
fréquemment au cours de la lecture à
partir de la carte P2 ou du dispositif P2,
ce qui indique qu’il existe un problème de
performances.
Comment vérifier le pilote P2
<Remarque>
Lorsque vous vérifiez si le lecteur de carte
P2 est correctement installé, assurez-vous
de connecter le périphérique approprié à
l’ordinateur personnel. Les périphériques
non connectés à l’ordinateur personnel ne
peuvent pas être vérifiés à l’aide de la
méthode suivante :
Pour Windows 7,
sélectionnez “Démarrer”, cliquez avec le
bouton droit de la souris sur “Ordinateur”, et
sélectionnez “Propriétés”. La fenêtre des
propriétés système apparaît. Cliquez sur
Gestionnaire de périphériques en haut à
gauche de la fenêtre.
Pour Windows Vista,
sélectionnez: “Démarrer” > “Panneau de
configuration” > “Système et
maintenance”. Cliquez sur Gestionnaire de
pèriphèriques.
Pour Windows XP Professionnel,
sélectionnez : “Démarrer” > “Panneau de
configuration” > “Système”. La fenêtre
“Propriétés système” apparaît.
Sélectionnez l’onglet “Hardware”, puis
cliquez sur “Device Manager”.
Pour Windows 2000,
sélectionnez : “Démarrer” > “Paramètres”
> “Panneau de configuration” >
“Système”. La fenêtre “Propriétés système”
apparaît. Sélectionnez l’onglet “Hardware”,
puis cliquez sur “Device Manager”.
- 14 -
P2Installer(VQT2G26-1)_F.book 15 ページ
1
2010年2月12日 金曜日 午後1時29分
Vérifiez l’affichage du pilote du dispositif P2.
Vérification du pilote de la carte P2
“IDE ATA/ATAPI controllers” –
“Panasonic P2 Card” est défini.
“P2 Disk Drive” – “P2Card Series
Cached Disk” est défini.
Contrôler les pilotes des dispositifs USB
P2
“Universal Serial Bus controllers” –
“Panasonic P2 Series USB Device”
est défini.
Pilotes des dispositifs P2
Pilote de la carte P2
Figure 21
- 15 -
P2Installer(VQT2G26-1)_F.book 16 ページ
2010年2月12日 金曜日 午後1時29分
Contrôler le pilote 1394b de la carte P2
Pour Windows XP Professionnel,
Cliquez sur “MATSHITA AJ-PCD20 #1 IEEE 1394 SBP2 Device” énuméré sous “Disk
drives”, puis cliquez sur l’onglet “Pilote” dans le panneau des propriétés “MATSHITA
AJ-PCD20 #5 IEEE 1394 SBP2 Device”. “Provider” - “Panasonic” est paramétré.
Pilotes 1394b
pour dispositifs
Figure 22
- 16 -
P2Installer(VQT2G26-1)_F.book 17 ページ
2010年2月12日 金曜日 午後1時29分
Pour Windows Vista,
Cliquez sur “P2 SBP2 Device”. Il y a 5 options affichées, de “MATSHITA AJ-PCD20
#1 IEEE 1394 SBP2 Device” à “MATSHITA AJ-PCD20 #5 IEEE 1394 SBP2 Device”.
Pilotes 1394b
pour dispositifs
Figure 23
- 17 -
P2Installer(VQT2G26-1)_F.book 18 ページ
2010年2月12日 金曜日 午後1時29分
Pour Windows 7,
Cliquez sur “Driver” dans le panneau de propriétés de chacun des cinq lecteurs de
disque sous “Disk drives”, “Panasonic” s’affiche comme “Provider”.
Pilotes 1394b
pour dispositifs
Figure 24
<Remarque>
En fonction de l’environnement, l’indication “Disk drive” (cinq) pourrait être remplacée par
“MATSHITA AJ-PCD20 #1 IEEE1394 SBP2 Device” jusqu’à “MATSHITA AJ-PCD20 #5
IEEE1394 SBP2 Device” ou bien par “Panasonic P2 Series SBP2 Device” (cinq).
- 18 -
P2Installer(VQT2G26-1)_F.book 19 ページ
2010年2月12日 金曜日 午後1時29分
10. Contrôler la version
du pilote P2
Pour Windows 7,
sélectionnez : “Panneau de configuration”
> “Programmes” > “Désinstaller un
programme”. Un écran de liste qui affiche la
version apparaît.
Pour Windows Vista,
sélectionnez: “Panneau de configuration”
> “Programmes” > “Programmes et
fonctionnalités” > “Affichage” > “Détails”.
Appuyez sur la touche “Alt” pour afficher le
menu, sélectionnez “Choisir les détails...”
dans le menu “Affichage”, cochez la case
“Version” et cliquez sur le bouton “OK” pour
afficher la version.
Pour Windows XP Professionnel,
dans la fenêtre “Ajouter ou supprimer des
programmes” du Panneau de configuration,
sélectionnez “Panasonic P2 Drivers”, puis
reportez-vous aux informations d’aide.
Pour Windows 2000,
dans la fenêtre “Ajouter/Supprimer des
applications” du Panneau de configuration,
sélectionnez “Panasonic P2 Drivers”, puis
reportez-vous aux informations d’aide.
11.Gestionnaire de
carte P2
Après l’installation du logiciel P2, l’icône
“P2 Card Manager” est ajoutée au panneau
de contrôle et à la barre des tâches.
Les noms de carte et les mots de passe
peuvent être paramétrés pour les cartes P2
en utilisant “P2 Card Manager”.
Démarrez “P2 Card Manager” et
sélectionnez la carte P2 souhaitée parmi
les cartes P2 reconnues, les boutons
“Change Card Name” et “Change
Password” sont activés. Après avoir cliqué
sur le bouton “Refresh”, les dernières
informations concernant la carte P2 sont
déterminées et affichées.
(Les noms de carte et mots de passe pour
les cartes P2 inutilisées ne sont pas
paramétrés.)
<Remarque>
Si la carte P2 ne peut pas être écrite parce
que le bouton de protection en écriture est
paramétré sur “PROTECT” etc., le nom et
le mot de passe de la carte ne peuvent pas
être paramétrés.
<Change Card Name>
Les noms de carte peuvent être modifiés
dans cet écran. Un mot de passe est
nécessaire pour la modification.
Aucun mot de passe n’est paramétré quand
une nouvelle carte P2 est insérée. Veillez à
utiliser le mot de passe requis pour les
cartes P2 qui sont insérées et utilisez un
mot de passe.
1) Cliquez sur le bouton “Change Card
Name”, et saisissez le mot de passe et
le nom de la carte.
2) Après avoir cliqué sur le bouton “OK”, le
nom de la carte peut être modifié. En
appuyant sur le bouton “Cancel”
l’utilisateur revient à l’écran “P2 Card
Manager” sans modifier le nom de la
carte.
- 19 -
P2Installer(VQT2G26-1)_F.book 20 ページ
2010年2月12日 金曜日 午後1時29分
<Change Password>
Les mots de passe protégeant les noms de
carte peuvent être contrôlés depuis cet
écran.
12.Logiciel pour
chaque dispositif P2
1) Cliquez sur le bouton “Change
Password”, et saisissez le vieux et le
nouveau mot de passe.
Saisissez le mot de passe actuel dans la
colonne “Old Password”.
Saisissez un nouveau mot de passe
dans la colonne “New Password” et
saisissez le même nouveau mot de
passe dans la colonne “New Password
Confirm”.
Après l’installation du logiciel P2, le logiciel
pour chaque dispositif P2 est installé
simultanément. Pour le logiciel pour chaque
dispositif, voir le manuel d’utilisation de
chaque logiciel.
2) Cliquez sur le bouton “OK” pour
confirmer la modification. Cliquez sur le
bouton “OK” quand le message
“Successfully changed. When you eject,
..... information may be shown.” apparaît.
3) En appuyant sur le bouton “Cancel”
l’utilisateur revient à l’écran “P2 Card
Manager”.
4) Après la modification du mot de passe,
les informations de la carte P2 dont le
mot de passe a été modifié
disparaissent de l’écran “P2 Card
Manager”. Enlevez la carte P2.
<Remarques>
z L’icône “P2 Card Manager” n’apparaît
pas dans la barre des tâches par défaut
de Windows 7. Pour accéder à l’icône
“P2 Card Manager”, cliquez sur le bouton
3 dans la barre des tâches.
z Dans Windows 7 et Windows Vista, il se
peut que la boîte de dialogue de
confirmation “Assistant Compatibilité des
programmes” s’affiche après avoir fermé
l’écran “P2 Card Manager”. Dans ce cas,
sélectionnez “Ce Panneau de
configuration fonctionne correctement” et
fermez la boîte de dialogue.
- 20 -
P2Installer(VQT2G26-1)_F.book 21 ページ
2010年2月12日 金曜日 午後1時29分
13.Formatage de carte P2
Procédure de formatage
1
3
Dans l’Explorateur Windows, cliquez
avec le bouton droit de la souris sur la
carte P2 et sélectionnez “Format…”
dans le menu affiché.
Définissez le nom de volume, etc. et
cliquez sur “Start”. Pour les cartes de
la série AJ-P2E, la durée de vie
restante affichée figure 27 s’affiche.
Vérifiez la durée de vie restante et
cliquez sur “OK”.
Figure 27
4
Figure 25
2
La fenêtre de formatage de la carte P2
illustrée figure 26 s’affiche.
Si vous n’avez pas coché la case “Full
delete” de la fenêtre illustrée figure 26,
la fenêtre d’avertissement illustrée
figure 28 s’affiche. Si vous êtes certain
de vouloir procéder au formatage,
cliquez sur le bouton “OK” pour
commencer le formatage.
a
b
c
Figure 28
d
e
f
Figure 26
a Affiche la capacité de la carte P2.
b Saisissez un nom de volume de
votre choix.
c Cochez la case pour utiliser le
numéro de série de la carte P2
comme nom de volume.
d Cochez la case pour supprimer
toutes les données de la carte P2.
e Ferme la fenêtre.
f Commence le formatage.
Si vous avez coché la case “Full
delete” de la fenêtre illustrée figure 26,
la fenêtre d’avertissement illustrée
figure 29 s’affiche. Si vous êtes certain
de vouloir procéder au formatage,
cliquez sur le bouton “OK”.
Figure 29
- 21 -
P2Installer(VQT2G26-1)_F.book 22 ページ
2010年2月12日 金曜日 午後1時29分
z Pour le formatage, vous devez vous
Dans ce cas, une fenêtre d’avertissement
supplémentaire du type de celle illustrée
figure 30 s’affiche. Si vous êtes certain
de vouloir procéder au formatage, cliquez
sur “OK” pour commencer.
Figure 30
5
Lors du formatage, la progression est
indiquée par la barre de progression
illustrée figure 31.
connecter sous un nom d’utilisateur
disposant de privilèges administrateur.
z Si vous cochez la case “Use serial
number for volume label”, le numéro de
série de la carte P2 est automatiquement
renseigné comme nom de volume.
Cependant, si vous modifiez le numéro
de série en une chaîne de caractères
différents, cette nouvelle chaîne de
caractères est définie comme nom de
volume.
z Dans le cas d’une carte de la série AJP2E, la durée de vie restante de la carte
P2 est affichée comme suit.
Durée
Couleur
de vie d’affichage
restante
Figure 31
6
Lorsque le formatage est terminé, la
fenêtre illustrée figure 32 s’affiche.
Cliquez sur le bouton “OK” pour
fermer la fenêtre.
100% 61%
Bleu
60% 21%
Vert
20% 9%
Jaune
8%-1%
Rouge
0%
Rouge
Affichage
z Si “RUN DOWN CARD” s’affiche, le
Figure 32
7
Cliquez sur le bouton “Close” dans la
fenêtre illustrée figure 26 pour fermer
la fenêtre.
<Remarques>
z Vous ne pouvez pas récupérer des
données effacées par un formatage.
Vérifiez toujours les données avant de
procéder à un formatage.
- 22 -
formatage ne peut pas être effectué
correctement. Nous vous recommandons
de sauvegarder les données de la carte
et de la changer dans la semaine. Si
vous continuez à utiliser une carte
usagée, la lecture et l’enregistrement
normaux ne seront plus possibles.
z Le processus d’effacement complet de la
carte P2 est équivalent à l’opération
d’écriture et réduit donc sa durée de vie
restante.
z Il se peut que l’affichage de l’Explorateur
ne soit pas mis à jour après le formatage.
Dans ce cas, quittez l’Explorateur et
redémarrez l’ordinateur personnel.
P2Installer(VQT2G26-1)_F.book 23 ページ
2010年2月12日 金曜日 午後1時29分
14.Utilisation de Windows 7
Paramètres d’affichage du lecteur
Dans les paramètres par défaut de
Windows 7, un lecteur vide dans lequel
aucune carte P2 n’est insérée ne s’affiche
pas dans Ordinateur ou dans
l’arborescence de l’Explorateur Windows.
Pour toujours afficher le lecteur, changez
les paramètres Windows de “Options des
dossiers”.
Attribution de noms de lecteur
Lorsqu’un lecteur P2 est connecte sous
Windows 7, il se peut que le nom du lecteur
ne soit pas attribue en fonction de l’ordre
des emplacements.
Si c’est le cas, changez l’attribution de
noms du lecteur “Gestion des disques dans
Windows”.
<Remarques>
z Si vous utilisez le lecteur P2 avec
l’interface IEEE1394b, le nom du lecteur
ne peut pas être changé.
z Si vous installez le pilote IEEE1394b
pour le lecteur P2 pendant la mise à jour
du pilote P2, un message indiquant que
le pilote a déjà été installé pourrait
s’afficher. Même si cela arrive, veillez à
effectuer l’installation du pilote
IEEE1394b.
- 23 -
P2Installer(VQT2G26-1)_F.book 24 ページ
2010年2月12日 金曜日 午後1時29分
Avec Macintosh
Pilote pour emplacement de carte PC pour PowerBook
de Macintosh
Ce logiciel de pilote est utilisé pour
référencer le contenu d’une carte P2 sur un
ordinateur portable PowerBook de
Macintosh avec emplacement de carte PC.
Ce logiciel de pilote fonctionne en
environnement Macintosh comme suit.
<Remarques>
z Uniquement le pilote pour emplacement
de carte est installé.
z Lors du retrait de la carte P2, déplacez la
carte P2 sur “Corbeille” et attendez que
l’icône disparaisse.
z Modèles compatibles
Séries PowerBook G4
z S.E.
Mac OS X 10.4.11
Mac OS X 10.5.6
<Remarque>
Ce logiciel de pilote ne prend pas en
charge Mac OS X 10.6.
<Installation du pilote pour emplacement
de carte PC pour PowerBook de
Macintosh>
1
2
3
Insérez le CD-ROM fourni.
Double-cliquez sur le dossier
Macintosh du CD-ROM.
Pour Mac OS X 10.4
Double-cliquez sur le dossier Tiger.
Pour Mac OS X 10.5
Double-cliquez su le dossierr
Leopard.
4
5
Double-cliquez sur
P2PCCard Install.pkg.
L’installation du logiciel de pilote
démarre. Suivez les instructions sur
l’écran pour l’installation.
- 24 -
Le commutateur de protection contre
l’écriture n’est pas active lorsque la
carte P2 est inserée dans
l’emplacement de carte PC.
Assurez-vous de retirer la carte P2 de
l’emplacement de carte PC, d’activer le
commutateur, puis de réinsérer la carte
pour que la configuration du
commutateur soit effective.
P2Installer(VQT2G26-1)_F.book 25 ページ
2010年2月12日 金曜日 午後1時29分
Formateur de carte P2 pour Macintosh
Il s’agit du logiciel permettant de formater
une carte P2 en utilisant la fente pour carte
de l’ordinateur portable Macintosh
PowerBook ou le lecteur P2 (sauf AJPCD10).
<Formatage de carte P2>
1
Lorsque vous cliquez deux fois sur
l’icône du formateur de carte P2 de
Macintosh, la fenêtre du formateur de
carte P2 illustrée figure 33 s’affiche.
<Nouvelle installation du formateur de
carte P2>
1
2
3
Double-cliquez sur le dossier
Macintosh du CD-ROM.
Pour Mac OS X 10.4
Double-cliquez sur le dossier Tiger.
Pour Mac OS X 10.6
Double-cliquez sur le dossier
SnowLeopard.
5
6
Double-cliquez sur le dossier
P2Formatter.
Double-cliquez sur P2Formatter.dmg
pour ouvrir une nouvelle fenêtre.
Glissez P2Formatter apparaissant
dans la nouvelle fenêtre sur un
emplacement approprié comme le
bureau.
<Désinstallation du formateur de carte
P2>
1
2
b
c
d
e
f
g
h
Insérez le CD-ROM fourni.
Pour Mac OS X 10.5
Double-cliquez sur le dossier
Leopard.
4
a
i
j
Figure 33
a Sélectionnez l’emplacement où la
carte P2 est introduite.
b Affiche l’emplacement sélectionné.
c Affiche la capacité totale de la
carte P2.
d Affiche le numéro de série de la
carte P2 introduite.
e Affiche l’état du commutateur de
protection en écriture.
f Saisissez le nom de volume de
votre choix.
g Cochez la case pour utiliser le
numéro de série de la carte P2
comme nom de volume.
h Cochez la case pour supprimer
toutes les données de la carte P2.
i Ferme la fenêtre du formateur de
carte P2.
j Commence le formatage.
Glissez P2Formatter dans la
corbeille, puis sélectionnez “Vider la
Corbeille…” dans le menu “Finder”.
Cliquez sur “OK” dans la fenêtre de
confirmation pour le supprimer.
- 25 -
P2Installer(VQT2G26-1)_F.book 26 ページ
2
2010年2月12日 金曜日 午後1時29分
Définissez le nom de volume et
cliquez sur “Start”. Pour les cartes de
la série AJ-P2E, la durée de vie
restante illustrée figure 34 s’affiche.
Vérifiez la durée de vie restante et
cliquez sur “OK”.
Dans ce cas, une fenêtre
d’avertissement supplémentaire du
type de celle illustrée figure 37
s’affiche. Si vous êtes certain de
vouloir procéder au formatage, cliquez
sur le bouton “OK” pour commencer.
Figure 34
3
Figure 37
Si vous n’avez pas coché la case “Full
delete” de la fenêtre illustrée figure 33,
la fenêtre d’avertissement illustrée
figure 35 s’affiche. Si vous êtes certain
de vouloir procéder au formatage,
cliquez sur le bouton “OK” pour
commencer le formatage.
4
Lors du formatage, la progression est
indiquée par la barre de progression
illustrée figure 38.
Figure 38
5
Figure 35
Si vous avez coché la case “Full
delete” de la fenêtre illustrée figure 33,
la fenêtre d’avertissement illustrée
figure 36 s’affiche. Si vous êtes certain
de vouloir procéder au formatage,
cliquez sur le bouton “OK”.
Figure 36
- 26 -
Cliquez sur le bouton “Quit” dans la
fenêtre illustrée figure 33 pour
terminer le formatage.
P2Installer(VQT2G26-1)_F.book 27 ページ
2010年2月12日 金曜日 午後1時29分
<Remarques>
z Vous ne pouvez pas récupérer des
données effacées par un formatage.
Vérifiez toujours les données avant de
procéder à un formatage.
z N’enlevez pas les cartes P2 pendant que
le formateur est en fonction.
z Pendant l’utilisation de lecteur P2 (sauf
AJ-PCD10), le indicateur d’activité
continue à clignoter après le formatage
s’il accède à d’autres cartes P2 n’ayant
pas été formatées. N’enlevez pas les
cartes P2 pendant que le indicateur
d’activité clignote.
z AJ-PCD35 ne fonctionne pas avec le
formateur AJ-PCD20. Utilisez le
formateur AJ-PCD35 (Ver. 1.30 ou
supérieure).
z Si vous cochez la case “Use serial
number for volume label”, le numéro de
série de la carte P2 est automatiquement
renseigné comme nom de volume.
Cependant, si vous modifiez le numéro
de série en une chaîne de caractères
différents, cette nouvelle chaîne de
caractères est définie comme nom de
volume.
z Dans le cas d’une carte de la série AJP2E, la durée de vie restante de la carte
P2 est affichée comme suit.
Durée
Couleur
de vie d’affichage
restante
100% 61%
Bleu
60% 21%
Vert
20% 9%
Jaune
8%-1%
Rouge
0%
Rouge
z Si vous continuez à utiliser une carte
usagée, la lecture et l’enregistrement
normaux ne seront plus possibles.
Le processus d’effacement complet de la
carte P2 est équivalent à l’opération
d’écriture et réduit donc sa durée de vie
restante.
Affichage
z Si “RUN DOWN CARD” s’affiche, le
formatage ne peut pas être effectué
correctement. Nous vous recommandons
de sauvegarder les données de la carte
et de la changer dans la semaine.
- 27 -
P2Installer(VQT2G26-1)_F.book 28 ページ
2010年2月12日 金曜日 午後1時29分
Web Site: http://panasonic.net
Panasonic Broadcast & Television Systems Co.
3 Panasonic Way, 2E-7 Secaucus, NJ 07094 Tel: 201-348-5300
http://www.panasonic.com/broadcast e-mail: [email protected]
Panasonic Canada Inc.
5770 Ambler Drive, Mississauga, Ontario L4W 2T3 Tel: 905-624-5010
Panasonic de México S.A. De C.V.
Casa Matriz: Moras No.313 Col. Tlacoquemecatl Del Valle Del.Benito Juárez México, D.F., C.P.03200
Tel: 55-5488-1000 Fax: 55-5575-6783
Panasonic Latin America, S.A.
P.O.Box 0816-03164 Panama, Republic of Panama Tel: +507-229-2955
Fax: 507-229-5352
Panasonic do Brasil Ltda.
Rua Cubatão, 320-6o andar-Paraíso CEP 04013-001- São Paulo -SP Tel: 11-3889-4000
Fax: 11-3889-4004
Professional & Broadcast IT Systems Business Unit Europe
Panasonic AVC Systems Europe a Division of Panasonic Marketing Europe GmbH
Hagenauer Str. 43, 65203 Wiesbaden-Biebrich Deutschland Tel: +49-611-235-481
Panasonic Systems Asia Pacific (Broadcast Regional Operation Center)
2 Jalan Kilang Barat, Panasonic Building, Singapore 159346 Tel: +65-6270-0110
©
2009