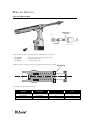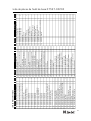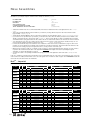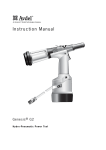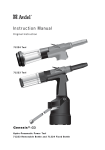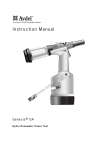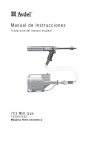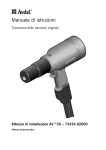
1
Manuel d’instructions
07
53
7
Tr a d u c t i o n d u m a n u e l o r i g i n a l
0753
Genesis® 7537
Druckluftgerät
7
S o m m a i re
Règles de Sécurité
4
Caractéristiques
Caractéristiques de L'outil 07537
Dimensions de L'outil
5
5
Utilisation Prévue
6
Mise en Service
Alimentation Pneumatique
Curseur Mécanique
Curseur
Chargement et Rechargement de L’outil
Chargement de L’outil
Rechargement de L’outil
Procédure D’utilisation
Identification et Orientation des
Ressorts D’aiguille
Ensembles de Nez
Nez de Pose
Sélection d’un Nez de Pose
Sélection des Nez de Pose - Mesures Anglo-Saxonnes
Sélection des Nez de Pose - Metrique
Aiguilles et Ressorts D’aiguille
Chobert® et Grov® - Mesures Anglo-Saxonnes
Chobert® et Grov® - Metrique
Briv® - Mesures Anglo-Saxonnes
Types de Cônes D’aiguille et Longueur 'P'
Briv® - Metrique
Avlug®, Avsert®, Avtronic® et Rivscrew® Mesures AngloSaxonnes - Metrique
Entretien de L’outil
Chaque Jour
Chaque Semaine
Graisse au Bisulfure de Molybdène EP 3735
Informations de Sécurité
Informations de Sécurité Graisse MolyKote® 55m
Informations de Sécurité Graisse MolyKote® 111
Kit D’entretien
7
8
9
9
10
10
10
Entretien
Démontage de L’outil 07537-00200
07537-00200 - Assemblage Général
et Liste de Pièces
24-25
26-27
Plein D’huile
Huile
Information de Sécurité Hyspin® VG 32 et AWS (Huile)
Pump Pour de Plein D’huile
Procedure de Plein D’huile
28
28
28
29
Diagnostic des Defauts
Symptôme, Cause Possible et Remède
30
11
12
13
14
15
16
16
17
18
19
19
20
21
21
21
22
22
23
GARANTIE LIMITEE.
Les termes de la garantie limitée Avdel confirment l'engagement de cette dernière vis-à-vis de produits exempts de
vices de fabrication et de matériaux et ce dans des conditions d'utilisation normales. Cette garantie limitée tient compte
des restrictions suivantes : (1) le produit sera installé, entretenu et exploité conformément à la documentation et au
mode d'emploi y afférents et (2) Avdel aura confirmé le vice signalé après inspection et tests. La garantie limitée Avdel
susdite est valable douze (12) mois, à compter de la livraison du produit par Avdel à l'acheteur direct du produit Avdel.
Le renvoi des marchandises défectueuses constitue le recours exclusif en cas de manquement à la garantie susdite ;
celles-ci seront remplacées ou remboursées au prix d'achat, la décision en la matière appartenant à Avdel. LA
GARANTIE LIMITEE EXPRESSE ET LE RECOURS SUSDITS SONT EXCLUSIFS ET SE SUBSTITUENT A TOUS AUTRES
GARANTIES ET RECOURS. AVDEL DESAVOUE ET EXCLUT SPECIFIQUEMENT TOUTE GARANTIE IMPLICITE DE QUALITE,
D'APTITUDE A L'EMPLOI ET DE COMMERCIABILITE DU PRODUIT.
Avdel UK Limited poursuit une politique de développement et d'amélioration continue et se réserve le droit de modifier les caractéristiques de ses produits sans préavis.
3
Règles de Sécurité
Toute personne participant à l'installation, à l'utilisation ou à l'entretien de cet outil doit lire attentivement
ce manuel.
1
Ne pas employer à d'autres usages que celui prévu.
2
Ne pas utiliser avec cet outil/cette machine d’autres matériels que ceux recommandés et fournis par Avdel UK Limited.
3
Toute modification apportée par le client à l'outil ou à la machine, aux ensembles de nez, aux accessoires ou à tout autre matériel
fourni par Avdel UK Limited ou ses représentants relève de la seule et entière responsabilité du client. Avdel UK Limited donnera
volontiers son avis sur toute modification envisagée.
4
L'outil ou la machine doivent être maintenus en permanence en état de fonctionner sans danger et leur bon état et fonctionnement
doivent être vérifiés à intervalles réguliers par un personnel compétent et ayant reçu la formation adéquate. Toute opération de
démontage ne doit être entreprise que par des personnes formées aux procédures Avdel UK Limited. Ne pas démonter cet
outil/cette machine avant d'avoir consulté les instructions de maintenance. Prière de contacter Avdel UK Limited en indiquant vos
besoins en formation.
5
L'outil ou la machine doivent à tout moment être utilisés conformément à la législation d'hygiène et de sécurité conforme aux
règlements du Ministère du Travail en application de l'article R233-69 du code du travail. Toute question relative à la bonne
utilisation de l'outil ou de la machine et à la sécurité de l'opérateur doit être adressée à Avdel UK Limited.
6
Il appartient au client d'expliquer à chaque opérateur les précautions à respecter lors de l'utilisation de l'outil ou de la machine.
7
Toujours débrancher le tuyau d'air du raccord d'arrivée de l'outil ou de la machine avant tout réglage, montage ou démontage d'un
8
Ne pas mettre en marche un outil ou une machine dirigés vers une/des personne(s).
9
L’opérateur veillera à adopter une position équilibrée et stable avant d’utiliser l’outil/la machine.
ensemble de nez.
10 S'assurer que les orifices de mise à l'atmosphère ne viennent pas à être obstrués ou masqués et que les flexibles sont toujours en bon
état.
11 La pression d'utilisation ne doit pas dépasser 7 bars.
12 La combinaison fixation, aiguille, dimension du trou et épaisseur de tôle doit être conforme aux spécifications imposées par
Avdel UK Limited.
13 Ne pas utiliser l’outil si celui-ci n’est pas muni d’un ensemble de nez complet, à moins d’une consigne contraire explicite.
14 Lors de l'utilisation de l'outil, l'opérateur et les personnes se trouvant à proximité doivent impérativement porter des lunettes de
sécurité pour se protéger contre l'éjection des fixations en cas de pose ‘en l'air’. Nous recommandons le port de gants en cas de
présence d'arêtes ou d'angles vifs sur l'application.
15 Veiller à ne pas laisser des vêtements amples, cravates, cheveux longs, chiffons de nettoyage, etc. se prendre dans les parties
mobiles de l'outil. L'outil doit être maintenu sec et propre pour donner la meilleure prise.
16 Lors du transport de l'outil, éloigner les mains de la gâchette ou du levier pour éviter un déclenchement intempestif de l'outil.
17 Tout contact excessif avec de l’huile hydraulique doit être évité. Veiller à bien se laver pour éviter tout risque d’éruption cutanée.
I M P O R TA N T
Bien qu’une usure et un marquage limités des aiguilles soient inévitables suite à leur utilisation normale et
correcte, l’on veillera à les examiner régulièrement à la recherche de signes d’usure ou de marquage
excessifs, en particulier au niveau du diamètre du cône et de la zone de prise des mâchoires d’aiguille du fût,
de signes de piquage intensif du fût ou de déformation de l’aiguille. Un dysfonctionnement de l’aiguille en cours
d’utilisation pourrait provoquer son éjection de l’outil. La responsabilité de veiller à ce que les aiguilles soient
remplacées avant d’atteindre un niveau excessif d’usure et toujours avant le nombre maximum de poses
préconisé, incombe au client. Contacter le représentant Avdel UK Limited le plus proche, qui se chargera de
fournir cette information en mesurant la force de mandrinage de votre application à l’aide d’un outil de test
calibré. Ces outils sont également vendus sous la référence 07900-09080 et sont fournis avec toute
l’information nécessaire aux tests incluse dans ce manuel.
4
Caractéristiques
Caractéristiques de l’outil 07537
Pression d’air
minimum - maximum
5 - 7 bars
Volume d’air libre necessaire @ 5,1 bars / 75 lbf/in2
2,6 litres
Course
minimum
28 mm
Force de Traction
@ 5,5 bars / 80 lbf/in2
3,89 kN
Cycle de Pose
environ
1 seconde
Niveau Sonore
Inférieur à
70 dB(A)
Poids
Outil
2.3 kg
Vibration
Inférieur à
2,5 m/s2
D i m e n s i o n s d e L’ o u t i l
Référence 07537-00200
60
2.36
475
18.70
53
07
50
1.96
7
338
13.30
163 140
6.41 5.51
98
3.85
121
51
2
075
37
120
150
110
5
Utilisation Prévue
L'outil pneumatique 07537 est un outil à main léger conçu pour la pose de fixations rapides Avdel® (sauf Avlug® 1/16") ; il convient
tout particulièrement à l'assemblage en lots ou chaîne continue requis par un large éventail d'applications, toutes industries
confondues.
Les numéros de référence indiqués permettent de commander un outil complet, sans équipement de pose.
Le numéro de référence de l'outil du modèle 07537 est 07537-00200. Voir la rubrique Assemblage général des pages 56-57.
L'outil convient à la pose de la plupart des fixations à répétition, comme le montre le tableau ci-dessous.
L'outil est utilisé avec un équipement de pose spécifique. La sélection des composants compatibles avec le type et les dimensions de
la fixation utilisée par votre application doit s’effectuer à partir de la rubrique Equipement de pose du manuel (voir pages 42-50). Les
dimensions des nez de pose sont listées sur les pages 43.
2,4 mm
CHOBERT®
●
GROV®
●
AVLUG®
●
●
BRIV®
●
●
3,2 mm
4,0 mm
4,8 mm
6,4 mm
●
●
●
●
●
●
●
●
●
2,5 mm
2,8 mm
3 mm
3,5 mm
4 mm
●
●
6 mm
M2.5
4-40
UNC
M3
6-32
UNC
●
RIVSCREW®
●
AVTRONIC®
●
AVSERT®
6
TAILLE DE LA FIXATION
NOM DE
LA FIXATION
●
●
●
Mise en Service
Alimentation Pneumatique
Tous les outils sont actionnés à l'air comprimé, à la pression optimale de 5,5 bars. Nous recommandons l'utilisation de régulateurs de
pression et de dispositifs automatiques de filtration et d'huilage sur le circuit d'alimentation pneumatique. Ces appareils doivent être
montés à 3 mètres au plus de l'outil (voir le schéma ci-dessous) afin d'assurer à l'outil une durée de vie maximum et une maintenance
minimum.
Les flexibles d'alimentation en air doivent avoir une résistance nominale en pression égale à au moins 150 % de la pression maximum
produite par le système, ou à 10 bars, minimum. Ces flexibles doivent résister à l'huile, avoir une paroi extérieure résistant à
l'abrasion, et ils doivent être armés si les conditions d'utilisation présentent un risque de détérioration. Tous les flexibles d'air DOIVENT
IMPERATIVEMENT avoir un diamètre intérieur minimum de 6,4 millimètres.
Lire le détail des opérations d’entretien quotidien, page 51.
07
53
7
ROBINET D'ARRET
(SERT LORS DE LA MAINTENANCE DES APPAREILS
DE FILTRATION, REGULATION ET D'HUILAGE)
PIQUAGE SUR
L'ALIMENTATION
PRINCIPALE
3 METRES MAXIMUM
0 2 4
07 53 7
1416
12
6 8 10
POINT DE PURGE
DE L'ALIMENTATION
PRINCIPALE
REGULATEUR DE PRESSION
ET FILTRE (A PURGER
QUOTIDIENNEMENT)
7
Mise en Service
Curseur Mecanique
COTE APPUI DU
RESSORT
CANON
CURSEUR
NEZ DE POSE
Il existe trois types de curseurs mécaniques différents, adaptés aux diverses références :
•
•
•
07271-01100
07279-05843
07279-05845
Utilisé pour les aiguilles standards et jetables 5/32"
les aiguilles jetables 1/8"
les aiguilles jetables 3/16"
La différence entre les ensembles ci-dessus correspond au diamètre interne de l'obturateur.
OBTURATEUR
Ces éléments sont codés couleur, comme suit :
8
REF. PIECE DE CURSEUR
MECANIQUE.
REF. PIECE
OBTURATEUR
COLORIS
DIAMETRE DU TROU
(en mm)
07271-01100
07150-00402
ACIER
2.7
07279-05843
07159-05844
OR
2.2
07279-05845
07159-05846
ARGENT
3.3
Mise en Service
Curseur
IMPORTANT
S'il n'est pas correctement monté, le curseur mécanique ne permet pas l'alimentation en fixations.
Bien que le curseur mécanique soit monté dans le bon sens à la livraison de l'outil, nous recommandons de vérifier son orientation
avant de monter l'équipement de pose. Le côté légèrement concave, portant le ressort, du curseur mécanique doit être orienté vers
l'avant de l'outil, comme indiqué sur l'illustration ci-dessous.
Lorsqu'il est monté dans le bon sens, le curseur mécanique sort facilement du canon quand on introduit une aiguille dans son centre,
et qu'on la retire ensuite.
Pour inverser l'orientation du curseur mécanique, procéder de la façon
suivante :
Les numéros de repère en caractères gras renvoient à la rubrique
Assemblage général & liste de pièces de l’outil 07537-00200 des
pages 56-57.
CURSEUR
MECANIQUE
CÔTE APPUI
DU RESSORT
•
Retirer le clip 48 et faire coulisser l’obturateur 50 pour le retirer.
•
A l’aide d’une clé Allen, retirer une des vis à tête cylindrique 5, en
veillant à bien purger l’air. Retirer l’autre vis à tête cylindrique 5.
•
Faire sortir l’obturateur arrière 47.
•
Extraire l'ensemble piston des mâchoires d'aiguille 51 avec les
mâchoires 34.
•
Dégager le ressort 35 et le carter porte-mâchoires 41.
•
Introduire une aiguille dans le trou situé à l'arrière du canon 44 jusqu'à ce qu'elle dépasse à travers l'avant du canon, puis
extraire ensemble l'aiguille et le curseur mécanique par l'avant.
•
Remonter les composants dans l'ordre inverse du démontage.
•
Introduire l’ensemble Curseur mécanique 36 par l’avant du canon et dans le bon sens.
CANON
NEZ DE POSE
C h a rg e m e n t e t R e c h a rg e m e n t d e L’ o u t i l
IMPORTANT
Le chargement de l'outil et le montage de l'équipement de pose sur l'outil ne sont qu'une même opération.
Lors de la commande d'un outil complet, la livraison comprend en principe l'équipement de pose correspondant au type de fixation à
poser. Pour identifier les composants de l'équipement de pose et sélectionner les bons éléments, consulter la rubrique équipements
de pose, pages 42-50.
Si le matériel livré comprend un nez de pose, des aiguilles et des ressorts d’aiguille, passer au chargement de l’outil et au montage de
l’équipement de pose en suivant les étapes de la page suivante.
Les numéros de repère en caractères gras renvoient à la rubrique Assemblage général & liste de pièces de l’outil 07537-00200 des pages 56-57.
9
Mise en Service
Chargement de l’outil
•
Raccorder l'outil à l'alimentation pneumatique.
•
Ouvrir les mâchoires d'aiguille 34 en prise sur l'aiguille en coupant l'interrupteur de serrage mâchoires (repères 22 et 23).
•
Visser le nez de pose sélectionné sur le canon 25 de l'outil.
•* Introduire une aiguille du côté tige des fixations, à travers le chargeur carton.
•
Faire coulisser le ressort d’aiguille sur l’aiguille en vérifiant sa bonne orientation, comme indiqué sur le tableau de la page 41.
•
En tenant le côté tige de l'aiguille, arracher le chargeur carton qui entoure les fixations.
•
Ouvrir le nez de pose soit en faisant tourner la bague extérieure des mâchoires actionnées par came, soit en poussant vers
l'extérieur sur l'extrémité des mâchoires, de la façon illustrée ci-dessous à gauche.
•
Introduire dans le nez de pose l'ensemble aiguille, ressort et fixations préalablement réalisé jusqu'à ce que la première fixation à
poser dépasse du nez de pose.
•
Fermer le nez de pose et régler de telle sorte que la première fixation dépasse de 1,5 à 3 mm, de la façon illustrée ci-dessous à
droite.
•
Fermer les mâchoires d’aiguille pour bien assurer le blocage de l’aiguille, en actionnant l’interrupteur de serrage mâchoire
(repères 22 et 23).
1.5mm - 3mm
(1/16" - 1/8")
Rechargement de l’outil
•
Ouvrir les mâchoires d'aiguille 34 de l'outil.
•
Ouvrir le nez de pose et extraire de l'outil l'aiguille vide et le ressort.
•
Recharger l'outil en suivant les instructions ci-dessus, en partant de l'étape •*.
P ro c e d u r e d ’ u t i l i s a t i o n
IMPORTANT
Il est essentiel de vérifier que l’orientation du curseur mécanique et de l’équipement de pose est correcte avant
toute utilisation de l’outil.
•
Pousser la fixation dépassant du nez de pose à fond dans le trou de l'application, en maintenant l'outil bien d'équerre.
•
Actionner la gâchette et la maintenir enfoncée. Le cône d'aiguille est tiré à travers la fixation, ce qui provoque le formage de la
fixation dans l'application.
•
Enlever l'outil.
•
Relâcher la gâchette. La fixation suivante se présente automatiquement dans le nez de pose, prête à la pose.
Les numéros de repère en caractères gras renvoient à la rubrique Assemblage général & liste de pièces de l’outil 07537-00200 des
pages 56-57.
10
Mise en Service
IDENTIFICATION ET ORIENTATION DES RESSORTS D'AIGUILLE
FIXATION
NOM
NEZ DE POSE
TAILLE
(VOIR LA RUBRIQUE EQUIPEMENT DE POSE)
ENSEMBLE AIGUILLE /
RESSORT / FIXATION
TAILLE
DE L'AIGUILLE
RESSORT D'AIGUILLE
3/32"
BRIV ®
CHOBERT ®
AVLUG ®
GROVIT ®
CONE D'AIGUILLE
STANDARD BISEAUTE
3/32"
ACCES LIMITE ET ACCES
LIMITE ACTIONNE A CAME
TOUTES
1/8"
TOUS
TOUTES
5/32"
TOUS
TOUTES
3/16"
TOUS
TOUTES
6 mm
STANDARD
TOUTES, SAUF
3E
SURDIMENSIONNEE
3/32"
TOUS, SAUF
STANDARD BISEAUTE,
ACCES LIMITE
TOUTES
3/32"
STANDARD BISEAUTE,
ACCES LIMITE
TOUTES
1/8"
TOUS
TOUTES
5/32"
TOUS
TOUTES, SAUF
3E
SURDIMENSIONNEE
5/32"
TOUS
3E
SURDIMENSIONNEE
3/16"
TOUS
TOUTES, SAUF
2E
SURDIMENSIONNEE
3/16"
TOUS
2E
SURDIMENSIONNEE
1/4"
TOUS
TOUTES
TOUS
TOUTES
TOUS
TOUTES
TOUS
TOUTES
6 x 32
UNC
TOUS
TOUTES
2.5 mm
TOUS
TOUTES
2.8 mm
TOUS, SAUF
ACCES LIMITE
TOUTES
2.8 mm
ACCES LIMITE
TOUTES
CHOBERT ®
GROVIT ®
CHOBERT ®
TOUTES
VIROLE
AIGUILLE
RESSORT
2.8 mm
RIVSCREW ®
3 mm
3.5 mm
4 mm
2.5 mm
AVSERT ®
4 x 40
UNC
3 mm
AVTRONIC ®
11
Ensembles de nez
Sur les outils de rivetage rapide tels que le type 0753 Mk II, l'équipement de pose est toujours constitué de trois éléments : un nez de
pose, une aiguille et un ressort. Ces trois éléments sont accordés à la fixation posée, et à la taille du trou de l'application.
I M P O R TA N T
Pour éviter d'avoir à démonter complètement l'outil, vérifier l'orientation du curseur avant de monter
l'équipement de pose sur l'outil. Voir la partie "Curseur mécanique" page 39.
Il est nécessaire de monter le bon équipement de pose sur l'outil afin d'assurer à la fois une pose correcte
des fixations et la sEcuritE du fonctionnement de l'outil. Lire soigneusement les instructions de sEcuritE de
la page 34.
Pour identifier la bonne combinaison d'équipement de pose à monter sur l'outil, choisir d'abord un nez de pose selon les instructions
de la rubrique ci-dessous, puis consulter la rubrique aiguille pour sélectionner aussi bien l'aiguille elle-même que son ressort. Les
aiguilles et les ressorts sont illustrés page 41.
Pour monter l'équipement de pose, suivre la procédure "Chargement de l'outil" page 40.
Nez de pose
I M P O R TA N T
Une erreur dans le choix du nez de pose peut avoir pour effet un mauvais placement ou un mauvais
serrage de la fixation.
Les nez de pose se répartissent en 7 formes de base, représentées page opposée, dont les dimensions intérieures varient en fonction
de la fixation pour laquelle ils sont prévus. Les dimensions exactes correspondant aux lettres de l'illustration de la page opposée sont
indiquées dans les "Tableaux de sélection des nez de pose" des pages 44-45.
Pour une forme donnée, il peut exister plusieurs options de forme d'embout, chacune présentant certains avantages facilitant la pose
des fixations.
Plat
•
•
Forme d'extrémité normale de tous les nez de pose.
Convient à toutes les applications sans contraintes d'accès.
Universel
•
•
Conçue pour être utilisée avec les fixations Chobert® à tête universelle.
Peut également être employée avec les fixations Briv® pour obtenir le serrage le plus fort possible. Noter que cela diminue la
plage de serrage de la fixation Briv® d'environ 0,4 mm.
En Retrait
•
•
Utilisable seulement avec les fixations Briv®.
Donne un plus fort serrage que la forme plate, mais moindre que celui de la forme universelle, sans réduction de la plage de
serrage de la fixation.
Biseauté
•
•
Disponible dans les versions indiquées dans les tableaux de choix des nez de pose.
Permet une meilleure accessibilité qu'une forme plate, et avec la même plage de serrage.
A Formage de Tête
•
•
12
Utilisable seulement avec les fixations Rivscrew®.
Déforme la tête des fixations pour donner un bon serrage.
Ensembles de nez
Selection d’un nez de pose
•
Relever le nom, la taille et le matériau de la fixation à poser.
•
Rechercher cette fixation dans la première colonne des tableaux de sélection des nez
de pose de la page 44, dans le cas des mesures anglaises, et de la page 45 dans le
cas des mesures métriques.
•
Dans la dernière colonne du tableau, noter les nez de pose disponibles. Seuls ceux
qui sont indiqués existent.
•
Sélectionner celui qui convient le mieux à l'application en se référant au plan du nez
de pose concerné. Si l'application ne comporte pas de contraintes d'accès, retenir
de préférence la forme standard à embout plat, avec ou sans came.
STANDARD
'B'
28,6
'E'
'D'
33,5
PLAT
UNIVERSEL
EN RETRAIT
BISEAUTE
Existe en quatre formes d'embout
différentes. Permet de poser toutes les
fixations (sauf Rivscrew) sur les
applications ne présentant que peu ou pas
de contraintes d'accès.
LONG
ACCES LIMITE
LONG COURBE
'B'
28,6
'B'
'B'
'F'
20,5
33,5
'D'
'E'
'D'
33,5
'E'
'E'
28,6
'F'
RIVET
Ø
mm
3,2mm ,620
4,0mm ,690
4,8mm ,720
PLAT
UNIVERSEL
in.
15,7
17,5
18,3
PLAT
EN RETRAIT
Existe pour la pose de la plupart des
fixations. Permet une pénétration
supérieure dans les applications sans
autres contraintes d'accès.
STANDARD ACTIONNE PAR CAME
EN RETRAIT
Disponible dans les versions indiquées dans
LE TABLEAU DE SELECTION DES NEZ DE
POSE. Permet une pénétration supérieure
dans les applications à accès limité.
Les aiguilles doivent être courbées à la main
pour suivre la courbure de la mâchoire.
PLAT
Disponible dans les versions indiquées
dans LE TABLEAU DE SELECTION DES
NEZ DE POSE.
Permet d'accéder à des applications à
accès très limité.
ACCESS LIMITE PAR CAME
LONG ACTIONNE PAR CAME
'B'
'B'
'B'
28.6
28,6
1,25
'E'
34
'D'
41,4
'E'
'D'
'D'
34
'E'
37,1
1,46
'D'
28,6
PLAT
A FORMAGE DE TETE (FT)
PLAT
PLAT
Disponibles dans les versions indiquées dans LE TABLEAU DE SELECTION DES NEZ DE POSE, page suivante. Fonctions équivalentes à celles
des versions standard et accès limité ci-dessus, avec, en plus, une came facilitant et accélérant l'ouverture du nez de pose, et donc le
rechargement en fixations.
Les dimensions indiquées en caractères gras sont en millimètres.
13
Ensembles de nez
Selection des nez de pose - Mesures anglo-saxonnes
La colonne "N° de référence" établit la correspondance avec les colonnes du même nom de la partie aiguilles. Elle identifie à la fois
l'aiguille et le ressort nécessaires pour un nez de pose donné et une fixation particulière.
NEZ DE POSE
FIXATION
NEZ DE POSE
DIMENSIONS
'B'
'D'
'E'
1
# STANDARD - UNIVERSEL
07150-03203
,36
1,33
,24
1
ACCES LIMITE - ACTIONNE PAR CAME
07177-03003
,20
1,18
,16
,16
3
ACCES LIMITE
07274-01000
,22
1,07
,16
2,30
,16
4
LONG - COURBE - PLAT
07150-05003
,41
2,28
,16
,41
1,18
,20
5
# STANDARD - UNIVERSEL
07150-03204
,41
1,22
,32
07170-03104
,41
1,19
,20
5
STANDARD - ACTIONNE PAR CAME - PLAT
07170-04600
,41
1,18
,20
LONG - PLAT
07150-04004
,41
2,18
,20
6
# LONG - UNIVERSEL
07150-04204
,41
2,22
,30
6
LONG - COURBE - PLAT
07150-05004
,41
2,12
,20
6
LONG - ACTIONNE PAR CAME - PLAT
07170-05000
,41
2,18
,20
7
STANDARD - PLAT
07150-03005
,48
1,30
,24
7
# STANDARD - UNIVERSEL
07150-03205
,48
1,35
,41
7
STANDARD - BISEAUTE
07150-03105
,44
1,30
,24
7
STANDARD - ACTIONNE PAR CAME - PLAT
07170-04700
,48
1,30
,24
8
LONG - PLAT
07150-04005
,48
2,30
,24
8
# LONG - UNIVERSEL
07150-04205
,48
2,35
,42
8
LONG - COURBE - PLAT
07150-05005
,48
2,23
,24
8
LONG - ACTIONNE PAR CAME - PLAT
07170-05100
,48
2,30
,24
9
STANDARD - PLAT
07150-03006
,56
1,18
,33
9
# STANDARD - UNIVERSEL
07150-03206
,56
1,24
,47
9
STANDARD - BISEAUTE
07150-03106
,56
1,18
,33
9
STANDARD - ACTIONNE PAR CAME - PLAT
07170-04800
,56
1,18
,33
10
LONG - PLAT
07150-04006
,56
2,30
,33
10
# LONG - UNIVERSEL
07150-04206
,56
2,39
,48
10
LONG - COURBE - PLAT
07150-05006
,56
2,21
,33
10
LONG - ACTIONNE PAR CAME - PLAT
07170-05200
,56
2,30
,33
11
STANDARD - PLAT
07150-03008
,64
1,18
,39
11
STANDARD - ACTIONNE PAR CAME - PLAT
07170-04900
,64
1,18
,39
12
LONG - PLAT
07150-04008
,64
2,18
,39
12
LONG - ACTIONNE PAR CAME - PLAT
07170-05300
,64
2,18
,39
13
STANDARD - BISEAUTE
07170-03103
,36
1,30
,15
14
ACCES LIMITE - ACTIONNE PAR CAME
07177-03003
,20
1,18
,16
14
ACCES LIMITE
07274-01000
,22
1,07
,16
-
-
-
-
-
-
15
STANDARD - PLAT
07150-03004
,41
1,18
,20
15
STANDARD - EN RETRAIT
07170-03004
,41
1,20
,30
15
STANDARD - BISEAUTE
07170-03104
,41
1,19
,20
16
LONG - PLAT
07150-04004
,41
2,18
,20
16
LONG - EN RETRAIT
07170-03204
,41
2,18
,30
16
LONG - COURBE - PLAT
07150-05004
,41
2,12
,20
16
LONG - COURBE - EN RETRAIT
07170-03304
,41
2,12
,30
-
-
-
-
-
-
4,0mm BRIV®
17
STANDARD - PLAT
07150-03005
,48
1,30
,24
17
STANDARD - EN RETRAIT
07170-03005
,48
1,32
,41
ALLIAGE D'ALUMINIUM,
LAITON, ACIER
18
LONG - PLAT
07150-04005
,48
2,30
,24
18
LONG - EN RETRAIT
07170-03205
,48
2,30
,41
18
LONG - COURBE - PLAT
07150-05005
,48
2,23
,24
18
LONG - COURBE - EN RETRAIT
07170-03305
,48
2,23
,41
19
STANDARD - PLAT
07150-03005
,48
1,30
,24
19
STANDARD - EN RETRAIT
07170-03005
,48
1,32
,41
20
LONG - PLAT
07150-04005
,48
2,30
,24
20
LONG - EN RETRAIT
07170-03205
,48
2,30
,41
20
LONG - COURBE - PLAT
07150-05005
,48
2,23
,24
20
LONG - COURBE - EN RETRAIT
07170-03305
,48
2,23
,41
4,8mm BRIV®
21
STANDARD - PLAT
07150-03006
,56
1,18
,33
21
STANDARD - EN RETRAIT
07170-03006
,56
1,20
,47
ALLIAGE D'ALUMINIUM,
LAITON, ACIER
22
LONG - PLAT
07150-04006
,56
2,30
,33
22
LONG - EN RETRAIT
07170-03206
,56
2,30
,47
22
LONG - COURBE - PLAT
07150-05006
,56
2,21
,33
22
LONG - COURBE - EN RETRAIT
07170-03306
,56
2,21
,47
23
STANDARD - PLAT
07150-03006
,56
1,18
,33
23
STANDARD - EN RETRAIT
07170-03006
,56
1,20
,47
24
LONG - PLAT
07150-04006
,56
2,30
,33
24
LONG - EN RETRAIT
07170-03206
,56
2,30
,47
24
LONG - COURBE - PLAT
07150-05006
,56
2,21
,33
24
LONG - COURBE - EN RETRAIT
07170-03306
,56
2,21
,47
25
STANDARD - ACTIONNE PAR CAME
07170-05600
,64
1,21
,52
25
STANDARD - PLAT
07170-05800
,64
1,21
,52
26
LONG - ACTIONNE PAR CAME
07170-05700
,64
2,19
,52
26
LONG - PLAT
07170-05900
,64
2,19
,52
27
STANDARD - PLAT
07150-03003
,36
1,30
,16
27
STANDARD - BISEAUTE
07150-03103
,36
1,30
,16
27
STANDARD - ACTIONNE PAR CAME - PLAT
07170-04500
,36
1,30
,16
28
LONG - PLAT
07150-04003
,41
2,30
,16
28
LONG - COURBE - PLAT
07150-05003
,41
2,28
,16
-
-
-
-
-
29
STANDARD - PLAT
07150-03004
,41
1,18
,20
29
STANDARD - BISEAUTE
07170-03104
,41
1,19
,20
29
STANDARD - ACTIONNE PAR CAME - PLAT
07170-04600
,41
1,18
,20
30
LONG - PLAT
07150-04004
,41
2,18
,20
30
LONG - COURBE - PLAT
07150-05004
,41
2,12
,20
30
LONG - ACTIONNE PAR CAME - PLAT
07170-05000
,41
2,18
,20
31
STANDARD - PLAT
07150-03003
,36
1,30
,16
-
-
-
-
-
-
32
STANDARD - PLAT
07150-03004
,41
1,18
,20
32
STANDARD - ACTIONNE PAR CAME - PLAT
07170-04600
,41
1,18
,20
33
STANDARD - PLAT
07150-03003
,36
1,30
,16
33
ACCES LIMITE - ACTIONNE PAR CAME
07271-08000
,41
1,18
,16
34
LONG - PLAT
07150-04003
,41
2,30
,16
-
-
-
-
-
-
35
STANDARD - PLAT
07271-05600
,36
1,30
,16
36
ACCES LIMITE - ACTIONNE PAR CAME
07271-08100
,40
1,18
,16
5/32" CHOBERT®
& GROVIT®
3/16" CHOBERT®
& GROVIT®
1/4" CHOBERT®
2,4mm BRIV®
LAITON SEULEMENT
3,2mm BRIV®
ALLIAGE D'ALUMINIUM,
LAITON, ACIER
4,0mm BRIV®
ACIER INOXYDABLE
SEULEMENT
4,8mm BRIV®
ACIER INOXYDABLE
SEULEMENT
6mm BRIV®
ALLIAGE D'ALUMINIUM,
ACIER
3/32" AVLUG®
1/8" AVLUG®
2,5mm, 4-40 UNC
AVSERT®
3,0mm, 6-32 UNC
AVSERT®
2,5mm AVTRONIC®
2,8mm AVTRONIC®
1
STANDARD - PLAT
07150-03003
,36
1,30
,16
1
STANDARD - ACTIONNE PAR CAME - PLAT
07170-04500
,36
1,30
,16
2
STANDARD - BISEAUTE
07170-03103
,36
1,30
4
LONG - PLAT
07150-04003
,41
5
STANDARD - PLAT
07150-03004
5
STANDARD - BISEAUTE
6
DIMENSIONS
'B'
'D'
'E'
No. DE REFERENCE
1/8" CHOBERT®
& GROVIT®
No. DE REFERENCE
Repère
TYPE ET
FORME D'EMBOUT
3/32" CHOBERT®
& GROVIT®
TYPE ET
FORME D'EMBOUT
Repère
37
LONG - PLAT
07271-05900
,41
2,30
,16
-
-
-
-
-
-
2,8mm RIVSCREW®
38
STANDARD - ACTIONNE PAR CAME - FT
07271-03000
,41
1,18
,24
-
-
-
-
-
-
3,0mm RIVSCREW®
39
STANDARD - ACTIONNE PAR CAME - FT
07271-03000
,41
1,18
,24
-
-
-
-
-
-
3,5mm RIVSCREW®
40
STANDARD - ACTIONNE PAR CAME - FT
07271-03500
,41
1,18
,24
-
-
-
-
-
-
4,0mm RIVSCREW®
41
STANDARD - ACTIONNE PAR CAME - FT
07271-04000
,41
1,18
,25
-
-
-
-
-
-
# Ces nez de pose conviennent à la pose des rivets Chobert® à forme de tête universelle. Lorsqu'ils sont utilisés avec la taille équivalente
de Briv®, ils permettent d'obtenir le plus fort serrage possible. Noter que lors de la pose de fixations Briv®, la prise maximum se trouve
réduite d'environ 0,4 mm.
14
Ensembles de nez
Selection des nez de pose - Metrique
NEZ DE POSE
FIXATION
NEZ DE POSE
TYPE ET
FORME D'EMBOUT
No. DE REFERENCE
DIMENSIONS
'B'
'D'
'E'
Repère
1
STANDARD - PLAT
07150-03003
9,14 33,02 4,06
1
STANDARD - ACTIONNE PAR CAME - PLAT
07170-04500
9,14 33,02 4,06
2
STANDARD - BISEAUTE
07170-03103
4
LONG - PLAT
5
5
6
TYPE ET
FORME D'EMBOUT
No. DE REFERENCE
DIMENSIONS
'B'
'D'
'E'
1
# STANDARD - UNIVERSEL
07150-03203
9,14 33,78 6,10
1
ACCES LIMITE - ACTIONNE PAR CAME
07177-03003
5,08 29,97 4,06
9,14 33,02 4,06
3
ACCES LIMITE
07274-01000
5,59 27,18 4,06
07150-04003
10,41 58,42 4,06
4
LONG - COURBE - PLAT
07150-05003 10,41 57,91 4,06
STANDARD - PLAT
07150-03004
10,41 29,97 5,08
5
# STANDARD - UNIVERSEL
07150-03204 10,41 30,99 8,13
STANDARD - BISEAUTE
07170-03104
10,41 30,23 5,08
5
STANDARD - ACTIONNE PAR CAME - PLAT
07170-04600 10,41 29,97 5,08
LONG - PLAT
07150-04004
10,41 55,37 5,08
6
# LONG - UNIVERSEL
07150-04204 10,41 56,39 7,62
6
LONG - COURBE - PLAT
07150-05004
10,41 53,85 5,08
6
LONG - ACTIONNE PAR CAME - PLAT
07170-05000 10,41 55,37 5,08
7
STANDARD - PLAT
07150-03005
12,19 33,02 6,10
7
# STANDARD - UNIVERSEL
07150-03205 12,19 34,29 10,41
7
STANDARD - BISEAUTE
07150-03105
11,18 33,02 6,10
7
STANDARD - ACTIONNE PAR CAME - PLAT
07170-04700 12,19 33,02 6,10
8
LONG - PLAT
07150-04005
12,19 58,42 6,10
8
# LONG - UNIVERSEL
07150-04205 12,19 59,69 10,67
8
LONG - COURBE - PLAT
07150-05005
12,19 56,64 6,10
8
LONG - ACTIONNE PAR CAME - PLAT
07170-05100 12,19 58,42 6,10
9
STANDARD - PLAT
07150-03006
14,22 29,97 8,38
9
# STANDARD - UNIVERSEL
07150-03206 14,22 31,50 11,94
9
STANDARD - BISEAUTE
07150-03106
14,22 29,97 8,38
9
STANDARD - ACTIONNE PAR CAME - PLAT
07170-04800 14,22 29,97 8,38
10
LONG - PLAT
07150-04006
14,22 58,42 8,38
10
# LONG - UNIVERSEL
07150-04206 14,22 60,71 12,19
10
LONG - COURBE - PLAT
07150-05006
14,22 56,13 8,38
10
LONG - ACTIONNE PAR CAME - PLAT
07170-05200 14,22 58,42 8,38
11
STANDARD - PLAT
07150-03008
16,26 29,97 9,91
11
STANDARD - ACTIONNE PAR CAME - PLAT
07170-04900 16,26 29,97 9,91
12
LONG - PLAT
07150-04008
16,26 55,37 9,91
12
LONG - ACTIONNE PAR CAME - PLAT
07170-05300 16,26 55,37 9,91
13
STANDARD - BISEAUTE
07170-03103
9,14 33,02 3,81
14
ACCES LIMITE - ACTIONNE PAR CAME
07177-03003
14
ACCES LIMITE
07274-01000
5,59 27,18 4,06
-
-
-
15
STANDARD - PLAT
07150-03004
10,41 29,97 5,08
15
STANDARD - EN RETRAIT
07170-03004 10,41 30,48 7,62
15
STANDARD - BISEAUTE
07170-03104
10,41 30,23 5,08
16
LONG - PLAT
07150-04004 10,41 55,37 5,08
16
LONG - EN RETRAIT
07170-03204
10,41 55,37 7,62
16
LONG - COURBE - PLAT
07150-05004 10,41 53,85 5,08
16
LONG - COURBE - EN RETRAIT
07170-03304
10,41 53,85 7,62
-
-
4,0mm BRIV®
17
STANDARD - PLAT
07150-03005
12,19 33,02 6,10
17
STANDARD - EN RETRAIT
07170-03005 12,19 33,53 10,41
ALLIAGE D'ALUMINIUM,
LAITON, ACIER
18
LONG - PLAT
07150-04005
12,19 58,42 6,10
18
LONG - EN RETRAIT
07170-03205 12,19 58,42 10,41
18
LONG - COURBE - PLAT
07150-05005
12,19 56,64 6,10
18
LONG - COURBE - EN RETRAIT
07170-03305 12,19 56,64 10,41
19
STANDARD - PLAT
07150-03005
12,19 33,02 6,10
19
STANDARD - EN RETRAIT
07170-03005 12,19 33,53 10,41
4,0mm BRIV®
ACIER INOXYDABLE
SEULEMENT
20
LONG - PLAT
07150-04005
12,19 58,42 6,10
20
LONG - EN RETRAIT
07170-03205 12,19 58,42 10,41
20
LONG - COURBE - PLAT
07150-05005
12,19 56,64 6,10
20
LONG - COURBE - EN RETRAIT
07170-03305 12,19 56,64 10,41
4,8mm BRIV®
21
STANDARD - PLAT
07150-03006
14,22 29,97 8,38
21
STANDARD - EN RETRAIT
07170-03006 14,22 30,48 11,94
ALLIAGE D'ALUMINIUM,
LAITON, ACIER
22
LONG - PLAT
07150-04006
14,22 58,42 8,38
22
LONG - EN RETRAIT
07170-03206 14,22 58,42 11,94
22
LONG - COURBE - PLAT
07150-05006
14,22 56,13 8,38
22
LONG - COURBE - EN RETRAIT
07170-03306 14,22 56,13 11,94
23
STANDARD - PLAT
07150-03006
14,22 29,97 8,38
23
STANDARD - EN RETRAIT
07170-03006 14,22 30,48 11,94
24
LONG - PLAT
07150-04006
14,22 58,42 8,38
24
LONG - EN RETRAIT
07170-03206 14,22 58,42 11,94
24
LONG - COURBE - PLAT
07150-05006
14,22 56,13 8,38
24
LONG - COURBE - EN RETRAIT
07170-03306 14,22 56,13 11,94
25
STANDARD - ACTIONNE PAR CAME
07170-05600
16,33 30,65 13,14
25
STANDARD - PLAT
07170-05800 16,33 30,65 13,14
26
LONG - ACTIONNE PAR CAME
07170-05700
16,33 55,65 13,14
26
LONG - PLAT
07170-05900 16,33 55,65 13,14
27
STANDARD - PLAT
07150-03003
9,14 33,02 4,06
27
STANDARD - BISEAUTE
27
STANDARD - ACTIONNE PAR CAME - PLAT
07170-04500
9,14 33,02 4,06
28
LONG - PLAT
28
LONG - COURBE - PLAT
07150-05003
10,41 57,91 4,06
-
-
29
STANDARD - PLAT
07150-03004
10,41 29,97 5,08
29
STANDARD - BISEAUTE
07170-03104 10,41 30,23 5,08
29
STANDARD - ACTIONNE PAR CAME - PLAT
07170-04600
10,41 29,97 5,08
30
LONG - PLAT
07150-04004 10,41 55,37 5,08
30
LONG - COURBE - PLAT
07150-05004
10,41 53,85 5,08
30
LONG - ACTIONNE PAR CAME - PLAT
07170-05000 10,41 55,37 5,08
31
STANDARD - PLAT
07150-03003
9,14 33,02 4,06
-
-
32
STANDARD - PLAT
07150-03004
10,41 29,97 5,08
32
STANDARD - ACTIONNE PAR CAME - PLAT
07170-04600 10,41 29,97 5,08
33
STANDARD - PLAT
07150-03003
9,14 33,02 4,06
33
ACCES LIMITE - ACTIONNE PAR CAME
07271-08000 10,41 29,97 4,06
34
LONG - PLAT
07150-04003
10,41 58,42 4,06
-
-
35
STANDARD - PLAT
07271-05600
9,14 33,02 4,06
36
ACCES LIMITE - ACTIONNE PAR CAME
2,4 mm CHOBERT®
& GROV®
3,2 mm CHOBERT®
& GROV®
4,0 mm CHOBERT®
& GROV®
4,8 mm CHOBERT®
& GROV®
6,4 mm CHOBERT®
2,4mm BRIV®
LAITON SEULEMENT
3,2mm BRIV®
ALLIAGE D'ALUMINIUM,
LAITON, ACIER
4,8mm BRIV®
ACIER INOXYDABLE
SEULEMENT
6mm BRIV®
ALLIAGE D'ALUMINIUM,
ACIER
2,4 mm AVLUG®
3,2 mm AVLUG®
2,5mm, 4-40 UNC
AVSERT®
3,0mm, 6-32 UNC
AVSERT®
2,5mm AVTRONIC®
2,8mm AVTRONIC®
Repère
-
07150-03103
5,08 29,97 4,06
-
-
-
-
-
-
9,14 33,02 4,06
07150-04003 10,41 58,42 4,06
-
-
-
-
-
-
-
-
-
-
-
-
07271-08100 10,16 29,97 4,06
37
LONG - PLAT
07271-05900
10,41 58,42 4,06
-
-
-
-
-
-
2,8mm RIVSCREW®
38
STANDARD - ACTIONNE PAR CAME - FT
07271-03000
10,41 29,97 6,10
-
-
-
-
-
-
3,0mm RIVSCREW®
39
STANDARD - ACTIONNE PAR CAME - FT
07271-03000
10,41 29,97 6,10
-
-
-
-
-
-
3,5mm RIVSCREW®
40
STANDARD - ACTIONNE PAR CAME - FT
07271-03500
10,41 29,97 6,10
-
-
-
-
-
-
4,0mm RIVSCREW®
41
STANDARD - ACTIONNE PAR CAME - FT
07271-04000
10,41 29,97 6,35
-
-
-
-
-
-
# Ces nez de pose conviennent à la pose des rivets Chobert® à forme de tête universelle. Lorsqu'ils sont utilisés avec la taille équivalente
de Briv®, ils permettent d'obtenir le plus fort serrage possible. Noter que lors de la pose de fixations Briv®, la prise maximum se trouve
réduite d'environ 0,4 mm.
15
Ensembles de nez
Aiguilles et Ressorts d’aiguille
Les aiguilles et leurs ressorts, illustrés page 41, doivent être choisis en fonction du type et de la dimension des fixations, ainsi que de
la taille du trou de l'application. L'emploi d'une aiguille inappropriée augmente le risque de rupture et d'usure du cône de l'aiguille. Des
problèmes d'alimentation peuvent survenir si l'on emploie le mauvais type de ressort.
I M P O R TA N T
LIRE SOIGNEUSEMENT LES INSTRUCTIONS DE SECURITE de la page 34.
Bien qu’une usure et un marquage limités des aiguilles soient inévitables suite à leur utilisation normale et correcte,
l’on veillera à les examiner régulièrement à la recherche de signes d’usure ou de marquage excessifs, en particulier
au niveau du diamètre du cône et de la zone de prise des mâchoires d’aiguille du fût, de signes de piquage intensif
du fût ou de déformation de l’aiguille. Un dysfonctionnement de l’aiguille en cours d’utilisation pourrait provoquer son
éjection de l’outil. La responsabilité de veiller à ce que les aiguilles soient remplacées avant d’atteindre un niveau
excessif d’usure et toujours avant le nombre maximum de poses préconisé, incombe au client. Contacter le
représentant Avdel UK Limited le plus proche, qui se chargera de fournir cette information en mesurant la force de
mandrinage de votre application à l’aide d’un outil de test calibré. Ces outils sont également vendus sous la
référence 07900-09080 et sont fournis avec toute l’information nécessaire aux tests.
C h o b e r t ® e t G ro v ® - M e s u r e s a n g l o - s a x o n n e s
Pour choisir l'aiguille ou le ressort de l'aiguille, suivre les instructions de la page 48.
FIXATION
REPERE
TAILLE
DU TROU DIAMETRE
DU CONE
1
1
3/32" CHOBERT ®
& GROV ®
2
2
3
3
1/8" CHOBERT®
& GROV®
5/32" CHOBERT ®
& GROV®
1/8" CHOBERT ®
& GROV ®
5/32" CHOBERT ®
& GROV®
3/16" CHOBERT ®
& GROV ®
1/4" CHOBERT®
-
-
SEL. REC. ,0725
-
-
-
-
-
+,0035
,076
-
-
07150-08103
,078
07150-06803
07150-06003
,166
07150-08003
,071
+,0015
,074
07150-06303
,174
-
-
07170-06873
-
-
-
-
+,0035
,076
-
-
07150-08103
,078
07170-06873
07150-06003
,166
07150-08003
,071
+,0015
,074
07150-06303
,174
-
-
07170-06903
-
-
-
-
+,0035
,076
-
-
07150-08103
,078
07170-06903
,166
07150-09003
,071
+,0035
,076
-
-
07150-09103
,078
07150-07803
5
SEL. REC. ,088
07150-06004
,216
07150-08004
,090
+,004
,092
07150-06104
,237
07150-08104
,098
07150-06804
6
SEL. REC. ,088
07150-07004
,216
07150-09004
,090
+,004
,092
07150-07104
,237
07150-09104
,098
07150-07804
7
SEL. REC. ,107
07150-06005
,244
07150-08005
,100
+,008
,115
07150-06105
,284
07150-08105
,116
07170-06875
-
-
-
-
-
-
-
-
-
-
-
07150-07005
,244
07150-09005
,100
+,008
,115
07150-07105
,284
07150-09105
,116
07170-07875
7
8
9
10
-
-
SEL. REC. ,107
-
-
SEL. REC. ,132
-
-
SEL. REC. ,132
-
-
-
-
-
-
-
-
-
-
-
07150-06006
,247
07150-08006
,102
+,014
,146
07150-06106
,320
07150-08106
,130
07170-06876
-
-
-
-
-
-
-
-
-
-
-
07150-07006
,247
07150-09006
,102
+,014
,146
07150-07106
,320
07150-09106
,130
07170-07876
-
-
-
-
-
-
-
-
-
-
-
11
SEL. REC. ,184
07150-06008
,268
07150-08008
,110
+,012
,196
07150-06108
,330
07150-08108
,134
07150-06808
12
SEL. REC. ,184
07150-07008
,268
07150-09008
,110
+,012
,196
07150-07108
,330
07150-09108
,134
07150-07808
REPERE
1
3/32" CHOBERT ®
& GROV®
SEL. REC. ,0725
07150-06803
-
07150-07003
10
FIXATION
-
SEL. REC. ,0725
9
1/4" CHOBERT ®
-
REFERENCE
DE RESSORT
4
8
3/16" CHOBERT®
& GROV®
SEL. REC. ,0725
1E AIGUILLE SURDIMENSIONNEE - JAUNE
AIGUILLE STANDARD - VERTE
TAILLE
REFERENCE
P.
P.
P.
NUMERO DE REFERENCE
P.
NUMERO DE REFERENCE
DU TROU DIAMETRE REFERENCE
DE L'AIGUILLE MAXI
MAXI
MAXI
DE L'AIGUILLE S/R
DU CONE DE L'AIGUILLE MAXI
DE L'AIGUILLE S/R
07150-06003
07150-06303
+,0015
,071
,166
07150-08003
,074
,174
-
-
-
3E AIGUILLE SURDIMENSIONNEE - ROUGE
2E AIGUILLE SURDIMENSIONNEE - BLEUE
TAILLE
TAILLE
P.
P.
P.
NUMERO DE REFERENCE
P.
NUMERO DE REFERENCE
DU TROU DIAMETRE REFERENCE
DU TROU DIAMETRE REFERENCE
MAXI
MAXI
DU CONE DE L'AIGUILLE MAXI
DE L'AIGUILLE S/R
DU CONE DE L'AIGUILLE MAXI
DE L'AIGUILLE S/R
07150-06103
+,0035 ,076
,185
-
REFERENCE
DE RESSORT
07150-06803
1
-
-
-
-
-
-
-
-
-
-
-
-
-
2
+,0035
,076
07150-06103
,185
-
-
-
-
-
-
-
-
07170-06873
2
-
-
-
-
-
-
-
-
-
-
-
-
-
3
+,0035
,076
07150-06103
,185
-
-
-
-
-
-
-
-
07170-06903
3
-
-
-
-
-
-
-
-
-
-
-
-
-
4
+,0035
,076
07150-07103
,185
-
-
-
-
-
-
-
-
07150-07803
5
+,010
,098
07150-06204
,268
07150-08204
,110
+,014
,102
07150-06304
,288
07150-08304
,118
07150-06804
6
+,010
,098
07150-07204
,268
07150-09204
,110
+,014
,102
07150-07304
,288
07150-09304
,118
07150-07804
7
+,015
,122
07150-06205
,320
07150-08205
,130
-
-
-
-
-
-
07170-06875
7
-
-
-
-
-
-
+,025
,132
07150-06305
,372
07150-08305
,150
07150-06805
8
+,015
,122
07150-07205
,320
07150-09205
,130
-
-
-
-
-
-
07170-07875
8
-
-
-
-
-
-
+,025
,132
07150-07305
,372
07150-09305
,150
07150-07805
9
-
-
-
-
-
-
-
-
-
-
-
-
-
9
+,024
,156
07150-06206
,372
07150-08206
,150
-
-
-
-
-
-
07150-06806
10
-
-
-
-
-
-
-
-
-
-
-
-
-
10
+,024
,156
07150-07206
,372
07150-09206
,150
-
-
-
-
-
-
07150-07806
11
-
-
-
-
-
-
-
-
-
-
-
-
-
12
-
-
-
-
-
-
-
-
-
-
-
-
-
# S/R = aiguille à cône court. Voir les explications pages 48-49.
16
Ensembles de nez
Les tableaux des pages gauche et droite ci-dessous, et des 4 pages suivantes, donnent la liste de toutes les aiguilles et ressorts
d'aiguille disponibles par fixation ou groupe de fixations, en l'occurrence les Chobert® et Grov® sur ces pages.
Bien que les fixations soient toujours mentionnées avec leurs unités respectives, chaque tableau a été reproduit en double, de façon à
présenter les dimensions en unités anglaises sur la page de gauche, puis en unités métriques sur celle de droite. Ces tableaux de
sélection des aiguilles renvoient à ceux des pages 44-45, qui permettent de choisir les nez de pose, par le biais de la colonne
"Repère".
C'est le diamètre du cône situé à l'extrémité de l'aiguille qui détermine, lorsqu'il le traverse, la dilatation du corps de la fixation.
Bien qu'il existe différentes formes de cône convenant à différents types de fixations (voir les illustrations de la page 49), il est
nécessaire de disposer de tailles de cône progressives pour tenir compte des tolérances de diamètre du trou auxquelles l'application
doit répondre, de sorte que la fixation soit toujours suffisamment dilatée pour remplir le trou.
Un cône d'aiguille trop gros exerce des contraintes excessives sur l'aiguille, et une aiguille venant à casser en cours d'utilisation peut
se trouver éjectée violemment de l'outil.
Les tableaux de sélection sont agencés en quatre parties de "taille d'aiguille", allant de la catégorie "standard" à la catégorie "3e
surdimensionnée", chacune reconnaissable à un code de couleur porté par l'extrémité des cônes d'aiguille eux-mêmes.
C h o b e r t ® e t G ro v ® - M e t r i q u e
FIXATION
REPERE
1
1
2,4 mm CHOBERT ®
& GROV®
2
2
3
3
3,2 mm CHOBERT ®
& GROV®
4,0 mm CHOBERT ®
& GROV®
2,4 mm CHOBERT ®
& GROV ®
3,2 mm CHOBERT ®
& GROV ®
4,0 mm CHOBERT ®
& GROV ®
4,8 mm CHOBERT ®
& GROV ®
6,4 mm CHOBERT®
SEL. REC. 1,84
-
-
SEL. REC. 1,84
-
-
07150-06803
-
-
-
-
+,09
1,93
-
-
07150-08103
1,98
07150-06803
07150-06003
4,22
07150-08003
1,80
+,04
1,88
07150-06303
4,42
-
-
07170-06873
-
-
-
-
+,09
1,93
-
-
07150-08103
1,98
07170-06873
07150-06003
4,22
07150-08003
1,80
+,04
1,88
07150-06303
4,42
-
-
07170-06903
-
-
-
-
+,09
1,93
-
-
07150-08103
1,98
07170-06903
07150-07003
4,22
07150-09003
1,80
+,09
1,93
-
-
07150-09103
1,98
07150-07803
5
SEL. REC. 2,24
07150-06004
5,49
07150-08004
2,29
+,10
2,34
07150-06104
6,02
07150-08104
2,49
07150-06804
6
SEL. REC. 2,24
07150-07004
5,49
07150-09004
2,29
+,10
2,34
07150-07104
6,02
07150-09104
2,49
07150-07804
7
SEL. REC. 2,72
07150-06005
6,20
07150-08005
2,54
+,20
2,92
07150-06105
7,21
07150-08105
2,95
07170-06875
-
-
-
-
-
-
-
-
-
-
-
07150-07005
6,20
07150-09005
2,54
+,20
2,92
07150-07105
7,21
07150-09105
2,95
07170-07875
7
8
9
10
-
-
SEL. REC. 2,72
-
-
SEL. REC. 3,35
-
-
SEL. REC. 3,35
-
-
-
-
-
-
-
-
-
-
-
07150-06006
6,27
07150-08006
2,59
+,35
3,71
07150-06106
8,13
07150-08106
3,30
07170-06876
-
-
-
-
-
-
-
-
-
-
-
07150-07006
6,27
07150-09006
2,59
+,35
3,71
07150-07106
8,13
07150-09106
3,30
07170-07876
-
-
-
-
-
-
-
-
-
-
-
11
SEL. REC. 4,67
07150-06008
6,81
07150-08008
2,79
+,30
4,98
07150-06108
8,38
07150-08108
3,40
07150-06808
12
SEL. REC. 4,67
07150-07008
6,81
07150-09008
2,79
+,30
4,98
07150-07108
8,38
07150-09108
3,40
07150-07808
10
FIXATION
-
REFERENCE
DU RESSORT
SEL. REC. 1,84
9
6,4 mm CHOBERT ®
-
1E AIGUILLE SURDIMENSIONNEE - JAUNE
TAILLE
P.
P.
NUMERO DE REFERENCE
DU TROU DIAMETRE REFERENCE
MAXI
DU CONE DE L'AIGUILLE MAXI
DE L'AIGUILLE S/R
07150-06303
+,04
1,88
4,42
-
4
8
4,8 mm CHOBERT ®
& GROV®
AIGUILLE STANDARD - VERTE
TAILLE
P.
P.
NUMERO DE REFERENCE
DU TROU DIAMETRE REFERENCE
MAXI
DU CONE DE L'AIGUILLE MAXI
DE L'AIGUILLE S/R
07150-06003
1,80
SEL. REC. 1,84
4,22
07150-08003
-
-
2E AIGUILLE SURDIMENSIONNEE - BLEUE
3E AIGUILLE SURDIMENSIONNEE - ROUGE
REPERE TAILLE
TAILLE
P.
P.
P.
NUMERO DE REFERENCE
P.
NUMERO DE REFERENCE
DU TROU DIAMETRE REFERENCE
DU TROU DIAMETRE REFERENCE
MAXI
MAXI
DU CONE DE L'AIGUILLE MAXI
DE L'AIGUILLE S/R
DU CONE DE L'AIGUILLE MAXI
DE L'AIGUILLE S/R
1
07150-06103
+,09
1,93
4,70
-
REFERENCE
DU RESSORT
07150-06803
1
-
-
-
-
-
-
-
-
-
-
-
-
-
2
+,09
1,93
07150-06103
4,70
-
-
-
-
-
-
-
-
07170-06873
2
-
-
-
-
-
-
-
-
-
-
-
-
-
3
+,09
1,93
07150-06103
4,70
-
-
-
-
-
-
-
-
07170-06903
3
-
-
-
-
-
-
-
-
-
-
-
-
-
4
+,09
1,93
07150-07103
4,70
-
-
-
-
-
-
-
-
07150-07803
5
+,25
2,49
07150-06204
6,81
07150-08204
2,79
+,35
2,59
07150-06304
7,32
07150-08304
3,00
07150-06804
6
+,25
2,49
07150-07204
6,81
07150-09204
2,79
+,35
2,59
07150-07304
7,32
07150-09304
3,00
07150-07804
7
+,38
3,10
07150-06205
8,13
07150-08205
3,30
-
-
-
-
-
-
07170-06875
7
-
-
-
-
-
-
+,63
3,35
07150-06305
9,45
07150-08305
3,81
07150-06805
8
+,38
3,10
07150-07205
8,13
07150-09205
3,30
-
-
-
-
-
-
07170-07875
8
-
-
-
-
-
-
+,63
3,35
07150-07305
9,45
07150-09305
3,81
07150-07805
9
-
-
-
-
-
-
-
-
-
-
-
-
-
9
+,60
3,96
07150-06206
9,45
07150-08206
3,81
-
-
-
-
-
-
07150-06806
10
-
-
-
-
-
-
-
-
-
-
-
-
-
10
+,60
3,96
07150-07206
9,45
07150-09206
3,81
-
-
-
-
-
-
07150-07806
11
-
-
-
-
-
-
-
-
-
-
-
-
-
12
-
-
-
-
-
-
-
-
-
-
-
-
-
# S/R = aiguille à cône court. Voir les explications pages 48-49.
17
Ensembles de nez
Pour trouver la référence d'aiguille correspondant à une application particulière, lire les instructions ci-dessous après avoir relevé les
informations suivantes, illustrées par l'exemple fourni en regard. Les réponses correspondant à l'exemple apparaissent en grisé et en italique.
Chobert®
3,2 mm
Série 1125
NOM DE LA FIXATION
exemple
TAILLE DE LA FIXATION
FICHE TECHNIQUE
TAILLE DU TROU DE L'APPLICATION
ESPACE DERRIERE L'APPLICATION
"REPERE" TIRE DU TABLEAU DE SELECTION DES NEZ DE POSE
•
•
•
•
•
•
•
•
Illimité
5 (standard plat)
Soustraire la dimension minimum de trou recommandée (SEL. REC), trouvée dans la fiche technique de la fixation, de la dimension réelle
du trou de l'application, par exemple 0,005.
Passer à la page du tableau de choix de l'aiguille concernant la fixation, en choisissant les unités anglaises ou métriques (pages 46 à 50),
par exemple page 46.
En partant de la rubrique ‘Aiguille standard - Verte’, retrouver les dimensions de la fixation dans la colonne de gauche, par exemple
Chobert® & Grov® de 3,2 mm.
Si l'on a déjà choisi un nez de pose convenant à la pose de la fixation, on doit alors pouvoir trouver, dans la rubrique concernant la fixation
en question, une ligne ayant le même "Repère" que celle du tableau de sélection des nez de pose, par exemple 5.
Cette ligne du Repère est celle dans laquelle on trouvera aussi bien la référence de l'aiguille que celle du ressort. Cette ligne se prolonge
dans la deuxième partie du tableau pour les aiguilles de catégorie 2e et 3e surdimensionnée.
Parcourir cette ligne jusqu'aux colonnes "taille du trou", et choisir celle qui est égale à la valeur calculée en premier lieu ou qui s'en
rapproche le plus. On peut alors lire le numéro de référence de l'aiguille à côté de la taille du trou, par exemple 07150-06104.
Pour les fixations Chobert® et Grov®, et elles seulement, la plupart des aiguilles existent aussi en version "cône court " (voir les
illustrations de la page 49). Les aiguilles à cône court permettent de limiter les risques de contact entre le cône de l'aiguille et un obstacle
situé à l'arrière, ce qui aurait pour effet d'empêcher un bon appui de la face inférieure de la tête de la fixation sur la surface de
l'application, et donc un défaut de serrage à ce joint.
Quelle que soit la taille d'aiguille que l'on retienne, il est également nécessaire de vérifier que la valeur "P" convient à l'aiguille. "P" est
l'espace nécessaire au cône de l'aiguille à l'arrière de la fixation, en plus de la longueur de la fixation dépassant de l'application, comme
indiqué sur le schéma de la page 49.
On peut alors lire la référence du ressort d'aiguille correspondant dans la colonne de droite du tableau, par exemple 07150-06804.
Dans tous les cas, on doit assurer un serrage satisfaisant du joint, notamment si la taille du trou de l'application est très proche de la
prochaine condition de trou surdimensionné, auquel cas il est plus sûr de choisir la taille d'aiguille supérieure pour obtenir un serrage plus fort.
NE PAS OUBLIER que cela conduit à augmenter la force de mandrinage et à réduire la durée de vie de l'aiguille
BRIV® - Mesures anglo-saxonnes
Pour choisir l'aiguille ou le ressort de l'aiguille, suivre les instructions plus haut.
FIXATION
3/32" BRIV ®
LAITON SEULEMENT
1/8" BRIV ®
ALLIAGE D'ALUMINIUM, LAITON, ACIER
5/32" BRIV ®
ALLIAGE D'ALUMINIUM, LAITON, ACIER
5/32" BRIV ®
ACIER INOXYDABLE SEULEMENT
3/16" BRIV ®
ALLIAGE D'ALUMINIUM, LAITON, ACIER
3/16" BRIV ®
ACIER INOXYDABLE SEULEMENT
6mm BRIV ®
ALLIAGE D'ALUMINIUM, ACIER
FIXATION
3/32" BRIV ®
LAITON SEULEMENT
1/8" BRIV ®
ALLIAGE D'ALUMINIUM, LAITON, ACIER
5/32" BRIV ®
ALLIAGE D'ALUMINIUM, LAITON, ACIER
5/32" BRIV ®
ACIER INOXYDABLE SEULEMENT
3/16" BRIV ®
ALLIAGE D'ALUMINIUM, LAITON, ACIER
3/16" BRIV ®
ACIER INOXYDABLE SEULEMENT
6mm BRIV ®
ALLIAGE D'ALUMINIUM, ACIER
18
REPERE TAILLE
DU TROU DIAMETRE
DU CONE
13 SEL. REC. ,072
AIGUILLE STANDARD - VERTE
REFERENCE
DE L'AIGUILLE
P.
MAXI
1E AIGUILLE SURDIMENSIONNEE - JAUNE
TAILLE
REFERENCE
P.
DU TROU DIAMETRE
DU CONE
DE L'AIGUILLE
MAXI
REFERENCE
DU RESSORT
07150-06013
,119
+,004
,076
07150-06113
,123
07170-06873
14
SEL. REC.
,072
07150-06013
,119
+,004
,076
07150-06113
,123
07170-06903
15
SEL. REC.
,092
07271-06414
,120
+,005
,097
07271-06514
,126
07150-06814
16
SEL. REC.
,092
07271-07414
,120
+,005
,097
07271-07514
,126
07150-07814
17
SEL. REC.
,110
07150-06015
,136
+,005
,115
07150-06115
,142
07170-06875
18
SEL. REC.
,110
07150-07015
,136
+,005
,115
07150-07115
,142
07170-07875
19
SEL. REC.
,120
07170-06805
,126
+,005
,124
07170-06825
,132
07170-06875
20
SEL. REC.
,120
07170-07805
,126
+,005
,124
07170-07825
,132
07170-07875
21
SEL. REC.
,141
07150-06016
,157
+,005
,146
07150-06116
,164
07170-06876
22
SEL. REC.
,141
07150-07016
,157
+,005
,146
07150-07116
,164
07170-07876
23
SEL. REC.
,150
07170-06806
,150
+,005
,1535
07170-06826
,156
07170-06876
24
SEL. REC.
,150
07170-07806
,150
+,005
,1535
07170-07826
,156
07170-07876
25
SEL. REC.
,179
07150-06018
,165
+,005
,183
07150-06118
,171
07150-06846
26
SEL. REC.
,179
07150-07018
,165
+,005
,183
07150-07118
,171
07150-07846
REPERE
13
2E AIGUILLE SURDIMENSIONNEE - BLEUE
TAILLE
DU TROU DIAMETRE
DU CONE
,079
+,008
3E AIGUILLE SURDIMENSIONNEE - ROUGE
REFERENCE
DE L'AIGUILLE
07150-06213
P.
MAXI
,126
TAILLE
DU TROU DIAMETRE
DU CONE
-
REFERENCE
DE L'AIGUILLE
-
P.
MAXI
-
REFERENCE
DU RESSORT
07170-06873
14
+,008
,079
07150-06213
,126
-
-
-
-
07170-06903
15
+,010
,102
07271-06614
,133
-
-
-
-
07150-06814
16
+,010
,102
07271-07614
,133
-
-
-
-
07150-07814
17
+,010
,120
07150-06215
,149
-
-
-
-
07170-06875
18
+,010
,120
07150-07215
,149
-
-
-
-
07170-07875
19
-
-
-
-
-
-
-
-
-
20
-
-
-
-
-
-
-
-
-
21
+,010
,151
07150-06216
,170
+,012
,153
07150-06316
,173
07170-06876
22
+,010
,151
07150-07216
,170
+,012
,153
07150-07316
,173
07170-07876
23
-
-
-
-
-
-
-
-
-
24
-
-
-
-
-
-
-
-
-
25
+,010
,189
07150-06218
,177
-
-
-
-
07150-06846
26
+,010
,189
07150-07218
,177
-
-
-
-
01750-07846
Ensembles de nez
Ty p e s d e c ô n e d ’ a i g u i l l e e t d i s t a n c e ‘ P ’
Les aiguilles pour Briv® en acier inoxydable se reconnaissent facilement au V gravé à l'extrémité des cônes d'aiguille.
Lors de l'utilisation de nez de pose courbes, il est nécessaire de courber les aiguilles à la main pour leur donner la même courbure que
le nez de pose, afin d'assurer une bonne alimentation des fixations.
P
CHOBERT®,
P
CONE COURT
(CHOBERT® ET
GROV® SEULEMENT)
GROV®,
AVSERT®, AVTRONIC®
P
P
BRIV®
(ACIER INOXYDABLE)
BRIV®
P
P
RIVSCREW®
AVLUG®
BRIV® - Metrique
1E AIGUILLE SURDIMENSIONNEE - JAUNE
TAILLE
REFERENCE
P.
DU TROU DIAMETRE
DU CONE
DE L'AIGUILLE
MAXI
AIGUILLE STANDARD - VERTE
REFERENCE
DE L'AIGUILLE
P.
MAXI
1,83
07150-06013
3,02
+,10
1,93
07150-06113
3,12
07170-06873
1,83
07150-06013
3,02
+,10
1,93
07150-06113
3,12
07170-06903
SEL. REC.
2,34
07271-06414
3,05
+,13
2,46
07271-06514
3,20
07150-06814
16
SEL. REC.
2,34
07271-07414
3,05
+,13
2,46
07271-07514
3,20
07150-07814
17
SEL. REC.
2,79
07150-06015
3,45
+,13
2,92
07150-06115
3,61
07170-06875
18
SEL. REC.
2,79
07150-07015
3,45
+,13
2,92
07150-07115
3,61
07170-07875
19
SEL. REC.
3,05
07170-06805
3,20
+,13
3,15
07170-06825
3,35
07170-06875
ACIER INOXYDABLE SEULEMENT
20
SEL. REC.
3,05
07170-07805
3,20
+,13
3,15
07170-07825
3,35
07170-07875
4,8 mm BRIV®
21
SEL. REC.
3,58
07150-06016
3,99
+,13
3,71
07150-06116
4,17
07170-06876
22
SEL. REC.
3,58
07150-07016
3,99
+,13
3,71
07150-07116
4,17
07170-07876
23
SEL. REC.
3,81
07170-06806
3,81
+,13
3,90
07170-06826
3,96
07170-06876
ACIER INOXYDABLE SEULEMENT
24
SEL. REC.
3,81
07170-07806
3,81
+,13
3,90
07170-07826
3,96
07170-07876
6 mm BRIV®
25
SEL. REC.
4,54
07150-06018
4,18
+,13
4,65
07150-06118
4,34
07150-06846
26
SEL. REC.
4,54
07150-07018
4,18
+,13
4,65
07150-07118
4,34
07150-07846
TAILLE
DU TROU DIAMETRE
DU CONE
FIXATION
REPERE
2,4 mm BRIV®
LAITON SEULEMENT
13
SEL. REC.
14
SEL. REC.
15
3,2 mm BRIV®
ALLIAGE D'ALUMINIUM, LAITON, ACIER
4,0 mm BRIV®
ALLIAGE D'ALUMINIUM, LAITON, ACIER
4,0 mm BRIV®
ALLIAGE D'ALUMINIUM, LAITON, ACIER
4,8 mm BRIV®
ALLIAGE D'ALUMINIUM, ACIER
FIXATION
2,4 mm BRIV®
LAITON SEULEMENT
2E AIGUILLE SURDIMENSIONNEE - BLEUE
TAILLE
REPERE
REFERENCE
P.
DU TROU DIAMETRE
DU CONE
DE L'AIGUILLE
MAXI
13
3,20
07150-06213
+,20
2,01
3E AIGUILLE SURDIMENSIONNEE - ROUGE
TAILLE
REFERENCE
P.
DU TROU DIAMETRE
DU CONE
DE L'AIGUILLE
MAXI
-
REFERENCE
DU RESSORT
REFERENCE
DU RESSORT
07170-06873
14
+,20
2,01
07150-06213
3,20
-
-
-
-
07170-06903
15
+,25
2,59
07271-06614
3,38
-
-
-
-
07150-06814
16
+,25
2,59
07271-07614
3,38
-
-
-
-
07150-07814
17
+,25
3,05
07150-06215
3,78
-
-
-
-
07170-06875
18
+,25
3,05
07150-07215
3,78
-
-
-
-
07170-07875
19
-
-
-
-
-
-
-
-
-
ACIER INOXYDABLE SEULEMENT
20
-
-
-
-
-
-
-
-
-
4,8 mm BRIV®
21
+,25
3,84
07150-06216
4,32
+,30
3,85
07150-06316
4,39
07170-06876
22
3,2 mm BRIV®
ALLIAGE D'ALUMINIUM, LAITON, ACIER
4,0 mm BRIV®
ALLIAGE D'ALUMINIUM, LAITON, ACIER
4,0 mm BRIV®
ALLIAGE D'ALUMINIUM, LAITON, ACIER
+,25
3,84
07150-07216
4,32
+,30
3,85
07150-07316
4,39
07170-07876
23
-
-
-
-
-
-
-
-
-
ACIER INOXYDABLE SEULEMENT
24
-
-
-
-
-
-
-
-
-
6 mm BRIV®
25
+,25
4,79
07150-06218
4,49
-
-
-
-
07150-06846
26
+,25
4,79
07150-07218
4,49
-
-
-
-
07150-07846
4,8 mm BRIV®
ALLIAGE D'ALUMINIUM, ACIER
19
Ensembles de nez
Avlug®, Avsert®, Avtronic® & Rivscrew® - Metrique et Mesures anglo-saxonnes
Pour choisir l'aiguille ou le ressort de l'aiguille, suivre les instructions de la page 48.
REPERE
FIXATION
3/32" AVLUG ®
1/8" AVLUG
®
2,5 mm, 4-40 UNC
AVSERT ®
3,0 mm, 6-32 UNC
AVSERT ®
2,5 mm AVTRONIC®
2,8 mm AVTRONIC®
TAILLE
DU TROU DIAMETRE
DU CONE
AIGUILLE STANDARD - VERTE
REFERENCE
DE L'AIGUILLE
P.
MAXI
1E AIGUILLE SURDIMENSIONNEE - JAUNE
TAILLE
REFERENCE
P.
DU TROU DIAMETRE
DU CONE
DE L'AIGUILLE
MAXI
REFERENCE
DU RESSORT
27
SEL. REC.
,076
07150-06603
,353
+,005
,081
07150-06703
,478
07150-06803
28
SEL. REC.
,076
07150-07603
,353
+,003
,079
07150-07703
,368
07150-07803
29
SEL. REC.
,098
07150-06604
,593
-
-
-
-
07150-06804
30
SEL. REC.
,098
07150-07604
,593
-
-
-
-
07150-07804
31
SEL. REC.
,0725
07150-06003
,145
-
-
-
-
07150-06803
32
SEL. REC.
,088
07150-06004
,185
-
-
-
-
07150-06804
33
SEL. REC.
,070
07170-06025
,140
+,003
,073
07170-06125
,140
07150-06803
34
SEL. REC.
,070
07170-07025
,140
+,003
,073
07170-07125
,140
07150-07803
35
SEL. REC.
,079
07170-06028
,150
+,003
,082
07170-06128
,150
07170-06528
36
SEL. REC.
,079
07170-06028
,150
+,003
,082
07170-06128
,150
07170-06873
37
SEL. REC.
,079
07170-07028
,150
+,003
,082
07170-07128
,150
07170-07528
2,8 mm RIVSCREW ®
38
SEL. REC.
* ,065
07271-06030
,127
-
-
-
-
07271-06630
3,0 mm RIVSCREW ®
39
SEL. REC.
* ,065
07271-06030
,127
-
-
-
-
07271-06630
3,5 mm RIVSCREW ®
40
SEL. REC. * ,0825
07271-06035
,132
-
-
-
-
07271-06635
4,0 mm RIVSCREW ®
41
SEL. REC.
* ,103
07271-06140
,150
-
-
-
-
07271-06640
* ces dimensions s'entendent entre m
FIXATION
3/32" AVLUG ®
1/8" AVLUG®
2,5 mm, 4-40 UNC
AVSERT ®
3,0 mm, 6-32 UNC
AVSERT ®
2,5 mm AVTRONIC®
2,8 mm AVTRONIC®
REPERE
2E AIGUILLE SURDIMENSIONNEE - BLEUE
TAILLE
P.
REFERENCE
DU TROU DIAMETRE
MAXI
DU CONE
DE L'AIGUILLE
3E AIGUILLE SURDIMENSIONNEE - ROUGE
TAILLE
REFERENCE
P.
DU TROU DIAMETRE
DU CONE
DE L'AIGUILLE
MAXI
REFERENCE
DU RESSORT
27
-
-
-
-
-
-
-
-
-
28
-
-
-
-
-
-
-
-
-
29
-
-
-
-
-
-
-
-
-
30
-
-
-
-
-
-
-
-
-
31
-
-
-
-
-
-
-
-
-
32
-
-
-
-
-
-
-
-
-
33
+,006
,076
07170-06225
,140
-
-
-
-
07150-06803
34
+,006
,076
07170-07225
,140
-
-
-
-
07150-07803
35
+,006
,085
07170-06228
,150
-
-
-
-
07170-06528
36
+,006
,085
07170-06228
,150
-
-
-
-
07170-06873
37
+,006
,085
07170-07228
,150
-
-
-
-
07170-07528
2,8 mm RIVSCREW ®
38
-
-
-
-
-
-
-
-
-
3,0 mm RIVSCREW ®
39
-
-
-
-
-
-
-
-
-
3,5 mm RIVSCREW ®
40
-
-
-
-
-
-
-
-
-
4,0 mm RIVSCREW ®
41
-
-
-
-
-
-
-
-
-
AIGUILLE STANDARD - VERTE
REFERENCE
DE L'AIGUILLE
07150-06603
P.
MAXI
8,97
27
28
SEL. REC.
1,93
07150-07603
8,97
+,10
2,01
07150-07703
9,35
07150-07803
29
SEL. REC.
2,49
07150-06604
15,06
-
-
-
-
07150-06804
30
SEL. REC.
2,49
07150-07604
15,06
-
-
-
-
07150-07804
31
SEL. REC.
1,84
07150-06003
3,68
-
-
-
-
07150-06803
32
SEL. REC.
2,24
07150-06004
4,70
-
-
-
-
07150-06804
33
SEL. REC.
1,78
07170-06025
3,56
+,07
1,85
07170-06125
3,56
07150-06803
34
SEL. REC.
1,78
07170-07025
3,56
+,07
1,85
07170-07125
3,56
07150-07803
35
SEL. REC.
2,01
07170-06028
3,81
+,07
2,08
07170-06128
3,81
07170-06528
36
SEL. REC.
2,01
07170-06028
3,81
+,07
2,08
07170-06128
3,81
07170-06873
37
SEL. REC.
2,01
07170-07028
3,81
+,07
2,08
07170-07128
3,81
07170-07528
2,8 mm RIVSCREW ®
38
SEL. REC.
* 1,65
07271-06030
3,23
-
-
-
-
07271-06630
3,0 mm RIVSCREW ®
39
SEL. REC.
* 1,65
07271-06030
3,23
-
-
-
-
07271-06630
3,5 mm RIVSCREW ®
40
SEL. REC.
* 2,10
07271-06035
3,35
-
-
-
-
07271-06635
4,0 mm RIVSCREW ®
41
SEL. REC.
* 2,62
07271-06140
3,81
-
-
-
-
07271-06640
2,4 mm AVLUG®
3,2 mm AVLUG®
2,5 mm, 4-40 UNC
AVSERT ®
3,0 mm, 6-32 UNC
AVSERT®
2,5 mm AVTRONIC ®
2,8 mm AVTRONIC®
REPERE
1E AIGUILLE SURDIMENSIONNEE - JAUNE
TAILLE
REFERENCE
P.
DU TROU DIAMETRE
DU CONE
DE L'AIGUILLE
MAXI
2,06
+,10
07150-06703
12,14
TAILLE
DU TROU DIAMETRE
DU CONE
SEL. REC. 1,93
FIXATION
REFERENCE
DU RESSORT
07150-06803
* ces dimensions s'entendent entre m
FIXATION
2E AIGUILLE SURDIMENSIONNEE - BLEUE
TAILLE
REFERENCE
P.
DU TROU DIAMETRE
DU CONE
DE L'AIGUILLE
MAXI
3E AIGUILLE SURDIMENSIONNEE - ROUGE
TAILLE
REFERENCE
P.
DU TROU DIAMETRE
DU CONE
DE L'AIGUILLE
MAXI
REFERENCE
DU RESSORT
27
-
-
-
-
-
-
-
-
-
28
-
-
-
-
-
-
-
-
-
29
-
-
-
-
-
-
-
-
-
30
-
-
-
-
-
-
-
-
-
31
-
-
-
-
-
-
-
-
-
32
-
-
-
-
-
-
-
-
-
33
+,15
1,93
07170-06225
3,56
-
-
-
-
07150-06803
34
+,15
1,93
07170-07225
3,56
-
-
-
-
07150-07803
35
+,15
2,16
07170-06228
3,81
-
-
-
-
07170-06528
36
+,15
2,16
07170-06228
3,81
-
-
-
-
07170-06873
37
+,15
2,16
07170-07228
3,81
-
-
-
-
07170-07528
2,8 mm RIVSCREW ®
38
-
-
-
-
-
-
-
-
-
3,0 mm RIVSCREW ®
39
-
-
-
-
-
-
-
-
-
3,5 mm RIVSCREW ®
40
-
-
-
-
-
-
-
-
-
4,0 mm RIVSCREW ®
41
-
-
-
-
-
-
-
-
-
2,4 mm AVLUG®
3,2 mm AVLUG ®
2,5 mm, 4-40 UNC
AVSERT ®
3,0 mm, 6-32 UNC
AVSERT ®
2,5 mm AVTRONIC®
2,8 mm AVTRONIC®
20
REPERE
E n t re t i e n d e l ’ o u t i l
L'entretien doit être effectué de façon régulière, et une révision approfondie doit avoir lieu chaque année ou tous les 500,000 cycles minimum.
I M P O R TA N T
Il appartient à l'employeur de faire en sorte que les instructions de maintenance des outils soient confiées aux
personnes compétentes. L'opérateur ne doit pas être impliqué dans la maintenance ou la réparation de l'outil, à
moins qu'il n'ait reçu la formation appropriée.
Chaque jour
•
•
•
•
•
•
Chaque jour, avant d'utiliser l'outil, ou lors de sa première mise en service, verser quelques gouttes d'une huile de lubrification
propre dans l'arrivée d'air de l'intensificateur, si l'alimentation pneumatique ne comporte pas d'huileur. Si l'outil est utilisé de façon
continue, débrancher le flexible de l'alimentation pneumatique, et lubrifier l'outil toutes les deux ou trois heures.
Rechercher les fuites d'air et d'huile. Les flexibles et raccords endommagés doivent être remplacés par des neufs.
S'il n'y a pas de filtre sur le régulateur de pression, purger la conduite d'air pour la débarrasser de toute accumulation de saletés
ou d'eau avant de raccorder le flexible à l'intensificateur. Si un filtre est monté, le purger.
Vérifier que l'équipement de pose monté est le bon.
Vérifier régulièrement les aiguilles en recherchant les traces d'usure ou de dommages, et en tenant le compte du nombre de
poses (voir les instructions de sécurité, page 34).
Vérifier que le couvercle de base est serré à fond sur le carter principal.
Chaque semaine
•
•
Suivre les procédures intégrales “quotidiennes” décrites ci-dessus.
Démonter, examiner, nettoyer et graisser les mâchoires d’aiguille (voir “Cylindre des mâchoires d’aiguille’ de la rubrique ‘Maintenance’,
page 54).
Graisse au Bisulfure de Molybdene EP 3753 Informations de Securite
La graisse peut être commandée séparément. Sa référence est indiquée dans le kit d'entretien, sur la page 53.
Premiers Secours
PEAU:
Cette graisse résistant parfaitement à l'eau, la meilleure façon de l'éliminer est d'employer un émulsifieur approuvé pour usage
cutané.
INGESTION:
Veiller à ce que le patient boive 30 ml de lait de magnésie, de préférence dans une tasse de lait.
YEUX:
Irritante, mais sans danger. Rincer à l'eau et faire appel à un médecin.
Incendie
POINT ECLAIR : supérieur à 220°C.
Non classé comme inflammable.
Agents d'extinction appropriés : CO2, Halon ou jet d'eau, si appliqué par une personne qualifiée.
Environnement
racler les dépôts. Les brûler ou les mettre en décharge sur un site approuvé.
Manutention
Utiliser une crème protectrice ou des gants résistant à l'huile.
Stockage
A l'écart de la chaleur et des agents oxydants.
21
E n t re t i e n d e l ’ o u t i l
Informations de Sécurité, Graisse Molykote® 55m
Premiers secours
PEAU:
Rincer à l'eau. Essuyer.
INGESTION:
Les mesures de premier secours ne sont normalement pas nécessaires.
YEUX:
Rincer à l'eau.
Incendie
POINT ECLAIR : supérieur à 101.1°C. (coupelle fermée)
Propriétés explosives : Aucune
Mousse de dioxyde de carbone, poudre sèche ou fine pulvérisation d'eau.
L'eau peut être utilisée pour refroidir les récipients exposés au feu.
Environnement
Veiller à ce que de grandes quantités de produit ne s'écoulent pas dans les égouts ou eaux de ruissellement.
Méthodes de nettoyage : Racler les dépôts puis les placer dans un récipient approprié doté d'un couvercle. Les écoulements de
produit rendent les surfaces extrêmement glissantes.
Présente un danger pour les organismes aquatiques et peut avoir des répercussions négatives durables sur l'environnement
aquatique. Toutefois, la forme physique et l'insolvabilité dans l'eau du produit rendent sa biodisponibilité négligeable.
Manutention
Aération générale recommandée. Eviter tout contact avec la peau ou les yeux.
Stockage
Ne pas stocker à proximité d'agents oxydants. Maintenir le couvercle sur le produit et stocker à l'abri de l'eau et de l'humidité.
Informations de Sécurité, Graisse Molykote® 111
Premiers secours
PEAU:
Les mesures de premier secours ne sont normalement pas nécessaires.
INGESTION:
Les mesures de premier secours ne sont normalement pas nécessaires.
YEUX:
Les mesures de premier secours ne sont normalement pas nécessaires.
INHALATION:
Les mesures de premier secours ne sont normalement pas nécessaires.
Incendie
POINT ECLAIR : supérieur à 101.1°C. (coupelle fermée)
Propriétés explosives : Aucune
Mousse de dioxyde de carbone, poudre sèche ou fine pulvérisation d'eau.
L'eau peut être utilisée pour refroidir les récipients exposés au feu.
Environnement
Aucun effet contraire anticipé.
Manutention
Aération générale recommandée. Eviter tout contact avec les yeux.
Stockage
Ne pas stocker à proximité d'agents oxydants. Maintenir le couvercle sur le produit et stocker à l'abri de l'eau et de l'humidité.
22
E n t re t i e n d e l ’ o u t i l
Kit d’entretien
Nous préconisons l'utilisation des kits d'entretien suivants pour tous travaux d'entretien.
®
®
®
23
E n t re t i e n
Tous les 500,000 cycles, ainsi qu'aux périodes recommandées, l'outil doit être entièrement démonté, et les composants usés ou endommagés doivent
être remplacés. Les joints toriques et étanchéités doivent être remplacés par des pièces neuves, lubrifiés à la graisse Molykote® 55m pour les joints
pneumatiques ou Molykote® 111 pour les joints hydrauliques.
I M P O R TA N T
Les instructions de sécurité figurent pages 34.
Il appartient à l'employeur de faire en sorte que les instructions de maintenance des outils soient confiées aux
personnes compétentes. L'opérateur ne doit pas être impliqué dans la maintenance ou la réparation de l'outil, à
moins qu'il n'ait reçu la formation appropriée.
Sauf indication contraire, l'alimentation pneumatique doit être débranchée avant toute opération d'entretien ou de démontage.
Il est recommandé d'effectuer tout démontage dans de bonnes conditions de propreté.
Avant de démonter l'outil, il est nécessaire d'enlever l'équipement de pose.
Pour procéder à l'entretien total de l'outil, nous vous conseillons de procéder au démontage des sous-ensembles en respectant
l'ordre indiqué.
Demontage de l’outil 07537-00200
DEPOSE DES PIECES MOULEES DE TETE
•
•
•
•
A la main, faire pivoter le Clip 48 et déposer l'obturateur 50.
A l'aide d'une clé Allen*, retirez les vis d'arrêt du corps moulé 2 et les écrous 7 du corps de l'outil, ainsi qu’une vis 97 du corps
moulé gauche 60.
Retirez le corps moulé droite et gauche 59 et 60.
Remonter dans l'ordre inverse du démontage.
ENSEMBLE PISTON PNEUMATIQUE
•
•
•
•
•
•
•
Bloquer le corps 72 de l'outil inversé transversalement par rapport aux bossages d'arrivée d'air dans un étau à mordaches.
Déposer le soufflet en caoutchouc 67.
A l'aide d'une clé à ergots*, dévisser le couvercle de base 73.
Dévisser les écrous de blocage 6 (x2) et déposer la plaque de base 77.
Déposer la chemise de cylindre 75 avec les rondelles d'étanchéité 78 (x2) et les joints toriques 9 (x2).
Déposer l'ensemble piston pneumatique 58 du carter principal 72, avec le joint torique, les joints à lèvre (au nombre de trois) et
la bague de guidage.
Remonter dans l'ordre inverse du démontage.
ENSEMBLE TIROIR DE VALVE
•
•
•
•
•
•
•
•
Déposer l'ensemble piston pneumatique 58 et l'ensemble joint d'intensificateur 71 en suivant les instructions fournies
précédemment.
A l'aide de la clé en 'T'* et de l'embout de clé en 'T'*, desserrer l'écrou de blocage 64 et le déposer avec la plaque supérieure
76, les colonnettes d'assemblage 74 et l'ensemble tube de transfert 69.
Retirer l'outil de l'étau, et séparer le carter principal 72, avec le joint torique 20, de l'ensemble poignée 57.
Retirer l'ensemble tête 56 de l'ensemble poignée 57 et déposer le joint torique 19 du tube d'intensificateur.
Pousser sur le siège de valve 62 pour l'extraire, avec les deux joints toriques 18 (au nombre de deux).
Déposer tous les composants de l'ensemble tiroir de valve 68.
Enlever enfin le joint torique 18 du logement cylindrique de la poignée.
Pour le remontage, inverser l'ordre de démontage en veillant à ce que l'orifice central du siège de valve 62 soit orienté vers le
haut, vers le joint torique 17.
GACHETTE
•
•
•
Avec le chasse-goupille* de 2 mm, chasser l'axe de gâchette 65 et dégager la gâchette 61 par le haut.
A l'aide de l'extracteur de valve pneumatique*, dévisser la valve de gâchette 24.
Remonter dans l'ordre inverse du démontage.
Se référer aux repères inclus dans les kits d'entretien 07900-05300 & 71210-99990. Pour la liste complète, voir la page 53.
Les numéros de repère en caractères gras renvoient à la rubrique Assemblage générale et liste de pièces des pages 56-57.
24
E n t re t i e n
Demontage de l’outil 07537-00200
CYLINDRE DES MACHOIRES D’AIGUILLE
•
•
•
•
•
•
•
•
•
•
•
•
•
A l’aide d’une clé Allen*, retirer une des vis à tête cylindrique 5, en veillant à bien purger l’air du cylindre des mâchoires d’aiguille.
Retirer l’autre vis à tête cylindrique 5.
Faire sortir l’obturateur arrière 47.
Extraire les composants des mâchoires d’aiguille pneumatiques, soit l’ensemble de piston de mâchoires d’aiguille 51, le ressort
35, les mâchoires 34 et le carter porte-mâchoires 41.
Retirer l’obturateur de l’arrière de l’ensemble piston à l’aide d’une clé Allen* et d’une barre insérée dans la grande fente de la tourelle.
Nettoyer la tourelle à l’aide d’un foret de 4,7 mm et replacer l’obturateur à l’aide d’un produit d’étanchéité non durcissant (comme
Loctite® Multi-gasket 574*).
Retirer le joint torique d’étanchéité de piston 10.
Serrer le canon 44 dans un étau équipé de mâchoires tendres*, pour éviter de l’endommager.
A l’aide d’une clé à tube*, dévisser le bouchon de canon 45 en empêchant le canon 44 de tourner, à l’aide d’une clé à fourche*.
Débrancher le tube en accordéon de mâchoire d'aiguille pneumatique 54 de l'ensemble tête et extraire le cylindre de mâchoires
d'aiguille 46 de l'outil.
Retirer le joint torique 13, la bande de frottement 40 et le ressort de rappel du canon 37.
La longueur sans charge du ressort 35 doit être de 38,1 mm. Le changer si nécessaire.
Enduire les mâchoires d’aiguille de graisse au bisulfure de molybdène avant de remonter.
Remonter en inversant la procédure de démontage.
PISTON HYDRAULIQUE
•
•
•
•
•
•
•
•
•
•
•
•
Déposer le cylindre de mâchoires d'aiguille 46 de la façon déjà décrite.
Bloquer l'ensemble tête 56 entre les mâchoires d'un étau, muni de mordaches* pour éviter tout risque de détérioration ; défaire
le limiteur de course 39.
A l'aide d'une clé Allen*, desserrer la vis 3 qui retient le bloc interrupteur 55 contre le canon 44.
A l'aide d'une clé Allen*, déposer le bloc interrupteur 55 et le joint torique 21, en dévissant la vis de serrage 4.
Tenir fermement l'outil et extraire le canon 44 du carter principal (une petite quantité de fluide hydraulique risque d'être éjectée de
l'intérieur du carter principal).
Enlever avec précaution le piston 38, pour éviter d'endommager l'alésage du carter.
Enlever le joint à lèvre 15.
Le joint à lèvre 16 est difficile à extraire sans le détériorer ; il peut être laissé en place pendant le nettoyage (s'il est jugé qu'il ne
court aucun risque consécutivement au processus de nettoyage). Si toutefois le remplacement du joint à lèvre 16 s'avère
nécessaire, procéder comme suit :
A l'aide d'une spatule*, extraire le joint à lèvre 16 de l'ensemble tête 56 en veillant à ne pas endommager la cavité de la tête et
les alésages. Le joint à lèvre 16 déposé DOIT être mis au rebut.
Pour remplacer le joint à lèvre 16, dévisser le bouchon de purge existant 43 jusqu'à ce que la face interne soit de niveau avec
l'alésage interne de l'ensemble tête 56. Cette précaution permet de dégager le passage en vue de l'insertion d'un joint à lèvre 16
neuf par l'arrière du carter principal.
Veiller à ce que le joint à lèvre 16 soit suffisamment graissé et inséré dans le bon sens, autrement dit, côté évasé du joint orienté
vers l'arrière des mâchoires d'aiguille.
Terminer le remontage dans l'ordre inverse du démontage.
VALVE MARCHE / ARRET DE MACHOIRES D’AIGUILLE
•
•
•
•
•
•
•
•
•
Cet ensemble est conçu pour ne nécessiter qu’un minimum d’entretien au cours de la durée de vie de l’outil.
Si le démontage de la valve s’avère nécessaire, procéder comme suit :
Déposer le bloc interrupteur 55 en suivant la procédure de la rubrique "Piston hydraulique.
A l’aide d’un tournevis*, enlever avec précaution la rondelle Starlock chromée 22 du tiroir pneumatique de mâchoires 49 et jeter
cette rondelle.
Extraire le tiroir pneumatique de mâchoires 49 du bloc interrupteur 55.
En veillant à ne pas endommager le tiroir pneumatique de mâchoires 49, retirer les joints toriques 11.
Nettoyer le tiroir et remonter des joints toriques 11 neufs à l’aide de la bille de montage* et l’insérer dans le bloc interrupteur 55,
en faisant attention à bien l’orienter.
Monter une rondelle Starlock chromée 22 neuve en serrant l’ensemble dans un étau équipé de mâchoires tendres, pour éviter de
l’endommager. NE PAS APPLIQUER UNE FORCE EXCESSIVE.
Terminer le remontage en inversant la procédure de démontage.
POIGNEE & OBTURATEUR
•
Nettoyer et examiner les pièces moulées à la recherche de fissuration ou autres dommages.
CURSEUR MECANIQUE
•
Nettoyer et huiler le curseur mécanique 36.
I M P O R TA N T
Pratiquer sur l'outil les vérifications et opérations correspondant à l'entretien quotidien et hebdomadaire.
Un plein d'huile est TOUJOURS nécessaire après démontage de l'outil et avant de l'utiliser.
* Correspond aux repères inclus dans les kits d'entretien 07900-05300 & 71210-99990. Pour la liste complète, voir la page 53.
Les numéros de repère en caractères gras renvoient à la rubrique Assemblage générale et liste de pièces des pages 56-57.
25
26
28
27
W
1
5
8
COUPE 'X'-'X'
48
47
50
22
37
23
42
40
39
38
67
75
94
88
93
95
73
72
64
96
59, 60
13
79
80
81
82
2, 7
11
49
10
35
51
46
45 36
3
W
34
8
5
COUPE 'W'-'W'
21
54
31 10
41
2, 7
90
19
20
71
57
20
15
91
43
56
92
16
A
A
2, 7
33
70
58 ENSEMBLE
PISTON
PNEUMATIQUE
14
89
69
32
24
61
65
78
18
18
30
66
4
X
97 Ref
55
X
29
44
9
77
COUPE 'A'-'A'
17
6
62 25
68
87
89
74
74
76
98
12
Assemblage général de l’outil de base 0 7 5 3 7 - 0 0 2 0 0
07001-00223
07001-00401
07001-00404
07001-00445
07001-00504
07002-00108
07002-00134
07002-00153
07005-01972
07005-10057
07007-00017
07007-00224
07007-01503
07007-01504
07008-00010
07151-00403
07154-00404
07271-01100
07490-03002
07530-00203
07530-00204
07530-00206
26
27
28
29
30
31
32
33
34
35
36
37
38
39
40
12 07003-00127
13 07003-00167
14 07003-00418
15 07003-00236
16 07003-00237
17 07003-00271
18 07003-00281
19 07003-00287
20 07003-00288
21 07003-00383
22 07004-00058
23 07004-00059
24 07005-00088
25 07005-01274
07003-00027
10 07003-00113
11 07003-00121
01
02
03
04
05
06
07
08
09
REFERENCE
QTE
2
3
VIS LONGUE M4 X 10 A TETE CYLINDRIQUE A SIX PANS CREUX
1
VIS DE PRESSION CREUSE LONGUE M5 x 6
1
VIS LONGUE M4 X 15 A TETE CYLINDRIQUE A SIX PANS CREUX
2
VIS LONGUE M4 X 6 A TETE CYLINDRIQUE A SIX PANS CREUX
2
DADO NYLOK M6
3
ECROU HEXAGONAL M4
2
RONDELLE M4 (PLASTIQUE)
2
JOINT TORIQUE
2
JOINT TORIQUE
2
JOINT TORIQUE
1
JOINT TORIQUE
1
JOINT TORIQUE
2
JOINT TORIQUE
1
JOINT A LEVRE (DYNAMIQUE)
2
JOINT A LEVRE (STATIQUE)
1
JOINT TORIQUE
3
JOINT TORIQUE
1
JOINT TORIQUE
2
JOINT TORIQUE
2
JOINT TORIQUE - (Diam. int. 3,00 Sec. 1,00)
1
RONDELLE STARLOCK CHROMEE 1/8"
1
RONDELLE STARLOCK NOIRE 1/8"
1
VALVE DE GACHETTE
1
OBTURATEUR BSP 1/8"
1
1
RACCORD FILETE EN L
1
CLAPET ANTI-RETOUR
1
CHAPEAU ANTI-POUSSIERE
2
GOUPILLE SPIRALEE Diam. 3 x 10
1
ICONE LIVRE OUVERT (NON ILLUSTREE)
ETIQUETTE CONFORMITE CE (NON ILLUSTREE) 1
FLEXIBLE 6"
1
MACHOIRES
2
RESSORT
1
CURSEUR MECANIQUE
1
RESSORT DE RAPPEL DU CANON
1
PISTON
1
LIMITEUR DE COURSE
1
BANDE DE FROTTEMENT
1
VIS CREUSE SANS TETE LONGUE M4 x 5
DESCRIPTION
LISTE DE PIECES 07537-00200
REPERE
1
2
-
-
2
2
1
1
-
46
-
77
78
79
80
72
73
74
75
76
67
68
69
70
71
62
63
64
65
66
51
52
53
54
55
56
57
58
59
60
61
47
48
49
50
44
45
71221-02006 RONDELLE D'ETANCHEITE
71221-20101 PIECE DE MOULURE DE COMPTEUR
71221-20102 VIS SPECIALE M4
71210-02055
71210-03400
07537-00810
71210-03700
SOUFFLET EN CAOUTCHOUC
ENSEMBLE TIROIR DE VALVE
ENSEMBLE TUBE DE TRANSFERT
ENSEMBLE VALVE MARCHE/ARRET
71210-03800 ENSEMBLE JOINT D'INTENSIFICATEUR
71211-02001 CARTER PRINCIPAL USINE
71211-02002 COUVERCLE DE BASE USINE
71211-02004 COLONNETTES D'ASSEMBLAGE
71211-02008 CHEMISE DE CYLINDRE
71213-02010 ENSEMBLE PLAQUE SUPERIEURE
71221-02005 RONDELLA DI TENUTA
71210-02014 ECROU DE BLOCAGE
71210-02024 AXE DE GACHETTE
71210-02031 SILENCIEUX
07537-00203
07537-00204
07537-00300
07537-00400
07537-00500
07537-00600
07537-00700
71210-02008
71210-02009
07530-02207
07530-02213
07530-02220
07530-02302
07530-02603
07530-02800
07537-00201
07537-00202
07530-02201
07530-02205
07530-0O500
43
2
-
1
1
1
1
1
2
1
1
1
2
1
2
-
-
-
-
93
94
95
96
97
98
91
92
86
87
88
89
90
82
83
84
85
81
RECHANGE REPERE
1
1
2
1
1
QTE
1
2
ENSEMBLE BOUCHON DE PURGE (ELEMENTS 83 à 86)
1
CANON
1
BOUCHON DE CANON
1
CYLINDRE DES MACHOIRES D'AIGUILLE
1
OBTURATEUR ARRIERE
1
CLIP
1
TIROIR PNEUMATIQUE DES MACHOIRES
1
OBTURATEUR
1
ENSEMBLE PISTON DE MACHOIRES D'AIGUILLE
1
ETIQUETTE (NON ILLUSTREE)
2
ETIQUETTE (NON ILLUSTREE)
1
TUBE PNEUMATIQUE EN ACCORDEON DES MACHOIRES D'AIGUILLE
1
BLOC INTERRUPTEUR
1
ENSEMBLE TÊTE
1
ENSEMBLE POIGNEE
1
ENSEMBLE PISTON PNEUMATIQUE (87 à 96)
1
ENSEMBLE PIECE MOULEE DE CARTER PRINCIPAL 07537 - DROIT
1
ENSEMBLE PIECE MOULEE DE CARTER PRINCIPAL 07537 - GAUCHE
1
GACHETTE
1
SIEGE DE VALVE
1
DESCRIPTION
-
REFERENCE
07530-00208 CARTER PORTE-MACHOIRES
07530-00310 OBTURATEUR
41
42
-
RECHANGE REPERE
REFERENCE
07003-00280
07003-00274
71211-03202
07537-00501
07001-00411
07007-01993
07002-00098
71221-20104
71210-03205
07001-00442
07002-00163
71221-20103
71221-20105
07003-0O142
07003-00194
07001-00442
07530-00501
71211-03201
QTE
2
1
1
1
1
1
1
1
JOINT TORIQUE
3
JOINT/ RACLETTE
1
TIGE D'INTENSIFICATEUR
1
ENTRETOISE
1
VIS A TETE FRAISEE M6 X 25
1
AIMANT A POLE CENTRAL
1
ECROU NYLOK M5
1
VIS A TETE FRAISEE M5 X 19
1
BAGUE GUIDE
VIS HEXAGONALE M5 X 6 LONGUE PRISE 1
2
RONDELLE
DESCRIPTION
ECROU DE RETENUE DE MOULURE
COMPTEUR MODIFIE
JOINT D'ETANCHEITE
JOINT D'ETANCHEITE
VIS
BOUCHON
PISTON
-
-
1
1
1
-
RECHANGE
Liste de pièces de l’outil de base 0 7 5 3 7 - 0 0 2 0 0
27
Plein d’huile
Le plein d’huile est TOUJOURS nécessaire après un démontage de l'outil et avant toute utilisation. Il peut également être utile pour restaurer la
totalité de la course après une utilisation prolongée, si l'on constate que la course diminue et que les fixations ne sont pas complètement
posées en une seule action sur la gâchette.
Huile
L'huile recommandée est la Hyspin® VG 32, qui existe en bidons de 0,5 litre, (référence 07992-00002), ou d'1 gallon (4,5 litres), (référence
07992-00006). Voir ci-dessous le tableau des caractéristiques et des mesures de sécurité.
Information de Securite Hyspin® VG 32 et AWS (Huile)
Premiers Secours
PEAU:
Laver soigneusement, à l'eau et au savon, dès que possible. Un contact occasionnel ne requiert pas de soins immédiats. Un contact de courte
durée ne requiert pas de soins immédiats.
INGESTION:
Faire appel immédiatement à des soins médicaux. NE PAS faire vomir le patient.
YEUX
Rincer immédiatement à l'eau courante pendant plusieurs minutes. Quoique cette huile ne soit pas très irritante, une légère irritation peut
apparaître suite au contact.
Incendie
Agents d'extinction appropriés : CO2, poudre sèche, mousse ou brouillard d'eau. NE PAS employer de jet d'eau.
Environnement
MISE EN DECHARGE : Sur site homologué par les soins d'une société agréée. Peut être incinérée. Le produit usagé peut être recyclé.
PRODUIT REPANDU : Empêcher la contamination par le produit des évacuations, égouts et cours d'eau. Eponger avec une substance absorbante.
Manipulation
Porter une protection oculaire, des gants imperméables (PVC, par exemple), et un tablier plastique. Employer dans des locaux bien aérés.
Stockage
Pas de précautions particulières.
Pump Pour Plein D’huile
La procédure de plein d'huile ci-contre vous obligera à vous munir d'une pompe pour plein d'huile 07900-00700 :
28
Plein d’huile
P ro c e d u r e d e P l e i n D ’ h u i l e
I M P O R TA N T
DÉBRANCHER L'ALIMENTATION PNEUMATIQUE DE L'OUTIL, OU COUPER L'AIR A LA VALVE 70.
Toutes les opérations doivent être effectuées sur un établi propre, avec les mains propres, dans un local propre.
Veiller à ce que l’huile de rechange soit parfaitement propre et exempte de bulles d’air.
Des précautions DOIVENT être prises à tous moments pour éviter la pénétration de corps étrangers dans l’outil et tout
risque consécutif de détérioration irréversible.
•
Enlever la vis de purge 85 et le joint d'etancheite 84.
•
Raccorder l'alimentation pneumatique à l'outil et placer la valve marche/arrêt 70 sur MARCHE.
•
Renverser l'outil au-dessus d'un récipient et actionner la gâchette. L'huile est éjectée par l'orifice de la vis de purge.
VEILLER A NE PAS ORIENTER L'ORIFICE DE PURGE EN DIRECTION DE L'OPERATEUR OU D'AUTRES PERSONNES.
•
Débrancher l'alimentation pneumatique de l'outil, ou mettre la valve de marche/arrêt 70 sur ARRET.
•
Remplir la pompe d'huile.
•
Visser la pompe de plein d'huile 07900-00700 sur l'orifice de la vis de purge, avec le joint d'etancheite 84 en place.
•
Actionner la pompe en appuyant vers le bas et en relâchant à plusieurs reprises jusqu'à sentir une résistance.
•
Enlever la pompe et l'écrou d'arrêt.
•
Remettre en place la vis de purge 85 le joint d'etancheite 84.
•
Raccorder l'alimentation pneumatique à l'outil et placer la valve marche/arrêt 70 sur MARCHE.
•
Vérifier que la course de l'outil correspond à la spécification minimum, soit 30 millimètres. Pour mesurer la course, mesurer la
distance entre l'arrière du cylindre des mâchoires d'aiguille et les pièces moulées de carter principal AVANT d'appuyer sur la
gâchette puis lorsque la gâchette est entièrement actionnée. La course correspond à la différence entre les deux relevés. Si la
course ne correspond pas à la spécification minimum, répéter la procédure de plein d'huile.
Les numéros de repère en caractères gras renvoient à la rubrique Assemblage générale et liste de pièces des pages 66-71.
29
Diagnostic des Defauts
Symptome
Cause Possible
Remede
Ref de Page
L'outil ne parvient
Faible pression d'air
Augmenter la pression d'air
pas à poser les
Manque de lubrification
Lubrifier l'outil et son orifice d'entrée d'air
fixations
Force de mandrinage excessive
Vérifier la prise de la fixation et la taille du
trou de l'application
Vérifier la taille de l'aiguille
Mâchoires d’aiguille usées ou brisées
Changer les mâchoires d'aiguille
Mâchoire d'aiguille désactivée
Activer la mâchoire d'aiguille
Présence d’air dans le circuit hydraulique
Voir “procédure de plein d’huile”
Echappement de
Mâchoires d’aiguille usées ou encrassées
Nettoyer ou changer selon les besoins
l'aiguille : les
Pression ou débit d'air insuffisants
Augmenter la pression ou le débit d'air
mâchoires ne
L'interrupteur de serrage mâchoires ne
Changer l'interrupteur
saisissent pas
fonctionne pas
l'aiguille
Fuites d’air aux mâchoires d’aiguille
29
Remplacer les joints toriques 10 de
l'ensemble piston 51
Aiguille cassée et n'atteignant pas les
Changer l'aiguille
mâchoires d'aiguille
Clapet anti-retour défectueux
Changer le clapet anti-retour
Les mâchoires ne
Mâchoires d’aiguille ou carter porte-
Nettoyer ou lubrifier
lâchent pas l'aiguille
mâchoires encrassés
Interrupteur de mâchoires d'aiguille
Changer les joints toriques
défectueux
Défaut d'introduction
Mâchoires d'aiguille non activées
Activer les mâchoires d'aiguille
des fixations dans les
Mâchoires d'aiguille usées
Changer les mâchoires d'aiguille
nez de pose
Mauvaise orientation du curseur mécanique
Remonter en rectifiant l'orientation
Mauvais nez de pose
Monter le bon nez de pose
Ressort de l'aiguille manquant
Monter le bon ressort d'aiguille
Mauvais jeu entre tête de fixation et nez de
Régler le jeu entre 1,5 et 3 mm.
pose au chargement
Voir "Chargement de l'outil"
Curseur mécanique grippé
Nettoyer et huiler le curseur mécanique
Faiblesse du ressort extérieur entourant le
Changer le curseur mécanique
10
curseur mécanique
Usure excessive de la
Le ressort de l'aiguille n'est pas le bon
Monter le bon ressort d'aiguille
Force de mandrinage excessive
Vérifier la taille du trou et l'épaisseur de
l'application, et la capacité de prise des
mâchoire d'aiguille
fixations
Passage de plus d'une Echappement de l'aiguille
Mêmes vérifications que pour
fixation à la fois
Echappement de l'aiguille
Mauvais jeu entre tête de fixation et nez de
Régler le jeu entre 1,5 et 3 mm.
pose au chargement
Voir "Chargement de l'outil"
10
Les autres symptômes ou pannes doivent être signalés à votre distributeur Avdel agréé ou centre de réparation le plus proche.
30
Déclaration de conformité
Nous, Avdel UK Limited; Watchmead Industrial Estate, Welwyn Garden City, Hertfordshire, AL7 1LY
Royaume-Uni, déclarons sous notre seule responsabilité que le produit:
Modèle 07537
N° de série
faisant l'objet de la présente déclaration est conforme aux normes suivantes :
EN ISO 12100 - parties 1 et 2
BS EN ISO 8662 - partie 6
BS EN ISO 11202
BS EN ISO 3744
BS EN 982
ISO EN 792 - partie 13-2000
BS EN 983
selon les dispositions de la Directive 2006/42/CE concernant le rapprochement des législations des États membres relatives
aux machines.
A. Seewraj - Directeur, Services techniques de fabrication - outils d'automation
Date d'émission
Cette boîte contient un outil pneumatique en conformité
avec la Directive sur les machines 2006/42/EC.
La "Déclaration de conformité" est jointe.
Since 1936
2010
AUSTRALIA
Infastec (Australia) Pty Ltd.
891 Wellington Road
Rowville
Victoria 3178
Tel: +61 3 9765 6400
Fax: +61 3 9765 6445
[email protected]
GERMAN
Avdel Deutschland GmbH
Rotenburger Str. 28
30659 Hannover
Tel: +49 (0) 511 7288 0
Fax: +49 (0) 511 7288 133
[email protected]
CANADA
Avdel Canada Limited
1030 Lorimar Drive
Mississauga
Ontario L5S 1R8
Tel: +1 905 364 0664
+800 268 9947
Fax: +1 905 364 0678
+800 594 7661
[email protected]
INDIA
Infastech Fastening Technologies
India Private Limited
Plot No 0Z-14, Hi Tech SEZ,
SIPCOT Industrial Growth Center,
Oragadam, Sriperumbudur Taluk,
Kanchipuram District,
602105 Tamilnadu
Tel: +91 44 4711 8001
Fax: +91 44 4711 8009
info-in@infastech. com
T
CHINA
Infastech (China) Ltd
RM 1708, 17/F.,
Nanyang Plaza,
57 Hung To Rd., Kwun Tong
Hong Kong
Tel: +852 2950 0631
Fax: +852 2950 0022
[email protected]
FRANCE
Avdel France S.A.S.
Bat. Le Monet Paris Nord 2
9 Allée des Impressionistes
CS 59328 Villepinte
95941 Roissy CDG Cedex
Tel: +33 (0) 149 909500
Fax: +33 (0) 149 909550
[email protected]
T
ITALY
Avdel Italia S.r.L.
Viale Lombardia 51/53
20861 Brugherio (MB)
Tel: +39 039 2879911
Fax: +39 039 2873079
[email protected]
JAPAN
Infastech Kabushiki Kaisha
Center Minami SKY,
3-1 Chigasaki-Chuo, Tsuzuki-ku,
Yokohama-city,
Kanagawa Prefecture
Japan 224-0032
Tel: +81 45 947 1200
Fax: +81 45 947 1205
[email protected]
Manual No.
Issue
Change Note No.
07900-00845
B7
13/112
MALAYSIA
Infastech (Malaysia) Sdn Bhd
Lot 63 Persiaran Bunga
Tanjung 1,
Senawang Industrial Park
70400 Seremban
Negeri Sembilan
Tel: +606 676 7168
Fax: +606 676 7101
[email protected]
SINGAPORE
Infastech (Singapore) Pte Ltd.
31 Kaki Bukit Road 3
#05-03/06 Techlink
Singapore, 417818
Tel: +65 6372 5653
Fax: +65 6744 5643
[email protected]
SOUTH KOREA
Infastech (Korea) Ltd.
32-9, Jik-dong,
Gwangju-si, Gyeonggi-do
Korea, 464-090
Tel: +82 31 661 6342
+82 31 798 6340
Fax: +82 31 798 6342
[email protected]
SPAIN
Avdel Spain S.A
C/ Puerto de la
Morcuera, 14
Poligono Industrial Prado
Overa
Ctra. de Toledo, km 7,8
28919 Leganés (Madrid)
Tel: +34 91 3416767
Fax: +34 91 3416740
[email protected]
TAIWAN
Infastech/Tri-Star Limited
No 269-7, Baodong Rd,
Guanmiao Dist.
Tainan City
Taiwan, R.O.C. 71841
Tel: +886 6 596 5798 (ext 201)
Fax: +886 6 596 5758
[email protected]
THAILAND
Infastech Thai Co., Ltd
64/132 Moo 4 Tambon
Pluakdaeng
Amphur Pluakdaeng Rayong
21140 Thailand
Tel: +66 (0) 38 656360
Fax: +66 (0) 38 656346
info-th@infastech. com
UNITED KINGDOM
Avdel UK Limited
Pacific House
2 Swiftfields
Watchmead Industrial Estate
Welwyn Garden City
Hertfordshire AL7 1LY
Tel: +44 (0) 1707 292000
Fax: +44 (0) 1707 292199
[email protected]
USA
Avdel USA LLC
614 NC Highway 200 South
Stanfield, North Carolina 28163
Tel: +1 704 888 7100
Fax: +1 704 888 0258
[email protected]
Infastech (Decorah) LLC
1304 Kerr Drive
Decorah, IA 52101
Tel: +1 563 383 4216
Fax: +1 563 387 3540
www.avdel-global.com
www.infastech.com
AV™, Autosert ® (equipment), Avbolt ®, Avdel ®, Avdelmate ®, Avdel TX2000 ®, Avdelok ®, Avex ®, Avibulb®, Avinox®, Avinut ®, Avlug ®, Avmatic ®,
Avplas®, Avseal ®, Avsert ®, Avtainer ®, Avtronic ®, Briv ®, Bulbex ®, Chobert ®, Eurosert ®, Fastriv ®, Finsert ®, Genesis ®, Grovit ®, Hemlok®, Hexsert ®,
Holding your world together ®, Hydra ®, Infalok ®, Interlock ®, Klamp-Tite ®, Klamptite KTR ®, Kvex ®, Maxlok ®, Monobolt ®, Monob ulb®, Neobolt ®,
Nutsert ®, Nutsert SQ ®, Portariv ®, Rivmatic ®, Rivscrew ®, Speed Fastening ®, Squaresert ®, Stavex ®, Supersert® , Thin Sheet Nutsert ®, Titan ®,
T- Lok ®, TLR ®, TSN ®, TX2000 ®, Versa- Nut ®, Viking ® and Viking 360 ® are trademarks of Avdel UK Limited. eRiv™, Infastech ®, NeoSpeed ® and
Our Technology, Your Success™ are trademarks of Infastech Intellectual Properties Pte Ltd. The names and logos of other companies
mentioned herein may be trademarks of their respective owner s.
This document is for informational purposes only. Infastech makes no warranties, expressed or implied, in this document.
Data shown is subject to change without prior notice as a result of continuous product development and improvement policy.
Your local Avdel representative is at your disposal should you need to confirm latest information.
© 2012 Infastech
Since 1922
Instruction Manual
07
53
7
Original Instruction
0753
Genesis® 07537
H y d ro - P n e u m a t i c P o w e r To o l
7
Contents
Safety Rules
4
Specifications
Specification for 7537 Tool
Tool Dimensions
5
5
Intent of Use
6
Putting into Service
Air Supply
Mechanical Cursors
Cursor
Loading and Reloading the Tool
Loading the Tool
Reloading the Tool
Operating Procedure
Mandrel Follower Springs Identification
and Orientation
7
8
9
9
10
10
10
11
Nose Assemblies
Nose Jaws
Selecting a Nose Jaw
Nose Jaw Selection - Imperial
Nose Jaw Selection - Metric
Mandrels and Mandrel Follower Springs
Chobert® and Grovit® - Imperial
Chobert® and Grovit® - Metric
Briv® - Imperial
Mandrel Head Types and ‘P’ Length
Briv® - Metric
Avlug®, Avsert®, Avtronic® and Rivscrew®
Imperial and Metric
Servicing the Tool
Daily
Weekly
MolyLithium Grease EP 3753 Safety Data
Molykote® 55m Grease Safety Data
Molykote® 111 Grease Safety Data
Service Kits
Maintenance
Dismantling 07537-00200
General Assembly and Parts List 07537-00200
24-25
26-27
Priming
Oil Details
Hyspin® VG 32 and AWS 32 Oil Safety Data
Priming Pump
Priming Procedure
28
28
28
29
Fault Diagnosis
Symptom, Possible Cause and Remedy
30
12
13
14
15
16
16
17
18
19
19
20
21
21
21
22
22
23
LIMITED WARRANTY
Avdel makes the limited warranty that its products will be free of defects in workmanship and materials
which occur under normal operating conditions. This Limited Warranty is contingent upon: (1) the product
being installed, maintained and operated in accordance with product literature and instructions, and (2)
confirmation by Avdel of such defect, upon inspection and testing. Avdel makes the foregoing limited
warranty for a period of twelve (12) months following Avdel’s delivery of the product to the direct purchaser
from Avdel. In the event of any breach of the foregoing warranty, the sole remedy shall be to return the
defective Goods for replacement or refund for the purchase price at Avdel’s option. THE FOREGOING
EXPRESS LIMITED WARRANTY AND REMEDY ARE EXCLUSIVE AND ARE IN LIEU OF ALL OTHER WARRANTIES
AND REMEDIES. ANY IMPLIED WARRANTY AS TO QUALITY, FITNESS FOR PURPOSE, OR MERCHANTABILITY
ARE HEREBY SPECIFICALLY DISCLAIMED AND EXCLUDED BY AVDEL.
Avdel UK Limited policy is one of continuous product development and improvement and we reserve the right to change the specification of any product without prior notice.
3
Safety Rules
This instruction manual must be read with particular attention to the following safety rules, by any person
installing, operating, or servicing this tool.
1
Do not use outside the design intent.
2
Do not use equipment with this tool/machine other than that recommended and supplied by Avdel UK Limited.
3
Any modification undertaken by the customer to the tool/machine, nose assemblies, accessories or any equipment supplied by Avdel
UK Limited. or their representatives, shall be the customer’s entire responsibility. Avdel UK Limited. will be pleased to advise upon any
proposed modification.
4
The tool/machine must be maintained in a safe working condition at all times and examined at regular intervals for damage and
function by trained competent personnel. Any dismantling procedure shall be undertaken only by personnel trained in Avdel UK
Limited procedures. Do not dismantle this tool/machine without prior reference to the maintenance instructions. Please contact Avdel
UK Limited. with your training requirements.
5
The tool/machine shall at all times be operated in accordance with relevant Health and Safety legislation. In the U.K. the “Health and
Safety at Work etc. Act 1974” applies. Any question regarding the correct operation of the tool/machine and operator safety should
be directed to Avdel UK Limited.
6
The precautions to be observed when using this tool/machine must be explained by the customer to all operators.
7
Always disconnect the airline from the tool/machine inlet before attempting to adjust, fit or remove a nose assembly.
8
Do not operate a tool/machine that is directed towards any person(s) or the operator.
9
Always adopt a firm footing or a stable position before operating the tool/machine.
10 Ensure that vent holes do not become blocked or covered and that hoses are always in good condition.
11 The operating pressure shall not exceed 7 bar (100 lbf/in2).
12 The combination of fastener, mandrel, hole size and sheet thickness shall be in accordance with Avdel UK Limited. Specifications.
13 Do not operate the tool if it is not fitted with a complete nose assembly unless specifically instructed otherwise.
14 When using the tool, the wearing of safety glasses is required both by the operator and others in the vicinity to protect against
fastener ejection, should a fastener be placed ‘in air’. We recommend wearing gloves if there are sharp edges or corners on the
application.
15 Take care to avoid entanglement of loose clothes, ties, long hair, cleaning rags etc. in the moving parts of the tool which should be
kept dry and clean for best possible grip.
16 When carrying the tool from place to place keep hands away from the trigger/lever to avoid inadvertent startup.
17 Excessive contact with hydraulic oil should be avoided. To minimize the possibility of rashes, care should be taken to wash
thoroughly.
I M P O R TA N T
While a small amount of wear and marking will naturally occur through normal and correct use of mandrels,
they must be regularly examined for excessive wear and marking, with particular attention to the head
diameter, the tail jaw gripping area of the shank or heavy pitting of the shank and any mandrel distortion.
Mandrels which fail during use could forcibly exit the tool. It is the customer's responsibility to ensure that
mandrels are replaced before any excessive levels or wear and always before the maximum recommended
number of placings. Contact your Avdel representative who will let you know what that figure is by measuring
the broach load of your application with a calibrated test tool. These tools can also be purchased under Part
Number 07900-09080, supplied with all necessary information for testing in this manual.
4
Specifications
S p e c i f i c a t i o n f o r 0 7 5 3 7 To o l
Air Pressure
Minimum - Maximum
5-7 bar (70-100 lbf/in2)
Free Air Volume Required
@ 5.1 bar /75 lbf/in2
2.6 litres (0.09 ft3)
Stroke
Minimum
28.0 mm (1.10 in)
2
Pull Force
@ 5.5 bar /80 lbf/in
3.89 kN (875 lbf)
Cycle time
Approximately
1 second
Noise Level
Less than
70 dB(A)
Weight
Tool
2.3 kg (5.06 lb)
Vibration
Less than
2.5 m/s2 (8 ft/s2)
To o l D i m e n s i o n s
Part Number 07537-00200
60
2.36
475
18.70
53
07
50
1.96
7
338
13.30
163 140
6.41 5.51
98
3.85
121
51
2
075
37
120
150
110
5
Intent of Use
The pneumatic 07537 tool is a handheld lightweight tool designed to place Avdel® speed fasteners (except 1/16” Avlug®) making it
ideal for batch or flow-line assembly in a wide variety of applications throughout all industries.
Part numbers are shown to order a complete tool but no nose equipment.
The tool part number for the 07537 model is 07537-00200. See the general assemblies on pages 26-27.
The tool will place most repetition fasteners, as shown in the table below.
The tool is used with specific nose equipment. Reference must be made to the Nose Equipment section of the manual when selecting
compatible components for the type and size of fastener used in your application (see pages 12-20). Nose jaw dimensions are shown
on page 13.
FASTENER SIZE
FASTENER NAME
3/32"
1/8"
5/32"
3/16"
CHOBERT®
●
●
●
●
GROVIT®
●
●
●
●
AVLUG®
●
●
BRIV®
●
●
●
●
2.5mm
2.8mm
3mm
3.5mm
4mm
●
●
6mm
M2.5
4-40
UNC
M3
6-32
UNC
●
●
RIVSCREW®
●
AVTRONIC®
●
AVSERT®
6
1/4"
●
●
●
Putting into Service
Air Supply
All tools are operated with compressed air at an optimum pressure of 5.5 bar. We recommend the use of pressure regulators and
filtering systems on the main air supply. These should be fitted within 3 metres of the tool (see diagram below) to ensure maximum
tool life and minimum tool maintenance.
Air supply hoses should have a minimum working effective pressure rating of 150% of the maximum pressure produced in the system
or 10 bar, whichever is the highest. Air hoses should be oil resistant, have an abrasion resistant exterior and should be armoured
where operating conditions may result in hoses being damaged. All air hoses MUST have a minimum bore diameter of 6.4 millimetres
or 1/4 inch.
Read servicing daily details page 21.
STOP COCK
(USED DURING MAINTENANCE
OF FILTER/REGULATOR UNIT)
TAKE OFF POINT
FROM
MAIN SUPPLY
3 METRES MAXIMUM
0 2 4
1416
12
6 8 10
MAIN SUPPLY
DRAIN POINT
07 53 7
PRESSURE REGULATOR
AND FILTER (DRAIN DAILY)
7
Putting into Service
07
53
7
Mechanical Cursors
SPRING
LOADED END
TOOL
BARREL
0753
7
CURSOR
NOSE
JAWS
For reference there are three different mechanical cursor types:
•
•
•
07271-01100
07279-05843
07279-05845
Used for Standard mandrels and 5/32” Disposable mandrels
Used for 1/8” Disposable mandrels
Used for 3/16” Disposable mandrels
The difference in the above assemblies is the internal diameter of the End Plug.
END PLUG
These are colour coded see below:
8
MECHANICAL CURSOR
PART NO.
END PLUG
PART NO.
COLOUR
HOLE DIAMETER
(mm)
07271-01100
07150-00402
PLAIN STEEL
2.7
07279-05843
07159-05844
GOLD
2.2
07279-05845
07159-05846
SILVER
3.3
Putting into Service
Cursor
IMPORTANT
If fitted incorrectly, the cursor will not allow feeding of the fasteners.
While the cursor will be fitted the correct way round when the tool is supplied, we recommend that you check its orientation before
fitting the nose equipment. The sprung loaded, slightly concave, end of the cursor should point towards the front of the tool as shown
in the illustration.
When fitted the correct way round, the cursor will easily slide out of the barrel when a mandrel is pushed into its centre then pulled
back.
To reverse the orientation of the cursor, follow these steps:
Item numbers in bold refer to the general assembly and parts list for
the 07537-00200 on pages 26-27.
CURSOR
SPRING
LOADED END
•
Remove the clip 48 and slide off end cap 50.
•
Using an Allen Key, remove one cap head screw 5 ensuring that
any trapped air is exhausted. remove the second cap head screw
5.
•
Pull out rear plug 47.
•
Pull out tail jaw piston assembly 51 together with jaws 34.
•
Lift out spring 35 and jaw housing 41.
•
Insert a mandrel into the hole in the rear end of barrel 44 until it protrudes through the front of the barrel, then pull out the
mandrel and cursor together through the front.
•
Reassemble components in reverse order.
•
Insert Mechanical Cursor Assembly 36 into the front of the barrel, correct way round.
TOOL
BARREL
NOSE
JAWS
L o a d i n g a n d R e l o a d i n g t h e To o l
IMPORTANT
The procedure for loading the tool and for fitting the nose equipment to the tool is integral.
When ordering a complete tool or system you will normally be supplied with all the nose equipment required for the fastener to be
placed.
To identify nose equipment components or to select the correct elements, read the nose equipment section, on pages 12-20.
If you have been supplied with a nose jaw, mandrels and mandrel follower springs proceed with loading the tool and fitting the nose
equipment as shown overleaf.
Item numbers in bold refer to the general assembly and parts list for the 07537-00200 on pages 26-27.
9
Putting into Service
L o a d i n g t h e To o l
•
Connect the air supply to the tool.
•
Open tail jaws 34 which grip the mandrel, by switching off the tail jaw switch (items 22 and 23).
•
Screw selected nose jaws onto barrel 44 of the tool.
•* Insert a mandrel into the tail end of the fasteners through the paper pod.
•
Slide the mandrel follower spring onto the mandrel ensuring correct orientation, as shown in the table on page 11.
•
Gripping the tail end of the mandrel, tear off the paper pod from around the fasteners.
•
Open the nose jaws either by rotating the outer ring on Cam operated jaws or by pushing outwards on the jaw ends, as illustrated
below left.
•
Insert the previously assembled mandrel, mandrel follower spring and fasteners into the nose jaws until the first fastener to be
placed is protruding from the nose jaw.
•
Close the nose jaws and adjust so that the first fastener protrudes by 1.5mm - 3mm (1/16” to 1/8”), as shown in the illustration
below right.
•
Close the tail jaws to ensure the mandrel is gripped, by switching on the tail jaw switch (items 22 and 23).
1.5mm - 3mm
(1/16" - 1/8")
R e l o a d i n g t h e To o l
•
Open tail jaws 34 of tool.
•
Open the nose jaws and pull the empty mandrel and mandrel follower spring out of the tool.
•
Reload the tool by following the above instructions, starting at stage •*.
O p e r a t i n g P ro c e d u r e
IMPORTANT
You must check that the cursor orientation and the nose equipment are correct before attempting to operate the
tool.
•
Push the fastener, protruding from the nose jaws, fully into the application holes ensuring that the tool is held square.
•
Operate the trigger without releasing - the mandrel head is pulled through the fastener, forming the fastener into the application.
•
Remove the tool.
•
Release the trigger. The next fastener will be automatically presented through the nose jaws, ready for placing.
Item numbers in bold refer to the general assembly and parts list for the 07537-00200 on pages 26-27.
10
Putting into Service
MANDREL FOLLOWER SPRINGS IDENTIFICATION AND ORIENTATION
FASTENER
NAME
NOSE JAW
SIZE
(SEE NOSE EQUIPMENT SECTION)
MANDREL
SIZE
MANDREL/MANDREL FOLLOWER SPRING
AND FASTENER ASSEMBLY
MANDREL FOLLOWER SPRING
3/32"
MANDREL HEAD
STANDARD TAPERED
FERRULE
MANDREL
ALL
SPRING
BRIV ®
3/32"
LIMITED ACCESS &
LIMITED ACCESS CAM OPERATED
ALL
1/8"
ALL
ALL
5/32"
ALL
ALL
3/16"
ALL
ALL
6mm
STANDARD
ALL
EXCEPT 3rd
OVERSIZE
3/32"
ALL EXCEPT
STANDARD TAPERED,
LIMITED ACCESS
ALL
3/32"
STANDARD TAPERED,
LIMITED ACCESS
ALL
1/8"
ALL
ALL
5/32"
ALL
ALL EXCEPT
3rd
OVERSIZE
5/32"
ALL
3rd
OVERSIZE
3/16"
ALL
ALL EXCEPT
2nd
OVERSIZE
3/16"
ALL
2nd
OVERSIZE
1/4"
ALL
ALL
ALL
ALL
ALL
ALL
ALL
ALL
6 x 32
UNC
ALL
ALL
2.5mm
ALL
ALL
2.8mm
ALL EXCEPT
LIMITED ACCESS
ALL
2.8mm
LIMITED ACCESS
ALL
CHOBERT ®
AVLUG ®
GROVIT ®
CHOBERT ®
GROVIT ®
CHOBERT ®
2.8mm
RIVSCREW ®
3mm
3.5mm
4mm
2.5mm
AVSERT ®
4 x 40
UNC
3mm
AVTRONIC ®
11
Nose Assemblies
On speed fastening tools such as 0753 MkII type, the nose equipment always consists of three elements: a nose jaw, a mandrel and a
mandrel follower spring. All three items are matched to the fastener being placed and to the hole size in the application.
I M P O R TA N T
To avoid complete dismantling of the tool it is essential to check the orientation of the cursor before fitting
the nose equipment to the tool. See ‘CURSOR’ section on page 9.
It is essential that the correct nose equipment is fitted to the tool to ensure both effective placing of the
fastener and SAFE operation of the tool. READ THE SAFETY INSTRUCTIONS page 4 carefully.
To identify the correct combination of nose equipment to fit your tool first select a nose jaw by reading the section below then read the
mandrel section to select part numbers both for the mandrel itself and for the mandrel follower spring. Mandrels and mandrel follower
springs are illustrated on page 11.
To fit the nose equipment, follow the ‘Loading the Tool’ procedure page 10.
Nose Jaws
I M P O R TA N T
The wrong nose jaw could result in an incorrectly placed fastener or incorrect clench.
Nose Jaws can be categorised into 7 different basic shapes as illustrated opposite, even though internal dimensions will vary
according to the fastener it is intended for. Exact dimensions referring to the letters in the illustrations opposite are indicated in the
‘Nose Jaw Selection Tables’ on pages 14-15.
For a particular shape, there may be several options of end form giving access benefits or fastener placing enhancement.
Flat
•
•
Normal end form of all nose jaws.
Suitable on all applications with no access restrictions.
Universal
•
•
Designed for use with universal head Chobert® fasteners.
Can also be used with Briv® fasteners to obtain the highest possible clench. Note this reduces the maximum grip range of the
Briv® fastener by approximately 0.015” (0.4mm).
Recessed
•
•
For use with Briv® fasteners ONLY.
It gives a higher clench than a flat end form but less than a universal end form, with no reduction of the grip range of the fastener.
Tapered
•
•
Available as shown in the ‘Nose Jaw Selection Tables’.
Allows greater accessibility than a flat end form and places the same range.
Head Forming
•
•
12
For use with Rivscrew® fasteners ONLY.
Deforms the head of the fastener to achieve good clench.
Nose Assemblies
Selecting a Nose Jaw
•
List the name, size and material of the fastener to be placed.
•
Look for this fastener in the first column of the nose jaw selection tables on page 14
if you use imperial measurements and on page 15 if you use metric units.
•
Looking right across the table, take note of which nose jaws are available. ONLY
those shown are available.
•
Select which is most suitable for your application by referring to the respective nose
jaw drawing. If your application has no access restriction, you should select the
standard shape with a flat end form with or without a cam.
STANDARD
'B'
28.6
1.125
'E'
33.5
1.32
FLAT
'D'
UNIVERSAL RECESSED TAPERED
Available in 4 different end forms to place
all fasteners (except Rivscrew). Suitable on
applications with no or little access restriction.
LIMITED ACCESS
LONG CURVED
'B'
'B'
'F'
'E'
'D'
33.5
1.32
'E'
28.6
1.125
RIVET
Ø
1/8
5/32
3/16
'D'
41.4
1.63
'F'
mm
.620
.690
.720
in.
15.7
17.5
18.3
FLAT
Available to place most of the fasteners.
Allows more penetration into applications
with no other access restriction.
20.5
0.81
RECESSED
Available as shown in NOSE JAW SELECTION TABLE.
Allows more penetration into applications
with restricted access.
Mandrels must be curved by hand to follow
the shape of the jaw.
STANDARD CAM OPERATED
LONG CAM OPERATED
'B'
FLAT
Available as shown in NOSE JAW SELECTION TABLE.
Allows access into very restrictive applications.
LIMITED ACCESS CAM OPERATED
'B'
'B'
28.6
1.25
28.6
1.25
'E'
34
1.34
'D'
'E'
34
1.34
'D'
'E'
28.6
1.25
FLAT
HEAD FORMING (HF)
FLAT
37.1
1.46
'D'
FLAT
Available as shown in NOSE JAW SELECTION TABLE overleaf. Equivalent functions to the Standard and Limited Access above with the
addition of a cam to ease and speed up the nose jaw opening thus the pod reloading procedure.
Dimensions shown in bold are millimetres. Other dimensions are in inches.
13
Nose Assemblies
Nose Jaw Selection - Imperial
The ‘REF Nº’ column cross references with the ‘REF Nº’ columns in the mandrel section. It identifies both the mandrel and mandrel
follower spring required for a particular nose jaw with a specific fastener.
FASTENER
REF.
Nº
NOSE JAW
DIMENSIONS
'B'
'D'
'E'
TYPE AND
END FORM
PART Nº
1
STANDARD - FLAT
07150-03003
.36
1.30
.16
1
STD. CAM OPERATED - FLAT
07170-04500
.36
1.30
.16
2
STANDARD - TAPERED
07170-03103
.36
1.30
4
LONG - FLAT
07150-04003
.41
5
STANDARD - FLAT
07150-03004
5
STANDARD - TAPERED
6
REF.
Nº
NOSE JAW
DIMENSIONS
'B'
'D'
'E'
TYPE AND
END FORM
PART Nº
1
# STANDARD - UNIVERSAL
07150-03203
.36
1.33
.24
1
LTD. ACCESS CAM OPERATED
07177-03003
.20
1.18
.16
.16
3
LIMITED ACCESS
07274-01000
.22
1.07
.16
2.30
.16
4
LONG CURVED - FLAT
07150-05003
.41
2.28
.16
.41
1.18
.20
5
# STANDARD - UNIVERSAL
07150-03204
.41
1.22
.32
07170-03104
.41
1.19
.20
5
STD. CAM OPERATED - FLAT
07170-04600
.41
1.18
.20
LONG - FLAT
07150-04004
.41
2.18
.20
6
# LONG - UNIVERSAL
07150-04204
.41
2.22
.30
6
LONG CURVED - FLAT
07150-05004
.41
2.12
.20
6
LONG CAM OPERATED - FLAT
07170-05000
.41
2.18
.20
7
STANDARD - FLAT
07150-03005
.48
1.30
.24
7
# STANDARD - UNIVERSAL
07150-03205
.48
1.35
.41
7
STANDARD - TAPERED
07150-03105
.44
1.30
.24
7
STD. CAM OPERATED - FLAT
07170-04700
.48
1.30
.24
8
LONG - FLAT
07150-04005
.48
2.30
.24
8
# LONG - UNIVERSAL
07150-04205
.48
2.35
.42
8
LONG CURVED - FLAT
07150-05005
.48
2.23
.24
8
LONG CAM OPERATED - FLAT
07170-05100
.48
2.30
.24
9
STANDARD - FLAT
07150-03006
.56
1.18
.33
9
# STANDARD - UNIVERSAL
07150-03206
.56
1.24
.47
9
STANDARD - TAPERED
07150-03106
.56
1.18
.33
9
STD. CAM OPERATED - FLAT
07170-04800
.56
1.18
.33
10
LONG - FLAT
07150-04006
.56
2.30
.33
10
# LONG - UNIVERSAL
07150-04206
.56
2.39
.48
10
LONG CURVED - FLAT
07150-05006
.56
2.21
.33
10
LONG CAM OPERATED - FLAT
07170-05200
.56
2.30
.33
11
STANDARD - FLAT
07150-03008
.64
1.18
.39
11
STD. CAM OPERATED - FLAT
07170-04900
.64
1.18
.39
12
LONG - FLAT
07150-04008
.64
2.18
.39
12
LONG CAM OPERATED - FLAT
07170-05300
.64
2.18
.39
13
STANDARD - TAPERED
07170-03103
.36
1.30
.15
14
LTD. ACCESS CAM OPERATED
07177-03003
.20
1.18
.16
14
LIMITED ACCESS
07274-01000
.22
1.07
.16
-
-
-
-
-
-
15
STANDARD - FLAT
07150-03004
.41
1.18
.20
15
STANDARD - RECESSED
07170-03004
.41
1.20
.30
1/8" BRIV®
15
STANDARD - TAPERED
07170-03104
.41
1.19
.20
16
LONG - FLAT
07150-04004
.41
2.18
.20
Al. Alloy,
Brass, Steel
16
LONG - RECESSED
07170-03204
.41
2.18
.30
16
LONG CURVED - FLAT
07150-05004
.41
2.12
.20
16
LONG CURVED - RECESSED
07170-03304
.41
2.12
.30
-
-
-
-
-
-
5/32" BRIV®
17
STANDARD - FLAT
07150-03005
.48
1.30
.24
17
STANDARD - RECESSED
07170-03005
.48
1.32
.41
Al. Alloy,
Brass, Steel
18
LONG - FLAT
07150-04005
.48
2.30
.24
18
LONG - RECESSED
07170-03205
.48
2.30
.41
18
LONG CURVED - FLAT
07150-05005
.48
2.23
.24
18
LONG CURVED - RECESSED
07170-03305
.48
2.23
.41
19
STANDARD - FLAT
07150-03005
.48
1.30
.24
19
STANDARD - RECESSED
07170-03005
.48
1.32
.41
20
LONG - FLAT
07150-04005
.48
2.30
.24
20
LONG - RECESSED
07170-03205
.48
2.30
.41
20
LONG CURVED - FLAT
07150-05005
.48
2.23
.24
20
LONG CURVED - RECESSED
07170-03305
.48
2.23
.41
3/16" BRIV®
21
STANDARD - FLAT
07150-03006
.56
1.18
.33
21
STANDARD - RECESSED
07170-03006
.56
1.20
.47
Al. Alloy,
Brass, Steel
22
LONG - FLAT
07150-04006
.56
2.30
.33
22
LONG - RECESSED
07170-03206
.56
2.30
.47
22
LONG CURVED - FLAT
07150-05006
.56
2.21
.33
22
LONG CURVED - RECESSED
07170-03306
.56
2.21
.47
23
STANDARD - FLAT
07150-03006
.56
1.18
.33
23
STANDARD - RECESSED
07170-03006
.56
1.20
.47
24
LONG - FLAT
07150-04006
.56
2.30
.33
24
LONG - RECESSED
07170-03206
.56
2.30
.47
24
LONG CURVED - FLAT
07150-05006
.56
2.21
.33
24
LONG CURVED - RECESSED
07170-03306
.56
2.21
.47
6mm BRIV®
25
STD. CAM OPERATED
07170-05600
.64
1.21
.52
25
STANDARD - FLAT
07170-05800
.64
1.21
.52
Al. Alloy, Steel
26
LONG CAM OPERATED
07170-05700
.64
2.19
.52
26
LONG - FLAT
07170-05900
.64
2.19
.52
27
STANDARD - FLAT
07150-03003
.36
1.30
.16
27
STANDARD - TAPERED
07150-03103
.36
1.30
.16
27
STD. CAM OPERATED - FLAT
07170-04500
.36
1.30
.16
28
LONG - FLAT
07150-04003
.41
2.30
.16
28
LONG CURVED - FLAT
07150-05003
.41
2.28
.16
-
-
-
-
-
29
STANDARD - FLAT
07150-03004
.41
1.18
.20
29
STANDARD - TAPERED
07170-03104
.41
1.19
.20
29
STD. CAM OPERATED - FLAT
07170-04600
.41
1.18
.20
30
LONG - FLAT
07150-04004
.41
2.18
.20
30
LONG CURVED - FLAT
07150-05004
.41
2.12
.20
30
LONG CAM OPERATED - FLAT
07170-05000
.41
2.18
.20
31
STANDARD - FLAT
07150-03003
.36
1.30
.16
-
-
-
-
-
-
32
STANDARD - FLAT
07150-03004
.41
1.18
.20
32
STD. CAM OPERATED - FLAT
07170-04600
.41
1.18
.20
33
STANDARD - FLAT
07150-03003
.36
1.30
.16
33
LTD. ACCESS CAM OPERATED
07271-08000
.41
1.18
.16
34
LONG - FLAT
07150-04003
.41
2.30
.16
-
-
-
-
-
-
35
STANDARD - FLAT
07271-05600
.36
1.30
.16
36
LTD. ACCESS CAM OPERATED
07271-08100
.40
1.18
.16
3/32" CHOBERT®
& GROVIT®
1/8" CHOBERT®
& GROVIT®
5/32" CHOBERT®
& GROVIT®
3/16" CHOBERT®
& GROVIT®
1/4" CHOBERT®
3/32" BRIV®
Brass only
5/32" BRIV®
St.Steel only
3/16" BRIV®
St.Steel only
3/32" AVLUG®
1/8" AVLUG®
2.5mm, 4-40 UNC
AVSERT®
3.0mm, 6-32 UNC
AVSERT®
2.5mm AVTRONIC®
2.8mm AVTRONIC®
37
LONG - FLAT
07271-05900
.41
2.30
.16
-
-
-
-
-
-
2.8mm RIVSCREW®
38
STD. CAM OPERATED - HF
07271-03000
.41
1.18
.24
-
-
-
-
-
-
3.0mm RIVSCREW®
39
STD. CAM OPERATED - HF
07271-03000
.41
1.18
.24
-
-
-
-
-
-
3.5mm RIVSCREW®
40
STD. CAM OPERATED - HF
07271-03500
.41
1.18
.24
-
-
-
-
-
-
4.0mm RIVSCREW®
41
STD. CAM OPERATED - HF
07271-04000
.41
1.18
.25
-
-
-
-
-
-
# These nose jaws are suitable for placing Chobert® rivets with a Universal Head Form. When used on the equivalent size of Briv®, the
highest possible clench is achieved. Note when using Briv® fasteners, the maximum grip is reduced by approximately 0.015" (0.4mm).
14
Nose Assemblies
Nose Jaw Selection - Metric
FASTENER
REF.
Nº
NOSE JAW
TYPE AND
END FORM
PART Nº
DIMENSIONS
'B'
'D'
'E'
1
STANDARD - FLAT
07150-03003
9.14 33.02 4.06
1
STD. CAM OPERATED - FLAT
07170-04500
9.14 33.02 4.06
2
STANDARD - TAPERED
07170-03103
4
LONG - FLAT
5
5
6
REF.
Nº
NOSE JAW
TYPE AND
END FORM
PART Nº
DIMENSIONS
'B'
'D'
'E'
1
# STANDARD - UNIVERSAL
07150-03203
9.14 33.78 6.10
1
LTD. ACCESS CAM OPERATED
07177-03003
5.08 29.97 4.06
9.14 33.02 4.06
3
LIMITED ACCESS
07274-01000
5.59 27.18 4.06
07150-04003
10.41 58.42 4.06
4
LONG CURVED - FLAT
07150-05003 10.41 57.91 4.06
STANDARD - FLAT
07150-03004
10.41 29.97 5.08
5
# STANDARD - UNIVERSAL
07150-03204 10.41 30.99 8.13
STANDARD - TAPERED
07170-03104
10.41 30.23 5.08
5
STD. CAM OPERATED - FLAT
07170-04600 10.41 29.97 5.08
LONG - FLAT
07150-04004
10.41 55.37 5.08
6
# LONG - UNIVERSAL
07150-04204 10.41 56.39 7.62
6
LONG CURVED - FLAT
07150-05004
10.41 53.85 5.08
6
LONG CAM OPERATED - FLAT
07170-05000 10.41 55.37 5.08
7
STANDARD - FLAT
07150-03005
12.19 33.02 6.10
7
# STANDARD - UNIVERSAL
07150-03205 12.19 34.29 10.41
7
STANDARD - TAPERED
07150-03105
11.18 33.02 6.10
7
STD. CAM OPERATED - FLAT
07170-04700 12.19 33.02 6.10
8
LONG - FLAT
07150-04005
12.19 58.42 6.10
8
# LONG - UNIVERSAL
07150-04205 12.19 59.69 10.67
8
LONG CURVED - FLAT
07150-05005
12.19 56.64 6.10
8
LONG CAM OPERATED - FLAT
07170-05100 12.19 58.42 6.10
9
STANDARD - FLAT
07150-03006
14.22 29.97 8.38
9
# STANDARD - UNIVERSAL
07150-03206 14.22 31.50 11.94
9
STANDARD - TAPERED
07150-03106
14.22 29.97 8.38
9
STD. CAM OPERATED - FLAT
07170-04800 14.22 29.97 8.38
10
LONG - FLAT
07150-04006
14.22 58.42 8.38
10
# LONG - UNIVERSAL
07150-04206 14.22 60.71 12.19
10
LONG CURVED - FLAT
07150-05006
14.22 56.13 8.38
10
LONG CAM OPERATED - FLAT
07170-05200 14.22 58.42 8.38
11
STANDARD - FLAT
07150-03008
16.26 29.97 9.91
11
STD. CAM OPERATED - FLAT
07170-04900 16.26 29.97 9.91
12
LONG - FLAT
07150-04008
16.26 55.37 9.91
12
LONG CAM OPERATED - FLAT
07170-05300 16.26 55.37 9.91
13
STANDARD - TAPERED
07170-03103
9.14 33.02 3.81
14
LTD. ACCESS CAM OPERATED
07177-03003
14
LIMITED ACCESS
07274-01000
5.59 27.18 4.06
-
-
-
15
STANDARD - FLAT
07150-03004
10.41 29.97 5.08
15
STANDARD - RECESSED
07170-03004 10.41 30.48 7.62
1/8" BRIV®
15
STANDARD - TAPERED
07170-03104
10.41 30.23 5.08
16
LONG - FLAT
07150-04004 10.41 55.37 5.08
Al. Alloy,
Brass, Steel
16
LONG - RECESSED
07170-03204
10.41 55.37 7.62
16
LONG CURVED - FLAT
07150-05004 10.41 53.85 5.08
16
LONG CURVED - RECESSED
07170-03304
10.41 53.85 7.62
-
-
5/32" BRIV®
17
STANDARD - FLAT
07150-03005
12.19 33.02 6.10
17
STANDARD - RECESSED
07170-03005 12.19 33.53 10.41
Al. Alloy,
Brass, Steel
18
LONG - FLAT
07150-04005
12.19 58.42 6.10
18
LONG - RECESSED
07170-03205 12.19 58.42 10.41
18
LONG CURVED - FLAT
07150-05005
12.19 56.64 6.10
18
LONG CURVED - RECESSED
07170-03305 12.19 56.64 10.41
19
STANDARD - FLAT
07150-03005
12.19 33.02 6.10
19
STANDARD - RECESSED
07170-03005 12.19 33.53 10.41
20
LONG - FLAT
07150-04005
12.19 58.42 6.10
20
LONG - RECESSED
07170-03205 12.19 58.42 10.41
20
LONG CURVED - FLAT
07150-05005
12.19 56.64 6.10
20
LONG CURVED - RECESSED
07170-03305 12.19 56.64 10.41
3/16" BRIV®
21
STANDARD - FLAT
07150-03006
14.22 29.97 8.38
21
STANDARD - RECESSED
07170-03006 14.22 30.48 11.94
Al. Alloy,
Brass, Steel
22
LONG - FLAT
07150-04006
14.22 58.42 8.38
22
LONG - RECESSED
07170-03206 14.22 58.42 11.94
22
LONG CURVED - FLAT
07150-05006
14.22 56.13 8.38
22
LONG CURVED - RECESSED
07170-03306 14.22 56.13 11.94
23
STANDARD - FLAT
07150-03006
14.22 29.97 8.38
23
STANDARD - RECESSED
07170-03006 14.22 30.48 11.94
24
LONG - FLAT
07150-04006
14.22 58.42 8.38
24
LONG - RECESSED
07170-03206 14.22 58.42 11.94
24
LONG CURVED - FLAT
07150-05006
14.22 56.13 8.38
24
LONG CURVED - RECESSED
07170-03306 14.22 56.13 11.94
6mm BRIV®
25
STD. CAM OPERATED
07170-05600
16.33 30.65 13.14
25
STANDARD - FLAT
07170-05800 16.33 30.65 13.14
Al. Alloy, Steel
26
LONG CAM OPERATED
07170-05700
16.33 55.65 13.14
26
LONG - FLAT
07170-05900 16.33 55.65 13.14
27
STANDARD - FLAT
07150-03003
9.14 33.02 4.06
27
STANDARD - TAPERED
27
STD. CAM OPERATED - FLAT
07170-04500
9.14 33.02 4.06
28
LONG - FLAT
28
LONG CURVED - FLAT
07150-05003
10.41 57.91 4.06
-
-
29
STANDARD - FLAT
07150-03004
10.41 29.97 5.08
29
STANDARD - TAPERED
07170-03104 10.41 30.23 5.08
29
STD. CAM OPERATED - FLAT
07170-04600
10.41 29.97 5.08
30
LONG - FLAT
07150-04004 10.41 55.37 5.08
30
LONG CURVED - FLAT
07150-05004
10.41 53.85 5.08
30
LONG CAM OPERATED - FLAT
07170-05000 10.41 55.37 5.08
31
STANDARD - FLAT
07150-03003
9.14 33.02 4.06
-
-
32
STANDARD - FLAT
07150-03004
10.41 29.97 5.08
32
STD. CAM OPERATED - FLAT
07170-04600 10.41 29.97 5.08
33
STANDARD - FLAT
07150-03003
9.14 33.02 4.06
33
LTD. ACCESS CAM OPERATED
07271-08000 10.41 29.97 4.06
34
LONG - FLAT
07150-04003
10.41 58.42 4.06
-
-
35
STANDARD - FLAT
07271-05600
9.14 33.02 4.06
36
LTD. ACCESS CAM OPERATED
3/32" CHOBERT®
& GROVIT®
1/8" CHOBERT®
& GROVIT®
5/32" CHOBERT®
& GROVIT®
3/16" CHOBERT®
& GROVIT®
1/4" CHOBERT®
3/32" BRIV®
Brass only
5/32" BRIV®
St.Steel only
3/16" BRIV®
St.Steel only
3/32" AVLUG®
1/8" AVLUG®
2.5mm, 4-40 UNC
AVSERT®
3.0mm, 6-32 UNC
AVSERT®
2.5mm AVTRONIC®
2.8mm AVTRONIC®
-
07150-03103
5.08 29.97 4.06
-
-
-
-
-
-
9.14 33.02 4.06
07150-04003 10.41 58.42 4.06
-
-
-
-
-
-
-
-
-
-
-
-
07271-08100 10.16 29.97 4.06
37
LONG - FLAT
07271-05900
10.41 58.42 4.06
-
-
-
-
-
-
2.8mm RIVSCREW®
38
STD. CAM OPERATED - HF
07271-03000
10.41 29.97 6.10
-
-
-
-
-
-
3.0mm RIVSCREW®
39
STD. CAM OPERATED - HF
07271-03000
10.41 29.97 6.10
-
-
-
-
-
-
3.5mm RIVSCREW®
40
STD. CAM OPERATED - HF
07271-03500
10.41 29.97 6.10
-
-
-
-
-
-
4.0mm RIVSCREW®
41
STD. CAM OPERATED - HF
07271-04000
10.41 29.97 6.35
-
-
-
-
-
-
# These nose jaws are suitable for placing Chobert® rivets with a Universal Head Form. When used on the equivalent size of Briv®, the
highest possible clench is achieved. Note that when using Briv® fasteners, the maximum grip is reduced by approximately 0.015" (0.4mm).
15
Nose Assemblies
Mandrels and Mandrel Follower Springs
Mandrels and mandrel follower springs, illustrated on page 11 need to be selected to suit the fastener type and size as well as the size
of the hole in the application. Use of the wrong mandrel could increase the risk of breakage and the wear of the mandrel head.
Feeding problems could occur if the wrong mandrel follower spring is used.
I M P O R TA N T
READ THE SAFETY INSTRUCTIONS page 4 carefully.
While a small amount of wear and marking will naturally occur through normal and correct use of mandrels, they
must be regularly examined for excessive wear and marking, with particular attention to the head diameter, the
tail jaw gripping area of the shank or heavy pitting of the shank and any mandrel distortion. Mandrels which fail
during use could forcibly exit the tool. It is the customer’s responsibility to ensure that mandrels are replaced
before any excessive levels of wear and always before the maximum recommended number of placings. Contact
your Avdel. representative who will let you know what that figure is by measuring the broach load of your
application with our calibrated measuring tool. These tools can also be purchased under part number 0790009080, supplied with all necessary information for testing.
C h o b e r t ® a n d G ro v i t ® - I m p e r i a l
For mandrel or mandrel follower spring selection, follow instructions on page 18.
# S/R: Short Reach Mandrel. See page 18-19 for explanation.
16
Nose Assemblies
Tables below left and right and over the next four pages list part numbers of all mandrels and mandrel follower springs available per
fastener or group of fasteners, i.e. for Chobert® and Grovit® on these pages.
While fastener sizes are always shown in their specified units, each table has been produced twice to offer dimensions in imperial units
on the left-hand page then in metric units on the right-hand page. These 'Mandrel Selection' tables cross-reference with the 'Nose Jaw
Selection' tables on pages 14-15 through the ‘Ref. Nº’ column.
It is the diameter of the head at the end of a mandrel which when pulled through controls the expansion of the fastener body.
While there are different head shapes to suit different types of fasteners (see illustration on page 19), progressive head sizes are
needed to reflect manufacturing tolerances on the diameter of the hole in your application so that the fastener always expands
sufficiently to fill the hole.
Too large a mandrel head would overstress the mandrel and mandrels which fail during use could forcibly exit the tool.
Selection tables are arranged into four 'mandrel size' sections, ranging from 'standard’ to '3rd oversize', each being colour coded as
per the end of the mandrel heads themselves.
C h o b e r t ® a n d G ro v i t ® - M e t r i c
FASTENER
REF.
Nº
1/8" CHOBERT®
& GROVIT®
5/32" CHOBERT®
& GROVIT®
3/16" CHOBERT®
& GROVIT®
1/4" CHOBERT®
FASTENER
3/32" CHOBERT®
& GROVIT®
1/8" CHOBERT®
& GROVIT®
5/32" CHOBERT®
& GROVIT®
3/16" CHOBERT®
& GROVIT®
1/4" CHOBERT®
HEAD
Ø
AS REC. 1.84
STANDARD MANDREL - GREEN
P
MANDREL
# S/R MANDREL
P
MAX.
PART Nº
PART Nº
MAX.
4.22
07150-06003
1.80
07150-08003
HOLE
SIZE
1ST OVERSIZE MANDREL - YELLOW
P
MANDREL
P
# S/R MANDREL
MAX.
MAX.
PART Nº
PART Nº
4.42
07150-06303
-
SPRING
PART Nº
+.04
HEAD
Ø
1.88
1
-
-
-
-
-
-
+.09
1.93
-
-
07150-08103
1.98
07150-06803
2
AS REC.
1.84
07150-06003
4.22
07150-08003
1.80
+.04
1.88
07150-06303
4.42
-
-
07170-06873
2
-
-
-
-
-
-
+.09
1.93
-
-
07150-08103
1.98
07170-06873
3
AS REC.
1.84
07150-06003
4.22
07150-08003
1.80
+.04
1.88
07150-06303
4.42
-
-
07170-06903
3
-
-
-
-
-
-
+.09
1.93
-
-
07150-08103
1.98
07170-06903
4
AS REC.
1.84
07150-07003
4.22
07150-09003
1.80
+.09
1.93
-
-
07150-09103
1.98
07150-07803
5
AS REC.
2.24
07150-06004
5.49
07150-08004
2.29
+.10
2.34
07150-06104
6.02
07150-08104
2.49
07150-06804
6
AS REC.
2.24
07150-07004
5.49
07150-09004
2.29
+.10
2.34
07150-07104
6.02
07150-09104
2.49
07150-07804
7
AS REC.
2.72
07150-06005
6.20
07150-08005
2.54
+.20
2.92
07150-06105
7.21
07150-08105
2.95
07170-06875
7
-
-
-
-
-
-
-
-
-
-
-
-
-
8
AS REC.
2.72
07150-07005
6.20
07150-09005
2.54
+.20
2.92
07150-07105
7.21
07150-09105
2.95
07170-07875
1
3/32" CHOBERT®
& GROVIT®
HOLE
SIZE
07150-06803
8
-
-
-
-
-
-
-
-
-
-
-
-
-
9
AS REC.
3.35
07150-06006
6.27
07150-08006
2.59
+.35
3.71
07150-06106
8.13
07150-08106
3.30
07170-06876
9
-
-
-
-
-
-
-
-
-
-
-
-
-
10
AS REC.
3.35
07150-07006
6.27
07150-09006
2.59
+.35
3.71
07150-07106
8.13
07150-09106
3.30
07170-07876
10
-
-
-
-
-
-
-
-
-
-
-
-
-
11
AS REC.
4.67
07150-06008
6.81
07150-08008
2.79
+.30
4.98
07150-06108
8.38
07150-08108
3.40
07150-06808
12
AS REC.
4.67
07150-07008
6.81
07150-09008
2.79
+.30
4.98
07150-07108
8.38
07150-09108
3.40
07150-07808
2ND OVERSIZE MANDREL - BLUE
P
P
MANDREL
# S/R MANDREL
MAX.
MAX.
PART Nº
PART Nº
4.70
07150-06103
-
HOLE
SIZE
3RD OVERSIZE MANDREL - RED
P
P
MANDREL
# S/R MANDREL
MAX.
PART Nº
MAX.
PART Nº
-
REF.
Nº
HOLE
SIZE
1
+.09
HEAD
Ø
1.93
-
HEAD
Ø
-
1
-
-
-
-
-
-
-
-
-
-
-
-
-
2
+.09
1.93
07150-06103
4.70
-
-
-
-
-
-
-
-
07170-06873
SPRING
PART Nº
07150-06803
2
-
-
-
-
-
-
-
-
-
-
-
-
-
3
+.09
1.93
07150-06103
4.70
-
-
-
-
-
-
-
-
07170-06903
3
-
-
-
-
-
-
-
-
-
-
-
-
-
4
+.09
1.93
07150-07103
4.70
-
-
-
-
-
-
-
-
07150-07803
5
+.25
2.49
07150-06204
6.81
07150-08204
2.79
+.35
2.59
07150-06304
7.32
07150-08304
3.00
07150-06804
6
+.25
2.49
07150-07204
6.81
07150-09204
2.79
+.35
2.59
07150-07304
7.32
07150-09304
3.00
07150-07804
7
+.38
3.10
07150-06205
8.13
07150-08205
3.30
-
-
-
-
-
-
07170-06875
7
-
-
-
-
-
-
+.63
3.35
07150-06305
9.45
07150-08305
3.81
07150-06805
8
+.38
3.10
07150-07205
8.13
07150-09205
3.30
-
-
-
-
-
-
07170-07875
8
-
-
-
-
-
-
+.63
3.35
07150-07305
9.45
07150-09305
3.81
07150-07805
9
-
-
-
-
-
-
-
-
-
-
-
-
-
9
+.60
3.96
07150-06206
9.45
07150-08206
3.81
-
-
-
-
-
-
07150-06806
10
-
-
-
-
-
-
-
-
-
-
-
-
-
10
+.60
3.96
07150-07206
9.45
07150-09206
3.81
-
-
-
-
-
-
07150-07806
11
-
-
-
-
-
-
-
-
-
-
-
-
-
12
-
-
-
-
-
-
-
-
-
-
-
-
-
# S/R: Short Reach Mandrel. See page 18-19 for explanation.
17
Nose Assemblies
To find the correct part number of a mandrel for a particular application, read the instructions below after you have gathered the following
information as per example alongside. Answers for the example are shown in grey italic.
Chobert®
example
FASTENER NAME
FASTENER SIZE
DATASHEET
APPLICATION HOLE SIZE
CLEARANCE BEHIND APPLICATION
‘REF.Nº’ FROM NOSE JAW SELECTION TABLE
1/8”
Series 1125
0.1335”
Infinite
5 (standard flat)
•
Subtract the minimum hole size recommended (AS REC.) in the fastener datasheet from the actual application hole size. -example:
0.005.
• Turn to the page with the ‘Mandrel Selection’ table for your fastener, selecting either the imperial or the metric dimensions table
(pages 16-20). -example: page 16.
• Staring with the ‘Standard Mandrel - Green’ section, find your fastener size in the left-hand column. -example 1/8” Chobert® & Grovit®.
• If you selected a nose jaw which place you fastener, you should now be able to find a line within your fastener section with the same
‘Ref No.’ as that from the ‘Nose Jaw Selection’ table. -example: 5. This is your line ‘Ref. No.’ in which you will find both your mandrel
and mandrel follower spring part number. This line continues into the second half of the table for the ‘2nd’ and ‘3rd’ oversize mandrels.
• Scan along the line to the ‘hole size’ columns and select which ever is the nearest or equal to the figure calculated in step one. You
-example: 07150-06104
may now read the mandrel part number next to the ‘hole size’.
• For Chobert® and Grovit® only, most mandrels are also available in a ‘short reach’ version (see illustration on page 19). Short reach
mandrels are used to minimise the possibility of the mandrel head contacting an obstruction. This would result in the underside of the
fastener head not seating properly on the application surface, causing a lack on clench in the joint.
• Whichever size mandrel you settle on, you will also need to check the ‘P’ figure against that mandrel is adequate. ‘P’ is the clearance
required for the mandrel head at the back of the application IN ADDITION to the length of the fastener protruding through the
application, as shown in the illustration on page 19.
• You may now read the corresponding mandrel follower spring part number in the right-hand column of the table. -example: 0715006804.
In all cases, satisfactory clenching of the joint should be assessed particularly if the size of the hole in your application is very close to the
next oversize hole condition, when it will be safe to select the greater size of mandrel to obtain a higher clench. REMEMBER that this will
increase the broach load and reduce the mandrel life.
Briv® - Imperial
For mandrel or mandrel follower spring selection, follow instructions above.
AS REC.
HEAD
Ø
.072
STANDARD MANDREL - GREEN
MANDREL
PART Nº
07150-06013
P
MAX.
.119
+.004
HEAD
Ø
.076
AS REC.
.072
07150-06013
.119
+.004
.076
07150-06113
.123
07170-06903
15
AS REC.
.092
07271-06414
.120
+.005
.097
07271-06514
.126
07150-06814
16
AS REC.
.092
07271-07414
.120
+.005
.097
07271-07514
.126
07150-07814
5/32” BRIV®
Al. Alloy,
Brass, Steel
17
AS REC.
.110
07150-06015
.136
+.005
.115
07150-06115
.142
07170-06875
18
AS REC.
.110
07150-07015
.136
+.005
.115
07150-07115
.142
07170-07875
5/32” BRIV®
St.Steel only
19
AS REC.
.120
07170-06805
.126
+.005
.124
07170-06825
.132
07170-06875
20
AS REC.
.120
07170-07805
.126
+.005
.124
07170-07825
.132
07170-07875
3/16” BRIV®
Al. Alloy,
Brass, Steel
21
AS REC.
.141
07150-06016
.157
+.005
.146
07150-06116
.164
07170-06876
22
AS REC.
.141
07150-07016
.157
+.005
.146
07150-07116
.164
07170-07876
3/16” BRIV®
St.Steel only
23
AS REC.
.150
07170-06806
.150
+.005
.1535
07170-06826
.156
07170-06876
24
AS REC.
.150
07170-07806
.150
+.005
.1535
07170-07826
.156
07170-07876
6mm BRIV®
25
AS REC
.179
07150-06018
.165
+.005
.183
07150-06118
.171
07150-06846
Al. Alloy, Steel
26
AS REC
.179
07150-07018
.165
+.005
.183
07150-07118
.171
07150-07846
FASTENER
REF.
Nº
HOLE
SIZE
13
+.008
HEAD
Ø
.079
-
HEAD
Ø
-
3RD OVERSIZE MANDREL - RED
MANDREL
PART Nº
-
P
MAX.
-
07170-06873
14
+.008
.079
07150-06213
.126
-
-
-
-
07170-06903
1/8” BRIV®
Al. Alloy,
Brass, Steel
15
+.010
.102
07271-06614
.133
-
-
-
-
07150-06814
16
+.010
.102
07271-07614
.133
-
-
-
-
07150-07814
5/32” BRIV®
Al. Alloy,
Brass, Steel
17
+.010
.120
07150-06215
.149
-
-
-
-
07170-06875
18
+.010
.120
07150-07215
.149
-
-
-
-
07170-07875
5/32” BRIV®
St.Steel only
19
-
-
-
-
-
-
-
-
-
20
-
-
-
-
-
-
-
-
-
3/16” BRIV®
Al. Alloy,
Brass, Steel
21
+.010
.151
07150-06216
.170
+.012
.153
07150-06316
.173
07170-06876
22
+.010
.151
07150-07216
.170
+.012
.153
07150-07316
.173
07170-07876
3/16” BRIV®
St.Steel only
23
-
-
-
-
-
-
-
-
-
24
-
-
-
-
-
-
-
-
-
6mm BRIV®
Al. Alloy, Steel
25
+.010
.189
07150-06218
.177
-
-
-
-
07150-06846
26
+.010
.189
07150-07218
.177
-
-
-
-
07150-07846
REF.
Nº
HOLE
SIZE
13
14
1/8” BRIV®
Al. Alloy,
Brass, Steel
FASTENER
3/32” BRIV®
Brass only
3/32” BRIV®
Brass only
18
2ND OVERSIZE MANDREL - BLUE
P
MANDREL
MAX.
PART Nº
.126
07150-06213
HOLE
SIZE
HOLE
SIZE
1ST OVERSIZE MANDREL - YELLOW
MANDREL
P
PART Nº
MAX.
07150-06113
.123
SPRING
PART Nº
07170-06873
SPRING
PART Nº
Nose Assemblies
M a n d r e l H e a d Ty p e s a n d ‘ P ’ L e n g t h
Mandrels for stainless steel Briv® are easily identifiable by a ‘V’ cut in the end of the mandrel heads.
When using curved nose jaws, mandrels have to be bent by hand to match the curvature of the nose jaw, thus ensuring good feed of
fasteners.
P
P
SHORT REACH
(CHOBERT® &
GROVIT® ONLY)
CHOBERT®, GROVIT®,
AVSERT®, AVTRONIC®
P
P
BRIV®
(STAINLESS STEEL)
BRIV®
P
P
RIVSCREW®
AVLUG®
Briv® - Metric
AS REC.
HEAD
Ø
1.83
STANDARD MANDREL - GREEN
MANDREL
PART Nº
07150-06013
P
MAX.
3.02
+.10
HEAD
Ø
1.93
AS REC.
1.83
07150-06013
3.02
+.10
1.93
07150-06113
3.12
07170-06903
15
AS REC.
2.34
07271-06414
3.05
+.13
2.46
07271-06514
3.20
07150-06814
16
AS REC.
2.34
07271-07414
3.05
+.13
2.46
07271-07514
3.20
07150-07814
4.0mm BRIV®
Al. Alloy,
Brass, Steel
17
AS REC.
2.79
07150-06015
3.45
+.13
2.92
07150-06115
3.61
07170-06875
18
AS REC.
2.79
07150-07015
3.45
+.13
2.92
07150-07115
3.61
07170-07875
4.0mm BRIV®
St.Steel only
19
AS REC.
3.05
07170-06805
3.20
+.13
3.15
07170-06825
3.35
07170-06875
20
AS REC.
3.05
07170-07805
3.20
+.13
3.15
07170-07825
3.35
07170-07875
4.8mm BRIV®
Al. Alloy,
Brass, Steel
21
AS REC.
3.58
07150-06016
3.99
+.13
3.71
07150-06116
4.17
07170-06876
22
AS REC.
3.58
07150-07016
3.99
+.13
3.71
07150-07116
4.17
07170-07876
4.8mm BRIV®
St.Steel only
23
AS REC.
3.81
07170-06806
3.81
+.13
3.90
07170-06826
3.96
07170-06876
24
AS REC.
3.81
07170-07806
3.81
+.13
3.90
07170-07826
3.96
07170-07876
6mm BRIV®
25
AS REC
4.54
07150-06018
4.18
+.13
4.65
07150-06118
4.34
07150-06846
Al. Alloy, Steel
26
AS REC
4.54
07150-07018
4.18
+.13
4.65
07150-07118
4.34
07150-07846
FASTENER
REF.
Nº
HOLE
SIZE
13
+.20
HEAD
Ø
2.01
-
HEAD
Ø
-
3RD OVERSIZE MANDREL - RED
MANDREL
PART Nº
-
P
MAX.
-
07170-06873
14
+.20
2.01
07150-06213
3.20
-
-
-
-
07170-06903
3.2mm BRIV®
Al. Alloy,
Brass, Steel
15
+.25
2.59
07271-06614
3.38
-
-
-
-
07150-06814
16
+.25
2.59
07271-07614
3.38
-
-
-
-
07150-07814
4.0mm BRIV®
Al. Alloy,
Brass, Steel
17
+.25
3.05
07150-06215
3.78
-
-
-
-
07170-06875
18
+.25
3.05
07150-07215
3.78
-
-
-
-
07170-07875
4.0mm BRIV®
St.Steel only
19
-
-
-
-
-
-
-
-
-
20
-
-
-
-
-
-
-
-
-
4.8mm BRIV®
Al. Alloy,
Brass, Steel
21
+.25
3.84
07150-06216
4.32
+.30
3.85
07150-06316
4.39
07170-06876
22
+.25
3.84
07150-07216
4.32
+.30
3.85
07150-07316
4.39
07170-07876
4.8mm BRIV®
St.Steel only
23
-
-
-
-
-
-
-
-
-
24
-
-
-
-
-
-
-
-
-
6mm BRIV®
Al. Alloy, Steel
25
+.25
4.79
07150-06218
4.49
-
-
-
-
07150-06846
26
+.25
4.79
07150-07218
4.49
-
-
-
-
07150-07846
REF.
Nº
HOLE
SIZE
13
14
3.2mm BRIV®
Al. Alloy,
Brass, Steel
FASTENER
2.4mm BRIV®
Brass only
2.4mm BRIV®
Brass only
2ND OVERSIZE MANDREL - BLUE
P
MANDREL
MAX.
PART Nº
3.20
07150-06213
HOLE
SIZE
HOLE
SIZE
1ST OVERSIZE MANDREL - YELLOW
MANDREL
P
PART Nº
MAX.
07150-06113
3.12
SPRING
PART Nº
07170-06873
SPRING
PART Nº
19
Nose Assemblies
A v l u g ® , A v s e r t ® , A v t ro n i c ® a n d R i v s c r e w ® - I m p e r i a l a n d M e t r i c
For mandrel or mandrel follower spring selection, follow instructions on page 18.
1ST OVERSIZE MANDREL - YELLOW
P
MANDREL
MAX.
PART Nº
.478
07150-06703
07150-06803
07150-07703
.368
07150-07803
-
-
-
07150-06804
-
-
-
-
07150-07804
.145
-
-
-
-
07150-06803
07150-06004
.185
-
-
-
-
07150-06804
.070
07170-06025
.140
+.003
.073
07170-06125
.140
07150-06803
AS REC.
.070
07170-07025
.140
+.003
.073
07170-07125
.140
07150-07803
35
AS REC.
.079
07170-06028
.150
+.003
.082
07170-06128
.150
07170-06528
36
AS REC.
.079
07170-06028
.150
+.003
.082
07170-06128
.150
07170-06873
37
AS REC.
.079
07170-07028
.150
+.003
.082
07170-07128
.150
07170-07528
2.8mm RIVSCREW®
38
AS REC.
* .065
07271-06030
.127
-
-
-
-
07271-06630
3.0mm RIVSCREW®
39
AS REC.
* .065
07271-06030
.127
-
-
-
-
07271-06630
3.5mm RIVSCREW®
40
AS REC.
* .0825
07271-06035
.132
-
-
-
-
07271-06635
4.0mm RIVSCREW®
41
AS REC.
* .103
07271-06140
.150
-
-
-
-
07271-06640
3RD OVERSIZE MANDREL - RED
MANDREL
PART Nº
-
P
MAX.
-
FASTENER
3/32" AVLUG®
1/8" AVLUG®
2.5mm, 4-40 UNC
AVSERT®
3.0mm, 6-32 UNC
AVSERT®
2.5mm AVTRONIC®
2.8mm AVTRONIC®
AS REC.
HEAD
Ø
.076
STANDARD MANDREL - GREEN
MANDREL
PART Nº
07150-06603
P
MAX.
.353
+.005
HEAD
Ø
.081
AS REC.
.076
07150-07603
.353
+.003
.079
29
AS REC.
.098
07150-06604
.593
-
30
AS REC.
.098
07150-07604
.593
31
AS REC.
.0725
07150-06003
32
AS REC.
.088
33
AS REC.
34
REF.
Nº
HOLE
SIZE
27
28
HOLE
SIZE
SPRING
PART Nº
* These Dimensions are Across Flats
2ND OVERSIZE MANDREL - BLUE
P
MANDREL
MAX.
PART Nº
-
HOLE
SIZE
REF.
Nº
HOLE
SIZE
27
-
HEAD
Ø
-
-
HEAD
Ø
-
28
-
-
-
-
-
-
-
-
-
29
-
-
-
-
-
-
-
-
-
30
-
-
-
-
-
-
-
-
-
31
-
-
-
-
-
-
-
-
-
32
-
-
-
-
-
-
-
-
-
33
+.006
.076
07170-06225
.140
-
-
-
-
07150-06803
34
+.006
.076
07170-07225
.140
-
-
-
-
07150-07803
35
+.006
.085
07170-06228
.150
-
-
-
-
07170-06528
36
+.006
.085
07170-06228
.150
-
-
-
-
07170-06873
37
+.006
.085
07170-07228
.150
-
-
-
-
07170-07528
2.8mm RIVSCREW®
38
-
-
-
-
-
-
-
-
-
3.0mm RIVSCREW®
39
-
-
-
-
-
-
-
-
-
3.5mm RIVSCREW®
40
-
-
-
-
-
-
-
-
-
4.0mm RIVSCREW®
41
-
-
-
-
-
-
-
-
-
STANDARD MANDREL - GREEN
MANDREL
PART Nº
07150-06603
P
MAX.
8.97
FASTENER
3/32" AVLUG®
1/8" AVLUG®
2.5mm, 4-40 UNC
AVSERT®
3.0mm, 6-32 UNC
AVSERT®
2.5mm AVTRONIC®
2.8mm AVTRONIC®
SPRING
PART Nº
-
LINE
Nº
HOLE
SIZE
27
AS REC.
HEAD
Ø
1.93
+.10
1ST OVERSIZE MANDREL - YELLOW
P
MANDREL
HEAD
MAX.
PART Nº
Ø
12.14
07150-06703
2.06
28
AS REC.
1.93
07150-07603
8.97
+.10
2.01
07150-07703
9.35
07150-07803
29
AS REC.
2.49
07150-06604
15.06
-
-
-
-
07150-06804
30
AS REC.
2.49
07150-07604
15.06
-
-
-
-
07150-07804
31
AS REC.
1.84
07150-06003
3.68
-
-
-
-
07150-06803
32
AS REC.
2.24
07150-06004
4.70
-
-
-
-
07150-06804
33
AS REC.
1.78
07170-06025
3.56
+.07
1.85
07170-06125
3.56
07150-06803
34
AS REC.
1.78
07170-07025
3.56
+.07
1.85
07170-07125
3.56
07150-07803
35
AS REC.
2.01
07170-06028
3.81
+.07
2.08
07170-06128
3.81
07170-06528
36
AS REC.
2.01
07170-06028
3.81
+.07
2.08
07170-06128
3.81
07170-06873
37
AS REC.
2.01
07170-07028
3.81
+.07
2.08
07170-07128
3.81
07170-07528
2.8mm RIVSCREW®
38
AS REC
* 1.65
07271-06030
3.23
-
-
-
-
07271-06630
3.0mm RIVSCREW®
39
AS REC.
* 1.65
07271-06030
3.23
-
-
-
-
07271-06630
3.5mm RIVSCREW®
40
AS REC.
* 2.10
07271-06035
3.35
-
-
-
-
07271-06635
4.0mm RIVSCREW®
41
AS REC.
* 2.62
07271-06140
3.81
-
-
-
-
07271-06640
3RD OVERSIZE MANDREL - RED
MANDREL
PART Nº
-
P
MAX.
-
FASTENER
3/32" AVLUG®
1/8" AVLUG®
2.5mm, 4-40 UNC
AVSERT®
3.0mm, 6-32 UNC
AVSERT®
2.5mm AVTRONIC®
2.8mm AVTRONIC®
HOLE
SIZE
SPRING
PART Nº
07150-06803
* These Dimensions are Across Flats
2ND OVERSIZE MANDREL - BLUE
P
MANDREL
MAX.
PART Nº
-
LINE
Nº
HOLE
SIZE
27
-
HEAD
Ø
-
-
HEAD
Ø
-
28
-
-
-
-
-
-
-
-
-
29
-
-
-
-
-
-
-
-
-
30
-
-
-
-
-
-
-
-
-
31
-
-
-
-
-
-
-
-
-
32
-
-
-
-
-
-
-
-
-
33
+.15
1.93
07170-06225
3.56
-
-
-
-
07150-06803
34
+.15
1.93
07170-07225
3.56
-
-
-
-
07150-07803
35
+.15
2.16
07170-06228
3.81
-
-
-
-
07170-06528
36
+.15
2.16
07170-06228
3.81
-
-
-
-
07170-06873
37
+.15
2.16
07170-07228
3.81
-
-
-
-
07170-07528
2.8mm RIVSCREW®
38
-
-
-
-
-
-
-
-
-
3.0mm RIVSCREW®
39
-
-
-
-
-
-
-
-
-
3.5mm RIVSCREW®
40
-
-
-
-
-
-
-
-
-
4.0mm RIVSCREW®
41
-
-
-
-
-
-
-
-
-
FASTENER
3/32" AVLUG®
1/8" AVLUG®
2.5mm, 4-40 UNC
AVSERT®
3.0mm, 6-32 UNC
AVSERT®
2.5mm AVTRONIC®
2.8mm AVTRONIC®
20
HOLE
SIZE
SPRING
PART Nº
-
S e r v i c i n g t h e To o l
Regular servicing should be carried out and a comprehensive inspection performed annually or every 500,000 cycles, whichever is
sooner.
I M P O R TA N T
The employer is responsible for ensuring that tool maintenance instructions are given to the appropriate
personnel.
The operator should not be involved in maintenance or repair of the tool unless properly trained.
Daily
•
•
•
•
•
•
Daily, before use or when first putting the tool into service. Pour a few drops of clean lubricating oil into the air inlet of the tool if
no lubricator is fitted on air supply. If the tool is in continuous use, the air hose should be disconnected from the main air supply
and the tool lubricated every two to three hours.
Check for air and oil leaks. If damaged, hoses and couplings should be replaced.
If there is no filter on the pressure regulator, bleed the airline to clear it of accumulated dirt or water before connecting the air
hose to the intensifier. If there is a filter, drain it.
Check that the nose equipment is correct.
Check mandrels regularly for signs of wear or damage monitoring the number of placings (read the safety instructions on page 4).
Check the base cover is fully tightened onto the body.
We e k l y
•
•
Conduct the full “Daily” procedures as described above.
Remove, inspect, clean and grease the Tail Jaws (refer to “Tail Jaw Cylinder” in the "Maintenance Section" page 24).
MolyLithium Grease EP 3753 Safety Data
Grease can be ordered as a single item, the part number is shown in the Service Kits page 23.
First Aid
SKIN:
As the grease is completely water resistant it is best removed with an approved emulsifying skin cleaner.
INGESTION:
Ensure the individual drinks 30ml Milk of Magnesia, preferably in a cup of milk.
EYES:
Irritant but not harmful. Irrigate with water and seek medical attention.
Fire
FLASH POINT: Above 220°C.
Not classified as flammable.
Suitable extinguishing media: CO2, Halon or water spray if applied by an experienced operator.
Environment
Scrape up for burning or disposal on approved site.
Handling
Use barrier cream or oil resistant gloves
Storage
Away from heat and oxidising agent.
21
S e r v i c i n g t h e To o l
Molykote® 55m Grease Safety Data
First Aid
SKIN:
Flush with water. Wipe off.
INGESTION:
No first aid should be needed.
EYES:
Flush with water.
Fire
FLASH POINT: Above 101.1°C. (closed cup)
Explosive Properties: No
Suitable Extinguishing Media: Carbon Dioxide Foam, Dry Powder or fine water spray.
Water can be used to cool fire exposed containers.
Environment
Do not allow large quantities to enter drains or surface waters.
Methods for cleaning up: Scrape up and place in suitable container fitted with a lid. The spilled product produces an extremely
slippery surface.
Harmful to aquatic organisms and may cause long-term adverse effects in the aquatic environment. However, due to the physical
form and water - insolubility of the product the bioavailability is negligible.
Handling
General ventilation is recommended. Avoid skin and eye contact.
Storage
Do not store with oxidizing agents. Keep container closed and store away from water or moisture.
Molykote® 111 Grease Safety Data
First Aid
SKIN:
No first aid should be needed.
INGESTION:
No first aid should be needed.
EYES:
No first aid should be needed.
INHALATION:
No first aid should be needed.
Fire
FLASH POINT: Above 101.1°C. (closed cup)
Explosive Properties: No
Suitable Extinguishing Media: Carbon Dioxide Foam, Dry Powder or fine water spray.
Water can be used to cool fire exposed containers.
Environment
No adverse effects are predicted.
Handling
General ventilation is recommended. Avoid eye contact.
Storage
Do not store with oxidizing agents. Keep container closed and store away from water or moisture.
22
S e r v i c i n g t h e To o l
Service Kits
For all servicing we recommend the use of the following service kits.
Spanners are specified in inches and across flats unless otherwise stated.
SERVICE KIT : 07900-05300
ITEM PART Nº
07900-00157
07900-00006
07900-00446
07900-00603
07900-00520
07900-00521
07900-00602
07900-00595
07900-00434
07900-00237
07900-00012
07900-00008
DESCRIPTION
CIRCLIP PLIERS
SPATULA
EXTRACTOR
BARREL VICE JAWS
3/8" ROD
1/4" ROD
'O' RING ASSEMBLY BULLET
18mm SPANNER
32mm SPANNER
3/8" x 5/16" B.S.W. SPANNER
9/16" x 5/8" SPANNER
7/16" x 1/2" SPANNER
SERVICE KIT : 71210-99990
PART Nº
07900-00667
07900-00692
07900-00670
07900-00672
07900-00706
07900-00684
07900-00685
07900-00351
07900-00469
07900-00158
DESCRIPTION
PISTON SLEEVE
TRIGGER VALVE EXTRACTOR
BULLET
'T' SPANNER
LOCATION SPIGOT
GUIDE TUBE
INSERTION ROD
3 MM ALLEN KEY
2.5 MM ALLEN KEY
2 MM PIN PUNCH
Nº OFF
ITEM PART Nº
1
1
1
1
1
1
1
1
1
1
1
1
07900-00352
07900-00710
07900-00725
07900-00243
07900-00717
07900-00013
07900-00617
07900-00469
07900-00351
07900-00224
07900-00225
07992-00020
DESCRIPTION
SEAL REMOVAL HOOK
BARREL PLUG REMOVAL SPANNER
BULLET
SCREWDRIVER
INTENSIFIER SPANNER
1/8" ALLEN KEY
LOCTITE® MULTI-GASKET 574 50ml PACK
2.5mm ALLEN KEY
3mm ALLEN KEY
4mm ALLEN KEY
5mm ALLEN KEY
80g TIN MOLYLITHIUM GREASE EP 3753
Nº OFF
1
1
1
1
1
1
1
1
1
1
1
1
Spanners are specified in inches and across flats unless otherwise stated.
Nº OFF
1
1
1
1
1
1
1
1
1
1
PART Nº
07900-00157
07900-00008
07900-00012
07900-00015
07900-00686
07900-00677
07900-00698
07900-00700
07992-00020
07992-00075
07900-00775
DESCRIPTION
CIRCLIP PLIERS
7/16 x 1/2 SPANNER
9/16 x 5/8 SPANNER
5/8 x 11/16 SPANNER
PEG SPANNER
SEAL EXTRACTOR
STOP NUT
PRIMING PUMP
GREASE - MOLY LITHIUM E.P.3753
GREASE - MOLYKOTE® 55M
GREASE - MOLYKOTE® 111
Nº OFF
1
1
1
1
1
1
1
1
1
1
1
23
Maintenance
Every 500,000 cycles the tool should be completely dismantled and new components should be used where worn, damaged or when
recommended. All ‘O’ rings and seals should be renewed and lubricated with Molykote® 55m grease for pneumatic sealing or
Molykote® III for hydraulic sealing.
I M P O R TA N T
Safety Instructions appear on page 4.
The employer is responsible for ensuring that tool maintenance instructions are given to the appropriate personnel.
The operator should not be involved in maintenance or repair of the tool unless properly trained.
The airline must be disconnected before any servicing or dismantling is attempted, unless specifically instructed otherwise.
It is recommended that any dismantling operation be carried out in clean conditions.
Prior to dismantling the tool, you will need to remove the nose equipment.
For total tool servicing we advise that you proceed with the dismantling of sub-assemblies in the order shown.
Dismantling 07537-00200
REMOVAL OF THE HEAD MOULDINGS
•
•
•
•
Manually flip the Clip 48 up and remove the End Cap 50.
Using an Allen Key*, remove the three securing Screws 2 and Nuts 7 from the tool body assembly and one Screw 97 from the
LH Body Moulding 60.
Remove the RH and LH Body Moulding 59 and 60.
Assemble in reverse order of dismantling.
PNEUMATIC PISTON ASSEMBLY
•
•
•
•
•
•
•
Clamp the Body 72 of the inverted tool across the air inlet bosses in a vice fitted with soft jaws.
Pull off the Rubber Boot 67.
Using the peg spanner* unscrew Base Cover 73.
Unscrew Locknuts 6 (2 off) and remove the Base Plate 77.
Remove the Cylinder Liner 75, together with Sealing Washers 78 (2 off) and ‘O’ Rings 9 (2off).
Remove Pneumatic Piston Assembly 58 from Body 72 together with ‘O’ Ring, Lip Seal (3 off) and Guide Ring.
Assembly in reverse order.
VALVE SPOOL ASSEMBLY
•
•
•
•
•
•
•
•
Remove Pneumatic Piston Assembly 58 and Intensifier Seal Assembly 71 as described immediately above.
Using the ’T’ spanner* and location spigot* undo Clamp Nut 64 and remove it together with Top Plate 76, Tie Rods 74 and
Transfer Tube Assembly 69.
Release the tool from the vice and separate Body 72 with ‘O’ Ring 20 from Handle Assembly 57.
Pull off the Head Assembly 56 from Handle Assembly 57 and remove ‘O’ Ring 19 from the intensifier tube.
Push out Valve Seat 62 together with both ‘O’ Rings 18 (2 off).
Remove all the components of Valve Spool Assembly 68.
Finally remove ‘O’ Ring 18 out of the handle counter bore.
Assemble in reverse order to dismantling ensuring that the central port in Valve Seat 62 faces upwards towards”O” Ring 17.
TRIGGER
•
•
•
Using the 2 millimeter diameter pin punch*, drive Trigger Pin 65 out and lift off Trigger 61.
Unscrew Trigger Valve 24 using the trigger valve extractor*.
Assemble in reverse order to dismantling.
* Refers to items included in the service kits 07900-05300 & 71210-99990. For complete list see page 23.
Item numbers in bold refer to the general assemblies and parts lists on pages 26-27.
24
Maintenance
Dismantling 07537-00200
TAIL JAW CYLINDER
•
•
•
•
•
•
•
•
•
•
•
•
•
Using an Allen Key*, remove one cap head Screw 5 ensuring that any trapped air in the tail jaw cylinder is exhausted. Remove
the second cap head Screw 5.
Pull out Rear Plug 47.
Extract air tail jaw components, comprising Tail Jaw Piston Assembly 51, Spring 35, Jaws 34 and Jaw Housing 41.
Remove plug at rear of piston assembly using an Allen Key* and a bar through the large slot in the turret.
Clean out turret using a 4.7mm (3/16”) drill and replace plug using a non-hardening sealing compound, e.g. Loctite® Multi-gasket
574*.
Remove piston seal ‘O’ Ring 10.
Grip Barrel 44 in a vice using soft jaws* to avoid damage.
Using a box spanner*, unscrew Barrel Plug 45, preventing Barrel 44 turning by using an open ended spanner*.
Disconnect Air Tail Jaw Concertina Tube 54 from Head Assembly and pull Tail Jaw Cylinder 46 from tool.
Remove ‘O’ Ring 13, Rubbing Strip 40 and Barrel Return Spring 37.
Free length of Spring 35 should be 38.1mm (1.5”). Replace if necessary.
Coat the tail jaws with Moly Lithium grease before assembling.
Assemble in reverse order of dismantling.
HYDRAULIC PISTON
•
•
•
•
•
•
•
•
•
•
•
•
Remove Tail Jaw Cylinder 46 as described earlier.
Grip Head Assembly 56 in vice using soft jaws* to avoid damage, undo Stroke Limiter 39.
Using an Allen Key*, loosen Screw 3 clamping the Switch Block 55 to the Barrel 44.
Using an Allen Key*, remove the Switch Block 55 & O Ring 21, by undoing the securing Screw 4.
Hold the tool firmly and pull the Barrel 44 from the body (a small quantity of hydraulic oil may be ejected from inside body).
Remove Piston 38 carefully so as not to damage body bore.
Remove Lip Seal 15.
Lip Seal 16 is difficult to remove without damaging, but can remain in place during cleaning (provided it is not affected by cleaning
process). If however, Lip Seal 16 requires renewing proceed as follows:
Using spatula*, prise out Lip Seal 16 from Head Assembly 56, taking care not to damage head cavity and bores. The removed
Lip Seal 16 MUST be discarded.
To replace Lip Seal 16, unscrew existing Bleed Plug 43 until inside face is level with internal bore of the Head Assembly 56. This
will provide a smooth passage for insertion of new Lip Seal 16 through rear of body.
Ensure the Lip Seal 16 is well greased and the correct way round with the open end of the seal facing the rear tail jaws.
Complete assembly in reverse order of dismantling.
TAIL JAW ON/OFF VALVE
•
•
•
•
•
•
•
•
•
The unit is designed so that minimum of servicing is required during the life of the tool.
If it is necessary to dismantle valve, proceed as follows:
Remove Switch Block 55 as described in section “Hydraulic Piston”.
Using a screwdriver*, carefully remove the Chrome Star-lock Washer 22 from Air Tail Jaw Spool 49 and discard washer.
Extract Air Tail Jaw Spool 49 from Switch Block 55.
Taking care not to damage the Air Tail Jaw Spool 49, remove the ‘O’ Rings 11.
Clean spool and refit new ‘O’ Rings 11 using assembly bullet* and insert into Switch Block 55, noting its orientation.
Fit New Chrome Star-lock Washer 22 by clamping in vice using a soft jaw vice to prevent damage. DO NOT USE UNDUE FORCE.
Complete assembly in reverse order of dismantling.
HANDLE & END CAP
•
Clean and inspect mouldings for cracks or other damage.
CURSOR
•
Clean and oil Mechanical Cursor 36 occasionally with a little light oil.
I M P O R TA N T
Check the tool against daily and weekly servicing.
Priming is ALWAYS necessary after the tool has been dismantled and prior to operating.
* Refers to items included in the service kits 07900-05300 & 71210-99990. For complete list see page 23.
Item numbers in bold refer to the general assemblies and parts lists on pages 26-27.
25
26
28
27
W
1
5
8
48
47
50
SECTION 'X'-'X'
22
37
23
42
40
11
49
10
35
51
39
38
67
75
94
88
93
95
73
72
64
96
59, 60
13
79
80
81
82
2, 7
3
W
34
46
45 36
8
5
PART SECTION 'W'-'W'
21
54
31 10
41
2, 7
90
19
20
71
57
20
15
91
43
56
92
16
A
A
2, 7
14
58 Assy
89
69
32
24
61
65
33
70
78
18
18
30
66
4
X
97 Ref
55
X
29
44
9
77
SECTION 'A'-'A'
17
6
62 25
68
87
89
74
74
76
98
12
G e n e r a l A s s e m b l y o f 0 7 5 3 7 - 0 0 2 0 0 To o l
DESCRIPTION
07007-01504
07008-00010
07151-00403
07154-00404
07271-01100
07490-03002
07530-00203
07530-00204
07530-00206
32
33
34
35
36
37
38
39
40
BARREL RETURN SPRING
PISTON
STROKE LIMITER
RUBBING STRIP
CE MARK LABEL (NOT SHOWN)
6" FLEXIBLE HOSE
JAWS
SPRING
MECHANICAL CURSOR
L TYPE THREADED NIPPLE
NON-RETURN VALVE
DUST CAP
DIA 3 x 10 LONG SPIRAL PIN
BOOK SYMBOL LABEL (NOT SHOWN)
07005-01972
07005-10057
07007-00017
07007-00224
07007-01503
26
27
28
29
30
31
M4 x 5 LONG SKT HD GRUB SCREW
M4 x 10 LONG SKT HD CAP SCREW
M5 x 6 LONG SKT HD SET SCREW
M4 X 15 LONG SKT HD CAP SCREW
M4 X 6 LONG SKT HD CAP SCREW
M6 NYLOK NUT
M4 HEX NUT
M4 WASHER (PLASTIC)
'O' RING
'O' RING
'O' RING
'O' RING
'O' RING
'O' RING
LIP SEAL (DYNAMIC)
LIP SEAL (STATIC)
'O' RING
'O' RING
07003-00287 'O' RING
07003-00288 '0' RING
07003-00383 'O' RING - (I/D 3.00 Sec 1.00)
07004-00058 1/8" STARLOCK WASHER CHROME
07004-00059 1/8" STARLOCK WASHER BLACK
07005-00088 TRIGGER VALVE
07005-01274 1/8" BSP PLUG
01
02
03
04
05
06
07
08
09
10
11
12
13
14
15
16
17
18
19
20
21
22
23
24
25
PART Nº
07001-00223
07001-00401
07001-00404
07001-00445
07001-00504
07002-00108
07002-00134
07002-00153
07003-00027
07003-00113
07003-00121
07003-00127
07003-00167
07003-00418
07003-00236
07003-00237
07003-00271
07003-00281
ITEM
07537-00200 PARTS LIST
QTY SPARES ITEM
2
41
3
42
43
1
44
1
45
2
2
2
46
3
47
2
48
2
49
2
2
50
2
2
51
1
52
1
1
53
2
54
1
1
55
2
56
1
57
3
58
1
59
2
60
2
61
1
62
1
63
1
64
1
65
66
1
67
1
68
1
69
2
70
1
71
1
72
1
73
2
2
74
1
75
1
76
1
77
1
78
1
79
1
1
80
PART Nº
71213-02010
71221-02005
71221-02006
71221-20101
71221-20102
71210-03800
71211-02001
71211-02002
71211-02004
71211-02008
71210-02031
71210-02055
71210-03400
07537-00810
71210-03700
71210-02014
71210-02024
07530-02207
07530-02213
07530-02220
07530-02302
07530-02603
07530-02800
07537-00201
07537-00202
07537-00203
07537-00204
07537-00300
07537-00400
07537-00500
07537-00600
07537-00700
71210-02008
71210-02009
07530-00208
07530-00310
07530-0O500
07530-02201
07530-02205
QTY SPARES ITEM
1
81
2
82
1
83
1
84
1
85
86
TAIL JAW CYLINDER
1
87
REAR PLUG
1
88
CLIP
1
89
AIR TAIL JAW SPOOL
1
90
END CAP
1
91
TAIL JAW PISTON ASSEMBLY
1
92
LABEL (NOT SHOWN)
2
93
LABEL (NOT SHOWN)
1
94
AIR TAIL JAW CONCERTINA TUBE
1
95
SWITCH BLOCK
1
96
HEAD ASSEMBLY
1
97
HANDLE ASSEMBLY
1
98
PNEUMATIC PISTON Assembly (87 to 96) 1
07537 BODY MOULDING ASSEMBLY - RH 1
07537 BODY MOULDING ASSEMBLY - LH 1
TRIGGER
1
VALVE SEAT
1
CLAMP NUT
1
TRIGGER PIN
1
SILENCER
2
RUBBER BOOT
1
VALVE SPOOL ASSEMBLY
1
TRANSFER TUBE ASSEMBLY
1
ON / OFF VALVE ASSEMBLY
1
INTENSIFIER SEAL ASSEMBLY
1
BODY MACHINED
1
BASE COVER MACHINED
1
TIE RODS
2
CYLINDER LINER
1
TOP PLATE ASSEMBLY
1
BASE PLATE
1
SEALING WASHER
2
COUNTER MOULDING
1
SPECIAL M4 SCREW
2
DESCRIPTION
JAW HOUSING
BLANKING PLUG
BLEED PLUG Assembly [Items 83 to 86]
BARREL
BARREL PLUG
PART Nº
DESCRIPTION
07007-01993
07002-00098
71221-20104
71210-03205
07001-00442
07002-00163
CENTRE POLE MAGNET
M5 NYLOK NUT
M5x19 C'SK SCREW
GUIDE RING
M5x6 LONG SKT HD BUTTON SCREW
WASHER
71221-20103 MOULD RETAINING NUT
71221-20105 MODIFIED COUNTER
07003-0O142 BONDED SEAL
07003-00194 BONDED SEAL
07001-00442 SCREW
07530-00501 PLUG
71211-03201 PISTON
07003-00280 'O' RING
07003-00274 SEAL/WIPER
71211-03202 INTENSIFIER ROD
07537-00501 SPACER
07001-00411 M6x25 C'SK HEAD SCREW
QTY SPARES
2
1
1
1
1
1
1
1
1
1
1
3
1
1
1
1
1
1
1
1
2
P a r t s L i s t f o r 0 7 5 3 7 - 0 0 2 0 0 To o l
27
Priming
Priming is ALWAYS necessary after the tool has been dismantled and prior to operating. It may also be necessary to restore the full
stroke after considerable use, when the stroke may be reduced and fasteners are not fully placed by one operation of the trigger.
Oil Details
The recommended oil for priming is Hyspin® VG 32 available in 0.5l (part number 07992-00002) or one gallon containers (part
number
07992-00006). Please find specific table and safety data below.
Hyspin® VG 32 and AWS Oil Safety Data
First Aid
SKIN:
Wash thoroughly with soap and water as soon as possible. Casual contact requires no immediate attention. Short term contact requires
no immediate attention.
INGESTION:
Seek medical attention immediately. DO NOT induce vomiting.
EYES:
Irrigate immediately with water for several minutes. Although NOT a primary irritant, minor irritation may occur following contact.
Fire
Flash point: 232°C. Not classified as flammable.
Suitable extinguishing media: CO2, dry powder, foam or water fog. DO NOT use water jets.
Environment
WASTE DISPOSAL: Through authorised contractor to a licensed site. May be incinerated. Used product may be sent for reclamation.
SPILLAGE: Prevent entry into drains, sewers and water courses. Soak up with absorbent material.
Handling
Wear eye protection, impervious gloves (e.g. of PVC) and a plastic apron. Use in well ventilated area.
Storage
No special precautions.
Priming Pump
To enable you to follow the priming procedure opposite, you will need to obtain a priming pump 07900-00700.
28
Priming
P r i m i n g P ro c e d u r e
I M P O R TA N T
DISCONNECT THE TOOL FROM THE AIR SUPPLY OR SWITCH OFF AT VALVE 70.
All operations should be carried out on a clean bench, with clean hands in a clean area.
Ensure that the new oil is perfectly clean and free from air bubbles.
Care MUST be taken at all times, to ensure that no foreign matter enters the tool, or serious damage may result.
•
Remove Bleed Screw 85 and Bonded Seal 84.
•
Connect air supply to tool and switch ON/OFF Valve 70 to ‘ON” position.
•
Invert tool over suitable container and actuate trigger. Waste oil will be ejected through the bleed screw hole.
CARE SHALL BE TAKEN TO ENSURE THAT THE BLEED HOLE IS NOT DIRECTED TOWARDS THE OPERATOR OR OTHER
PERSONNEL.
•
Disconnect air supply to tool or switch ON/OFF Valve 70 to ‘OFF” position.
•
Fill the priming pump with oil.
•
Screw priming pump 07900-00700 into the bleed screw hole with Bonded Seal 84 in place.
•
Actuate the priming pump by pressing down and releasing several times until resistance is felt.
•
Remove the priming pump.
•
Replace Bleed Screw 85 and Bonded Seal 84.
•
Connect air supply to tool and switch ON/OFF valve 70 to ‘ON” position.
•
Check that the stroke of the tool meets the minimum specification of 30 millimetres. To check the stroke, measure the distance
between the rear of the tail jaw cylinder and body mouldings, BEFORE pressing the trigger and when the trigger is fully actuated.
The stroke is the difference between the two measurements. If it does not meet the minimum specification, repeat the priming
procedure.
Item numbers in bold refer to the general assembly drawing and parts list on pages 26-27.
29
Fault Diagnosis
M PpTtO
SSyYm
oM
m
P oP sO sS iSbI Bl eL ECCaAuUsSeE
M EeDdYy
RReEm
Tool will not place
Low air pressure.
Increase air pressure
fastener
Lack of lubrication.
Lubricate tool at air inlet point
High broach load.
Check fastener grip and application
P aPA
g GeE RReEfF
hole size
Check for correct size mandrel.
‘Mandrel Slip’ -
Worn or broken tail jaws.
New tail jaws
Tail jaws switched off.
Switch on tail jaws
Air in hydraulic system.
See ‘Priming Procedure’
Worn or dirty tail jaws.
Clean or renew as necessary
jaws will not grip
’ Insufficient air pressure/volume.
Increase air pressure/volume
mandrel
’ Tail jaw switch inoperable.
Replace switch
’ Air leaks to tail jaws.
Renew ‘O’ Rings 10 on Piston Assembly 51
Mandrel broken and not reaching tail jaws.
Replace mandrel
Defective non-return valve.
Replace non-return valve
Jaws will not
Dirty tail jaws or jaw housing.
Clean and lubricate
release mandrel
Faulty tail jaw switch.
Replace ‘O’ rings
Fasteners will not
Tail jaws not switched on.
Switch on tail jaws
feed through nose
Worn tail jaws.
Renew tail jaws
jaws
Cursor orientation incorrect.
Refit, ensuring correct orientation
Incorrect nose jaws.
Fit correct nose jaws
Mandrel follower spring not fitted.
Fit correct mandrel follower spring
Incorrect gap between fastener head
Set gap to 1.5mm - 3mm (1/16” - 1/8”)
and nose jaws when loaded.
See ‘Loading the Tool’
Cursor sticking.
Clean and oil cursor
Weak outer spring around cursor.
Renew cursor
Incorrect mandrel follower spring fitted.
Fit correct mandrel follower spring
High broach load.
Check application hole size and thickness
Excessive tail jaw
wear
10
and fastener grip capability
Feeding more than
Mandrel slip.
Check as for ‘Mandrel Slip’, stage 2
one fastener at a
Incorrect gap between fastener head
Set gap to 1.5mm - 3mm (1/16” - 1/8”)
time
and nose jaws when loaded
See ‘Loading the Tool’
Other symptoms or failures should be reported to your local Avdel® authorised distributor or repair centre.
30
29
10
Declaration of Conformity
We, Avdel UK Limited; Watchmead Industrial Estate, Welwyn Garden City, Hertfordshire, AL7 1LY
declare under our sole responsibility that the product:
Model 07537
Serial No.
................................................
to which this declaration relates is in conformity with the following standards:
EN ISO 12100 - parts 1 & 2
BS EN ISO 8662 - part 6
BS EN ISO 11202
BS EN ISO 3744
BS EN 982
ISO EN 792 - part 13-2000
BS EN 983
following the provisions of the Machine Directive 2006/42/EC
A. Seewraj - Product Engineering Manager Automation Tools
Date of issue
This box contains a power tool which is in
conformity with Machines Directive 2006/42/EC.
The ‘Declaration of Conformity’ is contained within.
31
Since 1936
2010
AUSTRALIA
Infastec (Australia) Pty Ltd.
891 Wellington Road
Rowville
Victoria 3178
Tel: +61 3 9765 6400
Fax: +61 3 9765 6445
[email protected]
GERMAN
Avdel Deutschland GmbH
Rotenburger Str. 28
30659 Hannover
Tel: +49 (0) 511 7288 0
Fax: +49 (0) 511 7288 133
[email protected]
CANADA
Avdel Canada Limited
1030 Lorimar Drive
Mississauga
Ontario L5S 1R8
Tel: +1 905 364 0664
+800 268 9947
Fax: +1 905 364 0678
+800 594 7661
[email protected]
INDIA
Infastech Fastening Technologies
India Private Limited
Plot No 0Z-14, Hi Tech SEZ,
SIPCOT Industrial Growth Center,
Oragadam, Sriperumbudur Taluk,
Kanchipuram District,
602105 Tamilnadu
Tel: +91 44 4711 8001
Fax: +91 44 4711 8009
info-in@infastech. com
T
CHINA
Infastech (China) Ltd
RM 1708, 17/F.,
Nanyang Plaza,
57 Hung To Rd., Kwun Tong
Hong Kong
Tel: +852 2950 0631
Fax: +852 2950 0022
[email protected]
FRANCE
Avdel France S.A.S.
Bat. Le Monet Paris Nord 2
9 Allée des Impressionistes
CS 59328 Villepinte
95941 Roissy CDG Cedex
Tel: +33 (0) 149 909500
Fax: +33 (0) 149 909550
[email protected]
T
ITALY
Avdel Italia S.r.L.
Viale Lombardia 51/53
20861 Brugherio (MB)
Tel: +39 039 2879911
Fax: +39 039 2873079
[email protected]
JAPAN
Infastech Kabushiki Kaisha
Center Minami SKY,
3-1 Chigasaki-Chuo, Tsuzuki-ku,
Yokohama-city,
Kanagawa Prefecture
Japan 224-0032
Tel: +81 45 947 1200
Fax: +81 45 947 1205
[email protected]
Manual No.
Issue
Change Note No.
07900-00845
B7
13/112
MALAYSIA
Infastech (Malaysia) Sdn Bhd
Lot 63 Persiaran Bunga
Tanjung 1,
Senawang Industrial Park
70400 Seremban
Negeri Sembilan
Tel: +606 676 7168
Fax: +606 676 7101
[email protected]
SINGAPORE
Infastech (Singapore) Pte Ltd.
31 Kaki Bukit Road 3
#05-03/06 Techlink
Singapore, 417818
Tel: +65 6372 5653
Fax: +65 6744 5643
[email protected]
SOUTH KOREA
Infastech (Korea) Ltd.
32-9, Jik-dong,
Gwangju-si, Gyeonggi-do
Korea, 464-090
Tel: +82 31 661 6342
+82 31 798 6340
Fax: +82 31 798 6342
[email protected]
SPAIN
Avdel Spain S.A
C/ Puerto de la
Morcuera, 14
Poligono Industrial Prado
Overa
Ctra. de Toledo, km 7,8
28919 Leganés (Madrid)
Tel: +34 91 3416767
Fax: +34 91 3416740
[email protected]
TAIWAN
Infastech/Tri-Star Limited
No 269-7, Baodong Rd,
Guanmiao Dist.
Tainan City
Taiwan, R.O.C. 71841
Tel: +886 6 596 5798 (ext 201)
Fax: +886 6 596 5758
[email protected]
THAILAND
Infastech Thai Co., Ltd
64/132 Moo 4 Tambon
Pluakdaeng
Amphur Pluakdaeng Rayong
21140 Thailand
Tel: +66 (0) 38 656360
Fax: +66 (0) 38 656346
info-th@infastech. com
UNITED KINGDOM
Avdel UK Limited
Pacific House
2 Swiftfields
Watchmead Industrial Estate
Welwyn Garden City
Hertfordshire AL7 1LY
Tel: +44 (0) 1707 292000
Fax: +44 (0) 1707 292199
[email protected]
USA
Avdel USA LLC
614 NC Highway 200 South
Stanfield, North Carolina 28163
Tel: +1 704 888 7100
Fax: +1 704 888 0258
[email protected]
Infastech (Decorah) LLC
1304 Kerr Drive
Decorah, IA 52101
Tel: +1 563 383 4216
Fax: +1 563 387 3540
www.avdel-global.com
www.infastech.com
AV™, Aut osert ® (equipment), Avbolt ®, Avdel ®, Avdelmate ®, Avdel TX2000 ®, Avdelok ®, Avex ®, Avibulb®, Avinox®, Avinut ®, Avlug ®, Avmatic ®,
Avplas®, Avseal ®, Avsert ®, Avtainer ®, Avtronic ®, Briv ®, Bulbex ®, Chobert ®, Eurosert ®, Fastriv ®, Finsert ®, Genesis ®, Grovit ®, Hemlok®, Hexsert ®,
Holding your world together ®, Hydra ®, Infalok ®, Interlock ®, Klamp-Tite ®, Klamptite KTR ®, Kvex ®, Maxlok ®, Monobolt ®, Monob ulb®, Neobolt ®,
Nutsert ®, Nutsert SQ ®, Portariv ®, Rivmatic ®, Rivscrew ®, Speed Fastening ®, Squaresert ®, Stavex ®, Supersert® , Thin Sheet Nutsert ®, Titan ®,
T- Lok ®, TLR ®, TSN ®, TX2000 ®, Versa- Nut ®, Viking ® and Viking 360 ® are trademarks of Avdel UK Limited. eRiv™, Infastech ®, NeoSpeed ® and
Our Technology, Your Success™ are trademarks of Infastech Intellectual Properties Pte Ltd. The names and logos of other companies
mentioned herein may be trademarks of their respective owner s.
This document is for informational purposes only. Infastech makes no warranties, expressed or implied, in this document.
Data shown is subject to change without prior notice as a result of continuous product development and improvement policy.
Your local Avdel representative is at your disposal should you need to confirm latest information.
© 2012 Infastech
Since 1922