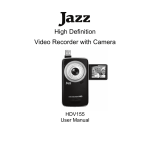
1
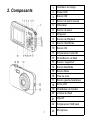
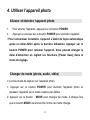
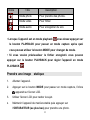
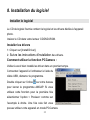
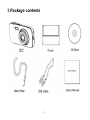
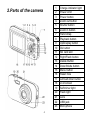
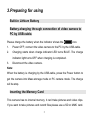
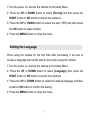
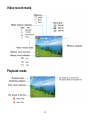
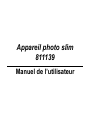
Appareil photo slim
811139
Manuel de l’utilisateur
1. Contenu----------------------------------------------------------------------- 4
2.Composants------------------------------------------------------------------ 5
3. Préparation pour utilisation-------------------------------------------- 6
Batterie Lithium (incluse)------------------------------------------------------- 6
Rechargement de la batterie via connexion de l’appareil à un PC à l’aide
d’un câble USB.------------------------------------------------------------------ 6
Insertion d’une carte mémoire--------------------------------------------------7
Formater la carte mémoire----------------------------------------------------- 8
Réglage de la langue-------------------------------------------------------------8
Réglage de la date et de l’heure------------------------------------------------ 9
Ecran d'Affichage---------------------------------------------------------------10
4. Utiliser l’appareil photo-------------------------------------------------12
Allumer et éteindre l’appareil photo----------------------------------------- 12
Changer de mode (photo, audio, vidéo)------------------------------------- 12
Prendre une image statique------------------------------------------------- 13
Utiliser le retardateur et le mode continue---------------------------------- 14
Utiliser le flash------------------------------------------------------------------15
Utiliser la fonction zoom-------------------------------------------------------16
Faire un enregistrement vidéo-------------------------------------------------17
Enregistrement audio-----------------------------------------------------------18
5. Utiliser le menu en mode enregistrement------------------------ 18
Menu en mode capture--------------------------------------------------------- 18
Menu en mode vidéo------------------------------------------------------------21
Menu de réglage---------------------------------------------------------------- 22
6. Playback--------------------------------------------------------------------- 24
Playback pour photos---------------------------------------------------------- 24
Lire une vidéo------------------------------------------------------------------- 24
Lire les fichiers sons------------------------------------------------------------25
Autres fonctions en mode playback-------------------------------------------26
Connecter l’appareil photo numérique à un PC----------------------------30
1
Utiliser un lecteur de carte---------------------------------------------------- 30
Connecter l’appareil photo à un PC avec un câble USB------------------ 31
8. Installation du logiciel---------------------------------------------------31
9. Dépannage------------------------------------------------------------------ 33
10. Information technique------------------------------------------------- 35
2
Merci d’avoir acheté cet appareil photo numérique. Merci de
rigoureusement lire ces instructions avant d’utiliser votre appareil. Garder
le manuel d’utilisateur dans un endroit sûr après lecture de celui-ci afin de
pouvoir vous y référer à nouveaux plus tard.
Précautions
Avant d’utiliser l’appareil, soyez sûr de bien lire et comprendre les
précautions d’utilisation décrites ci-dessous.
• Ne pas essayer d’ouvrir l’appareil même ni de le modifier de n’importe
quelle façon. La maintenance et la réparation doit être prise en charge par
les services des fournisseurs autorisés uniquement.
• Garder l’appareil photo hors de portée de l’eau et d’autres liquides. Ne
pas utiliser l’appareil photo avec les mains mouillées. Ne jamais utiliser la
l’appareil photo sous la pluie ou sous la neige. L’humidité peut provoquer le
danger d’un choc électrique.
• Utiliser exclusivement les accessoires d’alimentation recommandés.
Utiliser une source électrique non expressément recommandée peut
provoquer une surchauffe, une déformation du produit, une inflammation,
un choc électrique et d’autres dangers.
3
1. Contenu
4
2. Composants
5
1
2
3
4
5
6
7
8
9
10
Indicateur de charge
11
12
13
14
15
16
17
18
19
20
Emplacement carte SD
21
Objectif
22
Emplacement USB Jack
23
Microphone
Power LED
Bouton ON
Bouton de zoom inversé
Obturateur
Bouton de zoom
Dragonne
Bouton de Playback
Bouton Haut/Ecran
Bouton OK
Droite/Bouton du flash
Bouton ‘’supprimer’’
Bouton Bas/Mode
Bouton Menu
Trou du reset
Bouton gauche/retardateur
Ecran LCD
Retardateur de lumière
Lumière du flash
3. Préparation pour utilisation
Batterie Lithium (incluse)
Rechargement de la batterie via connexion de l’appareil à
un PC à l’aide d’un câble USB.
Recharger la batterie quand l’indicateur suivant apparait :
1.
.
Eteindre l’appareil; connecter l’appareil photo au pc avec le câble
USB.
2.
Le chargement de la batterie démarre lorsque la LED devient BLEUE.
La batterie est rechargée lorsque la LED indicateur de chargement
s’éteint.
3.
Déconnecter l’appareil photo.
Note:
Quand la batterie est en charge via le câble USB, appuyer sur le bouton
ON permet de passer l’appareil en mode stockage de mémoire ou en mode
webcam. Faire de la sorte interrompt le chargement de la batterie.
6
Insertion d’une carte mémoire
Cet appareil photo ne dispose pas de mémoire interne. Pour faire vos
photos et vidéos, utiliser une carte SD ou MMC est nécessaire. Toujours
éteindre l’appareil avant d’insérer ou de retirer une carte mémoire. Insérer
la carte en respectant le sens d’insertion (voir image). Ne pas forcer pour
faire rentrer votre carte en cas de résistance. La carte mémoire est équipée
d’une protection en écriture qui protège les données des suppressions de
fichiers involontaires. Avant d’enregistrer, de formater ou de supprimer des
fichiers de la carte SD, désactiver la protection en écriture au préalable.
1.
Eteindre l’appareil photo.
2.
Insérer la carte mémoire comme sur l’illustration.
•
Ne jamais insérer d’autres objets qui ne sont pas des cartes
SD/MMC dans l’emplacement carte SD. Faire ainsi peut entrainer
des dommages sur l’appareil et sur la carte.
•
Ne jamais retirer la carte de l’appareil pendant que celui-ci est
allumé. Faire ainsi peut endommager les photos et vidéos prises
ainsi que la carte mémoire.
7
Formater la carte mémoire
Toutes les données seront supprimées, les fichiers protégés inclus.
Assurez-vous de transférer les fichiers que vous voulez conserver sur
l’ordinateur avant le formatage.
1:Allumer l’appareil, passer en mode Setup Menu.
2: Appuyer sur le bouton Haut ou Bas pour sélectionner [Format] puis
appuyer sur le bouton Droite puis OK pour démarrer le sous menu.
3: Appuyer sur le bouton Haut ou Bas pour sélectionner [YES] puis
appuyer sur le bouton OK pour supprimer toutes les données.
4: Appuyer sur le bouton MENU pour fermer le menu.
Réglage de la langue
Lorsque vous utilisez l’appareil pour la première fois, assurez-vous de
choisir une langue appropriée et de régler la date et l’heure avant utilisation
de l’appareil.
1:Allumer l’appareil, aller dans le menu SETUP.
2: Appuyer sur le bouton Haut ou Bas pour sélectionner [Language] puis
appuyer sur le bouton Droite puis sur OK pour lancer le sous menu.
3: Appuyer sur le bouton Haut ou Bas pour sélectionner la langue voulue
8
puis appuyer sur le bouton OK pour confirmer le réglage.
4: Appuyer sur le bouton Menu pour fermer le menu.
Réglage de la date et de l’heure
1:Allumer l’appareil et aller dans le menu
SETUP.
2: Appuyer sur le bouton Haut ou Bas
pour
sélectionner
appuyer
[Date&Time]
ensuite sur le bouton
Droite puis OK pour lancer le
sous-menu.
3: Appuyer sur le bouton Haut ou Bas pour changer la valeur soulignée.
Appuyer sur le bouton Droite ou Gauche pour déplacer le curseur d’un
réglage à l’autre.
4: Appuyer sur le bouton OK pour confirmer les réglages effectués.
5: Appuyer sur le bouton MENU pour fermer le menu.
9
Ecran d'Affichage
Mode : prise de photos
10
Mode : capture de vidéos
Playback mode
11
4. Utiliser l’appareil photo
Allumer et éteindre l’appareil photo
1.
Pour allumer l’appareil, appuyer sur le bouton POWER.
2.
Appuyer à nouveau sur le bouton POWER pour éteindre l’appareil.
• Pour économiser la batterie, l’appareil s’éteint de façon automatique
après un délai défini après la dernière utilisation. Appuyer sur le
bouton POWER pour rallumer l’appareil. Vous pouvez changer le
délai d’extinction en réglant les fonctions [Power Save] dans le
menu de réglage.
Changer de mode (photo, audio, vidéo)
Il y’a trois mode de capture sur l’appareil photo.
1: Appuyer sur le bouton POWER pour éteindre l’appareil photo et
repasser l’appareil sur le mode capture par défaut.
2: Appuyer sur le bouton
MODE pour changer de mode. A chaque fois
que le bouton MODE est enclenché l’icône de mode change.
12
Icone
Titre
Description
Mode photo
Pour prendre des photos.
Mode vidéo
Pour filmer.
Mode audio
Pour enregistrer du son.
• Lorsque l’appareil est en mode playback
vous devez appuyer sur
le bouton PLAYBACK pour passer en mode capture après quoi
vous pouvez utiliser le bouton MODE pour changer de mode.
• Si vous voulez prévisualiser le fichier enregistré vous pouvez
appuyer sur le bouton PLAYBACK pour régler l’appareil en mode
PLAYBACK
.
Prendre une image
statique
1.
Allumer l’appareil.
2.
Appuyer sur le bouton MODE pour passer en mode capture, l’icône
apparait sur l’écran LCD.
3.
Utiliser l’écran LCD pour cadrer le sujet.
4.
Maintenir l’appareil de manière stable puis appuyer sur
l’OBTURATEUR (au plus bas) pour prendre une photo.
13
•
Automatiquement le numéro affiché sur l’écran diminue de 1. Par
exemple, si l’écran afficher 018, quand l’appareil est allumé, après
la prise d’une photo, 017 apparaitra. Si la mémoire est pleine
“Memory Full“ apparaitra sur l’écran.
• Assurez-vous que votre doigt ne couvre pas l’objectif.
•
Ne retirez pas la carte mémoire ou la batterie lorsque l’appareil
sauvegarde l’image, sans quoi l’image ne saura pas totalement
sauvegardée.
Utiliser le retardateur et le mode continue
Utilisez le retardateur pour régler le délai entre le moment où l’obturateur
est enfoncé et le temps ou la photo est prise. Utiliser le mode continue
(burst snapshot) pour prendre des photos en rafale.
1: Allumer l’appareil, et lancez le menu capture. (Voir page 19)
2: Appuyer sur le bouton Haut ou Bas puis sélectionner [Capture Mode]
puis appuyer sur le bouton Droite puis OK pour lancer le sous-menu.
2 secondes: L’action sur obturateur sera effective après un délai de 2
secondes.
10 Secondes: l’action sur l’obturateur sera effective après
un délai de 10 secondes.
14
Continue: Maintenir l’obturateur pour prendre des photos en rafale.
Les photos seront prises avec un intervalle de 1 seconde jusqu’à
remplissage de la mémoire si vous conservez l’obturateur
enclenché. Enfoncer l’obturateur une fois pour prendre 3 photos en
rafale.
3: Appuyer sur le bouton Haut ou Bas pour sélectionner le mode voulu puis
appuyer sur OK pour confirmer le réglage.
4: Appuyer sur le bouton MENU pour fermer le menu.
5: Enfoncer l’obturateur pour prendre une photo.
• Vous pouvez aussi utiliser le bouton Gauche/Retardateur pour
changer rapidement de mode.
Utiliser le flash
Le flash ne sert pas qu’à prendre des photos en cas de faible luminosité, il
sert aussi lorsque le sujet est dans l’ombre et à contre-jour. Appuyer sur le
bouton Droite/Flash fait défiler les différents modes de flash. Le flash ne
s’activera pendant une prise en rafale ou pendant un enregistrement vidéo.
1.
Allumer l’appareil et régler la caméra en mode capture.
2.
Appuyer sur le bouton Droite/Flash pour changer de mode de flash. A
15
chaque fois que le bouton Droite/Flash est enfoncé, le type de flash
change.
Icone
Titre
Description
Auto flash
Le
Flash
se
déclenche
automatiquement
lorsqu’une photo est prise dans des conditions
qui
requièrent
une
source
de
lumière
supplémentaire.
3.
Full Flash
Le flash s’enclenche à chaque prise de photo
Flash OFF
Le flash ne se déclenche jamais.
Appuyer sur l’obturateur pour prendre une photo.
• Le flash ne fonctionnera pas si le niveau de batterie est bas.
• L’écran est blanc lorsque le flash se charge. L’image suivante peut
être prise qu’après chargement complet du flash.
• Prendre une photo avec un flash dans un environnement éclairé
peut causer une mauvaise exposition.
Utiliser la fonction zoom
Cet appareil a une fonction zoom qui permet de faire un zoom ou un zoom
16
inverse. Le zoom digital agrandit ou rétrécit la photo en utilisant un
processus logiciel.
1: Allumer l’appareil et passer en mode capture vidéo.
2: Appuyer sur
ou
pour zoomer ou faire un zoom inverser sur la
photo.
: Zoom inversé pour une photo à grand angle.
: Zoomer pour une photo rapprochée.
Quand le bouton du zoom est enclenché, le niveau de zoom apparait sur
l’écran LCD.
Faire un enregistrement vidéo
1: Allumer la caméra et passer en mode capture de vidéo.
2: Enfoncer l’obturateur pour démarrer l’enregistrement. Appuyer sur le
bouton Haut pour ajouter une pause, appuyer à nouveau pour reprendre.
L’enregistrement.
3: Enfoncer l’obturateur à nouveau pour mettre fin à l’enregistrement. Si la
mémoire est pleine, l’appareil s’arrête d’enregistrer.
• L’écran LCD affiche le temps de vidéo enregistrée.
17
• Cet appareil numérique n’a pas d’enceintes. La voix que vous
enregistrez ne peut être écoutée que par lecture sur un ordinateur.
Enregistrement audio
1: Allumer l’appareil et passer en mode enregistrement de son.
2: Enfoncer l’obturateur pour démarrer l’enregistrement. Appuyer sur le
bouton Haut pour ajouter une pause, appuyer à nouveau pour reprendre
l’enregistrement.
3: Enfoncer à nouveau l’obturateur pour terminer l’enregistrement. Si la
mémoire est pleine, l’appareil s’arrêtera d’enregistrer.
•
Au centre de l’écran LCD s’affiche la durée d’enregistrement
réalisée.
•
Il n’y’a pas de menu en mode capture audio.
5. Utiliser le menu en mode enregistrement
Quand un menu s’affiche, les boutons Hauts/Bas/Droite sont utilisés pour
faire les réglages voulus. Le menu d’enregistrement audio n’a pas de
menu.
18
Menu en mode capture
1: Allumer l’appareil et passer en mode capture.
2: Appuyer sur le bouton menu pour afficher le menu.
3: Utiliser le bouton Haut ou Bas pour choisir une option.
4: Appuyer sur le bouton Droite ou OK pour
rentrer dans le sous-menu.
5: Utiliser le bouton Haut ou Bas pour
sélectionner une nouvelle option.
6: Appuyer sur OK pour confirmer le réglage.
7: Appuyer sur le bouton MENU pour fermer le
menu.
Liste des options du Menu Capture
Option
Résolution
Fonction
5 possibilités :
3264x2448(8M),2592X1944(5M),2048X1536(3M),
1600x1200(2M), 640X480(VGA)
Qualité
Choisir une qualité d’image inférieure pour diminuer la taille
de l’image avant de faire de nouvelles photos. 3
possibilités : [Super Fine] /[Fine] /[Normal].
19
Metering
Change la méthode de mesure de la luminosité des photos.
[Center]: Le calcul de l’exposition sera basé sur la lumière
au centre de la prise, ce choix est adapté pour une
utilisation générale de l’appareil photo numérique.
[Multi]: Le calcul de l’exposition sera basé sur la lumière
moyenne.
[Spot]: Seul le repère au centre de l’écran LCD servira au
calcul de la lumière.
Balance
Ajuster la balance de blanc pour s’adapter à différentes
de blanc
sources
de
lumière.
5
possibilités:
[Auto]/[Daylight]/
[Cloudy] / [Fluorescent] / [Bulb].
Exposition
Règle
la
valeur
du
posemètre
manuellement
pour
/
compenser
Posemètre
comme un éclairage intérieur sombre ou un fort contrejour.
des conditions d’éclairage inhabituelles
L’exposition varie entre –2.0 et 2.0.
Mode
Utiliser cette option pour régler la caméra sur différents
Capture
modes: [Off]/ [Self-timer 2s]/ [Self-timer 10s]/ [Continues].
Effets
Utiliser cette fonction pour changer la couleur de l’image:
[Normal]/ [B&w] /[Sepia] / [Negative]/[ Red]/ [Green]/[ Blue].
20
Date
Cette fonction peut êtreutilisée pour ajouter une date ou une
heure sur les photos que vous prenez: [Off]/[Date]/[Date et
Heure]
Menu en mode vidéo
1: En mode enregistrement de vidéo appuyer sur
le bouton Menu pour afficher le menu.
2: Utiliser le bouton Haut ou Bas pour
sélectionner une option.
3: Appuyer sur le bouton Droite ou OK pour
rentrer dans le sous-menu.
4: Utiliser le bouton Haut ou Bas pour sélectionner l’option désirée.
5: Appuyer sur OK pour confirmer le réglage.
6: Appuyer sur le bouton MENU pour fermer le menu.
Option
Fonction
Taille vidéo
Sélectionner une taille de vidéo inférieure pour faire
des vidéos plus longues.
3 possibilités : 720x480/640x480/320X240.
Fréquence
Sélectionner une fréquence d’images inférieure pour
21
d’images
enregistrer plus longtemps. 2 possibilités : High/ Low.
Metering
Change la méthode de mesure de la luminosité des
photos.
[Center]: Le calcul de l’exposition sera basé sur la
lumière au centre de la prise, ce choix est
adapté pour une utilisation générale de
l’appareil photo numérique.
[Multi]: Le calcul de l’exposition sera basé sur la
lumière moyenne.
[Spot]: Seul le repère au centre de l’écran LCD servira
au calcul de la lumière.
Balance de blanc
Ajuster la balance de blanc pour s’adapter à
différentes
sources
de
lumière.
5
possibilités:
[Auto]/[Daylight]/ [Cloudy] / [Fluorescent] / [Bulb].
Menu de réglage
Vous pouvez gérer les options systèmes
de l’appareil dans le menu de réglage.
(SETUP)
22
1: Allumer l’appareil, appuyer sur le bouton Menu pour afficher le menu.
[Setup/réglage].
2: Appuyer sur le bouton Droite pour sélectionner
3: Utiliser le bouton Haut ou Bas pour sélectionner une option.
4: Appuyer sur Droite ou OK pour rentrer dans le sous-menu.
5: Utiliser le bouton Haut ou Bas pour sélectionner l’option désirée.
6: Appuyer sur OK pour confirmer le réglage.
7: Appuyer sur le bouton Menu pour fermer le menu.
Option
Sons
Fonction
Programmer le son:
Obturateur :[On]/[Off]
Bip :[On]/[Off]
Fréquence
La fréquence de l’éclairage doit être fixée entre 60HZ
et 50HZ. [50HZ] / [60HZ]
Economie
Pour économiser de l’énergie, l’appareil s’éteint
d’énergie
automatiquement
après
un
certain
temps.
3
possibilités : [1min.] / [3min.] / [5min.].
Date & Heure
Programme la date et l’heure
Langue
Programme la langue de l’appareil photo
USB
Vous
pouvez
utiliser
23
l’appareil
photo
comme
CameraPC ou comme carte mémoire. [PCCAM]: pour
passer en mode CameraPC; [MSDC]: Pour passer en
mode mémoire.
Formatage
Format carte SD
Reset all
Pour remettre toutes les options d’origines.
[Oui]/ [Non].
6. Playback
Playback pour photos
1: Allumer l’appareil, appuyé sur le bouton PLAYBACK pour passer
. Les derniers fichiers enregistrés
l’appareil en mode playback
apparaitront sur l’écran LCD. S’il n’y’a pas d’images enregistrées, le
message [No file] apparait.
2: Appuyer sur le bouton Droite ou Gauche pour voir les images
précédentes.
24
Lire une vidéo
1: Appuyer sur le bouton Gauche ou Droite pour sélectionner la vidéo que
vous voulez revoir.
2: Appuyer sur OK pour lancer la lecture de la vidéo. Appuyer sur Menu
pour mettre fin à la lecture. Appuyer sur Haut pour mettre en pause,
appuyer à nouveau pour reprendre. Appuyer sur le bouton Droite pour
faire une lecture accélérée et appuyer sur le bouton Gauche pour
revenir en arrière.
• Cet appareil photo numérique n’est pas équipé d’enceintes. La voix
enregistrée ne peut être écoutée que par lecture sur un ordinateur.
Lire les fichiers sons
1: Appuyer sur le bouton Gauche ou Droite pour sélectionner le fichier
audio que vous voulez réécouter.
2: Appuyer sur OK puis démarrer la lecture. Appuyer sur le bouton MENU
pour arrêter la lecture. Appuyer sur le bouton Haut pour mettre en pause
puis appuyer à nouveau pour reprendre. Appuyer sur le bouton Droite
25
pour faire une lecture accélérée et appuyer sur le bouton Gauche pour
revenir en arrière.
Cet appareil photo numérique n’est pas équipé d’enceintes. La voix
enregistrée ne peut être écoutée que par lecture sur un ordinateur.
Autres fonctions en mode playback
Vu en Vignettes
Appuyer sur
pour voir les fichiers en mode vignettes. Utiliser les
boutons UP/DOWN/LEFT/RIGHT pour sélectionner un fichier. Appuyer sur
OK pour voir le fichier en plein écran.
Verrouiller des fichiers
1: Appuyer sur le bouton Menu en mode playback.
2: Appuyer sur le bouton Haut ou Bas pour sélectionner l’option [Lock].
3: Appuyer sur le bouton Droite ou OK pour rentrer dans le sous-menu.
4: Utiliser le bouton Haut ou Bas pour sélectionner l’option: [Lock/Unlock
one]: Lock /Unlock current file. [Lock All]: Lock all files. [Unlock all]: Unlock
all files.
26
5: Appuyer sur OK pour confirmer le réglage.
6: Appuyer sur le bouton MENU pour fermer le menu.
• Si le fichier a été bloqué, l’icône
apparaitra sur l’écran LCD. Un
fichier verrouiller (lock) ne peut pas être supprimé.
Supprimer des fichiers
1: Appuyer sur le bouton MENU en mode playback.
2: Appuyer sur le bouton Haut ou Bas pour sélectionner le fichier à
supprimer [Delete/Supprimer].
3: Appuyer sur le bouton Droite ou sur OK pour rentrer dans le sous menu
[One/Un]: Supprime le fichier. [All/Tout]: Supprime tous les fichiers à
l’exception des fichiers verrouillés.
4: Utiliser le bouton Haut ou Bas pour sélectionner l’option désirée.
5: Appuyer sur OK pour confirmer le réglage. Une boite de dialogue
apparaitra. Utiliser le bouton Haut ou Bas pour sélectionnera l’option
[Yes/Oui].
6: Appuyer sur OK pour supprimer le fichier ou tous les fichiers.
• Si vous voulez supprimer un fichier seul vous pouvez appuyer sur le
bouton DELETE/SUPPRIMER pour supprimer le fichier rapidement.
1: Sélectionner le fichier que vous voulez supprimer en utilisant les
27
boutons Haut, Bas, Gauche, Droite.
2: Appuyer sur le bouton Delete/Supprimer et la boîte de dialogue
apparait : “Supprimer cette image? Oui, Non”.
3: Appuyer sur le bouton Haut ou Bas pour sélectionner “Oui”.
4: Appuyer sur OK pour supprimer le fichier.
5: Appuyer sur le bouton Menu pour quitter.
Jouer un diaporama
1: Appuyer sur le bouton Menu en mode playback.
2: Appuyer sur le bouton Bas ou Haut pour sélectionner l’option [Slide
Show/Diaporama].
3: Appuyer sur le bout Droite ou OK pour rentrer dans le sous menu.
[Start/Démarrer]: Sélectionner cette option pour préparer un diaporama
après réglage du mode de visualisation.
[Interval]: Ajuster l’intervalle de temps en appuyant sur le bouton Gauche
ou DROITE. Le temps d’intervalle vari de 1 seconde à 10
secondes.
[Repeat/Répéter]: Appuyer sur le bouton Gauche ou Droite pour régler la
fonction répétition : On ou Off.
4: Utiliser le bouton Haut
ou Bas pour sélectionner [Start/Démarrer].
5: Appuyer sur OK pour démarrer le diaporama.
28
6: Appuyer sur le bouton Menu pour mettre fin au diaporama.
• Seules les photos peuvent être vues en diaporama.
Effets
Se référer à la page 20.
Rotation de l’image
1: Sélectionner l’image que vous voulez tourner en mode playback.
2: Appuyer sur le bouton Menu pour afficher le menu.
3: Appuyer sur les boutons Haut et Bas pour sélectionner l’option [Rotate].
4: Appuyer sur le bouton Droite ou OK pour démarrer le sous-menu :
Rotate: A chaque fois que le bouton OK est enfoncé, l’image subira une
rotation de 90 degrés.
Save / sauvegarder: Sélectionner cette option pour sauvegarder la rotation.
Back / retour: Sélectionner cette option pour fermer le menu.
Redimensionner
1: Sélectionner une image que vous voulez redimensionner en mode
playback.
2: Appuyer sur le bouton MENU pour afficher le menu.
29
3: Appuyer sur le bouton Haut ou Bas pour sélectionner l’option
[Resize/Redimensionner].
4: Appuyer sur Droite ou OK pour lancer le sous-menu: 2048x1536/
1280x960/ 640x480 .
5: Appuyer sur le bouton Haut ou Bas pour sélectionner l’option.
6: Appuyer sur le bouton OK pour sauvegarder l’image redimensionnée.
• L’image ne peut être que rétrécit.
7. Connexions
Connecter l’appareil photo numérique à un PC
Il existe deux façons de chargés les fichiers de l’appareil photo ou de la
carte mémoire à l’ordinateur:
•
En insérant la carte mémoire dans un lecteur de carte.
•
En connectant l’appareil à l’ordinateur via le câble USB.
Utiliser un lecteur de carte
1: Ejecter la carte mémoire de l’ordinateur puis
30
l’insérer dans un lecteur de carte connecté à un ordinateur.
2:ouvrir [Ordinateur] or [Explorateur Windows] puis double-cliquer sur le
l’icône de disque amovible qui représente la carte mémoire.
3: Copier les images de la carte dans le dossier de votre choix sur le
disque dur de l’ordinateur.
Connecter l’appareil photo à un PC avec un câble USB
1: Passer en mode USB [MSDC] mode. Voir détails page 24.
2:Connecter le câble USB fournit au port USB de l’ordinateur puis allumer
l’appareil photo numérique. Le message “MSDC” apparait sur l’écran
lorsque la connexion avec l’ordinateur s’établit.
3: Ouvrir [Ordinateur] ou [Explorateur Windows]. Un ‘’disque amovible’’
apparait dans la liste des lecteurs. Double-cliquer sur l’icône "Disque
Amovible" pour voir le contenu. Les fichiers stockés dans l’appareil
apparaissent dans le dossier "DCIM".
4: Copier les fichiers ou photos sur votre ordinateur.
31
8. Installation du logiciel
Installer le logiciel
Le CD de logiciel fournis contient le logiciel et les drivers dédiés à l’appareil
photo.
Insérer le CD dans votre lecteur CD/DVD-ROM.
Installer les drivers
1: Cliquer sur [Install Driver].
2: Suivre les instructions d’installation des drivers.
Comment utiliser la fonction PCCamera :
Veillez à avoir bien installé les driver dans un premier temps.
Connectez l’appareil à l’ordinateur à l’aide du
câble USB, démarrer le programme.
Double cliquer sur l’icône
sur votre bureau
pour lancer le programme AMCAP. Si vous
utilisez cette fonction pour la première fois
sélectionner l’option < Preview> comme sur
l’exemple à droite. Une fois cela fait vous
pouvez utiliser votre appareil en mode PCCamera.
32
Si vous voulez changer la taille de l’image, sélectionner <Video Capture
Pin> pour changer la taille de sortie.
9. Dépannage
L’appareil ne démarre pas.
1. La batterie est insérée dans le
mauvais sens.
★ Recharger la batterie dans le
bon sens.
2. La batterie est trop faible pour
★ Remplacer ou recharger la
démarrer l’appareil.
batterie.
33
L’appareil ne prend pas de photo.
★ Insérer une nouvelle carte
1. La mémoire est pleine.
mémoire
2.La
carte mémoire n’est pas
formatée correctement.
★ Formater à nouveau la carte
mémoire ou utiliser une nouvelle
carte.
L’image est flou ou hors cadre.
1. L’appareil était en mouvement
★Tenir fermement l’appareil sans
lors de la prise de la photo.
bouger lors de la prise de photos.
L’image n’apparait pas sur l’écran LCD.
1.Une carte mémoire avec des
★ L’appareil ne peut pas afficher
fichiers non JPG (enregistré avec
des images non JPG.
un autre appareil) est chargé.
Les photos prises s’enregistre pas dans la mémoire.
1. L’appareil a été éteint avant
l’enregistrement de l’image.
★Si l’indicateur de batterie faible
apparait
sur
remplacer
l’écran
la
LCD,
batterie
immédiatement.
Attention:
Si l’appareil ne fonctionne plus suite à une mauvaise utilisation, presser le
34
bouton reset pour redémarrer l’appareil.
10. Information technique
Capteur
5 Mega Pixels CMOS
Ecran
1.8 " TFT LCD Couleur
Capacité
150cm ~ Infini
(distance)
Ouverture
F3.0, Mise au point fixe
Obturateur
Obturateur électronique
Résolution
Still Image: 3264x2448(8M),2592X1944(5M),
2048X1536(3M),1600x1200(2M), 640X480(VGA)
Vidéo: 720x480, 640x480, 320x240
Sensitivité
Balance
Auto
de
Blanc
Contrôle
Auto/Daylight/Cloudy/Fluorescent/Bulb
de
-2EV to +2EV in 0.3 step
l’exposition
35
Burst / Rafale
Inclus
Flash Mode
Auto / force/ Off
Retardateur
2 sec. / 10 sec.
Stockage
Mémoire externe : SD / MMC
Alimentation
Batterie lithium
Température
En fonctionnement: 0° C à 40° C
ambiante
Eteinte: -20 à 60° C
Microphone
Inclus
36
SLIM DIGITAL CAMERA
811139
User’s Manual
1.Package contents--------------------------------------------------------------------- 3
2.Parts of the camera-------------------------------------------------------------------4
3.Preparing for using-------------------------------------------------------------------5
Bulit-in Lithium Battery---------------------------------------------------------5
Inserting the Memory Card----------------------------------------------------5
Format the memory card------------------------------------------------------ 6
Setting the Language ---------------------------------------------------------- 7
Setting the date and time------------------------------------------------------8
Monitor screen display---------------------------------------------------------9
4.Using this digital camera--------------------------------------------------------- 11
Turning the Camera On and Off-------------------------------------------- 11
Change the record mode---------------------------------------------------- 11
Taking still images------------------------------------------------------------ 12
Using the Self-timer and continues -----------------------------------------13
Using the Flash--------------------------------------------------------------- 14
Using the Zoom Function----------------------------------------------------15
Recording video clip----------------------------------------------------------16
Recording audio-------------------------------------------------------------- 17
5.Using the menu in record mode------------------------------------------------17
Menu in capture mode------------------------------------------------------- 17
Menu in video mode----------------------------------------------------------19
Setup menu------------------------------------------------------------------- 21
6. Playback------------------------------------------------------------------------------- 22
Playback still image---------------------------------------------------------- 22
Playing back movie clips-----------------------------------------------------23
Playing back audio files------------------------------------------------------23
Other function in playback mode------------------------------------------- 24
7. Making connections--------------------------------------------------------------- 28
Connecting the Camera to a PC--------------------------------------------28
Using a Card Reader---------------------------------------------------------28
Connecting the Camera to a PC with the USB Cable--------------------29
8. Software Installation---------------------------------------------------------------29
9. Troubleshooting-------------------------------------------------------------------- 31
10. Technical Specifications------------------------------------------------------- 32
1
Thank you for purchasing this digital camera. Please read these operating
instructions carefully in order to use the digital camera correctly. Keep the
instructions in a safe place after reading so that you can refer to them later.
Precautions
Before using the camera, please ensure that you read and understand the
safety precautions described below.
• Do not try to open the case of the camera or attempt to modify this camera
in any way. Maintenance and repairs should be carried out only by
authorized service providers.
• Keep the camera away from water and other liquids. Do not use the
camera with wet hands. Never use the camera in the rain or snow. Moisture
creates the danger of electric shock.
• Use only the recommended power accessories. Use of power sources not
expressly recommended for this equipment may lead to overheating,
distortion of the equipment, fire, electrical shock or other hazards.
2
1.Package contents
3
2.Parts of the camera
4
1
2
3
4
5
6
7
8
9
10
11
12
13
14
15
16
17
18
19
20
Charge indicator light
Power LED
Power button
Zoom out button
Shutter button
Zoom in button
Hand strap
Playback button
Up/Display button
Ok button
SD card slot
Right/Flash button
Delete Button
Down/Mode button
Menu button
Reset hole
Left/self-timer button
LCD screen
Selft-timer light
Flash light
21
22
23
Lens
USB jack
Microphone
3.Preparing for using
Bulit-in Lithium Battery
Battery-charging through connection of video camera to
PC by USB-cable.
Please charge the battery when the indicator shows the
icon.
1.
Power OFF; connect the video camera to the PC by the USB-cable.
2.
Charging starts when charge indicator LED turns BLUE. The charge
indicator light turns OFF when charging is completed.
3.
Disconnect the video camera.
Note:
When the battery is charging by the USB-cable, press the Power button to
get the camera into Mass storage mode or PC camera mode. The charge
will be stop.
Inserting the Memory Card
This camera has no internal memory, it can’t take pictures and video clips.
If you want to take pictures and record files please use a SD or MMC card.
5
Turn off the camera before inserting or
removing the memory card. Be sure to orient
the card correctly when inserting it. Never try
to force the memory card into the slot when
you feel resistance. The memory card has a write protect switch, which
used to protect data from accidental deletion. Therefore, whenever you
want to record, format or delete files in the SD card, disable the write
protection beforehand.
1.
Turn off the digital camera.
2.
Insert the memory card as illustrated.
•
Never insert any other object which is not a SD/MMC card into the
camera’s SD card slot. Doing so will cerate the risk of damaging
to the camera and the card.
•
Never remove the SD card from the camera while the camera is
powered on. Doing so can cause failure to the picture recording
operation, and even damage the memory card.
Format the memory card
All data will be deleted including protected files. Be sure to download
important files to your computer before formatting.
6
1:Turn the power on, and set the camera to the Setup Menu.
2: Press the UP or DOWN button to select [Format] and then press the
RIGHT button or OK button to launch the submenu.
3: Press the UP or DOWN button to select the item [YES] and then press
the OK button to erase all data.
4: Press the MENU button to close the menu.
Setting the Language
When using the camera for the first time after purchasing it, be sure to
choose a language and set the date & time before using the camera.
1:Turn the power on, and set the camera to the Setup Menu.
2: Press the UP or DOWN button to select [Language] then press the
RIGHT button or OK button to launch the submenu.
3: Press the UP or DOWN button to select the desired language and then
press the OK button to confirm the setting.
4: Press the MENU button to close the menu.
7
Setting the date and time
1:Turn the power on, and set the camera
to
the Setup Menu.
2: Press the UP or DOWN button to
select [Date&Time] then press the
RIGHT or OK button to launch the
submenu.
3: Press the UP or DOWN button to change the highlighted value. Press
the LEFT or RIGHT button to move the cursor between settings.
4: Press the OK button to confirm the setting.
5: Press the MENU button to close the menu.
8
Monitor screen display
Capture mode
9
Video record mode
Playback mode
10
4.Using this digital camera
Turning the Camera On and Off
1.
To turn on the camera, press the POWER button to turns on the
camera.
2.
Press the POWER button again to turn the camera off.
• To save battery power, the camera automatically turns off a period
of time after the last control accessed. Press the POWER button to
power the camera back on. You can change the power-off time by
setting the function [Power Save] in the Setup menu.
Change the record mode
There are three record modes in this camera.
1: Press the POWER button to turn on the camera, and the camera get into
the default capture mode.
2: Press the MODE button to change the mode. Each time the MODE
button is pressed the mode icon is changed.
11
Display
Title
Description
Capture mode
For taking still photos.
Video mode
For recording movie clips.
Audio mode
For recording audio files.
• When the digital camera is in playback mode
you must press the
PLAYBACK button to change it to record mode firstly then you can
use the MODE button to change mode.
• If you want to preview the record files you can press the PLAYBACK
button to set the digital camera to playback mode
.
Taking still images
1.
Turn on the camera.
2.
Press the MODE button to set the camera to capture mode, the icon
appears on the LCD screen.
3.
Use the LCD screen to frame your subject.
4.
Hold the camera steady and then press the SHUTTER button
completely down to take a picture.
12
• Automatically the number displayed on the screen is decreased by
one. For example, if the screen displays 018 when the camera is
powered on, after one photo has been captured, 017 will appear. If
the memory is full, “Memory Full “ will appear on screen.
• Make sure that your fingers do not cover the lens.
•
Do not take the memory card or battery out when the camera is
saving the image, otherwise the image will not be saved completely.
Using the Self-timer and continues
Use the self-timer to set a delay from the time the SHUTTER button is
pressed to the time the image is shot. Use the burst snapshot to take
pictures continuously.
1:Turn the power on, and set the camera to the Capture Menu.
2: Press the UP or DOWN button to select [Capture Mode] then press the
RIGHT or OK button to launch the submenu.
2 seconds: The Shutter release will delay for 2 seconds.
10 Seconds: The Shutter release will delay for 10 seconds.
13
Continues: Hold the SHUTTER button to take pictures continuously. It
will automatically take pictures in the interval of 1 second until the
memory is full if you don’t release the SHUTTER button. Or press
the SHUTTER button once to take three pictures continuously.
3: Press the UP or DOWN button to select the desired mode and then
press the OK button to confirm the setting.
4: Press the MENU button to close the menu.
5: Press the SHUTTER button to take picture.
• You can also press the LEFT/SELF-TIMER button to change the
mode quickly.
Using the Flash
The flash is not only for taking pictures when there is insufficient light, but
also for when the subject is in shade or with backlight conditions. Pressing
the RIGHT/FLASH button cycles your camera through the various flash
modes. The flash will not activate during continuous shooting or movie
recording.
1.
Turn the power on and set the camera to the Capture mode.
14
2.
Press the RIGHT/FLASH button to change the flash mode. Each time
the RIGHT/FLASH button is pressed the flash mode is changed.
Icon
Title
Description
Auto flash
Flash fires automatically when shooting
conditions require extra lighting.
Full Flash
Flash fires every time you take a photo,
regardless of lighting conditions.
Flash OFF
3.
The flash never fires even in dark conditions.
Press SHUTTER button to take a picture.
• The flash will not work when the battery is low.
• The screen is blank when the flash is charging. The next image can
be shot only when charging is completed.
• Shooting with a flash in a bright environment may cause incorrect
exposure.
Using the Zoom Function
This camera has a digital zoom function that allows you to zoom in or zoom
out on subjects. The digital zoom enlarges or shrinks the image using a
15
software process.
1: Turn the camera on and set it to capture mode or video record mode.
2: Press the
or
button to compose the image.
: zoom out for a wide-angle shot.
: zoom in for a telephoto shot.
When the zoom button is pressed, the value of magnification level
appears on the LCD monitor.
Recording video clip
1: Turn the camera on and set it to video record mode.
2: Press the SHUTTER button to start recording. Press the UP button to
have a pause and press it again to continue.
3: Press the SHUTTER again to end the recording. If the memory is full the
camera will stop recording automatically.
•
The LCD monitor displays the recorded time.
• This digital camera doesn’t have a speaker. So the voice you record
can be heard only by playing it on PC.
16
Recording audio
1: Turn the digital camera on and set it to audio record mode.
2: Press the SHUTTER button to start recording. Press the UP button to
have a pause and press it again to continue.
3: Press the SHUTTER again to end the recording. If the memory is full the
digital camera will stop recording automatically.
•
On the center of the LCD monitor displays the recorded time.
•
There is no menu in audio record mode.
5.Using the menu in record mode
When a menu is displayed, the UP/DOWN/RIGHT/OK button is used to
make the desired setting. The audio record mode doesn’t have a menu.
Menu in capture mode
1: Turn on the camera and set it to capture mode.
2: Press the MENU button to display the menu.
3: Use the UP or DOWN button to select an item.
17
4: Press the RIGHT button or OK button to
enter the submenu.
5: Use the UP or DOWN button to select the
desired item.
6: Press the OK button to confirm the setting.
7: Press the MENU button to close the menu.
Capture menu list
Menu item
Resolution
Function
There are five options for choice:
3264x2448(8M),2592X1944(5M),2048X1536(3M),
1600x1200(2M), 640X480(VGA)
Quality
Select a lower image quality to decrease the image size in
order to capture more images. There are three options for
choice:[Super Fine] /[Fine] /[Normal].
Metering
Change the metering method to change the brightness of
the picture.
[Center]: The exposure will be calculated based on light in
the center area and this is suitable for general use.
[Multi]: The exposure will be calculated based on the
18
average light.
[Spot]: Only the spot in the center of the LCD screen will be
metered for light.
White
Adjust the white balance to suit different light sources.
Balance
There five items for option: [Auto]/[Daylight]/ [Cloudy] /
[Fluorescent] / [Bulb].
Exposure
Set the exposure value manually to compensate for unusual
lighting conditions such as indirect indoor lighting, dark
backgrounds, and strong backlighting. The exposure value
range is –2.0 to 2.0.
Capture
Mode
Effect
Use this item to set the camera to different mode: [Off]/
[Self-timer 2s]/ [Self-timer 10s]/ [Continues].
Use this function to change the image’s color tone:
[Normal]/ [B&w] /[Sepia] / [Negative]/[ Red]/ [Green]/[ Blue].
Date
This function can be used to add a date or time to your
Stamp
pictures as you take them.
[Off]/[Date]/[Date&Time]
19
Menu in video mode
1: In video record mode press the MENU
button to display the menu.
2: Use the UP or DOWN button to select an item.
3: Press the RIGHT or OK button to enter the submenu.
4: Use the UP or DOWN button to select the desired item.
5: Press the OK button confirm the setting.
6: Press the MENU button to close the menu.
Menu item
Function
Movie Size
Select small movie size to record longer time.
There are three items for option: 720x480/640x480/
320X240.
Frame Rate
Select low frame rate to record longer time. There are
two items for option: High/ Low.
Metering
Change
the
metering
method
to
change
the
brightness of the picture.
[Center]: The exposure will be calculated based on
light in the center area and this is suitable for
general use.
20
[Multi]: The exposure will be calculated based on the
average light.
[Spot]: Only the spot in the center of the LCD screen
will be metered for light.
White Balance
Adjust the white balance to suit different light sources.
There five items for option: [Auto]/[Daylight]/ [Cloudy] /
[Fluorescent] / [Bulb].
Setup menu
You can set the system items in setup menu.
1: Turn the power on and press the MENU button to
display the menu.
[Setup].
2: Press the RIGHT button to select
3: Use the UP or DOWN button to select an item.
4: Press the RIGHT button or OK button to enter the submenu.
5: Use the UP or DOWN button to select the desired item.
6: Press the OK button to confirm the setting.
7: Press the MENU button to close the menu.
21
Menu item
Sounds...
Function
Sets the operation sound :
Shutter :[On]/[Off]
Beep :[On]/[Off]
Power
Light Frequency should be set to either 60Hz or 50Hz
frequency
depending on your region. [50HZ] / [60HZ].
Power save
To save power, the camera is turned off automatically
after a period of time. There are three options: [1min.] /
[3min.] / [5min.].
Date& Time
Setting Date and time.
Language
Setting Language.
USB
You can use this camera as a PC camera or removable
disk. [PCCAM]: Use as a PC camera;
[MSDC]: Use as a removable disk.
Format
Format SD card.
Reset all
To reset the entire menu and button operation settings
to initial default. [Yes]/ [ No].
22
6. Playback
Playback still image
1: Turn the camera on, and then press the PLAYBACK button to set the
camera to playback mode
. The latest recorded file appears on the
LCD screen. If there are no images stored, a message [No file]
appears.
2: Press the LEFT or RIGHT button to preview the previous or next image.
Playing back movie clips
1: Press the LEFT or RIGHT button to select the movie clips you want to
playback.
2: Press the OK button to start playing. Press the MENU button to end
playing. Press the UP button to pause it and press it again to continue.
Press the RIGHT button to fast forward and press the LEFT button to
back forward.
23
• This digital camera doesn’t have a speaker. So the voice you record
can be heard only by playing it on PC.
Playing back audio files
1: Press the LEFT or RIGHT button to select the audio file you want to
playback.
2: Press the OK button to start playing. Press the MENU button to end
playing. Press the UP button to pause it and press it again to continue.
Press the RIGHT button to fast forward and press the LEFT button to
back forward.
• This digital camera doesn’t have a speaker. So the voice you record
can be heard only by playing it on PC.
Other function in playback mode
Viewing Thumbnails
Press the
button to view the file in thumbnails mode. Use the
24
UP/DOWN/LEFT/RIGHT button to select a file. Press the OK button to
view the file in full screen.
Lock files
1: Press the MENU button in playback mode.
2: Press the UP or DOWN button to select the item [Lock].
3: Press the RIGHT button or OK button to enter the submenu.
4: Use the UP or DOWN button to select the item: [Lock/Unlock one]: Lock
/Unlock current file. [Lock All]: Lock all files. [Unlock all]: Unlock all files.
5: Press the OK button to confirm the setting.
6: Press the MENU button to close the menu.
• If the file has been locked the icon
will display on the LCD
screen. The locked file can not be deleted.
Delete files
1: Press the MENU button in playback mode.
2: Press the UP or DOWN button to select the item [Delete].
3: Press the RIGHT button or OK button to enter the submenu.[ One]:
Delete current file. [All]: Delete all files except locked files.
4: Use the UP or DOWN button to select the item.
25
5: Press the OK button to confirm the setting. A dialog box will appear.
Using UP or DOWN button to select the item [Yes].
6: Press the OK button to delete the current file or all files.
• If you want to delete a single file you can press the DELETE button
to delete the file quickly.
1: Select the file which you want to delete by using the UP, DOWN,
LEFT, RIGHT button.
2: Press the DELETE button, and then the dialog box appears: “Delete
This Image? Yes,
No”.
3: Press the UP or DOWN button to select “ Yes”.
4: Press the OK button to delete the file.
5: Press the MENU button to exit.
Play a slide show
1: Press the MENU button in playback mode.
2: Press the UP or DOWN button to select the item [Slide Show].
3: Press the RIGHT button or OK button to enter the submenu.
[Start]: Select this item to prepare for slide showing after setting the slide
show mode.
[Interval]: Set the interval time by pressing the LEFT or RIGHT button. The
range of interval time is 1 second to 10 seconds.
26
[Repeat]: Press the LEFT or RIGHT button to set the repeat function on or
off.
4: Use the UP or DOWN button to select [Start].
5: Press the OK button start slide show.
6: Press the MENU button to end slide show.
• Only the still image can be show in slide show.
Effect
Refer to page 19.
Rotate the image
1: Select an image you want to rotate in playback mode.
2: Press the MENU button to display the menu.
3: Press the UP or DOWN button to select the item [Rotate].
4: Press the RIGHT button or OK button to launch the submenu:
Rotate: Each time the OK button is pressed the image will rotate 90°.
Save: Select this item to save the rotated image.
Back: Select this item to close the submenu.
27
Resize
1: Select an image you want to resize in playback mode.
2: Press the MENU button to display the menu.
3: Press the UP or DOWN button to select the item [Resize].
4: Press the RIGHT button or OK button to launch the submenu:
2048x1536/ 1280x960/ 640x480 .
5: Press the UP or DOWN button to select the item.
6: Press the OK button to save the resized image.
• The image can only be resize to smaller size.
7. Making connections
Connecting the Camera to a PC
There are two ways to download files from the camera's internal memory or
memory card to a computer:
•
By inserting the memory card into a card reader
•
By connecting the camera to a computer using the supplied USB
cable.
28
Using a Card Reader
1: Eject the memory card from the camera and
insert it into a card reader that is connected to a
computer.
2:Open [My Computer] or [Windows Explorer] and
double-click the removable disk icon that represents the memory card.
3: Copy images from the card into a directory of your choice on the
computer’s hard disk.
Connecting the Camera to a PC with the USB Cable
1: Set the USB mode to [MSDC] mode. See the details on page 24.
2:Connect the supplied USB cable to the computer's USB port and turn on
the camera. A message “MSDC” appears on the screen when
connection to the computer has been successfully completed.
3: Open [My Computer] or [Windows Explorer]. A "Removable Disk"
appears in the drive list. Double-click the "Removable Disk" icon to view
its contents. Files stored on the camera are located in the folder named
"DCIM".
29
4: Copy the photos or files to your computer.
8. Dreiver Installation
Installing the Software
The bundled software CD has the drivers and software that come with
digital camera.
Insert the CD into your CD-ROM drive.
Install Driver
1:Click [Install Driver].
2: Follow the on-screen instructions to install the drivers.
How to use the PC Camera function
Please install the camera driver first. Connect
the camera to the computer with a USB cable,
run the program
Double click the icon
on your desktop to run
the AMCAP program.
If it was the first time you
30
use this function please select the item < Preview> as in the illustration.
And then you can use it as the pc camera function.
If you want to change the imaging size, select <Video Capture Pin> to
change the Output Size.
9. Troubleshooting
Power does not turn on.
1.Battery is inserted in the wrong
direction.
★ Reload battery in the correct
direction.
31
2.Battery is insufficient to power on.
★ Replace
or
recharge
the
battery.
The camera does not take pictures.
1.Memory is full.
★Insert a new memory card.
2.Memory card is not formatted
★Format the memory card again
correctly.
or use a new card.
Image is blurry or out of focus.
1.The camera was moving when
★Hold the camera steady when
the image was captured.
shooting picture.
Image is not displayed on the LCD monitor.
1.A memory card with non-JPG
★ This camera cannot display
images
non-JPG images.
(recorded
with
other
camera) is loaded.
Recorded images are not saved in memory.
off
★ If the battery low indicator
before the images are saved in
appears on the LCD monitor,
memory.
replace the battery immediately.
1.The
camera
was
turned
Attention:
If camera can not operation due to illegal usage, please press reset hole
button to restart again.
32
10. Technical Specifications
Sensor
5 MegaPixels CMOS
Display
1.8 " TFT Color LCD
Focus range
150cm ~ infinity
Aperture
F3.0, Fixed Focus
Shutter
Electronic shutter
Resolution
Still Image: 3264x2448(8M),2592X1944(5M),
2048X1536(3M),1600x1200(2M), 640X480(VGA)
Video: 720x480, 640x480, 320x240
Sensitivity
Auto
White
balance
Auto/Daylight/Cloudy/Fluorescent/Bulb
Exposure
-2EV to +2EV in 0.3 step
control
Burst
Included
Flash Mode
Auto / force/ Off
Self-timer
2 sec./ 10 sec.
33
Storage
External memory: SD / MMC
Power
Lithium battery
Supply
Ambient
Operating: 0° C to 40° C
temperature
Storage: -20 to 60° C
Microphone
Built-in
34