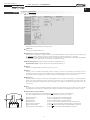
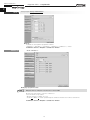
1
D UK F Helios Ventilatoren ANWENDER-HANDBUCH KWL®-Steuerung www.easycontrols.net NR. 82 200 D DEUTSCH Helios Ventilatoren ANWENDER-HANDBUCH Inhaltsverzeichnis KAPITEL 1. ALLGEMEINE MONTAGE- UND BETRIEBSHINWEISE . . . . . . . . . . . . . . . . . . . . . . . . . . . . . . . . . .Seite 1.0 Wichtige Informationen . . . . . . . . . . . . . . . . . . . . . . . . . . . . . . . . . . . . . . . . . . . . . . . . . . . . . . . . . . . . . . . . .Seite 1.1 Warn- und Sicherheitshinweise . . . . . . . . . . . . . . . . . . . . . . . . . . . . . . . . . . . . . . . . . . . . . . . . . . . . . . . . . . .Seite 1.2 Gewährleistungs- und Haftungsansprüche . . . . . . . . . . . . . . . . . . . . . . . . . . . . . . . . . . . . . . . . . . . . . . . . . .Seite 1.3 Einführung . . . . . . . . . . . . . . . . . . . . . . . . . . . . . . . . . . . . . . . . . . . . . . . . . . . . . . . . . . . . . . . . . . . . . . . . . . .Seite 1.4 Über Helios eaysyControls . . . . . . . . . . . . . . . . . . . . . . . . . . . . . . . . . . . . . . . . . . . . . . . . . . . . . . . . . . . . . .Seite 1.5 Konfiguration des KWL-Gerätes über Webportal . . . . . . . . . . . . . . . . . . . . . . . . . . . . . . . . . . . . . . . . . . . . . .Seite 1.6 Funktionsübersicht . . . . . . . . . . . . . . . . . . . . . . . . . . . . . . . . . . . . . . . . . . . . . . . . . . . . . . . . . . . . . . . . . . . .Seite 1 1 1 1 1 1 1 2 KAPITEL 2. ZUBEHÖR . . . . . . . . . . . . . . . . . . . . . . . . . . . . . . . . . . . . . . . . . . . . . . . . . . . . . . . . . . . . . . . . . . . . . .Seite 3 2.0 Zubehörkomponenten . . . . . . . . . . . . . . . . . . . . . . . . . . . . . . . . . . . . . . . . . . . . . . . . . . . . . . . . . . . . . . . . . .Seite 3 KAPITEL 3. ERSTINBETRIEBNAHME . . . . . . . . . . . . . . . . . . . . . . . . . . . . . . . . . . . . . . . . . . . . . . . . . . . . . . . . . .Seite 4 3.0 Erstinbetriebnahme KWL-Lüftungsgerät . . . . . . . . . . . . . . . . . . . . . . . . . . . . . . . . . . . . . . . . . . . . . . . . . . . .Seite 4 KAPITEL 4. FUNKTION LOKALER WEBSERVER . . . . . . . . . . . . . . . . . . . . . . . . . . . . . . . . . . . . . . . . . . . . . . . .Seite 12 4.0 Zugang zum lokalen Webserber . . . . . . . . . . . . . . . . . . . . . . . . . . . . . . . . . . . . . . . . . . . . . . . . . . . . . . . . .Seite 12 KAPITEL 5. FUNKTIONSBESCHREIBUNG . . . . . . . . . . . . . . . . . . . . . . . . . . . . . . . . . . . . . . . . . . . . . . . . . . . . .Seite 30 5.0 Funktionsbeschreibungen . . . . . . . . . . . . . . . . . . . . . . . . . . . . . . . . . . . . . . . . . . . . . . . . . . . . . . . . . . . . . .Seite 30 KAPITEL 6. GERÄTEPARAMETER . . . . . . . . . . . . . . . . . . . . . . . . . . . . . . . . . . . . . . . . . . . . . . . . . . . . . . . . . . .Seite 36 6.0 Geräteparameter . . . . . . . . . . . . . . . . . . . . . . . . . . . . . . . . . . . . . . . . . . . . . . . . . . . . . . . . . . . . . . . . . . . . .Seite 36 Datenschutz . . . . . . . . . . . . . . . . . . . . . . . . . . . . . . . . . . . . . . . . . . . . . . . . . . . . . . . . . . . . . . . . . . . . . . . . . . . . .Seite 38 Anwender-Handbuch KWL®-Steuerung – easyControls D 1.0 Wichtige Informationen Zur Sicherstellung einer einwandfreien Funktion und zur eigenen Sicherheit sind alle nachstehenden Vorschriften genau durchzulesen und zu beachten. Dieses Anwender-Handbuch ist für den Fachinstallateur und den Endkunden bestimmt. 1.1 Warn- und Sicherheitshinweise Nebenstehendes Symbol ist ein sicherheitstechnischer Warnhinweis. Alle Sicherheitsvorschriften bzw. Symbole müssen unbedingt beachtet werden, damit jegliche Gefahrensituation vermieden wird. ACHTUNG 1.2 Gewährleistungs- und Haftungsansprüche Zur Wahrung der Gewährleistungs- und Haftungsansprüche des Kunden sind zwingend nachfolgende Ausführungen zu beachten: – Umsetzung nach Montage und Betriebsvorschrift „ Gerät“ – Umsetzung nach Anwender-Handbuch „ Helios EasyControls” – Die Verwendung von Zubehörteilen, die nicht von Helios freigegeben, empfohlen oder angeboten werden, ist nicht zulässig. Eventuell auftretende Schäden unterliegen nicht der Gewährleistung. Wenn diese Ausführungen nicht beachtet werden, entfällt unsere Gewährleistung. Gleiches gilt für Haftungsansprüche an den Hersteller. HINWEIS ☞ 1.3 Einführung Wir empfehlen vorweg die beiliegende Montage- und Betriebsvorschrift des KWL-Lüftungsgerätes zu lesen, bevor das Anwender-Handbuch zur KWL®-Steuerung zur Anwendung kommt. Die Montage- und Betriebsvorschrift des KWL-Gerätes enthält wichtige Informationen, die vor Verwendung der Applikation Helios easyControls beachtet werden sollte: z.B. Allgemeine Sicherheitshinweise, eine ausführliche Installationsbeschreibung sowie die Inbetriebnahme des Lüftungsgerätes etc. 1.4 Über Helios easyControls Helios easyControls ermöglicht mit integriertem lokalem Webserver auf dem Basic-Modul (Steuerplatine) und LAN-Anschluss die Bedienung und Lüftungsregelung von Helios KWL®-Geräten. Die serienmäßig mit easyControls ausgestatteten Gerätetypen können einfach und schnell in ein PC-Netzwerk integriert und über die komfortable Oberfläche in jedem beliebigen Webbrowser bedient und konfiguriert werden. Ob mit PC oder Laptop, mit Tablet oder Smartphone. KAPITEL 1 ALLGEMEINE HINWEISE – Basis-Funktionen des lokalen Webservers Über die integrierte LAN-Schnittstelle (Anschluss Gerätevorderseite) können die zahlreichen Funktionen der Lüftungsanlage direkt über den Webbrowser konfiguriert werden. Die wichtigsten Basis-Funktionen im Überblick: - Inbetriebnahme-Assistent - Auswahl/Einstellung der Lüfterstufe (Auto/manuell / Stufe 1-4) - Einstellung Wochenprogramm Lüftung/Heizung - Aktivierung Party-/Ruhe-/Urlaubsbetrieb - Auswahl Zugriffsrechte - Sperrung der Bedienelemente - Einstellung CO2-, VOC- und Feuchte Steuerung - Firmware-Update (nur über Internet möglich) - Anzeige von Filterwechsel, Betriebszuständen/-stunden, Fehlermeldungen etc. 1.5 L IN K Konfiguration des KWL-Gerätes über Webportal http://www.easycontrols.net ➞ Eingabe in die Browser-Adresszeile Helios easyControls ermöglicht den direkten Zugriff (Benutzername/Passwort) auf das KWL-Lüftungsgerät unabhängig davon, wo der Anwender sich befindet. Ob von zu Hause oder von unterwegs über das Internet bzw. LAN (eine aktive Freischaltung vorausgesetzt). Über das Helios easyControls Webportal können berechtigte Anwender, Servicetechniker oder Wohnungsbaugesellschaften jederzeit extern oder lokal Geräteeinstellungen ändern oder Statusinformationen abfragen (siehe auch Punkt 1.6, Funktionsübersicht). Pos. ➊☞ – Verbindung über PC-Netzwerk/Internet: Die Bedienung des Lüftungsgerätes erfolgt über das Helios easyControls Applikations-Menü im Webbrowser, per PC/Laptop oder per Tablet/Smartphone über eine LAN/WLAN-Router Verbindung (TCP/IP; RJ45). Pos. ➋☞ – Lokale Verbindung über lokalen Webserver: KWL-Gerät per LAN-Kabel (TCP/IP; RJ45) mit dem PC/Laptop verbinden und das Applikations-Menü von easyControls über die IP-Adresse: http://192.168.1.199 im Webbrowser öffnen. Pos. ➌☞ – Manueller Betrieb Ist kein PC-Netzwerk vorhanden oder wird ein manueller Zugriff bevorzugt, kann easyControls über ein Komfort-Bedienelement KWL-BEC mit Grafik-Display oder einen Stufenschalter KWL-BE gesteuert werden. Pos. ➍☞ – Gebäudeleittechnik Über die serienmäßige Modbus-Schnittstelle (TCP/IP; RS 485) oder ein optional erhältliches KNX-Modul (Einbau im Schaltschrank) können die KWL-Geräte einfach in ein Netzwerk der Gebäudeleittechnik eingebunden werden. Der Funktionsumfang ist jedoch reduziert, zum Beispiel kann das Wochenprogramm über den Modbus nicht programmiert werden. 1 Anwender-Handbuch KWL®-Steuerung – easyControls D 1.6 Funktionsübersicht 2 Anwender-Handbuch KWL®-Steuerung – easyControls D KAPITEL 2 2.0 Zubehörkomponenten Die Helios EasyControls-Steuerung macht es möglich, das Lüftungsgerät ohne Bedienelemente und Zubehör zu betreiben. Die folgenden Zubehörkomponenten erweitern jedoch die Bedien- und Steuerungsnöglichkeiten. 2.1 Bedienelement Schiebeschalter, Type „KWL-BE” (Best.-Nr. 4265) Bedienelement mit dreistufigem Schiebeschalter inkl. Betriebsanzeige, für Unterputzmontage oder Aufputzmontage (siehe Zubehör). Steuerleitung SL 6/3 (3 m lang) im Lieferumfang enthalten, weitere Längen (Zubehör) erhältlich. Überblick der Funktionen: – Dreistufiger Betrieb über Schiebeschalter. – Drei frei definierbare Betriebsstufen innerhalb des gesamten Kennlinienfeldes. – Über die Offset-Funktion kann der Abluftventilator mit ± 20 % Differenz betrieben werden. – Steuerspannung direkt am Bedienelement messbar. – Zur Realisierung einer weiteren Betriebsstufe, z. B. Nachtbetrieb, optional um Wochenzeitschaltuhr (WSUP/WSUP-S, Best.-Nr. 9990/ 9577, Zubehör) ergänzbar. – Leuchtdiode für optische Anzeige der Betriebszustände, z.B. Filterwechsel, Zulufttemperatur < +5 °C, Störungen und Betrieb. ZUBEHÖR HINWEIS ☞ Eine detaillierte Funktionsbeschreibung ist der Montage- und Betriebsvorschrift des KWL-BE zu entnehmen! 2.2 HINWEIS ☞ Bedienelement Komfort, Type „KWL-BEC” (Best.-Nr. 4263) Bedienelement Komfort mit Grafikdisplay und benutzerfreundlicher Menüführung. Es können max. acht Bedienelemente Komfort an den digitalen Bus angeschlossen werden. Überblick der Funktionen: – Inbetriebnahme-Assistent – Auswahl der Betriebsstufen. Es stehen 4 Lüfterstufen, sowie die Betriebsarten AUTO und MANUELL zur Auswahl – Vier frei definierbare Betriebsstufen innerhalb des gesamten Kennlinienfeldes (siehe Kennlinie in der Geräte MBV) – Wochenprogramm für Lüftungsbetrieb und Nachheizung inkl. Standard und Individuellen Wochenprogrammen – Einstellungen der CO2-, VOC- und Feuchteparameter – Anpassung der Geräte-Einstellungen über Bedienelement – Anzeige von Störungen, Warnungen und Infos – Bedienelement kann über ein Passwort gesperrt werden Eine detaillierte Funktionsbeschreibung ist der Montage- und Betriebsvorschrift des KWL-BEC zu entnehmen! 2.3 KWL-Fühler CO2-Fühler, Type „KWL-CO2” (Best.-Nr. 4272) Zur Erfassung der CO2-Konzentration in der Raumluft. Es können max. acht CO2-Fühler an den digitalen Bus angeschlossen werden. Je nach CO2-Konzentration wird die Lüfterstufe entsprechend angesteuert. VOC-Fühler, Type „KWL-VOC” (Best.-Nr. 4274) Zur Erfassung der VOC-Konzentration in der Raumluft. Es können max. acht VOC-Fühler an den digitalen Bus angeschlossen werden. Je nach VOC-Konzentration wird die Lüfterstufe entsprechend angesteuert. Feuchte-Fühler, Type „KWL-FTF” (Best.-Nr. 4273) Zur Erfassung der relativen Raum-Feuchte und der Raumtemperatur. Es können max. acht Feuchte-Temperatur Fühler an den digitalen Bus angeschlossen werden. Je nach relativer Raum-Feuchte und/oder Raumtemperatur, wird die entsprechende Steuerung aktiviert. HINWEIS ☞ Detaillierte Funktionsbeschreibungen sind den jeweiligen Montage- und Betriebsvorschriften zu entnehmen! 2.6 Erweiterungsmodul für externe Vorheizung oder Nachheizung, Type „KWL-EM” (Best.-Nr. 4269) Zur Ansteuerung einer externen Vorheizung (EHR-R, SEWT oder LEWT) oder Nachheizung (EH oder WW), zusätzlich können Verschlussklappen (Fortluft / Außenluft) oder Überwachungssysteme (Störungsausgang/Statusausgang) angeschlossen werden. Eine detaillierte Funktionsbeschreibung ist der Montage- und Betriebsvorschrift des KWL-EM zu entnehmen! 2.7 KNX/EIB-Modul, Type „KWL-KNX” (Best.-Nr. 4275) Zur Integration der KWL-Lüftungsanlage in die KNX/EIB-Gebäudeleittechnik. Für den Schaltschrankeinbau. Eine detaillierte Funktionsbeschreibung ist der Montage- und Betriebsvorschrift des KWL-KNX zu entnehmen. 3 Anwender-Handbuch KWL®-Steuerung – easyControls D 3.0 KAPITEL 3 ERSTINBETRIEBNAHME LÜFTUNGSGERÄT ACHTUNG Erstinbetriebnahme KWL-Lüftungsgerät Die Einregulierung der KWL-Lüftungsanlage ist zwingend notwendig, um die optimale Funktion der Anlage sicherzustellen. Die Erstinbetriebnahme des KWL-Gerätes variiert je nach angeschlossenem Zubehör (siehe Punkte 4.1 bis 4.3) Ohne erfolgreich durchgeführte Erstinbetriebnahme des Lüftungsgerätes, kann die KWL-Lüftungsanlage nicht in Betrieb genommen werden! 3.1 Erstinbetriebnahme über lokalen Webserver (Teil der Serienausstattung) Über einen lokalen Webserver lassen sich Grundparameter über den Browser eines Notebooks oder PCs einstellen. Für die Erstinbetriebnahme über den lokalen Webserver, werden folgende Hilfsmittel benötigt: 1. Notebook mit LAN Anschluss und Administratorrechten 2. LAN-Netzwerkkabel Schritt 1: Netzwerkeinstellungen >> KWL-Lüftungsanlage ist mit einem Router mit DHCP-Server verbunden: Der Anlage wird durch DHCP automatisch eine IP-Adresse zugewiesen. Über die MAC-Adresse des KWL-Gerätes (siehe Geräteprüfbericht) kann im Routermenü (siehe Router-Anleitung) die zugewiesene IP-Adresse abgelesen werden Beispiel: KWL-Gerät => IP 192.168.199.22 >> KWL-Lüftungsgerät ist direkt an Notebook angeschlossen: Wird die Anlage direkt an das Notebook angeschlossen, wird keine automatische DHCP-Adresse zugewiesen. Die KWL-Lüftungsanlage erhält nach 30 Sec. Wartezeit die folgende IP-Adresse 192.168.1.199 Um die KWL-Lüftungsanlage über den Browser zu erreichen, muss der IP-Adressenbereich des Notebooks ebenfalls angepasst werden. Eingabe der IP-Adresse 192.168.1.2 für das Notebook: Systemsteuerung > Netzwerk- und Freigabecenter > Adaptereinstellungen ändern > LAN-Verbindung > Eigenschaften von... (Netzwerk) > Internetprotokoll Version 4 > Eigenschaften (Allgemein) > ... Passwort: !helios! ☞ Schritt 2: Gerätekonfiguration durchführen Eingabe der zugewiesenen IP-Adresse aus Schritt 1 in der Adresszeile des Browsers (http://192.---.---.---). Für die Erstinbetriebnahme ist das Servicetechniker-Login Passwort !helios! einzutragen. Bei Bedarf kann das Passwort nachträglich geändert werden. Auf der Home-Seite wird bei nicht durchgeführter Inbetriebnahme eine Infomeldung angezeigt. Um die Inbetriebnahme zu starten, in der Menüleiste den Button „ Erstinbetriebnahme” anklicken. 4 Anwender-Handbuch KWL®-Steuerung – easyControls D HINWEIS ☞ 3.1.1 Systemkonfiguration Im Erstinbetriebnahmemenü lassen sich die wichtigsten Konfigurationen auf einen Blick einstellen: Sprache: Format: Land: Aktuelle Browserzeit: Auswahl: „ Deutsch”, „ Englisch”, „ Französisch”, weitere... Auswahl: „ dd.mm.yyyy”, „ mm.dd.yyyy”, „ yyyy.mm.dd” Länderauswahl: Deutschland etc. Die aktuelle Browserzeit inklusive Datum und GMT wird übernommen, wenn „ Browserzeit beim Speichern übernehmen” aktiviert ist. Datum: Eingabe / Änderung: Anzeige des aktuellen Datums, das Datum kann durch überschreiben geändert werden. Uhrzeit: Eingabe / Änderung: Anzeige der aktuellen Uhrzeit, die Uhrzeit kann durch überschreiben geändert werden. Unterschied zu GMT in Stunden: Eingabe / Änderung: Anzeige der aktuellen Zeitzone (Standard für DE GMT +1 bzw. im Sommer GMT +2. Die Zeitzone kann durch Überschreiben geändert werden. Sommer/Winterzeit Modus: Bei aktivierter Checkbox erfolgt die automatische Sommer-/Winterzeitumstellung. Bei deaktivierter Checkbox wird die Uhrzeit nicht angepasst. Betriebsart "Auto" immer um Bei aktivierter Checkbox wird der Betriebsmodus des KWL-Gerätes um 00:00 Uhr 0 Uhr aktivieren: auf automatischen Betrieb zurückgesetzt. INTERNET § ACHTUNG Dieser Abschnitt ist nur bei Anschluss an ein Netzwerk- und Onlineverbindung relevant Automatische Softwareupdates: Bei aktivierter Checkbox, sucht das System täglich nach neuer Software. Wird eine aktuellere Softwareversion gefunden, wird diese automatisch installiert. Der Installationsvorgang startet zwischen 23:00 und 05:00 Uhr. Empfehlung: „ Automatische Softwareupdates” aktivieren! Datenabgleich mit Bei aktivierter Checkbox werden alle betriebsentscheidenden Parameter und easyControls Portal: Messwerte an den Portalserver www.easycontrols.net gesendet. Über dieses Webportal kann jederzeit von unterwegs auf die KWL-Lüftungsanlage zugegriffen werden, um Einstellungen vorzunehmen. Zusätzliche Auswertungen, wie z.B. Temperaturverläufe sind ebenfalls möglich. Button: Über den Button „ Software jetzt aktualisieren” wird der aktuelle Versionsstand „Software jetzt aktualisieren” aktualisiert. Die Aktualisierung beinhaltet die Firmware des Motherboard, sowie der Zubehörkomponenten (KWL-EM, KWL-BEC, KWL-CO2, KWL-VOC und KWLFTF) und sämtliche Seiteninhalte. Konfigurationseinstellungen über Button „Speichern” sichern, sonst gehen Daten verloren! 3.1.2 Gerätekonfiguration Lüfterstufe 1-4: Mindestlüfterstufe: Wärmetauschertyp: Bedienelement KWL-BE Bedienelement KWL-BEC Vorheizung: Abluft: Ansteuerspannung des Abluft-/Fortluftventilators Zuluft: Ansteuerspannung des Zuluft-/Außenluftventilators 0 = Gerät kann ausgeschaltet werden. 1 = Gerät kann nicht ausgeschaltet werden. Kunststoff; Aluminium; Enthalpie Über diese Funktion kann der dreistufen Schiebeschalter KWL-BE gesperrt werden. Einstellung: Ein = KWL-BE nicht gesperrt; Aus = KWL-BE gesperrt Über diese Funktion kann das Bedienelement Komfort KWL-BEC gesperrt werden. Einstellung: Ein = KWL-BEC nicht gesperrt; Aus = KWL-BEC gesperrt Vorheizung verwenden Ein/Aus 5 Anwender-Handbuch KWL®-Steuerung – easyControls D Funktionsart KWL-EM: ACHTUNG Einstellung der Funktionsart für angeschlossene Erweiterungsmodule (max. sind zwei KWL-EM möglich). Details sind der Bedienungsanleitung KWL-EM zu entnehmen. Konfiguration KWL-Gerät: Über die Gerätekonfiguration lässt sich das Regelverhalten der KWL-Lüftungsanlage anpassen. Es wird zwischen 2 Konfigurationen unterschieden: 1 = DIBT: Der Frostschutz des Wärmetauschers ist ab < - 0 °C Außenlufttemperatur aktiviert und über die (optional installierte) Vorheizung oder Luftmengenreduzierung sichergestellt. Bei einer Zulufttemperatur von <+5 °C werden die Ventilatoren abgeschaltet. 2 = PHI: Der Frostschutz des Wärmetauschers ist ab < -3 °C aktiviert (Vorgabe PHI) und wird durch die vom Passivhaus-Institut vorgeschriebene Vorheizung sichergestellt. Bei einer Zulufttemperatur von < +5 °C werden die Ventilatoren abgeschaltet. Behaglichkeitstemperatur: In der Konfiguration KWL-Gerät (2 = PHI) ist eine Behaglichkeitstemperatur von 16,5 °C definiert. Diese Vorgabe ist durch das PHI festgelegt. Sinkt die Zuluft unter 16,5 °C, wird die Vorheizung oder Nachheizung (falls vorhanden) zum Erwärmen der Zuluft genutzt. Die Behaglichkeitstemperatur kann individuell durch Überschreiben angepasst werden. Gerätekonfigurationseinstellungen über Button „Speichern” sichern, sonst gehen Daten verloren! 3.1.3 Fühlerkonfigurationen Funktion: Die Aufgabe der Feuchtesteuerung ist ausschließlich die Reduzierung der Raumluftfeuchte durch Erhöhen des Luftaustauschs. > Feuchtesteuerung „ Notwendige Einstellungen” Nur Feuchte: Nur Temperatur: Kombiniert: Sollwert: Schaltstufe: Stoppzeit in Std.: > CO2-Steuerung Sollwert: Schaltstufe: > VOC-Steuerung Sollwert: Der Status der Feuchtesteuerung kann zwischen „ Aus”, „ Stufig” oder „ Stufenlos” konfiguriert werden. „Aus” Feuchtesteuerung deaktiviert „Stufig” Feuchtesteuerung aktiv mit stufiger Regellogik „Stufenlos” Feuchtesteuerung aktiv mit stufenloser Regellogik Je nach Feuchteniveau, werden die Ventilatoren stufenlos (Lüfterstufen 0-1-2-3-4) zwischen Spannung Stufe 0 und Spannung Stufe 4 geregelt. Auf der Webserverseite und im Bedienelement Komfort KWL-BEC wird die prozentuale Ansteuerung angezeigt. Es wird nur der Feuchtewert an die Feuchtesteuerung übergeben, die Raumtemperatur wird nicht für die Nachheizungssteuerung verwendet. Es wird nur die Raumtemperatur an die Nachheizungssteuerung übergeben, die Feuchtewerte werden nicht für die Feuchtesteuerung verwendet. Sowohl Feuchtewerte als auch die Raumtemperatur werden für die Steuerung vewendet. Gibt den gewünschten max. Wert der Raumluftfeuchte an Einstellbereich zwischen 20-80 % r.F; Schrittweite 5 % r.F Gibt den Schwellwert in % rel. Feuchte an, der als Grenzwert für die Veränderung der rel. Luftfeuchte eingestellt wurde. Die Einstellung ist in 5 %-Schritten von 5-20 % möglich. Wird der Sollwert überschritten, wird die nächst höhere Stufe bis zur Unterschreitung des Sollwertes aktiviert. Wird der Sollwert nicht innerhalb einer Zeit von 2 Stunden erreicht, wird für die Dauer der Stoppzeit die Feuchtesteuerung deaktiviert. Einstellbereich zwischen 0-24 Stunden; Schrittweite 1 Stunde Der Status der CO2-Steuerung kann zwischen „ Aus”, „ Ein” und „ stufig” konfiguriert werden. Aus: CO2-Steuerung deaktiviert Ein: CO2-Steuerung aktiv mit stufiger Regellogik Stufig: CO2-Steuerung aktiv mit stufenloser Regellogik Je nach CO2-Konzentration, werden die Ventilatoren stufenlos (Lüferstufen 0-1-2-3-4) zwischen Spannung Stufe 0 und Spannung Stufe 4 geregelt. Auf der Webserverseite und im Bedienelement Komfort KWL-BEC wird die prozentuale Ansteuerung angezeigt. Gibt den gewünschten max. Wert der CO2-Konzentration an. Einstellbereich zwischen 300-2000 ppm; Schrittweite 50 ppm Gibt die Schwelle an, wann die nächste Lüfterstufe aktiviert wird, z.B. Sollwert 1000 ppm, Schaltstufe 150 ppm. Ist der Messwert zwischen 850-1000 ppm, wird Stufe 1 aktiviert. Steigt die CO2-Konzentration auf 1000-1150 ppm, wird die nächste Stufe (Stufe 2) aktiviert. Einstellbereich zwischen 50-400 ppm; Schrittweite 50 ppm Der Status der VOC-Steuerung kann zwischen „ Aus”, „ Ein” und „ stufig” konfiguriert werden. Aus: VOC-Steuerung deaktiviert Ein: VOC-Steuerung aktiv mit stufiger Regellogik Stufig: VOC-Steuerung aktiv mit stufenloser Regellogik Je nach VOC-Konzentration, werden die Ventilatoren stufenlos (Lüferstufen 0-1-2-3-4) zwischen Spannung Stufe 0 und Spannung Stufe 4 geregelt. Auf der Webserverseite und im Bedienelement Komfort KWL-BEC wird die prozentuale Ansteuerung angezeigt. Gibt den gewünschten max. Wert der VOC-Konzentration an Einstellbereich zwischen 300-2000 ppm; Schrittweite 50 ppm 6 Anwender-Handbuch KWL®-Steuerung – easyControls D Schaltstufe: ACHTUNG HINWEIS ☞ Fühlerkonfigurationseinstellungen über Button „Speichern” sichern, sonst gehen Daten verloren! 3.2 ACHTUNG Gibt die Schwelle an, wann die nächste Lüfterstufe aktiviert wird, z.B. Sollwert 1000 ppm, Schaltstufe 150 ppm. Ist der Messwert zwischen 850-1000 ppm, wird Stufe 1 aktiviert. Steigt die VOC-Konzentration auf 1000-1150 ppm, wird die nächste Stufe (Stufe 2) aktiviert. Einstellbereich zwischen 50-400 ppm; Schrittweite 50 ppm Erstinbetriebnahme über KWL-BE (Bedienelement Schiebeschalter) Bei der Inbetriebnahme über ein KWL-BE ist Folgendes zu beachten! Sobald zusätzlich eine der folgenden Zubehörkomponenten (KWL-EM, KWL-BEC, KWL-CO2, KWL-VOC, KWL-FTF oder KWL-KNX) angeschlossen wird, muss die Inbetriebnahme über das Komfort Bedienelement KWL-BEC oder über den lokalen Webserver erfolgen. Wird nur ein KWL-BE angeschlossen und kein lokaler Webserver genutzt, ist die Inbetriebnahme durch Anpassung der Betriebsstufen abgeschlossen. 3.2.1 Bedienelement KWL-BE mit Betriebsanzeige Das Bedienelement KWL-BE wird ohne Werkseinstellung geliefert! Die Einstellung der einzelnen Stufen muss durchgeführt werden! (s. u.) Alle Helios KWL-Kompaktgeräte können mit dem Unterputz-Bedienelement Schiebeschalter KWL-BE (Best.-Nr. 4265; Gehäuse für Aufputzmontage KWL-APG, Best.-Nr. 4270) angesteuert werden. Es ermöglicht manuell drei frei definierbare Betriebsstufen, die auf der Platine über Potentiometer justiert werden können (mit Kreuzschlitzschraubendreher, Ø 3 mm; Abb. unten). Über das Potentiometer „ OS“ kann eine abweichende Luftmenge des Abluftventilators zum Zuluftventilator im Bereich ±20 % eingestellt werden. ➀ Schiebeschalter ➁ Skala Stufe S1-S3 ➂ Betriebsanzeige d.h. Fehleranzeige „Blinkcode“ ➂ ➀ Potentiometerjustierung, ➀ bis ➄ ➁ RJ12 Steuerleitung Potentiometer: HINWEIS ☞ ➀ ➁ ➂ ➃ ➄ Stufe S1 Stufe S2 Stufe S3 Offset „OS“ „A1“ ➅ ➆ ➇ ➈ ➉ „GND“ (Masse) „o“ (Messpunkt) „S“ (Messpunkt) „A“ (Messpunkt) Betriebsanzeige LED ➉ ➂ ➁ ➀ ➄ ➇ ➆ ➈ ➃ ➅ GND / 1 2 3 Brücke auf Klemme 2/3 (prüfen) (Werkseinstellung, siehe SS-1071) TIPP: Spannungsmessung: über GND u. S kann die Ausgangsspannung des Zuluftventilators in der eingestellten Betriebsstufe gemessen werden. 3.2.2 Einstellbereich der Schaltstufen Das Bedienelement KWL-BE verfügt über 5 Potentiometer: Bezeichnung Potentiometer S1 S2 S3 OS A1 GND o S A Skala Bezeichnung Stufe 1 des Zuluftventilators Stufe 2 des Zuluftventilators Stufe 3 des Zuluftventilators Offset* für Abluftventilator Spannung externer Befehl Masse Offset Spannung Spannung Schiebeschalter Spannung externer Befehl Einstellbereich 0 bis 10,0 Volt 1,7 bis 10,0 Volt 1,7 bis 10,0 Volt 3,7 bis 5,5 Volt 1,7 bis 10,0 Volt Messpunkt Messpunkt Messpunkt *Offset = Abweichung des Abluftventilators zum Zuluftventilator ± 20 % Typ / Grundeinstellungen KWL EC 200 W KWL EC 300 W KWL EC 500 W KWL EC 220 D KWL EC 340 D KWL EC 270 W KWL EC 370 W Stufe 1 3V 3V 3V 2,5V 2,5V 3V 2,7V 7 Stufe 2 Stufe 3 6V 9V 6V 9V 6V 9V 5V 8,5V 5V 8,5V 5V 7,6V 4,8V 7,8V Je nach angeschlossenem Lüftungsgerät kann die in der Tabelle beschriebene Spannung als Vorgabe eingestellt werden. Es ist jedoch erforderlich, die Spannungen entsprechend der berechneten Volumenströme nach DIN 1946, Teil 6 gemäß dem Beispiel Seite 3 zu ermitteln und die Grundeinstellungen anzupassen. Anwender-Handbuch KWL®-Steuerung – easyControls D 3.3 Erstinbetriebnahme über KWL-BEC (Bedienelement Komfort) Über das Bedienelement Komfort KWL-BEC lassen sich Grundparameter einfach einstellen. Schritt 1: Bei dem Systemstart erfolgt automatisch die Abfrage nach der Bedienelement-Adresse (AD). Wurde die Adresse bereits eingegeben, wird dies nicht mehr abgefragt. Sind mehr als ein Bedienelement Komfort am KWL-Lüftungsgerät angeschlossen, darf keine Doppelvergabe der Bedienelement-Adresse erfolgen (Adressbereich AD 1-8). WICHTIGER HINWEIS ☞ Erst nachdem alle Bedienelemente Komfort eine individuelle Adresse erhalten haben, mit Schritt 2 fortfahren. Nach der Eingabe der Bedienelement-Adresse(n), wird das Bedienelement Komfort neu gestartet. Schritt 2: Der Inbetriebnahmeassistent startet bei allen Bedienelementen Komfort. Die Erstinbetriebnahme darf jedoch nur mit einem der angeschlossenen Bedienelemente Komfort durchgeführt werden. HINWEIS ☞ Bedienungshinweis zur Menüstruktur: Über den Drehencoder (Abb.1) kann durch rechts/links drehen zwischen „ Ändern” oder „ Weiter” ausgewählt werden. Wird z.B. Ändern mit einem schwarzen Hintergrund dargestellt, kann über drücken des Drehencoders die Funktion ausgewählt werden. Durch drehen wird können die Einstellungen angepasst werden, durch drücken wird die Eingabe bestätigt. Nach erfolgreicher Anpassung kann mit „ Weiter” zum nächsten Menüpunkt gesprungen werden. ➀ Anzeige über Grafikdisplay ➁ Drehencoder ➂ Blende Software-Menüführung durch Drehen nach links und rechts kann durch das Software-Menü navigiert werden. ➀ ➁ Steuerungsfunktionen durch Drücken (Push), wird die im Display angezeigte Funktion ausgewählt/aktiviert. MENÜ ☞ ➂ Bedienmenü / Parametereinstellungen Sprache: Sprachauswahl Seite 1: „ Deutsch”, „ Englisch”, „ Französisch”, „ Italienisch” (über den Punkt „ Weitere” in Ebene 2 wechseln) Auswahl Seite 2: „ Weitere” > Funktion nicht belegt Nach der Eingabe der Bedienelement-Adresse wird das Bedienelement Komfort neu gestartet. Datum: Datum wird angezeigt und kann durch Überschreiben geändert werden. Uhrzeit: Urhrzeit wird angezeigt und kann durch Überschreiben geändert werden. Zeitzone: Unterschied zu GMT in Stunden Eingabe / Ändern: Anzeige der aktuellen Zeitzone (Standard für DE GMT +1 bzw. im Sommer GMT +2. Änderung ist durch Überschreiben möglich. Anpassung Format: Auswahlmöglichkeit: TT.MM.JJJJ; MM.TT.JJJJ; JJJJ.MM.TT 8 Anwender-Handbuch KWL®-Steuerung – easyControls D Automatische Sommer/Winterzeit Aktion: Bei aktivierter Checkbox „Ein” erfolgt die automatische Sommer-/Winterzeitumstellung. Bei aktivierter Checkbox „Aus” wird die Uhrzeit nicht automatisch ange passt. Konfiguration Lüftungsgerät Über die Gerätekonfiguration lässt sich das Regelverhalten der KWL-Lüftungsanlage anpassen. Es wird zwischen 2 Konfigurationen unterschieden: 1 = DIBT: Der Frostschutz des Wärmetauschers ist ab < - 0 °C Außenlufttemperatur aktiviert und über die (optional installierte) Vorheizung oder Luftmengenreduzierung sichergestellt. Bei einer Zulufttemperatur von <+5 °C werden die Ventilatoren abgeschaltet. 2 = PHI: Der Frostschutz des Wärmetauschers ist ab < -3 °C aktiviert (Vorgabe PHI) und wird durch die vom Passivhaus-Institut vorgeschriebene Vorheizung sichergestellt. Bei einer Zulufttemperatur von < +5 °C werden die Ventilatoren abgeschaltet. Wärmetauschertyp: Auswahlmöglichkeit: „Kunststoff”, „Aluminium” oder „Enthalpie” Lüfterstufen 1-4: Abluft: Ansteuerspannung des Abluft-/Fortluftventilators Zuluft: Ansteuerspannung des Zuluft-/Außenluftventilators Die Anpassung der Lüfterstufen erfolgt nach abgeschlossener Erstinbetriebnahme über das Menü „ Systemeinstellungen” (Passwort: 0103) unter der Rubrik „ Lüfterstufen” gemäß dem Beispiel in Kapitel 3, Seite 3-9 Mindestlüfterstufe: Auswahlmöglichkeit: Stufe 0 = Ausschaltfunktion kann aktiviert werden Stufe 1 = Ausschaltfunktion kann nicht aktiviert werden (mind. LS 1) Vorheizung: Auswahlmöglichkeit: Vorheizung verwenden „Ein” oder „Aus” FEUCHTE-STEUERUNG (Anzeige nur wenn Feuchte-Fühler angeschlossen ist!) Auswahlmöglichkeit: Der Status der Feuchtesteuerung kann zwischen „ Aus”, „ Stufig” oder „ Stufenlos” konfiguriert werden. „Aus” Feuchtesteuerung deaktiviert „Stufig” Feuchtesteuerung aktiv mit stufiger Regellogik (Lüferstufen 0-1-2-3-4) „Stufenlos” Feuchtesteuerung aktiv mit stufenloser Regellogik Je nach Feuchteniveau, werden die Ventilatoren stufenlos (Lüferstufen 0-1-2-3-4) zwischen Spannung Stufe 0 und Spannung Stufe 4 geregelt. Auf der Webserverseite oder im Bedienelement Komfort KWL-BEC wird die prozentuale Ansteuerung angezeigt. Notwendige Einstellungen Nur Feuchte: Nur Temperatur: Kombiniert: Sollwert: Schaltstufen: Es wird nur der Feuchtewerte an die Feuchtesteuerung übergeben, die Raumtemperatur wird nicht für die Nachheizungssteuerung verwendet. Es wird nur die Raumtemperatur an die Nachheizungssteuerung übergeben, die Feuchtewerte werden nicht für die Feuchtesteuerung verwendet. Sowohl Feuchtewerte als auch die Raumtemperatur wird den entsprechende Steuerungen übergeben. Gibt den gewünschten Grenzwert der Raumluftfeuchte an. Einstellbereich zwischen 20-80 % r.F; Schrittweite 5 % r.F Werkseinstellung: 45 % Gibt den Schwellwert in % rel. Feuchte an, der als Grenzewert für die Veränderung der rel. Luftfeuchte eingestellt wurde. Die Einstellung ist in 5 %-Schritten von 5-20% möglich. Wird der Sollwert überschritten, wird die nächst höhere Stufe bis zur Unter schreitung des Sollwertes aktiviert. 9 Anwender-Handbuch KWL®-Steuerung – easyControls D Stoppzeit in Std.: Wird der Sollwert nicht innerhalb einer Zeit von 2 Stunden erreicht, wird für die Stoppzeit die Feuchtesteuerung deaktiviert. Einstellbereich zwischen 0-24 Stunden; Schrittweite 1 Stunde. CO2-STEUERUNG Auswahlmöglichkeit: Der Status der CO2-Steuerung kann zwischen „ Aus”, „ Stufig” oder „ Stufenlos” konfiguriert werden. „Aus” CO2-Steuerung deaktiviert „Stufig” CO2-Steuerung aktiv mit stufiger Regellogik „Stufenlos” CO2-Steuerung aktiv mit stufenloser Regellogik Je nach CO2-Konzentration, werden die Ventilatoren stufenlos Lüferstufen 0-1-2-3-4) zwischen Spannung Stufe 0 und Spannung Stufe 4 geregelt. Auf der Webserverseite oder im Bedienelement Komfort KWL-BEC wird die prozentuale Ansteuerung angezeigt. Sollwert: Gibt den gewünschten max. Wert der CO2-Konzentration an Einstellbereich zwischen 300-2000 ppm; Schrittweite 50 ppm. Werkseinstellung: 1000 ppm (Standardwert) Schaltstufen: Gibt die Schwelle an, wann die nächste Lüfterstufe aktiviert wird, z.B. Sollwert 1000 ppm, Schaltstufe 150 ppm. Ist der Messwert zwischen 850-1000 ppm, wird Stufe 1 aktiviert. Steigt die CO2-Konzentration auf 1000-1150 ppm, wird die nächste Stufe (Stufe 2) aktiviert. Einstellbereich zwischen 50-400 ppm; Schrittweite 50 ppm. VOC-STEUERUNG Auswahlmöglichkeit: Der Status der VOC-Steuerung kann zwischen „ Aus”, „ Stufig” oder „ Stufenlos” konfiguriert werden. „Aus” VOC-Steuerung deaktiviert „Stufig” VOC-Steuerung aktiv mit stufiger Regellogik „Stufenlos” VOC-Steuerung aktiv mit stufenloser Regellogik Je nach VOC-Konzentration, werden die Ventilatoren stufenlos (Lüferstufen 0-1-2-3-4) zwischen Spannung Stufe 0 und Spannung Stufe 4 geregelt. Auf der Webserverseite oder im Bedienelement Komfort KWL-BEC wird die prozentuale Ansteuerung angezeigt. Sollwert: Gibt den gewünschten max. Wert der VOC-Konzentration an. Einstellbereich zwischen 300-2000 ppm; Schrittweite 50 ppm. Werkseinstellung: 1000 ppm (Standardwert) Schaltstufen: Gibt die Schwelle an, wann die nächste Lüfterstufe aktiviert wird, z.B. Sollwert 1000 ppm, Schaltstufe 150 ppm. Ist der Messwert zwischen 850-1000 ppm wird Stufe 1 aktiviert. Steigt die VOC-Konzentration auf 1000-1150 ppm, wird die nächste Stufe (Stufe 2) aktiviert. Einstellbereich zwischen 50-400 ppm; Schrittweite 50 ppm 10 Anwender-Handbuch KWL®-Steuerung – easyControls D HINWEIS ☞ Die nachfolgenden Einstellungen sind erforderlich, wenn das KWL-Gerät in ein Computer-Netzwerk eingebunden oder direkt mit einem Computer verbunden ist (detaillierte Beschreibung, Seite 24). Bei netzwerkunabhängigem Betrieb sind die Einstellungen ohne Funktion. DHCP: Auswahlmöglichkeit: Automatische IP-Adressenzuweisung über DHCP „ Ja” (Bild links) oder „ Nein” IP-Adresse: Anzeige abhängig von der DHCP Einstellung (siehe oben) „ Aus” Eingabe der gewünschten IP-Adresse „ Ein” Anzeige der zugewiesen IP-Adresse (Bild links) Gateway: Anzeige abhängig von der DHCP Einstellung „ Aus” Eingabe des gewünschten Gateways „ Ein” Anzeige des zugewiesen Gateways (Bild links) Subnetmask: Anzeige abhängig von der DHCP Einstellung: „ Aus” Eingabe der gewünschten Subnetmask 255.---.---.--„ Ein” Anzeige der zugewiesen Subnetmask (Bild links) Datenabgleich mit easyControls Portal: Aktion: Bei aktivierter Checkbox „Ja” werden alle Betriebsentscheidenen Parameter und Messwerte an den Helios Portalserver gesendet. Über das Helios Webportal www.easycontrols.net können Sie von unterwegs auf Ihre KWL-Lüftungsanlage zugreifen und Einstellungen vornehmen. Zusätzlich sind weitere Auswertungen wie z.B. Temperaturverläufe möglich. Automatische Firmwareupdates: Aktion: Bei aktivierter Checkbox „Ja” wird täglich online nach neuer Firmware gesucht. Wird neue Firmware gefunden, wird diese automatisch aktualisiert. Der Ladevorgang startet zwischen 23:00 und 05:00 Uhr. Empfehlung! Automatische Firmware-Updates erlauben! HINWEIS ☞ Nach abgeschlossener Erstinbetriebnahme, wird das Bedienteil KWL-BEC bzw. das System neu gestartet. 11 Anwender-Handbuch KWL®-Steuerung – easyControls D KAPITEL 4 FUNKTION LOKALER WEBSERVER 4.0 Zugang zum lokalen Webserver Unter Punkt 3.1 Schritt 1 ist beschrieben, wie die IP-Adresse der KWL-Lüftungsanlage ermittelt wird. 4.1 Benutzerkonten (s.a. Seite 24) – Benutzerkonto „Service” Das Benutzerkonto „ Service” ist nur für den Helios-Servicetechniker vorgesehen. – Benutzerkonto „Advanced” (Eigentümer) Das Benutzerkonto „ Advanced” ermöglicht die Bedienung der KWL-Lüftungsanlage im grundlegenden Funktionsumfang. Dieses Benutzerkonto ist speziell für den „ Wohnungseigentümer” vorgesehen. – Benutzerkonto „Basic” (Mieter) Das Benutzerkonto „ Basic” ermöglicht die Bedienung der KWL-Lüftungsanlage mit einem stark eingeschränkten. Funktionsumfang. Dieses Benutzerkonto ist speziell für den „ Mieter” vorgesehen, grundlegende Einstellungen sind über dieses Benutzerkonto nicht möglich. 4.2 Beschreibung des Helios easyControls Webinterface L IN K http://192.168.0.0 ➞ Eingabe in die Browser-Adresszeile MENÜ à Hauptmenü „Home” ➊ Lüfterstufe: Anzeige der aktivierten Lüfterstufe (z.B. „ Nennlüftung” Stufe 2) – Aktuellen Lüfterstufe in % Wird im Menü „ Konfiguration > Fühler „ mind. eine der Fühlerkonfigurationen (CO2, VOC oder Feuchte/Temperatur) als stufenlos definiert, wird im Untermenü „ Status” zusätzlich die aktuelle Lüfterstufe in % angezeigt. Diese prozentuale Anzeige definiert den Bereich zwischen der minimalen und maximalen Lüfterstufe in Abhängigkeit von den eingestellten Spannungswerten im Menü „ Konfiguration > Lüfter”. ➋ Auswahl Betriebsmodus: Im Button wird der aktive Modus durch einen grün eingefärbten Text signalisiert. – Button Modus „AUTO” Die über das Wochenprogramm eingestellten Lüfterstufen werden zeitabhängig aktiviert, des Weiteren wird die Lüfterstufe bei Verwendung von CO2-, VOC- oder Feuchte-Fühler (Zubehör) Messwertabhängig geregelt. – Button Modus „Manuell” Über die Buttons - / + kann die Lüfterstufe angepasst werden. Die Mindestlüftertsufe ist standardmäßig auf 1 eingestellt, die Lüfterstufe 0 ist somit nicht aktivierbar. Der manuelle Modus wird täglich um 00.00 Uhr in den automatischen Modus zurückgesetzt. Über die Anmeldung im Portal www.easycontrols.net kann diese Logik deaktiviert werden. ➌ Button Kurzprogramme: Durch anklicken wird die Seite „ Partybetrieb” aufgerufen. Diese ermöglicht über die Untermenüs „ Partybetrieb”, „ Ruhebetrieb” und „ Urlaubsbetrieb” einen schnellen Zugriff auf die Einstellungen der Kurzprogramme. Zur Beschreibung der Funktionen siehe Hauptmenü „ Kurzprogramm” (Seite 15) ➍ Button Status: Durch anklicken wird die Seite „ Systemstatus” aufgerufen. Diese ermöglicht über die Untermenüs „ Status” und „ Fehler” einen schnellen Einblick auf sämtliche Systemeinstellungen. Zur Beschreibung der Funktionen siehe Hauptmenü „ Systemstatus” (Seite 15) 12 Anwender-Handbuch MENÜ KWL®-Steuerung – easyControls à D Hauptmenü „Kurzprogramm” ➥ Untermenü Partybetrieb ➊ Lüfterstufe: Über die Buttons - / + kann die Lüfterstufe eingestellt werden. Diese Lüfterstufe wird für die unter „ Dauer” eingestellte Zeit (5-180 Minuten) aktiviert. ➋ Dauer (5-180) Minuten: Über die Buttons -10 / +5 / +15 kann die Dauer des Partybetriebs angepasst werden. Die Dauer kann zwischen 5 bis 180 Minuten eingestellt werden, die Schrittweite beträgt 5 Minuten. ➌ Button „Jetzt aktivieren”: Über das Button wird der Partybetrieb aktiviert, zeitgleich wird die Beschriftung des Buttons in zurücksetzen geändert. Über das Button zurücksetzen kann der Partybetrieb deaktiviert werden. ➍ Restzeit in Minuten: Beim aktiven Partybetrieb wird die noch verbleibende Restlaufzeit angezeigt bis der Partybetrieb deaktiviert wird. ➥ Untermenü Ruhebetrieb ➊ Lüfterstufe: Über die Buttons - / + kann die Lüfterstufe eingestellt werden. Diese Lüfterstufe wird für die unter „ Dauer” eingestellte Zeit (5-180 Minuten) aktiviert. ➋ Dauer: Über die Buttons -10 / +5 / +15 kann die Dauer des Ruhebetriebs angepasst werden. Die Dauer kann zwischen 5 bis 180 Minuten eingestellt werden, die Schrittweite beträgt 5 Minuten. ➌ Button „Jetzt aktivieren”: Über das Button wird der Ruhebetrieb aktiviert, zeitgleich wird die Beschriftung des Buttons in zurücksetzen geändert. Über das Button zurücksetzen kann der Ruhebetrieb deaktiviert werden. ➍ Restzeit in Minuten: Beim aktiven Ruhebetrieb wird die noch verbleibende Restlaufzeit angezeigt bis der Ruhebetrieb deaktiviert wird. 13 Anwender-Handbuch KWL®-Steuerung – easyControls D ➥ Untermenü Urlaubsbetrieb ➊ Urlaubsprogramm Auswahlmöglichkeit: Der Status des Urlaubsprogramms kann zwischen „ Intervall”, „ Konstant” und „ Aus” konfiguriert werden. – Intervall Die KWL-Lüftungsanlage kann in einstellbaren Zeitintervallen mit definierter Lüfterstufe (1-4) automatisch in Betrieb gesetzt werden. Der Intervallmodus beginnt bei definiertem „ Startdatum”. Im Abstand der in der Intervallzeit festgelegten Dauer (z.B. 2 h), wird im Zeitraum zwischen Start- und Enddatum das Lüftungsgerät in der Einschaltzeit festgelegten Dauer (z.B. 60 Min.) mit definierter Lüfterstufe (1-4) betrieben. Nach Erreichen des „ Enddatums”, schaltet das KWL-Gerät in den automatischen Modus. – Konstant Ist das „ Startdatum” erreicht, wird die KWL-Lüftungsanlage in die konstante Lüftungsstufe versetzt. Nach Erreichen des „ Enddatums”, schaltet das KWL-Gerät in den automatischen Modus. – Aus Urlaubsprogramm ist deaktiviert HINWEIS ➋ Lüfterstufe: Über die Buttons - / + kann die Lüfterstufe angepasst werden. Die Lüfterstufe wird im Urlaubsbetrieb aktiviert. ➌ Startdatum: Gibt das gewünschte Startdatum des Urlaubsprogramms an ➍ Enddatum: Gibt das gewünschte Enddatum des Urlaubsprogramms an (Zwischen Startdatum und Enddatum muss mind. ein Tag liegen) ➎ Intervallzeit: Gibt den Intervallrythmus an, ab wann der Lüftungsbetrieb für die Einschaltzeit aktiv ist. ➏ Einschaltzeit: Gibt die Dauer an, wie lange der Lüftungsbetrieb nach Ablauf der Intervallzeit aktiv ist. ☞ ➡ Einstellungen über ”Speichern” bestätigen 14 Anwender-Handbuch MENÜ KWL®-Steuerung – easyControls D à Hauptmenü „Systemstatus” ➥ Untermenü Status 6 7 4 9 2 8 3 1 5 ➊ Betriebsart: Anzeige der aktuellen Betriebsart / Betriebsmodus ➋ Lüfterstufe: Anzeige der aktivierten Lüfterstufe ➌ Lüfterstufe in Prozent: >> Anzeige optional Wird im Menü „ Konfiguration > Fühler „ mind. eine der Fühlerkonfigurationen (CO2, VOC oder Feuchte/Temperatur) als stufenlos definiert, wird im Untermenü „ Status” zusätzlich die aktuelle Lüfterstufe in % angezeigt. Diese prozentuale Anzeige definiert den Bereich zwischen der minimalen und maximalen Lüfterstufe in Abhängigkeit von den eingestellten Spannungswerten im Menü „ Konfiguration > Lüfter”. ➍ Drehzahl Zuluft (rpm): Zeigt die aktuelle Drehzahl des Zuluftventilators an Drehzahl Abluft (rpm): Zeigt die aktuelle Drehzahl des Abluftventilators an ➎ Bypass: Zeigt an ob die Bypassklappe geöffnet oder geschlossen ist ➏ Fehler: Wird ein Fehler in der KWL-Lüftungsanlage erkannt, erfolgt je nach Fehler eine Abschaltung der Anlage oder eine Deaktivierung einzelner Funktionen (hierzu bitte Seite 17 Fehlermeldungen beachten!). Über die Zahl wird die Menge der aktuellen Fehler angezeigt. Durch anklicken des Button Detail gelangt man zu der Seite „ Fehler”. ➐ Warnungen: Wird ein untypischer Zustand in der KWL-Lüftungsanlage erkannt, erfolgt je nach Situation eine Abschaltung der Anlage oder eine Deaktivierung einzelner Funktionen (hierzu bitte Seite 17 Warnmeldungen beachten!). Über die Zahl wird die Menge der aktuellen Warnungen angezeigt. Durch anklicken des Button Detail gelangt man zu der Seite „ Fehler”. ➑ Infos: Es werden Infos zu diversen Betriebszuständen angezeigt wie z.B. Filterwechsel, Frostschutz usw. Über die Zahl wird die Menge der aktuellen Infos angezeigt. Durch anklicken des Button Detail gelangt man zu der Seite „ Fehler”. ➒ Aktuelle Werte Temperaturfühler: Eine KWL-Lüftungsgerät besitzt standardmäßig vier im Gerät vormontierte Temperaturfühler. Über das verfügbare Zubehör können weitere Temperaturfühler angeschlossen werden. (1) (2) (3) (4) (5) (6) (7) Außenluft-Fühler: Zuluft-Fühler: Abluft-Fühler: Fortluft-Fühler: Kanal-Fühler Außenluft: Kanal-Fühler Zuluft: Rücklauf-Fühler WW-Register: Position Position Position Position Position Position Position 15 in Außenluftstutzen am KWL EC Gerät in Zuluftluftstutzen am KWL EC Gerät in Abluftluftstutzen am KWL EC Gerät auf der Fortluftseite direkt hinter dem Wärmetauscher vor dem Vorheizregister KWL EM (VHZ) im Außenluftrohr nach dem Nachheizregister KWL EM (NHZ) im Zuluftrohr im Nachheizregister KWL EM (NHZ) im Zuluftrohr Anwender-Handbuch KWL®-Steuerung – easyControls D ➓ 11 12 13 Vor- / Nachheizung (8) Vorheizung = Status EIN oder AUS Vorheizung an (in %): Gibt die prozentuale Heizleistung an, mit der die Vorheizung arbeitet (9) Nachheizung = Status EIN oder AUS Nachheizung an (in %): Gibt die prozentuale Heizleistung an, mit der die Nachheizung arbeitet Aktuelle Werte KWL-FTF (Feuchtesteuerung) Anzeige des aktueller Status (Aus, Ein oder Stufenlos) Anzeige der angeschlossen Feuchte-Fühler: Messwert jedes Fühlers Aktuelle Werte KWL-VOC (Mischgaskonzentration) Anzeige des aktueller Status – Aus, Ein oder Stufenlos Anzeige der angeschlossen VOC-Fühlers: Messwert jedes Fühlers Aktuelle Werte KWL-CO2 Anzeige des aktueller Status – Aus, Ein oder Stufenlos Anzeige der angeschlossen CO2-Fühlers: Messwert jedes Fühlers ➥ Untermenü Fehler ➊ HINWEIS ☞ Fehler / Warnungen / Infos: Anzeige aller im System möglichen Fehler, Warnungen und Informationen Fehler: rot markiert Warnungen: orange markiert Informationen: grün markiert Ein komplette Fehlerübersicht mit Lösungsansätzen ist auf Seite 17 ersichtlich! ➡ Fehlermeldungen über ”Fehler zurücksetzen” reseten 16 Anwender-Handbuch KWL®-Steuerung – easyControls D Fehlerindikation: „Fehler”, „Warnung” und „Info” Nr Fehler (rot) Warnung (orange) Info (grün) Lösung 1 2 3 Drehzahlfehler Zuluftventilator Drehzahlfehler Fortluftventilator 4 SD-Karten Fehler beim Schreiben der E-Eprom-Daten bei "FLASH-Ringpuffer VOLL" Bus Überstrom über max. Wert Fehler beim Download einer Datei (nicht vorhanden?) 7 Hauptplatine: VHZ EH Fehler bei der Null-Durchgangserkennung Fehler beim Lesen einer Datei von der SD-Karte 8 KWL-EM (VHZ): Fehler bei der NullDurchgangserkennung Fehler beim Upload einer Datei 9 KWL-EM (NHZ): Fehler bei der NullDurchgangserkennung Andere Fehler 10 Hauptplatine: Interner Temp-Sensorfehler - (T1 -Aussenluft (fehlt od. Kabelbruch) 1. Sensor aktivieren! 2. Kabel kontrollieren! 11 Hauptplatine: Interner Temp-Sensorfehler - (T2) -Zuluft- (fehlt od. Kabelbruch) 1. Sensor aktivieren! 2. Kabel kontrollieren! 12 Hauptplatine: Interner Temp-Sensorfehler - (T3) -Abluft-(fehlt od. Kabelbruch) 1. Sensor aktivieren! 2. Kabel kontrollieren! 13 Hauptplatine: Interner Temp-Sensorfehler - (T4) -Fortluft-(fehlt od. Kabelbruch) 1. Sensor aktivieren! 2. Kabel kontrollieren! 14 Hauptplatine: Interner Temp-Sensorfehler - (T1 -Aussenluft (Kurzschluss) 15 Hauptplatine: Interner Temp-Sensorfehler - (T2) -Zuluft- (Kurzschluss) 16 Hauptplatine: Interner Temp-Sensorfehler - (T3) -Abluft-(Kurzschluss) 17 Hauptplatine: Interner Temp-Sensorfehler - (T4) -Fortluft-(Kurzschluss) 18 KWL-EM als VHZ konfiguriert, aber nicht vorh. oder ausgefallen 19 KWL-EM als NHZ konfiguriert, aber nicht vorh. oder ausgefallen 20 KWL-EM (VHZ): Kanalfühler (T5) -Aussenluft-(fehlt od. Kabelbruch) 21 KWL-EM (NHZ): Kanalfühler (T6) -Zuluft-(fehlt od. Kabelbruch) 22 KWL-EM (NHZ): Kanalfühler (T7) -Rücklauf WW-Register(fehlt od. Kabelbruch) KWL-EM (VHZ): Kanalfühler (T5) -Aussenluft-(Kurzschluss) 5 6 23 24 KWL-EM (NHZ): Kanalfühler (T6) -Zuluft-(Kurzschluss) 25 KWL-EM (NHZ): Kanalfühler (T7) -Rücklauf WW-Register-(Kurzschluss) 26 KWL-EM (VHZ): Sicherheitsbegrenzer automatisch 27 KWL-EM (VHZ): Sicherheitsbegrenzer manuell 28 KWL-EM (NHZ): Sicherheitsbegrenzer automatisch 29 KWL-EM (NHZ): Sicherheitsbegrenzer manuell 30 KWL-EM (NHZ): Frostschutz WW Rücklauf < z.B. 7 °C 31 KWL-EM (NHZ): Frostschutz WW Zuluft < z.B. 7 °C 32 Hauptplatine: Frostschutz externes WW Reg. Zulufttemperatur < 5 °C (nur PHI) Filterwechsel durchführen Frostschutz WT, nur Abluftbetrieb aktiv Reserved DNS Server nicht gefunden (Kein Internet?) Filter wechseln! Internetverbindung prüfen! Fehler bei der Berechnung der Checksume (Falsche Checksummer in dem Container?) Fehler die der Handhabung der SD-Karte (Nicht vorhanden?) 17 Anwender-Handbuch KWL®-Steuerung – easyControls D MENÜ à Hauptmenü „Wochenprogramm” ➊ BEISPIEL ☞ Profil: Folgende Wochenprogramm-Profile sind auswählbar: „ Standard 1, Standard 2, Standard 3, Benutzerdefiniert 1, Benutzerdefiniert 2, AUS” ➡ Auswahl über ”Speichern” bestätigen oder „Abbrechen” – Profil „Standard 1” ➊ Tag- und Zeiteinstellungen: T IP P ! Mit TAB-Taste der Tastatur durch die Auswahlfelder navigieren! Auswahlmöglichkeit der Wochentage: „ Montag” bis „ Sonntag” Folgende Eingabefelder sind vorhanden: – Auswahl der gewünschten Lüfterstufe „ 1 bis 4” – Uhrzeit von „ 00:00” bis „ 23.59” soll das Gerät in der ausgewählten Lüfterstufe betrieben werden. ➡ Eingaben über ”Speichern” bestätigen oder „Abbrechen” 18 Anwender-Handbuch KWL®-Steuerung – easyControls D BEISPIEL – Profil „Benutzerdefiniert 1” ☞ ➊ Tag- und Zeiteinstellungen: Auswahlmöglichkeit der Wochentage: „ Montag” bis „ Sonntag” Folgende Eingabefelder sind vorhanden: – Auswahl der gewünschten Lüfterstufe „ 1 bis 4” – Uhrzeit von „ 00:00” bis „ 23.59” soll das Gerät in der ausgewählten Lüfterstufe betrieben werden. ➋ Einstellungen kopieren Über den Button „ Alle auswählen” können alle oder bestimmte Wochentage kopiert werden. Hierzu Checkbox „ aktivieren” oder „ deaktivieren” oder „ Auswahl aufheben” ➡ Eingaben über ”Speichern” bestätigen oder „Abbrechen” ➊ T IP P ! Tag- und Zeiteinstellungen: Auswahlmöglichkeit der Wochentage: „ Montag” bis „ Sonntag” Folgende Eingabefelder sind vorhanden: – Auswahl der gewünschten Lüfterstufe „ 1 bis 4” – Uhrzeit von „ 00:00” bis „ 23.59” soll das Gerät in der ausgewählten Lüfterstufe betrieben werden. Mit TAB-Taste der Tastatur durch die Auswahlfelder navigieren! Übersicht: Vordefiniertes Wochenprogramm „ Standard 1-3” 19 Anwender-Handbuch KWL®-Steuerung – easyControls D MENÜ à Hauptmenü „Nachheizung” ➊ BEISPIEL ☞ Nachheizung: Folgende Nachheizungs-Profile sind auswählbar: „ Standard 1, Standard 2, Konstant, Benutzerdefiniert 1, Benutzerdefiniert 2, AUS” ➡ Auswahl über ”Speichern” bestätigen oder „Abbrechen” – Profil Nachheizung „Standard 1” Übersicht: Vordefiniertes Wochenprogramm Nachheizung „ Standard 1-2” ➡ Eingaben über ”Speichern” bestätigen oder „Abbrechen” 20 Anwender-Handbuch KWL®-Steuerung – easyControls D BEISPIEL ☞ ACHTUNG – Profil Nachheizung „Benutzerdefiniert 1” Wenn kein Erweiterungsmodul KWL-EM angeschlossen ist, ist das Profil „Nachheizung” deaktiviert ➊ Nachheizungsprofil aktivieren im Zeitraum vom Tag: .... Monat: .... bis Tag: .... Monat: .... Mit dieser Funktion besteht die Möglichkeit die Nachheizung in einer definierten Zeitperiode zu aktivieren ➋ Temperatur Diese Funktion steht nur bei angeschlossenen Zuluftkanal-/ und Feuchte-Temperaturfühler zur Verfügung – Max. Kanaltemperatur (13-40) in °C – Min. Kanaltemperatur (10-37) in °C Die Zuluftkanaltemperatur wird mit dem Kanalfühler (T6) gemessen und mit der eingestellten min/max. Temperatur verglichen. Sinkt die Zuluftkanaltemperatur unter z.B. +16,5 °C wird die Nachheizung aktiviert auch wenn der Raum bereits den Sollwert erreicht hat. Ist die Zuluftkanaltemperatur über z.B. +40 °C wird die Heizleistung reduziert, auch wenn der Raum den Sollwert nicht erreicht hat. ➌ Tag- und Zeiteinstellungen: Auswahlmöglichkeit der Wochentage: „ Montag” bis „ Sonntag” Folgende Eingabefelder sind vorhanden: – Temperaturwerte in °C – Uhrzeit von „ 00:00” bis „ 23.59” soll das Gerät im gewünschtem Temperaturbereich betrieben werden. ➍ Einstellungen kopieren Über den Button „ Alle auswählen” können alle oder bestimmte Wochentage kopiert werden. Hierzu Checkbox „ aktivieren” oder „ deaktivieren” oder „ Auswahl aufheben” ➡ Eingaben über ”Speichern” bestätigen oder „Abbrechen” 21 Anwender-Handbuch KWL®-Steuerung – easyControls D MENÜ MENÜ à à Hauptmenü „Technische Info” ➊ Geräte Daten: Angaben zum installierten KWL-Gerät – Type – Sicherheitsnummer – Best.-Nr. – Seriennummer – MAC-Adresse – Produktionscode ➋ Technische Information im Internet: Geräteinfos: > Link zur Helios Webseite um weitere technische Informationen zu erhalten Data Security / Disclaimer: Link zu wichtigen Datenschutzhinweisen ➌ Hotline Service – Ihr direkter Draht zu uns!: After Sales Elektrotechnischer Support / Kundendienst / Ersatzteile: +49 (0) 7720 / 606 222 Hauptmenü „Netzwerk einrichten” ➊ WICHTIGER HINWEIS ☞ Netzwerkeinstellungen: Im Menü „ Netzwerk einrichten” können folgende Netzwerkeinstellungen vorgenommen werden: – DHCP verwenden: Status „ aktivieren” ➞ Checkbox setzen oder „ deaktivieren” Bei „aktiviertem” DHCP verwenden” werden alle Netzwerkeinstellungen automatisch zugewiesen – Hostname: Automatisch zugewiesen oder frei wählbar Über einen frei wählbaren Hostnamen (z.B. "MeinKWL") ist im Browser ein Zugriff auf das KWL-Gerät auch ohne Kenntnis der IP-Adresse möglich. – IP-Adresse: Automatisch zugewiesen oder frei wählbar – Subnetzmaske: Automatisch zugewiesen oder frei wählbar – Standard Gateway: Automatisch zugewiesen oder frei wählbar – Standard DNS: Automatisch zugewiesen oder frei wählbar – Fallback DNS: Automatisch zugewiesen oder frei wählbar ➡ Eingaben über ”Speichern” bestätigen oder „Abbrechen” HINWEIS ✍ Wenn die Netzwerkeinstellungen manuell eingetragen werden, sollten diese notiert werden. Bitte beachten, dass nach dem Speichern nur noch über die eingetragene IP-Adresse auf das Gerät zugegriffen werden kann! 22 Anwender-Handbuch KWL®-Steuerung – easyControls MENÜ à D Hauptmenü „Konfiguration” ➥ Untermenü System ➊ Systemkonfiguration Sprache: Sprachauswahl (9 Sprachen) „ Deutsch”, „ Englisch”, „ Französisch” ...etc. Format: Datum-Formatwahl „ dd.mm.yyyy”, „ mm.dd.yyyy” „ yyyy.mm.dd” Land: Länderauswahl: Deutschland etc. Aktuelle Browserzeit: Systemvorgabe Unterschied zu GMT in Stunden: Systemvorgabe Browserzeit beim Speichern übernehmen: Datum: Einfache Aktualisierung des geräteinternen Datums Uhrzeit: Einfache Aktualisierung der geräteinternen Uhrzeit Unterschied zu GMT in Stunden: Abweichende Einstellmöglichkeit der Stunden zur „ Greenwich Mean Time” Sommer/Winterzeit Modus: Bei aktivierter Checkbox erfolgt eine automatische Umstellung Betriebsart "Auto" immer um 0 Uhr aktivieren: Der Betriebsmodus des KWL-Gerätes wird um 00:00 Uhr auf automatischen Betrieb zurückgesetzt – Automatische Softwareupdates: Bei aktivierter Checkbox, sucht das System täglich nach neuer Software. Wird online eine aktuellere Softwareversion gefunden, wird diese automatisch installiert. Der Installationsvorgang startet zwischen 23:00 und 05:00 Uhr. Empfehlung: „ Automatische Softwareupdates” aktivieren! – Datenabgleich mit Helios easyControls Portal: Bei aktivierter Checkbox, werden alle betriebsentscheidenden Parameter und Messwerte regelmäßig an den Portalserver www.easycontrols.net gesendet. Über dieses Webportal kann jederzeit von unterwegs auf die KWL-Lüftungsanlage zugegriffen werden um detaillierte Einstellungen vorzunehmen. Zusätzlich sind auch Auswertungen wie z.B. Temperaturverläufe über das easyControls Portal im Internet möglich. ACHTUNG ➡ Software jetzt aktualisieren! Sollten die „Softwareupdates” und der „Datenabgleich” durch den Benutzer bei deaktivierter Checkbox betrieben werden, entfällt jedliche Gewährleistung gegenüber Helios! 23 Anwender-Handbuch KWL®-Steuerung – easyControls D ➋ Status Software Version: Gibt die aktuelle Software-Version der Gerätesteuerung an ➋ Drehzahl Zuluft (rpm): Zeigt die aktuelle Drehzahl des Zuluftventilators an Abluft (rpm): Zeigt die aktuelle Drehzahl des Abluftventilators an ➌ Betriebsstunden Anzeige der Betriebsstunden bis zum aktuellen Zeitpunkt folgender Gerätekomponenten: Zuluftventilator; Abluftventilator; Vorheizung; Nachheizung ➍ % der abgegebenen Heizleistung Vorheizung: Nachheizung: ➡ Einstellungen über ”Speichern” bestätigen oder „Abbrechen” ➥ Untermenü Gerät ➊ Gerätekonfiguration: Im Menü „ Gerätekonfiguration” können folgende Geräteeinstellungen vorgenommen werden: Konfiguration Lüftungsgerät: Auswahl „ DIBt” oder „ Passivhaus” Vorheizungstyp: Auswahl „ EH-Basis”, EH-ERW, „ SEWT” oder „ LEWT” Vorheizung: Status „ EIN” oder „ AUS” Funktionsart KWL-EM: Status „ Funktion 1” oder „ Funktion 2” Nachlaufzeit Vor-/Nachheizung: Eingabe der Nachlaufzeit (in Minuten) Wärmetauschertyp: Auswahl „ Kunststoff”, „ Aluminium” oder „ Enthalpie” Externer Kontakt: Auswahl „ Funktion 1 bis 6” Störungsausgang: Status „ Sammelstörung” oder „ nur Fehler” Bedienelement KWL-BE: Status „ EIN” oder „ AUS” Bedienelement Komfort KWL-BEC: Status „ EIN”, „ AUS” und „ nur anzeigen” ➋ Filterwechsel: Wechselintervall in Monaten: 6 (Werkseinstellung) Restlaufzeit in Tagen: z.B. 180 Tage ➡ Restlaufzeit neu starten Wenn der Filterwechselintervall abgelaufen ist (Anzeige 0), muss der Filter (Außenluft) ersetzt werden. – Am Bedienelement KWL-BE wird der abgelaufene Filterintervall als Blinkcode detektiert (Seite 17, Fehler Nr.1) Der RESET am Bedienelement erfolgt über den Schiebeschalter >> Schalter einmal nach oben und unten schieben – Am Bedienelement Komfort KWL-BEC wird im Display die Fehlermeldung „ Info 1” angezeigt Der RESET am Bedienelement Komfort erfolgt nach Wechsel des Filters bzw. öffnen der Gerätetür Nach dem Neustart wird der Wechselintervall auf 9 Monate eingestellt (Einstellmöglichkeiten von 1 bis 9 Monaten). HINWEIS: Wenn vor dem Filterwechsel ein individueller Wechselintervall eingetragen wurde z.B. 3 Monate, wird diese Intervalleinstellung nach dem Filterwechsel wieder übernommen. 24 Anwender-Handbuch KWL®-Steuerung – easyControls D ➌ Bypass: Bypass aktivieren im Zeitraum vom Tag: .... Monat: .... bis Tag: .... Monat: .... Mit dieser Funktion besteht die Möglichkeit die Bypassfunktion in einer definierten Zeitperiode zu aktivieren Min. Außenlufttemperatur in °C: 18 (Werkseinstellung) Offset Zulufttemperatur in °C: 4 (Werkseinstellung) ACHTUNG Passive Außenluftkühlung: Status „ EIN” oder „ AUS” Bei der Verwendung von Klimaanlagen in einem Gebäude im Sommer kann die deutlich kühlere Abluft zur Abkühlung der warmen Außenluft über den Kreuzgegenstrom-Wärmetauscher genutzt werden. Diese Funktion wird über die Aktivierung der "Passiven Außenluftkühlung" realisiert. Achtung! Bei der aktivierten passiven Außenenluftkühlung, muss der Stopfen im KWL-Gerät entfernt werden (s. Abb) um eventuell anfallendes Kondensat im Außenluftbereich über den Kondensatablauf abführen zu können. Nach der Deaktivierung der "Passiven Außenluftkühlung" (Winterbetrieb) ist der Stopfen wieder einzusetzen. ➍ Gebäudetechnik: Bei aktivierter Checkbox ist die Modbus-Schnittstelle zur Gebäudeleittechnik „ aktiviert” ➎ ACHTUNG Gerät in Lieferzustand setzen: Wochenprogramm zurücksetzen: Hierzu Checkbox „ aktivieren” Bei aktivierter Checkbox, werden alle Eingaben des Wochenprogramms gelöscht! Geräteinstellungen auf Werkseinstellungen zurücksetzen: ➡ zurücksetzen! ➡ Einstellungen über ”Speichern” bestätigen oder „Abbrechen” Hinweis: Die Filterrestlaufzeit wird beim Zurücksetzen nicht verändert ➥ Untermenü Lüfter ➊ Lüfterkonfiguration Abluft / Zuluft Lüfterstufe 1: Abluft ... Zuluft Lüfterstufe 2: Abluft ... Zuluft Lüfterstufe 3: Abluft ... Zuluft Lüfterstufe 4: Abluft ... Zuluft 25 ... ... ... ... Anwender-Handbuch KWL®-Steuerung – easyControls D Mindestlüfterstufe: Status „ 0” oder „ 1” Über die Auswahl „ 0” kann die Lüfterstufe 1 als Ausschaltfunktion eingestellt werden Zuluftbetrieb: Stufe „ 1 bis 4” - bei Ansteuerung über externen Kontakt (Funktion 4) > siehe Seite 33 Abluftbetrieb: Stufe „ 1 bis 4” - bei Ansteuerung über externen Kontakt (Funktion 5) > siehe Seite 33 ➋ Bedienelement KWL-BE / GLT (Gebäudeleittechnik): Zuordnung Lüfterstufen: Über die Auswahl „ 0-10V” (Werkseinstellung) oder über die Auswahl „ stufig” mit den Untermenüs: – Bereich 0-2 V Stufe 0 – Bereich 2-4 V Stufe 1 – Bereich 4-6 V Stufe 2 – Bereich 6-8 V Stufe 3 – Bereich 8-10 V Stufe 4 ➡ Einstellungen über ”Speichern” bestätigen oder „Abbrechen” ➥ Untermenü Fühler HINWEIS ✍ In diesem Menü werden alle in der KWL-Anlage angeschlossenen Fühler wie z.B. Feuchte-/CO2- und VOC-Fühler angezeigt. Je nach Anzahl der angeschlossenen Fühler (max. 8 Stück möglich) werden diese in den Felder aufgelistet um an diesen weitere Einstellungen und Zuordungen vorzunehmen. Die Fühlerbezeichnung kann individuell überschrieben werden! „ KWL-FTF 1” kann z.B. durch die Bezeichnung "Bad" ersetzt werden ➊ Feuchte-Temperatur-Fühler-Konfiguration Feuchtesteuerung: Folgende Auswahlmöglichkeiten sind möglich „ AUS”, „ EIN”, „ Stufenlos” – KWL-FTF AD1 Nur Feuchte – KWL-FTF AD2 Nur Feuchte – KWL-FTF AD3 Nur Feuchte – KWL-FTF AD4 Nur Feuchte – KWL-FTF AD5 Nur Feuchte – KWL-FTF AD6 Nur Feuchte – KWL-FTF AD7 Nur Feuchte – KWL-FTF AD8 Nur Feuchte Sollwerte Feuchtesteuerung (20-80) % r.F: 45 (Werkseinstellung) Schaltstufen Feuchte-Steuerung (5-20) % r.F: 10 (Werkseinstellung) Stoppzeit in Std. (0-24): 2 Std. (Werkseinstellung) ➋ CO2-Steuerung: CO2-Steuerung: Folgende Auswahlmöglichkeiten sind möglich „ AUS”, „ EIN”, „ Stufenlos” – KWL-CO2 AD1 – KWL-CO2 AD2 – KWL-CO2 AD3 – KWL-CO2 AD4 – KWL-CO2 AD5 – KWL-CO2 AD6 – KWL-CO2 AD7 – KWL-CO2 AD8 Sollwert-CO2 (450-2000) ppm: 1000 (Werkseinstellung) Schaltstufen CO2-Steuerung (50-200) ppm: 100 (Werkseinstellung) 26 Anwender-Handbuch KWL®-Steuerung – easyControls D ➌ VOC - Steuerung: VOC-Steuerung: Folgende Auswahlmöglichkeiten sind möglich „ AUS”, „ EIN”, „ Stufenlos” – KWL-VOC AD1 – KWL-VOC AD2 – KWL-VOC AD3 – KWL-VOC AD4 – KWL-VOC AD5 – KWL-VOC AD6 – KWL-VOC AD7 – KWL-VOC AD8 Sollwert-VOC (450-2000) ppm: 1200 (Werkseinstellung) Schaltstufen VOC-Steuerung (50-200) ppm: 100 (Werkseinstellung) ➡ Einstellungen über ”Speichern” bestätigen oder „Abbrechen” MENÜ à Hauptmenü „Erstinbetriebnahme” In diesem Menü werden schnell und übersichtlich alle wichtigen Informationen und Einstellungen angezeigt, die bei der Erstinbetriebnahme vorgenommen wurden. Eine detailierte Beschreibung des Ablaufs zur „ Erstinbetriebnahme” von KWL-Geräten ist in Kapitel 3, ab Punkt 3.2 zu finden. ➡ Einstellungen über ”Speichern” bestätigen oder „Abbrechen” 27 Anwender-Handbuch KWL®-Steuerung – easyControls D MENÜ à Hauptmenü „Mein Konto” ➥ Untermenü Menü Modus ➊ Passwort: !helios! ☞ Passwort: helios ☞ Menüansicht – Benutzerkonto „Service” Nach Eingabe des Passworts ermöglicht das Benutzerkonto „ Service” die Bedienung der KWL-Lüftungsanlage mit einem vordefiniertem Funktionsumfang (siehe Abb. unten), welcher speziell für den „ Servicetechniker” vorgesehen ist. – Benutzerkonto „Advanced” (Eigentümer) Nach Eingabe des Passworts ermöglicht das Benutzerkonto „ Advanced” die Bedienung der KWL-Lüftungsanlage mit einem vordefiniertem Funktionsumfang (siehe Abb. unten), welcher speziell für den „ Wohnungseigentümer” vorgesehen ist. 28 Anwender-Handbuch KWL®-Steuerung – easyControls D Passwort: easy ☞ – Benutzerkonto „Basic” (Mieter) Das Benutzerkonto „ Basic” ermöglicht die Bedienung der KWL-Lüftungsanlage mit einem vordefiniertem Funktionsumfang (siehe Abb. unten), welcher speziell für den „ Mieter” vorgesehen ist. ➥ Untermenü Passwort ändern ➊ Passwort ändern Bei der Passwortvergabe müssen acht Ziffern eingegeben werden. Altes Passwort: Neues Passwort: Passwort wiederholen: ➡ Eingaben über ”Passwort ändern” bestätigen oder „Abbrechen” ➥ Untermenü Abmelden Sie haben sich erfolgreich vom System abgemeldet! 29 Anwender-Handbuch KWL®-Steuerung – easyControls D 5.0 KAPITEL 5 FUNKTIONSBESCHREIBUNG Funktionsbeschreibungen 5.0.1 System Boot (Systemstart) Nach jedem System Boot erfolgt die Überprüfung der am Digital Bus angeschlossener Zubehörkomponenten. Wird eine Zubehörkomponente nach dem System Boot entfernt, wird dies unverzüglich durch eine Info (Info 4) angezeigt. Zubehörkomponenten dürfen nicht im laufenden Betrieb angeschlossen werden, wird dies dennoch versucht, werden die Zubehörkomponenten erst nach einem Neustart am System angemeldet. 5.0.2 Lüftungsmodus Die KWL EC-Lüftungsgeräte können in zwei Modi betrieben werden. „manuell” und „auto“. HINWEIS ☞ Modus manuell: In Modus „manuell” sind die Bedienelemente KWL-BE (GLT 0-10V) und KWL-BEC aktiv. Die Leistungsregelung der Lüfter erfolgt direkt über diese Bedienelemente oder über den lokalen Webserver bzw. über das Webportal. Das Wochenprogramm für die Lüfterstufen, sowie die bedarfsgerechte Leistungsregelung über VOC-, CO2- und FTF-Messwerte ist deaktiviert. Die Anzeige der Lüfterstufe bzw. der prozentualen Lüfteransteuerung hängt von den verwendeten Zubehörkomponenten ab. Wird kein KWL-BE (GLT 0-10V) verwendet, ist ausschließlich die Anzeige der Lüfterstufe im Display des KWLBEC und dem lokalen Webservers zu sehen. Wird jedoch ein KWL-BE (GLT 0-10V) verwendet, wird zusätzlich der prozentuale Ansteuerungswert ausgegeben. Hierbei ist 0V = 0 % und 10V = 100 % (Ventilatoren laufen ab 17 % an). Das Bedienelement Schiebeschalter KWL-BE (GLT 0-10) kann nur im Modus „manuell” benutzt werden. Eine Umschaltfunktion von „auto” auf „manuell” ist über das Bedienelement KWL-BE nicht möglich. Modus auto: Im Modus „auto” erfolgt die Leistungsregelung der Lüfter über das Wochenprogramm. Bei Verwendung der als Zubehör erhältlichen VOC-, CO2- und FTF-Fühler wird die Leitungsregelung zusätzlich durch die Messwerte beeinflusst. Werden verschieden Lüfterstufen intern angefordert, wird immer die höchste Lüfterstufe aktiviert. Die Anzeige der Lüfterstufe bzw. der prozentualen Lüfteransteuerung hängt von den verwendeten Zubehörkomponenten ab. Wird ein KWL-VOC, KWL-CO2 oder KWL-FTF-Fühler mit der Konfiguration „ stufig“ verwendet, ist ausschließlich die Anzeige der Lüfterstufe im Display des KWL-BEC und dem lokalen Webservers zu sehen. Wird jedoch ein KWL-VOC oder KWL-CO2 oder KWL-FTF-Fühler mit der Konfiguration „ stufenlos“ verwendet, wird zusätzlich der prozentuale Ansteuerungswert ausgegeben. Hierbei ist 1,7 V = 1 % und Stufe 4 = 100 % (Stufe 0 = 0 %). 5.0.3 Partybetrieb Die Funktion „Partybetrieb” ermöglicht für eine definierte Zeit die Lüftung in einer bestimmten Lüfterstufe. Die Funktion Partybetrieb kann jederzeit aktiviert bzw. abgebrochen werden, entweder über das KWL-BEC, den lokalen Webserver, den externen Kontakt oder über das easyControls Portal (www.easycontrols.net). Die Dauer sowie die Lüfterstufe der Partyfunktion kann über die folgenden Menüpunkte angepasst werden: – Bedienelement Komfort KWL-BEC ð siehe Bedienungsanleitung (Nr. 82219) – Lokaler Webserver ð siehe Seite 13 – www.easycontrols.net 5.0.4 Ruhebetrieb Die Funktion „Ruhebetrieb” ermöglicht für eine bestimmte Zeit die Lüftung in einer bestimmten Lüfterstufe. Die Funktion Ruhebetrieb kann jederzeit aktiviert bzw. abgebrochen werden, entweder über das KWL-BEC, den lokalen Webserver, den externen Kontakt oder über das easyControls Portal (www.easycontrols.net). Die Dauer, sowie die Lüfterstufe der Ruhefunktion kann über die folgenden Menüpunkte angepasst werden: – Bedienelement Komfort KWL-BEC ð siehe Bedienungsanleitung (Nr. 82219) – Lokaler Webserver ð siehe Seite 13 – www.easycontrols.net 5.0.5 Wochenprogramm Über die Wochenzeitschaltuhr werden die Lüfterstufen zeitabhängig gesteuert. Es stehen 3 Standard Wochenprogramme zur Auswahl, zusätzlich können 2 individuelle Wochenprogramme erstellt werden. Es können je Tag 10 Zeiten mit entsprechender Lüfterstufe definiert werden. Sollte der Wunsch nach einer zeitabhängigen Lüftersteuerung nicht bestehen, kann diese Funktion ausgeschaltet werden. Das Wochenprogramm ist nur im Modus „ auto“ aktiv. Das Wochenprogramm kann über die folgenden Menüpunkte angepasst werden: – Bedienelement Komfort KWL-BEC ð siehe Bedienungsanleitung (Nr. 82219) – Lokaler Webserver ð siehe Seite 18 – www.easycontrols.net 5.0.6 Nachheizung / Nachheizungswochenprogramm (Zubehör) Über das Nachheizungswochenprogramm wird die Zulufttemperatur zeitabhängig gesteuert. Es stehen 2 Standard Wochenprogramme zur Auswahl, zusätzlich können 2 individuelle Wochenprogramme erstellt werden. Über die Betriebsart „ konstant“ kann eine Temperatur dauerhaft vorgegeben werden. Es können je Tag 10 Zeiten mit entsprechender Temperatur definiert werden. Sollte der Wunsch nach einer zeitabhängigen Nachheizungssteuerung nicht bestehen, kann diese Funktion ausgeschaltet werden. Das Wochenprogramm ist im Modus „ auto” und „ manuell“ aktiv. Das Nachheizungswochenprogramm kann über die folgenden Menüpunkte angepasst werden: – Bedienelement Komfort KWL-BEC ð siehe Bedienungsanleitung (Nr. 82219) – Lokaler Webserver ð siehe Seite 20 – www.easycontrols.net 30 Anwender-Handbuch KWL®-Steuerung – easyControls D HINWEIS ☞ WICHTIGER HINWEIS ☞ Bei Verwendung eines Raumfühlers KWL-FTF, wird auf die Raumtemperatur geregelt. Es stehen hierdurch weitere Einstellmöglichkeiten zur Verfügung. Es kann die minimale und maximale Kanaltemperatur eingestellt werden. Die Regelung erfolgt auf Basis einen Pulspaketsteuerung, hiermit kann die Heizleistung zwischen 0-100 % stufenlos geregelt werden. Hinweise: – Wird das Elektro-Nachheizregister angesteuert, wird ebenfalls die Nachlaufzeit für den Zuluftventilator aktiviert. Wird das KWL EC-Lüftungsgerät ausgeschaltet, erfolgt ein Nachlauf des Zuluftventilators. Standardmäßig beträgt die Nachlaufzeit 60 Sek. dies kann auch 120 Sek. geändert werden, sobald die Heizung nicht mehr benötigt wird läuft die Nachlaufzeit ab. – Die Nachheizung wird nur aktiviert, wenn die Motoren eine mind. Drehzahl erreicht haben und die Sicherheitstemperaturbegrenzer nicht ausgelöst haben. Über ein KWL EC-Lüftungsgerät können keine Räume aufgeheizt werden! Es wird nur die Zulufttemperatur erwärmt. Deßhalb ist eine Raumheizung zwingend erforderlich! 5.0.7 Fühlerwerte Standardmäßig werden die KWL-Lüftungsgeräte mit einem Außen-, Zuluft-, Abluft- und Fortlufttemperaturfühler ausgeliefert. Über das Helios Zubehör stehen weitere Temperaturfühler aber auch VOC, Feuchte-Temperatur und CO2Fühler zur Auswahl. Die aktuellen Fühlerwerte können über die folgenden Menüpunkte betrachtet werden: – Bedienelement Komfort KWL-BEC ð siehe Bedienungsanleitung (Nr. 82219) – Lokaler Webserver ð siehe Seite 15 – www.easycontrols.net Über das easyControls Portal können Fühlerwerte über einen Zeitraum von 1 Jahr betrachtet und analysiert T IP P ! werden. 5.0.8 Urlaubsprogramm Über das Urlaubsprogramm kann ein in der Zukunft liegender Urlaub bereits im Vorfeld geplant werden. Für diesen Zeitraum kann ein definierter Lüftungszyklus zwischen „ Intervallbetrieb” oder „ konstante Lüftung” ausgewählt werden. Wenn das Startdatum erreicht wird, startet das Urlaubsprogramm automatisch. Beim Erreichen des Enddatums oder bei einem Abbruch, wird das Urlaubsprogramm wieder deaktiviert. 5.0.9 Frostschutz Kreuzgegenstrom-Wärmetauscher Der Wärmetauscher Frostschutz wurde grundlegend überarbeitet um ein Maximum an Energie Ersparnis zu erreichen. Durch die neue Logik, wird der Wärmebereitstellungsgrad permanent berechnet. Hierbei wird die Außenluft-, Fortluftund Ablufttemperatur überwacht. Bei Unterschreiten des mind. Wärmebereitstellungsgrads, erfolgt die Zuschaltung der Vorheizung. Sinkt trotz Vorheizbetrieb der Wärmebereitstellungsgrad weiter ab, erfolgt die Abschaltung des Zuluftventilators. 5.0.10 Frostschutz Warmwasser-Nachheizregister Der Frostschutz des Warmwasserheizregisters wird durch Verwendung eines Rücklauftemperaturfühlers und eines Kanaltemperaturfühlers sichergestellt. Die Fühler werden am Erweiterungsmodul KWL-EM angeschlossen. Des Weiteren der Mischer und die Umwälzpumpe des Warmwasser-Nachheizregisters WHR... Sinkt die Temperatur am Rücklauftemperaturfühler und/oder am Kanaltemperaturfühler auf unter +7 °C, erfolgt eine Notabschaltung des KWL-Lüftungsgerät. Hierbei schließen die Verschlussklappen und der Mischer sowie die Umwälzpumpe wird aktiviert. HINWEIS ☞ Bei Verwendung einer Warmwasserheizung müssen Außenluftverschlussklappen und Fortluftverschluss klappen angeschlossen werden. 5.0.11 Frostschutz für unabhängige Wasserheizregister Bei einer Zulufttemperatur unter +5 °C wird der Zuluft- und Abluftventilator ausgeschaltet um nachgeschaltete Warmwasser-Nachheizregister vor Frostschäden zu schützen. Dies wird durch Fehlermeldung Nr.32 (rot) signalisiert. Sobald die Zulufttemperatur über +5 °C steigt wird der Zuluft- und Abluftventilator automatisch eingeschaltet. HINWEIS ☞ 5.0.12 Vorheizung (Zubehör) Je nach Geräteausführung, kann in dem KWL-Lüftungsgerät oder extern im Rohrsystem (in Verbindung mit Erweiterungsmodul KWL-EM) eine Vorheizung verbaut werden. Die Vorheizung wird zur Erwärmung der Außenluft verwendet. Dies ist notwendig wenn der Wärmetauscher zu vereisen droht oder die Behaglichkeitstemperatur (Vorgabe des Passiv Haus Institut) von 16,5 °C in der Zuluft unterschritten wird. Die Vorheizung wird sowohl von der Wärmetauscher-Frostschutzfunktion sowie von der Behaglichkeitstemperatur angesteuert. Die Regelung erfolgt auf Basis einen Pulspaketsteuerung, hiermit kann die Heizleistung zwischen 0-100 % stufenlos geregelt werden. Hinweise: – Die Behaglichkeitstemperatur ist nur in der Passivhaus-Konfiguration PHI (Konfi 2) aktiv. Wird ebenfalls eine Nachheizung verbaut, erfolgt die Anhebung der Zulufttemperatur auf 16,5 °C (Behaglichkeitskriterium) über das ElektroNachheizregister. – Wird die Elektro-Vorheizung angesteuert, wird ebenfalls die Nachlaufzeit für den Zuluftventilator aktiviert. Wird das KWL-Lüftungsgerät ausgeschaltet, erfolgt ein Nachlauf des Zuluftventilators. Standardmäßig beträgt diese Nachlaufzeit 60 Sek.. Dies kann in 120 Sek. abgeändert werden. Sobald die Heizung nicht mehr benötigt wird, läuft die Nachlaufzeit ab. – Die Vorheizung wird nur aktiviert, wenn die Motoren eine mind. Drehzahl erreicht haben und die Sicherheitstemperaturbegrenzer nicht ausgelöst haben. 31 Anwender-Handbuch KWL®-Steuerung – easyControls D 5.0.13 Bypass Die Bypassfunktion ermöglicht die Umgehung des Wärmetauschers um frische Außenluft ohne Wärmerückgewinnung direkt ins Gebäude zu leiten. Hierbei wird die Außenluft über den Wärmetauscher nicht zusätzlich erwärmt. Definition: Bypass geschlossen ð Winterbetrieb mit Wärmerückgewinnung Bypass geöffnet ð Sommerbetrieb ohne Wärmerückgewinnung (Wärmetauscherumgehung) Die Einstellungen der Bypassfunktion können über die folgenden Menüpunkte angepasst werden: – Bedienelement Komfort KWL-BEC ð siehe Bedienungsanleitung (Nr. 82219) – Lokaler Webserver ð siehe Seite 24 – www.easycontrols.net Es wird zwischen 2 Betriebszuständen unterschieden: 1. Keine Nachheizung vorhanden oder deaktiviert In diesem Fall, wird die Einstellung „ Bypasstemperatur“ und „ Außenluftbegrenzung“ berücksichtigt. Die Bypasstemperatur gibt an, ab welcher Ablufttemperatur bzw. Raumtemperatur (KWL-FTF-Fühler sind als „ nur Temperatur“ oder „ kombiniert“ eingestellt) der Bypass öffnen soll. Die Außenluftbegrenzung gibt an, ab welcher Außenlufttemperatur die Funktion Bypass freigegeben wird (automatische Winterabschaltung). Generell muss die Außenlufttemperatur niedriger als die Abluft- bzw. Raumtemperatur sein. Steigt die Abluft- bzw. Raumtemperatur über die Bypasstemperatur und liegt die Außenlufttemperatur über der Außenluftbegrenzung wird der Bypass geöffnet. 2. Nachheizung aktiv über Wochenprogramm oder feste Sollwerttemperatur In diesem Fall, wird die Einstellung „ Offset“ und „ Außenluftbegrenzung“ berücksichtigt. Die Zulufttemperatur die über das Menü Nachheizung definiert wurde (Wochenprogramm oder Festwert) ist die Basis auf diese Soll-Temperatur wird ein der Offset addiert, die Summe ergibt somit die Bypasstemperatur ab welcher Ablufttemperatur bzw. Raumtemperatur (KWL-FTF sind als „ nur Temperatur“ oder „ kombiniert“ eingestellt) der Bypass öffnen soll. Die Außenluftbegrenzung gibt an, ab welcher Außenlufttemperatur die Funktion Bypass freigegeben wird (automatische Winterabschaltung). Generell muss die Außenlufttemperatur niedriger als die Abluft- bzw. Raumtemperatur sein. Steigt die Abluft- bzw. Raumtemperatur über die Summe aus Nachheizungstemperatur plus Offset „ Bypasstemperatur“ und liegt die Außenlufttemperatur über der Außenluftbegrenzung wird der Bypass geöffnet. Eine weitere Option ist die Funktion „ passive Außenluftkühlung“. Mit dieser Funktion wird die kühlere Abluft verwendet um die wärmere Außenluft mittels Wärmetauscher abzukühlen. Dieser Prozess kann speziell bei Objekten mit einer Klimaanlage und feuchter Außenluft (schwüle Witterung) zu einem deutlichen Kondensatanfall auf der Außenluft führen. Bei den Geräten KWL EC 200 W, KWL EC 300 W und KWL EC 500 W sind hierfür Kondensatablauflöffnungen vorgesehen. Über diese Öffnung kann das Kondensatwasser von der Außenluftseite zur Fortluftseite ablaufen ohne eine Geruchsbelästigung darzustellen (Außenluftseite steht unter Überdruck die Fortluftseite steht unter Unterdruck). Die Funktion kann über das easyControls Portal (www.easycontrols.net) aktiviert werden oder über den lokalen Webserver (ab Software Version V2.03). WICHTIG ☞ ACHTUNG – Bei den KWL EC 200 W, KWL EC 300 W und KWL EC 500 W muss die Kondensatablauföffnung einmal jähr lich geprüft werden. – Bei den restlichen KWL-Geräten kann die Kombination aus Klimaanlage und extremer Luftfeutigkeit in der Außenluft zu Wasserschäden führen. Die Verwendung der passiven Außenluftkühlung ohne Klimaanlage ist hingegen unkritisch. Jedoch sollte bei den KWL-Geräten eine Wanne unter dem Gerät angebracht werden, um Wasserschäden am Gebäude zu vermeiden. In Extremsituationen kann Kondensatwasser anfallen. 5.0.14 Externer Kontakt Über die Funktion „ externen Kontakt”, können über bauseitige Schalter diverse Gerätefunktionen aktiviert werden. Über die Zubehörkomponenten KWL-VOC, KWL-CO2 und KWL-EM (Ausnahme NHZ als WW konfiguriert) können externe Kontakte angeschlossen werden. Funktionen des externen Kontakts können über folgende Menüpunkte angepasst werden: – Bedienelement Komfort KWL-BEC ð siehe Bedienungsanleitung (Nr. 82219) – Lokaler Webserver ð siehe Seite 24 – www.easycontrols.net Funktionsübersicht: Funktion 1: Externer Kontakt ein- bzw. ausschalten Zur Funktion wird einer oder mehrere externe Kontakte geöffnet oder geht eine Zubehörkomponente im laufenden Betrieb verloren (Kabelbruch oder defekt der Komponente) wird das KWL-Lüftungsgerät ausgeschaltet. Hierbei sind die Sicherheitsfunktionen aktiv und im Bedienelement KWL-BEC bzw. auf der Webseite wird „ externer Kontakt” angezeigt. Erst wenn alle externen Kontakte wieder geschlossen sind, wird das KWL-Lüftungsgerät eingeschaltet. ACHTUNG Sobald Buskomponenten ausgefallen sind, benötigt es ein Neustart des KWL-Lüftungsgeräts um die Systemparameter zu aktualisieren. Ohne diesen Neustart bleibt das Gerät ausgeschaltet. ACHTUNG Der externe Kontakt ist nicht für Vorrichtungen vorgesehen, die das Leben von Bewohner schützen sollen! Die Verwendung z.B. als Unterdruckabschaltung für Feuerstätten ist nicht gestattet, da die Abschaltung des KWL-Lüftungsgerätes nicht zu 100 % sichergestellt ist. Fallbeispiel: Kabelbruch und Neustart des Geräts – In diesem Fall, stehen die ausgefallen externen Kontakte zur Auswertung nicht mehr zur Verfügung). 32 Anwender-Handbuch KWL®-Steuerung – easyControls D Funktion 2: Kamintaster Zur Funktion, wird einer oder mehrere externe Kontakte geschlossen wird der Abluftventilator abgeschaltet. Wird der externe Kontakt kürzer als 1 Sek. geschlossen, erfolgt die Abschaltung des Abluftventilators über eine fest eingestellte Dauer von 15 Minuten. Wird der externe Kontakt länger als 1 Sek. geschlossen, wird der Abluftventilator solange abgeschaltet wie der externe Kontakt geschlossen bleibt. Funktion 3: Partybetrieb aktivieren Zur Funktion, wird einer oder mehrere externe Kontakte geschlossen wird der Partybetrieb aktiviert. Die Dauer und die Lüftungsstufe werden aus der Funktion Partybetrieb übernommen, die Dauer und die Lüfterstufe kann angepasst werden. Nach Ablauf der Partyfunktion muss erneut der externe Kontakt geschlossen werden um die Funktion erneut zu aktivieren, ist einer oder mehrer externe Kontakte zu diesem Zeitpunkt geschlossen müssen diese zuvor erst geöffnet werden. Erst wenn alle externen Kontakte geöffnet waren kann die Funktion neu aktiviert werden. Funktion 4: Zuluftbetrieb Zur Funktion, wird einer oder mehrere externe Kontakte geschlossen wird der Zuluftbetrieb aktiviert. Die Lüftungsstufe kann über folgende Menüs angepasst werden. – Bedienelement Komfort KWL-BEC ð siehe Bedienungsanleitung (Nr. 82219) – Lokaler Webserver ð siehe Seite 25 – www.easycontrols.net Um den Zuluftbetrieb zu beenden muss der externe Kontakt geöffnet werden, nur wenn alle externen Kontakte geöffnet sind endet der Zuluftbetrieb. Funktion 5: Abluftbetrieb Zur Funktion, wird einer oder mehrere externe Kontakte geschlossen wird der Abluftbetrieb aktiviert. Die Lüftungsstufe kann über folgende Menüs angepasst werden. – Bedienelement Komfort KWL-BEC ð siehe Bedienungsanleitung (Nr. 82219) – Lokaler Webserver ð siehe Seite 25 – www.easycontrols.net Um den Abluftbetrieb zu beenden muss der externe Kontakt geöffnet werden, nur wenn alle externen Kontakte geöffnet sind endet der Abluftbetrieb. HINWEIS ☞ Funktion 6: Bypass in Winterbetrieb (passive Außenluftkühlung) oder Sommerbetrieb versetzen Zur Funktion, wird einer oder mehrere externe Kontakte geschlossen wird der Sommerbetrieb aktiviert (keine Wärmerückgewinnung über den Wärmetauscher). Um den Sommerbetrieb zu beenden, muss der externe Kontakt geöffnet werden, nur wenn alle externen Kontakte geöffnet sind endet der Sommerbetrieb. Wenn die Funktion 6 ausgewählt ist, ist die normale Bypassfunktion deaktiviert. 5.0.15 CO2-Steuerung Die CO2-Steuerung übernimmt die Überwachung der CO2-Konzentration in der Raumluft. Steigt die CO2-Konzentration über die Sollwertvorgabe, wird die Lüfterstufe entsprechend angepasst. Es wird immer auf den größten Messwert geregelt. Zur Auswahl stehen die Regelungsarten „ stufenlos” und „ stufig“. Stufenlos: (Werkseinstellung) Durch Eingabe des Sollwert der CO2-Konzentration, ermittelt die CO2-Steuerung die Abweichung und regelt die Lüfteransteuerung in vielen kleinen Schritten. Hierdurch kommt es zu keinen schnellen Drehzahländerungen und somit zu keinen direkt wahrnehmbaren Geräuschänderungen. Die Lüfterstufe 4 markiert jedoch die höchst mögliche Lüfterstufe (Lüfteransteuerung). Stufig: Durch Eingabe des Sollwert und der Schaltstufen, ermittelt die CO2-Steuerung die notwendige Lüfterstufe. Anhand der Tabelle wird dies nochmal dargestellt: Sollwert Schaltstufe max. Messwert Notwendige Lüfterstufe 1000 ppm 100 ppm 0-1000 ppm Stufe 0 (nur möglich bei Mindestlüfterstufe 0) 1000 ppm 100 ppm 1001-1100 ppm Stufe 1 1000 ppm 100 ppm 1101-1200 ppm Stufe 2 1000 ppm 100 ppm 1201-1300 ppm Stufe 3 1000 ppm 100 ppm 1301-xxxx ppm Stufe 4 33 Anwender-Handbuch KWL®-Steuerung – easyControls D 5.0.16 VOC-Steuerung (Mischgasfühler) Die VOC-Steuerung übernimmt die Überwachung der VOC-Konzentration der Raumluft, steigt das VOC-Konzentration über die Sollwertvorgabe wird die Lüfterstufe entsprechend angepasst. Es wird immer auf den größten Messwert geregelt. Zur Auswahl stehen die Regelungsarten „ stufenlos” und „ stufig“. Stufenlos: (Werkseinstellung) Durch Eingabe des Sollwert der VOC-Konzentration ermittelt die VOC-Steuerung die Abweichung und regelt die Lüfteransteuerung in vielen kleinen Schritten. Hierdurch kommt es zu keinen schnellen Drehzahländerungen und somit zu keinen direkt wahrnehmbaren Geräuschänderungen. Die Lüfterstufe 4 markiert jedoch die höchst mögliche Lüfterstufe (Lüfteransteuerung). Stufig: Durch Eingabe des Sollwert und der Schaltstufen ermittelt die VOC-Steuerung die notwendige Lüfterstufe. Anhand der Tabelle wird dies nochmal dargestellt: Sollwert Schaltstufe max. Messwert Notwendige Lüfterstufe 1000 ppm 100 ppm 0-1000 ppm Stufe 0 (nur möglich bei Mindestlüfterstufe 0) 1000 ppm 100 ppm 1001-1100 ppm Stufe 1 1000 ppm 100 ppm 1101-1200 ppm Stufe 2 1000 ppm 100 ppm 1201-1300 ppm Stufe 3 1000 ppm 100 ppm 1301-xxxx ppm Stufe 4 5.0.17 Feuchte-/Temperatursteuerung Die Feuchte-/Temperatursteuerung übernimmt die Überwachung der Raumluftfeuchte. Steigt das Feuchteniveau über die Sollwertvorgabe, wird die Lüfterstufe entsprechend angepasst. Es wird immer auf den größten Messwert geregelt. Zur Auswahl stehen die Regelungsarten „ stufenlos” und „ stufig“. Stufenlos: (Werkseinstellung) Durch Eingabe des Sollwert der relativen Luftfeuchte ermittelt die Feuchtesteuerung die Abweichung und regelt die Lüfteransteuerung in vielen kleinen Schritten. Hierdurch kommt es zu keinen schnellen Drehzahländerungen und somit zu keinen direkt wahrnehmbaren Geräuschänderungen. Die Lüfterstufe 4 markiert jedoch die höchst mögliche Lüfterstufe (Lüfteransteuerung). Wird die Sollwertvorgabe nach 2 Stunden nicht erreicht, wird für die Stoppzeit (einstellbar von 0-24 Stunden) aktiv und deaktiviert für diese Stoppzeit die Feuchtesteuerung. Hierdurch wird sichergestellt, dass bei höherer Außenluftfeuchte nicht unnötig viel gelüftet wird. Stufig: Durch Eingabe des Sollwert und der Schaltstufen ermittelt die Feuchtesteuerung die notwendige Lüfterstufe. Anhand der Tabelle wird dies nochmal dargestellt: Sollwert Schaltstufe max. Messwert Notwendige Lüfterstufe 45 % r.F 10 0-45 % r.F Stufe 0 (nur möglich bei Mindestlüfterstufe 0) 45 % r.F 10 46-55 % r.F Stufe 1 45 % r.F 10 56-65 % r.F Stufe 2 45 % r.F 10 66-75 % r.F Stufe 3 45 % r.F 10 76-99 % r.F Stufe 4 Wird die Sollwertvorgabe nach 2 Stunden nicht erreicht, wird für die Stoppzeit (einstellbar von 0-24 Stunden) aktiv und deaktiviert für diese Stoppzeit die Feuchtesteuerung. Hierdurch wird sichergestellt, dass bei höherer Außenluftfeuchte nicht unnötig viel gelüftet wird. 34 Anwender-Handbuch KWL®-Steuerung – easyControls D 5.0.18 Betriebsstundenzähler des Zuluft- und Abluftventilatoren Die Betriebsstunden werden jeweils für den Zuluftventilator und Abluftventilator aufsummiert. Die Aufsummierung findet minutengenau statt, wird ein Lüfter nur 30 Sek. betrieben wird diese Zeit nicht zwischengespeichert. Die Betriebsstunden können nicht gelöscht werden, wird ein neuer Ventilator eingebaut ist die aktuelle Betriebsstundenzahl zu notieren. 5.0.19 Betriebsstundenzähler Vor- und Nachheizung Die Betriebsstunden werden jeweils für die Vorheizung und Nachheizung aufsummiert. Die Aufsummierung findet minutengenau statt. Wird die Heizung nur 30 Sek. betrieben, wird diese Zeit nicht zwischengespeichert. Zusätzlich wird die Prozentuale Ansteuerung der Vorheizung bzw. der Nachheizung aufsummiert. Durch die beiden Information „ Betriebsstunden und prozentuale Ansteuerung“ kann der Energieverbrach ermittelt werden. Die KWL-EVH haben eine Leistung von 1 kW. Durch folgende Formel erhält man die kW/h: kW/h= Betriebsstunden × Prozentuale Ansteuerung × Heizleistung (1 kW) Die Betriebsstunden können nicht gelöscht werden, wird ein neuer Ventilator eingebaut ist die aktuelle Betriebsstundenzahl zu notieren. 5.0.20 Filterwechselanzeige Über die Filterwechselanzeige wird die Notwendigkeit des Filterwechsels signalisiert. Das Intervall kann nach dem Filterwechsel zwischen 1 und 9 Monaten eingestellt werden. Werksseitig sind 6 Monate eingestellt. Wird die Gerätetüre geöffnet, geht das KWL-Lüftungsgerät von einem Wechsel aus und startet erneut mit dem Countdown. 35 Anwender-Handbuch KWL®-Steuerung – easyControls D 6.0 KAPITEL 6 Geräteparameter GERÄTEPARAMETER Parameter/Einstellungen KWL EC 200 W KWL EC 200 W ET KWL EC 270 W KWL EC 270 W ET KWL EC 300 W KWL EC 300 W ET KWL EC 370 W KWL EC 370 W ET KWL EC 500 W KWL EC 500 W ET KWL EC 220D KWL EC 340D Datumsformat TT.MM.JJJJ TT.MM.JJJJ TT.MM.JJJJ TT.MM.JJJJ TT.MM.JJJJ TT.MM.JJJJ TT.MM.JJJJ TT.MM.JJJJ TT.MM.JJJJ TT.MM.JJJJ TT.MM.JJJJ TT.MM.JJJJ Sommer/Winterzeit Modus aktiviert aktiviert aktiviert aktiviert aktiviert aktiviert aktiviert aktiviert aktiviert aktiviert aktiviert aktiviert Zeitzone +2 +2 +2 +2 +2 +2 +2 +2 +2 +2 +2 +2 Sprache deutsch deutsch deutsch deutsch deutsch deutsch deutsch deutsch deutsch deutsch deutsch deutsch Behaglichkeitstemperatur (für Konfiguration 2 PHI) 16,5 °C 16,5 °C 16,5 °C 16,5 °C 16,5 °C 16,5 °C 16,5 °C 16,5 °C 16,5 °C 16,5 °C 16,5 °C 16,5 °C KWL-BEC gesperrt nicht aktiv nicht aktiv nicht aktiv nicht aktiv nicht aktiv nicht aktiv nicht aktiv nicht aktiv nicht aktiv nicht aktiv nicht aktiv nicht aktiv KWL-BE gesperrt nicht aktiv nicht aktiv nicht aktiv nicht aktiv nicht aktiv nicht aktiv nicht aktiv nicht aktiv nicht aktiv nicht aktiv nicht aktiv nicht aktiv ModBus (TCP/IP) aktiviert aktiviert aktiviert aktiviert aktiviert aktiviert aktiviert aktiviert aktiviert aktiviert aktiviert aktiviert Wärmetauschertyp Kunststoff Enthalpie Kunststoff Enthalpie Kunststoff Enthalpie Kunststoff Enthalpie Kunststoff Enthalpie Kunststoff Kunststoff Beta-Tester (Option für Portalnutzer) nicht aktiv nicht aktiv nicht aktiv nicht aktiv nicht aktiv nicht aktiv nicht aktiv nicht aktiv nicht aktiv nicht aktiv nicht aktiv nicht aktiv Wochenprogramm Standard 1 Standard 1 Standard 1 Standard 1 Standard 1 Standard 1 Standard 1 Standard 1 Standard 1 Standard 1 Standard 1 Standard 1 Nachheizung Aus Aus Aus Aus Aus Aus Aus Aus Aus Aus Aus Aus Zuluft-Raumtemperatur 20,0 °C 20,0 °C 20,0 °C 20,0 °C 20,0 °C 20,0 °C 20,0 °C 20,0 °C 20,0 °C 20,0 °C 20,0 °C 20,0 °C Minimale Kanaltemperatur 16,5 °C 16,5 °C 16,5 °C 16,5 °C 16,5 °C 16,5 °C 16,5 °C 16,5 °C 16,5 °C 16,5 °C 16,5 °C 16,5 °C Maximale Kanaltemperatur 35,0 °C 35,0 °C 35,0 °C 35,0 °C 35,0 °C 35,0 °C 35,0 °C 35,0 °C 35,0 °C 35,0 °C 35,0 °C 35,0 °C Urlaubsfunktion aus aus aus aus aus aus aus aus aus aus aus aus Startdatum Urlaub 01.06.2014 01.06.2014 01.06.2014 01.06.2014 01.06.2014 01.06.2014 01.06.2014 01.06.2014 01.06.2014 01.06.2014 01.06.2014 01.06.2014 Enddatum Urlaub 13.06.2014 13.06.2014 13.06.2014 13.06.2014 13.06.2014 13.06.2014 13.06.2014 13.06.2014 13.06.2014 13.06.2014 13.06.2014 13.06.2014 Betriebsart Urlaub konstant konstant konstant konstant konstant konstant konstant konstant konstant konstant konstant konstant Intervalldauer Urlaub 2h 2h 2h 2h 2h 2h 2h 2h 2h 2h 2h 2h Einschaltzeit Urlaubsintervall 60 Min. 60 Min. 60 Min. 60 Min. 60 Min. 60 Min. 60 Min. 60 Min. 60 Min. 60 Min. 60 Min. 60 Min. Dauer Partybetrieb 180 Min. 180 Min. 180 Min. 180 Min. 180 Min. 180 Min. 180 Min. 180 Min. 180 Min. 180 Min. 180 Min. 180 Min. Lüfterstufe Partybetrieb 0 0 0 0 0 0 0 0 0 0 0 0 Dauer Ruhebetrieb 120 Min. 120 Min. 120 Min. 120 Min. 120 Min. 120 Min. 120 Min. 120 Min. 120 Min. 120 Min. 120 Min. 120 Min. Lüfterstufe Ruhebetrieb 0 0 0 0 0 0 0 0 0 0 0 0 Ablufttemperatur 20,0 °C 20,0 °C 20,0 °C 20,0 °C 20,0 °C 20,0 °C 20,0 °C 20,0 °C 20,0 °C 20,0 °C 20,0 °C 20,0 °C Raumtemperatur 20,0 °C 20,0 °C 20,0 °C 20,0 °C 20,0 °C 20,0 °C 20,0 °C 20,0 °C 20,0 °C 20,0 °C 20,0 °C 20,0 °C Außenluftbegrenzung 18,0 °C 18,0 °C 18,0 °C 18,0 °C 18,0 °C 18,0 °C 18,0 °C 18,0 °C 18,0 °C 18,0 °C 18,0 °C 18,0 °C Offset zu Nachheizungstemperatur 3,0 °C 3,0 °C 3,0 °C 3,0 °C 3,0 °C 3,0 °C 3,0 °C 3,0 °C 3,0 °C 3,0 °C 3,0 °C 3,0 °C 1303 1303 1303 1303 1303 1303 1303 1303 1303 1303 1303 1303 Stufe 1 Zuluftventilator 3 3 3 3 3 3 3 3 3 3 2,5 3 Stufe 1 Abluftventilator 3 3 3 3 3 3 3 3 3 3 2,5 3 Stufe 2 Zuluftventilator 6 6 5 5 6 6 5 5 6 6 5 5 Stufe 2 Abluftventilator 6 6 5 5 6 6 5 5 6 6 5 5 Stufe 3 Zuluftventilator 7,5 7,5 6,5 6,5 7,5 7,5 6,5 6,5 7,5 7,5 7 6,5 Stufe 3 Abluftventilator 7,5 7,5 6,5 6,5 7,5 7,5 6,5 6,5 7,5 7,5 7 6,5 Stufe 4 Zuluftventilator 9 9 7,5 7,5 9 9 7,5 7,5 9 9 8,5 7,5 Stufe 4 Abluftventilator 9 9 7,5 7,5 9 9 7,5 7,5 9 9 8,5 7,5 Partybetrieb Ruhebetrieb Bypass Bedienelement Sperren Passwort Lüfterstufen Analogeingang (KWL-BE oder GLT 0-10V) Zuordnung Lüfterstufen aktiviert nein nein nein nein nein nein nein nein nein nein nein nein Zuordnung Lüfterstufen nach Analogspannung 0-2 V 0 0 0 0 0 0 0 0 0 0 0 0 Zuordnung Lüfterstufen nach Analogspannung 2-4 V 1 1 1 1 1 1 1 1 1 1 1 1 Zuordnung Lüfterstufen nach Analogspannung 4-6 V 2 2 2 2 2 2 2 2 2 2 2 2 Zuordnung Lüfterstufen 3 nach Analogspannung 6-8 V 3 3 3 3 3 3 3 3 3 3 3 Zuordnung Lüfterstufen 4 nach Analogspannung 8-10 V 4 4 4 4 4 4 4 4 4 4 4 1 1 1 1 1 1 1 1 1 1 1 Mindestlüfterstufe Min. Lüfterstufe 1 Lüfterstufe Zuluft-/Abluftbetrieb Zuluftbetrieb 2 2 2 2 2 2 2 2 2 2 2 2 Abluftbetrieb 2 2 2 2 2 2 2 2 2 2 2 2 36 Anwender-Handbuch KWL®-Steuerung – easyControls D Parameter/Einstellungen KWL EC 200 W KWL EC 200 W ET KWL EC 270 W KWL EC 270 W ET KWL EC 300 W KWL EC 300 W ET KWL EC 370 W KWL EC 370 W ET KWL EC 500 W KWL EC 500 W ET KWL EC 220D KWL EC 340D Konfiguration Lüftungsgerät 1 (DIBt) 1 (DIBt) 1 (DIBt) 1 (DIBt) 1 (DIBt) 1 (DIBt) 1 (DIBt) 1 (DIBt) 1 (DIBt) 1 (DIBt) 1 (DIBt) 1 (DIBt) Wärmetauschertyp Kunststoff Enthalpie Kunststoff Enthalpie Kunststoff Enthalpie Kunststoff Enthalpie Kunststoff Enthalpie Kunststoff Kunststoff Vorheizungstyp EH-Basis EH-Basis EH-Basis EH-Basis EH-Basis EH-Basis EH-Basis EH-Basis EH-Basis EH-Basis EH-Basis EH-Basis Vorheizung EIN EIN EIN EIN EIN EIN EIN EIN EIN EIN EIN EIN 1 (EIN/AUS) 1 (EIN/AUS) 1 (EIN/AUS) 1 (EIN/AUS) 1 (EIN/AUS) 1 (EIN/AUS) 1 (EIN/AUS) 1 (EIN/AUS) 1 (EIN/AUS) 1 (EIN/AUS) 1 (EIN/AUS) 1 (EIN/AUS) Regelungsart Stufenlos Stufenlos Stufenlos Stufenlos Stufenlos Stufenlos Stufenlos Stufenlos Stufenlos Stufenlos Stufenlos Stufenlos Sollwert 45 % r.F 45 % r.F 45 % r.F 45 % r.F 45 % r.F 45 % r.F 45 % r.F 45 % r.F 45 % r.F 45 % r.F 45 % r.F 45 % r.F Schaltstufen 10 % r.F 10 % r.F 10 % r.F 10 % r.F 10 % r.F 10 % r.F 10 % r.F 10 % r.F 10 % r.F 10 % r.F 10 % r.F 10 % r.F Stoppzeit 2 Std. 2 Std. 2 Std. 2 Std. 2 Std. 2 Std. 2 Std. 2 Std. 2 Std. 2 Std. 2 Std. 2 Std. Bezeichnung Fühler Adresse 1 ...-FTF AD1 ...-FTF AD1 ...-FTF AD1 ...-FTF AD1 ...-FTF AD1 ...-FTF AD1 ...-FTF AD1 ...-FTF AD1 ...-FTF AD1 ...-FTF AD1 ...-FTF AD1 ...-FTF AD1 Bezeichnung Fühler Adresse 2 ...-FTF AD2 ...-FTF AD2 ...-FTF AD2 ...-FTF AD2 ...-FTF AD2 ...-FTF AD2 ...-FTF AD2 ...-FTF AD2 ...-FTF AD2 ...-FTF AD2 ...-FTF AD2 ...-FTF AD2 Bezeichnung Fühler Adresse 3 ...-FTF AD3 ...-FTF AD3 ...-FTF AD3 ...-FTF AD3 ...-FTF AD3 ...-FTF AD3 ...-FTF AD3 ...-FTF AD3 ...-FTF AD3 ...-FTF AD3 ...-FTF AD3 ...-FTF AD3 Bezeichnung Fühler Adresse 4 ...-FTF AD4 ...-FTF AD4 ...-FTF AD4 ...-FTF AD4 ...-FTF AD4 ...-FTF AD4 ...-FTF AD4 ...-FTF AD4 ...-FTF AD4 ...-FTF AD4 ...-FTF AD4 ...-FTF AD4 Bezeichnung Fühler Adresse 5 ...-FTF AD5 ...-FTF AD5 ...-FTF AD5 ...-FTF AD5 ...-FTF AD5 ...-FTF AD5 ...-FTF AD5 ...-FTF AD5 ...-FTF AD5 ...-FTF AD5 ...-FTF AD5 ...-FTF AD5 Bezeichnung Fühler Adresse 6 ...-FTF AD6 ...-FTF AD6 ...-FTF AD6 ...-FTF AD6 ...-FTF AD6 ...-FTF AD6 ...-FTF AD6 ...-FTF AD6 ...-FTF AD6 ...-FTF AD6 ...-FTF AD6 ...-FTF AD6 Bezeichnung Fühler Adresse 7 ...-FTF AD7 ...-FTF AD7 ...-FTF AD7 ...-FTF AD7 ...-FTF AD7 ...-FTF AD7 ...-FTF AD7 ...-FTF AD7 ...-FTF AD7 ...-FTF AD7 ...-FTF AD7 ...-FTF AD7 Bezeichnung Fühler Adresse 8 ...-FTF AD8 ...-FTF AD8 ...-FTF AD8 ...-FTF AD8 ...-FTF AD8 ...-FTF AD8 ...-FTF AD8 ...-FTF AD8 ...-FTF AD8 ...-FTF AD8 ...-FTF AD8 ...-FTF AD8 Konfiguration Adresse 1 Nur Feuchte Nur Feuchte Nur Feuchte Nur Feuchte Nur Feuchte Nur Feuchte Nur Feuchte Nur Feuchte Nur Feuchte Nur Feuchte Nur Feuchte Nur Feuchte Konfiguration Adresse 2 Nur Feuchte Nur Feuchte Nur Feuchte Nur Feuchte Nur Feuchte Nur Feuchte Nur Feuchte Nur Feuchte Nur Feuchte Nur Feuchte Nur Feuchte Nur Feuchte Konfiguration Adresse 3 Nur Feuchte Nur Feuchte Nur Feuchte Nur Feuchte Nur Feuchte Nur Feuchte Nur Feuchte Nur Feuchte Nur Feuchte Nur Feuchte Nur Feuchte Nur Feuchte Konfiguration Adresse 4 Nur Feuchte Nur Feuchte Nur Feuchte Nur Feuchte Nur Feuchte Nur Feuchte Nur Feuchte Nur Feuchte Nur Feuchte Nur Feuchte Nur Feuchte Nur Feuchte Konfiguration Adresse 5 Nur Feuchte Nur Feuchte Nur Feuchte Nur Feuchte Nur Feuchte Nur Feuchte Nur Feuchte Nur Feuchte Nur Feuchte Nur Feuchte Nur Feuchte Nur Feuchte Konfiguration Adresse 6 Nur Feuchte Nur Feuchte Nur Feuchte Nur Feuchte Nur Feuchte Nur Feuchte Nur Feuchte Nur Feuchte Nur Feuchte Nur Feuchte Nur Feuchte Nur Feuchte Konfiguration Adresse 7 Nur Feuchte Nur Feuchte Nur Feuchte Nur Feuchte Nur Feuchte Nur Feuchte Nur Feuchte Nur Feuchte Nur Feuchte Nur Feuchte Nur Feuchte Nur Feuchte Konfiguration Adresse 8 Nur Feuchte Nur Feuchte Nur Feuchte Nur Feuchte Nur Feuchte Nur Feuchte Nur Feuchte Nur Feuchte Nur Feuchte Nur Feuchte Nur Feuchte Nur Feuchte Regelungsart Stufenlos Stufenlos Stufenlos Stufenlos Stufenlos Stufenlos Stufenlos Stufenlos Stufenlos Stufenlos Stufenlos Stufenlos Sollwert 1000 ppm 1000 ppm 1000 ppm 1000 ppm 1000 ppm 1000 ppm 1000 ppm 1000 ppm 1000 ppm 1000 ppm 1000 ppm 1000 ppm Schaltstufen 100 ppm 100 ppm 100 ppm 100 ppm 100 ppm 100 ppm 100 ppm 100 ppm 100 ppm 100 ppm 100 ppm 100 ppm Bezeichnung Fühler Adresse 1 ...-CO2 AD1 ...-CO2 AD1 ...-CO2 AD1 ...-CO2 AD1 ...-CO2 AD1 ...-CO2 AD1 ...-CO2 AD1 ...-CO2 AD1 ...-CO2 AD1 ...-CO2 AD1 ...-CO2 AD1 ...-CO2 AD1 Bezeichnung Fühler Adresse 2 ...-CO2 AD2 ...-CO2 AD2 ...-CO2 AD2 ...-CO2 AD2 ...-CO2 AD2 ...-CO2 AD2 ...-CO2 AD2 ...-CO2 AD2 ...-CO2 AD2 ...-CO2 AD2 ...-CO2 AD2 ...-CO2 AD2 Bezeichnung Fühler Adresse 3 ...-CO2 AD3 ...-CO2 AD3 ...-CO2 AD3 ...-CO2 AD3 ...-CO2 AD3 ...-CO2 AD3 ...-CO2 AD3 ...-CO2 AD3 ...-CO2 AD3 ...-CO2 AD3 ...-CO2 AD3 ...-CO2 AD3 Bezeichnung Fühler Adresse 4 ...-CO2 AD4 ...-CO2 AD4 ...-CO2 AD4 ...-CO2 AD4 ...-CO2 AD4 ...-CO2 AD4 ...-CO2 AD4 ...-CO2 AD4 ...-CO2 AD4 ...-CO2 AD4 ...-CO2 AD4 ...-CO2 AD4 Bezeichnung Fühler Adresse 5 ...-CO2 AD5 ...-CO2 AD5 ...-CO2 AD5 ...-CO2 AD5 ...-CO2 AD5 ...-CO2 AD5 ...-CO2 AD5 ...-CO2 AD5 ...-CO2 AD5 ...-CO2 AD5 ...-CO2 AD5 ...-CO2 AD5 Bezeichnung Fühler Adresse 6 ...-CO2 AD6 ...-CO2 AD6 ...-CO2 AD6 ...-CO2 AD6 ...-CO2 AD6 ...-CO2 AD6 ...-CO2 AD6 ...-CO2 AD6 ...-CO2 AD6 ...-CO2 AD6 ...-CO2 AD6 ...-CO2 AD6 Bezeichnung Fühler Adresse 7 ...-CO2 AD7 ...-CO2 AD7 ...-CO2 AD7 ...-CO2 AD7 ...-CO2 AD7 ...-CO2 AD7 ...-CO2 AD7 ...-CO2 AD7 ...-CO2 AD7 ...-CO2 AD7 ...-CO2 AD7 ...-CO2 AD7 Bezeichnung Fühler Adresse 8 ...-CO2 AD8 ...-CO2 AD8 ...-CO2 AD8 ...-CO2 AD8 ...-CO2 AD8 ...-CO2 AD8 ...-CO2 AD8 ...-CO2 AD8 ...-CO2 AD8 ...-CO2 AD8 ...-CO2 AD8 ...-CO2 AD8 Gerätekonfiguration Externer kontakt Funktion Feuchtesteuerung CO2-Steuerung VOC-Steuerung Regelungsart Stufenlos Stufenlos Stufenlos Stufenlos Stufenlos Stufenlos Stufenlos Stufenlos Stufenlos Stufenlos Stufenlos Stufenlos Sollwert 1000 ppm 1000 ppm 1000 ppm 1000 ppm 1000 ppm 1000 ppm 1000 ppm 1000 ppm 1000 ppm 1000 ppm 1000 ppm 1000 ppm Schaltstufen 100 ppm 100 ppm 100 ppm 100 ppm 100 ppm 100 ppm 100 ppm 100 ppm 100 ppm 100 ppm 100 ppm 100 ppm Bezeichnung Fühler Adresse 1 ...-VOC AD1 ...-VOC AD1 ...-VOC AD1 ...-VOC AD1 ...-VOC AD1 ...-VOC AD1 ...-VOC AD1 ...-VOC AD1 ...-VOC AD1 ...-VOC AD1 ...-VOC AD1 ...-VOC AD1 Bezeichnung Fühler Adresse 2 ...-VOC AD2 ...-VOC AD2 ...-VOC AD2 ...-VOC AD2 ...-VOC AD2 ...-VOC AD2 ...-VOC AD2 ...-VOC AD2 ...-VOC AD2 ...-VOC AD2 ...-VOC AD2 ...-VOC AD2 Bezeichnung Fühler Adresse 3 ...-VOC AD3 ...-VOC AD3 ...-VOC AD3 ...-VOC AD3 ...-VOC AD3 ...-VOC AD3 ...-VOC AD3 ...-VOC AD3 ...-VOC AD3 ...-VOC AD3 ...-VOC AD3 ...-VOC AD3 Bezeichnung Fühler Adresse 4 ...-VOC AD4 ...-VOC AD4 ...-VOC AD4 ...-VOC AD4 ...-VOC AD4 ...-VOC AD4 ...-VOC AD4 ...-VOC AD4 ...-VOC AD4 ...-VOC AD4 ...-VOC AD4 ...-VOC AD4 Bezeichnung Fühler Adresse 5 ...-VOC AD5 ...-VOC AD5 ...-VOC AD5 ...-VOC AD5 ...-VOC AD5 ...-VOC AD5 ...-VOC AD5 ...-VOC AD5 ...-VOC AD5 ...-VOC AD5 ...-VOC AD5 ...-VOC AD5 Bezeichnung Fühler Adresse 6 ...-VOC AD6 ...-VOC AD6 ...-VOC AD6 ...-VOC AD6 ...-VOC AD6 ...-VOC AD6 ...-VOC AD6 ...-VOC AD6 ...-VOC AD6 ...-VOC AD6 ...-VOC AD6 ...-VOC AD6 Bezeichnung Fühler Adresse 7 ...-VOC AD7 ...-VOC AD7 ...-VOC AD7 ...-VOC AD7 ...-VOC AD7 ...-VOC AD7 ...-VOC AD7 ...-VOC AD7 ...-VOC AD7 ...-VOC AD7 ...-VOC AD7 ...-VOC AD7 Bezeichnung Fühler Adresse 8 ...-VOC AD8 ...-VOC AD8 ...-VOC AD8 ...-VOC AD8 ...-VOC AD8 ...-VOC AD8 ...-VOC AD8 ...-VOC AD8 ...-VOC AD8 ...-VOC AD8 ...-VOC AD8 ...-VOC AD8 Filterwechsel Filterwechselintervall 6 Monate 6 Monate 6 Monate 6 Monate 6 Monate 6 Monate 6 Monate 6 Monate 6 Monate 6 Monate 6 Monate 6 Monate Nachlaufzeit Zuluftventilator (Heizungsbetrieb) Nachlaufzeit 60 s 60 s 60 s 60 s 60 s 60 s 60 s 60 s 60 s 60 s 60 s 60 s DHCP verwenden aktiviert aktiviert aktiviert aktiviert aktiviert aktiviert aktiviert aktiviert aktiviert aktiviert aktiviert aktiviert Default IP 192.168.1.199 192.168.1.199 192.168.1.199 192.168.1.199 192.168.1.199 192.168.1.199 192.168.1.199 192.168.1.199 192.168.1.199 192.168.1.199 192.168.1.199 192.168.1.199 Automatische Softwareupdates Datenabgleich mit Helios Controls Portal Passwörter aktiviert aktiviert aktiviert aktiviert aktiviert aktiviert aktiviert aktiviert aktiviert aktiviert aktiviert aktiviert aktiviert aktiviert aktiviert aktiviert aktiviert aktiviert aktiviert aktiviert aktiviert aktiviert aktiviert aktiviert Kundenmenü 5255 5255 5255 5255 5255 5255 5255 5255 5255 5255 5255 5255 Servicemenü 0103 0103 0103 0103 0103 0103 0103 0103 0103 0103 0103 0103 Netzwerkeinstellungen 37 Datenschutz Datenschutzerklärung für www.easycontrols.net / Sicherheitshinweise 1. Die Helios Ventilatoren GmbH, kurz Helios, nimmt den Schutz personenbezogener Daten sehr ernst. Die Nutzung unserer Webseite ist in der Regel ohne Angabe personenbezogener Daten möglich. Soweit auf unseren Seiten personenbezogene Daten (beispielsweise Name, Anschrift oder E-Mail-Adressen) erhoben werden, erfolgt dies, soweit möglich, stets auf freiwilliger Basis. 2. Wir verkaufen oder handeln nicht mit den Daten, welche Sie uns im Rahmen dieses Angebots zur Verfügung stellen. Diese Daten werden ohne Ihre ausdrückliche Zustimmung auch nicht an Dritte weiter gegeben, soweit wir nicht rechtlich dazu verpflichtet werden. 3. Um Sie als Kunde zu schützen, verwenden wir ausschließlich geprüfte Verschlüsselungstechniken. Mittels SSL (Secure Socket Layer) werden Ihre persönlichen Daten verschlüsselt (für Dritte nicht einsehbar) über das Internet übertragen. So können Sie sicher sein, dass Ihre persönlichen Daten, wie z.B. Name und Anschrift, nur an unseren Server übertragen werden. Wir weisen darauf hin, dass die Datenübertragung und Datenspeicherung im Internet Sicherheitsrisiken birgt. Ein Schutz der Daten vor dem Zugriff durch unbefugte Dritte ist nicht möglich und kann somit nicht garantiert werden. 4. Sofern Sie die Übertragung von Informationen an diese Webseite in den Einstellungen des Geräts oder die Fernsteuerung des Gerätes über dieses Portal aktiviert haben, erfolgt diese unverschlüsselt. Diese Übertragungen enthalten aber keine persönlich identifizierbaren Informationen. Unter anderem werden folgende Informationen von den Geräten / den Steuerungen an diese Webseite übermittelt: MAC-Adresse der Steuerung, Messwerte, Konfigurationswerte / Informationen für die Wiederherstellung der Parameter der Anlage (Backup), Störmeldungen, Gerätetype etc. Die Übertragung erfolgt soweit für die Funktionalität der Ziele, welche mit dieser Webseite erreicht werden sollen, in unterschiedlichen Intervallen. 5. Die an Helios übermittelten Daten werden lediglich zur zweckbezogenen Durchführung der jeweiligen Serviceleistung verwendet. Eine werbliche Nutzung durch Helios oder Unternehmen der Helios-Gruppe ist möglich. Wenn Sie unsere Websites besuchen, auch wenn dies beispielsweise über einen Link in unseren Newslettern geschieht, wird zum Zweck der Systemsicherheit zeitweise der Domain-Name oder die IP-Adresse des anfragenden Rechners aufgezeichnet. Dies gilt auch für die Dateianfrage, das Zugriffsdatum, den HTTP-Antwort-Code und die Website, von der aus der Rechner auf unsere Seiten kommt und schließlich für die Datenmenge (Bytes), die übermittelt werden. Außerdem speichern wir einige Informationen in Form sogenannter "Cookies" auf Ihrem Computer, damit wir unsere Informationsdarstellung im Internet nach Ihren Präferenzen optimieren können (Profildaten). Zur Erfüllung der gesetzlichen Anforderungen oder zur wiederholten Verwendung werden Ihre Angaben langfristig archiviert. Ihre personenbezogenen Daten können Sie jederzeit online einsehen oder ändern. 6. Cookies: Auf dieser Webseite werden eventuell benutzerseitige Informationen in Cookies gespeichert. Dies dient dazu sitzungsbasierte Informationen zu speichern, die beispielsweise verwendet werden, um Datenbankprozesse, z.B. die Projektinformationen über die gesamte Dauer des Websitebesuches, festhalten zu können. Diese Informationen werden durch ein sogenanntes "Cookie" in Ihrem Webbrowser gespeichert. Ein Cookie ist eine textbasierte Kennung, die ein Webserver an Ihren Computer senden kann um ihn für die Dauer des Besuches zu identifizieren und dient auf dieser Seite lediglich der Speicherung einer Sitzungskennung. Sie können Ihren Browser so einstellen, dass er Sie über die Platzierung von Cookies informiert. So wird der Gebrauch von Cookies für Sie transparent. L IN K Die aktuell gültigen Datenschutz- und Sicherheitshinweise finden Sie auf www.easycontrols.net Alle Abbildungen ohne Gewähr! Als Referenz am Gerät griffbereit aufbewahren! Druckschrift-Nr. 82 200/11.14 www.heliosventilatoren.de Service und Information D HELIOS Ventilatoren GmbH + Co KG · Lupfenstraße 8 · 78056 VS-Schwenningen CH HELIOS Ventilatoren AG · Tannstrasse 4 · 8112 Otelfingen A HELIOS Ventilatoren · Postfach 854 · Siemensstraße 15 · 6023 Innsbruck F HELIOS Ventilateurs · Le Carré des Aviateurs · 157 avenue Charles Floquet · 93155 Le Blanc Mesnil Cedex GB HELIOS Ventilation Systems Ltd. · 5 Crown Gate · Wyncolls Road · Severalls Industrial Park · Colchester · Essex · CO4 9HZ Helios Ventilatoren USER MANUAL KWL®-control system www.easycontrols.net NO. 82 200 UK ENGLISH Helios Ventilatoren USER MANUAL Table of Contents CHAPTER 1. GENERAL INSTALLATION AND OPERATING INSTRUCTIONS . . . . . . . . . . . . . . . . . . . . . . . . . . .Page 1.0 Important information . . . . . . . . . . . . . . . . . . . . . . . . . . . . . . . . . . . . . . . . . . . . . . . . . . . . . . . . . . . . . . . . . .Page 1.1 Warning and safety instructions . . . . . . . . . . . . . . . . . . . . . . . . . . . . . . . . . . . . . . . . . . . . . . . . . . . . . . . . . .Page 1.2 Guarantee and liability claims . . . . . . . . . . . . . . . . . . . . . . . . . . . . . . . . . . . . . . . . . . . . . . . . . . . . . . . . . . . .Page 1.3 Introduction . . . . . . . . . . . . . . . . . . . . . . . . . . . . . . . . . . . . . . . . . . . . . . . . . . . . . . . . . . . . . . . . . . . . . . . . . .Page 1.4 About Helios easyControls . . . . . . . . . . . . . . . . . . . . . . . . . . . . . . . . . . . . . . . . . . . . . . . . . . . . . . . . . . . . . .Page 1.5 KWL unit configuration via web portal . . . . . . . . . . . . . . . . . . . . . . . . . . . . . . . . . . . . . . . . . . . . . . . . . . . . . .Page 1.6 Functional overview . . . . . . . . . . . . . . . . . . . . . . . . . . . . . . . . . . . . . . . . . . . . . . . . . . . . . . . . . . . . . . . . . . . .Page 1 1 1 1 1 1 1 2 CHAPTER 2. ACCESSORIES . . . . . . . . . . . . . . . . . . . . . . . . . . . . . . . . . . . . . . . . . . . . . . . . . . . . . . . . . . . . . . . . .Page 3 2.0 Accessory components . . . . . . . . . . . . . . . . . . . . . . . . . . . . . . . . . . . . . . . . . . . . . . . . . . . . . . . . . . . . . . . . .Page 3 CHAPTER 3. INITIAL START-UP VENTILATION UNIT. . . . . . . . . . . . . . . . . . . . . . . . . . . . . . . . . . . . . . . . . . . . . .Page 4 3.0 Initial start-up KWL-Ventilation unit. . . . . . . . . . . . . . . . . . . . . . . . . . . . . . . . . . . . . . . . . . . . . . . . . . . . . . . . .Page 4 CHAPTER 4. FUNCTION LOCAL WEB SERVER. . . . . . . . . . . . . . . . . . . . . . . . . . . . . . . . . . . . . . . . . . . . . . . . . Page 12 4.0 Access to local web server . . . . . . . . . . . . . . . . . . . . . . . . . . . . . . . . . . . . . . . . . . . . . . . . . . . . . . . . . . . . .Page 12 CHAPTER 5. FUNCTIONAL DESCRIPTION . . . . . . . . . . . . . . . . . . . . . . . . . . . . . . . . . . . . . . . . . . . . . . . . . . . .Page 30 5.0 Functional descriptions . . . . . . . . . . . . . . . . . . . . . . . . . . . . . . . . . . . . . . . . . . . . . . . . . . . . . . . . . .. . . . . . Page 30 CHAPTER 6. UNIT PARAMETERS . . . . . . . . . . . . . . . . . . . . . . . . . . . . . . . . . . . . . . . . . . . . . . . . . . . . . . . . . . . .Page 36 6.0 Unit parameters . . . . . . . . . . . . . . . . . . . . . . . . . . . . . . . . . . . . . . . . . . . . . . . . . . . . . . . . . . . . . . . . . . . . .Page 36 Data protection . . . . . . . . . . . . . . . . . . . . . . . . . . . . . . . . . . . . . . . . . . . . . . . . . . . . . . . . . . . . . . . . . . . . . . . . . . .Page 38 User Manual KWL®-control system – easyControls UK 1.0 Important information In order to ensure complete and effective operation and for your own safety, all of the following instructions should be read carefully and observed. This user manual is intended for specialist installers and end customers. 1.1 Warning and safety instructions The accompanying symbol is a safety-relevant prominent warning symbol. All safety regulations and/or symbols must be absolutely adhered to, so that any dangerous situation is avoided. ATTENTION 1.2 Guarantee and liability claims In order to safeguard the guarantee and liability claims of the customer, the following information must be observed: – Implementation according to “unit” Installation and operating instructions – Implementation according to “ Helios easyControls” user manual – The use of accessories, which are not approved, recommended or offered by Helios, is not permissible. Any damages are excluded from the guarantee. If these instructions are not observed, all warranty claims and accommodation treatment are excluded. This also applies to any liability claims extended to the manufacturer. 1.3 Introduction We recommend reading the enclosed KWL ventilation unit installation and operating instructions before using the KWL® control system user manual. The KWL ventilation unit installation and operating instructions contain important information, which should be observed before using Helios easyControls application, e.g. general safety instructions, a detailed installation guide and the initial start-up of the ventilation unit etc. 1.4 About Helios easyControls Helios easyControls enables the operation and fan regulation of Helios KWL® units with an integrated local web server on the basic module (control board) and LAN connection. The unit types equipped with easyControls as standard can be integrated into a PC network easily and quickly and operated and configured via the convenient interface on any web browser. Whether on the PC or laptop, tablet or smartphone. CHAPTER 1 GENERAL INFORMATON NOTE ☞ – Basis functionen of the local webserver The numerous functions of the ventilation system can be configured directly through the web browser via integrated LAN interface (Connection device front page). Overview: The most important basic functions: - Start-up assistant - Select/setting the fan speed (auto/manually / speed 1-4) - Setting weekly programme ventilation/heating - Activation Booster-/Whisper-/Vacation mode - Select access rights - Blocking the controllers - Setting CO2-, VOC- and humidity sensors - Firmware update (only possible via Internet) - Display of filter change, operating conditions/-hours, error messages etc. 1.5 L IN K KWL configuration via web portal http://www.easycontrols.net ➞ Enter in the browser address line Helios easyControls enables direct access (user name/password) to the KWL ventilation unit, regardless of the location of the user. Whether at home or on the go, connection via the internet or LAN (an active connection is required). Authorised users, service technicians or housing companies can change unit settings or retrieve status information at any time externally or locally via the Helios easyControls web portal (see also section 1.6, Functional overview). – Connection via PC network/internet: The ventilation unit can be operated via the Helios easyControls application menu in the web browser, on PC/laptop or tablet/smartphone through a LAN/WLAN router connection (TCP/IP; RJ45). Pos. ➊☞ – Local connection via local web server: Connect KWL unit to PC/laptop with LAN cable (TCP/IP; RJ45) and open the easyControls application menu through the IP address: http://192.168.0.0 in the web browser. Pos. ➋☞ – Manual operation If no PC networks are available, or if manual access is preferred, easyControls can be controlled via a comfort controller KWL-BEC with graphic display or a slide switch controller KWL-BE. Pos. Pos. ➌☞ ➍☞ – Building control system The KWL units can easily be integrated into a building control system network via the standard Modbus interface (TCP/IP; RS 485) or an optional KNX module (installation in control cabinet). However, the range of functions will be reduced, for example. The weekly programme cannot be programmed via the Modbus. 1 User Manual KWL®-control system – easyControls UK 1.6 Functional overview 2 User Manual KWL®-control system – easyControls UK CHAPTER 2 2.0 Accessory components The Helios EasyControls control system makes it possible to operate the ventilation unit without controllers and accessories. However, the following accessory components increase the opportunities regarding operation and control. 2.1 Slide switch controller, type “KWL-BE” (Ref. no. 4265) Controller with three-speed slide switch incl. operating display, for flush-mounted installation or surface mounted installation (see Accessories). Control line SL 6/3 (3 m long) included in delivery, other lengths available (Accessories). Functional overview: – Three-speed operation via slide switch. – Three freely definable operating speeds within the entire performance diagram. – The extract air fan can be operated at ± 20 % difference via the Offset function. – Control voltage directly measurable from controller – A clock timer (WSUP/WSUP-S, No. 9990/ 9577, accessories) can be added for the realisation of a further operation level, e.g. night operation. – Light-emitting diode for optical display of the operating conditions, e.g. filter change, supply air temperature < +5 °C, faults and operation. ACCESSORIES NOTE ☞ A detailed functional description can be found in the KWL-BE Installation and Operating Instructions! 2.2 NOTE ☞ Comfort controller, Type “KWL-BEC” (Ref. no. 4263) Comfort controller with graphic display and user-friendly menu navigation. Up to eight comfort controllers can be connected to the digital bus. Functional overview: – Initial start-up assistant – Operating speed selection. There are 4 fan speeds for selection, as well as operating modes AUTO and MANUAL – Four freely definable operating speeds within the entire performance diagram (see performance curve in the Unit MBV) – Weekly programme for ventilation operation and auxiliary heating incl. standard and Individual weekly programmes – CO2, VOC and humidity parameter settings – Adjustment of unit settings via controller – Displays errors, warnings and infos – Controller can be locked with a password A detailed functional description can be found in the KWL-BEC Installation and Operating Instructions! 2.3 KWL sensors CO2 sensor, type “KWL-CO2” (Ref. no. 4272) For measuring CO2 concentration in room air. Up to eight CO2 sensors can be connected to the digital bus. Depending on the CO2 concentration, the fan speed is controlled accordingly. VOC sensor, type “KWL-VOC” (Ref. no. 4274) For measuring the VOC concentration in room air. Up to eight VOC sensors can be connected to the digital bus. Depending on the VOC concentration, the fan speed is controlled accordingly. Humidity sensor, type “KWL-FTF” (Ref. no. 4273) For measuring the relative humidity and room temperature. Up to eight humidity-temperature sensors can be connected to the digital bus. Depending on the relative humidity and/or room temperature, the corresponding control system is activated. NOTE ☞ Detailed functional descriptions can be found in the respective Installation and Operating Instructions! 2.6 Extension module for external preheater or afterheater, type “KWL-EM” (Ref. no. 4269) Additional cover flaps (outgoing air / outside air) or monitoring systems (fault output/status output) can be connected to control an external preheater (EHR-R, SEWT or LEWT) or afterheater (EH or WW). A detailed functional description can be found in the KWL-EM Installation and Operating Instructions! 2.7 KNX/EIB module, type “KWL-KNX” (Ref. no. 4275) For the integration of the KWL ventilation unit in the KNX/EIB building control system. For control cabinet installation. A detailed functional description can be found in the KWL-KNX Installation and Operating Instructions. 3 User Manual KWL®-control system – easyControls UK 3.0 CHAPTER 3 INITIAL START-UP VENTILATION UNIT ATTENTION Initial start-up KWL ventilation unit The setting up of the KWL ventilation unit is absolutely necessary to ensure the optimal functioning of the unit. The initial start-up of the KWL unit depends on the connected accessories (see section 4.1 to 4.3) The KWL ventilation unit cannot be operated without successfully carrying out the initial start-up of the ventilation unit! 3.1 Initial start-up via local web server (comes as standard) The basic parameters can be set on a notebook or PC browser via a local web server. The following tools are required for the initial start-up via the local web server: 1. Notebook with LAN connectivity and administrator rights 2. LAN network cable Step 1: Network settings >> KWL-Lüftungsanlage ist mit einem Router mit DHCP-Server verbunden: The unit is automatically assigned an IP address via DHCP. The assigned IP address can be read from the MAC address of the KWL unit (see unit test report) in the router menu (see router manual) Example: KWL unit => IP 192.168.199.22 >> KWL ventilation unit is directly connected to the notebook: If the unit is directly connected to the notebook, an automatic DHCP address will not be assigned. The KWL ventilation unit will receive the following IP address 192.168.1.199 after 30 sec. wait time. In order to contact the KWL ventilation unit via the browser, the IP address range of the notebook must also be adjusted. Enter the IP address 192.168.1.2 for the notebook: Control panel > Network and Sharing Centre > Change Adapter Settings > LAN Connection > Properties of... (network) > Internet protocol version 4 > Properties (General) > ... Password: !helios! ☞ Step 2: Configure unit Enter the assigned IP address from Step 1 in the address line of the browser (http://192.---.---.---). The service technician login password !helios!must be entered for the initial start-up. If required, the password can be changed at a later date. An info message will be displayed on the home page if the initial start-up has not been carried out. In order to start the initial start-up, click the “Initial start-up” button on the menu bar. 4 User Manual KWL®-control system – easyControls UK NOTE ☞ 3.1.1 Configuration The most important configurations can be adjusted at a glance in the initial start-up menu: Language: Format: Land: Aktuelle Browserzeit: Selection: “German”, “English”, “French”, other... Selection: “dd.mm.yyyy”, “mm.dd.yyyy”, “yyyy.mm.dd” Location of unit: Germany etc. The current browser time including date and GMT is transferred when “transfer browser time when saving” is activated. Date: Enter / change: Current date is displayed, the date can be overwritten. Time: Enter / change: Current time is displayed, the time can be overwritten. Difference to GMT in hours: Enter / change: Current time zone is displayed (standard for DE GMT +1 or in summer GMT +2. The time zone can be overwritten. Summer/wintertime mode: When checkbox is activated, the summer/wintertime changeover will be automatic. When checkbox is deactivated, the time will not be adjusted. Activate operating mode „Auto“ When this box is checked, the operation mode of the KWL device will be reset to always at 0 o'clock: automatic operation at 00:00 clock. INTERNET § ATTENTION This section is only relevant for connecting to a network and online connection Automatic software updates: When checkbox is activated, the system will search for new software on a daily basis. If a newer software version is found, it will be installed automatically. The installation process starts between 23:00 and 05:00 hrs. Recommendation: Activate “automatic software updates”! Data synchronisation with When checkbox is activated, all operation-critical parameters and measured valueasyControls portal: es are sent to the Helios portal server. You can access your KWL ventilation unit and change settings via the web portal www.easycontrols.net when you are on the go. Further evaluations are also possible, such as temperature profiles. Button: The current software version is updated by pressing the “Update software now” “Update software now” button. The update includes the motherboard firmware, the accessory components (KWL-EM, KWL-BEC, KWL-CO2, KWL-VOC and KWLFTF) and all page contents Save configuration settings with the “Save” button, otherwise the data will be lost! 3.1.2 Unit configuration Fan speeds 1-4: Minimum fan speed: Heat exchanger type: Controller KWL-BE Controller KWL-BEC Preheater: Function type KWL-EM: KWL unit configuration: Extract air: Control voltage for extract air/outgoing air fan Supply air: Control voltage for supply air/outside air fan 0 = Unit can be switched off. 1 = Unit cannot be switched off. Plastic; aluminium; enthalpy The three-speed slide switch controller KWL-BE can be locked with this function. Setting: On = KWL-BE not locked; Off = KWL-BE locked The comfort controller KWL-BEC can be locked with this function. Setting: On = KWL-BEC not locked; Off = KWL-BEC locked Use preheater On/Off Setting the function type for connected extension modules (max. two KWL-EM possible). Details can be found in the KWL-EM operating instructions. The control behaviour of the KWL ventilation unit can be adjusted via unit configuration. 5 User Manual KWL®-control system – easyControls UK ATTENTION There are two different configurations: 1 = DIBT: The heat exchanger frost protection is activated at < - 0 °C outside air temperature and ensured by the (optional) preheater or air volume reduction. In case of a supply air temperature of < +5 °C, the fans are switched off. 2 = PHI: The heat exchanger frost protection is activated at < -3 °C outside air temperature (PHI specification) and ensured by the preheater stipulated by the PassivhausInstitute. In case of a supply air temperature of < +5 °C, the fans are switched off. Comfort temperature: A comfort temperature of 16.5 °C is defined in the KWL unit configuration (2 = PHI). This default temperature is determined by the PHI. If the supply air falls below 16.5 °C, the preheater or afterheater (if available) is used to heat the supply air. The comfort temperature can be individually adjusted by overwriting. Save configuration settings with the “Save” button, otherwise the data will be lost 3.1.3 Sensor configuration Function: The function of the humidity control is solely to reduce the humidity by increasing the air exchange. > Humidity control The status of the humidity control can be configured to “Off”, “Stepped” or “Continuous“. “Off” Humidity control deactivated “Stepped” Humidity control active with stepped control logic “Continuous” Humidity control active with continuous control logic Depending on the humidity level, the fans are continuously regulated (fan speeds 0-12-3-4) between voltage speed 0 and voltage speed 4. The percentage control is displaye d on the web server page or on the comfort controller KWL-BEC. „ Required settings” Only humidity: Only the humidity value is transferred to the humidity control, the room temperature is not used for the auxiliary heating control. Only temperature: Only the room temperature is transferred to the auxiliary heating control, the humidity values are not used for the humidity control. Combined: Both the humidity value and the room temperature are used for the controls. Set value: Indicates the desired max. humidity value in the setting range between 20-80 % RH; step size 5 % RH Switching steps: Indicates the % rel. humidity which is set as the limit value for the change of rel. humidity. The adjustment is possible in 5 % steps from 5-20 %. If the set value is exceeded, the next higher speed will be activated until the value falls below the set value. Stop time in hours.: If it is not possible to reach the set value within 2 hours, the humidity control will be deactivated for the stop time. Setting range between 0-24 hours; step size 1 hour. > CO2 control Set value: Switching steps: > VOC control Set value: Switching steps: b ATTENTION The status of the CO2 control can be configured to “Off”, “Stepped” or “Continuous”. “Off” CO2 control deactivated “Stepped” CO2 control active with stepped control logic “Continuous” CO2 control active with continuous control logic Depending on the CO2 level, the fans are continuously regulated (fan speeds 0-1-2-34) between voltage speed 0 and voltage speed 4. The percentage control is displayed on the web server page or on the comfort controller KWL-BEC. Indicates the desired max. CO2 concentration value. Setting range between 300-2000 ppm; step size 50 ppm. The threshold indicates when the next fan speed will be activated, e.g. set value 1000 ppm, switching step 150 ppm. If the measured value is between 850-1000 ppm, speed 1 will be activated. If the CO2 concentration increases to 1000-1150 ppm, the next speed will be activated (speed 2). Setting range between 50-400 ppm; step size 50 ppm. The status of the VOC control can be configured to “Off”, “Stepped” or “Continuous”. “Off” VOC control deactivated “Stepped” VOC control active with stepped control logic “Continuous” VOC control active with continuous control logic Depending on the VOC level, the fans are continuously regulated (fan speeds 0-1-2-34) between voltage speed 0 and voltage speed 4. The percentage control is displayed on the web server page or on the comfort controller KWL-BEC. Indicates the desired max. VOC concentration value in the setting range between 3002000 ppm; step size 50 ppm The threshold indicates when the next fan speed will be activated, e.g. set value 1000 ppm, switching step 150 ppm. If the measured value is between 850-1000 ppm, speed 1 will e activated. If the VOC concentration increases to 1000-1150 ppm, the next speed will be activated (speed 2). Setting range between 50-400 ppm; step size 50 ppm 6 User Manual KWL®-control system – easyControls UK NOTE ☞ ATTENTION 3.2 Store sensor configuration settings by pressing “Save”, otherwise data will be lost! Initial start-up via KWL-BE (slide switch controller) The following must be taken into account when initially starting up via KWL-BE! As soon as one of the following accessory components (KWL-EM, KWL-BEC, KWL-CO2, KWL-VOC, KWL-FTF or KWL-KNX) is additionally connected, the unit must be initially started up via the comfort controller KWL-BEC or the local web server. If only one KWL-BE is connected and the local web server is not used, the initial start-up is completed by adjusting the operating speeds. 3.2.1 KWL-BE slide switch controller with operating display The slide switch controller KWL-BE is delivered without factory settings! The individual speeds must be set! (see below) All Helios KWL compact units with the easyControls control system can be controlled via the flush-mounted slide switch controller KWL-BE (Ref. no. 4265; housing for flush-mounted installation KWL-APG, Ref. no. 4270). It enables three manually definable operating speeds, which can be adjusted via the potentiometer on the circuit board (with Phillips screwdriver, Ø 3 mm; Fig.1). The airflow rate of the extract air fan can deviate in relation to the supply air fan in the range of ±20 % via the potentiometer “OS“. ➀ Slide switch ➁ Scala Speed S1-S3 ➂ Operation display i.e. Error display „Blinkcode“ ➂ ➀ Potentiometeradjustment, ➀ to ➄ ➁ RJ12 Control line Potentiometer: NOTE ☞ ➀ ➁ ➂ ➃ ➄ Speed S1 Speed S2 Speed S3 Offset „OS“ „A1“ ➅ ➆ ➇ ➈ ➉ „GND“ (Ground) „o“ (Measuring point) „S“ (Measuring point) „A“ (Measuring point) Operaion display LED ➉ ➄ ➇ ➆ ➂ ➁ ➀ ➈ ➃ ➅ GND / 1 2 3 Bridge to terminal 2/3 (checking) (factory setting, see SS-1071) TIP: Voltage metering: The output voltage of the supply air fan in the set operating speed can be measured via GND and S. 3.2.2 Setting range of switching speeds The slide switch controller KWL-BE has 5 potentiometers: Potentiometer description S1 S2 S3 OS A1 GND o S A Scale Description Speed 1 of supply air fan Speed 2 of supply air fan Speed 3 of supply air fan Offset* for extract air fan Voltage external command Ground Offset voltage Voltage slide switch Voltage external command Setting range 0 bis 10,0 Volt 1,7 bis 10,0 Volt 1,7 bis 10,0 Volt 3,7 bis 5,5 Volt 1,7 bis 10,0 Volt Measuring point Measuring point Measuring point *Offset = Deviation of extract air fan from supply air fan ± 20 % Type/basic settings KWL EC 200 W KWL EC 300 W KWL EC 500 W KWL EC 220 D KWL EC 340 D KWL EC 270 W KWL EC 370 W Speed 1 Speed 2 Speed 3 Depending on the connected ventilation unit, the voltage in the table can be set as a default. 3V 6V 9V 3V 6V 9V However, it is necessary to determine the voltages 3V 6V 9V corresponding to the calculated volume flows ac2,5V 5V 8,5V cording to DIN 1946, part 6 pursuant to the example 2,5V 5V 8,5V on page 3 and adjust the basic settings. 3V 5V 7,6V 2,7V 4,8V 7,8V 7 User Manual KWL®-control system – easyControls UK 3.3 Initial start-up via KWL-BEC (comfort controller) The unit control parameters can be easily adjusted via the comfort controller KWL-BEC. Step 1: You will automatically be asked for the controller address during the system start-up. If an address has already be assigned, it will no longer be requested. If several controllers are connected to the KWL-ventilation unit, it should be ensured that the addresses are unique (address range AD 1-8). IMPORTANT NOTE ☞ Once all comfort controllers have received an individual address, proceed to step 2. Once the controller address(es) are entered, the comfort controller will reboot. Step 2: The start-up assistant starts. IMPORTANT: The initial start-up should only be performed with a connected controller. NOTE ☞ Operating information on menu structure: “Change” or “Continue” can be selected by rotating the rotary encoder right/left. For example, if “Change” is shown with a black background, the function can be selected by pushing the rotary encoder. The settings can be adjusted by rotating and the entry is confirmed by pushing (push). Following successful adjustment, push “Continue” to move to the next menu item. ➀ Display through graphic display ➁ Rotary encoder ➂ Panel Software menu navigation The menu can be navigated by rotating left and right ➀ ➁ Control functions By pushing, the fuction shown on the display can be selected/activated. MENU ☞ ➂ Control menu / parameter settings Language: Language selection Page 1: “German”, “English”, “French”, “ Italian” (change to “Functional level 2” via “More” item) Selection Page 2: “More” > Function not in use After entering the controller address, the comfort controller will restart. Date: Date is shown and can be changed by overwriting. Time: Time is shown and can be changed by overwriting. Time zone: Difference to GMT in hours Enter / change: Current time zone displays (standard for DE GMT +1 or in the summer GMT +2. Can be changed by overwriting. Format adjustment: Options: DD.MM.YYYY; MM.DD.YYYY; YYYY.MM.DD 8 User Manual KWL®-control system – easyControls UK Automatic summer/wintertime Action: When checkbox “On” is activated, the summer-/wintertime changeover will take place automatically. When checkbox “Off” is activated, the time will not be automatically adjusted. Configuration of ventilation unit The control behaviour of the KWL ventilation unit can be adjusted via unit configuration. There are two different configurations: 1 = DIBT: The heat exchanger frost protection is activated at < - 0 °C outside air temperature and ensured by the (optional) preheater or air volume reduction. In case of a supply air temperature of < +5 °C, the fans are switched off. 2 = PHI: The heat exchanger frost protection is activated at < -3 °C outside air temperature (PHI specification) and ensured by the preheater stipulated by the PassivhausInstitute. In case of a supply air temperature of < +5 °C, the fans are switched off. Heat exchanger type: Options: “Plastic”, “Aluminium” or “Enthalpy” Lüfterstufen 1-4: Extract air: Control voltage of extract/outgoing air fan Supply air: Control voltage of supply/outside air fan The fan speeds can be adjusted via the “System settings” menu (Password: 0103) under the heading “Fan speeds” once the initial start-up is complete Minimum fan speed: Options: Speed 0 = Switch-off function can be activated Speed 1 = Switch-off function cannot be activated (min. FS 1) (Factory setting: Speed 1) Preheater: Options: Use preheater “On” or “Off” (Factory setting: On) HUMIDITY CONTROL Options: The status of the humidity control can be configured to “Off”, “Stepped” or “Continuous“. “Off” Humidity control deactivated “Stepped” Humidity control active with stepped control logic “Continuous” Humidity control active with continuous control logic Depending on the humidity level, the fans are continuously regulated (fan speeds 0-1-23-4) between voltage speed 0 and voltage speed 4. The percentage control is displayed on the web server page or on the comfort controller KWL-BEC (Factory setting: Continuous). Required settings Only humidity: Only temperature: Combined: Set value: Switching steps: Only the humidity value is transferred to the humidity control, the room temperature is not used for the auxiliary heating control. Only the room temperature is transferred to the auxiliary heating control, the humidity values are not used for the humidity control. Both the humidity value and the room temperature are transferred to the respective controls. Adjustable limit value of humidity. Setting range between 20-80 % RH; step size 5 % RH (Factory setting: 50 %) The threshold value in % rel. humidity indicates the value set as the limit value for the change of rel. humidity. The adjustment is possible in 5 % steps from 5-20 %. If the set value is exceeded, the next higher speed will be activated until the value falls below the set value. 9 User Manual KWL®-control system – easyControls UK Stop time in hours: If it is not possible to reach the set value within 2 hours, the humidity control will be deactivated for the stop time. Setting range between 0-24 hours; step size 1 hour. CO2 CONTROL Options: The status of the CO2 control can be configured to “Off”, “Stepped” or “Continuous”. “Off” CO2 control deactivated “Stepped” CO2 control active with stepped control logic “Continuous” CO2 control active with continuous control logic Depending on the CO2 level, the fans are continuously regulated (fan speeds 0-1-2-34) between voltage speed 0 and voltage speed 4. The percentage control is displayed on the web server page or on the comfort controller KWL-BEC (Factory setting: Continuous). Adjustable limit value of CO2 concentration. Setting range between 300-2000 ppm; step size 50 ppm. Set value: Switching steps: The threshold indicates when the next fan speed will be activated, e.g. set value 1000 ppm, switching step 150 ppm. If the measured value is between 850-1000 ppm, speed 1 will be activated. If the CO2 concentration increases to 1000-1150 ppm, the next speed will be activated (speed 2). Setting range between 50-400 ppm; step size 50 ppm. VOC CONTROL Options: The status of the VOC control can be configured to “Off”, “Stepped” or “Continuous”. “Off” VOC control deactivated “Stepped” VOC control active with stepped control logic “Continuous” VOC control active with continuous control logic Depending on the VOC level, the fans are continuously regulated (fan speeds 0-1-2-34) between voltage speed 0 and voltage speed 4. The percentage control is displayed on the web server page or on the comfort controller KWL-BEC (Factory setting: Continuous). Set value: Switching steps: Adjustable limit value of VOC concentration. Setting range between 300-2000 ppm; step size 50 ppm. (Factory setting: 800 ppm) The threshold indicates when the next fan speed will be activated, e.g. set value 1000 ppm, switching step 150 ppm. If the measured value is between 850-1000 ppm, speed 1 will be activated. If the VOC concentration increases to 1000-1150 ppm, the next speed will be activated (speed 2). Setting range between 50-400 ppm; step size 50 ppm 10 User Manual KWL®-control system – easyControls UK NOTE ☞ The following settings are required when the KWL unit is integrated in a computer network or directly connected to a computer. The settings are without function for network-independent operation. DHCP: Options: Automatic IP address assignment via DHCP “Yes” (Image left) or “No” IP adress: Display depends on DHCP settings (see above) “Off” Enter the desired IP address “On” Displays the assigned IP address (Image left) Gateway: Display depends on DHCP settings “Off” Enter the desired gateway “On” Displays the assigned gateway (Image left) Subnetmask: Display depends on DHCP settings “Off” Enter the desired Subnet mask 255.---.---.--“On” Displays the assigned Subnet mask (Image left) Data synchronisation with easyControls portal: Action: When checkbox “Yes” is activated, all operation-critical parameters and measured values are sent to the Helios portal server. You can access your KWL ventilation unit and change settings via the Helios web portal www.easycontrols.net when you are on the go. Further evaluations are also possible, such as temperature profiles. Automatic firmware updates: Action: When checkbox “Yes” is activated, the system will check online for new firmware on a daily basis. If new firmware is found, it will be automatically updated. The charging process begins between 23:00 and 05:00 hrs. Recommendation! Enable automatic firmware updates! NOTE ☞ Once the initial start-up is complete, the controller KWL-BEC or the system will reboot. 11 User Manual KWL®-control system – easyControls UK CHAPTER 4 FUNCTION LOCAL WEB SERVER 4.0 Access to local web server The determination of the IP address of the KWL ventilation unit is described in section 3.1 Step 1. 4.1 User accounts (see also Page 24) – User account “Service” The user account “Service” is solely intended for the Helios service technicians. – User account “Advanced” (Owner) The user account “Advanced” allows the operation of the KWL ventilation unit with a basic range of functions. This user account is specifically intended for the “property owners”. – User account “Basic” (Tenant) The user account “Basic” allows the operation of the KWL ventilation unit with a strongly reduced range of functions. This user account is specifically intended for the “tenants”, basic settings can not be changed through this user account. 4.2 Description of Helios easyControls web interface L IN K http://192.168.0.0 ➞ Enter in the browser address line MENU à Main menu „Home” ➊ Fan speed: Displays the activated fan speed (e.g. “nominal ventilation” Speed 2) – Current fan speed in % If at least one of the following control systems (CO2, VOC or humidity) is defined as continuous, the current fan speed is also shown in % in the menu. This percentage defined the range between the minimum and maximum fan speed as a function of the selected voltage values in the menu „ Configuration > Fan”. ➋ Operating mode selection: The active mode is signalled by a green coloured text in the button. – Button “AUTO” mode The activation of the fan speeds set via the weekly programme is time dependent, and the fan speeds when using CO2, VOC or humidity sensors (accessories) are regulated using the measured values. – Button “Manual” mode The fan speeds can be adjusted with the - / + Buttons. The minimum fan speed is set to 1 as standard, thus fan speed 0 cannot be activated. The manual mode changes back to automatic mode at 00.00 hrs on a daily basis. This logic can be deactivated by logging on to the portal at www.easycontrols.net. ➌ Button Short-programme: The “Booster mode” page is called up by clicking. This allows quick access to the short-programme settings via the submenus “Booster mode”, “Whisper mode” and “Vacation mode”. See main menu “Short-programme” (Page 15) for a functional description ➍ Button Status: The “System status” page is called up by clicking. This allows quick access to all system settings via the submenus “Status” and “Errors”. See main menu “System status” (Page 15) for a functional description 12 User Manual KWL®-control system – easyControls MENU à UK Main menu „Short-programme” ➥ Submenu Booster mode ➊ Fan speed: The fan speed can be set via the buttons - / +. This fan speed will be activated for the time set under “Duration“ (5-180 minutes). ➋ Duration (5-180) minutes: The duration of booster mode can be adjusted via the buttons -10 / +5 / +15. The duration can be set between 5 and 180 minutes, the step size is 5 minutes. ➌ Button “Activate now”: Booster mode is activated via the button, the text on the button is simultaneously reset. Booster mode can be deactivated via the reset button. ➍ Remaining time in minutes: When booster mode is active, the remaining time is shown until booster mode is deactivated. ➥ Submenu Whisper mode ➊ Fan speed: The fan speed can be set via the buttons - / +. This fan speed will be activated for the time set under “Duration“ (5-180 minutes). ➋ Duration: The duration of whisper mode can be adjusted via the buttons -10 / +5 / +15. The duration can be set between 5 and 180 minutes, the step size is 5 minutes. ➌ Button “Activate now”: Whisper mode is activated via the button, the text on the button is simultaneously reset. Whisper mode can be deactivated via the reset button. ➍ Remaining time in minutes: When whisper mode is active, the remaining time is shown until whisper mode is deactivated. 13 User Manual KWL®-control system – easyControls UK ➥ Submenu Vacation programme ➊ Vacation programme Option: The vacation programme status can be configured to “Interval”, “Constant” and “Off” – Interval The KWL ventilation unit can be operated automatically in adjustable time intervals with defined fan speeds (1-4). The interval mode starts with a defined “start date”. The ventilation unit will be operated in the period between the start and end date for the duration specified for the activation period (e.g. 60 Min.) with the defined fan speed (1-4) at intervals equal to the duration specified in the interval time (e.g. 2 h). Once the “End date” is reached, the KWL will switch to automatic mode. – Constant When the “Start date” is reached, the KWL ventilation unit is switched to constant ventilation speed. Once the “End date” is reached, the KWL will switch to automatic mode. – Off Vacation programme is deactivated NOTE ☞ ➋ Fan speed: The fan speed can be set via the buttons - / +. The fan speed is activated in vacation mode. ➌ Start date: Indicates the desired vacation programme start date ➍ End date: Indicates the desired vacation programme end date (There must be at least one day between the start date and end date) ➎ Interval time: Indicates the interval rhythm, when the ventilation mode is active for the activation period. ➏ Activation period: Indicates the duration for how long the ventilation mode is active after the end of the interval time. ➡ Confirm settings by pressing ”Save” 14 User Manual KWL®-control system – easyControls MENU UK à Main menu „System status”” ➥ Submenu Status 6 7 4 9 2 8 3 1 5 ➊ Operating mode: Display the current operating mode / operation mode ➋ Fan speed: Displays the active fan speed ➌ Current fan speed in % If at least one of the following control systems (CO2, VOC or humidity) is defined as continuous, the current fan speed is also shown in % in the menu. This percentage defined the range between the minimum and maximum fan speed as a function of the selected voltage values in the menu „ Configuration > Fan”. ➍ Rotation speed supply air (rpm): Displays the current rotation speed of the supply air fan Rotation speed extract air (rpm): Displays the current rotation speed of the extract air fan ➎ Bypass: Displays the open or closed bypass flap ➏ Errors: If an error is detected in the KWL ventilation unit, the unit will switch off or individual functions will deactivate depending on the error (please refer to page 17 Error messages!). The figure shows the number of current errors. Pressing the Detail button takes you to the “Error” page. ➐ Warnings: If an atypical condition is detected in the KWL ventilation unit, the unit will switch off or individual functions will deactivate depending on the error (please refer to page 17 Warning messages!). The figure shows the number of current warnings. Pressing the Detail button takes you to the “Error” page. ➑ Infos: Information on various operation conditions is displayed, such as Filter change, Frost protection, etc. The figure shows the number of current infos. Pressing the Detail button takes you to the “Error” page. ➒ Current temperature sensor values: A KWL ventilation unit comes with four pre-installed temperature sensors as standard. Further temperature sensors can be connected with the available accessories. (1) (2) (3) (4) (5) (6) (7) Outside air sensor: Supply air sensor: Extract air sensor: Outgoing air sensor: Outside air duct sensor: Supply air duct sensor: Return sensor WW register: Position Position Position Position Position Position Position 15 in outside air spigot on KWL EC unit in supply air spigot on KWL EC unit in extract air spigot on KWL EC unit on the outgoing air side directly behind the heat exchanger before the pre-heating radiator KWL EM (VHZ) in outside air pipe after the after heating radiator KWL EM (NHZ) in supply air pipe in auxiliary heating radiator KWL EM (NHZ) in supply air pipe User Manual KWL®-control system – easyControls UK ➓ 11 12 13 Pre- / Afterheater (8) Preheater = ON/OFF Preheater ON (in %): Displays the current heating capacity, with the preheater works (9) Afterheater = ON/OFF Afterheater ON (in %): Displays the current heating capacity, with the afterheater works Current KWL- FTF values (humidity control) Displays the current status (Off, On or Continuous) Displays the connected humidity sensors: Measured value from each sensor Current KWL-VOC values Displays the current status (Off, On or Continuous) Displays the connected VOC sensors: Measured value from each sensor Current KWL-CO2 values Displays the current status (Off, On or Continuous) Displays the connected CO2 sensors: Measured value from each sensor ➥ Submenu Errors ➊ Errors / Warnings / Infos: Displays all possible errors, warnings and information in the system Errors: shown in red Warnings: shown in orange Information: shown in green A complete error overview with solution approaches can be found on page 17! NOTE ☞ ➡ Reset error messages via ”Error reset” 16 User Manual KWL®-control system – easyControls UK Error indication: “Error”, “Warning” and “Info” No. 1 2 Error (red) Speed error Supply air fan Speed error Outgoing air fan 3 Warning (orange) Reserved DNS server not found Solution Change filter! Check internet connection (no internet?)! 4 SD card error when writing the E-Eprom data with "FLASH-ring buffer FULL" Error when downloading a file (not available?) 5 Bus overcurrent above max. value Error when calculating the checksum (incorrect checksum in container?) 6 Info (green) Carry out filter change Frost protection WT, only extract air operation active Error when handling the SD card (not available?) 7 Motherboard: VHZ EH error with the zero-crossing identification Error when reading a file from the SD card 8 KWL-EM (VHZ): Error with the zerocrossing identification Error when uploading a file 9 KWL-EM (NHZ): Error with the zerocrossing identification Other error 10 Motherboard: Int. temp. sensor error (T1) outside air (missing or cable break) 1. Activate sensor! 2. Check cable! 11 Motherboard: Int. temp. sensor error (T2) supply air- (missing or cable break) 1. Activate sensor! 2. Check cable! 12 Motherboard: Int. temp. sensor error (T3) extract air- (missing or cable break) 1. Activate sensor! 2. Check cable! 13 Motherboard: Int. temp. sensor error (T4) outgoing air- (missing or cable break) 1. Activate sensor! 2. Check cable! 14 Motherboard: Int. temp. sensor error (T1) outside air (short-circuit) 15 Motherboard: Int. temp. sensor error (T2) supply air- (short-circuit) 16 Motherboard: Int. temp. sensor error (T3) extract air -( short-circuit) 17 Motherboard: Int. temp. sensor error (T4) outgoing air -( short-circuit) 18 KWL-EM as VHZ configured, but unavailable or malfunction 19 KWL-EM as NHZ configured, but unavailable or malfunction 20 KWL-EM (VHZ): duct sensor (T5) -outside air- (missing or cable break) 21 KWL-EM (NHZ): duct sensor (T6) -supply air-(missing or cable break) 22 KWL-EM (NHZ): duct sensor (T7) -return WW register(missing or cable break) KWL-EM (VHZ): duct sensor (T5) -outside air-(short-circuit) 23 24 KWL-EM (NHZ): duct sensor (T6) -supply air-(short-circuit) 25 KWL-EM (NHZ): duct sensor (T7) -return WW register-(short-circuit) 26 KWL-EM (VHZ): Safety limiter automatic 27 KWL-EM (VHZ): Safety limiter manual 28 KWL-EM (NHZ): Safety limiter automatic 29 KWL-EM (NHZ): Safety limiter manual 30 KWL-EM (NHZ): Frost protection WW return < e.g. 7 °C 31 KWL-EM (NHZ): Frost protection WW Supply air < e.g.. 7 °C 32 Motherboard: Frost protection external WW reg. Supply air temp. < 5°C (only PHI) 17 User Manual KWL®-control system – easyControls UK MENU à Main menu „Weekly programme” ➊ EXAMPLE ☞ Profile: The following weekly programme profiles can be selected: “Standard 1, Standard 2, Standard 3, User-defined 1, User-defined 2, OFF” ➡ Confirm selection by pressing ”Save” or press “Cancel” – Profile „Standard 1” ➊ T IP ! Day and time settings: Navigate through the selection fields with the TAB key on the keyboard! Options for days in the week: “Monday” to “Sunday” The following input fields are available: – Selection of desired fan speed “1 to 4” – Time from “00:00” to “23.59” the unit should be operated in the selected fan speed. ➡ Confirm entries by pressing ”Save” or press “Cancel” 18 User Manual KWL®-control system – easyControls UK EXAMPLE – Profile „User-defined 1” ☞ T IP ! ➊ Day and time settings: Options for days in the week: “Monday” to “Sunday” The following input fields are available: – Selection of desired fan speed “1 to 4” – Time from “00:00” to “23.59” the unit should be operated in the selected fan speed. ➋ Copy settings All or certain days of the week can be copied by pressing the “Select all” button. Relevant checkboxes “Activate” or “Deactivate” or “Clear selection” ➡ Confirm entries by pressing ”Save” or press “Cancel” ➊ Day and time settings: Options for days in the week: “Monday” to “Sunday” The following input fields are available: – Selection of desired fan speed “1 to 4” – Time from “00:00” to “23.59” the unit should be operated in the selected fan speed. Navigate through the selection fields with the TAB key on the keyboard! Overview: Predefined weekly programme “Standard 1-3” Time Mo. - Fr. Time Saturday Time Sunda y Standard 1 0:00 - 6:30 6:30 - 11:30 11:30 - 13:30 13:30 - 21:00 21:00 - 24:00 Speed 1 Speed 2 Speed 3 Speed 2 Speed 1 0:00 - 8:30 8:30 - 12:00 12:00 - 14:00 14:00 - 23:00 23:00 - 24:00 Speed 1 Speed 2 Speed 3 Speed 2 Speed 1 0:00 - 8:30 8:30 - 9:30 9:30 - 21:00 21:00 - 23:00 23:00 - 24:00 Speed 1 Speed 2 Speed 3 Speed 2 Speed 1 Time Mo. - Fr. Time Saturday Time Sunda y Standard 2 0:00 - 6:30 6:00 - 8:00 8:00 - 16:00 16:00 - 18:00 18:00 - 20:30 20:30 - 22:30 22:30 - 24:00 Speed 1 Speed 3 Speed 1 Speed 2 Speed 3 Speed 2 Speed 1 0:00 - 8:00 8:00 - 8:30 8:30 - 10:00 10:00 - 18:00 18:00 - 21:00 21:00 - 24:00 Speed 1 Speed 2 Speed 3 Speed 2 Speed 3 Speed 2 0:00 - 9:00 9:00 - 10:30 10:30 - 15:00 15:00 - 22:00 22:00 - 24:00 Speed 1 Speed 2 Speed 3 Speed 2 Speed 1 Time Mo. - Fr. Time Saturday Time Sunda y 0:00 - 5:30 Speed 2 0:00 - 6:30 Speed 2 0:00 - 6:30 Speed 2 5:30 - 8:00 Speed 3 6:30 - 8:00 Speed 3 6:30 - 8:00 Speed 3 Standard 3 8:00 - 11:00 11:00 - 11:30 11:30 - 13:00 13:00 - 21:00 Speed 1 Speed 3 Speed 3 Speed 3 8:00 - 11:30 11:30 - 13:00 13:00 - 22:00 22:00 - 24:00 Speed 3 Speed 4 Speed 3 Speed 2 8:00 - 11:30 11:30 - 13:00 13:00 - 22:00 22:00 - 24:00 Speed 3 Speed 4 Speed 3 Speed 2 19 User Manual KWL®-control system – easyControls UK MENU à Main menu „Afterheater” ➊ Afterheater: The following afterheater profiles can be selected: “Standard 1, Standard 2, Constant, User-defined 1, User-defined 2, OFF” ➡ Confirm selection by pressing ”Save” or press “Cancel” EXAMPLE ☞ – Profile Afterheater “Standard 1” Overview: Predefined weekly programme afterheater “Standard 1-2” Standard 1 Afterheating Time 0:00 - 6:30 6:30 - 11:30 11:30 - 13:30 13:30 - 21:00 21:00 - 24:00 Temp. Mo.-Fr. OFF 17°C 18°C 17°C OFF Time 0:00 - 8:30 8:30 - 12:00 12:00 - 14:00 14:00 - 23:00 23:00 - 24:00 Temp. Sa. OFF 17°C 18°C 17°C OFF Time 0:00 - 8:30 8:30 - 9:30 9:30 - 21:00 21:00 - 23:00 23:00 - 24:00 Temp. Su. OFF 17°C 18°C 17°C OFF Standard 2 Afterheating Time 0:00 - 6:30 6:00 - 8:00 8:00 - 16:00 16:00 - 18:00 18:00 - 20:30 20:30 - 22:30 22:30 - 24:00 Temp. Mo.-Fr. OFF 18°C OFF 17°C 18°C 17°C OFF Time 0:00 - 8:00 8:00 - 8:30 8:30 - 10:00 10:00 - 18:00 18:00 - 21:00 21:00 - 24:00 Temp. Sa. OFF 17°C 18°C 17°C 18°C 17°C Time 0:00 - 9:00 9:00 - 10:30 10:30 - 15:00 15:00 - 22:00 22:00 - 24:00 Temp. Su. OFF 17°C 18°C 17°C OFF ➡ Confirm entries by pressing ”Save” or press “Cancel” 20 User Manual KWL®-control system – easyControls UK EXAMPLE ☞ ATTENTION – Profile Afterheater „User-defined 1” When the extansion module KWL-EM isn't connected, the profile "Afterheater" is disabled ➊ Activation of afterheating during planning horizon from day: .... Month: .... to day: .... Month: .... With this function it is possible to activate the afterheating in a defined time period ➋ Temperature This function is only available when the supply air sensor / and humidity-temperature sensor is connected – Max. duct temperature (13-40) in °C: Upper limit value for the afterheating to avoid in the transition period an over-heating of the building. – Min. duct temperature (10-37) in °C: Lower limit value for the afterheating to prevent the cooling function in summer by the outside air and cause unnecessary energy consumption. ➌ Day and time settings Options for days in the week: “Monday” to “Sunday” The following input fields are available: – Temperature values in °C – Time from “00:00” to “23.59” the unit should be operated in the desired temperature range. ➍ Copy settings All or certain days of the week can be copied by pressing the “Select all” button. Relevant checkboxes “Activate” or “Deactivate” or “Clear selection” ➡ Confirm entries by pressing ”Save” or press “Cancel” 21 User Manual KWL®-control system – easyControls UK MENU à Main menu „Technical info” ➊ Device data: Details regarding the installed KWL unit – Type – Security code – Ref. no. – Serial number – MAC address – Production code MENU à ➋ Technical information on the web: Device info / Instructions: > Link to Helios website to obtain further technical information Data Security / Disclaimer: Link to important privacy notices ➌ Hotline service – your direct line to us!: After-sales electro-technical support / Customer service / Spare parts: +49 (0) 7720 / 606 222 Main menu „Network settings” ➊ IMPORTANT NOTE ☞ Network: The following network settings can be adjusted in the “Network setup” menu: – Use DHCP: status “activate”➞ check checkbox or “deactivate” In case of “activated” DHCP use, all network settings are automatically assigned – Hostname: Assigned automatically or freely selectable About a freely selectable hostname (e.g. "MyKWL") you get access through the webbrowser to the KWL unit, without knowledge of the IP address. – IP address: Automatically assigned or freely selectable – Subnetmask: Automatically assigned or freely selectable – Standard gateway: Automatically assigned or freely selectable – Standard DNS: Automatically assigned or freely selectable – Fallback DNS: Automatically assigned or freely selectable ➡ Confirm entries by pressing ”Save” or press “Cancel” NOTE ✍ If the network settings are entered manually, these should be noted down. Please note that only the entered IP address can be used to access the unit after saving! 22 User Manual KWL®-control system – easyControls MENU à UK Main menu „Configuration” ➥ Sub menu System ➊ System configuration Language: Language selection “German”, “English”, “French” Format: Date format selection “dd.mm.yyyy”, “mm.dd.yyyy” “ yyyy.mm.dd” Location of unit: Country location: Germany etc. Current browser time: System default Difference to GMT in hours: System default Take over browser time when saving: Date: Simple update of unit-internal date Time: Simple update of unit-internal time Difference to GMT in hours: Deviating adjustment capability of hours to “Greenwich Mean Time” Summer/Wintertime mode: In case of active checkbox, switching will be automatic Activate operating mode „ Auto“ always at 0 o'clock: The operating mode of the KWL unit will be reset at 00:00 o'clock to automatic operation. – Automatic software updates: When checkbox is activated, the system will check online for new firmware on a daily basis. If new firmware is found, it will be automatically updated. The installation process begins between 23:00 and 05:00 hrs. Recommendation: Activate “Automatic software updates”! – Data synchronisation with Helios Controls portal: Action: When checkbox “Yes” is activated, all operation-critical parameters and measured values are sent to the Helios portal server. You can access your KWL ventilation unit and change settings via the easyControls portal www.easy controls.net when you are on the go. Further evaluations are also possible, such as temperature profiles.. ➡ Update software now! ATTENTION Should the “Software updates” and “Data synchronisation” be carried out by the user with a deactivated checkbox, any warranty from Helios shall be void! 23 User Manual KWL®-control system – easyControls UK ➋ Status Software version: Indicates the current software version of the unit control system ➌ Rotation speed Supply air fan (rpm): Display the current fan rotation speed of the supply air fan Extract air fan (rpm): Display the current fan rotation speed of the extract air fan ➍ Operating hours Displays the operating hours for the following unit components up to the current time: Supply air fan; extract air fan; preheater; afterheater ➎ % of heating output Preheater: Afterheater: ➡ Confirm settings by pressing ”Save” or press “Cancel” ➥ Sub menu Device ➊ Device configuration: IThe following unit settings can be adjusted in the “Unit configuration“ menu: Configuration ventilation unit: Selection “DIBt” or “Passivhaus” Preheater type: Selection “EH-Basis”, EH-ERW, “SEWT” or “LEWT” Preheater: Status “ON” or “OFF” Function type KWL-EM: Status “Function 1” or “Function 2” Run-on time Pre-/Afterheater: Entry of run-on time (in minutes) Heat exchanger type: Selection “Plastic”, “Aluminium” or “Enthalpy” External contact: Selection “Function 1 to 6” Fault output: Status “Collective fault” or “Only error” Slide switch controller KWL-BE: Status “ON” or “OFF” Comfort controller KWL-BEC: Status “ON”, “OFF” and “Only display” ➋ Filter change: Change interval in months: 6 (factory setting) Remaining time: e.g. 180 days ➡ Restart remaining time If the filter change interval has expired (display 0), the filter (outside air) must be replaced. – On the slide switch controller KWL-BE the expired filter interval is detected as a flash code (page 17, error no. 1) The RESET at the slide switch control is carried out via the slide switch >> Switch slide switch back from step 1 to 3 to 1. – On the comfort controller KWL-BEC the error message "info 1" is shown in the display. The RESET at the comfort controller is carried out after changing the filter or open the unit door. After the restart, the change interval is set to 9 months (settings 1-9 months). NOTE: If prior to the filter change an individual change interval is entered e.g. 3 months is this interval setting used again after the filter change. 24 User Manual KWL®-control system – easyControls UK ➌ Bypass: Activate the bypass during the planning horizon from day: .... month: .... to day: .... month: .... With this function it is possible to activated the bypass function in a specified time period. Min. outside air temperature in °C: 18 (factory setting) Offset supply air temperature in °C: 4 (factory setting) ATTENTION Passive outdoor air cooling: Status „ ON” or „ OFF” By the use of air-conditioning systems in a building in summer the clearly cooler extract air can be used for cooling the warm outside air over the cross countercurrent heat exchanger. This function is implemented via the activation of the "passive outdoor air cooling". ATTENTION! With the activated outdoor cooling the stopper must be removed in the KWL-unit (see Fig.) to discharge any condensate in the outdoor air area via a condensate drain. After disabling the "passive outdoor air cooling" (winter mode) the stopper is to be installed again. ➍ Building control system: In case of active checkbox, the Modbus interface to the building control system will be “activated” ➎ ATTENTION Reset device to factory settings: Keep weekly programme: “activate” checkbox In case of activated checkbox, all weekly programme entries will be deleted! Reset device settings to factory settings: “activate” checkbox ➡ Reset! ➡ Confirm settings by pressing ”Save” or press “Cancel” Note: The filter remaining time is not changed when resetting ➥ Submenu Fan ➊ Fan configuration Extract air / Supply air Fan speed 1: Extract air... Supply air ... Fan speed 2: Extract air... Supply air ... Fan speed 3: Extract air... Supply air ... Fan speed 4: Extract air... Supply air ... 25 User Manual KWL®-control system – easyControls UK Minimum fan speed: Status “0” or “1” By selecting “0”, fan speed 1 can be set as a switch-off function Supply air operation: Speed “1 to 4” Extract air operation: Speed “1 to 4” ➋ KWL-BE slide switch controller / GLT (Building Control System): Assignment of fan speeds: By selecting “0-10V” (factory setting) Or by selecting “stepped” on the submenus: – Range 0-2 V Speed 0 – Range 2-4 V Speed 1 – Range 4-6 V Speed 2 – Range 6-8 V Speed 3 – Range 8-10 V Speed 4 ➡ Confirm settings with ”Save” or press “Cancel” ➥ Submenu Sensors NOTE ✍ This menu displays all sensors connected to the KWL unit, such as Humidity/CO2 and VOC sensors. Depending on the number of connected sensors (max. 8 units possible), these are listed in the fields so that further settings and assignments can be made. The sensor description can be individually overwritten! For example, “KWL-FTF 1” can be changed to "Bathroom" ➊ ➋ Humidity-temperature sensor configuration Humidity control: The following selections are possible “OFF”, “ON”, “Continuous” – KWL-FTF AD1 Only humidity – KWL-FTF AD2 Only humidity – KWL-FTF AD3 Only humidity – KWL-FTF AD4 Only humidity – KWL-FTF AD5 Only humidity – KWL-FTF AD6 Only humidity – KWL-FTF AD7 Only humidity – KWL-FTF AD8 Only humidity Set values Humidity control (20-80) % RH: 45 (factory setting) Switching steps Humidity control (5-20) % RH: 10 (factory setting) Stopping time in hours (0-24): 2 hours (factory setting) CO2 control: CO2 control: The following selections are possible “OFF”, “ON”, “Continuous” – KWL-CO2 AD1 – KWL-CO2 AD2 – KWL-CO2 AD3 – KWL-CO2 AD4 – KWL-CO2 AD5 – KWL-CO2 AD6 – KWL-CO2 AD7 – KWL-CO2 AD8 Set value CO2 (450-2000) ppm: 1000 (factory setting) Switching steps CO2 control (50-200) ppm: 100 (factory setting) 26 User Manual KWL®-control system – easyControls UK ➌ VOC control: VOC control: The following selections are possible “OFF”, “ON”, “Continuous” – KWL-VOC AD1 – KWL-VOC AD2 – KWL-VOC AD3 – KWL-VOC AD4 – KWL-VOC AD5 – KWL-VOC AD6 – KWL-VOC AD7 – KWL-VOC AD8 Set value VOC (450-2000) ppm: 1200 (factory setting) Switching steps VOC control (50-200) ppm: 100 (factory setting) ➡ Confirm settings with ”Save” or press “Cancel” MENU à Main menu „Initial start-up” This menu displays all of the important information and settings regarding the initial start-up quickly and clearly. A detailed description of the “Initial start-up” process for KWL units can be found in section 3, from section 3.2 onwards. ➡ Confirm settings with ”Save” or press “Cancel” 27 User Manual KWL®-control system – easyControls UK MENU à Main menu „My account” ➥ Submenu View menu ➊ Password: !helios! ☞ Password: !helios! ☞ User account “Service” After entering the password, the user account “Service” allows the operation of the KWL-ventilation unit with a predefined range of functions (see Fig. below), which is specifically intended for the “service technicians”. – User account “Advanced” (Owner) After entering the password, the user account “Advanced” allows the operation of the KWL-ventilation unit with a predefined range of functions (see Fig. below), which is specifically intended for the “property owners”. 28 User Manual KWL®-control system – easyControls UK Password: easy ☞ – User account “Basic” (Tenants) The user account “Basic” allows the operation of the KWL-ventilation unit with a predefined range of functions (see Fig. below), which is specifically intended for the “tenants” ➥ Submenu Change password ➊ Change password When assigning passwords eight digits must be entered. Old password: New password: Repeat password: ➡ Confirm entries with ”Change password” or press “Cancel” ➥ Submenu Log out You have successfully logged out of the system! 29 User Manual KWL®-control system – easyControls UK 5.0 CHAPTER 5 FUNCTIONAL DESCRIPTION Functional descriptions 5.0.1 System boot (System start) The accessory components connected to the Digital Bus are checked after each system boot. If an accessory component is removed after the system boot, this is immediately shown by an Info (Info 4). Accessory components must not be connected whilst the unit is in operation, if this is nevertheless attempted, the system will only register the accessory components after a restart. 5.0.2 Ventilation mode The KWL EC ventilation units can be operated in two modes. “Manual” and “Auto“. NOTE ☞ Manual mode: The controllers KWL-BE (GLT 0-10V) and KWL-BEC are active in “manual” mode. The fan power is controlled directly via these controllers or via the local web server or the web portal. The weekly programme for the fan speeds, and the need-oriented power control via VOC, CO2 and FTF measurement values is deactivated. The displaying of the fan speed and percentage fan activation depends on the accessory components in use. If a KWLBE (GLT 0-10V) is not used, then the fan speed is only displayed on the KWL-BEC and the local web server. However, if a KWL-BE (GLT 0-10V) is used, the percentage fan activation will also be shown. In this respect, 0V = 0 % and 10V = 100 % (fans run from 17 %). The slide switch controller KWL-BE (GLT 0-10) can only be used in “manual” mode. It is not possible to switch from “auto” to “manual” via the slide switch controller KWL-BE. Modus auto: The fan power is regulated by the weekly programme in “auto” mode. When using the VOC, CO2 and FTF sensors, which are available as accessories, then the power control is also influenced by the measured values. If different fan speeds are requested internally, the highest fan speed will always be activated. The displaying of the fan speed and percentage fan activation depends on the accessory components in use. If a KWL-VOC, KWL-CO2 or KWL-FTF sensor is used with the configuration “stepped“, then the fan speed is only displayed on the KWL-BEC and the local web server. However, if a KWL-VOC or KWL-CO2 or KWL-FTF sensor is used with the configuration “continuous“, the percentage fan activation will also be shown. In this respect, 1,7 V = 1 % and speed 4 = 100 % (speed 0 = 0 %). 5.0.3 Booster mode The “Booster mode” function allows for ventilation at a certain fan speed for a defined period of time. The booster mode function can be activated or deactivated at any time, either via the KWL-BEC, the local web server, the external contact or the easyControls portal (www.easycontrols.net). The duration and fan speed of the booster mode function can be adjusted via the following menu items: – Comfort controller KWL-BEC ð see Operating Instructions (No. 82 219) – Local web server ð see Page 13 – www.easycontrols.net 5.0.4 Whisper mode The “Whisper mode” function allows for ventilation at a certain fan speed for a defined period of time. The whisper mode function can be activated or deactivated at any time, either via the KWL-BEC, the local web server, the external contact or the easyControls portal (www.easycontrols.net). The duration and fan speed of the whisper mode function can be adjusted via the following menu items: – Comfort controller KWL-BEC ð see Operating Instructions (No. 82 219) – Local web server ð see Page 13 – www.easycontrols.net 5.0.5 Weekly programme The fan speeds are controlled time-dependently via the Clock timer. There are 3 standard weekly programmes for selection, and another 2 individual weekly programmes can be created. 10 times can be defined with corresponding fan speeds per day. If time-dependent fan control is not required, this function can be switched off. The weekly programme is only active in “auto“ mode. The weekly programme can be adjusted via the following menu items: – Comfort controller KWL-BEC ð see Operating Instructions (No. 82 219) – Local web server ð see Page 18 – www.easycontrols.net 5.0.6 Afterheater / afterheater weekly programme (Accessories) The supply air temperature is controlled time-dependently via the afterheater weekly programme. There are 2 standard weekly programmes for selection, and another 2 individual weekly programmes can be created. A temperature can be permanently set via the “constant“ operating mode. 10 times can be defined with corresponding fan speeds per day. If time-dependent afterheater control is not required, this function can be switched off. The weekly programme is active in “auto“ and “manual“ mode. The afterheater weekly programme can be adjusted via the following menu items: – Comfort controller KWL-BEC ð see Operating Instructions (No. 82219) – Local web server ð see Page 20 – www.easycontrols.net 30 User Manual KWL®-control system – easyControls UK When using a KWL-FTF sensor, the room temperature is regulated. In this respect, further setting options are available. The minimum and maximum duct temperature can be adjusted. The regulation is based on a pulse package control, which allows the continuous regulation of heat output between 0-100 %. NOTE ☞ IMPORTANT NOTE ☞ Notes: – If the electric afterheater radiator is activated, the run-on time for the supply air fan is also activated. When the KWL EC ventilation unit is switched off, the supply air fan will run on. The run-on time is 60 sec. as standard, which can also be changed to 120 sec., the run-on time will end as soon as the heater is no longer required. – The afterheater is only activated if the motors have reached a min. speed and the safety temperature limiter has not been triggered. Rooms cannot be heated by a KWL EC ventilation unit! Only the supply air temperature is warmed. Room heating is therefore absolutely necessary! 5.0.7 Sensor values The KWL ventilation units come with a outside air, supply air, extract air and outgoing air temperature sensor as standard. Additional temperature sensors and VOC, humidity-temperature and CO2 sensors are available from the Helios Accessories. The current sensor values can be viewed in the following menu items: – Comfort controller KWL-BEC ð see Operating Instructions (Nr. 82 219) – Local web server ð see Page 15 – www.easycontrols.net T IP ! Sensor values over a period of 1 year can be viewed and analysed via the easyControls portal. 5.0.8 Vacation programme Future holidays can be planned in advance using the vacation programme. A defined ventilation cycle between “interval operation” or “constant ventilation” can be selected for this period. When the start date is reached, the vacation programme will start automatically. When the end date is reached or the programme is cancelled, the vacation programme will be deactivated. 5.0.9 Frost protection cross-counterflow heat exchanger The heat exchanger frost protection has been fundamentally revised to provide maximum energy saving. The heat recovery efficiency is permanently calculated by the new logic. In this respect, the outside air, outgoing air and extract air are monitored. In the event that the min. heat recovery efficiency is not met, the preheater is connected. If the heat recovery efficiency continues to fall despite the preheater operation, the supply air fan will be switched off. 5.0.10 Frost protection hot water afterheater radiator The hot water auxiliary heating is ensured by using a return temperature sensor and a duct temperature sensor. The sensors are connected to the extension module KWL-EM. Furthermore, the mixer and the circulation pump of the hot water afterheater radiator WHR... If the temperature at the return temperature sensor and/or the duct temperature sensor falls below +7 °C, this will cause an emergency shutdown of the KWL ventilation unit. In this respect, the cover flaps will close and the mixer and the circulation pump will be activated. NOTE ☞ When using a hot water heater, the outside air cover flaps and outgoing air cover flaps must be connected. 5.0.11 Frost protection for independent hot water heating radiator In case of a supply air temperature below +5 °C, the supply air and extract air fan will be switched off to protect the downstream hot water afterheater radiator from frost damage. This is signalled by error message No.32 (red). As soon as the supply air temperature exceeds +5 °C, the supply air and extract air fan will be automatically switched on. 5.0.12 Preheater (Accessories) A preheater can be installed in the KWL ventilation unit or externally in the pipe system (in connection with extension module KWL-EM) depending on the unit design. The preheater is used to heat the outside air. This is necessary if there is a risk of the heat exchanger freezing or if the comfort temperature (Passiv Haus Institute default) of 16.5 °C is not reached in the supply air. The preheater is activated by both the heat exchanger frost protection function and the comfort temperature. The regulation is based on a pulse package control, which allows the continuous regulation of heat output between 0-100 %. NOTE ☞ Notes: – The comfort temperature is only active in the Passivhaus configuration PHI (config 2). If an afterheater is also installed, the supply air temperature is increased to 16.5 °C (comfort criteria) by the electric afterheater. – If the electric preheater is activated, the run-on time for the supply air fan is also activated. When the KWL EC ventilation unit is switched off, the supply air fan will run on. The run-on time is 60 sec. as standard, which can also be changed to 120 sec., the run-on time will end as soon as the heater is no longer required. – The preheater is only activated if the motors have reached a min. speed and the safety temperature limiter has not been triggered. 31 User Manual KWL®-control system – easyControls UK 5.0.13 Bypass The bypass function allows the bypassing of the heat exchanger to feed fresh outside air directly into the building without heat recovery. In this respect, the outside air is not additionally heated by the heat exchanger. Definition: Bypass closed ð Winter operation with heat recovery Bypass opened ð Summer operation without heat recovery (heat exchanger bypass) The bypass function settings can be adjusted in the following menu items: – Comfort controller KWL-BEC ð see Operating Instructions (No. 82219) – Local web server ð see Page 24 – www.easycontrols.net There are two different operating conditions: 1. No afterheater available or deactivated In this case, the “bypass temperature“ and “outside air limit“ settings are considered. The bypass temperature indicates the extract air temperature or room temperature (KWL-FTF sensor are set as “only temperature“ or “ combined“) at which the bypass should open. The outside air limit indicates the outside air temperature at which the bypass function is enabled (automatic winter deactivation). In general, the outside air temperature must be less than the extract air or room temperature. If the extract air or room temperature exceeds the bypass temperature and the outside air temperature is above the outside air limit, the bypass will be opened. 2. Afterheater active via weekly programme or fixed set value temperature In this case, the “offset“ and “outside air limit“ settings are considered. The supply air temperature which has been defined on the afterheater menu (weekly programme or fixed value) is the basis for which the target temperature is added to the offset, the sum indicates the bypass temperature at which the extract air or room temperature (KWL-FTF are set as “only temperature“ or “combined“) should open the bypass. The outside air limit indicates the outside air temperature at which the bypass function is enabled (automatic winter deactivation). In general, the outside air temperature must be less than the extract air or room temperature. If the extract air or room temperature exceeds the sum of the afterheater temperature plus the bypass temperature offset and the outside air temperature is above the outside air limit, the bypass will be opened The “passive outside air cooling“ function is another option. With this function, the cooler extract air is used to cool the warmer outside air by means of the heat exchanger. This process can specifically lead to the formation of condensation from the outside air in properties with an air conditioning system and humid outside air (humid weather). The units KWL EC 200 W, KWL EC 300 W and KWL EC 500 W are provided with condensation outlet openings for this reason. The condensation water can run from the outside air side to the outgoing air side via this opening without causing an odour nuisance (outside air side is under overpressure and the outgoing air side is under negative pressure). The function can be activated via the easyControls portal (www.easycontrols.net) or via the local web server (as of software version V2.03). IMPORTANT ☞ ATTENTION – With regard to the KWL EC 200 W, KWL EC 300 W and KWL EC 500 W, the condensation outlet opening must be checked once annually. – With regard to the other KWL units, the combination of an air conditioning system and an extreme level of humidity in the outside air can lead to water damage. Whereas, the use of passive outside air cooling without an air conditioning system is non-critical. However, with regard to KWL units, a tray should be installed under the unit to avoid water damage to the building. Condensation water can develop in extreme situations. 5.0.14 External contact With regard to the “external contact” function, various unit functions can be activated via installed switches. With regard to the accessory components KWL-VOC, KWL-CO2 and KWL-EM (exception NHZ configured as WW), external contacts can be connected. The external contact functions can be adjusted in the following menu items: – Comfort controller KWL-BEC ð see Operating Instructions (No. 82219) – Local web server ð see Page 24 – www.easycontrols.net Functional overview: Function 1: Switch external contact on or off With regard to the function, If one or more external contacts are opened or if an accessory component is lost during operation (cable break or component defect), the KWL ventilation unit will be switched off. In this respect, the safety functions are active and “external contact” will be displayed on the controller KWL-BEC and on the website. The KWL ventilation unit will be switched on once all external contacts are reconnected. ATTENTION If bus components malfunction, the KWL ventilation unit must be restarted to update the system parameters. The unit will remain switched off until it is restarted. ATTENTION The external contact is not intended for devices which should protect the lives of residents! The use e.g. as a pressure shutdown regulator for fireplaces is not permitted, as the shutting down of the KWL ventilation unit is not 100 % ensured. Example case: Cable break and unit restart – in this case, the malfunctioning external contacts are no longer available for analysis). 32 User Manual KWL®-control system – easyControls UK Function 2: Flue key With regard to the function, If one or more external contacts are closed , the extract air fan is switched off. If the external contact is closed for less than 1 sec., the extract air fan will be switched off for a fixed period of 15 minutes. If an external contact is closed for longer than 1 sec., the extract air fan will be switched off as long as the external contact is closed. Function 3: Activate booster mode With regard to the function, If one or more external contacts are closed , the booster mode is activated. The duration and the fan speed are adopted from the booster mode function, the duration and the fan speed can be adjusted. When the booster mode function has ended, the external contact must be closed again to reactivate the function, and if one or more external contacts are closed at this time, they must be opened beforehand. Once all external contacts are opened, the function can be reactivated. Function 4: Supply air operation With regard to the function, If one or more external contacts are closed , the supply air operation is activated. The fan speed can be adjusted on the following menus. – Comfort controller KWL-BEC ð see Operating Instructions (No. 82 219) – Local web server ð see Page 25 – www.easycontrols.net In order to end the supply air operation, the external contact must be opened and the supply air operation will only end when all external contacts are opened. Function 5: Extract air operation With regard to the function, If one or more external contacts are closed, the extract air operation is activated. The fan speed can be adjusted on the following menus. – Comfort controller KWL-BEC ð see Operating Instructions (No. 82 219) – Local web server ð see Page 25 – www.easycontrols.net In order to end the extract air operation, the external contact must be opened and the extract air operation will only end when all external contacts are opened. NOTE ☞ Funktion 6: Set bypass to winter mode (passive outside air cooling) or summer mode With regard to the function, If one or more external contacts are closed, the summer mode is activated (no heat recovery through heat exchanger). In order to end the summer mode, the external contact must be opened, the summer mode will only end when all external contacts are opened. When function 6 is selected, the normal bypass function is deactivated. 5.0.15 CO2-Steuerung The CO2 control takes care of monitoring the CO2 concentration in the room air. If the CO2 concentration exceeds the default set value, the fan speed is adjusted accordingly. The highest measured value will always be used for regulation. Regulation types continuous” and “stepped“ are available for selection. Continuous: (Factory setting) By entering the set value of CO2 concentration, the CO2 control determines the difference and regulates the fan activation in several small steps. In this respect, there are no quick speed changes and thus no immediately perceivable sound changes. However, fan speed 4 marks the highest possible fan speed (fan activation). Stepped: By entering the set value and the switching steps, the CO2 control determines the required fan speed. This is shown once more in the following table: Set value Switching step Max. measure value Required fan speed 1000 ppm 100 ppm 0-1000 ppm Speed 0 (only possible with min. fan speed 0) 1000 ppm 100 ppm 1001-1100 ppm Speed 1 1000 ppm 100 ppm 1101-1200 ppm Speed 2 1000 ppm 100 ppm 1201-1300 ppm Speed 3 1000 ppm 100 ppm 1301-xxxx ppm Speed 4 33 User Manual KWL®-control system – easyControls UK 5.0.16 VOC control (mixed gas sensor) The VOC control takes care of monitoring the VOC concentration in the room air. If the VOC concentration exceeds the default set value, the fan speed is adjusted accordingly. The highest measured value will always be used for regulation. Regulation types continuous” and “stepped“ are available for selection. Continuous: (Factory setting) By entering the set value of VOC concentration, the VOC control determines the difference and regulates the fan activation in several small steps. In this respect, there are no quick speed changes and thus no immediately perceivable sound changes. However, fan speed 4 marks the highest possible fan speed (fan activation). Stepped: By entering the set value and the switching steps, the VOC control determines the required fan speed. This is shown once more in the following table: Set value Switching step Max. measure value Required fan speed 1000 ppm 100 ppm 0-1000 ppm Speed 0 (only possible with min. fan speed 0) 1000 ppm 100 ppm 1001-1100 ppm Speed 1 1000 ppm 100 ppm 1101-1200 ppm Speed 2 1000 ppm 100 ppm 1201-1300 ppm Speed 3 1000 ppm 100 ppm 1301-xxxx ppm Speed 4 5.0.17 Humidity/temperature control The humidity/temperature control takes care of monitoring the humidity. If the level of humidity exceeds the default set value, the fan speed is adjusted accordingly. The highest measured value will always be used for regulation. Regulation types continuous” and “stepped“ are available for selection. Continuous: (Factory setting) By entering the set value of relative humidity, the humidity control determines the difference and regulates the fan activation in several small steps. In this respect, there are no quick speed changes and thus no immediately perceivable sound changes. However, fan speed 4 marks the highest possible fan speed (fan activation). If the default set value is not reached after 2 hours, the stop time will be activated (adjustable from 0-24 hours) and the humidity control will be deactivated for this stop time. This will ensure that there is no unnecessary ventilation when there are higher levels humidity in the outside air. Stepped: By entering the set value and the switching steps, the humidity control determines the required fan speed. This is shown once more in the following table: Set value Switching step Max. measure value Required fan speed 45 % r.F 10 0-45 % r.F Speed 0 (only possible with min. fan speed 0) 45 % r.F 10 46-55 % r.F Speed 1 45 % r.F 10 56-65 % r.F Speed 2 45 % r.F 10 66-75 % r.F Speed 3 45 % r.F 10 76-99 % r.F Speed 4 If the default set value is not reached after 2 hours, the stop time will be activated (adjustable from 0-24 hours) and the humidity control will be deactivated for this stop time. This will ensure that there is no unnecessary ventilation when there are higher levels humidity in the outside air. 34 User Manual KWL®-control system – easyControls UK 5.0.18 Operating hours counter for supply air and extract air fans The operating hours are summed up for the supply air and extract air fan. The summation is to the minute and if a fan is only operated for 30 sec., this time will not be stored temporarily. The operating hours cannot be deleted and the current number of operating hours should be noted when a new fan is installed. 5.0.19 Operating hours counter for preheater and afterheater The operating hours are summed up for the preheater and afterheater. The summation is to the minute. If a heater is only operated for 30 sec., this time will not be stored temporarily. The percentage activation of the preheater or afterheater is also summed up. The energy consumption can be calculated from both the “operating hours and percentage activation“. The KWL-EVH have an output of 1 kW. The kW/h can be calculated by using the following formula: kW/h= Operating hours × percentage activation × heat output (1 kW) The operating hours cannot be deleted and the current number of operating hours should be noted when a new fan is installed. 5.0.20 Filter change display Filter checks are signalled by the filter change display. The interval can be set between 2 and 12 months. The factory setting is 6 months. If the unit doors are opened, the KWL ventilation unit will assume a change and restart the countdown. 35 User Manual KWL®-control system – easyControls UK 6.0 CHAPTER 6 Unit parameters UNIT PARAMETERS Parameters/settings KWL EC 200 W Date format DD.MM.YYYY DD.MM.YYYY DD.MM.YYYY DD.MM.YYYY DD.MM.YYYY DD.MM.YYYY DD.MM.YYYY DD.MM.YYYY DD.MM.YYYY DD.MM.YYYY DD.MM.YYYY DD.MM.YYYY Summer/wintertime mode activated activated activated activated activated activated activated activated activated activated activated activated Time zone +2 +2 +2 +2 +2 +2 +2 +2 +2 +2 +2 +2 Language German German German German German German German German German German German German Comfort temperature (for configuration 2 PHI) 16,5 °C 16,5 °C 16,5 °C 16,5 °C 16,5 °C 16,5 °C 16,5 °C 16,5 °C 16,5 °C 16,5 °C 16,5 °C 16,5 °C KWL-BEC locked not activ not activ not activ not activ not activ not activ not activ not activ not activ not activ not activ not activ KWL-BE locked not activ not activ not activ not activ not activ not activ not activ not activ not activ not activ not activ not activ ModBus (TCP/IP) activated activated activated activated activated activated activated activated activated activated activated activated Heat exchanger type Plastic Enthalpy Plastic Enthalpy Plastic Enthalpy Plastic Enthalpy Plastic Enthalpy Plastic Plastic Beta-Tester (Option for portal user) not activ not activ not activ not activ not activ not activ not activ not activ not activ not activ not activ not activ Weekly programme Standard 1 Standard 1 Standard 1 Standard 1 Standard 1 Standard 1 Standard 1 Standard 1 Standard 1 Standard 1 Standard 1 Standard 1 Auxliary heater Off Off Off Off Off Off Off Off Off Off Off Off Supply air room temperature 20,0 °C 20,0 °C 20,0 °C 20,0 °C 20,0 °C 20,0 °C 20,0 °C 20,0 °C 20,0 °C 20,0 °C 20,0 °C 20,0 °C Minimum duct temperature 16,5 °C 16,5 °C 16,5 °C 16,5 °C 16,5 °C 16,5 °C 16,5 °C 16,5 °C 16,5 °C 16,5 °C 16,5 °C 16,5 °C Maximum duct temperature 35,0 °C 35,0 °C 35,0 °C 35,0 °C 35,0 °C 35,0 °C 35,0 °C 35,0 °C 35,0 °C 35,0 °C 35,0 °C 35,0 °C Vacation funfction Off Off Off Off Off Off Off Off Off Off Off Off Start date vacation 01.06.2014 01.06.2014 01.06.2014 01.06.2014 01.06.2014 01.06.2014 01.06.2014 01.06.2014 01.06.2014 01.06.2014 01.06.2014 01.06.2014 End date vacation 13.06.2014 13.06.2014 13.06.2014 13.06.2014 13.06.2014 13.06.2014 13.06.2014 13.06.2014 13.06.2014 13.06.2014 13.06.2014 13.06.2014 Operating mode vacation constant constant constant constant constant constant constant constant constant constant constant constant Vacation interval duration 2h 2h 2h 2h 2h 2h 2h 2h 2h 2h 2h 2h 60 Min. 60 Min. 60 Min. 60 Min. 60 Min. 60 Min. 60 Min. 60 Min. 60 Min. 60 Min. 60 Min. Activation time vacation interval 60 Min. KWL EC 200 W ET KWL EC 270 W KWL EC 270 W ET KWL EC 300 W KWL EC 300 W ET KWL EC 370 W KWL EC 370 W ET KWL EC 500 W KWL EC 500 W ET KWL EC 220D KWL EC 340D Booster mode Duration booster mode 180 Min. 180 Min. 180 Min. 180 Min. 180 Min. 180 Min. 180 Min. 180 Min. 180 Min. 180 Min. 180 Min. 180 Min. Fan speed booster mode 0 0 0 0 0 0 0 0 0 0 0 0 Duration stand-by 120 Min. 120 Min. 120 Min. 120 Min. 120 Min. 120 Min. 120 Min. 120 Min. 120 Min. 120 Min. 120 Min. 120 Min. Fan speed stand-by 0 0 0 0 0 0 0 0 0 0 0 0 Extract air temperature 20,0 °C 20,0 °C 20,0 °C 20,0 °C 20,0 °C 20,0 °C 20,0 °C 20,0 °C 20,0 °C 20,0 °C 20,0 °C 20,0 °C Room temperature 20,0 °C 20,0 °C 20,0 °C 20,0 °C 20,0 °C 20,0 °C 20,0 °C 20,0 °C 20,0 °C 20,0 °C 20,0 °C 20,0 °C Outside air limit 18,0 °C 18,0 °C 18,0 °C 18,0 °C 18,0 °C 18,0 °C 18,0 °C 18,0 °C 18,0 °C 18,0 °C 18,0 °C 18,0 °C Offset to auxilary heater temperature 3,0 °C 3,0 °C 3,0 °C 3,0 °C 3,0 °C 3,0 °C 3,0 °C 3,0 °C 3,0 °C 3,0 °C 3,0 °C 3,0 °C 1303 1303 1303 1303 1303 1303 1303 1303 1303 1303 1303 1303 Speed 1 Supply air fan 3 3 3 3 3 3 3 3 3 3 2,5 3 Speed 1 Extract air fan 3 3 3 3 3 3 3 3 3 3 2,5 3 Speed 2 Supply air fan 6 6 5 5 6 6 5 5 6 6 5 5 Speed 2 Extract air fan 6 6 5 5 6 6 5 5 6 6 5 5 Speed 3 Supply air fan 7,5 7,5 6,5 6,5 7,5 7,5 6,5 6,5 7,5 7,5 7 6,5 Speed 3 Extract air fan 7,5 7,5 6,5 6,5 7,5 7,5 6,5 6,5 7,5 7,5 7 6,5 Speed 4 Supply air fan 9 9 7,5 7,5 9 9 7,5 7,5 9 9 8,5 7,5 Speed 4 Extract air fan 9 9 7,5 7,5 9 9 7,5 7,5 9 9 8,5 7,5 Whisper mode Bypass Look controller Password Fan speeds Analogue input (KWL-BE or GLT 0-10V) Assignment fan speeds activated no no no no no no no no no no no no Assignment fan speeds for analogue voltage 0-2 V 0 0 0 0 0 0 0 0 0 0 0 0 Assignment fan speeds for analogue voltage 2-4 V 1 1 1 1 1 1 1 1 1 1 1 1 Assignment fan speeds for analogue voltage 4-6 V 2 2 2 2 2 2 2 2 2 2 2 2 Assignment fan speeds for analogue voltage 6-8 V 3 3 3 3 3 3 3 3 3 3 3 3 Assignment fan speeds for analogue voltage 8-10 V 4 4 4 4 4 4 4 4 4 4 4 4 1 1 1 1 1 1 1 1 1 1 1 1 Minimum fan speed Min. fan speed Fan speed supply air-/extract air operation Supply air operation 2 2 2 2 2 2 2 2 2 2 2 2 Extract air operation 2 2 2 2 2 2 2 2 2 2 2 2 36 User Manual KWL®-control system – easyControls UK Parameters/settings KWL EC 200 W KWL EC 200 W ET KWL EC 270 W KWL EC 270 W ET KWL EC 300 W KWL EC 300 W ET KWL EC 370 W KWL EC 370 W ET KWL EC 500 W KWL EC 500 W ET KWL EC 220D KWL EC 340D Configuration unit 1 (DIBt) 1 (DIBt) 1 (DIBt) 1 (DIBt) 1 (DIBt) 1 (DIBt) 1 (DIBt) 1 (DIBt) 1 (DIBt) 1 (DIBt) 1 (DIBt) 1 (DIBt) Heat exchanger type Plastic Enthalpy Plastic Enthalpy Plastic Enthalpy Plastic Enthalpy Plastic Enthalpy Plastic Plastic Preheater type EH-Basis EH-Basis EH-Basis EH-Basis EH-Basis EH-Basis EH-Basis EH-Basis EH-Basis EH-Basis EH-Basis EH-Basis Preheater ON ON ON ON ON ON ON ON ON ON ON ON 1 (ON/OFF) 1 (ON/OFF) 1 (ON/OFF) 1 (ON/OFF) 1 (ON/OFF) 1 (ON/OFF) 1 (ON/OFF) 1 (ON/OFF) 1 (ON/OFF) 1 (ON/OFF) 1 (ON/OFF) 1 (ON/OFF) Regulation type Continuous Continuous Continuous Continuous Continuous Continuous Continuous Continuous Continuous Continuous Continuous Continuous Set value 45 % r.F 45 % r.F 45 % r.F 45 % r.F 45 % r.F 45 % r.F 45 % r.F 45 % r.F 45 % r.F 45 % r.F 45 % r.F 45 % r.F Switching steps 10 % r.F 10 % r.F 10 % r.F 10 % r.F 10 % r.F 10 % r.F 10 % r.F 10 % r.F 10 % r.F 10 % r.F 10 % r.F 10 % r.F Stop time 2 hrs. 2 hrs. 2 hrs. 2 hrs. 2 hrs. 2 hrs. 2 hrs. 2 hrs. 2 hrs. 2 hrs. 2 hrs. 2 hrs. Description Sensor Address 1 ...-FTF AD1 ...-FTF AD1 ...-FTF AD1 ...-FTF AD1 ...-FTF AD1 ...-FTF AD1 ...-FTF AD1 ...-FTF AD1 ...-FTF AD1 ...-FTF AD1 ...-FTF AD1 ...-FTF AD1 Description Sensor Address 2 ...-FTF AD2 ...-FTF AD2 ...-FTF AD2 ...-FTF AD2 ...-FTF AD2 ...-FTF AD2 ...-FTF AD2 ...-FTF AD2 ...-FTF AD2 ...-FTF AD2 ...-FTF AD2 ...-FTF AD2 Description Sensor Address 3 ...-FTF AD3 ...-FTF AD3 ...-FTF AD3 ...-FTF AD3 ...-FTF AD3 ...-FTF AD3 ...-FTF AD3 ...-FTF AD3 ...-FTF AD3 ...-FTF AD3 ...-FTF AD3 ...-FTF AD3 Description Sensor Address 4 ...-FTF AD4 ...-FTF AD4 ...-FTF AD4 ...-FTF AD4 ...-FTF AD4 ...-FTF AD4 ...-FTF AD4 ...-FTF AD4 ...-FTF AD4 ...-FTF AD4 ...-FTF AD4 ...-FTF AD4 Description Sensor Address 5 ...-FTF AD5 ...-FTF AD5 ...-FTF AD5 ...-FTF AD5 ...-FTF AD5 ...-FTF AD5 ...-FTF AD5 ...-FTF AD5 ...-FTF AD5 ...-FTF AD5 ...-FTF AD5 ...-FTF AD5 Description Sensor Address 6 ...-FTF AD6 ...-FTF AD6 ...-FTF AD6 ...-FTF AD6 ...-FTF AD6 ...-FTF AD6 ...-FTF AD6 ...-FTF AD6 ...-FTF AD6 ...-FTF AD6 ...-FTF AD6 ...-FTF AD6 Description Sensor Address 7 ...-FTF AD7 ...-FTF AD7 ...-FTF AD7 ...-FTF AD7 ...-FTF AD7 ...-FTF AD7 ...-FTF AD7 ...-FTF AD7 ...-FTF AD7 ...-FTF AD7 ...-FTF AD7 ...-FTF AD7 Description Sensor Address 8 ...-FTF AD8 ...-FTF AD8 ...-FTF AD8 ...-FTF AD8 ...-FTF AD8 ...-FTF AD8 ...-FTF AD8 ...-FTF AD8 ...-FTF AD8 ...-FTF AD8 ...-FTF AD8 ...-FTF AD8 Unit configuration External contact Function Humitiy control Configuration Address 1 Only humidity Only humidity Only humidity Only humidity Only humidity Only humidity Only humidity Only humidity Only humidity Only humidity Only humidity Only humidity Configuration Address 2 Only humidity Only humidity Only humidity Only humidity Only humidity Only humidity Only humidity Only humidity Only humidity Only humidity Only humidity Only humidity Configuration Address 3 Only humidity Only humidity Only humidity Only humidity Only humidity Only humidity Only humidity Only humidity Only humidity Only humidity Only humidity Only humidity Configuration Address 4 Only humidity Only humidity Only humidity Only humidity Only humidity Only humidity Only humidity Only humidity Only humidity Only humidity Only humidity Only humidity Configuration Address 5 Only humidity Only humidity Only humidity Only humidity Only humidity Only humidity Only humidity Only humidity Only humidity Only humidity Only humidity Only humidity Configuration Address6 Only humidity Only humidity Only humidity Only humidity Only humidity Only humidity Only humidity Only humidity Only humidity Only humidity Only humidity Only humidity Configuration Address 7 Only humidity Only humidity Only humidity Only humidity Only humidity Only humidity Only humidity Only humidity Only humidity Only humidity Only humidity Only humidity Configuration Address 8 Only humidity Only humidity Only humidity Only humidity Only humidity Only humidity Only humidity Only humidity Only humidity Only humidity Only humidity Only humidity CO2 control Regulation type Continuous Continuous Continuous Continuous Continuous Continuous Continuous Continuous Continuous Continuous Continuous Continuous Set value 1000 ppm 1000 ppm 1000 ppm 1000 ppm 1000 ppm 1000 ppm 1000 ppm 1000 ppm 1000 ppm 1000 ppm 1000 ppm 1000 ppm Switching steps 100 ppm 100 ppm 100 ppm 100 ppm 100 ppm 100 ppm 100 ppm 100 ppm 100 ppm 100 ppm 100 ppm 100 ppm Description Sensor Address 1 ...-CO2 AD1 ...-CO2 AD1 ...-CO2 AD1 ...-CO2 AD1 ...-CO2 AD1 ...-CO2 AD1 ...-CO2 AD1 ...-CO2 AD1 ...-CO2 AD1 ...-CO2 AD1 ...-CO2 AD1 ...-CO2 AD1 Description Sensor Address 2 ...-CO2 AD2 ...-CO2 AD2 ...-CO2 AD2 ...-CO2 AD2 ...-CO2 AD2 ...-CO2 AD2 ...-CO2 AD2 ...-CO2 AD2 ...-CO2 AD2 ...-CO2 AD2 ...-CO2 AD2 ...-CO2 AD2 Description Sensor Address 3 ...-CO2 AD3 ...-CO2 AD3 ...-CO2 AD3 ...-CO2 AD3 ...-CO2 AD3 ...-CO2 AD3 ...-CO2 AD3 ...-CO2 AD3 ...-CO2 AD3 ...-CO2 AD3 ...-CO2 AD3 ...-CO2 AD3 Description Sensor Address 4 ...-CO2 AD4 ...-CO2 AD4 ...-CO2 AD4 ...-CO2 AD4 ...-CO2 AD4 ...-CO2 AD4 ...-CO2 AD4 ...-CO2 AD4 ...-CO2 AD4 ...-CO2 AD4 ...-CO2 AD4 ...-CO2 AD4 Description Sensor Address 5 ...-CO2 AD5 ...-CO2 AD5 ...-CO2 AD5 ...-CO2 AD5 ...-CO2 AD5 ...-CO2 AD5 ...-CO2 AD5 ...-CO2 AD5 ...-CO2 AD5 ...-CO2 AD5 ...-CO2 AD5 ...-CO2 AD5 Description Sensor Address 6 ...-CO2 AD6 ...-CO2 AD6 ...-CO2 AD6 ...-CO2 AD6 ...-CO2 AD6 ...-CO2 AD6 ...-CO2 AD6 ...-CO2 AD6 ...-CO2 AD6 ...-CO2 AD6 ...-CO2 AD6 ...-CO2 AD6 Description Sensor Address 7 ...-CO2 AD7 ...-CO2 AD7 ...-CO2 AD7 ...-CO2 AD7 ...-CO2 AD7 ...-CO2 AD7 ...-CO2 AD7 ...-CO2 AD7 ...-CO2 AD7 ...-CO2 AD7 ...-CO2 AD7 ...-CO2 AD7 Description Sensor Address 8 ...-CO2 AD8 ...-CO2 AD8 ...-CO2 AD8 ...-CO2 AD8 ...-CO2 AD8 ...-CO2 AD8 ...-CO2 AD8 ...-CO2 AD8 ...-CO2 AD8 ...-CO2 AD8 ...-CO2 AD8 ...-CO2 AD8 VOC control Regulation type Continuous Continuous Continuous Continuous Continuous Continuous Continuous Continuous Continuous Continuous Continuous Continuous Set value 1000 ppm 1000 ppm 1000 ppm 1000 ppm 1000 ppm 1000 ppm 1000 ppm 1000 ppm 1000 ppm 1000 ppm 1000 ppm 1000 ppm Switching steps 100 ppm 100 ppm 100 ppm 100 ppm 100 ppm 100 ppm 100 ppm 100 ppm 100 ppm 100 ppm 100 ppm 100 ppm Description Sensor Address 1 ...-VOC AD1 ...-VOC AD1 ...-VOC AD1 ...-VOC AD1 ...-VOC AD1 ...-VOC AD1 ...-VOC AD1 ...-VOC AD1 ...-VOC AD1 ...-VOC AD1 ...-VOC AD1 ...-VOC AD1 Description Sensor Address 2 ...-VOC AD2 ...-VOC AD2 ...-VOC AD2 ...-VOC AD2 ...-VOC AD2 ...-VOC AD2 ...-VOC AD2 ...-VOC AD2 ...-VOC AD2 ...-VOC AD2 ...-VOC AD2 ...-VOC AD2 Description Sensor Address 3 ...-VOC AD3 ...-VOC AD3 ...-VOC AD3 ...-VOC AD3 ...-VOC AD3 ...-VOC AD3 ...-VOC AD3 ...-VOC AD3 ...-VOC AD3 ...-VOC AD3 ...-VOC AD3 ...-VOC AD3 Description Sensor Address 4 ...-VOC AD4 ...-VOC AD4 ...-VOC AD4 ...-VOC AD4 ...-VOC AD4 ...-VOC AD4 ...-VOC AD4 ...-VOC AD4 ...-VOC AD4 ...-VOC AD4 ...-VOC AD4 ...-VOC AD4 Description Sensor Address 5 ...-VOC AD5 ...-VOC AD5 ...-VOC AD5 ...-VOC AD5 ...-VOC AD5 ...-VOC AD5 ...-VOC AD5 ...-VOC AD5 ...-VOC AD5 ...-VOC AD5 ...-VOC AD5 ...-VOC AD5 Description Sensor Address 6 ...-VOC AD6 ...-VOC AD6 ...-VOC AD6 ...-VOC AD6 ...-VOC AD6 ...-VOC AD6 ...-VOC AD6 ...-VOC AD6 ...-VOC AD6 ...-VOC AD6 ...-VOC AD6 ...-VOC AD6 Description Sensor Address 7 ...-VOC AD7 ...-VOC AD7 ...-VOC AD7 ...-VOC AD7 ...-VOC AD7 ...-VOC AD7 ...-VOC AD7 ...-VOC AD7 ...-VOC AD7 ...-VOC AD7 ...-VOC AD7 ...-VOC AD7 Description Sensor Address 8 ...-VOC AD8 ...-VOC AD8 ...-VOC AD8 ...-VOC AD8 ...-VOC AD8 ...-VOC AD8 ...-VOC AD8 ...-VOC AD8 ...-VOC AD8 ...-VOC AD8 ...-VOC AD8 ...-VOC AD8 Filter change Filter change interval 6 months 6 months 6 months 6 months 6 months 6 months 6 months 6 months 6 months 6 months 6 months 6 months Run-on time Supply air fan (heating operation) Run-on time 60 s 60 s 60 s 60 s 60 s 60 s 60 s 60 s 60 s 60 s 60 s 60 s Use DHCP activated activated activated activated activated activated activated activated activated activated activated activated Default IP 192.168.1.199 192.168.1.199 192.168.1.199 192.168.1.199 192.168.1.199 192.168.1.199 192.168.1.199 192.168.1.199 192.168.1.199 192.168.1.199 192.168.1.199 192.168.1.199 Automatic Software updates Data synchronisation with Helios Controls portal Passwords activated activated activated activated activated activated activated activated activated activated activated activated activated activated activated activated activated activated activated activated activated activated activated activated Customer menu 5255 5255 5255 5255 5255 5255 5255 5255 5255 5255 5255 5255 Service menu 0103 0103 0103 0103 0103 0103 0103 0103 0103 0103 0103 0103 Network settings 37 Data privacy Data privacy statement for www.easycontrols.net / security guidelines 1. Helios Ventilatoren GmbH, Helios in short, attaches great importance to the protection of personal data. As a rule, the use of our website is possible without providing personal information. If possible, collecting personal data (like name, address or e-mail addresses) is always done on a voluntary basis. 2. We shall not sell or trade the data that you provide us in the context of this offer. No personal data will be forwarded to any third parties without your express consent, unless required by the law. 3. In order to protect you as the customer, we only use tested encryption techniques. Your personal data is transferred over the internet in encrypted form by means of SSL (Secure Socket Layer) (not accessible for third parties). Thus, you can be sure that your personal information, such as name and address shall only be transferred to our server. We draw your attention to the fact that data transmission and data storage over the Internet involves security risks. Protection of the data against the unauthorised access by third parties is not possible and thus cannot be guaranteed. 4. If you have activated the transmission of information to this web site in the unit settings or the unit controller via this Portal, this shall be unencrypted. However, these transmissions do not contain any personally identifiable information. The information transmitted from the units / controllers to this website includes the following: MAC address of controller, measured values, configuration values / information for the recovery of unit parameters (backup), error messages, unit type, etc. The information is transmitted at various intervals as required for the functionality and the aims which are to be achieved with this website. 5. The data transmitted to Helios shall only be used for the purpose-related provision of the respective service. The commercial use of this information by Helios or companies in the Helios group is not possible. If you visit our website, even if via a link in a newsletter, for system security reasons, the domain name or IP address of the inquiring computer will be temporarily stored. This also applies to the file enquiry, date of access, the HTTP answer code and the website from which the computer is coming to our pages and, finally, the data quantity (bytes) that is transferred are also collected and stored. Furthermore, we shall store some information in the form of 'cookies' on your PC so that we can optimise our presentation of information on the internet according to your preferences (profile data). Your data shall be archived in the long-term to meet legal requirements or for repeated use. You may view and change your personal data online at any time. 6. Cookies: Potential user-side information is stored on this website in the form of Cookies. The purpose of this is to store session-based information, which is used, for example, to record database processes, e.g. the project information over the entire period of the website visit. This information shall be stored as so-called "Cookies" in your web browser. A Cookie is a text-based identifier, which can be sent to your computer by a web server to identify you for the duration the visit. It also serves to store session identification data on this site. You can set up your browser so that it informs you of the placing of cookies. This ensures that the use of cookies is transparent for you. L IN K The current valid Data Privacy and Security Guidelines can be found at www.easycontrols.net All illustrations subject to correction! Keep at hand for future reference! Print No. 82 200/11.14 www.heliosventilatoren.de Service und Information D HELIOS Ventilatoren GmbH + Co KG · Lupfenstraße 8 · 78056 VS-Schwenningen CH HELIOS Ventilatoren AG · Tannstrasse 4 · 8112 Otelfingen A HELIOS Ventilatoren · Postfach 854 · Siemensstraße 15 · 6023 Innsbruck F HELIOS Ventilateurs · Le Carré des Aviateurs · 157 avenue Charles Floquet · 93155 Le Blanc Mesnil Cedex GB HELIOS Ventilation Systems Ltd. · 5 Crown Gate · Wyncolls Road · Severalls Industrial Park · Colchester · Essex · CO4 9HZ Helios Ventilateurs MANUEL D’UTILISATION Régulation KWL® www.easycontrols.net N° 82 200 F FRANÇAIS Helios Ventilateurs MANUEL D’UTILISATION Sommaire CHAPITRE 1. INFORMATIONS GÉNÉRALES . . . . . . . . . . . . . . . . . . . . . . . . . . . . . . . . . . . . . . . . . . . . . . . . . . . .Page 1.0 Informations importantes . . . . . . . . . . . . . . . . . . . . . . . . . . . . . . . . . . . . . . . . . . . . . . . . . . . . . . . . . . . . . . . .Page 1.1 Consignes de sécurité . . . . . . . . . . . . . . . . . . . . . . . . . . . . . . . . . . . . . . . . . . . . . . . . . . . . . . . . . . . . . . . . . .Page 1.2 Demande de garantie - Réserves du constructeur . . . . . . . . . . . . . . . . . . . . . . . . . . . . . . . . . . . . . . . . . . . .Page 1.3 Mise en route . . . . . . . . . . . . . . . . . . . . . . . . . . . . . . . . . . . . . . . . . . . . . . . . . . . . . . . . . . . . . . . . . . . . . . . .Page 1.4 À propos de eaysyControls . . . . . . . . . . . . . . . . . . . . . . . . . . . . . . . . . . . . . . . . . . . . . . . . . . . . . . . . . . . . . .Page 1.5 Configuration du système KWL via le portail Web . . . . . . . . . . . . . . . . . . . . . . . . . . . . . . . . . . . . . . . . . . . . .Page 1.6 Vue d’ensemble des fonctions . . . . . . . . . . . . . . . . . . . . . . . . . . . . . . . . . . . . . . . . . . . . . . . . . . . . . . . . . . .Page 1 1 1 1 1 1 1 2 CHAPITRE 2. ACCESSOIRES . . . . . . . . . . . . . . . . . . . . . . . . . . . . . . . . . . . . . . . . . . . . . . . . . . . . . . . . . . . . . . . .Page 2.0 Accessoires de commande . . . . . . . . . . . . . . . . . . . . . . . . . . . . . . . . . . . . . . . . . . . . . . . . . . . . . . . . . . . . . .Page 2.1 Commutateur à 3 positions . . . . . . . . . . . . . . . . . . . . . . . . . . . . . . . . . . . . . . . . . . . . . . . . . . . . . . . . . . . . . .Page 2.2 Commande à distance numérique . . . . . . . . . . . . . . . . . . . . . . . . . . . . . . . . . . . . . . . . . . . . . . . . . . . . . . . .Page 2.3 Sondes KWL . . . . . . . . . . . . . . . . . . . . . . . . . . . . . . . . . . . . . . . . . . . . . . . . . . . . . . . . . . . . . . . . . . . . . . . . .Page 2.4 Module d’extension . . . . . . . . . . . . . . . . . . . . . . . . . . . . . . . . . . . . . . . . . . . . . . . . . . . . . . . . . . . . . . . . . . . .Page 2.5 Module KNX/EIB . . . . . . . . . . . . . . . . . . . . . . . . . . . . . . . . . . . . . . . . . . . . . . . . . . . . . . . . . . . . . . . . . . . . . .Page 3 3 3 3 3 3 3 CHAPITRE 3. 1ÉRE MISE EN SERVICE DU SYSTÈME KWL . . . . . . . . . . . . . . . . . . . . . . . . . . . . . . . . . . . . . . . . .Page 3.0 Première mise en service du système KWL . . . . . . . . . . . . . . . . . . . . . . . . . . . . . . . . . . . . . . . . . . . . . . . . . .Page 3.1 Première mise en service via un serveur Web local . . . . . . . . . . . . . . . . . . . . . . . . . . . . . . . . . . . . . . . . . . . .Page 3.2 Première mise en service avec le commutateur KWL-BE . . . . . . . . . . . . . . . . . . . . . . . . . . . . . . . . . . . . . . .Page 3.3 Première mise en service avec la commande à distance KWL-BEC . . . . . . . . . . . . . . . . . . . . . . . . . . . . . . .Page 4 4 4 7 8 CHAPITRE 4. FONCTIONS DU SERVEUR WEB LOCAL . . . . . . . . . . . . . . . . . . . . . . . . . . . . . . . . . . . . . . . . . .Page 4.0 Accès au serveur Web local . . . . . . . . . . . . . . . . . . . . . . . . . . . . . . . . . . . . . . . . . . . . . . . . . . . . . . . . . . . .Page 4.1 Comptes utilisateurs . . . . . . . . . . . . . . . . . . . . . . . . . . . . . . . . . . . . . . . . . . . . . . . . . . . . . . . . . . . . . . . . . .Page 4.2 Description du portail Web Helios easyControls . . . . . . . . . . . . . . . . . . . . . . . . . . . . . . . . . . . . . . . . . . . . .Page 12 12 12 12 CHAPITRE 5. DESCRIPTION DES FONCTIONS . . . . . . . . . . . . . . . . . . . . . . . . . . . . . . . . . . . . . . . . . . . . . . . . .Page 30 5.0 Description des fonctions . . . . . . . . . . . . . . . . . . . . . . . . . . . . . . . . . . . . . . . . . . . . . . . . . . . . . . . . . . . . . .Page 30 CHAPITRE 6. PARAMÉTRES DES CENTRALES . . . . . . . . . . . . . . . . . . . . . . . . . . . . . . . . . . . . . . . . . . . . . . . .Page 36 6.0 Paramètres des centrales . . . . . . . . . . . . . . . . . . . . . . . . . . . . . . . . . . . . . . . . . . . . . . . . . . . . . . . . . . . . . .Page 36 Protection des données . . . . . . . . . . . . . . . . . . . . . . . . . . . . . . . . . . . . . . . . . . . . . . . . . . . . . . . . . . . . . . . . . . . .Page 38 Manuel d’utilisation Régulation KWL® – easyControls F 1.0 Informations importantes Il est important de bien lire et de respecter les consignes suivantes pour le bon fonctionnement de l’appareil et pour la sécurité des utilisateurs. Ce manuel d’utilisation est destiné aux installateurs ainsi qu’aux clients finaux. 1.1 Consignes de sécurité Les symboles ci-contre indiquent une consigne de sécurité. Toutes les consignes de sécurité ainsi que les symboles doivent être impérativement respectés, afin d’éviter tout danger ! ATTENTION 1.2 Demande de garantie - Réserves du constructeur Les demandes de garantie et de responsabilités du client sont à vérifier selon les points suivants : – Respect des consignes indiquées dans la notice « Paramétrage et mise en service de la centrale KWL ». – Respect des consignes indiquées dans le manuel d’utilisation « Helios easyControls ». – L’utilisation d’accessoires non fournis, non conseillés ou non proposés par Helios, est interdite. Les dégâts éventuels causés par cette utilisation ne sont pas pris en charge. Si ces consignes ne sont pas respectées, la garantie s’annule. Idem pour les réserves constructeur. REMARQUE ☞ 1.3 Mise en route Il est recommandé de lire attentivement la notice de paramétrage et mise en service KWL (n° 82237) avant le manuel de régulation easyControls (n°82200) ci-présent. La notice de montage et d’utilisation de paramétrage et mise en service contient des informations importantes qui doivent être appliquées avant l’application de la régulation Helios easyControls : consignes de sécurité générales, description détaillée de l’installation, mise en service de la centrale, etc. 1.4 À propos de Helios easyControls Helios easyControls permet d’utiliser et de réguler les centrales Helios KWL® grâce à un serveur Web local sur le module classique (platine de commande) et un raccordement LAN. Les modèles de série équipés avec easyControls peuvent facilement et rapidement être reliés à l’ordinateur réseau et être utilisés et configurés via n’importe quel navigateur Web. Sur PC, portable, avec tablette ou Smartphone. CHAPITRE 1 INFORMATIONS GÉNÉRALES – Fonctions de base du serveur Web local Grâce au raccordement LAN (connexion sur le devant de l’appareil), de nombreuses fonctions de la centrale peuvent directement être configurées via un navigateur Web. Fonctions de base principales : - Assistant de mise en service. - Choix/Paramétrage des vitesses (auto/manuel/vitesse 1-4). - Paramétrage du programme hebdomadaire ventilation/chauffage. - Activation du mode marche forcée/absence/vacances. - Choix des droits d’accès. - Verrouillage du commutateur. - Paramétrage des sondes CO2, COV et humidité. - Mise à jour du Firmware (seulement possible via Internet). - Affichage du changement de filtres, de l’état et durée de fonctionnement, messages d’erreur, etc. 1.5 L IE N Configuration du système KWL via le portail Web http://www.easycontrols.net ➞ À renseigner dans la barre d’adresse du navigateur de recherche Helios easyControls permet un accès direct (identifiant/mot de passe requis) au système de ventilation quelque soit l’endroit où se trouve l’utilisateur : à la maison, en déplacement, via Internet ou LAN (connexion active requise). Les utilisateurs autorisés, le service technique ou la société immobilière peuvent se connecter n’importe quand au portail Helios easyControls pour changer les paramétrages ou vérifier l’état de fonctionnement du système (voir également section 1.6, vue d’ensemble des fonctions). Pos. ➊☞ – Connexion via le réseau PC/Internet La commande de la centrale de ventilation se fait par le menu easyControls via le navigateur Web, par PC/portable ou par tablette/Smartphone via une connexion au routeur LAN/WLAN (TCP/IP ; RJ45). Pos. ➋☞ – Connexion locale via un serveur Web local Connecter le système KWL via un câble LAN (TCP/IP ; RJ45) avec le PC/portable et accéder au menu easyControls avec l’adresse IP http://192.168.1.199 Pos. ➌☞ – Utilisation manuelle Si aucun réseau PC n’est accessible ou si un accès manuel est préférable, easyControls peut être paramétré avec la commande à distance numérique KWL-BEC avec affichage graphique ou avec un commutateur KWL-BE. Pos. ➍☞ – Réseau domotique Le système KWL peut facilement s’intégrer au réseau domotique via le MODBUS installé de série (TCP/IP ; RS 485) ou via un module optionnel KNX (installation en armoire sur rail DIN). Certaines fonctions sont alors supprimées comme par le paramétrage du programme hebdomadaire qui ne pas être programmé via le MODBUS. 1 Vue d’ensemble des fonctions 1.6 Régulation KWL® – easyControls Manuel d’utilisation F RACCORDEMENT TCP/IP Raccordement LAN PC/Portable RACCORDEMENT TCP/IP 8 unités max. 8 unités max. 8 unités max. 8 unités max. CABLE DE LIAISON RJ12 (analogique) acte es KWL Centrales compacte avec serveur Web local du module basique (carte-mère) avec : - Assistant de mise en service - Paramétrage des vitesses - Programme hebdomadaire - Droits d'accès - Commande des sondes - Changement de filtre - etc. Composants de raccordement (accessoire) CABLE DE LIAISON RJ12 (analogique) Concept de régulation KWL L Raccordement routeur LAN/WLAN Interface MODBUS pour Gestion Technique Centralisée (GTC) CABLE DE LIAISON RJ10 (NUMERIQUE) Serveur Web Helios Régulation via le navigateur Front-End Identifiant : xxxx Mot de passe : xxxx RACCORDEMENT INTERNET MOBILE Accès protégé : - Locataire - Service technique - Société immobilière RACCORDEMENT MENT RS-485 OU OU OU 2 RACCORDEMENT RS-485 Manuel d’utilisation Régulation KWL® – easyControls F CHAPITRE 2 2.0 Accessoires de commande La régulation Helios easyControls permet d’utiliser le système de ventilation sans commutateur ou sans accessoires. Les accessoires de commande suivants élargissent le spectre des possibilités de régulation et d’utilisation. 2.1 Commutateur à 3 positions, modèle « KWL-BE » (réf. n°4265) Commutateur à trois positions à glissière avec témoin lumineux, pour montage apparent ou encastré, (voir accessoires). Câble de liaison SL 6/3 (long. 3 m) inclus, autres longueurs disponibles (accessoires). Vue d’ensemble des fonctions : – Sélection des trois vitesses via interrupteur à glissière. – Trois vitesses régulables sur la totalité des plages de fonctionnement. – La fonction Offset permet de décaler la vitesse du ventilateur d’extraction de ±20 %. – La tension de commande peut être mesurée directement sur le commutateur. – Possibilité de raccorder une horloge (WSUP/WSUP-S, réf. n°9990/ 9577, accessoire) pour abaissement de nuit par ex. – Témoin lumineux pour indication visuelle de l’état de fonctionnement. Par exemple : entretien filtre, T° de soufflage <+5 °C, défaut de fonctionnement, etc. Une description complète de l’accessoire est disponible dans la notice du commutateur KWL-BE ! 2.2 Commande à distance (CAD) numérique, modèle « KWL-BEC » (réf. n°4263) Commande à distance numérique avec affichage graphique et menu de navigation intuitif. Possibilité de raccorder jusqu’à 8 unités via la connexion BUS. Vue d’ensemble des fonctions : – Assistant de mise en service. – Sélection des modes de fonctionnement. 4 vitesses de ventilation au choix et possibilité d’avoir un fonctionnement AUTO ou MANUEL. – 4 vitesses de fonctionnement réglables sur la totalité des plages de fonctionnement (voir notice de l'appareil). – Programme Hebdo pour ventilation naturelle et chauffage, standard et sur mesure. – Réglages des paramètres CO2, COV et d'humidité. – Réglage des paramètres de l'appareil via la commande à distance. – Affichage des alarmes, avertissements et informations. – La commande à distance peut être verrouillée avec un mot de passe. Une description complète de l’accessoire est disponible dans la notice de la commande à distance KWL-BEC ! 2.3 Sondes KWL Sonde CO2, modèle « KWL-CO2 » (réf. n°4272) Pour la détection de la concentration de CO2 dans l'air intérieur. Possibilité de raccorder 8 sondes de CO2 max. via le BUS numérique. La vitesse du ventilateur est commandée en fonction de la concentration du taux de CO2. ACCESSOIRES REMARQUE REMARQUE ☞ ☞ Sonde COV, modèle « KWL-VOC » (réf. n°4274) Pour la détection de la concentration de COV dans l'air intérieur. Possibilité de raccorder 8 sondes de COV max. via le BUS numérique. La vitesse du ventilateur est commandée en fonction de la concentration de COV. Sonde d’hygrométrie, modèle « KWL-FTF » (réf. n°4273) Pour la détection de l’humidité relative et pour la mesure de la température de l'air intérieur. Possibilité de raccorder 8 sondes d’hygrométrie max. via le BUS numérique. La vitesse du ventilateur sera activée en fonction de l’humidité relative et/ou de la température de l’air intérieur. REMARQUE ☞ Une description complète est disponible dans chaque notice d’installation et d’utilisation des sondes ! 2.4 Module d’extension, modèle « KWL-EM », pour préchauffage ou chauffage (réf. n°4269) Pour le contrôle des périphériques externes : préchauffage (EHR-R, SEWT ou LEWT) ou chauffage (EH ou WW). Possibilité également de raccorder des registres (air rejeté/extérieur) ou des éléments de surveillance (sorties alarme/état). Une description complète de l’accessoire est disponible dans la notice du module d’extension pour préchauffage et chauffage KWL-EM ! 2.5 Module KNX/EIB, modèle « KWL-KNX » (réf. n°4275) Permet l’intégration du système de ventilation KWL dans un réseau GTC-KNX/EIB. Pour une installation en armoire sur rail DIN. Une description complète est disponible dans la notice d’installation et d’utilisation du module KWL-KNX ! 3 Manuel d’utilisation Régulation KWL® – easyControls F 3.0 CHAPITRE 3 1ÈRE MISE EN SERVICE DU SYSTÈME KWL ATTENTION Première mise en service système KWL Le paramétrage du système KWL est nécessaire pour une utilisation optimale. La première mise en service des systèmes KWL varie selon les différents accessoires connectés (voir sections 4.1 à 4.3). Si la première mise en service du système de ventilation n’est pas correctement effectuée, le système KWL ne pourra pas être mis en service ! 3.1 Première mise en service via un serveur Web local (partie de l’équipement de série) Configurer les paramètres de base via le navigateur d’un Notebook ou d’un PC avec un serveur Web local. Lors de la première mise en service via un serveur Web local, vérifier les points suivants : 1. Notebook avec raccordement LAN et droits d’administrateur. 2. Câble réseau LAN. Étape 1 : Réglage des paramètres réseau >> Le groupe de ventilation KWL est connecté à un routeur configuré en serveur DHCP : Une adresse IP est automatiquement attribuée au groupe KWL par le serveur DHCP. L’adresse MAC des centrales KWL (voir le certificat de la centrale), permet de lire l’adresse IP dans le menu du routeur (voir manuel routeur). Exemple : centrale KWL => IP 192.168.199.22 >> La centrale KWL est directement connectée à un ordinateur Si la centrale est connectée directement à un ordinateur, aucune adresse DHCP ne lui sera attribuée automatiquement. La centrale KWL affiche, au bout de 30 secondes, l’adresse IP suivante : 192.168.1.199 Pour que la centrale KWL soit accessible via un navigateur Web, le champ de l’adresse IP doit être configuré. Renseigner de l’adresse IP 192.168.1.2 pour l’ordinateur Panneau de configuration>Centre réseau et partage>Modifier les paramètres de la carte>Connexion au réseau local>Propriétés>Protocole Internet Version 4 Mot de passe : !helios! ☞ Étape 2 : Configuration de la centrale Entrer l'adresse IP attribuée lors de l'étape 1 dans la barre d'adresse du navigateur (http://192.---.---.---). Pour la 1ère mise en service, indiquer le mot de passe de l’identifiant du technicien SAV : !helios! Le mot de passe pourra être modifié par la suite. Sur la page d’accueil, un message d’information apparaît lorsque la 1ère mise en service n’a pas été effectuée. Pour effectuer la 1ère mise en service, cliquer sur le bouton « 1ère Mise en Service » dans la barre de menu. 4 Manuel d’utilisation Régulation KWL® – easyControls F REMARQUE ☞ 3.1.1 Configuration du système Les configurations les plus importantes peuvent facilement être paramétrées dans le menu de la 1ère mise en service : Langue : Format de la date : Pays : Heure du routeur : Date : Heure : Différence de GMT en heure : Heure hiver/été : Activer le mode d’utilisation « Auto » toujours à minuit : INTERNET § ATTENTION Choix : « allemand », « anglais », « français », etc. Choix : « jj.mm.aaaa », « mm.jj.aaaa », « aaaa.mm.jj ». Choix du pays : Frankreich (France), etc. La date et le fuseau horaire du navigateur Web se synchroniseront quand la case « synchronisation du navigateur Web lors de l’enregistrement » sera cochée. Saisie/Modification : affiche la date et permet de la modifier. Saisie/Modification : affiche l’heure et permet de la modifier. Saisie/Modification : affiche le fuseau horaire (standard pour FR GMT+1 et GMT+2 l’été) et permet de le modifier. En cochant cette case, l’heure s’actualisera automatiquement selon l’heure d’été ou d’hiver. En la décochant, l’heure ne s’actualisera pas. En cochant cette case, le mode de fonctionnement du système KWL se mettra automatiquement à 0h00 lorsqu’il est réinitialisé. Cette section ne concerne que les appareils connectés au réseau et à Internet ! Update logiciel automatique : En cochant cette case, le système recherchera quotidiennement des mises à jour pour le logiciel. S’il trouve une version plus récente du logiciel, la mise à jour se fera automatiquement. L’installation débutera entre 23:00 et 5:00. Conseil : Cocher la case « Updte logiciel automatique ». Synchronisation avec En cochant cette case, tous les paramètres et les mesures effectués portail easyControls : seront envoyés sur le portail www.easycontrols.net. Ce portail est accessible à tout moment pour paramétrer la centrale KWL. Des traitements de données supplémentaires telles que les gradients de températures sont également possibles. Bouton Avec le bouton « Mise à jour du logiciel », la version actuelle du logiciel sera « Mise à jour logiciel » : actualisée. Le firmware de la carte mère, les accessoires et sondes (KWL-EM, KWL-BEC, KWL-CO2, KWL-VOC et KWL-FTF) et le contenu des pages Web seront ainsi mis à jour. Sauvegarder les paramètres de configuration avec le bouton « Mise à jour logiciel » pour ne pas perdre les données ! 3.1.2 Configuration appareil Vitesses 1-4 : Air repris : réglage de la tension de commande du ventilateur de reprise/rejet. Air soufflé : réglage de la tension de commande du ventilateur de soufflage/air extérieur. Vitesse min. : 0 = l’unité peut s’éteindre. 1 = l’unité ne peut pas s’éteindre. Échangeur type : Synthétique, aluminium, enthalpique. Commande 3 positions : Avec cette fonction, le commutateur à 3 positions KWL-BE peut être désactivé. Paramétrage : MARCHE = KWL-BE activé; ARRÊT = KWL-BE désactivé. Préchauffage : Mise en marche ou Arrêt du préchauffage. Commande digitale : Avec cette fonction, la commande à distance numérique KWL-BEC peut être désactivée. MARCHE = KWL-BEC activée; ARRÊT = KWL-BEC désactivée. Mode fonction KWL-EM : Paramétrage des modules d’extension (2 modules max. KWL-EM disponibles). Détails disponibles dans la notice KWL-EM. 5 Manuel d’utilisation Régulation KWL® – easyControls F Configuration : ATTENTION Choix possibles : avec cette fonction, l’installation sera paramétrée sur un des deux modes de fonctionnement programmés: 1 = DIBT : la protection antigel de l’échangeur fonctionne lorsque la température de l’air extérieur est inférieure à 0 °C et est assurée par le préchauffage (option) ou par la réduction du débit d’air entrant. Le ventilateur s’arrête lorsque la température de l’air soufflé est supérieure à 5 °C. 2 = Maison Passive (PHI) : la protection antigel de l’échangeur fonctionne lorsque la température est inférieure à -3 °C (objectif PHI) et est assurée par le préchauffage prescrit par la maison passive. Le ventilateur s’arrête lorsque la température de l’air soufflé est supérieure à 5 °C. Température de confort : La température de confort définie pour la configuration appareil (2 = Maison Passive) est 16,5 °C. Cette exigence a été fixée par la Maison Passive. Si la température de soufflage descend sous 16,5 °C, le préchauffage ou le chauffage (si existant) sont activés pour augmenter la température de soufflage. Possibilité de modifier cette température. Sauvegarder les paramètres de configuration avec le bouton « enregistrer » pour ne pas perdre les données ! 3.1.3 Configuration sonde Fonction : > Contrôle d’humidité : « Paramètres requis » - Humidité seule : - Température seule : - Combiné : - Consigne d’humidité : - Échelle de commutation : - Temps d’arrêt en heures : > Contrôle de CO2 : - Consigne CO2 : - Échelle de commutation : > Contrôle de COV : - Consigne de COV : - Échelle de commutation : ATTENTION L’objectif du contrôle d’humidité est de réduire au max. l’humidité ambiante en augmentant le taux de renouvellement d’air. Le fonctionnement de la sonde d’hygrométrie peut être paramétré entre « arrêt », « par paliers » ou « progressif » : « ARRÊT » Contrôle de l’humidité désactivé. « PAR PALIERS » Contrôle de l’humidité régulé par paliers. « PROGRESSIF » Contrôle de l’humidité régulé de manière progressive. Le taux d’humidité régule la tension de commande des ventilateurs en continu (Vitesses 0-1-2-3-4) entre la vitesse 0 et 4. Sur la commande à distance KWL-BE et la page Web, le pilotage sera indiqué en pourcentage. Seul le taux d’humidité est pris en compte pour contrôler l’humidité, la température ambiante ne sera pas prise en compte pour réguler le chauffage. Seule la température ambiante est prise en compte pour réguler la température, le taux d’humidité ne sera pas pris en compte pour réguler l’humidité. L’unité KWL est régulée en fonction du taux d’humidité et de la température ambiante. Indique le taux d’humidité max. souhaité. Réglage entre 30 et 95 % HR, par palier de 5 %. Indique le seuil de commutation en % d’humidité relative. Le réglage se fait par palier de 5 %, entre 5 et 20 %. Lorsqu’un seuil est dépassé, le palier suivant est activé. Si la valeur de consigne n’est pas atteinte au bout de 2 heures, le contrôle d’humidité passe en mode veille durant la valeur réglée. Réglage entre 0 et 24 h, par palier de 1 h. Le fonctionnement de la sonde CO2 peut être paramétré entre « arrêt », « par paliers » ou « progressif » : « ARRÊT » Contrôle du CO2 désactivé. « PAR PALIERS » Contrôle du CO2 régulé par paliers. « PROGRESSIF » Contrôle du CO2 régulé de manière progressive. Le taux de CO2 régule la tension de commande des ventilateurs en continu, entre la vitesse 0 et 4. Sur la commande à distance KWL-BE et la page Web, le pilotage sera indiqué en pourcentage. Indique le taux de concentration de CO2 max. souhaité. Réglage entre 300 et 2 000 ppm, par palier de 50 ppm. Indique le seuil de commutation. Par ex. : consigne = 1 000 ppm, seuil de commutation = 150 ppm, taux mesuré compris entre 850 et 1 000 ppm, vitesse 1 activée. Si la concentration de CO2 passe à une valeur comprise entre 1 000 et 1 150 ppm, la vitesse suivante s’activera (vitesse 2). Réglage entre 50 et 400 ppm, par palier de 50 ppm. Le fonctionnement de la sonde COV peut être paramétré entre « arrêt », « par paliers » ou « progressif » : « ARRÊT » Contrôle du COV désactivé. « PAR PALIERS » Contrôle du COV régulé par paliers. « PROGRESSIF » Contrôle du COV régulé de manière progressive. Le taux de COV régule la tension de commande des ventilateurs en continu, entre la vitesse 0 et 4. Sur la commande à distance KWL-BE et la page Web, le pilotage sera indiqué en pourcentage. Indique le taux de concentration de COV max. souhaité. Réglage entre 300 et 2 000 ppm, par palier de 50 ppm. Indique le seuil de commutation. Par ex. : consigne = 1 000 ppm, seuil de commutation = 150 ppm, taux mesuré compris entre 850 et 1 000 ppm, vitesse 1 activée. Si la concentration de COV passe à une valeur comprise entre 1 000 et 1 150 ppm, la vitesse suivante s’activera (vitesse 2). Réglage entre 50 et 400 ppm, par palier de 50 ppm. Sauvegarder les paramètres de configuration avec le bouton « enregistrer » pour ne pas perdre les données ! 6 Manuel d’utilisation Régulation KWL® – easyControls F REMARQUE ATTENTION ☞ 3.2 1ère mise en service avec le commutateur KWL-BE (commutateur 3 positions) Lors de la 1ère mise en service avec un KWL-BE, vérifier les points suivants : Si un des accessoires (KWL-EM, KWL-BEC, KWL-CO2, KWL-COV, KWL-FTF ou KWL-KNX) est raccordé, la 1ère mise en service doit se faire via la commande numérique KWL-BEC ou le serveur Web local. Si le système KWL est piloté uniquement via un KWL-BE, sans serveur Web local, la 1ère mise en service s’effectuera en ajustant les seuils de tensions des ventilateurs directement sur le commutateur. 3.2.1 Commutateur 3 positions KWL-BE avec témoin lumineux Le commutateur KWL-BE est livré sans paramétrages usine ! Les vitesses doivent être programmées individuellement ! (voir ci-dessous) Tous les groupes KWL peuvent être pilotés avec le commutateur 3 positions KWL-BE (réf. n°4265 ; boîtier pour montage apparent KWL-APG, réf. n°4270). Possibilité de régler les 3 vitesses de fonctionnement individuellement, en ajustant les potentiomètres présents sur la carte (avec un tournevis cruciforme, Ø 3 mm ; fig. 1). Sur le potentiomètre « OS » possibilité de régler un décalage entre le ventilateur de soufflage et le ventilateur d’extraction de ±20 %. ➀ Interrupteur à glissière ➁ Échelle seuil S1-S3 ➂ Affichage de l’état ou affichage erreur « clignotement » ➂ ➀ Ajustement des potentiomètres ➀à➄ ➁ RJ12 Connecteur Potentiomètre : REMARQUE ☞ ➀ ➁ ➂ ➃ ➄ Vitesse S1 Vitesse S2 Vitesse S3 Offset „OS“ „A1“ ➅ ➆ ➇ ➈ ➉ « GND »(terre) «o» (point de mesure) «S» (point de mesure) «A» (point de mesure) Témoin lumineux LED ➉ ➂ ➁ ➀ ➄ ➇ ➆ ➈ ➃ ➅ GND / 1 2 3 Shunt sur les bornes 2/3 (testé) (paramètre usine, voir SS-1071) ASTUCE : Mesure de tension La tension de commande du ventilateur de soufflage peut être mesurée entre les points GND et S. 3.2.2 Paramétrage des paliers Le commutateur 3 positions KWL-BE comporte 5 potentiomètres : Échelle Nom du potentiomètre S1 S2 S3 OS A1 GND o S A Description Vitesse 1 du ventilateur de soufflage Vitesse 2 du ventilateur de soufflage Vitesse 3 du ventilateur de soufflage Offset* pour ventilateur de reprise Tension commande externe Terre Tension Offset Tension commutateur Tension de commande externe Plage de réglage 0 à 10,0 Volt 1,7 à 10,0 Volt 1,7 à 10,0 Volt 3,7 à 5,5 Volt 1,7 à 10,0 Volt Point de mesure Point de mesure Point de mesure *Offset = Différence entre les ventilateurs d’extraction et de soufflage à ±10 %. Type / Paramètres par défaut KWL EC 200 W KWL EC 300 W KWL EC 500 W KWL EC 220 D KWL EC 340 D KWL EC 270 W KWL EC 370 W Vitesse 1 Vitesse 2 3V 6V 3V 6V 3V 6V 2,5 V 5V 2,5 V 5V 3V 5V 2,7 V 4,8 V 7 Vitesse 3 Selon le modèle, la tension donnée dans le tableau ci-contre est indiquée comme valeur par défaut. 9V 9V Il est cependant indispensable de calculer les 9V débits afin de répondre aux normes DIN 1946, 8,5 V (exemple page 3) et de modifier ces paramètres 8,5 V de base. 7,6 V 7,8 V Manuel d’utilisation Régulation KWL® – easyControls F 3.3 1ère mise en service avec la commande distance KWL-BEC Les paramètres par défaut se règlent facilement sur le commutateur KWL-BEC. Étape 1 : Lorsque le système démarre, il attribue automatiquement une adresse à la commande à distance (CAD) numérique. Si l’adresse est déjà renseignée, elle ne sera pas demandée. Si plusieurs commandes à distance numériques KWL-BEC sont connectées, elles doivent toutes avoir une adresse différente (plage d’adresses de 1 à 8). NOTE IMPORTANTE ☞ Avant de passer à l’étape 2, s’assurer que chaque CAD KWL-BEC a une adresse différente. Une fois l’adresse renseignée, le commutateur redémarre. Étape 2 : L’assistant de la 1ère mise en service est accessible sur toutes les CAD. La 1ère mise en service ne peut s’effectuer qu’à partir d’une seule commande KWL-BEC présente sur le réseau. REMARQUE ☞ Remarque sur le fonctionnement de la structure du menu : La molette de commande (fig 1) permet la rotation vers la droite ou vers la gauche, et de choisir entre « Modifier » ou « Suivant ». Si « Modifier » est écrit sur un fond noir, il se sélectionne en cliquant sur la molette. On défile à l’intérieur des paramètres en tournant la molette, lorsque le paramètre recherché est trouvé, cliquer sur la molette. Puis, cliquer sur « Suivant » pour passer au menu de l’élément suivant. ➀ Affichage numérique ➁ Molette ➂ Cache Interface du logiciel navigation dans le menu en tournant la molette vers la droite ou la gauche. Fonctions des contrôles affichage des fonctions choisies/activées en pressant (Push). MENU ☞ ➀ molette ➁ molette ➂ Configuration du système/Menu principal Langue : Choix page 1: « allemand », « anglais », « français », « italien » (naviguer avec le bouton « autre » vers la page 2). Choix page 2: « autre » > Fonction non proposée. Après la saisie de l’adresse de la CAD, la commande à distance redémarra. Date : Affiche la date et permet de la modifier. Heure : Affiche l’heure et permet de la modifier. Fuseau horaire : Saisie/Modification : Affiche le fuseau horaire (Standard pour FR GMT +1 par ex. GMT +2 l’été) et permet de le modifier. Ajustement du format : Choix possibles : « jj.mm.aaaa », « mm.jj.aaaa », « aaaa.mm.jj ». 8 Manuel d’utilisation Régulation KWL® – easyControls F Heure été/hiver automatique : En cochant la case « MARCHE », l’heure s’actualisera automatiquement selon l’heure d’été ou d’hiver. En cliquant sur la case « ARRÊT », l’heure ne s’actualisera pas. Configuration : Avec cette fonction, l’installation sera paramétrée sur un des deux modes de fonctionnement programmés : 1 = DIBT : la protection antigel de l’échangeur fonctionne lorsque la température de l’air extérieur est inférieure à 0 °C et est assurée par le préchauffage (option) ou par la réduction du débit d’air entrant. Le ventilateur s’arrête lorsque la température de l’air soufflé est supérieure à 5 °C. 2 = PHI : la protection antigel de l’échangeur fonctionne lorsque la température est inférieure à -3 °C (objectif PHI) et est assurée par le préchauffage prescrit par la maison passive. Le ventilateur s’arrête lorsque la température de l’air soufflé est supérieure à 5 °C. « Synthétique », « aluminium », « enthalpique ». Échangeur : Vitesse 1-4 : Vitesse minimale : Air repris : Réglage de la tension de commande du ventilateur de reprise/rejet. Air soufflé : Réglage de la tension de commande du ventilateur de soufflage/air extérieur. Le réglage des vitesses s’effectue lors de la 1ère mise en service sous le menu « paramétrage du système » (mot de passe : 0103), rubrique « vitesses », selon les exemples du chapitre 3, pages 4-11. Vitesse 0 = la vitesse 0 peut être activée. Vitesse 1 = la vitesse 0 ne peut pas être activée (Vitesse 1 min. 1). Préchauffage : Mise en marche ou Arrêt du préchauffage. Contrôle d’humidité : (S’affiche seulement est raccordée !) Le fonctionnement de la sonde d’hygrométrie peut être paramétré entre « arrêt », « à étages » ou « progressif » : « ARRÊT » Contrôle de l’humidité désactivé. « À ÉTAGES » Contrôle de l’humidité régulé par paliers (Vitesses 0-1-2-3-4). « PROGRESSIF » Contrôle de l’humidité régulé de manière progressive. Le taux d’humidité régule la tension de commande des ventilateurs en continu, entre la vitesse 0 et 4. Sur la commande à distance KWL-BEC et la page Web, le pilotage sera indiqué en pourcentage. Paramètres requis Humidité seule : Température seule : Combiné : Seul le taux d’humidité est pris en compte pour contrôler l’humidité, la température ambiante ne sera pas prise en compte pour réguler le chauffage. Seule la température ambiante est prise en compte pour réguler la température, le taux d’humidité ne sera pas pris en compte pour réguler l’humidité. L’unité KWL est régulée en fonction du taux d’humidité et de la température ambiante. Valeur de consigne : Indique le taux d’humidité max. souhaité. Réglage entre 20 et 80 % HR, par palier de 5 %. Réglage usine : 50 %. Seuil de commutation : Indique le seuil de commutation en % d’humidité relative. Le réglage se fait par palier de 5 %, entre 5 et 20 %. Lorsqu’un seuil est dépassé, le palier suivant est activé. 9 Manuel d’utilisation Régulation KWL® – easyControls F Temps d’arrêt en heures : Si la valeur de consigne n’est pas atteinte au bout de 2 heures, le contrôle d’humidité se désactive durant la valeur réglée. Réglage entre 0 et 24 h, par palier de 1 h. Contrôle de CO2 : Le fonctionnement de la sonde CO2 peut être paramétré entre « arrêt », « à étages » ou « progressif » : « ARRÊT » Contrôle du CO2 désactivé. « À ÉTAGES » Contrôle du CO2 régulé par paliers (Vitesses 0-1-2-3-4). « PROGRESSIF » Contrôle du CO2 régulé de manière progressive. Le taux de CO2 régule la tension de commande des ventilateurs en continu, entre la vitesse 0 et la vitesse 4. Sur la commande à distance KWL-BE et la page Web, le pilotage sera indiqué en pourcentage. Valeur de consigne : Indique le taux de concentration de CO2 max. souhaité. Réglage entre 300 et 2 000 ppm, par palier de 50 ppm. Paramètre usine : 1000 ppm (valeur par défaut). Seuil de commutation : Indique le seuil de commutation. Par ex. : consigne = 1 000 ppm, seuil de commutation = 150 ppm, taux mesuré compris entre 850 et 1 000 ppm et vitesse 1 activée. Si la concentration de CO2 passe à une valeur comprise entre 1 000 et 1 150 ppm, la vitesse suivante s’activera (vitesse 2). Réglage entre 50 et 400 ppm, par palier de 50 ppm. Contrôle de COV : Le fonctionnement de la sonde COV peut être paramétré entre « arrêt », « à étages » ou « progressif » : « ARRÊT » Contrôle du COV désactivé. « À ÉTAGES » Contrôle du COV régulé par paliers (Vitesses 0-1-2-3-4). « PROGRESSIF » Contrôle du COV régulé de manière progressive. Le taux de COV régule la tension de commande des ventilateurs en continu, entre la vitesse 0 et la vitesse 4. Sur la commande à distance KWL-BE et la page Web, le pilotage sera indiqué en pourcentage. Valeur de consigne : Indique le taux de concentration de COV max. souhaité. Réglage entre 300 et 2 000 ppm, par palier de 50 ppm. Paramètre usine : 1000 ppm (valeur par défaut). Seuil de commutation : Indique le seuil de commutation. Par ex. : consigne = 1 000 ppm, seuil de commutation = 150 ppm, taux mesuré compris entre 850 et 1 000 ppm et vitesse 1 activée. Si la concentration de COV passe à une valeur comprise entre 1 000 et 1 150 ppm, la vitesse suivante s’activera (vitesse 2). Réglage entre 50 et 400 ppm, par palier de 50 ppm. 10 Manuel d’utilisation Régulation KWL® – easyControls F NOTE ☞ Les paramétrages suivants ne peuvent s’effectuer que si la centrale KWL est connectée à un réseau ou directement à un ordinateur (voir description détaillée, page 24). Sans connexion, les paramétrages sont inutiles. DHCP : Attribution automatique d’une adresse IP via un DHCP : « Oui » (image à gauche) ou « Non ». Adresse IP : Affichage dépendant du paramétrage DHCP (voir ci-dessus) : « ARRÊT » Indiquer l’adresse IP souhaitée. « MARCHE » Affichage de l’adresse IP attribuée (image à gauche). Passerelle : Affichage dépendant du paramétrage du DHCP : « ARRÊT » Indiquer la passerelle souhaitée. « MARCHE » Affichage de la passerelle attribuée. (image à gauche). Masque sous-réseau : Affichage dépendant du paramétrage DHCP: « ARRÊT » Indiquer le masque sous-réseau souhaité: 255.---.---.--« MARCHE » Affichage du masque sous-réseau attribué (image à gauche). Synchronisation avec le portail easyControls : En cochant la case « OUI », tous les paramètres et les mesures effectués seront envoyés sur le portail www.easycontrols.net. Ce portail est accessible à tout moment pour paramétrer la centrale KWL. Des traitements de données supplémentaires telles que les gradients de températures sont également possibles. Mise à jour automatique logiciel : En cochant la case « oui », le système recherchera quotidiennement des mises à jour pour le logiciel. S’il trouve une version plus récente du logiciel, la mise à jour se fera automatiquement. L’installation se déroulera entre 23h00 et 5h00. Conseil ! Cocher la case « Mise à jour automatique des logiciels ». NOTE ☞ Une fois la 1ère mise en service terminée, le commutateur KWL-BEC et le système redémarreront. 11 Manuel d’utilisation Régulation KWL® – easyControls F CHAPITRE 4 FONCTION SERVEUR WEB LOCAL 4.0 Accès au serveur Web local L’attribution de l’adresse IP de la centrale KWL est expliquée section 3.1, étape 1. 4.1 Comptes utilisateurs (voir aussi page 24) – Compte utilisateur « Service » Le compte utilisateur « Service » est uniquement destiné au service technique Helios. – Compte utilisateur « Avanced » (propriétaire) Le compte utilisateur « Avanced » permet de d’utiliser le système de ventilation KWL avec une plage de fonction basique. Le compte utilisateur « Service » est uniquement destiné au propriétaire. – Compte utilisateur « Basic » (locataire) Le compte utilisateur « Basic » permet de d’utiliser le système de ventilation KWL avec une plage de fonction restreinte. Le compte utilisateur « Basique » est uniquement destiné au locataire et les fonctions de base ne peuvent pas être modifiées avec ce compte. 4.2 Description du portail Web Helios easyControls L IE N http://192.168.0.0 ➞ À indiquer dans le champ d’adresse du navigateur MENU à Menu principal « Home » ➊ Vitesse actuelle du ventilateur : Affiche la vitesse activée du ventilateur (exemple : « ventilation nominale » vitesse 2). – Vitesse actuelle du ventilateur en % Dans le menu « configuration > sonde », si min. une sonde (CO2, COV ou hygrométrie) est configurée en fonctionnement progressif, la vitesse actuelle du ventilateur sera indiquée en % dans le sous menu « statut ». Cet affichage en % définit la plage entre la vitesse minimale et maximale du ventilateur en fonction des valeurs du voltage paramétré dans le menu « Configuration > Ventilateur ». ➋ Choix du mode d’utilisation : Le mode actif est signalé par un texte de couleur verte dans le bouton. – Bouton mode « AUTO » L’activation des vitesses du ventilateur définie avec le programme hebdomadaire est relative au temps et les vitesses du ventilateur sont régulées selon les valeurs mesurées des sondes CO2, COV ou humidité (accessoire). – Bouton mode « MAN. » Les vitesses du ventilateur peuvent être ajustées avec les boutons - / +. La vitesse min. du ventilateur est réglée sur 1, la vitesse 0 du ventilateur ne peut être activée. Le mode manuel passera en mode automatique à 0h00, tous les jours. Cette option peut être désactivée en se connectant au portail www.easycontrols.net. ➌ Bouton « Programmes courts » : Cliquer sur le bouton « Programmes courts ». Cela permet d’accéder rapidement aux sous-menus « Activer marche forcée », « Activer mode absence » et « Mode vacances », et, de paramétrer ces programmes courts. Pour plus de détails concernant ces fonctions, voir menu principal « programmes courts » (page 15). ➍ Bouton « l’état du système » : Cliquer sur le bouton « L’état du système ». Cela permet d’accéder rapidement aux sous-menus « Statut » et « Code erreur » et de paramétrer tous les paramètres système. Pour plus de détails concernant ces fonctions, voir menu principal « l’état du système » (page 15). 12 Manuel d’utilisation MENU Régulation KWL® – easyControls à F Menu principal « Programmes courts » ➥ Sous-menu Activer marche forcée ➊ Vitesse du ventilateur : La vitesse du ventilateur peut être ajustée avec les boutons -/+. Cette vitesse durera selon la « Durée (5-180) minutes » indiquée. ➋ Durée (5-180) minutes : La durée du mode « marche forcée » peut être ajustée avec les boutons -10 / +5 / +15. La durée peut être paramétrée de 5 à 180 minutes avec un palier de 5 minutes. ➌ Bouton « Activer » : Le mode « marche forcée » s’activera en cliquant sur ce bouton et l’intitulé du bouton se changera en « Annuler ». Le mode « marche forcée » se désactive en cliquant sur « Annuler ». ➍ Temps restant en minutes : En activant le mode « marche forcée », le temps restant avant désactivation du mode s’affichera. ➥ Sous-menu Activer mode absence ➊ Vitesse du ventilateur : La vitesse du ventilateur peut être ajustée avec les boutons -/+. Cette vitesse durera selon la « Durée (5-180) minutes » indiquée. ➋ Durée (5-180) minutes : La durée du mode « absence » peut être ajustée avec les boutons -10 / +5 / +15. La durée peut être paramétrée de 5 à 180 minutes avec un palier de 5 minutes. ➌ Bouton « Activer » : Le mode « absence » s’activera en cliquant sur ce bouton et l’intitulé du bouton se changera en « Annuler ». Le mode « absence » se désactive en cliquant sur « Annuler ». ➍ Temps restant en minutes : En activant le mode « absence », le temps restant avant désactivation du mode s’affichera. 13 Manuel d’utilisation Régulation KWL® – easyControls F ➥ Sous-menu Mode vacances ➊ Mode vacances : Possibilités : le mode « vacances » possède trois statuts « intervalle », « permanent » et « arrêt ». – Intervalle Le système de ventilation KWL peut être mis en route automatiquement selon des intervalles ajustables avec une vitesse de ventilation/Lüfterstufe déterminée (1 à 4). Le mode « intervalle » démarre avec une date définie de « Début ». La centrale fonctionnera pendant la durée définie (par ex. 60 minutes) à intervalles réguliers (par ex. 2 h) à la vitesse déterminée (1 à 4) jusqu'à la date de fin indiquée. Lorsque la date définie dans le champ « Fin » est atteinte, la centrale KWL bascule en mode automatique. – Permanent Le mode « permanent » démarre à la date définie dans le champ « Début ». Lorsque la date définie dans le champ « Fin » est atteinte, la centrale KWL bascule en mode automatique. – Arrêt Le mode vacances est « désactivé ». NOTE ➋ Vitesse du ventilateur : La vitesse du ventilateur peut être ajustée avec les boutons -/+. La vitesse du ventilateur est activée en mode vacances. ➌ Début : Affiche la date désirée de début du programme. ➍ Fin : Affiche la date désirée de fin du programme. (min. un jour doit se situer entre Début et Fin). ➎ Intervalle : Définit la durée entre 2 fonctionnements programmés (durée de l'arrêt). ➏ Fonctionnement : Définit la durée du fonctionnement programmé. ☞ ➡ Sauvegarder les paramètres en cliquant sur « Enregistrer ». 14 Manuel d’utilisation Régulation KWL® – easyControls MENU F à Menu principal « L’état du système » ➥ Sous-menu Statut 6 7 4 9 2 8 3 1 5 ➊ Mode : Affiche le mode activé. ➋ Vitesse : Affiche la vitesse active. ➌ Vitesse en % : >> Affichage optionnel Dans le menu « configuration > sonde », si min. une sonde (CO2, COV ou hygrométrie) est configurée en fonctionnement progressif, la vitesse actuelle du ventilateur sera indiquée en % dans le sous menu « statut ». Cet affichage en % définit la plage entre la vitesse minimale et maximale du ventilateur en fonction des valeurs du voltage paramétré dans le menu « Configuration > Ventilateur ». ➍ Régime air additionnel (rpm) : affiche la vitesse actuelle de l’air soufflé. Régime air vicié (rpm) : affiche la vitesse actuelle de l’air repris. ➎ By-Pass : Indique si le clapet du by-pass est ouvert (Auf) ou fermé (Zu). ➏ Erreurs : Si une erreur est détectée dans le système de ventilation KWL, l’unité s’éteindra ou des fonctions individuelles se désactiveront selon l’erreur (voir page 17 pour la signification des messages d’erreur). Le nombre affiché indique le nombre d’erreurs. Pour afficher la page « Code erreur », cliquer sur le bouton « Détails ». ➐ Avertissements : Si un état de fonctionnement anormal est détecté dans le système de ventilation KWL, l’unité s’éteindra ou des fonctions individuelles se désactiveront selon l’erreur (voir page 17 pour la signification des messages d’avertissements). Le nombre affiché indique le nombre d’avertissements. Pour afficher la page « Code erreur », cliquer sur le bouton « Détails ». ➑ Infos : La page « Infos » affiche différentes informations concernant les états de fonctionnement, tel le changement de filtre, la protection anti-gel, etc. Le nombre affiché indique le nombre d’informations. Pour afficher la page « Code erreur », cliquer sur le bouton « Détails ». ➒ Valeurs températures : Le système de ventilation KWL est équipé de série avec quatre sondes de température. Des sondes de températures supplémentaires peuvent être ajoutées parmi les accessoires disponibles. (1) (2) (3) (4) (5) (6) (7) T° air extérieur : T° air soufflé : T° air repris : T° air rejeté : Sonde gaine air ext. : Sonde gaine air soufflé : Sonde retour registre WW : Raccordement Raccordement Raccordement Raccordement Raccordement Raccordement Raccordement 15 air extérieur sur centrale KWL EC air soufflé sur centrale KWL EC air repris sur centrale KWL EC sur le côté de l’air rejeté, directement derrière l’échangeur avant préchauffage KWL EM (VHZ) sur gaine air ext. après chauffage KWL EM (NHZ) sur gaine air soufflé sur chauffage KWL EM (NHZ) sur gaine air soufflé Manuel d’utilisation Régulation KWL® – easyControls F ➓ 11 12 13 Pré- / Chauffage (8) Préchauffage = Statuts MARCHE ou ARRÊT Préchauffage marche (en %) : affiche la chaleur actuelle en pourcentage avec préchauffage activé. (9) Chauffage = Statuts MARCHE ou ARRÊT Chauffage marche (en %) : affiche la chaleur actuelle en pourcentage avec le chauffage activé. Paramètres FTF-KWL (hygro) Affiche le statut actuel – Arrêt, Marche ou Progressif. Affiche les sondes d’hygrométrie raccordées : mesure de chaque sonde. Paramètres VOC-KWL (taux de COV) Affiche le statut actuel – Arrêt, Marche ou Progressif. Affiche les sondes de COV raccordées : mesure de chaque sonde. Paramètres CO2-KWL (taux de CO2) Affiche le statut actuel – Arrêt, Marche ou Progressif. Affiche les sondes de CO2 raccordées : mesure de chaque sonde. ➥ Sous-menu Code erreur ➊ Erreurs / Avertissements / Infos : Affiche toutes les erreurs, avertissements et informations possibles. Erreurs : écriture rouge. Avertissements : écriture orange. Infos : écriture verte. La liste complète des erreurs et leurs solutions est consultable page 17 ! NOTE ☞ ➡ Supprimer les messages d’erreurs via le bouton « Acquitter ». 16 Manuel d’utilisation Régulation KWL® – easyControls F Signalisation des erreurs : « Erreurs », «Avertissements » et « Infos » N° Erreur (rouge) 1 2 3 Erreur vitesse ventilateur air soufflé Erreur vitesse ventilateur air rejeté 4 Erreur cartes SD lors de l’écriture de données E-Eprom avec "Mémoire tamplon FLASH PLEINE" Surintensité BUS dépasse la valeur max. 5 6 Avertissement (orange) Infos (vert) Procéder à un changement de filtres Protection anti-gel WT, air extrait seul Reserved Serveur DNS non trouvé (Pas de connexion Internet ?) Solution Changer les filtres ! Vérifier la connexion Internet ! Erreur lors du téléchargement d’une donnée (non disponible ?) Erreur lors du calcul de la somme totale (Erreur dans la transmission des données ?) Erreur de la manipulation de la carte SD (non disponible ?) 7 Platine de régulation : erreur signal de Erreur de lecture sur la carte SD régulation batterie électrique de dégivrage 8 KWL-EM (VHZ) : erreur signal de régulati- Erreur lors du téléchargement d’une on batterie électrique de dégivrage donnée 9 KWL-EM (NHZ) : erreur signal de régulati- Autre erreur on batterie électrique de chauffage 10 Platine : erreur sonde de temp. interne (T1) Air ext. (absente ou rupture de câble) 1. Activer la sonde ! 2. Contrôler le câble ! 11 Platine : erreur sonde de temp. interne (T2) Air soufflé (absente ou rupture de câble) 1. Activer la sonde ! 2. Contrôler le câble ! 12 Platine : erreur sonde de temp. interne (T3) Air repris (absente ou rupture de câble) 1. Activer la sonde ! 2. Contrôler le câble ! 13 Platine : erreur sonde de temp. interne (T4) Air rejeté (absente ou rupture de câble) 1. Activer la sonde ! 2. Contrôler le câble ! 14 Platine : erreur sonde de temp. interne (T1) Air ext. (court-circuit) 15 Platine : erreur sonde de temp. interne (T2) Air soufflé (court-circuit) 16 Platine : erreur sonde de temp. interne (T3) Air repris (court-circuit) 17 Platine : erreur sonde de temp. interne (T4) Air rejeté (court-circuit) 18 KWL-EM configuré comme préchauffage, mais indisponible ou défectueux 19 KWL-EM configuré comme chauffage, mais indisponible ou défectueux 20 KWL-EM (préchauf.) : sonde de gaine (T5) Air ext. (absente ou rupture de câble) 21 KWL-EM (chauff.) : sonde de gaine (T6) Air soufflé (absente ou rupture de câble) 22 KWL-EM (chauff.) : sonde de gaine (T7) Retour registre WW (absente ou rupture de câble) KWL-EM (préchauf.) : sonde de gaine (T5) Air ext. (court-circuit) 23 24 KWL-EM (chauff.) : sonde de gaine (T6) Air soufflé (court-circuit) 25 KWL-EM (chauff.) : sonde de gaine (T7) Retour registre WW (court-circuit) 26 KWL-EM (préchauf.) : limiteur de sécurité automatique 27 KWL-EM (préchauf.) : limiteur de sécurité manuel 28 KWL-EM (chauff.) : limiteur de sécurité automatique 29 KWL-EM (chauff.) : limiteur de sécurité manuel 30 KWL-EM (chauff.) : protection anti-gel WW - Retour < par ex. 7 °C 31 KWL-EM (chauff.) : protection anti-gel WW - Air soufflé < par ex. 7 °C 32 Platine : protection anti-gel WW ext. Température air soufflé <5 °C (seulement PHI) 17 Manuel d’utilisation Régulation KWL® – easyControls F MENU à Menu principal « Horloge hebdomadaire » ➊ EXEMPLE ☞ Profil : Possibilité de choisir parmi les programmes suivants : « Standard 1 », « Standard 2 », « Standard 3 », « Utilisateur 1 », «Utilisateur 2 », « Arrêt ». ➡ Confirmer le choix avec « Enregistrer » ou annuler avec « Annuler ». – Profil « Standard 1 » ➊ ASTUCE Réglage programme hebdo : ! Naviguer entre les champs de sélection avec la touche TAB ! Choix du jour de la semaine : « Lundi » à « Dimanche ». Les choix suivants sont possibles : – Choix de la vitesse souhaitée : de 1 à 4. – Horaire de « 00:00 » à « 23:59 » pendant lequel la centrale fonctionnera selon la vitesse sélectionnée. ➡ Confirmer le choix avec « Enregistrer » ou annuler avec « Annuler ». 18 Manuel d’utilisation Régulation KWL® – easyControls F EXEMPLE – Profil « Utilisateur 1 » ☞ ➊ Réglage programme hebdo : Choix du jour de la semaine : « Lundi » à « Dimanche ». Les choix suivants sont possibles : – Choix de la vitesse souhaitée : de 1 à 4. – Horaire de « 00:00 » à « 23:59 » pendant lequel la centrale fonctionnera selon la vitesse sélectionnée. ➋ Copier les paramètres : Avec le bouton « Tout sélectionner », il est possible de recopier certains jours ou tous. « Activer » ou « désactiver » les cases à cocher ou « Annuler la sélection » . ➡ Confirmer le choix avec « Enregistrer » ou annuler avec « Annuler ». ASTUCE ! Naviguer entre les champs de sélection avec la touche TAB ! Vue d’ensemble : programme hebdo prédéfini « Standard 1-3 ». 19 Manuel d’utilisation Régulation KWL® – easyControls F MENU à Menu principal « Chauffage » ➊ Chauffage : Possibilité de choisir parmi les programmes suivants : « Standard 1 », « Standard 2 », « Constant », « Utilisateur 1 », «Utilisateur 2 », « Arrêt ». ➡ Confirmer le choix avec « Enregistrer » ou annuler avec « Annuler ». EXEMPLE ☞ – Profil chauffage « Standard 1 » Vue d’ensemble : horloge hebdomadaire prédéfinie pour chauffage « Standard 1-2 ». ➡ Confirmer le choix avec « Enregistrer » ou annuler avec « Annuler ». 20 Manuel d’utilisation Régulation KWL® – easyControls F EXEMPLE ☞ ATTENTION – Profil chauffage « Utilisateur 1 » Si aucun module d’extension KWL-EM n’est raccordé, le profil « Chauffage » est désactivé. ➊ Activer le chauffage sur une période de l’année À partir du jour : .... Mois : .... Jusqu’au jour : .... Mois : .... Cette fonction permet d’activer le chauffage pendant une période de temps donnée. ➋ Température Cette fonction n’est disponible que si des sondes de gaine sur l’air soufflé / hygro sont raccordées. – Température de gaine max. (13-40) en °C : Valeur limite haute de température de soufflage afin d'éviter une surchauffe du bâtiment en mi-saison. – Température de gaine min. (10-37) en °C : Valeur limite basse de la température de soufflage pour interdire le free-cooling en été et éviter une consommation d'énergie inutile ➌ Réglage programme hebdo : Choix du jour de la semaine : « Lundi » à « Dimanche ». Les choix suivants sont possibles : – Valeur de la température en °C. – Horaire de « 00:00 » à « 23:59 » pendant lequel la centrale fonctionnera selon la vitesse sélectionnée. ➍ Copier les paramètres : Avec le bouton « Tout sélectionner », il est possible de recopier certains jours ou tous. « Activer » ou « désactiver » les cases à cocher ou « Annuler la sélection ». ➡ Confirmer le choix avec « Enregistrer » ou annuler avec « Annuler ». 21 Manuel d’utilisation Régulation KWL® – easyControls F MENU MENU à à Menu principal « Données techniques » ➊ Information appareil : Données concernant la centrale KWL installée : – Type – Code de sécurité – N° Réf. – Numéro de série – Adresse MAC – Code production ➋ Informations techniques sur Web : Infos appareil / Manuels : > Lien vers le site Helios pour obtenir plus d’informations techniques. Data Security / Disclaimer : Lien vers les notes concernant la protection des données. ➌ Service-Hotline – Votre ligne directe pour nous joindre ! : Service SAV / Service client / Pièces détachées : +(33) (0) 1 48 65 75 61 Menu principal « Accès Web » ➊ NOTE IMPORTANTE ☞ Paramétrages réseau : Paramétrer les configurations suivantes dans le menu « Accès Web » : – Utiliser DHCP : activer statut ➞ Cocher la case ou « désactiver ». En cochant « utiliser DHCP », tous les paramètres réseau seront automatiquement attribués. – Hostname : attribué automatiquement ou renommable au choix. Lorsque le hostname est renommé (« MonKWL » par ex.), la centrale est accessible via le navigateur sans connaissance nécessaire de l’adresse IP. – Adresse IP : attribuée automatiquement ou à déterminer. – Masque sous-réseau : attribué automatiquement ou à déterminer. – Passerelle : attribuée automatiquement ou à déterminer. – Serveur DNS : attribué automatiquement ou à déterminer. – Serveur DNS auxiliaire : attribué automatiquement ou à déterminer. ➡ Confirmer le choix avec « Enregistrer » ou annuler avec « Annuler ». NOTE ✍ Lorsque les paramètres réseau sont renseignés manuellement, les noter. Seule l’adresse IP indiquée donnera accès à l’unité après la sauvegarde ! 22 Manuel d’utilisation Régulation KWL® – easyControls MENU à F Menu principal « Configuration » ➥ Sous-menu Système ➊ Configuration système : Langue : Choix de la langue (9 langues possibles) : « Français », « Deutsch », « English », etc. Format : Choix du format de la date : « jj.mm.aaaa », « mm.jj.aaaa » ou « aaaa.mm.jj ». Location de l’unité : Choix du pays : France, etc. Heure du routeur : Valeur par défaut du système. Différence de GMT en heures : Valeur par défaut du système. Heure du routeur pour sauvegarde : Date : mise à jour simple de la date interne de la centrale. Heure : mise à jour simple de l’heure interne de la centrale. Différence de GMT en heure : réglage en heures du décalage par rapport à l'heure de Greenwich. Heure hiver/été : changement d’heure automatique lorsque la case est cochée. Activer mode de service toujours à minuit : le mode de service du système KWL sera réinitialisé automatiquement à minuit et rebasculera en mode automatique. – Update logiciel automatique : Si cette case est cochée, le système cherchera quotidiennement les mises à jours logiciel disponibles. Si une nouvelle mise à jour est trouvée, elle sera automatiquement installée. La mise à jour s’effectue entre 23h et 05h. Conseil : cocher la case « Update logiciel automatique » ! – Synchronisation avec portail Helios : Si cette case est cochée, tous les états de fonctionnements et valeurs mesurées seront régulièrement envoyés sur le serveur du portail www.easycontrols.net. Ce portail Web est accessible continuellement : il permet d’accéder au système de ventilation et de configurer les paramètres en détail. D’autres possibilités (paramètres sondes de température, etc.) sont également accessibles via le portail Internet easyControls. ATTENTION ➡ Mise à jour logiciel Si les cases « Update logiciel automatique » et « Synchronisation avec portail Helios » sont décochées par l’utilisateur, toute garantie sera annulée ! 23 Manuel d’utilisation Régulation KWL® – easyControls F ➋ États Version logiciel : affiche la version actuelle du logiciel installé. ➋ Nombre de tours Soufflage (rpm) : affiche de nombre actuel du ventilateur de soufflage. Extraction (rpm) : affiche de nombre actuel du ventilateur d’extraction. ➌ Heures de fonctionnement Affiche les heures de fonctionnement à jour pour les unités suivantes : Ventilateur de soufflage ; ventilateur d’extraction ; préchauffage ; chauffage. ➍ % production de chaleur Préchauffage : Chauffage : ➡ Confirmer le choix avec « Enregistrer » ou annuler avec « Annuler ». ➥ Sous-menu Dispositif ➊ Configuration appareil : Dans le menu « Configuration appareil », les paramètres suivants peuvent être définis : Mode : « (1) DIBt » ou « (2) Maison passive ». Préchauffage type : « EH-Basis », « EH-ERW », « SEWT » ou « LEWT ». Préchauffage : « Arrêt » ou « Marche ». Chauffage type : « Électrique » ou « Eau chaude ». Tempo pré-/chauffage : Durée du tempo (en minutes). Échangeur de chaleur type : « Plastique », « Aluminium » ou « Enthalpique ». Contact externe : Fonction 1 à 6. Sortie alarme : « Tous défauts » ou « Défaut isolé ». Commande 3 positions : « Arrêt » ou « Marche ». Commande digitale : « Arrêt », « Marche » ou « Afficher seulement ». ➋ Entretien filtres : Intervalle en mois : 6 (paramétrage usine). Temps restant (en jours) : 180 (par ex.). ➡ Réinitialisation entretien filtre Lorsque le temps restant est écoulé (0 affiché), le filtre (air extérieur) doit être changé. – Sur la commande 3 positions KWL-BE, un clignotement (page 17, erreur 1) indiquera lorsque le temps est écoulé (changement de filtre nécessaire). La réinitialisation pour la commande à 3 positions se fait via la glissière >> glisser l’interrupteur une fois vers le haut puis vers le bas. – Sur la commande à distance KWL-BEC, le message d’erreur « Info 1 » s’affichera. La réinitialisation de la commande à distance doit se faire après le changement de filtre ou après l’ouverture de la trappe de visite. Après le redémarrage, l’intervalle de changement est de 9 mois (possibilité de le paramétrer de 1 à 9 mois). REMARQUE : Si un changement d’intervalle est paramétré (3 mois par exemple) avant le changement de filtre, celui-ci sera pris en compte après le changement de filtre. 24 Manuel d’utilisation Régulation KWL® – easyControls F ➌ Bypass : Activez la période allant de la date : Jour : ... Mois : .... Jour : ... Mois : .... Cette fonction permet d’activer la fonction bypass selon une période définie. Min T° air extérieur en °C : Offset T° air soufflé en °C : 18 (configuration usine). 4 (configuration usine). Refroidissement passif de l’air extérieur : statuts « MARCHE » ou « ARRÊT ». Lors de l’utilisation de la climatisation dans un bâtiment en été, l’échangeur à contre-courant peut être utilisé pour refroidir l’air entrant. Cette fonction s’active avec « Refroidissement passif de l’air extérieur ». ATTENTION Attention ! En activant le refroidissement passif de l’air, l’obturateur doit être retiré (voir photos) pour que toute accumulation de condensation au niveau de l’air extérieur puisse s’évacuer. Une fois la fonction « Refroidissement passif de l’air extérieur » désactivée (hiver), l’obturateur peut être remis. ➍ GTC : En cochant cette case, l’interface MODBUS sera activée. ➎ ATTENTION Restaurer les paramètres usine : Conserver programme hebdo : cocher la case pour l’activer. En activant cette case, toutes les entrées du programme hebdo seront effacées ! Reset réglages usine : ➡ Restaurer ! ➡ Confirmer les paramètres via « Enregistrer » ou alors «Annuler ». Remarque : le temps restant avant changement de filtre ne sera pas changé. ➥ Sous-menu Ventilateur ➊ Configuration ventilateurs Extraction / Soufflage Vitesse 1 : Extraction ... Soufflage ... Vitesse 2 : Extraction ... Soufflage ... Vitesse 3 : Extraction ... Soufflage ... Vitesse 4 : Extraction ... Soufflage ... Vitesse min. : Statut « 0 » ou « 1 » Le choix de la vitesse « 0 » peut être configuré comme fonction d’extinction. 25 Manuel d’utilisation Régulation KWL® – easyControls F Réglage soufflage : Vitesse « 1 à 4 ». Réglage extraction : Vitesse « 1 à 4 ». ➋ Commande 3 positions/ GTC (Gestion Technique Centralisée) : Contrôle de la vitesse : au choix « 0-10 V » (réglage usine). ou « Paliers » avec les sous-menus : – Plage 0-2 V Vitesse 0 – Plage 2-4 V Vitesse 1 – Plage 4-6 V Vitesse 2 – Plage 6-8 V Vitesse 3 – Plage 8-10 V Vitesse 4 ➡ Confirmer les paramètres avec « Sauvegarder » ou alors « Annuler ». ➥ Sous-menu Sondes Toutes les sondes connectées (humidité, CO2, COV) sont affichées. Pour chaque sonde connectée (8 unités max.), il est possible de modifier les paramètres et les consignes dans le champs à côté. La désignation de la sonde peut être modifiée individuellement ! La sonde « KWL-FTF 1 » peut par exemple être renommée en « Salle de bain ». NOTE ✍ ➊ Configuration des sondes de température et d’hygrométrie Contrôle d’humidité - Les choix suivants sont possibles : « Arrêt », « Par paliers », « Progressif ». – KWL-FTF AD1 Hygro seule – KWL-FTF AD2 Hygro seule – KWL-FTF AD3 Hygro seule – KWL-FTF AD4 Hygro seule – KWL-FTF AD5 Hygro seule – KWL-FTF AD6 Hygro seule – KWL-FTF AD7 Hygro seule – KWL-FTF AD8 Hygro seule Consigne d’humidité (20-80) % HR : 45 (réglage usine). Échelle de commutation (5-20) % HR : 10 (réglage usine). Temps d’arrêt en heures (0-24) : 2 heures (réglage usine). ➋ Configuration CO2 Contrôle CO2 - Les choix suivants sont possibles : « Arrêt », « Par paliers », « Progressif ». – KWL-CO2 AD1 – KWL-CO2 AD2 – KWL-CO2 AD3 – KWL-CO2 AD4 – KWL-CO2 AD5 – KWL-CO2 AD6 – KWL-CO2 AD7 – KWL-CO2 AD8 Consigne CO2 (450-2000) ppm : 1000 (réglage usine). Échelle de commutation CO2 (50-200) ppm : 100 (réglage usine). 26 Manuel d’utilisation Régulation KWL® – easyControls F ➌ Configuration COV : Contrôle COV - Les choix suivants sont possibles : « Arrêt », « Par paliers », « Progressif ». – KWL-VOC AD1 – KWL-VOC AD2 – KWL-VOC AD3 – KWL-VOC AD4 – KWL-VOC AD5 – KWL-VOC AD6 – KWL-VOC AD7 – KWL-VOC AD8 Consigne COV (450-2000) ppm: 1200 (réglage usine). Échelle de commutation COV (50-200) ppm : 100 (réglage usine). ➡ Confirmer les changements avec « Sauvegarder » ou alors « Annuler ». MENU à Menu principal « Première mise en service » Toutes les informations et configurations importantes peuvent être vues rapidement et clairement dans ce menu. Une description détaillée des étapes de la « 1ère mise en service » des centrales KWL se trouve dans le chapitre 3, section 3.2. ➡ Confirmer les changements avec « Sauvegarder » ou alors « Annuler ». 27 Manuel d’utilisation Régulation KWL® – easyControls F MENU à Menu principal « Mon compte » ➥ Sous-menu Menü Modus ➊ Mot de passe : !helios! ☞ Mot de passe : !helios! ☞ Vue du menu – Compte de l’utilisateur « Service » Une fois le mot de passe renseigné, le compte utilisateur « Service » permet d’utiliser la centrale KWL avec une plage prédéfinie de fonctions (voir schéma ci-dessous), dédiée spécifiquement au « SAV ». – Compte de l’utilisateur « Advanced » (propriétaire) Une fois le mot de passe renseigné, le compte utilisateur « Advanced » permet d’utiliser la centrale KWL avec une plage prédéfinie de fonctions (voir schéma ci-dessous), dédiée spécifiquement au « propriétaire ». 28 Manuel d’utilisation Régulation KWL® – easyControls F Mot de passe : easy – Compte de l’utilisateur « Basic » (locataire) Une fois le mot de passe renseigné, le compte utilisateur « Basic » permet d’utiliser la centrale KWL avec une plage prédéfinie de fonctions (voir schéma ci-dessous), dédiée spécifiquement au « locataire ». ☞ ➥ Sous-menu Changer le mot de passe ➊ Changer mot de passe Le mot de passe doit composer huits chiffres. Ancien mot de passe : Nouveau mot de passe : Confirmer mot de passe : ➡ Confirmer les changements avec « Sauvegarder » ou alors « Annuler ». ➥ Sous-menu Déconnectez-vous Vous vous êtes déconnecté avec succès ! 29 Manuel d’utilisation Régulation KWL® – easyControls F 5.0 CHAPITRE 5 DESCRIPTION DES FONCTIONS Descriptions des fonctions 5.0.1 System Boot (démarrage système) Après chaque redémarrage du système, tous les composants reliés au BUS numérique sont vérifiés. Si un composant est déconnecté du system boot, un message s’affichera immédiatement (Info 4). Ne pas connecter les composants lorsque l’unité est en marche, ils ne seront reconnus qu’après un redémarrage du système. 5.0.2 Mode ventilation L’unité de ventilation KWL EC peut fonctionner selon deux modes : « manuel » et « auto ». NOTE ☞ Mode manuel : Les accessoires KWL-BE (entrée 0-10 V) et KWL-BEC sont activés en mode « manuel ». Le paramétrage de la ventilation se fait via ces accessoires ou via le serveur Web local avec l’interface Web. Le programme hebdomadaire pour la vitesse des ventilateurs et la régulation en fonction des valeurs mesurées des sondes COV, CO2 et HR sont désactivés. La vitesse des ventilateurs et le signal de commande (en %) dépendent des composants connectés. Si aucun module KWL-BE (entrée 0-10 V) n’est connecté, la vitesse des ventilateurs s’affiche sur l’écran de la KWL-BEC et sur celui du serveur Web local. Si un module KWL-BE (entrée 0-10 V) est connecté, la valeur (%) de la puissance du ventilateur est donnée. Dans ce cas : 0 V = 0 % et 10 V = 100 % (les ventilateurs fonctionnent à partir de 17 %). Le commutateur KWL-BE (entrée 0-10 V) ne peut être utilisé qu’en mode « manuel ». Le changement de fonction « auto » vers « manuel » n’est pas possible avec le commutateur KWL-BE. Mode auto : En mode « auto », la vitesse des ventilateurs est paramétrée avec le programme hebdomadaire. Si les sondes COV, CO2 et HR (accessoires) sont connectées, les valeurs mesurées vont agir sur la vitesse du ventilateur. Si des vitesses différentes sont demandées en interne, la valeur la plus haute sera toujours sélectionnée. L’affichage de la vitesse et de la puissance (%) des ventilateurs dépend des accessoires connectés en cours d’utilisation. Si une sonde COV, CO2 ou HR est connectée avec la configuration « paliers », le palier sera affiché sur l’écran de la KWL-BEC et sur l’interface du serveur Web local. Si toutes les sondes COV, CO2 ou HR sont connectées avec la configuration « paliers », la puissance du ventilateur (%) sera ajoutée. Dans ce cas : 1,7 V = 1 % et Vitesse 4 = 100 % (Vitesse 0 = 0 %). 5.0.3 Marche forcée La fonction « Marche forcée » permet de programmer une vitesse spécifique pour une période donnée. Ce mode peut être activé ou désactivé en tout temps via la KWL-BEC, le serveur Web local, le contact externe ou via le portail easyControls (www.easycontrols.net). La durée et la vitesse de la marche forcée peuvent être paramétrées à l’aide des menus suivants : – Commande à distance KWL-BEC ð voir notice de montage (n° 82219) – Serveur Web local ð voir page 13 – www.easycontrols.net 5.0.4 Mode absence La fonction « Mode absence » permet de programmer une vitesse spécifique pour une période donnée. Ce mode peut être activé ou désactivé en tout temps via la KWL-BEC, le serveur Web local, le contact externe ou via le portail easyControls (www.easycontrols.net). La durée et la vitesse du mode absence peuvent être paramétrés à l’aide de : – Commande à distance KWL-BEC ð voir notice de montage (n° 82219) – Serveur Web local ð voir page 13 – www.easycontrols.net 5.0.5 Programme hebdomadaire Les paliers peuvent être programmés de façon hebdomadaire. Il y a 3 programmes hebdomadaires disponibles en standard et deux autres supplémentaires peuvent être créés. Dix périodes avec des différentes vitesses peuvent être définies par jour. Cette option peut être désactivée si le programme n’est pas désiré. Le programme hebdomadaire est juste actif en mode « auto ». Le programme hebdomadaire peut être paramétré à l’aide de : – Commande à distance KWL-BEC ð voir notice de montage (n° 82219) – Serveur Web local ð voir page 18 – www.easycontrols.net 5.0.6 Programme hebdomadaire de préchauffage/chauffage (accessoire) Avec le programme hebdomadaire de chauffage, la température de soufflage peut être paramétrée en fonction de l’heure. Il y a 2 programmes hebdomadaires disponibles en standard et deux autres supplémentaires peuvent être créés. Avec le mode « constant », possibilité d’une température permanente. Dix périodes avec des différentes vitesses peuvent être définies par jour. Cette option peut être désactivée si le programme n’est pas désiré. Le programme hebdomadaire est actif en modes « manuel » et « automatique ». Le programme hebdomadaire de préchauffage / chauffage peut être paramétré à l’aide de : – Commande à distance KWL-BEC ð voir notice de montage (n° 82219) – Serveur Web local ð voir page 20 – www.easycontrols.net 30 Manuel d’utilisation Régulation KWL® – easyControls F La température d’une pièce peut être paramétrée avec la sonde hygro KWL-FTF. Différents paramètrages sont possibles. Une température minimale et maximale d’air peuvent être paramétrées. Le paramétrage se fait sur la base d’une commande Burst ce qui permet une un paramétrage progressif de la sortie de chaleur entre 0-100 %. NOTE ☞ NOTE IMPORTANTE ☞ Note : – Si le chauffage électrique est activé, la temporisation du soufflage est aussi activée. Si la centrale KWL EC est éteinte, le ventilateur de soufflage fonctionnera. La durée standard du fonctionnement est de 60 secondes et peut être changée à 120 secondes. Lorsque le chauffage n’est plus utile, il s’éteindra. – Le chauffage s’activera seulement si les moteurs ont atteint une vitesse min. de fonctionnement et que la limite max. de température n’est pas atteinte. Les pièces ne peuvent pas être chauffées avec une centrale KWL EC ! Seul l’air soufflé est chauffé. C’est pourquoi il est important de chauffer la pièce ! 5.0.7 Valeurs de sondes Les centrales KWL de série sont livrées avec des sondes de température pour l’air extérieur, l’air soufflé, l’air repris et l’air rejeté. D’autres accessoires sont disponibles tels que d’autres sondes température, mais aussi, des sondes de COV et de CO2. Les valeurs actuelles des sondes peuvent être lues à l’aide de : – Commande à distance KWL-BEC ð voir notice de montage (n° 82219) – Serveur Web local ð voir page 15 – www.easycontrols.net ASTUCE ! Les valeurs de sondes peuvent être vues et analysées sur une année via l’interface easyControls. 5.0.8 Mode vacances Avec le mode vacances, des vacances peuvent être programmées à l’avance. Un cycle de ventilation défini : « intervalle » ou « permanent ». Lorsque la date de début est atteinte, le mode vacances démarre automatiquement. Lorsque la date de fin est atteinte ou lorsque que le programme est désactivé, le mode s’arrête automatiquement. 5.0.9 Protection antigivre de l'échangeur à contre-courant L’échangeur de chaleur à contre-courant a été conçu pour optimiser au maximum l’économie d’énergie. Désormais, l’efficacité de l’échangeur de chaleur est constamment calculée. Ainsi, l’air extérieur, soufflé et repris sont analysés. Si l’efficacité min. de l’échangeur n’est pas atteinte, le préchauffage fonctionnera. Si l’efficacité de l’échangeur n’augmente pas malgré l’activité du préchauffage, le ventilateur de soufflage sera arrêté. 5.0.10 Protection antigel de la batterie à eau chaude La protection anti-gel de la batterie à eau chaude est assurée par une sonde de température placée sur le retour eau chaude et une sonde de gaine. Les sondes sont connectées au module d’extension KWL-EM tout comme la vanne 3 voies et la pompe de circulation.Si la température mesurée sur l’une des deux sondes descend au-dessous de 7 °C, la centrale se met en arrêt d’urgence. Les registres se fermeront, la vanne s'ouvrira et la pompe sera mise en marche. Lorsqu'on utilise une batterie à eau chaude, il convient de raccorder des registres sur l'air neuf et l'air rejeté. NOTE ☞ 5.0.11 Protection anti-gel pour batterie eau chaude indépendante Lorsque la température de soufflage est inférieure à +5 °C, les ventilateurs de soufflage et d’extraction s’éteignent afin de protéger la batterie à eau chaude des dégâts du gel. Le message d’erreur n° 32 (rouge) sera alors affiché. Lorsque la température de soufflage passe au-dessus de 5 °C, les ventilateurs de soufflage et d’extraction se rallument automatiquement. 5.0.12 Préchauffage (accessoires) Selon le modèle, un préchauffage peut être monté dans la centrale ou en gaine de prise d'air extérieur, connecté au module KWL-EM. Le préchauffage a pour fonction de réchauffer l’air extérieur. Cette installation est nécessaire s’il existe un risque de givrage ou si la température de confort de 16,5 °C (donnée du PassivHaus Institut) n’est pas atteinte pour l’air soufflé. Le préchauffage est enclenché par la protection anti-givre et par la température de confort. Le réglage se fait sur le principe de la commande Burst, ce qui permet une régulation progressive d’un chauffage entre 0-100 %. NOTE ☞ Remarques : – La température de confort n’est active que dans une configuration Maison passive (configuration 2). Si un chauffage est également installé, la température de soufflage est augmentée jusque 16,5 °C (critère de confort) avec le chauffage électrique. – Si le préchauffage électrique est activé, le ventilateur de soufflage est également activée. Si la centrale est désactivée, le ventilateur de soufflage post-ventilation continuera à fonctionner pendant 60 sec. en standard (peut être modifiée à 120 sec.). Lorsque le chauffage n'est plus sollicité, la post-ventilation est désactivée. – Le préchauffage s’activera seulement quand le moteur aura atteint une vitesse min, ceci pour éviter le déclenchement des thermostats de sécurité 31 Manuel d’utilisation Régulation KWL® – easyControls F 5.0.13 Bypass La fonction bypass permet de faire entrer l’air extérieur à l’intérieur sans le préchauffer. Ainsi, l’air extérieur n’est pas chauffé par l’échangeur de chaleur. Définition : Bypass fermé ð Utilisation l’hiver avec échangeur de chaleur. Bypass ouvert ð Utilisation l’été sans échangeur de chaleur (air bypassé). Les paramètres de la fonction bypass sont consultables à l’aide de : – Commande à distance KWL-BEC ð voir notice de montage (n° 82219) – Serveur Web local ð voir page 24 – www.easycontrols.net Il existe deux configurations d’utilisation : 1. Aucun préchauffage présent ou actif Dans ce cas, les paramètres « Température de bypass » et « Limite de l’air extérieur » sont pris en compte. La température du bypass indique la température de l’air extrait ou celle de la température intérieure (sondes KWL-FTF paramétrées en tant que « seule » ou « combiné ») à laquelle le bypass doit s’ouvrir. La limite d’air extérieure donnée indique la température à laquelle le bypass doit se fermer (fermeture automatique en hiver). En règle générale, la température de l’air extérieur doit être inférieure à celle de la pièce. Si la température de l’air soufflé et de la pièce sont supérieures à celle du bypass et que la température limite extérieure est atteinte, le bypass sera ouvert. 2. Chauffage actif avec le programme hebdomadaire et la valeur de température de consigne Dans ce cas, les paramètres « OFFSET » et « limite de l’air extérieur » sont pris en compte. La température de soufflage qui se définit dans le menu chauffage (programme hebdomadaire ou valeur de consigne) est la base sur laquelle la température de consigne est ajoutée à l’offset, le total indiquant la température à laquelle l’air extrait ou l’air de la pièce (les sondes HR KWL-FTF sont configurées sur « température seule » ou « combiné ») le bypass s’ouvre. La limite de l’air extérieur donnée est celle à laquelle la température de l’air extérieur ferme le bypass (désactivation automatique l’hiver). En général, la température de l’air extérieur doit être plus basse que celle de l’air extrait ou de celui de la pièce. Si l’air extrait ou la température de la pièce dépasse celle de l’air extrait, le bypass se ferme. L’autre option est « refroidissement passif de l’air extérieur ». Avec cette option, l’air extrait est utilisé pour refroidir l’air sortant au moyen de l’échangeur de chaleur. Cette action combinée à une climatisation et un air extérieur humide (temps humide) entraîne une formation de la condensation. Pour les centrales KWL EC 200 W, KWL EC 300 W et KWL EC 500 W l’ouverture de l’obturateur du condensateur est obligatoire. Avec cette ouverture, l’écoulement des condensats de l’air extérieur vers l’air rejeté se fait sans aucun bruit (le côté de l’air extérieur est sous-pression alors que celui de l’air rejeté est en surpression). La fonction peut s’activer via l’interface easyControls (www.easycontrols.net) ou via le serveur Web local (version supérieure ou égale à Version V2.03). IMPORTANT ☞ ATTENTION – L’ouverture de l’écoulement des condensats doit être vérifiée une fois par an pour les centrales KWL EC 200 W, KWL EC 300 W et KWL EC 500 W. – Pour les autres centrales KWL, la combinaison d’une climatisation avec des conditions météorologiques humides peut conduire à des dégâts des eaux. L’utilisation d’un refroidissement passif de l’air extrait sans climatisation n’est pas critique. Dans des situations extrêmes, la condensation de l’eau peut s’aggraver. 5.0.14 Contact externe Avec l’option « contact externe », les interrupteurs de série peuvent être activés pour différentes fonctions. Avec les accessoires KWL-VOC, KWL-CO2 et KWL-EM (sauf lorsqu'une batterie eau chaude est raccordée) peuvent être connectées aux contacts externes. Les contacts externes peuvent être paramétrés à l’aide de : – Commande à distance KWL-BEC ð voir notice de montage (n° 82219) – Serveur Web local ð voir page 24 – www.easycontrols.net Vue d’ensemble des fonctions : Fonction 1 : brancher ou débrancher le contact externe Avec cette option, un ou plusieurs contacts externes seront ouverts, ou, si un composant est débranché (rupture de câble ou composant défectueux) la centrale KWL s’éteindra. Dans ce cas, les fonctions de sécurité sont activées et il sera affiché « contact externe » sur la commande à distance KWL-BEC et sur la page Internet. La centrale se rallumera une fois que tous les contacts externes seront reconnectés. ATTENTION Si les composants BUS dysfonctionnent, la centrale KWL doit être redémarrée pour que les paramètres sytème soient actualisés. Sans redémarrage, l’appareil reste éteint. ATTENTION Le contact externe n’est pas conçu pour des utilisations censées protéger la vie des habitants ! L’utilisation en tant que détecteur pour les systèmes anti-incendie n’est par exemple pas permise, car la désactivation de la centrale KWL n’est pas assurée à 100 %. Exemple : En cas de coupure de courant ou de redémarrage d’un appareil - dans ce cas, les contacts externes défectueux ne sont plus disponibles pour analyse. 32 Manuel d’utilisation Régulation KWL® – easyControls F Fonction 2 : Touche cheminée Avec cette fonction, si un ou plusieurs contacts sont fermés, le ventilateur de soufflage s’éteindra. Si le contact externe est fermé moins d’une seconde, le ventilateur d’extraction sera éteint pour une période de 15 min. Si un contact externe est fermé plus d’une seconde, le ventilateur d’extraction sera éteint tant que le contact sera fermé. Fonction 3 : Activer le mode marche forcée Avec cette fonction, si un ou plusieurs contacts externes sont femés et la marche forcée activée. La durée et la vitesse de fonctionnement seront repris du mode marche forcée. À la fin du mode « marche forcée », le contact externe doit être refermé pour réactiver la fonction (si un ou plusieurs des contacts sont encore fermés, il faudra d'abord les ouvrir). C'est seulement lorsque tous les contacts sont ouverts que la fonction peut être réactivée. Fonction 4 : Soufflage Avec cette fonction, si un ou plusieurs contacts externes sont fermés, le soufflage s’activera. Les vitesses peuvent être paramétrée à l’aide de : – Commande à distance KWL-BEC ð voir notice de montage (n° 82219) – Serveur Web local ð voir page 25 – www.easycontrols.net Pour que le mode soufflage s’arrête, tous les contacts externes devront être ouverts. Fonction 5 : Reprise Avec cette fonction, si un ou plusieurs contacts externes sont fermés l’extraction s’active. Les vitesses peuvent être paramétrées à l’aide de : – Commande à distance KWL-BEC ð voir notice de montage (n° 82219) – Serveur Web local ð voir page 25 – www.easycontrols.net Pour que le mode reprise s’arrête, tous les contacts externes devront être ouverts. Fonction 6 : Bypass en hiver (refroidissement extérieur passif) ou mode été Avec cette fonction, si un ou plusieurs contacts externes sont fermés, le mode été s’active (l’air n’est pas chauffé via l’échangeur). Pour que le mode été s’arrête, tous les contacts externes doivent être ouverts. NOTE ☞ Lorsque que la fonction 6 est choisie, la fonction bypass normale est désactivée. 5.0.15 Contrôle du taux de CO2 Le contrôle du taux de CO2 permet de suivre le taux de CO2 dans la pièce. Si le taux de CO2 est au-dessus de la valeur de consigne, la vitesse du ventilateur passera au palier suivant. La plus grande valeur mesurée sera toujours choisie. 2 choix de régulation possibles : « progressif » et « par paliers ». Progressif : (réglage usine) En indiquant une valeur de consigne du taux de CO2, le contrôle du taux de CO2 détermine la différence et régule l’utilisation du ventilateurs en différentes petites étapes. Ainsi, aucun changement rapide de vitesse n’est effectué ce qui évite toute nuisance sonore. La vitesse 4 est la vitesse la plus élevée possible (régulation du ventilateur). Par paliers : En indiquant une valeur de consigne et des paliers, le contrôle du taux de CO2 détermine la vitesse nécessaire. Voici un tableau récapitulatif : Valeur de consigne Palier Valeur mesurée max. Vitesses demandées 1000 ppm 100 ppm 0-1000 ppm Vitesse 0 (seulement si vitesse min. 0) 1000 ppm 100 ppm 1001-1100 ppm Vitesse 1 1000 ppm 100 ppm 1101-1200 ppm Vitesse 2 1000 ppm 100 ppm 1201-1300 ppm Vitesse 3 1000 ppm 100 ppm 1301-xxxx ppm Vitesse 4 33 Manuel d’utilisation Régulation KWL® – easyControls F 5.0.16 Contrôle taux de COV (Composants Organiques Volatiles) Le contrôle du taux de COV permet de suivre le taux de COV dans la pièce. Si le taux de COV est au-dessus de la valeur de consigne, la vitesse du ventilateur passera au palier suivant. La plus grande valeur mesurée sera toujours choisie. 2 choix de régulation possibles : « progressif » et « par paliers ». Progressif : (réglage usine) En indiquant une valeur de consigne du taux de COV, le contrôle du taux de COV détermine la différence et régule l’utilisation du ventilateurs en différentes petites étapes. Ainsi, aucun changement rapide de vitesse n’est effectué ce qui évite toute nuisance sonore. La vitesse 4 est la vitesse la plus élevée possible (régulation du ventilateur). Par paliers : En indiquant une valeur de consigne et des paliers, le contrôle du taux de COV détermine la vitesse nécessaire. Voici un tableau récapitulatif : Valeur de consigne Palier Valeur mesurée max. Vitesses demandées 1000 ppm 100 ppm 0-1000 ppm Palier 0 (seulement si vitesse min. 0) 1000 ppm 100 ppm 1001-1100 ppm Palier 1 1000 ppm 100 ppm 1101-1200 ppm Palier 2 1000 ppm 100 ppm 1201-1300 ppm Palier 3 1000 ppm 100 ppm 1301-xxxx ppm Palier 4 5.0.17 Contrôle du taux d’humidité et de température Le contrôle du taux du taux d’humidité et de température permet de suivre le taux d’hygrométrie dans la pièce. Si le taux hygrométrique est au-dessus de la valeur de consigne, la vitesse du ventilateur passera au palier suivant. La plus grande valeur mesurée sera toujours choisie. 2 choix de régulation possibles : « progressif » et « par paliers ». Progressif : (réglage usine) En indiquant une valeur de consigne du taux d’hygrométrie, le contrôle du taux d’hygrométrie détermine la différence et régule l’utilisation du ventilateurs en différentes petites étapes. Ainsi, aucun changement rapide de vitesse n’est effectué ce qui évite toute nuisance sonore. La vitesse 4 est la vitesse la plus élevée. Si la valeur de consigne n’est pas atteinte après 2 heures; le temps d’arrêt (paramétrable de 0 à 24h) s’activera et le contrôleur d’humidité se désactivera le temps de cet arrêt. Ceci permet d’éviter toute ventilation inutile quand le taux d’humidité de l’air extérieur est élevé. Par paliers : En indiquant une valeur de consigne et des paliers, le contrôle du taux d’hygrométrie détermine la vitesse nécessaire. Voici un tableau récapitulatif : Valeur de consigne Palier Valeur mesuée max. Vitesses demandées 45 % HR 10 0-45 % HR Palier 0 (seulement si vitesse min. 0) 45 % HR 10 46-55 % HR Palier 1 45 % HR 10 56-65 % HR Palier 2 45 % HR 10 66-75 % HR Palier 3 45 % HR 10 76-99 % HR Palier 4 Si la valeur de consigne n’est pas atteinte après 2 heures; le temps d’arrêt (paramétrable de 0 à 24h) s’activera et le contrôleur d’humidité se désactivera le temps de cet arrêt. Ceci permet d’éviter toute ventilation inutile quand le taux d’humidité de l’air extérieur est élevé. 34 Manuel d’utilisation Régulation KWL® – easyControls F 5.0.18 Compte des heures d’utilisation pour les ventilateurs de soufflage et d’extraction Toutes les heures d’utilisation pour chaque ventilateur de soufflage et d’extraction sont totalisées. Le total est exprimé en minute. Si un ventilateur fonctionne seulement 30 sec., ce temps ne sera pas temporairement comptabilisé. Les heures d’utilisation ne peuvent pas être supprimées. Le total des heures est à noter si un nouveau ventilateur est installé. 5.0.19 Compte des heures d’utilisation pour le chauffage et le préchauffage Toutes les heures d’utilisation pour pour le chauffage et le préchauffage sont totalisées. Le total est exprimé en minute. Si le chauffage fonctionne seulement 30 sec., ce temps ne sera pas temporairement comptabilisé. Le pourcentage d’utilisation du préchauffage ou du chauffage est aussi totalisé. La consommation d’énergie peut être calculée à partir des heures d’utilisation et du pourcentage d’utilisation. Les KWL-EVH possèdent une puissance de 1 kW. Les kW/h peuvent être calculés avec la formule suivante : kW/h= Heures d’utilisation × pourcentage d’utilisation × puissance du chauffage (1 kW) Les heures d’utilisation ne peuvent pas être supprimées. Le total des heures est à noter si un nouveau ventilateur est installé. 5.0.20 Affichage du changement de filtres L’état des filtres est indiqué sur l’écran de changement de filtres. L’intervalle peut être paramétré entre 2 et 12 mois. Le réglage usine est 6 mois. Si la porte de centrale est ouverte, le compte à rebours sera remis à zéro. 35 Manuel d’utilisation Régulation KWL® – easyControls F 6.0 CHAPITRE 6 Paramètres des centrales PARAMÈTRES DES CENTRALES Paramètres KWL EC 200 W KWL EC 200 W ET KWL EC 270 W KWL EC 270 W ET KWL EC 300 W KWL EC 300 W ET KWL EC 370 W KWL EC 370 W ET KWL EC 500 W KWL EC 500 W ET KWL EC 220 D KWL EC 340 D Format de la date JJ.MM.AAAA JJ.MM.AAAA JJ.MM.AAAA JJ.MM.AAAA JJ.MM.AAAA JJ.MM.AAAA JJ.MM.AAAA JJ.MM.AAAA JJ.MM.AAAA JJ.MM.AAAA JJ.MM.AAAA JJ.MM.AAAA Heure hiver /été activé activé activé activé activé activé activé activé activé activé activé Fuseau horaire +2 +2 +2 +2 +2 +2 +2 +2 +2 +2 +2 +2 Langue allemand allemand allemand allemand allemand allemand allemand allemand allemand allemand allemand allemand Température de confort (pour la configuration 2 PHI) 16,5 °C 16,5 °C 16,5 °C 16,5 °C 16,5 °C 16,5 °C 16,5 °C 16,5 °C 16,5 °C 16,5 °C 16,5 °C 16,5 °C Verrouillage KWL-BEC non-actif non-actif non-actif non-actif non-actif non-actif non-actif non-actif non-actif non-actif non-actif non-actif Verrouillage KWL-BE non-actif non-actif non-actif non-actif non-actif non-actif non-actif non-actif non-actif non-actif non-actif non-actif MODBUS (TCP/IP) activé activé activé activé activé activé activé activé activé activé activé activé Type d’échangeur de chaleur Plastique Enthalpique Plastique Enthalpique Plastique Enthalpique Plastique Enthalpique Plastique Enthalpique Plastique Plastique Testeur beta (Option pour le portail utilisateur) non-actif non-actif non-actif non-actif non-actif non-actif non-actif non-actif non-actif non-actif non-actif non-actif Programme hebdomadaire Standard 1 Standard 1 Standard 1 Standard 1 Standard 1 Standard 1 Standard 1 Standard 1 Standard 1 Standard 1 Standard 1 Standard 1 Chauffage arrêt arrêt arrêt arrêt arrêt arrêt arrêt arrêt arrêrt arrêt arrêt arrêt Air soufflé de l’air ambiant 20,0 °C 20,0 °C 20,0 °C 20,0 °C 20,0 °C 20,0 °C 20,0 °C 20,0 °C 20,0 °C 20,0 °C 20,0 °C 20,0 °C Température de gaine min. 16,5 °C 16,5 °C 16,5 °C 16,5 °C 16,5 °C 16,5 °C 16,5 °C 16,5 °C 16,5 °C 16,5 °C 16,5 °C 16,5 °C Température de gaine max. 35,0 °C 35,0 °C 35,0 °C 35,0 °C 35,0 °C 35,0 °C 35,0 °C 35,0 °C 35,0 °C 35,0 °C 35,0 °C 35,0 °C Mode vacances arrêt arrêt arrêt arrêt arrêt arrêt arrêt arrêt arrêt arrêt arrêt arrêt Date de début des vacances 01.06.2014 01.06.2014 01.06.2014 01.06.2014 01.06.2014 01.06.2014 01.06.2014 01.06.2014 01.06.2014 01.06.2014 01.06.2014 01.06.2014 Date de fin des vacances 13.06.2014 13.06.2014 13.06.2014 13.06.2014 13.06.2014 13.06.2014 13.06.2014 13.06.2014 13.06.2014 13.06.2014 13.06.2014 13.06.2014 Démarrage vacances constant constant constant constant constant constant constant constant constant constant constant constant Durée intervalle vacances 2h 2h 2h 2h 2h 2h 2h 2h 2h 2h 2h 2h Arrêt intervalle vacances 60 min 60 min 60 min 60 min 60 min 60 min 60 min 60 min 60 min 60 min 60 min 60 Min. Durée marche forcée 180 min 180 min 180 min 180 min 180 min 180 min 180 min 180 min 180 min 180 min 180 min 180 Min. Vitesses marche forcée 0 0 0 0 0 0 0 0 0 0 0 0 Durée du mode absence 120 min 120 min 120 min 120 min 120 min 120 min 120 min 120 min 120 min 120 min Vitesses mode absence 0 0 0 0 0 0 0 0 0 0 0 0 Température de l’air soufflé 20,0 °C 20,0 °C 20,0 °C 20,0 °C 20,0 °C 20,0 °C 20,0 °C 20,0 °C 20,0 °C 20,0 °C 20,0 °C 20,0 °C Température ambiante 20,0 °C 20,0 °C 20,0 °C 20,0 °C 20,0 °C 20,0 °C 20,0 °C 20,0 °C 20,0 °C 20,0 °C 20,0 °C 20,0 °C Limitation air extérieur 18,0 °C 18,0 °C 18,0 °C 18,0 °C 18,0 °C 18,0 °C 18,0 °C 18,0 °C 18,0 °C 18,0 °C 18,0 °C 18,0 °C Offset pour température chauffage 3,0 °C 3,0 °C 3,0 °C 3,0 °C 3,0 °C 3,0 °C 3,0 °C 3,0 °C 3,0 °C 3,0 °C 3,0 °C 3,0 °C 1303 1303 1303 1303 1303 1303 1303 1303 1303 1303 1303 1303 Vitesse 1 Ventilateur soufflage 3 3 3 3 3 3 3 3 3 3 2,5 3 Vitesse 1 Ventilateur reprise 3 3 3 3 3 3 3 3 3 3 2,5 3 Vitesse 2 Ventilateur soufflage 6 6 5 5 6 6 5 5 6 6 5 5 Vitesse 2 Ventilateur reprise 6 5 5 6 6 5 5 6 6 5 5 Vitesse 3 Ventilateur soufflage 7,5 7,5 6,5 6,5 7,5 7,5 6,5 6,5 7,5 7,5 7 6,5 Vitesse 3 Ventilateur reprise 7,5 6,5 6,5 7,5 7,5 6,5 6,5 7,5 7,5 7 6,5 Vitesse 4 Ventilateur soufflage 9 9 7,5 7,5 9 9 7,5 7,5 9 9 8,5 7,5 Vitesse 4 Ventilateur reprise 9 7,5 7,5 9 9 7,5 7,5 9 9 8,5 7,5 Marche forcée Mode absence 120 min Bypass Verrouillage commande Mot de passe Vitesses 6 7,5 9 Entrée analogique (KWL-BE ou GTC 0-10 V) Contrôle des vitesses activé non non non non non non non non non non non non Contrôle de la vitesse selon tension analogique 0-2 V 0 0 0 0 0 0 0 0 0 0 0 0 Contrôle de la vitesse selon tension analogique 2-4 V 1 1 1 1 1 1 1 1 1 1 1 1 Contrôle de la vitesse selon tension analogique 4-6 V 2 2 2 2 2 2 2 2 2 2 2 2 Contrôle de la vitesse selon tension analogique 6-8 V 3 3 3 3 3 3 3 3 3 3 3 3 Contrôle de la vitesse selon tension analogique 8-10 V 4 4 4 4 4 4 4 4 4 4 4 4 1 1 1 1 1 1 1 1 1 1 1 Vitesse de ventilation minimale Vitesse min. 1 Configuration des ventilateurs Soufflage 2 2 2 2 2 2 2 2 2 2 2 2 Extraction 2 2 2 2 2 2 2 2 2 2 2 2 36 Manuel d’utilisation Régulation KWL® – easyControls F Paramètres KWL EC 200 W KWL EC 200 W ET KWL EC 270 W KWL EC 270 W ET KWL EC 300 W KWL EC 300 W ET KWL EC 370 W KWL EC 370 W ET KWL EC 500 W KWL EC 500 W ET KWL EC 220 D KWL EC 340 D Configuration de la centrale 1 (DIBt) 1 (DIBt) 1 (DIBt) 1 (DIBt) 1 (DIBt) 1 (DIBt) 1 (DIBt) 1 (DIBt) 1 (DIBt) 1 (DIBt) 1 (DIBt) 1 (DIBt) Type d’échangeur plastique enthalpique plastique enthalpique plastique enthalpique plastique enthalpique plastique enthalpique plastique plastique Préchauffage type EH basique EH basique EH basique EH basique EH basique EH basique EH basique EH basique EH basique EH basique EH basique EH basique Préchauffage marche marche marche marche marche marche marche marche marche marche marche marche Configuration du système Contact externe Fonction 1 (marche/arrêt) 1 (marche/arrêt) 1 (marche/arrêt) 1 (marche/arrêt) 1 (marche/arrêt) 1 (marche/arrêt) 1 (marche/arrêt) 1 (marche/arrêt) 1 (marche/arrêt) 1 (marche/arrêt) 1 (marche/arrêt) 1 (marche/arrêt) Configuration Hygro-T Réglage progressif progressif progressif progressif progressif progressif progressif progressif progressif progressif progressif progressif Valeur de consigne 45 % HR 45 % HR 45 % HR 45 % HR 45 % HR 45 % HR 45 % HR 45 % HR 45 % HR 45 % HR 45 % HR 45 % HR Seuil de commutation 10 % HR 10 % HR 10 % HR 10 % HR 10 % HR 10 % HR 10 % HR 10 % HR 10 % HR 10 % HR 10 % HR 10 % HR Temps d’arrêt 2 heures 2 heures 2 heures 2 heures 2 heures 2 heures 2 heures 2 heures 2 heures 2 heures 2 heures 2 heures Description sonde Adresse 1 ...-FTF AD1 ...-FTF AD1 ...-FTF AD1 ...-FTF AD1 ...-FTF AD1 ...-FTF AD1 ...-FTF AD1 ...-FTF AD1 ...-FTF AD1 ...-FTF AD1 ...-FTF AD1 ...-FTF AD1 Description sonde Adresse 2 ...-FTF AD2 ...-FTF AD2 ...-FTF AD2 ...-FTF AD2 ...-FTF AD2 ...-FTF AD2 ...-FTF AD2 ...-FTF AD2 ...-FTF AD2 ...-FTF AD2 ...-FTF AD2 ...-FTF AD2 Description sonde Adresse 3 ...-FTF AD3 ...-FTF AD3 ...-FTF AD3 ...-FTF AD3 ...-FTF AD3 ...-FTF AD3 ...-FTF AD3 ...-FTF AD3 ...-FTF AD3 ...-FTF AD3 ...-FTF AD3 ...-FTF AD3 Description sonde Adresse 4 ...-FTF AD4 ...-FTF AD4 ...-FTF AD4 ...-FTF AD4 ...-FTF AD4 ...-FTF AD4 ...-FTF AD4 ...-FTF AD4 ...-FTF AD4 ...-FTF AD4 ...-FTF AD4 ...-FTF AD4 Description sonde Adresse 5 ...-FTF AD5 ...-FTF AD5 ...-FTF AD5 ...-FTF AD5 ...-FTF AD5 ...-FTF AD5 ...-FTF AD5 ...-FTF AD5 ...-FTF AD5 ...-FTF AD5 ...-FTF AD5 ...-FTF AD5 Description sonde Adresse 6 ...-FTF AD6 ...-FTF AD6 ...-FTF AD6 ...-FTF AD6 ...-FTF AD6 ...-FTF AD6 ...-FTF AD6 ...-FTF AD6 ...-FTF AD6 ...-FTF AD6 ...-FTF AD6 ...-FTF AD6 Description sonde Adresse 7 ...-FTF AD7 ...-FTF AD7 ...-FTF AD7 ...-FTF AD7 ...-FTF AD7 ...-FTF AD7 ...-FTF AD7 ...-FTF AD7 ...-FTF AD7 ...-FTF AD7 ...-FTF AD7 ...-FTF AD7 Description sonde Adresse 8 ...-FTF AD8 ...-FTF AD8 ...-FTF AD8 ...-FTF AD8 ...-FTF AD8 ...-FTF AD8 ...-FTF AD8 ...-FTF AD8 ...-FTF AD8 ...-FTF AD8 ...-FTF AD8 ...-FTF AD8 Configuration Adresse 1 hygro seule hygro seule hygro seule hygro seule hygro seule hygro seule hygro seule hygro seule hygro seule hygro seule hygro seule hygro seule Configuration Adresse 2 hygro seule hygro seule hygro seule hygro seule hygro seule hygro seule hygro seule hygro seule hygro seule hygro seule hygro seule hygro seule Configuration Adresse 3 hygro seule hygro seule hygro seule hygro seule hygro seule hygro seule hygro seule hygro seule hygro seule hygro seule hygro seule hygro seule Configuration Adresse 4 hygro seule hygro seule hygro seule hygro seule hygro seule hygro seule hygro seule hygro seule hygro seule hygro seule hygro seule hygro seule Configuration Adresse 5 hygro seule hygro seule hygro seule hygro seule hygro seule hygro seule hygro seule hygro seule hygro seule hygro seule hygro seule hygro seule Configuration Adresse 6 hygro seule hygro seule hygro seule hygro seule hygro seule hygro seule hygro seule hygro seule hygro seule hygro seule hygro seule hygro seule Configuration Adresse 7 hygro seule hygro seule hygro seule hygro seule hygro seule hygro seule hygro seule hygro seule hygro seule hygro seule hygro seule hygro seule Configuration Adresse 8 hygro seule hygro seule hygro seule hygro seule hygro seule hygro seule hygro seule hygro seule hygro seule hygro seule hygro seule hygro seule Réglage progressif progressif progressif progressif progressif progressif progressif progressif progressif progressif progressif progressif Valeur de consigne 1000 ppm 1000 ppm 1000 ppm 1000 ppm 1000 ppm 1000 ppm 1000 ppm 1000 ppm 1000 ppm 1000 ppm 1000 ppm 1000 ppm Seuil de commutation 100 ppm 100 ppm 100 ppm 100 ppm 100 ppm 100 ppm 100 ppm 100 ppm 100 ppm 100 ppm 100 ppm 100 ppm Description sonde Adresse 1 ...-CO2 AD1 ...-CO2 AD1 ...-CO2 AD1 ...-CO2 AD1 ...-CO2 AD1 ...-CO2 AD1 ...-CO2 AD1 ...-CO2 AD1 ...-CO2 AD1 ...-CO2 AD1 ...-CO2 AD1 ...-CO2 AD1 Description sonde Adresse 2 ...-CO2 AD2 ...-CO2 AD2 ...-CO2 AD2 ...-CO2 AD2 ...-CO2 AD2 ...-CO2 AD2 ...-CO2 AD2 ...-CO2 AD2 ...-CO2 AD2 ...-CO2 AD2 ...-CO2 AD2 ...-CO2 AD2 Description sonde Adresse 3 ...-CO2 AD3 ...-CO2 AD3 ...-CO2 AD3 ...-CO2 AD3 ...-CO2 AD3 ...-CO2 AD3 ...-CO2 AD3 ...-CO2 AD3 ...-CO2 AD3 ...-CO2 AD3 ...-CO2 AD3 ...-CO2 AD3 Description sonde Adresse 4 ...-CO2 AD4 ...-CO2 AD4 ...-CO2 AD4 ...-CO2 AD4 ...-CO2 AD4 ...-CO2 AD4 ...-CO2 AD4 ...-CO2 AD4 ...-CO2 AD4 ...-CO2 AD4 ...-CO2 AD4 ...-CO2 AD4 Description sonde Adresse 5 ...-CO2 AD5 ...-CO2 AD5 ...-CO2 AD5 ...-CO2 AD5 ...-CO2 AD5 ...-CO2 AD5 ...-CO2 AD5 ...-CO2 AD5 ...-CO2 AD5 ...-CO2 AD5 ...-CO2 AD5 ...-CO2 AD5 Description sonde Adresse 6 ...-CO2 AD6 ...-CO2 AD6 ...-CO2 AD6 ...-CO2 AD6 ...-CO2 AD6 ...-CO2 AD6 ...-CO2 AD6 ...-CO2 AD6 ...-CO2 AD6 ...-CO2 AD6 ...-CO2 AD6 ...-CO2 AD6 Description sonde Adresse 7 ...-CO2 AD7 ...-CO2 AD7 ...-CO2 AD7 ...-CO2 AD7 ...-CO2 AD7 ...-CO2 AD7 ...-CO2 AD7 ...-CO2 AD7 ...-CO2 AD7 ...-CO2 AD7 ...-CO2 AD7 ...-CO2 AD7 Description sonde Adresse 8 ...-CO2 AD8 ...-CO2 AD8 ...-CO2 AD8 ...-CO2 AD8 ...-CO2 AD8 ...-CO2 AD8 ...-CO2 AD8 ...-CO2 AD8 ...-CO2 AD8 ...-CO2 AD8 ...-CO2 AD8 ...-CO2 AD8 Réglage progressif progressif progressif progressif progressif progressif progressif progressif progressif progressif progressif progressif Valeur de consigne 1000 ppm 1000 ppm 1000 ppm 1000 ppm 1000 ppm 1000 ppm 1000 ppm 1000 ppm 1000 ppm 1000 ppm 1000 ppm 1000 ppm Seuil de commutation 100 ppm 100 ppm 100 ppm 100 ppm 100 ppm 100 ppm 100 ppm 100 ppm 100 ppm 100 ppm 100 ppm 100 ppm Description sonde Adresse 1 ...-VOC AD1 ...-VOC AD1 ...-VOC AD1 ...-VOC AD1 ...-VOC AD1 ...-VOC AD1 ...-VOC AD1 ...-VOC AD1 ...-VOC AD1 ...-VOC AD1 ...-VOC AD1 ...-VOC AD1 Description sonde Adresse 2 ...-VOC AD2 ...-VOC AD2 ...-VOC AD2 ...-VOC AD2 ...-VOC AD2 ...-VOC AD2 ...-VOC AD2 ...-VOC AD2 ...-VOC AD2 ...-VOC AD2 ...-VOC AD2 ...-VOC AD2 Description sonde Adresse 3 ...-VOC AD3 ...-VOC AD3 ...-VOC AD3 ...-VOC AD3 ...-VOC AD3 ...-VOC AD3 ...-VOC AD3 ...-VOC AD3 ...-VOC AD3 ...-VOC AD3 ...-VOC AD3 ...-VOC AD3 Description sonde Adresse 4 ...-VOC AD4 ...-VOC AD4 ...-VOC AD4 ...-VOC AD4 ...-VOC AD4 ...-VOC AD4 ...-VOC AD4 ...-VOC AD4 ...-VOC AD4 ...-VOC AD4 ...-VOC AD4 ...-VOC AD4 Description sonde Adresse 5 ...-VOC AD5 ...-VOC AD5 ...-VOC AD5 ...-VOC AD5 ...-VOC AD5 ...-VOC AD5 ...-VOC AD5 ...-VOC AD5 ...-VOC AD5 ...-VOC AD5 ...-VOC AD5 ...-VOC AD5 Description sonde Adresse 6 ...-VOC AD6 ...-VOC AD6 ...-VOC AD6 ...-VOC AD6 ...-VOC AD6 ...-VOC AD6 ...-VOC AD6 ...-VOC AD6 ...-VOC AD6 ...-VOC AD6 ...-VOC AD6 ...-VOC AD6 Description sonde Adresse 7 ...-VOC AD7 ...-VOC AD7 ...-VOC AD7 ...-VOC AD7 ...-VOC AD7 ...-VOC AD7 ...-VOC AD7 ...-VOC AD7 ...-VOC AD7 ...-VOC AD7 ...-VOC AD7 ...-VOC AD7 Description sonde Adresse 8 ...-VOC AD8 ...-VOC AD8 ...-VOC AD8 ...-VOC AD8 ...-VOC AD8 ...-VOC AD8 ...-VOC AD8 ...-VOC AD8 ...-VOC AD8 ...-VOC AD8 ...-VOC AD8 ...-VOC AD8 Configuration CO2 Configuration COV Entretien filtre Intervalle entre changement 6 mois 6 mois 6 mois 6 mois 6 mois 6 mois 6 mois 6 mois 6 mois 6 mois 6 mois 6 mois Temporisation ventilateur de soufflage (mode chauffage) Temps d’arrêt 60 s 60 s 60 s 60 s 60 s 60 s 60 s 60 s 60 s 60 s 60 s 60 s Utilisation DHCP activé activé activé activé activé activé activé activé activé activé activé activé IP par défaut 192.168.1.199 192.168.1.199 192.168.1.199 192.168.1.199 192.168.1.199 192.168.1.199 192.168.1.199 192.168.1.199 192.168.1.199 192.168.1.199 192.168.1.199 192.168.1.199 Paramétrage du réseau Actualisation automatique du activé logiciel Synchronisation des données activé avec l’interface Helios Controls Mots de passe activé activé activé activé activé activé activé activé activé activé activé activé activé activé activé activé activé activé activé activé activé activé Menu client 5255 5255 5255 5255 5255 5255 5255 5255 5255 5255 5255 5255 Menu service 0103 0103 0103 0103 0103 0103 0103 0103 0103 0103 0103 0103 37 Protection des données Protection des données informatiques personnelles pour easycontrols.net / consignes de sécurité 1. Helios Ventilateurs SARL - en abrégé Helios - prend très au sérieux la question de la protection des données personnelles. D'une manière générale, il est possible d'utiliser notre page internet sans fournir de données personnelles. Lorsque des données personnelles (telles le nom, l'adresse ou l'adresse électronique) doivent être collectées lors de la navigation sur nos pages, cela se fait sur une base volontaire dans toute la mesure du possible. 2. Nous n'effectuons aucune opération de vente, ni aucune opération commerciale à partir des données que vous mettez à notre disposition dans le cadre de cette offre. Ces données ne seront pas non plus retransmises à des tiers sans votre assentiment exprès, à moins que nous y soyons tenus légalement. 3. Afin de vous protéger en tant que client, nous ne faisons usage que de techniques de cryptage éprouvées. Vos données personnelles sont retransmises cryptées - elles ne sont donc pas accessibles à des tiers - via Internet au moyen de SSL (Secure Socket Layer). Vous pouvez ainsi être certain que vos données personnelles, telles votre nom ou votre adresse, ne sont transférées qu'à notre serveur. Nous attirons toutefois votre attention sur le fait que le transfert et le stockage des données sur Internet comportent certains risques en termes de sécurité. Il n'est pas possible de protéger les données contre un accès à des personnes non-autorisées et nous ne sommes donc pas en mesure de garantir cette protection. 4. Dès lors que vous activez sur ce portail la transmission d'informations à cette page internet dans les réglages de l'appareil ou via une commande à distance de l'appareil, celle-ci n'est pas cryptée. Mais ces transferts ne contiennent pas d'informations personnelles identifiables. Parmi les informations retransmises à cette page internet à partir de l'appareil / des réglages figurent : l'adresse MAC de la commande, les valeurs mesurées, les valeurs de configuration / les informations pour le rétablissement des paramètres du système (Backup), les messages d'anomalie, les modèles d'appareils, etc. Mais ces informations ne sont retransmises que dans la mesure où elles permettent à cette page internet d'atteindre ses objectifs, et ce à différents intervalles. 5. Les données retransmises à Helios ne sont utilisées que dans l'objectif d'apporter la prestation de service correspondante. Helios ou les entreprises du groupe Helios peuvent en faire usage à des fins publicitaires. Lorsque vous consultez notre site, même depuis un lien dans notre newsletter, le nom du domaine ou l'adresse IP de l'ordinateur à l'origine de la requête sont enregistrés par moments à des fins de sécurité du système. Ceci vaut également pour la demande de fichier, la date d'accès, le code de réponse HTTP et la page internet à partir de laquelle l'ordinateur accède à notre page et enfin pour le flot de données transmis (Bytes). Nous enregistrons également des informations sur votre ordinateur sous forme de ce que l'on appelle des « cookies », afin de pouvoir optimiser la présentation de nos informations sur Internet selon vos préférences (données de profil). Vos informations sont archivées pour une certaine durée, afin de pouvoir répondre aux exigences légales et d'être réutilisées. Vous pouvez à tout moment consulter ou modifier vos données personnelles. 6. Cookies : Il peut arriver que sur cette page internet, des informations relatives à l'utilisateur soient enregistrées sous forme de cookies. Cela sert à enregistrer des informations relatives à la session, qui sont par exemple utilisées pour conserver des processus de bases de données, par exemple des informations de projet sur la durée totale de la consultation du site. Ces informations sont enregistrées sur votre navigateur sous forme de ce que l'on appelle un « cookie ». Un cookie est un identifiant sous forme de texte, qu'un serveur peut envoyer à votre ordinateur, pour l'identifier pendant la durée de votre visite. Sur la page consultée, il ne sert qu'à enregistrer un identifiant de session. Vous pouvez régler votre navigateur de sorte à être informé du placement de cookies, ce qui rendra leur utilisation transparente pour vous. L IE N Les consignes de sécurité et de protection de données valides et actuelles se trouvent sur www.easycontrols.net Illustrations non contractuelles ! Conserver la notice à proximité de l’appareil ! Réf. n°. 82 200/11.14 www.helios-fr.com Service et informations D HELIOS Ventilatoren GmbH + Co KG · Lupfenstraße 8 · 78056 VS-Schwenningen CH HELIOS Ventilatoren AG · Tannstrasse 4 · 8112 Otelfingen A HELIOS Ventilatoren · Postfach 854 · Siemensstraße 15 · 6023 Innsbruck F HELIOS Ventilateurs · Le Carré des Aviateurs · 157 avenue Charles Floquet · 93155 Le Blanc Mesnil Cedex GB HELIOS Ventilation Systems Ltd. · 5 Crown Gate · Wyncolls Road · Severalls Industrial Park · Colchester · Essex · CO4 9HZ