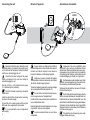
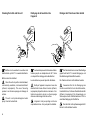
1
Caution! Federal (USA) law restricts this device to sale by or on the order of a dentist. OPERATION INSTRUCTIONS mode d'emploi BEDIENUNGSANLEITUNG INSTRUCCIONES DE EMPLEO ISTRUZIONI PER L’USO BRUKSANVISNING Piezon® 150 Piezon® 250 Piezon 150 Piezon 250 3 4 9 2 5 1A 6 10 7 8 11 1B 7 12 6 15 14 13 16 5 17 Components Components Bestandteile 1 1 1 2 3 4 5 6 7 8 9 10 11 12 13 14 15 16 17 Unit 1A Piezon 150 1B Piezon 250 Water flow rate adjustment Power knob Handpiece holder Handpiece connection External power supply connection Foot pedal connection Water hose connection Bottle Handpiece cord Handpiece Power supply Foot pedal (2 steps) Water supply hose Scaling tips CombiTorque External filter 2 3 4 5 6 7 8 9 10 11 12 13 14 15 16 17 Appareil 1A Piezon 150 1B Piezon 250 Réglage du débit d'eau Pommeau de puissance Pièce à main Support de pièce à main Branchement d'alimentation électrique externe Branchement de la pédale de commande Branchement du conduit d'alimentation d'eau Bouteille Cordon de pièce à main Pièce à main Alimentation électrique externe Pédale de commande (2 positions) Tuyau d'alimentation d'eau Instruments de détartrage CombiTorque Filtre externe 2 3 4 5 6 7 8 9 10 11 12 13 14 15 16 17 Gerät 1A Piezon 150 1B Piezon 250 Einstellung der Wasserdurchsatzmenge Leistungsregler Halter für das Handstück Anschluss des Handstücks Externer Stromversorgungsanschluss Fussschalteranschluss Wasserschlauchanschluss Flasche Handstückkabel Handstück Stromversorgung Fußschalter (2 Positionen) Wasserversorgungsschlauch Scaling-Spitzen CombiTorque Externer Filter EMS supplies units with various accessories. The "Packing list" shows exactly what is included with your unit. EMS fournit cet appareil avec différents accessoires. Le bordereau d’expédition détaille exactement ce qui est inclus avec votre appareil. EMS bietet Geräte in unterschiedlichen Ausstattungsvarianten an. Für die genaue Ausstattung Ihres Geräts beachten Sie bitte die beiliegende „Packing list“. Componentes Componenti Komponenter 1 1 1 2 3 4 5 6 7 8 9 10 11 12 13 14 15 16 17 Unidad 1A Piezon 150 1B Piezon 250 Ajuste del caudal de agua Selector de potencia Soporte del mango Conexión del mango Conexión de la fuente de alimentación externa Conexión para el pedal de mando Conexión de la manguera de agua Botella Cable del mango Mango Fuente de alimentación Pedal (2 pasos) Manguera de suministro de agua Puntas de raspado CombiTorque Filtro externo EMS ofrece este aparato con diferentes variantes de equipamiento. Para información sobre el equipamiento exacto de su aparato, consulte la lista "Packing list" incluida con la unidad. 2 3 4 5 6 7 8 9 10 11 12 13 14 15 16 17 Unità 1A Piezon 150 1B Piezon 250 Regolazione della velocità del flusso d'acqua Manopola d'accensione e regolazione della potenza Supporto per il manipolo Connessione del manipolo Connessione dell'alimentazione esterna Collegamento della pedaliera Connessione del tubo flessibile dell'acqua Bottiglia Cavo del manipolo Manipolo Alimentatore Pedale (2 gradi) Tubo flessibile di alimentazione dell'acqua Punte di ablazione del tartaro CombiTorque Filtro esterno EMS mette a disposizione unità con vari accessori. Nella distinta sono elencati esattamente gli accessori forniti con l'unità. 2 3 4 5 6 7 8 9 10 11 12 13 14 15 16 17 Enhet 1A Piezon 150 1B Piezon 250 Reglering av vattnets flödeshastighet Effektratt Handstyckeshållare Handstyckesanslutning Anslutning för externt nätaggregat Pedalanslutning Anslutning för vattenslang Flaska Handstyckessladd Handstycke Nätaggregat Pedal (2 steg) Slang för vattentillförsel Spetsar för borttagning av plack och tandsten CombiTorque Externt filter EMS tillhandahåller olika tillbehör till enheterna. Förpackningslistan visar exakt vad som medföljer enheten. Dear customers, CHERS CLIENTS, Sehr geehrte Kunden, Thank you for buying a new EMS product. This device meets the highest quality and safety standards. Nous vous félicitons de l'acquisition de ce nouveau produit EMS. Il répond aux plus hautes exigences en matière de qualité et de sécurité. Wir gratulieren Ihnen zum Kauf Ihres neuen EMS-Produkts. Es erfüllt höchste Ansprüche an Qualität und Sicherheit. In order to get the best out of this high-end dental product and ensure the longest working life possible, please read this manual carefully before using or maintaining the product. Afin d’utiliser au mieux votre appareil dentaire haut de gamme et pour lui assurer une durée de vie la plus longue possible, veuillez lire attentivement ce manuel avant d’utiliser l’appareil ou avant toute intervention de maintenance. Für eine optimale Nutzung dieses hochwertigen Zahnpflegeprodukts und die Gewährleistung einer möglichst langen Nutzungsdauer lesen Sie bitte die gesamte Bedienungsanleitung, bevor Sie das Produkt verwenden oder warten. Utilisation qualifiée Sachgemäße Verwendung Ce produit doit faire l’objet d’une utilisation qualifiée, dans le cadre de la médecine dentaire selon les directives de santé et de sécurité, et les mesures de prévention des accidents applicables, et dans le respect des instructions de ce mode d’emploi. Ce produit ne doit être préparé ou entretenu que par un personnel formé pour la protection contre les infections, la protection du personnel et la sécurité des patients. Un usage inadéquat (par ex. manque d’hygiène ou d’entretien), le non-respect des instructions ou l’utilisation d’accessoires ou de pièces non-approuvées par EMS annulent tout dédommagement dans la cadre de la garantie ou toute autre demande de dédommagement. Dieses Produkt wurde für die sachgemäße Verwendung in der Zahnmedizin gemäss der geltenden Gesundheits- und Sicherheitsvorschriften, Unfallverhütungsmaßnahmen sowie der vorliegenden Bedienungsanleitung entwickelt. Das Produkt darf nur von Personen vorbereitet und gewartet werden, die in den Infektionsschutz, Personenschutz und die Patientensicherheit eingewiesen wurden. Eine unsachgemässe Verwendung (z.B. aufgrund mangelhafter Hygiene oder Wartung), Nichtbeachtung unserer Bedienungsanleitung oder die Verwendung von Zubehör und Einzelteilen, die nicht von EMS genehmigt wurden, hat das Erlöschen aller Gewährleistungsansprüche und aller anderen Ansprüche zur Folge. Qualified use This product is only intended for qualified use in dental medicine according to the applicable health and safety regulations, accident prevention measures and in observance of these instructions for use. The product must only be prepared and maintained by persons who have been instructed in infection protection, personal protection and patient safety. Improper use (e.g. due to lack of hygiene or maintenance), non-compliance with our instructions or the use of accessories and spare parts not approved by EMS invalidates all claims under warranty and any other claims. Qualifications of the user The product has been developed and designed for the target group “dentists, dental hygienists, dental employees (prophylaxis) and dental assistants”. For further details on the various instruments and their scopes of application, please refer to the operation instructions supplied with your Piezon system or available from the distributor in your country. Utilisateur qualifié Ce produit a été conçu et développé pour des dentistes, des hygiénistes dentaires, du personnel dentaire (prophylaxie) et des assistant(e)s dentaires. Pour toute information complémentaire concernant les différents instruments et leurs domaines d’application, veuillez-vous référer au mode d’emploi fourni avec votre système Piezon ou auprès du distributeur de votre pays. Qualifikationen des Nutzers Das Produkt wurde gezielt für Zahnärzte, Dentalhygieniker, zahnmedizinische Fachangestellte (Prophylaxe) und Zahnarzthelferinnen entwickelt und entworfen. Weitere Informationen über die verschiedenen Instrumente und ihre Anwendungsbereiche finden Sie in den Bedienungsanweisungen, die Sie im Lieferumfang Ihres Piezon-Systems oder bei dem Vertriebshändler in Ihrem Land finden. Estimados clientes, Gentile cliente, Bästa kunder, Les agradecemos la adquisición de su nuevo producto EMS, el cual satisface las exigencias más altas en lo que a calidad y seguridad se refiere. Grazie per aver acquistato un nuovo prodotto EMS. Questo apparecchio soddisfa gli standard di qualità e di sicurezza più elevati. Tack för ditt köp av en ny EMS-produkt. Denna produkt uppfyller de högsta kvalitets- och säkerhetsstandarderna. Per ottenere il meglio da questo prodotto dentistico di fascia alta ed assicurarne la massima durata possibile, legga attentamente il presente manuale prima di utilizzare il prodotto e di sottoporlo a manutenzione. För att du ska få ut det bästa av denna tandläkarprodukt med hög kapacitet och för att säkerställa maximal livslängd ber vid dig noga läsa igenom denna handbok innan du använder eller underhåller produkten. Utilizzo qualificato Behörig användning Questo prodotto è destinato esclusivamente a un utilizzo odontoiatrico qualificato ai sensi della normativa sanitaria e di sicurezza applicabile, delle misure di prevenzione degli incidenti e conformemente alle presenti istruzioni per l'uso. La preparazione e la manutenzione di questo prodotto devono essere affidate esclusivamente a personale istruito sulla protezione dalle infezioni, sulla protezione personale e sulla sicurezza del paziente. Un utilizzo inappropriato (per esempio a causa di igiene o manutenzione insufficienti), la mancata osservanza delle nostre istruzioni o l'impiego di accessori e ricambi non autorizzati da EMS, comportano l'invalidazione di qualunque reclamo coperto o non coperto dalla garanzia. Denna produkt är avsedd endast för behörig användning inom tandläkarvård i enlighet med gällande hälsoskydds- och säkerhetsföreskrifter, olycksförebyggande åtgärder och efterlevnad av denna bruksanvisning. Produkten får förberedas och underhållas endast av personer som har fått anvisningar inom infektionsskydd, personligt skydd och patientsäkerhet. Felaktig användning (t.ex. på grund av brist på hygien eller underhåll), icke-efterlevnad av våra anvisningar eller användning av tillbehör och reservdelar som inte har godkänts av EMS ogiltiggör alla garantianspråk och andra krav. A fin de sacar el máximo partido de este producto dental de alto rendimiento y obtener la máxima duración del mismo, lea este manual atentamente antes de utilizar o realizar el mantenimiento del producto. Uso cualificado Este producto solo debe utilizarse en medicina dental siguiendo las normas de higiene y seguridad aplicables, las medidas de prevención de accidentes y las instrucciones de este manual. Este producto solo debe ser preparado y mantenido por personas que tengan formación sobre protección contra infecciones, protección personal y seguridad de los pacientes. El uso inadecuado (por ejemplo, debido a falta de higiene o mantenimiento), el incumplimiento de nuestras instrucciones o el uso de accesorios y repuestos no aprobados por EMS invalida la garantía y todas las reclamaciones. Cualificaciones del usuario El producto ha sido diseñado y desarrollado para el grupo de profesionales "dentistas, higienistas dentales, empleados dentales (profilaxis) y asistentes dentales". Para más detalles sobre los diversos instrumentos y sus ámbitos de aplicación, consulte las instrucciones de uso suministradas con el sistema Piezon o disponibles en el distribuidor de su país. Qualifiche dell'utilizzatore Questo prodotto è stato progettato e sviluppato per le categorie "dentisti, igienisti dentali, infermieri di studio dentistico (profilassi) e assistenti dentisti". Per maggiori dettagli sui vari strumenti e i loro campi d'applicazione, consulti le istruzioni d'impiego fornite con il sistema Piezon o disponibili presso il distributore nazionale. Användarens behörighet Produkten har utvecklats och utformats för målgruppen ”tandläkare, tandhygienister, tandläkarpersonal (profylax) och tandläkarassistenter”. För närmare information om de olika instrumenten och deras tillämpningsområden, se den bruksanvisning som medföljer Piezon-systemet eller kan tillhandahållas av återförsäljaren i ditt land. About this manual A PROPOS DE CE MANUEL Zu diesem Handbuch The illustrations in these instructions represent the Piezon 150 (unless otherwise specified); however, these instructions also apply to the Piezon 250. Les illustrations dans ce manuel representent le Piezon 150 (sauf précisé contrairement); ces instructions s'appliquent aussi au Piezon 250. Auf den Abbildungen in dieser Bedienungsanleitung ist der Piezon 150 zu sehen (sofern nichts anderes spezifiziert ist). Trotzdem gelten diese Anweisungen auch für den Piezon 250. These operating instructions are to ensure the correct installation and use of this product. Always keep this document close at hand. Ce mode d’emploi est destiné à l’installation et à l’utilisation correcte de ce produit. Veuillez conserver ce document toujours à portée de main. Please read these operating instructions carefully as they explain the most important details and procedures. Please pay special attention to the safety precautions. Veuillez lire attentivement ce mode d’emploi car tous les détails et tous les gestes importants y sont clairement décrits. Respectez en particulier les remarques concernant la sécurité. Die Bedienungsanleitung soll Ihnen helfen, dieses Produkt richtig zu installieren und zu bedienen. Bewahren Sie diese Unterlagen immer griffbereit auf. Misuse can damage the product and hence cause risks and hazards for patients, users and third parties. Un usage inapproprié peut endommager l’appareil et entraîner des risques ou des dangers pour les patients, les utilisateurs et les tiers. Instructions concerning the components of the system are provided separately in the relative instructions for use. Read the instruction manuals originally delivered with each of the components before using this product. Do not hesitate to contact your local EMS dealer for further information. Les instructions concernant les composants du système sont fournies séparément dans les manuels d’instructions correspondants. Veuillez lire les manuels d’instructions livrés avec chacun des composants avant d’utiliser ce produit. N’hésitez pas à contacter votre distributeur EMS pour plus d’informations. This product needs special precautions regarding electromagnetic compatibility and needs to be installed and put into service according to the "Electromagnetic compatibility" manual. Ce produit nécessite une précaution particulière concernant la compatibilité électromagnétique et a besoin d'être installé et mise en service en accord avec le manuel "Compatibilité Électromagnétique". Lesen Sie die Bedienungsanleitung aufmerksam durch. Alle wesentlichen Einzelheiten und Handgriffe werden anschaulich erklärt. Beachten Sie dabei besonders die Sicherheitshinweise. Die unsachgemäße Verwendung des Produkts kann zu Beschädigungen führen, von denen Risiken und Gefahren für Patienten, Nutzer und Dritte ausgehen. Anweisungen zur Bedienung der Systembestandteile sind in den jeweiligen Bedienungsanleitungen zu finden. Vor der Verwendung dieses Produkts sind die Bedienungsanleitungen zu lesen, die im Lieferumfang der Systembestandteile enthalten sind. Weitere Informationen erhalten Sie bei Ihrem EMS-Händler. Für dieses Produkt sind im Bereich der elektromagnetischen Verträglichkeit spezielle Vorsichtsmaßnahmen erforderlich. Es muss daher in Übereinstimmung mit dem Handbuch „Elektromagnetische Verträglichkeit“ installiert und in Betrieb genommen werden. Acerca de este manual Informazioni sul presente manuale Om denna handbok Las ilustraciones de este manual muestran el Piezon 150 (a menos que se especifique lo contrario). Sin embargo, estas instrucciones también se aplican al Piezon 250. In queste istruzioni, le figure si riferiscono al Piezon 150 (se non altrimenti specificato); le istruzioni valgono tuttavia anche per il Piezon 250. Bilderna i dessa anvisningar visar Piezon 150 (om inte annat anges). Dessa anvisningar gäller emellertid även för Piezon 250. Estas instrucciones de empleo sirven para garantizar una instalación y uso correctos de este producto. Tenga siempre a mano este documento. Le presenti istruzioni per l'uso servono ad assicurare la corretta installazione e il corretto utilizzo del prodotto. Tenga sempre questo documento a portata di mano. Syftet med denna bruksanvisning är att säkerställa korrekt installation och användning av denna produkt. Se till att alltid ha detta dokument nära till hands. Lea atentamente las instrucciones de empleo, que describen de forma clara todos los detalles y procedimientos importantes. Preste atención especialmente a los consejos de seguridad. Legga attentamente le istruzioni per l'uso perché esse spiegano i particolari e le procedure più importanti. Ponga un'attenzione particolare alle precauzioni di sicurezza. Läs noga igenom denna bruksanvisning eftersom den förklarar den viktigaste informationen och de viktigaste procedurerna. Var särskilt uppmärksam på säkerhetsanvisningarna. El mal uso puede dañar el producto y por lo tanto causar riesgos y peligros para los pacientes, usuarios y terceros. L'utilizzo non corretto può danneggiare il prodotto e causare rischi e pericoli per pazienti, utilizzatori e persone terze. Felaktig användning kan skada produkten och följaktligen orsaka risker och faror för patienter, användare och tredje parter. Las instrucciones relativas a los componentes del sistema se proporcionan por separado en las instrucciones de uso de los mismos. Antes de utilizar este producto, lea el manual de instrucciones suministrado con cada uno de los componentes. No dude en ponerse en contacto con su distribuidor local de EMS si desea información adicional. Le istruzioni riguardanti i componenti del sistema sono fornite a parte, nelle relative istruzioni per l'uso. Prima di usare questo prodotto, legga il manuale di istruzioni fornito in origine con ciascuno dei componenti. Per ulteriori informazioni non esiti a contattare il rappresentante locale di EMS. Anvisningar beträffande systemets komponenter tillhandahålls separat i respektive bruksanvisning. Läs de användarhandböcker som medföljde vid den ursprungliga leveransen av var och en av komponenterna innan du använder produkten. Tveka inte att kontakta din lokala EMS-återförsäljare om du önskar mer information. Il presente prodotto richiede particolari precauzioni per quanto riguarda la compatibilità elettromagnetica e richiede l'installazione e la messa in funzione conformemente al manuale "Compatibilità elettromagnetica". Denna produkt kräver särskilda försiktighetsåtgärder avseende elektromagnetisk kompatibilitet och måste installeras och tas i drift enligt handboken Elektromagnetisk kompatibilitet. Este producto necesita precauciones especiales referentes a la compatibilidad electromagnética y necesita ser instalado y puesto en servicio según el manual "Compatibilidad electromagnética". To prevent possible patient or user injury or damage to the Piezon150 and 250, please note the corresponding directives: Danger Risk of patient or user injury Caution Risk of damage to the device or environmental harm Pour prévenir des possibles accidents corporels ou dommages au Piezon 150 et 250, merci de tenir compte des directives suivantes: Please note Useful additional information and hints Danger Risque de blessure pour le patient ou l'utilisateur Attention Risque de dommage à l'appareil ou à l’environnement Gefahr Gefahr von Personen- oder Nutzerschäden Achtung Drohende Sach- und Umweltschäden Prohibited Remarques Informations complémentaires utiles et tours de main Authorized Interdit Hinweis Nützliche Zusatzinformationen und Anwendungstipps Autorisé Verboten Note that the English version of this manual is the master from which the translations derive. In case of any discrepancy, the binding version is the English text. We would be pleased to answer your questions or listen to your suggestions. We do, of course, provide support in case of technical problems. Please call your approved EMS repair center or your dealer directly. We wish you lots of success! EMS Beachten Sie bitte die nachstehenden Anweisungen, um eine Verletzung des Patienten oder Nutzers bzw. die Beschädigung des Piezon 150 und 250 zu vermeiden: Erlaubt Les traductions dans ce manuel sont basées sur sa version anglaise. Ainsi le texte en anglais fera référence en cas de divergence. Nous sommes à votre entière disposition pour répondre à vos questions et nous sommes à l’écoute de vos éventuelles suggestions. Naturellement, nous vous proposons un soutien technique en cas de problèmes. Veuillez contacter votre centre de réparation agré EMS ou votre distributeur. Es wird darauf hingewiesen, dass das englische Original der Bedienungsanleitung als Vorlage für alle Übersetzungen gilt. Bei eventuellen Abweichungen ist der englische Text bindend. Avec nos meilleurs vœux de succès! Wir stehen Ihnen gerne für Fragen zur Verfügung und nehmen Ihre Anregungen dankbar an. Bei Problemen bieten wir Ihnen selbstverständlich technische Unterstützung an. Wenden Sie sich bitte direkt an ein EMS-genehmigtes Reparaturzentrum oder Ihren Händler. EMS Wir wünschen Ihnen viel Erfolg! EMS Para evitar posibles daños o lesiones a pacientes y usuarios del Piezon150 y 250, tenga en cuenta las directivas correspondientes: Si tengano presenti le seguenti direttive per evitare possibili lesioni a paziente e utilizzatore o danni al Piezon 150 e 250: För att förhindra risken för skador på patienten, användaren eller Piezon150 och 250 ber vi dig observera motsvarande direktiv: Peligro Riesgo de lesiones en el paciente o usuario Pericolo Rischio di lesioni al paziente o all'operatore Fara Risk för skada på patienten eller användaren Precaución Riesgo de daños en el dispositivo o medioambientales Attenzione Rischio di danni al dispositivo o all'ambiente Observación Informaciones adicionales útiles y consejos prácticos Nota Utili informazioni aggiuntive e suggerimenti Prohibidas Vietato Permitidas Autorizzato La versión original de este manual está escrita en inglés. En caso de cualquier discrepancia con alguna traducción a otro idioma distinto, prevalecerá lo indicado en el texto original. Si noti che la versione originale di questo manuale è quella inglese, dalla quale derivano le traduzioni. In caso di eventuali discrepanze, fa fede il testo in inglese. Estamos a su entera disposición para responder a sus preguntas, pero también para atender sugerencias. En caso de problemas le ofrecemos naturalmente nuestro apoyo técnico. Diríjase directamente a su centro de reparaciones o distribuidor autorizado de EMS. Rimaniamo a sua disposizione per eventuali domande e suggerimenti. Ovviamente forniamo assistenza in caso di problemi tecnici. Si rivolga al centro di assistenza EMS autorizzato o al rivenditore. ¡Le deseamos mucho éxito! EMS Le auguriamo buon lavoro! EMS Försiktighet Risk för skada på enheten eller miljön Observera Användbar ytterligare information och praktiska tips Förbjudet Tillåtet Observera att den engelska versionen av denna handbok utgör det original från vilket översättningarna är gjorda. Skulle skillnader förekomma, är det den engelska texten som är bindande. Vi vill gärna svara på dina frågor eller ta emot dina synpunkter. Självklart ger vi support vid eventuella tekniska problem. Kontakta vårt godkända EMS-reparationscenter eller din återförsäljare direkt. Vi önskar dig mycket framgång! EMS Contents Sommaire Inhalt Treatment.......................................................... 2 Indications..................................................... 2 Contraindication............................................ 2 Installation and connection............................... 4 Installing the pump (Piezon 250).................. 4 Connecting the unit ...................................... 6 Electrical safety precautions....................... 10 Preparing for treatment................................... 12 Mode and instruments................................ 12 Connecting the handpiece.......................... 14 Attaching the instruments........................... 16 Installing the bottle (Piezon 250)................ 18 Solutions compatible with the circuit.......... 20 Operating the unit........................................... 22 Setting the ultrasound power...................... 24 "Perio" mode............................................... 26 "Scaling" mode............................................ 28 Setting the liquid flow rate ......................... 30 Piezon handpiece LED (Option) ................ 32 Foot pedal functions.................................... 34 End of treatment.............................................. 36 Circuit washing............................................ 38 Handpiece disassembly.............................. 40 Cleaning and sterilizing................................... 42 Cleaning...................................................... 42 Packaging for sterilization........................... 44 Sterilization.................................................. 44 Cleaning the bottle and the unit.................. 46 Disinfecting the circuit................................. 48 Maintenance................................................... 50 Verification of O-rings................................. 52 Replacing the pump (Piezon 250)............... 54 Safety precautions.......................................... 56 Storing the product......................................... 60 Disposal.......................................................... 62 Warranty.......................................................... 62 Accessories.................................................... 62 EMS Service................................................... 64 Symbols.......................................................... 66 Technical data................................................. 72 Troubleshooting.............................................. 76 Traitement......................................................... 2 Indications..................................................... 2 Contre-indication........................................... 2 Installation et connection.................................. 4 Installation de la pompe (Piezon 250).......... 4 Brancher l'appareil ....................................... 6 Remarques concernant la sécurité électrique..................................................... 10 Préparation pour le traitement........................ 12 Mode et instruments................................... 12 Connexion de la pièce à main..................... 14 Fixation des instruments............................. 16 Installation de la bouteille (Piezon 250)...... 18 Solutions compatibles avec le circuit . ....... 20 Utilisation de l'appareil.................................... 22 Réglage de la puissance des ultrasons...... 24 Le mode "Perio".......................................... 26 Mode "Détartrage"...................................... 28 Réglage du débit du liquide ....................... 30 Pièce à main Piezon LED (Option) ............ 32 Fonction de la pédale de commande......... 34 En fin de traitement......................................... 36 Rinçage du circuit....................................... 38 Démontage de la pièce à main................... 40 Nettoyage et stérilisation................................ 42 Nettoyage.................................................... 42 Emballage pour la stérilisation.................... 44 Stérilisation.................................................. 44 Nettoyage de la bouteille et de l'appareil.... 46 Désinfection du circuit................................. 48 Maintenance................................................... 50 Vérification du joint torique......................... 52 Replacement de la pompe (Piezon 250).... 54 Remarques concernant la sécurité................. 56 Rangement du produit.................................... 60 Recyclage....................................................... 62 Garantie.......................................................... 62 Accessoires..................................................... 62 Service EMS................................................... 64 Symboles........................................................ 66 Caractéristiques techniques........................... 72 Dépannage...................................................... 77 Behandlung....................................................... 2 Indikationen................................................... 2 Kontraindikationen........................................ 2 Installation und Anschluss................................ 4 Installieren der Pumpe (Piezon 250)............ 4 Anschliessen des Geräts ............................. 6 Elektrische Sicherheitsvorschriften............ 10 Vorbereiten der Behandlung........................... 12 Betriebsart und Instrumente....................... 12 Anschliessen des Handstücks.................... 14 Befestigen der Instrumente......................... 16 Installieren der Flasche (Piezon 250)......... 18 Mit dem Kreislauf kompatible Lösungen..... 20 Verwendung des Geräts................................. 22 Einstellen der Ultraschallleistung................ 24 Die Perio-Betriebsart.................................. 26 Scaling-Betriebsart..................................... 28 Einstellen der Wasserdurchsatzmenge ..... 30 Piezon-Handstück-LED (Option) ............... 32 Funktionen des Fussschalters.................... 34 Ende der Behandlung..................................... 36 Waschen des Kreislaufs............................. 38 Demontieren des Handstücks..................... 40 Reinigen und Sterilisieren............................... 42 Reinigen...................................................... 42 Verpackung für die Sterilisierung................ 44 Sterilisation.................................................. 44 Reinigen der Flasche und des Geräts........ 46 Desinfizieren des Kreislaufs....................... 48 Wartung........................................................... 50 Prüfen der O-Ringe..................................... 52 Austauschen der Pumpe (Piezon 250)....... 54 Sicherheitsvorschriften................................... 56 Lagern des Produkts....................................... 60 Entsorgen des Produkts................................. 62 Garantie.......................................................... 62 Zubehör........................................................... 62 EMS-Service................................................... 64 Symbole.......................................................... 66 Technische Daten........................................... 73 Fehlerbehebung.............................................. 78 ÍNDICE Indice Innehåll Tratamiento....................................................... 3 Indicaciones.................................................. 3 Contraindicaciones....................................... 3 Instalación y conexión...................................... 5 Instalación de la bomba (Piezon 250).......... 5 Conexión de la unidad ................................. 7 Precauciones de seguridad eléctrica......... 11 Preparación para el tratamiento..................... 13 Modo e instrumentos.................................. 13 Conexión del mango................................... 15 Conexión de los instrumentos.................... 17 Instalación de la botella (Piezon 250)......... 19 Soluciones compatibles con el circuito...... 21 Funcionamiento de la unidad.......................... 23 Ajuste de la potencia de los ultrasonidos... 25 Modo "Perio"............................................... 27 Modo "Raspado"......................................... 29 Ajuste del caudal del líquido ...................... 31 LED del mango Piezon (opcional) ............. 33 Funciones del pedal.................................... 35 Fin del tratamiento.......................................... 37 Limpieza del circuito................................... 39 Desmontaje del mango............................... 41 Limpieza y esterilización................................. 43 Limpieza...................................................... 43 Embalaje para la esterilización................... 45 Esterilización............................................... 45 Limpieza de la botella y la unidad............... 47 Desinfección del circuito............................. 49 Mantenimiento................................................. 51 Verificación de las juntas tóricas................ 53 Sustitución de la bomba (Piezon 250)........ 55 Precauciones de seguridad............................ 57 Almacenamiento del producto........................ 61 Eliminación del producto................................. 63 Garantía.......................................................... 63 Accesorios...................................................... 63 Servicio técnico de EMS................................. 65 Símbolos......................................................... 67 Especificaciones técnicas.............................. 73 Solución de problemas................................... 79 Trattamento....................................................... 3 Indicazioni..................................................... 3 Controindicazioni.......................................... 3 Installazione e collegamenti............................. 5 Installazione della pompa (Piezon 250)........ 5 Connessione dell'unità . .............................. 7 Precauzioni di sicurezza elettrica............... 11 Preparazione per il trattamento...................... 13 Modalità e strumenti.................................... 13 Connessione del manipolo......................... 15 Fissaggio degli strumenti............................ 17 Installazione della bottiglia (Piezon 250).... 19 Soluzioni compatibili con il circuito............. 21 Funzionamento dell'unità................................ 23 Impostazione della potenza ultrasonica..... 25 Modalità "Perio".......................................... 27 Modalità "Ablazione del tartaro"................. 29 Impostazione della velocità del flusso del liquido ......................................................... 31 LED del manipolo Piezon (Opzionale) ....... 33 Funzioni del pedale..................................... 35 Fine del trattamento........................................ 37 Lavaggio del circuito................................... 39 Smontaggio del manipolo........................... 41 Pulizia e sterilizzazione.................................. 43 Pulizia.......................................................... 43 Imballaggio per la sterilizzazione............... 45 Sterilizzazione............................................. 45 Pulizia della bottiglia e dell'unità................. 47 Disinfezione del circuito.............................. 49 Manutenzione................................................. 51 Controllo delle guarnizioni anulari.............. 53 Sostituzione della pompa (Piezon 250)...... 55 Precauzioni di sicurezza................................. 57 Immagazzinamento del prodotto.................... 61 Smaltimento.................................................... 63 Garanzia.......................................................... 63 Accessori........................................................ 63 Assistenza EMS.............................................. 65 Simboli............................................................ 67 Dati tecnici...................................................... 74 Ricerca e risoluzione dei problemi................. 80 Behandling........................................................ 3 Indikationer.................................................... 3 Kontraindikationer......................................... 3 Installation och anslutning................................ 5 Installera pumpen (Piezon 250).................... 5 Ansluta enheten ........................................... 7 Elektriska säkerhetsanvisningar................. 11 Förbereda för behandling............................... 13 Läge och instrument................................... 13 Ansluta handstycket.................................... 15 Fästa instrumenten..................................... 17 Installera flaskan (Piezon 250)................... 19 Lösningar som är förenliga med kretsen...... 21 Använda enheten............................................ 23 Ställa in ultraljudseffekten........................... 25 Läget Perio (Parodonti)............................... 27 Läget Scaling (Borttagning av plack och tandsten)...................................................... 29 Ställa in vätskans flödeshastighet ............. 31 Lysdioden på Piezon-handstycket (tillval) . 33 Pedalfunktioner........................................... 35 Vid slutet av behandlingen.............................. 37 Tvätta kretsen.............................................. 39 Demontera handstycket.............................. 41 Rengöring och sterilisering............................. 43 Rengöring.................................................... 43 Omslag för sterilisering............................... 45 Sterilisering................................................. 45 Rengöra flaskan och enheten..................... 47 Desinfektera kretsen................................... 49 Underhåll......................................................... 51 Kontrollera O-ringen................................... 53 Byta ut pumpen (Piezon 250)..................... 55 Säkerhetsanvisningar..................................... 57 Förvaring av produkten................................... 61 Kassering........................................................ 63 Garanti............................................................ 63 Tillbehör.......................................................... 63 EMS-service................................................... 65 Symboler......................................................... 67 Tekniska data.................................................. 74 Felsökning....................................................... 81 Treatment Traitement Behandlung Indications Indications Indikationen This product is designed for use in dentistry with EMS ultrasound instruments for the following indications: Ce produit est destiné à être utilisé en dentisterie avec des instruments à ultrasons EMS Piezon pour les applications suivantes: Dieses Produkt wurde für eine Verwendung in der Zahnmedizin mit EMS Ultraschallgeräten für folgende Indikationen entwickelt: Scaling • Removal of supragingival calculus • Removal of stains Détartrage • Elimination du tartre supra-gingival • Elimination des taches Endo • Preparation, cleaning and irrigation of root canals • Retrograde preparation of root canals • Condensing gutta-percha • Removal of crowns, bridges and restorations Endodontie • Préparation, nettoyage et irrigation des canaux radiculaires • Préparation rétrograde des canaux radiculaires • Condensation de la gutta-percha • Descellement de couronnes, bridges et restaurations Scaling • Entfernen von supragingivalen Konkrementen • Entfernen von Verfärbungen Restorative • Preparation of cavities • Cementation of restorations • Condensing of amalgams Periodontics • Scaling and root planing • Periodontal therapy Restauration • Façonnage de cavités • Scellement de restaurations • Condensation d’amalgame Parodontie • Détartrage et surfaçage radiculaire • Thérapie parodontale Contraindication Contre-indication Ultrasonic oscillations may prevent cardiac pacemakers and defibrillators from functioning properly. Therefore, we recommend that patients with a cardiac pacemaker or a defibrillator should not be treated with this product. Contre-indication: le fonctionnement correct des stimulateurs cardiaques peut être perturbé par les oscillations ultrasoniques de hautes fréquences. Nous vous conseillons de ne pas traiter les patients porteurs. 2 Endodontie • Aufbereiten, Reinigen und Spülen von Wurzelkanälen • Retrogrades Aufbereiten von Wurzelkanälen • Kondensation des Guttaperchas • Lösen von Kronen, Brücken, Inlays und Stiftaufbauten sowie zur GuttaperchaKondensation Zahnrestauration • Kavitätenpräparation • Zementierung der Restaurationen • Kondensation des Amalgams Zahnfleischbehandlungen • Scaling und Wurzelglättung • Parodontaltherapie Kontraindikationen Ultraschallschwingungen verhindern u. U. das ordnungsgemäße Funktionieren von Herzschrittmachern und Defibrillatoren. Aus diesem Grund raten wir von einer Verwendung dieses Produkts zur Behandlung von Patienten mit einem Herzschrittmacher oder einem Defibrillator ab. Tratamiento Trattamento Behandling Indicaciones Indicazioni Indikationer Este producto está diseñado para uso en odontología con instrumentos de ultrasonidos EMS para las siguientes indicaciones: Questo prodotto è stato progettato per l'uso odontoiatrico con strumenti a ultrasuoni EMS per le seguenti indicazioni: Denna produkt är avsedd att användas inom tandläkarvården tillsammans med EMS ultraljudsinstrument för följande indikationer: Raspado • Eliminación del sarro supragingival • Eliminación de manchas Ablazione del tartaro • Rimozione delle concrezioni sopragengivali • Rimozione di macchie Borttagning av plack och tandsten • Borttagning av supragingival tandsten • Borttagning av fläckar Endodoncia • Preparación, limpieza e irrigación de conductos radiculares • Preparación retrógrada de conductos radiculares • Condensación de la gutapercha • Extracción de coronas, puentes y restauraciones Endodonzia • Preparazione, lavaggio e irrigazione dei canali radicolari • Preparazione retrograda dei canali radicolari • Condensazione della guttaperca • Rimozione di corone, ponti e restauri Endodonti • Förberedelse, rengöring och spolning av rotkanaler • Retrograd förberedelse av rotkanaler • Kondensering av guttaperka • Borttagning av kronor, bryggor och restaureringar Restauración • Preparación de cavidades • Cementación de restauraciones • Condensación de las amalgamas Periodoncia • Raspado y alisado radicular • Terapia periodontal Contraindicaciones Las oscilaciones ultrasónicas pueden afectar el funcionamiento correcto de marcapasos y desfibriladores cardiacos. Por lo tanto, se recomienda no tratar con este producto a pacientes que tengan un marcapasos o un desfibrilador. Restauro • Preparazione di cavità • Cementazione di restauri • Condensazione di amalgame Interventi periodontali • Ablazione del tartaro e politura radicolare • Terapia periodontale Controindicazioni Le oscillazioni ultrasoniche potrebbero interferire con il corretto funzionamento di pacemaker cardiaci e defibrillatori. Raccomandiamo perciò di non trattare i pazienti portatori di pacemaker o defibrillatore con questo prodotto. Restaurering • Förberedelse av kaviteter • Cementering av restaureringar • Kondensering av amalgam Parodonti • Borttagning av plack och tandsten och rotplaning • Parodontal behandling Kontraindikationer Ultraljudssvängningar kan leda till att hjärtpacemakers och -defibrillatorer inte fungerar korrekt. Därför rekommenderar vi att patienter som bär en hjärtpacemaker eller -defibrillator inte behandlas med denna produkt. 3 Installation and connection Installation et connection Installation und Anschluss Installing the pump (Piezon 250) Installation de la pompe (Piezon 250) Installieren der Pumpe (Piezon 250) Ensure that the pump head cover is correctly closed, before using the device. S'assurer que le couvercle de tête de pompe est correctement fermé, avant d'utiliser l'appareil. Vergewissern Sie sich, dass der Pumpenkopfdeckel ordentlich geschlossen ist, bevor Sie das Gerät verwenden. 4 Instalación y conexión Installazione e collegamenti Installation och anslutning Instalación de la bomba (Piezon 250) Installazione della pompa (Piezon 250) Installera pumpen (Piezon 250) Antes de usar el dispositivo asegúrese de que la cubierta de la cabeza de la bomba está cerrada correctamente. Prima di utilizzare il dispositivo, assicurarsi che la calotta della testa della pompa sia chiusa. Säkerställ att pumphuvudets hölje är stängt på rätt sätt innan du använder produkten. 5 Connecting the unit Brancher l'appareil Anschliessen des Geräts 30 VDC Always check that the unit is installed in a safe and stable position. A possible fall may suddenly pull on the cord and the handpiece, hurting the patient and the user, and damaging the unit. Check that the rated voltage of the power supply corresponds to the local line voltage to prevent damaging the unit. Use the unit only in a FI protected mains supply (FI = Residual current protection). For USA or Canada: connect only to a Hospital Grade outlet. Install the external filter of water before connecting the hose to the water supply. Connect the unit to a water supply with the original EMS water hose supplied with your product. It is recommended to use an independent water supply. 6 Toujours vérifier que l'appareil est installé de manière stable et sûre. Une éventuelle chute pourrait entraîner le cordon de la pièce à main, blesser le patient et l'utilisateur et endommager l'appareil. Vérifier que la tension nominale de l'appareil correspond bien à la tension secteur de votre cabinet afin d'éviter d'endommager l'appareil. Connecter l’appareil uniquement à une prise protégée par un interrupteur différentiel (protection FI). Vergewissern Sie sich grundsätzlich, dass das Gerät in einer sicheren und stabilen Position installiert wird. Das Herunterfallen kann einen unvorhergesehenen Zug am Kabel oder am Handstück, die Verletzung des Patienten und des Nutzers oder eine Beschädigung des Geräts zur Folge haben. Die Nennspannung des Gerätes muss mit der örtlichen Versorgungsspannung übereinstimmen. Das Gerät kann sonst beschädigt werden. Schliessen Sie das Gerät nur über einen FI-Schalter (Fehlerstromschutz) an. Pour les USA ou le Canada: brancher uniquement à une prise secteur "Hospital Grade". Nur für USA oder Kanada: Schliessen Sie das Gerät nur an eine Steckdose mit „Hospital Grade“ an. Installer le filtre à eau externe avant de brancher le tuyau à l'alimentation d'eau. Installieren Sie den externen Wasserfilter, bevor Sie den Schlauch an die Wasserversorgung anschliessen. Brancher l'alimention d'eau de l'appareil avec le tuyau original EMS, livré avec votre appareil. Schliessen Sie das Gerät über den Original-EMSWasserschlauch im Lieferumfang Ihres Produkts an die Wasserversorgung an. Wir empfehlen die Verwendung einer unabhängigen Wasserversorgung. Il est recommandé d'utiliser un circuit d'eau indépendant. Conexión de la unidad Connessione dell'unità Ansluta enheten 2 a BAR 1.0 - 5.0 PSI 15 - 72 kPA 100 - 500 1 b c Compruebe siempre que la unidad esté instalada en una posición segura y estable. Si cayera tiraría del cable y del mango, dañando al paciente, al usuario y a la unidad. Compruebe que la tensión nominal de la fuente de alimentación es correcta para evitar daños en la unidad. Conecte su aparato a una toma de corriente protegida por un interruptor diferencial (protección FI). Únicamente para los E.E.U.U. o Canadá: Conecte únicamente con un cable Hospital Grade. Instale el filtro externo del agua antes de conectar la manguera al suministro de agua. Conecte la unidad al suministro de agua con la manguera original EMS incluida con el producto. Se recomienda utilizar un suministro de agua independiente. Verificare sempre che l'unità sia installata in posizione stabile e sicura. Un'eventuale caduta potrebbe tirare improvvisamente il cavo e il manipolo, con possibili lesioni al paziente e all'utilizzatore e danni all'unità. Per evitare danni all'unità, controllare che la tensione nominale dell'alimentazione corrisponda alla tensione di rete locale. Usare l'unità solo in un'alimentazione di rete FI (FI = protezione da corrente residua). Per USA o Canada: collegare esclusivamente a una presa di categoria ospedaliera. Prima di collegare il tubo flessibile all'erogazione dell'acqua, installare il filtro dell'acqua esterno. Collegare l'apparecchio a un'erogatore d'acqua con il tubo flessibile dell'acqua originale EMS fornito insieme al prodotto. Si raccomanda di usare un'erogatore d'acqua indipendente. Kontrollera alltid att enheten installeras i ett säkert och stabilt läge. Ett eventuellt fall kan leda till en plötslig dragkraft på sladden och handstycket och skada patienten, användaren och enheten. Kontrollera att nätaggregatets nominella spänning motsvarar den lokala ledningsspänningen för att förhindra skada på enheten. Enheten får användas endast med en FI-skyddad nätströmsförsörjning (FI = restströmsskydd). För USA och Kanada: Anslut endast till ett eluttag av sjukhuskvalitet (Hospital Grade). Montera det externa vattenfiltret innan du ansluter slangen till vattentillförseln. Anslut enheten till en vattentillförsel med den originalvattenslang från EMS som medföljer produkten. Vi rekommenderar användning av en oberoende vattentillförsel. 7 To connect the foot pedal and the power supply to the Piezon 250, turn over the unit as shown in the pictures above. 8 Pour connecter la pédale et l'alimentation au Piezon 250, retourner l'appareil comme illustré ci-dessus. Um den Fussschalter und das Netzkabel an den Piezon 250 anzuschließen, drehen Sie das Gerät wie in den Abbildungen gezeigt um. 30 VDC Para conectar el pedal y la fuente de alimentación al Piezon 250, dé la vuelta a la unidad como se muestra en las imágenes de arriba. Per collegare il pedale e l'alimentatore al Piezon 250, capovolgere l'apparecchio come mostrato nella figura qui sopra. Vänd på enheten enligt bilderna ovan när du ska ansluta pedalen och nätaggregatet till Piezon 250. 9 Electrical safety precautions Remarques concernant la sécurité électrique Elektrische Sicherheitsvorschriften No modification of the unit and the accessories supplied with the unit are allowed. N’apportez aucune modification sur l'appareil et sur les accessoires livrés avec l'appareil. An diesem Gerät und dem mitgelieferten Zubehör dürfen keinerlei Modifikationen vorgenommen werden. L'utilisateur ne doit pas toucher simultamement la prise du cable et le patient Der Steckverbinder des Handstückkabels und der Patient dürfen nicht gleichzeitig berührt werden. Do not touch the connector of the handpiece cord and the patient simultaneously. The power supply must not be fixed tightly by screw. The power supply can be placed on a table or hung on the wall. So it is accessible and can easily be detached. To disconnect the unit from the supply network, unplug the power supply. 10 Le boitier d'alimentation ne doit pas être fixé par vis. Le boitier d'alimentation peut être placé sur la table ou suspendu au mur, de manière à ce qu'il puisse être débranché facilement. Pour déconnecter l'appareil du réseau, débranchez l'alimentation électrique. Das Netzteil darf nicht mit einer Schraube befestigt werden. Das Netzteil kann auf einen Tisch gestellt oder an die Wand gehängt werden. Auf diese Weise ist es jederzeit griffbereit. Um das Gerät von der Netzstromversorgung zu trennen, ziehen Sie den Netzstecker. Precauciones de seguridad eléctrica Precauzioni di sicurezza elettrica Elektriska säkerhetsanvisningar No se permite ninguna modificación de la unidad y de los accesorios suministrados con la unidad. Non è consentita alcuna modifica all'apparecchio e agli accessori forniti con l'apparecchio. Det är inte tillåtet att utföra några ändringar av enheten och de tillbehör som medföljer enheten. No toque el conector del cable del mango y el paciente simultáneamente. La fuente de alimentación no debe fijarse firmemente con un tornillo. La fuente de alimentación se puede colocar sobre una mesa o colgada en la pared. De este modo es accesible y se puede desconectar fácilmente. Para desconectar la unidad de la red de alimentación, desconecte la fuente de alimentación. Non toccare contemporaneamente il connettore del cavo del manipolo e il paziente. viti. L'alimentatore non deve essere fissato con Vidrör inte handstyckessladdens anslutning och patienten samtidigt. Nätaggregatet får inte fästas med skruv. L'alimentatore può essere posato su un tavolo o appeso a parete. In questo modo rimane accessibile e può essere facilmente staccato. Nätaggregatet kan ställas på ett bord eller hängas upp på väggen, så att det är åtkomligt och enkelt kan kopplas från. Per scollegare l'apparecchio dalla rete d'alimentazione, staccare la spina dell'alimentatore. Om du vill koppla bort enheten från strömnätet ska du koppla från nätaggregatet. 11 Preparing for treatment Préparation pour le traitement Vorbereiten der Behandlung Mode and instruments Mode et instruments Betriebsart und Instrumente Scaling Détartrage Scaling Avoid using the HVE (high volume evacuation) to ensure sufficient cooling of the tooth and the instrument. The instrument heats up quickly if the irrigation flow rate is not sufficient. Eviter l'utilisation du HVE (high volume évacuation) afin d'assurer un refroidissement suffisant de la dent et de l'instrument. L'instrument chauffe rapidement si le flux d'irrigation est insuffisant. Um eine ausreichende Kühlung des Zahns und des Instruments zu gewährleisten, sollten Sie die Verwendung der Hochleistungsabsaugung vermeiden. Bei einer unzureichenden Durchflussrate heizt das Instrument schnell auf. Instruments: please refer to the "Piezon Systems" manual. 12 Instrument: Merci de se référer au mode d'emploi "Piezon Systems". Instrumente: Weitere Informationen finden Sie im Handbuch über Piezon-Systeme. Preparación para el tratamiento Preparazione per il trattamento Förbereda för behandling Modo e instrumentos Modalità e strumenti Läge och instrument Raspado Ablazione del tartaro Borttagning av plack och tandsten Evite el uso de la HVE (evacuación de alto volumen) para asegurar una refrigeración suficiente del diente y del instrumento. El instrumento se calienta rápidamente si el caudal de irrigación es insuficiente. Non utilizzare l'HVE (High Volume Evacuation: evacuazione di grande volume) per garantire un raffreddamento sufficiente del dente e dello strumento. Se la velocità del flusso d'irrigazione non è sufficiente, lo strumento si scalda rapidamente. Undvik användning av HVE (high volume evacuation) för att säkerställa effektiv kylning av tanden och instrumentet. Instrumentet hettas upp snabbt om spolningens flödeshastighet inte är tillräcklig. Instrumentos: consulte el manual "Sistemas Piezon". Strumenti: consultare il manuale "Sisitemi Piezon". Instrument: Se handboken för Piezonsystemen. 13 Connecting the handpiece Connexion de la pièce à main Anschliessen des Handstücks Clean, disinfect and sterilize the different pieces and accessories of this product before each use. Please refer to the "Cleaning, disinfecting and sterilizing" chapter. Non-sterile pieces and accessories may cause bacterial or viral infections. Nettoyer, désinfecter et stériliser les différentes pièces et accessoires de ce produit avant chaque usage. Veuillez-vous référer au chapitre "Nettoyage désinfection et stérilisation". Des pièces et accessoires non-stériles peuvent causer des infections bactériennes ou virales. Reinigen, desinfizieren und sterilisieren Sie die verschiedenen Bestandteile und das Zubehör dieses Produkts vor jeder Verwendung. Weitere Informationen finden Sie im Kapitel „Reinigen, Desinfizieren und Sterilisieren“. Nichtsterile Teile und Zubehör können bakterielle oder virale Infektionen verursachen. Blow dry the connections to remove the possible presence of liquid to ensure a proper electrical contact. Never blow compressed air in the irrigation connections as this will irremediably damage internal parts. 14 Souffler dans les connecteurs pour enlever une présence éventuelle de liquide afin d'assurer un bon contact électrique. Ne jamais envoyer d'air comprimé dans les passages d'irrigation car cela endommagerait irrémédiablement les pièces internes. Blasen Sie die Anschlüsse mit Luft trocken, um eventuell vorhandene Flüssigkeiten zu entfernen und einen einwandfreien elektrischen Kontakt zu gewährleisten. Blasen Sie grundsätzlich keine Druckluft in die Spülungsanschlüsse, da dies zu irreversiblen Schäden an innenliegenden Teilen führen kann. Conexión del mango Connessione del manipolo Ansluta handstycket Limpie, desinfecte y esterilice las diversas piezas y accesorios de este producto antes de cada uso. Consulte el capítulo "Limpieza, desinfección y esterilización ". Las piezas y accesorios no estériles pueden causar infecciones bacterianas o virales. Pulire, disinfettare e sterilizzare i vari pezzi e accessori di questo prodotto prima di ogni utilizzo. Consultare il capitolo "Pulizia, disinfezione e sterilizzazione". Pezzi e accessori non sterili potrebbero provocare infezioni batteriche o virali. Rengör, desinfektera och sterilisera produktens olika delar och tillbehör före varje användning. Se kapitlet Rengöring, desinfektion och sterilisering. Osterila delar och tillbehör kan orsaka bakterie- eller virusinfektioner. Seque las conexiones con aire caliente para eliminar la posible presencia de líquidos a fin de garantizar un buen contacto eléctrico. Nunca sople aire comprimido en las conexiones de irrigación, ya que esto dañaría irremediablemente componentes internos. Asciugare con soffio d'aria le connessioni per rimuovere ogni possibile presenza di liquido, in modo da assicurare un corretto contatto elettrico. Non soffiare in alcun caso aria compressa nelle connessioni d'irrigazione: si danneggerebbero irrimediabilmente le parti interne. Blås anslutningarna torra så att eventuell vätska avlägsnas för att säkerställa god elektrisk kontakt. Blås aldrig tryckluft in i spolningsanslutningarna eftersom det orsakar irreparabla skador på interna delar. 15 Attaching the instruments Fixation des instruments Befestigen der Instrumente Use only the CombiTorque to tighten the EMS instrument on the handpiece to the correct torque. Once the instrument is screwed all the way in, give an extra quarter of a turn to obtain the required torque. Utiliser uniquement le CombiTorque pour fixer l'instrument EMS sur la pièce à main au couple approprié. Une fois l'instrument vissé, serrer encore d’un quart de tour afin d'obtenir le couple de serrage requis. Sie dürfen grundsätzlich nur den CombiTorque verwenden, um das EMS-Instrument mit dem richtigen Drehmoment am Handstück zu befestigen. Sobald das Instrument festgeschraubt ist, führen Sie eine zusätzliche Vierteldrehung mit dem Schlüssel aus, um das erforderliche Drehmoment zu erhalten. For further details on the use of the instruments, please refer to the "Piezon Sytems" manual. 16 Pour plus de détails concernant l’utilisation des instruments, veuillez-vous référer au mode d’emploi "Piezon Systems". Weitere Informationen zur Verwendung der Instrumente finden Sie im Handbuch über die Piezon-Systeme. Conexión de los instrumentos Fissaggio degli strumenti Fästa instrumenten Utilice únicamente la CombiTorque para apretar el instrumento EMS en el mango hasta el par de torsión correcto. Después de atornillar el instrumento hasta el fondo, dé un cuarto de vuelta adicional para obtener el par de torsión requerido. Servirsi esclusivamente del CombiTorque per serrare con la coppia corretta lo strumento EMS sul manipolo. Una volta avvitato a fondo lo strumento, serrarlo di un altro quarto di giro per ottenere la coppia richiesta. Använd endast CombiTorque för att dra åt EMS-instrumentet på handstycket till rätt åtdragningsmoment. När instrumentet har skruvats hela vägen in vrider du en kvarts varv till för att uppnå rätt åtdragningsmoment. Para más información sobre el uso de los instrumentos, consulte el manual "Sistemas Piezon". Per maggiori dettagli sull'uso degli strumenti, consultare il manuale "Sistemi Piezon". För närmare information om hur du använder instrumenten, se handboken för Piezonsystemen. 17 Installing the bottle (Piezon 250) Installation de la bouteille (Piezon 250) Installieren der Flasche (Piezon 250) Always check the condition of the bottle cap O-ring before installing the bottle. Please refer to the "Maintenance" chapter. Toujours vérifier l'état du joint du couvercle de la bouteille avant de la mettre en place. Veuillez-vous réferer au chapitre "Maintenance". Use the graduations on the bottle to adjust the quantity of solution necessary for the treatment. Utiliser les graduations sur la bouteille pour ajuster la quantité de solution nécessaire au traitement. Vor dem Installieren der Flasche müssen Sie grundsätzlich den Zustand des O-Rings des Flaschendeckels prüfen. Weitere Informationen finden Sie im Kapitel „Wartung“. Install the bottle using a rotating movement until it comes to a stop. Installer la bouteille en faisant un mouvement de rotation jusqu'en butée. 18 Verwenden Sie die Einteilungen auf der Flasche, um die Lösungsmenge für die Behandlung abzufüllen. Installieren Sie die Flasche mit einer Drehbewegung bis an den Anschlag. Instalación de la botella (Piezon 250) Compruebe siempre el estado de la junta tórica del tapón de la botella antes de instalar la botella. Consulte el capítulo "Mantenimiento". Utilice las graduaciones de la botella para ajustar la cantidad de solución necesaria para el tratamiento. Instale la botella con un movimiento de rotación hasta alcanzar el tope. Installazione della bottiglia (Piezon 250) Installera flaskan (Piezon 250) Prima di installare la bottiglia, controllare sempre le condizioni della guarnizione anulare del tappo della bottiglia. Consultare il capitolo "Manutenzione". Kontrollera alltid skicket hos O-ringen i flasklocket innan du installerar flaskan. Se kapitlet Underhåll. Servirsi delle graduazioni sulla bottiglia per regolare la quantità di soluzione necessaria per il trattamento. Installare la bottiglia con un movimento rotatorio fino allo scatto d'arresto. Använd graderingarna på flaskan för att ställa in den mängd lösning som behövs för behandlingen. Installera flaskan med en vridrörelse tills det tar stopp. 19 Solutions compatible with the circuit Solutions compatibles avec le circuit Mit dem Kreislauf kompatible Lösungen Please read the instructions for use of the disinfecting products. Veuillez-vous référer aux modes d’emploi des produits désinfectants. Lesen Sie bitte die Anweisungen zur Verwendung der Desinfektionslösungen. Please refer to standards applicâble in your country regarding the purchase and use of these products. Disinfecting solutions for the treatment • Chlorhexidine (≤ 0.3%) • Physiological water (NaCl ≤ 0.9%) • Hydrogen peroxide (H2O2 ≤ 3%) • Carbanilides • Quaternary ammonium compounds • Citric acid • Aromatic essence • Ethanol Veuillez-vous référer aux normes en vigueur dans votre pays pour l'acquisition et l'utilisation de ces produits. Beachten Sie beim Kauf und bei der Verwendung dieser Produkte bitte die in Ihrem Land geltenden Normen. Solutions désinfectants pour le traitement • Chlorhexidine (≤ 0,3%) • Eau physiologique (NaCl ≤ 0.9%) • Peroxide d'hydrogène (H2O2) 5% • Carbanilides • Composants ammonium quaternaires • Acide citrique • Essence aromatique • Ethanol Desinfektionslösungen für die Behandlung • Chlorhexidin (≤ 0,3%) • Physiologisches Wasser (NaCl ≤ 0,9%) • Wasserstoffperoxid (H2O2 ≤ 3%) • Carbanilide • Quaternäre Ammoniumverbindungen • Zitronensäure • Aromatische Essenz • Ethanol Examples of common products BacterX® pro / Triclosan / Listerine® / Alodont® / Meridol® / BreathRx® / CloSYS™ / Scope® / Cepacol® /..... Disinfecting solutions for washing the circuit • EMS Ultra Clean (H2O2 6%) • Hydrogen peroxide (H2O2 5%) • Sterilox (hypochlorous acid) Exemples de produits courants BacterX® pro / Triclosan / Listerine® / Alodont® / Meridol® / BreathRx® / CloSYS™ / Scope® / Cepacol® /..... Solutions désinfectants pour laver le circuit • EMS Ultra Clean (H2O2 6%) • Peroxide d'hydrogène (H2O2 5%) • Sterilox (acide hypochlorique) Incompatible mixing Mélanges incompatibles Different disinfecting solutions can be used during treatment. Chemical reactions might occur between these solutions and damage the unit. Wash the liquid circuit for 20 seconds with distilled (or demineralized) water before using a different disinfecting solution (please refer to the "End of treatment" chapter). Différents solutions désinfectantes peuvent être utilisées durant le traitement. Des réactions chimiques pourraient se produire entre ces liquides et endommager l’appareil. Laver le circuit de liquide pendant 20 secondes avec de l'eau distillée (ou déminéralisée) avant d'utiliser une solution désinfectante différente (veuillez-vous référer au chapitre "Fin de traitement"). 20 Beispiele für allgemeine Produkte BacterX® pro / Triclosan / Listerine® / Alodont® / Meridol® / BreathRx® / CloSYS™ / Scope® / Cepacol® /..... Desinfektionslösungen zum Waschen des Kreislaufs • EMS Ultra Clean (H2O2 6%) • Wasserstoffperoxid (H2O2 5%) • Sterilox (Hypochlorsäure) Unverträgliche Mischungen Während der Behandlung können unterschiedliche Desinfektionslösungen verwendet werden. Zwischen den verschiedenen Lösungen kann es zu chemischen Reaktionen und in der Folge zu einer Beschädigung des Geräts kommen. Waschen Sie den Flüssigkeitskreislauf 20 Sekunden lang mit destilliertem (oder demineralisierten) Wasser, bevor Sie eine andere Desinfektionslösung verwenden. Weitere Informationen finden Sie im Kapitel „Ende der Behandlung“. Soluciones compatibles con el circuito Soluzioni compatibili con il circuito Lösningar som är förenliga med kretsen Lea las instrucciones de uso de los productos desinfectantes. Leggere le istruzioni d'uso dei prodotti disinfettanti. Läs bruksanvisningen för desinfektionsprodukterna. Siga las normas vigentes en su país sobre la compra y uso de estos productos. Fare riferimento alle norme applicabili nel proprio paese per l'acquisto e l'uso di questi prodotti. Se de standarder som är tillämpliga i ditt land beträffande köp och användning av sådana produkter. Soluzioni disinfettanti per il trattamento • Cloressidina (≤ 0.3%) • Acqua fisiologica (NaCl ≤ 0.9%) • Perossido d'idrogeno (H2O2 ≤ 3%) • Difeniluree (Carbanilidi) • Composti di ammoniaca quaternaria • Acido citrico • Essenza aromatica • Etanolo Desinfektionslösningar för behandlingen • Klorhexidin (≤ 0,3 %) • Fysiologisk koksaltlösning (NaCl ≤ 0,9 %) • Väteperoxid (H2O2 ≤ 3 %) • Karbanilider • Kvartära ammoniumföreningar • Citronsyra • Aromatisk essens • Etanol Esempi di prodotti comuni Exempel på vanliga produkter BacterX® pro / Triclosan / Listerine® / Alodont® / Meridol® / BreathRx® / CloSYS™ / Scope® / Cepacol® /..... BacterX® pro / triklosan / Listerine® / Alodont® / Meridol® / BreathRx® / CloSYS™ / Scope® / Cepacol® /..... Soluzioni disinfettanti per il lavaggio del circuito • EMS Ultra Clean (H2O2 6%) • Perossido d'idrogeno (H2O2 5%) • Sterilox (acido ipocloroso) Desinfektionslösningar för rengöring av kretsen • EMS Ultra Clean (H2O2 6 %) • Väteperoxid (H2O2 5 %) • Sterilox (underklorsyrlighet) Mezclas incompatibles Miscelazioni incompatibili Oförenliga blandningar Durante el tratamiento se pueden utilizar distintas soluciones desinfectantes. Se pueden producir reacciones químicas entre estas soluciones y dañar la unidad. Lave el circuito de líquido durante 20 segundos con agua destilada (o desmineralizada) antes de usar otra solución desinfectante distinta (consulte el capítulo "Fin del tratamiento"). Durante il trattamento si possono usare diverse soluzioni disinfettanti. Tra queste soluzioni potrebbero verificarsi reazioni chimiche in grado di danneggiare l'unità. Prima di utilizzare una soluzione disinfettante diversa, lavare il circuito del liquido per 20 secondi con acqua distillata o demineralizzata (consultare il capitolo "Fine del trattamento"). Olika desinfektionslösningar kan användas under behandling. Kemiska reaktioner skulle kunna uppstå mellan dessa lösningar och skada enheten. Tvätta vätskekretsen i 20 sekunder med destillerat (eller demineraliserat) vatten innan du använder en annan desinfektionslösning (se kapitlet Vid slutet av behandlingen). Soluciones desinfectantes para el tratamiento • Clorhexidina (≤ 0.3%) • Agua fisiológica (NaCl ≤ 0,9%) • Peróxido de hidrógeno (H2O2 ≤ 3%) • Carbanilidos • Compuestos de amonio cuaternario • Ácido cítrico • Esencia aromática • Etanol Ejemplos de productos comunes BacterX® pro / Triclosan / Listerine® / Alodont® / Meridol® / BreathRx® / CloSYS™ / Scope® / Cepacol® /..... Soluciones desinfectantes para el lavado del circuito • EMS Ultra Clean (H2O2 6%) • Peróxido de hidrógeno (H2O2 5%) • Sterilox (ácido hipocloroso) 21 Operating the unit Utilisation de l'appareil Verwendung des Geräts To switch on the unit turn the power knob in a clockwise direction. Tourner l'interrupteur principal dans le sens des aiguilles d'une montre pour mettre l'appareil sous tension. Zum Einschalten des Geräts drehen Sie den Leistungsregler im Uhrzeigersinn. Two control lamps light up. One lights the setting index to indicate that the unit is switched on. The other lights the Perio power range. 22 Deux voyants de control s'allument. Un voyant de réglage indique que l'appareil est sous tension. L'autre voyant indique le niveau de puissance Perio. Zwei Kontrolllampen leuchten auf. Eine Kontrollleuchte zeigt an, dass das Gerät eingeschaltet ist. Die andere Kontrollleuchte zeigt den Leistungsbereich des Perio-Geräts an. Använda enheten 5 Funzionamento dell'unità 4 Funcionamiento de la unidad MA X.E ND 4 5 O MA X.P ER IO Para encender la unidad gire el selector de potencia en el sentido de las agujas del reloj. Se iluminan dos lámparas de control. Una indica que la unidad está encendida. La otra indica la potencia Perio. Per accendere l'unità, ruotare la manopola d'accensione e regolazione della potenza in senso orario. Si accendono due spie di controllo. Una illumina l'indice di impostazione per segnalare l'accensione dell'unità. L'altra illumina la scala di potenza Perio. När du vill slå på enheten vrider du effektratten i medurs riktning. Två kontrollampor tänds. Den ena tänds vid inställningsskalan för att indikera att enheten är påslagen. Den andra lyser för att indikera effektintervallet för Parodonti (Perio). 23 Réglage de la puissance des ultrasons Einstellen der Ultraschallleistung Use the rotating knob to increases or decreases the power of the ultrasound. Utiliser le pommeau rotatif pour augmenter ou diminuer la puissance des ultrasons. Verwenden Sie den Drehknopf zum Erhöhen oder Verringern der Ultraschallleistung. The unit has a setting range from "ON" to "MAX" to optimize the power of the ultrasound according to the treatment. L'appareil dispose d'une plage de niveau partant de "ON" jusqu'à "MAX" pour optimiser le réglage da la puissance des ultrasons en accord avec le traitement. Das Gerät verfügt über einen Einstellbereich von „EIN“ bis „MAX“ für eine optimale an die Behandlung angepasste Einstellung der Ultraschallleistung. Des informations sur le réglage optimal de la puissance des ultrasons sont disponibles sur le manuel "Piezon Systems". Weitere Informationen über die optimale Einstellung der Ultraschallleistung für einzelne Instrumente finden Sie im Handbuch über PiezonSysteme. MAX Setting the ultrasound power 8 3 MA X.P 4 IO ER 5 6 7 For information on optimal setting of the ultrasound power for each instrument, please refer to the "Piezon Systems" manual. 24 Impostazione della potenza ultrasonica Ställa in ultraljudseffekten Utilice el selector rotativo para aumentar o disminuir la potencia de los ultrasonidos. Utilizzare la manopola rotante per aumentare o ridurre la potenza degli ultrasuoni. Använd vridratten när du vill öka eller minska ultraljudseffekten. La unidad tiene un rango de ajuste desde "ON" hasta "MAX" para optimizar la potencia de los ultrasonidos según el tratamiento. L'unità dispone di una variazione d'impostazione da "ON" a "MAX" per ottimizzare la potenza degli ultrasuoni in funzione del trattamento. Enheten har ett inställningsintervall från ON (På) till MAX, för att optimera ultraljudseffekten enligt den aktuella behandlingen. Para obtener información sobre el ajuste óptimo de la potencia de ultrasonidos para cada instrumento, consulte el manual "Sistemas Piezon". Per ottenere informazioni sull'impostazione ottimale della potenza degli ultrasuoni di ciascuno strumento, consultare il manuale "Sistemi Piezon". För information om optimal inställning av ultraljudseffekten för varje instrument, se handboken för Piezon-systemen. 4 5 Ajuste de la potencia de los ultrasonidos MA X.P ER IO 25 "Perio" mode Die Perio-Betriebsart 7 Le mode "Perio" 6 OFF ON 2 3 4 5 IO MAX. PER When using an Perio tip, the maximum power setting is 4. Le réglage maximum pour l'utilisation d'un instrument Perio est de 4. The setting range for the "Perio" mode is from "ON" to "4" maximum. La plage de réglage pour un instrument "Perio" est de "ON" à "4" maximum. When the "Perio" mode switch ON, a led indicates the setting of the power for ultrasounds. The maximum limit of the range is indicated by the mark "MAX. PERIO". Lorsque le mode "Perio" est sur ON, un voyant indique le réglage de la puissance des ultrasons. La limite maximum de l'utilisation est indiquée par le repère "MAX. PERIO". 26 Bei der Verwendung einer Perio-Spitze entspricht die maximal zulässige Leistungseinstellung dem Wert 4. Der Einstellbereich für die Perio-Betriebsart reicht von „EIN“ bis maximal „4“. Wenn die Perio-Betriebsart eingeschaltet wird, leuchtet eine LED auf und zeigt die Einstellung der Ultraschallleistung an. Die maximale Einstellung ist mit „MAX. PERIO“ gekennzeichnet. Modo "Perio" Modalità "Perio" Läget Perio (Parodonti) PERIO ON 2 3 4 5 6 7 8 MAX La potencia máxima cuando se utilizan puntas Perio es 4. Nell'uso di una punta Perio, l'impostazione massima della potenza è 4. Vid användning av en Perio-spets (parodontispets) är den maximala effektinställningen 4. El rango de potencia para el modo "Perio" va desde "ON" hasta un máximo de "4". L'intervallo di impostazioni per la modalità "Perio" è da "ON" a un massimo di "4". Inställningsintervallet för läget Perio (Parodonti) är från ON (På) till högst 4. Cuando el modo "Perio" está encendido, una luz LED indica el ajuste de la potencia de los ultrasonidos. El límite máximo del rango se indica con la marca "MAX. PERIO". All'accensione della modalità "Perio", un LED indica l'impostazione della potenza degli ultrasuoni. Il limite massimo dell'intervallo è indicato dal segno "MAX. PERIO". När läget Perio (Parodonti) slås på indikerar en lysdiod inställningen för ultraljudseffekt. Maxgränsen för intervallet indikeras av märket MAX. PERIO. 27 Mode "Détartrage" Scaling-Betriebsart 2 "Scaling" mode ON 6 7 8 The "Scaling" mode uses the entire power range for the ultrasounds, from "ON" to "MAX". 28 MAX OFF Le mode détartrage utilise la plage entière de puissances des ultrasons, de "ON" jusqu'à MAX". Die Scaling-Betriebsart nutzt den gesamten Ultraschallleistungsbereich von „EIN“ bis „MAX“. Modo "Raspado" Modalità "Ablazione del tartaro" Läget Scaling (Borttagning av plack och tandsten) SCALING ON El modo "Raspado" utiliza todo el rango de potencia de los ultrasonidos, desde "ON" hasta"MAX". 2 3 La modalità "Ablazione del tartaro" utilizza l'intero intervallo di potenze degli ultrasuoni, da "ON" a "MAX". 4 5 6 7 8 MAX Läget Scaling (Borttagning av plack och tandsten) använder hela effektintervallet för ultraljud, från ON (På) till MAX. 29 Réglage du débit du liquide Einstellen der Wasserdurchsatzmenge 4 5 Setting the liquid flow rate MA X.P ER IO Optimal settings for the liquid flow rate for each instrument are indicated in the operating instructions of the "Piezon Systems". Le réglage optimal pour le débit du liquide pour chaque instrument est indiqué dans le manuel d'utilisation "Piezon Systems". Never work dry to avoid heat damage on the tooth, unless the instrument is intended specifically for this purpose. The tip of the instrument immediately heats up when used dry. Ne jamais travailler à sec afin d'éviter des dommages dus à la chaleur sur le dents, à moins que l'instrument ne soit conçu pour ce mode d'utilisation. La pointe de l'instrument s'échauffe immédiatement lorsqu'il est utilisé à sec. For further information concerning instruments usable in "DRY WORK" mode, please refer to the "Piezon Systems" manual. 30 Veuillez consulter les informations concernant les instruments utilisables en mode sec "DRY WORK", dans le manuel du "Piezon Systems". Die optimalen Einstellungen für den Wasserdurchsatz einzelner Instrumente sind der Bedienungsanleitung über die Piezon-Systeme zu entnehmen. Das Gerät darf grundsätzlich nicht trocken verwendet werden, um Hitzeschäden am Zahn zu vermeiden, sofern das Instrument nicht speziell für diesen Zweck geeignet ist. Bei einer trockenen Verwendung heizt die Spitze des Instruments sofort auf. Weitere Informationen über die in der Betriebsart „DRY WORK“ verwendbaren Instrumente finden Sie im Handbuch über PiezonSysteme. Ajuste del caudal del líquido Impostazione della velocità del flusso del liquido Ställa in vätskans flödeshastighet Los ajustes óptimos para el caudal de cada instrumento se indican las instrucciones de funcionamiento de los "Sistemas Piezon". Le impostazioni ottimali della velocità del flusso del liquido di ogni strumento sono riportate nelle istruzioni sul funzionamento dei "Sistemi Piezon". Optimala inställningar för vätskans flödeshastighet för varje instrument anges i bruksanvisningen för Piezon-systemen. Nunca trabaje en seco para evitar dañar el diente por el calor, a menos que el instrumento esté diseñado específicamente con esta finalidad. La punta del instrumento se calienta inmediatamente cuando se utiliza en seco. Para más información respecto a los instrumentos que se pueden utilizar en seco (modo "DRY WORK"), consulte el manual "Sistemas Piezon" Per evitare danni da calore sul dente, non lavorare in alcun caso a secco, tranne che con strumenti destinati specificatamente a questo tipo di utilizzo. Se usata a secco, la punta dello strumento si riscalda immediatamente. Per maggiori informazioni sugli strumenti utilizzabili in modalità "LAVORO A SECCO", consultare il manuale "Sistemi Piezon". För att förhindra värmeskada på tanden ska du aldrig arbeta i torrt tillstånd, utom om instrumentet är särskilt avsett för detta ändamål. Instrumentets spets hettas upp omedelbart om den används i torrt tillstånd. För mer information om instrument som kan användas i läget DRY WORK (Torrt arbete), se handboken för Piezon-systemen. 31 Piezon handpiece LED (Option) Pièce à main Piezon LED (Option) Piezon-Handstück-LED (Option) The Piezon handpiece LED lights up when the foot pedal is activated. It remains lit for a duration of 20 seconds after the foot pedal is released. La pièce à main Piezon LED s'éclaire lorsque la pédale de commande est activée. Elle reste allumée pour une durée de 20 secondes après que la pédale soit relâchée. Die Piezon-Handstück-LED leuchtet auf, wenn der Fussschalter aktiviert wird. Die LED leuchtet für eine Dauer von 20 Sekunden nach dem Loslassen des Fussschalters. 32 LED del mango Piezon (opcional) LED del manipolo Piezon (Opzionale) Lysdioden på Piezon-handstycket (tillval) 20 seconds La luz LED del mango Piezon se ilumina al activar el pedal. Permanece encendida durante 20 segundos después de soltar el pedal. Il LED del manipolo Piezon si accende all'attivazione del pedale. Rimane acceso per 20 secondi dopo il rilascio del pedale. Lysdioden på Piezon-handstycket tänds när pedalen aktiveras. Den fortsätter lysa i 20 sekunder efter att pedalen har släppts upp. 33 Foot pedal functions Fonction de la pédale de commande Funktionen des Fussschalters Ultrasounds with liquid Ultrasons avec liquide Ultraschall mit Flüssigkeit (2 STEPS) 1 EN Liquid spray + Light FR Jet de liquide + Lumière DE Sprühnebel + Licht ES Pulverizador de líquido + Luz IT Spruzzo liquido + Luce Sv Vätskesprej + ljus 1 2 EN Liquid spray + Light + Ultrsounds FR Jet de liquide + Lumière + Ultrasons DE Sprühnebel + Licht + Ultraschall ES Pulverizador de líquido + Luz + Ultrasonidos Upon first use, keep pressure on the pedal until the water goes out off the handpiece. 34 IT Spruzzo liquido + Luce + Ultrasuoni Sv Vätskesprej + ljus + ultraljud Avant la première utilisation maintenir la pression sur la pédale jusqu'à ce que la pièce à main expulse du liquide. Bei der ersten Verwendung des Fußschalters drücken Sie den Fussschalter, bis Wasser aus dem Handstück spritzt. Funciones del pedal Funzioni del pedale Pedalfunktioner Ultrasonidos con líquidos Ultrasuoni con liquido Ultraljud med vätska Antes de la primera utilización, mantenga la presión en el pedal hasta que salga agua por el mango. Al primo utilizzo, mantenere la pressione sul pedale fino alla fuoriuscita dell'acqua dal manipolo. Vid den första användningen ska pedalen hållas nedtryckt tills vattnet har kommit ut ur handstycket. 35 End of treatment En fin de traitement Ende der Behandlung Clean the instrument and the CombiTorque with running water before disinfection. Nettoyer l'instrument et le CombiTorque avec de l'eau courante avant la désinfection. Clean the unit and the accessories (please refer to the "Cleaning, disinfecting and sterilizing" chapter). Nettoyer l'appareil et les accessoires (veuillez lire le chapitre "Nettoyage, désinfection et stérilisation"). Reinigen Sie das Instrument und den CombiTorque vor dem Desinfizieren unter fliessendem Wasser. 36 Reinigen Sie das Gerät mitsamt dem Zubehör (weitere Informationen finden Sie im Kapitel „Reinigen, Desinfizieren und Sterilisieren“). Fin del tratamiento Fine del trattamento Vid slutet av behandlingen Limpie el instrumento y la CombiTorque con agua corriente antes de desinfectarlos. Prima della disinfezione, pulire lo strumento e il CombiTorque con acqua corrente. Rengör instrumentet och CombiTorque med rinnande vatten före desinfektion. Limpie la unidad y los accesorios (consulte el capítulo "Limpieza, desinfección y esterilización). Pulire l'unità e gli accessori (consultare il capitolo "Pulizia, disinfezione e sterilizzazione"). Rengör enheten och tillbehören (se kapitlet Rengöring, desinfektion och sterilisering). 37 Circuit washing Rinçage du circuit Waschen des Kreislaufs 1 20 s 4 5 H 2O (distilled water) MA X.P ER IO 3 Once the treatment has been completed, wash the circuit during 20 sec. of distilled (or demineralized) water to avoid a possible reaction caused by ageing of the solution or by an inadvertent mixture of liquids. Une fois le traitement terminé rincer le circuit pendant 20 sec. avec de l'eau distillée (ou déminéralisée) afin d'éviter une réaction possible causée par une solution ou par un mélange involontaire avec le liquide. Clean the unit and the accessories (please refer to the "Cleaning, disinfecting and sterilizing" chapter). Nettoyer l'appareil et les accessoires (veuillez lire le chapitre "Nettoyage, désinfection et stérilisation". 38 2 Nach Abschluss der Behandlung waschen Sie den Kreislauf 20 Sekunden lang mit destilliertem (oder demineralisierten) Wasser, um eine eventuelle Reaktion durch eine Alterung der Lösung oder eine unbeabsichtigte Mischung von Flüssigkeiten zu verhindern. Reinigen Sie das Gerät mitsamt dem Zubehör (weitere Informationen finden Sie im Kapitel „Reinigen, Desinfizieren und Sterilisieren“). Limpieza del circuito Lavaggio del circuito Tvätta kretsen Cuando haya terminado el tratamiento, limpie el circuito durante 20 segundos con agua destilada (o desmineralizada) para evitar una posible reacción causada por el envejecimiento de la solución o por una mezcla involuntaria de líquidos. Una volta terminato il trattamento, lavare il circuito per 20 sec. con acqua distillata (o demineralizzata) per evitare una possibile reazione provocata dall'invecchiamento della soluzione o da una miscelazione involontaria di liquidi. Tvätta kretsen i 20 sekunder med destillerat (eller demineraliserat) vatten efter att behandlingen har slutförts för att förhindra en eventuell reaktion orsakad av lösningsåldring eller oavsiktlig blandning av vätskor. Pulire l'unità e gli accessori (consultare il capitolo "Pulizia, disinfezione e sterilizzazione"). Rengör enheten och tillbehören (se kapitlet Rengöring, desinfektion och sterilisering). Limpie la unidad y los accesorios (consulte el capítulo "Limpieza, desinfección y esterilización). 39 Handpiece disassembly Démontage de la pièce à main Demontieren des Handstücks Unscrew the cap and the light guide (when equipped) under running water before cleaning. Dévisser l'embout et la lumière (si équipé) et le rincer à l'eau courante avant nettoyage. Lösen Sie den Deckel und den Lichtleiter (sofern vorhanden) vor dem Reinigen unter fließendem Wasser. 40 Desmontaje del mango Smontaggio del manipolo Demontera handstycket Desatornille el tapón y la guía de la luz (si está equipado con esta opción) bajo agua corriente antes de la limpieza. Svitare il tappo e la guida luminosa (se in dotazione) e passarli sotto l'acqua corrente prima della pulizia. Skruva loss höljet och ljusledaren (i förekommande fall) under rinnande vatten före rengöring. 41 Cleaning and sterilizing Nettoyage et stérilisation Reinigen und Sterilisieren Recommended cleaning, packaging for sterilization, and sterilization procedures are provided below. Les procédures de nettoyage, et emballage pour la stérilisation sont décrites ci-dessous. Im Folgenden sind die Empfehlungen im Hinblick auf Reinigungs-, Verpackungs- und Sterilisierungsverfahren aufgeführt. Cleaning Nettoyage Reinigen Only the manual reprocessing is validated for the handpiece, the CombiTorque and the instruments. • Remove any externally attached soiling by brushing carefully with a soft surface brush or cloth. • Remove the instruments from handpiece. • Soak all parts in the cleaning solution for, at a minimum, the time and the concentration specified by the manufacturer of the cleaning agent. 42 • Le manuel Reprocessing est valable seulement pour la pièce à main, le CombiTorque et les instruments. • Enlever délicatement à l'aide d'une brosse ou d'un chiffon les saletés sur les parties extérieures. • Détacher les instruments de la pièce à main. • Tremper toutes les parties dans une solution de nettoyage. Lire les spécifications données par le fabricant concernant la concentration de la solution de nettoyage et la durée du trempage. Die manuelle Aufbereitung ist auf das Handstück, den CombiTorque und die Instrumente beschränkt. • Verwenden Sie eine weiche Bürste oder ein weiches Tuch, um Verschmutzungen von den äußeren Teilen zu entfernen. • Nehmen Sie die Instrumente vom Handstück ab. • Tauchen Sie alle Teile in die Reinigungslösung und beachten Sie in Bezug auf die Dauer und die Konzentration des Reinigungsmittels die Anweisungen des Herstellers. 135°C Limpieza y esterilización Pulizia e sterilizzazione Rengöring och sterilisering A continuación se indican los procedimientos recomendados de limpieza, embalaje para la esterilización y esterilización. Le procedure raccomandate per la pulizia, l'imballaggio per la sterilizzazione e la sterilizzazione sono illustrate qui sotto. Rekommenderade förfaranden för rengöring, omslag för sterilisering och sterilisering ges nedan. Limpieza Pulizia Rengöring El reprocesamiento manual solo está validado para el mango, la CombiTorque y los instrumentos. • Quite la suciedad externa cepillando la zona con cuidado con un cepillo suave o un paño. • Extraiga los instrumentos del mango. • Sumerja todas las piezas en la solución de limpieza con la concentración y durante el tiempo especificados por el fabricante del agente de limpieza. Per il manipolo, il CombiTorque e gli strumenti è consentito solo il ricondizionamento manuale. • Togliere tutta la sporcizia attaccata all'esterno strofinando attentamente con una spazzola o un panno dalla superficie morbida. • Staccare gli strumenti dal manipolo. • Immergere tutte le parti nella soluzione detergente almeno per il tempo e con la concentrazione indicati dal produttore del prodotto detergente. Endast den manuella bearbetningen har validerats för handstycket, CombiTorque och instrumenten. • Avlägsna eventuell utvändigt fäst smuts genom att borsta försiktigt med en mjuk ytborste eller trasa. • Avlägsna instrumenten från handstycket. • Blötlägg alla delar i rengöringslösningen under minst den tid och vid den koncentration som anges av tillverkaren av rengöringsmedlet. 43 • Brush the parts in the cleaning solution if any visible soiling is detected. • Submerge all components completely in drinking water. • Rinse through all product lumens with drinking water. • Repeat the cleaning process if the last rinse does not run clear, or if stains are still visible on the product. • Dry all components at room température. Packaging for sterilization The clean, dry instruments should be placed in a sterilization container. The container should be bagged in a sterilization pouch that is validated for use in a 135 °C steam sterilization cycle. The sterilization pouch should be sealed according to the manufacturer’s instructions. Sterilization EMS recommends sterilization in a fractional cycle at 132 °C for at least 4 min. EMS recommends use of biological indicators and chemical indicators that have been validated for use in a 132 °C steam sterilization cycle. The hot air sterilization and radio-sterilization procedure may not be used (as it causes the destruction of products). • Brosser les pièces dans la solution de nettoyage en cas de résidu de saletés. • Submerger complètement tous les composants dans de l'eau potable. • Rincer tous les canaux du produit avec de l'eau potable. • Répéter le nettoyage si le dernier rinçage n'est pas parfaitement propre et si il y a encore des colorations visibles sur le produit. • Laisser sécher tous les composants à température ambiante. Emballage pour la stérilisation L'instrument propre et sec doit être placé dans une boite de stérilisation. Cette boite doit être placée ensuite dans une poche de stérilisation à vapeur prévue pour une température de 135 °C. La fermeture de cette poche doit être effectuée conformement aux instructions du fabricant. Stérilisation EMS recommande une stérilisation en fraction de cycle à 132 °C pendant au moins 4 min. EMS recommande l'utilisation d'indicateurs biologiques et chimiques qui ont été validés pour des cycle de stérilisation à vapeur à 132 °C. Les procédures de stérilisation à air chaud et la radio-stérilisation ne doivent pas être utilisées (provoquent la destruction des produits). • Bürsten Sie die Teile in der Reinigungslösung, bis keine Verschmutzungen mehr zu sehen sind. • Tauchen Sie alle Bestandteile in Trinkwasser. • Spülen Sie alle Kanäle des Produkts mit Trinkwasser. • Wiederholen Sie den Reinigungsprozess, wenn das Wasser beim letzten Spülgang noch nicht klar ist, oder wenn auf dem Produkt immer noch Verschmutzungen erkennbar sind. • Trocknen Sie alle Komponenten bei Raumtemperatur. Verpackung für die Sterilisierung Die sauberen, trockenen Instrumente müssen in einen Sterilisationsbehälter gelegt werden. Der Behälter sollte in einen Sterilisationsbeutel verpackt werden, der für die Verwendung in einem Dampfsterilisationszyklus bei 135 °C verwendet werden kann. Der Sterilisationsbeutel sollte gemäß den Anweisungen des Herstellers versiegelt werden. Sterilisation EMS empfiehlt die Sterilisation in Teilzyklen von mindestens 4 Minuten bei 132 °C. EMS empfiehlt die Verwendung biologischer und chemischer Indikatoren, die sich für die Verwendung in einem Dampfsterilisationszyklus bei 132 °C eignen. Sie dürfen weder die Heissluftsterilisation noch die Strahlensterilisation verwenden (da diese Verfahren zur Zerstörung des Produkts führen). 44 • Cepille las piezas en la solución de limpieza si se detecta suciedad visible. • Sumerja todos los componentes completamente en agua potable. • Enjuague todos los conductos del producto con agua potable. • Repita el proceso de limpieza si en el último enjuagado el agua no sale limpia o si todavía hay manchas visibles en el producto. • Seque todos los componentes a temperatura ambiente. Embalaje para la esterilización Los instrumentos secos y limpios deben colocarse en un recipiente de esterilización. El recipiente debe colocarse en una bolsa de esterilización con un ciclo de esterilización por vapor a 135 °C. La bolsa de esterilización debe sellarse según las instrucciones del fabricante. Esterilización EMS recomienda un ciclo fraccionado de esterilización a 132 °C durante al menos 4 min. EMS recomienda el uso de indicadores biológicos y químicos que hayan sido certificados para su uso en un ciclo ce esterilización por vapor a 132 °C. No deben utilizarse procedimientos de esterilización por aire caliente ni por radiación (ya que causa la destrucción de los productos). • Spazzolare le parti immerse nella soluzione detergente se si rileva della sporcizia visibile. • Immergere completamente tutti i componenti in acqua potabile. • Sciacquare accuratamente tutte le aperture del prodotto con acqua potabile. • Ripetere il processo di pulizia se l'acqua dell'ultimo risciacquo non è completamente trasparente o se sul prodotto sono ancora visibili macchie. • Asciugare tutti i componenti a temperatura ambiente. Imballaggio per la sterilizzazione Gli strumenti puliti e asciutti devono essere messi in un contenitore per la sterilizzazione. Il contenitore deve essere imbustato in un sacchetto di sterilizzazione adatto all'impiego in cicli di sterilizzazione a vapore di 135°C. Il sacchetto di sterilizzazione deve essere sigillato attenendosi alle istruzioni del fabbricante. Sterilizzazione EMS raccomanda la sterilizzazione in ciclo frazionato a 132°C per almeno 4 min. EMS raccomanda l'uso di indicatori biologici e chimici adatti all'impiego in cicli di sterilizzazione a vapore di 132°C. La procedura di sterilizzazione in aria calda e quella di radio-sterilizzazione non sono utilizzabili (provocherebbero la distruzione dei prodotti). • Borsta delarna i rengöringslösningen om någon synbar smuts detekteras. • Sänk ned alla komponenter fullständigt i dricksvatten. • Skölj igenom alla produktens lumina med dricksvatten. • Upprepa rengöringsprocessen om den sista sköljningen inte ger en klar sköljvätska eller om fläckar fortfarande syns på produkten. • Torka alla komponenter vid rumstemperatur. Omslag för sterilisering De rena, torra instrumenten ska placeras i en steriliseringsbehållare. Behållaren ska inneslutas i en steriliseringspåse som har validerats för användning i en ångsteriliseringscykel vid 135 °C. Steriliseringspåsen ska förseglas enligt tillverkarens anvisningar. Sterilisering EMS rekommenderar sterilisering i en fraktionerad cykel vid 132 °C under minst 4 min. EMS rekommenderar användning av biologiska indikatorer och kemiska indikatorer som har validerats för användning i en ångsteriliseringscykel vid 132 °C. Förfaranden för varmluftssterilisering och strålsterilisering får inte användas (de orsakar nedbrytning av produkterna). 45 Cleaning the bottle and the unit Nettoyage de la bouteille et de l'appareil Reinigen der Flasche und des Geräts Bottles can be washed in a washer and disinfected at up to 95 °C in a washer disinfector. Les bouteilles peuvent être lavées et désinfectées jusqu'à une température de 95 °C dans un dispositif de nettoyage et de désinfection. Die Flaschen können in einer Waschanlage gespült und bei 95 °C in einem Reinigungs- und Desinfektionsgerät desinfiziert werden. Les bouteilles ne peuvent pas être stérilisées. Die Flaschen können nicht sterilisiert werden. Nettoyer l'appareil uniquement avec des désinfectants à base d'alcool incolore (éthanol, isopropanol) disponible dans le commerce. L'utilisation de poudre à récurer ou d'une éponge abrasive endommage l'état de surface. Verwenden Sie für die Reinigung des Geräts ausschließlich ein alkoholbasiertes, handelsübliches, farbloses Desinfektionsmittel (Ethanol, Isopropanol). Die Verwendung von Scheuerpulver oder Kratzschwämmen führt zu einer Beschädigung der Oberfläche. Bottles cannot be sterilized. Clean the unit only with an alcohol-based, commercially-available, colorless disinfectant (ethanol, isopropanol). The use of scouring powder or an abrasive sponge will damage its surface. The unit is not protected against water spray. It cannot be sterilized. 46 L'appareil n'est pas protégé contre les vaporisations d'eau. Il ne peut pas être stérilisé. Das Gerät ist nicht spritzwassergeschützt. Es kann nicht sterilisiert werden. Limpieza de la botella y la unidad Pulizia della bottiglia e dell'unità Rengöra flaskan och enheten Las botellas se pueden lavar en una lavadora y desinfectarse hasta 95 °C en una lavadora desinfectadora. Le bottiglie possono essere lavate in lavatrice e disinfettate in una lavatrice disinfettante fino a 95°C. Flaskorna kan tvättas i en diskmaskin och desinfekteras vid upp till 95 °C i en diskdesinfektor. Las botellas no pueden esterilizarse. Le bottiglie non possono essere sterilizzate. Limpie la unidad únicamente con un desinfectante incoloro a base de alcohol (etanol, isopropanol) comercialmente disponible. La utilización de polvos de limpieza o de una esponja abrasiva dañaría su superficie. Pulire l'unità esclusivamente con disinfettante incolore a base di alcool disponibile in commercio (etanolo, isopropanolo). L'utilizzo di polvere abrasiva o di spugna abrasiva ne danneggerebbe la superficie. El aparato no está protegido contra las proyecciones de agua. No puede esterilizarse. L'unità non è protetta dagli spruzzi d'acqua. Non può essere sterilizzata. Flaskorna kan inte steriliseras. Enheten får rengöras endast med ett alkoholbaserat, färglöst desinfektionsmedel som finns tillgängligt i handeln (etanol, isopropanol). Användning av skurpulver eller en slipande svamp orsakar skador på enhetens yta. Enheten är inte skyddad mot vattensprej. Den kan inte steriliseras. 47 Disinfecting the circuit 1 Désinfection du circuit 2 20 s H 2O (distilled water) Desinfizieren des Kreislaufs 3 disinfecting liquid 20 s It is recommended to disinfect the liquid circuit daily. Il est recommandé de désinfecter le circuit de liquide quotidiennement. Wir empfehlen die tägliche Desinfizierung des Flüssigkeitskreislaufs. Disinfection is necessary to reduce crystalline deposits and the number of bacteria in the liquid circuit of the unit; the following procedure achieves a 5 log reduction of target pathogens (using disinfecting solutions for washing the circuit as listed at the beginning of this manual): 1 Remove the instrument, 2 Wash the circuit during 20 seconds with distilled (or demineralized) water, 3 Disinfect the circuit during 20 seconds with an appropriate disinfecting solution for washing the circuit 4 Allow the disinfecting liquid to act for 5 minutes, 5 Rinse the circuit during 20 seconds with sterile water. La désinfection est nécessaire à la réduction du dépôt cristallin et au nombre de bactéries dans le circuit du liquide de l'appareil; la procédure suivante décrit en 5 pas la réduction de pathogènes (utilisant des solutions de nettoyage du circuit, comme listées en début de ce manuel): 1 Démonter l'instrument, 2 Rincer le circuit pendant 20 secondes avec de l'eau distillée (ou déminéralisée), 3 Désinfecter le circuit pendant 20 secondes avec une solution appropriée, 4 Laisser agir le liquide désinfectant pendant 5 minutes, 5 Rincer le circuit pendant 20 secondes avec de l'eau stérile. Die Desinfektion dient zur Reduzierung von kristallinen Ablagerungen und von Bakterien im Flüssigkeitskreislauf des Geräts. Im Folgenden werden die 5 Schritte zur Reduzierung von Krankheitserregern (unter Verwendung von Desinfektionslösungen zum Spülen des Kreislaufs wie am Anfang dieses Handbuchs aufgeführt) beschrieben: 1 Demontieren Sie das Instrument. 2 Waschen Sie den Flüssigkeitskreislauf 20 Sekunden lang mit destilliertem (oder demineralisierten) Wasser. 3 Desinfizieren Sie den Kreislauf 20 Sekunden lang mit einer geeigneten Desinfektionslösung zum Waschen des Flüssigkeitskreislaufs. 4 Lassen Sie die Desinfektionslösung 5 Minuten lang einwirken. 5 Spülen Sie den Kreislauf 20 Sekunden lang unter sterilem Wasser. 48 Desinfección del circuito 4 Disinfezione del circuito 5 5 min Desinfektera kretsen 20 s 6 H 2O (sterile water) Se recomienda desinfectar el circuito del líquido a diario. Si raccomanda di disinfettare il circuito del liquido ogni giorno. Vi rekommenderar att vätskekretsen desinfekteras dagligen. La desinfección es necesaria para reducir los depósitos cristalinos y el número de bacterias en el circuito de líquido de la unidad. El procedimiento siguiente de 5 pasos consigue reducir los agentes patógenos (usando las soluciones desinfectantes para limpiar el circuito que se indican al principio de este manual): 1 Extraiga el instrumento, 2 Lave el circuito durante 20 segundos con agua destilada (o desmineralizada), 3 Desinfecte el circuito durante 20 segundos con una solución desinfectante apropiada para lavar el circuito, 4 Deje que el líquido desinfectante actúe durante 5 minutos, 5 Enjuague el circuito durante 20 con agua esterilizada. La disinfezione è necessaria per ridurre i depositi cristallini e il numero di batteri nel circuito del liquido dell'unità; la seguente procedura ottiene una riduzione di 5 log dei patogeni bersaglio (usando le soluzioni disinfettanti per il lavaggio del circuito elencate all'inizio di questo manuale): 1 Togliere lo strumento, 2 Lavare il circuito per 20 secondi con acqua distillata o demineralizzata, 3 Disinfettare il circuito per 20 secondi con soluzione disinfettante adatta per il lavaggio del circuito 4 Lasciare agire il liquido disinfettante per 5 minuti, 5 Lavare il circuito per 20 secondi con acqua sterile. Desinfektion är nödvändig för att minska mängden kristallina avlagringar och antalet bakterier i enhetens vätskekrets. Följande förfaranden uppnår en 5 logminskning av målpatogenerna (med de desinfektionslösningar för rengöring av kretsen som finns förtecknade i början av denna handbok): 1 Avlägsna instrumentet. 2 Tvätta kretsen i 20 sekunder med destillerat (eller demineraliserat) vatten. 3 Desinfektera kretsen i 20 sekunder med lämplig desinfektionslösning för att tvätta kretsen. 4 Låt desinfektionslösningen verka i 5 minuter. 5 Skölj kretsen i 20 sekunder med sterilt vatten. 49 Maintenance Maintenance Wartung The EMS Piezon instruments must be checked regularly using the EMS "Tip Card". Ultrasound instruments wear during use and become shorter. Worn instruments are ineffective and are a cause of discomfort to the patient. Les instruments EMS Piezon doivent être vérifiés régulièrement utilisant la EMS "Tip Card". Les instruments ultrasons s'usent pendant l'usage et deviennent plus court. Les instruments usés sont inefficaces et provoquent un inconfort du patient. Die EMS Piezon-Instrumente müssen regelmäßig mithilfe der EMS „Tip Card“ geprüft werden. Ultraschallgeräte verschleißen beim Gebrauch und werden kürzer. Abgenutzte Instrumente sind ineffizient und verursachen Beschwerden. Instruments showing wear on the diamond coating must be replaced. Les instruments avec des traces d'usure sur le revêtrement en diamant doivent être remplacés. Instrumente mit einer abgenutzten Diamantbeschichtung müssen ersetzt werden. For precautionary reasons, do not exceed the validated lifespan of the components (see the Technical Data chapter). Par précaution, ne pas dépasser la validité de la durée de vie des composants (voir le chapitre Caractéristiques techniques). Always use EMS original parts. Using nonoriginal components may damage the equipment, and practitioner or patient may be injured. Toujours utiliser des pièces d'origines EMS. L'utilisation de composants d'une autre origine peuvent endommager l'équipement, blesser l'utilisateur et le patient. Als Vorsorgemassnahme sollte die validierte Lebensdauer der Komponenten (im Kapitel „Technische Daten“) nicht überschritten werden. 50 Verwenden Sie grundsätzlich EMS Originalteile. Die Verwendung von Nicht-Originalbestandteilen kann zu einer Beschädigung des Geräts oder zu einer Verletzung des Nutzers oder des Patienten führen. Mantenimiento Manutenzione Underhåll Los instrumentos Piezon de EMS deben revisarse regularmente con la "Tip Card" de EMS. Los instrumentos de ultrasonidos se desgastan por el uso y se van haciendo más cortos. Los instrumentos desgastados son ineficaces y pueden causar molestias al paciente. Gli strumenti EMS Piezon devono essere controllati regolarmente utilizzando la "Scheda punte" di EMS. Gli strumenti a ultrasuoni si consumano durante l'uso e si accorciano. Gli strumenti consumati sono inefficaci e procurano disagio al paziente. EMS Piezon-instrumenten måste kontrolleras regelbundet med hjälp av EMS Tip Card (Spetskort). Ultraljudsinstrumenten slits under användningen och blir kortare. Slitna instrument är ineffektiva och orsakar obehag för patienten. Los instrumentos en los que el recubrimiento de diamante esté desgastado se deben sustituir. Gli strumenti che presentano segni di usura sul rivestimento diamantato devono essere sostituiti. Por precaución, no exceda la vida útil aprobada de los componentes (vea el capítulo Especificaciones técnicas). Per ragioni precauzionali, non superare la durata convalidata dei componenti (vedere il capitolo dei Dati tecnici). Utilice siempre piezas originales de EMS. El uso de componentes no originales puede causar daños en el equipo y lesiones en el médico o el paciente. Usare sempre ricambi originali EMS. L'utilizzo di componenti non originali potrebbe danneggiare l'attrezzatura e provocare lesioni al medico o al paziente. Instrument som uppvisar slitage av diamantbeläggningen måste bytas ut. Av försiktighetsskäl får komponenternas validerade livslängd inte överskridas (se kapitlet Tekniska data). Använd alltid originaldelar från EMS. Användning av icke-originalkomponenter kan orsaka skada på utrustningen, tandläkaren eller patienten. 51 Verification of O-rings Vérification du joint torique Prüfen der O-Ringe A damaged or worn out O-ring must be replaced immediately. Un joint torique endommagé ou usé doit être remplacé immédiatement. Ein beschädigter oder abgenutzter O-Ring muss sofort ausgewechselt werden. Check that both connectors of the cord are dry before connecting it to the unit. Vérifier que les connecteurs du câble sont bien secs avant de les brancher sur l'appareil. Please refer to the instructions provided with the maintenance set to replace an O-ring. Veuillez-vous référer aux instructions fournis avec le set de maintenance pour remplacer un joint torique. Vergewissern Sie sich, dass beide Steckverbinder des Netzkabels trocken sind, bevor Sie das Kabel an das Gerät anschliessen. Always use EMS original parts. Using nonoriginal instruments may damage the unit, and practitioner or patient may be injured. 52 Toujours utiliser des pièces d'origines EMS. L'utilisation de composants d'une autre origine peuvent endommager l'équipement, blesser l'utilisateur et le patient. Weitere Informationen finden Sie in der Bedienungsanleitung für das Wartungsset zum Austauschen eines O-Rings. Verwenden Sie grundsätzlich EMS Originalteile. Die Verwendung von Nicht-Originalinstrumenten kann zu einer Beschädigung des Geräts oder zu einer Verletzung des Nutzers oder des Patienten führen. Verificación de las juntas tóricas Controllo delle guarnizioni anulari Kontrollera O-ringen Si una junta tórica está dañada o desgastada debe sustituirse inmediatamente. Le guarnizioni anulari danneggiate o usurate devono essere sostituite immediatamente. En skadad eller utsliten O-ring måste bytas ut omedelbart. Asegúrese de que los dos conectores del cable estén secos antes de conectarlos a la unidad. Verificare che entrambi i connettori del cavo siano asciutti prima di connetterlo all'unità. Consulte las instrucciones suministradas con el juego de mantenimiento para sustituir una junta tórica. Per sostituire una guarnizione anulare, consultare le istruzioni fornite con la dotazione di manutenzione. Utilice siempre piezas originales de EMS. El uso de instrumentos no originales puede causar daños en la unidad y lesiones en el médico o el paciente. Usare sempre ricambi originali EMS. L'utilizzo di strumenti non originali potrebbe danneggiare l'unità e provocare lesioni al medico o al paziente. Kontrollera att sladdens båda anslutningar är torra innan du ansluter den till enheten. Se de anvisningar som medföljer underhållssetet för att byta en O-ring. Använd alltid originaldelar från EMS. Användning av icke-originalinstrument kan orsaka skada på enheten, tandläkaren eller patienten. 53 Replacing the pump (Piezon 250) Replacement de la pompe (Piezon 250) Austauschen der Pumpe (Piezon 250) The pump of the unit is a wear part, it is recommended to change it every 12 months. La pompe de l'appareil est un élément qui s'use, il est recommandé de la remplacer tous les 12 mois. Die Pumpe des Geräts ist ein Verschleissteil, das alle 12 Monate ausgewechselt werden sollte. To change the pump, please refer to the chapter installing the pump in this manual. Pour changer la pompe, veuillez vous référer au chapitre installation de la pompe dans ce manuel. Weitere Informationen zum Auswechseln der Pumpe finden Sie in diesem Handbuch im Kapitel „Installieren der Pumpe“. 54 Sustitución de la bomba (Piezon 250) Sostituzione della pompa (Piezon 250) Byta ut pumpen (Piezon 250) La bomba de la unidad es una pieza que se desgasta y se recomienda cambiarla cada 12 meses. La pompa dell'unità è una parte soggetta ad usura e si raccomanda di cambiarla ogni 12 mesi. Enhetens pump är en slitdel och vi rekommenderar att den byts ut med 12 månaders intervall. Per cambiare la pompa, consultare il capitolo "Installazione della pompa" di questo manuale. För anvisningar för att byta ut pumpen, se kapitlet Installera pumpen i denna handbok. Para cambiar la bomba, consulte el capítulo de instalación de la bomba en este manual. 55 Safety precautions Remarques concernant la sécurité Sicherheitsvorschriften EMS and the dealer of this product accept no liability for direct or consequential injury or damage resulting from improper use, arising in particular through non-observance of the operating instructions, or improper preparation and maintenance. EMS et le distributeur de ce produit ne peuvent être tenus responsables d’éventuels préjudices directs et indirects résultant d’un emploi inadéquat ou d’un maniement incorrect, en particulier lorsque le mode d’emploi n’a pas été respecté ou lorsque la préparation et l’entretien n’ont pas été correctement effectués. EMS und der Händler des Produkts haften nicht für direkte und Folgeschäden, die durch eine unsachgemässe Verwendung des Produkts auftreten, insbesondere durch Nichtbeachtung der Bedienungsanleitung oder unsachgemässe Vorbereitung oder Wartung. Use for the intended purpose only: before using the product, make sure that you have studied the operating instructions. This also applies to any equipment used with this product. Failure to observe the operating instructions may result in the patient or user suffering serious injury or the product being damaged, possibly beyond repair. Risk of explosion: do not use this product in the presence of inflammable anaesthetics or gases. The operator shall not touch the cord connector and the patient simultaneously. During treatment, avoid touching the patient with the handpiece body, as the heat from the handpiece can be uncomfortable for the patient. This product must be used only by trained and qualified personnel. Before each treatment, check the contents of the bottle as well as the liquid present in the circuit. 56 N’utiliser le produit que pour les applications prévues: ce mode d’emploi doit être soigneusement étudié et compris avant l’utilisation. Ceci est également valable pour tous les équipements pouvant être utilisés en combinaison avec ce produit. Vous éviterez ainsi tous risques de blessures et d’endommagement de votre produit. Risque d’explosion: Ne pas utiliser ce produit en présence d’anesthésiques ou de gaz inflammables. L'utilisateur ne doit pas toucher simultamement la prise du cable et le patient. Pendant le traitement, éviter de toucher le patient avec le corps de la pièce à main. La chaleur de la pièce à main peut être désagréable pour le patient. Ce produit ne doit être utilisé que par un personnel qualifié et formé. Avant chaque traitement, vérifier le contenu de la bouteille et le liquide présent dans le circuit. Nur für den vorgesehenen Verwendungszweck einsetzen: Vor dem Einsatz des Geräts müssen Sie diese Bedienungsanleitung aufmerksam gelesen und verstanden haben. Dies gilt gleichermassen für alle in Kombination mit diesem Gerät eingesetzten Produkte. Die Nichtbeachtung der Bedienungsanleitung kann ernsthafte Verletzungen des Nutzers bzw. des Patienten oder eine möglicherweise irreparable Beschädigung des Produkts zur Folge haben. Explosionsgefahr: Verwenden Sie dieses Produkt nicht in Gegenwart von entzündlichen Anästhetika oder Gasen. Der Bediener darf den Kabelstecker und den Patienten nicht gleichzeitig berühren. Während der Behandlung sollte der Kontakt des Patienten mit dem Grundkörper des Handstücks vermieden werden, da die Wärme des Handstücks dem Patienten Unbehagen verursachen kann. Dieses Produkt darf nur von entsprechend geschultem und qualifiziertem Personal verwendet werden. Prüfen Sie vor jeder Behandlung den Inhalt der Flasche sowie die Flüssigkeit im Kreislauf. Precauciones de seguridad Precauzioni di sicurezza Säkerhetsanvisningar EMS y el distribuidor de este producto no se hacen responsables de los daños directos e indirectos derivados del uso o manipulación incorrectos de este producto, especialmente por la no observación de las instrucciones de empleo o por una preparación y un mantenimiento incorrectos. EMS e il rivenditore di questo prodotto non si assumono alcuna responsabilità per danni o lesioni diretti o conseguenti derivati da un uso improprio, e in particolare dalla mancata osservanza delle istruzioni per l'uso o da una preparazione e manutenzione non corrette. EMS och återförsäljaren av denna produkt tar inget ansvar för direkt eller sekundär personskada eller materiell skada som uppstår till följd av felaktig användning, i synnerhet på grund av ickeefterlevnad av bruksanvisningen, eller felaktig förberedelse och felaktigt underhåll. Utilizar únicamente para su finalidad prevista: antes de utilizar este producto por primera vez, lea con atención estas instrucciones de empleo hasta su completa comprensión. Válido igualmente para todos los productos que utilice en combinación con este aparato. La no observancia de estas instrucciones de empleo puede tener como consecuencia lesiones o desperfectos de los productos, puede que irreparables. Utilizzare esclusivamente per l'uso previsto: Prima di utilizzare il prodotto, studiare le istruzioni per l'uso. Ciò vale anche per qualsiasi apparecchiatura utilizzata con questo prodotto. La mancata osservanza delle istruzioni per l'uso può comportare gravi lesioni al paziente o all'operatore o danni al prodotto, anche irreparabili. Får användas endast för det avsedda syftet: Se till att du har läst igenom bruksanvisningen innan du använder produkten. Det här gäller för all utrustning som används tillsammans med denna produkt. Underlåtenhet att följa bruksanvisningen kan leda till att patienten eller användaren skadas allvarligt eller till produktskada som kan vara irreparabel. Riesgo de explosión: No utilice este producto en combinación con anestésicos o gases inflamables. El operador no debe tocar el conector del cable y el paciente simultáneamente. Durante el tratamiento, evite tocar el paciente con el mango, ya que el calor que desprende puede causar molestias al paciente. Este producto debe ser utilizado únicamente por personal capacitado y cualificado. Antes de cada tratamiento, compruebe el contenido de la botella, así como el líquido presente en el circuito. Rischio di esplosione: non usare questo prodotto in presenza di gas anestetici o infiammabili. L'operatore non deve toccare contemporaneamente il connettore del cavo e il paziente. Durante il trattamento, non toccare il paziente con il corpo del manipolo, perché il calore del manipolo potrebbe essere sgradevole per il paziente. Questo prodotto deve essere usato esclusivamente da personale formato e qualificato. Prima di ogni trattamento, controllare il contenuto della bottiglia nonché il liquido presente nel circuito. Risk för explosion: Denna produkt får inte användas i närheten av brandfarliga anestetika eller gaser. Användaren får inte vidröra sladdens anslutning och patienten samtidigt. Undvik att vidröra patienten med handstyckets kropp under behandlingen eftersom värmen från handstycket kan vara obehaglig för patienten. Denna produkt får användas endast av utbildad och behörig personal. Kontrollera innehållet i flaskan samt den vätska som finns i kretsen före varje behandling. 57 Clean, disinfect and sterilize the different pieces and accessories of this product before each use. Please refer to the information provided in this operating instructions. Non-sterile pieces and accessories may cause bacterial or viral infections. This product has been investigated with regard to safety from electrical shock and fire hazard. ETL (Electrical Testing Laboratories) has not investigated the physiological effects. Always examine the product for damage before commencing treatment. Damaged accessories or a damaged unit must not be used and must be replaced. Use original EMS spare parts and accessories only. Have this product exclusively repaired by an approved EMS repair center. Use exclusively the external power supply (ref EK-357) delivered with the EMS unit. Use exclusively the pedal (ref EK-128) delivered with the EMS unit. Certain types of mobile telecommunication equipment could potentially interfere with this product. The separation distances recommended in the "Electromagnetic compatibility" manual must be taken into account. 58 Avant chaque utilisation, nettoyer, désinfecter et stériliser les différentes pièces et accessoires de ce produit. Respecter pour cela les indications correspondantes dans ce mode d’emploi. Différentes pièces et accessoires non stérilisés peuvent être à l’origine d’infections bactériennes ou virales. Ce produit a fait l’objet d’une étude en ce qui a trait aux risques de choc électrique et d’incendie. ETL (Electrical Testing Laboratories) n’a pas étudié les effets physiologiques. Reinigen, desinfizieren und sterilisieren Sie die verschiedenen Bestandteile und das Zubehör dieses Produkts vor jeder Verwendung. Weitere Informationen hierzu finden Sie in dieser Bedienungsanleitung. Nichtsterile Teile und Zubehör können bakterielle oder virale Infektionen verursachen. Dieses Produkt war Gegenstand einer Studie bezüglich der Brand- und Stromschlaggefahr. ETL (Electrical Testing Laboratories) hat die physiologischen Auswirkungen nicht untersucht. Vérifier avant chaque traitement que le produit ne présente pas de défauts. Un accessoire ou un appareil endommagé ne doit plus être utilisé. Il doit être remplacé. N’utilisez que des pièces et des accessoires EMS d’origine. Überprüfen Sie Ihr Produkt vor jeder Behandlung auf Schäden. Beschädigtes Zubehör oder ein beschädigte Geräte dürfen nicht mehr verwendet werden und sind zu ersetzen. Verwenden Sie ausschliesslich Original-EMSErsatzteile und -Zubehör. Faites réparer ce produit exclusivement par un centre de réparation agréé EMS. Reparaturen dürfen nur von einem EMS-genehmigten Reparaturzentrum ausgeführt werden. Utiliser exclusivement l'alimentation externe (ref EK-357) délivrée avec l'appareil EMS. Verwenden Sie ausschließlich das externe Netzteil (Ref EK-357), das im Lieferumfang des EMS-Geräts enthalten ist. Utiliser exclusivement la pédale (ref EK-128) délivrée avec l'appareil EMS. Certains types d'équipements de télécommunication mobiles peuvent potentiellement interférer avec ce produit. Respecter la distance de sécurité comme recommandée dans le manuel "Compatibilité Électromagnétique". Verwenden Sie ausschließlich den Fussschalter (Ref EK-128), der im Lieferumfang des EMS-Geräts enthalten ist. Bestimmte Arten von mobilen Funkkommunikationsgeräten können das Funktionieren des Produkts beeinträchtigen. Die im Handbuch „Elektromagnetische Verträglichkeit“ empfohlenen räumlichen Entfernungen müssen eingehalten werden. Limpie, desinfecte y esterilice las diversas piezas y accesorios de este producto antes de cada uso. Consulte la información suministrada en estas instrucciones de empleo. Las piezas y accesorios no estériles pueden causar infecciones bacterianas o virales. Pulire, disinfettare e sterilizzare i vari pezzi e accessori di questo prodotto prima di ogni utilizzo. Consultare le informazioni fornite in queste istruzioni di funzionamento. Pezzi e accessori non sterili potrebbero provocare infezioni batteriche o virali. Este producto ha sido sometido a un estudio sobre los riesgos de choque eléctrico y de incendio. ETL (Electrical Testing Laboratories) no ha investigado los efectos fisiológicos. Questo prodotto è stato sottoposto ad uno studio di valutazione dei rischi di scossa elettrica e pericolo di incendio. ETL (Electrical Testing Laboratories: Laboratori di collaudi elettrici) non ha studiato gli effetti fisiologici. Compruebe antes de cada tratamiento que su producto no presenta defectos. Un accesorio o un aparato dañado no se debe utilizar. Deben sustituirlo. Utilice únicamente piezas y accesorios originales EMS. La reparación de este producto debe realizarla exclusivamente un centro de reparación de EMS. Utilice únicamente la fuente de alimentación externa (ref EK-357) entregada con la unidad EMS. Utilice únicamente el pedal (ref EK-128) entregado con la unidad EMS. Determinados tipos de equipos de telecomunicaciones móviles pueden interferir potencialmente con este producto. Se deben tener en cuenta las distancias de separación recomendadas en el manual "Compatibilidad electromagnética". Prima di iniziare il trattamento esaminare sempre il prodotto per rilevare la presenza di eventuali danni. Gli accessori danneggiati o un'unità danneggiata non devono essere utilizzati e vanno sostituiti. Usare esclusivamente parti di ricambio e accessori EMS originali. Questo prodotto deve essere riparato esclusivamente presso un centro assistenza EMS autorizzato. Utilizzare esclusivamente l'alimentatore esterno (rif. EK-357) fornito con l'unità EMS. Utilizzare esclusivamente il pedale (rif. EK-128) fornito con l'unità EMS. Alcuni tipi di apparecchi di telecomunicazione mobile potrebbero potenzialmente interferire con questo prodotto. Attenersi alle distanze di separazione consigliate nel manuale "Compatibilità elettromagnetica". Rengör, desinfektera och sterilisera produktens olika delar och tillbehör före varje användning. Se den information som tillhandahålls i denna bruksanvisning. Osterila delar och tillbehör kan orsaka bakterie- eller virusinfektioner. Produkten har undersökts med avseende på säkerhet relaterad till elstöt och brandrisk. ETL (Electrical Testing Laboratories) har inte undersökt de fysiologiska effekterna. Undersök alltid produkten avseende skador innan du påbörjar en behandling. Skadade tillbehör eller en skadad enhet får inte användas och måste bytas ut. Använd endast originalreservdelar och -tillbehör från EMS. Låt endast ett godkänt EMS-reparationscenter reparera denna produkt. Använd endast det externa nätaggregat (ref. EK-357) som medföljer vid leveransen av EMS-enheten. Använd endast den pedal (ref. EK-128) som medföljer vid leveransen av EMS-enheten. Vissa typer av mobil telekommunikationsutrustning kan eventuellt störa denna produkt. De separationsavstånd som rekommenderas i handboken Elektromagnetisk kompatibilitet måste beaktas. 59 Storing the product Rangement du produit COND ITION TRAN S DE TRANSPOR TRAN Tempe SPORT AND SPOR rature T UND STOR T ET LAGEAGE -10°C +40°C Humid R 10 95 ity % % DE STOC COND BEDIN KAGE ITION GUNG S EN Press 500 ure hpa 1060 Keep the original packaging until the product is to be disposed of permanently. It can be used for shipping or storing at any time. Should you wish to put your product out of use for an extended period of time: • Proceed as described in the "Cleaning, disinfecting and sterilizing" chapter, • Proceed to a washing of the circuit without bottle to empty it, • Pack the product and all accessories in the original packaging. Please refer to the storage and transport conditions in the "Technical data" chapter. 60 hpa Lagern des Produkts .CH ITY UAL ISSQ W S EMS Nous vous conseillons de conserver l’emballage d’origine jusqu’à la mise au rebut de votre produit. Vous pouvez ainsi l’utiliser à tout moment pour le rangement ou le transport. Bewahren Sie die Originalverpackung bis zur endgültigen Entsorgung Ihres Produkts auf. So kann sie jederzeit für das Verschicken oder Lagern des Geräts verwendet werden. Si vous envisagez de ne pas utiliser votre produit durant une période prolongée: • Suivre les étapes décrites au chapitre "Nettoyage, désinfection et stérilisation", • Procéder à un nettoyage du circuit sans la bouteille pour vider le circuit, • Ranger le produit et les accessoires dans l’emballage d’origine. Wenn Sie das Produkt über einen längeren Zeitraum nicht verwenden möchten: • Gehen Sie wie im Kapitel „Reinigen, Desinfizieren und Sterilisieren“ beschrieben vor. • Waschen Sie den Kreislauf ohne Flasche, um ihn zu leeren. • Verpacken Sie das Produkt und alle Zubehörteile in der Originalverpackung. Veuillez tenir compte des conditions de stockage et de transport décrites au chapitre "Caractéristiques techniques". Beachten Sie bitte auch die Lager- und Transportbedingungen im Abschnitt „Technische Daten“. Almacenamiento del producto Immagazzinamento del prodotto COND ITION TRAN S DE TRANSPOR TRAN Tempe SPORT AND SPOR rature T UND STOR T ET LAGEAGE -10°C +40°C Humid R 10 95 ity % DE STOC COND BEDIN KAGE ITION GUNG S EN Press % 500 ure hpa 1060 hpa Förvaring av produkten .CH ITY UAL ISSQ W S EMS Le aconsejamos que conserve el embalaje original hasta el momento de deshacerse de su producto. Puede utilizarlo para transportarlo o almacenarlo en cualquier momento. Conservare l'imballo originale fino allo smaltimento definitivo del prodotto, È possibile usarlo in qualsiasi momento per riporre il prodotto o spedirlo. Si no va a utilizar el producto durante un periodo de tiempo largo: • Proceda como se describe en el capítulo “Limpieza, desinfección y esterilización”. • Realice un lavado del circuito sin la botella para vaciarlo, • Guarde el producto y todos los accesorios en el embalaje original. Qualora si intenda non utilizzare più il prodotto per un periodo di tempo prolungato: • Procedere come descritto nel capitolo "Pulizia, disinfezione e sterilizzazione", • Procedere a un lavaggio del circuito senza bottiglia per vuotarlo, • Imballare il prodotto e tutti gli accessori nella confezione originale. Por favor, observe también las condiciones de almacenamiento y transporte descritas en el capítulo "Especificaciones técnicas". Consultare le condizioni di conservazione e di trasporto nel capitolo "Dati tecnici". Behåll originalförpackningen tills produkten ska kasseras slutgiltigt. Den kan när som helst användas för transport eller förvaring. Om du önskar ta din produkt ur bruk under en längre tidsperiod: • Följ anvisningarna i kapitlet Rengöring, desinfektion och sterilisering. • Tvätta kretsen utan flaska för att tömma den. • Förpacka produkten och alla tillbehör i originalförpackningen. Se de förvarings- och transportförhållanden som anges i kapitlet Tekniska data. 61 Disposal Recyclage Entsorgen des Produkts The product must not be discarded in domestic household waste. Le produit ne doit pas être jeté dans la poubelle domestique. Das Produkt darf nicht mit dem normalen Haushaltsmüll entsorgt werden. Should you wish to definitively dispose of the product, please comply with the regulations which apply in your country. Si vous souhaitez mettre définitivement au rebut le produit, respectez les directives nationales spécifiques en vigueur dans votre pays. Wollen Sie Ihr Produkt endgültig entsorgen, beachten Sie bitte die jeweils in Ihrem Land geltenden Bestimmungen. Waste Electrical and Electronic Equipment belonging to customers located in the European Union may be shipped to EMS for recycling in accordance to the WEEE regulations. The costs of recycling, exclusive of shipping fees, are covered by EMS. Les équipements électriques et électroniques en fin de vie appartenant aux clients localisés dans l'Union Européenne peuvent être envoyés à EMS pour être recyclés en accord avec la directive WEEE. Les coûts du recyclage, à l'exclusion des frais de transports, sont couverts par EMS. Abfall aus elektrischen und elektronischen Geräten im Besitz von Kunden in der Europäischen Union kann gemäß der WEEE-Richtlinie für die Wiederverwertung an EMS zurückgegeben werden. Die Kosten für das Recycling, exklusive der Kosten für die Anlieferung, werden von EMS übernommen. Warranty Garantie Garantie Des dégâts liés au non-respect du mode d’emploi ou l’usure des pièces sont exclus de la garantie. Durch Nichtbeachtung der Bedienungsanleitung und Abnutzung entstandene Schäden an Gerätebestandteilen sind von der Garantie ausgenommen. Damage due to non-adherence to the operating instructions or resulting from the wear out of parts are excluded from warranty. The warranty of your product will be cancelled if you try to open it. La garantie de votre produit sera annulée si vous essayez de l’ouvrir. Die Garantie Ihres Produkts erlischt, wenn Sie versuchen, es zu öffnen. Accessories Accessoires Zubehör Accessories are available from EMS or any authorized dealers. Please contact your customer service directly. Vous trouverez les accessoires auprès d'EMS ou de l'un des distributeurs autorisés. Veuillez contacter votre service clientèle directement. Zubehör erhalten Sie bei Ihrer EMS-Niederlassung oder Ihrem EMS-Fachhändler. Bitte wenden Sie sich direkt an den Kundendienst. 62 Eliminación del producto Smaltimento Kassering El producto no debe tirarse con los residuos domésticos. Il prodotto non deve essere smaltito nei normali rifiuti domestici. Produkten får inte kasseras som hushållsavfall. Si deseara deshacerse definitivamente del producto, cumpla la normativa correspondiente de su país. Se si desidera smaltire definitivamente il prodotto, attenersi alle normative in vigore nel proprio paese. Los Residuos de Aparatos Eléctricos y Electrónicos (RAEE) que pertenezcan a clientes que se encuentren en la Unión Europea pueden enviarse a EMS para su reciclaje de conformidad con la normativa sobre RAEE. Los costes del reciclaje, a excepción de los gastos de envío, están cubiertos por EMS. I rifiuti da apparecchiature elettriche ed elettroniche appartenenti ai clienti situati nell'Unione Europea possono essere inviati a EMS per riciclarli in conformità con la normativa RAEE. Il costo del riciclaggio, eccetto i costi di spedizione, sarà a carico di EMS. Elektrisk och elektronisk utrustning som ska kasseras och som tillhör kunder i Europeiska unionen kan skickas till EMS för återvinning i enlighet med bestämmelserna i WEEE-direktivet (om avfall som utgörs av eller innehåller elektriska eller elektroniska produkter). EMS står för kostnaderna för återvinning, exklusive transportkostnader. Garantía Garanzia Garanti Los daños debidos a la falta de cumplimiento de las instrucciones de empleo o al desgaste de los componentes por el uso están excluidos de la garantía. I danni dovuti al mancato rispetto delle istruzioni per l'uso o all'usura delle parti sono esclusi dalla garanzia. Skador som uppkommit på grund av icke-efterlevnad av bruksanvisningen eller till följd av normal förslitning av delar undantas från garantin. Se si tenta di aprire il prodotto la garanzia verrà annullata. Produktgarantin ogiltiggörs om du försöker öppna produkten. Accesorios Accessori Tillbehör Los accesorios se encuentran disponibles a través de EMS o cualquier distribuidor autorizado. Contacte directamente con el servicio de atención al cliente. Gli accessori sono disponibili presso EMS o i rivenditori autorizzati. Si prega di contattare direttamente l'assistenza clienti. Tillbehör kan tillhandahållas av EMS eller en auktoriserad återförsäljare. Kontakta kundservice direkt. La garantía de su producto quedará anulada si intenta abrirlo. Följ de föreskrifter som är tillämpliga i ditt land om du vill kassera produkten slutgiltigt. 63 EMS Service Service EMS EMS-Service Should your product need additional servicing or repairs, please send it to your dealer or to an authorized EMS Repair Center. Pour toute autre intervention de maintenance ou de réparation, envoyez votre produit à votre distributeur ou directement à votre centre de réparation agréé EMS. Für alle anderen Wartungs- oder Reparaturarbeiten schicken Sie Ihr Produkt bitte an Ihren Händler oder direkt an ein EMS-genehmigtes Reparaturzentrum. Des réparations sans autorisation ou le non-respect du mode d’emploi dégagent EMS de toute responsabilité et annulent la garantie. Reparaturen ohne Erlaubnis sowie Schäden bei Nichtbeachtung der Bedienungsanleitung entbinden EMS von jeglicher Haftung. Ausserdem erlischt der Garantieanspruch. In the case of non-authorized repairs or damages due to non-adherence to the operating instructions, EMS accepts no liability whatsoever. This will also void the warranty. It is best to ship your product in the original packaging. It protects your product against damage during shipment. Pour l’expédition, utiliser de préférence l’emballage d’origine. Votre produit sera protégé contre d'eventuelles détérioriations. Risk of transmitting micro-organisms! To protect the personnel of the repair center and for safety reasons during transport and shipment, the product and the accessories returned to the factory for repair or revision must be cleaned, disinfected and sterilized in accordance with the operating manual. Repair can be refused for product or accessories received in a contaminated condition. Risque de transmission de microorganismes! Pour protéger le personnel en charge des réparations, et pour des raisons de sécurité pendant le transport et l'expédition, le produit et les accessoires retournés en réparation ou en révision doivent être nettoyés, désinfectés et stérilisés en accord avec le manuel d'utilisation. Si l’appareil ou les accessoires comportent des risques de contamination, les réparations peuvent être refusées. Gefahr der Übertragung von Krankheitserregern! Zum Schutz der Mitarbeiter im Reparaturzentrum und aus Sicherheitsgründen während des Transports müssen Produkt und Zubehör, die zur Reparatur oder Überprüfung an das Werk zurückgesendet werden, gemäß der Bedienungsanleitung gereinigt, desinfiziert und sterilisiert werden. Die Annahme nicht gereinigter Geräte zur Reparatur kann abgelehnt werden. En cas d’expédition directe de votre produit vers votre centre de réparation agréé EMS, indiquer le nom du distributeur. Cela nous permettra de simplifier le traitement. Bei einem Direktversand Ihres Produkts an das EMS-genehmigte Reparaturzentrum geben Sie bitte den Namen des Händlers an. Dies vereinfacht die Bearbeitung. When sending your product directly to the approved EMS repair center, please include the name of your dealer. This simplifies processing. 64 Versenden Sie Ihr Produkt am besten in der Originalverpackung. Dadurch ist es während des Versands vor Beschädigung geschützt. Servicio técnico de EMS Assistenza EMS EMS-service Para todos los demás trabajos de mantenimiento o reparación rogamos envíe su producto a su distribuidor o a un centro de reparación autorizado por EMS. Qualora il prodotto richieda ulteriore assistenza o riparazioni, inviarlo al rivenditore o a un Centro Assistenza EMS autorizzato. Om produkten behöver ytterligare service eller reparation ska den skickas till återförsäljaren eller till ett auktoriserat EMS-reparationscenter. Nel caso di riparazioni non autorizzate o danni dovuti alla mancata osservanza delle istruzioni per l'uso, EMS declina qualsiasi responsabilità in merito e ne renderà nulla la garanzia. EMS kan inte hållas ansvarigt vid obehörig reparation eller skador uppkomna på grund av icke-efterlevnad av bruksanvisningen. Detta ogiltiggör även garantin. Si consiglia di spedire il prodotto nel suo imballo originale. In questo modo sarà protetto da danni durante la spedizione. Det är bäst att skicka produkten i originalförpackningen. Den skyddar produkten mot skador under transport. Sussiste il rischio di trasmissione di microorganismi! Per proteggere il personale del centro di assistenza e per motivi di sicurezza durante il trasporto e la spedizione, il prodotto e gli accessori restituiti alla fabbrica per la riparazione o la revisione devono essere puliti, disinfettati e sterilizzati in conformità con il manuale di istruzioni. La riparazione può essere rifiutata se il prodotto o gli accessori pervengono in condizioni di contaminazione. Risk för överföring av mikroorganismer! För att skydda personalen på reparationscentret samt av säkerhetsskäl under transport och frakt måste alla produkter och tillbehör som returneras till fabriken för reparation eller översyn först rengöras, desinfekteras och steriliseras enligt användarhandboken. Reparation kan nekas om produkt eller tillbehör mottas i kontaminerat tillstånd. Una reparación no autorizada así como los daños derivados de la no observación de las instrucciones de empleo liberan a EMS de cualquier responsabilidad en cuanto a la garantía se refiere. Para el transporte lo mejor es utilizar el embalaje original. Dentro de éste su producto estará protegido de forma óptima contra un transporte incorrecto. Riesgo de transmisión de microorganismos. Para proteger al personal del centro de reparación y por motivos de seguridad durante el transporte y envío, deben limpiarse, desinfectarse y esterilizarse todos los productos y accesorios que se devuelvan a fábrica para su reparación o revisión conforme se describe en el manual de instrucciones. Puede rechazarse reparar el producto o los accesorios que se reciban contaminados. Cuando envíe su producto directamente a un centro de reparación autorizado por EMS, indique el nombre de su distribuidor. De este modo se facilitará la gestión. Quando si spedisce il prodotto direttamente a un centro di assistenza EMS autorizzato, specificare il nome del proprio rivenditore per semplificare il processo. Om du skickar produkten direkt till det godkända EMS-reparationscentret ber vi dig ange återförsäljarens namn. Detta förenklar bearbetningen. 65 Symbols Symboles Symbole Manufacturer’s logo Logo du fabricant Herstellerlogo MAX.PERIO Power setting maximum of the mode "PERIO" Réglage de la puissance maximum du mode "PERIO" Maximale Leistungseinstellung in der Perio-Betriebsart CE marking: refers to directive 93/42 EEC, including EN 60601-1 and EN 60601-1-2 Marquage de conformité CE. Se rapporter à la directive 93/42 CEE, y compris EN 60601-1 et EN 60601-1-2 CE-Kennzeichen: Bezieht sich auf die Richtlinie 93/42 EWG, einschliesslich EN 60601-1 und EN 60601-1-2 Caution! Attention! Achtung! Plug 30 VDC Prise 30 VDC Stecker 30 VDC Output Sortie Ausgang Foot pedal connection Connexion pour la pédale de commande Fussschalteranschluss Water supply connection Connexion pour l'alimentation en eau Wasserversorgungsanschluss 66 Símbolos Simboli Symboler Logotipo del fabricante Logo del produttore Tillverkarens logotyp MAX.PERIO Ajuste de potencia máxima del modo "PERIO" Impostazione potenza massima della modalità "PERIO" Maximal effektinställning för läget PERIO (Parodonti) Marcación de conformidad CE: hace referencia a la norma 93/42 CEE, inclusive EN 60601-1 y EN 60601-1-2 Marchio CE: si riferisce alla direttiva 93/42 CEE, inclusa la EN 60601-1 e EN 60601-1-2 CE-märkning: hänvisar till direktiv 93/42 EEG, inklusive EN 60601-1 och EN 60601-1-2 ¡Precaución! Attenzione! Försiktighet! Conector 30 V CC Spina 30 V DC (corrente continua) 30 VDC-kontakt Salida Uscita Utgång Conexión para el pedal de mando Collegamento della pedaliera Pedalanslutning Conexión del suministro de agua Collegamento erogazione acqua Anslutning för vattentillförsel 67 Refer to instruction manual Lire le manuel d'instructions Siehe Bedienungsanleitung Reference number Numero de la référence Referenznummer Serial number Numéro de série Seriennummer Manufacturer Fabricant Hersteller Manufacture date Date de fabrication Herstellungsdatum 135°C Sterilizable at up to 135 °C Stérilisable jusqu'à 135 °C Sterilisierbar bei bis zu 135 °C Liquid flow rate Débit de liquide Wasserdurchsatzmenge Disposal of waste electrical & electronic equipment (applicâble in the European Union and other European countries with separate collection systems) Traitements des appareils électriques et électroniques en fin de vie (Applicâble dans les pays de l’Union Européenne et aux autres pays européens disposant de systèmes de collecte sélective) Entsorgung von gebrauchten elektrischen und elektronischen Geräten (anzuwenden in den Ländern der Europäischen Union und anderen europäischen Ländern mit einem separaten Sammelsystem für diese Geräte) Degree of protection against water permeability Degré de protection de perméabilité à l'eau Schutzgrad gegen Wasserdurchlässigkeit 68 Consulte el manual de instrucciones Consultare il manuale delle istruzioni Se användarhandboken Número de referencia Numero di riferimento Referensnummer Número de serie Numero di serie Serienummer Fabricante Produttore Tillverkare Fecha de fabricación Data di fabbricazione Tillverkningsdatum 135°C Esterilizable hasta 135 °C Sterilizzabile fino a 135°C Steriliserbar upp till 135 °C Caudal de líquido Velocità flusso liquido Vätskans flödeshastighet Tratamiento de los equipos eléctricos y electrónicos al final de su vida útil (Aplicable en la Unión Europea y en países europeos con sistemas de recogida selectiva de residuos) Smaltimento delle apparecchiature elettriche ed elettroniche di scarto (applicabile nell'Unione Europea e altri paesi europei con sistemi di raccolta differenziata) Kassering av avfall som utgörs av eller innehåller elektriska eller elektroniska produkter (gäller inom Europeiska unionen och i andra europeiska länder med system för separat insamling) Grado de protección contra la permeabilidad al agua Grado di protezione contro la permeabilità dell'acqua Grad av skydd mot vattenintrång 69 Applied part, type BF Pièce appliquée de type BF Zur Anwendung am Patienten, Typ BF Thermal disinfection Désinfection thermique Thermische Desinfektion 70 Pieza de aplicación tipo BF Parte applicata, tipo BF Patientansluten del, BF-typ Desinfección térmica Disinfezione termica Värmedesinfektion 71 Technical data Caractéristiques techniques Description Description Manufacturer EMS ELECTRO MEDICAL SYSTEMS SA, CH-1260 Nyon, Switzerland Fabricant EMS ELECTRO MEDICAL SYSTEMS SA, CH-1260 Nyon, Suisse Models Piezon 150 & Piezon 250 Modèles Piezon 150 & Piezon 250 Classification EN 60601-1 - Class II - Applied part, Type BF - IP 20, unit - IP X1, foot pedal Classification EN 60601-1 - Class II - Partie appliquée du type BF - IP 20, appareil - IP X1, pédale de commande Classification 93 / 42 EEC Class IIa Classification 93 / 42 EEC Class IIa Operating mode: With irrigation Without irrigation Continuous operation Duty cycle 10% during 10 min. maximum Modes de fonctionnement: Avec irrigation Sans irrigation Opération continue Durée du cycle 10% pendant 10 min. maximum Power Supply: External voltage unit 100-240 VAC / 50-60 Hz 30 VDC Tensions/fréquences de l’alimentation: Alimentation externe 100-240 VAC / 50-60 Hz 30 VDC Power consumption 30 W Puissance nominale 30 VA Ultrasonic specifications: Maximum output Frequency range 8 Watts 24-32 kHz Spécificités ultrason: Sortie maximum Plage de fréquences 8 Watts 24-32 kHz Weight Piezon 150: Approx. 0.6 kg Piezon 250: Approx. 1 kg Poids Piezon 150: Approx. 0.6 kg Piezon 250: Approx. 1 kg Dimensions in mm (H x W x D) Piezon150: 96 x 170 x 135 Piezon250: 96 x 153 x 215 Dimensions en mm (HxLxP) Piezon 150: 96 x 170 x 135 Piezon 250: 96 x 153 x 215 Operating conditions +10 °C to +40 °C 30% to 75% relative humidity Altitude max. 3000 m Conditions de fonctionnement de +10 °C à +40 °C de 30% à 75% d’humidité relative Altitude max. 3000 m Storage and transport conditions -10 °C to +40 °C 10% to 95% relative humidity 500 hPa to 1060 hPa air pressure Conditions de stockage et de transport de -10 °C à +40 °C de 10% à 95% d’humidité relative pression atm. de 500 hPa à 1060 hPa 72 Technische Daten Especificaciones técnicas Denominación Beschreibung Hersteller EMS ELECTRO MEDICAL SYSTEMS SA, CH-1260 Nyon, Schweiz Fabricante EMS ELECTRO MEDICAL SYSTEMS SA, CH-1260 Nyon, Suiza Modelle Piezon 150 & Piezon 250 Modelos Piezon 150 y Piezon 250 Klassifikation EN 60601-1 - Klasse II - Zur Anwendung am Patienten, Typ BF - IP 20, Gerät - IP X1, Fussschalter Clasificación EN 60601-1 - Clase II - Pieza de aplicación tipo BF - IP 20, unidad - IP X1, pedal Klassifikation 93 / 42 EWG Klasse IIb Clasificación 93 / 42 CEE Clase IIa Betriebsart: Mit Spülung Ohne Spülung Kontinuierlicher Betrieb Arbeitszyklus 10% während max. 10 min. Modo de funcionamiento: Con irrigación Sin irrigación continua Ciclo de trabajo 10% durante 10 min. máximo Stromversorgung: Externe Stromversorgung 100-240 VAC / 50-60 Hz 30 VDC Fuente de alimentación: Unidad de tensión externa 100-240 V CA / 50-60 Hz 30 V CC Nennleistung 30 W Potencias nominales 30 W Technische Daten zum Ultraschall: Max. Ausgabe Frequenzbereich 8 Watt 24-32 kHz Especificaciones de ultrasonidos: Salida máxima Rango de frecuencias 8W 24-32 kHz Gewicht Piezon 150: Etwa 0,6 kg Piezon 250: Etwa 1 kg Peso Piezon 150: Aprox. 0,6 kg Piezon 250: Aprox. 1 kg Abmessungen in mm (H x B x T) Piezon 150: 96 x 170 x 135 Piezon 250: 96 x 153 x 215 Dimensiones in mm (Al x An x Pr) Piezon150: 96 x 170 x 135 Piezon250: 96 x 153 x 215 Betriebsbedingungen +10 °C bis +40 °C 30 % bis 75 % rel. Feuchte Höhe max. 3000 m Condiciones de funcionamiento +10 °C a +40 °C 30% hasta 75% humedad relativa Altitud máx. 3000 m Lager- und Transportbedingungen -10 °C bis +40 °C 10% bis 95% rel. Feuchte Luftdruck 500 hPa bis 1060 hPa Condiciones almacenamiento y transporte -10 °C a +40 °C 10% hasta 95% humedad relativa Presión atm. 500 hPa hasta 1060 hPa 73 Dati tecnici Tekniska data Descrizione Beskrivning Produttore EMS ELECTRO MEDICAL SYSTEMS SA, CH-1260 Nyon, Svizzera Tillverkare EMS ELECTRO MEDICAL SYSTEMS SA, CH-1260 Nyon, Schweiz Modelli Piezon 150 e Piezon 250 Modeller Piezon 150 och Piezon 250 Classificazione EN 60601-1 - Classe II - Parte applicata, Tipo BF - IP 20, unità - IP X1, pedale Klassificering enligt EN 60601-1 – Klass II – Patientansluten del, BF-typ – IP 20, enhet – IP X1, pedal Classificazione 93 / 42 CEE Classe IIa Klassificering enligt 93/42 EEG Klass IIa Driftläge: Med spolning Utan spolning Kontinuerlig drift Driftcykel 10 % under högst 10 min Strömförsörjning: Externt nätaggregat 100-240 VAC / 50-60 Hz 30 VDC Strömförbrukning 30 W Ultraljudsspecifikationer: Maximal uteffekt Frekvensintervall 8W 24-32 kHz Modalità di funzionamento: Con irrigazione Senza irrigazione Funzionamento continuo Ciclo di funzionamento 10% per 10 min. al massimo Alimentazione: Unità di tensione esterna 100-240 V AC / 50-60 Hz 30 V DC Consumo di corrente 30 W Specifiche ultrasuoni: Uscita massima Gamma di frequenze 8 Watt 24-32 kHz Peso Piezon 150: Circa 0,6 kg Piezon 250: Circa 1 kg Dimensioni in mm (A x L x P) Piezon150: 96 x 170 x 135 Piezon250: 96 x 153 x 215 Condizioni di funzionamento Da +10 °C a +40 °C Da 30% a 75% di umidità relativa Altitudine max. 3000 m Condizioni di conservazione e trasporto Da -10 °C a +40 °C Da 10% a 95% di umidità relativa Da 500 hPa a 1060 hPa di pressione dell'aria 74 Vikt Piezon 150: ca 0,6 kg Piezon 250: ca 1 kg Mått i mm (H x B x D) Piezon150: 96 x 170 x 135 Piezon250: 96 x 153 x 215 Användningsförhållanden +10 °C till +40 °C 30 % till 75 % relativ fuktighet Höjd över havet högst 3 000 m Förvarings- och transportförhållanden -10 °C till +40 °C 10 % till 95 % relativ fuktighet 500 hPa till 1060 hPa lufttryck 75 Troubleshooting Symptom Solution The LEDs of the power supply do not illuminate when the unit is switched on • • • • • Check that the mains cord of the power supply is properly connected to the mains supply Check the power supply of the dental office Turn the power knob of the unit to ON and check if the LED is lit Replace the transformer Send the unit and the accessories to an approved EMS repair center No irrigation flow when the foot pedal is pressed • • • • • • • • • • • Turn the liquid flow rate knob to the maximum Make sure that water comes in external device for the Piezon 150 Make sure that the bottle is properly installed for the Piezon 250 Disconnect the ultrasound handpiece and check that the liquid exits from the cord Use compressed air (max. 3 bar) and check that air comes out of the handpiece If the air does not come out of the handpiece send to an approved EMS repair center Replace the external filter for the Piezon 150 Replace the pump head for the Piezon 250 Check the connection of the foot pedal Replace the foot pedal Send the unit and the accessories to an approved EMS repair center No ultrasound oscillations when the foot pedal is pressed • • • • • • Check that the handpiece is connected to the handpiece cord Control that the instrument is tight Check that the instrument is not cracked Check the connection of the foot pedal Replace the foot pedal Send the unit and the accessories to an approved EMS repair center Ultrasound power decreasing or inadequate • • • • • Check that the selector is beyond the position 4 Control that the instrument is tight Check the wear of the instrument and replace if necessary Replace the handpiece Send the unit and the accessories to an approved EMS repair center Water leaks between the handpiece cord and the handpiece • • • Replace the O-ring on the handpiece cord Replace the handpiece Send the handpiece to an approved EMS repair center Only Piezon 250: Water leaks from the bottle or the device • • • Check the O-ring of the bottle cap Replace the bottle Send the handpiece to an approved EMS repair center Insufficient lighting of the handpiece • Replace the light guide 76 Dépannage Symptômes Solutions La LED de l'alimentation électrique externe ne s'allume pas quand l'appareil est sur "ON" • • • • • Contrôler que le câble de l'alimentation électrique externe soit correctement branché à la prise de courant Contrôler l’alimentation électrique du cabinet Tourner le pommeau sur ON et contrôler si la LED est allumée Remplacer le transformateur Expédier l'appareil et les accessoires à un réparateur agréé EMS Pas d’irrigation lorsque la pédale de commande est actionnée • • • • • • • • • • • Régler le débit d'irrigation au maximum Contrôler les connexions des tuyaux d'eau pour le Piezon 150 Contrôler la bonne installation de la bouteille pour le Piezon 250 Déconnecter la piéce à main ultrasons et contrôler aue le liquide sort bien du cordon Utiliser de l'air comprimé (max. 3 bar) et contrôler que l'air sort bien de la pièce à main Déconnecter la pièce à main et utilisez de l’air comprimé (max. 3 bar) pour contrôler si elle est bouchée Remplacer le filtre d'eau externe pour le Piezon 150 Remplacer la tête de pompe pour le Piezon 250 Contrôler le branchement de la pédale de commande Remplacer la pédale de commande Expédier l'appareil et les accessoires à un réparateur agréé EMS Pas de vibration ultrasonique lorsque la pédale de commande est actionnée • • • • • • Contrôler que la pièce à main soit bien branchée a son cordon Contrôler que l’instrument soit correctement fixé Contrôler que l'instrument soit en bon état Contrôler le branchement de la pédale de commande Remplacer la pédale de commande Expédier l'appareil et les accessoires à un réparateur agréé EMS Puissance des ultrasons décroissante ou insuffisante • • • • Contrôler que le sélecteur soit après la position 4 Contrôler que l’instrument soit correctement fixé Contrôler l’usure de l’instrument et remplacez-le si nécessaire Expédier l'appareil à un réparateur agréé EMS Fuite d’eau entre le cordon de la pièce à main et la pièce à main • • • Remplacer le joint torique entre la pièce à main et le cordon Remplacer la pièce à main Expédier la pièce à main à un réparateur agréé EMS Seulement Piezon 250: Fuite d'eau entre la bouteille et l'appareil • • • Contrôler le joint torique du bouchon de la bouteille Remplacer la bouteille Expédier la pièce à main à un réparateur agréé EMS Eclairage de la pièce à main insuffisant • Remplacer le guide lumière 77 Fehlerbehebung Fehler Lösung Die Betriebsanzeigen leuchten nicht auf, wenn das Gerät eingeschaltet wird • • • • • Prüfen Sie, ob der Netzstecker des Netzkabels ordentlich in die Netzsteckdose eingesteckt ist. Prüfen Sie die Netzstromversorgung der Zahnarztpraxis. Drehen Sie den Leistungsregler des Geräts auf „EIN“ und prüfen Sie, ob die Betriebsanzeige leuchtet. Ersetzen Sie den Transformator. Senden Sie das Gerät und das Zubehör an ein EMS-genehmigtes Reparaturzentrum. Es fließt kein Wasser, wenn der Fussschalter aktiviert wird. • • • • • • • • • • • Drehen Sie den Regler für die Wasserdurchsatzmenge auf das Maximum. Vergewissern Sie sich, dass das externe Gerät für den Piezon 150 mit Wasser versorgt wird. Vergewissern Sie sich, dass die Flasche für den Piezon 250 ordnungsgemäß installiert wurde. Trennen Sie das Ultraschall-Handstück und prüfen Sie, ob Flüssigkeit austritt. Verwenden Sie Druckluft (max. 3 bar) und prüfen Sie, ob Luft aus dem Handstück austritt. Tritt keine Luft aus dem Handstück aus, senden Sie es an ein EMS genehmigtes Reparaturzentrum Ersetzen Sie den externen Filter für den Piezon 150 Ersetzen Sie den Pumpenkopf für den Piezon 250 Prüfen Sie den Anschluss des Fusspedals. Ersetzen Sie den Fußschalter. Senden Sie das Gerät und das Zubehör an ein EMS-genehmigtes Reparaturzentrum. Es gibt keine Ultraschallschwingungen, wenn der Fussschalter aktiviert wird. • • • • • • Prüfen Sie, ob das Handstück an das Netzkabel angeschlossen ist. Kontrollieren Sie, ob sich das Instrument in einem einwandfreien Zustand befindet. Vergewissern Sie sich, dass das Instrument keine Risse aufweist. Prüfen Sie den Anschluss des Fusspedals. Ersetzen Sie den Fußschalter. Senden Sie das Gerät und das Zubehör an ein EMS-genehmigtes Reparaturzentrum. Die Ultraschallleistung sinkt oder lässt sich nicht richtig einstellen. • • • • • Prüfen Sie, ob der Regler auf eine Position über den Wert 4 eingestellt ist. Kontrollieren Sie, ob sich das Instrument in einem einwandfreien Zustand befindet. Prüfen Sie das Instrument auf Abnutzungserscheinungen und wechseln Sie es ggf. aus. Ersetzen des Handstücks Senden Sie das Gerät und das Zubehör an ein EMS-genehmigtes Reparaturzentrum. Zwischen dem Kabel des Handstücks und dem Handstück tritt Wasser aus. • • • Ersetzen Sie den O-Ring am Handstückkabel. Ersetzen des Handstücks Senden Sie das Handstück an ein EMS-genehmigten Reparaturzentrum. Nur Piezon 250: Aus der Flasche oder dem Gerät tritt Wasser aus. • • • Überprüfen Sie den O-Ring des Flaschendeckels. Ersetzen Sie die Flasche Senden Sie das Handstück an ein EMS-genehmigten Reparaturzentrum. Unzureichende Beleuchtung des Handstücks • Ersetzen Sie den Lichtleiter 78 Solución de problemas Síntomas Solución Los LED de la fuente de alimentación no se iluminan cuando la unidad está encendida • • • • • Compruebe que el cable de alimentación está conectado a la toma de corriente Verifique la fuente de alimentación del armario Gire el selector de potencia a la posición ON y compruebe si se enciende el LED Sustituya el transformador Envíe el aparato y los accesorios a un centro de reparación autorizado por EMS No hay caudal de irrigación al pulsar el pedal • • • • • • • • • • • Gire el mando de caudal de líquido para abrirlo al máximo Asegúrese de que el agua entra en el dispositivo externo para el Piezon 150 Asegúrese de que la botella está instalada correctamente para el Piezon 250 Desconecte el mango de ultrasonidos y compruebe si el líquido sale del tubo Utilice aire comprimido (máx. 3 bar) y verifique que el aire sale del mango Si no sale aire del mango, envíelo a un centro de reparaciones autorizado por EMS Sustituya el filtro externo para el Piezon 150 Sustituya el cabezal de la bomba para el Piezon 250 Compruebe la conexión del pedal Sustituya el pedal Envíe el aparato y los accesorios a un centro de reparación autorizado por EMS No hay oscilaciones de ultrasonidos al pulsar el pedal • • • • • • Compruebe que el mango esté conectado al cable Compruebe que el instrumento esté firmemente conectado Compruebe que el instrumento no esté agrietado Compruebe la conexión del pedal Sustituya el pedal Envíe el aparato y los accesorios a un centro de reparación autorizado por EMS Potencia de ultrasonidos en descenso o inadecuada • • • • • Compruebe si el selector está por encima de la posición 4 Compruebe que el instrumento esté firmemente conectado Compruebe el desgaste del instrumento y reemplace si es necesario Vuelva a colocar el mango Envíe el aparato y los accesorios a un centro de reparación autorizado por EMS Hay una fuga de agua entre el cable del mango y el mango • • • Sustituya la junta tórica en el cable del mango Vuelva a colocar el mango Envíe el mango a un centro de reparación autorizado por EMS Solo Piezon 250: Hay una fuga de agua en la botella o en el dispositivo • • • Compruebe la junta tórica del tapón de la botella Cambie la botella Envíe el mango a un centro de reparación autorizado por EMS La luz del mango es insuficiente • Sustituya la guía de la luz 79 Ricerca e risoluzione dei problemi Sintomo Soluzione I LED dell'alimentazione non si accendono all'accensione dell'unità • • • • • Controllare che il cavo d'alimentazione dell'alimentatore sia correttamente collegato alla presa di rete Controllare la rete elettrica dello studio dentistico Ruotare la manopola d'accensione dell'unità su ON e controllare che il LED si accenda Sostituire il trasformatore Inviare l'unità e gli accessori a un centro assistenza EMS autorizzato Assenza totale di flusso d'irrigazione quando si preme il pedale • • • • • • • • • • • Ruotare la manopola della velocità del flusso di liquido fino al massimo Per il Piezon 150, assicurarsi che l'acqua giunga nel dispositivo esterno Per il Piezon 250, assicurarsi che la bottiglia sia installata correttamente Scollegare il manipolo a ultrasuoni e verificare che il liquido fuoriesca dal cavo Utilizzare aria compressa (max. 3 bar) per verificare che l'aria fuoriesca dal manipolo Se l'aria non fuoriesce dal manipolo, inviarlo a un centro di assistenza EMS autorizzato Per il Piezon 150, sostituire il filtro esterno Per il Piezon 250, sostituire la testa della pompa Controllare il collegamento del pedale Sostituire il pedale Inviare l'unità e gli accessori a un centro assistenza EMS autorizzato Assenza di oscillazioni a ultrasuoni quando si preme il pedale • • • • • • Verificare che il manipolo sia collegato al cavo del manipolo Controllare la saldezza dello strumento Controllare che lo strumento non sia incrinato Controllare il collegamento del pedale Sostituire il pedale Inviare l'unità e gli accessori a un centro assistenza EMS autorizzato Potenza degli ultrasuoni in calo o insufficiente • • • • • Controllare che il selettore sia oltre la posizione 4 Controllare la saldezza dello strumento Controllare l'usura dello strumento e sostituirlo se necessario Sostituire il manipolo Inviare l'unità e gli accessori a un centro assistenza EMS autorizzato Perdite d'acqua tra il cavo del manipolo e il manipolo • • • Sostituire la guarnizione anulare del cavo del manipolo Sostituire il manipolo Inviare il manipolo a un centro assistenza EMS autorizzato Solo per Piezon 250: Perdite d'acqua dalla bottiglia o dal dispositivo • • • Controllare la guarnizione anulare del tappo della bottiglia Sostituire la bottiglia Inviare il manipolo a un centro assistenza EMS autorizzato Illuminazione insufficiente del manipolo • Sostituire la guida luce 80 Felsökning Symtom Lösning Lysdioderna på nätaggregatet tänds inte när enheten slås på • • • • • Kontrollera att nätaggregatets nätsladd är korrekt ansluten till strömnätet Kontrollera tandläkarmottagningens nätström Vrid effektratten på enheten till ON (På) och kontrollera om lysdioden tänds Byt ut transformatorn Skicka enheten och tillbehören till ett godkänt EMS-reparationscenter Inget spolningsflöde när pedalen trycks ned • • • • • • • • • • • Vrid ratten för vätskans flödeshastighet till maxinställningen Säkerställ att det kommer vatten i den externa enheten för Piezon 150 Säkerställ att flaskan är korrekt installerad för Piezon 250 Koppla bort ultraljudshandstycket och kontrollera att vätskan kommer ut från sladden Använd tryckluft (högst 3 bar) och kontrollera att luften kommer ut från handstycket Om luften inte kommer ut från handstycket ska du skicka produkten till ett godkänt EMS-reparationscenter Byt ut det externa filtret för Piezon 150 Byt ut pumphuvudet för Piezon 250 Kontrollera pedalanslutningen Byt ut pedalen Skicka enheten och tillbehören till ett godkänt EMS-reparationscenter Inga ultraljudssvängningar när pedalen trycks ned • • • • • • Kontrollera att handstycket är anslutet till handstyckessladden Kontrollera att instrumentet är ordentligt fäst Kontrollera att instrumentet inte uppvisar sprickor Kontrollera pedalanslutningen Byt ut pedalen Skicka enheten och tillbehören till ett godkänt EMS-reparationscenter Ultraljudseffekten minskar eller är otillräcklig • • • • • Kontrollera att väljaren är inställd på ett värde som är högre än position 4 Kontrollera att instrumentet är ordentligt fäst Kontrollera instrumentets grad av slitage och byt ut instrumentet vid behov Byt ut handstycket Skicka enheten och tillbehören till ett godkänt EMS-reparationscenter Vatten läcker ut mellan handstyckessladden och handstycket • • • Byt ut O-ringen på handstyckessladden Byt ut handstycket Skicka handstycket till ett godkänt EMS-reparationscenter Endast Piezon 250: Vatten läcker ut från flaskan eller produkten • • • Kontrollera O-ringen i flasklocket Byt ut flaskan Skicka handstycket till ett godkänt EMS-reparationscenter Otillräcklig belysning av handstycket • Byt ut ljusledaren 81 CANADA EMS Canada Inc. 5524 St. Patrick St., Suite 312 Montreal, QC H4E 1A8 Tel. +1 514 736 5066 Fax +1 514 736 5065 e-mail: [email protected] CHINA E.M.S. Electro Medical Systems Shanghai 24A, Jin Sui Mansion, N°379 Pudong Nan Rd. Shanghai, China 200120 Tel. +86 21 3363 2323 Fax +86 21 3363 2152 e-mail: [email protected] GERMANY EMS Electro Medical Systems GmbH Schatzbogen 86 D-81829 München Tel. +49 89 42 71 61 0 Fax +49 89 42 71 61 60 e-mail: [email protected] ITALY EMS Italia S.r.l Via Faravelli 5 I-20149 Milano Tel. +39 02 3453 8111 Fax +39 02 3453 2778 e-mail: [email protected] SPAIN EMS Electro Medical Systems España SL Bernardino Obregón 14 bis E-28012 Madrid Tlf. +34 91 528 99 89 Fax +34 91 539 34 89 e-mail: [email protected] USA EMS Corporation 11886 Greenville Avenue #120 Dallas, TX 75243, USA Tel. +1 972 690 83 82 Fax +1 972 690 89 81 e-mail: [email protected] EMS-SWISSQUALITY.COM ed. 2013/06 Ch. de la Vuarpillière 31 1260 Nyon SWITZERLAND Tel. +41 22 99 44 700 Fax +41 22 99 44 701 e-mail: [email protected] FB-569/3 EMS worldwide offices (dental) © Copyright EMS SA EMS Electro Medical Systems SA