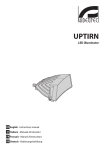
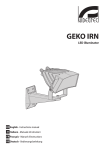
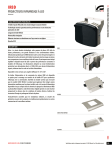
Download GEKO IRH - SANTEC Video
Transcript
GEKO IRH
LED illuminator
EN English - Instructions manual
IT Italiano - Manuale di istruzioni
FR Français - Manuel d’instructions
DE Deutsch - Bedienungslanleitung
GEKO IRH
LED illuminator
EN English - Instructions manual
Contents
ENGLISH
1 About this manual.......................................................................................................... 3
1.1 Typographical conventions................................................................................................................................... 3
2 Notes on copyright and information on trademarks................................................... 3
3 Safety rules..................................................................................................................... 3
4 Identification................................................................................................................... 4
4.1 Product description and type designation..................................................................................................... 4
4.2 Product markings..................................................................................................................................................... 4
5 Declaration of conformity to product standards......................................................... 4
6 Preparing the product for use....................................................................................... 5
6.1 Unpacking and contents........................................................................................................................................ 5
6.1.1 Unpacking................................................................................................................................................................................... 5
6.1.2 Contents....................................................................................................................................................................................... 5
6.2 Safely disposing of packaging material............................................................................................................ 5
7 Assembling and installing............................................................................................. 5
7.1 Assembly...................................................................................................................................................................... 5
7.2 Installation................................................................................................................................................................... 5
7.2.1 Installation of wall-mounted illuminator......................................................................................................................... 5
7.2.2 Installation of housing-fitted illuminator (OSUPPIR kit)............................................................................................. 6
7.2.3 Connections............................................................................................................................................................................... 6
7.2.4 Photocell sensitivity................................................................................................................................................................. 7
7.2.5 Disabling the photocell.......................................................................................................................................................... 7
7.2.6 Power and control cable........................................................................................................................................................ 7
7.2.7 Maximum cable length.......................................................................................................................................................... 8
8 Disposal of waste materials........................................................................................... 8
9 Troubleshooting............................................................................................................. 8
9.1 Checking the power supply.................................................................................................................................. 8
9.2 Checking the photocell’s operation................................................................................................................... 8
10 Technical data............................................................................................................... 9
10.1 General..................................................................................................................................................................... 9
10.2 Mechanical.............................................................................................................................................................. 9
10.3 Electrical................................................................................................................................................................... 9
10.4 Environment........................................................................................................................................................... 9
10.5 Certifications........................................................................................................................................................... 9
11 Technical drawings..................................................................................................... 10
1 About this manual
3 Safety rules
Do not stare at the lamp when on. It can be
harmful for eyes.
1.1 Typographical conventions
The products emits infrared light. Use
suitable shielding or protect the eyes.
DANGER!
Emission of infrared light or laser.
It can be harmful for eyes. Pay attention to
the provided indications.
DANGER!
High level hazard.
Risk of electric shock. Disconnect the
power supply before proceeding with any
operation, unless indicated otherwise.
RISK GROUP 2
CAUTION: Do not look at operating
lamp. Eye injury may result.
NOTICE: IR emitted from this
product. Use appropriate shielding
or eye protection.
Fig. 1
DANGER!
Hot surface.
Avoid contact. Surfaces are hot and may
cause personal injury if touched.
WARNING!
Medium level hazard.
This operation is very important for the
system to function properly. Please read
the procedure described very carefully and
carry it out as instructed.
INFO
Description of system specifications.
We recommend reading this part carefully
in order to understand the subsequent
stages.
2 Notes on copyright and
information on trademarks
The quoted names of products or companies are
trademarks or registered trademarks.
Instructions manual - English - EN
Before installing and using this unit, please read this
manual carefully. Be sure to keep it handy for later
reference.
Infrared illuminator.
RISK GROUP 2
CAUTION: Do not look at operating
lamp. Eye injury may result.
CAUTION: Do not stare at operating
lamp. May be harmful to the eyes.
Fig. 2
White light illuminator.
During normal operation the surface of the
illuminator can reach high temperatures.
Do not, therefore, allow direct contact
and position the appliance where it is
inaccessible to unauthorised persons.
Before touching switch off the illuminator
and allow to cool for a minimum period of
10 minutes.
The manufacturer declines all responsibility
for any damage caused by an improper use
of the appliances mentioned in this manual.
Furthermore, the manufacturer reserves
the right to modify its contents without any
prior notice. The documentation contained
in this manual has been collected with great
care, the manufacturer, however, cannot
take any liability for its use. The same thing
can be said for any person or company
involved in the creation and production of
this manual.
3
EN - English - Instructions manual • The device must be installed only and exclusively
by qualified technical personnel.
4 Identification
• Before any technical work on the appliance,
disconnect the power supply.
4.1 Product description and type
designation
• Do not use power supply cables that seem worn
or old.
• Never, under any circumstances, make any
changes or connections that are not shown in
this handbook: improper use of the appliance
can cause serious hazards, risking the safety of
personnel and of the installation.
• Use only original spare parts. Non-original spare
parts could cause fire, electrical discharge or other
hazards.
• Before proceeding with installation check the
supplied material to make sure it corresponds
to the order specification by examining the
identification labels (4.2 Product markings, page 4).
State of the art illuminator, which provides high
reliability and excellent image quality. The GEKO
lights the entire scene evenly, eliminating hotspots
and underexposures, for unbeatable night-time
images and secure surveillance of the area. The high
efficiency heat sink body ensures maximum LED
durability and protection against over-temperatures,
whereas the front glass, made of special
technopolymer, provides high infrared transmittance
(transparent glass in the white light version). The
GEKO illuminators are protected against electrostatic
discharges.
These illuminators incorporate a circuit that allows
them to be powered directly from a 12-24Vdc or
24Vac supply.
A weatherproof box with 230Vac or 120Vac power
supply is available as accessory for one or two GEKO
illuminators.
GEKO is supplied with a wall-mount bracket that
rotates horizontally and vertically and can be
assembled in a housing by means of the OSUPPIR
bracket.
4.2 Product markings
See the label attached to the outside of the package.
5 Declaration of conformity
to product standards
This is a Class A product. In a domestic
environment this product may cause radio
interference. In this case the user may be
required to take adequate measures.
• Electrical safety: EN60598
• Safety of laser products: EN60825-1
• Electromagnetic compatibility: EN55022, Class A
• Immunity: EN50130-4
• FCC Part 15, Class A
4
7 Assembling and installing
During normal operation the surface of the
illuminator can reach high temperatures.
Do not, therefore, allow direct contact
and position the appliance where it is
inaccessible to unauthorised persons.
Before touching switch off the illuminator
and allow to cool for a minimum period of
10 minutes.
Any change that is not expressly approved
by the manufacturer will invalidate the
guarantee.
6.1 Unpacking and contents
6.1.1 Unpacking
Do not stare directly into the lamp at a
distance of less than 1.7m (5.6ft).
When the product is delivered, make sure that the
package is intact and that there are no signs that it
has been dropped or scratched.
The assembly and installation must be
performed only by skilled personnel.
If there are obvious signs of damage, contact the
supplier immediately.
Keep the packaging in case you need to send the
product for repairs.
7.1 Assembly
6.1.2 Contents
Fasten the top bracket (01) to the lamp using the
screws and washers (02) supplied.
Check the contents to make sure they correspond
with the list of materials as below:
01
• Illuminator with bracket
• Wall-fastening bracket
02
• Instructions manual
6.2 Safely disposing of packaging
material
The packaging material can all be recycled. The
installer technician will be responsible for separating
the material for disposal, and in any case for
compliance with the legislation in force where the
device is to be used.
When returning a faulty product we recommend
using the original packaging for shipping.
02
Fig. 3
7.2 Installation
7.2.1 Installation of wall-mounted
illuminator
The illuminator’s position can be decided at
the time of installation.
Fig. 4
5
Instructions manual - English - EN
6 Preparing the product for
use
EN - English - Instructions manual Fasten the bracket as shown in the figure. Drive the
wall screws in tight.
7.2.2 Installation of housing-fitted
illuminator (OSUPPIR kit)
Fasten the plate (01) between the bottom of the
housing (02) and the bracket (03) using the screws
supplied (04).
Fig. 5
Fasten the illuminator, complete with its bracket,
using the screw, the nut and the washer supplied.
03
02
01
04
Fig. 8
Fasten the illuminator (complete with its bracket)
using the nut and the washer.
Fig. 6
Set the illuminator’s vertical and horizontal
inclination by adjusting the two fastening screws.
Fig. 9
Set the vertical and horizontal inclination (Fig. 7,
page 6).
Fig. 7
Check the resulting illumination range on the
screen.Tighten all the screws.
Check the resulting illumination range on the screen.
Tighten all the screws.
7.2.3 Connections
Power supply
and control
Fig. 10
6
Photocell
Switch-on
threshold
regulator
7.2.5 Disabling the photocell
The photocell is set in the factory at a predetermined
luminous level, suitable for most installations
(approximately 50Lux). In the event the intervention
threshold (illuminator activation) must be adjusted
differently, loosen the plug on the illuminator rear
and proceed adjusting.
To disable the lamp’s automatic switch-on set the
brightness to minimum (turn the potentiometer all
the way anticlockwise). With this setting the lamp can
only be switched on by closing the telemetry contact,
if the system is equipped with a central dusk switch
or a remote-controlled contact.
Using a Phillips screwdriver, turn the trimmer
anticlockwise to make the illuminator switch on in
low brightness conditions or clockwise to make it
switch on in better brightness conditions.
7.2.6 Power and control cable
The illuminator is supplied with a 2m (6.6ft) long
power and control cord.
Power cables, black and white: The illuminator
can be powered either by 24Vac or 12Vdc. Provide
power to the black and white cable pair (the polarity
is irrelevant). For proper operation please refer to the
charts, taking into account the power supply and the
type of lamp installed (7.2.7 Maximum cable length,
page 8).
To avoid the breakdown of the product
connect maximum two illuminators for
each power supply.
Fig. 11
Adjust the trimmer slowly, in the preset brightness
conditions, until the warning light next to the
trimmer turns on. Once you pass the threshold (LED
on), turn slightly back in the opposite direction.
After making the adjustments make sure
that the plug is closed tight to ensure
perfect sealing.
Remote control (telemetry) cables, green and red
colors: The control cable (telemetry) lets you turn
on the illuminator remotely by means of a clean
contact applied between the ends of the green and
red cables. For proper operation, make sure that the
photocell is disabled (7.2.5 Disabling the photocell,
page 7). Close the contact to turn on the illuminator.
Open the contact to turn it off.
When setting the illuminator to be switched
on automatically by the embedded dusk
switch, make sure to insulate the remote
control (telemetry) cables in the power cord
(green and red colors).
7
Instructions manual - English - EN
7.2.4 Photocell sensitivity
EN - English - Instructions manual 7.2.7 Maximum cable length
Depending on the type of illuminator (Low or
High Power) and on the supply voltage, apply the
following maximum distances for the power cables
(to be connected to the black and white wire pair).
Cables specifications (12Vdc power supply)
Cable
section
AWG
0.5mm²
Maximum distance
Low Power illuminator
High Power illuminator
20
10m (32ft)
6m (19.7ft)
0.75mm² 18
16m (52ft)
9m (29.5ft)
1mm²
17
22m (72.2ft)
12m (39ft)
1.5mm²
16
32m (105ft)
18m (59.1ft)
Tab. 1
Cables specifications (24Vac power supply)
Cable
section
AWG
Maximum distance
Low Power illuminator
High Power
illuminator
0.34mm² 22
25m (82ft)
15m (49.2ft)
0.5mm²
20
40m (131ft)
22m (72.2ft)
0.75mm² 18
60m (197ft)
35m (114ft)
1.5mm²
120m (393ft)
70m (229ft)
16
Tab. 2
The telemetry cable (green and red colors) should
have a minimum cross-section of 0.34mm² (AWG22)
and a maximum length of 200m (656ft).
8
8 Disposal of waste
materials
This symbol mark and recycle system
are applied only to EU countries and not
applied to the countries in the other area of
the world.
Your product is designed and manufactured with
high quality materials and components which can be
recycled and reused.
This symbol means that electrical and electronic
equipment, at their end-of-life, should be disposed of
separately from your household waste.
Please dispose of this equipment at your local
Community waste collection or Recycling centre.
In the European Union there are separate collection
systems for used electrical and electronic products.
9 Troubleshooting
9.1 Checking the power supply
Check that the unit is connected to a voltage
between 12-24Vdc or 24Vac +/- 10%.
9.2 Checking the photocell’s
operation
Leave the telemetry connection open.
10.3 Electrical
10.1 General
Power supply: 12-24Vdc or 24Vac, 50/60Hz
Die cast aluminium body
State of the art SMD LED
Consumption: 6-12W
Supplied complete with horizontal and vertical
rotating support in painted galvanized steel
Wavelengths: 850nm, 940nm and white light
GEKO IRH - Beam pattern and achievable distances
Horizontal/vertical beam
patterns
Wavelength
850nm,
low
power
Wavelength
850nm,
high power (=1,4
x low
power)
Wavelength
940nm
White
light
10˚
100m
(328ft)
140m
(460ft)
100m
(328ft)
30˚
60m
(197ft)
84m
(276ft)
60m
(197ft)
60m
(197ft)1
60˚
40m
(131ft)
56m
(184ft)
40m
(131ft)
40m
(131ft)1
Input for activation by means of a volt free relay
contact
Supplied with multipole cable: 4xAWG22 (0,34mm²),
L=2m
10.4 Environment
Indoor/Outdoor
Operating temperature:
-- With infrared illuminator: -50°C (-58°F)/+60°C
(140°F)
Tab. 3
The distances and the performance depend on
the camera/lens used and on the environmental
conditions.
1 Achievable distances with camera in Day mode
(colour image)
10.2 Mechanical
Dimensions: 133x112x135mm (5.2x4.4x5.3in)
Unit weight: 0.9kg
Adjustable built-in photocell for automatic activation
and deactivation
-- With white light illuminator: -50°C (-58°F)/+50°C
(122°F)
IP66/IP67 according to EN60529
10.5 Certifications
Electrical safety: EN60598
Photobiological safety of lamps and lamp systems:
EN 62471
Electromagnetic compatibility: EN55022, Class A
Immunity: EN50130-4
FCC Part 15, Class A
9
Instructions manual - English - EN
10 Technical data
11 Technical drawings
Ø8
3
133
.5
104
Ø8
60
25 18
The dimensions of the drawings are in millimetres.
.5
150
°
20°
104
85
144
48
135
30
80
60
20
65
50
112
101
104
124
133
Fig. 12
65
Ø 6.2
108
GEKO IRH.
Headquarters Italy Videotec S.p.A.
UK Representative office
France Videotec France S.à.r.l.
Asia Pacific Videotec (HK) Ltd
Via Friuli, 6 - I-36015 - Schio (VI) Italy
Tel. +39 0445 697411 - Fax +39 0445 697414
Email: [email protected]
Voie du Futur, Zac des Portes - 27100 - Val-de-Reuil, France
Tel. +33 2 32094900 - Fax +33 2 32094901
Email: [email protected]
Tel./Fax +44 01353 775438 (Sales)
Tel. +44 0113 815 0047 (Technical support)
Tel. +44 0113 815 0031 (Orders/Shipping dept.)
Email: [email protected]
Unit C 24 Floor - Gold King Industrial Building
35-41, Tai Lin Pai Road - Kwai Chung, NT, Hong Kong
Tel. +852 2333 0601 - Fax +852 2311 0026
Email: [email protected]
Americas Videotec Security, Inc.
35 Gateway Drive, Suite 100 - Plattsburgh, NY 12901 - U.S.A.
Tel. +1 518 8250020 - Fax +1 425 648 4289
Email: [email protected] - www.videotec.us
www.videotec.com
Printed in Italy © 2012 Videotec S.p.A.
MNVCIRHS_1302_EN
GEKO IRH
Illuminatore a LED
IT Italiano - Manuale di istruzioni
Sommario
ITALIANO
1 Informazioni sul presente manuale.............................................................................. 3
1.1 Convenzioni tipografiche...................................................................................................................................... 3
2 Note sul copyright e informazioni sui marchi commerciali......................................... 3
3 Norme di sicurezza......................................................................................................... 3
4 Identificazione................................................................................................................ 4
4.1 Descrizione e designazione del prodotto........................................................................................................ 4
4.2 Marcatura del prodotto.......................................................................................................................................... 4
5 Dichiarazione di conformità alle norme di prodotto................................................... 4
6 Preparazione del prodotto per l'utilizzo....................................................................... 5
6.1 Disimballaggio e contenuto................................................................................................................................. 5
6.1.1 Disimballaggio........................................................................................................................................................................... 5
6.1.2 Contenuto................................................................................................................................................................................... 5
6.2 Smaltimento in sicurezza dei materiali di imballaggio............................................................................... 5
7 Assemblaggio e installazione........................................................................................ 5
7.1 Assemblaggio............................................................................................................................................................ 5
7.2 Installazione................................................................................................................................................................ 5
7.2.1 Installazione dell'illuminatore a muro.............................................................................................................................. 5
7.2.2 Installazione dell'illuminatore su custodia (kit OSUPPIR).......................................................................................... 6
7.2.3 Collegamenti.............................................................................................................................................................................. 6
7.2.4 Sensibilità fotocellula.............................................................................................................................................................. 7
7.2.5 Disabilitazione della fotocellula.......................................................................................................................................... 7
7.2.6 Cavo di alimentazione e controllo...................................................................................................................................... 7
7.2.7 Lunghezza massima cavi....................................................................................................................................................... 8
8 Smaltimento dei rifiuti................................................................................................... 8
9 Troubleshooting............................................................................................................. 8
9.1 Controllo dell’alimentazione elettrica............................................................................................................... 8
9.2 Controllo delle funzioni della fotocellula......................................................................................................... 8
10 Dati tecnici.................................................................................................................... 9
10.1 Generale................................................................................................................................................................... 9
10.2 Meccanica................................................................................................................................................................ 9
10.3 Elettrico.................................................................................................................................................................... 9
10.4 Ambiente................................................................................................................................................................. 9
10.5 Certificazioni........................................................................................................................................................... 9
11 Disegni tecnici............................................................................................................ 10
1 Informazioni sul presente
manuale
3 Norme di sicurezza
Non fissare la lampada in funzione. Può
essere dannoso per gli occhi.
Prima di installare e utilizzare questa unità, leggere
attentamente questo manuale. Conservare questo
manuale a portata di mano come riferimento futuro.
1.1 Convenzioni tipografiche
PERICOLO!
Emissione di luce infrarossa o laser.
Può essere dannoso per gli occhi. Prestare
attenzione alle indicazioni fornite.
PERICOLO!
Pericolosità elevata.
Rischio di scosse elettriche. Prima di
eseguire qualsiasi operazione assicurarsi di
togliere tensione al prodotto, salvo diversa
indicazione.
RISK GROUP 2
CAUTION: Do not look at operating
lamp. Eye injury may result.
NOTICE: IR emitted from this
product. Use appropriate shielding
or eye protection.
Fig. 1
INFO
Descrizione delle caratteristiche del
sistema.
Si consiglia di leggere attentamente per
comprendere le fasi successive.
2 Note sul copyright e
informazioni sui marchi
commerciali
I nomi di prodotto o di aziende citati sono marchi
commerciali o marchi commerciali registrati
appartenenti alle rispettive società.
Illuminatore infrarosso.
RISK GROUP 2
PERICOLO!
Superficie calda.
Evitare il contatto. Le superfici sono calde
e potrebbero causare danni alla persona in
caso di contatto.
ATTENZIONE!
Pericolosità media.
L'operazione è molto importante per il
corretto funzionamento del sistema. Si
prega di leggere attentamente la procedura
indicata e di eseguirla secondo le modalità
previste.
Manuale di istruzioni - Italiano - IT
Il prodotto emette luce infrarossa.
Utilizzare schermature appropriate o
proteggere gli occhi.
CAUTION: Do not look at operating
lamp. Eye injury may result.
CAUTION: Do not stare at operating
lamp. May be harmful to the eyes.
Fig. 2
Illuminatore a luce bianca.
Durante il normale funzionamento
la superficie dell'illuminatore può
raggiungere temperature elevate. Evitare
pertanto il contatto diretto e posizionare
l’apparecchiatura in luogo non accessibile
al personale non autorizzato. Per
qualunque operazione di manutenzione
spegnere il dispositivo d’illuminazione e
lasciarlo raffreddare per almeno 10 minuti.
Il produttore declina ogni responsabilità
per eventuali danni derivanti da un
uso improprio delle apparecchiature
menzionate in questo manuale. Si
riserva inoltre il diritto di modificarne il
contenuto senza preavviso. Ogni cura è
stata posta nella raccolta e nella verifica
della documentazione contenuta in questo
manuale, tuttavia il produttore non può
assumersi alcuna responsabilità derivante
dall'utilizzo della stessa. Lo stesso dicasi
per ogni persona o società coinvolta nella
creazione e nella produzione di questo
manuale.
3
• L'installazione e la manutenzione del dispositivo
deve essere eseguita solo da personale tecnico
qualificato.
IT - Italiano - Manuale di istruzioni • Prima di effettuare interventi tecnici
sull'apparecchio togliere l'alimentazione elettrica.
• Non utilizzare cavi di alimentazione con segni di
usura o invecchiamento.
• Non effettuare per nessun motivo alterazioni o
collegamenti non previsti in questo manuale:
l'uso di apparecchi non idonei può portare a
gravi pericoli per la sicurezza del personale e
dell'impianto.
• Utilizzare solo parti di ricambio originali. Pezzi di
ricambio non originali potrebbero causare incendi,
scariche elettriche o altri pericoli.
• Prima di procedere con l'installazione controllare
che il materiale fornito corrisponda alle specifiche
richieste esaminando le etichette di marcatura (4.2
Marcatura del prodotto, pagina 4).
4 Identificazione
4.1 Descrizione e designazione
del prodotto
Illuminatore di ultima generazione in grado di
fornire un'elevata affidabilità e qualità d'immagine
notevole. GEKO illumina l’intera scena in modo
omogeneo eliminando macchie di luce e di buio
per insuperabili immagini notturne e una sicura
sorveglianza dell’area. Il corpo dissipatore ad alta
efficienza garantisce la massima durata dei LED
e protezione contro le sovratemperature, mentre
il vetro frontale, in speciale tecnopolimero, offre
un’elevata trasmittanza infrarossa (vetro trasparente
nella versione a luce bianca). Gli illuminatori GEKO
sono protetti contro le scariche elettrostatiche.
Questi illuminatori integrano un circuito che
permette l’alimentazione diretta da 12-24Vdc o
24Vac.
L'alimentatore in scatola stagna è disponibile come
accessorio per uno o due fari GEKO, in versione
230Vac o 120Vac.
GEKO é fornito con supporto per il montaggio a muro
con rotazione orizzontale e verticale e può essere
montato sotto custodia tramite il supporto OSUPPIR.
4.2 Marcatura del prodotto
Vedere l’etichetta posta all’esterno dell’imballo.
5 Dichiarazione di
conformità alle norme di
prodotto
Questo è un apparecchio di Classe A. In un
ambiente residenziale questo apparecchio
può provocare radiodisturbi. In questo
caso può essere richiesto all'utilizzatore di
prendere misure adeguate.
• Sicurezza elettrica: EN60598
• Sicurezza degli apparecchi laser: EN60825-1
• Compatibilità elettromagnetica: EN55022, Classe A
• Immunità: EN50130-4
• FCC Part 15, Classe A
4
6 Preparazione del
prodotto per l'utilizzo
7 Assemblaggio e
installazione
Durante il normale funzionamento
la superficie dell'illuminatore può
raggiungere temperature elevate. Evitare
pertanto il contatto diretto e posizionare
l’apparecchiatura in luogo non accessibile
al personale non autorizzato. Per
qualunque operazione di manutenzione
spegnere il dispositivo d’illuminazione e
lasciarlo raffreddare per almeno 10 minuti.
6.1 Disimballaggio e contenuto
6.1.1 Disimballaggio
Alla consegna del prodotto verificare che l'imballo
sia integro e non abbia segni evidenti di cadute o
abrasioni.
Non guardare direttamente la lampada
quando ci si trova a meno di 1.7m.
In caso di evidenti segni di danno all'imballo
contattare immediatamente il fornitore.
Conservare l'imballo nel caso sia necessario inviare il
prodotto in riparazione.
6.1.2 Contenuto
Controllare che il contenuto sia corrispondente alla
lista del materiale sotto elencata:
• Illuminatore con staffa
Manuale di istruzioni - Italiano - IT
Qualsiasi cambiamento non espressamente
approvato dal costruttore fa decadere la
garanzia.
L'assemblaggio e l'installazione vanno
eseguiti solo da personale qualificato.
7.1 Assemblaggio
Fissare la staffa superiore (01) al faro tramite le viti e
rondelle (02) fornite in dotazione.
• Staffa fissaggio a muro
01
• Manuale di istruzioni
6.2 Smaltimento in sicurezza dei
materiali di imballaggio
02
02
I materiali d'imballo sono costituiti interamente da
materiale riciclabile. Sarà cura del tecnico installatore
smaltirli secondo le modalità di raccolta differenziata
o comunque secondo le norme vigenti nel Paese di
utilizzo.
Fig. 3
In caso di restituzione del prodotto
malfunzionamente è consigliato l'utilizzo
dell'imballaggio originale per il trasporto.
7.2.1 Installazione dell'illuminatore a
muro
7.2 Installazione
In fase di installazione è possibile decidere
la posizione dell'illuminatore.
Fig. 4
5
Fissare la staffa come descritto in figura, serrando a
fondo le viti a parete.
7.2.2 Installazione dell'illuminatore su
custodia (kit OSUPPIR)
IT - Italiano - Manuale di istruzioni Fissare la piastra (01) tra fondo custodia (02) e staffa
(03) tramite le viti in dotazione (04).
Fig. 5
Fissare l'illuminatore completo di staffa tramite vite,
dado e rondelle in dotazione.
03
02
01
04
Fig. 8
Fissare l'illuminatore completo di staffa tramite il
dado e la rondella.
Fig. 6
Regolare l'inclinazione verticale ed orizzontale
dell'illuminatore agendo sulle apposite viti di
fissaggio.
Fig. 9
Regolare l'inclinazione verticale ed orizzontale (Fig. 7, pagina 6).
Verificare a monitor il campo di illuminazione
ottenuto. Serrare a fondo tutte le viti.
Fig. 7
7.2.3 Collegamenti
Verificare a monitor il campo di illuminazione
ottenuto.Serrare a fondo tutte le viti.
Alimentazione
e controllo
Fig. 10
6
Fotocellula
Regolatore
soglia
accensione
7.2.5 Disabilitazione della fotocellula
La regolazione della fotocellula è effettuata in
fabbrica ad un livello luminoso prefissato ed idoneo
alla maggior parte delle installazioni (circa 50Lux).
Nel caso si voglia regolare in maniera diversa la soglia
di intervento (accensione dell'illuminatore), svitare il
tappo posizionato sul retro del faro e provvedere alla
regolazione.
Per disabilitare l’accensione automatica del faro
impostare la luminosità al minimo (regolare il
potenziometro in senso antiorario fino a finecorsa).
In questa maniera si potrà accendere il proiettore
solamente mediante chiusura del contatto di
telemetria, nel caso si disponga di un impianto a
crepuscolare centralizzato o di un contatto attivabile
da remoto.
Regolare il trimmer con un cacciavite a croce in
verso antiorario per far accendere l'illuminatore con
condizioni di luminosità inferiore mentre regolare il
verso orario per regolare l'illuminatore in condizioni
di luminosità superiore.
7.2.6 Cavo di alimentazione e controllo
L'illuminatore viene provvisto con un cordone di
alimentazione e di controllo lungo 2m.
Cavi di alimentazione, colori bianco e nero:
L'illuminatore può essere alimentato sia a 24Vac sia
a 12Vdc. Fornire alimentazione alla coppia di cavi
bianco e nero( la polarità è irrilevante). Per un corretto
funzionamento, a seconda del tipo di alimentazione e
del modello di faro scelto, fare riferimento alle tabelle
(7.2.7 Lunghezza massima cavi, pagina 8).
Per evitare l'avaria del prodotto collegare al
massimo due fari per ogni alimentatore.
Fig. 11
Regolare lentamente il trimmer, nelle condizioni
di luminosità prefissata, fino a far accendere la
spia luminosa presente a fianco del trimmer. Una
volta oltrepassata la soglia (led acceso) regolare
leggermente in senso contrario.
Al termine delle regolazioni accertarsi che
il tappo di chiusura sia adeguatamente
serrato per garantire la tenuta ermetica del
prodotto.
Cavi di controllo remoto (telemetria), colori verde
e rosso: Il cavo di controllo (telemetria), permette
una accensione da remoto dell'illuminatore mediante
un contatto pulito applicato tra le estremità dei
cavi verde e rosso. Per un corretto funzionamento,
assicurarsi di avere disabilitato la fotocellula (7.2.5
Disabilitazione della fotocellula, pagina 7). Chiudere
il contatto per accendere l'illuminatore. Aprire il
contatto per spegnerlo.
Nel caso di utilizzo dell’accensione
automatica dell'illuminatore mediante
interruttore crepuscolare incorporato,
assicurarsi di isolare opportunamente i cavi
relativi al controllo remoto (Telemetria)
presenti nel cordone di alimentazione
(colori verde e rosso).
7
Manuale di istruzioni - Italiano - IT
7.2.4 Sensibilità fotocellula
7.2.7 Lunghezza massima cavi
IT - Italiano - Manuale di istruzioni In relazione al tipo di illuminatore (modello Low
o High power) e alla tensione di alimentazione,
attenersi alle seguenti distanze massime per i cavi di
alimentazione (da collegare alla coppia di fili bianco
e nero).
Specifiche cavi (alimentazione 12Vdc)
Sezione AWG
cavo
Distanza massima
0.5mm²
10m
6m
20
Illuminatore versio- Illuminatore versione Low Power
ne High Power
0.75mm² 18
16m
9m
1mm²
17
22m
12m
1.5mm²
16
32m
18m
Questo simbolo e il sistema di riciclaggio
sono validi solo nei paesi dell'EU e non
trovano applicazione in altri paesi del
mondo.
Il vostro prodotto è costruito con materiali e
componenti di alta qualità, che sono riutilizzabili o
riciclabili.
Prodotti elettrici ed elettronici che portano questo
simbolo alla fine dell'uso devono essere smaltiti
separatamente dai rifiuti casalinghi.
Vi preghiamo di smaltire questo apparecchio in un
Centro di raccolta o in un'Ecostazione.
Nell'Unione Europea esistono sistemi di raccolta
differenziata per prodotti elettrici ed elettronici.
Tab. 1
Specifiche cavi (alimentazione 24Vac)
Sezione AWG
cavo
Distanza massima
Illuminatore versione Low Power
Illuminatore
versione High
Power
0.34mm² 22
25m
15m
0.5mm²
40m
22m
0.75mm² 18
60m
35m
1.5mm²
120m
70m
20
16
Tab. 2
Per il cavo di telemetria (colori verde e rosso),
utilizzare un cavo di sezione minima 0,34mm²
(AWG22) e una distanza massima di 200m.
8
8 Smaltimento dei rifiuti
9 Troubleshooting
9.1 Controllo dell’alimentazione
elettrica
Controllare che l’unità sia collegata a una tensione
compresa tra 12-24Vdc o 24Vac +/-10%.
9.2 Controllo delle funzioni della
fotocellula
Lasciare aperto il contatto di telemetria.
10 Dati tecnici
10.3 Elettrico
10.1 Generale
Alimentazione: 12-24Vdc o 24Vac, 50/60Hz
Corpo in pressofusione di alluminio
LED SMD allo stato dell’arte
Consumo: 6-12W
Lunghezze d’onda: 850nm, 940nm e luce bianca
GEKO IRH - Angolo di diffusione e distanze
illuminatore
Angolo di
diffusione
orizzontale/verticale
Lunghezza d'onda
850nm,
bassa
potenza
Lunghezza d'onda
850nm,
alta
potenza
(=1,4 x
bassa
potenza)
Lunghezza d'onda
940nm
Luce
bianca
Fornito con cavo multipolare: 4xAWG22 (0,34mm²),
L=2m
10.4 Ambiente
Temperatura di esercizio:
-- Con illuminatore infrarosso: -50°C/+60°C
100m
140m
100m
30˚
60m
84m
60m
60m1
60˚
40m
56m
40m
40m1
-- Con illuminatore a luce bianca: -50°C/+50°C
Tab. 3
Le distanze e le prestazioni dipendono dal tipo
di telecamera/obiettivo usati e dalle condizioni
ambientali.
1 Distanze ottenute con telecamera impostata in
modalità Giorno (immagine a colori).
Dimensioni: 133x112x135mm
Ingresso per accensione tramite contatto pulito
esterno
Interno/Esterno
10˚
10.2 Meccanica
Fotocellula integrata regolabile per accensione e
spegnimento automatico
Manuale di istruzioni - Italiano - IT
Fornito completo di supporto con rotazione
orizzontale e verticale in acciaio zincato e verniciato
IP66/IP67 secondo EN60529
10.5 Certificazioni
Sicurezza elettrica: EN60598
Sicurezza fotobiologica delle lampade e dei sistemi a
lampada: EN 62471
Compatibilità elettromagnetica: EN55022, Classe A
Immunità: EN50130-4
FCC Part 15, Classe A
Peso unitario: 0.9kg
9
11 Disegni tecnici
Ø8
3
133
.5
104
Ø8
60
25 18
Le dimensioni dei disegni sono espresse in millimetri.
.5
150
°
20°
104
85
144
48
135
30
80
60
20
65
50
112
101
104
124
133
Fig. 12
65
Ø 6.2
108
GEKO IRH.
Headquarters Italy Videotec S.p.A.
UK Representative office
France Videotec France S.à.r.l.
Asia Pacific Videotec (HK) Ltd
Via Friuli, 6 - I-36015 - Schio (VI) Italy
Tel. +39 0445 697411 - Fax +39 0445 697414
Email: [email protected]
Voie du Futur, Zac des Portes - 27100 - Val-de-Reuil, France
Tel. +33 2 32094900 - Fax +33 2 32094901
Email: [email protected]
Tel./Fax +44 01353 775438 (Sales)
Tel. +44 0113 815 0047 (Technical support)
Tel. +44 0113 815 0031 (Orders/Shipping dept.)
Email: [email protected]
Unit C 24 Floor - Gold King Industrial Building
35-41, Tai Lin Pai Road - Kwai Chung, NT, Hong Kong
Tel. +852 2333 0601 - Fax +852 2311 0026
Email: [email protected]
Americas Videotec Security, Inc.
35 Gateway Drive, Suite 100 - Plattsburgh, NY 12901 - U.S.A.
Tel. +1 518 8250020 - Fax +1 425 648 4289
Email: [email protected] - www.videotec.us
www.videotec.com
Printed in Italy © 2012 Videotec S.p.A.
MNVCIRHS_1302_IT
GEKO IRH
Projecteur à LED
FR Français - Manuel d’instructions
Sommaire
FRANÇAIS
1 À propos de ce mode d’emploi...................................................................................... 3
1.1 Conventions typographiques.............................................................................................................................. 3
2 Notes sur le copyright et informations sur les marques de commerce...................... 3
3 Normes de securité......................................................................................................... 3
4 Identification................................................................................................................... 4
4.1 Description et désignation du produit............................................................................................................. 4
4.2 Marquage du produit.............................................................................................................................................. 4
5 Déclaration de conformité aux normes du produit..................................................... 4
6 Préparation du produit en vue de l’utilisation............................................................. 5
6.1 Déballage et contenu.............................................................................................................................................. 5
6.1.1 Déballage.................................................................................................................................................................................... 5
6.1.2 Contenu....................................................................................................................................................................................... 5
6.2 Élimination sans danger des matériaux d’emballage.................................................................................. 5
7 Assemblage et installation............................................................................................ 5
7.1 Assemblage................................................................................................................................................................ 5
7.2 Installation................................................................................................................................................................... 5
7.2.1 Installation du projecteur sur le mur................................................................................................................................. 5
7.2.2 Installation du projecteur sur le caisson (kit OSUPPIR)............................................................................................... 6
7.2.3 Connexions................................................................................................................................................................................. 6
7.2.4 Sensibilité photocellule.......................................................................................................................................................... 7
7.2.5 Désactivation de la photocellule........................................................................................................................................ 7
7.2.6 Câble d'alimentation et de contrôle.................................................................................................................................. 7
7.2.7 Longueur maximum des câbles.......................................................................................................................................... 8
8 Élimination des déchets................................................................................................. 8
9 Troubleshooting............................................................................................................. 8
9.1 Contrôle de l'alimentation électrique............................................................................................................... 8
9.2 Contrôle des fonctions de la photocellule....................................................................................................... 8
10 Données techniques..................................................................................................... 9
10.1 Généralités.............................................................................................................................................................. 9
10.2 Mécanique............................................................................................................................................................... 9
10.3 Électrique................................................................................................................................................................. 9
10.4 Environnement...................................................................................................................................................... 9
10.5 Certifications........................................................................................................................................................... 9
11 Dessins techniques..................................................................................................... 10
1 À propos de ce mode
d’emploi
3 Normes de securité
Ne pas fixer l'ampoule lorsqu'elle est en
marche. Peut être dangereux pour les yeux.
Avant d’installer et d’utiliser cet appareil, veuillez
lire attentivement ce mode d’emploi. Conservez-le à
portée de main pour pouvoir vous y reporter en cas
de besoin.
Le produit émet une lumière infrarouge.
Utiliser des protection adéquates ou se
protéger les yeux.
RISK GROUP 2
DANGER!
Émission de lumière infrarouge ou laser.
Peut être dangereux pour les yeux. Suivre
les indications fournies.
DANGER!
Risque élevé.
Risque de choc électrique. Sauf indication
contraire, sectionner l'alimentation avant
de procéder à toute opération.
CAUTION: Do not look at operating
lamp. Eye injury may result.
NOTICE: IR emitted from this
product. Use appropriate shielding
or eye protection.
Fig. 1
REMARQUE
Description des caractéristiques du
système.
Il est conseillé de procéder à une
lecture attentive pour une meilleure
compréhension des phases suivantes.
2 Notes sur le copyright
et informations sur les
marques de commerce
Les noms de produit ou de sociétés cités sont des
marques de commerce ou des marques de commerce
enregistrées.
Projecteur infrarouge.
RISK GROUP 2
DANGER!
Surface à température élevée.
Evitez le contact. La température des
surfaces est élevée et leur contact peut
provoquer des blessures corporelles.
ATTENTION!
Risque moyen.
Opération extrêmement importante en vue
d’un fonctionnement correct du système;
lire avec attention les opérations indiquées
et s’y conformer rigoureusement.
Manuel d'instructions - Français - FR
1.1 Conventions typographiques
CAUTION: Do not look at operating
lamp. Eye injury may result.
CAUTION: Do not stare at operating
lamp. May be harmful to the eyes.
Fig. 2
Projecteur à lumière blanche.
Durant le fonctionnement normal, la
surface du projecteur peut atteindre
des températures élevées. Éviter par
conséquent tout contact direct et
positionner l’appareil dans un endroit
non accessible au personnel non autorisé.
Avant de la toucher, éteindre le dispositif
d’illumination et le laisser refroidir durant
10 minutes minimum.
Le producteur décline toute responsabilité
pour les dommages éventuels dus à une
utilisation non appropriée des appareils
mentionnés dans ce manuel. On réserve
en outre le droit d’en modifier le contenu
sans préavis. La documentation contenue
dans ce manuel a été rassemblée et vérifiée
avec le plus grand soin, cependant, le
producteur ne peut pas s’assumer aucune
responsabilité dérivante de l’emploi de
celle là. La même chose vaut pour chaque
personne ou société impliquées dans la
création et la production de ce manuel.
3
• L’installation et l’entretien du dispositif doivent
être exclusivement être effectués par un personnel
technique qualifié.
• Sectionner l’alimentation électrique avant toute
intervention technique sur l’appareil.
FR - Français - Manuel d'instructions • Ne pas utiliser de câbles d’alimentation usés ou
endommagés.
• Ne procéder sous aucun prétexte à des
modifications ou des connexions non prévues
dans ce manuel: l'utilisation d’appareils non
adéquats peut comporter des dangers graves pour
la sécurité du personnel et de l’installation.
• Utiliser uniquement des pièces de rechange
d’origine. Les pièces non d’origine peuvent être
source d’incendies, de choc électrique ou autres.
• Avant de procéder à l’installation, contrôler que
le matériel fourni correspond à la commande
et examiner les étiquettes de marquage (4.2
Marquage du produit, page 4).
4 Identification
4.1 Description et désignation du
produit
Projecteur de dernière génération, capable
d’apporter une fiabilité très élevée et une
remarquable qualité d'image. Le projecteur GEKO
éclaire toute la scène de manière homogène,
éliminant les tâches de lumière et d'obscurité et
obtenant ainsi d'excellentes images nocturnes et une
surveillance sûre de la zone. Le corps dissipateur à
haut rendement garantit la durée maximale des LED
et une protection contre les surchauffes des plus
importantes, tandis que le verre frontal, en technopolymère spécial, offre une élevée transmission
infrarouge (verre transparent en version avec lumière
blanche). Les projecteurs GEKO sont protégés des
décharges électrostatiques.
Ces illuminateurs intègrent un circuit qui permet
l'alimentation directe de 12-24Vdc ou de 24Vac.
Une boîte étanche avec alimentation en 230Vac ou
120Vac est disponible comme accessoire pour un ou
deux projecteurs GEKO.
GEKO est fourni avec un support pour le montage
mural avec rotation horizontale et verticale et peut
être monté sous caisson à l'aide du support OSUPPIR.
4.2 Marquage du produit
Voir l’étiquette á l’extérieur de l’emballage.
5 Déclaration de conformité
aux normes du produit
Cet appareil appartient à la classe A.
Pourtant dans un milieu résidentiel il peut
être la cause de radioperturbations. Dans ce
cas il est préferable de prendre des mésures
appropritées.
• Sécurité électrique: EN60598
• Sécurité des appareils à laser: EN60825-1
• Compatibilité électromagnétique: EN55022, Classe
A
• Immunité: EN50130-4
• FCC Part 15, Classe A
4
6 Préparation du produit en
vue de l’utilisation
7 Assemblage et
installation
Toute modification non approuvée
expressément par le fabricant entraînera
l’annulation de la garantie.
6.1 Déballage et contenu
6.1.1 Déballage
Lors de la livraison du produit, vérifier que
l’emballage est en bon état et l’absence de tout signe
évident de chute ou d’abrasion.
Ne pas regarder directement la lampe à une
distance inférieure à 1.7m.
En cas de dommages évidents, contacter
immédiatement le fournisseur.
Conserver l’emballage en cas de nécessité
d’expédition du produit pour réparation.
6.1.2 Contenu
Contrôler que le contenu correspond à la liste
matériel indiquée ci-dessous:
• Projecteur avec étrier
L’assemblage et l’installation doivent être
effectués par un personnel qualifié.
7.1 Assemblage
Fixer l'étrier supérieur (01) et le projecteur avec les vis
et les rondelles (02) fournies.
• Etrier de fixage mural
01
• Manuel d'instructions
6.2 Élimination sans danger des
matériaux d’emballage
02
02
Le matériel d’emballage est entièrement composé
de matériaux recyclables. Le technicien chargé de
l’installation est tenu de l’éliminer conformément aux
dispositions en matière de collecte sélective et selon
les normes en vigueur dans le pays d’utilisation.
Fig. 3
En cas de retour du produit défectueux, il est
conseillé d'utiliser l'emballage original pour le
transport.
7.2.1 Installation du projecteur sur le
mur
7.2 Installation
On peut décider la position du projecteur
lors de la phase d'installation.
Fig. 4
5
Manuel d'instructions - Français - FR
Durant le fonctionnement normal, la
surface du projecteur peut atteindre
des températures élevées. Éviter par
conséquent tout contact direct et
positionner l’appareil dans un endroit
non accessible au personnel non autorisé.
Avant de la toucher, éteindre le dispositif
d’illumination et le laisser refroidir durant
10 minutes minimum.
Fixer l'étrier comme illustré sur la figure, en serrant à
fonds les vis sur le mur.
7.2.2 Installation du projecteur sur le
caisson (kit OSUPPIR)
Fixer la plaque (01) entre le fond du caisson (02) et
l'étrier (03) avec les vis fournies (04).
FR - Français - Manuel d'instructions Fig. 5
Fixer le projecteur ainsi que l'étrier avec la vis, l'écrou
et les rondelles fournis.
03
02
01
04
Fig. 8
Fixer le projecteur ainsi que l'étrier avec l'écrou et la
rondelle.
Fig. 6
Régler l'inclinaison verticale et horizontale
du projecteur en agissant sur les vis de fixage
correspondantes.
Fig. 9
Régler l'inclinaison verticale et horizontale (Fig. 7,
page 6).
Vérifier sur le moniteur le champ d'éclairage obtenu.
Serrer à fond toutes les vis.
Fig. 7
7.2.3 Connexions
Vérifier sur le moniteur le champ d'éclairage
obtenu.Serrer à fond toutes les vis.
Alimentation et
contrôle
Fig. 10
6
Photocellule
Régulateur du
seuil d'allumage
7.2.5 Désactivation de la photocellule
Le réglage de la cellule photoélectrique est effectué
en usine à un niveau lumineux fixé et approprié à
la plupart des installations (environ 50Lux) Si l'on
souhaite régler différemment le seuil d'intervention
(allumage du projecteur), dévisser le bouchon situé à
l'arrière du projecteur et effectuer le réglage.
Pour désactiver l'allumage automatique du
projecteur, configurer l'éclairage au minimum (régler
le potentiomètre dans le sens antihoraire jusqu'à
la butée). De cette façon, on pourra allumer le
projecteur uniquement avec la fermeture du contact
de télémétrie si l'on dispose d'une installation
crépusculaire centralisée ou d'un contact activable à
distance.
Régler le trimmer avec un tournevis cruciforme dans
le sens antihoraire pour allumer le projecteur avec
des conditions de faible éclairage et dans le sens
horaire avec des conditions d'éclairage meilleur.
7.2.6 Câble d'alimentation et de
contrôle
Le projecteur est équipé d'un cordon d'alimentation
et de contrôle de 2m de long.
Câbles d'alimentation, couleurs blanche et noire:
Le projecteur peut être alimenté aussi bien à 24Vac
qu'à 12Vdc. Fournir l'alimentation au couple de
câbles blanc et noir (la polarité a peu d'importance).
Pour un fonctionnement correct selon le type
d'alimentation et de modèle du projecteur choisi,
consulter les tableaux (7.2.7 Longueur maximum des
câbles, page 8).
Fig. 11
Avec les conditions d'éclairage déterminé, régler
lentement le trimmer jusqu'à allumer le voyant
lumineux présent à côté de celui-ci. Une fois que le
seuil (led allumée) est dépassé, régler légèrement
dans le sens contraire.
Au terme des réglages, vérifier que le
bouchon de fermeture soit bien serré
pour garantir l'étanchéité hermétique du
produit.
En cas d'allumage automatique du
projecteur grâce à l'interrupteur
crépusculaire incorporé, s'assurer de bien
isoler les câbles relatifs au contrôle à
distance (Télémétrie) présents sur le cordon
d'alimentation (couleurs vert et rouge).
Pour éviter des dégâts au produit raccorder
un maximum de deux illuminateurs pour
chaque alimentation.
Câbles de contrôle à distance (télémétrie),
couleurs vert et rouge: Le câble de contrôle
(télémétrie) permet un allumage à distance du
projecteur avec un contact sec appliqué entre
les extrémités des câbles vert et rouge. Pour un
fonctionnement correct, s'assurer d'avoir désactivé la
photocellule (7.2.5 Désactivation de la photocellule,
page 7). Fermé le contact pour allumer le projecteur.
Ouvrir le contact pour l'éteindre.
7
Manuel d'instructions - Français - FR
7.2.4 Sensibilité photocellule
7.2.7 Longueur maximum des câbles
Selon le type de projecteur (modèle Low ou High
power) et la tension d'alimentation, respecter les
distances maximums suivantes pour les câbles
d'alimentation (à brancher au couple de fils blanc et
noir).
FR - Français - Manuel d'instructions Câbles spécifiques (alimentation 12Vdc)
Section
du
câble
AWG
0.5mm²
Distance maximale
Projecteur version
Low Power
Projecteur version
High Power
20
10m
6m
0.75mm² 18
16m
9m
1mm²
17
22m
12m
1.5mm²
16
32m
18m
Tab. 1
Câbles spécifiques (alimentation 24Vac)
Section
du
câble
AWG
Distance maximale
Projecteur version Low Power
Projecteur version High Power
0.34mm² 22
25m
15m
0.5mm²
20
40m
22m
0.75mm² 18
60m
35m
1.5mm²
120m
70m
16
Tab. 2
Pour le câble de télémétrie (couleurs vert et rouge),
utiliser un câble de section minimum 0,34mm²
(AWG22) et une distance maximum de 200m.
8
8 Élimination des déchets
Ce symbole et le système de recyclage ne
sont appliqués que dans les pays UE et non
dans les autres pays du monde.
Votre produit est conçu et fabriqué avec des matèriels
et des composants de qualité supérieure qui peuvent
être recyclés et réutilisés.
Ce symbole signifie que les équipements électriques
et électroniques en fin de vie doivent être éliminés
séparément des ordures ménagères.
Nous vous prions donc de confier cet équipement à
votre Centre local de collecte ou Recyclage.
Dans l’Union Européenne, il existe des systèmes
sélectifs de collecte pour les produits électriques et
électroniques usagés.
9 Troubleshooting
9.1 Contrôle de l'alimentation
électrique
Contrôler que l’unité est branchée à une tension
comprise entre 12-24Vdc ou à 24Vac +/- 10%.
9.2 Contrôle des fonctions de la
photocellule
Laissant ouvert le branchement de la télémétrie.
10 Données techniques
10.3 Électrique
10.1 Généralités
Alimentation: 12-24Vdc ou 24Vac, 50/60Hz
Corps en fonte d’aluminium
LED SMD dans l'état actuel de la technique
Consommation: 6-12W
Fourni avec le support à rotation horizontale et
verticale en acier zingué et vernis
Longueurs d’onde: 850nm, 940nm et lumière blanche
Angle de
diffusion
horizontal/
vertical
Longueur Longueur Lud’onde
d’onde
mière
850nm,
940nm
blanpuissance
che
élevée
(=1,4 x
basse
puissance)
10˚
100m
140m
100m
30˚
60m
84m
60m
60m1
60˚
40m
56m
40m
40m1
Tab. 3
Longueur
d’onde
850nm,
basse
puissance
Les distances et les performances relatives dépendent
du type de caméra / objectif utilisés et des conditions
ambiantes.
1 Distances obtenues avec caméra réglée en mode Jour
(image couleur).
10.2 Mécanique
Dimensions: 133x112x135mm
Entrée pour allumage par un contact sec externe
Manuel d'instructions - Français - FR
GEKO IRH - Angle de diffusion et distances
Cellule de détection intégrée et réglable pour
allumage et extinction automatique
Fourni avec un câble multipolaire: 4xAWG22
(0,34mm²), L=2m
10.4 Environnement
Intérieur/Extérieur
Température d'exploitation:
-- Avec projecteur infrarouge: -50°C/+60°C
-- Avec projecteur à lumière blanche: -50°C/+50°C
IP66/IP67 selon EN60529
10.5 Certifications
Sécurité électrique: EN60598
Sécurité photobiologique des lampes et des systèmes
à lampe: EN 62471
Compatibilité électromagnétique: EN55022, Classe A
Immunité: EN50130-4
FCC Part 15, Classe A
Poids net: 0,9kg
9
11 Dessins techniques
Ø8
3
133
.5
104
Ø8
60
25 18
Les dimensions des dessins sont exprimées en millimètres.
.5
150
°
20°
104
85
144
48
135
30
80
60
20
65
50
112
101
104
124
133
Fig. 12
65
Ø 6.2
108
GEKO IRH.
Headquarters Italy Videotec S.p.A.
UK Representative office
France Videotec France S.à.r.l.
Asia Pacific Videotec (HK) Ltd
Via Friuli, 6 - I-36015 - Schio (VI) Italy
Tel. +39 0445 697411 - Fax +39 0445 697414
Email: [email protected]
Voie du Futur, Zac des Portes - 27100 - Val-de-Reuil, France
Tel. +33 2 32094900 - Fax +33 2 32094901
Email: [email protected]
Tel./Fax +44 01353 775438 (Sales)
Tel. +44 0113 815 0047 (Technical support)
Tel. +44 0113 815 0031 (Orders/Shipping dept.)
Email: [email protected]
Unit C 24 Floor - Gold King Industrial Building
35-41, Tai Lin Pai Road - Kwai Chung, NT, Hong Kong
Tel. +852 2333 0601 - Fax +852 2311 0026
Email: [email protected]
Americas Videotec Security, Inc.
35 Gateway Drive, Suite 100 - Plattsburgh, NY 12901 - U.S.A.
Tél. +1 518 8250020 - Fax +1 425 648 4289
Email: [email protected] - www.videotec.us
www.videotec.com
Printed in Italy © 2012 Videotec S.p.A.
MNVCIRHS_1302_FR
GEKO IRH
LED-Scheinwerfer
DE Deutsch - Bedienungslanleitung
Inhaltsverzeichnis
DEUTSCH
1 Allgemeines.................................................................................................................... 3
1.1 Schreibweisen............................................................................................................................................................ 3
2 Anmerkungen zum Copyright und Informationen zu den Handelsmarken.............. 3
3 Sicherheitsnormen......................................................................................................... 3
4 Identifizierung................................................................................................................ 4
4.1 Beschreibung und Bezeichnung des Produktes............................................................................................ 4
4.2 Kennzeichnung des Produkts.............................................................................................................................. 4
5 Erklärung zur Übereinstimmung mit den Produktnormen........................................ 4
6 Vorbereitung des Produktes auf den Gebrauch.......................................................... 5
6.1 Entfernen der Verpackung und Inhalt............................................................................................................... 5
6.1.1 Entfernen der Verpackung.................................................................................................................................................... 5
6.1.2 Inhalt............................................................................................................................................................................................. 5
6.2 Sichere Entsorgung der Verpackungsmaterialien........................................................................................ 5
7 Zusammenbau und Installation.................................................................................... 5
7.1 Zusammenbau........................................................................................................................................................... 5
7.2 Installation................................................................................................................................................................... 5
7.2.1 Wandmontage des Scheinwerfers..................................................................................................................................... 5
7.2.2 Installation des Scheinwerfers am Gehäuse (Bausatz OSUPPIR)............................................................................. 6
7.2.3 Verbindungen............................................................................................................................................................................ 6
7.2.4 Empfindlichkeit der Fotozelle.............................................................................................................................................. 7
7.2.5 Deaktivierung der Fotozelle................................................................................................................................................. 7
7.2.6 Versorgungs- und Steuerkabel............................................................................................................................................ 7
7.2.7 Maximale Kabellänge.............................................................................................................................................................. 8
8 Müllentsorgungsstellen................................................................................................. 8
9 Troubleshooting............................................................................................................. 8
9.1 Kontrolle der Stromversorgung........................................................................................................................... 8
9.2 Kontrolle der Funktionen der Fotozelle............................................................................................................ 8
10 Technische Daten.......................................................................................................... 9
10.1 Allgemeines............................................................................................................................................................ 9
10.2 Mechanik................................................................................................................................................................. 9
10.3 Elektrik...................................................................................................................................................................... 9
10.4 Umgebung.............................................................................................................................................................. 9
10.5 Zertifizierungen..................................................................................................................................................... 9
11 Technische Zeichnungen........................................................................................... 10
1 Allgemeines
3 Sicherheitsnormen
Lesen Sie bitte vor dem Installieren und dem
Verwenden dieses Gerätes die Bedienungsanleitung
sorgfältig durch. Bewahren Sie sie zum späteren
Nachschlagen auf.
Die Lampe nicht anfassen, wenn sie in
Betrieb ist. Kann zu Verletzungen an den
Augen führen.
1.1 Schreibweisen
Das Produkt strahlt Infrarotlicht aus.
Entsprechende Abschirmungen verwenden
oder die Augen schützen.
GEFAHR!
Emission von Infrarotlicht oder Laser.
Kann zu Verletzungen an den Augen
führen. Die mitgelieferten Informationen
beachten.
CAUTION: Do not look at operating
lamp. Eye injury may result.
NOTICE: IR emitted from this
product. Use appropriate shielding
or eye protection.
Abb. 1
ANMERKUNG
Beschreibung der Systemmerkmale.
Eine sorgfältige Lektüre wird empfohlen,
um das Verständnis der folgenden Phasen
zu gewährleisten.
2 Anmerkungen
zum Copyright und
Informationen zu den
Handelsmarken
Die angeführten Produkt- oder Firmennamen sind
Handelsmarken oder eingetragene Handelsmarken.
Infrarot- Scheinwerfer.
RISK GROUP 2
GEFAHR!
Heiße Oberfläche.
Nicht berühren. Die Oberflächen sind
heiß und können bei Berührung zu
Verbrennungen führen.
ACHTUNG!
Mittlere Gefährdung.
Der genannte Vorgang hat große
Bedeutung für den einwandfreien Betrieb
des Systems: es wird gebeten, sich die
Verfahrensweise anzulesen und zu
befolgen.
Bedienungslanleitung - Deutsch - DE
GEFAHR!
Erhöhte Gefährdung.
Stromschlaggefahr. Falls nichts anderes
angegeben, unterbrechen Sie die
Stromversorgung, bevor die beschriebenen
Arbeiten durchgeführt werden.
RISK GROUP 2
CAUTION: Do not look at operating
lamp. Eye injury may result.
CAUTION: Do not stare at operating
lamp. May be harmful to the eyes.
Abb. 2
Weißlicht- Scheinwerfer.
Im normalen Betrieb kann der Scheinwerfer
an der Oberfläche Hohe Temperaturen.
erreichen. Vermeiden Sie deshalb die
direkte Berührung und positionieren
Sie das Gerät an einem Ort, der für
Unbefugte unzugänglich ist. Bevor
man sie berührt, muss deshalb die
Ausleuchtungseinrichtung abgeschaltet
werden und mindestens 10 Minuten lang
abkühlen.
Der Hersteller lehnt jede Haftung für
eventuelle Schäden ab, die aufgrund
unsachgemäßer Anwendung der in diesem
Handbuch erwähnten Geräte entstanden
ist. Ferner behält er sich das Recht vor, den
Inhalt ohne Vorkündigung abzuändern.
Die Dokumentation in diesem Handbuch
wurde sorgfältig ausgeführt und überprüft,
dennoch kann der Hersteller keine Haftung
für die Verwendung übernehmen. Dasselbe
gilt für jede Person oder Gesellschaft, die
bei der Schaffung oder Produktion von
diesem Handbuch miteinbezogen ist.
3
• Die Installation und Wartung der Vorrichtung ist
technischen Fachleuten vorbehalten.
4 Identifizierung
• Vor technischen Eingriffen am Gerät muss die
Stromversorgung unterbrochen werden.
4.1 Beschreibung und
Bezeichnung des Produktes
• Es dürfen keine Versorgungskabel mit Verschleißoder Alterungsspuren verwendet werden.
DE - Deutsch - Bedienungslanleitung • Unter keinen Umständen dürfen Veränderungen
oder Anschlüsse vorgenommen werden, die
in diesem Handbuch nicht genannt sind: Der
Gebrauch ungeeigneten Geräts kann die Sicherheit
des Personals und der Anlage schwer gefährden.
• Es dürfen nur Original-Ersatzteile verwendet
werden. Nicht originale Ersatzteile können zu
Bränden, elektrischen Entladungen oder anderen
Gefahren führen.
• Vor der Installation ist anhand des
Kennzeichnungsschildes nachzuprüfen, ob das
gelieferte Material die gewünschten Eigenschaften
(4.2 Kennzeichnung des Produkts, Seite 4).
Scheinwerfer der neusten Generation, der eine
hohe Zuverlässigkeit und eine bemerkenswerte
Bildqualität bietet. Die vom Scheinwerfer GEKO
erzeugte Beleuchtung erhellt gleichmäßig das
gesamte Sichtfeld und beseitigt Licht- und
Dunkelflecken für unübertreffliche Nachtbilder
und eine sichere Überwachung des Bereichs.
Der Hochleistungskühlkörper garantiert die
maximale Lebensdauer der LEDs und Schutz gegen
Übertemperaturen, während das Frontglas aus
Spezialkunststoff eine hohe infrarote Durchlässigkeit
bietet; im weißes Licht Version das Glas ist
transparent. Die GEKO Scheinwerfer sind zudem
gegen elektrostatische Entladungen geschützt.
Diese Scheinwerfer besitzen eine Schaltung, die die
direkte Stromversorgung mit 12-24Vdc oder 24Vac
ermöglicht.
Ein Schützgehäuse mit 230Vac- oder 120Vac- Netzteil
für einen oder zwei GEKO-Scheinwerfer ist als
Zubehör lieferbar.
GEKO wird mit der Halterung für die Wandmontage
geliefert, die sich waagerecht und senkrecht drehen
lässt, und durch die Halterung OSUPPIR unter dem
Gehäuse montiert werden kann.
4.2 Kennzeichnung des Produkts
Siehe das Schild außen auf der Verpackung.
5 Erklärung zur
Übereinstimmung mit den
Produktnormen
Dies ist eine Einrichtung der Klasse A.
Diese Einrichtung kann im Wohnbereich
Funkstörungen verursachen. In diesem
Fall kann vom Betreiber verlangt werden,
angemessene Maßnahmen durchzuführen.
• Elektrische Sicherheit: EN60598
• Sicherheit der Lasergeräte: EN60825-1
• Elektromagnetische Verträglichkeit: EN55022,
Klasse A
• Immunität: EN50130-4
• FCC Part 15, Klasse A
4
6 Vorbereitung des
Produktes auf den
Gebrauch
7 Zusammenbau und
Installation
Jede vom Hersteller nicht ausdrücklich
genehmigte Veränderung führt zum Verfall
der Gewährleistungsrechte.
6.1 Entfernen der Verpackung
und Inhalt
6.1.1 Entfernen der Verpackung
Bei der Lieferung des Produktes ist zu prüfen, ob die
Verpackung intakt ist oder offensichtliche Anzeichen
von Stürzen oder Abrieb aufweist.
Sehen Sie aus weniger als 1.7m Entfernung
nicht direkt in die Lampe.
Bei offensichtlichen Schadensspuren an der
Verpackung muss umgehend der Lieferant
verständigt werden.
Zusammenbau und Installation sind
qualifizierten Fachleuten vorbehalten.
Bewahren Sie die Verpackung auf für den Fall, dass
das Produkt zur Reparatur eingesendet werden muss.
6.1.2 Inhalt
Prüfen Sie, ob der Inhalt mit der nachstehenden
Materialliste übereinstimmt:
7.1 Zusammenbau
Den oberen Bügel (01) mithilfe der mitgeliefert
Schrauben und Unterlegscheiben (02) am
Scheinwerfer befestigen.
01
• Scheinwerfer mit Bügel
• Bügel für Wandmontage
• Bedienungslanleitung
02
6.2 Sichere Entsorgung der
Verpackungsmaterialien
Die Verpackungsmaterialien sind vollständig
wiederverwertbar. Es ist Sache des
Installationstechnikers, sie getrennt, auf jeden
Fall aber nach den geltenden Vorschriften des
Anwendungslandes zu entsorgen.
02
Abb. 3
7.2 Installation
7.2.1 Wandmontage des Scheinwerfers
Während der Installation kann die Position
des Scheinwerfers gewählt werden.
Im Falle der Rückgabe des nicht korrekt
funktionierenden Produktes empfiehlt sich die
Verwendung der Originalverpackung für den
Transport.
Abb. 4
5
Bedienungslanleitung - Deutsch - DE
Im normalen Betrieb kann der Scheinwerfer
an der Oberfläche Hohe Temperaturen.
erreichen. Vermeiden Sie deshalb die
direkte Berührung und positionieren
Sie das Gerät an einem Ort, der für
Unbefugte unzugänglich ist. Bevor
man sie berührt, muss deshalb die
Ausleuchtungseinrichtung abgeschaltet
werden und mindestens 10 Minuten lang
abkühlen.
Den Bügel wie in der Abbildung befestigen und die
Schrauben an der Wand festziehen.
7.2.2 Installation des Scheinwerfers am
Gehäuse (Bausatz OSUPPIR)
Die Platte (01) zwischen Gehäuse (02) und Bügel (03)
mithilfe der mitgelieferten Schrauben (04) befestigen.
Abb. 5
DE - Deutsch - Bedienungslanleitung Den mit Bügel versehenen Scheinwerfer mithilfe der
in der Lieferung enthaltenen Schraube, Mutter und
Unterlegscheiben befestigen.
03
02
01
04
Abb. 8
Den mit Bügel versehenen Scheinwerfer mithilfe von
Mutter und Unterlegscheibe befestigen.
Abb. 6
Die vertikale und horizontale Neigung des
Scheinwerfers wird eingestellt, indem die
entsprechenden Befestigungsschrauben gedreht
werden.
Abb. 9
Die vertikale und horizontale Neigung einstellen
(Abb. 7, Seite 6).
Mit dem Überwachungsgerät den hierdurch
ausgeleuchteten Bereich prüfen. Alle Schrauben
festziehen.
7.2.3 Verbindungen
Abb. 7
Mit dem Überwachungsgerät den hierdurch
ausgeleuchteten Bereich prüfen.Alle Schrauben
festziehen.
Versorgung und
Steuerung
Abb. 10
6
Fotozelle
Regler der
EinschaltungGrenze
7.2.4 Empfindlichkeit der Fotozelle
7.2.5 Deaktivierung der Fotozelle
Die Fotozelle wird werkseitig auf eine festgelegte
Lichtstärke eingestellt, welche für den Großteil der
Installationen geeignet ist (etwa 50Lux). Zum Ändern
der Einsatzgrenze (Einschalten des Scheinwerfers)
den an der Rückseite des Scheinwerfers angebrachte
Deckel entfernen und die Einstellung vornehmen.
Zur Deaktivierung der automatischen Einschaltung
des Scheinwerfers Helligkeit auf das Minimum
einstellen (Potenziometer entgegen Uhrzeigersinn
bis zum Anschlag drehen). Auf dieser Weise kann
der Scheinwerfer nur durch Schließen des Kontakts
der Telemetrie eingeschaltet werden, sollte eine
zentral geschaltete Dämmerungsanlage oder ein
fernzuschaltender Kontakt vorhanden sein.
Den Trimmer mit einem KreuzschlitzSchraubenzieher entgegen Uhrzeigersinn drehen, um
die Helligkeit des Scheinwerfers zu verringern, und
im Uhrzeigersinn, um seine Helligkeit zu erhöhen.
7.2.6 Versorgungs- und Steuerkabel
Bedienungslanleitung - Deutsch - DE
Der Scheinwerfer verfügt über ein Versorgungs- und
Steuerkabel mit einer Länge von 2m.
Versorgungskabel, schwarz und weiß: Der
Scheinwerfer kann wohl mit 24Vac als auch mit
12Vdc versorgt werden. Dem weißen und schwarzen
Kabel (Polarität ist unerheblich) Strom zuführen.
Für einen einwandfreien Betrieb entsprechend
des Versorgungstyps und des gewählten
Scheinwerfermodells siehe Tabellen. (7.2.7 Maximale
Kabellänge, Seite 8).
Abb. 11
Den Trimmer langsam auf die festgelegte Helligkeit
einstellen, bis sich die Kontrollleuchte an der Seite
des Trimmers einschaltet. Sobald die Grenze erreicht
wurde (LED-Leuchte eingeschaltet), leicht im
Uhrzeigersinn einstellen.
Nach den Einstellungen prüfen, dass der
Verschlussdeckel angemessen angezogen
ist, um die hermetische Dichtheit des
Produkts zu garantieren.
Bei einer automatischen Einschaltung des
Scheinwerfers über einen eingebauten
Dämmerungsschalter, ist sicherzustellen,
dass die Kabel der Fernsteuerung
(Telemetrie) im Versorgungskabel (Farbe
grün und rot) angemessen isoliert sind.
Um den Produktausfall zu vermeiden,
höchstens zwei Scheinwerfer für jedes
Netzteil verbinden.
Kabel der Fernsteuerung (Telemetrie), Farbe grün
und rot: Das Steuerkabel (Telemetrie) erlaubt das
Einschalten des Scheinwerfers aus der Ferne über
einen potenzialfreien Kontakt, der zwischen den
Enden des grünen und roten Kabels angebracht wird.
Für einen einwandfreien Betrieb sicherstellen, dass
die Fotozelle deaktiviert wurde (7.2.5 Deaktivierung
der Fotozelle, Seite 7). Zum Einschalten des
Scheinwerfers Kontakt schließen. Zum Ausschalten
Kontakt öffnen.
7
7.2.7 Maximale Kabellänge
Je nach Scheinwerfertyp (Modell Low oder
High Power) und Versorgungsspannung
müssen die folgenden maximalen Abstände für
Versorgungskabel (Anschluss an das weiße und
schwarze Kabel) beachtet werden.
DE - Deutsch - Bedienungslanleitung Eigenschaften der Kabel (Versorgung 12Vdc)
Kabel
Querschnitt
AWG
0.5mm²
20
Höchstentfernung
Scheinwerfer
Ausführung Low
Power
Scheinwerfer
Ausführung High
Power
10m
6m
0.75mm² 18
16m
9m
1mm²
17
22m
12m
1.5mm²
16
32m
18m
Eigenschaften der Kabel (Versorgung 24Vac)
AWG
Höchstentfernung
Scheinwerfer
Ausführung Low
Power
Scheinwerfer
Ausführung High
Power
0.34mm² 22
25m
15m
0.5mm²
40m
22m
0.75mm² 18
60m
35m
1.5mm²
120m
70m
20
16
Tab. 2
Als Kabel der Telemetrie (Farbe grün und rot)
muss ein Kabel mit einem Mindestquerschnitt von
0,34mm² (AWG22) auf einer Distanz von maximal
200m verwendet werden.
8
Dieses Symbol und das entsprechende
Recycling-System gelten nur für EULänder
und finden in den anderen Ländern der
Welt keine Anwendung.
Ihr Produkt wurde entworfen und hergestellt
mit qualitativ hochwertigen Materialien und
Komponenten, die recycelt und wiederverwendet
werden können.
Dieses Symbol bedeutet, daß elektrische und
elektronische Geräte am Ende ihrer Nutzungsdauer
von Hausmüll getrennt entsorgt werden sollen.
Bitte entsorgen Sie dieses Gerät bei Ihrer örtlichen
Sammelstelle oder im Recycling Centre.
In der Europäischen Union gibt es unterschiedliche
Sammelsysteme für Elektrik- und Elektronikgeräte.
Tab. 1
Kabel
Querschnitt
8 Müllentsorgungsstellen
9 Troubleshooting
9.1 Kontrolle der
Stromversorgung
Prüfen Sie, ob die Einheit an eine Spannung zwischen
12-24Vdc oder 24Vac +/- 10% angeschlossen ist.
9.2 Kontrolle der Funktionen der
Fotozelle
Die Funktionen der Fotozelle prüfen, indem diese
mit einem schwarzen Band verdeckt wird und die
Telemetrieverbindung offen bleibt.
10 Technische Daten
10.3 Elektrik
10.1 Allgemeines
Netzteil: 12-24Vdc oder 24Vac, 50/60Hz
Korpus aus Aluminiumdruckguß
SMD-LEDs nach neustem Stand der Technik
Verbrauch: 6-12W
Komplett mit stahlverzinkten und lackierten
Halterungen für eine waagerechte und senkrechte
Drehung geliefert.
Wellenlänge: 850nm, 940nm und weißes Licht
GEKO IRH - Öffnungswinkel und Abstände
Wellenlänge
850nm,
niedrige
Leistung
Wellenlänge
850nm,
hohe
Leistung
(=1,4 x
niedrige
Leistung)
Wellenlänge
940nm
Weißes
Licht
Eingang für die Einschaltung über einen externen
Trockenkontakt
Geliefert mit mehrpoligem Kabel: 4xAWG22
(0,34mm²), L=2m
10.4 Umgebung
Innen/Äußere Installationen
Betriebstemperatur:
-- Mit Infrarot- Scheinwerfer: -50°C/+60°C
-- Mit Weißlicht- Scheinwerfer: -50°C/+50°C
10˚
100m
140m
100m
30˚
60m
84m
60m
60m1
IP66/IP67 nach EN60529
60˚
40m
56m
40m
40m1
10.5 Zertifizierungen
Tab. 3
Die Abstände und die Leistung hängen von der
verwendeten Art der Kamera / Objektiv und den
Umgebungsbedingungen ab.
1 Abstände erhalten mit Kamera in Tag-Modus
(Farbbild).
Elektrische Sicherheit: EN60598
Fotobiologische Sicherheit der Lampen und der
Lampensysteme: EN 62471
10.2 Mechanik
Elektromagnetische Verträglichkeit: EN55022, Klasse
A
Abmessungen: 133x112x135mm
Immunität: EN50130-4
Einheitsgewicht: 0,9 kg
Bedienungslanleitung - Deutsch - DE
Streuwinkel horizontal /
vertikal
Einstellbare integrierte Fotozelle für eine
automatische Ein- und Ausschaltung
FCC Part 15, Klasse A
9
11 Technische Zeichnungen
Ø8
3
133
.5
104
Ø8
60
25 18
Die Abmessungen der Zeichnungen sind in Millimeter angegeben.
.5
150
°
20°
104
85
144
48
135
30
80
60
20
65
50
112
101
104
124
133
65
Ø 6.2
108
Abb. 12 GEKO IRH.
Headquarters Italy Videotec S.p.A.
UK Representative office
France Videotec France S.à.r.l.
Asia Pacific Videotec (HK) Ltd
Via Friuli, 6 - I-36015 - Schio (VI) Italy
Tel. +39 0445 697411 - Fax +39 0445 697414
Email: [email protected]
Voie du Futur, Zac des Portes - 27100 - Val-de-Reuil, France
Tel. +33 2 32094900 - Fax +33 2 32094901
Email: [email protected]
Tel./Fax +44 01353 775438 (Sales)
Tel. +44 0113 815 0047 (Technical support)
Tel. +44 0113 815 0031 (Orders/Shipping dept.)
Email: [email protected]
Unit C 24 Floor - Gold King Industrial Building
35-41, Tai Lin Pai Road - Kwai Chung, NT, Hong Kong
Tel. +852 2333 0601 - Fax +852 2311 0026
Email: [email protected]
Americas Videotec Security, Inc.
35 Gateway Drive, Suite 100 - Plattsburgh, NY 12901 - U.S.A.
Tel. +1 518 8250020 - Fax +1 425 648 4289
Email: [email protected] - www.videotec.us
www.videotec.com
Printed in Italy © 2012 Videotec S.p.A.
MNVCIRHS_1302_DE
Headquarters Italy Videotec S.p.A.
UK Representative office
France Videotec France S.à.r.l.
Asia Pacific Videotec (HK) Ltd
Via Friuli, 6 - I-36015 - Schio (VI) Italy
Tel. +39 0445 697411 - Fax +39 0445 697414
Email: [email protected]
Voie du Futur, Zac des Portes - 27100 - Val-de-Reuil, France
Tel. +33 2 32094900 - Fax +33 2 32094901
Email: [email protected]
Tel./Fax +44 01353 775438 (Sales)
Tel. +44 0113 815 0047 (Technical support)
Tel. +44 0113 815 0031 (Orders/Shipping dept.)
Email: [email protected]
Unit C 24 Floor - Gold King Industrial Building
35-41, Tai Lin Pai Road - Kwai Chung, NT, Hong Kong
Tel. +852 2333 0601 - Fax +852 2311 0026
Email: [email protected]
Americas Videotec Security, Inc.
35 Gateway Drive, Suite 100 - Plattsburgh, NY 12901 - U.S.A.
Tel. +1 518 8250020 - Fax +1 425 648 4289
Email: [email protected] - www.videotec.us
www.videotec.com
MNVCIRHS_1302


