1
RBV26
FR SOUFFLEUR/ASPIRATEUR
MANUEL D’UTILISATION
1
EN BLOWER/VACUUM
USER’S MANUAL
12
DE GEBLÄSE/LAUBSAUGER BEDIENUNGSANLEITUNG21
ES ASPIRADOR/SOPLADOR
MANUAL DE UTILIZACIÓN
IT
MANUALE D’USO
43
PT SOPRADOR/ASPIRADOR
MANUAL DE UTILIZAÇÃO
54
NL BLAZER/ZUIGER
GEBRUIKERSHANDLEIDING65
ASPIRATORE/SOFFIATORE
SV LÖVBLÅS/-SUGINSTRUKTIONSBOK
DA HAVEBLÆSER OG -STØVSUGER
BRUGERVEJLEDNING
NO LØBLÅSER/LØVSUGERBRUKSANVISNING
FI
PUHALLIN/IMURI
KÄYTTÄJÄN KÄSIKIRJA
32
75
84
93
102
HU LOMBFÚVÓ/LOMBSZÍVÓ
HASZNÁLATI ÚTMUTATÓ
111
CS FUKAR / VYSAVAČ
NÁVOD K OBSLUZE
122
RU ПЫЛЕСОС-ВОЗДУХОДУВ
РУКОВОДСТВО ПО ЭKCПЛYATAЦИИ131
RO ASPIRATOR/SUFLANTĂ
MANUAL DE UTILIZARE
142
PL DMUCHAWA/ODKURZACZ OGRODOWY
INSTRUKCJA OBSŁUGI
153
SL PUHALNIK-SESALNIK LISTJA
UPORABNIŠKI PRIROČNIK164
HR PUHALICA/USISAVAČ
KORISNI»KI PRIRU»NIK
ET PUHUR-IMUR
KASUTAJAJUHEND183
174
LT PŪSTUVAS - SIURBLYS
NAUDOJIMO VADOVAS
192
LV PŪTĒJS-SŪCĒJS
SK DÚCHADLO/VYSÁVAČ
LIETOTĀJA ROKASGRĀMATA
201
NÁVOD NA POUŽITIE
210
BG МАШИНА ЗА ОБДУХВАНЕ/ЗАСМУКВАНЕ
РЪКОВОДСТВО ЗА УПОТРЕБА220
WARNING! It is essential that you read the instructions in this manual before assembling, operating
and maintaining this machine.
Важно!
От изключителна важност е да прочетете инструкциите в това ръководство, преди да боравите с
тази машина.
Subject to technical modifications / Sous réserve de modifications techniques / Technische Änderungen vorbehalten /
Bajo reserva de modificaciones técnicas / Con riserva di eventuali modifiche tecniche / Technische wijzigingen voorbehouden /
Com reserva de modificações técnicas / Med forbehold for tekniske ændringer / Med förbehåll för tekniska ändringar /
Tekniset muutokset varataan / Med forbehold om tekniske endringer / могут быть внесены технические изменения /
Z zastrzeżeniem modyfikacji technicznych / Změny technických údajů vyhrazeny / A műszaki módosítás jogát fenntartjuk /
Sub rezerva modificaţiilor tehnice / Paturam tiesības mainīt tehniskos raksturlielumus /
Pasiliekant teisę daryti techninius pakeitimus / Tehnilised muudatused võimalikud / Podloæno tehniëkim promjenama /
Tehnične spremembe dopuščene / Právo na technické zmeny je vyhradené / Подлежи на технически модификации
FR
FR
FR
EN
EN
EN
DE
LV
SK
BG
DEFrançais
ES IT PT
NL SV DA à
NOpartir
FI HU
RU RO
PL SL d'origine)
HR ET LT LV
(Traduction
du CS
mode
d'emploi
SK
BG
SK
BG
DE
ES
IT
ES
PT
IT
INTRODUCTION
PT
NL
NL
SV
SV
DA
DA
NO
NO
FI
FI
HU
CS
HU
CS
RU
RU
RO
RO
PL
PL
SL
SL
chaude de l’appareil.
HR
HR
ET
ET
LT
LT
LV
FR EN DE ES
IT PT NL SV DA NO FI HU■■ CS
RU un
RO masque
PL SLanti-poussières
HR ET LT en
LV conditions
SK BG
Portez
Cet appareil possède de nombreuses caractéristiques
poussiéreuses pour éviter toute blessure due à
FR
EN
DE
ES
P
NL
SV
DA
NO
FI
HU
CS
RU
RO
PL
SL
HR
ET
LT
LV
SK BG
qui en rendent l’utilisation
IT plus agréable. La plus grande
l’inhalation des poussières.
priorité a été donnée à la sécurité, aux performances et à
Inspectez
la zone
chaque
EN de
DEcetES
IT lors
NLconception
SV DA afin
NO deFIle HU■■ CS
RU RO
PL de
SLtravail
HR avant
ET LT
LV utilisation.
SK BG
laFR
fiabilité
appareil
PTde sa
Retirez tous les objets tels que pierres, verre brisé,
rendre facile à utiliser et à entretenir.
clous,
projetés
FR EN DE ES IT PT NL SV DA NO FI HU CS
RUcâbles
RO ou
PLficelle
SL qui
HRpourraient
ET LT seLVvoirSK
BG
ou qui pourraient s’emmêler dans la machine.
FR EN DE ES
IT PT NL GÉNÉRALES
SV DA NO
CONSIGNES
DE SÉCURITÉ
FI
HU■■ CS
RU un
RO
SLet un
HRbon
ETéquilibre.
LT LVNe SK
BG
Gardez
bonPL
appui
travaillez
DA
UTILISATION PRÉVUE:
Cet
appareil
ne
doit
être
utilisé
qu'à
l'extérieur.
FR EN DE ES IT PT NL SV DA NO
FI HU
Il est destiné au soufflage des débris légers tels que
■■
les
feuilles,
l'herbe
et
autres
déchets
du
jardin.
Il
peut
FR EN DE ES IT PT NL SV DA NO
FI HU
également aspirer et broyer les débris légers mentionnés
■■
ci-dessus
collecter
Il n'aHU
FR EN etDEles ES
IT dans
PT son
NL sac
SV d'aspiration.
DA NO FI
■■
pas été conçu pour le pompage ou l'aspiration d'eau ou
FR
EN
DE
ES
FR EN
DE ES
autres
liquides.
FR
IT
IT
PT
NL
SV
NO
FI
HU
PT
NL
SV
DA
NO
FI
HU
EN
DE ES IT PT
AVERTISSEMENT:
NL
SV
DA
NO
FI
HU
Lisez et comprenez toutes ces instructions.
FR ENLe DE
ES IT dePT
NL les
SVinstructions
DA NO listées
FI HU
non respect
toutes
ci-dessous peut entraîner un choc électrique, un
FR ENincendie,
DE ES
NL SV au
DAmonoxyde
NO FI deHU
et/ouIT unePTintoxication
carbone qui peut entraîner la mort ou de graves
FR EN DE ES IT PT NL SV DA NO FI HU
blessures.
■FR
■ NeENlaissez
pas ITdes PTenfants
ou DA
des NO
personnes
DE ES
NL SV
FI HU
inexpérimentées utiliser cet appareil.
pas en extension. Le travail en extension peut
CS
RU RO
HR ETet l’entrée
LT LV enSK
BG
entraîner
une PL
perteSL
d’équilibre
contact
avec des surfaces chaudes.
CS
RU
RO
PL
SL
HR
ET
LT
LV
SK
BG
N'utilisez jamais l'appareil sans écran pare-étincelles;
cet écran
se situe
l'intérieur
du pot
CS
RU RO
PL à SL
HR ET
LTd'échappement.
LV SK BG
Avant de ranger l’appareil, laissez le moteur refroidir.
CS
RU
RO
PL
SL
HR
ET
LT
LV
SK
BG
Respectez les instructions d’entretien contenues dans
RU d’emploi.
RO PL SL HR ET LT LV SK BG
CSce mode
■■ Vérifiez l’appareil avant toute utilisation à la recherche
CS d’attaches
PL SL HR
LV SK BG
RU ROdesserrées,
de ET
fuiteLT d’essence,
etc.
Remplacez toute pièce endommagée.
CS
RU
RO
PL
SL
HR
ET
LT
LV
SK
BG
■■ Avant toute opération de nettoyage, de réparation
de RO
vérification,
assurez-vous
CS ouRU
SL HRle moteur
ET LT et LV
SK BG
PL arrêtez
que toutes les parties mobiles se sont bien arrêtées.
Débranchez
l’antiparasite
et
éloignez-le
de
la
CS RU RO PL SL HR ET LT LV SKbougie
BG
pour prévenir tout démarrage accidentel.
CS
RUréparations
RO PL sur
SL le HR
ET LT LV neSK
BG
■
■ Les
souffleur/aspirateur
doivent
être effectuées que par des réparateurs qualifiés. Les
DE démarrer
ES IT ouPTfaire
NLtourner
SV le
DAmoteur
NO en
FI unHU CS RU RO PL SL HR ET
LT LV SK BG
■FR
■ NeEN
jamais
réparations et l’entretien effectués par du personnel
lieu fermé; l’inhalation de gaz d’échappement peut
non
qualifié
peuvent
entraîner
à
FRêtre
ENmortelle.
DE ES IT PT NL SV DA NO FI HU CS RU RO PL SL HR ET
SK BG
LTdes LVblessures
l’opérateur et endommager l’appareil.
■FR
■ Portez
toujours
une PT
protection
EN DE
ES IT
NL SVoculaire
DA NOà volets
FI HU ■
CS
RU RO PL
SL HR ET
■ N’effectuez
les réparations
sur leLTsouffleur/aspirateur.
LV SK BG
latéraux respectant la norme EN 166, ainsi qu’une
L’utilisation de pièces détachées non autorisées peut
protection
auditive.
Si
vous
ne
respectez
pas
cette
FR EN DE ES IT PT NL SV DA NO FI HU CS créer
RU un
ROrisque
PL de
SLblessures
HR ETgraves
LT à
LVl’utilisateur,
SK BGou
consigne, des objets pourraient être projetés vers vos
endommager l’appareil.
yeux,
et
vous
pourriez
subir
d’autres
blessures.
FR EN DE ES IT PT NL SV DA NO FI HU CS RU RO PL SL HR ET LT LV SK BG
■■ Ne travaillez pas à partir d’une échelle, d’un toit, d’un
■■ Gardez tous les enfants, visiteurs et animaux à au
arbre ou autre support instable. Un appui stable sur
moins 15m de distance.
une surface solide permet un meilleur contrôle du
■■ Portez des pantalons longs et épais, des bottes et
souffleur/aspirateur en cas d’imprévu.
des gants. Ne portez pas de vêtements amples, de
shorts ou de bijoux quels qu’ils soient, et ne travaillez
RÈGLES PARTICULIÈRES DE SÉCURITÉ
pas pieds nus.
■■ Contenez les cheveux longs au dessus du niveau des
épaules afin d’éviter qu’ils ne soient happés par des
pièces en rotation.
■■ Tenez toujours le souffleur/aspirateur dans votre
main droite pendant utilisation. Reportez-vous au
chapitre Utilisation plus bas dans ce mode d’emploi
ainsi qu’aux informations additionnelles concernant la
position correcte à adopter pendant l’aspiration.
■■ N’utilisez pas cet appareil lorsque vous êtes fatigué,
malade, ou sous l’influence de l’alcool, de drogues ou
de médicaments.
■■ Ne travaillez pas sous de mauvaises conditions
d’éclairage.
■■ Pour réduire les risques de perte d’audition associés
au niveau(x) sonore(s), il est nécessaire de porter une
protection auditive.
■■ Maintenez toutes les parties de votre corps éloignées
de toute pièce en mouvement et de toute surface
■■ Pour réduire le risque de blessure associé à la
mise en contact avec les pièces en mouvement,
1
FR
FR
EN
EN
FR
EN
FR
EN
DE
LV
SK
BG
DEFrançais
ES IT PT
NL SV DA à
NOpartir
FI HU
RU RO
PL SL d'origine)
HR ET LT LV
(Traduction
du CS
mode
d'emploi
SK
BG
DE
ES
IT
ES
PT
IT
PT
NL
SV
DA
NO
FI
HU
CS
RU
RO
PL
SL
HR
ET
LT
NL
SV
DA
NO
FI
HU
CS
RU
RO
PL
SL
HR
ET
LT
LV
SK
BG
NL
SV
DA
NO
FI
HU
CS
RU
RO
PL
SL
HR
ET
LT
LV
SK
BG
arrêtez le moteur avant la mise en place et le retrait
■■ Refaites le plein d’essence avant de démarrer le
N’opérez
pasNLsi une
ou plusieurs
moteur.
le bouchon
ne
FRd’accessoires.
EN DE ES
IT PT
SV DA
NO FI HU CS
RU Ne
ROretirez
PL jamais
SL HR
ET LT d’essence
LV SK etBG
protection(s) manque(nt). Débranchez toujours
rajoutez jamais d’essence lorsque le moteur tourne ou
avantIT
toute opération
d’entretien
ou tout
lorsqu’il
FRl’antiparasite
EN DE ES
P NL SV
DA NO
FI HU CS
RU est
ROchaud.
PL SL HR ET LT LV SK BG
accès à une partie mobile.
■■ Ne fumez pas lorsque vous manipulez de l’essence.
DEpasES
IT l’extrémité
DA vers
NO des
FI HU CS RU RO PL SL HR ET LT LV SK BG
PT NLdu SV
■FR
■ NeEN
faites
pointer
souffleur
■■ Mélangez le carburant en extérieur, hors de la
personnes ou des animaux.
présence de flammes ou d’étincelles.
DE
ES
IT
PT
■■ Ne faites jamais fonctionner l’appareil sans que ses
■■ Dévissez lentement le bouchon d’essence pour
FRtubes
EN ne
DEsoient
ES enITplace.
PT Le
NLsystème
NO FI HU CS
RU la
RO
PL SL
HR ET que
LT deLV
SK BG
SV deDAverrouillage
relâcher
pression
et empêcher
l’essence
ne
de cette machine garantit qu'elle ne peut pas être
se répande autour de l’orifice.
marche
placeFIet HU CS RU RO PL SL HR ET LT LV SK BG
FRmise
EN enDE
ES sans
IT que
PT le
NLtube
SVne soit
DAen NO
■■ Serrez fermement le bouchon d’essence après avoir
que le taquet de commutation ne soit en position de
fait le
plein.
FRfonctionnement.
EN DE ES IT PT NL SV DA NO
FI HU CS
RU
RO PL SL HR ET LT LV SK BG
■■ Essuyez toute essence répandue par la machine.
■■ N’introduisez jamais aucun objet dans les tubes du
FRsouffleur.
EN DE ES IT PT NL SV DA NO
RU RO PL
SLde HR
ET deLT
LV SK avant
BG
Eloignez-vous
de 9m
la zone
remplissage
FI HU CS
de démarrer le moteur.
■FR
■ N’utilisez
appareil
décrite
EN DEcetES
IT que
PT de
NLla façon
SV DA
NO dans
FI ceHU CS RU RO PL SL HR ET LT LV SK BG
■■ Ne tentez sous aucun prétexte de brûler l’essence
mode d’emploi.
FR
EN
DE
ES
IT
PT
NL
SV
DA
NO
FI
HU
RU RO PL SL HR ET LT LV SK BG
CSrenversée.
■■ N’utilisez pas l’aspirateur sans que le sac soit en
■
■ Si de l’essence a été renversée, ne tentez pas de
place; des débris volant pourraient causer de graves
FRblessures.
EN DE Fermez
ES IT toujours
PT NL complètement
SV DA NO leFI sacHU CS démarrer
PL SLmais
HR éloignez
ET LT laLVmachine
SK BG
le moteur
de
RU RO
l’endroit où l’essence à été renversée et évitez de
d’aspirateur avant utilisation.
FR EN DE ES IT PT NL SV DA NO FI HU CS créer
RU toute
PL d’embrasement
SL HR ET LT
LV toutes
SK BG
tant que
les
ROsource
■■ Les pales de la turbine en rotation peuvent entraîner
vapeurs d’essence ne se sont pas dissipées.
de
graves
blessures.
Arrêtez
le
moteur
et
assurezFR EN DE ES IT PT NL SV DA NO FI HU CS RU RO PL
SL HR ET LT LV SK BG
■■ Remettez en place avec soin tous les bouchons de
vous que les pales aient cessé de tourner avant
réservoir
et
de
bidon
d’ouvrir
la
trappe
de
l’aspirateur
ou
avant
de
monter/
FR EN DE ES IT PT NL SV DA NO FI HU CS RU RO PL SLd'essence.
HR ET LT LV SK BG
changer les tubes. N’introduisez jamais ni vos mains
■■ Vidangez le réservoir d’essence dans un bidon prévu
FRni EN
DEobjet
ESdans
IT lesPT
NLdeSV
DA NOlorsqu’ils
FI HU CS pour
RU cet
RO emploi
PL SLet arrimer
LT LV
SK deBGle
aucun
tubes
l’aspirateur
l’appareil
avant
HR ET
sont en place sur l’appareil.
transporter dans un véhicule.
FR EN DE ES IT PT NL SV DA NO FI HU CS RU RO PL SL HR ET
LT LV SK BG
■■ Ne faites jamais fonctionner l’appareil sans qu’un
■■ Lorsque vous vidangez le réservoir d’essence, faitesaccessoire adapté soit en place. Lorsque vous
le
dans
un
lieu
bien
ventilé
et
utilisez
prévu
FR EN DE ES IT PT NL SV DA NO FI HU CS RU RO PL SL HR ET
SK BG
LT unLVbidon
l’utilisez comme un souffleur, installez les tubes de
pour cet usage.
trappe.
FRsoufflage
EN DEet refermez
ES IT laPT
NL Lorsque
SV DAvous
NO l’utilisez
FI HU ■
CS
RU RO PL
SLsolHR
ET LTle moteur,
SKlaissez
BG
■ Mettez-vous
sur un
nu, arrêtez
LV et
comme un aspirateur, installez toujours les tubes
refroidir le moteur avant de refaire le plein.
d’aspiration
et
un
sac
d’aspiration.
Assurez-vous
que
FR EN DE ES IT PT NL SV DA NO FI HU CS RU RO PL SL HR ET LT LV SK BG
■■ Conservez ce mode d’emploi. Reportez-vous
le sac d’aspiration est complètement fermé lorsque
y fréquemment et utilisez-le pour apprendre le
en fonctionnement
l’expulsion
FRl’appareil
EN DEestES
IT PT NL pour
SV éviter
DA NO
FI HU CS RU RO PL SL HR ET LT LV SK BG
fonctionnement de l’appareil aux autres personnes
de débris volants.
susceptibles de s’en servir. Si vous prêtez cette
■■ Evitez les situations qui pourraient mettre le feu au
machine à quelqu’un, prêtez-lui également ce mode
sac d’aspiration. Ne travaillez pas à proximité d’une
d’emploi.
flamme nue. N’aspirez pas les cendres chaudes d’une
■■ Utilisez une protection auditive lorsque vous utilisez
cheminée, le charbon de bois, les amas de brindilles,
l'appareil. L'utilisation d'autres outils similaires à
etc. N’aspirez pas de mégots de cigares ou de
proximité augmente le risque de blessures.
cigarettes à moins qu’ils soient complètement froids.
■■ L'utilisation d'une protection auditive réduit la capacité
à entendre les avertissements (cris ou alarmes).
ALIMENTATION EN CARBURANT
L'utilisateur doit redoubler d'attention par rapport aux
■■ L’essence est hautement inflammable. Prenez des
événements survenant dans la zone de travail.
précautions lorsque vous manipulez de l’essence pour
réduire les risques de graves blessures.
■■ Il a été reporté que les vibrations engendrées par les
outils à main peuvent contribuer à l'apparition d'un
état appelé le Syndrome de Raynaud chez certaines
personnes. Les symptômes peuvent comprendre des
fourmillements, un engourdissement et un blanchiment
des doigts, généralement par temps froid. Des facteurs
■■ Stockez l’essence dans un lieu frais et bien ventilé, à
bonne distance de sécurité de toute source d’étincelle
et/ou d’appareil produisant des flammes.
■■ Mélangez et stockez le carburant dans des bidons
spécifiquement prévus pour cet usage.
2
FR
FR
FR
EN
EN
EN
DE
LV
SK
BG
DEFrançais
ES IT PT
NL SV DA à
NOpartir
FI HU
RU RO
PL SL d'origine)
HR ET LT LV
(Traduction
du CS
mode
d'emploi
SK
BG
DE
ES
IT
ES
PT
IT
PT
NL
NL
SV
SV
DA
DA
NO
NO
FI
FI
HU
HU
CS
CS
héréditaires, l'exposition au froid et à l'humidité, le
alimentaire,
les DA
habitudes
de HU CS
FRrégime
EN DE
PT NL etSV
NO FI
ES leIT tabagisme
travail peuvent contribuer au développement de ces
Certaines
FRsymptômes.
EN DE ES
P NL peuvent
SV DAêtre
NOprises
FI HU CS
IT mesures
par l'utilisateur pour aider à réduire les effets des
FRvibrations:
EN DE ES IT
PT NL SV DA NO FI HU CS
a) Gardez votre corps au chaud par temps froid.
FR Lorsque
EN DE vous
ES utilisez
IT PT l'appareil,
DA des
NOgants
FI HU CS
NL SV
portez
afin de garder vos mains et vos poignets au
FR EN DE ES IT PT NL SV DA NO FI HU CS
chaud. Le temps froid est considéré comme un
l'apparition
du HU CS
FR facteur
EN DEcontribuant
ES IT très
PT largement
NL SV àDA
NO FI
Syndrome de Raynaud.
FRb) A
prèsDEchaque
session
pratiquez
EN
ES IT
PT de
NL travail,
SV DA
FI HU CS
NO des
exercices qui favorisent la circulation sanguine.
FRc) F
aites
des
pauses
fréquentes.
Limitez
la
quantité
EN DE ES IT PT NL SV DA NO
FI HU CS
d'exposition journalière.
FR
EN
DE
ES
IT
PT
NL
SV
DA
NO
FI
■■ Si vous ressentez l'un des symptômes associés àHU CS
ce syndrome, arrêtez immédiatement le travail et
FRconsultez
EN DEvotre
ES médecin
IT PTpour
NLlui SV
DA part.
NO FI HU CS
en faire
■FR
■ Pour
l'inhalation
EN réduire
DE ES lesIT risques
PT NLliésSV à DA
NO FI deHU CS
poussières, humidifiez légèrement la zone de travail
soufflage.
FRavant
EN l'aspiration
DE ES ou
IT le PT
NL SV DA NO FI HU CS
■■ Utilisez un râteau ou un balai de jardin pour détacher
FRlesEN
DE compacts
ES IT ainsi
PT que
NL lesSV
DAdeNO
FI ouHU CS
débris
amas
feuilles
autres déchets avant d'utiliser le souffleur.
FR
EN
DE
ES
IT
PT
NL
SV
DA
NO
FI
HU
CS
■■ Lorsqu'il y a un risque de chute d'objets, portez un
de chantier.
FRcasque
EN DE
ES IT PT NL SV DA NO FI HU CS
RU
RO
PL
SL
HR
ET
LT
RU
RO
PL
SL
HR
ET
LT
LV
SK
BG
RU
RO
PL
SL
HR
ET
LT
LV
SK
BG
RU
RO
PL
SL
HR
ET
LT
LV
SK
BG
RU
RO
PL
SL
HR
ET
LT
LV
SK
BG
RU
RO
PL
SL
HR
ET
LT
LV
SK
BG
RU
RO
PL
SL
HR
ET
LT
LV
SK
BG
RU
RO
PL
SL
HR
ET
LT
LV
SK
BG
RU
RO
PL
SL
HR
ET
LT
LV
SK
BG
RU
RO
PL
SL
HR
ET
LT
LV
SK
BG
RU
RO
PL
SL
HR
ET
LT
LV
SK
BG
RU
RO
PL
SL
HR
ET
LT
LV
SK
BG
RU
RO
PL
SL
HR
ET
LT
LV
SK
BG
PL
SL
HR
ET
LT
LV
SK
BG
SL
HR
ET
LT
LV
SK
BG
RU
RO
RU RO
PL
RU RO
PL
SL
HR
ET
LT
LV
SK
BG
RU RO
PL
SL
HR
ET
LT
LV
SK
BG
LT
LV
SK
BG
LV
SK
BG
SK
BG
BG
ET
FR
EN
DE
ES
IT
PT
NL
SV
DA
NO
FI
HU
CS
RU RO
PL
SL
HR
FR
EN
DE
ES
IT
PT
NL
SV
DA
NO
FI
HU
CS
RU RO
PL
SL
HR
ET
FR
EN
DE
ES
IT
PT
NL
SV
DA
NO
FI
HU
CS
RU RO
PL
SL
HR
ET
LT
FR
EN
DE
ES
IT
PT
NL
SV
DA
NO
FI
HU
CS
RU RO
PL
SL
HR
ET
LT
LV
SK
FR
EN
DE
ES
IT
PT
NL
SV
DA
NO
FI
HU
CS
RU RO
PL
SL
HR
ET
LT
LV
SK
3
LT
LV
BG
FR
FR
EN
DE
EN
FR
EN
FR
EN
LV
SK
BG
DEFrançais
ES IT PT
NL SV DA à
NOpartir
FI HU
RU RO
PL SL d'origine)
HR ET LT LV
(Traduction
du CS
mode
d'emploi
SK
BG
DE
DE
ES
IT
PT
NL
SV
DA
NO
ES
IT
PT
NL
SV
DA
NO
ES
IT
PT
NL
SV
DA
NO
FI
HU
CS
RU
RO
PL
SL
HR
ET
LT
FI
HU
CS
RU
RO
PL
SL
HR
ET
LT
LV
SK
BG
FI
HU
CS
RU
RO
PL
SL
HR
ET
LT
LV
SK
BG
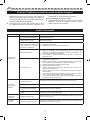
SYMBOLES
Certains
de figurer
sur cet
apprenez
leur signification.
FR
EN des
DE symboles
ES
P sont
NL susceptibles
SV DA NO
FI HU
CS appareil.
RU ROEtudiez-les
PL SL etHR
ET LT
LV SK BG
ITci-après
Une interprétation correcte de ces symboles vous permettra d’utiliser votre appareil dans de meilleures conditions
de sécurité
plus adéquate.
FR
EN DEet de
ES manière
IT
NL SV DA
PT
SYMBOLE
FR
FR
EN
EN
DE
DE
NOM
ES
IT
NL
PT
SV
Alerte de Sécurité
ES
IT
PT
SV
NL
NO
FI
HU
CS
RU
RO
DÉSIGNATION/EXPLICATION
DA
NO
FI
HU
CS
RU
RO
PL
SL
HR
ET
LT
LV
SK
BG
PL
SL
HR
ET
LT
LV
SK
BG
HR
ET
LT
LV
SK
BG
Signale un risque potentiel de blessures.
DA
NO
FI
HU
CS
RU
RO
PL
SL
FR
EN
DE
FR
EN
DE
FR
EN
DE
PourNO
réduire
de blessures,
ESLisez
IT le PT
SV DA
FI les
HUrisques
CS RU
RO PL l’utilisateur
SL HR doit
ET lire
LT et comprendre
LV SK BG
ModeNL
d’Emploi
le mode d’emploi avant d’utiliser cette machine.
oculaire
ES IT PT NL SV DA Portez
FI HU une
CS protection
RU RO PL
SL équipée
HR ET d’écrans
LT LV latéraux
SK BG
NO toujours
Portez une protection
répondant à la norme EN 166 ainsi qu’une protection auditive lorsque
oculaire
et
auditive
ES IT PT NL SV DA vous
NO utilisez
HUappareil.
CS RU RO PL SL HR ET LT LV SK BG
FI cet
FR
EN
DE
ESTrappe
IT d’aspiration
PT NL SV
DA Ne
NOfaites
FI pas
CS RU
RO PL
HRn’est
ET pas
LTverrouillée.
LV SK BG
fonctionner
l’appareil
si la SL
trappe
HU
FR
EN
DE
ES
IT
PT
NL
SV
DA
FR
EN
DE
ES
IT
PT
NL
SV
DA
Ne faites pas fonctionner l’appareil sans que les tubes ne soient en
DA place.
NO FI HU CS RU RO PL SL HR ET LT LV SK BG
Cheveux longs
NO
FI
HU
NO
FI
HU
CS
RU
RO
PL
SL
HR
ET
LT
LV
SK
BG
RU
RO
PL
SL
HR
ET
LT
LV
SK
BG
Les cheveux longs risquent d’être aspirés dans l’entrée d’air.
CS
FR
EN
DE
ESTubes
IT de
PTsoufflage
NL SV
FR
EN
DE
ES
IT
PT
NL
SV
DA
FR
EN
DE
ES
IT
PT
NL
SV
DA Utilisez
NO FIde l’essence
HU CS sans
RU plomb
RO PL
HR indice
ET LT
LV égal
SK ou
BG
SL d’un
automobile
d’octane
FR
EN
DE
ES
IT
PT
NL
SV
DA
FR
EN
DE
ES
IT
PT
NL
SV
DA Gardez
NO FItoutHU
CS (en
RUparticulier
RO PL lesSL
HR etET
LT LVà une
SK BG
visiteur
enfants
les animaux)
FR
EN
DE
ES
IT
PT
NL
SV
DA
RU RO
PL
SL
HR
ET
NL
SV
Danger de ricochet.
DA NO FI HU CS RU RO
PL
SL
HR
ET
LT
Vêtements amples
Huile et Essence
Eloignez les Visiteurs
PL aspirés dans l’entrée d’air.
Les vêtements amples risquent d’être
NO
FI
HU
CS
RU RO
SL
HR
ET
LT
LV
SK
supérieur à 91 [(R + M)/2)]. Cet appareil est équipé d’un moteur 2-temps
NO FI HU CS RU RO PL SL HR ET LT LV SK BG
nécessitant l’emploi d’un mélange essence-huile
2 temps.
distance d'au moins 15m de la zone de travail.
NO
FI
HU
CS
LT
LV
SK
BG
SK
BG
BG
FR
EN
DE
Ricochet
ES IT PT
FR
EN
DE
ES
IT
PT
NL
SV
DA
NO
FI
HU
CS
RU RO
PL
SL
HR
ET
LT
LV
SK
FR
EN
DE
ES
IT
PT
NL
SV
DA
NO
FI
HU
CS
RU RO
PL
SL
HR
ET
LT
LV
SK
Les signaux et mots suivants sont destinés à indiquer le niveau de risque associé à cette machine.
SYMBOLE
SIGNAL
BG
SIGNIFICATION
LV
BG
DANGER:
Imminence d’un danger qui, si l’on n’y prend garde, peut entraîner la mort
ou de graves blessures.
AVERTISSEMENT:
Situation potentiellement dangereuse qui, si l’on n’y prend garde, peut
entraîner la mort ou des blessures graves.
ATTENTION:
Situation potentiellement dangereuse qui, si l’on n’y prend garde, peut
entraîner des blessures moyennes ou légères.
ATTENTION:
(Sans symbole d’alerte de sécurité) Indique une situation pouvant entraîner
des dommages matériels.
4
FR
FR
FR
EN
EN
EN
DE
LV
SK
BG
DEFrançais
ES IT PT
NL SV DA à
NOpartir
FI HU
RU RO
PL SL d'origine)
HR ET LT LV
(Traduction
du CS
mode
d'emploi
SK
BG
DE
ES
IT
ES
PT
IT
PT
NL
NL
SV
SV
DA
DA
NO
NO
DESCRIPTION
Fig
FR1a.EN DE ES
IT PT NL SV DA NO
1. Tube d’aspiration inférieur
ENd’aspiration
DE ES
2.FRSac
IT P NL SV DA NO
3. Adaptateur
EN DE de
ESpuissance
IT
PT NL SV DA NO
4.FRRégulateur
5. Manette des gaz
EN d’aspiration
DE ES supérieur
IT PT NL SV DA NO
6.FRTube
7. Bouchon d’essence
FR EN DE ES IT PT NL SV DA NO
8. Poignée du lanceur
9.FRLevier
EN de
DEstarter
ES IT PT NL SV DA NO
10. Poignée supérieure
11.
Interrupteur
Marche/arrêt
FR EN DE ES IT PT NL SV DA NO
12. Interrupteur positif du côté soufflage
FRPoire
EN d’amorçage
DE ES IT PT NL SV DA NO
13.
14. Poignée pour aspiration
FR
EN
DE
ES
IT
PT
NL
SV
Fig 1b
FRTube
EN d’aspiration
DE ES supérieur
IT PT NL SV
15.
16. Volet de trappe
FR EN DE ES IT PT NL SV
17. Couvercle d'entrée d'air
18.
soufflage
inférieur
FRTube
EN deDE
ES IT
PT NL SV
19. Interrupteur positif du côté aspiration
31.
Embout
haute
vitesse
FR EN DE ES IT PT NL SV
DA
FI
NO
FI
HR
ET
LT
PL
SL
HR
ET
LT
LV
SK
BG
FI
HU
CS
RU
RO
PL
SL
HR
ET
LT
LV
SK
BG
FI
HU5. CS
RU de
ROl’accélérateur
PL SL HR
Manette
ET
LT
LV
SK
BG
LT
LV
SK
BG
LT
LV
SK
BG
LT
LV
SK
BG
LV
SK
BG
LV
SK
BG
FI
NO
SL
RO
FI
DA
PL
RU
FI
FI
RO
CS
FI
NO
RU
HU
FI
DA
CS
FI
FI
FI
HU
29. Vis de maintien du tube d’aspiration
Fig 7
8. Poignée et corde du lanceur
HU9. CS
RUdeRO
PL SL HR ET
Levier
starter
11. Interrupteur Marche/arrêt
HU13.CS
RU
RO PL SL HR ET
Poire
d’amorçage
30. Etiquette de démarrage rapide
HU
CS
RU
RO
PL
SL
HR
ET
8 RU RO PL SL HR ET LT
HUFigCS
12. Interrupteur positif du côté soufflage
Interrupteur
HU19.CS
RU ROpositif
PL du
SLcôté
HRaspiration
ET LT
HUFigCS
9
RU
RO
PL
SL
HR
ET
LT
LV
SK
BG
HR
ET
LT
LV
SK
BG
Fig 10
HU 4.CS
RU ROde PL
SL HR ET
Régulateur
puissance
5. Manette de l’accélérateur
LT
LV
SK
BG
LT
LV
SK
BG
LV
SK
BG
LV
SK
BG
LV
SK
BG
31. Embout haute vitesse
HU
HU
CS
CS
RU
RU
RO
RO
PL
SL
PL
SL
HR
ET
DA
NO
FI
DA
NO
FI
HU Fig
CS 11RU RO PL SL HR ET LT
12. Interrupteur positif du côté soufflage
HU 19.
CS Interrupteur
RU RO positif
SLcôté
HRaspiration
ET LT
PL du
FR2 EN DE ES IT PT NL SV DA NO
Fig
15. Tube de soufflage supérieur
FRTube
EN deDE
ES IT
PT NL SV DA NO
18.
soufflage
inférieur
19. Interrupteur positif du côté aspiration
FR EN DE ES IT PT NL SV DA NO
31.
Embout haute vitesse
FI
HU Fig
CS 12RU RO
FI
HU 33.
CS Cadran
RU RO
PL àSL
LT ouvrir
LV ou
SKfermer
BG
HR ET pour
de filtre
air - tournez-le
FI
HU
FR
EN
DE
ES
Fig 3
2.FRSacEN
d’aspiration
DE ES
3. Adaptateur
FR
EN
DE
ES
PL
SL
HR
ET
LT
32. Couvercle de filtre à air
le filtre à air
CS
RU RO
PL
SL
HR
IT
PT
NL
SV
DA
NO
FI
IT
PT
NL
SV
DA
NO
FI
Fig 13
HU CS RU RO PL SL HR
32. Couvercle de filtre à air
air PL SL HR
HU 34.
CS Filtre
RU àRO
IT
PT
NL
SV
DA
NO
FI
HU
CS
RU RO
PL
SL
HR
ET
ET
LT
LT
ET
LT
ET
LT
LV
SK
BG
LV
SK
BG
SK
BG
SK
BG
LV
LV
Fig 4
CARACTÉRISTIQUES
FRLanguette
EN DE ES IT PT NL SV DA NO FI HU CS RU RO PL SL HR ET LT LV SK BG
20.
21. Adaptateur mis en place dans le sac d’aspiration
CARACTÉRISTIQUES DE L’APPAREIL
22. Raccord à taquet métallique et languette de
Cylindrée du moteur………………………………....... 26cc
verrouillage
Vitesse de l’air....................................................320 Km/h
Fig 5
Flux d’air............................................................11 m3/min
17. Couvercle d'entrée d'air
Poids....................................................................... 4.3 kg
19. Interrupteur positif du côté aspiration
23. Sac d’aspiration
Puissance nominale...............................................0,6 kW
24. Vis de l’entrée d’air
Régime moteur (Maxi)..................................... 9000 tr/min
25. Volet de la trappe d’entrée d’air d’aspiration
Régime moteur (Au ralenti)................. 3000 – 4600 tr/min
Fig 6
Niveau de puissance sonore selon EN 15503:2009
17. Couvercle d'entrée d'air
19. Interrupteur positif du côté aspiration
Annexe A (Souffleur/aspirateur)
26. Ouverture d’aspiration
En fonctionnement...................................85.9/84.4 dB(A)
27. Languette de verrouillage
Au ralenti................................................70.8 / 70.2 dB(A)
28. Tube d’aspiration
5
FR
FR
FR
EN
EN
EN
DE
LV
SK
BG
DEFrançais
ES IT PT
NL SV DA à
NOpartir
FI HU
RU RO
PL SL d'origine)
HR ET LT LV
(Traduction
du CS
mode
d'emploi
SK
BG
DE
ES
IT
ES
PT
IT
PT
NL
NL
SV
SV
DA
DA
NO
NO
FI
FI
Niveau équivalent de pression sonore pondéré A.............
HU
HU
CS
CS
RU
RU
RO
RO
PL
PL
SL
SL
HR
ET
LT
HR
ET
LT
LV
SK
BG
HUASPIRATEUR
CS RU RO
PL SL HR
/ SILENCIEUX
ET
LT
LV
SK
BG
HU
ET
Le souffleur est équipé d’un puissant moteur de 26cc
de
FR EN DE ES
IT PT NL SV /DA
NO
FI HUayant
CS assez
RU de
RO puissance
PL SL pour
HR effectuer
ET LT les
LV travaux
SK BG
...........................................................105.9
104.4
dB(A)
soufflage et d’aspiration difficiles.
Niveau
pression
sonore
niveau
l'opérateur
FR ENde DE
ES
SV deDA
NO FI HUSTART
CS EASY™
RU RO PL SL HR ET LT LV SK BG
IT Pau NL
Le système de démarrage Start Easy™ permet un
(Souffleur/aspirateur)En fonctionnement.91.6 / 95.5 dB(A)
FR EN DE ES IT
CS RU plus
ROfacile
PL etSL
ET LT LV SK BG
plusHR
rapide.
PT NL SV DA NO FI HUdémarrage
Au ralenti.................................................78.9 / 81.4dB(A)
FR EN DE ES IT PT NL SV DA NO FI HUMANETTE
CS RU DE
ROL’ACCÉLÉRATEUR
PL SL HR ET LT LV SK BG
Niveau équivalent de pression sonore
pondéré A.............
Le souffleur peut être utilisé à toutes les vitesses
FR EN DE ES IT PT NL SV DA
NO
FI HUintermédiaires,
CS RU ROdepuis
PL leSLralenti
HR jusqu’à
ET LT
...............................................................84.4
/ 88.0
dB(A)
pleinLVgaz.SK BG
Incertitude
de mesure
sonore...............3
dB(A)
FR EN DE
ES ITdu niveau
PT NL
SV
NO
FI
DA
Valeur de vibration à la poignée selon EN 15503:2009
FR
EN
Annexe B
DE
ES
IT
PT
NL
SV
DA
NO
FR EN
DE (Poignée
ES IT avant/
PT NL
SV arrière)
DA NO
Mode
souffleur
poignée
FI
FI
La conversion du souffleur en aspirateur/silencieux
HU CS RU RO PL SL HR ET LT LV SK BG
est simple et peut être effectuée à l’aide d’un tournevis
cruciforme.
CS
RU
RO
PL
SL
HR
LT
LV
SK
BG
SAC D’ASPIRATION
En
20.4 m/s
FRfonctionnement.....................................9.9
EN DE ES IT PT NL SV DA /NO
FI 2 HU CS RU RO PL SL HR ET LT LV SK BG
Le sac d’aspiration s’accroche facilement au souffleur à
Au ralenti....................................................8.7 / 11.9 m/s2
l’adaptateur
FR EN DE ES IT PT NL SV DA NO FI HU l’aide deRU
RO PL pour
SL sac
HRd’aspiration.
ET LT LV SK BG
CS
Valeur totale équivalente de vibration ........9.7 / 19.4 m/s2
FR EN
DE ES
IT avant
PT NL
SV DA
NO FI HU POIGNÉE
CS RU POUR
RO ASPIRATION
PL SL HR ET LT LV SK BG
Mode
aspiration
(poignée
/ poignée
arrière)
Cette
caractéristique
vous
permet
d’effectuer
Incertitude de la mesure des vibrations................1.5 m/s2
confortablement
les
FR EN DE ES IT PT NL SV DA NO FI HU CS RU RO PLtâches
SL d’aspiration.
HR ET LT LV SK BG
APPRENEZ À CONNAÎTRE VOTRE SOUFFLEUR/
FR EN DE ES IT PT NL SV DA NO FI HU
ASPIRATEUR
Voir Figures 1a - 1b.
FR EN DE ES IT PT NL SV DA NO FI HU
L’utilisation en toute sécurité de ce produit nécessite de
bien
informations
FR comprendre
EN DE ESles IT
PT NL apposées
SV DA sur
NOl’outil
FI etHU
présentes dans ce mode d’emploi, ainsi que le travail à
effectuer.
FR EN DE ES IT PT NL SV DA NO FI HU
TUBES
CS RUD’ASPIRATION
RO PL
SL HR ET LT LV SK BG
Les tubes d’aspiration peuvent être mis en place sur le
souffleur
à
l’aide
d’un
tournevis
CS RU RO PL SL HR cruciforme.
ET LT LV SK BG
CS
RU RO
MONTAGE
PL
SL
HR
ET
LT
LV
SK
BG
SK
BG
SK
BG
SK
BG
CS RU RO PL SL HR ET
LT LV
DÉBALLAGE
Cet appareil doit être assemblé.
TUBE
DE SOUFFLAGE
FR EN
DE ES IT ET
PTEMBOUTS
NL SV DA NO FI HU CS RU RO PL SL HR ET
LV
LT que
■■ Sortez délicatement l’appareil ainsi
Le tube de soufflage peut être assemblé et monté sur le
accessoires
de
l’emballage.
Assurez-vous
souffleur
FR EN sans
DE aucun
ES outil.
IT PT NL SV DA NO FI HU CS RU RO PL SL HR ET LT
les éléments listés sont bien présents. LV
FR EN DE ES POSITIFS
IT PT NL SV DA NO FI HU CS
INTERRUPTEURS
Cet appareil est équipé d'interrupteurs positifs. Il ne
FR EN DEque
ESsi les
IT deux
PT contacts
NL SV métalliques
DA NO FIsontHU CS
fonctionnera
insérés dans les interrupteurs positifs. Ceci réduit les
risques d'entrée en contact accidentelle avec les éléments
en rotation.
RÉGULATEUR DE PUISSANCE
Le régulateur de puissance vous permet d’utiliser
le souffleur sans avoir à maintenir la manette de
l’accélérateur. Pour ralentir le moteur, il vous suffit de
pousser le levier du régulateur vers l’avant.
RU RO
PL
SL
HR
ET
LT
LV
tous ses
que
tous
SK BG
AVERTISSEMENT:
si une
RUN’utilisez
RO PLpasSLcetHRappareil
ET LT
LV des
SK pièces
BG
présentes dans la liste est y déjà montée lorsque
vous le déballez. Les pièces présentes sur la liste
ne sont pas montées sur l’appareil par le fabricant
et doivent l’être par l’utilisateur. L’utilisation
d’un appareil qui aurait pu être mal monté est
susceptible d’entraîner de graves blessures.
■■ Vérifiez l’appareil avec soin afin de vous assurer qu’il
n’a pas été cassé ou endommagé durant le transport.
■■ Ne jetez pas les emballages avant d’avoir vérifié et
utilisé avec succès l’appareil.
EMBOUT HAUTE VITESSE AVEC RACLETTE POUR
FEUILLES MOUILLÉES
L’embout haute vitesse est parfait pour les feuilles
mouillées et collées. Il vous permet de gratter les feuilles
mouillées et les débris tout en utilisant le souffleur.
ASSEMBLAGE DES TUBES DE SOUFFLAGE
Voir Figure 2.
■■ Insérez une des extrémités du tube inférieur dans une
des extrémités du tube supérieur.
MOTEUR
■■ Alignez les languettes du carter du souffleur avec
6
FR
FR
FR
EN
EN
EN
DE
LV
SK
BG
DEFrançais
ES IT PT
NL SV DA à
NOpartir
FI HU
RU RO
PL SL d'origine)
HR ET LT LV
(Traduction
du CS
mode
d'emploi
SK
BG
LV
SK
BG
LV
SK
BG
DE
ES
IT
ES
PT
IT
PT
NL
NL
SV
SV
DA
DA
NO
NO
FI
FI
HU
HU
CS
CS
RU
RU
RO
RO
PL
PL
SL
SL
HR
HR
ET
ET
LT
LT
les rainures du tube supérieur; insérez le tube dans
tournevis droit puis desserrez la vis de la trappe pour
carter
verrouillez
l’ensemble
ouvrir
de l’admission
d’airLT
aspiré.
FRle EN
DEpuisES
IT PT
NL SV enDAle pivotant;
NO FI HU CS
RUla trappe
RO PL
SL HR ET
LV SK BG
assurez-vous que la sécurité plastique est bien
■■ Alignez les languettes du carter avec les tubes.
n’empêche
pas
le
démarrage.
FRenfoncée
EN DE afin
ESqu’elle
P
NL
SV
DA
NO
FI
HU
CS
RU
RO
PL
SL
HR
ET
LT
LV SK BG
IT
■■ Serrez les vis du tube supérieur pour le verrouiller sur
Vérifiez le bon serrage de l’ensemble après une
le carter
du souffleur.
contact
FRpremière
EN DEutilisation
ES ITet resserrez-le
SVbesoin.
DA NO FI HU CS
RU RO
PL SL Assurez-vous
HR ET LT que
LV leSK
BG
PT NL au
métallique du tube d'aspiration est inséré dans
■■ Fermez le couvercle d'entrée d'air et serrez la vis du
l'interrupteur
FR EN DE ES IT PT NL SV DA NO FI HU CS
RU RO positif.
PL SL HR ET LT LV SK BG
couvercle, en vous assurant que le contact métallique
Retrait des tubes d’aspiration:
est
bien
inséré
dans
l'interrupteur
positif.
FR EN DE ES IT PT NL SV DA NO FI HU■■ CS
RU RO
SL tube
HR d’aspiration
ET LT LV
SK BG
Desserrez
les PL
vis du
supérieur
en
■■ Branchez le Buse sur le tube de soufflage inférieur.
les tournant dans le sens inverse des aiguilles d’une
FR
EN
DE
ES
IT
PT
NL
SV
NO
FI
HU
CS
RU
RO
PL
SL
HR
ET
LT
LV
SK
BG
DA
■■ Pour retirer le tube de soufflage, tirez sur le taquet
montre.
pour le retirer de l'interrupteur positif, puis tournez
Retirez
par les
du carter
FR EN DE ES IT PT NL SV DA NO
FI HU■■ CS
RU l’ensemble
RO PL formé
SL HR
ET deux
LT tubes
LV SK
BG
les tubes pour les retirer de la sortie d'air du carter
du souffleur.
du souffleur.
FR EN DE ES IT PT NL SV DA NO
RU RO
PL SL HR
ET LTde LV
SK d’air
BG
FI HU■■ CS
Refermez
et verrouillez
la trappe
l’entrée
d’aspiration en serrant sa vis.
MISE
EN PLACE
SACPT
D’ASPIRATION
FR EN
DE ESDU IT
NL SV DA NO FI
CS
RU
RO
PL
SL
HR
ET
LT
LV
SK
BG
HU
Voir Figures 3 - 4.
UTILISATION
EN DE
IT PT
NL du
SV sac
DA etNO
FI HU CS
RU RO PL SL HR ET LT LV SK BG
■FR
■ Ouvrez
la ES
fermeture
éclair
insérez-y
l’adaptateur comme illustré. Poussez l’adaptateur à
FRtravers
EN DE
ES ITsituée
PT àNL
SV DA
FI HU Note:
CS RU
RO PL
SL HRd'interrupteurs
ET LT LV positifs
SK BG
L'appareil
est équipé
du
l’ouverture
l’opposé
de laNO
fermeture
côté de l'ouverture d'aspiration et du côté de l'ouverture
éclair. Si l’installation est correcte, l’extrémité la plus
FRlarge
EN deDE
ES IT doit
PT rester
NL àSV
DA NO
FI HU de
CS soufflage.
RU RO
PL SL
HR ET LT que
LV si SK
BG
L'appareil
ne fonctionnera
les deux
l’adaptateur
l’intérieur
du sac.
contacts métalliques sont insérés dans les interrupteurs
■FR
■ Alignez
les
languettes
de
l'adaptateur
du
sac
EN DE ES IT PT NL SV DA NO FI HU CS RU RO PL
SL HR ET LT LV SK BG
positifs. Lorsque vous utilisez
l'appareil en mode souffleur
d'aspiration avec les languettes de verrouillage de la
(fig.8), le contact métallique du tube de soufflage et celui
sortie
du
carter
du
souffleur;
poussez
l'adaptateur
de
FR EN DE ES IT PT NL SV DA NO FI HU CS RU RO PL SL HR ET LT LV SK BG
de la trappe doivent être insérés dans leur interrupteur
sac contre le carter. Pivotez pour verrouiller, poussez
respectif.
l'appareil
contact
dans NL
la fente
FRle EN
DE métallique
ES IT PT
SV de
DA l'interrupteur
NO FI HU positif
CS RU
RO PLLorsque
SL HR
ET fonctionne
LT LV en
SK mode
BG
aspirateur (Fig. 11), les contacts métalliques du tube
positif pour vous assurer que l'interrupteur est actionné
et du
insérés
FRet EN
ES IT PT NL SV DA NO FI HU adaptateur
CS RU RO
PL tube
SL d'aspiration
HR ET doivent
LT LVêtreSK
BG
prêt àDE
fonctionner.
dans leurs contacts positifs respectifs.
■■ Faites pivoter le sac d’aspiration jusqu’à ce que la
FR
EN DE ES IT PT NL SV DA NO
bandoulière
soit orientée vers le haut.
FI
HU
CS
■FR
■ Assurez-vous
du sac
EN DE ESqueITla fermeture
PT NL éclair
SV DA
NOestFIbienHU CS
fermée avant de mettre l’appareil en marche.
FR
EN
DE
ES
IT
PT
NL
SV
DA
NO
FI
HU
CS
MISE EN PLACE DES TUBES D’ASPIRATION
FR Figures
EN DE
ES IT PT NL SV DA NO FI HU CS
Voir
5 - 6.
AVERTISSEMENT:
Les pales de la turbine en rotation peuvent
entraîner de graves blessures. Arrêtez toujours
le moteur et assurez-vous que les pales ont
cessé de tourner avant d’ouvrir la trappe de
l’aspirateur ou avant de monter/changer les tubes.
N’introduisez jamais ni vos mains ni aucun objet
dans les tubes de l’aspirateur lorsqu’ils sont en
place sur l’appareil.
Mise en place des tubes d’aspiration:
■■ Assemblez les tubes d’aspiration supérieur et inférieur
en alignant les languettes tu tube inférieur avec les
rainures du tube supérieur. Les deux tubes n'en
forment plus qu'un une fois leur assemblage effectué.
RU RO
PL
SL
HR
ET
LT
AVERTISSEMENT:
RUNeRO
PL pas
SLl’habitude
HR ETde LT
SKrendre
BG
LV vous
laissez
l’appareil
moins prudent. Rappelez-vous qu’une fraction de
RU RO PL SL HR ET LT LV SK BG
seconde d’inattention suffit à provoquer de graves
blessures.
RU RO PL SL HR ET LT LV SK
BG
AVERTISSEMENT:
N'utilisez pas la machine à proximité d'une fenêtre
ouverte.
AVERTISSEMENT:
Portez toujours une protection oculaire à volets
latéraux respectant la norme EN166, ainsi qu’une
protection auditive. Si vous ne respectez pas
cette consigne, des objets pourraient être projetés
vers vos yeux, et vous pourriez subir d’autres
blessures.
APPLICATIONS
Vous pouvez utiliser cet appareil pour effectuer les
opérations suivantes:
■■ Retirer les feuilles et les autres débris de votre pelouse
■■ Appuyez sur les languettes de la trappe à l’aide d’un
7
FR
FR
EN
EN
FR
EN
FR
EN
DE
LV
SK
BG
DEFrançais
ES IT PT
NL SV DA à
NOpartir
FI HU
RU RO
PL SL d'origine)
HR ET LT LV
(Traduction
du CS
mode
d'emploi
SK
BG
SK
BG
DE
ES
IT
ES
PT
IT
NL
SV
DA
NO
FI
HU
ES
IT
RU
RU
RO
RO
PL
PL
SL
SL
HR
HR
ET
ET
LT
PT
NL
SV
DA
NO
FI
HU
CS
P
NL
SV
DA
NO
FI
HU
CS
RU dans
RO le
PLsens
SLdes
HRaiguilles
ET LT
SK BG
tournant
d’uneLVmontre.
■■ Garder les terrasses et les allées exemptes de feuilles
■■
d’aiguilles
FRet EN
DE de
ESpin IT PT NL SV DA NO FI HU
■■ Aspirer les feuilles de votre pelouse
■■
DE
CS
LT
LV
Nettoyez et vérifiez le joint du bouchon d’essence
avant
en place.
CS
RUde le
ROremettre
PL SL
HR ET LT LV SK BG
Remettez le bouchon en place et serrez-le en le
MÉLANGE
DU CARBURANT
Essuyez
essence
FR EN DE ES IT
RU toute
RO PL
SL répandue
HR ET sur
LT l’appareil.
LV SK BG
PT NL SV DA NO FI HU■■ CS
Cet appareil est équipé d’un moteur 2-temps et nécessite
■■ Eloignez-vous à au moins 9m du point de remplissage
l’emploi
essence-huile
FR ENd’un
DEmélange
ES IT
PT NL 2 temps.
SV DALe mélange
NO FI HU CS
RUde démarrer
RO PL le
SLmoteur.
HR ET LT LV SK BG
avant
doit être de 50:1.
NOTE:
QUE FI
de HU CS RU RO PL SL HR ET LT LV SK BG
FR ENNous
DE vous
ES recommandons
IT PT NL de
DA NO
SVn’utiliser
AVERTISSEMENT:
l’huile Ryobi (mélange exact) ou G avec votre appareil.
Vérifiez qu’il n’y ait pas de fuite d’essence. Un
FR EN DE ES IT PT NL SV DA NO FI HU CS RU RO PL SL HR ET LT LV SK BG
bouchon d’essence qui fuit entraîne un risque
POUR MÉLANGER LE CARBURANT:
et doit
FR EN DE ES IT PT NL SV DA NO
FI HU CS d’incendie
RU RO PL
SL être
HRimmédiatement
ET LT LV remplacé.
SK BG
■■ Utilisez un bidon propre autorisé à contenir de
Si vous trouvez une fuite, corrigez le problème
l’essence.
avant
d’utiliser
l’appareil.
Le
non
respect
FR EN DE ES IT PT NL SV DA NO
FI HU CS RU RO PL SL HR ET LT LV SK BGde
■■ Mélangez dans le bidon l’huile moteur 2-temps avec
cette précaution peut entraîner un incendie qui
l’essence
sansITplomb,
les instructions
FRdeEN
DE ES
PT en
NL suivant
SV DA
NO FI
RU RO de
PLgraves
SL blessures.
HR ET LT LV SK BG
HU CS causerait
indiquées sur le bidon d’huile.
FR EN DE ES IT PT NL SV DA NO FI HU CARBURANTS
PL SL HR ET LT LV SK BG
CS RU RO OXYGÉNÉS
NOTE: Ce moteur est garanti fonctionner avec de
Les dommages engendrés au circuit d’essence ou les
FR EN DE ES IT PT NL SV DA NO FI HU CS RU RO PL SL HR ET LT LV SK BG
l’essence
sans plomb automobile d’un indice d’octane
problèmes de performance résultant de l’utilisation d’un
minimum de 91 [(R + M) / 2]. N’utilisez pas de l’huile pour
FR EN DE ES IT PT NL SV DA NO FI HU carburant
CS RU oxygéné
SL HRplus
ET d’agents
LT LVoxygénants
SK BG
RO PLcontenant
automobile ou de l’huile pour moteurs hors-bord 2-temps.
qu’indiqué plus bas ne sont pas couverts par la garantie.
NOTE:
La
plupart
des
mélanges
se
conserveront
pendant
FR EN DE ES IT PT NL SV DA NO FI HU Les
CS carburants
RU RO PL
SL HR
ET 10%
LT LV
SK BG
contenant
jusqu’à
d’éthanol
en
un maximum de 30 jours. NE MÉLANGEZ PAS de
volume (couramment appelés E10) ou 15% d’éthanol en
quantités
supérieures
à
vos
besoins
pour
une
période
de
FR EN DE ES IT PT NL SV DA NO FI HU volume
CS RU(couramment
RO PL SL
HRE15)
ET sont
LT acceptables.
LV SK BG
appelés
30 jours.
N’UTILISEZ PAS D’ESSENCE E85. VOTRE GARANTIE
FR EN DE ES IT PT NL SV DA NO FI HU CS RU RO PL SL HR ET LT LV SK BG
EN SERAIT ANNULÉE.
MÉLANGE ESSENCE / HUILE 2-TEMPS (50:1)
FR
EN
DE
ES
IT
PT
FR
EN
DE ES 1 gallon
IT PT(US)
NL
FR
EN
DE
ESSENCE
ES 1 litre
IT PT
NL
NL
SV
DA
NO
FI
SV 2.6
DA oz.
NO
FI
HUILE
(20 ml)
SV 20
DAcc NO
FI
HU
CS
RU RO
PL
SL
HR
ET
LT
LV
SK
BG
DÉMARRAGE ET ARRÊT
HU Voir
CS Figure
RU RO
LV SK BG
7. PL SL HR ET LT
NOTE: Il est normal que le moteur émette de la fumée lors
HU de
CS saRU
RO PL
SL HR ET LT
LV SK BG
première
utilisation.
FR EN DE ES
IT PT NL SV DA NO FI HU
REMPLISSAGE
DU RÉSERVOIR
AVERTISSEMENT:
FR ENL’essence
DE ES est
IT extrêmement
PT NL SV inflammable
DA NO FI etHU
explosive. Un incendie ou une explosion dus
à l’essence vous brûlera ainsi que d’autres
personnes. Arrêtez toujours le moteur avant de
faire le plein. N’ajoutez jamais d’essence à un
appareil dont le moteur est en marche ou bien
chaud. Eloignez-vous à au moins 9m du point
de remplissage avant de démarrer le moteur. Ne
fumez pas et restez à l’écart des flammes nues
et des sources d’étincelles. Le non respect des
règles de sécurité concernant la manipulation de
l’essence peut entraîner de graves blessures.
■■ Nettoyez la surface autour du bouchon d’essence pour
éviter toute contamination.
■■ Desserrez doucement le bouchon en le tournant dans
le sens inverse des aiguilles d’une montre.
■■ Versez avec soin le mélange dans le réservoir.
8
1.
CS Pressez
RU ROla poire
PL d'amorçage
SL HR ETà 10
LTreprises.
LV SK BG
NOTE: Au bout de la 7ème pression, l'essence
doit
être
visible
dans
la
poire
d'amorçage.
CS RU RO PL SL HR ET LT LV SK Dans
BGle
cas contraire, continuez de presser jusqu'à ce que
l'essence soit visible.
2. Verrouillez l'accélérateur en l'enfonçant puis en tirant
sur le régulateur de régime.
3. Mettez le levier de starter en position "FULL".
4. Tout en maintenant l'accélérateur complètement
enfoncé, tirez sur la poignée du lanceur jusqu'à ce que
le moteur semble démarrer. Ne tirez pas sur le lanceur
à plus de 4 reprises.
5. Mettez le levier de starter en position "HALF".
6. Tirez sur la poignée du lanceur jusqu'à ce que le
moteur démarre. Ne tirez pas sur le lanceur à plus
de 6 reprises. NOTE: Si le moteur ne démarre pas,
remettez le starter en position "FULL" et répétez
l'opération à partir de l'étape 2.
7. Laissez le moteur tourner pendant 10 secondes, puis
mettez le levier de starter en position "RUN".
FR
FR
FR
EN
EN
EN
DE
LV
SK
BG
DEFrançais
ES IT PT
NL SV DA à
NOpartir
FI HU
RU RO
PL SL d'origine)
HR ET LT LV
(Traduction
du CS
mode
d'emploi
SK
BG
SK
BG
DE
ES
ES
IT
IT
PT
PT
NL
NL
SV
SV
DA
DA
NO
NO
FI
FI
HU
HU
CS
CS
RU
RU
RO
RO
PL
PL
SL
SL
HR
HR
ET
ET
LT
LT
LV
RÉGULATEUR DE PUISSANCE
Figure
SV DA NO FI HUVoirCS
RU 10.
RO PL SL HR ET LT LV SK BG
Le régulateur de puissance peut être utilisé pour se servir
1. Pressez la poire d'amorçage à 10 reprises.
FR
EN
DE
ES
P
NL
SV
DA
NO
FI
HU
CS
RU
RO maintenir
PL SL l’accélérateur.
HR ET LT LV SK BG
du souffleur sans
2. Mettez le levier de IT
starter en position "RUN".
■■ Pour activer le régulateur de régime, tirez son levier
3. Enfoncez complètement la gâchette des gaz et tirez
FR EN DE ES IT
NL SV DA NO FI HU CS
PL à
SLobtenir
HR leETrégime
LT désiré.
LV SK BG
PT jusqu'à
versRU
vousRO
de façon
sur la poignée du lanceur
ce que le moteur
PourRUdésactiver
régulateur,
FRdémarre.
EN DE ES IT PT NL SV DA NO FI HU■■ CS
RO PL leSL
HR ET poussez
LT LV son
SK levier
BG
complètement vers l’avant de l’appareil.
Pour
FR arrêter
EN DEle moteur:
ES IT PT NL SV DA NO FI HU CS RU RO PL SL HR ET LT LV SK BG
Maintenez le contacteur en position "O" jusqu’à ce que le
UTILISATION EN ASPIRATEUR
FR EN
DE ES IT PT NL SV DA NO FI HUVoirCS
RU 11.
RO PL SL HR ET LT LV SK BG
moteur
s’arrête.
Figure
Démarrage
d’unES
moteur
FR EN DE
IT chaud:
PT NL
AVERTISSEMENT:
RU RO PL SL HR ET LT LV SK BG
Gardez l’échappement et toutes les surfaces
chaudes
de
EN DE ES IT PT NL SV DA NO
PL souffleur/aspirateur
SL HR ET LT éloignées
LV SK BG
FI HU CS RU RO du
votre corps. Le non respect de cette précaution
AVERTISSEMENT:
peut entraîner de graves blessures.
EN DE ES IT PT NL SV DA NO FI
Ne placez pas le souffleur sur ou à proximité deHU CS RU RO PL SL HR ET LT LV SK BG
débris ou de graviers. Les débris sont susceptibles
EN DE ES IT PT NL SV DA NO FI HU ■CS
RU en
ROplace
PL les
SL tubes
HR ET
LT LV etSKle BG
■ Mettez
d’aspiration
sac
d’être aspirés par l’admission d’air du souffleur,
d’aspiration. Reportez-vous au chapitre concernant le
ce
qui
peut
entraîner
des
dommages
et
des
EN DE ES IT PT NL SV DA NO FI HU CS montage
PL
SL
HR
ET
LT
LV
SK
BG
RU RO
plus haut dans ce mode d’emploi.
blessures graves.
UTILISATION
FR EN DE EN
ESMODE
IT ASPIRATEUR
PT NL SV DA
Voir Figures 8 - 9.
FR
FR
FR
FR
NO
FI
HU
EN DE les
ES outils
IT PT
NL SVqu’à
DA des
NO heures
FI HU
■FR
■ N’utilisez
à moteur
raisonnables – évitez de le faire tôt le matin ou
FRtard
ENle DE
IT risqueriez
PT NL SV
DA NO
FI HU
soir, ES
où vous
de gêner
des gens.
Conformez-vous aux horaires stipulés dans les
FRrèglements
EN DE locaux.
ES IT PT NL SV DA NO FI HU
CS
■
■ Démarrez
le souffleur.
CS
RU RO
PL SL Reportez-vous
HR ET LT à Démarrage
LV SK BGet
Arrêt plus haut dans ce mode d’emploi.
CS
RU ROla bandoulière
LT épaule
LV SKdroite.
BG
PL SL HRsur ETvotre
■
■ Mettez
Maintenez la poignée supérieure avec votre main
CS gauche
RU RO
PL poignée
HR ET LTavec
LV votre
SK main
BG
SL d’aspiration
et la
droite.
■FR
■ Pour
le nombre
EN réduire
DE ESle niveau
IT PT sonore,
NL SVlimitez
DA NO
FI HU CS RU RO PL SL HR ET LT LV SK BG
d'appareils utilisés simultanément et faites fonctionner
■■ Effectuez un mouvement de balayage de gauche
souffleur
droite
de laHR
limiteET
des débris.
FRle EN
DE au
ESplusITpetit
PTrégime
NL moteur
SV DApossible.
NO FI HU CS à RU
ROle long
PL SL
LT LV Pour
SK éviter
BG
tout bourrage, ne mettez pas directement le tube
■■ Vérifiez votre appareil avant chaque utilisation, en
dansSL
le tas
de débris.
FRparticulier
EN DE l’échappement,
ES IT PT NL
SV DA d’air,
NO et
FI lesHU CS d’aspiration
RU RO PL
HR
ET
les entrées
LT LV SK BG
filtres à air.
■■ Maintenez le moteur plus haut que l’embout
FR EN DE ES IT PT NL SV DA NO FI HU CS d’aspiration
RU RO PL
SL HR ET LT
LV SK BG
du tube.
■■ Utilisez un râteau et un balai pour désagglutiner les
débris
avant
de
les
souffler.
■
■
Faites
toujours
pointer
le
tube
d’aspiration
vers l’aval
FR EN DE ES IT PT NL SV DA NO FI HU CS RU RO PL SL HR ET LT LV SK
BG
lorsque vous travaillez sur une pente.
■■ En conditions poussiéreuses, humidifiez légèrement
FRlesEN
DE ES
NL SV DA NO FI HU ■
CS
RU éviter
RO d'occasionner
PL SL HR de
ETgraves
LT blessures
LV SK ou
surfaces
si de IT
l’eauPT
est disponible.
BG
■ Pour
des
dommages à l'appareil, ne tentez pas d'aspirer des
■■ Prenez garde aux enfants, aux animaux, aux fenêtres
cailloux, du verre brisé, des bouteilles ou autres objets
ouvertes et aux voitures venant d’être lavées, et
similaires.
soufflez les débris à bonne distance.
■■ En cas de bouchage des tubes d’aspiration, arrêtez
le moteur, assurez-vous de l’arrêt complet des pales
de la turbine, et débranchez l’antiparasite avant de
nettoyer l’obstruction.
■■ Maintenez le souffleur comme illustré Figure 9, afin
que le flux d’air puisse s’écouler près du sol.
■■ Pour éviter de répandre les débris, soufflez vers les
bords extérieurs pour former un amas. Ne soufflez
jamais vers le centre d’un amas.
■■ Retirez les tubes d’aspiration et dégagez les débris
du carter de la turbine du souffleur. Retirez le sac
et nettoyez le tube. Aidez-vous au besoin d’un petit
bâton ou d’une tige pour nettoyer toute la longueur du
tube. Assurez-vous que tous les débris ont été retirés
avant de remettre les tubes en place.
■■ Pour éviter de répandre les débris, souffl ez vers les
bords extérieurs pour former un amas. Débarrassezvous proprement des débris.
■■ L’embout haute vitesse est tout particulièrement
conçu pour les feuilles mouillées et collantes. Il vous
permet de décoller les feuilles ou débris mouillés tout
en utilisant le souffleur.
ENTRETIEN
9
FR
FR
FR
FR
FR
FR
FR
FR
EN
EN
EN
DE
LV
SK
BG
DEFrançais
ES IT PT
NL SV DA à
NOpartir
FI HU
RU RO
PL SL d'origine)
HR ET LT LV
(Traduction
du CS
mode
d'emploi
SK
BG
DE
ES
IT
ES
PT
IT
PT
NL
NL
SV
SV
DA
DA
NO
NO
FI
FI
AVERTISSEMENT:
réparations
utilisant
ENN’effectuez
DE ESles IT
PT NL qu’en
SV DA
NO des
FI
pièces détachées identiques. L’utilisation de toute
ENautre
DE pièce
ES détachée
P
NL
SV
DA
NO
FIet
représente
un
danger
IT
peut causer des dommages matériels.
EN
DE ES IT
PT NL SV DA NO FI
AVERTISSEMENT:
Portez toujours une protection oculaire à volets
ENlatéraux
DE ES
IT PT
SV DA
FI
NL EN166,
respectant
la norme
ainsiNO
qu’une
protection auditive. Si vous ne respectez pas
EN DE ES IT PT NL SV DA NO FI
cette consigne, des objets pourraient être projetés
vous
subir NO
d’autres
ENversDEvosESyeux,
IT etPT
NLpourriez
SV DA
FI
blessures graves.
HU
CS
RU
RO
PL
SL
HR
ET
LT
HU
CS
RU
RO
PL
SL
HR
ET
LT
LV
SK
BG
HU
CS
RU
RO
PL
SL
HR
ET
LT
LV
SK
BG
l’appareil. Tournez le bouton dans le sens des
aiguilles
montre
ce que
couvercle
soit
HU CS
RU d’une
RO PL
SL jusqu’à
HR ET
LT le LV
SK BG
bien verrouillé.
DE PL
LA SL
SORTIE
DU
HUNETTOYAGE
CS RU RO
HR D'ÉCHAPPEMENT,
ET LT LV SK BG
SILENCIEUX ET DU PARE-ÉTINCELLES
HUSelon
CS leRU
PL SL HR
ETle LT
BG
typeRO
de carburant
utilisé,
type LV
et laSK
quantité
d’huile utilisée, et/ou vos conditions d’utilisation, la sortie
HUd’échappement,
CS RU RO l’échappement,
PL SL HR ET
LV SK BG
et/ouLTle pare-étincelles
peuvent se trouver encrassés par de la calamine. Si vous
CS RU RO PL SL HR ET LT LV SK BG
constatez une perte de puissance de votre outil, il peut
être
calamine
accumulée.
FR EN DE ES IT PT NL SV DA NO
FI HU CSnécessaire
RU RO dePLretirer
SL laHR
ET LT
LV SK Nous
BG
vous recommandons fortement de ne confier ce travail
AVERTISSEMENT:
qu’à
des
réparateurs
qualifiés.
FR ENAvant
DE deESvérifier,
IT PT
NL ou
SV réparer
DA NO
nettoyer
l’appareil,
FI HU CS RU RO PL SL HR ET LT LV SK BG
arrêtez le moteur, attendez l’arrêt complet de
remplacer
le pareFR ENtoutes
DE les
ESpièces
IT en
PT mouvement,
NL SV DA
NO
FI
CS recommandé
RU RO PLde nettoyer
SL HR ou
ETde LT
LV SK
BG
et débranchezHUIl est
étincelles toutes les 50 heures ou tous les ans pour
l’antiparasite que vous éloignerez de la bougie. Le
de ET
votre LT
produit.
FR ENnonDE
ES de
IT ces
PTconsignes
NL SV peut
DA entraîner
NO FI deHU maintenir
PL SL HR
LV Le
SK pareBG
CS RUlesROperformances
respect
étincelles peut se trouver à différents endroits selon le
graves blessures et des dommages matériels.
FR EN DE ES IT PT NL SV DA NO FI HU modèle
CS RU
ROVeuillez
PL SL
HR ET
LV SKle plus
BG
acheté.
contactez
votreLTrevendeur
proche pour connaître l’emplacement du pare-étincelles
ENTRETIEN
GÉNÉRAL
FR EN DE ES IT PT NL SV DA NO FI HU de
CS votre
RU modèle.
RO PL SL HR ET LT LV SK BG
Evitez d’utiliser des solvants pour nettoyer les parties en
plastique.
La
plupart
des
plastiques
sont
susceptibles
FR EN DE ES IT PT NL SV DA NO FI HU CS RUAVERTISSEMENT:
RO PL
SL HR ET LT LV SK BG
d'être endommagés par différents types de solvants du
Pour éviter tout risque d’incendie, ne faites jamais
FR EN DE
ES des
IT chiffons
PT NL propres
SV DA
NOretirer
FI laHU CS RU RO PL SL HR ET LT LV SK BG
commerce.
Utilisez
pour
fonctionner le souffleur/aspirateur sans que le
saleté, les poussières, l’huile, la graisse, etc.
pare-étincelles ne soit en place.
FR
FR
FR
FR
FR
EN
DE
ES
IT
PT
NL
SV
DA
NO
FI
HU
HU
AVERTISSEMENT:
EN DE ES IT PT NL SV DA NO FI HU
Ne laissez jamais du liquide de frein, de l’essence,
des produits à base de pétrole, des huiles
EN DE ES IT PT NL SV DA NO FI HU
pénétrantes, etc. entrer en contact avec les parties
plastique.
chimiques
ENen DE
ES ITLesPTproduits
NL SV
DA NOpeuvent
FI HU
endommager, affaiblir ou détruire les plastiques,
de graves
blessures.
ENce qui
DE pourrait
ES ITentraîner
PT NL
SV DA
NO FI HU
CS
RU RO
PL
SL
HR
ET
LT
LV
SK
BG
SAC
CS D’ASPIRATION
RU RO PL SL HR ET
LT LV SK BG
Un sac sale entraînera une diminution des performances.
Pour
nettoyer
sac,SL
retournez-le
secouez-le.
Lavez-le
CS RU
RO lePL
HR ET et LT
LV SK
BG
dans de l’eau savonneuse au moins une fois par an.
CS
RU RO
PL
SL
HR
ET
LT
LV
SK
BG
BOUCHON D’ESSENCE
FR
CS RUAVERTISSEMENT:
RO PL SL HR ET LT LV SK BG
Un bouchon d’essence qui fuit entraîne un risque
FR pouvez
EN DEsouvent
ES IT
PT les
NL réglages
SV DAet réparations
NO FI HU CS RUd’incendie
RO PL et SL
HR remplacé
ET LT immédiatement.
LV SK BG
Vous
effectuer
doit être
décrites ici. Faites exécuter les autres réparations sur
votre aspirateur/souffleur par un service après-vente
Le bouchon d’essence comporte un filtre non remplaçable
agréé.
et un clapet anti-retour. Un filtre à essence bouché
entraînera de mauvaises performances du moteur. Si
NETTOYAGE DU FILTRE À AIR
les performances s’améliorent lorsque le bouchon est
Voir Figure 12 - 13.
dévissé, le clapet anti-retour est peut-être défectueux,
Pour de meilleures performances et une longue durée de
ou le filtre bouché. Remplacez le bouchon d’essence au
vie, gardez le filtre à air propre.
besoin.
■■ Retirez le couvercle du filtre à air en tournant le bouton
dans le sens inverse des aiguilles d’une montre tout
en tirant doucement sur le couvercle.
REMPLACEMENT DE LA BOUGIE
Ce moteur utilise une bougie Ryobi AC00160, Champion
RCJ-6Y ou NGK BPMR7A avec un écartement des
électrodes de 0.7 mm. Changez-la au moins une fois par
an, en utilisant un modèle identique.
■■ Rincez le filtre dans de l’eau propre.
■■ Essorez doucement le filtre pour en retirer l’excès
d’eau. Remettez le filtre en place.
STOCKAGE DE L’APPAREIL
■■ Débarrassez l’appareil de tous les corps étrangers.
■■ Remettez le couvercle du filtre à air en place sur
10
FR
FR
EN
DE
EN
FR
EN
FR
EN
LV
SK
BG
DEFrançais
ES IT PT
NL SV DA à
NOpartir
FI HU
RU RO
PL SL d'origine)
HR ET LT LV
(Traduction
du CS
mode
d'emploi
SK
BG
DE
ES
IT
ES
PT
IT
PT
NL
SV
DA
NO
FI
HU
CS
RU
RO
PL
SL
HR
ET
LT
NL
SV
DA
NO
FI
HU
CS
RU
RO
PL
SL
HR
ET
LT
LV
SK
BG
NL
SV
DA
NO
FI
HU
CS
RU
RO
PL
SL
HR
ET
LT
LV
SK
BG
GUIDE
DA
NO DE
FI DÉPANNAGE
HU CS RU RO PL SL HR ET
LT
LV
SK
BG
Rangez-le à l’intérieur en un lieu sec, bien ventilé, et
manipulation en toute sécurité de l’essence.
portée
à l’écart
FRhors
EN deDE
PT Gardez-le
NL SV DA
NO des
FI HUPour
CSunRU
RO PL
HRouET
stockage
de 1SL
mois
plus:LT LV SK BG
ESdes ITenfants.
produits corrosifs tels que les produits chimiques de
■■ Vidangez toute l’essence du réservoir dans un bidon
FRjardinage
EN DEet les
ES selsITde déneigement.
P NL SV DA NO FI HU CS
RU
RO
PL
SL
HR
ET
LV tourner
SK BGle
autorisé à contenir de l’essence.LTFaites
■■ Conformez-vous à toutes les normes ISO et tous
moteur jusqu’à ce qu’il s’arrête.
FRlesEN
DE ES locaux
IT
NL SV
DA NO et FIla HU CS RU RO PL SL HR ET LT LV SK BG
PT
règlements
concernant
le stockage
DE
ES
IT
PT
EN
DE
ES
FR
EN
DE
ES
RO
PL
SL
HR
ET
LT
LV
SK
BG
FR
EN
DE
ES Pas
IT d’essence
PT NLdans
SVle réservoir.
DA NO Remplissez
FI HU le CS
RU RO
réservoir.
PL
SL
HR
ET
LT
LV
SK
BG
FR
EN
DE
perlée
ES Bougie
IT PT
NLou noyée.
SV DA
FR
EN
DE
ES Bougie
IT PT cassée,
NL SV(porcelaine
DA NO
FI
FR
EN
DE
ES
FI
Problème
IT
PT
NL
IT
PT
NL
SV
FR
SV
Cause Possible
DA
NO
NO
fêlée ou électrodes cassées) Fil
haute tension en court-circuit,
IT PT ou
NLdébranché.
SV DA NO
interrompu,
FR
EN
DE
ES
DA
NO
FR
EN
DE
ES Allumage
IT PT défectueux.
NL SV DA
NO
FR
EN
DE
ES
IT
PT
NL
SV
DA
NO
FR
EN
DE
ES
IT
PT
NL
SV
DA
NO
FR
EN
DE
ES
IT
PT
NL
SV
DA
NO
FR
EN
DE
ES
IT
PT
NL
SV
DA
NO
FR
EN
DE
ES
FR
EN
DE
FR
EN
FR
EN
Le moteur ne
démarre pas.
IT
PT
NL
SV
Le moteur est noyé
IT
PT
NL
SV
DA
NO
ES
IT
PT
NL
SV
DA
NO
DE
ES
IT
PT
NL
SV
DA
NO
DE
ES
IT
PT
NL
SV
DA
NO
Le moteur
démarre avec
difficulté.
FI
HU
Solution
Présence d’eau dans l’essence
ou mélange périmé.
CS
RU
FI
Remplacez
HU la bougie.
CS RU
●●
●●
HU
RO
PL
SL
HR
ET
LT
LV
SK
BG
CS
RU
RO
PL
SL
HR
ET
LT
LV
SK
BG
CS
RU
RO
PL
SL
HR
ET
LT
LV
SK
BG
Remplacez la bougie. ou,
Remplacez le fi l haute tension ou rebranchez-le.
HU
●● Assurez-vous que les commutateurs sont enclenchés et prêts à l'emploi:
FI HU CS
RO PL SL HR ET LT LV SK BG
●● Mettez les protections à leur emplacement correct au niveau des
ouvertures de soufflage et d'aspiration, et insérez immédiatement les
FI taquets
HU CS
PL SL HR ET LT LV SK BG
dansRU
les fentes de commutation.
●● Si le moteur ne parvient toujours pas à démarrer, contactez un
FI réparateur
HU CS agréé.
RU RO
SL HR ET LT LV SK BG
●● Démontez la bougie, puis retournez l'appareil de façon que le trou de
FI bougie
HU CS
RU vers
RO lePL
HR ET LT LV SK BG
soit tourné
sol.
●● Mettez le levier de starter en position "RUN" puis tirez sur le lanceur de
reprises.
l'excès d'essence
moteur.
FI 10
HUà 15CS
RU Ceci
RO purgera
PL SL
ET duLT
LV SK BG
●● Vidangez toute essence présente dans le produit.
●● Nettoyez
FI
HU CSet remontez
RU ROla bougie.
PL SL HR
LT LV SK BG
●● Nettoyez toute essence renversée et éloignez-la d'au moins 9 m du
avantRU
de redémarrer.
FI moteur
HU CS
RO PL SL HR ET
LV SK BG
●● Tirez sur la poignée du lanceur à 3 reprises avec le levier du starter en
position “RUN”.
FI HU CS RU RO PL SL HR ET LT
SK BG
●● Si le moteur ne démarre pas, mettez le levier de starter en position
"FULL" et reprenez la procédure normale de démarrage.
FI
HU CS RU RO PL SL HR ET LT LV
BG
●● Si le moteur ne parvient toujours pas à démarrer, répétez la procédure
précédente avec une bougie neuve.
RU
RO
PL
SL
HR
ET
LT
LV
SK
FI
HU
CS
RU RO
PL
SL
HR
ET
LT
LV
SK
BG
Vidangez tout le circuit et refaites le plein avec de l’essence neuve.
Mélange trop riche en huile.
Vidangez et refaites le plein avec un mélange correct.
Trop ou pas assez de starter.
Mettez le starter en position adéquate.
Faiblesse de l’étincelle à la
bougie.
Contactez un service après-vente agréé.
Le moteur
manque de
puissance.
Le filtre à air est bouché.
Nettoyez le filtre à air. Reportez vous à Nettoyage du Filtre à Air plus haut
dans ce mode d’emploi.
Le moteur
chauffe.
Mélange trop pauvre en huile.
Mélangez le carburant en suivant les instructions de la section "Mélange du
Carburant" plus haut dans ce manuel.
11
English (Original
instructions)
Deutsch (Übersetzung
der originalen
Anleitungen)
INTRODUCTION
Overreaching can result in loss of balance or exposure
to hot surfaces.
This product has many features for making its use
more pleasant and enjoyable. Safety, performance, and
dependability have been given top priority in the design of
this product making it easy to maintain and operate.
■■ Never operate the unit without a spark arrestor screen;
this screen is located inside the silencer.
■■ Before storing, allow the engine to cool.
■■ Maintain the unit per maintenance instructions in this
operator’s manual.
GENERAL SAFETY RULES
■■ Inspect the unit before each use for loose fasteners,
fuel leaks, etc. Replace any damaged parts.
INTENDED USE:
This product is only intended for use outdoors.
It is intended for blowing light debris including leaves,
grass and other garden refuse. It is intended to vacuum
and mulch light debris as above and collect in the debris
bag. It is not designed to suck or vacuum water or other
liquid.
■■ Before cleaning, repairing, or inspecting, switch off
the engine and make certain all moving parts have
stopped. Disconnect the spark plug wire, and keep the
wire away from the plug to prevent starting.
■■ Service on the blower/vacuum must be performed by
qualified repair personnel only. Service or maintenance
performed by unqualified personnel could result in
injury to the user or damage to the product.
WARNING:
Read and understand all instructions. Failure
to follow all instructions listed below may result
in electric shock, fire and/or carbon monoxide
poisoning which will cause death or serious
personal injury.
■■ Use only identical replacement parts when servicing
the blower/vacuum. Use of unauthorized parts may
create a risk of serious injury to the user, or damage
to the product.
■■ Do not use on a ladder, rooftop, tree, or other unstable
support. Stable footing on a solid surface enables
better control of the blower/vacuum in unexpected
■■ Do not allow children or untrained individuals to use
this unit.
situations.
■■ Never start or run the engine inside an enclosed area;
breathing exhaust fumes can kill.
SPECIFIC SAFETY RULES
■■ Always wear eye protection with side shields marked
to comply with EN 166, along with hearing protection.
Failure to do so could result in objects being thrown
into your eyes and other possible serious injuries.
■■ Always hold the blower/vacuum in your right hand
during blower operation. Refer to the Operation
instructions later in this manual for proper position
during vacuum operation and additional information.
■■ Keep all bystanders, children, and pets at least 15m
away.
■■ To reduce the risk of hearing loss associated with
sound level(s), hearing protection is required.
■■ Wear heavy long trousers, long sleeves, boots, and
gloves. Do not wear loose-fitting clothing, shorts,
sandals, jewelry of any kind, or go barefoot.
■■ To reduce the risk of injury associated with contacting
rotating parts, stop the engine before installing
or removing attachments. Do not operate without
guard(s) in place. Always disconnect the spark plug
before performing maintenance or accessing any
movable parts.
■■ Secure long hair so it is above shoulder level to
prevent entanglement in any rotating parts.
■■ Do not operate this unit when you are tired, ill, or under
the influence of alcohol, drugs, or medication.
■■ Do not point the blower nozzle in the direction of
people or pets.
■■ Do not operate in poor lighting.
■■ Keep all parts of your body away from any moving
parts and all hot surfaces of the unit.
■■ Never run the unit without blower tubes installed. The
interlock device on this machine ensure that the unit
cannot start without tube assembled and switch slider
at operation position.
■■ Wear a face filter mask in dusty conditions to reduce
the risk of injury associated with the inhalation of dust.
■■ Never place any objects inside the blower tubes.
■■ Check the work area before each use. Remove all
objects such as rocks, broken glass, nails, wire, or
string which can be thrown or become entangled in
the machine.
■■ Use only as directed in this operator’s manual.
■■ Do not operate vacuum without vacuum bag installed;
flying debris could cause serious injury. Always close
vacuum bag completely before operating.
■■ Keep firm footing and balance. Do not overreach.
12
English (Original
instructions)
Deutsch (Übersetzung
der originalen
Anleitungen)
■■ Rotating impeller blades can cause severe injury. Stop
the engine and ensure impeller blades have stopped
rotating before opening the vacuum door or installing/
changing tubes. Do not put hands or any other object
into the vacuum tubes while they are installed on the
unit.
before refueling.
■■ Save these instructions. Refer to them frequently
and use them to instruct others who may use this
tool. If you loan someone this tool, loan them these
instructions also.
■■ This product is very noisy when operating. To prevent
long term hearing damage, wear hearing protection
and keep other persons 15m away from the work area.
Operating similar tools nearby increases risk of injury.
■■ Never run the unit without the proper equipment
attached. When used as a blower, always install the
blower tubes and close the door. When used as a
vacuum, always install the vacuum tubes and vacuum
bag. Make sure the vacuum bag is completely zipped
when the unit is running to avoid flying debris.
■■ Use of hearing protection reduces the ability to hear
warnings (shouts or alarms). The operator must pay
extra attention to what is going on in the work area.
■■ Avoid situations that could cause fire in the vacuum
bag. Do not operate near an open flame. Do not
vacuum warm ash from fireplaces, barbecue pits,
brush piles, etc. Do not vacuum discarded cigars or
cigarettes unless the cinders are completely cool.
■■ It has been reported that vibrations from hand-held
tools may contribute to a condition called Raynaud’s
Syndrome in certain individuals. Symptoms may
include tingling, numbness and blanching of the fingers,
usually apparent upon exposure to cold.Hereditary
factors, exposure to cold and dampness, diet, smoking
and work practices are all thought to contribute to the
development of these symptoms.There are measures
that can be taken by the operatorto possibly reduce
the effects of vibration:
FUELING
■■ Fuel is highly flammable. Take precautions when
using to reduce the chance of serious personal injury.
■■ Store fuel in a cool, well-ventilated area, safely away
from spark and/or flame-producing equipment.
a. Keep your body warm in cold weather. When operating
the unit wear gloves to keep the hands and wrists
warm. It is reported that cold weather is a major factor
contributing to Raynaud’s Syndrome.
b. After each period of operation, exercise to increase
blood circulation.
c. Take frequent work breaks. Limit the amount of
exposure per day.
If you experience any of the symptoms of this
condition, immediately discontinue use and see your
doctor about these symptoms.
■■ Mix and store fuel in containers specifically designed
for this purpose.
■■ Add fuel before starting the engine. Never remove
the cap of the fuel tank or add fuel while the engine is
running or when the engine is hot.
■■ Do not smoke while handling fuel.
■■ Mix and store fuel in a container approved for petrol.
■■ Mix fuel outdoors where there are no sparks or flames.
■■ Loosen fuel cap slowly to release pressure and to
keep fuel from escaping around the cap.
■■ To reduce the hazard from dust inhalation, slightly
dampen the work area before blowing or vacuuming.
■■ Tighten the fuel cap securely after refueling.
■■ Use a garden rake or a broom to loosen heavy
deposits or fallen leaves or other waste before using
the blower.
■■ Wipe spilled fuel from the unit. Move 9m away from
refueling site before starting engine.
■■ Never attempt to burn off spilled fuel under any
circumstances.
■■ When there is a risk of falling objects, wear head
protection.
■■ If fuel is spilled, do not attempt to start the engine but
move the machine away from the area of spillage and
avoid creating any source of ignition until fuel vapors
have dissipated.
■■ Tighten all fuel tank and container caps securely.
■■ Empty fuel tank into a container approved for petrol
and restrain the unit from moving before transporting
in a vehicle.
■■ When draining the fuel tank, use an approved fuel
storage container in a well-ventilated area.
■■ Select bare ground, stop engine, and allow to cool
13
English (Original
instructions)
Deutsch (Übersetzung
der originalen
Anleitungen)
SYMBOLS
Some of the following symbols may be used on this product. Please study them and learn their meaning. Proper
interpretation of these symbols will allow you to operate the product better and safer.
SYMBOL
NAME
DESIGNATION/EXPLANATION
Safety Alert
Indicates a potential personal injury hazard.
Read
the
manual
Operator’s
To reduce the risk of injury, user must read and understand
operator’s manual before using this product.
Wear Eye and Hearing
Protection
Always wear eye protection with side shields marked to comply with
EN 166 as well as hearing protection when operating this equipment.
Vacuum Door
Do not run unit while vacuum door is unsecured.
Long Hair
Risk of long hair being drawn into air inlet.
Blower Tubes
Do not run unit without tubes in place.
Loose Clothing
Risk of loose clothing being drawn into air intake.
Petrol and lubricant
Use unleaded petrol intended for motor vehicle use with an octane
rating of 91 [(R + M) / 2] or higher. This product is powered by a
2-cycle engine and requires pre-mixing petrol and 2-cycle lubricant.
Keep Bystanders Away
Keep all bystanders at least 15m (50ft) away.
Ricochet
Danger of ricochet.
The following signal words and meanings are intended to explain the levels of risk associated with this product.
SYMBOL
SIGNAL
MEANING
DANGER:
Indicates an imminently hazardous situation, which, if not avoided, will result in
death or serious injury.
WARNING:
Indicates a potentially hazardous situation, which, if not avoided, could result in
death or serious injury.
CAUTION:
Indicates a potentially hazardous situation, which, if not avoided, may result in
minor or moderate injury.
CAUTION:
(Without Safety Alert Symbol) Indicates a situation that may result in property
damage.
14
English (Original
instructions)
Deutsch (Übersetzung
der originalen
Anleitungen)
DESCRIPTION
Fig 1a.
1. Lower vacuum tube
2. Vacuum bag
3. Adaptor
4. Cruise control
5. Throttle trigger
6. Upper vacuum tube
7. Fuel cap
8. Starter grip
9. Choke lever
10.Upper handle
11.On/off switch
12.Positive switch at blowing side
13.Primer bulb
14.Vacuum handle
Fig 7
5. Throttle trigger
8. Starter grip and rope
9. Choke lever
11. On/Off switch
13. Primer bulb
30. Quick start label
Fig 8
12. Positive switch at blowing side
19. Positive switch at vacuuming side
Fig 9
31. High velocity nozzle
Fig 10
4. Cruise control
5. Throttle trigger
Fig 1b
15. Upper blower tube
16. Door tab
17. Inlet cover door
18. Lower blower tube
19. Positive switch at vacuuming side
31. High velocity nozzle
Fig 11
12. Positive switch at blowing side
19. Positive switch at vacuuming side
Fig 12
32. Air filter cover
33. Air filter dial - turn to open or close air filter
Fig 13
32. Air filter cover
Fig 2
15. Upper blower tube
18. Lower blower tube
19. Positive switch at vacuuming side
31. High velocity nozzle
34. Air filter
FEATURES
Fig 3
2. Vacuum bag
3. Adaptor
PRODUCT SPECIFICATIONS
Engine Displacement................................................ 26cc
Air Velocity..........................................................320 Km/h
Air volume.........................................................11 m3/min
Fig 4
20. Raised slot
21. Adaptor installed in vacuum bag
22. Raised locking tab with switch insert metal plate
Weight..................................................................... 4.3 kg
Rated power............................................................ 0.6Kw
Fig 5
17. Inlet cover
19. Positive switch at vacuuming side
23. Vacuum bag assembly
24. Screw on Inlet cover
25. Vacuum Inlet cover tab
Engine speed (Max.)..........................................9000 rpm
Engine speed (Idle.)................................3000 – 4600rpm
Sound power level according to EN 15503:2009 Annex
A(Blower / vaccum)
Racing....................................................85.9 / 84.4 dB(A)
Fig 6
17. Inlet cover
19. Positive switch at vacuuming side
26. Vacuum opening
27. Locking tab
28. Vacuum tube assembly
29. Screw for holding vacuum tube assembly
Idling.......................................................70.8 / 70.2 dB(A)
Equivalent A-weight emission sound pressure level
...........................................................105.9 / 104.4 dB(A)
Sound pressure level at operator position(Blower/
vaccum)
15
English (Original
instructions)
Deutsch (Übersetzung
der originalen
Anleitungen)
Racing....................................................91.6 / 95.5 dB(A)
VACUUM BAG
The vacuum bag attaches to the blower easily by using
the vacuum bag adaptor.
Idling........................................................78.9 / 81.4dB(A)
Equivalent A-weight emission sound pressure level.........
...............................................................84.4 / 88.0 dB(A)
VACUUM HANDLE
This feature allows user to perform vacuuming duties
comfortably.
VACUUM TUBES
The vacuum tubes can be installed on the blower using a
cross head screw driver.
Uncertainty of sound level measurement..............3 dB(A)
vibration value at handle according to EN 15503:2009
Annex B
Blower mode(Front handle/ rear handle)
Racing........................................................9.9 / 20.4 m/s2
Idling...........................................................8.7 / 11.9 m/s2
Equivalent vibration total value...................9.7 / 19.4 m/s2
Uncertainty of vibration measurement..................1.5 m/s2
ASSEMBLY
UNPACKING
This product requires assembly.
n Carefully remove the product and any accessories
from the box. Make sure that all items listed in the
packing list are included.
WARNING:
Do not use this product if any parts on the
Packing List are already assembled to your
product when you unpack it. Parts on this
list are not assembled to the product by the
manufacturer and require customer installation.
Use of a product that may have been
improperly assembled could result in serious
personal injury.
n Inspect the product carefully to make sure no
breakage or damage occurred during shipping.
n Do not discard the packing material until you have
carefully inspected and satisfactorily operated the
product.
KNOW YOUR BLOWER/VACUUM
See Figures 1a - 1b.
The safe use of this product requires an understanding of
the information on the tool and in this operator’s manual
as well as a knowledge of the project you are attempting.
BLOWER TUBE AND NOZZLES
The blower tube can be assembled and installed on the
blower without using any tools.
POSITIVE SWITCHES
The product is equipped with positive switches. The unit
will only run if both the metal contacts are inserted into
the positive switches. This reduces the risk of accidental
contact with rotating parts.
CRUISE CONTROL
The cruise control feature allows the user to operate the
blower without holding the throttle trigger. To slow the
engine, simply push the cruise control lever forward.
ASSEMBLING THE BLOWER TUBES
See Figure 2.
n Insert one end of the lower tube into one end of the
upper tube.
n Align raised tabs on blower housing outlet to the
slots on the upper tube; slide together and tighten
securely by twisting; press slider plate into positive
switch's slot to allow the positive switch to engage
and be ready to work. Check tightness after initial
use and retighten if needed.
n Close the inlet cover and tighten the screw on the
cover, making sure the metal contact is inserted into
the positive switch.
n Connect the nozzle to the lower blower tube.
n To remove the blower tube, pull out the slider from
the positive switch, then rotate the tubes to remove
them from the blower housing outlet.
HIGH VELOCITY NOZZLE WITH WET LEAF SCRAPER
The high velocity nozzle is great for wet sticky leaves.
It allows you to scrape off wet leaves or debris while
operating the blower.
MOTOR
The blower has a powerful 26cc engine with sufficient
power to handle tough blowing and vacuuming jobs.
START EASY™
The Start Easy™ feature allows easier and quicker
starting.
THROTTLE TRIGGER
The blower can be operated at any speed between idle
and full throttle.
INSTALLING THE VACUUM BAG
See Figures 3 - 4.
n Unzip the vacuum bag and place the adaptor inside
as shown. Push the vacuum bag adaptor through the
VACUUM / SILENCER
Converting the blower to a vacuum/silencer is simple and
can be done using a cross head screwdriver.
16
English (Original
instructions)
Deutsch (Übersetzung
der originalen
Anleitungen)
n
n
n
opening opposite to the zipper. The wider end of the
adaptor will remain on the inside of the vacuum bag
when installed properly.
Align the raised slots on the vacuum bag adaptor
with the raised locking tabs on the blower housing
outlet; push the bag adaptor onto the housing.
Twist to lock into place, press the metal contact into
the positive switch slot to make sure the switch is
engaged and ready to operate.
Rotate the vacuum bag until the shoulder strap is
upright.
Make sure the vacuum bag is zipped and closed
before starting the unit.
unit in vacuum mode (Fig. 11), the metal contact on the
adapter tube and the vacuum tube must be inserted into
their respective positive switches.
WARNING:
Do not allow familiarity with this product to
make you careless. Remember that a careless
fraction of a second is sufficient to inflict serious
injury.
WARNING:
Do not operate the machine near open windows
WARNING:
Always wear eye protection with side shields
marked to comply with EN166, along with
hearing protection. Failure to do so could result
in objects being thrown into your eyes and
other possible serious injuries.
INSTALLING THE VACUUM TUBES
See Figures 5 - 6.
WARNING:
Rotating impeller blades can cause severe
injury. Always stop the engine and ensure
impeller blades have stopped rotating before
opening the vacuum door or installing/changing
tubes. Do not put hands or any other object into
the vacuum tubes while they are installed on
the unit.
APPLICATIONS
You may use this product for the purposes listed below:
n Clearing leaves and other debris from your lawn
n Keeping decks and driveways free from leaves and
pine needles
n Vacuuming leaves from your lawn
MIXING THE FUEL
This product is powered by a 2-cycle engine and requires
premixing petrol and 2-cycle oil. The mixture should be at
a 50:1 ratio.
NOTE: We recommend you use ONLY Ryobi (exact mix)
or G oil in your product.
TO MIX THE FUEL:
n Use a clean container that is approved for use with
petrol.
n Mix the 2-cycle engine oil with unleaded petrol in
the container, according to the instructions on the oil
package.
This engine is certified to operate on unleaded petrol
intended for automotive use with an octane rating of
91 [(R + M) / 2] or higher. Do not use automotive oil or
2-cycle outboard oil.
NOTE: Most fuel mixture will stay fresh up to 30 days.
DO NOT mix quantities larger than usable in a 30 day
period.
2-CYCLE FUEL / OIL MIX (50:1)
To install the vacuum tubes:
n Secure the upper and lower vacuum tubes together
by aligning the raised locking tabs with the matching
orifice on the upper vacuum tube. The two tubes
become one tube assembly after inserting them
together.
n Depress door tab using a flathead screwdriver and
loosen the screw on the door to open the vacuum
inlet door.
n Align tabs on housing with tube assembly.
n Tighten screws on upper vacuum tube to secure to
the blower housing. Make sure the metal contact on
the vacuum tube is inserted into the positive switch.
To remove the vacuum tubes:
n Loosen screws of the upper vacuum tube by turning
counterclockwise.
n Remove the vacuum tube assembly from the blower
housing.
n Close the vacuum inlet cover door securely by
fastening the screw on the door.
OPERATION
PETROL
1 gallon (US)
1 liter
OIL
2.6 oz.
20 cc (20 ml)
FILLING THE TANK
WARNING:
Petrol is extremely flammable and explosive. A
fire or explosion from petrol will burn you and
others. Always shut off engine before fueling.
Never add fuel to a machine with a running
or hot engine. Move at least 9m. away from
Note: The unit has positive switches at the blowing and
vacuuming opening sides. The unit will only run if both
the metal contacts are inserted into the positive switches.
When running the unit in blower mode (fig. 8), the metal
contact on the blow tube and the door must be inserted
into their respective positive switches. When running the
17
English (Original
instructions)
Deutsch (Übersetzung
der originalen
Anleitungen)
n
n
n
n
n
n
n
refueling site before starting engine. Do not
smoke and stay away from open flames and
sparks. Failure to safely handle fuel could result
in serious personal injury.
Clean the surface around the fuel cap to prevent
contamination.
Loosen the fuel cap slowly by turning counterclock
wise.
Pour the fuel mixture carefully into the tank.
Clean and inspect the fuel cap gasket before
replacing the fuel cap.
Replace the fuel cap and tighten it by turning it clock
wise.
Wipe spilled fuel from the product.
Move at least 9m. away from the refueling area
before starting the product.
choke position and repeat the procedure from step 2.
7. Allow the engine to run for 10 seconds, then set the
choke lever to “RUN” position.
To start a warm engine:
1. Press the primer bulb 10 times.
2. Set the choke lever to “RUN” position.
3. Squeeze the throttle trigger completely and pull the
starter grip until the engine starts.
To stop the engine:
Press and hold the switch in the stop "O" position until
the engine stops.
BLOWER OPERATION
See Figures 8 - 9.
WARNING:
Check for fuel leaks. A leaking fuel cap is a fire
hazard and must be replaced immediately. If
you find any leaks, correct the problem before
using the product. Failure to do so could result
in a fire that could cause serious personal
injury.
WARNING:
Do not place blower on top of or near loose
debris or gravel. Debris may be sucked into
blower intake vent resulting in possible damage
to the unit and could result in serious personal
injury.
n Operate power equipment at reasonable hours only not early in the morning or late at night when people
might be disturbed. Comply with the times listed in
local ordinances.
n To reduce sound level, limit the number of products
used at any one time and operate the blower at the
lowest possible throttle speed. This may also reduce
vibration levels.
n Check your equipment before operation, especially
the silencer, air intakes, and air filters.
n Use rakes and brooms to loosen debris before
blowing.
n In dusty conditions, slightly dampen surfaces when
water is available.
n Watch out for children, pets, open windows, or
freshly washed cars, and blow debris safely away.
n Hold blower, as shown in Figure 9, so the air stream
can work close to the ground.
■■ Blow around the outer edges of a debris pile to prevent
debris from scattering. Never blow directly into the
center of a pile.
n After using blowers or other equipment, CLEAN UP!
Dispose of debris properly.
n The high velocity nozzle is specifically designed for
wet sticky leaves. It allows you to scrape wet leaves
or debris while operating the blower.
OXYGENATED FUELS
Fuel system damage or performance problems resulting
from the use of an oxygenated fuel containing more than
the percentages of oxygenates stated previously are not
covered under warranty.
Ethanol. Petrol containing up to 10% ethanol by volume
(commonly referred to as E10) or 15% ethanol by volume
(commonly referred to as E15) are acceptable.
DO NOT USE E85 FUEL. IT WILL VOID YOUR
WARRANTY.
STARTING AND STOPPING
See Figure 7.
NOTE: It is normal for smoke to be emitted from a new
engine during first use.
To start a cold engine:
1. Press the primer bulb 10 times.
NOTE: After the 7th press, the fuel should be visible
in the primer bulb. If not, continue pressing until the
fuel is visible.
2. Lock the throttle lever by squeezing the throttle trigger
and pulling back on the cruise control.
3. Set the choke lever to “FULL” choke position.
4. Keeping the throttle trigger locked and squeezed
completely, pull the starter grip until the engine is
about to start. Do not pull the starter grip more than
4 times.
5. Set the choke lever to "HALF" choke position.
6. Pull the starter grip until the engine starts. Do not pull
the starter grip more than 6 times.
NOTE: If the engine does not start, return to “FULL”
CRUISE CONTROL
See Figure 10.
The cruise control can be used to operate the blower
without holding the throttle trigger.
■■ To engage the cruise control, pull the cruise control
lever back towards user and stop at the desired
18
English (Original
instructions)
Deutsch (Übersetzung
der originalen
Anleitungen)
n
throttle setting.
To release the cruise control, push cruise control
lever all the way towards the front of unit.
to follow these instructions can result in serious
personal injury or property damage.
GENERAL MAINTENANCE
Avoid using solvents when cleaning plastic parts.
Most plastics are susceptible to damage from various
commercial solvents. Use clean cloths to remove dirt,
dust, lubricant, grease, etc.
VACUUM OPERATION
See Figure 11.
WARNING:
Keep the silencer and all hot surfaces of the
blower/vacuum away from your body. Failure to
do so could result in possible serious personal
injury.
n Install the vacuum tubes and the bag. Refer to the
"Assembly" section earlier in this manual.
n Start the blower. Refer to "Starting and Stopping"
earlier in this manual.
n Place the vacuum bag strap over your right shoulder.
Hold the upper handle in your left hand and the
vacuum handle in your right hand.
n Move the blower/vacuum from side to side along
outer edge of the debris. To avoid clogging, do not
place the vacuum tube directly into the debris pile.
n Hold the engine higher than the inlet end of the
vacuum tube.
n Always point vacuum tube downhill when working on
a hillside.
■■ To avoid serious injury to the operator or damage to
the unit, do not attempt to suck rocks, broken glass,
bottles, or other similar objects.
WARNING:
Do not at any time let brake fluids, petrol,
petroleum-based products, penetrating
lubricants, etc., come in contact with plastic
parts. Chemicals can damage, weaken or
destroy plastic which may result in serious
personal injury.
You can often make adjustments and repairs described
here. For other repairs, have the blower/vacuum serviced
by an authorized service dealer.
CLEANING THE AIR FILTER
See Figure 12 - 13.
For proper performance and long life, keep air filter clean.
n Remove the air filter cover by turning the dial counter
clockwise while gently pulling on the cover.
n Rinse filter with clean water.
n Gently squeeze filter until excess water is removed.
Replace the filter.
n Place the air filter cover back on the unit. Turn dial
clockwise until cover is secure.
CLEANING THE EXHAUST PORT, SILENCER AND
SPARK ARRESTOR
Depending on the type of fuel used, the type and amount
of lubricant used, and/or your operating conditions, the
exhaust port, silencer, and/or spark arrestor screen may
become blocked with carbon deposits. If you notice a
power loss with your petrol-powered tool, you may need
to remove these deposits to restore performance. We
highly recommend that only qualified service technicians
perform this service.
It is recommended to clean or replace the spark arrestor
every 50 hours or yearly to ensure proper performance
of your product. Spark arrestors may be in different
locations depending on the model purchased. Please
contact your nearest service dealer for the location of the
spark arrestor for your model.
■■ If the vacuum tubes should clog, stop the engine,
ensure impeller blades have stopped spinning, and
disconnect the spark plug wire before cleaning out the
obstruction.
n Remove the vacuum tubes and clear the debris from
the blower fan housing. Remove the bag and clear
the tube. A small rod or stick may be required to clear
the entire tube length. Ensure that all debris has
been cleared before reassembling the vacuum tubes.
MAINTENANCE
WARNING:
When servicing, use only identical replacement
parts. Use of any other parts may create a
hazard or cause product damage.
WARNING:
To avoid a fire hazard, never run the blower/
vacuum without the spark arrestor in place.
WARNING:
Always wear eye protection with side shields
marked to comply with EN166, along with
hearing protection. Failure to do so could result
in objects being thrown into your eyes and
other possible serious injuries.
VACUUM BAG
A dirty bag will reduce performance. To clean the bag,
turn it inside out and shake. Wash the bag in soapy water
at least once a year.
WARNING:
Before inspecting, cleaning, or servicing the
machine, shut off the engine, wait for all moving
parts to stop, disconnect the spark plug wire
and move it away from the spark plug. Failure
FUEL CAP
WARNING:
A leaking fuel cap is a fire hazard and must be
replaced immediately.
The fuel cap contains a non-serviceable filter and a
19
English (Original
instructions)
Deutsch (Übersetzung
der originalen
Anleitungen)
check valve. A clogged fuel filter will cause poor engine
performance. If performance improves when the fuel cap
is loosened, check valve may be faulty or filter clogged.
Replace fuel cap if required.
n
Abide by all ISO and local regulations for the safe
storage and handling of petrol.
When storing 1 month or longer:
n Drain all fuel from tank into a container approved for
petrol. Run engine until it stops.
SPARK PLUG REPLACEMENT
This engine uses a Ryobi AC00160, Champion RCJ-6Y
or NGK BPMR7A spark plug with a .025 in. electrode
gap. Use an exact replacement and replace annually.
STORING THE PRODUCT
n Clean all foreign material from the product. Store
idle unit indoors in a dry, well-ventilated area that is
inaccessible to children. Keep away from corrosive
agents such as garden chemicals and de-icing salts.
TROUBLESHOOTING
Problem
Engine fails to start.
Possible Cause
Solution
No fuel in tank.
Fill the tank.
Spark plug shorted or fouled.
Replace the spark plug.
Spark plug broken (cracked porcelain
or electrodes broken; ignition lead wire
shorted, broken, or disconnected from
spark plug.)
●●
●●
Check and make sure the switches engaged are ready to
work:
●● Put the guards to the right positions at the blowing and
vacuuming opening sides, and insert the sliders into the
switch slots right way.
●● If the engine still fails to start, contact an authorized
service centre.
Ignition inoperative.
●●
Engine flooded
●●
●●
●●
●●
●●
●●
●●
Engine hard to start.
Replace the spark plug; or
Replace the lead wire or attach it to the spark plug.
Remove the spark plug, then turn the unit until the spark
plug hole aims at the ground.
Set the choke lever to “RUN” position and pull the starter
grip 10 to 15 times. This will clear excessive fuel from the
engine.
Remove any fuel from the product.
Clean and reinstall the spark plug.
Clean up any spilled fuel and move it at least 9 m away
from the engine before restarting.
Pull the starter grip 3 times with the choke lever at “RUN”
position.
If the engine does not start, set the choke lever to “FULL”
position and repeat the normal starting procedure.
If the engine still fails to start, repeat the above procedure
with a new spark plug.
Water in petrol or stale fuel mixture.
Drain the entire system and refill with fresh fuel.
Too much lubricant in fuel mixture.
Drain and refill with correct mixture.
Engine under or over choked.
Adjust the choke as necessary.
Weak spark at spark plug.
Contact an authorized service centre.
Engine lacks power.
Air filter clogged.
Engine overheats.
Insufficient lubricant in fuel mixture.
Clean the air filter according to the "Cleaning the Air Filter"
section earlier in this manual.
Mix the fuel according to the "Mixing the Fuel" section earlier
in this manual .
20
FR
FR
EN
DE
ES
IT
PT
NL
SV
DA
NO
FI
HU
CS
RU
RO
PL
SL
HR
ET
LT
LV
SK
BG
EN
DE
ES
IT
PT
NL
SV
DA
NO
FI
HU
CS
RU
RO
PL
SL
HR
ET
LT
LV
SK
BG
DE
ES
IT
PT
NL
SV
DA
NO
FI
HU
CS
RU
RO
PL
SL
HR
ET
LT
LV
SK
BG
IT PT NL SV DA NO FIder
HUoriginalen
CS RU RO Anleitungen)
PL SL HR ET
ES Deutsch(Übersetzung
LT
LV
SK
BG
FR
EN
FR
EN
DE
FR
EN
DE
ES
EINFÜHRUNG
IT
P
NL
SV
DA
NO
FI
HU
CS
RU
RO
PL
SL
HR
ET
LT
LV
SK
BG
NO
FI
HU
CS
RU
RO
PL
SL
HR
ET
LT
LV
SK
BG
■■ Überprüfen Sie vor jedem Gebrauch den
Arbeitsbereich.
Objekte
wie
FR EN DE ES IT
RU RO PLEntfernen
SL HR Sie
ET alle
LT LV
SK BG
PT NL SV DA NO FI HU CS
z.B. Steine, zerbrochenes Glas, Nägel, Draht oder
Dieses Produkt hat viele Eigenschaften, die den
Fäden,
werden
der
Gebrauch
angenehmer
FR EN DE
ES IT und
PT erfreulicher
DA NO Bei
FI HU CS
RU die
ROhochgeschleudert
PL SL HR ET
LT oder
LV sich
SK inBG
NL SV gestalten.
Maschine verfangen könnten.
der Entwicklung dieses Produkts wurde der Sicherheit,
Leistungsfähigkeit
Priorität
FR EN DE ES und
IT Zuverlässigkeit
PT NL SVhöchste
DA NO
FI HU■■ CS
RU Sie
RO fürPLeinen
SL sicheren
HR ET Stand
LT und
LV eine
SK gute
BG
Sorgen
eingeräumt, was auch die Pflege und den Betrieb
Balance. Nicht überstrecken. Überstrecken kann zu
erleichtert.
FR EN DE ES IT PT NL SV DA NO FI HU CS
RU Verlust
RO PL
HR ET LToderLVKontakt
SK BG
einem
des SL
Gleichgewichts
mit
heißen Oberflächen führen.
FR EN DE ESSICHERHEITSREGELN
IT PT NL SV DA
ALLGEMEINE
■■ Bedienen Sie das Gerät nie ohne Funkenschutz, der
Schutz
in dem
HU CS
RU befindet
RO PLsichSL
HR Schalldämpfer.
ET LT LV SK BG
FR EN DE ESVERWENDUNG:
IT PT NL SV DA NO
FI
VORGESEHENE
■■ Lassen Sie den Motor vor der Einlagerung abkühlen.
Dieses Produkt ist nur zum Einsatz im Freien vorgesehen.
FRist EN
DE ES
PT NLvonSV
DA Kehrgut,
NO FI wieHU CS RU RO PL SL HR ET LT LV SK BG
Es
vorgesehen
zum IT
Wegblasen
leichtem
■■ Pflegen Sie das Gerät gemäß den Pflege- und
Laub, Gras und anderen Gartenabfällen. Es ist zum Aufsaugen
Wartungsanweisungen in dieser Gebrauchsanleitung.
und
FR Mulchen,
EN DEsowie
ES Sammeln
IT PT des
NLo.a.SVleichten
DA Kehrguts
NO FI imHU CS RU RO PL SL HR ET LT LV SK BG
Sammelbeutel vorgesehen. Es ist nicht zum Aufsaugen von
■■ Untersuchen Sie das Gerät vor jedem Gebrauch
Wasser
oderDE
anderen
vorgesehen.
lose RO
Befestigungen,
FR EN
ES Flüssigkeiten
IT PT NL
SV DA NO FI HU CS aufRU
PL SL HRTreibstoffleckstellen
ET LT LV SK usw.
BG
Tauschen Sie beschädigte Teile aus.
WARNUNG:
FR EN
DE ES IT PT NL SV DA NO FI HU ■
CS
RU RO
ET LTReparieren
LV SK oder
BG
■ Schalten
Sie PL
vor SL
dem HR
Reinigen,
Lesen Sie die Anweisungen ganz durch
Untersuchen
den
Motor
aus
und
vergewissern
Sie
Sie FI
sie HU CS RU RO PL SL HR ET LT LV SK BG
FR ENundDEvergewissern
ES IT PT Sie
NL sich,
SV dass
DA NO
sich, dass sich alle beweglichen Teile im Stillstand
verstanden haben! Die Nichtbeachtung
befinden. Lösen Sie zur Vermeidung eines Startens
Anweisungen
FR ENderDE folgenden
ES IT PT
NL SV DA kann
NO FIzu HU CS RU RO PL SL HR ET LT LV SK BG
das Zündkerzenkabel und halten sie das Kabel von
Stromschlag,
Feuer
und/oder
schwerer
der Zündkerze fern.
die Tod
FR ENKohlenmonoxidvergiftung
DE ES IT PT NL führen,
SV DA
NO oder
FI HU CS RU RO PL SL HR ET LT LV SK BG
■■ Die Wartung des Gebläsesaugers darf nur von
schwere Personenschäden zur Folge haben
Reparaturpersonal
durchgeführt
FR ENkönnen.
DE ES IT PT NL SV DA NO FI HU CS qualifiziertem
RU RO PL SL
HR ET
LT LV
SK BG
werden. Durch unqualifiziertes Personal durchgeführte
EN DE SieESKindern
IT PT
SV DA NO
FI HU CS WartungsRU RO oder
PL Pflegearbeiten
SL HR ET können
LV Verletzung
SK BG
■FR
■ Erlauben
oderNLungeschulten
Personen
LT zur
des Benutzers oder der Beschädigung des Produkts
nicht den Gebrauch des Geräts.
FR EN DE ES IT PT NL SV DA NO FI HU CS führen.
RU RO PL SL HR ET LT
LV SK BG
■■ Starten oder verwenden Sie das Gerät niemals in
■
■
Verwenden
Sie
ausschließlich
identische
Ersatzteile
FRgeschlossenen
EN DE ES Räumen.
IT PTDass
NL Einatmen
SV DA von
NOAbgasen
FI HU CS RU RO PL SL HR ET LT LV SK BG
zur Wartung des Gebläsesaugers. Die Verwendung
kann tödlich sein.
nicht-autorisierter Ersatzteile birgt die Gefahr einer
EN DE
ES ITAugenschutz
PT NL mit
SV Seitenschutz,
DA NO FI derHU CS RU RO PL SL HR ET LT LV SK BG
■FR
■ Tragen
Sie immer
schweren Verletzung des Benutzers oder einer
als mit der EN 166 Norm entsprechend gekennzeichnet
Beschädigung des Produkts.
ist, sowie Gehörschutz. Tun Sie dies nicht, könnten
■■ Verwenden Sie das Gerät nicht auf einer Leiter, einem
Fremdkörper in Ihre Augen geraten, oder Sie könnten
Dach, Baum oder auf einer anderen unsicheren
andere schwere Verletzungen erleiden.
Oberfläche. Ein sicherer Stand auf festen Untergrund
■■ Halten Sie mindestens 15 Meter Abstand zu
ermöglicht eine bessere Kontrolle des Gebläsesaugers
unbeteiligten Personen, Kindern und Tieren.
in unerwarteten Situationen.
■■ Tragen Sie lange, schwere Hosen, Kleidung mit langen
Ärmeln, Stiefel und Handschuhe. Tragen Sie keine
BESONDERE SICHERHEITSREGELN
locker sitzende Kleidung, kurze Hosen, Sandalen und
keinen Schmuck. Gehen Sie nicht barfuß.
■■ Halten Sie den Gebläsesauger während des
■■ Arbeiten Sie mit diesem Gerät nicht, wenn Sie müde
oder krank sind, oder unter dem Einfluss von Alkohol,
Drogen oder Medikamenten stehen.
Gebläsebetriebs immer in der rechten Hand.
Lesen Sie für weitere Informationen zum korrekten
Halten während des Saugbetriebs und zusätzliche
Informationen die Anweisungen unter Betrieb weiter
unten in dieser Anleitung.
■■ Nicht bei schlechter Beleuchtung verwenden.
■■ Halten Sie alle Körperteile von den sich bewegenden
Teilen und den heißen Oberflächen des Geräts fern.
■■ Ein Gehörschutz ist erforderlich um die Gefahr
einer Gehörschädigung durch laute Geräusche zu
verringern.
■■ Tragen Sie bei staubigen Bedingungen einen
Atemschutz um das Verletzungsrisiko durch das
Einatmen von Staub zu verringern.
■■ Zur Verringerung des Verletzungsrisikos durch
Kontakt mit den sich drehenden Teilen, schalten
21
FR
FR
EN
DE
ES
IT
PT
NL
SV
DA
NO
FI
HU
CS
RU
RO
PL
SL
HR
ET
LT
LV
SK
BG
EN
DE
ES
IT
PT
NL
SV
DA
NO
FI
HU
CS
RU
RO
PL
SL
HR
ET
LT
LV
SK
BG
DE
ES
IT
PT
NL
SV
DA
NO
FI
HU
CS
RU
RO
PL
SL
HR
ET
LT
LV
SK
BG
IT PT NL SV DA NO FIder
HUoriginalen
CS RU RO Anleitungen)
PL SL HR ET
ES Deutsch(Übersetzung
LT
LV
SK
BG
LT
LV
SK
BG
FR
EN
FR
EN
DE
FR
EN
DE
ES
IT
P
NL
SV
DA
NO
FI
HU
Sie den Motor aus bevor Sie Teile montieren oder
GerätSV
nicht
FRentfernen.
EN DE Betreiben
ES IT Sie
DAohne,
NO dass
FI HU■■
PTdas NL
die Schutzvorrichtung(en) angebracht sind. Ziehen
Sie
immer
den
Zündkerzenstecker
ab,
bevor
Sie
das
FR EN DE ES IT PT NL SV DA NO FI HU
■■
Gerät warten, oder an beweglichen Teilen arbeiten.
EN DE
IT PT NL niemals
DA Personen
NO FI HU
SV auf
■FR
■ Richten
Sie ES
die Gebläsedüse
oder Tiere.
FR
EN
DE
ES
IT
PT
NL
SV
DA
NO
FI
HU
■■ Verwenden Sie das Gerät niemals, wenn
■■
nichtNL montiert
Der
FRdieEN Gebläserohre
DE ES IT PT
SV DA sind.
FI HU■■
NO
Sperrmechanismus an dieser Maschine stellt sicher,
montiertes
Rohr
dem HU
FRdass
EN das
DEGerät
ES nicht
IT ohne
PT NL
SV DA
NOund FI
■■
Schiebeschalter in Betriebsposition gestartet werden
FRkann.
EN DE ES IT PT NL SV DA NO FI
HU
■■ Stecken Sie
FRGebläserohre.
EN DE ES
niemals
Gegenstände
in
die
CS
RU
RO
PL
SL
HR
ET
oder Flammen bildenden Geräten.
CS
RU und
RO lagern
PL SL
HR ET inLT
LV für
SKdiesen
BG
Mischen
Sie Kraftstoff
speziell
Zweck vorgesehenen Behältern.
CS
RU RO PL SL HR ET LT LV SK BG
Betanken
Sie die Maschine vor dem Starten des
Motors. Entfernen Sie niemals den Deckel des
RU RO PL SL HR ET LT LV SK BG
Treibstofftanks und füllen Sie niemals Treibstoff nach
während der Motor noch läuft oder heiß ist!
CS
CS
RU
RO
PL
SL
HR
ET
LT
LV
Beim Umgang mit Treibstoff nicht Rauchen!
SK
BG
CS
RU Sie
RO Treibstoff
PL SL imHR
ET und
LTnicht
LVin der
SK Nähe
BG
Mischen
Freien
von Funken oder Flammen.
CS
RU
RO
PL
SL
HR
ET
LT
LV
SK
BG
Lösen Sie den Tankdeckel vorsichtig um Druck
abzulassen
zu vermeiden,
dassLV
Treibstoff
um
CS
RU ROund
PLumSL
HR ET LT
SK BG
den Deckel herum austritt.
HU ■CS
RU Sie
RO den
PL Tankdeckel
SL HR ETnach
LT dem
LV Nachfüllen
SK BG
■ Drehen
wieder gut fest.
■FR
■ Verwenden
Sie IT
das PT
Gerät
der NO
in dieser
EN DE ES
NL nur
SV in DA
FI HU CS RU RO PL SL HR ET LT LV SK BG
■■ Wischen Sie verschütteten Treibstoff von dem Gerät
Gebrauchsanweisung beschriebenen Weise.
von HR
dem ET
Tankbereich
EN DE ES
IT PT
NL niemals,
SV DA solange
NO FI derHU CS und
RUbewegen
PL9mSL
LT LV weg,
SK bevor
BG
RO es
■FR
■ Verwenden
Sie den
Sauger
Sie den Motor starten.
Saugbeutel nicht montiert ist. Umherfliegendes
FRKehrgut
EN DEkann
ES schwere
IT PT Verletzungen
NL SV DA verursachen.
NO FI HU ■
CS
RU RO Sie
HR Umständen
ET LT LV
SK BG
■ Versuchen
verschütteten
PLunterSLkeinen
Treibstoff abzubrennen!
Schließen Sie den Saugbeutel immer vollständig
FRbevor
EN Sie
DEdas
ESGerät
IT einschalten.
PT NL SV DA NO FI HU CS RU RO PL SL HR ET LT LV SK BG
■■ Sollten Sie Treibstoff verschüttet haben, versuchen
Sie nicht, den Motor zu starten, sondern entfernen Sie
■FR
■ Rotierende
Flügelklingen
schwerste
EN DE ES IT PT NL können
SV DA NO
FI HU CS RU RO PL SL HR ET LT LV SK BG
die Maschine aus dem Bereich in dem der Treibstoff
Verletzungen verursachen. Schalten Sie den Motor
vermeiden Sie
vergewissern
FRaus
ENundDE
ES IT Sie
PT sich,
NL dass
SV die
DAFlügelklingen
NO FI HU CS verschüttet
RU RO wurde
PL SLundHR
LV Entstehung
SK BG
ET LT die
einer Zündquelle bis die Treibstoffdämpfe verflogen
aufgehört haben sich zu drehen bevor Sie die
sind.
Saugerklappe
öffnen
oder
Rohre
anbringen
oder
FR EN DE ES IT PT NL SV DA NO FI HU CS RU RO PL SL HR ET
LT LV SK BG
wechseln. Greifen Sie nicht mit den Händen in die
■■ Ziehen Sie alle Treibstofftank- und Behälterdeckel fest
FRSaugrohre
EN DE und
ES stecken
IT PT
DA NO FI
RU RO PL SL HR ET LT
Sie NL
keineSV
Gegenstände
in dieHU CS an.
LV SK BG
Saugrohre, solange diese am Gerät angebracht sind.
■
■
Entleeren
Sie
den
Tank
vor
dem
Transport
in einem
FR EN DE ES IT PT NL SV DA NO FI HU CS RU RO PL SL HR ET LT LV SK BG
■■ Verwenden Sie das Gerät niemals, solange nicht
Fahrzeug in einen für Benzin zugelassenen Behälter
das richtige Zubehör angebracht ist. Montieren Sie
Sie das
FR EN DE ES IT PT NL SV DA NO FI HU CS und
RUsichern
RO PL
SL Gerät
HR gegen
ET LTVerrutschen.
LV SK BG
beim Gebläsebetrieb immer zuerst die Gebläserohre
■■ Verwenden Sie beim Entleeren des Treibstofftanks
und schließen Sie die Klappe. Montieren Sie beim
in einem gut belüfteten Bereich einen für die
Saugerbetrieb immer zuerst die Saugerrohre
Treibstofflagerung zugelassenen Behälter.
und den Saugbeutel. Achten Sie zur Vermeidung
■■ Suchen Sie sich vor dem Befüllen einen freien
von umherfliegendem Kehrgut darauf, dass der
Bodenbereich, schalten Sie den Motor aus und lassen
Saugerbeutel beim Betrieb des Geräts ganz
Sie ihn abkühlen.
geschlossen ist.
IT
PT
NL
SV
DA
NO
FI
■■ Vermeiden Sie Situationen, die dazu führen könnten,
dass der Saugerbeutel Feuer fängt. Nicht in der
Nähe einer offenen Flame verwenden. Saugen Sie
niemals heiße Asche aus Kaminen, Grills, Kehrhaufen
usw. Saugen Sie niemals weggeworfene Zigarren
oder Zigaretten auf, sofern diese nicht vollständig
ausgekühlt sind.
MIT TREIBSTOFF BEFÜLLEN
■■ Benzin ist leicht entflammbar! Ergreifen Sie zur
Verringerung der Wahrscheinlichkeit einer schweren
Verletzung beim Befüllen mit Treibstoff entsprechende
Vorsichtsmaßnahmen.
■■ Bewahren Sie diese Anweisungen auf. Lesen Sie sie
regelmäßig nach und verwenden Sie sie um andere,
die dieses Werkzeug verwenden sollten, einzuweisen.
Sollten Sie dieses Werkzeug jemandem leihen, geben
Sie dieser Person auch diese Anleitung.
■■ Lagern Sie Treibstoff in einem kühlen, gut gelüftetem
Bereich und in sicherem Abstand zu Zündfunken und/
■■ Vibrationen von mit der Hand gehaltenen Werkzeugen
können bei einigen Personen zu einem Zustand, der
■■ Tragen Sie bei der Arbeit mit dem Produkt
Gehörschutz. Der Betrieb ähnlicher Werkzeuge in
der näheren Umgebung erhöht das Verletzungsrisiko.
Das Tragen von Gehörschutz verringert Ihre Fähigkeit
Warnungen zu hören (Warnungen oder Zurufe). Der
Benutzer muss dem, was im Arbeitsbereich vor sich
geht ganz besondere Beachtung schenken.
22
FR
FR
EN
DE
ES
IT
PT
NL
SV
DA
NO
FI
HU
CS
RU
RO
PL
SL
HR
ET
LT
LV
SK
BG
EN
DE
ES
IT
PT
NL
SV
DA
NO
FI
HU
CS
RU
RO
PL
SL
HR
ET
LT
LV
SK
BG
DE
ES
IT
PT
NL
SV
DA
NO
FI
HU
CS
RU
RO
PL
SL
HR
ET
LT
LV
SK
BG
IT PT NL SV DA NO FIder
HUoriginalen
CS RU RO Anleitungen)
PL SL HR ET
ES Deutsch(Übersetzung
LT
LV
SK
BG
FR
EN
FR
EN
DE
FR
EN
DE
ES
IT
P
NL
SV
DA
NO
FI
HU
CS
RU
RO
PL
SL
Raynaud Syndrom genannt wird, führen. Symptome
FRsind
EN u.a.
DEKribbeln,
ES IT Taubheitsgefühl
NO FI HU CS RU RO PL SL
PT NL SVundDAepisodische
Weißfärbung der Finger und treten normalerweise bei
Kälte
auf.
Man
geht
davon
aus,
dass
ererbte
Faktoren,
FR EN DE ES IT PT NL SV DA NO FI HU CS RU RO PL SL
Kälte und Feuchtigkeit, Essgewohnheiten, Rauchen
zur PT
Entwicklung
dieser
FRund
ENArbeitsweise
DE ES IT
NL SV
DASymptome
NO FI HU CS RU RO PL SL
beitragen. Der Anwender kann Maßnahmen ergreifen,
die DE
Auswirkungen
FRumEN
ES IT der
PT Vibrationen
NL SV möglicherweise
DA NO FI HU CS RU RO PL SL
zu verringern:
DE Sie
ESdenITKörper
PT bei
NLKälte
SV warm.
DA Tragen
FI HU CS RU RO PL SL
NO Sie
FR a)EN
Halten
beim Betrieb des Geräts Handschuhe, um Hände
FR EN
ES IT PT
DA Berichten
NO
FIzu HU CS RU RO PL SL
undDE
Handgelenke
warmNLzu SV
halten.
Folge ist kaltes Wetter ein wesentlicher Faktor, der
FR EN
ES IT
PT NL
SV DA NO FI
HU CS RU RO PL SL
zumDE
Raynaud
Syndrom
beiträgt.
b) Betätigen Sie sich nach jedem Einsatz körperlich,
FR EN
ES IT PTzu NL
SV DA NO FI HU CS RU RO PL SL
um DE
den Blutkreislauf
steigern.
c) Machen Sie regelmäßig Pausen. Beschränken Sie
FR EN
DE
ES
IT
PT
NL
die Beanspruchung pro Tag. SV DA NO FI HU CS RU RO PL SL
Sollten bei Ihnen Symptome dieses Zustands
FR auftreten,
EN DE stellen
ES ITSiePT
NL SV den
DA Betrieb
NO FI einHU CS RU RO PL SL
unverzüglich
und suchen Sie in Hinsicht auf die Symptome einen
FR Arzt
EN auf.
DE ES IT PT NL SV DA NO FI HU CS RU RO PL
SL
■FR
■ Um
die
Gefahr
durch
das
Einatmen
von
Staub
zu
EN DE ES IT PT NL SV DA NO FI HU CS RU RO PL SL
reduzieren, befeuchten Sie einfach den Arbeitsbereich,
bevor
Saugen
FR EN Sie
DEBlasen
ES oder
IT PT
NL beginnen.
SV DA NO FI HU CS RU RO PL SL
■■ Benutzen Sie einen Gartenrechen oder Besen um
FRschwere
EN DEAblagerungen,
ES IT PT Laub
NL oder
SV DA
NO Abfall
FI HU CS
anderen
aufzulockern, bevor Sie das Gebläse benutzen.
FR
EN
DE
ES
IT
PT
NL
SV
DA
NO
FI
HU
CS
■■ Tragen Sie einen Kopfschutz, wenn die Gefahr von
FRfallenden
EN DEObjekten
ES ITbesteht.
PT NL SV DA NO FI HU CS
HR
ET
LT
LV
SK
BG
HR
ET
LT
LV
SK
BG
HR
ET
LT
LV
SK
BG
HR
ET
LT
LV
SK
BG
HR
ET
LT
LV
SK
BG
HR
ET
LT
LV
SK
BG
HR
ET
LT
LV
SK
BG
HR
ET
LT
LV
SK
BG
HR
ET
LT
LV
SK
BG
HR
ET
LT
LV
SK
BG
HR
ET
LT
LV
SK
BG
HR
ET
LT
LV
SK
BG
HR
ET
LT
LV
SK
BG
HR
ET
LT
LV
SK
BG
LT
LV
SK
BG
LV
SK
BG
SK
BG
BG
ET
RU RO
PL
SL
HR
RU RO
PL
SL
HR
ET
RU RO
PL
SL
HR
ET
LT
LT
LV
FR
EN
DE
ES
IT
PT
NL
SV
DA
NO
FI
HU
CS
RU RO
PL
SL
HR
ET
LT
LV
SK
FR
EN
DE
ES
IT
PT
NL
SV
DA
NO
FI
HU
CS
RU RO
PL
SL
HR
ET
LT
LV
SK
23
BG
FR
FR
EN
DE
ES
IT
PT
NL
SV
DA
NO
FI
HU
CS
RU
RO
PL
SL
HR
ET
LT
LV
SK
BG
EN
DE
ES
IT
PT
NL
SV
DA
NO
FI
HU
CS
RU
RO
PL
SL
HR
ET
LT
LV
SK
BG
DE
ES
IT
PT
NL
SV
DA
NO
FI
HU
CS
RU
RO
PL
SL
HR
ET
LT
LV
SK
BG
IT PT NL SV DA NO FIder
HUoriginalen
CS RU RO Anleitungen)
PL SL HR ET
ES Deutsch(Übersetzung
LT
LV
SK
BG
FR
EN
FR
EN
DE
FR
EN
DE
ES
FR
EN
DE
ES
IT
IT
P
NL
SV
DA
NO
PT
NL
SV
DA
NO
FI
HU
CS
RU
RO
PL
SL
HR
ET
LT
LV
SK
BG
FI
HU
CS
RU
RO
PL
SL
HR
ET
LT
LV
SK
BG
SYMBOLE
Einige der folgenden Symbole könnten mit diesem Produkt verwendet werden. Bitte schauen Sie sich diese an und
FR EN DE ES IT PT NL SV DA NO FI HU CS RU RO PL SL HR ET LT LV SK BG
machen Sie sich mit ihrer Bedeutung vertraut. Ein gutes Verständnis dieser Symbole erlaubt es Ihnen das Produkt
besser
einzusetzen.
FR
EN und
DEsicherer
ES IT
PT NL
DA NO FI HU CS RU RO PL SL HR ET LT LV SK BG
SYMBOL
FR
FR
EN
EN
DE
DE
FR
EN
DE
FR
EN
DE
ES
ES
NAME
IT
PT
SV
NL
SV
Sicherheitswarnung
IT
PT
NL
SV
BESCHREIBUNG/ERKLÄRUNG
DA
NO
FI
HU
CS
RU
RO
PL
SL
HR
Warnt vor einer möglichen Verletzungsgefahr.
NO
DA
FI
HU
CS
RU
RO
PL
SL
HR
ET
LT
LV
SK
BG
ET
LT
LV
SK
BG
Um die Verletzungsgefahr zu verringern, muss der Anwender vor
ES Bedienungsanleitung
IT PT NL SV DA NO
RO PL SL HR ET LT LV SK BG
FI HU CSdesRUProdukts
der Verwendung
die Betriebsanleitung gelesen und
lesen
verstanden
haben.
ES IT PT NL SV DA NO FI
CS RU RO PL SL HR ET LT LV SK BG
HU
FR
EN
DE
Augen- und
Tragen Sie beim Betrieb dieses Geräts Augenschutz, der als der EN
ES Gehörschutz
IT PT NLtragen
SV DA NO
HUentsprechend
RO PL SL ist,
HR sowie
ET Gehörschutz.
LT LV SK BG
CS RU gekennzeichnet
166 FI
Norm
FR
EN
DE
ES
FR
EN
DE
ES
FR
EN
DE
ES
IT
PT
NL
SV
DA
NO
FI HU
HR die
ET Saugklappe
LT LV SKnicht
BG
Schalten
Sie CS
das RU
Gerät RO
nicht PL
ein, SL
solange
IT
PT
NL
SV
DA
NO
Saugklappe
Lange Haare
IT
PT
NL
SV
DA
gesichert ist.
FI
HU
CS
RU
RO
PL
SL
HR
ET
LT
LV
Gefahr, dass lange Haare in den Lufteinlass gesaugt werden.
NO
FI
HU
CS
PL
RU RO
SL
HR
ET
LT
LV
SK
BG
SK
BG
FR
EN
DE
ES Gebläserohre
IT PT NL
SV
Schalten Sie das Gerät nicht ein, solange die Rohre nicht angebracht
DA NO FI HU CS RU RO PL SL HR ET LT LV SK BG
sind.
FR
EN
DE
ES
FR
EN
DE
ES
IT
PT
NL
SV
DA
NO
FI
HU
CS
RU RO
PL
SL
HR
IT
PT
NL
SV
DA
NO
FI
HU
CS
RU RO
PL
SL
HR
Lockere Kleidung
SV
NL
SV
SK
BG
ET
LT
LV
SK
BG
Verwenden Sie bleifreies Benzin für Kraftfahrzeuge mit einer
DA NO
FI HUvonCS
RU + M)
RO / 2]
PLoder
SLhöher.
HR Dieses
ET
BG
LT
Oktanzahl
91 [(R
ProduktLVwirdSK
durch
einen Zweitaktmotor angetrieben und benötigt ein im voraus mit
DA NO FI HU CS RU RO PL SL HR ET LT
SK
BG
LV
Zweitaktöl gemischtes Benzingemisch.
EN
DE
ES
EN
DE
ES
FR
EN
DE
ES Halten
IT PT
NL SV DA
Sie Zuschauer
NO
FI Sie
HUalleCS
RU RO besonders
PL SL Kinder
HR ET
SK BG
Halten
Zuschauer,
und LT
Tiere,LVmindestens
ES
NO
DE
NL
PT
LV
FR
EN
PT
IT
LT
FR
FR
IT
ET
Gefahr, dass lockere Kleidung in den Lufteinlass gesaugt wird.
Benzin und Öl
fern
IT
PT
NL
SV
DA
Querschläger
15m vom Arbeitsbereich fern.
FI
HU
CS
RU RO
PL
SL
HR
ET
LT
LV
SK
BG
Gefahr von Querschlägern
Die folgenden Signalwörter und –bedeutungen sollen den mit diesem Produkt verbundenen Risikograd
veranschaulichen.
SYMBOL
SIGNAL
BEDEUTUNG
GEFAHR:
Bezeichnet eine unmittelbare Gefahrensituation, die, falls sie nicht vermieden wird,
zum Tode oder schweren Verletzungen führen kann.
WARNUNG:
Bezeichnet eine mögliche Gefahrensituation, die, falls sie nicht vermieden wird, zum
Tode oder schweren Verletzungen führen kann.
ACHTUNG:
Bezeichnet eine mögliche Gefahrensituation, die, falls sie nicht vermieden wird, zu
kleineren und mittleren Verletzungen führen kann.
ACHTUNG:
(ohne Sicherheitswarnsymbol) Bezeichnet eine Situation, die zu Sachschaden führen
kann.
24
FR
FR
EN
DE
ES
IT
PT
NL
SV
DA
NO
FI
HU
CS
RU
RO
PL
SL
HR
ET
LT
LV
SK
BG
EN
DE
ES
IT
PT
NL
SV
DA
NO
FI
HU
CS
RU
RO
PL
SL
HR
ET
LT
LV
SK
BG
DE
ES
IT
PT
NL
SV
DA
NO
FI
HU
CS
RU
RO
PL
SL
HR
ET
LT
LV
SK
BG
IT PT NL SV DA NO FIder
HUoriginalen
CS RU RO Anleitungen)
PL SL HR ET
ES Deutsch(Übersetzung
LT
LV
SK
BG
LT
LV
SK
BG
FR
EN
FR
EN
DE
FR
EN
DE
ES
IT
P
NL
SV
DA
NO
FI
HU
CS
RU
RO
PL
SL
HR
ET
BESCHREIBUNG
Abb.
FR 1a
EN DE ES IT
CS7 RU RO PL SL HR ET LT LV SK BG
PT NL SV DA NO FI HUAbb.
5. Gashebel
1. Unteres Saugrohr
2.
mit Starterseil
FR Fangsack
EN DE ES IT PT NL SV DA NO FI HU8. Startergriff
CS RU RO
PL SL HR ET LT LV SK BG
3. Adapter
9. Choke-Hebel
Ein/Aus
FR Geschwindigkeitsregulierung
EN DE ES IT PT NL SV DA NO FI HU11.CS
RU Schalter
RO PL SL HR ET LT LV SK BG
4.
13. Einspritzpumpe
5. Gashebel
FR Oberes
EN DE
ES IT PT NL SV DA NO FI HU30.CS
RU RO PL SL HR ET LT LV SK BG
Schnellstartanleitung
6.
Saugrohr
7. Tankdeckel
FR Startergriff
EN DE ES IT PT NL SV DA NO
FI HUAbb.
CS8 RU RO PL SL HR ET LT LV SK BG
8.
12. Sicherheitsschalter auf der Gebläseseite
9. Choke-Hebel
FR EN DE
RU RO PL SL
HRSaugerseite
ET LT LV SK BG
FI HU19.CS
Sicherheitsschalter
auf der
10.Oberer
Griff ES IT PT NL SV DA NO
11. Ein/Aus Schalter
FR EN DE ES IT PT NL SV DA NO FI
CS RU RO PL SL HR ET LT LV SK BG
HUAbb.
9
12.Sicherheitsschalter auf der Gebläseseite
31. Hochgeschwindigkeitsdüse
13.Einspritzpumpe
FR EN DE ES IT PT NL SV DA NO FI HU CS RU RO PL SL HR ET LT LV SK BG
14.Saugergriff
FR EN DE ES IT PT NL SV DA NO FI HU Abb.
CS 10
RU RO PL SL HR ET LT LV SK BG
4. Geschwindigkeitsregulierung
Abb. 1b
15.Oberes
Gebläserohr
FR EN DE
ES IT PT NL SV DA NO FI HU 5.
CSGashebel
RU RO PL SL HR ET LT LV SK BG
16. Klappenlasche
FREinlassabdeckung
EN DE ES IT PT NL SV DA NO FI HU Abb.
CS 11
RU RO PL
SL HR ET LT LV SK BG
17.
12. Sicherheitsschalter auf der Gebläseseite
18. Unteres Gebläserohr
auf der
FRSicherheitsschalter
EN DE ES ITaufPT
NL SV DA NO FI HU 19.
CS Sicherheitsschalter
RU RO PL SL
HRSaugerseite
ET LT LV SK BG
19.
der Saugerseite
31. Hochgeschwindigkeitsdüse
FR EN DE ES IT PT NL SV DA NO FI HU Abb.
CS 12
RU RO PL SL HR ET LT LV SK BG
32. Luftfilterabdeckung
Abb. 2
FROberes
EN DE
ES IT PT NL SV DA NO FI HU 33.
CS Luftfilterhebel
RU RO PL - drehen
SL HR zum
LT oder
LV Schließen
SK BG
ETÖffnen
15.
Gebläserohr
des Luftfilters
18. Unteres Gebläserohr
FR EN DE ES IT PT NL SV DA NO FI HU CS RU RO PL SL HR ET
LT LV SK BG
19. Sicherheitsschalter auf der Saugerseite
Abb. 13
31.
FRHochgeschwindigkeitsdüse
EN DE ES IT PT NL SV DA NO FI HU 32.
CS Luftfilterabdeckung
RU RO PL SL HR ET LT
LV SK BG
34.
Luftfilter
Abb.
FR 3EN DE ES IT PT NL SV DA NO FI HU CS RU RO PL SL HR ET LT LV SK BG
2. Fangsack
EIGENSCHAFTEN
3.FR
Adapter
EN DE ES IT PT NL SV DA NO FI HU CS
RU RO PL SL HR ET LT LV SK BG
TECHNISCHE DATEN
Hubraum................................................................. 26ccm
Luftgeschwindigkeit............................................320 Km/h
Luftvolumen.......................................................11 m3/min
Gewicht................................................................... 4.3 kg
Nennleistung...........................................................0.6kW
Motordrehzahl (Max.).....................................9000 U/min.
Motordrehzahl (Leerlauf) ....................3000 – 4600U/min.
Schallenergiespiegel gemäß EN 15503:2009 Anhang
A(Gebläse/Sauger)
Vollbetrieb...............................................85.9 / 84.4 dB(A)
Leerlauf..................................................70.8 / 70.2 dB(A)
Äquivalent A-Bewertung Emissions-Schalldruckpegel...... ...........................................................105.9 / 104.4 dB(A)
Schalldruckpegel an der Bedienerposition (Gebläse/
Sauger)
Vollbetrieb...............................................91.6 / 95.5 dB(A)
Leerlauf...................................................78.9 / 81.4dB(A)
Äquivalent A-Bewertung Emissions-Schalldruckpegel...... ...............................................................84.4 / 88.0 dB(A)
Unsicherheit der Geräuschpegelmessung............3 dB(A)
Abb. 4
20. Erhabene Kerbe
21. Adapter im Fangsack
22. Erhöhte Verriegelungszunge mit in den Schalter
gesteckte Metallplatte
Abb. 5
17. Einlassabdeckung
19. Sicherheitsschalter auf der Saugerseite
23. Anbringen des Fangsacks
24. Schraube an der Einlassklappe
25. Zunge an der Saugeinlassabdeckung
Abb. 6
17. Einlassabdeckung
19. Sicherheitsschalter auf der Saugerseite
26. Saugeröffnung
27. Verriegelungslasche
28. Anbringen des Saugrohrs
29. Schraube zum Halten des Saugrohrs
25
FR
FR
EN
DE
ES
IT
PT
NL
SV
DA
NO
FI
HU
CS
RU
RO
PL
SL
HR
ET
LT
LV
SK
BG
EN
DE
ES
IT
PT
NL
SV
DA
NO
FI
HU
CS
RU
RO
PL
SL
HR
ET
LT
LV
SK
BG
DE
ES
IT
PT
NL
SV
DA
NO
FI
HU
CS
RU
RO
PL
SL
HR
ET
LT
LV
SK
BG
IT PT NL SV DA NO FIder
HUoriginalen
CS RU RO Anleitungen)
PL SL HR ET
ES Deutsch(Übersetzung
LT
LV
SK
BG
LT
LV
SK
BG
FR
EN
FR
EN
DE
FR
EN
DE
ES
IT
P
NL
SV
DA
NO
FI
HU
CS
RU
RO
PL
SL
HR
ET
Vibrationswert am Griff gemäß EN 15503:2009 Anhang B
Schalldämpfer ist einfach und erfolgt mit Hilfe eines
Gebläsebetrieb
FR EN DE (Vordergriff/hinterer
ES IT
NLGriff)
SV DA NO FI HUKreuzschlitzschraubenziehers.
CS RU RO PL SL HR ET LT LV SK BG
PT
Vollbetrieb...................................................9.9 / 20.4 m/s2
2
Unsicherheit
der
Vibrationsmessung.
.
..................1.5
m/s
FR EN DE ES IT PT NL SV DA NO FI HUFANGSACK
CS RU RO PL SL HR ET LT LV SK BG
Der Saugerbeutel wird einfach mit Hilfe des
FR
EN
DE
ES
IT
PT
NL
DA
NO
FI
HU
CS RU RO PL am
SL Gebläse
HR ETangebracht.
LT LV SK BG
MACHEN SIE SICH MIT IHREM GEBLÄSESAUGER
SV
Saugerbeuteladapters
VERTRAUT
FR EN
DE ES 1aIT- 1b.PT NL SV DA NO FI HU CS RU RO PL SL HR ET LT LV SK BG
Siehe
Abbildungen
SAUGERGRIFF
Die sichere Verwendung dieses Produkts erfordert
ermöglicht
dem LT
Benutzer,
auch
FR EN DE ES IT PT NL SV DA NO
FI HUDiese
CS Vorrichtung
RU RO PL
SL HRes ET
LV SK
BGin
ein Verständnis der in dieser Gebrauchsanweisung
der Saugfunktion komfortabel arbeiten zu können..
enthaltenen Informationen über das Werkzeug, sowie
FR EN DE ES IT PT NL SV DA NO
FI HU CS RU RO PL SL HR ET LT LV SK BG
Kenntnisse über die Arbeiten, die Sie in Angriff nehmen.
SAUGROHRE
FR EN DE ES IT PT NL SV DA NO FI
RO PL können
SL HR ETmit LT Hilfe
LV SK eines
BG
Saugrohre
HUDieCS RU
GEBLÄSEROHR UND DÜSEN
Kreuzschlitzschraubenziehers am Gebläse angebracht
Das
Gebläserohr
kann
ohne
den
Einsatz
von
Werkzeugen
FR EN DE ES IT PT NL SV DA NO FI HU werden.
CS RU RO PL SL HR ET LT LV SK BG
zusammengebaut und am Gebläse angebracht werden.
FR
EN
DE
ES
IT
PT
NL
SV
DA
NO
FI
HU
CS
RU
PL
SL
HR
ET
LT
LV
SK
BG
SICHEHEITSSCHALTER
FR Produkt
EN DEist mit
ES Sicherheitsschaltern
IT PT NL SV ausgestattet.
DA NO FIDasHU
Das
Gerät ist nur betriebsbereit, wenn beide Metallkontakte in
FR EN DE ES IT PT NL SV DA NO FI HU
die
Sicherheitsschalter gesteckt sind. Das verringert die
Gefahr von versehentlichem Kontakt mit sich drehenden
FR EN DE ES IT PT NL SV DA NO FI HU
Teilen.
RO
ZUSAMMENBAU
CS
RU RO PL
SL
HR
ET
LT
LV
SK
BG
START EASY™
Die Start Easy™ Funktion ermöglicht ein einfacheres und
schnelleres Starten.
ZUSAMMENBAU DER GEBLÄSE ROHRE
Siehe Abbildung 2.
■■ Schließen Sie die Einlassabdeckung und ziehen Sie
die Schraube der Abdeckung fest. Stellen Sie sicher,
dass der Metallkontakt in den Sicherheitsschalter
gesteckt ist.
■■ Richten Sie die erhabenen Laschen am Auslass des
Gebläsegehäuses auf das obere Rohr aus. Schieben
Sie das Rohr in das Gehäuse und sichern Sie es durch
Drehen. Prüfen Sie, ob der Plastikauslöser gedrückt
AUSPACKEN
CS RU RO PL
SL HR ET LT LV SK BG
Dieses Produkt muss vor der ersten Benutzung
CS RU RO PL werden.
zusammengebaut
SL HR ET LT LV SK BG
■■ Nehmen Sie Produkt und Zubehör vorsichtig aus dem
FR EN DE ES IT PT NL SV DA NO FI HU CS Karton.
RU ROPrüfen
PL Sie,
SL ob
ET LT LV die
SK in BG
HR
alle Gegenstände,
der
GESCHWINDIGKEITSREGULIERUNG
Packliste
aufgeführt
sind,
vorhanden
sind.
Die
Vorrichtung
zur SV DA
automatischen
FR EN DE
ES IT PT NL
NO FI HU CS RU RO PL SL HR ET
LT LV SK BG
Geschwindigkeitskontrolle ermöglicht es dem Benutzer,
FR Gebläse
EN DE ES
IT PT NL ohne
SV DA
FI HU CS RUWARNUNG:
RO PL SL HR ET
das
zu verwenden
den NO
Gashebel
LT LV SK BG
Verwenden Sie dieses Produkt nicht, falls auf der
gedrückt zu halten. Drücken Sie zum Verringern
Packliste
aufgeführte
Teile
bereits
an IhrSK
Produkt
FR
EN
DE
ES
IT
PT
NL
SV
DA
NO
FI
HU
CS
RU
RO
PL
SL
HR
ET
LT
BG
LV
der Motorgeschwindigkeit einfach den Hebel zur
montiert sind, wenn Sie es auspacken! Die Teile
Geschwindigkeitsregulierung nach vorne.
FR EN DE ES IT PT NL SV DA NO FI HU CS RUaufRO
PL Liste
SL wurden
HR ET
LVdenSK
BG
dieser
nichtLTdurch
Hersteller
am Produkt vormontiert und müssen vom Kunden
HOCHGESCHWINDIGKEITSDÜSE
MIT
SCHABER
FÜR
FR EN DE ES IT PT NL SV DA NO FI HU CS RU RO PL SL HR ET LT LV SK BG
montiert werden. Die Verwendung eines Produkts,
FEUCHTES LAUB
das nicht ordnungsgemäß montiert wurde, kann
Die Hochgeschwindigkeitsdüse eignet sich hervorragend
zu schweren Verletzungen führen.
für feuchtes, am Boden klebendes Laub. Mit ihr können
Sie feuchtes Laub oder Kehrgut mit dem laufenden
■■ Untersuchen Sie das Produkt sorgfältig und
Gebläse los kratzen.
vergewissern Sie sich, dass während des Transports
keine Beschädigungen aufgetreten sind.
MOTOR
■■ Werfen Sie das Verpackungsmaterial nicht fort bis Sie
Das Gebläse verfügt über einen leistungsstarken 26ccm
Motor mit ausreichend Leistung selbst für schwere
das Produkt genau untersucht und erfolgreich benutzt
Gebläse- und Saugarbeiten.
haben.
GASHEBEL
Das Gebläse kann mit jeder gewünschten Geschwindigkeit
von Leerlauf bis Vollgas betrieben werden.
SAUGER / SCHALLDÄMPFER
Der Umbau des Gebläses
zu
einem
Sauger/
26
FR
FR
EN
DE
ES
IT
PT
NL
SV
DA
NO
FI
HU
CS
RU
RO
PL
SL
HR
ET
LT
LV
SK
BG
EN
DE
ES
IT
PT
NL
SV
DA
NO
FI
HU
CS
RU
RO
PL
SL
HR
ET
LT
LV
SK
BG
DE
ES
IT
PT
NL
SV
DA
NO
FI
HU
CS
RU
RO
PL
SL
HR
ET
LT
LV
SK
BG
IT PT NL SV DA NO FIder
HUoriginalen
CS RU RO Anleitungen)
PL SL HR ET
ES Deutsch(Übersetzung
LT
LV
SK
BG
FR
EN
FR
EN
DE
FR
EN
DE
ES
IT
P
NL
SV
DA
NO
FI
ist, so dass der Sperrmechanismus gelöst und das
betriebsbereit
FR Gerät
EN somit
DE ES
IT
SV Sie
DA nach
NO dem
FI
PT ist.NLPrüfen
ersten Gebrauch den festen Sitz und ziehen Sie das
Rohr,
falls
erforderlich,
noch
einmal
fest.
FR EN DE ES IT PT NL SV DA NO FI
■■ Ziehen Sie den Schieber aus dem Sicherheitsschalter
FR und
EN drehen
DE ES SieIT diePT Rohre
NL SV
DA von
NO dem
FI
um sie
Gebläseauslass zu entfernen.
EN DE Sie
ESdasITDüse
PTans
NLUnteres
SV Gebläserohr.
DA NO FI
■FR
■ Schließen
■■ Ziehen Sie zum Entfernen des Gebläserohrs den
FR EN DE ES IT PT NL SV DA NO
FI
Kontakt aus dem Sicherheitsschalter und drehen die
Rohre
um
sie
aus
der
Gehäuseöffnung
zu
entfernen.
FR EN DE ES IT PT NL SV DA NO
FI
HU
CS
RU
RO
PL
SL
HR
ET
LT
LV
SK
BG
HU
CS
RU
RO
PL
SL
HR
ET
LT
LV
SK
BG
CS
RU
RO
PL
SL
HR
ET
LT
LV
SK
BG
RO
PL
SL
HR
ET
LT
LV
SK
BG
■■ Richten Sie die Laschen des Gehäuses auf die Rohre
aus.RU RO PL SL HR ET LT LV SK BG
HU CS
■■ Ziehen Sie die Schrauben oben auf dem Saugrohr
HU CS
HR ET LT zu
LV befestigen.
SK BG
fest,RU
um RO
es anPLdemSLGebläsegehäuse
Stellen Sie sicher, dass der Metallkontakt an dem
HU CS
RU
RO
PL
SL
HR
ET
LT
LV
SK ist.
BG
Saugrohr in den Sicherheitsschalter eingesteckt
Abnehmen der Saugerrohre:
Lösen
die PL
Schrauben
am ET
oberen
HU■■ CS
RU Sie
RO
SL HR
LT Saugrohr
LV SKindem
BG
Sie sie gegen den Uhrzeigersinn drehen.
Ziehen
ausET
dem LT
Gebläsegehäuse.
HU■■ CS
RU Sie
ROdasPLSaugrohr
SL HR
LV SK BG
■■ Schließen Sie die Abdeckklappe des Saugereinlasses,
RU Sie
RO
SL HR
LV SK BG
die PL
Schraube
in derETTür LT
festziehen.
HU CSindem
ANBRINGEN
FR EN DE DES
ES SAUGERBEUTELS
IT PT NL SV DA NO FI
Siehe Abbildungen 3 - 4.
■FR
■ Öffnen
Sie den
Sie den
EN DE
ES Fangsack
IT PT und
NL setzen
SV DA
NO Adapter
FI HU
wie gezeigt ein. Drücken Sie den Fangsackadapter
FR durch
EN die
DE Öffnung
ES IT gegenüber
PT NL dem
SV DA
NO
FI HU
Reißverschluss.
Bei richtigem Anbringen verbleibt das breitere Ende
FR des
ENAdapters
DE ESim Inneren
IT PT des
NLSaugerbeutels.
SV DA NO FI HU
■■ Richten Sie den Nut an dem Anschluss des
FR EN DE ES IT PT NL SV DA NO FI HU
Laubfangsacks mit der Verriegelungszunge an dem
schieben
Sie DA
den NO
Anschluss
FR Gebläseauslass
EN DE ES aus;
IT PT
NL SV
FI HU
auf den Auslass. Zum Verriegeln drehen, drücken Sie
dann
die
Metallkontakte
in
den
Sicherheitsschalter
FR EN DE ES IT PT NL SV DA NO FI HU
um sicherzustellen, dass der Schalter eingeschaltet
FR und
ENbetriebsbereit
DE ES ITist. PT NL SV DA NO FI HU
■■ Drehen Sie den Saugerbeutel bis der Schultergurt
FR nach
EN oben
DE gerichtet
ES IT ist.
PT NL SV DA NO FI HU
■■ Vergewissern Sie sich, dass der Saugerbeutel fest
FR verschlossen
EN DE ESist, bevor
IT PT
SV DA
NO FI HU
Sie NL
das Gerät
starten.
FR
EN
DE
ES
IT
PT
NL
SV
DA
NO
FI
HU
BETRIEB
CS
Bitte
Das HR Gerät
CS RU beachten:
ET LT verfügt
LV SK über
BG
RO PL SL
Sicherheitsschalter an den Blas- und Saugöffnungen.
Das
funktioniert
wenn
CS Gerät
RU RO
ET beide
LT Metallkontakte
LV SK BG
PL SLnur,HR
in die Sicherheitsschalter eingesteckt sind. Wenn das
CS RU
RO PL SL benutzt
HR ET
LV8).SK
BG
Gerät
im Gebläsemodus
wirdLT
(Abb.
müssen
die Metallkontakte an dem Gebläserohr und der Tür in die
CS RU RO
PL SL HReingesteckt
ET LT sein.
LV Wenn
SK BG
jeweiligen
Sicherheitsschalter
das
Gerät im Saugermodus betrieben wird (Abb. 11), muss der
CS RU RO PL SL HR ET
LT LV SK BG
Metallkontakt an dem Adapterrohr und dem Saugerrohr in
den
CS jeweiligen
RU RO Schalter
PL SL gesteckt
HR ETsein.LT
LV SK BG
CS
CS
ANBRINGEN DER SAUGROHRE
Siehe
Abbildungen
FR EN
DE ES 5 -IT6. PT NL SV DA NO FI HU CS
WARNUNG:
Das rotierende Gebläserad kann schwerste
Verletzungen verursachen. Schalten Sie den
Motor jedes Mal aus und vergewissern Sie sich,
dass das Gebläserad aufgehört hat sich zu
drehen, bevor Sie die Saugerklappe öffnen oder
Rohre anbringen oder wechseln. Greifen Sie nicht
mit den Händen in die Saugrohre und stecken Sie
keine Gegenstände in die Saugerrohre, solange
diese am Gerät angebracht sind.
Anbringen der Saugerrohre:
■■ Richten Sie die erhabenen Sperrlaschen des unteren
Saugerrohrs auf die entsprechenden Öffnungen
im oberen Saugerrohr aus. Die beiden Rohre
werden zu einem Rohr zusammengefügt, indem Sie
zusammengesteckt werden.
■■ Drücken Sie die Klappenlasche mit einem
Schraubenzieher nach unten und lösen Sie die
Schraube in der Klappe, um die Saugereinlassklappe
zu öffnen.
RU
RUWARNUNG:
RO PL SL
HR
ET
LT
LV
SK
BG
Achten Sie darauf, dass Vertrautheit mit diesem
RUProdukt
RO PLSieSLnicht
HR nachlässig
ET LT LVwerden
BG
SK lässt.
Denken Sie daran, dass Nachlässigkeit für den
RU RO PL SL HR ET LT LV SK BG
Bruchteil einer Sekunde ausreicht um schwere
Verletzungen zu verursachen.
WARNUNG:
Das Gerät nicht in der Nähe offener Fenster
verwenden.
WARNUNG:
Tragen Sie immer Augenschutz mit Seitenschutz,
der als EN166 entsprechend gekennzeichnet ist,
sowie Gehörschutz. Tun Sie dies nicht, könnten
Fremdkörper in Ihre Augen geraten, oder Sie
könnten andere schwere Verletzungen erleiden.
ANWENDUNGEN
Sie können dieses Produkt für die unten aufgeführten
Zwecke verwenden:
■■ Entfernen von Laub und anderem Kehrgut von Ihrem
Rasen.
■■ Befreien von Terrassen und Einfahrten von Laub und
Tannennadeln.
27
FR
FR
EN
DE
ES
IT
PT
NL
SV
DA
NO
FI
HU
CS
RU
RO
PL
SL
HR
ET
LT
LV
SK
BG
EN
DE
ES
IT
PT
NL
SV
DA
NO
FI
HU
CS
RU
RO
PL
SL
HR
ET
LT
LV
SK
BG
DE
ES
IT
PT
NL
SV
DA
NO
FI
HU
CS
RU
RO
PL
SL
HR
ET
LT
LV
SK
BG
IT PT NL SV DA NO FIder
HUoriginalen
CS RU RO Anleitungen)
PL SL HR ET
ES Deutsch(Übersetzung
LT
LV
SK
BG
LT
LV
SK
BG
FR
EN
FR
EN
DE
FR
EN
DE
ES
FR
EN
DE
ES
IT
P
NL
SV
DA
NO
FI
PT
NL
SV
DA
NO
FI
■■ Aufsaugen von Laub von Ihrem Rasen.
IT
HU
CS
RU
RO
PL
SL
HR
ET
■■ Säubern und prüfen Sie bevor Sie den Tankdeckel
wieder
Dichtungsmanschette.
HU CS
RU aufschrauben
RO PL SLdieHR
ET LT LV SK BG
■■ Setzen Sie den Tankdeckel auf und ziehen Sie ihn
durch
Drehen
im
Uhrzeigersinn
HU CS RU RO PL SL HR ET fest.
LT LV SK BG
■■ Wischen Sie verschütteten Treibstoff von dem Gerät.
Entfernen
HU■■ CS
RU ROSiePLsichSLvorHRdem
ET Starten
LT LVdesSKMotors
BG
mindestens 9 Meter von dem Betankungsort.
normal,
dassLVbeim
HUBITTE
CS BEACHTEN:
RU RO PL Es
SL istHR
ET LT
SKersten
BG
Gebrauch eines neuen Motors Qualm ausgestoßen wird.
TREIBSTOFF
FR EN DE MISCHEN
ES IT PT NL SV DA NO FI
Dieses Produkt wird durch einen Zweitaktmotor
FR
EN
DE
IT PTein NL
NO FI
angetrieben undESbenötigt
im voraus
vorbereitetes
SV DA
Gemisch aus Benzin und 2-Taktöl. Das Mischverhältnis
FR EN
DE ES IT PT NL SV DA NO FI
beträgt
50:1.
BITTE
BEACHTEN:
Wir
empfehlen,
dass
FR EN DE ES IT PT NL SV DA NO
FI HU CS RU RO PL SL HR ET LT LV SK BG
Sie
AUSSCHLIESSLICH
Ryobi
(im
exakten
WARNUNG:
Mischungsverhältnis)
oder
G
Öl
mit
diesem
Produkt
FR EN DE ES IT PT NL SV DA NO
RU ROSie
PLaufSLTreibstofflecks!
HR ET LT Ein
LV undichter
SK BG
FI HU CS Achten
verwenden.
Tankdeckel stellt eine Feuergefahr dar und
FR EN DE ES IT PT NL SV DA NO FI
RU RO
PL SL ersetzt
HR ET werden!
LT LV Falls
SK Sie
BG
HU CS muss
unverzüglich
TREIBSTOFF MISCHEN:
undichte Stellen finden sollten, bringen Sie
■FR
■ Verwenden
Sie einen
EN DE ES
IT PTsauberen
NL SV Behälter,
DA NO derFI zurHU CS das
RU Problem
RO PL erst
SL inHR
ET LTbevor
LV Sie
SK das
BG
Ordnung,
Verwendung mit Benzin zugelassen ist.
Produkt verwenden. Falls Sie dies nicht tun,
FR
EN
DE
ES
IT
PT
NL
SV
DA
NO
FI
HU
CS
RO
PL
SL
HR
ET
LT
LV
SK
BG
RU
■■ Mischen Sie in dem Behälter das 2-Taktmotoröl mit
kann dies zu einem Feuer führen, dass schwere
bleifreiem Benzin gemäß den Anweisungen auf der
Verletzungen verursachen kann.
FR Ölverpackung.
EN DE ES IT PT NL SV DA NO FI HU CS RU RO PL SL HR ET LT LV SK BG
SAUERSTOFFGESÄTTIGTE TREIBSTOFFE
FR EN DE ES IT PT NL SV DA NO FI HU CS RU RO PL
SL HR ET LT LV SK BG
Dieser Motor ist zum Betrieb mit bleifreiem Benzin für den
Schäden am Treibstoffsystem oder Leistungsprobleme
Gebrauch
in
Kraftfahrzeugen
mit
einer
Oktanzahl
von
91
der PL
Verwendung
FR EN DE ES IT PT NL SV DA NO FI HU als
CS Folge
RU RO
LT LV SK BG
SL HRvonETsauerstoffgesättigtem
[(R + M) / 2] oder höher zugelassen. Verwenden Sie kein
Treibstoff mit mehr als dem o.a. Prozentsatz an
KFZ-Öl
oder
2-Takt
Außenborderöl.
werden
Garantie
FR EN DE ES IT PT NL SV DA NO FI HU Sauerstoffsättigung
CS RU RO PL SL
ET von
LT der
LV SK
BG
HR nicht
abgedeckt.
2-TAKT
/ ÖLITGEMISCH
FR ENBENZIN
DE ES
PT NL(50:1)
SV DA NO FI HU Ethanol:
CS RU Benzin,
RO PLdas
SLbisHR
LT LVim SK
BG
ET Ethanol
zu 10%
Volumen
enthält (allgemein als E10 bezeichnet) oder 15% Ethanol
FR EN DE BENZIN
ES IT PT NL ÖL
SV DA NO FI HU im
CSVolumen
RU RO
PL SLalsHR
LVakzeptabel.
SK BG
LT ist
(allgemein
E15 ET
bezeichnet)
VERWENDEN SIE KEINEN E85 TREIBSTOFF!
Gallone
FR EN DE 1ES
IT (USA)
PT NL 2,6
SV Unzen
DA NO FI HU CS RU RO PL SL HR ET LT
LV SK BG
DADURCH WIRD IHRE GARANTIE UNGÜLTIG!
1 Liter
20 ccm (20 ml)
FR
EN
DE
ES
IT
PT
NL
SV
DA
NO
FI
HU
CS
RU RO
PL
SL
HR
ET
LT
LV
SK
BG
STARTEN UND AUSSCHALTEN
Abbildung
7. SL HR ET LT LV SK BG
FR EN DE ES IT PT NL SV DA NO FI HU Siehe
CS RU
RO PL
BITTE BEACHTEN: Die meisten Treibstoffgemische
WARNUNG:
halten bis zu 30 Tage. Mischen Sie KEINE Mengen, die Sie
Benzin ist äußerst leicht entflammbar und
nicht innerhalb dieses 30-tägigen Zeitraums verbrauchen.
höchst explosiv! Ein Benzinfeuer oder eine
1. Drücken Sie die Einspritzpumpe 10 Mal. HINWEIS:
Benzinexplosion fügt Ihnen und anderen
Brandverletzungen zu! Schalten Sie vor dem
Nach 7 Mal drücken sollte Treibstoff in der
Befüllen immer den Motor aus. Betanken Sie
Einspritzpumpe sichtbar sein. Falls nicht, drücken Sie
niemals eine Maschine mit laufendem oder
weiter bis Treibstoff zu sehen ist.
heißem Motor. Entfernen Sie sich vor Anlassen
2. Verriegeln Sie den Gashebel indem Sie den Hebel
des Motors mindestens 9 Meter von dem
drücken und die Geschwindigkeitsregulierung zurück
Betankungsort. Rauchen Sie nicht und halten
ziehen
Sie sich von offenen Flammen und Funken
3. Stellen Sie den Chokehebel auf die "VOLL" Position.
fern. Wird mit Treibstoffen nicht auf sichere
4. Ziehen Sie, während Sie den Gashebel gedrückt und
Weise umgegangen, kann dies zu schweren
verriegelt halten, den Startergriff bis der Motor startet.
Verletzungen führen.
Ziehen Sie den Startergriff nicht mehr als 4 Mal.
5. Stellen Sie den Chokehebel auf die "HALB" Position.
■■ Säubern Sie die Oberfläche um den Tankdeckel um
6. Den Startergriff ziehen bis der Motor anspringt. Ziehen
eine Verschmutzung zu vermeiden.
Sie den Startergriff nicht mehr als 6 Mal. HINWEIS:
■■ Lösen Sie langsam den Tankdeckel, indem Sie ihn
Wenn der Motor nicht startet, stellen Sie den Choke
gegen den Uhrzeigersinn drehen.
auf "VOLL" zurück und wiederholen den Vorgang ab
■■ Füllen Sie die Treibstoffmischung vorsichtig in den
Schritt 2.
Tank.
BEFÜLLEN DES TANKS
28
FR
FR
EN
DE
ES
IT
PT
NL
SV
DA
NO
FI
HU
CS
RU
RO
PL
SL
HR
ET
LT
LV
SK
BG
EN
DE
ES
IT
PT
NL
SV
DA
NO
FI
HU
CS
RU
RO
PL
SL
HR
ET
LT
LV
SK
BG
DE
ES
IT
PT
NL
SV
DA
NO
FI
HU
CS
RU
RO
PL
SL
HR
ET
LT
LV
SK
BG
IT PT NL SV DA NO FIder
HUoriginalen
CS RU RO Anleitungen)
PL SL HR ET
ES Deutsch(Übersetzung
LT
LV
SK
BG
LT
LV
SK
BG
FR
EN
FR
EN
DE
FR
EN
DE
ES
IT
P
NL
SV
DA
NO
FI
7. Lassen Sie den Motor für 10 Sekunden laufen,
Sie ESdann
FRstellen
EN DE
IT den
NL SVHebel
DA auf
NO die
FI
PT Choke
Betriebsposition("BETRIEB" Position).
Einen
warmen
Motor
anlassen:
FR EN DE ES IT PT NL SV DA NO FI
8. Drücken Sie die Einspritzpumpe 10 Mal.
Stellen Sie
FRden
ENChokehebel
DE ES auf
IT die
PT"BETRIEB"
NL SV
DA NO FI
Position.
9. Drücken Sie den Gashebel voll durch und ziehen den
FRStartergriff,
EN DE bis
ES derITMotor
PT startet.
NL SV DA NO FI
FR EN DE ES IT PT
Motor
ausschalten:
Den Schalter in der Stop "O"
FR EN DE ES IT PT
der Motor ausgeht.
FR EN DE ES IT PT
GEBLÄSEBETRIEB
Siehe
Abbildungen
FR EN
DE ES 8 -IT9. PT
FR
WARNUNG:
EN
DE ES IT
PT
HU
CS
RU
RO
PL
SL
HR
ET
Sie feuchtes Laub oder Kehrgut mit dem laufenden
Gebläse
los kratzen.
HU CS
RU RO
PL SL HR ET LT LV SK BG
GESCHWINDIGKEITSKONTROLLE
HUAUTOMATISCHE
CS RU RO PL
SL HR ET LT LV SK BG
Siehe Abbildung 10.
es, BG
das
HUDieCSGeschwindigkeitsregulierung
RU RO PL SL HR ET ermöglicht
LT LV SK
Gebläse zu verwenden ohne den Gashebel gedrückt zu
HUhalten.
CS RU
RO
PL
SL
HR
ET
LT
LV
SK
BG
RO
■■ Ziehen
Sie
zum
Aktivieren
der
Geschwindigkeitsregulierung
Hebel
zur
NL SV DA NO
FI HU CS
RU RO PL SL HR ET den
LT LV
SK BG
Geschwindigkeitsregulierung nach hinten zum
Position gedrückt halten bis
bis die
Gasposition
ist.
NL SV DA NO
RU RO
PL gewünschte
SL HR ET
LT LV erreicht
SK BG
FI HU CSBenutzer
■■ Drücken
Sie
zum
Lösen
der
den LT
Hebel
NL SV DA NO FI
RU RO PL SL HR ET
LV ganz
SK nach
BG
HU CSGeschwindigkeitsregulierung
vorne.
CS
NL
SV
DA
NO
FI
HU
PL
SL
HR
ET
LT
LV
SK
BG
NL
SV
DA
NO
FI
Abbildung
HU Siehe
CS RU
RO 11.
PL
SL
HR
ET
LT
LV
SK
BG
Legen Sie das Gebläse nicht auf oder in die
Kies.DA
DasNO
Kehrgut
FR ENNähe
DE losen
ES Kehrguts
IT PT oder
NL SV
FI HU CS
könnte in den Lufteinlass des Gebläses
FR ENgesaugt
DE ES
IT und
PT möglicherweise
NL SV DA das
NO Gerät
FI HU CS
werden
beschädigen und zu schweren Verletzungen
FR ENführen.
DE ES IT PT NL SV DA NO FI HU CS
EN DE Sie
ES motorbetriebene
IT PT NL SV Geräte
DA NO nurFI zuHU
■FR
■ Betreiben
entsprechend angemessenen Zeiten – nicht früh
FR am
ENMorgen
DE ES
SVwenn
DA dies
NO andere
FI HU
oder ITspätPT
am NL
Abend
Personen stören könnte. Halten Sie sich an die
FR EN DE ES IT PT NL SV DA NO FI HU
Zeiten, die in regionalen Anordnungen aufgeführt
sind.
FR EN DE ES IT PT NL SV DA NO FI HU
■■ Begrenzen Sie die Anzahl der gleichzeitig eingesetzten
Geräte um den Schallpegel zu verringern, und
FR EN DE ES IT PT NL SV DA NO FI HU
bedienen Sie den Laubbläser bei der niedrigsten für
Aufgabe
erforderlichen
FR die
EN
DE ES
IT PT Drehzahl.
NL SV Dadurch
DA NO können
FI HU
auch die Vibrationen gemindert werden.
■■ Sparen Sie durch die Verwendung von Laubgebläsen
■■ Prüfen Sie Ihre Geräte vor dem Betrieb, insbesondere
Schalldämpfer, Lufteinlass und Luftfilter.
■■ Verwenden Sie Besen und Rechen um Kehrgut vor
dem Blasen zu lockern.
■■ Feuchten Sie Oberflächen bei staubigen Bedingungen
leicht an, sofern Wasser vorhanden ist.
■■ Achten Sie auf Kinder, Tiere, geöffnete Fenster oder
frisch gewaschene Autos und blasen Sie Kehrgut auf
sichere Weise fort.
■■ Halten Sie das Gebläse wie in Abbildung 9 gezeigt, so
dass der Luftstrahl nah am Boden geführt wird.
■■ Blasen Sie um die äußeren Ränder von Kehrguthaufen
herum und vermeiden Sie so, ass Kehrgut verstreut
wird. Blasen Sie niemals direkt in die Mitte eines
Haufens.
■■ Nach der Verwendung von Gebläsen oder anderen
Geräten, RÄUMEN SIE AUF! Beseitigen Sie Kehrgut
ordnungsgemäß.
■■ Die Hochgeschwindigkeitsdüse wurde eigens für
feuchtes, verklebtes Laub entwickelt. Mit ihr können
29
RU
SAUGERBETRIEB
WARNUNG:
RUHalten
HR ET LT
BG
Schalldämpfer
und LV
alle SK
heißen
ROSiePLden SL
Oberflächen des Gebläsesaugers von Ihrem
RUKörper
RO PL
ET LT LV SK
BG
fern. SL
EineHRNichtbeachtung
dieser
Warnung kann zu schweren Personenschäden
RUführen.
RO PL SL HR ET LT LV SK BG
CS
RU ROSiePL
SL HR und
ETden
LTBeutel
LV an.
SKLesen
BG
■
■ Bringen
die Saugrohre
Sie hierzu den entsprechenden Abschnitt in dieser
CS Gebrauchsanweisung.
RU RO PL SL HR ET
LT LV SK BG
■■ Das Gebläse starten. Lesen Sie hierzu den o.a.
CS Abschnitt
RU RO PL
SL HR
BG
Starten
und ET
Ausschalten
LT LV inSKdieser
Gebrauchsanweisung.
CS
RU
RO
PL
SL
HR
ET
LT
SK
LV über BG
■■ Legen Sie sich den Gurt des Fangsacks
die
rechte Schulter. Halten Sie den oberen Griff in Ihrer
CS linken
RU RO
PL
SL
HR
ET
LT
LV
BG
SKrechten
Hand und den Saugergriff in ihrer
Hand.
CS
RU
RO
PL
SL
HR
ET
LT
LV
SK
■■ Führen Sie den Gebläsesauger von Seite zu BG
Seite
entlang dem äußeren Rand des Kehrguts. Halten Sie
zur Vermeidung von Verstopfungen das Saugrohr
nicht direkt in den Kehrguthaufen hinein.
■■ Halten Sie den Motor höher als das Einlassende des
Saugrohrs.
■■ Richten Sie bei der Arbeit in Hanglage das Saugrohr
immer hangabwärts.
■■ Vermeiden Sie schwere Verletzungen des Benutzers
und eine Beschädigung des Geräts, indem Sie keine
Steine, zerbrochenes Glas, Flaschen oder andere
ähnliche Objekte aufsaugen.
■■ Sollten das Saugrohr verstopfen, schalten Sie
den Motor aus, vergewissern Sie sich, dass das
Gebläserad aufgehört hat sich zu drehen, und ziehen
Sie den Zündkerzenstecker ab, bevor Sie damit
beginnen die Verstopfung zu lösen.
■■ Entfernen Sie die Saugrohre und entfernen Sie
Kehrgut aus dem Gebläseradgehäuse. Entfernen
Sie den Beutel und reinigen Sie das Rohr. Es kann
sein, dass eine kurze Stange oder ein Stock benötigt
werden, um das Rohr in der ganzen Länge zu
reinigen. Vergewissern Sie sich, dass das gesamte
FR
FR
EN
DE
ES
IT
PT
NL
SV
DA
NO
FI
HU
CS
RU
RO
PL
SL
HR
ET
LT
LV
SK
BG
EN
DE
ES
IT
PT
NL
SV
DA
NO
FI
HU
CS
RU
RO
PL
SL
HR
ET
LT
LV
SK
BG
DE
ES
IT
PT
NL
SV
DA
NO
FI
HU
CS
RU
RO
PL
SL
HR
ET
LT
LV
SK
BG
IT PT NL SV DA NO FIder
HUoriginalen
CS RU RO Anleitungen)
PL SL HR ET
ES Deutsch(Übersetzung
LT
LV
SK
BG
FR
EN
FR
EN
DE
FR
EN
DE
ES
FR
EN
DE
ES
IT
P
NL
SV
DA
NO
FI
HU
CS
RU
RO
PL
SL
HR
ET
LT
LV
SK
BG
PL
SL
HR
ET
LT
LV
SK
BG
LT
LV
SK
BG
SK
BG
Kehrgut entfernt wurde, bevor Sie die Saugrohre
überschüssige Wasser ausgedrückt ist. Setzen Sie
FilterRO
wieder
anbringen.
FR wieder
EN DE
ES IT
RU
PL ein.
SL HR ET LT LV SK BG
PT NL SV DA NO FI HU■■ CSden
Setzen Sie die Luftfilterabdeckung wieder auf das
Gerät.
Drehen
Sie
den HR
Drehknopf
WARTUNG
UND
PFLEGE
FR EN DE ES IT PT NL SV DA NO FI HU CS RU RO PL SL
ET LTim Uhrzeigersinn
LV SK BG
bis die Abdeckung fest sitzt.
FR EN
DE ES IT PT NL SV DA NO FI HU CS RU RO PL SL HR ET LT LV SK BG
WARNUNG:
REINIGEN
VON
AUSLASSÖFFNUNG,
Verwenden Sie für die Wartung nur
FR ENOriginalersatzteile.
DE ES IT PT NLDieSV DA
NO FI HUSCHALLDÄMPFER
CS RU RO PL UND
SL FUNKENFÄNGER
HR ET LT LV SK BG
Verwendung
Je nach Art des verwendeten Benzins und der Art
anderer Teile kann gefährlich sein oder eine
desPLverwendeten
FR ENBeschädigung
DE ES ITdesPT
NL SV
DA NO
FI HUundCS Menge
RU RO
SL HR ETÖlsLT und/oder
LV SK Ihren
BG
Produkts
verursachen.
Betriebsbedingungen, können die Auslassöffnung,
der
Schalldämpfer
und/oder
der
Funkenschutzgitter
FR EN
DE ES IT PT NL SV DA NO
CS RU RO PL SL HR ET LT LV SK BG
FI HUdurch
WARNUNG:
Kohlenstoffablagerungen verstopfen. Sollte am
Tragen
Sie
immer
Augenschutz
mit
benzingetriebenen
FR ENSeitenschutz,
DE ES ITderPTals NLEN166
SV DA
NO
FI
CS
RU RO PL Werkzeug
SL HR ETein LT Leistungsverlust
LV SK BG
HU
entsprechend
festgestellt werden, müssen diese Verkohlungen beseitigt
gekennzeichnet ist, sowie Gehörschutz. Tun Sie
werden,
damit
die
Leistung
wieder
hergestellt
werden
FR EN DE ES IT PT NL SV DA NO FI HU CS RU RO PL SL HR ET LT LV SK
BG
dies nicht, könnten Fremdkörper in Ihre Augen
kann. Wir empfehlen nachdrücklich, dass nur qualifizierte
oderIT SiePTkönnten
schwere
dieseSLWartungsarbeiten
FR ENgeraten,
DE ES
NL SVandere
DA NO
FI HU Servicetechniker
CS RU RO PL
HR ET LT LVdurchführen
SK BG
sollten.
Verletzungen erleiden.
FR
FR
FR
FR
FR
IT
PT
NL
SV
DA
NO
FI
WARNUNG:
Sie den
vor SV
dem DA
Untersuchen,
ENSchalten
DE ES
IT Motor
PT NL
NO FI
Säubern oder Warten der Maschine aus, warten
auf ES
den Stillstand
aller SV
beweglichen
ENSieDE
IT PT NL
DA NO Teile,
FI
ziehen Sie den Zündkerzenstecker ab und
Sie ihn
Sie
ENentfernen
DE ES
IT von
PT der
NLZündkerze.
SV DA Sollten
NO FI
diese Anweisungen nicht befolgen kann dies zu
schweren
Verletzungen
oder
Beschädigungen
EN DE ES IT PT NL SV DA NO FI
führen.
EN
DE
ES
IT
PT
NL
SV
DA
NO
FI
RO
HU
CS
RU
HU
CS
RU RO
PL
SL
HR
HU
CS
RU RO
PL
SL
HR
Es wird empfohlen den Funkenfänger alle 50 Stunden oder
reinigen
Leistung
HU jährlich
CS RU zuRO
ET LT LV SK
BG
PL umSLdieHRordnungsgemäße
Ihres Produkts zu gewährleisten. Funkenschutzgitter
können
sich
je
nach
Modell
an
verschiedenen
Stellen
HU CS RU RO PL SL HR ET LT LV SK BG
befinden. Bitte wenden Sie sich an einen Kundendienst
Nähe,
das
HU in
CS Ihrer
RU RO
PL um
SL herauszufinden,
LV sich
SK BG
HR ET LT wo
Funkenschutzgitter bei Ihrem Gerät befindet.
ALLGEMEINE WARTUNG UND PFLEGE
Vermeiden
Sie die
von SV
Lösungsmitteln
beimHU
FR EN DE
ES Verwendung
IT PT NL
DA NO FI
Reinigen der Plastikteile. Die meisten Kunststoffe können
von
beschädigt
FR verschiedenen
EN DE ES Lösungsmitteln
IT PT NL SV
DA NOwerden.
FI HU
Verwenden Sie saubere Tücher um Verunreinigungen wie
Dreck,
Staub,
usw.SV
zu entfernen.
FR EN
DE Öl,ESSchmierstoffe
IT PT NL
DA NO FI HU
WARNUNG:
Lassen Sie niemals Bremsflüssigkeiten, Benzin,
Produkte auf Erdölbasis, Rostlöser usw. mit den
Plastikteilen in Kontakt kommen. Chemikalien
können Plastik beschädigen, aufweichen oder
zerstören, was zu schweren Verletzungen
führen kann.
CS
CS
ET
WARNUNG:
zur HR
Vermeidung
RUArbeiten
RO PLSie SL
ET
LV SK BG
LTder Feuergefahr
niemals mit dem Gebläsesauger, wenn das
RUFunkenschutzgitter
RO PL SL HRsichETnicht
LTan Ort
BG
LVundSKStelle
befindet.
ET
LT
LV
FANGSACK
Ein
Fangsack
CS verschmutzter
RU RO PL SL
HR ETverringert
LT LV dieSKLeistung.
BG
Kehren Sie den Sack zum Reinigen von innen nach außen
und schütteln Sie ihn aus. Waschen Sie den Fangsack
mindestens einmal pro Jahr in Seifenwasser.
TANKDECKEL
WARNUNG:
Ein undichter Tankdeckel stellt eine Feuergefahr
dar und muss unverzüglich ersetzt werden!
Der Tankdeckel verfügt über einen wartungsfreien Filter
und ein Rückschlagventil. Ein verstopfter Treibstofffilter
führt zu einer verschlechterte Motorleistung. Falls die
Leistung sich verbessert, wenn der Tankdeckel gelöst wird,
kann das Rückschlagventil defekt oder der Filter verstopft
sein. Ersetzen Sie falls erforderlich den Tankdeckel.
Viele der hier beschriebenen Einstellungen und
Reparaturen können Sie selbst ausführen. Lassen Sie
weitergehende Reparaturen an dem Gebläsesauger
durch den autorisierten Kundendienst ausführen.
LUFTFILTER REINIGEN
Siehe Abbildung 12 - 13.
Halten Sie für eine optimale Leistung und lange
Lebensdauer den Luftfilter sauber.
■■ Entfernen Sie die Luftfilterabdeckung, indem Sie den
Drehknopf im Uhrzeigersinn drehen und dabei leicht
an der Abdeckung ziehen.
■■ Spülen Sie den Filter mit sauberem Wasser.
■■ Drücken Sie den Filter vorsichtig aus bis das
ZÜNDKERZEN AUSTAUSCHEN
Dieser Motor verwendet eine Ryobi AC00160, Champion
RCJ-6Y oder NGK BPMR7A Zündkerze mit einem
Elektrodenabstand von 0,635 mm (0,025 Zoll). Verwenden
Sie einen genauen Ersatz und ersetzen Sie die Zündkerze
jährlich.
30
FR
FR
EN
DE
ES
IT
PT
NL
SV
DA
NO
FI
HU
CS
RU
RO
PL
SL
HR
ET
LT
LV
SK
BG
EN
DE
ES
IT
PT
NL
SV
DA
NO
FI
HU
CS
RU
RO
PL
SL
HR
ET
LT
LV
SK
BG
DE
ES
IT
PT
NL
SV
DA
NO
FI
HU
CS
RU
RO
PL
SL
HR
ET
LT
LV
SK
BG
IT PT NL SV DA NO FIder
HUoriginalen
CS RU RO Anleitungen)
PL SL HR ET
ES Deutsch(Übersetzung
LT
LV
SK
BG
LT
LV
SK
BG
FR
EN
FR
EN
DE
FR
EN
DE
ES
IT
P
NL
SV
DA
NO
FI
LAGERUNG DES PRODUKTS
■FR
■ Entfernen
EN DE Sie
ES alle
IT Fremdkörper
FI
PT NL SVvon DAdemNOGerät.
Lagern Sie das Gerät an einem trockenen, gut
gelüfteten
Ort,
der
Kindern
keinen
Zugang
bietet.
FR EN DE ES IT PT NL SV DA NO FI
Von Korrosionsmitteln wie Gartenchemikalien und
FR Streusalz
EN DE fernhalten.
ES IT PT NL SV DA NO FI
■■ Halten Sie sich an alle ISO und regionalen
von und
FR Bestimmungen
EN DE ES über
IT die
PT sichere
NL SVLagerung
FI
DA NO
den Umgang mit Benzin!
FR
EN
DE
ES
FR
EN
DE
ES
Problem
FR
EN
DE
ES
IT
PT
NL
SV
DA
IT
PT
NL
SV
DA
Möglicher Grund
IT
PT
NL
SV
Kein Benzin im Tank.
ET
LT
LV
SK
BG
HU
CS
RU
RO
PL
SL
HR
ET
LT
LV
SK
BG
HU
CS
RU
RO
PL
SL
HR
ET
LT
LV
SK
BG
HU
CS
RU
RO
PL
SL
HR
ET
LT
LV
SK
BG
CS
RU
RO
PL
SL
HR
ET
LT
LV
SK
BG
CS
RU
RO
PL
SL
HR
ET
LT
LV
SK
BG
RO
PL
SL
HR
ET
LT
LV
SK
BG
FI
HU CS auswechseln.
RU RO
●● Zündkerze
PL
SL
HR
ET
LT
LV
SK
BG
LT
LV
SK
BG
FI
FI
Lösung
FI
ES
SV
DA
NO
FI
ES oder
IT verschmutzt.
PT NL SV
DA
NO
FI
FR
EN
DE
ES
ES
FR
EN
DE
ES
IT
PT
NL
SV
DA
NO
FR
EN
DE
ES
IT
PT
NL
SV
DA
NO
FR
EN
DE
ES
IT
PT
NL
SV
DA
NO
FR
EN
FR
EN
DE
ES
IT
PT
NL
SV
DA
NO
DE
ES
IT
PT
NL
SV
DA
NO
FR
EN
DE
ES
IT
PT
NL
SV
DA
NO
FR
EN
DE
ES
IT
PT
NL
SV
DA
NO
Motor springt
nicht an.
Zündung funktioniert nicht.
Motor abgesoffen
HU
Tank befüllen.
DE
Zündkerze
ist
defekt,
(gesprungenes
IT PT NL Porzellan
SV DA oder
NO
defekte Elektroden), Zündkabel
kurzgeschlossen, defekt oder
IT PT NL SV DA NO
von der Zündkerze getrennt.
ET
HR
DE
kurzgeschlossen
HR
SL
NO
NO
SL
PL
EN
DE
NL
DA
PL
RO
GUIDE DE DÉPANNAGE
NO
RO
RU
EN
EN
PT
RU
CS
FR
FR
IT
CS
Lagerung
1 Monat
oderET
länger:
HUBeiCS
RU ROvonPL
SL HR
LT LV SK BG
■■ Entleeren Sie das gesamte Benzin aus dem Tank in
einen
für
Benzin
zugelassenen
Behälter.
Sie
HU CS RU RO PL SL HR ET LT LVLassen
SK BG
den Motor laufen bis er von selbst ausgeht.
HU
FR
Zündkerze
HU
HU
Zündkerze auswechseln.
●●
FI
HU
CS
RU
Zündkabel ersetzen oder mit Zündkerze verbinden.
HU
CS
RU RO
PL
SL
HR
ET
Überprüfen
Sie die
und stellen sicher,
FI
HU CS
RUSchalter
RO PL
HR dass
ET dieLTeingeschaltet
LV SK und
BG
betriebsbereit sind:
●
●
Montieren
Sie
die
Schutzvorrichtungen
an
die
richtigen
Stellen
an
den
FI HU CS RU RO PL SL
ET LT LV SK BG
Blas- und Saugöffnungen und die Kontakte richtig in die Schlitze der
Schutzschalters gesteckt sind.
FI
HU CS
RU RO
PL SLkontaktieren
HR
SK BG
●● Wenn
der Motor
nicht startet,
Sie LT
einenLV
autorisierten
Kundendienst.
FI
HU CS SieRU
RO PL und
SL drehen
HR dann
ET das GerätLV
SK das
BG
●● Entfernen
die Zündkerze
so, dass
Zündkerzenloch auf den Boden gerichtet ist.
FI
HU
CS
RU
RO
PL
SL
HR
ET
LT
SK
BG
●● Stellen Sie den Chokehebel auf die "BETRIEB" Position und ziehen Sie
den Starterhebel 10 bis 15 Mal. Dadurch wird überschüssiger Kraftstoff
FI aus
HUdem
CSMotor
RUentfernt.
RO PL SL HR ET LT LV
BG
●● Entfernen Sie den Kraftstoff aus dem Produkt.
●● Reinigen
die Zündkerze
sie wieder
ein. SK
FI
HU CSSie RU
RO PL und
SLsetzen
HR SieET
LT LV
●● Wischen Sie verschütteten Treibstoff auf und entfernen Sie den
Kraftstoff mindestens 9 Meter vor dem Anlassen.
●● Ziehen Sie, mit dem Chokehebel in der "BETRIEB" Position, den
Startergriff 3 Mal.
●● Wenn der Motor nicht startet, stellen Sie den Chokehebel auf die "VOLL"
Position und wiederholen den normalen Startvorgang.
●● Wenn der Motor immer noch nicht startet, wiederholen Sie den obigen
Vorgang mit einer neuen Zündkerze.
SL
HR
ET
LT
LV
SK
BG
Présence d’eau dans l’essence
ou mélange périmé.
Vidangez tout le circuit et refaites le plein avec de l’essence neuve.
Mélange trop riche en huile.
Vidangez et refaites le plein avec un mélange correct.
Trop ou pas assez de starter.
Mettez le starter en position adéquate.
Faiblesse de l’étincelle à la
bougie.
Contactez un service après-vente agréé.
Le moteur
manque de
puissance.
Le filtre à air est bouché.
Nettoyez le filtre à air. Reportez vous à Nettoyage du Filtre à Air plus haut
dans ce mode d’emploi.
Le moteur
chauffe.
Mélange trop pauvre en huile.
Mischen Sie den Kraftstoff entsprechend dem Abschnitt "Mischen des
Kraftstoffs" in dieser Bedienungsanleitung.
Le moteur
démarre avec
difficulté.
31
Español (Traducción de las instrucciones originales)
INTRODUCCIÓN
■■ Use una máscara de filtro en condiciones en las que
haya mucho polvo para reducir el riesgo de lesiones
asociadas con la inhalación de polvo.
Este producto tiene muchas funciones para que su uso
sea más cómodo y ameno. Se ha dado prioridad a la
seguridad, rendimiento y fiabilidad al diseño de este
producto para que resulte más fácil su mantenimiento y
uso.
■■ Compruebe el área de trabajo antes de cada uso.
Retire todos los objetos como rocas, cristales rotos,
clavos, cables o cuerdas que puedan salir despedidos
o quedar enganchados en la máquina.
■■ Manténgase firme y equilibrado. No realice
sobreesfuerzos. Al estirarse para alcanzar algo,
puede perder el equilibrio o exponerse a superficies
calientes.
NORMAS GENERALES DE SEGURIDAD
USO PREVISTO:
Este producto sólo está destinado para uso al aire libre.
Está destinado para el soplado de escombros ligeros
incluyendo hojas, hierba y otros restos del jardín. Está
diseñado para aspirar y triturar desechos ligeros como
se indica arriba y acumularlos en la bolsa de basura.
No está diseñado para absorber o aspirar agua u otros
líquidos.
■■ No utilice la unidad sin una pantalla protectora de
chispas; esta pantalla se encuentra en el interior del
silenciador.
■■ Antes de almacenarlo, deje que se enfríe el motor
■■ Siga las instrucciones de mantenimiento de este
manual de usuario.
■■ Revise la unidad antes de cada utilización para verificar
si existen tornillos sueltos, fugas de combustible, etc.
Reemplace las piezas dañadas.
ADVERTENCIA:
Lea detenidamente todas las instrucciones.
Si no sigue todas las instrucciones que figuran
a continuación podrían ocurrir descargas
eléctricas, incendios y/o la intoxicación por
monóxido de carbono, resultando en lesiones
graves o incluso la muerte.
■■ Antes de limpiar, reparar o revisar la herramienta,
apague el motor y asegúrese de que todas las piezas
móviles se han detenido. Desconecte el cable de la
bujía, y mantenga el cable alejado de la bujía para
evitar el arranque.
■■ Solamente el personal de reparación cualificado
debería realizar labores de servicio en este soplador/
ventilador. Las labores de servicio o mantenimiento
realizado por personal no cualificado podría provocar
lesiones al usuario o daños al producto.
■■ No permita que niños o individuos sin experiencia
utilicen este aparato.
■■ Nunca encienda el motor dentro de un área cerrada,
ya que respirar los gases de escape puede ser mortal.
■■ Utilice únicamente piezas de repuesto idénticas en el
soplador/aspirador. El uso de piezas no autorizadas
podría conllevar un riesgo de daños graves para el
usuario, o daños al producto.
■■ Utilice siempre gafas de protección con protección
lateral conformes a la norma EN 166, junto
con protectores auditivos. Si no sigue estas
recomendaciones, podrían entrar objetos extraños en
los ojos y podría sufrir otras lesiones graves.
■■ No utilice esta herramienta en una escalera, en la
azotea, en un árbol o sobre otros soportes inestables.
La superficie en la que se encuentra debe ser lo
suficientemente estable para que permita el mejor
control del soplador/ventilador en situaciones
inesperadas.
■■ Las personas, niños y animales deberán estar a 15
metros del aparato como mínimo.
■■ Use pantalones largos y resistentes, mangas largas,
botas y guantes. No use ropa holgada, pantalones
cortos, sandalias, joyas de cualquier tipo, o vaya
descalzo.
NORMAS DE SEGURANÇA ESPECÍFICAS
■■ Recoja el cabello largo para que quede por encima del
nivel de los hombros y evitar así que se enmarañe en
cualquier pieza giratoria.
■■ No trabaje con poca luz.
■■ Siempre sostenga el aspirador/soplador con su mano
derecha durante el funcionamiento de la herramienta.
Consulte las instrucciones de funcionamiento más
adelante en este manual para conocer la posición
correcta durante el funcionamiento del aspirador e
información adicional.
■■ Mantenga todas las partes de su cuerpo lejos de
cualquier parte móvil y todas las superficies calientes
de la unidad.
■■ Para reducir el riesgo de pérdidas auditivas asociada
con el nivel de ruido(s), es necesario utilizar
dispositivos de protección auditiva.
■■ No utilice este aparato si está cansado o si se
encuentra bajo la influencia de drogas, alcohol o
medicamentos.
32
Español (Traducción de las instrucciones originales)
■■ Para reducir el riesgo de lesiones relacionadas con el
contacto con piezas giratorias, detenga el motor antes
de instalar o extraer cualquier accesorio. No utilice
la herramienta sin las protecciones correctamente
colocadas en su lugar. Desconecte siempre la bujía
antes de realizar cualquier tarea de mantenimiento o
a la hora de acceder a las piezas móviles.
específicamente diseñados para este propósito.
■■ Agregue combustible antes de arrancar el motor.
Nunca quite el tapón del depósito de combustible o
añada combustible mientras el motor esté en marcha
o cuando el motor esté caliente.
■■ No fume mientras manipule el combustible.
■■ Mezcle el combustible al aire libre donde no haya
chispas o llamas.
■■ No dirija la boquilla del soplador hacia personas o
animales domésticos.
■■ Afloje la tapa del combustible lentamente para liberar
la presión y evitar que el combustible se escape por
la tapa.
■■ Nunca utilice la unidad sin los tubos del soplador
instalados. El dispositivo de interbloqueo de esta
máquina asegura que la unidad no puede arrancar
sin el tubo acoplado y el dispositivo deslizante del
interruptor en posición de funcionamiento.
■■ Apriete de forma segura el tapón del combustible
después de llenar la herramienta con combustible.
■■ Limpie el combustible derramado de la unidad. Aleje
la herramienta 9m del sitio donde ha repostado antes
de arrancar el motor.
■■ Nunca coloque objetos dentro de los tubos del
soplador.
■■ Utilice el soplador sólo tal y como se indica en este
manual de usuario.
■■ Nunca intente quemar el combustible derramado bajo
ninguna circunstancia.
■■ No utilice el aspirador sin bolsa instalada ya que los
residuos sueltos podrían causar lesiones graves.
Cierre siempre la bolsa del aspirador completamente
antes utilizar la herramienta.
■■ Si se derrama combustible, no intente arrancar el
motor. Aleje la máquina fuera de la zona de derrame y
evite crear cualquier fuente de ignición hasta que los
vapores de combustible se hayan disipado.
■■ Las aspas de rotación del impulsor pueden causar
lesiones graves. Detenga el motor y asegúrese de
que las aspas del impulsor han dejado de girar antes
de abrir la tapa del aspirador o al instalar o cambiar
los tubos. No introduzca las manos o cualquier otro
objeto dentro de los tubos del aspirador, mientras
estén instalados en la unidad.
■■ Apriete los tapones del depósito de combustible y los
tapones de contención de forma segura.
■■ Vacíe los depósitos de combustible en un recipiente
adecuado para gasolina y coloque la unidad de
forma que no se mueva antes de transportarla en un
vehículo.
■■ Nunca utilice la unidad sin los accesorios correctos.
Cuando se utilice como soplador, instale siempre los
tubos del soplador y cierre la tapa. Cuando se utilice
como aspirador, instale siempre los tubos y la bolsa
para el aspirador. Asegúrese de que la bolsa para
el aspirador está completamente cerrada cuando la
unidad se encuentre en funcionamiento para evitar
que los residuos salgan despedidos.
■■ Al drenar el depósito de combustible, utilice un
recipiente adecuado para el almacenamiento de
combustible en un área ventilada.
■■ Escoja un terreno libre de obstáculos, detenga el
motor, y deje que se enfríe antes de volver a llenar
con combustible.
■■ Guarde estas instrucciones. Consulte los manuales
con frecuencia y facilíteselos a otras personas que
puedan utilizar esta herramienta. Si presta esta
herramienta, facilite también estas instrucciones.
■■ Evite las situaciones que podrían implicar un riesgo
de incendio de la bolsa para el aspirador. No utilice
la herramienta cerca de una llama expuesta. No
aspire cenizas calientes de chimeneas, barbacoas,
maleza apilada, etc. No aspire cigarros o cigarrillos
desechados a menos que las cenizas se hayan
enfriado completamente.
ABASTECIMIENTO
■■ El combustible es altamente inflamable. Tome
precauciones a la hora de utilizar la herramienta para
reducir el riesgo de lesiones personales graves.
■■ Cuando utilice el producto, use dispositivos de
protección auditiva.Si utiliza herramientas de
funcionamiento similares cerca aumentará el riesgo
de lesiones.
■■ El uso de dispositivos de protección auditiva reducirá
su capacidad para oír posibles advertencias (gritos o
alarmas). El operador debe prestar atención extra a lo
que está sucediendo en el área de trabajo.
■■ Se ha demostrado que las vibraciones provenientes
de herramientas que se sostienen con las manos
pueden contribuir a la aparición de una enfermedad
denominada Síndrome de Raynaud en determinados
individuos. Los síntomas pueden incluir hormigueo,
■■ Guarde el combustible en un lugar fresco y bien
ventilado, de forma segura y lejos de chispas y/o
equipos de producción de llamas.
■■ Mezcle y almacene el combustible en contenedores
33
Español (Traducción de las instrucciones originales)
entorpecimiento y decoloración de los dedos,
generalmente aparentes cuando tiene lugar una
exposición al frío.Se considera que los factores
hereditarios, exposición al frío y a la humedad, dieta,
tabaquismo y prácticas de trabajo contribuyen al
desarrollo de estos síntomas. Existen medidas que
pueden ser tomadas por el operador para reducir los
efectos de vibración:
a) Mantenga su cuerpo caliente durante el tiempo
frío. Al manipular la unidad, utilice guantes para
mantener las manos y las muñecas calientes. Hay
informes que indican que el tiempo frío es un gran
factor que contribuye al síndrome de Raynaud.
b) Después de cada período de funcionamiento,
realice ejercicios para aumentar la circulación
sanguínea.
c) Haga pausas de trabajo frecuentes Limite la
cantidad de exposición por día.
Si siente alguno de los síntomas de esta enfermedad,
interrumpa inmediatamente el uso y consulte a su
médico estos síntomas.
■■ Para reducir el riesgo de inhalación de polvo,
humedezca ligeramente el área de trabajo antes de
soplar o aspirar.
■■ Use un rastrillo de jardín o una escoba para remover
los restos pesados o las hojas caídas y otros residuos
antes de usar el soplador.
■■ Cuando exista riesgo de caída de objetos, utilice
protección para la cabeza.
34
Español (Traducción de las instrucciones originales)
SÍMBOLOS
Algunos de los siguientes símbolos pueden ser utilizados en este producto. Por favor, estudie y aprenda su
significado. La interpretación correcta de estos símbolos le permitirá utilizar el producto de un modo mejor y más
seguro.
SÍMBOLO
NOMBRE
DENOMINACIÓN/EXPLICACIÓN
Alerta de seguridad
Indica un posible daño personal.
Lea el Manual de Usuario
Para reducir el riesgo de daños, el usuario debe leer y comprender
el manual de usuario antes de utilizar este producto.
Use gafas de protección
y dispositivos de
protección auditiva
Cuando utilice la herramienta, use siempre gafas de protección
con protección lateral conformes a la norma EN 166, además de
protectores auditivos.
Tapa del aspirador
No utilice la unidad si la tapa no está bien cerrada.
Pelo largo
Si utiliza la herramienta con el pelo suelto existe un riesgo de que
sea absorbido por el tubo de la entrada de aire.
Tubos del soplador
No utilice la unidad si no están los tubos en su lugar.
Ropa suelta
Gasolina y lubricantes
Si utiliza la herramienta con ropa holgada existe un riesgo de que
sea absorbida por el tubo de la entrada de aire.
Utilice gasolina sin plomo para vehículos de motor con un octanaje
de 91 [(R + M)/2)] o superior. Este producto se acciona mediante
un motor de 2 ciclos y necesita gasolina premezclada y lubricante
de 2 ciclos.
Mantenga alejadas a
otras personas
Mantenga a todos los espectadores, especialmente a los niños y
las mascotas, por lo menos a 15 metros de la zona de trabajo.
Rebote
Riesgo de rebote.
Las siguientes señales y sus significados pretenden explicar los niveles de riesgo asociados a este producto.
SÍMBOLO
SEÑAL
SIGNIFICADO
PELIGRO:
Indica una situación peligrosa inminente que, de no ser evitada, podría provocar
daños graves o incluso la muerte.
ADVERTENCIA:
Indica una situación potencialmente peligrosa que, de no ser evitada, podría
provocar daños graves o incluso la muerte.
PRECAUCIÓN:
Indica una situación potencialmente peligrosa que, de no ser evitada, podría
provocar daños moderados o leves.
PRECAUCIÓN:
(Sin símbolo de seguridad) Indica una situación que podría provocar daños
materiales.
35
Español (Traducción de las instrucciones originales)
DESCRIPCIÓN
Fig 1a.
1. Tubo inferior del aspirador
2. Bolsa del aspirador
3.Adaptador
4. Control de crucero
5. Gatillo del acelerador
6. Tubo superior del aspirador
7. Tapón del combustible
8. Gancho del estárter
9. Revisa la palanca del estrangulador
10. Asa superior
11. Interruptor de encendido/apagado
12. Interruptor positivo en posición de soplado
13.Cebador
14. Asa del aspirador
29. Tornillo para fijar el conjunto de los tubos del aspirador
Fig. 1b
15. Tubo superior del soplador
16. Lengüeta de la tapa
17. Cubierta de admisión
18. Tubo inferior del soplador
19. Interruptor positivo en posición de aspirado
31. Boquilla de alta velocidad
Fig. 10
4. Control de crucero
5. Gatillo del acelerador
Fig. 7
5. Gatillo del acelerador
8. Gancho del estárter y cuerda
9. Revisa la palanca del estrangulador
11. Interruptor de encendido/apagado
13. Cebador
30. Etiqueta de encendido rápido
Fig. 8
12. Interruptor positivo en posición de soplado
19. Interruptor positivo en posición de aspirado
Fig. 9
31. Boquilla de alta velocidad
Fig. 11
11. Interruptor positivo en posición de soplado
12. Interruptor positivo en posición de aspirado
Fig. 2
15. Tubo superior del soplador
18. Tubo inferior del soplador
19. Interruptor positivo en posición de aspirado
31. Boquilla de alta velocidad
Fig. 12
32. Cubierta del filtro de aire
33. Selector del filtro de aire – girar para abrir o cerrar el
filtro de aire
Fig. 3
2. Bolsa del aspirador
3. Adaptador
Fig. 13
32. Cubierta del filtro de aire
34. Filtro de aire
Fig. 4
20. Ranura en relieve
21. Adaptador instalado en bolsa del aspirador
22. Lengüeta de bloqueo levantada con placa de metal de
inserción del interruptor
CARACTERÍSTICAS
ESPECIFICACIONES DEL PRODUCTO
Régimen del motor....................................................26cc
Velocidad del aire.............................................. 320 Km/h
Volumen del aire............................................... 11 m3/min
Peso........................................................................4.3 kg
Potencia nominal....................................................0.6KW
Velocidad del motor (Max.)................................ 9000 rpm
Velocidad del motor (ralentí).................. 3000 – 4600rpm
Nivel de potencia acústica según EN 15503:2009 Anexo
A (aspirador/soplador)
En operación......................................... 85.9 / 84.4 dB(A)
Ralentí................................................... 70.8 / 70.2 dB(A)
Nivel de presión acústica ponderado A.105.9 /104.4 dB(A)
Nivel de presión acústica en el puesto del operador
(soplado/aspirado)
En operación......................................... 91.6 / 95.5 dB(A)
Fig. 5
17. Cubierta de admisión
19. Interruptor positivo en posición de aspirado
23. Conjunto de la bolsa del aspirador
24. Tornillo de la puerta de entrada de aire
25. Lengüeta de cubierta de la Admisión de Aspirado
Fig. 6
17. Cubierta de admisión
19. Interruptor positivo en posición de aspirado
26. Apertura del aspirador
27. Lengüeta de fijación
28. Conjunto de tubos del aspirador
36
Español (Traducción de las instrucciones originales)
Ralentí................................................... 78.9 / 81.4 dB(A)
Nivel de presión acústica ponderado A. 84.4 / 88.0 dB(A)
Incertidumbre en la medición del nivel acústico... 3 dB(A)
valor de vibración en la manivela según la EN 15503:2009
Anexo B
Modo soplado (manivela delantera/manivela trasera)
En operación............................................. 9.9 / 20.4 m/s2
Ralentí....................................................... 8.7 / 11.9 m/s2
Valor total de vibración equivalente........... 9.7 / 19.4 m/s2
Incertidumbre en la medición de vibración.......... 1,5 m/s2
BOLSA DEL ASPIRADOR
La bolsa del aspirador se instala en el soplador fácilmente
usando el adaptador de bolsa.
MANGO DEL ASPIRADOR
Esta característica permite
cómodamente.
al
usuario
aspirar
TUBOS DEL ASPIRADOR
Los tubos del aspirador pueden instalarse en el soplador
utilizando un destornillador de estrella.
CONOZCA SU SOPLADOR/ASPIRADOR
Vea las Figuras 1a - 1b.
El uso seguro de este producto requiere la comprensión
de la información de la herramienta y del manual de
usuario, así como el conocimiento del proyecto que
intenta realizar.
MONTAJE
DESEMBALAJE
Este producto debe montarse.
■■ Retire con cuidado el producto y los accesorios de
la caja. Asegúrese de que están incluidos todos los
elementos que figuran en la lista del paquete de
embalaje.
BOQUILLAS Y TUBO DEL SOPLADOR
El tubo del soplador puede montarse e instalarse en el
soplador sin necesidad de herramientas.
INTERRUPTORES POSITIVOS
El producto está equipado con interruptores positivos.
La unidad sólo funcionará si ambos contactos metálicos
se insertan en los interruptores positivos. Esto reduce el
riesgo de contacto accidental con las piezas giratorias.
ADVERTENCIA:
No utilice este producto si ya está montado
en el producto algún elemento de la lista del
paquete de embalaje cuando lo desembale. El
fabricante no ha montado los elementos de esta
lista en el producto y requieren de la instalación
del cliente. Usar un producto que puede haber
sido mal montado podría provocar graves daños
personales.
CONTROL DE CRUCERO
La función de control de crucero permite al usuario utilizar
el soplador sin apretar el gatillo acelerador. Para reducir
la velocidad del motor, simplemente empuje la palanca de
control de velocidad hacia adelante.
BOQUILLA DE ALTA VELOCIDAD CON RASPADOR
DE HOJA HÚMEDA
La boquilla de alta velocidad es ideal para hojas húmedas
y pegajosas. Le permite raspar los residuos u hojas
mojadas mientras utiliza el soplador.
■■ Revise el producto con atención para asegurarse
de que no se produjeron daños o roturas durante el
transporte.
■■ No tire el material de embalaje hasta que haya
revisado con atención y haya utilizado el producto de
manera satisfactoria.
MOTOR
El soplador tiene un potente motor de 26cc con la potencia
suficiente para realizar trabajos difíciles de soplado y
aspiración.
MONTAJE DE LOS TUBOS DEL SOPLADOR
Ver Figura 2.
■■ Inserte un extremo del tubo inferior en un extremo del
tubo superior.
START EASY™
La función de encendido fácil Start Easy™ permite un
encendido fácil y rápido.
■■ Alinee las pestañas en relieve de la salida de la
carcasa del soplador con las ranuras del tubo superior;
deslícelas juntas y apriételas de forma segura
realizando un movimiento de giro; asegúrese de que
el gatillo de plástico se ha pulsado para activar el
dispositivo de bloqueo y para que la unidad esté lista
para trabajar. Compruebe que esté correctamente
fijado después de su uso inicial y vuelva a apretar si lo
considera necesario.
GATILLO ACELERADOR
El soplador puede funcionar a cualquier velocidad entre
ralentí y aceleración total.
ASPIRADOR / SILENCIADOR
Convertir el soplador en aspirador/silenciador es simple y
puede realizarse utilizando un destornillador de estrella.
37
Español (Traducción de las instrucciones originales)
■■ Cierre la cubierta de admisión y apriete el tornillo de
la cubierta, asegurándose de que el contacto de metal
está insertado en el interruptor positivo.
■■ Alinee las pestañas de la carcasa con el conjunto de
tubos.
■■ Apriete los tornillos del tubo superior del aspirador
para fijar la carcasa del soplador. Asegúrese de
que el contacto de metal del tubo de aspirado está
insertado en el interruptor positivo.
■■ Para retirar el tubo del soplador, saque el dispositivo
deslizante del interruptor positivo, a continuación, gire
los tubos para sacarlos de la toma de la carcasa del
soplador.
Para extraer los tubos del aspirador:
■■ Afloje los tornillos del tubo superior del aspirador
girándolos hacia la izquierda.
INSTALACIÓN DE LA BOLSA DEL ASPIRADOR
Ver ilustraciones 3-4.
■■ Retire el tubo del soplador tirando del contacto
metálico, girándolo y retirándolo de la toma de la
carcasa del soplador.
■■ Extraiga el conjunto del tubo del aspirador de la
carcasa del soplador.
■■ Cierre la compuerta de entrada del aspirador de forma
segura fijando el tornillo de la compuerta.
■■ Abra la bolsa del aspirador y coloque el adaptador en
el interior tal y como se muestra. Empuje el adaptador
de la bolsa del aspirador a través de la apertura
opuesta al cierre de la bolsa. El extremo más ancho
del adaptador permanecerá en el interior de la bolsa si
se instala correctamente.
FUNCIONAMIENTO
Nota: La unidad dispone de interruptores positivos en
las aperturas laterales de soplado y aspiración. La unidad
sólo funcionará si ambos contactos metálicos se insertan
en los interruptores positivos. Cuando la unidad funciona
en modo soplado (fig. 8), el contacto de metal del tubo
de soplado y la puerta deben estar insertados en sus
respectivos interruptores positivos. Cuando la unidad
funciona en modo succión (fig. 11), el contacto de metal
del tubo del adaptador y el tubo de succión deben estar
insertados en sus respectivos interruptores positivos.
■■ Alinee las ranuras en relieve del adaptador de la bolsa
con las pestañas de bloqueo de la salida de la carcasa
del soplador; y empuje el adaptador de la bolsa en la
carcasa. Gírelo para ajustarlo a su posición, pulse el
contacto de metal de la ranura del interruptor positivo
para asegurarse de que el interruptor está instalado y
listo para funcionar.
■■ Gire la bolsa hasta que la correa para el hombro esté
vertical.
■■ Asegúrese de que la bolsa está cerrada antes de
encender la unidad.
ADVERTENCIA:
Preste especial atención aunque esté
familiarizado con el producto. Recuerde que un
despiste de una sola fracción de segundo es
suficiente para causar daños graves.
INSTALACIÓN DE LOS TUBOS DEL ASPIRADOR
Ver ilustraciones 5-6.
ADVERTENCIA:
Las aspas de rotación del impulsor pueden
causar lesiones graves. Detenga siempre
el motor y asegúrese de que las aspas del
impulsor han dejado de girar antes de abrir la
tapa del aspirador o instalar/cambiar los tubos.
No introduzca las manos o cualquier otro objeto
dentro de los tubos del aspirador, mientras
estén instalados en la unidad.
Para instalar los tubos del aspirador:
■■ Acople los tubos superior e inferior alineando las
pestañas de bloqueo con el orificio correspondiente
del tubo superior del aspirador, los dos tubos se
convierten en un sólo tubo después de acoplarlos.
Los dos tubos se convierten en un conjunto tras
introducirlos juntos.
ADVERTENCIA:
No manejara la máquina cerca de ventanas
abiertas.
ADVERTENCIA:
Use siempre gafas de protección con protección
lateral que cumplan la normas EN166, junto
con protección auditiva. Si no sigue estas
recomendaciones, podrían entrar objetos
extraños en los ojos y podría sufrir otras
lesiones graves.
APLICACIONES
Puede utilizar este producto para los fines que figuran a
continuación:
■■ Extraiga siempre las hojas y otros desechos para
evitar obstrucciones
■■ Presione la lengüeta de la tapa con un destornillador
plano y afloje el tornillo de la tapa para abrir la tapa de
entrada de vacío.
■■ Mantenga siempre las cubiertas y orificios de entrada
38
Español (Traducción de las instrucciones originales)
libres de hojas yo agujas de pino
depósito.
■■ Aspirar hojas de su césped
MEZCLA DEL COMBUSTIBLE
Este producto se acciona mediante un motor de 2 ciclos
y necesita gasolina premezclada y aceite de 2 ciclos. La
mezcla debe ser en una proporción de 50 a 1.
NOTA: Le recomendamos que utilice SÓLO aceite Ryobi
(mezcla exacta) o aceite G en su producto.
■■ Limpie y revise la junta de la tapa de combustible
antes de cambiar la tapa.
■■ Reemplace la tapa del combustible y apriétela
girándola en sentido horario.
■■ Limpie el combustible derramado del producto.
■■ Aléjese al menos a 9 metros de distancia de la zona
de llenado de combustible antes de encender el
producto.
PARA COMBINAR EL COMBUSTIBLE:
■■ Utilice un recipiente limpio adecuado para su uso con
gasolina.
ADVERTENCIA:
Compruebe si hay fugas de combustible.
Una tapa de combustible que presente fugas
constituye un peligro de incendio y deberá
ser reemplazada de inmediato. Si encuentra
cualquier fuga, corrija el problema antes de usar
el producto. Si no lo hace podría provocar un
incendio que podría causar lesiones personales
graves.
■■ Mezcle el aceite de motor de 2 tiempos con gasolina
sin plomo en el recipiente, de acuerdo con las
instrucciones del envase del aceite.
Este motor está certificado para funcionar con gasolina
sin plomo para uso automotriz con un octanaje de 91 [(R +
M) / 2] o superior. No utilice aceite de automoción o aceite
de fueraborda de 2 tiempos.
NOTA: La mayor parte de la mezcla de combustible
se mantendrá con todas sus propiedades durante un
máximo de 30 días. NO mezcle cantidades superiores a
las usadas en un periodo de 30 días.
COMBUSTIBLES OXIGENADOS
Los problemas de rendimiento o del sistema de combustible
resultantes de la utilización de un combustible oxigenado
que contengan una cantidad mayor de los porcentajes
de compuestos oxigenados que se han mencionado
anteriormente no están cubiertos por la garantía.
MEZCLA DE ACEITE/COMBUSTIBLE DE 2 TIEMPOS
(50:1)
GASOLINA
ACEITE
1 gallon (EEUU)
1 litro
Las gasolinas que contengan hasta un 10% de etanol en
volumen (comúnmente conocida como E10) o el 15% de
etanol en volumen (comúnmente conocida como E15) son
aceptables.
NO USE COMBUSTIBLE E85 YA QUE LA GARANTÍA
QUEDARÁ ANULADA.
2.6 oz.
20 cc (20 ml)
LLENADO DEL DEPÓSITO
ADVERTENCIA:
La gasolina es altamente inflamable y explosiva.
Si se produce un incendio o una explosión
de gasolina podría sufrir quemaduras usted
y personas que se encuentren en el lugar.
Apague siempre el motor antes de llenarlo
de combustible. Nunca añada combustible
a una máquina con el motor en marcha o
caliente. Sitúese al menos a 9m del lugar
de rellenado antes de arrancar el motor. No
fume y manténgase alejado de las llamas
abiertas y chispas. Si no maneja con cuidado
el combustible podría provocar lesiones
personales graves.
■■ Limpie la superficie alrededor de la tapa del
combustible para evitar la contaminación.
INICIO Y PARADA
Véase la Figura 7.
NOTA: Es normal que los motores nuevos emitan humo
cuando use por primera vez.
Para arrancar el motor en frío:
1. Pulse el cebador 10 veces.
NOTA: Después del 7º prensado, el combustible debe
ser visible en el cebador. Si no, continúe haciendo
presión hasta que el combustible sea visible.
2. Bloquee la palanca de aceleración apretando el gatillo
del acelerador y reteniendo el control de crucero.
3. Coloque la palanca del estrangulador en posición
“FULL”.
4. Mantenga el gatillo del acelerador bloqueado y
totalmente apretado, tire de la palanca de arranque
hasta que el motor esté a punto de arrancar. No tire de
la palanca de arranque más de 4 veces.
5. Coloque la palanca del estrangulador en la posición
■■ Afloje la tapa del combustible lentamente girándola
hacia la izquierda.
■■ Vierta la mezcla de combustible con cuidado en el
39
Español (Traducción de las instrucciones originales)
“HALF”.
6. Tire de la palanca de arranque hasta que el motor
arranque. No tire de la palanca de arranque más de
6 veces.
NOTA: Si el motor no arranca, vuelva a colocar el
estrangulador en posición “FULL” y repita el proceso
desde el paso 2.
7. Deje que el motor funcione durante 10 segundos, y
coloque la palanca del estrangulador en la posición
“RUN”.
montón de escombros. Nunca dirija el soplador
directamente al centro de una pila.
■■ Después de usar sopladores u otros equipos,
LIMPIE LA ZONA. Deshágase de los desechos
adecuadamente.
■■ La boquilla de alta velocidad está específicamente
diseñada para hojas pegajosas o mojadas. Le permite
raspar los residuos u hojas mojadas mientras utiliza
el soplador.
CONTROL DE CRUCERO
Véase la Figura 10.
El control de crucero puede ser utilizado para utilizar el
ventilador sin tener pulsado el gatillo del acelerador.
■■ Para activar el control de crucero, tire de la palanca
del control de crucero hacia el usuario y pare en la
configuración de obturador deseada.
Para arrancar un motor caliente:
1. Pulse el cebador 10 veces.
2. Coloque la palanca del estrangulador en posición
“RUN”.
3. Apriete el gatillo del acelerador completamente y tire
de la palanca de arranque hasta que arranque el
motor.
■■ Para desactivar el control de crucero, empuje la
palanca del control de crucero totalmente hacia la
parte delantera de la unidad.
FUNCIONAMIENTO DE LA TURBINA
Ver ilustraciones 8-9.
FUNCIONAMIENTO DEL ASPIRADOR
Véase la Figura 11.
ADVERTENCIA:
Mantenga el silenciador y todas las superficies
calientes del soplador/aspirador lejos de su
cuerpo. De otro modo, podría sufrir lesiones
personales graves.
ADVERTENCIA:
No coloque el soplador sobre o cerca de
desechos o grava. Los escombros podrían ser
absorbidos por la toma de entrada de aire del
soplador resultando en posibles daños a la
unidad y causando lesiones personales graves.
■■ Utilice el equipo a horas razonables, solamente – ni
muy temprano ni muy tarde cuando pueda molestar a
la gente. Cumpla con los horarios que figuran en las
normativas locales.
■■ Instale los tubos y la bolsa. Consulte la sección de
montaje mencionada anteriormente en este manual.
■■ Para reducir los niveles de ruido, limite el número
de productos utilizados al mismo momento y haga
funcionar el soplador a la menor velocidad posible del
obturador. Esto también puede reducir los niveles de
vibración.
■■ Coloque la correa de bolsa por encima de su hombro
derecho. Sostenga el asa superior con su mano
izquierda y el asa del aspirador en la derecha.
■■ Encienda el soplador. Consulte el apartado Encendido
y parada que aparece al principio de este manual.
■■ Mueva el soplador/aspirador de un lado a otro a lo
largo del borde exterior de los escombros. Para evitar
atascos, no coloque el tubo del aspirador directamente
en el montón de escombros.
■■ Revise su equipo antes de utilizarlo, especialmente el
silenciador, las tomas de aire, y los filtros de aire.
■■ Use rastrillos y escobas para esparcir los desechos
antes de utilizar el soplador.
■■ Mantenga el motor más alto que el extremo de la
entrada de aire del tubo del aspirador.
■■ En condiciones de polvo, humedezca ligeramente la
superficie cuando haya agua disponible.
■■ Dirija siempre el tubo del aspirador hacia abajo
cuando trabaje en una superficie inclinada.
■■ Preste especial atención a los niños, mascotas,
ventanas abiertas, o coches recién lavados, cuando
vaya a utilizar el soplador.
■■ Para evitar lesiones graves al operador o daños a
la unidad, no intente recoger piedras, vidrios rotos,
botellas, u otros objetos similares.
■■ Sostenga el soplador, tal y como se muestra en la
Figura 9, para que la corriente de aire pueda moverse
cerca del suelo.
■■ Si los tubos del aspirador están obstruidos, detenga
el motor y asegúrese de que las aspas del impulsor
han dejado de girar, y desconecte el cable de la bujía
antes de limpiar la obstrucción.
■■ Para evitar la dispersión de los escombros, dirija
el soplador alrededor de los bordes exteriores del
40
Español (Traducción de las instrucciones originales)
■■ Extraiga los tubos del aspirador y retire los escombros
de la carcasa del ventilador del soplador. Extraiga
la bolsa y limpie el tubo. Puede ser necesaria una
pequeña varilla o un palo para desobstruir la longitud
completa del tubo. Asegúrese de que todos los
desechos se han limpiado antes de volver a montar
los tubos del aspirador.
Para un mantenimiento adecuado y una larga duración,
mantenga limpia la pantalla del filtro de aire.
■■ Extraiga la cubierta del filtro de aire girando el botón
en sentido horario, mientras tira suavemente de la
tapa.
■■ Enjuague el filtro con agua limpia.
■■ Apriete suavemente el filtro hasta que se elimine el
exceso de agua. Reemplace el filtro.
MANTENIMIENTO
■■ Coloque el nuevo filtro de aire en la unidad. Gire el
botón en sentido horario hasta fijar la cubierta.
ADVERTENCIA:
Utilice sólo piezas de recambio idénticas en
la herramienta. El uso de otras piezas puede
ocasionar riesgos o daños en el producto.
LIMPIEZA DEL ORIFICIO DE ESCAPE,
SILENCIADOR Y EL EXTINTOR DE CHISPAS
EL
Dependiendo del tipo de combustible utilizado, de
la cantidad y tipo de lubricante utilizado y/o de las
condiciones de funcionamiento, el puerto de escape,
silenciador y/o la pantalla del parachispas pueden
bloquearse con restos de carbón. Si percibe una
pérdida de potencia de la herramienta, puede tener que
eliminar los residuos para restablecer el rendimiento. Le
recomendamos que este servicio sea solamente realizado
por técnicos especializados.
ADVERTENCIA:
Use siempre gafas de protección con protección
lateral que cumplan la normas EN166, junto
con protección auditiva. Si no sigue estas
recomendaciones, podrían entrar objetos
extraños en los ojos y podría sufrir otras
lesiones graves.
Se recomienda limpiar o reemplazar el extintor de
chispas cada 50 horas o una vez al año para asegurar un
rendimiento adecuado de su producto. Los parachispas
pueden estar colocados en diferentes lugares
dependiendo del modelo adquirido. Póngase en contacto
con el distribuidor autorizado de su localidad para adquirir
el parachispas par su modelo.
ADVERTENCIA:
Antes de revisar, limpiar o realizar labores de
mantenimiento del equipo, apague el motor,
espere a que todas las piezas móviles se
detengan, desconecte el cable de la bujía y
aléjelo de la bujía. El incumplimiento de estas
instrucciones puede resultar en lesiones
corporales graves o daños a la propiedad.
ADVERTENCIA:
Para evitar un posible riesgo de incendio,
nunca utilice el soplador/aspirador sin colocar el
protector de chispas.
MANTENIMIENTO GENERAL
Evite el uso de disolventes para limpiar las piezas de
plástico. La mayoría de los plásticos se dañan con
diferentes tipos de disolventes comerciales. Utilice paños
limpios para eliminar la suciedad, el polvo, los restos de
lubricante y grasa, etc.
BOLSA DEL ASPIRADOR
Una bolsa sucia reduce el rendimiento. Para limpiar la
bolsa, déle la vuelta y agítela. Lave la bolsa con agua y
jabón al menos una vez al año.
ADVERTENCIA:
No permita que las piezas de plástico entren
en contacto con líquidos de frenos, gasolina,
productos derivados del petróleo, lubricantes
penetrantes, etc. Los productos químicos
pueden dañar, destruir o debilitar el plástico, lo
que puede ocasionar graves daños personales.
TAMPÃO DO COMBUSTÍVEL
ADVERTENCIA:
Una tapa de combustible que presente fugas
constituye un peligro de incendio y deberá ser
reemplazada de inmediato.
La tapa del combustible contiene un filtro desechable y
una válvula de retención. Un filtro de combustible atascado
causará un rendimiento pobre del motor. Si su rendimiento
mejora cuando se afloja el tapón del combustible, puede
significar que la válvula de comprobación está defectuosa
o el filtro atascado. Reemplace la tapa de combustible si
es necesario.
En ciertas ocasiones podrá realizar ajustes y reparaciones
que se describen aquí. Para realizar otras reparaciones,
deberá llevar el producto a un distribuidor autorizado.
LIMPIEZA DEL FILTRO DE AIRE
Véase la figura 12 - 13.
41
Español (Traducción de las instrucciones originales)
en una zona seca y bien ventilada, a la que no puedan
acceder los niños. Almacénelo lejos de agentes
corrosivos como sales de deshielo y productos
químicos de jardín.
CAMBIO DE LA BUJÍA
Este motor utiliza una bujía Ryobi AC00160, Champion
RCJ-6Y o NGK BPMR7A con una abertura para el
electrodo de 0,05 pulgadas. Utilice una pieza de recambio
exacta y reemplácela anualmente.
■■ Respete todas las normativas ISO
ALMACENAMIENTO DEL PRODUCTO
■■ Limpie todo el material extraño que pueda permanecer
en el producto. Guarde la unidad inactiva a cubierto,
GUIDE DE DÉPANNAGE
Problema
Posible causa
No hay combustible
depósito.
Solución
en
el
Llene el depósito.
Bujía agotada o cortocircuitada.
Reemplace la bujía.
La bujía está rota, (porcelana
agrietada o electrodos rotos) El
cable de encendido ha sufrido
un cortocircuito, está roto, o
desconectado de la bujía.)
●●
●●
Ignición inoperativa.
Le moteur ne
démarre pas.
Motor inundado
Reemplace la bujía. o
Sustituya cable o conéctelo a la bujía.
Compruebe que los interruptores engranados están listos para funcionar:
●● Ponga las cubiertas protectoras a las posiciones adecuadas en las
aperturas de soplado y de vacío e introduzca las correderas en las
ranuras del interruptor.
●● Si el motor sigue sin arrancar, póngase en contacto con un centro de
servicio autorizado.
●● Extraiga la bujía, y encienda la unidad de manera que el orificio de la
bujía apunte al suelo.
●● Coloque la palanca del estrangulador en posición “RUN” y tire de la
palanca de arranque de 10 a 15 veces. Esto eliminará el exceso de
combustible del motor.
●● Retire todo el combustible del producto.
●● Limpie y vuelva a colocar la bujía.
●● Limpie cualquier derrame de combustible y sitúelo al menos a 9 m del
motor antes de volver a encender el motor.
●● Tire de la palanca de arranque 3 veces con la palanca del estrangulador
en posición “RUN”.
●● Si el motor no arranca, ponga la palanca del estrangulador en posición
“FULL” y repita el procedimiento normal de arranque.
●● Si el motor sigue sin arrancar, repita el procedimiento anterior con una
bujía nueva.
Hay agua en la gasolina o la
mezcla de gasolina está en mal
estado.
Drene todo el sistema y rellene con combustible nuevo.
Demasiado lubricante en la
mezcla de combustible.
Drene y rellene con la mezcla correcta.
El motor se ha ahogado.
Ajuste el estrangulador según sea necesario.
Chispa débil en la bujía.
Póngase en contacto con el centro de servicio autorizado.
El motor no tiene
potencia.
Filtro de aire obstruido.
Limpie el fi ltro de aire. Consulte el LIMPIEZA DEL FILTRO DE AIRE
mencionado anteriormente.
El motor se
sobrecalienta.
Lubricante insufi ciente en la
mezcla de combustible.
Mezcle el combustible según la sección “Mezcla de Combustible” de este
manual.
Difícil de arrancar.
42
Italiano (Traduzione dalle istruzioni originali)
INTRODUZIONE
■■ Rimanere a debita distanza dagli organi in movimento
e non toccare mai le superfici che durante l’uso si
riscaldano.
Questo prodotto è idoneo per il solo utilizzo in esterni.
L’utensile è adatto a spazzare via piccoli detriti compresi
foglie, erba e altri scarti naturali in giardini. È inoltre adatto
per aspirare e triturare piccoli detriti come indicato sopra
e raccoglierli nell’apposito sacchetto. Non è adatto ad
aspirareo risucchiare acqua o altri liquidi.
■■ Se l’utilizzo dell’apparecchio produce polvere,
indossare una maschera in grado di filtrare le particelle
della polvere per evitare i rischi legati all’inalazione di
polveri nocive.
■■ Controllare la zona di lavoro prima di utilizzare
l’utensile. Rimuovere eventuali oggetti come sassi,
frammenti di vetro, chiodi, fili metallici, corde ed altri
oggetti che potrebbero essere scagliati verso l’esterno
o rimanere impigliati nell’apparecchio.
NORME GENERALI DI SICUREZZA
APPLICAZIONI:
Questo prodotto è progettato per tagliare siepi in posizione
verticale lungo strade, vie d'accesso e attorno ad aiuole.
Questo accessorio è indicato solo per tagliare erba e altro
tipo di vegetazione morbida. Non è adatto a tagliare in
altre direzioni tranne che verticalmente né è indicato per
tagliare materiali diversi da erba e vegetazione. Da non
utilizzare con un motore elettrico.
■■ Mantenere sempre un ottimo equilibrio. Non
protendersi. In caso contrario si potrà cadere o toccare
componenti molto calde.
■■ Non mettere mai in funzione l'utensile senza il
parascintille; il parascintille si trova all'interno del
silenziatore. .
■■ Lasciare raffreddare l’apparecchio prima di riporlo.
■■ Eseguire un’accurata manutenzione dell’utensile
conformemente alle istruzioni riportate nella sezione
“Manutenzione” del presente manuale.
AVVERTENZE:
Leggere e comprendere tutte le istruzioni. La
mancata osservanza di tutte le istruzioni indicate
potrà causare scosse elettriche, incendi e/o
avvelenamento da monossido di carbonio il che
potrà causare gravi lesioni personali o morte.
■■ Ispezionare l’utensile prima di ogni impiego
assicurandosi che gli elementi di fissaggio siano
adeguatamente serrati, che non siano presenti
perdite di carburante e che non vi siano componenti
danneggiati. Sostituire qualunque componente
danneggiato.
■■ Non permettere che i bambini mettano in funzione
l’utensile.
■■ Prima di svolgere le operazioni di pulizia, riparazione
o ispezione, scollegare il motore e assicurarsi che
tutte le parti siano ferme. Scollegare sempre il filo
della candela e tenerlo lontano dall’utensile per evitare
l’eventuale accensione accidentale.
■■ Non avviare mail il motore in un ambiente chiuso; i gas
di scarico possono rivelarsi letali.
■■ Durante l’utilizzo indossare sempre occhiali di
protezione con schermi proettivi che rispettino lo
standard EN 166, e dispositivi di protezione uditiva. La
mancata osservanza di tale norma potrà causare gravi
lesioni personali a causa di oggetti che rimbalzano
negli occhi.
■■ Far svolgere le eventuali riparazioni sull’aspiratore/
soffiatore sempre da personale qualificato. Eventuali
servizi di manutenzione o riparazione svolti da
personale non qualificato potranno causare danni al
prodotto o lesioni all’utente.
■■ Tenere eventuali osservatori, bambini e animali almeno
a 15 m di distanza. Evitare di mettere in funzione se
circondati da persone, soprattutto bambini.
■■ Utilizzare solo parti di ricambio identiche quando si
svolgono le operazioni di riparazione sul soffiatore/
aspiratore. L’utilizzo di parti non autorizzare potrà
causare rischi di gravi lesioni all’utente o danni al
prodotto.
■■ Indossare pantaloni lunghi e spessi, maniche lunghe,
stivali e guanti. Non indossare indumenti ampi,
pantaloni corti, sandali, gioielli e non lavorare mai a
piedi nudi.
■■ Non utilizzare su scale, tetti, alberi o in altre posizioni
non stabili. Un solido equilibrio su una superfice stabile
aiuterà a controllare meglio il soffiatore/aspiratore in
situazioni inaspettate.
■■ Legare i capelli lunghi al di sopra delle spalle per
evitare che rimangano impigliati nelle parti rotanti.
■■ Non utilizzare l’apperecchio quando si è stanchi o
ammalati, sotto l’effetto di alcol o droghe oppure se si
stanno assumendo dei medicinali.
NORME DI SICUREZZA SPECIFICHE
■■ Non utilizzare l’utensile se non vi è luce sufficiente per
lavorare.
■■ Tenere sempre l’impugnatura del soffiatore/aspiratore
con la mano destra. Per ulteriori informazioni e per la
43
Italiano (Traduzione dalle istruzioni originali)
corretta posizione con la quale reggere l’utensile, fare
riferimento alla sezione Funzionamento del presente
manuale.
■■ Mescolare e riporre il carburante in contenitori appositi.
■■ Aggiungere il carburante prima di avviare il motore.
Non rimuovere il tappo del carburante del serbatoio nè
aggiungere carburante mentre il motore è in funzione
o è caldo.
■■ Per limitare i rischi di perdita dell’udito legati al(i)
livello(i) di rumorosità dell’apparecchio, indossare
dispositivi di protezione uditiva.
■■ Non fumare mentre si maneggia il carburante.
■■ Per evitare i rischi di lesioni provocate dal contatto con
gli organi in movimento, arrestare il motore prima di
montare o di rimuovere gli accessori. Non mettere in
funzione senza il(i) paralame. Scollegare sempre il filo
della candela prima di eseguire qualsiasi intervento
di manutenzione o di intervenire su un componente
mobile.
■■ Mescolare in un ambiente all’aperto, lontano da
eventuali scintille o fiamme.
■■ Svitare lentamente il tappo del serbatoio per scaricare
la pressione ed evitare che il carburante si sparga
attorno al tappo stesso.
■■ Avvitare saldamente il tappo del serbatoio dopo il
riempimento.
■■ Non rivolgere la bocca del soffiatore verso persone o
animali domestici.
■■ Pulire il carburante versato dalla macchina. Spostarsi
di almeno 9 m dal sito presso il quale si è ricaricata
la macchina di carburante prima di avviare il motore.
■■ Non avviare mai l’apparecchio se gli accessori richiesti
non sono stati installati. Il dispositivo di interblocco su
questa macchina assicura che l'unità non si avvii senza
il tubo montato e senza i dispositivi di scorrimento
dell'interruttore nella posizione di funzionamento.
■■ Non tentare mai di bruciare il carburante versato
all’esterno.
■■ Nel caso in cui si sia versato carburante all’esterno,
non mettere in moto l’utensile, ma allontanarsi dal
luogo in cui si è versato il carburante per evitare
eventuali incendi fino a che i vapori non si siano
dispersi.
■■ Non inserire mai oggetti nel tubo del soffiatore.
■■ Utilizzare l’utensile solo come indicato nel manuale.
■■ Non utilizzare senza il sacchetto di raccolta; eventuali
detriti di rimablzo potranno causare gravi lesioni alla
persona. Chiudere sempre il sacchetto di raccolta
completamente prima di avviare le operazioni di
pulizia.
■■ Serrare il serbatoio del carburante e i tappi del
contenitore.
■■ Svuotare il serbatoio versando il carburante in una
tanica destinata a contenere benzina e bloccare
l’apparecchio onde evitare che si muova durante il
trasporto.
■■ Le lame rotanti possono causare gravi lesioni personali.
Arrestare il motore e assicurarsi che le lame smettano
di ruotare prima di aprire lo scarico dell’aspiratore
o di cambiare/installare i tubi. Non inserire le mani
o eventuali oggetti nei tubi dell’aspiratore mentre
vengono installati sull’unità.
■■ Svuotare il serbatoio versando il carburante in una
tanica destinata a contenere benzina, svolgendo tali
operazioni in una zona ben ventilata.
■■ Non avviare l’utensile senza gli accessori corretti.
Quando l’utensile viene usato come un soffiatore,
installare sempre i tubi del soffiatore. Assicurarsi che
il sacchetto di raccolta sia completamente chiuso
quando l’utensile è in funzione per evitare che, una
volta acceso l’utensile, detriti di rimbalzo colpiscano
l’operatore.
■■ Arrestare il motore e lasciarlo raffreddare prima di
riempire il serbatoio.
■■ Evitare le situazioni in cui il sacco di raccolta potrebbe
incendiarsi. Non utilizzare questo apparecchio nelle
vicinanze di una fiamma libera. Non aspirare ceneri
ancora calde di camini, barbecue, ecc. Non aspirare
mozziconi di sigari o di sigarette ancora incandescenti.
■■ Quando si mette in funzione il prodotto, indossare
cuffie di protezione. Mettere in funzione utensili simili
a distanza ravvicinata potrà causare rischi di lesioni.
■■ Conservare le presenti istruzioni. Fare riferimento ad
essere frequentemente e utilizzarle per istruire gli
operatori che utilizzeranno questo utensile. Nel caso
in cui si presti l’utensile ad eventuali terzi, allegare allo
stesso le sue istruzioni.
■■ L’utilizzo di dispositivi di protezione ridurrà la capacità
di ascoltare eventuali segnali d'allarme (grida o
avvertimenti). L'operatore dovrà prestare attenzione a
ciò che accade nella zona di lavoro.
RIEMPIMENTO DEL SERBATOIO
■■ Il carburante è una sostanza altamente infiammabile.
Prendere le dovute precauzioni per evitare rischi di
gravi lesioni personali.
■■ Si è riscontrato che le vibrazioni da utensili operati con
le mani possono provocare una condizione chiamata
Sindrome di Raynaud in alcuni individui. I sintomi
possono comprendere formicolio, intorpidimento
e perdita di colore alle dita e si verificano di solito
■■ Riporre in un ambiente fresco e ben ventilato, lontano
da scintille o fiamme.
44
Italiano (Traduzione dalle istruzioni originali)
■
■
■
■
quando ci si espone al freddo. Fattori ereditari,
esposizione al freddo e all’umidità, una dieta scorretta,
fumo e condizioni di lavoro non sicure potranno
contribuire allo sviluppo di questi sintomi. L’operatore
potrà prendere le seguenti precauzioni per ridure gli
effetti delle vibrazioni:
a) Tenere il proprio corpo al caldo in temperature
basse. Quando si mette in funzione l’unità
indossare guanti per tenere mani e polsi caldi. Le
basse temperature contribuiscono a causare la
Sindrome di Raynaud.
b) Dopo aver utilizzato l’utensile per un certo periodo,
fare degli esercizi per stimolare la circolazione del
sangue.
c) Fare spesso delle pause. Limitare la quantità di
esposizione giornaliera.
Nel caso in cui si provino i sintomi di questa
condizione, interrompere immediatamente l’utilizzo
dell’utensile e consultare un dottore.
Per ridurre il rischio di inalazione di polvere, inumidire
leggermente la zona di lavoro prima di procedere con
le operazioni di soffiatura o aspirazione.
Utilizzare un rastrello da giardino o una scopa per
rimuovere eventuali depositi pesanti di foglie o altre
macerie prima di utilizzare il soffiatore.
Indossare un elmetto di protezione se si lavora in
zone nelle quali si potrà essere colpiti alla testa da
eventuali oggetti.
45
Italiano (Traduzione dalle istruzioni originali)
SIMBOLI
Alcuni dei seguenti simboli potranno comparire sul presente prodotto. Studiarli attentamente e impararne il loro
significato. Una corretta interpretazione dei presenti simboli permetterà all’operatore di utilizzare meglio e in modo
più sicuro il prodotto.
SIMBOLO
DENOMINAZIONE
SIGNIFICATO/SPIEGAZIONE
Allarme sicurezza
Indica precauzioni sulla sicurezza dell’operatore.
Leggere il Manuale
d’Istruzioni
Per ridurre il rischio di lesioni, leggere
il manuale d’istruzioni prima di utilizzare l’utensile.
Indossare occhiali di
protezione e dispositivi di
protezione uditiva
Indossare occhiali di protezione che rispettino lo standard EN 166
come pure dispositivi di protezione uditiva mentre si utilizza questo
utensile.
Sportello aspiratore
Non mettere in funzione l’utensile se lo sportello dell’aspiratore non
è chiuso.
Capelli lunghi
I capelli lunghi potranno essere risucchiati dall’aspiratore.
Tubi soffiatore
Non utilizzare senza tubi inseriti.
Abiti ampi
Abiti ampi potranno rimanere impigliati nelle ventole dell’aria.
Carburante e lubrificante
Utilizzare benzina senza piombo per veicoli a motore con un numero
di ottani pari a 91 [(R + M) / 2 ] o più alto. Questo prodotto è alimentato
da un motore a 2 tempi e dovrà essere ricaricato con una miscela di
benzina e lubrificante per motori a 2 tempi.
Tenere lontani eventuali
osservatori
Tenere eventuali osservatori, soprattutto bambini ad almeno 15 m di
distanza dalla zona di lavoro.
Rimbalzo
Pericolo di rimbalzo.
attentamente
I seguenti simboli indicano i livelli di rischio associati a questo prodotto.
SIMBOLO
SEGNALE
SIGNIFICATO
PERICOLO:
Indica una situazione pericolosa che, se non evitata attentamente, potrà causare
gravi lesioni alla persona o morte.
AVVERTENZE:
Indica una situazione potenzialmente pericolosa che, se non evitata attentamente,
potrà causare gravi lesioni alla persona o morte.
ATTENZIONE:
Indica una situazione potenzialmente pericolosa che, se non evitata attentamente,
potrà causare lesioni minori o moderate alla persona.
ATTENZIONE:
(Senza Simbolo di Pericolo) Indica una situazione che potrà causare danni a
cose.
46
Italiano (Traduzione dalle istruzioni originali)
DESCRIZIONE
Fig 1a.
1. Tubo inferiore aspiratore
2. Sacchetto aspiratore
3.Adattatore
4. Controllo velocità
5. Leva acceleratore
6. Tubo superiore aspiratore
7. Tappo serbatoio
8. Impugnatura di avviamento
9. Leva dell'aria
10. Manico superiore
11. Interruttore Acceso/Spento
12. Interruttore positivo sul lato del soffiatore
13. Peretta di innesco
14. Manico aspiratore
Fig 7
5. Leva accelerazione
8. Impugnatura e corda di avviamento
9. Leva dell'aria
11. Interruttore On/Off (Acceso/Spento)
13. Peretta di innesco
30. Etichetta Quick Start (Avviamento Veloce)
Fig 8
12. Interruttore positivo sul lato del soffiatore
19. Interruttore positivo sul lato dell'aspiratore
Fig 9
31. Ugello ad alta velocità
Fig 10
4. Controllo velocità
5. Leva di accelerazione
Fig 1b
15. Tubo superiore soffiatore
16. Sportello aspiratore
17. Coperchio interno
18. Tubo inferiore soffiatore
19. Interruttore positivo sul lato dell'aspiratore
31. Ugello ad alta velocità
Fig 11
12. Interruttore positivo sul lato del soffiatore
19. Interruttore positivo sul lato dell'aspiratore
Fig 12
32. Coperchio filtro dell’aria
33. Manopola filtro dell'aria - girare per aprire o chiudere
il filtro dell'aria
Fig 13
32. Coperchio filtro dell’aria
34. Filtro dell’aria
Fig 2
15. Tubo superiore soffiatore
18. Tubo inferiore soffiatore
19. Interruttore positivo sul lato dell'aspiratore
31. Ugello ad alta velocità
Fig 3
2. Sacchetto aspiratore
3. Adattatore
CARATTERISTICHE
SPECIFICHE PRODOTTO
Spostamento motore................................................. 26cc
Velocità dell’aria.................................................320 Km/h
Volume dell’aria.................................................11 m3/min
Peso........................................................................ 4.3 kg
Alimentazione nominale.......................................... 0.6Kw
Velocità motore (Massima).................................9000 rpm
Velocità motore (Minima).........................3000 – 4600rpm
Livello di potenza sonora in conformità con quanto stabilito
dallo standard EN 15503:2009 Allegato A(Soffiatore/
aspiratore)
A pieno regime.......................................85.9 / 84.4 dB(A)
Al minimo................................................70.8 / 70.2 dB(A)
Livello di pressione sonora equivalente con pesatura A
....................................................105.9 / 104.4 dB(A)
Livello di pressione sonora alla posizione dell’operatore
(Aspiratore/soffiatore)
A pieno regime.......................................91.6 / 95.5 dB(A)
Al minimo.................................................78.9 / 81.4dB(A)
Livello di pressione sonora equivalente con pesatura A
........................................................84.4 / 88.0 dB(A)
Fig 4
20. Fessura rialzata
21. Adattatore installato nel sacchetto del soffiatore
22. Linguetta di blocco rialzata con piastra in metallo a
interruttore
Fig 5
17. Coperchio interno
19. Interruttore positivo sul lato dell'aspiratore
23. Gruppo sacchetto di raccolta
24. Sportello vano aspiratore a incastro
25. Linguetta coperchio ingresso aspiratore
Fig 6
17. Coperchio interno
19. Interruttore positivo sul lato dell'aspiratore
26. Apertura aspiratore
27. Linguetta di blocco
28. Montaggio tubo aspiratore
29. Vite per reggere il gruppo tubo aspiratore
47
Italiano (Traduzione dalle istruzioni originali)
SACCHETTO DI RACCOLTA
Il sacchetto di raccolta viene facilmente collegato al
soffiatore con un adattatore.
MANICO ASPIRATORE
Permette all’utente di svolgere le funzioni di aspirazione
facilmente e comodamente.
Incertezza delle misurazioni del livello sonoro......3 dB(A)
Valore delle vibrazioni sul manico in conformità con
quanto stabilito dallo standard EN 15503:2009 Allegato B
Modalità soffiatore (Manico anteriore / manico posteriore)
A pieno regime...........................................9.9 / 20.4 m/s2
Al minimo....................................................8.7 / 11.9 m/s2
Valore totale delle vibrazioni equivalenti.....9.7 / 19.4 m/s2
Incertezza delle misurazioni delle vibrazioni........1.5 m/s2
TUBI ASPIRATORE
I tubi dell’aspiratore possono essere installati sul soffiatore
utilizzando un giravite a croce.
FAMILIARIZZARE CON IL SOFFIATORE/ASPIRATORE
Vedere le Figure 1a - 1b.
L’utilizzo sicuro del presente prodotto richiede una
comprensione delle istruzioni riguardanti l’utensile e del
manuale dell’operatore come pure la perfetta conoscenza
del lavoro che si intende svolgere.
MONTAGGIO
RIMOZIONE IMBALLO
Il prodotto deve essere montato
■■ Rimuovere attentamente il prodotto e i suoi accessori
dalla scatola. Assicurarsi che tutti gli accessori indicati
nella lista siano inclusi.
TUBO E BOCCHETTE SOFFIATORE
Il tubo del soffiatore può essere montato e installato sul
soffiatore senza utilizzare alcun utensile.
INTERRUTTORI POSITIVI
Questo prodotto è dotato di interruttori positivi. L'unità
funzionerà solo se entrambi i contatti in metallo saranno
inseriti negli interruttori positivi. Ciò ridurrà il rischio di
contatto accidentale con le parti rotanti.
AVVERTENZE:
Non utilizzare il prodotto se alcune part della
lista sono state già montate. Le parti su questa
lista non sono montate dalla ditta produttrice e
richiedono l’installazione da parte del cliente.
L’utilizzo del prodotto non montato correttamente
potrà causare gravi lesioni personali.
■■ Controllare il prodotto attentamente per assicurarsi
che non abbia riportato danni nè si sia rotto durante
il trasporto.
REGOLATORE DI VELOCITÀ
Il dispositivo di regolatore di velocità permette all’utente
di mettere in funzione il soffiatore senza reggere la leva
dell’accelerazione. Per rallentare il motore, spingere in
avanti la leva del controllo di velocità.
■■ Non gettare il materiale dell’imballo senza averlo
controllato prima e senza aver messo in funzione il
prodotto.
BOCCHETTA AD ALTA VELOCITÀ CON RASCHIAFOGLIE BAGNATE
La bocchetta ad alta velocità è ideale per raschiare via
foglie bagnate. Permette di raschiare via foglie bagnate o
detriti mentre si mette in funzione il soffiatore.
MONTAGGIO TUBI SOFFIATORE
Vedere la Figura 2.
■■ Inserire una estremità del tubo inferiore in una
estremità del tubo superiore.
MOTORE
Il soffiatore è dotato di un potente motore da 26cc con
sufficiente potenza per lavori di soffiatura e aspirazione.
■■ Allineare le linguette rialzate sulla sede del soffiatore
con le fessure sul tubo superiore; far scivolare le due
parti assieme e serrare; assicurarsi che il grilletto in
plastica venga premuto per permettere al dispositivo
di blocco di venir inserito e di funzionare. Controllare
che il tutto sia serrato dopo il primo utilizzo e serrare
ancora se necessario.
DISPOSITIVO DI AVVIO START EASY™
Il dispositivo Start Easy™ permette di avviare facilmente e
velocemente l'utensile.
LEVA ACCELERAZIONE
Il soffiatore può essere messo in funzione a qualsiasi
velocità, sia essa minima o massima.
■■ Chiudere il coperchio interno e serrare le viti sul
coperchio, assicurandosi che i contatti in metallo siano
inseriti nell'interruittore positivo.
■■ Collegare il ugello all tubo inferiore soffiatore.
ASPIRATORE / SILENZIATORE
Convertire il soffiatore in aspiratore/silenziatore è facile;
la conversione può essere fatta utilizzando un giravite a
croce.
■■ Per rimuovere il tubo del soffiatore, sfilare il dispositivo
di scorrimento dall'interruttore positivo, quindi ruotare i
tubi per rimuoverli dalla sede del soffiatore.
INSTALLAZIONE DEL SACCHETTO RACCOGLI
48
Italiano (Traduzione dalle istruzioni originali)
POLVERE
Vedere le Figure 3 - 4.
■■ Aprire il sacchetto di raccolta e posizionare l’adattatore
al suo interno come indicato. Inserire l’adattatore
del sacchetto di raccolta nell’apertura di fronte alla
cerniera. Se installato correttamente, l’estremità
più ampia dell’adattatore deve essere rivolta verso
l’interno del sacchetto di raccolta.
del soffiatore e dell'aspiratore. L'unità funzionerà solo
se entrambi i contatti in metallo verranno inseriti negli
interruttori positivi. Quando si attiverà l'unità in modalità
soffiatore (fig. 8), il contatto in metallo sul tubo e sullo
sportello del soffiatore dovrà essere inserito nei rispettivi
interruttori positivi. Quando si mette in funzione l'unità
nella modalità aspiratore (Fig. 11), il contatto di metallo sul
tubo dell'adattatore e sul tubo dell'aspiratore deve essere
inserito nei rispettivi interruttori positivi.
■■ Allineare le fessure sull'adattatore del sacchetto
dell'aspiratore con le linguette di blocco sull'uscita
dell soffiatore; inserire l'adattatore del sacchetto al
suo posto. Girare per bloccarlo, premere il contatto
in metallo all'interno della fessura dell'interruttore
positivo per assicurarsi che l'interruttore sia inserito e
pronto a funzionare.
AVVERTENZE:
Eventuali distrazioni durante l’utilizzo di
questo prodotto potranno causare una perdita
di controllo. Ricordare che una minima
disattenzione potrà causare gravi danni alla
persona.
■■ Ruotare il sacchetto di raccolta fino a che la cinghia da
spalla no sia dritta.
AVVERTENZE:
Non mettere in funzione l’utensile accanto a
finestre aperte.
■■ Assicurarsi che il sachetto di raccolta sia chiuso prima
di avviare l’utensile .
INSTALLAZIONE TUBI ASPIRATORE
Vedere le Figure 5 - 6.
AVVERTENZE:
Le lame rotanti possono causare gravi lesioni
personali. Arrestare il motore e assicurarsi che
le lame abbiano smesso di girare prima di aprire
lo sportello o di installare/cambiare tubi. Non
inserire mani o oggetti nei tubi dell’aspiratore
mentre sono installati nell’utensile.
AVVERTENZE:
Indossare sempre visiere o occhiali di sicurezza
con protezioni laterali che rispettino lo standard
di protezione EN166, e cuffie di protezione. Non
rispettare questa regola di base potrà causare
gravi lesioni personali dal momento che si potrà
essere colpiti da materiali di rimbalzo.
APPLICAZIONI
Questo prodotto è indicato per le seguenti applicazioni:
■■ Rimuovere foglie e altri detriti dall’erba
Per installare i tubi dell’aspiratore:
■■ Assicurare i tubi superiori e inferiori assieme allineando
le linguette di blocco rialzate con l’apertura sul tubo
superiore di aspirazione. I due tubi diventano un tubo
solo dopo averli inserti l'uno sull'altro.
■■ Rimuovere foglie e aghi di pino da viali e verande
■■ Aspirare foglie da prati
■■ Premere la linguetta con un giravite piatto e allentare
la vite sullo sportello per aprirlo.
MISCELA DI CARBURANTE
Questo apparecchio funziona con un motore a 2 tempi che
necessita di una miscela di benzina e olio di sintesi per
2 tempi. La miscela dovrebbe avere un rapporto di 50:1.
NOTE: Si raccomanda di utilizzare SOLO olio Ryobi
(miscela esatta) o olio G nel prodotto.
■■ Allineare le linguette sull’utensile con i tubi.
■■ Serrare le viti sul tubo superiore dell'aspiratore per
assicurarlo alla sede del soffiatore. Assicurarsi che il
contatto in metallo del tubo dell'aspiratore sia inserito
nell'interruttore positivo.
MISCELAZIONE CARBURANTE:
■■ Utilizzare un recipiente pulito adatto a contenere
benzina.
Per rimuovere i tubi:
■■ Allentare le viti del tubo superiore dell’aspiratore
girandole in senso antiorario.
■■ Miscelare l’olio per motore a 2 tempi con benzina
senza piombo nel contenitore, secondo le istruzioni
indicate sulla confezione.
Questo motore funziona con benzina senza piombo per
autovetture con numero di ottano almeno pari o superiore
a 91 [(R + M) / 2]. Non utilizzare olio motore per autovetture
nè olio a 2 tempi per fuoribordo.
NOTE: La maggior parte delle miscele rimane utilizzabile
fino a 30 giorni dalla miscelazione. NON mescolare
■■ Rimuovere i tubi di aspirazione dal soffiatore.
■■ Chiudere lo sportello del coperchio interno
dell’aspiratore avvitando le viti sul coperchio.
FUNZIONAMENTO
NOTE: L'unità è dotata di interruttori positivi sui lati
49
Italiano (Traduzione dalle istruzioni originali)
quantità maggiori non utilizzabili entro 30 giorni.
Benzina contenente fino al 10% di etanolo per volume
(comunemente indicato come E10) o fino al 15%
(comunemente indicata come E15).
MISCELA DI CARBURANTE A 2 TEMPI / OLIO (50:1)
CARBURANTE
OLIO
1 gallone (US)
2.6 oz.
1 litro
20 cc (20 ml)
Non utilizzare carburante E85. In caso contrario si
rischierà di invalidare la garanzia.
AVVIO E ARRESTO
Vedere la Figura 7.
NOTE: È normale che un nuovo motore emetta fumo
durante il primo utilizzo.
RIEMPIMENTO DEL SERBATOIO
AVVERTENZE:
La benzina è una sostanza altamente
infiammabile ed esplosiva. Un incendio o
un’esplosione causati dalla benzina comportano
rischi di gravi ustioni. Arrestare sempre il motore
prima di riempire il serbatoio. Non riempire mai il
serbatoio di un apparecchio quando il motore è
acceso oppure è ancora caldo. Prima di avviare
il motore, allontanarsi di almeno 9m dal luogo in
cui è provveduto al riempimento del serbatoio
del carburante. Non fumare e tenersi lontano da
fiamme vive e scintille. La mancata osservanza di
tale norme potrà causare gravi lesioni personali.
Avviamento a freddo:
1. Premere la pompetta 10 volte.
NOTA: Dopo aver premuto per 7 volte, il carburante
dovrebbe diventare visibile nella pompetta. In caso
contrario, continuare a premere fino a che il carburante
non sia visibile.
2. Bloccare la leva della valvola a farfalla premendo il
grilletto e tirando il regolatore di velocità.
3. Posizionare la leva dell'aria sulla posizione “FULL”
(Pieno).
4. Mantenere la valvola a farfalle inserita e premere
completamente, tirare la leva di avvio fino a che il
motore non parte. Non tirare la leva di avvio per più
di 4 volte.
5. Posizionare la leva dell'aria sulla posizione “CHOKE”.
6. Tirare la leva di avvio fino a che non si avvia il motore.
Non titare la leva di avvio più di 6 volte.
NOTA: Se il motore non si avvia, riposizionare su
“FULL” (Pieno) e ripetere la procedura dalla fase 2.
7. Lasciare il motore in funzione per 10 secondi, quindi
settare la leva dell'aria in posizione “RUN” (Avvio).
■■ Pulire il serbatoio nell’area intorno al tappo per
prevenire eventuali contaminazioni di carburante.
■■ Svitare lentamente il tappo del serbatoio in senso
antiorario.
■■ Versare con cautela la miscela di carburante nel
serbatoio.
■■ Pulire e ispezionare la guarnizione del tappo del
serbatoio prima di sostituirlo.
■■ Riposizionare immediatamente il tappo del serbatoio
e serrarlo a fondo.
Avviamento a caldo:
■■ Rimuovere le tracce di carburante eventualmente
versato.
1. Premere la pompetta 10 volte.
2. Posizionare la leva dell'aria su “RUN” (Avvio).
3. Premere il grilletto della valvola a farfalla
completamente e tirare la leva di avvio fino a che il
motore non si metta in funzione.
Per arrestare il motore:
Premere e trattenere l’interruttore di accensione in
posizione di arresto "O" e il motore si bloccherà.
■■ Spostarsi di circa 9m dalla zona di ricarica prima di
avviare il prodotto.
AVVERTENZE:
Controllare che non vi siano eventuali perdite.
Un tappo che perde costituisce un rischio e deve
essere sostituito immediatamente. In caso di
perdite, correggere il problema prima di utilizzare
il prodotto. La mancata osservanza di tale norma
potrà causare un incendio che potrà provocare
gravi lesioni personali.
FUNZIONAMENTO SOFFIATORE
Vedere le Figure 8 - 9.
AVVERTENZE:
Non posizionare il soffiatore su o vicino detriti o
ghiaia. I detriti potranno venire risucchiati nella
ventola del soffiatore causando danni all’utensile
e gravi lesioni personali.
CARBURANTI OSSIGENATI
Danni al sistema carburante o problemi di prestazioni
risultanti dall’utilizzo di carburante ossigenato contenente
percentuali superiori a quelle indicate sopra non saranno
coperti da garanzia.
50
Italiano (Traduzione dalle istruzioni originali)
■■ Svolgere le operazioni di lavoro sempre in orari
convenienti - non utilizzare mai al mattino presto o in
tarda serata per evitare di disturbare. Rispettare gli
orari indicati dalle ordinanze locali.
riferimento alla sezione Montaggio nel presente
manuale.
■■ Avviare il soffiatore. Far riferimento al paragrafo Avvio
e Arresto nel presente manuale.
■■ Per ridurre il livello del rumore, limitare il numero
di prodotti utilizzati allo stesso tempo e mettere in
funzione il soffiatore alla più bassa velocità possibile.
Ciò ridurrà i livelli di vibrazioni.
■■ Posizionare la cinghia dell’aspiratore sulla spalla
destra. Tenere il manico superiore con la mano
sinistra e il manico dell’aspiratore con la mano destra.
■■ Spostare l’aspiratore/soffiatore da un lato all’altro sui
detriti da rimuovere. Per evitare eventuali ostruzioni,
non posizionare il tubo dell’aspiratore direttamente
sulla pila di macerie.
■■ Controllare l’attrezzatura prima delle operazioni,
soprattutto la marmitta, le griglie dell’aria e i filtri.
■■ Utilizzare rastrelli e scope per setacciare il materiale
da aspirare.
■■ Mantenere il motore più in alto rispsetto al tubo di
ingresso dell’aspiratore.
■■ In caso di polvere, inumidire leggermente il materiale
con dell’acqua se necessario.
■■ Puntare sempre il tubo dell’aspiratore in basso mentre
si lavora su un pendio.
■■ Fare attenzione a bambini, animali, finestre aperte
o auto lavate da poco e soffiare via le macerie
mantenendo sempre la massima attenzione.
■■ Per evitare gravi lesioni all'operatore o danni all'unità,
non tentare di aspirare rocce, vetri rotti, bottiglie o altri
oggetti simili.
■■ Tenere il soffiatore come mostrato in Figura 9, in modo
che il getto d’aria possa essere rivolto verso terra.
■■ Nel caso in cui i tubi si ostruiscano, arrestare il motore,
assicurarsi che le lame si siano bloccate e scollegare
la candela prima di rimuovere eventuali ostruzioni.
■■ Per utilizzare l’utensile per spazzare via materiali di
scarto, soffi are sempre verso gli angoli di un mucchio
di materiale. Non soffiare direttamente sul centro del
mucchio.
■■ Rimuovere i tubi dell’aspiratore ed eventuali detriti
dalle ventole del soffiatore. Rimuovere il sacchetto di
raccolta e pulire il tubo. Si potrà aver bisogno di una
piccola asta o di un bastoncino per pulire il tubo in tutta
la sua lunghezza. Assicurarsi che tutti i detriti siano
stati rimossi prima di rimontare i tubi dell’aspiratore.
■■ Dopo aver utilizzato un soffiatore o altri utensili simili,
PULIRE! Smaltire correttamente il materiale di scarto
raccolto.
■■ L’ugello ad alta velocità è specificatamante progettato
per foglie umide difficili da rimuovere. Permette di
rimuovere le foglie umide o i detriti mentre si mette in
funzione il soffiatore.
MANUTENZIONE
AVVERTENZE:
Quando si svolgono operazioni di manutenzione,
utilizzare solo parti di ricambio originali. Utilizzare
pezzi di ricambio diversi potrà causare rischi o
danneggiare il prodotto.
CONTROLLO DELLA VELOCITÀ
Vedere la Figura 10.
Il dispositivo di controllo della velocità può essere utilzizato
per mettere in funzione il soffiatore senza reggere la leva
dell’accelerazione.
■■ Per inserire il regolatore di velocità, tirare la leva dello
stesso verso l'utente e bloccarla sull'impostazione
della leva dell'aria desiderata.
AVVERTENZE:
Indossare sempre occhiali o visiere di sicurezza
con protezioni laterali che rispettino lo standard
EN166 e cuffie protettive. In caso contrario si
potranno riportare gravi lesioni personali.
■■ Per rilasciare il controllo della velocità, spingere la leva
del controllo velocità completamente in avanti.
FUNZIONAMENTO ASPIRATORE
Vedere la Figura 11.
AVVERTENZE:
Prima di controllare, pulire o svolgere le necessarie
operazioni di assistenza sull’utensile, bloccare
il motore, attendere che le parti in movimento
si fermino e scollegare dall’alimentazione. Il
mancato rispetto di queste istruzioni potrà causare
gravi lesioni personali o danni a cose.
AVVERTENZE:
Tenere la marmitta e le superfici calde del
soffiatore/aspiratore lontane dal corpo. La
mancata osservanza di tale norma potrà
causare gravi lesioni personali.
MANUTENZIONE GENERALE
Evitare di utilizzare solventi quando si puliscono le parti
■■ Installare i tubi dell’aspiratore e il sacchetto. Far
51
Italiano (Traduzione dalle istruzioni originali)
in plastica. La maggior parte delle plastiche può essere
danneggiata da solventi commerciali. Utilizzare un panno
pulito per rimuovere tracce si sporco, polvere, olio, grasso,
ecc.
AVVERTENZE:
Per evitare incendi, non mettere mai in funzione il
soffiatore/aspiratore senza la candela.
SACCHETTO DI RACCOLTA
Un scchetto di raccolta pieno non garantirà prestazioni
ottimali. Per pulire il sacchetto, rigirarlo e scuoterlo.
Lavare il sacchetto con acqua e sapone almeno una volta
all’anno.
TAPPO DEL SERBATOIO
AVVERTENZE:
Un tappo del serbatoio che perde carburante deve
essere immediatamente sostituito.
AVVERTENZE:
Evitare che sostanze quali liquidi per i freni,
benzina, prodotti a base di petrolio, oli penetranti,
ecc. vengano a contatto con parti metalliche.
Le sostanze chimiche potranno danneggiare,
indebolire o distruggere la plastica, il che potrà
risultare in gravi lesioni personali.
Solo le parti indicate nella lista componenti andranno
riparate o sostituite dall’utente. Tutte le operazioni di
manutenzione diverse da quelle indicate nel capitolo
riguardante la manutenzione nel presente manuale
d’istruzioni dovranno essere svolte da un Centro Servizi
Autorizzato.
Il tappo del serbatoio contiene un filtro non sostituibile
e una valvola di controllo. Un filtro ostruito causerà
prestazioni scadenti. Se le prestazioni migliorano quando
il coperchio viene svitato, la valvola di controllo potrà
essere difettosa o il filtro intasato. Sostituire il tappo del
serbatoio se necessario.
PULIZIA DEL FILTRO DELL’ARIA
Vedere le Figure 12 - 13.
Per prestazioni ottimali e una lunga durata, mantenere il
filtro dell’aria pulito.
SOSTITUZIONE CANDELA
Questo motore utilizza una candela Ryobi AC00160,
Champion RCJ-6Y o NGK BPMR7A con una distanza
tra le punte degli elettrodi di 6,35 mm (.025 in). Utilizzare
ricambi identici e sostituire annualmente.
■■ Rimuovere il coperchio del filtro dell’aria girando il
dispositivo di regolazione in senso antiorario mentre si
tira leggermente il coperchio.
RIPONIMENTO
■■ Rimuovere eventuali detriti dal prodotto. Riporlo in
un luogo asciutto e ben aerato, lontano dalla portata
dei bambini. Non riporlo in prossimità di agenti
corrosivi quali prodotti chimici da giardinaggio e sali
antighiaccio.
■■ Sciacquare il filtro con acqua pulita.
■■ Premere leggermente il filtro fino a che non venga
rimossa l’acqua. Reinserire il filtro.
■■ Rimettere il coperchio del filtro sull’unità. Girare il
dispositivo in senso orario fino a che il coperchio non
sia stato correttamente assicurato.
■■ Rispettare tutte le norme ISO e le regolazioni locali per
il corretto riponimento del carburante.
PULIRE LA PORTA DI SCARICO, IL SILENZIATORE E
IL DISPOSITIVO DI ARRESTO DELLA CANDELA
NOTE: A seconda del tipo di carburante e della
quantità di lubrificante utilizzato, e/o delle condizioni
di funzionamento, la porta di scarico, la marmitta e/o
il parascintille potranno rimanere bloccati a causa di
depositi di sporco. Se si ravvisa una perdita di potenza
durante l’uso dell’attrezzo, si dovranno asportare questi
depositi per ripristinare le prestazioni a livello ottimale. Far
svolgere tali servizi solo da tecnici qualificati.
Si raccomanda di pulire o sostituire il dispositivo della
candela dopo 50 ore di utilizzo o annualmente per
assicurarsi prestazioni ottimali del prodotto. Le candele
potranno trovarsi in punti diversi dell’utensile a seconda
del modello acquistato. Contattare il proprio rivenditore
di fiducia per indentificare la candela nel proprio modello.
Nel caso di riponimento per 1 mese o più:
■■ Versare tutto il carburante rimanente nel serbatoio
in una tanica destinata a contenere benzina. Far
funzionare il motore sino a quando non si arresta.
52
Italiano (Traduzione dalle istruzioni originali)
GUIDE DE DÉPANNAGE
Problema
Possibile causa
Soluzione
Mancanza di carburante nel
serbatoio.
Candela
cortocircuitata
o
difettosa.
Candela
rotta
(porcellana
o elettrodi rotti) Cavo di
accensione cortocircuitato, rotto
o scollegato dalla candela.)
Sostituire la candela.
●●
●●
Sostituire la candela. o
Sostituire il cavo o collegare la candela.
Controllare e assicurarsi che gli interruttori inseriti siano pronti a funzionare:
●● Posizionare gli schermi di protezione nella giusta posizione sulle uscite
di aspirazione e soffiatura e inserire i dispositivi di scorrimento nelle
fessure.
●● Se il motore non si avvia, contattare un centro servizi autorizzato.
●● Rimuovere la candela, quindi girare l'unità fino a che il foro della candela
non sia rivolto verso il terreno.
●● Posizionare la leva dell'aria su “RUN” (Avvio) e tirare la leva di avvio
10-15 volte. Ciò permetterà di rimuovere il carburante in eccesso dal
motore.
●● Rimuovere il carburante dal prodotto.
●● Pulire e reinstallare la candela.
●● Pulire l'eventuale carburante versato e spostarsi dalla zona di ricarica di
almeno 9m prima di riavviare il motore.
●● Tirare la leva di avvio 3 volte con la leva dell'aria sulla posizione “RUN”
(Avvio).
●● Se il motore non si avvia, impostare la leva dell'aria su “FULL” (Pieno) e
ripetere la normale procedura di avvio.
●● Se il motore non si avvia, ripetere la procedura di cui sopra con una
nuova candela.
Accensione non funzionante.
Il motore non si
avvia.
Motore sommerso
Il motore si avvia
con difficoltà.
Riempire il serbatoio.
Presenza
di
acqua
nel
carburante o miscela vecchia.
Rimuovere il carburante e riempire con carburante nuovo.
Eccessiva quantità
cante nella miscela.
Rimuovere il carburante e riempire con la miscela corretta.
Motore non
bloccato.
di
lubrifi
funzionante
o
Regolare la leva dell’aria se necessario.
Candela debole.
Contattare un centro servizi autorizzato.
Il motore non ha
energia.
Filtro dell’aria ostruito.
Pulire il fi ltro dell’aria. Far riferimento al paragrafo Pulizia del Filtro dell’Aria
nel presente manuale.
Il motore si
surriscalda.
Lubrifi cante insuffi ciente nella
miscela.
Mescolare il carburante seguendo le istruzioni nella sezione “Miscelare il
carburante” nella prima parte del presente manuale.
53