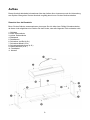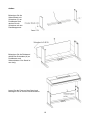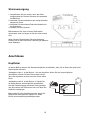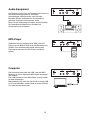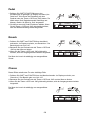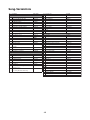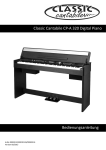
1
Digital Piano
DP-A 310
Bedienungsanleitung
ArtNr 00039138
Version 05/2015
1
Herzlichen Glückwunsch!
Bevor Sie das Gerät einschalten, empfehlen wir, diese Bedienungsanleitung sorgfältig
durchzulesen. Verwahren Sie die Betriebsanleitung an einem sicheren Ort auf.
Standort
Um ernsthafte Schäden, Verfärbungen und Fehlfunktionen zu vermeiden, setzen Sie ihr Gerät
niemals folgenden Umweltbedingungen aus:
• Direktem Sonnenlicht
• Hohen Temperaturen (in der Nähe von Heizkörpern oder tagsüber im Auto)
• Hoher Luftfeuchtigkeit
• Übermäßigem Staub
• Feuchtigkeit und Nässe
• Starken Vibrationen
Stromversorgung
• Vergewissern Sie sich, dass ein passendes Netzteil verwendet wird, das mit der
Eingangsspannung des jeweiligen Landes übereinstimmt.
• Schalten Sie das Gerät aus (OFF), wenn Sie es nicht verwenden.
• Wenn Sie das Gerät eine längere Zeit nicht benutzen, ziehen Sie den Netzstecker aus der
Steckdose.
• Benutzen Sie das Gerät nicht bei Gewittern.
• Vermeiden Sie die Nutzung einer Steckdose, an denen Geräte mit hohem Strombedarf
angeschlossen sind, wie Elektroheizungen oder -öfen. Desweiteren vermeiden Sie die Nutzung
von Mehrfachsteckdosen, weil dies die Soundqualität beeinflusst, Funktionsfehler und mögliche
Schäden verursachen kann.
• Um Schaden am Gerät oder an anderen, damit verbundenen, Geräten zu vermeiden, schalten
Sie alle Gerät AUS, wenn Sie die Verkabelung vornehmen oder lösen.
Handling und Transport
• Benutzen Sie niemals Gewalt an den Reglern, Verbindungen oder anderen Teilen des
Instrumentes.
• Reißen Sie nicht an den Steckern, sondern ziehen Sie diese vorsichtig heraus.
• Lösen sie alle Kabelverbindungen, bevor Sie das Gerät transportieren.
• Vermeiden Sie physische Erschütterungen durch Schütteln oder fallen lassen.
• Legen Sie keine schweren Gegenstände auf dem Instrument ab, dies kann zu Kratzern oder
ernsteren Schäden führen.
Reinigung
• Säubern Sie das Gerät mit einem trockenen, weichen Tuch.
• Um hartnäckige Verschmutzungen zu entfernen, benutzen Sie ein leicht angefeuchtetes Tuch.
• Benutzen Sie niemals Alkohol oder chemische Reinigungsmittel.
• Vermeiden Sie das Ablegen von Vinyl auf der Oberfläche (Vinyl verklebt und verfärbt die
Oberfläche).
Elektrische Verträglichkeit
Dieses Instrument verfügt über digitale Schaltungen und kann evtl. zu Störungen führen, wenn es
sich zu nah an Radio- oder Fernsehgeräten befindet. Sollten solche Störungen auftreten, stellen
Sie das Instrument weiter entfernt von den betroffenen Geräten auf.
Öffnen Sie das Gerät nicht
Bei Defekt oder Fehlfunktion geben Sie das Gerät in eine Fachwerkstatt.
2
Inhaltsverzeichnis
Bedienelemente und Display
5
Vorderseite
LCD
Rückseite
Pedal
5
6
8
8
Aufbau
9
Stromversorgung
12
Anschlüsse
12
Kopfhörer
Audio-Equipment
MP3-Player
Computer
12
13
13
13
Einstellungen
14
Lautstärke
Brillanz
14
14
Abspielen eines Demo-Songs
14
Sounds
15
Auswahl
Dual-Modus
Lower-Modus
Anschlagdynamik - Touch Response
Transponieren
15
15
15
16
16
Piano-Modus
16
Metronom
Twinova
Skalen
17
17
17
Begleitautomatik
18
Rhythmus-Spur
Alle Spuren
Bereiche
Lautstärke
Fingering
Tempo
Ein-Finger-Bedienung
18
18
19
20
20
22
22
Harmonie
23
Assistenz-Funktion
23
Aufrufen der Funktion
Gitarren-Modus
Piano-Modus
23
24
25
DSP-Effekt
25
Mischer
26
Pedal-Funktion
26
Funktionsmenü
27
Tuning
Split-Funktion
27
28
3
Taktart
Lautstärke des Metronoms
Pedal
Reverb
Chorus
Harmonie-Art
Harmonie-Tempo
MIDI In
MIDI Out
Ausschalten
Taktart
28
28
29
29
29
30
30
31
31
31
31
Wiederherstellen der Werkseinstellungen
32
Registration Memory
32
Einstellungen
Aufrufen der Einstellungen
Auswahl des Speicherplatzes
Freeze-Funktion
32
32
32
33
Song-Album
33
Aufnahme
33
Starten der Aufnahme
Stoppen der Aufnahme
Playback
Löschen eines Songs
33
34
34
35
Song
35
Anhören der Songs
Song-Einstellungen
Übungssong
35
35
36
MIDI
36
Was ist MIDI?
MIDI-Geräte
Datenaustausch mit dem Computer
36
36
37
Hilfe bei Störungen
37
Spezifikationen
38
Übersicht über die Sounds
39
Übersicht über die Styles
44
Song-Verzeichnis
46
Album-Liste
47
Verzeichnis der Akkorde
48
MIDI Implementierung
49
Skalen-Systeme
50
WEEE-Erklärung / Entsorgung
51
Herstellerangaben
51
4
Bedienelemente
und Description
Display
Panel & Display
Vorderseite
Front
Panel
1
2
3
4
5
6
7
8
9
12
13
14
15
16
17
18
1. [VOLUME] knob
Adjust master volume
10
19
When [SHIFT] button pressed
3. [RHYTHM] button
Song-Modus
Adjust the RHYTHM
volume
Tastenbelegung
SONG MODE:
12. [START/STOP] button
Start or stop Style-Modus
playing the song
2. [BRILLIANCE] knob
1 VOLUME:
Lautstärkeregler 4. [BASS] button
Adjust
voice brilliance
Adjust BASS volume
9. 2
[ACCOMP]
button
BRILLANCE
Adjust the ACCOMP volume
5. [CHORD] button
RHYTHM + SHIFT: Lautstärke Adjust CHORD volume
10.
3*[MELODY OFF] button
6. [PHRASE] button
TurnRhythmus
off the right-hand melody
Adjust the PHRASE volume
BASS button
+ SHIFT: Lautstärke Bass
11.4*[FREEZE]
7. [LOWER] button
Freeze the style parameter.
CHORD + SHIFT: Lautstärke Adjust LOWER volume
5*[CHORD MODE] button
17.
Chord
8. [UPPER] button
Choose
chord mode
Adjust UPPER volume
13. [PAUSE] button
Pause or continue playing the song
14. [REPEAT A/B] button
Set the beginning and ending location
of loop to the current song
15. [REW] button
Rewind the song
16. [FF] button
Fast forward the song
STYLE MODE:
12. [START/STOP] button
Start or stop playing the style
PHRASE + SHIFT: Lautstärke
6*
18. [FUNCTION+/-] button
19. [SHIFT]
button
Phrase
Choose the function menu
Combine with other buttons to
access
advanced
functions
LOWER
+ SHIFT:
Lautstärke
When [SHIFT] button released
7*
Lower Voice
3~8. Style direct button
Shortcut to select a style
8*
UPPER + SHIFT: Lautstärke
18. [TEMPO+/-] button
Upper Voice
9
ACCOMP: Lautstärke für die
Begleitautomatik
10
MELODY OFF: schaltet die
Melodie für die rechte Hand ab
11
13. [SYNC START] button
Turn the Sync Start on or off
14. [INTRO/ENDING] button
Play the Intro or Ending
Adjust the tempo
15. [A] button
A Fill-in A plays
16. [B] button
A Fill-in B plays
LCD
11 FREEZE: Freeze-Funktion
2
4
3
1 TWINOVA
12
TOUCH
6
13
7
16
START/STOP:SCALE
für Styles
START/STOP für Songs
HARMONY
9
PAUSE8
5
15
14
REPEAT: Wiederholen
RECORD
20
15
ACCOMP
21
1. Twinova
2. Touch
16
3. Voice/Style/Demo/Song/Album
4. Number
17
CHORD: Chord-Modus
5. A.B.C/Full range/Accompaniment
section
TEMPO+/-: Anpassen des
6. Chord
18
Tempos
7. Character
8. Measure
19 SHIFT-Taste
AW_DP330_Manual_G06_150420
4
MELODY 2
23
MELODY 3
24
25
REW: zum Beginn des Songs
9. Beat
10.FF:
Tempo
Schnellvorlauf
11. Memory/Freeze/O.T.S./Bank
12. DSP effect
13. Dual voice
14. Lower voice
15. Right hand
16. Scale
17. Harmony
PERFORM.H 19
INTRO/ENDING: fügt ein Entro
oder
Ending ein
MELODY 4
MELODY 5
26
A: fügt das Fill-In A ein
18. Performance assistant
19.fügt
Performance
B:
das Fill Inassistant
B ein high
20. Record
21. ACCOMP track
22. MELODY 1 track
23. MELODY 2 track
24. MELODY 3 track
25. MELODY 4 track
26. MELODY 5 track
Die mit * gekennzeichneten Tasten dienen ohne SHIFT-Taste als Schnellauswahl für Styles.
4
2015
MELODY 1
22
17
SYNC START:
an-/abschalten
12
PERFORM 18
13
des Sync-Modus
14
10 11
20
10:28:32
5
10
95
75
25
5
0
Choose the function menu
Combine with other buttons to
access advanced functions
13. [SYNC START] button
Turn the Sync Start on or off
When [SHIFT] button released
3~8. Style direct button
Shortcut to select a style
14. [INTRO/ENDING] button
Play the Intro or Ending
18. [TEMPO+/-] button
Adjust the tempo
LCD
15. [A] button
A Fill-in A plays
16. [B] button
A Fill-in B plays
LCD
2
7
4
3
1 TWINOVA
TOUCH
6
9
8
12
13
14
15
10 11
5
RECORD
20
ACCOMP
21
1. Twinova
2. Touch
3. Voice/Style/Demo/Song/Album
4. Number
5. A.B.C/Full range/Accompaniment
section
6. Chord
7. Character
8. Measure
4
MELODY 1
22
MELODY 2
23
MELODY 3
24
9. Beat
10. Tempo
11. Memory/Freeze/O.T.S./Bank
12. DSP effect
13. Dual voice
14. Lower voice
15. Right hand
16. Scale
17. Harmony
MELODY 4
25
4
Twinova
10 Tempo
2
Touch
11
3
Voice, Style, Demo, Song,
Album
12 DSP Effekt
21 Begleitspur
19 Assistenz High
20 Aufnahme
4
Nummer
10:28:32
13 Dual Voice
22 Melodie-Spur 1
5
A.B.C., Full Range,
Begleitung
14 Lower Voive
23 Melodie-Spur 2
6
Chord
15 Rechte Hand
24 Melodie-Spur 3
7
Buchstaben
16 Skala
25 Melodie-Spur 4
8
Taktzahl
17 Harmonie
26 Melodie-Spur 5
9
Taktart
18 Assistenz-Funktion
20
6
HARMONY
17
PERFORM
18
PERFORM.H 19
18. Performance assistant
19. Performance assistant high
20. Record
21. ACCOMP track
22. MELODY 1 track
23. MELODY 2 track
24. MELODY 3 track
25. MELODY 4 track
26. MELODY 5 track
AW_DP330_Manual_G06_150420
2015
16
MELODY 5
26
1
Memory, Freeze, O.T.S.,
Bank
SCALE
Panel & Display Description
24
22
21
20
25
23
27
26
When [SHIFT] button released
21. [STYLE] button
Enter style mode
28
37
29
38
30
39
When [SHIFT] button pressed
21. [DEMO] button
Enter demo mode
Ohne SHIFT-Taste
22. [VOICE] button
Enter voice mode
21 STYLE: Starten Style-Modus
23. [SONG] button
Enter song mode and play songs
22 VOICE: Voice-Modus
27~34. Voice direct button
Shortcut to select a voice
22. [PERFORM] button
Enter the Performance Assistant
mode
21 DEMO:
23. [ALBUM] button
Enter album mode
(Soundauswahl)
27. [PIANO] button
31
40
32
41
33
34
42
43
35
36
44
45
20. LCD
Display the information of the piano
24.Mit
Data
dial
SHIFT-Taste
Adjust the value
25~26.des
[YES/+]/[NO/-]
button
Starten
Demo-Modus
Adjust the value
PERFORM: Einschalten der Assistenz35. [TWINOVA] button
22
Funktion
Turn the TWINOVA on or off
23 SONG: Starten des Song-ModusSelect the piano mode
23 ALBUM: Starten
der Funktion
36. [OCTAVE]
button
37. [BANK] button
the DIAL:
memoryDatenauswahl
bank
24Adjust
DATA
38.
25[STORE] button
Register the current panel settings
+/- Tasten
26 M1~M4 button
39~42.
Recall the registered panel settings
28. [METRONOME] button
24
Turn the metronome on or off
25
29. [DUAL] button
Turn the Voice R2 on or off
26
Set octave in TWINOVA mode
44. [HARMONY] button
Turn harmony effect on or off
45. [SCALE] button
Turn the scale effect on or off
27
30. [LOWER] button
Turn the Voice L on 27
or off PIANO:
28
31. [TOUCH] button
METRONOME: An-/Abschalten
28 setting
Choose a keyboard touch
Metronoms
43. [O.T.S] button
Turn one touch setting on or off
When [SHIFT] button pressed
29[ACCOMP] button
38.
Select the accomp track to record
Starten des Modus
32. [DSP] button
29 or DUAL:
An-/Abschalten
Pedal
Turn the DSP effect on
off
der Funktion
30
30button
LOWER: An-/Abschalten
33~34. [TRANSPOSE+/-]
Adjust the transpose
31
37. [RECORD] button
Enter record mode
39~43.Sound-Auswahltasten
MELODY 1-5 button
Select the melody1-5 track to record
32
des
der Funktion
31 TOUCH: Einstellungen für die Touch-Funktion
Rear Panel
32 DSP: An-/Abschalten der Funktion
33
33
34
34
35 TWINOVA: An-/Abschalten der Funktion
46
47
48
49
50
35
51
52
53
54
TRANSPOSE +/-: Transponieren
52. Soft Pedal(multi function pedal)
When you step on the soft pedal, all
notes played on the keyboard will
have a softer effect.
36 OCTAVE: An-/Abschalten der Funktion
36
53. Sostenuto Pedal
46. DC IN Jack
49. MIDI IN
When you step on the sostenuto
theSpeicherplatz-Einstellung
DC 15V
Connect the MIDI OUT of 37
external
37Connect
BANK:
RECORD: Aufnahme-Modus
pedal, the notes played before you
device to the MIDI IN terminal on
power adaptor.
step on the pedal would have a
the rear panel.
sustain
effect.
ACCOMP:
Auswahl
einer
Begleitspur für die
47.
IN Jack speichern
38AUX.
STORE:
38
Aufnahme 54. Sustain Pedal
50. MIDI OUT
Connect an external sound
source, such as an Mp3 or
Connect the MIDI IN of external
Use this pedal to sustain the sound.
39CD player.
39
device to the MIDI OUT terminal
It also supports the half-pedal
on the rear panel.
operation. Performing with the sustain
48.
40AUX. OUT Jack
40
pedal will achieve a smooth effect.
Connect
the audio
equipment.
51. USB Jack
M1-M4:
Speicher
für Einstellungen
Connect to a computer. 41 MELODY 1-5: Auswahl einer Melodiespur für
41
die Aufnahme
42
42
43 O.T.S.: An-/Abschalten der Touch-Funktion
43
44 HARMONY: An-/Abschalten der Funktion
44
AW_DP330_Manual_G06_150420
2015
4
20
10:28:32
45 SCALE: An-/Abschalten der Funktion
45
7
5
100
95
75
25
5
0
Select the &
accomp
track to record
Panel
Display
Description
39~43. MELODY 1-5 button
Select the melody1-5 track to record
24
27
tings
ttings
Rear
Panel
30
31
28
37
26
ngs
37. [RECORD] button
Enter record mode
Rückseite
25
33~34. [TRANSPOSE+/-] button
Adjust the transpose
29
38
39
40
32
41
33
42
34
43
35
36
44
45
52
52. Soft Pedal(multi
When you step on
notes played on th
have a softer effec
46
49
50
51
When [SHIFT] button pressed
20. LCD 47 48
21. [DEMO] button
Display the information of the piano
53. Sostenuto Pedal
46. DC IN Jack
49. MIDI IN
Enter demo mode
When you step on
Connect
DC dial
15V
Connect the MIDI OUT of external
24.the
Data
pedal, the notes p
device to the MIDI IN terminal on
power adaptor.
22. [PERFORM] button
Adjust the value
step on the pedal
the rear panel.
Enter the Performance Assistant
sustain effect.
MIDI
IN:
Verbindungsbuchse
(die
MIDI
OUT
47. AUX. IN
Jack [YES/+]/[NO/-] button
mode
25~26.
46 DC IN: Buchse für das
15 V-Netzteil
4950. Buchse
eines externen MIDI-Gerätes wird54.
mitSustain Pedal
MIDI OUT
Connect
anAdjust
external
thesound
value
source, such as an Mp3 or
Connect
the MIDI
IN of external
dieser
Buchse
verbunden
23. [ALBUM] button
Use this pedal to s
CD player.
device to the MIDI OUT terminal
Enter album mode
35. [TWINOVA] button
It also supports th
on theOUT:
rear panel.
MIDI
Verbindungsbuchse (die MIDI IN - operation. Perform
Turn the TWINOVA on or off
AUX IN: Buchse für
48.MP3AUX. oder
OUT CD-Player
Jack
27. [PIANO]
47 button
50 Buchse eines externen MIDI-Gerätes wird hierpedal will achieve
Anschluss
Connect
the[OCTAVE]
audio equipment.
51. USB Jack
Select the piano mode
36.
button
angeschlossen
Connect to a computer.
Set octave in TWINOVA mode
28. [METRONOME]
button
AUX OUT: Anschlussmöglichkeit für AudioTurn48the metronome on or off
44. [HARMONY] button51 USB: Anschlussbuchse für einen Computer
Equipment
Turn harmony effect on or off
29. [DUAL] button
Turn the Voice R2 on or off
45. [SCALE] button
Turn the scale effect on or off
30. [LOWER] button AW_DP330_Manual_G06_150420
Turn the Voice L on 2015
or off 4 20
10:28:32
31. [TOUCH] button
Choose a keyboard touch setting
ff
cord
record
32. [DSP] button
Turn the DSP effect on or off
Pedal
Pedal
33~34. [TRANSPOSE+/-] button
Adjust the transpose
37. [RECORD] button
Enter record mode
53
52
49
50
51
49. MIDI IN
52 MIDI
SoftOUT
Pedal
Connect the
of external
device to the MIDI IN terminal on
the rear panel.
54
52. Soft Pedal(multi function pedal)
When you step on the soft pedal, all
notes played on the keyboard will
have a softer effect.
53. Sostenuto Pedal
Dieses PedalWhen
reduziert
die
das Timbre der
you step
onLautstärke
the sostenutound ändert leicht 100
pedal, the
notes played
before „weicher“
you
gespielten Noten,
wodurch
der Klang
wird.
step on the pedal would have a
95
sustain
effect.
Wenn Sie auf
das Sostenutopedal
treten, während Sie Tasten gedrückt
75
halten, werden die Töne so lange ausgehalten, bis Sie das
Pedal
50. MIDI OUT
54. Sustain Pedal
Connect the MIDI IN of external loslassen (Sustain).
Die
anschließend
gespielten
Töne
werden
nicht
Use this pedal to sustain the sound.
Sostenuto
Pedal
device to53
the MIDI
OUT terminal
also supports
the half-pedal
ausgehaltenItsondern
normal
wiedergegeben. So können Sie
on the rear panel.
operation.
with
the sustain
beispielsweise
einen Performing
Akkord mit
Sustain
versehen und andere
Noten
25
pedal will achieve a smooth effect.
staccato spielen.
51. USB Jack
Connect to a computer.
54
Sustain Pedal
5
Es funktioniert genauso wie das Pedal an einem akustischen Piano, es
bewirkt also ein Sustain des Sounds, nachdem Sie Ihre0 Hände von den
5
Tasten genommen haben.
8
Aufbau
Dieser Abschnitt beinhaltet Informationen über den Aufbau Ihres Instruments und die Vorbereitung
zum Spielen. Bitte gehen Sie den Abschnitt sorgfältig durch bevor Sie das Gerät anschalten.
Übersicht über die Einzelteile
Bevor Sie den Ständer zusammenbauen, besorgen Sie sich bitte einen Philips-Schraubendreher,
da dieser nicht mitgeliefert wird. Stellen Sie dann sicher, dass alle folgenden Teile vorhanden sind:
1. Gehäuse
2. linker Seitenständer
3. rechter Seitenständer
4. Rückwand
5. Pedalkasten
6. Schrauben 4x15BA (8 St.)
7. Schrauben M6x40 (4 St.)
8. Schraubenabdeckungen (4 St.)
9. Handschrauben (4 St. )
10. Pedalkabel
11. Netzteil
9
Aufbau
Befestigen Sie die
Seitenständer mit
Schrauben (7) am
Pedalkasten und
decken Sie die
Schrauben mit den
Plastikkappen ab.
Befestigen Sie die Rückwand
mithilfe der Schrauben (6) an
Pedalkasten und
Seitenständern. Der Stand ist
nun fertig.
Legen Sie das Piano auf den Stand und
befestigen Sie es mit den Handschrauben.
10
Drehen Sie nun an der Stellschraube am Pedalkasten bis die Pedalbox Bodenkontakt hat.
Verbinden Sie das Pedalkabel mit der Pedalbuchse an der Rückseite des Gerätes und verbinden
Sie abschließend das Netzteil mit der DC In-Buchse.
11
Stromversorgung
1. Vergewissern Sie sich zuerst, dass das Gerät
ausgeschaltet ist. Drehen Sie dann die Lautstärke
auf Minimum.
2. Verbinden Sie das Netzteil mit der entsprechenden
Buchse am Piano.
3. Verbinden Sie das andere Ende des Netzteils mit
der Steckdose.
4. Schalten Sie das Gerät an.
Bitte beachten Sie, dass sich das Gerät selbst
ausschaltet, wenn es länger als 30 min nicht benutzt
wird.
Wenn Sie das Gerät längere Zeit nicht benutzen,
trennen Sie es bitte vom Strom. Gleiches gilt während
eines Gewitters.
Anschlüsse
Kopfhörer
An dieser Buchse können Sie Standard-Kopfhörer anschließen, wenn Sie in Ruhe oder spät in der
Nacht spielen möchten.
Connections
„Headphone Jack 1“ ist die Buchse 1 für den Kopfhörer. Wenn Sie hier einen Kopfhörer
anschließen, können Sie den Pianosound sowohl
durch die Kopfhörer als auch aus dem Piano selbst
hören. a pair of Headphones
Connecting
A standard pair of stereo headphones can be plugged in here for
private practice
or late-night
playing.
„Headphone
Jack
2“ ist die Buchse 2. Sobald Sie
Jack1: when a pair of headphones is plugged into the jack 1, the
an
dieser
Buchse
einen
Kopfhörer anschließen,
sound can be heard from both headphones and speakers of the
wird die Tonübertragung durch das Piano gestoppt
instrument.
Jack2: when
pair of
headphones
is plugged into nur
the jack
2, the
unda Sie
können
den Pianosound
noch
über den
internal stereo
speakerempfangen.
system is automatically shut off. The
Kopfhörer
sound can only be heard from headphones.
Note:
Bitte
Sieloss
diewhen
Lautstärke
herunter,please
wenn Sie
To avoid the
riskregeln
of hearing
using headphones,
do not playlängere
the pianoZeit
withmit
a high
volume level
for a long
Kopfhörern
spielen,
Ihrtime.
Gehör
könnte sonst dauerhaft geschädigt werden.
Connecting an Audio Equipment
The rear-panel AUX.OUT jack delivers the output of the instrument
for connection to a keyboard amplifier, stereo sound system, a mixing
console, or tape recorder. Use an audio cord to plug into the AUX OUT
jack located on the rear panel then plug the other end of the cord into
AUX.IN of the amplifier.
Note:
To avoid damaging the speakers, please ensure that the volume
has been set to the minimum level before connecting the power
and other devices.
12
Jack1
Jack2
Jack2: when a pair of headphones is plugged into the jack 2, the
Note:
a pair
of
Headphones
internal
stereo
speaker
system
is automatically
shut off. please
The
ToConnecting
avoid the
risk of
hearing
loss when
using headphones,
canthe
only
bestereo
heard
from
doAsound
not
play
piano
with aheadphones
high headphones.
volumecan
level
a long in
time.
standard
pair
of
befor
plugged
here for
private
Note:practice or late-night playing.
Jack1:
a pair
of headphones
is plugged
into the jackplease
1, the
To avoidwhen
the risk
of hearing
loss when
using headphones,
sound
headphones
andforspeakers
of the
do not can
playbe
theheard
pianofrom
withboth
a high
volume level
a long time.
instrument.
Connecting
Audio Equipment
Jack2: when a pairan
of headphones
is plugged into the jack 2, the
The
rear-panel
AUX.OUT
jack delivers
the output shut
of the
instrument
internal stereo speaker system
is automatically
off.
The
forsound
connection
to abekeyboard
amplifier,
stereo sound system, a mixing
can
only
heard
from
headphones.
Die
Buchse
AUX
OUT
an
der
Rückseite
des
Pianos
console,
or tape recorder.
an audio
cord to plug into the
AUX
OUT ist
Connecting
anUse
Audio
Equipment
Note:
eine
fürother
Verstärker,
jack
located
onAnschlussmöglichkeit
the rear panel
then plug the
end
cord into
The
rear-panel
the
output
of of
thethe
instrument
To
avoid
the riskAUX.OUT
of hearingjack
lossdelivers
when using
headphones,
please
AUX.IN
of
the amplifier.
for
connection
to
a
keyboard
amplifier,
stereo
sound
system,
Stereoanlagen,
Mischkonsolen
oder
Recorder.
do not play the piano with a high volume level for a long time. a mixing
console,
or tape recorder.
an audio cord
plugVerbindung
into the AUX OUT
Note:
Benutzen
Sie einUse
Audiokabel
fürtodie
located
on the
rear
panel then
plugensure
the other
the cord into
Tojack
avoid
damaging
the
speakers,
please
thatend
the of
volume
Instrument
externem
AUX.IN
of the
amplifier.
has
beenzwischen
set
to the
minimum
level und
before
connectingGerät.
the power
Sie die Verbindung herstellen, drehen Sie bitte
and
otherBevor
devices.
Note:
Connecting
anspeakers,
Audio
Equipment
To avoid
the
please
ensure
that the volume
diedamaging
Lautstärke
auf
Minimum
um Schäden
an
The
AUX.OUT
jacklevel
delivers
the connecting
output of the
has rear-panel
been
set
to
the
minimum
before
theinstrument
power
Lautsprechern
zu
verhindern.
for
to a keyboard amplifier, stereo sound system, a mixing
andconnection
other devices.
console, or tape recorder. Use an audio cord to plug into the AUX OUT
jack located on the rear panel then plug the other end of the cord into
AUX.IN of the amplifier.
Audio-Equipment
Jack1
Jack2
Jack1
Jack2
Note:
To avoid damaging the speakers, please ensure that the volume
has been set to thean
minimum
level before
connecting the power
Connecting
MP3/CD
Player
and other
Connect
thedevices.
audio output of an MP3/CD player or other audio
source to the stereo AUX IN jack on the rear panel.
Connecting
anwith
MP3/CD
Player
The
input signal is mixed
the piano signal,
allowing you
to Connect
play along
music.
thethe
audio
output of an MP3/CD player or other audio
sourceVerbinden
to the stereoSie
AUXden
IN jack
on the rear
panel.
Ausgang
eines
MP3- oder CDThe input signal is mixed with the piano signal, allowing you
Players
mit
der
Buchse
AUX
IN
an
der Rückseite des
to play along the music.
MP3-Player
Gerätes. Das einkommende Signal wird mit dem
Pianosignal gemischt und Sie können zur Musik
Connecting
an MP3/CD Player
spielen.
Connect the audio output of an MP3/CD player or other audio
source to the stereo AUX IN jack on the rear panel.
The input signal is mixed with the piano signal, allowing you
to play along the music.
Connecting a Computer
The instrument receives and transmits MIDI messages via the
USB connector.
Connecting
Computer
Connecting
the MIDI INa/OUT
to Computer via The MIDI/USB
The instrument receives and transmits MIDI messages via the
converter.
USB connector.
Connecting the MIDI IN /OUT to Computer via The MIDI/USB
Note:
converter.
If this product does not work correctly when connected to a USB 3.0
port, you will need to connect to a USB 2.0 port.
1
Computer
9
Note:
Connecting
a Computer
Das Instrument
kann
überwhen
die USBoderto die
MIDIIf this product
does not work
correctly
connected
a USB
3.0
7
The instrument receives and transmits MIDI messages via the
port, connector.
you
will needan
to connect
a USB 2.0 MIDI-Daten
port.
Buchsen
seiner to
Rückseite
empfangen
USB
Connecting
the
MIDI
IN
/OUT
to
Computer
via
The
MIDI/USB
und senden.
converter.
Der USB-Anschluss kann MIDI-Daten sowohl senden
als auch empfangen.
Note:
Bitte beachten
Sie,correctly
dass Sie
das
Gerät an
If this product
does not work
when
connected
to aeinem
USB 3.0USB
2.0-Port
das
port, you
will needanschließen,
to connect to a da
USB
2.0 Gerät
port. an einem USB 3.0Port nicht korrekt funktioniert.
2
5
0
9
9
W_DP330_Manual_G06_150420
15
4
20
10:28:34
AW_DP330_Manual_G06_150420
2015
4
20
10:28:34
9
AW_DP330_Manual_G06_150420
2015
4
20
10:28:34
13
Turn the [VOLUME] knob clockwise, the volume increases and vice
versa.
Einstellungen
Adjusting
the Master Volume
Adjusting
Lautstärke the Master Volume
Turn the [VOLUME] knob clockwise, the volume increases and vice
versa.
Drehen Sie den Regler VOLUME nach rechts um die Lautstärke zu erhöhen oder
Turn the [VOLUME] knob clockwise, the volume increases and vice
nach links, um sie zu vermindern.
versa.
Adjusting the Voice Brilliance
Brillanz
Turn the [BRILLIANCE] knob clockwise, the voice sounds brighter
and vice versa. You can change the piano brilliance as you wish.
Benutzen Sie den Regler BRILLANCE um die Brillanz des Sounds ihren
Wünschen anzupassen.
Adjusting the Voice Brilliance
Adjusting the Voice Brilliance
Turn the [BRILLIANCE] knob clockwise, the voice sounds brighter
and vice versa.eines
You can change
the piano brilliance as you wish.
Abspielen
Demo-Songs
TurnDas
the [BRILLIANCE]
knob
clockwise,
the voice sounds
brighter
Piano verfügt
über
fünf wundervolle
Demosongs.
and vice versa. You can change the piano brilliance as you wish.
Eine Liste der Demosongs finden Sie im
Playing the Demo Song
Anhang.
Drücken Sie die Tasten STYLE und DEMO gleichzeitig um einen Demosong zu starten.
Benutzen
das Drehrad
oderdemos.
die Tasten
und -/NO um einen Demosong
The Sie
instrument
features 5DATA
wonderful
Please +/YES
refer to Demo
List.
auszuwählen.
Im Display erscheinen Name und Nummer des Songs. Die Songs werden in einer
Endlosschleife abgespielt.
1. Holding down [SHIFT] button, then press the [DEMO] button to start
demo song playing, and the LCD will display the number and name
Um den Demosong
zu beenden, drücken Sie bitte die Tasten START/STOP. Drücken Sie abermals
of demo.
die Tasten STYLE und DEMO um den Demomodus zu verlassen.
Fantaisie
2. You can use the data dial, the [+/YES]/ [-/NO] button to select a
Bitte beachten
Sie, dass im Demomodus nicht alle Knöpfe und Tasten zur Verfügung stehen. Die
demo song.
The instrument
features
wonderful
refer to Demo
Tastenbelegung
finden
Sie 5im
ersten demos.
KapitelPlease
der Bedienungsanleitung.
List.
3.
Press the [START/STOP] button to stop playing. Holding down
Playing the Demo Song
Playing the Demo Song
[SHIFT] button, then press the [demo] button to exit demo mode.
1. Holding
[SHIFT]demos.
button,Please
then press
[DEMO] button to start
The instrument
features down
5 wonderful
refer the
to Demo
demo song playing, and the LCD will display the number and name
Note:
List.
of demo.
In the
demo status, all the demo songs will loop playing. And all
buttons
and keys
arethen
unavailable
except
[DEMO],
1. Holding down [SHIFT]
button,
press the
[DEMO]
button[START/STOP],
to start
[TEMPO+/-],
[+/YES],
[-/NO]
button,
data
dial,
2.
You
can
use
the
data
dial,
the
[+/YES]/
[-/NO]
button
to select a
demo song playing, and the LCD will display the number[VOLUME]
and
name
knob and POWER SWITCH.
demo song.
of demo. knob,[BRILLIANCE]
3. Press the [START/STOP] button to stop playing. Holding down
2. You can use [SHIFT]
the data dial, the [+/YES]/ [-/NO] button to select a
button, then press the [demo] button to exit demo mode.
demo song.
3. Press theNote:
[START/STOP] button to stop playing. Holding down
In the demo
status,
the demo
songs
willdemo
loop playing.
[SHIFT] button,
then press
theall[demo]
button
to exit
mode. And all
buttons and keys are unavailable except [DEMO], [START/STOP],
[TEMPO+/-], [+/YES], [-/NO] button, data dial, [VOLUME]
Note: 10 knob,[BRILLIANCE] knob and POWER SWITCH.
In the demo status, all the demo songs will loop playing. And all
buttons and keys are unavailable except [DEMO], [START/STOP],
[TEMPO+/-], [+/YES], [-/NO] button, data dial, [VOLUME]
knob,[BRILLIANCE] knob and POWER SWITCH.
AW_DP330_Manual_G06_150420
2015
4
10
20
10:28:35
14
Fantaisie
Fantaisie
Playing Voices
Playing
Dieses Piano verfügt über 500 außergewöhnlich realistischer Sounds, den Voices. Eine Liste mit
PlayingVoices
Voices
Sounds
The instrument features 500 exceptionally realistic voices. Please refer
allenList.
Sounds finden Sie im Anhang.
to Voices
The instrument features 500 exceptionally realistic voices. Please refer
Playing
The
instrument
features 500 exceptionally realistic voices. Please refer
to Voices
List. Voices
to
List. press [VOICE] button or one of the voice direct
1. Voices
In idle mode,
buttons to enter the voice mode. LCD will display the “VOICE R1”
Playing
Voices
indicate,
and display the current voice name and number.
Playing
Voices
1. In
idle mode, press
[VOICE] button or one of the voice direct
Drücken
Sie
die
Taste
VOICE.
Imtoof
Display
erscheint
buttons
to
enter
the
mode.
LCD button
will
thevoice
“VOICE
R1” want
1.
In
idle
mode,
press
[VOICE]
button
or display
one
the
direct
2. Use the data dial,voice
[+/YES]/
[-/NO]
select
a voice
you
indicate,
and
display
the
current
voice
name
and
number.
R1“
und
diethe
Voice-Nummer.
buttons
to enter
voice
mode.
LCD
will button
displaytothe
“VOICE
to„VOICE
play. You
can the
also
use
voice
direct
select
one.R1”
indicate, and display the current voice name and number.
2. Use
the
dataplay
dial,
[+/YES]/
[-/NO]
button
to
a voice
want
Wählen
Sie
eine
Voice
aus,
Sie
das you
Drehrad
3. You
can
the
keyboard
and
listenindem
to select
the wonderful
voice.
to
can also
the voice
direct
button
to select
one.you want
2.play.
Use You
the data
dial,use
[+/YES]/
[-/NO]
button
to select
a voice
oder die Tasten +/YES und -/NO benutzen. Sie
to play. You can also use the voice direct button to select one.
Note:
können
eine
Voice auch
über die
Voicetasten[VOICE]
direkt
When
DUAL
and LOWER
on,wonderful
you can press
3. You
canthe
play
the keyboard
andfunction
listen to isthe
voice.
anwählen.
button
repeatedly
to
choose
the
voice
source.
The
corresponding
3. You can play the keyboard and listen to the wonderful voice. LCD
indicate will highlight between R1, R2, L.
Note:
When
the
DUAL
andVoicetasten
LOWER function
is on,über
you can
press
[VOICE]
Note:
Jede
der
verfügt
drei
Voicebutton
repeatedly
to and
choose
the voice
source.
The
corresponding
LCD
When
the DUAL
LOWER
function
is on,
you
can press [VOICE]
Quellen:
R1,
R2, und
L.voice
Wenn
die Dual- oder Lowerindicate
willrepeatedly
highlight between
R1,
L. source. The corresponding LCD
button
to choose
theR2,
Funktion
aktivbetween
ist, können
Sie
indicate
will highlight
R1, R2,
L. durch Drücken der
Auswahl
StGrdPno
StGrdPno
StGrdPno
Playing
two voices
Voicecetaste
zwischen simultaneously-DUAL
den Soundquellen wechseln. Das entsprechende Kontrolllicht leuchtet auf.
The piano has a dual voice function. You can play two voices to make
the sound more richly.
Playing two voices simultaneously-DUAL
two
voices
simultaneously-DUAL
ThePlaying
piano
hasmode,
a dual
voice
function.
You can
play and
two voices
to make
1.
In idle
holding
down [SHIFT]
button,
then press
[DUAL]
the The
sound
more
richly.
piano
has
a dual
function.
You
candisplays
play twothe
voices
to make
button
to
turn
dual voice
function
on. The
LCD
current
voice
thename
soundand
more
richly. and the indicate “VOICE R 2” and “DUAL”
number,
1. In idle mode, holding down [SHIFT] button, and then press [DUAL]
Drücken
Sie
die down
Tasten
SHIFT
und
DUAL.
Zwei
button
tocan
turn
dual
function
on.the
The[+/YES],
LCDbutton,
displays
the
current
voice
1.
idle
mode,
holding
[SHIFT]
and
then
press
[DUAL]
2. In
You
use
the
data
dial,
[-/NO]
button
or
voice
direct
name
and
number,
and
the
indicate
“VOICE
R
2”
and
“DUAL”
button
to
turn
dual
function
on.
The
LCD
displays
the
current
voice
verschiedene
Voices
klingen
gleichzeitig.
Die
Nummer
button to select the dual voice you want to play.
name
and number, and
theim
indicate
“VOICE
R 2” and “DUAL”
der Dual-Voice
wird
Display
angezeigt.
2. You
can the
use keyboard,
the data dial,
[+/YES],
button
or voice
direct
3. Play
andthe
then
you will[-/NO]
hear two
different
voices
are
button
tocan
select
the
you
wantItto
play.
2. You
use
thedual
datavoice
dial,inthe
[+/YES],
[-/NO]like
button
or voice direct
sounded
simultaneously
a
layer.
seems
two
different
Wählen
Sie
eine
Dual-Voice
aus
(=
VOICE
R2),
indem
button
to select
the dual
voice
you
want to play.
instruments
playing
at the
same
time.
Siekeyboard,
das Drehrad
oder die Tasten +/YES und -/NO oder die
3. Play the
and then you will hear two different voices are
Voicetasten
benutzen.
sounded
simultaneously
a
layer.
seems
like
different
3.
Play
the
keyboard,
then
youIt will
hear
twotwo
different
voices
are
4. When
dual
function and
isinon,
holding
down
[SHIFT]
button,
and then
instruments
playing
at
the same
sounded[DUAL]
simultaneously
in turn
a time.
layer.
seems like
pressing
button
will
dualIt function
off. two different
instruments
playing
at the same
Wenn sich
die Tastatur
imtime.
Splitmodus befindet, wird nur
4. When
dualBereich
function is
holding
down
[SHIFT]
and then belegt,
der
füron,die
rechte
Hand
mit button,
der Dual-Voice
Note:
pressing
[DUAL]
button
will
turn
dual only
function
off. hand
4.
When
dual
function
isbeen
on,
holding
down
[SHIFT]
button,
and
When
the
keyboard
has
split,
the
right
area
will then
der für die linke Hand nicht.
pressing
[DUAL]
button
will
turn
dual
function
off.
respond the dual voice, the left hand will not respond to it.
Dual-Modus
SSlowStr
SSlowStr
SSlowStr
Note:
When
the keyboard has been split, only the right hand area will
Note:
respond
the
voice, has
the left
hand
willonly
notthe
respond
to it. area
When
thedual
keyboard
been
split,
right hand
will
Playing
Different
Voices
with
Both
handsrespond the dual voice, the left hand will not respond to it.
Lower-Modus
LOWER
The lower function splits the keyboard into two individual areas, with
Playing
Different
Voices with Both handsthe left-hand
the lower voice. Sounds „nebeneinander“ zu
Um mitarea
zweiforverschiedenen
Playing
Different
Voices with Both handsLOWER
1. In idle mode, holding down [SHIFT] button, and then press
spielen,
drücken
Sie
die Tasten
SHIFT
und
LOWER.
Die
TheLOWER
lower
function
splitstothe
keyboard
into
two individual
areas,
with
[LOWER]
button
turn
the lower
function
on.
Nummer
der
Lower-Voice
wird
im
Display
angezeigt
the The
left-hand
area
for
the
lower
voice.
lower
function
splits
the
keyboard
into
two
individual
areas,
with
The keyboard is split into two independent sections, and each
left-hand
area
for
the
lower
voice.
section
has
its voice.
The
LCD
displays
the left
voice name
1. Intheidle
mode,
holding
down
[SHIFT]
button,
and
thenhand
press
(VOICE
L).
Sie
können
eine
Lower-Voice
auswählen,
and
number,
and
the
indicate
“VOICE
L”
and
“LOWER”
[LOWER]
button
to
turn
the
lower
function
on.
1. In
idle
mode,
holding
down
[SHIFT]
button,
and
then
press
indem Sie das Drehrad oder die Tasten +/YES und -/NO
The[LOWER]
keyboardbutton
is splitto
into
two
independent
sections,
turn
the
lower function
on. and each
oder
die
Voicetasten
benutzen.
section
has
its
voice.
The
LCD
displays
the
left
hand
voice
The
keyboard
is
split
into
two
independent
sections,
and
eachdirect
2. You can use the data dial, the [+/YES], [-/NO]
button
or name
voice
andsection
number,
and
indicate
“VOICE
andthe
“LOWER”
itsthe
voice.
The voice
LCD
displays
left
hand voice name
button
tohas
select
the
lower
youL”want
to
play.
and number, and the indicate “VOICE L” and “LOWER”
2. You can use the data dial, the [+/YES], [-/NO] button or voice direct
button
select
voicethe
you
want to[-/NO]
play. button or voice direct
2. Youtocan
usethe
thelower
data dial,
[+/YES],
SSlowStr
SSlowStr
SSlowStr
button to select the lower voice you want to play.
11
15
11
AW_DP330_Manual_G06_150420
11
Note: [LOWER] button will turn lower function off.
pressing
The right hand voice does not change when you change lower voice.
Note:
The right hand voice does not change when you change lower voice.
3. Split
Play the
keyboard in different sections, and you will hear two
Point
different
ThePoint
Pointvoices.
on the keyboard that separates voice L and voice R1/R2 is
Split
called
point". The
point is voice
set to LF#3
the factory
The
Pointthe
on"split
the keyboard
thatsplit
separates
andatvoice
R1/R2 is
Durch
nochmaliges
Drücken
Tasten
und LOWER
setting.
However
youThe
can
set
this toisdown
any
key
you
Refer
4.
When
lower
function
is
on,
holding
[SHIFT]
button,
and to
then
called
the
"split
point".
split
point
set der
to
F#3
atwant.
the SHIFT
factory
KeySplit
setting
for can
splitset
point
setting.
However
you
thissetting.
to any
keyfunction
you want.
pressing
[LOWER]
button
will
turn
lower
off. Refer to
KeySplitDer
setting
for split point
setting.
Note:
Splitpoint
stellt
die Trennung zwischen VOICE L
The right hand voice does not change when you change lower voice.
und VOICE R1/R2 dar. Er sitzt ab Werk bei F#3. Sie
können ihn jedoch jeder beliebigen Taste zuweisen.
Split Point
The Point
on the
keyboard
that separates
voice„Einstellen
L and voice R1/R2
Bitte
lesen
Sie dazu
das Kapitel
des is
called
the "split point". The split point is set to F#3 at the factory
Touch
Splitpoints“.
setting. However you can set this to any key you want. Refer to
wird der Modus wieder beendet.
Touch
The touch response feature allows you to control the voice volume with
KeySplit
setting
for split
point
setting.
The
touch
response
feature
allows
you
control
the an
voice
volume with
the
strength
you
play
on the
keys,
justtolike
playing
acoustic
theinstrument.
strength you play on the keys, just like playing an acoustic
instrument.
The piano has three touch types to choose.
The
hasdown
three[SHIFT]
touch types
to choose.
1.piano
Holding
button,
and then press [TOUCH] button to
Dasdown
Keyboard
mitdisplays
einer
Touch
Response-Funktion
1. Holding
[SHIFT]
button,
and
then
[TOUCH]
button to
enter
touch
settings.ist
LCD
thepress
touch
setting number.
Touch
enter
touch
settings.
LCD
theIhres
touchAnschlags
setting number.
The
default
number
is 2.displays
ausgestattet,
d.h.
die
Kraft
beeinflusst
TheThe
touch
response
feature
default
number
is 2. allows you to control the voice volume with
unmittelbar
den
Sound,
genau
wie
an
einem
the strength you play on the keys, just like playing an acoustic akustischen
2. Choose
a touch type.
instrument.
Instrument.
TOUCH
2. Choose
touch
type. touch setting, using [+/YES]/ [-/NO] or data dial
WhenaLCD
displays
TOUCH
LCD
touch
setting,
using
[+/YES]/
[-/NO]
or data dial
or holding
downtouch
[SHIFT]
button,
and then
pressing
[TOUCH]
TheWhen
piano
has displays
three
types
to choose.
Drücken
Sie
SHIFT
undand
TOUCH,
im Display
wird der
or button
holding
down
[SHIFT]
button,
then
pressing
[TOUCH]
can
change
touch
type:
OFF,
001(soft),
002(normal),
1. Holding
down
[SHIFT]
button,
and
then
press [TOUCH]
button to
button
can
change
touch
type:
OFF,
001(soft),
002(normal),
003(hard).
Pressing
[+/YES]
and [-/NO]
simultaneously
will set
gegenwärtige
Wert
angezeigt.
Der
Bereich
geht
von OFF
enter
touchPressing
settings. [+/YES]
LCD displays
the touch
setting number.
003(hard).
and2(normal).
[-/NO]
simultaneously
will set
touch
value
to3 default
setting:
(aus)
bis
(hart).
Ab
Werk
ist
2
eingestellt.
Benutzen
Sie
The
default
is setting:
2.
touch
value number
to default
2(normal).
Default Split Point
Anschlagdynamik - Touch Response
das Drehrad oder die Tasten +/YES und -/NO um den
2. Choose
a touch
type. oder drücken Sie + und - gleichzeitig um
Wert
zu ändern
TOUCH
When
LCD
displays touch setting,
using [+/YES]/ [-/NO] or data dial
zur
Werkseinstellung
zurückzukehren.
or holding down [SHIFT] button, and then pressing [TOUCH]
Transpose
button can change touch type: OFF, 001(soft), 002(normal),
Transpose
Transpose
theand
overall
pitch
of the instrument
to be
003(hard). function
Pressingallows
[+/YES]
[-/NO]
simultaneously
will set
Transpose
function
allows
theaoverall
pitchofofone
theoctave
instrument
to be
transposed
downsetting:
by
maximum
in semitone
touch valueup
to or
default
2(normal).
transposed
steps. up or down by a maximum of one octave in semitone
steps.
1. Holding down [SHIFT] button, and then press [TRANSPOSE+] or
1. Holding
down [SHIFT]
button,
andtranspose
then presssettings.
[TRANSPOSE+]
or
[TRANSPOSE-]
button
to enter
LCD displays
Mit dieserbutton
Funktion
können
Siesettings.
die Tonhöhe
des thethe
[TRANSPOSE-]
toTranspos.
enter
transpose
LCD is
displays
current transpose:
xxx
The default
number
0.
Instruments
verändern.
Diedefault
Reichweite
eine
current
transpose: xxx
Transpos. The
number beträgt
is 0.
Transponieren
Touch
Touch
Touch
Touch
Touch
Touch
Transpose
Oktave in Halbtonschritten (-12 bis +12).
2. Whenfunction
LCD displays
[+/YES]/to[-/NO]
Transpose
allows the
the current
overall transpose,
pitch of theuse
instrument
be or
2.
When
LCD
displays
thetranspose
current transpose,
use
[+/YES]/
[-/NO]
or
data
dial
to
change
value.
The
max
transpose
is
transposed up or down by a maximum of one octave in semitone ±12
data
dial
to
change
transpose
value.
The
max
transpose
is
±12
semitones.
steps. Drücken Sie SHIFT und TRANSPOSE + oder -, im
semitones.
Display
derand
aktuell
eingestellte
Wert (ab
1. Holding
down erscheint
[SHIFT] button,
then press
[TRANSPOSE+]
or Werk
3. Press
[+/YES]button
andeinen
[-/NO]
simultaneously
will setLCD
the transpose
[TRANSPOSE-]
to enter
transpose
settings.
displayskönnen
the
0).
Wenn
Sie
Song
in
G
spielen
möchten,
3. current
Press
[+/YES]
andxxx
[-/NO]
simultaneously
will number
set the transpose
value
to its default
setting:
000The
Transpos.
transpose:
Transpos.
default
is 0.
den
Wertsetting:
auf -05
007 einstellen. Die
valueSie
to its
default
000oder
Transpos.
Transpos
Transpos
Transponierung bezieht sich auf alle Teile der Musik und des Keyboards.
2. Note:
When LCD displays the current transpose, use [+/YES]/ [-/NO] or
Note:
Ifdata
youdial
want
play song
in G key,
youThe
can max
set the
transpose
to -05 or
toto
change
transpose
value.
transpose
is ±12
If you
want
play
song
G key,
you can
set
to -05 or und -/NO oder TRANSPOSE
Benutzen
Sie
das
Drehrad
oder
dietranspose
Tasten
+/YES
+ oder - um den
007,
thentoyou
can
playin
the
G
scale
using
C the
scale
keys. Transpose
semitones.
Transpos
007,
then is
you
can play
thepart
G scale
using
Cand
scale
keys. Transpose
setting
applied
to
all
of
the
music
keyboard.
Wert zu ändern. Drücken Sie +/YES und -/NO oder TRANSPOSE + und - gleichzeitig,
um den
Playing
Voices
setting is applied to all part of the music and keyboard.
3. PressWert
[+/YES]
simultaneously will
set the transpose
aufand
die[-/NO]
Werkseinstellung
zurückzusetzen.
value to its default setting: 000 Transpos.
Note:
Piano
If you
want to Mode
play song in G key, you can set the transpose to -05 or
This
function
is play
to setthe
theGvoice
the whole
keyboard
to piano
007,
then
you can
scaleof
using
C scale
keys. Transpose
instantly.
setting
is applied to all part of the music and keyboard.
12 Unabhängig
vonbutton,
allenand
Einstellungen,
diebutton
Sie can
down [SHIFT]
then press [PIANO]
12 1. Holding
enter
or
exit
piano
mode.
vielleicht gemacht haben, können Sie die Piano-
Piano-Modus
Einstellungen mit einem einzigen Knopfdruck
AW_DP330_Manual_G06_150420
aufrufen. Drücken Sie gleichzeitig die Tasten SHIFT
mode.
AW_DP330_Manual_G06_150420
2015
4
20
10:28:35
The
accompaniment
plays Pianomodus
the rhythm part. zu gelangen
und
PIANO umonly
in den
015
4
20
10:28:35
oder um ihn wieder zu verlassen.
12 Note:
In diesem Modus können auch das Menü „Mixer“
1. In piano mode, you can set the mixer function and enter function
oder das Funktionsmenü aufrufen. A.B.C. ist
menu.
2. Inautomatisch
piano mode, the abgeschaltet.
A.B.C. is automatically turned off.
2. In piano mode, the accompaniment control is the same to other
AW_DP330_Manual_G06_150420
015
Default Split Point
Default Split Point
4
20
10:28:35
Metronome
16
Using metronome helps you with beat that guides your playing by
preset tempo.
Piano
Metronome
Metronome
Using
metronome
helps
youyou
withwith
beatbeat
thatthat
guides
youryour
playing
by by
Using
metronome
helps
guides
playing
preset
tempo.
preset tempo.
1. Holding
down
[SHIFT]
button,
andand
thenthen
press
the the
[METRO]
1. Holding
down
[SHIFT]
button,
press
[METRO]
Metronom
button
to turn
the the
metronome
on or
button
to turn
metronome
onoff.
or off.
Drücken
Sie
Tasten
SHIFT und METRO um das
2. Metronome
beatbeat
typedie
setting
2. Metronome
type
setting
Please
refer
to
Beat
Type
Setting.
Metronom
Weitere
Please
refer toeinBeatoder
Typeauszuschalten.
Setting.
Informationen zur Einstellung der Taktart finden Sie im
Note:
entsprechenden Kapitel.
Note:
ChurOrg2
ChurOrg2
1. The
metronome
will will
respond
in the
nextnext
beatbeat
if it is
when
1. The
metronome
respond
in the
if itopened
is opened
when
the the
accompaniment
is playing.
accompaniment
is
playing.
Starten
Sie dieis Begleitautomatik,
das Metronom
passt
2. When
the the
metronome
on,
thenthen
startstart
the the
accompaniment,
the the
2. When
metronome
is on,
accompaniment,
metronome
will will
adjust
the einer
beatbeat
toAufnahme
the
accompaniment.
den Takt
an.adjust
Bei
wird der Sound des
metronome
the
to the
accompaniment.
3. When
recording,
metronome
cannot
be recorded.
3. When
recording,
metronome
beats
cannot
be recorded.
Metronoms
nicht
mitbeats
aufgenommen.
Twinova
Twinova
Twinova
TheThe
twinova
mode
cancan
splitsplit
the the
keyboard
intointo
twotwo
sections
which
twinova
mode
keyboard
sections
which
have
the
same
pitch
and
voice.
It
helps
teaching
and
learning
piano.
haveIm
theTwinovamodus
same pitch and voice.
It helps
teaching
and learning
piano.
ist die
Tastatur
in zwei
Bereiche
mit gleicher Tonhöhe und gleicher Voice geteilt.
1. Press
[TWINOVA]
button
to turn
twinova
function
on. on.
TheThe
LCDLCD
1. Press
[TWINOVA]
button
to turn
twinova
function
indicate
of twinova
is lighted.
In twinova
mode,
dualdual
voice
andand
indicate
of twinova
is lighted.
In twinova
mode,
voice
1.
Um
den
Modus
zu
starten
(oder
zu
beenden),
lower
voice
are
unavailable.
The
default
split
point
is
E3
(32).
lower voice are unavailable. The default split point is E3 (32).
When
youdrücken
are are
ready
to exit,
press
[TWINOVA]
button
again.
Sie
TWINOVA.
Die Indikatorlampe
When
you
ready
to exit,
press
[TWINOVA]
button
again.
„Twinova“ leuchtet auf. In diesem Modus sind die
2. In2.twinova
mode,
the the
default
voice
of „Lower“
right
hand
andand
left
hand
is is
Funktionen
„Dual“
und
nicht
verfügbar,
In twinova
mode,
default
voice
of right
hand
left
hand
the the
upper
voice
youyou
select
before
entering
twinova
mode.
UseUse
the the
upper
voice
select
before
entering
twinova
mode.
der
Split-Punkt
liegt
beior E3
(32),
datadata
dial,dial,
the the
[+/YES],
[-/NO]
button
the
voice
direct
button
to
[+/YES], [-/NO] button or the voice direct button to
2. voice.
Voice
Auswahl:
Im Twinovamodus ist die aktive
choose
choose
voice.
Voice die Upper Voice. Diese können Sie vor
3. In3.twinova
mode,
press
[OCTAVE]
button,
LCD
temporarily
Aktivierung
des
Modus
wie
gehabt
aussuchen.
In twinova
mode,
press
[OCTAVE]
button,
LCD
temporarily
displays
the
octave
value
of
twinova.
Now
you
can
use
the the
datadata
3. Festlegen
siehe
im use
displays
the octavedes
valueSplit-Punkts:
of twinova. Now
you can
dial,dial,
the the
[+/YES],
[-/NO]
button
to set
octave
value
of twinova.
TheThe
[+/YES],
[-/NO]
button
to
set
octave
value
of
twinova.
entsprechenden
Kapitel.
range
of
octave
is
-1
to
1.
Press
[+/YES]
and
[-/NO]
simultaneously
range of octave is -1 to 1. Press [+/YES] and [-/NO] simultaneously
4.the
Oktav-Einstellung
im aktiven
Twinovamodus:
will will
set
octave
value
to its
setting:
000.
set the
octave
value
todefault
its default
setting:
000.
Drücken Sie OCTAVE; im Display erscheint kurz
Note:
Note: der aktuelle Wert. Sie können ihn mit DIAL oder
1. In1.the
Demo
and
song
mode,
theBereich
[TWINOVA]
button
is-1
invalid.
+/verändern;
der
geht
von
1.
In the
Demo
and
song
mode,
the
[TWINOVA]
button
isbis
invalid.
Playing
Voices
2. Please
referrefer
to KeySplit
setting
to set
the the
splitsplit
point
setting.
2. Please
to KeySplit
setting
to set
point
setting.
TWINOVA
TWINOVA
TWINOVA
TWINOVA
StGrdPno
StGrdPno
Octave
Octave
The The
Default
SplitSplit
PointPoint
is E3is E3
Default
3. The
[OCTAVE]
button
is invalid
outside
twinova
mode.
3. The
[OCTAVE]
button
is invalid
outside
twinova
mode.
Bitte
beachten
Sie
When
the
octave
is
changed,
some
voices
may
be muted
in the
When the octave is changed, some voices may
be muted
in the
highest
lowest
range.
ImorDemound
Songmodus ist die Funktion Twinova
highest
or lowest
range.
1313
Scalenicht verfügbar.
This function allows you to experience different stretched tunings when
you play certain genres of music that is not composed based on twelve
equal interval.
Skalen
W_DP330_Manual_G06_150420
AW_DP330_Manual_G06_150420
4
20
10:28:35
Press
2015
4
20 [SCALE]
10:28:35 button
015
1.
repeatedly to turn on/off the function. The
corresponding icon will light on/off on the right of LCD.
Diese Funktion erlaubt die Nutzung verschiedener
Sieselection
Musikrichtungen spielen möchten,
2. ScaleSkalen,
type and falls
root key
auf[SCALE]
der Zwölftonskala
Press die
and nicht
hold the
button to enter beruht.
the scale setting menu.
The scale icon keeps flashing.
The default setting is “001 Pytha C”. You can press [+/YES], [-/NO]
1. Drücken Sie SCALE um in den Skalenmodus zu
button to select a different scale type.
leuchtet
auf.
Press one gelangen,
of the C7-B7das
keysIndikatorlämpchen
to select a root key. LCD
will display
the scale type
and root
Ab Werk
istkey.
das Intervall 001 Pytha C eingestellt.
2. Es sind sechs Skalen verfügbar: Pythagoras,
Major, Minor, Meantone, Werckmeister und
Number Kirnberg.
LCD Name
1
Pytha Sie abermals SCALE um den Modus zu
3. Drücken
2
Major
beenden,
das Lämpchen erlischt.
3
Minor
4. Im Skalenmodus halten Sie die Taste SCALE
4
Mean Tone
gedrückt
um in den Auswahlmodus zu gelangen.
Werck
5
Um
eine Skala auszusuchen, benutzen Sie bitte
StGrdPno
SCALE
Pytha C
SCALE
The piano has six types of scale, as shown below:
6
Note:
Kirnberg
17
Root key selection
die Tasten + und -. Die Nummer der Skala wird im Display angezeigt. Sie können auch die
Tasten C7 bis B7 benutzen.
Bitte beachten Sie: Der Modus wird automatisch beendet, wenn sich das Piano im Song- und
Demomodus befindet.
Begleitautomatik
Auto Accompaniment
Diese Funktion stellt Ihnen eine vollständige Band oder ein komplettes Orchester als Begleitung
zur Seite. Abhängig von den Akkorden, die Sie mit der linken Hand spielen, passt sich die
Begleitautomatik selbständig an. Das Instrument verfügt über 200 Styles in einer Vielzahl
verschiedener Musikgenres. Probieren Sie verschiedene aus, eine Liste mit den verfügbaren
Styles
finden Sie im
Anhang.
The auto
accompaniment
feature
puts a full backing band at your
Auto Accompaniment
fingertips. To use it, all you have to do is to play the chords with your
hand using
selected accompaniment style, and then the
uts a full left
backing
band your
at your
accompaniment
will
automatically
play along, instantly following the
do is to play the chords with your
chords you play. With auto accompaniment, even a solo performer can
mpaniment
style,
and then
thebacking of an entire band or orchestra. This
enjoy
playing
with the
play along,
instantly
following
keyboard
features
200the
styles in a variety of musical genres. Try to
animent, select
even some
a soloofperformer
can
the different
styles (refer to Style List) and enjoy the
n entire band
orchestra. This
auto or
accompaniment
feature.
ariety of musical genres. Try to
refer to Style Rhythmus-Spur
List) and enjoy the
Play
Auto Accompaniment(rhythm
track
1. Drücken
Sie STYLE, im Display erscheinen
Name und
only)Nummer des Styles.
2. Wählen
Sie
einen
Benutzen
hierzu
1. Press
any of the
style
directStyle
buttonaus.
or [STYLE]
buttonSie
to enter
thedas
styleDrehrad
mode. LCD
displays
the name+/YES
and number
of the current
style.
iment(rhythm
track
oder
die Tasten
und -/NO.
Sie können
die Styles auch direkt über die Style-Tasten auswählen.
2. Use Wie
the data
dial,
[+/YES],sind
[-/NO]
button
or the
style direct
bei
denthe
Sounds
auch
hier
wieder
alle Tasten
on or [STYLE]
button
to enter
button
to choose
the the
style you want to play.
mit
je
zwei
Styles
belegt.
Die
Auswahl
erfolgt
daher
ame and number of the current style.
auch,
wie
zuvor
beschrieben.
3. Press the [START/STOP] button to start the rhythm tracks of the
3. the
Drücken
Sie START/STOP
um[SYNC]
die Rhythmusspur
der
accompaniment.
Also you can press
and then
play any
8BtPiano
-/NO] buttonauto
or
style direct
start the rhythm tracks
of the autoSie
accompaniment.
Begleitautomatik
zu starten.
können auch SYNC
want to play. key to
drücken und die Begleitung startet mit dem ersten
Spielen
einer
Taste.
to start the rhythm
tracks
of the
8BtPiano
can press [SYNC] and then play any
the auto accompaniment.
Play Auto Accompaniment(all tracks)
Spuren
1. InAlle
style mode,
press [CHORD MODE] button to enter “auto bass
chord” (A.B.C.)mode. The keyboard is split into two sections. Left
hand
section is chord
detect section.
LCD
will show
the indicate
1. Drücken
Sie CHORD
umThe
den
Modus
„auto
bass chord = A.B.C“ aufzurufen. Der Bereich
of “A.B.C.” Now pressing any key in chord detect section(Sync Start
füryou
diewilllinke
Hand
wirdaccompaniment.
zum Bereich für die Begleitautomatik. Akkorde, die Sie in diesem
status)
hear the
fantastic
PressBereich
[CHORD spielen,
MODE] button
again to
enter “FULL RANGE”
mode.
werden
automatisch
erkannt
und als Basis für die vollautomatische
The LCD will show the indicate of “FULL RANGE”. The whole
MODE] button to Begleitung
enter “auto bass
genutzt.
Drücken Sie CHORD MODE um in den „Full Range“-Modus zu
keyboard is chord detect
section.
8BtPiano
iment(all tracks)
oard is split into two
sections.Nun
Left werden Akkorde auf dem gesamten Keyboard erkannt.
gelangen.
ction. The LCD will show the indicate
8BtPiano
2. can
Drücken
Sie Start
SYNC
START;
die
Beat-Anzeigeleuchte
blinkt in Time mit
dem aktuellen
2.detect
You
press [SYNC]
button and
then play
a chord
in chord detect
ey in chord
section(Sync
section
to start auto
accompaniment
of all tracks.
When you
change bezeichnet. Sobald Sie nun einen
Tempo.
Dieser
Zustand
wird
als
Stand
By-Modus
c accompaniment.
a chord, the accompaniment automatically changes.
Akkord
mit [START/STOP]
der
linken Hand
startet die Begleitautomatik. Versuchen Sie z.B.
again to enter
“FULL
RANGE”
mode.
You
can
also
press
buttonspielen,
to start auto
of “FULL RANGE”.
TheC-Dur-Akkord.
whole
accompaniment
of rhythm track, then play a chord in chord detect
einen
n.
section. It will start auto accompaniment of all tracks.
8BtPiano
8BtPiano
Note:
nd then play
a chord in chord detect
18
pianoWhen
can save
user styles. To use your styles, you should use
ment of allThe
tracks.
you10change
the software of MEDELI to convert the style, then use the USB to save
tomatically
changes.
the styles to piano.
OP] button to start auto
, then play a chord in chord detect
Default auto accompaniment section
Drücken
Sie SYNC oder START/STOP.
Play 3.
Auto
Accompaniment(all
tracks) Sie
können
jetzt
den MODE]
Style jederzeit
stoppen
und
1. In style mode,
press
[CHORD
button to enter
“auto bass
chord” (A.B.C.)mode.
The keyboard
split into loslassen
two sections. oder
Left
starten, indem
Sie dieisTasten
hand section is chord detect section. The LCD will show the indicate
drücken.
of “A.B.C.”
Now pressing any key in chord detect section(Sync Start
status) you will hear the fantastic accompaniment.
Press [CHORD MODE] button again to enter “FULL RANGE” mode.
Das Piano kann 10 User-Styles speichern. Um
The LCD will show the indicate of “FULL RANGE”. The whole
Ihre isStyles
zu benutzen,
konvertieren Sie sie mit
keyboard
chord detect
section.
8BtPiano
der Software von MEDELI und übertragen Sie via
8BtPiano
2. You can
press [SYNC] button and then play a chord in chord detect
USB.
section to start auto accompaniment of all tracks. When you change
a chord, the accompaniment automatically changes.
You can also press [START/STOP] button to start auto
accompaniment of rhythm track, then play a chord in chord detect
section. It will start auto accompaniment of all tracks.
Note:
The piano can save 10 user styles. To use your styles, you should use
the software of MEDELI to convert the style, then use the USB to save
the styles to piano.
Default auto accompaniment section
Bereiche
Auto
Accompaniment
Es gibt
verschiedene Typen von Begleitautomatik-Sektionen, die Ihnen erlauben, das Arrangement
der Begleitung dem Song anzupassen, den Sie spielen, so z.B. Intro, Main (A, B), Fill In (A, B) und
Ending. Sie können während des Spiels einfach zwischen diesen wechseln und so ganz persönlich
Arrangements zusammenstellen.
Accompaniment
Sections
15
There are various types of Auto Accompaniment sections that allow
you to
vary the arrangement of the accompaniment to match the song
Intro
you are playing.
Diese
Sektion wird für die Einleitung eines Stückes
They are: Intro, Main (A, B), Fill (A, B), and Ending.
W_DP330_Manual_G06_150420
verwendet.
das your
Introperformance
beendet ist,
By switching
amongSobald
them during
youwechselt
can easily die
015
4
20
10:28:35
produce
the dynamic elements
a professional sounding
Begleitautomatik
zum of
Hauptteil.
arrangement in your performance.
8BtPiano
Hauptteil
INTRO
Section (Main)
Diesisist
Hauptbestandteil
des Stückes, es wird ein
The intro
an der
opening
section of the song.
When
the intro pattern über
is finished,
the system
automatically
shift
to
Begleitpattern
mehrere
Taktewill
gespielt,
die so
lange
the main section.
wiederholt werden bis eine andere Sektion ausgewählt wird.
MAIN Section
The main
is an important section of the song. And it plays an
Fill In
accompaniment pattern and repeats infinitely until another section’s
Diese Sektion stellt dynamische Variationen zur Verfügung,
button is pressed.
die Ihr Spiel noch professioneller
klingen lassen. Sobald das Fill In beendet ist, kehrt die Begleitautomatik zum Mainpattern (A, B)
FILLzurück.
IN Section
Auto fill in function automatically adds a fill to your performance. When
the fill-in is finished, accompaniment shifts to the Main section (A, B,).
Ending
Diese
Sektion dient zum Beenden des Songs. Nach einem
ENDING
Section
Ending
is used
for the
ending ofhängt
the song.
When
the ending is finished,
Länge
eines
Endings
vom
ausgewählten
Style ab.
accompaniment automatically stops. The length of the ending differs
depending on the selected style.
Ending stoppt die Begleitautomatik. Die
Bitte beachten Sie: Ein ausgewählter Fill wird so lange wiederholt wie Sie den Knopf A/B gedrückt
halten.
Note:
Hold down the A/B button when the style is playing, the selected fill-in
pattern repeats continuously until button is released.
Press A/B button when style stops, it will change to the normal section.
Playing Different Accompaniment
Sections
1. Press the [STYLE] button
19
2. Press style direct button or use the data dial, [+/YES]/ [-/NO] button
to select a style.
Note:
Hold down the A/B button when the style is playing, the selected fill-in
pattern repeats continuously until button is released.
Press A/B button when style stops, it will change to the normal section.
Playing
Different Accompaniment
Spielen mit verschiedenen Bereichen
Sections
1. Press 1.
theDrücken
[STYLE] button
Sie STYLE.
2. Wählen Sie einen Style aus.
2. Press style direct button or use the data dial, [+/YES]/ [-/NO] button
3. Drücken
Sie CHORD MODE.
to select
a style.
4. Drücken Sie SYNC.
Drücken
Siebutton
A. to enter A.B.C. (auto bass chord)
3. Press 5.
[CHORD
MODE]
mode.6. Drücken Sie INTRO/ENDING. Nun blinkt das „A“
auf dem Display, der Style ist fertig zum
4. Press [SYNC]
button.
Abspielen.
7. Sobald Sie mit der linken Hand einen Akkord
5. Press [A]spielen,
button. beginnt die Begleitautomatik. Wenn das
Intro beendet ist, wechselt die Begleitautomatik
6. Press the [INTRO/ENDING] button. Now the “A” indicate on LCD,
zum Mainpattern A.
and the style is ready to play.
8. Drücken Sie B. Es wird ein Fill In gespielt, gefolgt
the Mainpattern
accompanimentB.as soon as you start playing in Chord
7. It will startvon
9.When
Drücken
Sie INTRO/ENDING.
Dasit Ending
wird
section.
the playback
of the intro is finished,
automatically
leads intogespielt,
Main A section.
anschließend stoppt die
Begleitautomatik.
8. Press the [B] button. A fill-in plays, automatically followed by the
8BtPiano
1
9
7
Main B section.
9. Press the [INTRO/ENDING] button again, and it will enter the
2
Ending Section.
When the ending is finished, the auto accompaniment automatically
stops.
Lautstärke
1. Drücken Sie ACCOMP+ oder ACCOMP-, im Display
erscheint der Wert der aktuell eingestellten Lautstärke.
Der Wertebereich geht von 0 bis 127.
2. Benutzen Sie das Drehrad, ACCOMP+/- oder +/YES
und -/NO um den Wert zu verändern.
W_DP330_Manual_G06_150420
15
4
20
10:28:35
3. Um die Begleitautomatik stumm zu schalten, drücken
Sie gleichzeitig +/YES und -/NO. Im Display erscheint
„Off Accomp“. Drücken Sie abermals um die Begleitung
wieder zu hören.
16
Fingering
Als Fingering wird die Art bezeichnet, mit der Sie der Begleitautomatik die Akkord angeben. Es gibt
zwei Arten, die im Folgenden beschrieben werden: Chord-Fingermodus und Full Range-Modus.
Grundlagen
Ein Akkord besteht aus drei oder mehr Noten, die gleichzeitig
gespielt werden. Ein C-Dur-Akkord besteht beispielsweise aus
den Noten C als Grundton (Root), E als dritter Note (Terz) der CDur-Tonleiter und G als fünfter Note der C-Dur-Tonleiter (Quinte).
20
5
0
Auto Accom
Wie im vorangegangenen Beispiel gezeigt, wird der tiefste Ton als Grundton bezeichnet (Root).
Das Intervall zum Grundton (kleine oder große Terz) entscheidet, ob es sich bei einem Dreiklang
Accompaniment
Volume
um einen Moll- oder Dur-Akkord
handelt.
This function is used to change the volume of all tracks of
accompaniment.
1. Press [ACCOMP] button, the LCD will display ACCOMP volume
Die grundlegende Charakteristik
des
(0 to 127). At
thisDreiklangs
time, you canbleibt
use the data dial, or [+/YES]/ [-/NO]
to adjust ACCOMP
volume.
auch erhalten, wenn wirbutton
die Reihenfolge
ändern,
um
verschiedene Umkehrungen (Inversions) zu spielen.
2. When the LCD will displays ACCOMP volume, press [+/YES] and
Acco
[-/NO] button simultaneously can mute the ACCOMP volume.
The LCD displays “OFF Accomp”. press [+/YES] and [-/NO] button
simultaneously again can open the ACCOMP volume.
Häufige Dreiklänge
Fift
Chord Fingering
How the chords are played or indicated with your left hand (in the auto
accompaniment section of the keyboard) is referred to as "fingering".
There areMajor
2 types of fingerings as described below.
Dur
Third
Chord Basics
A chord, in music, is any harmonic set of three or more notes that is
Minor
heard as if sounding simultaneously. The most frequently encountered
chords are triads. A triad is a set of three notes that can be stacked in
thirds. When stacked in thirds, the triad's members, from lowest
pitched tone
to highest, are called: the Root, the Third, and the Fifth.
Augmented
Moll
Übermäßiger
Major Triad
Mino
Triad Type
There are following basic triad types:
Verminderter
Diminished
Major Triad A root with a major third added above and a perfect fifth
will consist as a “Major Triad”.
with a minor
third handelt,
added above
a perfect
Triad A root
Der Name sagt aus, Minor
um welchen
Grundton
es sich
ob and
es sich
um fifth
einen
will consist as a “Minor Triad”.
Mollakkord oder um Augmented
einen Verminderten
handelt usw.
A root with a major third added above and an augmented
Triad
fifth will consist as an “Augmented Triad”.
Diminished A root with a minor third added above and a diminished
Triad
fifth will consist as a “Diminished Triad”.
Chord Inversion
Wesich
define
this chord itsaus
rootdem
is notGrundton
in the bass und
(i.e., is
not the lowest
Der Akkordname setzt
zusammen
dem
note) as an inversion
chord. When
the root
in the
bass, we call the
Tongeschlecht. Im nebenstehendem
Beispiel
handelt
es is
sich
also
chord: root-position chord. If we put the Third and Fifth in the root
um einen C-Moll-Akkord.
position, then it forms “Inversion”, we call this chord “Inversion Chord”.
Diminished Triad
Augm
Dur- oder
Root Position First Inversion
See the following major triad and its inverted chord.
Chord Name
The chord name contains two parts content: Chord root and Chord
type.
Single Finger
Single Finger
In diesem Modus können
Sie diemakes
ganze
Vielfalt
der Akkord
Sie nur
Single-finger
it simple
to produce
major,spielen,
seventh, indem
minor and
minor
seventh chords by pressing a minimum number of keys on the
wenige Tasten drücken
müssen.
auto accompaniment section.
21
AW_DP330_Manual_G06_150420
2015
4
20
10:28:36
Chord Root
Chord
Auto Accompaniment
Multi-Finger
allows you to play chords in normal fingering. Try playing
Auto Multi-finger
Accompaniment
the 32 chord types in C scale as listed on the right.
Multi Finger
Note:
Multi-Finger
In fullModus
range mode,
entire
keyboardmit
will normalem
only recognize chords
Dieser
erlaubt
das inSpielen
Multi-finger
allows
you to
playthe
chords
normal fingering.
Try playing
played in normal fingering.
the 32Fingering.
chord types Versuchen
in C scale as Sie,
listed die
on the
32right.
Akkorde in C zu
spielen, die in nebenstehender Tabelle aufgeführt
Note:sind.
In full range mode, the entire keyboard will only recognize chords
played in normal fingering.
Full Range-Modus
In diesem Modus erkennt das Keyboard nur
Akkorde mit normalem Fingering.
Tempo
Each style of the instrument has been set with a default or standard
tempo; however, this can be changed by using the [TEMPO+/-]
buttons.
1. Use the [TEMPO+/-] button to change the tempo.
Tempo While the tempo data is flashing, use the data dial can also change
Each style ofthe
thetempo.
instrument has been set with a default or standard
tempo;Jeder
however,
thisin
can
be changed
by using ist
themit
[TEMPO+/-]
Style
diesem
Instrument
seinem eigenen Tempo programmiert
buttons.
2. Press
the [TEMPO+]
and
[TEMPO-]
buttons
simultaneously
to
worden.
Trotzdem
kann
das
Tempo
Ihren
Wünschen
angepasst
werden.
1. Use the [TEMPO+/-]
button to
change
the tempo.
restore
the
default
tempo
setting.
Benutzen
Sie dazu die Tasten TEMPO+ oder -. Der Wert des Tempos beginnt
While
the tempo
Note: data is flashing, use the data dial can also change
thezu
tempo.
blinken.
Sie können das Tempo auch mit dem Drehrad ändern. Um das
The tempo will change when changing the style not playing the
Originaltempo
wieder
herzustellen,
drücken
die Tasten
TEMPO + und accompaniment
. The tempo
will not change
whenSie
changing
the
2. Press
the [TEMPO+]
and
[TEMPO-] buttons
simultaneously to
style
playing the
accompaniment
.
gleichzeitig.
restore the default tempo setting.
Tempo
Note:
The tempo will change when changing the style not playing the
One .Touch
accompaniment
The tempoSetting
will not change when changing the
When
One
Touch Setting
style playing the accompaniment
. is switched on, you can instantly recall all
auto accompaniment related settings including voices selection and
digital effects simply with a single touch of a button.
1. Press the [O.T.S.] button to turns on the One Touch Setting for
dieser
handelt es sich um eine sehr
OneBei
Touch
Setting
currentFunktion
style.
Einrichtung,
der
alleall
Whenkomfortable
One Touch Setting
is switchedin
on,
youSie
canpraktisch
instantly recall
auto accompaniment
related
settings
including
voices selection
andhaben,
Einstellungen,
die
Begleitautomatik
zu tun
2.
Press one of
themit
oneder
touch
setting buttons [M1]-[M4].
Various panel
digital effects simply with a single touch of a button.
settings
(such as voice,
effect, etc.)
that match the selected style
mit einem
Knopfdruck
einsehen
können.
1. Press thecan
[O.T.S.]
button to
turns on
thejust
One
Settingpress.
for
be instantly
recalled
with
a Touch
single button
current style.
Auto accompaniment is automatically turned on during O.T.S mode.
1. Drücken
O.T.S.
um die
One TouchSie
Setting
parameter
list:Einstellungen für den
Part
(VOICE
R2,Style
L)buttons
ausgewählten
anzusehen.
2. Pressaktuell
one ON/OFF
of the
one
touchR1,
setting
[M1]-[M4]. Various panel
Voice Change (VOICE R1, R2, L)
settings
(such asSie
voice,
effect,
etc.)
that match the selected
style
2. Drücken
einen
der
Einstellungsknöpfe
M1-M4.
Voice Volume (VOICE R1, R2, L)
can beVerschiedene
instantly
recalled
with just
a R2,
single
button
press.
Voice
Reverb
LevelEinstellungen
(VOICE
R1,
L)wie
Voice,
Effekt, etc., die
Auto accompaniment
is automatically
on during O.T.S mode.
Voice Chorus Level
(VOICE R1, R2,turned
L)
mit
dem parameter
laufenden
Style korreliert
sind, werden angezeigt. Zu
One Touch
Setting
list:
Ein-Finger-Bedienung
StGrdPno
StGrdPno
den O.T.S.-Parametern gehören:
Part ON/OFF
(VOICE
R1, Voice
R2, L) Change, Voice Volume, Reverb- und Choruslevel.
Part
on/off,
Note:
Voice Change (VOICE R1, R2, L)
1. In
O.T.S.R1,
mode,
the A.B.C. function would turn on automatically.
Voice Volume
(VOICE
R2, L)
2. In
O.T.S.
mode,
the
cannot be registered.
Voice Reverb
Level
(VOICE
R1,wird
R2,memory
L)
In diesem
Modus
die A.B.C.-Funktion
automatisch angeschaltet, Memory
Voice Chorus Level (VOICE R1, R2, L)
werden.
Note:18
1. In O.T.S. mode, the A.B.C. function would turn on automatically.
2. In O.T.S. mode, the memory cannot be registered.
18
AW_DP330_Manual_G06_150420
2015
4
20
AW_DP330_Manual_G06_150420
10:28:36
22
kann nicht registriert
Harmony
Harmonie
Sie können den Tönen der rechten Hand verschiedene Harmonie-Noten beifügen.
The harmony function can add harmony effect to the main voice.
Auswahl der Harmonie-Art
1. Drücken
Sie HARMONY; im Display erscheint „off“.
Harmony
Switch
Funktionbutton.
ist also
1. PressDie
[HARMONY]
Theabgeschaltet.
LCD displays “OFF”, which
indicates
the harmony
effect is turned
off now. um den Effekt
2. Drücken
Sie abermals
HARMONY
anzuschalten; im Display erscheint „Duett“.
2. When
the LCD displays
“OFF”,
repeat oder
the previous
operation.
The und
3. Benutzen
Sie das
Drehrad
die Tasten
+/YES
LCD now displays “Duet”, which indicates the harmony effect is
umtype
dieisArt
der Harmonie zu ändern.
open,-/NO
and the
Duet.
3. To choose a different harmony type, please refer to the harmony
setting
in functiondes
menu.
Anwenden
Harmonie-Effekts
Off
Duet
1. Schalten Sie die Begleitautomatik an.
2. Spielen Sie mit der linken Hand einen Akkord.
3. Spielen Sie einige Noten mit der rechten Hand. Die Harmonie-Noten werden automatisch
zugefügt.
Play with Harmony Effect
Harmonie-Funktionen
Oktave,
Tremolo
und Trill können immer angewendet
Turn Die
on the
A.B.C function, first play a1+5,
chord,
then playEcho,
notes in
right
Andere
Harmonie-Funktionen
stehen
nur
hand werden.
section, the
notes played
in main voice will be added
with
thezur Verfügung, wenn die Begleitautomatik
harmony
ist. effect.
aktiv
Performance
Assistant
Note:
The harmony types of 1+5, Octave, Echo, Tremolo, Trill will respond
whether the A.B.C. is open or not. Other types of harmony will respond
There
arewhen
2 voices
you can
only
the A.B.C.
is select
open. to perform in performance assistant
mode: Guitar, Piano.
Assistenz-Funktion
What’s the performance assistant?
Es stehen
Sounds infunction.
dieser Funktion
zur Verfügung: Guitar und Piano. Es ist eine einfach zu
Performance
assistantzwei
is an easy-to-use
With this function
you will find
playing to beFunktion,
more interesting.
Even
if you
not a
bedienende
die das
Spiel
fürareGitarristen
und Keyboarder interessanter gestalten kann.
keyboard player, the performance assistant will help you to play
Der
Assistent
ist
mit
vielen
wunderbaren
Phrasen
ausgestattet!
your familiar instrument voice on the keyboard. If you're a pianist,
you can easier to achieve many hard perform skills on the keyboard
with the help of this function.
Performance assistant will provided many wonderful phrases. Just
use several keys and you will perform your own wonderful music.
Aufrufen der Funktion
1. Drücken Sie die Tasten SHIFT und PERFORM um
den Assistenten aufzurufen. Ab Werk ist der
eingeschaltet
und im Display
Enter theGitarren-Modus
Performance
Assistant
erscheint
der Name
despress
Gitarrensounds.
1. Holding down
[SHIFT] button,
and then
[PERFROM] button
2.enter
Ändern
Sie den Sound
derdefault
Tasten
+/Yes
you can
the performance
assistantmithilfe
mode. The
setting
is Guitar Mode
the LCD will display Guitar's voice name.
oderand
-/No.
3. Im Display erscheint als Taktart „4-4“. Sie können
2. You can use
theTaktart
Data Dial,
or [-/NO] button
to change
die
im [+/YES]
Funktionsmenü
ändern.
Zur the
voice you want to perform.
Auswahl stehen: 2/4, 3/4, 4/4 und 6/8.
4.
Dasfield
Tempo
können Sie mit den Tasten TEMPO+
3. In the measure
in LCD, the "4-4" will be displayed. It means
und
TEMPOthe default beat value is theeinstellen.
4/4 and you can change the beat value
you want in function menu. Please refer to Performance Beat
setting in function menu. You can choose the beat between 2/4, 3/4,
4/4, and 6/8 beat.
SteelGtr
PERFORM
4. In Performance Assistant mode, use [TEMPO+] or [TEMPO-] to
change the tempo.
23
Guitar Mode
19
endings.
Chord part
A0 to B3 is the chord part area. Play a chord in this area.
Guitar Key map
Sub Area 1
C4 to B4 (only white keys) is the sub area 1. 5 types of broken chord
are provided in this area.
Gitarren-Modus
Chord Part
Sub Area 1 Sub Area 2
Rhythm
Area
Position Change
Sub AreaIn
2 diesem Modus können Sie auf dem Keyboard spielen wie auf einer Gitarre. Möglich
The 6 keys:
C5 to A5 (only white
keys) is just
like real guitar's
6 strings.Echoism sowie zwei Endings.
beispielsweise
Strumming,
gebrochene
Akkorde,
Play a free solo in this area.
sind
10
Das Keyboard ist folgendermaßen aufgeteilt:
Rhythm Area
C6 to G6 (only white keys) is the rhythm area. Wonderful styles and
strums are provided in this area. Use A6 to B6 to play an ending.
95
75
SteelGtr
Position Change
Press C7, the guitar voice will be changed to a high position.
PERFORM
PERFORM•H
Note:
The keys above C7 doesn’t respond in this mode.
5
1. A0 bis B3 - Chord Part-Bereich. Hier können Sie Akkorde spielen.
2. C4 bis B4 - nur die weißen Tasten: Broken Chord-Bereich.
3. C5 bis A5 - nur die weißen Tasten: entsprechen den Gitarrensaiten. Hier können Sie ein freies
Solo spielen.
_DP330_Manual_G06_150420
4. C6 bis G6 - nur die weißen Tasten: Rhythmus-Bereich. Hier finden Sie einzigartige Strums und
5
4
20
10:28:36
Styles, benutzen Sie sie beispielsweise für ein Ending.
5. Drücken Sie C7 und der Sound wird in eine höhere Position versetzt.
20
Die Tasten oberhalb von C7 stehen in diesem Modus nicht zur Verfügung.
Performance Assistant
Das Spielen im Gitarren-Modus
Playing
in Guitar
Spielen
Sie einenMode
Akkord im 1. Bereich. Der Akkord
SteelGtr
Play a chord
chord angezeigt
part.
wird in
imthe
Display
und Sie hören den
A chord type will be displayed on the LCD and the guitar root note will
Grundton.
be sounded.
PERFORM
Play a broken chord in the sub area 1.
When the chord type displayed, press a white key in the sub area 1, a
Versuchen
Sie
verschieden
Tasten
im 2.
wonderful
broken chord
phrase
will start. Try
to change
theBereich;
white key sie
hören
jeweils
verschiedene
wundervolle
Phrasen.
and you will hear some different type of phrase. Change the chord with
your left hand; you will hear the broken chord phrase has a little bit
change.
Play a free solo in the sub area 2.
When the
chord type
press amit
white
keylinken
in the sub
area
2
Spielen
Siedisplayed,
einen Akkord
der
Hand
und
you can play guitar free solo, sounds like you're playing a real one.
freies Solo im 3. Bereich.
Try to change the chord with your left hand, and play your free solo.
The last white key B5 is invalid.
Chord Part
Sub Area 1 Sub Area 2
Rhythm
Area
Position Change
Chord Part
Sub Area 1 Sub Area 2
Rhythm
Area
Position Change
ein
Play a strum rhythm in the rhythm area.
When the chord type displayed, press a white key in the rhythm area
you can play the magic strum rhythm. Try to change the chord with
your left Versuchen
hand, and play
your
strums.
Sie
eine
Begleitung im 4. Bereich
(strumming).
End the guitar performing.
Press the A6 or B6 to end your guitar performs. When the ending is
finished, the phrase stops automatically.
Play the echoism.
Umkeys
Ihr on
Spiel
Ending
zuRhythm
beschließen,
All of black
Sub mit
areaeinem
1, Sub area
2 and
area are drücken
Sie
die
Tasten
A6
oder
B6.
Die
Begleitung
stoppt
echoism keys. There are 5 kinds of echoism to arrange on the
C#, D#,
F#, G#, A#
circularly.
automatisch.
Change the position
Press the C7, the PERFORM.H icon will be lightened on the LCD. It
means that the guitar position has been changed to the High position.
Try to play the white keys in sub area 1, Sub area 2 and Rhythm area,
listen to the phrase you are performing now.
24
Piano Mode
Piano Key Map
In Piano Mode, you can easily to achieve many hard piano perform
25
Chord Part
Sub Area 1Sub Area 2
Chord Part
Sub Area 1 Sub Area 2
Rhythm
Area
Position Change
Rhythm
Area
Position Change
Chord Part
Sub Area 1 Sub Area 2
Rhythm
Area
Position Change
Chord Part
Sub Area 1 Sub Area 2
Rhythm
Area
Position Change
0
Play a strum rhythm in the rhythm area.
When the chord type displayed, press a white key in the rhythm area
you can play the magic strum rhythm. Try to change the chord with
your left hand, and play your strums.
Position Change
End the guitar performing.
Press the A6
or schwarzen
B6 to end your
guitar performs.
When the ending
is 4 sind
Alle
Tasten
in den Bereichen
1, 2 und
finished, the
phrase
stops
automatically.
Echo-Tasten. Es gibt fünf Arten: C#, D#, F#, G#, A#.
Play the echoism.
All of black keys on Sub area 1, Sub area 2 and Rhythm area are
echoism keys. There are 5 kinds of echoism to arrange on the C#, D#,
F#, G#, A# circularly.
Chord Part
Sub Area 1Sub Area 2
Chord Part
Sub Area 1 Sub Area 2
Rhythm
Area
Position Change
Rhythm
Area
Position Change
Positions-Wechsel: Drücken Sie C7; im Display
erscheint
Change the
position „Perform.H“. Spielen Sie die weißen Tasten
Press the C7,
PERFORM.H
will4be
lightened
theden
LCD.neuen
It
denthe
Bereichen
1, 2icon
und
und
hörenonSie
means thatSound.
the guitar position has been changed to the High position.
Try to play the white keys in sub area 1, Sub area 2 and Rhythm area,
listen to the phrase you are performing now.
in
Chord Part
Sub Area 1 Sub Area 2
Rhythm
Area
Position Change
Piano Mode
Chord Part
Sub Area 1 Sub Area 2
Piano Key Map
In Piano Mode, you can easily to achieve many hard piano perform
skills just like playing the acoustic one. In this mode you can use some
perform skills
like pianoModus
rhythm (5),
brokenSie
chord
andeinem
also 3
In diesem
können
wie(5)auf
endings.
Rhythm
Area
Piano-Modus
Position Change
akustischen Piano spielen. Dazu stehen verschiedene
zur with
Verfügung:
The piano Funktionen
key map is similar
the guitarPiano-Rhythmen,
key map. Press A6 to Broken
C7(white keys)
will start
an ending.
All the black keys above C4 are
Chords
sowie
drei Endings.
invalid.
Piano Key map
Die Belegung ist ähnlich wie beim Gitarren-Modus: Drücken Sie die Tasten A6 bis C7 um ein
Playing
in Piano
Mode
Ending
zu spielen.
Die schwarzen Tasten oberhalb von C4 sind in diesem Modus nicht belegt.
1. Select Piano Mode.
In performance
assistant
use data
or [-/NO]
Wenn sich
das mode,
Keyboard
im dial,[+/YES]
Assistenz-Modus
button to select Piano Mode.
befindet, benutzen Sie das Drehrad oder die Tasten
+/YES
oder part.
-/NOPlay
umsome
in den
Piano-Modus
2. Play a chord
in chord
phrases
in Sub area zu
and
wechseln.
Rhythm area.
Chord Part
Sub Area
Rhythm
Area
10
StGrdPno
PERFORM
75
Probieren
Sietodie
Bereiche
aus
und
endverschiedenen
3. Press the
A6,B6 or C7
your piano perform.
When the
ending
is finished,
the phrase
automatically.
beenden
Siestops
Ihr Spiel
mit einem der Endings.
UmPerformance
die Assistenz-Funktion
zu beenden, drücken Sie eine der folgenden Tasten: VOICE, STYLE,
Exit the
Assistant
25
When the phrase
stops,
pressSHIFT,
the [VOICE],
[STYLE], [SONG],
SONG,
DEMO,
PERFORM.
[DEMO], [SHIFT]+[PERFORM] to exit the Performance Assistant
mode.
5
DSP Effect
21
DSP-Effekt
With the built in digital effects, you can add ambiance and depth to
your music in a variety of ways such as adding reverb that makes
DP330_Manual_G06_150420
you sound
like you
playing in a concert
hall Effekte
or addingkönnen
harmonySie
Mit Hilfe
derare
eingebauten
digitalen
4
20
10:28:36
notesIhrer
for a Musik
full, richAmbiente
sound.
und Tiefe in vielfältiger Weise
1. The
DSP effect is set to ON and the icon on the LCD is lightened
verleihen.
Sie
können
beispielsweise einen Hall
when keyboard is power on. The chorus and reverb value can be
zuschalten,
so
dass
der
adjusted in the function menu. Sound klingt wie beim Spielen
in
einer großen Halle oder Sie können Harmonie-Noten für
einendown
volleren
Klang
zufügen.
2. Holding
[SHIFT]
button,
and then press the [DSP] button to
turn DSP effect on or off.
StGrdPno
1. Beim Einschalten des Gerätes ist der DSP-Effekt
Note: aktiv und die Kontrolllampe leuchtet. Chorus und
It may cause a break or a noise while switching on/off the DSP when
können
Sie
im Funktionsmenü
einstellen.
style and Reverb
song playing.
This is
normal
and need not panic.
2. Drücken Sie die Tasten SHIFT und DSP um den Effekt abzuschalten.
Mixer
Mixer function can control the volume of different tracks.
1. Holding down [SHIFT] button, and then press the [RHYTHM] button
to set the Rhythm track volume. LCD displays “Rhythm” and the
track volume.
2. When the LCD displays “Rhythm” , use the data dial or the
95
25
[+/YES]/[-/NO] button to adjust the value. Pressing [+/YES] and
[-/NO] button simultaneously can turn off/on a track volume.
Rhythm
0
Mixer
2. Holding down [SHIFT] button, and then press the [DSP] button to
StGrdPno
turn DSP effect on or off.
Note:
Mixer function can control the volume of different tracks.
It may cause a break or a noise while switching on/off the DSP when
1. Holding down [SHIFT] button, and then press the [RHYTHM] button
style and song playing. This is normal and need not panic.
Mischer
to set the Rhythm track volume. LCD displays “Rhythm” and the
track volume.
2. verändern möchten.
Mixer
Drücken Sie MIXER. Benutzen Sie diesen Knopf um den Teil auszuwählen, dessen Lautstärke Sie
When the LCD displays “Rhythm” , use the data dial or the
[+/YES]/[-/NO] button to adjust the value. Pressing [+/YES] and
[-/NO] button simultaneously can turn off/on a track volume.
Drücken
Sie die
SHIFT
und
RHYTHM. Im
Mixer1.function
can control
theTasten
volume of
different
tracks.
1. HoldingDisplay
down [SHIFT]
button, and
then press
the
[RHYTHM]
button
erscheinen
„Rhythm“
und
die
Lautstärke
des
3. to
The
of other
tracks
suchLCD
as Bass,
Chord,
Lower,and
andthe
setvolume
the
Rhythm
track
volume.
displays
“Rhythm”
Tracks.
Uppervolume.
can be set the same to Rhythm track.
track
2. Passen Sie die Lautstärke nach Ihren Wünschen an
Bereich von 0 bis 127), indem Sie das Drehrad
2. When (im
the LCD displays “Rhythm” , use the data dial or the
oder
diebutton
Tasten
+/YES
-/NO
benutzen.
Note:
[+/YES]/[-/NO]
to adjust
the und
value.
Pressing
[+/YES] and
In [-/NO]
voice R1
setting
status, the
[UPPER]
button
adjusts
the main
button
simultaneously
can turn
off/on
a
track
volume.
Gleichzeitiges
Drücken
der
Tasten
+/YES
undvoice
-/NO
volume. In
voice
R2
setting
status,
the
[UPPER]
button
adjusts
the
schaltet die Spur stumm. Abermaliges Drücken R2
voice
3.
Thevolume.
volume
of other
such
schaltet
sie tracks
wieder
an.as Bass, Chord, Lower, and
Upper can be set the same to Rhythm track.
3. Die Spuren Bass, Chord, Lower und Upper können
ebenso eingestellt werden.
Note:
In voice R1 setting status, the [UPPER] button adjusts the main voice
volume. In voice R2 setting status, the [UPPER] button adjusts the R2
voice volume.
Pedal
Function
Pedal-Funktion
The Soft pedal is a single pedal which can be configured to different
Pedal
können
verschiedene
Funktionen
zugewiesen
Please
refer to
the “Pedal Type”
in “Function menu”
for
pedalDem
function.
details.
werden. Einzelheiten dazu finden Sie auch im Kapitel
Soft)
1. Soft
Pedal(Pedel
über
das Funktionsmenü.
When you step on the soft pedal, all notes played on the keyboard
will have a softer effect.
Pedal
Function
1. Soft: Wenn Sie das Pedal treten, bekommen alle
Töne einen weicheren Klang.
2. Pedal
Start/Stop(Pedal
St/T) which can be configured to different
Soft
The
pedal
is Sie
a single
pedal
2.
Wenn
dem
PedalSt/T”,
die Funktion
„Pedal
St/T“
If pedal
assign
is set
as “Pedal
assign
pedal willmenu”
have the
Please
refer
to the “Pedalthe
Type”
in “Function
for
pedal
function.
zuweisen,
bekommt
es
dieselbe
Funktion
wie der
same
function
as
[START/STOP]
button.
details.
START/STOP-Knopf.
Soft)
1. Soft Pedal(Pedel
3. When
Pedal
Memory
Select(Pedal
Mem)allMem“
you
step Funktion
on the soft „Pedal
pedal,
notes played
on the
keyboard
3. Mit
der
wird bei
jedem
Treten
If pedal
assign
is
set
as
“Pedal
Mem”,
it will load the
will
have
a
softer
effect.
des Pedals der nächste
Parameter
vonnext
M1memory
geladen.
parameter from M1 when you step on the pedal.
Dienumber
maximale
Anzahl
The total
of memory
youist
can32.
load is 32.
2. Pedal Start/Stop(Pedal St/T)
22
If pedal assign is set as “Pedal Mem”, it will load the next memory
parameter from M1 when you step on the pedal.
The total number of memory you can load is 32.
AW_DP330_Manual_G06_150420
4
20
10:28:37
22
AW_DP330_Manual_G06_150420
2015
4
The option and parameters are as follows:
LCD Display
Range
Rhythm: xxx
0 - 127
Bass:
xxx
0 - 127
Chord: xxx
0 - 127
Lower: xxx
0 - 127
xxxparameters
0 - 127
TheUpper:
option and
are as follows:
Rhythm
LCD Display
Rhythm: xxx
Bass:
xxx
Chord: xxx
Lower: xxx
Upper: xxx
Range
0 - 127
0 - 127
0 - 127
0 - 127
0 - 127
Pedal Soft
Pedal St/T
Pedal Soft
Pedal Mem
Pedal St/T
If pedal assign is set as “Pedal St/T”, the assign pedal will have the
same function as [START/STOP] button.
3. Pedal Memory Select(Pedal Mem)
2015
Rhythm
20
10:28:37
26
Pedal Mem
Funktionsmenü
Drücken Sie die Tasten SHIFT und FUNCTION um das Funktionsmenü aufzurufen; im Display
erscheint die aktuelle Funktion. Mithilfe des Drehrads oder der Tasten +/YES und -/NO können Sie
die Parameter ändern. Siehe folgende Tabelle:
Nummer
Display-Anzeige
Bereich
Ab Werk
1
xxx Tune
-50 ~ +50
0
2
xxx KeySplit
1 ~ 88
3
xxx BeatType
0, 2 ~ 9
4
xxx MetroVol
0~127
Function 4Menu
34
80
Holding down [SHIFT] button, and then press [FUNCTION</>] button
to enter function
menu.
ThePedal
LCD displays
5
00x
xxxx the current function menu
Sust,St/T, Mem
option. Use [+/YES]/ [-/NO] or data dial to set parameter of the current
menu.
6
xxx ReverbLev
0 ~ 127
The option and parameters are as follows:
No.
1
2
3
4
5
6
7
8
7
xxx ChorusLev
LCD display
xxx Tune
xxx KeySplit
8
xxx BeatType
xxx MetroVol
00x Pedal xxxx
9
xxx
xxx ReverbLev
ChorusLev
xxx 10
xxx xxxx
0 ~ 127
Sust
Sound-abhängig
Range
Default
Duet, StandardTrio,
Full Chord, Rock Duet,
-50 ~ +50
000
Country
Duet,
Country
Trio, Block, 4 Close
1 ~ 88
034
xxx
xxxx
1,
4
Close
2,
4
Open,
1+5,
Octave, Strum,
0, 2 ~ 9
004
0~127
080 Echo, Tremolo, Trill
Sust,St/T, Mem
Sust
HarmonySpeed
1~ 4
Depend on voice
0 ~ 127
Depend on1voice
0 ~Midi
127 In
xxx
~ 16 ALL
Duet
Duet, StandardTrio, Full
11
xxxChord,
Midi Rock
Out Duet, Country
1 ~ 16
Country Trio, Block,
12
xxxDuet,
PowerOff
OFF, 30,60
4 Close 1, 4 Close 2,
13
xxx Perform
BeatOctave,
4-4, 3-4, 2-4, 6-8
4 Open, 1+5,
Strum, Echo, Tremolo, Trill
9 xxx HarmonySpeed 1 ~ 4
1
Bitte beachten Sie:
10 xxx Midi In
ALL
1 ~ 16,ALL
Das Menü wird automatisch beendet, wenn
innerhalb von fünf Sekunden keine
11 xxx Midi Out
001
1 ~ 16
12 xxx PowerOff
030
OFF, 30,60
13 xxx Perform Beat
4-4
4-4, 3-4, 2-4, 6-8
Holding down [SHIFT] button, and then press [FUNCTION</>] button
to enter function menu. The LCD displays the current function menu
option.
Note:Use [+/YES]/ [-/NO] or data dial to set parameter of the current
menu.
The function menu status will exit if no operation is done within 5 seconds.
Sound-abhängig
Duet
1
ALL
1
30
4-4
Eingabe erfolgt.
Function
Menu
Tuning
Diese Funktion erlaubt, die Tonhöhe des Pianos zu verändern
Instrumente anzupassen.
The option
are as
follows:
um sieand
anparameters
Aufnahmen
oder
andere
No. LCD display
Tune
Range
Default
This
function
sets
the
pitch
of
entire
keyboard
by
steps
of cents.
1 1.
xxx Drücken
Tune
-50Tasten
~ +50 SHIFT und TUNE;
000
Sie die
im Display
1.2Holding
down
[SHIFT]
button,
and
then
press
[FUNCTION
] der
xxx erscheint
KeySplit „xxx 1Tune“.
~ 88 Mithilfe des Drehrads
034 </>
oder
button to select tune menu. LCD displays “xxx Tune”.
3 xxx Tasten
BeatType
0, 2 ~-/NO
9
004Parameter
+/YES
und
können
Sie
den
Use [+/YES]/[-/NO]
or data
dial to change
tune
value.
Its range is
4from
xxx-50
MetroVol
080
ändern.
to 50 cents. 0~127
5 2.
00xGleichzeitiges
Pedal xxxx
Sust,St/T,
Sust und -/NO
DrückenMem
der Tasten +/YES
2.6Press
[+/YES]
[-/NO]
will set theDepend
tune value
to
ReverbLev
xxx setzt
on voice
0 ~simultaneously
127 auf den Ursprungswert
dieand
Einstellung
000
default
setting:000.
The
setting
is
applied
to
both
accompaniment
ChorusLev
7itsxxx
Depend
on
voice
0
~
127
zurück. Die Einstellung bezieht sich auf Sound und
and the voice.
8 xxx Begleitung.
xxxx
Duet
Duet, StandardTrio, Full
Chord, Rock Duet, Country
KeySplit
Duet, Country Trio, Block,
This function sets the point which separates the entire keyboard to two
4 Close 1, 4 Close 2,
sections.
4 Open, 1+5, Octave,
27
Strum, and
Echo,
Tremolo,
Trill
</>]
1. Holding down [SHIFT] button,
then
press [FUNCTION
9button
xxx HarmonySpeed
1
1
~
4
to select keysplit menu. LCD displays “xxx KeySplit”. Use
[-/NO]
to change keysplit value.ALL
The range of
10[+/YES]/
xxx Midi
In or data 1dial
~ 16,ALL
keysplit: 1~88.
11 xxx Midi Out
001
1 ~ 16
Tune
2. Press [+/YES] and [-/NO] simultaneously will set the tune value to
its default setting:000. The setting is applied to both accompaniment
and the voice.
Tune
KeySplit
Split-Funktion
This function sets the point which separates the entire keyboard to two
sections.
Der Splitpoint teilt das Keybord in einen Bereich für die
Begleitung
(links vom Splitpoint) und einen für das
1. Holding
down [SHIFT] button, and then press [FUNCTION</>]
Melodiespiel
(rechts
davon).
button
to select keysplit
menu.
LCD displays “xxx KeySplit”. Use
[+/YES]/ [-/NO] or data dial to change keysplit value. The range of
keysplit
: 1~88. Sie FUNCTION-FUNCTION um „Splitpoint“
1. Drücken
auszuwählen. Im Display erscheint „xxx KeySplit“.
2. Press [+/YES] and [-/NO] simultaneously will set the keysplit value
2.
Sie können den Wert mit dem Drehrad oder den Tasten
to its default setting: F#3(34).
+/YES und -/NO ändern. Der Bereich geht von 1 bis
Note: 88. Wenn Sie die Tasten +/YES und -/NO gleichzeitig
drücken,
Werkseinstellung
When twinova
is onwird
, the die
range
of keysplit is C3~C6wieder
(28~64).hergestellt
Press
[+/YES](F#3-34).
and [-/NO] simultaneously will set twinova keysplit value to its
KeySplit
default setting: E3(32).
Wenn Twinova aktiv ist, liegt der Bereich zwischen C3 und C6 (28-64). Drücken Sie +/YES und -/
NO gleichzeitig um die ursprüngliche Einstellung von E3 (32) wieder herzustellen.
Function Menu
AW_DP330_Manual_G06_150420
2015
4
20
10:28:37
Function Menu
Taktart
Beat
Type
1. Holding down [SHIFT] button, and then press [FUNCTION</>]
1. Drücken
um“xxx
„Beat“
button
to selectSie
beatSHIFT+FUNCTION
type menu. LCD displays
BeatType”.
Beat
Type [-/NO] orImdata
Useauszuwählen.
[+/YES]/
dial to change
beat„xxx
type. BeatType“.
The range of Der
Display
erscheint
beat type:
0, 2~9.
</>ist
1. Holding
down
[SHIFT]geht
button,
and
] 4
Wertebereich
von
2 then
bis 9press
und[FUNCTION
0, ab Werk
button to select beat type menu. LCD displays “xxx BeatType”.
Useeingestellt.
[+/YES]/
or data
dial to changewill
beat
The type
rangevalue
of
2. Press
[+/YES][-/NO]
and [-/NO]
simultaneously
settype.
the beat
2.
Sie
können
den
Wert
mit
dem
Drehrad
oder
den
Tasten
beat
type:
0,
2~9.
to its default setting: 004.
+/YES und -/NO ändern. Wenn Sie die Tasten +/YES
2. Press
[+/YES]
[-/NO] simultaneously
setdie
the beat type value
und
-/NOand
gleichzeitig
drücken, will
wird
to itsWerkseinstellung
default setting: 004. wieder hergestellt.
BeatType
BeatType
Metro Volume
1. Holding
down [SHIFT] button, and then press [FUNCTION</>]
Lautstärke
des Metronoms
button to select beat volume menu. LCD displays “xxx MetroVol”.
Metro
Volume
Use [+/YES]/
[-/NO] or data dial to change beat volume. The range
of1.beat
volume:
0~127.
1. Holding
down [SHIFT]
button, and then pressum
[FUNCTION
</>]
Drücken
Sie
SHIFT+FUNCTION
zur Einstellung
für
button
to
select
beat
menu. LCD displays
“xxx MetroVol”.
die Lautstärkevolume
des Metronoms
zu glangen.
Im Display
Use [+/YES]/
or data
dial to changewill
beat
range
2. Press
[+/YES][-/NO]
and
[-/NO]
simultaneously
setvolume.
the beatThe
volume
erscheint
„xxx
MetroVol“.
Der Wertebereich
geht
von 0
of
beat
0~127.
value
tovolume:
its default
setting: 080.
bis 127, ab Werk ist 80 eingestellt.
2. Sie
können
mit dem Drehrad
den Tasten
2. Press
[+/YES]
and den
[-/NO]Wert
simultaneously
will set theoder
beat volume
value
to its default
setting:
080.
+/YES
und -/NO
ändern.
Wenn Sie die Tasten +/YES
und -/NO gleichzeitig drücken, wird die
Werkseinstellung wieder hergestellt.
MetroVol
MetroVol
Pedal Type
1. Holding down [SHIFT] button, and then press [FUNCTION</>] button
to select pedal type menu. LCD displays “00x Pedal xxxx”.
Pedal
Type[-/NO] or data dial to change pedal type. 3 types of
Use [+/YES]/
pedal are
available:
Soft
pedal(
Softthen
), accompaniment
start/stop
1. Holding
down
[SHIFT]
button,
and
press [FUNCTION
</>] button
2.
Pedal(St/T),
memory
switchLCD
pedal(Mem).
to
select pedal
type menu.
displays “00x Pedal xxxx”.
Use [+/YES]/ [-/NO] or data dial to change pedal type. 3 types of
pedal are
available:
Soft pedal(
Soft), accompaniment
start/stop
Press
[+/YES]
and [-/NO]
simultaneously
will set the pedal
type to its
Pedal(St/T),
memory
switch
pedal(Mem).
default setting: Soft.
2. Press [+/YES] and [-/NO] simultaneously will set the pedal type to its
default setting: Soft.
28
Pedal Soft
Pedal Soft
23
2.
2. Press
Press [+/YES]
[+/YES] and
and [-/NO]
[-/NO] simultaneously
simultaneously will
will set
set the
the beat
beat volume
volume
value
value to
to its
its default
default setting:
setting: 080.
080.
MetroVol
Pedal
Pedal
Type
1. Drücken
Pedal
TypeSie SHIFT+FUNCTION um zu den
1.
down
button,
and
press
[FUNCTION
</>
Einstellungen
gelangen;
Display
erscheint
„00x
1. Holding
Holding
down [SHIFT]
[SHIFT]zu
button,
and then
thenim
press
[FUNCTION
</>]] button
button
to
pedal
type
menu.
LCD
displays
“00x
Pedal
xxxx”.
to select
select
pedal
type
menu.
LCD
displays
“00x
Pedal
xxxx”.
Pedal
xxx“.
Sie
können
die
Einstellung
mit
dem
Use
33 types
Use [+/YES]/
[+/YES]/ [-/NO]
[-/NO] or
or data
data dial
dial to
to change
change pedal
pedal type.
types of
of
Drehrad
oderSoft
den
Tasten
+/YES
und type.
-/NOstart/stop
ändern.
Zur
pedal
pedal(
pedal are
are available:
available: Soft
pedal(Soft
Soft),), accompaniment
accompaniment start/stop
Pedal(St/T),
memory
switch
pedal(Mem).
Wahl
stehen
Soft,
Begleitautomatik
Start/Stop
und
Pedal(St/T), memory switch pedal(Mem).
Memory Switch. Ab Werk ist „Soft“ eingestellt.
2.
[+/YES]
and
[-/NO]
simultaneously
will
pedal
to
2. Sie
können
drei
Pedal-Funktionen
Wenn
2. Press
Press
[+/YES]
and aus
[-/NO]
simultaneously
will set
set the
thewählen.
pedal type
type
to its
its
default
setting:
Soft
.
default
Soft. +/YES und -/NO gleichzeitig drücken,
Siesetting:
die Tasten
wird die Werkseinstellung wieder hergestellt.
Pedal
Pedal Soft
Soft
Reverb
Reverb Level
1. 1. Drücken Sie SHIFT und FUNCTION um das Menü
</>]] button
1. Holding
Holding down
down [SHIFT]
[SHIFT] button,
button, and
and then
then press
press [FUNCTION
[FUNCTION</>
button
to
select
reverb
menu.
LCD
displays
“xxx
Reverb
”.
level
Lev
aufzurufen.
Im
Display
erscheint
„xxx
ReverbLev“.
Der
to select reverb level menu. LCD displays “xxx ReverbLev”.
Use Bereich
[+/YES]/ [-/NO]
data
to change reverb level.
geht or
von
0 dial
bis
Use [+/YES]/ [-/NO]
or data
dial 127.
to change reverb level.
Range: 0~127
Range:
0~127 Sie das Drehrad oder die Tasten +/YES und
2. Benutzen
-/NO
umand
den[-/NO]
Wertsimultaneously
zu ändern. will set the reverb level to
2.
[+/YES]
2. Press
Press
[+/YES]
simultaneously
will-/NO
set the
reverb level to
Wenn
Sieand
die[-/NO]
Tasten
+/YES und
gleichzeitig
its3.default
setting.
its default setting.
drücken, wird der Ausgangszustand wieder hergestellt.
Note:
Note:
The Der
reverb
default
value ist
depends
on thevom
voice.
leveldes
Wert
Levels
abhängig
The reverb
value depends
on the voice.ausgewählten
level default
Sound.
ReverbLev
ReverbLev
24
24
Chorus
AW_DP330_Manual_G06_150420
AW_DP330_Manual_G06_150420
2015
4
20
10:28:38
2015
4
20
10:28:38
Dieser Effekt verleiht dem Ton eine vielfältige Fülle.
1. Drücken Sie SHIFT und FUNCTON um das Menü aufzurufen. Im Display erscheint „xxx
ChorusLev“. Der Bereich geht von 0 bis 127.
2. Benutzen Sie das Drehrad oder die Tasten +/YES und -/NO um den Wert zu ändern.
Function Menu
3. Wenn Sie die Tasten +/YES und -/NO gleichzeitig drücken, wird der Ausgangszustand wieder
hergestellt.
level
Chorus
Der Wert
des Levels ist abhängig vom ausgewählten
1. Holding
down [SHIFT] button, and then press [FUNCTION</>]
Sound.
button to select chorus level menu. LCD displays “xxx ChorusLev”.
Use [+/YES]/ [-/NO] or data dial to change chorus level.
Range: 0~127
2. Press [+/YES] and [-/NO] simultaneously will set the chorus level
to its default setting.
Note:
The chorus level default value depends on the voice.
Harmony Type
1. Holding down [SHIFT] button, and then press [FUNCTION</>]
button to select harmony type menu. LCD displays “xxx xxxx”.
Use [+/YES]/ [-/NO] or data dial to change harmony type. 29
The harmony types are as follows:
Number
LCD Display
ChorusLev
1. Holding
downsetting.
[SHIFT] button, and then press [FUNCTION</>]
to its default
button to select chorus level menu. LCD displays “xxx ChorusLev”.
Use [+/YES]/ [-/NO] or data dial to change chorus level.
Note:
TheRange:
chorus0~127
level default value depends on the voice.
2. Press [+/YES] and [-/NO] simultaneously will set the chorus level
Harmonie-Art
Harmony
Type
to its default setting.
ChorusLev
1. Holding down [SHIFT] button, and then press [FUNCTION</>]
Note:
tolevel
select
harmony
type
menu. on
LCD
Thebutton
chorus
default
value
depends
thedisplays
voice. “xxx xxxx”.
Use [+/YES]/ [-/NO] or data dial to change harmony type.
Nummer Display-Anzeige
The harmony types are as follows:
Harmony
Type
1LCD
Duet
Number
Display
1. Holding down [SHIFT] button, and then press [FUNCTION</>]
1 button to select
Duet
harmony type
2 Standard
Triomenu. LCD displays “xxx xxxx”.
Duet
2 Use [+/YES]/StandardTrio
[-/NO] or data dial to change harmony type.
Full
Chord
3
3 Full
Chord
The harmony types are as follows:
Rock Duet
4
4Country
Rock
Duet
Number
LCD
Display
Duet
5
1
Duet
Trio
6
5Country
Country
Duet
2
StandardTrio
Block
7
Chord
3
Close
1 Trio
8
64Full
Country
Rock
Duet
4
4
Close
2
9
74Country
Block
5
Open Duet
10
1. Drücken Sie die Tasten SHIFT und FUNCTION um zu den
Country Trio
6
11
81+5
Close 1
Einstellungen zu gelangen; im Display erscheint „xxx xxxx“.
Block
7
Octave
12
4 Close
8
9Strum
Close1 2
13
2. Gleichzeitiges Drücken der Tasten +/YES und -/NO stellt die
4
Close
9
Echo 2
14
Werkseinstellung wieder her: Duet.
10
Open
4 Open
10
15
Tremolo
1+5
11
16
11Trill
1+5
3. Bei den Harmonie-Arten Echo, Tremolo oder Trill kann der Effekt
Octave
12
weiter angepasst werden. Bitte lesen Sie Weiteres dazu im
2.13Press [+/YES]
and
[-/NO] simultaneously will set harmony type to
12Strum
Octave
nächsten Kapitel.
default
setting:
Duet.
Echo
14
Duet
13Tremolo
Strum
15
Harmonie-Art
Strum, Echo, Trill oder Tremolo ist,
3.16When the harmony
type is echo, tremoloWenn
or trill, die
the speed
of
14Trill
Echo
harmony effect
note can be adjusted. Please
refer
to
the
harmony
beeinflusst die Tempo-Einstellung den Effekt.
speed setting.
2. Press [+/YES]
and
[-/NO]
simultaneously
will set harmony type to
15 Tremolo
default setting: Duet.
4. When the harmony type is strum, echo, tremolo or trill, the tempo
setting will16
alsoTrill
change the harmony note speed.
3. When the harmony type is echo, tremolo or trill, the speed of
harmony effect note can be adjusted. Please refer to the harmony
Harmony
Speed
speed setting.
When the harmony type is echo, tremolo or trill, the harmony speed
can
set the
harmony
effect
speed
to 4 tremolo
default speed.
4. When
the
harmony
typenote
is strum,
echo,
or trill, the tempo
1. Holding
down
[SHIFT]
button,
and
then
press
[FUNCTION</>]
setting will also change the harmony note speed.
button to select harmony speed menu. LCD displays “xxx
HarmonySpeed”. Use [+/YES]/ [-/NO] or data dial to change
Harmony
Speed
harmony speed.
Range: 1~4.
1. the
Drücken
SHIFT
FUNCTON
das Menü
When
harmonySie
type
is echo,und
tremolo
or trill, theum
harmony
speed
can setaufzurufen.
the harmony effect
note speed
to 4 default
speed.
Im
Display
erscheint
„xxx
HarmonySpeed“.
2. Press [+/YES] and [-/NO] simultaneously will set the chorus volume
1. Holding
down
[SHIFT]
button,
then
Bereich
geht
von and
1 bis
4.press [FUNCTION</>]
to itsDer
default
setting:001.
button to select harmony speed menu. LCD displays “xxx
2.
Benutzen
Sie
das
Drehrad
oder
die Tasten +/YES und
HarmonySpeed”. Use [+/YES]/ [-/NO] or data dial to change
-/NOspeed.
um den
Wert
zu ändern.
harmony
Range:
1~4.
Harmonie-Tempo
3. Wenn Sie die Tasten +/YES und -/NO gleichzeitig
drücken,
wird[-/NO]
der Ausgangszustand
2. Press
[+/YES] and
simultaneously will set (1)
the wieder
chorus volume
to itshergestellt.
default setting:001.
HarmonySpeed
HarmonySpeed
25
AW_DP330_Manual_G06_150420
2015
4
20
25
10:28:38
AW_DP330_Manual_G06_150420
2015
4
20
10:28:38
30
MIDI InMenu
Function
1. Drücken Sie SHIFT und FUNCTON um das Menü
Im Display erscheint „xxx Midi In“. Der
MIDIaufzurufen.
IN Menu
Function
Bereich
geht
von
1 bisand
16;then
ALL.
1. Holding down [SHIFT]
button,
press [FUNCTION</>]
2.
Benutzen
Sie
das
Drehrad
oder die
+/YES
button to select
MIDI in menu. LCD displays
“xxxTasten
Midi In”.
Use und
Function
Menu
[+/YES]/
or data
dial to change
in channel:1~16, ALL.
-/NO[-/NO]
um die
Midi-Kanäle
zuMIDI
ändern.
3. Wenn
MIDI
IN Sie die Tasten +/YES und -/NO gleichzeitig
2. Holding
Press
[+/YES]
and
[-/NO]
simultaneously
will set
MIDI in wieder
channel
to
Function
drücken,
wird
der
Ausgangszustand
(ALL)
</>]
1.
downMenu
[SHIFT]
button,
and then press
[FUNCTION
MIDI
IN
its
default
setting:
ALL.
button
to select MIDI in menu. LCD displays “xxx Midi In”. Use
hergestellt.
1. Holding
and thenMIDI
press
[FUNCTION</>ALL.
]
[+/YES]/down
[-/NO][SHIFT]
or databutton,
dial to change
in channel:1~16,
button to select MIDI in menu. LCD displays “xxx Midi In”. Use
[+/YES]/
[-/NO]and
or data
dial
to change MIDI
channel:1~16,
ALL.to
MIDI
IN[+/YES]
2. Press
[-/NO]
simultaneously
willinset
MIDI in channel
1. Holding
down
[SHIFT]
its default
setting:
ALL.button, and then press [FUNCTION</>]
2.
Press to
[+/YES]
and
simultaneously
will“xxx
set MIDI
channel
button
select
MIDI[-/NO]
in menu.
LCD displays
Midi in
In”.
Use to
MIDI
Out
MIDI
OUT
its default
setting:
ALL.dial to change MIDI in channel:1~16, ALL.
[+/YES]/
[-/NO]
or data
1. Holding down [SHIFT] button, and then press [FUNCTION</>] button
to1.select
Midi Out
menu.
LCD
displays
“xxx Midi
Out”.
Drücken
Sie[-/NO]
SHIFT
und
FUNCTON
um
das
Menüto
2. Press
[+/YES] and
simultaneously
willMidi
set Out
MIDI
in channel
Use [+/YES]/
[-/NO]
or data
dial to change
channel:
1~16.
aufzurufen.
Im Display erscheint „xxx Midi Out“. Der
its default
setting: ALL.
MIDI Bereich
OUT geht von 1 bis16.
2. Holding
Press [+/YES]
and [-/NO]
simultaneously
will set
Midi Out </>
channel
to
1.
down [SHIFT]
button,
and then
press
[FUNCTION
] button
Benutzen
Sie
das
Drehrad
oder
die
Tasten +/YES
und
its2.
default
setting:
001.
MIDI
OUT
to
select
Midi
Out menu.
LCD displays “xxx Midi Out”.
um[-/NO]
den orWert
ändern.
1. Holding
down
[SHIFT]
button,
and
press
</>1~16.
] button
Use -/NO
[+/YES]/
data zu
dial
to then
change
Midi[FUNCTION
Out channel:
Wenn
Tasten
gleichzeitig
to3.
select
MidiSie
Outdie
menu.
LCD +/YES
displaysund
“xxx -/NO
Midi Out”.
Use OUT
[+/YES]/
order
data
dial to changewill
Midi
channel:
1~16.to
MIDI
drücken,
wird
Ausgangszustand
(001)
wieder
2. Press
[+/YES][-/NO]
and
[-/NO]
simultaneously
setOut
Midi
Out
channel
1. Holding
down
[SHIFT]
button,
and
then
press
[FUNCTION
</>
]
button
its default
setting:
001.
hergestellt.
2.
[+/YES]
and
[-/NO]LCD
simultaneously
will Midi
set Midi
toPress
select
Midi
menu.
displays “xxx
Out”.Out channel to
Power
OffOut
Use
[+/YES]/
data
dial to change
Miditime.
Out channel: 1~16.
itsfunction
default
setting:
This
is [-/NO]
used 001.
toorset
automatic
shutdown
1. Press [FUNCTION</>] button to select power off menu. LCD displays
2. Press
andUse
[-/NO]
simultaneously
will set
Out channel
“xxx [+/YES]
PowerOff”.
[+/YES]/
[-/NO] or data
dialMidi
to change
time to
OFF,
030,001.
060.
itsvalue:
default
setting:
Ausschalten
Power
Off
This function is used to set automatic shutdown time.
2. Press
Press [FUNCTION
[+/YES]
and</>
[-/NO]
simultaneously,
the time
will beLCD
restored
to
Power
Off Funktion
1.
] button
to select
off menu.
displays
Mit dieser
können
Siepower
festlegen,
nach welcher
default:
030
(30 minutes).
This
function
is used
to set
automatic
shutdown
time.to change time
“xxx
[+/YES]/
[-/NO]
or data dial
ZeitPowerOff”.
sich
dasUse
Gerät
automatisch
ausschalten
soll.
value:[FUNCTION
OFF, 030, 060.
</>] button to select power off menu. LCD displays
1. Press
“xxx PowerOff”.
Power
Off Use [+/YES]/ [-/NO] or data dial to change time
value:
OFF,
030,
060.
1. Drücken
Sie
SHIFT
und shutdown
FUNCTON
um
Menü to
This
function
is used
to
set
automatic
2. Press
[+/YES]
and
[-/NO]
simultaneously,
thetime.
time
willdas
be restored
aufzurufen.
Im] button
Display
erscheint
PowerOff“.
default:
030 (30 minutes).
</>
1. Press
[FUNCTION
to select
power „xxx
off menu.
LCD displays
2.“xxx
Press
[+/YES] and
[-/NO]
simultaneously,
time
restored
to
PowerOff”.
Use
[+/YES]/
[-/NO]
or data
dial
to will
change
time
Mögliche
Einstellungen
sind
0, the
30
und
60be
min.
value:
060.
default:OFF,
030 030,
(30 minutes).
2. Benutzen SieBeat
das Drehrad
Performance
Type oder die Tasten +/YES und
This function
used
to set
thezu
performance
-/NO isum
den
Wert
ändern. assistant beat type.
2.1.Press
[+/YES] and [-/NO] simultaneously, the time will be restored to
</>] button
Holding
down
[SHIFT]
button,
and
thenund
press-/NO
[FUNCTION
3. Wenn
Sieminutes).
die Tasten +/YES
gleichzeitig
default:
030 (30
to select Perform Beat menu. LCD displays “xxx Perform Beat”.
drücken, wird der Ausgangszustand (030) wieder hergestellt.
Use [+/YES]/ [-/NO] or data dial to change performance beat: 4-4,
Performance
Beat Type
3-4, 2-4, 6-8.
This function is used to set the performance assistant beat type.
Performance
Beat
Type
1.
Holding down [SHIFT]
button,
and then press [FUNCTION</>] button
2. to
Press
[+/YES]
andBeat
simultaneously
will“xxx
set performance
beat
This
function
is used
to[-/NO]
setmenu.
the
performance
assistant
beat type.
select
Perform
LCD displays
Perform
Beat”.
channel
to
its
default
setting:
4-4.
Use
[+/YES]/
[-/NO]
or
data
dial
to
change
performance
beat:
4-4,
1. Holding down [SHIFT] button, and then press [FUNCTION</>] button
3-4,
2-4, 6-8.
to select
Perform Beat
menu.
LCD displays “xxx Perform Beat”.
Performance
Beat
Type
[+/YES]/
[-/NO]
or data
dial to change
performance
beat: 4-4,
ThisUse
function
is used
to set
the performance
assistant
beat type.
1. Drücken
Sie[-/NO]
SHIFT
und
FUNCTON
das</>
Menü
3-4,
2-4,
6-8. [SHIFT]
2.Holding
Press
[+/YES]
and
simultaneously
will [FUNCTION
set um
performance
beat
1.
down
button,
and then press
] button
aufzurufen.
Im
Display
erscheint
„xxx
Perform
Beat“.
channel
to
its
default
setting:
4-4.
to select Perform Beat menu. LCD displays “xxx Perform Beat”.
2.Use
Press
[+/YES]
and
[-/NO]
simultaneously
will
set
performance
beat
[+/YES]/
[-/NO]
or data
dial3/4,
to change
performance
beat: 4-4,
Zur
Wahl
stehen
4/4,
2/4 und
6/8.
3-4,
2-4,
6-8.
channel
to
its
default
setting:
4-4.
2. Benutzen Sie das Drehrad oder die Tasten +/YES und
Taktart
Restore
Factory Setting
-/NO um den Wert zu ändern.
2. Press
[+/YES] and [-/NO] simultaneously will set performance beat
3. Wenn
Sie die Tasten +/YES und -/NO gleichzeitig
channel to its default setting: 4-4.
drücken,
wird
der Ausgangszustand
(4/4)and
wieder
Pressing
and holding
[+/YES]
and [-/NO] button together
then turn
the power
on, the piano would be restored to factory setting. It will
hergestellt.
delete all the user data: user styles, user songs and registered
memory. The LCD will display “Loading.”. After the restore completed,
the piano will start normally.
Pressing and holding [+/YES] and [-/NO] button together and then turn
the power on, the piano would be restored to factory setting. It will
31turn
delete
all and
the user
data:
user styles,
user songs
registered
Pressing
holding
[+/YES]
and [-/NO]
button and
together
and then
26memory.
will display
the restore
the powerThe
on,LCD
the piano
would “Loading.”.
be restoredAfter
to factory
setting.completed,
It will
the
piano
will user
start data:
normally.
delete
all the
user styles, user songs and registered
memory.
The
LCD
will
display
“Loading.”.
After together
the restore
Pressing and holding [+/YES] and
[-/NO] button
andcompleted,
then turn
the piano will start normally.
Restore Factory Setting
Restore Factory Setting
Restore Factory Setting
Midi In
Midi In
Midi In
Midi In
Midi Out
Midi Out
Midi Out
Midi Out
PowerOff
PowerOff
PowerOff
PowerOff
Perform Beat
Perform Beat
Perform Beat
Perform Beat
Restore Factory
Setting
Wiederherstellen
der Werkseinstellungen
Wenn Sie beim Einschalten des Gerätes die Tasten +/YES und -/NO
Pressinghalten,
and holding
[+/YES]
andEinstellungen
[-/NO] button together
and then turn
gedrückt
werden
alle
zurückgesetzt
und Benutzerthe power on, the piano would be restored to factory setting. It will
Styles,
Benutzer-Songs und die Speicher werden gelöscht. Im Display
delete all the user data: user styles, user songs and registered
erscheint
„Loading“.
das Löschen
und
die Wiederherstellung
der
memory. The
LCD will Sobald
display “Loading.”.
After the
restore
completed,
the piano will start normally.
Werkseinstellung
abgeschlossen ist, startet das Gerät wie gewohnt.
26
Registration Memory
AW_DP330_Manual_G06_150420
2015
Dieses
ist ein Instrument mit einer Vielzahl
4
20 Keyboard
10:28:38
Register Memory
Register Memory
Register Memory
an Funktionen
undwith
Einstellungsmöglichkeiten.
Die
The keyboard
is an instrument
a variety of controls and functions,
the Registration
Memory
feature can make
your performance
more
Funktion
„Registration
Memory“
erlaubt
es,
alle
Ihre
instrument
variety of
and functions,
easilyThe
andkeyboard
efficiently.isItan
allows
you towith
savea virtually
allcontrols
panel settings
to
vorgenommenen
Einstellung
zu your
speichern
und sie
the Registration
can
make
performance
a Registration
MemoryMemory
setting,feature
and you
can
instantly
recall
custom more
easily
and
Ita allows
you to save virtually
all
panel settings to
mit
einem
einzigen
Knopfdruck
wieder
aufzurufen.
panelThe
settings
byefficiently.
pressing
single
button.
keyboard
is
an instrument
variety
of controls
andcustom
functions,
a Registration
Memory
setting, with
and ayou
can instantly
recall
the
Registration
feature
can
make your performance more
panel
settings byMemory
pressing
a single
button.
easily and efficiently. It allows you to save virtually all panel settings to
a Registration Memory
setting, and
you can instantly recall custom
Registering
the Panel
Setting
panel
settings
by
pressing
a
single
button.
1. There
are 8 memory banks,
each bank
has 4 memories
Registering
the and
Panel
Setting
(M1-M4).
1. There are 8 memory banks, and each bank has 4 memories
(M1-M4).
Registering
the button,
Panel
Setting
2. Holding1.down
the
[STORE]
press one Banks)
of the registration
Es
gibt
8 Speicher
(Memory
mit jeweils 4 Speicherplätzen (M1 bis M4).
1.
There
are
8
memory
banks,
and
each
has
4 memories
memory
buttons:
[M1]
- [M4].
Notice that thebank
new
settings
will
2.
Halten
Sie
die
STORE-Taste
gedrückt
und drücken Sie einen der Speicherknöpfe
2. Holding
down the [STORE] button, press one of the registration
(M1-M4).
replace
the previous memory data.
memory
buttons:
[M1] - [M4].
that thedie
newvorherigen
settings will
Bitte
beachten
Sie, Notice
dass dabei
replace
the previous
memory
data. press one
Einstellungen
überschrieben
werden.
2. Holding
down
the [STORE]
button,
of the registration
Einstellungen
Mem Stor
M1 bis M4.
Mem Stor
Note:
memory
buttons: [M1]
- [M4]. Notice thatlöschen,
the new settings
3. Sie
Speicherplätze
indemwill
Sie beim
Press [STORE]
andkönnen
[M1] button
then power on, the registration
Note:
replace the previous memory data.
memory will beEinschalten
set to default.des Gerätes die Tasten STORE und M1
Mem Stor
Press [STORE] and [M1] button then power on, the registration
memory gedrückt
will be set tohalten.
default.
Note:
Press [STORE] and [M1] button then power on, the registration
memory will be set to default.
Recalling the Registered Panel Settings
PressRecalling
one of the registration
memory buttons: [M1]
- [M4].Settings
In this
the Registered
Panel
example, the panel settings stored in the memory 2 of bank 1 are
Aufrufen der Einstellungen
Press one of the registration memory buttons: [M1] - [M4]. In this
recalled.
example, the panel
settings
stored in the memory
bank 1 are
Recalling
the
Registered
Panel2 ofSettings
recalled.
Press
one
of
the
registration
memory
buttons:
[M1]
[M4].
In this
Drücken Sie einen der Speicherknöpfe M1 bis
M4. Im
Note:
example, the panel settings stored in the memory 2 of bank 1 are
nebenstehendem
Beispiel
die Einstellungen
aus
Registration
data cannot be recalled
whenwerden
the One Touch
Setting
recalled.
Note:
function
isSpeicher
on.
2 cannot
der 1.be
Memory
aufgerufen.
Registration
data
recalled Bank
when the
One Touch Setting
function is on.
Note:
Registration
dataFunktion
cannot be „One
recalled
when the
One Touch
Wenn die
Touch
Setting“
aktivSetting
ist, können
function
is
on.
keine Informationen aus dem Speicher abgerufen werden.
StGrdPno
StGrdPno
StGrdPno
Selecting a Registration Bank
1. Press
the [BANK] button.
There are 8 banksBank
in all and each bank
Selecting
a Registration
2.
has
memories(M1-M4).
PressThere
the [BANK]
button,
LCDeach bank
1.4Press
the [BANK] button.
are 8 banks
inthe
all and
displays
Bank”.
Selecting
a Registration
Bank
has“Mem
4 memories(M1-M4).
Press the [BANK]
button, the LCD
displays
Bank”.
1. Press
the“Mem
[BANK]
button. There are 8 banks in all and each bank
Select
a bank.
Use the data dial,
[+/YES]
or [-/NO]button,
buttonthe
to select
has
4 memories(M1-M4).
Press
the [BANK]
LCD a
Bank”.
bank
from 1 ato“Mem
8. Use
2. displays
Select
bank.
the data dial, [+/YES] or [-/NO] button to select a
1. from
Drücken
bank
1 to 8.Sie BANK; im Display erscheint „Mem Bank“.
2. Wählen
Siethe
einen
Speicher
mithilfe
2. Select
a bank. Use
data der
dial, acht
[+/YES]
or [-/NO] aus
button
to selectdes
a Drehrads
bank from
NO.1 to 8.
Auswahl des Speicherplatzes
oder der Tasten +/YES oder -/
Accompaniment Freeze
WhenAccompaniment
Freeze is switched on, styleFreeze
settings (style number,
accompaniment
section,
accompaniment
volume,(style
tempo,
transpose,
When Freeze
is switched
on, style settings
number,
chords,
mixer, split point)
will not
change
even when
a registered
Accompaniment
Freeze
accompaniment
section,
accompaniment
volume,
tempo, transpose,
memory
is recalled.
When
Freeze
switched
stylechange
settings
(style
number,
chords,
mixer,issplit
point) on,
will not
even
when
a registered
accompaniment
section,
volume,
tempo,indicate.
transpose,
1. Press
the [FREEZE]
button,accompaniment
the LCD will display
FREEZE
32
memory
is recalled.
chords,
mixer,
split
point)
will
not
change
even
when
a
registered
Now
the
accompaniment
parameters
would
not
be
changed
when
1. Press the [FREEZE] button, the LCD will display FREEZE
indicate.
memory
is recalled.
recalling
memory. parameters would not be changed when
Nowregistered
the
accompaniment
1. Press
theregistered
[FREEZE]memory.
button, the LCD will display FREEZE indicate.
recalling
Now
the
accompaniment
parameters
would
be changed
2. In freeze status, press the [FREEZE]
button.
The not
freeze
function iswhen
StGrdPno
StGrdPno
10
95
2. Select a bank. Use the data dial, [+/YES] or [-/NO] button to select a
bank from 1 to 8.
Freeze-Funktion
Accompaniment
Freeze
Wenn die Freeze-Funktion
aktiviert ist, werden Style-
When Freeze is switched on, style settings (style number,
Einstellungen wie Nummer, Begleitautomatik-Bereiche,
accompaniment section, accompaniment volume, tempo, transpose,
Lautstärke,
Mischer
und
chords,
mixer, splitTempo,
point) willTransponierung,
not change even when
a registered
memory
is recalled.
Splitpoint
nicht verändert, auch wenn ein Speicher
1. Press
the [FREEZE]
aufgerufen
wird.button, the LCD will display FREEZE indicate.
Now the accompaniment parameters would not be changed when
recalling registered memory.
StGrdPno
1. Drücken Sie FREEZE um die Funktion zu aktivieren.
Die Kontrolllampe
leuchtet auf.
2. In freeze
status, press the [FREEZE] button. The freeze function is
2.
Drücken
Sie
abermals
FREEZE
umoff.
sie wieder
turned off. The freeze indicate on
LCD will light
abzuschalten; die Kontrolllampe erlischt.
Song Album
Song-Album
The album function allows you to practise a song with the preset style,
tempo
and
voice. Try playing ermöglicht
the 120 songs
in the einen
album list.
Die
Album-Funktion
Ihnen
Song mit
1. Holding
down
[SHIFT]
button,
and
then
press
[
ALBUM
]
voreingestelltem Style, Tempo und Sound zubutton
üben.can
Das
turn the album function on or off.
27
Keyboard verfügt über120 solcher Songs.
2. When the album function is on, LCD displays the album song name
1. the
Drücken
Sie
SHIFT
um [+/YES]
die Funktion
and
indicate of
album.
Nowund
useALBUM
the data dial,
or [-/NO]zu
4
20
10:28:38
buttonaktivieren
can select the
song
play. The piano will adjust the
oder
zutodeaktivieren.
accompaniment
parameters
fit that song.
2. Im Display
werden to
Nummer
und Name des SOngs
angezeigt.
3. Press
voice direct button or style direct button can exit the album
3. Benutzen
Sie das Drehrad oder die Tasten +/YES und
function.
-/NO um einen anderen Song auszuwählen.
4. Sie können die Funktion auch durch Drücken der Styleoder Voicetasten beenden.
AW_DP330_Manual_G06_150420
2015
13JoursEnFR
Song Recording
Aufnahme
With the easy-to-use song recording features, you can record your own
keyboard performances as a user song. 10 user songs can be
recorded
witheinfach
6 tracks (1
track, 5Aufnahmefunktion
MELODY tracks) each.können
Mit der
zuACCOMP
benutzenden
Sie Ihr eigenes Spiel aufnehmen, ein so
genannter User-Song. Sie können 10 solcher User-Songs aufnehmen, jeweils mit 6 Spuren: einer
Among them, the accompaniment track is used for recording style and
und
fünf Melodiespuren
this Begleitspur
recorded track (Accomp)
is user song's
accomp.
Melody tracks are (Melody).
used for
recording melodies.
Sie können eine Begleitspur und eine Melodiespur gleichzeitig aufnehmen, jedoch nicht zwei
Accomp track and melody track can be recorded together, but you
Melodiespuren. Selbstverständlich können Sie auch alle Spuren einzeln aufnehmen und
cannot record two melody tracks at the same time. Of course you can
abspielen.
Die Aufnahme
bleibt
gespeichert,
onlyzusammen
record accomp
or melody; Accomp
and several
melody
tracks can auch wenn Sie das Gerät ausschalten.
simultaneous playback. The recorded data will not lose when you turn
off the power.
Starten
der Aufnahme
Start
Recording
Before you start recording, you need to select a user song to keep the
1. Drücken
Sie
und RECORD
um in den Songrecording
song, and
setSHIFT
the recording
tracks.
1. Holding
down
[SHIFT]
button,
and
then
press
the
[RECORD]
button
Auswahlmodus zu gelangen. Im Display
erscheint
to enter
user
song
selection
mode.
The
LCD
displays
“RecSong1”
„RecSong1“. Benutzen Sie das Drehrad oder die
and sequence number.
und or
-/NO
um
denselect
Songthe
auszuwählen,
Use Tasten
the data +/YES
dial, [+/YES]
[-/NO]
button
user song you
den
Sie
aufnehmen
möchten.
want to record.
RecSong1
2. Drücken Sie erneut SHIFT und FUNCTION um in den
2. Holding
down [SHIFT] button, zu
andgelangen.
then press the
button
Vorbereitungsmodus
Die[RECORD]
Kontrolllampe
again to enter record preparation mode. LCD lightens the “REC”
flag, and LCD will flash beat indicate. The piano will automatically
33
select an empty track to record your performance.
The LCD indicate in the below which flashes shows the record
track.
RECORD
ACCOMP
MELODY 1 MELODY 2 MELODY 3 MELODY 4 MELODY 5
2. Holding down [SHIFT] button, and then press the [RECORD] button
again to enter record preparation mode. LCD lightens the “REC”
flag, and LCD will flash beat indicate. The piano will automatically
select an empty track to record your performance.
The LCD indicate in the below which flashes shows the record
track.
„Rec“ leuchtet auf und das Blinken gibt den Takt an.
Das Keyboard wählt selbständig den nächsten freien
3. In theSpeicherplatz.
recording preparation status, you can adjust parameters such
as the voice, style and tempo. When recording a new song, it will
3. Sie können nun Parameter wie Voice, Style und Tempo
automatically select “Melody 1” as the recorded track.
überprüfen.
Wenn
Sieand
einen
Song aufnehmen,
Holding
down [SHIFT]
button,
then neuen
press “ACCOMP”
(or
“MELODY1”
to
“MELODY
5”)
to
make
your
own
selection.
wählt das Keyboard automatisch „Melody
1“ als
The aufzunehmende
ACCOMP track and Spur
one of aus.
MELODY
track can
recordedeine
Drücken
Siebeeinfach
at the same time, but it cannot record two MELODY track
andere Spurtaste (Accomp oder Melody) aus, wenn Sie
simultaneously.
eine andere Spur aufnehmen wollen. Eine Style kann
nur
in der Begleitspur
4. Press
[START/STOP]
button or aufgenommen
play the keyboard werden.
to start recording.
When
choosingSie
the START/STOP
accomp tack and A.B.C.
is on, play
anan
effective
4. Drücken
oder fangen
Sie
zu
chords in left hand section or press [START/STOP] button would
spielen
um
die
Aufnahme
zu
starten.
Wenn
die
start recording.
Begleitautomatik aktiv ist, startet auch ein Akkord der
Note: linken Hand die Aufnahme.
RECORD
ACCOMP
MELODY 1 MELODY 2 MELODY 3 MELODY 4 MELODY 5
StGrdPno
RECORD
ACCOMP
MELODY 1 MELODY 2 MELODY 3 MELODY 4 MELODY 5
Style can only be recorded in “Accomp” track.The recording track LCD
indicate
three
states:über
Blinking,Light,
Go out.
Diehas
Spur
verfügt
eine Kontrollleuchte,
die den jeweiligen
Status anzeigt.
Das
Blinken
bedeutet,
dass
die
Spur
für
die
Aufnahme
ausgewählt
wurde. Sollten sich bereits
•
Blinking:
It means the track was chosen for recording. If the track
Daten darauf
werden
diese gelöscht.
have recorded
data, thebefinden,
original data
will be replaced.
Light:
It means
this trackder
have
data, the
recording
process
willDaten
record darauf befinden, die gleichzeitig mit der
Leuchten
Lampe
zeigt
an, dass
sich
• Das
data with
playback the
recorded track
at the(Playback).
same time.
Aufnahme
abgespielt
werden
Go out: It means this track has no data or has data which can not
Lampe aus ist, befinden sich entweder keine Daten Daten darauf oder die Daten sind
• Wenn
playback
whendie
recording.
nicht für ein Playback geeignet.
When recording an existing song, the keyboard will automatically
select the empty track next to the occupied track. For example, if
Wenn alle sechs Spuren belegt sind und eine neu aufgenommen werden soll, wählen Sie sie
“Melody 1” is occupied, then “Melody 2” will be selected as the record
einfach
und have
starten
die Aufnahme.
Die
Spur
wird dadurch gelöscht und mit neuem Inhalt
track.
When allaus
6 tracks
beenSie
recorded
and a specific
track
needs
to bebelegt.
revised, press the button of that track and start recording. The
original data will be replaced.
Song Recording
Song Recording
Stop Recording
29
Stoppen
Aufnahme
1. When
recording is der
in process,
holding down [SHIFT] button and
then press the [RECORD] button to stop recording.
Stop
1. Recording
Drücken Sie die Tasten SHIFT und RECORD um die
1. When Aufnahme
down [SHIFT]
button
and will
2.
recording is in
ifholding
the memory
is full, the
recording
zuprocess,
stoppen.
then 10:28:38
press
the automatically,
[RECORD] button
to stop
stop
and
save
and the
LCDrecording.
displays “Rec_Full”.
20
2. Wenn der Speicherplatz erschöpft ist, erscheint im
Display
„Rec_Full“.
Die
Aufnahme
wird
abgebrochen
2. IfWhen
recording
in process,
if the memory
is full, will
the stop
recording will
3.
you choose
theisaccomp
recording,
the recording
undsave
gespeichert.
stop and
automatically,
and
displays
“Rec_Full”.
automatically
when
the ending
of the LCD
rhythm
finishes.
3. Wenn Sie eine Begleitung aufnehmen, stoppt die
automatisch
mit
Endewill
des
Songs.
3. If you Aufnahme
choose the accomp
recording,
thedem
recording
stop
AW_DP330_Manual_G06_150420
2015
4
Rec_Full
Rec_Full
automatically when the ending of the rhythm finishes.
Playback Recording
1. When recording is in process, holding down [SHIFT] button and
Playback
then press the [RECORD] button, it will stop recording and enter the
Playback
Recording
song play mode,
and the current recorded song will play
automatically
in circle.
1. When
is einer
in process,
holding down
[SHIFT]
and
1. recording
Während
Aufnahme
drücken
Siebutton
die Tasten
then press the [RECORD] button, it will stop recording and enter the
SHIFT
und RECORD.
Die Aufnahme
wird gestoppt,
song play
mode, and
the to
current
2. Press
the [SONG]
button
enterrecorded
the song song
modewill
andplay
it will play all
das
Gerät
wechselt
in den
Song-Modus
undtodie
automatically
in circle.
songs
circularly.
Use
the data dial,
[+/YES]
or [-/NO] button
select
Aufnahme
fortlaufend
abgespielt.
a song,
there are 70wird
songs
in all, including
10 user songs (61~70).
If 2.
thereDrücken
is no
dataSie
in
the
selected
song,
it willand
display
“NoFile”
SONG
umuser
den
Song-Modus
aufzurufen.
2. Press
the
[SONG]
button
to enter
the
song
mode
it will
play all
and
stop
playing.
songsAlle
circularly.
Usewerden
the data fortlaufend
dial, [+/YES] or
[-/NO] button
to select
Songs
abgespielt.
Benutzen
a song, there are 70 songs in all, including 10 user songs (61~70).
Sieno
das
Drehrad
oder die
Tasten
+/YES und
-/NO um
If there
data
the selected
user stop
song,
it will display
“NoFile”
3. You
canisselect
oneinuser
song in song
playing
mode, press
einen
Song
auszuwählen.
Es
gibt
insgesamt
70
and
stop
playing.
[PLAY/STOP] button, this user song will play circularly.
Songs; die Benutzer-Songs finden sich auf den
Plätzen
61 user
bis 70.
keine
vorhanden,
3. You can
select one
songSind
in song
stopSongs
playing mode,
press
[PLAY/STOP]
button,
this
user
song
will
play
circularly.
erschein im Display „NoFile“.
3. Drücken Sie PLAY/STOP um den Song fortlaufend abzuspielen.
Delete User Song
34
1. Pressing and holding [RECORD] and [SONG] button together and
turn power on simultaneously, all user songs will be erased.
Delete User Song
1. In
Pressing
and holding
[RECORD]
and
[SONG]
button
together
and
2.
the recording
preparation
status,
holding
down
[SHIFT]
button
NoFile!
NoFile!
Delete User Song
1. Pressing and holding [RECORD] and [SONG] button together and
Löschen eines Songs
turn power on simultaneously, all user songs will be erased.
2. In1.the Wenn
recording
preparation
status,
holding down
Sie
die Tasten
RECORD
und [SHIFT]
SONGbutton
gedrückt
and then press the [RECORD] button for two second, the LCD will
halten, während Sie das Gerät einschalten, werden
display “Delete?”. Holding down [SHIFT] button then press
alle vorhandenen
gelöscht.
[ACCOMP]
(or [MELODY 1]Daten
to [MELODY
5]) button to select the
track
want Sie
to delete.
2. you
Halten
im Vorbereitungsmodus RECORD für 2
WhenSekunden
some track indicate
is lightened,
it indicates
that the track
gedrückt;
im Display
erscheint
data you want to delete, otherwise, it indicate that the track data you
„Delete?“
want to
keep. If all(löschen?).
the track indicates are lightened, the whole user
3. will
Wählen
Sieafter
die confirmation.
Spur aus, die Sie löschen möchten
song
be erased
während Sie die SHIFT-Taste gedrückt halten. Drücken
3. Choose
the+/YES
track you
delete,zu
press
[+/YES]oder
to confirm
Sie
umwant
dentoSong
löschen
-/NOand
um die Aktion abzubrechen.
Delete?
the recorded data in this track will be erased. Press [-/NO] to quit
this step, and go back to the recording preparation status
Song
Das Keyboard verfügt über 60 vorgefertigte Songs und 10 Benutzer-Songs. Alle 60 Songs können
Sie mit abgeschalteter Melodiespur üben.
Song
Song
The piano has 60 preset songs in addition to 10 user songs. All preset
piano has 60 preset songs in addition to 10 user songs. All preset
30The
Anhören
der
Songs
songs
can be
be practised
practised
with melody-off.
melody-off.
songs
can
with
1. Drücken
Siesongs
SONG. Alle Songs werden reihum
Listen
to the
the
songs
Listen
to
abgespielt.
1. Press
the [SONG] button
button to
to enter
enter the
the song
song mode.
mode. The
The LCD
LCD shows
shows
1.
“SONG”
indicate
and
it
will
play
all
songs
circularly.
2.
Wählen
Sie
einen
Song
aus,
indem
Sie
das
Drehrad
“SONG”
indicate and it will play all songs circularly.
4
20
10:28:38
oder die Tasten +/YES und -/NO benutzen.
2. Use
Use the
the data
data dial,
dial, [+/YES]
[+/YES] or
or [-/NO]
[-/NO] button
button to
to select
select aa song.
song.
2.
3. Wenn
Sie einen
Song
wiederholt
abspielen
möchten,
drücken Sie die Taste START/STOP.
3. Once
Once you
you start
start playing
playing aa song
song by
by pressing
pressing [[ ]] button,
button, itit will
will play
play
3.
4. Wenn
Song beendet
ist und Sie den Song-Modus
current
songder
repeatedly.
current
song
repeatedly.
verlassen möchten drücken Sie einer der STYLE- oder
oderpress
DUAL.
4.
When
the song
song is
is stopped,
stopped,
press
the style
style or
or voice
voice direct
direct button,
button,
4. WhenVOICE-Tasten
the
the
Press the [SONG]
AW_DP330_Manual_G06_150420
2015
Jambalay
Jambalay
[DUAL] button
button and
and so
so on
on will
will exit
exit the
the song
song mode.
mode.
[DUAL]
Song-Einstellungen
Song Control
1. Introductory
Introductory
beat startet mit einem Einzähler und somit mit
1.
beat
1. Ein Song
Before song
song start
start playing,
playing, itit has
has the
the introductory
introductory beat, the measure
Before
negativen
Taktzahl.
Der
beginnt,
sobald die
starts einer
from negative
negative
value.
begins to
to
playSong
song when
when
starts
from
value.
ItIt begins
play
song
the measure
Taktzahl
1
erreicht.
goes
to
1.
goes to 1.
2. Während der Song abgespielt wird, können Sie mit der
2. REW,
REW, Taste
FF and
andFF
PAUSE
den Song schnell „vorspulen“, mit REW den
2.
FF
PAUSE
WhenSong
the song
song
is playing:
playing:
When
the
is
„zurückspulen“
und mit PAUSE den Song anhalten.
Press the
the [[ ]] button
button to
to fast
fast forward
forward the
the song.
song.
Press
3.
Drücken
Sie
REPEAT
um
den
Song
zu measure).
wiederholen. Er wird fortlaufend abgespielt.
Press the
the [[ ]] button
button to
to rewind
rewind the
the
song
(base
on the
Press
song
(base
on
Press the
the [[ ]] button
button to
to pause
pause the
the playing
playing song.
song.
Press
3.
3. Song
Song Repeat
Repeat
When
When playing
playing the
the song,
song, press
press the
the [[ ]] to
to set
set the
the loop
loop begin and
press
press itit again
again to
to set
set the
the loop
loop end.
end. When
When in
in loop
loop status,
status, press [ ]
again
again to
to quit
quit the
the loop
loop playing
playing status.
status.
35
Practice Song
1.
1. When
When song
song playback
playback stops,
stops, press
press [MELODY
[MELODY OFF]
OFF] button to turn off
the
the right-hand
right-hand melody.
melody. LCD
LCD will
will display
display “R”
“R” on
on the
the right bottom.
Practice Song
Übungssong
1. When
song playback stops, press [MELODY OFF] button to turn off
the right-hand melody. LCD will display “R” on the right bottom.
1. Wenn das Playback stoppt, drücken Sie MELODY
2. PressOFF
[START/STOP]
button to beginfür
thedie
practice.
um die Melodiespur
rechte Hand
abzuschalten. Rechts unten erscheint im Display „R“.
2. Drücken Sie START/STOP um mit dem Üben zu
beginnen.
Jambalay
MIDI
With the MIDI functions you can expand your musical possibilities. This
section will let you know what MIDI is, and what it can do, as well as
how you can use MIDI on your instrument.
MIDI
What's
MIDI?
Durch die MIDI-Funktionen können Sie Ihre
MIDI
musikalischen Möglichkeiten erweitern. Dieser Abschnitt
MIDI (short for Musical Instrument Digital Interface) allows a wide
variety of electronic musical instruments, computers and other related
devices to connect and communicate with one another. MIDI carries
event messages that specify notation, pitch and velocity, control
was MIDI
ist,volume,
was esvibrato,
kannaudio
und panning,
wie Sie and
diese
signalserklärt,
for parameters
such as
With
theFunktionen
MIDI
functions
you
can
expand
your
musical
possibilities.
auf
Ihrem
Instrument
nutzen
können.This
program
change
information
to change
the
voice
selections.
section will let you know what MIDI is, and what it can do, as well as
how
you can usecan
MIDI
on your
instrument.
The instrument
output
the real-time
playback information via MIDI
messages and control external MIDI devices. The instrument can also
AW_DP330_Manual_G06_150420
2015 accept
4
20 incoming
10:28:38 MIDI messages and generate sound accordingly.
31
Was ist MIDI?
What's
MIDI?
MIDI messages can be divided into two groups: Channel messages
MIDI (short for Musical Instrument Digital Interface) allows a wide
MIDI (Musical Instrument Digital Interface) ist ein
and System.
variety of electronic musical instruments, computers and other related
Standard
für die
Kommunikation
elektronischen Musikinstrumenten und
devicesweltweiter
to connect and
communicate
with
one another. MIDIzwischen
carries
This piano has a USB port, which can be connected to a PC as
event messages
that specify
notation,
pitch and velocity,
control
Computern.
Durch
den
Austausch
von
Informationen
zwischen
den Geräten können Systeme
an MIDI input or MIDI output.
signals MIDI-Instrumenten
for parameters such asund
volume,
vibrato, audio
panning, and
Laufwerken
entstehen,
die vielfältiger und flexibler sind als isolierte
program change information to change the voice selections.
von
Instrumente. Sie können Computer, Sequenzer, Expander oder andere Keyboards mit Ihrem
Keyboard
MIDI-Signale
können invia
zwei
The instrument
can vernetzen.
output the real-time
playback information
MIDIGruppen geteilt werden: Kanal-Signale und
messages
and control external
MIDI
devices.
The instrument
can der
also sowohl für MIDI In als auch für MIDI Out
System-Signale.
Das
Pino
hat einen
USB-Port,
accept
incoming
MIDI messages and generate sound accordingly.
MIDIgenutzt
Terminals
werden kann.
In order to exchange MIDI data between multiple devices, each device
MIDI
canby
beadivided
must messages
be connected
cable. into two groups: Channel messages
and System.
MIDI IN: Receives MIDI data from a computer.
This
a USBthe
port,
which caninformation
be connected
to a PC
MIDIpiano
OUT: has
Transmits
instrument
as MIDI
dataasto
an
MIDI MIDI
input device.
or MIDI output.
another
MIDI-Geräte
Um MIDI-Signale austauschen zu können, müssen
die Geräte mit einem Kabel verbunden sein. MIDI IN
Daten von einem Computer, MIDI Out
MIDIempfängt
Terminals
In ordersendet
to exchange
MIDI
multiple
devices,
each device
Daten
andata
einbetween
anderes
Gerät.
Bitte wecken
Sie
Upload/Download
Data
from
the
Computer
must
beden
connected
by a cable.
Computer
aus dem Ruhezustand oder einem
1. Connect a standard USB cable between the rear-panel USB jack on
Stand
By-Modus
auf,
bevor
Siecomputer.
ihn verkabeln.
theIN:
instrument
and
USB
jack
your
MIDI
Receives
MIDIthe
data
from
a on
computer.
Schalten
Siethe
das
Keyboard
bitte erst
nach
dem
MIDI OUT:
Transmits
instrument
information
as MIDI
data
to
another
MIDI
device.
Herstellen
derfirst,
Kabelverbindung
2. Power
on the
piano
and then open the an.
PCSUITE software in
your computer. If the LCD displays “PCLink..” it indicates the piano
connects the PC successfully.
PCLink..
3. You can download 10 MIDI files to the keyboard as user songs or
upload the user songs to PC.
Upload/Download Data from the Computer
4. Connect
You can upload
userUSB
styles
to the
computer
a backupUSB
or jack on
1.
a standard
cable
between
the as
rear-panel
2.
5.
download
themand
to the
the
instrument
thekeyboard.
USB jack on your computer.
You can upload memory files to the computer as a backup or
download them to the keyboard.
Power on the piano first, and then open the PCSUITE software in
your computer. If the LCD displays “PCLink..” it indicates the piano
36
Please refer
software
operation instructions for detail operating
connects
theto
PC
successfully.
methods.
3. You can download 10 MIDI files to the keyboard as user songs or
upload the user songs to PC.
PCLink..
Upload/Download Data from the Computer
1. Connect a standard USB cable between the rear-panel USB jack on
Datenaustausch mit dem Computer
the instrument and the USB jack on your computer.
1. Verbinden
an der Rückseite
2. Power
on the pianoSie
first,die
andUSB-Buchse
then open the PCSUITE
software in
PCLink..
your computer.
If
the
LCD
displays
“PCLink..”
it
indicates
the piano mit
Ihres Instrumentes über ein Standard-USB-Kabel
connects the PC successfully.
einem Computer.
2. Schalten Sie das Instrument ein, öffnen Sie dann die
3. You can download 10 MIDI files to the keyboard as user songs or
„PC to
Suite“
uploadSoftware
the user songs
PC. auf Ihrem Computer; im Display
wird „PCLink angezeigt.
3. can
Sieupload
können
MIDI-Dateien
zum
4. You
user10
styles
to the computer
as aKeyboard
backup or als User-Songs übertragen. Sie können ebenso
download
themVoices
to the keyboard.
Styles,
oder Memory-Dateien übertragen auf den Computer übertragen.
You
memory
files to the computer
asSie
a backup
4. can
Fürupload
genauere
Informationen
lesen
bitte or
die Bedienungsanleitung der Software.
download them to the keyboard.
5. Please refer to software operation instructions for detail operating
methods.
Hilfe bei Störungen
32
Problem
Mögliche Ursache und Lösung
Man hört ein „pop“, wenn das Gerät anoder abgeschaltet wird.
Das ist normal und nicht besorgniserregend.
Man hört nichts, wenn auf dem Keyboard
gespielt
wird.
10:28:39
Möglicherweise ist die Lautstärke zu niedrig
eingestellt. Drehen Sie sie etwas weiter auf.
Es treten Geräusche während der
Benutzung eines Mobiltelefons auf.
Ein Mobiltelefon in der Nähe des Instruments kann
Interferenzen verursachen. Schalten Sie das
Telefon aus oder gehen Sie etwas weiter weg vom
Gerät.
Die Begleitautomatik startet nicht obwohl
sie sich im Stand By-Modus befindet.
Versuchen Sie, die Begleitautomatik im Bereich
der rechten Hand zu starten. Um sie synchron zu
starten, müssen Sie eine Taste im Bereich der
linken Hand drücken.
Bestimmte Noten klingen falsch.
Überprüfen Sie, ob der Tune-Wert auf 0 steht. Sie
können das Instrument auf die Werkseinstellungen
zurücksetzen, indem Sie die Tasten +/YES und -/
NO gedrückt halten, während Sie das Keyboard
einschalten.
Die Harmonie-Funktion geht nicht.
Wenn ein Drum Kit als Voice R1 ausgewählt ist,
steht die Funktion nicht zur Verfügung.
Nach einer Verbindung mit einem
Computer wird das Keyboard nicht
erkannt.
Überprüfen Sie, ob das USB-Kabel ordentlich
verbunden ist und versuchen Sie gegebenenfalls,
das Keyboard an einem andern USB-Port
anzuschließen.
AW_DP330_Manual_G06_150420
2015
4
20
37
Spezifikationen
LCD Display
Multifunktionales Display
Tasten
88, Hammermechanik
Polyphonie
128
Voices
500
Styles
200 + 10 Benutzer-Styles
Songs
60 + 10 Benutzer-Songs
Demo
5
Albumliste
120
Regler
Power on/off, Volume, Brilliance, Tempo+/-, Shift, Function,
Melody Off, Freeze, Bank, Store, M1-M4, O.T.S., +/Yes, -/
No, Style (Demo), Voice (Perform), Song (Album), Piano,
Metronome, Dual, Touch, Lower, DSP, Harmony, Accomp+/-,
Scale, Twinova, Octave, Bank, Store, M1-M4
Regler Begleitautomatik
Start/Stop, Sync Start (Pause), Intro/Ending (Repeat A-B), A
(REW), B (FF), Chord Mode
Aufnahme
Record, Accomp Track, Melody Track 1-5
Speicher
32
Anschlüsse
DC IN, Headphones, AUX IN, AUX OUT, MIDI IN, MIDI
OUT, USB-MIDI
Stromversorgung
15 V, 2500 mA
Lautsprecher
2 x 4 Ω, 25 W
2 x 8 Ω, 20 W
Abmessungen B x T x H
1380 x 485 x 840 mm
Gewicht
44 kg
Alle Spezifikationen können ohne Ankündigung geändert werden.
38
Voice List
Übersicht
über die Sounds
No. Name
Piano
Stereo Grand Piano
1
4
Glockenspiel 2
Glocken2
56
Music Box 1
MusicBox
StGrdPno
57
Music Box 2
MusicBo2
Acoustic Grand Piano (wide) 1
GrandPnW
58
Music Box 3
MusicBo3
3
Acoustic Grand Piano (dark)
GrandPnD
59
Toy Box
ToyBox
4
Octave Piano 1
OctPno1
60
Music Box & Harp
Mbx&Harp
5
Octave Piano 2
OctPno2
61
Stereo Vibrapho
StVibes
6
Piano & Strings
Pno&Str
62
Rigid Vibraphone
RigiVibe
7
Piano & Choir
Pno&Cho
63
Vibraphone 1
Vibra
8
Acoustic Grand Piano
GrandPno
64
Vibraphone 2
Vibra2
9
Stereo Bright Piano
StBrtPno
65
Vibraphone (wide) 1
VibraW
10
Bright Acoustic Piano
BritePno
66
Vibraphone (wide) 2
VibraW2
11
Bright Acoustic Piano (wide) 1
BritePnW
67
Vibraphone & Bell
Bell&Vib
12
Chorus Piano
ChoruPno
68
Marimba 1
Marimba
13
Electric Grand Piano
E.Grand
69
Marimba 2
Marimba2
14
Electric Grand Piano (wide)
E.GrandW
70
Marimba (wide)
MarimbaW
15
Stereo Honk-Tonk
StHonkTo
71
Stereo Marimba
StMarim
16
Honky-tonk Piano
HnkyTonk
72
Marimba & Vibraphone
Mar&Vib
17
Honky-tonk Piano (wide) 1
HnyTonkW
73
Xylophone 1
Xylophon
18
Stereo Hard Electric Piano
StHarEp
74
Xylophone 2
Xylopho2
19
Detuned Electric Piano 1
DetunEP1
75
Tubular Bells
TubulBel
20
Detuned Electric Piano 2
DetunEP2
76
Church Bell
ChurBell
21
Electric Piano 1
E.Piano1
77
Carillon
Carillon
22
Electric Piano 2
E.Piano2
78
Dulcimer
Dulcimer
23
Electric Piano (wide) 1
EPnoW1
Santur
24
Electric Piano (wide) 2
EPnoW2
79 Santur
Organ
25
EP Legend
EPLegend
80
Drawbar Organ 1
DrawOrgn
26
EP Phase
EPPhase
81
Drawbar Organ 2
DrawOrg2
27
60's Electric Piano
60'sEP
82
Soft Stereo Drawbar Organ
SfDrawOr
28
Electric Piano 1 (velocity mix)
E.PnoV1
83
Mellow Drawbar Organ
MellDrOr
29
Electric Piano 2 (velocity mix)
E.PnoV2
84
Detuned Drawbar Organ 1
DeDraOrg
30
Velocity Crossfade Electric Piano
VeCrosEP
85
Detuned Drawbar Organ 2
DeDraOr2
31
Layered Electric Piano 1
LayerEp1
86
Italian 60's Organ
60'sOrgn
32
Layered Electric Piano 2
LayerEp2
87
1970 Percussive Organ
1970PcOr
33
Nylon Electric Piano
NylonEP
88
Percussive Organ 1
PercOrgn
34
Warm Electric Piano
WarmEp
89
Percussive Organ 2
PercOrg2
35
Grand Harpsichord
GraHarps
90
Light Click Organ
LClickOr
36
Harpsichord 1
Harpsi
91
Detuned Percussive Organ
DePerOrg
37
Harpsichord 2
Harpsi2
92
Stereo Rotary Organ
StRotaOr
38
Harpsichord (wide)
HarpsiW
93
Rock Organ
RockOrgn
39
Harpsichord (octave mix) 1
HarpsiO
94
Rotary Organ
RotaOrgn
40
Harpsichord Release
HarpsiR
95
Slow Rotary Organ
SloRotOr
41
Harpsichord (with key off)
HarpsiOf
96
Detuned Church Organ
DeChuOrg
42
Clavi 1
Clavi
97
Church Organ 1
ChurOrgn
43
Clavi 2
Clavi2
98
Church Organ 2
ChurOrg2
44
Clavi (wide) 1
ClaviW1
99
Church Organ (octave mix)
ChurOrgO
45
Clavi (wide) 2
ClaviW2
ReedOrgn
46
Clavi Wah
ClaviWa
100 Reed Organ
101 Puff Organ
PuffOrgn
Pulse Clavi
Chromatic Percussion
48 Celesta 1
PluseClv
102 Accordion 1
103 Accordion 2
Acordion
Celesta
Acordin3
49
Celesta 2
Celesta2
104 Accordion 3
105 Mustte
50
Birght Celeasta
BirCelea
AccordSo
51
Celesta & Sine
Celes&Si
106 Accord It Solo
107 Sweet Harmonica
52
Reecho Bell
RechBell
Celesta & Music Box
Celes&MB
108 Harmonica 1
109 Harmonica 2
Harmnica
53
54
Glockenspiel 1
Glocken
110 Tango Accordion
TangoAcd
AW_DP330_Manual_G06_150420
2015
55
2
47
34
LCD Name
20
10:28:39
39
Acordin2
1
9
7
Mustte
SwetHarm
Harmnic2
2
5
0
Voice List
Guitar
111 Acoustic Guitar (nylon) 1
166 Electric Bass (finger) 2
FngrBas2
NylonGtr
167 Electric Bass (finger) 3
FngrBas3
112 Acoustic Guitar (nylon) 2
NylonGt2
168 Finger Slap Bass
FngrSlap
113 Acoustic Guitar (nylon + key off)
NylGtrOf
169 Wah Finger Bass
WahFnBs
114 Ukulele
Ukulele
170 Electric Bass (pick) 1
PickBass
115 Velocity Nylon Guitar
NylnGtVe
171 Electric Bass (pick) 2
PickBas2
116 Chorus Nylon Guitar
ChoNyGt
172 Mute Pick Bass
MuPkBass
117 Bright Nylon Guitar
118 Acoustic Guitar (steel) 1
BrNyGt
173 Fretless Bass 1
174 Fretless Bass 2
Fretless
119 Acoustic Guitar (steel) 2
120 Steel Guitar with Body Sound
SteelGt2
175 Slap Bass 1
176 Slap Bass 2
SlapBas1
121 Tremolo Steel Guitar
122 Mandolin
TremGt
177 Slap Bass 3
178 Slap Bass 4
SlapBas3
123 12-Strings Guitar
124 Chorus Steel Guitar
12StrGtr
179 Synth Bass 1
180 Synth Bass 2
SynBass1
125 Nylon & Steel Guitar
126 Stereo Steel Guitar
Ny&SteGt
181 Synth Bass 3 (resonance)
182 Synth Bass 4 (attack)
ResoBass
127 Steel Guitar Bend
128 Steel Guitar Harmonics
GtBend
129 Velocity Steel Guita 1
130 Velocity Steel Guita 2
VelSte1
185 Hammer
186 Synth Bass (rubber)
Hammer
VelSte2
131 Velocity Steel Guita 3
132 Electric Guitar (jazz) 1
VelSte3
187 Attack Pulse
AtackPls
JazzGtr
133 Electric Guitar (jazz) 2
134 Electric Guitar (pedal steel)
JazzGt2
Strings & Orchestral Instruments
188 The Violin
189 Violin 1
Violin
135 Mellow Guitar
136 Velocity Jazz Guitar
MelloGt
190 Violin 2
191 Violin (slow attack)
SlViolin
137 Jazz Guitar Detuned
138 Mid Tone Guitar
JazzGtDt
192 Soft Violin
193 Viola 1
Viola
139 Electric Guitar (clean) 1
140 Electric Guitar (clean) 2
CleanGtr
194 Viola 2
195 Viola 3
Viola3
141 Stereo Clean Guitar
142 Velocity Clean Guitar
StCleGtr
143 Electric Guitar (detuned clean)
144 Electric Guitar (muted velo-sw)
DetClnGt
145 Electric Guitar (muted)
146 Electric Guitar (funky cutting)
MutedGtr
147 Jazz Man
148 Stereo Muted Guitar
JazzMan
149 Guitar Pinch
150 Overdriven Guitar
GtPinch
151 Distortion Guitar 1
152 Distortion Guitar 2
DistGtr
153 Distortion Guitar (with feedback) 1
154 Distorted Rhythm Guitar
FeedbkGt
155 5th Distortion
156 Stereo Distorted Guitar
5thDist
157 Guitar Feedback
158 Guitar Harmonics
GtrFedbk
Bass
159 Acoustic Bass 1
160 Acoustic Bass 2
SteelGtr
SteelBdy
Mandolin
ChoSteGt
StSteGt
183 Synth Bass (warm)
184 Clavi Bass
GtHarm
PedalGtr
JazzGtVe
MidTonGt
CleanGt2
CleGtVel
MutVelGt
FunkGt
Ovrdrive
DistGt2
DistRyth
StDistor
AcoBass2
161 Jazz Style
162 A.Bass & Mute G.T.
JazzSty
163 Resonant Bass
164 Wah Bass 1
ResBass
165 Electric Bass (finger) 1
4
20
10:28:39
AtackBas
WarmBass
ClavBass
RubbBass
TheVin
Violin2
SoftVin
Viola2
Celloen
200 Contrabass 1
201 Contrabass 2
Contrabs
Cello2
Chamber
Contrbs2
TremStr
TremStr2
204 Slow Tremolo Strings 1
205 Slow Tremolo Strings 2
SlwTrSt1
206 Pizzicato Strings 1
207 Pizzicato Strings 2
PizzStr
208 Octave Pizzicato
209 Orchestral Harp 1
OctoPizz
210 Orchestral Harp 2
211 Yang Chin
Harp2
SlwTrSt2
PizzStr2
Harp
YangChin
Timpani
Timpani2
TheStr
Strings1
216 String Ensembles 2
217 Synth Strings 1
Strings2
SynStrs2
WahBass1
218 Synth Strings 2
219 Synth Strings 3
FngrBass
220 Synth Strings 4
SynStrs4
Bs&GtMu
AW_DP330_Manual_G06_150420
2015
SynBass2
198 Celloen 16'
199 Chamber Music
Ensemble
214 The Strings
215 String Ensembles 1
AcoBass
SlapBas4
Cello
212 Timpani 1
213 Timpani 2
GtrHarmo
SlapBas2
196 Cello 1
197 Cello 2
202 Tremolo Strings 1
203 Tremolo Strings 2
StMuGt
Fretlss2
40
SynStrs1
SynStrs3
35
Voice List
221 Synth Strings 5
SynStrs5
277 Synth Brass 1
SynBras1
222 Resonant Strings
ResonSt
278 Synth Brass 2
SynBras2
223 Stereo Slow Strings
SSlowStr
279 Synth Brass 3
SynBras3
224 Slow Strings
SlowStr
280 Synth Brass 4
SynBras4
225 Strings and Brass
Str&Bras
281 Analog Synth Brass 1
AnaBras1
226 Legato Strings
LegatStr
282 Analog Synth Brass 2
AnaBras2
227 Orchestra
Orchstr
283 Jump Brass
JumpBras
228 Arco Strings
229 60's Strings
ArcoStr
284 Octave Synth Brass
285 Synth Brass & Strings 1
SynBraOc
230 1970 Strings
231 Solo Strings
70’Str
286 Synth Brass & Strings 2
287 Echo Brass
SyBr&St2
232 Choir Aahs 1
233 Choir Aahs 2
ChoirAah
234 Choir Aahs 3
235 Stereo Choir Aahs
ChoirAh3
236 Strings & Choir
237 Humming
StrChoir
238 Voice Oohs
239 Analog Voice
VoiceOoh
240 Synth Voice
241 Bass Hit Plus
SynVoice
242 Orchestra Hit 1
243 Orchestra Hit 2
OrchHit
244 Euro Hit
245 6th Hit
EuroHit
Brass
246 Trumpet 1
247 Trumpet 2
36
60'sStr
SoloStr
Reed
288 Soprano Sax 1
289 Soprano Sax 2
ChoirAh2
StChoir
4
EchoBr
SprnoSax
SprnSax2
290 Soprano Sax Soft
291 Slow Soprano Sax
SopSaxSf
292 Sweet Soprano Sax
293 Alto Sax
SweSpSax
294 Soft Alto Sax
295 Super Alto Sax
SoftAlto
296 Tenor Sax 1
297 Tenor Sax 2
TenorSax
298 Baritone Sax
299 Sweet Oboe
BariSax
6thHit
300 Oboe 1
301 Oboe 2
Oboe
Trumpet
302 English Horn 1
303 English Horn 2
EngHorn
304 Woodwinds
305 Bassoon 1
Woodwind
Basson2
Humming
AnaVoice
BassHit
OrchHi2
Trumpet2
SlSopSax
AltoSax
SuprAlto
TenoSax2
SwetOboe
Oboe2
EngHorn2
248 Trumpet 3
249 Dark Trumpet Soft
Trumpet3
250 Sweet Trumpet
251 Wah Trumpet
SweetTp
WahTp
306 Bassoon 2
307 Clarinet 1
252 Trombone 1
253 Trombone 2
Trombone
308 Clarinet 2
Clarine2
Trmbone2
254 Bright Trombone
255 Strings & Trombone
BritBone
Pipe
309 Piccolo
310 Flute
Piccolo
256 Tuba 1
257 Tuba 2
Tuba
258 Soft Tuba
259 Muted Trumpet 1
SoftTuba
260 Muted Trumpet 2
261 French Horn 1
MuteTrp2
262 French Horn 2 (warm)
263 French Horn 3
FrHorn2
DarkTrp
Str&Trb
Bassoon
Clarinet
Flute
311 Sweet Flute
312 Recorder
SweeFlut
313 Sweet Pan Flute
314 Pan Flute
SwPanFu
315 Blown Bottle
316 Shakuhachi
Bottle
Whistle
FrHorn3
317 Whistle 1
318 Whistle 2
264 Stereo French Horn
265 Horn Orchestra
StFrHorn
319 Ocarina
Ocarina
5thHornO
266 Brass Section 1
267 Brass Section 2 (octave mix)
Brass
Synth Lead
320 Lead 1 (square)
SquareLd
268 Brass Section 3
269 Brass Section 4
Brass3
270 Brass Section 5
271 Brass Swell
Brass5
272 Brass Band
273 Bright Brass Section
BrasBand
274 Mute Brass Ensemble
275 Sforzato Brass
MuteEns
276 Brass & Strings
Bras&Str
Tuba2
MuteTrp1
FrHorn
Brass2
Brass4
BrasSwel
BrBraSec
SfrzBras
AW_DP330_Manual_G06_150420
2015
SyBr&St1
20
10:28:39
41
Recorder
PanFlute
Shakhchi
Whistle2
321 Square
322 Lead 1b (sine)
Square
323 Square Lead 1
324 Lead 1a (square 2)
SquarLd1
325 Lead 2a (sawtooth 2)
326 Lead 2d (sequenced analog)
SawLead2
327 Lead 2 (sawtooth)
328 Lead 2b (saw + pulse)
SawLead1
329 Lead 2c (double sawtooth)
330 Lead 3 (calliope)
DubSawLd
SineLead
SquarLd2
SquAnaLd
SawPlsLd
CaliopLd
Voice List
331 Lead 4 (chiff)
ChiffLd
332 Lead 5 (charang)
CharanLd
Percussive
385 Tinkle Bell
TnklBell
333 Lead 5a (wire lead)
WireLead
386 Agogo
Agogo
334 Lead 6 (voice)
VoiceLd
387 Steel Drums
SteelDrm
335 Lead 7 (fifths)
FifthsLd
388 Woodblock
WoodBlok
336 Lead 8 (bass + lead)
BassLead
389 Castanets
Castanet
337 Lead 8a (soft wrl)
SftWrlLd
390 Taiko Drum
TaikoDum
ConBasDm
NewAgePd
391 Concert Bass Drum
392 Melodic Tom 1
Synth Pad
338 Pad 1 (new age)
339 Slow Square
SlowSqu
393 Melodic Tom 2 (power)
394 Synth Drum
NewYrPd
PWMPad
395 Rhythm Box Tom
396 Electric Drum
RhythBox
342 PWM Pad
343 Pad 2a (sine pad)
SinePad
397 Reverse Cymbal
RevCymbl
344 Horn Pad
345 Pad 3 (polysynth) 1
HornPad
SFX
398 Guitar Fret Noise
FretNoiz
346 Click Pad
347 Analog Pad
ClickPd
348 Poly Pad
349 Pad 4 (choir)
PolyPad
350 Pad 4a (itopia)
351 Pad 5 (bowed) 1
ItopiaPd
352 Pad 6 (metallic) 1
353 Pan Pad
MetalPad
354 Pad 7 (halo) 1
355 Pad 7 (halo) 2
HaloPad
356 Pad 8 (sweep) 1
357 Pad 8 (sweep) 2
SweepPad
358 Dipolar Pad
359 Rising
DipolPad
360 Congregate
Synth SFX
361 FX 1 (rain)
362 FX 2 (soundtrack)
WarmPad
PolySyPd
AnaloPad
ChoirPad
BowedPad
PanPad
HaloPad2
SweePad2
GtCtNoiz
401 Breath Noise
402 Flute Key Click
BrthNoiz
403 Seashore
404 Rain
Seashore
405 Thunder
406 Wind
Thunder
407 Stream
408 Bubble
Stream
FlKeyClk
Rain
Wind
Bubble
Tweet
Dog
HouseGlp
Congrega
413 Sheep
414 Telephone Ring 1
Sheep
FXRain
415 Telephone Ring 2
416 Door Creaking
Telphon2
Soundtrk
Progenit
365 FX 3 (crystal)
366 FX 4 (atmosphere)
Crystal
367 Warm Air
368 FX 5 (brightness)
WarmAir
369 FX 6 (goblins)
370 Choir Bell
Goblins
371 FX 7 (echoes) 1
372 FX 7a (echo bell) 1
Echoes
373 FX 7b (echo pan)
374 FX 8 (sci-fi)
EchoPan
Tweet2
Telphone
DoorCrek
417 Door
418 Scratch
Door
419 Wind Chime
420 Helicopter
WindChim
421 Car Engine
422 Car Stop
CarEngin
423 Car Pass
424 Car Crash
CarPass
425 Siren
426 Train
Siren
Jetplane
Sci-Fi
427 Jetplane
428 Starship
BurtNois
Sitar
429 Burst Noise
430 Applause
431 Laughing
432 Screaming
Laughing
433 Punch
434 Heart Beat
Punch
435 Footsteps
436 Gunshot
Footstep
MachnGun
Explosio
SynMalet
Atmosphr
Bright
ChoirBel
EchoBell
376 Sitar 2 (bend)
377 Banjo
Sitar2
378 Shamisen
379 Koto
Shamisen
380 Taisho Koto
381 Kalimba
TaishoKt
382 Bag Pipe
383 Fiddle
Bagpipe
Fiddle
437 Machine Gun
438 Lasergun
384 Shanai
Shanai
439 Explosion
10:28:39
BsStSlap
411 Horse Gallop
412 Bird Tweet 2
Rising
363 Progenitor
364 FX 3a (synth mallet)
20
ElecDrum
399 Guitar Cutting Noise
400 Acoustic Bass String Slap
409 Bird Tweet 1
410 Dog
Banjo
Koto
Kalimba
AW_DP330_Manual_G06_150420
4
MeldTom2
SynDrum
340 New Year Pad
341 Pad 2 (warm)
Ethnic Misc.
375 Sitar 1
2015
MelodTom
42
Scratch
Helicptr
CarStop
CarCrash
Train
Starship
Applause
Scream
HeartBet
Gunshot
Lasergun
37
Voice List
Combined Voice
440 Stereo Piano & Strings Pad
471 Full Strings 1
FullStr1
StPn&Str
472 Full Strings 2
FullStr2
441 Stereo Piano & Choir
StPn&Cho
473 Symphonic
Symphon
442 Stereo Piano & Synth Strings
StPn&Syn
474 Stereo Choir & Strings
StCh&Str
443 Stereo Piano & Warm Pad
StPn&Pad
475 Stereo Choir & Steel Guitar
Ch&Gt
444 Stereo Piano & Soft Ep
StPn&Ep
476 3 Trumpet Loose
3Trump
445 FM Electric Piano
FMEp
477 Trombone & Stereo Strings
Tb&StStr
446 Digital Piano
DigiPn
478 3 Trombones Loose
3Tromb
447 E.Piano & Strings
EP&Str
479 3 Muted Trumpets Loose
3MuTrumb
448 E.Piano & Ac Guitar
EP&Gt
480 Club Brass
ClubBras
449 E.Piano & Vibraphone
Ep&Vib
481 Brass & Woodwinds
Br&Wood
450 E.Piano 2 & Pad
Ep&Pad
482 Woodwinds & Strings
Wind&Str
451 E.Piano 2 & Strings
Ep2&Str
483 Section Woods Small
WoodSma
452 Harpsichord & Stereo Strings
Harps&St
484 Pan Flute & Strings Pad
PanFu&St
453 Music Box & Stereo Strings
Mxb&Str
485 Koto & Shamisen
Koto&Sh
454 Vibraphone & Stereo Strings
Vib&Str
455 Vibraphone Octave
VibOct
Arabic Instruments
486 Kanoun
Kanoun
456 Vibraphone & Marimba & Kalimba
VibMK
487 Aoud
Aoud
457 Marimba & Kalimba
Mar&Kal
488 Bouzouk
Bouzouk
458 Marimba Delay
MarDel
489 Nay
Nay
459 Xylophone Octave
XylopOct
490 Mizmar
Mizmar
460 Organ & Stereo Strings
Org&Str
461 Stereo Organ & Piano
StOr&Pno
Drum Set
491 Standard Set
StandSet
462 Rock Organ & Strings
RoOr&Str
492 Room Set
RoomSet
463 Church Organ & Choir
ChuOr&Ch
493 Power Set
PowerSet
464 Church Organ & Strings
ChuOr&St
494 Electronic Set
ElectSet
465 Acoustic Guitar & Flute
Gt&Fl
495 Analog Set
AnalgSet
466 Acoustic Guitar & Clav
Gt&Cl
496 Jazz Set
JazzSet
467 24 String Guitar
24Gt
497 Brush Set
BrushSet
468 Steel Guitar & Warm Pad
StGt&Pad
498 Orchestra Set
OrcheSet
469 Stereo Strings & Horn
StStr&Hn
499 SFX Set
SFXSet
470 Orchestra
Orchest
500 Arabic Set
ArabiSet
38
AW_DP330_Manual_G06_150420
2015
4
20
10:28:39
43
Style List
Übersicht über die Styles
No. Full Name
LCD Name
8 BEAT
NatuBld
8Beat Piano
8BtPiano
55 Love Ballad
LoveBld
2
8Beat 1
8Beat1
56 Easy Ballad
EasyBld
3
8Beat Shuffle
8BtShufl
57 Slow Ballad
SlowBald
4
Guitar Pop 1
GtPop1
58 Folk Ballad
FolkBld
PopBld1
5
8Beat Hip Hop
8BtHiHop
59 Pop Ballad 1
6
8Beat R&B
8BeatR&B
60 Pop Ballad 2
PopBld2
7
8Beat Pop
8BtPop
61 EP Ballad
EPBallad
8
Pop Funk 1
PopFunk1
ROCK
9
Rhythm & Beat 1
Rhy&Bt1
62 Rock
Rock
10
8Beat Disco 1
8BtDisc1
63 New Wave
NewWave
11
8Beat Rock
8BtRock
64 Ska
Ska
PopRock2
12
8Beat 2
8Beat2
65 Pop Rock 2
13
Sweet Beat
SweetBt
66 Slow Rock
SlowRock
14
8Beat Dance
8BtDance
67 70's Rock & Roll
70'sRock
15
8Beat Disco 2
8BtDisc2
68 Folk Rock
FolkRock
16
8Beat 3
8Beat3
69 Soft Rock
SoftRock
17
60's 8Beat
60's8Bt
70 Easy Rock
EasyRock
16 BEAT
71 New Shuffle
NewShufl
18
RkHipHop
16Beat 1
16Beat1
72 Rock Hip Hop
19
16Beat Funk 1
16BtFuk1
73 Rock&Roll 1
R'N'R1
20
16Beat Ballad 1
16BtBld1
74 Rock & Roll 2
R'N'R2
21
16Beat R&B
16BtR&B
BALLROOM
22
Pop 16Beat 1
Pop16Bt1
75 Tango 1
Tango1
23
16Beat Funk 2
16BtFuk2
76 Spain Matador
Matador
24
16Beat Dance
16BDanc
77 Twist 1
Twist1
BandFox
16Beat 2
16Beat2
78 Big Band Fox
26
Pop 16Beat 3
Pop16Bt3
79 Tango 2
Tango2
27
Modern 16Beat
Modrn16B
80 Slow Fox
SlowFox
28
16Beat Hot
16BtHot
81 Slow Waltz 1
SlowWlz1
29
16Beat Modern
16BModr
82 Swing Fox
SwingFox
30
16Beat 3
16Beat3
83 Salsa 1
Salsa1
31
Cool Beat
CoolBeat
84 Cha Cha 1
ChaCha1
ChaCha2
16Beat Ballad 2
16BtBld2
85 Cha Cha 2
33
16Beat 4
16Beat4
86 Beguine 1
Beguine1
34
Pop Shuffle
PopShufl
87 Beguine 2
Beguine2
88 Rumba 1
Rumba1
32
POP
35
Pop Rock 1
PopRock1
89 Samba 1
Samba1
36
Pop Dance 1
PopDanc1
90 Samba 2
Samba2
37
Pop Fusion
PopFusn
91 Jive
Jive
AnalgNt1
92 Fox Trot
FoxTrot
38
Analog Night 1
39
6/8 Pop
6/8Pop
DANCE
40
Brit. Pop 1
BritPop1
93 Techno 1
Techno1
41
Brit. Pop 2
BritPop2
94 Hip Hop 1
HipHop1
42
Pop Hit
PopHit
95 Dream Dance
DrmDance
43
Fusion Shuffle
FusShufl
96 House
House
44
Analog Night 2
AnalgNt2
97 Pop Dance 2
PopDanc2
45
Pop Beat
PopBeat
98 Down Beat
DownBeat
Progress
46
Soft Beat
SoftBeat
99 Progressive
47
60's Pop
60'sPop
100 Rap 1
Rap1
48
Sting Latin
StigLatn
101 Disco
Disco
102 Soft Disco
SoftDisc
BALLAD
49
R&B Ballad 1
R&BBad1
103 Disco Party
DscParty
50
Guitar Ballad
GtBallad
104 70's Disco
70'sDisc
51
Ballad Rcok
BalladRk
105 Club Dance
ClubDanc
PianoPop
106 Euro Dance
EuroDanc
52
Piano Pop
AW_DP330_Manual_G06_150420
4
SoftBald
54 Natural Ballad
1
25
2015
53 Soft Ballad
20
10:28:39
39
44
Style List
107 Hip Hop 2
HipHop2
SOUL & FUNK
Lambada
Funk1
162 Pop Cha Cha 1
PChaCha1
109 Classic Funk
ClasFunk
163 Pop Cha Cha 2
PChaCha2
110 Gospel Swing
GopSwing
164 Salsa 2
Salsa2
111 Gospel
Gospel
WALTZ & TRADITIONAL
112 Funk 2
Funk2
165 Waltz
Waltz
113 Electric Funk
ElecFunk
166 Old Waltz
OldWaltz
114 Groove Funk
GrooveFk
167 English Waltz
EngWaltz
115 Cool Funky
ColFunky
168 German Waltz
GemWaltz
116 Jazz Funk
JazzFunk
169 ViennaWaltz
VinaWtz
117 Groove
Groove
170 Slow Waltz 2
SlwWltz2
118 Soul
Soul
171 Jazz Waltz
JzWaltz
119 Hip Hop Beat
HipHopBt
172 Polka
Polka
120 R&B
R&B
173 6/8 March
6/8March
121 Soul Beat
SoulBeat
174 German Polka
GerPolka
122 R&B Ballad 2
R&BBld2
175 Party Polka
PtyPolka
176 Army March
ArmMarch
123 Latin Jazz 1
LatinJz1
177 March
March
124 Big Band
BigBand
178 US March
USMarch
125 Dixieland 1
Dixland1
179 Musette
Musette
126 Broadway Big Band
BwayBand
180 Mazurke
Mazurke
127 Swing
Swing
WORLD
128 Latin Jazz 2
LatinJz2
181 Enka Ballad
EnkaBald
129 Fusion
Fusion
182 Laendler
Laendler
130 Acid Jazz
AcidJazz
183 Hawaiian
Hawaiian
131 Cool Jazz Ballad
CoolJzBd
184 Sirtake
Sirtake
132 Swing Shuffle
SwingSfl
185 Dangdut
Dangdut
133 Big Band Medium
BandMid
186 6/8 Flipper
6/8Flipp
134 Dixieland 2
Dixland2
187 New Age
NewAge
135 Guitar Swing 2
GtSwing2
188 Tarantella
Tarantel
136 Ragtime
Ragtime
189 Scottish
Scottish
137 Modern Jazz Ballad
MdJzBald
190 Norteno
Norteno
138 Swing Ballad
SwingBal
ARAB
139 Orchestra Swing
OrhSwing
191 Zarb 6/8
Zarb 6/8
192 Zarb Tempo
ZarbTemp
COUNTRY
140 Country Pop 1
CntyPop1
193 Bandary
Bandary
141 Bluegrass 1
Bluegrs1
194 Zarb Daf
Zarb Daf
142 Country 8Beat
Ct8Beat
195 Pop 4/4
Pop 4/4
143 Modern Country
ModernCt
196 Saidi IR
Saidi IR
144 Country Pop 2
CntyPop2
197 Cifte
Cifte
145 Bluegrass 2
Bluegrs2
198 Baladi
Baladi
146 2/4 Country
2/4Cntry
199 Masmoudi
Masmoudi
147 Country Quick Steps
QuickStp
200 Wehda
Wehda
148 Country Folk
CntyFolk
149 Country Shuffle
CnyShufl
LATIN & LATIN DANCE
150 Bossa Nova
BosaNov
151 Latin
Latin
152 New Reggae
NewRegga
153 Dance Reggae
DanRegga
154 Pasodoble
Pasodobl
155 Lite Bossa
LteBossa
156 Latin Rock
LatinRck
157 Disco Samba
DscSamba
158 Mambo
Mambo
159 Rumba 2
Rumba2
40
AW_DP330_Manual_G06_150420
4
Tikitkta
161 Lambada
108 Funk 1
SWING & JAZZ
2015
160 Tikitikita
20
10:28:39
45
Song List
Song-Verzeichnis
No. Full Name
LCD Name
FOLK & COUNTRY
30 Prelude In C
Prelude
31 Chinese Dance
ChDance
1
Jambalaya
Jambalay
32 Emperors Waltz
EmprWalz
2
Ding! Dong! Merrily On High
DingDong
33 March Militaire
MilMar1
3
Battle Hymne Of The Republic
Battle
34 Symphony No.40
Symphony
4
The Old Gray Mare
GrayMare
JAZZ & FUSION
5
American Patrol
USPatrol
35 ShanZhaShu
ShanZhaS
6
Christmas Is Coming
IsComing
36 You Are My Sunshine
MySun
7
Sippin`Cider Through A Straw
SCTStraw
37 June Samba
JunSamba
8
Christmas Sound
Sound
38 Funk
Funk
39 I Can......
I Can...
SeaShore
GOLDEN & POP
9
On London Bridge
LdBridge
40 Sea Shore
10
Are You Lonesome Tonight
Lonesome
PIANO
11
Der Deitcher`s Dog
DerDDog
41 Fur Elise
FurElise
12
Joy to The World
JoyWorld
42 Military March
MMarch
13
Silent Night
SltNight
43 Habanera
Habanera
14
Ave Maria
AveMaria
44 Minuet
Minuet
15
Five Hundred Miles
FHMiles
45 Austria Variation
AVariati
16
Happy New Year
HappyNY
46 Old Macdonald Had A Farm
OldAFarm
17
It’s Beginning To Look A Lot Like
LikeXmas
47 Wedding March
Wedding
48 2-Part Invention #13 In A Minor.B.W. Iii
Invntion
Christmas
18
Jeanie With The Light Brown Hair
LighHair
49 Minuet In G
MinuetG
19
My Bonnie
MyBonnie
50 Turkish March
TurkishM
20
Song Of The Pearlfisher
SongOfTP
51 Hey Diddle Diddle
HeDiddle
52 Italian Polka
ItaPolka
CLASSICAL
21
Swan
Swan
53 Moseta Dance
MosetaDn
22
Prelude To Act 2 (Swan Lake)
SwanLak1
54 Bulie Dance
BulieDn
23
Valse (Swan lake)
SwanLak2
55 Waltz in A Flat Op.39 No.15
Waltz in A
24
The Happy Farmer
HpFarmer
56 Wild Rose
WildRose
25
The Sleeping Beauty
SleepBty
57 Away In A Manger
AwayInAM
26
La Traviata
LaTravia
58 Jack & Jill
JackJill
27
Wiegenlied
Wiegenli
59 Angles We Have Heard On High
Angles
28
Mov.2 Adagio Non Troppo Piano
Sonata9
60 Waltz
Waltz
Demo
Sonata No.9 In D
29
Mov.1 Andante Grazioso Piano Sonata
No.11 In A [Alla TurSonata11ca]
Sonata11
1
Fantasia
Fantasia
2
Funk
Funk
3
Dancing Melody
DanceMld
4
Mystic River
MystRivr
5
Dream of freedom
Dream
100
95
75
25
5
0
41
AW_DP330_Manual_G06_150420
2015
4
20
10:28:39
46
Album-Liste
Album List
No. Full Name
LCD
55 Love Story
LoveStory
1
13 Jours en france
Name13JoursEnFR
56 Mambo No.5
Mambo No.5
2
A lover's concerto
ALversConcer
57 Mambo No.8
Mambo8
3
A whiter shade of pale
AWHTShade
58 Massachusetts
Massachusett
4
Again
Again
59 Menuet
Menuet
5
Air for the g-string
G-String
60 Miami beach rumba
MIABechRumba
6
Always in my heart
AlwInMyheart
61 Military march
MilMarch
7
Ahonen der sn blauen donau
BlauenDonau
62 Misty
Misty
8
annie laurie
AnnieLaurie
63 Moon river
Moon River
9
Are you lonesome tonight?
RULoneTonite
64 My darling clementine
MDarinClemnt
10
Arirang
Arirang
65 My way
MyWay
11
Around the world
AroundWorld
66 Never on sunday
NeverOnSun.
12
Auf flugeln des gesanges
Gesanges
67 New world
NewWorld
13
Auld lang syne
AuldLangSyne
68 O sole mio
OSoleMio
14
Ave maria
Ave maria
69 Oh! Carol
OhCarol
15
Beautiful dreamer
BeauDreamer
70 Oh! Susanna
OhSusanna
16
Beyond the reef
BeyondThReef
71 Old folks at home
Old folks
17
Blue tango
BlueTango
72 One way ticket to the blues
OnWyTicktBls
18
Brazil
Brazil
73 Only you
OnlyYou
19
Bridal march
BridalMarch
74 Over the rainbow
OverRainbow
20
Can't help fallin' in love
CantHlpFalLv
75 Petite fleur
PetiteFleur
21
Carry me back to old virginny
CarryMeBack
76 Red river valley
RedRiver
22
Chanson du toreador
Toreador
77 Rhythm of the rain
RhythmOfRain
23
Dance des mirlitons
Mirlitons
78 Rock around the clock
RockArndClk
24
Danny boy
DannyBoy
79 Sail along silv'ry moon
SalAlongMoon
25
Do re mi
DoReMi
80 Sailing
Sailing
26
Ebb tide
Ebb Tide
81 Santa lucia
Santa lucia
27
El condor pasa
ElCondorPasa
82 Sealed with a kiss
SealedW/Kiss
28
Etude op.10 no.3
Etude3
83 Serenade
Serenade
29
Five hundred miles
500 miles
84 Serenata rimpiant
Serenata
30
Fly me to the moon
FlyMeMoon
85 Siboney
Siboney
31
Frohlicher landmann
landmann
86 Silent night
Silent night
32
Fruhlingsstimmen
FLingsTimmen
87 Sleepy lagoon
SleepyLagoon
33
Gavotte
Gavotte
88 Songs of Spring
SongSpring
34
Green, green grass of home
Green Grass
89 Speak softly love
SpeakSoftLv
35
Greensleeves
Greensleeves
90 Summertime
Summertime
36
Happy birthday to you
Birthday
91 Superstar
Superstar
37
Hey jude
HeyJude
92 Swan lake
SwanLake
38
Home sweet home
SweetHome
93 Sweet and gentle
Sweet&Gentle
39
How deep is your love
HDeepIsUrLv
94 Tennessee waltz
TN Waltz
40
Hungarian dances no.5
HUdances5
95 The end of the world
EndOfThWorld
41
Hymne a l'amour
Hymnel'amour
96 The girl from ipanema
GirlFromIpan
42
If
If
97 The house of the rising sun
HousOfRisSun
43
In the mood
InTheMood
98 The river of no return
RiverOfNoRet
44
Jingle bells
Jingle bells
99 The shadow of your smile
Your smile
45
Joy to the world
JoyTheWorld
100 The siaters waltzes
SiatersWaltz
46
Kaiser walzer
KaiserWalzer
101 The sound of silence
SndOfSilence
47
La mer
LaMer
102 The way we were
TheWayWeWere
48
La paloma
LaPaloma
103 Tico-tico
Tico
49
La playa
La playa
104 Tie a yellow ribbon'round the ole oak tree YellowRibbon
50
La reine de saba
Saba
105 Toccata
Toccata
51
L'amour est blue
L'amourBlue
106 Tombe la neige
TombeLaNeige
52
Lara's theme from "Doctor zhivago"
DoctorZhivag
107 Top of the world
TopOfThWorld
53
Last waltz
LastWaltz
108 Traumerei
Traumerei
54
Long,long ago
LonglongAgo
109 Triumphal march
Triumphal
42
47
AW_DP330_Manual_G06_150420
2015
4
20
10:28:39
Album List
110 Una lacrima sul viso
ULSViso
111 Unchained melody
UnchainMelod
112 Valse des fleurs
ValseFleurs
113 Waves of the danube
WavesDanube
114 Wedding march
WeddingMarch
115 Wiegenlied
Wiegenlied
116 Wiegenlied
Wiegenlied
117 Words
Words
118 Yesterday
Yesterday
119 Yesterday once more
OnceMore
120 You are my sunshine
UrMySunshine
Verzeichnis der Akkorde
Chord List
Chord Name (Abbreviation)
Normal Voicing
Chord
Display
Major [M]
1-3-5
C
C
Major sixth [6]
1-(3)-5-6
C6
C6
Major seventh [M7]
1-3-(5)-7
CM7
CM7
Major seventh sharp eleventh [M7#11]
1-(2)-3-#4-(5)-7
CM7#11
CM7#11
Major add ninth [Madd9]
1-2-3-5
Cmadd9
CM(9)
Major ninth [M9]
1-2-3-(5)-7
CM9
CM7(9)
Major sixth add ninth [6 9]
1-2-3-(5)-6
C6 9
C6(9)
Augmented [aug]
1-3-#5
Caug
Caug
Minor [m]
1-b3-5
Cm
Cm
Minor sixth [m6]
1-b3-5-6
Cm6
Cm6
Minor seventh [m7]
1-b3-(5)-b7
Cm7
Cm7
Minor seventh flatted fifth [m7b5]
1-b3-b5-b7
Cm7b5
Cm7b5
Minor add ninth [madd9]
1-2-b3-5
Cmadd9
Cm(9)
Minor ninth [m9]
1-2-b3-(5)-b7
Cm9
Cm7(9)
Minor eleventh [m11]
1-(2)-b3-4-5-(b7)
Cm11
Cm7(11)
Minor major ninth [mM7]
1-b3-(5)-7
CmM7
CmM7
Minor major ninth [mM9]
1-2-b3-(5)-7
CmM9
CmM7(9)
Diminished [dim]
1-b3-b5
Cdim
Cdim
Diminished seventh [dim7]
1-b3-b5-6
Cdim7
Cdim7
Seventh [7]
1-3-(5)-b7
C7
C7
Seventh suspended fourth [7sus4]
1-4-5-b7
C7sus4
C7sus4
Seventh flatted fifth [7b5]
1-3-b5-b7
C7b5
C7b5
Seventh ninth [7 9]
1-2-3-(5)-b7
C7 9
C7(9)
Seventh sharp eleventh [7#11]
1-2-3-#4-(5)-b7 or 1-(2)-3-#4-5-b7
C7#11
C7(#11)
Seventh thirteenth [7 13]
1- 3-(5)-6-b7 or 2- 3-5-6-b7
C7 13
C7(13)
Seventh flatted ninth [7b9]
1-b2-3-(5)-b7
C7b9
C7(b9)
Seventh flatted thirteenth [7b13]
1-3-5-b6-b7
C7b13
C7(b13)
Seventh sharp ninth [7#9]
(1)-#2-3-(5)-b7
C7#9
C7(#9)
Major seventh augmented [M7aug]
1-3-#5-7
CM7aug
CM7aug
Seventh augmented [7aug]
(1)-3-#5-b7
C7aug
C7aug
Suspended fourth [sus4]
1-4-5
Csus4
Csus4
One plus two plus five [1+2+5]
1-2-5
C1+2+5
C
43
AW_DP330_Manual_G06_150420
2015
4
20
10:28:39
48
MIDI Implementierung
100
95
75
25
5
45
AW_DP330_Manual_G06_150420
2015
4
20
10:28:40
49
0
Skalen-Systeme
Es gibt verschiedene Tonsysteme, die hauptsächlich durch ihre besonderen Intervalle
gekennzeichnet sind. Die wohltemperierte Stimmung ist wohl die am weitesten verbreitete
Stimmung, vor allem im westlichen Kulturkreis. Sie wird für die Stimmung von Klavieren und
Keyboards benutzt und ist sehr variabel, insofern als alle Tonarten darauf gespielt werden können.
Es gibt jedoch auch andere Stimmungen, die vor der Einführung der wohltemperierten Stimmung
gebräuchlich waren und es in anderen Kulturkreisen auch noch sind.
Das Piano verfügt über sechs verschiedene Tonsysteme.
Pythagorean
Die Pythagoreische Stimmung, benannt nach dem antiken Mathematiker und Philosophen
Pythagoras, zeichnet sich durch Intervalle von reinen Quinten aus. Sie eignet sich für Musikstile,
die Quinten als Wohlklang und Terzen als Dissonanz betrachten.
Pure Major & Pure Minor
Tonsysteme mit reiner Stimmung bestehen ausschließlich aus Intervallen, deren
Frequenzverhältnisse die Quotienten kleiner ganzer Zahlen sind. Sie klingen ausgesprochen
harmonisch und natürlich.
Meantone
Die mitteltönige Stimmung mit ihren reinen Terzen basiert auf dem pythagoreischen Prinzip und
war im 16. Jahrhundert das gebräuchliche System beispielsweise für Kirchenorgeln. Sie klingt
wundervoll und rein.
Werckmeister
Die nach Andreas Werkmeister benannte Skala war eine Weiterentwicklung der mitteltönigen
Stimmung. Hier wird das pythagoreische Komma in vier gleiche Teile zerlegt indem bestimmte
Quinten um ein Viertel Komma verkleinert werden. Diese Stimmung klingt typisch nach
Klassizismus und Romantik.
Kirnberger
Auch diese Stimmung, entwickelt von Johann Kirnberger in der zweiten Hälfte des 18.
Jahrhunderts, ist eine Weiterentwicklung der mitteltönigen Stimmung. Sie klingt im Allgemeinen
ausgewogener als die Werksmeister-Stimmung.
Twelve-tone equal temperament
Die Zwölftonreihe ist eine beliebige Anordnung der zwölf verschiedenen Tonhöhen der
chromatischen Tonleiter in einem gleichschwebend temperierten Tonsystem. In einer
Zwölftonkomposition darf ein Ton erst dann ein zweites Mal verwendet werden, wenn alle anderen
Töne der Reihe bereits aufgetreten sind.
50
WEEE-Erklärung / Entsorgung
Ihr Produkt wurde mit hochwertigen Materialien und Komponenten entworfen und
hergestellt, die recyclebar sind und wieder verwendet werden können. Dieses Symbol
bedeutet, dass elektrische und elektronische Geräte am Ende ihrer Nutzungsdauer
vom Hausmüll getrennt entsorgt werden müssen. Bitte entsorgen Sie dieses Gerät bei
Ihrer örtlichen kommunalen Sammelstelle oder im Recycling Center. Bitte helfen Sie
mit, die Umwelt, in der wir leben, zu erhalten.
!
Technische Änderungen und Änderungen im Erscheinungsbild vorbehalten. Alle Angaben
entsprechen dem Stand bei Drucklegung. Für die Richtigkeit und Vollständigkeit der enthaltenen
Beschreibungen, Abbildungen und Angaben übernimmt Musikhaus Kirstein GmbH keinerlei
Gewähr. Abgebildete Farben und Spezifikationen können geringfügig vom Produkt abweichen.
Musikhaus Kirstein GmbH - Produkte sind nur über autorisierte Händler erhältlich. Distributoren
und Händler sind keine Handlungsbevollmächtigten von Musikhaus Kirstein GmbH und haben
keinerlei Befugnis, die Musikhaus Kirstein GmbH in irgendeiner Weise, sei es ausdrücklich oder
durch schlüssiges Handeln, rechtlich zu binden. Diese Bedienungsanleitung ist urheberrechtlich
geschützt. Jede Vervielfältigung, bzw. jeder Nachdruck, auch auszugsweise, und jede Wiedergabe
der Abbildungen, auch in verändertem Zustand, ist nur mit schriftlicher Zustimmung der Firma
Musikhaus Kirstein GmbH gestattet.
!
Herstellerangaben
Musikhaus Kirstein GmbH
Bernbeurener Strasse 11
86956 Schongau
Telefon: 0049-909494-0
Telefax: 0049-909494-19
www.kirstein.de
!
51