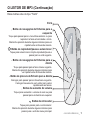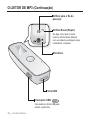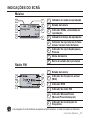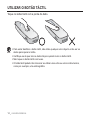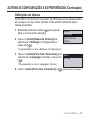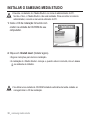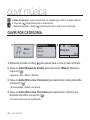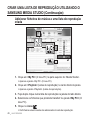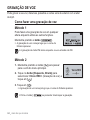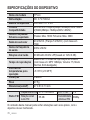
1
YP-U4 leitor de MP3 Manual do utilizador imagine as possibilidades Obrigado por ter adquirido este produto Samsung. Para receber assistência completa, registe o produto em www.samsung.com/global/register funções do seu novo leitor de MP3 Moderno. Inteligente. Seguro. E muito divertido. O novo leitor de MP3 é tudo isto e muito mais. Muito compacto quase não ocupa espaço no bolso e a sua tecnologia avançada oferece um som de elevada qualidade. Vai adorar este novo leitor de MP3, quando faz exercício, transfere as suas músicas preferidas ou ouve rádio FM. Use-o uma vez e vai pensar como é que conseguiu viver sem ele até agora. UMA INTERFACE FÁCIL DE UTILIZAR! Este leitor de MP3 é um produto com USB integrado o que evita a necessidade de utilizar um cabo USB e oferece uma grande velocidade de transferência de dados e um carregamento muito prático COM O YP-U3 TEM TOTAL LIBERDADE DE ESCOLHA DAS SUAS MÚSICAS FAVORITAS! MAIS TEMPO DE REPRODUÇÃO - MENOR TEMPO DE TRANSFERÊNCIA! Uma bateria totalmente carregada pode proporcionar-lhe 16 horas de música Os tempos de transferência são menores. Com a capacidade USB 2.0, o leitor é muito mais rápido do que os modelos com USB 1.1. UMA EXCELENTE ACÚSTICA O novo leitor de MP3 integra a tecnologia de Pode criar listas de reprodução com as suas som única DNSe™ (Digital Natural Sound engine) da Samsung criada para oferecer músicas preferidas. um som mais rico e profundo e proporcionar EXPANSÃO E COMPATIBILIDADE uma audição com uma qualidade incrível. Além disso, não fica limitado aos ficheiros MP3. Este novo leitor é compatível com os formatos MP3 e WMA. TOTAL INTEGRAÇÃO ENTRE FORMA E FUNÇÕES NAVEGAÇÃO COM UM TOQUE! É agradável ao tacto e bonito. Mas também é fácil de manejar e utilizar. Pode tocar no painel táctil para navegar pelos menus. informação de segurança O que significam os ícones e sinais deste manual do utilizador: Indica que existe o risco de morte ou ferimentos graves. AVISO CUIDADO Indica que existe o risco potencial de ferimentos ou danos materiais. CUIDADO Para reduzir o risco de incêndio, explosão, choque eléctrico ou ferimentos quando utilizar o leitor de MP3, respeite as precauções básicas de segurança seguintes: NOTA Indica que existem sugestões ou páginas de referência que podem ser úteis para utilizar o leitor. NÃO tente. NÃO desmonte. NÃO toque. Siga rigorosamente as instruções. Desligue a ficha da tomada de corrente. Contacte o centro de assistência para obter ajuda. Estes sinais de aviso existem para evitar ferir o utilizador ou as outras pessoas. Respeite-os rigorosamente. Depois de ler esta secção, guarde-a num local seguro para consultas futuras. informação de segurança Este manual descreve como utilizar correctamente o leitor de mp3. Leia-o com atenção para não danificar o leitor ou ferir-se. Dê especial atenção aos avisos seguintes: PROTEJA-SE Não desmonte, repare ou modifique o leitor. CUIDADO Evite expor o leitor à humidade e não o deixe cair na água. Se o leitor se molhar, não o ligue pois pode apanhar um choque eléctrico. Em vez disso, contacte um centro de assistência ao cliente Samsung perto de si. Não utilize este produto durante uma trovoada com relâmpagos. Caso contrário, irá provocar avarias ou haverá o risco de choque eléctrico. CUIDADO Não utilize os auriculares enquanto conduzir uma bicicleta, automóvel ou motociclo. Se o fizer, pode provocar um acidente grave e, além disso, é proibido por lei em alguns locais. Se utilizar os auriculares enquanto anda ou faz jogging numa estrada, sobretudo, nas passagens de peões, pode provocar um acidente grave. Para sua segurança, verifique se o fio dos auriculares não fica preso no braço ou noutros objectos enquanto faz exercício ou anda. Tome cuidado quando utilizar o leitor com a ficha USB puxada para fora. O conector metálico USB pode provocar ferimentos. AVISO Não guarde o leitor em locais húmidos, com pó ou fuligem, porque esses ambientes podem provocar um incêndio ou choque eléctrico. PROTEJA-SE AVISO Se utilizar os auriculares ou os auscultadores durante muito tempo pode provocar lesões auditivas graves. Ouvir um som com um nível superior a 85db, durante um período de tempo prolongado, afecta a audição. Quanto mais alto for o som, mais graves podem ser as lesões (a altura de uma conversa normal é de 50 a 60db e o nível de ruído na estrada é de cerca de 80db). Recomenda-se vivamente que regule o nível de volume para um valor médio (o nível médio é normalmente inferior a 2/3 do máximo). Se sentir zumbidos nos ouvidos, baixe o volume ou deixe de utilizar os auriculares ou auscultadores. PROTEJA O LEITOR DE MP3 Não deixe o leitor em locais com temperaturas superiores a 35°C (como um sauna ou no interior de um automóvel estacionado). Não sujeite o leitor a impactos fortes nem o deixe cair. Não coloque objectos pesados sobre o leitor. Evite a entrada de poeiras ou outras partículas no interior do leitor. Não coloque o leitor junto de objectos magnéticos. Faça sempre uma cópia de segurança dos dados importantes. A Samsung não é responsável pela perda dos dados. Utilize apenas os acessórios fornecidos ou aprovados pela Samsung. Não borrife água no dispositivo. Nunca limpe o leitor com substâncias químicas, como benzina ou outras mais voláteis, pois podem dar origem CUIDADO a um incêndio ou choque eléctrico, além de danificarem a superfície respectiva. CUIDADO NOTA A não aplicação destas instruções pode provocar ferimentos ou danificar o leitor. A impressão do manual deve ser feita a cores e colocando um visto em “Fit to Page” (Ajustar ao tamanho da página) na opção de impressão para uma melhor visualização. Índice CONCEITOS BÁSICOS 9 9 10 13 14 15 16 16 17 17 18 18 19 20 20 23 27 28 29 31 32 36 SAMSUNG MEDIA STUDIO 37 37 38 39 O que vem incluído O leitor de MP3 Indicações do ecrã Utilizar o botão táctil Carregar a bateria Cuidar da bateria Ligar e desligar Ouvir música Controlar o volume Desactivar os botões Procurar ficheiros utilizando o “Procura Ficheiro” Eliminar ficheiros com o “Procura Ficheiro” Alterar as configurações e as preferências Definições de música Definições de Rádio FM Definições de som Definições do ecrã Definições de idioma Definições de Data/Hora Definições do sistema Reiniciar o sistema Requisitos do PC Instalar o Samsung Media Studio Transferir ficheiros para o leitor com o Samsung Media Studio Índice OUVIR MÚSICA 42 42 43 44 44 44 44 44 45 45 46 47 48 49 50 50 51 51 Ouvir por categoria Voltar ao ecrã da reprodução actual Fazer uma pausa Procurar dentro de uma faixa Reproduzir desde o princípio da faixa actual Reproduzir a faixa anterior Reproduzir a faixa seguinte Criar uma lista de reprodução utilizando o samsung media studio Criar uma lista de reprodução Adicionar ficheiros de música a uma lista de reprodução criada Transferir uma Lista de reprodução para o leitor utilizando o Media Studio Criar uma lista de reprodução no leitor de mp3 Reproduzir uma playlist Eliminar um ficheiro da lista de reprodução Eliminar todos os ficheiro da lista de reprodução Função de personalização do botão do utilizador Para definir o Modo de Botão de Utilizador Índice MAIS DO QUE MÚSICA 55 RESOLUÇÃO DE PROBLEMAS 66 69 ANEXO 55 55 56 57 57 57 58 58 59 59 60 64 64 65 Ouvir rádio FM Para utilizar a função de som desligado Procurar estações de FM Como mudar para modo predefinido Como mudar para modo manual Guardar estações na memória de pré-sintonização Para ouvir uma estação pré-sintonizada Como apagar uma pré-sintonização Como gravar emissões de Rádio FM Como parar a gravação Utilizar a transmissão de dados Gravação de voz Como fazer uma gravação de voz Para parar a gravação de voz 66 Resolução de problemas 69 70 71 Árvore do menu Especificações do dispositivo Licença conceitos básicos O QUE VEM INCLUÍDO O novo leitor de mp3 vem acompanhado dos acessórios indicados abaixo. Se faltar algum destes elementos, contacte o centro de assistência ao cliente da Samsung. Leitor Ohrhörer Installations-CD O design dos acessórios pode ser alterado, a fim de ser melhorado, sem aviso prévio. conceitos básicos _ 9 O LEITOR DE MP3 Auriculares Marcado com um “L” para o auricular esquerdo e com um “R” para o auricular direito. Também serve de antena para o rádio FM do leitor de MP3. Tomada de ligação dos auriculares Interruptor de espera Faça deslizar na direcção da seta para bloquear as funções dos botões. Botão de utilizador/gravação Toque para definir a repetição de secções, DNSe, Velocidade de reprodução, Modo de reprodução. Mantenha premido para iniciar /parar a gravação de rádio FM ou de voz. Botão ligar e reproduzir/pausa Mantenha premido para ligar/desligar. Carregue para reprodução/pausa. Indicadores LED 10 _ conceitos básicos O LEITOR DE MP3 (Continuação) Estes botões são do tipo “Táctil” Ecrã Botão de navegação de ficheiros para a esquerda Toque para passar para o menu/faixa anterior ou para reproduzir a faixa actual desde o início. Mantenha premido durante alguns instantes para ver rapidamente as faixas de música. Botão de reproduzir/pausa e seleccionar Toque para seleccionar a função reproduzir/pausa e passar para o ecrã seguinte. Botão de navegação de ficheiros para a direita Toque para passar para a faixa /menu seguinte. Mantenha premido durante alguns instantes para ver rapidamente as faixas de música. Botão de procura de ficheiro para a direita Carregar para passar para a faixa/menu seguinte. Carregar brevemente sem soltar para varrer rapidamente as faixas. Botão de aumento do volume Toque para aumentar o volume de som ou para passar para um item/menu superior. Botão de retroceder Toque para passar para o ecrã anterior. Mantenha premido durante alguns instantes para passar para o ecrã do menu principal. conceitos básicos _ 11 O LEITOR DE MP3 (Continuação) Orifício para o fio do pescoço Orifício Reset (Repor) Se algo correr mal no leitor, prima o orifício Reset (Repor) com um objecto pontiagudo para reinicializar o sistema. Microfone Ficha USB Interruptor USB Faz deslizar a ficha USB para dentro e para fora. 12 _ conceitos básicos INDICAÇÕES DO ECRÃ Música 5 6 7 Rising Sun 8 1 1 Indicador do modo de reprodução 2 2 Estado da bateria 3 3 Indicador DNSe, velocidade de reprodução 4 4 Indicador do tempo de reprodução 5 Indicador de reprodução da faixa actual / número total de faixas 6 Indicador de reprodução/pausa, Procura 7 Nome da música 8 Barra de estado da reprodução 1 Estado da bateria 2 Indicador da frequência actual (MHz) 3 Indicador RDS 4 Indicador de rádio FM 5 Indicador Manual/Preset (Manual/Pré-sintonização) 6 Indicador de localização da frequência Rádio FM 4 1 5 2 Jazz 3 6 As imagens do ecrã destinam-se apenas a fins ilustrativos. O ecrã real pode ser diferente. NOTA conceitos básicos _ 13 UTILIZAR O BOTÃO TÁCTIL Toque no botão táctil com a ponta do dedo. NOTA Para evitar danificar o botão táctil, não utilize qualquer outro objecto a não ser os dedos para operar o botão. Certifique-se de que tem os dedos limpos quando tocar no botão táctil. Não toque no botão táctil com luvas. O botão táctil poderá não funcionar se utilizar uma unha ou outros instrumentos, como por exemplo, uma esferográfica. 14 _ conceitos básicos CARREGAR A BATERIA Carregue a bateria antes de utilizar o leitor pela primeira vez ou se não o tiver utilizado durante muito tempo. A bateria do leitor MP3 demora cerca de 4 horas a carregar totalmente, embora o tempo de carregamento completo possa variar, dependendo do ambiente do PC. Indicações do ecrã USB connected (USB ligado) - Carregar - Carga completa 2 1 1. Faça deslizar o interruptor [ A direcção de inserção da porta USB pode diferir, dependendo do PC. Por isso, antes de a inserir, observe a ficha USB do leitor para saber a direcção de inserção correcta. ]. A ficha USB aparece. 2. Ligue a ficha USB à porta USB ( ) do PC, como se mostra na figura. conceitos básicos _ 15 CUIDAR DA BATERIA A bateria durará mais tempo se seguir estas indicações relativas à manutenção e armazenamento da bateria. • ҏRecarregue a bateria num local com uma temperatura entre 5°C~35°C. • Não a sobrecarregue (mais de 12 horas). Um carregamento ou descarregamento excessivo pode encurtar a vida útil da bateria. • O tempo de vida da bateria vai encurtando à medida que o tempo passa, já que é um consumível. NOTA Se carregar o leitor enquanto estiver ligado a um computador laptop, verifique se a bateria do laptop também está totalmente carregada ou se o laptop está ligado à fonte de alimentação. LIGAR E DESLIGAR Ligar Mantenha premido o botão [ ]. O dispositivo é ligado. Desligar Mantenha premido o botão [ Rising Sun ]. O dispositivo é desligado. NOTA O dispositivo é automaticamente desligado quando nenhum botão for carregado num determinado período de tempo no modo de pausa. A programação de fábrica para <Auto Power Off> (Alimentação automática desligada) é de 1 minuto, mas pode alterar este período de tempo. Para mais informações, consulte a página 33. 16 _ conceitos básicos OUVIR MÚSICA Carregue os ficheiros de música no leitor de mp3 utilizando o Samsung Media Studio. Saiba mais acerca do Media Studio na página 39. 1. Mantenha premido o botão [ ecrã do menu principal. ] para passar para o Music 2. Toque no botão [Esquerda, Direita] para seleccionar <Music> (Música) e toque em [ ]. Aparece a lista <Music> (Música). 3. Utilize o botão [Para cima, Para baixo] e [ ] para seleccionar um ficheiro de música da sua preferência. 4. Toque em [ ] para reproduzir o ficheiro de música seleccionado. A música começa a ser reproduzida. NOTA Now Playing Artists Albums Songs Rising Sun Toque em [ ] para passar para o ecrã anterior. Mantenha premido o botão [ ] para passar para o ecrã do menu principal. CONTROLAR O VOLUME Toque no botão [Para cima, Para baixo]. Irá ver o ícone do controlo de volume. O intervalo de volume está definido entre 00 e 30. Toque no botão [Para cima] para aumentar o som e no botão [Para baixo] para diminuir o som. conceitos básicos _ 17 DESACTIVAR OS BOTÕES A função de bloqueio desactiva todos os outros botões do leitor de mp3, para que se carregar num deles acidentalmente durante a utilização, a música, por exemplo, não seja interrompida. 1. Faça deslizar o interruptor [ ] na direcção da seta para activar a função Lock (Bloquear). 2. Faça deslizar o interruptor [ ] na direcção oposta à da seta para libertar a função de bloqueio. PROCURAR FICHEIROS UTILIZANDO O “PROCURA FICHEIRO” Procure facilmente um ficheiro através da função “File Browser” (Procura Ficheiro). 1. Mantenha premido o botão [ ] para passar para o ecrã do menu principal. 2. Toque no botão [Esquerda, Direita] para seleccionar <File Browser> (Procura Ficheiro) e toque em [ ]. É apresentada a lista de pastas <File Browser> (Procura Ficheiro) que inclui “Música, Listas de reprodução, Transm. Dados e Ficheiros gravados ”. File Browser Music Playlists Datacasts Recorded Files 3. Toque no botão [Para cima, Para baixo] para seleccionar a pasta pretendida. 4. Toque em [ ] para que seja apresentada a lista de ficheiros da pasta seleccionada. Toque em [ ] para passar para o ecrã anterior. 5. Toque no botão [Para cima, Para baixo] para seleccionar um ficheiro pretendido. 6. Toque em [ ]. O ficheiro começa a ser reproduzido. 18 _ conceitos básicos ELIMINAR FICHEIROS COM O “PROCURA FICHEIRO” 1. Mantenha premido o botão [ ecrã do menu principal. ] para passar para o 2. Toque no botão [Esquerda, Direita] para seleccionar <File Browser> (Procura Ficheiro) e toque em [ ]. É apresentada a lista de pastas <File Browser> (Procura Ficheiro). Music Playlists Datacasts Recorded Files Music Space.mp3 Rising Sun.mp3 3. Toque no botão [Para cima, Para baixo] para seleccionar a pasta pretendida e toque em [ ]. 4. Toque no botão [Para cima, Para baixo] para seleccionar o ficheiro que pretende eliminar e prima o botão [ ]. Add to Playlist Delete from Playl... Delete File 5. Toque no botão [Para cima, Para baixo] para seleccionar <Delete File> (Apagar ficheiros) e toque em [ ]. É apresentada a janela de confirmação. 6. Toque no botão [Esquerda, Direita] para seleccionar <Yes> (Sim) e toque em [ ]. O ficheiro é eliminado Após terem sido eliminados, os ficheiro não podem ser recuperados. CUIDADO O ficheiro a ser reproduzido não será eliminado. NOTA conceitos básicos _ 19 ALTERAR AS CONFIGURAÇÕES E AS PREFERÊNCIAS O leitor de mp3 vem com as configurações e preferências que foram programadas na fábrica, mas pode alterar os valores pré-programados para personalizar o leitor. NOTA Toque em [ ] para passar para o ecrã anterior. Mantenha premido durante alguns Mantenha premido o botão [ ] para passar para o ecrã do menu principal. Definições de música 1. Mantenha premido o botão [ ] para passar para o ecrã do menu principal. 2. Toque no botão [Esquerda, Direita] para seleccionar <Settings> (Configurações) e toque em [ ]. Music FM Radio User Button Mode Sound É apresentado o menu <Settings> (Configurações). 3. Toque no botão [Para cima, Para baixo] para Sound Effect seleccionar <Music> (Música) e toque em [ ]. DNSe É apresentado o menu <Music> (Música). 4. Utilize o botão [Para cima, Para baixo] e [ para definir funções. Play Mode ] Play Speed Toque no botão [Para cima, Para baixo] para percorrer para cima ou para baixo o menu actual. Toque em [ ] para passar para o item seguinte/seleccionar o menu. NOTA Se o ecrã <Settings> (Configurações) estiver aberto e não tocar em qualquer botão durante algum tempo, as configurações que não foram guardadas serão perdidas e o leitor voltará ao ecrã anterior. O que é o DNSe? Digital Natural Sound Engine (DNSe) é uma função de efeito de som para os leitores de MP3 desenvolvida pela Samsung. Fornece várias definições de som no sentido de melhorar o tipo de música que está a ouvir. 20 _ conceitos básicos ALTERAR AS CONFIGURAÇÕES E AS PREFERÊNCIAS (Continuação) Opções de configuração de Music (Música) Sound Effect (Efeito de Som): Pode definir o modo de rua, a nitidez e EQ master. <Street Mode> (Modo de rua): Permite-lhe ouvir música no exterior de forma clara filtrando alguns dos ruídos da rua. Seleccione <Off> (Desligado) ou <On> (Ligado). <Clarity> (Claro): Pode desfrutar de um som mais nítido com maior qualidade Seleccione entre <0-2>. <Master EQ> (EQ Master): Pode optimizar as definições de som. Toque no botão [Esquerda, Direita] para seleccionar a frequência que pretende ajustar. Toque no botão [Para cima, Para baixo] para ajustar o nível da frequência seleccionada e, em seguida, toque em [ ]. DNSe :Seleccione o som adequado a cada género de música. Seleccione entre <Normal>, <Studio> (Estúd), <Rock>, <Classical> (Clássico), <Jazz>, <Ballad> (Balada), <Club>, <R&B>, <Dance> (Dança), <Concert Hall> e <User> (Utilizador). Também pode definir a função <EQ> e <3D & BASS> no modo DNSe depois de ter seleccionado <User> (Utilizador). Consulte a página 22. Play Mode (Modo de reprodução): Seleccione o modo de reprodução como, por exemplo, as definições de repetição.Seleccione entre <Normal>, <Repeat>(Repetir), <Repeat One>(Repetir uma), e <Shuffle>(Aleatório). Play Speed (Velocidade de reprodução):Regule a velocidade de reprodução de música ou de gravação de ficheiros. <x0.7>, <x0.8>, <x0.9>, <x1.0(Normal)>, <x1.1>, <x1.2>, ou <x1.3>. (Quanto maior o número, mais rápida é a reprodução.) Skip Interval (Saltar intervalo): Pode avançar rapidamente num ficheiro em vários intervalos. Salte uma faixa completa ou salte vários segundos de uma só vez <1 Song>(1 Música), <5sec>(5seg), <10sec>(10seg), <30sec>(30seg) e <1min>. Tag(Etiqueta): Pode seleccionar apresentar as informações das faixas de um ficheiro de música com etiquetas ID3. Seleccione entre <On> (Ligado) ou <Off> (Desligado). NOTA Se o ficheiro foi criado com uma taxa de bits variável (VBR), a duração real do intervalo poderá não ser exactamente aquela que seleccionou. A velocidade de reprodução ajustada pode diferir da velocidade real, em função do ficheiro. O que é o Tag ID3? São as informações relativas a uma música que estão anexadas ao ficheiro de música, como o nome, artista, álbum, ano, género e comentários. conceitos básicos _ 21 ALTERAR AS CONFIGURAÇÕES E AS PREFERÊNCIAS (Continuação) Como definir o DNSe (Digital Natural Sound engine) (Continuação) <EQ> Pode ajustar frequências de som individuais consoante o seu gosto. 1. Toque no botão [Para cima, Para baixo] no menu EQ DNSe para seleccionar <User> (Utilizador) e toque 3D & BASS no botão [Direita]. 2. Toque no botão [Para cima, Para baixo] para seleccionar <EQ> e toque em [ ]. É apresentado o ecrã de definição de <EQ>. 3. Toque no botão [Esquerda, Direita] para seleccionar a frequência que pretende ajustar e toque no botão [Para cima, Para baixo] para ajustar o nível da frequência seleccionada. Pode seleccionar entre <–10 ~ +10> para o nível da frequência seleccionada. 4. Toque em [ ]. É apresentada a janela de confirmação. 5. Toque no botão [Esquerda, Direita] para seleccionar <Yes> (Sim) e toque em [ ]. A definição está concluída. <3D & BASS> Pode definir o som surround 3D e o nível de Bass Boost. 1. Toque no botão [Para cima, Para baixo] no menu EQ DNSe para seleccionar <User> (Utilizador) e toque 3D & BASS no botão [Direita]. 2. Toque no botão [Para cima, Para baixo] para seleccionar <3D & BASS> e toque em [ ]. É apresentado o ecrã de definição de <3D & BASS>. 3. Toque no botão [Esquerda, Direita] para seleccionar <3D> ou <Bass> e toque no botão [Para cima, Para baixo]. Pode seleccionar um nível de <3D> de 0 a 4 e <Bass> de 0 a 4. 4. Toque em [ ]. É apresentada a janela de confirmação. 5. Toque no botão [Esquerda, Direita] para seleccionar <Yes> (Sim) e toque em [ A definição está concluída. 22 _ conceitos básicos ]. ALTERAR AS CONFIGURAÇÕES E AS PREFERÊNCIAS (Continuação) Definições de Rádio FM Pode definir automaticamente as preferências de rádio FM e seleccionar também a sensibilidade e a área de recepção de FM. 1. Mantenha premido o botão [ ] para passar para o ecrã do menu principal. Music FM Radio User Button Mode Sound 2. Toque no botão [Esquerda, Direita] para seleccionar <Settings> (Confi gurações) e toque em [ ]. É apresentado o menu <Settings> (Configurações). 3. Toque no botão [Para cima, Para baixo] para Mode seleccionar <FM Radio> (Rádio FM) e toque Auto Preset em [ ]. FM Region É apresentado o menu <FM Radio> (Rádio FM). 4. Utilize o botão [Para cima, Para baixo] e [ FM Sensitivity ] para definir funções. conceitos básicos _ 23 ALTERAR AS CONFIGURAÇÕES E AS PREFERÊNCIAS (Continuação) Opções de definição de Rádio FM Mode(Modo): Pode mudar para o modo Manual ou Predefinido. Seleccione <Manual> ou <Preset> (Predefinição). Se não existirem frequências predefinidas, o leitor não passa para o Modo Predefinido. Auto Preset (Memória automática): Procura automaticamente as frequências disponíveis. Consulte a página 25. FM Region (Região FM): Pode mudar a definição de uma região de FM para preparar uma viagem para fora do país. Seleccione entre <Korea/US> (Coreia/ EUA), <Japan> (Japão) ou <Other Countries> (Outros Países). FM Sensitivity(Sensibilidade FM): Para receber mais ou menos frequências de rádio FM, ajuste a opção <FM Sensitivity> (Sensibilidade FM). Seleccione entre <Low> (Baixo), <Middle> (Médio) e <High> (Alto).Se seleccionar <High> (Alto), pode receber mais frequências. RDS Display(Ecrã RDS): O RDS (Radio Data System – Sistema de Dados de Rádio) fornece a recepção e apresentação de mensagens, como informações sobre a emissão. Seleccione entre <Program Type> (Tipo de programa) ou <Program Service> (Serviço de programação). Ź página 26. NOTA As frequências de rádio previamente guardadas são apagadas se mudar a <FM Region> (Região FM) no leitor. A região FM pode ser eliminada ou alterada consoante a região de destino do leitor. Gama de frequências por região - Korea/US (Coreia/EUA) : Procure frequências FM em leitores de 100 kHz entre 87,5 MHz~108,0 MHz. - Japan (Japão) : Procure frequências FM em leitores de 100 kHz entre 76,0 MHz~108,0 MHz. - Other Country (Outros países) : Procure frequências FM em leitores de 50 kHz entre 87,50 MHz~108,00 MHz. 24 _ conceitos básicos ALTERAR AS CONFIGURAÇÕES E AS PREFERÊNCIAS (Continuação) Definir Auto Preset (Memória automática) Pode predefinir um máximo de 30 estações na memória do leitor de MP3 e para voltar às estações premindo apenas um botão. Programar o leitor de MP3 para localizar e armazenar estações automaticamente. Automático – armazena automaticamente todas as estações recebidas pelo leitor 1. Toque no botão [Para cima, Para baixo] no menu das definições de Rádio FM para seleccionar <Auto Preset> (Memória automática) e toque em [ ]. Mode Auto Preset FM Region FM Sensitivity É apresentada a janela de confirmação da présintonização automática. 2. Toque no botão [Esquerda, Direita] para seleccionar <Yes> (Sim) e toque em [ ]. São automaticamente definidas até 30 frequências. Após ter terminado as definições, toque no botão [Esquerda, Direita] para seleccionar uma frequência predefinida, no modo Predefinição. Cancelar Auto Preset (Memória automática) Se quiser cancelar a pré-sintonização automática, carregue num botão qualquer durante o processo. A pré-sintonização automática é cancelada e só são guardadas as frequências sintonizadas até esse ponto. Ligue sempre os auriculares ao leitor quando procura ou define NOTA frequências.Os auriculares actuam como antena para detectar a recepção de rádios FM. Em áreas com má recepção, o leitor não pode localizar uma frequência de FM disponível Pode querer re-sintonizar as estações guardadas se tencionar ouvir o leitor de MP3 noutra cidade. Para apagar as estações pré-sintonizadas e guardar novas estações, repita o processo. conceitos básicos _ 25 ALTERAR AS CONFIGURAÇÕES E AS PREFERÊNCIAS (Continuação) Para definir RDS Display (Visualização RDS) O RDS (Radio Data System – Sistema de Dados de Rádio) fornece a recepção e apresentação de mensagens, tais como informações sobre a emissão. As informações sobre o programa, tais como Notícias, Desporto ou Música ou as informações sobre a estação emissora são apresentadas no ecrã. 1. Toque no botão [Para cima, Para baixo] no menu das definições de Rádio FM para seleccionar <RDS Display> (Ecrã RDS) e toque em [ ]. RDS Display Aparece o menu <RDS Display> (Ecrã RDS). 2. Toque no botão [Para cima, Para baixo] para seleccionar o modo do ecrã RDS e toque em [ ]. Program Type Program Service Seleccione <Program Type> (Tipo de programa) ou <Program Service> (Serviço de programação). Lista RDS Display (Ecrã RDS) Program Type(Tipo de programas): Apresenta o tipo de programa que está a ser emitido. Program Service(Serviço de programação): Apresenta o nome da estação emissora e é composto por 8 caracteres. Se começar a receber informações PS, o nome PS (BBC, AFO, NDR, etc.) é apresentado no visor. Se não estiver a receber as informações PS, aparece no ecrã a frequência FM original. NOTA Se a força do sinal FM for fraca, as informações RDS podem não ser apresentadas. 26 _ conceitos básicos ALTERAR AS CONFIGURAÇÕES E AS PREFERÊNCIAS (Continuação) Definições de som Pode definir o sinal sonoro e o limite de volume. 1. Mantenha premido o botão [ ] para passar para o ecrã do menu principal. Music FM Radio User Button Mode Sound 2. Toque no botão [Esquerda, Direita] para seleccionar <Settings> (Configurações) e toque em [ ]. É apresentado o menu <Settings> (Configurações). 3. Toque no botão [Para cima, Para baixo] para Beep Sound seleccionar <Sound> (Som) e toque em [ ]. Volume Limit É apresentado o menu <Sound> (som). 4. Utilize o botão [Para cima, Para baixo] e [ para definir funções. ] Opções de definição de som Beep Sound (Sinal sonoro): Define como activado ou desactivado o sinal sonoro para as operações com o ecrã táctil. Seleccione entre <Off> (Desligado) e <On> (Ligado). Volume Limit (Limite de Volume): Pode evitar danos de audição configurando o limite do volume quando utiliza os auriculares. <On> (Ligado) limita o nível máximo de volume para 15.O nível máximo de volume quando o limite de volume está definido para <Off> (Desligado) é 30. Mesmo se tiver seleccionado <Off> (Desligado), o volume é novamente definido para 15 para evitar lesões auditivas quando voltar a ligar o leitor. conceitos básicos _ 27 ALTERAR AS CONFIGURAÇÕES E AS PREFERÊNCIAS (Continuação) Definições do ecrã Altere o tempo para desligar a iluminação de fundo, a protecção de ecrã e o efeito de iluminação de LED. 1. Mantenha premido o botão [ ] para passar Display para o ecrã do menu principal. Language 2. Toque no botão [Esquerda, Direita] para Date/Time Set seleccionar <Settings> (Configurações) e System toque em [ ]. É apresentado o menu <Settings> (Configurações). 3. Toque no botão [Para cima, Para baixo] para Display Off seleccionar <Display> (Ecrã de visualização) e Screen Saver toque em [ ]. LED Effect É apresentado o menu <Display> (Ecrã de visualização). 4. Utilize o botão [Para cima, Para baixo] e [ ] para definir funções. Opções de definição do ecrã Display Off (Ecrã desligado) : Se não se tocar em nenhuma tecla durante o tempo definido, o ecrã desliga-seautomaticamente. Seleccione entre <15sec>(15seg), <30sec>(30seg), <1min>, <3min>, <5min>, e <Always On> (Sempre ligado). Carregue em qualquer botão para o voltar a ligar. Screen Saver (Protecção Ecrã): Pode definir uma imagem para utilizar como protecção de ecrã. Seleccione a imagem de protecção de ecrã em <Random> (Aleatório), o tempo actual ou as três imagens e seleccione o tempo de espera: <15sec> (15seg), <30sec> (30seg), <1min>, <3min>, <5min> e <Off> (Desligado). Se não seleccionar nenhum botão com um dos tempos indicados, o leitor irá apresentar a imagem de protecção de ecrã. LED Effect (Efeito do LED): Seleccione o efeito de iluminação do LED. Seleccione entre <Off>(Desligado), <Button>(Botão) (activa quando se carrega num botão), <Random>(Aleatório) ou <Always on>(Sempre ligado). 28 _ conceitos básicos ALTERAR AS CONFIGURAÇÕES E AS PREFERÊNCIAS (Continuação) Definições de idioma Pode definir os menus do novo leitor de MP3 para serem apresentados em qualquer um dos vários idiomas. Pode alterar facilmente para o idioma pretendido. 1. Mantenha premido o botão [ ] para passar para o ecrã do menu principal. Display Language Date/Time Set System 2. Toque no botão [Esquerda, Direita] para seleccionar <Settings> (Configurações) e toque em [ ]. É apresentado o menu <Settings> (Configurações). 3. Toque no botão [Para cima, Para baixo] para Menu seleccionar <Language> (Idioma) e toque em ID3 Tag [ ]. É apresentado o menu <Language> (Idioma). 4. Utilize o botão [Para cima, Para baixo] e [ ] para definir funções. conceitos básicos _ 29 ALTERAR AS CONFIGURAÇÕES E AS PREFERÊNCIAS (Continuação) Opções de definição do idioma Menu: Defina a língua para o menu. Seleccione entre <English>, <한국어>, <Français>, <Deutsch>, <Italiano>, <日本語>, <Ё᭛ㅔԧ>, <Ё᭛㐕储>, <Español>, <Ɋɭɫɫɤɢɣ>, <Magyar>, <Nederlands>, <Polski>, <Português>, <Svenska>, <ѳъѕ>, <ýeština>, <ƧnjnjLjǎNJNjƽ>, <Türkçe>, <Norsk>, <Dansk>, <Suomi>, <Español (Sudamérica)>, <Português (Brasil)>, <Indonesia>, <TiӃng ViӋt>, <Bulgarian>, <Română>, <ɍɤɪɚʀɧɫɶɤɚ>, <Slovenšþina> e <Slovenský>. ID3 Tag(Etiqueta ID3): Defina o idioma no qual as informações da faixa e o texto serão apresentados. Seleccione entre <English>, <Korean>, <French>, <German>, <Italian>, <Japanese>, <Chinese(S)>, <Chinese(T)>, <Spanish>, <Russian>, <Hungarian>, <Dutch>, <Polish>, <Portuguese>, <Swedish>, <Thai>, <Finnish>, <Danish>, <Norwegian>, <Afrikaans>, <Basque>, <Catalan>, <Czech>, <Estonian>, <Greek>, <Hrvatski>, <Icelandic>, <Rumanian>, <Slovak>, <Slovene> <Turkish>e <Vietnamese>. As línguas suportadas podem ser alteradas ou adicionadas. NOTA O que é o Tag ID3? São as informações relativas a uma música que estão anexadas ao ficheiro de música, como o nome, artista, álbum, ano, género e comentários. 30 _ conceitos básicos ALTERAR AS CONFIGURAÇÕES E AS PREFERÊNCIAS (Continuação) Definições de Data/Hora Configurar a hora irá permitir que a unidade registe os ficheiros gravados com a data e hora correcta. 1. Mantenha premido o botão [ ] para passar para o ecrã do menu principal. Display Language Date/Time Set System 2. Toque no botão [Esquerda, Direita] para seleccionar <Settings> (Confi gurações) e toque em [ ]. É apresentado o menu <Settings> (Configurações). 3. Toque no botão [Para cima, Para baixo] para seleccionar <Date/Time Set> (Configurar data/hora) e toque em [ ]. Date Time É apresentado o menu <Data/Time Set> (Configurar data/hora). 4. Utilize o botão [Para cima, Para baixo] e [ ] para definir funções. Opções de definições de Data/Hora Date(Data): Pode acertar a data actual. Toque no botão [Esquerda, Direita] para passar para Ano, Mês, Data, e toque no botão [Para cima, Para baixo] para definir cada um dos itens. Time(Hora): Pode acertar a hora actual. Toque no botão [Esquerda, Direita] para passar para Hora, Min, AM/PM e toque no botão [Para cima, Para baixo] para definir cada um dos itens. conceitos básicos _ 31 ALTERAR AS CONFIGURAÇÕES E AS PREFERÊNCIAS (Continuação) Definições do sistema Seleccione as predefinições do temporizador, do modo de início e da alimentação automática desligada adequadas. 1. Mantenha premido o botão [ ] para passar para o ecrã do menu principal. Display Language Date/Time Set System 2. Toque no botão [Esquerda, Direita] para seleccionar <Settings> (Configurações) e toque em [ ]. É apresentado o menu <Settings> (Configurações). 3. Toque no botão [Para cima, Para baixo] para Sleep seleccionar <System> (Sistema) e toque em Auto Power Off [ ]. PC Connection É apresentado o menu <System> (Sistema). 4. Utilize o botão [Para cima, Para baixo] e [ 32 _ conceitos básicos Library Update ] para definir funções. ALTERAR AS CONFIGURAÇÕES E AS PREFERÊNCIAS (Continuação) Opções de definição do sistema Sleep (Suspenso): Desliga o dispositivo depois de ter decorrido o tempo especificado. Seleccione entre <Off>(Desligado), <15 min>, <30 min>, <60 min>, <90 min>, ou<120 min>. Auto Power Off (Alimentação automática desligada): Desliga o dispositivo sempre que não for carregado nenhum botão depois de ter decorrido o tempo especificado quando em modo de pausa. Seleccione entre <15sec>(15seg), <30sec>(30seg), <1min>, <3min>, <5min> ou <Always On>. (Sempre ligado). PC Connection (Ligação ao PC): Pode configurar uma ligação USB ao PC na opção <Removable Disk> (Disco amovível) ou <MTP>. As predefinições de fábrica da ligação ao PC estão configuradas como <MTP>.Se seleccionar <Removable Disk> (Disco amovível) pode utilizar o leitor como um dispositivo de armazenamento amovível.Consulte a página 34. Library Update (Actualização da biblioteca): O leitor actualiza a biblioteca automaticamente quando desliga a ficha USB. Contudo, se a actualização da biblioteca não for correctamente efectuada, terá de proceder à actualização manual. Toque no botão [Esquerda, Direita] para seleccionar <Yes> (Sim) e toque em [ ]. Default Set (Config. inicial): Repõe todas as definições no valor predefinido. Seleccione entre <Yes> (Sim) ou <No> (Não). <Yes> (Sim) inicializa com os valores predefinidos. <No> (Não) cancela os valores predefinidos. Format (Formatar): Formata a memória interna. Seleccione entre <Yes> (Sim) ou <No> (Não). Se seleccionar <Yes> (Sim) formata a memória interna e apaga todos os ficheiros do leitor. Se seleccionar <No> (Não) não formata a memória interna. Verifique antes de iniciar a formatação. About (Acerca): Verifica a versão do firmware e a capacidade da memória. A opção <Firmware Version> (Versão Firmware) apresenta a versão do firmware actual. <Used> (Usado) indica a utilização, <Available> (Disponív) indica a capacidade restante e <Total> indica a capacidade total da memória. NOTA Sobre a memória integrada 1GB = 1,000,000,000 bytes : a capacidade real de formatação pode ser menor, pois o firmware interno utiliza uma parte da memória. conceitos básicos _ 33 ALTERAR AS CONFIGURAÇÕES E AS PREFERÊNCIAS (Continuação) Quando a ligação ao pc está definida como <Removable disk> (Disco amovível) Utilizar como disco amovível Pode utilizar o leitor como um dispositivo de armazenamento amovível. Antes de começar – Ligue o leitor ao PC. NOTA 1. Abra os ficheiros/pastas a transferir do PC. 2. A partir do ambiente de trabalho, abra <My Computer>(O meu computador) <U4>. 3. Seleccione os ficheiros/pastas para transferir do PC e arraste e largue-os na pasta pretendida no <U4>. As pastas ou os ficheiros seleccionados são transferidos para o leitor. CUIDADO É apresentada uma mensagem durante a transferência dos ficheiros de ou para o leitor.Desligar a ficha USB enquanto a mensagem de transferência é apresentada pode provocar danos no leitor. A ordem dos ficheiros de música apresentados no explorador do PC pode ser diferente da ordem de reprodução no leitor. Se transferir um ficheiro DRM (ficheiro pago) para o disco amovível, o ficheiro não será reproduzido. O que é o DRM? DRM (Digital Rights Management) (Gestão de direitos digitais) é uma tecnologia e serviço destinado a impedir a utilização ilegal de conteúdos digitais e a proteger os lucros e direitos de autor dos respectivos proprietários. Os ficheiros DRM são ficheiros de música pagos identificados como ficheiros de música MP3 adquiridos legalmente pela tecnologia de protecção contra cópias ilegais. 34 _ conceitos básicos NOTA ALTERAR AS CONFIGURAÇÕES E AS PREFERÊNCIAS (Continuação) Quando a ligação ao pc está definida como <Removable disk> (Disco amovível) (Continuação) Desligar do PC Siga os passos abaixo para evitar causar danos nos dados e no leitor quando o desliga do PC. 1. Coloque o cursor do rato sobre o ícone na barra de tarefas, no canto inferior direito do ambiente de trabalho e clique com o botão esquerdo do rato. 2. Clique na mensagem <Safely Remove USB Mass Storage Device Drive>(Remover com segurança o dispositivo de armazenamento de massa USB). 1 3. Desligue o leitor do PC. 2 CUIDADO ҏNão desligue o leitor do PC durante a transferência de ficheiros. Se o fizer poderá danificar os dados e o leitor. ҏNão é possível remover o leitor enquanto os ficheiros do leitor estão a ser reproduzidos no PC. Volte a tentar depois de terminada a reprodução do ficheiro. conceitos básicos _ 35 REINICIAR O SISTEMA Se o leitor de mp3 não se ligar, não reproduzir a música ou não for reconhecido pelo computador quando o ligar, tem de reiniciar o sistema. Carregue no Orifício Reset(Repor) na parte inferior do produtocom a ajuda de um objecto pontiagudo, como um clip. O sistema é iniciado. A função de reposição não elimina as informações de tempo e os dados guardados na memória Integrada. 36 _ conceitos básicos samsung media studio O Samsung Media Studio é uma aplicação de software fácil de utilizar que o ajuda a organizar as músicas, fotografias, filmes e outros ficheiros no PC. Com os ficheiros já ordenados e organizados no Media Studio, pode transferi-los rapidamente para o leitor de mp3 sem ter procurar em todo o disco rígido o ficheiro correcto. REQUISITOS DO PC Para instalar e executar o Media Studio, o PC tem de respeitar as especificações mínimas seguintes: • Pentium 500MHz ou superior • USB Port 2.0 • Windows XP Service Pack 2 ou superior • DirectX 9.0 ou superior • 100MB de espaço livre no disco • Unidade de CD Rom (2X ou superior) • Windows Media Player 10.0 ou superior • Resolução 1024 X 768 ou superior • Internet Explorer 6.0 ou superior • 512 MB de RAM ou superior samsung media studio _ 37 INSTALAR O SAMSUNG MEDIA STUDIO CUIDADO Execute o instalador do <Media Studio> na conta do administrador do PC. Se não o fizer, o <Media Studio> não será instalado. Para encontrar a conta de administrador, consulte o manual de utilizador do PC. 1. Insira o CD de instalação fornecido com o leitor na unidade de CD-ROM do seu computador. 2. Clique em <Install now> (Instalar agora). Siga as instruções para iniciar a instalação. A instalação do <Media Studio> começa e, quando estiver concluída, cria um ícone no ambiente de trabalho. CUIDADO Se utilizar uma unidade de CD-ROM instalada verticalmente tenha cuidado ao carregar/retirar o CD de instalação. 38 _ samsung media studio TRANSFERIR FICHEIROS PARA O LEITOR COM O SAMSUNG MEDIA STUDIO A transferência de ficheiros com o <Media Studio> é a maneira mais fácil de passar os ficheiros do PC para o leitor de mp3. A transferência de ficheiros <Media Studio> é a forma mais fácil de obter ficheiros do PC para o leitor de MP3. 2 1 1. Faça deslizar o interruptor [ A direcção de inserção da porta USB pode diferir, dependendo do PC. Por isso, antes de a inserir, observe a ficha USB do leitor para saber a direcção de inserção correcta. ]. A ficha USB aparece. 2. Ligue a ficha USB à porta USB ( ) do PC, como se mostra na figura. Aparece a mensagem <USB connected> (USB ligado) no visor do leitor. O <Media Studio> abre-se automaticamente assim que ligar o leitor ao PC Se o programa não se abrir automaticamente, clique duas vezes no ícone <Media Studio> no ambiente de trabalho. Introduzir a ficha USB Ejectar a ficha USB Faça deslizar o interruptor [ USB do leitor. ] para ejectar a ficha 2 Introduzir a ficha USB Volte a empurrar a ficha USB para dentro do leitor ]. enquanto faz deslizar o interruptor [ Certifique-se de que empurra sem soltar o interruptor ]quando liga a ficha USB ao leitor. Se não o [ CUIDADO fizer, pode danificar o leitor. 1 samsung media studio _ 39 TRANSFERIR FICHEIROS PARA O LEITOR COM O SAMSUNG MEDIA STUDIO (Continuação) 3. Clique no ícone Clique em . para ver a lista de músicas. 3 YP-U4[MTP] [YP-U4[MTP]] > M... 4. Clique em <Add File> (Adicionar arquivo) no fundo do <Media Studio>. Aparece a janela <Open> (Abrir). 4 5. Seleccione os ficheiros que pretende adicionar e clique em <Open> (Abrir). Os ficheiros são adicionados à lista existente no lado esquerdo do ecrã <Media Studio>. 5 6. Seleccione o ficheiro que quer transferir na lista existente no lado esquerdo. 7. Clique no ícone . YP-U4[MTP] O ficheiro seleccionado é transferido para o leitor. [YP-U4[MTP]] > M... 6 7 40 _ samsung media studio TRANSFERIR FICHEIROS PARA O LEITOR COM O SAMSUNG MEDIA STUDIO (Continuação) CUIDADO Não desligue a ficha USB durante a transferência de ficheiros. Se a desligar durante a transferência pode danificar o leitor ou o PC. Ligue o leitor directamente ao computador em vez de utilizar um hub USB para evitar instabilidade. Durante a ligação todas as funções estão desactivadas. NOTA Se a bateria tiver pouca carga, quando ligar a ficha USB ao PC, o leitor é carregado durante alguns minutos antes de se ligar ao PC. Utilize o sistema de ficheiros FAT 32 quando formatar o leitor no PC.No Windows Vista, clique em Restaurar predefinições de dispositivo e formate o leitor. O Samsung Media Studio tem uma função de Ajuda muito completa. Se não conseguir encontrar a resposta à sua pergunta sobre o Media Studio, clique em <MENU> ĺ <Help> (Ajuda) ĺ<Help> (Ajuda) na parte superior do programa <Media Studio>. A tecnologia de reconhecimento de músicas e dados relacionados são fornecidos por Gracenote e Gracenote CDDB® Music Recognition ServiceSM. CDDB é uma marca registada da Gracenote. O logótipo da Gracenote e do Gracenote CDDB bem como o logótipo “Powered by Gracenote CDDB” são marcas registadas da Gracenote. Music Recognition Service e MRS são serviços da Gracenote. samsung media studio _ 41 ouvir música Antes de começar! - Ligue os auriculares, em seguida ligue o leitor e verifique a bateria. NOTA Toque em [ ] para passar para o ecrã anterior. Mantenha premido o botão [ ] para passar para o ecrã do menu principal. OUVIR POR CATEGORIA 2 3 Now Playing Music 1. Mantenha premido o botão [ Artists Albums Songs 4 Rising Sun ] para passar para o ecrã do menu principal. 2. Toque no botão [Esquerda, Direita] para seleccionar <Music> (Música) e toque em [ ]. Aparece a lista <Music> (Música). 3. Toque no botão [Para cima, Para baixo] para seleccionar a lista pretendida e toque em [ ]. É apresentado o ficheiro de música. 4. Toque no botão [Para cima, Para baixo] para seleccionar o ficheiro que pretende reproduzir e toque em [ ]. A música começa a ser reproduzida. 42 _ ouvir música OUVIR POR CATEGORIA (Continuação) Lista de músicas Informações sobre o ficheiro, incluindo o nome do artista, o nome do álbum, o título da música e o género, são apresentadas de acordo com as informações da Etiqueta ID3 no respectivo ficheiro de música. Um ficheiro sem etiqueta ID3 é apresentado como [Unknown] (Desconhecido). Now Playing (Agora a Reproduzir): Reproduz um ficheiro recentemente reproduzido ou passa para o ecrã de reprodução do ficheiro actual. Artists (Artista): Reproduzir por artista Albums (Álbum): Reproduzir por álbum Songs (Canções): Para reproduzir por ordem numérica ou alfabética Genres (Género): Reproduzir por género Playlists (Listas de reprodução) : Reproduzir por listas de músicas. Recently Added (Adicionado recentemente): O leitor apresenta a lista de ficheiros, ordenada pela data de transferência. Recorded Files (Ficheiros gravados): Mostra todos os ficheiros gravados. Music Browser (Procur música): Apresenta todos os ficheiros de música armazenados na pasta de músicas. NOTA Os ficheiros de música MP3 e WMA são compatíveis com o leitor. Os ficheiros MP1 ou MP2 que apenas alteraram a extensão para MP3 poderão não ser reproduzidos no leitor. O que é o Tag ID3? São as informações relativas a uma música que estão anexadas ao ficheiro de música, como o nome, artista, álbum, ano, género e comentários. VOLTAR AO ECRÃ DA REPRODUÇÃO ACTUAL Pode voltar ao ecrã de reprodução actual, em qualquer altura, enquanto está a utilizar as outras funções. 1. Mantenha premido o botão [ ] para passar para o ecrã do menu principal. Music 2. Toque no botão [Esquerda, Direita] para seleccionar <Music> (Música) e mantenha premido [ ]. O leitor volta ao ecrã de reprodução actual. ouvir música _ 43 FAZER UMA PAUSA 1. Carregue em botão [ ] enquanto a música está a tocar. A reprodução da música entra em pausa. 2. Carregue novamente em botão [ ]. A música volta a tocar a partir do ponto em que parou. PROCURAR DENTRO DE UMA FAIXA 1. Mantenha premido o botão [Esquerda, Direita], enquanto a faixa seleccionada está a ser reproduzida. Começa uma procura em direcção ao fim ou ao início dessa faixa. 2. Solte o botão na altura em que pretende começar a ouvir. A reprodução começa a partir do ponto em que soltou o botão. REPRODUZIR DESDE O PRINCÍPIO DA FAIXA ACTUAL Toque no botão [Esquerda] 3 segundos depois do início da reprodução da faixa. A faixa actual começa a ser reproduzida desde o início. REPRODUZIR A FAIXA ANTERIOR Toque no botão [Esquerda] durante os primeiros 3 segundos de reprodução da faixa. Toque duas vezes no botão [Esquerda] 3 segundos depois do início da reprodução da faixa. A faixa seguinte começa a ser reproduzida. REPRODUZIR A FAIXA SEGUINTE Toque no botão [Direita]. A faixa seguinte começa a ser reproduzida. CUIDADO Ao reproduzir ficheiros de velocidade de transmissão variável (VBR), a faixa anterior poderá não ser reproduzida mesmo quando se toca no botão [Esquerda] em menos de 3 segundos. 44 _ ouvir música CRIAR UMA LISTA DE REPRODUÇÃO UTILIZANDO O SAMSUNG MEDIA STUDIO Com o <Media Studio>, pode criar a sua própria colectânea ou lista de reprodução de ficheiros de áudio. Antes de começar! - Ligue o leitor ao PC. O Media Studio tem de estar instalado no PC. Criar uma lista de reprodução YP-U4[MTP] 1 OK [YP-U4[MTP]]... 3 2 1. Clique em <Playlists> (Listas de reprodução) na parte superior de <Media Studio>. Aparece a janela <Playlists> (Listas de reprodução). 2. Clique em <New Playlists> (Novo listas de reprodução) na parte inferior. Aparece a janela <Create Playlists> (Criar listas de reprodução). 3. Escreva o título da lista de reprodução e clique em [OK]. Será atribuído um nome à nova lista de reprodução e esta será armazenada na secção <Playlists> (Listas de reprodução), em <Media Studio>. ouvir música _ 45 CRIAR UMA LISTA DE REPRODUÇÃO UTILIZANDO O SAMSUNG MEDIA STUDIO (Continuação) Adicionar ficheiros de música a uma lista de reprodução criada 1 YP-U4[MTP] 4 2 5 3 1. Clique em <My PC> (O meu PC) na parte superior do <Media Studio>. Aparece a janela <My PC> (O meu PC). 2. Clique em <Playlists> (Listas de reprodução) no canto direito da janela. Aparece a janela <Playlists> (Listas de reprodução). 3. Faça duplo clique numa lista de reprodução na janela do lado direito. 4. Seleccione os ficheiros que pretende transferir na janela <My PC> (O meu PC). 5. Clique no ícone . Os ficheiros seleccionados são adicionados à Lista de reprodução. 46 _ ouvir música CRIAR UMA LISTA DE REPRODUÇÃO UTILIZANDO O SAMSUNG MEDIA STUDIO (Continuação) Transferir uma Lista de reprodução para o leitor utilizando o Media Studio YP-U4[MTP] 1 2 [YP-U4[MTP]]... 3 1. Clique em <Playlists> (Listas de reprodução) na parte superior de <Media Studio>. Aparece a janela <Playlists> (Listas de reprodução). 2. Seleccione uma lista de reprodução na secção <Playlists> (Listas de reprodução). 3. Clique no ícone . A lista de reprodução seleccionada é transferida para o leitor em <Music>(Musica) ĺ <Playlists> (Listas de reprodução). NOTA O leitor pode reproduzir um máximo de 400 ficheiros de música para cada lista de reprodução. ouvir música _ 47 CRIAR UMA LISTA DE REPRODUÇÃO NO LEITOR DE MP3 Se já transferiu ficheiros para o leitor de MP3, pode criar uma lista de reprodução “Favoritos” sem o Media Studio ou sem o PC. 1. Mantenha premido o botão [ ecrã do menu principal. ] para passar para o 2. Toque no botão [Esquerda, Direita] para seleccionar <File Browser> (Procura Ficheiro) e toque em [ ]. 3. Toque no botão [Para cima, Para baixo] para seleccionar <Music> (Música) e toque em [ ]. São apresentados os ou o ficheiro de música. Add to Playlist Delete from Playl... Delete File Playlist 1 Playlist 2 Playlist 3 Playlist 4 4. Toque no botão [Para cima, Para baixo] para seleccionar um ficheiro que pretenda adicionar à lista de reprodução e prima o botão [ ]. É apresentado o menu <Playlist> (Lista de reprodução). 5. Toque no botão [Para cima, Para baixo] para seleccionar <Add to Playlist> (Adic. lista rep) e toque em [ ]. É apresentado <Playlist 1> (Lista rep 1) a <Playlist 5> (Lista rep 5). 6. Toque no botão [Para cima, Para baixo] para seleccionar o número da lista de reprodução à qual pretende adicionar o ficheiro seleccionado e toque em [ ]. O ficheiro seleccionado é adicionado à lista de reprodução. Pode verificar a lista de reprodução em <Music> (Música) ĺ <Playlists> (Listas de reprodução) ĺ <Playlist 1> (Lista rep 1) a <Playlist 5> (Lista rep 5) no menu principal. NOTA Pode adicionar um máximo de 400 ficheiros de música a cada lista de reprodução (<Playlist 1> (Lista rep 1) a <Playlist 5> (Lista rep 5)). 48 _ ouvir música REPRODUZIR UMA PLAYLIST 1. Mantenha premido o botão [ ecrã do menu principal. ] para passar para o 2. Toque no botão [Esquerda, Direita] para seleccionar <Music> (Música) e toque em [ ]. Genres Playlists Recently Added Recorded Files É apresentada a lista de <Music> (Música). 3. Toque no botão [Para cima, Para baixo] para seleccionar <Playlists> (Listas de reprodução) e toque em [ ]. Aparecem a(s) lista(s) de músicas. Playlist 1 Playlist 2 Playlist 3 Playlist 4 4. Toque no botão [Para cima, Para baixo] para seleccionar a lista de reprodução pretendida e toque em [ ]. São apresentados os ficheiros de música armazenados na lista de reprodução seleccionada. Se não forem encontradas playlists, aparece a mensagem <No file> (Nenhum arquivo) no ecrã. 5. Toque no botão [Para cima, Para baixo] para seleccionar o ficheiro de música que pretende reproduzir e toque em [ ]. O ficheiro de música começa a ser reproduzido. NOTA Consulte as páginas 45 e 47 para obter informações sobre como transferir a lista de reprodução utilizando o <Media Studio>. ouvir música _ 49 ELIMINAR UM FICHEIRO DA LISTA DE REPRODUÇÃO 1. Mantenha premido o botão [ ] para passar para o ecrã do menu principal. 2. Toque no botão [Esquerda, Direita] para seleccionar <Music> (Música) e toque em [ ]. É apresentada a lista de <Music> (Música). Playlist 1 Playlist 2 Playlist 3 Playlist 4 3. Toque no botão [Para cima, Para baixo] para seleccionar Add to Playlist <Playlists> (Listas de reprodução) e toque em [ ]. Aparecem a(s) lista(s) de músicas. Delete from Playlist 4. Toque no botão [Para cima, Para baixo] para seleccionar Delete All from P... a lista de reprodução pretendida e toque em [ ]. São apresentados os ficheiros de música armazenados na lista de reprodução seleccionada. 5. Toque no botão [Para cima, Para baixo] para seleccionar um ficheiro que pretenda eliminar da lista de reprodução e prima o botão [ ]. É apresentado o menu <Playlist> (Lista de reprodução). 6. Toque no botão [Para cima, Para baixo] para seleccionar <Delete from Playlist> (Apagar da lista rep) e toque em [ ]. É apresentada uma janela a solicitar a confirmação da eliminação. 7. Toque no botão [Esquerda, Direita] para seleccionar <Yes> (Sim) e toque em [ ]. O ficheiro seleccionado é eliminado da lista de reprodução. ELIMINAR TODOS OS FICHEIRO DA LISTA DE REPRODUÇÃO Siga os passos 1-4 acima. 5. Prima o botão [ ]. É apresentado o menu <Playlist> (Lista de reprodução). Add to Playlist Delete from Playl... 6. Toque no botão [Para cima, Para baixo] para seleccionar Delete All from Play <Delete All from Playlist> (Eliminar tudo da lista) e toque em [ ]. É apresentada uma janela a solicitar a confi rmação da eliminação. 7. Toque no botão [Esquerda, Direita] para seleccionar <Yes> (Sim) e toque em [ ]. São eliminados todos os fi cheiros da lista de reprodução. 50 _ ouvir música FUNÇÃO DE PERSONALIZAÇÃO DO BOTÃO DO UTILIZADOR Pode definir o botão para controlar um dos quatro modos listados abaixo. Depois de o fazer, pode aceder directamente ao modo com o botão . Para definir o Modo de Botão de Utilizador Utilize o botão durante a reprodução para uma alteração simples de modo. 1. Mantenha premido o botão [ ] para passar Music para o ecrã do menu principal. FM Radio 2. Toque no botão [Esquerda, Direita] para User Button Mode seleccionar <Settings> (Confi gurações) e toque Sound em [ ]. É apresentado o menu <Settings> (Configurações). 3. Toque no botão [Para cima, Para baixo] para seleccionar <User Button Mode> (Modo botão utilizador) e toque em [ ]. É apresentado o menu <User Button Mode> (Modo botão utilizador). Repeat A-B DNSe Play Speed Play Mode 4. Toque no botão [Para cima, Para baixo] para seleccionar o modo de botão utilizador pretendido e toque em [ ]. Opções do modo de botão de utilizador Repeat A-B (Repetir A-B): Define a secção a repetir. DNSe: Permite-lhe seleccionar um efeito de som adequado para a música. Play Speed (Velocidade de reprodução): Regula a velocidade de reprodução entre rápida e lenta. Play Mode(Modo de reprodução): Selecciona o modo de repetição da reprodução. NOTA A predefinição de fábrica do modo botão de utilizador está definida como <Repeat A-B> (Repetir A-B). ouvir música _ 51 FUNÇÃO DE PERSONALIZAÇÃO DO BOTÃO DO UTILIZADOR (Continuação) Para definir a secção a repetir Esta função permite ouvir repetidamente determinadas partes de uma faixa. É recomendável para a aprendizagem de línguas. 1. Defina o modo de botão de utilizador para <Repeat A-B> (Repetir A-B) e reproduza o ficheiro escolhido. Rising Sun ] no início da 2. Carregue no botão [ secção que pretende repetir. É definido o ponto inicial e é apresentada a marca < > na barra de estado de reprodução. Rising Sun 3. Carregue novamente no botão [ ] para definir o fim da secção que pretende repetir. A marca < > é apresentada na barra de estado da reprodução e a secção especificada começa a ser reproduzida repetidamente. Como cancelar a repetição de secção Carregue no botão [ secção. ] novamente durante a repetição da A repetição da secção é cancelada. NOTA A repetição da secção é automaticamente cancelada nos casos indicados a seguir. É definido o ponto inicial da secção a repetir mas o ponto final não é definido antes da faixa actual terminar. Pode especificar o ponto de fim em menos de 3 segundos após o início da secção de repetição. 52 _ ouvir música FUNÇÃO DE PERSONALIZAÇÃO DO BOTÃO DO UTILIZADOR (Continuação) Para utilizar o botão DNSe Seleccione o som correcto para cada género de música. 1. Defina o modo de botão de utilizador para <DNSe> (DNSe) e reproduza um ficheiro à sua Rising Sun escolha. ] para seleccionar o 2. Prima o botão [ DNSe pretendido. Sempre que carregar no botão, o modo DNSe muda pela ordem seguinte (Normal) ĺ (Estúd) ĺ (Rock) ĺ (Clássico) ґĺ (Jazz) ĺ (Balada) ĺ (Club) ĺ (R&B) ĺ (Dança) ĺ (Concert Hall) ĺ (Utilizador) O que é o DNSe? Digital Natural Sound Engine (DNSe) é uma função de efeito de som para os NOTA leitores de MP3 desenvolvida pela Samsung. Fornece várias definições de som no sentido de melhorar o tipo de música que está a ouvir. Para utilizar o botão de Reprodução Rápida Aumente ou reduza a velocidade da sua música preferida ajustando a velocidade de reprodução. 1. Defina o modo de botão de utilizador para <Play Speed> (Velocidade de reprodução) e Rising Sun reproduza um ficheiro à sua escolha. ] para seleccionar a 2. Prima o botão [ velocidade de reprodução pretendida. Sempre que carregar no botão, a velocidade de reprodução muda pela ordem seguinte <NOR(Normal)>, <X 1.1>, <X 1.2>, <X 1.3>, <X 0.7>, <X 0.8>, <X 0.9>. Quanto maior for o número, mais rápida é a velocidade. NOTA Dependendo do ficheiro, a velocidade de reprodução ajustada pode ser diferente da velocidade real. ouvir música _ 53 FUNÇÃO DE PERSONALIZAÇÃO DO BOTÃO DO UTILIZADOR (Continuação) Para utilizar o botão Play Mode Seleccione o modo de reprodução como, por exemplo, as definições de repetição. 1. Defina o modo de botão de utilizador para <Play Mode> (Modo de reprodução) e reproduza um ficheiro à sua escolha. Rising Sun 2. Prima o botão [ ] para seleccionar o modo de reprodução pretendido. Sempre que carregar no botão, o modo de reprodução muda pela ordem (Normal)ґ (Repetir)ґ (Repetir uma) (Aleatório). seguinte Opções do modo de reprodução : Reproduz todos os ficheiros da lista de música actual, ordenados pela hora. : Repete e reprodução de todos os ficheiros da lista de música actual. : Repete a reprodução de um ficheiro. : Repete aleatoriamente e reprodução de todos os ficheiros da lista de música actual. 54 _ ouvir música mais do que música O seu novo leitor de mp3 oferece-lhe mais do que música. Oiça Rádio FM, utilize transmissão de dados e gravação de voz. O YP-U3 põe muito mais ao seu dispor. OUVIR RÁDIO FM Antes de começar! - Ligue os auriculares, em seguida ligue o leitor e verifique a bateria. NOTA Toque em [ ] para passar para o ecrã anterior. Mantenha premido o botão [ ] para passar para o ecrã do menu principal. 1. Mantenha premido o botão [ ecrã do menu principal. ] para passar para o FM Radio 2. Toque no botão [Esquerda, Direita] para seleccionar <FM Radio> (Rádio FM) e toque em [ ]. A recepção de Rádio FM é iniciada. Para utilizar a função de som desligado 1. Carregue no botão [ O som é cortado. 2. Prima o botão [ NOTA ] enquanto ouve rádio FM. ]novamente para retomar a audição. Ligue sempre os auriculares ao leitor quando procura ou define frequências. Os auriculares actuam como antena para detectar a recepção de rádios FM. Em áreas com má recepção, o leitor não pode localizar uma frequência de FM disponível. mais do que música _ 55 OUVIR RÁDIO FM (Continuação). Procurar estações de FM 1. Carregue sem soltar o botão [Esquerda, Direita] e, em seguida, solte no modo Manual. A procura pára na frequência mais próxima do ponto onde soltou o botão. Searching OU, 1. Toque no botão [Esquerda, Direita] para percorrer as frequências uma por uma no modo Manual. Passa para frequências sempre que se carregar no botão. 56 _ mais do que música Jazz OUVIR RÁDIO FM (Continuação) Como mudar para modo predefinido Seleccione este modo se quiser procurar uma programação de cada vez nas programações de frequência FM. Prima sem soltar [ ] em Modo manual. Jazz As palavras <PRESET> (Predefinição) aparecem no ecrã. Se não existirem frequências predefinidas, o leitor não passa para o Modo Predefinido. NOTA Como mudar para modo manual Seleccione este modo se quiser procurar manualmente uma frequência de cada vez na banda FM. Prima sem soltar [ ] em Modo predefinido. Jazz As palavras <MANUAL> aparecem no ecrã. Guardar estações na memória de pré-sintonização Pode armazenar um máximo de 30 estações na memória do leitor de MP3 e para voltar a elas basta carregar num dos números. Utilize o modo manual para que o leitor de MP3 guarde apenas as estações seleccionadas por si ou localize e guarde as estações locais automaticamente. Manual – seleccione apenas as estações que pretende armazenar 1. Toque no botão [Esquerda, Direita] para seleccionar a frequência que pretende predefinir no modo Manual e toque em [ ]. Jazz A frequência seleccionada é adicionada à lista predefinida. Se já estiver predefinida a mesma frequência, a definição é desactivada. Para procurar automaticamente uma frequência de pré-sintonização, NOTA consulte a página 25. mais do que música _ 57 OUVIR RÁDIO FM (Continuação) Para ouvir uma estação pré-sintonizada No modo de predefinição, toque no botão [Esquerda, Direita] para percorrer as estações predefinidas. Pode ouvir a frequência de rádio que foi guardada. Jazz Como apagar uma pré-sintonização Siga os passos abaixo para eliminar frequências enquanto ouve umaestação de rádio FM. 1. No modo de predefinição, toque no botão [Esquerda, Direita] para procurar a frequência predefinida que pretende eliminar e prima o ]. botão [ Delete? É apresentada a janela de confirmação para eliminar. 2. Toque no botão [Esquerda, Direita] para seleccionar <Yes> (Sim) e toque em [ ]. A frequência seleccionada é eliminada. Se não pretender eliminar o número predefinido, seleccione <No> (Não). 3. Para eliminar outras frequências predefinidas, siga os passos 1-2 indicados acima. 58 _ mais do que música OUVIR RÁDIO FM (Continuação) Como gravar emissões de Rádio FM Pode gravar emissões de rádio FM em qualquer altura enquanto ouve rádio. 1. Toque no botão [Esquerda, Direita] para seleccionar a frequência para gravar no ecrã de Rádio FM e mantenha premido o botão [ ]. A gravação é iniciada. Prima o botão [ ] se pretender interromper a gravação. NOTA Como parar a gravação 1. Mantenha premido o botão [ a gravação. ] durante Aparece uma mensagem a perguntar se pretende ouvir o ficheiro que acabou de gravar. Playback recorded file? 2. Toque no botão [Esquerda, Direita] para seleccionar <Yes> (Sim) ou <No> (Não) e toque em [ ]. Se seleccionar <Yes> (Sim), o ficheiro que acabou de ser gravado é reproduzido. Se seleccionar <No> (Não), o ficheiro gravado não é reproduzido. NOTA O ficheiro gravado é guardado em <File Browser> (Procura Ficheiro) ĺ <Recorded Files> (Ficheiros gravados) ĺ <FM Radio> (Rádio FM). Cada ficheiro de gravação de rádio FM tem capacidade para 5 horas. Pode armazenar um máximo de 999 ficheiros para a gravação de rádio FM. Pode criar uma gravação de aproximadamente 31 horas, no máximo. (com base na velocidade de 128Kbps, a 2GB) O nome do ficheiro gravado é automaticamente especificado, como por exemplo, “FM_AAMMDD_XXX.mp3”. “FM” significa gravação de rádio FM, “AAMMDD” indica a data da gravação e “XXX” corresponde ao número do ficheiro. mais do que música _ 59 UTILIZAR A TRANSMISSÃO DE DADOS Utilizando o <Media Studio>, pode transferir informações de blogues e ficheiros registados com RSS para o leitor. NOTA O que é o RSS? RSS significa Rich Site Summary ou Really Simple Syndication. É um sistema de transmissão de dados baseado em xml utilizado para fornecer aos utilizadores informações sobre sítios da Web actualizados regularmente, tais como páginas de notícias e blogues, de uma forma mais fácil e prática. O que são Transmissões de dados? Pode receber automaticamente informações actualizadas sem ter de visitar constantemente páginas de notícias, blogues ou sítios da Web UCC. Antes de começar! - Tem de instalar o <Media Studio> no seu PC. Consulte a página 38. Registar um canal Pode criar um novo canal registando sítios da Web ou páginas da Web com suporte para RSS. 1. Clique em <Subscribe> (Subscrever) na parte inferior de <Datacasts> (Transm. dados) do <Media Studio>. 2. Introduza um endereço em <URL> e clique em <ŹNext> (Seguinte). 2 Se copiar um endereço da Web e clicar em <Subscribe> (Subscrever), o endereço copiado é automaticamente apresentado em <URL>. É apresentada a janela de confirmação da definição se o endereço da Web suportar RSS. 3. Clique em <OK>. O canal pretendido está registado. em Datacasts (Transm. dados) para o canal registado. Aparece o ícone Consulte a secção <Datacasts> (Transm. dados) do <Media Studio> para obter instruções detalhadas. 60 _ mais do que música NOTA UTILIZAR A TRANSMISSÃO DE DADOS (Continuação) Criar um novo grupo de canal Pode criar um novo grupo para gerir canais por categoria. 1. Clique em <New Group> (Novo grupo) na parte inferior de <Datacasts> (Transm. dados) em <Media Studio>. 2. Escreva o nome e a descrição do grupo e clique em <OK>. 2 Transferir uma transmssão de dados do <Media Studio> Antes de começar! - Ligue o leitor ao PC. O Media Studio tem de estar instalado no PC. Consulte a página 38. 1. O <Media Studio> inicia-se automaticamente assim que o leitor é ligado ao PC. YP-U4[MTP] 2 Se o programa não iniciar automaticamente, faça duplo do <Media clique no ícone Studio> no ambiente de trabalho. 2. Clique em <Datacasts> (Transm. dados) na parte superior de <Media Studio>. [YP-U4[MTP]] > M.. 3 Aparece a lista de canais do grupo de transmissões de dados. 3. Clique no canal de grupo pretendido. mais do que música _ 61 UTILIZAR A TRANSMISSÃO DE DADOS (Continuação) Transferir uma transmssão de dados do <Media Studio> 4. Clique no canal pretendido. YP-U4[MTP] [YP-U4[MTP]] > M.. 4 5. Seleccione a mensagem que pretende transferir. YP-U4[MTP] [YP-U4[MTP]] > M.. 6. Clique no ícone . A mensagem do canal seleccionado será transferida para o leitor em <File Browser> (Procura Ficheiro) ĺ <Datacasts> (Transm. dados). NOTA 5 6 na parte superior do <Media Studio> para passar para o ecrã anterior. Clique em Em <Datacasts> (Transm. dados), do <Media Studio>, se a mensagem incluir um anexo (ficheiro de música), pode transferir o mesmo para o leitor.No entanto, poderá não ser possível transferir o anexo, dependendo da política do sítio da Web aplicável. 62 _ mais do que música UTILIZAR A TRANSMISSÃO DE DADOS (Continuação) VISUALIZAR TRANSMISSÕES DE DADOS Os ficheiros de música transferidos são guardados em <Datacasts> (Transm. dados) no leitor. NOTA Antes de começar! - Transfira a mensagem do canal pretendido para o leitor utilizando o <Media Studio>. Consulte a página 60~62. Toque em [ ] para passar para o ecrã anterior. Mantenha premido o botão [ ] para passar para o ecrã do menu principal. 1. Mantenha premido o botão [ ] para passar para o ecrã do menu principal. Datacasts 2. Toque no botão [Esquerda, Direita] para seleccionar <Datacasts> (Transm. dados) e toque em [ ]. É apresentada a lista de Transmissão de dados. Se não forem encontradas transmissões de dados, será apresentada a mensagem <No File> (Nenhum arquivo) no ecrã. My Channel 1 3. Toque no botão [Para cima, Para baixo] para My Channel 2 seleccionar a lista do canal pretendido e toque My Channel 3 em [ ]. My Channel 4 São apresentados os ficheiros de música. 4. Toque no botão [Para cima, Para baixo] para seleccionar o ficheiro pretendido e toque em [ ]. O ficheiro de música seleccionado começa a ser reproduzido. mais do que música _ 63 GRAVAÇÃO DE VOZ Pode gravar a sua voz, discursos, palestras e outros sons de exterior com o leitor de mp3. Como fazer uma gravação de voz Método 1 Pode fazer uma gravação de voz em qualquer altura enquanto utiliza as outras funções. ]. Mantenha premido o botão [ A gravação de voz começa logo que o nome do ficheiro aparecer. A gravação de rádio FM inicia enquanto ouve a emissão de FM. NOTA Método 2 1. Mantenha premido o botão [ ] para passar para o ecrã do menu principal. Voice REC 2. Toque no botão [Esquerda, Direita] para seleccionar <Voice REC> (Gravação de voz) e toque em [ ]. 3. Toque em [ ]. A gravação de voz começa logo que o nome do ficheiro aparecer. Prima o botão [ NOTA 64 _ mais do que música ] se pretender interromper a gravação. GRAVAÇÃO DE VOZ (Continuação) Para parar a gravação de voz 1. Mantenha premido o botão [ pretender interromper a gravação. ] quando Aparece uma mensagem a perguntar se pretende ouvir o ficheiro que acabou de gravar. Playback recorded file? 2. Toque no botão [Esquerda, Direita] para seleccionar <Yes> (Sim) ou <No> (Não) e toque em [ ]. Se seleccionar <Yes> (Sim), o ficheiro que acabou de ser gravado é reproduzido. Se seleccionar <No> (Não), o ficheiro gravado não é reproduzido. CUIDADO Não coloque o microfone demasiado perto nem demasiado afastado, uma vez que a gravação pode ficar com uma qualidade fraca. A gravação de voz não funciona correctamente quando a bateria está fraca. NOTA O ficheiro gravado é guardado em <File Browser> (Procura Ficheiro) ĺ <Recorded Files> (Ficheiros gravados) ĺ <Voice> (Voz). Cada ficheiro de gravação de voz tem capacidade para 5 horas. Pode armazenar um máximo de 999 ficheiros para gravação de voz. Pode criar uma gravação de aproximadamente 42 horas, no máximo. (com base na velocidade de 96Kbps, a 2GB) O nome do ficheiro gravado é automaticamente especificado, como por exemplo, “VCE_YYMMDD_XXX.mp3”. “VCE” significa gravação de voz, “AAMMDD” indica a data da gravação e “XXX” corresponde ao número do ficheiro. mais do que música _ 65 resolução de problemas Se tiver um problema com o novo leitor de mp3, procure uma solução nesta lista. Se o problema persistir, contacte o centro de assistência ao cliente Samsung mais próximo. PROBLEMA SOLUÇÃO Não se consegue ligar. • O leitor não liga se a bateria estiver totalmente descarregada. Recarregue a bateria e volte a ligar. • Carregue no botão Orifício Reset (Repor). Os botões não funcionam. • Verifique se o interruptor está na direcção da posição da seta. • Verifique se carregou no botão correcto e carregue novamente. • Carregue no botão Orifício Reset (Repor). O ecrã não liga. 66 _ resolução de problemas • Se <Display Off> (Ecrã desligado) estiver seleccionado em <Settings> (Configurações) ĺ <Display> (Ecrã de visualização), o ecrã desliga-se. Toque em qualquer botão e verifique se volta a ligar. • O ecrã pode não ser visto quando lhe bate o sol directo. PROBLEMA SOLUÇÃO O dispositivo está desligado. • O leitor desliga-se automaticamente se a bateria estiver totalmente descarregada. Recarregue a bateria. • Se a opção <Auto Power Off> (Alimentação automática desligada) estiver seleccionada em <Settings> (Configurações) ĺ <System> (Sistema), a alimentação será desligada quando o leitor estiver no modo de pausa. Ligue o leitor. A vida da bateria difere da indicada no Manual. • A duração da bateria pode variar, dependendo do modo de som e das definições do ecrã. • A vida útil da bateria pode ser menor se deixar o leitor durante períodos muito longos num local com temperaturas muito altas ou baixas. Mau funcionamento do programa Media Studio • Verifique se o PC respeita os requisitos básicos do sistema. • Verifique se a ficha USB está correctamente ligada e tente novamente. A ligação ao PC está desactivada. O leitor não está a funcionar. • Carregue em <Start> na barra de ferramentas do PC para executar o Windows Update. Seleccione Key Updates (Actualizações chave) e Service Packs e actualize todos. Volte a arrancar o PC e volte a ligar o dispositivo. • Verifique se o ficheiro disponível foi guardado na memória. • Verifique se o ficheiro de música está danificado. • Verifique se a bateria tem carga suficiente. resolução de problemas _ 67 PROBLEMA O carregamento do ficheiro não funciona. SOLUÇÃO • Verifique se o ficha USB esta bem ligado. Volte a ligar se necessario. • Verifique se a memoria esta cheia. • Carregue no botão Orifício Reset (Repor). Faltam ficheiros ou dados. Visualização anormal do tempo de reprodução durante a reprodução. • Verifique se o ficha USB foi desligado durante a transmissão de ficheiros ou de dados. Se for esse o caso, podem ocorrer graves danos não só nos ficheiros e dados, mas também no dispositivo. Convém ter bastante cuidado uma vez que a Samsung não se responsabiliza pela perda de dados. • Verifique se o ficheiro está no formato VBR (Taxa de bits variável). Visualização anormal do nome do ficheiro. • Aceda a <Settings> (Configurações) ĺ <Language> (Idioma) ĺ <ID3 Tag> (Etiqueta ID3) no ecrã do menu principal e seleccione o idioma adequado e actualize a biblioteca manualmente. O dispositivo está quente. • Durante o recarregamento o dispositivo pode ficar quente. Tal não afecta a vida do dispositivo nem as suas funções. A velocidade de transferência de ficheiros é demasiado baixa. • Se estiver a utilizar vários programas incluindo o <Media Studio> no PC, a velocidade de transferência será baixa. Feche os programas desnecessários e experimente fazer novamente a transferência. 68 _ resolução de problemas anexo ÁRVORE DO MENU Apresenta-se abaixo uma descrição breve da maneira como os menus e funções estão organizados no novo leitor de mp3. Ecrã de selecção do menu Music FM Radio Datacasts Voice REC File Browser Settings Music FM Radio User Button Mode Sound Display Language Date/Time Set System Sound Effect Mode Repeat A-B Beep Sound Display Off Menu Date Sleep DNSe Auto Preset DNSe Volume Limit Screen Saver ID3 Tag Time Auto Power Off Play Mode FM Region Play Speed Play Speed FM Sensitivity Skip Interval RDS Display Tag Play Mode LED Effect PC Connection Library Update Default set Format About anexo _ 69 ESPECIFICAÇÕES DO DISPOSITIVO Nome do modelo Alimentação Bateria incorporada Ficheiro Compatibilidade Número de pastas/ ficheiros suportado YP-U4 DC 3.7V/ 500mA 300 mAh / 3.7 V DC MPEG1/2/2.5 Layer3(8kbps~320kbps, 8kHz~48kH z)WMA(48kbps~192kbps,8kHz~48kHz) Pastas: Máx. 1000/ Ficheiros: Máx. 3000 Saída do auricular 20 mW/Ch. (França 5 mW/Ch.) (com base em 16) Gama da frequência de saída 40Hz~20kHz Relação sinal ruído 90 dB with 20 kHz LPF(based on 1kHz 0 dB) Tempo de reprodução Máximo de 16 horas de reprodução de música (com base em: MP3 128kbps, Volume: 15, Modo Normal, Ecrã desligado) Intervalo de temperaturas para operação Protecção Peso Dimensões(LxAxP) Rádio FM -5~35°C (23~95°F) Plástico 27.5g 27 X 83 X 13 mm Frequência de FM 87.5~108.0MHz Relação sinal/ 55 dB ruído FM D.H.T. FM 1% Sensibilidade 38dB utilizável FM O conteúdo deste manual pode sofrer alterações sem aviso prévio, com o objectivo de ser melhorado. 70 _ anexo LICENÇA O produto que acompanha este manual do utilizador está licenciado ao abrigo de determinados direitos de propriedade intelectual de determinadas entidades. Esta licença limita-se a usos privados não comerciais pelos consumidores finais de conteúdos licenciados. Não são concedidos direitos de uso comercial. A licença não abrange qualquer outro produto para além do que acompanha este manual e não se estende a qualquer produto ou processo não licenciado conforme a ISO/IEC 11172-3 ou a ISO/IEC 13818-3, usado ou vendido em combinação com este. A licença abrange apenas a utilização deste produto para codificar e/ou descodificar ficheiros de áudio conforme a ISO/IEC 11172-3 ou a ISO/IEC 13818-3. Não são concedidos direitos ao abrigo desta licença para características ou funções do produto que não sejam conforme a 11172-3 ou a ISO/IEC 13818-3. APENAS EUROPA Este símbolo, no produto ou na respectiva literatura, indica que o mesmo não deve ser eliminado juntamente com outros resíduos domésticos no final do seu ciclo de vida. A fim de evitar possíveis danos ambientais ou para a saúde humana causados por uma eliminação de resíduos não controlada, separe este produto de outros tipos de resíduos e recicle-o de forma responsável, a fim de promover a reutilização sustentável de recursos materiais. Os utilizadores domésticos devem obter junto do vendedor onde adquiriram este produto, ou das autoridades locais, informação pormenorizada sobre os locais e a forma como podem eliminar este artigo para uma reciclagem segura em termos ambientais. Os utilizadores empresariais devem contactar os seus fornecedores e consultar os termos e condições do contrato de aquisição. Este produto não deve ser misturado com outros resíduos comerciais a eliminar. anexo _ 71 DECLARAÇÃO PÚBLICA DE SOFTWARE GPL/LGPL LICENCIADO UTILIZADO NESTE PRODUTO Os GPL executáveis e bibliotecas LGPL seguintes são utilizados neste produto e estão sujeitos ao Acordo de Licença de Utilização GPL/LGPL, incluído como parte do código fonte desta documentação, destes executáveis e bibliotecas e podem ser solicitados via correio electrónico, através do endereço dmav.sec@ samsung.com GPL EXECUTABLES: - Linux Kernel, Busybox LGPL LIBRARIES - uClibc, SDL GNU GENERAL PUBLIC LICENSE Version 2, June 1991 surrender the rights. These restrictions translate to certain responsibilities for you if you distribute copies of the software, or if you modify it. Copyright (C) 1989, 1991 Free Software Foundation, Inc. 51 Franklin Street, Fifth Floor, Boston, MA 02110-1301, USA For example, if you distribute copies of such a program, Everyone is permitted to copy and distribute verbatim copies whether gratis or for a fee, you must give the recipients all the rights that you have. You must make sure that they, too, of this license document, but changing it is not allowed. receive or can get the source code. And you must show Preamble them these terms so they know their rights. The licenses for most software are designed to take away your freedom to share and change it. By contrast, the GNU General Public License is intended to guarantee your freedom to share and change free software--to make sure the software is free for all its users. This General Public License applies to most of the Free Software Foundation’s software and to any other program whose authors commit to using it. (Some other Free Software Foundation software is covered by the GNU Lesser General Public License instead.) You can apply it to your programs, too. When we speak of free software, we are referring to freedom, not price. Our General Public Licenses are designed to make sure that you have the freedom to distribute copies of free software (and charge for this service if you wish), that you receive source code or can get it if you want it, that you can change the software or use pieces of it in new free programs; and that you know you can do these things. We protect your rights with two steps: (1) copyright the software, and (2) offer you this license which gives you legal permission to copy, distribute and/or modify the software. Also, for each author’s protection and ours, we want to make certain that everyone understands that there is no warranty for this free software. If the software is modified by someone else and passed on, we want its recipients to know that what they have is not the original, so that any problems introduced by others will not reflect on the original authors’ reputations. Finally, any free program is threatened constantly by software patents. We wish to avoid the danger that redistributors of a free program will individually obtain patent licenses, in effect making the program proprietary. To prevent this, we have made it clear that any patent must be licensed for everyone’s free use or not licensed at all. The precise terms and conditions for copying, distribution To protect your rights, we need to make restrictions that and modification follow. forbid anyone to deny you these rights or to ask you to TERMS AND CONDITIONS FOR COPYING, DISTRIBUTION AND MODIFICATION 0. This License applies to any program or other work which contains a notice placed by the copyright holder saying it may be distributed under the terms of this General Public License. The “Program”, below, refers to any such program or work, and a “work based on the Program” means either the Program or any derivative work under copyright law: that is to say, a work containing the Program or a portion of it, either verbatim or with modifications and/or translated into another language. (Hereinafter, translation is included without limitation in the term “modification”.) Each licensee is addressed as “you”. that in whole or in part contains or is derived from the Program or any part thereof, to be licensed as a whole at no charge to all third parties under the terms of this License. c) If the modified program normally reads commands interactively when run, you must cause it, when started running for such interactive use in the most ordinary way, to print or display an announcement including an appropriate copyright notice and a notice that there is no warranty (or else, saying that you provide a warranty) and that users may redistribute the program under these conditions, and telling the user how to view a copy of this License. (Exception: if the Program itself is interactive but does not normally print such an announcement, your work based on the Program is not required to print an announcement.) Activities other than copying, distribution and modification are not covered by this License; they are outside its scope. The act of running the Program is not restricted, and the output from the Program is covered only if its contents constitute a work based on the Program (independent of having been These requirements apply to the modified work as a whole. made by running the Program). Whether that is true depends If identifiable sections of that work are not derived from the Program, and can be reasonably considered independent and on what the Program does. separate works in themselves, then this License, and its terms, 1. You may copy and distribute verbatim copies of the Program’s do not apply to those sections when you distribute them as source code as you receive it, in any medium, provided that separate works. But when you distribute the same sections as you conspicuously and appropriately publish on each copy part of a whole which is a work based on the Program, the an appropriate copyright notice and disclaimer of warranty; distribution of the whole must be on the terms of this License, keep intact all the notices that refer to this License and to the whose permissions for other licensees extend to the entire absence of any warranty; and give any other recipients of the whole, and thus to each and every part regardless of who Program a copy of this License along with the Program. wrote it. You may charge a fee for the physical act of transferring a Thus, it is not the intent of this section to claim rights or copy, and you may at your option offer warranty protection in contest your rights to work written entirely by you; rather, exchange for a fee. the intent is to exercise the right to control the distribution of 2. You may modify your copy or copies of the Program or any portion of it, thus forming a work based on the Program, and copy and distribute such modifications or work under the terms of Section 1 above, provided that you also meet all of these conditions: derivative or collective works based on the Program. In addition, mere aggregation of another work not based on the Program with the Program (or with a work based on the Program) on a volume of a storage or distribution medium does not bring the other work under the scope of this License. a) You must cause the modified files to carry prominent 3. You may copy and distribute the Program (or a work based notices stating that you changed the files and the date on it, under Section 2) in object code or executable form of any change. under the terms of Sections 1 and 2 above provided that you b) You must cause any work that you distribute or publish, also do one of the following: a) Accompany it with the complete corresponding machine- terminated so long as such parties remain in full compliance. readable source code, which must be distributed under the terms of Sections 1 and 2 above on a medium 5. You are not required to accept this License, since you have not signed it. However, nothing else grants you permission customarily used for software interchange; or, to modify or distribute the Program or its derivative works. b) Accompany it with a written offer, valid for at least three These actions are prohibited by law if you do not accept years, to give any third party, for a charge no more than this License. Therefore, by modifying or distributing the your cost of physically performing source distribution, a Program (or any work based on the Program), you indicate complete machine-readable copy of the corresponding your acceptance of this License to do so, and all its terms source code, to be distributed under the terms of and conditions for copying, distributing or modifying the Sections 1 and 2 above on a medium customarily used Program or works based on it. for software interchange; or, 6. Each time you redistribute the Program (or any work c) Accompany it with the information you received as to based on the Program), the recipient automatically receives the offer to distribute corresponding source code. (This a license from the original licensor to copy, distribute or alternative is allowed only for noncommercial distribution modify the Program subject to these terms and conditions. and only if you received the program in object code You may not impose any further restrictions on the recipients’ or executable form with such an offer, in accord with exercise of the rights granted herein. You are not responsible Subsection b above.) for enforcing compliance by third parties to this License. The source code for a work means the preferred form of the work for making modifications to it. For an executable work, complete source code means all the source code for all modules it contains, plus any associated interface definition files, plus the scripts used to control compilation and installation of the executable. However, as a special exception, the source code distributed need not include anything that is normally distributed (in either source or binary form) with the major components (compiler, kernel, and so on) of the operating system on which the executable runs, unless that component itself accompanies the executable. 7. If, as a consequence of a court judgment or allegation of patent infringement or for any other reason (not limited to patent issues), conditions are imposed on you (whether by court order, agreement or otherwise) that contradict the conditions of this License, they do not excuse you from the conditions of this License. If you cannot distribute so as to satisfy simultaneously your obligations under this License and any other pertinent obligations, then as a consequence you may not distribute the Program at all. For example, if a patent license would not permit royalty-free redistribution of the Program by all those who receive copies directly or indirectly through you, then the only way you could satisfy If distribution of executable or object code is made by offering both it and this License would be to refrain entirely from access to copy from a designated place, then offering distribution of the Program. equivalent access to copy the source code from the same place counts as distribution of the source code, even though If any portion of this section is held invalid or unenforceable third parties are not compelled to copy the source along with under any particular circumstance, the balance of the section is intended to apply and the section as a whole is the object code. intended to apply in other circumstances. 4. You may not copy, modify, sublicense, or distribute the Program except as expressly provided under this License. Any It is not the purpose of this section to induce you to infringe any attempt otherwise to copy, modify, sublicense or distribute the patents or other property right claims or to contest validity of Program is void, and will automatically terminate your rights any such claims; this section has the sole purpose of protecting under this License. However, parties who have received copies, the integrity of the free software distribution system, which is or rights, from you under this License will not have their licenses implemented by public license practices. Many people have made generous contributions to the wide range of software distributed through that system in reliance on consistent application of that system; it is up to the author/donor to decide if he or she is willing to distribute software through any other system and a licensee cannot impose that choice. This section is intended to make thoroughly clear what is believed to be a consequence of the rest of this License. 8. If the distribution and/or use of the Program is restricted in certain countries either by patents or by copyrighted interfaces, the original copyright holder who places the Program under this License may add an explicit geographical distribution limitation excluding those countries, so that distribution is permitted only in or among countries not thus excluded. In such case, this License incorporates the limitation as if written in the body of this License. 9. The Free Software Foundation may publish revised and/or new versions of the General Public License from time to time. Such new versions will be similar in spirit to the present version, but may differ in detail to address new problems or concerns. Each version is given a distinguishing version number. If the Program specifies a version number of this License which applies to it and “any later version”, you have the option of following the terms and conditions either of that version or of any later version published by the Free Software Foundation. If the Program does not specify a version number of this License, you may choose any version ever published by the Free Software Foundation. 10. If you wish to incorporate parts of the Program into other free programs whose distribution conditions are different, write to the author to ask for permission. For software which is copyrighted by the Free Software Foundation, write to the Free Software Foundation; we sometimes make exceptions for this. Our decision will be guided by the two goals of preserving the free status of all derivatives of our free software and of promoting the sharing and reuse of software generally. NO WARRANTY 11. BECAUSE THE PROGRAM IS LICENSED FREE OF CHARGE, THERE IS NO WARRANTY FOR THE PROGRAM, TO THE EXTENT PERMITTED BY APPLICABLE LAW. EXCEPT WHEN OTHERWISE STATED IN WRITING THE COPYRIGHT HOLDERS AND/OR OTHER PARTIES PROVIDE THE PROGRAM “AS IS” WITHOUT WARRANTY OF ANY KIND, EITHER EXPRESSED OR IMPLIED, INCLUDING, BUT NOT LIMITED TO, THE IMPLIED WARRANTIES OF MERCHANTABILITY AND FITNESS FOR A PARTICULAR PURPOSE. THE ENTIRE RISK AS TO THE QUALITY AND PERFORMANCE OF THE PROGRAM IS WITH YOU. SHOULD THE PROGRAM PROVE DEFECTIVE, YOU ASSUME THE COST OF ALL NECESSARY SERVICING, REPAIR OR CORRECTION. 12. IN NO EVENT UNLESS REQUIRED BY APPLICABLE LAW OR AGREED TO IN WRITING WILL ANY COPYRIGHT HOLDER, OR ANY OTHER PARTY WHO MAY MODIFY AND/OR REDISTRIBUTE THE PROGRAM AS PERMITTED ABOVE, BE LIABLE TO YOU FOR DAMAGES, INCLUDING ANY GENERAL, SPECIAL, INCIDENTAL OR CONSEQUENTIAL DAMAGES ARISING OUT OF THE USE OR INABILITY TO USE THE PROGRAM (INCLUDING BUT NOT LIMITED TO LOSS OF DATA OR DATA BEING RENDERED INACCURATE OR LOSSES SUSTAINED BY YOU OR THIRD PARTIES OR A FAILURE OF THE PROGRAM TO OPERATE WITH ANY OTHER PROGRAMS), EVEN IF SUCH HOLDER OR OTHER PARTY HAS BEEN ADVISED OF THE POSSIBILITY OF SUCH DAMAGES. END OF TERMS AND CONDITIONS How to Apply These Terms to Your New Programs If you develop a new program, and you want it to be of the greatest possible use to the public, the best way to achieve this is to make it free software which everyone can redistribute and change under these terms. To do so, attach the following notices to the program. It is safest to attach them to the start of each source file to most effectively convey the exclusion of warranty; and each file should have at least the “copyright” line and a pointer to where the full notice is found. one line to give the program’s name and an idea of what it does. Copyright (C) yyyy name of author This program is free software; you can redistribute it and/ or modify it under the terms of the GNU General Public License as published by the Free Software Foundation; either version 2 of the License, or (at your option) any later version. subroutine library, you may consider it more useful to permit linking proprietary applications with the library. If this is what you want to do, use the GNU Lesser General Public License instead of this License. This program is distributed in the hope that it will be GNU LESSER GENERAL PUBLIC LICENSE useful, but WITHOUT ANY WARRANTY; without Version 2.1, February 1999 even the implied warranty of MERCHANTABILITY or Copyright (C) 1991, 1999 Free Software Foundation, Inc. FITNESS FOR A PARTICULAR PURPOSE. See the 51 Franklin Street, Fifth Floor, Boston, MA 02110-1301 USA GNU General Public License for more details. Everyone is permitted to copy and distribute verbatim copies You should have received a copy of the GNU General of this license document, but changing it is not allowed. Public License along with this program; if not, write to the Free Software Foundation, Inc., 51 Franklin Street, Fifth Floor, Boston, MA 02110-1301, USA. [This is the first released version of the Lesser GPL. It Also add information on how to contact you by electronic also counts as the successor of the GNU Library Public License, version 2, hence the version number 2.1.] and paper mail. If the program is interactive, make it output a short notice like this when it starts in an interactive mode: Preamble Gnomovision version 69, Copyright (C) year name of author The licenses for most software are designed to take away Gnomovision comes with ABSOLUTELY NO WARRANTY; your freedom to share and change it. By contrast, the GNU for details type `show w’. This is free software, and you General Public Licenses are intended to guarantee your are welcome to redistribute it under certain conditions; freedom to share and change free software--to make sure type `show c’ for details. the software is free for all its users. The hypothetical commands `show w’ and `show c’ should show the appropriate parts of the General Public License. Of course, the commands you use may be called something other than `show w’ and `show c’; they could even be mouse-clicks or menu items--whatever suits your program. This license, the Lesser General Public License, applies to some specially designated software packages--typically libraries--of the Free Software Foundation and other authors who decide to use it. You can use it too, but we suggest you first think carefully about whether this license or the ordinary You should also get your employer (if you work as a programmer) General Public License is the better strategy to use in any or your school, if any, to sign a “copyright disclaimer” for the particular case, based on the explanations below. program, if necessary. Here is a sample; alter the names: When we speak of free software, we are referring to freedom Yoyodyne, Inc., hereby disclaims all copyright interest in the program `Gnomovision’ (which makes passes at compilers) written by James Hacker. signature of Ty Coon, 1 April 1989 Ty Coon, President of Vice of use, not price. Our General Public Licenses are designed to make sure that you have the freedom to distribute copies of free software (and charge for this service if you wish); that you receive source code or can get it if you want it; that you can change the software and use pieces of it in new free programs; and that you are informed that you can do these things. This General Public License does not permit incorporating To protect your rights, we need to make restrictions that your program into proprietary programs. If your program is a forbid distributors to deny you these rights or to ask you to surrender these rights. These restrictions translate to certain We call this license the “Lesser” General Public License responsibilities for you if you distribute copies of the library because it does Less to protect the user’s freedom than the or if you modify it. ordinary General Public License. It also provides other free For example, if you distribute copies of the library, whether software developers Less of an advantage over competing gratis or for a fee, you must give the recipients all the rights non-free programs. These disadvantages are the reason we that we gave you. You must make sure that they, too, use the ordinary General Public License for many libraries. receive or can get the source code. If you link other code However, the Lesser license provides advantages in certain with the library, you must provide complete object files to the special circumstances. recipients, so that they can relink them with the library after For example, on rare occasions, there may be a special need making changes to the library and recompiling it. And you to encourage the widest possible use of a certain library, so that it becomes a de-facto standard. To achieve this, nonmust show them these terms so they know their rights. We protect your rights with a two-step method: (1) we copyright free programs must be allowed to use the library. A more the library, and (2) we offer you this license, which gives you frequent case is that a free library does the same job as legal permission to copy, distribute and/or modify the library. widely used non-free libraries. In this case, there is little to gain by limiting the free library to free software only, so we To protect each distributor, we want to make it very clear that use the Lesser General Public License. there is no warranty for the free library. Also, if the library is modified by someone else and passed on, the recipients In other cases, permission to use a particular library in nonshould know that what they have is not the original version, free programs enables a greater number of people to use a so that the original author’s reputation will not be affected by large body of free software. For example, permission to use the GNU C Library in non-free programs enables many more problems that might be introduced by others. people to use the whole GNU operating system, as well as Finally, software patents pose a constant threat to the existence its variant, the GNU/Linux operating system. of any free program. We wish to make sure that a company Although the Lesser General Public License is Less cannot effectively restrict the users of a free program by protective of the users’ freedom, it does ensure that the user obtaining a restrictive license from a patent holder. Therefore, of a program that is linked with the Library has the freedom we insist that any patent license obtained for a version of the and the wherewithal to run that program using a modified library must be consistent with the full freedom of use specified version of the Library. in this license. The precise terms and conditions for copying, distribution and Most GNU software, including some libraries, is covered by the modification follow. Pay close attention to the difference between ordinary GNU General Public License. This license, the GNU a “work based on the library” and a “work that uses the library”. Lesser General Public License, applies to certain designated The former contains code derived from the library, whereas the libraries, and is quite different from the ordinary General Public latter must be combined with the library in order to run. License. We use this license for certain libraries in order to permit linking those libraries into non-free programs. TERMS AND CONDITIONS FOR COPYING, DISTRIBUTION AND MODIFICATION When a program is linked with a library, whether statically or using a shared library, the combination of the two is legally 0. This License Agreement applies to any software library or speaking a combined work, a derivative of the original library. other program which contains a notice placed by the copyright The ordinary General Public License therefore permits holder or other authorized party saying it may be distributed such linking only if the entire combination fits its criteria of under the terms of this Lesser General Public License (also freedom. The Lesser General Public License permits more called “this License”). Each licensee is addressed as “you”. lax criteria for linking other code with the library. A “library” means a collection of software functions and/ or data prepared so as to be conveniently linked with application programs (which use some of those functions and data) to form executables. The “Library”, below, refers to any such software library or work which has been distributed under these terms. A “work based on the Library” means either the Library or any derivative work under copyright law: that is to say, a work containing the Library or a portion of it, either verbatim or with modifications and/or translated straightforwardly into another language. (Hereinafter, translation is included without limitation in the term “modification”.) “Source code” for a work means the preferred form of the work for making modifications to it. For a library, complete source code means all the source code for all modules it contains, plus any associated interface definition files, plus the scripts used to control compilation and installation of the library. a) The modified work must itself be a software library. •b) You must cause the files modified to carry prominent notices stating that you changed the files and the date of any change. c) You must cause the whole of the work to be licensed at no charge to all third parties under the terms of this License. d) If a facility in the modified Library refers to a function or a table of data to be supplied by an application program that uses the facility, other than as an argument passed when the facility is invoked, then you must make a good faith effort to ensure that, in the event an application does not supply such function or table, the facility still operates, and performs whatever part of its purpose remains meaningful. (For example, a function in a library to compute square roots Activities other than copying, distribution and modification are has a purpose that is entirely well-defined independent of not covered by this License; they are outside its scope. The the application. Therefore, Subsection 2d requires that any act of running a program using the Library is not restricted, application-supplied function or table used by this function and output from such a program is covered only if its contents must be optional: if the application does not supply it, the constitute a work based on the Library (independent of the square root function must still compute square roots.) use of the Library in a tool for writing it). Whether that is true depends on what the Library does and what the program that These requirements apply to the modified work as a whole. If uses the Library does. identifiable sections of that work are not derived from the Library, 1. You may copy and distribute verbatim copies of the Library’s and can be reasonably considered independent and separate complete source code as you receive it, in any medium, works in themselves, then this License, and its terms, do not provided that you conspicuously and appropriately publish on apply to those sections when you distribute them as separate each copy an appropriate copyright notice and disclaimer of works. But when you distribute the same sections as part of warranty; keep intact all the notices that refer to this License a whole which is a work based on the Library, the distribution and to the absence of any warranty; and distribute a copy of of the whole must be on the terms of this License, whose permissions for other licensees extend to the entire whole, and this License along with the Library. thus to each and every part regardless of who wrote it. You may charge a fee for the physical act of transferring a copy, and you may at your option offer warranty protection in Thus, it is not the intent of this section to claim rights or contest your rights to work written entirely by you; rather, exchange for a fee. the intent is to exercise the right to control the distribution of 2. You may modify your copy or copies of the Library or any derivative or collective works based on the Library. portion of it, thus forming a work based on the Library, and copy and distribute such modifications or work under the In addition, mere aggregation of another work not based terms of Section 1 above, provided that you also meet all on the Library with the Library (or with a work based on the Library) on a volume of a storage or distribution medium does of these conditions: not bring the other work under the scope of this License. 3. You may opt to apply the terms of the ordinary GNU General Public License instead of this License to a given copy of the Library. To do this, you must alter all the notices that refer to this License, so that they refer to the ordinary GNU General Public License, version 2, instead of to this License. (If a newer version than version 2 of the ordinary GNU General Public License has appeared, then you can specify that version instead if you wish.) Do not make any other change in these notices. header file that is part of the Library, the object code for the work may be a derivative work of the Library even though the source code is not. Whether this is true is especially significant if the work can be linked without the Library, or if the work is itself a library. The threshold for this to be true is not precisely defined by law. If such an object file uses only numerical parameters, data structure layouts and accessors, and small macros and small inline functions (ten lines or less in length), then the use of the Once this change is made in a given copy, it is irreversible object file is unrestricted, regardless of whether it is legally a for that copy, so the ordinary GNU General Public License derivative work. (Executables containing this object code plus applies to all subsequent copies and derivative works made portions of the Library will still fall under Section 6.) from that copy. Otherwise, if the work is a derivative of the Library, you may This option is useful when you wish to copy part of the code distribute the object code for the work under the terms of of the Library into a program that is not a library. Section 6. Any executables containing that work also fall 4. You may copy and distribute the Library (or a portion or under Section 6, whether or not they are linked directly with derivative of it, under Section 2) in object code or executable the Library itself. 6. As an exception to the Sections above, you may also combine or link a “work that uses the Library” with the Library to produce a work containing portions of the Library, and distribute that work under terms of your choice, provided that the terms permit modification of the work for the customer’s If distribution of object code is made by offering access to own use and reverse engineering for debugging such copy from a designated place, then offering equivalent access modifications. to copy the source code from the same place satisfies the You must give prominent notice with each copy of the work requirement to distribute the source code, even though third that the Library is used in it and that the Library and its use parties are not compelled to copy the source along with the are covered by this License. You must supply a copy of this object code. License. If the work during execution displays copyright 5. A program that contains no derivative of any portion of notices, you must include the copyright notice for the Library the Library, but is designed to work with the Library by being among them, as well as a reference directing the user to the compiled or linked with it, is called a “work that uses the Library”. copy of this License. Also, you must do one of these things: form under the terms of Sections 1 and 2 above provided that you accompany it with the complete corresponding machinereadable source code, which must be distributed under the terms of Sections 1 and 2 above on a medium customarily used for software interchange. Such a work, in isolation, is not a derivative work of the Library, and therefore falls outside the scope of this License. However, linking a “work that uses the Library” with the Library creates an executable that is a derivative of the Library (because it contains portions of the Library), rather than a “work that uses the library”. The executable is therefore covered by this License. Section 6 states terms for distribution of such executables. When a “work that uses the Library” uses material from a a) Accompany the work with the complete corresponding machine-readable source code for the Library including whatever changes were used in the work (which must be distributed under Sections 1 and 2 above); and, if the work is an executable linked with the Library, with the complete machine-readable “work that uses the Library”, as object code and/or source code, so that the user can modify the Library and then relink to produce a modified executable containing the modified Library. (It is understood that the user who changes the contents of a) Accompany the combined library with a copy of the same definitions files in the Library will not necessarily be able to work based on the Library, uncombined with any other recompile the application to use the modified definitions.) library facilities. This must be distributed under the terms of the Sections above. b) Use a suitable shared library mechanism for linking with b) Give prominent notice with the combined library of the the Library. A suitable mechanism is one that (1) uses at fact that part of it is a work based on the Library, and run time a copy of the library already present on the user’s explaining where to find the accompanying uncombined computer system, rather than copying library functions form of the same work. into the executable, and (2) will operate properly with a modified version of the library, if the user installs one, as 8. You may not copy, modify, sublicense, link with, or distribute long as the modified version is interface-compatible with the Library except as expressly provided under this License. the version that the work was made with. Any attempt otherwise to copy, modify, sublicense, link c) Accompany the work with a written offer, valid for at least three years, to give the same user the materials specified in Subsection 6a, above, for a charge no more than the cost of performing this distribution. d) If distribution of the work is made by offering access to copy from a designated place, offer equivalent access to copy the above specified materials from the same place. e) Verify that the user has already received a copy of these materials or that you have already sent this user a copy. with, or distribute the Library is void, and will automatically terminate your rights under this License. However, parties who have received copies, or rights, from you under this License will not have their licenses terminated so long as such parties remain in full compliance. 9. You are not required to accept this License, since you have not signed it. However, nothing else grants you permission to modify or distribute the Library or its derivative works. These actions are prohibited by law if you do not accept this License. Therefore, by modifying or distributing the Library (or any work For an executable, the required form of the “work that uses the based on the Library), you indicate your acceptance of this Library” must include any data and utility programs needed License to do so, and all its terms and conditions for copying, for reproducing the executable from it. However, as a special distributing or modifying the Library or works based on it. exception, the materials to be distributed need not include anything that is normally distributed (in either source or binary 10. Each time you redistribute the Library (or any work form) with the major components (compiler, kernel, and so based on the Library), the recipient automatically receives a on) of the operating system on which the executable runs, license from the original licensor to copy, distribute, link with or modify the Library subject to these terms and conditions. unless that component itself accompanies the executable. You may not impose any further restrictions on the recipients’ It may happen that this requirement contradicts the license exercise of the rights granted herein. You are not responsible restrictions of other proprietary libraries that do not normally for enforcing compliance by third parties with this License. accompany the operating system. Such a contradiction means you cannot use both them and the Library together in 11. If, as a consequence of a court judgment or allegation of patent infringement or for any other reason (not limited to patent an executable that you distribute. issues), conditions are imposed on you (whether by court order, 7. You may place library facilities that are a work based on agreement or otherwise) that contradict the conditions of this the Library side-by-side in a single library together with other License, they do not excuse you from the conditions of this library facilities not covered by this License, and distribute such License. If you cannot distribute so as to satisfy simultaneously a combined library, provided that the separate distribution of the your obligations under this License and any other pertinent work based on the Library and of the other library facilities is obligations, then as a consequence you may not distribute the otherwise permitted, and provided that you do these two things: Library at all. For example, if a patent license would not permit royalty-free redistribution of the Library by all those who receive copies directly or indirectly through you, then the only way you could satisfy both it and this License would be to refrain entirely from distribution of the Library. 14. If you wish to incorporate parts of the Library into other free programs whose distribution conditions are incompatible with these, write to the author to ask for permission. For software which is copyrighted by the Free Software Foundation, write to If any portion of this section is held invalid or unenforceable the Free Software Foundation; we sometimes make exceptions under any particular circumstance, the balance of the section for this. Our decision will be guided by the two goals of is intended to apply, and the section as a whole is intended to preserving the free status of all derivatives of our free software and of promoting the sharing and reuse of software generally. apply in other circumstances. NO WARRANTY It is not the purpose of this section to induce you to infringe any patents or other property right claims or to contest validity of 15. BECAUSE THE LIBRARY IS LICENSED FREE OF any such claims; this section has the sole purpose of protecting CHARGE, THERE IS NO WARRANTY FOR THE LIBRARY, TO the integrity of the free software distribution system which is THE EXTENT PERMITTED BY APPLICABLE LAW. EXCEPT implemented by public license practices. Many people have WHEN OTHERWISE STATED IN WRITING THE COPYRIGHT made generous contributions to the wide range of software HOLDERS AND/OR OTHER PARTIES PROVIDE THE LIBRARY distributed through that system in reliance on consistent “AS IS” WITHOUT WARRANTY OF ANY KIND, EITHER application of that system; it is up to the author/donor to decide EXPRESSED OR IMPLIED, INCLUDING, BUT NOT LIMITED if he or she is willing to distribute software through any other TO, THE IMPLIED WARRANTIES OF MERCHANTABILITY AND FITNESS FOR A PARTICULAR PURPOSE. THE ENTIRE system and a licensee cannot impose that choice. RISK AS TO THE QUALITY AND PERFORMANCE OF THE This section is intended to make thoroughly clear what is LIBRARY IS WITH YOU. SHOULD THE LIBRARY PROVE believed to be a consequence of the rest of this License. DEFECTIVE, YOU ASSUME THE COST OF ALL NECESSARY 12. If the distribution and/or use of the Library is restricted in SERVICING, REPAIR OR CORRECTION. certain countries either by patents or by copyrighted interfaces, 16. IN NO EVENT UNLESS REQUIRED BY APPLICABLE the original copyright holder who places the Library under this LAW OR AGREED TO IN WRITING WILL ANY COPYRIGHT License may add an explicit geographical distribution limitation HOLDER, OR ANY OTHER PARTY WHO MAY MODIFY AND/ excluding those countries, so that distribution is permitted only OR REDISTRIBUTE THE LIBRARY AS PERMITTED ABOVE, in or among countries not thus excluded. In such case, this BE LIABLE TO YOU FOR DAMAGES, INCLUDING ANY License incorporates the limitation as if written in the body of GENERAL, SPECIAL, INCIDENTAL OR CONSEQUENTIAL this License. DAMAGES ARISING OUT OF THE USE OR INABILITY TO USE THE LIBRARY (INCLUDING BUT NOT LIMITED TO LOSS OF DATA OR DATA BEING RENDERED INACCURATE OR LOSSES SUSTAINED BY YOU OR THIRD PARTIES OR A FAILURE OF THE LIBRARY TO OPERATE WITH ANY OTHER SOFTWARE), EVEN IF SUCH HOLDER OR OTHER PARTY HAS BEEN ADVISED OF THE POSSIBILITY OF Each version is given a distinguishing version number. If the SUCH DAMAGES. Library specifies a version number of this License which applies to it and “any later version”, you have the option of following the END OF TERMS AND CONDITIONS terms and conditions either of that version or of any later version published by the Free Software Foundation. If the Library does How to Apply These Terms to Your New Libraries not specify a license version number, you may choose any If you develop a new library, and you want it to be of the version ever published by the Free Software Foundation. greatest possible use to the public, we recommend making 13. The Free Software Foundation may publish revised and/ or new versions of the Lesser General Public License from time to time. Such new versions will be similar in spirit to the present version, but may differ in detail to address new problems or concerns. it free software that everyone can redistribute and change. You can do so by permitting redistribution under these terms (or, alternatively, under the terms of the ordinary General Public License). To apply these terms, attach the following notices to the library. It is safest to attach them to the start of each source file to most effectively convey the exclusion of warranty; and each file should have at least the “copyright” line and a pointer to where the full notice is found. one line to give the library’s name and an idea of what it does. Copyright (C) year name of author This library is free software; you can redistribute it and/or modify it under the terms of the GNU Lesser General Public License as published by the Free Software Foundation; either version 2.1 of the License, or (at your option) any later version. This library is distributed in the hope that it will be useful, but WITHOUT ANY WARRANTY; without even the implied warranty of MERCHANTABILITY or FITNESS FOR A PARTICULAR PURPOSE. See the GNU Lesser General Public License for more details. You should have received a copy of the GNU Lesser General Public License along with this library; if not, write to the Free Software Foundation, Inc., 51 Franklin Street, Fifth Floor, Boston, MA 02110-1301 USA Also add information on how to contact you by electronic and paper mail. You should also get your employer (if you work as a programmer) or your school, if any, to sign a “copyright disclaimer” for the library, if necessary. Here is a sample; alter the names: Yoyodyne, Inc., hereby disclaims all copyright interest in the library `Frob’ (a library for tweaking knobs) written by James Random Hacker. signature of Ty Coon, 1 April 1990 Ty Coon, President of Vice Se tem algumas dúvidas ou comentários sobre os produtos Samsung, contacte por favor a nossa linha de apoio a clientes Samsung. SAMSUNG ELECTRONICA PORTUGUESA, S.A 80820-SAMSUNG(726-7864) www.samsung.com/pt REV.0.0