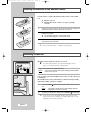
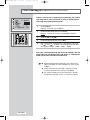
1
rubens_monitor_eng 1/28/03 8:40 PM Page 1 LCD MONITOR SyncMaster 211MP SyncMaster 241MP Owner’s Instructions Before operating the unit, please read this manual thoroughly, and retain it for future reference. ON-SCREEN MENUS PC DISPLAY PICTURE IN PICTURE (PIP) PICTURE BY PICTURE (PBP) TELETEXT rubens_monitor_eng.qxd 2/11/03 6:29 AM Page 2 Caution The lightning flash and arrow head within the triangle is a warning sign alerting you of “dangerous voltage” inside the product. CAUTION RISK OF ELECTRIC SHOCK DO NOT OPEN CAUTION: TO PREVENT ELECTRICAL SHOCK, DO NOT REMOVE REAR COVER, NO USER SERVICEABLE PARTS INSIDE. REFER SERVICING TO QUALIFIED SERVICE PERSONNEL. The exclamation point within the triangle is a warning sign alerting you of important instructions accompanying the product. WARNING: TO PREVENT DAMAGE WHICH MAY RESULT IN FIRE OR SHOCK HAZARD, DO NOT EXPOSE THIS APPLIANCE TO RAIN OR MOISTURE. ☛ The main voltage is indicated on the rear of your set and the frequency is 50 or 60 Hz. Information in this document is subject to change without notice. © 2003 Samsung Electronics Co., Ltd. All rights reserved. Reproduction in any manner whatsoever without the written permission of Samsung Electronics Co., Ltd. is strictly forbidden. Samsung Electronics Co., Ltd. shall not be liable for errors contained herein or for incidental or consequential damages in connection with the furnishing, performance, or use of this material. The Samsung logo is the registered trademarks of Samsung Electronics Co., Ltd.; Microsoft, Windows® and Windows® NT are registered trademark of Microsoft Corporation; VESA, DPMS and DDC are registered trademarks of Video Electronics Standard Association. All other product names mentioned herein may be the trademarks or registered trademarks of their respective owners. Plug and Play The adoption of the new VESA® Plug and Play solution eliminates complicated and time consuming setup. It allows you to install your set in a Plug and Play compatible system without the usual hassles and confusion. Your computer system can easily identify and configure itself for use with your set. Your set automatically tells the computer system its Extended Display Identification Data (EDID) using Display Data Channel (DDC) protocols so the computer system can automatically configure itself to use your set. If your PC system needs a monitor driver, install monitor driver contained on the accompanied CD according to the operating system your computer uses. For more information, refer to the driver installation instructions included with your CD package. PowerSaver This set is EPA ENERGY STAR® compliant and NUTEK compliant when used with a computer equipped with VESA DPMS functionality. For energy conservation, turn your set Off when you are not using it or when leaving it unattended for long periods. EUROPEAN NOTICE Products with the CE Marking comply with the EMC Directive (89/336/EEC), (92/31/EEC), (93/68/EEC) and the Low Voltage Directive (73/23/EEC) issued by the Commission of the European Community. Compliance with these directives implies conformity to the following European Norms: ■ ■ ■ ■ ■ ■ ■ English-2 EN55022:1998+A1:2000 – Radio Frequency Interference EN55024:1998 – Electromagnetic Immunity EN55013:1990+A12:1994+A13:1996+A14:1999 – Radio Frequency Interference EN55020:1994+A11:1996+A12/A13/A14:1999 – Electromagnetic Immunity EN61000-3-2:1995+A1/A2 :1998 – Power Line Harmonics EN61000-3-3:1995 – Voltage Fluctuations EN60065:1997 or EN60095:1998 – Product Safety. rubens_monitor_eng 1/28/03 8:40 PM Page 3 Safety Instructions These illustrations represent precautions concerning your TV. 10% 75% 40° H H 5° œ Do NOT expose the TV to extreme temperature conditions or to extreme humidity conditions. Do NOT expose the TV to direct sunlight. √ œ Do NOT expose the TV to any liquids. If the TV is broken, do not try to √ repair it yourself. Contact qualified service personnel. œ During a storm conditions (especially when there is lightning) unplug the TV from the mains socket and aerial. Keep all power adaptors apart. √ Possible fire hazard. œ Always keep the power adaptor in a well-ventilated area. Remove and discard the plastic √ cover from the power adaptor before use. Possible fire hazard. œ Keep the power adaptor away from any other heater. Possible fire hazard. If the remote control is not used for a √ long period of time, remove the batteries and store it in a cool, dry place. @@@@@@@@e? @@@@@@@@e?@@@@@@@@?e@@@@@@@@e?@@@@@@@@?e@@@@@@@@e?@@@@@@@@?e@@@@@@@@e?@@@@@@@@?e@@@@@@@@e?@@@@@@@@?e@@@@@@@@e?@@@@@@@@?e@@@@@@@@e?@@@@@@@@?e@@@@@@@@e?@@@@@@@@?e@@@@@@@@e?@@@@@@@@?e@@@@@@@@e?@@@@@@@@?e@@@@@@@@e?@@@@@@@@?e@@@@@@@@e?@@@@@@@@?e@@@@@@@@e?@@@@@@@@?e@@@@@@@@e?@@@@@@@@?e@@@@@@@@e?@@@@@@@@?e@@@@@@@@e?@@@@@@@@?e@@@@@@@@e?@@@@@@@@?e@@@@@@@@e?@@@@@@@@?e@@@@@@@@e?@@@@@@@@?e@@@@@@@@e?@@@@@@@@?e@@@@@@@@e?@@@@@@@@?e @@@@@@@@e? @@@@@@@@e?@@@@@@@@?e@@@@@@@@e?@@@@@@@@?e@@@@@@@@e?@@@@@@@@?e@@@@@@@@e?@@@@@@@@?e@@@@@@@@e?@@@@@@@@?e@@@@@@@@e?@@@@@@@@?e@@@@@@@@e?@@@@@@@@?e@@@@@@@@e?@@@@@@@@?e@@@@@@@@e?@@@@@@@@?e@@@@@@@@e?@@@@@@@@?e@@@@@@@@e?@@@@@@@@?e@@@@@@@@e?@@@@@@@@?e@@@@@@@@e?@@@@@@@@?e@@@@@@@@e?@@@@@@@@?e@@@@@@@@e?@@@@@@@@?e@@@@@@@@e?@@@@@@@@?e@@@@@@@@e?@@@@@@@@?e@@@@@@@@e?@@@@@@@@?e@@@@@@@@e?@@@@@@@@?e@@@@@@@@e?@@@@@@@@?e@@@@@@@@e?@@@@@@@@?e@@@@@@@@ @@@@@@@@ @@h? @@ @@h? @@ @@h? @@ @@h? @@ @@h? @@ @@h? @@ @@ @@ @@ @@ @@ @@ @@ @@ @@ @@ @@ @@ @@ @@ @@ @@ @@g @@g @@g @@g @@g @@g @@@@@@@@ @@@@@@@@ THIS DEVICE IS NOT FOR USE IN INDUSTRIAL ENVIRONMENTS @@ @@ @@ @@ @@ @@ @@ @@ @@ @@ @@ @@ @@ @@ @@ @@ ?@@ ?@@ ?@@ ?@@ ?@@ ?@@ ?@@@@@@@@?e@@@@@@@@e?@@@@@@@@?e@@@@@@@@e?@@@@@@@@?e@@@@@@@@e?@@@@@@@@?e@@@@@@@@e?@@@@@@@@?e@@@@@@@@e?@@@@@@@@?e@@@@@@@@e?@@@@@@@@?e@@@@@@@@e?@@@@@@@@?e@@@@@@@@e?@@@@@@@@?e@@@@@@@@e?@@@@@@@@?e@@@@@@@@e?@@@@@@@@?e@@@@@@@@e?@@@@@@@@?e@@@@@@@@e?@@@@@@@@?e@@@@@@@@e?@@@@@@@@?e@@@@@@@@e?@@@@@@@@?e@@@@@@@@e?@@@@@@@@?e@@@@@@@@e?@@@@@@@@?e@@@@@@@@e?@@@@@@@@?e@@@@@@@@e?@@@@@@@@?e@@@@@@@@e?@@@@@@@@?e@@@@@@@@e?@@@@@@@@?e@@@@@@@@ ?@@@@@@@@?e@@@@@@@@e?@@@@@@@@?e@@@@@@@@e?@@@@@@@@?e@@@@@@@@e?@@@@@@@@?e@@@@@@@@e?@@@@@@@@?e@@@@@@@@e?@@@@@@@@?e@@@@@@@@e?@@@@@@@@?e@@@@@@@@e?@@@@@@@@?e@@@@@@@@e?@@@@@@@@?e@@@@@@@@e?@@@@@@@@?e@@@@@@@@e?@@@@@@@@?e@@@@@@@@e?@@@@@@@@?e@@@@@@@@e?@@@@@@@@?e@@@@@@@@e?@@@@@@@@?e@@@@@@@@e?@@@@@@@@?e@@@@@@@@e?@@@@@@@@?e@@@@@@@@e?@@@@@@@@?e@@@@@@@@e?@@@@@@@@?e@@@@@@@@e?@@@@@@@@?e@@@@@@@@e?@@@@@@@@?e@@@@@@@@e?@@@@@@@@?e@@@@@@@@ ?@@@@@@@@ ?@@@@@@@@ English-3 rubens_monitor_eng 1/28/03 8:40 PM Page 4 Contents ◆ FOREWORD ■ ■ Caution ......................................................................................................... Safety Instructions .......................................................................................... 2 3 ◆ CONNECTING AND PREPARING YOUR TV/Monitor ■ ■ ■ ■ ■ ■ ■ ■ ■ ■ Viewing the Control Panel.............................................................................. Installing on the Wall ..................................................................................... Viewing the Connection Panel ....................................................................... - Connecting an Aerial or Cable Television Network..................................... - Connecting Computer................................................................................. - Connecting DTV Set-Top Box, VCR, or DVD .............................................. - Connecting External A/V Devices ............................................................... - Connecting External Speakers ..................................................................... - Connecting Speakers................................................................................... Viewing Pictures From External Sources ......................................................... Viewing the Remote Control (All Functions Except Teletext)........................... Viewing the Remote Control (Teletext Functions) ........................................... Inserting the Batteries in the Remote Control.................................................. Switching On and Off .................................................................................... Becoming Familiar with the Remote Control.................................................. Choosing Your Language ................................................................................ 6 7 8 9 9 10 10 10 10 11 12 13 14 14 15 16 ◆ SETTING THE CHANNELS ■ ■ ■ ■ ■ ■ Storing Channels Automatically...................................................................... Storing Channels Manually............................................................................. Giving Channels Names................................................................................. Skipping Unwanted Channels ........................................................................ Fine Tuning Channel Reception...................................................................... Sorting the Stored Channels ........................................................................... 17 18 19 20 20 21 ◆ USING THE VARIOUS FUNCTIONS ■ ■ ■ ■ ■ ■ ■ English-4 Changing the Picture Standard ....................................................................... Adjusting the Picture Settings ......................................................................... Selecting the Picture Format........................................................................... Freezing the Current Picture........................................................................... Changing the Sound Standard ........................................................................ Adjusting the Sound Settings .......................................................................... Enjoying the Dolby Sound.............................................................................. 22 22 23 23 24 24 25 rubens_monitor_eng 1/28/03 8:40 PM Page 5 Contents ◆ USING THE VARIOUS FUNCTIONS ■ ■ ■ ■ ■ ■ Switching the Internal Speakers On/Off.......................................................... Choosing the MTS (Multichannel Television Stereo) ....................................... Viewing the Picture In Picture (PIP) ................................................................ Viewing the Picture By Picture (PBP; Double Screen)..................................... Switching Off Automatically........................................................................... Displaying Information................................................................................... 25 26 27 28 29 29 ◆ USING THE PC FUNCTIONS ■ ■ ■ ■ ■ ■ ■ ■ Adjusting the Brightness and Contrast ............................................................ Selecting the Image Size................................................................................. Adjusting the Image Quality........................................................................... Changing the Image Position.......................................................................... Adjusting the Color ........................................................................................ Initializing the Image Settings......................................................................... Display Modes ............................................................................................... PowerSaver .................................................................................................... 30 30 31 31 32 32 33 33 ◆ USING THE TELETEXT FEATURE ■ ■ ■ ■ ■ Teletext Feature .............................................................................................. Displaying the Teletext Information ................................................................ Selecting a Page by Number .......................................................................... Using FLOF to Select a Page .......................................................................... Storing Teletext Pages ..................................................................................... 34 34 35 36 36 ◆ RECOMMENDATIONS FOR USE ■ ■ ■ Troubleshooting: Before Contacting Service Personnel ................................... Technical and Environmental Specifications................................................... Wiring the Mains Power Supply Plug (UK Only) ............................................ Symbols Press ☛ ➢ Important Note 37 38 39 English-5 rubens_monitor_eng 1/28/03 8:40 PM Page 6 Viewing the Control Panel @@@@@@@@e? @@@@@@@@e?@@@@@@@@?e@@@@@@@@e?@@@@@@@@?e@@@@@@@@e?@@@@@@@@?e@@@@@@@@e?@@@@@@@@?e@@@@@@@@e?@@@@@@@@?e@@@@@@@@e?@@@@@@@@?e@@@@@@@@e?@@@@@@@@?e@@@@@@@@e?@@@@@@@@?e@@@@@@@@e?@@@@@@@@?e@@@@@@@@e?@@@@@@@@?e@@@@@@@@e?@@@@@@@@?e@@@@@@@@e?@@@@@@@@?e@@@@@@@@e?@@@@@@@@?e@@@@@@@@e?@@@@@@@@?e@@@@@@@@e?@@@@@@@@?e@@@@@@@@e?@@@@@@@@?e@@@@@@@@e?@@@@@@@@?e@@@@@@@@e?@@@@@@@@?e@@@@@@@@e?@@@@@@@@?e@@@@@@@@e?@@@@@@@@?e@@@@@@@@e?@@@@@@@@?e@@@@@@@@e?@@@@@@@@?e@@@@@@@@e?@@@@@@@@?e@@@@@@@@e?@@@@@@@@?e@@@@@@@@e?@@@@@@@@?e@@@@@@@@e?@@@@@@@@?e@@@@@@@@e?@@@@@@@@?e@@@@@@@@e?@@@@@@@@?e@@@@@@@@e?@@@@@@@@?e@@@@@@@@e?@@@@@@@@?e@@@@@@@@e?@@@@@@@@?e@@@@@@@@e?@@@@@@@@?e@@@@@@@@e?@@@@@@@@?e@@@@@@@@e?@@@@@@@@?e@@@@@@@@e?@@@@@@@@?e@@@@@@@@e?@@@@@@@@?e@@@@@@@@e?@@@@@@@@?e@@@@@@@@e?@@@@@@@@? @@@@@@@@e?@@@@@@@@?e@@@@@@@@e?@@@@@@@@?e@@@@@@@@e?@@@@@@@@?e@@@@@@@@e?@@@@@@@@?e@@@@@@@@e?@@@@@@@@?e@@@@@@@@e?@@@@@@@@?e@@@@@@@@e?@@@@@@@@?e@@@@@@@@e?@@@@@@@@?e@@@@@@@@e?@@@@@@@@?e@@@@@@@@e?@@@@@@@@?e@@@@@@@@e?@@@@@@@@?e@@@@@@@@e?@@@@@@@@?e@@@@@@@@e?@@@@@@@@?e@@@@@@@@e?@@@@@@@@?e@@@@@@@@e?@@@@@@@@?e@@@@@@@@e?@@@@@@@@?e@@@@@@@@e?@@@@@@@@?e@@@@@@@@e?@@@@@@@@?e@@@@@@@@e?@@@@@@@@?e@@@@@@@@e?@@@@@@@@?e@@@@@@@@e?@@@@@@@@?e@@@@@@@@e?@@@@@@@@?e@@@@@@@@e?@@@@@@@@?e@@@@@@@@e?@@@@@@@@?e@@@@@@@@e?@@@@@@@@?e@@@@@@@@e?@@@@@@@@?e@@@@@@@@e?@@@@@@@@?e@@@@@@@@e?@@@@@@@@?e@@@@@@@@e?@@@@@@@@?e@@@@@@@@e?@@@@@@@@?e@@@@@@@@e?@@@@@@@@?e@@@@@@@@e?@@@@@@@@?e@@@@@@@@e?@@@@@@@@?e@@@@@@@@e?@@@@@@@@?e@@@@@@@@e?@@@@@@@@?e@@@@@@@@e?@@@@@@@@?e@@@@@@@@e?@@@@@@@@?e@@@@@@@@ @@@@@@@@e?@@@@@@@@?e@@@@@@@@e?@@@@@@@@?e@@@@@@@@e?@@@@@@@@?e@@@@@@@@e?@@@@@@@@?e@@@@@@@@e?@@@@@@@@?e@@@@@@@@e?@@@@@@@@?e@@@@@@@@e?@@@@@@@@?e@@@@@@@@e?@@@@@@@@?e@@@@@@@@e?@@@@@@@@?e@@@@@@@@e?@@@@@@@@?e@@@@@@@@e?@@@@@@@@?e@@@@@@@@e?@@@@@@@@?e@@@@@@@@e?@@@@@@@@?e@@@@@@@@e?@@@@@@@@?e@@@@@@@@e?@@@@@@@@?e@@@@@@@@e?@@@@@@@@?e@@@@@@@@e?@@@@@@@@?e@@@@@@@@e?@@@@@@@@?e@@@@@@@@e?@@@@@@@@?e@@@@@@@@e?@@@@@@@@?e@@@@@@@@e?@@@@@@@@?e@@@@@@@@e?@@@@@@@@?e@@@@@@@@e?@@@@@@@@?e@@@@@@@@e?@@@@@@@@?e@@@@@@@@e?@@@@@@@@?e@@@@@@@@e?@@@@@@@@?e@@@@@@@@e?@@@@@@@@?e@@@@@@@@e?@@@@@@@@?e@@@@@@@@e?@@@@@@@@?e@@@@@@@@e?@@@@@@@@?e@@@@@@@@e?@@@@@@@@?e@@@@@@@@e?@@@@@@@@?e@@@@@@@@e?@@@@@@@@?e@@@@@@@@e?@@@@@@@@?e@@@@@@@@e?@@@@@@@@?e@@@@@@@@e?@@@@@@@@?e@@@@@@@@e?@@@@@@@@?e @@@@@@@@ @@@@@@@@e? @@@@@@@@e?@@@@@@@@?e@@@@@@@@e?@@@@@@@@?e@@@@@@@@e?@@@@@@@@?e@@@@@@@@e?@@@@@@@@?e@@@@@@@@e?@@@@@@@@?e@@@@@@@@e?@@@@@@@@?e@@@@@@@@e?@@@@@@@@?e@@@@@@@@e?@@@@@@@@?e@@@@@@@@e?@@@@@@@@?e@@@@@@@@e?@@@@@@@@?e@@@@@@@@e?@@@@@@@@?e@@@@@@@@e?@@@@@@@@?e@@@@@@@@e?@@@@@@@@?e@@@@@@@@e?@@@@@@@@?e@@@@@@@@e?@@@@@@@@?e@@@@@@@@e?@@@@@@@@?e@@@@@@@@e?@@@@@@@@?e@@@@@@@@e?@@@@@@@@?e@@@@@@@@e?@@@@@@@@?e@@@@@@@@e?@@@@@@@@?e@@@@@@@@e?@@@@@@@@?e@@@@@@@@e?@@@@@@@@?e@@@@@@@@e?@@@@@@@@?e@@@@@@@@e?@@@@@@@@?e@@@@@@@@e?@@@@@@@@?e@@@@@@@@e?@@@@@@@@?e@@@@@@@@e?@@@@@@@@?e@@@@@@@@e?@@@@@@@@?e@@@@@@@@e?@@@@@@@@?e@@@@@@@@e?@@@@@@@@?e@@@@@@@@e?@@@@@@@@?e@@@@@@@@e?@@@@@@@@?e@@@@@@@@e?@@@@@@@@?e@@@@@@@@e?@@@@@@@@?e@@@@@@@@e?@@@@@@@@?e@@@@@@@@e?@@@@@@@@?e@@@@@@@@e?@@@@@@@@?e@@@@@@@@e?@@@@@@@@? @@h? @@ @@h? @@ @@h? @@ @@h? @@ @@h? @@ @@h? @@ @@ @@ @@ @@ @@ @@ @@ @@ @@ @@ @@ @@ @@ @@ @@ @@ @@ @@ @@ @@ @@ @@ @@ @@ @@ @@ @@ @@ @@ @@ @@ @@ @@ @@ @@ @@ @@ @@ @@ @@ @@ @@ @@ @@ @@ @@ @@ @@ @@ @@ @@ @@ @@ @@ @@ @@ @@ @@ @@ @@ @@ @@ @@ @@ @@ @@ @@ @@ @@ @@ @@ @@ @@ @@ @@ @@ @@ @@ @@ @@ @@ @@ @@ @@ @@ @@ @@ @@ @@ @@ @@ @@ @@ @@ @@ @@ @@ @@ @@ @@ @@ @@ @@ @@ @@ @@ @@ @@ @@ @@ @@ @@ @@ @@ @@ @@ @@ @@ @@ @@ @@ @@ @@ @@ @@ @@ @@ @@ @@ @@ @@ @@ @@ @@ @@ @@ @@ @@ @@ @@ @@ @@ @@ @@ @@ @@ @@ @@ @@ @@ @@ @@ @@ @@ @@ @@ @@ @@ @@ @@ @@ @@ @@ @@ @@ @@ @@ @@ @@ @@ @@ @@ @@ @@ @@ @@ @@ @@ @@ @@ @@ @@ @@ @@ @@ @@ @@ @@ @@ @@ @@ @@ @@ @@ @@ @@ @@ @@ @@ @@ @@ @@ @@ @@ @@ @@ @@ @@ @@ @@ @@ @@ @@ @@ @@ @@ @@ @@ @@ @@ @@ @@ @@ @@ @@ @@ @@ @@ @@ @@ @@ @@ @@ @@ @@ @@ @@ @@ @@ @@ @@ @@ @@ @@ @@ @@ @@ @@ @@ @@ @@ @@ @@ @@ @@ @@ @@ @@ @@ @@ @@ @@ @@ @@ @@ @@ @@ @@ @@ @@ @@ @@ @@ @@ @@ @@ @@ @@ @@ @@ @@ @@ @@ @@ @@ @@ @@ @@ @@ @@ @@ @@ @@ @@ @@ @@ @@ @@ @@ @@ @@ @@ @@ @@ @@ @@ @@ @@ @@ @@ @@ @@ @@ @@ @@ @@ @@ @@ @@ @@ @@ @@ @@ @@ @@ @@ @@ @@ @@ @@ @@ @@ @@ @@ @@ @@ @@ @@ @@ @@ @@ @@ @@ @@ @@ @@ @@ @@ @@ @@ @@ @@ @@ @@ @@ @@ @@ @@ @@ @@ @@ @@ @@ @@ @@ @@ @@ @@ @@ @@ @@ @@ @@ @@ @@ @@ @@ @@ @@ @@ @@ @@ @@ @@ @@ @@ @@ @@ @@ @@ @@ @@ @@ @@ @@ @@ @@ @@ @@ @@ @@ @@ @@ @@ @@ @@ @@ @@ @@ @@ @@ @@ @@ @@ @@ @@ @@ @@ @@ @@ @@ @@ @@ @@ @@ @@ @@ @@ @@ @@ @@ @@ @@ @@ @@ @@ @@ @@ @@ @@ @@ @@ @@ @@ @@ @@ @@ @@ @@ @@ @@ @@ @@ @@ @@ @@ @@ @@ @@ @@ @@ @@ @@ @@ @@ @@ @@ @@ @@ @@ @@ @@ @@ @@ @@ @@ @@ @@ @@ @@ @@ @@ @@ @@ @@ @@ @@ @@ @@ @@ @@ @@ @@ @@ @@ @@ @@ @@ @@ @@ @@ @@ @@ @@ @@ @@ @@ @@ @@ @@ @@ @@ @@ @@ @@ @@ @@ @@ @@ @@ @@ @@ @@ @@ @@ @@ @@ @@ @@ @@ @@ @@ @@ @@ @@ @@ @@ @@ @@ @@ @@ @@ @@ @@ @@ @@ @@ @@ @@ @@ @@ @@ @@ @@ @@ @@ @@ @@ @@ @@ @@ @@ @@ @@ @@ @@ @@ @@ @@ @@ @@ @@ @@ @@ @@ @@ @@ @@ @@ @@ @@ @@ @@ @@ @@ @@ @@ @@ @@ @@ @@ @@ @@ @@ @@ @@ @@ @@ @@ @@ @@ @@ @@ @@ @@ @@ @@ @@ @@ @@ @@ @@ @@ @@ @@ @@ @@ @@ @@ @@ @@ @@ @@ @@ @@ @@ @@ @@ @@ @@ @@ @@ @@ @@ @@ @@ @@ @@ @@ @@ @@ @@ @@ @@ @@ @@ @@ @@ @@ @@ @@ @@ @@ @@ @@ @@ @@ @@ @@ @@ @@ @@ @@ @@ @@ @@ @@ @@ @@ @@ @@ @@ @@ @@ @@ @@ @@ @@ @@ @@ @@ @@ @@ @@ @@ @@ @@ @@ @@ @@ @@ @@ @@ @@ @@ @@ @@ @@ @@ @@ @@ @@ @@ @@ @@ @@ @@ @@ @@ @@ @@ @@ @@ @@ @@ @@ @@ @@ @@ @@ @@ @@ @@ @@ @@ @@ @@ @@ @@ @@ @@ @@ @@ @@ @@ @@ @@ @@ @@ @@ @@ @@ @@ @@ @@ @@ @@ @@ @@ @@ @@ @@ @@ @@ @@ @@ @@ @@ @@ @@ @@ @@ @@ @@ @@ @@ @@ @@ @@ @@ @@ @@ @@ @@ @@ @@ @@ @@ @@ @@ @@ @@ @@ @@ @@ @@ @@ @@ @@ @@ @@ @@ @@ @@ @@ @@ @@ @@ @@ @@ @@ @@ @@ @@ @@ @@ @@ @@ @@ @@ @@ @@ @@ @@ @@ @@ @@ @@ @@ @@ @@ @@ @@ @@ @@ @@ @@ @@ @@ @@ @@ @@ @@ @@ @@ @@ @@ @@ @@ @@ @@ @@ @@ @@ @@ @@ @@ @@ @@ @@ @@ @@ @@ @@ @@ @@ @@ @@ @@ @@ @@ @@ @@ @@ @@ @@ @@ @@ @@ @@ @@ @@ @@ @@ @@ @@ @@ @@ @@ @@ @@ @@ @@ @@ @@ @@ @@ @@ @@ @@ @@ @@ @@ @@ @@ @@ @@ @@ @@ @@ @@ @@ @@ @@ @@ @@ @@ @@ @@ @@ @@ @@ @@ @@ @@ @@ @@ @@ @@ @@ @@ @@ @@ @@ @@ @@ @@ @@ @@ @@ @@ @@ @@ @@ @@ @@ @@ @@ @@ @@ @@ @@ @@ @@ @@ @@ @@ @@ @@ @@ @@ @@ @@ @@ @@ @@ @@ @@ @@ @@ @@ @@ @@ @@ @@ @@ @@ @@ @@ @@ @@ @@ @@ @@ @@ @@ @@ @@ @@ @@ @@ @@ @@ @@ @@ @@ @@ @@ @@ @@ @@ @@ @@ @@ @@ @@ @@ @@ @@ @@ @@ @@ @@ @@ @@ @@ @@ @@ @@ @@ @@ @@ @@ @@ @@ @@ @@ @@ @@ @@ @@ @@ @@ @@ @@ @@ @@ @@ @@ @@ @@ @@ @@ @@ @@ @@ @@ @@ @@ @@ @@ @@ @@ @@ @@ @@ @@ @@ @@ @@ @@ @@ @@ @@ @@ @@ @@ @@ @@ @@ @@ @@ @@ @@ @@ @@ @@ @@ @@ @@ @@ @@ @@ @@ @@ @@ @@ @@ @@ @@ @@ @@ @@ @@ @@ @@ @@ @@ @@ @@ @@ @@ @@ @@ @@ @@ @@ @@ @@ @@ @@ @@ @@ @@ @@ @@ @@ @@ @@ @@ @@ @@ @@ @@ @@ @@ @@ @@ @@ @@ @@ @@ @@ @@ @@ @@ @@ @@ @@ @@ @@ @@ @@ @@ @@ @@ @@ @@ @@ @@ @@ @@ @@ @@ Power Indicator @@ @@ @@ @@ @@ @@ @@ @@ @@ @@ @@ @@ @@ @@ @@ @@ @@ @@ @@ @@ @@ @@ @@ @@ @@ @@ @@ @@ @@ @@ @@ @@ @@ @@ @@ @@ @@ @@ @@ @@ @@ @@ @@ @@ @@ @@ @@ @@ @@ @@ @@ @@ @@ @@ @@ @@ @@ @@ @@ @@ @@ @@ @@ @@ @@ @@ @@ @@ @@ @@ @@ @@ @@ @@ @@ @@ @@ @@ @@ @@ @@ @@ @@ @@ @@ @@ @@ @@ @@ @@ @@ @@ @@ @@ @@ @@ @@ @@ @@ @@ @@ @@ @@ @@ @@ @@ @@ @@ @@ @@ @@ @@ @@ @@ @@ @@ @@ @@ @@ @@ @@ @@ @@ @@ @@ @@ @@ @@ @@ @@ @@ @@ @@ @@ @@ @@ @@ @@ @@ @@ @@ @@ @@ @@ @@ @@ @@ @@ @@ @@ @@ @@ @@ @@ @@ @@ @@ @@ @@ @@ Remote Control Sensor @@ @@ @@ @@ @@ @@ @@ @@ @@ @@ @@ @@ @@ @@ @@ @@ @@ @@ @@ @@ @@ @@ @@ @@ @@ @@ @@ @@ @@ @@ @@ @@ @@ @@ @@ @@ @@ @@ @@ @@ @@ @@ @@ @@ @@ @@ @@ @@ @@ @@ @@ @@ @@ @@ @@ @@ @@ @@ @@ @@ @@ @@ @@ @@ @@ @@ @@ @@ @@ @@ @@ @@ @@ @@ @@ @@ @@ @@ @@ @@ @@ @@ @@ @@ @@ @@ @@ @@ @@ @@ @@ @@ @@ @@ @@ @@ @@ @@ @@ @@ @@ @@ @@ @@ @@ @@ @@ @@ @@ @@ @@ @@ @@ @@ @@ @@ @@ @@ @@ @@ @@ @@ @@ @@ @@ @@ @@ @@ @@ @@ @@ @@ @@ @@ @@ @@ @@ @@ @@ @@ @@ @@ @@ @@ @@ @@ @@ @@ @@ @@ @@ @@ @@ @@ @@ @@ @@ @@ @@ @@ @@ @@ @@ @@ @@ @@ @@ @@ @@ @@ @@ @@ @@ @@ @@ @@ @@ @@ @@ @@ @@ @@ @@ @@ @@ @@ @@ @@ @@ @@ @@ @@ @@ @@ @@ @@ @@ @@ @@ @@ @@ @@ @@ @@ @@ @@ @@ @@ @@ @@ @@ @@ @@ @@ @@ @@ @@ @@ @@ @@ @@ @@ @@ @@ @@ @@ @@ @@ @@ @@ @@ @@ @@ @@ @@ @@ @@ @@ @@ @@ @@ @@ @@ @@ @@ @@ @@ @@ @@ @@ @@ @@ @@ @@ @@ @@ @@ @@ @@ @@ @@ @@ @@ @@ @@ @@ @@ @@ @@ @@ @@ @@ @@ @@ @@ @@ @@ @@ @@ @@ @@ @@ @@ @@ @@ @@ @@ @@ @@ @@ @@ @@ @@ @@ @@ @@ @@ @@ @@ @@ @@ @@ @@ @@ @@ @@ @@ @@ @@ @@ @@ @@ @@ @@ @@ @@ @@ @@ @@ @@ @@ @@ @@ @@ @@ @@ @@ @@ @@ @@ @@ @@ @@ @@ @@ @@ @@ @@ @@ @@ @@ @@ @@ @@ @@ @@ @@ @@ @@ @@ @@ @@ @@ @@ @@ @@ @@ @@ @@ @@ @@ @@ @@ @@ @@ @@ @@ @@ @@ @@ @@ @@ @@ @@ @@ @@ @@ @@ @@ @@ @@ @@ @@ @@ @@ @@ @@ @@ @@ @@ @@ @@ @@ @@ @@ @@ @@ @@ @@ @@ @@ @@ @@ @@ @@ @@ @@ @@ @@ @@ @@ @@ @@ @@ @@ @@ @@ @@ @@ @@ @@ @@ @@ @@ @@ @@ @@ @@ @@ @@ @@ @@ @@ @@ @@ @@ @@ @@ @@ @@ @@ @@ @@ @@ @@ @@ @@ @@ @@ @@ @@ @@ @@ @@ @@ @@ @@ @@ @@ @@ @@ @@ @@ @@ @@ @@ @@ @@ @@ @@ @@ @@ @@ @@ @@ @@ @@ @@ @@ @@ @@ @@ @@ @@ @@ @@ @@ @@ @@ @@ @@ @@ @@ @@ @@ @@ @@ @@ @@ @@ @@ @@ @@ @@ @@ @@ @@ @@ @@ @@ @@ @@ @@ @@ @@ @@ @@ @@ @@ @@ @@ @@ @@ @@ @@ @@ @@ @@ @@ @@ @@ @@ @@ @@ @@ @@ @@ @@ @@ @@ @@ @@ @@ @@ @@ @@ @@ @@ @@ @@ @@ @@ @@ @@ @@ @@ @@ @@ @@ @@ @@ @@ @@ @@ @@ @@ @@ @@ @@ @@ @@ @@ @@ @@ @@ @@ @@ @@ @@ @@ @@ @@ @@ @@ @@ @@ @@ @@ @@ @@ @@ @@ @@ @@ @@ @@ @@ @@ @@ @@ @@ @@ @@ @@ @@ @@ @@ @@ @@ @@ @@ @@ @@ @@ @@ @@ @@ @@ @@ @@ @@ @@ @@ @@ @@ @@ @@ @@ @@ @@ @@ @@ @@ @@ @@ @@ @@ @@ @@ @@ @@ @@ @@ @@ @@ @@ @@ @@ @@ @@ @@ @@ @@ @@ @@ @@ @@ @@ @@ @@ @@ @@ @@ @@ @@ @@ @@ @@ @@ @@ @@ @@ @@ @@ @@ @@ @@ @@ @@ @@ @@ @@ @@ @@ @@ @@ @@ @@ @@ @@ @@ @@ @@ @@ @@ @@ @@ @@ @@ @@ @@ @@ @@ @@ @@ @@ @@ @@ @@ @@ @@ @@ @@ @@ @@ @@ @@ @@ @@ @@ @@ @@ @@ @@ @@ @@ @@ @@ @@ @@ @@ @@ @@ @@ @@ @@ @@ @@ @@ @@ @@ @@ @@ @@ @@ @@ @@ @@ @@ @@ @@ @@ @@ @@ @@ @@ @@ @@ @@ @@ @@ @@ @@ @@ @@ @@ @@ @@ @@ @@ @@ @@ @@ @@ @@ @@ @@ @@ @@ @@ @@ @@ @@ @@ @@ @@ @@ @@ @@ @@ @@ @@ @@ @@ @@ @@ @@ @@ @@ @@ @@ @@ @@ @@ @@ @@ @@ @@ @@ @@ @@ @@ @@ @@ @@ @@ @@ @@ @@ @@ @@ @@ @@ @@ @@ @@ @@ @@ @@ @@ @@ @@ @@ @@ @@ @@ @@ @@ @@ @@ @@ @@ @@ @@ @@ @@ @@ @@ @@ @@ @@ @@ @@ @@ @@ @@ @@ @@ @@ @@ @@ @@ @@ @@ @@ @@ @@ @@ @@ @@ @@ @@ @@ @@ @@ @@ @@ @@ @@ @@ @@ @@ @@ @@ @@ @@ @@ @@ @@g @@g @@g @@g @@g @@g @@@@@@@@ ?@@@@@@@@?e@@@@@@@@e?@@@@@@@@?e@@@@@@@@e?@@@@@@@@?e@@@@@@@@e?@@@@@@@@?e@@@@@@@@e?@@@@@@@@?e@@@@@@@@e?@@@@@@@@?e@@@@@@@@e?@@@@@@@@?e@@@@@@@@e?@@@@@@@@?e@@@@@@@@e?@@@@@@@@?e@@@@@@@@e?@@@@@@@@?e@@@@@@@@e?@@@@@@@@?e@@@@@@@@e?@@@@@@@@?e@@@@@@@@e?@@@@@@@@?e@@@@@@@@e?@@@@@@@@?e@@@@@@@@e?@@@@@@@@?e@@@@@@@@e?@@@@@@@@?e@@@@@@@@e?@@@@@@@@?e@@@@@@@@e?@@@@@@@@?e@@@@@@@@e?@@@@@@@@?e@@@@@@@@e?@@@@@@@@?e@@@@@@@@e?@@@@@@@@?e@@@@@@@@e?@@@@@@@@?e@@@@@@@@e?@@@@@@@@?e@@@@@@@@e?@@@@@@@@?e@@@@@@@@e?@@@@@@@@?e@@@@@@@@e?@@@@@@@@?e@@@@@@@@e?@@@@@@@@?e@@@@@@@@e?@@@@@@@@?e@@@@@@@@e?@@@@@@@@?e@@@@@@@@e?@@@@@@@@?e@@@@@@@@e?@@@@@@@@?e@@@@@@@@e?@@@@@@@@?e@@@@@@@@e?@@@@@@@@?e@@@@@@@@e?@@@@@@@@?e@@@@@@@@e?@@@@@@@@?e@@@@@@@@e?@@@@@@@@?e@@@@@@@@e?@@@@@@@@?e@@@@@@@@e?@@@@@@@@?e@@@@@@@@ ?@@@@@@@@?e@@@@@@@@e?@@@@@@@@?e@@@@@@@@e?@@@@@@@@?e@@@@@@@@e?@@@@@@@@?e@@@@@@@@e?@@@@@@@@?e@@@@@@@@e?@@@@@@@@?e@@@@@@@@e?@@@@@@@@?e@@@@@@@@e?@@@@@@@@?e@@@@@@@@e?@@@@@@@@?e@@@@@@@@e?@@@@@@@@?e@@@@@@@@e?@@@@@@@@?e@@@@@@@@e?@@@@@@@@?e@@@@@@@@e?@@@@@@@@?e@@@@@@@@e?@@@@@@@@?e@@@@@@@@e?@@@@@@@@?e@@@@@@@@e?@@@@@@@@?e@@@@@@@@e?@@@@@@@@?e@@@@@@@@e?@@@@@@@@?e@@@@@@@@e?@@@@@@@@?e@@@@@@@@e?@@@@@@@@?e@@@@@@@@e?@@@@@@@@?e@@@@@@@@e?@@@@@@@@?e@@@@@@@@e?@@@@@@@@?e@@@@@@@@e?@@@@@@@@?e@@@@@@@@e?@@@@@@@@?e@@@@@@@@e?@@@@@@@@?e@@@@@@@@e?@@@@@@@@?e@@@@@@@@e?@@@@@@@@?e@@@@@@@@e?@@@@@@@@?e@@@@@@@@e?@@@@@@@@?e@@@@@@@@e?@@@@@@@@?e@@@@@@@@e?@@@@@@@@?e@@@@@@@@e?@@@@@@@@?e@@@@@@@@e?@@@@@@@@?e@@@@@@@@e?@@@@@@@@?e@@@@@@@@e?@@@@@@@@?e@@@@@@@@e?@@@@@@@@?e@@@@@@@@ ?@@@@@@@@?e@@@@@@@@e?@@@@@@@@?e@@@@@@@@e?@@@@@@@@?e@@@@@@@@e?@@@@@@@@?e@@@@@@@@e?@@@@@@@@?e@@@@@@@@e?@@@@@@@@?e@@@@@@@@e?@@@@@@@@?e@@@@@@@@e?@@@@@@@@?e@@@@@@@@e?@@@@@@@@?e@@@@@@@@e?@@@@@@@@?e@@@@@@@@e?@@@@@@@@?e@@@@@@@@e?@@@@@@@@?e@@@@@@@@e?@@@@@@@@?e@@@@@@@@e?@@@@@@@@?e@@@@@@@@e?@@@@@@@@?e@@@@@@@@e?@@@@@@@@?e@@@@@@@@e?@@@@@@@@?e@@@@@@@@e?@@@@@@@@?e@@@@@@@@e?@@@@@@@@?e@@@@@@@@e?@@@@@@@@?e@@@@@@@@e?@@@@@@@@?e@@@@@@@@e?@@@@@@@@?e@@@@@@@@e?@@@@@@@@?e@@@@@@@@e?@@@@@@@@?e@@@@@@@@e?@@@@@@@@?e@@@@@@@@e?@@@@@@@@?e@@@@@@@@e?@@@@@@@@?e@@@@@@@@e?@@@@@@@@?e@@@@@@@@e?@@@@@@@@?e@@@@@@@@e?@@@@@@@@?e@@@@@@@@e?@@@@@@@@?e@@@@@@@@e?@@@@@@@@?e@@@@@@@@e?@@@@@@@@?e@@@@@@@@e?@@@@@@@@?e@@@@@@@@e?@@@@@@@@?e@@@@@@@@e?@@@@@@@@?e@@@@@@@@e?@@@@@@@@?e@@@@@@@@ @@@@@@@@ ?@@@@@@@@?e@@@@@@@@e?@@@@@@@@?e@@@@@@@@e?@@@@@@@@?e@@@@@@@@e?@@@@@@@@?e@@@@@@@@e?@@@@@@@@?e@@@@@@@@e?@@@@@@@@?e@@@@@@@@e?@@@@@@@@?e@@@@@@@@e?@@@@@@@@?e@@@@@@@@e?@@@@@@@@?e@@@@@@@@e?@@@@@@@@?e@@@@@@@@e?@@@@@@@@?e@@@@@@@@e?@@@@@@@@?e@@@@@@@@e?@@@@@@@@?e@@@@@@@@e?@@@@@@@@?e@@@@@@@@e?@@@@@@@@?e@@@@@@@@e?@@@@@@@@?e@@@@@@@@e?@@@@@@@@?e@@@@@@@@e?@@@@@@@@?e@@@@@@@@e?@@@@@@@@?e@@@@@@@@e?@@@@@@@@?e@@@@@@@@e?@@@@@@@@?e@@@@@@@@e?@@@@@@@@?e@@@@@@@@e?@@@@@@@@?e@@@@@@@@e?@@@@@@@@?e@@@@@@@@e?@@@@@@@@?e@@@@@@@@e?@@@@@@@@?e@@@@@@@@e?@@@@@@@@?e@@@@@@@@e?@@@@@@@@?e@@@@@@@@e?@@@@@@@@?e@@@@@@@@e?@@@@@@@@?e@@@@@@@@e?@@@@@@@@?e@@@@@@@@e?@@@@@@@@?e@@@@@@@@e?@@@@@@@@?e@@@@@@@@e?@@@@@@@@?e@@@@@@@@e?@@@@@@@@?e@@@@@@@@e?@@@@@@@@?e@@@@@@@@e?@@@@@@@@?e@@@@@@@@e?@@@@@@@@?e@@@@@@@@ Œ Source Displays a menu of all of the available input sources (TV/Video/S-Video/DVD/DTV/PC). Ø - CH ❷+ Moves the selector up or down on the OSD. Increases or decreases the channel number. ´ PIP Activates PIP (Picture-In-Picture) ∏ -❿ VOL ➛+ Moves the selector left or right on the OSD. Increases or decreases the level of audio volume and the values of the selected function. ˇ PBP Activates PBP (Picture-By-Picture). ¨ Menu Opens the OSD and selects the function. ˆ Exit Exit from the on-screen menu. English-6 ” Auto Allows you experience the quality of displayed picture. The values of fine, coarse and position are adjusted automatically. (It works PC mode only.) ’ (Power) Turns ON/OFF your set. ?@@ ?@@ ?@@ ?@@ ?@@ ?@@ ?@@@@@@@@ ?@@@@@@@@ rubens_monitor_eng 1/28/03 8:40 PM Page 7 Installing on the Wall 1 Removing the Stand Using a hexagonal wrench, remove the stand. 2 Removing Rubbers Remove the four rubbers from the edges. 3 Mounting on the Wall Mount the stand on the wall using screws or nails. 4 Fixing the Set Using a hexagonal wrench, fix your set into the stand. ☛ Installation Notes ◆ Do not install your set on any place other than vertical walls. ◆ To protect the performance of your set and prevent troubles, avoid the followings: - Do not install next to smoke and fire detectors. - Do not install in an area subjected to vibration or high voltage. - Do not install in the wall. - Do not install near or around any heating apparatus. ◆ Use only recommended parts and components. English-7 rubens_monitor_eng 1/28/03 8:40 PM Page 8 Viewing the Connection Panel @@@@@@@@e? @@@@@@@@e?@@@@@@@@?e@@@@@@@@e?@@@@@@@@?e@@@@@@@@e?@@@@@@@@?e@@@@@@@@e?@@@@@@@@?e@@@@@@@@e?@@@@@@@@?e@@@@@@@@e?@@@@@@@@?e@@@@@@@@e?@@@@@@@@?e@@@@@@@@e?@@@@@@@@?e@@@@@@@@e?@@@@@@@@?e@@@@@@@@e?@@@@@@@@?e@@@@@@@@e?@@@@@@@@?e@@@@@@@@e?@@@@@@@@?e@@@@@@@@e?@@@@@@@@?e@@@@@@@@e?@@@@@@@@?e@@@@@@@@e?@@@@@@@@?e@@@@@@@@e?@@@@@@@@?e@@@@@@@@e?@@@@@@@@?e@@@@@@@@e?@@@@@@@@?e@@@@@@@@e?@@@@@@@@?e@@@@@@@@e?@@@@@@@@?e@@@@@@@@e?@@@@@@@@?e@@@@@@@@e?@@@@@@@@?e@@@@@@@@e?@@@@@@@@?e@@@@@@@@e?@@@@@@@@?e@@@@@@@@e?@@@@@@@@?e@@@@@@@@e?@@@@@@@@?e@@@@@@@@e?@@@@@@@@?e@@@@@@@@e?@@@@@@@@?e@@@@@@@@e?@@@@@@@@?e@@@@@@@@e?@@@@@@@@?e@@@@@@@@e?@@@@@@@@?e@@@@@@@@e?@@@@@@@@?e@@@@@@@@e?@@@@@@@@?e@@@@@@@@e?@@@@@@@@?e@@@@@@@@e?@@@@@@@@?e@@@@@@@@e?@@@@@@@@?e@@@@@@@@e?@@@@@@@@?e@@@@@@@@e?@@@@@@@@? @@@@@@@@e?@@@@@@@@?e@@@@@@@@e?@@@@@@@@?e@@@@@@@@e?@@@@@@@@?e@@@@@@@@e?@@@@@@@@?e@@@@@@@@e?@@@@@@@@?e@@@@@@@@e?@@@@@@@@?e@@@@@@@@e?@@@@@@@@?e@@@@@@@@e?@@@@@@@@?e@@@@@@@@e?@@@@@@@@?e@@@@@@@@e?@@@@@@@@?e@@@@@@@@e?@@@@@@@@?e@@@@@@@@e?@@@@@@@@?e@@@@@@@@e?@@@@@@@@?e@@@@@@@@e?@@@@@@@@?e@@@@@@@@e?@@@@@@@@?e@@@@@@@@e?@@@@@@@@?e@@@@@@@@e?@@@@@@@@?e@@@@@@@@e?@@@@@@@@?e@@@@@@@@e?@@@@@@@@?e@@@@@@@@e?@@@@@@@@?e@@@@@@@@e?@@@@@@@@?e@@@@@@@@e?@@@@@@@@?e@@@@@@@@e?@@@@@@@@?e@@@@@@@@e?@@@@@@@@?e@@@@@@@@e?@@@@@@@@?e@@@@@@@@e?@@@@@@@@?e@@@@@@@@e?@@@@@@@@?e@@@@@@@@e?@@@@@@@@?e@@@@@@@@e?@@@@@@@@?e@@@@@@@@e?@@@@@@@@?e@@@@@@@@e?@@@@@@@@?e@@@@@@@@e?@@@@@@@@?e@@@@@@@@e?@@@@@@@@?e@@@@@@@@e?@@@@@@@@?e@@@@@@@@e?@@@@@@@@?e@@@@@@@@e?@@@@@@@@?e@@@@@@@@e?@@@@@@@@?e@@@@@@@@ @@@@@@@@e?@@@@@@@@?e@@@@@@@@e?@@@@@@@@?e@@@@@@@@e?@@@@@@@@?e@@@@@@@@e?@@@@@@@@?e@@@@@@@@e?@@@@@@@@?e@@@@@@@@e?@@@@@@@@?e@@@@@@@@e?@@@@@@@@?e@@@@@@@@e?@@@@@@@@?e@@@@@@@@e?@@@@@@@@?e@@@@@@@@e?@@@@@@@@?e@@@@@@@@e?@@@@@@@@?e@@@@@@@@e?@@@@@@@@?e@@@@@@@@e?@@@@@@@@?e@@@@@@@@e?@@@@@@@@?e@@@@@@@@e?@@@@@@@@?e@@@@@@@@e?@@@@@@@@?e@@@@@@@@e?@@@@@@@@?e@@@@@@@@e?@@@@@@@@?e@@@@@@@@e?@@@@@@@@?e@@@@@@@@e?@@@@@@@@?e@@@@@@@@e?@@@@@@@@?e@@@@@@@@e?@@@@@@@@?e@@@@@@@@e?@@@@@@@@?e@@@@@@@@e?@@@@@@@@?e@@@@@@@@e?@@@@@@@@?e@@@@@@@@e?@@@@@@@@?e@@@@@@@@e?@@@@@@@@?e@@@@@@@@e?@@@@@@@@?e@@@@@@@@e?@@@@@@@@?e@@@@@@@@e?@@@@@@@@?e@@@@@@@@e?@@@@@@@@?e@@@@@@@@e?@@@@@@@@?e@@@@@@@@e?@@@@@@@@?e@@@@@@@@e?@@@@@@@@?e@@@@@@@@e?@@@@@@@@?e@@@@@@@@e?@@@@@@@@?e@@@@@@@@e?@@@@@@@@?e @@@@@@@@ @@@@@@@@e? @@@@@@@@e?@@@@@@@@?e@@@@@@@@e?@@@@@@@@?e@@@@@@@@e?@@@@@@@@?e@@@@@@@@e?@@@@@@@@?e@@@@@@@@e?@@@@@@@@?e@@@@@@@@e?@@@@@@@@?e@@@@@@@@e?@@@@@@@@?e@@@@@@@@e?@@@@@@@@?e@@@@@@@@e?@@@@@@@@?e@@@@@@@@e?@@@@@@@@?e@@@@@@@@e?@@@@@@@@?e@@@@@@@@e?@@@@@@@@?e@@@@@@@@e?@@@@@@@@?e@@@@@@@@e?@@@@@@@@?e@@@@@@@@e?@@@@@@@@?e@@@@@@@@e?@@@@@@@@?e@@@@@@@@e?@@@@@@@@?e@@@@@@@@e?@@@@@@@@?e@@@@@@@@e?@@@@@@@@?e@@@@@@@@e?@@@@@@@@?e@@@@@@@@e?@@@@@@@@?e@@@@@@@@e?@@@@@@@@?e@@@@@@@@e?@@@@@@@@?e@@@@@@@@e?@@@@@@@@?e@@@@@@@@e?@@@@@@@@?e@@@@@@@@e?@@@@@@@@?e@@@@@@@@e?@@@@@@@@?e@@@@@@@@e?@@@@@@@@?e@@@@@@@@e?@@@@@@@@?e@@@@@@@@e?@@@@@@@@?e@@@@@@@@e?@@@@@@@@?e@@@@@@@@e?@@@@@@@@?e@@@@@@@@e?@@@@@@@@?e@@@@@@@@e?@@@@@@@@?e@@@@@@@@e?@@@@@@@@?e@@@@@@@@e?@@@@@@@@?e@@@@@@@@e?@@@@@@@@?e@@@@@@@@e?@@@@@@@@? @@h? @@ @@h? @@ @@h? @@ @@h? @@ @@h? @@ @@h? @@ @@ @@ @@ @@ @@ @@ @@ @@ @@ @@ @@ @@ @@ @@ @@ @@ @@ @@ @@ @@ @@ @@ @@ @@ @@ @@ @@ @@ @@ @@ @@ @@ @@ @@ @@ @@ @@ @@ @@ @@ @@ @@ @@ @@ @@ @@ @@ @@ @@ @@ @@ @@ @@ @@ @@ @@ @@ @@ @@ @@ @@ @@ @@ @@ @@ @@ @@ @@ @@ @@ @@ @@ @@ @@ @@ @@ @@ @@ @@ @@ @@ @@ @@ @@ @@ @@ @@ @@ @@ @@ @@ @@ @@ @@ @@ @@ @@ @@ @@ @@ @@ @@ @@ @@ @@ @@ @@ @@ @@ @@ @@ @@ @@ @@ @@ @@ @@ @@ @@ @@ @@ @@ @@ @@ @@ @@ @@ @@ @@ @@ @@ @@ @@ @@ @@ @@ @@ @@ @@ @@ @@ @@ @@ @@ @@ @@ @@ @@ @@ @@ @@ @@ @@ @@ @@ @@ @@ @@ @@ @@ @@ @@ @@ @@ @@ @@ @@ @@ @@ @@ @@ @@ @@ @@ @@ @@ @@ @@ @@ @@ @@ @@ @@ @@ @@ @@ @@ @@ @@ @@ @@ @@ @@ @@ @@ @@ @@ @@ @@ @@ SPK (R) L R S-VIDEO VIDEO @@ @@ @@ @@ @@ @@ @@ @@ AUDIO (L) AUDIO (R) @@ @@ @@ @@ @@ @@ @@ @@ @@ @@ @@ @@ @@ @@ @@ @@ @@ @@ @@ @@ @@ @@ @@ @@ @@ @@ @@ @@ @@ @@ @@ @@ @@ @@ @@ @@ @@ @@ @@ @@ AUDIO OUT @@ @@ @@ @@ @@ @@ @@ @@ @@ @@ @@ @@ @@ @@ @@ @@ @@ @@ @@ @@ @@ @@ @@ @@ AV JACK @@ @@ @@ @@ @@ @@ @@ @@ @@ @@ @@ @@ @@ @@ @@ @@ @@ @@ @@ @@ @@ @@ @@ @@ @@ @@ @@ @@ @@ @@ @@ @@ @@ @@ @@ @@ @@ @@ @@ @@ @@ @@ @@ @@ @@ @@ @@ @@ @@ @@ @@ @@ @@ @@ @@ @@ @@ @@ @@ @@ @@ @@ @@ @@ @@ @@ @@ @@ @@ @@ @@ @@ @@ @@ @@ @@ @@ @@ @@ @@ @@ @@ @@ @@ @@ @@ @@ @@ @@ @@ @@ @@ @@ @@ @@ @@ @@ @@ @@ @@ @@ @@ @@ @@ @@ @@ @@ @@ @@ @@ @@ @@ @@ @@ @@ @@ @@ @@ @@ @@ @@ @@ @@ @@ @@ @@ @@ @@ @@ @@ @@ @@ @@ @@ @@ @@ @@ @@ @@ @@ @@ @@ @@ @@ @@ @@ @@ @@ @@ @@ @@ @@ @@ @@ @@ @@ @@ @@ @@ @@ @@ @@ @@ @@ @@ @@ @@ @@ @@ @@ @@ @@ @@ @@ @@ @@ @@ @@ @@ @@ @@ @@ @@ @@ @@ @@ @@ @@ @@ @@ @@ @@ @@ @@ @@ @@ @@ @@ @@ @@ @@ @@ @@ @@ @@ @@ @@ @@ @@ @@ @@ @@ @@ @@ @@ @@ @@ @@ @@ @@ @@ @@ @@ @@ @@ @@ @@ @@ @@ @@ @@ @@ @@ @@ @@ @@ @@ @@ @@ @@ @@ @@ @@ @@ @@ @@ @@ @@ @@ @@ @@ @@ @@ @@ @@ @@ @@ @@ @@ @@ @@ @@ @@ @@ @@ @@ @@ @@ @@ @@ @@ @@ @@ @@ @@ @@ @@ @@ @@ @@ @@ @@ @@ @@ @@ @@ @@ @@ @@ @@ @@ @@ @@ @@ @@ @@ @@ @@ @@ @@ @@ @@ @@ @@ @@ @@ @@ @@ @@ @@ @@ @@ @@ @@ @@ @@ @@ @@ @@ @@ @@ @@ @@ @@ @@ @@ @@ @@ @@ @@ @@ @@ @@ @@ @@ @@ @@ @@ @@ @@ @@ @@ @@ @@ @@ @@ @@ @@ @@ @@ @@ @@ @@ @@ @@ @@ @@ @@ @@ @@ @@ @@ @@ @@ @@ @@ @@ @@ @@ @@ @@ @@ @@ @@ @@ @@ @@ @@ @@ @@ @@ @@ @@ @@ @@ @@ @@ @@ @@ @@ @@ @@ @@ @@ @@ @@ @@ @@ @@ @@ @@ @@ @@ @@ @@ @@ @@ @@ @@ @@ @@ @@ @@ @@ @@ @@ @@ @@ @@ @@ @@ @@ @@ @@ @@ @@ @@ @@ @@ @@ @@ @@ @@ @@ @@ @@ @@ @@ @@ @@ @@ @@ @@ @@ @@ @@ @@ @@ @@ @@ @@ @@ @@ @@ @@ @@ @@ @@ @@ @@ @@ @@ @@ @@ @@ @@ @@ @@ @@ @@ @@ @@ @@ @@ @@ @@ @@ @@ @@ @@ @@ @@ @@ @@ @@ @@ @@ @@ @@ @@ @@ @@ @@ @@ @@ @@ @@ @@ @@ @@ @@ @@ @@ @@ @@ @@ @@ @@ @@ @@ @@ @@ @@ @@ @@ @@ @@ @@ @@ @@ @@ @@ @@ @@ @@ @@ @@ @@ @@ @@ @@ @@ @@ @@ @@ @@ @@ @@ @@ @@ @@ @@ @@ @@ @@ @@ @@ @@ @@ @@ @@ @@ @@ @@ @@ @@ @@ @@ @@ @@ @@ @@ @@ @@ @@ @@ @@ @@ @@ @@ @@ @@ @@ @@ @@ @@ @@ @@ @@ @@ @@ @@ @@ @@ @@ @@ @@ @@ @@ @@ @@ @@ 5 @@ @@ @@ @@ @@ @@ @@ @@ @@ @@ @@ @@ @@ @@ @@ @@ @@ @@ @@ @@ @@ @@ @@ @@ @@ @@ @@ @@ @@ @@ @@ @@ @@ @@ @@ @@ @@ @@ @@ @@ @@ @@ @@ @@ @@ @@ @@ @@ @@ @@ @@ @@ @@ @@ @@ @@ @@ @@ @@ @@ @@ @@ @@ @@ @@ @@ @@ @@ @@ @@ @@ @@ @@ @@ @@ @@ @@ @@ @@ @@ @@ @@ @@ @@ @@ @@ @@ @@ @@ @@ @@ @@ @@ @@ @@ @@ @@ @@ @@ @@ @@ @@ @@ @@ @@ @@ @@ @@ @@ @@ @@ @@ @@ @@ @@ @@ @@ @@ @@ @@ @@ @@ @@ @@ @@ @@ @@ @@ @@ @@ @@ @@ @@ @@ @@ @@ @@ @@ @@ @@ @@ @@ @@ @@ 6 @@ @@ @@ @@ @@ @@ @@ @@ @@ @@ @@ @@ @@ @@ @@ @@ @@ @@ @@ @@ @@ @@ @@ @@ 4 @@ @@ @@ @@ @@ @@ @@ @@ @@ @@ @@ @@ @@ @@ @@ @@ @@ @@ @@ @@ @@ @@ @@ @@ @@ @@ @@ @@ @@ @@ @@ @@ @@ @@ @@ @@ @@ @@ @@ @@ @@ @@ @@ @@ @@ @@ @@ @@ @@ @@ @@ @@ @@ @@ @@ @@ @@ @@ @@ @@ @@ @@ @@ @@ @@ @@ @@ @@ @@ @@ @@ @@ @@ @@ @@ @@ @@ @@ @@ @@ @@ @@ @@ @@ @@ @@ @@ @@ @@ @@ @@ @@ @@ @@ @@ @@ @@ @@ @@ @@ @@ @@ @@ @@ @@ @@ @@ @@ @@ @@ @@ @@ @@ @@ @@ @@ @@ @@ @@ @@ @@ @@ @@ @@ @@ @@ @@ @@ @@ @@ @@ @@ @@ @@ @@ @@ @@ @@ @@ @@ @@ @@ @@ @@ @@ @@ @@ @@ @@ @@ @@ @@ @@ @@ @@ @@ @@ @@ @@ @@ @@ @@ @@ @@ @@ @@ @@ @@ @@ @@ @@ @@ @@ @@ @@ @@ @@ @@ @@ @@ @@ @@ @@ @@ @@ @@ @@ @@ @@ @@ @@ @@ @@ @@ @@ @@ @@ @@ @@ @@ @@ @@ @@ @@ @@ @@ @@ @@ DC POWER PC AUDIO (ST) VIDEO @@ @@ @@ @@ @@ @@ @@ @@ RF SCART @@ @@ @@ @@ @@ @@ @@ @@ @@ @@ @@ @@ @@ @@ @@ @@ @@ @@ @@ @@ @@ @@ @@ @@ @@ @@ @@ @@ @@ @@ @@ @@ @@ @@ @@ @@ @@ @@ @@ @@ @@ @@ @@ @@ @@ @@ @@ @@ @@ @@ @@ @@ @@ @@ @@ @@ SPK (L) @@ @@ @@ @@ @@ @@ @@ @@ @@ @@ @@ @@ @@ @@ @@ @@ @@ @@ @@ @@ @@ @@ @@ @@ @@ @@ @@ @@ @@ @@ @@ @@ @@ @@ @@ @@ @@ @@ @@ @@ @@ @@ @@ @@ @@ @@ @@ @@ @@ @@ @@ @@ @@ @@ @@ @@ @@ @@ @@ @@ @@ @@ @@ @@ @@ @@ @@ @@ @@ @@ @@ @@ @@ @@ @@ @@ @@ @@ @@ @@ @@ @@ @@ @@ @@ @@ @@ @@ @@ @@ @@ @@ @@ @@ @@ @@ @@ @@ @@ @@ @@ @@ @@ @@ @@ @@ @@ @@ @@ @@ @@ @@ @@ @@ @@ @@ @@ @@ @@ @@ @@ @@ @@ @@ @@ @@ @@ @@ @@ @@ @@ @@ @@ @@ @@ @@ @@ @@ @@ @@ @@ @@ @@ @@ @@ @@ @@ @@ @@ @@ @@ @@ @@ @@ @@ @@ @@ @@ @@ @@ @@ @@ @@ @@ @@ @@ @@ @@ @@ @@ @@ @@ @@ @@ @@ @@ @@ @@ @@ @@ @@ @@ @@ @@ @@ @@ @@ @@ @@ @@ @@ @@ @@ @@ @@ @@ @@ @@ @@ @@ @@ @@ @@ @@ @@ @@ @@ @@ @@ @@ @@ @@ @@ @@ @@ @@ @@ @@ @@ @@ @@ @@ @@ @@ @@ @@ @@ @@ @@ @@ @@ @@ @@ @@ @@ @@ @@ @@ @@ @@ @@ @@ @@ @@ @@ @@ @@ @@ @@ @@ @@ @@ @@ @@ @@ @@ @@ @@ @@ @@ @@ @@ @@ @@ @@ @@ @@ @@ @@ @@ @@ @@ @@ @@ @@ @@ @@ @@ @@ @@ @@ @@ @@ @@ @@ @@ @@ @@ @@ @@ @@ @@ @@ @@ @@ @@ @@ @@ @@ @@ @@ @@ @@ @@ @@ @@ @@ @@ @@ @@ @@ @@ @@ @@ @@ @@ @@ @@ @@ @@ @@ @@ @@ @@ @@ @@ @@ @@ @@ @@ @@ @@ @@ @@ @@ @@ @@ @@ @@ @@ @@ @@ @@ @@ @@ @@ @@ @@ @@ @@ @@ @@ @@ @@ @@ @@ @@ @@ @@ @@ @@ @@ @@ @@ @@ @@ @@ @@ @@ @@ @@ @@ @@ @@ @@ @@ @@ @@ @@ @@ @@ @@ @@ @@ @@ @@ @@ @@ @@ @@ @@ @@ @@ @@ @@ @@ @@ @@ @@ @@ @@ @@ @@ @@ @@ @@ @@ @@ @@ @@ @@ @@ @@ @@ @@ @@ @@ @@ @@ @@ @@ @@ @@ @@ @@ @@ @@ @@ @@ @@ @@ @@ @@ @@ @@ @@ @@ @@ @@ @@ @@ @@ @@ @@ @@ @@ @@ @@ @@ @@ @@ @@ @@ @@ @@ @@ @@ @@ @@ @@ @@ @@ @@ @@ @@ @@ @@ @@ @@ @@ @@ @@ @@ @@ @@ @@ @@ @@ @@ @@ @@ @@ @@ @@ @@ @@ @@ @@ @@ @@ @@ @@ @@ @@ @@ @@ @@ @@ @@ @@ @@ @@ @@ @@ @@ @@ @@ @@ @@ @@ @@ @@ 6 @@ @@ @@ @@ @@ @@ @@ @@ @@ @@ @@ @@ @@ @@ @@ @@ @@ @@ @@ @@ @@ @@ @@ @@ @@ @@ @@ @@ @@ @@ @@ @@ 7 @@ @@ @@ @@ @@ @@ @@ @@ @@ @@ @@ @@ @@ @@ @@ @@ @@ @@ @@ @@ @@ @@ @@ @@ @@ @@ @@ @@ @@ @@ @@ @@ @@ @@ @@ @@ @@ @@ @@ @@ @@ @@ @@ @@ @@ @@ @@ @@ @@ @@ @@ @@ @@ @@ @@ @@ @@ @@ @@ @@ @@ @@ @@ @@ @@ @@ @@ @@ @@ @@ @@ @@ @@ @@ @@ @@ @@ @@ @@ @@ @@ @@ @@ @@ @@ @@ @@ @@ @@ @@ @@ @@ @@ @@ @@ @@ @@ @@ @@ @@ @@ @@ @@ @@ @@ @@ @@ @@ @@ @@ @@ @@ @@ @@ @@ @@ @@ @@ @@ @@ @@ @@ @@ @@ @@ @@ @@ @@ @@ @@ @@ @@ @@ @@ @@ @@ @@ @@ @@ @@ @@ @@ @@ @@ @@ @@ @@ @@ @@ @@ @@ @@ @@ @@ @@ @@ @@ @@ @@ @@ @@ @@ @@ @@ @@ @@ @@ @@ @@ @@ @@ @@ @@ @@ @@ @@ @@ @@ @@ @@ @@ @@ @@ @@ 1 @@ @@ @@ @@ @@ @@ @@ @@ @@ @@ @@ @@ @@ @@ @@ @@ @@ @@ @@ @@ @@ @@ @@ @@ @@ @@ @@ @@ @@ @@ @@ @@ @@ @@ @@ @@ @@ @@ @@ @@ @@ @@ @@ @@ @@ @@ @@ @@ @@ @@ @@ @@ @@ @@ @@ @@ @@ @@ @@ @@ @@ @@ @@ @@ @@ @@ @@ @@ @@ @@ @@ @@ @@ @@ @@ @@ @@ @@ @@ @@ @@ @@ @@ @@ @@ @@ @@ @@ @@ @@ @@ @@ @@ @@ @@ @@ @@ @@ @@ @@ @@ @@ @@ @@ @@ @@ @@ @@ @@ @@ @@ @@ @@ @@ @@ @@ @@ @@ @@ @@ 3 @@ @@ @@ @@ @@ @@ @@ @@ @@ @@ @@ @@ @@ @@ @@ @@ @@ @@ @@ @@ @@ @@ @@ @@ @@ @@ @@ @@ @@ @@ @@ @@ @@ @@ @@ @@ @@ @@ @@ @@ @@ @@ @@ @@ @@ @@ @@ @@ @@ @@ @@ @@ @@ @@ @@ @@ @@ @@ @@ @@ @@ @@ @@ @@ @@ @@ @@ @@ @@ @@ @@ @@ @@ @@ @@ @@ @@ @@ @@ @@ @@ @@ @@ @@ @@ @@ @@ @@ @@ @@ @@ @@ @@ @@ @@ @@ @@ @@ @@ @@ @@ @@ @@ @@ @@ @@ @@ @@ @@ @@ @@ @@ @@ @@ @@ @@ @@ @@ @@ @@ @@ @@ @@ @@ @@ @@ @@ @@ @@ @@ @@ @@ @@ @@ @@ @@ @@ @@ @@ @@ @@ @@ @@ @@ @@ @@ @@ @@ @@ @@ @@ @@ @@ @@ @@ @@ @@ @@ @@ @@ @@ @@ @@ @@ @@ @@ @@ @@ @@ @@ @@ @@ @@ @@ @@ @@ @@ @@ @@ @@ @@ @@ @@ @@ @@ @@ @@ @@ @@ @@ @@ @@ @@ @@ @@ @@ @@ @@ @@ @@ @@ @@ @@ @@ @@ @@ @@ @@ @@ @@ @@ @@ @@ @@ @@ @@ @@ @@ @@ @@ @@ @@ @@ @@ @@ @@ @@ @@ @@ @@ @@ @@ @@ @@ @@ @@ @@ @@ @@ @@ @@ @@ @@ @@ @@ @@ @@ @@ @@ @@ @@ @@ @@ @@ @@ @@ @@ @@ @@ @@ @@ @@ @@ @@ @@ @@ @@ @@ @@ @@ @@ @@ 2 @@ @@ @@ @@ @@ @@ @@ @@ @@ @@ @@ @@ @@ @@ @@ @@ @@ @@ @@ @@ @@ @@ @@ @@ @@ @@ @@ @@ @@ @@ @@ @@ @@ @@ @@ @@ @@ @@ @@ @@ @@ @@ @@ @@ @@ @@ @@ @@ Power Input @@ @@ @@ @@ @@ @@ @@ @@ @@ @@ @@ @@ @@ @@ @@ @@ @@ @@ @@ @@ @@ @@ @@ @@ @@ @@ @@ @@ @@ @@ @@ @@ @@ @@ @@ @@ @@ @@ @@ @@ @@ @@ @@ @@ @@ @@ @@ @@ @@ @@ @@ @@ @@ @@ @@ @@ @@g @@g @@g @@g @@g @@g @@@@@@@@ ?@@@@@@@@?e@@@@@@@@e?@@@@@@@@?e@@@@@@@@e?@@@@@@@@?e@@@@@@@@e?@@@@@@@@?e@@@@@@@@e?@@@@@@@@?e@@@@@@@@e?@@@@@@@@?e@@@@@@@@e?@@@@@@@@?e@@@@@@@@e?@@@@@@@@?e@@@@@@@@e?@@@@@@@@?e@@@@@@@@e?@@@@@@@@?e@@@@@@@@e?@@@@@@@@?e@@@@@@@@e?@@@@@@@@?e@@@@@@@@e?@@@@@@@@?e@@@@@@@@e?@@@@@@@@?e@@@@@@@@e?@@@@@@@@?e@@@@@@@@e?@@@@@@@@?e@@@@@@@@e?@@@@@@@@?e@@@@@@@@e?@@@@@@@@?e@@@@@@@@e?@@@@@@@@?e@@@@@@@@e?@@@@@@@@?e@@@@@@@@e?@@@@@@@@?e@@@@@@@@e?@@@@@@@@?e@@@@@@@@e?@@@@@@@@?e@@@@@@@@e?@@@@@@@@?e@@@@@@@@e?@@@@@@@@?e@@@@@@@@e?@@@@@@@@?e@@@@@@@@e?@@@@@@@@?e@@@@@@@@e?@@@@@@@@?e@@@@@@@@e?@@@@@@@@?e@@@@@@@@e?@@@@@@@@?e@@@@@@@@e?@@@@@@@@?e@@@@@@@@e?@@@@@@@@?e@@@@@@@@e?@@@@@@@@?e@@@@@@@@e?@@@@@@@@?e@@@@@@@@e?@@@@@@@@?e@@@@@@@@e?@@@@@@@@?e@@@@@@@@e?@@@@@@@@?e@@@@@@@@e?@@@@@@@@?e@@@@@@@@ ?@@@@@@@@?e@@@@@@@@e?@@@@@@@@?e@@@@@@@@e?@@@@@@@@?e@@@@@@@@e?@@@@@@@@?e@@@@@@@@e?@@@@@@@@?e@@@@@@@@e?@@@@@@@@?e@@@@@@@@e?@@@@@@@@?e@@@@@@@@e?@@@@@@@@?e@@@@@@@@e?@@@@@@@@?e@@@@@@@@e?@@@@@@@@?e@@@@@@@@e?@@@@@@@@?e@@@@@@@@e?@@@@@@@@?e@@@@@@@@e?@@@@@@@@?e@@@@@@@@e?@@@@@@@@?e@@@@@@@@e?@@@@@@@@?e@@@@@@@@e?@@@@@@@@?e@@@@@@@@e?@@@@@@@@?e@@@@@@@@e?@@@@@@@@?e@@@@@@@@e?@@@@@@@@?e@@@@@@@@e?@@@@@@@@?e@@@@@@@@e?@@@@@@@@?e@@@@@@@@e?@@@@@@@@?e@@@@@@@@e?@@@@@@@@?e@@@@@@@@e?@@@@@@@@?e@@@@@@@@e?@@@@@@@@?e@@@@@@@@e?@@@@@@@@?e@@@@@@@@e?@@@@@@@@?e@@@@@@@@e?@@@@@@@@?e@@@@@@@@e?@@@@@@@@?e@@@@@@@@e?@@@@@@@@?e@@@@@@@@e?@@@@@@@@?e@@@@@@@@e?@@@@@@@@?e@@@@@@@@e?@@@@@@@@?e@@@@@@@@e?@@@@@@@@?e@@@@@@@@e?@@@@@@@@?e@@@@@@@@e?@@@@@@@@?e@@@@@@@@e?@@@@@@@@?e@@@@@@@@ ?@@@@@@@@?e@@@@@@@@e?@@@@@@@@?e@@@@@@@@e?@@@@@@@@?e@@@@@@@@e?@@@@@@@@?e@@@@@@@@e?@@@@@@@@?e@@@@@@@@e?@@@@@@@@?e@@@@@@@@e?@@@@@@@@?e@@@@@@@@e?@@@@@@@@?e@@@@@@@@e?@@@@@@@@?e@@@@@@@@e?@@@@@@@@?e@@@@@@@@e?@@@@@@@@?e@@@@@@@@e?@@@@@@@@?e@@@@@@@@e?@@@@@@@@?e@@@@@@@@e?@@@@@@@@?e@@@@@@@@e?@@@@@@@@?e@@@@@@@@e?@@@@@@@@?e@@@@@@@@e?@@@@@@@@?e@@@@@@@@e?@@@@@@@@?e@@@@@@@@e?@@@@@@@@?e@@@@@@@@e?@@@@@@@@?e@@@@@@@@e?@@@@@@@@?e@@@@@@@@e?@@@@@@@@?e@@@@@@@@e?@@@@@@@@?e@@@@@@@@e?@@@@@@@@?e@@@@@@@@e?@@@@@@@@?e@@@@@@@@e?@@@@@@@@?e@@@@@@@@e?@@@@@@@@?e@@@@@@@@e?@@@@@@@@?e@@@@@@@@e?@@@@@@@@?e@@@@@@@@e?@@@@@@@@?e@@@@@@@@e?@@@@@@@@?e@@@@@@@@e?@@@@@@@@?e@@@@@@@@e?@@@@@@@@?e@@@@@@@@e?@@@@@@@@?e@@@@@@@@e?@@@@@@@@?e@@@@@@@@e?@@@@@@@@?e@@@@@@@@e?@@@@@@@@?e@@@@@@@@ @@@@@@@@ ?@@@@@@@@?e@@@@@@@@e?@@@@@@@@?e@@@@@@@@e?@@@@@@@@?e@@@@@@@@e?@@@@@@@@?e@@@@@@@@e?@@@@@@@@?e@@@@@@@@e?@@@@@@@@?e@@@@@@@@e?@@@@@@@@?e@@@@@@@@e?@@@@@@@@?e@@@@@@@@e?@@@@@@@@?e@@@@@@@@e?@@@@@@@@?e@@@@@@@@e?@@@@@@@@?e@@@@@@@@e?@@@@@@@@?e@@@@@@@@e?@@@@@@@@?e@@@@@@@@e?@@@@@@@@?e@@@@@@@@e?@@@@@@@@?e@@@@@@@@e?@@@@@@@@?e@@@@@@@@e?@@@@@@@@?e@@@@@@@@e?@@@@@@@@?e@@@@@@@@e?@@@@@@@@?e@@@@@@@@e?@@@@@@@@?e@@@@@@@@e?@@@@@@@@?e@@@@@@@@e?@@@@@@@@?e@@@@@@@@e?@@@@@@@@?e@@@@@@@@e?@@@@@@@@?e@@@@@@@@e?@@@@@@@@?e@@@@@@@@e?@@@@@@@@?e@@@@@@@@e?@@@@@@@@?e@@@@@@@@e?@@@@@@@@?e@@@@@@@@e?@@@@@@@@?e@@@@@@@@e?@@@@@@@@?e@@@@@@@@e?@@@@@@@@?e@@@@@@@@e?@@@@@@@@?e@@@@@@@@e?@@@@@@@@?e@@@@@@@@e?@@@@@@@@?e@@@@@@@@e?@@@@@@@@?e@@@@@@@@e?@@@@@@@@?e@@@@@@@@e?@@@@@@@@?e@@@@@@@@e?@@@@@@@@?e@@@@@@@@ you connect an audio or video system to your set, ☛ Whenever ensure that all elements are switched off. Refer to the documentation supplied with your equipment for detailed connection instructions and associated safety precautions. English-8 ?@@ ?@@ ?@@ ?@@ ?@@ ?@@ ?@@@@@@@@ ?@@@@@@@@ rubens_monitor_eng 1/28/03 8:40 PM Page 9 Viewing the Connection Panel (continued) Œ Connecting an Aerial or Cable Television Network (depending on the model) To view television channels correctly, a signal must be received by the set from one of the following sources: - An outdoor aerial - A cable television network - A satellite network ´ Connecting Computer - Connect the 15 Pin D-SUB connector to the PC video connector. - Connect the stereo audio cable to ”Audio (ST)” on the rear of your set and the other end to “Audio Out” of the sound card on your computer. - If necessary, please install monitor driver contained on the accompanied CD. For more information, refer to the driver installation instructions included with your CD package. ➣ 15 Pin D-SUB connector Pin Separate H/V Composite H/V Sync-on-green 1 Red (R) Red (R) Red (R) 2 Green (G) Green (G) Green (G) + Horizontal/Vertical sync. 3 Blue (B) Blue (B) Blue (B) 4 Grounding Grounding Grounding 5 Grounding (DDC) Grounding (DDC) Grounding (DDC) 6 Red (R) Grounding Red (R) Grounding Red (R) Grounding 7 Green (G) Grounding Green (G) Grounding Green (G) Grounding 8 Blue (B) Grounding Blue (B) Grounding Blue (B) Grounding 9 No connection No connection Not used 10 Sync Grounding Sync Grounding Sync Grounding 11 Grounding Grounding Grounding Data (DDC) 12 Data (DDC) Data (DDC) 13 Horizontal sync. Horizontal/Vertical sync. Not used 14 Vertical sync. Not used Not used 15 Clock (DDC) Clock (DDC) Clock (DDC) English-9 rubens_monitor_eng 1/28/03 8:40 PM Page 10 Viewing the Connection Panel ˇ Connecting DTV Set-Top Box, VCR, or DVD - Connect the DTV, VCR, or DVD SCART cable to the SCART connector of the DTV, VCR, or DVD. - If you wish to connect both the DTV Set-Top Box and VCR (or DVD), you should connect the DTV Set-Top Box to the VCR (or DVD) and connect the VCR (or DVD) to your set. ¨ Connecting External A/V Devices - Connect RCA or S-VIDEO cable to an appropriate external A/V device such as VCR, DVD, or Camcorder. - Connect RCA audio cables to “AUDIO (L)” and “AUDIO (R)” on the rear of your set and the other ends to corresponding audio out connectors on the A/V device. - Headphone may be connected to the headphone output (∏) on the rear of your set. While the headphone is connected, the sound from the built-in speakers will be disabled. ˆ Connecting External Speakers Connect RCA audio cables to amplifier built-in speakers (to take full advantage of the Surround sound effect). Ø Connecting Speakers (depending on the model) @@@@@@@@e? @@@@@@@@e?@@@@@@@@?e@@@@@@@@e?@@@@@@@@?e@@@@@@@@e?@@@@@@@@?e@@@@@@@@e?@@@@@@@@?e@@@@@@@@e?@@@@@@@@?e@@@@@@@@e?@@@@@@@@?e@@@@@@@@e?@@@@@@@@?e@@@@@@@@e?@@@@@@@@?e@@@@@@@@e?@@@@@@@@?e@@@@@@@@e?@@@@@@@@?e@@@@@@@@e?@@@@@@@@?e@@@@@@@@e?@@@@@@@@?e@@@@@@@@e?@@@@@@@@?e@@@@@@@@e?@@@@@@@@?e@@@@@@@@e?@@@@@@@@?e@@@@@@@@e?@@@@@@@@?e@@@@@@@@e?@@@@@@@@?e@@@@@@@@e?@@@@@@@@?e@@@@@@@@e?@@@@@@@@?e@@@@@@@@e?@@@@@@@@?e@@@@@@@@e?@@@@@@@@?e@@@@@@@@e?@@@@@@@@?e@@@@@@@@e?@@@@@@@@?e@@@@@@@@e?@@@@@@@@?e@@@@@@@@e?@@@@@@@@?e@@@@@@@@e?@@@@@@@@?e@@@@@@@@e?@@@@@@@@?e@@@@@@@@e?@@@@@@@@?e@@@@@@@@e?@@@@@@@@?e@@@@@@@@e?@@@@@@@@?e@@@@@@@@e?@@@@@@@@?e@@@@@@@@e?@@@@@@@@?e@@@@@@@@e?@@@@@@@@?e@@@@@@@@e?@@@@@@@@?e@@@@@@@@e?@@@@@@@@?e@@@@@@@@e?@@@@@@@@?e@@@@@@@@e?@@@@@@@@?e@@@@@@@@e?@@@@@@@@? @@@@@@@@e?@@@@@@@@?e@@@@@@@@e?@@@@@@@@?e@@@@@@@@e?@@@@@@@@?e@@@@@@@@e?@@@@@@@@?e@@@@@@@@e?@@@@@@@@?e@@@@@@@@e?@@@@@@@@?e@@@@@@@@e?@@@@@@@@?e@@@@@@@@e?@@@@@@@@?e@@@@@@@@e?@@@@@@@@?e@@@@@@@@e?@@@@@@@@?e@@@@@@@@e?@@@@@@@@?e@@@@@@@@e?@@@@@@@@?e@@@@@@@@e?@@@@@@@@?e@@@@@@@@e?@@@@@@@@?e@@@@@@@@e?@@@@@@@@?e@@@@@@@@e?@@@@@@@@?e@@@@@@@@e?@@@@@@@@?e@@@@@@@@e?@@@@@@@@?e@@@@@@@@e?@@@@@@@@?e@@@@@@@@e?@@@@@@@@?e@@@@@@@@e?@@@@@@@@?e@@@@@@@@e?@@@@@@@@?e@@@@@@@@e?@@@@@@@@?e@@@@@@@@e?@@@@@@@@?e@@@@@@@@e?@@@@@@@@?e@@@@@@@@e?@@@@@@@@?e@@@@@@@@e?@@@@@@@@?e@@@@@@@@e?@@@@@@@@?e@@@@@@@@e?@@@@@@@@?e@@@@@@@@e?@@@@@@@@?e@@@@@@@@e?@@@@@@@@?e@@@@@@@@e?@@@@@@@@?e@@@@@@@@e?@@@@@@@@?e@@@@@@@@e?@@@@@@@@?e@@@@@@@@e?@@@@@@@@ @@@@@@@@e?@@@@@@@@?e@@@@@@@@e?@@@@@@@@?e@@@@@@@@e?@@@@@@@@?e@@@@@@@@e?@@@@@@@@?e@@@@@@@@e?@@@@@@@@?e@@@@@@@@e?@@@@@@@@?e@@@@@@@@e?@@@@@@@@?e@@@@@@@@e?@@@@@@@@?e@@@@@@@@e?@@@@@@@@?e@@@@@@@@e?@@@@@@@@?e@@@@@@@@e?@@@@@@@@?e@@@@@@@@e?@@@@@@@@?e@@@@@@@@e?@@@@@@@@?e@@@@@@@@e?@@@@@@@@?e@@@@@@@@e?@@@@@@@@?e@@@@@@@@e?@@@@@@@@?e@@@@@@@@e?@@@@@@@@?e@@@@@@@@e?@@@@@@@@?e@@@@@@@@e?@@@@@@@@?e@@@@@@@@e?@@@@@@@@?e@@@@@@@@e?@@@@@@@@?e@@@@@@@@e?@@@@@@@@?e@@@@@@@@e?@@@@@@@@?e@@@@@@@@e?@@@@@@@@?e@@@@@@@@e?@@@@@@@@?e@@@@@@@@e?@@@@@@@@?e@@@@@@@@e?@@@@@@@@?e@@@@@@@@e?@@@@@@@@?e@@@@@@@@e?@@@@@@@@?e@@@@@@@@e?@@@@@@@@?e@@@@@@@@e?@@@@@@@@?e@@@@@@@@e?@@@@@@@@?e@@@@@@@@e?@@@@@@@@?e@@@@@@@@e?@@@@@@@@?e@@@@@@@@e?@@@@@@@@ @@@@@@@@e? @@@@@@@@e?@@@@@@@@?e@@@@@@@@e?@@@@@@@@?e@@@@@@@@e?@@@@@@@@?e@@@@@@@@e?@@@@@@@@?e@@@@@@@@e?@@@@@@@@?e@@@@@@@@e?@@@@@@@@?e@@@@@@@@e?@@@@@@@@?e@@@@@@@@e?@@@@@@@@?e@@@@@@@@e?@@@@@@@@?e@@@@@@@@e?@@@@@@@@?e@@@@@@@@e?@@@@@@@@?e@@@@@@@@e?@@@@@@@@?e@@@@@@@@e?@@@@@@@@?e@@@@@@@@e?@@@@@@@@?e@@@@@@@@e?@@@@@@@@?e@@@@@@@@e?@@@@@@@@?e@@@@@@@@e?@@@@@@@@?e@@@@@@@@e?@@@@@@@@?e@@@@@@@@e?@@@@@@@@?e@@@@@@@@e?@@@@@@@@?e@@@@@@@@e?@@@@@@@@?e@@@@@@@@e?@@@@@@@@?e@@@@@@@@e?@@@@@@@@?e@@@@@@@@e?@@@@@@@@?e@@@@@@@@e?@@@@@@@@?e@@@@@@@@e?@@@@@@@@?e@@@@@@@@e?@@@@@@@@?e@@@@@@@@e?@@@@@@@@?e@@@@@@@@e?@@@@@@@@?e@@@@@@@@e?@@@@@@@@?e@@@@@@@@e?@@@@@@@@?e@@@@@@@@e?@@@@@@@@?e@@@@@@@@e?@@@@@@@@?e@@@@@@@@e?@@@@@@@@?e@@@@@@@@e?@@@@@@@@?e@@@@@@@@e?@@@@@@@@?e@@@@@@@@e?@@@@@@@@?e@@@@@@@@e?@@@@@@@@? @@h? @@ @@h? @@ @@h? @@ @@h? @@ @@h? @@ @@h? @@ @@ @@ @@ @@ @@ @@ @@ @@ @@ @@ @@ @@ @@ @@ @@ @@ @@ @@ @@ @@ @@ @@ @@ @@ @@ @@ @@ @@ @@ @@ @@ @@ @@ @@ @@ @@ @@ @@ @@ @@ @@ @@ @@ @@ @@ @@ @@ @@ @@ @@ @@ @@ @@ @@ @@ @@ @@ @@ @@ @@ @@ @@ @@ @@ @@ @@ @@ @@ @@ @@ @@ @@ @@ @@ @@ @@ @@ @@ @@ @@ @@ @@ @@ @@ @@ @@ @@ @@ @@ @@ @@ @@ @@ @@ @@ @@ @@ @@ @@ @@ @@ @@ @@ @@ @@ @@ @@ @@ @@ @@ @@ @@ @@ @@ @@ @@ @@ @@ @@ @@ @@ @@ @@ @@ @@ @@ @@ @@ @@ @@ @@ @@ @@ @@ @@ @@ @@ @@ @@ @@ @@ @@ @@ @@ @@ @@ @@ @@ @@ @@ @@ @@ @@ @@ @@ @@ @@ @@ @@ @@ @@ @@ @@ @@ @@ @@ @@ @@ @@ @@ @@ @@ @@ @@ @@ @@ @@ @@ @@ @@ @@ @@ @@ @@ @@ @@ @@ @@ @@ @@ @@ @@ @@ @@ @@ @@ @@ @@ @@ @@ @@ @@ @@ @@ @@ @@ @@ @@ @@ @@ @@ @@ @@ @@ @@ @@ @@ @@ @@ @@ @@ @@ @@ @@ @@ @@ @@ @@ @@ @@ @@ @@ @@ @@ @@ @@ @@ @@ @@ @@ @@ @@ @@ @@ @@ @@ @@ @@ @@ @@ @@ @@ @@ @@ @@ @@ @@ @@ @@ @@ @@ @@ @@ @@ @@ @@ @@ @@ @@ @@ @@ @@ @@ @@ @@ @@ @@ @@ @@ @@ @@ @@ @@ @@ @@ @@ @@ @@ @@ @@ @@ @@ @@ @@ @@ @@ @@ @@ @@ @@ @@ @@ @@ @@ @@ @@ @@ @@ @@ @@ @@ @@ @@ @@ @@ @@ @@ @@ @@ @@ @@ @@ @@ @@ @@ @@ @@ @@ @@ @@ @@ @@ @@ @@ @@ @@ @@ @@ @@ @@ @@ @@ @@ @@ @@ @@ @@ @@ @@ @@ @@ @@ @@ @@ @@ @@ @@ @@ @@ @@ @@ @@ @@ @@ @@ @@ @@ @@ @@ @@ @@ @@ @@ @@ @@ @@ @@ @@ @@ @@ @@ @@ @@ @@ @@ @@ @@ @@ @@ @@ @@ @@ @@ @@ @@ @@ @@ @@ @@ @@ @@ @@ @@ @@ @@ @@ @@ @@ @@ @@ @@ @@ @@ @@ @@ @@ @@ @@ @@ @@ @@ @@ @@ @@ @@ @@ @@ @@ @@ @@ @@ @@ @@ @@ @@ @@ @@ @@ @@ @@ @@ @@ @@ @@ @@ @@ @@ @@ @@ @@ @@ @@ @@ @@ @@ @@ @@ @@ @@ @@ @@ @@ @@ @@ @@ @@ @@ @@ @@ @@ @@ @@ @@ @@ @@ @@ @@ @@ @@ @@ @@ @@ @@ @@ @@ @@ @@ @@ @@ @@ @@ @@ @@ @@ @@ @@ @@ @@ @@ @@ @@ @@ @@ @@ @@ @@ @@ @@ @@ @@ @@ @@ @@ @@ @@ @@ @@ @@ @@ @@ @@ @@ @@ @@ @@ @@ @@ @@ @@ @@ @@ @@ @@ @@ @@ @@ @@ @@ @@ @@ @@ @@ @@ @@ @@ @@ @@ @@ @@ @@ @@ @@ @@ @@ @@ @@ @@ @@ @@ @@ @@ @@ @@ @@ @@ @@ @@ @@ @@ @@ @@ @@ @@ @@ @@ @@ @@ @@ @@ @@ @@ @@ @@ @@ @@ @@ @@ @@ @@ @@ @@ @@ @@ @@ @@ @@ @@ @@ @@ @@ @@ @@ @@ @@ @@ @@ @@ @@ @@ @@ @@ @@ @@ @@ @@ @@ @@ @@ @@ @@ @@ @@ @@ @@ @@ @@ @@ @@ @@ @@ @@ @@ @@ @@ @@ @@ @@ @@ @@ @@ @@ @@ @@ @@ @@ @@ @@ @@ @@ @@ @@ @@ @@ @@ @@ @@ @@ @@ @@ @@ @@ @@ @@ @@ @@ @@ @@ @@ @@ @@ @@ @@ @@ @@ @@ @@ @@ @@ @@ @@ @@ @@ @@ @@ @@ @@ @@ @@ @@ @@ @@ @@ @@ @@ @@ @@ @@ @@ @@ @@ @@ @@ @@ @@ @@ @@ @@ @@ @@ @@ @@ @@ @@ @@ @@ @@ @@ @@ @@ @@ @@ @@ @@ @@ @@ @@ @@ @@ @@ @@ @@ @@ @@ @@ @@ @@ @@ @@ @@ @@ @@ @@ @@ @@ @@ @@ @@ @@ @@ @@ @@ @@ @@ @@ @@ @@ @@ @@ @@ @@ @@ @@ @@ @@ @@ @@ @@ @@ @@ @@ @@ @@ @@ @@ @@ @@ @@ @@ @@ @@ @@ @@ @@ @@ @@ @@ @@ @@ @@ @@ @@ @@ @@ @@ @@ @@ @@ @@ @@ @@ @@ @@ @@ @@ @@ @@ @@ @@ @@ @@ @@ @@ @@ @@ @@ @@ @@ @@ @@ @@ @@ @@ @@ @@ or @@ @@ @@ @@ @@ @@ @@ @@ @@ @@ @@ @@ @@ @@ @@ @@ @@ @@ @@ @@ @@ @@ @@ @@ @@ @@ @@ @@ @@ @@ @@ @@ @@ @@ @@ @@ @@ @@ @@ @@ @@ @@ @@ @@ @@ @@ @@ @@ @@ @@ @@ @@ @@ @@ @@ @@ @@ @@ @@ @@ @@ @@ @@ @@ @@ @@ @@ @@ @@ @@ @@ @@ @@ @@ @@ @@ @@ @@ @@ @@ @@ @@ @@ @@ @@ @@ @@ @@ @@ @@ @@ @@ @@ @@ @@ @@ @@ @@ @@ @@ @@ @@ @@ @@ @@ @@ @@ @@ @@ @@ @@ @@ @@ @@ @@ @@ @@ @@ @@ @@ @@ @@ @@ @@ @@ @@ @@ @@ @@ @@ @@ @@ @@ @@ @@ @@ @@ @@ @@ @@ @@ @@ @@ @@ @@ @@ @@ @@ @@ @@ @@ @@ @@ @@ @@ @@ @@ @@ @@ @@ @@ @@ @@ @@ @@ @@ @@ @@ @@ @@ @@ @@ @@ @@ @@ @@ @@ @@ @@ @@ @@ @@ @@ @@ @@ @@ @@ @@ @@ @@ @@ @@ @@ @@ @@ @@ @@ @@ @@ @@ @@ @@ @@ @@ @@ @@ @@ @@ @@ @@ @@ @@ @@ @@ @@ @@ @@ @@ @@ @@ @@ @@ @@ @@ @@ @@ @@ @@ @@ @@ @@ @@ @@ @@ @@ @@ @@ @@ @@ @@ @@ @@ @@ @@ @@ @@ @@ @@ @@ @@ @@ @@ @@ @@ @@ @@ @@ @@ @@ @@ @@ @@ @@ @@ @@ @@ @@ @@ @@ @@ @@ @@ @@ @@ @@ @@ @@ @@ @@ @@ @@ @@ @@ @@ @@ @@ @@ @@ @@ @@ @@ @@ @@ @@ @@ @@ @@ @@ @@ @@ @@ @@ @@ @@ @@ @@ @@ @@ @@ @@ @@ @@ @@ @@ @@ @@ @@ @@ @@ @@ @@ @@ @@ @@ @@ @@ @@ @@ @@ @@ @@ @@ @@ @@ @@ @@ @@ @@ @@ @@ @@ @@ @@ @@ @@ @@ @@ @@ @@ @@ @@ @@ @@ @@ @@ @@ @@ @@ @@ @@ @@ @@ @@ @@ @@ @@ @@ @@ @@ @@ @@ @@ @@ @@ @@ @@ @@ @@ @@ @@ @@ @@ @@ @@ @@ @@ @@ @@ @@ @@ @@ @@ @@ @@ @@ @@ @@ @@ @@ @@ @@ @@ @@ @@ @@ @@ @@ @@ @@ @@ @@ @@ @@ @@ @@ @@ @@ @@ @@ @@ @@ @@ @@ @@ @@ @@ @@ @@ @@ @@ @@ @@ @@ @@ @@ @@ @@ @@ @@ @@ @@ @@ @@ @@ @@ @@ @@ @@ @@ @@ @@ @@ @@ @@ @@ @@ @@ @@ @@ @@ @@ @@ @@ @@ @@ @@ @@ @@ @@ @@ @@ @@ @@ @@ @@ @@ @@ @@ @@ @@ @@ @@ @@ @@ @@ @@ @@ @@ @@ @@ @@ @@ @@ @@ @@ @@ @@ @@ @@ @@ @@ @@ @@ @@ @@ @@ @@ @@ @@ @@ @@ @@ @@ @@ @@ @@ @@ @@ @@ @@ @@ @@ @@ @@ @@ @@ @@ @@ @@ @@ @@ @@ @@ @@ @@ @@ @@ @@ @@ @@ @@ @@ @@ @@ @@ @@ @@ @@ @@ @@ @@ @@ @@ @@ @@ @@ @@ @@ @@ @@ @@ @@ @@ @@ @@ @@ @@ @@ @@ @@ @@ @@ @@ @@ @@ @@ @@ @@ @@ @@ @@ @@ @@ @@ @@ @@ @@ @@ @@ @@ @@ @@ @@ @@ @@ @@ @@ @@ @@ @@ @@ @@ @@ @@ @@ @@ @@ @@ @@ @@ @@ @@ @@ @@ @@ @@ @@ @@ @@ @@ @@ @@ @@ @@ @@ @@ @@ @@ @@ @@ @@ @@ @@ @@ @@ @@ @@ @@ @@ @@ @@ @@ @@ @@ @@ @@ @@ @@ @@ @@ @@ @@ @@ @@ @@ @@ @@ @@ @@ @@ @@ @@ @@ @@ @@ @@ @@ @@ @@ @@ @@ @@ @@ @@ @@ @@ @@ @@ @@ @@ @@ @@ @@ @@ @@ @@ @@ @@ @@ @@ @@ @@ @@ @@ @@ @@ @@ @@ @@ @@ @@ @@ @@ @@ @@ @@ @@ @@ @@ @@ @@ @@ @@ @@ @@ @@ @@ @@ @@ @@ @@ @@ @@ @@ @@ @@ @@ @@ @@ @@ @@ @@ @@ @@ @@ @@ @@ @@ @@ @@ @@ @@ @@ @@ @@ @@ @@ @@ @@ @@ @@ @@ @@ @@ @@ @@ @@ @@ @@ @@ @@ @@ @@ @@ @@ @@ @@ @@ @@ @@ @@ @@ @@ @@ @@ @@ @@ @@ @@ @@ @@ @@ @@ @@ @@ @@ @@ @@ @@ @@ @@ @@ @@g ?@@ @@g ?@@ @@g ?@@ @@g ?@@ @@g ?@@ @@g ?@@ @@@@@@@@ ?@@@@@@@@?e@@@@@@@@e?@@@@@@@@?e@@@@@@@@e?@@@@@@@@?e@@@@@@@@e?@@@@@@@@?e@@@@@@@@e?@@@@@@@@?e@@@@@@@@e?@@@@@@@@?e@@@@@@@@e?@@@@@@@@?e@@@@@@@@e?@@@@@@@@?e@@@@@@@@e?@@@@@@@@?e@@@@@@@@e?@@@@@@@@?e@@@@@@@@e?@@@@@@@@?e@@@@@@@@e?@@@@@@@@?e@@@@@@@@e?@@@@@@@@?e@@@@@@@@e?@@@@@@@@?e@@@@@@@@e?@@@@@@@@?e@@@@@@@@e?@@@@@@@@?e@@@@@@@@e?@@@@@@@@?e@@@@@@@@e?@@@@@@@@?e@@@@@@@@e?@@@@@@@@?e@@@@@@@@e?@@@@@@@@?e@@@@@@@@e?@@@@@@@@?e@@@@@@@@e?@@@@@@@@?e@@@@@@@@e?@@@@@@@@?e@@@@@@@@e?@@@@@@@@?e@@@@@@@@e?@@@@@@@@?e@@@@@@@@e?@@@@@@@@?e@@@@@@@@e?@@@@@@@@?e@@@@@@@@e?@@@@@@@@?e@@@@@@@@e?@@@@@@@@?e@@@@@@@@e?@@@@@@@@?e@@@@@@@@e?@@@@@@@@?e@@@@@@@@e?@@@@@@@@?e@@@@@@@@e?@@@@@@@@?e@@@@@@@@e?@@@@@@@@?e@@@@@@@@e?@@@@@@@@?e@@@@@@@@e?@@@@@@@@?e@@@@@@@@e?@@@@@@@@?e@@@@@@@@e?@@@@@@@@?e@@@@@@@@ ?@@@@@@@@?e@@@@@@@@e?@@@@@@@@?e@@@@@@@@e?@@@@@@@@?e@@@@@@@@e?@@@@@@@@?e@@@@@@@@e?@@@@@@@@?e@@@@@@@@e?@@@@@@@@?e@@@@@@@@e?@@@@@@@@?e@@@@@@@@e?@@@@@@@@?e@@@@@@@@e?@@@@@@@@?e@@@@@@@@e?@@@@@@@@?e@@@@@@@@e?@@@@@@@@?e@@@@@@@@e?@@@@@@@@?e@@@@@@@@e?@@@@@@@@?e@@@@@@@@e?@@@@@@@@?e@@@@@@@@e?@@@@@@@@?e@@@@@@@@e?@@@@@@@@?e@@@@@@@@e?@@@@@@@@?e@@@@@@@@e?@@@@@@@@?e@@@@@@@@e?@@@@@@@@?e@@@@@@@@e?@@@@@@@@?e@@@@@@@@e?@@@@@@@@?e@@@@@@@@e?@@@@@@@@?e@@@@@@@@e?@@@@@@@@?e@@@@@@@@e?@@@@@@@@?e@@@@@@@@e?@@@@@@@@?e@@@@@@@@e?@@@@@@@@?e@@@@@@@@e?@@@@@@@@?e@@@@@@@@e?@@@@@@@@?e@@@@@@@@e?@@@@@@@@?e@@@@@@@@e?@@@@@@@@?e@@@@@@@@e?@@@@@@@@?e@@@@@@@@e?@@@@@@@@?e@@@@@@@@e?@@@@@@@@?e@@@@@@@@e?@@@@@@@@?e@@@@@@@@e?@@@@@@@@ ?@@@@@@@@?e@@@@@@@@e?@@@@@@@@?e@@@@@@@@e?@@@@@@@@?e@@@@@@@@e?@@@@@@@@?e@@@@@@@@e?@@@@@@@@?e@@@@@@@@e?@@@@@@@@?e@@@@@@@@e?@@@@@@@@?e@@@@@@@@e?@@@@@@@@?e@@@@@@@@e?@@@@@@@@?e@@@@@@@@e?@@@@@@@@?e@@@@@@@@e?@@@@@@@@?e@@@@@@@@e?@@@@@@@@?e@@@@@@@@e?@@@@@@@@?e@@@@@@@@e?@@@@@@@@?e@@@@@@@@e?@@@@@@@@?e@@@@@@@@e?@@@@@@@@?e@@@@@@@@e?@@@@@@@@?e@@@@@@@@e?@@@@@@@@?e@@@@@@@@e?@@@@@@@@?e@@@@@@@@e?@@@@@@@@?e@@@@@@@@e?@@@@@@@@?e@@@@@@@@e?@@@@@@@@?e@@@@@@@@e?@@@@@@@@?e@@@@@@@@e?@@@@@@@@?e@@@@@@@@e?@@@@@@@@?e@@@@@@@@e?@@@@@@@@?e@@@@@@@@e?@@@@@@@@?e@@@@@@@@e?@@@@@@@@?e@@@@@@@@e?@@@@@@@@?e@@@@@@@@e?@@@@@@@@?e@@@@@@@@e?@@@@@@@@?e@@@@@@@@e?@@@@@@@@?e@@@@@@@@e?@@@@@@@@?e@@@@@@@@e?@@@@@@@@?e@@@@@@@@e?@@@@@@@@ ?@@@@@@@@ @@@@@@@@ ?@@@@@@@@?e@@@@@@@@e?@@@@@@@@?e@@@@@@@@e?@@@@@@@@?e@@@@@@@@e?@@@@@@@@?e@@@@@@@@e?@@@@@@@@?e@@@@@@@@e?@@@@@@@@?e@@@@@@@@e?@@@@@@@@?e@@@@@@@@e?@@@@@@@@?e@@@@@@@@e?@@@@@@@@?e@@@@@@@@e?@@@@@@@@?e@@@@@@@@e?@@@@@@@@?e@@@@@@@@e?@@@@@@@@?e@@@@@@@@e?@@@@@@@@?e@@@@@@@@e?@@@@@@@@?e@@@@@@@@e?@@@@@@@@?e@@@@@@@@e?@@@@@@@@?e@@@@@@@@e?@@@@@@@@?e@@@@@@@@e?@@@@@@@@?e@@@@@@@@e?@@@@@@@@?e@@@@@@@@e?@@@@@@@@?e@@@@@@@@e?@@@@@@@@?e@@@@@@@@e?@@@@@@@@?e@@@@@@@@e?@@@@@@@@?e@@@@@@@@e?@@@@@@@@?e@@@@@@@@e?@@@@@@@@?e@@@@@@@@e?@@@@@@@@?e@@@@@@@@e?@@@@@@@@?e@@@@@@@@e?@@@@@@@@?e@@@@@@@@e?@@@@@@@@?e@@@@@@@@e?@@@@@@@@?e@@@@@@@@e?@@@@@@@@?e@@@@@@@@e?@@@@@@@@?e@@@@@@@@e?@@@@@@@@?e@@@@@@@@e?@@@@@@@@?e@@@@@@@@e?@@@@@@@@?e@@@@@@@@e?@@@@@@@@?e@@@@@@@@e?@@@@@@@@?e@@@@@@@@e?@@@@@@@@?e@@@@@@@@ ?@@@@@@@@ English-10 rubens_monitor_eng 1/28/03 8:40 PM Page 11 Viewing Pictures From External Sources Once you have connected up your various audio and video systems, you can view the different sources by selecting the appropriate input. 1 2 Check that all the necessary connections have been made (refer to pages 8 and 9 for further details). Switch your set on and if necessary, press the SOURCE button repeatedly. The input sources are displayed in the following order: Ant (TV) - Scart - Video - S-Video - PC. Power SOURCE AUT UTO DISPLAY DISPLA STILL P.STD .STD S.STD .STD MUTE EXIT PRE-CH -/-- TTX/MIX V.DOLBY HOLD DUAL I/II LIST/FLOF SLEEP SUBPAGE P.SIZE PBP SIZE CANCEL PIP ON English-11 LOCATE rubens_monitor_eng 1/28/03 8:40 PM Page 12 Viewing the Remote Control (All Functions Except Teletext) Self-adjust to the incoming video signal Power er Television On/Off SOURCE AUT UTO DISPLA DISPLAY STILL Available sources selection Display the setting information Picture freeze P.STD S.STD .STD Picture effect selection Sound effect selection Next channel Menu display and change confirmation P MENU Volume decrease Volume increase P Previous channel MUTE EXIT Temporary sound switch-off Numeric buttons for direct channel access Exit from the OSD 1 2 3 4 5 6 7 8 9 PRE-CH -/-- One/Two-digit channel selection 0 Previous channel TTX/MIX V.DOLBY .DOLBY Virtual Dolby menu display Sound mode selection HOLD DUAL I/II LIST/FLOF DU SLEEP SUBP SUBPAGE GE P.SIZE .SIZE PBP Automatic switch-off Picture size selection SIZE CANCEL PIP ON PIP size selection Picture-In-Picture On/Off LOCATE LOCA PIP location selection Picture-By-Picture (Double screen) ➣ English-12 The performance of the remote control may be affected by bright light. rubens_monitor_eng 1/28/03 8:40 PM Page 13 Viewing the Remote Control (Teletext Functions) Power er SOURCE AUTO DISPLAY P.STD STILL S.STD Teletext next page Programme selection by name P MENU P Teletext previous page MUTE EXIT 1 2 3 4 5 6 7 8 9 PRE-CH -/-0 Teletext display/ mix both teletext information and the norma l broadcast Teletext hold Teletext reveal TTX/MIX V.DOLBY .DOLBY HOLD DUAL I/II LIST/FLOF SLEEP SUBPAGE GE P.SIZE PBP Teletext store Teletext sub-page SIZE CANCEL PIP Teletext mode selection (List or Flof) Teletext cancel ON LOCATE LOCA Teletext size selection Fastext topic selection English-13 rubens_monitor_eng 1/28/03 8:40 PM Page 14 Inserting the Batteries in the Remote Control You must insert or replace the batteries in the remote control when you: ◆ Purchase your set ◆ Find that the remote control is no longer operating correctly 1 Remove the cover on the rear of the remote control by pressing the symbol downwards and then pulling firmly to remove it. 2 Insert two R03, UM4, “AAA” 1.5V or equivalent batteries taking care to respect the polarities: ◆ + on the battery against + on the remote control ◆ - on the battery against - on the remote control 3 Replace the cover by aligning it with the base of the remote control and pressing it back into place. ➣ Do not mix battery types, i.e. alkaline and monganese. Switching On and Off The mains lead is attached to the rear of your set. ☛ Power SOURCE AUT UTO DISPLAY DISPLA P.STD .STD If you have purchased this set in the United Kingdom, refer to page 39 for further instructions on plug wiring. STILL S.STD .STD Plug the mains lead into an appropriate socket. The screen is turned on and a green Standby indicator appears Result: on the front of your set. Your set can be placed in Standby mode, in order to reduce the power consumption. The Standby mode can be useful when you wish to interrupt viewing temporarily (during a meal, for example). MUTE EXIT PRE-CH -/-- TTX/MIX V.DOLBY HOLD DUAL I/II LIST/FLOF SLEEP SUBPAGE P.SIZE PBP SIZE CANCEL PIP ON English-14 LOCATE 1 Press the Power ( ) button on the remote control or the front of your set. The screen is turned off and a green Standby indicator Result: disappears on the front of your set. 2 To switch your set back on, simply press the Power ( ) button again. ➣ Do not leave your set in Standby mode for long periods of time (when you are away on holiday, for example). Turn your set off by unpluging from the mains and aerial. rubens_monitor_eng 1/28/03 8:40 PM Page 15 Becoming Familiar with the Remote Control The remote control is used mainly to: ◆ Change channels and adjust the volume ◆ Set up your set using the on-screen menu system Power Power The following table presents the most frequently used buttons and their functions. Power AUTO SOURCE DISPLAY SOURCE AUT UTO DISPLAY DISPLA P.STD .STD P.STD SOURCE Button S.STD ▲ P Viewing Function Menu Function Used to display the next stored channel. Used to select the previous menu option. Used to display the previous stored channel. Used to select the next menu option. P MENU Power P ▼ MUTE MUTE EXIT EXIT SOURCE AUTO PRE-CH P.STD MUTE 9 -/-- TTX/MIX DUAL I/II LIST/FLOF HOLD V.DOLBY CANCEL HOLD SUBPAGE DUAL I/II SIZE LIST/FLOF PIP CANCEL SLEEP DISPLAY SLEEP P.SIZE STILL ON SUBPAGE PBP 1 2 3 Used to display the corresponding channels. 4 5 6 7 8 Used to select a channel numbered ten or over. Press this button, and the “--” symbol is displayed. Enter the two-digit channel number. PBP 0 SIZE LOCATE PIP LOCATE S.STD TTX/MIX Used to decrease the volume. Power MUTE EXIT SOURCE Used to increase the volume. P.STD MUTE EXIT ➣ P.SIZE DISPLAY STILL HOLD DUAL DU AL I/II LIST/FLOF SLEEP SUBPAGE SUBP GE P.SIZE .SIZE PBP SIZE DUAL I/II LIST/FLOF STILL Used to return to the previous menu or normal viewing. CANCEL MUTE MUTEsystem and return EXITto normal EXIT Used to exit from the menu viewing directly. SIZE PIP ON V.DOLBY P.SIZE PBP DUAL I/II LIST/FLOF SUBPAGE SIZE ON PBP LOCATE CANCEL PIP PRE-CH PRE-CH V.DOLBY V.DOLBY HOLD DUAL HOLDI/II LIST/FLOF DUAL I/II LIST/FLOF CANCEL CANCEL SLEEP SUBPAGE SLEEP SUBPAGE SIZE -/-- -/-- LOCATE TTX/MIX TTX/MIX SIZE PIP PIP ON ON CANCEL PIP ON To turnPRE-CH the sound back on, press this button again, or press the - or + button. V.DOLBY Used to display the on-screen menu system. PRE-CH SLEEP SUBPAGE TX/MIX LEEP DISPLAY AUTO V.DOLBY .DOLBY Used to... ◆ Display a submenu containing P.STD S.STD selectionsS.STD for the current menu option. ◆ Search backwards manually for channels ◆ Increase a menu option value. Used to switch the sound off temporarily. EXIT HOLD SOURCE AUTO -/-- HOLD -/-- Used to... ◆ Display a submenu containing selections for the current menu option. Power◆ Search forwards manually for channels ◆ Reduce a menu option value. MUTE TTX/MIX MENU 9 PRE-CH -/-- ON P.SIZE P.STD EXIT PRE-CH V.DOLBY -/-TTX/MIX AUTO STILL Used to switch repeatedly between the last two channels displayed. (PRE-CH; Previous Channel) S.STD to 0 OURCE DISPLAY P PRE-CH -/-- Power S.STD .STD DISPLAY S.STD STILL AUTO P.STD STILL STILL English-15 LOCATE LOCA TE rubens_monitor_eng 1/28/03 8:40 PM Page 16 Choosing Your Language Power SOURCE AUTO DISPLAY P.STD .STD Power STILL Power When you start using your set for the first time, you must select the SOURCE SOURCE AUTO DISPLAY AUTO DISPLAY STILLmenus STILL language which will be used for displaying and indications. S.STD .STD Power P 1 MENU P.STD Press the MENU P.STD button. Result: S.STD The main menu is displayed. Power S.STD SOURCE SOURCE AUTO DISPLAY AUTO DISPLAY STILL STILL S.STD S.STD EXIT EXIT PRE-CH PRE-CH V.DOLBY V.DOLBY P 2 MUTE EXIT Function Sleep Timer PIP PBP -/-Language ¨ ¨ à à Off PRE-CH English TTX/MIX Result: ¨ ¨ DUAL I/II LIST/FLOF SLEEP SUBPAGE SIZE CANCEL P.STD The options available in the Function group are displayed. 3 Press the 4 Press the P▼ or P▲ button to select the Language. 5 Select a particular language by pressing the repeatedly. MUTE MUTE EXIT EXIT 6 When you are satisfied with your choice, press the EXIT button to return to normal viewing. V.DOLBY HOLD Press the P▼ or P▲ button to select the Function. P.STD - or + button. MUTE PIP - or + button MUTE ON P.SIZE PBP LOCATE -/-- TTX/MIX HOLD -/-- TTX/MIX PRE-CH PRE-CH V.DOLBY V.DOLBY -/-- DUAL HOLDI/II LIST/FLOF DUAL I/II LIST/FLOF CANCEL CANCEL TTX/MIX SLEEP P.SIZE SUBPAGE SLEEP SUBPAGE SIZE P.SIZE PBP PBP SIZE PIP PIP ON HOLD ON LOCATE LOCATE SLEEP P.SIZE English-16 -/-- TTX/MIX DUAL HOLD I/II LIST/FLOF DUAL I/II LIST/FLOF CANCEL SUBPAGE SLEEP P.SIZE PBP SUBPAGE SIZE PBP CANCEL SIZE PIP PIP ON ON LOCATE LOCATE rubens_monitor_eng 1/28/03 8:40 PM Page 17 Storing Channels Automatically You can scan for the frequency ranges available to you (and Power Power availability depends on your country). Automatically allocated programme numbers may not correspond to actual or desired programme numbers. However you can sort numbers SOURCE SOURCE AUTO DISPLAY AUTO DISPLAY STILL STILL manually and PoweryouPower clear any channels do not wish to watch. 1 P.STD SOURCE Result: 2 P.STD SOURCE AUTO Press the MENU button. S.STD DISPLAY STILL P.STD S.STD STILL Power Power S.STD S.STD The main menu is displayed. P.STD Press the P▼ or P▲ button to select the Channel. SOURCE SOURCE AUTO DISPLAY AUTO DISPLAY STILL STILL Result: The options available in the Channel group are displayed. Power - or 3 Power Press the Result: 4 DISPLAY AUTO Channel Auto store Manual store Name Add/Erase Fine tune Channel sort SOURCE + button. P.STD P.STD S.STD à ¨ Channel Country Search à ¨ Channel Country Search Press the DISPLAY AUTO - or DISPLAY STILL STILL + button again. MUTE available in the EXITAuto EXIT Result: MUTEThe options store group are P.STD S.STD S.STD displayed with the Country is selected. 5 Select your country by pressing the - or + button repeatedly. MUTE MUTE EXIT The following countries are available:EXIT Belgie - Deutschland - Espania - France - Italia - Nederland - Schweiz - Sverige - UK - East Europe. 6 Press the P▼ or P▲ button to select MUTEthe Search, MUTE and then press EXIT the EXIT - or + button. ➣ 7 Search Program Frequency Band The search will end automatically. Channels are sorted PRE-CH -/-and stored in an order PRE-CH which reflects their position in the frequency range, (with lowest first and highest last). The programme originally selected is then displayed. -/-- MUTE TTX/MIX TTX/MIX EXIT EXIT V.DOLBY UK 1 205MHz VHF-H V.DOLBY PRE-CH PRE-CH -/--/-To stop the search before it has finished, press the EXIT button. HOLD DUAL HOLD I/II LIST/FLOF DUAL LIST/FLOF CANCEL CANCEL When the channels have beenI/IIstored, you can: TTX/MIXchannels TTX/MIX V.DOLBY V.DOLBY ◆ Change ◆ Assign a name to the stored channels (refer -/--/-- to page 19)PRE-CH PRE-CH SLEEP SUBPAGE SLEEP SUBPAGE SIZE SIZE PIP PIP ◆ Clear a channel (refer to page 20) HOLD DUAL HOLDI/II LIST/FLOF DUAL I/II LIST/FLOF CANCEL CANCEL ◆ Fine tune channel reception if necessary (refer to page 20) ON ON ◆ Sort them in the order required (refer to page 21) TTX/MIX TTX/MIX V.DOLBY V.DOLBY P.SIZE SLEEP -/-- TTX/MIX -/-P.SIZE P.SIZE PBP PBP SUBPAGE SLEEP SUBPAGE SIZE P.SIZE PBP TTX/MIX V.DOLBY SLEEP SUBPAGE SLEEP SUBPAGE SIZE V.DOLBY SLEEP SUBPAGE SLEEP SUBPAGE SIZE PBP LOCATE PIP ON ON HOLD DUAL HOLDI/II LIST/FLOF DUAL I/II LIST/FLOF CANCEL PRE-CH LOCATE LOCATE DUAL HOLDI/II LIST/FLOF DUAL I/II LIST/FLOF CANCEL P.SIZE PBP LOCATE SIZE PIP PRE-CH PBP HOLD P.SIZE ¨ S.STD P.STD MUTE UK The Auto store is selected. SOURCE AUTO Result: ¨ ¨ ¨ ¨ ¨ ¨ P.SIZE CANCEL SIZE PIP PIP ON ON LOCATE LOCATE P.SIZE PBP PBP CANCEL SIZE PIP PIP ON ON LOCATE LOCATE English-17 ¨ rubens_monitor_eng 1/28/03 8:40 PM Page 18 Storing Channels Manually You can store up to 100 channels, including those received via cable Power Power networks. When storing channels manually, you can choose: Channel Auto store Manual store Name Add/Erase Fine tune Channel sort ¨ ¨ ¨ ¨ ¨ ¨ ◆ Whether or not to store each of the channels found ◆ The programme channel which you SOURCE SOURCE AUTO number DISPLAY AUTO of each DISPLAY STILL stored STILL Power Power wish to identify SOURCE 1 Channel à à ¨ ¨ ¨ Color system AUTO Sound system BG Search 0MHz Channel C 1 Program P 1 Store ? Channel à à ¨ 2 à à ¨ ¨ ¨ Channel à à ¨ ¨ ¨ S.STD STILL S.STD Press the P▼ or P▲ button to select the Channel. SOURCE SOURCE AUTO DISPLAY AUTO DISPLAY STILL STILL The options available in the Channel group are displayed. 3 Press P.STD the P.STD- or 4 Press the P▼ or P▲ button to select the Manual store. Press the SOURCE SOURCE AUTO DISPLAY AUTO DISPLAY STILL - or + button. Result: + button. S.STD Power S.STD Power The options available in the Manual store group are MUTE EXIT displayed with the ColorEXIT system selected. P.STD is P.STD S.STD MUTE STILL S.STD Power Power If necessary, indicate the broadcasting standard required by pressing EXIT the MUTE - or + button EXIT repeatedly. MUTE Result: Color system AUTO Sound system BG Search 0MHz Channel C 1 Program P 1 Store ? DISPLAY STILL Press the MENU button. Result: 5 Channel P.STD DISPLAY AUTO PowerP.STDPower Result: The main menu is displayed. P.STD S.STD S.STD ¨ ¨ Color system AUTO Sound system BG Search 0MHz Channel C 1 Program P 1 Store ? P.STD SOURCE AUTO The color standards inSTILL thePower followingPower order: SOURCE SOURCE AUTO DISPLAY AUTOare displayed DISPLAY STILL AUTO - PAL - SECAM - NT4.43. 6 SOURCEIndicate SOURCE AUTO the DISPLAY AUTO DISPLAY STILL P.STDor P▲P.STD S.STD Press the P▼ button to select the SoundS.STD system. MUTE MUTE EXIT EXIT sound standard required by pressing the - or + button repeatedly. P.STD P.STD S.STD PRE-CH PRE-CH -/-Result: -/--The sound standards are displayed in the following order: BG - DK - I - L. Power Power 7 Color system AUTO Sound system BG Search 0MHz Channel C 1 Program P 1 Store ? MUTEV.DOLBY MUTE -/-TTX/MIX If you know the TTX/MIX channelPRE-CH number PRE-CH toV.DOLBY be stored, press the P▼ or P▲ EXIT button to select the Channel. Indicate the required number by SOURCE SOURCE AUTO DISPLAY AUTO DISPLAY STILL pressing the Power - or Power + button. -/-- TTX/MIX HOLD TTX/MIX DUAL HOLDI/II V.DOLBY LIST/FLOF DUAL I/II V.DOLBY LIST/FLOF CANCEL EXIT STILL CANCEL If you do not know the channel numbers,P.STD press the P▼ or P▲ button P.STD S.STD to select the Search. Start the search by pressing the - or PRE-CH PRE-CH -/-- SLEEP -/-- SUBPAGE SOURCE SOURCE AUTO DISPLAY AUTO DISPLAY STILL STILL SLEEP SUBPAGE SIZE CANCEL SIZE PIP PIP HOLD DUAL HOLDI/II LIST/FLOF DUAL I/II LIST/FLOF CANCEL +button. ON ON MUTE MUTE EXIT The tuner scans the frequency rangeEXIT until the first P.STD P.STD S.STD S.STD P.SIZE P.SIZE PBPor theSIZE PBP TTX/MIX TTX/MIX V.DOLBYLOCATE V.DOLBY SLEEP SUBPAGE SLEEP SUBPAGE SIZE PIP PIP channel channel that you LOCATE selected is received on your screen. ON ON MUTE MUTE PRE-CH -/--/-HOLDI/II PBP LIST/FLOF DUAL I/IILOCATE LIST/FLOF CANCEL CANCEL LOCATE P.SIZEHOLD P.SIZE PBPDUAL S.STD Result: Channel à à ¨ ¨ ¨ Color system AUTO Sound system BG Search 0MHz Channel C 1 Program P 1 Store ? 8 9 Channel à à ¨ English-18 To assign a programme number to a channel, select the Program by pressing the P▼ or P▲ button. Press the - or + button to find the correct number. TTX/MIX TTX/MIX V.DOLBY V.DOLBY SLEEP SUBPAGE SLEEP SUBPAGE SIZE SIZE PIP PIP ON Press the P▼ or P▲ button toON select the Store. Select the OK by pressing button. LOCATE HOLD DUAL HOLDI/II LIST/FLOF DUAL I/II LIST/FLOF CANCEL CANCEL P.SIZE the P.SIZE PBP - orPBP + LOCATE Result: ¨ ¨ Color system AUTO Sound system BG Search 0MHz Channel C 1 Program P 1 Store OK 10 EXIT PRE-CH MUTE MUTE EXIT The programme PRE-CH PRE-CH number are -/-- channel -/-- and associated stored. SLEEP SUBPAGE SLEEP SUBPAGE SIZE SIZE PIP Repeat Steps 7 to TTX/MIX 9 for each channelV.DOLBY to be stored. TTX/MIX V.DOLBY MUTE MUTE EXIT P.SIZE HOLD DUAL HOLDI/II LIST/FLOF DUAL I/II LIST/FLOF CANCEL SLEEP SUBPAGE SLEEP SUBPAGE SIZE P.SIZE -/-- P.SIZE PBP -/-- PBP SIZE PIP ON -/-LOCATE TTX/MIX EXIT P.SIZE PBP TTX/MIX CANCEL PIP HOLD ON -/-LOCATESLEEP TTX/MIX TTX/MIX PRE-CH PRE-CHP.SIZE HOLD TTX/MIX V.DOLBY -/-- ON -/-PBP LOCATE TTX/MIX PIP ONPRE-CH P LOCATE V.DOLBY V DUAL HOLDI/II LIST/FLOF DUAL I/II LIST/FLOF CANCEL C PRE-CH PRE-CH SUBPAGE SLEEP SUBPAGE SIZE SIZE PIP ON V.DOLBY V.DOLBY LOCATE P.SIZE PBP PBP DUAL HOLDI/II LIST/FLOF DUAL I/II LIST/FLOF CANCEL V.DOLBY EXIT CANCEL L rubens_monitor_eng 1/28/03 8:40 PM Page 19 Giving Channels Names Power Power If channel name information is broadcast when you store the channels either manually or automatically, the names are assigned Power to the SOURCE AUTOhowever DISPLAY AUTO change DISPLAY STILL these STILL channels directly. YouSOURCE can names or assign new Power names as required. SOURCE P.STD AUTO SOURCE 1 P.STD DISPLAY AUTO DISPLAY S.STD Press the MENU button. Result: P.STD P.STD S.STD Power Press the P▼ or P▲ button to select the Channel. Channel Result:SOURCE The SOURCE options the AUTO available DISPLAY AUTO inDISPLAY STILLChannel STILLgroup are displayed. 3 Press the Power - or P.STD 4 5 Power + button. P.STD S.STD S.STD Press the SOURCE P▼ or P▲ button DISPLAY toAUTO select DISPLAY the Name. Press SOURCE AUTO STILL STILL the + button. Result: P P P P 1 2 3 4 S.STD EXIT S.STD EXIT Press the 7 Press the P▼ or P▲ button to select a letter (A~Z), a number(0~9) or a symbol (-, space). Move on the previous or next letter by pressing the - or + button. 8 Repeat Steps 5 to 7 for each channel to be assigned to a new PRE-CH PRE-CH -/-name. -/-- - or MUTE + button. MUTE EXIT MUTE MUTE TTX/MIX TTX/MIX PRE-CH EXIT EXIT V.DOLBY V.DOLBY DUAL HOLDI/II V.DOLBY LIST/FLOF DUAL I/II LIST/FLOF CANCEL PRE-CH -/-- SLEEP SUBPAGE SLEEP CANCEL SUBPAGE SIZE SIZE PIP DUAL I/II LIST/FLOF PRE-CH -/--/-ON SLEEP LOCATE LOCATE P.SIZE P.SIZE PBP PBP SUBPAGE SIZE PIP TTX/MIX TTX/MIX V.DOLBY V.DOLBY ON PRE-CH PRE-CH -/--/-LOCATE PBP HOLD DUAL HOLDI/II LIST/FLOF DUAL I/II LIST/FLOF CANCEL CANCEL SLEEP HOLD P.SIZE SLEEP P.SIZE TTX/MIX HOLD DUAL I/II LIST/FLOF SLEEP SUBPAGE CANCEL PIP PRE-CH ON V.DOLBY SUBPAGE SLEEP SUBPAGE SIZE V.DOLBY CANCEL HOLD TTX/MIX A EXIT TTX/MIX HOLD Channel EXIT EXIT 6 P.SIZE 1 2 3 4 The current channels are displayed. P.STD MUTE P.STD MUTE MUTE TTX/MIX P P P P - or If necessary, select the channel to be assigned to a new name by MUTE pressing the P▼ or P▲ button. -/-- ¨ ¨ ¨ ¨ ¨ ¨ The main menu is displayed. S.STD Power 2 S.STD STILL Channel Auto store Manual store Name STILL Add/Erase Fine tune Channel sort SIZE PIP SIZE PIP ON P.SIZE PBP LOCATE V.DOLBY PIP DUAL HOLDI/II LIST/FLOF DUAL I/II LIST/FLOF CANCEL ON CANCEL ON P.SIZE PBP PBP LOCATE SUBPAGE SLEEP SUBPAGE SIZE P.SIZE PBP PBP LOCATE SIZE PIP PIP ON ON LOCATE LOCATE English-19 rubens_monitor_eng 1/28/03 8:40 PM Page 20 Skipping Unwanted Channels You can exclude the channels you chosen from the channels you scanned. When you scan through the stored channels, those you have Power Power chosen to skip are not displayed. Channel Auto store Manual store Name Add/Erase Fine tune Channel sort ¨ ¨ ¨ ¨ ¨ ¨ Power All channels that you SOURCE do not specifically choose STILL to skip are displayed SOURCE AUTO DISPLAY AUTO DISPLAY STILL Power during scanning. SOURCE SOURCEP.STDAUTO P.STD DISPLAY 1 P P P P 1 2 3 4 Added Added Added Added 2 Result: DISPLAY Power P.STD The main menu is S.STD displayed. Press the P▼ or P▲ button to select the Channel. SOURCE AUTO S.STD Press the MENU button. Power Result: P.STD Channel STILL S.STD AUTO DISPLAY SOURCE AUTO DISPLAY The options available in the Channel group are displayed. P.STD 3 4 Channel P P P P 1 2 3 4 Press the P.STD - or S.STD + S.STD button. Press the P▼ or P▲ button to select the Add/Erase. Press the - or + button. Result: Erased Added Added Added The stored channels are displayed. MUTE MUTE EXIT EXIT 5 Press the P▼ or P▲ button to select the channel to add or erase. MUTE If necessary, select the Added or Erased by pressing the - or MUTE EXIT + button. 6 Repeat Step 5 for each channel to be added or erased. MUTE MUTE -/-- -/-- TTX/MIX PRE-CH -/-- P -/-PRE-CHV.DOLBY TTX/MIX Power PRE-CH V.DOLBY TTX/MIX Power V DUAL HOLD I/II do LIST/FLOF DUAL I/II have LIST/FLOF CANCEL CANCEL the channel, If the reception is clear, you not to fine-tune TTX/MIX HOLD V.DOLBY as this is done automatically during the search and store operation. PRE-CH -/-HOLD DUAL I/II LIST/FLOF If however signal SOURCE isAUTO weakPRE-CH or distorted, SOURCE DISPLAY AUTO DISPLAY STILLyou may STILL have to fine-tune -/-- the SUBPAGE SLEEP SUBPAGE SIZE PIP PIP HOLD SLEEP DUAL I/II LIST/FLOF CANCEL SIZE the channel manually. Channel ¨ ¨ ¨ ¨ ¨ ¨ ON Power P.STD P.STD S.STD PBP SIZEV.DOLBY PBP PIP LOCATE TTX/MIX SLEEP P.SIZE SUBPAGEP.SIZE Power 1 Press the MENU button. SOURCE Result: SOURCE AUTO DISPLAY AUTO 2 Fine tune 7 3 ON DISPLAY STILL ON S.STD LOCATE STILL TTX/MIX SLEEP SUBPAGE HOLD P.SIZE DUAL I/II PBP LIST/FLOF The main menu is displayed. HOLDP.SIZEDUAL I/IIPBP LIST/FLOF English-20 EXIT EXIT Fine Tuning Channel Reception Auto store Manual store Name Add/Erase Fine tune Channel sort STILL STILL SLEEP SUBPAGE SLEEP SUBPAGEThe options SIZE PIP Result: available in the Channel group are displayed. ON P.SIZE PBP Press the - or + button. LOCATE P.SIZE PBP 4 Press the P▼ or P▲ button to select the Fine tune. 5 Obtain a sharp and clear picture and good sound quality by pressing the - or + button. MUTE MUTE EXIT EXIT MUTE -/-- TTX/MIX EXIT -/-- TTX/MIX CANCEL CANCEL LOCATE Press select the Channel. P.STD the P▼ P.STDor P▲ button toS.STD S.STD MUTE V.DOLBY SIZE EXIT PRE-CH PRE-CH V.DOLBY V.DOLBY SIZE PIP ON LOCATE rubens_monitor_eng 1/28/03 8:40 PM Page 21 Sorting the Stored Channels You can exchange the numbers of two channels, in order to: Channel Power Power order in which the channels have been ◆ Modify the numeric automatically stored. ◆ Give easilySOURCE remembered SOURCE AUTO DISPLAY AUTO numbers DISPLAY STILL to the STILLchannels that you Power Power watch most often. P.STD SOURCE 1 2 S.STD DISPLAY STILL S.STD STILL Power Result:Power P.STDThe main P.STD menu is displayed. S.STD S.STD DISPLAY AUTO Press the MENU button. Channel From To Store Press the P▼ or P▲ button to select the Channel. SOURCE SOURCE AUTO Result: Power 3 P.STD SOURCE AUTO DISPLAY AUTO DISPLAY STILL STILL Power - or + S.STD button. S.STD SOURCE The options available in the Channel group are displayed. Press the P.STD P.STD SOURCE AUTO DISPLAY STILL AUTO DISPLAY Press the P.STD Result: SOURCE 6 + button. P.STD STILL S.STD S.STD SOURCE AUTO The options available in the Channel sorting group are DISPLAY MUTE DISPLAY MUTE EXIT EXIT AUTO displayed withSTILL the From is selected. P.STD Select the channel number that you wish to change by pressing the S.STD MUTE EXIT - orMUTE + button repeatedly. EXIT P.STD STILL MUTE EXIT P 1 P 3 ? From To Store P 3 P 1 OK EXIT Press the P▼ or P▲ button to select the Store. Select the OK to confirm the exchange of channel numbers by pressing the - or PRE-CH PRE-CH -/--/-+ button. MUTE MUTE Channel EXIT EXIT The selected channel is exchanged with the one chosen PRE-CH number. -/--previously -/-- stored to thePRE-CH TTX/MIX TTX/MIX V.DOLBY V.DOLBY Result: 8 Channel From S.STDTo Store Press the P▼ or P▲ button to select the To. Select the new number by which you wish to identify the channel by pressing the - or + button repeatedly. MUTE 7 - or P 1 P-? Power 4 Power Press the P▼ or P▲ button to select the Channel sorting. 5 ¨ ¨ ¨ ¨ ¨ ¨ Auto store Manual store Name Add/Erase Fine tune Channel sort MUTE For all the channels to move to the required channel numbers, EXIT repeat TTX/MIX steps 7 after select the From by pressing the P▼ or P▲ HOLD 5 to DUAL HOLD I/II LIST/FLOF DUAL I/II LIST/FLOF CANCEL CANCEL TTX/MIX V.DOLBY V.DOLBY button. EXIT MUTE -/-- TTX/MIX -/-HOLD TTX/MIX -/-SLEEP HOLD -/-SLEEP HOLD PRE-CH SUBPAGE SLEEP SUBPAGE SIZEI/II PRE-CH SIZE PIP DUAL HOLDI/II LIST/FLOF DUAL LIST/FLOF CANCEL ON PIP CANCEL ON P.SIZE TTX/MIX SLEEP LOCATE P.SIZE PBP PBP V.DOLBY V.DOLBY SUBPAGE SLEEP SUBPAGE SIZE SIZE PIP PRE-CH ON LOCATE PIP DUAL HOLD I/II LIST/FLOF DUAL I/II LIST/FLOF CANCEL P.SIZE P.SIZE PBP PBP V.DOLBY PRE-CH SUBPAGE SLEEP SUBPAGE SIZE SIZE PIP DUAL I/II LIST/FLOF TTX/MIX P.SIZE P.SIZE PBP PBP CANCEL ON V.DOLBY LOCATE SLEEP SUBPAGE SIZE PIP HOLD DUAL I/II LIST/FLOF P.SIZE PBP SLEEP SUBPAGE CANCEL ON LOCATE SIZE PBP LOCATE TTX/MIX -/-- PIP HOLD ON TTX/MIX LOCATE SLEEP HOLD P.SIZE SLEEP V.DOLBY PRE-CH DUAL I/II LIST/FLOF CANCEL V.DOLBY SUBPAGE SIZE DUAL I/II LIST/FLOF PIP CANCEL ON LOCATE PBP SUBPAGE PIP ON P.SIZE CANCEL LOCATE PRE-CH -/-- ON SIZE PIP ON P.SIZE PBP LOCATE LOCATE English-21 rubens_monitor_eng 1/28/03 8:40 PM Page 22 Changing the Picture Standard Power Picture à Mode Brightness Contrast Sharpness Color Tint Size Custom ¨ You can selectSOURCE the type of picture best corresponds to your SOURCE AUTO DISPLAY AUTOwhich DISPLAY STILL STILL Power Power viewing requirements. P.STD 1 à 2 SOURCE AUT UTO DISPLA DISPLAY P.STD .STD 3 STILL 4 P S.STD SOURCE P.STD - or P.STD DISPLAY STILL STILL S.STD S.STD EXIT EXIT PRE-CH PRE-CH V.DOLBY V.DOLBY + button. The Mode is selected. Select the required picture effect by pressing the - or + button repeatedly. The following picture effects are available: MUTE EXIT EXIT Custom MUTE - Standard - Natural - Mild. You can also set these options simply by pressing the P.STD (Picture Standard) button. MUTE ➣ EXIT DISPLAY AUTO The options available in the Picture group are displayed. Press the ➣ MUTE SOURCE AUTO Press the P▼ or P▲ button to select the Picture. Result: S.STD .STD S.STD The main menu is displayed. Result: Power P.STD Press the MENU button. Result: ¨ Wide Power MUTE On the Picture menu, if you change the Brightness, Contrast, Sharpness, Color or Tint (NTSC only) settings, the Custom is selected automatically. -/-- -/-- PRE-CH PRE-CH V.DOLBY V.DOLBY -/-- PRE-CH -/-- TTX/MIX TTX/MIX Adjusting the Picture Settings TTX/MIX V.DOLBY HOLD DUAL I/II LIST/FLOF SLEEP SUBPAGE P.SIZE PBP CANCEL HOLD DUAL HOLDI/II LIST/FLOF DUAL I/II LIST/FLOF CANCEL CANCEL Power Power TTX/MIX SIZE ON à à TTX/MIX PIP Picture LOCATE Mode Brightness Contrast Sharpness Color Tint Size -/-- Custom ¨ SLEEP settings SUBPAGE SLEEP SUBPAGE SIZE allow SIZE PIP PIP Your set has several you to STILL control picture SOURCE SOURCE AUTO which DISPLAY AUTO DISPLAY STILL HOLD DUAL HOLDI/II LIST/FLOF DUAL I/II LIST/FLOF CANCEL CANCEL ON ON quality. Power Power P.SIZE P.STD 1 2 Power Power LOCATE S.STD SLEEP STILL P.SIZE P.STD P.STD S.STD S.STD SOURCE AUTObutton DISPLAY AUTO DISPLAY STILL STILL Press the P▼ orSOURCE P▲ to select the Picture. SUBPAGE SLEEP SUBPAGE SIZE P.SIZE PBP PBP The options available in the Picture group are displayed. P.STD 70 LOCATE S.STD The main menu is displayed. Result: Brightness PBP SOURCE AUTO AUTO DISPLAY STILL Press the MENUSOURCE button. DISPLAY Result: ¨ Wide P.SIZE PBP P.STD P.STD S.STD S.STD 3 Press the 4 Select the option (Brightness, Contrast, Sharpness, Color or Tint-NTSC only) to be adjusted by pressing the P▼ or P▲ button. Press the - or + button. - or + button. MUTE EXIT Result: MUTEThe horizontal bar is displayed. 5 Press the MUTE ➣ - or MUTE EXIT + button to reach the required setting. EXIT EXIT If you make any changes to these settings, the picture standard is automatically switched to Custom. MUTE MUTE -/-- -/-- EXIT EXIT PRE-CH PRE-CH English-22 TTX/MIX -/-HOLD TTX/MIX TTX/MIX -/-- V.DOLBY V.DOLBY PRE-CH PRE-CH DUAL HOLDI/II LIST/FLOF DUAL I/II LIST/FLOF CANCEL CANCEL TTX/MIX V.DOLBY V.DOLBY SIZE PIP PIP ON ON LOCATE LOCATE SOURCE AUTO DISPLAY STILL P.STD S.STD MUTE EXIT Selecting the Picture Format Power Power You can selectSOURCE the picture which best corresponds to your SOURCE AUTOformat DISPLAY AUTO DISPLAY STILL STILL viewing requirements. Power Power P.STD 1 S.STD S.STD Press the MENU button. Result: 2 P.STD à SOURCE SOURCE AUTO P.STD P.STD DISPLAY AUTO DISPLAY STILL The main menu is displayed. S.STD Press the P▼ or P▲ button to select the Picture. Result: Custom à TTX/MIX The options available in the Picture group are displayed. 3 Press the 4 Press the P▼ or P▲ button to select the Size. 5 Select the required picture format by pressing the - or button repeatedly. The following picture MUTE MUTE EXIT formats EXITare available: Wide - Normal 1 - Normal 2 - Zoom 1 - Zoom 2. - or Picture Mode Brightness Contrast STILL Sharpness Color -/--Tint Size S.STD + button. PRE-CH Wide V.DOLBY HOLD DUAL DU AL I/II LIST/FLOF SLEEP SUBPAGE SUBP GE P.SIZE .SIZE PBP SIZE CANCEL PIP ON ➣ You can also select these options simply by pressing the P.SIZE (Picture Size) button. MUTE -/-- TTX/MIX -/-- TTX/MIX PRE-CH PRE-CH V.DOLBY V.DOLBY -/-- Freezing the Current Picture HOLD DUAL HOLDI/II LIST/FLOF DUAL I/II LIST/FLOF CANCEL MUTE -/-- EXIT EXIT PRE-CH PRE-CH V.DOLBY V.DOLBY LOCATE LOCA TE CANCEL TTX/MIX TTX/MIX SLEEP SIZE SIZE PIP PIP Press the STILLSLEEP buttonSUBPAGE on the SUBPAGE remote control to freeze the picture on DUAL HOLDI/II LIST/FLOF DUAL I/II LIST/FLOF CANCEL CANCEL ON ONHOLD a given frame. To return to normal viewing, press the STILL button again. Power LOCATE LOCATE P.SIZE P.SIZE PBP PBP SLEEP P.SIZE SUBPAGE SLEEP SUBPAGE SIZE P.SIZE PBP PBP SIZE PIP PIP ON ON LOCATE LOCATE SOURCE AUT UTO DISPLA DISPLAY STILL P.STD .STD S.STD .STD MUTE EXIT PRE-CH -/-- TTX/MIX V.DOLBY English-23 HOLD DUAL I/II LIST/FLOF SLEEP SUBPAGE P.SIZE PBP SIZE CANCEL PIP ON LOCATE ¨ ¨ rubens_monitor_eng 1/28/03 8:40 PM Page 24 Changing the Sound Standard Power Mode Bass Treble Dolby Speaker MTS Sound à Custom ¨ You can selectSOURCE the type of special effect toSTILL be used when SOURCE AUTO DISPLAY AUTOsound DISPLAY STILL Power Power watching a given broadcast. P.STD : : à Off Off Mono 1 ¨ AUT UTO DISPLA DISPLAY P.STD .STD 3 STILL 4 P S.STD SOURCE SOURCE AUTO P.STD P.STD - or STILL S.STD S.STD EXIT EXIT PRE-CH PRE-CH V.DOLBY V.DOLBY DUAL HOLDI/II LIST/FLOF DUAL I/II LIST/FLOF CANCEL CANCEL + button. The Mode is selected. Select the required sound effect by pressing the - or + button repeatedly. The following sound effects are available: MUTE EXIT EXIT Custom MUTE - Standard - Music - Movie - Speech. You can also set these options simply by pressing the S.STD (Sound Standard) button. MUTE MUTE EXIT -/-- Adjusting the Sound Settings PRE-CH -/-- TTX/MIX HOLD DISPLAY STILL The options available in the Sound group are displayed. Press the ➣ MUTE DISPLAY AUTO Press the P▼ or P▲ button to select the Sound. Result: S.STD .STD S.STD The main menu is displayed. Result: Power P.STD Press the MENU button. Result: 2 SOURCE Power Power -/-- PRE-CH PRE-CH V.DOLBY -/-- Power TTX/MIX TTX/MIX V.DOLBY SOURCE SOURCE AUTO DISPLAY AUTO STILL Power DISPLAY Power V.DOLBY DUAL I/II LIST/FLOF SLEEP Mode SUBPAGE à CANCEL Sound SIZE PIP Custom Bass ON P.SIZETreble PBP LOCATE Dolby Speaker MTS à : : Off Off Mono ¨ STILL HOLD canDUAL HOLD LIST/FLOF DUAL I/IIto LIST/FLOF CANCEL The sound settings be I/II adjusted suit yourCANCEL personal preferences. TTX/MIX 1 ¨ -/-- P.STD P.STD SOURCE SLEEP SLEEP SIZE Power SUBPAGE Power SUBPAGE Press the MENU button. Result: ON S.STD DISPLAY AUTO PIP HOLD ON The main menuP.STD is displayed. P.STD P.SIZE SOURCE 2 S.STD SOURCE AUTO SIZE PIP P.SIZE PBP SOURCE AUTO PBP DISPLAY AUTO LOCATE DISPLAY STILL TTX/MIX DISPLAY STILL S.STD LOCATE STILL SLEEP Press the P▼ or P▲ button to select the Sound. STILL S.STD SUBPAGE SLEEP SUBPAGE SIZE SIZE PIP PIP ON ON LOCATE LOCATE Result: P.STDThe options the SoundS.STD group are displayed. P.STD available in S.STD P.SIZE Bass P.SIZE PBP PBP 3 Press the 4 Select the option (Bass or Treble) to be adjusted by pressing the P▼ or P▲ button. Press the - or + button. - or + button. 47 Result: 5 The horizontal bar is displayed. MUTE Press the MUTE - or EXIT + button to reach the required setting. MUTE ➣ EXIT MUTE EXIT EXIT If you make any changes to these settings, the sound standard is automatically switched to Custom. MUTE MUTE -/-- -/-- EXIT EXIT PRE-CH PRE-CH -/-V.DOLBY V.DOLBY English-24 TTX/MIX HOLD -/-SLEEP TTX/MIX TTX/MIX -/-- PRE-CH PRE-CH V.DOLBY V.DOLBY SIZE PIP I/II LIST/FLOF PIP I/II LIST/FLOF DUAL HOLD DUAL CANCEL V.DOLBY V.DOLBY ON ON CANCEL DUAL HOLDI/II LIST/FLOF DUAL I/II LIST/FLOF CANCEL TTX/MIX TTX/MIX CANCEL PRE-CH PRE-CH -/-SUBPAGE SLEEP SUBPAGE SIZE HOLD TTX/MIX rubens_monitor_eng 1/28/03 8:40 PM Page 25 Enjoying the Dolby Sound Power Power This feature provides a AUTO home theater-like Dolby STILL effect by mixing the SOURCE SOURCE DISPLAY AUTO DISPLAY STILL left and right speakers. Power 1 Power P.STD SOURCE SOURCE AUTO Result: 2 P.STD S.STD S.STD Press the MENU button. DISPLAY AUTO DISPLAY STILL STILL The main menu is displayed. Mode Bass Treble Dolby Speaker MTS à à Sound Custom : : On Off Mono ¨ ¨ Press the to select the Sound. P.STD P.STDP▼ or P▲ button S.STD S.STD Result: The options available in the Sound group are displayed. 3 Press the 4 Press the P▼ or P▲ button to select the Dolby. 5 For enjoying the Dolby sound effect, select the On by pressing the - orMUTE + button. MUTE EXIT EXIT ➣ MUTE - or + button. You can also select simply by pressing the V.DOLBY (Virtual Dolby) button. MUTE EXIT -/-- -/-- EXIT PRE-CH PRE-CH V.DOLBY V.DOLBY Switching the Internal Speakers On/Off TTX/MIX Power TTX/MIX Power -/-- PRE-CH -/-- PRE-CH HOLD speakers DUAL HOLD LIST/FLOF DUAL I/II LIST/FLOF CANCEL When the internal switched off, allCANCEL the sound is routed to SOURCE SOURCE AUTOI/II are DISPLAY AUTO DISPLAY STILL STILL the external speakers. TTX/MIX 1 2 TTX/MIX V.DOLBY V.DOLBY PowerSLEEP Power SLEEP SIZE SIZE PIP PIP P.STD SUBPAGE P.STD SUBPAGE S.STD S.STD ON ON Press the MENU button. HOLD DUAL HOLD I/II LIST/FLOF DUALSOURCE I/II LIST/FLOF CANCEL CANCEL SOURCE AUTO DISPLAY AUTO DISPLAY STILL STILL LOCATE LOCATE P.SIZE PBP menuPBP Result: P.SIZEThe main is displayed. Mode Bass Treble Dolby Speaker MTS à à Sound Custom : : SLEEP SLEEP SIZE PIPto select PIPthe PressSUBPAGE the P▼ orSIZE P▲P.STD button Sound.S.STD P.STDSUBPAGE S.STD ON ON Result: P.SIZE The options available in the Sound group are displayed. P.SIZE PBP LOCATE PBP LOCATE 3 Press the 4 Press the P▼ or P▲ button to select the Speaker. 5 Select the On to be routed the sound to the internal speakers by pressingMUTE the - or + button. EXIT MUTE EXIT - or MUTE -/-- TTX/MIX + button. MUTE -/-- TTX/MIX EXIT EXIT PRE-CH PRE-CH V.DOLBY V.DOLBY PRE-CH PRE-CH -/--/-HOLD DUAL HOLDI/II LIST/FLOF DUAL I/II LIST/FLOF CANCEL CANCEL TTX/MIX TTX/MIX SLEEP SUBPAGE SLEEP SUBPAGE SIZE V.DOLBY V.DOLBY SIZE PIP PIP English-25 On On Mono ¨ ¨ Power rubens_monitor_eng SOURCE 1/28/03 8:40 PM AUTO DISPLAY P.STD Page 26 STILL S.STD Choosing the MTS (Multichannel Television Stereo) Power MUTE Mode Bass Treble Dolby Speaker MTS à à Sound EXIT Custom : : On On Mono ¨ Depending on the particular program being broadcast, you can listen to Stereo, Mono, or Dual I/II (Dual is usuallySTILL a foreign-language SOURCE SOURCE AUTO DISPLAY AUTO I/IIDISPLAY STILL translation). Power Power P.STD ¨ Power 1 P.STD S.STD Press the MENU button. Result: S.STD SOURCE SOURCE AUTO 2 TTX/MIX V.DOLBY .DOLBY HOLD DUAL DU AL I/II LIST/FLOF SLEEP SUBPAGE SUBP GE P.SIZE .SIZE PBP SIZE CANCEL DISPLAY STILL STILL P.STD P.STD S.STD S.STD EXIT EXIT PRE-CH PRE-CH V.DOLBY V.DOLBY DUAL HOLDI/II LIST/FLOF DUAL I/II LIST/FLOF CANCEL CANCEL The main menu is displayed. PRE-CH -/-- DISPLAY AUTO Press the P▼ or P▲ button to select the Sound. Result: The options available in the Sound group are displayed. 3 Press the 4 Press the P▼ or P▲ button to select the MTS. 5 Select the required sound mode by pressing the - or + button repeatedly. The sound modesEXIT are displayed MUTE MUTE EXIT in the following order: Mono - Stereo - Dual I - Dual II.. - or + button. PIP ON LOCATE LOCA TE MUTE MUTE You can also set these options simply by pressing the DUAL I/II button. The “DUAL I/II” button displays/controls the processing and output of the audio signal. ➣ -/-- PRE-CH -/-- PRE-CH ◆ If the receiving conditions deteriorate, listening will be easier if the mode is set to the Mono. TTX/MIX V.DOLBY V.DOLBY switching occurs, ◆ IfTTX/MIX the stereo signal is weak and an automatic -/--/-then switch to the Mono. HOLD receiving DUAL HOLDI/IIa mono LIST/FLOF DUAL I/IIsound LIST/FLOF CANCEL CANCEL ◆ When in the AV mode, connect to the “AUDIO (L)” connector on the rear panel. TTX/MIX TTX/MIX SLEEP SUBPAGE SLEEP SUBPAGE SIZE SIZE PIP ON P.SIZE P.SIZE PBP PBP LOCATE PIP HOLD ON LOCATE SLEEP P.SIZE English-26 SUBPAGE SLEEP SUBPAGE SIZE P.SIZE PBP PBP SIZE PIP PIP ON ON LOCATE LOCATE rubens_monitor_eng 1/28/03 8:40 PM Page 27 Viewing the Picture In Picture (PIP) You can displayPower a sub picture Power within the main picture of TV program or external A/V devices such as VCR or DVD. In this way you can watch TV program or monitor the video input from any connected devices Power Power SOURCE AUTO video DISPLAY AUTO STILL STILL while watching TV or SOURCE other input.DISPLAY 1 P.STD Press the MENU P.STD button. Result: 2 S.STD Power SOURCE SOURCE AUTO P.STD P.STD Press the 4 Press the P▼ or P▲ button to select the PIP. Press the + button. SOURCE AUTO DISPLAY AUTO 6 S.STD ¨ : à à ¨ On TV Small ¨ ¨ STILL - or S.STD S.STD The options available in the PIP group are displayed. MUTE MUTE EXIT Select the On by pressingSOURCE the SOURCE -AUTO or EXIT Function DISPLAY STILL +AUTO button.DISPLAY MUTE STILL MUTE EXIT You can also activate the PIP simply by pressing the PIP ON button. To deactivate the PIP,P.STD press it again. S.STD P.STD S.STD Press the P▼ or P▲ button to select the TV/Video. Select a source Power Power EXIT MUTE EXIT of the sub picture by pressing the MUTE - or + button. Result: English ¨ Function PIP TV/Video Size Position S.STD DISPLAY STILL Power P.STD Power P.STD ➣ S.STD + button. SOURCE 5 STILL STILL The options available in the Function group are displayed. P.STDPower P.STDPower S.STD 3 Result: DISPLAY STILL Off Power AUTO DISPLAY AUTO DISPLAY STILL Press the P▼ or P▲ buttonSOURCE to selectSOURCE the Function. - or DISPLAY AUTO à ¨ ¨ à S.STD The main menu is displayed. Result: Function Sleep Timer PIP PBP Language PIP EXIT TV/Video Size Position : à à ¨ On TV Small ¨ ¨ Power The sources are displayed in the following order: SOURCE SOURCE AUTO DISPLAY AUTO DISPLAY STILL TV - Scart - Video - S-Video. SOURCE STILL AUTO DISPLAY P.STD STILL S.STD Function 7 -/-- PRE-CH -/-- PRE-CH Press the P▼ or P▲ button to select the Size. Select a size of the MUTE P.STD MUTE P.STD EXIT S.STD EXIT sub picture by pressing the - or + button. -/-- -/-- S.STD PRE-CH Result:TTX/MIX The TTX/MIX sizes are displayedV.DOLBY in the following V.DOLBY order: Small - Medium - Large. ➣ 8 TTX/MIX TTX/MIX V.DOLBY You can also selectDUAL these options simply by pressing the SIZE HOLD DUAL HOLDI/II LIST/FLOF I/II LIST/FLOF CANCEL CANCEL button. PRE-CH EXIT PRE-CH MUTE-/-- MUTE-/-EXIT HOLD DUAL HOLDI/II LIST/FLOF DUAL I/II LIST/FLOF CANCEL Press the P▼ orSUBPAGE P▲ button to selectSIZE the Position. Move the sub SLEEP SLEEP SUBPAGE SIZE PIP PIP picture counterclockwise byTTX/MIX pressingTTX/MIX the or + button.V.DOLBY V.DOLBY ON ON ➣ SIZE PIP ON LOCATE PBP EXIT EXIT SIZE PIPV.DOLBY PIPV.DOLBY P.SIZE P.SIZE PBP ON ON PRE-CH PRE-CH -/--/-HOLD DUAL HOLD I/II LIST/FLOF DUAL I/II LIST/FLOF CANCEL CANCEL LOCATE LOCATE P.SIZE P.SIZE PBP PBP à à ¨ MUTE PIP PIP TV/Video Size ON Position : à à ¨ ON LOCATE PRE-CH -/-- V.DOLBY HOLD DUAL DU AL I/II LIST/FLOF SLEEP SUBPAGE SUBP GE P.SIZE .SIZE PBP SIZE P.SIZE PRE-CH ON TTX/MIX TTX/MIX LOCATE P.SIZE PBP PBP V.DOLBY LOCATE V.DOLBY HOLD DUAL HOLDI/II LIST/FLOF DUAL I/II LIST/FLOF CANCEL CANCEL SLEEP SUBPAGE SLEEP SUBPAGE SIZE English-27 P.SIZE P.SIZE PBP PBP On TV Small CANCEL PIP ON ON PRE-CH PIP -/--/-SUBPAGE SLEEP SUBPAGE SIZE SIZE PIP ¨ ¨ EXIT CANCEL HOLD P.SIZE DUAL HOLDI/II P.SIZE LIST/FLOF DUAL I/II PBP LIST/FLOF CANCELLOCATE CANCELLOCATE PBP SLEEP On TV Small V.DOLBY TTX/MIX TTX/MIX SLEEP TTX/MIXSUBPAGE V.DOLBY SIZE V.DOLBY PIP SLEEP SUBPAGE SIZE PIP ON : Function SLEEP SUBPAGE SLEEP SUBPAGE SIZE You can also move the sub picture simply by pressing the LOCATE LOCATE P.SIZE P.SIZE PBP PBP LOCATE button. PRE-CH PRE-CH -/--/-HOLD DUAL HOLDI/II LIST/FLOF DUAL I/II LIST/FLOF CANCEL CANCEL MUTE MUTE TTX/MIX TTX/MIX SLEEP SUBPAGE SLEEP SUBPAGE SIZE PIP TV/Video Size PRE-CH Position SIZE PIP PIP ON ON LOCATE LOCATE LOCATE LOCA TE ¨ ¨ rubens_monitor_eng 1/28/03 8:40 PM Page 28 Viewing the Picture By Picture (PBP; Double Screen) Power Function Sleep Timer PIP PBP Language à ¨ ¨ à Off English ¨ ¨ 1 P.STD Press the MENU P.STD button. Result: 2 Function PBP TV/Video Swap : à ¨ On TV Power When external A/V devices (PC, VCR, or DVD) are connected to your set or watching TV, you can display two video sources simultaneously Power Power AUTO DISPLAY AUTO DISPLAY STILL STILL in the screen.SOURCE SOURCE S.STD Power DISPLAY ¨ 3 Press the 4 Press the P▼ or P▲ button to select the PBP. Press the + button. - or STILL 5 Function : à ¨ On TV ¨ SOURCE AUTO SOURCE AUTO : à ¨ On TV TTX/MIX V.DOLBY P.STD P.STD DUAL DU AL I/II LIST/FLOF SLEEP SUBPAGE SUBP GE SIZE ¨ PBP EXIT S.STD - or DISPLAY AUTO + button. DISPLAY STILL STILL S.STD S.STD MUTE -/-- MUTE PRE-CH PRE-CH MUTE MUTE -/-- 8 Press the TTX/MIX ➣ - or TTX/MIX + button. EXIT EXIT -/-- -/-V.DOLBY EXIT PRE-CH P V.DOLBY V V.DOLBY The main picture and the sub picture are interchanged. TTX/MIX TTX/MIX You can also do by pressing PBP button. HOLD DUAL HOLD I/II simply LIST/FLOF DUAL I/II LIST/FLOF CANCEL the CANCEL -/-- MUTE P.SIZE MUTE SUBPAGE SLEEP SUBPAGE SIZE TTX/MIX P.SIZE PBP LOCATE LOCA TE -/-EXIT SIZE PIP TTX/MIX ON PRE-CH EXIT HOLD PRE-CH DUAL HOLDI/II LIST/FLOF DUAL I/II LIST/FLOF CANCEL PIP ON V.DOLBY V.DOLBY SLEEP SUBPAGE SLEEP SUBPAGE SIZE LOCATE LOCATE PBP PRE-CH PRE-CH -/--/-HOLD DUAL HOLDI/II LIST/FLOF DUAL I/II LIST/FLOF CANCEL CANCEL P.SIZE P.SIZE PBP PBP TTX/MIX TTX/MIX SLEEP SUBPAGE SLEEP SUBPAGE SIZE SIZE PIPV.DOLBY PIPV.DOLBY ON -/-- TTX/MIX -/-- SLEEP SUBPAGE SLEEP SUBPAGE SIZE V.DOLBY V.DOLBY TTX/MIX P.SIZE P.SIZE PBP PBP DUAL HOLDI/II LIST/FLOF DUAL I/II LIST/FLOF CANCEL CANCEL SLEEP SUBPAGE SLEEP SUBPAGE SIZE P.SIZE PBP ON HOLDI/IIPBP LIST/FLOF DUAL I/II LIST/FLOF CANCEL CANCEL LOCATE LOCATE P.SIZEHOLD P.SIZE PBPDUAL PRE-CH PRE-CH HOLD P.SIZE English-28 S.STD EXIT Press the P▼ or P▲ button to select the Swap. ON P.SIZE .SIZE P.STD 7 CANCEL PIP STILL - or The sources are displayed in the following order: TV - Scart - Video - S-Video. SLEEP HOLD DISPLAY STILL Press the P▼ or P▲ button to select the TV/Video. Select a source MUTE EXIT of the sub picture by pressing the MUTE - or + button.EXIT Result: PRE-CH -/-- DISPLAY AUTO You can also activate the PBP simply by pressing the PBP button. To deactivate the PBP, press it again. Result: Function MUTE SOURCE EXIT PBP TV/Video Swap S.STD + button. Select the On by pressing the ➣ 6 MUTE S.STD Power available in the PBP group are displayed. Result: Power The options S.STD PBP TV/Video Swap DISPLAY STILL STILL The options available in the Function group are displayed. P.STDPower P.STDPower S.STD MUTE P.STD P.STD AUTO DISPLAY AUTO DISPLAY STILL Press the P▼ or P▲ buttonSOURCE to selectSOURCE the Function. P.STD AUTO P.STD DISPLAY AUTO Power SOURCE SOURCE SOURCE AUTO The main menu is displayed. Result: Power SOURCE S.STD PBP SIZE PIP PIP ON ON LOCATE LOCATE SIZE PIP PIP ON ON LOCATE LOCATE SIZE PIP ON LOCATE rubens_monitor_eng 1/28/03 8:40 PM Power Page 29 SOURCE AUTO DISPLAY P.STD STILL S.STD Switching Off Automatically Power Power You can select a time period of between 10 and 240 minutes after SOURCE SOURCE AUTO DISPLAY AUTO STILL STILL your set automatically switches off. DISPLAY Power 1 P.STD Press the MENU P.STD button. P.STD P.STD S.STD Press the - or S.STD + button. The Sleep Timer is selected. MUTE ¨ ¨ à à EXIT Off English PRE-CH -/-- TTX/MIX V.DOLBY .DOLBY HOLD DUAL DU AL I/II LIST/FLOF SLEEP SUBPAGE SUBP GE P.SIZE .SIZE PBP SIZE CANCEL PIP ON Select the number of minutes after which your set switches off by pressing the - or + button repeatedly. MUTE Sleep Timer PIP PBP Language STILL The options available in the Function group are displayed. Result: 4 S.STD Press the P▼ or P▲ button to select the Function. Result: 3 S.STD SOURCE SOURCE AUTO DISPLAY AUTO DISPLAY STILL The main menu is displayed. Result: 2 Power Function MUTE EXIT LOCATE LOCA TE EXIT ◆ The preset time intervals: 10, 20, 30, 60, 90, 120, 150, 180, 210, and 240 minutes. ➣ MUTE MUTE EXIT EXIT You can also select simply by pressing the “SLEEP” button. If the sleep timer is already set, the screen displays the remaining time and then your set will be switched off. If the sleep timer is not yet set, displays Off. -/-- TTX/MIX -/-- TTX/MIX PRE-CH PRE-CH V.DOLBY V.DOLBY -/-Displaying-/--Information HOLD PRE-CH DUAL HOLDI/II LIST/FLOF DUAL I/II LIST/FLOF CANCEL TTX/MIX TTX/MIX SLEEP SUBPAGE SLEEP SUBPAGE SIZE PRE-CH CANCEL V.DOLBY V.DOLBY SIZE PIP PIP You can view the setting status of selected source by pressing the ON ON HOLD HOLD I/II LIST/FLOF DUAL I/II LIST/FLOF CANCEL CANCEL information “DISPLAY” button on theDUAL remote control. The displayed are different depending on the selected source.LOCATE LOCATE P.SIZE P.SIZE PBP PBP SLEEP P.SIZE SUBPAGE SLEEP SUBPAGE SIZE P.SIZE PBP PBP SIZE PIP PIP ON ON LOCATE LOCATE Power SOURCE AUT UTO DISPLA DISPLAY STILL P.STD .STD S.STD .STD MUTE EXIT PRE-CH -/-- TTX/MIX English-29 HOLD DUAL I/II LIST/FLOF SLEEP SUBPAGE P.SIZE PBP SIZE V.DOLBY CANCEL PIP ON LOCATE ¨ ¨ rubens_monitor_eng 1/28/03 8:40 PM Page 30 Power Power Adjusting the Brightness and Contrast ➣ SOURCE SOURCE AUTO DISPLAY AUTO DISPLAY STILL button. STILL Preset to the PC mode by pressing the SOURCE Power Power P.STD SOURCE PC ¨ ¨ ¨ ¨ ¨ 1 Image Image Lock Position Color Adjust Recall 1024x768 48kHz Result: 2 59Hz SOURCE AUTO DISPLAY P.STD - or + button. 4 Press the - or + button again. 5 Select the option (Brightness or Contrast) to be adjusted for the color of your computer image by pressing the P▼ or P▲ button. MUTE MUTE EXIT Press the - or + button. EXIT S.STD STILL P.STD P.STD S.STD S.STD MUTE available in the EXITImageEXIT Result: MUTEThe options group are displayed. The horizontal bar is displayed. Press the - or MUTE MUTE -/-- -/-- MUTE MUTE TTX/MIX -/-- TTX/MIX -/-- + button to reach the required setting. EXIT EXIT PRE-CH PRE-CH EXIT EXIT STILL S.STD Power ➣ MUTE EXIT PC Image Brightness Contrast Expanded 1 Size à 1 V.DOLBY DUAL DU AL I/II LIST/FLOF Power ¨ 2 Result: 3 SIZE PIP 4 DISPLAY AUTO DISPLAY STILL STILL The options available in the PC group are displayed. SUBPAGE SLEEP SUBPAGE SIZE SIZE PIP PIP P.STD P.STD HOLD - DUAL HOLDI/II +LIST/FLOF DUAL I/II LIST/FLOF CANCEL CANCEL Press the or button. ON ON Result: P.SIZEThe Image LOCATE P.SIZE PBP is selected. PBP CANCEL Power The main menu is displayed. ON ON P.STD P.STD S.STD S.STD HOLD HOLD LIST/FLOF DUAL LIST/FLOF CANCEL LOCATE LOCATE P.SIZE P.SIZE PBPI/II PBP Press the P▼ orDUAL P▲ button toI/IIselect the PC.CANCEL TTX/MIX TTX/MIX V.DOLBY SOURCE V.DOLBY SOURCE AUTO SLEEP SUBPAGE SUBP GE Power DUAL HOLDI/II LIST/FLOF DUAL I/II LIST/FLOF CANCEL CANCEL TTX/MIX V.DOLBY V.DOLBY SOURCE SOURCE AUTO DISPLAY AUTO DISPLAY STILL button. STILL Preset to the PC mode by pressing the SOURCE Power Power SLEEP SUBPAGE SLEEP SUBPAGE SIZE SIZE PIP PIP PRE-CH PRE-CH -/--/-HOLD DUAL HOLDI/II LIST/FLOF DUAL I/II LIST/FLOF CANCEL CANCEL ON ON P.STD P.STD S.STD S.STD SOURCE SOURCE AUTO DISPLAY AUTO DISPLAY STILL STILL LOCATE LOCATE P.SIZE P.SIZE PBP PBP Press the MENUTTX/MIX button. TTX/MIX V.DOLBY V.DOLBY SLEEP SUBPAGE SLEEP SUBPAGE SIZE SIZE PIP PIP PRE-CH PRE-CH -/--/-- SLEEP TTX/MIX V.DOLBY V.DOLBY PRE-CH PRE-CH Result: PRE-CH -/-- SLEEP S.STD Power P.STD P.STD S.STD AUTO is DISPLAY AUTO DISPLAY STILL Result:SOURCE The SOURCE Image selected. HOLD Selecting the Image SizeTTX/MIX HOLD S.STD Press the 6 75 Power P.STD Press the P▼ or P▲ button to select the PC. Result: Power S.STD STILL 3 ¨ Brightness S.STD DISPLAY STILL AUTO available DISPLAY AUTO inDISPLAY STILLPC group STILLare displayed. Result:SOURCE The SOURCE options the PC à DISPLAY AUTO The main menu is displayed. Power P.STD Power Image Brightness Contrast Expanded 1 Size P.STD SOURCE AUTO Press the MENU button. Press the SUBPAGE SLEEP SUBPAGE SIZE - or SIZE PIP + button again. ON S.STD S.STD LOCATE PIP ON ON P.SIZE .SIZE PBP MUTEThe options MUTE EXITImage EXIT Result: P.SIZE inLOCATE the group are displayed. LOCATE P.SIZE PBP available PBP LOCATE LOCA TE 5 Press the P▼ or P▲ button to select the Size. Select a size of the your computer image by pressing the - or + button. MUTE Result: ➣ MUTE EXIT EXIT The sizes are displayed in the following order: Expanded 1 - Expanded 2 - Normal. You can also select these options simply by pressing the P.SIZE (Picture Size) button. MUTE MUTE EXIT -/-- PRE-CH -/-- EXIT PRE-CH English-30 TTX/MIX -/-- TTX/MIX -/-- HOLD TTX/MIX DUAL HOLDI/II LIST/FLOF DUAL I/II LIST/FLOF CANCEL CANCEL TTX/MIX V.DOLBY V.DOLBY SLEEP HOLD -/-SUBPAGE SLEEP SUBPAGE SIZE SIZE PIP DUAL HOLDI/II LIST/FLOF DUAL I/II LIST/FLOF CANCEL ON -/-PIP CANCEL ON PRE-CH PRE-CH TTX/MIX LOCATE TTX/MIX LOCATE V.DOLBY V.DOLBY P.SIZE P.SIZE PBP V.DOLBY V.DOLBY PRE-CH PRE-CH PBP rubens_monitor_eng 1/28/03 8:40 PM Page 31 Adjusting the Image Quality ➣ Power Power SOURCE SOURCE AUTO Preset to the PC mode by pressing the SOURCE button. Power DISPLAY AUTO DISPLAY STILL STILL Poweris used to fine tune and get the best image by removing This feature noises that create unstable images with jitters and shimmers. SOURCE SOURCE P.STD AUTO 1 STILL S.STD Power DISPLAY S.STD Press the MENU button. Result: P.STD 2 P.STD DISPLAY PC AUTO P.STD The main menu is displayed. S.STD Power ¨ ¨ ¨ ¨ ¨ Image STILL Image Lock Position Color S.STD Adjust Recall 1024x768 48kHz 59Hz Press the P▼ or P▲ button to select the PC. Result: options available inSTILL the PC group are displayed. SOURCE SOURCE AUTO TheDISPLAY AUTO DISPLAY STILL Power 3 Press the P.STD 4 Power - or P.STD PC + button. S.STD Image Lock Coarse Fine S.STD SOURCE AUTObutton DISPLAY AUTO DISPLAY STILL STILL Press the P▼ orSOURCE P▲ to select the Image Lock. Press the or + button. - Result: P.STDThe options the ImageS.STD Lock group are P.STD available in S.STD MUTE MUTE EXIT EXIT displayed. 5 MUTE Select the option (Coarse or Fine) to be adjusted for the quality of MUTE EXIT your computer image by pressing the P▼ or P▲ button. Press the - or + button. Result: 6 MUTE 1344 - or MUTE + button to reach the required setting. EXIT EXIT This feature may change the width of the image. If necessary, adjust PRE-CH PRE-CH -/-- to center. -/-the position -/-- MUTE TTX/MIX Power MUTE TTX/MIX EXIT PRE-CH V.DOLBY EXIT V.DOLBY Power DUAL HOLD I/II LIST/FLOF DUAL I/II LIST/FLOF CANCEL CANCEL TTX/MIX HOLDthe V.DOLBY Changing Image Position ➣ 1 2 3 4 TTX/MIX V.DOLBY Power 59Hz V-Position ON Select the position (H-Position or V-Position) MUTE MUTE EXIT EXIT to be adjusted by LOCATE LOCATE PBP PBP pressingP.SIZE the P▼ P.SIZE or P▲ button. Press the - or + button. Result: MUTE The horizontal bar is displayed. MUTE 6 PRE-CH -/-- SOURCE SOURCE AUTO DISPLAY AUTO DISPLAY STILL button. STILL HOLD DUAL I/II LIST/FLOF CANCEL Power Preset to the PC mode by pressing the SOURCE SLEEP SIZE PIP PIP HOLD SLEEP DUAL I/II SUBPAGE LIST/FLOFSUBPAGE CANCEL SIZE PRE-CH PRE-CH -/--/-PC SOURCE AUTO DISPLAY STILL ON ON P.STD P.STD S.STDPower SLEEP SUBPAGE SIZE PIP Image ¨ SOURCE AUTO DISPLAY STILL S.STDPower P.SIZE PBP PBPPIP LOCATE LOCATE Image ¨ SLEEP the SUBPAGE SIZE ON Lock Press MENUP.SIZE button. P.STD S.STD TTX/MIX TTX/MIX V.DOLBY Position ¨ ON V.DOLBY PRE-CH PRE-CH -/--/-Color Result: The main menu is displayed. P.STD S.STD LOCATEAdjust ¨ SOURCE SOURCE AUTO DISPLAY AUTOP.SIZEDISPLAY STILLPBP STILL Recall ¨ Power LOCATE P.SIZE Power PBP 1024x768 48kHz HOLD HOLDP▼ I/II LIST/FLOF DUAL LIST/FLOF CANCEL CANCEL Press DUAL the or P▲I/IIbutton to select the PC. TTX/MIX TTX/MIX V.DOLBY V.DOLBY P.STD P.STD S.STD S.STD Result:SOURCE The SOURCE options the AUTO available DISPLAY AUTO inDISPLAY STILLPC group STILLare displayed. SLEEP SUBPAGE SLEEP SUBPAGE SIZE SIZE PIP PIP HOLD - DUAL HOLDI/II +LIST/FLOF DUAL I/II LIST/FLOF CANCEL CANCEL Press the or button. ON ON PC P.STD P.STD S.STD S.STD Position Press the P▲ button to select the Position. Press the LOCATE LOCATE P.SIZE P.SIZE PBPP▼ or PBP H-Position SLEEP SUBPAGE SIZE SIZE PIP PIP or +SLEEP button.SUBPAGE ON 5 Coarse The horizontal bar is displayed. Press the ➣ EXIT EXIT EXIT Press the - or + button to reach the required setting. MUTE MUTE EXIT EXIT H-Position 50 MUTE MUTE -/-- -/-- EXIT EXIT PRE-CH PRE-CH English-31 PRE-CH -/--/-- TTX/MIX TTX/MIX PRE-CH V.DOLBY V.DOLBY TTX/MIX TTX/MIX HOLD DUAL HOLDI/II LIST/FLOF DUAL I/II LIST/FLOF CANCEL-/--CANCEL-/-V.DOLBY SLEEP SUBPAGE SLEEP SUBPAGE SIZE HOLD SIZE PIP PIP V.DOLBY PRE-CH PRE-CH DUAL I/II LIST/FLOF CANCEL rubens_monitor_eng 1/28/03 8:40 PM Page 32 Power Adjusting the Color ➣ ¨ ¨ ¨ ¨ ¨ Image Image Lock Position Color Adjust Recall 1024x768 48kHz SOURCE SOURCE AUTO DISPLAY AUTO DISPLAY STILL STILL Power Power Preset to the PC mode by pressing the SOURCE button. SOURCE PC 1 Power P.STD SOURCE AUTO P.STD DISPLAY AUTO DISPLAY STILL S.STD STILL Press the MENU button. S.STD Power Power Result:P.STD The main menu is displayed. P.STD S.STD S.STD 2 59Hz AUTO Press the P▼ or P▲ button to select the PC.SOURCE SOURCE Result: DISPLAY STILL STILL S.STD S.STD EXIT EXIT PRE-CH PRE-CH V.DOLBY V.DOLBY DUAL HOLD I/II LIST/FLOF DUAL I/II LIST/FLOF CANCEL Power CANCEL The options available in the PC group are displayed. P.STD Color Mode Red Green Blue PC à Custom ¨ Press the Power - or Power + button. 4 Press the P▼ or P▲ button to select the Color Adjust. Press the - or SOURCE+ button. SOURCE AUTO DISPLAY AUTO DISPLAY STILL STILL Result: PC à Custom ¨ P.STD 3 5 Color Mode Red Green Blue DISPLAY AUTO 6 Power Power The options available in the Color Adjust group are MUTE MUTE displayed with the ColorEXIT Mode isEXIT selected. P.STD P.STD S.STD S.STD SOURCE SOURCE AUTO DISPLAY AUTO DISPLAY STILL STILL Select the required color mode by pressing the - or + button MUTE EXIT EXIT repeatedly. The following color modes are available: Custom Color 1P.STD - ColorP.STD 2 - Color 3. S.STD S.STD MUTE If you wish adjust the color which best corresponds to your viewing requirements, select the option (Red, Green, or Blue) to be adjusted MUTE MUTE by pressing the P▼ or P▲ button. Press the - or + button. Result: -/--The horizontal bar is displayed. PRE-CH PRE-CH -/-- 7 Press the -/-- ➣ Red -/-TTX/MIX MUTE - or PRE-CH V.DOLBY EXIT V.DOLBY EXIT DUAL HOLDI/II V.DOLBY LIST/FLOF DUAL I/II V.DOLBY LIST/FLOF CANCEL MUTE EXIT CANCEL EXIT -/-- If you change the Red, Green, or Blue settings, the Color mode is selected to Custom automatically. TTX/MIX 100 HOLD SLEEP HOLD TTX/MIX MUTE SLEEP SUBPAGE SLEEP SUBPAGE SIZE CANCEL SIZE PIP DUAL HOLD I/II LIST/FLOF DUAL I/II LIST/FLOF CANCEL ON P.SIZE P.SIZE PBP SUBPAGE SLEEP SIZE Power SUBPAGE Power Initializing the Image Settings ➣ PC 59Hz 2 3 PC ¨ ¨ LOCATE PIP ON TTX/MIX LOCATE ON ON HOLD PRE-CH PRE-CH -/--/-Power P.SIZE LOCATE LOCATE P.SIZE PBP PBP SOURCE SOURCE AUTO DISPLAY AUTO DISPLAY STILL STILL Preset to the PC mode by pressing the SOURCE button. TTX/MIX Press the P▼ orSUBPAGE P▲ button to selectSIZE the PC. PIP SLEEP SLEEP SUBPAGE SIZE PIP HOLDI/II LIST/FLOF DUAL I/II LIST/FLOF CANCEL P.STD P.STD options available inCANCEL the Result: HOLDThe DUAL ON PC group ON are displayed. Press the LOCATE P.SIZE - or P.SIZE PBP + button. PBP SLEEP Recall Image Recall Color Recall PBP SIZE PIP -/-- PIP SLEEP SUBPAGE SLEEP SIZE PIP SOURCESUBPAGE AUTO SIZE DISPLAY PIP STILL SOURCE AUTO DISPLAY STILL ON ON P.STD P.STD S.STD S.STD TTX/MIX TTX/MIX V.DOLBY V.DOLBY You can replace-/-all image the factory PRE-CHdefault values. -/--settings withPRE-CH Power Power LOCATE LOCATE P.SIZE P.SIZE PBP P.STD PBP S.STD 1 P.STD Press the MENUDUAL button. S.STDI/II LIST/FLOF HOLD HOLD I/II LIST/FLOF DUAL CANCEL CANCEL V.DOLBY SOURCE V.DOLBY SOURCE AUTO DISPLAY AUTO DISPLAY STILL STILL The TTX/MIX main menu is displayed. Result:TTX/MIX ¨ ¨ ¨ ¨ ¨ Image Image Lock Position Color Adjust Recall 1024x768 48kHz + button to reach the required setting. PRE-CH TTX/MIX MUTE SUBPAGE SLEEP SUBPAGE SIZE SIZE PIP Press the P▼ or P▲ button to select the - or ON Recall. ON Press the + button. LOCATE P.SIZE PBP available PBP inLOCATE the Recall group are displayed. Result: P.SIZEThe options 5 Select the option (Image Recall or Color Recall) to be replaced by pressing the P▼ or P▲ button. Press the - or MUTE + button. MUTE EXIT The screen becomes black and return to original view Result: about a few seconds later. MUTE EXIT S.STD LOCATE PIP 4 MUTE S.STD EXIT EXIT English-32 MUTE -/-- -/-- PRE-CH PRE-CH V.DOLBY V.DOLBY MUTE EXIT -/--/-- TTX/MIX TTX/MIX PRE-CH EXIT PRE-CH rubens_monitor_eng 1/28/03 8:40 PM Page 33 Display Modes If the signal from the system equals to the standard signal mode, the screen is adjusted automatically. If the signal from the system doesn’t equal to the standard signal mode, adjust the mode with referring to the Video card user guide because the screen might not display or only the power LED might be on. For the display modes listed below, the screen image has been optimized during manufacture. Mode Resolution Horizontal Frequency (kHz) Vertical Frequency (Hz) Pixel Clock Frequency (MHz) Sync Polarity (H/V) VGA 720 x 400 640 x 480 640 x 480 640 x 480 31.469 31.469 37.500 43.269 70.087 59.940 75.000 85.008 28.322 25.175 31.500 36.000 -/+ -/-/-/- SVGA 800 x 600 800 x 600 46.875 53.674 75.000 85.061 49.500 56.250 +/+ +/+ XGA 1024 x 768 1024 x 768 1024 x 768 48.363 60.023 68.677 60.004 75.029 84.997 65.000 78.750 94.500 -/+/+ +/+ SXGA 1280 x 1024 1280 x 1024 63.981 79.976 60.020 75.025 108.000 135.000 + / -, + / +/+ UXGA 1600 x 1200 75.000 60.000 162.000 + / -, + / - WUXGA 1920 x 1200 (SyncMaster 241MP) 75.000 60.000 193.156 + / -, + / - PowerSaver This set has a built-in power management system called PowerSaver. This system saves energy by switching your set into a low-power mode when it has not been used for a certain period of time. The available modes are “On”, “Standby”, “Sleep”, and “Deep Sleep”. PowerSaver operates with a VESA DPMS compliant video card installed in your computer. You use a software utility installed on your computer to set up this feature. State Normal Operation Power-Saving Function mode (EPA/NUTEK) Horizontal Sync Active Inactive Vertical Sync Active Inactive Power Indicator Green Green, Blinking (1 sec interval) SyncMaster 211MP : 110W (Max.) SyncMaster 241MP : 120W (Max.) Less than 8W Power Consumption ➣ This set automatically returns to normal operation when horizontal and vertical sync return. This occurs when you move the computer’s mouse or press a key on the keyboard. English-33 rubens_monitor_eng 1/28/03 8:40 PM Page 34 Teletext Feature Most television channels provide written information services via teletext. Information provided includes: ◆ Television programme times ◆ News bulletins and weather forecasts ◆ Sports results ◆ Travel information This information is divided into numbered pages (see diagram). Part A Selected page number. B Broadcasting channel identity. C Current page number or search indications. D Date and time. E Text. F Status information. FASTEXT information. ➣ Power SOURCE Contents Teletext information is often divided between several pages displayed in sequence, which can be accessed by: ◆ Entering the page number ◆ Selecting a title in a list ◆ Selecting a coloured heading (FASTEXT system) Displaying the Teletext Information AUTO DISPLAY P.STD STILL S.STD You can display Teletext information at any time on your set. ☛ P MENU P MUTE For Teletext information to be displayed correctly, channel reception must be stable; otherwise: ◆ Information may be missing ◆ Some pages may not be displayed EXIT 1 1 2 3 4 5 6 2 Select the channel providing the Teletext service using the P▼ or P▲ button. Press the TTX/MIX button to activate the teletext mode. Result: 7 8 9 The contents page is displayed. It can be redisplayed at any time by pressing the (index) button. PRE-CH -/-0 TTX/MIX 3 If you wish to display the actual broadcast at the same time as the teletext page, press the TTX/MIX button again. 4 To return to normal viewing, press the CANCEL ( 5 Press the TTX/MIX button again to exit from the teletext display. V.DOLBY .DOLBY HOLD DUAL DU AL I/II LIST/FLOF SLEEP SUBPAGE SUBP GE P.SIZE PBP SIZE CANCEL PIP ON English-34 LOCATE ) button. rubens_monitor_eng 1/28/03 8:40 PM Page 35 Selecting a Page by Number Power SOURCE You can enter the page number directly by pressing the numeric buttons on the remote control. 1 Enter the three-digit page number given in the content by pressing the corresponding numeric buttons. AUTO DISPLAY P.STD .STD STILL S.STD .STD P Power MENU Result: 2 The current page counter is incremented and the page is then displayed. If the selected page is linked with several secondary pages, the secondary pages are displayed in sequence. To freeze the display on a given page, press the HOLD ( ) button. Press the HOLD ( ) button again to resume. Using the various display options: SOURCE AUTO DISPLAY P P.STD MUTE S.STD EXIT 1 2 3 4 5 6 7 8 9 PRE-CH -/-0 MUTE To display... Press the... ◆ Both teletext information and the normal broadcast TTX/MIX EXIT TTX/MIX V.DOLBY .DOLBY HOLD DUAL DU AL I/II LIST/FLOF SLEEP SUBPAGE SUBP GE P.SIZE .SIZE PBP SIZE (reveal) PIP ◆ The normal screen (reveal) again LOCATE LOCA TE PRE-CH -/-- TTX/MIX SUBPAGE ( CANCEL ON ◆ Hidden text (answers to quiz games, for example) ◆ A secondary page, by entering its 4-digit number STILL V.DOLBY ) HOLD DUAL DU AL I/II LIST/FLOF ◆ The next page (page up) SLEEP SUBPAGE SUBP GE ◆ The previous page (page down) P.SIZE .SIZE PBP SIZE CANCEL PIP ON ◆ Double-size letters in the: • Upper half of the screen • Lower half of the screen SIZE ( ) • Once • Twice ◆ Normal screen • Three times English-35 LOCATE LOCA TE rubens_monitor_eng 1/28/03 8:40 PM MUTE Page 36 EXIT Using FLOF to Select a Page PRE-CH -/-- TTX/MIX V.DOLBY .DOLBY HOLD DUAL DU AL I/II LIST/FLOF SLEEP SUBPAGE SUBP GE SIZE CANCEL PIP The various topics included in the teletext pages are color-coded, and can be selected by pressing the colored buttons on the remote control. 1 Display the teletext contents page by pressing the TTX/MIX button. 2 Press the coloured button corresponding to the topic that you wish to select;the available topics are given on the status line. ON P.SIZE .SIZE LOCATE LOCA TE PBP Power SOURCE AUTO DISPLAY P.STD Result: STILL The page is displayed with other coloured information that can be selected in the same way. S.STD P 3 To display the previous or next page, press the corresponding coloured button. 4 To display the subpage, see the following steps. ◆ Press the SUBPAGE ( ) button. Result: The available subpages appear. MENU P MUTE ◆ Select the required sub-page. Sub-pages can be scrolled by using the (P▼) or (P▲) button. EXIT Power SOURCE AUTO DISPLAY STILL P.STD S.STD -/-- PRE-CH Storing Teletext Pages TTX/MIX V.DOLBY HOLD DUAL I/II LIST/FLOF SLEEP SUBPAGE MUTE P.SIZE PBP SIZE CANCEL PIP ON EXIT LOCATE 1 2 3 4 5 6 7 8 9 You can store up to four teletext pages to display them later at leisure. 1 Result: ➣ PRE-CH -/-0 TTX/MIX V.DOLBY .DOLBY HOLD DUAL DU AL I/II LIST/FLOF SLEEP SUBPAGE SUBP GE P.SIZE .SIZE PBP SIZE CANCEL ) button. Four 3-digit numbers are displayed in different colors. The LIST/FLOF ( ) button is used to switch between the LIST and FLOF modes. 2 Press the colored button corresponding to the page that will be replaced. 3 Enter the new page number using the numeric buttons. 4 Repeat steps 2 and 3 for each page to be stored, using a different colored button each time. 5 Press the PIP ON English-36 Select the LIST mode using the LIST/FLOF ( LOCATE LOCA TE (store) button until the corresponding blocks blink. rubens_monitor_eng 1/28/03 8:40 PM Page 37 Troubleshooting: Before Contacting Service Personnel Before contacting Samsung after-sales service, perform the following simple checks. If you cannot solve the problem using the instructions below, note the model and serial number of your set and contact your local dealer. No sound or picture ◆ ◆ ◆ ◆ Normal picture but no sound ◆ Check the volume. ◆ Check whether the MUTE button has been pressed on the remote control. No picture or black and white picture ◆ Adjust the color settings. ◆ Check that the broadcast system selected is correct. Sound and picture interference ◆ Try to identify the electrical appliance that is affecting the set and move it further away. ◆ Plug your set into a different mains socket. Blurred or snowy picture, distorted sound ◆ Check the direction, location and connections of your aerial. This interference is often due to the use of an indoor aerial. Remote control malfunctions ◆ Replace the remote control batteries. ◆ Clean the upper edge of the remote control (transmission window). ◆ Check the battery terminals. “Check Signal Cable” message is displayed. ◆ Check that the signal cable is firmly connected to the PC or video sources. ◆ Check that the PC or video sources are turned on. On PC mode, “Not Supported Mode” message is displayed. ◆ Check the maximum resolution and the frequency of the video Adapter. ◆ Compare these values with the data in the Display Modes Timing Chart. On PC mode, horizontal or vertical bars appear to flicker, jitter or shimmer on the image. ◆ Adjust the Coarse or Fine function. On PC mode, screen is black and power indicator light is steady amber or blinks every 0.5 or 1 seconds ◆ The TV is using its power management system. ◆ Move the computer’s mouse or press a key on the keyboard. On PC mode, image is not stable and may appear to vibrate. ◆ Check that the display resolution and frequency from your computer or video board is an available mode for your set. On your computer check: Control Panel, Display, Settings. ◆ If the setting is not correct, use your computer utility programme to change the display settings. Check that the mains lead has been connected to a wall socket. Check that you have pressed the Power ( ) button. Check the picture contrast and brightness settings. Check the volume. ➣ Your set supports multiscan display functions within the following frequency domain: Horizontal frequency: 30 ~ 85 kHz Vertical frequency: 55 ~ 85 Hz On PC mode, image is not centered on the screen. ◆ Adjust the horizontal and vertical position. You need the Monitor driver software. ◆ Download the driver from WWW pages: http://www.samsungusa.com/monitor http://www.samsung-monitor.com English-37 rubens_monitor_eng 1/28/03 8:40 PM Page 38 Technical and Environmental Specifications Model SyncMaster 211MP Panel Size Display Size Type Pixel Pitch Viewing Angle 21.3” Diagonal 24.06” Diagonal 432(H) x 324(V) mm 518.4(H) x 324(V) mm a-si TFT active matrix 0.27 (H) x 0.27 (V) mm 80/80/80/80 (L/R/T/B) Frequency Horizontal Vertical Display Color 30 ~ 85 kHz 55 ~ 85 Hz 16,777,216 colors Display Resolution Maximum Mode SyncMaster 241MP 1600 x 1200 @ 60 Hz Input Signal Sync. 1920 x 1200 @ 60 Hz H/V Separate, TTL, P. or N. H/V Composite, TTL, P. or N. Sync-on-green 0.3 Vp-p, N. 0.7 Vp-p @ 75 ohm Video Signal TV/Video Color System Sound System Video Format PAL, SECAM, NTSC4.43 B/G, D/K, I, L, L’ CVBS, S-VHS Scart Video Input/Output RGB Input Audio Input/Output 1.0 Vp-p @ 75 ohm 0.7 Vp-p @ 75 ohm 500mVrms Color system PAL Power Supply Input Output 100 - 240 V (50Hz / 60Hz) DC 14V/8A Power Consumption Maximum Power Saving Dimensions (W X D X H) Monitor body With stand Environmental Considerations Operating Temperature Operating Humidity Storage Temperature Storage Humidity Audio Characteristics Audio Input Audio Input (PC) Audio Output Speaker Output Headphone Output Frequency Response English-38 110 W 120 W <8W 531.5 x 67.5 x 422 578.7 x 218.2 x 472 618 x 67.5 x 422 665.2 x 218.2 x 472 50 °F to 104 °F (10 °C to 40 °C) 10% to 80% - 13 °F to 113 °F (-25 °C to 45 °C) 5% to 95% RCA Jack (L, R), 0.5Vrms (-9dB) 3.5Ø Stereo Jack, 0.5Vrms (-9dB) RCA Jack (L, R), 0.5Vrms (-9dB) Max. 5W Output (3.5Ø Stereo Jack, 2) Max. 10mW Output (3.5Ø Stereo Jack, 32Ω) RF: 80Hz ~ 15kHz (at- 3dB) A/V: 80Hz ~ 20kHz (at- 3dB) 211mp-241mp.qxd 2/10/2003 1:25 PM Page 1 MAØN HÌNH LCD SyncMaster 211MP SyncMaster 241MP Taøi lieäu Höôùng daãn Söû duïng Tröôùc khi söû duïng maùy, ñeà nghò quyù khaùch vui loøng ñoïc kyõ taøi lieäu höôùng daãn söû duïng naøy vaø löu laïi ñeå tham khaûo veà sau. DANH MUÏC CHÖÙC NAÊNG TREÂN MAØN HÌNH MAØN HÌNH PC CHÖÙC NAÊNG MAØN HÌNH CON (PIP) CHÖÙC NAÊNG NHIEÀU MAØN HÌNH (PBP) DÒCH VUÏ TELETEXT 211mp-241mp.qxd 2/10/2003 1:25 PM Page 2 Caûnh baùo Caûnh baùo NGUY CÔ SOÁC ÑIEÄN KHOÂNG ÑÖÔÏC MÔû! Caûnh baùo: ÑEÅ TRAÙNH BÒ SOÁC ÑIEÄN, KHOÂNG ÑÖÔÏC MÔÛ VOÛ SAU CUÛA MAÙY. BEÂN TRONG KHOÂNG COÙ PHAÀN NAØO NGÖÔØI SÖÛ DUÏNG COÙ THEÅ THAO TAÙC. HAÕY LIEÂN HEÄ NHAÂN VIEÂN BAÛO TRÌ COÙ CHUYEÂN MOÂN. CAÛNH BAÙO: Hình tam giaùc chöùa tia chôùp vaø ñaàu muõi teân laø bieåu töôïng caûnh baùo baïn veà "möùc ñieän theá nguy hieåm" beân trong saûn phaåm naøy. Hình tam giaùc chöùa daáu chaám than laø bieåu töôïng caûnh baùo baïn veà nhöõng höôùng daãn quan troïng cho saûn phaåm. CAÛNH BAÙO: ÑEÅ TRAÙNH THIEÄT HAÏI COÙ THEÅ GAÂY CHAÙY HOAËC SOÁC ÑIEÄN, KHOÂNG NEÂN ÑEÅ MAÙY NGOAØI TRÔØI MÖA HOAËC NÔI AÅM ÖÔÙT. Ñieän aùp chính ñöôïc theå hieän ôû phía sau maùy vaø taàn soá doøng ñieän laø 50 hoaëc 60Hz. Tieáng Vieät-2 211mp-241mp.qxd 2/10/2003 1:25 PM Page 3 Caùc höôùng daãn veà an toaøn Caùc hình minh hoïa döôùi ñaây töôïng tröng cho nhöõng tình huoáng caûnh baùo tröôùc ñoái vôùi maùy thu hình (TV) cuûa baïn. œW KHOÂNG ñeå TV trong ñieàu kieän nhieät ñoä hay ñoä aåm quaù cao hoaëc quaù thaáp. KHOÂNG neân ñaët TV döôùi aùnh saùng maët trôøi chieáu tröïc tieáp. X W Khoâng neân ñeå TV tieáp xuùc vôùi baát kyø loaïi chaát loûng naøo. Neáu TV bò beå, khoâng neân töï yù söûa X chöõa. Haõy lieân heä vôùi nhaân vieân baûo trì coù chuyeân moân. W Khi trôøi möa, baõo (ñaëc bieät khi coù seùt), haõy ruùt phích caém cuûa TV ra khoûi nguoàn ñieän vaø aêngten. Haõy ñeå caùc boä tieáp hôïp ñieän xa nhau. Vì coù theå ñoù laø nguy cô gaây chaùy. X W Luoân giöõ boä tieáp hôïp ñieän ôû nôi thoâng thoaùng. Gôõ boû bao bì khoûi boä tieáp hôïp ñieän X tröôùc khi söû duïng. Vì coù theå ñoù laø nguy cô gaây chaùy. W Giöõ boä tieáp hôïp ñieän traùnh xa moïi nguoàn toûa nhieät khaùc. Vì coù theå ñoù laø nguy cô gaây chaùy. Neáu baïn khoâng söû duïng boä ñieàu khieån töø xa trong thôøi gian daøi, haõy X thaùo pin vaø baûo quaûnôû nôi khoâ thoaùng. SAÛN PHAÅM NAØY KHOÂNG THÍCH HÔÏP ÑEÅ SÖÛ DUÏNG TRONG MOÂI TRÖÔØNG SAÛN XUAÁT COÂNG NGHIEÄP Tieáng Vieät-3 211mp-241mp.qxd 2/10/2003 1:25 PM Page 4 Muïc luïc LÔØI NOÙI ÑAÀU Q Q KEÁT NOÁI VAØ CHUAÅN BÒ TV/MAØN HÌNH Q Q Q Q Q Q Q Q Q Q Tìm hieåu baûng ñieàu khieån ....................................................................... Laép ñaët treân Töôøng ................................................................................. Xem baûng keát noái .................................................................................... - Keát noái vôùi aêng-ten hoaëc maïng truyeàn hình caùp.................................. - Keát noái vôùi maùy tính ............................................................................. - Keát noái vôùi boä DTV SET-TOP BOX, thieát bò VCR hoaëc ñaàu DVD ....... - Keát noái vôùi caùc Thieát bò A/V khaùc ........................................................ - Keát noái vôùi loa gaén ngoaøi ..................................................................... - Keát noái vôùi loa ...................................................................................... Xem hình aûnh töø nhöõng nguoàn beân ngoaøi .............................................. Tìm hieåu boä ñieàu khieån töø xa .................................................................. (Taát caû caùc chöùc naêng tröø chöùc naêng Teletext) Tìm hieåu boä ñieàu khieån töø xa (Nhöõng chöùc naêng Teletext)..................... Laép pin vaøo boä ñieàu khieån töø xa.............................................................. Caùch baät vaø taét TV.................................................................................. Laøm quen söû duïng boä Ñieàu khieån Töø xa ................................................ Choïn ngoân ngöõ ....................................................................................... CAØI ÑAËT KEÂNH Q Q Q Q Q Q Caûnh baùo ............................................................................................... Höôùng daãn söû duïng an toaøn ................................................................... Löu keânh töï ñoäng .................................................................................... Löu keânh thuû coâng .................................................................................. Ñaët teân cho caùc keânh.............................................................................. Boû qua caùc keânh khoâng muoán xem ........................................................ Tinh chænh baét soùng keânh ....................................................................... Saép xeáp caùc keânh ñaõ löu ........................................................................ SÖÛ DUÏNG NHÖÕNG CHÖÙC NAÊNG KHAÙC Q Q Q Q Q Q Q Tieáng Vieät-4 Thay ñoåi chuaån hình aûnh ........................................................................ Ñieàu chænh caùc thoâng soá hình aûnh .......................................................... Choïn daïng hình aûnh ............................................................................... Caùch laøm ñöùng hình................................................................................ Thay ñoåi chuaån aâm thanh ....................................................................... Ñieàu chænh caùc thoâng soá aâm thanh ......................................................... Thöôûng thöùc aâm thanh voøm (Dolby) ....................................................... 2 3 6 7 8 9 9 10 10 10 10 11 12 13 14 14 15 16 17 18 19 20 20 21 22 22 23 23 24 24 25 211mp-241mp.qxd 2/10/2003 1:25 PM Page 5 Muïc luïc SÖÛ DUÏNG NHÖÕNG CHÖÙC NAÊNG KHAÙC Q Q Q Q Q Q SÖÛ DUÏNG CAÙC CHÖÙC NAÊNG PC Q Q Q Q Q Q Q Q Ñieàu chænh ñoä saùng vaø ñoä töông phaûn.................................................... Choïn kích côõ hình aûnh ............................................................................ Ñieàu chænh chaát löôïng hình aûnh .............................................................. Thay ñoåi vò trí hình aûnh ........................................................................... Ñieàu chænh maøu ....................................................................................... Caøi ñaët laïi giaù trò goác caùc thoâng soá hình aûnh .......................................... Caùc cheá ñoä hieån thò................................................................................. Chöùc naêng tieát kieäm ñieän ........................................................................ CAÙCH SÖÛ DUÏNG CHÖÙC NAÊNG TELETEXT Q Q Q Q Q Baät/Taét loa tích hôïp ................................................................................. Choïn chöùc naêng MTS (Multichannel Television Stereo) ........................ Baät chöùc naêng Maøn hình con (PIP)......................................................... Baät chöùc naêng Nhieàu maøn hình (PBP- Maøn hình ñoâi) ............................ Chöùc naêng töï ñoäng taét ............................................................................ Chöùc naêng hieån thò thoâng tin................................................................... Chöùc naêng Teletext................................................................................. Hieån thò thoâng tin teletext ........................................................................ Choïn moät trang baèng soá ......................................................................... Caùch duøng FLOF ñeå choïn moät trang ...................................................... Löu tröõ caùc trang teletext ........................................................................ LÔØI KHUYEÂN KHI SÖÛ DUÏNG Q Q Q Khaéc phuïc söï coá: Tröôùc khi lieân heä nhaân vieân baûo trì ............................ Caùc thoâng soá kyõ thuaät vaø moâi tröôøng...................................................... Caùch noái daây ñaàu caém ñieän (chæ daønh cho khu vöïc Anh quoác).............. Caùc kyù hieäu Nhaán Quan troïng 25 26 27 28 29 29 30 30 31 31 32 32 33 33 34 34 35 36 36 37 38 39 Löu yù Tieáng Vieät-5 211mp-241mp.qxd 2/10/2003 1:26 PM Page 6 Tìm hieåu Baûng ñieàu khieån Ñeøn baùo coù ñieän Boä caûm öùng ñieàu khieån töø xa Œ Nguoàn Hieån thò danh muïc taát caû caùc thieát bò ñaàu vaøo hieän coù(TV/Video/S-Video/DVD/DTV/PC). ´ PIP Kích hoaït chöùc naêng PIP (Maøn hình con). Š PBP Kích hoaït chöùc naêng PBP (Maøn hình ñoâi). Danh muïc Môû OSD (Hieån thò treân maøn hình) vaø choïn moät chöùc naêng. ˆ Thoaùt Thoaùt khoûi danh muïc treân maøn hình. Tieáng Vieät-6 -S CH T+ Di chuyeån thanh saùng choïn leân hoaëc xuoáng treân maøn hình. •-X VOL W+ Di chuyeån thanh saùng choïn qua traùi hoaëc phaûi treân maøn hình. Taêng hoaëc giaûm möùc aâm löôïng vaø giaù trò cuûa chöùc naêng ñöôïc choïn. Auto Cho pheùp baïn caûm nhaän chaát löôïng cuûa hình aûnh ñang hieån thò. Caù thoâng soá veà ñoä mòn, ñoä thoâ vaø vò trí ñöôïc ñieàu chænh töï ñoäng. (Chæ hoaït ñoäng ôû cheá ñoä PC) (Ñieän) Baät/Taét maøn hình. 211mp-241mp.qxd 2/10/2003 1:26 PM Page 7 Caùch laép ñaët treân töôøng 1 Thaùo chaân ñeá Duøng vít 6 caïnh ñeå thaùo chaân ñeá. 2 Gôõ caùc mieáng cao su Gôõ 4 mieáng cao su ôû caùc caïnh ra. 3 Gaén leân töôøng Gaén chaân ñeá leân töôøng baèng oác vít hoaëc ñinh. 4 Laép maøn hình Duøng vít 6 caïnh ñeå laép maøn hình vaøo chaân ñeá. Löu yù khi laép ñaët X Khoâng laép ñaët maøn hình leân baát kyø nôi naøo khaùc ngoaøi töôøng thaúng ñöùng. X Ñeå baûo veä khaû naêng hoaït ñoäng cuûa maøn hình vaø ñeå traùnh söï coá, haõy laøm theo nhöõng höôùng daãn sau: - Khoâng laép ñaët maøn hình keá beân maùy baùo khoùi vaø chaùy. - Khoâng laép ñaët maøn hình ôû nôi phaûi chòu ñoä rung hoaëc ñieän theá cao. - Khoâng laép ñaët maøn hình trong töôøng. - Khoâng laép ñaët maøn hình gaàn hoaëc xung quanh caùc thieát bò toûa nhieät. X Chæ söû duïng caùc thaønh phaàn vaø boä phaän ñöôïc khuyeân duøng. Tieáng Vieät-7 211mp-241mp.qxd 2/10/2003 1:26 PM Page 8 Tìm hieåu Baûng keát noái Ñaàu vaøo ñieän t cöù khi naøo baïn keát noái moät heä thoáng aâm thanh hoaëc Baá hình aûnh vaøo maøn hình, nhôù laø tröôùc heát phaûi taét moïi thieát bò. Tham khaûo taøi lieäu keøm theo thieát bò ñeå ñöôïc höôùng daãn chi tieát veà keát noái vaø bieát nhöõng caûnh baùo an toaøn lieân quan. Tieáng Vieät-8 211mp-241mp.qxd 2/10/2003 1:26 PM Page 9 Tìm hieåu Baûng keát noái (tieáp theo) ŒX Caùch keát noái vôùi aêng-ten hoaëc maïng truyeàn hình caùp (tuøy theo kieåu maøn hình) Ñeå coù theå xem ñöôïc caùc keânh TV, maùy thu hình phaûi nhaän ñöôïc tín hieäu töø moät trong nhöõng nguoàn sau: - AÊng-ten trôøi - Maïng truyeàn hình caùp - Maïng truyeàn hình veä tinh ´Y Keát noái vôùi maùy tính - Caém ñaàu caém D-SUB 15 chaân vaøo coång PC Video. - Caém moät ñaàu cuûa daây aâm thanh noåi vaøo coång "Audio(ST)" ôû maët sau cuûa maøn hình vaø caém ñaàu kia vaøo coång "Audio Out" cuûa card aâm thanh trong maùy tính. - Neáu caàn thieát, haõy caøi ñaët trình ñieàu khieån maøn hình coù trong CD keøm theo. Muoán bieát theâm chi tieát, haõy tham khaûo höôùng daãn caøi ñaët trình ñieàu khieån keøm theo hoäp ñöïng CD. Ñaàu caém D-SUB 15 chaân Chaân caém H/V rieâng leû H/V toång hôïp Ñoàng boä tín hieäu xanh 1 Ñoû (R) Ñoû (R) Ñoû (R) 2 Xanh (G) Xanh (G) Xanh (G) + Ngang/Doïc ñoàng boä 3 Xanh döông (B) Xanh döông (B) Xanh döông (B) 4 Tieáp ñaát Tieáp ñaát Tieáp ñaát 5 Tieáp ñaát (DDC) Tieáp ñaát (DDC) Tieáp ñaát (DDC) 6 Ñoû (R) Tieáp ñaát Ñoû (R) Tieáp ñaát Ñoû (R) Tieáp ñaát 7 Xanh (G) Tieáp ñaát Xanh (G) Tieáp ñaát Xanh (G) Tieáp ñaát 8 Xanh döông (B) Tieáp ñaát Xanh döông (B) Tieáp ñaát Xanh döông (B) Tieáp ñaát 9 Khoâng keát noái Khoâng keát noái Khoâng söû duïng 10 Ñoàng boä tieáp ñaát Ñoàng boä tieáp ñaát Ñoàng boä tieáp ñaát 11 Tieáp ñaát Tieáp ñaát Tieáp ñaát 12 Döõ lieäu (DDC) Döõ lieäu (DDC) Döõ lieäu (DDC) 13 Ñoàng boä ngang Ñoàng boä ngang/doïc Khoâng söû duïng 14 Ñoàng boä doïc Khoâng söû duïng Khoâng söû duïng 15 Ñoàng hoà (DDC) Ñoàng hoà (DDC) Ñoàng hoà (DDC) Tieáng Vieät-9 211mp-241mp.qxd 2/10/2003 1:26 PM Page 10 Tìm hieåu Baûng keát noái ¨Z Keát noái vôùi boä DTV SET-TOP BOX, thieát bò VCR hoaëc ñaàu DVD - Caém daây SCART cuûa caùc thieát bò DTV, VCR hoaëc DVD vaøo coång SCART treân caùc thieát bò ñoù. - Neáu muoán keát noái caû 2 thieát bò DTV Set-Top Box vaø VCR (hoaëc DVD), baïn phaûi keát noái thieát bò DTV vaøo thieát bò VCR (hoaëc DVD) tröôùc, sau ñoù keát noái thieát bò VCR (hoaëc DVD) vaøo maøn hình. ¨[ Keát noái vôùi caùc thieát bò A/V khaùc - Caém daây RCA hoaëc S-Video vaøo moät thieát bò A/V khaùc töông thích nhö VCR, DVD hoaëc maùy quay phim. - Caém moät ñaàu cuûa caùc daây aâm thanh RCA vaøo coång "AUDIO(L)" vaø "AUDIO(R)" ôû maët sau cuûa maøn hình vaø caém ñaàu kia vaøo coång aâm thanh töông öùng treân thieát bò A/V. - Baïn coù theå caém headphone vaøo coång headphone (^) ôû maët sau cuûa maøn hình. Trong khi headphone ñang hoaït ñoäng, baïn seõ khoâng nghe ñöôïc aâm thanh töø loa tích hôïp. ¨\ Keát noái vôùi loa gaén ngoaøi Caém caùc daây aâm thanh RCA vaøo boä loa gaén ngoaøi coù tích hôïp saün boä khuyeách ñaïi (ñeå ñaït ñöôïc hieäu quaû aâm thanh voøm toái öu) Ø ¨] Keát noái vôùi loa (Keát noái vôùi loa (tuøy kieåu maøn hình) Hoaëc Tieáng Vieät-10 211mp-241mp.qxd 2/10/2003 1:26 PM Page 11 Xem hình aûnh töø caùc nguoàn beân ngoaøi Moät khi ñaõ keát noái vaøo caùc heä thoáng Audio/Video, baïn coù theå xem hình aûnh töø caùc nguoàn khaùc nhau baèng caùch choïn ñuùng ngoõ vaøo töông öùng. 1 Kieåm tra xem taát caû caùc keát noái caàn thieát ñaõ ñöôïc thöïc hieän chöa (tham khaûo trang 8 vaø 9 ñeå bieát theâm chi tieát). 2 Baät maøn hình vaø neáu caàn thieát, haõy baám nuùt SOURCE nhieàu laàn. Caùc loaïi ñaàu vaøo ñöôïc hieån thò theo thöù töï sau: Ant (TV) - Scart - Video - S-Video - PC. Tieáng Vieät-11 211mp-241mp.qxd 2/10/2003 1:26 PM Page 12 Tìm hieåu boä ñieàu khieån töø xa (Taát caû caùc chöùc naêng tröø chöùc naêng Teletext) Töï ñoäng ñieàu chænh tín hieäu hình aûnh nhaän ñöôïc Baät / Taét TV Caùc loaïi ñaàu vaøo coù theå choïn Löïa choïn hieäu öùng hình aûnh Keânh tieáp theo Giaûm aâm löôïng Hieån thò thoâng tin caøi ñaët Laøm ñöùng hình Choïn hieäu öùng aâm thanh Hieån thò danh muïc vaø xaùc nhaän thay ñoåi Taêng aâm löôïng Keânh tröôùc Taét aâm thanh taïm thôøi Thoaùt khoûi danh muïc treân maøn hình Caùc nuùt soá ñeå choïn keânh tröïc tieáp Choïn keânh 1/2 chöõ soá Choïn cheá ñoä aâm thanh Keânh tröôùc Hieån thò danh muïc AÂm thanh voøm aûo Choïn kích thöôùc PIP Töï ñoäng taét Choïn kích côõ hình aûnh Baät/Taét chöùc naêng Maøn hình con Choïn vò trí PIP Chöùc naêng Nhieàu maøn hình (Maøn hình ñoâi) Hoaït ñoäng cuûa boä ñieàu khieån töø xa coù theå bò aûnh höôûng bôûi aùnh saùng choùi. Tieáng Vieät-12 211mp-241mp.qxd 2/10/2003 1:26 PM Page 13 Tìm hieåu boä ñieàu khieån töø xa (Caùc chöùc naêng Teletext) Trang Teletext tieâp theo Choïn chöông trình theo teân Trang Teletext tröôùc Hieån thò teletext/Troän thoâng tin teletext vôùi chöong trình TV ñang phaùt. Giöõ Teletext Hieån thò teletext Choïn cheá ñoä Teletext (danh saùch hoaëc FLOF) Huûy boû Teletext Löu tröõ Teletext Trang Teletext phu Choïn kích côõ Teletext Choïn chuû ñeà Fastext Tieáng Vieät-13 211mp-241mp.qxd 2/10/2003 1:26 PM Page 14 Laép pin vaøo boä ñieàu khieån töø xa Baïn phaûi laép pin hoaëc thay pin cho boä ñieàu khieån töø xa khi baïn: X Mua TV X Nhaän thaáy boä ñieàu khieån töø xa khoâng coøn hoaït ñoäng bình thöôøng. 1 Môû naép sau cuûa boä ñieàu khieån töø xa baèng caùch nhaán bieåu töôïng chæ xuoáng vaø sau ñoù ñaåy nhanh theo höôùng muõi teân. 2 Laép hai pin 1,5V loaïi R03, UM4, "AAA" hoaëc töông ñöông vaø chuù yù laép theo ñuùng caùc cöïc: X cöïc + treân pin ñoái vôùi cöïc + treân boä ñieàu khieån töø xa X cöïc - treân pin naèm ñoái vôùi cöïc - treân boä ñieàu khieån töø xa 3 Ñoùng naép baèng caùch ñaët noù thaúng haøng vôùi khe treân boä ñieàu khieån töø xa vaø ñaåy noù vaøo laïi vò trí. Khoâng neân duøng chung nhieàu loaïi pin khaùc nhau, ví duï: loaïi kieàm vaø loaïi mangan. Caùch baät vaø taét TV Daây ñieän ñöôïc gaén phía sau maøn hình TV. Neáu baïn mua maøn hình naøy ôû Anh Quoác, haõy xem trang 39 ñeå bieát theâm höôùng daãn veà vieäc laép ñaët daây ñieän. Caém daây ñieän vaøo moät oå caém thích hôïp. Keát quaû: Maøn hình ñöôïc baät leân vaø ñeøn baùo Standby (chôø) maøu xanh phía tröôùc maøn hình seõ phaùt saùng. Baïn coù theå ñeå maøn hình TV ôû cheá ñoä chôø (Standby) ñeå tieát kieäm ñieän. Cheá ñoä chôø coù theå höõu duïng khi baïn muoán ngöng xem TV taïm thôøi (ví duï: trong böõaaên). 1 Nhaán nuùt Power ( ) treân boä ñieàu khieån töø xa hoaëc ôû maët tröôùc maøn hình. Keát quaû: Maøn hình seõ bò taét vaø ñeøn baùo Standby (chôø) maøu xanh phía tröôùc maøn hình seõ taét. 2 2 Ñeå baät laïi TV, chæ caàn nhaán nuùt Power ( ) laàn nöõa. Khoâng neân ñeå TV ôû cheá ñoä chôø trong khoaûng thôøi gian daøi (ví duï: khi baïn ñi nghæ maùt). Haõy taét haún maøn hình baèng caùch ruùt daây ñieän vaø aêng-ten ra. Tieáng Vieät-14 211mp-241mp.qxd 2/10/2003 1:26 PM Page 15 Taäp söû duïng boä ñieàu khieån töø xa Boä ñieàu khieån töø xa ñöôïc söû duïng vôùi muïc ñích chính laø: X Chuyeån keânh vaø ñieàu chænh aâm löôïng X Caøi ñaët maøn hình TV baèng caùch söû duïng heä thoáng danh muïc treân maøn hình Baûng döôùi ñaây giôùi thieäu moät soá nuùt thöôøng söû duïng nhaát vaø chöùc naêng cuûa chuùng. Nuùt Chöùc naêng hieån thò Chöùc naêng danh muïc V P Hieån thò keânh ñaõ löu keá tieáp. Choïn tuøy choïn danh muïc tröôùc ñoù. P W Hieån thò keânh ñaõ löu tröôùc ñoù. Choïn tuøy choïn danh muïc tieáp theoù. PRE-CH Chuyeån qua laïi lieân tuïc giöõa 2 keânh môùi xem. (PRE-CH; Previous Channel) Ñeå Hieån thò caùc keânh coù soá töông öùng. -/-- Choïn moät keânh mang soá 10 hoaëc lôùn hôn. Nhaán nuùt naøy, bieåu töôïng "--" seõ hieån thò. Nhaäp soá keânh coù 2 chöõ soá. MUTE Giaûm aâm löôïng. Duøng ñeå... X Hieån thò danh muïc con chöùa caùc muïc löïa choïn cuûa danh muïc hieän haønh. X Chuyeån tôùi/lui caùc keânh theo caùch thuû coâng. X Giaûm giaù trò moät tuøy choïn danh muïc. Taêng aâm löôïng. Duøng ñeå... X Hieån thò danh muïc con chöùa caùc muïc löïa choïn cuûa danh muïc hieän haønh. X Chuyeån tôùi/lui caùc keânh theo caùch thuû coâng. X Taêng giaù trò moät tuøy choïn danh muïc. Taét aâm thanh taïm thôøi. Baät laïi aâm thanh, nhaán nuùt naøy laàn nöõa, hoaëc nhaán - hoaëc +. nuùt MENU EXIT Hieån thò heä thoáng danh muïc treân maøn hình. Trôû laïi danh muïc tröôùc ñoù hoaëc cheá ñoä hieån thò bình thöôøng. Thoaùt khoûi heä thoáng danh muïc vaø trôû laïi ngay cheá ñoä maøn hình bình thöôøng. Tieáng Vieät-15 211mp-241mp.qxd 2/10/2003 1:26 PM Page 16 Choïn ngoân ngöõ Khi baïn söû duïng TV laàn ñaàu, baïn phaûi choïn ngoân ngöõ ñeå hieån thò danh muïc vaø caùc thoâng baùo (chæ soá). 1 Nhaán nuùt MENU. Keát quaû: 2 Nhaán nuùt PW hoaëc PV ñeå choïn muïc Function. Keát quaû: Tieáng Vieät-16 Danh muïc chính seõ hieån thò. Caùc tuøy choïn coù trong muïc Function seõ hieån thò. 3 Nhaán nuùt 4 Nhaán PW hoaëc nuùt PV ñeå choïn muïc Language. 5 Choïn moät ngoân ngöõ cuï theå baèng caùch nhaán nuùt nhieàu laàn. 6 Khi ñaõ choïn xong ngoân ngöõ baïn muoán, nhaán nuùt EXIT ñeå trôû laïi cheá ñoä maøn hình bình thöôøng. - hoaëc +. - hoaëc + 211mp-241mp.qxd 2/10/2003 1:27 PM Page 17 Löu keânh töï ñoäng Baïn coù theå queùt vuøng taàn soá coù taùc duïng ôû khu vöïc cuûa baïn (ñieàu naøy coøn phuï thuoäc vaøo nöôùc baïn). Caùc soá hieäu chöông trình ñöôïc löu töï ñoäng coù theå khoâng töông öùng vôùi soá hieäu thaät söï hoaëc soá hieäu mong muoán cuûa chöông trình ñoù. Tuy nhieân, baïn coù theå saép xeáp caùc soá hieäu baèng tay vaø xoùa baát cöù keânh naøo baïn khoâng muoán xem. 1 Nhaán nuùt MENU. Keát quaû: 2 Nhaán nuùt PW hoaëc PV ñeå choïn muïc Channel. Keát quaû: 3 Nhaán nuùt Keát quaû: 4 Danh muïc chính seõ hieån thò. Nhaán nuùt Keát quaû: Caùc muïc löïa choïn trong nhoùm Channel seõ hieån thò. - hoaëc +. Muïc Auto Store seõ ñöôïc choïn. - hoaëc + laàn nöõa. Caùc muïc löïa choïn trong nhoùm Auto store seõ hieån thò cuøng vôùi muïc Country ñöôïc choïn. 5 Nhaán nuùt - hoaëc + nhieàu laàn ñeå choïn nöôùc cuûa baïn. Baïn coù theå choïn nhöõng nöôùc sau: Belgie - Deutschland - Espania - France - Italia - Nederland - Schweiz - Sverige - UK - East Europe. 6 Nhaán nuùt PW hoaëc PV ñeå choïn muïc Search, sau ñoù nhaán nuùt - hoaëc +. Keát quaû: Quaù trình queùt seõ töï ñoäng keát thuùc. Caùc keânh ñöôïc saép xeáp vaø löu theo thöù töï töông öùng cuûa chuùng trong vuøng taàn soá, (vuøng taàn soá thaáp nhaát seõ ñöùng ñaàu, vaø vuøng taàn soá cao nhaát seõ ñöùng cuoái). Chöông trình ñöôïc choïn ban ñaàu seõ hieån thò. Muoán ngöøng quaù trình doø keânh tröôùc khi noù keát thuùc, haõy nhaán nuùt EXIT. 7 Khi caùc keânh ñaõ ñöôïc löu, baïn coù theå thöïc hieän caùc thao taùc sau: X Ñoåi keânh X Ñaët teân cho caùc keânh ñaõ löu (xem trang 19) X Xoùa keânh (xem trang 20) X Tinh chænh chaát löôïng thu keânh neáu caàn thieát (xem trang 20). X Saép xeáp chuùng theo thöù töï yeâu caàu (xem trang 21) Tieáng Vieät-17 211mp-241mp.qxd 2/10/2003 1:27 PM Page 18 Löu keânh thuû coâng Baïn coù theå löu toái ña 100 keânh TV, keå caû caùc keânh truyeàn hình caùp. Khi baïn löu keânh thuû coâng, baïn coù caùc löïa choïn sau: X Coù löu moãi keânh doø ñöôïc hay khoâng X Soá hieäu chöông trình maø baïn muoán gaùn cho moãi keânh ñöôïc löu. 1 Nhaán nuùt MENU. Keát quaû: 2 Danh muïc chính seõ hieån thò. Nhaán nuùt PW hoaëc PV ñeå choïn muïc Channel. Keát quaû: Caùc muïc löïa choïn trong nhoùm Channel seõ hieån thò. 3 Nhaán nuùt 4 Nhaán nuùt PW hoaëc PV ñeå choïn muïc Manual store. Nhaán nuùt - hoaëc + laàn nöõa. Keát quaû: 5 Caùc tuøy choïn coù trong muïc Manual store seõ hieån thò cuøng vôùi muïc Color System ñöôïc choïn. Nhöõng chuaån maøu seõ hieån thò theo thöù töï sau: AUTO - PAL - SECAM - NT4.43. Nhaán nuùt PW hoaëc PV ñeå choïn muïc Sound system. baïn coù theå xaùc ñònh chuaån aâm thanh caàn thieát baèng caùch nhaán nuùt hoaëc + nhieàu laàn. Keát quaû: 7 +. Neáu caàn, baïn coù theå xaùc ñònh chuaån phaùt soùng caàn thieát baèng caùch nhaán nuùt - hoaëc + nhieàu laàn. Keát quaû: 6 - hoaëc Caùc chuaån aâm thanh seõ hieån thò theo thöù töï sau: BG - DK - I - L. Neáu baïn bieát soá hieäu keânh seõ ñöôïc löu, nhaán nuùt PW hoaëc PV ñeå hoïn muïc Channel. baïn coù theå xaùc ñònh chuaån aâm thanh caàn thieát baèng caùch nhaán nuùt - hoaëc + nhieàu laàn. Neáu baïn khoâng bieát soá hieäu keânh, nhaán nuùt PW hoaëc PV ñeå choïn muïc Search. Nhaán nuùt - hoaëc + ñeå baét ñaàu doø. Keát quaû: 8 Ñeå gaùn soá hieäu chöông trình cho moät keânh, choïn muïc Program baèng caùch nhaán nuùt PW hoac PV. Nhaán nuùt - hoaëc + ñeå tìm soá ñuùng. 9 Nhaán nuùt PW hoaëc PV ñeå choïn muïc Store. Choïn OK baèng caùch nhaán nuùt - hoaïc +. Keát quaû: 10 Tieáng Vieät-18 Boä doø keânh seõ queùt vuøng taàn soá cho ñeán khi keânh ñaàu tieân hoaëc keânh baïn ñaõ choïn hieån thò treân maøn hình. Keânh vaø soá hieäu chöông trình lieân quan seõ ñöôïc löu. Laëp laïi caùc böôùc töø 7 ñeán 9 cho moãi keânh muoán löu. 211mp-241mp.qxd 2/10/2003 1:27 PM Page 19 Ñaët teân cho caùc keânh Neáu thoâng tin veà teân keânh ñöôïc phaùt vaøo thôøi ñieåm baïn ñang löu keânh thuû coâng hoaëc töï ñoäng, teân keânh seõ ñöôïc gaùn tröïc tieáp vaøo keânh. Tuy nhieân, baïn coù theå thay ñoåi nhöõng teân naøy hoaëc ñaët teân môùi neáu caàn thieát. 1 Nhaán nuùt MENU. Keát quaû: 2 Danh muïc chính seõ hieån thò. Nhaán nuùt PW hoaëc PV ñeå choïn muïc Channel. Keát quaû: Caùc muïc löïa choïn trong nhoùm Channel seõ hieån thò. 3 Nhaán nuùt 4 Nhaán nuùt PW hoaëc PV ñeå choïn muïc Name. Nhaán nuùt hoaëc +. Keát quaû: - hoaëc +. - Caùc keânh hieän haønh seõ hieån thò. 5 Neáu caàn, nhaán nuùt PW hoaëc PV ñeå choïn keânh maø baïn muoán ñaët teân môùi. 6 Nhaán nuùt 7 Nhaán nuùt PW hoaëc PV ñeå choïn moät kyù töï (A ~ Z), con soá (0~9) hoaëc bieåu töôïng (-, khoaûng traéng). Nhaán nuùt - hoaëc + ñeå chuyeån veà kyù töï tröôùc ñoù hoaëc sang kyù töï keá tieáp. 8 Laäp laïi böôùc 5 ñeán 7 cho moãi keânh maø baïn muoán ñaët teân môùi. - hoaëc +. Tieáng Vieät-19 211mp-241mp.qxd 2/10/2003 1:27 PM Page 20 Boû qua caùc keânh khoâng muoán xem Baïn coù theå choïn nhöõng keânh maø baïn muoán loaïi boû trong quaù trình doø keânh. Khi baïn doø qua caùc keânh ñaõ löu, nhöõng keânh baïn ñaõ choïn ñeå boû qua seõ khoâng hieån thò. Taát caû nhöõng keânh baïn khoâng choïn ñeå loaïi boû seõ hieån thò trong quaù trình doø keânh. 1 Nhaán nuùt MENU. Keát quaû: 2 Danh muïc chính seõ hieån thò. Nhaán nuùt PW hoaëc PV ñeå choïn muïc Channel. Keát quaû: Caùc muïc löïa choïn trong nhoùm Channel seõ hieån thò. 3 Nhaán nuùt 4 Nhaán nuùt PW hoaëc PV ñeå choïn muïc Add/Erase. Nhaán nuùt hoaëc +. Keát quaû: - hoaëc +. - Caùc keânh ñaõ löu seõ hieån thò. 5 Nhaán nuùt PW hoaëc PV ñeå choïn keânh muoán theâm hoaëc xoùa. Neáu caàn, nhaán nuùt - hoaëc + ñeå choïn Added hoaëc Erased. 6 Laäp laïi böôùc 5 cho moãi keânh maø baïn muoán theâm vaøo hoaëc xoùa. Tinh chænh baét soùng keânh Neáu tín hieäu nhaän ñöôïc roõ, baïn khoâng caàn phaûi tinh chænh keânh, vì quaù trình naøy ñöôïc thöïc hieän töï ñoäng trong luùc doø vaø löu keânh. Tuy nhieân, neáu tín hieäu quaù yeáu hoaëc hình aûnh meùo moù, baïn coù theå phaûi tinh chænh keânh baèng tay. 1 Nhaán nuùt MENU. Keát quaû: 2 Nhaán nuùt PW hoaëc PV ñeå choïn muïc Channel. Keát quaû: Tieáng Vieät-20 Danh muïc chính seõ hieån thò. Caùc muïc löïa choïn trong nhoùm Channel seõ hieån thò. 3 Nhaán nuùt 4 Nhaán nuùt PW hoaëc PV ñeå choïn muïc Fine tune. 5 Nhaán nuùt - hoaëc + ñeå ñaït ñöôïc chaát löôïng hình aûnh saéc neùt, roõ raøng vaø chaát löôïng aâm thanh toát. - hoaëc +. 211mp-241mp.qxd 2/10/2003 1:27 PM Page 21 Saép xeáp caùc keânh ñaõ löu Baïn coù theå hoaùn ñoåi soá hieäu cuûa 2 keânh ñeå: X Ñieàu chænh laïi soá thöù töï maø caùc keânh ñaõ ñöôïc töï ñoäng löu. X Gaùn soá deã nhôù cho nhöõng keânh baïn xem thöôøng xuyeân nhaát. 1 Nhaán nuùt MENU. Keát quaû: 2 Danh muïc chính seõ hieån thò. Nhaán nuùt PW hoaëc PV ñeå choïn muïc Channel. Keát quaû: Caùc muïc löïa choïn trong nhoùm Channel seõ hieån thò. 3 Nhaán nuùt 4 Nhaán nuùt PW hoaëc PV ñeå choïn muïc Channel sorting. Nhaán nuùt - hoaëc +. Keát quaû: - hoaëc +. Caùc tuøy choïn coù trong muïc Channel sorting seõ hieån thò cuøng vôùi muïc From ñöôïc choïn. 5 Nhaán nhieàu laàn nuùt muoán thay ñoåi. 6 Nhaán nuùt PW hoaëc PV ñeå choïn muïc To. Nhaán nuùt - hoaëc + nhieàu laàn ñeå choïn con soá môùi maø baïn muoán gaùn cho keânh naøy. 7 Nhaán nuùt PW hoaëc PV ñeå choïn muïc Store. Nhaán nuùt - hoaëc + ñeå choïn OK nhaèm xaùc nhaän vieäc hoaùn ñoåi soá hieäu keânh. Keát quaû: 8 - hoaëc + ñeå choïn soá hieäu keânh baïn Keânh ñöôïc choïn ñöôïc hoaùn ñoåi vôùi keânh ñöôïc löu tröôùc ñoù theo soá hieäu keânh ñaõ choïn. Muoán chuyeån taát caû caùc keânh tôùi soá hieäu keânh caàn thieát, haõy laäp laïi böôùc 5 ñeán 7 sau khi choïn muïc From baèng caùch nhaán nuùt PW hoaëc PV. Tieáng Vieät-21 211mp-241mp.qxd 2/10/2003 1:27 PM Page 22 Thay ñoåi chuaån hình aûnh Baïn coù theå choïn loaïi hình aûnh thích öùng nhaát vôùi yeâu caàu cuûa baïn. 1 Nhaán nuùt MENU. Keát quaû: 2 Nhaán nuùt PW hoaëc PV ñeå choïn muïc Picture. Keát quaû: 3 Nhaán nuùt Keát quaû: 4 Danh muïc chính seõ hieån thò. Caùc muïc löïa choïn trong nhoùm Picture seõ hieån thò. - hoaëc +. Muïc Mode ñöôïc choïn. baïn coù theå xaùc ñònh chuaån aâm thanh caàn thieát baèng caùch nhaán nuùt - hoaëc + nhieàu laàn. Baïn coù theå choïn nhöõng hieäu öùng hình aûnh sau: Custom - Standard - Natural - Mild. Baïn cuõng coù theå caøi ñaët nhöõng tuøy choïn naøy chæ baèng caùch caàn nhaán nuùt P.STD (Chuaån Hình AÛnh). ÔÛ danh muïc Picture, neáu baïn thay ñoåi giaù trò caùc muïc Contrast (töông phaûn), Brightness (ñoä saùng), Sharpness (ñoä neùt), Color (maøu), hoaëc Tint (saéc thaùi) (chæ daønh cho heä NTSC), muïc Custom seõ ñöôïc choïn töï ñoäng. Ñieàu chænh caùc thoâng soá hình aûnh Maøn hình TV cuûa baïn coù moät soá muïc thoâng soá cho pheùp baïn ñieàu chænh chaát löôïng hình aûnh. 1 Nhaán nuùt MENU. Keát quaû: 2 Danh muïc chính seõ hieån thò. Nhaán nuùt PW hoaëc PV ñeå choïn muïc Picture. Keát quaû: Caùc muïc löïa choïn trong nhoùm Picture seõ hieån thò. 3 Nhaán nuùt 4 Nhaán nuùt PW hoaëc PV ñeå choïn thoâng soá (Brightness, Contrast, Sharpness, Color hoaëc Tint- chæ daønh cho heä NTSC) caàn ñieàu chænh. Nhaán nuùt - hoaëc +. Keát quaû: 5 Nhaán nuùt - hoaëc +. Moät thanh ngang seõ hieån thò. - hoaëc + ñeå choïn thoâng soá caàn thieát. Neáu baïn thöïc hieän baát kyø thay ñoåi naøo, chuaån aâm thanh seõ töï ñoäng chuyeån sang cheá ñoä Custom. Tieáng Vieät-22 211mp-241mp.qxd 2/10/2003 1:28 PM Page 23 Choïn daïng hình aûnh Baïn coù theå choïn loaïi hình aûnh thích öùng nhaát vôùi yeâu caàu cuûa baïn. 1 Nhaán nuùt MENU. Keát quaû: 2 Danh muïc chính seõ hieån thò. Nhaán nuùt PW hoaëc PV ñeå choïn muïc Picture. Keát quaû: Caùc muïc löïa choïn trong nhoùm Picture seõ hieån thò. 3 Nhaán nuùt 4 Nhaán nuùt PW hoaëc PV ñeå choïn muïc Size. 5 Baïn coù theå xaùc ñònh chuaån aâm thanh caàn thieát baèng caùch nhaán nuùt - hoaëc + nhieàu laàn. Baïn coù theå choïn nhöõng hieäu öùng hình aûnh sau: Wide - Normal 1 - Normal 2 - Zoom 1 - Zoom 2. - hoaëc +. Baïn cuõng coù theå caøi ñaët nhöõng tuøy choïn naøy chæ baèng caùch caàn nhaán nuùt P.SIZE (Kíùch thöôùc hình aûnh). Laøm ñöùng khung hình hieän taïi Nhaán nuùt STILL treân boä ñieàu khieån töø xa ñeå laøm ñöùng hình trong moät khung hình. Ñeå trôû laïi maøn hình bình thöôøng, nhaán nuùt STILL laàn nöõa. Tieáng Vieät-23 211mp-241mp.qxd 2/10/2003 1:28 PM Page 24 Thay ñoåi chuaån aâm thanh Baïn coù theå duøng boä ñieàu khieån töø xa ñeå choïn loaïi hieäu öùng aâm thanh ñaëc bieät muoán söû duïng khi xem moät chöông trình. 1 Nhaán nuùt MENU. Keát quaû: 2 Nhaán nuùt PW hoaëc PV ñeå choïn muïc Sound. Keát quaû: 3 Nhaán nuùt Keát quaû: 4 Danh muïc chính seõ hieån thò. Caùc muïc löïa choïn trong nhoùm Sound seõ hieån thò. - hoaëc +. Muïc Mode ñöôïc choïn. Baïn coù theå xaùc ñònh chuaån aâm thanh caàn thieát baèng caùch nhaán nuùt - hoaëc + nhieàu laàn. Nhöõng hieäu öùng aâm thanh sau ñaây coù taùc duïng: Custom - Standard - Music - Movie - Speech. Baïn cuõng coù theå caøi ñaët nhöõng tuøy choïn naøy chæ baèng caùch caàn nhaán nuùt S.STD (Chuaån aâm thanh). Caùch ñieàu chænh caùc thoâng soá aâm thanh Baïn coù theå ñieàu chænh caùc muïc thoâng soá aâm thanh sau ñeå phuø hôïp vôùi sôû thích cuûa mình. 1 Nhaán nuùt MENU. Keát quaû: 2 Danh muïc chính seõ hieån thò. Nhaán nuùt PW hoaëc PV ñeå choïn muïc Sound. Keát quaû: Caùc muïc löïa choïn trong nhoùm Sound seõ hieån thò. 3 Nhaán nuùt 4 Nhaán nuùt PW hoaëc PV ñeå choïn tuøy choïn (Bass hoaëc Treble) caàn ñieàu chænh. Nhaán nuùt - hoaëc +. Keát quaû: 5 Nhaán nuùt - hoaëc +. Moät thanh ngang seõ hieån thò. - hoaëc + ñeå choïn thoâng soá caàn thieát. Neáu baïn thöïc hieän baát kyø thay ñoåi naøo, chuaån aâm thanh seõ töï ñoäng chuyeån sang cheá ñoä Custom. Tieáng Vieät-24 211mp-241mp.qxd 2/10/2003 1:28 PM Page 25 Thöôûng thöùc aâm thanh voøm (Dolby) Chöùc naêng naøy mang laïi hieäu öùng aâm thanh voøm aûo taïi nhaø baèng caùch phoái hôïp hai loa traùi vaø phaûi. 1 Nhaán nuùt MENU. Keát quaû: 2 Danh muïc chính seõ hieån thò. Nhaán PW hoaëc nuùt PV ñeå choïn muïc Sound. Keát quaû: Caùc muïc löïa choïn trong nhoùm Sound seõ hieån thò. 3 Nhaán nuùt 4 Nhaán nuùt PW hoaëc PV ñeå choïn muïc Dolby. 5 Nhaán nuùt - hoaëc + ñeå choïn muïc On nhaèm truyeàn aâm thanh vaøo caùc loa tích hôïp. - hoaëc +. Baïn cuõng coù theå choïn tuøy choïn naøy chæ caàn nhaán nuùt V.DOLBY (AÂm thanh voøm aûo). Baät/Taét loa tích hôïp Khi loa tích hôïp bò taét, taát caû aâm thanh seõ ñöôïc truyeàn qua loa gaén ngoaøi. 1 Nhaán nuùt MENU. Keát quaû: 2 Danh muïc chính seõ hieån thò. Nhaán nuùt PW hoaëc PV ñeå choïn muïc Sound. Keát quaû: Caùc muïc löïa choïn trong nhoùm Sound seõ hieån thò. 3 Nhaán nuùt 4 Nhaán nuùt PW hoaëc PV ñeå choïn muïc Speaker. 5 Nhaán nuùt - hoaëc + ñeå choïn muïc On nhaèm truyeàn aâm thanh vaøo caùc loa tích hôïp. - hoaëc +. Tieáng Vieät-25 211mp-241mp.qxd 2/10/2003 1:28 PM Page 26 Choïn chöùc naêng MTS (Multichannel Television Stereo) Tuøy theo chöông trình cuï theå ñang ñöôïc phaùt soùng, baïn coù theå nghe baèng Stereo, Mono hoaëc Dual I/II (Dual I/II thöôøng laø moät chöùc naêng dòch ngoân ngöõ nöôùc ngoaøi) 1 Nhaán nuùt MENU. Keát quaû: 2 Danh muïc chính seõ hieån thò. Nhaán nuùt PW hoaëc PV ñeå choïn muïc Sound. Keát quaû: Caùc muïc löïa choïn trong nhoùm Sound seõ hieån thò. 3 Nhaán nuùt 4 Nhaán nuùt PW hoaëc PV ñeå choïn muïc MTS. 5 Baïn coù theå xaùc ñònh chuaån aâm thanh caàn thieát baèng caùch nhaán nuùt - hoaëc + nhieàu laàn. Caùc chuaån aâm thanh seõ hieån thò theo thöù tö ïsau: Mono - Stereo - Dual 1 - Dual 2. - hoaëc +. Baïn cuõng coù theå caøi ñaët nhöõng tuøy choïn naøy chæ baèng caùch caàn nhaán nuùt S.STD (Chuaån aâm thanh). Nuùt "DUAL I/II" hieån thò/ñieàu khieån vieäc thi haønh vaø xuaát tín hieäu aâm thanh. X Neáu ñieàu kieän baét soùng trôû neân xaáu ñi, baïn seõ nghe ñöôïc aâm thanh deã daøng hôn neáu cheá ñoä aâm thanh ñöôïc chuyeån veà Mono. X Neáu tín hieäu Stereo bò yeáu vaø xaûy ra hieän töôïng töï ñoäng chuyeån cheá ñoä, baïn haõy chuyeån qua cheá ñoä Mono. X Khi nhaän tín hieäu aâm thanh Mono ôû cheá ñoä AV, haõy caém daây aâm thanh vaøo coång "AUDIO (L)" ôû maët sau maøn hình. Tieáng Vieät-26 211mp-241mp.qxd 2/10/2003 1:28 PM Page 27 Baät chöùc naêng Maøn hình con (PIP) Baïn coù theå cho hieån thò moät maøn hình con naèm trong maøn hình chính cuûa chöông trình TV hoaëc maøn hình hieån thò noäi dung cuûa caùc thieát bò AV khaùc nhö VCR hoaëc DVD. Theo caùch naøy baïn coù theå vöøa xem chöông trình TV hoaëc quan saùt hình aûnh nhaäp vaøo töø baát cöù thieát bò naøo ñöôïc keát noái trong khi vaãn xem chöông trình TV hoaëc hình aûnh nhaäp töø nhöõng nguoàn khaùc. 1 Nhaán nuùt MENU. Keát quaû: 2 Danh muïc chính seõ hieån thò. Nhaán nuùt PW hoaëc PV ñeå choïn muïc Function. Keát quaû: Caùc muïc löïa choïn trong nhoùm Function seõ hieån thò. 3 Nhaán nuùt 4 Nhaán nuùt PW hoaëc PV ñeå choïn muïc PIP. Nhaán nuùt Keát quaû: 5 Nhaán nuùt - hoaëc +. - hoaëc +. Caùc muïc löïa choïn trong nhoùm PIP seõ hieån thò. - hoaëc + ñeå choïn muïc On. Baïn cuõng coù theå chæ caàn nhaán nuùt PIP ON ñeå baät chöùc naêng PIP. Ñeå taét chöùc naêng naøy, nhaán nuùt ñoù laàn nöõa. 6 Nhaán nuùt PW hoaëc PV ñeå choïn muïc TV/Video. Nhaán nuùt hoaëc + ñeå choïn nguoàn hình cho maøn hình con. Keát quaû: 7 Caùc nguoàn hình aûnh seõ hieån thò theo thöù töï sau: TV - Scart - Video - S-Video. Nhaán nuùt PW hoaëc PV ñeå choïn muïc Size. Nhaán nuùt + ñeå choïn kích côõ cho maøn hình con. Keát quaû: - - hoaëc Caùc kích côõ seõ hieån thò theo thöù töï sau: Small - Medium - Large. Baïn cuõng coù theå caøi ñaët nhöõng tuøy choïn naøy chæ baèng caùch caàn nhaán nuùt SIZE. 8 Nhaán nuùt PW hoaëc PV ñeå choïn muïc Position. Di chuyeån maøn hình con ngöôïc chieàu kim ñoàng hoà baèng caùch nhaán nuùt hoaëc +. Baïn cuõng coù theå di chuyeån maøn hình con chæ caàn nhaán nuùt LOCATE. Tieáng Vieät-27 211mp-241mp.qxd 2/10/2003 1:28 PM Page 28 Baät chöùc naêng Nhieàu maøn hình (PBP; Maøn hình ñoâi) Khi coù nhöõng thieát bò AV khaùc (PC, VCR hoaëc DVD) ñöôïc keát noái vôùi maøn hình hoaëc khi ñang xem TV, baïn coù theå cho hieån thò hai nguoàn hình cuøng luùc treân maøn hình. 1 Nhaán nuùt MENU. Keát quaû: 2 Danh muïc chính seõ hieån thò. Nhaán nuùt PW hoaëc PV ñeå choïn muïc Function. Keát quaû: Caùc muïc löïa choïn trong nhoùm Function seõ hieån thò. 3 Nhaán nuùt 4 Nhaán nuùt PW hoaëc PV ñeå choïn muïc PBP. Nhaán nuùt Keát quaû: 5 Nhaán nuùt - hoaëc +. - hoaëc +. Caùc muïc löïa choïn trong nhoùm PBP seõ hieån thò. - hoaëc + ñeå choïn muïc On. Baïn cuõng coù theå chæ caàn nhaán nuùt PBP ñeå baät chöùc naêng PBP. Ñeå taét chöùc naêng naøy, nhaán nuùt ñoù laàn nöõa. 6 Nhaán nuùt PW hoaëc PV ñeå choïn muïc TV/Video. Nhaán nuùt hoaëc + ñeå choïn nguoàn hình cho maøn hình phuï. Keát quaû: Caùc nguoàn hình aûnh seõ hieån thò theo thöù töï sau: TV - Scart - Video - S-Video. 7 Nhaán nuùt PW hoaëc PV ñeå choïn muïc Swap. 8 Nhaán nuùt Keát quaû: - - hoaëc +. Maøn hình chính vaø maøn hình phuï hoaùn ñoåi cho nhau. Baïn cuõng coù theå laøm vieäc naøy maø chæ caàn nhaán nuùt PBP. Tieáng Vieät-28 211mp-241mp.qxd 2/10/2003 1:28 PM Page 29 Chöùc naêng töï ñoäng taét Baïn coù theå choïn moät khoaûng thôøi gian töø 10 phuùt ñeán 240 phuùt sau khi ñaõ caøi ñaët chöùc naêng töï ñoäng taét. 1 Nhaán nuùt MENU. Keát quaû: 2 Nhaán nuùt PW hoaëc PV ñeå choïn muïc Function. Keát quaû: 3 Nhaán nuùt Keát quaû: 4 Danh muïc chính seõ hieån thò. Caùc muïc löïa choïn trong nhoùm Function seõ hieån thò. - hoaëc +. Muïc Sleep Timer ñöôïc choïn. Nhaán nuùt - hoaëc maøn hình seõ taét. + nhieàu laàn ñeå choïn soá phuùt maø sau ñoù X Baïn coù theå caøi ñaët cho maøn hình töï ñoäng taét sau nhöõng khoaûng thôøi gian döôùi ñaây: 10, 20, 30, 60, 90, 120, 150, 180, 210 vaø 240 phuùt. Baïn cuõng coù theå chæ caàn nhaán nuùt “SLEEP” ñeå choïn soá phuùt. Neáu boä ñeám thôøi gian taét ñaõ ñöôïc caøi ñaët, maøn hình seõ hieån thò soá thôøi gian coøn laïi vaø sau ñoù maøn hình seõ taét. Neáu boä ñeám thôøi gian taét chöa ñöôïc caøi ñaët, maøn hình seõ hieån thò Off. Chöùc naêng hieån thò thoâng tin Baïn coù theå xem caùc thoâng soá caøi ñaët hieän taïi cuûa moät nguoàn ñaõ choïn baèng caùch nhaán nuùt "DISPLAY" treân boä ñieàu khieån töø xa. Thoâng tin ñöôïc hieån thò seõ khaùc nhau tuøy theo nguoàn ñöôïc choïn. Tieáng Vieät-29 211mp-241mp.qxd 2/10/2003 1:29 PM Page 30 Ñieàu chænh ñoä saùng vaø ñoä töông phaûn Nhaán nuùt SOURCE ñeå caøi saün cheá ñoä PC. 1 Nhaán nuùt MENU. Keát quaû: 2 Nhaán nuùt PW hoaëc PV ñeå choïn muïc 'PC'. Keát quaû: 3 Nhaán nuùt Keát quaû: 4 Nhaán nuùt Keát quaû: 5 Caùc muïc löïa choïn trong nhoùm PC seõ hieån thò. - hoaëc +. Muïc Image ñöôïc choïn. - hoaëc + laàn nöõa. Caùc tuøy choïn coù trong muïc Image seõ hieån thò. Nhaán nuùt PW hoaëc PV ñeå choïn tuøy choïn caàn ñieàu chænh (Brightness hoaëc Contrast) cho maøu saéc cuûa hình aûnh maùy tính. Nhaán nuùt - hoaëc +. Keát quaû: 6 Danh muïc chính seõ hieån thò. Nhaán nuùt Moät thanh ngang seõ hieån thò. - hoaëc + ñeå choïn giaù trò caàn thieát. Choïn kích côõ hình aûnh Nhaán nuùt SOURCE ñeå caøi saün cheá ñoä PC. 1 Nhaán nuùt MENU. Keát quaû: 2 Nhaán nuùt PW hoaëc PV ñeå choïn muïc PC. Keát quaû: 3 Nhaán nuùt Keát quaû: 4 Nhaán nuùt Keát quaû: 5 Danh muïc chính seõ hieån thò. Caùc tuøy choïn coù trong muïc PC seõ hieån thò. - hoaëc +. Muïc Image ñöôïc choïn. - hoaëc + laàn nöõa. Caùc tuøy choïn coù trong muïc Image seõ hieån thò. Nhaán nuùt PW hoaëc PV ñeå choïn muïc Size. Nhaán nuùt + ñeå choïn moät kích côõ cho hình aûnh maùy tính. Keát quaû: - hoaëc Caùc kích côõ seõ hieån thò theo thöù töï sau: Expanded 1 - Expanded 2 - Normal. Baïn cuõng coù theå caøi ñaët nhöõng tuøy choïn naøy chæ baèng caùch caàn nhaán nuùt P.SIZE (Kíùch thöôùc hình aûnh). Tieáng Vieät-30 211mp-241mp.qxd 2/10/2003 1:29 PM Page 31 Ñieàu chænh chaát löôïng hình aûnh Nhaán nuùt SOURCE ñeå caøi saün cheá ñoä PC. Chöùc naêng naøy ñöôïc duøng ñeå tinh chænh vaø cho chaát löôïng hình aûnh toát nhaát baèng caùch loaïi boû nhieãu laøm cho hình aûnh khoâng oån ñònh do coù raêng cöa vaø boùng môø. 1 Nhaán nuùt MENU. Keát quaû: 2 Danh muïc chính seõ hieån thò.. Nhaán nuùt PW hoaëc PV ñeå choïn muïc PC. Keát quaû: Caùc tuøy choïn coù trong muïc PC seõ hieån thò. 3 Nhaán nuùt 4 Nhaán nuùt PW hoaëc PV ñeå choïn muïc Image Lock. Nhaán nuùt hoaëc +. Keát quaû: 5 +. - Caùc tuøy choïn coù trong muïc Image Lock seõ hieån thò. Nhaán nuùt PW hoaëc PV ñeå choïn tuøy choïn caàn ñieàu chænh (Coarse hoaëc Fine) cho chaát löôïng maøu cuûa hình aûnh maùy tính. Nhaán nuùt - hoaëc +. Keát quaû: 6 - hoaëc Nhaán nuùt Moät thanh ngang seõ hieån thò. - hoaëc + ñeå choïn giaù trò caàn thieát. Chöùc naêng naøy coù theå thay ñoåi ñoä roäng cuûa hình aûnh. Neáu caàn, haõy ñieàu chænh vò trí hình vaøo giöõa. Thay ñoåi vò trí hình aûnh Nhaán nuùt SOURCE ñeå caøi saün cheá ñoä PC. 1 Nhaán nuùt MENU. Keát quaû: 2 Danh muïc chính seõ hieån thò. Nhaán nuùt PW hoaëc PV ñeå choïn muïc PC. Keát quaû: Caùc tuøy choïn coù trong muïc PC seõ hieån thò. 3 Nhaán nuùt 4 Nhaán nuùt PW hoaëc PV ñeå choïn muïc Position. Nhaán nuùt hoaëc +. 5 Nhaán nuùt PW hoaëc PV ñeå choïn vò trí caàn ñieàu chænh (H-Position hoaëc V-Position). Nhaán nuùt - hoaëc +. Keát quaû: 6 Nhaán nuùt - hoaëc +. - Moät thanh ngang seõ hieån thò. - hoaëc + ñeå choïn giaù trò caàn thieát. Tieáng Vieät-31 211mp-241mp.qxd 2/10/2003 1:29 PM Page 32 Ñieàu chænh maøu Nhaán nuùt SOURCE ñeå caøi saün cheá ñoä PC. 1 Nhaán nuùt MENU. Keát quaû: 2 Danh muïc chính seõ hieån thò. Nhaán nuùt PW hoaëc PV ñeå choïn muïc PC. Keát quaû: Caùc tuøy choïn coù trong muïc PC seõ hieån thò. 3 Nhaán nuùt 4 Nhaán nuùt PW hoaëc PV ñeå choïn muïc Color Adjust. Nhaán nuùt - hoaëc +. Keát quaû: - hoaëc +. Caùc tuøy choïn coù trong muïc Color Adjust seõ hieån thò cuøng vôùi muïc Color Mode ñöôïc choïn. 5 Nhaán nuùt - hoaëc + nhieàu laàn ñeå choïn cheá ñoä maøu caàn thieát. Baïn coù theå choïn nhöõng cheá ñoä maøu sau: Custom Color 1 - Color 2 - Color 3. 6 Neáu muoán ñieàu chænh maøu cho phuø hôïp nhaát vôùi yeâu caàu cuûa baïn, nhaán nuùt PW hoaëc PV ñeå choïn caùc tuøy choïn (Red, Green hoaëc Blue) caàn ñieàu chænh. Nhaán nuùt - hoaëc +. Keát quaû: 7 Nhaán nuùt Moät thanh ngang seõ hieån thò. - hoaëc + ñeå choïn giaù trò caàn thieát. Neáu baïn thay ñoåi caùc giaù trò Red, Green hoaëc Blue, muïc Color Mode seõ töï ñoäng ñöôïc chuyeån veà Custom. Caøi ñaët laïi giaù trò goác caùc thoâng soá hình aûnh Nhaán nuùt SOURCE ñeå caøi saün cheá ñoä PC. Baïn coù theå thay taát caû caùc thoâng soá hình aûnh baèng giaù trò maëc ñònh khi maøn hình ñöôïc xuaát xöôûng. Tieáng Vieät-32 1 Nhaán nuùt MENU. Keát quaû: Danh muïc chính seõ hieån thò. 2 Nhaán nuùt PW hoaëc PV ñeå choïn muïc PC. Keát quaû: Caùc tuøy choïn coù trong muïc PC seõ hieån thò. 3 Nhaán nuùt 4 Nhaán nuùt PW hoaëc PV ñeå choïn muïc Recall. Nhaán nuùt - hoaëc Keát quaû: Caùc tuøy choïn coù trong muïc Recall seõ hieån thò. 5 Nhaán nuùt PW hoaëc PV ñeå choïn tuøy choïn (Image Recall hoaëc Color Recall) caàn thay theá. Nhaán nuùt - hoaëc +. Keát quaû: Maøn hình seõ chuyeån sang maøu ñen vaø sau vaøi giaây seõ trôû laïi cheá ñoä hieån thò nguyeân thuûy. - hoaëc +. +. 211mp-241mp.qxd 2/10/2003 1:29 PM Page 33 Caùc cheá ñoä hieån thò Neáu tín hieäu thu ñöôïc hôïp chuaån, maøn hình seõ töï ñoäng hieäu chænh. Neáu tín hieäu töø heä thoáng maùy tính khoâng töông ñöông vôùi cheá ñoä tín hieäu chuaån, haõy ñieàu chænh cheá ñoä hieån thò baèng caùch tham khaûo theâm Saùch höôùng daãn söû duïng cuûa card maøn hình vì maøn hình coù theå khoâng hieån thò hoaëc chæ coù ñeøn baùo ñieän baät saùng. Vôùi nhöõng cheá ñoä hieån thò ñöôïc lieät keâ döôùi ñaây, hình aûnh hieån thò treân maøn hình ñaõ ñöôïc toái öu hoùa trong quaù trình saûn xuaát. Cheá ñoä Ñoä phaân giaûi Taàn soá queùt ngang Taàn soá queùt doïc (kHz) (Hz) Taàn soá ñieåm aûnh Cöïc tính ñoàng boä (MHz) (H/V) VGA 720 x 400 640 x 480 640 x 480 640 x 480 31.469 31.469 37.500 43.269 70.087 59.940 75.000 85.008 28.322 25.175 31.500 36.000 -/+ -/-/-/- SVGA 800 x 600 800 x 600 46.875 53.674 75.000 85.061 49.500 56.250 +/+ +/+ XGA 1024 x 768 1024 x 768 1024 x 768 48.363 60.023 68.677 60.004 75.029 84.997 65.000 78.750 94.500 -/+/+ +/+ SXGA 1280 x 1024 1280 x 1024 63.981 79.976 60.020 75.025 108.000 135.000 + / -, + / +/+ UXGA 1600 x 1200 75.000 60.000 162.000 + / -, + / - WUXGA 1920 x 1200 (SyncMaster 241MP) 75.000 60.000 193.156 + / -, + / - Chöùc naêng tieát kieäm ñieän Maøn hình naøy coù moät heä thoáng quaûn lyù ñieän naêng tích hôïp ñöôïc goïi laø Tieát Kieäm Ñieän. Heä thoáng naøy tieát kieäm ñieän baèng caùch chuyeån maøn hình sang cheá ñoä duøng ít naêng löôïng khi noù khoâng ñöôïc söû duïng trong moät khoaûng thôøi gian nhaát ñònh. Baïn coù theå choïn caùc cheá ñoä "On", "Standby", "Sleep" vaø "Deep Sleep". Chöùc naêng Tieát Kieäm Ñieän hoaït ñoäng vôùi moät card maøn hình töông thích chuaån VESA DPMS ñöôïc caøi ñaët trong maùy tính. Baïn phaûi duøng moät phaàn meàm tieän ích caøi ñaët trong maùy tính ñeå thieát laäp chöùc naêng naøy. Traïng thaùi Hoaït ñoäng bình thöôøng Cheá ñoä Chöùc naêng tieát kieäm ñieän(EPA/NUTEK) Ñoàng boä truïc ngang Ñang hoaït ñoäng Khoâng hoaït ñoäng Ñoàng boä truïc doïc Ñang hoaït ñoäng Khoâng hoaït ñoäng Ñeøn baùo coù ñieän Xanh Nhaáp nhaùy (khoaûng caùch 1 giaây) SyncMaster 211MP : 110W (Toái ña) SyncMaster 241MP : 120W (Toái ña) Ít hôn 8W Coâng suaát tieâu thuï Maøn hình seõ töï ñoäng trôû veà hoaït ñoäng bình thöôøng khi ñoàng boä truïc ngang vaø ñoàng boä truïc doïc trôû laïi. Hieän töôïng naøy xaûy ra khi baïn di chuyeån chuoät maùy tính hoaëc nhaán moät phím treân baøn phím. Tieáng Vieät-33 211mp-241mp.qxd 2/10/2003 1:29 PM Page 34 Chöùc naêng Teletext Haàu heát caùc keânh truyeàn hình ñeàu cung caáp dòch vuï thoâng tin chöõ thoâng qua teletext. Thoâng tin cung caáp bao goàm: X Thôøi gian caùc chöông trình truyeàn hình X Baûn tin vaø Döï baùo thôøi tieát X Tin theå thao X Thoâng tin du lòch Caùc thoâng tin naøy ñöôïc chia thaønh trang coù ñaùnh soá (xem bieåu ñoà). Phaàn Noäi dung A Soá trang ñöôïc choïn. B Nhaän daïng keânh ñang phaùt. C Soá trang hieän haønh hoaëc thoâng baùo doø tìm. D Ngaøy vaø giôø. E Vaên baûn. F Thoâng tin traïng thaùi. Thoâng tin FASTEXT. Thoâng tin Teletext thöôøng ñöôïc chia thaønh nhieàu trang hieån thò theo thöù töï. Baïn coù theå truy caäp baèng caùch: X Nhaäp soá trang X Choïn moät chuû ñeà trong danh saùch X Choïn moät tieâu ñeà maøu (heä thoáng FASTEXT) Hieån thò Thoâng tin Teletext Baïn coù theå cho hieån thò thoâng tin Teletext treân maøn hình baát cöù luùc naøo. Ñeå thoâng tin Teletext ñöôïc hieån thò ñuùng, vieäc baét soùng keânh phaûi oån ñònh; neáu khoâng: X Thoâng tin coù theå thaát laïc X Moät soá trang coù theå khoâng xem ñöôïc 1 Söû duïng nuùt PW hay PV ñeå choïn keânh cung caáp dòch vuï teletext. 2 Nhaán nuùt TTX/MIX ñeå kích hoaït cheá ñoä teletext. Keát quaû: Tieáng Vieät-34 Trang chöùa noäi dung seõ hieån thò. Coù theå xem laïi trang naøy baát kyø luùc naøo baèng caùch nhaán nuùt (index). 3 Neáu baïn muoán hieån thò chöông trình ñang phaùt soùng cuøng luùc vôùi trang teletext, nhaán nuùt TTX/MIX laàn nöõa. 4 Ñeå trôû laïi maøn hình bình thöôøng, nhaán nuùt CANCEL ( 5 Nhaán nuùt TTX/MIX laàn nöõa ñeå thoaùt khoûi cheá ñoä hieån thò teletext. ). 211mp-241mp.qxd 2/10/2003 1:29 PM Page 35 Choïn moät trang baèng soá Baïn coù theå nhaäp soá trang tröïc tieáp baèng caùch nhaán nuùt soá treân boä ñieàu khieån töø xa. 1 Nhaäp soá trang coù 3 chöõ soá coù trong noäi dung teletext baèng caùch nhaán nhöõng nuùt soá töông öùng. Keát quaû: 2 Boä ñeám soá trang hieän haønh seõ taêng leân, sau ñoù trang ñöôïc choïn seõ hieån thò. Neáu trang ñöôïc choïn coù lieân keát vôùi nhöõng trang phuï khaùc, caùc trang naøy seõ hieån thò theo thöù töï. Ñeå taïm döøng taïi moät trang naøo ñoù, nhaán nuùt HOLD ( ). Ñeå tieáp tuïc xem, nhaán nuùt HOLD ( ) laàn nöõa. Caùch duøng caùc tuøy choïn hieån thò: Ñeå hieån thò... Nhaán... X Caû thoâng tin Teletext vaø chöông trình phaùt soùng thoâng thöôøng TTX/MIX X Vaên baûn aån (chaúng haïn nhö caùc caâu traû lôøi cho troø chôi ñoá) (môû ra) X Maøn hình bình thöôøng (môû ra) laàn nöõa X Moät trang phuï, baèng caùch nhaäp soá trang goàm 4 chöõ soá SUBPAGE ( ) X Trang keá tieáp (trang tröôùc) X Trang tröôùc ñoù (trang sau) X Gaáp ñoâi côõ chöõ trong: Nöûa treân maøn hình Nöûa döôùi maøn hình SIZE ( ) • Moät laàn Hai laàn X Maøn hình bình thöôøng • Ba laàn Tieáng Vieät-35 211mp-241mp.qxd 2/10/2003 1:29 PM Page 36 Duøng FLOF ñeå choïn moät trang Caùc chuû ñeà coù trong nhöõng trang Teletext ñöôïc maõ hoùa baèng maøu; baïn coù theå choïn chuû ñeà baèng caùch nhaán caùc nuùt maøu treân boä ñieàu khieån töø xa. 1 Hieån thò trang muïc luïc Teletext baèng caùch nhaán nuùt TTX/MIX. 2 Nhaán nuùt maøu töông öùng vôùi chuû ñeà baïn muoán choïn; nhöõng chuû ñeà coù theå choïn xuaát hieän ôû doøng traïng thaùi. Keát quaû: Trang ñöôïc choïn hieån thò vôùi nhöõng thoâng tin baèng maøu khaùc maø baïn coù theå choïn theo caùch töông töï. 3 Ñeå hieån thò trang tröôùc ñoù hoaëc trang tieáp theo, nhaán nuùt maøu töông öùng. 4 Ñeå hieån thò trang phuï, xem caùc böôùc sau. X Nhaán nuùt SUBPAGE ( ). Keát quaû: Caùc trang phuï hieän höõu seõ hieån thò. X Choïn trang phuï caàn thieát. Baïn coù theå cuoän leân xuoáng caùc trang phuï baèng caùch duøng nuùt (PW) hoaëc (PV). Löu tröõ caùc trang Teletext Baïn coù theå löu toái ña 4 trang teletext ñeå xem laïi vaøo luùc raûnh. 1 Choïn cheá ñoä LIST baèng nuùt LIST/FLOF ( Keát quaû: Boán con soá goàm 3 chöõ soá ñöôïc hieån thò vôùi maøu khaùc nhau. Nuùt LIST/FLOF ( LIST vaø FLOF. Tieáng Vieät-36 ). ) duøng ñeå chuyeån qua laïi giöõa cheá ñoä 2 Nhaán nuùt maøu töông öùng vôùi trang seõ ñöôïc thay theá. 3 Nhaäp vaøo soá trang môùi baèng caùc nuùt soá. 4 Laëp laïi caùc böôùc 2 vaø 3 khi löu moãi trang, moãi laàn duøng moät nuùt maøu khaùc nhau. 5 Nhaán nuùt (store) cho ñeán khi khoái töông öùng nhaáp nhaùy. 211mp-241mp.qxd 2/10/2003 1:29 PM Page 37 Khaéc phuïc söï coá: Tröôùc khi lieân heä vôùi Nhaân vieân baûo haønh Tröôùc khi lieân heä vôùi boä phaän haäu maõi cuûa Samsung, caàn thöïc hieän caùc kieåm tra ñôn giaûn sau. Neáu baïn khoâng theå xöû lyù söï coá theo chæ daãn döôùi ñaây, haõy ghi laïi model vaø soá xeâ-ri cuûa TV vaø lieân heä vôùi Nhaø phaân phoái taïi ñòa phöông. Khoâng coù hình/tieáng X X X X Kieåm tra xem daây ñieän ñaõ ñöôïc caém vaøo oå ñieän chöa. Kieåm tra xem baïn ñaõ nhaán nuùt Power ( ) chöa. Kieåm tra vieäc caøi ñaët ñoä töông phaûn vaø ñoä saùng. Kieåm tra aâm löôïng. Coù hình nhöng khoâng coù tieáng X Kieåm tra aâm löôïng. X Kieåm tra xem coù nhaán nuùt MUTE treân boä ñieàu khieån töø xa khoâng. Khoâng coù hình hay chæ coù hình ñen traéng X Chænh laïi maøu. X Kieåm tra vieäc choïn heä phaùt soùng coù ñuùng khoâng. Nhieãu hình/tieáng X Kieåm tra coù thieát bò ñieän töû naøo khaùc gaây nhieãu cho TV khoâng. Neáu coù, di chuyeån chuùng ra xa. X Caém TV vaøo moät oå ñieän khaùc. Hình aûnh bò nhoøe hoaëc bò haït, aâm thanh meùo moù X Kieåm tra höôùng, vò trí vaø keàt noái aêng-ten. Hieän töôïng nhieãu naøy thöôøng xaûy ra khi duøng aêng-ten trong nhaø. Boä ñieàu khieån töø xa bò truïc traëc X Thay pin boä ñieàu khieån töø xa. X Lau saïch caïnh treân cuûa boä ñieàu khieån töø xa (khu vöïc thu phaùt soùng). X Kieåm tra caùc ñieåm noái cuûa pin. Xuaát hieän thoâng baùo “Check Signal Cable” (Kieåm tra caùp tín hieäu). X Kieåm tra xem caùp tín hieäu ñöôïc keát noái toát vôùi PC hoaëc caùc nguoàn video chöa. X Kieåm tra xem PC vaø caùc thieát bò video nguoàn ñaõ ñöôïc baät chöa. ÔÛ cheá ñoä PC, xuaát hieän thoâng baùo "Not Supported Mode" X Kieåm tra ñoä phaân giaûi toái ña vaø taàn soá cuûa boä töông hôïp video. X So saùnh nhöõng giaù trò naøy vôùi döõ lieäu trong Display Modes Timing Chart (Sô ñoà ñònh giôø caùc kieåu hieån thò) ÔÛ cheá ñoä PC, xuaát hieän caùc soïc ngang hoaëc doïc gaây nhaùy, tröôït hình. X Ñieàu chænh chöùc naêng Coarse vaø Fine. ÔÛ cheá ñoä PC, maøn hình ôû traïng thaùi ñen vaø ñeøn baùo ñieän bò môø laâu hoaëc nhaáp nhaùy moãi 0,5 giaây hoaëc 1 giaây X TV ñang söû duïng heä thoáng quaûn lyù nguoàn cuûa noù. X Di chuyeån con chuoät maùy tính hoaëc aán moät phím treân baøn phím. ÔÛ cheá ñoä PC, hình aûnh khoâng oån ñònh vaø coù theå bò rung. X Kieåm tra xem ñoä phaân giaûi maøn hình vaø taàn soá cuûa maùy tính hoaëc card maøn hình coù töông thích vôùi cheá ñoä hieån thò cuûa TV khoâng. Treân PC kieåm tra: Control Panel, Display, Settings. X Neáu ñaõ caøi ñaët ñuùng, duøng chöông trình tieän ích cuûa maùy tính ñeå thay ñoåi caøi ñaët maøn hình. TV cuûa baïn hoã trôï caùc chöùc naêng queùt ña chieàu trong phaïm vi taàn soá sau: Taàn soá queùt ngang: 30 ~ 85 kHz Taàn soá queùt doïc: 55 ~ 85 Hz ÔÛ cheá ñoä PC, hình aûnh khoâng caân ôû giöõa. X Chænh vò trí queùt ngang/doïc. Baïn caàn trình ñieàu khieån maøn hình. X Taûi veà trình ñieàu khieån töø caùc trang Web: http://www.samsungusa.com/monitor http://www.samsung-monitor.com Tieáng Vieät-37 211mp-241mp.qxd 2/10/2003 1:29 PM Page 38 Caùc thoâng soá kyõ thuaät vaø moâi tröôøng Kieåu maùy Panel Kích thöôùc Kích thöôùc hieån thò Loaïi Dieän tích ñieåm aûnh Goùc nhìn SyncMaster 211MP 21,3’’ theo ñöôøng cheùo 24,06’’ theo ñöôøng cheùo 432 (Ngang) X 324 (Doïc) mm 518,4 (Ngang) X 324 (Doïc) mm maøn hình a-si TFT ma traän ñoäng 0,27 (Ngang) X 0,27 (Doïc) mm 80/80/80/80 (L/R/T/B) Taàn soá Queùt ngang Queùt doïc Maøu hieån thò Ñoä phaân giaûi Cheá ñoä toái ña Tín hieäu vaøo Ñoàng boä Tín hieäu hình 30 ~ 85 kHz 55 ~ 85 Hz 16.777.216 maøu 1600 x 1200 @ 60 Hz PAL, SECAM, NTSC4,43 B/G, D/K, I, L, L’ CVBS, S-VHS Scart Ñaàu vaøo/ra hình Ñaàu vaøo RGB Ñaàu vaøo/ra tieáng 1,0 Vp-p @ 75 ohm 0,7 Vp-p @ 75 ohm 500mVrms Heä maøu PAL Nguoàn ñieän Ngoõ vaøo Ngoõ ra Coâng suaát tieâu thuï Toái ña Tieát kieäm Kích thöôùc (Roäng x Daøy x Cao) Daùng maøn hình Coù ñeá Caùc thaønh phaàn aâm thanh Ñaàu vaøo tieáng Ñaàu vaøo tieáng (PC) Ñaàu ra tieáng Ñaàu ra loa Ñaàu ra headphone Taàn soá Phaûn hoài Tieáng Vieät-38 1920 x 1200 @ 60 Hz H/V Rieâng leû, TTL, P. hoaëc N. H/V Toång hôïp, TTL, P. hoaëc N. Sync-on-green 0,3 Vp-p, N. 0,7 Vp-p @ 75 ohm TV/Video Heä maøu Heä tieáng Daïng hình aûnh Ñieàu kieän moâi tröôøng Nhieät ñoä laøm vieäc Ñoä aåm laøm vieäc Nhieät ñoä nôi löu giöõ Ñoä aåm nôi löu giöõ SyncMaster 241MP 100 - 240 V (50Hz / 60Hz) DC 14V/8A 110 W 531,5 x 67,5 x 422 578,7 x 218,2 x 472 <8W 120 W 618 x 67,5 x 422 665,2 x 218,2 x 472 50 °F ñeán 104 °F (10 °C to 40 °C) 10% ñeán 80% - 13 °F ñeán 113 °F (-25 °C to 45 °C) 5% ñeán 95% RCA Jack (L, R), 0,5Vrms (-9dB) 3,5Ø Stereo Jack, 0,5Vrms (-9dB) RCA Jack (L, R), 0,5Vrms (-9dB) Ñaàu ra toái ña 5W (3,5Ø Stereo Jack, 2) Ñaàu ra toái ña 10W (3,5Ø Stereo Jack, 32) RF: 80Hz ~ 15kHz (at- 3dB) A/V: 80Hz ~ 20kHz (at- 3dB) rubens_monitor_eng 1/28/03 8:40 PM Page 41 - AFTER SALES SERVICE - Do not hesitate to contact your retailer or service agent if a change in the performance of your product indicates that a faulty condition may be present. ELECTRONICS BN68-00169F-00