1
User’s Guide
Q-Entry SE
133.02A
Copyright notice
The information in this document is subject to change without prior notice and
does not represent a commitment on the part of Q-MATIC AB.
All efforts have been made to ensure the accuracy of this manual, but Q-MATIC
can not assume any responsibility for any errors and their consequences.
The Q-Entry SE User's Guide is copyrighted and all rights are reserved.
Reproduction of any part of this manual, in any form, is not allowed, unless written permission is given by Q-MATIC AB.
COPYRIGHT © Q-MATIC AB, 2002-2013
133.01A
Q-MATIC AB
i
Q-Entry SE User’s Guide
ii
Q-MATIC AB
133.01A
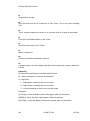
Contents
1. Presentation ........................................... 1
Front Panel..............................................................
Keyboard .................................................................
Connectors ..............................................................
Keys ........................................................................
Hood........................................................................
Ticket Roll ...............................................................
Paper feed button ....................................................
Control Unit .............................................................
2
4
5
5
6
7
7
8
2. Daily Use ................................................ 9
Print Tickets ..........................................................
Multiple Tickets .....................................................
Group Tickets ........................................................
Means of Payment ................................................
Copies of Tickets ...................................................
Corrections ............................................................
Exchange cash......................................................
Exercise ................................................................
10
10
11
11
12
12
14
15
3. Price ..................................................... 17
Edit Prices ............................................................. 18
Edit VAT Rates...................................................... 20
Assign a VAT Rate Index to a Button .................... 22
4. Ticket ................................................... 25
Ticket Text .............................................................
Edit a Ticket Text ..................................................
Shortcut keys ........................................................
Special Characters ................................................
Control Codes .......................................................
133.01A
Q-MATIC AB
26
26
29
30
31
iii
Q-Entry SE User’s Guide
Special Codes ....................................................... 34
Example, change an existing Ticket ...................... 37
Example, design a new Ticket ............................... 40
5. Statistics ............................................... 45
Stored Information ................................................. 46
Statistics Reports .................................................. 46
Cash Commitment ................................................ 47
6. X-Reports ............................................. 49
To print the Report ................................................ 50
The information on the X-Report ........................... 52
7. Z-Report ............................................... 55
To print the Report ................................................ 56
The information on the Z-Report ........................... 57
Print old Z-Reports ................................................ 61
8. Sales Report ........................................ 63
To print the Report ................................................ 64
The information on the Sales Report ..................... 64
9. Customer Report .................................. 67
To print the Report ................................................ 68
The information on the Customer Report .............. 69
10. Number of Customers Report ............ 71
To print the Report ................................................ 72
The information on the Number of
Customers Report ................................................. 73
11. Total Report ....................................... 75
To print the Report ................................................ 76
12. Set-up ................................................ 77
To change the Set-up ............................................
Date Format ..........................................................
Time Format ..........................................................
Tax Percentage .....................................................
Rate.......................................................................
Cash Commitment ................................................
Number Sequence Reset ......................................
New Set-up ...........................................................
iv
Q-MATIC AB
78
78
79
79
80
80
81
81
133.01A
13. Button Settings ................................... 83
To change the Settings .........................................
Ticket Button Settings ...........................................
Number Button Settings ........................................
New Settings .........................................................
Edit Button Name ..................................................
84
84
85
86
86
14. Reset Number Sequences ................. 89
Ticket Number Sequences .................................... 90
To reset Ticket Number Sequences ...................... 90
15. Change Date ...................................... 93
To change the Date ............................................... 94
16. Change Time...................................... 95
To change the Time, 24 hours format ................... 96
To change the Time, 12 hours format ................... 97
17. Change Company Info ....................... 99
To change Company Info .................................... 100
18. Maintenance..................................... 101
Change Ticket Roll .............................................. 102
Maintenance........................................................ 103
19. Shortcut Keys ................................... 105
133.01A
Q-MATIC AB
v
1. Presentation
Topics in this chapter
Front Panel ................................................................... 2
Keyboard ...................................................................... 4
Connectors ................................................................... 5
Keys .............................................................................. 5
Hood ............................................................................. 6
Ticket Roll ..................................................................... 7
Paper feed button ......................................................... 7
Control Unit ................................................................... 8
133.01A
Q-MATIC AB
1
Q-Entry SE User’s Guide
Q-ENTRY SE is a 3rd generation system used at entrances to print Tickets. It
can be used in any situation where a Ticket is needed. It is connected to a Control Box to meet goverment regulations.
This chapter contains a short description of the BP2885 Q-Entry Ticket Printer.
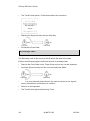
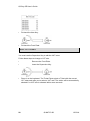
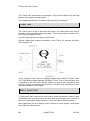
Front Panel
The Front Panel covers the keyboard of the Ticket Printer. The information
shown on the Front Panel is printed on paper stripes that are inserted into the
Front Panel. This makes it possible to customise the Ticket Printer.
There are three types of buttons on the printer:
•
There are fifteen Ticket Buttons, one for each product or type of ticket.
•
The Number Buttons can be used when a customer wants more than one
Ticket.
•
The Means of Payment Buttons can be used to specify type of payment.
The front of the Ticket Printer with the Ticket Buttons, the Number Buttons and the Means of Payment
Buttons.
The Front Panel must be removed to change the settings of the printer.
2
Q-MATIC AB
133.01A
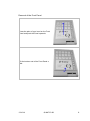
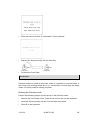
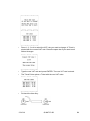
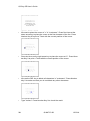
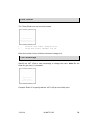
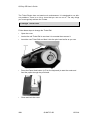
Removal of the Front Panel
Press the palm of your hand on the Front
Panel and push the Panel upwards.
Lift the bottom end of the Front Panel a
little.
133.01A
Q-MATIC AB
3
Q-Entry SE User’s Guide
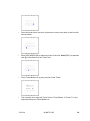
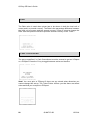
Pull the Front Panel downwards and
remove it from the Ticket Printer. Be
careful not to bend it.
Keyboard
The Front Panel (see above) covers the keyboard. The keyboard is used to
change settings, edit Ticket Texts and print Statistics Reports.
4
Q-MATIC AB
133.01A
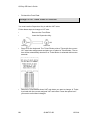
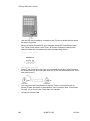
Connectors
All connectors are placed at the back of the Ticket Printer.
Made in Sweden
BP2885 Q-ENTRY
2MB 230V
Date 2001-12-07
The back of the Ticket Printer with the connectors and the label.
A. Power Supply. Note! Never connect the Ticket Printer to another voltage
than the voltage printed on the label at the back of the Ticket Printer.
B. Cash Drawer. Automatically open a cash drawer from the Ticket Printer.
C. System connector. Displays are connected here.
D. Control Unit.
Keys
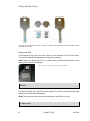
There are two keys that specify the access level to the Ticket Printer.
User key
The User key is for the daily use of the Ticket Printer. With the user key it is
possible to print Tickets but you cannot print Statistics Reports, change the
prices or change the settings.
133.01A
Q-MATIC AB
5
Q-Entry SE User’s Guide
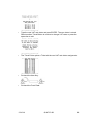
The User Key is marked with number 1 and has no notches. The Supervisor Key is marked with number
2 and has two notches.
Supervisor Key
The Supervisor Key gives the user access to the settings of the Ticket Printer.
You can print Statistics Reports and change the settings.
Note! Keep the Supervisor Key in a safe place. Unauthorised persons must
never get access to the settings.
Use the keys to select User or Supervisor Mode.
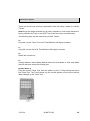
Hood
The hood protects the Ticket Roll and the Keys. The hood is locked to protect the
inside from unauthorised tampering.
Note! The hood must be closed and locked when the Printer is used.
Ticket Roll
6
Q-MATIC AB
133.01A
The Ticket Roll is placed under the hood of the Ticket Printer.
Paper feed button
A paper feed button is placed under the hood, on the left side as seen from the
front:
133.01A
Q-MATIC AB
7
Q-Entry SE User’s Guide
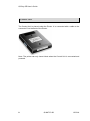
Control Unit
The Control Unit is placed under the Printer. It is connected with a cable to the
connector D on the back of the Printer.
Note: The printer can only issue tickets when the Control Unit is connected and
powered.
8
Q-MATIC AB
133.01A
2. Daily Use
Topics in this chapter
Print Tickets ................................................................ 10
Multiple Tickets ........................................................... 10
Group Tickets ............................................................. 11
Means of Payment ...................................................... 11
Copies of Tickets ........................................................ 12
Corrections ................................................................. 12
Exchange cash ........................................................... 14
Exercise ...................................................................... 15
133.01A
Q-MATIC AB
9
Q-Entry SE User’s Guide
The Q-Entry SE Ticket Printer is designed to be easy to use. This chapter describes the functions you use when you print Tickets.
Print Tickets
The User Key must be used to get Tickets.
Press one of the Ticket Buttons to print a Ticket. One Ticket is printed each time
the key is pressed.
Multiple Tickets
Sometimes a group arrives and you want to print more than one Ticket for a
customer. There are two ways to print multiple Tickets.
1. Press the Ticket Button one time for each Ticket. This option is always
possible.
2. Use the Number Keys. Note! This option is not available on all Printers.
Use the Number Keys in the following way.
•
Enter the number of Tickets you want to print then press one of the Ticket
Buttons to print the Tickets. The Ticket Printer asks you to confirm your
choice if you choose to print ten Tickets or more. The following Ticket is
printed.
•
Press the Ticket Button a second time to print the Tickets or press the space
bar to abort the printout.
10
Q-MATIC AB
133.01A
Group Tickets
Note! This option is not available on all Printers and it is not available if you can
use the Number Keys to print multiple Tickets.
It is possible to print Tickets for groups. Use the Number Keys to enter the size of
the group.
•
Enter the number of persons in the group.
•
Select one of the Ticket Buttons. You must confirm your choice if you want to
print a Ticket for ten customers or more. The following Ticket is printed.
•
Press the Ticket Button a second time to print the Ticket or press the space
bar to abort the printout.
Means of Payment
If none of the Means of Payment buttons are pressed before issuing a ticket the
printer will register the payment as Cash.
If the payment is of another type press the corresponding Means of Payment
button immediately before pressing the Ticket Button.
Example1: Issuing two tickets paid with a debit card.
Press:
<2> <Debit Card> <Ticket Button>
Example2: Issuing one ticket paid with a debit card.
Press:
133.01A
<Debit Card> <Ticket Button>
Q-MATIC AB
11
Q-Entry SE User’s Guide
Copies of Tickets
Depending on a factory setting, this option is enabled or disabled.
When pressing Button number 15, a copy of the previous ticket is printed. Only
one copy can be printed.
Corrections
Depending on a factory setting, this option is enabled or disabled.
Corrections are used when the user presses the wrong Ticket Button or when a
customer changes his mind. You must have access to the Supervisor Key to do
corrections.
Save all the faulty Tickets so they can be corrected later. Make sure that it is
possible to see which Ticket Buttons that were used to print the Tickets.
Note! The Corrections will be printed on the Statistics Reports as a separate
entry.
Perform the following steps to do a correction.
•
Remove the Front Plate on the Ticket Printer so you can use the keyboard.
•
Insert the Supervisor Key and turn it to the Supervisor Mode.
•
You must manually enter the sum you want to correct so it is a good
idea to calculate the sum before you continue.
•
Press C on the keyboard.
•
The Ticket Printer prints the following Ticket.
12
Q-MATIC AB
133.01A
•
Press the Ticket Button for which you want to make the correction. The following Ticket is printed.
•
Press the Means of Payment Button for which you want to
make the correction. The following Ticket is printed.
•
You will get the following message if you press another key or an unused
Ticket Button.
•
Enter the amount for the correction. The following Ticket is printed.
•
Press Y to confirm the amount otherwise press any other key to abort the
correction.
133.01A
Q-MATIC AB
13
Q-Entry SE User’s Guide
•
The Ticket Printer prints a Ticket that confirms the correction.
•
Replace the Supervisor Key with the User Key.
•
Put back the Front Plate.
Exchange cash
The Exchange cash is the money in the till before the start of the sales.
Perform the following steps to enter the amount of exchange cash.
•
Remove the Front Plate on the Ticket Printer so you can use the keyboard.
•
Insert the Supervisor Key and turn it to the Supervisor Mode.
•
You must manually enter the sum you want to correct so it is a good
idea to calculate the sum before you continue.
•
Press U on the keyboard.
•
The Ticket Printer prints the following Ticket.
14
Q-MATIC AB
133.01A
•
Enter the amount of cash. A confirmation Ticket is printed.
•
Replace the Supervisor Key with the User Key.
•
Put back the Front Plate.
Exercise
Exercise mode is a mode of the printer where it is possible to use the printer in
the normal way, printing tickets an so on, except that no actual sales are being
made. It is mainly used for training purposes.
Entering the Exercise mode
Perform the following steps to put the printer in the Exercise mode.
•
Remove the Front Plate on the Ticket Printer so you can use the keyboard.
•
Insert the Supervisor Key and turn it to the Supervisor Mode.
•
Press E on the keyboard.
133.01A
Q-MATIC AB
15
Q-Entry SE User’s Guide
•
The Ticket Printer prints a Ticket with the text Exercise mode: active.
The Supervisor Mode must continue to be on.
Now it is possible to use the Ticket Printer like normal but no sales are being
made.
Every ticket that is printed in the Exercise mode is overprinted with the text Exercise in a large font.
Note! Be careful: it is also possible to make (real) changes to settings and to
print real X and Z Reports in the Exercise mode!
Ending the Exercise mode
To exit the Exercise mode, do either of the following,
•
Press the E key again.
•
The Ticket Printer prints a Ticket with the text Exercise mode: inactive.
•
Replace the Supervisor Key with the User Key.
or
•
16
Switch to User mode directly, without pressing the E key.
Q-MATIC AB
133.01A
3. Price
Topics in this chapter
Edit Prices ................................................................ 18
Edit VAT Rates ........................................................ 20
Assign a VAT Rate Index to a Button ....................... 22
133.01A
Q-MATIC AB
17
Q-Entry SE User’s Guide
Prices are changing all the time (usually increasing). It is of great importance that
the prices are easy to change in the system.
This chapter describes how you change prices and VAT rates in the Q-Entry SE
Ticket Printer.
The system manages 4 VAT rates. These VAT rates are accounted for separately on the Z-reports.
Before using the system, in addition to setting a price for each button/product
one of the 4 VAT rates must be selected.
Note: When changing a VAT rate all buttons assigned to that VAT rate index will
use that new rate.
Edit Prices
You must use the Supervisor Key to edit the price.
Follow these steps to change the price assigned to a Ticket Button.
•
Remove the Front Plate.
•
Insert the Supervisor Key.
•
Press P on the keyboard. The Ticket Printer prints a Ticket with the current
prices and asks you to select a Ticket Button. The action will be automatically
aborted if no Ticket Button is pressed within some seconds.
18
Q-MATIC AB
133.01A
•
Select the Ticket Button whose price you want to change. A Ticket is printed
with the current price. Press the space bar if you want to exit without
changes.
•
Type the new price and press ENTER. The new price is stored. Select another Ticket Button to continue to change prices or press the space bar to
exit.
•
The Ticket Printer prints a Ticket with the new prices.
133.01A
Q-MATIC AB
19
Q-Entry SE User’s Guide
•
Put back the User Key.
•
Put back the Front Plate.
Edit VAT Rates
You must use the Supervisor Key to edit the VAT rates.
Follow these steps to change a VAT rate.
•
Remove the Front Plate.
•
Insert the Supervisor Key.
•
20
Press L on the keyboard. The Ticket Printer prints a Ticket with the current
VAT rates and asks you to select a VAT rate. The action will be automatically
aborted if no VAT rate is selected within some seconds.
Q-MATIC AB
133.01A
•
Press 1, 2, 3 or 4 to select the VAT rate you want to change. A Ticket is
printed with the current VAT rate. Press the space bar if you want to exit
without changes.
•
Type the new VAT rate and press ENTER. The new VAT rate is stored.
•
The Ticket Printer prints a Ticket with the new VAT rates.
•
Put back the User Key.
133.01A
Q-MATIC AB
21
Q-Entry SE User’s Guide
•
Put back the Front Plate.
Assign a VAT Rate Index to a Button
You must use the Supervisor Key to edit the VAT rates.
Follow these steps to change a VAT rate.
•
Remove the Front Plate.
•
Insert the Supervisor Key.
•
Press O on the keyboard. The Ticket Printer prints a Ticket with the current
VAT rate index assignments and asks you to select a Ticket Button. The action will be automatically aborted if no Ticket Button is selected within some
seconds.
•
Select the Ticket Button whose VAT rate index you want to change. A Ticket
is printed with the current assigned VAT rate index. Press the space bar if
you want to exit without changes.
22
Q-MATIC AB
133.01A
•
Type the new VAT rate index and press ENTER. The new index is stored.
Select another Ticket Button to continue to change VAT rates or press the
space bar to exit.
•
The Ticket Printer prints a Ticket with the new VAT rate index assignments.
•
Put back the User Key.
•
Put back the Front Plate.
133.01A
Q-MATIC AB
23
Q-Entry SE User’s Guide
24
Q-MATIC AB
133.01A
4. Ticket
Topics in this chapter
Ticket Text ............................................................... 26
Edit a Ticket Text ..................................................... 26
Shortcut keys ........................................................... 29
Special Characters................................................... 30
Control Codes .......................................................... 31
Special Codes .......................................................... 34
Example, change an existing Ticket ......................... 37
Example, design a new Ticket ................................. 40
133.01A
Q-MATIC AB
25
Q-Entry SE User’s Guide
The Tickets can contain text and logotypes. They can be made of thin low-cost
paper or high quality coloured paper.
This chapter describes the Tickets and the way they are designed.
Ticket Text
The Ticket Text is a mix of plain text and codes. The codes specify the look of
the text and the information from the system. There are two types of codes: Control Codes and Special Codes.
Control Codes specifies the layout of the Ticket.
Special Codes place system information on the Ticket, for example the price,
time and date, etc.
This is a typical Ticket. There is a logotype placed with the ESC P Control Code.
The Ticket Button Name specifies the type of Ticket. Text is printed exactly as it
is specified in the Ticket text. Special Codes are used to print information such
as price, number of customers, date and time. Control Codes and Special Codes
are explained later in this chapter.
Edit a Ticket Text
To edit a plain text is easy but to use Control Codes and Special Codes is more
complicated. We recommend that you start with small changes then continue to
the more complicated changes when you are more familiar with the system.
We suggest that you do a drawing of the Ticket on a piece of paper. Write down
the Codes and the plain text.
26
Q-MATIC AB
133.01A
Here is a description of how you edit Ticket Texts.
•
Remove the Front Plate.
•
Insert the Supervisor Key.
•
Press T on the keyboard. The Ticket Printer prints a Ticket with the following
text.
•
Press the Ticket Button for which you want to edit the text. The Ticket Printer
prints a Ticket with the current Ticket Text.
•
The Ticket has a lot of cryptic text. It is the Control Codes and the Special
Codes. The Control Codes consist of a @ character, a letter and a number.
The @ is the ESC key on the keyboard. Common control codes are @h that
specifies the height of the characters and @b that specifies the width of the
characters.
•
The Special Codes consist of a # character and a letter. Common Special
Codes are #p - Ticket Price, #c - Number of customers on the Ticket, #d date, #t - time and #n - Ticket Number. The Ticket Printer automatically inserts the correct values at the positions of the Special Codes.
•
Edit the Ticket text. Use the arrow keys to move the cursor. The cursor is
shown as a rectangle or as an inverted character on the Ticket. Press the key
in the bottom right corner of the keyboard to print a Ticket with the current
cursor position and the latest text changes.
133.01A
Q-MATIC AB
27
Q-Entry SE User’s Guide
•
Use the DEL key to delete a character or the F2 key to delete the line where
the cursor is placed.
•
When you have concluded all your changes, press the Ticket Button again.
The Ticket Printer prints a test Ticket. All Control Codes are used but the
Special Codes are not replaced by their corresponding values.
•
Press T and continue to edit if you are not satisfied with the Ticket. Remove
the Supervisor Key and insert the User Key if you are satisfied with the Ticket
and want to use it.
•
You can press the Ticket Button to test the Ticket but remember that all
printed Tickets are stored in the statistics. Use Correction (See “Corrections”
on page 12.) to remove the Ticket from the statistics.
•
Put back the Front Plate.
28
Q-MATIC AB
133.01A
Shortcut keys
There are some keys and key combinations that will make it easier to edit the
Tickets.
Note! Keys are always pressed one by one in sequence, never at the same time.
Never press the ALT key or the SHIFT key at the same time as another key.
The following keys can be used when you edit Tickets.
F0
Copy the current Ticket Text to all Ticket Buttons with higher numbers.
F1
Copy the current line to all Ticket Buttons with higher numbers.
F2
Delete the current line.
F3
Change between Insert Mode (default) and Over write Mode. In Over write Mode
the new text over writes the existing text.
Number Button 9
Print the current Ticket Text. Use this button to print a Ticket during the edit of
the Ticket Text. The Ticket shows you the current position of the cursor and the
latest changes in the Ticket Text.
133.01A
Q-MATIC AB
29
Q-Entry SE User’s Guide
ALT + Up Arrow
Move the cursor to the first line.
ALT + Down Arrow
Move the cursor to the last line.
ALT + Right Arrow
Move the cursor to the end of the line.
ALT + Left Arrow
Move the cursor to the start of the line.
Special Characters
It is possible to print other characters than those shown on the keyboard. Enter
ALT SHIFT and a three-digits number to insert the character into the ticket text.
Note! Do not press the keys at the same time. Press ALT then SHIFT then the
three digits.
Examples
Euro Symbol (€): ALT SHIFT 128
Pound Symbol (£): ALT SHIFT 163
30
Q-MATIC AB
133.01A
Control Codes
The Control Codes specify the layout of the Tickets.
All Control Codes consist of ESC a letter and a number. ESC is replaced with @
on the Tickets printed while you edit the text. ESC specifies that it is a Control
Code and not plain text.
The letter specifies the type of Control Code. The number is the value used by
the Control Code.
Here is a list with all Control Codes. [ESC] is the ESC key on the keyboard and x
must be replaced with a valid value.
[ESC]Bx
Specify the width of the text compared to the normal width of the selected font.
Note! The Control Command only affects one line. The following values are
valid.
0
1
2
3
4
Half the normal width
Normal width
Two times the normal width
Three times the normal width
Four times the normal width, etc.
Note! You will get an error message if the text becomes too long for the line.
Reduce the text width until the text can be printed on one line.
[ESC]Cx
Print bar code on the Ticket. The Control Code is placed in front of the number.
Use [ESC]B and [ESC]H to specify the size of the code. The following bar codes
are available.
0
1
2
3
Code - 2/5
EAN 13
Interleaved Code - 2/5
Code 39
Example
Print the Ticket Number as a bar code.
@h5@b3@c1 #n
The first Control Codes specify the height (@h5) and the width (@b3) of the bar
code. The last Control Code selects bar code type EAN 13. #n is the Special
Code for the Ticket Number.
133.01A
Q-MATIC AB
31
Q-Entry SE User’s Guide
[ESC]E
This is used as the end of a bar code. All bar codes except EAN 13 must end
with [ESC]E.
Example
Print the same Ticket Number as in the example above but use Code 39 instead
of EAN 13.
@h5@b3@c3#n@E
[ESC]Fx
Specify the character set used by the Q-Entry SE Ticket Printer. The following
character sets are available.
1
2
3
Default Q-Entry character set.
Q-Matic SD set
ANSI
[ESC]Gx
Select the font for the selected line. Note! The Control Code only affects one
line. The following fonts are available. Font 1 is the default font and will be used
if no other font is selected.
1
2
3
4
5
Q-MATIC Standard (6 x 10)
IBM PC Standard (6 x 10)
IBM PC Standard (8 x 14)
IBM PC Standard (6 x 8)
Times New Roman 16 x 28
[ESC]Hx
Specify the height of the characters compared to the standard height for the
selected font. Note! The Control Command only affects one line. The following
values are valid.
1
2
3
4
5
The
The
The
The
The
font height
font height
font height
normal font
font height
is 1/8 of the normal height.
is ¼ of the normal height.
is ½ of the normal height.
height.
is two times the normal height.
[ESC]I
Print with an inverted font on the selected line. The characters are white and the
background is coloured.
[ESC]L
Align the selected line to the left.
[ESC]Mx
Specify the position of the centre line. The centre line specifies the centre of the
Ticket. The position is the number of pixels from the left of the Ticket. Normally
32
Q-MATIC AB
133.01A
the centre line is at position 224 which is the middle of the Ticket (the Ticket is
448 pixels wide).
Enter a value less than 224 to move the centre line to the left. Enter a value
above 224 to move the centre line to the right.
Note! This Control Command affects the line where it is entered and all lines
above.
[ESC]N
The text on the selected line is centred on the Ticket. This is the default setting
and the text will be automatically centred even if the Control code is omitted.
Note! [ESC]Mx (see above) affects the result of [ESC]N.
[ESC]P"filename"ATx,y
Place a logotype or any other picture on the Ticket. Replace file name with the
name of the picture file. Note! The picture must be available in the Ticket Printer.
Note! There must be no spaces between the Control Command, the file name
and the co-ordinates.
Note! The file name must be inside quotation marks ("").
The picture is places at the position specified by x and y. X is the number of
pixels from the left edge of the Ticket and to the left side of the picture. Y is the
number of pixels from the bottom of the Ticket and to the bottom of the picture.
Example
We want to place a logotype at the top of the Ticket. The logotype is saved as
logo.pic. The following line places the logotype on the Ticket.
@p"logo.pic"at20,200
[ESC]R
Align the selected line to the right.
[ESC]S
Print all digits on the line with enlarged characters. This Control Code is used
when you want a number to have a dominating appearance. You can use
[ESC]S together with change width ([ESC]B) and change height ([ESC]H).
Note! You cannot use [ESC]S together with select font ([ESC]G).
[ESC]U
Print the text on the line upside-down.
[ESC]Yx
133.01A
Q-MATIC AB
33
Q-Entry SE User’s Guide
Move the line above and below the current line the number of steps specified by
x. One step is 0.1089 mm. Maximum value of x is 65535.
Note! 65535 is the theoretical maximum value. This is 7137 mm or more than 7
meters. This is of course an impossible value. We recommend that you never
use a value above 60.
[ESC]Zx
Move all lines above the current line upwards. Specify the number of steps (x)
that the lines should be moved. One step is 0.1089 mm. Maximum value of x is
65535.
Note! 65535 is the theoretical maximum value. This is 7137 mm or more than 7
meters. This is of course an impossible value. We recommend that you never
use a value above 60.
Special Codes
Special Codes place information on the Tickets. All Special Codes start with a #
character followed by a letter. The letter specifies the type of Special Code.
Press SHIFT then the #/3 key to get #. Note! Never press SHIFT at the same
time as another key. It must be pressed before the key it should affect.
The Special Codes are replaced by information from the Q-Entry SE Ticket
Printer. This information is not placed on the Ticket while you edit the Ticket. The
Special Codes are printed on the Ticket when you make a test print. The real
information is printed when you use the User Key and prints real Tickets.
The Control Codes affect the information printed at the position for the Special
Codes. You can use the Control Codes to change the size of the information, to
print it as bar code, etc.
The following Special Codes are available.
#a1, #a2, #a3
Address row 1, 2 and 3.
#c
Print the number of customers on the Ticket. This information is important if you
can use the Number Buttons to specify the number of customers for a Ticket.
#d
Print the current date on the Ticket.
#d + x
34
Q-MATIC AB
133.01A
Add x days to the current date.
Example
#d+10
Add 10 days to the current date. If it is 13 March then 23 March will be printed on
the Ticket.
#e
Print the price in Euros. This Special Code was used when prices had to be in
both the local currency and in Euro.
#f
Control Unit ID. A string that uniquely identifies the Control unit.
#g, #g(1,12)
Transactions ID. The first number in the parenthesis is the offset and the second
number is the number of characters to print. The example will print the first 12
characters of the ID.
#i
Machine ID (POS id). A string that uniquely identifies the printer.
#k
Print the Sales Period ID on the Ticket. This ID is changed to a new value every
time the Z-Report is printed.
#m
Print the VAT on the Ticket. The percentage of the VAT is specified in the settings.
#nx
Print the Ticket Number on the Ticket. There are sixteen Ticket Number Sequences. Enter 1 to 15 after n to select one of the sequences. Ticket Number
Sequence 16 is used as a common sequence shared by all Ticket Buttons and
you omit the sequence number (type only #n) to get Ticket Number sequence
16.
The Ticket Number Sequence is only increased when it is printed on the Ticket.
You can use the same Ticket Number Sequence many times at the same Ticket;
the same number will be printed at all positions.
You can use more than one Ticket Number Sequence on a Ticket, for example
the common sequence (#n) and a specified sequence (for example #n5).
133.01A
Q-MATIC AB
35
Q-Entry SE User’s Guide
#o
Organization number.
#p
Print the total price for all customers on the Ticket. This is the price including
VAT.
#q
This is a special sequence counter. It is not reset when a Z-report is generated.
#s
Print the Ticket Button Name on the Ticket.
#t
Print the current time on the Ticket.
#u
Means of payment.
#w
Prints the Vat Rate expressed in percent.
#x
Company name. Use this together with #a and #o to print the company details on
a ticket.
#{WA(text)}
Command for specifying the resulting width of a text.
W - width, expressed in numbers of characters.
A - alignment:
L - Left aligned, padding is done to the right
R - Right aligned, padding is done to the left
C - Centred, padding is done evenly on both sides
Examples:
#{10L(#s)} - prints the Button Name left aligned, width 10 characters
#{8R(#p)} - prints the Price right aligned, width 8 characters
#{15C(#u)} - prints the Means of Payment centred, width 15 characters
36
Q-MATIC AB
133.01A
Example, change an existing Ticket
In this example we will make a small change in an existing Ticket Text. The current Ticket looks like this figure.
We want to change the word "customers" to "visitors" and we want to reduce the
size of the last line with date, time and Ticket Number. We want to change the
text for Ticket Button 14 and 15.
•
Insert the Supervisor Key and turn it into the Supervisor Mode.
•
Remove the Front Plate so you can use the keyboard.
•
Press T on the keyboard. The Ticket Printer prints the following Ticket.
•
Press Ticket Button 14. The Ticket Printer prints a Ticket with the current
Ticket Text.
133.01A
Q-MATIC AB
37
Q-Entry SE User’s Guide
•
We want to place the cursor at "c" in "customers". Press five times at the
down arrow key to place the cursor at the first character of the line. Press
Number Key 9 to print a Ticket with the current position of the cursor.
•
Press six times on the right arrow key to place the cursor at "c". Press Number Key 9 to print a Ticket with the current position of the cursor.
•
We use the DEL key to delete all characters in "customers". Press Number
Key 9 to make sure that you do not delete any other characters.
•
Type "visitors". Press Number Key 9 to check the result.
38
Q-MATIC AB
133.01A
•
Press the down arrow one time to place the cursor at the start of the line with
time and date.
•
Enter [ESC]h2[ESC]b0 to reduce the size of the text. Note! [ESC] is replaced
with @ in the printout of the Ticket Text.
•
Press Ticket Button 14 to get a preview of the Ticket.
•
The next step is to copy this Ticket Text to Ticket Button 15. Press T on the
keyboard then press Ticket Button 14.
133.01A
Q-MATIC AB
39
Q-Entry SE User’s Guide
•
Press F0 to copy the current Ticket Text to all Ticket Buttons with a higher
number. In this case we copy the Ticket text from Ticket Button 14 to Ticket
Button 15.
•
Press "y" to confirm your action. The Ticket Printer prints an OK Ticket and
after some seconds a preview of the Ticket Text.
•
The Ticket Text for Ticket Button 14 and 15 are changed into the new text.
Replace the Front Plate.
•
Remove the Supervisor Key and insert the User Key. Turn the User Key into
User Mode. The Ticket Printer is ready to use.
Note! You can test the new Tickets but all Tickets are stored in the statistics.
Use Correction to remove test Tickets from the statistics. See “Corrections” on
page 12.
Example, design a new Ticket
We want to design a completely new Ticket. We want the following Ticket.
LOGOTYPE
"Price:" nn.nn
"VAT:" nn.nn
Date time
Ticket Number
40
Q-MATIC AB
133.01A
We want the price to be clearly visible. The VAT should be smaller than the
price. Date and Time should be larger than VAT but smaller than the price. The
Ticket Number should be in the same size as the VAT.
The logotype is stored in a file called logo.pic.
We write the code at a piece of paper before we do anything at the printer.
[ESC]p"logo.pic"at20,200
[ESC]h3[ESC]b3Price:#p
[ESC]h2[ESC]b0VAT:#m
#d #t
[ESC]h2[ESC]b0#n
We want all Tickets to look like this.
Now we want to enter this text into the Ticket Printer.
•
Insert the Supervisor Key and turn it into the Supervisor Mode.
•
Remove the Front Plate so you can use the keyboard.
•
Press T on the keyboard. The Ticket Printer prints the following Ticket.
•
Select Ticket Button 1. The current Ticket Text is printed.
•
We want to remove the current text. Place the cursor at each of the lines and
press F2 to delete the line. Press Number Button 9 to see the current position
of the cursor and the Ticket Text.
133.01A
Q-MATIC AB
41
Q-Entry SE User’s Guide
•
Remove all lines, even those without text. Now we have a completely empty
Ticket. Enter the Ticket Text. Press Number Button 9 regularly to check the
current position of the cursor and the Ticket Text.
•
Press Ticket Button 1 to get a preview of the Ticket. Press T and Ticket Button 1 again. Edit the Ticket Text if there were any errors. Press Ticket Button
1 to get a new preview of the Ticket.
•
When you are satisfied with the Ticket Text you should press T and Ticket
Button 1. Then press F0 to copy the Ticket Text to all Ticket Buttons.
•
Now you have a completely new Ticket.
42
Q-MATIC AB
133.01A
•
Replace the Front Plate.
•
Remove the Supervisor Key and insert the User Key. Turn the User Key into
User Mode. The Ticket Printer is ready to use.
Note! You can test the new Tickets but all Tickets are stored in the statistics.
Use Correction to remove test Tickets from the statistics. See “Corrections” on
page 12.
133.01A
Q-MATIC AB
43
Q-Entry SE User’s Guide
44
Q-MATIC AB
133.01A
5. Statistics
Topics in this chapter
Stored Information ................................................... 46
Statistics Reports ..................................................... 46
Cash Commitment ................................................... 47
133.01A
Q-MATIC AB
45
Q-Entry SE User’s Guide
To store information for future use is a necessity for an Admission and Ticketing
System.
The Q-Entry SE Ticket Printer stores all information in a safe way so it can be
used in Statistics Reports.
Stored Information
Q-Entry SE stores information each time a Ticket Button is pressed. It stores the
number of customers for each Ticket Button and within each Time Period. It also
stores the total sum of money for each Ticket Button and within each Time Period.
A Time Period is thirty minutes. The day is divided into 48 Time Periods.
The information is stored in a safe way. A battery backup guarantees that the
information survives power cuts.
Statistics Reports
The Statistics Reports are based on the stored statistics. They present the information in a way that is easy to read. The following Statistics Reports are available. You must always use the Supervisor Key to print a Statistics Report.
X-Report
The X-Report informs you of total sales and sale per button since the latest ZReport was printed. The Ticket Printer deletes no information when you print an
X-Report.
Z-Report
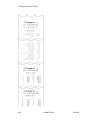
The Z-Report informs you of total sales and sale per button since the latest ZReport was printed. Note! The Ticket Printer deletes all information used in the
Z-Report and the X-Report when you print a Z-Report.
Sales Report
The Sales Report shows the number of customers and the sales for each month
during the year.
46
Q-MATIC AB
133.01A
Customer Report
The Customer Report shows the number of customers for each Ticket Button
and for each month during the year.
Number of Customers Report
The Number of Customers Report is the total number of customers since the
latest Z-Report.
Cash Commitment
It is possible to specify that the Cash Commitment must be entered before you
can print an X-Report or a Z-Report; see page 76.
The Cash Commitment is the amount of money in the till when you print an XReport or a Z-Report.
This value is compared to the total value in the Z-Report and the X-Report.
The Printer asks for the Cash Commitment once every sales period. The question will not be asked again until you have printed a Z-Report.
133.01A
Q-MATIC AB
47
Q-Entry SE User’s Guide
48
Q-MATIC AB
133.01A
6. X-Report
Topics in this chapter
To print the Report ................................................... 50
The information on the X-Report .............................. 52
133.01A
Q-MATIC AB
49
Q-Entry SE User’s Guide
The X-Report is usually used for current sales information. There are three types
of X-Report: for all buttons with total sales, for one button, and total sales only.
This chapter describes the X-Report and its contents.
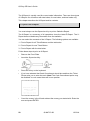
To print the Report
You must always use the Supervisor Key to print a Statistics Report.
The X-Report is a summary of all operations since the latest Z-Report. The XReport does not delete any information from the statistics.
You can select the contents of the X-Report. The following options are available.
1. Print a Report for all Ticket Buttons and the total sales.
2. Print a Report for one Ticket Button.
3. Print a Report with the total sales.
Follow these steps to print an X-Report.
•
Remove the Front Plate.
•
Insert the Supervisor Key.
•
Press the X key on the keyboard.
•
If you have selected that Cash Commitment should be used then the Ticket
Printer asks you to enter the cash. Note! The Cash Commitment option may
be disabled. In such cases there will be no question.
•
Count the money in the till and subtract the money you started with. Enter the
sum and press ENTER.
50
Q-MATIC AB
133.01A
Note! The Ticket Printer asks this question only once. The question will not be
repeated until a Z-Report is printed.
•
You must confirm the value. Press Y on the keyboard to confirm the value or
press any other key to ignore the entered value. You must press X to start a
new printout if you chose to ignore the entered value. The following Ticket is
printed if you abort the printout.
•
The following Ticket is printed if you confirmed the entered Cash Commitment. You will get this Ticket immediately if the Cash Commitment option is
disabled.
•
It is now time to select the contents of the X-Report.
•
Press A or Number Button 1 on the keyboard to print a report that contains
information about all Ticket Buttons and the total sales.
•
Press the Space bar or Number Button 0 on the keyboard to print a report
that contains the total sales but no information about the Ticket Buttons.
•
Press a Ticket Button to print a report that contains information about the
selected Ticket Button but not the total sales.
133.01A
Q-MATIC AB
51
Q-Entry SE User’s Guide
The printout starts immediately.
•
Read the Statistics Report and check if you must do any correction. Replace
the Supervisor Key with the User Key when you do not want to print any
more reports.
•
Put back the Front Plate.
The information on the X-Report
The X-Report contains the sale of Tickets made after the latest Z-Report was
printed. Here are two examples: Button 2 and all buttons.
52
Q-MATIC AB
133.01A
The Sequence Number is increased by 1
each time you print the X-Report. It is not
possible to reset the Sequence Number.
The Sequence Number is an accounting
verification.
1
Sequence Number
2
Date and time
The date and time when the X-Dagrapport
was generated.
3
Company name
The company name registered in this ticket
printer.
4
Corporate id
The corporate id registered in this ticket
printer.
5
POS id
The POS id registered in this ticket printer.
6
Grand Total Sales
The total sum for all sales made from this
Ticket Printer.
7
Grand Total Returns
The total sum for all returns made from this
Ticket Printer.
8
Grand Total Net
The total sum net sales made from this
Ticket Printer.
9
Sales
This is the total sum for all sales shown on
this X-Report.
10
Sales - Cash /
Debit card / Credit
card / Coupon
This is the sales for each Means of Payment on this X-Report. Note: the types of
Means of Payment available depend on the
configuration.
11
Exchange cash
This is the amount of exchange money in
the till.
12
VAT sales
133.01A
This is the VAT amount of each VAT rate
on this X-Report. Note: the VAT rates available depend on the configuration.
Q-MATIC AB
53
Q-Entry SE User’s Guide
13
Corrections /
Number of Corrections
This is the sum of all corrections and the
number of corrections, on this X-Report.
18
Copies sum /
Copies count
This is the sum of the amounts on the ticket
copies printed and the number of ticket copies, on this X-Report.
19
16 Practice sum /
Practice count
This is the sum of the amounts on the practice tickets printed and the number of practice tickets, on this X-Report.
20
Number of Customers
This is the the number of customers, on this
X-Report. Several customers can enter on
one ticket.
21
Number of Receipts
This is the the number of tickets printed, on
this X-Report
This is the sale for each Time Period.
22
54
Product Sales
Time – Customers – Sales.
Q-MATIC AB
133.01A
7. Z-Report
Topics in this chapter
To print the Report ................................................... 56
The information on the X-Report .............................. 57
Print old Z-Reports ................................................... 61
133.01A
Q-MATIC AB
55
Q-Entry SE User’s Guide
The Z-Report is a summary of all sales since the latest Z-Report. It is usually
used as verification for the bookkeeping.
This chapter describes the Z-Report and its contents.
To print the Report
You must always use the Supervisor Key to print a Statistics Report.
The Z-Report deletes all information used in the X-report and the Z-Report.
Follow these steps to print a Z-Report.
•
Remove the Front Plate.
•
Insert the Supervisor Key.
•
Press the Z key on the keyboard.
•
If you have selected that Cash Commitment should be used then the Ticket
Printer asks you to enter the cash. Note! The Cash Commitment option may
be disabled. In such cases the Z-Report will be printed immediately.
•
Count the money in the till and subtract the money you started with. Enter the
sum and press ENTER.
56
Q-MATIC AB
133.01A
Note! The Ticket Printer asks this question only once. The question will not
be repeated until
a Z-Report is printed.
•
You must confirm the value. Press Y on the keyboard to confirm the value or
press any other key to ignore the entered value. You must press Z to start a
new printout if you chose to ignore the entered value. The following Ticket is
printed if you abort the printout.
•
The Ticket Printer prints the Z-Report.
•
Read the Statistics Report and check if you must do any correction. Replace
the Supervisor Key with the User Key when you do not want to print any
more reports.
•
Put back the Front Plate.
The information on the Z-Report
The Z-Report is a summary of all sales since the latest Z-Report.
133.01A
Q-MATIC AB
57
Q-Entry SE User’s Guide
58
Q-MATIC AB
133.01A
The Sequence Number is increased by 1 each
time you print the Z-Report. It is not possible to
reset the Sequence Number. The Sequence
Number is an accounting verification.
1
Sequence Number
2
Date and time
The date and time when the Z-Report was
generated.
3
Company name
The company name registered in this ticket
printer.
4
Corporate id
The corporate id registered in this ticket printer.
5
POS id
The POS id registered in this ticket printer.
6
Grand Total Sales
The total sum for all sales made from this Ticket
Printer.
7
Grand Total Returns
The total sum for all returns made from this
Ticket Printer.
8
Grand Total Net
The total sum net sales made from this Ticket
Printer.
9
Grand Total
Corrections
The total sum for all corrections made from this
Ticket Printer.
10
Grand Total Net
The difference between Grand Total Sales and
Grand Total Corrections.
11
Sales
This is the total sum for all sales shown on this
Z-Report.
12
Sales - Cash / Debit
card / Credit card /
Coupon
This is the sales for each Means of Payment on
this Z-Report. Note: the types of Means of
Payment available depend on the configuration.
13
Exchange cash
This is the amount of exchange money in the till.
VAT sales
This is the VAT amount of each VAT rate on this
Z-Report. Note: the VAT rates available depend
on the configuration.
14
133.01A
Q-MATIC AB
59
Q-Entry SE User’s Guide
The Cash Commitment was entered before the
Z-Report was printed. This is the amount of
money in the till when you have subtracted the
start money (the money in the till when you
started to sell the Tickets). Note: this information
is only printed if the Cash Commitment function
is active.
15
Cash Commitment
16
Difference C.C. Total
17
Corrections / Number
of Corrections
This is the sum of all corrections and the number
of corrections, on this Z-Report.
18
Copies sum / Copies
count
This is the sum of the amounts on the ticket
copies printed and the number of ticket copies,
on this Z-Report.
19
16 Practice sum /
Practice count
This is the sum of the amounts on the practice
tickets printed and the number of practice
tickets, on this Z-Report.
20
Number of Customers
21
Number of Receipts
This is the the number of tickets printed, on this
Z-Report
22
Product Sales
This is a list of the sales for each of the Ticket
Buttons (1 - 15), on this Z-Report:
This is the difference between the Cash
Commitment and the Sales. There is something
wrong if the difference is not 0. You must trace
the cause of the difference. A negative
difference means a cash deficit. A positive
difference means a cash surplus. Note: this
information is only printed if the Cash
Commitment function is active.
This is the the number of customers, on this ZReport. Several customers can enter on one
ticket.
Button number - Price on the button - Number of
Customers - Sales.
60
Q-MATIC AB
133.01A
Print old Z-Reports
It is possible to print old Z-Reports. To print a report, enter the Sequence Number before you press Z to select one of the stored Z-Reports. The Ticket Printer
prints no Z-Report if you enter a Sequence Number that is not stored in the
memory.
133.01A
Q-MATIC AB
61
Q-Entry SE User’s Guide
62
Q-MATIC AB
133.01A
8. Sales Report
Topics in this chapter
To print the Report ................................................... 64
The information on the X-Report .............................. 64
133.01A
Q-MATIC AB
63
Q-Entry SE User’s Guide
The Sales Report shows the number of customers and the sales for each month
during a year.
This chapter describes the Sales Report and its contents.
To print the Report
You must always use the Supervisor Key to print a Statistics Report.
Follow these steps to print a Sales Report.
•
Remove the Front Plate.
•
Insert the Supervisor Key.
•
Press the M key on the keyboard.
•
The Ticket Printer prints the Sales Report.
•
Read the Statistics Report and check if you must do any correction. Replace
the Supervisor Key with the User Key when you do not want to print any
more reports.
•
Put back the Front Plate.
The information on the Sales Report
The following information is shown on the Sales Report.
64
Q-MATIC AB
133.01A
1 Total year
This is the total number of customers and the total sales for the latest twelve
months.
2 Customer
The customer column is the number of customers for each month.
3 Sales
The sales column is the total sales for each month.
133.01A
Q-MATIC AB
65
Q-Entry SE User’s Guide
66
Q-MATIC AB
133.01A
9. Customer Report
Topics in this chapter
To print the Report ................................................... 68
The information on the X-Report .............................. 69
133.01A
Q-MATIC AB
67
Q-Entry SE User’s Guide
The Customer Report shows the number of customers for each Ticket Button
and month.
This chapter describes the Customer Report and its contents.
To print the Report
You must always use the Supervisor Key to print a Statistics Report.
Follow these steps to print a Customer Report.
•
Remove the Front Plate.
•
Insert the Supervisor Key.
•
Press the A key on the keyboard.
•
You can choose if you want a report that covers one month or a year (January to December).
The Ticket Printer prints a Ticket that asks you to select a month or to press
the space bar to select all months.
•
Enter the number in front of the month and ENTER to print a Statistics Report
that covers that month. Press the space bar and ENTER to print a Statistics
Report that covers all months.
•
The Ticket Printer prints the Customer Report.
•
Read the Statistics Report and check if you must do any correction. Replace
the Supervisor Key with the User Key when you do not want to print any
more reports.
•
Put back the Front Plate.
68
Q-MATIC AB
133.01A
The information on the Customer Report
•
The following information is shown on the Customer Report.
1 All Months or month
There will be a page with a summary for all months (January to December) if the
report covers a year. The month name is printed here if the report only covers
one month.
2 Ticket Button
There is one line for each Ticket Button
3 Customers
The number of customers for the Ticket Buttons.
133.01A
Q-MATIC AB
69
Q-Entry SE User’s Guide
70
Q-MATIC AB
133.01A
10. Number of
Customers Report
Topics in this chapter
To print the Report ........................................................... 72
The information on the X-Report ...................................... 73
133.01A
Q-MATIC AB
71
Q-Entry SE User’s Guide
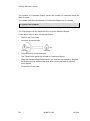
The Number of Customers Report shows the number of customers since the
latest Z-report.
This chapter describes the Number of Customers Report and its contents.
To print the Report
You must always use the Supervisor Key to print a Statistics Report.
Follow these steps to print a Customer Report.
•
Remove the Front Plate.
•
Insert the Supervisor Key.
•
Press the K key on the keyboard.
•
The Ticket Printer prints the Number of Customers Report.
•
Read the Statistics Report and check if you must do any correction. Replace
the Supervisor Key with the User Key when you do not want to print any
more reports.
•
Put back the Front Plate.
72
Q-MATIC AB
133.01A
The information on the Number of Customers Report
The following information is shown on the Number of Customers Report.
1 Date and Time
The date and time the Statistics Report was printed.
2 Customers
This is the number of customers since the last Z-Report.
133.01A
Q-MATIC AB
73
Q-Entry SE User’s Guide
74
Q-MATIC AB
133.01A
11. Total Report
Topics in this chapter
To print the Report ................................................... 76
133.01A
Q-MATIC AB
75
Q-Entry SE User’s Guide
The Total Report shows the total number of Tickets and the total sale since the
latest Total Report was printed.
This chapter describes the Total Report and its contents.
To print the Report
The Total Report can be printed when the User Key is used.
Follow these steps to print a Total Report.
•
Press the space bar on the keyboard.
•
The Ticket Printer prints the Total Report.
The Total Report shows the number of Tickets and the total sale since the latest
Total Report was printed. The Total Report aids the Cashier in calculation if a
group of single sales are made and are being paid for as one transaction.
76
Q-MATIC AB
133.01A
12. Set-up
Topics in this chapter
To change the Set-up .............................................. 78
Date Format ............................................................. 78
Time Format............................................................. 79
Tax Percentage........................................................ 79
Rate ......................................................................... 80
Cash Commitment ................................................... 80
Number Sequence Reset ......................................... 81
New Set-up .............................................................. 81
133.01A
Q-MATIC AB
77
Q-Entry SE User’s Guide
The Set-up specifies the way the Ticket Printer works. These settings are usually
not changed.
This chapter describes the different set-up options and how they are changed.
To change the Set-up
Note! A faulty set-up may result in an erratic behaviour.
Insert the Supervisor key, remove the Front Plate and press the S key to enter
the Edit Set-up Mode. In the Edit Set-up Mode you will step through each of the
set-up options. The Ticket Printer prints a Ticket with the current setting for each
set-up option.
You have two choices for each set-up option, to edit it or to continue without
changes. Press ENTER on the keyboard to continue to the next set-up option
without any changes. You must step through all set-up options even if you do not
want to change them all.
This chapter describes all the set-up options and what you should enter to
change them. The set-up options will appear in the same order as they are described in this manual.
Date Format
The Ticket Printer can use three date formats.
1
2
3
4
dd/mm yy. Example: 23/ 2 02 (23
mm/dd yy. Example: 2/23 02 (23
dd/mm/yyyy. Example: 23/02/2002
yyyy/mm/dd. Example: 2002/02/23
February 2002)
February 2002)
(23 February 2002)
(23 February 2002)
Enter the number in front of the date format to change to it.
78
Q-MATIC AB
133.01A
Time Format
The Ticket Printer can use two time formats.
1
2
24-hours time format. Example 15:30.
am/pm time format. Example 3:30 pm.
Enter the number in front of the time format to change to it.
Tax Percentage
Specify the VAT. Enter a new percentage to change the value. Note! Do not
enter any per cent (%) character.
Example. Enter 25 to specify that the VAT is 25 per cent of the prize.
133.01A
Q-MATIC AB
79
Q-Entry SE User’s Guide
Rate
The Rate value is used when prices has to be shown in both the local unit of
money and in a second currency. The Rate is the percentage difference between
the local unit of money and the second currency. Enter a value to change the
Rate. Use the Special Code #e to print the second currency on the Ticket.
Cash Commitment
The set-up specifies if a Cash Commitment must be entered to get an X-Report
or a Z-Report. Press the C key to toggle between active and inactive.
Note! You must print a Z-Report if there are any stored sales otherwise you
cannot change this set-up. The Ticket Printer informs you that there are stored
sales and that you must print a Z-Report.
80
Q-MATIC AB
133.01A
Number Sequence Reset
Each Ticket is assigned a Ticket Number. This set-up option specifies if the
Ticket Number should be reset when a Z-Report is printed. Press C on the keyboard to change the set-up option.
New Set-up
The Ticket Printer prints a Ticket with the new set-up when you exit the Edit setup Mode. Check that the set-up is correct.
Press S on the keyboard if you want to return to the Edit set-up Mode. Remove
the Supervisor key, insert the User Key and put back the Front Plate when you
have finished all changes.
133.01A
Q-MATIC AB
81
Q-Entry SE User’s Guide
82
Q-MATIC AB
133.01A
13. Button Settings
Topics in this chapter
To change the Set-up .............................................. 84
Ticket Button Settings .............................................. 84
Number Button Settings ........................................... 85
New Settings ............................................................ 86
Edit Button Name ..................................................... 86
133.01A
Q-MATIC AB
83
Q-Entry SE User’s Guide
In the Button Settings you can make some changes in the way the Ticket Buttons and the Number Buttons are used.
To change the Settings
Insert the Supervisor key, remove the Front Plate and press the B key to enter
the Button Settings Mode.
The Button Settings Mode is divided into two stages, one for the Ticket Buttons
and one for the Number Buttons. The Ticket Printer prints Tickets for each stage.
You must step through all settings even if you do not want to change them all.
Press ENTER on the keyboard to continue without changes.
Ticket Button Settings
You can turn off those Ticket Buttons that are not used. The Ticket Printer beeps
to indicate that the Ticket Button cannot be used and it prints no Ticket.
It can be a good idea to turn off Ticket Buttons that are not used. You prevent
that Tickets are printed by mistake.
The Ticket Printer prints a Ticket with the current settings.
Press a Ticket Button to change its settings. A Ticket Button that is active (ON)
will be inactive (OFF) and vice versa. Press ENTER when you are ready with the
settings.
84
Q-MATIC AB
133.01A
Number Button Settings
You must make two decisions about the Number Buttons. First, do you want to
use them at all? Second, if they are used, how do you want to use them?
The Ticket Printer prints a Ticket that asks you if you want to use the Number
Buttons. The Number Buttons are used when you do not want to press the Ticket
Button one time for each Ticket when a customer buys many Tickets.
Press Y to make the Number Buttons active or press N to turn them off.
If you use the Number Buttons then you can specify how they should work.
There are two possibilities: Group Tickets or Single Tickets.
Group Tickets are when one Ticket can be used for more than one person. You
use the Number Buttons to specify the number of customers for a Ticket. Example: Press Number Button 5 and Ticket Button 3 to print a Ticket for five customers.
Single Tickets are when the Ticket Printer prints one Ticket for each customer.
You use the Number Buttons to specify the number of Tickets. Example: Press
number Button 5 and Ticket Button 3 to print five Tickets.
Press G to choose Group Tickets or press S to choose Single Tickets.
133.01A
Q-MATIC AB
85
Q-Entry SE User’s Guide
New Settings
The last Ticket shows the settings after your changes. Check that the settings
are correct.
Note! Check that you have not turned off any Ticket Buttons that are used. It is
very annoying to find that a Ticket Button is inactive when you are going to use it.
Press B to return to the Button Settings if you want to make more changes.
Remove the Supervisor key, insert the User Key and put back the Front Plate
when you have finished all changes.
Edit Button Name
The Ticket Button Name is a short piece of information that can be printed on the
Ticket. You use Special Command #s to print the Button Name on the Ticket.
•
Insert the Supervisor key, remove the Front Plate and press N on the keyboard. The Ticket Printer prints the following Ticket.
•
Press the Ticket Button for which you want to change the name. The Ticket
Printer prints a Ticket with the current name.
86
Q-MATIC AB
133.01A
•
Enter a new name. Use the arrow keys to move the cursor in the text. Press
DEL to delete the selected character.
Press SHIFT then the letter key to get a capital letter. Never press SHIFT and
another key at the same time.
Use ALT and an arrow key to place the cursor at the last position in the selected direction. Example: ALT then the right arrow places the cursor at the
end of the line.
•
Press ENTER to exit. The Ticket Printer prints a Ticket with the new Button
Name.
133.01A
Q-MATIC AB
87
Q-Entry SE User’s Guide
88
Q-MATIC AB
133.01A
14. Reset Number
Sequences
Topics in this chapter
Ticket Number Sequences ....................................... 90
To reset Ticket Number Sequences ......................... 90
133.01A
Q-MATIC AB
89
Q-Entry SE User’s Guide
This function resets the Ticket Numbers used on the Tickets.
Ticket Number Sequences
There are sixteen Ticket Number Sequences in the Ticket Printer. They are
numbered 1 to 15 and one common sequence.
The Special Code #n prints the Ticket Number on the Ticket. You can print a
Ticket Number from a specific Ticket Number Sequence (for example #n11) or
you can print a Number from the common sequence (#n). The Ticket Number
Sequence is increased with 1 every time it is printed with one exception and that
is if the same Ticket Number Sequence is printed more than one time on the
same Ticket.
Many Ticket Buttons can share the same Ticket Number Sequence.
To reset Ticket Number Sequences
You can reset one Ticket Number Sequence or all of them.
Insert the Supervisor Key, remove the Front Plate and press Q on the keyboard.
The following Ticket is printed.
Enter the Ticket Number Sequence you want to reset or enter 16 if you want to
reset all Ticket Number Sequences.
Press enter without entering any number to exit without changes. The following
Ticket is printed.
90
Q-MATIC AB
133.01A
The Ticket Printer prints the following Ticket if a Ticket Number Sequence was
reset.
133.01A
Q-MATIC AB
91
Q-Entry SE User’s Guide
92
Q-MATIC AB
133.01A
15. Change Date
Topics in this chapter
To change the Date ................................................. 94
133.01A
Q-MATIC AB
93
Q-Entry SE User’s Guide
The date is usually printed on the Tickets.
This chapter describes how you change the date.
To change the Date
Insert the Supervisor Key, remove the Front Plate and press D on the keyboard.
The following Ticket is printed.
Enter the date according to the information on the Ticket. You must always press
ENTER when you have entered a value (see the example below).
Example
We want to enter 7 March 2002 and we use date format 1.
Enter the day then ENTER, the month then ENTER and the year then ENTER.
Type 07 then ENTER
Type 03 then ENTER
Type 02 then ENTER
The Ticket Printer prints a Ticket with the new date.
94
Q-MATIC AB
133.01A
16. Change Time
Topics in this chapter
To change the Date ................................................. 96
To change the Time, 12 hours format ...................... 97
133.01A
Q-MATIC AB
95
Q-Entry SE User’s Guide
The time is usually printed on the Tickets.
This chapter describes how you change the time.
To change the Time, 24 hours format
Insert the Supervisor Key, remove the Front Plate and press H on the keyboard.
The following Ticket is printed.
Enter the hours then ENTER then the minutes and ENTER. Always enter two
digits.
Example
We want to enter 14:27.
Type 14 then press ENTER
Type 27 then press ENTER
The Ticket Printer prints a Ticket with the new time.
96
Q-MATIC AB
133.01A
To change the Time, 12 hours format
Insert the Supervisor Key, remove the Front Plate and press H on the keyboard.
The following Ticket is printed.
Enter the hours then ENTER then the minutes and if it is am (a) or pm (p) and
ENTER. Always enter two digits. Type a for am and p for pm.
Example
We want to enter 2:27pm.
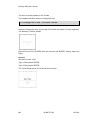
Type 02 then press ENTER
Type 27p then press ENTER
The Ticket Printer prints a Ticket with the new time.
133.01A
Q-MATIC AB
97
Q-Entry SE User’s Guide
98
Q-MATIC AB
133.01A
17. Change Company
Info
Topics in this chapter
To change Company Info ....................................... 100
133.01A
Q-MATIC AB
99
Q-Entry SE User’s Guide
There are three editable items that concern information about the company.
They are:
•
Organization number
•
Address
•
Name
To change Company Info
The company info items are all changed in the same way:
1. Insert the Supervisor Key.
2. Remove the Front Plate.
3. On the keyboard, press a specific letter key.
4. Use the ticket edit functions, see “Edit a Ticket Text” on page 26, “Shortcut
keys” on page 29, and perhaps Control Codes, also in that chapter.
5. When finished, press ENTER.
Organization number
Press V.
Address
Press W.
Company Name
Press Y.
100
Q-MATIC AB
133.01A
18. Maintenance
Topics in this chapter
Change Ticket Roll................................................. 102
Maintenance .......................................................... 103
133.01A
Q-MATIC AB
101
Q-Entry SE User’s Guide
The Ticket Printer does not need much maintenance. It is designed to run without problems. There is no ink or toner that you can run out of. The only things
you must regularly add are the Tickets.
Change Ticket Roll
Follow these steps to change the Ticket Roll.
•
Open the cover.
•
Look at the old Ticket Roll to see how it is mounted then remove it.
•
Insert the new Ticket Roll and feed it into the print head as far as you can.
•
Press the Paper feed button (or R on the keyboard) to start the motor and
feed the paper through the print head.
•
Close and lock the cover.
102
Q-MATIC AB
133.01A
Maintenance
The Ticket Printer needs no special maintenance to work properly. Use a piece
of cloth and a mild detergent.
Note! Do not use any detergents that may damage the plastic (white spirit, etc.).
Note! Never use any conductive material to clean the print head. This may result
in a short circuit which damages the print head.
133.01A
Q-MATIC AB
103
Q-Entry SE User’s Guide
104
Q-MATIC AB
133.01A
19. Shortcut Keys
133.01A
Q-MATIC AB
105
Q-Entry SE User’s Guide
Here is a list of all shortcut keys used to print reports, edit settings, and the like.
Key
Function (page where it is described)
A Customer Report (page 64)
B Edit Button Settings (page 80)
C Corrections (page 12)
D Change Date (page 90)
E Exercise (page 15)
G Reset Numbers (page 86)
H Change Time (page 92)
K Number of Customers Report (page 68)
L VAT Rates (page 20)
M Sales Report (page 60)
N Button Name (page 82)
O VAT/Button connections (page 22)
P Edit Price (page 18)
Q Reset Ticket Number Sequence (page 86)
R Paper Feed (page 98)
S Edit Button Settings (page 80)
106
Q-MATIC AB
133.01A
T Edit Ticket Text (page 26)
U Set Exchange (page 14)
V Organization number (page 34)
W Address (page 33)
X X-Report (page 48)
Y Company Name (page 35)
Z Z-Report (page 54)
Space Total Report (page 72)
bar
133.01A
Q-MATIC AB
107
Q-MATIC AB,
Box 198,
SE-431 23 Mölndal,
Sweden.
VAT No SE556212749701
Phone:
Fax:
Email:
Web:
+46 31 756 46 00
+46 31 756 46 99
[email protected]
www.qmatic.com