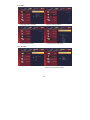
1
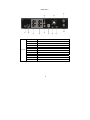
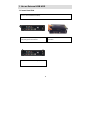
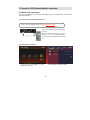
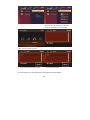
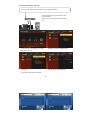
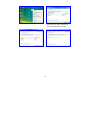
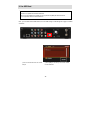
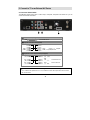
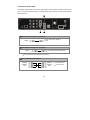
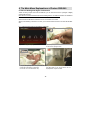
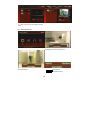
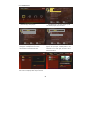
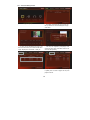
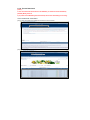
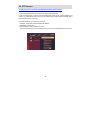
USER MANUAL Probox PBR-500 Contents Introduction ......................................................... 3 Usage Precautions ....................................................................................................... 3 Specifications ................................................................................................................ 4 Recording Function ...................................................................................................... 5 MultiMedia Player Function ......................................................................................... 6 Package Contents ........................................................................................................ 7 Product Descriptions of Each Part ............................................................................. 8 1. Use as External USB HDD ................................... 11 1.1 Insert Hard Disk ........................................................................................ 11 1.2 Format Built-in HDD ................................................................................ 12 1.3 Copy & Paste the files through USB ................................................... 13 1.3.1 Windows 98SE .................................................................................................. 13 1.3.2 Windows ME...................................................................................................... 14 1.3.3 Windows 2000, XP ........................................................................................... 15 1.3.4 Linux ................................................................................................................... 16 1.3.5 Mac ..................................................................................................................... 17 2. Connect to a PC(s) through Network connection .................. 19 2.1 Wired LAN Connection ........................................................................................ 19 2.2 Wireless Connection ............................................................................................ 23 3. Shared File Playback (Stream) ............................. 28 3.1 Windows 98SE, ME ............................................................................................. 28 3.2 Windows 2000 ...................................................................................................... 30 3.3 Windows XP.......................................................................................................... 32 3.4 Windows Vista ...................................................................................................... 35 4. Use USB Host ..................................................... 39 5. Connect to TV or an External AV Device........................... 41 5.1 Connect Video Cable........................................................................................... 41 1 5.2 Connect Audio Cable ...........................................................................................42 6. How to use the Remote Control? .......................... 44 6.1 Explanations of the remote buttons....................................................................44 7. Initial Set-up ................................................... 46 7.1 Format HDD...........................................................................................................46 7.2 Initial basic setup ..................................................................................................48 8. The Main Menu Explanations of Probox PBR-500 ...... 49 8.1 Record Analogue & Digital TV Channels ..........................................................49 8.2 REC. LIST ..............................................................................................................55 8.3 Multimedia..............................................................................................................59 8.4 Setup ......................................................................................................................60 9. Remote Web-Access & Torrent Download ............... 68 9.1.1. System Info. ......................................................................................................69 9.1.2. File List ...............................................................................................................70 9.1.3. Record List ........................................................................................................71 9.1.4. History List .........................................................................................................75 9.1.5. Torrent Download .............................................................................................76 10. FTP Server .................................................... 79 10.1.1. Access to the PBR-500(FTP Server) by using the web-browser. ...........80 10.1.2. Access to the PBR-500(FTP Server) by using FTP Client Program.......81 11. Firmware Upgrade .......................................... 83 2 Introduction Usage Precautions Please read the followings carefully and refer to [Cautions] in the manual for the proper use. * Probits Co. Ltd has no responsibilities for the recorded programs or files made or distributed for the purpose of Copyright illegal commercial or transactional activities. The party or parties who record or distribute the contents bear all the responsibilities (Civil or Criminal) direct or indirect.. Supported codec * The Probox PBR-500 may not play some media files. Please check the codec types. Also it may not play or run improperly depending on file characters or circumstance. * Connect the power adapter as well when you connect the Probox PBR-500 to a PC. Probox PBR-500 may not be connected if the USB cable is more than 3 meters (9.8 feet). USB Device Recommended length is 3 meters (9.8 feet) (recommend you to use the supplied USB cable.) If the USB cable is too long, the transfer speed and the connection may not be good. If you connect this device to USB 1.1 Host Adapter, the speed is USB 1.1 (Max. 12Mbps), so we recommend you to connect to USB2.0 for full speed of max. 480Mbps. USB Host * The USB Host may not be matched with all USB storages. Please check the compatibility before you purchase or use the USB storage. HDD Type Radio Waves Cross * Only 3.5” SATA type HDD can be used. * The Probox PBR-500 may have the possibility of radio waves cross, so recommend not to use the service related to human safety. Data Backup * We strongly recommend you to back up the data to another safe media. We are not responsible for data damage or loss in built-in HDD. Drop, shock * Do not drop the device. It may cause critical damage to the hard drive Strange Materials * Don’t insert steel materials (coin, etc) or other materials that may cause the Probox PBR-500 defect.. Disassemble / Remodel * Don’t try to disassemble or remodel the Probox PBR-500. It may cause malfunction Stack Up * Don’t stack another heavy material on the Probox PBR-500. Exposure to water, * Don’t expose the Probox PBR-500 to oil, water, dust, moisture or rain and wind. moisture, etc If the Probox PBR-500 is wet then unplug the power cable from the unit right away. Heat * Keep the Probox PBR-500 away from heated areas. Set it up in well-ventilated places. Magnetic Materials * Keep all magnetic materials away from the Probox PBR-500. Magnetic materials such as speakers or magnets may erase or cause damage to the data stored in the hard disk. * Probits Co. Ltd has no warranty of responsibility for the broken HDD. 3 Specifications Product Name Probox PBR-500 Main CPU RealTek RTD 1282 200Mhz processor Power 12V 3A Weight Approx. 450g (without HDD inside) Dimension & Weight 185(L) x 158(W) x 57(H) mm & Weight (g) 450 Front VFD Display Colorful VFD Display Available OS USB Device Compatible: Windows 98SE/ME/2000/XP, Mac OS 9.0 higher, Linux 2.4 higher USB Device Device Port x 1pcs, 480Mbps USB 2.0 (USB 1.1 compatible) USB Host Host Port x 2pcs, 480Mbps USB 2.0 (USB 1.1 compatible) Supporting to read USB devices like External USB HDD, ODD, Flash Drive, Card Reader Wired LAN 10/100 Mbps LAN (RJ-45) x 1ea, 100BaseTx:UTP/STP Category 5 LAN cable compatible Wireless USB Dongle (option) 54Mbps IEEE802.11g USB Dongle HDD Type 3.5” SATA HDD HDD File System NTFS / FAT32 (Recording, Time-Shift, EPG function is available on FAT only). TV Type NTSC / PAL Mpg, mpeg, avi, vob, tp, ts, trp, dat, iso, ifo, m2t Video Format AVI, MPEG1/2/4 (xvid), IFO, ISO, VOB, DAT, TP Up to 1920 x 1080i Audio Format MP3, OGG, WMA, AAC, AC3, WAV Photo Format JPG/JPEG, BMP, PNG Subtitles Smi, sub, srt Composite Video Output Component Y, Pb, Pr (480p, 720p, 1080i) HDMI (480p, 720p, 1080i,) Audio Output Analogue : Stereo L & R S/PDIF Digital Output : Coaxial / Optical AV-IN Composite, Component Memory 64M Byte. Cooling Fan 25 x 25 Brushless Micro Fan Language English, Spanish, French, Germany, Italian, Dutch, Russian (Other languages will be added). Working Temperature 0˚C ~ 60˚C Working Humidity 10% ~ 50% * VIDEO : Not support VC-1, MKV, H.264 or WMV (supported by the real-time transcoding) * AUDIO : Not support FLAC, APE or WMA-Lossless 4 Recording Function * In order to use the recording function (Direct Record, Time-Shift, Time-Schduling Record, EPG Record), Remote Web-Access and Torrent Download, you should do the HDD Format on TV (Not through a PC). Probox PBR-500 has an internal TV tuner and fully records Analogue (PAL / NTSC) & Digital (DVB-T / ATSC) TV channels as well as the media player functions. The Probox PBR-500 has the direct recording function. Direct Record If you want to record the channel you are watching right now, then just press [RECORD] button on the front panel or on the remote control then it records the current channel. Time-Scheduling Record EPG You can record the programs you like by the Time-Scheduling Record on the unit directly or through web-access to the unit remotely. The Probox PBR-500 supports ‘EPG Recording’ by the program names. ‘Time-Shift’ function can give you the recording of programming to a storage medium to be viewed or listened to at a more convenient time. Time-Shift Being interrupted while watching live TV programs (such as pick up calls & answer the door), all you need to is to press [TIMESHIFT] button on the remote to record the program for a period of time and then later press [TIMESHIFT] key again to pick up the location where you left off. Torrent Download Probox PBR-500 supports Remote Torrent Download through the Remote Web-Access Control. You can convert the analogue contents such as VCR to a digital contents AV-IN into a HDD inside through AV-IN and record the digital signal from Cable Set-Top-Box, Satellite Set-Top-Box, etc which has AV-Out. Probox PBR-500 supports Composite / Component AV-IN. * The Probox PBR-500 will detect a new HDD you insert and will give you a question whether you want to do HDD format or not. * Make sure that your TV mode is switched to the ‘AV input mode on TV. 5 MultiMedia Player Function The Probox PBR-500 is a stand-alone, multimedia HDD (Hard Disk Drive) player that plays digital videos, music, photos and DVD files on TV and home entertainment system. You can enjoy the digital contents at home without having to burn discs or having to play it back on a DVD or CD player. MultiMedia Player High-Definition HDMI LAN Wireless USB 2.0 The Probox PBR-500 can play back the videos, music, photos from the HDD inside, an external USB storage through USB. The Probox PBR-500 play the HD video (up to 1920 x 1080i) and photos by using HDMI connection. By using the single & simple HDMI connection, you can enjoy the high quality of the digital video and audio. It provides 10/100Mbps network connection for the ‘Real-Time Transcoding’, so you can stream the real-time transcoded contents from the PC. With the 802.11g USB dongle connection, you can enjoy the contents streaming by wireless. With the two USB 2.0 Host connections, you can attach additional external USB storages to further extend the storage capacities. 6 Package Contents The Probox PBR-500 package includes the below items and it may be different from the actual contents. PBR-500 Manual CD Remote Controller AV Cable WiFi USB Dongle (Option) 7 USB Cable Power Adapter Product Descriptions of Each Part The PBR-500 has its own button at the front panel as well as with the remote controller. < Front View > ① ③ ④ ② Front View ⑤ ① POWER Power ON / OFF button ② IR Receives the remote controller signal ③ VFD Display Colorful display for the status of the unit. ④ OK [Enter] OK (Enter)or Select button. Navigation Volume Up / Down knob Left / Right Navigation knob. ⑤ PLAY Play the files (contents) button ⑥ REC Direct Record Button ⑦ STOP Stop the file playback button. 8 ⑥ ⑦ < Back View > ⑪ ⑨ ⑤ ① Back View ② ③ ④ ⑥ ⑦ ⑧ ⑩ ① Power Jack Connect the power adapter. ② LAN Wired LAN connection to a PC for the file streaming. ③ AV-OUT Connect Probox to TV (Composite / Component) ④ AV-IN Connect an external AV device for recording. ⑤ Coaxial Coaxial cable for 5.1 ch. Digital audio output ⑥ Optical Optical cable for 5.1 ch. Digital audio output ⑦ USB Host Connect to an external WiFi USB dongle or storage. ⑧ USB Device Connect Probox PBR-500 to a PC by USB cable. ⑨ Cooling Fan Extract the heat air to outside ⑩ HDMI Connect HDMI Cable to TV ⑪ Antenna IN Connect the antenna cable from a wall into this jack. ⑫ Antenna OUT Connect the antenna cable from the PBR-500 to TV 9 ⑫ Use as External USB HDD 10 1. Use as External USB HDD 1.1 Insert Hard Disk Use 3.5” SATA Hard Disk for Desktop. ① Unscrew 2-spot and open the top cover with pulling up the arrow direction ② Connect Power and SATA connector to Hard Disk. ③ Finish assemble with screwing 2-spot, 11 1.2 Format Built-in HDD You should do HDD Format while you are connecting the PBR-500 with TV (Not through PC) then the PBR500 will have some partitions. Insert a HDD into PBR-500 and connect it to TV and then turn on PBR-500 & TV (select AV mode). After turn the both devices, then you will have a question window on TV whether you want to do a HDD format or not. ☞ For the detail procedure, please refer to Chapter 7. 12 1.3 Copy & Paste the files through USB PBR-500 can be an external hard disk drive in case when you connect it to a PC through USB connection and you can copy & paste the files from / to your PC to / from built-in HDD in PBR-500. * When you connect PBR-500 to a PC, you should connect power cable as well. 1.3.1 Windows 98SE First, you have to install Windows 98 Driver before connecting to a PC. Find the driver at the supplied CD. After finishing installation, of Windows 98 Driver, connect PBR-500 to a PC through USB cable, and plug power cable to PBR-500 as well. 1) Click [Start > Settings>Control Panel > System > Device Manager > Hard disk controllers > Hi-Speed USB-IDE Bridge Controller]. 3) After file transfer, remove PBR-500 by using remove icon at Windows right-down corner. If you don’t follow this procedure, the transferred files and PBR-500 may be damaged. 2) You can now find a new volume at ‘My Computer’ or ‘Explorer’ and you can copy & paste the files. If you can not find a new volume, then do HDD format again. Windows 98SE detects FAT32 file system only. 13 1.3.2 Windows ME 1) After connecting PBR-500 and plug power 3) After file transfer, remove PBR-500 by using cable, Windows itself will install driver remove icon at automatically. If you don’t follow this procedure, the transferred Windows right-down corner. And then, check the driver installation at files and PBR-500 may be damaged. Windows [Start > Settings > Control Panel > (view all Control Panel options) > System > Device Manager > Universal Serial Bus controllers > USB Mass Storage Device] 2) You can now find a new volume at ‘My Computer’ or ‘Explorer’ and you can copy & paste the files. If you can not find a new volume, then do HDD format again. Windows ME detects FAT32 file system only. 14 1.3.3 Windows 2000, XP 3) After file transfer, remove PBR-500 by using 1) After connecting PBR-500 and plug power cable, Windows itself will install driver remove icon automatically. If you don’t follow this procedure, the transferred at Windows right-down corner. And then, check the driver installation at files and PBR-500 may be damaged. Windows [Start > Settings > Control panel > (switch to classic View on Windows XP) > system > Hardware > Device manager > Universal Serial Bus controllers > USB Mass Storage Device]. 2) You can now find a new volume at ‘My Computer’ or ‘Explorer’ and you can copy & paste the files. When you see ‘Non High-Speed USB Hub Message’ The message will be displayed On windows XP when you plug PBR-500 into USB 1.1 spec. Host adapter. If you can not find a new volume, then do HDD format again. Windows 2000, XP detects both FAT32 and NTFS file system. 15 1.3.4 Linux It can be available on Linux 2.4 higher. [Automatic Mount] After booting, do log-in. Connect PBR-500 -> Power On PBR-500 -> Check the detection with [fdisk] -> make Mount Pointer (ex. mediatest) at Folder Mount(/mnt) -> Edit [/etc/fstab] -> add the following; /dev/sda /mnt/mediatest vfat noauto, user 0 0 (in case of FAT32 HDD) /dev/sda /mnt/mediatest ntfs noauto, user 0 0 (in case of NTFS HDD) Do Log-in again. above example “sda” is assumed that the PBR-500 will be detected as “sda” on your system. If not, you have to write the drive name which is detected as “USB Mass Storage”, not “sda”. [Manual Mount] Connect PBR-500 -> Power On PBR-500 -> Check the detection with [fdisk] -> make Mount Pointer (ex. mediatest) at Folder Mount(/mnt) -> Edit [/etc/fstab] -> add the following; mount –t vfat /dev/sda /mnt/mediatest (in case of FAT32 HDD) mount –t ntfs /dev/sda /mnt/mediatest (in case of FAT32 HDD) above example “sda” is assumed that the PBR-500 will be detected as “sda” on your system. If not, you have to write the drive name which is detected as “USB Mass Storage”, not “sda” [How to stop using] Do [unmount] at Device Control. 16 1.3.5 Mac It can be available on Mac 9.0 higher. No need to install the installation driver at Mac OS 9.x version and the PBR-500 will be detected automatically. If the PBR-500 is detected correctly, an icon is appeared at a monitor. When removing PBR-500 safely, drag the icon to a trash and unplug PBR-500. 17 Connect to PC via Network 18 2. Connect to a PC(s) through Network connection 2.1 Wired LAN Connection You can connect PBR-500 to a PC (PCs) for a file streaming by LAN or wireless and for using ‘Real-TimeTranscoding’ streaming. 2.1.1 Direct connection between PBR-500 & a PC. In case, connect a PC to PBR-500 directly (Have to use a ‘Cross-Over’ cable.) Connect LAN cable to the LAN ports between PBR500 and PC. [TIP] If the computer’s LAN card was connected to Internet line, you can mount additional LAN card to your PC and connect that additional LAN card to PBR500. Follow up the below procedure. ① At the main page, select [Setup] icon or press ② Select [Network] icon => [Wired Lan Setup] [Setup] button on the remote. 19 ③ Select DHCP IP (AUTO) or FIX IP (MANUAL). ④ Put the fixed IP address & subnet mask as the above. (No need to put Default Gateway / DNS server IP address) and press [OK] to save the configuration. ⑤ Go to the main page and select [Multimedia] icon to ⑥ Select [LAN] icon. find the connected to PBR-500 by network. ⑦ You can find the connected a PC(s) by network. ⑧ You can find the shared folder. For more information how to make a folder shared, go to [Shared File Playback (Stream)]. 20 2.1.2 Connection through a router PCs. In case, connecting through a Router or Hub and you can use a general ‘Direct cable’. Connect LAN cable to the LAN ports between a Router or Hub and PBR-500. In this case, you have to use a general Direct LAN Cable type. ② Select [Wired Lan Setup] => [DHCP IP (AUT)] ① At the main page, select [Setup] icon or press [Setup] button on the remote. ③ Press [OK]. ④ Now, PBR-500 get a dynamic IP address. * You can assign a specific DNS server IP address. 21 ⑤ Go to the main page and select [Multimedia] icon to ⑥ Select [LAN] icon. find the connected to PBR-500 by network. ⑦ You can find the connected a PC(s) by network. ⑧ You can find the shared folder. For more information how to make a folder shared, go to [Shared File Playback (Stream)]. 22 2.2 Wireless Connection PBR-500 supports two types of wireless structure; 1) Ad-Hoc mode & 2) Infrastructure mode. 1) Ad-Hoc Mode Direct 1:1 wireless LAN connection between a wireless PC and PBR- 2) Infrastructure Mode 500 Wireless LAN connection type with without having wireless Access Point. having Wireless Access Point. See the setup for 2) Infrastructure mode by using a router. ① At the main page, select [Setup] icon or press ② Select [Wireless Setup] and you can name the [Setup] button on the remote. connection as you want by a virtual key-board. 23 ③ Press [OK] to modify the connection Select [▷] ④ Select Infrastructure (AP) button on the remote. ⑤ Select [Auto] and ress [▷] button ⑥ You can find the wireless Access Points and select one AP. ⑦ Double-check the selected Wireless SSID and ⑧ Select [DHCP IP AUTO]] to get a dynamic IP confirm. address. 24 ⑨ Now, you can check the setup configuration you did ⑩ Then PBR-500 is testing the setup configuration until here. and trying to connect the selected AP. ⑫ Now PBR-500 is connected to the selected AP and ⑪ You can see all configurations you did. get the wireless signal & a dynamic IP address. ⑭ Select [LAN] icon. ⑬ Go to the main page and select [Multimedia] icon to find the connected to PBR-500 by network. 25 ⑮ You can find the connected a PC(s) by network and you can find the shared folder. Note Wireless AP (Infrastructure Mode) or Wireless Adapter (Ad-Hoc Mode) is needed for wireless connection. IEEE 802.11g wireless standard is recommended for better wireless environment. PBR-500 is compatible with IEEE 802.11g & b standard. 26 Shared File Playback (Stream) 27 3. Shared File Playback (Stream) After you connect PBR-500 and a PC (PCs) by LAN or Wireless, you have to set up network configurations of both a PC (PCs) and PBR-500 as well. Here, there is the information how to make a folder shared and network configuration.. 3.1 Windows 98SE, ME 1) Select a folder which you want to share. 3) After that, the shared folder will be displayed Right-click the folder and click [Sharing] in as following picture. pop-up menu. 4) Move to [Control panel > Network], and double click ‘TCP/IP->LAN card’ that you want to use on your computer. In order to see LAN Card name, move to [Control Panel>System>Device Manager>Network adaptors]. 2) Check ‘Shared as’ and write ‘Share Name’. For example, “My Movie” Make sure not to write a long ‘share name’ long in English Recommend to check ‘Read Only’ at ‘Access Type’ Do not write anything at ‘Passwords’ 5) Check ‘Specify an IP address’, and write ‘IP address’ & ‘Subnet mask’ that you want to use. For example, IP address: 192.168.1.3 / Subnet mask: 255.255.255.0 28 If you select ‘Obtained an IP address automatically’, you don’t need to write a specific IP address. 29 3.2 Windows 2000 1) Select a folder which you want to share. Right-click the folder and click ‘Sharing’ in pop Recommend only to use ‘Read>Allow’ at menu. Permissions. 2) Check ‘Share this folder’ and write ‘share name’. For example, “My Movie” Make sure not to write a long ‘share name’ in English 4) After that, the shared folder will be displayed as following picture. 5) Move to Panel>Administrative [Settings>Control Tools>Computer management>Local Users and Groups>Users], and double click ‘Guest’. 3) Click ‘Permissions’ and check whether “Everyone” account is or not. If not, add “Everyone” account. 30 6) Check ‘User cannot change password’ and ‘Password never expires’. 9) Check ‘Use the following IP address’, and write ‘IP address’ & ‘Subnet mask’ that you want 7) Move to [Control Panel>Network and Dial-up to use. Connections], and select Properties of ‘Local For example, Area Connections’ by right click of mouse. IP address: 192.168.1.3 Subnet mask: 255.255.255.0 If you see two or more ‘Local area connections’, select one that you will use for connecting to PBR500. If you select ‘Obtained an IP address automatically’, you don’t need to write a specific IP address. 8) Double click ‘Internet Protocol (TCP/IP)’ that you want to use on your computer. 31 3.3 Windows XP 1) Select a folder which you want to share. Right-click the folder and click ‘Sharing and 3) After that, the shared folder will be displayed Security’ in pop menu. as following picture. 4) Move to [Settings>Control Panel> Administrative Tools> Computer management> Local Users and Groups>Users], and double click ‘Guest’. This is for Windows XP Professional. Windows XP Home users can’t see this figure. Go to next number 6). If you can’t find ‘Administrative Tools’ at Control Panel, click “Switch to classic view” in left-up corner on screen. 2) Check ‘Share this folder on the network’ and write ‘Share name’. For example, “My Movie” Make sure not to write a long ‘share name’ in English. 5) Check ‘User cannot change password’ and ‘Password never expires’. >> See next page 32 . 7) Double click ‘Internet Protocol(TCP/IP)’ that you want to use on your computer. 6) Move connections], to and [Control select Panel>Network ‘Local area 8) Check ‘Use the following IP address’, and connections’ properties by right click of mouse. write ‘IP address’ & ‘Subnet mask’ that you want to use. If you can’t find ‘Administrative Tools’ at Control For example, Panel, click “Switch to classic view” in left-up corner IP address: 192.168.1.3 on screen. Subnet mask: 255.255.255.0 If you see two or more ‘Local area connections’, select one that you will use for connecting to PBR500. 33 9) At above number 8) figure, click ‘Advanced’ Check ‘Off’ and click ‘OK’ Tab. Disable ‘Internet Connection Firewall’. If you use service pack 2, refer to the following figures. Click ‘Settings’ at ‘Windows Firewall’ 34 3.4 Windows Vista Before you start “folder sharing”, you need to set up 3 items for correct Network sharing. 3.4.1 Setup of User Accounts and Family safety 1) Click Start > Settings > Control Panel > 2) Make sure the account is “Guest”. Users Accounts and Family safety 3) If the “Guest” account is off, then switch it to “On”. 35 3.4.2. Disable the “Firewall” 1) Click Start > Setting > Control Panel > 2) Click at ‘Off (not recommended) Security > Windows Firewall on / off 3.4.3 Setup of Network and Sharing Center 1) . Click Start > Setting > Control Panel > 2) Select “Password Protected sharing” Network and Internet > Network and and select “Turn off password protected Sharing Center. sharing”. 36 3) Make a folder you want to share. 4) You will get a popup “Choose people to share with” then select “Everyone (All users in this list) and press “Add” button. 5) After you register the user account, then click “Share” button. 37 . Use USB Host 38 4. Use USB Host Note PBR-500 is not compatible with all external USB devices. With so many external USB devices available, we can not guarantee compatibility with all external devices. We do not guarantee all kinds of external USB devices. Here, you can insert external USB devices, such as USB storage or USB Dongle we supply for wireless connection. 1) Insert an external USB device into a USB 2) Select [USB] icon and then you can see the contents host port. from the USB device. 39 Connect to External AV Device 40 5. Connect to TV or an External AV Device 5.1 Connect Video Cable The PBR-500 supports three types of video output; “Composite, Component and HDMI” and you can connect one of these connections. ① ② ③ ① HDMI : HDMI Cable (not supplied) HDMI Connect HDMI Jack of TV ② Composite: Yellow RCA cable. (Supplied) Yellow (CVBS) Yellow (CVBS) Connect to Composite (CVBS) Jack of TV ③ Component: Y, Pb, Pr component cable (not supplied) Red (Pr) Red (Pr) Connect Pr Jack of TV Blue (Pb) Blue (Pb) Connect Pb Jack of TV Green (Y ) Green (Y ) Connect Y Jack of TV If you can not see a normal screen after connecting a video cable, check the followings; On TV : Switch to video Input Mode: Turn on TV, and switch to the same video input mode as video connection. See TV user manual. 41 5.2 Connect Audio Cable The PBR-500 supports three types of audio output; “Stereo, Coaxial, Optical”. Use audio connection that your TV or Audio set supports. Normally, TV supports stereo audio connection, and this package supplies stereo audio cable. ③ ① ② ① Coaxial: Coaxial cable for Digital 5.1 ch. (not supplied) COAXIAL Connect coaxial jack of Amplifier or Receiver. ② Optical : Optical Cable for Digital 5.1 ch. (not supplied) Connect Optical Jack of Amplifier or Receiver OPTICAL Don’t connect optical and coaxial cable together at the same time. ③ Stereo: Red & White RCA Cable (supplied) Red (STEREO-R) Red (STEREO-R) (STEREO-L) White (STEREO-L) White 42 Connect R Jack of TV. Connect L Jack of TV. How to Use the Remote Control? 43 6. How to use the Remote Control? 6.1 Explanations of the remote buttons. This is the explanations of the remote buttons. EPG Record EPG program INFO Show the information of the content F1 T.B.D (Add a function later) F2 T.B.D (Add a function later) POWER Power On / Off the unit SETUP Set up the various configurations of the unit MUTE Pause the audio sound Numeric Key Insert a number INS REPLY Backward to 10 seconds frame CM SKIP Forward 30 seconds frame REW Rewind SLOW Play back in slow motion. FF Fast Forward PREV. Previous chapter or file Rec Schedule Set up the Time-Scheduling Recording time NEXT Next chapter or file. UP Up navigation button LEFT / REW Left navigation button / Rewind RIGHT / FF Right navigation button / Fast Foward DOWN Down navigation button OK / Enter OK [Enter] button. RETURN Return the previous screen / folder Time Shift Time-Shift record of the live channel HOME Go to the main first page Vol + Volume up REC. Direct Record button. Vol - Volume down PAUSE Pause the playback of a content PLAY Play a content STOP Stop a content playback Repeat (1/ALL) Repeat one file or all files Repeat (A<->B) Repeat the selected section GOTO Jump into a specific time frame of a content 44 TV Watch & Record TV channels AV-IN Select AV-IN source (Composite or Component) AV-OUT Select AV-OUT (TV-OUT) ZOOM Zoom video / image playback REC. LIST Go to REC. List menu and show the recorded TV AUDIO Select an audio track channel lists SUBTITLE Select a subtitle MEDIA TYPE File sort (Movie, Audio, Photo) MultiMEDIA Play the contents from HDD, USB, Network TOP Menu Go to Top menu at ISO file ANGLE See the Teletext at DVB-T DELETE Delete a file EXTRAS T.B.D (Add a function later) 45 7. Initial Set-up 7.1 Format HDD After you insert a used or new HDD into PBR-500 and then turn on PBR-500 for the first time, then you have the HDD format page. You should do the HDD format at PBR-500, otherwise, you can not record TV programs or AV-In. If you want to use PVR function (Direct Record TV channels, Time-Shift, EPG), you have to do a HDD format in the Probox PBR-500 (Not at a PC). ① Press [OK] to start a HDD format. ② Set up the capacity for [TimeShift] function. ③ Set up the capacity for [Direct Record, EPG] and ④ Multimedia has tow partitions; FAT / NTFS. Multimedia (FAT / NTFS). -. FAT : Read & Write -. NTFS : Read only. If you want to move files from a folder to Multimedia folder or use [Remote Web-Access], then you can only move or copy & paste the files to [FAT] partition. 46 ⑤ Now, the HDD is formatting. Any key on the remote ⑥ Now, the HDD format is running. or front panel is not working at this moment. ⑥ Now, the HDD format is completed and has four partitions. -. Time-Shift partition / -. Record partition -. FAT partition / -. NTFS partition. 47 7.2 Initial basic setup ② [DTV Region] : Select a country name that you ① [TV Input] : Select TV-Input type want to watch Digital TV. -. Antenna : Connect antenna cable -. CATV : Connect cable TV cable. ④ [Channel Set] : Select analogue or digital TV signal. ③ [Channel Scan] : Scan the channels by auto or -. TV : Analogue TV manual. -. DTV : Digital TV. 48 8. The Main Menu Explanations of Probox PBR-500 8.1 Record Analogue & Digital TV Channels Thanks to having a Hybrid Tuner with the PBR-500, you can watch and record TV (Analogue & Digital) channels with this menu. Direct Record / Time-Shift / EPG Record,/Time-Scheduling Record / AV-IN Record functions are available at this menu. Make sure that the PBR-500 is connected to TV and TV should be on AV mode. While you are watching a channel on TV mode, you can record another channel on AV mode with the PBR500. 8.1.1. Direct Record Analogue & Digital TV Channels. ① At the main page, select [TV] icon. ② Press [Record] button on the remote then the record icon at the top-right is shown. ③ If you press [Record] button one by one then the ④ If you want to stop the recording TV channel, then recorded time is increased up to 240minutes. press [Stop] button on the remote. Refer to the next (30->60->90->120->180->240minutes->Off) chapter [8.2 REC. List] for more detail. 49 ⑥ You can find the recorded lists here and play the lists. ⑤ If you want to watch the recorded TV channels then go to [REC. List] menu and select [Digital] or [Analog] menu. 8.1.2. Time-Shift Record. ② Press [Time-Shift] key on the remote then the time- ① At the main page, select [TV] icon. shift progress bar is shown at the bottom of TV. ③ Press [Play] button on the remote then it resumes ④ Progress bar explanation. from the paused frame. : Play progress bar. : Time-Shift progress bar. 50 8.1.3. EPG Record. ① At the main page, select [TV] icon. ② Press [EPG] button on the remote and then you will have the EPG program page as the above. ③ Select a day & a program that you want to record by ④ If you want to cancel the selected EPG record pressing [Rec. Schedule] button on the remote. program, then press [Rec. Schedule] button at the Then it added a new schedule as the above. selected list on the remote again, and then it will be removed as the above. ⑤ You can see the recorded list at [REC. List] menu. ⑥ You can find the recorded list by EPG record. Refer to the next chapter [8.2 REC. List] for more detail. 51 8.1.4. Time-Scheduling Record. ① At the main page, select [TV] icon. ② Press [REC. Schedule] button on the remote and then you will have the Time-Scheduling-Record page as the above. ③ You have the time-scheduling-reocrd page as the ④ After set up the configuration, press [OK] key on the above and select & set up of TV Channel / Start Time / remote then there will be confirmation window as the Length / Repeat period / Record Path / Quality, etc. above and select [Confirm]. ⑤ Then the selected channel is added as the above. ⑥ If you want to delete the selected TV channel, then go to [Delete] menu and select a program file and press [OK] on the remote. 52 ⑦ Select one of the three menu to cancel the time- ⑧ If you want to check the status of the selected record scheduling-record. list then go to [Status] menu and then you can see the status detail. ⑧ When the time-scheduling-record is coming then it ⑨ If you want to stop the record, then press [Stop] shows the question prompt and select [Confirm] or just button on the remote and then select [Confirm]. leave it then it starts the recording automatically. ⑩ After the record is completed, then you can go to the ⑪ After the recording is completed, then you can go to [Status] menu and check the recording status. the [REC. List] menu and find the recorded lists. 53 8.1.5. AV-IN Record. ① At the main page, select [TV] icon. ② Press [Source] button several times on the remote until you have the screen that you connected to PBR-500 with a external analogue AV device. ③ Press [Record] button on the remote then it starts ④ If you want to stop the recording then press [Stop] the recording the analogue contents into the digital button on the remote. contents from the external AV device. 54 8.2 REC. LIST You can see the recorded lists of the analogue & digital TV channels here and playback or move, delete, rename, etc the lists. 8.2.1. Digital Recorded Lists ① At the main page, select [REC. List] icon or press ② Select [Digital] [REC. List] button on the remote. ③ You can play, delete, rename, sort, title edit, tools the files. For more detail how to rename, delete, sorting, Title Edit, Tools, see the next 8.2.2 chapter. 55 8.2.2. Analogue Recorded Lists ① At the main page, select [REC. List] icon or press ② Select [Analog] [REC. List] button on the remote. ③ You can play, delete, rename, sort, title edit, tools the ④ You can delete the selected files. files. ⑤ You can change the file name by using a virtual ⑥ Sort the files by ‘Title Number’, ‘Recording Time’, ‘Title keyboard. Name’, ‘Fresh Titles’. 56 ⑦ [Set Thumbnail] : ⑧ [AB Erase] : Remove from SETA to SETB area. ⑨ [Split Title] : Divide on title into two titles. ⑨-ⓐ Now, there is a new title (TITLE4) which was divided from Title 3. ⑩ [Merge Title] : Merge two titles into one title. ⑪ [Add Chapter Mark] : Give chapters to a file for easy chapter by chapter skip. 57 ⑫ [Remove Chapter Mark] : Remove the marked ⑬ [Copy to FAT32 partition] : Copy & Paste the selected chapter. file to FAT32 partition and then you can see the files at a PC. At a PC, you can not access the partition for Recording but only can access to FAT & NTFS. ⑭ [Tools] : Delete all files at one time. 58 8.3 Multimedia Play back the contents (Movie, Audio, Photo) from a HDD, Network (LAN / Wireless) connections and an external USB storage. ① At the main page, select [Multimedia] icon or press ② After selected Multimedia icon, then you have four [M.MEIDA] button on the remote. sub-icons (HDD, LAN, USB) If you press [Media Type] button on the remote then PBR-500 sort the file types as the below; [All Media] [Music] [Photo] [Movie] ③ You can also sort the files by using [MEDIA TYPE] on the remote control such as movie, audio, photo. 59 ◆ Tip You can use various buttons on the remote while you are playing movie, audio, photo. For more information, refer to [How to use the Remote Control] at Chapter 6. ③ If you play a movie or photo, it provides ‘Preview’ function as the above. 8.4 Setup Set up the various configurations of Probox PBR-500. 8.4.1. TV ① At the main page, select [Setup] icon or press ② [TV Input] : Select TV-Input type [SETUP] button on the remote. Antenna : Connect antenna cable CATV : Connect cable TV cable. ③ [DTV Region] : Select a country name for ④ [Channel Scan] : You can scan TV channels Digital TV signal reception. automatically or manually. 60 ⑤ [AUTO SCAN] : The Probox PBR-500 is ⑥ [MANUAL SCAN] : You can scan a channel scanning the channels automatically. manually. ⑦ [Channel Set] : You can make book-mark for the favorite channels of analogue & digital channels. 8.4.2. Audio ② [Digital Output] : Select an Audio-out ① [Night Mode] : Off : Turn off the bass sound On : Turn on the bass sound Comfort : The bass sound is between Off & On. 61 8.4.3. Video ① [Aspect Ratio] : Select a proper ratio. ② [Brightness] : Adjust the brightness ③ [Contrast] : Adjust the contrast ④ [TV System] : Select a proper TV-Out 8.4.4. RECORD ① [Quality] : Select a recording quality that you want. ② [Auto Chapter] : Add chapters while you are recording in order to skip chapter by chapter. 62 ③ [Permanent Timeshift] : If [On] then the timeshift ④ [REC Device] : Select a storage method that function will be running automatically if you press [Pause] you want to save the recorded channels into. button on the remote while you are watching a TV channel. 8.4.5. Network ; Refer to Chapter 2 for more detail. ① [Wired LAN Setup] : Set up the LAN connection ② [Wireless Setup] : Set up the wireless connection configurations. configurations. 63 8.4.6. System ② [Time] : Set the time of the unit. This affects on the ① [Menu Language] : Select a language time-schedule record, EPG. ★ Very Important ★ If you want to use PVR function (Direct Record TV channels, Time-Shift, EPG), you have to do a HDD format in the Probox PBR-500 (Not at a PC). ③ [HDD Format] : Do a HDD format for using PVR ④ Press [OK] to start a HDD format. function. ⑤ Set up the capacity for [TimeShift] function. ⑥ Set up the capacity for [Direct Record, EPG] and Multimedia (FAT / NTFS). 64 ⑦ Multimedia has tow partitions; FAT / NTFS. ⑧ Now, the HDD is formatting. Any key on the remote -. FAT : Read & Write or front panel is not working at this moment. -. NTFS : Read only. If you want to move files from a folder to Multimedia folder or use [Remote Web-Access], then you can only move or copy & paste the files to [FAT] partition. ⑨ Now, the HDD format is completed and has four ⑩ [Restore Default] : Make the unit to factory reset. You partitions. need to set up all configurations again after do this -. Time-Shift partition /-. Record partition / -. FAT partition menu. -. NTFS partition. ⑪ [Power Off mode] -. Instant Off : Turn off the unit now. -. Suspend Off : the unit goes to [sleep] mode. For the Remote Web-Access / Bittorrent Download, you should select this mode. 65 8.4.7. MISC ① [Slide Show Timing] : Set the slide time interval. ② [Transition Effect] : Give the slide-show effect. ③ [Background Music] : Select the background music playback path. 66 Remote Web-Access & Torrent Downloading 67 9. Remote Web-Access & Torrent Download [Remote Web-Access] & [Torrent Download] function is the very unique function of the PBR-500. You can access to the Probox PBR-500 through web-browser and can 1) Download the files from the Probox PBR-500 to a local PC 2) Set up the time-scheduling recording time to the PBR-500 throurh Web-browser remotely. 3) Check the recording status at the PBR-500. 4) Download the Torrent files to the PBR-500 directly. In order to use this function, you need to connect PBR-500 to a router and do [Port Forwarding / Port number : 80] or [DMZ Server] at the router. For more information how to setup the [Port Forwarding], refer to the manual of the router you are using. At the Probox PBR-500, you need to set up the below; -. IP Address : set the fixed private IP address to PBR-500 -. Subnet Mask : 255.255.255.0 -. Default Gateway : set the IP address of the public IP address of the router (If the router is using a dynamic public IP address then you need to use DDNS function of the router). -. DNS Server IP Address : For Bittorrent Download, you need to put the DNS server IP Address. 68 9.1.1. System Info. You can access to the PBR-500 through the web-browser and check the status such as the total or used capacity of each partition, recording result, system time information, etc. ■ HDD FREE SPACE -. Name : the name of each partition -. Total : the total capacity of each partition -. Used : used capacity of each partition -. Avail : Available capacity you can use later of each partition. -. Use : the used percentage of each partition. -. HDD1 / 2 : this is a partition you can see at a PC and upload or download the files to / from here. -. REC : the recorded files (Direct / Time-Scheduling Recording / EPG Recording) are supposed to be saved into this partition and you can only see this partition through web-browser and can not see this at a PC by using USB cable connection. -. TIME SHIFT : the time-shift recorded file is written into this partition. ■ RECORD LIST The Time-Scheduling Recording Lists or AV-IN Recording lists are shown at this field. If you click the number beside [Item(s)], then it goes to [Record List] menu. ■ HISTORY LIST It shows the recording result as “OK” or “Fail” ■ SYSTEM TIME -. PVR System Clock : the current time information of the PBR-500 you are using now. -. This Computer : the current time information of the PC you are using now. -. User Input : if you want to change the current time of the PBR-500, then click this and set up of the time and press [Apply] 69 button then the PBR-500 will have a new changed time information. 9.1.2. File List [File List] : Access to the HDD inside of the Probox PBR-500 and get the files from PBR-500 to the local PC you are using. For example, if you click [HDD1] folder then you can access to the HDD1 folder as below; And then select a file and download the file into your local PC you are using now. 70 9.1.3. Record List You can do the time-scheduling recording at this menu from Analogue or DTV or AV-IN. [New] : Add a new time-scheduling recording list [Delete] : delete the scheduled list. If you press [New] button then you will have the below mene. 71 1st Source : the first [Source] is to select AV-IN or Analogue or DTV. 2nd Source : If you select [TV] which means the analogue TV then you will have the analogue channels as the above. 72 3rd Source : If you select [DTV] which means the digital TV then you will have the analogue channels as the above. -. Start Time : Set up the recording time year / month / date / hour / minutes -. Length : set up the recording time length hour / minutes 73 -. Repeat : set up the repeat period such as once, everyday, every-Fri, etc as the above. -. Device : Select a device to record the channels. The default is HDD inside. -. Quality : Select a quality of the recording. After you set up the all configurations for the recording, then press [Submit] button. 74 Then now, you have a new requested recording list as the below; 9.1.4. History List Check the recording result at this menu. The below status says, the recording was succeed.(OK). 75 9.1.5. Torrent Download [Notice] : In order to download the Torrent files into the PBR-500, you should turn off the PBR-500 by [Stand-By Mode] power off. If you power off the PBR-500 by [Normal Power Off] then Torrent downloading is not running. How to download the Torrent Files? [Step 1] : search the torrent files at the websites and type the title you want to download. [Step 2] : You will get the a lot of related file names as the below and select the files. 76 [Step 3] : Click the selected file name as below and save the file into a folder. [Step 4] : Click the [Browse] button at the Web-Access page as below and add the Torrent file And the press [Start] button. [Step 4] : After you turn off the PBR-500 by [Stand-By Mode], the PBR-500 will start the Torrent file downloading. -. [Delete Job] : Delete the Torrent file from the PBR-500. -. [Delete Job and File] : Delete the Torrent file including the temporary files and also downloaded parts as well. 77 FTP Server 78 10. FTP Server Currently, two (2) users can access to the PBR-500 (FTP Server) at the same time. You can use the PBR-500 as a FTP server and can upload / download the files. In order to use this function, you need to connect the PBR-500 to a router and set up [Port Forwarding / Port number : 21] or [DMZ Server] at the router. For more information how to setup the [Port Forwarding], refer to the manual of the router you are using. At the Probox PBR-500, you need to set up the below; -. IP Address : set the fixed private IP address to the PBR-500 -. Subnet Mask : 255.255.255.0 -. Default Gateway : set the IP address of the router. (If the router is using a dynamic public IP address then you may need to use DDNS function of the router). 79 10.1.1. Access to the PBR-500(FTP Server) by using the web-browser. [Step 1] : Open the Web-Browser [Step 2] : type [ftp://id:password@FTP server IP address]. i.g ftp://admin:[email protected] [Step 3] : Then you can access to the PBR-500 folders and download or upload the files. 80 10.1.2. Access to the PBR-500(FTP Server) by using FTP Client Program. [Step 1] : Install the FTP client program at your PC. [Step 2] : Open the FTP client program. [Step 3] : Put the request date / Host : FTP Server IP address / Username / Password (The default port is “21”, so no need to put if you did not indicate a special port number) [Step 4] : Now, your computer has been successfully accessed to the PBR-500 (FTP Server). 81 Firmware Upgrade 82 11. Firmware Upgrade Download an upgrade file from a local distributor in your country or visit at www.myprobox.com or send an email to [email protected]. While upgrading the firmware, DO NOT turn off the PBR-500. How to upgrade the new firmware? Currently, you can upgrade the new firmware through the HDD inside or an external USB storage. [Step 1] : Connect the PBR-500 and TV and turn on the both devices. [Step 2] Save the new firmware at the Root Directory of the HDD inside or the external USB storage. [Step 3] : While you are pressing [Stop] button at the front panel of the PBR-500, unplug & plug the power cable. [Step 4] : Take away your finders from the [Stop] button. [Step 5] : Now, the PBR-500 is running the firmware upgrading. It takes more than 1 minute. So, please be patient while upgrading. 83