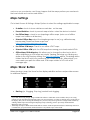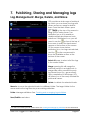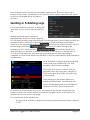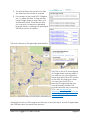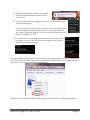
1
FLASHLIGHT Revision Sheet ULTRA GPS LOGGER V3.0 USER GUIDE Ultra GPS Logger is a GPS Tracker app which allows you to generate NMEA, KML and/or GPX logs with your GPS or GLONASS enabled Android device. It can keep GPS on during standby to permit long logging periods without interaction and with minimum battery drain. FlashLight Holger Kasten Jägerhausstrasse 72 74074 Heilbronn email: [email protected] Tel.: +49-32-221787969 Revision Sheet Document Revision History Version Date 1.0 13 Nov 2013 Revision Description Initial issue, UGL v3.075 DISCLAIMER - IMPORTANT INFORMATION DO NOT USE THIS PROGRAM WHILE DRIVING OR OPERATING OTHER MACHINERY. IT IS YOUR SOLE RESPONSIBILTY TO PREVENT ACCIDENTS AND TO FOLLOW LEGAL RESTRICTIONS THAT MIGHT PROHIBID USAGE OF MOBILE DEVICES WHILE DRIVING OR OPERATING OTHER MACHINERY. \EXCEPT WHEN OTHERWISE STATED IN WRITING THE COPYRIGHT HOLDERS AND/OR OTHER PARTIES PROVIDE THE PROGRAM “AS IS” WITHOUT WARRANTY OF ANY KIND, EITHER EXPRESSED OR IMPLIED, INCLUDING, BUT NOT LIMITED TO, THE IMPLIED WARRANTIES OF MERCHANTABILITY AND FITNESS FOR A PARTICULAR PURPOSE. THE ENTIRE RISK AS TO THE QUALITY AND PERFORMANCE OF THE PROGRAM IS WITH YOU. SHOULD THE PROGRAM PROVE DEFECTIVE, YOU ASSUME THE COST OF ALL NECESSARY SERVICING, REPAIR OR CORRECTION. ALL FEATURES THAT ARE DEPENDANT TO THIRD PARTIES ARE SUBJECT TO BE ALTERED OR REMOVED WITHOUT FURTHER NOTICE, SINCE THEY ARE OUT OF CONTROL OF THE PROGRAM DEVELOPER. ONLINE SERVICES ARE AN EXTRA FEATURE WHICH IS NOT GUARANTEED TO WORK AND/OR EXIST IN THE FUTURE AND MIGHT BE DISCONTINUED AT ANY TIME. THIS PROGRAM PROVIDES ANONYMOUS USAGE STATISTICS TO GOOGLE ANALYTICS. YOU CAN OPT OUT USING PREFERENCES. © 2013 by Holger Kasten. All rights reserved All rights reserved. No part of this document may be reproduced or transmitted in any form or by any means, electronic, mechanical, photocopying, recording, or otherwise, without prior written permission of Holger Kasten. The copyrights of Ultra GPS Logger and other FlashLight apps belong to Holger Kasten. The copyrights of other product, brand and company names and logos used or mentioned in this document belong to their respective owners. All other product, brand and company names and logos used or mentioned in this document may be the trademarks or registered trademarks of their respective owners. This document has links to other Websites and Apps. This linking does not constitute FlashLight´s endorsement of the content of their Websites or of their policies or products. These links are being provided as a convenience and for informational purposes only; they do not constitute an endorsement or an approval by FlashLight of any of the products, services or opinions of the corporation or organization or individual. FlashLight bears no responsibility for the accuracy, legality or content of the external site or for that of subsequent links. Contact the external site for answers to questions regarding its content. Ultra GPS Logger v3.0 User's Guide Page 1 Table of Contents Document Revision History ......................................................................................................1 DISCLAIMER - IMPORTANT INFORMATION ...............................................................................1 Table of Contents ......................................................................................................................2 1. Introduction .......................................................................................................................6 Support...................................................................................................................................6 Rating UGL .............................................................................................................................6 Donations...............................................................................................................................7 Other apps by FlashLight ......................................................................................................7 2. Features and Quick-Start..................................................................................................8 Key Features ..........................................................................................................................8 Quick Start Guide .................................................................................................................8 3. Logging Options and Preferences .................................................................................10 Formats ................................................................................................................................11 NMEA logs ................................................................................................................................................ 11 KML logs ................................................................................................................................................... 12 GPX logs ................................................................................................................................................... 12 Formats Options ..................................................................................................................12 KML Altitude Mode ................................................................................................................................ 12 GPX Version ............................................................................................................................................. 13 GPX Comments ...................................................................................................................................... 13 Trigger Options (Time, Distance, Stops).............................................................................13 KML/GPX trigger ..................................................................................................................................... 13 Minimum Distance ................................................................................................................................. 14 Log stops .................................................................................................................................................. 14 Stop trigger .............................................................................................................................................. 14 Accuracy Options ..............................................................................................................15 Accuracy Target/Filter .......................................................................................................................... 15 Log inaccurate ....................................................................................................................................... 16 Deactivate GPS after no good fix ...................................................................................................... 16 Naming Options ..................................................................................................................16 Default name .......................................................................................................................................... 16 Default POI name .................................................................................................................................. 17 Default category .................................................................................................................................... 17 Path for log files ...................................................................................................................................... 17 Autolog options ...................................................................................................................18 AutoLog.................................................................................................................................................... 19 Days, Start time, Stop time ................................................................................................................... 19 Altitude Settings ..................................................................................................................19 Altitude Offset ......................................................................................................................................... 20 Ultra GPS Logger v3.0 User's Guide Page 2 Pressure Sensor/Barometer ................................................................................................................... 20 Power Management ...........................................................................................................20 GPS while active..................................................................................................................................... 21 Prevent Standby ..................................................................................................................................... 21 GPS Standby ........................................................................................................................................... 21 Deactivate GPS after no good fix ...................................................................................................... 22 4. Creating Logs ..................................................................................................................22 Creating logs .......................................................................................................................22 Using the Notification Area ................................................................................................23 Notification Area overview .................................................................................................................. 23 Quick Control from the Notification Area ......................................................................................... 24 Notification Preferences ....................................................................................................................... 25 Creating and managing log sub-folders ..........................................................................26 5. Using Maps ......................................................................................................................26 Live View and Track View ..................................................................................................27 Map Types – Online and Offline.........................................................................................27 Mapsforge Offline Maps ....................................................................................................................... 27 Maps Settings ......................................................................................................................28 Maps 'More' Button .............................................................................................................28 Map Information Display ....................................................................................................29 The Mini-Compass ..............................................................................................................31 Map Follow Mode ...............................................................................................................31 Searching the map .............................................................................................................32 6. Marking and Managing POIs .........................................................................................32 Main and Log POIs ..............................................................................................................32 Creating POIs from the map ................................................................................................................ 32 Creating POIs from the GPS location ................................................................................................. 33 User POIs ..............................................................................................................................33 LAYER control ......................................................................................................................33 POI Tools ..............................................................................................................................34 View .......................................................................................................................................................... 34 Head to Map .......................................................................................................................................... 34 Head to Radar ........................................................................................................................................ 35 Navigate (Drive), Navigate (Walk) ..................................................................................................... 35 Get Address............................................................................................................................................. 35 Get Weather ........................................................................................................................................... 35 Edit POI ..................................................................................................................................................... 36 Delete ....................................................................................................................................................... 36 Search Places Online .........................................................................................................36 Importing and Exporting POIs ............................................................................................37 Ultra GPS Logger v3.0 User's Guide Page 3 Finding Latitude and Longitude for a POI ......................................................................................... 37 Importing from Google Maps Favorites – Classic Maps ................................................................. 38 Creating and Importing Google POI Maps with Google Map Engine Lite ................................ 38 Importing POIs from Google Earth ...................................................................................................... 39 Importing csv POI files ........................................................................................................................... 39 Importing GPX POI Files ......................................................................................................................... 39 Exporting POIs ......................................................................................................................................... 40 7. Publishing, Sharing and Managing logs ........................................................................41 Log Management: Merge, Delete, and Move..................................................................41 Sending or Publishing Logs .................................................................................................42 Send/Publish Settings..........................................................................................................44 Email settings ........................................................................................................................................... 44 Send/Publish settings ............................................................................................................................. 45 Send/Publish Activities .......................................................................................................47 Send by Email......................................................................................................................47 Publish via UOS (UGL Online Services ...............................................................................47 Publish via FTP......................................................................................................................47 Dropbox, SkyDrive, GoogleDrive .......................................................................................47 Auto Email when done .......................................................................................................47 8. Using Bluetooth ................................................................................................................48 Using an external GPS Receiver ........................................................................................49 Connect external Bluetooth GPS receiver ........................................................................................ 49 If the external GPS receiver is not present ........................................................................................ 51 Using UGL as a GPS Mouse (Send NMEA out) ...................................................................51 Forward internal GPS ............................................................................................................................. 54 Dual Log ...............................................................................................................................55 Talker ID ...............................................................................................................................55 Sending GPS Location to other apps on your device ......................................................56 Allow Mock locations: Android 4.2 and later ................................................................................... 56 Allow Mock locations: Android 4.1 and earlier ................................................................................ 57 Enable Mock locations within UGL ..................................................................................................... 57 Deactivate Mock locations ................................................................................................................. 57 9. Plug-Ins ............................................................................................................................58 UGL Widget ..........................................................................................................................58 UGL Lock Screen Widget ....................................................................................................59 UGL SMSCtrl Plug-in.............................................................................................................60 UGL Locale Plug-in..............................................................................................................61 Installing UGL Locale Plug-in..............................................................................................61 Example: UGL Locale Plug-in with EasyProfiles ................................................................62 Ultra GPS Logger v3.0 User's Guide Page 4 10. Other Topics..................................................................................................................63 GPS Control .........................................................................................................................63 MoreMore Menu ..............................................................................................................63 Reset/Update AGPS .............................................................................................................................. 63 Manage Tasks ......................................................................................................................................... 64 Provider Settings..................................................................................................................64 Presets ....................................................................................................................................................... 64 Provider Settings ..................................................................................................................................... 65 Layout, Units Settings ..........................................................................................................66 Toolbar...................................................................................................................................................... 66 Misc Settings ........................................................................................................................66 Misc ........................................................................................................................................................... 66 Car Mode ................................................................................................................................................ 67 Finish Line ................................................................................................................................................. 67 Backup & Restore ................................................................................................................................... 69 Language ................................................................................................................................................ 69 Google Analytics.................................................................................................................................... 69 Appendix I – NMEA format .....................................................................................................70 Appendix II – GPX Programs and Websites ..........................................................................71 Appendix III – Editing the categories list ...............................................................................73 Appendix IV – User POI Files ..................................................................................................74 CSV File Format ...................................................................................................................74 GPX File Format ...................................................................................................................74 KML File Format ...................................................................................................................75 Index ........................................................................................................................................76 Settings Index ..........................................................................................................................79 Ultra GPS Logger v3.0 User's Guide Page 5 1. Introduction Ultra GPS Logger (UGL) is a GPS Tracker which allows you to generate NMEA, KML and/or GPX logs with your GPS or GLONASS enabled Android device. It is able to keep GPS on during standby, which enables logging of a long period of time without the need of interaction with the device. UGL logs raw NMEA sentences, and can be set up to log as frequently as every second - much more accurately than other products which just log every minute – or as infrequently as once per day, for the ultimate in power savings. It supports intelligent KML/GPX output, which logs only real movement. Ultra GPS Logger also lets your device vibrate and flash its led in case the GPS fix is lost. Online, your track can be shown on Google Maps or Open Street Maps (OSM). For offline use, Mapsforge maps (which are based on OSM) can be downloaded when online and then used offline. UGL has a very large range of options available to allow you to tailor it to your specific needs. As a result, the user interface can appear complex. But with a little familiarization, it will quickly become clear how to select the options you want to get the most from the app. This document can change without notice. You can always download the latest version at the Ultra GPS Logger website http://ugl.flashlight.de/. The app can be obtained from Google Play. Support Please email [email protected] for support and enquiries. User feedback is highly appreciated. Ultra GPS Logger is used for a variety of activities, like hiking, sailing, car/motorcycle/yacht racing, and many of its features are the result of suggestions and requests from our users. Let us know what you use Ultra GPS Logger for :-) Rating UGL We would very much appreciate receiving a rating from you. If you have found UGL to be useful, please let others know. This can be done by clicking on the 'More' icon the top of the Main Screen, and then on the screen. at in the panel that appears at the bottom of As for any app, positive ratings are very important to us. UGL is loaded with features and flexibility, and it is worth some time to understand what you can do with it. If you are having difficulty or some problem with UGL, before giving a low rating, please email us at [email protected] – we will get back to you as quickly as we can to help you. Ultra GPS Logger v3.0 User's Guide Page 6 Donations Ultra GPS Logger is undergoing constant improvement as we add features and respond to user suggestions on ways to make the app more useful and easier to use. If you find that UGL has filled a need in your GPS activities, please consider sending a donation. Donations form an important part of our ability to continue to improve UGL. To donate, click on the 'More' icon at the top of the Main Screen, then on the panel that appears at the bottom of the screen. Your support is very much appreciated. in Other apps by FlashLight Other apps by FlashLight can also be obtained at Google Play: Ultra GPS Logger Lite Allows you to test the core functionality of Ultra GPS Logger for one week. If you want to continue using the app after one week or if you want to unlock all features you need to purchase the full version. UGL Widget Executes commands within Ultra GPS Logger, to do things such as starting, pausing and stopping the log, marking POIs, and other functions, all directly from your home screen. UGL Locale Plugin Allows remote control of Ultra GPS Logger via Locale API. To use, you need an app compatible with the Locale API, e.g. Locale, Tasker, or EasyProfiles. UGL SMSCtrl Plug-in Adds SMS notifications to Ultra GPS Logger, and allows remote control by SMS. sms N call 2 email Forwards your incoming and outgoing SMS and calls to your email account. Ultra GPS Logger v3.0 User's Guide Page 7 2. Features and Quick-Start Key Features UGL has a rich set of features and options: • Output formats: NMEA, KML, GPX • Log raw, by distance and/or by time • Log during standby • AutoLog, AutoStart • Send log/track by email; upload to Dropbox, SkyDrive, Google Drive; Publish to FTP • Compress log: Zip, KMZ • Google Maps, Open Street Map • POIs, etc. • Online Services • Barometer / pressure sensor • Use internal GPS or external GPS via Bluetooth • Allows other apps to use external GPS via Mock provider • Acts as GPS mouse to feed GPS to other devices Quick Start Guide You can use UGL "right out of the box" to record your first track. Start UGL, and the Main at the top of the screen to start recording a log. A Screen will come up. Press dialog will appear to give your log a name: After you have given your log the desired name, press to begin recording. button at the top of the Main screen changes to while UGL is The logging your track. Walk or drive somewhere to generate an interesting track and then press to end the log. Ultra GPS Logger v3.0 User's Guide Page 8 While logging or after you have stopped, you can press at the top of the Main screen. The Tracks screen appears (as shown on the right) listing all the recorded tracks – in this case, there is only the Demo_Trip log recorded above. Under Demo_Trip you will find information about the Demo_Trip log, such as the file sizes, the distance traveled, and other information while will be covered in the more detailed sections to follow. For now, press the Demo_Trip area and the Track Action menu appears. For this quick start, we are only going to View the track. However, as will be explained in more detail below, this is where you can send it, move it, open it, delete it, or rename it. Click on View, and the Map window will appear showing the recorded track. Your track can be shown online using Google Maps, Bing Maps, or Open Street Maps (OSM). If offline, you can use Mapsforge maps (which are based on OSM maps) that you previously downloaded. Ultra GPS Logger v3.0 User's Guide Page 9 The track starts at the green flag and moves in a clockwise loop to the final flag where logging was stopped. To view the track in Google Earth (you must have Google Earth installed on your device for this), from the Map display, tap at the top left to go back to the Main Screen, then tap and then the area of Demo_Track, to re-open the Tracks menu. Tap 'Open With' and select Google Earth. UGL will launch Google Earth which will then zoom into the area of the track itself to show it. Send/Publish is where you email the track, send it to Dropbox or other cloud storage, or otherwise send the log somewhere. These and other options on the Tracks Menu will be explained in more detail below. And that's it for the quick start, and that's all you really have to know to begin using UGL to record your travels and view the recorded log. In the remainder of this document, each feature and option of UGL will be explained in detail, to allow you to utilize the full power of the app. Tip: you can start, pause and stop logging from your device notification area, and you can also quickly mark POIs from there. Pull down the notification area to see and use these controls. 3. Logging Options and Preferences GPS logging always involves a tradeoff between how frequently points are logged, data file size, and battery power. Positional accuracy of the log increases with increased logging frequency, as more detail about the trip is recorded. But each Ultra GPS Logger v3.0 User's Guide Page 10 recorded point must be entered in a file, and having a needlessly high sampling rate just increases the file size, and can slow down subsequent operations you might want to perform on the resulting file, such as displaying it on Google Earth or using it to geotag photos. There is also the issue of battery power to consider because the GPS in your device consumes extra power. UGL has the ability to turn it off between log samples to conserve your battery power and then turn it on briefly when needed. As the sampling rate is decreased the battery consumption also decreases. If your travels involve stops of significant duration, there is really no point in logging the same position of the stop over and over. UGL has provision to prevent such needless data logging and also to turn the GPS off during stops to save additional power. If you are on a long trip or tour and want to make certain that you are logging on each day between certain hours, UGL provides auto-logging features to accomplish just that. Taken together, these and other logging and power management options in UGL provide the most sophisticated and flexible data logger available for your Android device. Managing these options is basic to understanding and controlling UGL. It occurs via the Settings screen. There are multiple ways to get to this screen. First, get to the Main screen (by starting the app or navigating to it if already started) and do one of the following: • Press the button at the top or bottom of the screen, then 'Settings' • Press the button at the top of the screen and then the panel that appears at the bottom of the screen. • Press button in the in the Quick Control panel. Any of these get you to the same place, the Settings Screen. The logging and power options are accessed through the and buttons on the Settings screen. Formats UGL can record any or all of three different log formats: NMEA, KML and GPX. Recording of each of these formats is enabled or disabled in the Formats section at the top of the Log Options screen. A check-mark indicates that format will be recorded. NMEA logs will contain the most detailed information and will be the largest size – NMEA logs are typically 30 times larger than the corresponding KML file. If you don't have plans to actually use the contents of the NMEA file it can be a good idea to disable recording it, as these files can easily get to be megabytes in size. Ultra GPS Logger v3.0 User's Guide Page 11 KML logs are the most compact – typically 1/30th the size of the corresponding NMEA file and ½ the size of corresponding GPX file. Both KML and GPX files are special cases of XML files, a hierarchical data structure to create data files that are both human and machine readable. KML files in particular are used by Google Earth (GE). The KML content is a single GE placemark containing the points that were recorded, as a GE line. You can display a UGL KML track in Google Earth directly from UGL: from and then press the desired log to the Main screen, click on see. A "Track Action" menu will appear. Select 'Open with', and then choose Google Earth. (Note: GE must be installed on your device for it to appear in this choice.) Other apps on your device that may be capable of displaying a KML file are also shown. You can also export the KML file via any of the various export options shown under the Send/Publish selection on the Track Action menu. See section 4 below GPX logs are about 2x larger than KML logs because each recorded point is a separate GPX trackpoint with position (latitude, longitude) and altitude, and the time the point was logged. Time is always recorded in "Z" or UTC time zone in GPX files. GPS logs are useful as input to a wide variety of programs and even websites. See Appendix II for descriptions of some of the many that are available. Formats Options The second block on the Log Options screen contains Format Options: KML Altitude Mode provides three options: Clamp to ground, relativeToGround, and absolute. The selected option is reflected in the KML log as an instruction to GE as to how to handle the altitude information in the log. Clamp to ground mode is the appropriate choice if you are moving about on the surface of the earth (e.g., driving, biking, hiking, boating). In this mode, the KML file contains the altitude information provided by your GPS, but GE plots each point on the earth's surface. This avoids the annoying problem of trying to plot a point that the GPS data says might be a few meters below the earth's surface (which can often occur due to GPS errors) where you can't see it in GE. relativeToGround and absolute modes are intended for motion above the surface of the earth (e.g., flight) and convey to GE that the recorded altitude data is either relative to the ground or is an absolute altitude value. Ultra GPS Logger v3.0 User's Guide Page 12 The setting chosen for KML Altitude Mode should be consistent with the Altitude settings which are discussed later in this guide. The default value for KML Altitude Mode is Clamp to ground, and the default Altitude settings are consistent with that. GPX Version sets the format for the GPX log to either GPX 1.0 or GPX 1.1. Either format can fully represent all of the information to be recorded in the log. GPX 1.0 is the default choice, with GPX 1.1 provided if you have an app that uses the GPX log but can't read the older GPX 1.0 format. GPX Comments is a check-box to enable the addition of verbose comments to the GPX log. Normally this would be unchecked. Enabling the comments adds comments to the GPX log mostly used for debugging, such as where the GPS data originated and other information about how the settings change the output. Trigger Options (Time, Distance, Stops) Points are logged when the logging trigger operates. The third section of the Log Options screen is devoted to programming the trigger. KML/GPX trigger – press this to bring up a dialog screen with the choices. There are two sets: the first set is based on distance (1 to 15 meters) and the second set is based on time (1 second to 24 hours). If one of the distance options is selected or a time option of 10 seconds or less between points, UGL needs to keep the GPS receiver turned on all the time. However, if a time option of 15 seconds or longer is chosen, then UGL can turn the GPS receiver off between logged points, saving battery power. You will want to experiment a little to find the settings you prefer for your various activities. Shorter time or distance choices give more points and finer resolution on your positional track, while longer times can yield smaller log files and increased battery life. For a typical trip by car lasting an hour or so, setting the interval to 5 seconds is a reasonable place to start. This setting would create 720 logged points per hour, resulting in a reasonably sized file. At 60 mph (96 kph), logged points would be 440 feet (134m) apart. If you need better location resolution, decrease the trigger interval. If your trip is very long and you don't need the resolution, or if your speed is going to be lower, increase the logging interval. Ultra GPS Logger v3.0 User's Guide Page 13 When walking the intervals can be very much longer. Even at a brisk walk at 4 mph you are moving at only 6 feet per second -- a 1 minute trigger interval would yield points every 360 feet. If you are using a distance trigger, consider that brisk walking at 4 mph (1.8 meters/second) would generate a trigger every 2.8 seconds if the trigger distance is set to 5 meters. The log size would be 320 points per mile (200 points per kilometer). If your excursion is longer than a few miles and if you don't need this sort of resolution, you increase the distance to keep the log shorter. In a car at 60 mph (96 kph), a setting of 15 meters for the distance trigger (the maximum distance trigger available) would produce about 106 points per mile (67 points per km). A 10-mile (16 km) drive would create a log with a little over 1000 points. If the drive is much longer than that, and you don't need the accuracy, you could go to a time trigger to reduce the log size. An advantage of distance trigger is that it does not log positions while stopped. Because UGL continues to log even when the device goes to sleep, if one of the power-saving trigger intervals is used then the total logging time for a trip can extend to days or longer without depleting the battery. Minimum Distance – if the trigger is set to a time (rather than a distance) interval, this option becomes available. Pressing it brings up a list of distances – select one to set the distance the device must be moved for UGL to log a point. This option saves log file size by ignoring repetitive points. For instance, when touring on foot, with frequent stops at various locations, UGL will omit those points while you aren't moving along. Again, you will want to experiment with this to find what you prefer for the kinds of outings you do, but a setting of 20 meters is a reasonable starting place, particularly since the random errors that occur in GPS position are usually smaller than that. Log stops – enabling this will cause UGL to create a POI entry in the log whenever it detects that you have remained stopped for a time longer than Stop Trigger. For example, if you were moving about a city during the day making stops, perhaps to visit customers, you could set the Stop interval to a long value such as 10 minutes, and enable Log stops. This interval would be long enough to prevent "false" POIs from being generated at traffic lights, but would faithfully mark each location where you stopped for a significant period. When you view the map from within UGL or perhaps on Google Earth, you would see POI markers (or placemarks in GE) at each stop location. Stop trigger – this works with Log stops (above) to set the stopped time required to log a POI at a stop location. Ultra GPS Logger v3.0 User's Guide Page 14 Accuracy Options The Accuracy Options on the Log Options page allows for three different settings involving the quality of the GPS fix. UGL deals with accuracy by first determining whether a given fix is within the user's accuracy requirements as set by the Accuracy Target/Filter below. If the fix is accurate by that definition, then the point is logged. Accuracy Target/Filter The Accuracy Target/Filter options specify the criteria for deciding that a given fix is 'accurate' or 'inaccurate'. If 'accurate', the point is logged; if 'inaccurate', UGL will try to improve the position until timeout. If the position is still 'inaccurate' and the timeout has occurred, a further decision is made based on the 'Log inaccurate' settings described in the next section. Any GPS location fix has positional error due to atmospheric disturbances and other noise sources. UGL uses information from the GPS receiver to estimate the position accuracy as the standard deviation of the horizontal position error in meters. That is, there is a 68% probability that the true location is within a circle whose radius is this calculated accuracy.1 The Accuracy Target/Filter dialog allows you to set an accuracy limit so that fix points with a larger calculated error will be declared 'inaccurate'. If you want to log all trigger points regardless of accuracy, select 'no filter'. If you select one of the distance values, you are selecting the radius of the allowable error circle; points whose calculated standard deviation of error are below the selected distance will be considered 'accurate' and logged, and those with error greater than that will be considered 'inaccurate' and dealt with according to the 'Log inaccurate' settings. If you select 'until timeout' instead of a distance value, then UGL will sample the GPS for 'X' seconds and then will log the last fix found at the end of this period, regardless of its calculated error. 'X' is set in the 'Deactivate GPS after no good fix' setting below. If longer trigger intervals are used (so that the GPS is turned off between log entries), UGL can allow extra time to achieve a fix within the Accuracy Filter. However, it will give up if that is not achieved with 'X' seconds, set in the 'Deactivate GPS after no good fix' setting. 1 This assumes that the positional fix errors are random with a normal distribution. In practice, location errors do not always follow such a simple distribution. Ultra GPS Logger v3.0 User's Guide Page 15 Log inaccurate For any point that was determined to be 'inaccurate' according to the Accuracy Target/Filter settings above (and therefore not yet logged), the 'Log inaccurate' settings tell UGL what to do with the point. If 'never' is chosen, the inaccurate point is discarded and not logged. Conversely, if 'always' is chosen, then inaccurate points are logged anyway. Logging under the two remaining choices (Position change >2x accuracy, and Position change >3x accuracy) is decided by how the position change compares with the accuracy setting. These are provided to give some bias towards logging movement since usually that's what is most interesting. Deactivate GPS after no good fix This provides the place to set 'X', the amount of time UGL will wait after a trigger to try to achieve a good fix (i.e. a fix within the Accuracy Filter). (See Accuracy Target/Filter above.) Naming Options When you start a log you have the option of specifying a name and a folder as well as a category for the log. The Naming Options section allows you to specify default values for the name and the category and for the directory and subfolder where the log will be saved. There is a similar option for setting a default name for POI's that are created either automatically (as in logging stops) or manually. Except for the case of automatic logging or POI creation, you have the chance when you start a log or create a POI to override the default values and enter anything you wish. Default name A default log name can be specified. This can be a specific name or an auto-text field filled in by UGL at the time the log is started. The default name applies to both manually started logs and auto-logs. In the example to the right, the Default name was set to Paris Logs, and that will be the default name for each log until the default is changed or a different name is specified at the time a log is manually started. 1 UGL can also create default names automatically. Press to get a list of auto-fields, as shown on the left. Selecting one of these will tell UGL to create a default name for the 1 Multiple logs can safely be created with the same name, as the log start date and time are always built into the actual file name on your device. When you examine the Tracks list within UGL, for each track you will see the name you specified, and immediately under that is the actual path on your device to the log, such as "/mnt/sdcard/GPSLogs/2013-10-13_101210_Paris_Log.kml". If a subsequent log is created with the same name, the file path would be identical except for the date and time the log was started. Note also that blanks are converted to underscore characters in both the name and the device file path, to make the filename be more compatible with different file systems and cloud providers which may not support blanks. Knowing the path is a great help if you are using a file manager outside of UGL to access log files. Ultra GPS Logger v3.0 User's Guide Page 16 log from the information specified. For instance, the second option, #FromToCity#, will create a name consisting of the city in which the log started plus the city in which the log ended. For the 'Nxt' options, 'Nxt' refers to the City or POI that your start position is next to or (in the case of a city) perhaps in. If #NoName# is chosen, then the name of the log will be a string with the date and time the log was started, e.g., '2013-10-13_101210'. If an auto-field is chosen, text can be added before and/or after the auto-field. This text will be included in the same positions in the resulting log name. For example, setting the default log name to 'ABC#NxtCity#XYZ' might create the log name 'ABCParisXYZ'. When UGL is choosing the actual POI name to use for a log, it considers Main POI, Track POI and User POI lists. Default POI name Setting the default POI name operates very much like setting a default log name. POIs are created manually or automatically such as when POIs are created automatically for stops. One difference is in how the #NoName# option works – if a POI is created with no name then it really has no name, and just appears as a marker on the map and a marker without a name in the POI list. The auto-name choices for POIs is a short list: • • • NxtCityOrPOI NxtCity NxtPOI As for the Default Names above, 'Nxt' refers to the City or POI that your POI position is next to (i.e., closest to) or (in the case of a city) perhaps in. When UGL is choosing the actual POI name to use for a POI, it considers Main POI, Track POI and User POI lists. Default category Logs can be assigned to a category. The available categories are Car, Hike, Train, Plane, Bike, Ship, Swim and Misc. You can set any of these as the default, which will be used as the category for auto-logs and will be suggested as the category when manually starting a log. Path for log files UGL allows you to create and use other folders for the Log Directory than the default folder 'GPSLogs'. The current Log Ultra GPS Logger v3.0 User's Guide Page 17 Directory name and path is shown just below the option. UGL selects its default Log Directory path from the first entry it finds in the list below that is actually a valid path: /sdcard/external_sd/ /storage/external_sd/ /storage/extSdCard/ /mnt/external_sd/ /mnt/extSdCard/ /Removable/MicroSD/ /sdcard-ext/ Once that path is found, it adds 'GPSLogs' to create the default full Log Directory pathname. When you tap on "Path for log files" a dialog will open. At the top is the Path you are trying to create, and it shows you are starting out at the device root level. Tapping on '*' will give you a list of the paths from the default path list above that were found to exist. Select one to set Path to an item from the list. Below, the folders under Path (top line) are shown. Pressing one will add it to the Path and then show you the folders at the new level, and so forth. Wherever you are, you can press 'Create' at the bottom to create a folder at that level. When you have finished building the path to the folder you want to use as the new Log Directory, press 'Create' or 'Select'. 'Create' allows you to create a folder within the path you have selected to that point to be the new Log Folder. 'Select' will set the path as it exists to that point as the new Log Folder. UGL then alerts you that a restart is required and that any logging in process will be stopped, and prompts you to restart UGL in order for your new selection to take effect. If you select 'restart', UGL will shut itself down and restart, after which the new or changed Log Directory path will be in effect. Any subfolders present in the chosen Log Directory are available for use as Log Directories and may be selected by this method or by selecting the subfolder in the Folders section of the tracks screen(See creating and managing subfolders). When UGL first uses a Log Directory, it creates a UserPOIs folder in the new directory. You can add additional User POIs to this directory (see Chapter 5 Marking and Managing POIs). The other item in the Log Directory is the categories list 'cat.txt' which can be edited 1 to create unique categories to which logs in the new folder can be assigned. Thus, each Log Directory can have its own User POIs and its own log categories. Autolog options UGL provides an autolog feature so that you won't forget to log important portions of your excursion. 1 Editing the categories file, cats.txt, is for advanced users. This is described further in Appendix III. Ultra GPS Logger v3.0 User's Guide Page 18 AutoLog There are 3 autolog options: Off, Always, and Time Range. • 'Off' turns autologging completely off. (It will not, however, stop an autolog that is already running – you have to manually stop it or wait for the auto-stop, if timed) • 'Always' keeps UGL always logging. If you stop an autolog with 'Always' set, then a new autolog will start immediately, or you can delay this auto-start by one hour at the time you stop the autolog in the Stop Log dialog. • 'Time Range': specify days and times for the auto-log to start and stop, explained immediately below. Days, Start time, Stop time If 'Time Range' is selected for the AutoLog operation, you then have the ability to set the days and times for the autologging to take place. Days and Start time: select on which days (Sunday through Saturday) and the time autologging is to start. The cycle will repeat until changed or until autologging is turned off. Stop time: select the time that autologging is to stop. If the Stop time is later than the Start time, autologging will start and stop on the selected Days. If the Stop time is earlier than the Start time, autologging will end at the Stop time on the following day, and UGL will note for you that the Stop time you have selected is on the next day. For example, if the selected days are Monday and Tuesday, with Start time of 11:00 and Stop time of 12:00, UGL will log on Monday from 11:00 to 12:00, and then will log again on Tuesday from 11:00 to 12:00. If the same days are selected with Start time of 23:00 and Stop time of 02:00, UGL will log from Monday 23:00 to Tuesday 02:00, and will then again log from Tuesday 23:00 to Wednesday 02:00. Altitude Settings Altitude information provided by GPS is rather inaccurate. UGL has several options to compensate for that fact. If an altitude correction method is in use, the Main screen will show the uncorrected altitude first, followed by the corrected altitude. Only the corrected altitude will be recorded in the GPX and KML track logs, and the track summary section records the correction method and reference. Ultra GPS Logger v3.0 User's Guide Page 19 Altitude Offset There are three choices in the Altitude Offset category: • • • Altitude Offset lets you specify an offset which is subtracted from the GPS altitude to correct it. Get Altitude sets the offset to the current altitude. Basically, it calibrates the current reading to zero altitude. Reset sets the offset back to zero, so that the uncorrected GPS altitude value is recorded in the log files. Pressure Sensor/Barometer If your device has a barometric pressure sensor 1 it can be used to correct the GPS altitude. This section has the preferences for controlling use of the pressure sensor. Use pressure sensor: if checked, the pressure sensor will be used to correct GPS altitude, and additional options will become available: Pressure reference: reference pressure used to calculate altitude. The default value is 1013.25hPa (which is also 1013.25 mbar, or 1 atmosphere) Get pressure: will get the current pressure reading from a local weather station. Requires an online connection. Get pressure by altitude: this uses the altitude reference provided by the user to calculate the pressure. Get pressure via altitude from closest POI: uses the altitude of the closest POI to calculate pressure. Reset: resets the pressure back to 1013.25 hPa. Power Management GPS logging can consume the battery in your device. With some logging apps, trying to log even a day-long excursion can run into battery limitations. UGL provides a complete set of options to achieve the lowest possible power consumption for your logging duration and accuracy requirements, and can be configured to permit multiday or even longer continuous logging. 1 If you don't know if your device has a pressure sensor, there are apps available that list all the sensors in your device. One such app is AndroSensor, available at the Google Play store. Ultra GPS Logger v3.0 User's Guide Page 20 The most important step your device can take to save power is to go to sleep. UGL can continue to log even when the tablet is otherwise asleep. The second most important step is to turn the GPS off when it is not being used – UGL does this when the logging trigger time interval is 15 seconds or longer. With the options for controlling the GPS and for logging while asleep, UGL can minimize battery drain. On the other hand, there are times that you want to prevent the tablet from going to sleep, for instance when using it to navigate and you want to see the map and the navigation information continuously. The Power Options on the Settings screen is where you configure UGL's power management GPS while active and Background GPS: Set these to keep the GPS turned on while UGL is active, and while it is in the background, respectively. These settings apply only when UGL is not logging, as the Logging Options control GPS operation when UGL is recording a log. Whether the app is in the background or is active, keeping the GPS on can help ensure that you always have a good fix available. Otherwise, if the GPS goes inactive and then has to be activated, there is a time needed for the GPS to acquire its fix. Keeping the GPS on while UGL is in the background also allows other apps to use the GPS while the screen is off. This is to help any other GPS app you may have that is unable to prevent the GPS from being turned off when the screen is off (and there are some that have this problem). Prevent Standby prevents your device from going into standby mode (and turning off the display) when that would be inconvenient, especially when you need to watch the screen while navigation. GPS Standby is able to deactivate the GPS during a stop and use the device accelerometer to reactivate it. It is perhaps the most effective way to conserve the battery and prevent logging of needlessly redundant position points during a stop.1 First, UGL finds that a stop has occurred by comparing accuracy and movement distance as for any detection of a stop. After deciding that the device has stopped moving, it waits half the Stop Trigger time, activates the device accelerometer, and starts checking both the GPS and the accelerometer to see if there is movement. If no movement is found for the remaining half of the Stop Trigger time, it deactivates the GPS and sets up the creation of the Stop POI. After this, only movement as detected by the accelerometer will reactivate the GPS. 1 The accelerometer in your device is quite sensitive and may indicate that you are moving again if the tablet is jiggled or moved a small amount. If so, the GPS will briefly be activated, some points may be logged, and then UGL will again detect that the device has stopped moving and will again deactivate the GPS. The extra power involved in this is negligible, and the few extra POIs that might result can easily be deleted. Ultra GPS Logger v3.0 User's Guide Page 21 Deactivate GPS after no good fix – this is the same as found in the Logging Options and is described there. 4. Creating Logs The previous sections explained the various options and settings that affect your logs and control the auto-logging process. This section will go into more detail than the Quick-start contained on starting and stopping logs and viewing them on UGL's maps. Creating logs Press at the top of the screen to start recording a log. (Alternatively, use the button in the notification area. A dialog will appear to give your log a name: The track name can be something you type, or you can set it to be a generated string by pressing the button to the right of the name area. The choices here include all the choices shown previously in the Naming options plus city and user POIs that are defined and reasonably close to your current position. The track will be saved in the indicated folder (GPSLogs) or in the folder you designated under Path for Log Files above. You can also create subfolders within the Log Directory - these can be created, deleted, renamed, or made the default subfolder from the 'more' button on the Tracks screen – see Creating and managing log sub-folders below. Subfolders may also be created outside of UGL using a file manager app for your device. If a default log file path has been selected in the Naming options, it will appear on the Folder line of the dialog. You can change this or accept the default value. button on the category You can also select a category for this log, by pressing the line. The dialog will open with the Default Category presented and you can change this to one of the other defined categories. The last step is to select which of the three available log formats you wish to have recorded. These were detailed in the Log Formats section of Logging Options above. After you have given your log the desired name, press The button at the top of the main screen changes to Ultra GPS Logger v3.0 User's Guide to begin recording. while UGL is Page 22 logging your track. Also, the UGL icon in the notification area and for the app itself will turn red and remain that color until logging is stopped. The icons also change color during autologging. While a log is being recorded, information about the track is shown in real time at the bottom of the Main Screen. Date and time the recording started File name in your device Category Current size of the NMEA, KML and GPX files Duration recorded Distance traveled Recorded stop Recorded stop POIs To end the log, press the button in the Quick Control area of the Main Screen or the notification area. You can quickly control UGL by using UGL Widget to place commands direclty on your home page or other launcher pages, or even on your lock screen. See UGL Widget further down in this guide. Using the Notification Area Notification Area overview Whenever UGL is running it displays one or more icons on your device notification area 1. Because UGL can be busy even when in the background or your device is asleep, it makes active use of the notification area, where it provides information, and also access to quick controls to start, stop, or pause a log and to quickly mark a POI. Whenever UGL is logging a track, the main notification icon turns red logging the icon is blue. 1 ; when it is not This notification area description is for devices running Jelly Bean. The images may differ under other Android operating systems. Ultra GPS Logger v3.0 User's Guide Page 23 Pulling down the notification area shows what UGL is doing ("KML, GPS logging"), and the current distance to the nearest city POI ("La Jolla…"). On position changes, UGL looks up the closest city to the current position from an offline database. UGL also uses the notification area to inform you when it is logging of important changes, such as lost GPS fix. Quick Control from the Notification Area When you pull down the notification area you will see in the notification with the UGL icon that there are buttons available for quick control. The right-most button is always Mark POI. Pressing it will bring up the same Mark POI dialog you would find when marking a POI from with UGL. It provides a very quick way to mark and assign a descriptive name to your location, whether you are logging or not. The Pause button is also present whether UGL is logging or not. If it is logging, then pressing Pause will do what you expect: pause logging. If you are not logging, pressing it will do nothing. If you are logging, it will pause the logging and its caption will switch to 'Resume'. Press it to resume logging. The leftmost two buttons control starting and stopping a log. If UGL is not logging, the Start log button will immediately start logging; the log file name will be the Default Name as set in the preferences. If instead StartLogDlg is pressed, UGL will first open the Start Log dialog to allow you to choose a name or set a category or subfolder different than the defaults. This is the same dialog (shown below) that appears if you start a log from within UGL – see Creating Logs above. If UGL is logging, then the leftmost two buttons change to stop buttons, to enable you to quickly stop logging. By default, bot buttons are 'Stop log', and do the same thing: stop the log. The two icons change back to the Start Log icon pair. The second stop button can be changed to 'StopDlg' as shown: go to MainSettings Layout,UnitsStop Dialog. The Stop Dialog allows you to edit the Track name, the "From" and "To" fields, and the track category. The '*' buttons shown on the StopDlg screenshot below will bring up a list of nearby cities and POIs. You can also directly enter or edit the text for each field by tapping on the field contents to bring up your keyboard. Ultra GPS Logger v3.0 User's Guide Page 24 StartDlg StopDlg Notification Preferences Aspects of UGL's notifications can be influenced by changing the Notifications preferences. These are located on the Settings page, in the 'Notification, Fix lost' settings. Show Notification Icon: if checked the UGL icon will appear in the notification group at the top left of your device screen. Whether the icon is displayed or not, pulling down the notification area will show the UGL regular notification or the 'Expandable Notification' if checked. Expandable notification: if checked, the UGL quick controls will appear when the notification area is pulled down. If not checked, only an abbreviated notification line giving UGL's status is shown. Notification priority: use this to set the notification priority to low, normal, high, or max. Notification type: this controls notifications upon a lost fix. 'Separate notification' will use a notification line for a lost fix and another for the quick controls. 'Single notification' will use the permanent quick controls notification area for lost fix notification, and not uses a separate notification line. 'No notification' eliminates lost fix notifications. Blink LED: if checked (and if your device has an LED for alerts), UGL will blink the LED upon a lost fix. Vibrate: If checked, UGL will vibrate your device on a lost fix. Ultra GPS Logger v3.0 User's Guide Page 25 Play sound: if checked, UGL will play a sound file 1 on a lost fix. The sound that is played is sound.mp3 in the Log Directory Creating and managing log sub-folders Sub-folders (folders within the Log Directory) can be created and used to store logs, should you wish to keep different kinds of logs separated. Subfolders can be created or deleted or renamed from outside of UGL by using a file manager app. To do this from within UGL, tap at the top of the Main screen, then the 'More' symbol , and then the Folder button in the panel at the bottom of the screen. A Folder Options dialog appears which lets you set a subfolder as the default subfolder, create a new folder, rename a folder, or delete a folder. Note that if you delete a folder, any logs stored in that folder will be deleted as well, so if you want to keep those logs, move them to another location. Once you have completed your action, you will return to the Tracks screen. In the Tracks display to the left, the Log Directory 'GPSLogs' has two subfolders named 'first subfolder' and 'another subfolder'. The contents of 'first subfolder' are displayed (indicated by the red line highlighting the subfolder name) – it contains one saved track. The default subfolder 'another subfolder' is indicated by italics. subfolder to make the default. Using this built-in mechanism for managing the subfolders of a Log Directory is the easiest method to create, rename, and delete subfolders as well as for picking a 5. Using Maps UGL has both online and offline maps for viewing your track. And even if no map is available, UGL can present a representation of your track on a blank background. 1 The sound file is 'sound.mp3' located in the Log Directory. You can replace this with any sound file you like using a file manager app, as long as the file is an mp3 file named 'sound.mp3' and located in the Log Directory. Ultra GPS Logger v3.0 User's Guide Page 26 Live View and Track View The UGL built-in maps can be used to view saved tracks, or show a live view. If UGL is not logging, then Live View will show a map centered at your current location. If, on the other hand, a track is being logged, then UGL will also show the track to the point that the map was displayed. There are multiple locations from which a Live View map may be called: • In the Quick Control panel • In the lower panel • By selecting Map from the • By selecting on the Main Screen that appears when the More button is pressed dropdown menu on the A track map is shown by first going to the off, pressing on the log you wish to see. screen screen, and then, with Multiselect Map Types – Online and Offline Offline Maps is not stable on all Android devices. The Offline Maps may or may not work well on your device. If it does not, please send an email to [email protected] letting us know your device brand and model, and what you observed. When viewing a map, you can choose from among a number of different map sources. With a map displayed, click on the More button or select More from the dropdown menu, and then choose Map Type . The Map Type screen appears, offering a number of different map sources, depending on whether 'Use Offline Maps' is enabled. By default only online maps are available. Offline maps can be added to the available maps by activating “Use Offline Maps” and configuring Mapsforge or JGW. UGL offers maps from Google, Bing, OSM and Mapsforge. Mapsforge Offline Maps If you are using Offline Maps and have already chosen Mapsforge, then when you go to Map Type you will see a list of the Mapsforge maps stored on your device (e.g. california.map, kansas.map) – pick the map for the area you are in. You may alternatively select 'Change Map Type' which takes you back to the original offline map type selection. You can download the regional Mapsforge maps you want to use offline from a selection that covers the globe, to be assured of having the maps you will need with you for offline use – these maps are at http://download.mapsforge.org/maps/. The other maps (Google, Bing, OSM) are intended for online use, but these types use a Ultra GPS Logger v3.0 User's Guide Page 27 cache on you your device, and it may happen that the maps portions you need are in the local cache and can be used offline. 1 Maps Settings Go to Main Screen Settings Map Options to select the settings applicable to maps: • ScaleBar: check to show a distance scale bar on the map • Prevent Rotation: check to prevent map rotation when the device is rotated. • Use Offline Maps : check to use Mapsforge offline maps (note: use of offline maps is not stable on all devices) • Selected Offline Map: select the Mapsforge map to use (e.g. california.map, kansas.map).Download these maps from http://download.mapsforge.org/maps/ • Use Offline JGW maps: Check to use offline JGW 2 maps. • Selected Offline JGW: pick the JGW map from among your downloaded JGWs. • Offline Maps/JGWs directory: this allows you to change the directory in which offline Mapsforge or JGW maps are stored. Tapping this brings up a dialog very similar to the Log Directory dialog. See Path For Log Files above. This dialog allows folders that don't exist to be created as you create the path. Alternatively, you can create your path for offline and JGW maps outside of UGL with a file manager app. Maps 'More' Button When showing a map, the 'More' button displays addition actions and provides access to additional options. • 1 2 Start Log (or, if logging, Stop Log) controls track logging. If you find, when using Google, Bing or OSM while offline or while WiFi is not available, that you are seeing portions of your map that scale improperly when you zoom in and out, or if there are missing pieces of the map on the display, then you are missing the cached pieces you need, and you will get better coverage in this situation by enabling Offline maps and selecting the Mapsforge maps (assuming you have previously downloaded the Mapsforge maps you need). JGW maps are maps in JPEG World format and are in raster format. Preparation and use of JGW maps with UGL is intended for geo-professionals; further discussion is beyond the scope of this Guide. Ultra GPS Logger v3.0 User's Guide Page 28 • Mark POI will mark a POI at the current location (use a long-press on the map to mark a POI at the point pressed – see Marking POIs below. • Current Position: center the map at the current GPS position • POI Manager: opens the POI manager – see POI Manager below. • Map Type: select the map type – see Map Types above. • Search: Search POIs – see Searching the Map below. • Center Track: if displaying a track, scale the map to place the track centered on the map. • Show/Opts: Provides the same list that pressing offers: o Current Position: center at current position o Center Track: scale and center map on the track o Follow: sets the map to follow the current position. If OFF, the map will not move as you move. Follow mode may be set to Pos (follow position) or Track (follow track). o Set mini compass to: NORTH. (If 'Head To' is selected for a POI, then the mini compass is set to point to the POI – this can set it back to North. (See Mini Compass) o Compass Mode: if OFF, the map is oriented North Up and the mini-compass is displayed to show where North is. If ON, the map is displayed to that it rotates on the display as you face different directions. The direction you are facing is the direction that is 'up' on the map display. This uses the internal device compass, not your direction of travel as detected by the GPS. Map Information Display A gray transparent band at the top of the map display shows information about the current log (if logging), current position and the 'target' position. Seven panels are shown in this space, numbered 1 thru 7; their contents are detailed below. Pressing on the panel moves to the next panel in the sequence. In the following description, information is given about your current position, the cursor position, and a POI position which is chosen by using the POI Manager, pressing on the desired POI and then pressing on 'Head to Map' on the popup menu. Current Position: Blue dot, showing where you are Cursor Position: a cursor (green dot) can be placed on the map by pressing the map at the desired location. Red marker: a POI in the MAIN POI list Blue marker: a POI in the LOG POI list Green marker: a POI in the USER POI list Green Flag: start of log Red Flag: end of Log Ultra GPS Logger v3.0 User's Guide Page 29 Current Position Cursor POI Panel 1 shows information about the current log, if UGL is logging, Panel 7 gives information about the map itself. Panels 2 thru 6 relate to the current position (first line) and the cursor position (second line). Panel 1: Current Log Information File Sizes NMEA KML GPX Elapsed Time Logged Distance Avg Speed Info Panel Number Panel 2: Current Position and Cursor Position – Lat/Lon Coordinates Latitude Longitude Panel 3: Current Position and Cursor Position – UTM Coordinates UTM Coordinates Panel 4: Distance to POI and Cursor, and Pointers Distance Pointers Panel 5: Distance to next city from Current Position and from Cursor City name (distance)[local time][sunrise/sunset] Panel 6: Current Position and Cursor Position – Altitudes GPS Altitudes Panel 7: Displayed Sizes Elevation on map Map dimensions in map distance, and in screen pixels Ultra GPS Logger v3.0 User's Guide Page 30 In certain situations, information may not be shown in some of the information panel fields. For instance, Panel 6 above shows that elevation data is not available for the POI or the Cursor positions. This can happen if you have no connection to a location provider via WiFi or cellular data connection so that UGL is unable to receive this information, as the elevation information for panel 6 comes from the map database. The pointers in panel 4 are similar to the pointers on the Main screen, and point at the target. If you rotate your device, these pointers will also rotate, so that they remain pointing at the intended target (the POI or the Cursor position). Other information from the panels is also shown continuously on the Main screen. The Mini-Compass UGL displays a mini compass at the upper left corner of the map display. The mini compass can be set to point to magnetic north or to a selected POI. To select a POI, use the POI manager to see a list of POIs. Select one by pressing it, and then from the popup menu, select Head to Map. To return the mini compass to pointing to north, press the More button or the button and select Show/Opts. From that popup, select 'Set mini compass to North'. Map Follow Mode Several choices are available for the Map Follow Mode. These are selected on the Show/Opts popup (from the map display, MoreShow/OptsFollow). Follow: Off The map will not automatically move in response to changes in position or track updating. Follow: Pos The map will automatically move to keep the current position centered on the map display Follow: Track As the track is updated with new track points, the map will move to place as much of the track on the map as it can (if UGL is logging a track) Keep in mind that UGL updates the map on log triggers, whether a log is being recorded or not. If the log trigger is set to, say, a 15 second interval, then the map will update on that trigger interval. For fast rapid map updates, choose a short time or short distance for the trigger interval. Ultra GPS Logger v3.0 User's Guide Page 31 Searching the map UGL maps can be searched for a location. The search itself is provided by the map provider (Google, Bing, etc.) and so the results are dependent on the chosen map type. Typically this search is used to find a city ("Paris") or a prominent feature ("Disneyland"). To try to find a specific airport, enter the name of the airport, (e.g., Los Angeles Airport). 'CDG' returns Charles de Gaulle Airport, but 'Paris Airport' returns Paris Muni Airport in Arkansas, USA. The point is that map search results can be unpredictable. If you know you will need to know certain locations prior to a trip, research those and build them into a custom POI list (see the POI Manager below). 6. Marking and Managing POIs POIs (Points of Interest) are used to mark interesting features on your logged tracks and show them on the map. UGL maintains four POI lists: Main, User, Log and City. Main POIs ( ), are created by the user directly from within UGL, while User POIs ( ) are defined in kml or gpx files supplied by the user. Log POIs ( ) (sometimes also referred to as Track POIs) are POIs created automatically or manually during logging. City POIs don't have a POI marker, and are defined within UGL; the user has no access to modify City POIs. UGL's POI Manager provides tools for: • Marking a POI • Editing and deleting POIs • Selecting a POI as a navigation target • Sending a POI via email • Finding out information about a POI (address, weather). • Searching for places online The POI Manager can be accessed from a number of places within UGL: • From the Quick Control panel near the top of the Main screen. • From the top of the Map screen • From the More button on the Main or Map screens Main and Log POIs Main and Log POIs are created by the user, either from the current location or by marking the POI on the map. Creating POIs from the map With a map visible, a POI can be created at the current location or at the cursor position on the map. Ultra GPS Logger v3.0 User's Guide Page 32 To create a POI at a desired location on the map, zoom in to enlarge the desired location and then long-press at that location. The cursor (green dot) will be placed at that location, and a popup "New POI" dialog will appear. See 'Edit POI' below for the details of this dialog. When finished, press 'Mark POI' to save the POI, or 'Cancel' to abandon it. Creating POIs from the GPS location There are a number of places within UGL where the icon can be found. Pressing this will create a POI at the current location and open the 'New POI' dialog – see 'Edit POI' below for details on this dialog. The icon can be found: • On the top line of UGL • On the 'More' panel from the map screen • On the Quick Control panel of the Main Screen • On the More panel of the Main Screen • On the Notification drop-down User POIs User POIs exist in kml, csv, or gpx files in the current Log Directory. You can organize your POIs by keeping POIs in separate files and may have any number of these. Individual user POI files are 'enabled' for UGL in the POI Manager's Layer control. UGL comes with two sample User POI files, located in the UserPOIs folder within the GPSLogs folder. These show the use of both the kml and csv formats for defining User POIs. Appendix IV provides the details of these and the gpx file formats. To enable or disable use of individual User POI files, navigate to the POI Manager and press 'LAYER' near the top of the screen. Enabled User POI files are shown with a check mark – press to change the status of individual files. See below for more details about Layer control. The screenshot below shows the example files supplied with UGL (one contains the Statue of Liberty and the other contains the Eiffel Tower), and an additional file, MyLocalPOIs.csv, supplied by the user. If you use additional Log Directories, each may have its own UserPOIs folder containing User POI definitions. LAYER control To access the Layer control, press 'LAYER' near the top of the POI Manager screen: Ultra GPS Logger v3.0 User's Guide Page 33 Individual check boxes are provided for each category of POI, and in the case of User POIs, each User POI file found in the UserPOIs folder of the Log Directory. Enabling an item allows the POIs to be shown in the POI Manager's POI lists and also shown on the map. Places POIs show the results of a POI search. See Search Places Online below. POI Tools From the POI Manager screen you can press on any of the listed POIs and a popup menu gives you a list of actions: View, Head to Map, Head to Radar, Navigate(Drive), Navigate(Walk), Get Address, Get Weather, Edit and Delete. Each of these is explained below: View The map is shown, centered on the selected POI. Head to Map Head To Map sets the mini compass to point to the selected POI, and the selected POI becomes the target for the POI distance and direction pointer in info panel 4. Ultra GPS Logger v3.0 User's Guide Page 34 Head to Radar Head To Radar brings up a "radar" display (shown to the right) with the target POI shown as a green ball on a polar display indicating direction and distance to the POI. Arrows point to magnetic north and the POI, and the current device compass direction is shown, at the bottom of the display. Rings are marked at distance intervals; the interval is adjusted automatically by UGL based on the target distance. Navigate (Drive), Navigate (Walk) The 'navigate' choices invoke Google maps to perform the navigation by starting the Google Maps app on your device. You can switch between the UGL app and the Google Maps app by using your device's 'recent apps' button . (If you need help using Google Maps, search the internet to find various guides and videos.) You must be online (i.e., have a WiFi or cellular data connection) to navigate. The Google Maps app will remain running until you end it (e.g., by wiping it away after pressing the device's button. Get Address Get Address will show the nearest city to the POI and the city elevation, the POI street address, and the sunrise and sunset times. Get Weather Get Weather will show weather details. You must be online to use get the address or weather for a POI. Ultra GPS Logger v3.0 User's Guide Page 35 Edit POI Edit brings up a popup window to edit the name, location and altitude of the POI. The Convert button brings up a tool for converting between various latitude/longitude formats. With the Convert tool you can select the units you prefer (decimal degrees, degreesminutes, or degrees-minutes-seconds) and then dial or enter the latitude and longitude coordinates. To finish, press the device's back key and the coordinates will be converted to decimal degrees in the POI Lat and Lon fields. The 'Category' entry is to select the list(s) the POI will be assigned to, either Main or Log or both. To accept the changes you made, press Mark POI. Press Cancel to exit the dialog without changing the POI. Note that User POIs cannot be directly edited by UGL. If you select a User POI for editing, the modifications will be saved to a new POI that is created in the Main and/or Log lists, depending on the Category setting. The original, unmodified User POI will remain in the User POI list. This is because User POIs are defined in kml, csv or gpx files supplied by the user, and UGL does not modify user poi files; the user needs to do that outside of UGL. Delete Delete will delete the selected POI. However, UGL cannot delete a User POI because they are defined in user-supplied kml, csv or gpx files. To delete a User POI, the user needs to delete the POI from its file outside of UGL. Search Places Online Pressing 'Search Places Online', at the bottom of the POI list, connects to Google's online POI search. A list of location types will appear. Select the type of interest, and a list of POIs of that type that are within approximately 2.5 km (1.6 miles) of your current location will appear as the Places POI list. (This list is temporary in the sense that if you leave the POI Manager the search results will disappear and a new search will be required to bring it back.) Ultra GPS Logger v3.0 User's Guide Page 36 A good strategy for dealing with the searched results is to scan it for any locations of interest. As each one is found, edit it to assign it to the Main POI list – it will remain there until you delete it. Continue through the search results list until you have 'captured' any of interest to the Main list. Alternatively, if you find exactly what you are looking for on your search, click on that entry and select Heat to Map (or Head to Radar) to set it as the POI destination on the map (or radar). Or, select Navigate to it to bring up Google's navigation app to the selected POI. Importing and Exporting POIs UGL's User POIs gives you the facility to create files with User POIs that you define and can bring into and use with UGL. UGL accepts User POIs in kml, csv, or gpx format. These files are created by a user (typically on a PC), and moved to the UserPOIs folder within a UGL Log Directory. Keep in mind that you can have multiple Log Directories defined, each containing different information, and select the one you want using Settings. The default Log Directory is GPSLogs at the device SD card root level. The following assumes the user knows how to create and edit files and how to locate the desired UGL Log Directory and use a file manager app to move User POI files to the UserPOIs folder within that directory. The UserPOIs folder can contain any number of User POI files. Files are selected for display and use by UGL by using the Layers tab in the POI manager. The check boxes in the USER POIS (FILE SELECTION) section are used to enable each of the files in the UserPOIs folder to be used and displayed by UGL. Appendix IV contains detailed information about each of the User POI file formats: kml, csv and gpx. To create your own POI files, the basic information you need for each POI is a name and the POI latitude and longitude. You can also include a short description with a POI. Finding Latitude and Longitude for a POI One of the most direct methods to get the lat/log coordinates for a location is to find that location on a PC using Google Maps. Right click on the location and select 'What's Here?" The latitude and longitude of the location will appear in the Google Maps search bar; from there it can be copied and pasted into a User POI file. A similar procedure works with Bing and Mapquest: right click on the desired location, and then highlight and copy the lat/lon from the popup box. Ultra GPS Logger v3.0 User's Guide Page 37 Importing from Google Maps Favorites – Classic Maps If you have Starred Places in Google Maps that you wish to import into UGL as User POIs, the following procedure can be used to create a kml file (this assumes you are using a PC): 1. 2. 3. 4. 5. Open Google Maps, click on My Places and select Create with classic My Maps. Name the map anything you like, and click the 'Unlisted' option. Click 'Save' and then 'Done' Click on My places and then Starred Places. For each Starred Place that want to export, click on it. On the popup that appears on the map, click on Save to map, and then select the map you created above. 6. When done adding Starred Places to your new map, open the map and click on Save 7. Click on KML to download a kml file containing the starred places you saved on your new map, as Google Earth placemarks. 8. Move the kml file to the UserPOIs folder in the Log Directory of your device. When this or any other User POI file has been placed in the UserPOIs folder, it is best to completely stop UGL and then restart it. To completely stop UGL, use Exit from the More menu on the Main screen; simply wiping UGL from the recent apps list on your device is not sufficient to fully stop UGL. You can create different maps within Google maps in this way, containing different categories of POIs you might want to create. New places can be added in the future and the map re-exported, to update your User POI lists for UGL. Creating and Importing Google POI Maps with Google Map Engine Lite While Google Map Engine Lite can't be used to access starred places created with classic Google Maps, it can be used to easily create and maintain User POI lists. To create and import a POI list using Google Map Engine Lite, do the following, on a PC: 1. 2. 3. 4. Go to Google Maps, Click on My Places, then click on Create Maps Click on New Map Give it a title by clicking on Untitled Map and add any description you wish Place the desired POI markers on the map a. Find the desired location, navigating as would to find any location in Google Maps b. Click on the place marker icon c. Click on the map where you want to place the POI d. Name the POI 5. When finished placing the POIs, lick on the folder icon, select Export to kml You can create many such maps and add or delete POIs on each map in the future, download the resulting kml file and move that to the UGL UserPOIs folder. Recall that Ultra GPS Logger v3.0 User's Guide Page 38 specific files can be used by UGL or 'hidden' by using the Layers tab of the POI Manager. Importing POIs from Google Earth Google Earth provides a particularly easy way to create and maintain kml files for UGL User POIs. Assuming the use of a PC: 1. Open Google Earth 2. For each POI you want to create: a. Navigate to near the location b. Click on the Add Placemark icon c. In the popup window, name the placemark d. Drag the placemark to the correct location (you may have to drag the New Placemark window out of the way to see the actual placemark, to drag it) e. Click on OK in the New Placemark window f. The new placemark will be added under 'My Places' in the navigation panel on the left 3. When finished adding placemarks, right-click on My Places in the navigation panel, and select Save Place As… 4. In the dialog, select the file location and the filename to save the kml file 5. Copy the kml file to the UserPOIs folder on your device. As with the Google Maps procedures above, Google Earth can be used to maintain different lists, by keeping them in different kml files. To edit one of these files, just open it in Google Earth. The kml file will appear under Temporary Places in the navigation panel. Click the adjacent triangle to see the placemarks marks in the file. To edit a placemark, right click on it and select properties. The name can be changed, and the placemark can be dragged to a different location, if desired (again, you may need to move the placemark window out of the way to see the placemark itself to drag it). When finished, just right-click on the placemarks file name in the navigation panel and select Save Place As…, then replace the version in the UserPOIs folder with your new kml file. Importing csv POI files Appendix IV shows the format required for csv lists of User POIs. csv files use commas to separate fields to define a POI. csv files can be created and saved using Excel or any text editor. Create or edit your csv file and then copy it to the UserPOIs folder of the Log Directory. Completely restart UGL to see your new User POIs (i.e., press the exit button from the 'More' menu of the main screen to completely exit UGL, then restart it). Importing GPX POI Files Often, other navigation and mapping software and apps can export POIs (often called 'waypoints', sometimes called 'favorites') to gpx files. Usually, UGL can import these files Ultra GPS Logger v3.0 User's Guide Page 39 without modification. Just copy the file to the UserPOIs folder in the Log Directory. UGL will recognize any waypoints (<wpt>) it finds in the gpx file as a User POI. POIs can have a description, and UGL will attempt to fill the description field when importing POIs from a GPX file. It uses the following priorities: If a <desc> field is found, that's used. Otherwise, it uses the <cmt> field, if found Otherwise, it uses the <type> field, if found Otherwise, it uses the <category> 1 field, if found Otherwise, description is left blank. Appendix IV shows the format of the GPX files, in case you want to edit your own. Exporting POIs There is no need to export User POIs defined in files created by the user, as the POIs are already in those files and UGL can't modify those files. To share these POIs with other, just send them the files (or subsets of the POIs in a User POI file). 1. Log and Main POIs can be shared easily: 2. From the POI Manager, press the 'More' button or the button 3. Click on 4. From the mail selection popup select an email app or a cloud destination A file named poi.kml is created in the current Log Directory and will be uploaded (if to a cloud destination) or attached to an email for you to address and send. This file contains all of the Main and Log POIs from UGL. If you want to subsequently remove some of the POIs in the file before you distribute it to others, there are a couple of options. First email or upload it to just yourself. Then: • • 1 Edit the file with a text editor, manually removing the POIs, or Open the kml file with Google Earth and delete the POIs (which are shown as Google Earth placemarks) you wish to eliminate, then save the resulting places to a new kml file. You can then share that file. <category> is not defined within the GPX 1.0 or 1.1 specifications but is used as a proprietary waypoint field in exported waypoints from at least one 3rd party GPS app. Ultra GPS Logger v3.0 User's Guide Page 40 7. Publishing, Sharing and Managing logs Log Management: Merge, Delete, and Move UGL provides a wide range of methods by which you can share your logs with others and move, merge or delete them. From the Main screen, press at the top of the screen to bring up the Tracks screen. Turn Multiselect on or off to enable or disable multiple simultaneous track selections. If Multiselect is on, you will need to use the button at the top of the screen to make the tracks menu appear at the bottom of the screen. On the screen shown below, Multiselect is on, two logs are selected, and the button was pressed to show the available actions at the bottom of the screen. Select All: press to select all of the logs in the current folder. Merge: pressing this will merge the selected tracks into a single track. A merged file will be created for each log format found (i.e., gpx and kml). Upon completion of the Merge, UGL will inform you of the newly created file paths and names. Delete: to delete the selected tracks. Move to: to move the selected tracks to a different folder. The target folder for the move must be the Log Directory or an existing subfolder. 1 Folder: Manage subfolders. See Creating and managing log subfolders Send/Publish: see below. 1 To create a new folder, press the 'Folder' button. See Creating and managing log subfolders for more information. Ultra GPS Logger v3.0 User's Guide Page 41 Most of these actions can also be reached by pressing the button at the top or bottom of the screen. If Multiselect is off, then the action can be selected from a popup list that will appear when the track is touched. Sending or Publishing Logs Once Send/Publish is selected, a dialog will then allow you to choose the method(s) to use. Multiple methods may be selected simultaneously, and when Send is pressed, UGL will execute all the selected methods. The settings which control these activities are described below, followed by descriptions of each of the available Send/Publish methods. In the sample dialog above, will cause an email to be sent with the will cause the selected logs to be selected logs attached. uploaded to UGL online services. will cause an email to be automatically sent with links to the uploaded files, in this case just to the files sent to UOS. Auto Email works with any/all of the uploading options: after uploading is complete, an Auto Email will be sent with links to all of the uploaded file and destination combinations. As an example, a single log recorded during a short walk was uploaded to UOS, and emailed, with the above settings. The Tracks list is shown to the left, with the example track, which has only a kml file of 3.8kb and a gpx file of 5.8kb. No NMEA log was recorded. After pressing on the desired track and selecting 'Send/Publish', the dialog on the previous page appeared and was filled out as shown, and then 'Send' was pressed. An email was automatically sent at the conclusion of the upload. As specified, the email contained two attached files (the kml and the gpx versions of the track). The email body is shown on the next page. The three blocks on this email show: 1. The tracks and activities: a single track sent by email attachment and by upload to UOS. Ultra GPS Logger v3.0 User's Guide Page 42 2. The actual files in the transfer. If no files are attached, this section is omitted. 3. For transfers to the cloud (UOS, Dropbox, etc.), a table with links to view the files using Google Maps or using OSM, or to download the files. These are the links you can send, to share the uploaded logs with others. If nothing was uploaded, the URL(s) section is omitted. This track viewed on Google Maps looks like this: The POIs on the UGL track appear in Google Maps as placemarks. If you click on one you will see the name and time of that POI (shown on the left). By clicking on 'more' you can save that POI to a selected Google Map that you have previously created. This provides another way to save log POIs – see the section on importing/exporting POIs for more on how to use Google Maps for you User POIs. Viewing the track on OSM maps is another way to see your track; as with Google Maps, the OSM links are in the email that was sent. Ultra GPS Logger v3.0 User's Guide Page 43 Log Formats: the three check boxes at the bottom allow you to choose which log formats will be sent or published. UGL will operate on those formats it finds from among the checked formats. That is, for example, if all three are checked but there are no NMEA format files among the selected tracks, UGL will operate on the log formats it does find. Merge: if checked, UGL will merge the selected logs into a single log with one merged log file produced for each found and selected log format. UGL will merge the selected files together and then send it (and not the source logs that were merged) according to the selected method(s). The original logs are not affected by merge. Within the merged kml or gpx files, each of the component tracks that went into the merged file continues to retain its identity. The example on the left shows a merged kml file structure open in Google Earth. Both of the component tracks can be seen as well as the placemarks from each log. The tracks are given differing colors so they can be easily identified on the Google Earth display. The structure of the gpx version of the same merged log open in Google Earth is shown on the left. As for the kml file, both of the component tracks and all of the track waypoints are reflected in the merged gpx file. Send/Publish Settings Send/Publish settings can be configured by selecting Online Services on the Settings screen (Main screenSettingsOnline Services). The following is a brief overview of these settings; more detail is provided when necessary with each of the methods. Email settings Default Email Address: enter the email address to which you want logs to be sent. If you press Select Email, you can choose one of your existing email accounts on your device to be the Default Email Address. Check the Use HTML Email box to enable HTML format for the emails. Note that Use HTML Email only applies to auto-sent emails. Those sent manually will be sent in plain text rather than html due to Android email limitations. Ultra GPS Logger v3.0 User's Guide Page 44 Send/Publish settings Preprocessing lets you select various options. NMEAZip compresses NMEA files to zip files prior to sending. KMLKMZ similarly compresses KML files. Simplify KML/GPX applies a filter to the log points to reduce the number of points while not substantially removing any important information from the log 1. Send/Publish activities lets you specify a default set of Send/Publish actions that will be selected when the Send/Publish dialog appears, at which time you can override any of these default settings. The default also applies to auto-send. Attach will cause an email to be sent to the specified email address with the log(s) attached. UGL Online Service (UOS) will cause the logs to be uploaded to the UGL web server where space is provided as a courtesy to UGL users. You will receive back links to the uploaded files which you can then be sent to those with whom you wish to share the logs. FTP selects sending the log(s) via FTP to a destination you specify. Checking Dropbox will result in the logs being copied there. Dropbox mode sets the way Dropbox storage is done: to the Dropbox App folder; to the top level of Dropbox; or to the Dropbox Public folder 2. You will receive back links to these files if the upload is to Public, or if Share uploaded files (below) is checked. Share uploaded files: if checked, you will receive back public links to the files you uploaded to any of the cloud storage systems. You can then send these links to those with whom you wish to share the logs. UOS files are always shared; anyone with the link is able to access the file. SkyDrive and GoogleDrive: check these to upload to these cloud storage systems. SkyDrive limits the link that can be generated to one that results in downloading the file from SkyDrive, whereas the links that are generated for GoogleDrive and Dropbox result in the track being displayed in Google Maps or OSM – the SkyDrive behavior is a limitation of SkyDrive, not UGL. Merge: check this to have the Merge option selected as the default case. URL Shortener: when UGL sends you back links to your uploaded logs, this option lets you choose how those links are created. Use full URLs: the URL link is the full link to the destination. Shorten with UGL Online Service: the link will appear to be to the UGL Online Service, but will take one to the file on the selected cloud storage. Shorten with Goo.gl, a link-shortening service that Google provides. While URL Shortening applies to both HTML and to plain text emails, the concept is most useful for plain text emails. First, here is an example of the three URL types 1 2 UGL basically uses the Ramer-Douglas-Peucker algorithm for reducing the number of points needed to describe a curve. Your Dropbox may not have a Public folder. Dropbox policy about creating Public folders has been in flux in the past. As of this writing, Dropbox does not supply new users with a Public folder, but you can create your own and set the access to public. However, this may change in the future. Ultra GPS Logger v3.0 User's Guide Page 45 – each one points to the same file, in this case to a gpx file uploaded to Dropbox: Full URL http://maps.google.com/maps?q=http://dl.dropbox.com/u/98089580/U GL/2013-10-19_083213_2013-10-19_083213_UCSD/2013-1019_083213_2013-10-19_083213_UCSD.gpx Goo.gl URL http://goo.gl/i74UpS UOS URL http://flashlight.de/r/5Sd/3Wb/dropbox/gmaps/2013-1019_083213_2013-10-19_083213_UCSD.gpx The full URL is quite lengthy. The Goo.gl URL is the shortest by far, but it hides useful information such as where the file is ("dropbox") and where it will be shown ("gmaps". The UOS URL is reasonably compact and has the advantage of revealing all the interesting information about the file: location, destination, log name and date, and the file format. If HTML format is chosen, hyperlinks are placed in the email to the uploaded files: The visible text shows the track date, name and format, as well as the location and the map that will be invoked for viewing. The actual URL underneath the link is the one created by the shortening method chosen: a full URL, the Goo.gl URL, or the UOS URL. Send/Publish formats: this sets the default selection of which formats (NMEA, KML, GPX) to send or publish. Auto Send/Publish: selects automatic send/publish action. The choices are off, 'after log stopped', or a time between 3 minutes and 24 hours. If 'after log stopped' is selected, then UGL will, after the log is stopped, automatically publish that log according to the settings detailed above. If a time interval is chosen, the automatic publication of any logs created during the interval occurs at the chosen interval. Auto Send Email: f this is selected then by default UGL will automatically send an email when uploading is completed with links to the uploaded logs. Usually, this would be activated because it provides the links to the uploaded files. Deactivate if those links are not needed, for instance when uploading to a private location without intending to share links to the logs. WiFi only: restricts sending/publishing to be only on WiFi (to avoid excessive data charges on your cellular coverage, if that's an issue for you). Publish FTP: these settings control uploading via FTP. Enter the address of the target FTP server. Also enter your Username and Password, the destination Directory, and the server's Website URL, and select the FTP mode to use (active or passive). Ultra GPS Logger v3.0 User's Guide Page 46 Send/Publish Activities With the settings description above, the various Send/Publish activities can be described. Any combination of activities may be chosen – all selected activities will be executed by UGL when 'Send' is pressed. Send by Email Check the Attach option to send the selected log(s) via email, to the default email address established in the email settings above. Note that this same email address is used for auto sent emails as well. Publish via UOS (UGL Online Services This selection uploads the selection to UOS (UGL Online Services). This is storage space made available free to UGL users and hosted on UOS, as an alternative to third-party cloud storage.1 Prior to your first use of UOS, you will need to log onto the service.2 Publish via FTP Use this selection to send the selected logs to a destination via FTP. You must first set up the required information for the transfer (ftp server, password, destination directory, and website address) using the Send/Publish settings, detailed above. The FTP website URL will be used in the URLs section of the email which is sent after uploading is complete -this effectively means you can have your private FTP but still have sharable URLs. Dropbox, SkyDrive, GoogleDrive If you have accounts at Dropbox, SkyDrive or GoogleDrive, you can check any of these boxes to send copies of the selected log(s) there. The settings for these cloud storage systems are detailed above. Auto Email when done Some of the send/publish activities can create links that you can then send to others with whom you wish to share the uploaded logs. Checking this will result in an automatic email being sent to the email address specified in the email settings (above) with these links. 1 UGL Online Services is subject to discontinuation at any time and without prior notice. Information shared on UOS accessible by other parties and is not secured or encrypted. 2 This is done from the Main screen: press the button at the top of the screen, then, from the panel that appears at the bottom of the screen, select Online Services and follow the instructions there to log on. Ultra GPS Logger v3.0 User's Guide Page 47 An email with the links is always offered. The effect of this option is to make that email automatic – you don't have to select the email app and send the email if this option is checked, as UGL will do that automatically. Also, keep in mind that if the email is not auto-sent, it will not be in HTML format because of Android email limitations. 8. Using Bluetooth UGL provides two methods of using Bluetooth: it can receive GPS data from an external Bluetooth GPS receiver and use that source instead of the internal GPS receiver in your device, and it also can send GPS data to another device such as a PC. There is a third possibility as well: UGL can provide GPS data from an external GPS to other apps running on your device. Other apps using GPS Android device running UGL Bluetooth GPS Receiver NMEA sent to UGL via Bluetooth NMEA Device: PC, sent by laptop, UGL via smartphone, Bluetooth tablet The diagram above shows three possible connections that UGL can make. Two are Bluetooth connections (left and right) and one is within your device (upper). On the left side, UGL can receive NMEA data from an external Bluetooth GPS receiver, rather than using the device internal GPS receiver. On the right, UGL can send NMEA data to another device, such as a PC running a navigation or mapping program, or another smartphone or tablet. At the top, UGL can provide the GPS location information it receives from an external GPS receiver to other apps running on your device – this is useful if your device has no internal GPS, for instance. The sections below will detail how to set up and use these connections. Ultra GPS Logger v3.0 User's Guide Page 48 Using an external GPS Receiver There are a number of reasons you might want to use an external GPS receiver with UGL. Some of these are: • Your device might not have an internal GPS receiver • Some external GPS receivers can be more sensitive than the internal GPS • Some external GPS receivers support WAAS which improves fix accuracy • You can position an external GPS in an optimal location for satellite reception and your device (cellphone or tablet) can be anywhere in Bluetooth range of the GPS (e.g., GPS up on the dash of a car with a good view of the sky; tablet being used in the back seat) • When using UGL's Finish Line feature or another sailboat racing program, the GPS position needs to be fixed with respect to the vehicle. Using an external GPS communicating via Bluetooth makes this practical, while it would be inconvenient to keep your tablet fixed in place. Connect external Bluetooth GPS receiver To connect an external Bluetooth GPS receiver to UGL, follow the steps detailed below to implement the left side of the drawing on page 48. The following assumes your device is not yet paired with your Bluetooth GPS receiver 1. 1 2 1) Turn on your device Bluetooth receiver: Go to device settings and, under Wireless & Networks, if Bluetooth is 'Off', press on the switch to turn it "On" 2) In UGL, go to the Bluetooth settings: Main screenSettingsBluetooth, and then tap 'BT GPS Receiver address' 3) Press on 'Pair new device' 2. This will take you to your device Bluetooth settings screen. The pairing instructions in this guide assume that you are initiating the connection from your Android device. If you initiate pairing from a PC, Windows will generate a random 6-digit PIN for you which you then enter, when asked, into your Android device. This pairs the Android device to the PC. You still need to connect UGL after that. Go to MainSettingsBluetoothBT GPS Receiver Address. Your PC (or other external device with which you have paired) should be listed in the 'Select BT device" popup. Tap on it to complete the connection to UGL. This actually takes you to your device-level Bluetooth settings screen. If you are not running Android 4.3, you may see something different than described here. Ultra GPS Logger v3.0 User's Guide Page 49 4) Your device Bluetooth must be on. If you see 'Off' at the upper right, just press on the switch. With Bluetooth 'on', it is likely your external receiver is already in the list of Available Devices. If it is not, press Search For Devices, and press on your device name to make it visible to other Bluetooth devices 1. 5) When your external Bluetooth GPS receiver is in the Available Devices list, press on it, and you will get a pairing dialog. Enter the PIN for your receiver and press OK to pair the external receiver. Usually the PIN will be '0000' or '1234'. Check the documentation for your GPS to find the PIN. Your receiver should now appear in the list of Paired Devices for your Android device. 6) Press your device 'back' button to return to UGL. Now you should see your Bluetooth GPS receiver listed in the 'Select BT device' dialog. Press it to set it as your receiver. 7) You will now see your external BT GPS receiver set as the BT GPS Receiver address. The last step is to turn on the UGL Bluetooth support at the top of the Bluetooth settings screen. Press the 'back' button on your device a couple of times to return to the Main screen. You will see the connection to your GPS receiver. In the Status section, you will see 'Bluetooth' shows the name of the external GPS receiver . In the Location section, the 'Used Provider' should show . If you go to the satellites screen (swipe to the left), it will show in the lower right and show the satellite constellation it is receiving from the external GPS receiver. If UGL is listening to the internal GPS receiver, 'Bluetooth' will be missing from the Main screen Status block. 'Used Provider' will show , and will show on the Satellites screen. 1 Keep in mind that most Bluetooth GPS receivers only allow one BT connection at a time. If your receiver is connected to, say, your PC, then your receiver won't be seen by your device. If it is on and functioning but not appearing, make sure you have disconnected it from any other device it might be connected to. Ultra GPS Logger v3.0 User's Guide Page 50 Once you have configured an external receiver, you can leave the 'BT GPS Receiver address' set up with the address you established. You can then enable or disable Bluetooth support to switch between your external and internal receivers. However, keep in mind that switching off UGL Bluetooth support will also stop UGL from sending out NMEA via Bluetooth to an external device (right side of drawing on page 48). If you are sending out NMEA, then you will instead need to 'deactivate' your external GPS receiver link. Go to MainSettingsBluetoothBT GPS Receiver AddressDeactivate. Re-activation is quite simple: go back to the same place. Your receiver will still be listed there so just select it. If the external GPS receiver is not present If for some reason UGL loses its connection to your external receiver, it will start searching for it. 'Bluetooth' in the Status section will show 'Search'. When the receiver comes back in range, it will find it and return to using it. As long UGL does not have a connection to an external receiver it will use the internal GPS (unless it has been deactivated in device settings). When the external receiver reappears, UGL will switch back to using it instead of the internal receiver. Using UGL as a GPS Mouse (Send NMEA out) UGL can send a NMEA stream with GPS data to another device over a Bluetooth link; this other device could be a PC or Mac, or another Android device, or anything else that wants NMEA GPS data and can pair with a Bluetooth GPS receiver to obtain it. This would, for instance, allow you to use UGL for logging your track, and a PC with a larger screen to run a navigation program, without having to add another GPS receiver for the PC. UGL can be set up to send either the internal or the external GPS data to a device; normally the external receiver has priority, but that can be changed in the Bluetooth settings to give the internal receiver priority. To set up UGL to send NMEA GPS data to another device, follow the steps outlined below to implement the right side of the drawing on page 48. The following is written for connecting to a PC running Windows 7. 1) Turn on your device Bluetooth receiver: Go to device settings and, under Wireless & Networks, if Bluetooth is 'Off', press on the switch to turn it "On". 2) In UGL, go to the Bluetooth settings: Main screenSettingsBluetooth, and then tap on BT client address Ultra GPS Logger v3.0 User's Guide Page 51 3) Press on 'Pair new device'. This will take you to your device Bluetooth settings screen. 4) Your device Bluetooth must be on. If you see 'Off' at the upper right, just press on the switch. With Bluetooth 'on', it is likely your PC is already in the list of Available Devices. If it is not, make sure the PD is Discoverable and tap Search For Devices. 5) When your external device is in the Available Devices list, tap it, and you will get a pairing dialog. You may enter any pin you like - you will be asked for the same PIN by your PC or other device. Tap OK to initiate pairing to the external device. In the example to the right, '1234' was arbitrarily chosen as the PIN. 6) On a PC running Windows, you will now see a balloon on your PC indicating the attempt to pair. Click on the balloon. 7) A window will appear, a PIN. Enter the PIN you entered in step 5 above. Ultra GPS Logger v3.0 User's Guide Page 52 8) Windows will then proceed to locate and install the needed device drivers for the connection 9) Your receiver should now appear in the list of Paired Devices for your Android device. Press your device 'back' button to return to UGL. Now you should see your Bluetooth external device (a PC, in this case) listed in the 'Select BT device' dialog. Tap it to set it as the destination for Bluetooth NMEA from UGL. 10) You will now see your external device set as the BT client. The last step is to turn on the UGL Bluetooth support at the top of the Bluetooth settings screen. It's a good idea to verify that the connection was properly made on the PC end of the link. Open 'Devices and Printers' from the Start menu, right click on your Android device that you just connected, and select 'Properties': Clicking on the Hardware tab and the Services tab will show the following windows: Ultra GPS Logger v3.0 User's Guide Page 53 Your actual results may be different than the above – what's important is seeing that a serial port service was established for the connection (in the case above, COM10). Programs that use GPS input expect that input on a serial port, and will have a way for you to specify on which port to find the incoming NMEA data stream. You can test that this is working in a number of different ways: 1) A very simple and direct way is to start a terminal emulator program (e.g. Hyperterm) on your PC and set it up for the com port you found above. The serial format is N-8-1 (no parity, 8 bits data, 1 stop bit). The data rate probably doesn't matter, as that's negotiated internally when the link is started. You should see NMEA sentence groups appearing once per second. 2) Use a simple GPS viewer, such as GPS Utility. These typically will allow you to open a window to see the incoming NMEA sentences and can also display the content fields such as latitude, longitude, altitude, velocity, and others. 3) Connect to the navigation or mapping program you intend to use and see if things appear to be working. Forward internal GPS By default, UGL uses the external BT GPS receiver as the data source for outgoing NMEA (when UGL is acting as a GPS mouse for an external device). If the connection to the external GPS is interrupted, UGL will stop sending outgoing NMEA, and will resume if and when the external receiver connection is restored. Ultra GPS Logger v3.0 User's Guide Page 54 By selecting this option, UGL will instead use the internal GPS as the source for outgoing NMEA. As for the default case, if the internal receiver becomes unavailable to UGL, then UGL will stop sending outgoing NMEA until the internal receiver again becomes available. Dual Log UGL can be put into Dual Log mode, instructing it to collect and save logs using both the internal GPS receiver and an external GPS receiver. For each log format that you have enabled, UGL will create two files. The file with internal GPS data will be named as it otherwise would have been, and the file with the external BT GPS data will have ".bt" added to its name. When you send/publish your logs, UGL will find and send or publish both types, if present in your Log Directory. To enable or disable Dual Log mode, go to MainSettingsBluetooth and tap on the Dual Log item. When in Dual Log mode, tapping in the satellites screen will switch it between the internal and the external receiver. The Main screen display also reflects the Dual Log mode: Shows connected BT GPS internal::external validity Internal::external satellites used/seen Internal is being used for GPS Provider Talker ID To change the Talker ID, go to MainSettingsBluetooth, and tap on . A dialog will let you choose among GP (for GPS), GL (for GLONASS 1), or GN (mixed GPS and GLONASS). NMEA information is assembled into NMEA sentences which are designed to support a wide range of marine electronics, such as GPS receivers, autopilots, communications equipment, depth sounders, and so forth. Within each type of equipment, there are a number of different sentences that can be sent to convey different types of information. The sentences start with $'XXYYY and end with carriage return and line feed, where $XX is the Talker ID and YYY identifies the type of sentence 2. 1 2 GLONASS is the Russian equivalent to GPS. See http://gpsd.berlios.de/NMEA.txt for a detailed description of NMEA sentences Ultra GPS Logger v3.0 User's Guide Page 55 UGL uses the Talker ID to decide from which incoming NMEA sentences it will extract the position. Common GPS receivers use $GP as the Talker ID; GLONASS and hybrid (GPS+GLONASS) receivers provide $GL and $GN sentences. If you have a hybrid receiver, it makes the most sense to select $GN, to get the best possible position from your receiver. The Talker ID has no impact on the internal GPS receiver because the Android operating system decides on the data to be extracted, not UGL. Also, the Talker ID has no impact on NMEA that is sent out by UGL, as UGL either sends out a one by one copy of the incoming BT NMEA stream or the internal NMEA stream. Sending GPS Location to other apps on your device UGL can send GPS location information from your external GPS receiver to other apps running on your device. This is particularly useful, for instance, if your device does not have an internal GPS receiver, as this now allows you to run mapping and navigation apps you otherwise could not. Setting this up implements the connection shown at the top of the drawing on page 48. Please note that this does not work when using internal GPS, but in that case, other apps can get GPS location directly from the internal GPS. Also, to access one of the settings required in your device, you may need to enable developer settings on your device, which makes available an entire range of device settings which fall into the 'dangerous' category. If you change some of these you can create problems on your device. Please follow the instructions below carefully. Setting up to send external GPS within your device will automatically disable your internal GPS, if you have one. When you turn this mode off, your internal GPS will be reenabled. In the following steps, you are going to: • • Allow Mock locations on your device Enable Mock locations within UGL Two methods to Allow Mock locations are given below. Use the first if your Android operating system is 4.2 or higher. Use the second if your system is 4.1 or lower. Allow Mock locations: Android 4.2 and later To 'Allow Mock locations', if you are running Android 4.2 or later, you will need to enable developer settings on your device. In Android 4.1 and earlier, the Allow Mock locations choice was on the device Location Access menu, but with 4.2 it was moved to Developer options. Ultra GPS Logger v3.0 User's Guide Page 56 To enable developer settings, 1. Open your device settings 2. Tap "About tablet" (or "About phone") 3. Find "Build number" at the bottom 4. Tap 'Build number' seven (7) times (the system will inform you when you have done enough tapping) Once developer settings are enabled, you can then enable Mock Locations: 5. Return to the device settings screen, and tap on Developer options (under System, at the bottom) 6. On the Developer options screen, tap on . Allow Mock locations: Android 4.1 and earlier If you are running Android 4.1 or earlier, 'Allow Mock locations' is located on the Location access screen of your device settings. Find it there and tap on 'Allow Mock locations' to enable it. Enable Mock locations within UGL Once you have enabled Allow Mock locations at the device level, you then need to tell UGL to supply the Mock locations. Go to the Bluetooth settings screen (MainSettingsBluetooth) and tap on 'Mock BT locations'. Now, other apps running on your Android device will receive GPS location information from the external Bluetooth GPS you have connected to UGL. Deactivate Mock locations To deactivate the Mock locations mode, you just undo what you did above: Uncheck Mock BT locations on the UGL Bluetooth settings screen, and uncheck Allow Mock locations on your system device settings. Ultra GPS Logger v3.0 User's Guide Page 57 9. Plug-Ins There are three UGL plug-ins which can be installed or uninstalled from the Plug-Ins Settings screen, reached by Main screenSettingsPlugins. These plug-ins provide increased flexibility in using UGL and also provide connectivity between UGL and other apps. UGL Widget lets you place buttons on your device launcher screens to execute specific UGL commands immediately. UGL SMSCtrl and UGL Locale provide the same command flexibility as UGL Widget, but allow UGL commands to be sent via SMS message or by another app via the Locale API. UGL Widget The UGL Widget plug-in (available from Google Play) lets you execute commands within UGL, such as StartLog, StopLog, MarkPOIDlg, and others, directly from a launcher screen on your device, making access to frequently used UGL commands very quick and easy. With the UGL Widget, you can create command buttons on any launcher page. You set each command button to be a specific UGL command. After downloading UGL Widget, do the following to install a command button. Find UGL Widget on your device widgets screen (from your device home screen, press the "all apps" button and then "Widgets" at the top). Turn pages on the widgets screens until you find UGL Widget (probably on the last page). Tap and hold on the widget icon, and drag it to the desired location on any of the launcher pages. A dialog will appear which allows you to select the desired command – the one shown initially is the first on a list of available commands. Tap the button to see the list; press on any of the commands to select it for the button you are creating. The available commands are: StartStop_Toggle StartDlgStop_Toggle PauseResume_Toggle MarkPOIDlg StartLog StartLogDlg PauseLog ResumeLog StopLog StopUGL BackgroundGPS_On BackgroundGPS_Off Lockscreen The table in the SMS section below gives details on each of the above command buttons. To give an example, if we choose the StartStop_Toggle command, then a dialog appears appropriate for that command (coincidentally shown above): in this case, you have the opportunity to specify the log file name. Setting this works just like setting the Ultra GPS Logger v3.0 User's Guide Page 58 log file name elsewhere: the '*' button brings up a list of auto-fields, and you can use the keyboard to enter or modify the log name. When finished, tap 'OK', and your button will be created. This particular command changes to StopLog if logging has started, and changes back to StartLog when logging has stopped. All of the commands listed above with 'Toggle' in the command name have this dual-purpose behavior. If you are running Android 4.2 or later, you can add widgets to your lock screen. Put your device to sleep and then press the power button to bring up the lock screen. Swipe from left to right to see the big '+', and tap on it. From there, select the UGL Widget and proceed as above to create the button. If you are create more than one button, you would then access it on the lock screen by swiping through the widgets (UGL or others) you have placed on the lock screen. UGL Lock Screen Widget In addition to the single command buttons available with UGL Widget, there is a "Lockscreen" selection. This can be placed on any launcher page just like any of the command buttons, but it is really designed to go on your device lock screen. The lock screen widget provides four buttons. The first three alternate function, depending on whether UGL is actively logging or not, at the time the button is tapped. StartStop_Toggle – Alternates between Start Log and Stop Log. StartDlgStop_Toggle – Alternates between StartLogDlg and StopLogDlg. This button and the MarkPOI button (below) start dialogs, and so you need to next unlock your tablet. The UGL app will be running with the necessary dialog showing, for you to fill out and submit. PauseResume – Alternates between Pause and Resume. MarkPOI – brings up a dialog to mark the current location as a POI. Below these four buttons, UGL shows more information. You can scroll down in this area to see additional information. The information displayed is: time, latitude, longitude, altitude, location-city (nearest city), location-poi (nearest POI). If UGL is logging, it will Ultra GPS Logger v3.0 User's Guide Page 59 also show that logging is active, and the log name, log types (NMEA, KML, GPX) and log category. If you place the lock screen widget on a launcher page, then you can long-press on it to show handles for resizing, as shown to the right. UGL SMSCtrl Plug-in The UGL SMSCtrl plug-in (available from Google Play) provides the ability to use SMS to execute commands from within UGL. It also enables SMS notifications from UGL. SMS notifications can be sent out for StartLog, StopLog and FinishLine. These options are selected in the SMSCtrl plug-in. The commands that can be executed within UGL by SMS message are basically the same as are available to UGL Widgets. The table below lists each command and its function, and shows the SMS message needed to invoke the command. In general for SMS messages: • • • SMS commands are not case sensitive Only one command can be in each SMS message UGL will ignore any text in an SMS message following the first '!' it encounters (this really matters only for the StartLog command). SMS Command StartStop_Toggle StartDlgStop_Toggle PauseResume_Toggle MarkPOIDlg StartLog StartLogDlg PauseLog ResumeLog StopLog StopUGL BackgroundGPS_On BackgroundGPS_Off Description If not logging, starts log. If logging, stops log. If not logging, starts log with Start Log dialog. If logging, stops log with Stop Log dialog If logging, pauses log. If paused, resumes logging. Creates a POI at the current position, with the Mark POI dialog If not logging, starts log. Syntax: StartLog <logname> <!> - see below for further explanation If not logging, starts log with Start Log dialog. If logging, pauses log. If logging paused, resumes logging. If logging, stops log. Causes UGL app to exit Keeps GPS on in background mode, when not logging (GPS is always on in background mode if logging) Turns GPS off in background mode if not logging (GPS is always on in background mode if logging) The StartLog command is the only SMS command that accepts an optional argument, the log name. In the SMS command, anything after 'StartLog' and before end of message or before a '!' is found is taken to be the log name. Examples: Ultra GPS Logger v3.0 User's Guide Page 60 StartLog StartLog San Jose StartLog San Jose! ads starts a log using the default log name starts a log named San Jose starts a log named San Jose –all after '!' is ignored The '!' instructs UGL to ignore the rest of the message UGL Locale Plug-in The UGL Locale plug-in (available from Google Play.) allows remote control of UGL by other apps via the Locale API (e.g., Locale, Tasker, EasyProfiles). The same commands are available to the Locale plug-in as are available via UGL Widgets or the SMSCtrl plug-ins. Various Android apps support the Locale API, including Locale, Tasker, and EasyProfiles. These apps share a common theme in that they are able to trigger actions based on detecting conditions and events in your device. To detect conditions and events, these apps monitor your device status, such as 'airplane mode', 'device docked', 'WiFi available', 'cell network available', 'earphone plugged in', 'low battery' and a long list of other events and status information. A powerful feature of these apps is their ability to monitor your location and, based on definitions you provide, determine that you are at work, at home, or at some other location you define. Based on this information about your device you can then set up actions. Simple examples might be to reduce your ring volume when at home between 10pm and 6am, or change your ringtone when at work. The UGL Locale plug-in allows UGL to be controlled within the Locale API framework. Some examples: Condition: Leaving home Action: StartLog Condition: Battery low Action: StopLog, Stop UGL, Warn user All of the commands listed above for the SMSCtrl plug-in can also be used as actions in these apps, providing greatly increased power and flexibility to your use of UGL. Installing UGL Locale Plug-in To install the UGL Locale Plug-in, just download it from Google Play. There is nothing else to do after that. If you click on its icon (which there is no actual reason to do), a dialog may pop-up stating that Locale is required to use the plug-in. Just cancel out of this dialog – apps that use the Locale API will be able to connect to UGL, as illustrated in the example below. Ultra GPS Logger v3.0 User's Guide Page 61 Example: UGL Locale Plug-in with EasyProfiles This section gives a short example using the UGL Locale plug-in with EasyProfiles, to start and stop a log when leaving and returning back to home. A complete explanation of EasyProfiles or the other Locale API apps is beyond the scope of this user guide. Please refer to the documentation for the app you want to use for more in-depth information. Briefly, EasyProfiles is based on profiles, rules, and locations. A profile is a named, defined state for your device. You can create a profile named "home", for example, and EasyProfiles can change settings in your device or initiate actions when that profile is entered or left. Profiles can be entered or left, in turn, either by manual selection or automatically based on rules you define. Rules have a set of conditions needed to be satisfied, and actions that are executed when the rule conditions are met. Locations can be defined (e.g., Home, Work, Beach) based on GPS location or on cell-located position; defined locations can be used in rule conditions. For this simple example, one location (Home), and three profiles (Home, Car, Default) were set up in EasyProfiles. The home location was defined as a 100m radius around a specific latitude and longitude. Then two rules were created: Leave home, and Reach home. Setting up either of these rules involves a similar process. First, 'Add new rule' is tapped, to get a dialog, shown to the right. Enter the rule name ("Leave home") and the Target Profile ("Car"). Then tap on the + symbol to add an action. A list of action categories will appear – select Locale Plugin Setting. A list of Locale plug-ins installed on your device will appear; select the UGL Locale plug-in. UGL will then be invoked by EasyProfiles, and give you a screen very similar to the UGL Widget selection screen. Ultra GPS Logger v3.0 User's Guide Page 62 Tap the button to see the list of UGL commands to execute when this rule is triggered and select the desired command. In this case, pick StartLog and give the log a name ("My Locale API Log"). A similar process is followed to create the Reach home rule, with StopLog selected as the UGL action. With these two rules, UGL will start a log whenever you leave home and will stop that log whenever you subsequently return to home. 10. Other Topics This section contains a collection of remaining UGL topics not covered above. GPS Control UGL provides access to your device-level GPS settings. Click on on the Quick Control panel of the Main Screen, or on the 'More' panel at the bottom of the Main Screen. The 'Location access' screen of your device settings will appear, giving you quick control of those settings. Pressing your device return button will take you back into UGL. MoreMore Menu Within the 'More' menu there is one additional 'More' menu: from the Quick Control panel on main screen, press or and then on the panel that appears at the bottom of the screen, find and press A popup menu will appear with additional UGL features: . Reset/Update AGPS AGPS (Assisted GPS) uses a data connection to get information that your device can use to speed up GPS fix acquisition. The GPS receiver needs to acquire signals from a number of satellites in order to obtain a GPS fix. To do that, it needs to know what satellites might be visible to it and approximately where they are in the sky. It gets and keeps this information in an almanac, initially acquired from the satellite signals, a slow process because the satellite data rate is low and the satellite locations are unknown at the beginning. Once the GPS receiver knows where it is, it can update its own almanac with the ongoing satellite updates. But if it has no idea where it is when it is turned on, it can take Ultra GPS Logger v3.0 User's Guide Page 63 a long time to get that initial fix because of that data delay – this is termed a "cold start". AGPS can provide that almanac information to the GPS receiver much faster than it can be received over the satellite link. However, sometimes the time to acquire a GPS fix may become too long because the AGPS information can be old or even incorrect so that it is hindering, rather than helping. Using the 'Reset AGPS' button will completely flush old AGPS information from your device, which allows the GPS fix to be obtained solely by satellite acquisition. 'Update AGPS' forces a new download of the almanac. Using these can significantly improve the GPS time-to-fix. Manage Tasks If you have set up automatic emails in the log settings (see Auto Send above) and you are not online, you can accumulate a backlog of emails to be transmitted. 'Manage Tasks' can be used to either cancel these pending tasks or cause them to be executed immediately. Provider Settings UGL uses two key 'providers' that provide location information: the network provider and the GPS provider. These are configured in the Provider Settings: Main screenSettingsProvider. Presets Three provider configuration presets are offered, to help avoid misconfiguration, as UGL is very sensitive to having the providers configured properly. The next section offers detailed control of the providers and is more 'dangerous' to use. The presets are: GPS + Network This is the default configuration. The network is used to always have a rough position for POIs or for log names, while GPS location is used for logging. Fusion Fusion is provided by Google as hybrid of GPS and network position data, with the goal of saving battery power while delivering precision comparable to GPS precision. Using this option may save some battery power, but it does not offer any precision advantage. Ultra GPS Logger v3.0 User's Guide Page 64 Passive If Passive is chosen, UGL does not actively interrogate the GPS to obtain position information and it does not control the GPS. Instead, it simply monitors the position information supplied to other applications. One way to make use of passive mode would be if you were using another app for GPS navigation and wanted to automatically save your logged trip whenever you were using your navigation app. If autologging is enabled, and if Passive is selected, then UGL will log your track whenever you are navigating, because it will be passively receiving the same GPS information that is going to your navigation application. If you stop your trip and your navigation app is stopped, then UGL will not receive GPS updates, and so logging will not occur. When you resume navigation, UGL will resume logging. Provider Settings This section offers more detailed (and more 'dangerous') control of the provider configuration. This should only be used by knowledgeable users. For each of the GPS Provider, Network Provider and Fusion Provider, there are three options available: Do not use: the provider is not used at all. Use: the provider is used for POI lookup and for naming Log: the provider is used for the location information written to the log file For the Passive Provider, the Log choice is divided into two: Log only GPS Log All The Passive Provider can receive GPS, Network and Fusion location information from other apps in your device. This option gives you the choice to restrict to only the GPS, and ignore Fusion and Network information. Activity recognition UGL has an algorithm to try to use your device sensors to recognize whether you are driving, standing or walking, and based on that it alters the log category. (This is under development – the goal is to be able to recognize every movement category). You have the choice to not use, or use, activity recognition to define the log category. Do not use Use to define log category Ultra GPS Logger v3.0 User's Guide Page 65 Layout, Units Settings These settings are reached by Main screenSettings Layout, Units. Use of most of the layout settings and the units settings (shown to the right) are selfexplanatory, with a description on the screen of each setting. Further explanation of others is below. Stop Dialog: please refer to its description on page 24. Toolbar: this enables a system modal toolbar at the upper left of your screen. This small toolbar will sit on top of any app that is running, and so it may cover some functionality is some apps. The toolbar may be contracted to a single icon by tapping the left-most icon. These icons have the following functions: Tap to expand/compress toolbar. Long press to rotate, and move toolbar to a different corner. Start/Stop Log. See StartDlgStop_Toggle Pause/Resume Log. See PauseResume_Toggle Mark POI. See MarkPOIDlg. Makes UGL the active app, showing the Main screen with More menu Misc Settings These settings are reached by Main screenSettingsMisc. Misc Device Identifier – What you enter here is added as a postfix to log names, to make it possible to easily distinguish the source of a log. Auto Start – to have UGL start automatically when your device is started. Ultra GPS Logger v3.0 User's Guide Page 66 Start in MapView – to start in Map view, otherwise UGL starts on the Main screen. About and Disclaimer – to have these displayed on startup Address lookup – select online, local, or both for address lookup. Selecting 'show dialog' will give you the choice when you look up addresses. 'Local' lookup is into a city database which ships with UGL. It should contain the majority of cities with more than 5000 citizen plus some attractions such as national parks etc. 'Online' lookup requires a data connections and sends the lookup request to Google. Fix GPS Date – implements a workaround for an issue with the firmware in some Samsung devices that results in the GPS data having a 24 hour error. If your GPS date is wrong, this fix may correct the problem. Car Mode "Car Mode" is a feature found in some devices that recognizes whether the device has been placed in a cradle in a car. It enters Car Mode when placed in the cradle, and exits Car Mode when the device is removed. Apps can take advantage of this mode to change their appearance or what they do, or perhaps initiate special actions on entry or exit. UGL provides a selection of actions to perform on Car Mode changes. The choices for either entry or exit are Nothing StartLog StopLog StopUGL (Causes UGL to exit) BackgroundGPS_On (Keeps gps on if not logging) BackggroundGPS_Off (Allows gps to be turned off if not logging) If your device does not have Car Mode, there are apps available that try to simulate it. One example is Car Mode Control, available at Google Play. Finish Line The Finish Line options are intended for sailboat racing. The user can define two POIs (FLStart and FLStop) – the line defined by these two points is the finish line. UGL will check each point to find the location and time just prior to, and just after, crossing the line. Using the boat's speed, it can calculate a precise time that the bow of the boat crossed the finish line. After crossing the line, an SMS message can be sent with summary information (if the SMS plugin is installed) and/or an email with detailed information Finish Line – this activates the Finish Line feature. Offset from bow (meter) – distance from the bow of the boat to the GPS receiver (your device, or external Bluetooth GPS receiver), in meters. Ultra GPS Logger v3.0 User's Guide Page 67 Stop Log – if checked, UGL will stop logging when the bow crosses the finish line. At the moment it is crossed the log will be stopped and sent by email. An SMS can also be sent, if the SMS plug-in is installed. Email Summary – will automatically email a finish line report after the finish line is crossed. An SMS summary can also be sent if the SMS plug-in is installed. The choice to send an SMS summary is in the plug-in. An example of an actual SMS summary is shown below: Boat name: Steadfast Race: LHorSO_R1 Crossing corrected time (AEDT): 26/10/13 16:05:36 Crossing corrected time (UTC): 26/10/13 05:05:36 Crossing: -34.073874, 151.154152 FL Start: -34.072914, 151.153503 FL Stop: -34.081049, 151.159003 "Boat name" is the device identifier. "Race" is the default log name. The email version includes the above summary and also includes the following: Ultra GPS Logger 3.075 Prev: -34.073863, 151.154230 [5.000000] Post: -34.073886, 151.154054 [5.000000] Crossing: -34.073874, 151.154152 dist_prev_to_cross: 7.313980012401768 dist_current_to_cross: 9.150849728321536 dist_prev_current: 16.46548823826415 Prev Time (UTC): 26/10/13 05:05:36 Post Time (UTC): 26/10/13 05:05:41 time_diff (ms): 5000 part_time (ms): 2221.003078246052 prefs_fl_bow_ofst: 5.5 bow_meter_per_s: 3.4402499198913574 bow_kmh: 12.384899711608886 bow_sec (s): 1.5987210604088 Crossing time (UTC): 26/10/13 05:05:38 Crossing corrected (BOW) (UTC): 26/10/13 05:05:36 Attached files: [/mnt/sdcard/GPSLogs/2013-1026_122508_LHorSO_R1_Steadfast.kml, /mnt/sdcard/GPSLogs/2013-1026_122508_LHorSO_R1_Steadfast.gpx] Delay after log start – this allows a delay to be programmed. UGL will not start looking for the finish line until the selected delay time after 'start log' is pressed. This option is included to handle the case that the start and finish lines are the same. To avoid UGL deciding that you finished when you are just starting, you can set this time so that it will not immediately look for the finish line after logging is started but instead will wait the selected time delay. Ultra GPS Logger v3.0 User's Guide Page 68 Backup & Restore Backup causes a backup to be saved, in the file location shown under the Backup button. The backup contains all the UGL settings. Restore and Restore defaults will reset UGL back to either the previously created backup or to the original default settings. When experimenting with settings, it is a good idea to first make a backup so that you can restore them later if you want to go back to what you had previously. Send Backup will create a current backup and send that backup file by email. This is primarily used to supply [email protected] information that may be useful in resolving any problem a user might be experiencing. Language At the moment, UGL supports only English and German. You can choose to use the device setting to control language, or override to choose English or German. Google Analytics Opt out – 'check' this to opt out of sending anonymous usage statistics to Google Analytics about your UGL usage. Ultra GPS Logger v3.0 User's Guide Page 69 Appendix I – NMEA format The National Marine Electronics Association (NMEA) defined a specification for communication between various pieces of marine electronics such as GPS receivers, chart plotters, auto pilots, and the like. A full version of the specification is available from the NMEA website. The communication takes place via a serial ascii data stream, with bits of information broken into NMEA sentences which convey position, velocity, position accuracy, deviation from desired track, and so on. There are a large number of different NMEA sentences, both standard sentences defined by NMEA itself or proprietary sentences defined by equipment manufacturers such as Garmin and other. The following links are intended to provide a starting place for understanding NMEAformatted information more completely. http://en.wikipedia.org/wiki/NMEA_0183 http://www.gpsinformation.org/dale/nmea.htm http://www.eoss.org/pubs/nmeafaq.htm Ultra GPS Logger v3.0 User's Guide Page 70 Appendix II – GPX Programs and Websites A large number of tools, apps and programs are available to work with and edit GPX files and to use that information to, for instance, display your altitude profile (interesting if you are a cyclist) or velocity versus time or distance, or geotag your photos. A very short list of a few of these is shown below. GPS Visualizer http://www.gpsvisualizer.com/ Website. Can convert GPX to or from other formats. It can chart the altitude track of your log showing you changes in elevation versus distance or time, create graphics files with a map and your track on the map, and do many other things. This site can also combine multiple GPX logs into a single GPX file containing your entire trip, for instance. GPS Visualizer can also be used as a front-end to GPSBabel GPSBabel http://www.gpsbabel.org/ Free program for converting and filtering GPX data. There is a graphical front-end to GPSBabel that makes it much easier to use than the underlying command-line driven core. Versions are available for windows and for macs. GPicSync http://www.gpsbabel.org/ Free program for geotagging. If you set the clock on your camera accurately and record a GPX track, GPicSync can then use the GPX information to geotag your photos. Geotagging is simply the addition of the latitude and longitude at which the photo was taken to the photo's internal EXIF information. GPicSync can also directly create KMZ files, which are zip files with a KML track and a folder of photos. When you view the KMZ file in GE, you will see your track with each of your photos located at the place it was taken. You can add notes to photos, rename them to more descriptive names, and so forth. It is a great way to save and share a trip experience. GPX_Editor http://sourceforge.net/projects/gpxeditor/ A free GPX track editor. GPS logs contain positional noise due to short-term atmospheric disturbances in the path between you and the satellites in the constellation used for a position fix. Sometimes you want to remove those aberrant points. Other times you may want to remove a Ultra GPS Logger v3.0 User's Guide Page 71 portion of a trip log and not share that with others. GPX_Editor lets you graphically edit the log points, removing, adding, or deleting as you wish. It also allows importing of NMEA information or other info to create a GPX file and in turn exporting GPX information to other formats. GeoSetter http://www.geosetter.de/ http://www.geosetter.de/en/ GeoSetter is a free tool for Windows for showing and changing geotag information and other metadata in image files. While not directly a GPX tool, it is very useful if you get involved with geotagging. EXIFtool Another free tool that, while not specifically a GPX tool, can be very useful in geotagging. In addition, EXIFtool can create a GPX file or a KML file from geotagged photos, a sort of inverse geotagging process. See the information at the website on the –p option for more on how to do this. www.sno.phy.queensu.ca/~phil/exiftool/ Zonum Solutions http://www.zonums.com A collection of free online and non-online tools for working with KML and GPX files, and other mapping tools, is available at Zonum Solutions. Ultra GPS Logger v3.0 User's Guide Page 72 Appendix III – Editing the categories list UGL's list of log categories can be edited to suit a user's particular needs. Each Log Directory that exists has its own category list in a file named cat.txt. A category list editor is planned for a future release of UGL; for now, if you want to change the categories you can edit the file manually, either on your device or on a personal computer. Editing this file is for advanced users; it is important to get it right. For the following, it is assumed that the reader can find and apply a text editor to the file and save the modified result back to the desired Log Directory. The default cat.txt file is shown below: Car, cc0000ff, 4, #ccff0000, 3, Red Hike, cc00ff00, 4, #cc00ff00, 3, Green Train, ccff0000, 4, #cc0000ff, 3, Blue Plane, cc0000ff, 4, #ccff0000, 3, Red Bike, cc00ff00, 4, #cc00ff00, 3, Green Ship, cc00ff00, 4, #cc00ff00, 3, Green Swim, cc00ff00, 4, #cc00ff00, 3, Green Misc, cc00ff00, 4, #cc00ff00, 3, Green Car_BT, cc0000ff, 4, #ccff0000, 3, Red Hike_BT, cc00ff00, 4, #cc00ff00, 3, Green Train_BT, ccff0000, 4, #cc0000ff, 3, Blue Plane_BT, cc0000ff, 4, #ccff0000, 3, Red Bike_BT, cc00ff00, 4, #cc00ff00, 3, Green Ship_BT, cc00ff00, 4, #cc00ff00, 3, Green Swim_BT, cc00ff00, 4, #cc00ff00, 3, Green Misc_BT, cc00ff00, 4, #cc00ff00, 3, Green Items are separated by commas. Each line starts with the name of the category followed by color information. You see above there are two sets of entries: one set ends with _BT and the other does not. The _BT entries are used for logs originating from an external Bluetooth GPS, and the others are used for logs originating from the internal device GPS. There are 6 fields on each line, separated by commas: Field 1: Category name Field 2: LineColor for the KML-format log Field 3: LineWidth for the KML-format log Field 4: LineColor for viewing tracks on the map in UGL Field 5: LineWidth for viewing tracks on the map in UGL Field 6: Comment KML colors are specified as 8 hexadecimal digits of the form TTBBGGRR where TT is transparency, BB is blue, GG is green, and RR is red1. The map colors are similar but the BB and RR portions are reversed, so that the color code is #TTRRGGBB. Note that the hex designator '#' should be included for the map colors and omitted for the KML colors. 1 A very nice KML color code generator can be found at the Zonum Solutions website. Ultra GPS Logger v3.0 User's Guide Page 73 Appendix IV – User POI Files CSV File Format "CSV" files (Comma Separated Variables) are used to convey data in a simple columnar format and in a human-readable form. UGL includes a sample User POI file in csv format, named 'example.csv'. It can be found in the UserPOIs folder in the GPSLogs directory at root level of the SD card: example.csv: Name,Comment,Latitude,Longitude Eiffel Tower,Paris,48.858447,2.294667 The first line (Name, Comment,…) must be present. The subsequent lines contain one POI per line with the fields in the order shown: Name, Comment or short description, latitude, longitude. Note that lat and lon must be in decimal decrees. Latitude degrees north are positive; south are negative. Longitude degrees east are positive; west are negative. Do not use commas anywhere but to separate fields, as any extraneous commas will be recognized as field delimiters, resulting in an error reading the file. CSV files can be edited with any text editor, or with Excel. If using excel, just remember to save the file as csv format rather than in a spreadsheet format. UGL ignores any extra columns present after the four defined above. GPX File Format There are two versions defined for GPX files: 1.0 and 1.1. GPS files are specific cases of XML files. See http://www.topografix.com/gpx.asp for a good explanation of GPX files and links to the 1.1 schema definition. A very simple GPX file example is shown below: <?xml version='1.0' encoding='UTF-8' standalone='yes' ?> <gpx version="1.1" creator="OsmAnd+" xmlns="http://www.topografix.com/GPX/1/1" xmlns:xsi="http://www.w3.org/2001/XMLSchema-instance" xsi:schemaLocation="http://www.topografix.com/GPX/1/1 http://www.topografix.com/GPX/1/1/gpx.xsd"> <wpt lat="42.2938261" lon="-71.3041556"> <name>Wellesley</name> <desc>Boston</desc> </wpt> <wpt lat="42.3628011" lon="-71.0877228"> <name>MIT Bookstore</name> <desc>Boston</desc> </wpt> </gpx> Ultra GPS Logger v3.0 User's Guide Page 74 The file has a header which defines the schema, followed by two waypoint definitions. Each waypoint starts with <wpt lat="42.3628011" lon="-71.0877228"> and ends with </wpt> The file ends with last line: </gpx> Within the <wpt> entry are two more fields: <name> and <desc>, for name and description. GPX files can be much more complex and contain routes and tracks as well as waypoints. Generally, GPX files are created from mapping or navigation software or exported from GPS hardware, but it is possible to create and maintain User POI lists in GPX format, although generally that won't be the easiest or most convenient method. KML File Format Like GPX files, KML files are special cases of XML files, designed to represent more complex data structures than a simple columnar format can handle. KML files are used by Google Earth for representing 'places' which can consist of placemarks and lines. Sometimes KML files are embedded in KMZ files, which are a simple zip file structure containing a KML file to define the places and a Files folder containing information relative to the defined places. For instance, the files folder might contain photos referenced by the placemarks. UGL contains a simple example kml file with one User POI, in example.kml, to be found in the UserPOIs folder within GPSLogs at the root SD card level: example.kml <?xml version="1.0" ?> <kml xmlns="http://earth.google.com/kml/2.0"> <Document> <Placemark> <name>Statue of Liberty</name> <description>New York City</description> <Point> <coordinates>-74.044481,40.689245,0</coordinates> </Point> </Placemark> </Document> </kml> (White space in a kml file is ignored – the indentations above were added for clarity. The actual example.kml file does not contain the indentations.) As can be seen, a User POI is defined in a kml file as a Placemark, with a name, description, and point coordinates. The file begins with a header defining the format, and then the document portion may contain any number of placemarks. KML files may contain additional information, including lines. UGL picks up the placemarks it finds in the file as the User POIs. Ultra GPS Logger v3.0 User's Guide Page 75 Index accelerometer, 21 accuracy options, 15 accuracy target/filter, 15 activity recognition, 65 address, 35 address lookup options, 67 AGPS, 63 reset, 64 update, 64 allow mock locations, 56 almanac, 64 altitude, 12, 31 altitude correction, 19, 20 altitude options, 19 auto send, 64 autolog options, 18 autologging, 8, 11 automatic log name, 16 Available Devices, 50, 52 backup/restore settings, 69 barometer, 20 battery, 11, 21 Bluetooth, 8, 48 available devices, 50, 52 pair, 52 paired devices, 50, 53 PIN, 50, 52 Bluetooth connection verify, 53 built-in maps, 27 car mode, 67 cat.txt, 18, 73 categories file, 18 edit, 73 category, 22 center track, 29 change map type, 27 city POIs, 32 cloud, 40, 45, 47 upload logs to cloud, 45 cold start, 64 compass mode, 29 corrected altitude, 19 creating logs, 22 csv files, 39 editing, 74 example, 74 current position, 29 cursor position, 29 deactivate GPS, 22 debugging, 13 default log category, 17 default POI name, 17 delete track(s), 41 developer settings, 56, 57 device drivers, 53 device identifier, 66 Disclaimer, 1 distance trigger, 13 donate, 7 download latest version, 6 download Mapsforge maps, 27 Dropbox, 8, 45 dual log mode, 55 EasyProfiles, 7 elect all tracks, 41 email, 64 after uploading, 46 auto, 47 email logs, 45 enable mock locations, 56 enquiries, 6 example.csv, 74 example.kml, 75 EXIFtool, 72 export POIs, 40 external device pair, 53 external GPS receiver, 48 connection, 49 deactivate, 51 search, 51 file export, 12 kml, 75 Finish Line, 49, 60, 67 flashlight.de, 47 UGL online services, 47 follow mode, 29 follow position, 29 follow track, 29 format options, 12 Format settings, 11 FTP, 8, 45, 47 setup, 47 fusion location provider, 64 GeoSetter, 72 geotagging, 71, 72 get address, 35 get weather, 35 GLONASS, 55 Goo.gl, 45, 46 Google analytics, 69 Google Drive, 8 Google Earth, 10, 12, 40 edit placemarks, 39 import from, 39 kml files, 39 Ultra GPS Logger v3.0 User's Guide merged file, 44 My Places, 39 placemark, 39 Google Maps, 8, 35, 37 export KML file, 38 import from map engine lite, 38 map engine lite, 38 starred places, 38 GoogleDrive, 45 GPicSync, 71 GPS simplify log, 45 time-to-fix, 64 GPS control, 63 GPS ctrl, 63 GPS editor, 71 GPS fix, 15 GPS fix accuracy, 15, 49 GPS location provider, 64 to other apps, 56 GPS Mouse, 51 GPS power management, 21 GPS receiver external, 48, 49 connecting, 49 deactivate, 51 pair, 50 search, 51 internal, 48 disable, 56 GPS Visualizer, 71 GPSBabel, 71 GPSLogs, 22 GPSLogs folder, 17 GPX, 11 programs and websites, 71 EXIFtool, 72 GeoSetter, 72 GPicSync, 71 GPS Visualizer, 71 GPSBabel, 71 GPX editor, 71 Zonum Solutions, 72 GPX files, 39 editing, 74 GPX format, 12, 74 GPX verbose log comments, 13 GPX version, 13 Import POIs from Google Maps, 38 JGW maps, 27, 28 KML, 11, 12 Page 76 compress to KMZ, 45 simplify log, 45 kml files, 38, 39 example, 75 KML files editing, 75 format, 75 language setting, 69 lat/lon format, 36 layers, 37 LED, 25 live view, 27 Locale, 7 locale API, 61 apps, 61 Locale API, 7 Locale plug-in commands, 61 location provider, 64 lock screen, 59 widget, 59 log categories file, 18 edit, 73 log category, 17, 22, 65, 73 log directory, 22, 26, 40 new, 18 path, 17 subfolders, 18 log during standby, 8 log file path, 17, 22 log format, 22, 44 log inaccurate settings, 15, 16 log trigger, 31 lost fix sound, 26 lost GPS fix, 24 Main screen, 8, 23, 55 manage tasks, 64 map follow mode, 31 map rotation, 28 map type, 27, 29 map updating, 31 maps, 26 built-in, 27 center track, 29 change map type, 27 compass mode, 29 current position, 29 cursor position, 29 download Mapsforge, 27 follow mode, 29 info panels, 30 information display, 29 JGW, 27 Mapsforge, 27 markers, 29 mini-compass, 29, 31, 34 'more' button, 28 navigate, 35 offline, 27 POI head to map, 34 POI position, 29 pointers, 31 scale bar, 28 searching, 32 show/opts, 31 type, 29 maps settings, 28 Mapsforge, 27 mark POI, 24, 29, 33 merge logs, 45 merge tracks, 41, 44 mini-compass, 29, 31 minimum trigger distance, 14 mock locations allow, 56 enable, 56 more button, 63 move track(s), 41 movement detection, 21 multiselect, 27 Multiselect, 41, 42 naming options, 16 navigate, 35 network location provider, 64 NMEA, 6, 11, 51 compress to zip, 45 format, 55, 70 from external receiver, 49 receive, 48 send, 48, 51, 53 send to external device, 51 notification area, 10, 23, 24 notification area options, 25 offline maps, 27, 28 online places search, 36 Online Services, 44 Open Street Map, 8 output formats, 8 'Pair, 49, 52 pause, 24 pending emails, 64 placemark, 12, 75 plug-ins, 58 UGL Locale, 58 UGL SMSCtrl, 58 UGL SMSCtrl, 60 UGL Widget, 58 POI head to map, 29, 31 POI head to radar, 35 POI lists, 32 POI manager, 29, 31, 32 POI name, 17 poi.kml, 40 pointers, 31 POIs address, 35 Ultra GPS Logger v3.0 User's Guide altitude, 36 category, 36 City, 32 create from map, 32 creating UserPOIs with Google Maps, 37 csv files, 39 current position, 32, 33 delete, 36 export, 40 export POIs, 40 GPX files, 39 head to map, 34 head to radar, 35 Import from Google Maps, 38 Importing,exporting, 37 kml files, 38, 39 layers, 33, 37 location, 36 Log, 32 Main, 32 map cursor position, 32 mark POI, 33 name, 36, 65 places, 34, 36 poi.kml, 40 searching online, 34 selected, 34 Send, 40 sunrise/sunset, 35 tools, 34 User, 33, 36 user POI files, 33 User POIs, 37 UserPOIs folder, 37 view on map, 34 weather, 35 power management, 20 power saving options, 13 Preferences. See Settings Index pressure reference, 20 pressure sensor, 20 prevent map rotation, 28 Provider setttings. see Provider settings in Settings Index quick control, 23, 63 Quick Start Guide, 8 radar display, 35 rating, 6 reference pressure, 20 reset AGPS, 64 sailboat, 67 Samsung date fix, 67 satellites screen, 50 tapping, 55 save settings, 69 Page 77 search places online, 36 search POIs, 29 send GPS, 56 Send/Publish, 10, 12, 41, 42, 47 auto send email, 42 by email, 47 example, 42 log formats, 44 merge tracks, 44 Send/Publish settings. See Settings Index - Online Services Settings. See Settings Index Settings backup/restore, 69 Settings screen, 11 SkyDrive, 8, 45 sleep mode, 14, 21 sms N call 2 email, 7 SMS plugin, 68 sound.mp3, 26 standby, 6, 8, 21 start UGL in map view, 67 start UGL on device startup, 66 start/stop log, 8, 22, 28 StartLogDlg, 24 stop detection, 21 stop POIs, 14 stop trigger, 14, 21 stop trigger time, 14 StopLogDialog, 24 stops, 11, 21 subfolders, 18, 22, 26, 41 sunrise/sunset, 35 support, 6 TalkerID, 55 Tasker, 7 time trigger, 13 Track action menu, 9 Track actions, 12, 41 delete track, 41 folder, 41 merge tracks, 41 move track, 41 select all, 41 Send/Publish, 41, 42 track name, 22 track POIs, 32 Tracks button, 9 Tracks menu, 10, 41 Tracks screen, 9, 41 trigger options, 13 log stops, 14 UGL Locale, 58 UGL Locale Plugin, 7, 61 UGL online server. UOS UGL Online Service, 45 UGL SMSCtrl, 58 command table, 60 UGL SMSCtrl, 60 UGL SMSCtrl Plug-in, 7 UGL Widget, 7, 58 Ultra GPS Logger v3.0 User's Guide commands, 58 Ultra GPS Logger, 7 Ultra GPS Logger Lite, 7 Ultra GPS Logger website, 6 UOS, 45, 46 UOS online server, 45 update AGPS, 64 upload logs, 45 upload to cloud, 47 URLs, 45 user POI files, 33, 37, 74, 75 User POIs, 18, 36, 37 csv files, 39 description from gpx file, 40 GPX files, 39 importing, 39 kml files, 39 UserPOIs importing, 38 kml files, 38 UserPOIs folder, 37 verbose log comments, 13 verify Bluetooth connection, 53 vibrate, 25 view track, 9 WAAS, 49 weather, 35 WiFi, 46 Windows Bluetooth pairing, 52 Zonum Solutions, 72 Page 78 Settings Index absolute altitude mode, 12 accuracy options, 15 accuracy target/filter, 15 deactivate GPS, 16 log inaccurate settings, 16 accuracy target/filter, 15 address lookup options, 67 allow mock locations, 56 altitude mode, 12 altitude options, 19 altitude offset, 20 Altitude options pressure sensor/barometer, 20 auto email, 47 autolog options, 18 always, 19 days,start stop times, 19 off, 19 time range, 19 backup/restore settings, 69 Bluetooth settings available devices, 50, 52 client address, 51 device, 49, 51, 52 dual log mode, 55 GLONASS, 55 mock locations allow, 56 enable, 56 outgoing NMEA, 51 PC Windows pairing, 52 PIN, 50, 52 TalkerID, 55 turn BT on, 49, 51, 52 Bluetooth setttings allow mock locations, 56 enable mock locations, 56 car mode, 67 clamp to ground mode, 12 client address, 51 cloud upload logs to cloud, 45 compress KML, 45 compress NMEA, 45 default email address, 44 developer settings, 56, 57 device identifier, 66 dual log mode, 55 enable mock locations, 56 Finish Line options, 67 fix GPS date, 67 Format settings, 11 FTP, 47 fusion location provider, 64 GLONASS, 55 Google analytics, 69 GPS settings (device level), 63 GPX verbose comments, 13 GPX version, 13 html email, 44 JGW map directory, 28 JGW maps, 28 KML altitude mode, 12 language, 69 layout settings, 66 Locale plug-in, 61 log files path, 17 log format GPX, 12 KML, 12 NMEA, 11 log format options absolute altitude mode, 12 clamp to ground mode, 12 GPX verbose comments, 13 GPX version, 13 KML altitude mode, 12 relative to ground mode, 12 log format settings, 11 log inaccurate settings, 15 log stops, 14 map follow mode, 31 maps compass mode, 29 follow mode, 29 follow off, 31 follow pos, 31 follow track, 31 mini-compass, 29 offline maps, 27 online maps, 27 prevent rotation, 28 selected offline map, 28 show scale bar, 28 use offline map, 28 maps options, 28 maps settings, 28 minimum trigger distance, 14 Misc settings, 66 address lookup options, 67 backup/restore send backup, 69 backup/restore settings, 69 car mode, 67 device identifier, 66 Finish Line, 67 activate, 67 offset from bow, 67 Ultra GPS Logger v3.0 User's Guide stop log on finish, 68 FinishLine delay after log start, 68 send email, 68 send SMS, 68 fix GPS date, 67 Google analytics, 69 language, 69 plug-ins, 58 Locale, 61 SMS, 60 UGL Widget, 58 save settings, 69 start in map view, 67 start UGL on device startup, 66 mock locations allow, 56 enable, 56 naming options automatic log name, 16 default log category, 17 default log name, 16 default name, 17 log file path, 17 notification expandable, 25 priority, 25 show icon, 25 type, 25 Notification area options, 25 notification on lost fix blink LED, 25 play sound, 26 sound.mp3, 26 vibrate, 25 offline map, 28 offline maps, 28 Online Services, 44 attach, 47 attach logs to email, 45 auto email, 47 auto send email, 46 auto send/publish, 46 cloud, 47 compress KML, 45 compress NMEA, 45 default email address, 44 default send/publish actions, 45 FTP, 46, 47 html email, 44 merge logs, 45 preprocessing, 45 select email service, 44 Page 79 select formats, 46 send by email, 47 send by WiFi only, 46 send logs by FTP, 45 sharing/public links, 45 simplify KML/GPX, 45 UGL online services, 47 UOS, 47 upload logs to cloud, 45 upload logs to UGL server, 45 URL shortener, 45 passive location provider, 65 plug-ins settings, 58 POIs Log, 32 Main, 32 User POIs, 32 power management Background GPS, 21 deactivate GPS, 22 GPS standby, 21 GPS while active, 21 prevent standby, 21 power saving options, 13 prevent rotation, 28 Provider settings activity recognition, 65 Provider setttings, 64, 65 presets, 64 fusion, 64 GPS+network, 64 passive, 65 relative to ground mode, 12 save settings, 69 scale bar, 28 select email service, 44 Send/Publish settings. See Settings Index - Online Services Send/Receive cloud, 47 settings backup/restore, 69 Settings backup/restore, 69 Ultra GPS Logger v3.0 User's Guide Settings screen, 11 simplify KML/GPX, 45 SMS plug-in, 60 start UGL in map view, 67 start UGL on device startup, 66 stop trigger, 14 stop trigger time, 14 TalkerID, 55 trigger options Log stops, 14 minimum distance, 14 stop trigger time, 14 time, distance, 13 UGL Locale, 58 UGL online services, 47 UGL SMSCtrl, 58 UGL Widget, 58 plug-in, 58 units settings, 66 URL shortener, 45 Page 80