1
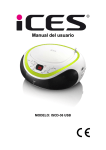
User's Manual
MODEL: ISCD-36 USB
CONTENT
1. PRECAUTIONS………………………………………………………………01
2. MAINTENANCE………………………………………………………………02
3. SPECIFICATION……………………………………………………………...02
4. PARTS NAME AND FUNCTIONS……………………………………….....02
4.1PARTS ON THE FRONT OF THE PLAYER........................................................02
4.2 PARTS ON THE LEFT SIDE OF THE PLAYER.................................................03
4.3 PARTS ON THE REAR OF THE PLAYE……………………………………..04
4.4PARTS ON THE RIGHT OF THE PLAYER……………………………...…………04
5.CHOOSING THE POWER SOURCES............................................................04
5.1 Connecting the AC power cord...........................................................................04
5.2 Connecting to USB storage………………………………………………………….05
5.3 Using the player on batteries..............................................................................05
6. PLAYING A CD OR MP3…………………………………………………….05
7. REPEAT AND PROGGRAMMED PLAY…………………………………..06
7.1 Repeat play.........................................................................................................06
7.2 Programmed play................................................................................................06
8.PLAYING OTHER AUDIO DEVICES THROUGH YOUR SET……………06
9.LISTENING TO THE RADIO………………………………………………….07
10. TROUBLE SHOOTING……………………………………………………...08
11. SERVICE AND SUPPORT…………………………………………………..09
1. PRECAUTIONS
Thank you for purchasing CD player. Please read this manual carefully before
operating and reserve it for future reference. It will be helpful to you if you
encounter any operational problem.
On Safety
·As the laser beam used in the CD player section may be harmful to the eyes, do not
attempt to disassemble the cabinet. Refer servicing to qualified personnel only.
·Should any solid object or liquid fall into the player, unplug the player, and have it checked
by qualified personnel before operating it any further.
On Placement
·Do not leave the player in a location near a heat source, or in a place subject to direct
sunlight, excessive dust or mechanical shock.
·Do not place the player on an inclined or unstable place.
·Do not place anything within 1 inch of the back of the cabinet. The ventilation holes must
not be covered for the player to operate properly and prolong the life of its components.
·If the player is left in a car parked in the sun, be sure to choose a location in the car where
the player will not be subjected to the direct rays of the sun.
·Since a strong magnet is used for the speakers, keep personal credit cards using magnetic
coding or spring wound watches away from the player to prevent possible damage from the
magnets.
On Power Sources
·For battery operation, use 6 size “C” batteries. We recommend alkaline batteries for longer
life.
·When the batteries will not be used for a few weeks or more, remove them to avoid
damage that can be caused by battery leakage or corrosion.
· If the player is brought directly from a cold to a warm location, or is placed in a very damp
room , moisture may condense on the lens inside the CD player section. Should this occur ,
the player will not operate properly. In this case, remove the CD and wait about an hour for
the moisture to evaporate.
·This CD player is designed to be played on a stable no vibration position. If you bump the
set during CD play, the music will stop or skip for a few seconds. This is normal for this type
of player.
Notes on CDs
·Before playing, clean the CD with a cleaning cloth. Wipe the CD from the center out.
·Do not expose the CD to direct sunlight or heat sources such as hot air ducts, not leave it in
a car parked in direct sunlight as there can be a considerable rise in temperature inside the
car.
·Do not stick paper or stickers on the CD, nor scratch the CD.
·After playing, store the CD in its case. If there is a scratch, dirt or fingerprints on the CD, it
may cause a tracking error or skipping.
Scratched Discs
If your disc is badly scratched, it will not play. You may be able to repair the disc if you buy a
disc polisher.
01
2. MAINTENANCE
Cleaning the Lens
If the lens becomes dirty, it may cause a skipping of sound during CD operation.
Clean with a commercially available lens cleaner and blower.
Cleaning the Cabinet
Clean the cabinet, panel and controls with a soft cloth slightly moistened with a mild
detergent solution. Do not use any type of abrasive pad, scouring powder, or solvent, such
as alcohol or benzene
3.SPECIFICATION
Power source
AC 230V
DC 9V (6 size ”C” batteries)
(Alkaline batteries are recommended)
Speakers
4 ohm
Output power
1.0W/channel
Dimensions
263 X 223 X 121
Weight
1225g(without batteries)
Playable disc type
Any normal CD used in portable players
Radio Frequency range
FM:87.5-108 MHz
4. PARTS NAME AND FUNCTIONS
4.1 Parts on the front of the main unit
02
1. FOLDER button :FOLDER SELECTION
2. NEXT:skip next track; Press and hold the button to fast forward play during play mode
3. PREV: skip previous track ; Press and hold the button to fast backward play during play
mode
4. Repeat: repeat the track, folder or whole disc/USB stick
5. Power LED indicator
LED light: main unit is turning on
LED off: main unit is turning off
6. LCD display
7. FM ST LED indicator
LED light: main unit is in FM stereo mode
LED off: main unit is in FM mono mode
8. Stop: Press this to stop play mode
9. Play/pause: Press this to play the disc/usb. When pressed in play mode, pause mode is
set. Press again to resume playback.
10. PROG:Programming the play sequence
11. OPEN/CLOSE:open or close CD door
12. CD door
13. FM antenna
14. Speakers
4.2 Parts on the left side of the main unit
1. Function switch
2. VOLUME control : increase/decrease the volume
03
4.3 Parts on the rear of the main unit
1. Audio input
Input audio signal
2. AC socket
4.4 Parts on the right side of the player
1. Tuning control
2. FM MONO/STEREO Switch
3. Display FM frequency
5.CHOOSING THE POWER SOURCES
You can use the AC power or batteries as a power source.
During playing(except radio mode), when there is no disc or USB insert, after about 5
minutes, this unit will turn to standby mode and then insert a disc/USB or press any button to
turn on this unit (except volume control and tuning control).
5.1 Connecting the AC power cord
Insert one end of the supplied AC power cord into the socket located at the rear of the
player,and the other end to the wall outlet.
04
5.2 Connecting to USB storage
1)Please connect the USB storage to the USB terminal of the main unit
2) The main unit will read the contents that are available on the USB storage device
automatically.
Note:
(1) When disc play, then insert the USB, the unit will automatically switch to play USB .
(2) When USB play, then place the disk, the unit will automatically switch to play the disc.
(3) When the existence of USB and the disc, the unit will play USB at first.
5.3Using the player on batteries
Insert 6 size"C"batteries (not supplied) into the battery compartment.
To use the player on batteries, disconnect and remove the AC power cord both from back of
the player and the wall outlet.
Note:
· If the plug of the AC power cord does not match your outlet,do not force it. Reverse it and
try again.The plug is polarized and only fits one way into the wall outlet and rear of the set.
·Replace the batteries when the POWER lamp dims or when the player stops operating.
Replace all the batteries with new ones.Before you replace the batteries,be sure to take out
the CD from the player.
·If the CD does not play on batteries, this means the batteries are almost used up.But the
radio may continue to play on these weak batteries because it uses less power than the CD
player.
6.PLAYING A CD or MP3
(1) Connect the supplied AC power cord or batteries.
(2) Slide the FUNCTION switch to CD/USB/AUX IN position, the POWER lamp will turn
on.
(3) Open the CD door and place a disc in the CD compartment with the label side up;
Insert the USB stick into the USB socket.
(4) Close the CD door, the display will show the total tracks of the disc or USB stick
(5) Press the PLAY/PAUSE button to start playing. Press the PLAY/PAUSE button in play
mode to pause the playback the track number will be flashing.Press the PLAY/PAUSE
button again to resume the playback.
(6) Adjust the VOLUME control to your preference.
(7) Press the STOP button to stop the playback.
(8) Slide the FUNCTION switch to OFF position to turn off the power.
NOTE:
(1) " NO" will show in the display if there is no disc in the CD compartment or if the disc is
upside down.
(2) If you bump the set during CD play,the music will stop or skip for a few seconds. This is
normal for this type of player.
05
(3) In USB mode, press FOLDER button repeatly to turn to next folder in the USB sticker.
(4) Max suppor 256 Folder, max track 1024 for DISC
Max support 999 Folder, max track 9999 for USB.
If a DISC or a USB have contain 1224, it will show C 24, the A means 10, B means 11,
C means 12, D means 13, E means 14, F means 15, the mostly to show track 1599.
7.REPEAT AND PROGGRAMMED PLAY
7.1 Repeat play
(1) Press the REPEAT button once to play the current song over and over,and the REPEAT
Lamp will be flashing.
(2)Press the REPEAT button twice to repeat play the currenct fold’s songs,and the fold
name will be flashing.
Note: in CD mode, this funciotn will be disable.
(3) Press the REPEAT three( twice) times to repeat playing all the songs in the CD or USB
stick
(4) Press the REPEAT button four( three) times to cancel the repeat play.
7.2 Programmed play
In STOP mode,you can make a program of up to 20 tracks in the order you want them to be
played.
(1) Slide the FUNCTION switch to CD/USB/AUX IN position,Make sure the CD/USB is
stopped.
(2) Press the PROGRAM button. The program number "P.01" will flash in the display.
(3) Press the PREV/NEXT button to select the desired track,and press the PROGRAM
button to confirm.
(4) REPEAT step 3 to program other tracks till you finish ( up to 20 tracks)
(5) Press the PLAY/PAUSE button to start programmed play.
To play all the programmed tracks repeatedly
Press the REPEAT button twice in program play mode.
To change the current program
Just create a new program following the programming procedure.
To cancel programmed play
Press the STOP button twice or slide the FUNCTION switch to OFF position.
8.PLAYING OTHER AUDIO DEVICES THROUGH YOUR SET
You can enjoy the music of a digital MP3 player,computer or any other external audio
device(with a 3.5mm stereo jack)through the set.
(1) Insert an audio cable(not included) with 3.5mm plugs on each end into the
06
HEADPHONES jack or LINE OUT jack of your MP3 player or computer,and the other end
into the AUX IN jack of the set.
(2) Connect the supplied AC power cord or batteries.
(3) Slide the FUNCTION switch to CD/ USBAUX IN position.
(4) Turn on your MP3 player or computer,adjust the VOLUME control of the MP3
player/computer and the player to the desired level.
(5) Slide the FUNCTION switch to OFF position after use.
NOTE:
When connecting an audio player to the set while the set is playing CD,the set will exit CD
mode and switch to AUDIO IN mode automatically.
9.LISTENING TO THE RADIO
(1) Connect the supplied AC power cord or batteries.
(2) Slide the FUNCTION switch to RADIO position,the POWER lamp will turn on.
(3) Slide the FM MONO/STEREO switch to the proper position that you want.
(4) Tune into the station you prefer using the TUNING control.Adjust for the clearest sound.
(5) Adjust the VOLUME control to your preference.
(6) Slide the FUNCTION switch to OFF position to turn off the radio.
NOTE:
Next time you want to listen to the radio,just slide the FUNCTION switch to RADIO
position.The player automatically starts playing the previously tuned station.
To improve broadcast reception
Change position of the antenna for FM.
07
10. Trouble shooting
Please refer the following instruction when there are some problems with this unit.
If the problem still exits, please consult your nearest service center
08
We reserve the right to make design and specification changes for product improvement.
The descriptions and characteristics given in this document are given as a general indication
and not as a guarantee. In order to provide the highest quality product possible, we reserve
the right to make any improvement or modification without prior notice. The English version
serves as the final reference on all product and operation details should any discrepancies
arise in other languages.
11. Service and support
For information: http://www.ices-electronics.com/
For support:
http://icessupport.zendesk.com
ICES helpdesk:
Germany
The Netherlands
Belgium
France
0900-1520530
0900-23553626
02-6200115
0170480005
(Local charges)
(Local charges + 1ct P/min)
(Local charges)
(Local charges)
The helpdesk is accessible from Monday to Friday from 9 AM till 6 PM.
In case your device needs repair, our helpdesk will redirect you to your local dealer.
ICES offers service and warranty in accordance to European law, which means that in
case of repair (both during and after the warranty period), you should contact your local
dealer.
Please note: It is not possible to send products directly to ICES for repair.
Important note: If this unit will be opened, or accessed in any way by a non-official
service center, the warranty expires immediately.
If at any time in the future you should need to dispose of this product please
note that: Waste electrical products should not be disposed of with household
waste. Please recycle where facilities exist. Check with your Local Authority or
retailer for recycling advice. (Waste Electrical and Electronic Equipment
Directive)
09