1
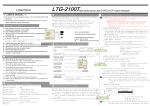
LOGICTECH LTG-2100 USER MANUAL
Manual written by E-Copter. For any information or comment on the present manual or if
you need any support, you can contact us at www.e-copter.com
E-Copter is the France and Monaco exclusive distributor of the LOGICTECH brand and
products manufactured by LOGICTECH, and thereby assures the After Sales Service and
the User Support for materials purchased from authorized dealers.
Specifications:
High performance Heading Hold gyro, specially designed for electric powered helicopters .
- Immediate Initialization (Tail Lock mode).
- Removal of drift effects in the event of temperature changes by internal software.
- Fully compatible with all types of transmitters and receivers.
- Support digital servos (Speed Servo function).
- Compatible with Logictech digital servos (LTS-6100G, LTS 3100G).
- Independent left and right mechanical servo limits programmation.
- Self diagnosis function
- Easy programmation with one button and transmitter rudder stick.
Safety tips / recommendations
- Be sure to properly install and connect the wires/plugs. Do not to introduce any foreign
substances in the product (corrosive, conductive, flammable and any other type of Solid,
liquid or chemical substances)
-Do not use the product under extreme conditions (conditions recommended: -5 ° to +35 °)
-Do not submit the product to sudden changes in temperature
-Be sure to install the product on a clean and degreased area to allow a suitable adhesive
power to the adhesive pad.
- Be sure to install the product in a abnormal vibration free area / support.
-The product should not be dismantled / reassembled by anyone except by authorised
people (Logictech maintenance or authorised service)
-Stop using the product if you have a malfunction or failure of the product and consult
immediately the after sale service
Technical Specifications:
- Voltage: 4.5 volts to 5.5 volts (nominal: 5 volts)-consumption: 20-mah - inputs: 2
(Anticouple, gain)-Outputs: 1 (anti-servo) - Gain Control: Remote (on channel allocated
issuer)-Programming: pushbutton and handle on the issuer anti-Indications of
programming / gain: 8-bit LED display-Dimensions: 22mmx22mmx11mm-Weight: 10
Grams
Installing Gyroscope:
- The gyroscope must be laid horizontally per respect to the axis of main rotor of the
helicopter. Typically, the gyroscope will be laid flat, with the LED and a button up
on a standard helicopter. For other flying objects (UFO,, aircraft, boats,
motorcycles…),please note that the gyroscope compensates and corrects the cap
through a virtual axis crossing from top to bottom (face with leds / buttons being the
top).
- Be sure to install the gyroscope at a distance of at least 10 cm of from the engine and as
far as possible from the belt. The functioning of the gyroscope could be disturbed by
electromagnetic noises generated by these components.
– Always make sure you are using perfect condition ball bearings on your models They are
sources of noise / static electricity, while the receiver will be much more sensitive to
disturbance, the gyroscope could be disturbed as well.
- Install the gyroscope close from the main rotor axis if possible, as there will be less
vibrations around the main mast than far away of it.
- Make sure your machine is setup free of vibrations, check and correct if necessary tracking
and balancing of your blades. You might also check your main rotor axis, your feathering
shaft, tail shaftr, and the screws that attach the feet of blade grips on the tail central hub if
you detect vibrations from the tail. The flybarl should be centered and balanced if
necessary (flybar paddles)
- Ensure that the gyroscope is installed on a clean surface, dry and grease free..
- In the case your model is equipped with a belt driven tail, please use graphite spray on the
belt (Operation to be renewed renew every 2 hours of operation) if you see abrupt
changes or unexplained tail orientation. If your tail boom is made of carbon, please sand
the clear coat of the carbon tail boom when using metal tail boom mounts where the tail
boom is pressed by the supports. This will allow to “ground” the tail boom and avoid
excessive static electricity generation..
- Install the gyroscope with the double-sided adhesive supplied in the box and in the absence
of double-sided adhesive please use top quality adhesive, 2 or 3mm thick .
- Connection Diagram:
Description of the gyroscope and its functions:
LEDs display:
1) Led "TL" (Tail Lock): whether or not the
operation is Tail Lock (led turned on) or in
normal mode (led flashing)
- 8 Leds horizontal display consists of 8 status /
programming LEDs. They indicate the gain
level during flight.
They are also used to indicate the choosen for a function during these steps
2) Servo Speed: Programming the type of servo used (Logictech, Digital, standard)
3) Rotate Rate: matching the servo speed to the gyro correction to avoid bounces
when making fast tail stops. The rotate rate is often set on 2nd or 3rd led on most of the
servos.
4) Direction: Programming the direction of Gyroscope correction (the direction of
servo travel is managed on the transmitter –reverse function- , please consult your
transmitter manual for further informations.
5) Servo Limit: Programming mechanical limits of the pitch slider. This is VERY
important to setup that function properly to avoid damaging your tail servo.
6) "MENU" button: This button is used to enter programming mode. We must
remain supported between 3 and 5 seconds on the
Button to enter programming mode (this deadline has been set to avoid entry into
programming mode unintended or accidental). Once in programming mode, press the
"MENU" button with keeping the rudder stick left or right at same time to change the
function values.
Remember: Menu button pressed alone allows you to switch between the different menus.
Once in the desired menu, holding the rudder stick left or right when pressing the menu
button allows to change the function value.
Once you will be familiar with your gyroscope setup procedure, you will be able to install
it on your helicopter and set it up easily ☺
STEP 1: SELECTION OF TYPE OF RECEIVERS
The internal software of the LTG 2100 is able to recognize the type of receiver which is used.
It allows him to match on the theorical neutral signal of the receiver and thus avoid the
phenomenon of "drifting", which can happen with other brands of gyroscopes when connecting
receivers of a different brand. For a beginner, it means that the gyroscope is compatible with
all the market receivers without having to make specific manipulation, and for the insiders, we
say simply that it will not be necessary in most cases need to modify the " sub-trim " to allow
the gyroscope to initialize correctly and without drifting from neutral.
If despite a perfect tail linkage adjustement in Rate mode (please see manual below for
exmplanations) and a proper setup, your helicopter is still drifting, please contact your
Logictech Service Center. It is possible, in some cases, after a hard crash, that the Gyro PCB
has moved in the Gyro case and needs to be taped back in the gyro case. This allows the PCB to
move in the case of a hard impact in order not to be damaged.
The gyroscopemust NOT be connected to the tail servo until Stage 3. THIS IS VERY
IMPORTANT !
Turn on your transmitter and make sure that there is no mixing on the path of anti-and gain.
Make sure all the trims and sub-trims are neutral, and that the exponential functions are not
enabled. Verify that the "Dual Rate" is well at 100%, and that the boundaries of the track
servo anti only to be maximum (See the notice of your radio, or visit us at www.e-copter.com
for more information).
Connect your gyroscope on the receiver (receiver must be off). There are 3 wires out from the
gyroscope.
One has a male socket (it is the only one). This cable will be connected to tail servo at step 3.
The second has a female plug with 3 wires. This cable will plugs LATER into the receiver on
the rudder output ( please respect polarities and signal). The last cable has a single wire and has
a blue plug This will be connected right now to the Gyro Gain receiver output ( most of time,
channel 5 or AUX 2 ).
Note about the receiver recognition: due to some specific power up cycles on new
transmitters ( especially Spektrum transmitters) you will have to turn on your transmitter,
then your receiver, and only after initialisation of the receiver, you will plug the gyro
rudder plug. UNPLUG YOUR ESC PLUG AND MOTOR PLUGS !!!
Put the rudder stick full left (after Transmitter and Receiver are on and working), and now,
while keeping the transmitter rudder stick left, plug the rudder plug of the gyro on the receiver.
Do not move the rudder stick of the transmitter now, you will see the first 3 red leds move from
one to the other for a few seconds, wait the second cycle and let the rudder stick go back to
neutral.
Cycle power your receiver and the receiver is now recognized. If the procedure does not work,
repeat the operation with rudder stick on the right, and make sure that no mixing is activated
and all values are as described at the beginning of step 1. In any case, once the procedure done,
you can simply go in the Gyro menu and check that keeping the rudder stick left or right with
pressing the menu button at same time changes the values of the functions menu you are in ☺
(Do not connect a servo until you have solved the servo type in " servo speed. " )
Once the gyroscope has recognized the type of receiver, shut down the receiver then back
so that the changes could be taken into account.
A note for Spektrum 2.4 gz equipments, you should know that when the receiver is switched
on, for two seconds, the position taken by the receiver corresponds to the position of sticks /
switches / trims and other related functions are the one recereived at the "Bind" (buddy)
transceiver receiver. Once the helicopter fully setup including the gyro, we recommend you
to make a new binding with throttle hold (or throttle cut), enabled, all sticks on neutral or if
you do not have throttle hold available, just put the throttle stick to zero ( bottom), make sure
gyro gain is at least 30% in Tail Lock mode and rebind ☺. This will be your power up /
failsafe values.
.
STEP 2: SELECTION OF SERVO TYPE (SERVO SPEED)
This function is used to select the type of servo connected to the gyroscope. We remind you
that the servo should NOT be plugged in at this moment. During setup, the selection will be
made through the first 3 leds. The LED 1 indicate the use of a Matched Logictech Servo ( LTS
6100G, LTS 3100G). The 2 led indicates the use of a standard digital servo. The 3 led
indicates the usae of a standard analog servo.
Please note that some cheap so called digital servos can NOT work with Standard Digital Servo
setup on the gyro ( you will hear your servo acting strangely). In that case, simply use the
“ Standard analog servo setup.
Press the MENU button with rudder stick on neutral for a few seconds. Led will blink in front
of “Servo Speed” menu. Release the button. Do not wait too long before changing the values
or the gyro will simply kick you out from the “menu” routine and you will have to get back in
by pressing the menu button ☺
Hold now the rudder stick full left and while keeping that position, press menu button. The top
led ( in the 8 status display led) shall move left if you are further than the first led. If not,
simply put the rudder stick on the right and when holding it full right, press menu. This
manipulation will be same for all other values setup, it can happen that when having the rudder
stick left, the values go to right and vice-versa. That is fully norma as it depends if you use the
rudder function normal or reverse, and it depends of the Transmitter / receiver you are using ☺
Choose the correct servo type .Please note that when choosing LTG matched gyro, if you later
come back to the servo speed menu, it will automatically bring you to the second led to avoid
accidental frying of a standard servo if you have one, but once setup on the LTG matched
servo, just go to the others menu and the values will be saved. If for example you miss the
“Limits” setup, you will have to go again through the entire menu functions, and servo speed
will be automatically re set to “ standard figital” , just unplug the servo wire when going
through the servo speed menu time to set it up back correctly.
STEP 3: SETTING UP THE GYRO GAIN
It is necessary to set up a gain of 30% in rate mode (normal mode) approximately to be able to
proceed with the mechanical adjustment of the tail neutral. Wait a few seconds after the Step 2
so that the gyroscope gets out of the programming menu, and enter into normal operation mode
(menu Leds are off). For getting to 30% gain in rate mode, use the Transmitter ATV /EPA /
TRAVEL or LIMIT adjustment of the channel allocated to gyroscope gain. Most of the
time,channels for gain are "Gear", "Aux", or "Gyro" (please refer to your transmitter manual for
further details). The gyro gain adjustement is most of the time linked to a 2 positions switch.
The gain adjustement procedure is very simple: Use the gain channel limits on the transmitter ,
in both directions, to adjust the gain in normal or rate mode. Just take into account the fact that
a channel has a stock -100 / 0 / +100. If you draw on a piece of paper a segment, indicating the
mid point at 0 , then left end(-100) and right end(+100), it is simply the gain adjust of the
gyroscope, in normal mode (left) or tail lock ( right). 0 is simply NO gain at all. Then, going
more to one or the other direction rises the gain in normal or rate mode According to the
direction of travel used to the track, everything that relates to the negative travel act on the gain
in normal mode, and the travel positive gains locking cap, and vice versa ( the "TL" led will
indicate you wether you are in normal or tail lock mode, on is Tail Lock, off or blinking is Rate
mode ( normal).
So, for example by having 30% gain in normal mode, it is enough simply to adjust the limit of
the road to gain gyroscope or -30 to +30 according to the direction of rotation of the track
( "menu" in the REVERSE Most radio). Once the gyroscope will be fully setup, we can rise
the values of travel for gain to -40 / +40 before making the finest settings.
In addition, your LOGICTECH gyro indicates you in which portion of gain you are,
using 8 red LEDs at the top of the gyro in normal use operation (excluding programming):
Led 1: 0 to 30%. Led 2: between 31 and 40% Led 3: between 41 and 50%. Led 4: between 51
and 60% Led 5: 61 to 70% Led 6: between 71 and 80 Led 7% between 81 and 90% Led 8:
between 91 and 100%
Depending on the type of transmitter / receiver used, it might happen that there is a little
difference between the gain you did setup in the transmitter ( gain channel limits) and the
real gain, but thanks to the display on the gyroscope, you can check the real gain and the
Tail Lock or Rate operation of the gyro.
STEP 4: ADJUSTMENT OF MECHANICAL NEUTRAL – IMPORTANT STEPAfter initializing the gyro in the Rate mode( "TL" Led off) and set the gain at 30%, you can
proceed with the installation and adjustment of the rudder servo arm and linkage. The servo
arm must be in a horizontal position if the servo is mounted in a vertical position, and
therefore… to vertical if the servo is mounted in a horizontal position. Then adjust the length
of the rod so that the tail blades anti have a pitch that would allow to fly in normal mode,
without any mixing or correction ( hovering) totally or close to straight on the rudder axis ( no
drifting). If ever to take off the helicopter begins to turn on itself quicker and quicker, go to
Step 5. Otherwise, if the meaning of compensation of the gyroscope is correct, you can finnish
this step and then move on to step 6. Adjust the tail LINKAGE length to allow the heli to hover
without having to bring corrections on the rudder channel. Take all the necessary time to adjust
as good as possible the tail linkage length. The linkage and tail pitch slider should be as free as
possible, with the fewest hard point as possible. From there depend the quality of
compensation given by the gyroscope. The same applies to vibration, your helicopter must be
fully setup so that the gyroscope can give the best of himself. This Step 5 will allow the gyro to
have the servo arm keeping a fully symmetrical travel and outputs to the tail for a perfect
operation, both sides, and same feeling in each direction inputs. This will allow as well the
Gyro to operate the servo the same way in both directions so that the rotate rate setup will be as
good for left and right operation / compensation. DO NOT MISS THIS STEP !
STEP 5: ROTATE RATE
This function is used to adjust the rate at which the gyroscope will give inputs to the tail servo,
in order to set up net pirouettes stops and enable the use of high gain values. This setting lets
you adjust the speed of reaction of the gyroscope depending on the speed of the servo used and
its installation. It will take some time to perfectly tune this setting , we recommend you to set
up a value of 2 or 3, and if you are an experienced pilot, then you have to try different settings
until you find a good balance between the reaction rate and pirouettes stopping without
encountering any bouncing (this setting is used primarily to remove the bouncing issues in fast
pirouettes and will help to reach maximum gain level to have a good tail holding in the fastest
manoevers). This setting is also called "DELAY" on other brands gyroscopes.
To adjust this feature, press the "MENU" button several times until you have the "ROTATE
RATE” led ON. Then, adjust the setting like on all other menus ( holding rudder stick either
left or right and press menu button at the same time).
STEP 6: DIRECTION
The gyroscope, in order to operate properly, must compensate in the right direction. Otherwise,
it will amplify the drift of the tail rather than compensate or lock it. If the gyroscope gives the
tail servo to the wrong compensation direction (Please do not confuse the direction of rotation
through radio, which acts for pilot rudder inputs only), simply press the "MENU" button
several times to turn on the "led DIRECTION." Then, with the handle of the anti-right or left,
press the "MENU" button to change the setting.
STEP 7:SERVO LIMITS
Your LOGICTECH gyroscope has a function for setting the mechanical limits of servo travel
for both directions ( left and right), independently. This kind of setting which exists on high
ends gyros generally exists only as a symmetrical value on same size gyros (one unique value
acting on both directions). Here, your 2100 LTG offers to settle the limits completely
independently for left, and right.
The settings must be done in RATE mode. If the setting is really too odd and that the gyro
software detects that the data inputs can not allow a correct operation of the tail, LTG 2100 will
simply cancel the programmed values and set a limit of 25% in each directions to avoid
damaging the tail servo.
You have to press the "MENU" button until the "SERVO LIMIT" led lights on. Then, move
the rudder stick slowly to the left to bring the tail pitch slider or linkage close to bind
mechanically. Hold the stick in this position and press the “menu” button ONE time. Then,
move slowly the rudder stick to the right untiul the pitch slider or the linkage is close to
mechanically bind, keep the rudder stick in that position and press “ menu” one time. Let the
rudder stick get back to NEUTRAL position, and press “menu” to validate the setting. You can
now check the travel limits of the tail servo by operating the stick full left / full right in both
rate and TL mode. If anything binds or if you did setup too small values, just repeat the process
until you are happy with the setup.
Attention! The pirouetting speed is set simply with the RUDDER limits on the
TRANSMITTER, and DOES NOT affect the mechanical limits you just did setup. The gyro
stores the mechanics limits of the tail servo as you learned him, and will not allow the servo to
bind whatever your rudder input or rudder limits are from the transmitter. Your inputs on the
rudder stick are translated from the gyro as angular inputs, the bigger the input is, the bigger
angular movement youa re requesting to the gyro, which will act in the mechanical limits that
are stored in it”s memory. That is why, you can either decrease or increase the pirouette speed
by reducing / increasing the rudder limits in the transmitter or Dual rate. You can bring the tail
more aggressive or gentle with setting Expo or Inverted Expo on the rudder channel. Gain
channel is ONLY used for gain setting.*.
Congratulations! You just finished programming your LOGICTECH LTG 2100 GYRO
WARRANTY / INFORMATION (blablabla for France only RCG guys ☺)
Your Logictech gyroscope is now solved, you just have to make a general audit of your
helicopter (if you are a beginner, ask your dealer or an experienced modeller, but do NOT run
your helicopter scale model alone to avoid accidents. Even a small model can be very
dangerous because of the rotation speed high main rotor.
Your Logictech gyroscope is guaranteed for a period of 12 months after purchase (the date of
purchase invoice from your dealer is valid). Attention, only gyroscopes purchased from
authorized resellers E-Copter and whose internal serial number (silkscreened number and serial
number associated software) corresponds to the gyroscopes distributed by E-Copter benefit
from the guarantee. In any other case, please bring the store who sold you the hardware, no
exceptions can be made and equipment will not be paid by E-Copter.
E-Copter disclaims any liability that may arise from the use of the gyroscope or failure may
occur during flight. Indeed, a helicopter model érduit being assembled, maintained and
operated by a third person, it is impossible for E-Copter ensure the proper setting, the proper
use and proper working of the scale model on which the gyroscope is used . Any use in a
device other than a helicopter model reduces electric place the gyroscope outside the
coverage under the warranty.
For further information, you can contact us by email at [email protected] and from 1
August 2007 to address [email protected].
You can also visit our website online support by visiting www.logictech.fr from 1 August
2007 or on www.e-copter.com, then clicking on "Support Dragonus / A2Pro / Logictech ".
We wish you many hours of fun with your scale model, but remember, a scale model is not a
toy, and its use is subject to certain basic safety rules. You can learn more about the French
and about els modélismes clubs, as well as about our bases and clubs neighbours on the site of
the French Federation of Aeromodelling www.ffam.asso.fr. Do not forget to check with your
assurance that you are covered for the steering wheel models, and if your insurance covers
individual do not, do not hesitate to join a club modeling approved by the FFAM or having its
own insurance to be covered in case of accidents causing injury to others.
That said, good flights
at all ☺ Team ECopter