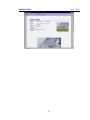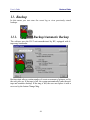
1
Digital Video Surveillance System
v1.60
User’s Guide
Distributor:
Hexium Vidoc
User’s Guide
2
Hexium Vidoc
User’s Guide
Notes
If you have any questions about the system, or comments, advice to help
our work, please do not hesitate to contact us at the following address or
phone number:
• Váci út 51/b Budapest 1134 HUNGARY•
• Tel.: (+36 1) 320-8338 • Fax.: (+36 1) 340-8072 •
• E-mail: [email protected] • Web: www.hexium.hu •
3
Hexium Vidoc
User’s Guide
1. Contents
1. Contents .............................................................................4
2. Installing The System........................................................7
2.1.
2.2.
2.3.
2.4.
2.5.
Minimal Configuration.................................................................. 7
Steps of Installation ....................................................................... 8
Change The Webcamera Settings ................................................. 8
24-hours Operation Mode ............................................................. 9
Included Users ............................................................................. 11
3. Introduction.....................................................................12
4. The Task of The System ..................................................14
5. The Most Important Hardware Units .............................15
5.1.
5.2.
Digitising Unit ............................................................................. 15
Backup Unit................................................................................. 16
5.2.1.
5.2.2.
5.3.
Device Overview............................................................................. 16
Conclusion....................................................................................... 16
Industrial Computer..................................................................... 17
6. The Operation of The System..........................................18
6.1.
6.2.
6.3.
6.4.
Picture Digitising Methods.......................................................... 18
Trigger ......................................................................................... 18
WatchDog.................................................................................... 18
Operator Functions ...................................................................... 19
7. User Interface ..................................................................20
7.1.
The Menu Structure of The Program .......................................... 20
8. File menu.........................................................................22
8.1.
8.2.
8.3.
8.4.
8.5.
8.6.
8.7.
File/Log In ................................................................................... 22
File/Log out ................................................................................. 22
File/Change Password ................................................................. 22
File/System Messages ................................................................. 23
File/Exit ....................................................................................... 23
File/Restart................................................................................... 23
File/Shut Down............................................................................ 23
9. Settings.............................................................................24
4
Hexium Vidoc
9.1.
9.2.
9.3.
9.4.
9.5.
9.6.
9.7.
9.8.
9.9.
9.10.
9.11.
9.12.
9.13.
9.14.
9.15.
9.16.
User’s Guide
Settings/Display........................................................................... 24
Settings/Digitising ....................................................................... 25
Register Settings.......................................................................... 27
Settings/Trigger ........................................................................... 28
Settings/WatchDog...................................................................... 29
Settings/ Pen/Tilt/Zoom .............................................................. 30
Settings/Motion Detector ............................................................ 31
Settings/External Alarm Inputs ................................................... 32
Settings/Compression.................................................................. 33
Settings/Backup........................................................................... 34
Settings/Network ......................................................................... 35
Settings/Alarm Signal.................................................................. 38
Settings/Webcamera.................................................................... 38
Settings/Rights............................................................................. 40
Settings/Save Settings ................................................................. 41
Settings/Restore Settings............................................................. 41
10. Event Log.........................................................................42
10.1. Events .......................................................................................... 42
10.1.1.
10.1.2.
Print ................................................................................................. 44
Export to 120MB FDD ................................................................... 45
10.2. Pictures ........................................................................................ 46
10.2.1.
10.2.2.
Export.............................................................................................. 46
Print ................................................................................................. 46
11. Backup .............................................................................48
11.1. Backup/Automatic Backup ......................................................... 48
11.2. Backup/Manual Backup .............................................................. 49
11.3. Backup/Restore ........................................................................... 50
12. LICENCE AND GUARANTEE CONDITIONS ............52
12.1.
12.2.
12.3.
12.4.
12.5.
12.6.
12.7.
SOFTWARE PRODUCT LICENCE.......................................... 52
SERIAL IDENTIFICATION NUMBER ................................... 52
Grant of Licence.......................................................................... 53
Software Installation and Use ..................................................... 53
Storage/Network Use .................................................................. 53
Licence Package .......................................................................... 53
Other Rights and Limitations ...................................................... 53
12.7.1.
"Not for Resale" Software............................................................... 53
12.7.2.
Limitations on Reverse Engineering, Decompilation and
Disassembly ...................................................................................................... 54
12.7.3.
Separation of Components.............................................................. 54
5
User’s Guide
Hexium Vidoc
12.7.4.
12.7.5.
12.7.6.
12.7.7.
12.7.8.
12.7.9.
12.7.10.
Rental............................................................................................... 54
Product Support............................................................................... 54
Software Product Transfer .............................................................. 54
Termination ..................................................................................... 54
Upgrades.......................................................................................... 55
Copyright......................................................................................... 55
Dual –Media Software Product....................................................... 55
12.8. Limited Warranties...................................................................... 56
12.8.1.
12.8.2.
Limited Warranty ............................................................................ 56
Customer Remedies ........................................................................ 56
12.9. No Liability for Consequential Damages.................................... 56
12.10. General Hardware Warranty ....................................................... 57
A. Appendix – List of Rights................................................58
B. Appendix – Events ...........................................................62
C. Appendix – Frequent Questions/Errors .........................66
6
Hexium Vidoc
User’s Guide
2. Installing The System
2.1.
Minimal Configuration
The minimal configuration for running and using the system is the
following:
• Intel Pentium Celeron 366MHz
• 64MByte RAM
• 4GB HDD free capacity
• Windows NT 4.0 (service pack 5)
• CD-ROM driver (to install)
The minimal configuration for running the demo is the following:
• Intel Pentium 200MHz
• 32MByte RAM
• 16MB HDD free capacity
• 4x CD-ROM driver
• Windows NT 4.0 (minimum service pack 3, service pack 5 advised
WARNING
Minimal configuration can differ from case to case
depending on the software system.
The above data provide only general information. The manufacturer
refuses all responsibility for damages arising from faulty installation or
inappropriate configuration.
7
Hexium Vidoc
User’s Guide
2.2.
Steps of Installation
For the full installation of the Vidoc system, please follow the steps below:
• Install HV-PCI6 or any compatible digitising card: with the help of
driver in the folder \hvpci6 on the install-CD: (Control Panel /
Multimedia / Devices / Add)
• Install Hexium Multi IOCard –optional–: by running the program
\iocard\install_nt.bat from the install-CD.
• Install Hexium ProGuard driver –optional–: by running the
program \proguard\install.bat from the install-CD.
• Install Hexium Vidoc SA/MA/SL software by running
\vidoc\setup.exe from the install-CD.
• Copy the licence floppy to the folder \vidoc and run install.bat (if it
is on the floppy)
• Test-run, in which the proper running of the system elements must
be checked (digitising card, I/O card).
• Change the web camera settings –optional- (see later)
• Install HexShell: –in the case of 24 hours operation system– (see
later)
If you have any questions or problems concerning the installation, please
go to the Appendix Frequent Questions/Errors at the end of the Guide or
call us.
2.3.
Change The Webcamera Settings
The installation process is made up by the following steps:
• Start to install the Microsoft Peer Web Services from the install
CD of Microsoft Windows NT 4.0 (run the program
\i386\InetSrv\InetStp.exe from the install CD)
• Do not install the following services, drivers: Gopher, Ftp, ODBC
• Set the World Wide Web publishing directory (e.g.: d:\InetPub è
d:\InetPub\wwwroot, d:\InetPub\scripts)
• After the successful installation, refresh the system with the most
recent Windows NT 4.0 Service Pack (min. Service Pack 5)
• run the program called Internet Service Manager (Start / Programs
/ Microsoft Peer Web Services / Internet Service Manager)
8
Hexium Vidoc
User’s Guide
•
if several services run parallel, set the services to run only the
www service
• at the parameters of the www service, choose the Directories page,
and change the name of the Default document to index.html
• copy the content of webvidoc directory from the Vidoc install CD
to the directory d:\InetPub
• after starting to run Vidoc, change the Local directory at Settings /
Webcamera to directory d:\InetPub\scripts\
If you want to install the webcamera service to be accessible for anyone
through local network:
• allow anonymous logon at the www service properties.
If you want to install the webcamera service to be accessible only by
password through local network:
• at the www service properties do not allow either anonymous
logon or Windows NT Challenge/Response, but tick the basic
(clear text) password authentication
• create a new user (member of Guests group) with the help of User
Manager (Start \ Programs \ Administrative Tools (Common)\ User
Manager).
•
The suggested length of the password is at least of 6 characters
including both small and capital letters as well as numbers.
• The newly created user will be able to control the pictures from the
cameras through the web only by using his login and password.
If you have any questions or problems concerning the installation, please
read the detailed description of the webcamera.
2.4.
24-hours Operation Mode
The 24-hours operation of the system is supported by the program called
HexShell, which automatically joins the system after starting Windows
NT, and starts the loading program of Vidoc.
HexShell itself is also protected by an access code, so access to the system
is only allowed to those who are entitled. There are two levels of authority
in HexShell. The first is the administrator level by which 24-hours or
normal shell can be set, the other is the maintainer level by which the
computer can be reset, shut down, or HexShell can be closed. The included
codes are the following:
9
Hexium Vidoc
User’s Guide
Type
administrator
maintainer
Access code
admin
log
IMPORTANT
Install or configure the HexShell module only after the successful testrun of Vidoc!
The steps of installation are the following:
• run the file \hexshell\c.bat from the CD, which will copy the files
needed to run HexShell to the hard disc.
• run the program „regedt32.exe” and under the registration key
HKEY_CURRENT_USER \ Software \ Hexium \ HexShell \ create the
following identifiers:
Identifier
Logon
LogonPsw
Load0
Type
REG_SZ
REG_SZ
REG_SZ
Value
Login name of the current user
Access code of the current user
Vidoc Loader file name with full way of
attainment
• start HexShell, then click on the „24-hours shell” button after typing
the administrator code,
• type the maintainer code, then click on the reset button. The program
will restart the computer in the 24-hours mode.
10
Hexium Vidoc
2.5.
User’s Guide
Included Users
All setting facilities and functions in the program are authority-dependent.
Only the entitled user is authorised to change the settings or do other tasks
(e.g. backup).
In the trade version of Vidoc, system configuration and user authority is
set by an included user called Administrator. His Login name is
„administrator”, his access code is „administrator”. It is important to
change his access code in time after configuration, because the
Administrator is entitled to change each functional and setting possibility
in the system.
The login names and access codes of the users included in the demo
version are the following:
User name
Administrator
Service-man
Doorman
Security guard
Login name
administrator
service
doorman
security
Base code
administrator
service
doorman
security
IMPORTANT
The authorities of the included users are set to show you an example.
Before applying the included users/authorities in a live system, please
make sure to compare them with the defined safety policy.
11
Hexium Vidoc
User’s Guide
3. Introduction
Due to our long experience in development, the dramatic progress in
computer technology, and the use of special mathematical image
processing and analysing methods, the most effective hardware and
software devices are included in the most recent version of Vidoc Digital
Video Surveillance System.
The application of these most up-to-date achievements makes it possible
for the Users to get access to such high quality functions that cannot be
realised by traditional analogue, Time-Lapse video systems.
Vidoc Digital Video Surveillance System has the following advantages:
•
High resolution digitising
•
Image processing without loss in quality
•
Possibility for detailed event log
•
Easy and fast filter in the event log
•
Intelligent motion and presence detector
•
Functions to improve picture quality
•
Restoring by DAT cassettes (high level of safety and convenience)
•
Effective compression functions
•
Included multiplexer
12
Hexium Vidoc
User’s Guide
•
Easy and cheap image forwarding to any distance through different
communicational channels (telephone, hired line, GSM, ISDN, LAN,
WAN, etc) (optional)
•
Taking into consideration all user requirements
For the realistic overview on this special area, we have to add that the
weakening but nowadays prevailing advantage of the traditional analogue
systems is that –although they produce much worse image quality- they are
cheaper and can be run more economically at the same level of restoring.
In the case of more complex systems, the digital system’s better image
quality, additional functions, its intelligent and flexible motion detection,
and effective image compression compensate for the above evident
advantages.
13
Hexium Vidoc
User’s Guide
4. The Task of The System
The task of the system is to detect motion or presence of objects at the
areas under camera surveillance, to log, back up and recall the system
events and alarms.
IMPORTANT INFORMATION
If you have any questions concerning the hardware or software
operation of the system, please send them to us via fax or e-mail to help
us provide better service to our clients.
We welcome all your professional questions, but we are also open to hear
your advice, ideas, opinions that could help our developing work.
14
Hexium Vidoc
User’s Guide
5. The Most Important Hardware Units
5.1.
Digitising Unit
The unit that basically determines the quality of the system you bought is
an HV-PCI6 video digitising (grabber) card. It makes it possible to digitise
the standard (CVBS, S-Video) analogue video signals coming from
different sources (camera, video) and to transfer them to an IBM PC
compatible personal computer with a PCI bus main-board.
IMPORTANT INFORMATION
The software of Vidoc Digital Video Surveillance System and the HVPCI6 video digitising card can co-operate optimally only with a PC with
suitable performance.
In a configuration of weak performance the right operation of the
system cannot be guaranteed!
The HV-PCI6 video digitising (framegrabber) card can handle 6 composite
video signals (CVBS) or 3 pairs of intensity- (Y) and colour (C) signals.
15
Hexium Vidoc
User’s Guide
The card can also process PAL, SECAM and NTSC standard video
signals. The suitable input is selected by the software. The maximum speed
of digitising is 25 pictures/sec (in case of NTSC signal 30 pictures); the
best resolution is 768*576 (NTSC signal 640*480). The card has three
operational modes. In the first one the digitised picture is greyscale (8 bit
greyscale operational mode), which means 8 bits per pixel. In the second
one colour difference signals contain information on the colour, and an
intensity signal on the picture intensity. (16 bit YUV operational mode). In
the third one an 8-bit colour component is used for each pixel (24 bit RGB
operational mode).
5.2.
Backup Unit
5.2.1.
Device Overview
Nowadays the most economical backup device of digital video systems is
DAT backup unit. You can see this statement justified in the following
table containing the cost analysis of different backup units per 1 GB
(March 2001).
Name
DAT
rewritable CD
HDD
5.2 GB OD
A:DRIVE
5.2.2.
Capacity
Investment
12 000 MB
640 MB
10 200 MB
5.2 GB
120 MB
220 000 HUF
60 000 HUF
520 000 HUF
20 000 HUF
Price of the
backup unit
3 500 HUF
1 100 HUF
22 000 HUF
23 500 HUF
2 000 HUF
Cost
290 HUF/GB
1 720 HUF/GB
2 160 HUF/GB
4 500 HUF/GB
16 500 HUF/GB
Conclusion
The above table shows that presently DAT has no rival if you need to store
large amount of data. (In this review only the backup devices under 500
000 HUF were compared.)
On the other hand, the table also shows that if you need to store only a
limited amount of data, A:DRIVE can be a good solution considering the
investment cost.
Certainly, besides the above-mentioned backup devices, high capacity, fast
HDD must also be installed to the system, which can function as a
temporary storage, too.
16
Hexium Vidoc
5.3.
User’s Guide
Industrial Computer
IMPORTANT INFORMATION
The software of Vidoc Digital Video Surveillance System and the HVPCI6 video digitising card can co-operate optimally only with a PC with
suitable performance.
If you want to install the system to a traditional PC, please consult with
one of our experts about the configuration needed.
In a configuration of weak performance the right operation of the
system cannot be guaranteed!
It is important to note that if you want to achieve reliable 24/7 operation
mode for the industrial version of the system, regular maintenance is
essential (e.g. cleaning the air filter regularly).
If you buy a complex system of 24/7 category, we suggest a PC running
with Windows NT and using industrial mainboard and chassis. These
devices and their supplementary units (power supply, fan, air filter, etc.)
together provide the continuous and reliable 24-hours operation.
17
Hexium Vidoc
User’s Guide
6. The Operation of The System
6.1.
Picture Digitising Methods
The system can make pictures from the installed cameras either
“automatically” or “manually”. The aim of the automatic picture digitising
is to have the cameras under continuous surveillance, i.e. to provide a
continuous protection of the objects. The aim of the manual picture
digitising is to make pictures in certain situations (e.g. alarm, operator’s
command) from a given camera and to store them in the event log.
The digitising unit keeps to the automatic digitising (in an automatic order)
until a manual picture-digitising request arises. If there is still a need for
digitising manually after making the first picture (e.g. a request could come
during digitising), and there was not “too many” manual pictures made
(priority of manual pictures), then a new manual picture will be digitised.
If not, then the unit will digitise from the next camera in the automatic
order. Digitising is done by the HV-PCI6 digitising card according to the
set parameters (registers).
6.2.
Trigger
The task of the trigger unit is to take pictures from the cameras at given
times, in given sizes and qualities according to its settings. These pictures
are stored in the event log.
6.3.
WatchDog
With complex, 24-hours systems (24/7 type systems), it is essential to use
an independent supervisory unit. Its task is to control the run of the system,
or to reset it in case of system stops due to network problems or outside
influences. At regular times the running system informs an outside unit
about its correct operation. If this unit does not get this feedback within a
certain time (TimeOut), the superior unit will start the reset of the system.
18
Hexium Vidoc
6.4.
User’s Guide
Operator Functions
The staff responsible for surveillance has two important functions. First, -if
they have the right- they can store a picture from any cameras (operator
pictures) by clicking the left mouse button at the picture of the given
camera.
Second, they can magnify the pictures by using the F1-F12 function keys.
They can return to the first function by pressing the Esc key.
19
Hexium Vidoc
User’s Guide
7. User Interface
At the start of the system, the user can see the program menu at the top of
the screen, and the pictures from the cameras below.
7.1.
The Menu Structure of The Program
The menu structure of the program -depending on the version (Stand
Alone/Master/Slave) is the following:
File
Log In
Log Out
Change Password
System Events
Exit
Restart
Shut Down
Settings
Display
Digitising
Trigger
WatchDog
Pan/tilt/zoom (optional)
Motion Detector
External Alarm Inputs (optional)
Compression
Backup and Restore (optional)
Network (optional)
Alarm Signal
Web Camera
Rights
Save Settings
Restore Settings
Event Log
Backup & Restore
Automatic backup (optional)
Manual backup (optional)
Restore (optional)
Modem
20
Hexium Vidoc
User’s Guide
Dial
Hang up
Help
Contents
Index
About
21
Hexium Vidoc
User’s Guide
8. File menu
8.1.
File/Log In
In this menu you can log in to the system by giving your exact login name
and password (the previous user will be logged out automatically).
Login name, Password: here you can give the data necessary for
log in.
Log in: you can log in with the given data.
8.2.
File/Log out
In this menu you can log out from the system. After log out a special user,
called “default user” will become current. His rights should be set so as not
to be able to change the system settings.
8.3.
File/Change Password
In this menu you can change your password
22
Hexium Vidoc
User’s Guide
8.4. File/System Messages
You can see the system event log (e.g.: event log is full, pictures are lost,
etc.)
Clear Event Log: you can clear the system events
8.5.
File/Exit
You can exit from the program.
8.6. File/Restart
You can restart the system (only in case of 24-hour shell).
8.7. File/Shut Down
You can shut down the system (only in case of 24-hour shell).
23
Hexium Vidoc
User’s Guide
9. Settings
In this menu you can find the functions by which you can change the
settings of the system.
9.1.
Settings/Display
In this menu you can set the parameters of display. In the top right part of
the dialogue box you can see the simplified picture of the screen. The
parameters of display are the following:
Number of Cameras: you can set the number and arrangement of
cameras displayed together at the screen (e.g. 12 cameras (4x3)
– 4 camera pictures horizontally, 3 vertically)
Display Parameters: the mode of camera display:
Freeze Scale: pictures are displayed at a 3:4 scaled area, even if
only a part of the screen is used this way.
Display Alarm Areas: if the system detects alarm with one of the
cameras, the contour of the alarmed surface is displayed as
red.
24
Hexium Vidoc
User’s Guide
Optimal Fill: the camera picture is enlarged/reduced to be
displayed at the largest possible size.
Smooth: if the digitised picture is of high resolution (768x576), in
case of motion displayed you can see stripes due to the fact
that the digitised picture is made up by two half-pictures. This
error is corrected by this setting.
Texts on Screen: textual information about the picture:
Camera Number, Camera Name: you can see the number and
name of camera
Picture Time: you can see the time the picture was taken
Picture Resolution: you can see the resolution and mode of the
picture
State: you can see the state of the picture (alarmed/manual/etc.)
Text Position: the position where textual information is displayed
Camera: you can set where to see the camera pictures at the screen.
This setting is valid for the current screen position, which can be
selected by mouse.
9.2.
Settings/Digitising
In this menu you can set the parameters of digitising. At the top of the
dialogue box you can change the settings for each camera, while at the
lower part you can set the parameters of automatic picture digitising.
25
Hexium Vidoc
User’s Guide
Digitising Parameters
Camera Settings:
Camera: here you can select the camera
Name: you can change the camera name
Register Settings: you can change the digitising parameters
Automatic Digitising:
You can see the order of automatic digitising; it determines the
order in which the system takes the pictures (the priority of a
camera can be increased by listing it more times than the others)
<camera><size><mode>[, <camera><size><mode>, …]
camera: camera number
size: l|m|s
l (large):768x576
m (medium)
384x288
s (small)192x144
mode: g|y|r
g (greyscale)
greyscale (8 bit)
y (YUV)
YUV (16 bit) coloured /slow/
r (RGB) RGB (24 bit) coloured
26
Hexium Vidoc
User’s Guide
e.g.:
#1.
1lg, 2lg, 3lg, 4lg
#2.
1lg, 2lg, 1lg, 3lg, 1lg, 4lg
#3.
1lg, 2mr, 3lg, 4sy
Daytime period: you can set the time interval for the daytime
automatic order. In the rest of the 24 hours the night shift
automatic order is valid
Daytime shift: you can set the automatic order used during the
daytime shift
Night shift: you can set the automatic order used during the night
shift
Non-automatic priority: determines the proportion of manually
digitised pictures, i.e. the maximum number of manual pictures
before the next automatic digitising.
Digitising Delay: the time scale between two digitised pictures,
expressed in ms
Camera Change Delay: if the two pictures in succession are taken
from two different cameras, the Camera Change Delay
(expressed in ms) shows the time needed for the system to start
to synchronise with the new camera signal. This setting is valid
only after computer reset.
Resolution: the size of the automatic picture
Video mode: the video mode of the automatic picture
9.3.
Register Settings
In this menu you can set the digitising parameters of the video input.
27
Hexium Vidoc
User’s Guide
Register: you can select the digitising card registers.
Value: you can set the register value
Default: sets the selected register at default value
Default All: sets all registers at default value
9.4.
Settings/Trigger
In this menu you can set the parameters of triggering:
28
Hexium Vidoc
User’s Guide
Camera: you can select the camera
Trigger time: time of triggering in sec
Resolution: the resolution of the triggered picture
Video mode: the video mode of the triggered picture
IMPORTANT
In case of overloaded system it is possible that the picture from a camera
will not be triggered when the triggering time has passed.
In this case set the triggering time parameters longer.
9.5.
Settings/WatchDog
In this menu you can set the parameters for WatchDog:
WatchDog Device:
Time-Out: the time limit after which WatchDog restarts the system
Device Type: the type of WatchDog
29
Hexium Vidoc
User’s Guide
Device Type/Settings: you can set the parameters
WatchDog Device Parameters:
Parallel Port:
Port Address: the port address of the WatchDog device
Acknowledge: bites acknowledging WatchDog
Serial Port:
Port Address: see above
Speed: the speed of the serial port
Acknowledge: see above
Industrial Mainboard:
Enable: the port address enabling the WatchDog device
Disable: the port address disabling the WatchDog device
Refresh: the port address refreshing the WatchDog device
Acknowledge: you can set what the system has to do to
acknowledge the WatchDog device.
Hexium proGuard:
proGuard Type: you can set the type of Hexium proGuard
WatchDog device
Device: you can select the hardware containing the WatchDog
device
9.6.
Settings/ Pen/Tilt/Zoom
In this menu you can set the camera Pen/Tilt/Zoom.
30
Hexium Vidoc
User’s Guide
Camera: you can select the camera
Position: you can select from settings defined beforehand
Iris, Focus, Zoom: you can set the optical parameters
<arrows>: you can move the camera up, down, to the right, to the
left, or back to the default position (the mouse can also fulfil this
function, if you click the right mouse button at the camera
picture and move it /the same as drag and drop)
9.7.
Settings/Motion Detector
In this menu you can define the motion detector areas and set their
parameters.
31
Hexium Vidoc
User’s Guide
Camera: you can select the camera
Area: you can select the area
Name: you can name the area
Area Active: you can activate the area (make live)
Sensitivity: the sensitivity of the area (general value between 520% depending on light conditions)
Time Value: you can set the adaptability parameters of the area
(=1:motion detector, >1:presence detector)
Left, Right, Top, Bottom: you can set the position and size of the
area
Start Time-End Time: you can set the intervals when the motion
detector area is active
9.8.
Settings/External Alarm
Inputs
In this menu you can set the triggering parameters of the external
analogue signals:
Input: you can select the input (8 or 16 depending on the system
required)
Enabled: you can enable the input
Alarm Level: you can set the logical alarm level (0 or 1)
32
Hexium Vidoc
User’s Guide
Camera: you can make connection between the input and a
camera; you can check the camera picture at the right side of the
dialogue box
Active Period: you can set the time interval when the alarm signal
of the input does results in a real alarm
Inputs: you can see the current state of the inputs
9.9.
Settings/Compression
In this menu you can set the compression parameters:
RAIN Technology: compression is carried out in several parts
(this version does not include this function)
YUV format: delayed colour
EJPEG Enabled: compression parameters are different for each
window of picture
(this version does not include this function)
EJPEG/Windows: you can set the EJPEG windows and their
compression parameters
(this version does not include this function)
Process of Changing Technology: the compression unit records
only the changes
(this version does not include this function)
More Settings: in this menu you can set other compression
parameters of secondary importance:
33
Hexium Vidoc
User’s Guide
Picture buffer (per camera): you can define the size of the
memory reserved for compression, expressed in kilobyte.
Number of Threads: you can set the number of compression
threads in the background. In single-processor computers the
values 1, 2, in multi-processor computers the values 1-3 are
suggested. If the number of threads is relatively high, the user
interface of the system will slow down.
9.10.
Settings/Backup
Select Backup Strategy:
Strategy: you can select the backup strategy
Primary Device: you can select the primary backup device
Backup mirror: you can set if you want the data mirrored to the
secondary device
Secondary Device: you can select the secondary backup device
Setting the Backup Parameters:
Continuous: continuous system backup to the primary device
Alarm limit: if free space in general is less than the value you set
here, the system sends a warning message
34
Hexium Vidoc
User’s Guide
Automatic: automatic system backup to the primary device
Start limit: if as many events or pictures piles up for backup as the
value you set here, the backup process starts automatically
Alarm limit: see above
Frequency: the maximum period of automatic data assemble and
backup; if the frequency time defined has passed since the last
backup, data backup will start even if the number of data for
backup has not reached the start limit
Manual:
Alarm required: if ticked, the user will be warned when the
number of events or size of pictures reaches the set limit
Alarm limit: see above
9.11.
Settings/Network
You can set the network parameters for the Slave units:
35
Hexium Vidoc
User’s Guide
IP Address of Vidoc Master: you can set the IP address of the
Master unit (1.1.1.100)
Port: you can set the port through which the current Slave unit is
connected to the Master unit. As this identification number
defines the number of the Slave unit, you should set it in the
following way:
Unit
Slave-1
Slave-2
Slave-3
Slave-4
Port
30001
30002
30003
30004
Packet, Connection Timeout: you can set the timeout value
allowed for network connection and the packages
Refresh Time: normally only the stored pictures are transferred to
the Master unit. In this menu you can set the time after which
the system sends a picture from the camera in question in any
case.
36
Hexium Vidoc
User’s Guide
WARNING
The pictures sent when the refresh time has passed are not stored either
in the Slave or the Master unit. The above function only helps control of
the Master unit.
If you set refresh time too low, you will unnecessarily load the network
and the Slave unit, therefore hindering the compression and transfer of
alarm pictures.
WARNING
If any of the computers responsible for running the Vidoc system
belongs to another network besides the closed network of the Vidoc
systems, Hexium Ltd. does not take the responsibility for any damage or
problem due to the incorrect operation or configuration of the
operational system or the computer network, or the hacker/cracker
attacks.
37
Hexium Vidoc
User’s Guide
9.12.
Settings/Alarm Signal
In this menu you can set the alarm sound parameters:
Alarm Sound Enabled: you can enable the alarm sound
Length of Sound: you can set the length of alarm sound
Length of Silence: you can set the length of silence (after pressing
the „+” button)
Output: you can enable the control over the output
Sound: you can set the value for the output: sound output
Silence: you can set the value for the output: silence output
Relay:
Sound: you can set the value for the relay: sound output
Silence: you can set the value for the relay: silence output
Alarm Sound: you can set the alarm sound rhythm (0-silence, 1sound)
9.13.
Settings/Webcamera
The system makes it possible to watch the camera pictures through
intranet, web interface. As with the trigger function, you can set the
38
Hexium Vidoc
User’s Guide
refreshing parameters for each camera (time, resolution, video mode).
However, the pictures prepared are not stored in the picture database, but
in a directory that you can set. The html files used for the web interface are
also in the set directory and refer to and show these picture files.
A webcamera co-operates with the following web browser software:
• Microsoft Internet Explorer 4.0
• Microsoft Internet Explorer 5.0 (suggested)
WARNING
If any of the computers responsible for running the Vidoc system
belongs to another network besides the closed network of the Vidoc
systems, Hexium Ltd. does not take the responsibility for any damage or
problem due to the incorrect operation or configuration of the
operational system or the computer network, or the hacker/cracker
attacks.
You can set the webcamera parameters:
39
Hexium Vidoc
User’s Guide
Local Directory: you can set the place to find the pictures for the
webcamera
Name of the HTML file: you can set the name of the generated
HTML file
Name of the JPG file: you can set the name of the stored picture
file, which should also contain the camera number (‘%’).
Camera: you can select the camera
Refresh Time: you can set the time related to the selected camera
after which the camera picture is refreshed on the web (see:
Trigger); 0: no refresh
Resolution, Video mode: you can set the resolution and video
mode of the web picture related to the given camera
9.14.
Settings/Rights
In this menu you can delete or create users, or you can set the rights of
different users.
Users: you can see the full and login name of each user
Rights: you can set the user’s rights (you can give only those rights
that you possess) (for the list of rights see Appendix)
New: you can create new user
40
Hexium Vidoc
User’s Guide
Modify: you can modify the password and/or name of the selected
user
Delete: you can delete an existing user
9.15.
Settings/Save Settings
In this menu you can save the settings of the system.
9.16.
Settings/Restore Settings
In this menu you can reload stored settings. When the restoration process
ends successfully, you can see the following message box:
41
Hexium Vidoc
User’s Guide
10.
10.1.
Event Log
Events
You can check the event log, acknowledge alarms or errors.
The system provides the following lists:
All: you can see all events
Alarms: you can see all alarms
System: you can see all system messages
Errors: all errors
Text: all text messages
Cameras: all messages related to the selected camera or area
User defined: all messages meeting the requirements given by
the user
Others:
Event Parameters: you can see the special parameters of the
current event
42
Hexium Vidoc
User’s Guide
Picture...: you can view or edit the picture related to the
selected event (see later)
Print...: you can print the events (see later)
Export to 120MB FDD...: exporting the events and the
related pictures (see later)
Acknowledge: you can acknowledge the current event
Detailed description of the special list functions:
Cameras:
Camera:
Camera, Area: you can set the camera filters
Time Limit:
Begin, End: you can set the event log time filters
User Defined:
43
Hexium Vidoc
User’s Guide
Event Type:
Alarm/Error/System/Test: you can set the type of the listed event
Alarm/Error ack. Status: if the selected event is an alarm or an error, the
event can be acknowledged
Acknowledged: lists the acknowledged events
Not Acknowledged: lists the unacknowledged events
Time Limit:
Begin, End: see above
Other Conditions:
User: you can select the user who was logged in at the time of the
event
Ack User: you can select the user who acknowledged the event
Event Log: you can select the event
Camera, Area: see above
10.1.1.
Print
You can print event logs according to the set filters:
44
Hexium Vidoc
10.1.2.
User’s Guide
Export to 120MB FDD
In this menu you can export the filtered event log and the related pictures
in HTML and JPEG formats. You can view the export with the help of any
web browsers:
45
Hexium Vidoc
User’s Guide
10.2.
Pictures
In this menu you can view the picture related to the event log:
10.2.1.
Export
You can save the current picture in a standard format:
10.2.2.
Print
You can see the current picture and the parameters of the event:
46
Hexium Vidoc
User’s Guide
47
Hexium Vidoc
User’s Guide
11. Backup
In this menu you can store the event log or view previously stored
backups.
11.1.
Backup/Automatic Backup
The software uses the DAT unit manufactured by HP, equipped with 6tape mag Autoloader.
Backup starts after a certain number of events or amount of pictures set by
the user piles up. If the tape is full, the system automatically loads the next
tape and continues backup. If the mag is full, the user can replace it with a
new one by the button Change Mag.
48
Hexium Vidoc
User’s Guide
IMPORTANT
To insure the correct operation of the backup unit, put a cleaning tape to
the mag to the position of the 6. tape
WARNING
If you take a mag from the unit and put it back, backup will continue on
the first tape possibly rewriting the recorded data you may still need.
To avoid that, always change the mag to another one.
11.2.
Backup/Manual Backup
Start!: starting the backup manually
Settings: setting the backup parameters
49
Hexium Vidoc
User’s Guide
IMPORTANT
To insure the correct operation of the backup unit, use a cleaning tape at
least once a week.
If you cannot provide a dust-free environment, clean the unit several
times a week.
Cleaning less often than needed will reduce the life span of the backup
unit and can make harm on its operation. Hexium Ltd will not take the
responsibility for data losses or other damages due to this problem.
WARNING
It is forbidden to use the cleaning tape more times than allowed in its
brochure.
11.3.
Backup/Restore
Restore: you can view the event log previously stored
Tape import: in this menu you can import a tape recorded in
another system.
50
Hexium Vidoc
User’s Guide
51
Hexium Vidoc
User’s Guide
12. LICENCE AND GUARANTEE
CONDITIONS
End-User Licence Agreement for
HEXIUM Software
IMPORTANT – READ CAREFULLY
This HEXIUM End-User License Agreement ("HEULA") is a legal
agreement between you (either an individual or a single entity) and
HEXIUM Ltd with which you acquired the software product identified
above. The software product includes computer software, and can also
include the associated media, any printed materials, and any "online" or
electronic documentation (SOFTWARE PRODUCT).
By installing, copying or otherwise using the SOFTWARE PRODUCT,
you agree to be bound by the terms of this HEULA. If you do not agree to
the terms of this HEULA, you may not use or copy the SOFTWARE
PRODUCT, but you should return it to your Distributor and ask for a
refund.
12.1.
SOFTWARE PRODUCT LICENCE
The SOFTWARE PRODUCT is protected by copyright laws and
international copyright treaties, as well as other intellectual property laws
and treaties. By this HEULA the SOFTWARE PRODUCT is licensed, not
sold.
12.2.
SERIAL IDENTIFICATION
NUMBER
The serial identification number of the software related to this guide:
52
Hexium Vidoc
12.3.
User’s Guide
Grant of Licence
This HEULA grants you the following rights:
12.4.
Software Installation and Use
You may install and use one copy of the SOFTWARE PRODUCT or any
of its prior versions with the same operation system on one computer. The
primary user of the computer to which the SOFTWARE PRODUCT was
installed is entitled to a make a single copy of the SOFTWARE
PRODUCT for his own exclusive use at his mobile computer.
12.5.
Storage/Network Use
You may also store or install a copy of the SOFTWARE PRODUCT on a
storage unit that you solely use for running the SOFTWARE PRODUCT
on your other computers over an internal network, or distribute the
SOFTWARE PRODUCT to your other computers over an internal
network. However, you must acquire and dedicate a license for the
SOFTWARE PRODUCT for each computer on which the SOFTWARE
PRODUCT is used or to which it is distributed. A license for the
SOFTWARE PRODUCT may not be shared or used concurrently on
different computers.
12.6.
Licence Package
If you have acquired this HEULA as a component of a Hexium Licence
Package, you are entitled to make the number of copies defined in the
printed version of this HEULA of the computer software portion of the
SOFTWARE PRODUCT, and use each copy of the software as declared
above. In this case you are also entitled to make copies for mobile
computer use as declared above.
12.7.
12.7.1.
Other Rights and Limitations
"Not for Resale" Software
If you can see the notice "Not for Resale" or "NFR" on the SOFTWARE
PRODUCT, you can not resell it or offer it for sale in any way even if this
HEULA declares the opposite.
53
Hexium Vidoc
User’s Guide
12.7.2.
Limitations on Reverse Engineering,
Decompilation and Disassembly
You may not reverse engineer, decompile, or disassemble the
SOFTWARE PRODUCT, except and only to the extent that such activity
is expressly permitted by applicable law notwithstanding this limitation.
12.7.3.
Separation of Components
The SOFTWARE PRODUCT is licensed as a single product. Its
component parts may not be separated for use on more than one computer.
12.7.4.
Rental
You may not loan, rent or lease the SOFTWARE PRODUCT
12.7.5.
Product Support
Hexium Ltd can provide product support for the SOFTWARE PRODUCT
("Product Support"). Any support software number placed at your disposal
by Hexium Ltd as a Product Support, is a part of the SOFTWARE
PRODUCT, and is the rules and limitations of this HEULA must be
applied for it. For lack of other agreement, all technical information
provided for Hexium Ltd as a part of the Product Support can be used for
business reasons by Hexium Ltd including other product support or
development. Such technical information will not be used in a way that
your entity may be inferred.
12.7.6.
Software Product Transfer
You may permanently transfer all of your rights under this HEULA
provided you retain no copies, you transfer all of the SOFTWARE
PRODUCT (including all component parts, the media and printed
materials, any upgrades, this HEULA and, if applicable, the Certificate(s)
of Authenticity), and the recipient agrees to the terms of this HEULA. If
the SOFTWARE PRODUCT is an upgrade, any transfer must also include
all prior versions of the SOFTWARE PRODUCT.
12.7.7.
Termination
Without prejudice to any other rights, Hexium Ltd may terminate this
HEULA if you fail to comply with the terms and conditions of this
HEULA. In such event, you must destroy all copies of the SOFTWARE
PRODUCT and all of its component parts.
54
Hexium Vidoc
12.7.8.
User’s Guide
Upgrades
If the SOFTWARE PRODUCT is labelled as an upgrade, you must be
properly licensed to use a product identified by Hexium Ltd as being
eligible for the upgrade in order to use the SOFTWARE PRODUCT. A
SOFTWARE PRODUCT labelled as an upgrade replaces and/or
supplements the Product that was base of the upgrade. You may use the
resulting upgraded product only in accordance with the terms of this
HEULA. If the SOFTWARE PRODUCT is an upgrade of one of the
components in your licensed software package, you may use or transfer the
SOFTWARE PRODUCT as a component of the uniform program
package, and you cannot separate it for use on more than one computer.
12.7.9.
Copyright
All title and copyrights in and to the SOFTWARE PRODUCT (including
but not limited to any images, photographs, animations, video, audio,
music, text and "applets," incorporated into the SOFTWARE PRODUCT),
the accompanying printed materials, and any copies of the SOFTWARE
PRODUCT, are owned by Hexium or its suppliers.
The SOFTWARE PRODUCT is protected by copyright laws and
international copyright treaties. Therefore you must treat the SOFTWARE
PRODUCT as any other products protected by copyright laws and keep the
extra limitations like you may install the SOFTWARE PRODUCT to only
one computer and you can keep the original copy only as a back-up, safe
copy. Besides, you cannot make copies of the printed materials of the
SOFTWARE PRODUCT.
12.7.10. Dual –Media Software Product
You may receive the SOFTWARE PRODUCT in more than one medium.
Regardless of the type or size of medium you receive, you may use only
one medium that is appropriate for your computer. You may not use or
install the other medium on another computer. You may not loan, rent,
lease, or otherwise transfer the other medium to another user, except as
part of the permanent transfer (as provided above) of the SOFTWARE
PRODUCT.
55
Hexium Vidoc
User’s Guide
12.8.
12.8.1.
Limited Warranties
Limited Warranty
Hexium Ltd warrants that (a) the SOFTWARE will perform substantially
in accordance with the accompanying written materials for a period of one
(1) year from the date of receipt, and (b) any hardware accompanying the
SOFTWARE will be free from defects in materials and workmanship
under normal use and service for a period of one (1) year from the date of
receipt. The implied warranties on the SOFTWARE and hardware, if any,
are limited to one year. Hexium Ltd. disclaims all other warranties. On the
basis of this warranty you are implied to warranties to the extent allowed
by applicable law.
12.8.2.
Customer Remedies
Hexium’s entire liability and your exclusive remedy shall be, at Hexium’s
option, either (a) return of the price paid, or (b) repair or replacement of
the SOFTWARE or hardware that does not meet Hexium’s Limited
Warranty and which is returned to Hexium with a copy of your receipt.
This Limited Warranty is void if failure of the SOFTWARE or hardware
has resulted from accident, abuse, or misapplication. Any replacement
SOFTWARE or hardware will be warranted for the remainder of the
original warranty period or thirty (30) days, whichever is longer.
12.9.
No Liability for Consequential
Damages
IN NO EVENT SHALL HEXIUM LTD OR ITS SUPPLIERS BE
LIABLE FOR ANY OTHER DAMAGES WHATSOEVER
(INCLUDING, WITHOUT LIMITATION, DAMAGES FOR LOSS OF
BUSINESS PROFITS, BUSINESS INTERRUPTION, LOSS OF
BUSINESS INFORMATION, OR ANY OTHER PECUNIARY LOSS)
ARISING OUT OF THE USE OF OR INABILITY TO USE THE
SOFTWARE PRODUCT, EVEN IF HEXIUM HAS BEEN ADVISED OF
THE POSSIBILITY OF SUCH DAMAGES. HEXIUM’S ANY
LIABILITY CONCLUDING FROM THIS CONTRACT IS ALWAYS
LIMITED TO THE SOFTWARE PRICE PAID BY THE CUSTOMER
AT THE MAXIMUM.
56
Hexium Vidoc
User’s Guide
12.10. General Hardware Warranty
Hardware units distributed by Hexium Ltd are warranted for 12 months,
which warranty can be implied at the headquarters of Hexium Ltd.
57
Hexium Vidoc
User’s Guide
A. Appendix – List of Rights
Basic Rights
Exit
Set user
User parameters
Set all users
Settings/Save
Settings/Restore
self-evident
new user, rights
own password
modifying the login name and password
of any users
save all settings
restore all settings
Display Rights
Display/Set the number of
cameras
Display/Set parameters in
picture
Display/Set display
parameters
Display/Set camera positions
number of cameras displayed
parameter types displayed in the picture
(text in picture+text position)
how the picture is displayed
which camera picture should be seen at
the different positions
Digitising Parameters Rights
self-evident (after selecting the camera,
name)
the order, resolution, video mode of
Digitising/Set automatic
picture digitising
order
Digitising/Set non-automatic the ratio of automatic and non-automatic
digitising, i.e. the maximum number of
picture priority
non-automatic pictures before restarting
the automatic digitising
non-automatic picture: operator picture,
triggered picture, pre-, and post-triggered
picture
modifying the delay time between
Digitising/Set delay time
Digitising/Set camera name
58
Hexium Vidoc
Digitising/Set operator
picture
Set registers
User’s Guide
digitising two pictures
parameters of operator picture (pre-, and
post-triggered pictures are taken with
these parameters)
self-evident
Trigger, Pre-Post Trigger Rights
Set Trigger
Set Pre-Post Trigger
parameters
self-evident
self-evident
Motion Detector Rights
Motion detector/Set area
name
Motion detector/Set area
setting the area name (after selecting the
camera and the area)
activate the area, set the sensitivity, time
value, time interval, size (left, right,
bottom, top)
External Alarm Settings Rights
Set external alarms
all setting possibilities
Compression Dialogue Rights
Set compression parameters all setting possibilities
setting EJPEG parameters
Compression/Set EJPEG
Pan/Tilt/Zoom Rights
Set pan/tilt/zoom
self-evident
Network Settings Rights
Set network parameters
self-evident
59
Hexium Vidoc
User’s Guide
Alarm Sound Settings Rights
Alarm sound
enabled/disabled
Set sound parameters
self-evident
self-evident
WatchDog Device Rights
WatchDog/Modifying device self-evident
self-evident
WatchDog/Set parameters
Webcamera Rights
Set Webcamera parameters
self-evident
Modem Rights
Modem/Dial
Modem/Hang-up
Modem/Settings
enable or disable dialling
enable or disable hang-up
modifying dialling parameters
Event Log and Picture Rights
Event log/View
Event log/Acknowledge
Event log/Print
Image processing/Export
Image processing/Apply filters
Image processing/Print
view the event log
enable or disable acknowledgement
print event log
enable or disable image export
self-evident
print picture
Backup Rights
Backup/Modify mode
Backup/Set parameters
Backup/Start
Backup/Cancel
Backup/Delete tape
Backup/Change mag
select backup mode
self-evident
enable or disable start of backup
enable or disable cancellation of backup
enable or disable deletion of Vidoc tape
enable or disable mag change
60
Hexium Vidoc
Restore/Start
Restore/Cancel
Restore/Tape import
User’s Guide
enable or disable start of restore
enable or disable cancellation of restore
self-evident
61
Hexium Vidoc
User’s Guide
B. Appendix – Events
Basic Events
log in to the system
log out of the system
the system has started
the system has stopped
self-evident
self-evident
taking operator pictures
the hard disc unit storing the events is full
event log has reached its maximum
possible size
the hard disc unit storing the pictures is
Hard disc is full (pictures
full
lost)
Picture space is full (pictures the hard disc unit reserved for pictures is
full
lost)
Log in
Log out
System start
System stop
Save settings
Restore settings
Operator picture
Hard disc is full (events lost)
Event log is full (events lost)
Display Events
Modifying the number of
displayed cameras
Modifying displayed
parameters
Modifying display
parameters
Modifying the position of
displayed cameras
self-evident
modifying the settings of text in picture
and text position
modifying display
modifying the position of camera pictures
62
Hexium Vidoc
User’s Guide
Events of Digitising Settings
Modifying camera name
Modifying automatic order
self-evident
modifying the automatic order of picture
digitising
modifying the priority of manual pictures
Modifying non-automatic
picture priority
self-evident
Modifying digitising delay
time
Modifying the parameters of self-evident
operator picture
Modifying camera registers modifying the registers
Trigger, Pre-Post Trigger Module Events
Modifying trigger
parameters
Modifying Pre-Post Trigger
parameters
Triggered picture
Pre-Triggered picture
Post-Triggered picture
self-evident
self-evident
trigger time has ended
self-evident
self-evident
Motion Detector Module Events
Modifying the name of
motion detector area
Modifying motion detector
area
Motion alarm
self-evident
modifying the parameters of the area
motion has been noticed in the picture
External Alarm Module Events
Modifying the settings of
external alarm
External alarm
self-evident
the external alarm input has shown alarm
63
Hexium Vidoc
User’s Guide
Compression Module Events
Modifying compression
parameters
Modifying EJPEG
parameters
self-evident
self-evident
Pan/Tilt/Zoom Events
Setting Pan/Tilt/Zoom
self-evident
Network Events
Modifying network
parameters
Connected
Connection closed
Reconnected
Disconnected
self-evident
self-evident
self-evident
self-evident
self-evident
Alarm Sound Events
Alarm sound enabled
Alarm sound disabled
Modifying sound
parameters
self-evident
self-evident
self-evident
WatchDog Device Events
Modifying WatchDog device self-evident
self-evident
Setting WatchDog
parameters
Webcamera Events
Modifying Webcamera
parameters
self-evident
64
Hexium Vidoc
User’s Guide
Event Log and Picture Events
Print event log
Export picture
Print picture
self-evident
self-evident
self-evident
Backup Events
Modifying backup mode
Modifying backup
parameters
Backup started (manual)
Backup started (automatic)
Backup started (continuous)
Backup finished
Backup cancelled
Error during backup
Delete tape
Restore started
Restore finished
Restore cancelled
Error during restore
Too many non-backed-up
event logs or pictures
Tape import started
Tape import finished
Tape import cancelled
Error during tape import
self-evident
self-evident
self-evident
self-evident
self-evident
self-evident
self-evident
self-evident
delete the tape used by Vidoc
self-evident
self-evident
self-evident
self-evident
self-evident
self-evident
self-evident
self-evident
self-evident
Modem Events
Successful dial
Successful hang-up
Modifying modem
parameters
self-evident
self-evident
self-evident
65
Hexium Vidoc
User’s Guide
C. Appendix – Frequent Questions/Errors
How is the digitising card able to accept 6 video signs if
there are only 4 entries at the back?
There are really only 4 entries at the back of the digitising card, but this is
due to the fact that unfortunately there is no more room there for others.
• The card is able to treat two more entries, but only with the help of an
enlarging panel supplement.
Why aren’t there pictures from the camera?
• Check the power supply of the cameras, the intactness of video cables,
the contact between the video cables and the digitising card. Check
whether the computer is switched on, and the Hexium Vidoc system is
running.
• Check if the driver of the digitising card has been installed; if the Start /
Settings / Control Panel / Hexium HV-PCI6 icon is listed.
• Check whether the driver has started; if the HexSAA7146 device is
running at Start / Settings / Control panel / Devices
• Check the settings of the driver at Start / Settings / Control panel /
Hexium HV-PCI6
• Size of driver memory should be at least 1344,
• choice of version should be appropriate, usually HV-PCI6 Ver 1.0
Rev A,B,C,D
• entry settings should correspond to the system of your digitising
card, usually 4 BNC on the card (and not 4 BNC on the card before
Ver 1.0)
• Choose Settings / Digitising menu from Vidoc, check if the setting
called Automatic order contains the camera in question.
• Choose Settings / Display menu from Vidoc, check if the camera in
question is shown on the monitor.
There are pictures from all cameras except camera 1.
Why?
The error may lie in the improper configuration of the digitising card
driver.
66
Hexium Vidoc
User’s Guide
• Check if the settings at Start / Settings / Control panel / Hexium HVPCI6 Entries correspond with your currently used system.
The pictures of the cameras are continuously changing to
lighter and darker alternately. Why is it so?
The time invariable of the automatic gain control (AGC) applied in
digitising is too high, so it cannot follow the quick picture shifts.
• Install the AGC-OFF version of the digitising card driver.
Unfortunately the video sign is quite weak by the time it
gets to the computer. Is there any easy solution for this
problem?
Yes, there is! The degree of gain of the digitising card entry can be
modified.
• Choose the menu Settings / Digitising from Vidoc, then choose the
camera in question.
• Go to Register settings and choose register Static Gain Control 2, 3 or 4
(only one of the three registers sets the camera in question), then set the
degree of gain.
There is a horizontal black line in the middle of the
pictures from the cameras, and it is moving up and down.
What is this and how can I remove it?
The problem is that the video signs connected to the same card are not
synchronised, and the multiplexer at the digitising card does not wait until
the digitising circuit adopts this synchronicity.
• Choose the menu Settings / Digitising from Vidoc, then increase
the Camerashift-delay parameter (in our experience 120-150ms is
enough).
• Reset your computer and then the Vidoc system.
One of the camera pictures is not stable, or there is
another camera picture in its place. How can I correct it?
If a longer delay time does not help (see above), the problem is that the
synchrony part of the video signal is not suitable for the digitising circuit
(either too low or out of the synchrony domain).
67
Hexium Vidoc
User’s Guide
• Choose the menu Settings / Digitising from Vidoc, then select the
camera in question.
• Select Register Settings, then Static Gain Control 2, 3 or 4 register
(only one of these three is valid for the camera), and set the gain value
to have a suitable picture.
• If the picture is still not stable, try to synchronise the Clamping Level
Control 21, 22, 31, 32 registers (one of these four registers is valid for
the camera).
In Vidoc the black-and-white camera pictures are
presented in a limited number of colours or as coloured
pictures. How can I correct it?
This problem may be due to wrong display settings of the computer. You
can correct it in the following way:
• Check at Start / Settings / Control Panel / Display / Settings / Colour
Palette if the set number of colours is at least 32.768. Set this number
32.768 at the minimum.
• Reset the Vidoc system.
There is not any event recorded in the event log. What is
the reason?
You can filter the events according to many conditions (Time Limit, User,
Event, Event Type). The above phenomenon is due to the fact that there is
no event meeting the filter conditions you have set. To see all events, select
panel “All”, then delete the conditions referring to the time of the event.
68