1
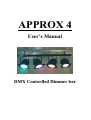
APPROX 4
User’s Manual
DMX Contorlled Dimmer bar
INDEX
Introduction.................................................................................
Unit installation……………...................................................…
Practical instructions.......................................………….……...
Buttons……………………........................................................
Menu………...............................................................................
1 Channel patch...............................................................
2 Channel inverting…..……...........................................
3 Preheat..........…............................................................
4 Limit………………………….....................................
5 Switch/dimmer……..……...........................................
6 Channel enabling…….................................................
7 Backup patch................................................................
8 Equalization curves......................................................
9 Hold…………..............................................................
10 Default settings............................................................
11 Display……….............................................................
12 Heat protection…..…………………………………...
13 Master/slave………………………………………….
14 Chase…………………………………………………
14.1 Standard chase…………..…………………..
14.2 Speed…..…………………………………….
14.3 Mode………………………………………...
14.4 Edit………..…………………………………
Lock/unlock…...……………………………………………….
Display messages………………...…………………………….
Unit maintenance……………………………………………....
Technical specifications….…………………………………….
Accessories……...……………………..…………………...…..
-2-
2
2
2
2
3
3
3
3
3
3
4
4
4
4
5
5
5
5
5
6
6
6
6
7
7
8
8
8
Introduction
Approx 4 is an innovative product in the field of traditional lighting, which has outstanding
technical solutions, sophisticated electronics, combined with simple and tasteful performance.
This unique product is the result of our careful, on-going developing works and the
experiences collected as users during the ages. At present-day’s lighting application the use of
the heavy dimmer-packs are clumsy, the heavy-current matrix requiring many technician is a
prolonged work. At small venues we often face to the lack of space and the incompatibility
with the sound-system. Even a few-lamp installation requires plenty of cable works.
Approx 4 sorts these problems out offering many more useful functions.
We are certain that You will be convinced after once tried it.
Approx 4 is built up of only the best quality parts and products of renowned companies.
Installing Approx 4
Set the lamps to be controlled and the fittings for fixing up the unit. Connect the lamp’s plugs
to the channel outputs. Fixing the Neutric Power Conn. supply power to the unit.
Right now Approx 4 is ready to work, and loads the settings according to the default settings.
According to the default settings the unit operates 4 pieces of 230V lamps. If you wish to use
different type of lamps, you must carry out the necessary settings in the menu before
connecting the lamps.
Supplying power, Approx 4 switches its channels on one-by-one with a 0.25sec. delay.
So the extremely high starting amperage caused by cold lamps is avoided.
Connecting DMX-512 control-signal to the unit, the flashing control-error message
disappears.
Entering the menu (press ENTER) further settings can be carried out.
Practical instructions
Before putting the unit in operation, always check the mains voltage!
In three-phase systems strive for symmetric load!
Always use proper, undamaged plugs!
Protect the unit from hard mechanical impacts (shocks, shakes), considering even the lamps!
Do not hinder the unit’s natural cooling!
Operate the unit protected from rain or splashing water!
Always disconnect the power supply before removing any of the two main blocks!
In lighting chain put a 120Ω line-closer resistor between the 2. and 3. pins of DMX after the
last unit!
Use of buttons
ENTER is used for access to the menu and the submenus inside and ESC is used to quit
them. UP and DOWN are used to skip among functions and set the values. Once a setting
has been finished pressing ENTER confirms the procedure, pressing ESC quits without
storage. The effects of the functions being changed immediately appear on the outputs too.
After two minutes from the last pressed button the unit quits the menu without saving the
values being set.
-3-
Menu
1. Ch (Channel) – Set DMX addresses
Each channel’s DMX address can be set from 1 to 512. (More channels can have the same
DMX address.) UP/DOWN are used to assign the values to the channels. On the display the
decimal point of the character dedicated to the channel being set is lit.
In CAdd submenu operators can set the starting address of the unit. In this case, this is the
address of the first channel, and Approx 4 automatically sets the rest of the channel’s
addresses one-by-one in numerically rising order . To access CAdd submenu press ENTER
twice, while a flashing warning sign can be seen on the display. Once starting address has
been set and ENTER pressed the unit carries the serial patching out. In CAdd mode all the
decimal points are lit.
Attention!!! Serial patching overwrites the values set one-by-one.
2. SIdE (Side) – Invert channels
This function is used to transpose the channel order. Entering the menu, operators can choose
between normal (nor) or inverted (Inv) mode. (Application e.g. for symmetric stage scene.)
3. Pr (Preheat) – Set preheat values
Channel’s preheat values can be set one-by-one or together from 0 to 100 per cent in 256
steps. On the display the serial number of the decimal points shows the channel being set.
In PrAll submenu after pressing ENTER a flashing warning sign appears, pressing ENTER
again set starts from the lowest preheat value of the 4 channels.
4. Li (Limit) – Set maximum output levels
Channel’s maximum values can be set one-by-one or together from 100 to 0 per cent in 256
steps. On the display the serial number of the decimal points shows the channel being set.
In LiAll submenu after pressing ENTER a flashing warning sign appears, pressing ENTER
again set starts from the lowest maximum value of the 4 channels. Limitation value overrides
the preheat value. If the limit’s value is lower than the preheat’s, obviously there is no real
operating range, and an error message can be seen on the display: the decimal point dedicated
to the channel flashes.
5. Suu (Switch) – Choose switch or dimmer mode
Operators can choose dimmer (OFF) or switch (ON) operating mode for each channel.
The decimal point dedicated to the channel being set is lit.
In switch mode the channel has two clear-cut thresholds (at the value of 240 or above it is on;
at 15 or below it is off).
In switch mode there is no preheat, but once the preheat value has been set to the channel it
remains stored, so as you return to dimmer mode the stored preheat value is active again.
-4-
6. En (Enable) – Enable channels
It is possible to put the channels out operation (OFF), or put them back into operation (ON).
At status feedback a small “o” indicates the channel is switched off on the display.
7. Ch.bu (Channel backup) – Patch backup channel
This menu is used to define the DMX channel corresponding to the backup channel (1-512).
This is a special channel, which can be activated above the value of 240. Basically the unit
operates in buffer data storing: in case of a control-signal cut it holds the last scene.
Operating the backup channel:
- one impulse: saving the actual scene created by DMX. If the backup scene has been
stored, at status feedback the 4 decimal points are lit on the display. In case of DMX cut
the stored backup scene fades up in 2 seconds.
-
a short + a long impulse: in case of a DMX cut the chase chosen for standard chase
activates. At status feedback the decimal points run on the display.
-
two short impulses: deletes the backup scene or chase has been chosen. The unit operates
in buffer data storing again.
8. EO.AL (Equalization) – Choose equalization curve
Approx 4 has an equalization chart which is recommended to use (tAbl) if the lighting
controller desk does not have this function. By means of this function nearly linear luminous
output can be reached when sliding the fader corresponding to the channel. If there is no need
to use this function, choose the linear (lin) curve.
9. Hold (Hold) – Use of Hold
Approx 4 stores the backup scene or chase even in the case of a power cut. To load the default
settings at the next use, the settings above are deleted in 30 minutes.
If applications last for more than one day, or if you wish to avoid data losing caused by more
than a 30 minutes long power cut, choose ON in Hold menu. In this case the unit stores the
settings for however long and loads them when you switch it on.
Otherwise, choose OFF.
-5-
10. bASE (Base) – Save or recall default settings
It is possible to store all the configurations of the unit into the storage device, and recall them
whenever required (this function can be really useful, if e.g. we use the unit often in the same
way).
To access to the menu press ENTER twice, while flashing warning sign can be seen on the
display.
- In LOAd submenu pressing ENTER twice (flashing warning sign), the stored
configuration into the storage device overwrites all the actual settings.
Attention!!! Once the second ENTER has been pressed you lose all the actual settings.
- In SAUE (save) submenu pressing ENTER flashing sign warns that you are going to
overwrite the default configurations in the storage device. Overwriting can be carried out
by pressing UP and DOWN simultaneously.
Attention!!! The actual settings overwrite the default configuration, and you lose the
former configuration for good.
11. dISP (Display) – Set display’s brightness
Approx 4 offers the possibility to set the brightness of the display in 10 phase (0-9) at status
feedback. Entering the menu the horizontal lines at the place of the second character show the
brightness which can be reached with the given phase. To turn the display off choose phase 0.
Independently of the phase chosen the menu and the error messages appear at full brightness.
12. t °C (Temperature) – Measure temperature
In the two main blocks of the unit temperature sensors are built in. Using this function (ON)
Approx 4 displays the heat measured in both blocks every minute.
- Exceeding 100 °C the measured value flashes on the display at full brightness.
- Exceeding 105 °C in any block the unit switches its channels off, cooling back under 100
°C it will switch the channels on automatically.
Avoiding heat protection (OFF) it is the operator’s responsibility to handle thermal problems
and consequences.
13. Conn (Connection) – Use of master/slave mode
Using the units without a lighting controller it is also possible to operate them simultaneously.
In Conn menu one of the units can be decided to operate as a master unit (MAS) , the rest as
slave units (SLAU). So it is enough to set the chase and its parameters just in the master unit,
the others will do the same.
Choosing Off master/slave can be switched off.
14. CHAS (Chase) – Edit or modify a Chase
Approx 4 has 9 preset, 3 logically editable and 1 level-memory (scale of 10%) editable
chases. Putting the unit in operation for the first time the editable chases are empty.
-6-
14.1 – Std (Standard) – Choose standard chase
In this submenu operators can choose a chase to be run or to be a stand-by chase from the
preset or edited ones available. The marks of the preset programs are 1-9, the marks of the
logically editable programs are A;b;C, the mark of the level-memory editable program is SP
(special).
14.2 – SPEE (Speed) – Set running speed
The running speed of a chase is determined by the cross-time between the steps and the holdtime of the scene. Entering the submenu two value, consist of two digits each, can be seen on
the display. The first value determines the cross-time, the second value determines the holdtime in tenths of seconds. The value where the decimal point is lit can be set by the use of
UP/DOWN. To change between the values to be set use ENTER (short).
Approx 4 immediately shows the speed on its outputs during the setting procedure. To
confirm the values set press and hold down ENTER.
14.3 – nnod (Mode) – Choose operating mode
The operating modes of a chase can be the following:
- oFF: the standard chase is off
- Auto: the running speed of the chase is determined by the settings set in the
.
menu Speed (14.2)
- Soun (sound): music sync mode, in this case the signal is provided by the built-in
microphone according to the cross and hold times set in the menu Speed (14.2)
14.4 – Edit (Edit) – Edit a chase
Entering the submenu choose the chase to be edited. Each chase can made up of a maximum
of 30 steps. Entering to edit A, b or C chase a label LEUE (level) appears on the display for a
second, then the maximum output levels dedicated to the 4 channels can be seen. Here it is
possible to limit the output level further in proportion to the operating range set in the menu
Limit (4). The values dedicated to the channels can be set from 0 to F (full) at the scale of
10% by the use of UP/DOWN. To change between the channels press ENTER (short). If the
maximum output levels of the channels have been set press and hold down ENTER to access
the edit steps. The serial number of the step to be edited appears on the display for a second
(e.g. St 1).
To facilitate quick editing, the serial numbers of the buttons are the same as the
channels’ and pressing the buttons, channels can be switched on or off.
Setting the first scene press and hold down UP to step to the next scene. To step back
to the previous scene press and hold DOWN.
To confirm editing press and hold ENTER.
Attention!!! The serial number of the step you quit by ENTER determines the length of the
chase. The steps above that number are stored, but will not run.
Pressing and holding down ESC editing can be quit without storage.
The editing of the special chase is the same as the maximal level’s setting of the logically
editable chase. Entering the special chase the serial number of the step to be set appears on the
display for a second, then the levels of the channels dedicated to the scene can be set from 0
to F. Skipping between scenes (up and down), finishing or leaving chase editing is the same
as in the logically editable chase.
-7-
Lock/unlock buttons
Locking the buttons unauthorized or accidental alteration can be avoided.
When Approx 4 is switched off press and hold UP and DOWN simultaneously, during that
switch the unit on. On the display label Loc. appears for a second.
Unlocking the buttons is the same as to lock them, in this case label unlo appears on the
display. Buttons work again according to their functions.
Define display messages
Under control of DMX-512 the feedback of the character dedicated to the channel in
dimmer mode
- horizontal line at the bottom: control-signal below preheat value
- horizontal line at the top: technical maximum control-signal (the value of the channel is
higher than 240)
- horizontal line in the middle: control-signal between the two above
Attention!!! If any of the horizontal lines flash, check the limit and preheat settings of the
channel dedicated to them. The warning sign means logical inconsistency (there is no real
operating range).
switch mode
- S: channel switched off
- H: channel switched on
Channel put out operation:
- o: channel put out operation
Feedback of decimal points:
- no decimal point lit: the unit operates in buffer data storing
- the 4 decimal point lit: backup scene is stored
- decimal points run: standard chase is on standby
Temperature feedback:
xxx : heat measured in the control-block
yyy : heat measured in the power-block
If the temperature of any of the blocks exceeds 100°C only the heat data can be seen
alternately on the display, the value(s) flash(es) at full brightness.
Heat protection coming into force (over 105°C) label Hot! and the heat value of the block
activated it flash alternately, until the block cools down.
Err or Err: the heat sensor of the given block is faulty (error)
In case of DMX-512 deficiency all the horizontal segments of the display flash
at full brightness as warning sign!
-
Loc. : buttons locked
Other messages possible without control-signal:
MAS: unit operates in master/slave mode is master
SLAU: unit operates in master/slave mode is slave
Hold : unit stores its configuration for however long
Hold + the 4 decimal points flash: there is no configuration to be stored
-8-
Unit maintenance
Approx 4 is a closed system, maintenance works are not required.
Remedying faulty operation:
Before you start searching the problem, make certain that all the circumstances for unit
operation are given.
It occurs in dimmers that the fuse (T 6,3A) can not protect the semiconductor properly when
the filament tears. In that case at the power-block side removing the covering and the bolts, on
the triac-block which can be pulled out with the aid of the card enclosed, the faulty
semiconductor can be changed.
Removing the bold the whole power-block can be pulled out by means of the built-in M4 nut.
The power-block with the exception of parts in the socket can not be repaired (for operating
bigger systems a spare block is recommended).
In case of a fault in the control-block or other faults contact your retailer!
Technical specifications
Power required: 170-240V 50Hz AC
Power absorbed by the electronics: 1,5VA
Power output: 4x1380W, Total: 4000W
Control-signal: DMX 512, 5-pin XLR connector (1.GND; 2.- ; 3.+)
Unit frame: eloxed aluminium
Display: 4 digit, 7 segments LED/red
Controls: 4 pc of ITT buttons
Labels: engraved
Operating temperature: -10°C – 105°C
Protection: IP34
Dimensions: 1498 x 40 x 60 mm
Weight: 2930g
CE
Accesories
1 pc of Neutric Power Conn. power connector
1 pc of 5-pin XLRm connector
1 pc of 5-pin XLRf connector
1 pc of user’s manual
1 pc of card (for changing triacs)
Serial number of the unit:.....................................
Date of sell:............................................
................................
Signature
Stamp
Manufacturer
Regal-Seton Bt.
1094 Budapest, Márton utca 35/a.
-9-
- 10 -