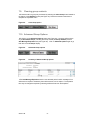
1
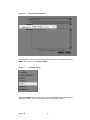
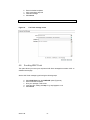
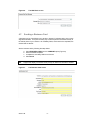
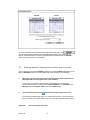
User Guide
www.pageone.co.uk
The information contained within this document is the property of PageOne Communications Ltd and may not be copied, used or disclosed in whole or in part,
except with the prior written permission of PageOne Communications
Contents
1.
Logging in
5
2.
Navigating your Connect account
5
3.
The Contact Manager
7
3.1
3.2
3.3
3.4
3.5
3.6
3.7
3.8
3.9
4.
4.1
4.2
4.3
4.4
4.5
4.6
4.7
4.8
5.
5.1
5.2
5.3
5.4
5.5
5.6
5.7
5.8
6.
6.1
6.2
6.3
6.4
6.5
6.6
6.7
Version 1.06
How to add a new contact
Understanding the options in the Contact Manager form
Amending or deleting an existing contact
Adding multiple contacts
Creating a copy of your contacts
Viewing and using your contacts
Searching for contacts
Where I can access my contacts
The Global Address Book Service
7
8
8
9
10
10
11
12
13
Sending messages with Connect
14
Sending an SMS text message
Scheduling your messaging
2-way virtual mobile numbers and alpha tags
Choosing the ‘From’ address for your SMS
Sending Flash SMS
Sending WAP Push
Sending a Business Card
Sending a Calendar Entry
14
17
17
19
19
20
20
22
Viewing messages sent from your account - the Outbox
22
Understanding the OUTBOX
Sorting your OUTBOX
Viewing longer messages
Accounts with multiple ‘From’ addresses
Interpreting the message status
Storing messages sent from your account
Finding specific messages sent from your account
Forwarding messages sent from your account
22
22
23
24
24
24
25
25
Viewing messages sent to your account - the Inbox
27
Understanding the INBOX
Sorting your INBOX
Viewing longer inbound SMS
Accounts with multiple 2way numbers
Storing messages sent to your account
Finding specific messages sent to your account
Replying or forwarding messages sent to your account
27
27
28
28
28
29
29
-2-
7.
Group Messaging
30
Adding group members
Editing and deleting group members
Using the Contacts section to populate groups
Adding multiple group contacts
Selecting group numbers for a group broadcast
Storing a copy of a group
Renaming your group
Searching for an entry within a group
Clearing group contents
Advanced Group Options
30
31
31
31
33
34
34
34
35
35
Creating & using Message Templates
36
Creating a message template
Using your templates
36
38
Presetting Text Message Alerts
41
9.1
9.2
9.3
9.4
Creating a preset message
Managing preset messages
Draft messages
Viewing sent scheduled messages
9.5
9.6
Viewing preset messages
Navigating through the Diary
41
45
46
45
47
48
48
Managing users with Account Management
49
Managing user accounts
Viewing messages sent from user accounts
Viewing messages sent to user accounts
Managing user broadcast groups
Managing Diverts
Editing a divert profile
Managing user access to value added services
Allocating access to broadcast groups
Allocating access to diverts
49
49
49
50
52
53
53
53
55
Other
57
Changing your password
Email alert of SMS replies
57
57
Contacting PageOne
58
7.1
7.2
7.3
7.4
7.5
7.6
7.7
7.8
7.9
7.10
8.
8.1
8.2
9.
10.
10.1
10.1.1
10.1.2
10.1.3
10.1.4
10.1.5
10.2
10.2.1
10.2.2
11.
10.1
10.2
12.
Version 1.06
-3-
System Requirements
Your Connect account is compatible for use with the following web browsers:
Internet Explorer 6 - 8
Firefox 2 - 3
Version 1.06
-4-
1.
Logging in
Access to your Connect account is provided through the secure PageOne website login
located at www.pageone.co.uk/login. Simply enter the username and password
supplied with your account. Your details are not case sensitive.
You are now ready to use your Connect account.
NB: After each login, you will be presented with the Compose Message screen by
default.
2.
Navigating your Connect account
Figure 1:
A typical Connect account
Your Connect account is comprised of the following features and functions:
Compose. All major message sending capabilities are accessed from COMPOSE.
Contact Manager. The contact details of people you regularly send messages to can
be added to your account from the CONTACT MANAGER.
Inbox. View the text messages sent to your account over the last 31 days. (For 2way
users only).
Outbox. Here, users can view records of all standard and group messages sent from
their account over the last 31 days.
Version 1.06
-5-
Diary. Single or repeated messages can be preset for sending at a later time and date.
Times and dates can be amended as required.
Groups. Create a predefined list of message recipients that you can contact
simultaneously with the same single message in an emergency.
Templates. Predefined message templates allow users to streamline their message
sending process. You can either create and store plain text messages or include a
time, date or free text field to customise your text.
Version 1.06
-6-
3.
The Contact Manager
The CONTACT MANAGER allows users to store the details of their contacts within an
online contact list. Users have the option to store up to three unique devices against a
single contact record, including their mobile phone number, group or pager number or
email address.
All stored contacts are displayed in the Contacts section (accessible from any
message sending screen in your account) allowing users to quickly and easily select
their message recipients (Figure 2 shows the Contacts section on the right of the
Compose Message screen).
Figure 2:
The Compose Message screen (with Contacts on the right hand
side)
3.1. How to add a new contact
a.
To add a new contact, select the CONTACT MANAGER option in your
Connect account. You will be presented with a form with which you can add
your new contact. See Figure 3.
Figure 3:
Version 1.06
The Contact Manager form
-7-
b.
Enter your new contact’s details.
All fields marked with an asterisk will need to be completed before a new record
can be successfully saved. i.e. each entry must have at least a First Name and
Surname. The Notes field allows users to add a comment against a specific
contact e.g. a departmental name such as “Networks”.
NB:
c.
3.2.
The length of First Names and Surnames are limited to 30 characters
each.
Select Add when you are happy with the entry.
Understanding the options in the Contact Manager
form
Here’s a brief explanation of what the respective buttons do in the CONTACT
MANAGER.
Displays a blank form for a user to input a new contact
Resets unsaved amendments made to an existing contact
Imports a list of contacts in Microsoft Excel format
Exports a list of your contacts in Microsoft Excel format
Saves a new contact to your contact list
Removes the contact selected
Allows you to save changes made to an existing contact
Deletes the entire contents of your CONTACT MANAGER
3.3.
Amending or deleting an existing contact
♦All contacts can be edited or deleted by selecting them in the Contacts section (see
Figure 4) from the CONTACT MANAGER. Make the necessary adjustments to the
contact’s details and select Update. Select Delete if you wish to remove them entirely from
the CONTACT MANAGER
♦You may delete your entire contact list by selecting the Delete All button
prompted to confirm your selection
Version 1.06
-8-
.
You will be
Figure 4:
3.4.
Editing an existing contact
Adding multiple contacts
♦The Import option in the CONTACT MANAGER enables you to add large numbers of
contacts simultaneously to the CONTACT MANAGER by allowing you to import an
external file saved in Microsoft Excel format
♦The Excel file that you wish to upload will need to have the information arranged in the
following format (see Figure 5):
[Surname] [First name] [Mobile number] [Pager number] [Email address] [Notes]
Figure 5:
Example import format
If you have inserted a header row containing column titles, this will be imported as well.
You should remove the header before performing an import.
♦An onscreen example will help guide you with the format required. Once you have
located the file you wish to import from your PC, select the Import option
Important. The current Import facility supports appending of records only, not
overwriting. If you import a list that contains an existing record contained in your
CONTACT MANAGER, an additional record will be added instead of the existing
record being updated.
Version 1.06
-9-
3.5.
Creating a copy of your contacts
♦To create a copy of your existing contacts, select Export from the CONTACT
MANAGER. An Excel formatted file will automatically be created containing a list of all of
your contacts
♦The information exported will be arranged in the following format:
[Surname] [First name] [Mobile number] [Pager number] [Email address] [Notes]
See Figure 6 below:
Figure 6:
Example export format
A header row will be added as part of the export identifying the information contained within
the file. If you later reuse this file to import back into your CONTACT MANAGER, you
should first remove the header row; otherwise this will be imported as well.
3.6.
Viewing and using your contacts
♦The Contacts section (see Figure 7) provides users with a summary of all the contacts
stored in the CONTACT MANAGER and their respective communication devices. When
sending a message, it allows users to quickly and conveniently select a contact’s stored
communication devices (e.g. their mobile phone number, email address, group or pager
number), doing away with the need for users having to continually enter a recipient’s
contact details manually
Figure 7:
Version 1.06
The Contacts section
- 10 -
♦All entered devices for your contacts will be displayed in the Contacts section with their
own respective icon (see Figure 8)
Figure 8:
The device icons
Represents a mobile phone number
Represents an email address
Represents a pager number or group address
NB:
Earlier versions of PageOne web accounts used the
icon to represent an email
address, please note that an email address is now represented by the
icon, while the
has been used to represent an mobile phone number or destination where an SMS
can be sent to. The
symbol is synonymous with text messaging on mobile phones.
♦To view the details of a specific communication device for a contact, simply hover over
the respective icon with your mouse, the detail will be displayed in a hover box
3.7.
Searching for contacts
♦If you’re looking for a specific contact or group of contacts, type their name, part of their
name or something common to the group into the Find Contact search box (see Figure 9)
Figure 9:
The Find Contact search box
The Find Contact button
♦All contacts matching your criterion will be left displayed in the Contacts section. To
reset the display to show all contacts, clear your criterion by deleting it from the Find
Contact search box
Example: to find all contacts that begin with the surname “Smith”, type the word “Smith”
into the Find Contact search box, alternatively, should you want to see all the contacts that
you’ve grouped as the “Networks team”, type some or all of the words “Networks team”. A
list of contacts that match your input will be displayed. You can select each contact by
clicking on each name individually, or by right clicking on your mouse (see Figure 10), you
will bring up a number of options including:
Version 1.06
- 11 -
Select All. Select all devices for the contacts displayed.
Select SMS. Select all the mobile numbers of the contacts displayed.
Select Pagers. Select all the group/pager numbers of the contacts displayed.
Select Emails. Select all the email addresses of the contacts displayed.
Select Fax. Please contact PageOne to FAX enable your account.
Select IM. Please contact PageOne to IM enable your account.
Figure 10:
The right clicked menu
Selecting one of the above options will automatically populate the To: field in the Compose
Message screen with your selected recipients.
NB:
3.8.
To search contact lists that contain 500 contacts or more, the Find Contact button
(see Figure 9) must be selected to initiate your search.
Where I can access my contacts
The Contacts section can be accessed from the following menus:
COMPOSE. Use the Contacts section to select contacts to send messages to.
CONTACT MANAGER. Select an existing contact record for editing or deletion.
GROUPS. Eliminate the need to manually enter recipients into your broadcast groups.
DIARY. Select recipients for a scheduled message.
Version 1.06
- 12 -
3.9.
The Global Address Book Service
♦If you have purchased the GLOBAL ADDRESS BOOK service, the Parent account will
be able to administer the contacts contained within all of the Parent’s user accounts on a
universal level
♦The GLOBAL ADDRESS BOOK setting enables all contacts added to the Parent’s
CONTACT MANAGER to be displayed and selectable in the Contacts section of all user
accounts
♦Any changes in the Parent’s CONTACT MANAGER will be reflected in the Contacts
section of the user accounts
♦The Parent retains full control over the ability to add, edit and remove any new contacts
added to the GLOBAL ADDRESS BOOK
Version 1.06
- 13 -
4.
Sending messages with Connect
You can send up to five different types of messages with your Connect account: SMS,
Flash SMS, WAP Push, Business Cards (vCard) and Calendar Entries (vCal). The
following section describes these types of messages and how to send them.
Getting Started
To send a message, select COMPOSE from the Service Menu (see Figure 11). This will
expand the COMPOSE option revealing the different message options available. Simply
select the type of message you want to send, complete the fields displayed and select
Send.
NB:
Each message type has different fields that will need to be completed in order to
successfully send the message.
Figure 11:
4.1.
a.
Message types within a Connect account
Sending an SMS text message
Input the number of the person you would like to send the message to or
select one of your contacts from the Contacts section (see section 3).
Alternatively, by typing the name or part of the name of your intended recipient into
the To: field you will generate a list of entries that match the name you have typed.
Just pick the number that you want from those available.
Version 1.06
- 14 -
Importing a list of recipients
♦You can input multiple recipients simultaneously by importing a list of numbers from a
CSV formatted file. Select the import list icon
on the Compose Message screen to
begin and follow the onscreen instructions. Figure 12 shows the dialog box you will see
after selecting the import list icon
Figure 12:
Dialog box for importing a CSV file
Your data should be arranged so that your recipient’s numbers only, are listed in the first
column of the file (see Figure 13 below). The import function is also available for all other
messaging options and can be used any time where this icon
is displayed.
Figure 13:
NB:
Example CSV format
Your CSV file should contain only the mobile numbers in the first
column, do not include recipient names or other details.
Version 1.06
- 15 -
You may also use a txt file arranged in the following format:
b. After selecting import, the numbers within the file will automatically be
entered into the To: field, see below:
c.
Type the message that you would like to send into the Message box (see
Figure 14).
If you have a message template that you prepared earlier, you can apply the
template by choosing it from the list in the Template dropdown.
NB:
Version 1.06
Note that a message from a standard text template can be added to
& or amended, templates that contain data and input fields only allow
selection from or input to. See the section “Creating & using
Message Templates” (section 8) on how to prepare a message
template.
- 16 -
Figure 14:
d.
A typical message
Once you are happy with your message select Send.
An onscreen confirmation that your request has been received will appear (see
Figure 15). You can check the status of the text messages that you send by going
to the OUTBOX menu (see section 5).
Figure 15:
4.2.
Message confirmation
Scheduling your messaging
♦If you don’t want to send your message right away you can “schedule” the sending of the
message. Check the Delivery Time box (see Figure 16) positioned above the Message
box. This will allow you to select a later time and date for sending. Complete the
remainder of the message as you would normally and press Send
Version 1.06
- 17 -
Figure 16:
The Delivery Time feature
If you change your mind and want to edit the message before it is sent, select it from the
DIARY option (Figure 17) in the Service Menu.
Figure 17:
The DIARY option
Selecting the DIARY option will allow you to view all broadcasts that have been set for a
future time and date. For more information about scheduling see section 9.
Version 1.06
- 18 -
4.3.
2-way Virtual Mobile Numbers and Alpha tags
2-way Virtual Mobile Number (MSISDN)
Short for Mobile subscriber ISDN, a MSISDN is a 2-way virtual mobile number used to
receive incoming SMS messages. This number will appear as the From dropdown address
on the recipient’s handset and forms part of the 2-way service, enabling bi-direction
messaging.
Several 2-way numbers can be applied to a Connect User Account and these can also be
selected from the From drop-down at the top of the Compose screen.
Alpha tags
Alpha tags allow your business to ‘brand’ SMS messages by tagging them with a unique
alphanumeric sender ID, typically in the form of your own brand or company name, i.e.
PAGEONE. This tag will appear as the ‘from’ address on the recipient’s handset, letting
recipients know immediately whom the message is from. Alpha tags are used strictly for
one-way messaging campaigns, where no response is required.
NOTE when using an alpha tag the message recipient will be unable to reply directly to the
incoming message. For a direct response, to your message a 2-way virtual Mobile number
must be used.
Several Alpha tags can be applied to a Connect User Account and these can be selected
using the From drop-down at the top of the Compose screen.
4.4.
Choosing the ‘From’ address for your SMS
♦If you have an alpha tag (Sender ID) or have more than one 2way number, you may
select which number (the ‘From’ address) your message will be sent from, by selecting it
from the From dropdown located at the top of the Compose Message screen (see Figure
18)
Figure 18:
Selecting a 2way number
Historical Data
Within the Outbox, the Source column will show whether the messages were sent from an
alpha tag or a 2-way virtual mobile number.
Any messages replied to by your recipients, can be viewed in, and retrieved from, the Inbox
and saved for later storage and analysis.
4.5.
Sending Flash SMS
Flash SMS messages unlike standard SMS appear directly on the screen of the recipient’s
mobile phone, instead of going into the phone’s ‘inbox’.
To send a Flash SMS perform the following steps:
a. Select Flash SMS from the COMPOSE option (Figure 19)
Version 1.06
- 19 -
b.
c.
d.
e.
NB:
Flash Messages are limited to 160 characters.
Figure 19:
4.6.
Enter the desired recipients
Apply a template if required
Insert the message
Select Send
The Flash message screen
Sending WAP Push
This option allows you to send your recipient a WAP Push message that contains a URL to
a Mobile Internet page.
Send a WAP Push message by performing the following steps:
a.
b.
c.
d.
e.
Version 1.06
Select WAP Push from the COMPOSE option (Figure 20)
Enter the desired recipients
Give your message or URL a title
Insert the URL, starting with http:// e.g. http://pageone.co.uk
Select Send
- 20 -
Figure 20:
4.7.
The WAP Push screen
Sending a Business Card
A business card or vCard allows you to send an “electronic” business card to one or more
supported handsets. It’s a quick and easy way to transfer personal information directly to
the mobile phone of your contacts. All mandatory fields, which need to be completed, are
marked with an asterisk.
Send a business card by following the steps below:
a.
b.
c.
d.
NB:
Select BUSINESS CARD from the COMPOSE option (Figure 21)
Enter the desired recipients
Complete the mandatory fields as a minimum
Select Send
Support and display of business cards (vCard) can differ from handset to handset.
Figure 21:
Version 1.06
The Business Card screen
- 21 -
4.8.
Sending a Calendar Entry
A Calendar Entry (vCal) lets you send information about up and coming appointments
direct to a compatible mobile phone. Upon reception of the calendar entry, a recipient can
save the entry details directly to the “calendar” feature of their mobile handset e.g. the time
and date of a planned exercise or team meeting.
a.
b.
c.
d.
e.
NB:
Support and display of calendar entries (vCal) can differ from handset to handset.
Figure 22:
5.
Select CALENDAR ENTRY from the COMPOSE option (Figure 22)
Enter the desired recipients
Complete the mandatory fields as a minimum
Select a start & end time and date
Select Send
The Calendar Entry screen
Viewing messages sent from your account the Outbox
You can view the messages sent in the last 31 days from your Connect account by
selecting the OUTBOX option (Figure 23) from the Service Menu.
Figure 23:
Version 1.06
The OUTBOX option
- 22 -
After selecting the OUTBOX, you will be presented with a screen similar to the one below.
Messages are displayed in chronological order, with the last message sent displayed at the
very top. An example OUTBOX can be seen in Figure 24.
Figure 24:
5.1.
An example OUTBOX
Understanding the OUTBOX
♦The information displayed in your account OUTBOX includes the 2way number that a
message was sent from (the Source), the number it was sent to (the Destination), the
message itself, the date and time that the message was sent (Dispatch Time), whether the
message has been received or not (Status) and lastly, the time when the status was last
updated (Status Time)
5.2.
Sorting your OUTBOX
♦Information can be sorted in ascending or descending order by simply clicking on the
column header. All columns may be sorted in this way. You only need to click on the
column header once. Depending on the amount of entries, the OUTBOX may take
a few moments to sort
Click the column to sort
5.3.
Viewing longer messages
♦Display of longer messages in the OUTBOX will be truncated. In order to view the
content of a longer message, click on the individual message itself. The entire message
will be displayed at the bottom of the screen along with the number of the recipient and the
message delivery status. (See Figure 25)
Version 1.06
- 23 -
Figure 25:
5.4.
Viewing the entire message
Accounts with multiple ‘From’ addresses
♦If you have more than one 2way number, an alpha tag or groups attached to your
Connect account, you can view the messages sent from each number by selecting the
number from the OUTBOX dropdown (Figure 26) located at the top of the screen
Figure 26:
5.5.
The OUTBOX dropdown
Interpreting the message status
♦The status of a sent message is shown using a “traffic light” system. A green light next to
the message means that it has been successfully delivered to a mobile phone. An orange
light means that your message has been sent but not yet delivered to the handset, usually
because the mobile phone is switched off or out of coverage. The red light means that your
message could not be sent. This normally occurs because the mobile number is incorrect
or invalid. If this happens, check you have sent your message to the correct number.
5.6.
Storing messages sent from your account
♦ A record of OUTBOX information can be exported into Excel file format by selecting the
button shown at the bottom of the OUTBOX screen. This will generate
a pop up that allows you to select and view a. the content of the messages sent or b. the
number of messages sent in a user defined 90 day period
Figure 27:
Version 1.06
The Export Outbox Reports option
- 24 -
Once you have selected the period and the type of report required, press
This will automatically generate an Excel formatted file containing the contents of your
request. Note that when you view an individual message and then select the EXPORT
option, the same export pop up will appear.
5.7.
.
Finding specific messages sent from your account
♦If you need to find a specific OUTBOX message or group of OUTBOX messages you can
filter the OUTBOX so that only the messages that you are looking for are displayed
a.
Begin your search by entering a search criterion into the Find Contact search
box (Figure 28) in the top right corner of the OUTBOX.
Type in the word, number or date/time that is associated with your message.
Connect lets you filter on anything from the Source Address, the Destination, the
Message itself, the Dispatch Time and even the Status Time.
b.
Press the Find Contact button
attached to the Find Contact search box.
The outbound messages that match your criterion will be shown. The more precise
that you are with your search criterion, the more accurate the results returned will be.
Figure 28:
Version 1.06
The Find Contact search box
- 25 -
To reset the filtered display, simply clear your search criterion from the Find Contact
search box. This should reset the OUTBOX display so that all messages are displayed
again.
5.8.
Forwarding messages sent from your account
♦Forward any of the messages sent from your account to another mobile number by
selecting the message from the OUTBOX. The individual message will be displayed at the
bottom of the screen where you will be able to select the Forward button (see Figure 29)
Figure 29:
The OUTBOX Forward option
Selecting Forward will take you to the Compose Message screen where you can then free
type the number that you wish to send to, import from a list, or select from the Contacts
section.
♦Note that the message you wish to forward has been pre-populated into the Message text
box. Once you have entered all recipients, select Send to forward the message to your
chosen recipients
Version 1.06
- 26 -
6.
Viewing messages sent to your account - the
Inbox
The INBOX (see Figure 30) shows all the SMS messages sent to your Connect account
over the last 31 days.
The default setting for your INBOX shows all the messages sent to your account. You can
view the inbound messages that belong to a specific 2way number by selecting the number
from the INBOX dropdown at the top of the INBOX.
Figure 30:
6.1.
The INBOX option
Understanding the INBOX
♦Each record in the INBOX shows the mobile number that sent in the message (the
Source), the time and date the message was delivered to your account (the Delivery
Time), and the message. Figure 31 shows an entry in a typical INBOX
Figure 31:
6.2.
A typical INBOX
Sorting your INBOX
♦Similar to the OUTBOX, users have the ability to sort their inbound messages. Click once
on the header of the column which you would like to sort the information by
Click the column to sort
Version 1.06
- 27 -
Sorting may take a few moments depending on how many inbound messages your account
contains. If you would like to re-sort the information, from descending to ascending for
example, simply click on the column header again.
6.3.
Viewing longer inbound SMS
♦To view longer responses, select the message from the list of replies. At the bottom of
the screen you will see the message detail (Figure 32). You then have a further option to
forward the message to another mobile or reply to that message, from your account
Figure 32:
6.4.
Viewing an INBOX message
Accounts with multiple 2way numbers
♦If you have more than one 2way number attached to your account, you can view the
messages sent to each number by selecting the number from the INBOX dropdown (Figure
33) located at the top of the screen
Figure 33:
6.5.
The INBOX dropdown
Storing messages sent to your account
♦INBOX information can also be exported into Excel file format by selecting the
button shown at the bottom of the INBOX screen. Selecting Export (see Figure
34) will generate a file of the last 31 days of SMS replies sent to your account.
Like the OUTBOX export, individual replies only, cannot be exported
Figure 34:
Version 1.06
The INBOX Export option
- 28 -
6.6.
Finding specific messages sent to your account
♦Similar to the OUTBOX, if you need to find a specific INBOX message or group of INBOX
messages you can filter the INBOX for the messages that you are looking for
a.
Enter your search criterion into the Find Contact search box in the top right
hand corner of the INBOX.
Type the word, number or date/time that is associated with your message.
You can filter on information contained in the Source Address, the Destination,
Message, and Delivery Time fields.
b.
Press the Find Contact button
attached to the Find Contact search box.
The inbound messages that match your criterion will be shown. The more precise
that you are with your search criterion, the more accurate the results returned will
be.
NB:
6.7.
You can display all replies again by clearing your search criterion from the Find
Contact search box. All replies should automatically be displayed once again. If
not, then clear any criterion entered and select the Find Contact button.
Replying or forwarding messages sent to your
account
♦Reply or forward any of the messages sent to your account to another mobile number by
selecting the message from the INBOX. Like the OUTBOX, the individual message will be
displayed (see Figure 35) and you will then be able to select the Reply or Forward options
as required
Figure 35:
INBOX Forward and Reply options
♦If you choose Reply you will be taken to the Compose Message screen where the To:
field will be pre-populated with the sender’s number. Simply type your response and press
Send to respond
♦When forwarding a message, you will again be taken to the Compose Message screen
where you can free type the number that you wish to send to or select from the Contacts
section. Press Send to complete the process
Version 1.06
- 29 -
7.
Group Messaging
PageOne broadcast groups allow a user to send the same message simultaneously to a
predefined group of recipients through the use of a dedicated group broadcast number.
The groups belonging to your account are accessible via the GROUPS option in the
Service Menu (Figure 36).
Figure 36:
The GROUPS option
Broadcast groups may contain a combination of mobile phone numbers, pager numbers
and email addresses.
7.1.
Adding group members
a.
To add a recipient to a broadcast group, select the GROUPS option from your
Connect account.
b.
Enter your recipient’s details into a blank set of “Surname”, “First name”,
“Address” and “Notes” fields within your selected group in the GROUPS
screen (Figure 37). Select add when you are happy with the entry.
Figure 37:
Version 1.06
The GROUPS screen
- 30 -
♦All saved group members can be edited or deleted by selecting the appropriate option
next to the group entry
7.2.
Editing and deleting group members
♦To edit or delete entries from a group, select the required group from the Broadcast
Groups dropdown
a.
You will be presented with all the members of your chosen group.
b.
Each entry in your group will be displayed with an edit or delete option
beside it. See Figure 38.
Figure 38:
Group edit options
c.
Selecting edit will highlight your chosen entry and allow you to amend any of
the details. Select Update to save your changes.
d.
If you chose the delete option, you will be prompted to confirm your choice.
Select OK to proceed.
7.3.
Using the Contacts section to populate groups
♦You may select recipients listed in your Contacts to populate the contents of a group.
Simply click on the contact you want added to the group from the Contacts. The details of
the new entry will be populated into an empty record. Select add to complete the process
7.4.
Adding multiple group contacts
♦You can import multiple recipients into a group using a file saved in Microsoft Excel
format. You will need to prepare a file with your data arranged in the following layout (also
see Figure 39):
[Surname] [First name] [Address] [Notes]
Version 1.06
- 31 -
Figure 39:
NB:
Group Import format
The Address field is the destination to which you want to send a message.
Save this file to a location on your computer so that it can be accessed for later use.
a.
Go to the GROUPS option and select the Import button from the bottom left
of the screen. You will be taken to the Group Import screen (see Figure 40).
b.
Select Browse and locate the file you wish to upload. Once you have found
the file you wish to import, select Upload.
Figure 40:
Version 1.06
Group Import screen
- 32 -
c.
You will be prompted to confirm your selection. Select OK to proceed with
the import.
NB:
Unlike the Contact Manager upload, the whole contents of your group will be
replaced. If you do not want to proceed with the change, select Cancel, and then
Cancel again. This will take you back to the Broadcast Group screen.
7.5.
Selecting group numbers for a group broadcast
♦A list of groups associated with your account, can be seen from the Groups tab located
at the bottom of the Toolbar (see Figure 41 below)
Figure 41:
The Groups tab (Toolbar)
♦Selecting the Groups tab will display any groups on your account. Selecting the group
will automatically populate the group number into the To: field. After that simply enter the
desired message as you would normally do and send. By hovering over the name of the
group, you will be able to view the actual group number
♦To show your Contacts again, select the Contacts tab, the Groups tab will then be
displayed at the bottom of the Toolbar as before
Version 1.06
- 33 -
7.6.
Storing a copy of a group
♦You can store a list of group members by carrying out an export
a.
Select the Export button in the GROUPS page. An Excel file containing the
group contents will automatically be created which you can save to your PC (see
Figure 42). Your group information will be exported in the following format:
[Surname][First name][Address][Notes]
Figure 42:
b.
7.7.
Example Group Export format
A header row will automatically be inserted. If you wish to re-import this file,
make sure you remove the header row first; otherwise this will be imported as well.
Renaming your group
♦You can rename your groups at any time by choosing the (rename) option at the top of
the Broadcast Group page (see Figure 43). Type in your desired name and choose OK.
Your name change will not be visible until you restart your web browser
Figure 43:
7.8.
Group rename option
Searching for an entry within a group
♦To search for a specific contact within a group, simply type part or all of their Surname,
First name, Device Type*, Address** or Notes into the Find Contact search box. All
matching entries will be shown onscreen
* A device type can be a mobile phone number, pager number, email address etc
** The Address is the actual number of the mobile phone, email address etc
Version 1.06
- 34 -
7.9.
Clearing group contents
♦All contacts within a group may be cleared by selecting the Clear Group button located at
the bottom of the GROUPS screen (see Figure 44). Follow the onscreen instructions to
complete the requested action
Figure 44:
Clear Group option
7.10. Advanced Group Options
♦By clicking on the Advanced Options button (see Figure 45), a summary will be shown
of your Broadcast Groups, including the Group number (the Group Address) and the
Sent Message Expiration time (see Figure 46). Click on Advanced Options again to go
back to the normal Groups display
Figure 45:
Advanced Group options
Figure 46:
Summary of Advanced Group options
♦The Sent Message Expiration time is a user-selected period in which messages if not
delivered to a recipient’s handset by the mobile networks, can be expired. The expiration
time may be changed as required by selecting a different time from the dropdown
Version 1.06
- 35 -
8.
Creating & using Message Templates
If you find you send the same message or a set of similar messages on a regular basis you
can create a message template that will save you from having to type the message in over
and over.
8.1.
a.
Creating a message template
To create a message template, go to the TEMPLATES option located at the
bottom of the Service Menu (see Figure 47).
Figure 47:
The TEMPLATES option
All templates that you create will be displayed in the TEMPLATES screen (see
Figure 48).
Figure 48:
b.
The TEMPLATES screen
Create a new template by selecting the Add New Template button located at
the bottom of the TEMPLATES screen.
This will take you to the Template designer where you will be able to define the
body of your message (see Figure 49).
Version 1.06
- 36 -
Figure 49:
c.
The Template designer
Give your new template a name.
Give your template a title which will help you to remember what your templated
message is about, for example; Meeting Reminder (see Figure 50 for an example
template).
Figure 50:
d.
An example template
Type the body of the message into the text box, and select Save to save the
template for future use.
The message may be a simple text message or you can choose to insert a Date,
Time or Input field that will allow you to personalise your message (see below).
inserts a date field indicated with the text <date/>. When the
template is used or previewed, the user will see a calendar, which they can then use to
. This date will be displayed in the message sent.
select a date
inserts a time field indicated with the text <time/>. When the
template is used or previewed, the user will see a
dropdown, which
they can use to select a time. Again the information will be displayed in the actual
message sent.
inserts a free text field, <input/>, which allows users to enter
text of their choice. When the template is used or previewed, the user will be
to enter information into.
presented with a free text field
Version 1.06
- 37 -
If you would like to see what your template will look like before you save it, select the
button (see Figure 51).
Figure 51:
A previewed template
♦All saved templates can be edited or deleted by selecting the appropriate option located
next to the template (see Figure 52)
Figure 52:
Template edit option
♦If you have a large number of templates, you can find them quickly and easily by typing
the template title or any part of the associated message into the Find Template box
(Figure 53). A list of templates, which match your criterion, will be shown onscreen
Figure 53:
8.2.
The Find Template box
Using your templates
♦Once created, you may select a template to use from the Templates dropdown (see
Figure 54) in the Compose Message screen
Version 1.06
- 38 -
Figure 54:
Selecting a template
♦Templated messages may be used for sending predefined SMS and Flash messages.
Templates are also available to select from in the DIARY feature (see section 9 for
information on scheduling your messaging)
a.
Select the required template from the dropdown, this will automatically enter
the text from the template into the Compose Message box (see Figure 55).
Figure 55:
Version 1.06
A templated message
- 39 -
b.
Make any necessary adjustments to the text and send the message as
normal.
NB:
Templates that only include simple text can be added to. Templates that include
time or date fields only allow users to make amendments by selection of a date or
time (see Figure 56).
Figure 56:
NB:
A template message with Date, Time, and Input fields
If you have not created any message templates, the template dropdown will not
appear in either the COMPOSE or DIARY features.
Version 1.06
- 40 -
9.
Presetting Text Message Alerts
Connect has an inbuilt “message scheduling” feature that allows users to set up text
message alerts in advance. This is useful for setting reminders or where delivery of
specific information is time dependent to an event occurring.
9.1.
a.
Creating a preset message
Go to the DIARY option in the Service Menu (see Figure 57).
Figure 57:
b.
The DIARY option
Select an Add Event icon
for the day that you want to create the message
for from the calendar (see Figure 58). This will take you to the Diary Message
form (Figure 59).
Figure 58:
Version 1.06
The DIARY screen
- 41 -
Figure 59:
The Diary Message form
♦Type the number of the contact you wish to send to or select their number from the
Contacts section. If you have a number of people you would like to send the message
to, you can import a list of recipients from a CSV formatted file (see Figure 12 and 13)
♦You may give your message a subject heading, however this will not be sent as part
of the message. You can also apply a message template that you have previously
created or you can simply type a message into the Message box provided. A typical
scheduled message is shown in Figure 60
Version 1.06
- 42 -
Figure 60:
c.
A typical scheduled message
Set how often you want the message to be sent.
You can choose to preset the message to be sent once, or if you would like to repeatedly
send the message for a range of dates, you may choose from Daily, Weekly, Monthly,
Yearly or Nth (every so many days). The default frequency is a one-off message. Figure
61 shows the options available to repeat your scheduled messages.
Version 1.06
- 43 -
Figure 61:
d.
Diary Repeat options
Set the time the message will be sent.
Messages can be sent to recipients at the time of the event or up to 2 days before
the start. The time and the date of the event can be changed by making the
necessary selections from the Time dropdown menu and the calendar pop up (see
Figure 62).
Figure 62:
Version 1.06
Diary Date/Time options
- 44 -
If you do not wish to send the message but want to retain it for personal reference save the
message as a Note by changing the event type at the top of the form.
e.
9.2.
Click Save to complete presetting the message. After clicking Save, you will
receive a prompt that the message has been added and be taken back to the
Diary.
Managing preset messages
♦All scheduled messages can be updated or deleted as required. Simply choose your
event from the Diary. This will open up the event in the Diary Message form where you
may either edit or delete the entry entirely
Version 1.06
- 45 -
9.3.
Draft messages
♦If you don’t have enough information or time to complete a message, you can save the
message in draft format for completion at a later date. The message will not be sent out
until you save it normally. All draft messages will be shown in italic text in the Diary until
the event is saved normally (see Figure 63)
Figure 63:
9.4.
A saved draft message
Viewing sent scheduled messages
♦Similar to standard text messages, any preset messages sent can be viewed in the
account’s OUTBOX
9.5.
Viewing preset messages
♦All preset messages can be viewed by selecting the individual message in the Diary view
You can choose to view your Diary in three views: by Day, by Week, or by Month. The
options to change your view are located at the bottom left of your Diary.
9.6.
Navigating through the Diary
♦To go to another day, week, or month use the << and >> buttons located at the top of the
Diary. You can also use the Quick Navigation Tool (the calendar located at the top of the
Diary, see Figure 64) to quickly move to the date that you want. Simply use a combination
of the >, >> or < and << to arrive at the date you require, then click on the particular day
that you want and you will be taken to that day in the Diary
Version 1.06
- 46 -
Figure 64:
Version 1.06
The Quick Navigation Tool
- 47 -
10. Managing users with Account Management
The ACCOUNT MANAGEMENT option allows the owner of a Connect Parent account to
view the messages sent and received by all user accounts, as well as enabling access to
valued added services administered by the Parent account.
Figure 65:
The ACCOUNT MANAGEMENT option
After selecting ACCOUNT MANAGEMENT, you will be presented with a screen similar to
the one below.
Figure 66:
Version 1.06
A typical ACCOUNT MANAGEMENT screen
- 48 -
10.1. Managing user accounts
♦The Manage Accounts feature enables Parent account owners to view the usage habits
of all user accounts owned by the Parent. It also enables the Parent account owner to
administer groups and diverts allocated to the user accounts
10.1.1.
Viewing messages sent from user accounts
Manage: Outbox allows Parent account owners to view messages sent by a selected user
account.
a.
Select Outbox from the ‘Manage’ dropdown (see Figure 67).
Figure 67: The Manage: Outbox option
b.
Select the user account whose Outbox you would like to view, then select
.
The outbound messages that have been sent by the selected user account over the
last 31 days will be displayed.
Details shown include, whom the message was sent to, the message, the time the
message was sent, the message status and the time the status was updated.
To view another user accounts outbound messages, simply repeat step b for the
required account.
♦You can view the entire message by selecting the message from the list of outbound
messages. Once selected you can forward the message to an alternative destination if
required
♦Make of copy of the outbound history by selecting
generated file
and saving the
10.1.2. Viewing messages sent to user accounts
Manage: Inbox allows Parent account holders to view the inbound messages sent to a
selected user account.
Version 1.06
- 49 -
a.
Select Inbox from the ‘Manage’ dropdown. See Figure 68.
Figure 68: The Manage: Inbox option
b.
Next select the user account whose Inbox you would like to view from the
drop down, then select
.
The inbound messages that have been sent to the selected user account over
the last 31 days will be displayed. To view another user’s inbound messages,
simply repeat step b for the required user account.
♦Details shown will include who sent the message, the message itself, the user
accounts 2way number, and the time of successful delivery to the user
♦You can view the entire message by selecting the message from the list of inbound
messages. Once selected you may choose to reply to the message or forward it to
another destination
♦You can choose to save a copy of these messages by selecting the
option at the bottom of the screen
10.1.3.
Managing user broadcast groups
The Manage: Group Management feature allows you populate and manage the contents
of groups you have allocated to your accounts.
a.
Choose the Group Management feature from ‘Manage’ dropdown.
Figure 69:
Version 1.06
The Manage: Group Management option
- 50 -
b.
Next select the user account whose broadcast groups you’d would like to
manage, then select
c.
.
The contents of the selected broadcast group will be displayed. Any feature
shown onscreen can be edited, just as if you were in the user account yourself.
Figure 70: Managing groups on a user account
Management capability includes editing the details of existing members, deleting
group members, adding new members, or even renaming the group itself.
♦Whatever changes you make here will be reflected in the group details the user
sees in their own account
d. If you would like to view and edit another group, simply select that group
from the Broadcast Groups dropdown (see Figure 71).
Figure 71:
Version 1.06
The Broadcast Groups dropdown
- 51 -
10.1.4.
Managing Diverts
Manage: Divert allows a Parent account owner to enable/disable a divert and manage a
divert profile (the devices that will receive your diverted messages).
Figure 72:
a.
The Manage: Divert option
Select the Divert feature from the ‘Manage’ dropdown and then the user
account whose divert you want to manage, followed by
. You will be
displayed the associated divert management page of the user account.
Figure 73:
b.
A typical Divert profile page
Make amendments to the divert as required (check/uncheck the ‘Divert on’
option, divert to another profile etc). To apply these to the account, select
. This will make the changes active on the user’s account.
To change these, simply make the required changes, and select
once again.
Version 1.06
- 52 -
10.1.5. Editing a divert profile
Users may edit the contents (e.g. the communication devices and recipients) of a divert
profile by selecting the edit option of the corresponding divert profile they would like to
amend. This will open the distribution list held against the divert. Simply add, amend or
remove the required communication devices like you would a broadcast group.
10.2. Managing user access to value added services
Through the ‘Manage access to my services’ option, Parent account owners can allocate
value added services such as broadcast groups and diverts to any one of their user
accounts.
10.2.1. Allocating access to broadcast groups
Online Management Groups lets you allocate one or more broadcast groups to the user
accounts belonging to the Parent account.
a.
First, select the Online Management Groups option from the Account
Management screen.
Figure 74:
Option for allocating groups to user accounts
You will be presented with a list of all broadcast groups present on your Parent
account.
Figure 75:
Version 1.06
An example group access list
- 53 -
NB:
b.
Group names displayed above are for example purposes only.
Select the group you would like to allocate by clicking on the dropdown option
belonging to your chosen group. A list of all the user accounts will be shown in
the dropdown.
Figure 76:
c.
Selecting a user account to allocate a group
Select the user account required and then select add to allocate the group. A
broadcast group can be allocated to more than one user.
Figure 77:
Allocating access to a broadcast group
Once allocated, the user account will be added to a list of any other user accounts
that the group has been allocated to. The group will now also appear in the
Version 1.06
- 54 -
GROUPS menu in the user account and within the user accounts Groups tab in
the Toolbar (from the Compose Message screen).
♦To unallocate a group, simply select the delete option (Figure 77) next to the user
account you want unallocated
Figure 78:
Removing group access
♦You can allocate/unallocate a group as many times as you require
10.2.2.
Allocating access to diverts
The Divert option contained in ‘Manage access to my services’ allows the Parent
account to allocate a divert administered by the Parent account owner to a user account of
their choice.
a.
Select the Divert option from the Account Management screen.
Similar to the broadcast group allocation screen, you will be presented with a list of
user accounts belonging to the Parent and the ability to allocate the divert to each.
b.
Simply allocate the divert to the account/s of your choice by selecting the
add option. The divert will now be selectable to utilise in the chosen user account.
To remove the divert from the user account, just select the delete option displayed
against the individual user account.
Figure 79:
Version 1.06
Adding divert access
- 55 -
Figure 80:
Version 1.06
Removing divert access
- 56 -
11. Other
11.1. Changing your password
♦You can change your password at any time by going into PREFERENCES (see Figure
81)
Enter your current password, and then submit and confirm your new one
Figure 81:
The Preferences screen
11.2. Email alert of SMS replies
♦You can specify an email address that your inbound SMS messages can be copied to.
Simply type the designated email address into the Reply to address field and select
Update (see Figure 82)
Figure 82:
Version 1.06
Specifying an email address for inbound SMS alerts
- 57 -
12. Contacting PageOne
If you would like any further assistance using your Connect account contact PageOne
Customer Services on 0844 811 0070 or email [email protected]
Version 1.06
- 58 -