1
!$#'"%&()
!"##"$%&"'()*+%,++'%-(!."/(',+(/01+.%("!(2")*%3.0)1
User Guide
1.36, August 2012
C: Contents
P:
Preamble......................................................................4
Versions!.................................................................................4
Copyright!................................................................................4
Contact!...................................................................................4
Show Credit!............................................................................4
1:
Introduction .................................................................5
2:
Getting Going ..............................................................6
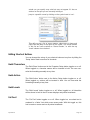
Downloading SpotTrack!.........................................................6
Running SpotTrack!.................................................................7
Purchasing SpotTrack!............................................................7
Trying SpotTrack!....................................................................8
3:
Things To Note .............................................................9
4:
Navigation .................................................................10
5:
Setup...........................................................................12
Specifying The Number of Followspots!................................12
Specifying The Followspot Layout!.......................................12
Setup Options!......................................................................13
Show Setup !.........................................................................14
Spot Setup !...........................................................................15
Character Setup !..................................................................16
Cast List!...............................................................................18
Importing Cast Information!...................................................19
Cast Pics!..............................................................................20
Size Setup!...........................................................................22
Action Setup!........................................................................24
6:
Working With Cues ....................................................26
Cue Numbers!.......................................................................27
Cue Information!....................................................................28
Navigating The Cuelist!.........................................................32
Editing Shortcut Buttons!......................................................33
Bold Characters!...................................................................33
Bold Action!...........................................................................33
Bold Levels!..........................................................................33
Fat Font!................................................................................33
Clear Formatting!..................................................................34
Undoing Changes!................................................................34
SpotTrack
v1.36
Page 2
Editing Setup Options!..........................................................34
Notes!....................................................................................35
Printing Notes!.......................................................................37
Swapping Spots!...................................................................37
Saving!..................................................................................38
7:
Windows .....................................................................39
Notepad!...............................................................................39
Spot Info!...............................................................................39
Cue List!................................................................................40
8:
Printing ........................................................................41
Spot Cue Sheet Printing Setup !............................................41
Printing Cue Sheets!.............................................................44
Master Cue Sheets!..............................................................45
Cast Pictures!........................................................................46
Size Abbreviations!...............................................................46
Spot Setups!..........................................................................46
Notes!....................................................................................46
A General Note On Printing!.................................................47
9:
Cue List .......................................................................48
Importing the Cue List!..........................................................48
Navigating Around The Cue List!..........................................50
10:
Control ........................................................................52
About SpotTrack!...................................................................52
Specifying The Followspot Layout!.......................................52
Show Only FL/Out In Printed Spot Cuesheets!.....................53
Clearing SpotTrack Completely !...........................................53
Partially Clearing SpotTrack!.................................................54
SpotTrack Information!..........................................................54
Help !.....................................................................................54
Lock Display!........................................................................54
Quit SpotTrack!.....................................................................54
11:
File Recovery .............................................................55
12:
Updating SpotTrack...................................................56
C:
Charity ........................................................................57
Behind The Scenes!..............................................................57
Light Relief!...........................................................................57
F:
FocusTrack .................................................................58
SpotTrack
v1.36
Page 3
P: Preamble
Versions
SpotTrack manual v1.36, issued August 8th 2012.
This manual relates to SpotTrack v1.36, released August 1st 2012.
Weʼd be grateful if you could report any errors by email to:
[email protected].
This manual is Copyright © 2012 FocusTrack, however please feel free to distribute it
as required. You may not change the content.
Copyright
SpotTrack is Copyright © 2009-2012 FocusTrack, all rights reserved.
Unlicensed copying or use of this software is prohibited.
A SpotTrack licence is valid for one show only.
For full licence information, visit www.spottrack.co.uk/licence
Developed using FileMaker Pro: portions of this software are ©1984-2011 FileMaker Inc. All rights reserved.
WARNING: This solution contains password(s) which can only be provided by the developer.
FocusTrack is a registered trademark and SpotTrack is a trademark of FocusTrack.
Other trademarks are hereby acknowledged.
Contact
www.spottrack.co.uk"
"
"
www.focustrack.co.uk
Tel, UK: (+44)(0) 3239 9793, US: (+1) 914 233 3809
Email: [email protected]
Found a bug? Email [email protected]
Thought of a new feature? Email [email protected]"
Show Credit
The show featured in the screen grabs in this manual is the Cameron Mackintosh /
NETworks production of the National Theatreʼs My Fair Lady, which toured the UK in
2005-2006 and the US in 2007-2008.
The showʼs creative team was:
Director: "
Shaun Kerrison, from the original by Trevor Nunn
Choreographer:" Fergus Logan, from the original by Matthew Bourne
Designer: "
Matt Kinley, from the original by Anthony Ward
Lighting: "
Rob Halliday & Oliver Fenwick, from the original by David Hersey.
More information at www.myfairladythemusical.com.
The spot cue sheets were created in early versions of SpotTrack by Matt Roper.
Thanks also to the other SpotTrack beta testers, particularly Dan Walker, Ellie Wright,
Anna Mac, Kristina Kloss, Mary Reed.
SpotTrack
v1.36
Page 4
1: Introduction
SpotTrack is a tool for creating and managing followspot cue sheets, for
shows with one to four followspots. It is designed to be quick to learn, easy to
use, and to both simplify many common tasks in managing followspots and
to reduce the amount of typing you have to do.
In particular, it allows you to:
• work on each spotʼs cue sheet in isolation, or with multiple cue
sheets side by side
• switch quickly between cue sheets
• define shortcut buttons for things you type regularly - character
names, sizes, common instructions, intensities
• store additional information about each spot - type, colour setup,
operator
• store additional information about the cast - character names,
character pictures, cast names and more
• print spot sheets for each spot op, and master spot calling sheets
for the spot caller; cue sheets can also highlight new or changed
cues automatically if required.
• print character contact sheets for spot ops, perfect for introducing
new spot ops or house spot ops meeting a touring show for the
first time to the characters they will be following.
SpotTrack also supports charity: fifteen percent of the sale price of each
SpotTrack licence goes to either Light Relief in the UK, or The ESTA
Foundationʼs Behind The Scenes in North America - you get to choose
which charity you support at the time of purchase. Find out more about these
charities on p57.
SpotTrack
v1.36
Page 5
2: Getting Going
Downloading SpotTrack
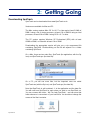
SpotTrack can be downloaded from www.SpotTrack.co.uk.
Versions are available for Mac and PC.
The Mac version requires Mac OS X v10.5.7 or later and at least 512Mb of
RAM if using a G4 or faster processor, at least 1Gb of RAM if using an Intel
processor, at least 2Gb of RAM if using OS X v10.7 or later.
The PC version requires Windows XP Professional (SP3) with at least
256Mb of RAM, or Vista with at least 1Gb of RAM.
Downloading the appropriate version will give you a .zip compressed file
containing SpotTrack. Double-clicking on the file will expand it to a folder
containing SpotTrack.
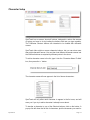
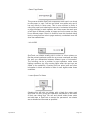
On a Mac, there are two main files, SpotTrack (the application, with the Sp
icon) and SpotTrack.spo (the data file):
"
"
On a PC, you will see more files, but the important ones are called
SpotTrack.exe (with the Sp icon) and SpotTrack.spo (the data file).
Note that SpotTrack is self-contained - it is the application and the data file.
You will need one SpotTrack for each show you wish to use SpotTrack on.
You can re-name the folder - ʻMy Fair Lady SpotTrackʼ - and can store that
folder wherever is convenient on your hard drive. You should not change the
names of the files it contains.
"
SpotTrack
"
v1.36
Page 6
Running SpotTrack
To run SpotTrack, double click on the ʻSpotTrackʼ file on a Mac, or the
ʻSpotTrack.exeʼ file on a PC.
"
"
"
Purchasing SpotTrack
To run SpotTrack, you need to purchase a SpotTrack licence - which you can
do via the website, www.spottrack.co.uk.
A SpotTrack licence costs £45.
To purchase a licence, you will need to specify the Registered User,
Registered Show and Show Venue for SpotTrack. The registered show
should be the show name (ʻMy Fair Ladyʼ); the venue could be the venue
name or some other description, such as ʻUK Tourʼ.
Each SpotTrack licence is valid for one show only - think of SpotTrack as a
consumable, like colour filters or lightbulbs.
Once you have registered and paid, you will receive a Registration Code by
email, which will enable SpotTrack for that show. Note that this code is
generated by a human being and so may not appear instantaneously.
Why do you have to purchase SpotTrack for each show? Because by doing
so, you (and your venue) are supporting two fantastic lighting charities Light Relief in the UK, and The ESTA Foundationʼs Behind The Scenes in
North America; you get to choose which when you purchase SpotTrack. You
can find out more about these charities on p57.
Once you have your Registration Code, you can enter it into SpotTrack to
get to work; enter the information required then press ʻOKʼ.
"
SpotTrack
v1.36
Page 7
As part of the registration process, SpotTrack will ask for your name and a
contact email; this information will be passed back to us purely for
registration and technical support purposes, and to allow us to send you
information about updated SpotTrack releases. If you donʼt want to receive
update information, just check the ʻdonʼt send news about updatesʼ box.
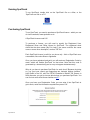
Trying SpotTrack
If you want to try SpotTrack before you buy, you can. Enter ʻDemoʼ as the
Registered User then press ʻOKʼ and SpotTrack will run in demo mode.
"
In this mode, you can only work on two spots, you wonʼt be able to print cue
sheets, and SpotTrack will quit just often enough to be borderline annoying
(every thirty minutes). Apart from that, you should be able to get an idea of
whether SpotTrack will be of use to you.
Every time you run SpotTrack in demo mode, it will give you a chance to
enter a registration code; if you do so here you will be able to continue
working with any cues you have already entered in SpotTrack.
SpotTrack
v1.36
Page 8
3: Things To Note
There are a couple of ways in which SpotTrack differs from other applications
that you should be aware of:
• Each SpotTrack contains both the SpotTrack application and the
SpotTrack data file, contained within one folder. You should have
a SpotTrack folder for each show you are using SpotTrack on.
SpotTrack (and FocusTrack) work like this in an attempt to ensure
that data remains accessible long-term, which can be important
for shows with a long life, whether they be hit musicals or drama,
opera or dance products that play in rep, but may drop out of the
rep only to re-appear years later. In some cases, data associated
with those shows has become unreadable - old MacDraw files
that nothing can now open, for example! We hope that by having
the application with the data, youʼll have a better chance of being
able to get into show data for a long time to come.
• No saving! Youʼll notice that there is no ʻSaveʼ command in
SpotTrack. It is saving your data as you work, hopefully to help
avoid that catastrophic moment when the power goes out and you
realise you havenʼt saved for the last three critical hours of tech!
Be careful, though: this also means that you canʼt work on the
show for a bit then decide to save it as a new version. If you want
to do that, you should copy the SpotTrack data file
(ʻSpotTrack.spoʼ, inside the SpotTrack folder) before you start work
for the day, to ensure that you still have the previous version
should you need it. This is good backup practice in any case, to
ensure you have a backup in case you (or your computer) have a
bad day.
SpotTrack
v1.36
Page 9
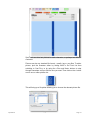
4: Navigation
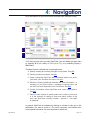
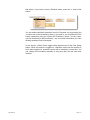
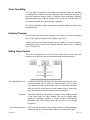
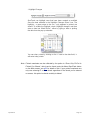
All of the features of SpotTrack can be accessed from the Main Screen:
B
A
D
F
C
E
Youʼll end up here when you start SpotTrack. You can always get back here
by pressing ⌘-0 (on a Mac) or Ctrl-0 (on a PC), or by selecting Display >
Main Menu.
The Main Screen is divided into six principal areas:
A. Editing: creating and making changes to cue sheets. See p26.
B. Printing: printing cue sheets. See p41.
C. Setup: configuring SpotTrack with information about your spots,
your show, your shortcuts and more. See p12.
D. Windows: Opening additional windows with other information - a
summary of your spotʼs setup, a notepad for taking notes, the
cue list if you have imported it from FocusTrack. See p39.
E. Control: Information about SpotTrack and some setup options.
See p52.
F. Version notes: A place to quickly make note of where you are up
to in the process of creating a show and which version of the
spot cues SpotTrack currently contains - ʻpreview 1ʼ, ʻfirst nightʼ
or whatever.
In general, SpotTrack is navigated by clicking on a button to take you to the
information you want to work on. The most commonly used buttons also
have keyboard shortcuts, the most important of which are:
SpotTrack
v1.36
Page 10
Mac!
⌘-0"
⌘-1"
⌘-2"
⌘-3"
⌘-4"
⌘-5"
PC!
ctrl-0"
ctrl-1"
ctrl-2"
ctrl-4"
ctrl-4"
ctrl-5"
⌘-N"
⌘-E"
ctrl-N" "
ctrl-E" "
Create a new cue
Erase the selected cue
⌘-O"
⌘-L"
ctrl-O " "
ctrl-L" "
Level OUT (thing Out!)
Level at FULL (think FL!)
ctrl-I" "
shift-ctrl-X"
ctrl-G" "
Set time for cue (thing tIme)
Copy cue text from cuelist (think teXt)
Add a script paGe number to a cue
⌘-I"
shift-⌘-X"
⌘-G"
!
"
"
"
"
"
"
Action
Return to the Main Screen
Spot 1ʼs cuesheet
Spot 2ʼs cuesheet
Spot 3ʼs cuesheet
Spot 4ʼs cuesheet
All spot cuesheets
You can see more keyboard shortcuts by selecting ʻHelpʼ from the Control
section of the main control screen, for Mac:
or PC:
You can also jump between the various displays using the Display menu.
!
SpotTrack
Note:! You can customise the order or names of your spots, and re-arrange which
keyboard shortcuts (keys 1-4) correspond to which spot. This allows you to
re-arrange the spot buttons and cuesheets to match the physical layout of
your spots. See p12.
v1.36
Page 11
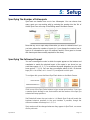
5: Setup
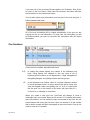
Specifying The Number of Followspots
SpotTrack can handle from one to four followspots. You can choose how
many spots you are working with by entering the number into the ʻNo of
Active Spotsʼ box at the top of the Editing area of the Main Screen.
"
Note that any cue or spot setup information you enter is retained even if you
you later reduce the number of spots (ie. if you change the number from 4
spots to 3, information for spot 4 is retained, useful if a tour goes to a house
with fewer spots than normally required for the show).
Specifying The Followspot Layout
You can re-arrange the order in which the spots appear on the buttons and
cuesheets to match the physical layout of the spots in our show (so you
could have spots 4, 3, 2, 1), or re-number the spots altogether (so you could
have spots 6, 7, 8, 9). You can also re-configure which of the 1-4 shortcut
keys (⌘-1-4 on a Mac, ctrl-1-4 on a PC) correspond to which spot.
To configure this, press the About SpotTrack button on the Main Screen.
Click in one of the Spot Order buttons to type a new spot number. If you type
a number that is already in use, that number and the number of the spot you
selected will swap positions.
Set Default will return the spot order to 1-4; Match Spot Order will match the
keyboard shortcut numbers to the spot numbers if possible, though the
shortcut numbers will always be 1, 2, 3, 4.
Spot numbers will be changed wherever they appear in SpotTrack, on-screen
and in print-outs.
SpotTrack
v1.36
Page 12
!
Note:! Re-numbering spots does not move any cue information about spots - it is
effectively re-labeling the spot columns in the cuesheet. It is best done before
starting work on a show. You can swap information between spots using the
Swap Spots buttons on the main screen; see p37.
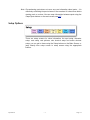
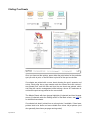
Setup Options
There are setup screens for show information, the spot setup, character
setup, cast setup, cast pictures, size shortcut setup and action shortcut
setup; you can get to these using the Setup buttons on the Main Screen, or
jump directly from setup screen to setup screen using the appropriate
buttons.
SpotTrack
v1.36
Page 13
Show Setup
Show Setup lets you store information about the production - show name,
lighting designer, lighting team and so on. The show name is the show name
you specified when you purchased SpotTrack; this cannot be changed. The
other information can be edited as required.
You can switch between fields by clicking, or using the tab key to step
between them (shift-tab to move backwards).
Name fields should have the job title specified in full as you wish it to appear,
ie. ʻLighting: Jean Rosenthalʼ rather than just ʻJean Rosenthalʼ. This lets you
specify the job titles as you prefer.
The ʻShow Big Logoʼ and ʻSmall Logoʼ fields are intended for show logo
graphics. The small logo is used in the top-left corner of cue sheets and onscreen; the big logo is used for the cover sheets of printed cue sheets. You
can either paste graphics into these fields, or use the ʻ<ʻ button to select
image files, and the ʻxʼ buttons to clear the fields.
SpotTrack
v1.36
Page 14
Spot Setup
Spot Setup lets you store information about the configuration of your
followspots - the spot type, its position or other description, its colour
magazine type and colour load, and the operatorʼs name. This screen will
only show the number of spots you currently have set as the number of
active spots.
Information entered here is printed on cue sheets and appears in on-screen
cue sheets but is only for reference - colour numbers entered in cue sheets
do not reference back to colours specified here. This means that you can
change a colour frame (making frame 2 into L201 instead of L202, perhaps)
here and print a new spot cover sheet without having to update all of the cue
sheet data.
You can move between fields by clicking on them, or using the tab key to
move to the next field, and shift-tab to move back a field.
The ʻCopyʼ buttons allow you to copy the entire spot setup (excluding the
operatorʼs name) from spot to spot. The ʻClear Spot Setupsʼ button will clear
all of the spot setups.
SpotTrack
v1.36
Page 15
Character Setup
SpotTrack has on-screen ʻshortcutʼ buttons, designed to reduce the amount
of typing you have to do by loading the buttons with text you type regularly.
The Character Shortcut buttons are intended to be loaded with character
names.
SpotTrack offers eight on-screen character buttons, but you can store more
than eight character names. You can then load different character names into
the Shortcut buttons as required by different points in the show.
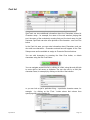
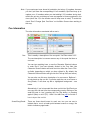
To add a character name to the list, type it into the ʻCharacter Name To Addʼ
box, then press the ʻ+ʼ button.
"
The character name will now appear in the list of known characters:
"
"
SpotTrack will only allow each character to appear in the list once, and will
warn you if you try to add a character it already knows about.
To transfer a character to one of the Shortcut buttons, click on the button. A
pop-up list will show the full list of characters; pick the character you want for
SpotTrack
v1.36
Page 16
that button. If you want to clear a Shortcut button, press the ʻxʼ next to that
button:
"
You can delete individual characters from the Character List by pressing the
ʻxʼ button next to that characterʼs name. If you want to, you an delete all of the
known characters using the ʻDelete All Charactersʼ button. In both cases,
only the character list will be affected - any cue sheet information you have
already entered will not be changed.
In cue sheets, a ʻBold Charsʼ toggle button appears next to the Char Setup
button. When this button is toggled on, character names will be inserted in
bold; when toggled off, character names will be inserted in normal text. You
can change the formatting manually at any time after the text has been
inserted.
SpotTrack
v1.36
Page 17
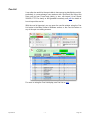
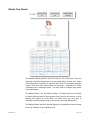
Cast List
SpotTrack can store additional information about the Characters entered in
Character setup - for example, the name of the cast member playing that
part, the name of the understudy covering that part, the track name for that
character. SpotTrack can also store pictures of the character - see Cast Pics
below
In the Cast List area, you can enter information about Characters, and can
also add new characters - Characters entered here will appear in the Char
Setup screen and be available to assign to Character Shortcut buttons.
You can add characters by pressing the New Char button, or delete
characters using the Del Char button.
"
"
"
You can navigate around this list by clicking in a field, using tab and shift-tab
to move right or left across a character. You can also sort by a field (the
character name, for example) by clicking on the title of that column:
"
"
"
or you can look at just a particular thing - a particular character name, for
example - by clicking on the ʻFind...ʼ button above that column then
specifying what youʼre looking for
"
SpotTrack
"
v1.36
Page 18
Finding something will only show matching entries. When you want to return
to seeing the full character list, press the ʻShow Allʼ button:
"
"
"
"
You can specify a an order for characters by entering a number in the ʻOrderʼ
column. If the characters are already in an order you like, you can set that
order using the ʻSet Orderʼ button; you can also clear any numbers youʼve
entered in this column using the ʻClear Orderʼ button. You donʼt have to
specify any order information, but if you do that order will be used when you
print any character or cast information, and in the Character List button that
appears in the Character Setup screen.
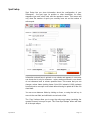
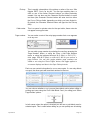
Importing Cast Information
If you already have a cast list in electronic format - for example, an Excel
spreadsheet from your wardrobe department or company manager - you can
often import that into SpotTrack rather than having to type everything from
scratch. Click on the Import... button to bring up the import options:
"
"
"
"
"
"
"
This will ask you to select a file to import the information from. You can use
the ʻShow:ʼ pop up to limit the type of files you can select
Once youʼve selected a file, you can decide how the information from your
file is imported into SpotTrack:
SpotTrack
v1.36
Page 19
"
"
Drag the ʻtarget fieldsʼ up and down so that they match the information in
your file. SpotTrack tries to store actor first and last names separately; if your
file has them together (ʻFred Smithʼ instead of ʻFredʼ, ʻSmithʼ), import that
name into the field ʻActor Name As One For Importʼ. SpotTrack will split the
name into first and last name after it has imported the information.
If your file has information that has no home in SpotTrack, click on the arrow
to turn it off and ensure that information is not inadvertently imported.
Once youʼve lined up the fields correctly, press ʻImportʼ to pull the information
into SpotTrack. After import you should check the information carefully to
make sure everything has ended up in the right place.
To add pictures to a character, you can either click on the ʻCast Picsʼ button
or press the circle to the left of the character name; both will take you to the
same place.
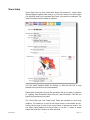
Cast Pics
SpotTrack can store pictures of each character, allowing you to print contact
sheets of characters for spot operators - this can give house spot ops
meeting a touring show for the first time a great head start on what theyʼre
looking for!
SpotTrack
v1.36
Page 20
"
SpotTrack can store two pictures for each character, so perhaps two different
costumes.
Pictures can be any standard file format - usually .jpg or .png files. To add a
picture, pick the character either by finding them in the Cast List then
switching to Cast Pics, or by using the <Prev and Next> buttons to step
through characters until you find the one you want. Then click on the < button
next to one or other picture slot:
"
"
"
"
This will bring up a file picker allowing you to choose the relevant picture file.
"
SpotTrack
v1.36
Page 21
You should normally leave ʻStore only a reference to the fileʼ unchecked so
that SpotTrack inserts a copy of the picture. If you do check this option,
SpotTrack will only reference the original file. This will keep your SpotTrack
files more compact, but will also mean that if you later move the picture file, it
may no longer be displayed in SpotTrack.
You can repeat the process to replace a photograph, or use the ʻxʼ button
next to a picture to remove it from SpotTrack.
There is space below each picture to add a brief note for that picture.
!
Note:! In some professional productions, there may be copyright or other
contractual issues with using cast pictures in this way. You should check with
your company manager or theatre administration prior to using cast pictures
in SpotTrack.
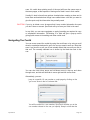
Size Setup
"
As with the Character Shortcut buttons, SpotTrack has six on-screen
Shortcut buttons intended for Sizes that you type regularly - ʻFull Bodyʼ, ʻHalf
Bodyʼ, ʻF/Bʼ and so on. SpotTrack allows you to use your own abbreviations.
You can also enter a longer explanation of the abbreviation (ʻF/Bʼ: ʻFull
Bodyʼ), and can print a glossary of these abbreviations for spot operators.
The six Size Shortcut buttons are set up just as Character Shortcut buttons
are. As with Character Shortcut buttons, you can store more than six
abbreviations and load different ones into the Shortcut buttons as required.
To add a size to the list, type it into the ʻSize to Add - Shortʼ box, and type a
longer explanation (if required) into the ʻLong:ʼ box, then press the ʻ+ʼ button:
"
The size and its longer description will now appear in the list of known sizes.
SpotTrack
v1.36
Page 22
"
SpotTrack will only allow each size to appear in the list once, and will warn
you if you try to add a size it already knows about.
To transfer a size to one of the Size Shortcut buttons, click on the button. A
pop-up list will show the full list of sizes; pick the size you want for that
button. If you want to clear a Shortcut button, press the ʻxʼ next to that button
"
You can delete individual sizes from the Character List by pressing the ʻxʼ
button next to that size. If you want to, you can delete all of the known sizes
using the ʻDelete All Sizesʼ button. In both cases, only the size list will be
affected - any cue sheet information you have already entered will not be
changed.
SpotTrack
v1.36
Page 23
Action Setup
"
As with the Character and Size Shortcut buttons, SpotTrack has eight onscreen Shortcut buttons intended for Actions that you type regularly - ʻFade
Inʼ, ʻFade Outʼ, ʻSwap toʼ, ʻIris Inʼ and so on.
The eight Action Shortcut buttons are set up just as Character Shortcut
buttons are. As with Character Shortcut buttons, you can store more than
eight actions and load different ones into the Shortcut buttons as required.
To add an Action to the list, type it into the ʻAction to Addʼ box, then press the
ʻ+ʼ button:
"
"
The Action will appear in the list of known Actions.
"
"
"
SpotTrack will only allow each Action to appear in the list once, and will warn
you if you try to add an Action it already knows about.
To transfer an Action to one of the Action Shortcut buttons, click on the
button. A pop-up list will show the full list of Actions; pick the Action you want
for that button. If you want to clear a Shortcut button, press the ʻxʼ next to
that button:
"
SpotTrack
"
v1.36
Page 24
You can delete individual Actions from the Actions List by pressing the ʻxʼ
button next to that Action. If you want to, you can delete all of the known
Actions using the ʻDelete All Actionsʼ button. In both cases, only the size list
will be affected - any cue sheet information you have already entered will not
be changed.
SpotTrack
v1.36
Page 25
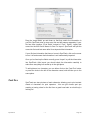
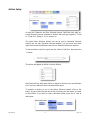
6: Working With Cues
You can create and edit cues from the Editing section of the Main Screen.
"
"
"
You can choose to work on cue sheets for one spot at a time, or to see two or
more spot cue sheets alongside each other by using the relevant buttons,
keyboard shortcuts or using the Display menu.
"
Starting from empty, you can create a new cue using the ʻNew Cueʼ button,
the menu item Cues > New Cue, or the keyboard shortcut ⌘-N (on a Mac)
or Ctrl-N (on a PC).
You can type anywhere by clicking on the relevant field, or move between
fields using the tab and shift-tab keys to move right or left across a cue.
If you have more than one spot displayed, the current active spot will have its
title in Blue:
The current active spot will be the last spot you have clicked on.
SpotTrack
v1.36
Page 26
If you use one of the on-screen Shortcut buttons for Character, Size, Action
or Level, or the Cue Time or Other Spot Time buttons, the button will enter
the information for the current active spot.
You can also quickly copy information from one spot to the next using the ʻ>ʼ
button between each spot.
All of the cue information will be copied automatically if the spot you are
copying too has no cue information; if it does have cue information you will
be asked whether you want to over-write that information with the copied
information.
Cue Numbers
"
Cues have two numbers associated with them:
"
lx Q:"
is usually the nearest lighting cue number to the followspot cue
point. Using lighting cue numbers in this way gives a set of
reference points common to all departments - stage management,
the lighting designer, the lighting console and the spot ops.
"
~Q:"
is the followspot cue number, which is a unique reference number
for each followspot action. In many cases there will be many spot
cues that happen within one lighting cue, so ʻlx Q 91ʼ might mark
the first spot cue in this section of the show, with spot cues 91.1,
91.2 and so on following on from there.
When you create a new spot cue, SpotTrack will attempt to insert a
meaningful spot cue number based on the current LX Q number and nearby
spot cue numbers. You can modify the spot cue number at any time, but you
should ensure that every spot cue has a spot cue number. It is this number
that is used to ensure that spot cues appear in the correct order. Cues do not
need to have an lx Q number.
SpotTrack
v1.36
Page 27
!
Note:! If you create spot cues ahead of production just using ~Q numbers, because
you donʼt yet know the corresponding LX cue numbers, SpotTrack may try to
replace your ~Q numbers when you start adding LX Q numbers during tech,
which can get very confusing as cues may appear in the wrong places in the
show (since the ~Q is the number used to keep cues in order). To avoid this,
check ʻDonʼt Change Spot Cue Numʼ on the Main Screen when working in
this way.
Cue Information
The other information associated with a cue is:
"
"
"
"
Cue:"
"
This is usually a description of the cue point: “As Eliza enters USCʼ.
The cue description is common across any of the spots that have a
cue here.
You can type anything here, or use the Character Shortcut buttons
to enter text if you have already clicked in the Cue field (the
Character Shortcut button will enter text into either the Cue or Pickup fields, depending on which you have clicked in. By default, the
Character Shortcut button will type into the Pick-up field; see below).
You can also use this as a description of a new scene- ʻBallroomʼ to help break up the cue list. If you also mark the cue as a Scene or
Song Break, it will show up with a highlighted background - see
below.
"
"
Scene/Song Break:"
SpotTrack
Alternatively, if youʼve imported the show cue list into SpotTrack you
can copy the cue text from the corresponding cue by clicking on the
small dot next to ʻcueʼ, pressing the Cue Text button, or pressing
apple-X (Mac) or ctrl-X (PC) - think X for teXt. See p48 for details of
how to import the cue list.
There are three check boxes for each cue, two you can use to
indicate that a cue is a break point between scenes or songs, the
third to indicate a page break:
"
"
"
"
"
"
"
"
"
"
v1.36
Page 28
"
"
"
"
Checking the top box marks the cue as the start of a scene, the
middle box the start of a secondary point such as a song. Scenes
are highlighted with a dark blue background, songs with an amber
background; this makes it easy to navigate around the cue list. You
can also jump directly to scene breaks without having to scroll
through the cue list by clicking on the pop-up list next to the ʻcueʼ
column heading.
"
"
The bottom check box is used to indicate that that cue should start
on a new page in printed cuesheets - useful when starting a new
act.
"
Colour:"
This is usually a colour frame number or numbers. You enter this
information by typing the relevant frame number.
"
Size:"
This is the size the spot should be for the pick-up. You can type
anything here, or click on one of the Size Shortcut buttons you have
previously created.
"
Intensity:"
This is the intensity the spot should fade up to. You can type a
numeric value here, or use the on-screen Intensity shortcut buttons.
SpotTrack can show an up or down arrow to indicate whether the
cue is fading the spot up or down. These arrows will only show if
you have checked ʻShow Level Change Arrowsʼ on the Main
screen. (Note that in some cases, particularly on older, slower
computers, having this option on can slow down scrolling through
the cue list, so you may wish to turn it off while making rapid edits.)
"
"
"
Time:"
SpotTrack
"
" "
This is the time for the spotʼs cue. Each spot has its own cue time,
or you can just leave the cue time blank. You can enter a time by
clicking in the field and typing the time in seconds; SpotTrack will
automatically add an ʻsʼ after the time.
v1.36
Page 29
"
"
Alternatively, you can specify a time by pressing one of the three
Time buttons at the bottom or top of the screen:
"
"
"
"
"
• Cue Time will set the time for the currently selected spot to the up
time of the corresponding cue number from the cue list, if you have
imported a cue list from FocusTrack. See p48 for details of how to
import the cue list.
• Other Spot Time will set the time for the currently selected spot
from the time set for one of the other spots in the same cue. If the
spots have different times in the same cue it will pick the time from
the lowest spot number with a time.
• Specify Time will bring up a dialogue box asking you to enter a
time: any spot that has activity in the current cue will have its time
set to the time you specify.
"
• You can clear all of the times in a cue by entering a blank time. If
you click Cue Time, any spot with activity in that cue will be set to
the Up time of the current cue, if you have imported a cue list from
FocusTrack. See p48 for details of how to import the cue list. This
is the quickest way for setting a time to all of the spots
simultaneously.
"
"
There is also a time ʻbuttonʼ at the top of the time column - the small
dot next to the time ʻtʼ.
"
"
"
"
"
"
Clicking on this will attempt to set the time for the current spot in the
currently selected cue ʻintelligentlyʼ - it will set it to the cue time if
available (ie. if you have imported a cue list from FocusTrack), or
failing that will set it to the time of another spot in the same cue. If
there is already a time set for this spot, it will not be changed.
SpotTrack
"
v1.36
Page 30
"
Pick-up:"
This is usually a description of the pickup or action of the cue: “Mrs
Higgins DSR”, “Iris in as he sits”. You can type anything here, or
click on one of the Action Shortcut buttons you have previously
created. You can also use the Character Shortcut buttons to enter
text here (the Character Shortcut button will enter text into either
the Cue or Pick-up fields, depending on which you have clicked in.
By default, the Character Shortcut button will type into the Pick-up
field).
"
Caller notes:"
This is a space for private notes for the spot caller; these notes do
not appear on any print-outs.
"
"
Page number:"
You can make a note of the script page number that a cue appears
on in any cue.
"
"
"
"
""
"
You can add a page number by selecting the cue then pressing the
ʻPage Numberʼ button, or using the Cues > Add Page Number
menu, or using the keyboard shortcut ⌘-G (Mac) or ctrl-G (PC) think page. Shift-⌘-G (Mac) or shift-ctrl-G will let you remove a
page number. You can also toggle whether page numbers are
visible or not using the ʻShow Pagesʼ button; this toggle applies to
on-screen displays and also to the Spot Caller printouts.
Each cue can contain information for one or more spots. If a cue only affects
one spot, the other spots will have blank entries for that cue.
You can choose whether or not you see these blank entries when editing or
printing spot cues using the ʻDonʼt Hide Blank Cuesʼ (for editing) and ʻSame
Page Breaksʼ options.
"
"
"
"
In both cases, when the option is checked you will see or print blank cues for
selected spots. This is useful when editing as you can quickly see all existing
SpotTrack
v1.36
Page 31
cues. Itʼs useful when printing as all of the spot will have the same cues on
the same pages, at the expense of having more ʻblankʼ cues in their cuelist.
Usually itʼs best to have these options checked when creating a show and to
have them unchecked when things have settled down a bit and you want to
give the spots only the information they actually need.
!
CAUTION:! If you try to delete a cue, be aware that it may contain information for spots
you donʼt have on-screen. SpotTrack will try to warn you if this is the case.
In any field, you can use copy/paste or apply formatting as required to copy
or emphasise information. Ctrl-clicking in a field will give a pop-up menu
giving quick access to formatting and other useful tools.
Navigating The Cuelist
You can move around the cuelist by using the scroll bars or by using a scroll
wheel or equivalent trackpad to get to the cue you need to work on. Note that
even if you scroll to a cue you do not actually select that cue until you click in
that cue. The currently selected cue is shown by the black bar next to the
cue:
"
"
You can also use ctrl-up arrow and ctrl-down arrow to step up and down
through cues, and tab and shift-tab to move right and left across cues.
Alternatively, you can:
• jump to a specific LX cue number or script page by clicking on the
ʻgo to cueʼ arrow in the lx Q column title:
You will be asked for a cue number; SpotTrack will take you to the
cue number closest to the cue you specify. Keep in mind that the
SpotTrack
v1.36
Page 32
actual cue you specify may exist but may not appear if it has no
actions for the spot you are currently looking at.
• jump to a specific scene by clicking on the symbol next to ʻcueʼ:
This will pop up a list of scene names; select one of these and
SpotTrack will jump to that point in the cuelist. The Scene Names
in this list are cues marked as ʻScene Breaksʼ, ie. with the top
ʻbreakʼ selector box checked.
Editing Shortcut Buttons
You can change the set-up of your shortcut buttons at any time by hitting the
ʻSetupʼ button next to each set of shortcuts.
Bold Characters
The ʻBold Charsʼ button next to the Character Setup button toggles on or off.
When toggled on, character names will be inserted in bold. You can overwrite the formatting manually at any time.
Bold Action
The ʻBold Actionʼ button next to the Action Setup button toggles on or off.
When toggled on, actions will be inserted in bold. You can over-write the
formatting manually at any time.
Bold Levels
The ʻBold Levelsʼ button toggles on or off. When toggled on, all intensities
will be shown in bold in the on-screen displays and printed cuesheets.
Fat Font
The ʻFat Fontʼ button toggles on or off. When toggled on, cue sheet text is
rendered in a ʻfatterʼ font which some users prefer. With this toggle on, this
font is used on-screen and on all printed cuesheets.
SpotTrack
v1.36
Page 33
Clear Formatting
You can apply formatting to cue sheet text manually using the standard
formatting tools. However, note that SpotTrack tries to adapt its text sizes to
give the maximum amount even on different sized cuesheets. Manually
applied formatting (for example, setting a font size to 36) over-rides this and
so causes problems when printing these cuesheets.
The ʻClear Formattingʼ button removes any manually applied formatting from
the selected cue.
Undoing Changes
You can undo the most recent changes youʼve made to a cue by selecting
Edit > Undo Typing, or pressing ⌘-Z (Mac) or ctrl-Z (PC).
You can undo the most recent changes youʼve made to a cue as a whole by
pressing the ʻUndoʼ button in the Intensity Shortcut button box, or selecting
Cues > Revert Cue.
Editing Setup Options
There are three options you can set which affect how you see spot cue
sheets as you edit them, which have already been mentioned above.
"
"
"Donʼt Hide Blank Cues:"
If checked, SpotTrack will only show you cues which have an entry
for the particular spot or spots you have chosen to look at (plus
cues which are set as ʻscene breakʼ cues). If unchecked, SpotTrack
will show you all of the cues you have created, even if some donʼt
have any actions for the spot or spots you are looking at.
"
Inverted:"
If checked, SpotTrack will switch to a ʻwhite on blackʼ display instead
of the usual ʻblack on whiteʼ display. This can be helpful when
working in darkened auditoria or other low-light environments,
particularly with LCD monitors that canʼt be set to a low enough
brightness.
" Level Change Arrows:"
SpotTrack can show up or down arrow symbols to indicate whether
a spot is going up or down in level relative to its previous cue level.
SpotTrack
v1.36
Page 34
"
"
"
"
"
"
SpotTrack figures these arrows out based on the levels you specify.
This figuring out can slow down scrolling through a cue sheet a little,
particularly on older, slower computers, so you can disable it by
unchecking this option. Generally it can be best to turn this off while
editing the cue sheet, but turn it on before printing cue sheets (since
it also governs whether arrows are printed) or calling the show from
the on-screen cuesheets.
"
"
As you edit spot levels, SpotTrack will automatically update the level
change arrows; if may take a few moments to do so but you can
carry on editing cues while it catches up.
"
"
Donʼt Change
Spot Cue Num:"
When you add or change an LX cue number, SpotTrack tries to
work out a sensible ~Q number. This can be a problem if youʼve
created a show in advance of tech, assigning ~Q numbers before
you know the corresponding LX cue numbers. As you start adding
LX cue numbers in tech, SpotTrack will replace the ~Q numbers
with new numbers based on the LX cues. Because the ~Q
numbers define the order that cues appear, things can get
confusing! Checking this box means SpotTrack leaves your ~Q
numbers alone. In normal use if youʼre starting a show from scratch
in tech you should leave this unchecked.
Notes
"
"
"
The Notes button on the Main Screen lets you see, edit and delete notes
taken during the run of the show using the ʻSpot Noteʼ and ʻCaller Noteʼ
buttons.
Each note will appear here along with the date and time the note was taken,
who the note was taken for (spot number or caller), a cue number for
reference, and the note itself. A check-box to the left of the note can be used
SpotTrack
v1.36
Page 35
to indicate that a note has been given or deal with if you do not actually want
to delete the note. You can also delete individual notes here by clicking in
the note then pressing the ʻDel Noteʼ button.
Using the buttons at the top of each column, you can sort by a particular
column (to see spot notes in spot order, for example), or find particular
entries (so to find only the entries for Spot 1, click on the ʻFind...ʼ button
above ʻSpotʼ, then specify Spot 1).
"
"
You can also manipulate which notes you see using the buttons at the top of
the screen.
"
"
Show Since Date:"
This will show only notes taken on or after the date specified in the
ʻShow Notes Since:ʼ box. You can type a date into this box, or use
the pop-up calendar. ʻ<ʻ will set todayʼs date, ʻxʼ will clear the date.
"
Show Before Date:"
This will show notes taken only before the date specified in the
ʻShow Notes Since:ʼ box.
"
Show All:"
This will show all of the notes. If Show All is greyed out then all of
the notes are currently shown.
" Show Only Not Give:"
SpotTrack
This will only show notes that have not been checked as ʻgivenʼ.
v1.36
Page 36
" Mark Shown As Give:"
This will mark all of the currently viewed notes as given. This is
useful when combined with the other show functions - ie. pick
todayʼs date then ʻShow Since Dateʼ then ʻMark ALL as givenʼ to
mark todayʼs notes as given.
You can always individually mark/unmark a particular note by
checking or unchecking its ʻgivenʼ box.
Delete All Show" This button will permanently delete all of the notes you can currently
see. It will ask for confirmation before actually deleting the notes.
Be careful as once you hit ʻOKʼ, those notes are gone.
Printing Notes
You can print notes using the ʻSpot Notesʼ, ʻCaller Notesʼ or ʻAll Notesʼ from
the Printing section of the SpotTrack Main Screen, deciding whether to print
all notes, only those you havenʼt marked as Given, only those created or
modified since a date you decide, or any combination of these. For more on
printing notes, refer to the Printing section, p41.
Swapping Spots
"
In some cases, it may be necessary to swap the cues for spots around - this
often happens if you move from a theatre with spots front-centre to one with
spots on the sides of a circle, for example; you may want to keep the spot
numbering the same, but spots may no longer be able to see to their own
side of the stage. SpotTrack lets you swap around the cues for spots 1 and 2
or for spots 3 and 4. You will be asked to confirm that you want to swap the
cues around, then will be asked for the cue range (start cue to end cue) you
want to swap. Leave these blank and the spots will be swapped for all the
cues. If you want to swap back, repeat the process.
!
SpotTrack
Note:! You can re-name spots to match the physical layout of the spots in your show
- see p12. However, re-naming spots in this way is effectively just re-labelling
the cuesheet column for each spot; the information contained in those
columns will not move. However, you can then use the swap buttons to move
cue information back to the right place.
v1.36
Page 37
Saving
SpotTrack automatically saves your work as it goes along to prevent lost
information if your computer crashes, the power goes out or some other bad
event happens.
This is a good thing - unless you normally keep different versions by working
on a cue sheet then saving it as a different version using ʻSave As...ʼ
If you want to keep a copy of an older cuesheet you should make a copy of
the SpotTrack file and rename it as an older version before starting to make
changes. The ʻVersion Notesʼ field in the Main Screen provides a convenient
place to note which version a particular SpotTrack is.
SpotTrack can help with version management by highlighting cues that
youʼve created or modified since a date you specify when printing cue
sheets, allowing you to call the spot opsʼ attention to changes. See p43 for
more information.
SpotTrack
v1.36
Page 38
7: Windows
SpotTrack has some auxiliary windows that can be opened alongside the
main cue list showing information useful while creating or editing cues.
"
Notepad
You may wish to quickly jot down more general notes than the Notes button
allows. SpotTrack lets you keep a separate notepad open in a separate
window - from the Main Screenʼs Windows section, select Notepad:
"
"
Spot Info
SpotTrack lets you keep the information about the followspot set-up on view
in a separate window, which can be useful when remembering an operatorʼs
name or the colour set-up of the spot. You can open this window using the
Spot Info button in the Main Screenʼs Windows section.
"
SpotTrack
"
v1.36
Page 39
Cue List
It can often be useful for the spot caller to have an up-to-date lighting cue list,
particularly to cross-reference cue numbers with. SpotTrack can import the
show cue list from FocusTrack (which, in turn, can import it from Strand
300/500, ETC Eos family or MA grandMA consoles); see p48 for details of
how to import the cue list.
With the cue list imported, you can open the cue list window using the Cue
List button in the Main Screenʼs Windows section, or the Cue List button on
any of the spot cue editing screens.
"
"
"
For more on using the Cue List display, see Cue List on p48.
SpotTrack
v1.36
Page 40
8: Printing
SpotTrack can print separate cue sheets for each followspot, and also master
spot calling sheets with the cues for all of the followspots, designed for a spot
caller to work from.
The individual spot cue sheets are designed to work on A4 or US letter-sized
or legal-sized paper. The master calling sheets work better on bigger paper eg. A3 or US legal.
Printing is controlled from SpotTrackʼs Main Screen.
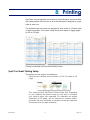
Spot Cue Sheet Printing Setup
The options you can set prior to printing are:
• Paper size for individual spot cue sheets - A4, A5, US Letter or US
Legal.
This setting governs SpotTrackʼs internal page size. Depending
on your computer and printer set-up you may have to configure
your printerʼs paper size separately. A5 cuesheets are printed
ʻlandscapeʼ on A5 paper, and are intended for creating smaller,
top-bound ʻflip-overʼ cuesheets for situations where spot operators
do not have room for larger cuesheets.
SpotTrack
v1.36
Page 41
• Same Page Breaks
"
This governs whether SpotTrack compresses each spotʼs cue sheet
to save paper- ie. spot 1 will not see ʻblankʼ cues where only spot 2
has any activity in those cues. This is more efficient in terms of
using less paper and reducing the amount of redundant information
or page changes for each operator, but it does mean that each spot
op will have a different number of pages and so the same cue may
be on different pages. Often it is useful to have this checked during
tech (so everyone can refer to page numbers), unchecked once the
show has settled down.
• Info In B/W
"
SpotTrack cue sheets usually print in colour on colour printers so
that the printed cuesheets match the on-screen cuesheets and help
the spot ops differentiate between different types of information.
The colouring can be a problem for spot operators under some
lighting conditions (eg. blue running lights when the spot ops are
visible to the audience). Checking this box prints level and other
information in black and white to make it more legible under these
conditions.
• Leave Space For Notes
"
Checking this will print cue sheets with a blank line under each
SpotTrack cue line, giving spot operators somewhere to add notes
of their own during tech. You can and should collect these notes
and add them to SpotTrack to ensure the ʻpermanentʼ cue sheets
are as detailed and accurate as possible!
SpotTrack
v1.36
Page 42
• Highlight Changes
SpotTrack can highlight cues that have been created or modified
since the date selected in the ʻHighlight Changes Since:ʼ box. The
highlight - a green edge to the cue - only appears in printed cue
sheets. To enable the highlight, check ʻHighlight changesʼ and then
enter a date into ʻMade Since:ʼ, either by typing a date or picking
the date from the pop-up calender:
You can clear a date by clicking on the ʻxʼ next to the date field; ʻ<ʻ
will enter todayʼs date.
!
SpotTrack
Note:! Printed cuesheets are also affected by the option to ʻShow Only FL/Out In
Printed Cue Sheetsʼ, which can be found under the About SpotTrack button
on the Main screen; see p53 for details of this. If your printed cuesheets are
only ever showing FL or 0 as levels regardless of the levels youʼve entered
on-screen, this option is almost certainly to blame!
v1.36
Page 43
Printing Cue Sheets
Once you have set the options, press either the print button for the particular
spot you wish to print, or the All button to print all of the spot cue sheets.
Cue sheets are printed with a cover sheet showing the spotʼs operator and
set-up. Each page has a page number and also shows the track version it
was printed from, and the date and time the cue sheet was printed, which
can help with version management while teching a show. A5 cuesheets do
not have the spot set-up printed on the cover sheet.
The Master Sheets will show change highlights (if selected) and level change
arrows (if selected under the Editing section of the Main screen, see p34) as
for individual cue sheets.
Cue sheets look best if printed from a colour printer, if available. Colour laser
printers tend to be faster and more reliable than colour ink-jet printers (and
also generally have lower per-page running costs!)
SpotTrack
v1.36
Page 44
Master Cue Sheets
"
"
"
The Master Sheets printouts show the cues for all of the spots. They are
designed as working documents for a spot caller calling a show ʻliveʼ, where
more information is needed ʻat a glanceʼ than will fit on a standard computer
screen. They work best when printed on big paper - preferably A3. These
cuesheets print in landscape mode - you may need to configure your printer
to print landscape.
The Master Sheets - A4 and Master Sheets - US Legal buttons are included
for those without access to large printers; they scale the A3 printout, so their
legibility will depend on your printer. For other sizes, you may want to
manually scale the printout using your printerʼs print-setup dialogue box.
The Master Sheets will show change highlights (if selected) and level change
arrows (if selected) as for individual cues.
SpotTrack
v1.36
Page 45
Cast Pictures
SpotTrack can print ʻcontact sheetsʼ of cast pictures either in ʻbigʼ format two characters per page, two pictures per character, or ʻsmallʼ format, which
prints just one picture per character (the left-hand picture picture from the
Cast Pics set-up is used in this print-out).
Size Abbreviations
"
Size Abbreviations is the glossary of short phrases for beam size (ʻF/Bʼ) and
the longer explanation (ʻFull Bodyʼ) and detailed description that you set up
in Size Setup. This is printed separately from spot cue sheets since youʼll
probably only need to print it once per spot per show.
Spot Setups
SpotTrack can print ʻsetup sheetsʼ for each spot, detailing the spot type,
operator and colour load. These are useful for passing to the crew to load
the correct colours into the spot.
Notes
"
SpotTrack can print notes taken during a show using the ʻSpot Noteʼ and
ʻCaller Noteʼ buttons (see p35) - you can print either notes for the spots,
notes for the caller, or all notes.
You can choose to print all notes, or only notes taken since a date you
specify in the ʻPrint Notes Since:ʼ box, either by typing a date or picking from
the pop-up calendar. You can also choose not to print notes youʼve already
marked as being given by checking the ʻDonʼt Print Given Notesʼ box.
SpotTrack
v1.36
Page 46
"
These two options allow you to keep all of the notes youʼve taken while only
printing the most recent ones. For more information on managing notes, see
the Notes section on p35. To print all notes, clear the date by pressing the ʻxʼ
button next to the calendar and uncheck the ʻDonʼt Print Given Notesʼ box.
ʻ<ʻ will set the date to todayʼs date.
A General Note On Printing
While you obviously need to print cue sheets for your spot ops (and
SpotTrack has been designed to make that easier to do!), please remember
that printing uses trees. Be considerate with what you print, and consider
both using recycled paper to print on, and re-cycling the paper you use as
you print updated cue sheets. Depending on your computer, you may be
able to use Preview to make sure youʼre printing the right thing before
committing it to paper!
In future, perhaps your spot ops could have screens showing their cue list
dynamically, and updated automatically, rather than having to repeatedly
print cue sheets. Weʼre working to make that possible in SpotTrack; let us
know if youʼre interested!
SpotTrack
v1.36
Page 47
9: Cue List
Because it is often useful for a Spot Caller to have a copy of the current
lighting console cue list, SpotTrack can import a console cue list generated
by FocusTrack - which can, in turn, import the cue data from ETC Eos
family , MA grandMA and Strand 300/500-series consoles.
"
For more about FocusTrack, see p58.
Importing the Cue List
To import a cue list into SpotTrack, it must have first been imported from the
console by FocusTrack version 2.000 or later.
Once you have the cue list in FocusTrack, you can import it into SpotTrack
from SpotTrackʼs Cue List display - get to this by pressing the ʻCue Listʼ
button in the SpotTrack Main Screen.
"
If you donʼt see a Cue List there, or if you want to update the cue list
SpotTrack is using, press the ʻImport from FocusTrackʼ button.
"
SpotTrack
v1.36
Page 48
If SpotTrack already has a cue list, it will warn you that this will be replaced
by the new one. Hit OK to confirm that. SpotTrack will then ask you to find
the ʻCue List.ftrʼ file for the show you wish to import. This will be located
inside the FocusTrack folder for the show. Select that file then press OK.
SpotTrack will import the cue list.
SpotTrack will import the entire cue list together with any notes that the LD or
programmer has added to the cue sheet in FocusTrack. Scene break
markers will also be imported - cues that show up with a blue background, as
in SpotTrack.
If cues are not marked as scene break cues (dark blue background) or subscene breaks (light blue background), you can mark cues by checking the
scene break boxes to the left of each cue.
"
"
"
Alternatively if there is any pattern to the way cues are labelled, you can use
that to automatically mark cues as scene breaks, using the ʻAuto Sc Breakʼ
and ʻAuto Sub Scʼ buttons
"
"
"
"
For example, if the programmer emphasises the start of each scene in the
console using text labels such as ʻ------ SC 1ʼ and ʻ------ SC 2ʼ, press ʻAuto Sc
Breakʼ then enter ʻ------ʼ as the text to match. All cues with labels starting with
that text will be marked as scene break cues.
SpotTrack can also show cues which have been added or deleted since the
last import from the console into FocusTrack. This can be useful when
checking whether cues referenced by the spot cue sheets are still current.
"
"
"
"
Press the ʻShow Deletedʼ button to see cut cues highlighted in red, the
ʻHighlight Newʼ button to see newly added cue parts highlighted in green.
SpotTrack
v1.36
Page 49
If you wish to manually add or delete cue parts, you can do so using the
ʻNew Cueʼ and ʻDelete Cue Partʼ buttons. Any changes you make in this way
will be lost next time you import cue data from FocusTrack. An indicator at
the top of the cue list will show you when you last imported a cue list from
FocusTrack.
Navigating Around The Cue List
You can scroll through the cue list as you would scroll through spot cues, or
use the <PREV or NEXT> buttons to step through cues, or the <SCENE or
SCENE> buttons to jump through the show a scene at a time (provided some
cues are marked as scene breaks - ie. show up with a blue background).
"
"
The cue list will also contain part cues, if there are any in the show. These
may or may not be of interest to you; you can choose whether to see all of
the cue parts, or just the cues using the ʻOmit Partsʼ and ʻShow Allʼ buttons.
"
"
"
"
(Note: the grandMA console does not support part cues, so you will not see
any part cues when importing from that console).
As with SpotTrack cues, you can also jump to specific cues or scenes using
the ʻGoto Cueʼ or ʻGoto Sceneʼ buttons.
SpotTrack
v1.36
Page 50
You can also force SpotTrack to jump to a cue you have selected in Cue List
using the ʻSpots to Cueʼ button.
"
"
"
When you do not need to see the Cue List, you can close it using the ʻClose
CueListʼ button.
SpotTrack
v1.36
Page 51
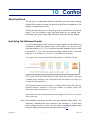
10: Control
About SpotTrack
This will give you information about the SpotTrack you are using, including
the SpotTrack version, the user and show that SpotTrack is registered to, the
charity it is supporting and more.
This screen also allows you to clear all or parts of a SpotTrack. This can be
useful if you are creating a new SpotTrack based on an existing one particularly if you want to keep Size and Action shortcuts you have defined.
Specifying The Followspot Layout
You can re-arrange the order in which the spots appear on the buttons and
cuesheets to match the physical layout of the spots in our show (so you
could have spots 4, 3, 2, 1), or re-number the spots altogether (so you could
have spots 6, 7, 8, 9). You can also re-configure which of the 1-4 shortcut
keys (⌘-1-4 on a Mac, ctrl-1-4 on a PC) correspond to which spot.
To configure this, press the About SpotTrack button on the Main Screen.
Click in one of the Spot Order buttons to type a new spot number. If you type
a number that is already in use, that number and the number of the spot you
selected will swap positions.
Set Default will return the spot order to 1-4; Match Spot Order will match the
keyboard shortcut numbers to the spot numbers if possible, though the
shortcut numbers will always be 1, 2, 3, 4.
Spot numbers will be changed wherever they appear in SpotTrack, on-screen
and in print-outs.
!
SpotTrack
Note:! Re-numbering spots does not move any cue information about spots - it is
effectively re-labelling the spot columns in the cuesheet. It is best done
before starting work on a show. You can swap information between spots
using the Swap Spots buttons on the main screen; see p37.
v1.36
Page 52
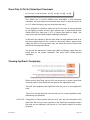
Show Only FL/Out In Printed Spot Cuesheets
This allows you to record detailed level information in the followspot
cuesheets, but have the printed cuesheets show only 0% (when the spot is at
0) or FL (when the spot is any any level other than zero).
This is intended for situations where the level of the spot is being controlled
by the lighting console and the spot operator has a mechanical dimmer
shutter which they fade from 0 to FL to control their fades on stage - this
setup most often used with tungsten beamlight followspots.
In this case, the intention is that the spot caller can keep detailed notes as to
the level programmed into the console so they know what to expect when
calling the show, but the operators only see when they have to fade in/out
rather than worrying about levels.
You can set this behaviour for each spot. When unchecked, spots show the
actual level on the printed cuesheets. This option ONLY affects printed
cuesheets.
Clearing SpotTrack Completely
"
When you buy SpotTrack you buy it for one show only; to enter a new show
name you have to clear SpotTrack and enter a new registration code.
ʻClear Allʼ will completely clear SpotTrack and ask you for a new registration
code.
ʻClear Cuesʼ will just clear the cues and ask you for a new registration code,
maintaining your Shortcuts.
SpotTrack
WARNING:! Using either of these options will clear all of your spot cue information from
SpotTrack. Be sure you have a backup of this SpotTrack somewhere else if
the show you are clearing is still current or if you need to keep it for archive
purposes.
v1.36
Page 53
If in any doubt, the safest way to start a new show is to download a new
version of SpotTrack from the SpotTrack website, www.spottrack.co.uk. This
will also ensure that you start each show with the most current version of
SpotTrack.
Partially Clearing SpotTrack
"
You can partially clear a SpotTrack using these buttons, each of which will
clear a specific set of information.
WARNING:! All of these buttons will clear sets of information from SpotTrack. Be sure you
have a backup of this SpotTrack somewhere else if the show you are
clearing is still current or if you need to keep it for archive purposes.
SpotTrack Information
Elsewhere on the About screen, you can find out about recent changes to
SpotTrack (this information is also available on the website), jump to the
SpotTrack or FocusTrack websites, or find out more about the charities you
support by purchasing SpotTrack.
Help
Help provides an on-screen reminder of the most useful keyboard shortcuts
in SpotTrack.
Lock Display
This puts up the show logo and locks out access to SpotTrack. It can be
useful when a laptop is left unattended in an auditorium. To unlock
SpotTrack, hold down the shift key and click on the ʻUnlock Displayʼ button.
Quit SpotTrack
This quits SpotTrack. You donʼt need to save as SpotTrack automatically
stores information as you work.
SpotTrack
v1.36
Page 54
11: File Recovery
In very, very rare cases, usually if your computer crashes while SpotTrack is
in the middle of trying to write its information to disc, the SpotTrack data file
can become corrupted.
The best defence against this is to make regular backup copies of the
SpotTrack data file - this is called ʻSpotTrack.spoʼ and is located in the
SpotTrack folder for your show. As you make copies, rename them to remind
yourself when that SpotTrack was valid to - ʻSpotTrack Sept 1 Tech Endʼ or a
similar scheme to suit your working methods.
If your active SpotTrack file does become corrupted, you can attempt to
recover it by running SpotTrack (double clicking on ʻSpotTrackʼ on a Mac or
ʻSpotTrack.exeʼ on a PC), the selecting File > Recover... SpotTrack will ask
you to locate the damaged ʻSpotTrack.spoʼ file and will then attempt to
recover it. This will work in almost all cases...
If it doesnʼt work, youʼll have to go back to using one of your backup files.
You should delete the damaged ʻSpotTrack.spoʼ file, copy the most recent
backup file, and rename that ʻSpotTrack.spoʼ. You should then be able to
open and continue to work with that file.
SpotTrack
v1.36
Page 55
12: Updating SpotTrack
When a new version of SpotTrack appears, you will have to import the
information from your current SpotTrack into a new SpotTrack.
To do this:
• Download and install the new version of SpotTrack.
• Run the new SpotTrack entering you registration information;
SpotTrack will only import from an old SpotTrack with the same
registration information.
• Make sure you have quit your old SpotTrack. Copy the
ʻSpotTrack.spoʼ file inside that SpotTrack.
• Rename the old file ʻSpotTrack.oldʼ. On a Mac, you may get a
warning about changing the file type extension - let it make the
change. Make sure you have not changed the name to
ʻSpotTrack.old.spoʼ or similar - using the File>Get Info command is
usually the best way to rename this file without this happening.
• Move the ʻSpotTrack.oldʼ file into your new SpotTrack folder.
• Start the new SpotTrack.
• From the SpotTrack Main Menu, go to ʻAbout SpotTrackʼ, then
scroll down past the release notes where you will find a button
called ʻImport from Oldʼ.
"
• Press ʻImport from Oldʼ. SpotTrack will warn you that this import
will over-write any information in the current SpotTrack, remind
you where the old file must be placed, then check the registration
code of the SpotTrack you are trying to import. If the code
matches, all of the show information will be imported. If not,
SpotTrack will tell you that the codes donʼt match.
With the import completed, you can then carry on using your new SpotTrack
as normal; you can remove the ʻSpotTrack.oldʼ file once the import is
complete.
SpotTrack
v1.36
Page 56
C: Charity
By purchasing SpotTrack for your show, you are supporting one of two
entertainment industry charities - The ESTA Foundationʼs Behind The
Scenes in North America, and Light Relief in the UK. You get to choose
which your SpotTrack supports when you purchase it, and your SpotTrack
will proudly display its chosen charity every time you run it.
Of course, charities can always do with more help, and both charities have a
whole range of initiatives through which you can help them with their work.
Please do visit their websites to find out more.
Behind The Scenes
Light Relief
www.estafoundation.org/bts.htm
www.lightrelief.org.uk
Behind the Scenes provides financial support to
entertainment technology industry professionals
when they are ill or injured. Individuals and
organizations contribute money to the program, and
Behind the Scenes provides grants for emergency
situations. With this initiative, our industry can make
sure our colleagues are cared for when tragedy
strikes.
Light Relief is a charity established by and for the
entertainment lighting industry, to help in times of
extreme hardship. Formed specifically to help theatre
lighting designers and those working in the field who
are not in regular full time employment, Light Relief
can provide either practical support or financial help,
depending on the individual need.
With Richard Pilbrow as Honorary Chairman, Light
Relief has a board of seven trustees, all of whom
work in the entertainment lighting industry.
Many people in the entertainment technology
industry lack health insurance and other financial
support systems that are common for professionals
in other fields. Behind the Scenes helps industry
members through crises, such as serious illness,
injury or death by fitting each grant to the recipient's
needs. Funds can be used for medical care and living
expenses such as rent, mortgage, utilities, food,
transportation and child care.
Most lighting designers and technicians are freelance
and earn their living through talent and hard,
demanding, physical work during anti-social hours.
Like most freelance people, they do not earn money
unless they are working, so sickness, physical
injuries or domestic crises can lead to dramatic falls
of income. This, in turn, affects not just them but also
their families.
Behind the Scenes is working to raise $5 million to
create an endowment so our industry will be able to
help our colleagues for many years into the future.
Please contribute today. Any amount will be
appreciated. Every contribution will help.
Light Relief helps people by providing practical
support or financial help - occasionally both - and
most of the people that we help are lighting designers
or technicians, or members of the Association of
Lighting Designers. If you know someone who needs
help, or if you need help for yourself or your family,
assistance may be as near as the click of your
mouse.
Since May of 2006, Behind the Scenes has been
providing grants to industry professionals or their
surviving family members to assist in a variety of
ways including: short term living expenses such as
food, housing and utilities; and assistance with
medical bills, health insurance, physical therapy, and
medications.
SpotTrack
v1.36
Page 57
F: FocusTrack
FocusTrack is a system designed for documenting show lighting, doing as
much of the work as possible automatically using information from the
lighting console rather than relying on show staff to manually track down
information - taking some of the work out of paperwork! If you have show
information in other places, such as VectorWorks Spotlight or Lightwright,
you can import that as well.
FocusTrack can automatically import show data from ETC Eos/Ion/Gio, MA
grandMA and Strand 300/500-series consoles; from that information it can
figure out which conventional and moving lights are used, where theyʼre
used (which positions, which cues) and how theyʼre used (which colours and
gobos).
You can then add other information - written descriptions of the focus, grid
focuses. Or you can use FocusTrack to control your lighting console,
switching lights on and moving them to the right positions for you to take
pictures of the focuses that can then be brought in to FocusTrack to leave
you with a complete, comprehensive record of the show lighting.
It also produces a very nice cue list, to which you can add pictures - and
which you can import into SpotTrack to give you something to work from
while creating your spot cues!
Show lighting is complicated. Keeping it looking right, even more so.
FocusTrack can help. Why not give it a go on your next show?
www.focustrack.co.uk
SpotTrack
v1.36
Page 58