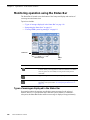
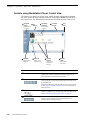
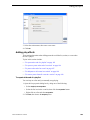
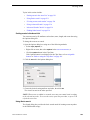
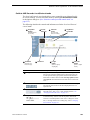
1
Turbo™
INTELLIGENT DIGITAL DISK RECORDER
User Guide
SOFTWARE VERSION 2.3
071-8401-02
JANUARY 2007
Copyright
Copyright © 2007 Grass Valley, Inc. All rights reserved. Printed in the United States of America.
Portions of software © 2000 – 2007, Microsoft Corporation. All rights reserved.
This document may not be copied in whole or in part, or otherwise reproduced except as
specifically permitted under U.S. copyright law, without the prior written consent of Grass
Valley, Inc., P.O. Box 59900, Nevada City, California 95959-7900
This product may be covered by one or more U.S. and foreign patents.
Trademarks
Grass Valley, K2, Aurora, Turbo, M-Series, Profile, Profile XP, NewsBrowse, NewsEdit,
NewsQ, NewsShare, NewsQ Pro, Aurora, and Media Manager are either registered
trademarks or trademarks of Grass Valley, Inc. in the United States and/or other countries.
Other trademarks used in this document are either registered trademarks or trademarks of the
manufacturers or vendors of the associated products. Grass Valley, Inc. products are covered
by U.S. and foreign patents, issued and pending. Additional information regarding Grass
Valley, Inc. trademarks and other proprietary rights may be found at
www.thomsongrassvalley.com.
Disclaimer
Product options and specifications subject to change without notice. The information in this
manual is furnished for informational use only, is subject to change without notice, and should
not be construed as a commitment by Grass Valley, Inc. Grass Valley, Inc. assumes no
responsibility or liability for any errors or inaccuracies that may appear in this publication.
U.S. Government
Restricted Rights
Legend
Use, duplication, or disclosure by the United States Government is subject to restrictions as set
forth in subparagraph (c)(1)(ii) of the Rights in Technical Data and Computer Software clause
at DFARS 252.277-7013 or in subparagraph c(1) and (2) of the Commercial Computer
Software Restricted Rights clause at FAR 52.227-19, as applicable. Manufacturer is Grass
Valley, Inc., P.O. Box 59900, Nevada City, California 95959-7900 U.S.A.
Revision Status
2
Turbo iDDR User Guide
Rev Date
Description
May 9, 2005
Initial Release for Software Version 2.1 — 071-8401-00
July 11, 2005
Update software version number for 2.2 — 071-8401-01
January 12, 2007
Update software version number for 2.3 — 071-8401-02
12 January 2007
Contents
Finding Information ........................................................................................... 9
Getting more information ......................................................................................... 10
Grass Valley Product Support ................................................................................. 11
Safety Summaries .............................................................................................. 13
Chapter 1
Product Introduction
Product overview and key features ......................................................................... 20
Functional description ............................................................................................. 23
About E-to-E mode ............................................................................................. 23
E-to-E considerations ......................................................................................... 24
Media disk space: How media is stored ............................................................. 24
Front panel controls and indicators ......................................................................... 25
Rear panel connectors ............................................................................................ 26
Turbo iDDR control modes...................................................................................... 27
Power-on and shutting down ................................................................................... 29
Accessing the Windows operating system .............................................................. 31
To access the Windows desktop: ....................................................................... 31
Chapter 2
Configuration: Turbo iDDR
Using the configuration manager ........................................................................... 34
Accessing Turbo iDDR configuration ................................................................. 34
Saving and restoring your settings .................................................................... 34
Restoring default settings .................................................................................. 35
About video scaling settings ................................................................................... 36
About aspect ratio conversion modes ............................................................... 36
Video scaling considerations .............................................................................. 37
Video output connector compatibility ...................................................................... 38
Guidelines for selecting video data rate ................................................................. 38
Configuring your Turbo iDDR .................................................................................. 39
Modifying system settings ................................................................................. 39
Modifying recorder channel (R1) settings .......................................................... 39
Modifying player channel (P1 and P2) settings ................................................. 41
Black Level .................................................................................................... 42
Modifying the front panel setup ......................................................................... 43
Setting GPI input triggers .................................................................................. 43
Setting GPI output triggers ................................................................................ 45
Adjusting video output timing ................................................................................. 45
Using the video reference input.......................................................................... 45
Video timing principles........................................................................................ 47
To adjust video output timing.............................................................................. 47
Chapter 3
Operation: Front Panel Control
Guide to using the front panel ................................................................................. 50
Enabling front panel control mode...................................................................... 50
Locking the front panel ....................................................................................... 50
Using the front panel controls............................................................................. 51
Conventions used in the front panel display ....................................................... 55
Recording clips ........................................................................................................ 57
About recording clips .......................................................................................... 58
About loop record mode ..................................................................................... 58
Guide to using the front panel Recorder display ................................................ 60
Before you record: Recorder settings checklist .................................................. 62
Features in the Recorder context menu ............................................................. 64
To record a clip................................................................................................... 65
Using IEEE 1394 Record mode.......................................................................... 66
Previewing a clip that is recording ...................................................................... 67
Turbo iDDR User Guide
Contents
Selecting widescreen mode ............................................................................... 68
Changing the current bin .................................................................................... 68
Renaming a clip.................................................................................................. 69
Viewing clip properties ....................................................................................... 69
Locating a clip .................................................................................................... 69
Playing and editing clips.......................................................................................... 70
About playing clips ............................................................................................. 71
Guide to using front panel Player display ........................................................... 72
Features in the player context menu .................................................................. 74
Loading media for playout .................................................................................. 75
Playing a clip ...................................................................................................... 76
Selecting loop play ............................................................................................. 76
Selecting E-to-E mode ....................................................................................... 76
Jumping to a specific timecode .......................................................................... 77
Editing a clip ....................................................................................................... 77
Creating Subclips ............................................................................................... 80
Locating the clip loaded in player ....................................................................... 82
Viewing clip properties ....................................................................................... 82
Playing playlists....................................................................................................... 83
Introducing Playlist mode ................................................................................... 84
Before using Playlist mode ................................................................................. 85
Guide to using the Edit List display .................................................................... 88
Creating a simple playlist ................................................................................... 90
Loading a playlist................................................................................................ 91
Playing a playlist................................................................................................. 91
Playing a playlist in loop mode ........................................................................... 92
Managing playlists .............................................................................................. 92
Save a copy of a playlist................................................................................ 92
Lock a playlist ................................................................................................ 92
View information about a playlist ................................................................... 92
Rename a playlist .......................................................................................... 92
Locate a playlist in the Clips pane ................................................................. 92
Select multiple items in a playlist ................................................................... 92
Select all events in the playlist....................................................................... 93
Editing a playlist ................................................................................................. 94
Adding GPI output triggers to playlists ............................................................... 96
Pausing at the end of an event........................................................................... 97
Importing and exporting media................................................................................ 97
About importing media ....................................................................................... 98
To import a video file .......................................................................................... 98
To import a still image file................................................................................... 98
About exporting media ....................................................................................... 100
To export media ................................................................................................. 100
Managing media...................................................................................................... 102
Guide to using the Clips display ......................................................................... 103
Working with bins ............................................................................................... 105
Working with assets ........................................................................................... 107
Rename assets.............................................................................................. 107
Delete assets................................................................................................. 107
Copy or Move assets ..................................................................................... 107
Lock assets.................................................................................................... 107
Select multiple assets in a bin ....................................................................... 107
Select all assets............................................................................................. 107
Erasing a clip's unused media............................................................................ 107
Working with the Recycle Bin ............................................................................. 108
Viewing bin and asset properties ....................................................................... 109
Monitoring operation using the Status Bar .............................................................. 110
4
Turbo iDDR User Guide
Types of messages displayed in the Status Bar................................................. 110
Interpreting the Status Icon ................................................................................ 111
Viewing iDDR system log messages.................................................................. 111
Chapter 4
Operation: AppCenter Workstation
Introducing AppCenter ............................................................................................ 114
Starting AppCenter ............................................................................................. 115
Using AppCenter in front panel control mode..................................................... 115
Using AppCenter in workstation control mode ................................................... 116
Enabling the workstation control mode............................................................... 116
Shutting down AppCenter and Windows ............................................................ 116
AppCenter user interface overview .................................................................... 118
Channel modes in AppCenter ............................................................................ 120
Tools in AppCenter............................................................................................. 121
Conventions used in the AppCenter interface .................................................... 122
Terms and concepts used in AppCenter ............................................................ 123
Selecting the channel mode ............................................................................... 124
Using on-screen transport controls..................................................................... 124
Recording clips ........................................................................................................ 124
About recording clips .......................................................................................... 125
About loop record mode ..................................................................................... 125
Guide to using Recorder mode........................................................................... 128
Before you record: Recorder settings checklist .................................................. 130
To record a clip................................................................................................... 131
Using IEEE 1394 Record mode.......................................................................... 135
Previewing a clip that is recording ...................................................................... 137
Changing the timecode source........................................................................... 138
Selecting widescreen mode................................................................................ 139
Changing the current bin .................................................................................... 139
Renaming a clip.................................................................................................. 140
Viewing clip properties........................................................................................ 140
Locating a clip..................................................................................................... 141
Displaying available storage space .................................................................... 141
Playing and editing clips .......................................................................................... 141
About playing clips.............................................................................................. 143
Selecting Player mode in AppCenter.................................................................. 143
Guide to using Workstation Player: Control View............................................... 144
Guide to using Workstation Player: Cue View.................................................... 147
Loading media for playout .................................................................................. 149
Playing a clip ...................................................................................................... 150
Selecting loop play ............................................................................................. 150
Selecting E-to-E mode........................................................................................ 150
Jumping to a specific timecode .......................................................................... 151
Using Cue points for playback............................................................................ 152
Editing a clip ....................................................................................................... 154
Creating Subclips ............................................................................................... 158
Locating the clip loaded in player ....................................................................... 161
Viewing clip properties........................................................................................ 161
Working with playlists .............................................................................................. 162
Introducing Playlist mode ................................................................................... 163
Before using Playlist mode ................................................................................. 164
Selecting Playlist mode ...................................................................................... 167
Guide to using Playlist mode: List View.............................................................. 167
Guide to using Playlist mode: Event View .......................................................... 170
Selecting Text or Thumbnail view....................................................................... 173
Selecting monitor information ............................................................................. 173
Creating a simple playlist.................................................................................... 174
Turbo iDDR User Guide
5
Contents
Inserting media in a playlist ................................................................................ 174
Playing a list ....................................................................................................... 177
Editing and rearranging events in a playlist........................................................ 178
Managing sections in a list ................................................................................. 183
Adding play effects ............................................................................................. 185
Adding GPI output triggers to playlists ............................................................... 190
Managing playlists .............................................................................................. 191
Saving a list as a program .................................................................................. 195
Importing and exporting media................................................................................ 197
About importing media ....................................................................................... 197
To import a video file .......................................................................................... 197
To import a still image file................................................................................... 198
About exporting media ....................................................................................... 201
To export media ................................................................................................. 202
Transferring media between Turbo iDDRs.............................................................. 204
About transferring media .................................................................................... 204
Transferring media from another iDDR .............................................................. 204
Sending media to another Turbo iDDR .............................................................. 205
Monitoring media file transfers ................................................................................ 207
Starting the Transfer Monitor.............................................................................. 208
Transfer Monitor pages and buttons .................................................................. 208
Viewing transfer jobs in Transfer Monitor ........................................................... 210
Viewing detailed transfer job properties ............................................................. 210
Aborting a transfer job ........................................................................................ 212
Removing transfer jobs from the completed list ................................................. 212
Managing media...................................................................................................... 213
Guide to using the Clips Pane ............................................................................ 214
Modifying the asset list view............................................................................... 219
Working with bins ............................................................................................... 221
Working with assets ........................................................................................... 223
Working with the Recycle Bin ............................................................................. 229
Locating assets .................................................................................................. 230
Working with asset metadata ............................................................................. 238
Viewing asset properties .................................................................................... 242
Monitoring the system using the StatusBar............................................................. 246
Interpreting StatusPane button icons ................................................................. 246
Message types displayed in the StatusBar ........................................................ 247
Using the StatusPane......................................................................................... 247
Chapter 5
Remote Control
Using remote control protocols ............................................................................... 252
About remote control and supported protocols .................................................. 252
Making RS-422 or Ethernet connections............................................................ 253
Remote control operation: In front panel mode .................................................. 254
Remote control operation: In Workstation mode ................................................ 255
Using GPI input and output triggers ........................................................................ 269
Making GPI connections .................................................................................... 269
Configuring GPI input triggers ............................................................................ 269
Configuring GPI output triggers .......................................................................... 270
Chapter 6
Using an Ethernet connection
Overview of networking ........................................................................................... 272
Making the Ethernet network connection ................................................................ 272
Configuring iDDR network settings ......................................................................... 274
Configure Windows network settings ................................................................. 274
Enable streaming: Adding network hosts names ............................................... 275
File sharing: Mapping network drives...................................................................... 276
6
Turbo iDDR User Guide
Chapter 7
Maintenance Tasks
Media drive maintenance ........................................................................................ 278
Defragmenting the media drives......................................................................... 278
Erasing unused media........................................................................................ 279
Clearing the media file system ........................................................................... 279
Running Storage Utility Mode............................................................................. 279
Appendix A
Keyboard Shortcuts
About keyboard operation ....................................................................................... 282
Channel select......................................................................................................... 282
Basic transport controls........................................................................................... 282
Off-speed play controls ........................................................................................... 283
Stop-Mode transport controls .................................................................................. 283
Mark-Point and Cue controls ................................................................................... 283
Miscellaneous controls ............................................................................................ 284
List controls ............................................................................................................. 284
Playlist controls ....................................................................................................... 284
Appendix B
Connector Pin-outs
RS-422 connector pinouts ....................................................................................... 285
Analog audio connector pinouts .............................................................................. 285
GPI I/O connector pinouts ....................................................................................... 286
Appendix C
Specifications
AC power specification ............................................................................................ 288
Environmental specifications................................................................................... 288
Mechanical specifications........................................................................................ 289
Electrical specifications ........................................................................................... 289
Serial Digital Video (SDI).................................................................................... 290
Composite Analog I/O ........................................................................................ 290
S-Video I/O ......................................................................................................... 291
Analog Component Video I/O............................................................................. 291
Genlock Reference............................................................................................. 292
System Timing.................................................................................................... 292
S/PDIF Digital Audio ........................................................................................... 293
Analog Audio ...................................................................................................... 293
Audio headphone output (with front panel option) .............................................. 293
LTC Input/Output ................................................................................................ 293
RS-422 specification........................................................................................... 294
GPI I/O specifications ......................................................................................... 294
IEEE 1394A interface specification .................................................................... 294
Operational specifications ....................................................................................... 295
Media file system performance........................................................................... 295
Video network performance................................................................................ 295
Composite analog video input performance ....................................................... 295
Index ...................................................................................................................... 297
Turbo iDDR User Guide
Contents
8
Turbo iDDR User Guide
Finding Information
This user manual describes the Turbo iDDR and provides instructions for configuring
and operating the product in a variety of applications.
How this manual is organized
This manual is organized around the tasks required to install, configure, and operate
the Turbo iDDR. The following describes the chapters included in this manual:
Chapter 1, Product Introduction — Provides the product functional description and
an overview of the key features.
Chapter 2, Configuration: Turbo iDDR — Describes how to modify the Turbo iDDR
configuration settings using the front panel display in front panel mode or using the
configuration tool provided in AppCenter Workstation mode.
Chapter 3, Operation: Front Panel Control — Describes how to operate the Turbo
iDDR in front panel mode.
Chapter 4, Operation: AppCenter Workstation — Describes how to operate the Turbo
iDDR using the AppCenter Workstation user interface available when you connect
VGA monitor, mouse, and keyboard.
Chapter 5, Remote Control — Describes how to setup and operate the Turbo iDDR
using industry standard remote control protocols or GPI-Input triggers.
Chapter 6, Using an Ethernet connection — Describes the basics of setting up a
network connection for file transfer or remote control using remote control protocols
over Ethernet.
Chapter 7, Maintenance Tasks — Contains step-by-step procedures for performing
routine maintenance on the Turbo iDDR to keep it running at peak performance.
Turbo iDDR User Guide
Finding Information
Getting more information
In addition to this document, information is available in the following locations.
Turbo Documentation CD-ROM
A full set of support documentation is available on the Documentation CD-ROM that
you received with your Turbo iDDR which includes:
•Turbo iDDR Quick Start Guide — This guide provides step-by-step
installation instructions for basic installation and operation, including
recording and playing clips, trimming clips, and making a playlist.
.
• Turbo iDDR User Manual — Describes the Turbo iDDR and provides instructions
for installing, configuring, and operating the product in either the front panel or
AppCenter Workstation control modes.
• Turbo iDDR Service and Troubleshooing Guide — Contains information for solving
common setup problems, as well as information on servicing and maintenance
• Turbo iDDR Release Notes — Contains the latest information about the Turbo
iDDR software shipped on your system. The information in this document includes
software upgrade instructions, software specifications and requirements, feature
changes from the previous releases, and any known problems.
On-line Help System
You can access the on-line help through the AppCenter Workstation user interface
which is available when you operate the Turbo iDDR using a VGA monitor, mouse,
and keyboard.
To access online help in AppCenter:
• In the main user interface toolbar, click Help, then choose Help Topics.
Thomson Grass Valley Web Site
This public Web site contains all the latest manuals and documentation, and
additional support information. Use the following URL.
http://www.thomsongrassvalley.com.
10
Turbo iDDR User Guide
Grass Valley Product Support
Grass Valley Product Support
To get technical assistance, check on the status of problems, or report new problems,
contact Grass Valley Product Support via e-mail, the Web, or by phone or fax.
Web Technical Support
To access support information on the Web, visit the product support Web page on the
Grass Valley Web site. You can download software or find solutions to problems by
searching our Frequently Asked Questions (FAQ) database.
World Wide Web: http://www.thomsongrassvalley.com/support/
Technical Support E-mail Address: [email protected].
Phone Support
Use the following information to contact product support by phone during business
hours. Afterhours phone support is available for warranty and contract customers.
United States
(800) 547-8949 (Toll Free)
France
+33 (1) 34 20 77 77
Latin America
(800) 547-8949 (Toll Free)
Germany
+49 6155 870 606
Eastern Europe
+49 6155 870 606
Greece
+33 (1) 34 20 77 77
Southern Europe
+33 (1) 34 20 77 77
Hong Kong
+852 2531 3058
Middle East
+33 (1) 34 20 77 77
Italy
+39 06 8720351
Australia
+61 1300 721 495
Netherlands
+31 35 6238421
Belgium
+32 2 3349031
Poland
+49 6155 870 606
Brazil
+55 11 5509 3440
Russia
+49 6155 870 606
Canada
(800) 547-8949 (Toll Free)
Singapore
+656379 1390
China
+86 106615 9450
Spain
+ 34 91 512 03 50
Denmark
+45 45968800
Sweden
+46 87680705
Dubai
+ 971 4 299 64 40
Switzerland
+41 (1) 487 80 02
Finland
+35 9 68284600
UK
+44 870 903 2022
Authorized Support Representative
A local authorized support representative may be available in your country. To locate
the support representative for your country, visit the product support Web page on the
Grass Valley Web site.
Turbo iDDR User Guide
Finding Information
12
Turbo iDDR User Guide
Safety Summaries
General Safety Summary
Review the following safety precautions to avoid injury and prevent damage
to this product or any products connected to it.
Only qualified personnel should perform service procedures.
While using this product, you may need to access other parts of the system.
Read the General Safety summary in other system manuals for warnings and
cautions related to operating the system.
Injury Precautions
Use Proper Power Cord
To avoid fire hazard, use only the power cord specified for this product.
Ground the Product
This product is grounded through the grounding conductor of the power
cord. To avoid electric shock, the grounding conductor must be connected
to earth ground. Before making connections to the input or output terminals
of the product, ensure that the product is properly grounded.
Do Not Operate Without Covers
To avoid electric shock or fire hazard, do not operate this product with
covers or panels removed.
Do Not operate in Wet/Damp Conditions
To avoid electric shock, do not operate this product in wet or damp
conditions.
Do Not Operate in an Explosive Atmosphere
To avoid injury or fire hazard, do not operate this product in an explosive
atmosphere.
Avoid Exposed Circuitry
To avoid injury, remove jewelry such as rings, watches, and other metallic
objects. Do not touch exposed connections and components when power is
present.
Product Damage Precautions
Use Proper Power Source
Do not operate this product from a power source that applies more than the
voltage specified.
Provide Proper Ventilation
To prevent product overheating, provide proper ventilation.
Turbo iDDR User Guide
Safety Summaries
Do Not Operate With Suspected Failures
If you suspect there is damage to this product, have it inspected by qualified
service personnel.
Battery Replacement
To avoid damage, replace only with the same or equivalent type. Dispose of
used battery according to the circuit board manufacturer’s instructions.
Safety Terms and Symbols
Terms in This Manual
These terms may appear in this manual:
!
!
WARNING: Warning statements identify conditions or practices that can
result in personal injury or loss of life.
CAUTION: Caution statements identify conditions or practices that may
result in damage to equipment or other property, or which may cause
equipment crucial to your business environment to become temporarily
non-operational.
Terms on the Product
These terms may appear on the product:
DANGER indicates a personal injury hazard immediately accessible as one
reads the marking.
WARNING indicates a personal injury hazard not immediately accessible
as you read the marking.
CAUTION indicates a hazard to property including the product.
Symbols on the Product
The following symbols may appear on the product:
DANGER high voltage
Protective ground (earth) terminal
!
14
Turbo iDDR User Guide
ATTENTION – refer to manual
Service Safety Summary
Service Safety Summary
!
WARNING: The service instructions in this manual are intended for
use by qualified service personnel only. To avoid personal injury, do
not perform any servicing unless you are qualified to do so. Refer to all
safety summaries before performing service.
Do Not Service Alone
Do not perform internal service or adjustment of this product unless another
person capable of rendering first aid and resuscitation is present.
Disconnect Power
To avoid electric shock, disconnect the main power by means of the power
cord or, if provided, the power switch.
Use Care When Servicing With Power On
Dangerous voltages or currents may exist in this product. Disconnect power
and remove battery (if applicable) before removing protective panels,
soldering, or replacing components.
To avoid electric shock, do not touch exposed connections
Certifications and Compliances
Canadian Certified Power Cords
Canadian approval includes the products and power cords appropriate for
use in the North America power network. All other power cords supplied are
approved for the country of use.
FCC Emission Control
This equipment has been tested and found to comply with the limits for a
Class A digital device, pursuant to Part 15 of the FCC Rules. These limits
are designed to provide reasonable protection against harmful interference
when the equipment is operated in a commercial environment. This
equipment generates, uses, and can radiate radio frequency energy and, if
not installed and used in accordance with the instruction manual, may cause
harmful interference to radio communications. Operation of this equipment
in a residential area is likely to cause harmful interference in which case the
user will be required to correct the interference at his own expense. Changes
or modifications not expressly approved by Grass Valley can affect
emission compliance and could void the user’s authority to operate this
equipment.
Turbo iDDR User Guide
15
Safety Summaries
Canadian EMC Notice of Compliance
This digital apparatus does not exceed the Class A limits for radio noise
emissions from digital apparatus set out in the Radio Interference
Regulations of the Canadian Department of Communications.
Le présent appareil numérique n’émet pas de bruits radioélectriques
dépassant les limites applicables aux appareils numériques de la classe A
préscrites dans le Règlement sur le brouillage radioélectrique édicté par le
ministère des Communications du Canada.
EN55103 1/2
Class A Warning
This product has been evaluated for Electromagnetic Compatibility under
the EN 55103-1/2 standards for Emissions and Immunity and meets the
requirements for E4 environment.
This product complies with Class A (E4 environment). In a domestic
environment this product may cause radio interference in which case the
user may be required to take adequate measures.
FCC Emission Limits
This device complies with Part 15 of the FCC Rules. Operation is subject to
the following two conditions: (1) This device may not cause harmful
interference, and (2) this device must accept any interference received,
including interference that may cause undesirable operation.
Laser Compliance
Laser Safety Requirements
The device used in this product is a Class 1 certified laser product. Operating
this product outside specifications or altering its original design may result
in hazardous radiation exposure, and may be considered an act of modifying
or new manufacturing of a laser product under U.S. regulations contained in
21CFR Chapter 1, subchapter J or CENELEC regulations in HD 482 S1.
People performing such an act are required by law to recertify and reidentify
this product in accordance with provisions of 21CFR subchapter J for
distribution within the U.S.A., and in accordance with CENELEC HD 482
S1 for distribution within countries using the IEC 825 standard.
Laser Safety
Laser safety in the United States is regulated by the Center for Devices and
Radiological Health (CDRH). The laser safety regulations are published in
the “Laser Product Performance Standard,” Code of Federal Regulation
(CFR), Title 21, Subchapter J.
The International Electrotechnical Commission (IEC) Standard 825,
“Radiation of Laser Products, Equipment Classification, Requirements and
User’s Guide,” governs laser products outside the United States. Europe and
member nations of the European Free Trade Association fall under the
jurisdiction of the Comité Européen de Normalization Electrotechnique
(CENELEC).
16
Turbo iDDR User Guide
Safety Certification
Safety Certification
This product has been evaluated and meets the following Safety
Certification Standards:
Turbo iDDR User Guide
Standard
Designed/tested for compliance with:
ANSI/UL60950, CAN/CSA
C22.2 No. 60950-00
12/01/2000
Safety of Information Technology Equipment, including
Electrical Business Equipment (Third edition).
IEC 950
Safety of Information Technology Equipment, including
Electrical Business Equipment (Third edition, 1999).
EN60950
Safety of Information Technology Equipment, including
Electrical Business Equipment (Third Edition 2000).
17
Safety Summaries
18
Turbo iDDR User Guide
Chapter
1
Product Introduction
Information in the chapter includes:
• “Product overview and key features”
• “Functional description”
• “Media disk space: How media is stored”
• “Front panel controls and indicators”
• “Rear panel connectors”
• “Turbo iDDR control modes”
• “Power-on and shutting down”
• “Accessing the Windows operating system”
Turbo iDDR User Guide
19
Chapter 1 Product Introduction
Product overview and key features
The Turbo iDDR is a multi-channel digital video recorder that allows simultaneous
record and playback of media stored on internal disk drives. The Turbo iDDR features
a single record channel (R1) and two play channels (P1/P2). Hours of storage depends
on the video compression settings selected. The front panel touch screen and TFT
display along with front panel transport controls allow easy operation and monitoring
with minimal external connections. The iDDR also provides a built in digital disk
recorder application— AppCenter Workstation. This application is available when
you connect a keyboard, mouse, and VGA monitor to the iDDR rear panel. The
Workstation application provides a graphical user interface to handle all essential
tasks provided in front panel mode and more.
Simultaneous access to common storage – Simultaneous access to common storage
by all three channels means that you can play a clip that is still being recorded, and
that a clip can be played simultaneously and independently on multiple channels.
Front panel operation– The front panel features a TFT display with touch screen and
VTR-like transport controls. The front panel is tilted to a convenient operating angle.
The user interface provides an on-screen keyboard for text entry (entering names and
timecode). You can also connect an external keyboard to the either the PS/2 or USB
ports for easy text entry or transport control using keyboard shortcuts.
Integrated control applications software – The standard control application not
only enables a number of simple manual and semi-automatic operations previously
available with tape, but also takes advantage of the capabilities of a disk based
recorder, e.g. simultaneous record/play, list playout, clip trimming.
20
Turbo iDDR User Guide
Product overview and key features
Multiple signal I/O formats – The following table describes the signal I/O formats
available in the iDDR. Refer to “Electrical specifications” on page 289 for complete
specifications.
Signal I/O format
Description
Connector
Analog Composite
PAL/NTSC
BNC
S-Video
PAL/NTSC
BNC
Analog Component
RGB (output only)
YUV
Input: BNC
Output: DVI-I
SDI
SDI conforms to SMPTE 259M
BNC
DVI
(Output ONLY)
Used for direct digital connections to digital
displays.
DVI-I
Analog Audio
2ch/video; Balanced differential analog; sampled @
48 KHz; 16-bit pcm
XLR
Digital (S/PDIF)
EBU Standard IEC958 “Digital audio interface”;
PCM or AC-3
BNC
LTC
1ch per record channel; 1 ch per play channel
BNC
Internal Generator
Time of day or user selectable start timecode;
drop-frame or non-drop-frame.
NA
IEEE 1394A; Available as a Record channel input
for importing and recording media from a digital
recording device that uses DV or HDV format.
1394
Connector
Video
Digitala
Audio
Timecode
IEEE 1394A
IEEE 1394A Input
a.
DVI used for output only. The connector carries both digital and component analog signals.
Selectable video compression data rates– The Turbo iDDR records video using
MPEG-2 Long GOP compression with selectable video data rate. This allows you to
choose the highest picture quality possible to obtain the storage capacity needed. The
following table shows the storage capacity estimates based on the video compression
data rate selected in the Turbo iDDR.
NOTE: Storage capacity will increase as larger disk sizes become available.
Selected
Data Rate
Approximate Storage Capacity
15Mbs
17 hours
12Mbs
21 hours
8 Mbs
30 hours
4Mbs
40 hours
Turbo iDDR User Guide
21
Chapter 1 Product Introduction
Convenient monitoring – The front panel display includes current clip information
for each channel, including a thumbnail image for the clip loaded on each channel. A
front panel headphone jack is provided for audio monitoring. The signal monitored
follows the channel selection.
Media transfer to other devices – The iDDR supports media transfers over the
standard Ethernet port. Supported devices for media transfers include other Turbo
iDDRs or the Grass Valley M-Series iVDR. You must configure the iDDR network
settings prior to attempting media transfers.
Importing and Exporting media – You can exchange media with other devices by
importing and exporting files using standard file formats. Files can be exchanged over
an Ethernet connection to network drives or using common forms of removable media
such as CD-R, DVD-R, external USB drives and flash drives. The following table
describes the file formats supported.
File Formats Supported
AVI DV25 or uncompressed (.avi)
Windows Media (.wmv)
General Exchange Format (*.gxf)
MPEG Program and Elementary Streams
(.mpg, .m2v, .m2p, .m2, .mpeg, .vob)
Quicktime (.qt, .mov)
Import
Export
!
!
!
!
!
!
!
!
!
Importing: Still images and still image sequences – You can import still image files
and still image sequences from local drives or network devices. The Turbo iDDR
supports the following graphic file formats: .jpg, .bmp, .tiff, .tga, .gif, .png.
Remote control support – You can use remote control devices and applications
software developed for the Turbo iDDR that use industry-standard serial protocols.
For each supported protocol, the iDDR provides a protocol-specific application.
Supported protocols includes BVW over RS422 and AMP protocol over RS422 or
Ethernet.
GPI triggers – GPI input triggers can be assigned to channels to control actions such
as record, play, stop, and skip a playlist event. GPI output triggers can be assigned to
play channels and inserted in playlists to control external equipment as the list is
played.
22
Turbo iDDR User Guide
Functional description
Functional description
The diagram illustrates how the three iDDR channels operate independently, but
share a common internal disk storage area. This gives all channels, one record channel
and two play channels, simultaneous random access to the same media files. This
means that you can play a clip that is still recording on the record channel. Each
channel handles one video track, two audio tracks, and one timecode track.
EE Switch Path to P1
P1
Output
Circuit
R1
Input
Circuit
R1
Record
Channel 1
P1
Play
Channel 1
Disk Storage
(SATA)
P2
Play
Channel 2
EE Switch Path to P2
P2
Output
Circuit
About E-to-E mode
Note that an E-to-E path is provided for monitoring purposes. In E-to-E mode, the
record channel audio and video inputs are switched to the play channel audio and
video outputs when the play channel is in stop mode or when no clip is loaded. This
allows you to monitor the record channel inputs while recording. The following table
describes play channel operation depending on the E-to-E selection.
E-to-E Setting
Play channel mode
Play channel output
E-to-E Disabled
Play, FF, Rewind
Show clip
Stop
Show clip
Eject
Show black
Play, FF, Rewind
Show clip
Stop
Show inputa.
Eject
Show inputa..
E-to-E Enabled
a.
Output is black if no video input is connected to R1. DVI-I output
does not support E-to-E.
Turbo iDDR User Guide
23
Chapter 1 Product Introduction
E-to-E considerations
When E-to-E mode is enabled, you can connect an external reference signal which is
synchronous to the video input. This will eliminate artifacts on the play channel
output (periodic vertical shift) due to routing an asynchronous signal through the
iDDR. However, this is not required for recording, the iDDR can record asynchronous
signals.
NOTE: E-to-E is provided for monitoring the record channel, and is not intended as
a program switch.
Media disk space: How media is stored
When media is recorded or imported, it is stored on the iDDR internal disk drives as
a multimedia clip. You can play clips individually, or you can create a playlist to play
several clips in sequence. Playlists are saved and can be loaded again at anytime. The
iDDR automatically prevents media referenced by a playlist from being deleted.
Clips can be edited by modifying the clip mark-in and mark-out points. This
determines the first and last frame of video when the clip plays. Playlists can also be
edited by moving or removing the events in the list.
All clips and playlists stored in the media file system are organized using bins. A bin
functions much like a directory in a conventional file system, except bins cannot be
nested, that is, a bin cannot contain other bins. You can create, name, and delete bins
to organize your clips and playlists. There must always be at least one bin in the media
file system, if not, the iDDR automatically creates a bin named default.
As the media disk space fills, you will need to manage the remaining storage space.
Warning messages are displayed when available storage reaches 10% total disk space.
All recording is halted when media storage reaches its full threshold.
You can manage media in the following ways:
• Delete unwanted assets – Locate and delete unwanted clips and playlists. Deleted
assets are moved to the Recycle Bin. You must empty the Recycle Bin to free the
disk space.
• Erase unused media – This is a manual operation that you can perform on
individual clips. This operation deletes the clip media that lies outside the clip
mark-in and mark-out points. (
• Clear Media File System – Use this feature to permanently erase all media stored
in the media file system. (See “Clearing the media file system” on page 279.)
The majority of the internal SATA disk drive space is reserved for media storage. The
size of the media storage partition is fixed and cannot be modified.
Related topics
“Managing media” on page 102
“Disk Storage Indicator” on page 56
“Managing media” on page 213
“Displaying available storage space” on page 141
24
Turbo iDDR User Guide
Front panel controls and indicators
Front panel controls and indicators
The front panel includes the following controls and indicators:
JOG
Drive
Bay
R1
Menu
P1
Clips
P2
Esc
Shift
Mark
In
Mark
Out
Standby button
SHTL
VAR
Front Panel Controls
(See page 50)
Power on indicator
Drive busy indicator
Head phone jack
& volume control
1394A
Connector
USB 2.0
Connector
!
WARNING: The power standby switch does not turn off power
to the system. The system must be disconnected from the power
source.
Control or Indicator
Description
Standby Button
Provides system On/Off control
NOTE: If you believe your iDDR is “hung” in an unresponsive
state, you can perform a forced shutdown by pressing and holding
the standby button for approximately five seconds.
Power-On Indicator
Indicates the standby switch is in the On position and operates as
follows:
On: Power is on and the Turbo iDDR is operational.
Blinking: Turbo needs service. Refer to the Turbo iDDR Service
Manual.
Drive busy indicator
Indicates that data is being written or read to disk
Headphone jack and volume
control
Used to monitor the audio output signal of the selected channel.
Switches automatically when a channel is selected.
IEEE1394A and USB
Connectors
Connectors for capable devices; useful for media import/export
Front panel controls
Provides VTR-like controls for operating the iDDR. Refer to “Guide
to using the front panel” on page 50.
Drive Bay
Houses the removable media drives.
Turbo iDDR User Guide
25
Chapter 1 Product Introduction
Rear panel connectors
R1
P1 OUTPUT
HD/SD PLAYER S/PDIF
SDI
Composite
S- Video
LTC In
S/PDIF
INPUT
SDI SD RECORDER PB
PR
RS 422 P1
Ch 1
P1
CMPST/Y
RS 422 R1
Ch 2
Ch 1
VIDEO REFERENCE
S- Video
LTC Out
P2
DVI-I
OUTPUT
HD/SD PLAYER
S/PDIF
SDI
Composite
RS 422 P2
R1
Ch 2
Ch 1
P2
Ch 2
Push
DVI-I
LTC Out
Push
GPI I/O
26
Turbo iDDR User Guide
S-Video
Turbo iDDR control modes
Turbo iDDR control modes
You can control the Turbo iDDR locally the front panel controls or through
workstation control mode. You can also control the iDDR remotely.
JOG
JOG
R1
MENU
P1
CLIPS
P2
ESC
SHIFT
MARK
OUT
MARK
OUT
SHTL
R1
Menu
P1
Clips
P2
Esc
Shift
Mark
In
Mark
Out
SHTL
VAR
VAR
Automation
System
Front Panel
(ONLY)
JOG
AppCenter Workstation
(ONLY)
Connect keyboard,
mouse, and VGA monitor
R1
MENU
P1
CLIPS
P2
ESC
SHIFT
MARK
OUT
MARK
OUT
SHTL
VAR
Remote Control
Device
Front Panel
+
GPI Control
(Six In/Out)
Control Protocol
over Ethernet
(AMP)
Control Protocols
over RS-422
(BVW, AMP)
AppCenter Workstation
Connect keyboard,
mouse, and VGA monitor
Local control modes
Front panel mode (ONLY)– The front panel includes a 320 by 240 TFT display with
touch screen and VTR-like transport controls. The front panel user interface provides
an on-screen keyboard for text entry (entering names and timecode). An external
keyboard connected to any USB port can be used for text entry or transport control
using keyboard shortcuts. A transport control device that emulates keyboard can be
used to control the iDDR through keyboard shortcuts. See Chapter 3, Operation: Front
Panel Control on page 49.
AppCenter Workstation mode (ONLY)– Connecting a keyboard, mouse and VGA
monitor provides access to AppCenter Workstation control application. AppCenter
comes pre-installed and provides a graphical user interface for controlling the Turbo
iDDR. See Chapter 4, Operation: AppCenter Workstation on page 113.
In addition:
• The mouse is only used on the AppCenter user interface, not the front panel
application.
• The mouse and keyboard are used to control the iDDR.
• Front panel transport control buttons functional in AppCenter Workstation mode,
i.e. record, play, stop, etc. and Shuttle/Jog.
Turbo iDDR User Guide
27
Chapter 1 Product Introduction
Connecting a keyboard, monitor and mouse to the rear panel provides access to the
AppCenter user interface. You can use mouse and keyboard shortcuts to control the
iDDR. The mouse is only used on the AppCenter user interface, not the front panel
application. See Chapter 4, Operation: AppCenter Workstation on page 113.
Front panel and AppCenter mode – In this mode of operation, the Turbo iDDR is
actually in front panel control mode, but AppCenter is still available by connecting a
keyboard, monitor and mouse for managing media, for example, moving, copying,
transporting or deleting clips.
Remote control modes
GPI Control – GPI input triggers can be assigned to channels to control actions such
as record, play, stop, and skip a playlist event. GPI output triggers can be defined for
channels and inserted in playlists to control external equipment as the list is played.
See “Setting GPI input triggers” on page 43.
Remote Control Device Using Serial Control Protocols Over RS-422 – The iDDR
can be controlled by devices and applications software developed for the Turbo iDDR
that use serial control protocols over the RS-422 serial port. See “Using remote
control protocols” on page 252.
Automation System Using Remote Control Protocols over Ethernet – The iDDR
can be controlled by devices and applications software developed for the iDDR that
use serial control protocols over the Ethernet network. See “Using remote control
protocols” on page 252.
28
Turbo iDDR User Guide
Power-on and shutting down
Power-on and shutting down
To power-on the iDDR
• Press the front panel standby switch to power on the iDDR.
At power-on, the iDDR initializes then starts the Windows operating system which
performs automatic logon using the Administrator user account.
Standby button
Power on indicator
Drive busy indicator
To shutdown the iDDR
• Press the front panel standby switch
- or • In Workstation mode, click System in AppCenter main menu, then choose
Shutdown in the pop-up menu. Select a shutdown mode, then click OK.
Turbo iDDR User Guide
29
Chapter 1 Product Introduction
Dialog box shutdown modes:
Shutdown Mode
Description
Exit to Windows
Exit AppCenter and display the Windows desktop.
Use the desktop shortcut to restart AppCenter.
Restart
Exit AppCenter and restart the Windows operating
system. AppCenter will restart automatically.
Storage Maintenance Mode
Exit AppCenter and restart the iDDR in storage
maintenance mode to allow maintenance on the
media disk subsystem. Refer to the Turbo iDDR
Service Manual for procedures.
Shutdown
Shutdown the Windows operating system and
power-off the iDDR.
NOTE: If you believe your iDDR is “hung” in an unresponsive state, you can
perform a forced shutdown by pressing and holding the standby button for
approximately five seconds.
!
30
Turbo iDDR User Guide
WARNING: The power standby switch does not turn off power to the
system. The system must be disconnected from the power source.
Accessing the Windows operating system
Accessing the Windows operating system
Some tasks require access to the Windows operating system that runs on the Turbo
iDDR, for example, modifying network settings.
To access the Windows desktop:
1. If in front panel mode, power-off the iDDR, then connect a keyboard, mouse, and
VGA monitor.
2. Press the front panel standby switch to Power-on.
The iDDR initializes then starts the Windows operating system which
automatically logs on using the Administrator user account.
!
Turbo iDDR User Guide
CAUTION: The Turbo iDDR is not a general purpose Windows
workstation. The Windows configuration on the iDDR has been
specifically set for use as a real time device. The Turbo iDDR is
configured for automatic logon allowing unattended booting. To avoid
partial or total system failure, do not modify any operating system
settings unless approved by Grass Valley Support. This includes but is
not limited to the following:
— Do not use the User Manager
— Do not use the Disk Administrator
— Do not load any third party software
— Do not install any Windows updates (these are distributed by
Thomson Grass Valley).
31
Chapter 1 Product Introduction
32
Turbo iDDR User Guide
Chapter
2
Configuration: Turbo iDDR
Information in this chapter includes:
• “Using the configuration manager” on page 34
• “About video scaling settings” on page 36
• “Video output connector compatibility” on page 38
• “Guidelines for selecting video data rate” on page 38
• “Configuring your Turbo iDDR” on page 39
• “Adjusting video output timing” on page 45
Turbo iDDR User Guide
33
Chapter 2 Configuration: Turbo iDDR
Using the configuration manager
The Configuration Manager is the primary configuration tool for the Turbo iDDR. It
makes settings that apply to the overall Turbo iDDR as well as settings that apply to
individual channels.
Configuration Manager settings are stored in a database. The Turbo iDDR’s current
configuration is always based on the settings saved in the database. When the Turbo
iDDR starts up it reads the settings from the database and configures itself
accordingly. When you modify a setting in Configuration Manager you must save the
setting in order to update the database and reconfigure the Turbo iDDR.
You can also save Configuration Manager settings as configuration files.
Configuration files are generated by the Configuration Manager application as
stand-alone XML files. You can save settings out of Configuration Manager into a
configuration file. Likewise, you can load settings into Configuration Manager from
a configuration file. However, you must use Configuration Manager as the means to
save the settings to the database before the settings actually take effect. Configuration
files are not linked directly to the database.
You can use configuration files as a means to back up your settings. You can also use
configuration files to save several different groups of customized settings, each with
a unique name, so that you can quickly load settings for specialized applications.
Refer to “Saving and restoring your settings” on page 34.
Accessing Turbo iDDR configuration
You can configure your system using either the front panel or the AppCenter
Workstation. The front panel uses the Tools menu to access iDDR configuration
settings. The AppCenter Workstation uses the Configuration Manager.
To access the configuration settings:
• In front panel mode, press Menu
, then choose Tools... using the control knob.
- or • In the Workstation AppCenter, select System | Configuration.
NOTE: If the Turbo iDDR is in Workstation mode, refer to “Enabling front panel
control mode” on page 50.
Saving and restoring your settings
Settings can be saved as a configuration file. You can save any number of uniquely
named custom configuration files. You can load a configuration file to restore system
settings.
To save custom settings:
1. In the Configuration Manager, click the Save button.
The Save As dialog opens.
2. Use the up arrow or select folders to navigate to the folder in which you want to
save the configuration file.
34
Turbo iDDR User Guide
Restoring default settings
3. Enter a name for the configuration file.
Do not name the file DefaultConfig.xml, as this name is reserved for the factory
default configuration file. Otherwise, standard Windows 2000 and up file naming
restrictions apply.
4. Click Save and Close.
To restore custom settings:
1. If you want to save current settings, you should save them as a configuration file
before continuing.
2. In the Configuration Manager, click the Load button.
The Open dialog opens.
3. Use the up arrow or select folders to navigate to the custom configuration file.
4. Select the custom configuration file.
5. Click Open.
The custom settings are loaded into Configuration Manager, but they are have not
been saved and put into effect.
6. Click OK to save and apply settings, and to close the Configuration Manager.
Restoring default settings
You can restore factory default settings as follows:
• You can restore some individual settings or groups of settings by selecting the
Default button which appears below the settings in the configuration screen.
• You can restore all the settings in Configuration Manager at once to their default
values as explained in the following procedure. This is useful for test purposes or
for removing site-specific settings when re-installing at a new site.
AppCenter Workstation
To restore all settings at once to their default values:
1. If you want to save current settings you should work through the previous
procedure “Saving and restoring your settings” before proceeding.
2. In the Configuration Manager dialog, click Restore.
The default settings are loaded into Configuration Manager, but they have not yet
been saved and put into effect.
3. Click OK to save settings and close Configuration Manager.
Front Panel
To restore all settings at once to their default values:
• On the front panel, press MENU
, choose Tools using the control knob, and select
Restore Defaults.
Turbo iDDR User Guide
35
Chapter 2 Configuration: Turbo iDDR
About video scaling settings
The iDDR video scaling feature allows you to play clips with different aspect ratios
and picture resolutions on the same play channel. For example, a play channel
configured to output standard definition (SD) video can play high definition (HD)
clips. The HD clip picture resolution is down-converted to SD and, if needed, the
aspect ratio is converted in the process. Similarly, SD clips are up-converted when
played on a play channel configured to output HD video.
The play channel uses the following information to determine how to scale the video
for playout:
• Clip aspect ratio attribute — During record channel setup, you must specify
whether the record channel is recording standard or widescreen video. This sets the
clip aspect ratio attribute. This attribute is saved as part of the media file and used
when the clip is played to determine video scaling. To set up the record channel,
see “Modifying recorder channel (R1) settings” on page 39.
• Play channel video type setting — During play channel setup, you must select the
video output type for each play channel– standard or high definition. This will
determine if the clip picture resolution needs up-conversion or down-conversion.
To set up the play channel video type, see “Adjusting video output timing” on
page 45.
NOTE: Some video output connectors become inactive for some video type
selections. See “Video output connector compatibility” on page 38.
• Play channel aspect ratio conversion mode — For each play channel, you must
specify one of three aspect ratio conversion modes to use when the picture image
needs resized. Selections include Bars, Crop, Bars & Crop. For more information,
see the next section “About aspect ratio conversion modes”.
About aspect ratio conversion modes
The aspect ratio conversion “mode” or “hint” setting for the play channel determines
how the picture image is resized for playout. The following table shows the results of
selecting different aspect ratio conversion modes for various video input types and
play channel aspect ratio settings. Use the table to determine the settings required for
your media type and display device.
Play Channel
Aspect Ratio
Conversion
Mode Setting
SD
(4:3)
(4:3)
NA
Output same as
clip. No rule
necessary.
HD
(16:9)
(4:3)
Bars
(Letter Box)
No information
lost.
HD
(16:9)
(4:3)
Bars & Crop
(Half Letter
Box)
Some information
lost.
Clip
36
Turbo iDDR User Guide
Clip
Example
Output
Example
Comments
Video scaling considerations
Play Channel
Aspect Ratio
Conversion
Mode Setting
HD
(16:9)
(4:3)
Crop
More information
lost.
HD
(16:9)
(16:9)
NA
Output same as
clip. No rule
necessary.
SD
(4:3)
(16:9)
Bars
(Pillar Box)
No information
lost.
SD
(4:3)
(16:9)
Bars & Crop
(Half Pillar
Box)
Some information
lost.
SD
(4:3)
(16:9)
Crop
(Zoom)
More information
lost.
Clip
Clip
Example
Output
Example
Comments
Video scaling considerations
Take the following into consideration when working with the video scaling features
of the Turbo iDDR.
• For the highest video quality, select a play channel video type that eliminates the
need for up or down conversion. This requires that you know how the source video
was encoded. For example, if an imported clip was encoded at 1920x1080i, set the
play channel to the same resolution.
• Some video output connectors become inactive depending on the play channel
video type selected.
• You can only set a clip’s aspect ratio attribute when it is recorded. Once a clip is
recorded or imported, you cannot change the attribute. If you want to change the
clip’s aspect ratio attribute, you must re-record or import the clip.
• In some cases you might want to deliberately set a clip’s aspect ratio attribute
“incorrectly”. For example, if a widescreen clip is being recorded on the iDDR and
it already has an aspect ratio treatment, such as letterbox as part of the media itself,
you would not want to again apply letterbox bars when the clip is played out to a
SD output, double-boxing. In this case, if you know the clip is destined for a SD
output, you can set the widescreen clip’s attribute to standard screen so that no
aspect ratio conversion takes play on the SD playout.
• The Turbo iDDR can play clips with different aspect ratio attributes in a single
playlist.
Turbo iDDR User Guide
37
Chapter 2 Configuration: Turbo iDDR
Video output connector compatibility
The following table shows which video output connectors are active depending on the
play channel video type setting. Use the table when making cable connections. To
change play channel video type, refer to “Adjusting video output timing” on page 45.
Play Channel Setting
Video Type
Setting
Resulting
Resolution
NTSC
720 x 480 I
PAL
720 x 576 I
Video Output Types Available
Aspect
Ratio
Availablea
S-Video
Composite
4:3 or 16:9
!
!
!
!
XGA
1024 x 768 P
4:3 or
WXGA
1365 x 768 P
16:9
1080i
1920 x 1080i
SDI
DVI -I
Digital
16:9 a
Analog Componentb
(Selectable)
VTR: Sony
DVD Player: RGB or YPbPr
!
Computer Monitor (RGBHV)
!
monitorc
monitor
a.
Aspect ratio conversion method is user selectable— bars, halfbars, or crop.
b.
Sync on Y or G when 3-wire formats are used.
c.
The monitor output is down-converted and not timed to the reference input.
It is provided for monitoring purposes only.
!
SMPTE 274M (RGB)
SMPTE 274M (YUV)
Guidelines for selecting video data rate
The type of video and how it will be used largely determines the video data rate setting
you should select. It is important to understand the type of material you will be
playing and select the appropriate setting. Generally set as high as possible to obtain
the storage capacity needed. Also consider the following:
• Sports footage (video containing lots of motion) requires significantly higher video
data rates than an interview show.
• Clips with lots of chrominance, typical of many commercials, require higher data
rates to maintain quality.
• Higher data rates should be used for any production work that requires multiple
generations or when the material is subject to up-conversion to HDTV.
NOTE: Information about iDDR system storage capacity for different video data
rates, see “Product overview and key features” on page 21.
38
Turbo iDDR User Guide
Configuring your Turbo iDDR
Configuring your Turbo iDDR
You can configure your system using either the front panel or the Workstation
AppCenter.
Modifying system settings
To access system settings:
• On the front panel, press MENU
, then choose Tools using the control knob, and
select All Channels.
- or • In the Workstation AppCenter, select System | Configuration, then click System.
Select a menu item...
And make settings as needed…
Video Reference
standard
NTSC (59.94 Hz)
Choose for the NTSC standard.
PAL (50 Hz)
Choose for the PAL standard.
Time of day source
Audio reference
level
Reference Present
Green LED indicates source is present.
Black LED indicates source is not present.
Reference Locked
Green LED indicates system is locked.
Black LED indicates system is not locked.
The time of day source is used for event scheduling, such as automatic play and
record events.
System Clock
The local Windows operating system
clock. If you select this source you should
verify that the clock’s time is correct
LTC Input
The channel’s LTC input.
0 dBU
+4 dBU
-4 dBU
Select the audio reference level used at
your facility.
Modifying recorder channel (R1) settings
To access recorder channel settings:
• On the front panel, press MENU
, then choose Tools using the control knob, and
select R1 Setup.
- or • In the Workstation AppCenter, select System | Configuration, and click Channel.
Turbo iDDR User Guide
39
Chapter 2 Configuration: Turbo iDDR
Select a menu item...
And make settings as needed…
Recorder
Setup
Compression
Format
MPEG
Only the MPEG compression format
is supported.
Recording Data
Rate
4Mb/s |-|-|-| 15Mb/s
Select 4, 8, 12, or 15 Mb/s. All
settings are long GOP. Refer to
“Guidelines for selecting video data
rate” on page 38.
Video Noise
Reduction
None
Low
Medium
High
Reducing video noise can improve
picture quality at low video data rates.
Too much noise reduction, however,
can cause loss of detail and create
posterization artifacts. It’s best to
experiment with different settings to
achieve the best result.
Input Type
Select based on how you connected your system.
Video Input
SDI
Choose if using SDI input.
R1
INPUT
SDI SD RECORDER Pb
S-Video
Pr
CMPST/Y
S-Video
Choose if using S-Video input.
R1
INPUT
SDI SD RECORDER Pb
Analog Composite
Pr
CMPST/Y
S-Video
Choose if using Composite input.
R1
INPUT
SDI SD RECORDER Pb
Analog
Component
Pr
CMPST/Y
S-Video
Choose if Y-Pr-Pb (DVD player is
connected.)
R1
INPUT
SDI SD RECORDER Pb
Audio Input
Audio Input
Type
Analog
Pr
CMPST/Y
S-Video
Select when using analog input.
R1
Digital (S/PDIF)
Select when using digital input.
R1
INPUT
S/PDIF Audio
Channel
Monitoring
40
Turbo iDDR User Guide
SDI SD RECORDER Pb
Pr
CMPST/Y
Audio Input
Trim
+/-12dB
For the Analog audio input type only.
Audio Input
Format
16-bit PCM
AC-3
For the Digital (S/PDIF) audio input
type only.
Timing Offset
+/-200 ms
Select the timing offset for the record
channel.
Display Audio
Meters
Yes
No
Available in the AppCenter
Configuration Manager only.
Modifying player channel (P1 and P2) settings
Modifying player channel (P1 and P2) settings
For help in making output type and aspect ratio settings, refer to “About video scaling
settings” on page 36.
To access player channel settings:
• On the front panel, press MENU
, then choose Tools using the control knob, and
select P1 or P2 Setup.
- or • In the Workstation AppCenter, select System | Configuration, click Channel, and
select the P1 or P2 tab.
Select a menu item...
And make settings as needed…
Video Output
NTSC (SD)
Video Output
Format
XGA (1024 X
768)
Select the video format for the play
channel(s).
WXGA (1365 X
768)
1080i
(1920x1080)
Turbo iDDR User Guide
Aspect Ratio
Standard
Widescreen
These choices available when Video
output type is NTSC, PAL, or XGA.
Aspect Ration
Conversion
Bars
Crop
Bars and Crop
Refer to “About video scaling settings”
on page 36.
Output
Component Type
RGB
Y, Pb, Pr
Select your component type.
Output Pedestal
On
Off
Select the appropriate pedestal setting.
Still-play mode
Still-Play mode settings determine how to generate the
still-play signal for the play channel when it is setup to
freeze on last frame of video in stop mode. You can select
line interpolated, or interlaced. Note that in normal play
mode, the play channel can be setup for E to E mode instead
of displaying freeze frame in stop mode. E to E mode is
enabled/disabled in the application running on the channel.
Refer to “Selecting E-to-E mode” on page 76
Field
(interpolated)
This is the default setting and uses the
content of one field for both fields
during still-play for a one field freeze.
This mode eliminates the motion jitter
that can be present in Interlaced mode.
Frame
(Interlaced)
This mode displays two fields in still
play mode for a two field freeze. With
this mode you might see some motion
jitter in still-play.
41
Chapter 2 Configuration: Turbo iDDR
Select a menu item...
And make settings as needed…
Video Output,
cont.
Test Mode
(colorbars)
On
Off
Temporarily displays 75% colorbar
signal on the channel output. This
setting is for test purposes only, so it is
not saved.
ProcAmp
Control
Video Gain
0-255
Chroma Gain
0-255
Chroma Phase
-127 to +128
Black Level
0-15
These controls adjust the color balance
in the video image and should only be
adjusted to correct a problem with a
faulty clip or with external output
equipment. Otherwise, leave these
controls at their default settings.
Sharpness
0-12
Frame Offset
Delays the video output. Range: NTSC 0-1 frames, PAL 0-3
frames
Line Offset
(coarse)
Delays the video output. Range: NTSC (525 lines) 0-524
lines, PAL (625 lines) 0-624 lines.
Sample Offset
(fine)
Delays the video output. Range: NTSC (525 lines) 0-1715
clock samples, PAL (625 lines) 0-1727 clock samples.
Analog Sub-pixel
Offset
Delays the timing within one sample interval. This setting
applies to analog video only and is available only if the
video output type is NTSC or PAL.
Audio Output
Timing Offset
+/-200 ms
Select the timing offset for the record
channel.
Channel
Monitoring
Display Audio
Meters
Yes
No
Available in the AppCenter
Configuration Manager only.
Video Output
Timing
42
Turbo iDDR User Guide
Modifying the front panel setup
Modifying the front panel setup
To access front panel settings:
• On the front panel, press MENU
, then choose Tools using the control knob, and
select Panel Options.
- or • In the Workstation AppCenter, select System | Configuration, and click Panel.
Select a menu item…
And make settings as needed…
Jog/Shuttle
Jog Speed
-1X to 1X
-1X to 3X
Shuttle Speed
-16X to 16X
-32X to 32X
VAR Setting
0.25 X
0.5 X
0.75 X
Specifies the preset play speed used when
variable speed play is selected.
Always Start at
VAR Preset
Yes
No
When this option is selected, whenever you
press the VAR button, the initial play speed
is determined by the VAR preset setting.
Then you can adjust the play speed using the
Jog/Shuttle knob (RANGE: ±1x normal
playback speed). When this option is
cleared, the initial play speed is determined
by the play speed last set by the Jog/Shuttle
knob.
Controls the sensitivity of the Jog/Shuttle
knob on the front panel.
Setting GPI input triggers
To access GPI input settings:
• On the front panel, press MENU
, then choose Tools using the control knob, and
select GPI Input Triggers.
- or • In the Workstation AppCenter, select System | Configuration, click GPI, then click
the GPI-Input tab.
On the GPI Input Triggers
menu, select...
And make settings as needed…
Trigger channel(s)
None
No GPI inputs are set.
R1
The GPI input controls channel R1.
P1
The GPI input controls channel P1.
P2
The GPI input controls channel P2.
Turbo iDDR User Guide
43
Chapter 2 Configuration: Turbo iDDR
On the GPI Input Triggers
menu, select...
And make settings as needed…
Trigger action
Play
Play current loaded clip or playlist in assigned
Player channel.
Record
Start recording a clip in Recorder channel.
Stop
Stop playback or record of assigned channel.
Rewind
Rewind playback of assigned channel. Channel
will stay in rewind mode until the beginning of clip
is reached or another transport action is taken.
Fast Forward
Fast forward playback of assigned channel.
Channel will stay in the fast forward mode until the
end of clip is reached or another transport action is
taken.
Cue Start
Cue to start of clip loaded in Player or Playlist
channel.
Cue End
Cue to end of clip loaded in assigned channel.
Eject
Ejects the current clip.
Preview
The current clip in the record channel is loaded in
play channel P1. NOTE: You can use Eject prior to
Preview if a clip is already loaded in the Play channel.
Cue Next
Event
Goes to next event in a Playlist and stops.
Cue Prev
Event
Goes to previous event in a Playlist and stops.
VAR
Playback
Plays loaded clip in variable speed play mode with
pre-set speed as set in “Modifying the front panel
setup” on page 43.
High
Select the active signal (high or low) required. This
is determined by the external equipment connected
to the GPI input.
Active
Low
44
Turbo iDDR User Guide
Setting GPI output triggers
Setting GPI output triggers
To access GPI input settings:
• On the front panel, press MENU
, then choose Tools using the control knob, and
select GPI Output Triggers.
- or • In the Workstation AppCenter, select System | Configuration, click GPI, then click
the GPI-Output tab.
On the GPI Output
Triggers menu,
select...
And make settings as needed…
Channel
None
No GPI output triggers are set.
R1
Channel R1 triggers the GPI output.
P1
Channel P1 triggers the GPI output.
P2
Channel P2 triggers the GPI output.
Name
GPI-Out-X
Enter the name of the action triggered by the GPI
output.
Active
HIgh
Select the active signal (high or low) required. This is
determined by the external equipment connected to the
GPI output.
Low
Adjusting video output timing
When integrating the iDDR into a video system, you may be required to use a video
reference signal to synchronize the iDDR and other video sources. This ensures a
stable picture on the display device when switching between other video sources.
Topics here include:
• “Using the video reference input” on page 45
• “Video timing principles” on page 47
• “To adjust video output timing” on page 47
Using the video reference input
The video reference signal is used to synchronize equipment in a video system so that
video output signals can be combined and switched with other signal sources
smoothly. Without synchronization, switching between signal sources will produce
picture jumps and rolls while the display device re-synchronizes.
Turbo iDDR User Guide
45
Chapter 2 Configuration: Turbo iDDR
Video Switcher
Display
System
Camera Feeds
Recorded
Video
Saffire™
iDDR
Video Reference
Signal Generator
NOTE: Some seamless video switchers contain frame lock circuitry that eliminates
the need to synchronize the iDDR. Refer to your video switcher documentation to
determine if you need to synchronize and time the iDDR.
The iDDR uses a composite analog video reference signal connected to the video
reference loop-through connector. The loop-thru must be terminated using a 75 ohm
terminator unless the signal is cabled (looped-through) to another device. A
synchronizing generator, or composite analog signal from a stable video source can
be used as a video reference signal.
Reference in/out
Reference in/out
-OR75 terminator
PR
P1
CMPST/Y
RS 422 R1
Ch 2
Ch 1
VIDEO REFERENCE
S- Video
LTC Out
P2
DVI-I
OUTPUT
HD/SD PLAYER
S/PDIF
SDI
Composite
RS 422 P2
R1
Ch 2
Ch 1
P2
Ch 2
Push
PB
Push
GPI I/O
46
Turbo iDDR User Guide
S-Video
Video timing principles
Video timing principles
If a video reference signal is used to synchronize the iDDR, all video outputs are
zero-timed, that is, the video output delay exactly matches the video reference signal
timing. You can use the iDDR video timing controls to make playout timing
adjustments to compensate for propagation delays through cabling and equipment in
the video system. This ensures that the iDDR output signals can be combined and
switched with other signal sources smoothly.
NOTE: The iDDR video output is not zero-timed in E-to-E mode and should not be
used in a timed video system. E-to-E mode is provided for monitoring purposes only
and is not intended as a program switch. See “About E-to-E mode” on page 23.
To adjust video output timing
By default, all video output timing is set to match the video reference input signal
(zero-timed). You can use the Video Output Timing adjustment, provided for each
play channel to meet downstream timing requirements.
1. To adjust video output timing:
• In the Workstation AppCenter, select System | Configuration, then select the
Channel tab, and click the P1 or P2 channel to configure.
— or —
• In front panel mode, press a play channel button—
or
, then press Menu
, select Tools using the control knob, and choose P1 or P2 Setup.
2. Use the control knob to adjust video output timing as required.
Make adjustments as needed…
Frame Offset
Delays video output. Range: NTSC 0-1 frames, PAL 0-3
frames
Lines
(coarse)
Delays the video output. Range: NTSC (525 lines) 0-524
lines, PAL (625 lines) 0-624 lines.
Samples
(fine)
Delays the video output. Range: NTSC (525 lines) 0-1715
clock samples, PAL (625 lines) 0-1727 clock samples.
Analog
Sub-Pixel
(SC)
Delays the timing within one sample interval. This setting
applies to analog video only and is available only if the video
output type is NTSC or PAL.
Turbo iDDR User Guide
47
Chapter 2 Configuration: Turbo iDDR
48
Turbo iDDR User Guide
Chapter
3
Operation: Front Panel Control
Topics here include:
• “Guide to using the front panel” on page 50
• “Recording clips” on page 57
• “Playing and editing clips” on page 70
• “Playing playlists” on page 83
• “Importing and exporting media” on page 97
• “Managing media” on page 102
• “Monitoring operation using the Status Bar” on page 110
Turbo iDDR User Guide
49
Chapter 3 Operation: Front Panel Control
Guide to using the front panel
This section includes the following topics:
• “Enabling front panel control mode” on page 50
• “Locking the front panel” on page 50
• “Using the front panel controls” on page 51
• “Conventions used in the front panel display” on page 55
Enabling front panel control mode
Front panel display in Workstation mode
If your iDDR is in Workstation mode, you can switch to front panel control mode
using the front panel controls or from Workstation display on the VGA monitor.
NOTE: When the iDDR switches to front panel mode, AppCenter releases control of
all iDDR channels and operation is interrupted.
To enable to front panel control mode, do one of the following:
• In AppCenter, click View, then select Front Panel.
- or • On the front panel, press
, then select Front Panel.
Locking the front panel
Locking the front panel prevents accidental interruption of iDDR operation.
• To lock the front panel, press the MENU button, then use the control knob to scroll
and select Tools, then select Lock Out Panel.
• To unlock the front panel, press the front panel ESC/SHIFT and the MENU buttons,
then uncheck Panel Locked.
50
Turbo iDDR User Guide
Using the front panel controls
Using the front panel controls
The front panel consists of four main components: the display controls, display and
touch screen, the edit controls, and the transport controls including the control knob.
NOTE: The front panel transport controls (i.e. play, record, stop, etc.) are also used
to control the iDDR in Workstation mode.
Display
Controls
Display &
Touchscreen
Jog/Shuttle
Controls
JOG
R1
MENU
P1
CLIPS
P2
ESC
SHIFT
MARK
IN
MARK
OUT
Edit Controls
SHTL
Variable Speed
Play Control
VAR
Control
Knob
Transport Control
The following table describes the front panel controls.
Display & Touchscreen
Used to display and operate the front panel mode graphical user interface.
TFT display and
touch screen
NOTE: In AppCenter Workstation mode, the front panel display is only
used to monitor iDDR status.
Playing a Clip
Record – Hold down PLAY, then press REC.
NOTE: Can be configured for pressing Record only.
+
- - -or- - -
Stop – Press STOP to stop Record/Play.
Play – Press PLAY to start playback.
Rewind – Hold down REW, then release the button to cause the clip to return
to the previous mode.
Fast Forward – Hold down FF, then release the button to cause the clip to
return to the previous mode.
Frame reverse – Tap and release the REW button.
Frame advance – Tap and release the FF button.
Turbo iDDR User Guide
51
Chapter 3 Operation: Front Panel Control
Cue to beginning of clip – Hold down STOP (or SHIFT), then press REW.
+
- - -or- - ESC
SHIFT
Cue to end of clip – Hold down STOP (or SHIFT), then press FF.
+
+
- - -or- - ESC
SHIFT
Play from the beginning of the clip - Press PLAY (or SHIFT), then press
REW.
+
+
- - -or- - ESC
SHIFT
Go to the end of the clip - Press PLAY (or SHIFT), then press FF.
+
+
- - -or- - ESC
SHIFT
+
Using the Control Knob
Jog – Press JOG, then turn knob. Playback advances or retards one frame at a
time according to the direction and rotational speed of the knob. The range of
jog speeds is ±1x.
NOTE: Range of jog speeds can be set for ±1x or ±3x.
Shuttle – Press SHTL, then rotate the knob for -32x to +32x normal playback
speed.
NOTE: Range of shuttle speeds ±16x or ±32x.
Variable Speed Play – (slo-mo) Press VAR. Off-speed play begins. You can
rotate the knob to set the play speed (RANGE: ±1x normal playback speed),
otherwise, speed remains at the preset play speed or the last variable play speed
used. Variable play speed is implemented using interpolated line and field
smoothing.
NOTE: Preset can be set to .25x, .5x or .75x. Initial play speed can be set to
start at either the preset speed, or the last play speed set by the Jog/Shuttle
knob.
Scroll and Select items– Used in the front panel display to make selections.
Rotate the knob to highlight items in lists or menus that appear in the front
panel display, then push in (bump) the knob to select the highlighted item.
Playing a playlist
Stop – Press STOP to stop play.
Play – Press PLAY to start playing the list from the current position (Time
Cursor).
Rewind – Hold down REW, then release the button to cause the list to return
to the previous mode.
Fast Forward – Hold down FF, then release the button to cause the list to
return to the previous mode.
52
Turbo iDDR User Guide
Control Knob
Using the front panel controls
Skip to previous event in a list – Hold down STOP (or SHIFT), then press
REW.
+
- - -or- - ESC
SHIFT
Skip to next event in a list – Hold down STOP (or SHIFT), then press FF.
+
+
- - -or- - ESC
SHIFT
Play previous event – Press PLAY (or SHIFT), then press REW.
+
+
- - -or- - ESC
SHIFT
Play next event – Press PLAY (or SHIFT), then press FF.
+
+
- - -or- - ESC
SHIFT
+
Play previous section – Press PLAY (or SHIFT), then press and HOLD REW
(Hold)
+
- - -or- - ESC
SHIFT
Play next section – Press PLAY (or SHIFT), then press and HOLD FF.
+
(Hold)
+
ESC
SHIFT
+
Skip to first selected event and stop – Press STOP, then select an event.
+ <Selection>
Skip to first selected event and play – Press PLAY, then select an event.
+ <Selection>
Turbo iDDR User Guide
53
Chapter 3 Operation: Front Panel Control
Display Controls
Show the Recorder display.
R1
Show the Player 1 display.
P1
Show the Player 2 display.
P1
Open the menu for the current display.
MENU
Open the Configuration menu.
MENU
+ scroll to
select Tools
Show the Clips display.
CLIPS
Show Bins display
Modify the next button press.
CLIPS
+
CLIPS
ESC
SHIFT
+
CLIPS
+
MARK
IN
+
MARK
OUT
ESC
SHIFT
Edit Controls
Set clip mark in to the current play position.
Clear mark in value.
Set a clip mark out to the current play position.
Clear mark out value.
54
Turbo iDDR User Guide
MARK
IN
ESC
SHIFT
MARK
OUT
ESC
SHIFT
Conventions used in the front panel display
Conventions used in the front panel display
The front panel display includes touch screen controls and indicators for the control
mode you’ve selected— Recorder, Player, Clips. Each control mode includes some
unique controls, however, some conventions are used in all control modes.
Channel Information
Storage
Indicator
Tool
Buttons
Clip
Properties
Control
Scroll Indicator
(Some displays)
Status Bar
The following table explains the front panel display conventions:
Control
Description and User Operation
Channel Information
Channel Label
Displays the delegated channel number. In this case, the first, and only,
recorder R1. The channel label appears in the upper left corner of every
display and menu.
Timecode
Indicates the current timecode of the timecode source selected for the
channel. Text color is white during record, and dimmed at other
times. The timecode value of xx:xx:xx:xx is displayed when the
timecode source is not present or is invalid.
Countdown
Displays the time remaining in the clip for a fixed length record. For other
recording modes (crash, continuous), the countdown is not shown.
Clip Properties Control
Thumbnail
Used to visually identify the clip or playlist. The image is generated from
the 16th image of the clip.
An “empty” monitor bitmap is used when no clip is loaded.
Once recording begins, a thumbnail is shown using the 16th frame of
video. During a continuous record, a new thumbnail is generated every
three minutes once the record loop length is reached.
A gray monitor bitmap with the text “no video” is shown when the the
Recorder is not receiving a video signal.
Turbo iDDR User Guide
55
Chapter 3 Operation: Front Panel Control
Control
Description and User Operation
An empty monitor bitmap with a black X is used if a thumbnail cannot be
created. There may be a problem recording the input video.
When the recorder is in IEEE 1394 record mode, the 1394 symbol is
displayed on the when playback stops. This is used to distinguish 1394
control from image displayed when not clip is loaded.
Audio meters
Small audio meter bars are shown in the lower right corner of the
thumbnail. These are used as audio signal indicators.
Clip Name
Displays the clip’s name. When no clip is loaded, this control shows,
<no clip>.
Clip Location
When a clip is loaded that has no length, such as after a New Clip menu
selection, the clip length is blank. The length is also blank when no clip
is loaded. During a crash record, the length increases until recording is
stopped. During a fixed length record, the length shows the duration at
which recording will be stopped automatically. During a continuous
record, the length shows the record buffer length. In both fixes and
continuous record modes, the length value does not change.
Mark In
Displays the current clip’s location. When no clip is loaded, this control
shows the current bin. The current bin can be changed from the Bin
display.
Mark Out
Shows the timecode at the start of the clip.
Clip Length
Shows the timecode at the current record position. When recording ends,
this value will be one field greater than the last playable timecode.
Tools and Indicators
Disk Storage Indicator
Graphically represents remaining storage.
0% Full
Tool Buttons
56
Turbo iDDR User Guide
60% Full
95% Full
Full
The Player and Recorder displays include tool
buttons for controlling the channel operation.
Recording clips
Control
Description and User Operation
Scroll Indicator
The scroll indicator appears on the right side of every display and menu.
The black bar represents the viewable portion of the display. The white
area outside the black bar indicates the portion of the display that is above
or below the current view
Nothing to scroll
Status Bar.
Displays messages that indicate the current state of the channel selected.
For more information, refer to “Monitoring operation using the Status
Bar” on page 110.
Recording clips
The recorder display is used to record clips on the iDDR. You can play the clip while
it is still recording, or you can finish the recording, and then play the clip or add it to
a playlist.
This section includes the following topics:
• “About recording clips” on page 58
• “About loop record mode” on page 58
• “Guide to using the front panel Recorder display” on page 60
• “Before you record: Recorder settings checklist” on page 62
• “Features in the Recorder context menu” on page 64
• “To record a clip” on page 65
• “Using IEEE 1394 Record mode” on page 66
• “Previewing a clip that is recording” on page 67
• “Changing the timecode source” on page 1
• “Selecting widescreen mode” on page 68
• “Changing the current bin” on page 68
• “Renaming a clip” on page 69
• “Viewing clip properties” on page 69
• “Locating a clip” on page 69
Turbo iDDR User Guide
57
Chapter 3 Operation: Front Panel Control
About recording clips
Select record channel signal inputs – Before you start recording, you may need to
select video, audio, and timecode inputs. Refer to “Modifying recorder channel (R1)
settings” on page 39.
Missing or intermittent LTC timecode - If LTC is the selected timecode source and
the LTC signal is missing, i.e. LTC not connected, the current timecode display shows
XX:XX:XX:XX. Also, clips recorded without timecode will show no mark-in/mark-out
timecode after recording. When LTC is detected, but the signal is intermittent, the last
valid timecode is displayed anytime the LTC signal disappears. Clips with missing or
intermittent timecode will show this behavior during playback in a play channel. If
LTC is intermittent or missing, try one of the following solutions:
• Use the internal timecode generator as the timecode source for recording.
• Stripe the timecode after the clip is recorded using the Player application. See
“Striping timecode (replacing the timecode track)” on page 66.
Using the video input noise reduction filter – The video input noise reduction filter
provides pre-filtering to enhance the picture quality.
Re-recording and appending clips is not supported through the user interface –
You cannot record over a previously recorded clip. To replace the unwanted clip,
delete it and record a new one. Also, appending previously recorded clips is not
supported, that is, once the recording is stopped, you cannot start the recording again
using the same clip. If a clip is currently loaded when record is selected, the clip is
ejected, and a new clip is created before recording begins.
NOTE: Appending previously recorded clips is supported through AMP Serial
Control Protocol. Contact Thomson Grass Valley for more information on control
devices available.
Pre-roll time — Recording begins as soon as record is selected.
About loop record mode
Loop record allows you to specify a fixed length recording that records continuously.
When the fixed length you specify is reached, iDDR begins to erase the oldest media
in 3 minute segments to make room for new media. In this way, new media is
continuously recorded while the recording is kept to a fixed length.
The loop recording is stored in the iDDR as a program. The program thumbnail is
displayed in the clips pane immediately after the recording starts. While recording,
you can load the loop record program in Player mode for playout or to create subclips.
The media referenced by the subclips that you create is saved outside the loop record
program and does not subtract from the loop record length. The subclips can be
inserted in Playlist mode as play events.
Loop mode operational considerations
Consider the following when planning for Loop Record operation:
• Minimum loop record length– 6 minutes
• Maximum loop record length– Maximum record length is limited by the amount
58
Turbo iDDR User Guide
About loop record mode
of storage space and the compression settings used. A message is displayed if the
fixed length you enter exceeds the available disk space.
• Minimum record to playback time– 5 seconds. In other words, playback in loop
record can start no sooner than 5 seconds after the start of record.
• Modifying the loop record name or length– You can modify the loop record
name or length during record. If you reduce record length, the oldest media outside
the new record length is erased.
• Stopping loop record– If the recording is stopped before the fixed length is
reached, the resulting program duration is the time elapsed since the recording
started. Like normal record mode, you cannot stop, then start a loop recording.
Once record is stopped, you must eject the program and create a new loop record.
• Transferring the loop record program– The loop record program cannot be
transferred to a file or networked device until record is stopped.
• Loop record storage space is not reserved– Loop record is allowed to start as
long as the record length you enter is less than the available storage, however, the
storage space is not reserved. For example, you may have enough storage space to
start the loop record, but you are still allowed to transfer media or otherwise fill
disk space. Warning messages are displayed in the AppCenter StatusBar when
available storage reaches 10% total disk space. All recording is halted when media
storage reaches its full threshold.
• Pausing the loop record program in Player mode– You cannot pause the loop
record program in Player mode indefinitely. Eventually, the record length is
reached and the video at the current position is erased. As this happens, the current
position is advanced in 3 minute increments as the oldest unused media is erased.
• Changing thumbnail image– Thumbnail images displayed in the clips pane are
generated using the 16th frame of video. The thumbnail image for a loop record
program appears as normal until the fixed length is reached. Then, the thumbnail
will update every 3 minutes as media is erased beginning with the oldest unused
media. As the media used to generate thumbnails is erased, new thumbnails are
generated.
• Erasing oldest media is suspended when creating a subclip– When creating
subclips in Player mode, erasing oldest media is suspended when the first mark is
entered (mark-in or mark-out). This means that the loop record program length
may grow larger than the length specified. Erasing media is resumed and the oldest
media outside the fixed length is purged when the second mark is entered and you
select the Accept button. You could inadvertently fill storage space if you enter the
subclip marks, but fail to click the Accept button.
NOTE: Erasing oldest media is also resumed when you exit subclip mode by
ejecting the subclip, or by clicking the Source Clip button.
• Use genlocked inputs for time delay– For error free time delay operation, ensure
that the video input is genlocked to the video reference signal. See “Using the video
reference input” on page 45. This will eliminate periodic picture shift.
Turbo iDDR User Guide
59
Chapter 3 Operation: Front Panel Control
Guide to using the front panel Recorder display
The Recorder display is shown when the R1 panel button is pressed. The following
describes the controls in the Recorder display interface.
Monitor
(Thumbnail)
Tool
Buttons
Progress
Bar
Control
Description and User Operation
Clip Properties Control
Monitor
A clip thumbnail is displayed for the current clip to visually identify the
clip. The thumbnail is generated from the 16th frame of the clip.
An “empty” monitor is used when no clip is loaded.
Once recording begins, a thumbnail is shown using the 16th frame of
video. During a loop record, a new thumbnail is generated every 3 minute
once the loop record length is reached.
A gray image with the text “no video” is shown when the Recorder is not
receiving a video signal.
An empty monitor with a black X is used if a thumbnail cannot be created.
There may be a problem with recording the input video.
When the recorder is in IEEE 1394 record mode, the 1394 symbol is
displayed on the when playback stops.
60
Audio meters
Small audio meter bars are shown in the lower right corner of the
thumbnail. Due to their size, they are more signal indicators than exact
level indicators.
If the audio source is compressed data (AC3) then the audio meters are
replaced with the Dolby symbol.
Progress bar
In crash or loop records, the progress bar is used to show progress without
any specific units. A pink to red gradient used to animate progress. Since
a fixed length record has a definite end, the progress bar represents the
duration of the record. The bar color in a fixed length record is red.
Turbo iDDR User Guide
Guide to using the front panel Recorder display
Control
Description and User Operation
Tool Buttons
Loop Record
Toggles the loop record mode on and off. When turning on the loop
record mode, the “buffer length” timecode entry control appears allowing
you to enter a loop length.
Fixed Length
Toggles the fixed length record mode on and off. When turning on the
fixed length mode, it opens a “fixed length” timecode entry control.
Eject
Ejects the current clip.
New Clip…
Ejects the current clip (if any) and creates a new clip using the current
seed name.
IEEE 1394A
Toggles the 1394 record mode on and off.
Audio…
Shows the audiometer display that contains the audio record level
controls and the input meters. Changes to the audio level are
automatically saved for the channel.
Turbo iDDR User Guide
61
Chapter 3 Operation: Front Panel Control
Before you record: Recorder settings checklist
Before recording, check the following recorder channel settings.
62
Record Channel Setting
Procedure
"
Verify video and audio input selection
In the monitor pane, check the thumbnail
and its audio level indicators to verify the
correct record channel inputs are seleccted.
If there is a problem, correct the settings.
See “Modifying recorder channel (R1) settings” on
page 39.
#
Verify video compression data rate
You can manage storage capacity and
video quality by adjusting the record
channel compression data rate. Generally
set as high as possible to obtain the storage
capacity needed.
See “Modifying recorder channel (R1) settings” on
page 39.
$
Verify digital audio compression setting
If the digital audio source uses AC3
encoding, you must select AC3 mode,
otherwise, select PCM encoding.
See “Modifying recorder channel (R1) settings” on
page 39.
%
Verify the timecode source
Make sure to select a valid timecode
source. You can use the internal timecode
generator or LTC.
See “Modifying recorder channel (R1) settings” on
page 39.
&
Verify widescreen mode setting
If the video source is in widescreen format,
you must select widescreen mode for the
recorder. This attribute is saved with the
clip and is used to control video scaling
when the clip is played. See “Video scaling
considerations” on page 37.
1. Press MENU , then choose Widescreen to toggle
the setting.
2. Press R1 to return to the Recorder display.
Turbo iDDR User Guide
NOTE: The clip aspect ratio cannot be changed
once the clip is recorded. If you want to change
the clip’s aspect ration attribute you must
re-record the clip.
Before you record: Recorder settings checklist
Record Channel Setting
'
Adjust audio level (if needed)
You can use the audio leveling feature to
adjust the analog or digital audio input
levels, excluding dolby encoded digital
audio.
Procedure
1. In the Recorder display, touch the Audio
button.
2. Use the touch screen or control knob to adjust
graphical faders. Only the selected faders are
adjusted. Pushing on the knob cycles selection
between both, left, or right channels.
- or Select Restore Unity
to return the audio
record level to the incoming audio input level.
NOTE: Increasing audio level reduces available
dynamic range, and may cause audio clipping
depending on audio content.
3. Press the ESC/SHIFT button to return to the
Recorder display.
(
Verify video compression settings
Choosing a video compression setting is a
trade-off between image quality and
storage capacity. Higher video quality
produces larger files which take up more
storage space and take longer to transfer to
external devices.
Turbo iDDR User Guide
See “Modifying recorder channel (R1) settings” on
page 39.
63
Chapter 3 Operation: Front Panel Control
Features in the Recorder context menu
The following table describes the tasks provided by the Recorder display context
menu.
To do this:
Press the MENU button, then select...
View the current clip properties.
Properties
Rename the clip loaded in Recorder.
Rename
This opens the text entry control which allows you
to rename the current clip. Renaming the clip
creates a new seed name. For example, if you
rename ‘Clip_1’ to ‘Promo’, subsequent clips will
be named ‘Promo-1’, ‘Promo-2’, and so on.
Locate and select the clip in the Clips display.
Locate
Set or clear the widescreen attribute.
Widescreen
Set this to match the active picture aspect ratio of
the video source being recorded. For example, if
your signal source active picture area is 16:9,
select Widescreen, if 4:3, delselect Widescreen.
Select a remote control protocol
Remote Control…
Remote control that lets you select the BVW or
AMP control protocols.
Open the Tools menu.
64
Turbo iDDR User Guide
Tools
To record a clip
To record a clip
You can record clips using the rear panel video, audio, and timecode input signals. Be
sure to refer to “Before you record: Recorder settings checklist” on page 62 if you
have trouble recording.
If E-to-E mode is selected, the play channel video output BNCs can be used to
monitor the video input signals.
To record:
1. Press
on the front panel to view recorder display.
2. Use one of the following record modes:
To:
Press:
Then do this:
Name a clip, then start
recording
Name the clip, then press
.
Specify the clip length before
starting record
Enter clip length using on-screen or external keyboard,
then press
.
NOTE: Record stops when clip length is reached.
Use Loop record mode
Enter loop length, then press
.
(See “About loop record mode” on page 58.)
Start recording immediately
(crash record), and then rename
the clip later.
Turbo iDDR User Guide
N/A
Press
65
Chapter 3 Operation: Front Panel Control
Using IEEE 1394 Record mode
The IEEE 1394 (FireWire) ports can be used for importing and recording media from
a digital recording device that uses DV or MPEG2 format. After selecting the IEEE
1394 input for the Record channel, you can use the iDDR transport controls to control
the IEEE 1394 device remotely through the 1394 connection.
NOTE: The rear panel port 2 (top) and the front panel 1394 port are shared. If a
device is already connected to port 2 you cannot connect a device to the front panel
port, or vice versa.
To use IEEE 1394 Record mode:
1. Connect and power-on the IEEE 1394 device.
2. Press
on the iDDR front panel to view recorder display.
3. Press IEEE 1394
. The record channel input switches to the 1394 input.
The status bar shows “Connecting to device”, then “Connected”. Initially, both the
monitor pane and the thumbnail in the Recorder display shows a IEEE 1394
symbol.
Timecode from the device is also displayed in the Recorder pane. If xx:xx:xx:xx is
displayed, the timecode from the device is not valid.
Use the following step to cue the IEEE 1394 device.
4. You can control the IEEE 1394 device remotely (play, rewind, fast-forward and
stop) in one of the following ways:
• Use the iDDR front panel controls (transport control buttons, Shuttle/Jog Knob).
• Use the record channel on-screen transport controls in AppCenter.
• Use iDDR keyboard shortcuts (see Appendix A, Keyboard Shortcuts on
page 281).
• Press Menu
, then choose Seek. Enter enter a specific timecode for the IEEE
1394 device to seek.
66
Turbo iDDR User Guide
Previewing a clip that is recording
5. After positioning the cue point on the IEEE 1394 device, use one of the following
methods to start recording:
To
Press
Then do this
Name a clip, then start
recording
Name the clip, then press
.
Specify the clip length before
starting record
Enter clip length using on-screen or external keyboard,
then press
.
NOTE: Record stops when clip length is reached.
Use Loop record mode
Enter loop length, then press
.
(See “About loop record mode” on page 58.)
Start recording immediately
(crash record), and then rename
the clip later
N/A
Press
6. Record continues until Stop is pressed.
Additional information about IEEE 1394 devices:
• When you start the recording, the iDDR pre-rolls the 1394 device several seconds,
then starts play back prior to capturing media. This ensures the video frame cued
in the channel monitor is recorded.
• There is no audio monitoring facility on the Turbo iDDR for 1394 devices. To
monitor audio, use the audio monitoring features on the DV device.
• The timecode from the 1394 device is not recorded. Rather, the Turbo iDDR starts
striping timecode for the clip starting at zero.
• You can play the clip while it is still recording. See “Previewing a clip that is
recording” on page 67.
• Depending on the device’s native format, media captured via IEEE 1394 may
require transcoding. If transcoding is required, media may not be captured in
real-time.
Previewing a clip that is recording
Preview loads the currently recording clip into a play channel. The play channel
becomes the selected channel, and the clip is cued and ready for play.
To preview a clip:
1. Start the record process.
2. Press
or
3. Press Menu
on the iDDR front panel.
, then use the control knob choose Now Recording.
The current clip is loaded and cued in the play channel and is ready to play.
Turbo iDDR User Guide
67
Chapter 3 Operation: Front Panel Control
4. Press
to play the clip.
Selecting widescreen mode
You must select the widescreen attribute when recording video with widescreen
aspect ratio— 16:9. The attribute is saved as part of the MPEG video media file. The
attribute is used by the play channel to handle aspect ratio conversion. For example,
disable aspect ratio conversion if the clip is played on a channel set for widescreen
display. This may occur when playing a list of clips with different aspect ratios. For
more information, refer to “About video scaling settings” on page 36.
To change the Widescreen attribute:
1. Press MENU
2. Press R1
, then use the control knob to choose Widescreen.
to return to the Recorder display.
NOTE: The clip aspect ratio cannot be changed once the clip is recorded. If you want
to change the clip’s aspect ration attribute you must re-record the clip.
Changing the current bin
On the iDDR, a fixed amount of disk space is reserved for storing media files— the
V:/ partition. Within the V:/ disk partition, your clips and playlists are stored in bins
which function like directories in a file system. You can organize your media by
creating and removing bins.
When recording starts, the new clip is stored in the current bin. You can change the
current bin to determine where you want the clip stored. The current bin name is
displayed under the clip name in the Recorder display, for example, V:/default.
NOTE: Changing the current bin affects the recorder and the player modes.
To change the current bin for the record channel:
1. Press CLIPS
, then use the control knob to choose Organize Bins.
You can also press CLIPS
The Bin display appears.
68
Turbo iDDR User Guide
twice to view the Bins.
Renaming a clip
2. Do one of the following:
• Use the control knob to highlight and select a bin to make it the current bin
- or • Touch a bin button to select it, then touch it again to view the bin. The selected
bin is now the current bin.
3. Press R1
to return to the Recorder display.
Related topics:
• “Creating a new bin” on page 105
• “Renaming a bin” on page 106
Renaming a clip
You can rename a clip during or after recording.
To rename a clip:
1. Press MENU
, then use the control knob to choose Rename.
2. Use the onscreen keyboard to rename the clip, then select Done.
Viewing clip properties
To view the properties of a clip loaded in Recorder mode:
1. Press MENU
, then use the control knob to choose Properties.
The properties display appears.
2. Use the control knob to browse or close the dialog box.
Locating a clip
You can locate the currently loaded clip by displaying the contents of the current bin
in the clips pane, as follows:
• Press MENU
Turbo iDDR User Guide
, then scroll and select Locate.
69
Chapter 3 Operation: Front Panel Control
The Clips display opens showing the contents of the bin where the clip is located.
Playing and editing clips
The information in this section describes how to play and edit clips recorded on the
iDDR. You can play clips in a variety of ways including off-speed play (VAR) and
triggered by GPI. In addition to editing existing clips the in and out points in existing
clips, you can create new clips using the iDDR subclip feature.
Information in this section includes:
• “About playing clips” on page 71
• “Guide to using front panel Player display” on page 72
• “Features in the player context menu” on page 74
• “Loading media for playout” on page 75
• “Playing a clip” on page 76
• “Selecting loop play” on page 76
• “Selecting E-to-E mode” on page 76
• “Jumping to a specific timecode” on page 77
• “Editing a clip” on page 77
• “Creating Subclips” on page 80
• “Locating the clip loaded in player” on page 82
• “Viewing clip properties” on page 82
70
Turbo iDDR User Guide
About playing clips
About playing clips
The front panel player display is used to play clips, programs, and playlists stored on
the iDDR. The player display is also used to trim clips by modifying the clip mark-in
or mark-out points. There is a player display for each play channel P1 and P2.
The player display has two additional views— Edit List and Subclip. Edit List is used
to create playlists by loading multiple clips or programs to create sequence of events.
Subclip view is used to create new clips from the source clip currently loaded in the
player display. Later, you can delete the source clip to free media storage space. The
media referenced by subclips remains.
Working with clips that are still recording
The following restrictions apply when working with a clip in Player mode that is
currently recording:
• You cannot rename the clip.
• The clip mark-in/mark-out points cannot be modified.
• Subclips created from a clip currently being recorded can only have a Mark Out
equal to the last frame that has been recorded when the subclip is created. You
cannot create a clip longer than has been recorded under the assumption that the
unrecorded frames will “fill it in”.
Otherwise, clips that are currently being recorded behave normally. As a reminder,
“Read-Only” is displayed in the StatusBar when the clip loaded or playing is still
being recorded.
Turbo iDDR User Guide
71
Chapter 3 Operation: Front Panel Control
Guide to using front panel Player display
The front panel player display is used to play a clip or playlists, modify clip names,
adjust clip mark in and mark out points, create sub-clips, and stripe timecode. Press
either the P1 or P2 buttons to show the player display. The following describes the
player display controls.
Storage
Indicator
Channel
Information
Monitor
(Thumbnail)
Tool
Buttons
Progress
Bar
Clip
Properties
Status
Bar
Control
Description and User Operation
Channel Information
Current Timecode - Displays recorded timecode. Text color is white
during playback, and dimmed at other times. The value of xx:xx:xx:xx is
displayed when the recorded timecode is not present or invalid.
Countdown Timecode - Displays the time remaining in the clip or list.
Monitor (Thumbnail)
Thumbnail - Used to visually identify the clip. Generated using the 16th
frame of the clip. An empty thumbnail with a black X is used if the clip
does not have a thumbnail. When playing a list, the thumbnail changes
each time a new event is played.
Progress bar - The progress bar represents the length of the playback.
Audio presence indicator - Indicate the presence of recorded audio.
72
Turbo iDDR User Guide
Guide to using front panel Player display
Control
Description and User Operation
Clip Properties
Clip Name - Displays the clip’s name. When no clip is loaded, this control
shows, <no clip>.
Clip Length - Shows the clip’s length in hours, minutes, seconds, and
frames. If no clip is loaded, the length is blank. If the clip is being
recorded, this value will change about every second.
Event Number - When a list is loaded into the player, the event number
indicates which event is currently playing in the list, for example 3 of 20.
When a single clip is loaded, the event number is always 1 of 1. If no clip
is loaded, the event number is blank.
In: and Out: - Shows the timecode values for the first and last frame of
the clip. You can modify clip in and out points. See “Moving clip mark-in/
mark-out points” on page 77. After modifying In/Out points, a <<< or >>>
symbol is displayed to indicate that marks can be cleared to reveal more
media or unused media can be erased to free disk space. See “Erasing a
clip's unused media” on page 107.
Toolbar Buttons
Toggles the loop play mode on and off.
Toggles the E-to-E mode on and off. See “Selecting E-to-E mode” on
page 76.
Ejects the current clip.
Shows the Subclip display for creating new clips from the current clip
loaded.
Shows the Edit List display for viewing assets loaded as a sequence of
events in a playlist.
Shows the audio meter panel for adjusting audio play level. Changes to the
audio level can be saved with the current clip.
Turbo iDDR User Guide
73
Chapter 3 Operation: Front Panel Control
Features in the player context menu
The following table describes the tasks provided by the Player display context menu:
74
Menu Item
Description
Properties
Opens the Clip Property dialog, or if a Playlist was loaded or is being edited, it opens
the List Property dialog.
Rename
Opens the text entry control which allows you to rename the current clip.
Locate
Opens the Clip display and selects the current asset. If editing an unnamed list, then
an error is shown in the statusbar.
Goto…
Opens the timecode keypad and cues the timeline position to the given timecode.
Now
Recording
Loads the clip the currently loaded in R1 into the current player.
Change
Thumbnail
Changes the asset’s thumbnail to the current frame.
Stripe
Timecode
Opens the Stripe Timecode control that allows you to replace clip time code using
stripe zero-based or time-of-day based timecode. This item is disabled for lists.
[ ] Prompts
Turns on/off prompts for trim and sub-clip operations
Remote
Control…
Opens the Remote control that lets you select the BVW or AMP control protocols
Tools
Opens the tools dialog.
Turbo iDDR User Guide
Loading media for playout
Loading media for playout
You can load clips or programs in the play display for playout.
To load media using the Clips display:
1. Press
or
2. Press CLIPS
to select a play channel.
to open the Clips display.
3. Rotate the control knob to highlight an asset, then push on the knob to load in the
player display.
The asset thumbnail and properties appear in the clip monitor.
To load a clip that is still recording:
1. Start the recording as described in “To record a clip” on page 65.
2. Press a play channel button —
3. Press MENU
or
.
, then scroll and select Now Recording using the control knob.
The clip thumbnail and properties appear in the clip monitor. Since the clip is still
recording, the mark-out point is updated periodically.
NOTE: If play channel E-to-E mode is enabled, play channel standard definition
outputs are switched to the record channel input until playout is started. Refer to
“Selecting E-to-E mode” on page 76.
Related topics:
• “Playing a clip” on page 76
• “Editing a clip” on page 77
Turbo iDDR User Guide
75
Chapter 3 Operation: Front Panel Control
Playing a clip
Once an asset is loaded in the player display, you can play it in regular or off-speed
play. You can also search for a specific frame of video using the transport controls.
Use the links in the following table to find information on playing clips.
If you are using…
Refer to...
Front Panel controls
“Using the front panel controls” on page 51
Keyboard shortcuts
Appendix A, Keyboard Shortcuts on page 281
GPI input triggers
“Setting GPI input triggers” on page 43
Selecting loop play
Loop play allows the clip to play in a continuous loop until Stop is pressed.
To enable loop play:
• To enable loop play, touch Loop (Off) to turn it on.
Selecting E-to-E mode
In E-to-E mode, the record channel inputs are switched to the play channel audio and
video outputs (standard definition) when the play channel is in stop mode or when no
clip is loaded. This allows you to monitor the record channel inputs while recording.
To enable E-to-E mode:
• In the player display, touch E-to-E to turn it on.
The following table describes play channel operation depending on the E-to-E
selection.
E-to-E Setting
Play channel mode
Play channel output
E-to-E Disabled
Play, FF, Rewind
Show clip
Stop
Show clip
Eject
Show black
Play, FF, Rewind
Show clip
Stop
Show inputa.
Eject
Show inputa.
E-to-E Enabled
a.
Output is black if no video input is connected to R1. DVI-I output
does not support E-to-E.
E-to-E considerations
When E-to-E mode is enabled, you can connect an external reference signal which is
synchronous to the video input. This will eliminate artifacts on the play channel
output (periodic vertical shift) due to routing an asynchronous signal through the
iDDR. However, this is not required for recording, the iDDR can record asynchronous
signals.
76
Turbo iDDR User Guide
Jumping to a specific timecode
NOTE: E-to-E is provided for monitoring the record channel, and is not intended as
a program switch.
Jumping to a specific timecode
The Goto dialog box allows the player mode to jump to the specific clip timecode that
you enter. You can enter an absolute timecode value based on recorded timecode, or
a relative timecode value, that is, cue the video to a point +/- some value relative the
current frame. If you don’t know the timecode value of the frame you want, you can
click and drag the scrub bar to shuttle to the desired frame.
To jump to a specific timecode:
1. Press MENU
, then use the control knob to choose Goto.
2. Enter a timecode value using the onscreen keypad and control knob.
3. Touch Done in the onscreen keypad.
Related topics:
• “Loading media for playout” on page 75
• “Playing a clip” on page 76
Editing a clip
Topics in this section are as follows:
• “Moving clip mark-in/mark-out points” on page 77
• “Clearing clip marks” on page 78
• “Adjusting clip audio level” on page 78
• “Changing the clip thumbnail image” on page 79
• “Striping timecode (replacing the timecode track)” on page 79
• “Renaming a clip in player mode” on page 80
Moving clip mark-in/mark-out points
Every clip has a mark-in point and a mark-out point which refer to the first and last
frames displayed when the clip is played. When first recorded, clip marks are set to
the beginning and end of available media. You can edit the clip marks in order to
reference only the desired media. When clip marks are moved, the unused media is
not deleted. Clearing the marks resets the them to the first and last frames of the
recorded clip.
The following restrictions apply when editing clip marks:
• Mark-in must precede the mark-out
• Marks cannot be set outside the recorded media
• Marks cannot be changed on a clip that is still being recorded.
Turbo iDDR User Guide
77
Chapter 3 Operation: Front Panel Control
NOTE: If more media exists after the current mark, a <<< or >>> symbol is
displayed next to the In/Out timecode. To permanently remove media outside the
marks, refer to “Erasing a clip's unused media” on page 107.
To move clip marks
1. Load the clip in the player.
2. Use the front transport controls to locate the desired frame.
3. Perform one of the following:
button to set mark-in point.
• Press the MARK-IN
• Press the MARK-OUT
button to set mark-out point.
Clearing clip marks
If media exists outside the clip marks, you can get access to that media by clearing the
clip marks. If more media exists after the clip marks, a <<< or >>> symbol is
displayed next to the In/Out timecode.
To clear clip mark-in or mark-out:
1. Load the clip in player.
2. Perform one of the following:
• Press ESC/SHIFT then MARK-IN
• Press ESC/SHIFT then MARK-OUT
to clear the mark-in point.
+
+
to clear the mark-out point.
Adjusting clip audio level
The audio meter display provides audio level adjustment for clips loaded in the player
display. If the clip loaded was recording using Dolby digital audio (AC3), the audio
gain adjustments are disabled.
To adjust audio level:
1. In the Player display, touch the Audio
Selected
Channel
2. Do one of the following:
78
Turbo iDDR User Guide
button.
Editing a clip
• Use the touch screen or control knob to adjust graphical faders.
Only the selected faders are adjusted. Pushing on the knob cycles selection
between both, left, or right channels.
- or • Touch Restore Unity
3. Touch Save Levels
to return the audio to the recorded level.
to save the audio level changes for the clip.
Saved audio levels are used every time the clip is loaded and played. Unsaved
changes are lost when the clip is ejected.
4. Press the ESC/SHIFT button to return to the player display.
Changing the clip thumbnail image
The clip thumbnail is displayed in AppCenter for visual identification of the clip. By
default, the 16th frame is used to generate the thumbnail image.
To change the clip thumbnail:
1. While monitoring the play channel output, use the transport controls to position the
clip to the desired video frame.
2. Press Menu
, then use the control knob to choose Change Thumbnail.
NOTE: If clip marks are edited so that the video frame used to generate the thumbnail
is outside the new clip marks, the thumbnail is reset to a position near the mark-in of
the modified clip.
Striping timecode (replacing the timecode track)
The stripe timecode dialog allows you to overwrite the existing timecode track for the
loaded clip. You can replace the recorded timecode with time of day, or a specific start
timecode value.
1. Load the clip into a play channel.
2. Press MENU
, then the control knob to choose Stripe Timecode.
3. Specify the replacement timecode:
– The new timecode track will start with the current time of day and
will contain continuous values ranging from the current time of day plus the length
of the clip.
Time of Day
Fixed Time – After choosing this option, select the timecode entry control, and enter
a start timecode value. The new timecode track will contain continuous values
ranging from the specified starting value to the starting value plus the length of the
clip.
– The drop frame option is available when system timing is set to 525
line standard. Drop frame allows the timecode track to indicate the actual running
time of the clip.
Drop frame
Turbo iDDR User Guide
79
Chapter 3 Operation: Front Panel Control
Renaming a clip in player mode
1. Press Menu
, then use the control knob to choose Rename.
2. Enter a new name using the onscreen keypad and control knob or an external
keyboard.
3. Touch Done in the onscreen keyboard, or press Enter on the external keyboard.
Creating Subclips
A subclip is a clip created by referencing a portion of media from another clip. For
example, if you recorded a two hour clip, you could create several short subclips to
use as previews or advertisements. Each subclip refers to a small portion of the
original clip and is listed along with all other clips in the clips pane. When working
with subclips, the original clip is sometimes called the source clip. After creating
subclips, you can delete the source clip.
Subclips created from a clip that is still recording can only have a mark-out equal to
the last frame that has been recorded when the subclip is created. You cannot create
a subclip longer than what has been recorded with the assumption the media will “fill
in”. You can create subclips from a clip being recorded in loop record mode. In loop
record mode, media referenced by the subclips is retained while unreferenced media
is discarded.
You can load subclips in the Control view and edit the mark-in/mark-out points the
same as a clip, provided the unreferenced source media has not been erased. If the
source media has been erased, the subclip retains 1 second of media on each side of
the mark-in and mark-out points. See “Moving clip mark-in/mark-out points” on
page 77.
To create subclips
1. Load a clip in the player.
2. Press Subclip
80
Turbo iDDR User Guide
in the player display.
Creating Subclips
Subclip Name
Subclip Location
Mark Labels
(Flash until set)
Flashes when both
mark-in and mark-out
have been set. Press
to accept marks and
create a new subclip.
Clears any subclip
marks that have
been set.
The Subclip display appears with a new subclip loaded and the front panel Mark-In
and Mark-Out buttons are flashing indicating that no mark-in or mark-out point are
defined. The default subclip name follows the form <source clip
name>-<number>, for example, if the source clip name is PlayoffGame, the
subclip name is PlayoffGame-1.
3. To rename the subclip, press MENU
, then choose Rename. Use the onscreen
keyboard or and external keyboard to rename the subclip.
Renaming the subclip creates a new seed name. For example, if you rename the
subclip PlayoffGame-1 to Highlight, subsequent subclips created are named
Highlight-1, Highlight-2, and so on.
4. Use the front panel transport controls to locate the desired frame, then press the
MARK-IN
button.
5. Use the front panel transport controls to locate the desired frame, then press the
MARK-OUT
6. Press Accept
button.
. The subclip is saved and ejected, then a new subclip name is
created.
NOTE: If the Accept button does not flash, but instead the clip is saved and a new
subclip is loaded, the iDDR is in Auto-subclip mode. See “About Auto Subclip mode”
on page 82.
NOTE: Clicking the Eject button prior to pressing the Accept button closes Subclip
mode without creating a new clip. Both of these buttons are used to exit Subclip mode.
Turbo iDDR User Guide
81
Chapter 3 Operation: Front Panel Control
About Auto Subclip mode
The Auto-Subclip feature changes the way that the subclip mode behaves. Auto
Subclip mode eliminates the “Accept” step in the subclip procedure. In Auto-Subclip
mode, you simply set mark-in, then set mark-out. On setting mark-out, the subclip is
automatically generated and ejected, and a new subclip name is loaded in the Subclip
display.
Auto Subclip mode is useful when you want to create subclips while a source clip is
playing. You simply load a clip, press play, then create subclips by selecting In, Out,
In, Out, etc.
To enable Auto Subclip mode:
• Press MENU
, then select Prompts.
Locating the clip loaded in player
You can determine where the currently loaded clip is stored in the media file system
using the locate command.
To locate the currently loaded clip:
• To locate the loaded clip, press MENU
, then select Locate.
The Clips display opens and lists the contents of the bin where the clip is located.
Viewing clip properties
To view the properties of a clip loaded in Player:
• Press MENU
, then select Properties.
The Clips display opens and lists the contents of the bin where the clip is located.
NOTE: To learn more about the Clip Properties dialog box, “Viewing clip
properties” on page 69.
82
Turbo iDDR User Guide
Playing playlists
Playing playlists
Topics in this section include:
• “Introducing Playlist mode” on page 84
• “Before using Playlist mode” on page 85
• “Guide to using the Edit List display” on page 88
• “Creating a simple playlist” on page 90
• “Loading a playlist” on page 91
• “Playing a playlist” on page 91
• “Playing a playlist in loop mode” on page 92
• “Managing playlists” on page 92
• “Editing a playlist” on page 94
• “Adding GPI output triggers to playlists” on page 96
• “Pausing at the end of an event” on page 97
Turbo iDDR User Guide
83
Chapter 3 Operation: Front Panel Control
Introducing Playlist mode
In addition to playing single a single clip, the iDDR play channels can also play lists
that contain clips and programs stored on the iDDR. Playlist mode is supported in
both front panel and workstation operating modes, however, workstation operation
extends the playlist features available.
The following table summarizes and compares the basic features supported in playlist
mode for both front panel and workstation operation.
Basic Feature
84
Description
Availability
Front Panel
Mode
Workstation
Mode
!
!
Editing playlists
Events in a playlist can be rearranged or removed,
and new events added between existing ones.
Editing events in
the list
Events can be renamed and trimmed. Trimming
an event moves the mark-in and mark-out points.
This only affects the event, not the source clip.
Event transitions
Transitions between all events in a list is a cut, i.e.
the last frame of an event is followed by the first
frame of the next event.
Loop on a
sectiona
Sections are provided within the list to provide
flexibility during playout. A section can be set up
to loop indefinitely. The section can be taken out
of the loop by manual intervention.
Loop on a list
Lists can be set up to loop indefinitely. The list
can be taken out of the loop by manual
intervention– stop or goto.
!
!
Pause at the end
of events
Events can pause playout at their end. At event
pauses, you can choose to show black, show
E-to-E, freeze on last frame, or freeze on next
event.
!
!
Pause at the end
of sectionsa.
Sections can pause playout at their end. At section
pauses, you can choose to show black, show
E-to-E, freeze on last frame, or freeze on next
event.
!
Saving a playlist
as a program
Playlists can be saved as a program. This saves
the media and transitions, but nothing that breaks
the flow of playout, such as pauses. In both front
panel and workstation operation, you can insert a
program into a playlist, or play a program in the
standard player mode.
!
GPI output
triggers
The iDDR provides 6 GPI output signals through
a rear panel connector for controlling external
equipment. You can configure events in a playlist
to trigger GPI outputs. A GPI trigger does not
disrupt playout of the play events. GPI triggers
can be set to occur at the beginning or end of an
event or section, or at these points with some
offset.
Turbo iDDR User Guide
!
!
!
!
!
!
Before using Playlist mode
Basic Feature
GPI Input
triggers
a.
Description
Availability
Front Panel
Mode
Workstation
Mode
!
!
You can assign any of the 6 GPI inputs to control
one or more play channels and the action you
want the iDDR channel(s) to take— play, VAR
play, cue next event, or cue next section, etc.
AppCenter Workstation includes more extensive
GPI output trigger features. See “Adding GPI
output triggers to playlists” on page 190.
Front panel playlist mode supports this feature for playlists created in workstation mode.
Before using Playlist mode
Read the following sections before using Playlist mode.
• “Terms used in Playlist mode” on page 85
• “Symbols used in Playlist mode” on page 86
• “Working with programs” on page 86
• “Using mixed aspect ratios in a playlist” on page 87
• “Inserting a clip that is still recording” on page 87
• “Inserting a playlist in a playlist (workarounds)” on page 87
Terms used in Playlist mode
The following terms are used in the Playlist mode.
Term
Definition
Playlist
A list is a sequence of events.
Event
Events are the components that make up a list. Events are created by adding a clip
or program to sections in a list.
Section
Playlists created in Workstation operating mode contain at least one section. All
events in a playlist are contained in sections. Sections have properties that include
repeat and pause. A playlist can have up to 100 sections. Each section can contain
up to 1000 events.
NOTE: Playlists created in Front Panel mode do not have sections; however,
when playlists created in Workstation mode are played in front panel mode,
section properties are used for playout just as they would in workstation mode.
Source Clip
The clip inserted in a list to create a play event.
Program
Playlists can be saved as a program in iDDR Workstation mode. Programs created
from a playlist include all the media and transitions in the playlist, but nothing that
breaks the flow of playout, such as a pause at the end of an event. Programs are also
created from the loop record mode.
Turbo iDDR User Guide
85
Chapter 3 Operation: Front Panel Control
Symbols used in Playlist mode
The following table describes the symbols used in the Playlist List view to describe
the properties of items in the list— play events, sections, and the list itself.
Symbol
Description
Locked
The item is locked and cannot be edited.
Pause
At the end of playout, this item will cause playout to pause.
Loop
At the end of playout, the item will repeat.
GPI Output Trigger
This event or section triggers one or more GPI outputs.
Up arrow
Event resolution does not match the play channel video output
type. The event will be up-converted on play.
Down arrow
Event resolution does not match the play channel video output
type. Event will be down-converted on play.
Working with programs
A program is a clip generated from a playlist using the Save As Program feature in the
Playlist mode. A program includes all the media in the playlist, but does not include
any event that breaks the flow of playout such as a pauses between events. You can
insert programs into other playlists as an event, or load and play them using the
standard Player mode. You can also send a program to a file or a video network
stream.
86
Turbo iDDR User Guide
Before using Playlist mode
Using mixed aspect ratios in a playlist
The iDDR can play clips with different aspect ratios in a single playlist. How the
media is displayed is determined by the play channel widescreen setting and clip
aspect ratio. The play channel determines the clip aspect ratio by examining the clip
aspect ratio attribute set when the clip was recorded. The following table describes
how the iDDR displays mixed aspect ratios. (See also “Video scaling considerations”
on page 37).
Event Aspect Ratio
Standard (4:3)
Play Channel Widescreen Setting
Standard (4:3)
Widescreen (16:9)
No conversion
Bars
(Pillarbox)
Bars & Crop
(Half-Pillarbox)
Crop (zoom)
Widescreen (16:9)
Bars
(Letterbox)
No conversion
Bars & Crop
(Half-letterbox)
Crop
Using mixed video resolutions in a single playlist
Playlists can contain events with different video resolutions. When the list is played,
the media is up-converted or down-converted as needed to match the play channel
video output type selected. See also “Video scaling considerations” on page 37.
NOTE: The transition between events with different resolutions takes approximately
1 second. During this time, play channel output is switched to black.
Inserting a clip that is still recording
Clips that are currently recording behave as other clips do in a list except for the
following restriction:
• The event-out timecode is set to the last recorded frame at the time the clip is
inserted in List view, or created in Event view. You can move the event-out
timecode as needed while the clip is still recording or after record is stopped.
Inserting a playlist in a playlist (workarounds)
While iDDR does not support a true “nested” playlist, you can retain some of the
functionality of inserting a playlist in a playlist in the following ways. These are
available in workstation operating mode only.
Turbo iDDR User Guide
87
Chapter 3 Operation: Front Panel Control
• Save the list as a program, then insert it into another playlist as an event.
• Use multi-item select and copy/paste.
• Copy/paste events or sections within the same list or from other lists.
• Copy the list in the clips pane, then load and edit the list.
Guide to using the Edit List display
To open the Edit List display, use the Edit List button in the Player display. The
following describes the controls in the Edit List display.
Player Display
Edit List with 1 event
(A single clip presented
as a list with 1 event.)
Current
Event
Monitor
Edit List with 4 events
(List is automatically created
when a second clip is
inserted.)
List Time Dome
Event Effects
Selected
Play Event
88
Turbo iDDR User Guide
Play
Event
Time Cursor
(Current play
position)
Guide to using the Edit List display
Control
Description and User Operation
Timecode
Shows the recorded timecode for the event currently playing.
Countdown
Displays the time to the end of the current event.
List Monitor
When in the event list display, the progress bar represents the duration of
the current event.
Event Thumbnail
Audio indicator
Progress Bar
Event Name
Event Duration
Event position
Event marks
List Button
The list button provides information about a list including play progress and
the list name and duration. Play list play progress is displayed using the
Time Dome. The Time Dome represents how much of the list has played.
An empty Time Dome indicates that the list has not started to play.
Events
Events - Events are the components that make up a list. Events are created
by inserting clips into the list.
Selected Events - Events can be selected as well as the list button itself. The
selection can be changed using the knob control or touch screen.
Selected Event
Lifted Event
Lifted Events - Selected items that are lifted using the Lift menu item, are
displayed with the upper left corner folded over. Lifted items can be moved
using the knob control.
NOTE: You can select more than one or more item using the
multiple-select feature. In this way, several items can be removed,
modified, or moved in the same operation.
Time Cursor
The time cursor indicates the current play position. The time cursor is
displayed over the event currently being played.
Drop Cursor
The drop cursor appears as a dark vertical line between events when a lifted
selection is being moved using the knob control. The cursor indicates the
location the lifted selection will be dropped when the knob is pushed in.
Turbo iDDR User Guide
89
Chapter 3 Operation: Front Panel Control
Event Effects
You can assign effects to events that are in the list.
Pause at end of event - List playout pauses when the end of the event is
reached.
GPI Output trigger - Triggers the selected GPI at beginning or end of
event.
Video Scaling
Up-conversion - Appears when the event’s resolution does not match
the play channel video output type. This icon indicates that the event is
going to be up-converted. For example a source with a XVGA resolution
will be up-converted to play out a video output set for a 1080i.
Down-conversion
- Appears when the event’s resolution does not
match the play channel video output type. This icon indicates that the event
is going to be down-converted. For example a source with a 1080i
resolution will be down-converted to play out a video output set for a
XVGA.
Creating a simple playlist
A new list contains no events unless a clip is loaded when you enter the Edit List
display. As you start inserting events, they will be played in the order you insert them.
1. Press a play channel button —
2. Press Edit List
or
.
in the player display.
If a clip was already loaded in the play channel, it appears as a single clip in the list.
3. Press CLIPS
to open the Clips display.
4. Perform one of the following steps to insert media:
• Double-touch a clip in the Clips display.
- or• Rotate the control knob to highlight a clip, then push in the knob.
5. When the playlist is complete, press ESC
to close the Clips display.
NOTE: You can insert new events between existing ones by using the control knob to
move the insertion point. The insertion point is immediately after the selected event.
6. Save the playlist using the following steps:
a. Press MENU
, then choose Save List... using the control knob.
b. Name the list using the onscreen keypad and control knob, or use an external
keyboard.
c. Touch Done in the onscreen keyboard, or press Enter on the external keyboard.
Related topics:
• “Playing playlists” on page 83
90
Turbo iDDR User Guide
Loading a playlist
• “Rearranging events in a playlist” on page 94
• “Adding GPI output triggers to playlists” on page 96
Loading a playlist
To load a playlist:
1. Press a play channel button —
2. Press CLIPS
or
.
to open the Clips display.
3. Perform one of the following steps to load a playlist:
• Double-touch a playlist displayed in the Clips display.
- or• Rotate the control knob to select a playlist, then push in the knob to load it.
Before the playlist is opened, the currently loaded clip or playlist is ejected.
NOTE: Playlists created using AppCenter Workstation mode may contain one or
more sections. For more information about sections see “Terms used in Playlist
mode” on page 76.
Playing a playlist
After a playlist is loaded, use the iDDR controls to play the list. These controls include
the front panel transport controls, GPI input triggers, and external keyboard
shortcuts..
To...
Do this...
Begin playing at the top of the list
Open the list, then press Play.
Begin playing at an event in the list
Select an event in the list, then press Play.
Continue playout after a pause in the list
Select the Play button.
Play the next event
Press the Play and FF buttons.
-orPress the Menu button, then choose Goto, and then
Next Event in the Goto pop-up menu.
Play the next section
Press the Play button and hold the FF button down.
-orPress the Menu button, then choose Goto, and then
Next Section in the Goto pop-up menu.
Skip playback to any event or section in the list
First, press and hold the Play button, then select the
event or section using the touch screen.
Select an event or section to playback
First, select the event or section, then press the
Menu button, and choose Selection in the Goto
pop-up menu. Then press Play.
Turbo iDDR User Guide
91
Chapter 3 Operation: Front Panel Control
To...
Do this...
Avoid delays when jumping to a new event or
section
First select the new event or section, then wait until
the diamond or standby icon is filled in before
jumping to the new event or section.
Use keyboard shortcuts to play the playlist
See “Keyboard Shortcuts” on page 281.
Use GPI input triggers to play the playlist
See “Setting GPI input triggers” on page 43.
Playing a playlist in loop mode
Choosing the loop mode allows a playlist to play out continuously until stop is
selected.
To enable loop mode:
• Press MENU
, then use the control knob to choose Loop, and then press Play
.
Managing playlists
To
Do this
Save a copy of a playlist
1. Press Menu
, then select Save List... using the control knob.
2. Name the list using the onscreen keypad and control knob or use
an external keyboard.
3. Select Done in the onscreen keyboard ,or press Enter on the
external keyboard.
Lock a playlist
See “Locking the front panel” on page 50.
View information about a
playlist
1. Select the playlist button using the control knob.
2. Press MENU
, then choose Properties using the control
knob.
Rename a playlist
1. Select the playlist button using the control knob.
2. Press MENU
, then choose Rename List using the control
knob.
Locate a playlist in the Clips
pane
1. Select the playlist button using the control knob.
2. Press MENU
, then choose Locate using the control knob.
The Clips pane opens to the bin where the playlist is located.
NOTE: Playlist metadata created in Workstation cannot be
viewed in front panel mode.
Select multiple items in a
playlist
92
Turbo iDDR User Guide
Press MENU
, then choose Multiple Selection using the control
knob. This allows you to select several events in the playlist rather
than have each new selection un-select the previous item.
Managing playlists
To
Do this
Select all events in the playlist
Press MENU
, then choose Select All Events using the control
knob. All events in the playlist are selected.
Turbo iDDR User Guide
93
Chapter 3 Operation: Front Panel Control
Editing a playlist
• “Adding media to a playlist” on page 94
• “Rearranging events in a playlist” on page 94
• “Removing events from a playlist” on page 95
• “Adjusting event audio levels” on page 95
• “Adding GPI output triggers to playlists” on page 96
• “Pausing at the end of an event” on page 97
Adding media to a playlist
You can edit a playlist by adding new media.
1. Use the control knob to select an event in the list. The media you add to the play
list is always inserted after the currently selected event.
2. Press CLIPS
insert media:
to open the Clips display, then use one of the following steps to
• Double-touch a clip or program image
- or• Use the control knob to highlight a clip, then push in the control knob to insert.
3. Press ESC
to close the Clips display.
4. The change is automatically saved.
Rearranging events in a playlist
You can rearrange events in a playlist so they play out in a different order.
1. Rotate the control knob to select an event in the playlist.
2. Do one of the following:
Press MENU
, then choose Lift.
- or Rotate the control knob to select an event, then push in on the knob to select.
94
Turbo iDDR User Guide
Editing a playlist
The selected event is displayed showing a folded corner to indicate it can be
moved.
3. Rotate the control knob to move the cursor to the desired position, then push in on
the knob to move the lifted event to the new location.
Removing events from a playlist
• Rotate the control knob to select an event in the playlist, then press MENU
, and
choose Remove.
Adjusting event audio levels
The audio meter display provides audio level adjustment for the selected in the player
display. If the clip loaded was recording using AC-3 digital audio, the audio gain
adjustments are disabled.
To adjust audio level:
1. Rotate the control knob to select an event in the playlist.
2. Press ESC/SHIFT, then choose Audio.
Selected
Channel
3. Do one of the following:
• Use the touch screen or control knob to adjust graphical faders.
Only the selected faders are adjusted. Pushing on the knob cycles selection
between both, left, or right channels.
- or • Touch Restore Unity
4. Touch Save Levels
to return the audio to the recorded level.
to save the audio level changes for the clip.
Saved audio levels are used every time the playlist is played. Unsaved changes are
lost when the playlist is ejected.
5. Press the ESC/SHIFT button to return to the player display.
Turbo iDDR User Guide
95
Chapter 3 Operation: Front Panel Control
Adding GPI output triggers to playlists
You can assign GPI output triggers to events in a playlist. The GPI outputs can be used
to trigger external equipment when the list plays. Before you can use GPI output
triggers in a list, you must assign GPI outputs to the play channel using the Tools
menu. See “Setting GPI output triggers” on page 45.
NOTE: If you want to play a list that was created on another play channel, you must
ensure that GPI triggers for the play channels use the same names, otherwise the GPI
triggers will not occur. Using identical GPI naming also allows copying and pasting
events between lists.
Adding GPI output triggers
1. Rotate the control knob to select an event in the playlist, then press MENU
, and
choose Add Effect.
2. Use the control knob to highlight a GPI Output in the Add Effect menu, then push
in the knob to select.
NOTE: If no GPI outputs are listed, use the configuration Tool to assign GPI outputs
to the current channel, then return to this step. “Setting GPI output triggers” on
page 45.
3. Use the control knob to highlight a GPI Position, then push in the knob to select.
Action
Trigger point
Start of event
First frame of event
End of event
Last frame of event
The GPI trigger symbol
is displayed on the event thumbnail.
Removing GPI output triggers
• Rotate the control knob to select an event in the playlist, then press MENU
choose Remove Effect.
96
Turbo iDDR User Guide
, and
Pausing at the end of an event
Pausing at the end of an event
1. Rotate the control knob to select an event in the playlist, then press MENU
, and
choose Add Effect.
2. Rotate the control knob to highlight Pause, then push in the knob to select.
3. Rotate the control knob to highlight Show black, Freeze on last frame, Show E-to-E,
or Freeze on next event, then push in the knob to select.
The Pause symbol
is displayed on the event thumbnail.
Importing and exporting media
This section includes the following topics:
• “About importing media” on page 98
• “To import a video file” on page 98
• “To import a still image file” on page 98
• “About exporting media” on page 100
• “To export media” on page 100
Turbo iDDR User Guide
97
Chapter 3 Operation: Front Panel Control
About importing media
You can import media using standard multimedia media and still image file formats.
Source files can be located on a local Turbo iDDR disk drive (fixed or removable
media), or a mapped networked drive.
Supported multimedia file formats
Supported File formats
Video elementary format
Audio elementary format
MPEG program streams
MPEG-2 Video
MPEG Layer II Audio
48 kHz, 16 bit stereo PCM
Dolby digital (AC-3)
GXF
DV25
MPEG-2 Video
48 kHz, 16 bit stereo PCM
Dolby digital (AC-3)
WMV (Windows Media)
Windows Media Video
Windows Media Audio
AVI
QuickTime
Supported still image and image sequence file formats
You can import still images and image sequence files from local Windows drives, or
networked devices. Imports are recorded using the aspect ratio and resolution you
specify. Still images are imported as a clip with a duration that you specify.
Supported file types include: .jpg, .bmp, .tiff, .tga, .gif, .png.
NOTE: Before playing a clip that is being imported from a file or stream, use the
Transfer Monitor to verify that the clip transfer rate is higher than the clip data rate.
This is required to prevent playback problems due to insufficient bandwidth.
To import a video file
When you import media from a file, the media is converted and stored using the iDDR
native file format.
To import a still image file
You can import still image or image sequence files. When imported, the image is
recorded as a clip using the duration, aspect ratio, and resolution you specify.
1. Press CLIPS.
2. Press MENU.
3. Scroll through the list and select Import.
4. Browse to locate the file you want to import, and select it using the control knob.
5. Rename the file, if desired.
Use the on-screen keyboard to change the filename, then touch Done or press Enter
on an external keyboard.
98
Turbo iDDR User Guide
To import a still image file
Refer to the following table to choose import options.
What type of image is this?
Fixed duration
Select if importing the first of a set of sequentially numbered files.
First of a numbered
sequence
Select if importing a still image to be displayed for a fixed period
of time.
What is the duration?
Enter a duration using the timecode entry numberpad.
What is the input frame format?
PC (VGA, XGA,
etc.)
For computer generated images files. During import the image is
gamma-corrected, deflickered and resized to a title-safe area.
Gama correction modifies mid range color tones leaving the
extreme tones untouched. Compensates for different PC monitors
and their display characteristics. The image is assumed to have
square pixels.
HD 1920x1080
59.94Hz
Images are HD frames, and have square pixels. The playout rate is
59.94Hz interlaced. The playout picture size is 1920x1080
HD 1920x1080
50 Hz
The images are HD frames, and have square pixels. The playout
rate is 50Hz interlaced. The playout picture size is 1920x1080
HD 1440x1080
59.94Hz
Images are HD frames, and have square pixels. The playout rate is
59.94Hz interlaced. The playout picture size is 1440x1080
HD 1440x1080
50 Hz
The images are HD frames, and have square pixels. The playout
rate is 50Hz interlaced. The playout picture size is 1440x1080
What type of clip should be created?
HD
Imports the image file as an HD clip at the current iDDR frame rate
setting.
SD 4:3
Imports the image file as a 4:3 SD clip at the current iDDR frame
rate setting.
SD 16:9
Imports the image file as a 16:9 SD clip at the current iDDR frame
rate setting.
How should the image aspect ratio be converted?
Turbo iDDR User Guide
Bars
Standard to Widescreen
Widescreen to Standard
Crop
Standard to Widescreen
Widescreen to Standard
99
Chapter 3 Operation: Front Panel Control
About exporting media
You can export iDDR clips using standard media file formats. The following table
describes the file formats supported.
Export: File Formats Supporteda
AVI DV25 or uncompressed (.avi)
General Exchange Format [SMPTE 360M] (*.gxf)
MPEG Program Streams (.mpg)
Windows Media (.wmv)
a.
When exporting playlists or programs to a file, only the GXF format
is available
Files can be exchanged over an Ethernet connection to network drives or using
common forms of removable media such as CD-R, DVD-R, external USB drives and
flash drives.
About sending files to external drives
The following are operational considerations when sending files to external drives:
• Estimating clip file sizes - AppCenter does not prevent you from sending a file
that is larger than the space available on the target disk. The transfer fails when the
disk becomes full. To avoid this problem, check the clip size reported in the clip
properties dialog box. You can use this to estimate the disk space required for the
clip.
• Best transfer performance - File transfers are handled concurrently, up to four at
a time. Additional transfer requests are queued. To enhance transfer performance,
you may try limiting transfers to one at a time.
• Adding/Removing USB devices - The USB connectors on the rear panel and front
panel can be used to connect a mouse, keyboard, USB drive, or other USB device.
Do not plug or unplug these devices while the iDDR is being used for critical play
to air activity.
• Maximum file sizes when exporting assets to USB drives- Exporting assets with
long durations may result in file sizes that exceed 4GB. Some USB drives are
formatted using FAT/FAT32 which has the 4GB maximum file size limitation.
Attempting to send a file to these disk volumes will cause the transfer operation to
fail. Disk volumes formatted using NTFS allow larger maximum file sizes. Before
exporting an asset, be sure to check that the file size is less than 4GB, otherwise,
ensure that the file system on the target drive supports larger files sizes.
To export media
1. Select the file (event or clip) to export.
2. Press CLIPS.
3. Press MENU.
4. Scroll through the list and select Export.
5. Browse to and select the location to export the file to.
100
Turbo iDDR User Guide
To export media
6. Select the export file type:
MPEG File (.mpg)
SMPTE 360M (.gxf)
Microsoft AVI (.avi)
Windows Media (.wmv)
Format
Export Settings
Microsoft Video 1
none
Uncompressed
none
Microsoft DV
Interleaved (Type 1)
Exports a Type 1 AVI file which contains a
standard DV bit stream where the video and audio
streams interlaced together. This type of AVI file
can only be read by software applications that
support DirectShow. This file cannot be read by
applications that are only compatible with Video
for Windows.
Non-Interleaved (Type 2)
Exports a Type 2 AVI file which produces a VFW
compatible AVI file format. This file type has
separate streams for video and audio and it can
also be processed by DirectShow. The advantage
of creating an Type 2 file is that the file can be read
by the older applications that do not support
DirectShow.
Windows Media
Turbo iDDR User Guide
Comment
Refer to the Microsoft Windows Media support website for information on
choosing the best settings for your application
101
Chapter 3 Operation: Front Panel Control
Managing media
The iDDR front panel Clips display is used to manage the clips, subclips, and playlists
stored on the iDDR. Almost all the media management tasks you’ll perform fall in the
following categories.
• “Guide to using the Clips display” on page 103
• “Working with bins” on page 105
• “Working with assets” on page 107
• “Erasing a clip's unused media” on page 107
• “Working with the Recycle Bin” on page 108
• “Viewing bin and asset properties” on page 109
NOTE: Additional media management features are available in AppCenter
Workstation even when the iDDR is in front panel control mode. These features
include search, adding user metadata, and more. See “Managing media” on
page 213 for more information.
102
Turbo iDDR User Guide
Guide to using the Clips display
Guide to using the Clips display
The Clips display is use to manage assets stored on the iDDR internal disk drives.
Assets include clips, and playlists, and programs. In addition to the typical file
management tasks such as browse, copy, move, delete, and managing the directory
structure, you’ll also use the clips pane to transfer files to other devices, and to import
or export assets using standard file formats (See “Importing and exporting media” on
page 97 and “Transferring media between Turbo iDDRs” on page 204.)
NOTE: Even though you are in front panel operation mode, you can still manage
assets and monitor channel status using the AppCenter Workstation Clips pane.
• To show the clips display, press the Clips
button.
The following table describes the Clips display.
Current
Bin
Storage
Indicator
Channel
Information
Clip
Button
Property
Icons
Playlist
Button
Status
Bar
Control
Description and User Operation
Channel Information
Selected Channel
Displays the active channel number. The channel label appears in the
upper left corner of every front panel display and menu.
Current Bin
Shows the name of the current bin being displayed. To change the current
bin, see “Changing the current bin” on page 105.
Storage Indicator
Graphically represents the remaining disk storage space.
Turbo iDDR User Guide
103
Chapter 3 Operation: Front Panel Control
Asset Buttons
Clip
Clips are shown with a thumbnail, the clip name, and length.
List
List buttons are similar to clip buttons, but show an extra “layer” to
suggest multiple media references.
Property Icons
Locked
Appears when the asset has been locked. Locked assets cannot be deleted.
Up-converted
Appears when the clip’s aspect ratio does not match the play channel
video output type. This icon indicates that the clip will be up-converted.
For example a clip with a 4:3 aspect ratio will be up-converted to play out
a video output set for a 16x9 (widescreen) aspect ratio.
Note that the same clip may have different conversion icons with different
play channels. The conversion icon follows the active channel. When the
recorder is active, then the conversion icon is determined by play channel
P1 video output setting.
NOTE: If a list contains at least one event that needs to be
up-converted, then the list asset will be shown with the up-conversion
icon.
Down-converted
Appears when the clip’s aspect ratio does not match the play channel
video output type. This icon indicates that the clip is going to be
down-converted. Note that the same clip may have different conversion
icons with different play channels. The conversion icon follows the active
channel. When the recorder is active, then the conversion icon is
determined by P1’s video output format.
NOTE: If a list contains at least one event that needs to be
up-converted, then the list asset will be shown with the up-conversion
icon.
104
Turbo iDDR User Guide
Working with bins
Working with bins
A bin is the container used to organize assets on the disk drives, similar to a directory
or folder on a computer. The iDDR does not support nested bins, that is, a bin cannot
contain another bin.
Topics here include:
• “Changing the current bin” on page 105
• “Creating a new bin” on page 105
• “Renaming a bin” on page 106
• “Deleting a bin” on page 106
Changing the current bin
1. To open the Bins display, do one of the following:
• Press CLIPS twice—
• Press CLIPS
+
, or
, then press MENU
, and choose Organize Bins.
2. Use the control knob to highlight a bin, then push in the knob to select.
The Clips display is shown, and displays the contents of the selected bin.
Creating a new bin
1. Open the Bins display, using one of the following:
• Press CLIPS twice—
• Press CLIPS
Turbo iDDR User Guide
+
, or
, then press MENU
, and choose Organize Bins.
105
Chapter 3 Operation: Front Panel Control
2. Press MENU
, then choose New Bin.
3. Use the text entry control or an external keyboard to name the bin.
Renaming a bin
1. Open the Bins display, using one of the following:
• Press CLIPS twice—
• Press CLIPS
2. Press MENU
+
, or
, then press MENU
, and choose Organize Bins.
, then choose Rename.
3. Use the text entry control or an external keyboard to rename the bin, then touch
Done or press Enter on the external keyboard.
Deleting a bin
1. Open the Bins display using one of the following:
• Press CLIPS twice—
• Press CLIPS
2. Press MENU
+
, or
, then press MENU
, and choose Organize Bins.
, then choose Delete.
Deleted bins are moved to the Recycle Bin unless it is bypassed. (See “Bypassing
the Recycle Bin when deleting” on page 109.) Holding down the SHIFT key during
delete also bypasses the Recycle Bin.
NOTE: You cannot delete a bin containing assets that are locked or in use. However,
the unlocked assets in the bin will be deleted.
106
Turbo iDDR User Guide
Working with assets
Working with assets
Assets include clips, subclips, playlists, and programs. The following table describes
how to perform common asset management tasks.
To
Do this
Rename assets
1. Use the control knob to highlight the asset in the Clips pane.
2. Press MENU
, then use the control knob to choose Rename.
3. Use the control knob or external keyboard to rename the asset.
4. Select Done in the onscreen keyboard, or press Enter on the
external keyboard.
Delete assets
You can safely delete a clip without harming the subclips, playlists,
and programs created from it. The media referenced by subclips,
playlists, and programs is preserved when the clip is deleted. Once the
source clip is deleted, subclips and playlist events retain an extra 1
second of media before and after their mark points to allow some
trimming.
1. Use the control knob to highlight the asset in the Clips pane.
2. Press Menu
, then use the control knob to choose Delete.
NOTE: Deleted assets are moved to the Recycle Bin unless the
bypass Recycle Bin option is used. You must empty the Recycle Bin
to free storage space.
Copy or Move assets
1. Use the control knob to highlight the asset in the Clips pane.
2. Press MENU
, then use the control knob to choose Copy To...
or Move To... .
3. Select the destination location from the menu.
NOTE: To copy or move multiple assets, press Menu, then choose
Select All or Multiple Selection. Multiple Selection operates the
same as CTRL+click on an external keyboard. See “Select
multiple assets in a bin” on page 107.
Lock assets
1. Use the control knob to highlight the asset in the Clips pane.
2. Press MENU
, then use the control knob to choose Lock.
Select multiple assets in a bin
Press MENU, then choose Multiple Selection using the control knob.
This allows you to select several events in the playlist rather than have
each new selection un-select the previous item.
Select all assets
Press MENU, then choose Select All using the control knob. All
events in the assets in the bin are selected.
Erasing a clip's unused media
After editing a clip by moving the mark-in/mark-out points, the remaining portion of
media outside the marks can be erased to free media storage space. If the media
outside the clip marks is referenced by a subclip, program, or event from a playlist,
that media is not erased. Subclips and playlist events retain an extra 1 second of media
before and after their mark points to allow some trimming.
Turbo iDDR User Guide
107
Chapter 3 Operation: Front Panel Control
1. Use the control knob to highlight the clip in the Clips pane.
2. Press MENU
, then use the control knob to choose Erase Unused Media.
Unused media is erased when you select the OK button and the Properties dialog
box is closed. After erasing unused media, the following is true:
• Media outside the clip marks is erased except that portion referenced by a
subclip, playlist event, or program.
• All subclips and events generated from the source clip will retain 1 second of
media before the mark-in and after the mark-out.
• Event-in becomes the first video frame of the file
• Event-out becomes the last video frame of the file
• Clip length becomes the total file length.
Working with the Recycle Bin
Deleted assets are placed in the Recycle Bin unless it is bypassed. Assets remain in
the Recycle Bin and continue to take up media disk space until the Recycle Bin is
emptied. You can work with assets in the Recycle Bin just like any other bin.
This section includes the following topics.
• “Viewing the Recycle Bin contents” on page 108
• “Emptying the Recycle Bin” on page 109
• “Bypassing the Recycle Bin when deleting” on page 109
Viewing the Recycle Bin contents
1. Open the Bins display using one of the following:
• Press Clips twice—
• Press Clips
+
, or
, then press Menu
, and choose Organize Bins.
2. Use the control knob to highlight Recycle Bin, the push in to select.
108
Turbo iDDR User Guide
Viewing bin and asset properties
Emptying the Recycle Bin
Emptying the Recycle Bin contents permanently removes the assets from media disk
drives.
• Open the Clips display or Bins display, then press Menu
, and choose Empty
Recycle Bin.
Bypassing the Recycle Bin when deleting
You can configure the iDDR so that deleted assets are immediately removed from the
media disk drives and bypass the Recycle Bin.
• Press Clips twice—
+
, then press Menu
, and choose Bypass Recycle
Bin.
NOTE: Holding down the SHIFT key during delete also bypasses the Recycle Bin.
Viewing bin and asset properties
You can view the properties of all assets shown in the Clips and Bins displays,
including clips, playlists, programs, and bins.
To display properties:
1. Use the control knob to highlight the asset in the Clips or Bins display.
You can also touch the item in the display to select it.
2. Press MENU
, then choose Properties.
The properties dialog is displayed.
Bin Properties
Clip Properties (general)
Clip Properties (media)
Turbo iDDR User Guide
109
Chapter 3 Operation: Front Panel Control
Monitoring operation using the Status Bar
The Status Bar is located across the bottom of the front panel display and consists of
a message area and status icon.
Topics here include:
• “Types of messages displayed in the Status Bar” on page 110
• “Interpreting the Status Icon” on page 111
• “Viewing iDDR system log messages” on page 111
Status Bar
Status Messages
Status
Icon
Icon Name
Description
Protocol Monitor
This icon appears when a channel is configured for remote control using
a remote control protocol application. The Protocol Monitor icon flashes
when any protocol is successfully receiving serial control protocol
commands.
Transfer Monitor
Appears during a file transfer or import/export operation.
Status
Always appears on the StatusBar, however, the button symbol changes
depending on the system status. See “Interpreting the Status Icon” on
page 111.
Types of messages displayed in the Status Bar
In normal operation, the message area displays status messages for the selected
channel, however, if a problem develops with the system software or a hardware
subsystem, the Status Bar flashes and an error message is displayed for approximately
110
Turbo iDDR User Guide
Interpreting the Status Icon
5 seconds. Afterward, the display returns to the channel status message and the error
message is written to the status log file. The following table gives examples of the
types of messages displayed in the Status bars.
Message Type
Example Messages
Channel Status
Message
Player 1: ‘Clip 7’ cued
Recorder 1: ‘Clip 13’ recording
No clip loaded.
System Error
Message
Media disks are full. Cannot record the clip;
The system drive is at full capacity. Disk recorder operations will fail. Delete
unused or temporary assets, and restart disk recorder.
Interpreting the Status Icon
When a message is written to the status log, a Status Icon is displayed in the Status
Bar indicating the severity of the message.
Status
Bar Icon
Name
Description
Information
All warnings and alert messages have been cleared.
NOTE: Messages are cleared using the System Status Display. See
“Viewing iDDR system log messages” on page 111.
Warning
There is at least one warning message, and no alert messages.
Alert
There is at least one uncleared alert message.
Viewing iDDR system log messages
The System Status Display is used to view all messages in the system log. The System
Status Display provides a central message area where status messages are listed.
System Status Display Topics:
• “Opening the System Status Display”
• “Showing iDDR software versions”
• “Clearing messages”
Opening the System Status Display
• To open the System Status Display, press the MENU button, then use the control
knob to scroll and select Tools, then select System Status.
Turbo iDDR User Guide
111
Chapter 3 Operation: Front Panel Control
Channel
Label
Message
Severity
Indicators
Storage
Remaining
System
Software
Version
Storage
Indicator
Scrollable
Message
Area
Status
Icon
Showing iDDR software versions
To display software versions:
1. Press the MENU button, then use the control knob to scroll and select Tools, then
System Status.
2. From within the System Message area, press the MENU button and select Software
Versions.
Clearing messages
To clear all status messages:
1. Press the MENU button, then use the control knob to scroll and select Tools, then
System Status.
2. From within the System Message area, press the MENU button and select Clear All
Messages.
All messages are removed from the System Status Display, and the status icon is
removed from the Status Bar.
112
Turbo iDDR User Guide
Chapter
4
Operation: AppCenter Workstation
Topics in this section include:
• “Introducing AppCenter” on page 114
• “Recording clips” on page 124
• “Playing and editing clips” on page 141
• “Working with playlists” on page 162
• “Importing and exporting media” on page 197
• “Transferring media between Turbo iDDRs” on page 204
• “Monitoring media file transfers” on page 207
• “Managing media” on page 213
• “Monitoring the system using the StatusBar” on page 246
Turbo iDDR User Guide
113
Chapter 4 Operation: AppCenter Workstation
Introducing AppCenter
AppCenter is the built-in video disk recorder application that provides a single
interface for tasks such as channel control, configuration, clip management, media
transfers, channel monitoring, and system monitoring. You can access AppCenter by
connecting a VGA monitor, mouse, and keyboard to the Turbo iDDR.
Topics in this section include:
• “Starting AppCenter” on page 115
• “Using AppCenter in front panel control mode” on page 115
• “Using AppCenter in workstation control mode” on page 116
• “Enabling the workstation control mode” on page 116
• “Shutting down AppCenter and Windows” on page 116
• “AppCenter user interface overview” on page 118
• “Channel modes in AppCenter” on page 120
• “Tools in AppCenter” on page 121
• “Conventions used in the AppCenter interface” on page 122
• “Terms and concepts used in AppCenter” on page 123
• “Selecting the channel mode” on page 124
• “Using on-screen transport controls” on page 124
114
Turbo iDDR User Guide
Starting AppCenter
Starting AppCenter
At power-up, the Windows operating system starts. On the Windows desktop, open
the AppCenter shortcut to start AppCenter.
Using AppCenter in front panel control mode
At first power up, the Turbo iDDR is in front panel control mode by default. This
mode enables front panel control and disables (closes) the AppCenter channel pane.
Only the monitor pane and the clips pane are displayed.
While the Turbo is in front panel control mode, each channel’s monitor pane displays
“In Use”. When the channel is selected its mode is displayed as “Front Panel”. In front
panel control mode you can use AppCenter to do the following:
• Monitor channels using the monitor pane.
• Manage media using the clips pane. This includes all file management tasks and
importing, exporting, and transferring media.
• Monitor Turbo system status using the Status Bar.
Turbo iDDR User Guide
115
Chapter 4 Operation: AppCenter Workstation
Using AppCenter in workstation control mode
Workstation control mode enables (opens) the AppCenter channel pane and disables
front panel touch screen control.
In workstation control mode, the front panel has limited use:
• Control play out using front panel transport controls.
• Monitor channel status.
• Select a channel.
Enabling the workstation control mode
Select View | Workstation to switch to workstation control mode. Likewise, select View
| Front Panel to switch to front panel control mode.
Upon restart, the Turbo returns to its last control mode.
Refer to “Turbo iDDR control modes” on page 27 for more information about the
different control options for a Turbo iDDR.
Shutting down AppCenter and Windows
To shut down AppCenter, do one of the following:
• Click the standard Windows X button in the title bar, or
• Select System | Shutdown. The Shutdown dialog box opens.
116
Turbo iDDR User Guide
Shutting down AppCenter and Windows
Shutdown options are as follows:
Shutdown Mode
Description
Exit to Windows
Exit AppCenter and display the Windows desktop.
Use the desktop shortcut to restart AppCenter.
Restart
Exit AppCenter and restart the Windows operating
system.
Storage Maintenance Mode
Exit AppCenter and restart the iDDR in storage
maintenance mode to allow maintenance on the
media disk subsystem. Refer to the Turbo iDDR
Service Manual for procedures.
Shutdown
Shutdown the Windows operating system and
power-off the iDDR.
Turbo iDDR User Guide
117
Chapter 4 Operation: AppCenter Workstation
AppCenter user interface overview
Monitor pane
Channel pane
Clips pane
Displays channel
status information
Displays channels in their
current control modes
Displays media stored
on media disks
This menu
changes for
the current
channel mode
These buttons
control media
management
operations
These buttons
control channel
operations
These tabs
switch views
for the chann
On-screen
transport con
duplicate fron
transport butt
A drop-down
list here selects
the channel's
mode
Click anywhere in the
Monitor pane or Channel
Control pane to select a
channel
Click and drag borders
to resize or hide panes
Statusbar
Displays current
operations and
system status
Main components in the AppCenter user interface
The following describes the main components in the AppCenter window
118
AppCenter Component
Description
Monitor pane
Displays the current information for the channel. Displays a thumbnail of
the clip currently loaded in the channel and indicates the current control
mode for the channel. Contains a drop down menu for changing the
channel’s mode. For the currently selected channel, the monitor pane has a
white background.
Channel pane
Displays each channel in its current mode. Only one channel can be
selected at a time. The currently selected channel is displayed with
transport controls, View tabs, and a white background.
Clips pane
Displays media stored on the Turbo iDDR and provides controls for media
management.
StatusBar
Displays status and error messages.
Turbo iDDR User Guide
AppCenter user interface overview
Displaying the channel pane in full screen
Select View | Fullscreen to fill the entire channel pane with only the selected channel.
This is useful when you need more room to display information, such as a long list in
Playlist mode.
To return to split screen, select View | Split Screen.
Turbo iDDR User Guide
119
Chapter 4 Operation: AppCenter Workstation
Channel modes in AppCenter
AppCenter channels have modes for performing essential tasks. When AppCenter
starts, each channel comes up in a mode. (See “Selecting the channel mode” on
page 124.)
Channel Mode
Name
User Interface
Recorder
Player
Control View
Channel
Type
Required
Essential Tasks
Recorder
Recording clips
Player
Play clips, edit and trim clips,
create sub-clips, and playout
using cue points.
Player
Operate remotely using
industry standard serial control
protocols over RS-422 or
Ethernet. Protocol-specific
recorder and player modes are
provided for each supported
protocols.
Player
Create and play event
playlists; Lists include clips
recorded in Recorder mode or
imported using the clips pane.
Cue View
Protocol modes
including Player
and Recorder
Playlist
List View
Event View
120
Turbo iDDR User Guide
Tools in AppCenter
Tools in AppCenter
AppCenter includes the following tools for managing the iDDR and its assets.
Tools
User Interface
Essential Tasks
Configuration
Manager
Configuring system
settings
Transfer Monitor
Monitoring media
transfers, including
network transfers and file
import/export
Online Help
Complete documentation
of operational tasks.
Turbo iDDR User Guide
121
Chapter 4 Operation: AppCenter Workstation
Conventions used in the AppCenter interface
The following table describes the graphical conventions used for the user controls in
the AppCenter interface. These graphical elements are used throughout the interface
to indicate such items as drop-down lists and text entry controls.
1 Drop-down List
2 Context Menu
3 Text Entry Control
4 Eject Button
5 View Tabs
6 Timecode Entry Controls
8 Assignable
Buttons
Convention
Graphical Description and User Action
"
Drop-down list
A horizontal line and arrowhead. Select and choose from a list of items in
the drop-down list.
#
Context Menu
This menu changes depending on the mode of the selected channel. It
becomes a menu for Recorder, Player, or Playlist.
$
Text Entry Control
A horizontal line and small dot. Select to open the text entry dialog.
%
Eject Button
Select to eject the current clip
&
View Tabs
Select one tab or the other to toggle between different views in Player
mode or in Playlist mode.
Control
Cue
122
7 Meterbar Button
Turbo iDDR User Guide
Terms and concepts used in AppCenter
Convention
Graphical Description and User Action
'
Timecode Entry
Control
A horizontal line and small dot. Select to open the timecode entry dialog
box.
'
Meterbar Button
Select to toggle between the Meterbar and the mode interface. The
Meterbar contains video and audio meters, and the audio level controls.
(
Assignable Button
Groups
Some button groups are assignable. (The Play view button group is shown
here.) Right-clicking a button opens a pop-up menu which lists the
alternative button choices. This allows you to customize the user interface
to suit your workflow.
Throughout the AppCenter interface, you can substitute a click-and-hold
action—lasting one second or more—for a right-click action.
Terms and concepts used in AppCenter
Selected channel – Of the three channels, there is always one selected channel. When
a channel is selected, the channel is displayed with a white background in the channel
pane. The front panel transport controls and keyboard are delegated to controlling the
selected channel. There are three ways to select the channel: pressing a channel select
button on the front panel, selecting a channel in the monitor pane, or pressing a
keyboard shortcut. Changing the channel selection does not disrupt other channels,
they continue to operate in the background.
Channel mode – Channels in AppCenter are always in one mode or another. Each
mode has its own set of buttons, lists, controls, and other characteristics, relative to
the operations performed in that mode. The name of the mode for the channel is
displayed in the channel’s monitor pane, which is also where you can change the
mode for the channel. “Selecting the channel mode” on page 124.
Assignable buttons – Some buttons are assignable which means that you can change
the action associated with the button to better suit your workflow. Right-clicking a
button causes a pop-menu to appear which lists the alternative button choices for that
button.
Clip thumbnail – Used for visual identification of a clip. By default, the thumbnail
is generated from the 16th frame of video. You can select a new thumbnail using
Player. If no thumbnail is available, an icon is displayed showing there is no
thumbnail.
Volume – The set of media drives that functions as a single physical disk in the iDDR.
The volume name used in the iDDR is ‘V:’ for the internal drives.
Bin – A bin is a container used to organize assets like clips and lists in the same way
as directories or folders are used on a typical computer system. A bin is associated
with a single disk volume.
Current Bin – The current bin functions as the target bin when recording clips or
creating playlists. It is also the source bin used to load clips and lists.
Turbo iDDR User Guide
123
Chapter 4 Operation: AppCenter Workstation
Selecting the channel mode
When the Turbo iDDR is started, each channel comes up in its last used mode. From
the factory, Recorder mode starts on the record channel, and Player mode starts on
both play channels.
To change channel modes, in the monitor pane, select the channel mode drop-down
list
for the channel, then choose a mode.
The selected mode replaces the current mode and appears in the channel’s space in
the channel pane. The channel becomes the selected channel.
Using on-screen transport controls
All channel modes have on-screen transport controls.
Rewind
Stop
Forward
Play
Record
Progress Bar
Cue to mark-in
Field Reverse
(Single click to
reverse one field.)
Cue to mark-out
Field Advance
(Single click to
advance one field.)
Recording clips
The recorder display is used to record clips on the iDDR. You can play the clip while
it is still recording, or you can finish the recording, and then play the clip or add it to
a playlist.
This section includes the following topics:
• “About recording clips” on page 125
• “About loop record mode” on page 125
• “Guide to using Recorder mode” on page 128
• “Before you record: Recorder settings checklist” on page 130
• “To record a clip” on page 131
• “Using IEEE 1394 Record mode” on page 135
• “Previewing a clip that is recording” on page 137
• “Changing the timecode source” on page 138
• “Selecting widescreen mode” on page 139
• “Changing the current bin” on page 139
• “Renaming a clip” on page 140
• “Viewing clip properties” on page 140
124
Turbo iDDR User Guide
About recording clips
• “Locating a clip” on page 141
• “Displaying available storage space” on page 141
About recording clips
Select record channel signal inputs – Before you start recording, you may need to
select video, audio, and timecode inputs. Refer to “Modifying recorder channel (R1)
settings” on page 39.
Missing or intermittent LTC timecode - If LTC is the selected timecode source and
the LTC signal is missing, i.e. LTC not connected, the current timecode display shows
XX:XX:XX:XX. Also, clips recorded without timecode will show no mark-in/mark-out
timecode after recording. When LTC is detected, but the signal is intermittent, the last
valid timecode is displayed anytime the LTC signal disappears. Clips with missing or
intermittent timecode will show this behavior during playback in a play channel. If
LTC is intermittent or missing, try one of the following solutions:
• Use the internal timecode generator as the timecode source for recording. See
“Changing the timecode source” on page 138.
• Stripe the timecode after the clip is recorded using the Player application. See
“Striping timecode (replacing the timecode track)” on page 66.
Using the video input noise reduction filter – The video input noise reduction filter
provides pre-filtering to enhance the picture quality.
Re-recording and appending clips is not supported through the user interface –
You cannot record over a previously recorded clip. To replace the unwanted clip,
delete it and record a new one. Also, appending previously recorded clips is not
supported, that is, once the recording is stopped, you cannot start the recording again
using the same clip. If a clip is currently loaded when record is selected, the clip is
ejected, and a new clip is created before recording begins.
NOTE: Appending previously recorded clips is supported through AMP Serial
Control Protocol. Contact Thomson Grass Valley for more information on control
devices available.
Pre-roll time — Recording begins as soon as record is selected.
About loop record mode
Loop record allows you to specify a fixed length recording that records continuously.
When the fixed length you specify is reached, iDDR begins to erase the oldest media
in 3 minute segments to make room for new media. In this way, new media is
continuously recorded while the recording is kept to a fixed length.
The loop recording is stored in the iDDR as a program. The program thumbnail is
displayed in the clips pane immediately after the recording starts. While recording,
you can load the loop record program in Player mode for playout or to create subclips.
The media referenced by the subclips that you create is saved outside the loop record
program and does not subtract from the loop record length. The subclips can be
inserted in Playlist mode as play events.
Turbo iDDR User Guide
125
Chapter 4 Operation: AppCenter Workstation
Loop mode operational considerations
Consider the following when planning for Loop Record operation:
• Minimum loop record length– 6 minutes
• Maximum loop record length– Maximum record length is limited by the amount
of storage space and the compression settings used. A message is displayed if the
fixed length you enter exceeds the available disk space.
• Minimum record to playback time– 5 seconds. In other words, playback in loop
record can start no sooner than 5 seconds after the start of record.
• Modifying the loop record name or length– You can modify the loop record
name or length during record. If you reduce record length, the oldest media outside
the new record length is erased.
• Stopping loop record– If the recording is stopped before the fixed length is
reached, the resulting program duration is the time elapsed since the recording
started. Like normal record mode, you cannot stop, then start a loop recording.
Once record is stopped, you must eject the program and create a new loop record.
• Transferring the loop record program– The loop record program cannot be
transferred to a file or networked device until record is stopped.
• Loop record storage space is not reserved– Loop record is allowed to start as
long as the record length you enter is less than the available storage, however, the
storage space is not reserved. For example, you may have enough storage space to
start the loop record, but you are still allowed to transfer media or otherwise fill
disk space. Warning messages are displayed in the AppCenter StatusBar when
available storage reaches 10% total disk space. All recording is halted when media
storage reaches its full threshold.
• Pausing the loop record program in Player mode– You cannot pause the loop
record program in Player mode indefinitely. Eventually, the record length is
reached and the video at the current position is erased. As this happens, the current
position is advanced in 3 minute increments as the oldest unused media is erased.
• Changing thumbnail image– Thumbnail images displayed in the clips pane are
generated using the 16th frame of video. The thumbnail image for a loop record
program appears as normal until the fixed length is reached. Then, the thumbnail
will update every 3 minutes as media is erased beginning with the oldest unused
media. As the media used to generate thumbnails is erased, new thumbnails are
generated.
• Erasing oldest media is suspended when creating a subclip– When creating
subclips in Player mode, erasing oldest media is suspended when the first mark is
entered (mark-in or mark-out). This means that the loop record program length
may grow larger than the length specified. Erasing media is resumed and the oldest
media outside the fixed length is purged when the second mark is entered and you
select the Accept button. You could inadvertently fill storage space if you enter the
subclip marks, but fail to click the Accept button.
NOTE: Erasing oldest media is also resumed when you exit subclip mode by
ejecting the subclip, or by clicking the Source Clip button.
• Use genlocked inputs for time delay– For error free time delay operation, ensure
that the video input is genlocked to the video reference signal. This will eliminate
126
Turbo iDDR User Guide
About loop record mode
periodic picture shift.
Turbo iDDR User Guide
127
Chapter 4 Operation: AppCenter Workstation
Guide to using Recorder mode
The following describes the basic controls in the Recorder mode.
1
Assignable
Buttons
(Default buttons
are shown)
2 Current
Timecode
5 Time Dome
"
3
Timecode
Source
4 Clip Name &
Current Bin
(Click clip name
to rename clip.)
6 Length
(Click to enter
fixed length)
7 Meter Bar
Button
(Click to adjust
audio)
Control
Description and User Operation
Assignable Buttons
Assignable buttons allow you to modify the button assignments to
best suit your workflow. Right-click a button to open a pop-up menu
which lists the alternative button choices.
Properties– Same as selecting Properties on the Recorder menu.
New Clip– Same as selecting New Clip on the Recorder menu.
Preview – Same as selecting Preview on the Recorder menu.
Locate – Same as selecting Locate on the Recorder menu.
128
#
Current Timecode
Indicates the current timecode of the timecode source selected for the
channel. Text color is white during record, and dimmed at other
times. The timecode value of XX:XX:XX:XX is displayed when the
timecode source is not present or is invalid. See “Changing the
timecode source” on page 138.
$
Timecode Source
The text displayed to the right of current timecode indicates the
timecode source: LTC or INT (internal generator).See “Changing the
timecode source” on page 138.
%
Clip Name Edit Control
Displays the clip’s name and location in the media storage system. To
rename the clip, click and enter text. To change the current bin, i.e.
the target location for recording clips, refer to “Changing the current
bin” on page 139. You can use the clips pane to manage and organize
clips. Refer to “Guide to using the Clips Pane” on page 214.
Turbo iDDR User Guide
Guide to using Recorder mode
&
Control
Description and User Operation
Time Dome
Progress
Only
This multi-function indicator displays either record progress only, or
available storage and record progress. The Time Dome also indicates
when the record channel is in Loop Record mode.
Available storage is estimated using the amount of free disk space and
the video compression settings for the channel.
The record progress indicator makes one revolution every 10 seconds
in normal record, or one revolution during a fixed length recording.
To change the Time Dome function, right-click the Time Dome, then
choose a mode from the pop-up menu.
Available
Storage
Available
Storage and
Continuous
Record Mode
'
Length
Select the Length control to enter the clip length, then choose record.
Recording continues until you choose stop, or the specified length is
reached. See “Using Fixed Length record mode” on page 132.
(
Meterbar Button
Displays the Meterbar which contains the audio record level controls
and signal meters. Changes to the audio level are saved for the
channel.
)
Context Menu
New Clip– Used to create and name clip prior to starting the
recording. If a clip is already loaded, selecting New Clip ejects the
current clip and creates a new one.See “Using New Clip record
mode” on page 131.
Preview– Used to load the current clip in a play channel for playback
while the clip is still recording. After record is started, select Preview
to load the clip into the next available play channel, then select Play.
See “Previewing a clip that is recording” on page 137.
Locate– Locates the currently loaded clip in the clips pane. See
“Locating a clip” on page 141.
Properties– Opens the Properties dialog for the currently loaded clip.
See “Viewing clip properties” on page 140.
Options - Opens the Record channel options dialog box.
Widescreen – Sets the channel for recording widescreen format.
Compressed Audio (AC3) – Sets the channel for recording AC3
audio.
IEEE 1394– Sets the channel for recording from a IEEE 1394 device.
Turbo iDDR User Guide
129
Chapter 4 Operation: AppCenter Workstation
Before you record: Recorder settings checklist
Before recording, check the following recorder channel settings.
Record Channel Setting
Procedure
"
Verify video and audio input selection
In the monitor pane, check the thumbnail
and its audio level indicators to verify the
correct record channel inputs are seleccted.
If there is a problem, correct the settings.
#
Verify video compression data rate
You can manage storage capacity and
video quality by adjusting the record
channel compression data rate. Generally
set as high as possible to obtain the storage
capacity needed.
Click Recorder in the AppCenter main menu, then
select Compressed Audio (AC3) to toggle the setting.
$
Verify digital audio compression setting
If the digital audio source uses AC3
encoding, you must select AC3 mode,
otherwise, select PCM encoding.
Click Recorder in the AppCenter main menu, then
select Compressed Audio (AC3) to toggle the setting.
%
Verify the timecode source
Make sure to select a valid timecode
source. You can use the internal timecode
generator or LTC.
See “Changing the timecode source” on page 138.
&
Verify widescreen mode setting
If the video source is in widescreen format,
you must select widescreen mode for the
recorder. This attribute is saved with the
clip and is used to control video scaling
when the clip is played. See “Video scaling
considerations” on page 37.
In AppCenter main menu, click Recorder |
Widescreen 16:9 to toggle widescreen mode.
'
Adjust audio level (if needed)
You can use the audio leveling feature to
adjust the analog or digital audio input
levels, excluding dolby encoded digital
audio.
NOTE: The clip aspect ratio cannot be changed
once the clip is recorded. If you want to change
the clip’s aspect ration attribute you must
re-record the clip.
1. In the Recorder pane, select the Meterbar
button.
2. Adjust audio level using the graphical faders.
Select the Meterbar button
again to return to
Recorder view.
130
Turbo iDDR User Guide
To record a clip
(
Record Channel Setting
Procedure
Verify video compression settings
Choosing a video compression setting is a
trade-off between image quality and
storage capacity. Higher video quality
produces larger files which take up more
storage space and take longer to transfer to
external devices.
See Chapter 2, Configuration: Turbo iDDR on
page 33.
To record a clip
This section covers:
• “Using New Clip record mode” on page 131
• “Using Crash record mode” on page 131
• “Using Fixed Length record mode” on page 132
• “Specify clip length after recording has begun” on page 132
• “Using loop record” on page 132
Using New Clip record mode
To create and name a clip before recording starts:
1. Verify video, audio, widescreen, AC3 audio, and other settings for your recording,
as explained in “Before you record: Recorder settings checklist” on page 130.
2. Select New Clip to create and load a clip.
3. To rename the clip, select the default clip name
name.
4. Select the record button on the front panel
controls
, then enter a new clip
, or use the onscreen transport
.
The recording progresses until you select Stop.
Using Crash record mode
Crash record occurs when you start a recording without specifying a clip name. The
clip is given a default name, then the recording continues until you select stop.
To crash record:
1. Verify video, audio, widescreen, AC3 audio, and other settings for your recording,
as explained in “Before you record: Recorder settings checklist” on page 130.
2. Select the record button on the front panel
controls
, or use the onscreen transport
.
The recording progresses until you select Stop.
Turbo iDDR User Guide
131
Chapter 4 Operation: AppCenter Workstation
Using Fixed Length record mode
You can specify the clip length before recording, or during recording. Fixed length
recording continues until the clip length is reached or until you select stop.
1. Verify video, audio, widescreen, AC3 audio, and other settings for your recording,
as explained in “Before you record: Recorder settings checklist” on page 130.
2. Select Length in the Recorder pane.
The Length dialog box appears.
3. Enter the clip length by typing only numbers, colons are added automatically.
4. Choose OK in the dialog box, or press Enter.
5. Select the record button on the front panel
controls
, or use the onscreen transport
.
Recording continues until Stop is selected or the desired length is reached. While
recording, the mark in and mark out update with the current status of the clip. The
Time Dome gives a visual indication of the percent complete as well as a
countdown from the specified length down to 00:00:00:00.
Specify clip length after recording has begun
While a clip is recording you can enter the clip length, as follows:
1. Select Length in the Recorder pane.
The timecode dialog box appears.
2. Enter the desired length, then select OK or Enter.
If the entered length is valid, longer than the amount of material already recorded,
the clip continues to record until it reaches the specified length or until you select
Stop.
Using loop record
You can configure Recorder for Continuous Record mode. Continuous record is
useful for applications that normally use Loop Record, for example a manual time
delay. Refer to “About recording clips” on page 125.
132
Turbo iDDR User Guide
To record a clip
1. Click the Time Dome
.
The Time Dome pop-up menu appears.
2. Choose Continuous Record in the pop-up menu.
The Time Dome changes to display loop record
. Default loop record length
is 1 hour, or the last record length used.
3. To change loop record length, click Length.
The Length dialog box appears.
4. Enter the clip length by typing only numbers, colons are added automatically.
5. Click OK in the dialog box, or press Enter.
6. Select the record button on the front panel
controls
, or use the onscreen transport
.
Recording continues until Stop is selected. While recording, the mark in and mark
out update with the current status of the clip. The Time Dome gives a visual
indication record progress.
7. Load and play the clip in Player mode using one of the following steps:
• In Recorder, click the Preview button, or
• Drag and drop from the Recorder monitor pane to the Player monitor pane.
Turbo iDDR User Guide
133
Chapter 4 Operation: AppCenter Workstation
The play channel becomes the selected channel, and the clip is cued and ready for
play.
134
Turbo iDDR User Guide
Using IEEE 1394 Record mode
Using IEEE 1394 Record mode
The IEEE 1394 (FireWire) ports can be used for importing and recording media from
a digital recording device that uses DV or MPEG2 format. After selecting the IEEE
1394 input for the Record channel, you can use the iDDR transport controls to control
the IEEE 1394 device remotely through the 1394 connection.
NOTE: The rear panel port 2 (top) and the front panel 1394 port are shared. If a
device is already connected to port 2 you cannot connect a device to the front panel
port, or vice versa.
To use IEEE 1394 Record mode:
1. Connect and power-on the IEEE 1394 device.
NOTE: The top rear panel 1394 port and the front panel 1394 port are electrically
the same. Use only one of these connectors.
2. Select the record channel and then select Recorder | Options.
The options dialog box opens.
3. Select Video, and choose IEEE 1394, then select OK.
IEEE 1394 view is displayed, and the record channel input switches to the 1394
input.
The status bar shows “Connecting to device”, then “Connected”. Initially, both the
monitor pane and the thumbnail in the Recorder display shows a IEEE 1394
symbol.
Timecode from the device is also displayed in the Recorder pane. If xx:xx:xx:xx is
displayed, the timecode from the device is not valid.
Use the following step to cue the IEEE 1394 device.
4. You can control the IEEE 1394 device remotely (play, rewind, fast-forward and
stop) in one of the following ways:
• Use the iDDR front panel controls (transport control buttons, Shuttle/Jog Knob).
Turbo iDDR User Guide
135
Chapter 4 Operation: AppCenter Workstation
• Use the record channel on-screen transport controls in AppCenter.
• Use iDDR keyboard shortcuts (see Appendix A, Keyboard Shortcuts on
page 281).
• Select Goto in the Recorder pane, then use the Goto Timecode dialog box to cue
to a specific timecode.
136
Turbo iDDR User Guide
Previewing a clip that is recording
5. After positioning the cue point on the IEEE 1394 device, use one of the following
methods to start recording:
• New Clip - See “Using New Clip record mode” on page 131.
• Crash Record - See “Using Crash record mode” on page 131.
• Fixed Length - See “Using Fixed Length record mode” on page 132.
6. Record continues until Stop is pressed.
Additional information about IEEE 1394 devices:
• When you start the recording, the iDDR pre-rolls the 1394 device several seconds,
then starts play back prior to capturing media. This ensures the video frame cued
in the channel monitor is recorded.
• There is no audio monitoring facility on the Turbo iDDR for 1394 devices. To
monitor audio, use the audio monitoring features on the DV device.
• The timecode from the 1394 device is not recorded. Rather, the Turbo iDDR starts
striping timecode for the clip starting at zero.
• You can play the clip while it is still recording. See “Previewing a clip that is
recording” on page 137.
• Depending on the device’s native format, media captured via IEEE 1394 may
require transcoding. If transcoding is required, media may not be captured in
real-time.
Previewing a clip that is recording
Preview loads the currently recording clip into a play channel. The play channel
becomes the selected channel, and the clip is cued and ready for play.
To preview a clip:
1. Start the record process.
2. Preview the clip using one of the following methods:
• In Recorder, select the Preview button.
- or • In the Monitor pane, drag and drop from the Recorder monitor a Player monitor.
The play channel becomes the selected channel, and the clip is cued and ready for
play.
NOTE: If a play channel is not available, i.e. the play channels are already playing
a clip, a warning message is displayed in the status bar.
3. To play the clip, select the play button on the front panel
transport controls
Turbo iDDR User Guide
, or use the onscreen
.
137
Chapter 4 Operation: AppCenter Workstation
Changing the timecode source
You can select the timecode source you want to record. You can use the internal
timecode generator or the rear panel LTC input.
Timecode
Display
Timecode
Source
To change the timecode source:
1. Perform one of the following to open the options dialog box:
• In the AppCenter main menu, click Recorder | Options | Timecode.
- or • In the Recorder pane, click the timecode display
The Options dialog box appears.
2. Click the Timecode button.
138
Turbo iDDR User Guide
.
Selecting widescreen mode
3. Choose a timecode source, then click OK.
Timecode Source
Description
LTC
Timecode is read from the LTC input for the channel.
Generator
The record channel has a timecode generator that runs in one of the following
modes:
Time of Day
The generator is locked to the Windows Operating system real time clock.
Start time
Specifies the timecode to use when the recording starts. The drop frame option is
enabled when the system timing is set to the 525 line standard. Drop frame
timecode allows the generator to operate as an accurate clock.
Selecting widescreen mode
You must select the widescreen attribute when recording video with widescreen
aspect ratio— 16:9. The attribute is saved as part of the MPEG video media file. The
attribute is used by the play channel to handle aspect ratio conversion. For example,
disable aspect ratio conversion if the clip is played on a channel set for widescreen
display. This may occur when playing a list of clips with different aspect ratios. For
more information, refer to “About video scaling settings” on page 36.
Changing the current bin
On the iDDR, a fixed amount of disk space is reserved for storing media files— the
V:/ partition. Within the V:/ disk partition, your clips and playlists are stored in bins
which function like directories in a file system. You can organize your media by
creating and removing bins.
When recording starts, the new clip is stored in the current bin. You can change the
current bin to determine where you want the clip stored. The current bin name is
displayed under the clip name in the Recorder display, for example, V:/default.
NOTE: Changing the current bin affects the recorder and the player modes.
To change the current bin:
1. Make sure the record channel is selected.
2. In the clips pane, click the Current Bin label
from the list.
Turbo iDDR User Guide
, then choose a bin
139
Chapter 4 Operation: AppCenter Workstation
Related topics:
• “Creating a new bin” on page 222
• “Renaming a bin” on page 223
Renaming a clip
You can rename a clip during or after recording.
To rename a clip:
1. Select the clip name control
in Recorder mode.
2. Enter the new clip name using the on-screen keyboard.
3. Click OK, or press Enter.
If a clip with the new name already exists in the current bin, an error message is
displayed.
Viewing clip properties
To view the properties of a clip loaded in Recorder mode:
In Recorder, do one of the following:
• Click the Properties button.
- or • Select Recorder | Properties.
NOTE: To learn more about the Clip Properties dialog box, “Viewing clip
properties” on page 140.
140
Turbo iDDR User Guide
Locating a clip
Locating a clip
You can locate the currently loaded clip by displaying the contents of the current bin
in the clips pane, as follows:
1. After or during recording, select Recorder | Locate.
2. The clips pane displays the contents of the bin where the clip is located.
Displaying available storage space
In the Recorder pane, you can display available storage using the Time Dome.
To display available storage:
1. Select the Time Dome
.
The Time Dome pop-up menu appears.
2. Choose Available Storage in the pop-up menu.
The Time Dome changes to display progress and available storage
.
Available storage displayed is based on the video data rate selected in the
Configuration dialog box. (See Chapter 2, Configuration: Turbo iDDR.) A filled
Time Dome represents no storage remaining. Available storage is also displayed
numerically under the timedome.
The white line functions as a “sweep second hand” to show record progress. It
sweeps through a complete revolution every 10 seconds when crash recording or
makes a single revolution on a fixed length record.
Playing and editing clips
The information in this section describes how to play and edit clips recorded on the
iDDR. You can play clips in a variety of ways including off-speed play (VAR) and
triggered by GPI. In addition to editing existing clips the in and out points in existing
clips, you can create new clips using the iDDR subclip feature.
Information in this section includes:
• “About playing clips” on page 143
• “Selecting Player mode in AppCenter” on page 143
• “Guide to using Workstation Player: Control View” on page 144
• “Guide to using Workstation Player: Cue View” on page 147
• “Loading media for playout” on page 149
• “Playing a clip” on page 150
• “Selecting loop play” on page 150
• “Selecting E-to-E mode” on page 150
• “Jumping to a specific timecode” on page 151
Turbo iDDR User Guide
141
Chapter 4 Operation: AppCenter Workstation
• “Using Cue points for playback” on page 152
• “Editing a clip” on page 154
• “Creating Subclips” on page 158
• “Locating the clip loaded in player” on page 161
• “Viewing clip properties” on page 161
142
Turbo iDDR User Guide
About playing clips
About playing clips
The AppCenter Workstation Player mode allows you to play media stored on the
iDDR, including clips and programs. The Player mode requires a single play channel.
Player mode has two views— Control View and Cue View. The Control View allows
you to play clips, trim clips, and create new subclips. The Cue View is used to add cue
points within a clip. After adding cue points, you can use the cue list to start playback
from any cue point in the list.
Working with clips that are still recording
The following restrictions apply when working with a clip in Player mode that is
currently recording:
• You cannot rename the clip.
• The clip mark-in/mark-out points cannot be modified.
• Subclips created from a clip currently being recorded can only have a Mark Out
equal to the last frame that has been recorded when the subclip is created. You
cannot create a clip longer than has been recorded under the assumption that the
unrecorded frames will “fill it in”.
Otherwise, clips that are currently being recorded behave normally. As a reminder,
“Read-Only” is displayed in the StatusBar when the clip loaded or playing is still
being recorded.
Playing a playlist saved as a program
Playlists cannot be loaded and played in Player mode. They must be played in Playlist
mode. However, you can save a playlist as a program and then play it in Player mode.
A program includes all the media and transitions in the playlist, but does not include
any event that breaks the flow of playout, such as, a pause. When a program is loaded
in Player mode, it is handled in the same way as a simple clip as far as Player mode
is concerned. For more information on creating programs refer to “Saving a list as a
program” on page 195.
Selecting Player mode in AppCenter
Player mode requires a single play channel. If the play channel is currently being used
in another mode, you can use the following steps to select the Player mode. Selecting
Player mode causes the play channel operation to stop, then Player mode is started.
To start Player mode on a play channel:
1. If the channel pane is not already in split screen view, select View | Split Screen.
2. In the monitor pane, select the control mode drop-down list for the play channel,
then choose Player.
The channel switches to Player mode and becomes the selected channel.
Turbo iDDR User Guide
143
Chapter 4 Operation: AppCenter Workstation
Guide to using Workstation Player: Control View
The Control view allows you to play a clip, modify its name, adjust mark in and mark
out points, create sub-clips, and stripe timecode. Selecting the Control view tab shows
the Control view. The following describes the essential controls in the Control view.
1 Assignable
2 Clip
Buttons
Timecode
(Default buttons
are shown)
6 Thumbnail
(Click to change
thumbnail)
144
3 Clip Name &
Current Bin
(Click clip name
to rename.)
7 Time Dome
(Click to select
loop-play mode)
4 Countdown
Timecode
8 Mark-In &
Mark-Out
(Click to set to
current frame
timecode)
5 View
Tabs
9 Meter Bar
Button
(Click to adjust
audio level)
Control
Description and User Operation
"
Assignable Buttons
Assignable buttons allow you to modify the button assignments to
best suit your workflow. Right-click a button to open a pop-up
menu which lists the alternative button choices.
#
Clip Timecode
Indicates the recorded timecode of the current frame being played.
The timecode value of XX:XX:XX:XX is displayed when there is no
recorded timecode.
Stop mode is indicated by ‘PB’ (Play Back), or ‘EE’ (E to E). Refer
to “Selecting E-to-E mode” on page 150 for more information on
these stop modes.
$
Clip Name & Current Bin
Displays the clip’s name and location in the video storage file
system. To rename the clip, click the Clip Name, then enter a new
name.See “Renaming a clip in player mode” on page 158.
%
Countdown Timecode
Displays the time remaining in the clip To select the countdown
mode you want to monitor, open the Options dialog box by
selecting Options in the Player menu.
Turbo iDDR User Guide
Guide to using Workstation Player: Control View
Description and User Operation
&
View tabs
These tabs toggle between Control and Cue views. Control is used
for playing and editing of clips. During playback, you can use the
Cue view to add cue points so that you can quickly cue a clip to a
frame.
'
Thumbnail
Used to visually identify the clip. By default, the thumbnail is
generated using the 16th frame of video. To change the thumbnail,
position the clip to the desired frame, then click the thumbnail. See
“Changing the clip thumbnail image” on page 157.
(
Time Dome
Progress
only
This multi-function control displays play progress, or play progress
with media marks which shows the relative position of mark-in/
mark-out points in the clip. The timecode underneath indicates play
time remaining. The Time Dome is also used to enable loop play.
Select the Time Dome, then use the pop-up menu to choose the
display mode, or to control loop play mode. See “Selecting loop
play” on page 150.
Control
Control
Cue
Progress
with media marks
Progress
& loop play
enabled
)
Set Mark-in and Set
Mark-out
These buttons are used to set new mark-in or mark-out points.
Position the clip to the desired frame, then click the In or Out
buttons. Unused media is not deleted. To clear a mark, right-click
the button, then choose Clear Mark in the pop-up menu. Marks are
reset to the beginning or end of available media. See “Editing a
clip” on page 154.
*
Meter Bar Button
Displays the Meterbar which contains the audio play level controls
and signal meters. Clicking the Save button saves changes made to
the clip audio level. Clicking Unity returns the audio levels to the
last saved level.
Turbo iDDR User Guide
145
Chapter 4 Operation: AppCenter Workstation
146
Control
Description and User Operation
Player Menu - Control
View
Load – Select to open the Load Clip dialog which displays the
contents of the current bin. Select a clip, then choose OK to load.
See “Loading media for playout” on page 149.
Subclip – Opens the Subclip mode which allows you to create
subclips from the currently loaded clip. A subclip is an entirely new
clip that references media in another clip. See “Creating Subclips”
on page 158.
Goto – Used to jump to a specific timecode. Select Goto, to open
the Goto dialog, then enter a timecode value or use the scrub bar to
go to the desired position. See “Jumping to a specific timecode” on
page 151.
Stripe Timecode– Opens the Stripe Timecode dialog which allows
you to replace the existing timecode track for the loaded clip. You
can replace with time of day, or a specific start timecode. See
“Striping timecode (replacing the timecode track)” on page 157.
Properties – Opens the Properties dialog for the currently loaded
clip. See “Viewing clip properties” on page 161.
Auto Subclips– The auto subclip check box changes the way that
the subclip mode behaves. When it is NOT checked, clips have to
be accepted manually. When it is checked, a subclip will be created
as soon as the user sets a mark out. See “About Auto Subclip mode”
on page 160.
E-to-E – When E-to-E mode is enabled the output video and audio
switches to the record channel input when the play channel is
stopped or when no clip is loaded,. If E-to-E is disabled, the output
freezes on the last frame of video. See “Selecting E-to-E mode” on
page 150.
Turbo iDDR User Guide
Guide to using Workstation Player: Cue View
Guide to using Workstation Player: Cue View
The Player mode Cue view is used to add cue points to the a clip. The Cue View
allows you to set, modify, and jump to cue points on the loaded clip. Clicking the Cue
tab displays the Cue view. The following describes the basic controls in the Cue view.
1 Customizable 2 Current
Buttons
Frame
(Default buttons
Timecode
are shown)
3 Cue List
4 Countdown
Timecode
5 View
Tabs
Control
Description and User Operation
"
Assignable Buttons
Assignable buttons allow you to modify the button assignments to
best suit your workflow. Right-click a button to open a pop-up menu
which lists the alternative button choices.
Add Cue – same as selecting “Add Cue” from the Player menu.
Remove – removes the selected cue.
Goto – used to jump to the selected cue, the next cue, or to a specific
timecode. See “Jumping to a specific timecode” on page 151.
Rename - opens text entry dialog box to rename the selected cue.
Create Clip - same as selecting “Create Clip” from the Player
menu. See “Creating subclips in Cue view” on page 160.
Create All - same as selecting “Create All Clips” from the Player
menu. See “Creating subclips in Cue view” on page 160.
Cue Selection – cues the first selected cue point for playback
showing a still frame of video for the cue point. See “Jump to the
selected cue point” on page 153.
#
Current Frame Timecode
Indicates the recorded timecode of the current frame being played.
The timecode value of XX:XX:XX:XX is displayed when there is no
recorded timecode.
$
Cue List
Displays a list of cue points that are set for the loaded clip. Cue
points are listed in chronological order beginning with the mark-in
point and ending with the mark-out point.
%
Countdown Timecode
Displays the time remaining in the clip. To select the countdown
mode you want to monitor, open the Options dialog box by selecting
Options in the context menu.
Turbo iDDR User Guide
147
Chapter 4 Operation: AppCenter Workstation
&
Control
Description and User Operation
View tabs
These tabs toggle between Control View and Cue Points view.
Control
Cue
148
Turbo iDDR User Guide
Loading media for playout
Loading media for playout
You can load clips or programs in the play display for playout.
Loading clips from the clips pane
1. Select a play channel by clicking in the channel’s monitor pane.
2. Locate the clip in the clips pane. If necessary, change bins by clicking the current
bin control
and selecting from the drop-down list.
3. Load the clip in one of the following ways:
• Drag the clip from the clips pane into the play channel.
• Select the clip, then choose the Load button in the clips pane.
• Double-click on the clip.
• Select the clip, then press Enter on the keyboard.
Loading a clip from Player mode
1. Select a play channel by clicking in the channel’s monitor pane.
2. Open the Load Clip dialog using one of the following:
• Click the Load button in Player.
• Select Player | Load.
3. If needed, use the Look in drop-down list to browse to the desired bin.
4. Select a clip in the Load Clip dialog, then click OK.
The clip is loaded in the player.
NOTE: If play channel E to E mode is enabled, play channel standard definition
outputs are switched to the record channel input until playout is started. Refer to
“Selecting E-to-E mode” on page 150.
Related topics:
• “Playing a clip” on page 150.
• “Using Cue points for playback” on page 152
Turbo iDDR User Guide
149
Chapter 4 Operation: AppCenter Workstation
Playing a clip
Once a clip is loaded in Player mode, you can play the clip or search for a specific
frame of video using the transport controls. Use the links in the following table to find
information on playing clips.
If you are using…
Refer to…
Front Panel controls
“Using the front panel controls” on page 51
On-screen transport controls
“Using on-screen transport controls” on page 124
Keyboard shortcuts
Appendix A, Keyboard Shortcuts on page 281
GPI input triggers
“Setting GPI input triggers” on page 43
Selecting loop play
Loop play allows the clip to play in a continuous loop until Stop is pressed. The Time
Dome is used to enable/disable loop play.
• Click the Time Dome
, then choose Loop Mode in the pop-up menu.
Selecting E-to-E mode
In E-to-E mode, the record channel inputs are switched to the play channel audio and
video outputs (standard definition) when the play channel is in stop mode or when no
clip is loaded. This allows you to monitor the record channel inputs while recording.
To enable E-to-E mode:
• In the AppCenter Workstation main menu, select Player then E-to-E.
The following table describes play channel operation depending on the E-to-E
selection.
E-to-E Setting
Play channel mode
Play channel output
E-to-E Disabled
Play, FF, Rewind
Show clip
Stop
Show clip
Eject
Show black
Play, FF, Rewind
Show clip
Stop
Show inputa.
Eject
Show inputa.
E-to-E Enabled
a.
150
Output is black if no video input is connected to R1. DVI-I output
does not support E-to-E.
Turbo iDDR User Guide
Jumping to a specific timecode
E-to-E considerations
When E-to-E mode is enabled, you can connect an external reference signal which is
synchronous to the video input. This will eliminate artifacts on the play channel
output (periodic vertical shift) due to routing an asynchronous signal through the
iDDR. However, this is not required for recording, the iDDR can record asynchronous
signals.
NOTE: E-to-E is provided for monitoring the record channel, and is not intended as
a program switch.
Jumping to a specific timecode
The Goto dialog box allows the player mode to jump to the specific clip timecode that
you enter. You can enter an absolute timecode value based on recorded timecode, or
a relative timecode value, that is, cue the video to a point +/- some value relative the
current frame. If you don’t know the timecode value of the frame you want, you can
click and drag the scrub bar to shuttle to the desired frame.
To jump to a specific timecode:
1. With a clip loaded in Player mode, do one of the following:
• Click the Goto button.
• Select Player | Goto.
The Goto Timecode dialog appears.
Clear
(Select to clear entry)
Back Space
Relative
(Select to enter a
relative timecode)
Absolute
(Select to enter an
absolute timecode)
Scrub bar
(Click and drag to
cue the desired frame)
2. Perform one of the following:
• Enter a relative timecode value, select the ‘+ or -’ key, enter timecode, then click
OK.
• Enter an absolute timecode value, select the ‘=’ key, enter timecode, then click
OK.
• Click and drag the scrub bar
Turbo iDDR User Guide
to cue the desired frame.
151
Chapter 4 Operation: AppCenter Workstation
Related topics:
• “Loading clips from the clips pane” on page 149
• “Loading a clip from Player mode” on page 149
• “Playing a clip” on page 150
Using Cue points for playback
Cue view allows you to add cue points to a clip. You can use cue points to manage
clip play out or create subclips. The following sections describe how to work with cue
points.
Topics included here:
• “About using cue points” on page 152
• “Viewing the cue list” on page 153
• “Adding a cue point” on page 153
• “Removing a cue point” on page 153
• “Jump to the selected cue point” on page 153
• “Jump to the next cue point” on page 154
• “Renaming a cue point” on page 154
About using cue points
When you select Cue View, a chronological list of cue points is displayed. The list
begins with the mark-in point and ends with the mark-out point. You can add
additional cue points to mark other frames within the clip. You can add cue points
while the clip is playing or in stop mode. When you add a cue point, it is listed by a
default name (such as “cue_1”) and timecode value.
Cue points cannot be moved, however, you can remove a cue point and use the
transport controls, or Goto Timecode dialog box to enter a new cue point at the current
position.
Cue points can be used to:
• Manage clip playout– jump to the selected cue or next cue.
• Create subclips– You can create a subclip from the selected cue point. The
selected cue point becomes the mark-in point, while the mark-out point is the same
as the source clip. If more than one cue point is selected, a subclip is created using
the first and last cue points. The “Create All” feature creates a subclip for every cue
in the list. Each subclip duration is from each cue point to the source clip mark-out
point. See “Creating subclips in Cue view” on page 160.
When working with cue points, keep these considerations in mind:
• Cue points are retained when a clip is copied or transferred– Cue points are
stored with the clip. All the cue points of the original clip are retained when the clip
is copied or transferred to another iDDR.
• Cue points and trimming– After you trim a clip by moving the mark-in or
mark-out points, the cue points outside the new mark-in and mark-out points are
152
Turbo iDDR User Guide
Using Cue points for playback
cleared and must be reinserted.
• Cue points and subclips– Subclips created from a clip with cue points retain all
cue points that fall between the marks of the new subclip. The subclip has its own
mark in and mark out points. See “Creating subclips in Cue view” on page 160.
• Cue points and programs– Cue points cannot be added to a program.
Viewing the cue list
1. Select a play channel by clicking in the channel’s monitor pane or by using the
front panel button
or
.
2. Select the Cue tab.
The Cue view appears showing the cue list for the clip loaded in Player mode.
Initially, only the mark-in and mark-out cue points are listed.
Adding a cue point
While the clip is playing, or in the stop mode, use the transport controls to find the
desired frame in the clip, then do one of the following:
• Click the Add Cue button.
• Select Player | Add Cue.
A cue point is added to the cue list using a unique name, e.g. Cue_1.
NOTE: Using the iDDR preview feature, you can play and add cue points to a clip
while it is still being recorded. (See “Previewing a clip that is recording” on
page 137.)
Related topics
• “Jump to the next cue point” on page 154
• “Removing a cue point” on page 153
Removing a cue point
1. In Cue view, select a cue point in the list.
2. Do one of the following:
• Click the Remove button, or
• Select Player | Remove.
Jump to the selected cue point
Use the following steps to jump to the selected cue point.
1. In Cue view, select a cue point in the list.
2. Do one of the following:
• Click the Cue Selection button, if you have one, or
• Select Player | Cue Selection, or
Turbo iDDR User Guide
153
Chapter 4 Operation: AppCenter Workstation
• Click the Goto button, then select Selection.
3. Press the Play button on the front panel or use the onscreen transport controls
Playout starts from the cued frame.
Jump to the next cue point
Use the following steps to jump to the next cue point. Depending on the current
play position, the clip will cue to the next cue point in the clip.
1. In Cue view, do one of the following:
• Click the Next Cue button, or
• Click the Goto button, then select Next Cue.
2. Press the Play button on the front panel or use the onscreen transport controls.
Playout starts from the cued frame.
Renaming a cue point
1. In Cue view, select a cue point in the list.
2. Select Player | Rename.
3. Use the text entry dialog to enter a new cue name, then click OK or press Enter.
Editing a clip
Topics in this section are as follows:
• “Moving clip mark-in/mark-out points” on page 154
• “Clearing mark-in/mark-out points” on page 156
• “Adjusting clip audio level” on page 156
• “Changing the clip thumbnail image” on page 157
• “Striping timecode (replacing the timecode track)” on page 157
• “Renaming a clip in player mode” on page 158
Moving clip mark-in/mark-out points
Every clip has a mark-in point and a mark-out point which refer to the first and last
frames displayed when the clip is played. When first recorded, clip marks are set to
the beginning and end of available media. You can edit the clip marks in order to
reference only the desired media. When clip marks are moved, the unused media is
not deleted. Clearing the marks resets the them to the first and last frames of the
recorded clip. (See also “Clearing mark-in/mark-out points” on page 156.)
The following restrictions apply when editing clip marks:
• Mark-in must precede the mark-out
• Marks cannot be set outside the recorded media
• Marks cannot be changed on a clip that is still being recorded.
154
Turbo iDDR User Guide
Editing a clip
NOTE: If more media exists after the current mark, a <<< or >>> symbol is
displayed beneath the In/Out timecode. To permanently remove media outside the
marks, refer to “Erasing a clip's unused media” on page 228.
NOTE: If more media exists after the current mark, a <<< or >>> symbol is
displayed beneath the In/Out timecode. To permanently remove media outside the
marks, refer to “Erasing a clip's unused media” on page 228.
To move clip marks, load the clip in player, then use one of the following methods.
• “Moving clip marks: Using the In/Out buttons” on page 155
• “Moving clip marks: Using the timecode entry controls” on page 155
• “Moving clip marks: Using the clip length control” on page 155
Moving clip marks: Using the In/Out buttons
1. Use the transport controls to locate the desired frame.
2. In Control view, click In
point.
to set mark-in point, or click Out
to set mark-out
3. In the Confirm Mark Change window, click Yes.
Moving clip marks: Using the timecode entry controls
1. In Control view, select the mark-in or mark-out timecode control
open the timecode entry dialog box.
to
2. Enter a timecode value, then click OK or press Enter.
Alternatively: Use the current position scrub bar
dialog box to locate the desired frame, then select OK.
in the timecode entry
Moving clip marks: Using the clip length control
Entering a new clip length moves the mark-out point.
1. Click the Length timecode entry control.
2. Enter a new clip length and click OK.
The clip length changes by moving the mark-out point.
Turbo iDDR User Guide
155
Chapter 4 Operation: AppCenter Workstation
Clearing mark-in/mark-out points
Clearing a mark point resets the mark to it’s default position— mark-in is set to the
beginning of available media; mark-out is set to the last frame of available media.
To clear a mark point, do one of the following:
• In Play view, click and hold the In or Out button, then choose Clear Mark in the
pop-up menu.
• In Play view, select the mark-in or the mark-out timecode control and click Clear,
then OK to clear the mark.
Clear
(Click Clear, then
OK to clear the mark.)
Adjusting clip audio level
The audio meter display provides audio level adjustment for clips loaded in the player
display. If the clip loaded was recording using Dolby digital audio (AC3), the audio
gain adjustments are disabled.
To adjust audio level;
1. In Player mode, click the Meterbar button
.
2. Adjust the audio level in one of the following ways:
• Adjust the graphical faders individually or “ganged” which insures both
channels use the same gain.
• Click Unity to set audio back to the last saved level.
3. Click Save to save changes to the clip audio level.
NOTE: Saved audio levels are used every time the clip is loaded and played. Unsaved
changes are lost when the clip is ejected.
4. Click the Meterbar button
156
Turbo iDDR User Guide
again to return to Player mode.
Editing a clip
Changing the clip thumbnail image
The clip thumbnail is displayed in AppCenter for visual identification of the clip. By
default, the 16th frame is used to generate the thumbnail image.
To change the clip thumbnail:
1. While monitoring the play channel output, use the front panel or onscreen transport
controls to position the clip to the desired video frame.
2. In Player, select the thumbnail, then click Yes in the Change Thumbnail dialog box.
NOTE: If clip marks are edited so that the video frame used to generate the thumbnail
is outside the new clip marks, the thumbnail is reset to a position near the mark-in of
the modified clip.
To reset the thumbnail:
• Select the thumbnail image, then choose Reset in the pop-up menu.
This resets the clip thumbnail to the 16th frame in the clip.
Striping timecode (replacing the timecode track)
The stripe timecode dialog allows you to overwrite the existing timecode track for the
loaded clip. You can replace the recorded timecode with time of day, or a specific start
timecode value.
1. Load the clip in the a play channel.
2. In Control view, select Player | Stripe Timecode. The Stripe Timecode dialog box
opens.
3. Specify the replacement timecode:
– The new timecode track will start with the current time of day and
will contain continuous values ranging from the current time of day plus the length
Time of Day
Turbo iDDR User Guide
157
Chapter 4 Operation: AppCenter Workstation
of the clip.
Fixed Time – After choosing this option, select the timecode entry control, and enter
a start timecode value. The new timecode track will contain continuous values
ranging from the specified starting value to the starting value plus the length of the
clip.
Drop frame – The drop frame option is available when system timing is set to 525
line standard. Drop frame allows the timecode track to indicate the actual running
time of the clip.
Renaming a clip in player mode
1. In the Control view, select the clip name control
.
2. Enter the new clip name.
3. Click OK, or press Enter.
Creating Subclips
A subclip is a clip created by referencing a portion of media from another clip. For
example, if you recorded a two hour clip, you could create several short subclips to
use as previews or advertisements. Each subclip refers to a small portion of the
original clip and is listed along with all other clips in the clips pane. When working
with subclips, the original clip is sometimes called the source clip. After creating
subclips, you can delete the source clip.
Subclips created from a clip that is still recording can only have a mark-out equal to
the last frame that has been recorded when the subclip is created. You cannot create
a subclip longer than what has been recorded with the assumption the media will “fill
in”. You can create subclips from a clip being recorded in loop record mode. In loop
record mode, media referenced by the subclips is retained while unreferenced media
is discarded.
You can load subclips in the Control view and edit the mark-in/mark-out points the
same as a clip, provided the unreferenced source media has not been erased. If the
source media has been erased, the subclip retains 1 second of media on each side of
the mark-in and mark-out points. See “Moving clip mark-in/mark-out points” on
page 154.
The following sections describe how to create subclips:
• “Creating Subclips” on page 158
• “About Auto Subclip mode” on page 160
• “Creating subclips in Cue view” on page 160
To create subclips
1. Load a clip in the player.
2. In the Player Control view, click the Subclip button.
158
Turbo iDDR User Guide
Creating Subclips
The Subclip display appears with a new subclip loaded. The In and Out buttons are
flashing indicating no mark-in or mark-out points are defined. The default subclip
name follows the form <source clip name>-<number>, for example, if the source
clip name is PlayoffGame, the subclip name is PlayoffGame-1.
3. To rename the subclip, click the subclip name control
, and
enter the new name in the Clip Name dialog, then click OK, or press Enter.
Renaming the subclip creates a new seed name. For example, if you rename the
subclip PlayoffGame-1 to Highlight, subsequent subclips created are named
Highlight-1, Highlight-2, and so on.
4. Enter the subclip marks as follows:
a. Using the transport controls, position the clip to the desired frame for mark-in,
then click the In button.
b. Using the transport controls, position the clip to the desired frame for mark-out,
then click the Out button.
Alternatively: Select the mark-in or mark-out timecode entry controls and enter
a specific timecode value.
Alternatively: Select the Length timecode entry control and enter a clip length,
then create either a mark-in or a mark-out point.
5. In Subclip view, click Accept.
The subclip is saved and ejected, then Player returns to Subclip view with a new
subclip name loaded.
NOTE: If the Accept button does not flash, but instead the clip is saved and a new
subclip is loaded, the iDDR is in Auto-subclip mode. See “About Auto Subclip mode”
on page 160.
NOTE: Clicking the Source Clip button or the Eject button prior to pressing the
Accept button closes Subclip mode without creating a new clip. Both of these buttons
are used to exit Subclip mode.
Turbo iDDR User Guide
159
Chapter 4 Operation: AppCenter Workstation
About Auto Subclip mode
The Auto-Subclip feature changes the way that the subclip mode behaves. Auto
Subclip mode eliminates the “Accept” step in the subclip procedure. In Auto-Subclip
mode, you simply set mark-in, then set mark-out. On setting mark-out, the subclip is
automatically generated and ejected, and a new subclip name is loaded in the Subclip
display.
Auto Subclip mode is useful when you want to create subclips while a source clip is
playing. You simply load a clip, press play, then create subclips by selecting In, Out,
In, Out, etc.
To enable Auto Subclip mode:
• In the Player mode Control View, click Player | Auto Subclips.
Creating subclips in Cue view
In Cue view, you can automatically create a subclip from the selected cue point. The
selected cue point becomes the mark-in point, while the mark-out point is the same as
the source clip. If more than one cue point is selected, a subclip is created using the
first and last cue points. This feature allows you to manage the media of interest as a
separate clip rather than media between cue points in a clip. For example, once you’ve
made a subclip, it can be added to a playlist.
By default, subclips generated from the cue list are given names of the format <clip
name>-<first cue name>. For example, a subclip generated from a cue point named
“cue_1” in a clip named “MyClip” is named “MyClip-cue_1”. If a clip already exists
with this name, you are prompted to enter a unique name.
To create a subclip from media between two selected cue points:
1. Select two cue points in the cue point list.
2. Click Player | Create Clip.
To create a subclip using a selected cue point as mark-in:
1. Select the cue point to use as the mark-in for the new clip.
2. Click Player | Create Clip.
The subclip is terminated by the source clip mark-out point.
To create a subclip for all cue points:
• Click Player | Create All.
In some cases, a progress dialog is displayed as the clips are generated.
Each subclip is terminated using the mark-out of the source clip.
160
Turbo iDDR User Guide
Locating the clip loaded in player
Locating the clip loaded in player
You can determine where the currently loaded clip is stored in the media file system
using the locate command.
To locate the currently loaded clip:
• Select Player | Locate.
The Clips pane opens and displays the contents of the bin where the clip is located.
Viewing clip properties
To view the properties of a clip loaded in Player:
• Click the Properties button.
- or • Select Player | Properties.
NOTE: To learn more about the Clip Properties dialog box, “Viewing clip
properties” on page 242.
Turbo iDDR User Guide
161
Chapter 4 Operation: AppCenter Workstation
Working with playlists
Information in this section includes:
• “Introducing Playlist mode” on page 163
• “Before using Playlist mode” on page 164
• “Selecting Playlist mode” on page 167
• “Guide to using Playlist mode: List View” on page 167
• “Guide to using Playlist mode: Event View” on page 170
• “Selecting Text or Thumbnail view” on page 173
• “Selecting monitor information” on page 173
• “Creating a simple playlist” on page 174
• “Inserting media in a playlist” on page 174
• “Playing a list” on page 177
• “Editing and rearranging events in a playlist” on page 178
• “Managing sections in a list” on page 183
• “Adding play effects” on page 185
• “Adding GPI output triggers to playlists” on page 190
• “Managing playlists” on page 191
• “Saving a list as a program” on page 195
162
Turbo iDDR User Guide
Introducing Playlist mode
Introducing Playlist mode
In addition to playing single a single clip, the iDDR play channels can also play lists
that contain clips and programs stored on the iDDR. Playlist mode is supported in
both front panel and workstation operating modes, however, workstation operation
extends the playlist features available.
The following table summarizes and compares the basic features supported in playlist
mode for both front panel and workstation operation.
Basic Feature
Description
Availability
Front Panel
Mode
Workstation
Mode
!
!
Editing playlists
Events in a playlist can be rearranged or removed,
and new events added between existing ones.
Editing events in
the list
Events can be renamed and trimmed. Trimming
an event moves the mark-in and mark-out points.
This only affects the event, not the source clip.
Event transitions
Transitions between all events in a list is a cut, i.e.
the last frame of an event is followed by the first
frame of the next event.
Loop on a
sectiona
Sections are provided within the list to provide
flexibility during playout. A section can be set up
to loop indefinitely. The section can be taken out
of the loop by manual intervention.
Loop on a list
Lists can be set up to loop indefinitely. The list
can be taken out of the loop by manual
intervention– stop or goto.
!
!
Pause at the end
of events
Events can pause playout at their end. At event
pauses, you can choose to show black, show
E-to-E, freeze on last frame, or freeze on next
event.
!
!
Pause at the end
of sectionsa.
Sections can pause playout at their end. At section
pauses, you can choose to show black, show
E-to-E, freeze on last frame, or freeze on next
event.
!
Saving a playlist
as a program
Playlists can be saved as a program. This saves
the media and transitions, but nothing that breaks
the flow of playout, such as pauses. In both front
panel and workstation operation, you can insert a
program into a playlist, or play a program in the
standard player mode.
!
GPI output
triggers
The iDDR provides 6 GPI output signals through
a rear panel connector for controlling external
equipment. You can configure events in a playlist
to trigger GPI outputs. A GPI trigger does not
disrupt playout of the play events. GPI triggers
can be set to occur at the beginning or end of an
event or section, or at these points with some
offset.
Turbo iDDR User Guide
!
!
!
!
!
!
163
Chapter 4 Operation: AppCenter Workstation
Basic Feature
GPI Input
triggers
a.
Description
Availability
Front Panel
Mode
Workstation
Mode
!
!
You can assign any of the 6 GPI inputs to control
one or more play channels and the action you
want the iDDR channel(s) to take— play, VAR
play, cue next event, or cue next section, etc.
AppCenter Workstation includes more extensive
GPI output trigger features. See “Adding GPI
output triggers to playlists” on page 190.
Front panel playlist mode supports this feature for playlists created in workstation mode.
Before using Playlist mode
Read the following sections before using Playlist mode.
• “Terms used in Playlist mode” on page 164
• “Symbols used in Playlist mode” on page 165
• “Working with programs” on page 165
• “Using mixed aspect ratios in a playlist” on page 166
• “Inserting a clip that is still recording” on page 166
• “Inserting a playlist in a playlist (workarounds)” on page 166
Terms used in Playlist mode
The following terms are used in the Playlist mode.
Term
Definition
Playlist
A list is a sequence of events.
Event
Events are the components that make up a list. Events are created by adding a clip
or program to sections in a list.
Section
Playlists created in Workstation operating mode contain at least one section. All
events in a playlist are contained in sections. Sections have properties that include
repeat and pause. A playlist can have up to 100 sections. Each section can contain
up to 1000 events.
NOTE: Playlists created in Front Panel mode do not have sections; however,
when playlists created in Workstation mode are played in front panel mode,
section properties are used for playout just as they would in workstation mode.
164
Source Clip
The clip inserted in a list to create a play event.
Program
Playlists can be saved as a program in iDDR Workstation mode. Programs created
from a playlist include all the media and transitions in the playlist, but nothing that
breaks the flow of playout, such as a pause at the end of an event. Programs are also
created from the loop record mode.
Turbo iDDR User Guide
Before using Playlist mode
Symbols used in Playlist mode
The following table describes the symbols used in the Playlist List view to describe
the properties of items in the list— play events, sections, and the list itself.
Symbol
Description
Locked
The item is locked and cannot be edited.
Pause
At the end of playout, this item will cause playout to pause.
Loop
At the end of playout, the item will repeat.
GPI Output Trigger
This event or section triggers one or more GPI outputs.
Up arrow
Event resolution does not match the play channel video output
type. The event will be up-converted on play.
Down arrow
Event resolution does not match the play channel video output
type. Event will be down-converted on play.
Working with programs
A program is a clip generated from a playlist using the Save As Program feature in the
Playlist mode. A program includes all the media in the playlist, but does not include
any event that breaks the flow of playout such as a pauses between events. You can
insert programs into other playlists as an event, or load and play them using the
standard Player mode. You can also send a program to a file or a video network
stream.
Turbo iDDR User Guide
165
Chapter 4 Operation: AppCenter Workstation
Using mixed aspect ratios in a playlist
The iDDR can play clips with different aspect ratios in a single playlist. How the
media is displayed is determined by the play channel widescreen setting and clip
aspect ratio. The play channel determines the clip aspect ratio by examining the clip
aspect ratio attribute set when the clip was recorded. The following table describes
how the iDDR displays mixed aspect ratios. (See also “Video scaling considerations”
on page 37).
Event Aspect Ratio
Standard (4:3)
Play Channel Widescreen Setting
Standard (4:3)
Widescreen (16:9)
No conversion
Bars
(Pillarbox)
Bars & Crop
(Half-Pillarbox)
Crop (zoom)
Widescreen (16:9)
Bars
(Letterbox)
No conversion
Bars & Crop
(Half-letterbox)
Crop
Using mixed video resolutions in a single playlist
Playlists can contain events with different video resolutions. When the list is played,
the media is up-converted or down-converted as needed to match the play channel
video output type selected. See also “Video scaling considerations” on page 37.
NOTE: The transition between events with different resolutions takes approximately
1 second. During this time, play channel output is switched to black.
Inserting a clip that is still recording
Clips that are currently recording behave as other clips do in a list except for the
following restriction:
• The event-out timecode is set to the last recorded frame at the time the clip is
inserted in List view, or created in Event view. You can move the event-out
timecode as needed while the clip is still recording or after record is stopped.
Inserting a playlist in a playlist (workarounds)
While iDDR does not support a true “nested” playlist, you can retain some of the
functionality of inserting a playlist in a playlist in the following ways. These are
available in workstation operating mode only.
166
Turbo iDDR User Guide
Selecting Playlist mode
• Save the list as a program, then insert it into another playlist as an event.
• Use multi-item select and copy/paste.
• Copy/paste events or sections within the same list or from other lists.
• Copy the list in the clips pane, then load and edit the list.
Selecting Playlist mode
Playlist mode requires a single play channel. If a play channel is currently being used
by another mode, you can use the following steps to select the Playlist mode.
Selecting the Playlist mode causes the current play channel mode to exit when Playlist
mode is started.
To start Playlist mode on a play channel, in the channel’s monitor pane, select the
mode drop-down list and choose Playlist. The channel switches to Playlist mode and
becomes the selected channel.
Guide to using Playlist mode: List View
The Playlist List View allows you to manage a list— insert, move, or modify events,
and to control playout of the list. Clicking the List tab displays the List view. You can
select the type of display for the asset list– text view, or thumbnail view. (See
“Selecting Text or Thumbnail view” on page 173.) The following describes the basic
controls in the List View.
List view in text display mode
1 Playlist
Timecode
2 Section
(A playlist has at
least one section)
4 View
3 Countdown
(Can display time
Tabs
to next event, section,
or end of list)
List
Event
5 Assignable
6 Time Cursor
Buttons
(Displays the current
(Default buttons
play position.)
are shown)
Turbo iDDR User Guide
7 Event List (Text View)
167
Chapter 4 Operation: AppCenter Workstation
List view in image display mode
List
Event
7 Event List (Image View)
(Time Domes display list
and section play progress.)
Control
Description and User Operation
"
List Timecode
Though each play event contains the timecode information from its
source clip, the timecode for the list is generated internally. This
timecode can be an offset from a specific timecode (the default is
01:00:00;00).See “Setting the playlist timecode” on page 193.
#
Section (Text View)
A list has as least one section, but can have up to 100. All events
belong to a section, and each section can have up to 1000 events. In
Thumbnail View, the section is displayed as a Time Dome which
shows the amount of the section that has played. An empty Time
Dome indicates the section has not started to play.
Sections can be expanded or collapsed to reveal or hide the events
that belong to the section. Expanded sections are indicated by a '-'
symbol.
Section (Thumbnail
View)
Countdown Timecode
Displays the time to the next event, section or end of the list. To
select the countdown mode you want to monitor, open the Options
dialog box by selecting Options in the Playlist menu.
%
View tabs
These tabs toggle between List View and Events view.
&
Assignable Buttons
List
$
Event
168
Turbo iDDR User Guide
Assignable buttons allow you to modify the buttons located in the
Playlist toolbar to best suit your workflow. Right-clicking a button
opens the button pop-up menu which lists the alternative button
choices.
Guide to using Playlist mode: List View
Control
Description and User Operation
'
Time Cursor
The time cursor indicates the current play position. The time cursor
is displayed over the event currently being played.
(
Event List
The Event List contains play events.
Play events are created from clips or programs which can be added
to the list in two ways: drag and drop from the clips pane, or using
the Insert button in List view, Event view, or in the clips pane. By
default, play events added to a list inherit the source clip’s name, but
you can rename events anytime.
Play events and sections can be configured to trigger GPI outputs.
GPI triggers can be set to occur when the event or section starts,
ends, or at these points plus or minus some offset. A GPI trigger does
not disrupt playout of the play events that following it. See “Adding
GPI output triggers to playlists” on page 190.
You can view the Event List in either the text view or thumbnail
view. Thumbnail view displays clip thumbnails along with Time
Domes for the list play progress, and section play progress. To
change the view, select Options in the Playlist menu.
Turbo iDDR User Guide
169
Chapter 4 Operation: AppCenter Workstation
Control
Description and User Operation
Playlist List View Menu
Insert Event– Opens the Insert Event dialog box which allows you
to insert all event types. See “Inserting media in a playlist” on
page 174.
Add Section– Adds a section to the end of the list. Once you add the
section, you can move it. See “Managing sections in a list” on
page 183.
New List– Opens the New List dialog box where you can choose the
current bin and specify the new list name before creating it. When a
new list is created, the current list is ejected and the new list is
created containing one section and no events. See “Creating a simple
playlist” on page 174.
Open List– Closes the current list and allows you to open an
existing list. See “Playing a list” on page 177.
Rename List– Rename the list currently loaded in Playlist mode.
Save As Program– Saves the current list as a program. The new
program is listed in the clips pane with other assets. Programs can be
played using the Player mode, or inserted in a list in Playlist mode.
See “Saving a list as a program” on page 195.
Locate– Locates the list or source clip for an event, depending on the
selection, in the clips pane. See “Locating a playlist in the clips
pane” on page 194 or “Locating the event source clip” on page 183.
Properties – Opens the properties dialog box for the selected item—
list, section, or play event. Properties dialog box includes pages for
setting up list timecode, adding metadata, and setting list attributes
that will occur when playback reaches the end of the list. Options
include repeat, or pause. See “Viewing playlist properties” on
page 194. Section properties and event properties dialog boxes
include options for setting the end behavior— repeat or pause, and
GPI output properties. See “Viewing playlist properties” on
page 194.
Move Up– Moves the selected event up in the list. See “Editing and
rearranging events in a playlist” on page 178.
Move Down– Moves the selected event down in the list. See
“Editing and rearranging events in a playlist” on page 178.
Goto– Opens the Goto pop-up menu which allows you to jump to
selection, next event, next section, or a timecode that you specify.
See “Playing a list” on page 177.
Options– Opens the Options dialog box which allows you to select
the asset list view (e.g. Text or Thumbnail view), and choose the list
monitoring information displayed in the Playlist mode and the
monitor pane. See “Selecting Text or Thumbnail view” on page 173.
Guide to using Playlist mode: Event View
The Playlist Event View allows you to create a new event before inserting it into the
play list, or to edit an existing event’s properties. Selecting the Event tab displays the
Event view. Note that you cannot open Event View while the list is playing. The
following describes the basic controls in the Event View.
170
Turbo iDDR User Guide
Guide to using Playlist mode: Event View
1 Create New Event
(Click to open the new
event dialog, then select
a clip to make an event.)
2 Current
Frame
Timecode
3 Event Name &
Section
(Click to rename)
4 Countdown
Timecode
5 View
Tabs
List
Event
6 Insert or
Accept*
7 Goto
(Click to enter
goto timecode)
*Note: Insert adds new event to the list.
Accept propagates changes made to
an existing event to the event in the list.
8 Time Dome
10
9 Thumbnail
(Click and hold
to change event
thumbnail or view
event properties.)
Event-In/Event-Out
(Sets the In or Out
point to the current
frame.)
Control
Description and User Operation
"
New Event Button
Clicking the New Event button opens the New Event window where
you can select a clip to load into the Event window. You can also
drag and drop clips onto the Event Name control in the Event View.
#
Event Timecode
Displays the event's timecode. This is the source clip’s recorded
timecode. It may be helpful when searching for a particular portion
of the media to set event marks.
$
Event Name Control
Displays the event’s name and section in the list. To rename the
event, click the event name control, then enter a new name. If no
event is selected when you switch to the Event View, the Event
Name control displays <No event loaded>. You can then create a
new event or return to the List View.
The section name that the event belongs to is displayed directly
below the event name. When viewing an event that is not in the list,
“Section: <not in list>” is displayed beneath the event name.
%
Countdown Timecode
Displays the time to end of event.
Turbo iDDR User Guide
171
Chapter 4 Operation: AppCenter Workstation
Description and User Operation
&
View tabs
These tabs toggle between List View and Events view.
'
Insert and Accept
Buttons
Insert Button – Displayed when editing a new event that is not yet
in the list. Inserts the current event into the list after the currently
selected event.
Accept Button – Displayed when editing an event in a list.
Propagates changes you made to the event properties to the event in
the list, for example, event marks, thumbnail, or end properties.
(
Goto Button
Opens the Goto dialog box which allows you to jump to a specific
timecode in the event.
)
Time Dome
Displays a graphical representation of the current position between
the event's marks with an empty Time Dome representing the current
position at event in, and a full dome representing the current position
at event out. The time remaining from the current position is
displayed beneath the Time Dome. When playing media that is
currently being recorded, you’ll see that the event mark-out is set to
the timecode of the last frame of video when event was initially
created even though the source clip is still recording.
*
Thumbnail
By default, an event uses the same thumbnail as the source clip. You
can select the thumbnail image to change the event thumbnail image
to the current frame, or to view the event properties.
+
Event In/Event Out
Used to change the in and out points of the event. These changes do
not take effect until the event is inserted into the list using the Insert
button, in the case of a new event, or the changes are accepted, using
the Accept button in the case of an existing clip. Clicking Accept
propagates event change to the event in the list. Changes to the event
are lost if you eject without selecting insert or accept as required.
Event In/Out changes do not affect the source clip's mark in and out
values, but only the event's marks used by the Playlist.
Playlist Events View
Menu
New Event– Opens the New Event dialog box which allows you to
navigate through the clips pane to select the source material for the
new event.
Insert Event– Inserts the loaded event in the list. The event is
inserted after the last selected event. This menu item only appears
when the event is not in the play list, for instance after selecting New
Event.
Locate– Locates the event’s source clip in the clips pane. See
“Locating the event source clip” on page 183.
Properties– Opens the Event Properties dialog box which includes
pages for setting up list timecode, adding metadata, and setting
attributes that will occur during playback.
Options– Opens the Options dialog box.
List
Control
Event
172
Turbo iDDR User Guide
Selecting Text or Thumbnail view
Selecting Text or Thumbnail view
The event list in the List view has two viewing modes– Thumbnail view, and Text
view. Thumbnail view displays events as thumbnails along with the section and the
list time domes. The text view lists events descriptions in text format. You can select
which event attributes are displayed in text view.
Use the following steps to select the view mode best for you:
1. In List view, select Playlist | Options.
The Options dialog box appears with the View settings tab selected.
2. Select a view mode:
Text View - displays events in text form including an event icon, name and an
additional attribute selectable using the Show drop-down list. Show attributes
include the following: Duration, Name only, Start time, or Start time and duration.
Thumbnail View - displays events in thumbnail form along with the event name.
3. Click OK to save settings and close the Options dialog.
Selecting monitor information
You can select the monitoring information displayed for the list. The selections you
make determine the list attributes that are displayed in the following locations:
• List information displayed in the monitor pane - List information is displayed
under the thumbnail in the monitor pane. You can select the list attributes displayed
in the monitor pane.
• Countdown timecode displayed in the Playlist toolbar - The countdown timer
can count down to the next section, the next event, or the end of list.
To select the monitor mode:
1. In List view, select Playlist | Options.
Turbo iDDR User Guide
173
Chapter 4 Operation: AppCenter Workstation
The Options dialog box appears.
2. Click the Monitor tab.
The Monitor settings page appears.
3. Select one of the monitor information options.
4. Click OK to save settings and close the Options dialog.
Creating a simple playlist
Lists are created using the List view. When Playlist mode is started, the last list loaded
on the play channel is opened automatically. If the last list loaded has been deleted,
then an empty list containing one section and no events is created. New lists are
named “List_n”, where n is the first number that results in a unique file name. There
is no “eject” operation in Playlist mode, as there is always a list loaded.
To create a new list:
1. Select Playlist | New List.
The New List dialog box is displayed.
2. Select the bin where you want to store the list, edit the default name for the new
list, then click OK.
The current list closes and the new list is created containing one section and no events.
Inserting media in a playlist
A new list contains one section and no events. When you start inserting play events,
they will be played in the order you insert them. You can move events in the list up
or down, or insert new events between existing ones by selecting the insertion point.
Selecting the insertion point in a playlist
• When using the Insert button or menu item, the insertion point is after the currently
174
Turbo iDDR User Guide
Inserting media in a playlist
selected event.
• When using the drag and drop method, you will see a drop cursor as you drag the
event over the list. The drop cursor indicates where the new event will be inserted.
NOTE: The time cursor only indicates the current play position, and cannot be
selected and moved. Selecting and dragging may inadvertently select and move the
event.
Inserting events in List view
To insert a play event in List view:
1. Select the List tab.
2. Do one of the following:
• Drag and drop assets from the clips pane using the drop cursor to locate the
insertion point.
• Drag and drop from the monitor pane. Select the thumbnail or video image, then
drag to List view. Use the drop cursor to locate the insertion point.
• Double-click an asset in the clips pane. The asset is inserted in the list after the
insertion point.
• Select an event in the list as the insert point, then select one or more assets in the
clips pane. Click Insert in the clips pane to insert the event after the insert point.
• Select an event in the list as the insert point, then click Insert in List view, and
select one or more assets in the Insert Event dialog box. Click OK to insert the
events.
Inserting play events in Event view
To insert a play event in Event view:
1. Click the Event tab.
2. Do one of the following:
• Drag and drop an asset from the clips pane, then click the Event view Insert
button to add it to the list.
Turbo iDDR User Guide
175
Chapter 4 Operation: AppCenter Workstation
• Select an asset in the clips pane and click the New Event button. After trimming
the event as required, click the Event view Insert button to insert the event in the
list.
• Click the New button to open the New Event dialog box. Select an asset in the
New Event dialog box, then click Load. Trim the clip if necessary, then click
Insert.
The event is displayed in the Event view and added to the list.
Using copy and paste to insert play events
Any asset that can be selected can be placed on the clipboard and pasted into another
application that accepts that type of asset. For example, you can copy a play event
from Playlist mode on one play channel and paste it into Playlist mode on the other
play channel. You can also copy a clip from the clips pane and paste it into the Playlist
mode.
The Cut, Copy, and Paste operations are performed by using the AppCenter's Edit
menu, by using the standard keyboard shortcuts (CTRL+C, CTRL+X, CTRL+V), or
by using the right-click menus of cut, copy and paste.
To insert an asset from the clips pane using the clipboard:
1. In the clips pane, select one or more assets.
2. Copy the assets to the clip board.
3. Select an insertion point in the list.
4. Paste the asset from the clipboard into the list.
To use the clipboard to move or copy events already in a play list:
1. Select the event(s) you wish to move or duplicate.
2. Copy or Cut the selection to the clipboard.
3. Select the new insertion point in the list.
4. Paste the event(s) from the clipboard into the list.
176
Turbo iDDR User Guide
Playing a list
Related Topics
• “Introducing AppCenter” on page 114
• “Keyboard Shortcuts” on page 281
• “Selecting multiple assets” on page 224
Playing a list
Once the list is complete, you can open it and play it, as described in the following
sections.
Opening a playlist
To open a list, do the following:
1. Select Playlist | Open List, or drag a playlist from te clips pane into the channel.
The Open List dialog box appears.
2. Locate and select the list you want to open, then click Open.
Before the list is opened, the currently loaded list is closed. In Playlist mode there
is no eject button, so you can open an existing list or create a new list without
manually closing the currently loaded list.
Playing a playlist
You can perform the following operations to play a playlist using the front panel
transport controls and AppCenter user interface. You can also use the keyboard
shortcuts for all transport controls. See “Keyboard Shortcuts” on page 281.
To...
Do this...
Begin playing at the top of the list
Open the list, then press Play.
Begin playing at an event in the list
Select an event in the list, then press Play.
Continue playout after a pause in the list
Press the Play button.
Play the next event
Press the Play and FF buttons.
-orSelect Goto, and then choose Next Event in the
Goto pop-up menu.
Play the next section
Press the Play button and hold the FF button down.
-orSelect Goto, and then choose Next Section in the
Goto pop-up menu.
Skip playback to any event or section in the list
First, press and hold the Play button, then select the
event or section using the touch screen.
Select an event or section to playback
First, select the event or section, then click Goto,
and choose Selection in the Goto pop-up menu.
Then press Play.
Avoid delays when jumping to a new event or
section
First select the new event or section, then wait until
the diamond or standby icon is filled in before
jumping to the new event or section.
Turbo iDDR User Guide
177
Chapter 4 Operation: AppCenter Workstation
To...
Do this...
Use keyboard shortcuts to play the play list
See “Using Keyboard shortcuts” on page 79.
Use GPI input triggers to play the play list
See “Configuring GPI inputs” on page 121.
Editing and rearranging events in a playlist
The following topics explain how to work with events in a playlist:
• “About editing events while the list is playing” on page 178
• “Creating an event before inserting it in a playlist” on page 178
• “Editing event marks” on page 179
• “Clearing event marks” on page 181
• “Moving events” on page 181
• “Removing events” on page 181
• “Copying events” on page 181
• “Renaming events” on page 181
• “Adjusting event audio levels” on page 182
• “Changing event thumbnail image” on page 182
• “Locating the event source clip” on page 183
• “Viewing event properties” on page 183
About editing events while the list is playing
If the List view is playing a list, you cannot monitor video and audio of an event when
you switch to the Event view. The channel resources and video/audio outputs are
being used by the List view. You cannot use the Event view while playlist is playing.
You must stop play back, then open Event view to edit an event.
Creating an event before inserting it in a playlist
You can create a playlist event as a new entity, rather than using an existing clip for
the playlist event.
To create a new event for insertion into a playlist:
1. In Event view, do one of the following to define the new event’s in and out points:
• Click Event In
point.
to set mark-in point and Event Out
to set mark-out
• Select the Event-In or Event-Out timecode control
to open the
timecode entry dialog box. Enter a timecode value then click OK or press Enter.
• Click the Length timecode entry control and enter a new event length.
2. Click Accept to add the event to the list.
178
Turbo iDDR User Guide
Editing and rearranging events in a playlist
Editing event marks
Every event has a event-in point and an event-out point which refer to the first and last
frames displayed when the event plays. When first created, event marks are set to the
mark-in and mark-out of the source clip. You can edit the event marks in order to
reference only the desired media. Event marks can be cleared to reset them to the
marks specified in the source clip. (See “Clearing event marks” on page 181.)
The following restrictions apply when editing event marks:
• Event-in must precede the Event-out
• Event marks cannot be set outside the recorded media of the source clip.
NOTE: If more media exists outside the current mark, a <<< or >>> symbol is
displayed beneath the current event mark timecode.
To move event marks, view the event in Event view, then use one of the following
methods to move clip marks.
• “Using the Event In/Out buttons” on page 180
• “Using the timecode entry controls” on page 180
• “Using the event length control” on page 180
Turbo iDDR User Guide
179
Chapter 4 Operation: AppCenter Workstation
Using the Event In/Out buttons
To move clip marks:
1. Use the transport controls to locate the desired frame.
NOTE: If the List view is playing a list, you cannot monitor video and audio of an
event when you switch to the Event view. The channel resources— video and audio
outputs, are being used by the List view. However, you can still edit an event in
Event view by using the event in/out timecode controls to enter timecodes values.
2. In Event view, click Event In
mark-out point.
to set mark-in point, or Event Out
to set
3. Do one of the following:
• For an existing event, click Accept to propagate the change to the event in the
list.
• For a new event, click Insert to add the event to the list.
Using the timecode entry controls
1. In Event view, select the Event-In or Event-Out timecode control
open the timecode entry dialog box.
to
2. Enter a timecode value then click OK or press Enter.
Alternatively: Use the current position scrub bar
dialog box to locate the desired frame, then click OK.
in the timecode entry
3. Do one of the following:
• For an existing event, click Accept to propagate the change to the event in the
list.
• For a new event, click Insert to add the event to the list.
Using the event length control
Entering a new event length moves the Event-out point.
1. Select the Length timecode entry control.
2. Enter a new event length and click OK to close the Length dialog box.
180
Turbo iDDR User Guide
Editing and rearranging events in a playlist
The event length changes by moving the event-out point.
3. Do one of the following:
• For an existing event, click Accept to propagate the change to the event in the
list.
• For a new event, click Insert to add the event to the list.
Clearing event marks
Clearing an event mark resets the mark to the marks used in the source clip. Event-in
is set to the mark-in point of the source clip, and event-out is set to the mark-out point
of the source clip.
To clear an event mark, do one of the following:
• With the event loaded in Event view, click and hold the Event In or Event Out
button, then choose Clear Mark in the pop-up menu.
• With the event loaded in Event view, select the Event-In or Event-Out timecode
control and click Clear, then OK to clear the mark.
Moving events
To the change the order of events in a list, perform one of the following:
• In List View, drag and drop the event into another location in the list.
• Select an event in List view, then choose Move Up or Move Down buttons on the
Playlist menu. The event moves up or down one position in the list.
• Use the Edit menu to Copy, Cut, or Paste the event. When you paste the event, it is
inserted after the currently selected event. NOTE: You can paste events that you
copied from a list running on the other play channel.
Removing events
To remove an event, perform one of the following:
• Select the event in List view, then press the Delete key on your keyboard.
• Select the event in List view, right-click, then select Remove.
• Use the Edit menu to Cut the event.
• Right-click on the event and select Cut Event.
Copying events
To copy an event, perform one of the following:
• Use the Edit menu to Copy the event.
• Righ-click on the event and select Copy Event.
Renaming events
To rename an event, perform one of the following:
• Select the event in List view, then select Playlist | Properties. Click on the name of
Turbo iDDR User Guide
181
Chapter 4 Operation: AppCenter Workstation
the event in the Properties dialog box and use the on-screen keyboard to change the
name; click OK.
• Select the event in List view, then switch to the Event View. Select the Event name
control
, enter a new name, and click OK.
Adjusting event audio levels
The audio level for each event in the list is adjusted independently.
To adjust the event audio level:
1. With the event loaded in the Event view, click the Meterbar button
.
2. Adjust the audio level using the graphical faders or click Unity to return audio to
the last saved level.
3. Click Save to save changes to the event audio level.
NOTE: Changing event audio levels does not affect the source clip. Saved audio
levels are stored and used every time the list is loaded and played. Unsaved changes
are lost when another list is loaded.
4. Click the Meterbar button
again to return to Event view.
Changing event thumbnail image
By default, an event's thumbnail is set to the thumbnail of its source clip.
To change an event's thumbnail:
1. Select the event in List View.
2. Select the Event tab to change to Event View.
3. Monitor video output and use the front panel or onscreen transport controls to
position the clip to the desired video frame.
4. Click the thumbnail in the Event pane, then click Yes in the message asking if you
want to change the thumbnail image.
The event will now be represented by the new thumbnail. If the event is the first
play event in the list, then the list thumbnail is updated to refer to the new event
thumbnail.
NOTE: If the you modify the event marks so that the thumbnail is outside of the event's
media, the thumbnail is automatically changed to correspond to the event's mark in
position.
182
Turbo iDDR User Guide
Managing sections in a list
Locating the event source clip
The locate menu item is used to locate and select the source clip in the clips pane that
is used to generate an event.
To locate the source clip:
• Select the event in List view, then select Playlist | Locate.
The source clip is selected in the clips pane.
Viewing event properties
1. Select the event in the List view.
2. Open the properties dialog box by doing one of the following:
• Select Playlist | Properties.
• Click the Properties button.
• Right-click the event and select Properties.
Related topics
• “To pause at the end of an event” on page 187
Managing sections in a list
A list has as least one section, and all events belong to a section. Sections management
tasks include the following:
• “Adding and removing sections”
• “Moving and copying sections”
• “Renaming sections”
Turbo iDDR User Guide
183
Chapter 4 Operation: AppCenter Workstation
Adding and removing sections
A playlist has as least one section, but can have up to 100 sections. All events belong
to a section, and each section can have up to 1000 events.
To add a section:
• In List view, select Playlist | Add Section. The new section is inserted at the end
of the list.
• Use the Edit menu to Cut, Copy, or Paste a section. When you paste the section,
it is inserted after the currently selected section. NOTE: You can paste a section
that you copied from a list running on the other play channel.
• Right-click on the section and select Cut, Copy, or Paste.
To remove a section, perform one of the following:
• Select the section in the list, right-click and select Remove.
• Use the Edit menu to Cut a section.
• Select the section in List view, then click the Remove button. This button only
appears in full screen viewing mode.
Moving and copying sections
To the change the order of sections in a list, perform one of the following:
• Drag and drop the section into another location in the list.
• Select an section in List view, then select Playlist | Move Up or Move Down. The
section moves up or down one position in the list.
• Use the Edit menu in the AppCenter toolbar or standard keyboard shortcuts to Cut,
Copy, or Paste the section. When you paste the section, it is inserted after the
currently selected section. NOTE: You can paste sections that you copied from a
list running on the other play channel.
• Right-click on the section and select Cut, Copy, or Paste.
Renaming sections
To rename a section:
1. Select the section in the List view.
2. Open the properties dialog box by doing one of the following:
• Select Playlist | Properties.
• Click the Properties button.
• Right-click on the section and select Properties.
184
Turbo iDDR User Guide
Adding play effects
3. Select the section name, then enter a new name.
4. Click OK.
Adding play effects
These settings determine what will happen at the end of the list, section, or event when
the list is played.
Topics in this section include:
• “To repeat at the end of a playlist” on page 185
• “To repeat or pause at the end of a section” on page 186
• “To pause at the end of an event” on page 187
• “To add pause to all events in a section” on page 188
• “To remove pause from all events in a section” on page 189
To repeat at the end of a playlist
You can loop on a list until you manually stop playing.
1. Open the list properties dialog box by doing one of the following:
• Select Playlist | List Properties.
• Select the list icon in the event list, then click the Properties button.
• Right-click on a list and select Properties.
2. Click End, then choose the Repeat option.
Turbo iDDR User Guide
185
Chapter 4 Operation: AppCenter Workstation
3. Click OK to close.
To repeat or pause at the end of a section
To force a pause at the end of all section events:
1. Select the section in the List view.
2. Open the properties dialog box by doing one of the following:
• Select Playlist | List Properties.
• Select the list icon in the event list, then click the Properties button.
• Right-click on a list and select Properties.
3. Click All Events.
4. Select the Change event pauses check box, then choose the Add a pause to every
event option.
186
Turbo iDDR User Guide
Adding play effects
5. Use the drop-down list to choose whether to Freeze on last frame, Freeze on next
event, Show black, or Show E-to-E.
6. Click OK.
Each event's properties are modified to include the specified pause type. During
playback, each event will remain paused at its end until you intervene. The pause
symbol
appears next to the events in List view.
To pause at the end of an event
1. Select the event in List view.
2. Open the properties dialog box by doing one of the following:
• Select Playlist | List Properties.
• Select the list icon in the event list, then click the Properties button.
• Right-click on a list and select Properties.
3. Click End.
Turbo iDDR User Guide
187
Chapter 4 Operation: AppCenter Workstation
4. In the End page, select the Pause at end option.
5. Use the drop down list to choose whether to Freeze on last frame, Freeze on next
event, Show black, or Show E-to-E.
6. Click OK.
The pause symbol
appears next to the event in List view.
Related topics
• “To add pause to all events in a section” on page 188
• “To remove pause from all events in a section” on page 189
To add pause to all events in a section
To force a pause at the end of all section events:
1. Select the section in the List view.
2. Open the properties dialog box by doing one of the following:
• Select Playlist | List Properties.
• Click the Properties button.
• Right-click on a section and select Properties.
3. Click All Events.
4. Select the Change event pauses check box, then choose the Add a pause to every
event option.
188
Turbo iDDR User Guide
Adding play effects
5. Use the drop-down list to choose whether to Freeze on last frame, Freeze on next
event, Show black, or Show E-to-E.
6. Click OK.
Each event's properties are modified to include the specified pause type. During
playback, each event will remain paused at its end until you intervene. The pause
symbol
appears next to the events in List view.
To remove pause from all events in a section
To remove pauses at the end of all section events:
1. Select the section in the List view.
2. Open the properties dialog box by doing one of the following:
• Select Playlist | List Properties.
• Click the Properties button.
• Right-click on a section and select Properties.
3. Click All Events.
Turbo iDDR User Guide
189
Chapter 4 Operation: AppCenter Workstation
4. Select the Change event pauses check box, then choose the Remove all pauses
option.
5. Click OK.
Pauses are removed from all events in the section. The section now plays without
pausing between any events.
Adding GPI output triggers to playlists
You can assign GPI output triggers to events and sections in a playlist. The GPI
outputs can be used to trigger external equipment when the list plays. Before you can
use GPI output triggers in a list, you must assign GPI outputs to the play channel using
Configuration Manager. Refer to Chapter 2, Configuration: Turbo iDDR on page 33.
NOTE: If you want to play a list that was created on another play channel, you must
ensure that GPI triggers assigned to the play channels use the same names, otherwise
the GPI triggers will not occur. Using identical GPI naming also allows copying and
pasting sections and events between lists.
To trigger GPI outputs:
1. Use Configuration Manager to assign GPI outputs to the current Play channel.
Follow instructions in Chapter 2, Configuration: Turbo iDDR, then return to this
procedure.
2. Select an event or section in the playlist, then open the properties dialog box by
doing one of the following:
• Select Playlist | Properties.
• Click the Properties button.
• Right-click on an event or section and select Properties.
190
Turbo iDDR User Guide
Managing playlists
3. Select Trigger GPI, then use the drop-down list to select a GPI output.
NOTE: If no GPI outputs are listed, use Configuration Manager to assign GPI
outputs to the current channel, then return to this step. Refer to Chapter 2,
Configuration: Turbo iDDR on page 33.
4. Select the trigger action for the GPI output:
a.
Action
Trigger point
Start of event or section
First frame of event or section
End of event or section
Last frame of event or section
Start plus
Start of event or section plus the time you enter.
Offset should not exceed the event or section total
length.a
End minus
End of event or section minus the time you enter.
Offset should not exceed the event or section total
length.a.
If the offset time entered exceeds the event or section length, a warning message is
displayed.
5. Click OK to save settings.
Managing playlists
Managing lists includes the following tasks:
• “Saving a copy of a playlist” on page 192
• “Renaming a playlist” on page 192
• “Changing the playlist thumbnail image” on page 192
• “Locking a playlist” on page 193
Turbo iDDR User Guide
191
Chapter 4 Operation: AppCenter Workstation
• “Setting the playlist timecode” on page 193
• “Locating a playlist in the clips pane” on page 194
• “Viewing playlist properties” on page 194
Saving a copy of a playlist
When you are creating a new playlist, you might find it easier to use an existing,
similar playlist as your starting point, rather than creating a list from scratch. To do
this you must first save a copy of the playlist with a new name. Then you can alter it
without changing the original playlist.
To save a copy of a playlist:
1. In the clips pane, select the playlist.
2. Copy the playlist onto the clipboard, using the Edit menu or standard keyboard
shortcuts.
3. Paste the playlist into the clips pane. A copy appears named “Copy of …”.
4. Rename the copy of the playlist, load it Playlist mode, and alter it to create your
new playlist.
Renaming a playlist
You can rename a playlist using the clips pane. The playlist must be unloaded from
the Playlist mode by creating a new playlist, or opening an existing one. See these
related sections to rename a playlist.
1. Select the playlist in the clips pane.
2. Right-click and select Rename.
3. Use the on-screen keyboard to enter and new name and click OK.
The renamed list appears in the clips pane.
Changing the playlist thumbnail image
The list thumbnail image graphically identifies the list when it appears in the clips
pane, or when the List view is set to the thumbnail view option. By default, the list
thumbnail is always set to the first play event's thumbnail.
To change the list thumbnail:
1. In the List view, select the first play event in the list.
2. Click the Event tab to go to Event View.
3. Use the front panel or onscreen transport controls to locate the video frame to be
used for the new thumbnail.
4. Click the Event view thumbnail image, then click Yes to set this event’s thumbnail
to the current position.
The first play event and the list now have the same thumbnail.
192
Turbo iDDR User Guide
Managing playlists
Locking a playlist
You can lock a list to prevent changes from being made.
1. Make sure that the list to be locked is selected in the list pane.
2. Open the list properties dialog box, doing one of the following:
• Select Playlist | List Properties.
• Select the list icon in the event list, then click the Properties button.
• Right-click on the list and select Properties.
3. Click General, then choose the Locked option.
4. Click OK to close. The lock symbol
appears next to the list in List view.
Setting the playlist timecode
The playlist timecode is displayed in the List view toolbar. This selection is also used
to generate LTC timecode for the play channel.
To select the playlist timecode:
1. Open playlist properties dialog by performing one of the following:
• In List view, select Playlist | List Properties.
• In List view, click the Properties button.
• Right-click on a list and select Properties.
The List Properties dialog box is displayed.
2. Click Timecode in the properties dialog box.
Turbo iDDR User Guide
193
Chapter 4 Operation: AppCenter Workstation
3. Select Drop Frame.
The drop frame option is available when system timing is set to 525 line standard.
Drop frame allows the playlist timecode to indicate the actual running time of the
list.
4. Specify a start time, then click OK.
The start timecode is displayed in the List view toolbar.
Locating a playlist in the clips pane
• In List view, select Playlist | Locate.
The bin containing the list is shown in the clips pane.
Viewing playlist properties
In List view, select the playlist, then open the properties dialog box by doing one of
the following:
• Select Playlist | Properties.
• Click the Properties button.
• Right-click on a playlist and select Properties.
194
Turbo iDDR User Guide
Saving a list as a program
Refer to the following for more information on these properties pages:
• Data Page – see “Working with asset metadata” on page 238
• Timecode Page – see “Setting the playlist timecode” on page 193
• End – see “Locking a playlist” on page 193
Saving a list as a program
Playlists can be saved as a program so that they can be managed as a single clip. This
saves the events in the list, but nothing that breaks the flow of playout such as pauses
between events or sections. Saving a list does not consume media storage space since
the program merely references the source clip media that is already stored in the
media file system. If the source clips are deleted, the media referenced by the program
is preserved. (See “Deleting an asset” on page 227.)
You can insert programs into other playlists, or load and play them using the standard
Player mode. In Player mode, you can edit the program mark-in and mark-out points
providing the source clips referenced by the program have not been deleted. If that is
the case, 1 second of media is preserved before and after the program mark-in and
mark-out allowing some trimming.
1. Load the playlist in the Playlist mode.
2. In List view, select Playlist | Save As Program.
Turbo iDDR User Guide
195
Chapter 4 Operation: AppCenter Workstation
3. Use the Look in control to change the current bin if required.
4. Select the Program Name text entry control to change the program name, then click
OK.
The list is saved as a program in the current bin.
196
Turbo iDDR User Guide
Importing and exporting media
Importing and exporting media
This section includes the following topics:
• “About importing media” on page 197
• “To import a video file” on page 197
• “To import a still image file” on page 198
• “About exporting media” on page 201
• “To export media” on page 202
About importing media
You can import media using standard multimedia media and still image file formats.
Source files can be located on a local Turbo iDDR disk drive (fixed or removable
media), or a mapped networked drive.
Supported multimedia file formats
Supported File formats
Video elementary format
Audio elementary format
MPEG program streams
MPEG-2 Video
MPEG Layer II Audio
48 kHz, 16 bit stereo PCM
Dolby digital (AC-3)
GXF
DV25
MPEG-2 Video
48 kHz, 16 bit stereo PCM
Dolby digital (AC-3)
WMV (Windows Media)
Windows Media Video
Windows Media Audio
AVI
QuickTime
Supported still image and image sequence file formats
You can import still images and image sequence files from local Windows drives, or
networked devices. Imports are recorded using the aspect ratio and resolution you
specify. Still images are imported as a clip with a duration that you specify.
Supported file types include: .jpg, .bmp, .tiff, .tga, .gif, .png.
NOTE: Before playing a clip that is being imported from a file or stream, use the
Transfer Monitor to verify that the clip transfer rate is higher than the clip data rate.
This is required to prevent playback problems due to insufficient bandwidth.
To import a video file
When you import media from a file, the media is converted and stored using the iDDR
native file format.
1. Verify the current bin. The current bin is the destination directory for the import
operation. For help, see “Changing the current bin” on page 140.
2. In the AppCenter Workstation main menu, select Clips | Import.
The Import dialog box opens.
Turbo iDDR User Guide
197
Chapter 4 Operation: AppCenter Workstation
3. Click File.
NOTE: The appearance of the asset list and file open dialog boxes is determined by
the Options setting. (See “Modifying the asset list view” on page 138.)
4. In the Source section, browse to locate and select the source file.
The Look in label shows the current location. The list under the Look in label
displays the contents of the current location. You can select items in the list (such
as a machine, disk drive, or folder) to explore its contents.
Clicking the up-arrow button
hierarchy.
moves up one directory level in the storage
The Look in drop-down list allows you to choose from one of the most recent
source locations visited (history).
5. Verify the destination directory indicated next to Bin Name. This is where the
imported file is placed.
6. Modify the clip name, if needed, by selecting the Clip Name edit control.
7. Click Import to start the import.
NOTE: Import is a background task and can be monitored using the Transfer
Monitor. See “Monitoring media file transfers” on page 207 to view the job status.
To import a still image file
You can import still image or image sequence files. When imported, the image is
recorded as a clip using the duration, aspect ratio, and resolution you specify.
1. Verify the current bin location. The current bin is the destination directory for the
import operation. For help, see “Changing the current bin” on page 221.
2. Select Clips | Import.
The Import dialog box opens.
198
Turbo iDDR User Guide
To import a still image file
3. Click File.
The Import dialog box appears.
NOTE: The appearance of the asset list and file open dialog boxes is determined by
the View Option setting. Use the Clips Pane context menu to choose Image or Text
view. (See “Modifying the asset list view” on page 219.)
4. In the Source section, browse to locate and select the source file.
The Look in label shows the current location. The list under the Look in label
displays the contents of the current location. You can select items in the list (such
as a machine, disk drive, or folder) to explore its contents.
Clicking the up-arrow button
hierarchy.
moves up one directory level in the storage
The Look in drop-down list allows you to choose from one of the most recent
source locations visited (history).
5. Verify the destination directory indicated next to Bin Name. This is where the
imported file is placed.
6. Modify the clip name, if needed, by selecting the Clip Name edit control.
7. Click Import. The Importing dialog box is displayed.
Turbo iDDR User Guide
199
Chapter 4 Operation: AppCenter Workstation
Refer to the following table to choose import options.
How should this image be interpreted?
First of a numbered
sequence
Select if importing a still image to be displayed for a fixed period
of time.
Fixed duration
Select if importing the first of a set of sequentially numbered
files.
What are the source and target formats?
Image
Clip
200
Turbo iDDR User Guide
PC (VGA, XGA,
etc.)
For computer generated images files. During import the image is
gamma-corrected, deflickered and resized to a title-safe area.
Gama correction modifies mid range color tones leaving the
extreme tones untouched. Compensates for different PC monitors
and their display characteristics. The image is assumed to have
square pixels.
HD 1920x1080
59.94Hz
Images are HD frames, and have square pixels. The playout rate is
59.94Hz interlaced. The playout picture size is 1920x1080
HD 1920x1080
50 Hz
The images are HD frames, and have square pixels. The playout
rate is 50Hz interlaced. The playout picture size is 1920x1080
HD 1440x1080
59.94Hz
Images are HD frames, and have square pixels. The playout rate is
59.94Hz interlaced. The playout picture size is 1440x1080
HD 1440x1080
50 Hz
The images are HD frames, and have square pixels. The playout
rate is 50Hz interlaced. The playout picture size is 1440x1080
HD
Imports the image file as an HD clip at the current iDDR frame rate
setting.
SD 4:3
Imports the image file as a 4:3 SD clip at the current iDDR frame
rate setting.
SD 16:9
Imports the image file as a 16:9 SD clip at the current iDDR frame
rate setting.
About exporting media
How should the image aspect ratio be converted?
Pad picture with
bars
Standard to Widescreen
Widescreen to Standard
Crop picture to fit
Standard to Widescreen
Widescreen to Standard
8. Click OK to import the file.
NOTE: Import is a background task and can be monitored using the Transfer
Monitor. See “Modifying the asset list view” on page 219 to view the job status.
About exporting media
You can export iDDR clips using standard media file formats. The following table
describes the file formats supported.
Export: File Formats Supporteda
AVI DV25 or uncompressed (.avi)
General Exchange Format [SMPTE 360M] (*.gxf)
MPEG Program Streams (.mpg)
Windows Media (.wmv)
a.
When exporting playlists or programs to a file, only the GXF format
is available
Files can be exchanged over an Ethernet connection to network drives or using
common forms of removable media such as CD-R, DVD-R, external USB drives and
flash drives.
About sending files to external drives
The following are operational considerations when sending files to external drives:
• Estimating clip file sizes - AppCenter does not prevent you from sending a file
that is larger than the space available on the target disk. The transfer fails when the
disk becomes full. To avoid this problem, check the clip size reported in the clip
properties dialog box. You can use this to estimate the disk space required for the
clip.
• Best transfer performance - File transfers are handled concurrently, up to four at
a time. Additional transfer requests are queued. To enhance transfer performance,
you may try limiting transfers to one at a time.
• Adding/Removing USB devices - The USB connectors on the rear panel and front
panel can be used to connect a mouse, keyboard, USB drive, or other USB device.
Do not plug or unplug these devices while the iDDR is being used for critical play
to air activity.
Turbo iDDR User Guide
201
Chapter 4 Operation: AppCenter Workstation
• Maximum file sizes when exporting assets to USB drives- Exporting assets with
long durations may result in file sizes that exceed 4GB. Some USB drives are
formatted using FAT/FAT32 which has the 4GB maximum file size limitation.
Attempting to send a file to these disk volumes will cause the transfer operation to
fail. Disk volumes formatted using NTFS allow larger maximum file sizes. Before
exporting an asset, be sure to check that the file size is less than 4GB, otherwise,
ensure that the file system on the target drive supports larger files sizes.
To export media
1. Select the asset(s) in the Clips Pane that you want to send to a file.
2. Open the Send to dialog box using one of the following steps:
• Select Clips | Send to, or
• Right-click the clip in the Clips Pane and select Send to.
The Send dialog box appears.
3. Click File, then locate and select the destination directory.
The Save in label shows the current destination. The list under the Save in label
displays the contents of the current destination. You can select items in the list
(such as a machine, disk drive, or folder) to explore its contents.
Clicking the up-arrow button
hierarchy.
moves up one directory level in the storage
The Save in drop-down list allows you to choose from one of the most recent target
locations used (history).
202
Turbo iDDR User Guide
To export media
4. Use the File Type drop-down list to select the file format:
MPEG File (.mpg)
SMPTE 360M (.gxf)
Microsoft AVI (.avi)
Windows Media (.wmv)
5. If desired, modify the destination file name using the File Name
control.
edit
6. Click Send.
7. If you chose Microsoft AVI (.avi) file format, you must select encoder type, then click
OK to export.
Format
Export Settings
Microsoft Video 1
none
Uncompressed
none
Microsoft DV
Interleaved (Type 1)
Exports a Type 1 AVI file which contains a
standard DV bit stream where the video and audio
streams interlaced together. This type of AVI file
can only be read by software applications that
support DirectShow. This file cannot be read by
applications that are only compatible with Video
for Windows.
Non-Interleaved (Type 2)
Exports a Type 2 AVI file which produces a VFW
compatible AVI file format. This file type has
separate streams for video and audio and it can
also be processed by DirectShow. The advantage
of creating an Type 2 file is that the file can be read
by the older applications that do not support
DirectShow.
Turbo iDDR User Guide
Comment
203
Chapter 4 Operation: AppCenter Workstation
Format
Export Settings
Comment
Windows Media
Refer to the Microsoft Windows Media support website for information on
choosing the best settings for your application
NOTE: Export is a background task and can be monitored using the Transfer
Monitor. See “Monitoring media file transfers” on page 124 to view the job status. If
the operation fails for any reason, the asset is deleted from the target location.
Transferring media between Turbo iDDRs
This section includes the following:
• “About transferring media” on page 204
• “Transferring media from another iDDR” on page 204
• “Sending media to another Turbo iDDR” on page 205
About transferring media
You can transfer media to and from the Turbo iDDR as streaming media, using the
Import Stream and the Send to Stream features. The iDDR supports streaming media
transfers over the 1Gb Ethernet port. The source or destination for a streaming transfer
must be another Turbo iDDR or M-Series iDDR. (Requires M-Series software
version 2.0.10 or higher.) The format for Turbo iDDR streaming is SMPTE 360M
(*.gxf). You must configure your network for streaming transfers prior to using these
features. See Chapter 6, Using an Ethernet connection on page 271.
A transfer job is created for each “import” or “send to” operation. Once created,
transfer jobs are added to the transfer job queue where they are dispatched in a first
in, first out basis. Transfer jobs are handled in the order they appear in the queue. Any
additional jobs wait in the queue. You can use the Transfer Monitor to check the status
of your transfers. See “Monitoring media file transfers” on page 207.
Transferring media from another iDDR
1. In the Clips Pane, change to the current bin, if desired. The current bin will be the
destination bin for the import operation.
For more details, see “Changing current bin using 'Look in' drop-down list.” on
page 221.
2. Select Clips | Import.
The Import dialog box opens.
204
Turbo iDDR User Guide
Sending media to another Turbo iDDR
3. Click Stream.
NOTE: The appearance of the asset list and file open dialog boxes is determined by
the View Option setting. Use the Clips Pane context menu to choose Image or Text
view. (See “Modifying the asset list view” on page 219.)
4. In the Source section, browse to locate and select the source file.
The Look in label shows the current location. The list under the Look in label
displays the contents of the current location. You can select items in the list such
as machine, disk volume or a bin, to explore its contents.
Clicking the up-arrow button
hierarchy.
moves up one directory level in the storage
The Look in drop-down list allows you to choose from one of the most recent source
locations visited (history).
5. In the Destination section, Bin Name displays the name of the current bin which
specifies the destination bin.
6. Specify a clip name, if desired, by clicking the Clip Name edit control.
7. Click Import to start the transfer.
NOTE: Import is a background task and can be monitored using the Transfer
Monitor. See “Monitoring media file transfers” on page 207 to view the job status.
Sending media to another Turbo iDDR
The iDDR supports streaming media transfers over the Ethernet connection.
Streaming transfers allow playout while the asset is still transferring. The destination
for a streaming transfer must be another iDDR. The format for Turbo iDDR streaming
is SMPTE 360M (*.gxf).
Turbo iDDR User Guide
205
Chapter 4 Operation: AppCenter Workstation
You must configure an iDDR network adapter prior to using the “Send to stream”
feature. Refer to Chapter 6, Using an Ethernet connection on page 271, then return to
this procedure.
1. In the Clips Pane, select the asset(s) you want to transfer.
2. Open the Send to dialog box using one of the following steps:
• Select Clips | Send to, or
• Right-click the clip and select Send to.
The Send to dialog box appears.
3. Click Stream, then locate and select the stream destination.
The Stream to label shows the current destination. The list under the Stream to label
displays the contents of the current location. You can select items in the list (a
machine, disk volume, or a bin) to explore its contents.
Clicking the up-arrow button
hierarchy.
moves up one directory level in the storage
The Stream to drop-down list allows you to choose from one of the most recent
target devices (history).
4. Click Send to transfer the asset(s).
NOTE: Send to stream is a background task and can be monitored using the iDDR
Transfer Monitor tool. (See “Monitoring media file transfers” on page 124.) If the
operation fails for any reason, the asset is deleted from the target location.
206
Turbo iDDR User Guide
Monitoring media file transfers
Monitoring media file transfers
The Transfer Monitor is used to monitor all iDDR transfer jobs and their status. A
transfer job is created for each “send to” or “import/export” operation. Once created,
transfer jobs are added to the transfer job queue where they are dispatched in a first
in, first out basis. Up to four transfer jobs can execute simultaneously. Any additional
jobs wait in the queue.
Topics in this section include:
• “Starting the Transfer Monitor”
• “Transfer Monitor pages and buttons”
• “Viewing transfer jobs in Transfer Monitor”
• “Viewing detailed transfer job properties”
• “Aborting a transfer job”
• “Removing transfer jobs from the completed list”
Turbo iDDR User Guide
207
Chapter 4 Operation: AppCenter Workstation
Starting the Transfer Monitor
To start Transfer Monitor, perform one of the following:
• Select File | Transfer Monitor
-or• In the AppCenter Statusbar, double-click the Transfer Monitor button
.
The Transfer Monitor button appears when a transfer job is present or pending.
Transfer Monitor pages and buttons
In the Transfer Monitor, transfer jobs are categorized and displayed on one of three
pages— Receiving, Sending, and Completed pages. On each page the transfer jobs are
displayed using a thumbnail image along with a brief description of its source,
destination and status. Jobs that have encountered errors are shown in red text.
• Source – The source of the transfer job. If the source includes multiple files, the
first file name is displayed plus a '…' sign beside it. You may find the full path of
all the source files from the Properties page.
• Destination – The destination of the transfer job. You may find the full path of all
the source files from the Properties page.
• Status – For ongoing transfer jobs, the transfer rate is displayed in megabytes per
second and percentage of job completed. All jobs waiting in the queue are shown
as “Pending”. Jobs that encountered errors are displayed in red text along with an
error code.
• Properties Button – Used to view more detailed information about a transfer job.
See “Viewing detailed transfer job properties” on page 210.
• Remove Button – Used to remove jobs from the Transfer queue.
• Remove All Button – Used to remove all of the jobs from the Transfer queue at
once.
• Abort Button – Used to cancel transfer jobs in progress.
208
Turbo iDDR User Guide
Transfer Monitor pages and buttons
Receiving Page
The Receiving page displays all import transfer jobs.
Sending Page
The Sending page displays all “Send to” transfer jobs and their status.
Completed Page
The Completed page displays all jobs that have completed successfully. Completed
jobs are automatically cleared after approximately 36 hours. You can manually clear
jobs from the completed list using Remove or Remove All.
Turbo iDDR User Guide
209
Chapter 4 Operation: AppCenter Workstation
Viewing transfer jobs in Transfer Monitor
Each transfer job is displayed in the Transfer Monitor with a thumbnail image along
with a brief description of its source, destination and status. For jobs that have
encountered errors, they are shown in red. You may find more detailed information
about a transfer job from its Properties page.
• Source: The source of the transfer job. If the source includes multiple files, the first
file name is displayed plus a '…' sign beside it. You may find the full path of all the
source files from the Properties page.
• Destination: The destination of the transfer job. You may find the full path of all
the source files from the Properties page.
• Status: For ongoing transfer jobs, the transfer rate is displayed in megabytes per
second and percentage of job completed. All jobs waiting in the queue are shown
as “Pending”. Jobs that encountered errors are displayed along with an error code.
You may find a more detailed error message in the Properties page.
Viewing detailed transfer job properties
1. In the Transfer Monitor, select a transfer job.
210
Turbo iDDR User Guide
Viewing detailed transfer job properties
2. Click Properties.
3. When the Transfer Job Properties dialog box appears, select the Transfer page to
examine transfer properties.
General properties page
Turbo iDDR User Guide
211
Chapter 4 Operation: AppCenter Workstation
Transfer properties page
Aborting a transfer job
1. In Transfer Monitor, select a transfer job in the list.
2. Click Abort.
Removing transfer jobs from the completed list
You can remove transfer jobs from the Completed page.
1. In Transfer Monitor, click Completed.
2. Remove the transfer jobs using one of the following:
• Select the job(s) to remove, then click Remove.
• Select the job(s) to remove, then click Remove All.
212
Turbo iDDR User Guide
Managing media
Managing media
The AppCenter Clips Pane is used to manage the assets stored on the iDDR. Almost
all the media management tasks you’ll perform fall in the following topics.
• “Guide to using the Clips Pane”
• “Modifying the asset list view”
• “Working with bins”
• “Working with assets”
• “Working with the Recycle Bin”
• “Locating assets”
• “Working with asset metadata”
• “Viewing asset properties”
Turbo iDDR User Guide
213
Chapter 4 Operation: AppCenter Workstation
Guide to using the Clips Pane
The Clips Pane in the iDDR user interface provides tools for managing assets stored
on the media drives. Assets include clips, and playlists, and programs. In addition to
the typical file management tasks such as browse, copy, move, delete, and managing
the directory structure, you’ll also use the Clips Pane to transfer files to other devices,
and to import or export assets using standard file formats.
NOTE: The Clips Pane in AppCenter Workstation can be used to manage media
when the iDDR is in front panel control mode. When the front panel display requires
text entry, for example, to name a clip, the external keyboard output is switched from
AppCenter to the front panel display.
Viewing the Clips Pane
The Clips Pane is always displayed in AppCenter. The size of the Clips Pane changes
when you resize the monitor pane or the channel pane. At its minimum size the Clips
Pane displays a single column of clip thumbnails.
(Click to change
the current bin.)
2 Context
Button
3 Assignable
Buttons
(Click and hold
to assign)
"
214
4 Asset List
(Image view shown here.
Text or Details views are
also available.)
Control
Description and User Operation
Current Bin Label
Displays the name and location of the current bin, or the summary
of the search or link operation. At first time start-up, the current bin
is V:/default. The bin named ‘default’ is on the internal disk
volume. Click the current bin label to change the current bin and
organize bins. See “About the Current Bin drop-down list” on
page 217.
Turbo iDDR User Guide
Guide to using the Clips Pane
#
Control
Description and User Operation
Context Button
The operation and label of the context button changes with the
mode of the selected channel.
Load – Displayed when the selected channel is in Player mode or
Recorder mode. Loads the asset selected in the asset list.
New Event– Displayed when the selected channel is in Playlist
mode Event View. Creates an unattached event in the playlist that
can be previewed and then inserted.
Insert – Displayed when the selected channel is in Playlist mode
List View. Inserts selected assets into the playlist.
Note: Double-clicking the asset in the asset list performs the same
function as clicking the context button.
$
Assignable Buttons
Assignable buttons allow you to modify the button assignments to
best suit your workflow. Right-clicking a button opens the button
pop-up menu which lists the alternative button choices.
Properties– Opens the Properties dialog for the selected asset. See
“Viewing clip properties” on page 242.
Search– Opens the search dialog box. See “Locating assets” on
page 230.
New Bin– Creates a new bin. To create a new bin in the current disk
volume, click New Bin, then enter the new bin name using onscreen
or external keyboard. See “Working with bins” on page 221.
Options– Opens the options dialog box which allows you to
modify how assets are displayed in the asset list. See “Modifying
the asset list view” on page 219.
Delete– Deletes the selected item(s). See “Deleting a bin” on
page 223, or “Deleting an asset” on page 227.
Rename– Opens the rename dialog box. See “Renaming an asset”
on page 224.
Send to– Opens the Send to dialog box used to send the asset to a
file, or streaming transfer to another networked device.
%
Asset List
Select from three view
options— Text, Image, or
Details
Displays the list of assets located in the current bin.
You can scroll through the list using the up/down arrow keys on an
external keyboard. Right-click to open the Asset Context menu.
See “About the asset context menu” on page 218.
You can change how assets are shown by selecting the view option.
View options include Image (thumbnail), Text, or Details (includes
thumbnail and detailed text). See “Modifying the asset list view” on
page 219.
Assets recorded using a different video standard or compression
type than the current system setting cannot be loaded and played.
These assets will appear “greyed” in the Clips Pane asset list.
This example shows the appearance of a PAL clip when the iDDR
is set to NTSC:
Turbo iDDR User Guide
215
Chapter 4 Operation: AppCenter Workstation
Control
Description and User Operation
Clips Menu
See “About the asset context menu” on page 218.
Terms used in the Clips Pane
The following table describes the terms used in the Clips Pane.
216
Asset
Description
Bin
A container used to organize assets, similar to a directory or folder on a
computer. A bin is contained within a disk volume. The iDDR does not support
nested bins, that is, a bin cannot contain another bin.
Current Bin
The current bin functions as the target bin when recording clips, or as the source
bin when loading clips. The current bin contents are listed in the Clips Pane. The
V:/default bin is created automatically.
Disk Volume
The iDDR has one disk volume located on the internal drives. The internal disk
volume is formatted using the iDDR media file system created by using the
Turbo Storage Utility. The internal disk volume uses the drive letter ‘V:’
Playlist
A sequence of events that can be loaded and played using the Playlist mode.
Playlists are created in the Playlist mode by adding clips or programs to a list.
Media
Media is the video, audio, and timecode source material recorded on the disk
drives. Each media type is stored in it’s own file which are referenced by one or
more clips for playback.
Clip
A clip references the media files stored on the media drives to allow playback of
the video and associated audio and timecode recorded from a single source.
Deleting a clip deletes the media referenced by the clip only if it is not referenced
by another clip. You can use the Find Links feature to find related assets. See
“Finding linked assets” on page 236.
Program
Programs are generated from loop record mode or from a playlist using the
Playlist mode. Programs generated in Playlist mode include all the media and
transitions in the playlist, but nothing that breaks the flow of playout, such as, a
pause at the end of an event.
Turbo iDDR User Guide
Guide to using the Clips Pane
About the Current Bin drop-down list
• To access the Current Bin drop-down list, click the Current Bin label
.
Current bin menu items
Menu Item
Description and User Operation
Organize Bins
Opens the Organize Bins dialog box used to manage bins— create, delete, rename,
change current bin.
See “Working with bins” on page 221.
Bin List
List of all the bins in the current disk volume. A volume must always have at least
one bin. The default bin is created automatically.
Recycle Bin
Displays the contents of the Recycle Bin. All assets deleted from the asset list are
stored in the Recycle Bin until it is emptied.
See “Working with the Recycle Bin” on page 229.
Cached Search
Results
The last four search results are cached. You can view the most recent search results
using the Current Bin drop-down list.
See “Locating assets” on page 230.
About the Clips menu
Click Clips in the AppCenter Workstation main menu to display the Clips Pane
context menu. The following table describes the context menu items.
Menu Item
Description
New Bin
Creates a new bin in the current disk volume. Use the onscreen or external
keyboard to enter the bin name.
See “Creating a new bin” on page 222.
Empty Recycle Bin
Permanently removes all items from the Recycle Bin. By default, deleted assets
are moved to the Recycle Bin and remain there until it is emptied. See
“Bypassing the Recycle Bin when deleting” on page 230 for information on
deleting assets without using the Recycle Bin.
Rename
Opens the Rename dialog box for the selected asset.
See “Renaming a bin” on page 223 or “Renaming an asset” on page 224.
Delete
Deletes the selected asset.
See “Deleting a bin” on page 223 or “Deleting an asset” on page 227.
Select All
Selects all items in the asset list. Operations available for Select All include:
delete, send to, and copy.
See “Selecting multiple assets” on page 224.
Turbo iDDR User Guide
217
Chapter 4 Operation: AppCenter Workstation
Menu Item
Description
Search
Opens the Search dialog box which is used to perform basic or advanced
searches.
See “Locating assets” on page 230.
Links
Opens the Links dialog box allowing you to locate other assets that are linked to
the selected asset. For example, a subclip is linked to the source clip.
See “Locating assets” on page 230.
Send To
Opens the Send To dialog box which is used to send assets to a different
location– another bin, disk volume, or another iDDR. Send To is also used to
export clips or programs to local windows drives or networked devices. See “To
export media” on page 115 or “Sending media to another Turbo iDDR” on
page 205.
Import
Opens the Import dialog box which is used to import assets from the following
sources:
– Media streams from another iDDR.
– Other media file formats from a local drive or over the network.
– Still image source files.
See “About importing media” on page 109.
Properties
Opens the Properties dialog box for the selected asset.
See “Viewing clip properties” on page 242.
Options
Opens the Options dialog box which allows you to change the way assets are
displayed in the asset list.
See “Modifying the asset list view” on page 219.
About the asset context menu
To open the asset context menu, right-click the asset.
218
Menu Item
Description
Options
Opens the Options dialog box which allows you to change the way assets are
displayed in the asset list. See “Modifying the asset list view” on page 219.
Send To
Opens the Send To dialog box which is used to send assets to a different
location– another bin, disk volume, or another iDDR. Send To is also used to
export clips or programs to local windows drives or networked devices. See
“About importing media” on page 109 or See “Sending media to another Turbo
iDDR” on page 119.
Turbo iDDR User Guide
Modifying the asset list view
Menu Item
Description
Cut, Copy, Paste
Used to move assets, or make a additional copies. Copying a clip does not
consume media disk space. Only a new reference to existing media is created.
See “Moving an asset to another bin” on page 224.
Rename
Opens the Rename dialog box for the selected asset.
See “Renaming a bin” on page 223 or “Renaming an asset” on page 224.
Delete
Deletes the selected asset.
See “Deleting a bin” on page 223 or “Deleting an asset” on page 227.
Links
Opens the Links dialog box allowing you to locate other assets that are linked to
the selected asset.
See “Finding linked assets” on page 236.
Properties
Opens the Properties dialog box for the selected asset.
See “Viewing clip properties” on page 242.
Modifying the asset list view
The asset list in the Clips Pane displays the contents of the current bin, and the results
from searches or from requests for linked assets. You can choose one of three views
to best suit your workflow.
1. Select Clips | Options.
2. In the View tab, select one of the following view options:
Image view
Turbo iDDR User Guide
219
Chapter 4 Operation: AppCenter Workstation
Displays the asset name and thumbnail image for each asset in the bin. Playlists are
displayed as a stack of thumbnails. You can change the video frame used to
generate the thumbnail. See “Changing the clip thumbnail image” on page 65.
Text view
The text view displays an icon and name for each asset and one attribute of your
choice. To select an asset attribute, select the Show drop-down list in the View
Options dialog box, then select one of the following attributes.
Attribute display options:
• Create Date
• Modified Date
• Length
• Type (MPEG or DV25)
• Location (full path)
The following table describes symbols shown in Text view.
Asset Symbols used
in the Text View
Asset Type
Clips with audio and video
Video only clip
Playlist
Details view
Details view displays assets with both a thumbnail and a detailed text description.
3. If you want to sort the assets, click the Sort tab, then choose how you want assets
sorted:
220
Turbo iDDR User Guide
Working with bins
4. Click OK.
The clips pane displays with the new view and sort order.
Working with bins
This section includes:
• “Changing current bin using 'Look in' drop-down list.” on page 221
• “Changing the current bin” on page 221
• “Creating a new bin” on page 222
• “Deleting a bin” on page 223
• “Renaming a bin” on page 223
Changing current bin using 'Look in' drop-down list.
• In the Clips Pane, click the Current Bin label
from the list.
, then choose a bin
Changing the current bin
Exploring a bin in the Organize Bins dialog box causes it to become the current bin.
1. In the Clips Pane, select the Current Bin drop-down list
select Organize Bins.
, then
2. In the Organize Bins dialog box, select a bin, then click Explore.
Turbo iDDR User Guide
221
Chapter 4 Operation: AppCenter Workstation
3. Close the Organize Bins dialog box.
4. The bin becomes the destination bin (for recording) and the source bin for loading
clips (for playing) for all channel operations.
Creating a new bin
1. Open the Organize Bin dialog box using one of the following methods:
• Select Clips | New Bin.
• Click the New Bin button in the clips pane.
• In the Clips Pane:
- Select the Current Bin drop-down list
Bins.
, then select Organize
- In the Organize Bins dialog box, select a disk volume, then click New Bin.
2. Enter the new bin name, then click OK.
3. Close the Organize Bins dialog box.
222
Turbo iDDR User Guide
Working with assets
Deleting a bin
1. In the Clips Pane, select the Current Bin label
Organize Bins.
, then select
2. In the Organize Bins dialog box, choose the bin you want to delete
3. Click the Delete button.
Deleted bins and assets are moved to the Recycle Bin unless the “Remove items
immediately when deleted.” option is set for the Recycle Bin (see “Bypassing the
Recycle Bin when deleting” on page 230). Holding down the SHIFT key during
delete also bypasses the Recycle Bin.
NOTE: You cannot delete a bin containing assets that are locked or in use. However,
the unlocked assets in the bin will be deleted.
4. Click Yes in the Confirm Delete dialog box.
5. Close the Organize Bins dialog box.
Renaming a bin
1. In the Clips Pane, select the Current Bin label
Organize Bins.
, then select
2. In the Organize Bins dialog box, choose the bin you want to rename, then click
Rename.
3. Edit the bin name, then click OK.
Asset names can contain up to 32 characters, including spaces. Spaces count as two
characters, and the following characters are not allowed: \ / : * ? < > | ' (single
quote) " (double quote) [ ] and ~ at the beginning of the name.
NOTE: If the renamed bin contains assets that are locked or in use, two bins will
appear after renaming— one with the new name, and one with the old name
containing the problem asset.
4. Close the Organize Bins dialog box.
Working with assets
Assets displayed in the Asset List include clips, subclips, playlists, and programs.
Refer to the following procedures to work with assets:
• “Renaming an asset” on page 224
• “Selecting multiple assets” on page 224
• “Moving an asset to another bin” on page 224
• “Copying an asset” on page 225
• “Deleting an asset” on page 227
• “Erasing a clip's unused media” on page 228
• “Locking an asset” on page 229
Turbo iDDR User Guide
223
Chapter 4 Operation: AppCenter Workstation
Renaming an asset
1. Select the asset in the Asset List.
2. Select Rename using one of the following:
• Select Clips | Rename, or
• Select Rename in the asset context menu, or
• Click the Rename button in the Clips Pane.
If the Rename button is not displayed in the Clips Pane, refer to assignable
buttons in “Guide to using the Clips Pane” on page 214.
The rename dialog box appears.
3. Edit the asset name, then click OK.
Asset names can contain up to 32 characters, including spaces. Spaces count as two
characters, and the following characters are not allowed: \ / : * ? < > | ' (single
quote) " (double quote) [ ] and ~ at the beginning of the name.
The renamed asset is not re-sorted.
NOTE: Assets that are locked or in use cannot be renamed.
Selecting multiple assets
You can select multiple assets in the Clips Pane as follows:
• Select Clips | Select All.
• Using mouse and keyboard, hold the SHIFT or CTRL key on the keyboard while
selecting multiple assets with the mouse or arrow keys.
Moving an asset to another bin
There are two ways to move an asset to another bin: Using Cut/Paste or the Send To
dialog box.
Using the cut and paste commands
1. Select the asset(s) in the asset list.
2. Cut the asset to the clipboard using one of the following:
• Select Cut in the asset context menu, or
• Select Edit in the AppCenter toolbar, then choose Cut.
• Use keyboard shortcut Ctrl + X.
3. Change the current bin to the target bin. (Refer to“Changing current bin using
'Look in' drop-down list.” on page 221.)
4. Paste the asset(s) from the clipboard to the current bin.
The Paste operation is accessed in the same way as Cut.
NOTE: If an asset is locked or in use, it remains in the existing bin, while the
remaining assets are moved to a new bin with the specified name.
224
Turbo iDDR User Guide
Working with assets
Using Send To
1. Select the asset(s) in the Asset List.
2. To open the Send To dialog box using do one of following:
• Select Clips | Send To, or
• Select Send To in the asset context menu, or
• Click the Send To button in the Clips Pane.
If the Send To button is not displayed in the Clips Pane, refer to assignable
buttons in“Guide to using the Clips Pane” on page 214.
The Send dialog box appears.
3. Click the Bin tab.
4. Select Move to in the right-hand drop-list.
5. Select the target bin name.
6. Click the Send button to close the Send dialog box, and move the file.
Move is a background task and can be monitored using the Transfer Monitor. Refer
to“Monitoring media file transfers” on page 124.
Copying an asset
The copy command creates a new asset that references the same media files belonging
to the original asset. Copying an asset does not duplicate the media files. Copying
does not impact the media storage space available.
The naming convention for copied assets in the same bin adds an underscore (“_”) and
a number after the original name. For example, the copied clip for “Clip1” will be
“Clip1_1”, “Clip1_2” and so on.
You can copy or move assets in two ways, as follows:
Turbo iDDR User Guide
225
Chapter 4 Operation: AppCenter Workstation
Using the copy and paste commands
1. Select the asset(s) in the asset list.
2. Copy the asset to the clipboard using one of the following:
• Select Copy in the asset context menu, or
• Select Edit in the AppCenter toolbar, then choose Copy.
• Use the keyboard shortcut Ctrl + C.
3. If needed, change the current bin to the target bin. (Refer to “Changing current bin
using 'Look in' drop-down list.” on page 221.)
4. Paste the asset(s) from the clipboard to the current bin.
The Paste operation is accessed in the same way as Copy.
NOTE: If an asset is locked or in use, it remains in the existing bin, while the
remaining assets are moved to a new bin with the specified name.
Using Send To
1. Select the asset(s) in the Asset List.
2. To open the Send To dialog box using do one of following:
• Select Clips | Send To, or
• Select Send To in the asset context menu, or
• Select the Send To button in the Clips Pane.
If the Send To button is not displayed in the Clips Pane, refer to assignable
buttons in “Guide to using the Clips Pane” on page 214.
The Send dialog box appears.
3. In the Send dialog box, click Bin, then Copy to in the left-hand drop-list.
4. Select the target bin name.
226
Turbo iDDR User Guide
Working with assets
5. Click the Send button to close the Send dialog box and copy the file.
NOTE: Copy is a background task and can be monitored using the Transfer Monitor.
Refer to “Monitoring media file transfers” on page 124.
Deleting an asset
You can delete assets to free storage space. You can safely delete a clip without
harming the subclips, playlists, and programs created from it. The media referenced
by subclips, playlists, and programs is preserved when the clip is deleted. Once the
source clip is deleted, subclips and playlist events retain an extra 1 second of media
before and after their mark points to allow some trimming.
Deleted assets are moved to the Recycle Bin unless the bypass Recycle Bin option is
used. (See “Bypassing the Recycle Bin when deleting” on page 230.) You must empty
the Recycle Bin to free storage space.
To delete an asset:
1. Select the asset or assets in the Asset List.
2. Select Delete using one of the following:
• Select Clips | Delete, or
• Select Delete in the asset context menu, or
• Click the Delete button in the Clips Pane.
If the Delete button is not displayed in the Clips Pane, refer to assignable buttons
in See “Guide to using the Clips Pane” on page 214.
A progress dialog appears when deleting multiple assets. If the selected asset is
contained in the Recycle Bin, it is permanently removed; otherwise, it is moved
from its original bin into the Recycle Bin. If an item of the same name is already in
the Recycle Bin, the new item is automatically renamed. (See also See “Bypassing
the Recycle Bin when deleting” on page 230.)
NOTE: Assets that are locked or in use cannot be deleted.
Turbo iDDR User Guide
227
Chapter 4 Operation: AppCenter Workstation
Erasing a clip's unused media
After editing a clip by moving the mark-in/mark-out points, the remaining portion of
media outside the marks can be erased to free media storage space. If the media
outside the clip marks is referenced by a subclip, program, or event from a playlist,
that media is not erased. Subclips and playlist events retain an extra 1 second of media
before and after their mark points to allow some trimming.
To erase unused media:
1. Select the clip in the asset list.
2. Open the Clip Properties dialog box using one of the following:
• Select Clips | Properties, or
• Select Properties in the asset context menu, or
• Click the Properties button in the Clips Pane.
If the Properties button is not displayed in the Clips Pane, refer to assignable
buttons in See “Guide to using the Clips Pane” on page 214.
The Clip Properties dialog appears.
3. In the Clip Properties dialog box, click Media.
4. On the Media page, select the Erase Unused Media option.
5. Click OK.
Unused media is erased when you click the OK button and the Properties dialog box
is closed. After erasing unused media, the following is true:
• Media outside the clip marks is erased except that portion referenced by a
subclip, playlist event, or program.
• All subclips and events generated from the source clip will retain 1 second of
media before the mark-in and after the mark-out.
• Event-in becomes the first video frame of the file
228
Turbo iDDR User Guide
Working with the Recycle Bin
• Event-out becomes the last video frame of the file
• Clip length becomes the total file length.
Locking an asset
Locked assets cannot be renamed, deleted, or modified in any way.
To lock an asset:
1. Select the asset in the Asset List.
2. To view the Properties dialog box for the selected asset, do one of the following:
• Select Clips | Properties, or
• Select Properties in the asset context menu, or
• Click the Properties button in the Clips Pane.
If the Properties button is not displayed in the Clips Pane, refer to assignable
buttons in “Guide to using the Clips Pane” on page 214.
The Asset Properties dialog appears:
3. Click the General tab, then select the Locked check box to lock the asset.
4. Click OK to close the Properties dialog.
Working with the Recycle Bin
Topics in this section:
• “Viewing the Recycle Bin contents” on page 229
• “Emptying the Recycle Bin” on page 230
• “Bypassing the Recycle Bin when deleting” on page 230
Viewing the Recycle Bin contents
• In the Clips Pane, select the Current Bin label
Turbo iDDR User Guide
, then select Recycle
229
Chapter 4 Operation: AppCenter Workstation
Bin.
The Recycle Bin assets are displayed in the asset list as the current bin. You can
work with assets in the Recycle Bin just like any other bin.
Emptying the Recycle Bin
1. In the Clips Pane, select the Current Bin label
Organize Bins.
, then select the
2. In the Organize Bins dialog box, select Recycle Bin from the bin list.
3. Click Empty, then Yes to confirm.
4. Close the Organize Bins dialog.
Bypassing the Recycle Bin when deleting
1. In the Clips Pane, select the Current Bin label
Organize Bins.
, then select the
2. In the Organize Bins dialog box, choose Recycle Bin.
3. Select Remove items immediately when deleted.
NOTE: Holding down the SHIFT key during delete also bypasses the Recycle Bin.
4. Close the Organize Bins dialog box.
Locating assets
Three tools are provided for locating assets: Sorting, Search, and Links. You can set
how assets are sorted by selecting the “sort by” attribute for the asset list. For
example, you can sort by name, modified date, length, etc. The Search dialog box
provides both basic search and advanced search modes for locating assets anywhere
in the iDDR media storage. Advanced search mode allows you to define search
criteria for assets based on user defined metadata. The Links dialog box helps you
determine assets that are related. For example, you can locate the source clip used to
generate a subclip, or you can determine if there are copies of a given clip.
230
Turbo iDDR User Guide
Locating assets
Topics in this section include:
• “Sorting assets in the Asset List” on page 231
• “Using Basic search” on page 231
• “Viewing recent search results” on page 234
• “Using Advanced Search” on page 234
• “Advanced Search Criteria” on page 236
• “Finding linked assets” on page 236
Sorting assets in the Asset List
You can sort assets by file attributes such as date, name, length, and create date using
the Options dialog box.
To change how assets are sorted:
1. Open the Options dialog box using one of the following methods:
• Select Clips | Options, or
• Right-click an asset, then select Options in the asset context menu, or
• Click the Options button in the Clips Pane.
If the Options button is not displayed in the Clips Pane, refer to assignable
buttons in “Guide to using the Clips Pane” on page 214.
2. Click the Sort tab in the Options dialog box.
3. Choose the desired sorting attribute and order, then click OK.
The Asset List sorts in the order specified.
NOTE: When assets are added or renamed, assets may not remain listed according
to the selected sort order. To re-sort the assets, repeat this procedure, or press F5 to
refresh the Asset List.
Using Basic search
The Search dialog box provides the basic search mode for locating assets anywhere
in the iDDR media storage.
Turbo iDDR User Guide
231
Chapter 4 Operation: AppCenter Workstation
1. Open the Search dialog box by doing one of the following:
• Select Clips | Search, or
• Click the Search button in the Clips Pane.
If the Search button is not displayed in the Clips Pane, refer to assignable buttons
in “Guide to using the Clips Pane” on page 214.
2. Choose Basic search, then specify search criteria on the Text, Date and Type tabs.
The search is performed using the combination of search criteria on all three tabs.
Search by text – If you know all or part of an asset name, use the Text tab. Select
the text entry control, then type all or part of the asset name in the “Enter Search
Text” dialog box. The default text search mode is “any word” or “word portion”.
For example, if you enter the word fire, search will find all asset names that contain
fire, for example, fires and house fire. For an “exact phrase” search, use a single
quote or double quote to specify the phrase. For example, if you enter “forest fire”,
search will locate all asset names that contain the phrase forest fire.
If the Search names only… option is selected, the search is applied to asset names.
If not selected, the search includes all asset metadata. Refer to “Working with asset
metadata” on page 238.
Search by date – If you are searching for assets created or modified within a
specific date or time range, use the Date tab. By default, the All Dates box is
selected. To specify date criteria, select the Find items option to enable the controls
under it. Use the drop-down list to choose Created or Modified, then do one of the
following:
• Select the between option, and then specify a date range. Click the edit control
to display a calendar for easy input.
• Select the in the last option, and then use the drop-down lists to specify a time
within a recent number of minutes, hours, days, or months.
232
Turbo iDDR User Guide
Locating assets
Search by Type – In the Type tab, select the type of assets— clips, programs or lists
to be searched. Search results will only include the selected types.
3. Once you have selected the search criteria, click OK to start the search.
The search results are displayed in the Clips Pane. The text in the Current Bin
control is replaced with a brief summary of the search. For example, Search: movie
- indicates all the clips, programs and lists with names like movie1, movie2, or
Search: Created Last 5 Days for assets created in the last 5 days.
Turbo iDDR User Guide
233
Chapter 4 Operation: AppCenter Workstation
Viewing recent search results
The last four search results are retained. You can view the most recent search results
using the Current Bin label.
• Select the Current Bin label
, then choose a search result.
Using Advanced Search
The Search dialog box provides the advanced search mode which provides an
extended set of attributes for locating assets anywhere in the iDDR media storage.
1. Open the Search dialog box by doing one of the following:
• Select Clips | Search, or
• Click the Search button in the Clips Pane.
If the Search button is not displayed in the Clips Pane, refer to assignable buttons
in“Guide to using the Clips Pane” on page 214.
2. Choose Advanced search to create adn view advanced search criteria.
When Advanced search is used, Basic search criteria is ignored.
3. Click Add to add new search criteria, or click Remove to remove it, then click OK
to start the search.
234
Turbo iDDR User Guide
Locating assets
The following table lists the advanced search attributes along with their conditions
and value choices. Advanced searches can include metadata attributes. Since these
are user defined, only their types and conditions are listed here. See also “Working
with asset metadata” on page 238.
Turbo iDDR User Guide
235
Chapter 4 Operation: AppCenter Workstation
Advanced Search Criteria
Conditions
Value
Value
Name
Like/Not Like
Name
N/A
Type
Is/Is Not
Clip
Program
List
N/A
Compression
Format
Is/Is Not
DV25
MPEG
N/A
Video Standard
Is/Is Not
NTSC
PAL
N/A
Create Date
Between
Before
After
Date 1
Date
Date
Date 2
Modified Date
Between
Before
After
Date 1
Date
Date
Date 2
Length
Greater Than
Less Than
Between
Equals
Length
Length
Length
Length 1
Length 2
Locked
Is
True/False
N/A
Drop-frame
timecode
Is
True/False
N/A
Data Type
Conditions
Value
Value
String
Like/Not Like
A string
N/A
Integer
Float
Greater Than
Less Than
Equals
Between
A number
N/A
Date
Between
Before
After
Date 1
Date
Date
Date 2
Boolean
Is
True/False
N/A
Metadata
Attributes
4. Once you have added all the search criteria, click OK to add the criteria.
5. Click OK to start the search.
The search results are displayed in the Clips Pane. The text in the Current Bin
control is replaced with a brief summary of the search.
Finding linked assets
The Links dialog box helps you locate assets that are related based on the links criteria
that you can specify.
1. In the asset list, select the asset for which you want to find linked assets.
2. Open the Links dialog box by performing one of the following steps:
236
Turbo iDDR User Guide
Locating assets
• Select Clips | Links, or
• Right-click an asset, then select Links, or
• Click the Links button in the Clips Pane.
If the Links button is not displayed in the Clips Pane, refer to assignable buttons
in “Guide to using the Clips Pane” on page 214.
3. Choose one of the link relationships to use.
Link Relationship
Description
Shared media
Find all assets that reference the same media files, i.e., the same video, audio,
timecode files in the media file system.
Source clip
Find the source clip from which a subclip was created.
Subclips
Find all subclips created from the selected clip.
References
When a playlist or program is selected, find all the assets that are referenced by
the playlist or program.
When a clip is selected, find all the playlists and events that reference that clip.
Same bin
Generate a list of assets that are located in the same bin
4. Click Find Now.
The results of the link operation are displayed in the Clips Pane. The text in the
Current Bin label is replaced by a brief summary of the links operation.
NOTE: Unlike the search results, link results are not cached. You must perform the
Links operation each time to discover linked assets.
Turbo iDDR User Guide
237
Chapter 4 Operation: AppCenter Workstation
Working with asset metadata
The properties dialog box displays information about an asset as described in
“Viewing asset properties” on page 242. The properties dialog box also includes a
user defined metadata feature that allows you to define and add your own information
about an asset. You can specify the metadata name, data type, and value.
The metadata you add for one asset automatically appears on properties pages for all
existing and future assets, except with no value entered. The values you specify for an
asset are retained with the asset for the following operations: copy, move, and send
to. The metadata you define for an asset can be used as search criteria in advanced
search.
Metadata types and their possible values are described in the following table.
Data Type
Value
Example: Name/Value
String
User defined string
Producer: John Doe
Integer
An integer value
Episode: 4
Float
A number expressed in
floating point
Version: 1.2
Date
Date
Air Date: 10/31/03
Boolean
True or False
QA: False
Topics in this section include:
• “Adding and modifying asset metadata” on page 238
• “Clearing metadata” on page 240
• “Deleting asset metadata” on page 241
Adding and modifying asset metadata
Use the following steps to add or modify metadata in the properties dialog box. The
metadata names you add will appear in the properties dialog box for all assets. See
also “Deleting asset metadata” on page 241.
1. Select an asset in the Clips Pane asset list.
2. Open the Properties dialog box using one of the following methods:
• Select Clips | Properties, or
• Select Properties in the asset context menu, or
238
Turbo iDDR User Guide
Working with asset metadata
• Click the Properties button in the Clips Pane.
If the Properties button is not displayed in the Clips Pane, refer to assignable
buttons in “Guide to using the Clips Pane” on page 214.
The properties dialog box appears:
3. Click the Data tab, then click Add Data or Modify on the data page.
4. Define or modify metadata using the following steps:
a. Select Name, then enter the metadata name in the Name dialog box.
Names are not case sensitive. “Episode” and “episode” are treated the same.
You cannot modify names of existing metadata. See also “Deleting asset
metadata” on page 241.
b. Select Type, then choose a data type from the drop-down list.
Metadata types include: String, Integer, Float, Date, and Boolean.
(Refer to “Working with asset metadata” on page 238.)
Turbo iDDR User Guide
239
Chapter 4 Operation: AppCenter Workstation
c. Select Value, then enter a metadata value in the Value dialog box.
d. Click OK to close the Add or Modify dialog box and save changes.
Your changes appear in the Properties dialog box for this and all other assets.
Clearing metadata
Clearing metadata removes the value entered for the selected metadata, but does not
delete the metadata name from the properties data page.
1. Select the asset in the Clips Pane asset list.
2. Open the Properties dialog box using one of the following:
• Select Clips | Properties, or
• Select Properties in the asset context menu, or
• Click the Properties button in the Clips Pane.
If the Properties button is not displayed in the Clips Pane, refer to assignable
buttons in “Guide to using the Clips Pane” on page 214.
The properties dialog box appears:
240
Turbo iDDR User Guide
Working with asset metadata
3. Click the Data tab, then scroll to locate and select the metadata entry you want to
clear.
4. Click Clear.
The metadata value is now blank.
5. Repeat step 3 and step 4 to clear other metadata values.
6. Click OK.
If the metadata name is used by any other asset, that is, a value has been entered on
another properties page, the metadata name will remain on all properties pages. See
also, “Deleting asset metadata” on page 241.
Deleting asset metadata
You may need to delete a metadata name, that is, remove it from all properties pages
when it becomes obsolete, or to repair a typographical error. There is no “delete
metadata” feature, however, metadata names are checked every time you close a
properties dialog box. If a metadata name is not being used, that is, no values are
entered for the metadata name on any asset properties page, the metadata name is
automatically deleted and removed from all metadata pages.
To delete a metadata name you just created:
1. In the asset Properties dialog box, click Data.
2. Select the metadata name you want to delete.
3. Click Clear.
4. Click OK.
The metadata name is removed from all asset properties pages since no metadata
value exists for any asset.
Turbo iDDR User Guide
241
Chapter 4 Operation: AppCenter Workstation
To delete a metadata name already in use
To completely purge a metadata name, you must clear the metadata value on all asset
properties data pages. When the last asset is cleared, and the properties dialog is
closed, the metadata name is purged and removed from all properties pages. Refer to
“Clearing metadata” on page 240.
Viewing asset properties
The properties dialog box varies depending on the asset.
• “Viewing clip properties” on page 242
• “Viewing playlist properties” on page 243
• “Viewing program properties” on page 244
• “Viewing bin properties” on page 244
• “Viewing volume properties” on page 245
Viewing clip properties
1. Select the clip in the Clips Pane asset list.
2. Open the Clip Properties dialog box using one of the following:
• Select Clips | Properties, or
• Select Properties in the asset context menu, or
• Click the Properties button in the Clips Pane.
If the Properties button is not displayed in the Clips Pane, refer to assignable
buttons in “Guide to using the Clips Pane” on page 214.
The Clip Properties dialog box appears. There are three pages in the clip dialog
box. General, Media, and Data. The General and Media pages are self explanatory.
The Data page is used to add metadata to the clip. To learn more, refer to “Working
with asset metadata” on page 238.
242
Turbo iDDR User Guide
Viewing asset properties
Viewing the General properties page
Viewing Media Properties page
The Media page displays all the relevant clip timecodes, including clip marks, and the
first and last frame of the clip. A Time Dome gives a graphical display of the relative
position of the marks within the recorded media.
Viewing Data properties page
This page allows you to define your own metadata and specify values for that
metadata. Refer to “Working with asset metadata” on page 238.
Viewing playlist properties
The playlist properties dialog box includes features that controlling list playback in
the Playlist mode. Refer to “To repeat or pause at the end of a section” on page 186
to learn about using the playlist properties dialog box.
Turbo iDDR User Guide
243
Chapter 4 Operation: AppCenter Workstation
Viewing program properties
1. Select the program in the Clips Pane asset list.
2. Open the Program Properties dialog box using one of the following methods:
• Select Clips | Properties, or
• Select Properties in the asset context menu, or
• Click the Properties button in the Clips Pane.
If the Properties button is not displayed in the Clips Pane, refer to assignable
buttons in “Guide to using the Clips Pane” on page 214.
The Program Properties dialog box is displayed which has two pages, General and
Data. The General page is self explanatory. The Data page is used to add metadata
to the program. To learn more, refer to “Working with asset metadata” on
page 238.
Viewing bin properties
1. In the Clips Pane, select the Current Bin label
Organize Bins.
, then select
2. In the Organize Bins dialog box, select a bin. The bin properties are displayed in
the Organize Bins dialog box.
244
Turbo iDDR User Guide
Viewing asset properties
Viewing volume properties
1. In the Clips Pane, select the Current Bin label
Organize Bins.
, then select
2. In the Organize Bins dialog box, select a disk volume. The volume properties are
displayed in the Organize Bins dialog box.
Turbo iDDR User Guide
245
Chapter 4 Operation: AppCenter Workstation
Monitoring the system using the StatusBar
The StatusBar, located across the bottom of the AppCenter window, is used to display
system and applications messages. In addition, the StatusBar includes several tool
buttons as described in the following table.
Status Messages
Protocol
Monitor
Button
Transfer
Monitor
Button
StatusPane
Button
Tool Name
Description
Protocol Monitor
This button appears when a channel is configured for remote control
using a remote control protocol application. The Protocol Monitor button
flashes when any protocol is successfully receiving serial control
protocol commands. Clicking on the Protocol Monitor button opens the
Protocol Monitor dialog box which shows the specific channel(s)
receiving messages. See “Monitoring remote control communications”
on page 268.
Transfer Monitor
Appears during a file transfer or import/export operation. Selecting the
button opens the Transfer monitor pane. See “Monitoring media file
transfers” on page 207.
StatusPane
Always appears on the StatusBar, however, the button symbol changes
depending on the system status. “Interpreting StatusPane button icons”
on page 246.
Interpreting StatusPane button icons
The StatusPane button always appears in the StatusBar. The button icon changes
depending on the status of the trap messages. Selecting the StatusPane button opens
the StatusPane which is used to view and manage status messages logged on the
system.
Icon
246
Name
Description
Default
All warnings and alert messages have been cleared.
Warning
There is at least one warning message, and no alert messages.
Alert
There is at least one uncleared alert message.
Turbo iDDR User Guide
Message types displayed in the StatusBar
Message types displayed in the StatusBar
The following table describes the message types that appear in the StatusBar.
Typically, the StatusBar message area displays status messages for the selected
channel, however, if a problem develops with the software application or a hardware
subsystem, an error message is momentarily displayed and the symbol for the
StatusPane button changes.
Message Type
Example Message
Channel Status
Message
Clip loaded, clip recording, no clip loaded.
Channel Error
Message
Media disks are full. Cannot record the clip.
Trap Summary
Message
The system drive is at full capacity. Disk recorder
operations will fail. Delete unused or temporary assets,
and restart disk recorder.
Using the StatusPane
The StatusPane is used to view detailed system messages including status, warning,
and error messages. The StatusPane provides a central message area where status
messages are listed. The StatusPane also includes subsystem status indicators, and the
StatusPane menu button. The subsystem status indicators display a red X when an
alert message for the subsystem is listed in the StatusPane. A yellow X is displayed
when a warning messages is listed.
StatusPane Topics:
• “Opening the StatusPane” on page 247
• “Showing iDDR software versions” on page 248
• “Managing messages in the Status Pane” on page 248
• “Closing the StatusPane” on page 248
• “Exporting log files” on page 249
Opening the StatusPane
• To open the StatusPane, click the StatusPane button
StatusBar.
in the AppCenter
The StatusPane is displayed and you can view messages.
Turbo iDDR User Guide
247
Chapter 4 Operation: AppCenter Workstation
Showing iDDR software versions
• Select the StatusPane menu button
, then choose Show Versions.
Software versions are displayed.
Managing messages in the Status Pane
All messages are listed in the Status Pane. You may find it necessary to use the
utilities found in the Status Pane menu to manage messages that appear in the Status
Pane.
Copying messages to the clip board
1. Select the messages in the StatusPane.
2. Click Copy.
After copying the message, it can be pasted using standard Windows techniques.
Clearing messages
Clearing messages from the StatusPane clears the state of the subsystem indicators so
they no longer display the alert and warning symbols.
• Click Clear.
All messages are removed from the StatusPane.
Closing the StatusPane
• Click Close.
248
Turbo iDDR User Guide
Using the StatusPane
Exporting log files
The procedures in this section describe how to export the Turbo iDDR and Windows
operating system log files. The Turbo iDDR log files include all applications
messages, the Windows Event Log, and messages related to managing the media file
system. The exported log files can be sent to Thomson Grass Valley product support
where they can be examined to analyze the operation of your iDDR.
NOTE: Export Log does not export StatusPane messages. To capture StatusPane
messages, refer to “Copying messages to the clip board” on page 290.
Use one of the following procedures to export the log files.
Exporting log files using the StatusPane
1. Select System | Export Log.
The ExportLog dialog box is displayed.
2. In the ExportLog dialog box, browse to locate the destination directory.
3. Select the File Name edit control, then enter a file name for the exported log file.
4. Use the Logs tab to select the log files to export.
5. Click Export.
6. When the export confirmation message appears, click OK.
7. Retrieve the log files, and send them to Thomson Grass Valley support for analysis.
Exporting log files using the Windows command line
This procedure allows you to export log files even if AppCenter does not start
properly. It uses the Windows command prompt.
1. In the Windows task bar, select Start | Run.
2. Type the following in the Run dialog box, then click OK.
c:\profile\exportlog
Turbo iDDR User Guide
249
Chapter 4 Operation: AppCenter Workstation
The ExportLog dialog box is displayed.
3. In the ExportLog dialog box, browse to locate the destination directory.
4. Select the File Name edit control, then enter a file name for the exported log file.
5. Use the Logs tab to select the log files to export.
6. Click Export.
7. When the export confirmation message appears, click OK.
8. Retrieve the log files, and send them to Thomson Grass Valley support for analysis.
250
Turbo iDDR User Guide
Chapter
5
Remote Control
Information in this chapter includes:
• “Using remote control protocols” on page 252
• “Using GPI input and output triggers” on page 269
Turbo iDDR User Guide
251
Chapter 5 Remote Control
Using remote control protocols
You can control the iDDR using remote control devices and applications software
developed for the Turbo iDDR that use industry-standard serial control protocols.
You can enable remote control mode from either the front panel control mode, or
workstation control mode.
Topics included here:
• “About remote control and supported protocols” on page 252
• “Making RS-422 or Ethernet connections” on page 253
• “Remote control operation: In front panel mode” on page 254
• “Remote control operation: In Workstation mode” on page 255
About remote control and supported protocols
The following table shows the remote control protocols supported:
Supported
Protocols
Comments
AMP
Advanced Media Protocol (AMP) - AMP is an extension of the Odetics
protocol.
BVW
BVW Protocol - supports standard set of commands used for VTR machine
control. BVW Insert Edit, used by most edit control panels, is not supported.
Refer to one of the following topics to enable remote control:
• “Remote control operation: In front panel mode” on page 254
• “Remote control operation: In Workstation mode” on page 255
About AMP protocol support
You can use Advanced Media Protocol (AMP) to control iDDR record and play
channels. This protocol is an extension of the Odetics protocol. External control
devices can be connected via rear panel RS-422 serial connectors, or an Ethernet
network connection.
Two-Head Player Model
The AMP protocol supports the use of a two-head player model in that two clips are
loaded simultaneously, as follows:
• Current clip — The AMP “preset id” is considered the current clip that controls
channel resources.
• Preview clip — The AMP “preview preset id” is considered the preview clip.
Generally the preview clip begins playing after the current clip completes, at which
point the preview clip becomes the current clip.
NOTE: If you use AMP remote protocol to perform video network transfers, you must
setup the video network and the Controller ID as described in the Installation chapter.
Refer to “Using an Ethernet connection” on page 271.
252
Turbo iDDR User Guide
Making RS-422 or Ethernet connections
AMP Local/Remote mode
In Workstation control mode, you can select Protocol control only or Local and
Protocol control. The Local and Protocol control mode allows you to control the
iDDR remotely, but also allows some local control at the same time.
Protocol control only mode – You can only monitor operations on the iDDR. You
cannot perform any control operations locally. All control comes from the external
device. The buttons, menu items, and other interface controls are disabled. From the
local iDDR, you can see the control operations as they take place, but you can’t
control channel resources using the user interface on the iDDR.
Local and Protocol control mode – Both local and remote control are allowed.
Control comes from the external device, but at the same time, all user interface
controls are enabled.
Local and Protocol control mode is available only when remote control is enabled
from Workstation mode. See “Remote control operation: In Workstation mode” on
page 255.
About BVW protocol support
You can use BVW protocol to control iDDR record and play channels. External
control devices can be connected via rear panel RS-422 serial connectors. The iDDR
supports a standard set of BVW commands used for VTR machine control. BVW
Insert Edit, used by some edit control panels, is not supported.
Making RS-422 or Ethernet connections
Serial protocol control is available through three 9-pin RS-422 serial port connectors
mounted on the iDDR rear panel, or through an Ethernet network connection (AMP
only).
• To make RS-422 cable connections using the following diagram.
• To make Ethernet connections and configure the Ethernet network, refer to “Using
an Ethernet connection” on page 271.
RS 422 P1
RS 422 R1
RS 422 P2
R1
S/PDIF
INPUT
SDI SD RECORDER PB
PR
RS 422 P1
Ch 1
P1
CMPST/Y
RS 422 R1
Ch 2
Ch 1
VIDEO REFERENCE
S- Video
LTC Out
P2
DVI-I
OUTPUT
HD/SD PLAYER
S/PDIF
SDI
Composite
S-Video
RS 422 P2
R1
Ch 2
Ch 1
P2
Ch 2
Push
LTC In
Push
GPI I/O
Turbo iDDR User Guide
253
Chapter 5 Remote Control
Remote control operation: In front panel mode
You can configure a channel for remote control operation from front panel mode. If
the channel is in use at the time, all channel activity is terminated and the current
media is ejected prior to switching to remote control mode.
1. Press a channel button —
2. Press MENU
or
or
.
, then choose Remote Control... using the control knob.
3. Use the control knob to select the remote control protocol and control port.
The channel switches to remote control mode. Press the Menu button to return to
local control.
NOTE: To return a channel to front panel control mode, press the front panel Menu
button.
254
Turbo iDDR User Guide
Remote control operation: In Workstation mode
Remote control operation: In Workstation mode
You can configure a channel for remote control from either front panel mode or
workstation mode. However, operating remote control from the Workstation mode
provides extended features that allow local and remote control at the same time.
Topics in this section include:
• “Enabling remote control from Workstation mode” on page 255
• “Guide to AMP Recorder: Protocol Only mode” on page 257
• “Guide to AMP Player: Protocol Only mode” on page 259
• “Guide to AMP Recorder: Local/Protocol mode” on page 261
• “Guide to AMP Player: Local/Protocol mode” on page 263
• “Using AMP Recorder: Local control tasks” on page 264
• “Using AMP Player: Local control tasks” on page 265
• “Using front panel transport controls” on page 268
• “Monitoring remote control communications” on page 268
Enabling remote control from Workstation mode
You can configure a channel for remote control operation from Workstation mode. If
the channel is in use at the time, all channel activity is terminated and the current
media is ejected prior to switching to remote control mode.
This procedure contains two sections:
• “Select a control protocol” on page 255
• “Select the control port and control mode” on page 255
Select a control protocol
1. If the Channel Pane is not already in split screen view, select View | Split Screen.
2. In the monitor pane, click the control mode drop-down list
channel, then choose a remote protocol.
list for the
The channel changes to remote control mode and becomes the selected channel.
3. Proceed to “Select the control port and control mode”.
Select the control port and control mode
After enabling remote control mode, you must select a control port and control mode–
Protocol control only, or Local and Protocol control.
1. Click the channel monitor in the Monitor Pane.
2. In AppCenter Workstation main menu, click Player or Recorder, as appropriate,
then choose Options.
The Local/Remote dialog box is displayed.
Turbo iDDR User Guide
255
Chapter 5 Remote Control
3. Select the remote control port as follows:
a. Temporarily set the Remote/Local option to Local and Protocol control.
b. Use the Protocol Controller Port drop-down list to choose a remote control port.
You can select one of the RS422 ports (P1-P4), or the Ethernet port (AMP only).
4. If choosing AMP protocol, select the Remote/Local control option as required by
your control system:
• Protocol control only — Disables local control. The iDDR is controlled only
from the remote device. The iDDR display is used to monitor the channel status
and control operations as they take place remotely.
• Local and Protocol control — Local control is enabled. You can use the
AppCenter Workstation interface and front panel transport controls to control
the channel even though remote control is enabled. With this setting, you must
take care to avoid conflicts between local and remote control.
5. If you using AMP protocol to perform video network transfers, you must setup the
video network and the Controller Id as described in the Installation chapter. Refer
to “Using an Ethernet connection” on page 271.
6. Test the system and recheck settings, if required.
256
Turbo iDDR User Guide
Remote control operation: In Workstation mode
Guide to AMP Recorder: Protocol Only mode
The Protocol control only mode allows you to only monitor the record channel
operations and view clip information. All control comes from the external device. The
buttons, menu items, and other interface controls are disabled. You can select this
mode by choosing the Protocol control only option in the Options dialog box. (See
“Select the control port and control mode” on page 255.)
The following describes the controls and indicators in the Protocol control only mode.
1 Assignable
Buttons
(Default buttons
are shown)
5 Thumbnail
2 Current
Timecode
3 Timecode
Source
(Switch to local control
mode to modify)
4 Clip Name &
Current Bin
6 Time Dome
Control
Description and User Operation
"
Assignable Buttons
The assignable button allows you to modify the button assignment to
best suit your workflow. Holding down a button longer than one
second opens the button pop-up menu which lists the alternative
button choices.
Button choices include Options or Properties. The buttons function
the same as the context menu items.
#
Current Timecode
Indicates the current timecode of the timecode source for recording.
The timecode value of XX:XX:XX:XX is displayed if there is no input
timecode.
$
Timecode Source
The text displayed to the right of current timecode indicates the
timecode source: LTC, or INT (internal generator). You must
temporarily switch to Local and Protocol control mode to change
the record channel timecode source.
%
Clip Name and location
Displays the current clip’s name and location in the media storage
system.
Turbo iDDR User Guide
257
Chapter 5 Remote Control
Control
Description and User Operation
&
Thumbnail
Used to visually identify the clip. By default, the thumbnail is
generated using the 16th frame of video. The thumbnail image can be
modified in Player.
'
Time Dome
Progress
Only
This control indicator displays record progress and available storage.
By default, the Time Dome indicates one revolution every 10
seconds, or one revolution during a fixed length recording. You must
switch to local control mode to change the Time Dome display, then
refer to “Displaying available storage space” on page 141.
Progress
and Available
Storage
258
Turbo iDDR User Guide
Remote control operation: In Workstation mode
Guide to AMP Player: Protocol Only mode
The Protocol control only mode allows you to only monitor play channel operations
and view clip information. All control comes from the external device. The buttons,
menu items, and other interface controls are disabled. You can select this mode by
choosing the Protocol control only option in the Options dialog box. (See “Select the
control port and control mode” on page 255.)
Channel status information displayed includes current clip timecode, current clip
name, countdown to the preview clip, and preview clip name.
The following describes the indicators displayed Protocol control only mode.
1 Assignable
Buttons
(Default buttons
are shown)
6 Thumbnail
(Current and
Preview clips)
2 Clip
Timecode
3 PB or EE
Mode
(Indicates the
selected mode)
4 Clip Name &
Current Bin
5 Countdown
Timecode
7 Time Dome
Control
Description and User Operation
"
Assignable Buttons
Assignable buttons allow you to modify the button assignment to
best suit your workflow. Holding down a button longer than one
second opens the button pop-up menu which lists the alternative
button choices.
Button choices include Options or Properties. The buttons function
the same as the context menu items.
#
Current Timecode
Indicates the current timecode of the timecode of the clip. The
timecode value of XX:XX:XX:XX is displayed when there is no
recorded timecode. See “Striping timecode (replacing the timecode
track)” on page 157.
$
EE or Playback Selection
The text displayed to the right of clip timecode indicates the playback
mode selection: EE or PB. When E to E is selected, the play channel
output switches to the record channel input when playback is
stopped. When PB is selected, play channel output freezes on the last
video frame. To select the playback mode, refer “Selecting E-to-E
mode” on page 150.
Turbo iDDR User Guide
259
Chapter 5 Remote Control
Control
Description and User Operation
%
Clip name and current bin
Displays the clip’s name and location in the video storage file
system. In Status view you cannot rename the clip.
&
Countdown timecode
Displays the time remaining for the clip loaded in player.
'
Thumbnail
Used to visually identify the current clip loaded in Player. When
AMP and VDCP protocols are used, the thumbnail includes the
current and preview clip. You can click or touch the thumbnail image
to toggle between the preview and current clip thumbnails. This
allows you to identify the preview clip before it plays. Generally the
preview clip begins playing after the current clip completes, at which
point the preview clip becomes the current clip.
(
Time Dome
Progress
only
This control displays play progress, or play progress with media
marks which shows the relative position of mark-in/mark-out points
in the clip. The timecode underneath indicates play time remaining.
The Time Dome is also used to enable and indicate loop play mode.
You must temporarily switch to Local Control mode, then select and
hold the Time Dome, and select Loop Play in the pop-up menu.
Progress
with media marks
Progress
& loop play
enabled
260
Turbo iDDR User Guide
Remote control operation: In Workstation mode
Guide to AMP Recorder: Local/Protocol mode
The Local and Protocol control mode allows you to control the record channel locally
as well as remotely. You can select this mode by choosing Local and Protocol control
in the Options dialog box. (See “Select the control port and control mode” on
page 255.)
The following describes the controls and indicators used in the Local and Protocol
control mode.
1 Assignable
Buttons
(Default buttons
are shown)
5 Thumbnail
(Current and
Preview clips)
2 Current
Timecode
6 Time Dome
3 Timecode
Source
(Use Context
menu to modify)
7 Length
Button
(Click to specify
clip length)
4 Clip Name &
Current Bin
8 Meter Bar
Button
(Click to adjust
audio)
Control
Description and User Operation
"
Assignable Buttons
Assignable buttons allow you to modify the button assignment to
best suit your workflow. Holding down a button longer than one
second opens the button pop-up menu which lists the alternative
button choices. Button choices include New Clip, Options, Locate
and Properties. The buttons function the same as the context menu
items.
#
Current Timecode
Indicates the current timecode of the timecode source for recording.
The timecode value of XX:XX:XX:XX is displayed if there is no
input timecode.
$
Timecode Source
The text displayed to the right of current timecode indicates the
timecode source: VITC, LTC, or INT (internal generator). See
“Changing the timecode source” on page 138.
%
Clip Name Edit Control
Displays the clip’s name and location in the media storage system.
To rename the clip, touch or click the Clip Name, then use the
onscreen or external keyboard to enter text. To change the current
bin, i.e. the target location for recording clips, refer to “Changing
the current bin” on page 139.
Turbo iDDR User Guide
261
Chapter 5 Remote Control
Control
Description and User Operation
&
Thumbnail
Used to visually identify the clip. By default, the thumbnail is
generated using the 16th frame of video.
'
Time Dome
Progress
Only
This control indicator displays record progress and available
storage. By default, the Time Dome indicates one revolution every
10 seconds, or one revolution during a fixed length recording.
Select the Time Dome, then choose Available Storage or Record
Progress only. See “Displaying available storage space” on
page 141.
Progress
and Available
Storage
262
(
Length
Select the Length control to enter the clip length, then choose
record. Recording continues until you choose stop, or the specified
length is reached.
)
Meterbar Button
Displays the Meterbar which contains the audio record level
controls and signal meters. Changes to the audio level are saved for
the channel.
Turbo iDDR User Guide
Remote control operation: In Workstation mode
Guide to AMP Player: Local/Protocol mode
The Local and Protocol control mode allows you to control a play channel locally as
well as remotely to play clips. You can select this control mode by choosing Local and
Protocol control in the Options dialog box. (See “Select the control port and control
mode” on page 255.)
The following describes the controls and indicators displayed in the Local and
Protocol control mode.
1 Assignable
Buttons
(Default buttons
are shown)
5 Thumbnail
(Current and
Preview clips)
"
2 Clip/Preview
Timecode
6 Time Dome
3 Clip Name &
Current Bin
7 Mark-In &
Mark-Out
4 Clip/Preview
Timecode
8 Meter Bar
Button
(Click to adjust
audio)
Control
Description and User Operation
Assignable Buttons
Assignable buttons allow you to modify the button assignment to
best suit your workflow. Holding down a button longer than one
second opens the button pop-up menu which lists the alternative
button choices.
Goto – Used to jump to a specific timecode in the current clip, or
skip to the preview clip. See “Skipping to the preview clip during
playout” on page 267 and “Jumping to a specific timecode” on
page 267.
Load – Opens the Load Clip dialog which displays the contents of
the current bin. Select a clip, then choose OK to load.
Options – Opens the Options dialog box used to select control mode
and control port. See “Select the control port and control mode”
on page 255. –
Turbo iDDR User Guide
263
Chapter 5 Remote Control
Control
Description and User Operation
#
Current Frame Timecode
and Stop Mode.
Indicates the recorded timecode of the current frame being played.
The timecode value of XX:XX:XX:XX is displayed when there is no
recorded timecode.
The text displayed to the right of clip timecode indicates the
playback mode selection: EE or PB. When E to E is selected, the play
channel output switches to the record channel input when playback
is stopped. When PB is selected, play channel output freezes on the
last video frame. To select the playback mode, refer “Selecting
E-to-E mode” on page 150.
$
Clip name & Current Bin
Displays the current or preview clip’s name and location in the video
storage file system. You can toggle between current and preview clip
name by clicking the thumbnail image. To rename the clip, touch or
click the clip name, then use the onscreen or external keyboard to
enter a new name.
%
Countdown Timecode
Indicates the time remaining for the clip.
&
Current and Preview Clip
Thumbnail
Used to visually identify the current clip loaded in Player. When
AMP and VDCP protocols are used, the thumbnail includes the
current and preview clip. You can click or touch the thumbnail image
to toggle between the preview and current clip thumbnails. This
allows you to identify the preview clip before it plays. Generally the
preview clip begins playing after the current clip completes, at which
point the preview clip becomes the current clip.
'
Time Dome
Progress
only
This control displays play progress, or play progress with media
marks which shows the relative position of mark-in/mark-out points
in the clip. The timecode underneath indicates play time remaining.
The Time Dome is also used to enable and indicate loop play mode.
Select and hold the Time Dome, then select Loop Play in the pop-up
menu.
Progress
with media marks
Progress
& loop play
enabled
(
Set Mark-in and Set
Mark-out
These buttons are used to set new mark-in or mark-out points.
Position the clip to the desired frame, then click or touch the In or
Out buttons. Unused media is not deleted. To clear a mark, hold
down the button for longer than one second, then choose Clear Mark
in the pop-up menu. Marks are reset to the beginning or end of
available media. See “Editing a clip” on page 154.
)
Meter Bar Button
Displays the Meterbar which contains the audio play level controls
and signal meters. Changes to the audio level can be saved with the
clip. See “Adjusting clip audio level” on page 156.
Using AMP Recorder: Local control tasks
In local control mode, you can perform all the tasks locally that are available in the
standard recorder application while the record channel is still under remote control.
For a full description of all the tasks you can perform using the Recorder user
interface, refer to “Guide to using Recorder mode” on page 128.
264
Turbo iDDR User Guide
Remote control operation: In Workstation mode
Using AMP Player: Local control tasks
In local mode, the Player user interface operates just like the standard Player
application. For a full description of all the tasks you can perform using the Player
user interface, refer to “Selecting Player mode in AppCenter” on page 143.
In addition, the following sections describe tasks that are unique to the AMP protocol
player applications.
• “Playout using current and preview clips”
• “Skipping to the preview clip during playout”
• “Jumping to a specific timecode”
Playout using current and preview clips
The AMP Player applications use a two-head model in that two clips are loaded
simultaneously, as follows:
• Current clip — The “preset id” is considered the current clip that controls channel
resources, i.e. video, audio, and timecode outputs.
• Preview clip — The “preview preset id” is considered the preview clip. Generally
the preview clip begins playing after the current clip completes, at which point the
preview clip becomes the current clip.
If you don’t need this functionality you can use the protocol player applications just
like the standard player, loading and playing a single clip. See “Loading media for
playout” on page 149 and “Playing a clip” on page 150.
To playout using current and preview clips:
1. Select View | Split Screen, if you are not in Split Screen view already.
2. Select a play channel using the front panel button
Tools pane.
P1
, or the play channel tab in the
3. In the protocol player, click (or touch) the thumbnail image to place the current clip
thumbnail in front of the preview thumbnail.
4. Load a clip from the Clips pane using one of the following:
• Click (or touch) the clip and drag it to the Player pane.
• Rotate the front panel Selection Knob to select a clip, then push in on the knob
to load the clip.
• Select the clip, then choose the Load button in the Clips pane.
• Double-click on an clip.
• Select a clip, then press Enter on an external keyboard.
The clip is loaded as the current clip and the thumbnail appears.
Turbo iDDR User Guide
265
Chapter 5 Remote Control
NOTE: You can load a preview clip only if the Current (preset) clip is loaded.
5. Load the preview as described in the previous step 4.
The preview thumbnail appears behind the current clip thumbnail. You can click
the thumbnail image to bring the preview image to the foreground without
effecting current clip playout.
6. Start current clip playout using your remote control device or software.
When the current clip playout reaches its mark-out point, it is ejected and the
preview clip is promoted to current clip and begins to play.
NOTE: You can toggle between current and preview clip thumbnails at anytime to
identify the preview clip without affecting current clip playout.
7. Load a new preview clip (see step 5) to continue uninterrupted playout.
266
Turbo iDDR User Guide
Remote control operation: In Workstation mode
Skipping to the preview clip during playout
During playout, you can skip to the preview clip.
• Select the Goto button in the player toolbar, then choose the Skip to Preview in the
pop-up menu.
The play channel begins to play the preview clip.
Jumping to a specific timecode
The Goto Timecode dialog allows you to jump to the specific timecode in the current
clip. You can enter absolute timecode values based on recorded timecode, or relative
timecode values.
To jump to a specific timecode:
1. Select the Goto button in the player toolbar, then select the Goto Timecode menu
item.
The Goto Timecode dialog appears.
Clear
(Select to clear entry)
Back Space
Relative
(Select to enter a
relative timecode)
Absolute
(Select to enter an
absolute timecode)
Scrub bar
(Click and drag to
cue the desired frame)
2. Enter a timecode value using one of the following:
• To enter a relative timecode value, select the ‘+ or -’ key, enter timecode, then
select OK.
• To enter an absolute timecode value, select the ‘=’ key, enter timecode, then
select OK.
• Select and drag the Scrub Bar
then click OK to close.
Turbo iDDR User Guide
while monitoring play channel output,
267
Chapter 5 Remote Control
Using front panel transport controls
The following describes how to control playout using the transport controls on the
optional front panel. The control application must be configured to allow local
control. (See “Select the control port and control mode” on page 255.)
Front Panel Buttons
Action
Play
Play
Stop
Stop
Rew
Previous Frame
FF
Next Frame
Rew(hold)
Rewind until released
FF(hold)
Fast forward until released.
Stop + Rew
Cue previous clip (in a list) or cue to start. This stops playout.
Stop + FF
Cue next clip (in a list) or cue end. This stops playout.
Stop + Rew(hold)
Cue previous clip (in a list) or cue to start. This stops playout.
Stop + FF(hold)
Skip to the start of the preview clip. This stops playout.
Stop + <Select>
Cue the selected clip.
Play + Rew
Play previous clip (in a list) or cue to start and begin playing.
Play + FF
Play next event (in a list) or cue to end.
Play + Rew (hold)
Play previous clip (in a list) or cue to start and begin playing.
Play + FF (hold)
Skip to (and play) the preview clip.
Play + <Select>
Play the selected clip
Monitoring remote control communications
The Protocol Monitor button
is displayed in the AppCenter StatusBar when a
protocol application is running on an iDDR channel. The button flashes when any
channel is receiving remote control messages. Clicking the button opens the Protocol
Monitor dialog box which you can use to determine which channels are receiving
messages.
NOTE: The Protocol Monitor dialog will not open until a controller is connected and
at least one command set is sent.
To open the Protocol Monitor dialog box:
• Click the Protocol Monitor button
in the AppCenter StatusBar.
The dialog box displays the channel number and protocol being used, along with
the port number and control mode (Local or Protocol only). The green status LED
indicates the port is receiving protocol commands.
268
Turbo iDDR User Guide
Using GPI input and output triggers
Using GPI input and output triggers
The iDDR provides 6 GPI inputs, and 6 GPI outputs on a single DB-15 pin rear panel
connector. GPI input triggers can be used to control channels including but not limited
to record, play, stop, and skip a playlist event. GPI output triggers can be defined for
channels and inserted in playlists to control external equipment as the list is played.
Topics here include:
• “Making GPI connections” on page 269
• “Configuring GPI input triggers” on page 269
• “Configuring GPI output triggers” on page 270
Making GPI connections
Cable the iDDR for GPI input and/or GPI output. You must supply your own interface
cable. Refer to “GPI I/O connector pinouts” on page 286.
GPI in/out
Configuring GPI input triggers
Use the configuration tool provided in either front panel or Workstation control
modes to define the GPI inputs for a channel. Refer to the following table.
or
Turbo iDDR User Guide
“Setting GPI input triggers” on page 43
269
Chapter 5 Remote Control
Configuring GPI output triggers
Use the configuration tool provided in either front panel or Workstation control
modes to define the GPI inputs for a channel. Refer to the following table.
or
“Setting GPI output triggers” on page 45
Related topics
“Adding GPI output triggers to playlists” on page 96
“Adding GPI output triggers to playlists” on page 190
270
Turbo iDDR User Guide
Chapter
6
Using an Ethernet connection
Topics in the chapter include:
• “Overview of networking” on page 272
• “Making the Ethernet network connection” on page 272
• “Configuring iDDR network settings” on page 274
• “File sharing: Mapping network drives” on page 276
Turbo iDDR User Guide
271
Chapter 6 Using an Ethernet connection
Overview of networking
Networking lets you connect your iDDR to other computers or a private network.
When you connect your iDDR to a network or another iDDR or computer, you can:
• Access files and folders on other iDDRs or computers.
• Control the iDDR remotely using devices and applications software developed for
the iDDR that use AMP protocol over Ethernet.
• Transfer media files between iDDRs using streaming media transfers over 1Gb
Ethernet.
• Monitor Turbo iDDR status using SNMP monitoring software.
Making the Ethernet network connection
There are many different ways to connect your iDDR to other computers or to a
network. You can connect your computer to:
• Another computer or iDDR using a direct cable connection. This requires a
cross-over Ethernet cable. Check with your local computer equipment supplier.
• Another computer or iDDR connected through an Ethernet hub or switch.
Ethernet
Switch
iDDR-1
iDDR-2
1000BaseT
Network
iDDR-1
iDDR-2
1000BaseT
Network
NOTE: If you are adding the iDDR to an existing network, you may want to configure
network settings before connecting the Ethernet cable. This avoids network conflicts
that can occur if the iDDR is not configured properly.
The following illustration shows the rear panel 1Gb Ethernet port.
272
Turbo iDDR User Guide
Making the Ethernet network connection
1Gb Ethernet Port
Turbo iDDR User Guide
273
Chapter 6 Using an Ethernet connection
Configuring iDDR network settings
Configure Windows network settings
This procedure guides you to the relevant network settings, but does not instruct you
on the specific settings required for your network. It is assumed that you understand
Ethernet networks in general and your particular network needs and that you can
apply that understanding to make the required settings using standard Windows
procedures. If you need help with these procedures, contact your network
administrator.
To configure the network settings:
1. If you normally operate your Turbo
iDDR in front panel mode, you
should connect a keyboard, mouse,
and VGA monitor before
proceeding. These are required for
accessing the Windows network
configuration tools. You may need
to restart Windows after making
connections to make the mouse and
keyboard operational.
Connect keyboard,
mouse, and monitor
!
CAUTION: The Turbo iDDR is not a general purpose Windows
workstation. The Windows configuration on the iDDR has been
specifically set for use as a real time device. The Turbo iDDR is
configured for automatic logon allowing unattended booting. To avoid
partial or total system failure, do not modify any operating system
settings unless approved by Grass Valley Support. This includes but is
not limited to the following:
— Do not use the User Manager
— Do not use the Disk Administrator
— Do not load any third party software
— Do not install any Windows updates (these are distributed by
Thomson Grass Valley).
2. In the Windows taskbar, select Start | Control Panel | Network and Internet
Connections and continue with standard Windows procedures to configure the
TCP/IP protocol properties on each Turbo iDDR on the network. You can setup the
network using DHCP, DNS, WINS, or other standard networking mechanisms.
NOTE: For a small network, without a DHCP server or domain name server (DNS),
you can set up a static IP address and create a Host file on each iDDR. The Host file
specifies a device name for each IP address used on the network. Refer to the
Windows documentation or your network administrator for more information.
274
Turbo iDDR User Guide
Enable streaming: Adding network hosts names
3. Shutdown and restart Windows.
4. If you are going to stream video between iDDRs, proceed to “Enable streaming:
Adding network hosts names” on page 275, otherwise, the iDDR is ready for
standard data networking tasks.
NOTE: If you have a problem with the network, try using the ping utility in the
Windows command prompt. Use either the IP address or host name. Troubleshoot as
needed. Also, refer to the Turbo iDDR Service Manual for troubleshooting
procedures.
Enable streaming: Adding network hosts names
You must add the host names of all peer iDDRs on the network that support streaming
transfers. Adding host names is required to allow selection of networked iDDRs in the
AppCenter user interface and to provide a successful network connection for
streaming. The host names added will appear in the “Import” and “Send to” dialog
boxes.
NOTE: By default, the iDDR host name is the same as the Windows computer name.
To determine the iDDR computer name, right-click My Computer on the Windows
desktop, then properties. Select the Network Identification tab and look for the “Full
computer name”.
In addition, if you are using remote protocol to perform video network transfers,
you’ll need to assign a unique Controller ID number for each host name. If you are
not using remote protocol for network transfers, you can leave the Controller Id blank.
Each hostname requires a unique ID on the local iDDR. The controller ID is not
global, that is, iDDR-2 may use controller ID 2 on one iDDR, but controller ID 1 on
another.
To add a network host names:
1. Start AppCenter Workstation, if it is not already running, using the desktop
shortcut.
2. In AppCenter main menu, select System, then choose Configuration.
3. Click the Remote tab.
The network host names are displayed.
Turbo iDDR User Guide
275
Chapter 6 Using an Ethernet connection
4. Click Add to open the Add Host dialog box, then do the following:
a. Select the Host Name text entry control, then enter the computer name of a peer
iDDR.
Make sure to enter the exact computer name. Any differences will result in being
unable to connect to the iDDR.
b. Select the controller id control and enter the identification number of the
computer you are adding.
c. Click OK in the Add Host dialog box.
5. Repeat step 4 for the remaining iDDRs.
6. In the Configuration dialog box, click OK to save settings.
Once the host names are added, the iDDR is ready for streaming operation. Refer
to “Transferring media between Turbo iDDRs” on page 204, and “Importing and
exporting media” on page 197 for procedures on transferring media.
File sharing: Mapping network drives
AppCenter Workstation supports media file import and export over the Ethernet
network connection. You must use standard Windows procedures to map a network
drive in Windows operating system before it appears in the AppCenter Workstation
Clips pane.
276
Turbo iDDR User Guide
Chapter
7
Maintenance Tasks
Topics in this section include:
• “Defragmenting the media drives” on page 278
• “Erasing unused media” on page 279
• “Clearing the media file system” on page 279
• “Running Storage Utility Mode” on page 279
Turbo iDDR User Guide
277
Chapter 7 Maintenance Tasks
Media drive maintenance
Over time you’ll need to perform the following media disk maintenance tasks:
• “Defragmenting the media drives” on page 278
• “Clearing the media file system” on page 279
• “Erasing unused media” on page 279“Clearing the media file system” on page 279
Defragmenting the media drives
After extended use of the Turbo iDDR, especially when recording and deleting
multiple short clips, the iDDR media drives can become fragmented. Severely
fragmented drives can slow down media access operations. To prevent this from
occurring, the iDDR generates a status message well before fragmentation becomes a
problem. When you receive this status message, you should plan a time when the
Turbo iDDR is not in operation and defragment the media drives.
There are two ways to defragment the media drives:
• Use the Storage Utility to defragment the drives – You can use the Storage Utility
defragment the media drives. Defragmenting the media drives can take a
significant period of time. Make sure you allow a day or more to defragment your
media drives.
Refer to the Turbo iDDR Troubleshooting and Service Guide for instructions on
using the Defragment command.
• Clear the file system – Alternatively, if there is no need to keep the media currently
on the Turbo iDDR, you can clear the media file system, which also defragments
the media drives in just a few moments. Refer to “Clearing the media file system”
on page 279.
278
Turbo iDDR User Guide
Erasing unused media
Erasing unused media
After editing a clip by moving the mark-in/mark-out points, the remaining portion of
media outside the marks can be erased to free media storage space. If the media
outside the clip marks is referenced by a subclip, program, or event from a playlist,
that media is not erased. Subclips and playlist events retain an extra 1 second of media
before and after their mark points to allow some trimming.
To erase unused media:
• In front panel mode, see “Erasing a clip's unused media” on page 107.
• In Workstation mode, see “Erasing a clip's unused media” on page 147.
Clearing the media file system
When you need to remove all media from the Turbo iDDR, you should use the Clear
File System operation rather than deleting all the clips manually. The Clear File
System operation returns the iDDR media storage system to its initial state, as it was
when you received it from the factory. This operation also clears up any ongoing
maintenance issues that can occur over time, such as fragmented media drives.
!
WARNING: Clearing the media file system will permanently remove
all media stored on the iDDR.
Refer to the Turbo iDDR Troubleshooting and Service Guide for instructions on
clearing media.
Running Storage Utility Mode
If the media storage system needs service work, you must restart the machine in
storage maintenance mode. In this mode all normal operations are suspended and only
storage utility runs. You should only restart in storage maintenance mode if instructed
to do so by a service procedure, as documented in the Turbo iDDR Troubleshooting
and Service Guide, or if under the direction of Grass Valley support.
Turbo iDDR User Guide
279
Chapter 7 Maintenance Tasks
280
Turbo iDDR User Guide
Appendix
A
Keyboard Shortcuts
Topics in the appendix include:
• “About keyboard operation”
• “Channel select”
• “Basic transport controls”
• “Off-speed play controls”
• “Stop-Mode transport controls”
• “List controls”
• “Playlist controls”
Turbo iDDR User Guide
281
Appendix A Keyboard Shortcuts
About keyboard operation
A keyboard can be connected and used in front panel control mode or AppCenter
Workstation mode to control the Turbo iDDR. The following describes the keyboard
shortcuts available. Keyboard shortcuts are disabled when text entry dialog boxes are
open.
F1
Esc
F2
F3
F4
F5
F6
F7
F8
F9
F10
F11
F12
Print
Scrn
SysRq
Scroll
Lock
Insert
Home
Page
up
Delete
End
Page
Down
Pause
Break
Channel Select
~
@
!
R1
1
Q
Tab
Caps
Lock
3
W
Z
Shift
Ctrl
%
5
R
E
S
A
$
4
# P2
P1
2
D
C
X
T
V
H
N
B
Alt
J
P
O
I
<
VAR/,
>
VAR/+
.
Channel select
Channel Select
~
!
R1
1
@
2
P1
# P2
3
$
4
%
5
Basic transport controls
I
A
S
H
J
282
Turbo iDDR User Guide
:
;
L
K
M
Play/Stop
O
<
VAR/,
>
VAR/+
.
\
}
]
"
'
?
/
Alt
Play/Stop
+
=
{
[
:
;
L
K
M
_
-
)
0
(
9
*8
U
Y
G
F
&
7
^
6
Enter
Shift
Ctrl
Off-speed play controls
Off-speed play controls
For this action...
Press
Play faster
Shift + L
(Repeat this key sequence to increment the play speed up to the maximum
forward shuttle speed.)
Play slower
Shift + J
(Repeat this key sequence to decrement the play speed up to the maximum
reverse shuttle speed.)
VAR/speed increment
period (.)
(Press for VAR play mode, then repeat to increment VAR speed.)
VAR/speed decrement
comma (,)
(Press for VAR play mode, then repeat to decrement VAR speed.)
Stop-Mode transport controls
For this action...
Press
Cue to mark-in
A, Shift + I
Cue to mark-out
S, Shift + O
Next frame
Arrow-right
Previous frame
Arrow-left
Go forward 1 second
Shift + Arrow-right
Go back 1 second
Shift + Arrow-left
Mark-Point and Cue controls
For this action...
Press
Set mark-in
I
Set mark-out
O
Clear mark-in
Ctrl + I
Clear mark-out
Ctrl + O
urbo iDDR User Guide
283
Appendix A Keyboard Shortcuts
Miscellaneous controls
Action
Press
Copy
Ctrl + C
Cut
Ctrl + X
Paste
Ctrl + V
Display split screen
mode with Clips pane.
Open online help
Shift
+
~
F1
List controls
The following shortcuts are used to control lists such as text view in Clips pane, or
Playlist's List view.
Action
Press
Select previous item in list
Up arrow
Select next item in list
Down arrow
Scroll to previous page
Page Up
Scroll to next page
Page Down
Scroll to top of list
Home
Scrolls to bottom of list
End
Delete current selection
Delete, Backspace
Playlist controls
284
Action
Press
Next event
Shift +S,
Ctrl + S,
Ctrl + Arrow-right
Previous event
Shift +A,
Ctrl + A,
Ctrl + Arrow-left
Next section
Shift + Ctrl + S,
Shift + Ctrl + Arrow-right
Previous section
Shift + Ctrl + A,
Shift + Ctrl + Arrow-left
Goto an event
Hold down the Alt key while clicking the event
Turbo iDDR User Guide
Appendix
B
Connector Pin-outs
The following sections describe iDDR rear panel connector pinouts.
• “RS-422 connector pinouts”
• “Analog audio connector pinouts”
• “GPI I/O connector pinouts”
RS-422 connector pinouts
The RS-422 interface conforms to ANSI/SMPTE 207M-1997 standard
(SMPTE 422).
5
1
9
Pin #
Female
6
Signal
Description
1
GND
Frame Ground
2
-TXD
Differential Transmit Data (low)
3
+RXD
Differential Receive Data (high)
4
GND
Transmit Signal Common
5
NC
Spare
6
GND
Receive Signal Common
7
+TXD
Differential Transmit Data (high)
8
-RXD
Differential Receive Data (low)
9
GND
Signal Ground
Analog audio connector pinouts
Push
Audio In
Connector
(female)
1
2
3
Turbo iDDR User Guide
2
1
Audio Out
Connector
(male)
3
285
Appendix B Connector Pin-outs
Pin #
Audio In
Pin #
Audio Out
1
Signal Ground
1
Signal Ground
2
(+)
2
(+)
3
(-)
3
(-)
GPI I/O connector pinouts
8
1
15
9
Pin
Signal
Pin
SIgnal
1
Output 1
9
Input 1
2
Output 2
10
Input 2
3
Output 3
11
Input 3
4
Output 4
12
Input 4
5
Output 5
13
Input 5
6
Output 6
14
Input 6
7
Output 7
15
Input 7
8
Ground
NOTE: Turbo iDDR software supports outputs 1-6 and inputs 1-6 only. Output 7 (pin
7) and input 7 (pin 15) are not used.
286
Turbo iDDR User Guide
Appendix
C
Specifications
Specifications in this chapter:
• “AC power specification”
• “Environmental specifications”
• “Mechanical specifications”
• “Electrical specifications”
• “Operational specifications”
Turbo iDDR User Guide
287
Appendix C Specifications
AC power specification
The Turbo iDDR AC power specification is shown in the following table.
Characteristic
Specification
Mains Input Voltage
100V to 240V auto-range, 50-60Hz
Power consumption
180 typical, maximum AC current 8A @ 115 VAC, 4A @ 230 VAC
Thermal Output
13000 BTU/h max
!
WARNING: Always use a grounded outlet to supply power to the
system. Always use a power cable with a grounded plug, such as the one
supplied with the system.
Environmental specifications
288
Characteristic
Specification
Ambient Temperature
Non-Operating
-40° to +60° C
Ambient Temperature
Operating
10° to +40° C
Relative Humidity
Operating 20% to 80% from -5° to +45°C
Non-Operating 10% to 80% from -30° to +60°C
Do not operate with visible moisture on the circuit boards
Operating Altitude
To 10,000 feet
IEC 950 compliant to 2000 meters
Storage Altitude
To 40,000 feet
Non-Operating
Mechanical Shock
Class 5 (30G) Thomson Grass Valley 001131500
Random Vibration
Operational: Class 6 Thomson Grass Valley 001131500
Non-Operational: Class 5 Thomson Grass Valley 001131500
Transportation
Thomson Grass Valley 001131500
Equipment Type
Information Technology
Equipment Class
Class 1
Installation Category
Category II Local level mains, appliances, portable equipment,
etc.
Pollution Degree
Level 2 operating environment, indoor use only.
Turbo iDDR User Guide
Mechanical specifications
Mechanical specifications
Dimension
Measurement
Height
5.20 in (132mm)
Width
16.75 in (426mm)
Depth
20.27 in (515mm)
18.60 in (472 mm) (From rack-mounting ears to BNCs)
Weight:
27.75. (12.6 kg)
Electrical specifications
The following sections describe the electrical specifications:
• “Serial Digital Video (SDI)”
• “Composite Analog I/O”
• “S-Video I/O”
• “Analog Component Video I/O”
• “Genlock Reference”
• “System Timing”
• “S/PDIF Digital Audio”
• “Analog Audio”
• “Audio headphone output (with front panel option)”
• “LTC Input/Output”
• “RS-422 specification”
• “GPI I/O specifications”
• “IEEE 1394A interface specification”
Turbo iDDR User Guide
289
Appendix C Specifications
Serial Digital Video (SDI)
Parameter
Specification
Video Standard
525 Line or 625 Line component
Number of Inputs
1 per record channel
Number of Outputs
2 per play channel
Data format
Conforms to SMPTE 259M
Number of bits
10bits
Connector
BNC, 75 ohm, No loop-through
Max Cable Length
225 meters (738 ft)
(Belden 8281 type cable)
Return Loss
≥15db, 5Mhz to 270Mhz
Composite Analog I/O
Parameter
Composite Video
a.
290
Specification
Standarda
NTSC, 525 line (59.94Hz) Conforms to SMPTE170M, or
PAL, 625 line (50Hz) Conforms CCIR Report 624
Number of Inputs
1 per record channel
Number of Outputs
1 per play channel
Connectors
BNC, 75 ohm
The iDDR can record signals from most non-timebase corrected signal sources such as color under video
playback devices, i.e. VHS or U-Matic VTRs, low cost cameras, and DVD players. However, for reliable
recording performance some devices may require external signal conditioning products, i.e. timebase
correction.
Turbo iDDR User Guide
S-Video I/O
S-Video I/O
Parameter
Specification
Composite Video Standard
a.
a
NTSC, 525 line (59.94Hz) or
PAL, 625 line (50Hz)
Number of Inputs
1 per record channel
Number of Outputs
1 per play channel
Connectors
Mini-DIN 4-pin, 75ohm
The iDDR can record signals from most non-timebase corrected signal sources such as color under video
playback devices, i.e. VHS or U-Matic VTRs, low cost cameras, and DVD players. However, for reliable
recording performance some devices may require external signal conditioning products, i.e. timebase
correction.
Analog Component Video I/O
Parameter
Component Video
Specification
Standarda
BetaCam (Sony) YPbPr
SMPTE 153/EBU N10 YUV
SMPTE 153/EBU N10 RGB (output only)
Sync Signal (input)
Input: Y
Sync Signal (output)
Play channel video type:
• YUV – 3 wire (sync on Y
• RGB – 5 wire (RGBHV)
Connectors
a.
Input: BNC, 75 ohm
Output: DVI-I
The iDDR can record signals from most non-timebase corrected signal sources such as color under video
playback devices, i.e. VHS or U-Matic VTRs, and low cost cameras. However, for reliable recording
performance some devices may require external signal conditioning products, i.e. timebase correction.
Turbo iDDR User Guide
291
Appendix C Specifications
Genlock Reference
a.
Characteristics
Description
Signal Type
NTSC/PAL Color Black Composite Analog
Connectors
2 BNC, 75 ohm passive loop through
Color Field Detection, Based on SCH
Phase
Correct color framing for signals having an average SCH phase
±40°; Lockup ±10°. Once locked to color field, it will stay
locked over a range of 0° to ±90°
Burst Frequency Lock Range
PAL,±10 Hz at subcarrier
NTSC, ±20 Hz at subcarrier
Signal Amplitude Lock Range
Stays locked to +6 dB and -3 dB
Input Return Loss
≥40 dB to 5 MHz
Unlocked internal clock accuracya
When not locked to a reference, 27Mhz. will be within ±
25PPM
Internal reference provides accurate free-running timing signals in the absence of genlock reference to
allow asynchronous record and play.
System Timing
292
Characteristics
Descriptiona
Nominal Playback Output Delay
Adjustable
(Default: Zero timed to reference)
Output Delay Range
(Independent for each play
channel)
Frames – NTSC 0 to +1 frames,
PAL 0 to +3 frames
Lines – NTSC (525 lines) 0 to +524 lines,
PAL (625 lines) 0 to +624 lines.
Samples – NTSC (525 lines) 0 to +1715 clock samples,
PAL (625 lines) 0 to +1727 clock samples.
Analog sub-pixels (SC)b– (analog video only). Range is
slightly more than one sample clock period.
Nominal E to E Output Delay
NA
(E to E is provided for monitoring purposes only, not intended as a
program switch.)
a.
All delay values shown are relative to Black Reference.
b.
Output delay adjustments affect the SDI and composite analog outputs together. The analog sub-pixel
adjustment is only a “fine” trim on the composite output with respect to the current SDI timing.
Turbo iDDR User Guide
S/PDIF Digital Audio
S/PDIF Digital Audio
Parameter
Specification
Standard
IEC 60958
Compressed AC-3 or PCM
Connector
BNC
Input Impedance
75 ohms (unbalanced)
Copyright Protection
If the audio input material has the copy-protection status bit turned on,
the audio input is muted. Also, warning symbol is displayed in the
Status pane and warning message is written in the Status log.
Analog Audio
Parameter
Specification
Audio Standard
Balanced differential analog
Audio Inputs
2 per record channel, Female XLR
Audio Outputs
2 per play channel, Male XLR
Impedance
Input: 15k ohms, balanced
Output: 50 ohms per side, balanced
Sampling and encoding
48 KHz and 16-bit pcm
Audio headphone output (with front panel option)
Parameter
Specification
Audio Standard
Single-ended analog output with volume control
Channels
One stereo pair, switched to monitor selected video channel
Connector
1/4 inch Stereo Audio Jack
LTC Input/Output
Parameter
Specification
Standard
SMPTE 12M Longitudinal Time Code, AC coupled, differential input
Number of Inputs
1 channel per record - Female XLR
Number of Outputs
1 channel per play - Male XLR
Input Impedance
1K ohm
Output Impedance
50 ohm
Minimum Input Voltage
0.1 V peak-to-peak, differential
Maximum Input Voltage
2.5 V peak-to-peak, differential
Nominal Output Voltage
2.0 V peak-to-peak differential.
LTC Reader
LTC reader will accept LTC at rates between 1/30 and 80 times the
nominal rate in either forward or reverse directions.
Turbo iDDR User Guide
293
Appendix C Specifications
Parameter
Specification
LTC Transmitter
LTC transmitter outputs LTC at the nominal frame rate for the selected
standard at 1x speed, forward direction only.
RS-422 specification
The RS-422 interface conforms to ANSI/SMPTE 207M-1997 standard
(SMPTE 422).
GPI I/O specifications
Characteristics
Description
Number of Inputs/Outputs
6 inputs; 6 outputs; 1 common ground
Connector type
15pin D
GPI Input
Inputs set to TTL level high = 2.4-5V
External current sink = 1ma
(Compatible with 5 volts CMOS/TTL open collector, or
contact closures.)
GPI Output
Outputs are open drain drivers.
Max. voltage when outputs are open = 30V
Max. current when outputs are closed = 100ma
Typical risetimes approximately 625ns
Typical falltimes approximately 400ns
IEEE 1394A interface specification
The following table describes the input requirements for the optional IEEE 1394A
interface.
Characteristics
Description
Standard
IEEE 1394A for import of video and audio from a digital
recording device.
NOTE: The iDDR record channel transport controls can
be used to control the remote device– play, stop, fast
forward, rewind, goto timecode.
Port Assignments
Any of the ports 1-3 can be used for making a connection to
a IEEE 1394 device.
NOTE: The top port on the rear panel and the front panel
port are electrically the same. Use only one port at a
time.
294
Video Requirements
DV – DV25 video
HDV – MPEG-2 MP@H14L
Audio Channels
2 channels, 16 bit, 48KHz
Timecode
Device timecode input is not recorded. Instead, the clip
timecode is striped using the iDDR record channel internal
timecode generator. Start timecode is automatically set to
00:00:00:00.
Turbo iDDR User Guide
Operational specifications
Operational specifications
Media file system performance
• Maximum number of clips: 20,000
• Minimum record to play time: 5 second from start of record.
Video network performance
The iDDR supports streaming video network transfers between iDDRs and M-Series
iVDRs using General Exchange Format (GXF) as described in SMPTE 360M.
• 100BaseT Network Performance: >33Mb/s with all channels operating at 15Mb/s
• 1GBaseT performance: >80Mb/s with all channels operating at 15Mb/s.
• Ethernet streaming and Ethernet control on the same network adapter interface is
allowed.
Composite analog video input performance
The iDDR can record signals from most non-timebase corrected signal sources such
as color under video playback devices, i.e. VHS or U-Matic VTRs, and low cost
cameras. However, for reliable recording performance some devices may require
external signal conditioning products, i.e. timebase correction.
Turbo iDDR User Guide
295
Appendix C Specifications
296
Turbo iDDR User Guide
Index
A
clip
active channel 123
adjusting video output timing 45
Advanced Search
adding search criteria 236
AES/EBU audio
specification 293
AMP 252
analog audio, connector pin-out 285
AppCenter
applications, standard 120
control options, local 27
control options, remote 28
keyboard shortcuts 282
minimizing 31
reposition on the desktop 119
tools, standard 121
user interface, conventions 122
user interface, overview 118
application, drop-down list 124
aspect ratio conversion modes 36
assignable buttons 123
audio
analog audio specification 293
digital audio specification 293
audio level
adjusting clip play level 145
adjusting clip record level 129
auto subclip mode 146
available storage 129
audio level, adjusting in Player 145
editing In/Out points 145
metadata 238
naming, illegal characters 224
previewing 129
thumbnail, changing 145
Clips pane
assets
importing from file 98, 197
metadata 238
send to a device 205
Recycle Bin
bypassing 230
compatibility, video output connector 38
composite video
specification 291
configuration
front panel 43
GPI input triggers 43
GPI output triggers 45
loading defaults 35
opening 34
player channel settings 41
recorder channel settings 39
saving and restoring 34
system settings 39
video scaling 36
Configuration Manager 34
connector pin-outs
analog audio 285
GPI 286
RS-422 285
controller Id 256
conversion modes, aspect ratio 36
current bin 123
B
battery replacement 14
bin
current bin 123
description 123
naming, illegal characters 223
BVW 252, 253
C
CD-RW drive
sending files to 100, 201
certifications and compliances 15
channel application 123
channel application, selecting 124
Turbo iDDR User Guide
D
data rate, guidelines for selecting 38
disk volume 123, 216
DVD drive
sending files to 100, 201
E
E to E mode, in Player 146
editing a clip 145
297
Index
electric shock, avoiding 13
emission limits, certifications 15
Ethernet, See network
event
new event, creating 171
exporting
log files 249
F
fire hazard, avoiding 13
FireWire
selecting 66, 67, 135, 137
front panel
illustration 25
Jog/Shuttle knob 52
transport controls 51
transport controls, using 51
front panel setup 43
G
properties, viewing 170
log files
exporting 249
logging database 249
loop play mode, selecting 145
M
mechanical specifications 289
media disks
displaying available storage time 129
metadata 238
searching 236
Meter Bar button 145
minimizing AppCenter 31
monitoring transfers 110, 246
N
network
cabling, connecting 272
host names, adding 275
GPI
connector pinout 286
electrical specification 294
GPI triggers
input 43
output 45
grounding, safety 13
guidelines for video rate selection 38
H
host names, adding 275
I
IEEE 1394
selecting 66, 67, 135, 137
illegal characters 223, 224
import
from device 98, 197
from file 98, 197
injury precautions 13
K
keyboard shortcuts 282
L
list
298
Turbo iDDR User Guide
O
Odetics Protocol 252
onscreen transport controls 124
P
Player
assignable buttons 144
clip properties, viewing 146
clip timecode display 144
clip, renaming 144
E to E mode 146
editing mark points 145
EE or PB indicator 144
jump to a timecode 146
loading clips 146
meter bar button 145
Scrub Bar 155
subclips, creating 146
thumbnail 145
time dome display, modifying 145
player channel settings 41
Playlist
assignable buttons 168
countdown, display options 144, 147, 168
list
properties, viewing 170
list timecode, selecting 168
list view, display options 170
list, display options 169
time cursor 169
power cords, certification 15
previewing a clip 129
product damage precautions 13
program 84, 85, 163, 164
Properties
metadata, working with 238
protocol monitor 110, 246
Protocol Player
local and protocol control 265
protocol control only 259
Protocol Recorder
local and protocol control 261
protocols 252
R
read-only 71, 143
rear panel, view 26
Recorder
assignable buttons 128
available storage, displaying 129
clip name, changing 128
context menu items 129, 145, 146, 148, 168,
170, 172, 216
current timecode display 128
fixed length recording 129
locating a clip 129
new clip 129
preview 129
timecode source, indicator 128
timedome 129
recorder channel settings 39
recording
signals from VHS or U-Matic VTRs 295
Recycle Bin
bypassing 230
remote control 261
control mode, selecting 255
control port, selecting 255
controller Id, setting 256
current and preview clip 252
playout, using current/preview 265
protocol monitor 268
Protocol Player
local and protocol control 265
Turbo iDDR User Guide
protocol control only 259
Protocol Recorder
local and protocol control 261
serial control protocols 28, 252
AMP 252
BVW 253
monitoring communications 268
skipping to preview clip 267
removable media 100, 201
RS-422
connector pinout 285
RS-422 control protocols 252
S
safety
certification 17
grounding 13
summary 13
terms and symbols 14
Scrub Bar 155
selecting data rate guidelines 38
send to
another device 204, 205
serial control 252
service safety summary 15
settings
front panel 43
GPI input triggers 43
GPI output triggers 45
player channel 41
settings, video scaling 36
shortcuts, keyboard 282
software versions, showing 248
specification
AC Power 288
electrical 289
mechanical 289
StatusBar
messages, types 247
using 110, 246
StatusPane 110, 246
button icons 111, 119, 246
copying messages 248
opening 111, 247
storage time available 129
subclips, creating 146
support, Grass Valley 11
system settings, configuring 39
299
Index
T
thumbnail
default 123
time cursor 169
time dome, in Player 145
timecode
intermittent or missing 58, 125
replacing clip timecode 146
striping 58, 125
Transfer Monitor 110, 246
transferring assets
to another device 204, 205
transport controls
displaying onscreen controls 124
front panel 51
trimming a clip 145
U
USB drives, using 100, 201
V
V drive 216
VDCP 252
ventilation 13
versions, showing 248
video output
timing
zero timed mode 47
video output connector compatibility 38
video output timing, adjusting 45
video scaling settings 36
W
web site, for Thomson Grass Valley 10
Windows
accessing the desktop 31
300
Turbo iDDR User Guide