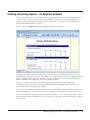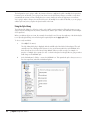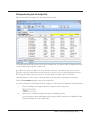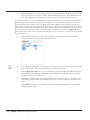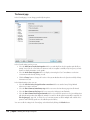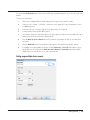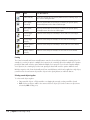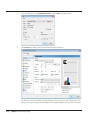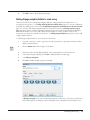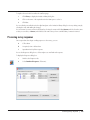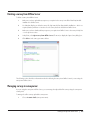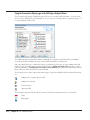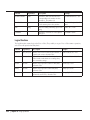
1
User Guide
KeyPoint User Guide
© Copyright 1999–2010 Speedwell Software Limited
Published by Speedwell
Part number: KEYPOINT192
All rights reserved.
No part of this publication, either the whole or any part thereof may be reproduced, transmitted, transcribed, stored in a retrieval
system or translated into any language or computer language in any form or by any means, electronic, mechanical, optical,
chemical, manual or otherwise, except as permitted under the licence agreement, without the prior express written permission of
the author(s) or the publisher.
Documentation: Smith Owen Associates
Project Manager: David Yeneralski
All trademarks and product names used in this book are trademarks, registered trademarks or trade names of their respective
holders.
This application contains JCL (JEDI Code Library). Source Code available under MPL from http://delphi-jedi.org
This application contains INDY. Source Code available under MPL License v1.1 from http://www.nevrona.com/Indy/
This application contains SynEdit Source Code available under MPL License v1.1. from http://synedit.sourceforge.net
Wptools© Julian Ziersch
ABBYY® FineReader® 8.0 Engine© ABBYY Software Ltd 2005. ABBYY, FINEREADER and ABBYY FineReader are registered
trademarks of ABBYY Software Ltd.
Portions copyright 1984-1998 FairCom Corporation. ‘FairCom’ and ‘c-tree Plus’ are trademarks of FairCom Corporation and are
registered in the United States and other countries. All rights reserved.
Contents
1
Welcome to KeyPoint
1
How this User Guide is organised . . . . . . . . . . . . . . . . . . . . . . . . . . . . . . . . . . . . 2
What is KeyPoint? . . . . . . . . . . . . . . . . . . . . . . . . . . . . . . . . . . . . . . . . . . . . . . . . 2
KeyPoint optional modules . . . . . . . . . . . . . . . . . . . . . . . . . . . . . . . . . . . . . . . . . 3
How to get help . . . . . . . . . . . . . . . . . . . . . . . . . . . . . . . . . . . . . . . . . . . . . . . . . 4
KeyPoint updates. . . . . . . . . . . . . . . . . . . . . . . . . . . . . . . . . . . . . . . . . . . . . . . . . 4
Conventions . . . . . . . . . . . . . . . . . . . . . . . . . . . . . . . . . . . . . . . . . . . . . . . . . . . . 5
2
Installing KeyPoint
7
Hardware and software requirements . . . . . . . . . . . . . . . . . . . . . . . . . . . . . . . . . 8
Installing KeyPoint . . . . . . . . . . . . . . . . . . . . . . . . . . . . . . . . . . . . . . . . . . . . . . . . 9
Checking for updates. . . . . . . . . . . . . . . . . . . . . . . . . . . . . . . . . . . . . . . . . . . . . 13
Uninstalling KeyPoint. . . . . . . . . . . . . . . . . . . . . . . . . . . . . . . . . . . . . . . . . . . . . 13
3
Using KeyPoint
15
Carrying out a survey . . . . . . . . . . . . . . . . . . . . . . . . . . . . . . . . . . . . . . . . . . . . . 16
Designing the survey – the Design workspace . . . . . . . . . . . . . . . . . . . . . . . . . . 16
Distributing the survey – the Invitation Manager . . . . . . . . . . . . . . . . . . . . . . . . 23
Collecting and entering responses – the Responses workspace . . . . . . . . . . . . . 25
Analysing and presenting the results – the Presentation workspace. . . . . . . . . . . 28
Managing surveys . . . . . . . . . . . . . . . . . . . . . . . . . . . . . . . . . . . . . . . . . . . . . . . 32
4
KeyPoint Tutorial 1
33
Quick Start tutorial . . . . . . . . . . . . . . . . . . . . . . . . . . . . . . . . . . . . . . . . . . . . . . 34
Session 1: Creating a new survey . . . . . . . . . . . . . . . . . . . . . . . . . . . . . . . . . . . . 34
Session 2: Adding questions and using the Style Library . . . . . . . . . . . . . . . . . . . 36
Session 3: Controlling question layout . . . . . . . . . . . . . . . . . . . . . . . . . . . . . . . . 46
Session 4: Distributing a survey on the web . . . . . . . . . . . . . . . . . . . . . . . . . . . . 47
Contents |
i
Session 5: Collecting and entering responses . . . . . . . . . . . . . . . . . . . . . . . . . . . 53
Session 6: Analysing and presenting results . . . . . . . . . . . . . . . . . . . . . . . . . . . . 56
5
KeyPoint Tutorial 2
63
Advanced tutorial . . . . . . . . . . . . . . . . . . . . . . . . . . . . . . . . . . . . . . . . . . . . . . . 64
Session 7: Adding a column line and an ordered choice question . . . . . . . . . . . 64
Session 8: Improving the look of the survey . . . . . . . . . . . . . . . . . . . . . . . . . . . . 67
Session 9: Adding a date question and a route. . . . . . . . . . . . . . . . . . . . . . . . . . 70
Session 10: Customising the Analysis Grid . . . . . . . . . . . . . . . . . . . . . . . . . . . . . 77
Session 11: Adding to the presentation . . . . . . . . . . . . . . . . . . . . . . . . . . . . . . . 80
6
Introducing Surveys
89
What is a survey?. . . . . . . . . . . . . . . . . . . . . . . . . . . . . . . . . . . . . . . . . . . . . . . . 90
The survey process . . . . . . . . . . . . . . . . . . . . . . . . . . . . . . . . . . . . . . . . . . . . . . 91
Sampling . . . . . . . . . . . . . . . . . . . . . . . . . . . . . . . . . . . . . . . . . . . . . . . . . . . . . . 92
Guidelines for compiling a survey . . . . . . . . . . . . . . . . . . . . . . . . . . . . . . . . . . . 93
Data collection methods . . . . . . . . . . . . . . . . . . . . . . . . . . . . . . . . . . . . . . . . . . 97
The Data Protection Act . . . . . . . . . . . . . . . . . . . . . . . . . . . . . . . . . . . . . . . . . . 98
7
Working with Surveys in KeyPoint
99
The KeyPoint environment . . . . . . . . . . . . . . . . . . . . . . . . . . . . . . . . . . . . . . . 100
KeyPoint surveys . . . . . . . . . . . . . . . . . . . . . . . . . . . . . . . . . . . . . . . . . . . . . . . 106
The Survey Design Wizard. . . . . . . . . . . . . . . . . . . . . . . . . . . . . . . . . . . . . . . . 114
Forms . . . . . . . . . . . . . . . . . . . . . . . . . . . . . . . . . . . . . . . . . . . . . . . . . . . . . . . 119
The KeyPoint spellchecker. . . . . . . . . . . . . . . . . . . . . . . . . . . . . . . . . . . . . . . . 134
Customising the KeyPoint environment . . . . . . . . . . . . . . . . . . . . . . . . . . . . . . 136
Working with styles . . . . . . . . . . . . . . . . . . . . . . . . . . . . . . . . . . . . . . . . . . . . . 142
8
Constructing a Survey
147
The Design workspace. . . . . . . . . . . . . . . . . . . . . . . . . . . . . . . . . . . . . . . . . . . 148
Sidebars . . . . . . . . . . . . . . . . . . . . . . . . . . . . . . . . . . . . . . . . . . . . . . . . . . . . . 149
Design considerations . . . . . . . . . . . . . . . . . . . . . . . . . . . . . . . . . . . . . . . . . . . 152
Adding questions. . . . . . . . . . . . . . . . . . . . . . . . . . . . . . . . . . . . . . . . . . . . . . . 153
Adding other objects to a survey . . . . . . . . . . . . . . . . . . . . . . . . . . . . . . . . . . . 177
Question routing . . . . . . . . . . . . . . . . . . . . . . . . . . . . . . . . . . . . . . . . . . . . . . . 191
ii
| Contents
The Properties sidebar . . . . . . . . . . . . . . . . . . . . . . . . . . . . . . . . . . . . . . . . . . . 195
The Asset Library . . . . . . . . . . . . . . . . . . . . . . . . . . . . . . . . . . . . . . . . . . . . . . . 230
Distributing the survey . . . . . . . . . . . . . . . . . . . . . . . . . . . . . . . . . . . . . . . . . . . 233
Tracking responses . . . . . . . . . . . . . . . . . . . . . . . . . . . . . . . . . . . . . . . . . . . . . 241
The Invitation Manager and sending a follow-up mailing . . . . . . . . . . . . . . . . . 242
The Address Book . . . . . . . . . . . . . . . . . . . . . . . . . . . . . . . . . . . . . . . . . . . . . . 244
9
Entering and Processing Responses
249
Gathering the data. . . . . . . . . . . . . . . . . . . . . . . . . . . . . . . . . . . . . . . . . . . . . . 250
Setting options for response entry . . . . . . . . . . . . . . . . . . . . . . . . . . . . . . . . . . 251
The Responses workspace . . . . . . . . . . . . . . . . . . . . . . . . . . . . . . . . . . . . . . . . 252
Entering responses . . . . . . . . . . . . . . . . . . . . . . . . . . . . . . . . . . . . . . . . . . . . . . 257
The Data Entry Module . . . . . . . . . . . . . . . . . . . . . . . . . . . . . . . . . . . . . . . . . . 263
Working with responses. . . . . . . . . . . . . . . . . . . . . . . . . . . . . . . . . . . . . . . . . . 264
Other options for data entry . . . . . . . . . . . . . . . . . . . . . . . . . . . . . . . . . . . . . . 268
10
KeyPoint Scanning Module
269
Introduction . . . . . . . . . . . . . . . . . . . . . . . . . . . . . . . . . . . . . . . . . . . . . . . . . . 270
Installing the Scanning Module licence . . . . . . . . . . . . . . . . . . . . . . . . . . . . . . 270
Designing surveys for use with the Scanning Module . . . . . . . . . . . . . . . . . . . . 273
Setting scan options . . . . . . . . . . . . . . . . . . . . . . . . . . . . . . . . . . . . . . . . . . . . . 277
Scanning completed surveys . . . . . . . . . . . . . . . . . . . . . . . . . . . . . . . . . . . . . . 280
Importing bitmap image files into the Scanning Module. . . . . . . . . . . . . . . . . . 282
Inputting scanned surveys . . . . . . . . . . . . . . . . . . . . . . . . . . . . . . . . . . . . . . . . 283
Reviewing the input responses. . . . . . . . . . . . . . . . . . . . . . . . . . . . . . . . . . . . . 289
Troubleshooting scanning problems. . . . . . . . . . . . . . . . . . . . . . . . . . . . . . . . . 290
11
Web Surveys
295
Web surveys: a summary. . . . . . . . . . . . . . . . . . . . . . . . . . . . . . . . . . . . . . . . . 296
Email setup . . . . . . . . . . . . . . . . . . . . . . . . . . . . . . . . . . . . . . . . . . . . . . . . . . . 298
Web setup. . . . . . . . . . . . . . . . . . . . . . . . . . . . . . . . . . . . . . . . . . . . . . . . . . . . 300
Distributing a web survey . . . . . . . . . . . . . . . . . . . . . . . . . . . . . . . . . . . . . . . . 307
Processing survey responses. . . . . . . . . . . . . . . . . . . . . . . . . . . . . . . . . . . . . . . 325
Tracking responses . . . . . . . . . . . . . . . . . . . . . . . . . . . . . . . . . . . . . . . . . . . . . 327
The Invitation Manager and sending a follow-up mailing . . . . . . . . . . . . . . . . . 328
Contents |
iii
12
surveyserver
331
Introduction . . . . . . . . . . . . . . . . . . . . . . . . . . . . . . . . . . . . . . . . . . . . . . . . . . 332
Setting up surveyserver . . . . . . . . . . . . . . . . . . . . . . . . . . . . . . . . . . . . . . . . . . 334
Uploading a survey form . . . . . . . . . . . . . . . . . . . . . . . . . . . . . . . . . . . . . . . . . 338
Previewing the uploaded form on surveyserver . . . . . . . . . . . . . . . . . . . . . . . . 340
Customising the appearance and behaviour of a surveyserver form . . . . . . . . . 343
Inviting respondents to take part in a survey . . . . . . . . . . . . . . . . . . . . . . . . . . 345
Processing survey responses. . . . . . . . . . . . . . . . . . . . . . . . . . . . . . . . . . . . . . . 350
The Invitation Manager and sending a follow-up mailing . . . . . . . . . . . . . . . . . 352
Uploading presentations . . . . . . . . . . . . . . . . . . . . . . . . . . . . . . . . . . . . . . . . . 354
Managing your surveyserver account . . . . . . . . . . . . . . . . . . . . . . . . . . . . . . . . 355
13
Offline Server
359
Introduction . . . . . . . . . . . . . . . . . . . . . . . . . . . . . . . . . . . . . . . . . . . . . . . . . . 360
Installing Offline Server . . . . . . . . . . . . . . . . . . . . . . . . . . . . . . . . . . . . . . . . . . 360
Setting options for using Offline Server . . . . . . . . . . . . . . . . . . . . . . . . . . . . . . 362
Uploading the survey to Offline Server . . . . . . . . . . . . . . . . . . . . . . . . . . . . . . 363
Downloading the survey . . . . . . . . . . . . . . . . . . . . . . . . . . . . . . . . . . . . . . . . . 364
Uploading the responses from the Data Entry Module to Offline Server . . . . . . 365
Downloading the responses from Offline Server to the KeyPoint database . . . . 366
Deleting a survey from Offline Server . . . . . . . . . . . . . . . . . . . . . . . . . . . . . . . 367
Managing surveys in surveyserver. . . . . . . . . . . . . . . . . . . . . . . . . . . . . . . . . . . 367
Changing the Offline Server. . . . . . . . . . . . . . . . . . . . . . . . . . . . . . . . . . . . . . . 369
14
Analysing Data
371
The Presentation workspace . . . . . . . . . . . . . . . . . . . . . . . . . . . . . . . . . . . . . . 372
The Analysis Grid. . . . . . . . . . . . . . . . . . . . . . . . . . . . . . . . . . . . . . . . . . . . . . . 372
The Statistics form . . . . . . . . . . . . . . . . . . . . . . . . . . . . . . . . . . . . . . . . . . . . . . 388
15
Presenting Data
389
Presenting data . . . . . . . . . . . . . . . . . . . . . . . . . . . . . . . . . . . . . . . . . . . . . . . . 390
Presentation forms. . . . . . . . . . . . . . . . . . . . . . . . . . . . . . . . . . . . . . . . . . . . . . 390
Common features of graphs and tables . . . . . . . . . . . . . . . . . . . . . . . . . . . . . . 392
Quick Analysis. . . . . . . . . . . . . . . . . . . . . . . . . . . . . . . . . . . . . . . . . . . . . . . . . 407
iv
| Contents
Topline Results . . . . . . . . . . . . . . . . . . . . . . . . . . . . . . . . . . . . . . . . . . . . . . . . 411
Presentation tables . . . . . . . . . . . . . . . . . . . . . . . . . . . . . . . . . . . . . . . . . . . . . 412
Graphs . . . . . . . . . . . . . . . . . . . . . . . . . . . . . . . . . . . . . . . . . . . . . . . . . . . . . . 429
16
360° Feedback Surveys
445
Using KeyPoint to carry out 360° feedback surveys . . . . . . . . . . . . . . . . . . . . . 446
Designing a 360° feedback survey in KeyPoint . . . . . . . . . . . . . . . . . . . . . . . . . 448
Analysing and presenting the results of a 360° survey . . . . . . . . . . . . . . . . . . . . 448
17
Sharing Data with Other Applications
461
Importing data. . . . . . . . . . . . . . . . . . . . . . . . . . . . . . . . . . . . . . . . . . . . . . . . . 462
Exporting a survey design or presentation to a Word file . . . . . . . . . . . . . . . . . 466
Exporting responses to an SPSS or CSV file . . . . . . . . . . . . . . . . . . . . . . . . . . . 467
Copying and pasting design or presentation objects as a picture. . . . . . . . . . . . 469
Saving a presentation as HTML . . . . . . . . . . . . . . . . . . . . . . . . . . . . . . . . . . . . 469
Office Integration . . . . . . . . . . . . . . . . . . . . . . . . . . . . . . . . . . . . . . . . . . . . . . 469
18
Using Expressions
473
Expressions in KeyPoint . . . . . . . . . . . . . . . . . . . . . . . . . . . . . . . . . . . . . . . . . . 474
Building an expression. . . . . . . . . . . . . . . . . . . . . . . . . . . . . . . . . . . . . . . . . . . 475
Expressions: reference section . . . . . . . . . . . . . . . . . . . . . . . . . . . . . . . . . . . . . 483
A
Statistics and Analysis Glossary
493
B
Shortcuts
501
C
Email Systems
505
D
Web Accessibility Guidelines
507
The W3C Guidelines . . . . . . . . . . . . . . . . . . . . . . . . . . . . . . . . . . . . . . . . . . . . 507
E
Connecting KeyPoint to an external address book
513
An example of creating an ODBC address book in KeyPoint . . . . . . . . . . . . . . 514
Contents |
v
vi
| Contents
1
Welcome to KeyPoint
This chapter introduces you to KeyPoint.
You will learn:
* How this User Guide is organised
* What KeyPoint can do for you
* What KeyPoint products and options are available
* How to get help
* How to update the software
* What conventions are used in this User Guide.
Chapter 1: Welcome to KeyPoint |
1
How this User Guide is organised
Most of this guide is devoted to showing you how to use KeyPoint, but it also includes some general guidelines for
creating and conducting surveys.
After a brief overview of the program, the rest of this chapter describes the different KeyPoint products and options,
how to get Help with using the program, how to get updates to the program, including contact details for KeyPoint
Support, and, finally, some conventions used in this User Guide.
The remaining chapters in this guide fall into three groups.
Chapters 2 to 5 give an introduction to KeyPoint including installation, a quick look round KeyPoint to see how the
program is organised for each of the phases in carrying out a survey, and two KeyPoint tutorial chapters leading you
through the processes of building a survey, publishing it, entering responses received and analysing the data.
Chapters 6 to 17 cover surveys and survey techniques, working with surveys in KeyPoint, constructing a survey in
KeyPoint, processing responses, web surveys, including the surveyserver service, using the optional Offline Server,
analysing and presenting data, using KeyPoint for 360° feedback surveys, and sharing data with other applications.
Chapter 18 and the Appendices provide references covering some more advanced topics including building
expressions, a glossary of statistical concepts used in KeyPoint, a list of keyboard shortcuts, a table summarising the
main points you need to consider when deciding between the different methods of carrying out web surveys using
KeyPoint, a summary of the World Wide Web Consortium’s Guidelines for web accessibility, and how you can satisfy
them using KeyPoint Web Accessibility surveys, and instructions for connecting KeyPoint to an external database
containing contact details for use as an address book in KeyPoint.
Note that this User Guide assumes you are familiar with Microsoft Windows® and know how to use the mouse, or
similar pointing device, run applications and use menus and icons.
What is KeyPoint?
KeyPoint is a Windows application designed to help you create, distribute and analyse surveys.
In KeyPoint you can:
* Create your own clear and attractive surveys using Question wizards, styles and various graphical tools
* Distribute your survey on paper or via the web
* Process responses from web surveys
* Enter responses from surveys: the optional KeyPoint Scanning Module, Data Entry Module and Offline Server
provide other options for entering responses see the next section, KeyPoint products, for more details
* View responses one at a time or in tabular format
* Analyse responses using a wide range of statistical tools
* Analyse and present the results of 360° feedback surveys
* Create tables and graphs based on the responses
* Connect multiple copies of KeyPoint running on different PCs in a network to the same survey so that, for
example, several people can enter responses to the survey at the same time (see also Data entry module in
the next section).
2
| Chapter 1: Welcome to KeyPoint
KeyPoint optional modules
You can extend the basic KeyPoint product using a number of optional modules. Some of these modules can be
purchased, while others, such as surveyserver, are available on a subscription basis. This User Guide gives instructions
for using the basic KeyPoint product and all optional modules.
The Data Entry Module
The Data Entry Module is a simplified version of KeyPoint designed purely for data entry. The Data Entry Module has
none of KeyPoint’s survey design, analysis or presentation features, so you will need to use the full version of KeyPoint
to create the survey together with its response database. However, once you have created the survey, you can
connect several networked PCs running the Data Entry Module to the survey’s response database and use them to
enter the responses. Once all the responses have been entered, you will need to use the full version of KeyPoint to
analyse and present the results of the survey.
The Data Entry Module provides an economic solution for larger surveys since it enables you to use several people to
process and enter response data without the expense of purchasing multiple copies of the full product. The Data
Entry Module is also useful for applications where respondents will enter their own responses directly, such as in
survey kiosks or on mobile devices, since it provides both a simpler environment and a cost saving compared with the
full product.
Offline Server, see next item, can be used in combination with the Data Entry Module to add greater flexibility in
applications where a permanent network connection is difficult or impossible.
See The Data Entry Module, page 263, for more details.
Offline Server
Offline Server allows you to enter responses into the Data Entry Module while it is disconnected from the KeyPoint
survey database. This is particularly useful if you are using the Data Entry Module in a survey kiosk or on a mobile PC
where it is difficult or impossible to maintain a network connection to the KeyPoint database. Once you have
collected the responses using the Data Entry Module, and can connect it to the network, you can transfer them to the
KeyPoint database through the Offline Server.
Offline Server Offline Server is available as a separate module that can be installed on your own server, but is also
provided as a component of surveyserver – see later in this section.
See Chapter 13, Offline Server for more details.
Scanning Module
The optional KeyPoint Scanning Module enables you to scan surveys and input them automatically into KeyPoint
responses, using Optical Mark Recognition (OMR) and Intelligent Character Recognition (ICR) to fill in the response
data.
See Chapter 10, KeyPoint Scanning Module for more details.
KeyPoint optional modules |
3
Web and Email module
The Web and Email module allows you to upload surveys to the web so that respondents can complete the survey on
the web. Returned responses can be automatically collected and downloaded into KeyPoint. KeyPoint supports a
number of mechanisms for handling the return of responses, including surveyserver (see next item) and the free use of
the Speedwell CamSP script.
surveyserver
surveyserver is an optional subscription service for the distribution and management of web surveys. surveyserver is
the easiest and most powerful way to carry out web surveys using KeyPoint. All you have to do to publish your survey
is press a button. Sending out invitations to complete the survey just takes a few steps using the Invitation Wizard, and
downloading the responses into KeyPoint is again just a question of pressing a button in a dialog box. See Chapter 12,
surveyserver, for full details and, in particular, Registering for the free surveyserver trial account, page 334, for how
to register for a free trial account.
How to get help
If you experience any difficulty using KeyPoint, you can try both this User Guide and the KeyPoint online help. You
can access the KeyPoint help at any time by pressing F1 on the keyboard or selecting KeyPoint Help from the Help
menu.
Selecting KeyPoint User Guide will open an on-screen version of this User Guide in, for example, Acrobat Reader –
see the Adobe website for how to download and install the free Acrobat Reader program if it is not already installed
on the PC .
Selecting Website (Help menu) will open your web browser and take you to the Speedwell home page at
http://www.speedwellsoftware.com/, where you can find many useful resources for KeyPoint users, including a page
of Frequently Asked Questions.
KeyPoint updates
Regular updates are posted to the Speedwell website. Select Check for Updates (Help menu), and KeyPoint will run
a check to see if there is a new update. If there is, and the upgrade is free, the website will give you instructions for
how to download and install it. If it is a paid-for upgrade, details of how to upgrade will be given. You can even set
KeyPoint to connect to the website regularly to check for new updates (tick Notify me of any KeyPoint updates in
the General page of the Options dialog box (Tools menu)).
4
| Chapter 1: Welcome to KeyPoint
You can contact KeyPoint support by telephone, mail or email. The contact details are:
Postal address
Speedwell
Denny Lodge Business Park
Chittering
Cambridgeshire
CB25 9PH
United Kingdom
Telephone number
+44 (0) 1223 851703
Email address
[email protected]
Website address
www.speedwellsoftware.com
Conventions
In this manual:
* Anything that should be clicked is shown in a bold typeface.
For example: Click OK.
* The menu on which a command can be found is placed in parentheses after the command; an arrow is used
to show a menu within a menu.
For example: Click Open (File menu) or Click Form (File®New submenu)
* When two actions are to be carried out together, they are linked by a plus sign.
For example: Ctrl+C or Ctrl+click.
These mean hold down the Ctrl key and press the C key or hold down the Ctrl key and left-click with the
mouse. The first of these is a keyboard shortcut to clicking Copy (Edit menu) – many people find that using
keyboard shortcuts is faster than selecting commands from a menu. See Appendix B, Shortcuts, for a list of
shortcuts – also, where there is a keyboard shortcut for a command, it is shown after the command name in
the KeyPoint menu.
* Extra tips and notes are sometimes given relating to adjacent text. They are displayed in the following format:
If you move the cursor over a button a pop-up hint (a ‘tooltip’) will appear.
* References to other parts of the User Guide are shown in bold italics.
For example: For more information, see Chapter 7, Working with Surveys in KeyPoint.
Conventions |
5
6
| Chapter 1: Welcome to KeyPoint
2
Installing KeyPoint
This chapter describes how to install KeyPoint.
You will learn about:
* System requirements
* The requirement for Internet access if you wish to use surveyserver or the CamSP script
* How to install KeyPoint
* Updating KeyPoint
* How to uninstall KeyPoint.
Chapter 2: Installing KeyPoint |
7
Hardware and software requirements
Minimum software and hardware requirements:
* A PC with a 500MHz processor or faster
* A monitor capable of displaying 65,536 colours (16 million recommended) in 800x600 or higher resolution
* A mouse, or similar pointing device
* Up to 330MB of hard disk space
* 256MB RAM (512MB recommended)
* A CD-ROM drive (or a network drive if you are installing KeyPoint over a network)
* Windows XP (SP3) or higher
* A suitable email account to use the email functions within KeyPoint
* Access to a web server if you want to produce web surveys (Speedwell’s own web server, surveyserver,
provides the easiest way of doing this)
* Internet access if you want to use surveyserver or the CamSP script – see next section
* A TWAIN compatible scanner if you want to use the Scanning Module.
Internet access
The PC you are using will need Internet access if you want to use surveyserver or the CamSP script to carry out web
surveys (see Chapter 11, Web Surveys). This may raise some configuration and security issues at some installations, so
this section contains notes giving details of some of the technical issues involved.
You should liaise with your network administrator to ensure that KeyPoint is allowed to access the Internet. The
following notes will help them to configure your system appropriately.
* Internet access is only required if you wish to use surveyserver or the CamSP script to carry out web surveys:
* For security reasons, when you are using CamSP script, KeyPoint does not embed your email address in
the web survey itself but holds it separately on the CamSP server. However, this means that Internet access
is required so that you can register your email address with the CamSP script server
* For surveyserver, Internet access is needed for registration, uploading surveys, downloading responses,
managing surveys and so on.
* CamSP script and surveyserver both use the same server (surveyserver.net).
If you experience a problem with the communication between KeyPoint and surveyserver, you may need to set up a firewall
exception for the domain name www.surveyserver.net. You should not use the IP address as this may change.
* KeyPoint uses standard (HTTP and HTTPS) protocols to communicate with surveyserver.
* Proxy server settings can be made by choosing Options (Tools menu) and displaying the Connection page.
8
| Chapter 2: Installing KeyPoint
Installing KeyPoint
Note that you will need administrator rights to install KeyPoint.
To install the full version of KeyPoint:
1
Insert the Installation disc into the PC’s disc drive.
2
If the setup program does not start up automatically, open Windows Explorer to view the disc drive and
double-click on the Setup.exe icon.
3
The Welcome page of the KeyPoint Installation Wizard will be displayed. Click Next.
4
Read the licence agreement and if you agree, select the I agree… radio button and click Next. Otherwise
click Cancel to exit the Installation Wizard.
5
In the Destination Folder page:
If you want to accept the default destination directory, just click Next.
If you do not want to install the program in the default location:
a
Click Change to display a browser page.
b Choose or create the required folder.
c
Click OK to return to the Destination Folder page.
d Click Next.
You should install and run KeyPoint from a local hard disk drive, not from a network drive. KeyPoint survey files can be saved and
run from a network drive, though operation will be faster if you use a local drive.
6
Click on a radio button to choose whether to perform a Complete or Custom installation, and click Next.
If you choose to perform a Custom installation, follow the instructions on screen.
7
Click Install to initiate the installation process.
8
Click Finish to exit the Installation Wizard.
The final installation step is to activate KeyPoint.
To activate KeyPoint on your PC:
1
Start up KeyPoint – if it is not started automatically by the Installation wizard, click the Start button on the
desktop and select KeyPoint 6 Web and Email from the All Programs® Speedwell menu.
2
In the KeyPoint Activation dialog box, choose whether to Activate now or Activate later and click Next.
* If you choose to Activate later, KeyPoint will open and you will be able to evaluate KeyPoint – there
are some restrictions in product usage.
* If you choose to Activate now, the License Manager dialog box will open.
3
To activate KeyPoint now, enter into the License Manager dialog box the Organisation, Department and
Product Key emailed to you after your purchase.
Installing KeyPoint |
9
4
Press Activate.
5
A dialog box will be displayed confirming KeyPoint activation – click OK to close the dialog box and open
KeyPoint.
surveyserver trial period
After you have installed KeyPoint, you will be able to register for a trial period using surveyserver.
The trial period for surveyserver lasts 30 days from the time you register, so you may want to delay registering until
you have familiarised yourself with the rest of the program to make sure that you get the most benefit from the trial
period and appreciate fully the advantages offered by surveyserver.
Changes made to your system
When you install KeyPoint, the PDF-XChange 4 printer driver is also installed automatically, so that you can output
surveys, responses and presentations in PDF (Portable Document Format).
After you have installed KeyPoint, KeyPoint PDF Printer (it uses the PDF-XChange 4 printer driver) will appear in the
printer list when you print documents from KeyPoint, but not for other applications on the PC.
If you are upgrading from KeyPoint 5.5, you can uninstall PDF-XChange 3 (unless you have purchased a separate PDF-XChange 3
license for use with other applications) – see Uninstalling PDF-XChange, page 14, for details.
During installation, KeyPoint also creates folders for the following:
* The KeyPoint program files
* KeyPoint examples
* The KeyPoint Style and Question Libraries (a system folder).
The KeyPoint installation program also makes changes to your Windows registry.
File locations
Depending on the PC’s operating system, the KeyPoint files are stored in the following locations – you can change the
location of those marked (default):
Vista/Windows 7
KeyPoint program – 32-bit PC (default – can be changed during installation)
* \Program Files\Speedwell\KeyPoint\6.0
KeyPoint program – 64-bit PC (default – can be changed during installation)
* \Program Files\Speedwell (x86)\KeyPoint\6.0
System (default – see next section)
* \ProgramData\Speedwell\KeyPoint\6.0\System
10
| Chapter 2: Installing KeyPoint
System backup (this holds a copy of the default system database files in case KeyPoint needs to recover from a
problem with the current system files)
* \ProgramData\Speedwell\KeyPoint\6.0\Default System
Dictionaries (see later for custom dictionaries)
* \ProgramData\Speedwell\KeyPoint\6.0\Dictionaries
Standard templates (installed with program – see later for user templates)
* \ProgramData\Speedwell\KeyPoint\6.0\Templates
Examples (these are copied to the user’s folder when they first run the program – see later for user’s folder)
* \ProgramData\Speedwell\KeyPoint\6.0\Examples
Scans (default – can be changed in Options dialog box (Scan menu))
* \Users\<user>\AppData\Roaming\Speedwell\KeyPoint\Scans
Responses (default – can be changed in Email & Web page of the Options dialog box (Tools menu))
* \Users\<user>\AppData\Roaming\Speedwell\KeyPoint\Inbox
Custom dictionaries
* \Users\<user>\AppData\Roaming\Speedwell\KeyPoint\Dictionaries
Examples
* \Users\<user>\Documents\KeyPoint 6\Examples
Templates
* \Users\<user>\Documents\KeyPoint 6\Templates
XP
KeyPoint program (default – can be changed during installation)
* \Program Files\Speedwell\KeyPoint\6.0
System (default – see next section)
* \Documents and Settings\All Users\Application Data\Speedwell\KeyPoint\6.0\System
System backup (this holds a copy of the default system database files in case KeyPoint needs to recover from a
problem with the current system files)
* \Documents and Settings\All Users\Application Data\Speedwell\KeyPoint\6.0\Default System
Dictionaries (see later for custom dictionaries)
* \Documents and Settings\All Users\Application Data\Speedwell\KeyPoint\6.0\Dictionaries
Standard templates (installed with program – see later for user templates)
* \Documents and Settings\All Users\Application Data\Speedwell\KeyPoint\6.0\Templates
Examples (these are copied to the user’s folder when when they first run the program – see later for user’s folder)
* \Documents and Settings\All Users\Application Data\Speedwell\KeyPoint\6.0\Examples
Installing KeyPoint |
11
Scans (default – can be changed in Options dialog box (Scan menu))
* \Documents and Settings\<user>\Application Data\Speedwell\KeyPoint\Scans
Responses (default – can be changed in Email & Web page of the Options dialog box (Tools menu))
* \Documents and Settings\<user>\Application Data\Speedwell\KeyPoint\Inbox
Custom dictionaries
* \Documents and Settings\<user>\Application Data\Speedwell\KeyPoint\Dictionaries
Examples
* \Documents and Settings\<user>\Documents\KeyPoint 6 \Examples
Templates
* \Documents and Settings\<user>\Documents\KeyPoint 6\Templates
Moving the system database
To move the system database to a different location:
1
Copy the contents of the current system database folder (called ‘System’ by default) to the new location.
2
Start KeyPoint and select Options (Tools menu) to display the Options dialog box.
3
Click Change on the General page to display the Define the system database location dialog box – this is
a standard Windows Open dialog box.
4
Use the dialog box to browse to the new location of the system database (which should contain the
system.kps file that you copied from the original location), and click Open.
You will be warned that you will need to close and restart KeyPoint for the change to take effect.
5
Close KeyPoint.
Do not delete the original System folder – if you do, KeyPoint will just recreate default files in the original location when you next
open it.
Sharing resources
To enable several users to share a Style Library, Asset Library and Address Book, copy the ‘System’ folder to a network
drive that all users can access. All users must then specify this network drive as the location of the system files by
following instructions 2–6 in the previous section to specify the shared folder as the ‘system database location’.
For several users to collect web survey responses in one location, create an ‘Inbox’ folder on a network drive that all
users can access. All users must then specify this network drive as the location for responses by entering this location
in the Email & Web page of the Options dialog box (Tools menu): click Change for Responses location to display a
browser dialog box and select the folder. See page 337 for what to do when several users share one surveyserver
account.
12
| Chapter 2: Installing KeyPoint
Installing the KeyPoint Data Entry Module
The KeyPoint Data Entry Module is installed using a different version of the Installation Wizard. To install the Data
Entry Module:
1
Insert the installation disc into the PC’s disc drive. If the KeyPoint Installation Wizard starts, click Cancel to
close it.
2
In Windows Explorer, browse to the ‘Data Entry Module’ folder on the installation disc.
3
Double-click on the Setup.exe icon in that folder.
4
Follow the instructions from Step 3 above for using the Installation Wizard.
Checking for updates
Once you have installed KeyPoint, you should check occasionally for updates to the program. To do this, you can
either select Check for updates (Help menu), or visit the website, www.speedwellsoftware.com.
Uninstalling KeyPoint
To uninstall KeyPoint from Windows Vista/Windows 7:
1
Select Control Panel from the Start menu.
2
Select Category from the View by list.
3
Select Uninstall a Program in the Programs item.
4
Scroll down the list of installed programs and select KeyPoint 6 Web and Email.
5
Press Uninstall or double-click KeyPoint 6 Web and Email.
6
Press Yes to confirm you want to unistall the program.
To uninstall KeyPoint from Windows XP:
1
Double-click the Add/Remove Programs icon in the Windows Control Panel.
2
Scroll down the list of installed programs and select KeyPoint 6 Web and Email.
3
Click Add/Remove Programs. The KeyPoint Uninstall Wizard starts.
4
In the Application Maintenance page, select Remove, and click Next.
5
In the next page, click Next to complete the uninstallation process.
Checking for updates |
13
Uninstalling PDF-XChange
When you install KeyPoint, the PDF-XChange 4 printer driver is also installed automatically, though you can remove it
if required.
On the other hand, if you were to uninstall KeyPoint, PDF-XChange would not be removed automatically, so you
would need to uninstall it separately.
To uninstall PDF-XChange 4:
Use the same procedure as for uninstalling KeyPoint (see previous section), but select PDF-XChange 4 at
the relevant points instead of KeyPoint 6 Web and Email.
If you are upgrading from KeyPoint 5.5, you can uninstall PDF-XChange 3, unless you have purchased a separate
PDF-XChange 3 license for use with other applications.
To uninstall PDF-XChange 3:
14
1
Choose Uninstall (Start®All Programs®PDF-XChange 3).
2
A confirmation dialog box will be displayed – click Yes if you are sure you want to uninstall
PDF-XChange 3.
3
After PDF-XChange has been removed, you will be prompted to restart Windows. You can either click Yes
to restart immediately or No to close the dialog box without restarting – the uninstallation process will be
completed when you next restart Windows.
| Chapter 2: Installing KeyPoint
3
Using KeyPoint
This chapter provides a quick look round KeyPoint, with overviews of how KeyPoint can help you at each of the
different stages involved in carrying out a survey.
You will learn about:
* The process of carrying out surveys
* Designing surveys
* Distributing surveys
* Receiving and inputting responses, including entering data manually, downloading web responses and using a
scanner
* Analysing and presenting the results of the survey
* Managing KeyPoint surveys.
Chapter 3: Using KeyPoint |
15
Carrying out a survey
The process of carrying out a survey involves the following steps:
Plan the
survey
Design
the survey
Distribute
the survey
Collect and
enter the
responses
Analyse and
present
the results
The first step, planning the survey, requires decisions on issues such as the purpose of the survey, who you want to
respond to it, the budget and who is to be responsible for organising and managing the survey – see Chapter 6,
Introducing Surveys, for an introduction to some general principles for conducting surveys.
KeyPoint provides the tools you need for carrying out all the remaining steps in the process:
Design
workspace
Invitation
Manager
Responses
workspace
Presentation
workspace
The following sections provide an overview of each of these processes and how KeyPoint helps you carry them out.
Designing the survey – the Design workspace
When you start up KeyPoint, the Welcome to KeyPoint dialog box gives you a choice between opening an existing
survey or creating a new survey by clicking the Create New button. (You can use the Welcome to KeyPoint dialog
box to manage your surveys in a number of different ways – see Managing surveys, page 32, for more details.) You
can also choose New from the File menu to create a new survey.
When you choose to create a new survey, the Survey Design Wizard will start up to guide you through the process of
choosing the type of survey, the layout, style, title, introductory text and headers and footers, and then takes you
through the process of adding the questions to your survey using the Question Wizard. Session 1 in the first tutorial,
page 34, takes you through an example of designing a new survey using the Survey Design Wizard – you won’t add
any questions to the survey in that session, but later sessions show you how to add questions using the Question and
Question Table Wizards.
When you have created the new survey design, it will be displayed in the Design workspace, where you can fine-tune
the design and add a wide range of other powerful features if required. The next section provides an overview of the
Design workspace and the way you can use it to enhance your survey design.
16
| Chapter 3: Using KeyPoint
The Design Workspace
The KeyPoint application window has the familiar Windows features of a title bar (showing the name of the KeyPoint
survey you are working on), menu bar and toolbar at the top, and a status bar at the bottom.
The main part of the window is taken up by the workspace area. There are three workspaces, Design, Responses and
Presentation, each corresponding to a different stage of the survey process. You select a workspace by clicking the tab
labelled with the workspace’s name at the top of the workspace area. When you click the Design tab, the KeyPoint
window looks something like this:
Design tab
Sidebar
tabs
Sidebar
tabs
Design form
Form tab
Each workspace may contain one or more forms – you choose which form to display by clicking on the tabs at the
bottom of the workspace. In the example picture, the Design workspace has two forms, which are called ‘Paper form’
and ‘Web form’.
In the Design workspace, there are also sidebar tabs down each side of the workspace area – you can choose whether
to show or hide each of the sidebar tabs if required.
The sidebars you can display for the Design workspace allow you to:
* select, add and delete pages, and select objects on a page (Page Manager)
* place a variety of different types of question and other objects on the form (Designer Tools)
* align, size and style objects to create the look you want (Align and Size, Format Palette and Properties).
Designing the survey – the Design workspace |
17
For more information about using KeyPoint workspaces, see:
* Chapter 7, Working with Surveys in KeyPoint, for general instructions on working with toolbars, sidebars,
surveys and forms
* Chapter 8, Constructing a Survey, for the Design workspace specifically.
Types of survey
KeyPoint enables you to create different types of survey depending on how you want to distribute it, how you want to
collect responses and how you want to input them when they are returned. You can create:
* paper-based surveys for inputting responses:
* using an image scanner if you have purchased the KeyPoint scanning module, which uses Intelligent
Character Recognition (ICR) and Optical Mark Recognition (OMR) on the scanned images
* manually using the Responses Workspace or the optional Data Entry Module.
* direct-entry surveys where the respondent or an interviewer enters the data directly into KeyPoint’s Responses
workspace or the Data Entry Module. Direct-entry surveys can be used, for example, with:
* telephone surveys
* survey kiosks
* hand-held devices.
* web-based surveys for use with:
* your own or an ISP’s web server
* surveyserver if you subscribe to the KeyPoint surveyserver service.
The following diagram summarises the types of survey you can create in KeyPoint:
Types of
survey
Direct entry
online/offline
Paper
Manual
input
Scanner
input
Telephone
Kiosk
For further details, see:
* Chapter 7, Working with Surveys in KeyPoint.
18
| Chapter 3: Using KeyPoint
Web
Hand-held
device
surveyserver
Own/ISP
server
Master and copy forms
You can use the Survey Design Wizard to create any of the different types of survey described in the last section.
However, there may be occasions when you want to use more than one of these types for the same survey – for
example, a web survey for some respondents and a paper-based survey for others. You could use the Survey Design
Wizard to create separate web and paper-based KeyPoint surveys, but the responses would then be entered into
different databases. You can get around this problem using KeyPoint’s copy forms.
The first survey design you create in a survey is the master form. Once you have completed the design, you can then
create a copy of it – a copy form – within the same survey. Initially, the copy form will be identical to the master form,
but you can then change it in many different ways. Essentially, you can change anything that affects the appearance of
the form, including the wording of questions and options, but you cannot add, delete or change the structure of
questions on copy forms – they are the same questions as on the master form and are linked to the same items in the
database.
You can use copy forms to create different versions of the same survey with, for example:
* different survey types, such as paper-based, direct-entry or web
* different wording, for example, using different languages
* different questions – although you cannot add or delete questions on a copy form, you can hide individual
questions (web) or make them non-printable (paper-based) so that respondents receiving different copy forms
see different questions.
The following diagram summarises some of the main ways you can use copy forms:
Design
Master form
Copy forms
Different types
of survey
Different wording
or languages
Different
questions
For further details, see:
* Copy forms, page 119.
Designing the survey – the Design workspace |
19
Questions and question tables
The diagram below shows the different types of question you can place on a KeyPoint survey form:
Text
Number
Date/time
Multiple
choice
Menu/
listbox
Ordered
choice
Range
Calculated
Questions
Question
Tables
Design
Generally speaking, the different types of question work in the way you would expect, but some points of note are:
* You can use menu/listbox questions for multiple choice questions in web and direct-entry surveys –
respondents pick their answer from a drop-down list instead of clicking check boxes, which can save room on
the survey form.
* You can use number and date/time questions to validate the format of answers given by respondents in web
and direct-entry surveys and for data entry.
* You can configure a text question to receive a bar code label, which can be read when you input the returned
questionnaires using the KeyPoint scanning module.
* Although KeyPoint treats calculated questions in some ways like the other types of question, you do not use
them to ask questions but to display the results of calculations, which may be based on a wide range of
dynamic data, including the answers given to other questions. The calculations can be shown to respondents
of web and direct-entry surveys, and during date entry, but can also be used for analysis and presentation
purposes.
You can use Question tables to group together questions of the same type (you can create tables of any type of
question). Question tables can make the survey layout more compact, attractive and easy to use: for example, by just
listing the options for a series of multiple choice questions at the top of the table. Grouping questions together also
enables you to analyse and compare the answers given to the questions in the table as a group.
For further details, see:
* Guidelines for compiling a survey, page 93, for general information about different types of question
* Adding questions, page 153
* Adding a question table with the Question Table Wizard, page 157.
20
| Chapter 3: Using KeyPoint
Other objects
For web and direct-entry surveys, you can also place navigation buttons directly onto the survey page allowing users
to, amongst other things, move between pages or print, save and submit the survey.
For printed surveys, you can add a preprinted barcode for use with the KeyPoint image scanning module so that
KeyPoint can identify the survey, form, page and respondent when the survey is scanned. You can also add a
‘barcode label’ object to a survey. This defines an area in a printed survey where the respondent can stick a barcode
label. In the Responses workspace (and web surveys created from the same form), the barcode label object appears as
a text question, and when the survey is scanned into KeyPoint, the KeyPoint Scanning Module reads the barcode and
places the result into the text question in the response, where it can be edited if required.
You can add a range of other objects to design forms, including text, a variety of graphics such as lines, rectangles and
pictures, and OLE objects. KeyPoint automatically numbers questions, but if you need more control over the way
questions are numbered, you can also add individual question number objects and use them instead of the automatic
numbering.
For further details, see:
* Adding other objects to a survey, page 177.
Controlling appearance and layout
When you create a survey using the Survey Design Wizard, KeyPoint automatically places the questions on the page.
Although this is usually a good starting point, you will probably want to fine-tune the layout to make it look as good as
possible. KeyPoint provides a wide range of tools and techniques to help you achieve this, including:
* Manual layout – you can move, resize and reshape questions and question tables, the individual components
within questions and question tables, and any other objects on the page.
* Automatic layout – by default, KeyPoint automatically arranges the components within questions and
question tables when you place them on the page or resize or reshape them. As mentioned in the previous
point, you can override the automatic layout by moving individual components within questions and question
tables, but you can revert to automatic sizing and layout at any time.
* Fonts – you can change the font, font size and font style of any of the text in questions, question tables and
text objects.
* Question/question table properties – you can fine-tune the parameters used for the automatic layout of an
individual question or table by editing its properties. For example, for a multiple choice question you can
decide whether the answers should be to the right of the question or below it, whether the answers are
arranged in columns, the spacing between components, and many other features. You can even choose to
arrange the answers in random order, which may be useful for eliminating the effect of any bias arising from
the order in which answers are presented.
* Column lines – you can arrange questions and other objects in columns by placing column lines on the page.
* Adding and removing paper or pages – you can create or remove space on the page using the Add paper
and Remove paper commands; you can also add and remove whole pages if required.
* The Align and Size sidebar – you can use tools on the Align and Size sidebar to set the relative alignment,
size and spacing of selected objects on the page.
Designing the survey – the Design workspace |
21
For further details, see:
* Moving and copying questions, page 170
* Aligning questions and other objects, page 172
* Inserting and removing white space in a survey, page 176
* The Properties sidebar, page 195.
Reusing design elements
KeyPoint lets you save time and achieve consistency through the reuse of design elements, using:
* Templates – you can save an existing KeyPoint design form as a template and use it as the basis for a new
survey.
* Clones – when you create a new survey, you can choose to make it a clone of an existing survey, which
means it has (copies of) its design forms, but no responses and a blank presentation form. You can then edit
the new copy as required.
* Master pages – each design (and presentation) form has a master page, on which you can place any text and
graphic objects you want to appear on every page of the form. You can also set a header and footer separately
for each form and make them appear on every page, or every page except the first. Double-sided surveys
have separate master pages for odd and even pages.
* The Style Library – the Style Library allows you to set the default properties for the different types of object
you can place on design (and presentation) forms. When you install KeyPoint, the Style Library contains a
wide range of styles, but you can edit them as required or create your own styles. Style properties control
virtually all aspects of an object’s appearance. Using styles saves you from having to set the properties of every
object on the form individually, and enables you to maintain consistency across the survey and, if required,
between different surveys.
* The Asset Library – when you install KeyPoint, the Asset Library contains a range of standard questions and
text for introductory and concluding sections. You can use objects from the Asset Library when you are
creating the survey using the Survey Design Wizard, or later when you are editing the design. You can add
your own objects to the Asset Library, such as questions, text, graphics, pictures and even whole pages.
For further details, see:
* Using a template to create a new survey, page 107
* Copying the design of an existing survey, page 109
* Master pages, page 131
* Using the Style Library, page 143
* The Asset Library, page 230
22
| Chapter 3: Using KeyPoint
Controlling responses
Data integrity is an important consideration when you are carrying out a survey, so KeyPoint provides a range of tools
to help you ensure the validity of the responses entered. For direct-entry and web surveys, you can use these tools to
prevent the respondents entering invalid data. You cannot prevent respondents writing invalid responses in
paper-based surveys, but you can use the data validity tools to prevent invalid data being entered into the database at
the response entry stage, though if you need to, you can override them to enter invalid “dirty” data. You can control
responses using:
* Answer formats/masks – you can specify the format that must be used when entering text, date and number
questions. For example, you can specify the number of decimal places or whether the day should come
before the month in dates, or vice versa. You can also use answer masks with text questions to restrict the
range of acceptable answers: for example, you could set masks that will only accept valid post codes or
telephone numbers. For number questions, you can also set maximum and minimum values for acceptable
answers.
* Valid if conditions – you can apply a validity condition to a question so that it rejects any answer failing the
condition. The condition may just depend on the answer given: for example, you might want to ensure that a
date of birth is not more than a hundred years ago, or some time in the future. But conditions can also be
made to depend on a wide range of data, including the answers given to other questions: for example, if you
have a number of questions asking what percentage of time the respondent spends on different activities, you
could prevent them entering answers that total more than 100%.
* Ask if conditions – you can also apply a condition to a question that must be satisfied before any answer can
be entered. In almost all cases this condition will depend on the answer given to one or more other questions:
for example, you might not want to ask if someone is pregnant if they have already said they are male.
* Routing – by default, when the answer to a question has been entered, KeyPoint moves the focus to the next
question. However, you can override this by drawing a route to another question and specifying a condition
for the route to be taken, which will usually depend on the answer given to the question. For example, if
someone has said they are retired, KeyPoint could skip past a set of questions about their current
employment.
For further details, see:
* Answers and answer formats, page 160
* Setting a text mask, page 197
* The Ask If/Valid If tab, page 204
* Question routing, page 191.
Distributing the survey – the Invitation Manager
Once you have completed and checked the survey design, you will need to distribute it to your intended
respondents. KeyPoint provides a number of tools to help you with this task. In particular:
* Address Book – you can create an address book in KeyPoint with contact details for your respondents. You
can add to and edit the Address Book in KeyPoint, or import entries from an external program such as
Outlook.
* Invitation Manager – you can use the Invitation Manager to send invitations to selected individuals or groups
in the Address Book. You can link text questions in the survey to fields in the Address Book so that you can
Distributing the survey – the Invitation Manager |
23
create personalised versions of the survey for each respondent. You can also use the Invitation Manager to
keep track of who has responded, and send follow-ups to anyone who has not responded yet.
For further details, see:
* The Address Book, page 244
* Using the Invitations Wizard for a paper-based survey, page 237
* Promoting a web survey – sending invitations, page 319
* Inviting respondents to take part in a survey, page 345 (for using the Invitation Manager with surveyserver).
Paper-based surveys
For paper-based surveys, the first stage in distributing the survey is to print it. If you plan to print the surveys yourself,
you can print them directly from KeyPoint or using the Invitation Manager, which allows you to personalise the copies
of the survey with data from the address book or to include a unique identifier enabling you to keep track of who has
returned their survey. If you are using the KeyPoint Scanning module, you can add a preprinted barcode identifying
the survey, form, respondent and page number so that this data can be automatically read from the returned survey
when it is scanned.
If you require a large number of copies, or high quality, you may prefer to use a commercial printer. To help you
create the files for use by a commercial printer, the KeyPoint PDF Printer driver is installed with KeyPoint. Pdf files
are also a good medium for internal distribution of the survey by email for pre-production review and checking.
For further details, see:
* Distributing the survey, page 233.
Web surveys
Before you can distribute web surveys, you need to provide KeyPoint with a certain amount of information about the
way your system is connected to the web and email, and how you want to receive responses – KeyPoint’s wizards
make this process very straightforward, especially if you choose to use surveyserver or the CamSP script.
Once you have designed the web survey, you need to create the required files and upload them to the server. How
you do this depends on whether you are using:
* surveyserver: all you need to do is press a button
* your own or an ISP’s server: you need to generate the files from KeyPoint and then upload them to the server
using an ftp or similar program.
You then need to invite people to complete the survey. You can use an external mail program to issue invitations to
complete a web survey with a link to the survey, or you can use KeyPoint’s Invitation Manager, which is simpler and
offers other features such as helping you keep track of responses.
For further details, see:
* Chapter 11, Web Surveys
* Chapter 12, surveyserver.
24
| Chapter 3: Using KeyPoint
Collecting and entering responses – the Responses workspace
Once you have designed your survey and distributed it to respondents, the next stage in carrying out the survey is to
collect the responses and enter the data into the KeyPoint database. In KeyPoint, you do this in the Responses
workspace or the optional Data Entry Module, which is, in effect, just a cut-down version of KeyPoint with the
Design and Presentation workspaces removed.
When you click on the Responses tab, KeyPoint displays the Responses workspace:
The Responses workspace contains the survey response form. This has the same appearance as the survey in the
Design workspace, but here the tick boxes, edit controls, etc, are active so that you can enter or edit data in the same
way as a respondent using a web survey. Also, when you enter or edit data in the survey response form, KeyPoint
applies any validation and routing rules you may have added in the design.
If you have created several versions of the survey design using copy forms, you can choose between the
corresponding versions of the response form using tabs at the bottom of the workspace in the same way as you
choose between copy forms in the Design workspace.
You can enter response data manually using the keyboard, or automatically by importing data from a scanner or from
web and email responses – see later in this section for an overview of the different ways of inputting response data.
After you have entered the data from the surveys returned by respondents, you can use the survey response form to
view and edit the responses individually (you can also view, but not edit, responses in the Analysis Grid – see page 28
for an overview).
Collecting and entering responses – the Responses workspace |
25
Tools in the toolbar displayed for the Responses workspace allow you to:
* display the first, last, next or previous response in the database
* add a new empty response to enter data
* save a new or edited response
* delete individual responses or a selected subset of responses.
The way you enter data into KeyPoint from returned surveys depends on the type of survey:
* Paper-based surveys – You can enter data:
* Manually: You input the data directly into a copy of the form using the Responses workspace.
If you have to enter a large number of surveys, the optional Data Entry Module provides an economical
way to input data using several PCs.
* Using an image scanner with the KeyPoint Scanning Module: You input the data using an image scanner in
two stages:
1
Scan the returned surveys and import the images into KeyPoint. You can either do this as a single
step, controlling the scanner from within KeyPoint without saving intermediate separate image files,
or you can scan the surveys using another application and import the resulting separate image files
into KeyPoint.
2
Input the data from the scanned images using KeyPoint’s OMR/ICR software. When you do this, a
new KeyPoint response is created for each returned survey. During this process, you can inspect
the images and, if necessary, re-order them if they have been scanned in the wrong order, or
delete any that you need to rescan or do not want to input for some reason.
When you review scanned responses in the Responses workspace, you can split the screen, with one part
showing the response data and the other the scanned image. This means that it is very easy for you to
check that the response has been read correctly from the image, and to make any changes required.
* Web surveys – You input web responses in the following steps:
1
If you are using your own server or an ISP’s server and you have chosen to collect the returned surveys
in a file on the server, download the file from the server to your PC.
This step is not required if you have chosen to have the returned surveys sent to you by email or if you
are using surveyserver.
26
2
Display the Responses dialog box from the Responses workspace and load the returned web/email
surveys.
3
View the returned surveys in the Responses dialog box, and, if necessary, edit or delete them.
4
Input the returned surveys from the Responses dialog box into responses in the KeyPoint database.
| Chapter 3: Using KeyPoint
* Direct-entry surveys – These include:
* Telephone surveys – the procedure for carrying out a telephone survey is to create a new response for the
survey in the Responses workspace (in KeyPoint or the Data Entry Module), read the interview questions
to the respondent from the response form and then enter their answers directly into the form.
* Survey kiosks and hand-held devices – in this case the respondents or interviewers enter responses directly
into KeyPoint or the Data Entry Module. If you are using more than one kiosk or hand-held device for the
same KeyPoint survey, there are two ways of working:
* Online: the PCs are connected to the KeyPoint database through a network and the responses are
added immediately to the database as they are entered and saved in KeyPoint or the Data Entry
Module. However, providing or maintaining the required network connection may not always be
convenient or possible.
* Offline (using the optional Offline Server module): the PCs do not need to be connected to a network
while the responses are collected using the Data Entry Module. This means that the responses cannot
be saved directly in the KeyPoint database but are stored on the PC until it is connected to the
network, when they can be uploaded to the Offline Server. The responses are then downloaded to the
KeyPoint database using the same procedure as for web surveys (see earlier in this section).
Offline Server is provided with surveyserver or can be purchased as a separate option if you do not subscribe to surveyserver – see
Chapter 13, Offline Server.
For further details, see:
* Chapter 9, Processing Responses, for details of entering responses manually
* Chapter 10, KeyPoint Scanning Module
* Chapter 11, Web Surveys, for web surveys using your own or an ISP’s server, and email surveys
* Chapter 12, surveyserver, for details of using surveyserver for web surveys
* Chapter 13, Offline Server, for details of using Offline Server for web surveys.
Collecting and entering responses – the Responses workspace |
27
Analysing and presenting the results – the Presentation workspace
The final stage of the survey is to examine the results, work out what they mean, and present your conclusions.
KeyPoint’s Presentation workspace provides a wide range of powerful tools to help you with these tasks.
The Presentation workspace provides three types of form for viewing and presenting response data:
* The Analysis Grid
* The Statistics form
* Presentation forms.
The following sections provide an overview of each of these in turn.
The Analysis Grid
When you click on the Presentation tab, the Presentation workspace opens at the Analysis Grid:
Presentation tab
Analysis Grid
Tabs for selecting
different
presentation
resources
The Analysis Grid displays the responses in a table: you can re-order the columns, sort the data, and apply filters so
that you see only some of the responses. The Analysis Grid filters can also be used to restrict the responses visible in
the Responses workspace or to be included in presentation tables and graphs.
For further details, see:
* The Analysis Grid, page 372.
28
| Chapter 3: Using KeyPoint
The Statistics form
The Statistics form is displayed when you click on the Statistics tab at the foot of the Presentation workspace. The
data is created automatically, and you cannot edit it. The form displays a wide range of statistics for each question in
the survey and for a number of system variables.
Analysing and presenting the results – the Presentation workspace |
29
The Presentation form
Presentation tab
Sidebar tabs
Presentation
form, showing
pie charts
Sidebar tabs
When you create a survey, KeyPoint creates a blank presentation form in the Presentation workspace called
Presentation1. You can select the form by clicking on its tab at the bottom of the Presentation workspace. You can
change the name of the form, and create additional blank presentation forms or duplicates of existing ones, as
required. When you add a new form, a new tab will appear at the bottom of the Presentation workspace so that you
can select it.
You can use presentation forms to create an analysis of the survey results by adding presentation objects such as tables
and graphs. You can use wizards from the Designer Tools sidebar to add:
* Tables containing a list of responses showing the answers given to selected questions
* Statistics tables showing a statistical analysis of the answers given to selected questions – a comprehensive set
of statistical functions is available for the analysis
* Distribution tables showing the distribution of answers given to a selected question (or the questions in a
selected question table)
* Cross tabs showing how the distribution of answers given to two selected questions are correlated
* Pivot tables, also showing how the distribution of answers given to selected questions are correlated, but in a
more flexible and interactive way than cross tabs
30
| Chapter 3: Using KeyPoint
* Graphs – you can show an analysis of the survey results in:
* Bar graphs
* Horizontal bar graphs
* Point/scatter graphs
* Line graphs
* Area graphs
* Pie graphs
* Radar graphs
* HiLo graphs
* Box plots.
You can also use tools in the Designer Tools sidebar to add:
* Text
* Lines and rectangles
* Pictures.
Alternatively, you can use the Quick Analysis Wizard to build a complete presentation. There are two levels within
the Quick Analysis Wizard: ‘Default settings’, which provides a very simple range of options but means you can create
a presentation in as few as three mouse clicks; and ‘Custom settings’, which provides much greater control over the
content and format of the presentation. Whichever level you use, the graphs and tables added to the presentation are
the same as if you had added them individually using the tools in the Designer Tools sidebar, so you can edit and add
to them as required.
Once you have created a presentation table or graph, you can customise it in many different ways to get just the
analysis and appearance you want. To give just a few examples, you can:
* Change the questions included in a table or graph, and the way they are analysed
* Work interactively with pivot tables
* Move and resize the whole table or chart, or individual components within it
* Split a large table across two or more pages
* Change the colours and fonts used for individual components
* Modify the 3D appearance of charts.
You can also create the following special presentation forms:
* Topline Results – the Topline Wizard creates a new form in the same format as the design form (you can
choose which copy form to base it on) showing frequency or percentage results for each of the answers in the
survey. Topline Results forms are not standard presentation forms: for example, you cannot add other
presentation graphs and charts to them.
* 360° Analysis – in most respects, KeyPoint treats a 360° feedback survey like any other survey (the only
requirement is that it must include questions identifying the respondent and the relationship between the
respondent and the person under review). You can create presentations in just the same way as for other
surveys, but KeyPoint also provides the 360 Degree Analysis Wizard to create a new 360° presentation form
with special 360° graphs and tables for analysing the results of a 360° feedback survey. Once you have created
the 360° presentation, you can edit the 360° graphs or tables using similar techniques to those used for
Analysing and presenting the results – the Presentation workspace |
31
standard presentation graphs and tables. You can also add standard presentation graphs or tables to a 360°
presentation form, and edit them in the normal way – the only difference between a standard presentation
form and a 360° presentation form is that you cannot add 360° graphs or tables to a standard presentation
form.
For further details, see:
* Chapter 15, Presenting Data
* Chapter 16, 360° Feedback Surveys.
Managing surveys
The Welcome to KeyPoint dialog box provides a number of tools for managing your surveys. You can use it to:
* Open a survey
* Create a new survey:
* using a wizard
* from a template
* as a clone of another survey
*
*
*
*
Rename a survey
Delete a survey
View statistics for a survey, such as the number of responses received
View tracking information showing how many people you have invited to complete the survey and the
number and percentage who have responded
* If you have created several versions of the survey using copy forms, view a breakdown of how many people
have responded to each version of the survey
* Manage your surveyserver account – the surveyserver control panel presents very detailed information about
your account, and gives you fine control over the appearance and behaviour of your forms, presentations etc.
For further details, see:
* Chapter 7, Working with Surveys in KeyPoint
32
| Chapter 3: Using KeyPoint
4
KeyPoint Tutorial 1
This chapter is a tutorial to help you get started with KeyPoint.
You will learn how to:
* Create a new survey
* Add questions
* Use the Style Library
* Control layout
* Create a web survey
* Enter responses
* Create a simple presentation.
Chapter 4: KeyPoint Tutorial 1 |
33
Quick Start tutorial
This tutorial covers the basics of creating and using surveys in KeyPoint. You should read this tutorial while sitting at
your computer so you can try the steps yourself.
The first six sessions, which are covered in this chapter, take you step-by-step through a simple example of the
complete process of creating a survey, distributing it, entering response data and analysing the results. The remaining
five sessions, which are covered in the next chapter, introduce you to some more advanced techniques.
Remember you can get help from the on-line Help system while you are working with KeyPoint by pressing F1 at any
time.
Session 1: Creating a new survey
To create a new survey:
1
Click the Start button on the desktop and select KeyPoint 6 Web and Email from the All Programs®
Speedwell menu.
The Welcome to KeyPoint dialog box will be displayed when the program opens.
2
Click the Create New button.
3
In the New Survey dialog box, click the Save button to accept the default survey name (My Survey) or
enter a new name if you prefer.
KeyPoint starts the Survey Design Wizard. This wizard allows you to set survey options and also add
questions. You can click Cancel at any time to go straight to your survey in KeyPoint.
4
If the Welcome To The Survey Design Wizard page is displayed (you can choose to hide introductory
pages in wizards), click Next to move on to the Survey Type page.
5
In this tutorial we will begin by designing a paper-based survey, so in the Survey Type page, click on the
Paper radio button and click Next to move on to the Survey Layout page.
6
In the Survey Layout page, click Next to accept the default page size and layout.
7
In the Survey Style page, select NORMAL and click Next.
8
In the Survey Title page, enter a title for the survey, in this case Film Survey. KeyPoint displays the title in
the box below. Click Next to continue.
9
A survey usually requires an introduction, explaining the purpose and scope of the survey to respondents.
The Asset Library contains prepared introductions.
Click the Library button. Double-click the General Introductions category, click an introduction and then
click the Use button to close the Asset Library.
Click Next to continue.
10
34
In the Header page you can create a page header to appear at the top of each page. In this case, leave the
header blank. Click Next.
| Chapter 4: KeyPoint Tutorial 1
11
In the Footer page, click on the Centre tab. Then right-click in the white area below to display a menu,
and select Page Number. This will cause the page number to appear on the bottom of every page of the
survey.
Click Next to continue.
12
In the Add Questions page you could choose to start adding questions using the wizard to help you.
However, this tutorial is going to show you how to do this ‘by hand’.
Click No, I’ll add questions manually.
Click Next to continue.
13
A survey should include a conclusion, perhaps thanking the respondent for their participation, or giving
instructions for returning the survey.
Select a prepared conclusion from the Asset Library by clicking the Library button.
14
Click Next and then Finish in the final page, or just Finish if Next is disabled (you can choose to hide final
pages in wizards).
KeyPoint displays the survey title, introduction, conclusion and footer on an otherwise blank Design form.
Further information
For more information on creating a new survey, see Chapter 7, Working with Surveys in KeyPoint.
Session 1: Creating a new survey |
35
Session 2: Adding questions and using the Style Library
We’re now going to add some questions – a text question, a number question, a menu/listbox question, and a
multiple choice question table. We’ll also use the Style Library to control the appearance of the multiple choice
questions.
The menu/listbox question is included in the tutorial for illustrative purposes only since you would obviously not include this type
of question on a paper-based survey.
However, before you add questions you should create some space for them by moving the Conclusion to the bottom
of the page.
Moving an object
Naturally, in order to select and move an object, you need to be able to see where it is. This is normally not a
problem, but can be an issue when you are dealing with objects, such as questions, that are made up of several parts.
KeyPoint allows you to display frames around objects showing exactly where they are – these are only to help you
with the design and are not printed or shown in web surveys.
To display frames around objects in the form design:
Select Frames (View menu).
You can choose whether or not to display frames during the rest of this tutorial – generally, the pictures in this User
Guide were taken with frames turned off.
To move an object (such as a piece of text) on a survey:
1
Zoom to view the full page by clicking on Page Height in the drop-down zoom list in the Toolbar.
2
Click on the Conclusion text to select it. As you move the pointer, it changes to a pointing finger when you
are over an object, and a flat hand when it is over a selected object. The selected object itself has green
‘handles’ at the corners and edges.
3
Drag the Conclusion text to the bottom of the page and click outside the text to deselect it.
Return the zoom size to a convenient view by selecting a magnification from the drop-down list in the Toolbar.
Working with sidebars
KeyPoint has a number of sidebars containing buttons and other controls for carrying out a wide variety of operations.
In particular, this session in the Tutorial shows you how to add questions to a KeyPoint survey using buttons in the
Designer Tools sidebar.
By default, when you are not using a sidebar it is shrunk to a tab on the left- or right-hand edge of the KeyPoint
window – see the picture in The KeyPoint environment, page 100.
Tabs can be moved, ‘pinned’ or ‘floated’ so that they are always visible or hidden. This means that if someone else has used the
KeyPoint installation before you, the sidebars may not be arranged as in the picture. However, the only rearrangement that could
cause a problem in following the instructions in this tutorial is if the sidebar is hidden. To avoid this, make sure that the relevant
command is ticked in the View menu: for this session, make sure Designer Tools is ticked.
36
| Chapter 4: KeyPoint Tutorial 1
To display the Designer Tools sidebar:
1
Make sure that Designer Tools is ticked in the View menu.
2
Move the pointer over the Designer Tools sidebar tab.
The Designer Tools sidebar will fly out from the side of the workspace, and will cover part of the form:
You can select a tool from the Designer Tools sidebar by clicking on it.
Session 2: Adding questions and using the Style Library |
37
If the window is not big enough to display all of the tools, there will be scroll buttons (as in the example picture), so
that you can scroll the sidebar up or down:
By default, the sidebar will shrink back to the tab when you are not using it. If you want to display it permanently, you
can pin it by clicking on its pin button:
See Sidebars, page 103, for more information about using sidebars.
Adding a text question
The instructions in this Tutorial show you how to add questions using tools in the Designer Tools sidebar. You can also
add questions using commands in the Insert menu – the only difference is you select a command for the specific type
of question instead of pressing a button and then choosing the type of question in the wizard.
38
| Chapter 4: KeyPoint Tutorial 1
To add a text question to a form:
1
Click the Question button in the Designer Tools sidebar (if you hover the pointer over a button a hint or
‘tooltip’ will appear, which confirms you have selected the right button).
2
Click on the form in roughly the position you want the question to appear.
KeyPoint starts the Question Wizard.
3
Click Next in the introductory page if it is displayed.
(You can tick the Don’t show any introductory steps box if you want to skip the first page of all wizards in
future, and, similarly, Don’t show any final steps on the last page.)
4
In the Question Type page, click Text – the preview panel shows an example of the selected question
type.
Click Next to continue.
5
In the Question Text page, enter the text of the question. For this tutorial, type Please write your full name
in the space provided.
Click Next to continue.
6
In the Question Name page, type Full name in the Question Name box.
Click Next/Finish.
KeyPoint places the question on the form. You can see the question name written on the answer line in grey italics.
You can move the question by selecting it and dragging it to where you want it. You select a question in the same way
as other objects by clicking in it. However, you can also select individual parts of a question, such as question text or
answer line. To select the whole question, click within the question, but avoid clicking on one of its components – see
the paragraph following the next instruction.
To resize or reshape a question:
Drag one of its handles.
Sometimes it’s hard to find a place to click that avoids individual parts of the question. Another way of selecting the
whole question, rather than just a part of it, is to hold Ctrl as you click (you may need to do this more than once, as
some questions are built from parts that are themselves made up from smaller components).
Session 2: Adding questions and using the Style Library |
39
Adding a number question
Now we’re going to add a number question:
1
Click the Question button in the Designer Tools sidebar and click on the form below the previous
question.
2
Click Next in the introductory page of the Question Wizard, if it is displayed.
3
In the Question Type page, click Numeric.
Click Next to continue.
4
Enter the question text: Please write your age in the space provided.
Click Next to continue.
5
In the Number Answer Format page you can specify what format the answer should take. In this case, the
answer is the respondent’s age, which is never going to be more than three digits long (and even that is
fairly rare).
Click in the Format box and delete all but two of the hash symbols and the final zero, leaving ##0.
Click Next to continue.
6
Type Age in the Question name box in the Question Name page.
7
Click Next/Finish.
KeyPoint places the question on the form. Notice that the question is automatically given the number 2, as you have
positioned it after the first question:
Now save the survey by clicking the Save button on the Toolbar.
40
| Chapter 4: KeyPoint Tutorial 1
Adding a menu question
So far you have seen how to create two open questions: name and age. Now you’re going to add a different type of
question, suitable for answers where there is a limited set of possible choices. An obvious example is the respondent’s
sex.
To add a menu question:
1
Click the Question button in the Designer Tools sidebar and click on the form below the previous
question.
2
Click Next in the introductory page of the Question Wizard, if it is displayed.
3
In the Question Type page, click Multiple Choice (menu/listboxes).
Click Next to continue.
4
In the Question Text page, type Are you male or female? Click Next to continue.
5
In the Answers page, click in the first row of the table, and type Male.
6
Click in the next row, or press the down arrow on the keyboard, and type Female.
7
Ensure that the Menu style radio button below the table is selected, and click Next to continue.
8
Type Sex as the question name in the Question Name page.
9
Click Next/Finish.
KeyPoint places the question on the form, below the two earlier questions, and gives it the number 3.
Session 2: Adding questions and using the Style Library |
41
The final questions you’re going to add to the form are a bit more complicated: a table of multiple choice questions.
However, before we do that, you’re going to learn how to use the Style Library. Changes you make to a style don’t
automatically affect items you have already placed on a survey, but they do affect the appearance of new items.
You’re going to make a change to the way the tick boxes in the multiple choice table are labelled, so you are going to
edit the style now, before you place the question table on the form.
Using the Style Library
The KeyPoint Style Library is a collection of styles, each of which contains settings for all the style features you can
assign to objects, including text fonts, frames, answer layouts, and the style of boxes, ticks and labels used in multiple
choice questions.
When you add new objects to a form, the currently selected style is used. You can also apply any of the defined styles
to an object by right-clicking on it and selecting the required style from the Apply style menu.
To choose a style and edit it:
1
Select Style (Tools menu).
The Style Library dialog box is displayed, with the available styles listed in the left-hand panel. The style
currently in use has a small green block next to its icon; at the moment this is the style NORMAL (since
that is the style we chose in the Survey Design Wizard). When you click on a style, an example of a
question – a multiple choice question, in fact – is shown in the panel on the right. We are going to make a
small change to the NORMAL style.
2
42
In the left-hand panel, click the + next to the NORMAL icon. This expands the style so that you can see a
list of its components, rather like in Windows Explorer.
| Chapter 4: KeyPoint Tutorial 1
The Preview tab, as in the picture above, shows an example of the style as it is currently defined.
3
Scroll down the list on the left, if necessary, and click Tick answer.
4
In the panel on the right, click the Presentation tab.
5
Choose the circular Style for the answer box.
6
Click Close to close the Style Library.
You can restore the NORMAL style to its original definitions by right-clicking on NORMAL in the left-hand pane of the
Style Library and selecting Restore to default. Note that you cannot do this with any other style.
Adding a multiple choice question table
Now we’ll add the multiple choice question table.
1
Click the Question Table button on the Designer Tools sidebar and click on the form, below the other
questions.
2
Click Next in the introductory page of the Question Table Wizard if it is displayed.
3
Type the title How much do you enjoy the following types of film? and click Next to continue.
Session 2: Adding questions and using the Style Library |
43
4
In the Question Type page, select Multiple Choice (tickboxes), and click Next to continue.
5
Now type the answer options by clicking next to the asterisk and typing each option. In the first row, type
Very much, then press Tab to move to the Score column: type 4.
Press Tab again to move to the next row, and type Quite a lot in the Answers column and 3 in the Score.
Continue by adding the answers No strong feelings, Not much, and Not at all, giving them the scores 2, 1
and 0 respectively. Click Next to continue.
44
6
In the Question Text page, type Action in the box: this is the first type of film you are asking your
respondents to rate. Click Next to continue.
7
In the Question Name page, leave Action as the question name, and click Next to continue.
8
In the Add more questions page, select Next question, and click Next.
9
Repeat steps 6–8, entering the following film types in the Question Text page: Comedy, Drama, Romance,
Science Fiction, and Thriller.
10
After accepting the question name for Thriller, select No more questions on the Add more questions
page, and click Next.
11
In the Table Name page, type the name Types of film enjoyed for the question table, and click Next.
12
Click Next/Finish to place the question table on the form.
| Chapter 4: KeyPoint Tutorial 1
The survey should now look more or less like this.
Further information
For more information on adding questions, see Chapter 8, Constructing a Survey.
For more information on the Style Library, see Using the Style Library, page 143.
Session 2: Adding questions and using the Style Library |
45
Session 3: Controlling question layout
Automatic layout
When you place a question on the survey design form, KeyPoint determines an appropriate size for it, and arranges its
components so that they are suitably aligned. If you resize or reshape the question, KeyPoint automatically realigns
the components so that the layout is preserved as far as possible.
For example:
1
Select the whole of the multiple choice question table – if only a part of it is selected, Ctrl+click until it is
all selected.
2
Drag the handle on the right-hand side to the left.
The columns of tick boxes are spaced closer together and, if there is not enough room, their headings may not fit into
a single line and will be broken over two lines. However, the various components in the question will still be aligned
with each other automatically.
Auto sizing
As well as automatically aligning the components within a question, you can get KeyPoint to adjust the size of
questions automatically depending on how much space there is between the left-hand edge of the question and the
right-hand edge of the paper.
To try this out:
1
If you have not already done so, follow the instructions in the previous section to reduce the width of the
multiple choice question table.
2
Right-click to pop up a menu, and select Auto Size.
The question is resized automatically so that it fits on the page, and its components are automatically laid out so that
they are appropriately spaced and aligned with each other.
Re-arranging question components manually
As a general rule, you can rely on KeyPoint’s automatic layout to align the components appropriately in a question.
However, as you become more experienced, you may find you want more control over how things look. KeyPoint
therefore allows you to move the individual components of a question within the question.
For example:
46
1
Select the first question you created (asking for the respondent’s name) – Ctrl+click if necessary to make
sure the whole question is selected and not just part of it.
2
Right-click on the question to display a context menu.
3
Select Manual Mode - All Objects.
| Chapter 4: KeyPoint Tutorial 1
The drag handles will turn from green to blue showing that the question is in manual layout mode. You
can tell if a question is in automatic or manual layout mode by selecting the whole question: the drag
handles are blue in manual mode and green in automatic mode.
4
Click on the answer part of the question so that just that part is selected.
5
Drag the answer down and to the right, away from the question text.
While the question is in manual layout mode, if you reshape or resize the question as a whole, the individual
components are not realigned automatically.
To realign and resize the question automatically and set it back to automatic layout mode:
1
With the answer still selected, Ctrl+click to select the whole question. Notice that the selection handles
are blue, not green, to show that it is in manual layout mode.
2
Right-click to pop up a menu, and select Auto Size.
This makes the answer left-align with the question text, and the selection handles are now green again, showing that
the question is back in automatic layout mode.
Using Realign also sets a question back into automatic layout mode, but does not resize it.
Don’t forget to save the survey regularly as you work through the tutorial.
Further information
For more information on working with questions and other objects on a design form, see Editing questions,
page 168, and the sections following it in Chapter 8, Constructing a Survey.
Session 4: Distributing a survey on the web
There are several ways to distribute your survey: see Web Surveys: a summary, page 296, for an overview. If you do
not want to distribute the survey on the web, you can go straight to page 54, Entering responses to a paper-based
survey.
This session shows you how to publish a web version of the survey on the web using surveyserver, Speedwell’s web
survey hosting service. As a user of KeyPoint, you can use surveyserver for a free trial period – all you need is Internet
access. See Setting up surveyserver, page 334, for how to register for the free trial period and then set up your PC to
use surveyserver. The whole process is very quick and does not require any specialist knowledge, since surveyserver
handles all the details automatically. If after the free trial period has ended you decide not to subscribe to
surveyserver, you can use one of the other methods for publishing web surveys that are supported by KeyPoint – see
Chapter 11, Web Surveys, for details.
Once you have registered for surveyserver you could just upload the form you have designed in the previous sessions.
However, the format we chose for that form was designed for a print-based survey. KeyPoint allows you to create
several versions of the same form for different purposes, so we will create a ‘copy form’ with a format that is better
suited for use on the web.
Session 4: Distributing a survey on the web |
47
Mixed-mode surveys
Surveys carried out using a variety of methods, such as paper-based, web and direct entry, are called mixed-mode
surveys. KeyPoint provides powerful support for mixed-mode surveys. As well as allowing you to create a customised
copy form for each mode, when the responses are entered, KeyPoint records the mode used so that you can analyse
the results according to the mode.
Creating a copy form for a web survey
The first form you create in a survey is the ‘master form’; the other forms you create from this are copy forms.
However, although you can change the format and appearance of the copy form and the objects on the copy form,
you cannot add or delete questions on the copy form or change them in any way that affects the structure of the
questions themselves, rather than their appearance. For example, on a copy form you can change the text for a
question and the answer options (labels) in a multiple choice question (for example, to use a different language), but
you cannot change the number of options or the scores. You must use the master form to make changes to the
structure of questions.
To create a copy form for a web survey:
1
Right-click on the tab (labelled Form 1 unless you have renamed it) at the bottom left-hand corner of the
form, and select New Copy Form.
A new form labelled Copy 1 will be created in the Design Workspace with the same questions and layout
as the master form.
2
To change the format of the form for use on the web, select Format (Form menu) to display the Properties
sidebar for the form open at its Format tab.
The Properties sidebar in the picture has been pinned.
You can also display the Properties sidebar by moving the pointer over the Properties sidebar tab in the same way as you
displayed the Designer Tools sidebar in an earlier session.
3
48
Click Web survey page sizes so that it is ticked – the form will be resized and an extra page added as the
questions will not all fit on a single page.
| Chapter 4: KeyPoint Tutorial 1
In the dialog box, the Size box will show suitable web page sizes in pixels and the Orientation box will be
hidden. We will just use the default size, so you can close the Properties sidebar by clicking on the
background of the form (if it is pinned, unpin it first).
4
You will need to use the techniques you learned in the last session to rearrange the text and questions so
that they fit neatly within the new pages:
a
Select the multiple choice question table (Ctrl+click if necessary to select the whole table) and drag it
to the top of the second page.
b Drag the conclusion text to the bottom of the second page.
c
With the multiple choice question table still selected, right-click and select Auto Size so that all the
answer options fit on the page.
Session 4: Distributing a survey on the web |
49
The form will now look something like this:
50
| Chapter 4: KeyPoint Tutorial 1
Uploading the form to surveyserver
To publish the survey on the web using surveyserver:
1
Make sure the copy form you created for the web is selected in the Design Workspace.
2
Select Upload survey (surveyserver menu).
3
Click Next in the Upload Wizard’s introductory page if it is displayed.
The Upload Wizard uploads the survey to surveyserver, and when it has finished, displays the URL of the
survey.
You might want to paste the URL into a document such as a mail program to invite respondents to take
part in the survey; to do this, select the URL in the edit box, press Ctrl+C to copy it to the clipboard.
Alternatively, you can view the URL later by selecting Web survey location (surveyserver menu).
4
Click Next and Finish to close the wizard.
The survey is now available for respondents to complete on the web.
You can invite respondents to take part in the survey by sending them emails from your normal email program,
quoting the URL for the survey. However, the KeyPoint Invitation Manager allows you to send invitations from within
KeyPoint and offers a number of other advantages:
* it is easier
* you do not need to use an email program or an email account
* you will be able to send follow-up messages
* you will be able to track responses
* you can prepopulate questions about the respondent with details from the address book, such as their name
and address, and automatically update the address book if the details are changed in the response
* when used with the CamSP script, you can send surveys as email attachments.
See Inviting respondents to take part in a survey, page 345, for using the Invitation Wizard with surveyserver, or
Promoting a web survey – sending invitations, page 319, for using it with other methods of carrying out web
surveys.
Previewing the survey
Once you have uploaded the survey, you can preview it to see what it will look like. The preview also allows you to
customise the appearance and behaviour of the survey and to launch the Invitation Wizard to send out invitations to
take part in the survey.
To preview the survey on surveyserver:
1
Make sure the copy form you uploaded is selected in the Design Workspace.
Session 4: Distributing a survey on the web |
51
2
Choose Show as HTML (Form menu) to display the Web Survey Preview window:
Note that surveyserver has added navigation buttons and a progress bar to the survey form. You can enter data into
the preview and use the navigation buttons to move between the pages of the form. However, you cannot submit the
data as a response, or save it.
As an alternative to the off-page navigation buttons shown below the survey page in the picture, KeyPoint allows you to add
navigation buttons to the survey pages themselves for use in web surveys (and the Responses workspace) – see Adding navigation
buttons, page 184, for details.
The Details button displays the surveyserver Control Panel so that you can view information about your surveyserver
account and customise the appearance and behaviour of the survey – see Customising the appearance and
behaviour of a surveyserver form, page 343, for details.
52
| Chapter 4: KeyPoint Tutorial 1
The Invite/Send button launches the Invitation Wizard to help you send out invitations to take part in the survey –
see Inviting respondents to take part in a survey, page 345, for details.
Further information
For more information on creating a web survey, see Chapter 12, surveyserver, if you want to use surveyserver; see
Chapter 11, Web Surveys, for the other methods.
Session 5: Collecting and entering responses
This session takes you on to the second stage of conducting a survey. Once you have created a survey and distributed
it, whether on paper or electronically, you have to get the information you collect into KeyPoint. You can then move
to the third stage, analysis and presentation.
Collecting responses to a web-based survey
If you distribute your survey by publishing it on the web, as described in the preceding session, you don’t have to sit
at the computer and enter the information yourself: KeyPoint imports the responses for you automatically.
If you’re working through this tutorial without publishing the example survey on the web, or if you just want to work with paper
surveys, you can skip the rest of this section and go straight on to the next section, Entering responses to a paper-based survey.
So that you have some responses to collect, you will need to visit surveyserver yourself and enter some responses to
your own survey. To do this:
1
Make sure the copy form you uploaded is selected in the Design Workspace.
2
Select Web survey location (surveyserver menu) to display a dialog box showing the URL of your survey:
3
Click the browser button to open the survey in your usual browser.
(Do not close the Web survey location dialog box yet as you will be using it again in Step 5).
4
Complete the survey and click its submit button. The standard confirmation page is displayed. (Do not
close the browser yet.)
5
In order to have some data to look at in the Analysis stage, repeat Steps 3 and 4 around eight to ten times,
entering different data each time.
6
Close the browser and click Close in the Web survey location dialog box.
Session 5: Collecting and entering responses |
53
To collect responses to a web survey:
1
In KeyPoint, click the Responses tab to display the Responses workspace.
2
Click on the tab for the copy form you uploaded to select it.
3
Select Download Responses (File menu). This displays the Responses dialog box.
4
Click the down-arrow button next to the Get Other Responses button, and select surveyserver.
5
Click the Get Other Responses button itself. KeyPoint will connect to surveyserver, collect any new
responses, and list them in the dialog box.
6
Click the Input Responses button. KeyPoint loads each response directly into the survey.
7
Click the Close button to view the processed responses in the Responses tab.
Entering responses to a paper-based survey
There are several ways of collecting and entering data if you are not publishing your survey on the web; these are
described in Processing Responses, Chapter 9, and KeyPoint Scanning Module, Chapter 10. In this section, you will
enter the data by hand, as if you were copying it from completed paper surveys.
To enter responses:
1
54
Click the Responses tab. The form you see there is a copy of the form you created in the Design
workspace. However, there are only two toolbars: the Data Entry toolbar, and the Toolbar.
| Chapter 4: KeyPoint Tutorial 1
There is a tab at the bottom of the workspace for the master form and each of the copy forms – the
Copy 1 tab will not appear in your workspace if you skipped the last session because you chose not to
work with web surveys and have not created the copy form for use on the web. You can select either the
master form or a copy form to enter data in the Responses workspace.
You will use the form in the Responses workspace to enter responses manually in the following steps, but
you can also use it to view previously entered responses and to edit them if necessary.
2
If you have not input any responses yet, the response form in the Responses Workspace will be blank
ready for you to enter data and you can go straight to the next step.
If you completed the previous session, the responses you downloaded from surveyserver will already be in
the Responses Workspace, and one of them will be displayed. To add a new empty response ready for
you to enter data:
Click the Add New Response button.
3
To enter a response, click the first answer line and type a full name. Then press Tab or click the next
answer line to continue entering answers. To enter the answer for a menu question, drop down the menu
and click on the answer. To enter a multiple choice answer, click the tick box for the option, or use the
arrow keys to move between options, and the spacebar to select an option.
4
When you have entered all the answers for a response, KeyPoint saves the response and creates the next
form automatically.
5
Now enter about ten responses, so that you have some data to use in the next stage.
For a multi-page survey you can choose whether to view the survey one page at a time (select Page by Page (View menu)) or in a
continuous sequence one page above the next. In continuous view, you choose which page to view using the vertical scroll bar;
in Page by Page view, you can use on-page navigation buttons (see Adding navigation buttons, page 184) or the Page Navigator
(see Viewing responses page by page, page 254).
You can navigate back and forth through the responses by clicking the
Next Response
and
Previous Response
buttons on the Data Entry toolbar.
Further information
For more information on entering and working with responses, see Chapter 9, Processing Responses. See also
Processing survey responses, page 350, for downloading surveyserver responses, or Processing survey responses,
page 325, if you are using one of the other web survey methods.
Session 5: Collecting and entering responses |
55
Session 6: Analysing and presenting results
After designing and distributing your survey, and collecting some responses, KeyPoint provides three ways of viewing
and working with the responses to your survey:
* the Analysis Grid, for viewing responses in table form
* the Statistics form, for viewing a range of statistics for the results
* Presentation forms (there can be more than one of these), for building your own presentations of the results in
table and graph form.
All these are available in the Presentation workspace, which you display by clicking on the Presentation tab
immediately below the toolbars. You then switch between the analysis, statistics and presentation forms by clicking on
the tabs near the foot of the KeyPoint window.
You will need a reasonable number of responses in your survey to work through the following sections. You can enter
these by hand into the survey you have been working with, or, to save time, open the example KeyPoint file film.kp,
which you will find in:
For Vista/Windows7:
\Users\<user>\Documents\KeyPoint 6\Surveys\Tutorials.
For Windows XP:
\Documents and Settings\<user>\KeyPoint 6\Surveys\Tutorials.
The example pictures in the following sections were taken using the responses in this file.
56
| Chapter 4: KeyPoint Tutorial 1
Viewing and sorting data: the Analysis Grid
When you first click the Presentation tab, the Analysis Grid is selected:
The Analysis Grid shows all the responses you entered, in tabular form. The question names are displayed at the top
of each column and each response occupies a row.
In addition to the questions you added to the survey, the Analysis Grid may, as in the example picture, show some ‘System
questions’, which give information about when the response was entered. You can choose whether to display these using the
Survey page in the Options dialog box (Tools menu) – the system questions are hidden in the rest of this tutorial.
Try double-clicking one of the responses: KeyPoint returns you to that response in the Responses workspace.
Click on the Presentation tab again to return to the Analysis Grid.
You can sort the responses in the Analysis Grid. For example, to sort the responses in alphabetical order by full name:
1
Click the small button to the right of Full name: it changes to show a down arrow:
2
Wait a few seconds. KeyPoint arranges the responses in alphabetical order.
If you click again, an up arrow will appear, and the responses will be sorted in reverse alphabetical order.
Clicking a third time restores the original order.
Session 6: Analysing and presenting results |
57
You can choose to display only those responses that satisfy certain conditions: this is called filtering. For example,
suppose you want to filter the responses so that only those responses where the respondent is over 30 are displayed:
1
Click in the box just below the Age question name. A small down arrow appears: click on this to display a
menu of expressions.
2
From the menu, select is greater than, and type 30. ‘>30’ is now shown in the box.
3
Press Tab. After a couple of seconds, KeyPoint displays only the records where the respondent is over 30:
If you compare the status bar in this picture with the one in the previous picture, you can see that only 15
out of 29 respondents satisfy the condition.
To view the conditions and delete them:
1
Click the small button at the top left-hand corner of the Analysis Grid or select Display Filter (Filter
menu) to display the Active Filter dialog box.
2
Click the Delete all conditions button. KeyPoint closes the dialog box, and displays all the responses
again.
To save the conditions (and other features you may have changed, such as sort order or column widths), click the
Save current view button in the Toolbar. For more information on custom views, see Views, page 387.
58
| Chapter 4: KeyPoint Tutorial 1
The Statistics form
To see the set of statistics for the data, click the Statistics tab. You’ll see a list down the left side of many different
statistics, such as Min, Max and Sum. The questions are arranged along the top. The statistic for a question is shown in
the cell where the question column and statistic row intersect. KeyPoint leaves the cell blank if a statistic does not
apply to the type of data in the question.
You can see the statistics for a subset of the data as well as the full data by filtering the data in the Analysis Grid before
clicking the Statistics tab. The picture below shows the statistics form for a subset of 15 responses (selected sheets) as
well as the total of 29 (all sheets).
The number of decimal places shown is controlled by the Visible decimal places in numbers setting in the Analysis page in the
Options (Tools menu) dialog box.
Session 6: Analysing and presenting results |
59
The Presentation form
You use Presentation forms to create your own customised data analyses.
Click the Presentation1 tab now to display a blank Presentation form.
The Presentation form has a blank page, rulers and toolbars, providing a whole range of tools for creating your own
tables and graphs. In the Presentation workspace, you use buttons in the Designer Tools sidebar to place tables and
graphs of different types onto the Presentation form.
Adding a table
We’ll start by placing a Statistics table on the form. For this example, we want the table to use only a subset of the
data:
1
Return to the Analysis Grid and enter the condition >28 in the Age column.
2
Return to the Presentation form and click the Stats Table button in the Designer Tools sidebar.
3
Click on the Presentation form to start the Statistics Table Wizard, and click Next in the introductory page
if it is displayed.
4
In the Data page, choose Selected because you want it to use the filtered responses only. Click Next to
continue.
5
You want it to display statistics for Age, so select that tick box. Click Next to continue.
6
In the Statistics page you can choose the statistics you want to calculate. Clear the Count tick box, and
select the Range and Mean tick boxes. Range will calculate the difference between the minimum and
maximum age and Mean will calculate the average age. Click Next to continue.
7
In the Update Method page, you can lock the table. This means KeyPoint takes a snapshot of the data and
uses it for the table, so the table will not change if the data changes. Alternatively, you can automatically
update the table, which means the statistics in the table will be updated automatically whenever you make
changes to the data in the Responses workspace or the filters in the Analysis Grid.
Leave both options unticked – if required, you will be able to update the table manually at any time by
clicking a button.
8
60
Click Next/Finish.
| Chapter 4: KeyPoint Tutorial 1
KeyPoint places the table on the Presentation form. The statistics are arranged along the top and your chosen
question occupies a row.
The number of decimal places shown is controlled by the Visible decimal places in numbers setting in the Analysis tab in the
Properties sidebar when the table is selected.
You can edit most features of the table, including its contents, font styles and sizes, background colour and borders:
for information, see Presentation tables, page 412.
Adding a graph for a multiple choice question table
Finally in this session, we’ll use the Graph Wizard to add to the presentation a graph showing the result of the
multiple choice question table about types of film:
1
Click the Graph button in the Designer Tools sidebar.
2
Click on the presentation form at about the point you want the graph to appear (you can easily move it
later if necessary). The Graph Wizard starts.
3
Click Next in the introductory page.
4
In the Data page, leave All selected, and click Next to continue.
5
In the Graph Style page, select the (vertical) Bar graph style
Session 6: Analysing and presenting results |
61
and click Next.
6
In the Plot Definition page, you choose the data and statistics to be included in the graph. The Question
box, in the centre, shows all the questions in the survey, with question tables grouped (rather like folders
group files together in Windows Explorer) so that you can select all the questions within them with a single
click.
Click on the box next to Types of film enjoyed to select the whole question table for the graph.
Click Next to continue.
7
In the Graph Title page, leave the default name unchanged, and click Next.
8
In the Update Method page, leave both the tick boxes unchecked, and click Next/Finish to close the
Wizard and place the graph on the page.
9
Enlarge the graph to a suitable size by dragging on one of the corner handles (in particular, make sure that
the graph is wide enough to display the X-axis labels in full).
To save your presentation:
Choose Save (File menu).
This is the end of the Quick Start tutorial, which has shown you how to start a new survey, create a survey, enter
responses and perform simple analyses.
Further information
For more information on statistics, the analysis grid and presentations, see Chapter 14, Analysing Data, and
Chapter 15, Presenting Data.
62
| Chapter 4: KeyPoint Tutorial 1
5
KeyPoint Tutorial 2
This chapter builds on the tutorial in the previous chapter to show you some more advanced techniques.
You will learn how to:
* Arrange part of a survey in columns
* Add more types of questions
* Add a route, using an expression
* Change the style of objects on the survey form
* Customise and save custom views of the Analysis Grid
* Add more advanced objects to a presentation.
Chapter 5: KeyPoint Tutorial 2 |
63
Advanced tutorial
If you worked through all the sessions in the previous chapter, you should now have a reasonably good idea of how
KeyPoint can help you prepare, carry out and analyse the results of a survey. The sessions in this chapter take you
back to some earlier stages in the process to show you some more advanced techniques.
The tutorial in this chapter develops the survey constructed in the previous chapter. You can either continue working
with the survey file you have created, or open Film2.kp, which you will find in:
For Vista/Windows7:
\Users\<user>\Documents\KeyPoint 6\Surveys\Tutorials
For Windows XP:
\Documents and Settings\<user>\KeyPoint 6\Surveys\Tutorials.
The Film2.kp survey and the one you created in the last chapter, provided you didn’t skip the session on Distributing
a survey on the web, has two forms: a master paper-based form and a copy form for use on the web. In the following
sessions you will make changes to the survey design. Unless instructed otherwise, you should make these changes to
the master form (some changes, such as adding questions, can only be made to master forms).
Session 7: Adding a column line and an ordered choice question
Adding a column line
A column line not only enables you to make better use of the survey page with a two (or more) column layout, it tells
KeyPoint how to renumber questions automatically, first down one column and then down the next.
In the film survey:
1
64
Select the master form in the Design Workspace.
| Chapter 5: KeyPoint Tutorial 2
2
Select Column Line (Insert menu).
A new column line will be added at the left-hand margin at the bottom of the survey:
3
Move the pointer over the middle of the column line and drag it so that it is to the right of the first
question:
4
Move the pointer over the column line’s lower drag handle and drag it down the page to the bottom of
question 3, stopping before you reach the top of question 4:
Note that when you add a column line, it is only added to the selected form. If you have created one or
more copy forms, you will need to add it separately to each form you want it to appear on, or add the
column before creating the new copy form(s).
Session 7: Adding a column line and an ordered choice question |
65
Adding an ordered choice question
Next we’re going to add an ordered choice question to ask about how people most like to see films.
1
Click the Question button in the Designer Tools sidebar and click on the Design form just to the right of
the upper end of the column line.
(You can only add questions using the master form – the new questions will be added automatically to any
copy forms you have created, but if you have changed the layout of the survey, they may not be in the
same position and may be given different numbers.)
KeyPoint starts the Question Wizard.
2
Click Next in the introductory page if it is displayed.
3
In the Question Type page, click Ordered Choice.
Click Next to continue.
4
In the Question Text page, enter the following text for the question:
Please rank the following ways of seeing films in your order of preference (1=most liked etc)
Click Next to continue.
5
In the Answers page of the wizard, enter the following answers:
Cinema
Rented Disc
Purchased Disc
Terrestrial TV
Satellite/Cable
Pay-per-view TV
Downloaded.
Click Next to continue.
66
| Chapter 5: KeyPoint Tutorial 2
6
In the Question Name page, enter Ways to see films, and click Next/Finish to place the question on the
form:
The new question is now Question 4, and the Multiple Choice question table has become Question 5;
without the column line, the new question would be Question 2, and Age would be Question 3.
7
The default for ordered choice questions is that respondents are required to enter preferences for all
options. To allow respondents to omit some options:
a
Make sure that Question 4 is selected and display the Properties sidebar (for example, move the
pointer over the sidebar tab or right-click on the question and select Edit ‘Ways to see films’
properties).
b Click on the Answers tab.
c
Set the Choose drop-down lists to not more than all:
Session 8: Improving the look of the survey
Aligning objects
Now that you have added another question, the survey layout may have become a bit untidy and unbalanced. Try
using the following techniques to even things up:
1
Select each of Questions 1 and 2 in turn (make sure you select all of the question, not just one of its
components), and make them smaller by dragging the handles on their left-hand sides to the right.
2
Click on Question 3 to select it (again make sure you select all of the question, not just one of its
components) and to deselect Questions 1 and 2 (in the next step you will reselect Questions 1 and 2 – the
Session 8: Improving the look of the survey |
67
reason for deselecting them now is to ensure that Question 3 is the first object in the selection so that the
later selected objects will be aligned to it).
3
Shift+click on Questions 1 and 2 to add them to the selection (again make sure you select all of the
questions, not just one of their components).
4
To align the questions:
a
Display the Align and Size sidebar if it is not already pinned – move the pointer over the Align and
Size sidebar tab (if the tab is hidden, select Align and Size (View menu) to show it first).
b Click the Left Align tool in the Align and Size sidebar.
The questions will be aligned to the first object you selected, which is Question 3 in this case.
5
Select the column line and drag it to the left.
6
Select Question 4 and drag it to the left so that it is close to the column line.
7
To arrange the answers of Question 4 in two columns:
a
Make sure that Question 4 is still selected and display the Properties sidebar (for example, move the
pointer over the sidebar tab or right-click on the question and select Edit ‘Ways to see films’
properties).
b Click on the Question layout tab.
c
Select Horizontally in the Arrange Choices box.
d Set Number of columns to 2.
e
Right-click on the question again, and select Auto Size.
The resulting layout will be something like the following (it may not be identical, as the effect of Auto Size depends
on the exact initial size and position of the questions):
Note that the copy form is not affected by the changes you have made to the master form.
68
| Chapter 5: KeyPoint Tutorial 2
Restyling the survey heading
The survey heading lacks impact at the moment, as it is simply in the default style for a text object. To improve its
appearance:
1
Select the survey heading, ‘Film Survey’ – green drag handles will appear around it.
2
Display the Format Palette sidebar if it is not already pinned – move the pointer over the Format Palette
sidebar tab (if the tab is hidden, select Format Palette (View menu) to show it first).
You will be using the Format Palette sidebar again later in this procedure so you may want to pin it now.
3
Use the Text controls in the Format Palette sidebar to select a larger font size (perhaps around 22 pt),
make it bold and with centred Alignment:
4
With the heading still selected, use the Object controls in the Format Palette sidebar to:
a
Clear the Transparent tick box to make the text background opaque and to enable the Colour button.
b Click on the Fill Colour button:
A standard Windows colour picker dialog box will be displayed.
c
Choose a colour from the dialog box (a fairly pale colour will allow the survey title to be legible).
d Click OK to close the dialog box.
e
Choose a Border Width and Colour.
Session 8: Improving the look of the survey |
69
5
Drag the drag handle in the middle of the left-hand side of the title to the left-hand margin of the page,
and the drag the right-hand side to the right margin.
The top of the form should now look something like this:
As before, the copy form is not affected by the changes you have made to the master form.
Session 9: Adding a date question and a route
The final question we will add to the survey is a date question, but we will do it without using the Question Wizard,
which can be quicker in some circumstances. Then we will add a condition – in this case using a ‘route’ – so that this
question is only asked if the respondent has given a particular answer to an earlier question.
We want to put the new question below the two-column section, but above the existing Question table 5, so first we
need to make some space for it. One way to do this is to select Question table 5 (making sure you select all of it) and
the conclusion and drag them down the page. However, there is an easier way to make some space if you need to
move several objects.
To make space by ‘adding paper’ to a survey:
70
1
Select Add Paper (Form menu).
2
Move the Add Paper pointer to the position you want to add the paper:
| Chapter 5: KeyPoint Tutorial 2
3
Press the mouse button and drag down the page to indicate the amount of paper to add:
4
Release the mouse button.
Question table 5 will be moved down the page leaving room for the new question:
To add a date question without the Wizard:
1
To turn the Question Wizard off:
a
Select Options (Tools menu) to display the Options dialog box.
b Select the General page if it is not already selected.
c
At the foot of the dialog, click the Don’t show wizards for question tools tick box so that it is ticked.
d Click OK to close the dialog box.
2
Select Date question (Insert menu).
KeyPoint places a date question after the conclusion, with a default question text, ‘Enter your question
here’, and an answer of date type. Note that it is Question 6.
3
Drag the new question into the space you made for it above Question table 5 – note that the new
question will be automatically renumbered to become Question 5 and the question table becomes
Question 6.
Now you need to change the date question’s properties.
Session 9: Adding a date question and a route |
71
4
With the question still selected, display the Properties sidebar (if it is not already pinned, move the pointer
over the Properties tab or right-click on the question and select Edit DateQuestion1 properties from the
context menu:
5
In the Question Text box, select all the default question text by dragging, and then type:
When did you last visit the cinema? (Please use the format MM/YYYY eg 05/2002 for May 2002)
6
72
In the Question name box, replace the default name with Last visit to cinema.
| Chapter 5: KeyPoint Tutorial 2
7
Click on the Answer tab:
8
Clear the Day tick box as we are only interested in the month and year.
9
In the Options box, leave Edit style selected and clear the Show date/time picker tick box.
If Show date/time picker is ticked, a down-arrow button is attached to the answer box. This has no function when you print out
the survey form, which is why it is cleared in Step 9. However, it does have a function for web forms and for forms in the
Responses workspace – if you click on the down-arrow button in one of these forms a calendar dialog box is displayed allowing
you to pick the date instead of type it directly in the edit box. Using the date/time picker is usually quicker than typing the date
and ensures that it is entered in the correct format. For these reasons, you might want to tick Show date/time picker for copy
forms used to generate web surveys and for paper forms when you come to enter the response data in the Responses workspace.
Alternatively, you could select Menu style for web and data entry forms – in this case you enter the answer by selecting the
date/time from a series of menus.
10
Right-click on the question in the form and select Auto-size to resize the question.
11
You will probably want to work with the Question Wizard turned on most of the time, so repeat Step 1
clicking the Don’t show wizards for question tools tick box so that it is unticked.
The date question now appears on the form with the new question text. However, it really only makes sense to ask
this question if the respondent has indicated in Question 4 that the cinema is one of the ways they see films, so we
Session 9: Adding a date question and a route |
73
are going to place a ‘route’ from Question 4 to Question 6 – skipping Question 5 – which the respondent will take if
they don’t enter a ranking for cinema in Question 4.
Routes allow you to lead users through the survey according to the answers they have given so that they can skip
irrelevant questions. Naturally, routes only apply to interactive forms – web forms and forms in the Responses
workspace.
To add a route:
1
Click the Route button in the Designer Tools sidebar and drag from Question 4 to Question 6.1 (make
sure that you start and end the route within the required questions). When you release the mouse button,
the Routing Rules dialog box is displayed.
2
Click New in the Routing Rules dialog box to display the Expression Editor dialog box:
3
In the Visual tab:
a
Click the NOT button to add the not condition:
b Right-click in the <Empty> box and select Includes (Functions®Logical submenu) from the context
menu:
74
| Chapter 5: KeyPoint Tutorial 2
c
Select Ways to see films in the Available questions drop-down list box – the Available answers
drop-down list box will become enabled.
d Select Cinema in the Available answers drop-down list box.
4
e
Click in the <value1> box and click the Available answers Add button.
f
Click in the <value2> box and click the Available questions Add button:
g
Click OK to return to the Routing Rules dialog box, which will show the expression you have created:
Click OK to close the Routing Rules dialog box.
Session 9: Adding a date question and a route |
75
The route appears on the Design form as a line, with a blob at its start and an arrow at its end:
start of route
end of route
The exact appearance of the route line is not important, and depends on precisely where you chose to click and drag.
All that matters is the start and end points – but these must be within the relevant questions.
The copy form is not affected by adding a route to the master form. If you want to add a route to the web form, bear
in mind that if you are using surveyserver to host the survey, the routing rule is only applied when the respondent
moves to another page, so you should arrange the questions so that the source question of the route is the last
question on the page.
76
| Chapter 5: KeyPoint Tutorial 2
Uploading the revised survey
If you uploaded the survey you created in the previous chapter to the web, now that you have made some changes to
the survey, you will need to upload it to the web again. You do this in exactly the same way as before using Upload
survey (surveyserver menu).
However, there are a few things you need to consider first. If you look at the copy form you created for the web in
the last chapter, you will see that the questions you added to the master form have been added to the copy form, but
the other changes you made will not have been copied to the copy form. This is what you would expect, as the
purpose of copy forms is to allow you to produce the same survey with different appearances. This means that in
order to upload a web version of the updated survey, you can proceed in two ways:
* You can use the existing copy form: you will need to move the new questions from the end of the copy form
to their required positions, then make the cosmetic changes you made to the master form, and finally add the
routing line
* You can create a new copy form from the master form, change its format to web page sizes, and, finally tidy
up the position and size of objects as before.
The second option will probably be easier and quicker, but one point to note is that if you take the first option, when
you upload the form to surveyserver, the new form will replace the previous one, and you will use the same URL to
access it. If you take the second option, the new form will be uploaded alongside the existing form, and it will have its
own separate URL. This means that, unless you deleted it from surveyserver, any respondents who knew the original
form’s URL would still be able to view and respond to it.
When you come to design your own surveys, if you want to use copy forms, you should give some thought about
when you are going to create them if you are to avoid repeating work unnecessarily.
Session 10: Customising the Analysis Grid
You may have already entered some responses when you worked through earlier sessions in the tutorial. However,
you should continue this tutorial using a version of the survey with some responses that include answers to the new
questions you have added. You can find an example with the name Film3.kp, in the folder:
For Vista/Windows7:
\Users\<user>\Documents\KeyPoint 6\Surveys\Tutorials
For Windows XP:
\Documents and Settings\<user>\KeyPoint 6\Surveys\Tutorials.
Open it now to continue with the next session.
You saw in the Quick Start tutorial (Session 6: Analysing and presenting results, page 56) how to view, sort and filter
responses in the Analysis Grid. There are many other ways you can customise the grid, and you can save your
customised settings (’views’) in order to use them again. This session gives just a few examples.
Session 10: Customising the Analysis Grid |
77
Changing the width of a column
The picture below shows some of the responses, with the columns at their default widths. You can save space by
reducing the width of some the columns.
To change the width of a column:
1
78
Move the pointer over the edge of the column whose width you want to change. The pointer changes
shape to a double-headed arrow:
| Chapter 5: KeyPoint Tutorial 2
2
Drag the column edge to make the column narrower.
By reducing the width of several columns you can see much more of each response.
Changing the order of columns
To change the position of a column in the Analysis Grid:
1
Select the column by clicking on its label.
2
Drag the column to the position you want it. The position where the column would be, if you released the
mouse button now, is shown by a bold line:
Session 10: Customising the Analysis Grid |
79
Choosing which columns to display
If you don’t want to see all the columns in the Analysis Grid, you can turn them on or off:
1
Right-click on any column label to display the On/Off dialog box (don’t click on a table label, as this will
offer you options relating only to the table and the columns within it):
2
Turn individual tick boxes on or off to display or hide columns, or select All On or All Off.
Saving a custom view of the Analysis Grid
When you have created a custom view of the Analysis Grid, you can name and save it for later use:
1
Click the Save current view button in the Toolbar.
2
Type a name for the view in the Save View dialog box, and click OK.
The view is now saved, and can be reloaded by selecting it from the drop-down list in the Toolbar.
Session 11: Adding to the presentation
In Session 6 you saw how to create a Statistics table and a graph in a presentation. In the final session of this tutorial,
we’ll show you how to add a Distribution table with some special features, and a Pivot table.
Once you’ve completed a presentation, you may want to publish it on the web, so that anyone interested in the
results – such as the people who completed the survey – can see what you found out. The session ends by showing
you how to do this.
Creating a Distribution table showing filtered responses
Before creating the table, you’re going to use the Analysis Grid to filter the responses.
In the Analysis Grid:
1
First make sure there aren’t any existing filters:
a
Click the
button.
b A dialog box will be displayed.
80
| Chapter 5: KeyPoint Tutorial 2
If it says there are no current filters:
* Click OK to close the dialog box.
If there are any current filters, the dialog box will give details:
* Click Delete All Conditions to remove the filters and close the dialog box.
2
Click in the row immediately below the heading of the Age column – a cursor will appear in the row and a
drop-down menu button with a down arrow will appear at the right-hand end of the cell.
3
Click on the drop-down menu button and select is greater than from the menu of operators – a >
symbol will appear in the cell.
4
Type 24 after the > symbol, and press Tab or Return to complete the expression. After a few moments
the grid will show only responses for people older than 24.
5
Click the Save current view button in the Toolbar, and name the view Over24.
Now switch to the Presentation form to create the Distribution table:
1
Click the Distribution table button and click on the form to start the wizard.
2
In the Data page, select Custom selection.
3
In the Custom Selection page, click the Copy Filter button to display the Copy Filter dialog box.
4
Choose Over24 from the Custom Views drop-down list, which includes all views that have a filter. The
filter expression for the selected view will be shown in the box below. Click OK to close the dialog box
and return to the wizard.
5
The Custom Selection page now shows the filter you selected: you could click Edit to edit it, but for now,
leave it unchanged. Click Next.
6
In the Questions page, select Ways to see films, and in the Ranges page, just click Next.
7
In the Statistics page, ensure that the Popularity tick box below the box of statistics is ticked; when it is, all
the Statistics boxes are clear by default. Click Next.
Session 11: Adding to the presentation |
81
8
In the Update Method page, select Automatically update the table, and click Finish to place the table on
the form.
The number of decimal places given for the numbers depends on a number of settings so your example may not look exactly like
the picture – the following steps show you how to change the number of decimal places.
9
Right-click on the table and select Edit Properties to display the Properties sidebar.
10
In the Analysis tab:
a
If Use form settings is selected, clear it – if it is selected, the number of decimal places is controlled by
a setting on the Global page in the Properties sidebar for the Form.
b Set the Visible decimal papers in numbers to 1:
The table ranks respondents’ choice using a value which is the inverse of the choice number, so that the most popular
have the highest number. For full details of how the scoring is calculated, see page 415, Popularity analysis.
To see the effect of automatic updating, return to the Responses workspace and add a few more responses, making
the new respondents over 24 so that their responses will be included in the table. When you return to the
presentation form, you will see that the results have changed accordingly.
Creating a Pivot table
A Pivot table allows you to investigate possible dependencies between the answers given to different questions in the
survey. In our small example survey, for instance, we can show how views about a certain type of film vary with
gender. To create a Pivot table to show this:
1
Click the Pivot table button in the Designer Tools sidebar.
2
Click on the presentation form to start the wizard.
3
In the Data page, leave All selected.
4
In the Column questions page:
a
82
In the left-hand list box, double-click on Types of film enjoyed, or click its + icon to show the
questions in the question table.
| Chapter 5: KeyPoint Tutorial 2
b Click Romance.
c
Click the add question button (or just double-click on the question) – the question will be added to the
right-hand list box.
d Click Next.
5
In the Row questions page:
a
In the left-hand list box, click Sex.
b Click the add question button (or just double-click on the question).
c
Click Next.
6
In the Data questions page, repeat Steps 4a–4d to add Romance and move on to the next page.
7
In the Column Ranges page, just click Next.
8
In the Row Ranges page, just click Next.
9
In the Statistics page, leave Count selected, and click Next.
10
In the Update Method page, leave both options unselected, and click Next/Finish.
KeyPoint places the Pivot table on the presentation form:
11
Right-click on the table and select Edit Properties to display the Properties sidebar.
12
In the Presentation tab, select Show Totals:
The table shows, for example, that there were three people who said they liked romantic films ‘very much’ and they
were all female.
Using a Pivot table interactively to analyse your data
What makes Pivot tables particularly useful is the ease and speed with which you can modify them once they have
been created, so that you can use them as a tool for investigation and analysis as well as presentation. This section
shows you a few examples.
To modify a Pivot table:
1
Display the properties sidebar for the table (for example, right-click on the Pivot table and select Edit
properties from the context menu).
Session 11: Adding to the presentation |
83
2
In the Properties sidebar, click the Definition tab to show the Definition page if it is not already selected:
The Definition page has separate boxes showing the Column, Row and Data questions and a list of Available
questions. You can use drag and drop or a context menu command to change the Column, Row and Data questions,
and the Pivot table will show the results immediately. The following examples show you how to use the Definition
page.
First, suppose you want to see if there is a relationship between age and the popularity of romance films:
1
Drag the Sex question from the Row box and drop it in the Available questions box (alternatively,
right-click on Sex and choose Delete – the remaining instructions will just use drag and drop, but there is
always an obvious alternative context menu command if you prefer to use it).
The Pivot table will immediately update removing the Male and Female columns, just leaving the total
figures.
2
Drag the Age question from the Available questions box and drop it into the Row box.
Again the Pivot table will immediately update showing a breakdown of responses in different age ranges.
The age ranges will have been selected automatically; the next step changes the ranges to give an age
breakdown in decades.
84
| Chapter 5: KeyPoint Tutorial 2
3
To change the age ranges
a
Right-click on Age in the Row box and choose Edit to display the Define ranges for dialog box.
b Clear the Auto tick box and enter a Min of 10 and a Max of 59.
c
Click Fixed length and enter 10.
d Click OK to close the dialog box.
Again the Pivot table will immediately update showing the age breakdown by decades:
Suppose now that you want to see if there are any differences in the age breakdown between men and women:
Drag the Sex question from the Available questions box and drop it above Age in the Row box.
The Pivot table will immediately update showing separate age breakdowns for men and women:
As a table gets larger it can become harder to identify any relationships that may be there, so the final two examples
provide alternative ways of summarising the information in our latest version of the table. In both examples we will
use this table as the starting point, so to save having to retrace your steps, we will first make a copy of the table:
1
Select the table and press Ctrl+C.
2
Press Ctrl+V to paste a copy of the table onto the presentation.
3
Drag the new copy to a convenient position on the presentation.
Another way of looking at how the popularity of romance films depends on age is to view the average age of people
giving each answer rather than a breakdown of numbers in each age range. Working with the copy of the Pivot table:
1
Drag Age from the Row box and drop it in the Data box.
2
Drag Romance from the Data box and drop it in the Available questions box.
3
Right-click on Age in the Data box and choose Edit to display the Choose statistics dialog box.
Session 11: Adding to the presentation |
85
4
Choose Mean and press OK.
The Pivot table will immediately update showing the average age of men and women giving each answer:
A mean age of 0 means no one gave that response.
The figures in the total column and row show the overall mean values for that row or column.
Instead of looking at the number of responses to each of the answers in the Romance question, another way of
summarising the data in the original table is to use the scores given to each answer as a measure of how much people
enjoyed romance films. Going back to the original table:
1
Drag the Romance question from the Column box and drop it in the Available questions box.
2
Right-click on Romance in the Data box and choose Edit to display the Choose statistics dialog box.
3
Choose Mean and press OK.
The Pivot table will immediately update showing a single column with the average scores given by men
and women in each age range. However, a more convenient arrangement is to have separate columns for
men and women.
4
Drag the Sex question from the Row box and drop it in the Column box.
5
Since the mean values all lie in a narrow range, set the number of decimal places to 1 on the Analysis tab
in the properties sidebar for the table:
Laying out and publishing a presentation
You have already seen how to place objects such as text, pictures, and rectangles onto a survey form, how to change
its background colour or place an image onto the form as a background. All the same resources are available for
refining the appearance of presentations, so we will leave the decisions up to you!
Publishing a presentation on the web
Finally, just as you published the survey on the web for respondents to complete, so you can publish the finished
presentation for them or any other interested parties to see. You can do this directly using surveyserver, but if you are
not using surveyserver, you can save the presentation as an HTML file, which you can then upload to your own
server.
86
| Chapter 5: KeyPoint Tutorial 2
Using surveyserver
To publish a presentation on the web using surveyserver:
1
With the presentation form selected, select Upload presentation (surveyserver menu).
2
Press Next in the introductory page if it is displayed.
KeyPoint uploads the presentation and then displays its URL in a dialog box.
3
To check the presentation, click the browser button in the dialog box to open the presentation in your
usual browser.
You can find out the URL at any time by selecting Web presentation location (surveyserver menu).
Saving a presentation as HTML
As an alternative to publishing the presentation on the web using surveyserver, you can save it as an HTML file by
selecting Save Presentation as HTML (File menu).
You can then preview the file in a browser or upload it to the web.
Session 11: Adding to the presentation |
87
88
| Chapter 5: KeyPoint Tutorial 2
6
Introducing Surveys
In this chapter, you will be introduced to some general principles for conducting surveys.
You will learn about:
* Types of survey
* Survey topics
* The survey process
* Survey projects
* Sampling
* Collecting the survey data
* Guidelines for compiling a survey
* The Data Protection Act.
Chapter 6: Introducing Surveys |
89
What is a survey?
A survey is a structured tool for gathering information about people. The basis of every survey is a set of questions
directed at extracting the information you want.
Even if you haven’t conducted a survey before, you’ve probably participated in one. Surveys are used widely in many
spheres, including business, government and academic research.
Example of a business survey:
A survey by a multinational corporation to find out what its employees think about a recent
restructuring of the organisation.
Example of an academic survey:
A survey of smokers by a psychologist to find out the relative success of different approaches to
giving up smoking.
Example of a government survey:
A national census.
Depending on the requirements, surveys can allow you to make informal qualitative assessments or provide results
that will be subjected to rigorous statistical analysis.
Properly designed and administered surveys are efficient, flexible and accurate. You can use surveys to collect
information from people about virtually anything. The following list shows some of the types of information you can
gather, with some example questions:
* Demographics
* Into which of the following age categories do you fall?
* In which of the following areas do you live?
* Attitudes
* How important do you think life insurance is?
* Should immigration be made easier/more difficult?
* Behaviour
* Approximately how much do you spend in a week in this store?
* How often do you buy product X?
* Preferences
* Rank the following television programmes in order of preference.
* Which of the following brands do you think offers the best value?
* Lifestyles
* How many computers do you have in your household?
* What is your household’s total gross monthly income?
90
| Chapter 6: Introducing Surveys
The survey process
1: Plan the survey
Once you have decided that you need to carry out a survey, the first questions you should ask are:
* What are the goals of the survey? In other words, what information are you hoping to collect?
* What is the budget for the survey?
* Who is going to be in charge of conducting the survey?
2: Decide who’s in charge
A survey is a type of project, and, like all projects, must be managed. The responsibilities of the project manager
should include:
* Drawing up detailed project plans
* Identifying staffing needs and the roles of staff members
* Identifying training needs
* Ensuring that the project proceeds according to schedule and within budget
* Quality control
* Crisis control.
Even if you don’t have a formal project management structure, these issues still have to be addressed: someone
should be clearly in charge!
3: Decide who to survey
When you’ve settled these issues, your next question should be “Who are we going to survey?” For example, if you
want to find out about the customers who have purchased WonderBrand: Are you going to survey customers all over
the country? Are you going to focus on only a few major cities? Are you going to look at all shops or just a particular
type of shop? Your answers to these questions can have an effect on the accuracy, validity and usefulness of the data,
as well as the cost and time required. See Sampling (page 92) for more information.
4: Design the survey
Once you’ve decided who you will be surveying, you need to design the survey. The more time you spend on
constructing the questions, the better chance you have of getting good quality answers. See Guidelines for compiling
a survey (page 93) for more information about composing questions and designing surveys. The example surveys
installed with KeyPoint will give you some ideas.
5: Test and trial the survey
Check the survey very carefully, both in the Responses workspace and (if you are distributing the survey on the web)
in any web browser your respondents may use. In particular, make sure any data validation and routing works as you
intend it to. You should also print the survey on paper and have it proof-read by more than one person.
The survey process |
91
In addition, you should trial the survey with a small sample of respondents: you may be surprised how it is possible to
misunderstand questions that you thought were clear!
6: Distribute the survey
The next step is data collection. This involves distributing the survey – whether by mail, the Internet, telephone or in
person – and then retrieving the completed survey responses and checking them for completeness.
7: Enter the data
After the responses have been checked, you will need to enter the data. If the surveys were distributed electronically,
this can be done automatically. Otherwise, you will need to enter the data using the keyboard and mouse, or optical
mark/character recognition software (see Chapter 10, KeyPoint Scanning Module). After you’ve entered the data, you
can analyse it using KeyPoint.
8: Analyse and present the data
Once you’ve analysed the data you need to interpret the statistical results; and you will probably want to present the
information in the form of a report for other people.
Sampling
In statistics terminology, the entire set of people that you would like to gather information about is known as a
‘population’ or ‘target population’. Usually, it’s not feasible to survey all the people in the target population, and even
if you could, it would be a very costly way to obtain information. In fact, it turns out that you can survey a subset of
the total population and get results that are almost as accurate as surveying the complete population. The act of
selecting a subset of the population is known as ‘sampling’.
There are recommended minimum and maximum limits for sample sizes. These limits are independent of the target
population size. The recommended minimum is 100. If you survey fewer than 100 people, the results will not be
representative of the target population. Of course, the exception to this is if the target population consists of fewer
than 100 people, in which case you should survey all the members of the population. The recommended maximum
is 1,000. Beyond 1,000, surveying more people is very unlikely to improve the reliability of the results by a significant
amount. As a guideline, you can use 10% of the population, provided it falls within the recommended minimum and
maximum.
Because you’re going to use the conclusions about the sample to make statements about the population, the sample
should be representative of the population. There are several methods you can use to achieve this, but the simplest is
to pick individuals randomly from the population. This is known as ‘random sampling’. Random sampling means that
every member of the population has an equal chance of being selected.
92
| Chapter 6: Introducing Surveys
Guidelines for compiling a survey
If you haven’t conducted a survey before, you may be surprised to learn how easily questions can be misunderstood,
ignored, or incorrectly answered. This section gives some guidelines for compiling clear and unambiguous surveys.
Open and closed questions
There are two main types of questions that you can use: open and closed. Open questions allow the respondent to
answer in their own words; closed questions give the respondent a list of preselected responses, and include multiple
choice and ordered choice questions. Surveys often use a mixture of both types of question.
Closed questions are harder to write than open questions because you need to select the response options in advance
and make sure you cover all relevant possibilities. However, because the options are limited, the responses are easy
to compare and you can analyse the responses statistically.
The main advantage of open questions is that you may be able to get an idea of the true feelings of the respondents.
Their responses aren’t limited to your preselected response options. Unfortunately, this also means that their answers
aren’t easily comparable. In order to analyse the answers you need to interpret and categorise them before data
entry.
Closed questions are generally considered more efficient and reliable than open questions.
Closed and open questions are sometimes referred to as structured and unstructured questions, respectively.
Closed questions
In closed questions your set of responses for a question will be either a set of discrete categories:
or a set of points between two extremes:
A set of points between two extremes is often referred to as a ‘scale’.
Guidelines for compiling a survey |
93
There are many types of scale you can use: choose a scale that is best suited to the question and to the way that
respondents think about the response to the question. You should also make the scales simple and easy to
understand.
The type of scale you use can influence the type of statistical analysis you can perform on the question.
When the responses on the list represent points between two extremes, you may be able to combine several
questions and ask the respondent to use the same scale for all the questions. This makes it easier for the respondent
to complete the survey because there are fewer instructions to read, and it also allows you to compare the responses
to different questions within the same survey.
In the examples already given, the respondent chooses one or more options – each option is either selected or not
selected. These are called multiple choice questions. Another way to ask a closed question is to ask the respondent to
rank or compare different items:
This is an example of an ordered choice question.
Composing questions
The language you use in your questions should be understandable to all your respondents. If the respondents cannot
understand the question, they won’t be able to provide an accurate answer.
Here are some guidelines for making questions easy to understand:
* Use words that you are sure all the respondents will understand
* Limit the use of negatives in your sentences
* Use complete, grammatically correct sentences
* Use short sentences that express only one idea
* Don’t use slang or words that may be misconstrued
* Limit the use of jargon to words you are sure all the respondents will understand.
It’s not enough that your questions are understandable. They also need to be unambiguous and precise so that all the
respondents will understand the questions in the same way. You should also make sure that all respondents
understand exactly what type of answer is required, and what context they should use when answering.
You should not ask questions that respondents are unable to answer because they do not have enough knowledge.
For example, it’s unlikely that a respondent would have enough information to answer the question “How many
times have you been to supermarket X in the last five years?”
94
| Chapter 6: Introducing Surveys
Don’t forget that your questions should be relevant to the purpose of the survey. You shouldn’t ask more questions
than you need to. If you do want to include questions that aren’t directly related to the purpose of the survey, you
should explain their purpose to the respondents.
Where possible, it is sensible to reuse questions that you know produce accurate answers.
After you’ve composed the questions, it’s a good idea to give them to experts to check. You can also test them on a
group of people from the target population. This will help you to iron out any problems.
Bias and error
You should be careful that the phrasing of the question doesn’t introduce bias or error into the responses.
You can introduce error by asking a question that respondents are unable to answer, that they understand in different
ways or that they are unsure about how to answer.
Examples of questions that can introduce error into your results:
A. In the last year, how many times have you been sick?
B. How often have you and your partner visited our shop in the last month?
In Example A, some respondents may not remember how many times they’ve been sick, and guess. Some
respondents may think that a common cold doesn’t count as being sick and consider only more serious illnesses,
while others will include everything from a sniffle to a heart attack.
In Example B, respondents with no partner will not know how to answer. Respondents who have a partner, but didn’t
visit the shop with them, will also not know how to answer. In both cases, they will either make their own decision
about how to answer the question, or simply skip the question.
You can introduce systematic error – known as ‘bias’ – by using words that evoke an emotion, or by using loaded or
leading questions that influence respondents to consistently select a particular response.
Example of a biased question:
Do you ever drink and drive and so endanger the lives of innocent people?
This question both asks a question about drunk driving and offers a judgement on it – that it is wrong to drive drunk
because it endangers the lives of innocent people. Because respondents do not like to think that what they are doing
is wrong, a greater number will select the No option than would have selected it if the question had not been biased.
A better way to phrase this question would be to ask:
How many drinks do you consume at a party when you are going to drive home afterwards?
Guidelines for compiling a survey |
95
Writing instructions
Most questions need instructions that explain to the respondent how they should answer the question. The length of
the instruction depends largely on the nature of the question. You should aim to equip all the respondents with
enough information to answer the question in the correct way.
You should explain:
* how to use the scale, if there is one
* what criteria the respondent should use
* where to write the answers.
If you’re in doubt, err on the side of caution by giving more information. If a respondent understands what’s required
quickly, they can always skip straight to answering the question. On the other hand, respondents may be put off by
long involved instructions, and either skip them, assuming they know what is required, or decline to complete the
questionnaire at all.
Include an example if you think that the respondent could still misunderstand the instruction.
Structure
Once you have decided what you are going to ask and how you are going to ask it, you need to decide the order in
which you are going to ask the questions.
When you are designing a survey you should think in terms of three sections: an introductory section, a main section,
and a concluding section. However, this does not mean that there should be rigid or obvious boundaries between
these sections.
The introductory section
Once a respondent starts answering questions, they’re very likely to continue – most refusals come right at the
beginning – so you should make the first few questions as appealing as possible. Make sure that these introductory
questions are quick and easy to answer. Put less threatening and more general questions in this section.
Don’t have any branching in the introductory section as this makes the survey appear more difficult. Branching in a
survey is where a respondent must move to a different question or section based on the instructions given in the
survey. This is more difficult for a respondent than simply progressing through the questions in order.
The main section
The structure of the main body must make sense to the respondent, so try to arrange the questions in logical groups.
It’s a good idea to group the questions by topic. Then within each topic group, you should group the questions by
scale type, since this makes the response task easier for the respondent. Grouping by scale type also uses less space as
you only need one set of instructions for the whole group.
You may want to include branching in the survey, but remember that each branch increases the complexity of the
survey, and this in turn gives the respondent more chances to go wrong. This means that you should use branching
sparingly. If you do use branching, be sure to cover all possibilities so that no matter which of the available paths the
respondents use, the survey appears complete and logical to them.
96
| Chapter 6: Introducing Surveys
The concluding section
Questions dealing with sensitive issues and demographic questions (see below) should be put at the very end of the
survey, since that’s when the respondent will be most co-operative. And it also means that if the respondent refuses to
answer the questions, you may still be able to use the information collected from the rest of the survey. Some
sensitive questions are easy to pick out because most people find them threatening, such as “Are you HIV positive?”
But you also need to look at your specific target population – are there any questions they may feel are threatening?
Demographic questions are questions about a person’s attributes that help to identify the person as part of one or
more groups in society. Demographic questions often include questions about age, gender and marital status.
Data collection methods
There are two main ways to collect survey information – computer-based and paper-based. Both of these can be
carried out by an interviewer or self-administered. If a survey is interviewer-administered, the interview may be
carried out by telephone or in person.
Example 1:
You manage an Internet service provider (ISP). An obvious method for collecting information from
your customers is to email them a message asking them to complete a web-based survey. Web
surveys are self-administered and computer-based.
Example 2:
Your company provides financial services. You want to survey existing clients to determine their
level of satisfaction with your services. Since you have all their details on file, you could conduct
telephone interviews. In this case the survey is interviewer-administered. And if the answers are
recorded electronically by the interviewer, the survey is computer-based.
Each method of collecting data has advantages and disadvantages. You should select the method that best suits your
sample, your survey objectives and your budget. For more information on web surveys, see Chapter 11, Web
Surveys, and Chapter 12, surveyserver.
Surveys that involve interviewers are usually more expensive than those that are self-administered. Not only do
interviewers have to be paid for the work they do, but they also need to be trained and then monitored to ensure that
they are administering the survey consistently and without prejudice. On the other hand, the response rate from an
interviewer-administered survey is often significantly higher than that from a single mailshot, and the quality of the
answers may be better because the interviewer can make sure that the answers are entered correctly.
Data collection methods |
97
The Data Protection Act
If you intend to process personal data about other people, you should be aware of the laws that govern your use of
the data you collect.
What is the Data Protection Act?
The Data Protection Act 1998 is the UK implementation of the EU Data Protection Directive 95/46/EC. It governs the
collection and use of personal data about people.
According to the act, you should:
* comply with the eight data protection principles
* register with the Data Protection Registrar
* allow people to access data held about them, and also to correct that data if necessary.
Other countries in the EU will have their own implementation of the EU Data Protection Directive. Countries outside
the EU are likely to have laws governing the use of data too.
The principles of the Data Protection Act 1998
The following is intended to be a summary of the Data Protection Act principles. Consult the full text (see
http://www.legislation.gov.uk/ukpga/1998/29/contents) for exact details.
If your company is situated outside the UK, you should consult your local laws.
* Personal data must be processed fairly and lawfully
* Personal and sensitive personal data should not be processed unless certain conditions are met. These
conditions include: the person has given their consent and the processing is required for a legitimate
purpose.
* Personal data should be processed fairly. For instance, the person from whom you obtained the data
*
*
*
*
*
*
*
98
should not have been misled about the purpose of the data.
Data must be processed in a way compatible with the legitimate purpose of the processing.
Personal data obtained should be relevant and adequate for the legitimate purpose of the processing, and
should not exceed the purpose.
Personal data should be accurate and kept up to date.
Personal data should not be kept longer than is necessary for the purpose.
Personal data should be processed in accordance with the rights of the people from whom the data is
obtained.
Personal data should be protected against unauthorised or unlawful processing, and accidental loss or
damage.
Personal data may only be exported to another country or area outside the European Economic Area if it also
provides an adequate level of protection for the people to whom the data refers.
| Chapter 6: Introducing Surveys
7
7
Working with Surveys in KeyPoint
In this chapter you will see how to use KeyPoint to create and work with surveys.
You will learn about:
* The KeyPoint environment
* Creating new surveys
* Opening and saving existing surveys
* The Survey Design Wizard
* Using forms
* Using the Page Manager
* Master pages
* Using the spellchecker
* Customising your environment
* Styles and the Style Library
* Setting survey options.
Chapter 7: Working with Surveys in KeyPoint |
99
The KeyPoint environment
The KeyPoint environment consists of a menu bar, a toolbar, and three workspaces. Each workspace caters for
different stages of the survey process.
The picture shows the KeyPoint window with rulers, a grid and frames displayed. You can hide any or all of these to
give a simpler environment. The picture shows the Design workspace, which has sidebar tabs allowing you to display
sidebars with controls for changing settings and working with objects on the form – the Presentation workspace also
has sidebar tabs for presentation forms.
The menu bar
* File: commands for opening, saving and closing surveys, setting a password to protect a survey, printing
surveys and altering the page setup. You can also use File menu commands to import and export forms and
data, and configure KeyPoint to work with the web.
* Edit: common editing commands, such as Cut, Copy, Paste, Paste Special, Clear and Select All. It also
contains Redo and Undo commands and commands for searching and replacing.
* View: commands for showing and hiding elements of the Design, Responses and Presentation workspaces.
* Form: commands for creating and managing copy forms, adding and removing pages and white space, and
setting the background, header, footer, margins and format for the selected form. It also allows you to preview
a web form using settings selected using other commands in the menu.
100 | Chapter 7: Working with Surveys in KeyPoint
* Tools: commands providing access to KeyPoint preferences, spellchecking, the Asset Library and other
features.
* Insert: commands for adding objects such as questions (Design workspace) and graphs and tables
*
*
*
*
*
(Presentation workspace) – the Insert menu is not displayed in the Responses workspace.
Response: commands for accessing response-related functions while entering data – the Response menu is
only displayed in the Responses workspace.
Filter: commands for viewing, editing, removing, saving and deleting filters on responses – the Filter menu
only appears for the Analysis Grid in the Presentation workspace.
Scan: commands for scanning and inputting responses filled in on paper surveys.
surveyserver: if you have registered for surveyserver, the surveyserver menu allows you to upload survey and
presentation forms and to manage your account.
Help: commands for accessing KeyPoint help and, if you are connected to the Internet, visiting the KeyPoint
website and checking for program updates.
Toolbar
The KeyPoint Toolbar appears in all workspaces, though the content of the toolbar depends on which workspace (and
in the case of the Presentation workspace, which form) is selected – the picture shows the Toolbar as it appears in the
Design workspace.
If the KeyPoint window is too narrow to display the Toolbar in a single line, the tools at the end of the Toolbar
automatically flow on to another line.
If required, you can change the appearance of the Toolbar by choosing Options (Tools menu) to display the Options
dialog box and displaying the Toolbars page to change the style and size of the Toolbar and its buttons – Auto switch
between icon sizes automatically adapts the button size to the resolution of your monitor.
The toolbar contains a collection of common KeyPoint functions, most of which are also available in the menus.
Buttons on the toolbar are active (not greyed-out) only when they can be applied to the object(s) you have selected or
to the survey as a whole. The following table gives a brief description of the action of each of the buttons appearing in
the Toolbar in the Design workspace – see Chapter 9, Processing Responses, for details of the buttons appearing in
the Responses workspace and Chapter 14, Analysing Data, for details of the buttons appearing in the Presentation
workspace.
Button
Name
Use this button to…
Surveys
display the Welcome to KeyPoint dialog box, allowing you to open surveys
and manage your surveyserver account and response tracking
New
display the New survey dialog box if no survey is currently open, allowing
you to create a new survey. If there is a survey open: the New button is
disabled in the Design workspace; it creates a new response form in the
Responses workspace; and it creates a new presentation form in the
Presentation workspace.
The KeyPoint environment | 101
Button
Name
Use this button to…
Open
open an existing survey
Save
save the current survey
Print
print the survey, response or presentation
Undo
undo the previous action – you can use the Undo button repeatedly to
undo multiple steps (see The Survey tab, page 140, for how to set the
number of steps you can undo)
Redo
redo the last undone action – if you have undone more than one action,
you can use the Redo button repeatedly to redo them
Zoom
zoom in on the form (see Zooming in and out, page 103)
Zoom (%)
specify an exact zoom scale
Add Page
add a new page to the current form
Delete Page
remove the selected page from the current form
Show as HTML
create and display a preview of a web survey, which can then be saved
and invitations or the survey itself sent using the Invitation Wizard
Upload Survey
upload the survey to surveyserver
Copying to the clipboard
If you copy one or more objects (questions, graphics etc) from a form to the Windows clipboard, you can paste them
into a document in another application, such as a wordprocessor. If the application allows it, you can paste them as
bitmaps or enhanced metafiles.
To do this, select Paste Special (Edit menu) in the target application to display a dialog box giving you the choice of
how the object(s) should be pasted.
Metafile format retains information about the structure of the objects, so, for example, if you choose the metafile
option, the target application’s editing features may allow you to edit text in the pasted object, change the fonts and
text styles, move and reshape lines and boxes, and so on.
102 | Chapter 7: Working with Surveys in KeyPoint
Zooming in and out
To zoom in, click the Zoom button and drag a box on the page, or select a larger value from the drop-down list. To
zoom out again, select a smaller zoom value from the drop-down list or type a value into the box.
Sidebars
A number of sidebar tabs are displayed alongside the workspace when you display the Design workspace or a
presentation form in the Presentation workspace – see the picture at the beginning of this chapter.
Moving the pointer over these tabs displays a sidebar with controls for carrying out a variety of operations. You can
display the following sidebars:
* Page Manager: you use this to select, add and delete pages in a form, and to select objects on a page – see
Using the Page Manager to navigate and work with forms, page 123
* Format Palette: you use this to format the text, fill, outline and shadow properties of the object(s) selected on
the form – see The Format Palette sidebar, page 150
* Properties: you use this to view and change the properties of the object(s) selected on the form, or the form
itself if no object is selected – see The Properties sidebar, page 195
* Align and Size: you use this to adjust the alignment and relative sizes of the object(s) selected on the form –
see Using the Align and Size sidebar, page 173.
* Designer Tools: you use this to place a variety of different types of question (Design workspace), table and
graph (Presentation workspace) and other objects on the form – see The Designer Tools sidebar, page 149.
Working with sidebars
Displaying and hiding Sidebar tabs
To display or hide a sidebar tab:
Choose the corresponding command from the View menu.
The sidebar itself will also be displayed, but may close automatically after a few seconds if you do not use it
immediately.
If the sidebar is open, you can also hide a sidebar tab, and the sidebar, by clicking the close box
The sidebar tab is also hidden when the sidebar is pinned – see Pinning sidebars, page 104.
in its title bar.
Displaying and hiding sidebars
To display or hide a sidebar (see the previous section if the sidebar tab is hidden):
Move the mouse pointer over its tab.
The sidebar will fly out from the side of the workspace, and will cover part of the form.
Unless the sidebar is pinned (see next section), KeyPoint will close the sidebar automatically if it is not being used, or
if you move the pointer over another sidebar (you can only have one unpinned sidebar open at a time).
The KeyPoint environment | 103
While the sidebar is displayed, you can adjust its width by dragging its free edge:
If the contents of the sidebar are too large to fit in the sidebar, scroll bars and/or arrows will be displayed so that you
can scroll the sidebar:
Pinning sidebars
By default, KeyPoint closes sidebars automatically when you are not using them. However, you can keep them open
by pinning them.
To pin a sidebar:
1
Display the sidebar (see the previous section).
104 | Chapter 7: Working with Surveys in KeyPoint
2
Click the pin button in the sidebar’s title bar:
The sidebar tab will be hidden and the pin icon will change to show that the sidebar is pinned
.
The workspace will also be rearranged so that the sidebar is tiled with the form (and any other pinned sidebars) rather
than lying over it.
Floating sidebars
When a sidebar is pinned (see the previous section) you can detach it from the side of the workspace to make it a
freely floating window.
To float a pinned sidebar:
Drag it by its title bar and drop it anywhere on the desktop.
To dock a floating sidebar:
Double-click in the title bar to dock it to the side it was last docked to.
Or:
Drag it by its title bar and drop it on either of the workspace sides.
In fact, you can dock a sidebar to any of the workspace edges, but the arrangement of controls assumes that they will be docked
to the sides.
You can reshape a floating toolbar by dragging its edges. This has no effect on the contents of the sidebar (apart from
the display of scroll bars/arrows if required).
Setting the sidebar style and button size
If required, you can change the appearance of the Sidebars by choosing Options (Tools menu) to display the Options
dialog box, and then displaying the Toolbars page to change the style and size of the Sidebars – see The Toolbars
page, page 139, for details.
The KeyPoint environment | 105
KeyPoint surveys
A KeyPoint survey can include:
* Survey forms
* Response forms
* The Analysis Grid
* Statistical data
* Presentation forms with graphs and tables.
Master forms and copy forms
Each survey has one ‘master’ survey form. However, you can also add copy forms. Copy forms enable you to create
customised versions of the survey with, for example, a different format or special instructions, or with some questions
hidden. For example, you may want a different format for web and paper-based versions, or to omit certain questions
for a particular target group. See Copy forms, page 119, for more details.
File extensions
KeyPoint surveys are stored in a file with a .kp extension, for example, ‘my survey.kp’, and each time you save the
survey a backup file with a .~kp file, for example, ‘my survey.~kp’, is saved along with the .kp file. If you need to
open the backup file for any reason, you will need to change its extension to .kp first.
Temporary .DIR folder
You may notice that while the survey is open KeyPoint creates a temporary folder with a .DIR extension, for example,
‘my survey.DIR ’. This folder is just used to hold temporary working files and will be deleted, together with the
temporary files it contains, when you close the survey in KeyPoint.
Creating a new KeyPoint survey
This section shows you how to create a new survey from scratch; see the next section, Using a template to create a
new survey, for how to create a new survey from a template file and Copying the design of an existing survey,
page 109, for how to create a new survey as a clone of an existing survey.
To create a new survey:
1
If KeyPoint is not running yet:
a
Select KeyPoint 6 Web and Email (Start®All Programs®Speedwell) to start KeyPoint and display the
Welcome to KeyPoint dialog box.
b Click the Create New button in the Welcome to KeyPoint dialog box.
If KeyPoint is already running, do one of:
Select New (File menu).
106 | Chapter 7: Working with Surveys in KeyPoint
Or:
If there is currently no survey open, click the New button.
Or:
a
Select Surveys (File menu) to display the Welcome to KeyPoint dialog box.
b In the Welcome to KeyPoint dialog box, click the Create New button.
In all cases, the New Survey dialog box will be displayed.
2
In the New Survey dialog box, select the folder in which you want to store the survey files – if you like,
you can create a new folder. You can use the right mouse button or the New Folder button to create a
new folder.
3
Type the name of the new survey in the File name field.
4
Click Save.
If you chose the name of an existing survey in the folder, you will be asked to confirm that you want to
overwrite it.
If KeyPoint was already open and there was an open survey with any unsaved changes before you started
creating the new survey, you will be asked if you want to save the changes before the old survey is closed.
5
The Survey Design Wizard will start so that you can set survey options, and start adding questions – see
The Survey Design Wizard, page 114, for more information.
Click Cancel if you don’t want to use the wizard.
You can click the Don’t show any introductory steps tick box to remove the introductory steps from all
wizards.
To stop the Survey Design Wizard from starting every time you create a new survey or a new form, clear the Start the
Survey Design Wizard on a new form tick box in the General page of the Options dialog box (Tools menu).
Using a template to create a new survey
To create a new survey using a template design form:
1
Either:
Select Open Template (File menu).
Or:
a
Select Surveys (File menu) to display the Welcome to KeyPoint dialog box.
(This dialog box is also displayed when you start KeyPoint, and you can carry out the following steps to
create the new survey from a template at that time also).
b In the Welcome to KeyPoint dialog box, click the Open Template button.
KeyPoint surveys | 107
In either case, the Templates dialog box will be displayed:
2
In the Templates dialog box:
a
Click on the item in the Categories box containing the template you want to use – the Templates box
will show a preview of all the templates in the selected category.
b Click on the preview of the required template in the Templates box to select it.
c
Click OK to confirm the selection and display the New Survey dialog box.
3
In the New Survey dialog box, select the folder in which you want to store the survey files – if you like,
you can create a new folder. You can use the right mouse button or the New Folder button to create a
new folder.
4
Type the name of the new survey in the File name field.
5
Click Save.
If you chose the name of an existing survey in the folder, you will be asked to confirm that you want to
overwrite it.
If KeyPoint was already open and there was an open survey with any unsaved changes before you started
creating the new survey, you will be asked if you want to save the changes before the old survey is closed.
The new survey will use the form saved in the template file as its master form, even if the form used to create the
template file using Save as Template (File menu) was a copy form. However, it will have the same name as the
original form, which could be misleading if the original was a copy form with a default name such as “Copy 1” – see
Renaming a form, page 121, for how to change the name of a form.
108 | Chapter 7: Working with Surveys in KeyPoint
See:
* Saving a design form as a template for new surveys, page 110, for how to save a template
* Forms, page 119, for information about master and copy forms
* the next section if you want to create a new survey based on an existing survey, including the master form and
any copy forms.
Copying the design of an existing survey
To create a new survey with the same design as an existing survey:
1
If KeyPoint is not running yet:
Select KeyPoint 6 Web and Email (Start®All Programs®Speedwell) to start KeyPoint and display the
Welcome to KeyPoint dialog box.
If KeyPoint is already running:
Select Surveys (File menu) to display the Welcome to KeyPoint dialog box.
2
In the Surveys list in the Welcome to KeyPoint dialog box, click on the survey you want to use as a model
for the new survey to select it.
If the survey you want to copy is not in the Surveys list (because you have not opened it in KeyPoint on this PC before), you will
need to open it in KeyPoint first to put it in the list (see Opening an existing survey, page 113), and then start these instructions
again from Step 1.
3
Click on Clone to display the New Survey dialog box.
4
In the New Survey dialog box, select the folder in which you want to store the survey files – if you like,
you can create a new folder. You can use the right mouse button or the New Folder button to create a
new folder.
5
Type the name of the new survey in the File name field.
6
Click Save.
If you chose the name of an existing survey in the folder, you will be asked to confirm that you want to
overwrite it.
If KeyPoint was already open and there was an open survey with any unsaved changes before you started
creating the new survey, you will be asked if you want to save the changes before the old survey is closed.
Creating a ‘clone’ of a survey copies the survey design but does not copy any responses or presentation designs – see
Saving a copy of a survey with a new name, page 110, if you want to make a complete copy of a survey including
responses and presentation designs.
Using data from another survey in a new survey
To import data from another survey into a new survey:
Select Import (File menu) – see Importing data, page 462, for details.
KeyPoint surveys | 109
Saving surveys
This section shows you how to carry out the following operations concerned with saving surveys:
* Saving
* Copying
* Saving a design form as a template for new surveys
* Renaming
* Optimising.
Saving a survey
To save the current survey:
Click the Save button on the Toolbar or select Save (File menu).
You are recommended to save your survey regularly, and in addition to using the procedure above, you can set
KeyPoint to save surveys automatically at regular intervals using the Survey page in the Options dialog box (Tools
menu), see The Survey page, page 140.
Saving a copy of a survey with a new name
The instructions in this section show you how to create a copy of a survey and give the copy a new name; see
Renaming a survey, page 111, if you just want to rename an existing survey without making a copy.
To save a copy of the current survey with a new name:
1
If there are any unsaved changes and you want them saved in the current survey (with the original name)
as well as in the new survey, select Save (File menu).
2
Select Save As (File menu).
3
In the Save Survey dialog box, select the folder in which you want to store the survey files – if you like, you
can create a new folder.
4
Type the name of the new survey in the File name box.
5
Click Save.
To copy an existing closed survey to a new location:
In Windows Explorer or My Computer, copy the .kp file and paste it in the required location.
Warning: Do not try to rename a survey by changing the file name using Windows Explorer or My Computer.
Saving a design form as a template for new surveys
To save a design form to be used as a template for new surveys:
1
If the Design workspace is not currently displayed, click on the Design tab at the top of the workspace
area.
110 | Chapter 7: Working with Surveys in KeyPoint
2
If there are any copy forms, click on the tab at the bottom of the Design workspace for the (master or
copy) form you want to use as the template.
3
Select Save As Template (File menu) to display the Save As Template dialog box:
The Templates box shows a preview of the templates already saved in the selected category.
4
Enter a name for the new template in the Template Name box.
5
In the Categories box, click on the category you want to save the new template in.
If there isn’t a suitable category for saving the template, right-click in the Categories box, select Add
Category from the menu displayed (the other commands in this menu allow you to rename or delete the
selected category), enter a name for the category in the Add Category dialog box and click OK.
6
Click OK in the Save As Template dialog box to save the template.
Renaming a survey
Warning: Do not try to rename a survey by changing the file name using Windows Explorer or My Computer.
To rename a survey:
1
Display the Welcome to KeyPoint dialog box:
* If KeyPoint is not running yet:
Select KeyPoint 6 Web and Email (Start®All Programs®Speedwell).
* If KeyPoint is already running:
a
If there is a survey currently open in KeyPoint, select Close to close it.
KeyPoint surveys | 111
b Select Surveys (File menu).
2
In the Surveys list in the Welcome to KeyPoint dialog box, click on the survey you want to rename to
select it. If the survey you want to rename is not in the Surveys list (because you have not opened it in
KeyPoint on this PC before), you will need to open it in KeyPoint first to put it in the list (see Opening an
existing survey, page 113), and then start these instructions again from Step 1.
3
Click Rename to display the Save Survey dialog box.
4
In the Save Survey dialog box, select the folder in which you want to store the renamed survey files – if
you like, you can use the existing folder or create a new folder.
5
Type the new name for the survey in the File name box.
6
Click Save to rename the survey and return to the Welcome to KeyPoint dialog box.
You can then open the renamed survey by clicking Open, or select another survey to open, or carry out
any of the other operations available in the Welcome to KeyPoint dialog box.
Optimising a survey
To reduce the disk space taken up by a saved survey:
Select Optimise (File menu).
It is a good idea to optimise surveys regularly.
Password protecting a survey
To add or edit a password to protect the current survey:
1
Select Password protect survey (File menu) to display a password dialog box.
2
Enter the new password in both boxes (delete the * characters to remove the password protection).
After a survey has been password protected, you will be asked to enter the password when you try to open it.
You can also password protect the Options dialog box – see Protecting KeyPoint options with a password, page 137, for details.
Deleting a survey
To delete a survey:
1
Either:
If KeyPoint is not running yet, select KeyPoint 6 Web and Email (Start®All Programs®Speedwell) to
start KeyPoint and display the Welcome to KeyPoint dialog box.
Or:
If KeyPoint is already running:
a
If the survey you want to delete is currently open in KeyPoint, select Close (File menu) to close it.
112 | Chapter 7: Working with Surveys in KeyPoint
b Select Surveys (File menu) to display the Welcome to KeyPoint dialog box.
2
In the Surveys list in the Welcome to KeyPoint dialog box, click on the survey you want to delete to select
it. If the survey you want to delete is not in the Surveys list (because you have not opened it in KeyPoint
on this PC before), you will need to open it in KeyPoint first to put it in the list (see Opening an existing
survey, page 113), and then start these instructions again from Step 1.
3
Click Delete.
You will be asked to confirm that you want to delete the survey.
You can also delete surveys by deleting the relevant files using Windows Explorer. However, in that case the survey
will not be removed from the Surveys list in the Welcome to KeyPoint dialog box.
Opening an existing survey
You can open an existing survey when you start KeyPoint or while working within KeyPoint.
You can find examples of surveys created in KeyPoint in the Examples folder.
Opening a survey when you start KeyPoint
To open a survey when you start KeyPoint:
1
Select KeyPoint 6 Web and Email (Start®All Programs®Speedwell) to open KeyPoint and display the
Welcome to KeyPoint dialog box.
2
In the Welcome to KeyPoint dialog box, either:
a
If the survey you want to open appears the Surveys list in the Welcome to KeyPoint dialog box, click
on it to select it.
b Click Open.
Or:
a
Click Browse to display the Open Survey dialog box.
b Browse to the folder in which the survey is stored.
c
Select the file.
d Click Open.
KeyPoint opens the survey.
Opening a survey after you have started KeyPoint
If you used the survey recently, you can select it from the list at the bottom of the File menu. Otherwise, to open a
survey after you have started KeyPoint:
1
Select Open (File menu).
KeyPoint surveys | 113
2
In the Open Survey dialog box, browse to the folder in which the survey is stored.
3
Select the file.
4
Click Open.
KeyPoint opens the survey.
The Survey Design Wizard
By default, the Survey Design Wizard starts automatically when you create a new survey (see below for how to stop
this happening). The wizard gives you an easy way to set your basic survey options. You can also use this wizard to
write the survey questions because it’s linked to the Question Wizard. It is also linked to the Asset Library, so you can
use prepared questions, introductions, conclusions and other objects. For more information on these, see Chapter 8,
Constructing a Survey.
To stop the Survey Design Wizard from starting every time you create a new survey or a new form, clear the Start the
Survey Design Wizard on a new form tick box in the General page of the Options dialog box (Tools menu).
Using the Survey Design Wizard
To use the Survey Design Wizard once it has started:
1
Click Next in the introductory step page, if it is displayed (you can click the Don’t show any introductory
steps tick box to remove the introductory steps from all wizards).
2
In the Survey Type page, either:
Select Choose a Template if you want the new survey to be based on an existing template file
Or:
Choose whether you want to create a Paper or Web/email survey or some Other type of survey.
Specifying the type of survey sets appropriate default values for such things as the page size, which you will
be able to modify later if required. You will also be able to add copy forms of a different type, which can
have the same questions but a different format.
Click Next to continue – go to Step 3 if you selected Choose a Template; otherwise, go to Step 4.
3
If you selected Choose a Template in the previous step, the Choose a Template page will be displayed.
In the Choose a Template page:
a
Click on the item in the Categories box containing the template you want to use – the Templates box
will show a preview of all the templates in the selected category.
b Click on the preview of the required template in the Templates box to select it.
c
4
Click Finish to close the wizard and create the new survey based on the template.
If you did not opt to choose a template, the Survey Layout page will be displayed.
114 | Chapter 7: Working with Surveys in KeyPoint
The Web survey page sizes tick box will be set according to the choice of survey type you made in the
last step, but you can change it here if required (for the web, the page sizes are given in pixels, and the
default orientation is landscape).
Choose the page size and orientation for the survey – to specify your own page, size select Custom Page
Size from the drop-down list.
Enter dimensions for the margins in the boxes (when you use the wizard to place questions, KeyPoint
aligns them using the margins).
Click Next to continue.
5
In the Survey Style page, select a style for the survey.
If you want to customise a style before selecting it, click the Style Library button to open the Style Library
dialog box (for more information, see Working with styles, page 142).
Click Next.
6
In the Survey Title page, enter a title for the survey. KeyPoint displays the title in the chosen style. Click
Next to accept it.
7
In the Introductory Text page, enter any introductory text for the survey.
Click the Library button if you want to use a prepared introduction. This will take you to the Asset Library.
For more information, see The Asset Library, page 230.
Click Next.
8
In the Header page and then the Footer page, enter text for the header and footer.
a
Select Adjust margin if you want the top/bottom margins adjusted so that the header/footer fits within
the margin.
b Select Show on first page if you want the header/footer to appear on the first page of the survey.
c
There are three tabs allowing you to enter text to appear at the left, centre and right of the header or
footer. For each tab:
i
Type in the required text for that position.
ii
To insert a field showing the date, time, page number, total number of pages or survey title,
right-click at the point in the text that you want to insert it. If you insert more than one field,
remember to insert a space between the fields.
You can also select Advanced from the context menu to enter an expression – for more
information on expressions, see Chapter 18, Using Expressions.
iii To set the text font, size, colour and style, select the text for which you want to change the
properties in the text box and press the relevant button or select the required option from the
relevant drop-down list.
d Click Next.
The Survey Design Wizard | 115
9
In the Add Questions page:
a
Choose whether you want to:
*
*
*
*
add a question
add a question table
add one or more objects from the Asset Library
leave adding any (more) questions, question tables or Asset Library objects until later (No, I’ll add
questions manually radio button).
b Click Next.
c
Go to Step 10 if you have selected the No, I’ll add questions manually radio button.
d Otherwise, if you have chosen to add:
* a question: you will be taken through the Question Wizard steps to construct the question – see
Adding a question with the Question Wizard, page 155, for details
* a question table: you will be presented with the Question Table Wizard to construct the question
table – see Adding a question table with the Question Table Wizard, page 157, for details
* one or more objects from the Asset Library: the Add Items from Asset Library page will be
displayed so that you can choose which objects to include – see the next section, Using items
from the Asset Library in the New Survey Wizard, for details.
You can use the Question and Question Table Wizards to design and add new questions and
question tables to the survey; you can use the Asset Library to add standard prebuilt questions,
tables and other objects.
e
When you have finished adding the question, table or Asset Library objects, you will be returned to
the Add Questions page – repeat from Step 9a until you have added all the required items.
You can add as many questions, question tables or Asset Library objects as you like – they will appear in
the survey design in the order you add them.
10
KeyPoint displays the Conclusion page when you click Next with No, I’ll add questions manually
selected in the Add Questions page.
In the Conclusion page, enter a conclusion for the survey. Click the Library button if you want to use a
prepared conclusion. This will take you to the Asset Library. For more information, see The Asset Library,
page 230.
Click Next.
11
Click the Finish button when you are ready.
116 | Chapter 7: Working with Surveys in KeyPoint
Using items from the Asset Library in the New Survey Wizard
The Add Items from Asset Library page is displayed if you choose I want to add objects from the Asset Library and
click Next in the New Survey Wizard’s Add Questions page (see previous section):
To add items from the Asset Library to the survey:
1
Browse the library in the Library items pane to find and select the first item(s) you want to add (you select
items in the usual way: click on an item to select it, Shift+click to extend the selection to a range of items,
Ctrl+click to add an individual item to the selection):
2
Click the add item button (or to add an individual item, just double-click on it). The selected item(s) will
be added to the Chosen items pane.
The Survey Design Wizard | 117
3
Repeat steps 1 and 2 for any other items you want to add. Each item will be added to the end of the list in
the Chosen items pane (if you select several items and add them together, they will be added in the same
order as they appear in the Library items list) – see the next step if you want to change the order.
As an alternative to Steps 1–3, you can click Library to display the Asset Library dialog box. You can then select and add items to
the Chosen items pane by either right-clicking on them in the library browser and choosing Use from the menu if you want to
leave the dialog box open to add more items, or by clicking the Use button to add the selected item and close the dialog box.
The advantage of using the Asset Library dialog box rather than Steps 1–3 is that you can preview the items before you add them.
You can choose whether to preview the item in its own style (the formatting used when it was added to the Asset Library) or in the
active style (the style you have chosen for the survey) by right-clicking in the library browser and choosing Apply active style.
Note that this only affects the preview in the Asset Library dialog box – see Step 6 for how to choose the style used to actually add
the items to the survey.
4
Items will be added to the survey in the order they appear in the Chosen items pane. If you want to
change the order, you can drag and drop the items in the list:
5
If you change your mind about one of the items you have chosen, click on it in the list in the Chosen items
pane to select it and click the remove item button, or double-click on the item.
6
Click the Apply active style tick box to choose whether the selected items should be added to the survey
in their own style (the formatting used when they were added to the Asset Library) or in the active style
(the style you have chosen for the survey).
7
Click Next to confirm your choices and return to the Add Questions page so that you can choose to add
more questions, question tables or Asset Library items, or to go on to the next step in creating the survey
design.
Clicking Back also returns you to the Add Questions page, but without adding any of the selected Asset
Library items to the survey.
118 | Chapter 7: Working with Surveys in KeyPoint
Forms
Forms are the actual pages where you place questions (Design workspace), enter responses (Responses workspace)
and place tables and graphs (Presentation workspace).
The Design workspace in all surveys has one, and only one, ‘master’ form, but you can add one or more ‘copy’ forms
– see the next section, Copy forms, for more information about what you can and cannot do with copy forms.
When you create a new form in the Design workspace and place questions on it, a corresponding form is
automatically added to the Responses workspace.
The Presentation workspace has at least three forms – the Analysis Grid, the Statistics form and one or more
Presentation forms. You can also create Top Line Analysis and 360° Analysis forms in the Presentation workspace.
Note that you cannot edit, delete or rename the Analysis Grid or the Statistics form.
Copy forms
The Design workspace in all surveys has one, and only one, ‘master’ form, but you can add one or more ‘copy’ forms.
Copy forms allow you to produce different versions of the survey for different purposes. For example, you may want
to use different formats for a paper version and a web version, or customised instructions for different target
populations. You can also choose whether questions are shown on copy forms (by hiding them for web or email
surveys or making them non-printable for paper surveys), so you can use copy forms to customise the questions asked
for different populations.
Creating a new copy form
To create a new copy form in the Design workspace, either:
1
Select the master form.
2
Select New Copy Form (Form menu).
1
Right-click the master form tab.
2
Select New Copy Form.
Or:
KeyPoint creates a new copy form with a default name, such as ‘Copy 1’.
You display, rename and delete copy forms in the same way as other forms.
Working with copy forms
Copy forms allow you to create different versions of a survey with different formatting and appearance, but with the
same underlying structure. In particular, all the copy forms share the same questions, and responses to the same
questions on different forms are entered into the same field in the responses database. Specifically, you can only add
Forms | 119
or delete questions on the master form: when you add a question to the master form, it is added to all the copy
forms, and when you delete a question from the master form it is deleted from all copy forms.
Although you cannot add or delete questions or question tables on copy forms, you can choose whether they are printed in a
paper-based survey or hidden in a web or email survey – for more details, see the list later in this section showing the changes that
you can make on a copy form.
The following section lists changes that can only be made on the master form, and the section following it lists
changes that can be made independently on copy forms. Neither list is exhaustive, but they should give you a good
feel for what you can and cannot change on copy forms.
Changes that can only be made on the master form
The following changes can only be made on the master form (the appropriate changes will be made automatically to
the copy forms):
* Add questions or question tables
* Delete questions or question tables
* Change the question name
* Change the answers to multiple, range and ordered choice questions (but you can change the labels that
appear in the place of the answers in copy forms – see Labels tab, page 217)
* Set the default value
* Set validation conditions.
Changes that can be made independently on copy forms
You can make the following changes on a copy form independently of the master form and any other copy forms:
* Change the page size and setup
* Add, remove or change graphical objects like lines, rectangles or pictures, and OLE objects
* Edit text, including question text (for multiple choice, range and ordered choice answers you can change the
text labels rather than the answers themselves – see Labels tab, page 217)
* Change the formatting of any object manually or by applying a style
* Set routing
* Change question numbering
* Move objects including questions and parts of questions manually or using realign, or set Auto Size mode
* For a paper-based survey, choose whether a question should be printed (click the Printable tick box on the
Inspector tab in the Properties sidebar)
* For a web or email survey, choose whether a question should be included (click the Hide on Web/Email tick
box on the Inspector tab in the Properties sidebar).
120 | Chapter 7: Working with Surveys in KeyPoint
Displaying a form
You select which form to display in one of two ways, depending on whether the Menu Form Navigation option on
the General page of the Options dialog box (Tools menu) is selected:
* If Menu Form Navigation is not selected, you can view a form by clicking its tab at the bottom of the
KeyPoint window.
* If Menu Form Navigation is selected, only the tab for the displayed form is shown at the bottom of the
KeyPoint window and you use the form context menu to display a different form:
To display another form using Menu Form Navigation:
1
Right-click in the form’s tab to display the form context menu.
2
Click on the name of the form you want to display in the Goto Form submenu. (The Goto Form submenu
listing all the forms is only included in the menu when Menu Form Navigation is selected.)
You can also use the form context menu to create new forms, or rename, duplicate, save or delete existing forms –
see the following sections.
Saving a form
The save command in the form context menu is only enabled if the form contains unsaved changes.
To save a form:
Select Save Form (Form menu), or for a response, Save Response (Response menu).
Or:
1
Right-click the form tab.
2
Select Save Form.
Renaming a form
To rename a form (you cannot rename response forms or the Analysis Grid or Statistics form):
1
Either:
Select Rename Form (Form menu).
Forms | 121
Or:
a
Right-click the form tab.
b Select Rename Form.
2
Type the new name at the cursor on the form tab.
3
Press Return to accept the new name.
Deleting a form
First of all, note that you cannot undo the deletion of a form!
If you do want to delete a form (you cannot delete the master form in the Design workspace or the Analysis Grid or
Statistics forms in the Presentation workspace), either:
Select Delete Form (Form menu), or for a response, Delete Response (Response menu).
Or:
1
Right-click the form tab.
2
Select Delete Form.
Creating a new response form
To create a new response form, do one of:
Select New Response (Response menu).
Or:
1
Right-click the form tab.
2
Select New Form.
Or:
Press the New Form button.
KeyPoint creates a new response form ready for you to enter new data.
Creating a new presentation form
To create a new presentation form, either:
Select New Form (Form menu).
122 | Chapter 7: Working with Surveys in KeyPoint
Or:
1
Right-click the form tab.
2
Select New Form.
KeyPoint creates a new presentation form with a default name.
Copying a copy form or a response or presentation form
To copy a form, either:
For a copy form or a form, select Duplicate Form (Form menu), or for a response, select Copy Response
(Response menu).
Or:
1
Right-click the form tab.
2
Select Duplicate Form.
KeyPoint copies the contents of the current copy or presentation form to a new copy or presentation form and gives it
a default name, or copies the current response to a new response.
For information on copying complete surveys, including the forms they contain, see Saving a copy of a survey with a
new name, page 110.
Using the Page Manager to navigate and work with forms
If the selected design form has Double Sided set in the Form properties, there are separate master pages for odd and even pages
(see right-hand picture above).
The Page Manager sidebar is a navigation tool allowing you to:
* move easily between the different pages of a form (in particular, it is the only way to access the form’s Master
page(s) – see Master pages, page 131)
* select individual objects on a page
* add and remove pages
* reorder pages.
Forms | 123
By default, KeyPoint shows the Page Manager sidebar tab when the Design Workspace or a Presentation form is
displayed (it is always hidden for other types of form). See Sidebars, page 103, for general information about working
with sidebars.
Controlling what is shown in the Page Manager
The Page Manager is synchronised with the KeyPoint Workspace and will automatically reflect any changes you make
to the form. If, however, you think it has become unsynchronised for some reason, right-click in the Page Manager
and choose Refresh.
The first main item(s) in the Page Manager are the form’s Master page(s) – see Master pages, page 131. This is
followed by the actual pages in the form: 1, 2 …
To see a list of the objects on a page:
Press the + icon next to the page:
124 | Chapter 7: Working with Surveys in KeyPoint
To hide the contents again:
Press the – icon next to the page.
To show or hide the lists of objects on all the pages:
1
Right-click in the Page Manager.
2
Choose Expand All or Collapse All.
To show (or hide) the components within the questions (this only affects Design forms):
1
Right-click in the Page Manager.
2
Choose Show Question Objects.
You can use the + and - icons to expand and collapse questions in the same way as for pages.
It is generally best to work with Show Question Objects turned off to avoid filling the Page Manager display with
unnecessary detail.
To show or hide routing (see Question routing, page 191, for how to use question routing) between questions (this
only affects Design forms):
1
Right-click in the Page Manager.
Forms | 125
2
Choose Show Routing.
This can be a good way to get an overview of the routing in long multi-page surveys.
If you have several routing lines on a page, it is a good idea to give them each a different colour so that you can
distinguish them easily. You can change the colour and width of a routing line by selecting it (on the actual page, not
in the Page Manager) and using the border colour and width tools in the Format Palette sidebar (see Object
formatting controls, page 151) or the Inspector tab in its Properties sidebar (see Inspector tab, page 219).
Changing the labels in the Page Manager
The pages in the survey or presentation are listed in order and numbered 1, 2… If required, you can add labels to the
page numbers in the Page Manager to help identify them. (You cannot edit the label of the Master page.)
To label a page in the Page Manager:
1
Right-click on the page in the Page Manager.
2
Choose Edit Description.
An edit box will open next to the page so that you can add/edit the label:
126 | Chapter 7: Working with Surveys in KeyPoint
An alternative to Steps 1 and 2 is to click once on the page number (or label if there is one already), and then once again (do not
double-click).
3
Enter the text for the label (up to 15 characters).
4
Repeat Steps 1–3 for any other pages.
The labels will be shown next to the page numbers:
Adding meaningful labels to pages can make navigating long multi-page surveys much easier. The labels have no
effect on the actual survey or presentation pages.
The objects in the Page Manager are also identified by labels:
The labels for questions are the question names you gave them when you created them (see, for example, Adding a
question with the Question Wizard, page 155). Other objects are initially identified by a default name given to them
by KeyPoint when you created them.
You cannot change the question names in the Page Manager (see, for example, Editing a question using the
Question Wizard, page 168), but you can change the labels used for other objects using the same method as for the
page labels. You can also view and edit a non-question-object label using the Inspector tab in the Properties sidebar.
Using the Page Manager to select pages or objects
To view a specific page in the KeyPoint workspace (this is the only way to display the Master page):
Double-click on the page in the Page Manager.
Forms | 127
You can also view one of the actual pages in the form (but not the Master page) by: right-clicking in the Page Manager
and choosing Go To Page to display the Go To Page dialog box, selecting the required page from the drop-down list
in the dialog box, and clicking OK; or by scrolling the Workspace window.
To select an object on one of the pages:
1
If you want to select an object on the Master page and one of the actual pages is currently displayed in the
Workspace, double-click on the Master page in the Page Manager.
If you want to select an object on one of the actual pages and the Master page is currently displayed in the
Workspace, double-click on any of the actual pages in the Page Manager.
This step is required because you can double-click on an object to switch between actual pages in the
survey or presentation, but you cannot double-click on an object to switch between an actual page and
the Master page.
2
Double-click on the object in the Page Manager.
Using the Page Manager to add, remove or reorder pages
To add one or more new pages anywhere in a Design or Presentation form:
1
Right-click in the Page Manager.
2
Choose Insert Pages to display the Insert Pages dialog box:
3
In the Insert box, enter the number of pages you want to add.
4
Click a radio button and select a page to choose where to add the page(s).
5
Click OK.
To add one page at the end of the Design or Presentation form:
Click the Add Page button
in the Page Manager.
To remove one or more new pages from a Design or Presentation form:
1
Select the pages you want to remove – click on a page to select it, Shift+click to extend the selection to a
range of pages, Ctrl+click to add an individual page to the selection. You cannot remove the Master page.
2
Either:
Right-click in the Page Manager and choose Delete Pages.
128 | Chapter 7: Working with Surveys in KeyPoint
Or:
Press the Delete Page(s) button
3
in the Page Manager.
A confirmation dialog box will be displayed – click Yes to delete the selected pages.
To move one or more pages to reorder the survey or presentation, either:
1
Select the pages you want to move – click on a page to select it, Shift+click to extend the selection to a
range of pages, Ctrl+click to add an individual page to the selection.
2
Drag the pages:
and drop them in their new position:
Or:
1
Right-click in the Page Manager and choose Move Pages to display the Move Pages dialog box:
The drop-down boxes at the top of the dialog box show the range of pages currently selected in the Page
Manager – see Step 1 in previous method. However, unlike the previous method, you cannot use this
method to move a discontinuous selection of pages – see example pictures for previous method.
2
Select the range of pages you want to move (you cannot move the Master page).
Forms | 129
3
Click a radio button and select a page to choose where to move the page(s).
4
Click OK.
Selecting objects directly on forms
This section describes how to use the mouse to select one or more objects directly on a form. You can also use the
Page Manager to select an individual object on a form – see Using the Page Manager to select pages or objects,
page 127.
Using the Ctrl key to select components of objects
As you would expect, you select objects on forms by clicking on them. However, objects sometimes exist within other
objects, such as the question text within a question, and you will need to be able to select either the whole object or
the component part. You can use the Ctrl key to cycle through the hierarchy of objects. For example, if you have a
table of multiple choice questions and click on a multiple choice option, the option will become selected, if you click
again while pressing the Ctrl key, the whole question will be selected, and if you Ctrl+click again, the question table
will be selected (if you Ctrl+click again, the option alone will be selected again).
You can also use the Ctrl key to add or remove objects from other objects. For example, if you hold down the Ctrl
key and drag a picture object towards a question, when the picture is close enough to be added to the question a
small plus sign will appear. You can then ‘drop’ the picture into the question. To remove an object from another
object, hold down the Ctrl key and drag it out.
Selecting more than one object
To select several objects together:
* Drag around the objects – all objects overlapping the dragged-out rectangle will be selected. Press Alt as you
drag to select objects fully enclosed within another object, such as the tick boxes within a multiple choice
question
* Press Shift and click on an object to add it to the current selection of objects (you can also remove an object
from a selection by pressing Shift and clicking on the object).
Stacking of objects on forms
When two object overlap, one of the objects will be in front of the other – by default, an object created later will be
in front of an earlier object. If the objects are transparent, this may not be obvious visually, but it does affect the way
you can select the objects – if you click on the area where they overlap, only the front object will be selected.
If required, you can change the stacking order of the objects so that you can select a lower object, or so that a higher
opaque object does not obscure a lower transparent one.
To move objects to the front or back in the stacking order:
1
Select the object(s).
2
Right-click on the object (or one of them if there is more than one) to display the context menu.
3
Select Bring to Front or Send to Back (Format submenu).
By repeated use of these commands on different objects you can produce any stacking order you require.
130 | Chapter 7: Working with Surveys in KeyPoint
Page layout of forms
KeyPoint provides two tools for helping you design the page layout of forms:
* The Page Setup dialog box for setting page format, margins, headers and footers
* Master pages, which can contain text, graphics, pictures, column lines, OLE objects, bar codes and navigation
buttons that you want to appear on every page of the form – see Master pages, page 131.
Page setup
In the Page Setup dialog box you can set margins, paper format, paper bin, and the header and footer for Survey
Design and Presentation forms.
To display the Page Setup dialog box:
Select Page Setup (File menu).
The Page Setup dialog box shares the following tabs with the properties sidebar when no object is selected:
* Page Margins – see Margins tab, page 224, for details
* Paper Format – see Format tab, page 225, for details
* Header/Footer – see Header and Footer tabs, page 226, for details.
The Page Setup dialog box also has a Paper bin tab allowing you to set which paper bins to use on the printer – the
options available depend on the default printer settings.
Master pages
Master pages allow you to create a layout of objects (column lines, text, graphics, pictures and OLE objects) that will
appear on every page of a Design or Presentation form. For example, if the design for your survey uses two columns
throughout the survey, all you need to do is put a single column line on the master page. This saves you having to add
column lines to each page individually, and ensures that the column widths are consistent on all the pages. Other
examples of things you may want to place on the Master page so that they appear on every page include your
company logo, lines to separate the header and footer from the body of the form, preprinted barcodes (see Adding a
barcode, page 180) and navigation buttons (see Adding Navigation buttons, page 184).
You can use the Page Setup to set text headers and footers that will appear on every page of the form, but the Master
page allows you to put repeating text, column lines, graphics, pictures and OLE objects anywhere on the page.
Each Design and Presentation form has its own Master page. When you create a copy form, the copy form’s Master
page is a copy of the master form’s Master page, but once it has been created, it is not linked to the original in any
way, so you can edit the copy and the original independently.
To view the Master page for the selected form you have to use the Page Manager:
1
If the Page Manager is not displayed, move the pointer over the Page Manager sidebar tab.
2
Double-click Master in the Page Manager.
The Workspace background changes from cream to blue when the Master page is displayed.
Forms | 131
Adding objects to Master pages
The Master page is blank when it is first displayed, ready for you to add objects.
You can use commands in the Insert menu to add text, graphics, column lines, pictures, rectangles and OLE objects to
the Master pages for Design and Presentation forms and navigation buttons and barcodes to Design forms. You can
also use tools in the Designer Tools sidebar to add the most commonly used of these objects:
When an actual page in a Design or Presentation form is selected, the Designer Tools sidebar and Insert menu also contains tools
for adding questions and question tables to Design forms and presentation tables and graphs to Presentation forms. These are
hidden when the Master page is selected, as it would make no sense to add these objects to a Master page.
The following table lists the items you can insert on Master pages in Design and Presentation workspaces:
Command
Tool
Text
For instructions, see
Adding text, page 178
Line
Adding a line, page 179
Picture
Inserting pictures, page 179
Column line
Column lines, page 175
Rectangle
Adding a rectangle, page 179
OLE Object
Adding OLE objects, page 189
Button
(Design forms only)
Barcode
(Design forms only)
132 | Chapter 7: Working with Surveys in KeyPoint
Adding navigation buttons, page 184
Adding a barcodes, page 180
When you add an object to a Master page, it appears on every actual page in the form with the same properties and
in the same position.
With one exception, you can only select a Master page object in the Master page. This means that you can only move
it, change its properties or delete it in the Master page.
The exception is buttons, which you can select on any page to change their properties, but you can only move or
delete them on the Master page – changing the properties of a Master page button on any page changes its properties
on every page.
Finding and replacing text
To find or replace text in the Design, Responses or Presentation workspace:
1
Select Find (Edit menu) or Replace (Edit menu).
Enter text to find
Enter replacement text
Choose the search
direction
Choose other
options
Choose whether to
search all questions or
only selected questions
The picture shows the Find dialog box in the Responses workspace – the Search on questions controls and the Search clean data
and Search dirty data check boxes only appear when you are searching in the Responses workspace or Analysis Grid.
The Replace with box and Replace button only appear for the Replace command.
2
Enter the text you want to find in the Text to find field.
3
Enter the replacement text if required.
4
If you wish, change the default search direction and start point.
5
Choose whether to search all questions or selected ones only.
6
Specify any additional search options to restrict the search.
7
Click the Find button.
8
If you want to continue searching, click the Find Next button until you’ve found the response you want.
Or, for a replace operation, click the Replace button to replace the found text and search for its next
occurrence.
Forms | 133
9
Repeat Step 8 if required.
10
Click the Close button.
The KeyPoint spellchecker
The spellchecker can be used in all the workspaces.
Using the spellchecker
To start the spellchecker:
1
Select Spelling (Tools menu).
2
When the spellchecker finds a word that is not in its dictionary, the Spelling dialog box appears.
3
You can choose to:
*
*
*
*
Ignore this instance of the word
Ignore All instances of the word (this instance and any instances in the rest of the document)
Add the word to the dictionary
Change this instance of the word to the text in the Replace With box – you can type directly into this
box or click on a word in the Suggestions list to transfer it to the Replace With box
* Change All to replace this instance and any instances in the rest of the document to the text in the
Replace With box.
You can also click Options to display the Spellchecker page of the Options dialog box – see the next
section.
134 | Chapter 7: Working with Surveys in KeyPoint
The Spellchecker page
The Spellchecker page in the Options dialog box (Tools menu) allows you to choose dictionaries and set other
spellchecking options.
Select this tick box to
re-check words replaced
during the spellcheck
Select these tick boxes to
get the spellchecker to
ignore certain types of
words
Choose which dictionaries
you want to use here
Manage your custom user
dictionaries here
Click the Dictionaries button to display the Dictionaries dialog box:
Use this dialog box as follows:
* To choose which dictionaries will appear in the Custom Dictionary drop-down list, tick their boxes in the list.
* To delete a custom dictionary, select it and click Delete.
The KeyPoint spellchecker | 135
* To edit a custom dictionary:
a
Select the dictionary and click Edit. A tabbed dialog box appears:
b Use the three tabs to:
* add words to the dictionary;
* enter corrections that you want to be made automatically (as in the picture above); and
* list words to be excluded – the effect of this is to remove the words from the dictionaries in use so
the spellchecker will always mark these words as incorrect when it finds them in the text.
Customising the KeyPoint environment
As you become familiar with KeyPoint you may find that you want to customise it to suit your individual preferences.
Changing KeyPoint options
The Options dialog box (Tools menu) allows you to change various settings in KeyPoint. This chapter describes how to
use the General, Toolbars, Survey, Designer and Spellchecker pages since they contain settings that are applicable to
more than one workspace – see the previous section for how to use the Spellchecker page and the following sections
for how to use the other pages:
* Responses page: Setting options for response entry, page 251
* Analysis page: Common presentation settings, page 403
* Connection page:
* non-surveyserver: The Options dialog box Connection page, page 300
* surveyserver: Making proxy server settings, page 335
136 | Chapter 7: Working with Surveys in KeyPoint
* Email & Web page:
* non-surveyserver settings: Setting Email and Web options, page 306
* surveyserver settings: Setting the folder used for downloaded responses, page 335
* Web Settings page:
* non-surveyserver settings: The Options dialog box Web Settings page, page 305
* surveyserver settings: Using the Web Settings page in the Options dialog box for surveyserver, page 336
* Address Book page: Choosing which Address Book to use, page 244
* Offline Server page: Setting options for using the Offline Server, page 362.
Options are stored on a per-computer basis. This means that if you use more than one computer, the survey may look
different on each one.
Protecting KeyPoint options with a password
To set a password to prevent unauthorised changes to KeyPoint options:
1
Press Set password in the Options (Tools menu) dialog box to display the Password protect options
dialog box:
2
Enter the password in both boxes.
3
Press OK to set the password.
When a password is set, you will have to enter a password when you choose Options (Tools menu) in order to
display the Options dialog box.
To remove the password protection:
Repeat the procedure for setting the password but delete the content of the boxes at Step 2.
Customising the KeyPoint environment | 137
The General page
In the General page you can change general KeyPoint options.
In the General settings section you can:
* Select the Notify me of any KeyPoint updates tick box to make KeyPoint check for updates periodically on
startup. You need to be connected to the Internet for this. If an update is available, KeyPoint opens your web
browser to display information on the update.
* Select the Menu Form Navigation tick box to display a form using the Goto Form submenu on the form
context menu rather than by clicking on a tab.
* Click the Change button to change the location of the system database where the Question and Style Library
information is stored.
In the Wizard settings section you can:
* Select the Start the Survey Design Wizard on a new form tick box to start the Survey Design Wizard
whenever you start a new form.
* Select the Don’t show any introductory steps tick box to remove the introductory page from all wizards.
* Select the Don’t show any final steps tick box to remove the final page from all wizards.
* Select the Don’t show wizards for question tools tick box if you want the question tools to just add questions
with default settings rather than display the wizard. You can then edit the questions manually as required. (See
The Designer page, page 141, for how to choose how many answers to add for multiple and ordered choice
questions and how many questions to be added in question tables.)
You can reset all the settings in the General page to their defaults by clicking the Defaults button.
138 | Chapter 7: Working with Surveys in KeyPoint
The Toolbars page
You use the Toolbars page of the Options dialog box (Tools menu) to change the appearance of the Toolbar, Menu
bar and sidebars.
In this page you can:
* Select Auto switch between icon sizes to make the size of buttons in the Toolbar and the Align and Size and
Designer Tools sidebars be set automatically to small if the resolution of your screen is 800×600 or less,
otherwise, for higher resolutions, the button size is set to large; if it is unselected, the button sizes are set using
the Large icons tick boxes.
In the Toolbar settings box you can:
* Choose between different styles of toolbar and menu
* Choose whether to use Large icons (buttons) if Auto switch between icon sizes is unticked
* Choose to Disable Delete All/Subset button (and the Delete All (Responses menu) command) in the
Responses workspace – see Deleting responses, page 266.
In the Sidebars settings box you can:
* Choose between different styles of sidebar
* Choose whether to use Large icons (buttons in the Toolbar and the Align and Size and Designer Tools
sidebars) if Auto switch between icon sizes is unticked
* Choose whether to Display sidebar text descriptions below the buttons in the Toolbar and the Align and
Size and Designer Tools sidebars
* Click Reset layout to unpin all sidebars, display all sidebar tabs and return them to their original positions.
Customising the KeyPoint environment | 139
In the Office colour scheme box you can:
* Choose between different Microsoft Office colour schemes – this setting only has an effect if you have chosen
Office as the setting for the Toolbar and/or Sidebars style.
You can reset all the settings in the Toolbars page to their defaults by clicking the Defaults button.
The Survey page
You use the Survey page of the Options dialog box (Tools menu) to change the default survey options.
In this page you can change the following survey characteristics:
* The ruler unit for the Design and Presentation workspaces – select a unit from the Units drop-down box
* How often the survey file will be saved automatically – set the value to 0 if you do not want to use autosave
* Whether to Show system questions in the Analysis grid and make them available for tables and graphs in
Presentation forms – the system questions show the date and time the respondent began to fill in a web
response (Started), when it was completed (Finished) and the time taken to fill it in (Duration), and the name
(Mode) of the copy form of the response
* The ordering of questions – alphabetical by question name or the order in which the questions were added
(this controls, for example, the order of questions in the Quick Analysis Wizard and in presentation objects
such as tables)
* Your user name – type your new user name in the User Name box
* The number of undo steps. The undo/redo feature is available in most parts of KeyPoint (survey design and
presentation design are probably where you are most likely to use it). You can choose the number of actions
140 | Chapter 7: Working with Surveys in KeyPoint
stored by KeyPoint (and thus the number of Undo steps you can carry out). There is no upper limit on this
setting, but you may want to limit the number of undo steps if your PC has only a small amount of memory.
The default number of steps is 10.
* How much compression should be used when the survey is saved – you can choose the balance between size
and speed that best suits you.
You can reset all the settings in the Survey page to their defaults by clicking the Defaults button.
The Designer page
The Designer page in the Options dialog box (Tools menu) contains settings allowing you to customise the Design and
Presentation workspaces.
In the Display Options section you can:
* Change the X and Y grid intervals
* Select Snap to Grid to switch on snap to grid
* Select Grid Visible to make the grid visible
* Select Line-Ups Visible to view line-ups
* Select Animations to enable the animation of animated .gif files in KeyPoint (this does not affect animations in
published web surveys).
See Aligning questions and other objects, page 172, for more information about the grid and line-ups.
Customising the KeyPoint environment | 141
In the Designing Options section you can set the defaults used when you choose not to use the Question and
Question Table Wizards (by selecting Don’t show wizards for question tools on the General page). You can set the
default number of:
* Answers in multiple choice and ordered choice questions
* Questions in question tables.
In the Colours section you can change the colour of:
* The non-printable area of the form and master form (Background)
* The printable area of the form (Paper)
* The margins (Margins)
* The frames drawn around objects, questions and question tables in the Design workspace when you choose
to make frames visible.
In the Export section:
* Select the Format of images when exporting – this controls the image format used when KeyPoint creates
web surveys.
You can reset all the settings in the Designer page to their defaults by clicking the Defaults button.
Working with styles
A KeyPoint style is a collection of effects such as fonts, colours, answer box shapes, fills, and so on – in fact, virtually
everything that affects the look of a form. You can edit, save and reuse styles to help you achieve a customised but
consistent look to surveys.
When you place an object in a survey it is placed with default values for the properties you see in the Properties
sidebar. These default values are taken from the current style. You can choose which style to use as the current style
using the Style Library; the current style is identified with a small green block next to its icon in the list of styles. After
you change the current style, all objects you place on the survey form from then on will have these properties, but
objects already on the survey form will not change.
As well as defining the current style to determine the default settings used when you create an object, you can at any
time apply any style to an existing object or to all existing objects on the form.
KeyPoint comes with several built-in styles, which you can edit. You can also add new styles of your own, or copy an
existing style to use as a basis for a new style. There are two special built-in styles:
* NORMAL – this is like the other styles, except that you can reset it to its original definition at any time, and
you cannot rename or delete it
* SCAN – the definitions for this style have been designed specifically to create surveys that are to be read using
the optional KeyPoint Scanning Module (see Chapter 10 for details).
142 | Chapter 7: Working with Surveys in KeyPoint
Using the Style Library
To open the Style Library:
Select Styles (Tools menu), or while you are creating a new survey, click the Style Library button in the
Survey Design Wizard.
To add a new style:
1
Right-click on one of the style names (such as NORMAL; it doesn’t matter which one you use) to pop up a
menu and select Add. A new default style will be added with its name selected so that you can edit it.
2
Type the name of the new style and press Return.
To copy style definitions from one style to another:
1
Right-click on the style you want to copy, and select Copy.
2
Right-click on the style you want to copy to, and select Paste.
All the existing style definitions will be replaced by the definitions in the copied style.
You can also copy an individual object style definition from one style to another – see the next section for details.
To set a style as the current style:
1
Select the style name.
2
Click Use.
Working with styles | 143
Or:
1
Right-click on the style.
2
Select Use Style.
The current style has a small green bar next to its name. From now on new objects will be created using the selected
style, until you choose to use another style. Changing the current style does not affect the formatting of existing
objects – see Applying styles, page 145, for how to apply a style to existing objects.
To rename a style:
1
Right-click on the style and select Rename, or click twice in the style name (do not double-click as that just
opens or closes the style folder).
The style name will become editable.
2
Type in the new name.
To delete a style:
1
Right-click on the style.
2
Select Delete.
To reset the NORMAL style to its original definitions:
1
Right-click on NORMAL.
2
Select Reset to default.
Changes to other styles are permanent, so if you are experimenting, it is best to copy the style first so that you can go back to the
original definitions if required.
To expand a style to view the objects within the style:
Double-click on the style name or click on the plus icon next to it.
Editing object styles
To edit an object style:
1
Expand the style you want to edit in the left-hand pane.
2
Click on the object you want to edit. Note that to change the style for a question type you should change
the styles relating to parts of the question. For instance, to change the style of multiple choice questions
you should edit the MultiChoiceQuestion and TickAnswer styles.
3
Several tabs for the object will appear in the right-hand pane. Edit the properties in the tabs. For more
information on the tabs for questions, see Question properties, pages 195–219. For more information on
the tabs for graphs and tables, see Chapter 15, Presenting Data. You can see the effects of changes in the
Preview tab.
144 | Chapter 7: Working with Surveys in KeyPoint
To copy individual object style definitions from one style to another:
1
Expand the style from which you want to copy the definition.
2
Right-click on the object whose definition you want to copy and select Copy.
3
Expand the style into which you want to paste the definition.
4
Right-click on the object into which you want to paste the definition (it must be the same object as you
copied from) and select Paste.
Applying styles
To apply a style to all objects on the current form:
1
Open the Style Library – see previous section.
2
Click on the style to select it.
3
Click Apply style.
Note that applying a style does not make it the current style.
To apply a style to an individual object on a form:
1
Right-click on the object in the form to select it and display a context menu.
2
Select the required style from the Apply style submenu.
When you apply a style to existing objects:
* If the object is in Auto Size mode, it will automatically realign (see Auto sizing, page 172)
* Any changes made to the object’s formatting, such as font size or colour, will be lost
* You can use Undo to undo the effects of applying the style.
Working with styles | 145
146 | Chapter 7: Working with Surveys in KeyPoint
8
Constructing a Survey
In this chapter, you will see how to construct an effective and attractive survey.
You will learn about:
* The Design workspace and its sidebars
* Designing a survey
* Adding and editing questions and other objects
* Question routing
* Using the Properties sidebar
* The Asset Library
* Printing and distributing the survey.
Chapter 8: Constructing a Survey | 147
The Design workspace
The Design workspace is where you create surveys.
Ruler
Designer Tools sidebar
tab
Page Manager
sidebar tab
Edge of
paper
Format Palette
sidebar tab
Page
margin
Properties
sidebar tab
Tabs to choose to display the master
form or a copy form
Grid
Selected question
Design form
Align and Size
sidebar tab
The Toolbar
When the Design workspace is displayed, the Toolbar contains the following special design tools in addition to the
general buttons appearing in all workspaces:
Tool
Use this tool to
add a page
remove a page
148 | Chapter 8: Constructing a Survey
Tool
Use this tool to
preview and save a web format survey based on the survey design
upload a survey to surveyserver
Sidebars
You can use the Designer Tools, Format Palette and Align and Size sidebars, in addition to the tools in the Toolbar, to
access common survey design functions. Buttons on the toolbars are active (not greyed out) only when they can be
applied to the object(s) you have selected or to the survey as a whole. See Sidebars, page 103, for general
information on working with sidebars.
The Designer Tools sidebar
The Designer Tools sidebar contains most of the tools you will need to build a professional looking survey.
Tool
To add
See
text, such as instructions and section
headings
Adding text, page 178
lines
Adding a line, page 179
pictures (in .gif, .png, .umf, .jpg, .jpeg,
.bmp, .ico, .emf or .wmf format)
Inserting pictures, page 179
navigation buttons
Adding navigation buttons, page 184
barcode
Adding a barcode, page 180
routing
Question routing, page 191
questions of various types
Adding a question with the Question Wizard, page 155
question tables
Adding a question table with the Question Table
Wizard, page 157
Sidebars | 149
Using the Designer Tools sidebar
To use a tool in the Designer Tools sidebar:
1
Click the button of the tool you want to use. (By default the tool will be deselected after you have used it;
press Shift while you click the button if you want the tool to remain selected after you have used it.)
2
Either:
Click the form to place a default size component.
Or:
Drag out a rectangle on the form to indicate the exact dimensions of the component.
The component will be added using the current style – see page 142 for more information about using KeyPoint
styles.
The Format Palette sidebar
Text formatting controls
If you’ve used a word processor, the text formatting controls on the Format Palette sidebar will look familiar to you.
They allow you to:
* Change the font type, size or colour
* Apply bold, italic or underline formatting to the text
* Left align, centre, right align or fully justify the text
* Choose whether text should wrap to the next line when it reaches the right-hand edge of the text box.
You can apply the same text format change to several objects at the same time by selecting them together before
applying the change – see Selecting objects directly on forms, page 130, for how to select multiple objects,
components of objects and objects lying lower in the stacking order.
150 | Chapter 8: Constructing a Survey
Object formatting controls
You use the object formatting controls on the Format Palette sidebar to set the fill colour of survey design objects, and
the colour and thickness of their borders and shadows.
Note that some properties do not apply to some types of object. For example, you change the colour and width of a
line object using the Border controls; it has no Fill or Shadow properties.
To apply a fill colour to an object:
1
Select the object.
2
If the Fill Transparent box is not ticked in the Format Palette sidebar, click Transparent to tick the box
and enable the Fill Colour box (the box shows the currently selected colour).
3
To change the selected colour:
a
Click in the Fill Colour box to display a standard Windows colour dialog box.
b Select the colour you want for the fill and click OK to close the dialog box.
To remove a fill colour from an object:
1
Select the object.
2
Click the Fill Transparent box to untick it (the Fill Colour box will be disabled).
To set the properties of an object’s border or shadow:
1
Select the object.
2
Select the width you want to set from the Border/Shadow Width drop-down list box in the Format Palette
sidebar.
The Border/Shadow Colour box will become enabled and show the currently selected colour.
Sidebars | 151
3
To change the selected colour:
a
Click in the Border/Shadow Colour box to display a standard Windows colour dialog box.
b Select the colour you want for the border/shadow and click OK to close the dialog box.
Changing the format of several objects
You can apply the same format change to several objects at the same time by selecting them together before applying
the change – see Selecting objects directly on forms, page 130, for how to select multiple objects, components of
objects and objects lying lower in the stacking order.
The Align and Size sidebar
You use the Align and Size sidebar to arrange survey Design and Presentation objects relative to each other – see
pages 173–174 for details.
Design considerations
This chapter covers the techniques of creating a survey within KeyPoint. However, as well as learning how to use
KeyPoint, you also need to consider the visual aspects of designing a survey. A clear and consistently presented survey
not only has more chance of being favourably received by respondents, but will also help to reduce errors.
Issues to think about include:
* Is the survey to be distributed on paper, electronically, or both? This will influence matters such as routing,
conditions and answer formats (masks) (see The Ask If/Valid If tab, page 204, Question routing, page 191,
Answers and answer formats, page 160, and Setting a text mask, page 197): you will have to include written
instructions for your respondents on a paper survey, but these can be built into the design for an electronic
version.
* Choices of fonts, font sizes and colours should be made with a view to how they will print or be viewed
on-screen. Avoid cramped text, and use typefaces and type styles consistently; for instance, always use the
same font for the question instructions.
* Your implementation of the survey should be tested very carefully before it is distributed. This applies
especially to routing, conditions and masks. Errors of this type may mean that the whole survey is invalidated
if, for example, respondents cannot answer the questions intended for them.
Following these tips will go a long way to making the survey more visually appealing. You can enhance the visual
appeal of the survey by making sure all the elements on the page are aligned correctly and that you make effective
use of lines, boxes, graphics (such as your company logo), shading and colour. Remember, though, that respondents
may find too many graphical elements and colours distracting. Colours are also more expensive to print than black
and white.
When you have made all the necessary decisions about fonts, colours, frames etc, you should save them as a Style of
your own in the Style Library. This helps to ensure that the survey has a consistent and professional appearance,
which will encourage respondents to complete it. See Working with styles, page 142.
152 | Chapter 8: Constructing a Survey
Adding questions
See Guidelines for compiling a survey, page 93, for general information and advice on devising and wording
questions.
There are two main types of questions:
* Open questions allow the respondents to answer in their own words
* Closed questions give the respondents a list of preselected responses. The respondents then choose the
response or set of responses that is most accurate for them from the list.
In KeyPoint, you can add and edit open questions with the following types of answers:
* Text
* Number
* Date/time
Adding questions | 153
You can add and edit closed questions with the following types of answers:
* Multiple choice
One type of multiple choice question is a simple yes/no question.
* Range multiple choice
Range multiple choice questions are effectively multiple choice questions with answer labels for the first and
last answers only. The response to the question is recorded as a number (score) corresponding to the answer
selected rather than a label.
* Ordered choice
You can also add menu/listbox questions, which are variations of multiple choice questions for use with
web-based surveys.
The multiple choice question example shows that the distinction between open and closed questions is not strict: the
example has four closed options, and a text field to write in an open answer.
The answers to closed questions can be either a set of discrete categories, or a set of points between two extremes. A
set of points between two extremes is often referred to as a “scale”.
154 | Chapter 8: Constructing a Survey
Range multiple choice questions provide another example of questions using a scale.
You may be able to combine several questions using the same scale. This makes it easier for the respondent to
complete the survey because there are fewer instructions to read. It also allows you to compare the responses to
different questions within the same survey. In KeyPoint, you can combine questions using the same scale into a
question table:
Calculated questions
In addition to open and closed questions, you can also add calculated questions. A calculated question allows you to
place a read-only ‘question’ that is a function of one or more of the respondent’s answers to other questions. Because
calculated questions don’t require an answer from respondents, you should either place them in a ‘For Office Use
Only’ section of the survey, make them non-printing or add them to the Survey Design form only after you’ve printed
the surveys. Note that if you include a calculated question in a web form, the answer will be updated automatically,
as the respondent enters answers to other questions.
Calculated questions make use of expressions. For more information on expressions, see Chapter 18, Using
Expressions.
You can create calculation columns directly in the Analysis Grid for use in a Presentation form object, such as a table,
without including them in a Design form. See Adding and editing Calculation columns, page 381, for how to define
calculation columns, and the rest of Chapter 15, Presenting Data, for information about Presentation forms.
Adding a question with the Question Wizard
This section shows you how to add questions using the Question Wizard, which is the default method of adding
questions in KeyPoint. However, you can also add questions manually – see Adding a question or question table
manually, page 166, for details. Also, see Adding a barcode, page 180, for how to add Barcode labels, which are a
special type of text question that defines areas of a printed survey where respondents can place barcode stickers
instead of entering text.
The instructions below show you how to add questions to an existing survey, but you can also add questions as part of
creating a new survey using the Survey Design Wizard. When the Survey Design Wizard asks you if you want to add
questions, choose Yes and click Next. You will be asked to specify what type of question you want to add, select the
required type, click Next to start the Question Wizard, then go to Step 4 in the following instructions.
Adding questions | 155
To add a question using the Question Wizard:
1
Click the Question Wizard button in the Designer Tools sidebar:
2
Click and drag an area on the form to the desired size, or just click to place it with the default size.
3
The Question Wizard starts. If an introductory page is displayed, click Next.
4
On the Question Type page, either:
a
Click on a radio button to select the type of question you want to add.
b Click Next to move on to the next step in the wizard.
Or, to use a question from the Asset Library (see The Asset Library, page 230):
a
Click Library to display the Asset Library dialog box – the Asset Library will hide all items apart from
questions.
b Select the required question in the Asset Library.
c
Click Use to select the question and move on to the next step in the wizard.
As an alternative to Steps 1–4, you can select the command for the required question type from the Insert menu. If you do this,
and Don’t show wizards for question tools is not ticked in the General tab of the Options (Tools menu) dialog box, the
Question Wizard will start up and you will be taken through the remaining steps. When you have completed the Wizard, the
question will be placed on the form with the default size and at a default position.
5
On the Question Text page:
a
Enter the text of the question, including any instructions for the respondent.
b Click Next.
6
The actions required in this step depend on the type of question:
* This step does not appear for text questions, so go straight to Step 8.
* For number and date questions, specify the form you would like the answer(s) to take on the Number
Answer Format or Date Answer Format page.
* For multiple choice, range multiple choice, ordered choice and menu/listbox questions, enter answer
options for the question on the Answers or Answer Range page.
For multiple choice questions, you can also enter scores for each option.
For range multiple choice questions, you enter labels and scores for the first and last answers only
* For calculated questions:
a
Click New to display the Expressions Editor dialog box.
b Use the Expressions Editor dialog box to enter the expression for the calculation. For more
information on expressions, see Chapter 18, Using Expressions.
c
Click OK to close the Expressions Editor dialog box.
156 | Chapter 8: Constructing a Survey
For more information on answers, answer formats and scores, see Answers and answer formats,
page 160, and Scores, page 167.
7
When you have set the formats/answers/expression, click Next.
8
On the Question Name page:
a
Enter a name for the question – see Question names and analysis groups after these instructions for
further information about question names.
b Select Answer Required if you want to ensure the question is answered.
If the option is selected, respondents filling in a web or direct-entry survey will be unable to submit the
survey without answering the question. Also, you will not be able to save a response in the Responses
workspace unless the question is answered – see Chapter 9, Processing Responses.
c
9
Choose an analysis group for the question from the drop-down list in the Analysis group box, or type
in a name for a new analysis group, or, if you do not want to include the question in an analysis group,
leave it blank. See Question names and analysis groups after these instructions for further information
about analysis groups.
If you are adding a question to an existing form, click Finish to place the question on the form.
(Depending on options set, you may be able to click Next to display a final information page if required; if
you do, click Finish in that page to place the question on the form.)
If you are using the Survey Design Wizard, click Next – you will be given the opportunity to add more
questions or question tables.
Question names and analysis groups
The question name is used to identify the question in KeyPoint. For example, it is used to identify the question in an
expression if you want the value of the expression to depend on the answer to the question – see Chapter 18, Using
Expressions. The question name is also used to identify questions in the Presentation workspace, for example, in the
Analysis Grid or when you select questions to include in tables and graphs – see Chapter 15, Presenting Data.
Analysis groups are used to label columns in the Analysis grid (see The Analysis grid, page 372). In the Analysis grid,
you can choose to show or hide all members of an Analysis group together. When you create a question table (see
the next section, Adding a question table with the Question Table Wizard) an analysis group is created for the table
and all the questions in the table are assigned to it by default. Analysis groups are not created for individual questions
by default, but you can create them as required, or assign an individual question to an existing analysis group.
The small blue cross
A small blue cross at the bottom right-hand corner of any object, such as a question number, question text, or answer
area, indicates that it may be cropped when you print the survey. To correct this, select the object and drag one of its
handles to make it larger. The blue cross disappears when the object’s bounding box is large enough.
Adding a question table with the Question Table Wizard
This section shows you how to add question tables using the Question Table Wizard, which is the default method of
adding question tables in KeyPoint. However, you can also add question tables manually – see Adding a question or
question table manually, page 166, for details.
Adding questions | 157
The instructions show you how to add a question table to an existing survey, but you can also add question tables as
part of creating a new survey using the Survey Design Wizard. When the Survey Design Wizard asks you if you want
to add questions, choose I want to add a question table, click Next, then go to Step 4 in the following instructions.
To add a question table with the Question Table Wizard:
1
Click the Question Table Wizard button in the Designer Tools sidebar.
Alternatively, select Question Table (Insert menu) and go straight to Step 3 – the table will be inserted
automatically at the default position and with the default size.
2
Click on the form, or drag out the area you want the table to occupy. The Question Table Wizard starts.
If the Wizard does not start, make sure that Don’t show wizards for question tools is not ticked in the General page of the
Options (Tools menu) dialog box.
3
If an introductory page is displayed, click Next.
4
In the Question Table Introduction page:
a
Enter a heading for the question table: this will apply to all the questions. For example, you might
enter ‘How often do you consume the following drinks?’, where the questions will be different types of
drink.
b Click Next.
5
On the Question Type page, either:
a
Click on a radio button to select the type of question you want to add.
b Click Next to move on to the next step in the wizard.
Or, to use a question from the Asset Library (see The Asset Library, page 230):
a
Click Library to display the Asset Library dialog box – the Asset Library will hide all items apart from
questions.
b Select the required question in the Asset Library.
c
Click Use to select the question and move on to the next step in the wizard.
For text or calculated questions, go straight to Step 7; for the other question types, go to Step 6.
6
The actions required in this step depend on the type of question (it does not apply to text or calculated
questions):
* For number and date questions, specify the form you would like the answer(s) to take on the Number
Answer Format or Date Answer Format page.
* For multiple choice, range multiple choice, ordered choice and menu/listbox questions, enter answer
options for the question on the Answers or Answer Range page.
For multiple choice questions, you can also enter scores for each option.
For more information on answers, answer formats and scores, see Answers and answer formats,
page 160, and Scores, page 167.
When you have set the formats/answers, click Next.
158 | Chapter 8: Constructing a Survey
7
On the Question Text page:
a
Enter the text of the question, including any instructions for the respondent.
b Click Next.
For calculated questions go to Step 8; for all other types of question, go to Step 9.
8
For a calculated question table:
a
Click New to display the Expressions Editor dialog box.
b Use the Expressions Editor dialog box to enter the expression for the calculation. For more information
on expressions, see Chapter 18, Using Expressions.
c
Click OK to close the Expressions Editor dialog box.
d Click Next in the Question Table Wizard.
9
On the Question Name page:
a
Enter a name for the question – see Question names and analysis groups, page 157, for more
information about question names.
b Select Answer Required if you want to ensure the question is answered.
See Step 6 in the previous instructions for more information about these settings.
b Click Next.
10
In the Add more questions page:
a
Either:
If you want to add more questions to the question table, choose Next question.
Or:
If you have added all the questions you want, choose No more questions.
b Click Next.
If you chose to add more questions, the wizard will take you back to Step 6 (Step 7 for text and calculated
questions) for the next question; otherwise, go on to the next step.
11
In the Table name page, enter a name for the table – this name will be used, for example, as the analysis
group name over the question columns for the table in the Analysis Grid (see Question names and
analysis groups, page 157, for more information about analysis groups).
12
If you are adding a question table to an existing form, click Finish to place the table on the form.
(Depending on the options set, you may be able to click Next to display a final information page if
required; if you do, click Finish in that page to place the table on the form.)
If you are using the Survey Design Wizard, click Next – you will be given the opportunity to add more
questions or question tables.
The question table will be placed on the Design form. If the table is too big to fit at the point where you put it on the
page, you will only see the first part of the table. You can either move the table, possibly onto a new page, in order to
see the complete table, or you can split it across more than one page – see Splitting a question table, page 171.
Adding questions | 159
Answers and answer formats
This section describes how to enter answer options and answer formats for questions using the Question Wizard.
The Question Wizard allows you to enter the answer options for multiple choice, range multiple choice and ordered
choice questions: for multiple choice questions, you can also enter a score for each option; for range multiple choice
questions, you enter labels and scores for the first and last answers only. For numeric and date questions, the wizard
allows you to specify the format that must be used when the answer is entered.
You can also edit the answers for multiple choice and ordered choice questions and answer formats for date and
numeric questions using the Properties sidebar – see page 195. You can also use the Properties sidebar to specify a
format for text answers – see page 197.
Setting multiple choice answers
The picture shows the wizard for a Multiple choice (menu/listboxes) question; the Menu style and List style radio
buttons do not appear for Multiple choice (tickboxes) question, but otherwise the wizard is identical.
In the Answers page, you specify the possible answers, with an optional ‘Other’ choice if you don’t want
respondents to be limited to the answers in your list. There is also a tick box allowing you to limit the choice to a
single answer when you enter data in the Responses workspace (see Chapter 9, Processing Responses) or when
respondents complete a web survey.
160 | Chapter 8: Constructing a Survey
You can click the Predefined button to choose from a wide range of predefined options, or you can enter your own
answers.
To enter your own answers:
1
Click in the row marked with an asterisk and type the first option in the Answers column.
2
Tab to the Scores column – or click in it – and enter a score if required. For more information on scores,
see Scores, page 167.
3
Tab to the next row, or click in it. Type the next option and a score if required.
4
Continue until you have typed in all the options.
5
If you want to change the order of the options, select the option you want to move and click on the up or
down arrow to move the option up or down in the list.
6
Clear the Only one choice allowed tick box if you want the respondent to be able to select more than
one option.
7
Click the With other tick box if you want the Other option to be included in the question options.
8
For multiple choice (menu/listboxes) question, click the Menu style or List style radio button to choose
which style to use (if you have cleared Only one choice allowed, the Menu style radio button will be
disabled, since you can only choose one option from a menu).
Setting range multiple choice answers
Adding questions | 161
In range multiple choice questions the respondent is presented with a series of tick boxes with only the first and last
tick box labelled – these represent the extremes of some range (for example, from ‘Strongly agree’ to ‘Strongly
disagree’), with the intermediate boxes implicitly representing intermediate points in the range.
In the Question Wizard’s Answer Range page, you specify the labels to be given to the answers at the ends of the
range. You must also assign a score to each of these labels. The ‘From’ score must be less than the ‘To’ score, and the
difference (plus 1) between these scores determines the number of answers – for example, if the first score is 3 and
the last score is 7, there will be a total of 5 answers, with scores of 3, 4, 5, 6, 7.
Note that although it is possible to set the ‘From’ score to 0, it would be a bad idea in most circumstances. This is
because a response giving this answer would not be distinguished from a response giving no answer, since this is also
assigned a score of 0.
When KeyPoint stores a response to a range multiple choice question, it just stores the score corresponding to the
selected answer, rather than a label.
By default, when KeyPoint places the question on the form it places the answer with the lowest score (the ‘From’
answer) first and the answer with the highest score (the ‘To’ answer) last, but you can tick Reverse if you want them
placed the other way round.
You can click the Predefined button to choose from a wide range of predefined answers, or you can enter your own
answers.
To enter your own answers (or edit the selected predefined answers):
1
Click in the ‘From’ Label box and enter the label for the answer with the lowest score.
2
Tab to the ‘From’ Score box, or click in it, and enter a score – you can type a number directly into the box
or click the up/down arrow buttons. For more information on scores, see Scores, page 167.
3
Repeat Steps 1 and 2 for the ‘To’ Label and Score boxes: the ‘To’ score must be larger than the ‘From’
score.
4
Tick Reverse if you want the answer with the highest score (the ‘To’ answer) to appear first and the answer
with the lowest score (the ‘From’ answer) to appear last in the question.
162 | Chapter 8: Constructing a Survey
Setting ordered choice answers
In the Answers page, you specify the range of possible answers, with an optional ‘Other’ choice if you don’t want
respondents to be limited to the answers in your list. You can click the Predefined button to choose from a wide
range of predefined options, or you can enter your own answers:
1
Click in the row marked with an asterisk and type the first option.
2
Tab to the next row – or click in it – and type the next option.
3
Continue until you have typed in all the options.
4
If you want to change the order of the options, select the option you want to move and click on the up or
down arrow to move the option up or down in the list.
5
Click the With other tick box if you want the Other option to be included in the question options.
Adding questions | 163
Setting number answer formats
In the Number Answer Format page:
1
The Format box allows you to specify the maximum number of digits a respondent may enter, and also
control what appears if they enter less than the maximum number of digits. A 0 and a # both represent a
single digit – the maximum number of digits is the sum of 0 and # characters. The leftmost 0 character
determines how many leading 0s (if any) are inserted if the respondent does not enter this maximum
number of characters. For example, #00 allows a maximum of three digits, and will add a leading 0 if the
respondent enters a single character (for example 03).
2
Use the up and down arrows to set the number of decimal places.
If you set the decimal places to more than 0, the Format box will show the decimal point, then a 0
character followed by the appropriate number of # characters (one less than the number of decimal
places). You can edit these as in Step 1 – the position of the rightmost 0 character after the decimal point
determines the number of trailing 0s displayed. For example, with a format of ##0.000, if the respondent
enters .5, it will display 0.500.
3
Click the Use thousand’s separator tick box to include a separator after every set of three digits in the
number – the separator is defined in the Windows Regional Settings Properties dialog box.
4
Click the Currency tick box to display the number as a currency. Edit the currency symbol if required.
164 | Chapter 8: Constructing a Survey
Setting date answer formats
In the Date Answer Format page:
1
To set the date/time format, do one of (or a combination of) the following:
* Choose one of the built-in formats from the Format drop-down list box
* Type in your own format by hand
* Use the controls in the Build mask and Order boxes to define the format.
Whichever method you use, the Preview box shows you an example of a date/time in the selected format.
2
In the Options box, choose whether to use:
* Edit style: if you want the answers to the date question to be entered in an edit box.
* Tick Show date/time picker if you want to attach a date/time picker to the edit box so that
respondents filling in web surveys and those entering data into KeyPoint by completing forms in
the Responses workspace can enter the answer by selecting a date and/or time using a calendar
control – see the example after these instructions.
Or:
* Menu style: if you want users to select their answers to the date question from drop-down menus.
a
Choose the range of years (from Start year to Finish year) to appear in the year menu.
b
Choose whether to Use month names or numbers.
c
Choose the Minutes interval – for example, choose 15 if you want the minutes menu to allow the
user to choose 0, 15, 30, 45 only.
Adding questions | 165
When to use the date/time picker
Choose Edit style with Show date/time picker unticked when printing a paper-based survey – you can change the
design later to make data entry easier.
If you use Edit style for a web survey or for data entry, users can type in their answers even if Show date/time picker
is ticked, so you will need to warn them to use the correct format by including instructions giving the required format
on the form or include a hint using the Question tab of the Properties sidebar (see page 196).
If you choose Edit style with Show date/time picker ticked, a drop-down arrow will be added to the edit box in the
form:
If the user clicks the drop-down arrow, the time/date picker will be displayed, allowing them to select the date/time:
When they click on a day, the date/time picker will close and the selected date/time entered in the edit box:
Adding a question or question table manually
As well as adding questions and question tables using wizards, you can add them in one step with default settings,
which you can then change manually.
To set KeyPoint for adding questions and question tables manually:
1
Select Options (tools menu) to display the Options dialog box.
2
On the General page, tick Don’t show wizards for question tools.
3
Display the Designer page.
166 | Chapter 8: Constructing a Survey
4
In the Designing Options box set the default number of answers to be included in multiple choice and
ordered choice questions, and the default number of multiple choice questions to be included in question
tables.
5
Click OK to close the Options dialog box.
To add a question manually:
Choose the command for the required type of question from the Insert menu.
The question will be placed on the form with default settings.
When Don’t show wizards for question tools is set, you can also use the Question tool in the Designer Tools sidebar to add a
multiple-choice question manually.
To add a question table manually:
Choose Question table (Insert menu).
The question table will be placed on the form with default settings.
See Editing questions, page 168, and The Properties sidebar, page 195, for how to change the questions from the
default settings.
Scores
Question answers are automatically assigned scores in KeyPoint. These can be modified for multiple choice questions
and range multiple choice questions, but not for other question types.
Scores can help you analyse the data because you can use them in expressions. You can also set up routing based on
scores (see Question routing, page 191).
The following table shows how scores are calculated for different types of questions.
Question type
Scoring method
Multiple choice
By default, not answered scores 0. First option scores 1, second option scores 2, and so
on. ‘Other’ scores 1 more than the highest scoring option.
If you edit the score values, any answer you do not assign a score to gives 0, otherwise
the score is the value you have assigned.
If you can choose more than one answer, the total score for the question is the sum of
the scores of the selected answers.
Range multiple choice
Not answered scores 0. Answers at the ends of the range score the assigned scores and
intermediate answers the score corresponding to their position in the range.
Ordered choice
All answers score 0, but the ranking of answers can be determined using the Choice
and Order functions detailed in Chapter 18, Using Expressions.
Text
All answers score 0
Numeric
Integer part of answer
Date/Time
Date part is converted to an integer
Adding questions | 167
Editing questions
In addition to the techniques described in the following subsections, you can use the Properties sidebar to edit
questions, see The Properties sidebar, page 195.
Editing a question using the Question Wizard
The easiest way to edit a question is to use the Question Wizard.
To edit a question using the Question Wizard:
1
Select the question.
2
Right-click the question and select Wizard.
3
Make the required changes in the Question Wizard.
4
Click Finish.
Editing text
To edit text in a question (or other object):
Double-click the text box.
The blue handles become red handles and an editing caret appears in the text box so that you can edit the text.
You can use this technique to edit the answer options for a multiple choice, range multiple choice or ordered choice
question without having to use the Question Wizard or the Properties sidebar.
Labels and codes
When you create a multiple choice, range multiple choice or ordered choice question, the option text you enter is
used in two distinct ways:
* as the text labelling the option on the survey form itself – this is called the option label
* as a code to identify the option in the KeyPoint response database – this is called the option code.
After you have created the question, you can change the labels and codes independently. Also, you can change the
label (but not the code) for an option independently on each copy form – for example, you can use different
languages for the same option on different copy forms.
You can edit a label on the master form using the Answers tab in the Properties dialog box and on a copy form using
the Labels tab in the Properties dialog box. Alternatively, you can edit a label on any form by editing the option text
directly in the form itself (see previous section). Note that when you edit a label, you are only editing the label for the
currently selected form (master or copy) – the labels on other forms and the code are unchanged.
You can edit the code for an option using the Answers tab in the Properties dialog box, but only when the master
form is selected. One reason you may want to change the code is that labels are often quite long so that respondents
can understand clearly what is being asked, but this means they can take up a lot of space in presentation tables and
graphs. To get around this problem, you can use an abbreviated form of the label for the code, and then choose to
use the codes in presentation tables and graphs – you can choose to use the codes or the labels from any of the copy
forms in presentation objects.
168 | Chapter 8: Constructing a Survey
For more details of how to change codes and labels on the master form, see The Answers tab, page 199, and for how
to change labels on copy forms, see The Labels tab, page 217.
Adding extra lines to an open question
To add extra lines to a text, date or number question (or the ‘Other’ option in a multiple choice question):
1
Select the answer part of the question.
2
Using the corner handles, drag a bigger box for the answer.
KeyPoint automatically adds extra lines to the answer.
When you enter text into a text answer box on the Response form or a web form, if you fill the box, a scroll bar will
appear and you will be able to continue adding more text – the scroll bar allows you to scroll the box so that you can
view all the text.
Changing the answer type of a question
After you’ve placed a question, you can change the answer type without having to replace the question. You can
change an open question type (text, numeric or date) to another open question type, or a closed question type
(multiple choice, range multiple choice, ordered choice or calculated) to another closed question type. However, it is
important to note that if you have already entered some responses, changing the question type may cause loss of
data.
To change the question type:
1
Right-click on the question to pop up a menu.
The menu contains a Convert sub-menu containing a list of commands allowing you to change the
question to another type.
2
Select the command for the required question type.
You will probably need to edit the question’s properties after you have changed its type. For example, if you change a
numeric question into a date question, you will need to change the format mask, if there is one.
Renumbering questions
When you insert questions into the middle of the survey, you need to renumber the questions following it.
In KeyPoint you can do this in two ways:
* Switch on auto renumbering for the survey – click an empty area of the page and display the Properties
sidebar, then select the Auto Renumber tick box
* Switch off auto renumbering (see previous bullet point), then select Renumber Questions (Tools menu).
If you are creating a long survey form, you may find that KeyPoint is rather slow if you have Auto Renumber on all
the time. If this happens, you can either renumber questions manually, or switch Auto Renumber back on only
occasionally.
Adding questions | 169
Moving and copying questions
The easiest way to move a question is to drag it to the new location.
You cannot drag a question so that any part of it is off the left- or right-hand side of the page, or in the space between
pages. You can drag a question from one page to another, but note that it does not appear to move until the pointer
is over the target page.
You can also move (or copy) a question using the Cut, Copy and Paste commands. Cutting a question will remove it
from the form; copying will leave the original on the form.
Cutting/copying and pasting a question
To cut or copy and then paste a question:
1
Select the question you want to move or copy.
2
Select Cut or Copy (Edit menu) – you can also right-click the question and select a command from the
pop-up menu.
3
Click on the page of the form in which you want to place the question.
4
Select Paste (Edit menu).
KeyPoint will paste the question (or any other object you have copied) at the same position on the page as the
original copied question (or object), unless there is already an object at that position, in which case it will be pasted at
a slightly displaced position. This means, for example, if you are pasting onto the same page, the copy will not be
pasted in exactly the same position as the original, unless you have moved it. However, this can cause problems, for
example, if you have arranged two objects so that their top left-hand corners coincide and you want to copy them
both onto another form – if you use the Paste (Edit menu) or standard Ctrl+V keyboard shortcut, one of the objects
would be displaced relative to the other when they are pasted. To avoid this problem, you can use the Ctrl+Shift+V
keyboard shortcut to paste all the objects in their original positions and in the same page as in the original form. If the
current form does not have that page, it will be added so that the objects can be pasted onto it – for example if you
copied the objects from page 3 in the original form and the current form only has one page, two pages will be added
to the current form and the objects pasted onto the new page 3.
You can use the Cut, Copy and Paste commands to cut/copy and paste between surveys as well as within a survey. If
you cut a question and paste it into the same survey, the question you paste will have the same question name.
However, any response data for the question will be lost. If you paste a question into a survey that already has a
question with that name, a new question name will be generated for the pasted question by adding _1 (or_2 etc, if
necessary) to the end of the question name.
When you copy a question on a master form and paste it somewhere else on the form, a new question will be created. You can
also paste the ‘question’ on to a copy form, but when you do this you are actually only pasting a picture of the question rather
than creating a new question.
170 | Chapter 8: Constructing a Survey
Splitting a question table
If a question table is too big to fit on a page, you can split it over two or more pages. You can do this automatically
(KeyPoint chooses where to make the split) or manually (you choose where to make the split). You can only split the
table automatically if the table does not fit within the printing area of the page; you can split a table manually at any
time.
To split a question table automatically across pages:
1
Ctrl+click on the question table until the whole table is selected.
2
Right-click on the selected table and select Split table.
The table will be split automatically so that it fits within the pages of the form – if necessary, new pages will be added.
To split a question table manually:
1
Ctrl+click on the question table until the whole table is selected.
2
Right-click on the selected table and select Split table at position.
When the cursor is over the table it changes shape:
3
Move the cursor to the point you want to split the table:
and click.
The table will be split at the selected point, and if the second part of the table does not fit on the same page, it will be
placed on the next page (a new page will be added if there isn’t a next page).
If required, you can move questions between different tables, or different parts of a split table by selecting the
question and Ctrl+dragging it to its new position.
When you split a table the questions in the two parts still remain in the same analysis group, so it is still easy to
include all questions in presentation tables and charts – see Chapter 15, Presenting Data, for details. On the other
hand, split tables are treated as separate tables for validation and routing purposes.
Merging a split table
To merge two or more parts of a Split table:
1
Select the parts in the order you want them merged – the first part you select will appear above the
second part, and so on.
2
Right-click in the selection and select Merge tables.
Adding questions | 171
Aligning questions and other objects
There are several tools and techniques to help you align questions and other objects on the page:
* Automatic layout
* The Auto Size command
* The Realign command
* The Align and Size sidebar
* The rulers
* The grid
* Line-ups
* Column lines
* X and Y co-ordinates
* Keyboard nudging
* Grouping.
Automatic layout
When you place a question on the Design form, KeyPoint determines an appropriate size for it, and arranges its
components so that they are suitably aligned. If you alter the question by resizing or reshaping it, or by changing
features such as its font size, KeyPoint automatically realigns the components so that the layout is preserved as far as
possible. You can tell whether a question is in automatic layout mode from the fact that its handles are green when
the whole question is selected; they are blue in manual layout mode.
Provided you do not ‘break up’ questions by moving any part of them separately – such as the question text, number
or answer – the question stays in automatic layout mode, and will be realigned after any changes you make.
Auto sizing
As well as automatically aligning the components within a question, you can get KeyPoint to adjust the size of
questions automatically, depending on how much space there is between the left-hand edge of the question and the
right-hand edge of the paper, or the first column line to the right. You may need to do this if you have moved parts of
the question and are not satisfied with the results.
To auto-size a question, select the whole question, right-click and select Auto Size from the pop-up menu.
Re-arranging question components manually and using Realign
As a general rule, you can rely on KeyPoint’s automatic layout to align the components appropriately in a question.
However, as you become more experienced, you may find you want more control over how things look. KeyPoint
therefore allows you to move the individual components of an object within the object that contains it.
For example, moving a question component within a question puts the question in manual layout mode; the
question’s handles are now blue when it is selected. When the question is in manual mode, the individual
components are not realigned automatically if you reshape or resize the question as a whole.
When you move an object within a containing object, the containing object is switched to manual mode, but its
components remain in automatic mode. For example, if you move a question within a question table, the question
172 | Chapter 8: Constructing a Survey
table will be switched to manual mode, but the question you moved will still be in automatic mode. To switch an
object and all its components to manual mode, select the whole of the object by Ctrl+clicking on any part of it,
right-click to pop up a menu, and select Manual Mode - All Objects.
To realign an object automatically and set it back to automatic layout mode:
1
Select the whole of the object by Ctrl+clicking on any part of it. Notice that the selection handles are
blue, not green, to show that it is in manual layout mode.
2
Right-click to pop up a menu, and select Realign.
The question and answer(s) will realign and the selection handles turn green again, showing that the question is back
in automatic layout mode.
Note that using Auto Size also sets an object back into automatic layout mode.
Using the Align and Size sidebar
You use the Align and Size sidebar to arrange survey Design and Presentation objects relative to each other (for
information on presentations, see Chapter 15, Presenting Data). See Sidebars, page 103, for general information on
working with sidebars.
Most of the align and size operations require you to select several objects together before applying the operation –
see Selecting objects directly on forms, page 130, for how to select multiple objects, components of objects and
objects lying lower in the stacking order.
The following table shows the action of each of the buttons.
Button
Name
Use this button to…
Align left edges
align the left-hand edges of all selected objects to the left-hand edge of the
object you selected first
Align right edges
align the right-hand edges of all selected objects to the right-hand edge of the
object you selected first
Align tops
align the top edges of all selected objects to the top edge of the object you
selected first
Align bottoms
align the bottom edges of all selected objects to the bottom edge of the object
you selected first
Align horizontal
centres
align the horizontal centres of all selected objects to the horizontal centre of
the object you selected first
Align vertical centres
align the vertical centres of all selected objects to the vertical centre of the
object you selected first
Centre horizontally
centre the selected object(s) horizontally within its (their) containing object –
see the section following this table
Adding questions | 173
Button
Name
Use this button to…
Centre vertically
centre the selected object(s) vertically within its (their) containing object – see
the section following this table
Space equally
horizontally
move the intermediate selected objects so that they are spaced equally
horizontally between those that are furthest apart
Space equally
vertically
move the intermediate selected objects so that they are spaced equally
vertically between those that are furthest apart
Grow to largest
horizontally
resize the selected objects horizontally to be the same size as the largest
Grow to largest
vertically
resize the selected objects vertically to be the same size as the largest
Shrink to smallest
horizontally
resize the selected objects horizontally to be the same size as the smallest
Shrink to smallest
vertically
resize the selected objects vertically to be the same size as the smallest
Centring
The Centre horizontally and Centre vertically buttons centre the selected object(s) within the containing object. For
example, if you select an option in a multiple choice question, the containing object is the multiple choice question:
pressing the button will centre the option within the multiple choice question. If you select the complete multiple
choice question, the containing object is the form: pressing the button will centre the question within the form.
With the exception of the Centre horizontally and Centre vertically buttons, which can be applied to a single object,
you will need to select at least two objects (three objects for the spacing buttons) to enable the buttons.
Selecting several objects together
To select several objects together:
* Drag around the objects – all objects within or overlapping the rectangle you drag out will be selected
* Shift+click on an object to add it to the current selection of objects (you can also remove an object from a
selection by Shift+clicking on it).
174 | Chapter 8: Constructing a Survey
The rulers
The rulers show horizontal and vertical page measurements in the unit selected in the Survey page of the Options
(Tools menu) dialog box.
To make it easier to align objects, KeyPoint also has a thin blue line on each ruler, which marks the current position of
the pointer.
Line-ups
Line-ups are light blue horizontal and vertical lines.
You can choose to make the Line-Ups Visible in the Designer page of the Options dialog box (Tools menu).
If you’ve chosen to show line-ups, they will appear when you drag a question or other object. Line-ups allow you to
see when the object you are dragging is in line with another object on the form.
The grid
The grid – regularly spaced horizontal and vertical lines on the page – allows you to align questions and other objects
relative to the intervals on the grid. If you choose to ‘snap to grid’, objects will be aligned automatically along the
nearest horizontal and vertical grid lines when you place them.
You can choose the grid dimensions, whether to make the Grid Visible and whether to use Snap to Grid, in the
Designer page of the Options dialog box (Tools menu).
Column lines
Column lines allow you to divide sections of the page into two or more columns. Although you don’t need column
lines in order to place more than one question across a page, renumbering will work best if you use them.
To insert a column line:
1
Select Column Line (Insert menu).
The column line will be inserted at the left-hand margin:
2
Drag the column line to the required position and length – drag the handles at the ends of the line to
adjust the length; drag the centre of the line to adjust its position.
Adding questions | 175
X and Y co-ordinates
The X and Y co-ordinates of the mouse pointer appear on the status bar. The X co-ordinate gives you the horizontal
position of the mouse pointer and the Y co-ordinate gives you the vertical position.
Keyboard nudging
You can also use the keyboard to ‘nudge’ objects:
Keys
Action
Ctrl+cursor arrow
Move selected object(s) 1 pixel in the arrow direction
Alt+cursor arrow
Move selected object(s) 5 pixels in the arrow direction
Shift+right or down cursor arrow
Stretch selected object(s) 1 pixel in the arrow direction
Shift+left or up cursor arrow
Shrink selected object(s) 1 pixel in the arrow direction
Grouping objects
Once you have aligned questions and objects relative to each other, you can keep their relative positions fixed by
creating an object group.
To group a number of objects:
1
Select the objects. See Selecting objects directly on forms, page 130, for how to select multiple objects,
components of objects and objects lying lower in the stacking order.
2
Select Group (Format menu).
When you select an object within a group, its handles are grey and cannot be dragged to reshape the object
independently.
To split a group so that you can move the individual objects independently:
1
Select the group.
2
Select Ungroup (Format menu).
Inserting and removing white space in a survey
The Add Paper and Remove Paper commands in the Form menu allow you to add or remove white space in the
survey.
The Add Page and Remove Page commands in the Form menu and buttons in the Toolbar allow you to add or
remove complete pages in the survey.
You can also add and remove pages using the Page Manager – see Using the Page Manager to add, remove or
reorder pages, page 128.
176 | Chapter 8: Constructing a Survey
Adding paper
To add paper to the survey:
1
Choose Add Paper (Form menu).
2
On the page, drag a box to show how much space you want to add there.
All questions below the space are moved downwards.
To add a complete new page at the end of the survey:
Click the Add Page button on the Toolbar or choose Add Page (Form menu).
Removing paper
To remove paper from the survey:
1
Choose Remove Paper (Form menu).
2
On the page, drag a box to show how much space you want to remove at that position.
All questions below the space are moved upwards.
To remove a complete page and all the objects on it:
1
Click in the page you want to remove. If you do not click in the page to identify the page to be removed, a
different page may be removed. If you do remove the wrong page, use Undo (Edit menu) to restore it.
2
Click the Remove Page button on the Toolbar or choose Remove Page (Form menu).
Adding other objects to a survey
As well as questions, you can add the following types of objects to surveys:
* Text
* Lines
* Rectangles
* Pictures
* Barcodes
* Navigation buttons
* OLE objects
* Question numbers.
Adding other objects to a survey | 177
Adding text
To add text to a survey:
1
Click the Text button in the Designer Tools sidebar.
2
Drag a frame for the text on the survey form.
3
Enter the text in the frame.
The text appears in the style you selected when you set up the survey.
You can edit the text by double-clicking on it, and you can change its appearance by using the controls in the Text
box in the Format Palette sidebar. For more information, see Text formatting controls, page 150.
Adding HTML text to a survey ‘by hand’
If you are familiar with HTML, you can add text objects to a survey design in HTML code.
To specify that the text in a text object is to be interpreted as HTML code:
1
Click on the text object to select it.
2
Display the Properties sidebar – see Working with sidebars, page 103.
3
Tick Is HTML.
For example, with Is HTML ticked, the text
<A href="http://www.speedwellsoftware.com/">KeyPoint</A>
will be displayed as a hyperlink – KeyPoint– leading to the Speedwell website.
Adding answers to text
You can add the answer given in the currently selected response to any editable text in a form, such as a text object
or the text in a question.
To add an answer to text in a form:
1
Double-click on the text object to make it editable.
2
Right-click at the point in the text where you want to add the answer to display a context menu.
3
Click on Insert Answer to display a submenu listing the questions in the survey.
3
Select the required question from the Insert Answer submenu.
For a web survey and a response form in the Responses workspace, the answer field in the text shows the answer
given to the question in the web survey or current response.
In the Design and Presentation workspace, you can choose whether to show the name of the question or the answer
given to the question in the response currently selected in the Responses workspace.
To choose what is shown in ‘answers’ in text fields in the Design and Presentation workspace:
Select Show Text Fields (View menu).
178 | Chapter 8: Constructing a Survey
To edit an answer in text:
1
Double-click on the text object to make it editable.
2
Right-click in the answer to display a context menu.
3
Select Edit Answer to display the Calculation dialog box.
4
Click Edit to display the Expression Editor – see Building an expression for instructions, page 475.
You can use the Expression Editor to add any expression to the text, not just question answers.
Adding a line
To add a line to a survey:
1
Click the Line button in the Designer Tools sidebar.
2
Drag the line on the form – hold the shift key down as you drag the line to constrain it to be horizontal,
vertical or at 45°.
You can change the appearance of the line using the controls in the Format Palette sidebar (see Object formatting
controls, page 151).
Adding a rectangle
To add a rectangle to a survey:
1
Select Rectangle (Insert menu).
A rectangle will be placed on the form with a default size and position.
2
Drag the rectangle to the required position and drag its corners to reshape and resize it as required – see
Resizing, moving and copying objects, page 190.
You can change the appearance of the rectangle using the controls in the Format Palette sidebar (see Object
formatting controls, page 151).
It is usually better to use the border controls in the Format Palette sidebar to place rectangles around questions and
text, instead of creating a separate rectangle using the Rectangle tool.
Adding a picture
To add a picture to a survey:
1
Click the Picture button in the Designer Tools sidebar.
2
Drag a frame for the picture on the survey form.
3
In the Open dialog box, browse to the picture file and select it.
Adding other objects to a survey | 179
The preview panel on the right shows the picture you have selected. If you want to preview the picture in
a separate window, right-click on the preview and select Preview from the context menu displayed.
KeyPoint picture objects can contain a wide range of picture formats including jpeg, png, bmp, emf, wmf, ico, umf and gif. They
can also display gif animations – select Animations in the Designer page of the Options (Tools menu) dialog box to enable the
animation of animated gif files in KeyPoint.
4
Click the Open button.
You can use the same methods as for other objects to move and resize pictures – see Resizing, moving and copying
objects, page 190. By default, Maintain picture aspect ratio is selected for pictures in the Inspector tab in the
Properties sidebar (see Inspector tab, page 219), but you can deselect it if required if you want to change the
picture’s aspect ratio.
Making a picture ‘transparent’
You can make a picture ‘transparent’ if required. In a transparent picture, any parts of the picture using the
‘transparent’ colour will be clear so that you can see any objects, or the background, lying behind those parts of the
picture. For pictures in GIF format, you can use a paint program to specify which colour should be treated as
transparent; for other formats, KeyPoint will use the colour in the picture’s bottom left hand pixel.
To make a picture transparent:
1
Select the picture and display the Properties sidebar.
2
Tick Transparent in the General box.
3
If you want to use transparent images in web surveys:
a
Select Options (Tools menu).
b Display the Designer page.
c
Select PNG from the ‘Format of images when exporting’ drop-down list box.
Adding a barcode
The KeyPoint Scanning Module (see Chapter 10, KeyPoint Scanning Module) supports the use of barcodes in two
ways:
* Preprinted barcodes: these are included on the surveys when they are printed and identify the survey, form,
page and respondent – see the following section for more details.
* Barcode labels: these are a special type of text question that define areas of a printed survey form where
respondents can place barcode stickers instead of entering text – see Barcode labels, page 183, for more
details.
180 | Chapter 8: Constructing a Survey
Preprinted barcodes
You can use preprinted barcodes to identify the survey, form and page when the returned survey is scanned. Also, if
you use the Invitation Manager to print the surveys (see Using the Invitations Wizard for a paper-based survey,
page 237), the barcode will also identify the respondent. The advantages of using preprinted barcodes are:
* Verification that the scanned response belongs to the survey form currently selected in KeyPoint when you
input it – see Inputting scanned surveys, page 283, for details of what happens if you try to input a scan into
the wrong survey form.
* More accurate and reliable identification of the respondent if the surveys were printed using the Invitation
Manager.
* If the surveys were printed using the Invitation Manager and the barcode is printed on all pages, KeyPoint can
identify the page number and respondent for every page, so the response pages can be scanned in any order.
When you insert a barcode it will only be placed on the selected form, so if you want to place the barcode on more
than one existing form, you will need to add it to each of them separately, or add it to the master form before creating
the copy form. However, since barcodes are only used on printed surveys and in conjunction with the KeyPoint
Scanning Module, there is no point in adding them to forms used for other purposes. The barcodes on different forms
are different objects and can be moved, resized, deleted and formatted independently of each other.
To add Preprinted barcode to a form:
1
If you have created one or more copy forms, select the form (master or copy form) on which you want to
place the barcode.
2
Click the Barcode button in the Designer Tools sidebar.
3
Click on the page at the point you want to place the barcode.
The Barcode Wizard will open.
4
Select Preprinted Barcode.
5
Tick Use on every page to place the barcode on every page of the from.
When Use on every page is selected, the barcode will be placed on the Master page(s) so that it appears
in the same position on every page.
6
Click Finish.
If you selected Use on every page, the barcode will be placed on the Master page(s) at the point you clicked – if the
form is double-sided, separate barcodes will be placed on the odd and even page Master pages. If Use on every page
is not selected, the barcode will just be placed at the point you clicked on the selected page.
You can choose whether to include the human-readable version of the data below the barcode by ticking or unticking Display
Code in the Inspector tab of the Properties sidebar for the barcode.
The barcode will be formatted according to the barcode properties defined in the Style Library for the currently
selected style, which you can edit as required – see Working with styles, page 142. If required, you can use the same
methods as for other objects to move, resize and format the barcode – see Resizing, moving and copying objects,
page 190, and The Format Palette sidebar page 150.
Adding other objects to a survey | 181
You are free to resize and reshape the barcode in any way you like, but you should not make it so small that it cannot be read
when the responses are scanned. You should always print and scan a few test sheets to make sure that the barcodes are being
read correctly.
Remember that if you selected Use on every page, you will need to adjust the barcode(s) on the Master page(s) – see
Master pages, page 131. If the form is double-sided, you can adjust the barcodes on the odd and even page Master
pages independently. For example, you could place the barcode at the left margin on odd pages and the right margin
on even pages, or you could delete the barcode from the even pages so that it only appears on the odd pages
(however, if you did this, KeyPoint would not be able to identify the form, page number or respondent for the even
pages, so you would have to scan all the pages into the correct form and in the correct order).
Changing the survey signature for barcodes
When you create a new survey, KeyPoint assigns it a unique identifier, which it uses, for example to match the
responses returned to a web survey to the correct survey database.
By default, this identifier is used in preprinted barcodes as the survey signature to identify the response sheets when
they are scanned, however, you can set your own survey signature if required.
You should not change the survey signature after the survey has been printed.
If you save a survey with a new name using Save As (File menu), the survey with the new name will have the same identifier as
the original survey, so they will have the same default survey signature. If you want to create a copy of a survey design and give
the new survey a new unique identifier, you should clone it – see Copying the design of an existing survey, page 109.
To set your own survey signature:
1
Select Survey Properties (File Menu) to display the Survey Properties dialog box:
2
Either:
Enter your own Survey Signature as required.
Or:
Click Reset to revert to the default survey identifier assigned by KeyPoint.
3
Click OK to confirm the change and close the dialog box.
You can use any text you wish as the signature, but as it will be used to identify the survey when the responses are scanned, you
should ensure that it is unique.
The length of the barcode depends on the number of characters in the signature – shorter signatures give shorter barcodes.
If you have already printed, scanned and input returned surveys using the old signature, the links between those responses and
their scan images will be broken so you will no longer be able to compare the KeyPoint data with the original scan image – see
Reviewing the input responses, page 289, for how to display the original scan image below a KeyPoint response.
182 | Chapter 8: Constructing a Survey
Barcode labels
Barcode labels are a special type of text question that define areas of a printed survey form where respondents can
place barcode stickers instead of entering text.
If you create a web survey from a form with a Barcode label, the Barcode label will appear as a normal text question in the web
survey.
To add a Barcode label to a form:
1
If you have created one or more copy forms, select the master form – since Barcode labels are a type of
text question, you cannot add them to copy forms.
2
Click the Barcode button in the Designer Tools sidebar.
3
Click on the page at the point you want to place the Barcode label.
The Barcode Wizard will open.
4
Select Barcode Label.
5
Click Next to display the Question Text page in the wizard.
6
Enter the question text – this could be an instruction to place the sticker in the box.
7
Click Next to display the Question Name page in the wizard.
8
On the Question Name page:
a
Enter a name for the question.
b Choose an analysis group for the question from the drop-down list in the Analysis group box, or type
in a name for a new analysis group, or, if you do not want to include the question in an analysis group,
leave it blank.
See Question names and analysis groups, page 157, for more information about question names and
analysis groups.
9
Click Finish.
The Barcode label question will be placed on the form at the point where you clicked and using the style defined in
the Style Library for the currently selected style:
If required, you can use the same methods as for other objects to move, resize and format the barcode – see
Resizing, moving and copying objects, page 190, and The Format Palette sidebar, page 150. In particular, you may
want to use the Format Palette sidebar to customise the border and fill properties to make it clear where the
respondent should place the sticker.
Adding other objects to a survey | 183
If required, you can change the “Stick barcode here” message using the Properties sidebar Presentation tab – see Text
questions, page 209.
You can also change the default message and box size in the Style Library (see Working with styles, page 142), as
follows:
1
Select Style Library (Tools menu) to open the Style Library.
2
Open the required style and select Text answer.
3
Click the Presentation tab.
4
Select Barcode label support.
5
Edit the Minimum label box dimensions and Box text as required.
6
Deselect Barcode label support – if you leave it selected, and use the Question Wizard to add a text
question, a Barcode label will be added.
7
Close the Style Library.
Scanned barcode results
In the Responses workplace, the Barcode label question appears as a normal text question (in the same way as it does
in a web survey). When the form is scanned, the barcode is read and the result entered in the response as a text
string, without any interpretation. However, if required, you could use expressions in calculated questions to convert
the barcode data into readable form – see Chapter 18, Using expressions.
KeyPoint supports the following one-dimensional barcode types:
* Codabar, Code 128, Code 39, Code 93, EAN 8, EAN 13, IATA 2 of 5, Industrial 2 of 5, Interleaved 2 of 5,
Matrix 2 of 5, Patch PostNet, UGC-128, UPC-A, UPC-E
* With checksum: Code 39, Interleaved 2 of 5, Codabar
* With supplemental: EAN 8, EAN 13, UPC-E.
Adding navigation buttons
Navigation buttons can be used on electronic versions of the survey (web surveys and the Responses workspace) to
move between pages and carry out a number of other actions like saving, submitting and printing the survey (see the
next section, Action of navigation buttons). This section describes how to place navigation buttons directly on the
survey page – see Adding off-page navigation buttons to a web survey, page 311, for how to add off-page
navigation buttons to a non-surveyserver survey; see Customising the appearance and behaviour of a surveyserver
form, page 343, for how to add off-page navigation buttons to a surveyserver survey; and Viewing responses page
by page, page 254, for how to use the Page Navigator with direct-entry surveys in the KeyPoint Responses workspace
and Data Entry Module.
Although navigation buttons obviously have no use on a printed survey, you may want to be able to use on-page
navigation buttons when you are entering or reviewing responses from a printed survey, or use the same form for a
web survey (though typically you would create separate forms for the two types of survey). If you want to do this, you
can make the navigation buttons non-printable by clearing the Printable tick box for the buttons on the Properties
sidebar Inspector tab – see Inspector tab, page 219. The buttons will then appear in the Responses workspace (and
web surveys created from the same form), but not in the printed forms.
184 | Chapter 8: Constructing a Survey
You can choose between two types of button:
* Image buttons: the appearance of image buttons is fixed (though you can choose different styles) and they
cannot be resized without loss of quality.
* Text buttons: you can enter your own text as a label to put on text buttons and the buttons can be resized
without loss of quality. As with image buttons, you can choose from a variety of different styles of text button.
To place navigation buttons on a form:
1
If you have created one or more copy forms, select the form (master or copy form) on which you want to
place the navigation buttons – the navigation buttons on different forms are different objects and can be
moved, resized, deleted and formatted independently of each other.
2
Click the Buttons button in the Designer Tools sidebar.
3
Click on the page at the point you want to place the first button – the buttons will be placed on the page
with a default size.
For text buttons, you can instead drag out the area for the first button – the other buttons will all have this
size. Dragging out an area has no effect for image buttons: all the buttons will still be placed on the page
with the default size.
The Button Wizard will open.
4
Select On-page navigation.
5
Tick Use on every page to place the navigation buttons at the same position on every page of the form –
this is appropriate in most cases.
When Use on every page is selected, the navigation buttons will be placed on the Master page(s).
6
Click Next to display the Button selection page in the wizard:
Adding other objects to a survey | 185
7
Choose whether to use:
* Text buttons – text boxes appear next to the tick boxes when Text buttons is selected, as in the
picture above
* Image buttons.
8
Select the required Style for the buttons from the drop-down list box.
9
Tick the boxes for the buttons you want to appear on the form – see the next section, Action of
navigation buttons, for what the buttons do.
For non-surveyserver web surveys, the Save and Print buttons require Javascript – see Distributing a web survey, page 307, for
further details.
10
For text buttons, edit the text in the text boxes for the selected buttons if required – for example, you may
want to do this if you are creating a survey form in a language other than English.
Once the buttons have been placed on the form, you will be able to change the font using the Format Palette sidebar. In
particular, you will be able to use a symbol font, so you could add the character for the required symbol at this stage. However,
you will also be able to select a symbol in the Properties sidebar for the button, so it may be easier to leave the text as it is at this
stage and change it using the Properties sidebar after the button has been placed on the form – see Arranging and customising
buttons, page 187.
11
Click Next to display the Progress bar page in the wizard.
12
If the survey has many pages and you want to include a progress bar showing how far the respondent is
through the survey:
a
Tick Progress bar.
b Select the required Style from the drop-down list box.
13
Click Next/Finish to close the wizard and place the buttons on the form.
The first button will be placed on the form at the point you clicked/dragged and the remaining buttons arranged in a
row to the right of the first button, until they reach the right-hand margin, after which they will wrap to the next line.
The progress bar, if selected, will be placed below the buttons. See Arranging and customising buttons, page 187,
for how to move and customise the buttons after they have been placed on the form.
Action of navigation buttons
The Next and Back buttons display the next and previous pages and the Print button prints the survey.
In the Responses workspace and the Data Entry module, the Save and Submit buttons both save the response, but
the Submit button also creates a new blank response. In web surveys, the Save button allows the user to save a
partially completed survey so that they can come back to it later; they can then press Submit to submit it when they
have finished it.
If you are entering data in a new response in the Responses workspace, the Data Entry module or a web survey, the
Reset button clears the response. If you are editing data in an existing response in the Responses workspace or the
Data Entry module, all the changes you have made will be undone.
The Refresh button is for use with surveyserver surveys only. Normally, surveyserver only uploads the current data
from the page when the respondent moves to another page or submits the survey. Pressing Refresh makes
surveyserver upload the data, make any calculations dependent on the data and refresh the page accordingly.
186 | Chapter 8: Constructing a Survey
Generally speaking, this would only be required if the questions on the page are linked in some way – for example,
an ask if condition for a question based on the answer given to another question on the same page (see The Ask
If/Valid If tab, page 204). In this case, the ask if condition would not be applied correctly after the first question was
answered until the page was refreshed. Given this additional complication, where possible, you should try to arrange
questions in surveyserver surveys so that if a question is linked to other questions, they are on different pages.
However, if you cannot avoid links between questions on the same page, you will need to include instructions telling
the respondent to press Refresh at the appropriate times. This problem does not arise with the Responses workspace,
the Data Entry module or non-surveyserver web surveys, which refresh automatically after each answer is entered.
Arranging and customising buttons
If required, you can use the same methods as for other objects to move and resize the navigation buttons and
progress bar – see Resizing, moving and copying objects, page 190.
If you chose to Use on every page and you want to move, resize or delete a button or the progress bar, the buttons
and progress bar will have been placed on the Master page(s), and you will need to adjust them there – see Master
pages, page 131, for how to display the Master pages.
You can also customise buttons and progress bars using the Properties sidebar (see Button tab, page 220, and
Progress bar tab, page 221) and, in the case of text buttons, the Format Palette sidebar (see The Format Palette
sidebar, page 150). In particular, you can use the Format Palette sidebar to set the font name and size for text buttons
– see later in this section for a recommended procedure for adjusting text buttons.
Unlike other objects, you can select a button or progress bar on a normal survey page even if has been placed on a
Master page, and then apply Format Palette and Properties sidebar changes to it (but you cannot move, resize or
delete it). However, if the button or progress button was placed on a Master page, the changes made to it on a
normal page will be applied to it on all the pages (or, if the form is double-sided, the changes will be applied to it on
all the even/odd pages, depending on whether you made the change on an even or odd page).
You can use the Progress bar tab in the Properties sidebar to change the style of the progress bar – the options are the
same as in the wizard.
For an image button, you can use the Button tab in the Properties sidebar to change the style and action of the button
– again, the options are the same as in the wizard.
Adding other objects to a survey | 187
For a text button, you can use the Button tab in the Properties sidebar to change the style, action and text of an image
button – again, the options are the same as in the wizard. However, it also gives you the option to use a symbol for
the text:
Choosing a symbol from the Button tab in the Properties sidebar is equivalent to entering the corresponding character
as the Text and setting the font to Wingdings in the Format Palette sidebar.
When choosing a font in the Format Palette sidebar you should consider how the survey is going to be used. If it is
going to be used in KeyPoint or the Data Entry module on other PCs or devices, you should make sure that the font
you choose is installed on those devices – the easiest way to ensure this is to use standard Windows fonts. On the
other hand, when the buttons are generated for use in a web survey, KeyPoint creates a bitmap image of the button
with the text on it, so it does not matter if the respondent’s computer has the font – all that matters is that the PC
generating the web survey has the font installed.
Once you have customised a button, you can save it in the Asset library for use in other surveys – see The Asset
Library, page 230.
Arranging and customising image buttons using the normal techniques is straightforward, but as there are rather more
variables involved, optimising the appearance of text buttons requires a little more care. The following is a good way
to proceed:
1
Run the Button Wizard to add the buttons to the Master page by choosing Use on every page – see
Adding navigation buttons, page 184.
2
Go to the Master page.
3
If you want to use symbols instead of text, select each button in turn and set the required symbol using the
Button tab in the Properties sidebar.
4
Select all the buttons and use the Format Palette sidebar to set the font, size, colour, style and alignment as
required.
5
Select a single button and resize it as required.
188 | Chapter 8: Constructing a Survey
6
Select all the buttons and use the grow or shrink buttons in the Align and Size sidebar to set all the buttons
to the required size – see Using the Align and Size sidebar, page 173.
7
Use the Align and Size sidebar to set the alignment and spacing of the buttons.
8
Select all the buttons and drag them to the required position on the survey page.
Adding OLE objects
OLE (object linking and embedding) is a de facto standard for sharing information between OLE-compatible
applications. For instance, you can use OLE to link or embed an Excel Worksheet in a Word document.
When you add an OLE object, it can be represented as an icon on the form if you select Display As Icon in the Insert
Object dialog box, or if the program that implements the OLE requires it. To view the object in its own window,
double-click the icon.
You can link the OLE object to the original file. If you do this, changes made to the original file are also made to the
object and vice versa. If you link to the original file, the data is not included in the KeyPoint file. If you want to include
large items in the survey, such as pictures, linking the object instead of embedding it will help reduce the size of the
KeyPoint file.
Adding a new OLE object
To create a new OLE object and add it to a survey:
1
Select OLE Object (Insert menu).
2
Drag a frame for the object on the survey form.
The Insert Object dialog box will be displayed.
3
Click the Create New radio button.
4
Select the type of object from the list.
5
Select the Display As Icon tick box if you want to represent the object as an icon on the form. You can
change the icon by clicking the Change Icon button. In the Change Icon dialog box, select the From File
radio button to choose a new icon from the list provided, or click the Browse button to locate the icon.
Click OK to return to the Insert Object dialog box.
6
Click the OK button.
Adding an OLE object from a file
To add an OLE object from a file to a survey:
1
Select OLE Object (Insert menu).
2
Drag a frame for the object on the survey form.
The Insert Object dialog box will be displayed.
3
Click the Create from File radio button.
Adding other objects to a survey | 189
4
Click the Browse button.
5
Locate the file in the Browse dialog box and click the Insert button.
6
If you want to link to the original file, select the Link tick box. If you do not link to the original, a copy of
the OLE object is included in the KeyPoint survey. When you use large OLE items, such as Microsoft AVI
videos, it is best to link to them.
7
Select the Display as icon tick box if you want to represent the object as an icon on the form.
You can change the icon by clicking the Change Icon button to display the Change Icon dialog box. Then
click the From File radio button to choose a new icon from the list provided, or click the Browse button to
locate the icon. Click OK to return to the Insert Object dialog box.
8
Click the OK button.
Adding a question number
To add a question number:
1
Select Question number (Insert menu).
2
Drag a frame for the question number on the form.
The number is added in the default style. You can edit the question number by right-clicking it or double-clicking it.
Resizing, moving and copying objects
To move an object (by drag and drop):
Select it and drag it to the new position.
To resize an object:
Select it, then drag its handles to resize it.
To move (by cut and paste) or copy an object:
1
Select the object.
2
Select Cut or Copy (Edit menu) or right-click the question and select the command from the pop-up
menu.
3
Click on the form where you want the to paste the object.
4
Select Paste (Edit menu).
You can use cut and paste to move an object between forms.
190 | Chapter 8: Constructing a Survey
Question routing
The purpose of routing is to direct respondents or those entering data along the correct route from question to
question, skipping questions that are irrelevant or need not be answered, depending on answers that have already
been given. For example, suppose you are a councillor concerned about the low level of public transport usage, and
you decide to conduct a survey. Your first question might ask whether or not the respondent uses the local bus
service: if they do, you want them to go on to answer questions about their experiences, but if they don’t, they should
answer questions that might help you understand their reasons.
In KeyPoint, you can set up routing in surveys. It is especially useful for surveys designed for use as web forms.
However, it also takes effect in the Responses tab, speeding up data entry and improving its accuracy, as the user is
directed automatically to the correct questions.
When a respondent is completing a web form, any routing conditions are applied only when the respondent moves
to another page or submits the survey. This means that you should make sure that the source and target questions of a
route are on different pages. This is easier to arrange if you use small pages with only a few questions on each page –
this is generally a good idea for web surveys anyway, as respondents can lose track of where they are if they have to
scroll up and down long pages on the screen.
In a web form or the Responses tab, if you select or enter an answer that triggers a particular route, KeyPoint will not
normally let you input clean data for questions that are skipped by the route. However, you can enter invalid or
‘dirty’ data for skipped questions in responses – see ‘Dirty’ data, page 261, for details.
Routing is not displayed in printed surveys, so you should include written instructions telling the respondents which
question they should answer next.
Adding a new route
To add a new route:
1
Click the Routing button on the Designer Tools sidebar.
2
To establish a route between two questions, drag a routing line from the first question to the second
question.
If you want to terminate the survey after a question, click in the question and drag the route so that it does not end on a question
(for example, off the edge of the paper).
Also note that if the route leads to a question table, you must drag onto a question in the table (typically it will be the first one),
not onto the area at the beginning of the table where there are no questions.
Question routing | 191
The Routing Rules dialog box will be displayed when you place the end of the route.
3
Click New to display the Expression Editor dialog box:
4
The expression is shown in the centre of the dialog box (initially it is empty). You can use the drop-down
list boxes at the top of the dialog box, the controls on the right-hand side and context menu commands to
build the required expression visually, or you can use the Advanced tab to build it textually (see
Chapter 18, Using Expressions, for more information about building expressions and details of the
functions and operators you can use). You can type expressions directly, but using the controls and menus
helps you avoid errors.
Leave the expression empty if you always want the route to be followed (see the paragraphs following the
example below for more details).
192 | Chapter 8: Constructing a Survey
5
Click Check expression to check that the expression you entered is valid.
6
Click OK to return to the Routing Rules dialog box.
7
Click OK to return to the Design workspace.
A routing line will be added between the two questions. The picture below shows three questions – routes have been
drawn from question 1 to questions 2, 3 and 4 (question 4 is not shown):
The route to Question 2 is taken if the respondent
answers 'Visit to the Police Station'
An expression achieving this is:
"contact how?" ='Visit to the Police Station’
The route to Question 3 is taken if the
respondent answers 'Phone call direct to the
Police Station’ or 'Phone call using
emergency call system’
An expression achieving this is:
("contact how?" ='Phone call direct to the
Police Station’) or
("contact how?" ='Phone call using
emergency call system’)
The route to question 4 is taken if the
respondent gives any other answer
This can be achieved by leaving the
expression blank if the route is added after the
other two – see below
Note that the routes in the picture above start with a blob, and end with an arrow. If a route does not end with an
arrow, or there is a red cross at the beginning, this indicates an error in the route, and you should edit it to correct it
(see later subsections).
If more than one route condition is true, the route that was created first will be taken. In the example, the third route
with the blank expression was created last. This means that although it is always true, it will only be taken if the
expressions for the first two routes are false.
If no route condition is true, you will be taken to the next question, as if no routes had been defined.
You can change the colour and width of a routing line by selecting it and using the border colour and width tools in
the Format Palette sidebar (see Object formatting controls, page 151) or by using the Inspector tab in the Properties
sidebar when the routing line is selected (see Inspector tab, page 219).
Question routing | 193
Testing the route
It is extremely important to test the route by saving the survey and entering some responses in the Responses form.
Try out the full range of answers, so that you can ensure the routes are correct. If you publish a survey with incorrect
routes, you risk invalidating the entire survey.
Adjusting the path of a route
To adjust the path of a route:
1
Click the routing line you want to adjust. The handles are shown in blue when a route is selected.
2
Using the handles, drag the line to the desired shape.
If you move the starting point to a different question, you will probably need to edit the routing rule expression so
that it tests the answers to the new starting point question instead of the old one. Leaving the expressions testing the
old starting point question could produce unexpected results.
Editing routing rules
To edit the routing rule for a route:
1
Double-click the routing line you want to modify to display the Routing Rules dialog box.
2
Click Edit to display the Expression Editor dialog box.
3
Edit the expression in the Expression Editor dialog box (see Chapter 18 for more information about editing
expressions).
4
Click Check expression to check that the edited expression is valid.
5
Click OK.
You can also display the Expression Editor dialog box by clicking Edit in the Properties sidebar’s Routing Rules tab.
Viewing and hiding routes
To view or hide routing lines (and the routing tool), select or deselect Routing (View menu).
194 | Chapter 8: Constructing a Survey
The Properties sidebar
You can use the Properties sidebar to view and edit the properties of questions, question tables, question groups,
routes and text and graphic objects. You can also view and edit the properties of the form’s background.
The Properties sidebar has one or more tabs containing settings for the object. Which tabs you see depends on the
type of object.
Displaying the Properties sidebar
To display the Properties sidebar for an object:
Move the pointer over the Properties sidebar tab.
Or:
Right-click on the object and choose Edit properties (if the object is a question, the command will include
the question name).
See Sidebars, page 103, for general information on working with sidebars, including how to pin a sidebar so that it is
displayed permanently.
To display the Properties sidebar for the form itself:
1
Click in the background to make sure no object is selected.
2
If the Properties sidebar is pinned, it will show the form’s properties, otherwise, move the pointer over the
Properties sidebar tab.
Or:
Right-click in the background and choose Edit properties.
Or:
Choose Background, Header, Footer, Format, Margins or HTML Settings (Form menu).
Question properties
The tabs displayed in the Properties sidebar for questions and the contents of those tabs depend on the type of
question selected. The following subsections describe each of the tabs in turn.
A few tabs have an Apply button, and you will need to click on this button to carry out any changes you make.
However, most of the changes you make using the Properties sidebar will be carried out as you make them: changes
that affect the appearance of the questions will be immediately obvious; other changes, such as changes to the
database, will also be carried out, but may not be immediately apparent. Some changes to questions do not take
effect until you click on another control or switch tabs.
The Properties sidebar | 195
The Question/Table tab
There is a Question or Table (for question tables) tab with nearly the same contents on the Properties sidebar for all
types of question and question table.
Type a hint here to pop
up in the Responses tab
You can use the controls in this tab to edit:
* Question/Table text – Edit the text in the question or the top of the table
* Question name (does not appear for question tables) – Edit the name used to identify the question in KeyPoint
* Analysis group – Choose an analysis group for the question or table, or type in a name to create a new analysis
group
All the questions in a table belong to the same analysis group, but this group may include other questions as
well as the table’s questions.
* Hint – Edit the hint appearing when you move the pointer over the question in the Responses workspace or
web forms
* Printable – Choose whether the question should be printed when you print the form
* Required – Choose whether the question/table must be answered
* Read Only – Choose whether answers to the question/table cannot be entered in the Responses workspace or
web forms.
196 | Chapter 8: Constructing a Survey
The Answer tab
There is an Answer tab on the Properties sidebar for text, numeric, date and calculated questions and tables of these
questions. The content of the tab depends on the type of question (the example below shows a text question).
The Answer(s) tab for Question tables shows the controls for the individual type of question in the table.
Most of the controls for a particular type of question also appear in the Question Wizard for that type of question –
see Answers and answer formats, page 160, for details. However, there are a number of additional controls:
* The Format edit box and Sample masks scroll box for text questions allow you to place limits on the text that
can be entered – see next section for details of how to use them
For information about the Format controls for date and numeric questions, see pages 164 and 165.
* The Format edit box for calculated questions allows you to enter a format mask defining how the calculated
result should be displayed. For details, see page 164
* The Answer Format controls are displayed for text questions and allow you to fix a limit to the number of
characters entered (Fixed Size) or allow any length of answer (Comment)
* The Values must be between spin boxes allow you to set maximum and minimum values for the data entered
in numeric questions.
Setting a text mask
If you don’t want to enforce any restrictions on the answer given to a text question, leave the Format text box on the
Answer tab of the Properties sidebar blank.
Otherwise, to create a text answer mask to restrict the answers that can be entered:
Type a mask into the Format box using the special symbols in the table below, or select a mask from the
Sample Masks list. If you choose a mask from the list, KeyPoint displays it in the Format text box, and
shows an example of text satisfying the mask in the Preview text box.
The Properties sidebar | 197
The text answer masks use special characters to represent the required answer format. Any answer the respondent
enters must match the mask.
Symbol
Explanation
{}
Curly brackets enclose a list of possible options the respondent can type. The respondent’s answer must
match one of the options. Options are separated with commas.
[]
Square brackets enclose an optional string of characters. The respondent’s answer does not need to
include it, but may if they wish.
#
A hash symbol represents any digit.
?
A question mark represents any letter (uppercase or lowercase).
&
An ampersand represents any letter (lowercase will be converted to uppercase automatically).
~
A tilde represents any letter (uppercase will be converted to lowercase automatically).
@
An ‘at’ symbol represents any character (letter, digit or punctuation).
!
An exclamation mark represents any character (lowercase letters will be converted to uppercase letters
automatically).
*n
An asterisk followed by a number n means that the respondent must enter n characters of the type given
after *n.
;
A semi-colon means that the character following it must actually be typed in by the respondent and not
treated as a text format symbol by KeyPoint. This ‘escape’ character allows you to require the respondent
to enter one of the special symbols in this table, such as ‘?’, ‘@ ‘or ‘;’ itself.
Example
Some answers matching the mask *5{@}[{0,1,2}] are:
238Ab0
125c92
67451
Some answers not matching the mask are:
23875c
A123
In words, this mask means the respondent must enter a sequence of any five characters followed optionally by a 0, 1
or 2.
198 | Chapter 8: Constructing a Survey
The Answers tab
There is an Answers tab on the Properties sidebar for multiple choice (including menu/list), range multiple choice,
ordered choice and tables of these questions. The content of the tab depends on the type of question (the example
below shows a multiple choice question).
The Answers tab only appears when the question or question table is selected in the master form – see The Labels tab, page 217,
for how to make the relevant equivalent changes for copy forms.
The Answers tab for a table of questions has the same controls as for an individual question of that type. Generally,
setting a property for a table of questions sets that property to the same value for each of the questions in the table –
if this is not the case, it will be mentioned in the following instructions.
The Answers tabs for ordered choice and multiple choice questions are similar except that for Ordered choice
questions there is no Default or Scores column or Only one choice allowed tick box.
The Answers tab for range multiple choice questions has the same controls as the Answer Range page in the Question
Wizard and they are used in exactly the same way – see Setting range multiple choice answers, page 161, for
details. None of the operations described in the rest of this section apply to range multiple choice questions.
To specify the number of options that can be chosen for multiple choice questions:
1
Tick or untick Only one choice allowed. If you tick it, the following steps do not apply.
The Properties sidebar | 199
2
Select an option from the first Choose drop-down list box: you can select ‘not more than’, ‘exact’ or ‘not
less than’.
3
Choose All or a number of options from the second Choose drop-down list box.
4
Click Apply to make the changes.
To choose the order in which multiple choice and ordered choice answers are listed in web forms, the Responses
workspace and Data Entry Module:
Choose the required option from the Ordering drop-down list box. You can choose from the following
options:
* Creation: the answers will be presented as in the Design form
* Alphabetical: the answers will be presented in alphabetical order
* Rotate: the answers will be presented in the same ordering as in the Design form, but each time the
web form is displayed or a new Response form is created the starting point will rotate through the
options – for example, abcde, bcdea, cdeab, deabc …
* Flip: the answers will be presented alternately in the same ordering as in the Design form and then the
reverse ordering – for example, abcde, edcba, abcde, edcba …
* Randomise: the answers will be presented in random order each time the web form is displayed or a
new Response form is created.
The last three of these selections display the options in different orders for different respondents, which can help
avoid any systematic bias in the responses – for example, respondents may tend to choose earlier options.
To choose whether to use the option codes instead of the labels in the master form:
Tick Display Codes.
To edit individual options:
1
Click in the Label cells and edit the text.
The label is the text used to label the options in the survey form itself (unless Display Codes is selected).
Different copy forms can have different label text, and in presentation tables and graphs, you can choose
between using the set of labels from one of the copy forms or the codes.
2
Click in the Code cells and edit the text.
The code is used to identify the option in the KeyPoint response database, though you can also use it
instead of the labels in the master form (by selecting Display Codes) and in presentation objects.
Changing the code for an answer affects the codes used when you enter responses in the future; it does
not change the codes used in any responses you have already entered, which will still use the old codes.
This means that changing the codes after you have entered some responses may make analysing the results
of the survey more complicated.
3
For multiple choice questions, click in the Scores cells and edit the text.
4
For multiple choice questions, click on a Default tick box to set that answer as the default answer selected
when a new response or web form is displayed (if Only one choice allowed is unticked, you can select
more than one default).
200 | Chapter 8: Constructing a Survey
For multiple choice question tables: if the whole table is selected, the default will be set for the whole
table; if an individual question is selected, the default will be set for that question only.
5
Click Apply to make the changes.
If you want to set defaults for individual questions in a multiple choice question table, make sure you click
Apply after setting each default and before selecting the next question in the table.
To add a new option:
1
To add an option at the end of the list:
Click in the blank row at the bottom of the table.
To insert an option above another option:
a
Right-click in the option to display a context menu.
b Select Insert.
2
Enter text in the Label and Code cells for the new option.
3
For a multiple choice question, enter a score, if required, and click on the Default tick box if you want to
make the option the default.
4
Repeat Steps 1–3 for any other new options.
5
Click Apply to make the changes.
To move an option up or down in the table:
1
Click in the row for the option.
2
Press the up or down button.
3
Repeat Step 2 to move the option to another position, or Steps 1 and 2 to move another option.
4
Click Apply to make the changes.
To delete an option:
1
Click in the row for the option.
2
Either:
a
Right-click in the option to display a context menu.
b Select Delete.
Or:
Press Ctrl+Del.
3
Repeat Steps 1 and 2 to delete any other options.
4
Click Apply to make the changes.
The Properties sidebar | 201
The Default Value tab
There is a Default Value tab with the same contents on the Properties sidebar for text, numeric and date questions
(you can enter default choices for multiple choice questions on the Answers tab – see the previous section).
If a default value has been set already it will be shown in the text box (United Kingdom in the example picture)
and the button will be marked Edit; if no default value has been set yet, the text box will be empty and the button
marked New.
To set or edit the default value for a question:
1
Click New/Edit to display the Expressions Editor dialog box.
2
Use the Expressions Editor dialog box to enter an expression to define the required calculation.
3
Click OK to close the Expressions Editor dialog box.
For more information on expressions, see Chapter 18, Using Expressions.
The expression will be evaluated when a new response or web form is created and the resulting value will be entered
in the question. Generally, users will be able to edit the answer if required, though you can prevent them from doing
so if you wish by making the question read-only (on the Question tab). It may be a good idea to draw the
respondent’s attention to the fact that they can edit default values.
Although you can enter a complex expression if required, in most cases you will just enter a constant value. To enter a
constant value in a text question, you should enclose the text in single quotes.
Unless the respondent edits the default value, it is frozen at the point when the response is created. For example, you
can enter the Today function as the default value in order to record the day on which the response was created.
Note that, in contrast, the value of a calculated question changes whenever the response is edited, so that if you used
Today in a calculated question, the date shown would change each time the response was modified.
The default value is entered before the respondent can answer any other questions, so the expression should not
depend on the answers to any other questions – because of this, the Questions and Answers menus/lists are disabled
in the Expressions Editor dialog box.
202 | Chapter 8: Constructing a Survey
The Number Pattern tab
There is a Number Pattern tab with nearly the same contents on the Properties sidebar for all types of question and
question table: the only variation is in that there are three tick boxes for question tables and only one for questions –
the picture shows a question table example.
The Number Pattern tab has the following controls:
* Disable question number (questions only) – Choose whether the question number should appear before this
question (see Form properties, page 223, for how to tick or clear this box for all questions at the same time)
* Number questions only (question tables only) – Choose whether the table as a whole should be numbered
(and the questions within it subnumbered) or the individual questions numbered separately
* Disable table number (question tables only) – Choose whether the table number, if there is one, should
appear at the top of this question table
* Disable subnumbers (question tables only) – Choose whether the questions within the table should be
numbered
* Preview – See the effect of the settings
* Number format – Select whether to use numbers, lowercase letters or uppercase letters for question
numbering. If the question is a question table, the first row controls the numbering of the table itself and the
second row the numbering of the questions within the table
* Introductory text – Select text to appear before the number or type in your own text
* Number separator – For a question table, select a character or type in your own text to appear between the
number of the table and the number of the individual question within the table
* Question separator – Select a character or type in your own text to appear after the number(s).
The Properties sidebar | 203
The Ask If/Valid If tab
There is an Ask If/Valid If tab with the same contents on the Properties sidebar for all types of question and question
table except calculated questions.
If a condition has been set already it will be shown in the text box and the button will be marked Edit; if no condition
has been set yet, the text box will be empty and the button marked New.
The Ask If/Valid If tab allows you to define:
* A condition that must be true before you can enter an answer (Ask If)
and/or
* A condition that must be true if the answer is to be accepted (Valid If).
To set or edit an Ask If or Valid If condition:
1
Select the Ask If or Valid If radio button.
2
Click New/Edit to display the Expressions Editor dialog box.
3
Use the Expressions Editor dialog box to enter an expression to define the required calculation.
See the following subsections for some examples and Chapter 18, Using Expressions, for more details of
how to build expressions.
4
Click OK to close the Expressions Editor dialog box.
It is important to use the Check Expression button in the Expressions Editor dialog box to check your
expression. However, this only tests whether KeyPoint understands the expression: it does not check that
the condition actually does what you want. The only way to check that is to work through the questions in
the Responses workspace, trying out all the possibilities – including unlikely ones. The more complex the
condition, the more you will need to test it.
204 | Chapter 8: Constructing a Survey
Ask If conditions
An Ask If condition allows you to skip a question based on certain conditions without having to define a route past
the question.
For example, the picture at the start of this section shows an Ask If condition on a question about how satisfied
respondents were with their treatment at a police station – the condition means that they will only be able to answer
the question if they have ticked Visit to Police Station to a question (contact how?) about how they reported a crime.
In this example, the condition is only true if a specific option (Visit to a Police Station), and only that option, is
selected for a multiple choice question (contact how?). This sort of condition using ’=’ is suitable when the multiple
choice question only allows the respondent to select one option.
However, this type of condition may not be appropriate if the question allows the respondent to select more than one
option. In that case, the condition would not be true if the respondent selected, for example, Visit to Police Station
and some other option. To get around this problem, you can use the Includes function. This is a logical function with
two arguments. It gives the value ‘True’ if the first argument is included in the second argument and ‘False’ if it does
not.
For example, suppose you ask the question Which recycling facilities do you use? (with question name “what
facilities”) and respondents are allowed to select more than one option. One of these options is Charity collections,
and you want any respondent who selected Charity collections to answer a follow-up question asking about the
timing of the collections, and you want them to answer it whether or not they selected other options as well. To
achieve this, you can use the following Ask If expression:
Includes('Charity collections';"what facilities")
Valid If conditions
A Valid If condition is tested after you have entered an answer and try to move to another question – if the condition
is False, an error message is displayed showing the condition, and you will not be able to leave the question until it is
satisfied.
The Properties sidebar | 205
For example, suppose you are asking a question to which the answer is a percentage, and thus must be less than or
equal to 100. It is easy to achieve the required result using a Valid If condition:
If a respondent attempts to enter a number larger than 100, an error message will be displayed telling them what the
condition is. If the condition is less obvious than the example above, it would be more helpful to spell it out in the
survey text, to prevent respondents entering invalid answers in the first place; the condition then acts just as a
fall-back for those who haven’t read your instructions.
In this example you could achieve the same result by setting range values of 0 and 100 in the Values must be
between spin boxes in the Answer tab – see The Answer tab, page 197.
As in this example, a Valid If condition for a question will almost always test the answer to the question itself, but it
may refer to other questions. For example, a series of questions might ask about how the respondent’s working day is
split between different activities as percentages of the total. In this case you might want a Valid if condition on all the
questions checking that the total for all the answers is less than or equal to 100%.
If the questions are in a numeric question table, you could achieve the same result by setting a validation condition in
the Total tab – see The Total tab, page 215.
206 | Chapter 8: Constructing a Survey
The Questions tab
The Questions tab only appears on the Properties sidebar for question tables.
The Vertical Options controls only appear for tables of multiple choice, ordered choice and range questions.
To choose the order in which questions are listed in web forms and in the Responses workspace:
Choose the required option from the Ordering drop-down list box. You can choose from the following
options:
* Creation: the questions will be presented as in the Design form
* Alphabetical: the questions will be presented in alphabetical order
* Rotate: the questions will be presented in the same ordering as in the Design form but each time the
web form is displayed or a new Response form is created the starting point will rotate through the
options – for example, abcde, bcdea, cdeab, deabc …
* Flip: the questions will be presented alternately in the same ordering as in the Design form and then
the reverse ordering – for example, abcde, edcba, abcde, edcba …
The Properties sidebar | 207
* Randomise: the questions will be presented in random order each time the web form is displayed or a
new Response form is created.
You may want to display the questions in different orders to avoid any systematic bias in the responses. You
may want to use this feature in the Responses workspace if you are carrying out a telephone survey.
You can use the table and buttons in the tab to edit the individual questions appearing in the question table.
To edit the question text or question name for a question in the table:
1
Click in the Question text or Question name for the question and edit the text.
2
Repeat for any other cells you want to edit.
3
Click Apply to make the changes.
To add a new question:
1
To add the new question at the end of the table:
Click in the blank row at the bottom of the table.
To add the new question before an existing question:
a
Right-click in the existing question and choose Insert.
b Click in the new blank row.
2
Enter text in the Question text and Question name cells.
3
Use the next set of instructions to move the question to the required position in the list.
4
Repeat Steps 1–3 for any other new questions.
5
Click Apply to make the changes.
To move a question up or down in the table:
1
Click in the row for the question.
2
Press the up or down button.
3
Repeat Step 2 to move the question to another position or Steps 1 and 2 to move another question.
4
Click Apply to make the changes.
To delete a question:
1
Right-click in the row for the question.
2
Choose Delete.
3
Repeat Steps 1 and 2 to delete any other questions.
4
Click Apply to make the changes.
208 | Chapter 8: Constructing a Survey
To set alternate background colours for each row (or column) in the table:
1
Tick Alternate Colours in the Horizontal Options (or Vertical Options) box.
2
To set the colours, click in the Odd row colour and Even row colour (or Odd column colour and Even
column colour) boxes to display a standard Windows colour picker dialog box.
To set dividing lines between each row (or column) in the table:
1
Tick Dividing Lines in the Horizontal Options (or Vertical Options) box.
2
To set the colour of the lines, click in the Colour box to display a standard Windows colour picker dialog
box.
3
Choose a setting from the Width drop-down list box to set the line thickness.
The Presentation tab
There is a Presentation tab on the Properties sidebar for all type of question and question tables except menu/listbox
questions and tables of menu/listbox questions. You use the controls on the tab to specify the appearance of the
question on the survey. The controls appearing depend on the type of question.
Date, numeric and calculated questions
For date, numeric and calculated questions, and tables of these questions, the only control on the Presentation tab is
a Style drop-down list box:
To set the style of the answer area for date, numeric and calculated questions:
Select the required Style from the drop-down list box.
The Properties sidebar | 209
Text questions
For text questions and tables of text questions, the Presentation tab enables you to choose whether to use the
question as a normal text question or to receive a barcode label, and to specify the appearance of the question’s
answer area in either case.
To use the text question as a normal text question:
1
Untick Barcode label support.
2
Select the required Style from the drop-down list box.
3
Set the number of Visible lines appearing in the answer area – if you choose the blank style, no lines will
appear, but it will affect the height of the answer area.
4
Set the approximate number of Visible characters per line in the answer area – if you choose one of the
styles without character dividers, this will just affect the width of the answer area.
The settings in Steps 3 and 4 are purely cosmetic and are not automatically linked to the number of characters of a Fixed Size text
answer – see The Answer tab, page 197.
To use a text question as an area for respondents to place a barcode label in printed surveys, or to edit a barcode
label inserted using the Barcode Wizard (see Barcode labels, page 183):
1
Tick Barcode label support.
2
Enter the minimum width and height of the label box. This sets minimum dimensions you can set when
resizing the box – if you want to use a smaller box, you will need to adjust these settings first.
When you create a new barcode label, the initial values are taken from the text question settings for the
current style – see Working with styles, page 142.
3
Edit the Box text that will be printed in the area that respondents should place the sticker.
210 | Chapter 8: Constructing a Survey
Text questions set to Barcode label support appear as ordinary text questions in the Responses workspace, the Data Entry
module and web surveys.
Ordered choice, multiple choice and range questions
For an ordered choice question and a table of ordered choice questions, you can set Size, Box, Character and
Alignment options:
The Properties sidebar | 211
For multiple choice and range questions, and tables of these questions, you can also set the colour and style of the
tick, or choose to use Advanced styles:
The Other box Style control only appears if With other is selected on the Answers tab for a multiple or ordered
choice question: you use it to select the style of the Other answer box.
You use the settings in the Tick and Box groups to control how boxes and ticks are displayed.
Alternatively, for multiple choice and range questions, you can select Advanced and choose the required Style from
the drop-down list box.
You can enter an exact Size or drag the slider to adjust the size of the answer boxes.
In the Character group of settings:
* Show Text displays the text of the answer next to each box (in the case of a question table, the rows or
columns will be labelled if this option is not selected)
* Show Number displays the answer number next to each box – if the number is shown, respondents will be
able to select the option on web and Response workspace forms by typing the number on the numeric keypad
* Show Shadow turns the shadow effect on or off for tick boxes.
212 | Chapter 8: Constructing a Survey
The Alignment drop-down list boxes only have an effect if Show Text is selected.
* The Tick Position controls the relative positions of the question text and the answer box: for example, Left
places the answer box to the left of the question text
* The Horizontal Alignment controls the position of the text in each question within its text box
* The Vertical Alignment controls the vertical position of the answer box and answer text within its text box.
The Question Layout tab
There is a Question Layout tab on the Properties sidebar for all type of question and question tables except
menu/listbox questions and tables of menu/listbox questions, but not for the individual questions within tables. You
use the controls on the tab to specify the appearance of the question or table on the survey.
The contents of the Question Layout tab vary according to the type of question or table. The pictures show the
Question Layout tab for an ordered choice question and a table of multiple choice questions.
Text, numeric, date and calculated questions only have the Place answer(s) radio buttons, which put the answer area
below or to the right of the question text. In the case of multiple choice, range multiple choice and ordered choice
questions, this setting controls the position of the options as a group relative to the question text. This control does not
appear for question tables.
In the Text box, which only appears for question tables, choose:
* Keep table text on left to place the table heading in the top left-hand cell of the table or in a separate row at
the top of the table.
The Properties sidebar | 213
In the Arrange Choices box for multiple choice, range multiple choice and ordered choice questions, choose:
* the number of columns you want the choices to be spread over – the following settings have no effect if this is
set to 1 or to the number of options
* Vertically to order the sequence of choices down the first column, then down the second column, and so on
* Horizontally to order the sequences of choices across the first row, then across the second row, and so on.
For example, if there are six choices, A–F, and you choose a vertical arrangement across three columns, you will get
A
C
E
B
D
F
Whereas, with a horizontal arrangement over three columns, you will get
A
B
C
D
E
F
To arrange the six choices in a single horizontal row, set the number of columns to the same as the number of
choices. It then makes no difference whether you select Vertically or Horizontally, as you will get the same result:
A
B
C
D
E
F
In the Arrange Choices box for tables of multiple choice and ordered choice questions, choose:
* Horizontally to arrange the options horizontally – each question is a row in the table with the question text
followed by the options
* Vertically to arrange the options vertically – each question is a column in the table with the question text at
the top and the options listed below it.
In the Gaps box:
* Vertical Gap controls the space between the rows of tick boxes
* Horizontal Gap control the space between the columns of tick boxes.
Question tables have an additional setting in the Gaps box, Indent, which sets a margin all around the table.
The Question/Answer ratio slider control is displayed for multiple choice, range multiple choice and ordered choice
questions and tables of multiple choice, range multiple choice and ordered choice questions. It determines how
KeyPoint’s automatic layout divides the horizontal space in a question or table between the question text and options.
It is only relevant, and therefore only enabled, for layouts in which the options are arranged after the questions.
Split table options controls appear for tables and allow you to control what happens when you split a table:
* Continue question numbering: specifies whether the numbering of the second part of the table continues
the sequence of the questions in the first part of the table or starts a new sequence at top level. For example:
* Ticked: the table 3.1, 3.2, 3.3, 3.4, split in the middle becomes 3.1, 3.2 and 3.3, 3.4
* Cleared: the table 3.1, 3.2, 3.3, 3.4, split in the middle becomes 3.1, 3.2 and 4.1, 4.2
* Remove question table text: specifies whether (option cleared) or not (option ticked) the table text at the top
of the table is added to the top of the second part of the split table.
Question tables of multiple choice, range multiple choice and ordered choice questions that have With other ticked
have an additional Other width control, which allows you to set the width of the ‘other’ edit boxes in the table.
214 | Chapter 8: Constructing a Survey
For question tables, choose:
* Use variable height for questions to make the height of question rows adapt to the height of individual
questions in the table automatically; otherwise the height of all questions in the table is kept the same. In both
cases you can adjust them manually if required.
If you adjust the layout of questions and question tables using the Properties sidebar, the question stays in automatic
layout mode.
The Total tab
There is a Total tab in the Properties sidebar for numeric question tables.
* Show Total specifies whether a total row should be added to the table.
In the Line group of settings:
* Show Line specifies whether a line should be drawn between the questions and the total row
* Colour specifies the colour of the line
* Width specifies the thickness of the line.
The Validation group of controls allows you to add a validation condition on the total value:
* The condition drop-down list box specifies the condition (for example, Total must equal, Total must be <)
* The value box(es) sets the value(s) used for the condition.
The Contact Link tab
There is a Contact Link tab in the Properties sidebar for text questions. You use the controls on the tab to link the text
question to a field in your Address Book. Then when you use the Invitation Wizard to invite respondents to complete
a web survey or to print a paper survey:
* the linked text question can be filled in (prepopulated) with the corresponding value from the Address Book
* the response can be used to update the Address Book field with the answer given by the respondent
The Properties sidebar | 215
* responses to an invitation to fill in a paper-based survey can be tracked.
* Use for contact identification specifies that this question should be used to hold a unique code created by
KeyPoint to identify the respondent. This is used for tracking responses to a paper survey and to link the
responses to a paper survey back to the Address Book entry when the returned survey is entered or scanned
into a KeyPoint response.
Note that if you want to track responses to a paper-based survey you will need to create one, and only one,
text question with Use for contact identification selected. Respondents should not change the identification
code, so the question should be marked, for example, as ‘For office use only’.
Web survey responses are automatically recognised by KeyPoint so Use for contact identification is not
relevant for web surveys. This means that if you are carrying out a mixed-mode survey (paper and web), you
should hide the contact identification question on the web survey – tick Hide on Web/Email on the Inspector
tab.
In the Link to contact field group of settings:
* Field specifies the Address Book field to be linked to the question – if a field is selected, at least one of the
following two tick boxes must be selected
* Update specifies that the Address Book field should be automatically changed to the answer given in the
answer when the response is entered
* Prepopulate specifies that the question should be filled in with the corresponding value from the Address
Book when a web survey is viewed by the respondent or a paper survey is printed.
When a text question is linked to a contact field or used for contact identification it is marked in the design workspace
by an Address Book icon
:
See Using the Invitations Wizard for a paper-based survey, page 237, or Promoting a web survey – sending
invitations, page 319, for how to use the Invitations Wizard.
216 | Chapter 8: Constructing a Survey
The Labels tab
There is a Labels tab in the Properties sidebar for multiple choice, range multiple choice and ordered choice
questions when a copy form is selected. The Labels tab enables you to change the text labelling the various answer
options. This enables you, for example, to have different language versions of the survey on different copy forms.
You can change the Codes used to identify the answer options in the KeyPoint responses database on the master form, but not on
copy forms.
To set the label text appearing for an answer on the selected copy form:
1
Click in the required cell in the Labels column.
2
Edit the text as required.
3
Choose the order to present the options. You can choose from the following options:
* Creation: the answers will be presented as in the Design form
* Alphabetical: the answers will be presented in alphabetical order
* Rotate: the answers will be presented in the same ordering as in the Design form but each time the
web form is displayed or a new Response form is created the starting point will rotate through the
options – for example, abcde, bcdea, cdeab, deabc …
* Flip: the answers will be presented alternately in the same ordering as in the Design form and then the
reverse ordering – for example, abcde, edcba, abcde, edcba …
* Randomise: the answers will be presented in random order each time the web form is displayed or a
new Response form is created.
The Properties sidebar | 217
One reason for displaying the options in different orders is to avoid any systematic bias in the
responses – for example, respondents may tend to choose earlier options. You may want to use this
feature in the Responses workspace if you are carrying out a telephone survey.
4
Tick Display Codes to use the Codes instead of the Labels for the form.
The Inspector tab
There is an Inspector tab in the Properties sidebar for all types of question and question table.
The controls in the picture appear for all types of question and question table, and on master and copy forms: see
later in this section for additional controls that appear for questions within question tables and for questions and
question tables on copy forms.
In the Behaviour group of settings:
* Hide in responses specifies whether the question or question table will be hidden or shown in the Responses
workspace and Data Entry Module – this can be useful, for example, if there is a question you want to appear
on a paper survey but not when the survey is used in a Data Entry Module in a kiosk.
* Hide on web survey specifies whether the question or question table will be hidden or shown on a web
survey generated from the form
* Position Locked specifies whether you can drag the question or question table, or any of its components, to
move or reshape it (you can move the question or table using the Left and Top controls in the Inspector tab
even if Position Locked is selected).
The Position group of controls allows precise control over the position and shape of a question by allowing you to
enter the exact positions relative to the edge of the page:
* The Height and Width boxes specify the height and width of the object’s frame
* The Left and Top boxes specify the distance of the object from the left-hand side of the paper and the top of
the paper, respectively.
218 | Chapter 8: Constructing a Survey
The Inspector tab is also used to make settings for questions and question tables on copy forms that appear on tabs in
the master form that are not displayed for copy forms. These settings include:
* Hint (the same as on the Question tab)
* Printable (the same as on the Question tab).
Properties of other objects
You can display the Properties sidebar for other objects on a Design form; the following sections describe the tabs that
appear.
Inspector tab
The Properties sidebar for all objects has an Inspector tab. In all cases, the Inspector tab has the following controls:
* Hide in responses specifies whether the object will be hidden or shown in the Responses workspace and
Data Entry Module – this can be useful, for example, if there is a question you want to appear on a paper
survey but not when the survey is used in a Data Entry Module in a kiosk.
* Hide on web survey specifies whether the object will be hidden or shown on a web survey generated from
the form
* Position Locked specifies whether you can drag the object to move or reshape it (you can move or reshape
the object using the Position controls in the Inspector tab even if Position Locked is selected).
* Position controls specifying the exact position and shape of the object
* A Display name edit box containing the name used to identify the object in the Page Manager
* A Printable tick box specifying whether the object should be printed
* A Hint text box allowing you to enter text that will appear in a tooltip when the pointer is moved over the
object in a web or response form.
In addition, the following controls appear on the Inspector tab for:
* Text objects:
* Is HTML specifies whether the text in the object should be interpreted as HTML code for web surveys
* Line, column line and routing line objects:
* Line colour specifies the colour of the line
* Line width specifies the width of the line
* Picture objects:
* Description is an optional comment documenting the picture
* Transparent specifies that any parts of the picture using the ‘transparent’ colour will be clear so that you
can see any objects beneath it – see Making a picture ‘transparent’, 180, for details
* Maintain picture aspect ratio specifies whether the aspect ratio is fixed when you resize the picture (this
only has an effect if Scale to fit is ticked)
* Scale to fit specifies whether you can resize the picture
* Picture displays a browse button when selected allowing you to change the picture file shown in the
object.
The Properties sidebar | 219
* Navigation button:
* Description a comment documenting the button
* Maintain picture aspect ratio specifies whether the aspect ratio is fixed when you resize the button
* Progress bar:
* Maintain picture aspect ratio specifies whether the aspect ratio is fixed when you resize the progress bar
* Preprinted barcodes
* Display Code specifies whether to show or hide the human-readable version of the data below the
barcode
* OLE objects:
* Description is an optional comment documenting the object
* OleObject displays a browse button when selected allowing you to change the OLE object file in the
object
* Scale to fit specifies whether the object is stretched/shrunk when it is resized.
* Question number object:
* Auto Renumber specifies whether the number should be updated automatically
* Is HTML specifies whether the text in the object should be interpreted as HTML code for web surveys.
Button tab
The Properties sidebar for a navigation button has a button tab:
The picture shows the Button tab for a text button; the label and Text/Symbol controls do not appear when an image
button is selected.
220 | Chapter 8: Constructing a Survey
The controls in the Button tab are exactly the same as in the Button Wizard (see Adding navigation buttons,
page 184) except that if you select Symbol, the Text text box is replaced by a Symbol drop-down list box:
Choosing a Symbol from the Properties sidebar is equivalent to entering the corresponding character as the Text and
setting the font to Wingdings in the Format Palette sidebar.
Progress bar tab
The Properties sidebar for a Progress bar has a Progress bar tab. The only control in the Progress bar tab is a style
drop-down list box allowing you to change the style of the Progress bar – the options are exactly the same as in the
Button Wizard when you add a progress bar (see Adding navigation buttons, page 184).
Line tab
The Properties sidebar for a graphic line has a Line tab allowing you to set the colour and width of the line. You can
also set these properties for the line using the Format Palette sidebar: see page 151 for details.
The Properties sidebar | 221
Number Pattern tab
The Properties sidebar for a Question number object has a Number Pattern tab.
The controls on this tab also appear on the Number Pattern tab for a question – see The Number Pattern tab,
page 203, for details.
Routing Rules tab
The Properties sidebar for a routing line has a Routing Rules tab, which allows you to view and edit the routing rule in
exactly the same way as in the Routing Rules dialog box – see Editing routing rules, page 194, for details.
222 | Chapter 8: Constructing a Survey
Form properties
The Properties sidebar for the form has Form, Margins, Format, Header, Footer and Inspector tabs. It also has an
HTML tab if you have selected CamSp script or Your web server in the Web Settings page of the Options dialog box
(Tools menu) as the survey Response method (it is not displayed if you have selected surveyserver).
You can display the Properties sidebar for the form by:
* Selecting Form, Header, Footer, or HTML Settings (Form menu) to open it at the appropriate tab
* Right-clicking on the background and selecting Edit properties
* Clicking on the form background if the Properties sidebar is pinned.
Form tab
To hide or show all question numbers:
Click the Disable numbers tick box – the box is ticked when question numbers are hidden.
You can override the Disable numbers setting for an individual question using the Disable question
number setting in the Number Pattern tab (see page 203) of the Properties sidebar for the question.
The Properties sidebar | 223
However, if you tick or clear Disable numbers in the Form tab again, it will remove any overrides for
individual questions.
To set auto renumbering on or off:
Click the Auto Renumber tick box – the box is ticked when auto renumbering is on. See Renumbering
questions, page 169, for more information about renumbering questions.
To set the Type of form:
Choose whether you want to print the survey Single sided or Double sided.
If you choose Double sided, the design form will have separate master pages for odd and even pages so you can
format them differently.
To set a background colour for the form:
1
Click the Fill interior tick box to select it.
2
Click the Colour button to display a standard Windows colour dialog box so that you can select the
background colour.
3
Select the required colour and click OK.
To choose a background image for the form:
1
Click the Choose button.
2
In the Open dialog box, browse to the folder containing the image you want to use, and select the image.
3
Click Open to place the image on the form background. The image will be tiled if necessary to fill the
background area.
To remove the background image, click Clear.
Margins tab
224 | Chapter 8: Constructing a Survey
To set the margins around the sides of the form:
Enter the required sizes in the boxes.
You can also make these settings using Page Setup (File menu) with the form selected.
Format tab
To set the size of the form:
1
Tick Web survey page sizes if you want to use the form to design a survey for the web – the Size
drop-down list box will show suitable sizes in pixels and the Orientation controls will be hidden.
2
From the Size drop-down list box, choose one of the default sizes or choose User Defined Size and enter
the required sizes in the Width and Length boxes.
3
For a paper-based form, choose the required Orientation.
You can also make these settings using Page Setup (File menu) with the form selected.
The Properties sidebar | 225
Header and Footer tabs
Select Adjust margin if you want the top/bottom margins adjusted so that the header/footer fits within the margin.
Select Show on the first page if you want the header/footer to appear on the first page of the survey.
There are three tabs allowing you to enter text to appear at the left, centre and right of the header or footer.
To insert a field showing the date, time, page number, total number of pages or survey title, or the result of calculating
an expression:
1
Right-click at the point in the text that you want to insert the field to pop up a menu.
2
Choose the field that you want to insert from the menu, or Advanced to display the Calculation dialog
box so that you can enter an expression (see Chapter 18, Using Expressions, for details).
If you insert more than one field, remember to insert a space between the fields.
To set the text font, size, colour and style:
1
Select the text for which you want to change the properties in the text box.
2
Press the relevant button or select the required option from the relevant drop-down list.
You can also make these settings using Page Setup (File menu) with the form selected.
226 | Chapter 8: Constructing a Survey
HTML
The HTML tab is only displayed if you have selected CamSp script or Your web server in the Web Settings page of
the Options dialog box (Tools menu) as the survey Response method (it is not displayed if you have selected
surveyserver). The HTML tab sets properties that will be used to build a web survey from the form if you select Show
as HTML (Form menu).
On this tab:
* HTML Types Setup displays the Advanced HTML Options dialog box so that you can set properties controlling
the behaviour and appearance of the web survey – see Setting advanced HTML options, page 310, for more
information.
* Web Accessibility specifies that a Web Accessibility version of the survey should be created (see Web
accessibility, page 312):
* Setup displays the Web Accessibility HTML Options dialog box so that you can specify properties of the
Web Accessibility survey – see Creating and using Web Accessibility surveys, page 313
* Validate Form checks whether the form design conforms to the Web Accessibility Guidelines. It is the
same as choosing Validate for Web Accessibility (Form menu) – see Validating a form for web
accessibility, page 313.
* Next page specifies whether a custom page is to be displayed when the respondent has completed and
submitted the survey, and the name of the HTML file containing the page.
* The Cookies group specifies whether respondents should be prevented from making more than one response:
* Allow only 1 response by specifies that respondents should be prevented from making more than one
response. Since cookies are used to prevent users responding more than once, and because cookies must
have an expiry date, you must also select an expiry date.
* Respondents will only be prevented from making more than one return if the use of cookies is enabled in
their browser. If it isn’t, they will not be prevented from sending multiple replies. If you want to impose a
The Properties sidebar | 227
more rigorous control, you can select Respondent must have cookies enabled. However, this will
prevent them completing any response if cookies are disabled. You will need to decide on the balance
between preventing people sending multiple responses and the risk that some may be prevented from
sending any response.
* Preview displays a preview window showing how the web survey will appear, but also allowing you to
generate the files ready to be uploaded to your server and invite respondents to fill in the survey. It is the
same as choosing Show as HTML (Form menu) – see Previewing and publishing a web survey,
page 316.
Navigation
The picture shows the Navigation tab for a non-surveyserver web form. For a surveyserver web form or a non-web
form, the only control on the tab is the Off-page navigation tick box.
For non-surveyserver web surveys, the Navigation tab provides an alternative to the Button Wizard (see Adding
off-page navigation buttons to a web survey, page 311) for setting off-page navigation – if you have used the Button
Wizard to set off-page navigation, the Navigation tab will reflect the settings you made in the wizard.
On this tab:
* Off-page navigation:
* web form: selects whether to place off-page navigation buttons in the workspace area (you can choose
where to put the buttons in surveyserver; if you are not using surveyserver, they will appear below the
page).
228 | Chapter 8: Constructing a Survey
* other forms: when Off-page navigation is ticked, the Page Navigator will always be displayed in the
*
*
*
*
*
Responses workspace when Page by Page (View menu) is selected; when it is not ticked, you can choose
whether to show the Page Navigator – see Viewing responses page by page, page 254, for more details.
The tick boxes in the Buttons group select which navigation buttons to include.
The Workspace colour button displays a colour picker for setting the colour of the workspace area around the
survey page when the survey is displayed in a browser.
Button style sets the style of the buttons.
Progress bar includes a progress bar showing how far, in terms of pages, the respondent has progressed
through the survey.
Progress style sets the style of the progress bar.
Inspector
Note that the settings apply to the selected form only, not the survey as a whole.
On this tab:
* Don’t display read-only warning controls whether a warning dialog box is displayed when a user tries to
change a form design that has been made read-only.
* Don’t show published warning controls whether a dialog box is displayed after you have printed a form or
used the Invitation Manager for the form asking if you want to make the form read-only.
* Read-only controls whether users can make changes to the form design
If you are going to use a scanner to input responses, it is very important to ensure that no changes are made to the form after the
survey has been printed, since KeyPoint uses the design form to determine where to read the answers from the scanned forms
and to match the answers to the questions – any changes to the design after the survey has been printed are likely to cause errors
when the responses are input.
* Add/Remove … controls whether the user can add or remove the named items in the form.
The Properties sidebar | 229
The Asset Library
The Asset Library is a database of prepared survey components. The default library supplied with KeyPoint contains a
selection of questions, introductions and conclusions. You can also use the Asset Library to store your own questions,
introductions and conclusions, but also many other types of KeyPoint object including question tables, graphics, OLE
objects and even pages. You can add items from the Asset Library when you use the New Survey Wizard to create a
new survey, or at any time later when you are using the Design workspace.
Items are stored in the Asset Library in several different categories, such as Demographics, General Introductions and
General Conclusions; these are represented by folder icons in the Asset Library.
To open the Asset Library, either:
Select Library (Tools menu).
Or, while you are creating a new survey:
Click the Library button in the Survey Design Wizard.
Using an item from the Asset Library
To use a question from the Asset Library:
1
Right-click in the library browser (left-hand) pane and choose Apply active style to decide whether to add
items in their own style (the formatting used when they were added to the Asset Library) or in the currently
active style.
2
Double-click the category in the left-hand pane in which the item is stored or click the plus sign
alongside it.
3
The category expands to show the items stored in it.
4
Select the item you want to use.
230 | Chapter 8: Constructing a Survey
5
Either:
Click the Use button to close the Asset Library and place the item after the last object in the Design
form.
Or:
Right-click and select Use Question from the menu to add the item after the last object in the Design
form without closing the Asset Library.
Adding an item to the Asset Library
You can add most types of KeyPoint object to the Asset Library, including questions, question tables, text, graphics
and OLE objects; you can also add a complete page to the Asset Library. You can add items to the Asset Library
directly from the Design workspace using a context menu command or by using copy and paste.
To add an item to the Asset Library directly from the Design workspace:
1
Right-click on the item and choose Add to Asset Library or to add a page, right-click in the background of
the page and choose Add current page to Asset Library.
The Add to Asset Library dialog box will be displayed:
2
Edit the name that will be used to identify the object in the library. The name used to identify an item
within a category must be unique in that category, but you can use the same name for items in different
categories.
3
Choose a category for the object, or, if you want to create a new category for the object, click New
category to display the New category dialog box and enter the name for a new category.
4
Press OK to add the object to the selected category.
To add an item to the Asset Library using copy and paste:
1
Copy the object you want to add by right-clicking it and selecting Copy, or by selecting the question and
pressing Ctrl+C on the keyboard.
2
Open the Asset Library.
3
Right-click the category where you want the item to be stored and select Add question from the menu.
Alternatively, to replace an existing library item with the item you copied from the form, right-click in the
category on the item that you want to replace and select Replace.
The Asset Library | 231
4
Type a name for the item in the left-hand pane and press Return to confirm the name.
5
Press Close to close the Asset Library.
Managing the Asset Library
In the Asset Library you can create, rename and delete categories and items. You can also move or copy items
between categories.
Adding a new category
To add a new category to the Asset Library:
1
Right-click anywhere in the left pane.
2
Select Add category.
3
Type the name you want to give to the category and press Return to confirm the name. (If you leave a
category empty, KeyPoint will not save it when you close the Asset Library.)
Renaming an item
To rename an item in the Asset Library:
1
Right-click the item you want to rename.
2
Select Rename.
3
Type the name you want to give it and press Return to confirm the name. The name used to identify an
item within a category must be unique in that category, but you can use the same name for items in
different categories.
Deleting categories and items
To delete a category or item from the Asset Library:
1
Right-click the item or category.
2
Select Delete.
A confirmation dialog box will be displayed.
3
Click Yes to confirm that you want to delete the item or category.
Moving an item between categories
To move an item from one category to another in the Asset Library:
1
Click the item you want to move.
2
Drag the item to its new category.
232 | Chapter 8: Constructing a Survey
Combining categories
To combine two categories:
Drag the first category and drop it on the second category.
KeyPoint adds all the items from the first category to the second category and deletes the first category name.
Distributing the survey
Once you’re happy with the survey, you can distribute it:
* on paper, for example, by mail
* electronically using the internet.
The remaining sections of this chapter describe how to distribute paper-based surveys; see Chapters 11, Web
Surveys, and 12, surveyserver, for details of how to distribute web surveys.
You can also use KeyPoint to carry out a survey using the Responses workspace or the Data Entry module directly – see the
following chapter for details. Examples of direct-entry surveys include telephone surveys, survey kiosks and the use of hand-held
devices by interviewers.
However, whichever method you use, before you distribute the survey you should first check it to make sure that:
* All spelling and grammar is correct (use the KeyPoint spellchecker to help with this: see The KeyPoint
Spellchecker, page 134)
* The question instructions are correct, clear and unambiguous
* The layout is clear and attractive.
You should give copies of the survey to experts for their comments. You should also administer the survey to a group
from the target population. This will help you identify problem areas, such as unclear instructions.
Chapter 6, Introducing Surveys, contains more advice and suggestions on survey design.
When you distribute the survey you can choose to use the Invitations Wizard. This enables you to:
* select the people to be sent the survey from the Address Book
* keep track of responses to see who has and has not replied yet
* fill in (prepopulate) text questions linked to fields in the Address Book with values held in the Address Book
(mail merge)
* automatically update linked Address Book fields with the answers given in the returned survey.
See Using the Invitations Wizard for a paper-based survey, page 237, for details. For electronic distribution, the
Invitations Wizard also enables you to send emails inviting the selected people to complete the survey.
Previewing the survey before you print it
To preview the survey:
1
Select Print Preview (File menu).
2
Click the Prior Page, Next Page, First Page and Last Page buttons to navigate back and forth through the
survey.
Distributing the survey | 233
3
Click the Print button if you want to print the survey, or click the Close button to return to the form.
Printing the survey
This section shows you how to print a survey directly on a printer: see Using a commercial printer, next section, and
Printing to PDF, page 235, for how to print to a PostScript or PDF file.
You can also print surveys using the Invitations Wizard – see Using the Invitations Wizard for a paper-based survey,
page 237, for details.
To print the survey:
1
Select Print (File menu) to display the Print dialog box.
2
In the Print dialog box, accept or change the printer name. Click the Properties button if you want to
make adjustments to the printer settings.
3
Make sure the Print to file tick box is cleared.
4
Specify the print range and the number of copies.
5
Click the OK button.
6
A dialog will be displayed asking if you want the form to be made ‘read only’ to prevent any changes
being made to it. Click Yes to make the form read only; click No to leave the form editable.
It is particularly important to ensure that there are no changes made to the design after the survey has been printed if
the returned forms are going to be input using a scanner as KeyPoint uses the design form to determine where the
answers should be read from the scanned forms and how they should be matched to the questions. Any changes
made to the design after the surveys have been printed are likely to cause errors when the responses are input. You
can change the read-only status of the form using the Inspector tab in the Properties sidebar for the form.
Using a commercial printer
If you are distributing a survey on paper, and you need a large number of copies, you should consider using a
commercial printing service. This may be less expensive than you think, especially if they use a system such as Xerox
Docutech, which is designed for print runs that are relatively small in commercial terms, and prints to a resolution of
600dpi, the same as a typical office laser printer.
Print jobs are delivered to commercial printers as files: for example, as email attachments. You can send a PDF
(Portable Document Format) or a PostScript file, created by a PostScript printer driver. Before you create either type
of file, you should do the following:
* check and proof-read the survey very thoroughly
* ensure that any pictures included in the survey have a resolution suitable for the printer to be used.
Also, if you want to send a PostScript file, you will need to:
* obtain and install a suitable PostScript printer driver; the printing service you plan to use will advise you on
this if necessary, and you can obtain most printer drivers free of charge from the printer manufacturers’
websites.
KeyPoint supports the production of PDF files using the KeyPoint PDF Printer driver – see the next section for details.
234 | Chapter 8: Constructing a Survey
To create a PostScript printer file:
1
Select Print (File menu) to display the Print dialog box.
2
From the drop-down Printer Name list, select the PostScript printer driver you want to use. Click the
Properties button if you want to make adjustments to the printer settings. (You should consult the printing
service you are using for advice on what printer settings to use.)
3
Click the Print to file tick box, and click OK.
4
In the Print to File dialog box, choose a folder to save the file in, give the file a name, and click OK.
5
A dialog will be displayed asking if you want the form to be made ‘read only’ to prevent any changes
being made to it. Click Yes to make the form read only; click No to leave the form editable.
It is particularly important to ensure that there are no changes made to the design after the survey has been printed if
the returned forms are going to be input using a scanner, as KeyPoint uses the design form to determine where the
answers should be read from the scanned forms and how they should be matched to the questions. Any changes
made to the design after the surveys have been printed are likely to cause errors when the responses are input. You
can change the read-only status of the form using the Inspector tab in the Properties sidebar for the form.
Printing to PDF
When you install KeyPoint, the KeyPoint PDF Printer driver (provided by PDF-XChange 4) is also installed
automatically so that you can output surveys (and responses and presentations) in PDF (Portable Document Format).
PDF documents can be viewed and printed using Adobe’s Acrobat Reader program, which runs on many different
types of computer. PDF is very widely used, and many applications install Acrobat Reader, so most people will be
able to read and print documents you send them in PDF format without taking any special action. However, if they
don’t already have Acrobat Reader, it can be downloaded free of charge from the Adobe website.
KeyPoint PDF Printer will appear in the printer list when you print documents from KeyPoint, but not for any other applications
on the PC.
Printing to PDF is especially useful if you want your output to be printed by a commercial printer – see the preceding
section.
To print a KeyPoint form to PDF:
1
Select Print (File menu) to display the Print dialog box.
Distributing the survey | 235
2
In the Print dialog box, select KeyPoint PDF Printer from the Name drop-down list box:
3
Click Properties to display the KeyPoint PDF Printer Properties dialog box:
This dialog box has a large number of settings allowing you to fine-tune the way the PDF is created. The
settings are arranged in groups, which are displayed in the right-hand panel when you click on the menu
236 | Chapter 8: Constructing a Survey
of options down the left-hand side. For help in using the dialog box, click on the About tab and then click
on the Help button.
* It is important to know how the Save options in the KeyPoint PDF Printer Properties dialog box control
are set, since this controls what will happen when you click Print in the Print Preview to save the form
as a PDF file – see the Help for the Save panel for details
* Unless you are sure that the people you are sending the PDF files have copies of all the fonts you have
used, you should ensure that the Embed All Fonts tick box is ticked in the Fonts panel
* If you are creating the PDF to send to a commercial printer, you should consult them for advice on
what printer settings to use.
4
When you have set the KeyPoint PDF Printer properties, click the OK button to confirm your settings and
return to the Print dialog box.
5
In the Print dialog box, specify the print range and the number of copies. You do not need to tick Print to
file when KeyPoint PDF Printer is selected as the printer – the output is saved automatically as a PDF file.
6
Click OK to print the form.
7
By default, a dialog box will be displayed asking if you want the form to be made ‘read only’ to prevent
any changes being made to it. Click Yes to make the form read only; click No to leave the form editable.
It is particularly important to ensure that there are no changes made to the design after the survey has been printed if
the returned forms are going to be input using a scanner, as KeyPoint uses the design form to determine where the
answers should be read from the scanned forms and how they should be matched to the questions. Any changes
made to the design after the surveys have been printed are likely to cause errors when the responses are input. You
can change the read-only status of the form and choose whether to display the warning dialog box using the Inspector
tab in the Properties sidebar for the form – see Inspector, page 229.
Using the Invitations Wizard for a paper-based survey
The previous sections showed you how to print a number of identical surveys. The following sections show you how
to use the Invitations Wizard to print:
* surveys customised for individual recipients in your address book (see The Address Book, page 244, for more
information about the Address Book). In order to do this, you will need to link one or more text questions in
the survey to fields in the Address Book – see the following section, Creating a contact link in a paper-based
survey, for details.
* surveys with a unique identifier allowing you to track responses and/or automatically update the Address Book
when the surveys are returned. The unique identifier can be either:
* a special text question, which will be printed with the unique identifier as its answer – see the following
section, Creating a contact link in a paper-based survey, for details.
Or, if you are using the KeyPoint Scanning Module to input responses:
* a preprinted barcode – see Preprinted barcodes, page 181, for how to add preprinted barcodes to a
survey.
The following section describes how to link questions to your address book and create a unique identifier question for
tracking; if you are using a preprinted barcode as the unique identifier for use with the KeyPoint Scanning Module
and you do not want to make any links to your address book, you can skip the next section and go straight to Printing
surveys, page 239.
Distributing the survey | 237
Creating a contact link in a paper-based survey
In order to use the Invitations Wizard to print customised surveys for individual recipients in your address book, you
must link one or more text questions in the survey to the Address Book. You do this using the Contact Link tab in the
Properties sidebar:
To link a text question to a field in the Address Book for mail merge and/or automatic updating:
1
Select the question on the form in the Design workspace.
2
Display the Contact Link tab in the Properties sidebar.
3
Choose the required Address Book field from the Field drop-down list box.
If a field is selected, at least one of the tick boxes in the next two steps must be selected – you can tick
both if required.
4
Tick Update if you want the Address Book automatically updated with the answer given to the question
when the returned survey is entered into a new response (by scanning or manually in the Responses
workspace) – you will be asked to confirm that you want to make the change. In order for the Address
Book to be automatically updated, the survey form must also have a question linking the respondent to
the invitation – see the next set of instructions.
5
Tick Prepopulate if you want the question filled in with the values in the linked Address Book field for the
selected respondents when the surveys are printed using the Invitations Wizard.
You can tick both Update and Prepopulate if required – the link to the Address Book has no effect if neither is ticked.
If you want to track responses and/or automatically update the Address Book when the surveys are returned, KeyPoint
must be able to identify the respondent. There are two ways of doing this:
* you can include one (and only one) identification question on the survey – see the instructions at the end of
this section.
* If you are using the KeyPoint Scanning Module to scan in the returned surveys, you can place a preprinted
barcode on the survey – see Preprinted barcodes, page 181, for how to add preprinted barcodes to a survey.
When you print the surveys using the Invitations Wizard, the identification question or barcode will be filled in with a
unique identifier so that when the survey is returned KeyPoint can link it back to the invitation and the contact’s entry
in the Address Book.
238 | Chapter 8: Constructing a Survey
To create an identifier question:
1
Add a text question to the survey form. Respondents should not change the identifier placed in the
question when it is printed, so it should be marked, for example, as ‘For office use only’.
2
Select the question and display the Contact Link tab in the Properties sidebar.
3
Tick Use for contact identification. Web survey responses are automatically recognised by KeyPoint, so
Use for contact identification has no use for web surveys. This means that if you are carrying out a
mixed-mode survey (paper and electronic), you should hide the contact identification question on the
web survey – tick Hide on Web Survey on the Inspector tab.
Printing surveys
You can use the Invitations Wizard to print surveys with the respondent’s name, etc, taken from your address book.
You can also include a unique identifier in the form of a question or a barcode so that the respondent can be
identified when the response is input or scanned. Alternatively, you can include an anonymous barcode, which
identifies the response for tracking purposes but is not linked to your Address Book. See the previous section for how
to link surveys to your Address Book, and Preprinted barcodes, page 181, for how to add preprinted barcodes to a
survey.
To print surveys using the Invitations Wizard:
1
Select Invite (Tools menu) to start the Invitations Wizard.
2
Click Next in the introductory step page, if it is displayed.
3
Tick Paper in the Invitation type page, and click Next to display the next page.
The Select contacts dialog box will be displayed automatically:
The left-hand pane shows the contacts in your Address Book; the right-hand pane will show the contacts
you have selected for this survey mailing.
Distributing the survey | 239
If you right-click in the left-hand pane, a context menu allows you to add new contacts to the Address
Book, delete a contact from the Address Book, change a contact’s properties and choose which groups a
contact belongs to. For more information on these operations, see The Address Book, page 244.
4
If you want to print unique but anonymous survey forms:
a
Click OK.
b Select Anonymous.
c
Set the Number of Unique Responses required.
d Click Next to display the Save Invitation Details page.
The unique identifier takes the form of a special text question (see previous section, Creating a contact link in a paper-based
survey) or preprinted barcode (see Preprinted barcodes, page 181, for how to add preprinted barcodes to a survey). KeyPoint
will only be able to track anonymous surveys with preprinted barcodes if you scan the returned surveys into KeyPoint using the
KeyPoint Scanning module to read the barcode.
Otherwise, to select respondents from your address book:
a
Select Show invalid if you want to show contacts that have been marked as invalid (see Adding a
contact to the KeyPoint Address Book manually, page 245, for how to mark contacts as invalid).
Invalid contacts will be shown with a horizontal line through them in the list.
b If you have defined groups within your Address Book and want to choose contacts from that group
only, select the required group from the drop-down list box at the top of the dialog box.
c
To add a contact to the invitation to fill in the survey, click on the contact in the left-hand pane, then
click:
To add all the contacts in the selected group to the invitation, click:
To remove a contact from the invitation, click on the contact in the right-hand pane, then click:
To remove all the contacts from the invitation, click:
d Repeat Steps b and c until you have selected all the contacts you want to include in the invitation.
e
Click OK to return to the Recipients page in the Invitations Wizard.
The list box shows the contacts you have selected for the invitation. If required, click Address Book to
redisplay the Select contacts dialog box to change your selection.
f
Click Next to display the Save Invitation Details page.
240 | Chapter 8: Constructing a Survey
5
In the Save Invitation Details page:
a
Enter a name for the invitation – you use this to identify the invitation for sending follow-up surveys
using the Invitation Manager (see The Invitation Manager and sending a follow-up mailing,
page 328) and for tracking responses (see Tracking responses, page 327).
b Untick Print Immediately if you do not want to print the surveys straight away – you will be able to
print them later using the Invitation Manager (see The Invitation Manager and sending a follow-up
mailing, page 328).
6
Click Finish.
* If you unticked Print Immediately in Step 5, you will be returned to the Design workspace.
* If you left Print Immediately ticked, the Print dialog box will be displayed so that you can select print
options and print the surveys – see Printing the survey, page 234, including the subsections Using a
commercial printer and Printing to PDF.
When the surveys are printed, there will be one survey for each of the contacts you selected or for the number of
anonymous unique surveys you selected (assuming you do not choose to print more than one copy in the Print dialog
box). If you included a contact identification question or preprinted barcode, it will contain a unique identifier. Any
text questions with Prepopulate ticked (see previous section) will be filled in with the corresponding field value for
the contact taken from the Address Book.
Tracking responses
In order to track responses, you must have included a contact identification question or barcode in the survey (see
Using the Invitations Wizard for a paper-based survey, page 237) and used the Invitations Wizard to print the
survey (see previous section).
To see statistics showing how many responses you have received to your invitations:
1
Choose Surveys (File menu).
2
Click on the Tracking tab.
3
Click Close to return to the current survey.
Tracking responses | 241
The Invitation Manager and sending a follow-up mailing
The Invitation Manager allows you to view the invitations you have sent with a list of the contacts you sent them to,
showing whether they have replied.
To open the Invitation Manager:
1
Select the Design workspace.
2
Select Invitations (Tools menu) to display the Invitation Manager:
The left-hand pane lists the invitations you have sent for the current survey.
The contacts tab shows the contacts to whom the selected invitation was sent (the Display Name and Email columns
do not appear if you chose to print anonymous surveys), and whether a reply has been received.
The Printed field shows when the surveys for the selected invitation were printed. If they have not been printed yet, it
contains a Print button.
To print surveys that were not ‘printed immediately’ in the Invitations Wizard:
1
Open the survey in the Design workspace and select the form used in the original invitation.
2
Select Invitations (Tools menu) to display the Invitation Manager.
3
Click in the Invitations list on the invitation whose surveys you want to print – if they have not been
printed yet, the Sent/Printed field contains a Print button.
4
Click Print to display the Print dialog box so that you can select print options and print the surveys – see
Printing the survey, page 234, including the subsections Using a commercial printer and Printing to
PDF.
242 | Chapter 8: Constructing a Survey
To reprint surveys that have not been returned yet:
1
Open the survey in the Design workspace and select the form used in the original invitation. If required,
you can edit the form in the Design workspace to explain why you are resending it.
2
Select Invitations (Tools menu) to display the Invitation Manager.
3
Click in the Invitations box on the invitation that you want to follow up (you can check which surveys have
not been returned yet on the Contacts tab).
4
Click Follow-up to start the Invitation Wizard.
5
Choose whether to carry out a paper or email follow-up – the following instructions assume you are going
to carry out a paper follow-up (see The Invitation Manager and sending a follow-up mailing, page 328,
for how to carry out an email follow-up).
6
Click Next.
7
What happens next depends on whether the surveys in the invitation were linked to individuals in your
address book or anonymous:
* If the surveys in this invitation are linked to individuals in your address book, the Recipients page will
be displayed showing the respondents who have not replied yet:
a
If required, click Address Book to display the Select contacts dialog box to change the list of
contacts to be sent the follow-up survey. (If all respondents in the invitation have already replied,
the Select contacts dialog box will be displayed automatically so that you can select the contacts
you want to send the follow-up survey to.)
b Click Next to display the Save Invitation Details page.
* If the surveys in this invitation are anonymous, the Select Contacts dialog box will be displayed:
a
Click OK to display the Recipients page.
If you want to link the follow up to specific people in your address book rather than anonymously, you could select them in the
Select Contacts dialog box.
b Select Anonymous.
c
Set the Number of Unique Responses required.
d Click Next to display the Save Invitation Details page.
8
In the Save Invitation Details page, enter a name for the follow-up invitation and choose whether to print
the surveys immediately.
9
Click Finish to close the Invitation Manager and to print the surveys if you chose to print them
immediately.
To delete an invitation from the Invitation Manager:
1
Open the survey in the Design workspace and select the form used in the invitation.
2
Select Invitations (Tools menu) to display the Invitation Manager.
3
Click in the Invitations box on the invitation that you want to delete.
4
Click Delete.
The Invitation Manager and sending a follow-up mailing | 243
The Address Book
The Address Book is used to hold the contact details of your respondents.
Choosing which Address Book to use
You can use KeyPoint’s own internal Address Book or an Address Book held in an external database such as a
company’s contact relationship manager. This section shows you how to select an external Address Book once a link
to it has been created; if you want to set up a link to an external database, you should contact your network/database
administrator – they can find instructions for setting up the link in Appendix E, Connecting KeyPoint to an external
address book.
To choose whether to use KeyPoint’s own internal Address Book or an Address Book held in an external database:
1
Choose Options (Tools menu) to display the Options dialog box.
2
Click on Address Book to display the Address Book page:
3
Click on the required Address Book – the KeyPoint default Address Book is the internal KeyPoint Address
Book; any others listed are links to external databases and will have names given to them when the links
were set up. The current active Address Book will be shown in bold italic type.
4
Click Activate – the selected Address Book will be activated when you close the dialog box.
The other buttons on this page are for setting up and editing the links to external databases and are for expert use
only – see Appendix E, Connecting KeyPoint to an external address book.
244 | Chapter 8: Constructing a Survey
The remaining instructions in this section apply to the currently active Address Book.
Displaying the Address Book
The active Address Book is displayed within the Select Contacts dialog box (see, for example, page 239) so that you
can the select the contacts that you want to send invitations/surveys to. You can right-click on the Address Book in the
Select Contacts dialog box to display a context menu allowing you to add, edit and delete contacts, and specify which
groups they belong to.
You can also display the Address Book independently to carry out these operations, and a number of others, including
creating groups and importing contacts from another Address Book.
To open the KeyPoint Address Book independently:
Select Address Book (Tools menu).
Adding a contact to the KeyPoint Address Book manually
To add a contact to the KeyPoint Address Book:
1
Select New Contact (Contacts menu) to display the Edit Contact dialog box:
(This dialog box is also displayed when you choose Properties (Contacts menu) to edit an existing
contact.)
2
Enter a Display name to identify the contact in the Address Book (this field must be filled in).
3
Tick Shared if your Keypoint ‘System’ folder is shared with other users and you want this contact to appear
in their Address Book as well as yours; leave it unticked if you want the contact to appear in your Address
Book only.
4
Tick Invalid if you want to mark the contact as invalid for some reason – invalid contacts will be shown
with a horizontal line through them in the Address Book and will be hidden in the Invitation Manager by
default, though you can show them if required.
The Address Book | 245
5
Fill in any of the other fields on the General and other tabs – you will need to fill in the Email field if you
want to use the Invitations Wizard to send invitations by email.
6
Click OK to return to the Address Book dialog box.
Importing contacts into the KeyPoint Address Book
To import contacts into the KeyPoint Address Book:
1
Select Import (File menu) to display the Import dialog box listing the types of file you can import.
2
Click on the type of Address Book file you want to import to select it and click Next.
What happens next depends on the selection you have made:
* If you selected Microsoft Outlook, you may first see a warning about allowing access to your Outlook
Address Book; this is part of Windows’ protection against viruses. Choose the period you want for
access, click Yes, then go to Step 5
* If you chose one of the other address book formats, go to Step 3.
3
The Choose file page of the Import Wizard will be displayed. Click Browse to display a standard Windows
Open dialog box, select the file you want to import and click Open to return to the Choose file page of
the Import Wizard.
Click Next to continue – what happens next depends on the type of file you are importing:
* If you are importing an old KeyPoint Address Book (addrbook.bat), go to Step 5
* If you are importing a csv file, go to Step 4.
4
In the Separators page:
a
Tick Column names in first row if the first line of the file contains the field names of the address book
you are importing – the sample at the top of the dialog box shows the first few lines of the file.
b Choose the character used to separate fields.
c
Choose the character used to delimit fields.
d Click Next to display the Match Columns page.
This has two columns: the Address Book Column, which lists all the fields in the KeyPoint Address
Book; and the CSV Column, which is blank initially. You use this page to tell KeyPoint how to match
fields in the CSV file and fields in the KeyPoint Address Book.
e
In the row for each KeyPoint Address Book field that you want to import into, click twice in the CSV
Column to display a drop-down list. The list will show the fields in the first line of the csv text. Choose
the csv field corresponding to the selected KeyPoint Address Book field.
You must choose a matching field for the Display name field; matching the other fields is optional.
f
5
Click Next to continue.
The final step displays the addresses in the Address Book you have selected with a tick box next to each.
Tick the boxes to the left of the contacts you want to import; click All to select all the contacts.
Click Finish when you have completed the selection.
246 | Chapter 8: Constructing a Survey
KeyPoint inserts the contacts into the Address Book.
Editing and removing contacts
To edit a contact in the KeyPoint Address Book:
1
Select the contact in the right-hand pane of the Address Book dialog box.
2
Select Properties (Contacts menu) to display the Edit Contact dialog box – see Adding a contact to the
KeyPoint Address Book manually, page 245.
3
Make the changes and click OK to return to the Address Book dialog box.
To remove contacts from the KeyPoint Address Book:
1
Select the contact(s) in the Address Book – you can select more than one using Ctrl+click or Shift+click
in the usual way.
2
Select Delete selected (Contacts menu).
3
You will be asked to confirm that you want to delete the contact(s).
Contact groups
You can organise your contacts into groups to make them easier to find and select in the Address Book.
To create a new contact group:
1
Select New Group (Groups menu) to display the Edit Group dialog box.
2
Enter a name for the group and click OK.
To rename a contact group:
1
Select the group in the left-hand pane in the Address Book.
2
Select Properties (Groups menu) to display the Edit Group dialog box.
3
Edit the name and click OK.
To delete a contact group:
1
Select the group in the left-hand pane in the Address Book.
2
Select Delete selected (Groups menu).
Deleting a group does not delete the contacts in the group from the Address Book.
To specify which groups a contact belongs to:
1
Select the contact in the right-hand pane of the Address Book.
2
Select Groups (Contacts menu) to display the Select groups for… dialog box.
3
Tick the boxes for the groups you want the contact to belong to.
The Address Book | 247
To share the contacts in a group:
1
Select the group in the left-hand pane in the Address Book.
2
Select Share Group (Groups menu).
To unshare the contacts in a group:
1
Select the group in the left-hand pane in the Address Book.
2
Select Unshare Group (Groups menu).
Note that there is no group share attribute – sharing or unsharing a group sets or unsets the share attribute of the
individual contacts in the group at the time you select the command. This means that you can unshare an individual
contact within a group after you have shared a group. Similarly, if you add an unshared contact to a group after it has
been shared, the contact will still be unshared.
For more information
On the Style Library and survey design options, see Chapter 7, Working with Surveys in KeyPoint.
On creating a web survey, see Chapter 11, Web Surveys.
248 | Chapter 8: Constructing a Survey
9
Entering and Processing Responses
In this chapter you will see how to enter survey responses.
You will learn about:
* Gathering and checking responses
* The Responses workspace
* Entering responses
* Entering invalid answers
* The Data Entry Module
* Working with responses
* Searching for text
* Exporting and importing data
* Bureau services.
Chapter 9: Entering and Processing Responses | 249
Gathering the data
In KeyPoint, a survey completed or returned by a respondent or an interviewer is known as a ‘response’. There are
several ways of entering response data. This chapter describes:
* Entering the data manually into KeyPoint’s Responses workspace or the Data Entry Module
* Importing the data from another application.
You can also enter response data by:
* Processing the data from email and web surveys – see Chapter 11, Web Surveys and Chapter 12,
surveyserver for details
* Using the optional KeyPoint Scanning Module – see Chapter 10, KeyPoint Scanning Module.
If you are using the optional Offline Server, you can enter data manually into the Data Entry Module while the PC is
offline using the procedures described in this chapter. Instructions for uploading the responses to the Offline Server
and then downloading them to the KeyPoint database are given in Chapter 13, Offline Server.
Administering and checking responses
To ensure the best possible results, it’s very important that you have a system in place for processing the responses to
the survey.
Your system should have rules for:
* Recording responses received and undeliverable items
* Deciding whether a response is acceptable for processing
* Resolving errors made by the respondent
* Entering the data.
When you receive a response by mail or from an interviewer, you should write the date it was received on the
response form. You may also want to write consecutive numbers on each response received. You can then enter the
number when you enter the rest of the data. This makes it easier to refer back to the original response later if you
need to check something.
If you distributed a survey by post, it is important to record any forms that were returned undelivered. A large number
of undelivered surveys could affect the validity of the results, as it could mean that the sample is no longer
representative of the population. It will also help you when you update the mailing list for future mailshots.
Once the responses have been recorded, they should be edited twice: once to weed out the obviously unusable
responses (for example, if important sections have not been filled in), and a second time to edit each of the remaining
responses in detail and make any corrections and notes that are necessary for the data to be entered. If you have
more than one editor, you should have an editing sheet that shows how different sections should be edited. This will
help to standardise the edits that are made.
Typical errors respondents make include:
* Marking more than one answer in a single-answer multiple choice
* Skipping a question or section they should have answered
* Answering a question or section they should have skipped.
250 | Chapter 9: Entering and Processing Responses
In all these cases, the answer should not be used in any analyses. Editors can either delete it or mark it for the data
capturers as unusable.
Setting options for response entry
You can set a number of options controlling the way responses are entered using the Responses page in the Options
(Tools menu) dialog box:
In this page you can choose:
* ‘Fast’ data entry mode – see Fast data entry, page 257
* Delete confirmation – a confirmation dialog box will be displayed when you delete a response
* Show only current response – the Responses workspace or Data Entry Module will only show the current
response or a new blank response.
You may want to use this setting in situations, such as a kiosk, where respondents fill in their own answers and
you do not want them to be able to see or edit other people’s responses. When this setting is selected and a
respondent saves their response, they will be reminded that they will not be able to change their answers once
the response has been saved and they will be given the opportunity to cancel the save operation.
* Lock completely in Full Screen mode – the PC will be locked completely when you choose Lock in full
screen mode – see Full Screen mode, page 255, for details.
* Show information bar – shows the information status bar at the bottom of the Responses workspace.
You may want to use this setting in situations, such as a kiosk, where respondents fill in their own answers and
you do not want them to be able to see how many other people have entered responses.
Setting options for response entry | 251
* Disable double clicking to change Full Screen mode – you will still be able to press f9 to switch in or out of
Full Screen mode, or select Full Screen (View menu) to switch into it.
* Auto save response when no activity for … seconds – responses will be saved automatically if there has
been no activity for the set period of time.
* Delete partially complete responses that can’t be saved – if autosaving is selected and the response
cannot be saved (for example, if a required question has not been answered), the response will be
automatically deleted at the end of the set time. If this option is not selected, a warning dialog box will be
displayed explaining the problem in exactly the same way as when an attempt is made to save an
incomplete response manually.
The auto saving option is particularly useful when the Responses workspace or the Data Entry Module is used
in a survey kiosk or mobile device where respondents are unsupervised and may walk away without saving
the response.
* Use this location for responses – when responses are entered manually in the Responses workspace or the
Data Entry Module, the contents of the text box are added as an answer to the Location system question (the
Location question is left blank if the text box is empty and for responses entered in other ways, such as from a
web survey or a scanner).
* Update location when editing responses – the location of the edited response will be automatically
updated to the current location setting.
To make it easier for analysis, the Location system question is structured as a multiple choice question, where
each new entry becomes a new multiple choice answer. If the Location is blank for all responses, the Location
column is automatically hidden in the Analysis grid. If required, you can choose to hide all the system question
columns – see The Survey page, page 140.
The Responses workspace
You use the Responses workspace to enter response data directly into the KeyPoint database by hand.
The optional Data Entry Module consists, essentially, of just the Responses workspace, and the instructions given in
this chapter for using the Responses workspace apply equally to the Data Entry Module unless they say otherwise –
see The Data Entry Module, page 263, for more details.
The Responses workspace displays a copy of the survey you designed in the Design workspace. You use this to fill in
the response data. As you enter the data, you will be directed from one question box to the next, according to the
survey’s routing settings.
You cannot make any changes to the layout of the questions, or to the page settings in the Responses workspace –
you have to make these changes in the Design workspace.
The data entry tools in the Toolbar
252 | Chapter 9: Entering and Processing Responses
The buttons appearing in the top row in the picture also appear in the Design workspace – see Toolbar, page 101, for
details. The data entry tools appearing in the bottom row are described in the following table:
Button
Name
Use this button to…
Scan Responses
scan responses into KeyPoint using the optional KeyPoint Scanning Module (see
Chapter 10 for details of the KeyPoint Scanning Module)
Split Form
split the screen for responses input using the optional KeyPoint Scanning Module
so that the lower part shows the original scanned input (see Chapter 10 for details
of the KeyPoint Scanning Module)
Download Responses
download responses from the web, email or Offline Server (see Chapter 11, Web
Surveys, Chapter 12, surveyserver and Chapter 13, Offline Server.)
First Response
view the first response
Previous Response
view the previous response
Next Response
view the next response
Last Response
view the last response
Save Response
save changes to the current response
New Response
add a new response
Delete Response
delete the current response
Delete All/Subset
delete all responses if the Subset button is off; delete selected responses if the
Subset button is on
Cancel Changes
cancel changes made to the current response
Subset On/Off
when on, only responses satisfying the Analysis Grid filter conditions (see Filters,
page 383) can be viewed, and they are sorted in the same order as in the Analysis
Grid; when off, all responses can be viewed and they are sorted in the order they
were entered
The first three buttons in the table and the Subset On/Off button do not appear in the Data Entry Module.
The Responses workspace | 253
The Response menu
The Response menu has all the functions carried out by the data entry tools in the Toolbar except for Scan
Responses (which is in the Scan menu), Download Responses (which is in the File menu) and Subset On/Off (which
has no equivalent menu command).
In addition to these, it also has Next Question and Previous Question commands for jumping to the next or previous
question in the form, and the Copy Response command for copying a response.
Viewing responses page by page
You can choose to view responses to multi-page surveys:
* Continuously: the pages are shown one below the other
* Page by page: only one page is displayed at a time.
To choose whether to view responses continuously or page by page:
Select Page by Page (View menu).
When responses are shown continuously, you can use the vertical scroll bar to display the next or previous pages, but
when responses are shown page by page, the vertical scroll bar can only be used to scroll an individual page, if it is
larger than the screen – it cannot be used to view the next or previous pages.
However, when Page by Page is selected, you can use navigation buttons to move between pages. There are two
types of navigation buttons:
* On page: these appear on the survey form itself – see Adding navigation buttons, page 184, for how to add
on-page navigation buttons. On-page navigation buttons appear on web surveys when they are uploaded and
in the Responses workspace, but you would probably want to make them non-printable if you are going to
print the survey forms.
* Off page: in the Responses workspace, the off-page navigation buttons appear in the Page Navigator (see
below); in web survey forms, off-page buttons appear above or below the form (see Adding off-page
navigation buttons to a web survey, page 311, for how to add off-page navigation buttons to a
non-surveyserver survey; see Customising the appearance and behaviour of a surveyserver form, page 343,
for how to add off-page navigation buttons to a surveyserver survey).
To show (or hide) the Page Navigator in the Responses workspace:
Select Page Navigator (View menu).
You can display the Page Navigator for page by page or continuous viewing and can be used in normal mode and Full
Screen mode (see the next section).
If Off-page navigation is ticked in the Navigation tab in the Properties sidebar for the form (see Navigation,
page 228), the Page Navigator is always displayed when Page by Page (View menu) is selected and cannot be
hidden.
254 | Chapter 9: Entering and Processing Responses
To use the Page Navigator:
* Press
to display the previous page in the current response.
* Press
to display the next page in the current response.
* Press
to save the current response.
Full Screen mode
If you prefer, you can enter responses in Full Screen mode. When the Responses workspace is in Full screen mode,
KeyPoint is maximised and the title bar, menu bar, status bar and toolbars are hidden so that you can concentrate on
the form, which is displayed at the currently selected magnification.
To turn Full Screen mode on:
Select Full Screen (View menu), press F9 or double-click in the form background.
To turn Full Screen mode off:
Press F9 or double-click in the form background.
The option to switch in and out of Full Screen mode by double-clicking can be disabled in the Responses page of the Options
(Tools menu) dialog box.
However, you can lock Full Screen mode to prevent the user turning Full Screen mode off unless they unlock it first –
see the following section.
Although the menu bar and toolbars are hidden, provided Full Screen mode is not locked, you can still select
commands using the keyboard shortcuts. In particular, you will probably find the following shortcuts useful:
Command
Menu
Shortcut
New Response
Responses
Ctrl+G
Save Response
Responses
Ctrl+H
Copy Response
Responses
Ctrl+J
Next Response
Responses
Ctrl+K
Previous Response
Responses
Ctrl+L
Cancel Changes
Responses
Esc
Next Question
Responses
Tab
Previous Question
Responses
Shift+Tab
Find
Edit
Ctrl+F
You can also navigate the responses using the keyboard – see Using the keyboard to navigate questions, page 258.
The Responses workspace | 255
Locking Full Screen mode
To lock Full Screen mode:
1
Right-click in the form background to display a context menu.
2
Choose Lock to display the Lock Full Screen mode dialog box:
3
Enter the password in both boxes.
4
Press OK to lock the screen.
To unlock Full Screen mode:
1
Right-click in the form background to display a context menu.
2
Choose Unlock to display the Unlock Full Screen mode dialog box.
3
Enter the password.
4
Press OK to unlock the screen.
The behaviour of the PC when Full Screen mode is locked depends on the setting of Lock completely in Full Screen
mode in the Responses page of the Options dialog box (Tools menu):
* If Lock completely in Full Screen mode is not selected, locking Full Screen mode prevents the user from
switching out of Full Screen mode, but, for example, does not prevent them using other programs on the PC
through the taskbar.
* If Lock completely in Full Screen mode is selected, locking Full Screen mode prevents the user from using
any other programs on the PC (in particular, the Windows taskbar is hidden), so all they can do is enter
responses until they unlock Full Screen mode.
Locking Full Screen mode does not disable the action of Ctrl+Alt+Del, so if there is a keyboard attached to the PC, users could
use Ctrl+Alt+Del to display the Task Manager and thus get control of the PC to run other programs, etc.
Text-to-Speech Mode
If the PC you are using has sound output fitted, you can get it to read out the text in a survey in the Responses
workspace or Data Entry Module by enabling Text-to-Speech Mode.
To enable or disable Text-to-Speech Mode in the Responses workspace or Data Entry Module:
1
If you are using KeyPoint, click on the Responses tab to display the Responses workspace.
2
Select Text-to-Speech Mode (Tools menu).
256 | Chapter 9: Entering and Processing Responses
To get the PC to read out text in the survey when the Responses workspace or Data Entry Module is in
Text-to-Speech Mode:
Move the pointer over the text you want read out.
You will need to make sure the PC's sound output is enabled and adjusted appropriately so that the voice can be
heard clearly.
To choose the voice used for Text-to-Speech Mode:
1
Select Select Voice (Tools menu) to display the Select Voice dialog box.
2
Select the required voice from the dialog box.
3
Press OK to confirm your choice and close the dialog box.
Entering responses
You can provide a hint for each question to help data entry (see The Question/Table tab, page 196). The hint is
displayed as a tooltip when you hover the pointer over the question in the Responses form. The hint is also displayed
to respondents completing web surveys.
Fast data entry
You can set a ‘Fast’ data entry mode using the Responses page in the Options (Tools menu) dialog box.
When ‘Fast’ data entry is set:
* After you have entered an answer, the entry focus will automatically move to the next question
* After you have entered an answer to the last question on the form, the response will be saved and a new
blank response created. This blank response will be deleted automatically if you do not enter any data.
Entering responses | 257
Using the keyboard to navigate questions
Entering responses in KeyPoint is quick and easy. You can select a question to enter data by clicking with the mouse,
or if you prefer to use the keyboard, you can use the following keys, as well as the command shortcuts listed earlier,
to navigate the response form:
Keys
Action
Down arrow
Move to next option in multiple choice, list, menu or ordered choice question.
Return
Move to next option in multiple choice or ordered choice question.
Right arrow
Move to next option in multiple choice question.
Up arrow
Move to previous option in multiple choice, list, menu or ordered choice question.
Left arrow
Move to previous option in multiple choice question.
Space bar
Select or deselect a tick box.
Shift+Return
Enter a line break in the text in a text question.
Survey modes – copy forms
If your survey design has one or more copy forms, you can use a copy form or the master form to enter data.
You select the required form in exactly the same way as in the Design workspace by clicking on its tab at the bottom
of the window or using Menu Form Navigation – see Displaying a form, page 121.
KeyPoint automatically records which form you used to enter the response as the answer to the ‘Mode’ system
question. You can view the answers to this Mode question in the Analysis Grid and include them in tables and graphs
in presentation forms.
When you add web responses (see Inputting responses, page 327), KeyPoint automatically assigns the appropriate
answer to the Mode question.
If required, you can hide the system questions – see The Survey page, page 140.
Responses to surveys sent out using the Invitations Wizard
If you use the Invitations Wizard to print the survey forms, KeyPoint will be able to keep track of the responses as they
are entered so that, for example, you can follow up on those that have not been returned, and can automatically
update contact details in your address book – see Using the Invitations Wizard for a paper-based survey, page 237,
for how to prepare a survey for use with the Invitations Wizard and then print it.
In order to identify the response and link it to the original invitation, the survey must contain a contact identification
question, which KeyPoint fills in automatically with a unique identification code when the survey is printed. When
you enter the responses to the survey, you should enter the identification code for each response in the contact
identification question.
258 | Chapter 9: Entering and Processing Responses
If any of the questions in the survey are linked to your address book and have Prepopulate set, you should enter the
identification code first. The answers to the linked questions will be filled in automatically with the values taken from
the address book, overwriting any answers you have already entered.
If any of the questions in the survey are linked to your address book and have Update set, and the answer you have
entered is not the same as the value already in the address book, when you save the response you will be asked if you
want to update the address book with the new value. You can answer:
* Yes to update the value in the address book for this response
* Yes to All to update the value in the address book for this response and for any other responses entered in this
session without asking for each one
* No to leave the value in the address book unchanged for this response
* No to All to leave the value in the address book unchanged for this response and for any other responses
entered in this session without asking for each one.
You will not be asked if you want to update the address book if you leave a question linked for Update blank. The
address book will not be updated, and the field will be blank in the saved response.
Entering answers to open questions
The open questions in KeyPoint are Text, Number and Date/Time. The general procedure for entering answers to
open questions is as follows:
1
Tab to the question or click on it to select it.
2
Type the answer to the question in the space.
3
Tab to the next question or click on it to select it.
Text questions
If several lines are allowed for an answer, such as for an address, press Shift+Return to move to the next line. If you
fill a line, the text will automatically wrap to the next line.
The standard Windows cut, copy and paste techniques are available when you are entering text answers.
Date/Time questions
The exact requirements for entering and editing dates and times depend on the format specified in the survey design.
If the question design uses a menu style, the correct format will be entered automatically. The correct format will also
be entered automatically if you use a date/time picker. It may be a good idea to provide a hint on the survey form
explaining the format required for date/time questions.
However, if you enter the data using an edit box, you will need to take care to make sure that you use the correct
format. For example, if the format is DD/MM/YYYY, you will need to enter a leading zero if the date or month is less
than 10 – once you have entered two digits, the / delimiter will be added automatically. On the other hand, if the
format is D/M/YY, you can either type a leading zero or follow a single digit with the delimiter character.
Entering responses | 259
Entering answers to closed questions
Multiple choice and range multiple choice questions
To enter multiple choice answers:
1
Tab to the question, or click on it to select it.
2
To select an answer using the mouse, click the box (clicking again deselects it).
To select an answer using the keyboard, use the arrow keys to move to the option and press the Space bar
(pressing the Space bar again deselects the answer). If there is a small number to the left of the box, you
can press the number in the numeric keypad to select that option (pressing the number again deselects it).
If the question is designed so that only one answer can be selected, making a new choice automatically
deselects the previous one.
3
Tab to the next question or select it by clicking.
Ordered choice questions
To enter an answer to an ordered choice question:
1
Tab to the question or click in the first answer box to select it.
2
Type a number in the box next to the first answer you want to select. Press the Down arrow key or Return
or click in the next box to move to the next option.
3
Repeat until you have typed a number next to the required number of answers. The number next to each
answer should be unique and should not exceed the total number of answers.
4
Tab to the next question or select it by clicking.
List/Menu questions
To enter an answer to a Menu question:
1
Tab to the question or click on it to select it (clicking opens the menu; clicking again closes it).
2
If the menu is open, click on the required answer, or press the Up arrow or Down arrow key to scroll
through the answers until the one required is highlighted and then press Return to select it.
If more than one answer is allowed, you can use Shift+click to select a range of adjacent answers, or
Ctrl+click to add (or remove) an individual answer to (or from) the current selection. You can also select
multiple answers by pressing Shift or Ctrl with the Up arrow or Down arrow key. You might want to add
these as instructions to respondents on your survey form.
3
Tab to the next question or select it by clicking.
To enter an answer to a List question:
1
Tab to the question or click on it to select it.
2
To select an answer from the list using the mouse, click on it (clicking again deselects it).
260 | Chapter 9: Entering and Processing Responses
To select an answer using the keyboard, press the Up arrow or Down arrow key until it is selected.
If more than one answer is allowed, you can use Shift+click to select a range of adjacent answers, or
Ctrl+click to add (or remove) an individual answer to (or from) the current selection. You can also select
multiple answers by pressing Shift or Ctrl with the Up arrow or Down arrow key. You might want to add
these as instructions to respondents on your survey form.
3
Tab to the next question or select it by clicking.
Saving and cancelling changes to responses
To save changes to a response:
Click the Tick button on the Data Entry toolbar, press Ctrl+H on the keyboard or select Save Response
(Responses menu).
To cancel changes made to a response since the last time you saved it:
Click the Cross button on the toolbar or select Cancel Changes (Responses menu).
Adding a new response
To add a new blank response:
Click the Plus button on the toolbar, press Ctrl+G on the keyboard or select New Response (Responses
menu).
‘Dirty’ data
If your responses have been checked and edited before data entry, they should contain very few errors. Normally,
KeyPoint prevents you from entering invalid data (also known as ‘dirty’ data), but if required, you can force it to
accept dirty data. The dirty data will be marked as invalid so that it is easy to find later for correction or deletion. Dirty
data will not be included in analyses in the Presentation workspace.
In ‘dirty data’ mode you can:
* enter data of the ‘wrong’ type, such as text into a numeric question
* tick more than one box in multiple choice, menu and list questions otherwise limited to a single answer
* enter invalid numbers in ordered choice questions
* ignore routing
* ignore masks
* ignore Ask If/Valid If conditions.
For a fixed-length text answer, you are still limited to the specified number of characters, even in dirty data mode.
Entering responses | 261
Entering dirty data
To enter dirty data:
1
Ctrl+click on the question. KeyPoint switches to dirty data mode for that question. You know you’re in
dirty data mode because the background colour for the question options changes. If the cursor is already
in the question, you can use Ctrl+Plus (on the numeric keypad) to switch into dirty data mode.
2
Enter the dirty data.
When you click on the next question or another part of the form, KeyPoint changes back to clean mode
automatically.
An answer marked as dirty data will appear with a coloured outline in both the Responses and Presentation tabs.
Although you can’t see the dirty data, it is displayed as a ToolTip if you move the pointer over the answer in either
the Responses workspace or the Analysis Grid.
The default colours for dirty data and cleaned data are red and blue respectively, but you can use the Options dialog
box (Tools menu) to change the colours used.
Example 1
You find that respondents using printed surveys have ticked more than one box for a multiple choice question, when
you had intended they should only tick one, and the survey design limits you to ticking one box when you enter the
data. Ctrl+click as you tick the first box, and you will be able to tick as many boxes as you need.
Note that you should switch off fast data entry (see page 257), since if this option is on, you will go straight to the next
question as soon as you tick one box.
Example 2
In a Staff Survey, you have asked respondents to fill in their departmental number, so you have created a numeric
question for the answer, with a mask restricting the answer to four digits. However, some respondents can’t
remember the number, so they have written the department name, such as Marketing, Financial Planning, and so on.
In dirty data mode, you can enter the full text of their answer, and go back later to enter the correct four-digit
response (see Cleaning dirty data, next section).
Example 3
In a survey on educational achievement, Question 10 asks respondents if they have any A-levels, and if they answer
Yes, routing directs them to Question 11 about which A-levels they have; otherwise they skip to Question 12. If a
respondent has answered No to Question 10, but nevertheless lists some A-levels in Question 11, you can enter the
contradictory answers as dirty data.
Cleaning dirty data
You can enter clean data ‘over’ dirty data by selecting the question and entering the clean data in the usual way. The
outline will change colour (to blue, unless you have changed from the default colour), indicating that the data has
been cleaned.
However, you can still see the replaced dirty data as a tooltip, when you move the pointer over the question in the
Responses workspace or the Analysis Grid.
262 | Chapter 9: Entering and Processing Responses
Editing dirty data
The previous section showed you how to add clean data to a question containing dirty data. However, even though
the question now contains clean data, it still contains the original dirty data.
To remove or change the original dirty data:
1
Ctrl+click on the question, or if the cursor is already in the question, use Ctrl+Plus (on the numeric
keypad).
The question’s background colour will show it is in dirty mode and the original dirty data will appear in it.
2
Edit the dirty data as required.
If you delete the dirty data, the question will no longer be marked as dirty (or cleaned if you have already cleaned the
dirty data).
Note that editing the dirty data in this way so that it now meets the question’s constraints (in other words, would have
been accepted as clean if you had entered it originally) does not clean the question. This ‘clean’ data is treated as if it
were dirty.
The Data Entry Module
The Data Entry Module is an optional KeyPoint component – contact Speedwell (see page 5 for contact details) for
purchase details. For more information on how to install the Data Entry Module, see Chapter 2, Installing KeyPoint.
The Data Entry Module | 263
The Data Entry Module interface only has the Responses workspace – the Design workspace and Presentation
workspace are not part of the data entry process, so are not included in the module.
The Data Entry Module is particularly useful for:
* larger surveys where you expect to have several data entry staff processing the responses
* survey kiosks
* mobile devices.
The Data Entry Module can be used in combination with the optional Offline Server (see Chapter 13, Offline Server)
so that, for example, survey kiosks and mobile devices do not need to be connected to a network while the responses
are entered.
A typical scenario for using the Data Entry Module
A computer on your network acts as the KeyPoint database server and runs the full version of KeyPoint. Several other
computers on the network each run the Data Entry Module, which is connected to the KeyPoint database server
through the network. As the responses are entered on these computers, the data is stored in the KeyPoint database.
Alternatively, with the optional Offline Server, the PCs running the Data Entry Module can be used to collect
responses while offline, and the responses then transferred to the KeyPoint database through the Offline Server when
they are connected to the network – see Chapter 13, Offline Server.
Working with responses
Filtering responses
You can choose to show all responses in the Responses workspace (you cannot filter responses in the Data Entry
Module), or just a filtered subset. In particular, you may want to do this to print (see Printing responses, page 267) or
delete (Deleting responses, page 266) a subset of the responses at the same time.
To show a subset of the responses in the Responses workspace:
1
Add the filter in the Analysis Grid (see Filters, page 383) to define the subset.
2
Set the Subset on/off button in the Data Entry toolbar on:
To show all of the responses in the Responses workspace:
Set the Subset on/off button in the Data Entry toolbar off:
264 | Chapter 9: Entering and Processing Responses
Navigating to a response
Use the buttons on the Data Entry toolbar or the commands on the Response menu to navigate back and forth
through responses.
* To move forward one Response, click the Next Response button or command (Response menu).
* To move back one Response, click the Previous Response button or command (Response menu).
* To move to the first response, click the First Response button.
* To move to the last response, click the Last Response button.
Editing a response
To edit a response:
1
Navigate to the response you want to edit.
2
Select the question you want to edit.
3
Make the changes.
4
Repeat Steps 2 and 3 for any other changes to this response.
5
Save the changes by clicking the Save Response button on the Data Entry toolbar or by selecting Save
Response (Response menu).
To cancel the changes if you change your mind about them before you have saved them:
Click the Cancel Changes button on the Data Entry toolbar or select Cancel Changes (Response menu).
If you are editing a response that has already been saved in the database, Cancel Changes merely undoes the
changes you have made in the current editing session. However, if you are entering data in a new response that has
not yet been saved, Cancel Changes deletes the whole response.
Copying a response
To create a new response with the same data as the current response:
Select Copy Response (Response menu).
Working with responses | 265
Deleting responses
You can choose to hide the Delete All/Subset button and Delete All command using the Options (Tools menu)
dialog box, so you may need to unhide the button/command before carrying out this operation – see The Toolbars
page, page 139.
To delete the current response:
Click the Delete Response button on the toolbar or select Delete Response (Responses menu).
To delete all responses or a filtered subset of responses (you cannot filter responses in the Data Entry Module):
1
If you want to delete a subset of the responses:
a
Add a filter in the Analysis Grid (see Filters, page 383) to define the subset.
b Set the Subset on/off button in the Data Entry toolbar on:
Otherwise, to delete all the responses:
Set the Subset on/off button in the Data Entry toolbar off:
2
Click the Delete All/Subset button on the toolbar or select Delete All (Responses menu).
Previewing and printing responses
You can print the current response, all the responses or a filtered subset of responses from the Responses workspace.
Previewing the response printout
To see how the currently displayed response will be printed:
1
Select Print Preview (File menu).
2
Use the buttons on the toolbar to navigate back and forth through the pages of the response.
3
Click the Print button if you want to print the response, or click the Close button in the print preview to
return to the Responses workspace.
The next section shows you how to print all responses or a subset of responses, as well as the current response – you
can only preview the printout of the current response.
266 | Chapter 9: Entering and Processing Responses
Printing responses
To print the current response, all the responses or a filtered subset of responses:
1
If you want to print a subset of the responses:
a
Add a filter in the Analysis Grid (see Filters, page 383) to define the subset.
b Set the Subset on/off button in the Data Entry toolbar on:
Otherwise, to print all the responses:
Set the Subset on/off button in the Data Entry toolbar off:
2
Select Print (File menu), or click the Print button in the Toolbar.
3
In the Print dialog box, tick Current response only if you want to print the current response only; clear
this tick box if you want to print a subset or all of the responses.
4
Select the printer you want to use. Click the Properties button if you want to make adjustments to the
printer settings.
5
Click the Print to file tick box if you want to print to a file.
6
Specify the print range and the number of copies.
7
Click the OK button.
Finding and replacing text in the Responses workspace
To find or replace text in responses:
Select Find (Edit menu) or press Ctrl+F on the keyboard, or select Replace (Edit menu) to display the Find
dialog box.
Find and Replace are disabled while you are entering or editing a response.
See Finding and replacing text, page 133, for how to use the Find dialog box.
Spellchecking
In KeyPoint you can spellcheck the responses you’ve entered.
For more information on using the spellchecker and setting spellchecking options, see Chapter 7, Working with
surveys in KeyPoint.
Working with responses | 267
Other options for data entry
See Chapter 10, KeyPoint Scanning Module, for inputting data from paper-based surveys using Optical Mark
Recognition (OMR) and Intelligent Character Recognition (ICR) using the optional KeyPoint Scanning Module.
See Importing Data, page 462, for how to import data from other KeyPoint surveys or csv (comma-separated values)
files.
Bureau services
After the responses have been edited, data entry requires very little specific knowledge of the survey requirements
and can often be outsourced. Many professional data processing companies already have the infrastructure, so you
may find that outsourcing data entry is cheaper and quicker than doing it in-house.
There are several factors to consider when assessing the ability of another company to meet your data processing
needs:
* Will the responses be in a format you can import easily into KeyPoint?
* Does the company have a proven track record of producing accurate data?
* Will the company be able to meet your deadline?
* How will you transfer the responses from your offices to the company?
* If you do discover errors in the data or forms go missing, can you hold the company accountable?
Contact Speedwell (see page 5 for contact details) for information about bureau services.
For more information
On creating an email or web survey, see Chapter 11, Web Surveys.
On analysing data, see Chapter 14, Analysing Data.
Our website has further information, and is at www.speedwellsoftware.com.
268 | Chapter 9: Entering and Processing Responses
10
KeyPoint Scanning Module
In this chapter you will see how to use the optional KeyPoint Scanning Module.
You will learn about:
* Activating the Scanning Module
* Installing the scanner
* Designing surveys for use with the Scanning Module
* Setting scan options
* Scanning completed surveys
* Inputting scanned surveys
* Reviewing the input responses.
Chapter 10: KeyPoint Scanning Module | 269
Introduction
The KeyPoint Scanning Module enables you to scan surveys using a scanner and input them automatically into
KeyPoint responses, using Optical Mark Recognition (OMR) and Intelligent Character Recognition (ICR) to fill in the
response data.
You can scan the surveys directly into KeyPoint using a scanner connected to the PC, or import separate bitmap
image files produced independently by a scanner, which does not have to be connected to the PC.
In outline, the process of using the KeyPoint Scanning Module consists of the following steps:
1
Install the scanning licence – when you install KeyPoint you automatically install a free licence allowing
you to carry out 50 scans so that you can try out and evaluate the Scanning Module. However, once you
have used these, to continue using it you will need to purchase a scanning licence and install it in
KeyPoint.
2
Make sure your survey is designed so that it is suitable for use with the Scanning Module.
3
Set the scanning options.
4
Either:
* Scan the completed surveys using a scanner connected to the PC
or
* Import independently scanned bitmap images of the completed surveys.
5
Input the scan images into KeyPoint responses.
6
Review and, if necessary, edit the results.
Each of these stages is described in turn in the following sections.
Installing the Scanning Module licence
KeyPoint comes with a free Scanning Module licence allowing you to carry out 50 scans so that you can try out and
evaluate the Scanning Module; to input further scans, you will need to purchase a scanning licence from Speedwell
and install it in KeyPoint. This section shows you how to install a new licence – you do not need to do anything to use
the free trial licence as that is installed automatically with KeyPoint.
This section describes how to install the software licence key; if you would prefer to use a hardware USB licence key (dongle),
contact Speedwell for details of charges – see page 5 for contact details.
After you have purchased a Scanning Module Licence, Speedwell will send you an email with your licence serial
number, which you will need to install in KeyPoint. You will need to use the same procedure if you change the
licence, for example, to increase the number of scans per month – again, you will be sent the new licence serial
number by email.
To install the scanning module licence:
1
Run KeyPoint and open a survey.
270 | Chapter 10: KeyPoint Scanning Module
2
Select Options (Scan menu) to display the Scanning Options dialog box:
3
Click Change Licence to display the Local License Manager dialog box.
4
Click Add New to display the Enter Serial Numbers dialog box.
5
Copy the serial number from the email sent to you by Speedwell when you purchased the Licence, and
paste it into the Add a new serial number box.
6
Click Add to add the serial number to the Added serial numbers box.
7
Click OK to start the Activation Wizard.
8
Either:
Click the via the Internet (recommended) radio button if you want to obtain your installation code
immediately over the Internet (you should use this option if possible).
Or:
Click the via E-mail radio button if you want to send an email request and receive your installation
code by email.
9
Click Next to display the next step in the Activation Wizard:
* If you chose via Internet (recommended):
a
The Wizard will remind you that you will need to be connected to the Internet.
Make sure you are connected, and click Next to connect to the ABBYY activation server.
Installing the Scanning Module licence | 271
The Wizard will connect to the activation site and after a short delay will inform you that your
licence has been activated.
b Click Finish to close the Activation Wizard and return to the Local License Manager dialog box,
which will show details of the licence – see below:
* If you chose by e-mail:
a
Either:
* Your email program will display a message requesting your installation code;
Or, if the Activation Wizard failed to start your email program:
* The wizard will give instructions for how to send the activation request.
b Send the activation request message exactly as it appears, without editing it in any way.
c
You will receive a reply containing your installation code, and instructions for how to install it –
follow these instructions to activate the licence.
After you have activated a licence, the Local License Manager dialog box shows summary details of the licence:
For further details of the licence:
1
Click on the license in the list box to select it.
2
Click Properties to display the License Properties dialog box.
3
Click Close to close the dialog box and return to the Local License Manager dialog box.
The licence for the Scanning Module allows you to input up to the number of pages per month that you chose on
purchase, or a total of 50 for the free initial trial licence. If you want to increase the number of pages you can input
per month, contact Speedwell for details of prices – see page 5 for contact details.
272 | Chapter 10: KeyPoint Scanning Module
You can check the maximum number of pages you can input per month and the number remaining in the current
month by selecting Options (Scan menu) to display the Scanning Options dialog box – see the picture earlier in this
section.
Installing the scanner
If you want to scan the surveys directly into KeyPoint using a scanner connected to the PC, follow the instructions
supplied with your scanner to connect it to your PC and install any software supplied with it.
You can also import separate bitmap image files produced by a scanner, which does not have to be connected to the
PC.
TWAIN is an industry standard interface definition allowing programs to take input from imaging devices such as
scanners or cameras. The KeyPoint Scanning Module communicates with your scanner through its TWAIN interface,
so your scanner must have a TWAIN interface installed – virtually all scanners are supplied with a TWAIN interface, so
this should not be a problem.
When you scan surveys into KeyPoint, a dialog box will be displayed by the scanner’s own software so that you can
set options and control the scan procedure. You should consult your scanner’s documentation for how to use this
dialog box.
Designing surveys for use with the Scanning Module
There are a number of guidelines to follow when you are designing a survey for use with the Scanning Module.
* Do not use menu or listbox question types – this is true for any paper survey.
* For multiple choice, range multiple choice and ordered choice answer boxes:
* set the Box Size to a value greater than 3.5
* set the Box Style to square , rounded square
* set Show Shadow to be off
or indented
* Date questions should not use the / separator, since this can be misread as 1 by the character recognition
software
* Text, numeric and date answer areas should set the answer Style to one of the following:
* box, for example:
* grid, for example:
* topless grid, for example:
Designing surveys for use with the Scanning Module | 273
To adjust the size of the grid boxes, select the answer object in the design and change the font size using
the Text toolbar. You can also change the proportions of the grid boxes by selecting a different font. For
example, when the font for the answer box is set to Arial, the grid boxes have a landscape format (they are
wider than they are high); to get portrait format boxes, you should change the font to, for example, Arial
Narrow or Courier New.
You can use the Visible lines and Visible characters per line settings in the Presentation tab in the
Properties sidebar to set the number of boxes in the grid.
See the next section for more information about using open questions.
* All question text and answer areas should have a white background.
* Do not put questions close to the edge of the paper.
* If you are going to print individualised surveys using the Invitation Manager (see Using the Invitations Wizard
for a paper-based survey, page 237), you will get more accurate identification of the scanned responses if
you include a preprinted barcode on the survey forms (see Adding a barcode, page 180). If you include a
barcode on every page, KeyPoint will be able to identify the respondent and page even if they are not
scanned in order. However, you must still input the pages into the correct survey form – see Handling
barcode scanning problems, page 292, for what happens if you do not scan a survey into the correct survey
form.
* If you are going to print the survey on both sides of the paper, and you are going to use a scanner with a sheet
feeder that can read both sides of the paper, the survey design must have an even number of pages. If it has
an odd number, add an extra blank page at the end of the design. Note that this extra page will not affect the
recognition time and will not be counted against your monthly page limit.
KeyPoint is supplied with a ‘Scan’ style in its Style Library with question styles satisfying the above conditions – see
Working with styles, page 142, for how to work with styles.
In addition to ensuring the survey satisfies the above conditions, you should ask respondents to fill in the surveys in
black ink to produce the maximum contrast with the background, and to print their answers to text questions – the
ICR software cannot interpret cursive (joined-up) writing. See the next section for further information about text
answers.
The Scanning Module uses the form design to interpret the scanned responses and locate the answers, so you must not change
the form design once you have printed the surveys. KeyPoint’s default behaviour when you print a survey form is to display a
dialog box asking if you want to make the form read only, and it is good practice to do so. If you did not make the form read only
when it was printed, you can set the read-only status (and re-enable the warning dialog box) in the form’s Inspector tab in the
Properties sidebar.
Open questions
Although the ICR software is able to recognise hand-printed answers with reasonable accuracy, the variation in
people’s writing means that if you include open questions in the survey, the accuracy will probably not be 100%. This
means that you will need to edit the survey responses manually after you have input them into KeyPoint. If you have
a large number of responses, this could become time-consuming and expensive. There are a number of steps you can
take to try to minimise this problem.
The first is to consider whether the open questions could be reworded as closed questions such as multiple choice or
ordered choice questions.
274 | Chapter 10: KeyPoint Scanning Module
If you find you need to include any open questions, where possible you should use a grid answer style. This strongly
encourages respondents to write a single character in each box, which makes it easier for the ICR software to
recognise it accurately.
Finally, it is even more important to check and test the survey if it includes open questions – see the next section for
more details. In particular, you should get the test surveys filled in by as wide a range of people as possible. This will
help you identify any potential problems, which you may be able to minimise by redesigning the survey. At the very
least, it will enable you to estimate the amount of work that will be required in correcting the responses once they
have been scanned and input.
Checking your design
You can get KeyPoint to check that your design will work correctly with the Scanning Module, and even get it to
change it for you automatically if necessary.
To check that your survey design is suitable for use with the Scanning Module:
1
In the Design workspace, select Check survey design for scanning compatibility (Scan menu) to display
the Check survey design for scanning compatibility dialog box:
2
If you want KeyPoint to fix any problems that it finds automatically, select the Auto Fix tick box – see the
paragraph after these instructions for the changes made when the survey is fixed automatically.
3
Click Check survey.
If there are no problems, a dialog box will be displayed:
Designing surveys for use with the Scanning Module | 275
If KeyPoint finds any problems, and you have selected Auto Fix, it will make the required changes and
report on the changes it has made:
If KeyPoint finds any problems, and you have not selected Auto Fix, it will just report on the changes that
should be made:
Note that in the first picture the changes are marked +, showing that they have been made; in the second
picture they are marked –, showing that they have not been made yet.
You can continue working on the survey design while the Check survey design for scanning compatibility
dialog box is displayed. You can also double-click in the dialog box on the question text (shown in bold) to
select the question in the survey design (if necessary, the survey will be scrolled so that the question is
visible).
4
If you have not used Auto Fix and want KeyPoint to make the changes listed, click the Fix button –
KeyPoint will make the changes and mark them with + in the dialog box, as in the first picture.
5
Click Close to close the dialog box.
When KeyPoint automatically fixes a survey, it makes the following changes where necessary:
* multiple choice and ordered choice answer boxes are changed to square boxes without shadows
* the answer boxes for open questions are changed to a grid of boxes
* the background to answer boxes is set to white.
When the answer box for an open question is changed to a grid of boxes, you may want to change the size of
the answer object and the font and font size it uses to adjust the number, size and shape of grid boxes – see
the note on page 274 for more details.
After using the Check survey design for scanning compatibility dialog box to fix the survey, you should look over the
layout of the survey to make sure it doesn’t need any minor adjustments.
276 | Chapter 10: KeyPoint Scanning Module
Once you have completed the survey design, you should test it by printing a few copies, filling them in, scanning
them and inputting them into KeyPoint Responses. If this reveals any problems, you will be able to sort them out
before you distribute the survey.
Note that when you input the completed surveys, KeyPoint uses the survey design to map the answers given in the
completed surveys to the answers recorded in the response. This means that once you have printed the surveys for
distribution, you must not edit the survey layout in any way. KeyPoint’s default behaviour when you print a survey
form is to display a dialog box asking if you want to make the form read only, and it is good practice to do so. If you
did not make the form read only when it was printed, you can set the read-only status (and re-enable the warning
dialog box) in the form’s Inspector tab in the Properties sidebar.
Setting scan options
Before you can start scanning completed surveys, you need to select which TWAIN source to use. You should also set
some other options, which affect the input of separate bitmap images as well as images scanned directly from the
selected source.
KeyPoint saves the choices you make, so you will not need to repeat the following procedure unless you want to
choose other settings.
To select the scanner and set options:
1
Select Options (Scan menu) to display the Scanning Options dialog box:
The Scanning source box lists the names of all the TWAIN sources installed on your PC.
Setting scan options | 277
2
Click on the name of the scanner you want to use to select it.
3
Choose the language that will be used to fill in the surveys from the Language drop-down list box.
It is important to specify the language correctly as the intelligent character recognition software needs to
know the language used in order to interpret the text entered by respondents.
4
Click Hand printed or Machine printed to specify whether text on the survey will be filled in manually or
using a printer, or click Automatically detected to allow KeyPoint to determine whether the response was
filled in by hand or using a printer.
This selection chooses which recognition procedure KeyPoint will use: if you choose Hand printed (the
default), Intelligent Character Recognition (ICR) will be used; if you choose Machine printed, Optical
Mark Recognition (OMR) will be used.
Note that if you set KeyPoint to Hand printed or Machine printed text, the surveys should be filled in
completely by hand or just using a printer, but not using a mixture of the two.
5
Specify whether the surveys are completed in Capital case or Small case letters, or whether the case
should be Automatically detected – if you know that the surveys will be filled in using a specific case,
specifying it can help the recognition accuracy.
6
After you have input a scanned survey into KeyPoint, the image is linked with the response so that you can
compare the original survey filled in by the respondent with the data recorded in the KeyPoint Response –
see Reviewing the input responses, page 289, for details. However, after you have checked the data that
has been input, you may want to delete the image. You can do this manually using the Scanned Images
dialog box (see Step 3 in Inputting scanned surveys, page 283) or you can set a value in the Delete
images after box to delete the images automatically a set number of days after they were input. Note that
deleting the image only deletes the scanned image held within KeyPoint and has no effect on the input
data in the response. Also, if the image was originally imported from an external bitmap file, rather than
scanned directly, it is only the copy of the image held within KeyPoint that is deleted: the original file is
unaffected.
Type a number directly into the Delete images after box or click on the up or down spin buttons to set
the number of days that you want to keep the scanned images after they have been input; enter 0 if you
don’t want to delete the images.
7
Click on Notify of scanning finished to select whether a message box is displayed when you have finished
scanning surveys – see the next section.
8
The settings in the Machine printed text recognition box control the way KeyPoint determines where to
look for the answers on the scans. The default values for these settings have been optimised to give
accurate and speedy performance and will work very well in most cases, so you should only need to
change these settings if you experience recognition or performance problems with particular surveys.
In the Machine printed text recognition options box:
* More accurate page positioning:
* When More accurate page positioning is selected (the default), the recognition software checks
the scan to determine the actual position of the text of each question on the form, and then uses
this position to determine where to look for the answer to that question (see later in these
instructions for how to specify how far KeyPoint will search for the text and how much of the
question text it checks).
278 | Chapter 10: KeyPoint Scanning Module
If KeyPoint fails to find the text for an individual question, it uses the locations it has detected for
the other questions together with the form design to determine where to look for the answer to
that question.
* Positioning deviation:
When More accurate page positioning is selected, KeyPoint will search around the expected
position of each question (determined by the form design and the detected positions of other
questions) to find the question text. The Positioning deviation setting determines how far
KeyPoint will search for the question text. The default value of 10mm works well in the vast
majority of cases, but there may occasionally be problems if the scans are very distorted, so, if
required, you can increase the Positioning deviation to make KeyPoint search a larger area,
but you should generally leave this setting at the default value of 10mm.
* When More accurate page positioning is not selected, the recognition software will just use the
position of the text of the first question it finds, and then use this position as an alignment point to
work out where the answers to all the questions can be found on the page. Note that although
deselecting More accurate page positioning increases the speed of recognition, this may be at the
expense of reliability and should only be used if you have high quality scans and need to increase
the recognition speed.
* Fast mode recognition:
Choosing Fast mode recognition increases the recognition speed but at the cost of slightly more errors
– if you find you are getting an unacceptable number of errors, you may want to try deselecting this
setting to improve the accuracy.
* Question text tolerance:
When KeyPoint is trying to determine the position of a question it tries to match the text it reads from
the scan to the text defined in the form design. The Question text tolerance determines how close the
match must be. For example, if the question text has 40 characters and a 5% tolerance is set, KeyPoint
will accept a match provided no more than two characters are different.
* Minimum tolerance:
For short questions, the Question text tolerance may not allow any errors – for example, with a
Question text tolerance of 5%, no errors would be allowed in a question with 6 characters since 5%
of 6 is 0 (after rounding). To allow some tolerance even for short questions, you can set a Minimum
tolerance – the number of allowed errors is the Minimum tolerance or the number calculated from
the Question text tolerance, whichever is larger.
* Limit recognition to first:
The Limit recognition to first setting determines the number of characters in the question text that
KeyPoint should use to identify the questions.Setting a smaller number of characters will speed up the
recognition process but may cause problems if more than one question begins with the same text – if
two or more questions use the same text, you could disable the question numbering for those
questions (see The Number Pattern tab, page 203) and include the question numbers in the question
title text so that the text for each question is unique.
9
By default, when you scan a page into a survey form that has a preprinted barcode (see Preprinted
barcodes, page 181, for how to add preprinted barcodes to survey forms), KeyPoint checks that the survey
signature matches the survey currently selected in the Responses workspace, and if it does not match, the
scan is rejected. Then when you input scanned responses, KeyPoint checks that the form identifier read
Setting scan options | 279
from the barcode matches the identifier of the selected form, and if it does not match, displays a dialog
box saying the response cannot be input. This means that you may not be able to input a scanned
response if the barcode is unreadable, or read incorrectly for some reason. To get around this problem,
the controls in the Barcode Options box allow you to relax the checks individually so that you will be able
to input the response – they also allow you to input scans into the ‘wrong’ survey form.
In the Barcode Options box, tick:
* Ignore Survey Signature if you do not want KeyPoint to check that the signature read from the
barcode matches the signature of the survey currently selected in the Responses workspace.
* Ignore Form Id if you do not want KeyPoint to check that the form identifier read from the barcode
matches the survey form currently selected in the Responses workspace.
* Ignore Page Number if you do not want KeyPoint to use the page number read from the barcode to
determine the order of scan pages in the response – the pages will be sorted in scan order, but you can
change this manually if required (see the instructions in Inputting scanned surveys, page 283, for
details).
Typically, you will only need to tick these boxes if you experience problems with incorrectly rejected scans
– see Handling barcode scanning problems, page 292, for further details of what to do if this happens.
10
In the Image Preview box, choose whether to display the scan previews, and reviews, in Black and White
or Greyscale/Colour – see Inputting scanned surveys, page 283, for details of previewing the scans
before you input them, and Reviewing the input responses, page 289, for how to review them after they
have been input.
11
The Scanned images path box shows the folder used to store the response images after they have been
scanned. To change the folder used:
a
Click Change to display a standard Windows Browse for Folder dialog box.
b Use the dialog box to select the required folder.
c
Press OK to confirm your selection, close the dialog box and return to the Scanning Options dialog
box.
To go back to using the default folder for the scanned images:
Click Set default.
12
Press OK to confirm your selections and close the dialog box.
Scanning completed surveys
This section show you how to scan completed surveys into KeyPoint using a scanner connected to the PC. See the
next section for how to import separate bitmap images of completed surveys: for example, images that have been
produced by a scanner that is not connected to the PC.
To scan completed surveys into KeyPoint:
1
Make sure your scanner is connected to the PC and switched on.
2
Start KeyPoint.
280 | Chapter 10: KeyPoint Scanning Module
3
Open the relevant survey in KeyPoint – you must scan the completed surveys into the correct KeyPoint
survey; if you scan them into the wrong survey, you will need to scan them again into the correct one.
4
Select the Responses workspace.
5
If the survey has more than one form, select the form used to print the survey.
6
Place the first sheet of the first survey in the scanner, or, if you are using a sheet feeder, load it with the
completed surveys.
7
Select Scan Responses (Scan menu).
A scanner manager dialog box will be displayed with controls allowing you to set options and control your
scanner. This dialog box is displayed by the driver program supplied with the scanner, and the options it
allows, the names used for controls and their layout vary according to the manufacturer and scanner
model. Because of this, it is not possible to give specific instructions in the following steps.
8
Make the following settings, or their equivalent for your scanner:
*
*
*
*
Scanning mode: greyscale
Resolution: 300dpi
Scaling: 100%
Paper size: set this to the size of paper used for the survey.
If you can preview the scan using the scanner manager software, adjust the brightness and contrast
controls to give the clearest text with a clean white background. If you can’t preview the text now, you will
be able to preview the scan in KeyPoint, and if necessary delete it and rescan with adjusted settings.
9
Use the scanner manager software to scan all the sheets of all the completed surveys in turn.
If all the survey pages have a preprinted barcode and were printed using the Invitation Manager, it does
not matter what order you scan the pages since KeyPoint can read the page number and respondent from
the barcode. Otherwise, KeyPoint assumes that all the sheets are scanned in order, and if a sheet is
missing, you should scan a blank sheet in its place.
10
When all of the sheets of all the completed surveys have been scanned, close the scanner manager
software dialog box.
While the scanner manager dialog box is open you will not see anything happening in KeyPoint itself. In
fact you can continue to carry out operations in KeyPoint while the scanner manager dialog box is open
and you are scanning completed surveys – naturally, you should not close the survey until you have
completed the scanning and closed the scanner manager dialog box.
11
When you close the scanner manager dialog box, KeyPoint will display a confirmation message (unless you
have disabled Notify of scanning finished in the Scanning options dialog box – see the previous section,
Setting scan options):
Click Close.
Scanning completed surveys | 281
By default, the image files containing the scanned pages for each KeyPoint survey design are stored in a separate subfolder within
the C:\Users\your username\AppData\Roaming\Speedwell\KeyPoint\Scans\ folder – see the
previous section, Setting scan options, for how to change this location.
See Inputting scanned surveys, page 283, for how to input the scanned responses into the KeyPoint database.
Importing bitmap image files into the Scanning Module
As an alternative to scanning completed surveys into KeyPoint using a scanner connected to the PC (see Scanning
completed surveys, page 280), you can import separate bitmap image files into the Scanning Module. This means
that the scanner you use to scan the completed surveys does not need to be connected to the KeyPoint PC.
If all the survey pages have a preprinted barcode and were printed using the Invitation Manager, it does not matter
what order you scan the pages since KeyPoint can read the page number and respondent from the barcode.
Otherwise, KeyPoint assumes that all sheets of all surveys are scanned in order, and there is a sheet for every page in
each survey. This means that it is very important that all sheets are scanned and imported in the correct order.
However, if, despite all precautions, you do import some files in the incorrect order, it is possible to change the order
of the imported pages before you input them into responses – see the next section, Inputting scanned surveys, for
details.
To import bitmap image files into the Scanning Module:
1
Place all the scan images you want to import in the same folder – make sure there are no other image files
in this folder as all the image files in the folder will be imported.
You can import TIFF, JPEG or BMP images. However, for TIFF you should make sure that LZW
compression is turned off when you save the files from the scanner.
2
Start KeyPoint.
3
Open the relevant survey in KeyPoint – you must import the bitmap image files into the correct KeyPoint
survey; if you import them into the wrong survey, you will need to import them again into the correct one.
4
Select the Responses workspace.
5
If the survey has more than one form, select the form used to print the survey.
6
Select Import Images (Scan menu) to display a standard Windows Folder Browser dialog box.
7
Use the dialog box to select the folder holding the image(s).
8
Press OK to close the Folder Browser dialog box and import the files.
The Scanned Images dialog box will be opened automatically so that you can input the images into KeyPoint – see
the next section, Inputting scanned surveys, for how to work with the Scanned Images dialog box.
There is no link to the original bitmap files once they have been imported. When image files are imported, KeyPoint
creates a copy of each image and saves it in a subfolder within the KeyPoint scanned images folder (there is a separate
subfolder for each KeyPoint survey design – see Setting scan options, page 277, for how to set the KeyPoint scanned
images folder). It is this image that appears in the preview pane in the Scanned Images dialog box, not the original
image.
Once images appear in the Scanned Images dialog box there is no distinction between imported image files and
images scanned directly into KeyPoint. In particular, when you input either type of image into KeyPoint responses by
282 | Chapter 10: KeyPoint Scanning Module
pressing Input Responses, they will be counted against the monthly quota allowed by your license (see Installing the
Scanning Module licence, page 270).
Inputting scanned surveys
After you have scanned a completed survey, each page is saved as an image file. The KeyPoint survey contains links to
the image files, but at this stage the survey will not have been added to the KeyPoint database as a KeyPoint response.
Remember that before you input the scanned survey images you must specify the language used for the survey
answers in the Scanning Options dialog box (see Setting scan options, page 277) – the OMR/ICR software needs to
know the language used in order to interpret the answers accurately.
To input survey scans into KeyPoint Responses:
1
Click on the Responses tab to display the Responses workspace.
2
If the survey has more than one form, select the form used to print the survey – see Handling barcode
scanning problems, page 292, for what happens if you select the wrong form for inputting responses.
KeyPoint will automatically record which form you used to input the responses as the answer to the
‘Mode’ system question. You can view the answers to this Mode question in the Analysis Grid and include
them in tables and graphs in presentation forms. If required, you can hide the system questions – see The
Survey page, page 140.
3
Select Input Responses (Scan menu) to display the Scanned Images dialog box:
The Responses box in the picture shows that three completed survey responses have been successfully
scanned into the current survey, but not input yet. The entry for the second scan (OCR-2) has been
expanded (click + to expand and – to shrink the responses), so you can see that the survey has two pages.
In this case, the first page has been selected, and the Information box shows identification data for it – in
this example, the form has a preprinted barcode so the Information box includes the data read from the
barcode (see Preprinted barcodes, page 181, for how to add a preprinted barcode to a survey form).
Inputting scanned surveys | 283
The Rejected Pages box shows that one scanned page has been rejected. You can click on the scans in the
Rejected Pages box to display information in the Information box about why the scan has been rejected:
If you have already input some survey scans, but not deleted them, they will still appear in the Responses
list, but with a tick icon instead of a ‘?’ – see the picture later in these instructions.
4
To preview the scanned image for a page:
a
If the response holding the required page is closed, expand it so that you can see its contents.
b Click on the page you want to preview to select it.
284 | Chapter 10: KeyPoint Scanning Module
c
Click Preview >> to display a preview pane at the bottom of the dialog box:
By default, the preview will be shown in black and white, but you can use the Options (Scan menu) dialog box to show it in
Greyscale/Colour if you prefer.
d Click the Zoom In or Zoom Out button to change the magnification of the preview – you will
probably need to zoom in to see any detail in the scan image.
e
If required, drag the edges of the Scanned Images dialog box to resize it so that the preview pane is
larger – you can use the scroll bars to view hidden parts of the image in the preview pane
5
The following instructions describe a number of operations you can carry out on selected pages in the
Scanned Images dialog box. Where appropriate, you can apply these operations to more than one page at
the same time by using the usual Windows technique to make the required selection of pages: to select a
range of adjacent pages, click on the first page to select it, then Shift+click on the last one; to add or
remove a page from the current selection, Ctrl+click on it.
6
If required, you can change the order of pages in a response, or move pages between responses, using
drag and drop:
Inputting scanned surveys | 285
You can also drag pages:
* from the Responses box to the Rejected Pages box if you want to reject a page (but not delete it) – you
can also move pages into the Rejected Pages box by selecting them, right-clicking on them to display a
context menu and selecting Reject Selected Pages;
* from the Rejected Pages box into a response in the Responses box.
You can also change the order of pages in a response by changing the page numbers.
To change the number assigned to a page:
a
Right-click on the page to display a context menu.
b Select Set Page Number to display the Page Number dialog box:
c
Enter the required page number.
d Click OK to close the dialog box and return to the Scanned Images dialog box.
The page will be numbered with the new number, but it will still be in the same position in the response.
You can also use this procedure to set the page number of a page number in the Rejected Pages box – see Handling barcode
scanning problems, page 292, for more on handling rejected pages.
To sort the pages in a response according to the page numbers currently assigned to them:
a
Right-click on the response to display a context menu.
b Select Sort Pages.
To renumber the pages:
a
Right-click on the response to display a context menu.
b Select Renumber Pages.
The pages will be numbered consecutively starting from 1 in the order they appear in the response.
7
If after previewing one or more pages in a scanned survey (response) you decide that you do not want to
input it or them:
* To delete all the pages in a response (and the response):
a
Right-click on the response to display a context menu.
b Select Delete Response.
* To delete one or more pages from one or more responses or from the Rejected Pages list:
a
Select the pages you want to delete.
286 | Chapter 10: KeyPoint Scanning Module
b Right-click on them to display a context menu.
c
Select Delete Selected Pages.
In all cases, the links to the page images will be deleted from the survey.
You can also use this procedure to delete images manually after they have been input – see Step 8 in
Setting scan options, page 277, for how to delete images automatically.
8
To input all the scanned surveys in the Responses list that have not been input yet, click Input Responses.
Go to Step 10 if you did not use the Invitations Wizard to print the survey forms.
9
If you used the Invitations Wizard to print the survey forms, and there are any text questions linked to the
address book with Update set, KeyPoint will check to see if the answers match the entries in the address
book. If they do not match, you will be asked if you want to update the address book with the new
value(s). You can answer:
* Yes to update the value(s) in the address book for this response
* Yes to All to update the value(s) in the address book for this response and for any other responses
entered in this session without asking for each one
* No to leave the value(s) in the address book unchanged for this response
* No to All to leave the value(s) in the address book unchanged for this response and for any other
responses entered in this session without asking for each one.
See Using the Invitations Wizard for a paper-based survey, page 237, for how to prepare a survey for
use with the Invitations Wizard and then print it.
10
A new KeyPoint response containing the answers read from the scan by the OMR/ICR software will be
added for each of the responses input from the Responses list.
KeyPoint responses must contain some data, so a response will not be added if the OMR/ICR software cannot read any answers in
the scanned pages for a completed survey form.
A summary dialog box is then displayed:
The summary dialog box shows how many pages have been recognised and input, and if there were any
problems – in this example, the form has a preprinted barcode and KeyPoint has detected that two of the
scanned pages were not printed from the currently selected form.
Inputting scanned surveys | 287
The documents that have been input successfully will be marked with a tick in the Scanned Images dialog
box:
The third response is still marked with a question mark, showing it has not been input yet. This is because
it was not printed from the currently selected form – compare the Form Id in the Information panel in this
picture (6) to the Form Id (3) when the second document was selected in the picture in Step 4.
Click OK to close both this dialog box and the Scanned Images dialog box.
Provided you have not deleted the images, it is possible to re-input a scan without rescanning the original completed
survey form or re-importing the bitmap image(s). You may want to do this if, for example, you have accidentally
deleted the response from the Responses workspace.
To re-input a scanned survey form:
1
Click on the Responses tab to display the Responses workspace.
2
Select Input Responses (Scan menu) to display the Scanned Images dialog box again.
3
Right-click on the response in the Responses list that you want to re-input. A context menu will be
displayed:
4
Select Mark As Unread.
The icon next to the response will change back to the ‘?’, showing it (or they) can be input again.
5
Click Input Responses to re-input the response(s) you have marked as unread (and any that have not
been input yet).
288 | Chapter 10: KeyPoint Scanning Module
Reviewing the input responses
After you have input the responses, the Responses Workspace will be split into two panes:
The upper pane shows the input response; the lower pane shows the image of the scanned page. You should
compare the image of the scan with the data entered in the response and edit the response if necessary. You can drag
the horizontal division between the two panes to resize them, if required.
Reviewing the input responses | 289
When you check the responses, you should check whether any of the data has been marked as ‘dirty’ when it was
input – this may be because the answers were not written clearly and could not be interpreted correctly. The quickest
way to identify responses with dirty data, and to get an overview of the responses that have been input, is to use the
Analysis Grid in the Presentation workspace. Any answers containing dirty data will have a coloured outline in the
grid; if you move the cursor over the answer a tooltip will be displayed showing you the dirty data. You can
double-click on a response in the Analysis Grid to display the response in the Responses workspace, where you can
edit the response, if required:
See ‘Dirty’ data, page 261, for information about dirty data, including how to clean and edit it.
The Responses workspace is split automatically when you input responses. However, you can also split it at any other
time, and, provided you have not deleted it from the survey, the original scanned image will be shown below the
response.
To split the Responses workspace to view the scan image below the response:
Select Split Form (Responses menu).
Repeating this procedure closes the split.
Troubleshooting scanning problems
If you have problems inputting scanned surveys, you can overlay information on the preview showing where KeyPoint
reads the data from the scan before applying ICR or OMR to interpret it.
To view information about where KeyPoint reads data from a scanned image:
1
Display the preview for the scan you want to investigate in the Scanned Images dialog box – see Steps 1–4
in Inputting scanned surveys, page 283.
290 | Chapter 10: KeyPoint Scanning Module
The procedure described in this section can be applied to scans before or after they have been input into KeyPoint responses,
provided you have not deleted them from the Scanned Images dialog box.
2
Double-click in the preview pane – if you zoom the preview, you will need to double-click again to
display the overlay.
KeyPoint will overlay the image with boxes and text showing where the data is read from the scan for OMR/OCR:
* The start of the question text is marked by a small red cross:
* The text KeyPoint used to recognise the question appears above the red cross – Please wri in the
example. The number of characters used to recognise the title text is determined by the Identify only first
setting in the Scanning Options dialog box – see Setting scan options, page 277).
* The numbers appearing in square brackets after the text show the offset between the position KeyPoint
expected to find the title and the position it actually found it. The actual numbers appearing here are not
particularly informative, but all of the questions on the same scan should have similar offsets, so any that
are markedly different indicate a problem – for example, a question that has been moved in the design
since the form was printed.
* Answer areas where text will be read, such as for text and ordered choice questions, are outlined in blue.
* Answer areas where marks will be read, such as for multiple choice questions, are outlined in magenta.
Troubleshooting scanning problems | 291
Handling barcode scanning problems
This section only applies to surveys with preprinted barcodes (see Preprinted barcodes, page 181, for how to add preprinted
barcodes to surveys).
If the form currently selected in the Responses workspace has a preprinted barcode, KeyPoint can perform a number
of checks to validate the scans to make sure that they were printed from the selected survey form. These checks are
carried out at different stages of the procedure and it is important to understand them, since in some cases you will
need to rescan the returned surveys, while in other cases you will be able to use the existing scan. Also, in some cases,
an incorrect scan will count against your scanning license quota, while in other cases it will not, depending on
whether the OMR/ICR software has been used.
Problems can arise in scanning pages (or importing bitmap images) with preprinted barcodes into the Scanning
Module for the reasons described in the following subsections.
The wrong survey is selected in the Responses workspace
What happens depends on whether the selected form in the survey has a barcode or not:
* If the selected survey form has a barcode, the page will be added to the Rejected pages list in the Scanned
Images dialog box, and if the scan has a barcode in the same position as the form, your scanning licence will
be charged for the scan.
* If the selected survey form does not have a barcode, the barcode on the scan will be ignored and the scans
will be added to the Responses list. Since the barcode has not been read, your scanning licence will not be
charged for the scan at this stage. However, if you do not notice the problem and try to input the responses,
your scanning licence will be charged at that point.
In both cases, you will need to delete the response(s) from the selected survey, select the correct survey in the
Responses workspace and rescan the page into it.
The wrong form is selected in the correct survey
The scanned pages will be added to the Responses list in the Scanned Images dialog box. What happens depends on
whether the selected form has a barcode or not, and if it does, on whether it is in the same position as the barcode
on the scanned page:
* If the selected form does not have a barcode, the barcode on the scan will be ignored so your scanning
licence will not be charged for the scan at this stage and, when the page is selected in the Responses list, the
information box will not show any survey, form, page number or respondent data.
In this case you should:
1
Close the Scanned Images dialog box.
2
Select the correct form in the Responses workspace.
3
Select Input Responses (Scan menu) to open the Scanned Images dialog box again.
4
Right-click in the Responses or Rejected Pages list to display a context menu.
5
Select Reprocess Scans For Current Form.
KeyPoint will now read the data from the barcodes (and charge your scanning licence) and apply it to
the pages in the Responses list ready for you to input them.
6
Click Input Responses to input the responses into the correct form.
292 | Chapter 10: KeyPoint Scanning Module
* If the selected form has a barcode, but it is not in the same position as the barcode in the scan, the page
will be added to the Rejected Pages list in the Scanned Images dialog box.
You should use the same procedure as in the previous case.
* If the selected form has a barcode, and it is in the same position as the barcode in the scan, the page will
be added to the Responses list with the data read from the barcode applied to it – your scanning licence
will be charged at this point, but will not be charged again when you input the responses later.
If you try to input the responses into the currently selected (incorrect) form, you will be warned and the
responses will not be input. To input them, just follow Steps 1, 2, 3 and 6 above.
The correct form is selected in the correct survey but the barcode has not been read or has been read
incorrectly
This may happen, for example, if the survey is creased or torn or the barcode has been defaced in some way.
* If the survey signature has not been read correctly, the scanned page will be added to the Rejected Pages list
in the Scanned Images dialog box – in this case, your scanning licence will only be charged at this stage if
KeyPoint was able to detect that there was a barcode on the scan and tried to use the OMR/OCR software to
read it.
* If the survey signature has been read correctly, the scan will be added to the Responses list and your scanning
licence will be charged for the scan. However, you will not be able to input the scan if the form identifier has
not been read correctly.
In these cases you should:
1
Close the Scanned Images dialog box.
2
Select Options (Scan menu) to display the Scan Options dialog box (see page 277 for a picture).
3
Tick the required Barcode Options to suspend the KeyPoint validation check(s) causing the problem.
4
Click OK to close the Scan Options dialog box.
5
Select Input Responses (Scan menu) to open the Scanned Images dialog box again.
6
If scanned pages were rejected because the survey signature was not read correctly:
a
If the pages are not numbered, assign the correct page number to each of them – see the instructions
in Inputting scanned surveys, page 283.
b Right-click in the Rejected Pages box to display a context menu.
c
Select Analyse Rejected Pages.
The rejected pages will be added to the Responses list.
As you have suspended the validation checks, double-check that all the scans really were printed from the selected survey form.
7
Click Input Responses to input the responses into the correct form. If your scanning licence has already
been charged for this scan because the barcode was read, it will not be charged again at this point, but if it
hasn’t been charged yet because KeyPoint did not detect the barcode, it will be now.
8
Re-enable the validation Barcode Options in the Scan Options dialog box to make sure future scans are
validated.
Troubleshooting scanning problems | 293
294 | Chapter 10: KeyPoint Scanning Module
11
Web Surveys
In this chapter you will find out how to conduct a survey using the web or email.
You will learn about:
* Setting connection, email and web options
* Publishing or distributing a web survey
* Processing responses
* Tracking responses and sending follow-up mailings.
Chapter 11: Web Surveys | 295
Web surveys: a summary
A web survey is made up of a number of files, which may include HTML files, image files and script files. The files for
the web survey are hosted on a web server, which may be:
* your own
* an Internet Service Provider’s
* Speedwell surveyserver.
As far as KeyPoint is concerned, there is no difference between using your own web server and an Internet Service
Provider’s. From now on, any references to using your own server should be read to include the possibility that you
are using an ISP’s.
You can distribute the survey by publishing the URL showing where the survey can be found. For example, you could
include the URL as a link in an email sent to your target audience. You can do this by hand, or automatically using the
KeyPoint Invitation Wizard (see Promoting a web survey – sending invitations, page 319), which makes the process
very easy, and has a number of other advantages, such as helping you to keep track of responses. Using the KeyPoint
Invitation Wizard allows you to send invitations as:
* Text emails containing links to the survey held on the web server
* As an HTML attachment to text emails.
(Note that even if you distribute the survey as an HTML attachment, you will still need to use a web server to
host some files, such as the script files responsible for submitting the responses.)
Note also that the availability of some of the Invitation Wizard options depends on the choices you make for hosting
and managing the survey: see Promoting a web survey – sending invitations, page 319.
surveyserver
Of the options for hosting Web surveys, surveyserver is the easiest to set up and use, and offers more flexible and
powerful features. Some of the main advantages to using it are:
* you do not need to use your own web server
* it is fully integrated with KeyPoint
* it is very easy to use: just press a button to upload the survey to the server; press another one to download the
responses
* if you use the SSL option, it is completely secure with encrypted Internet communications.
If you would like to assess these benefits in practice, you can register for a free 30 day trial period – see Registering
for the free surveyserver trial account, page 334.
A full description and instructions for using surveyserver are given in Chapter 12; the rest of this chapter concentrates
on the alternatives to using surveyserver for hosting Web surveys.
Alternatives to surveyserver
If you don’t want to use surveyserver, KeyPoint supports a number of other mechanisms for carrying out web surveys.
In outline, the procedure for publishing a KeyPoint web survey using any of these mechanisms is:
1
Use KeyPoint to save the HTML and other files.
296 | Chapter 11: Web Surveys
2
Use an ftp program to upload the files to the web server you are going to use.
The main difference between the mechanisms is the way in which responses are handled. You can choose between
using a script on your own web server to handle the responses or using the CamSP script on the Speedwell server –
see the following sections for details.
Using the CamSP script
Using the CamSP script is the next easiest alternative to using surveyserver, and it is free.
Set up is very straightforward since the CamSP script is not run on your server but on the Speedwell server so there
are no compatibility issues and no problems with making sure it is in the correct location and has the appropriate
authorities. To use the script, all you have to do is register your email address – this is a simple step in either the Email
or Web Setup Wizard (see The Email Setup Wizard, page 298, or The Web Setup Wizard, page 302). Your email
address will be held securely, and will not be used for any other purpose than to send you survey responses.
In order to use the CamSP script, both the PC you are using to create the survey and the computers used by survey
respondents must have Internet access.
A possible disadvantage of using the CamSP script is that it cannot be used with the KeyPoint Invitation Wizard to send invitations
to a web survey hosted on a web server – see the next section but one, Tracking, for some advantages of using the Invitation
Wizard. However, you can use the KeyPoint Invitation Wizard in combination with the CamSP script to distribute the survey as an
HTML attachment to a text email – see Promoting a web survey – sending invitations, page 319, for details.
Using your own web server
If you don’t want to use the CamSP script, KeyPoint will create a script to be uploaded and run on your own server.
You can choose between a Perl, ASP or PHP script, and you can choose whether the script should email responses to
you or save them on the server for you to download later using FTP. More details of all these alternatives can be
found in Distributing a web survey, page 307.
ASP scripts are recommended for use with Microsoft web server IIS, and PHP scripts for other web servers, provided
they support PHP version 4 or higher.
KeyPoint web surveys are compatible with the main types of web server, including Apache and IIS.
Tracking
If you use the KeyPoint Invitation Wizard to send out invitations to take part in a survey (see Promoting a web survey
– sending invitations, page 319), you can choose whether or not to track the responses.
If you do choose to track responses, you will be able to:
* identify which respondents have replied
* send a follow-up email to people who have not replied yet
* view statistics showing the overall response rate.
If you choose not to track responses, you will be able to reassure respondents that the survey is completely
anonymous.
Web surveys: a summary | 297
The KeyPoint Invitation Wizard also allows you to prepopulate contact information fields such as names and
addresses through questions linked to your address book and to update the contact details in your address book
automatically from the responses – see The Contact Link tab, page 215, for more details.
Email setup
Unless you intend to store responses in ASCII files on the web server (see Responses, page 300), you will need to set
up email in KeyPoint in order to receive the responses to Web surveys (you do not need to set up email if you are just
using surveyserver, though it is advisable).
In order to send and receive email from within KeyPoint, you first need to set connection options. For more
information on email systems and to help you decide which sort of connection to use, see Appendix C, Email
Systems. If you are unsure what settings to use, consult your systems administrator.
You should dedicate a separate email account to use just with your KeyPoint surveys. If you use the same account for
KeyPoint and other mail, the survey responses may be read accidentally when you pick up email using an email
program, such as Outlook, instead of being picked up by KeyPoint.
The Email Setup Wizard
The Email Setup Wizard helps you set connection options. However, if you prefer, you can set or edit email options
using the Connection page in the Options (Tools menu) dialog box – see The Options dialog box Connection page
(page 300).
To start the Email Setup Wizard:
Select Email Setup (File menu).
Or
Click on the Run wizard button on the Connection page in the Options (Tools menu) dialog box.
The Email Setup Wizard will also start automatically if you try to use one of the KeyPoint email or web
functions before you have set up connection options.
To use the wizard:
1
If the Welcome page is displayed, click Next to go on to the next step (this step will not be shown if you
have chosen not to show introductory steps).
2
Enter or edit the Display Name and Email Address (this will have been assigned to you by your Internet
Service Provider or network administrator), and click Next.
3
Enter or edit the Account Name and type in your Password (these will have been assigned to you by your
Internet Service Provider or network administrator), and click Next.
4
Choose whether to connect to the Internet using:
* Internet email protocols (POP/SMTP) – click Next and go to Step 5.
or
* MAPI – click Next and go to Step 6.
298 | Chapter 11: Web Surveys
(See Appendix C, Email Systems, for background information.)
Click Next: if you have chosen to use MAPI, skip the next step and go straight to Step 10.
5
If you chose Internet email protocols (POP/SMTP) in Step 4:
a
Enter the addresses of the servers for incoming and outgoing mail (these will have been assigned to you
by your Internet Service Provider or network administrator).
b If your mail server requires SMTP Authentication (check with your network administrator to find out if
it does):
i
Tick SMTP Authentication.
ii
Click the Settings button to display the SMTP Authentication dialog box.
iii Choose whether to use your profile settings, or log on using another account name and password.
iv Click OK to close the dialog box.
c
6
Click Next.
Click the Test button to check the Internet connection settings.
Click Next.
7
If you intend to use the CamSP script mechanism for receiving responses for web surveys (see Using a
CamSP script to email responses, page 304), click Register email address. KeyPoint will connect to
Speedwell’s web server and record your email address for future use by the CamSP script – your email
address will be stored securely and will not be used for any other purpose.
If you do not intend to use the CamSP script mechanism for receiving responses for web surveys, or you
want to register the address at a later time, tick Don’t register my email address.
The Next button (or Finish button if you have disabled the final steps in wizards) is disabled until you have
registered the email address or ticked Don’t register my email address.
8
Click Next and Finish (or just Finish if you have disabled the final steps in wizards) to close the wizard.
Email setup | 299
The Options dialog box Connection page
To carry out email setup using the Options dialog box:
1
Select Options (Tools menu).
2
Click on Connection to display the Connection page.
If you have already used the Email Setup Wizard to set up connection options, the Connection page will show the
selections you have made; otherwise, the edit boxes will be blank ready for you to enter your details. See the
previous section on using the Email Setup Wizard for more information about the settings.
Web setup
You will need to run the Web Setup Wizard if you intend to carry out any web or email survey.
Responses
One of the most important decisions you need to make in setting up KeyPoint for carrying out web and email surveys
is how you want the responses sent back to you. There are several ways of handling survey responses to web and
email surveys, each of which has different requirements. The options are:
A
surveyserver: If you use surveyserver, you do not need to do anything, since the response mechanism is
handled entirely by surveyserver – see Chapter 12 for details of how to set up and use surveyserver.
300 | Chapter 11: Web Surveys
B
CamSP script: Responses can be emailed to you using the CamSP script on Speedwell’s web server. For
this, respondents must have Internet access, but setting it up is very easy since all you have to do is register
your email address with Speedwell’s web server.
C
Mail server program: Responses can be emailed to you using a mail server program such as Sendmail. Like
the other methods below, this uses a Perl, ASP or PHP script on the web server; for more details of the
requirements, see Web server requirements, page 301.
D
Directory-based mail: Responses can be emailed to you using a directory-based mail program, as used by
Microsoft IIS and similar technology.
E
ASCII file(s) on the server: Responses can be saved as ASCII files on the server, which you then transfer to
your computer using an FTP program such as CuteFTP. Each response can be saved as a separate file, or
the responses can be collected together in a single ASCII file.
If you are thinking of conducting a web survey using your own server and the Perl, ASP or PHP script, you
will need the necessary technical knowledge, or access to someone, such as a system administrator, who
has that knowledge.
See Processing survey responses, page 325, for how to load the responses into KeyPoint and process them.
Perl, ASP and PHP
Perl is an acronym for Practical Extraction and Reporting Language. It is a programming language tailored for scanning
text files, extracting data from them, and presenting the data in summary form in reports.
ASP is an acronym for Active Server Pages. It is a Microsoft add-on to its Internet Information Services (IIS) server
software for creating and managing dynamic web pages. ASP scripts can be written in a variety of languages: KeyPoint
generates its scripts in JScript.
PHP is a (recursive) acronym for PHP: Hypertext Preprocessor. It is an open source, general purpose server-side
scripting language that is well-suited to web development and the creation of dynamic web pages, and can be
embedded in HTML pages.
ASP scripts are recommended for use with Microsoft web server IIS, and PHP scripts for other web servers, provided
they support PHP version 4 or higher. If your server does not use Microsoft web server IIS or support PHP version 4 or
higher, you will need to use a Perl script.
Web server requirements
In order to implement a KeyPoint web survey using methods C–E in Responses, page 300, the server must:
* Allow you to place your own Perl, ASP or PHP scripts on the server
* Be able to execute the Perl, ASP or PHP scripts
* Allow you to change file permissions.
You will also need to find out the following:
* Where to place the HTML and other files created by KeyPoint
* Where to place the Perl, ASP or PHP script (for example, cgi-bin/)
ASP and PHP scripts do not need to be in a fixed location on the server and can, for example, be in the
same directory as your survey.
Web setup | 301
In addition, if you are using a Perl script, you will need to find out the following:
* Where the Perl program is located (for example, usr/bin/perl)
* If a mail program is being used, where it is located (for example, /usr/sbin/sendmail).
You will need to get this information from your systems administrator if the web server belongs to your own
organisation, or from the providers if you are using an external service (such as an Internet Service Provider).
Finally, you will need an FTP program to upload files to the web server; FTP programs are readily available as
shareware, and some browsers have one built into them.
The Web Setup Wizard
The Web Setup Wizard takes you step-by-step through the process of making the settings for the choices described in
the preceding sections (apart from surveyserver: see Chapter 12 for how to set up surveyserver).
If you prefer, you can carry out web setup using the Web Settings page in the Options (Tools menu) dialog box – see
The Options dialog box Web Settings page (page 305).
To run the wizard:
1
Either:
Choose Web Setup (File menu).
Or
Click the Run wizard button in the Web Settings page of the Options dialog box (Tools menu).
2
If you have not disabled introductory pages for wizards, click Next to display the Responses page.
3
In the Responses page, you can choose how you want the web server to deal with responses:
* Click the surveyserver button if you have subscribed to Speedwell’s surveyserver service. If you
choose this option, there are only a few further settings to make – see Chapter 12 for setting up
surveyserver
* Click the Use your web server button to get the server to run a Perl, ASP or PHP script either to email
responses to you, or to save the responses as one or more ASCII files. For the remaining Web Setup
Wizard steps, see the next section, Using your web server
* Click the Use CamSP script to email response button to use a script on Speedwell’s web server to
email responses to the mailbox set in KeyPoint. Use of the CamSP script is free and available to all
users. For the remaining Web Setup Wizard steps, see Using a CamSP script to email responses,
page 304.
302 | Chapter 11: Web Surveys
Using your web server
This section applies if you are using a web server supplied by an external organisation such as an ISP as well as if you
are using one located within your own organisation.
If you chose Use your web server in the Responses page of the Web Setup Wizard, the wizard displays the Server
page.
1
Choose whether you want KeyPoint to create a Perl, ASP or PHP script to return the survey responses.
We recommend ASP scripts for use with Microsoft web server IIS, and PHP scripts for other web servers
that support PHP version 4 or higher. These technologies are easier to set up and more up-to-date than
Perl. If your server does not use Microsoft web server IIS or support PHP version 4 or higher, you will need
to use a Perl script.
2
Specify where you are going to put the Perl, ASP or PHP script.
For an ASP or PHP script, leave the box blank if you are going to put the script in the same directory as the
index.html file.
You can specify the path as:
* A relative path (relative to the location of the survey): for example, enter scripts if the script is in
the ‘scripts’ subfolder of the folder containing the survey (remember that you can use ‘/..’ to specify a
parent folder)
Or:
* An absolute path: for example, ‘http://www.yourwebsite.com/scripts’.
Remember to use ‘/’ in paths if the server uses Unix or Linux, for example,
usr/bin/perl
and ‘\’ if it uses Windows NT/2000/XP, for example
D:\web-site\cgi-bin
If you are not certain what to fill in, leave the defaults and pass all the web survey files generated when
you publish the survey to your system administrator.
3
If you have chosen to use Perl scripts, you will also need to enter the location of the Perl interpreter.
4
Click Next to display the Mail Server page.
5
In the Mail Server page you choose how the web responses will be sent to you or saved on the server. You
can choose to have the responses sent using program-based mail or directory-based mail, or to have the
responses saved in one or more ASCII files. See Responses, page 300, for more information about these
options.
* If you choose program-based mail for use with a Perl script, you will need to specify the location of the
mail program on the server
* If you choose directory-based mail, you will need to specify the location of the mail pickup directory
* If you choose to keep the responses on the server:
a
Specify the directory to be used (for example, /var/www/abc.com/htdocs/responses/).
Web setup | 303
b If you also choose to keep all the responses in a single file:
i
Enter the name of the file (KeyPoint will add the extension .kpw).
ii
Create an empty ASCII file, for example, using an application such as Notepad, with that
filename, including the .kpw extension.
iii Upload the empty ASCII file to the directory you have specified.
iv Once uploaded, set the file to have read/write permission set.
6
Click Next and Finish (or just Finish if you have disabled the final steps in wizards) to close the wizard.
Using a CamSP script to email responses
Use of the CamSP script is free and available to all users.
If you selected Use CamSP script to email response in the Responses page, the wizard displays the CamSP script
page.
1
Check that the correct email address for responses is shown in the Email address box.
If it is not correct, cancel the wizard, and either run the Email Setup Wizard (see The Email Setup Wizard,
page 298) and set the correct address there, or set the address in the Connection page of the Options
(Tools menu) dialog box (see The Options dialog box Connection page, page 300). Then restart the Web
Setup Wizard.
2
If you did not register the email address when you used the Email Setup Wizard (see The Email Setup
Wizard, page 298) click Register email address to connect to the Speedwell server to register the email
address to which responses should be sent.
The email address is securely saved on the Speedwell web server. No other details are transmitted or
saved. The email address will be used solely for the purposes of forwarding survey responses, and, in
particular, you can be assured that it will not be used for any sales or marketing activities.
3
Click Next and Finish (or just Finish if you have disabled the final steps in wizards) to close the wizard.
304 | Chapter 11: Web Surveys
The Options dialog box Web Settings page
To carry out web setup using the Options dialog box:
1
Select Options (Tools menu).
2
Display the Web Settings page.
The controls displayed in the lower part of the dialog box depend on which Response method is currently selected.
If you have already used the Web Setup Wizard to set up web options, the Web Settings page will show the
selections you have made; otherwise, the edit boxes will be blank ready for you to enter your details. See the
previous section on using the Web Setup Wizard for more information about the settings when Your web server or
CamSP script is selected; see Setting up and authenticating your connection to surveyserver, page 335, for when
surveyserver is selected.
Web setup | 305
Setting Email and Web options
You use the Email & Web page in the Options (Tools menu) dialog box to set options controlling the way KeyPoint
picks up and saves email and web responses. The settings in this tab cannot be set using a wizard.
Settings
To make email and response location settings in the Email & Web tab:
1
To change the Responses location (where responses are stored when they have been downloaded):
a
Click the Change button to display a standard windows Open dialog box.
b Browse to the folder (or create one) in which you want the mail to be stored.
c
Click Open.
d Click Yes when KeyPoint asks you whether it should create the email file msgidx.dat in the selected
location.
It is particularly important to consider the Responses location if there are several KeyPoint installations on
different PCs downloading responses from the same location: for example, if the same email account is
used by several people in your organisation for responses. This is because, when you collect responses, all
the responses are downloaded, not just those intended for you. This means that some responses intended
for other people may be downloaded to your PC, and will become inaccessible to them. To prevent this
happening, you should change the ‘Responses location’ on all the PCs to the same shared network folder,
which will then receive all responses when they are collected, so everyone will still have access to the
responses intended for them.
306 | Chapter 11: Web Surveys
2
Click Encrypt incoming emails if you want incoming email messages to be encrypted.
This setting allows you to stop other people reading confidential email responses. When selected,
incoming responses are encrypted so that they can only be read within KeyPoint. These responses will
then be unencrypted automatically for you when you access the email responses. The level of encryption
is sufficient to prevent most intruders reading the responses.
3
Click Delete email on successful read if you want KeyPoint to delete email messages it has successfully
processed from the email system.
Warning: If you select the Delete on successful read option, you will not be able to reload messages if you delete them in the
Mail Responses dialog box.
4
Email databases can become corrupted from time to time. To regenerate the database from existing email
messages, click the Regenerate button.
Web Responses settings
The ‘Web Responses settings’ are only relevant if you have chosen to use your own web server and to keep the
responses on the server rather than have them sent on to you as email – see Using your web server, page 303, in
particular Step 5.
To specify how web responses saved in a text file will be picked up by KeyPoint after they have been downloaded
from the web server:
1
Click Change to display a Windows Open dialog box and use it to select the default folder used to store
the web responses.
Typically, you will use an FTP program to download the responses from the web server to this folder.
2
Tick Always ask for the Web Responses directory if you want to be prompted for the Web Responses
directory when you select Download Responses (File menu) and click Get Other Responses in the
Responses dialog box, even if you have set a default directory – see Processing survey responses, page
325.
3
Tick Rename to ‘.bak’ after successful read if you want the extension of the responses file changed to
.bak after it has been read – this saves it as a backup and prevents it being accidentally read again into
KeyPoint.
When the responses file is renamed it will overwrite any existing .bak file. If you want to keep older .bak
files, you should rename them and/or move them to another directory.
Distributing a web survey
You can choose to generate up to three different HTML versions of your survey:
* Advanced: This version is always generated. Most of the design layout, data validation and routing defined in
the survey design are preserved. For a multi-page design, you can choose whether to create a single or
multi-page web survey. The Advanced version of the survey uses JavaScript, so requires JavaScript to be
enabled in the respondent’s browser.
If you choose a single HTML web page format for a multi-page design, all the pages of the survey design will
be formatted as separate pages but within a single HTML web page.
Distributing a web survey | 307
If you choose to distribute the survey as an HTML attachment to a text email using the Invitation Wizard, the
advanced version of the survey will be used, but within a single HTML web page, even if you have chosen
multi-page.
* No JavaScript: This optional version is displayed if the respondent’s browser has JavaScript disabled. Most of
the design layout is preserved, but all the pages in the design appear in a single HTML web page. Features
dependent on JavaScript, such as validation, routing, the calendar picker for date/time questions and the Save
and Print buttons will be missing.
* Web Accessibility: This optional version has a default single column single page layout that is designed to
make reading and completing the survey easier for respondents with disabilities – see Web accessibility,
page 312, for more details.
There is no validation or routing for respondents completing Web Accessibility surveys.
KeyPoint web surveys work on a wide range of operating systems (Windows, Macintosh, Linux, Unix …), and only
require browsers to be HTML version 4.01 compatible, which allows respondents to use virtually all current browsers,
including Internet Explorer, Netscape, Opera and Firefox.
Setting web survey options
To set the options controlling the appearance and behaviour of web surveys:
1
Select HTML Settings (Form menu) to display the HTML tab of the Properties sidebar.
Alternatively:
a
Click on the background of the form to make sure that no object is displayed.
b Display the Properties sidebar if it is not currently displayed – see Working with sidebars, page 103.
c
Click on the HTML tab.
The HTML tab of the Properties sidebar will be displayed:
308 | Chapter 11: Web Surveys
The Form Properties sidebar does not contain an HTML page when surveyserver is selected as the
response method – see The Options dialog box Web Settings page, page 305.
2
Click Advanced (JavaScript Required) Setup to display the Advanced HTML Options dialog box so that
you can set options controlling the appearance and behaviour of the web survey – see Setting advanced
HTML options, page 310, for instructions.
3
To generate files for a Web Accessibility version of the survey (see Web accessibility, page 312, for more
information about web accessibility) when you publish the survey:
a
Tick Web Accessibility.
b Click Setup to display the Web Accessibility HTML Options dialog box so that you can set options
controlling the appearance and behaviour of the Web Accessibility version of the survey – see
Creating and using Web Accessibility surveys, page 313, for details.
See Creating and saving the files for a web survey, page 318, for how the files for the Web
Accessibility version will be saved.
If you do not want to generate files for a Web Accessibility version of the survey:
Clear the Web Accessibility tick box.
4
Tick Web page if you want respondents to be taken to your own custom page after submitting the survey,
and type the name of the web page in the box alongside (include the path with the name or the URL if it
is not going to be in the same directory as the index.html file).
Leave Web page unticked to display the standard confirmation “Survey submitted. Thank you for
completing this survey”.
5
If you want to restrict respondents to submitting one response only:
a
Tick Allow only 1 response by.
b Select an expiry date – this is required because the procedure used to limit respondents to a single
response uses a cookie, and cookies must always have an expiry date.
c
Tick Respondent must have cookies enabled if you want to impose a more rigorous control over
respondents sending multiple replies – see following note.
The procedure for preventing multiple responses will only work if the respondent’s browser has the
use of cookies enabled; if cookies are disabled, the respondent would be able to submit multiple
responses. Choosing Respondent must have cookies enabled prevents any response being submitted
if cookies are disabled. In deciding whether to use this more rigorous control, you will need to choose
between preventing anybody sending multiple responses and the risk that some people may be
prevented from sending any response.
6
If required, click Preview to see how the web survey will appear – the preview also allows you to generate
the files ready to be uploaded to your server and invite respondents to fill in the survey. See Previewing
and publishing a web survey, page 316, for details.
Distributing a web survey | 309
Setting advanced HTML options
To set options controlling the appearance and behaviour of a web survey:
1
Click Advanced (JavaScript Required) Setup in the HTML page of the form properties sidebar to display
the Advanced HTML Options dialog box:
2
For a multi-page design, tick the Multi-page tick box to choose whether to create a single or multi-page
web form.
You cannot send a multi-page web survey as an HTML attachment to an email – it will be sent as a single HTML page even if
Multi-page is ticked.
Routing is enforced when the user changes HTML page, so it has no effect in a single HTML page survey.
3
Choose whether to use the High quality tickboxes/ticks selected in the design – otherwise the default
ticks and tickboxes given by the respondents’ browsers will be used.
4
Choose whether to Also generate a non-JavaScript version of the survey.
When you publish the web survey (see Creating and saving the files for a web survey, page 318) the files
for the non-JavaScript version will be saved in a folder (spl) alongside the folder (adv) holding the files for
the advanced survey (the files for the advanced version are always created).
The advanced version, which requires JavaScript, preserves most of the layout, data validation (but not masks) and routing defined
in the Design.
The non-JavaScript version preserves most visual aspects of the design layout, but will have a single HTML page only (even for
multi-page designs) and will lack features dependent on JavaScript, such as validation, routing, the calendar picker for date/time
questions, high quality tick boxes, and Navigation buttons.
If you create and upload the JavaScript and the non-JavaScript folders, the non-JavaScript version will be displayed automatically if
JavaScript is turned off in the respondent’s browser.
5
You can enter a password in the Password box if you want greater control over who completes the survey.
You will need to make sure that the people you want to complete the survey have access to the password.
Tick Show password if you want to see the text in the Password box in plain text; otherwise it is shown as
***. This has no effect on the published survey – respondents will not see the password in plain text as
they enter it.
You cannot password protect the non-JavaScript version.
310 | Chapter 11: Web Surveys
6
Click OK to return to the HTML properties page.
Adding off-page navigation buttons to a web survey
This section describes how to add off-page navigation buttons to advanced and No JavaScript versions of a
non-surveyserver web survey – see Creating and using Web Accessibility surveys, page 313, for how to add buttons
to the Web Accessibility version of the survey; Customising the appearance and behaviour of a surveyserver form,
page 343, for how to add off-page navigation buttons to a surveyserver survey; and Viewing responses page by
page, page 254, for how to use the Page Navigator with direct-entry surveys in the KeyPoint Responses workspace
and Data Entry Module. You can also add on-page navigation buttons to a survey, and these can be used in
surveyserver, non-surveyserver and direct-entry surveys – see Adding navigation buttons, page 184, for how to add
on-page navigation buttons.
To add off-page navigation buttons to a non-surveyserver web survey:
1
If you have created one or more copy forms, select the form (master or copy form) to which you want to
add the navigation buttons.
2
Click the Buttons button in the Designer Tools sidebar.
3
Click in the form to start the Buttons Wizard – it doesn’t matter where you click in the form.
4
If an introductory page is displayed, click Next to display the Buttons location page.
5
Select Off-page navigation.
6
Click Next to display the Buttons page in the wizard:
If Off-page navigation is selected, the Submit button appears on all versions of the survey, and the Next
button always appears on multi-page surveys (multi-page surveys only appear in the JavaScript version).
Distributing a web survey | 311
See Keyboard shortcuts for web surveys, page 316, for keyboard shortcuts users can use instead of
clicking the buttons.
7
Choose whether to include the following buttons in the advanced version of the survey (they will not
appear in the other versions):
* Back: this allows the respondent to go back to a previous page in a multi-page survey (even if it is
selected, it will not appear on single-page surveys). You may want to omit this button to prevent the
respondent going back to change an earlier entry if you are looking for their initial reactions.
* Save: this allows the respondent to save a partially completed survey so that they can come back to it
later and send it when they have finished it.
* Print: this allows the respondent to print the complete survey, including any answers they have
entered. This can be particularly useful for multi-page surveys since it allows users to print the
complete survey, including their answers, in one go rather than on a page-by-page basis using their
browser’s Print command.
8
Choose whether to include a Reset button (on JavaScript and non-JavaScript versions) allowing
respondents to start filling in the survey again from scratch. You may want to exclude this on multi-page
surveys to prevent the respondent going back to change an entry on an earlier page if you are looking for
their initial reactions.
9
Choose the required style of buttons from the Button style drop-down list box.
10
Click on the Workspace colour button to display a Windows colour picker to choose a background colour.
This is the colour for the background to the navigation buttons and progress bar, and for the browser area
around the form pages: see Form tab, page 223, for how to select the background within the form itself.
11
Click Next to display the Progress bar page in the wizard.
12
To include a progress bar on a multi-page survey showing how far the respondent has progressed through
the survey.
a
Tick Progress bar.
b Select the required style from the Progress style drop-down list box.
13
Click Next/Finish to confirm the settings you have made and close the wizard.
To edit the settings for off-page navigation, either:
Run the button Wizard again.
Or:
Display the Navigation page in the Properties sidebar for the form and edit the settings there – see
Navigation, page 228.
Web accessibility
KeyPoint fully supports the web accessibility requirements published in the World Wide Web Consortium (W3C)
Guidelines, which can be found at http://www.w3.org/TR/WAI-WEBCONTENT/. However, in order for your survey to
satisfy some of the requirements, you must make sure that you design and create it appropriately. For example, one
312 | Chapter 11: Web Surveys
of the requirements (in fact the first, Guideline 1.1) is that there is a text equivalent for every non-text element. In
KeyPoint, the only non-text elements are images and OLE objects, and KeyPoint supports the Guideline by allowing
you to add a text equivalent to the Description property using the Properties sidebar: satisfying the Guideline
depends on you actually doing this for all images and OLE objects.
Although KeyPoint cannot add elements like this to your design to ensure that the Web Accessibility survey satisfies all
the Guidelines, it can check whether there are any web accessibility problems in your survey design.
Validating a form for web accessibility
To check whether a Web Accessibility survey built from the current design may have problems satisfying the W3C
Guidelines:
Choose Validate for Web Accessibility (Form menu). (You can also click Validate Form in the HTML tab
of the form’s Properties sidebar – see Setting web survey options, page 308, for how to display this page.)
If KeyPoint identifies any problems, it will display a dialog box listing them:
For each item in the list there is a link identifying the object (Picture 2 in the example) and a description of the
problem, including the priority given to the relevant Guideline by W3C (Priority 1 is the highest). You can click the
link in the dialog box to select the object in the form. You can edit the object without closing the dialog box, and then
click Validate to recheck the form.
Appendix D, Web Accessibility Guidelines, lists the Guidelines relevant to the construction of a KeyPoint survey, any
specific KeyPoint features supporting them, and what you may need to do in order to satisfy them.
See the next section for how to create and use a Web Accessibility version of your survey, including how to set
options controlling the way it appears and behaves.
Creating and using Web Accessibility surveys
Before creating a Web Accessibility survey, you should check to see if the current survey design form has any web
accessibility problems and correct any that are identified – see the previous section, Validating a form for web
accessibility, for details.
To create a Web Accessibility version of your survey:
1
Display the HTML tab of the Properties sidebar – see Setting web survey options, page 308, for how to
display this page and for setting general web survey options.
2
Tick Web Accessibility in the Properties sidebar.
Distributing a web survey | 313
3
Click Web Accessibility Setup in the Properties sidebar to display the Web Accessibility HTML Options
dialog box:
4
Tick Reset, Save and Print to choose whether to include these buttons on the Web Accessibility version of
the survey (see Steps 6-8 in Setting advanced HTML options, page 310, for more information). Note that
the Save and Print buttons will not be displayed in the respondent’s browser if JavaScript is disabled.
5
Tick Ignore colours to make all text in the web survey black.
6
Tick External style sheet to create an external style sheet when the web survey is generated.
7
Enter any Default place-holding characters in edit boxes and text areas that you want to appear – these
can help respondents identify the places where they should type in entries.
8
Click OK to return to the HTML page in the form properties sidebar.
To preview the Web Accessibility version of the survey:
1
Do one of:
Click the Show as HTML toolbar button
Or:
Select Show as HTML (Form menu).
Or:
Click Preview in the HTML page in the Properties sidebar.
314 | Chapter 11: Web Surveys
A preview window will be displayed showing the advanced version of the survey:
2
Click the Text version link near the top of the page in the preview to display the Web Accessibility
version:
When you publish the web survey (see Creating and saving the files for a web survey, page 318), the files for the
Web Accessibility version will be saved in a folder (with the name ‘wai’) alongside the folder (’adv’) holding the files
for the advanced JavaScript version (these are always generated) and, if you have chosen to create it, the folder (’spl’)
holding the non-JavaScript version.
Distributing a web survey | 315
When you upload the files, you should upload the complete contents of the publication folder including all the
subfolders (wai, adv and spl, if generated) without changing the relative paths between them – for example, do not
change the names of the subfolders.
Once you have uploaded the files, the respondent will be able to switch between the different versions by:
* Clicking Text version in the advanced or (if JavaScript is disabled) the non-JavaScript version to display the
Web Accessibility version
* Clicking Normal version in the Web Accessibility version to return to the advanced or (if JavaScript is
disabled) the non-JavaScript version.
If you use the KeyPoint Invitation Wizard to send the survey as an HTML email or as an HTML attachment,
the respondent will receive the advanced version of the survey, not the Web Accessibility version.
See Previewing and publishing a web survey, page 316, for general information about previewing and publishing a
web survey.
Keyboard shortcuts for web surveys
When respondents complete web surveys they can use buttons on the survey to manage and navigate the survey they
are completing – see Adding off-page navigation buttons to a web survey, page 311.
Respondents may also use the following keyboard shortcuts for these buttons:
Button
Shortcut
Back
Alt+B
Next
Alt+N
Reset
Alt+R
Save
Alt+A
Submit
Alt+S
If you want to enable respondents to use these shortcuts, you will need to refer to them in your instructions for
completing the survey.
Previewing and publishing a web survey
To preview a web survey:
1
Display the survey design form that you want to use for the web survey in the Design workspace.
If you want to use a paper and/or web survey form as well as the web survey form, you can, for example,
create the design for the paper survey in the Master design form and the web design in a copy form.
2
Choose the required web survey settings using the HTML page in the Form Properties sidebar (see Setting
web survey options, page 308).
316 | Chapter 11: Web Surveys
3
Do one of:
Click the Show as HTML toolbar button
Or:
Select Show as HTML (Form menu).
Or:
Click Preview in the HTML page in the Properties sidebar.
If you have made any changes to the design, you will be asked if you want to save them before the
preview is displayed in the Web Survey Preview window:
Check the generated web survey in the preview. You can enter data and check features like validation and routing.
You cannot submit the survey, but the other navigation buttons (Back, Next, Save, Reset and Print) will work – if you
save the form, any data you entered will be recovered the next time you preview the form, just as if you were a
respondent saving a partially filled in survey.
You can click the Text version link near the top of the page in the preview to display and check the Web Accessibility
version if you generated one – see Web Accessibility, page 312, for details.
You cannot edit the survey in the Web Survey Preview window, so if you want to make any changes you will need to
click Close to return to the Design workspace, make the changes there and then recreate the web survey from Step 1
in these instructions.
Once you are satisfied with the web survey, you can create and save the files ready for uploading to your web server
– see the next section.
Distributing a web survey | 317
Creating and saving the files for a web survey
If you use the KeyPoint Invitation Wizard (see Promoting a web survey – sending invitations, page 319) to distribute
the survey, the wizard will create and save the required files for you automatically; this section shows you how to
create and save the web survey files independently of the KeyPoint Invitation Wizard.
To create and save the HTML and other files ready for you to publish on your web server:
1
Display the Web Survey Preview window (see previous section).
2
Click Publish in the Web Survey Preview window to display the Browse for Folder dialog box.
3
Use the Browse for Folder dialog box to select or create the publication folder for saving the web survey
files. When you upload the web survey you will need to upload all the files generated for the survey, so
you should select an empty folder or click Make new folder to create a new folder.
4
Click OK to generate the files.
If the selected folder is not empty, you will be warned that files may be overwritten: click OK to continue;
click Abort to quit the procedure without saving any files.
5
A confirmation dialog box will be displayed once the files have been saved. Click OK to return to
KeyPoint.
After KeyPoint has saved the files, the specified publication folder will contain the following files and folders:
* index.html
* adv subfolder
* spl subfolder if you have chosen to create a non-JavaScript version of the survey
* wai subfolder if you have chosen to create a Web Accessibility version of the survey
The adv, spl and wai subfolders will contain, where appropriate, html, image (.jpg, .gif and/or .png) and JavaScript
(.js) files, some of which may be in subfolders.
If you are using your own web server to handle responses, rather than the CamSP script, the publication folder will
also contain:
* Perl, ASP or PHP script files, depending on which you have chosen to use. In the English version of KeyPoint,
these files are named submit and common, with the appropriate .pl, .asp or .php extensions.
Once you have saved the HTML files you can open them in a browser to check what the survey looks like.
Uploading the files for a web survey
After you have saved the files for the web survey, you should pass them on to your system administrator.
The system administrator should:
* Place the index.html file the adv subfolder and, if created, the spl and wai subfolders in the required
directory on the web server – the web address of this directory will be the URL for your survey.
* Make sure that if a page is to be displayed after the respondent clicks the Submit button (for example,
nextpage.htm), this page is at the specified location.
* If you are using a Perl script, place it in the CGI directory on the web server.
318 | Chapter 11: Web Surveys
* If you are using an ASP or PHP script, place it in the selected directory on the web server (such as in the same
directory as the HTML files).
* Give the scripts executable permissions.
Promoting a web survey – sending invitations
Once you have designed your web survey, you need to announce it to the target population or sample group: for
example, by sending an email message to potential respondents, inviting them to participate in the survey and telling
them where they can find the survey on the web. You can do this from your own mail program, but there are a
number of advantages to doing it from KeyPoint using the Invitation Wizard – these are:
* It is easier.
* You will be able to send follow-up messages – see The Invitation Manager and sending a follow-up mailing,
page 328.
* You will be able to track responses – see Tracking responses, page 327.
* You can include personalised information for each of the individual respondents receiving the invitation, such
as his/her name and address.
* If you are using the CamSP script you can send the survey as an HTML attachment to an email (the Invitation
Wizard is the only way to do this). However, if you are using the CamSP script, you cannot use the Invitation
Wizard to invite respondents to complete a web survey hosted on your own server.
* If you use your own email program to invite respondents to complete the survey you will need to create, save
and upload the files first – see previous sections. If you use the Invitation Wizard the required files are created
and saved as part of the process, though you will still need to upload the files once they have been created.
To invite respondents to participate in a web survey:
1
Display the form in the Design workspace.
2
Select Invite (Tools menu) to start the Invitation Wizard.
3
If a Welcome page is displayed, click Next to display the Invitation type page.
4
In the Invitation type page, tick Web.
Distributing a web survey | 319
5
Click Next to display the Recipients page. If there are no currently selected contacts, the Select contacts
dialog box will be displayed automatically on top of it (if the Select contacts dialog box is not displayed, go
straight to Step 10:
The left-hand pane shows the contacts in your address book; the right-hand pane will show the contacts
you have selected for this survey mailing.
If you right-click in the left-hand pane, a context menu allows you to add new contacts to the address
book, delete a contact from the address book, change a contact’s properties and choose which groups a
contact belongs to. For more information on these operations, see The Address Book, page 244.
6
If you have defined groups within your address book and want to choose contacts from that group only,
select the required group from the drop-down list box at the top of the dialog box.
7
To add a contact to the invitation to fill in the survey, click on the contact in the left-hand pane, then click:
To add all the contacts in the selected group to the invitation, click:
To remove a contact from the invitation, click on the contact in the right-hand pane, then click:
To remove all the contacts from the invitation, click:
320 | Chapter 11: Web Surveys
8
Repeat Steps 6 and 7 until you have selected all the contacts you want to include in the invitation to fill in
the survey.
9
Click OK to display the Recipients page in the Invitation Wizard.
10
In the Recipients page:
a
The Subject box shows the text that will appear in the invitation email’s subject field – edit it as
required.
b The To box lists the contacts you have selected for the invitation. If required, click Address Book to
redisplay the Select contacts dialog box to change your selection.
c
Tick Track Responses if you want to attach unique response identifiers to the emails so that you can:
* track responses to check who has not responded yet
* prepopulate fields in the survey linked to the address book with data for the individual respondent
* update data in the address book for fields in the survey linked to the address book if the
respondent has changed the data.
Leave Track Responses unticked if you want to be able to assure respondents that the survey is
completely anonymous, though this means you will not be able to track responses, prepopulate fields
or update the address book automatically. See The Contact Link tab, page 215, for more information
about linking fields to the address book.
d Click Next.
What happens next depends on whether you are using the CamSP script or not:
* If you are using the CamSp script, the Personalise the email text page will be displayed – go to Step 12.
* Otherwise, the Web survey location page will be displayed – go to Step 11.
11
If you are not using the CamSp script, the Web survey location page will be displayed:
a
Enter the URL for the survey showing where it will be found on your server.
b Enter the URL label – this is the text appearing as the link to the survey URL.
c
Click Next to display the Script location page.
d Enter the absolute path to the Perl, PHP or ASP script.
e
Click Next to display the Personalise the email text page.
12
Use the Personalise the email text page to customise the text used in the invitation – see Personalising the
email text (next section) for details.
13
Click Next in the Personalise the email text page.
What happens next depends on whether you are using the CamSP script or not:
* If you are using the CamSp script, the Save Invitation Details page will be displayed – go to Step 17.
* Otherwise, the Confirmation email page will be displayed – go to Step 14.
Distributing a web survey | 321
14
If you are not using the CamSP script, the Confirmation email page will be displayed. If you want the
respondent to be sent a confirmation email when they have submitted their response:
a
Enter the Subject text for the email – this will appear in the email’s header.
b Enter the text for the body of the email. You can enter special fields as well as text – see Personalising
the email text, next section, for details.
c
Choose whether to send the email using plain text or HTML format.
d Click Next to display the Publish page and go to Step 14.
15
In the Publish page, if you have already created the web files for the survey (either because you have run
the Invitation Wizard before or because you have clicked Publish in the Web Survey Preview window),
and you do not want to create them again (for example, because you have not changed the survey
design):
Tick Publish only invitation files.
Otherwise:
a
Leave Publish only invitation files unticked.
b Enter the path to a folder for saving the files for the survey – type in the path or click
Browse for Folder dialog box so that you can select or create the folder.
to display the
If you have already generated the web survey on a previous occasion, it is very important that you use
the same folder, since KeyPoint will only create files that have changed since then and the changed
files must be saved in the same folder as the originals.
16
Click Next to create and save the files if you have chosen to publish the survey and display the Save
Invitation Details page – see Creating and saving the files for a web survey, page 318, for more
information about the files created.
If the selected folder is not empty, you will be warned that files may be overwritten: click OK to continue; click Abort to quit the
procedure without saving any files.
17
In the Save Invitation Details page:
a
Tick Save invitation as if you want to be able to send follow-up messages using the Invitation Manager
(see The Invitation Manager and sending a follow-up mailing, page 352). Save invitation as is
automatically ticked and disabled if you chose to track responses at Step 10c.
b If Save invitation as is ticked, enter a name for the invitation.
c
Tick Send immediately if you want to send the invitation emails immediately. Leave it unticked if you
do not want to send the invitations immediately, for example, if you want to upload the survey files
first.
If you do not want to send the invitations immediately, you will be able to do so later using the
Invitations Manager, see The Invitation Manager and sending a follow-up mailing, page 328.
However, in order to do this, you will need to tick Save invitation as and enter a name for the
invitation. If Save invitation as is unticked, Send immediately is automatically ticked and disabled.
d If you intend to send the invitation emails immediately and you are using a MAPI connection, start
your email program so that it can relay the messages.
322 | Chapter 11: Web Surveys
18
Click Next/Finish to close the wizard and, if you ticked Send immediately, email the invitations/surveys to
the addresses you selected.
19
If the form is not already ‘read only’, a dialog box will be displayed asking if you want the form to be made
read only to prevent any changes being made to it now that it has been published. Click Yes to make the
form read only; click No to leave the form editable.
You can change the read only status of the form using the Inspector tab in the Properties sidebar for the form.
See Processing survey responses, page 325, for how to collect and process responses to the survey.
Personalising the email text
If you are sending an invitation for respondents to fill in a survey on your web server or in an HTML attachment, you
can personalise the text of the invitation using the Personalise the email text page:
The following instructions also apply, with the obvious name changes, to the Confirmation email page in the
Invitation Wizard.
You can add to or edit the default text in the Invitation Text box (see next section, Editing the email text), or choose
some pre-prepared personalised text from a library of messages (see the next but one section, Using the invitation
library).
You can also choose whether to Send as plain text or Send as HTML. If you are using MAPI and select Send as
HTML, the invitation will be sent as an HTML attachment.
Distributing a web survey | 323
Editing the email text
Normal text is shown in black in the Invitation Text box; special fields are shown in blue.
There are the following special fields, which will be replaced by data in the invitation email when it is generated:
* Link, which will be replaced by the survey’s URL
* Various contact fields, including name, email, postal address, and so on, which will be replaced by the
relevant details from your address book.
To add a special field:
1
Right-click at the place in the text that you want to add the field.
2
Select the required field from the menu displayed.
You can delete special fields but you cannot edit them.
Using the invitation library
To add personalised text to the invitation library and/or select library text for the Personalise the email text page:
1
Click Library to display the Invitation Library dialog box:
2
Click Add to add a new entry in the name box – it will be added with a default name, which will be
selected so that you can edit it.
3
Enter the text for the invitation in the right-hand box – you can right-click to add special fields (see
previous section).
You can repeat Steps 2 and 3 for any other entries you want to add (when you click Add you will be asked
to confirm that you want to save the previous addition in the library).
4
To close the dialog box and save the text for the last entry you added in the library (you will be asked to
confirm that you want to do this), either:
* Click Use if you want to replace the text in the Personalise the email text page with the text from the
library.
* Click Close if you want to leave the text in the Personalise the email text page unchanged.
324 | Chapter 11: Web Surveys
To replace the text in the Personalise the email text page:
1
Click Library to display the Invitation Library dialog box.
2
Click on the name of the required text in the Name pane to select it.
3
Click Use.
You can edit the personalised text in the right-hand pane of the Invitation Library dialog box for any existing entry by
selecting the entry and making the changes.
You can rename or remove entries in the library by selecting the name and clicking Rename, which selects the name
so that you can edit it, or Remove, which deletes the name after you have confirmed that you want it removed.
Processing survey responses
Once respondents have begun sending responses to the survey, you can:
A
Collect them.
B
If required, view or delete them.
C
Input them into KeyPoint responses.
You use the Responses dialog box to collect and process email and web responses.
To display the Responses dialog box:
1
Switch to the Responses tab.
2
Select Download Responses (File menu).
Processing survey responses | 325
The Responses dialog box lists the responses that have already been collected. It marks responses as follows:
* Green tick: responses that have been input into KeyPoint responses
* Blue question mark: responses that have not been input into KeyPoint responses yet
* Red cross: responses that couldn’t be input into KeyPoint responses for some reason.
The form name shows you the form from which the original email/web survey was generated. If you have run more
than one email/web survey, you can view all responses in the database by selecting Show all responses.
Each response you receive is stored in a separate message file. You can view the file name by looking at the Message
File field (these files are stored in the email database folder, which is set in the Email & Web tab: see page 306).
The File Date field displays the date and time the response was received.
You can sort the responses in ascending or descending order by clicking the sort button at the right-hand end of the
column heading for the field you want to sort by (in the example picture, the up arrow in the File Date column
heading shows that the responses are sorted in date/time order with the most recent first).
Collecting new responses
To collect new responses in the Responses dialog box (see previous section):
1
If you are using a MAPI connection, start your email program so that KeyPoint can use it to read responses.
2
The next step depends on how you are receiving responses (see page 351 for collecting responses from
surveyserver):
* If responses are being emailed to you, click Get Email Responses in the Responses dialog box
* If you have already downloaded responses from a web server, click on the arrow next to the Get
Other Responses button and select Own server (it will remain selected for the next time you collect
responses). Then click on the Get Other Responses button itself, and, if prompted, navigate to the
folder where the responses have been saved.
KeyPoint loads the responses into the Responses dialog box. For MAPI connections, only responses
marked as unread are downloaded. For POP/SMTP connections, only responses that are not already in the
KeyPoint email database are downloaded.
3
The new responses are listed in the Responses dialog box. Each new response is marked with a blue
question mark, showing that it has not been input yet.
Viewing responses
Since KeyPoint cannot detect duplicate responses sent by the same person, you may want to view a response
message before inputting it, or you may want to find out why a response couldn’t be input, or was incorrectly input.
To view a response message before you input it:
1
Select the response you want to edit by clicking in it.
2
Click the Edit Response button.
3
Click OK to return to the Responses dialog box.
326 | Chapter 11: Web Surveys
Deleting response messages
To delete one or more response messages:
1
Select the response you want to delete by clicking in it (you can select more than one response using
Ctrl+click or Shift+click, as in Windows Explorer).
2
Click the Delete Response button to delete the response(s) from the email database (click Delete All to
delete all the responses).
If the Email Options are set to delete response messages from the email system on download, you will not
be able to download a response message again after you have deleted it from KeyPoint.
However, if a response message has not been deleted from the email system, but has been deleted from
the KeyPoint email database, you can download it again. If you are using a MAPI connection, you should
mark the response message you wish to download again as unread. If you use a POP/SMTP connection,
no action is required before downloading: just click Get Email Responses. Note that downloading a
response message a second time can lead to duplicate responses.
Inputting responses
After you have collected the response messages, and viewed them if required, you can input them into the responses
database for the survey so that you can view and analyse them as KeyPoint responses in the Responses workspace.
To input the collected responses for the current survey into the KeyPoint database:
1
Click the Input Responses button in the Responses dialog box (see previous sections).
KeyPoint processes each response directly into the database.
If the survey contains fields linked to the address book with update set (see The Contact Link tab,
page 215), and the respondent has entered data that is different from the data currently in the address
book, you will be asked if you want to update the address book.
2
Click the Close button to view the processed responses in the Responses workspace.
Tracking responses
In order to track responses (to see statistics showing how many responses you have received to your invitations), you
must send the invitations to complete the survey using the Invitation Wizard, and you must enable tracking (see
page 321) and save the invitation (see page 322).
To track responses:
1
Choose Surveys (File menu).
2
Click on the Tracking tab.
3
Click Close to return to the current survey.
Tracking responses | 327
The Invitation Manager and sending a follow-up mailing
The Invitation Manager allows you to view the invitations you have sent, with a list of the contacts you sent them to
and whether they have replied. It also allows you to send invitations that were not sent immediately by the Invitation
Wizard and to send a follow-up mailing.
To open the Invitation Manager:
1
Select the Design workspace.
2
Select Invitations (Tools menu) to display the Invitation Manager:
The left-hand pane lists the invitations for the current survey – if, as in the example, the invitation has not been sent
yet, the Sent/Printed field has a Send button, otherwise it shows the time and date the invitation was sent. The
Invitation and Confirmation message tabs show messages set for the invitation. If tracking was enabled, the contacts
tab shows the contacts to whom the invitation was sent, and whether they have replied.
To send an invitation that has not been sent yet:
1
If you are using a MAPI connection, start your email program so that KeyPoint can use it to send the
invitations.
2
Click Send in the Sent/Printed field.
3
You will be asked to confirm that you want to send the invitations; click Yes to continue.
4
A confirmation dialog box will be displayed when the invitations have been sent; press OK to return to the
Invitation Manager.
328 | Chapter 11: Web Surveys
If tracking was enabled for an invitation, you can send a follow-up message to contacts who have not responded yet.
To resend an invitation to contacts who have not responded to a survey:
1
Open the survey in the Design workspace and select the form used in the original invitation.
You will be able to customise the invitation/reminder text later in this procedure.
2
Select Invitations (Tools menu) to display the Invitation Manager.
3
Click on the invitation in the Invitations box that you want to follow up (you can check which respondents
haven’t replied yet on the Contacts tab).
4
Click Send follow-up.
5
The Recipients page of the Invitation Wizard will be displayed with the respondents who have not replied
yet shown in the To box.
Click Address Book to display the Select contacts dialog box if you want to change the list of contacts to
be sent the follow-up survey. (If all respondents in the invitation have replied, the Select contacts dialog
box will be displayed automatically so that you can select the contacts you want to send the follow-up
survey to.)
6
Click Next.
You will be taken through the same steps in the Invitation Wizard as when the original invitation was sent
– see Promoting a web survey – sending invitations, page 319, for details.
To delete an invitation from the Invitation Manager:
1
Open the survey in the Design workspace and select the form used in the invitation.
2
Select Invitations (Tools menu) to display the Invitation Manager.
3
Click in the Invitations box on the invitation that you want to delete.
4
Click Delete.
For more information
On analysing data, see Chapter 14, Analysing Data.
The Invitation Manager and sending a follow-up mailing | 329
330 | Chapter 11: Web Surveys
12
surveyserver
In this chapter you will find out how to conduct an email or web survey using surveyserver.
You will learn about:
* The benefits of using surveyserver
* Individual and group accounts
* Registering for the free surveyserver trial account
* Setting up and authenticating your connection to surveyserver
* Uploading a survey form
* Previewing the uploaded form on surveyserver
* Customising the appearance and behaviour of a surveyserver form
* Inviting respondents to take part in a survey
* Processing survey responses
* Tracking responses
* The Invitation Manager and sending a follow-up mailing
* Uploading presentations
* Managing your surveyserver account.
This chapter tells you how to use surveyserver to host web surveys; see Chapter 13, Offline Server, for how to use surveyserver as
an offline server.
Chapter 12: surveyserver | 331
Introduction
surveyserver is an optional subscription service supplied by Speedwell for the distribution and management of web
surveys. To allow you to find out about the benefits offered by surveyserver, Speedwell provides a free one-month
trial period using surveyserver. During this period you can use its full functionality, though there are some restrictions
on the disk space available to you and the number of responses you can receive. See Registering for the free
surveyserver trial account, page 334, for how to register for your free trial account.
Contact Speedwell if after trying surveyserver you want to subscribe to the service to continue using it – see page 5 for
contact details.
Using surveyserver
surveyserver is the easiest and most powerful way to carry out web surveys using KeyPoint. After you have gone
through the few steps needed to set up surveyserver, all you have to do to publish your survey is press a button.
Sending out invitations to complete the survey just takes a few steps using the Invitation Wizard, and downloading the
responses into KeyPoint is again just a question of pressing a button in a dialog box.
You do not need to know anything about the way the web server handles files or runs scripts. There is no need to
upload files to specific locations, or to set up email accounts to receive responses. All the details are handled
automatically and transparently by surveyserver, so you can concentrate on the content of the survey rather than the
mechanics of how it is managed.
When you upload a survey form to surveyserver, you are actually uploading an XML description of the form rather
than a generated HTML file. When a respondent views the form, surveyserver generates the HTML ‘on-the-fly’ and
optimised for the browser used by the respondent.
XML (Extensible Markup Language) is a very flexible but simple text format, which is used to describe documents in
terms of their structure rather than their appearance. XML is becoming an increasingly important medium for the
exchange of a wide variety of data on the web and elsewhere.
Security
One of the major advantages of using surveyserver is the very high level of security it offers. In particular, it provides:
* SSL communications – see the following paragraph for more details
* limited access to the physical computers (web servers, etc)
* limited access to the data stored on surveyserver
* an assurance that the data will not be used for any other purpose
* the ability to password protected web surveys
* the ability to make web surveys publicly available or to restrict access to people who have been sent a
personalised email invitation
* regular back up of all data.
surveyserver supports totally secure HTTP communications using SSL (the Secure Socket Layer protocol). In outline,
the way SSL works is that when you communicate with surveyserver through an Internet connection that also supports
SSL, the protocol first checks that the two servers are what they claim to be, and then uses the strongest encryption
method it can for all communications between the servers while they are connected. Provided your respondents also
332 | Chapter 12: surveyserver
use Internet connections supporting SSL, their communications will also be protected in the same way. This means
that you and your respondents can be confident that the connections are safe and that nobody will be able to read or
tamper with the data communicated.
Benefits of using surveyserver
Some of the main advantages of using surveyserver are:
* very easy to set up
* no restriction on the number of surveys or responses per survey, subject to an overall limit on the total space
and number of responses covered by your subscription
* no need for an email account to be set up in KeyPoint (though you will need to be able to receive an email
giving you your account password)
* supports group working through group accounts – see next section
* web surveys work with all major browsers and operating systems including Windows, Macintosh, Linux and
Unix
* validation and routing are carried out on the surveyserver server when the user changes pages or submits the
survey – this eliminates problems of running scripts etc in the browser
* users given feedback on validation errors when they change pages or submit the survey
* invitation emails can be sent by surveyserver at predetermined times
* easy to set start and finish dates for the survey and a limit on the number of responses accepted
* responses can be restricted to contacts who have received a personalised email invitation
* a very high level of security – see previous section
* sophisticated control panel allowing you to:
* view detailed information about all aspects of the surveyserver account, including usage, uploaded
surveys, forms and presentations
* delete forms, presentations and surveys
* customise the appearance of survey forms and presentations – for example, the appearance of the
navigation buttons.
Individual and group accounts
Speedwell offers both individual and group surveyserver accounts. With a group account, registered members of the
group can all use surveyserver and share its resources – space and other limits apply to the group as a whole, not on
an individual basis to members within the group.
Group members can choose to share their surveys with each other. They can give other group members the following
sharing rights:
* none: other group users can only view information about the survey
* weak sharing: other group users can also download responses from surveyserver
* strong sharing: other users can also carry out management actions on the survey, such as edit its appearance
and behaviour, and upload and delete its forms.
Introduction | 333
If required, a group can have a ‘superuser’ who has all rights over all surveys.
The free surveyserver trial account is only available for individual users. Contact Speedwell if you want to set up a
group account – see page 5 for contact details.
Setting up surveyserver
Registering for the free surveyserver trial account
If you have already purchased a licence for surveyserver, go straight to the next section, Setting up and
authenticating your connection to surveyserver.
The following procedure requires you to enter an email address to receive a password for your trial account. If you do
not have an email account you can use for this purpose, contact Speedwell – see page 5 for contact details.
To register for the free surveyserver trial account:
1
Select Register (surveyserver menu) to display the Registration form dialog box:
2
Complete the form by filling in the fields – you must enter data in the fields marked *.
The Login name must be unique, so if the name you enter has already been used, when you try to register
it you will be asked to enter another name.
The password for your trial account will be sent to the email address you enter.
334 | Chapter 12: surveyserver
3
Make sure your computer is connected to the Internet.
4
Click Register. KeyPoint will connect to the surveyserver website and register you for the free trial period –
your surveyserver password will be sent to the address you entered.
You will need to set up your connection to surveyserver before you can use your surveyserver account.
Setting up and authenticating your connection to surveyserver
This section describes how to set up and authenticate your connection to surveyserver. If you connect to the Internet
using a proxy server, you will need to enter its details – see the next section. Otherwise, go straight to the section
following that, Using the Web Setup Wizard.
Making proxy server settings
If you connect to the Internet using a proxy server:
1
Select Options (Tools menu) to display the Options dialog box.
2
Click on Connection in the left-hand pane to display the Connection page.
3
Tick Use proxy server.
4
Click the Advanced button to display the Proxy settings dialog box.
Your systems administrator will be able to tell you what settings to enter.
5
Click OK to close the Proxy settings dialog box.
At this stage, you can either click OK to close the Options dialog box and follow the instructions in the following
section to use the Web Setup Wizard to set up and authenticate your connection to surveyserver. However, you can
also make these settings in the Options dialog box while it is still open – see Using the Web Settings page in the
Options dialog box for surveyserver, page 336.
Using the Web Setup Wizard
If you connect to the Internet through a proxy server, you should enter the proxy server details before carrying out the
instructions in this section – see the previous section, Making proxy server settings.
The Web Setup Wizard takes you through the process of setting up and authenticating your connection to
surveyserver. If you prefer, you can carry out all of the web setup using the Options (Tools menu) dialog box – see the
following section.
To set up and authenticate your connection to surveyserver using the Web Setup Wizard:
1
Either:
Choose Web Setup (File menu).
Or :
Click the Run Wizard button in the Web Settings page of the Options dialog box (Tools menu).
2
If you have not disabled introductory pages for wizards, click Next to display the Responses page.
Setting up surveyserver | 335
3
In the Responses page, click the surveyserver button, then Next to display the surveyserver Account page:
4
Enter your Login name and Password (this will have been sent to you when you purchased the
surveyserver licence or registered for the free trial period).
If you have lost your password, enter your Login name and click I forgot my password. Your password
will be sent to you again by email.
5
If you want to use a Secure HTTP connection (SSL), tick the box. See Using surveyserver in the
Introduction to this chapter, page 332, for more information about SSL.
6
Click Authenticate.
KeyPoint will connect to surveyserver, check your account details and if they are valid, authenticate your
connection so that you can use the account.
If you want to see details of your account, click Details to display the surveyserver control panel.
7
Click Next and Finish, or just Finish if you have chosen not to display final pages.
You may also want to set the folder used for downloaded responses. This is particularly important if the same
surveyserver account is used by several people using KeyPoint installations on different PCs. See Setting the folder
used for downloaded responses, page 337, for details.
Using the Web Settings page in the Options dialog box for surveyserver
If you connect to the Internet through a proxy server, you should enter the proxy server details before carrying out the
instructions in this section – see Making proxy server settings, page 335.
To set up and authenticate your connection to surveyserver using the Options dialog box:
1
Select Options (Tools menu).
2
Click on Web Settings in the left-hand pane to display the Web Settings page.
336 | Chapter 12: surveyserver
3
Click on the surveyserver radio button in the Response method box.
With one exception (see the paragraph after these instructions), the dialog box will show the same controls
as in the wizard’s surveyserver Account page.
4
Follow Steps 4–6 in the previous instructions to set up and authenticate your connection to surveyserver.
5
If you want to change the folder used for downloaded responses, click Email & Web tab in the left-hand
pane – see the next section.
Otherwise, click OK to close the Options dialog box.
The Web Settings page in the Options dialog box has a Reset survey IDs button, which does not appear in the
wizard. You only need to use this if you change your surveyserver account (or if you are changing an Offline Server –
see Changing the Offline Server, page 369). When you upload a survey to surveyserver, a link is made between the
survey and your account, so if you change the account you will need to reset the link in order to ‘move’ the survey to
your new account. To do this, open the survey in KeyPoint, display the Web Settings page in the Options dialog box,
and click Reset survey IDs. You will need to do this for each of the surveys you want to move.
Setting the folder used for downloaded responses
In addition to the settings made by the Web Setup Wizard, you may want to change the folder used to store survey
response messages when they are downloaded from surveyserver.
This is particularly important if the same surveyserver account is used by several people using KeyPoint installations on
different PCs. This is because when you collect responses, all the responses are downloaded, not just those intended
for you. This means that some responses intended for other people may be downloaded to your PC, and will become
inaccessible to them.
To prevent this happening, you should change the ‘Responses location’ on all the PCs to the same shared network
folder, which will then receive all responses when they are collected, so everyone will still have access to the
responses intended for them.
Setting up surveyserver | 337
To set the folder used to store survey response messages when they are downloaded from surveyserver:
1
Select Options (tools menu) and click the Email & Web tab:
The only controls in the Email & Web tab affecting surveyserver are the Regenerate button and the
Change button in the Settings box.
2
Click the Change button in the Settings box to display a standard windows Open dialog box.
3
Browse to the folder (or create one) in which you want the response messages to be stored.
4
Click Open.
5
Click Yes when KeyPoint asks you whether it should create the file msgidx.dat in the selected location.
6
The response message database can become corrupted from time to time. To regenerate the database
from existing response messages, click the Regenerate button.
Uploading a survey form
Once you have designed your form, all you need to do to publish it is upload it to surveyserver.
If the survey has more than one form (master form and one or more copy forms), you can upload as many of them as
you wish. If you do upload more than one form for a survey, each will have its own URL, and they can be used
independently by different respondents. When you collect responses (see Processing survey responses, page 350),
the name of the form that was used by the respondent is shown in the Responses dialog box, but when you input the
responses they will all be loaded into the unique response database for the survey.
338 | Chapter 12: surveyserver
To upload a form to surveyserver:
1
Select Upload survey (surveyserver menu) to start the Upload Wizard – click Next if an introductory page
is displayed.
2
KeyPoint will connect to the surveyserver server and upload the survey form. When it has succeeded it will
show the URL for the uploaded form:
If you are going to send invitations to complete the survey using your own mail program rather than the
Invitations Wizard (see Inviting respondents to take part in a survey, page 345), you may want to make a
note of the URL. However, this isn’t essential as you can always find out what it is later – see next
instructions.
If you are going to use the Invitations Wizard, you don’t need to record the URL since the Invitations
Wizard already knows what it is.
3
Click Finish.
When you upload a form, default settings are used for items such as the style of navigation buttons used. If required,
you can change these items for the form once it has been uploaded – see Customising the appearance and
behaviour of a surveyserver form, page 343, for details.
To find out the URL for an uploaded form:
1
Display the form in the Design Workspace.
Uploading a survey form | 339
2
Select Web survey location (surveyserver menu) to display the Web survey location dialog box:
The URL is selected when the dialog box opens so that you can copy it to the clipboard. You can then
paste it into, for example, an email inviting someone to take part in the survey.
3
If required, you can display the uploaded form in your browser by clicking the browser button in the
dialog box.
4
Click Close.
Previewing the uploaded form on surveyserver
Once you have uploaded a form you can preview it to see what it will look like to respondents, including items, such
as navigation buttons, added by surveyserver. The preview window also allows you to launch the Invitation Manager
to help you send invitations to take part in the survey, and to display the surveyserver control panel to customise the
appearance and behaviour of the form, as well as to carry out a range of other management operations.
To preview a form uploaded to surveyserver:
1
Display the form in the Design Workspace.
340 | Chapter 12: surveyserver
2
Choose Show as HTML (Form menu) to display the Web Survey Preview window:
See later sections for how to use the buttons at the bottom of the window.
Web Accessibility survey
In addition to the normal survey, surveyserver provides a special version of your survey for use by respondents with
disabilities. You can provide access to this special version through:
* a ‘Text version’ link on the normal version of the survey – see show web accessibility version link setting on
page 344 (and for how to set options for the text version of the survey)
* an invitation including a ‘Web accessibility URL Link’ to the Web Accessibility version – see Editing the email
text, page 349.
KeyPoint fully supports the requirements for web accessibility published in the World Wide Web Consortium (W3C)
Guidelines, which can be found at http://www.w3.org/TR/WAI-WEBCONTENT/. However, in order for your survey to
satisfy some of the requirements, you must make sure that you design and create it appropriately. For example, one
of the requirements (in fact the first, Guideline 1.1) is that there is a text equivalent for every non-text element. In
KeyPoint, the only non-text elements are images and OLE objects, and KeyPoint supports the Guideline by allowing
you to add a text equivalent to the Description property in the Properties sidebar: satisfying the Guideline depends
on you actually doing this for all images and OLE objects.
Although KeyPoint cannot add elements like this to your design to ensure that the Web Accessibility version of the
survey satisfies all the Guidelines, it can check whether there are any web accessibility problems in your survey
design.
Previewing the uploaded form on surveyserver | 341
To check whether the Web Accessibility version of the survey built from the current design may have problems
satisfying the W3C Guidelines:
Choose Validate for Web Accessibility (Form menu).
If KeyPoint identifies any problems, it will display a dialog box listing them:
For each item in the list there is a link identifying the object (Picture 2 in the example) and a description of the
problem, including the priority given to the relevant Guideline by W3C (Priority 1 is the highest). You can click the
link in the dialog box to select the object in the form. You can edit the object without closing the dialog box, and then
click Validate to recheck the form.
Appendix D, Web Accessibility Guidelines, lists the Guidelines relevant to the construction of a KeyPoint survey, any
specific KeyPoint features supporting them, and what you may need to do in order to satisfy them.
342 | Chapter 12: surveyserver
Customising the appearance and behaviour of a surveyserver form
To customise the appearance and behaviour of the currently displayed uploaded surveyserver survey or presentation
form (see Uploading presentations, page 354):
Choose Web survey details (surveyserver menu) or Web presentation details (surveyserver menu).
The surveyserver control panel will open showing details of the current survey or presentation form in the forms or
presentations tab, respectively. For example:
The surveyserver control panel enables you to carry out a wide range of operations and can be opened in a number
of other ways (see Managing your surveyserver account, page 355). However, since in this case you have opened it
for a specific survey or presentation form, the control panel is opened with the current form selected and the controls
in edit mode so that you can change the settings (see Managing your surveyserver account, page 355, for general
instructions on using the surveyserver control panel).
Changes you make in the control panel are not automatically sent to surveyserver as you make them, so to confirm
any changes you have made:
Scroll down to the bottom of the tab and click the send button.
To abort any changes you have made but not sent yet:
Scroll down to the bottom of the tab and click the reset button.
Customising the appearance and behaviour of a surveyserver form | 343
You can customise the appearance and behaviour of the form by setting:
* active from/to: set start and/or end dates to limit the period during which the survey is available
* short URL parameter: you can type in a more memorable URL than the automatically generated one – as
you type, the URL next to the edit box will show the new full URL
You may receive a message telling you that the URL “must be unique”. This happens if the URL you have chosen has already
been used on surveyserver. You will need to try again by entering a different short URL. URLs on surveyserver are reserved for six
months after the survey has been deleted, to reduce the risk of late respondents to an old survey completing a new one that has
been given the same URL.
* progress bar style: either
* choose the style of progress bar from the drop-down list (choose --- if you do not want a progress bar), or
* click show all to display a page showing the full range of progress bars, click the radio button for the
required bar and click send to return to the forms tab with the selected progress bar
* navigation buttons style: either
* choose the style of navigation buttons from the drop-down list (see the next section for keyboard shortcuts
for the navigation buttons), or
* click show all to display a page showing the full range of progress bars, click the radio button for the
*
*
*
*
*
*
*
*
required bar and click send to return to the forms tab with the selected progress bar
show KeyPoint signature: choose whether to include the references to KeyPoint in the survey
navigation bar layout: choose where to display the navigation bar
navigation bar colour: choose a background colour for the navigation bar
respondents’ password: set a password that respondents will need to enter before they can complete the
survey
needs personalised invitation: restrict access to the survey to people who have received a personal invitation
through the Invitation Manager and restrict them to a single response
customised Submit Page: use the last page of the form (or last but one if you want to use the last page as a
customised Thank You Page – see next setting) as a customised Submit Page
customised Thank You Page: either use a customised Thank You Page by entering the URL for the page on
your own web server or leave the URL box blank to use the last page of the form as a customised Thank You
Page. You do not need to include the “http://” part of the URL, though you can if you want to
show web accessibility version link: choose whether to include a link labelled ‘text version’ in the normal
version of the survey so that respondents can display the Web Accessibility version
* Options: displays a page with the following web accessibility options:
The Options apply whether show web accessibility version link is ticked or not. Although respondents will not be able to go
directly from the normal version of the survey to the Web Accessibility version if it is unticked, they will be able to display it if you
include a ‘Web accessibility URL Link’ in an invitation (see Personalising the email text, page 348).
* tick ignore colours to display all text in the Web Accessibility version of the survey in black
* tick no images if you do not want any images displayed in the Web Accessibility version of the
survey
* enter any characters in the default place-holding characters in edit boxes and text area box that
you want displayed to help respondents identify the places where they should type in entries.
344 | Chapter 12: surveyserver
* show back/reset buttons: choose whether to include back and reset buttons (you may want to hide one or
both of these buttons if you want to get the first reactions to the questions only)
* show print button: choose whether to include a print button (a respondent will be able to click it to print the
complete survey including any answers they have entered; this can be particularly useful for multi-page
surveys since it allows the user to print the complete survey, including their answers, in one go, rather than
page-by-page using their browser’s Print command)
* show save button: choose whether to include a save button (a respondent will be able to click it to save a
partially completed survey so that they can come back to it later and send it when they have finished it)
* high quality tickboxes/ticks: choose whether to use the high quality tickboxes/ticks selected in the design –
otherwise the default ticks and tickboxes given by the respondents’ browsers will be used
* quota – limit: set an upper limit to the number of responses allowed (leave set to 0 if you don’t want to set a
limit).
Keyboard shortcuts for web surveys
When respondents complete a web survey they use buttons on the survey to manage and navigate the survey they
are completing. The next page, refresh, save and submit button appears on all web surveys; the presence of other
buttons depends on your surveyserver form settings for the survey (see previous section).
Respondents may also use the following keyboard shortcuts for these buttons:
Button
Shortcut
Previous
Alt+B
Next
Alt+N
Reset
Alt+R
Save
Alt+A
Submit
Alt+S
Refresh
Alt+F
If you want to enable respondents to use these shortcuts, you will need to refer to them in your instructions for
completing the survey.
Inviting respondents to take part in a survey
Once you have uploaded a form to surveyserver, you can invite people to take part in the survey. One possibility is to
send them an email using your normal email program, quoting the URL for the form – see last section. However, the
KeyPoint Invitation Manager allows you to send invitations from within KeyPoint and offers a number of other
advantages:
* it is easier
* you do not need to use an email program or an email account
* you will be able to send follow-up messages – see The Invitation Manager and sending a follow-up mailing,
page 352
* you will be able to track responses – see Tracking responses, page 354
Inviting respondents to take part in a survey | 345
* you can include personalised information for each of the individual respondents receiving the invitation, such
as his/her name and address.
To invite respondents to participate in a web survey:
1
Either:
Select Invite (Tools menu).
Or, if the Web Survey Preview window (see Previewing the uploaded form on surveyserver, page 340) is
open:
Click Invite/Send at the bottom of the Web Survey Preview window.
2
The Invitation Wizard will be started – click Next if the Welcome page is displayed.
3
Select Web in the Invitation type page and click Next.
4
The Select contacts dialog box will be displayed:
The left-hand pane shows the contacts in your address book; the right-hand pane will show the contacts
you have selected for this survey mailing.
If you right-click in the left-hand pane, a context menu allows you to add new contacts to the address
book, delete a contact from the address book, change a contact’s properties and choose which groups a
contact belongs to. For more information on these operations, see The Address Book, page 244.
5
If you have defined groups within your address book and want to choose contacts from that group only,
select the required group from the drop-down list box at the top of the dialog box.
6
To add a contact to the invitation to fill in the survey, click on the contact in the left-hand pane, then click:
346 | Chapter 12: surveyserver
To add all the contacts in the selected group to the invitation, click:
To remove a contact from the invitation, click on the contact in the right-hand pane, then click:
To remove all the contacts from the invitation, click:
7
Repeat Steps 5 and 6 until you have selected all the contacts you want to include in the invitation to fill in
the survey.
8
Click OK to display the Recipients page in the Invitation Wizard:
a
The Subject box shows the text that will appear in the invitation email’s subject field – edit it as
required.
b The To box lists the contacts you have selected for the invitation. If required, click Address Book to
redisplay the Select contacts dialog box to change your selection.
c
Tick Track Responses if you want to attach unique response identifiers to the emails so that you can:
* track responses to check who has not responded yet
* prepopulate fields in the survey linked to the address book with data for the individual respondent
* update data in the address book for fields in the survey linked to the address book if the
respondent has changed the data.
Leave Track Responses unticked if you want to be able to assure respondents that the survey is
completely anonymous, though this means you will not be able to track responses, prepopulate fields
or update the address book automatically.
See The Contact Link tab, page 215, for more information about linking fields to the address book.
d Click Next.
9
In the From details page, the Name and Email address fields show the name and address that will be
shown as the sender of the invitation.
a
Edit the Name and Email address if required.
b Click Next.
10
The Personalise the email text page will be displayed showing the text that will appear in the invitation
email.
Add to and edit the email text as required – see Personalising the email text (next section) for details. You
can include a link to the Web Accessibility version of the survey as well as or instead of the link to the
normal version.
Click Next.
Inviting respondents to take part in a survey | 347
11
The Confirmation email page will be displayed. If you want the respondent to be sent a confirmation
email when they have submitted their response:
a
Enter the Subject text for the email – this will appear in the email’s header.
b Enter the text for the body of the email. You can enter special fields as well as text – see Personalising
the email text, next section, for details.
c
Choose whether to send the email using plain text or HTML format.
d Click Next.
12
Leave the date and time set to the current values if you want the invitations sent immediately; otherwise
set them to the date and time that you want them to be sent.
13
Click Next to display the Save Invitation Details page, and:
a
Tick Save invitation as if you want to be able to send follow-up messages using the Invitation Manager
(see The Invitation Manager and sending a follow-up mailing, page 352). Save invitation as is
automatically ticked and disabled if you chose to track responses at Step 8c.
b If Save invitation as is ticked, enter a name for the invitation.
c
Click Next and Finish (or just Finish if the display of final steps in Wizards is disabled) to email the
invitations/surveys to the addresses you selected.
See Processing survey responses, page 350, for how to collect and process responses to the survey.
Personalising the email text
If you are sending an invitation for respondents to fill in a survey on the surveyserver server, you can personalise the
text of the invitation using the Personalise the email text page (see Step 10 in the previous section):
The following instructions also apply, with the obvious name changes, to the Confirmation email page in the
Invitation Wizard.
348 | Chapter 12: surveyserver
You can either add to or edit the default text in the Invitation Text box (see next section, Editing the email text), or
choose some pre-prepared personalised text from a library of messages (see next but one section, Using the
invitation library).
Editing the email text
Normal text is shown in black in the Invitation Text box. You can add to and edit this as required.
You can also add a number of special fields, which are shown in blue and will be replaced by data in the invitation
email. The special fields you can add are:
* Link, which will be replaced by the survey’s URL
* Web accessibility URL Link, which will be replaced by the URL for the Web Accessibility version of the survey
* Various contact fields, including name, email, postal address, and so on, which will be replaced by the
relevant details from your address book.
To add a special field:
1
Right-click at the place in the text that you want to add the field.
2
Select the required field from the menu displayed.
You can delete special fields but you cannot edit them.
Using the invitation library
To add personalised text to the invitation library and/or select library text for the Personalise the email text page:
1
Click Library to display the Invitation Library dialog box:
2
Click Add to add a new entry in the name box – it will be added with a default name, which will be
selected so that you can edit it.
3
Enter the text for the invitation in the right-hand box – you can right-click to add special fields (see
previous section).
You can repeat Steps 2 and 3 for any other entries you want to add (when you click Add you will be asked
to confirm that you want to save the previous addition in the library).
Inviting respondents to take part in a survey | 349
4
To close the dialog box and save the text for the last entry you added in the library (you will be asked to
confirm that you want to do this), either:
* Click Use if you want to replace the text in the Personalise the email text page with the text from the
library.
* Click Close if you want to leave the text in the Personalise the email text page unchanged.
To replace the text in the Personalise the email text page:
1
Click Library to display the Invitation Library dialog box.
2
Click on the name of the required text in the Name pane to select it.
3
Click Use.
You can edit the personalised text in the right-hand pane of the Invitation Library dialog box for any existing entry by
selecting the entry and making the changes.
You can rename or remove entries in the library by selecting the name and clicking Rename, which selects the name
so that you can edit it, or Remove, which deletes the name after you have confirmed that you want it removed.
Processing survey responses
Once respondents have begun responding to the survey, you can:
A
Collect them from surveyserver.
B
If required, view or delete them.
C
Input them into KeyPoint responses.
See Setting the folder used for downloaded responses, page 337, if you are using a single surveyserver account
from KeyPoint installations on more than one PC.
You use the Responses dialog box to collect and process responses from surveyserver.
To display the Responses dialog box:
1
Switch to the Responses tab.
350 | Chapter 12: surveyserver
2
Select Download Responses (File menu).
The Responses dialog box lists the responses that have already been collected. It marks responses as follows:
* Green tick: responses that have been input into the KeyPoint responses database
* Blue question mark: responses that have not yet been input into the KeyPoint responses database
* Red cross: responses that couldn’t be input into the KeyPoint responses database for some reason.
The form name shows you the form from which the original survey was generated. If you have run more than one
survey, you can view all responses in the database by selecting Show all responses.
Each response you receive is stored in a separate message file. You can view the file name by looking at the Message
File field (these files are stored in the email database folder, which can be set in the Email & Web tab: see Setting the
folder used for downloaded responses, page 337).
The File Date field displays the date and time the response was received.
You can sort the responses in ascending or descending order by clicking the sort button at the right-hand end of the
column heading for the field you want to sort by (in the example picture, the up arrow in the File Date column
heading shows that the responses are sorted in date/time order with the most recent first).
Collecting new responses
To collect new responses in the Responses dialog box (see previous section):
1
Click on the arrow next to the Get Other Responses button and select surveyserver (it will remain
selected for the next time you collect responses).
2
Click on the Get Other Responses button itself.
KeyPoint loads the responses for the current form from surveyserver into the Responses dialog box.
Processing survey responses | 351
3
The new responses are listed in the Responses dialog box. Each new response is marked with a blue
question mark showing that it has not yet been input.
Viewing a response
You may want to view a response message before inputting it, or you may want to find out why a response couldn’t
be input, or was incorrectly input.
To view a response before you input it:
1
Select the response you want to edit by clicking in it.
2
Click the Edit Response button.
3
Click OK to return to the Responses dialog box.
Deleting response messages
To delete one or more response messages:
1
Select the response you want to delete by clicking in it (you can select more than one response using
Ctrl+click or Shift+click, as in Windows Explorer).
2
Click the Delete Response button to delete the response(s) from the email database (click Delete All to
delete all the responses).
Inputting responses
After you have collected the response messages, and viewed them if required, you can input them into the responses
database for the survey so that you can view and analyse them as KeyPoint responses in the Responses workspace.
To input the collected responses for the current survey into the KeyPoint database:
1
Click the Input Responses button in the Responses dialog box (see previous sections).
KeyPoint processes each response directly into the database.
If the survey contains fields linked to the address book with update set (The Contact Link tab, page 215),
and the respondent has entered data that is different from the data currently in the address book, you will
be asked if you want to update the address book.
2
Click the Close button to view the processed responses in the Responses workspace.
The Invitation Manager and sending a follow-up mailing
The Invitation Manager allows you to view the invitations you have sent with a list of the contacts you sent them to
and whether they have replied.
To open the Invitation Manager to view the invitations to take part in a survey using a form:
1
Select the Design workspace and select the form used in the invitation.
352 | Chapter 12: surveyserver
2
Select Invitations (Tools menu) to display the Invitation Manager:
The left-hand pane lists the invitations you have sent for the current survey. The message tab shows the email
containing the invitation or email survey.
If tracking was enabled when the invitation was sent, the Contacts tab shows the contacts to whom the invitation was
sent, and whether they have replied.
The time/date in the Sent/Printed field is the time the invitation was completed in the Invitation Wizard. If you chose
to delay the sending of the invitations by setting a later time in the Invitation Wizard, this will not be the time the
invitation emails were actually sent: in fact, the invitations may not have been sent yet if the time you set for sending
the invitations has not arrived.
To see when an invitation was actually sent (or will be sent), view the Invitations tab in the surveyserver control panel
– see Managing your surveyserver account, page 355. In particular, if you change your mind about sending a
delayed invitation before it is sent, you can delete it in the control panel to prevent it being sent (deleting the
invitation in the Invitation Manager will not prevent it being sent by surveyserver).
If tracking was enabled for an invitation, you can send a follow-up message to contacts who have not responded yet.
To send the survey again to contacts who have not responded to a survey:
1
Open the survey in the Design workspace, and select the form used for the original invitation.
2
Select Invitations (Tools menu) to display the Invitation Manager.
3
Click in the Invitations box on the invitation that you want to follow up (you can check which respondents
haven’t replied yet on the Contacts tab).
4
Click Send follow-up.
5
The Recipients page of the Invitation Wizard will be displayed with the respondents who have not replied
yet shown in the To box. If all respondents in the invitation have replied, the Select contacts dialog box
The Invitation Manager and sending a follow-up mailing | 353
will be displayed automatically so that you can select the contacts you want to send the follow-up survey
to.
Otherwise, click Address Book to display the Select contacts dialog box if you want to change the list of
contacts to be sent the follow-up survey.
6
Click Next.
You will be taken through the same steps in the Invitation Wizard as when the original invitation was sent
– see the relevant sections earlier in this chapter for details.
To delete an invitation from the Invitation Manager:
1
Open the survey in the Design workspace and select the form used in the invitation.
2
Select Invitations (Tools menu) to display the Invitation Manager.
3
Click in the Invitations box on the invitation that you want to delete.
4
Click Delete.
Deleting an invitation from the Invitation Manager does not delete it from surveyserver. In particular, deleting a delayed invitation
from the Invitation Manager will not prevent the invitation being sent when the delayed time arrives. To prevent the invitation
being sent, you should delete it in the Invitations tab in the surveyserver control panel – see Managing your surveyserver
account, page 355.
Tracking responses
As well as using the Invitations Manager to see who has responded to your invitations (see previous instructions), you
can view response statistics in the Welcome to KeyPoint dialog box.
In order to track responses, you must send the invitations to complete the survey using the Invitation Wizard, and you
must enable tracking (see page 347) and save the invitation (see page 348).
To see statistics showing how many responses you have received to your invitations:
1
Choose Surveys (File menu).
2
Click on the Tracking tab.
3
Click Close to return to the current survey.
Uploading presentations
Once you have collected and input the responses to a survey, you can analyse the results using the Presentations
Workspace (see Chapter 14, Analysing Data). When you have created a presentation, you can publish it on
surveyserver, where it can be viewed by anyone you send the URL to.
To upload a presentation to surveyserver:
1
Display the required presentation form in the Presentation Workspace.
2
Select Upload presentation (surveyserver menu).
354 | Chapter 12: surveyserver
KeyPoint will connect to surveyserver and upload the survey form. When it has succeeded it will show the
URL for the uploaded form.
You may want to make a note of the URL now, but this isn’t essential as you can always find out what it is
later – see next instructions.
3
Click Finish.
When you upload a presentation form, default settings are used for items such as the style of navigation buttons used.
If required, you can change these and a number of other items for the form using the surveyserver control panel once
the form has been uploaded – see Customising the appearance and behaviour of a surveyserver form, page 343,
for details. In particular, you can enter a shorter or meaningful URL for the presentation.
To find out the URL for an uploaded form:
1
Display the form in the Presentation Workspace.
2
Select Web presentation location (surveyserver menu) to display the Web presentation location dialog
box:
The URL is selected when the dialog box opens so that you can copy it to the clipboard. You can then
paste it into, for example, an email inviting someone to view the presentation.
3
If required, you can display the uploaded presentation in your browser by clicking the browser button in
the dialog box.
4
Click Close.
Managing your surveyserver account
You use the surveyserver control panel to manage your surveyserver account (you must be connected to the Internet
to do this). You can display the surveyserver control panel in any of the following ways:
* Click the Details button in the surveyserver Preview Window (see Previewing the uploaded form on
surveyserver, page 340)
* Select Web survey details (surveyserver menu)
* Select Web presentation details (surveyserver menu)
* Select Account details (surveyserver menu)
* Select Surveys (File menu) and click on the surveyserver tab.
The surveyserver control panel presents very detailed information about your account and by allowing you to edit
some of it, gives you fine control over the appearance and behaviour of your forms, presentations etc.
Managing your surveyserver account | 355
The surveyserver control panel has the following tabs:
* user
* group (if you are using a group account)
* surveys
* forms
* presentations
* offline surveys
* invitations
And in Advanced view:
* addresses.
The meaning of most of the information and settings on the tabs is obvious, so the following sections will only
describe general techniques for using the control panel, and then summarise the information you can find and the
settings you can make on each tab.
Moving around and working in the control panel
You can move to another tab in the control panel by clicking on its tab at the top of the control panel window, or on
one of the links within the control panel shown by blue text.
You can retrace your path through the control panel tabs by clicking <<back.
Some of the tabs can be displayed in simple view with basic information, or advanced view with more detailed
information. To switch between views:
Click the advanced view or simple view at the bottom of the User or Group tab.
When you switch to advanced view for one tab, all tabs with an advanced view will be shown in advanced view. The
control panel has an additional tab, ‘addresses’, when it is switched to advanced view.
Summary lists
Most of the tabs can either show a summary list or details of one or more of the items in the list – for example, the
forms tab initially shows a list of the forms you have uploaded to surveyserver. In this list view, the final cell for each
form contains links allowing you to carry out a range of actions:
For the forms tab (other tabs are similar) clicking on these links causes the following actions to be carried out:
* show: redisplays the tab to show more details for that form;
* edit: redisplays the tab to show editable properties for that form with controls that allow you to change them.
When the tab is in edit mode, it contains a send button, which you must click to carry out the changes in
surveyserver, and a reset button, which you can click to abort any change you have made but not sent.
* delete: deletes the selected form
* invitations: takes you to the invitations tab to show details of the invitations saved for that form
* preview: displays a preview of the form in your browser.
356 | Chapter 12: surveyserver
To show or delete more than one item in a summary list:
1
Click the tick boxes in the first column for the items you want to show or delete; if any of the other tick
boxes are selected, click on them to make sure they are cleared:
You can select or deselect all of the rows at the same time by clicking All or None above or below the list:
2
Then:
* click the show button to display more details of all the ticked items in the tab (the path at the top of
the tab contains ‘show’ or ‘list’ depending on whether the tab is showing the details view or the
summary list);
* click the delete button to delete all ticked items (surveyserver accounts have a limited amount of hard
disk space, so you should delete files when you have finished with them).
User tab
The user tab shows information about your surveyserver account, including expiration date and space and response
limits, and the amount of these that have been used.
For a group account, you can display the User tab for another user by clicking on a link for that user in one of the
other tabs.
In Advanced view the User tab shows details of the selected user’s surveys.
Group tab
The Group tab is only displayed if you have a group account. It shows the group membership and the group’s
superuser if there is one. Clicking on a user link displays the User tab for that user.
In Advanced view, the Group tab shows details of the group’s surveys including which user owns each of them.
Managing your surveyserver account | 357
Surveys tab
The surveys tab shows summary or detailed information about the surveys for which you have uploaded forms.
You can delete surveys in either view. Deleting a survey deletes all its forms, presentations and responses from
surveyserver (but not from KeyPoint). You will be asked to confirm that you want to delete the survey. surveyserver
accounts have a limited amount of hard disk space, so you should delete files when you have finished with them.
If you have a group account, you can edit your surveys to set access rights to surveyserver for the survey. You can
make the survey:
* not shared: other group users can only view the survey’s information in the control panel
* weak sharing: other group users can also download responses from surveyserver
* strong sharing: other users can also carry out management actions on the survey, such as edit its surveyserver
settings, and upload and delete its forms.
Group accounts may also have a ‘super user’, who can manage all surveys, whatever their sharing setting.
Forms tab
The forms tab allows you to view and, in edit mode, change the appearance and behaviour of the forms you have
uploaded – see Customising the appearance and behaviour of a surveyserver form, page 343, for details.
Offline surveys
The Offline surveys tab shows summary or detailed information about the surveys for which you are using
surveyserver as an Offline Server – see Chapter 13, Offline Server for further details.
Presentations tab
The presentations tab allows you to view and, in edit mode, change the appearance and behaviour of the
presentations you have uploaded; the settings are similar to those you can make in the forms tab – see Customising
the appearance and behaviour of a surveyserver form, page 343, for details.
Invitations tab
The invitations tab allows you to view details of the invitations you have sent.
Addresses tab
The addresses tab allows you to view details of the contacts to whom you have sent invitations.
For more information
On analysing data, see Chapter 14, Analysing Data.
358 | Chapter 12: surveyserver
13
Offline Server
In this chapter you will find out how to set up and use Offline Server for entering responses into the Data Entry
Module while it is disconnected from the KeyPoint survey database, and then transfer them to the database when it is
connected at a later time.
You will learn about:
* Installing Offline Server
* Setting options in KeyPoint and the Data Entry Module for using Offline Server
* Uploading a survey from KeyPoint to Offline Server
* Downloading the survey to the Data Entry Module
* Uploading responses to Offline Server from the Data Entry Module
* Collecting the responses from Offline Server and inputting them into the KeyPoint database
* Deleting surveys from Offline Server
* Changing to a different Offline Server.
Offline Server is included in surveyserver, so you can have a free trial of Offline Server as part of the free one-month trial period
for surveyserver even if you do not intend to subscribe to surveyserver – see Registering for the free surveyserver trial account,
page 334.
Chapter 13: Offline Server | 359
Introduction
Offline Server is provided as a component of surveyserver but is also available as a separate module that can be
installed on your own server. Offline Server allows you to enter responses into the Data Entry Module while it is
disconnected from the KeyPoint survey database. This is particularly useful if you are using the Data Entry Module in a
survey kiosk or on a mobile PC where it is difficult or impossible to maintain a network connection to the KeyPoint
database. Once you have collected the responses using the Data Entry Module, and can connect it to the network,
you can upload them to Offline Server, and then download them from there to the KeyPoint database.
The general procedure for using Offline Server is as follows:
A
If you are not using surveyserver, install Offline Server on your own server – see the next section, Installing
Offline Server.
B
Configure the KeyPoint and Data Entry Module installations to work with Offline Server – see Setting
options for using Offline Server, page 362.
C
Upload the survey form from KeyPoint – see Uploading the survey to Offline Server, page 363.
D
Download the survey form from Offline Server to the Data Entry Module installations – see Downloading
the survey, page 364.
E
Enter the responses using the Data Entry Module while working offline – the responses will be
accumulated in the Data Entry Module.
F
When you can connect the Data Entry Module to the network, upload the responses to Offline Server
either automatically or manually – see Uploading the responses from the Data Entry Module to Offline
Server, page 365.
G
Download the responses from Offline Server and input them into the KeyPoint database – see
Downloading the responses from Offline Server to the KeyPoint database, page 366.
Installing Offline Server
This section describes how a network administrator should install Offline Server if it has been purchased as a separate
option; you do not need to install Offline Server if you subscribe to surveyserver.
To install Offline Server:
1
Run the setup program supplied on the server PC.
(Initially, you may prefer to install Offline Server on a desktop pc for testing.)
2
Click Next in the Welcome screen.
3
Enter the path for the folder you want to contain the Offline Server program files – the default is:
C:\Program Files\Speedwell\KeyPoint Offline Server\
(C:\Program Files (x86)\Speedwell\KeyPoint Offline Server\ for 64-bit operating
systems)
4
Click Next.
360 | Chapter 13: Offline Server
5
Enter the Server port number for the Offline Server – the default is:
Port 80.
This is the standard for http, so if the server PC is already running a web server on port 80, you will need
to enter another port number, such as 8080.
6
Click Next.
7
Click Install.
After the files have been installed, the server will be started up automatically.
8
You will be asked if you want to run the KeyPoint Offline Server Monitor. If you choose to do this, an icon
will appear in the Taskbar tray – see below for details.
9
Click Finish to close the installation dialog box and start up the KeyPoint Offline Server Monitor if you
selected that option.
In addition to installing the program files in the selected folder, the installation program will create a database to hold
the survey and uploaded surveys and responses in the folder:
* for Vista and Windows 7:
C:\Program Data\Speedwell\KeyPoint Offline Server\1.0.0.0\
* for Windows XP
C:\Documents and Settings\All Users\Application Data\Speedwell\KeyPoint
Offline Server\1.0.0.0\
KeyPoint Offline Server Monitor
The KeyPoint Offline Server is started automatically when you install it and then again each time you start up the PC.
The KeyPoint Offline Server Monitor, which is installed with the KeyPoint Offline Server, allows you to stop, restart
and configure the server.
To run the KeyPoint Offline Server Monitor:
Select KeyPoint Offline Server Monitor from the All Programs\Speedwell\KeyPoint Offline Server menu in
the Taskbar.
The KeyPoint Offline Server Monitor icon will appear in the Taskbar tray:
To control the KeyPoint Offline Server:
1
Right-click on the KeyPoint Offline Server Monitor icon will appear in the Taskbar tray to display a menu:
2
Select:
* Configuration to display a dialog box allowing you to change the Server port number.
* Start to start the Offline Server if it is not running.
* Stop to stop the Offline Server if it is running.
Installing Offline Server | 361
* Exit to close the KeyPoint Offline Server Monitor – this does not affect the status of the Offline Server
itself.
Setting options for using Offline Server
You need to set Offline Server options in the KeyPoint installation(s) used to design and collect the responses from the
Offline Server and in the Data Entry Modules used to enter the responses.
To set the Offline Server options in KeyPoint or the Data Entry Module:
1
Select Options (Tools menu) to display the Options dialog box.
2
Click on Offline Server to display the Offline Server page:
The picture shows the Offline Server page for the Data Entry Module – the bottom two tick boxes do not
appear for KeyPoint.
3
Select Use Offline Server to use this KeyPoint or Data Entry Module installation with the Offline Server.
4
Either, if you are using surveyserver as the Offline Server:
a
Select use surveyserver as Offline Server.
b Click Web Settings (KeyPoint) or surveyserver (Data Entry Module) in the left-hand panel to display
the Web Settings or surveyserver page.
c
Enter the login details for your surveyserver account – see Using the Web Settings page in the
Options dialog box for surveyserver, page 336, for details (note that the Reset survey IDs button
does not appear in the Data Entry Module surveyserver page).
362 | Chapter 13: Offline Server
You need to enter the surveyserver login details in all the KeyPoint and Data Entry Module installations
you intend to use with Offline Server.
Otherwise, if you have purchased the Offline Server option separately from surveyserver:
a
Leave Use surveyserver as Offline Server unselected.
b Enter the Server address/IP for the Offline Server.
c
Enter the Server port number for the Offline Server.
See your network administrator for the appropriate settings.
If you are configuring a KeyPoint installation, the procedure is complete.
5
If you are configuring a Data Entry Module installation:
a
Choose whether to Auto upload responses.
If this option is selected, when the Data Entry Module starts up, it checks if it is in contact with the
Offline Server and uploads any responses that have not been uploaded yet. It then checks again every
five minutes and uploads any new responses.
If this option is not selected, you will need to upload the responses manually when you connect to the
network – see Uploading the responses from the Data Entry Module to Offline Server, page 365.
b If you have selected Auto upload responses, select Notify me of auto Offline Server uploads if you
want notification whenever the Data Entry Module uploads the responses to the Offline Server:
Uploading the survey to Offline Server
In order to use the Offline Server for transferring responses entered offline to a survey, you must first upload the
survey to the Offline Server from KeyPoint – you cannot upload a survey to the Offline Server from the Data Entry
Module.
To upload a survey to the Offline Server:
1
Open the survey in KeyPoint.
2
In the Design workspace, if the survey has more than one form, click on the tab for the form you want to
upload.
3
Select Upload survey to Offline Server (Form menu).
A confirmation dialog box will be displayed.
4
Click Next/Finish.
Uploading the survey to Offline Server | 363
A survey can only be uploaded to one Offline Server at a time. If you try to upload a survey that has already been
uploaded to another Offline Server, a warning dialog box will be displayed:
See Changing the Offline Server, page 369, for how to change the Offline Server used for a survey.
Downloading the survey
Once you have uploaded the survey from KeyPoint to Offline Server, the next step is to download the survey to the
Data Entry Module installation(s) you are going to use for entering offline responses.
You can also use the procedure in this section to download the survey to a KeyPoint installation – see also Deleting a survey from
an Offline Server, page 365, for another use of the download command in KeyPoint.
To download a survey from Offline Server to the Data Entry Module:
1
Select Open survey from Offline Server (File menu) to display the Open Survey dialog box:
The dialog box lists the surveys currently uploaded to Offline Server.
The picture shows the dialog box when working in the Data Entry Module; see Deleting a survey from an Offline Server,
page 365, for when you are working in KeyPoint.
2
Click on the required survey.
364 | Chapter 13: Offline Server
3
Either:
* If there is no survey already saved on the PC with that name, a copy of the survey will be saved
automatically using the name of the survey and then opened in the Data Entry Module.
In this case the procedure is now complete and no further action is required.
Or:
* If there is already a survey file on the PC with the same name, the New Survey dialog box will be
displayed:
a
Use the dialog box to select a folder to save the survey on the local PC and enter a name for the
survey.
Survey forms are identified by a unique identifier within the survey, not by the file name. This
means you can use any name you wish to save the survey.
b Click Save to save the survey locally and open it in the Data Entry Module.
Once you have downloaded and saved the survey in the local PC, you will be able to open it on later occasions in the
normal way using the Welcome to KeyPoint dialog box or Open (File menu) without requiring a connection to Offline
Server. You can then enter responses in the usual way while offline. Then, when you are next connected to Offline
Server, you will be able to upload the accumulated responses – see the next section.
Uploading the responses from the Data Entry Module to Offline Server
If required, you can configure the Data Entry Module on a PC to upload responses automatically to the Offline Server
when the survey is open in the Data Entry Module and connected to Offline Server – see Setting options for using
Offline Server, page 362. If automatic upload is selected, the Data Entry Module checks whether a survey that was
originally downloaded from Offline Server is currently connected to it, and if it is, it uploads any accumulated
responses. The Data Entry Module carries out the check when the survey is opened, and then every five minutes until
the survey is closed.
You can also upload responses manually at any time that the Data Entry Module is connected to Offline Server – you
can do this whether automatic upload is selected or not.
To upload responses manually to Offline Server:
1
Select Upload responses to Offline Server (Response menu).
2
A dialog box will be displayed confirming that the responses have been uploaded:
3
Press OK to close the dialog box.
Responses are not automatically deleted from the Data Entry Module after they have been uploaded, but the fact that
they have been uploaded is recorded so that they will not be uploaded again.
Uploading the responses from the Data Entry Module to Offline Server | 365
Downloading the responses from Offline Server to the KeyPoint database
After you have uploaded the responses from the Data Entry Module to Offline Server, the next step is to download
them to the KeyPoint database.
To download the responses to a survey form from Offline Server to the KeyPoint database:
1
Open the survey in KeyPoint.
2
Switch to the Responses tab.
3
If the survey has more than one form, click on the form tab for the form uploaded to Offline Server.
4
Select Download Responses (File menu) to display the Responses dialog box.
5
Click the arrow button next to the Get Other Responses button to display a drop-down menu:
6
If you are using:
* surveyserver as the offline server, select surveyserver.
* the standalone Offline Server program on your own server, select Offline Server.
Your selection will remain selected for the next time you collect offline responses.
7
Click Get Other Responses.
The downloaded responses will be listed in the Responses dialog box and marked with a blue question mark showing
that they have not yet been input.
You use the Responses dialog box in exactly the same way as when downloading web responses – see, for example,
Viewing a response, page 352, in the surveyserver chapter, and the Deleting response messages and Inputting
responses sections following it for details.
366 | Chapter 13: Offline Server
Deleting a survey from Offline Server
To delete a survey from Offline Server:
1
Make sure you have uploaded any responses you require for the survey from all the Data Entry Module
installations to Offline Server.
2
Use Windows Explorer to delete the survey file (.kp) from the Data Entry Module installations – this is not
required, but they will have no function once the survey has been deleted from Offline Server.
3
Make sure you have downloaded any responses you require from Offline Server to the survey in KeyPoint
– see the previous section.
4
In KeyPoint, select Open survey from Offline Server (File menu) to display the Open Survey dialog box.
5
Click delete for the survey you want to delete:
The following section describes an alternative method for deleting the survey from Offline Server if you are using the
surveyserver Offline Server.
Managing surveys in surveyserver
If you are using the surveyserver Offline Server, you can manage the uploaded offline surveys using the surveyserver
control panel.
To manage the offline surveys uploaded to surveyserver:
1
Choose Account details (surveyserver menu).
Deleting a survey from Offline Server | 367
2
Click the offline surveys tab:
The offline surveys page in the surveyserver control panel lists the surveys uploaded to the surveyserver
Offline Server with summary details. For each survey, you can click:
* the survey name, to see details of the survey in the surveys page
* the owner, to see details of the user who uploaded the survey
* the group, to see details of the group who can use the survey if you have a surveyserver group
account.
3
To view details of one or more surveys in the offline surveys details page, either:
a
Tick the boxes in the name column for the surveys you want to view.
b Click the show button above or below the list.
Or:
Click show in the last column of the row for an individual survey.
4
To delete one or more surveys in the offline surveys details page:
a
Either:
i
Tick the boxes in the name column for the surveys you want to delete.
ii
Click the Delete button above or below the list.
Or:
Click delete in the last column of the row for the survey you want to delete.
In either case, a page will be displayed listing the surveys to be deleted with a delete button for you to
confirm that you want to delete them.
b Click delete.
See the previous section for an alternative way to delete uploaded offline surveys.
5
Click Close to close the surveyserver control panel.
368 | Chapter 13: Offline Server
Changing the Offline Server
You can only upload a survey to one Offline Server at a time. This section shows you how you can change the Offline
Server used for a survey. For example, if you take out a subscription to surveyserver, you may want to change the
Offline Server used for your surveys from an internal Offline Server to surveyserver.
If you want to upload a survey to a different Offline Server:
1
In each of the Data Entry Modules:
a
For each of the surveys downloaded from the old Offline Server:
i
Upload any outstanding responses to the old Offline Server.
ii
Delete the survey files from the Data Entry Module PC – strictly speaking this is not required, but
the files will have no function once the Offline Server has been changed, and if they are still on the
Data Entry Module PC, they may cause confusion.
b Set the Data Entry Module configuration for the new Offline Server – see Setting options for using
Offline Server, page 362.
2
In KeyPoint:
a
Download any outstanding responses from the old internal Offline Server into each of the surveys –
see Downloading the responses from Offline Server to the KeyPoint database, page 366.
b Set the KeyPoint configuration for the new Offline Server – see Setting options for using Offline
Server, page 362.
c
For each of the survey forms that you have previously uploaded to the old Offline Server and want to
upload to the new Offline Server:
i
Open the survey form in KeyPoint.
ii
In the Options (Tools menu) dialog box, click on surveyserver in the left-hand panel to display the
surveyserver page.
You use the controls on the surveyserver page even if you are not using surveyserver.
iii Click Reset survey IDs.
Steps ii and iii are required even if you have deleted the surveys from the old Offline Server.
iv Click OK to close the Options dialog box.
v
3
Select Upload survey to Offline Server (Form menu) to upload the survey to the new Offline
Server.
For each Data Entry Module installation, download the survey from the new Offline Server – see
Downloading the survey, page 364.
Changing the Offline Server | 369
370 | Chapter 13: Offline Server
14
Analysing Data
In this chapter you will learn how to analyse information collected using KeyPoint surveys.
You will learn about:
* The Presentation workspace
* The Analysis Grid
* Filters
* Views
* Viewing statistics
Chapter 14: Analysing Data | 371
The Presentation workspace
You analyse KeyPoint data using the Analysis Grid, which is displayed as part of the Presentation workspace. To select
the Presentation workspace, click on the Presentation tab at the top of the workspace area.
The Presentation workspace consists of a number of forms, identified by the tabs below the form. You can display the
following forms (see page 119 for general information about working with forms):
* The Analysis Grid (see the next section) – this is always present and you cannot change its name
* The Statistics form (see page 388 later in this chapter) – this is always present and you cannot change its name
* Any number of Presentation forms (see the next chapter, Presenting Data) – when you create a new survey the
Presentation tab will contain an empty Presentation form called ‘Presentation1’, but you can add and delete
Presentation forms as required, and change their names
* The Topline Results form (see the next chapter, Presenting Data) – this is created when you run the Topline
Wizard.
The Analysis Grid
The Analysis Grid is displayed by default when you click the Presentation tab.
Filter information
button
Sort button
Group name
Custom views
controls
Choose to display
codes or labels
Question
names
Type filter
expressions in
these rows
A response
The Analysis Grid is a table showing the answers given to questions in the responses – each row shows the answers
given to each question by a single respondent; each column shows the answers given to a single question by each
respondent.
372 | Chapter 14: Analysing Data
Related questions may be arranged in groups. The row above the question column names shows the names of the
groups to which questions belong.
When you create a question table, the questions in the table are all assigned to a group named after the table, but an
individual question is not assigned to any group when you create it. You can use the Question/Table tab in the
Properties sidebar to assign an individual question to an existing group or to create a new analysis group – see page
196 for details.
You can set the font used in the analysis grid by selecting Options (Tools menu) to display the Options dialog box,
clicking on Analysis to display the Analysis page, and then on the font button in the Analysis Grid box. In the Analysis
page you can also choose whether to Use question masks in the Analysis Grid – this applies the mask defined for the
question in the Design workspace to the values shown in the Analysis Grid. However, this only affects calculated
questions since the masks in other types of questions limit the values input, so applying them again has no effect.
In the Analysis Grid you can:
* For choice questions, view answer codes or the labels for a selected copy form
* Move question columns and analysis groups
* Resize question columns
* Hide and show question columns and analysis groups
* Add calculation columns
* Add text analysis columns
* Navigate through responses and jump to an original response in the Responses workspace
* Sort responses
* Filter responses to display selected responses only
* Use views to save filters and sorting and question column display choices
* View a selected response in the Responses tab.
When the Analysis Grid is displayed, the Toolbar has, in addition to controls available in other workspaces, the
custom view controls for saving and working with groups of filters – see Views, page 387, for more information.
Viewing codes or labels
To choose whether to view codes or the labels for a selected form for the answers to choice questions:
Choose Codes or the name of the form from the Display drop-down list box:
The answers to choice questions are stored in the responses database using the codes set when the response was entered. If you
have changed the codes since a response was entered, the old code will still appear in the response. This is the case even if you
choose to display labels since there is no longer a match between the old code and the form labels.
The Analysis Grid | 373
Selecting questions and groups in the Analysis Grid
To select a group:
Click the group name.
To select one question:
Click the question name.
To select a range of adjacent questions:
1
Move the pointer over the first question’s name (so that the pointer changes to a down arrow).
2
Drag across the questions you want to select.
1
Select the first question.
2
Hold down Shift and click on the question name of the last question.
Or
To add a question to a selection:
Hold down Ctrl and click on the question name.
Moving questions and groups in the Analysis Grid
To move a group or question(s):
Select the group or question(s) and drag it (them) to the new location. (Drag by the selected
group/question name.)
A bold vertical line marks where the group or question(s) will be placed.
Resizing question columns in the Analysis Grid
To resize a question column:
1
Move the pointer over the right-hand column boundary in the question name row – the pointer will
change shape to show that you can drag the column boundary.
2
Drag the boundary to the required position.
A broken vertical line marks where the column boundary will be placed.
Hiding and showing questions and groups in the Analysis Grid
To hide or show a question:
1
Right-click in the question name row to display a dialog box, which lists all the question names with a tick
box alongside each of them.
374 | Chapter 14: Analysing Data
2
Clear the tick next to the questions you want to hide, or click All Off to hide all of them. Ensure that the
box is ticked next to the questions you want to show (click All On to show all of them).
3
Click OK.
If you hide all the questions, there is no question name row to click on when you want to re-display all or some of the
questions again: to display the dialog box, right-click where the row labelling the question name would be displayed.
To hide or show a group:
1
Right-click in the group name row to display a dialog box, which lists all the groups (including the group
‘none’ containing all the questions not in another group) with a tick box alongside each of them.
2
In the dialog box, clear the ticks next to the groups you want to hide, or click All Off to hide all of them.
Ensure that the box is ticked next to the groups you want to show (click All On to show all of them).
3
Click OK.
Adding and editing Analysis columns
An advantage of open questions (and the ‘other’ option in multiple choice questions) is that they do not restrict the
respondent to a predetermined set of answers; the disadvantage is that analysing the results can be very difficult.
Analysis columns allow you to create a set of (closed) answers for an open question and then allocate each response
to one or more of these answers. In effect, you convert an open question into a multiple choice question, but with the
advantage of being able to use the respondents’ actual responses as a guide for creating the multiple choice options.
Once you have created an analysis column and allocated the responses to the answers you have created for it, you
can include the column in tables and graphs in just the same way as you would a multiple choice question.
To create and work with analysis columns:
1
If it is not already shown, display the Analysis grid by clicking the Presentation tab and then the Analysis
Grid tab.
2
Choose Analysis columns (Tools menu) to display the Analysis columns dialog box:
3
The Analysis columns dialog box lists any analysis columns that you have already created.
The Analysis Grid | 375
To create a new analysis column:
a
Click Add to display the Choose Question dialog box.
This dialog box lists all the open questions in the survey, including any multiple choice questions that
have an ‘other’ option allowing respondents to add their own free text answer.
b Click on the question for which you want to create a new analysis column to select it.
c
Click OK.
The Open question coding assistant will be opened. Depending on options set (see page 379), the
Suggested Answers dialog box may also be opened automatically to help you define a set of closed
answers to use for the question. See the next section, Using the Open question coding assistant, for
further instructions.
To edit an existing analysis column:
a
Click on the column in the list to select it.
b Click Edit.
The Open question coding assistant will be opened for the selected column – see the next section,
Using the Open question coding assistant, for further instructions.
To remove an existing analysis column:
a
Click on the column in the list to select it.
b Click Remove.
c
You will be asked to confirm the deletion – click Yes if you are sure you want to remove the selected
analysis column.
When you remove an analysis column, the definition of the column answers and any analysis you have performed
will be lost.
376 | Chapter 14: Analysing Data
Using the Open question coding assistant
The Column name box shows the name used to identify the analysis column in, for example, the table and graph
wizards. When you create a new analysis column it is given a default name, but you can edit the name in the Column
name box at any time to something more meaningful.
The Open question coding assistant allows you to define a set of (closed) answers for an open question and then
allocate each of the actual responses given by the respondents to one of these categories.
The right-hand list box shows the answers you have defined for the question, plus the all and not allocated items.
The Frequency column in the answers list box shows the number of responses you have allocated to each of the
answers you have created, and for all the total number of responses and for not allocated the number of responses
that you have not allocated to a category yet.
When you select one of the answers in the right-hand list box, the left-hand list box shows the actual responses
allocated to that answer. The Frequency column in the responses list box shows the number of respondents giving
exactly that response.
When you click on a response to select it in the responses list box, the * column in the answers list box marks any
answers containing the selected response with a *. If the response has not been allocated yet, not allocated is
marked.
The Analysis Grid | 377
Adding a set of answers based on responses
This section shows you how to create a group of closed answers for an open question based on the actual responses
given by respondents – see the next section for how to create individual answers by hand.
To create a group of answers based on responses:
1
Click Suggest answers to display the Suggested Answers dialog box:
The dialog box lists all the words appearing in the actual responses given by respondents, except for words
appearing in the list of ‘ignored words’. These are words like ‘a’, ‘and’, ‘the’, ‘to’ and ‘with’, which will
appear in many responses, are very unlikely to be useful as the basis for defining answers, and just make
the list of suggestions unnecessarily long. An initial list of ignored words is installed with KeyPoint, but you
can add to it or edit it if required – see the next step.
2
To edit the list of words that are ignored when suggesting answers:
a
Click Ignored words to display the Ignored words dialog box, showing the list of ignored words.
b To add to the list of ignored words, type the word into the edit box at the top of the dialog box and
click Add.
c
To edit a word in the list, click on it to add it to the edit box, edit it in the edit box and click Replace.
d To remove a word from the list, click on it to select it and click Delete.
e
3
When you have finished the list, click OK to return to the Suggested Answers dialog box.
Click the tick boxes next to the words for which you want to create an answer.
Respondents may well use different words to express the same idea: for example, different respondents
might use the words ‘money’, ‘cash’ and ‘finance’ in their responses, but all to mean essentially the same
thing. This means that for your final analysis you will probably only want a single answer for all these
responses. However, it may be a good idea to tick all of these words in the Suggested Answers dialog box
to take advantage of the auto-allocation function (see the next step) so that the responses containing any of
these words get allocated to one or other of these answers automatically when you close the dialog box.
You can then move all the responses to a single answer and delete the unwanted ones later.
378 | Chapter 14: Analysing Data
4
Tick Auto allocate if you want to allocate responses automatically to the answers created when you close
the dialog box.
All responses containing a ticked word will be allocated to that answer. This means that an individual
response may be allocated to several answers.
5
Tick Show this dialog automatically if you want the Suggested Answers dialog box opened automatically
when you click Add in the Analysis columns dialog box.
6
Click OK to close the Suggested Answers dialog box and create new answers for the ticked words. If you
chose to allow auto allocation at Step 4, any responses containing the ticked words will be allocated to the
corresponding answers.
You will probably need to do a certain amount of tidying up after creating answers using the Suggested Answers
dialog box. In particular, you may want to rename the answers and check that any auto-allocated responses have
indeed been allocated to appropriate answers. Later sections show you how to delete and rename answers, how to
allocate responses by hand and how to move responses between answers.
Adding individual answers
To add a new answer to the Open question coding assistant:
1
Click Add. A new answer will be added with a default name, which will be selected so that you can edit it.
2
Edit the name of the answer.
Renaming and deleting answers
To rename an answer in the Open question coding assistant:
1
Click in the answer to select it.
2
Click Rename or click in the answer’s name to make the name editable.
3
Edit the name of the answer.
To delete an answer in the Open question coding assistant:
1
Click in the answer to select it.
2
Click Delete.
The answer will be deleted immediately and any responses allocated to it will be moved to the not allocated item
(unless they are also allocated to another answer).
You cannot delete or rename the all or not allocated categories.
Allocating and deallocating responses
The instructions in this section show you how to allocate and deallocate responses using drag and drop – see the last
paragraph in this section for how to carry out these operations using menu commands.
To allocate one or more responses to an answer:
1
In the answers (right-hand) list box, click in all or, if the response has not yet been allocated, not
allocated.
The Analysis Grid | 379
If some responses have already been allocated, not allocated will contain fewer responses so unallocated
responses will be easier to find. On the other hand, if you want to allocate an unallocated response to
several answers, it is better to use all, since the response will disappear from not allocated as soon as you
allocate the response to the first answer.
2
If there are a large number of responses, it may be difficult to find the required responses in the responses
list. To reduce the number of responses shown in the responses list box, you can type text in the Filter box
– only responses containing the text will be shown in the responses list box.
You can also click on Response in the column headings in the responses list box to sort the responses
alphabetically, or Frequency to sort by the number of respondents giving the responses; click again to
reverse the sorting.
3
In the responses list box, select the responses you want to allocate: click to select an individual response,
Shift+click to extend the selection and Ctrl+click to add individual responses to the current selection.
If you select more than one response, the *s in the answers list box only show the allocations of the first
selected response.
4
Drag the selected responses and drop them on the required answer in the answers list box.
To reallocate one or more responses from one answer to another:
1
In the answers list box, click in the answer containing the responses you want to move.
2
In the responses list box, select the responses you want to move.
3
Drag the responses and drop them on the required answer in the answers list box.
To deallocate one or more responses:
1
In the answers list box, click in the answer from which you want to deallocate the responses.
If you want to deallocate the responses from all answers, you can click in any answer containing the
responses or all.
2
In the responses list box, select the responses you want to deallocate.
3
Drag the responses and drop them on:
* all to deallocate them from the selected answer
* not allocated to deallocate them from all answers.
You can also use context menu commands to allocate, reallocate and deallocate a response (you cannot use the
menu commands to allocate, reallocate or deallocate more than one response at the same time). To display the
context menu, right-click on a response in the responses list box. The context menu contains Add to and Move to
submenus listing the answers – selecting an answer from these submenus allocates the response to that answer and
either leaves the response in the current answer (Add to) or moves it from the current answer to the selected one
(Move to). The context menu also contains Remove from ‘current answer’ and Remove from all commands, which
perform the obvious actions.
When all or not allocated is selected, the Move to submenu is empty and Remove from ‘current answer’ does not appear in the
context menu.
380 | Chapter 14: Analysing Data
Adding and editing Calculation columns
Calculation columns allow you to see the result of calculations, which may be based on the answers given to
questions in the response. They are similar to calculated questions, except they are added directly in the Analysis Grid
and do not appear in the Design or Responses workspaces. The contents of calculation columns can be used in
presentation objects such as tables and charts – see later in this chapter for more information about presentation
objects.
To add a calculation column to the Analysis Grid:
1
Select Calculation columns (Tools menu) to display the Calculation columns dialog box:
2
Click Add to display the Edit calculation column dialog box:
3
Enter a name for the column in the Column name box.
4
Click Edit to display the Expression Editor so that you can enter the expression for the calculation – see
Chapter 18, Using Expressions, for more information about using the Expression Editor to build
expressions and for details of the functions and operators you can use.
5
Click OK to close the Expression Editor and return to the Edit calculation column dialog box.
The Analysis Grid | 381
6
Enter a Mask to format the way the result of the calculation is shown in the Analysis Grid. See Setting
number answer formats, page 164, Setting date answer formats, page 165, and Setting a text mask,
page 197, for more information about masks.
7
Click OK to add the column to the Calculation columns dialog box, and OK again to add the column to
the Analysis Grid.
To edit or delete a calculation column in the Analysis Grid:
1
Select Calculation columns (Tools menu) to display the Calculation columns dialog box, which will list all
the calculation columns.
2
Click on the column you want to edit or delete to select it.
3
Either:
Click Remove to delete the selected column.
Or:
Click Edit to redisplay the Edit calculation column dialog box where you can change the name,
expression or mask. Click OK to return to the Calculation columns dialog box.
4
Click OK to return to the Analysis Grid.
Navigating through responses
To scroll down through the responses:
Use the vertical scroll bar or press the down arrow key on the keyboard.
To go to the last response:
Press Ctrl+End on the keyboard.
To scroll up through the responses:
Use the vertical scroll bar or press the up arrow key on the keyboard.
To go to the first response:
Press Ctrl+Home on the keyboard.
To scroll right or left across the questions:
Use the horizontal scroll bar or the keyboard arrow keys.
Viewing a response
To view the original response in the Responses workspace, or to display the Read Mail dialog box if the response was
collected by email:
Double-click on the response row in the Analysis Grid.
382 | Chapter 14: Analysing Data
Sorting responses
By default, responses are listed in the Analysis Grid in the order they appear in the Responses workspace. If you
prefer, you can display them sorted according to the answers of any question or a calculation column in
alphabetical/numerical order (or the reverse).
When you sort using the answers to a calculated question, all the answers are recalculated before the responses are
sorted. This may take a noticeable time if the calculation is complex and/or there are a large number of responses.
To change the sort order of responses:
Click the button to the right of the question name you want to sort by until the button shows the required
sort order:
Down-pointing arrow for alphabetical/numerical order.
Up-pointing arrow for reverse alphabetical/numerical order.
No arrow for the default sort order.
When you release the button, there is a short delay before sorting takes place, so you can click it again to change or
remove the sort.
You can also sort on more than one question. For example, to sort responses first by age, and then by sex (so that
people of the same age are grouped together with females before males):
1
Press and hold Ctrl (do not release Ctrl until the final step).
2
Click the sort button on the Age question – click again to sort in the opposite direction.
3
Click the sort button on the Sex question – click again to sort in the opposite direction.
4
Release Ctrl.
The responses will be sorted in the required order.
There is a limit to the number of questions you can include when you sort on more than one question – the exact
number depends on the types of the questions.
Filters
You can choose to filter the responses shown in the Analysis Grid by certain criteria, so that only the responses that
match the criteria are displayed.
You can use the filters defined in the Analysis Grid to restrict the responses contributing to graphs and tables, and to
restrict the responses displayed in the Responses workspace.
Filters use the expression language, which you can use in its full form or in an abbreviated form. For more information
about expressions and the full expression language, see Chapter 18, Using Expressions.
The abbreviated expression language
In the abbreviated expression language, if you only enter an operator followed by an operand as a filter for a
question, KeyPoint automatically assumes the question name as the first operand. For example, if you wish to show
The Analysis Grid | 383
only responses with the Room Number greater than 35, which in the full expression language would be "Room
Number">35, using the abbreviated language you can just enter >35 as the filter in the Room Number question.
If you do not enter an operator, KeyPoint assumes the equals sign as the operator. For example, if you enter 35 for
the Room Number question, KeyPoint interprets this as "Room Number"=35.
You can use the abbreviated expression language to write more complex expressions. For instance, if you enter
includes Owen as the filter for the Surname question, KeyPoint will interpret it as the full expression
includes('Owen';"Surname").
If KeyPoint does not understand an abbreviated expression, it will treat it as a full expression.
Adding a filter to a question
To add a filter to a question:
1
Click in the grey box immediately below the question name.
2
Type the filter in the row.
You can insert an operator by selecting it from the drop-down list to the right of the box. Operators
include ‘is equal’, ‘includes’, ‘between’ and ‘not answered’.
You can insert an option for multiple choice questions by right-clicking in the filter row to display the
available options and selecting the one required.
3
Press Tab or Return, or click somewhere away from the row.
After a few seconds, KeyPoint displays the filtered results. If there is an error in the expression you have entered, the
box will be highlighted in red.
Examples of filters on different question types
The following sections give some examples of filters for different types of question. These are intended as starting
points to give an indication of how filters can be used. The examples are not exhaustive, and the fact that a particular
filter is not described for a particular question type does not mean that it cannot be used.
Text questions
The simplest condition on a text question is if the answer exactly matches a string. So, for example, typing Owen for
the Surname question will display only the responses where the surname is Owen (the match must be exact, so
responses with the surname Owens will not be shown).
You can use INCLUDES to look for matching text anywhere in the answer. Typing INCLUDES Owen will display
responses for Owen, Owens and Smith-Owen (but not Bowen as the matching is case-sensitive).
For an address question, you could select responses from Richmond, Yorkshire, as opposed to other Richmonds, using
the filter INCLUDES Richmond AND INCLUDES Yorkshire. Only responses that include both Richmond and
Yorkshire in the address will be selected. However, the fact that a response from Richmond Terrace in Bradford
would also be included shows that you do need to take some care in thinking about how filters will work.
You can use NOT with INCLUDES to exclude responses with certain text. For example, a NOT INCLUDES London
filter on addresses would exclude any responses with London in the address.
384 | Chapter 14: Analysing Data
Number questions
There are many possibilities for filters on number questions. A simple example is a filter like >=25 on an Age
question, which will return all answers where the age given was 25 or more.
As another example, suppose you are carrying out a survey of hotel guests and you want to compare the responses of
people in similar rooms but on different floors. To do this you could use a filter such as 16 OR 46 in the Room
Number question to return all responses from guests who stayed in rooms 16 or 46. On the other hand, if you wanted
to look at the responses of guests staying on the first floor you could also use the expression BETWEEN 10 19 to
select all responses for rooms 10 to 19 inclusive.
Date questions
In the hotel guests survey, you might want to look at responses from guests who stayed after a certain date. In this
case, a filter such as >01/01/00 would return responses from guests who stayed after 1st January 2000.
Multiple choice and ordered choice questions
If you just want to see the responses with a particular option selected, you can just enter that option as the filter
(right-click in the filter cell and select it from the menu). However, if the question allows respondents to select more
than one option, you may want to use INCLUDES to select responses that include that option, rather than that option
and only that option.
You can use OR to select responses with a range of answers. For example, favourable responses could be selected
with Good OR Very Good.
For questions allowing multiple selections, you can use AND to select responses including a particular combination.
For example, respondents to a film survey who like both Horror and Comedy films could be selected using
INCLUDES Horror AND INCLUDES Comedy.
Calculated questions
Calculated questions can produce text, numeric, date or logical answers, depending on the expression used. You can
use a filter of the appropriate type to select responses based on the results of the calculation.
Multiple filters
You can use more than one filter on a question, and you can have filters on several questions at the same time.
Filters in the same row
If you place filters on the same row in different questions, KeyPoint returns only the results that match all the filters in
the row.
The Analysis Grid | 385
For example, if the filter on the Extension question is >300 and the filter on the Department question is
=Administration, KeyPoint displays those responses for which the Extension is greater than 300 and the
department is Administration.
Filters in different rows
If you place filters in different rows, KeyPoint returns the results that match the criteria in any of the rows.
For example, if the filter on the Extension question is >300 and the filter in a different row on the Department
question is =Administration, KeyPoint displays those responses for which the Extension is greater than 300 or the
department is Administration.
Example of several filters in different rows and questions:
386 | Chapter 14: Analysing Data
Here the filters will return responses where Extension is greater than 300 and the department is Administration, or
where Extension is greater than 500 and the department is Finance.
Viewing and editing multiple filters
To view and edit the active filters:
1
2
Click the i button in the top left-hand corner of the Analysis Grid or select Display Filter (Filter menu).
The Active Filter dialog box displays the complete expression for the filters currently active.
3
To delete all the filters, click the Delete All Conditions button.
4
To edit a filter, click on the filter in the dialog box; this places the cursor in the filter so that you can edit it.
Views
An Analysis Grid view consists of:
* the current selection of visible (non-hidden) questions, in their current order and with their current column
widths
* the current sort order of responses
* all the active filters.
You use the Custom views controls in the Toolbar to save and delete views, and to reset the Analysis Grid to the
default view:
The Analysis Grid | 387
Saving a view
When you have created a set of filters and an arrangement of questions and groups, you may want to save it so that
you can use it again without having to specify all its features one by one. You can create a library of views and select a
view for your current purpose.
To save a view:
1
Click on the Save current view button in the Toolbar to display the Save view dialog box.
2
Type a name for the view in the Save current view as box, or choose the name of an existing view from
the drop-down list to overwrite it with the new view.
3
Click OK.
The view will now appear in the drop-down list box in the Toolbar.
Selecting a view
To select a view:
Select it from the drop-down list in the Toolbar.
Deleting a view
To delete a view:
1
Click on the Delete custom views button in the Toolbar to display the Delete Custom Views dialog box.
2
Click on the name of the view you want to delete to select it.
3
Click Delete.
Resetting the default view
To restore the view to the default:
Click on the Reset view button in the Toolbar.
The Statistics form
The data in the Statistics form is generated automatically when you display the Presentation workspace. The data in
this form is read-only, so it can only be modified by modifying the source data.
If there is an active filter in the Analysis Grid, separate statistics will be given for the selected responses and all
responses.
For more information on the statistics, see Appendix A, Statistics and Analysis Glossary.
388 | Chapter 14: Analysing Data
15
Presenting Data
In this chapter you will learn how to present information collected using KeyPoint surveys.
You will learn about:
* Presentation forms
* Data sources for graphs and tables
* Choosing questions for graphs and tables
* Defining ranges for graphs and tables
* Performing a Quick Analysis
* Generating Topline Results
* Creating and editing graphs and tables.
Chapter 15: Presenting Data | 389
Presenting data
KeyPoint allows you to present results using:
* Presentation forms: see the next section
* the Quick Analysis Wizard: this also produces a presentation form (see Quick Analysis, page 407)
* the Topline Wizard: this produces a replica of the original questionnaire with statistics for each question (see
Topline Results, page 411)
Presentation forms
You use Presentation forms to design your presentation of the data using graphs and tables. You use many of the same
techniques that you use with the Design form (see Chapter 8, Constructing a Survey) to design a survey.
When you create a new survey, an empty Presentation form called ‘Presentation1’ is added to the Presentation
workspace, but you can add and delete Presentation forms as required, and change their names – for general
information about working with forms, including adding, copying, renaming and deleting them, see Chapter 7,
Working with Surveys in KeyPoint.
When a Presentation form is selected, the following sidebars are displayed:
* Align and Size
* Format Palette
* Page Manager
* Designer Tools
* Properties.
The first three of these are used in exactly the same way as in the Design workspace: see Using the Align and Size
sidebar, page 173, The Format Palette sidebar, page 150, and Using the Page Manager to navigate and work with
forms, page 123. The Designer Tools sidebar is described in the next section; see The Properties sidebar for
presentation objects, page 401, for the Properties sidebar.
The Toolbar has a number of additional tools when a Presentation form is selected – see The Toolbar for
Presentation forms, page 392.
The 360 Degree Analysis Wizard creates a special type of Presentation form for analysing and presenting the results of a 360°
feedback survey: see Chapter 16, 360° feedback surveys, for details. However, most of the instructions given in the current
chapter for presentation forms also apply to 360° presentation forms.
See Chapter 17, Sharing Data with Other Applications, for how to share presentation data with other applications
such as Microsoft Excel.
390 | Chapter 15: Presenting Data
The Designer Tools sidebar
The Designer Tools sidebar contains the tools you need for adding presentation objects to a form to create a
professional-looking presentation (see Sidebars, page 103, for general information about working with sidebars,
including how to display them and pin them).
The Designer Tools sidebar is also displayed for survey forms in the Design workspace. Some tools are specific to the
selected workspace, but some appear for both workspaces. The following tools appear in both the Design and
Presentation workspaces:
Text
Line
Picture
For more information on using these tools, see Chapter 8, Constructing a Survey.
The Designer Tools sidebar also has the following specific tools for drawing tables and graphs:
Table
Stats Table
Distribution Table
Crosstab
Pivot Table
Graph
Using the Designer Tools sidebar
To add a presentation object to a presentation form:
1
Click the button of the tool you want to use.
2
Click the form to place a default size component, or drag out an area on the form to indicate the
dimensions of the component.
If you want to use a tool to create more than one object, press Shift as you click to select the tool so that the tool will
remain selected after you use it. Press Esc when you have finished.
Presentation forms | 391
The Toolbar for Presentation forms
Most of the buttons appearing in the Toolbar for Presentation forms can also be found on the Toolbar in the Design
workspace (for more information, see Chapter 8, Constructing a Survey). The following buttons are specific to the
Presentation workspace:
Button
Name
Action
Refresh
Updates the data for graphs and tables – see
Updating or locking graphs and tables, page 401.
Quick Analysis
Start a quick analysis of the data – see page 407.
Topline Results
Generates statistics for the questions. The questions
are displayed in the same format as in the survey
and the statistics are shown next to the questions.
See page 411 for details.
Common features of graphs and tables
Because the different types of tables and graphs are based on similar types of data, you often need to make similar
choices when you are creating any type of table or graph. To avoid repetition, these choices are described once, in
the following sections:
* Data sources (see next section)
* Choosing questions (see page 395)
* Ranges (see page 396)
* Sorting answers (see page 399)
* Questions on the x axis (see page 399)
* How ‘other’ answers are analysed (see page 400)
* Updating and locking graphs and tables (see page 401)
* The Properties sidebar for presentation objects (see page 401)
* Common presentation options (see page 403)
* Presentations and the Style Library (see page 405)
* Design elements in presentations (see page 406).
Following on from these sections are sections giving step-by-step instructions for creating a Quick Analysis (see
page 407), Topline Results (see page 411) and then each of the different types of table and graph (see from page 412
onwards).
392 | Chapter 15: Presenting Data
Data sources for graphs and tables
You can use the following as sources of data for any graph or table:
* All the responses (All)
* The data selected by the active filters in the Analysis Grid (Selected)
* Data selected according to conditions you will specify in the next step (Custom selection)
* Data from another object in the Presentation (Link). The Link option is not available for Quick Analysis or
Topline Results.
The table wizards and the Graph Wizard present these options on their Data page:
After you have created a table or graph, you can use the Filter tab in the Properties sidebar to change the first three of
these selections, but the only way to change to or from a link, or to change the link source, is to rerun the wizard.
You can set properties for the whole Presentation form using the form Filter tab, which is displayed in the Properties sidebar when
no object is selected in the form. For each object, you can then choose to use the form filter or set an individual filter for that
object: see the next section for details.
The All option is self-explanatory.
The Selected option is also reasonably self-explanatory. To use it, you must filter the responses in the Analysis Grid
before you use the Table or Graph wizard.
The effect of the Selected option in the wizard is to copy the current selection criteria to the filter property of the
table or graph. This means that if you later change the selection criteria in the Analysis Grid and update the table or
graph, it will be updated using the previous selection criteria, not the new ones.
The following sections give details of how to use custom selected or linked data.
Using custom selected data
This section describes how to make a selection of the data for a table or graph:
* while creating the table or graph – make your selection in the wizard by choosing Custom selection and then
* choose a saved custom view (see Views, page 387), or
* specify a filter using the KeyPoint expression language
You can also select data while creating a table or graph by linking it to another graph or table – see the next
section.
* after creating the table or graph – make your selection using the Filter tab in the Properties sidebar.
Common features of graphs and tables | 393
You can also select data before creating the table or graph by filtering the responses in the Analysis Grid and choosing Selected in
the wizard – see previous section.
To select the responses for a table or graph in the table wizards or the Graph Wizard:
1
In the Data page, click Custom selection.
2
Click Next.
3
In the Custom Selection page, either:
Click New to display the Expression Editor so that you can enter an expression to select the data (see
Chapter 18, Using Expressions, for details).
Or:
Click Copy filter to open the Copy filter dialog box, where you can choose a filter (view) you have
already defined in the Analysis Grid, or <selected>, which is the current selection criteria in the
Analysis Grid. After you have selected a filter and closed the Copy filter dialog box, the selected filter
expression is displayed in the wizard: you can edit it if necessary by clicking Edit to display the
Expression Editor.
To select the responses for an existing table or graph:
1
Click on the table or graph to select it.
2
Display the Properties sidebar and click on the Filter tab.
3
If you want to use an individual filter for the selected table or graph:
a
Clear Use form filter.
b Go to Step 4.
If you want to use the global form filter:
a
Tick Use form filter.
b Click Apply.
c
If you have already created the form filter, you are done.
To view or edit the form filter, click in the background of the form to display the Filter tab in the form
Properties sidebar.
The following step can be used to set an individual filter for a graph or table if the graph or table is
selected, or a global filter for the whole form if no objects are selected.
4
Either:
Click All to remove any filtering and select all responses in the survey.
Or:
a
Click Create selection and follow the instructions in Step 3 of the previous procedure.
b For an individual graph, click Add ‘(filtered)’ to the end of the title if you want plots identified in their
titles when the data is filtered.
c
Click Apply.
394 | Chapter 15: Presenting Data
Linking a graph to another presentation object
If you choose Link in the Data Source page of the Table Wizard or Graph Wizard, you can then select an object to
link to from the drop-down list.
For example, suppose you have already created a table using a custom filter, and you create a pie graph linked to the
table. If you then change the custom filter, the table will update, and the pie graph will also update to show the same
data.
Choosing questions for tables and graphs
For all tables and graphs, you need to choose which questions to include. You make this choice first in the wizard, but
you can change it later using the Questions tab in the Properties sidebar.
The procedure for choosing the questions for Pivot tables is slightly different from the procedure for other types of
table and graphs and is described separately in the section on using The Pivot Table Wizard – see page 421.
In both the wizard and the Properties sidebar, the available questions are presented in a list:
For Crosstabs, there are separate wizard pages for selecting row and column questions, and the Questions tab in the
Properties sidebar has separate boxes for choosing row and column questions. Another difference is that the All and
None buttons do not appear for Crosstabs.
You can tick the Show Tables box to display a structured list of questions in which question tables are shown rather
like folders in Windows Explorer. You can select all the questions in a table by ticking the box next to the table name.
Common features of graphs and tables | 395
If Show Tables is cleared, there is no entry for the question table itself and the questions in the tables are just listed
with the other questions:
The questions are shown in alphabetical order if Show questions in alphabetical order is ticked in the Survey page
of the Options dialog box (Tools menu); otherwise they are listed in the order they were added to the survey.
For Tables, Statistics tables and Crosstabs you can select as many questions as you like (but see note below for
Crosstabs). For Tables and Statistics tables the All and None buttons are enabled so that you can select all or none of
the questions with a single click. After clicking one of these buttons you can add or remove questions from the
selection by clicking in the tick boxes.
When you create a Crosstab, you can select as many row and column questions as you like in the wizard. If you select more than
one row, a separate table will be created for each row question, but if you select more than one column, all the selected columns
will appear in the same table (see Crosstabs with more than two questions, page 418, for more details). This means that in the
Questions tab in the Properties sidebar and in the wizard pages when you are editing an existing Crosstab, you can select several
column questions, but only one row question – selecting a second row question deselects the first.
You can select multiple questions for Distribution tables and graphs (not pie or donut graphs or Crosstabs) provided
they belong to the same question table, and then only if Show Tables is ticked.
For all other cases, you can only select one question at a time – the All and None buttons are disabled or not
displayed and ticking the box for another question unticks it for the previously selected one.
Ranges
Ranges can be a powerful tool in helping you to analyse the response data.
Ranges allow you to group together a number of possible answers into a restricted number of ‘bins’. For example, the
answers to a number question could be divided into a number of ranges such as 0–9, 10–19, 20–29, and so on. All
answers between 0 and 9 will then be grouped in the first range, answers between 10 and 19 will be grouped in the
second range, and so on. You can also group together answers for closed questions such as multiple choice questions.
For example, if you have a range of options from Very satisfied to Very dissatisfied, you could group the replies into
positive opinions and negative opinions to get an overall view of the balance between them.
The term ‘Ranges’ is not always appropriate, particularly when dealing with closed questions where the answers may
not form a scale. For this reason, ranges are sometimes also called categories.
396 | Chapter 15: Presenting Data
Defining ranges
Graphs, Distribution tables and Crosstab tables all use ranges in KeyPoint.
For graphs, the ranges are defined in the ‘Define ranges for’ dialog box. This is displayed by clicking on the Ranges
button in the Graph Wizard’s Display Plot Definition page, or the Plots tab in the Properties sidebar.
For Distribution tables, you use the Ranges page in the wizard, or the Ranges tab in the Properties sidebar.
For Crosstab tables, there are separate Ranges pages in the wizard for the row and column questions. In the Properties
sidebar you use the Ranges tab; you use a drop-down list box to choose whether you are viewing and editing the
range for the row or column question.
Despite these differences, you use the same techniques for defining and editing ranges in all cases. However, because
of differences in the nature of the data, you use different techniques for creating ranges for different types of question.
These are described in the following subsections. The pictures there show the ‘Define ranges for’ dialog box used for
graphs, but the same, or equivalent, controls are shown in the wizards and Ranges tabs for Distribution and Crosstab
tables.
Defining ranges for closed questions
For multiple choice and ordered choice questions the default ranges are the individual options you defined for the
question (Use each distinct answer as a category). However, you can also create your own ranges to group answers
together.
To define your own range for a closed question:
Click Make categories from groups. The existing categories are listed as blue folders under the yellow
folder representing the question:
* Click the plus sign next to a category to expand it.
* Click the minus sign next to a category to collapse it.
Common features of graphs and tables | 397
* To add a category, right-click the question name and select Add group.
* To rename or delete a category, right-click the category and select Rename or Delete.
You can use the ability to rename categories to abbreviate the answers to a closed question appearing
in a presentation if they are too long (or if you want to change them for some other reason). You will
need to choose Make categories from groups – by default, a separate category will be created for
each answer. Then rename the category for each answer.
* To move an option from one category into another, expand the source category and select the option.
Then drag it to the destination category.
* To prevent an option from contributing to the graph or table, drag it into the (excluded) category.
Defining ranges for number questions
To define a range for a number question, either:
Click Use each distinct answer as a category if you want a separate category for each number entered in
the responses.
Or, to define categories on the basis of number ranges:
1
Click Make categories from ranges.
2
Click the Auto tick box so that it is ticked (the default) if you want to use the minimum and maximum
values actually found in the data as the endpoints for the ranges. The minimum and maximum values in
the data will be shown as read-only values in the Min and Max boxes.
To set the endpoints for the ranges manually, click the Auto tick box so that it is cleared and enter the
required values in the Min and Max boxes.
3
If you want to include the upper limit of a range within the range, click the Include upper value in the
interval tick box. If the option is unticked, values on range boundaries will be included in the higher
range.
398 | Chapter 15: Presenting Data
For example, suppose you have the values 10, 12 and 13 and the ranges 10–13 and 13–16. If you select
the Include upper value in the interval tick box, the value 13 will be in the range 10–13. However, if you
clear the tick box, the value 13 will be in the range 13–16.
4
Do one of the following:
* If you want KeyPoint to calculate suitable equal length ranges automatically, click Calculated – if
(unknown) is shown, you can click Sample to make KeyPoint sample the data and perform the
calculation; if you do not click Sample the calculation will be performed when the graph or table is
created. This option is the default.
* If you want to use fixed length intervals, click Fixed length and type the interval you want to use in the
box alongside.
* If you want to use irregular intervals:
a
Click Sample to display the minimum and maximum values above and below the Breakdowns
box, if they are not shown already.
b Click Variable.
c
Type the upper boundary value of the first interval into the first row in the Breakdowns box.
(Naturally, it must be greater than the minimum value and less than the maximum one.)
d In the next row, enter the upper boundary value of the next interval, and repeat until you have
entered the upper boundary value of the next to highest interval (this is also the lower boundary
value of the highest interval).
Sorting answers
For Distribution and Crosstab tables and graphs, you can sort the table or graph display by the answer categories (see
Ranges, page 396, for how to define ranges/categories) in Ascending or Descending order, or None (the original order
of the categories). You can make this choice in the Question page of the Distribution Graph Wizard, the Rows and
Columns pages of the Crosstab Table Wizard or the Plot Definition table of the Graph Wizard. You can change the
sorting of existing tables or graphs using the Properties sidebar: Questions tab for Distribution and Crosstab tables;
Plots tab for graphs.
You can sort the data in simple Tables using the Sort tab in the Properties sidebar – see Sorting questions in Tables,
page 428.
Questions on the x axis
As mentioned in Choosing questions for tables and graphs, page 395, you can select multiple questions for
Distribution tables and graphs (not pie or donut graphs) provided they belong to the same question table. When you
do this, you can choose whether to display ‘Questions on the x axis’. This setting chooses whether the data is
analysed according to the questions or the answer categories.
For a graph this means:
* If ‘Questions on the x axis’ is selected, the questions are arranged along the x-axis and there are separate plots
for each category (see Ranges, page 396, for how to define ranges/categories)
* If ‘Questions on the x axis’ is deselected, the categories are arranged along the x-axis and there are separate
plots for each question.
Common features of graphs and tables | 399
For a Distribution table (assuming you have not transposed rows and columns), when ‘Questions on the x axis’ is
selected, each row shows the distribution statistics for a particular category for each question (categories in rows;
questions and statistics in columns). When ‘Questions on the x axis’ is deselected, each row shows the distributions
for a particular question for each category (questions in rows; categories and statistics in columns). See Distribution
tables, page 414, for some examples.
There is, however, another effect of the ‘Questions on the x axis’ setting, which becomes apparent when you link
another presentation object to the table (see page 395). If ‘Questions on the x axis’ is selected, the dependent object
will be based on the questions in the Distribution table; if it is deselected, it will be based on the categories in the
Distribution table.
You can set ‘Questions on the x axis’:
* in the Questions page of the Distribution Table Wizard
* in the Plot Definition page of the Graph Wizard
* in the Questions tab in the Properties sidebar for Distribution tables
* in the Plots tab in the Properties sidebar for graphs.
How ‘other’ answers are analysed
When you use a wizard to create a Distribution or Crosstab table, or a graph for a multiple choice, range multiple
choice or ordered choice question with an ‘other’ option, all the ‘other’ answers are grouped together in a single
‘other’ category. If you prefer, however, you can treat each of the distinct ‘other’ answers individually. In this case,
you can either treat each distinct answer as a separate category in its own right (the default), or by using the Ranges
tab in the Properties sidebar (see Defining ranges for closed questions, page 397), you can create your own
categories and then distribute the individual answers between them – for example, you could create categories for
‘other positive’, ‘other negative’ and ‘other neutral’ responses.
To choose whether to treat ‘other’ answers together or individually:
Tick or untick Include “other” in Analysis in the Analysis tab in the Properties sidebar for the presentation
object.
For example, the following question asked respondents how they had travelled to a meeting. They were offered four
alternatives (Hired car, Own car, Taxi, Train), and the opportunity to write in an Other answer if required. With the
box Include “other” in Analysis ticked, a Table showing frequency and percentage looks like this:
400 | Chapter 15: Presenting Data
Whereas with the box unticked (and each distinct answer treated as a separate category), the alternatives entered by
respondents are shown separately:
Updating and locking graphs and tables
You can choose to have a graph or table updated automatically with the latest survey data. You can set the automatic
updating property in the wizard when you create the graph or table, or later using the Analysis or Global tab in the
Properties sidebar (see Common presentation settings, page 403). However, automatic updating makes analysis
slower, so you may prefer to switch this option off.
The Properties sidebar also allows you to set delayed updating for tables and graphs – see Common presentation settings,
page 403, for details.
If a graph or table is not automatically updated, you can update it manually. To update the selected graph or table:
Click the Refresh button on the Analysis toolbar.
Alternatively, you can lock a graph or table in the wizard when it is created or later using Lock mode in the Analysis
tab in the Properties sidebar. When a graph or table is locked and the data changes, the graph or table will not be
updated automatically or when you click the Refresh button.
You can unlock a locked graph or table at any time using Lock mode in the Analysis tab in the Properties sidebar, and
then choose whether to set it to automatic or manual update.
The Properties sidebar for presentation objects
When a presentation form is selected, you can display the Properties sidebar allowing you to view and edit the
properties of the selected object, or the form itself if no object is selected. See Sidebars, page 103, for general
information about working with sidebars, including how to display them and pin them. You can also display the
Properties sidebar for a presentation object or the form itself by right-clicking on the object or the form, and selecting
Edit Properties from the context menu displayed.
Common features of graphs and tables | 401
The Properties sidebar allows you to view and edit settings for:
* tables and graphs (see next section)
* text, line, rectangle, picture and OLE objects: the behaviour of these objects is the same in the Design and
Presentation Workspaces – see Properties of other objects, page 219, for how to work with the properties of
these objects
* the Presentation form itself: see Presentation form properties, following the next section.
Table and graph properties
The Properties sidebar for a table or graph object has a variety of tabs containing settings for the object – depending
on the type of object, it may have Analysis, Plots, Series, Graph Layout, Filter, Regions, Presentation, Questions, Stats,
Results, Ranges, Definition, Sort and/or Inspector tabs.
Many of the controls in the Properties sidebar for tables and graphs are concerned with the features described in the
previous sections, such as choice of questions, ranges, answer sorting etc, and are common to most or all types of
table and graph – see the previous sections for details.
Some more object-specific properties are set initially in the wizard when you create the table or graph, and are
described in the sections explaining how to create the object (see the sections later in this chapter dealing with each
type of object).
Even more specialised properties, which cannot be set in the wizards, are described in the sections on how to edit
tables (see Editing tables, page 424) and graphs (see Editing graphs, page 440).
The remaining properties are self-explanatory, and are not described individually.
Most changes you make to table and graph properties are made immediately. However, in some cases, the tab in the
Properties sidebar includes an Apply button. To make the changes in these tabs, click Apply.
Presentation form properties
The Presentation form properties are shown in the Properties sidebar when a Presentation form is displayed but no
object is selected – click in the background to ensure that no object is selected. The Presentation form Properties
sidebar has the following tabs, which also appear in the Design workspace:
* Form
* Format
* Margins
* Header
* Footer
* Inspector
The content of these tabs in the Presentation workspace is very nearly the same as in the Design workspace (the only
differences are on the Form tab, which does not have any numbering controls, and the Inspector tab, which does not
have the tick boxes controlling the warning when you publish the survey or for preventing the addition and removal
of questions, answers, buttons and barcodes) – see Form properties, page 223, for how to work with these tabs.
402 | Chapter 15: Presenting Data
In addition, the Presentation form Properties sidebar also has the following tabs containing default settings that you
can choose to apply to tables and graphs in the Presentation form:
* Filter – the form Filter tab contains controls allowing you to create a common form filter for selecting data.
When an individual table or graph is selected, you can tick Use form filter in its Filter Properties tab to use
the form filter, or clear it to create an individual filter for the selected table or graph. See Data sources for
graphs and tables, page 393, for more details.
* Global – the Global tab contains controls for a number of update and presentation properties (see Global
Presentation form properties, page 404, for details). When an individual table or graph is selected, you can
tick Use form settings in its Analysis Properties tab to use the Global tab settings, or clear it to make individual
settings for those properties. For more details, see the next section, Common presentation options, and, in
particular, the subsection, Global Presentation form properties, within it.
Common presentation settings
Table and graph analysis properties
The Analysis tab in the Properties sidebar for a presentation table or graph contains a number of common settings for
presentation tables and graphs:
Common features of graphs and tables | 403
The default settings when you create the table or graph are determined by the form’s Global tab settings (see next
section).
To choose between using the form’s Global tab settings or individual settings for the selected table or graph:
Tick or clear Use form settings – the other controls on the page are disabled when Use form settings is
ticked.
To make the selected table or graph update automatically when the data has changed:
1
Tick Auto updates.
2
Tick Delayed refresh of auto update objects if you want tables and graphs to be updated only when they
are displayed – this could save having to wait quite a long time for a multi-page presentation to refresh.
See Excel links, page 472, for information about the Excel Link data; the use of the other controls should be obvious.
Global Presentation form properties
If the Global tab does not appear in the Properties sidebar, click in the Presentation form’s background to make sure
no object is selected.
The Global tab in the Presentation form Properties sidebar controls the default Analysis properties (see previous
section) for presentation tables and graphs when they are created and placed on the form. You can change these
settings for an individual table or graph using the Analysis tab (see previous section), or you can tick Use form
settings in the Analysis tab if you want the Global settings to override any individual settings for the table or graph – if
Use form settings is ticked, any changes you make to the Global settings will be applied to the table or graph.
You can also use the Global tab to choose the Source survey form for the selected Presentation form to use the
multiple choice, range multiple choice and ordered choice answer labels set in that copy form – for example, if you
have created copy forms in different languages, you may want to choose the copy form matching the language of the
presentation.
When you create a Presentation form (including the first presentation form when you create the survey), the initial
settings in the Global tab are taken from the Options dialog box (Tools menu) Analysis page. The Analysis page also
404 | Chapter 15: Presenting Data
contains settings controlling the appearance of the Analysis Grid (see The Analysis grid, page 372, for details) and the
background colours used for certain types of data.
Presentations and the Style Library
Each style in the Style Library contains default style elements used when creating tables and graphs. Creating or
choosing a style and editing it to meet your requirements before you create a presentation will ensure a consistent
look and save you time editing all the individual tables and graphs after they have been added to the presentation.
In general, most of the style elements are self-explanatory and are the same as the items that you can change for an
individual table or graph in the Properties sidebar. However, there is one aspect of graph styles that is not available as
a property: the Colour picker.
The Colour picker
When a graph is created, the colours used are taken from the Colour picker, in the current Style (for more
information on styles and the Style Library, see Working with styles, page 142). The Colour picker provides a palette
of colours to be used, but you can edit the palette to change the colours, add other colours and change their order.
Unlike other style properties, the colours in the Colour picker are applied to existing graphs as well as new ones when
they are created.
To use the Colour picker to edit style colours:
1
Select Style (Tools Menu) to display the Style Library dialog box.
2
Click on the plus icon next to a Style name to expand it and show the style’s components.
3
Select Graph at the bottom of the list of components.
Common features of graphs and tables | 405
4
Select the Analysis tab: this contains the Colour picker:
5
You can modify the Colour picker palette in the following ways:
* Double-click on a colour to display the Windows colour dialog box, which you can use to change or
edit the colour
* To insert a new colour in front of an existing one, right-click on the existing colour and select Insert
from the pop-up menu to display the Windows colour dialog box so that you can choose the new
colour
* To add a new colour at the end of the palette, right-click in the grey space away from the existing
colours, and select Add from the pop-up menu to display the Windows colour dialog box so that you
can choose the new colour
* To change the position of a colour in the palette, drag it to a new position. When you release the
mouse button, a pop-up menu appears: you can Move the dragged colour to the new position, or
Swap it with the colour that is already there
* To delete a colour, right-click on it and select Delete from the pop-up menu (if you are using a default
style, you can only delete a colour if you have added it yourself; the default colours cannot be
deleted).
Design elements in presentations
Many of the layout, design and printing features available for Presentation forms are the same as those in the Design
workspace.
406 | Chapter 15: Presenting Data
You can edit a graph, table or other object using the Properties sidebar – see The Properties sidebar for
presentation objects, page 401.
You can also edit graphs or tables in the wizard by right-clicking the graph or table and selecting Wizard.
In Presentation forms you can:
* Use the rulers, grid and line-ups to help you align graphs and tables
* Remove and add paper or pages
* Add and edit text, lines, rectangles, pictures and OLE objects
* Use the Shift and Control keys to select objects
* Move, copy and resize objects
* Print the presentation.
For more information on layout and printing features, see Chapter 8, Constructing a Survey.
Quick Analysis
In KeyPoint you can perform two types of ‘quick analysis’ of the survey results:
* Default Settings – all you have to do is make three simple choices.
* Custom Settings – this allows you much greater control over the content and presentation of the report, but
requires a little more work.
In both cases, the Quick Analysis Wizard uses default or style settings for many table and graph attributes, but the
resulting tables and graphs are the same as those you can create individually using wizards, so they can be
manipulated and edited as required using the techniques described later in this chapter for tables and graphs.
The following table compares the two types of quick analysis:
Feature
Default Settings
Custom Settings
Questions
included
Either all questions or all choice answer
questions
Questions can be selected individually for
inclusion; you can include the same question
several times for different analyses
Tables/graphs
Choice of distribution table, vertical bar
graph or pie chart for use with all questions
Any type of chart or table type except
cross-tabulation or pivot tables can be chosen
individually for each question
Statistics/analysis
function
Distribution tables show frequency and
Wide range of statistic type and analysis
percentages for questions, and just frequency function can be set individually for each table or
for question tables; charts plot frequency
graph
Data selection
If there is a current analysis grid filter, it is
used, otherwise all data is used
You can choose to use all data, the current
analysis grid filter or a custom selection
Categories
Defaults used
Can be set for different types of question
(numeric, date and text)
Quick Analysis | 407
Feature
Default Settings
Custom Settings
Layout
Bar graphs: 4 per page
Pie charts: 3 per page
Tables: placed one after the other
Single or multiple columns
Update
Manual
Manual, automatic or locked
Style
Current style used
Any style can be selected
Title, header and
footer
Default
Each can be set individually
Summary text
None
Summary text can be entered to appear at the
end of the report
Using the Quick Analysis Wizard
First of all, note that the Quick Analysis you create will be added at the end of the selected Presentation form. You
may want to create a new form for the Quick Analysis by selecting New Form (Form menu).
To create a Quick Analysis:
1
Click the Quick Analysis button in the Toolbar or select Generate Quick Analysis (Tools menu).
2
The Quick Analysis Wizard opens: click Next in the introductory page of the wizard, if it is displayed.
3
In the Wizard Settings page:
a
Click Default Settings or Custom Settings to choose the type of quick analysis – see previous section.
b If the survey has one or more copy forms, and you want to use labels rather than codes for choice
answers, choose the form with the labels you want to use from the Source Survey Form drop-down
list box.
When the report is created, the choice between using codes and labels will be determined by the
setting in the form’s Global tab in the Properties sidebar, but you can override this for an individual
table or graph using the Analysis tab in the Properties sidebar.
c
Click Next.
If you have selected Default Settings, go to the next step, otherwise go to Step 5.
4
If you selected Default Settings in the previous step:
a
Click a button to choose whether to use Distribution Tables (see page 414), Vertical Bar Graphs or
Pie Charts (see Defining plots, page 436).
b If you want to include a table or graph for all questions, click on Only include choice answer
questions to clear it; otherwise leave it ticked to exclude ordered choice, numeric, date and text
questions.
408 | Chapter 15: Presenting Data
c
Press Finish to close the wizard and compile the quick analysis.
The procedure for creating a Quick Analysis with Default Settings is now complete.
5
If you selected Custom Settings in Step 3, in the Data page, choose how responses should be selected for
inclusion in the Quick Analysis (see Data sources for graphs and tables, page 393).
Click Next to continue.
6
In the Questions page, to select the questions you want to use in the presentation:
a
Tick Show Tables to display a structured list of questions in which question tables are shown rather
like folders in Windows Explorer.
When tables are shown you will be able to select all the questions in a table together or individual
questions within the table. When a table is selected, you only need to make one set of presentation
choices for the table and these will be used for all the questions within the table. If you select
individual questions, you will need to set the presentation choices for each of them, but this does
mean you can choose to make them different if required.
b If you want to include text questions, clear Hide text questions, otherwise leave it ticked so that they
are not shown in the Available questions list.
c
Click in the Available questions list on the first question or question table you want to include to select
it.
d Click
e
to add the question to the Selected Questions list.
Repeat for the other questions you want to include.
You can add the same question more than once – for example, you may want to present the same results in a table and a graph.
You can select and add more than one question at a time from the Selected Questions list using the usual Windows techniques:
Shift+click to extend the current selection range; Ctrl+click to add an individual question to the current selection.
Click
to add all the questions – they will be added at the end of the current list. If Show Tables is ticked, the question table
will be added; if it is unticked, the individual questions will be.
To remove a question from the Selected Questions list, click on it to select it and press
; press
to remove them all.
The order of questions in the Selected Questions list determines the order they will appear in the Quick Analysis presentation. If
required, you can change the order in the Selected Questions list using drag and drop.
7
Still in the Questions page, to set the presentation options for each question and question table in the
Selected Questions list.
a
Click on the question or table to select it.
b From the Graph type drop-down list box, choose whether to display the data in a table or one of the
different types of graphs listed. The selection will be shown graphically next to the question in the
Selected Questions list.
You can choose any type of KeyPoint presentation graph (see page 429 for more about graphs). If you
choose Table, you will be able to choose whether to make it a Distribution table (see page 414), a
Statistics table (see page 413) or a Table (see page 413) at Step d – you cannot create Cross-tabulation
tables (see page 417) or Pivot tables (see page 419) as part of a Quick Analysis.
Quick Analysis | 409
c
For a question table, if you have chosen a relevant type of presentation, click Questions on x-axis to
choose whether the data is analysed according to the questions or the answer categories – see
Questions on the x axis, page 399, for details.
d From the Statistic type drop-down list box, choose whether to plot:
* Distributions:
* If at Step b you chose a table, this will produce a Distribution table – (see Distribution tables,
page 414)
* If at Step b you chose a graph, this is the equivalent of selecting Breakdown in the Graph
Wizard (see Defining plots, page 436, for more information)
* Calculations:
* If at Step b you chose a table, this will produce a Statistics table (see Statistics tables, page
413)
* If at Step b you chose a graph, this is the equivalent of selecting Statistics in the Graph Wizard
(see Defining plots, page 436, for more information)
* Values:
* If at Step b you chose a table, this will produce a Table (see Tables, page 413)
* If at Step b you chose a graph, this is the equivalent of selecting Values in the Graph Wizard
(see Defining plots, page 436, for more information).
For box plots, Values is automatically selected and the Statistic type drop-down list box is disabled
since the other options are not relevant.
8
e
If you have selected Distributions or Calculations as the Statistic type, tick the boxes in the Analysis
Functions box to select the distribution data or statistics to include or plot – see Distribution Tables,
page 414, Statistics tables, page 413, and Defining plots, page 436, for details (for a graph you are
setting the dependent variable in this step).
f
For Distribution tables, click Calculations to display a dialog box allowing you to choose what
calculations to display for each of the columns and rows in the table – see Showing totals and other
calculations, page 416, for details.
g
Click Next to continue.
In the Options page:
a
Choose how you want answers to open questions grouped in ranges (see Ranges, page 396).
You can choose different settings for each type of question, and these settings will be used for all
questions of that type.
b Click a radio button to choose the presentation layout specifying how the tables/graphs should be
arranged on the page. You can choose a single column (List) or multiple columns (8 per page: two
columns for portrait format and 4 columns for landscape; 4 per page: two columns for landscape
format only) of tables/graphs.
c
9
Click Next to continue.
In the Update Method page, choose whether to update automatically or lock the data in the tables or
graphs (see Updating and locking graphs and tables, page 401).
410 | Chapter 15: Presenting Data
Click Next to continue.
10
In the Quick Analysis Presentation Style page, choose or create a KeyPoint style to format the tables and
graphs in the Quick Analysis (see Presentations and the Style Library, page 405).
Click Next to continue.
11
In the Quick Analysis Presentation Title page, enter a title to appear at the top of the Quick Analysis – the
preview box shows how it will appear in the selected style.
Click Next to continue.
12
In the Header page, enter a header for the presentation form containing the Quick Analysis – this uses the
same controls as the Header and Footer tabs in the Form Properties sidebar (see Header and Footer tabs,
page 226).
Click Next to continue.
13
In the Footer page, enter a footer for the presentation form containing the Quick Analysis – this uses the
same controls as the Header and Footer tabs in the Form Properties sidebar (see Header and Footer tabs,
page 226).
Click Next to continue.
14
In the Quick Analysis Presentation Summary Text page, enter text to appear at the bottom of the Quick
Analysis – the preview box shows how it will appear in the selected style.
15
Click Finish to close the wizard and compile the quick analysis.
The tables and graphs produced by a Quick Analysis are the same as the tables and graphs you can create individually
using wizards, so they can be manipulated and edited using the techniques described later in this chapter for tables
and graphs.
Topline Results
Topline Results allow you to display statistics for each question in the same format as in the original survey. You can
choose between displaying frequency, percentages or adjusted percentages.
The Topline Results function works best with closed questions. For multiple choice questions, it shows the number or
percentage of respondents who chose each answer. For ordered choice questions, it shows the most popular ranking
and the number or percentage of respondents who gave it that ranking. For text, number and date questions, it shows
the most frequent response and how many times it occurred.
The Topline Wizard
To create a Topline Results display:
1
Click the Topline Results button on the Analysis toolbar or select Generate Topline Results (Tools menu).
2
The Topline Wizard opens: click Next in the introductory page of the wizard if it is displayed.
Topline Results | 411
3
In the Data page:
a
If the survey contains more than one Design form, choose which Design form to use for the layout of
the results, including which labels to use for multiple choice, range multiple choice and ordered choice
option answers.
b Choose how responses should be selected for inclusion in the Topline Results – see Data sources for
graphs and tables, page 393.
c
4
Click Next to continue.
Choose the statistic you want to display. You can choose one of: Frequency (the number of responses
giving that answer); Percentage (the number of responses giving that answer as a percentage of the
number of responses selected for the Topline Results); or Adjusted Percentage (the number of responses
giving that answer as a percentage of the number of selected responses giving an answer to that question).
Click Next to continue.
5
In the Update Method page, choose whether to update automatically or lock the data in the tables or
graphs (see Updating and locking graphs and tables, page 401).
6
Click the Finish button to display the Topline Results on a new Topline form.
Once you have created a Topline form, you can move and resize elements on the page in the same way as in the
Design form. You can also use the Properties sidebar to change the background, statistic displayed, response filter and
the update/locking mode.
Presentation tables
In KeyPoint you can create the following types of table:
* Tables
* Statistics tables
* Distribution tables
* Cross-tabulation tables
* Pivot tables.
In this manual, ‘Table’ spelled with an initial upper-case letter refers to the specific Table type of presentation table (ie
the first item in the list above); table spelled with a lower-case letter refers to any, or all, of the presentation table
types.
The following sections describe each of these different types of table in more detail and shows you how to create
them using wizards. There are then a number of sections describing how to work with tables once they have been
created.
412 | Chapter 15: Presenting Data
Tables
A Table display shows the answers given in each of the responses for each of the questions selected for the Table:
By default, there is a row for each response and a column for each question, but you can transpose rows and columns
using the Presentation tab in the Properties sidebar.
Since there is a row (or column) for every selected response, unless you have a very small data set, you are unlikely to
want to display all the survey responses in the Table, since they will probably overflow the Table (shown by small blue
crosses).
See Splitting tables, page 426, for how to display large Tables across several pages in a presentation.
However, Tables can be useful for displaying filtered sets of responses (see Data sources for graphs and tables,
page 393). For example, in the picture above, a filter has been used so that only responses from females are included.
If you do not want to restrict the responses included, you can use a Distribution or Statistics table to give summarised
information for larger data sets.
Statistics tables
A Statistics table shows a selectable group of statistics for the chosen questions. In the table, questions are placed in
rows and statistics in columns by default, but you can transpose rows and columns using the Presentation tab in the
Properties sidebar.
For more information on the statistics, see Appendix A, Statistics and Analysis Glossary.
Statistics tables are most useful for numeric questions:
Some statistics are also useful for multiple choice questions, provided the answers form a scale, and for range multiple
choice questions:
If you have given scores to the answers for a multiple choice question, they will be used to calculate the statistics.
Otherwise, the default scores (1 for the first answer, 2 for the second, etc) will be used.
If required, you can show the means of the values in Mean and Mean (%) columns by ticking Show totals on the
Presentation tab in the Properties sidebar.
Presentation tables | 413
Statistics tables are not useful for text questions, ordered choice questions or multiple choice questions that do not
form a scale.
Distribution tables
A Distribution table displays a table for a single question (or a selection of questions from a single question table),
showing the distribution of answers broken down by some category into ranges (see Ranges, page 396).
The distribution in each range can be shown by one or more of the following statistics:
* Frequency – the number of responses with answers within the range
* Percentage – the number of responses with answers within the range as a percentage of the total number of
responses selected for the table
* Adjusted percentage – the number of responses with answers within the range as a percentage of the number
of selected responses that gave an answer to the question
* Cumulative frequency – the number of responses with answers within the range or any lower range (thus the
final cumulative frequency is the number of responses)
* Cumulative percentage – the cumulative frequency as a percentage
* Cumulative adjusted percentage – the cumulative frequency as an adjusted percentage.
For ordered choice questions, the Distribution table can show a ‘popularity’ analysis instead of a selection of these
statistics – see the next section.
In the example above, the table shows the frequency and percentage of responses giving each of the answers. Note
that the total percentage is not 100% because one of the respondents failed to answer that question. If adjusted
percentage had been used, the total would have been 100%.
If questions belong to a question table, you can include a selection of the questions in the Distribution table (the
example below just shows frequency, but you can include other statistics as in the above example):
When more than one question is included, you can choose whether to arrange the questions on the x-axis, as in the
picture above, or on the y-axis:
414 | Chapter 15: Presenting Data
You can achieve a similar, but not identical, effect by transposing rows and columns using the Presentation tab in the
Properties sidebar. For example, transposing the rows and columns in the second example gives:
Note that although the questions are now arranged on the y axis, transposing rows and columns is not the same as
changing whether questions are on the x-axis.
The examples given so far have shown a total row at the bottom of the table (except where this becomes a column
when the table is transposed). You can hide this or show a range of other calculations on the rows and/or columns –
see Showing totals and other calculations, page 416, for details.
Popularity analysis
For ordered choice questions, the Distribution table can show a ‘popularity’ analysis instead of the statistics described
in the previous section. A frequency analysis, for example, shows the number of responses choosing each possible
ranking for each possible alternative. This can be cumbersome and difficult to interpret. For example, if respondents
are asked to rank ten items in order of preference, a frequency Distribution table will have 100 rows showing the
number of people who ranked the first item first, then the number who ranked it second, and so on until the last
(hundredth) row showing the number of people who ranked the last item last.
A popularity analysis combines the rankings for each item to give an overall popularity score. It is then easy to
compare the popularity of the different items.
Popularity is calculated as follows:
A
Each option is given a score by taking the ranking value given to it away from the number of options plus
1. For example, if the question asks respondents to put four options in order of preference, the top
preference (1) will be given a score of (4+1)-1 = 4. The lowest preference (4) gives a score of (4+1)-4=1.
If an option is not given a ranking, it is given a 0 score. This procedure means that the more popular an
option the higher its score.
B
The scores for each option are then totalled for all the selected responses to give a total score for each
option.
C
The total score for each option is then divided by the total number of responses to give an average score
for each option. This average score will lie between 0 and the number of options (0–4 in the example
above) – a popularity of 0 means no respondents ranked the option; a popularity equal to the number of
options means all respondents gave it the top ranking.
Presentation tables | 415
The following example shows a popularity analysis in a Distribution table and a horizontal bar graph:
Generally speaking, you should work with the relative sizes of the popularity scores rather than their absolute sizes.
For example, the absolute popularity results will be diluted if respondents do not rank all the options: either because
they are not asked to, or because they have failed to do so.
KeyPoint automatically removes from the popularity analysis any responses that have not given any answer to the
question.
Showing totals and other calculations
By default, Distribution tables show a total row at the bottom of the table. However, you can hide this or show a
range of other calculations on the rows and/or columns if required.
To hide or show the total and other calculations on a Distribution table:
1
Display the Properties sidebar – see Displaying the Properties sidebar, page 195.
2
On the Presentation tab, tick Show totals.
To choose which totals and other calculations to show on a Distribution table:
1
On the Questions tab in the Properties sidebar, click Calculations to display the Calculations for
Distribution Tables dialog box.
2
Tick the boxes for the calculation you want to display for rows and columns.
3
Click OK to return to the Properties sidebar.
416 | Chapter 15: Presenting Data
4
Click Apply to carry out the change.
Cross-tabulation tables
A Cross-tabulation table, or Crosstab, allows you to investigate the correlation between the answers given to two
different questions. The answers may be treated individually, or they may be grouped together in categories or ranges
(see Ranges, page 396).
You can create a Crosstab with more than two questions, but the correlations are still performed pairwise – see
Crosstabs with more than two questions, page 418, for more details.
For example, the following Crosstab was compiled to see if there was any correlation between the weight of
respondents and whether they smoke:
The first (shaded) column shows the possible answers for the first question (in general they could be ranges or
categories of answers). The first (shaded) row shows the possible answers (in this case divided into ranges) for the
second question. Each cell in the table corresponds to the combination of one possible answer to the first question
and one possible answer to the second question. In this example, in each cell:
* The first figure shows the frequency. This is the number of responses giving that combination of answers to the
two questions. In the example, the first cell shows that there were nine responses from smokers weighing less
than 54 kilos.
* The second figure shows the percentage by row. This is the number of responses giving that column and row
answer as a percentage of all those giving that row answer. In the example, the first cell shows that 23% of
smokers (the row answers) weighed less than 54 kilos (the row and column answer).
* The third figure shows the percentage by column. This is the number of responses giving that column and row
answer as a percentage of all those giving that column answer. In the example, the first cell shows that 47% of
those weighing less than 54 kilos (the column answers) were smokers (the row and column answer).
KeyPoint allows you to show any combination of these figures in a Crosstab using the Calculations page in the wizard
when you create the table or the Results tab in the Properties sidebar after you have created it.
Your chosen calculations are shown on separate lines within each cell.
In addition, you can also display the following statistics showing the distribution of answers in each column:
Mean Score
Standard deviation
Standard error
Presentation tables | 417
These statistics are shown at the bottom of each column in the Crosstab.
Finally, you can display the following statistics for the table as a whole showing the degree of correlation or
independence between the answers to the two questions:
Expected Cell Frequency
Chi Square
X2 Probability
Cramer’s V
Contingency Coefficient
Phi Coefficient
These statistics apply to the whole table and are shown at the bottom of the final total column.
KeyPoint allows you to show any combination of these statistics in a Crosstab using the Statistics page in the wizard
when you create the table or the Stats tab in the Properties sidebar later.
See Appendix A, Statistics and Analysis Glossary, for more information about these statistics.
The examples in this section have been based on a multiple choice question and a numeric question, but you can use
any type of question in a Crosstab.
Crosstabs with more than two questions
You can choose more than one question for the columns and/or rows in a Crosstab. If you do, the Crosstab shows
correlations between the answers to each row question and the answers to each column question taken in pairs – in
effect, you create multiple two question Crosstabs, though row questions are handled slightly differently from column
questions, as shown by the following examples:
* One column question and three row questions: there will be three separate Crosstab tables, one for each row
question
* Two column questions and one row question: there will be one Crosstab table, with the columns for the first
column question followed by the columns for the second column question (in effect, these are two Crosstab
tables side-by-side)
* Two column questions and three row questions: there will be three Crosstab tables, one for each row
question. In each of these tables, the columns for the first column question will be followed by the columns
for the second column question. In effect, there are six Crosstab tables: three sets of two Crosstab tables
side-by-side.
This means that when you create a Crosstab, several tables may be produced, each of which will have one row
question, but may contain several column questions. This means that in the Questions tab of the Properties sidebar
and in the wizard pages if you use the wizard to edit an existing Crosstab, you can select several column questions,
but only one row question – selecting a second row question deselects the first.
418 | Chapter 15: Presenting Data
Pivot tables
A Pivot table allows you to investigate possible dependencies between the answers given to different questions in the
survey. For example, in a health survey with questions about weight, gender, exercise and smoking, you could
investigate how weight might be related to a combination of the other factors, such as gender and the amount of
exercise taken:
Or, as another example, gender and smoking:
You can also split the answers to one question using the answers to other questions in a Pivot table, so you could
combine the above analyses to investigate how exercise might affect weight separately for male and female smokers
and non-smokers:
However, what makes Pivot tables particularly useful is the ease and speed with which you can create and switch
between these different views of the data – see Working with Pivot tables, page 422.
Pivot tables have three components: column questions (Smoking and Gender in the last example); row questions
(Exercise in the example); and data questions (Weight in the example).
Presentation tables | 419
Row and column questions can be closed questions, as in the examples so far, or open questions with the answers
divided into ranges. For example, in the following example Age is a numeric question for which the answers have
been divided into 6-year long ranges:
For the data question(s) you can choose:
Sum
Count
Min
Max
Mean
Standard deviation
Standard deviation of the
population
Variance
Variance of the population
If you choose ‘Count’, the table shows the number of responses giving some answer to the data question for each
combination of answers to the row and column questions. The other options (sum, min, max etc.) are only really
suitable for numeric questions. The other statistics use the value (or score for multiple choice questions) given for the
data question in the responses.
You can only choose one statistic for each data question. However, you can choose more than one data question for
the Pivot table, so you can choose the same question several times and select a different statistic for each. For
example:
420 | Chapter 15: Presenting Data
The Pivot Table Wizard
To create a Pivot table using the wizard:
1
Click the Pivot Table button on the Designer Tools sidebar.
2
Click on the Presentation form to create an automatically sized table at that position.
3
The Pivot Table Wizard opens: click Next in the introductory page of the wizard, if it is displayed.
4
In the Data page, choose the source of the data (see Data sources for graphs and tables, page 393) and
click Next to continue.
5
In the Column questions page:
a
In the left-hand list box, click on the first question you want to use as a column question to select it.
b Click the add question button (or just double-click on the question) – the question will be added to the
right-hand list box.
c
Repeat steps a and b for any other questions you want to use as column questions.
The order of the questions in the right-hand list box determines the order in which they will appear
split in the table – you can change the order of the questions in the list using drag and drop.
You can remove a question from the right-hand list box by clicking on it to select it and then clicking
the remove question button:
.
d Click Next to continue.
6
In the Row questions page, select the question(s) whose categories you want to use as rows in the Pivot
table using the same procedure as in Step 5.
Presentation tables | 421
Click Next to continue.
7
In the Data questions page, select the question(s) for which you want to show answer data in the Pivot
table cells using the same procedure as in Step 5.
Click Next to continue.
8
In the Column Ranges page, define the categories you want to use as the columns for each question (see
Ranges, page 396) and click Next to continue.
9
In the Row Ranges page, define the categories you want to use as the rows for each question (see Ranges,
page 396) and click Next to continue.
10
In the Statistics page, choose the statistic you want to calculate for each data question in the Pivot table
(see previous section).
Click Next to continue.
11
In the Update Method page, choose whether to update automatically or lock the data in the table (see
Updating and locking graphs and tables, page 401).
Click Next to continue (unless you have chosen not to display final pages in wizards).
12
Click Finish to place the table on the Presentation form.
Working with Pivot tables
This section shows you how you can work interactively with a Pivot table to examine and analyse the response data
along different dimensions. The ease and speed with which this can be done is what makes Pivot tables particularly
useful.
To work interactively with a Pivot table:
1
Click on the Pivot table to select it.
2
Display the Properties sidebar – see Sidebars, page 103, for how to display and work with sidebars.
422 | Chapter 15: Presenting Data
3
If it is not already displayed, click on the Definition tab to display the Definition page:
This section concentrates on how to use the Properties sidebar Definition page since this page only appears for Pivot
tables, and is the page that makes working with Pivot tables to produce alternative views of the data so quick and
easy. The controls on the other pages in the Properties sidebar are self-explanatory or concerned with features that
are common to most or all types of table and graph and are described in Common features of graphs and tables,
page 392, and the next section, Editing tables.
The Properties sidebar Definition page allows you to change the column, row and data questions interactively and see
the results immediately.
To add a new column, row or data question:
Drag the question from the Available questions list and drop it in the Column, Row or Data box.
Or:
Right-click on the question in the Available questions list and choose Add to column, Add to row or Add
to data.
You can also move questions between the Column, Row or Data boxes by drag and drop or by right-clicking on the
question and choosing Add to column, Add to row or Add to data.
Presentation tables | 423
To change the order of questions in the Column, Row or Data boxes:
Drag the questions within the box and drop them in the required positions.
To remove a column, row or data question:
Drag the question from the Column, Row or Data box and drop it in the Available questions box.
Or:
Right-click on the question in the Column, Row or Data box and choose Delete.
To change the categories you want to use as the columns or rows for a column or row question:
1
Right-click on the question in the Column or Row box and choose Edit.
2
Use the Define ranges for dialog box to define the categories – see Ranges page 396.
To change the statistic used for a data question:
1
Right-click on the question in the Data box and choose Edit.
2
Use the Choose statistics dialog box and select the required statistic.
Editing tables
When you create a table using a table wizard, it is placed at the position you click using the current style definitions
(see Presentations and the Style Library, page 405). After you have created a table, you can edit its contents and
appearance in several ways.
Moving and resizing tables
You can move and resize a presentation table in the same way as you can move and resize objects on a Design form;
for details, see Resizing, moving and copying objects, page 190.
When Auto split mode is set (see Splitting tables, page 426), you cannot change the height of a table by dragging the
drag handles on its outline. However, the height of the table will change if you change the height of the rows (see the
following section) even if Auto split mode is set.
If you increase or decrease the height and/or width of a table, the height of each row and/or the width of each
column will change proportionately. The table contents will never overflow the table’s boundaries, so if you make the
table too small, some text may be hidden so you may need to reduce the font size (see Formatting table contents,
page 427) to make sure all text is visible.
You can reset the overall size of a table, and its column widths and row heights, to the default settings by right-clicking
on the table and selecting Best fit from the pop-up menu – see Best fit mode, page 425.
424 | Chapter 15: Presenting Data
Resizing table columns and rows
To resize a column or row in a table manually:
1
Double-click in the table to select it for editing. The table appears with red ‘handles’ at the corners and on
the sides.
2
Move the pointer over the column or row boundary you want to move. The pointer changes to a double
line with a double arrow:
3
Either:
* To resize all columns or rows, drag the column or row boundary to the new position.
Or:
* To resize an individual column or rows, hold down Shift and drag the column or row boundary to the
new position.
You can reset the overall size of a table, and its column widths and row heights, by right-clicking on the table and
selecting Best fit from the pop-up menu – see next section.
Best fit mode
When you create a table, it is sized automatically and set in horizontal and vertical Best fit mode. This means, for
example, that if you change the font size (see Formatting table contents, page 427), the table will be automatically
resized to fit the new text size.
Best fit mode does not by itself automatically ensure that all data is shown since the table may become too big to fit
on the page – see Splitting tables, page 426, for how to make a table flow onto the next page automatically.
If you change the width of a table (by adjusting the table itself or the columns within the table), horizontal best fit
mode will be turned off for the table so the width will not change automatically if you adjust the font. Similarly, if you
change the height of a table (by adjusting the table itself or the rows within the table), vertical best fit mode will be
turned off for the table so the height will not change automatically if you adjust the font.
To resize a table automatically and turn Best fit mode on for it again:
1
Right-click on the table.
2
Choose Best fit.
Choosing Best fit overrides any manually set column and row sizes and sets horizontal and vertical Best fit mode on
for the table.
Presentation tables | 425
Splitting tables
If a table is too big to fit on a single page, you can split it across two or more pages. You can also split a table on a
single page: for example, you could split a long narrow table so that the two parts are side-by-side on the page.
Note, however, that you cannot split Pivot tables.
To set a table so that it is split automatically across pages:
Right-click on the table and select Auto split.
When Auto split is set, the table will be automatically extended downwards so that all the contents are shown. If in
doing this it reaches the bottom margin of the page, the table will be continued at the top of the next page: if there is
no next page, a new one will be added; if there is already a next page, the continuation table will be placed over any
existing content. The table will be split as many times as required to display all its contents.
Although the new parts of the table are placed on following pages, you can drag them back to the original page: for
example, to display a long narrow table in two parts side-by-side on the same page.
While Auto split is set on for a table, any changes you make that affect the space required to display all the data will
be automatically adjusted to accommodate any changes you make. For example, if you increase the font size, the
height of the final split will be increased, and if necessary, a new page added and the table continued onto it. If you
decrease the amount of space required, for example by filtering the data, the height of the final split will be
decreased, and if necessary, it will be removed (but the page it was on will remain).
When you create a Table, Auto split is set on by default; when you create the other types of table, it is set off by
default.
To split a table manually:
1
Right-click on the table and select Split table.
2
Move the pointer to the position you want to split the table (a horizontal line will appear to show you
where it will be split) and click.
To merge two parts of a split table, delete the second part and increase the height of the first part. No data is lost
when you delete the second or later parts of a table; when you delete the first part, all parts will be deleted.
When a table is split you can change the height of any of the individual parts (but if you try to change the height of
the final part of a table with Auto split set, it will be readjusted automatically so that all the data is still displayed).
However, the width of the table, and its columns (see next section) is fixed by the settings in the first part of the table.
Similarly, changes to the font, background, frame, shadow, etc, should be applied to the first part of the table.
426 | Chapter 15: Presenting Data
Formatting table contents
You use the Regions tab in the Properties sidebar to format the contents of the selected table (see Sidebars, page 103,
for how to display and work with sidebars):
(The Highlight and Shadow buttons are only enabled if Show 3D shading is ticked.)
To choose which part of the table to format, either:
Click on the required region(s) in the Region list. You can select more than one region in the usual way by
holding Shift as you click to extend a selection range, by holding Ctrl as you click to add to a selection or
by clicking All to select all the regions.
Or, to select a single region:
1
Double-click on the table – the drag handles will become red.
2
Click in the region you want to select.
The selected region(s) will be highlighted in the table.
To set the colour of elements in the selected region(s):
Click on the colour button for the element to display a standard Windows colour dialog box (you can also
set the Text colour using the Font dialog box – see instructions later in this section).
Presentation tables | 427
To set the alignment of the text within the selected region(s):
Click on the required Align and/or V. Align button.
To choose which gridlines to display within the selected region(s):
Click on the lines in the Gridlines graphic:
Click once to remove a line; click again to restore it.
To set the text margins inside the selected region(s):
Set the required values in the Margins spin boxes.
Because of HTML limitations, text margins will have no effect when you generate a web survey.
To set the text properties for the text in the selected region(s):
1
Click the Font sample box to display a standard Windows Font dialog box to set font properties.
2
Tick Word wrap if you want overflowing text in the selected region to flow onto a new line.
Sorting questions in Tables
When a Table is selected the Properties sidebar has a Sort tab:
428 | Chapter 15: Presenting Data
This allows you to sort the Table according to the answers given for up to three questions. When you have selected a
column in the first drop-down list box, the second drop-down list box is enabled so that you can choose a second
sorting column if required, and so on.
The results will be sorted by the first column, and then any results with identical values for the first column will be
sorted by the second column, and so on.
Graphs
In KeyPoint you can create the following types of graph (chart):
* Bar
* Donut
* Horizontal Bar
* Area
* Line
* Radar
* Point/Scatter
* HiLo
* Pie
* BoxPlot
For further information and examples of the different types of graph, see Graph styles, page 431.
Graphs provide a powerful tool for analysing and presenting data. They allow you to show how one quantity
(sometimes called the dependent or y variable) varies as you change another quantity (sometimes called the
independent or x variable). For example, you could plot the number of responses giving each of the answers to a
multiple choice question – the number of responses is the dependent variable, the question options form the
independent variable.
In the previous example, the dependent variable is just the number of responses. You can also plot a graph in which
the dependent variable is derived from the answers to a different question. For example, suppose your survey has
questions asking respondents about their age and income. Using the responses, you can use KeyPoint to plot a graph
of average income against age:
Graphs | 429
In this example, the independent variable is age, which has been divided into ten-year ranges. The dependent
variable is the average income calculated from the answers to the income question. The graph shows, for example,
that the group with the highest average income is the 50–60 group.
If you had also asked the question “How much do you put aside each year in savings?”, you could add a second plot
to the graph showing savings against age:
In the example above, the graph has two ‘series’: age × average income; age × average savings.
Instead of just adding the results from another question as a separate plot, as in the previous example, you can use
the answers to another question to break down or ‘split’ the results. For example, if the survey also asks for the
respondent’s sex, you can plot income against age split by gender to compare separately for male and female
respondents how average income varies with age:
In the graph above, the lighter bars represent one series, the darker bars another series. The graph shows that the
average income of male respondents in the sample is higher than that of female respondents in all age groups except
the 20–30 and 70–80 groups.
The examples covered in this section just give you a flavour of the power and flexibility of the KeyPoint graph
functions. The Graph Wizard takes you through the process of creating a graph, but you can also customise graphs
430 | Chapter 15: Presenting Data
once they have been created. Graph-specific features are described in the next section, together with a number of
sections describing changes you can make to graphs after you have created them, using the Properties sidebar.
KeyPoint allows you to customise the appearance of your graphs in many different ways using the Properties sidebar.
Generally speaking, the effect of these settings is self-explanatory, or easily discovered with a little experimentation, so
they are not covered in detail in this manual.
Graph styles
This section gives brief descriptions and examples of the different types of graph you can plot in KeyPoint.
Bar graph
A bar graph uses a rectangle (or block in three dimensions) for each answer (or category of answers) on the X axis. The
height of the rectangle shows the corresponding value of the dependent variable for that answer or category.
In the following example, the independent variable is the possible answers given to a question about bar food quality
and the dependent variable is the number of respondents giving each answer (frequency):
Horizontal bar graph
A horizontal bar graph is just a bar graph where the bars are arranged horizontally rather than vertically.
In the following example, the independent variable is the possible answers given to a question about the reason for
visiting a hotel and the dependent variable is the number of respondents giving each answer, as an adjusted
percentage:
Graphs | 431
Point/scatter graph
In a point graph, each value of the dependent variable is plotted as a point above the corresponding independent
variable value.
In the following example, the independent variable is the height of respondents and the dependent variable is their
weight:
A scatter graph is a point graph with the addition of a trend line:
The trend line is the ‘best’ straight line that can be drawn relating the points in the graph. To be precise, the trend line
is the linear least squares fit.
Line graph
A line graph is similar to a point graph, except that the data points are joined together by straight line segments to
form a continuous line (or ribbon in three dimensions).
The following example shows the distribution of ages (number of respondents within age bands) in the sample:
432 | Chapter 15: Presenting Data
Area graph
An area graph is similar to a line graph, except that the area underneath the line is filled in.
The following example shows the same results as in the line graph example:
Pie graph
In a pie graph the dependent variable values are represented as fractions of the total. The total is represented as a
complete circle (pie) and the proportion taken by each dependent variable value by a slice of the appropriate size.
In the following example, the independent variable is the possible answers given to a question about the popularity of
thrillers and the dependent variable is the proportion of responses giving each answer (you can show the absolute
numbers in a legend, as in the picture, or in labels):
Donut graph
In a donut graph the dependent variable values are represented as fractions of the total. The total is represented as a
complete ring and the proportion taken by each dependent variable value by a slice of the appropriate size. A Donut
graph is, essentially, a pie graph with a hole in the centre.
Graphs | 433
The following example shows the same results as in the pie graph example:
Radar graph
In a radar graph the independent variable is represented by the angle around a central point and the dependent
variable is given by the distance out from that point. You can think of it in terms of a wheel with spokes: each spoke
represents a value of the independent variable; the dependent variable values are then represented by distance along
the spokes. Once the data points are plotted, they are joined to each other by straight lines.
In the following example, the independent variable is the date at which respondents stayed at a hotel (broken into
month-long ranges), and the dependent variable, shown by the distance from the centre, is the number of responses:
434 | Chapter 15: Presenting Data
HiLo graph
A HiLo graph is type of bar graph for use with numeric questions or the score values of multiple choice questions. The
HiLo graph shows the spread of answers between the minimum and maximum values given by respondents.
In the following example, the independent variable is the gender of the respondents and the dependent variable is
their weight. The graph shows how the range of weights differs for the male and female respondents.
Box plot
A box plot (which is also sometimes called a box-and-whisker diagram) is a graph providing a concise summary of the
distribution of values in a set of data. The box plot shows:
* the median value
* lower and upper quartile values
* smallest and largest values (excluding outliers – see below example picture for a definition)
* individual mild and extreme outliers.
In the following example, the box plot shows information about the weight distributions in a population split by
gender.
* The dashed horizontal lines within the boxes show the median values: for example, for males this is 93kg and
57kg for females
* The boxes show the upper and lower quartiles: for males these are 81kg and 98kg, respectively, and 55kg and
62kg for females
Graphs | 435
* The whiskers show the smallest and largest values (excluding outliers): for males these are 70kg and 112kg,
respectively, and 49kg and 64kg for females
* The box plot also shows two outliers: a mild outlier of 50kg in the male distribution and an extreme outlier of
84kg in the female distribution.
The limits for outliers are defined in terms of the interquartile range. This is the difference between the lower and
upper quartiles – in other words, the length of the box. In the example picture, the interquartile range is (98-81) =
17kg for the males and (62-55) = 7kg for females. An extreme outlier is then defined as a value lying more than 3
times the interquartile range below the lower quartile or above the upper quartile; a mild outlier is a value lying
between 1.5 and 3 times the interquartile range from the quartiles.
Therefore, for the example, the outlier limits are 25.5kg and 51kg for males and 10.5kg and 21kg for females. This
means that the 50kg result for males, which lies 31kg below the lower quartile is a mild outlier, but the value of 84kg
in the female distribution is an extreme outlier since it is 22kg above the upper quartile.
You can create a box plot for a multiple choice question to view the distribution of answers. The values used for the
box plot are the scores for each answer: either user-defined scores, if there are any, or the default scores otherwise.
Defining plots
You use the Graph Wizard’s Plot definition page to choose and set the properties of the dependent and independent
variables for a plot, and whether it should contain one or more series.
The Plots tab in the Properties sidebar has the same controls, allowing you to change these settings for an existing
graph, but also has some additional controls – see Adding and working with multiple plots, page 440.
Independent variable
button
Splits button
Dependent variable
button
436 | Chapter 15: Presenting Data
The layout of controls in the Plots tab is slightly different from that shown in the picture of the wizard: the following
descriptions and instructions refer to the layout in the Wizard, but you should not have any difficulty in locating the
relevant controls in the Plots tab.
You cannot split a pie or donut graph, so the middle button shows Not Applicable when a pie or donut graph is
selected. There is only a single variable for HiLo and box plot graphs – you use the top button to select the variable
and the bottom button shows Not Applicable.
The Splits button, when available, is always labelled Split by; the names of the other buttons in the panel on the
left-hand side depend on the type of graph selected, but play essentially the same roles for all graph types:
Graph style
Independent variable
Dependent variable
Bar graph
Bar of
Height of
Horizontal bar graph
Bar of
Length of
Line and Point graphs
X points
Y points
Pie
Pie of
Slice
Donut
Pie of
Slice
Area
X area
Y area
Radar
Radar of
Radius
HiLo
HiLo of
N/A
Box plot
Box of
N/A
The process of defining the plot consists of the following stages:
1
Click the Independent variable button (top button in left-hand panel of wizard) if it is not already selected
– it is selected by default, so you will only need to do this if you have already clicked on one of the other
buttons.
If you are defining a box plot or HiLo graph, go straight to Step 3.
2
To choose what sort of data to display in the graph, click on:
* Breakdown to plot the values taken by a dependent variable (which you will select in Step 6) for
values of an independent variable (which you will select in Step 3)
* Statistics to display a selection of statistics describing the responses to a question (which you will select
in Step 3)
* Values to display all the values given in response to a question (which you will select in Step 3).
3
To choose the independent variable (x-axis) question(s):
a
Make sure the Independent variable button (top button) is still selected.
Graphs | 437
b Choose the question(s) to use as the independent variable(s) (see Choosing questions for tables and
graphs, page 395).
c
If you have selected questions in a question table and want to change the labels used to identify the
questions in the plot:
i
Click Question Names to display the Edit question names dialog box:
ii
Click in the Display name column for each question name and edit the name to be used as a label.
d If you are creating or changing:
* a Breakdown graph, go to Step 4.
* a box plot or HiLo graph, go to Step 5.
* a Values graph, you have now defined the plot. If you are using the wizard to create or change the
graph, click Next to go on to the next step. If you are using the Properties sidebar to change the
graph, the changes will be carried out automatically.
* a Statistics graph:
i
Click the Dependent variable button (bottom button) to display a list of statistical functions in the
right-hand panel: see Appendix A for more information.
ii
Click the tick boxes to choose which functions to plot. You can only select one function for a pie or
donut graph; you can select as many as you require for other types of graph.
iii You have now defined the plot for a Statistics graph. If you are using the wizard to create or
change the graph, click Next to go on to the next step. If you are using the Properties sidebar to
change the graph, the changes will be carried out automatically.
The following step only applies if you chose Breakdown at Step 2; go to Step 5 if you are defining a box plot or HiLo
graph; the process of defining the plot is complete in all other cases.
4
To specify the properties of the independent variable:
a
Make sure the Independent variable button (top button) is still selected.
b If required, create categories or ranges for the answers to the question (see Ranges, page 396).
You can choose whether to include or exclude the (Not Answered) category using the Display ‘Not Answered’ values in
distribution analysis tick box on the Analysis page in the Options (Tools menu) dialog box.
438 | Chapter 15: Presenting Data
c
If you selected more than one question in a question table to form the independent variable, choose
whether to plot the questions or the categories on the x-axis (see Questions on the x axis, page 399).
d If required, choose the ordering of the independent variable categories along the axis (see Sorting
answers, page 399).
5
If you want to split the plot using the answers given to another question:
You cannot split a pie or donut graph plot, or the series of plots created if you selected more than one question from a question
table at Step 3.
a
Click the Split by button (middle button).
b Choose the question you want to use to split the plot from the centre panel.
If you are creating a box plot or HiLo graph, the process of defining the plot is now complete.
The remaining steps only apply if you chose Breakdown at Step 2.
6
Click the Dependent variable button (bottom button).
* Go to Step 7 if you want the dependent variable to be derived just from the number of responses to
the independent variable question
Step 7 is the only option available if you are plotting a pie or donut graph or if you chose more than one question from a question
table at Step 3.
* Go to Step 8 if you want to choose a different question to use as the basis for the dependent variable.
7
To base the dependent variable on the number of responses to the independent variable question:
a
Leave the Independent variable question selected in the centre panel.
b Click the tick boxes in the right-hand panel to choose which statistical functions to plot. You can
only select one function for a pie or donut graph or split; you can select as many as you require for
other types of graph.
For a split, you can choose one of: frequency, percentage by row or percentage by column – see Cross-tabulation tables,
page 417, for more details. Otherwise, you can choose one or more of: frequency, percentage, or adjusted percentage, or
cumulative frequency, percentage, or adjusted percentage.
You have now defined the plot for a Breakdown graph using the number of responses to the independent
variable question as the basis for the dependent variable. If you are using the wizard to create or change
the graph, click Next to go on to the next step. If you are using the Properties sidebar to change the graph,
the changes will be carried out automatically.
8
To base the dependent variable on the answers given to a different question:
a
Select the question you want to use for the dependent variable in the centre panel.
b In the right-hand panel, tick a box to choose whether you want to plot the count, sum or average
of the answers to this question.
You have now defined the plot for a Breakdown graph using the answers given to a different question as
the basis for the dependent variable. If you are using the wizard to create or change the graph, click Next
to go on to the next step. If you are using the Properties sidebar to change the graph, the changes will be
carried out automatically.
Graphs | 439
Adding and working with multiple plots
The Plots tab in the Properties sidebar for a graph has the same controls as the Graph Wizard’s Plot definition page,
allowing you to change these settings for an existing graph. It also has the following additional controls for working
with multiple plots:
Click the graphic button to
choose the style for the plot
Click Add to add a new plot
Click Delete to delete the selected plot
Select a plot from the Plot drop-down list: the other
choices you make in the tab will be applied to this plot
Editing graphs
The Defining plots section, page 436, described how to change the definition of the plots in a graph using the Plots
tab in the Properties sidebar. This section describes how you can change other graph features and properties.
Changing the properties of plot series
The Series tab in the Properties sidebar for a graph allows you to set the options for each of the series in a graph:
Click here to change the
style of the selected series
Click an arrow button to change the order in which the
series are plotted: click the up-arrow to move the
selected series forward in the ordering; click the
down-arrow to move it back
Click here to select a series from the drop-down list: the
other choices you make in the tab will be applied to this
series
440 | Chapter 15: Presenting Data
The following buttons allow you to display three different sets of controls:
* General: see the picture above and the following paragraphs for more details.
* Style: these controls allow you to customise how the selected series is plotted. The controls available depend
on the style of plot, but are self-explanatory, so are not described in detail.
* Format: these controls allow you to choose whether and how labels and/or values (marks) should be shown
on the series elements; and where the horizontal and vertical axes should be shown. The controls are
self-explanatory, so are not described in detail.
You can use the general controls as follows (the availability of some settings depends on other selections, such as the
type of graph):
* Visible: choose whether the selected series should appear in the graph
* Title: edit the title for the selected series (the title appears in the legend, if it is displayed)
* Values sorting order: choose whether to sort the elements according to the dependent variable values (this
option is not available for multi-series graphs, split graphs or series in which the dependent variable is derived
from other graphs).
Setting a new values sorting order overrides any sorting set on the Plots tab. On the other hand, setting a new
sort order on the Plots tab overrides any existing values sorting order.
* Colour each: choose whether each series element should be plotted in a different colour or the same (solid)
colour (the Colour button below the Colour each tick box is hidden when Colour each is selected)
The colours used when you choose Colour each are set in the Style Library – for more information, see The
Colour picker, page 405. Unlike other style definitions, changes to the graph colours in the Style Library affect
existing graphs, not just newly created ones.
* Colour button: choose the colour used to fill the series elements (the Colour button is hidden when Colour
each is selected)
* Border: choose whether each element in the series should be plotted with a border, and click Edit to display
a dialog box so that you can set the border’s properties
* Pattern (not pie or donut graphs): choose the pattern used to fill the series elements
* For a Solid Pattern and a Rectangle style (click Style to set the style), choose whether to use a colour
Gradient, and click Edit to display a dialog box so that you can set the gradient’s properties.
See Changing the colour of series elements, page 443, for how to change the colour used for an individual series
element, and for an alternative method of changing the solid colour.
Graphs | 441
Changing the graph layout
The Graph Layout tab in the Properties sidebar for a graph allows you to customise aspects of the overall appearance
of the graph:
The four buttons in the top panel allow you to display three different sets of controls:
* General: see picture above
Generally speaking, if your chart has more than one series you will want to include a legend identifying the
series, but if there is only one series, the legend will only have one item, so you will probably want to hide it.
This is what you get from the default settings of the Position drop-down list box and Hide for single series
tick box. However, you can override these settings by choosing (none) from the Position drop-down list box
to hide the legend in all cases, or by clearing the Hide for single series tick box to show the legend for single
series plots.
* Perspective: these controls allow you to choose between a two and three-dimensional display, and to set the
depth and viewpoint of the three-dimensional display
* Axes: these controls allow you to set the properties of each of the axes
The Labels drop-down list box allows you to choose to display the axis labels horizontally, vertically or
diagonally.
The Axes settings have no effect on pie or donut graphs.
* Background: these controls allow you to set the fill used for the complete graph area, including the possibility
of using an image from an external file.
All the other controls in the Graph Layout tab are self-explanatory, so are not described in detail.
442 | Chapter 15: Presenting Data
Moving and resizing graphs
You can move and resize/reshape the whole graph in the same way as you can move and resize objects on a Design
form; for details, see Resizing, moving and copying objects, page 190.
You can also move and resize/reshape elements within the graph: you can move and resize/reshape the plot area (the
plot itself plus axes) and the legend, and you can move the title.
To move and resize/reshape elements within the graph:
1
Double-click on the graph so that it is selected and the drag handles are red.
2
Click on the element you want to move or resize so that it is selected and has blue drag handles.
3
Either:
Drag the element to its new position.
Or (except for the title):
Drag the drag handles to resize/reshape the element.
Changing text, fill, border and shadow properties of graph elements
To change the border and shadow properties of the graph, and all text elements within the graph text:
1
Click on the graph so that it is selected and the drag handles are blue.
2
Use the Format Palette sidebar to set the graph’s properties (see Text formatting controls, page 150, and
Object formatting controls, page 151).
To change the fill, border, shadow and text properties of an individual element within the graph:
1
Double-click on the graph so that it is selected and the drag handles are red.
2
Click on the element whose properties you want to change so that it is selected and has blue drag handles.
3
Use the Format Palette sidebar to set the graph element’s properties (see Text formatting controls,
page 150, and Object formatting controls, page 151).
Not all properties apply to all elements. For example, the axis title has text properties, which you can set
independently of other graph elements, but does not have fill, border or shadow properties.
Changing the colour of series elements
You can use the Series tab in the Properties sidebar (see Changing the properties of plot series, page 440) to choose
how the series elements (bars, points, lines, segments etc) should be coloured. You can choose:
* to use the same colour for all elements in a series, and choose which colour to use (see later in this section for
another way of choosing the colour for a complete series), or
* to use a different colour for each element.
When you choose the second option, the colours are taken from the settings in the current style (these settings are
also used when the graph is created). You can change the colours used for new and existing graphs by editing the
style (see The Colour picker, page 405).
However, you can also change the colour of an individual series element in a graph.
Graphs | 443
To change the colour of an individual element in a graph:
1
Double-click on the graph so that it is selected and the drag handles are red.
2
Shift-click on the element you want to change, to display a standard Windows colour selection dialog box.
3
Select the required colour for the element, and click OK to close the dialog box and set the colour.
If the legend is displayed, you can use it to change the colour of an individual element in a single series plot, or all the
elements in a series for a multi-series plot (this is equivalent to changing the Solid colour in the Series tab in the
Properties sidebar):
1
Double-click on the graph so that it is selected and the drag handles are red.
2
Shift-click in the legend on the key for the element or series you want to change to display a standard
Windows colour selection dialog box.
3
Select the required colour for the element, and click OK to close the dialog box and set the colour.
You can also change some aspects of the colouring using the Properties sidebar (for example, you can colour all the
elements with the same colour, which you can choose – see Changing the properties of plot series, page 440).
Publishing a presentation on the web
See Saving a presentation as HTML, page 469, for how to export a presentation as an HTML file.
In the same way as you can publish a survey on the web for respondents to complete, you can upload a finished
presentation for them or any other interested parties to see.
To do this if you are using surveyserver:
1
With the presentation form selected, select Upload presentation (surveyserver menu).
2
Once your access code is authenticated, KeyPoint uploads the presentation and displays its URL in a
dialog box.
You can find out the URL at any time by selecting Web presentation location (Tools menu). See
Customising the appearance and behaviour of a surveyserver form, page 343, for how to set options
controlling the appearance and behaviour of the presentation.
444 | Chapter 15: Presenting Data
16
360° Feedback Surveys
In this chapter you will learn how to analyse and present 360° feedback information collected using KeyPoint surveys.
You will learn about:
* How to use KeyPoint to carry out 360° feedback surveys
* Using KeyPoint to present the results of a 360° feedback survey
* Editing a 360° presentation
* Viewing and printing a 360° presentation.
Chapter 16: 360° Feedback Surveys | 445
Using KeyPoint to carry out 360° feedback surveys
This chapter describes the special features provided by KeyPoint for carrying out, analysing and presenting the results
of 360° feedback surveys. It does not describe the general principles of 360° feedback surveys, or give general advice
on their content or conduct.
The normal KeyPoint procedures for creating a survey, distributing it on paper or electronically, and then receiving
and entering the responses, are well suited to carrying out 360° feedback surveys, so there are no additional or
different procedures to describe. However, you do need to consider a few issues when designing the survey, and
these are discussed in the next section, Designing a 360° feedback survey in KeyPoint.
It is when you come to analysing and presenting the results of 360° feedback surveys that you need the special 360°
features provided by KeyPoint. In order to analyse the results of a 360° feedback survey, the responses must be
divided up in two stages. First, the responses need to be divided up according to the person being reviewed. Then all
the responses referring to each person being assessed have to be divided into reviewing groups according to the
relationship between the respondent and that person: for example, the person themselves, their managers, their peers
and their subordinates. In presenting the results, you will need a report for each person being assessed, with each of
these reports providing an analysis and comparison of how their performance is scored by the different reviewing
groups. All this is done automatically for you when you create a 360° presentation in KeyPoint.
In particular, a KeyPoint 360° presentation contains a report for each person under review. On the report you can
include special 360° tables and graphs showing how the person under review is scored by the different reviewing
groups. For example, the following table shows how the person under review was assessed by himself, his managers,
his subordinates and his peers on four questions relating to performance feedback:
The figures given are the average scores given by the different groups of respondents by answering multiple choice
answers. The values given by the Individual and Manager are whole numbers reflecting the fact that there is only a
single response for each; the other values are not whole numbers, because they are the average values given by a
group consisting of several respondents.
446 | Chapter 16: 360° Feedback Surveys
KeyPoint also provides a range of 360° graph types allowing you to present the same information graphically. For
example:
You can also create summaries giving the average scores on a group of questions. For example, in the following graph,
each of the points on the x-axis represents the questions in a multiple-choice table (for example, the four questions in
the Performance Feedback table shown in the previous examples). The values given for each point on each line are
calculated by averaging the scores for all the questions in the table given by all the members of the group represented
by the line:
See Analysing and presenting the results of a 360° survey following the next section for how to create, edit, view
and print 360° presentations.
Using KeyPoint to carry out 360° feedback surveys | 447
Designing a 360° feedback survey in KeyPoint
You use the normal KeyPoint procedures for creating the survey, though there are a number of points you should bear
in mind:
* The survey must include a question identifying the person being reviewed. The question can be a text or
multiple choice question. The answers given to this question will be used to collate all the responses relating to
each individual. This means that, if you use a text question, you must make sure that respondents all use
exactly the same name for a particular person. This means checking the responses carefully when they are
returned and, if necessary, editing the names to make sure they are exactly the same before you perform the
360° analysis.
* The survey must include a multiple choice question specifying the relationship between the respondent and
the individual under review.
* You can include any type of question in the survey, but only numerical and multiple questions can be used in
the 360° analysis, and to be included in the same presentation table or graph, multiple choice questions must
have the same set of possible answers. Note that this is automatically the case for questions in a question
table.
* The Asset Library (see page 230) contains a number of items supporting 360° feedback surveys, including
questions identifying the person under review and the relationship to the respondent.
Once you have created the survey, you can distribute it and collect the responses on paper or electronically in the
same way as any other KeyPoint survey. The rest of this chapter is devoted to the analysis and presentation of the
results of 360° feedback surveys, and it is here that KeyPoint provides particular support.
Analysing and presenting the results of a 360° survey
Once you have carried out a 360° survey and collected the responses, you can begin to analyse the results and create
presentations and reports. To do this, you use the 360 Degree Analysis Wizard to create a 360° presentation
containing special 360° table and graph objects. The Wizard allows you to choose which tables and graphs to include
in the presentation, set the style, add headers and footers, and so on. Once you have created the presentation, you
can use all the normal KeyPoint tools and techniques for formatting and editing the presentation, but you can also
edit the 360° table and graph objects and add others if required – see Adding and editing 360° tables and graphs,
page 459.
Note that 360° presentation tables and graphs can only be added to 360° presentations, and the only way to create a
360° presentation is using the Wizard.
Instructions for using the 360 Degree Analysis Wizard are given later in this chapter (see Using the 360 Degree
Analysis Wizard, page 450), but before that, the next section introduces the idea of a ‘360° survey label’, which you
can use to combine the results of several questions to produce overviews and summaries.
At a first reading, or if you don’t think you are going to need to use 360° survey labels, you could skip the next section and go
straight to Using the 360 Degree Analysis Wizard, page 450, and ignore any references to labels.
448 | Chapter 16: 360° Feedback Surveys
Combining question results to create summaries
As an example, suppose your survey has a number of question tables under the headings of ‘leadership’, ‘creativity’,
‘initiative’, and so on, with the questions in each table asking about different aspects of the topic. In presenting the
results of the survey, you can include graphs and/or presentation tables for each question table showing how the
individual was judged for each question in the table. However, you may also want to produce a summary graph,
showing the overall performance under the main headings of ‘leadership’, ‘creativity’, ‘initiative’, and so on. In
KeyPoint, you use ‘360° survey labels’ to create summaries like these.
A 360° survey label combines the results from several questions and produces the mean result. For numeric questions,
this is the mean of the responses given to the questions; for multiple choice questions, it is the mean of the multiple
choice scores of the responses given to the questions. You can only combine questions in a label if they are of the
same type: either numeric or multiple choice, and if they are multiple choice questions, the possible answers must all
be the same.
You can create labels in the 360 Degree Analysis Wizard when you create a presentation (see the next section); this
section shows you how to create and edit labels in the Presentation workspace at any other time.
Although 360° survey labels are specifically designed for use with 360° presentations, when you create one it will
appear in the Analysis grid as a new column. This means that it is available for use in normal presentations as well as
360° presentations.
To create a new 360° survey label:
1
Choose 360° survey label (Tools menu) to display the 360° survey labels dialog box:
The dialog box lists any labels that have already been created.
Analysing and presenting the results of a 360° survey | 449
2
Click Add to display the Edit label dialog box:
The Edit label dialog box lists all the numeric and multiple choice questions and question tables.
3
Tick the questions and/or question tables you want to include in the label.
If Show tables is ticked, you can tick a table to select all the questions in the table, or expand the table(s)
by pressing the + button(s) and select individual questions within the table(s).
You can only select questions and/or tables of the same type (see note at beginning of this section): ticking
a question or table of a different type unticks all existing selections.
4
Edit the Label name from the default to something more meaningful.
5
Press OK to close the dialog box and return to the 360° survey labels dialog box.
6
Repeat steps 2–5 to create any other labels you require.
7
Press OK to close the dialog box and return to the 360° survey label dialog box.
If required, you can display the 360° survey label dialog box at a later time to edit or delete labels in the obvious way.
However, you should note that editing or deleting a label may have an effect on existing presentations if the label was
included in the presentation.
Using the 360 Degree Analysis Wizard
To create a presentation of the results of a 360° survey:
1
Click on the Presentation tab to display the Presentation workspace – it doesn’t matter which form is
selected since the presentation will be created on a new 360° Presentation form.
2
Select Generate 360° Analysis (Tools menu) to start the 360 Degree Analysis Wizard.
Click Next if the introductory page is displayed.
3
In the Source survey form page, choose which form to use as the source for the presentation – this affects
the labels used for multiple choice, range multiple choice and ordered choice question options.
450 | Chapter 16: 360° Feedback Surveys
4
The Person Question page lists all the text and multiple choice questions in the survey. Click on the
question identifying the subject of the 360° feedback survey to select it.
Click Next to continue.
5
The Relationship Question page lists all the multiple choice questions in the survey. Click on the question
identifying the relationship between the respondent and the subject of the 360° feedback survey to select
it.
Click Next to continue.
6
You use the Presentation Objects page to define which tables and graphs will appear in the Presentation.
By default, the Wizard will create a presentation table and a radar graph for each numeric or multiple
choice question table in the survey, but you can change this in many different ways. As this requires a little
explanation to describe in full, it is treated in a separate section, Using the Presentation Objects page in
the 360 Degree Analysis Wizard, following this one.
When you have chosen and defined which tables and graphs you want to appear in the Presentation, click
Next to continue.
7
In the Style page, choose or create a KeyPoint style to format the tables and graphs in the Presentation (see
Presentations and the Style Library, page 405).
Click Next to continue.
8
In the Presentation Title page, enter a title to appear at the top of the Presentation – the preview box
shows how it will appear in the selected style.
You can click Name to add a field at the cursor that will show the name of the person being reviewed.
Click Next to continue.
9
In the Header page, enter a header for the new Presentation form – this uses the same controls as the
Header and Footer tabs in the Form Properties sidebar (see Header and Footer tabs, page 226).
Click Next to continue.
You can add the name of the person under review to the header by adding the AssessedPerson field to the header.
10
In the Footer page, enter a footer for the new Presentation form – this uses the same controls as the
Header and Footer tabs in the Form Properties sidebar (see Header and Footer tabs, page 226).
Click Next to continue.
11
In the Presentation Summary page, enter text to appear at the bottom of the new presentation – the
preview box shows how it will appear in the selected style.
If the display of final pages in Wizards is disabled, click Finish, otherwise, click Next and then Finish.
The 360° analysis will be compiled and added to a new 360° Presentation form – see Working with a 360°
presentation, page 457, for how to view and print the results and Editing a 360° presentation, page 458, for how to
customise it further.
Analysing and presenting the results of a 360° survey | 451
Using the Presentation Objects page in the 360 Degree Analysis Wizard
The Presentation Objects page is displayed as part of the process of creating a 360° presentation – see Step 5 in the
previous section. Although it is easy and intuitive to use, you can carry out a large number of operations using it, so it
is covered separately in this section.
The Available questions box lists all the numeric and multiple choice questions and all the numeric and multiple
choice question tables included in the survey, and any 360° survey labels you have defined.
360° survey labels allow you to combine the results of several questions so that you can create summary tables and
graphs. You can create labels in the Presentation Objects page (see Adding and editing labels, page 456), or before
you run the Wizard. See Combining question results to create summaries, page 449, for general information about
labels, and how to define them before you run the Wizard.
The following icons are used to represent the different types of questions and labels in the Presentation Objects page
are:
multiple choice or numeric question table
multiple choice question
numeric question
360° survey label.
The Presentation objects box lists the objects you want to include in the 360° presentation. You can include:
Tables
Radar graphs
452 | Chapter 16: 360° Feedback Surveys
Bar graphs
Horizontal bar graphs
Line graphs.
When the Presentation Objects page is displayed, the Presentation objects box contains a table and a radar graph
object for each multiple choice question table in the survey:
The large icon shows the type of object and the small icon shows its contents – in the example this is the ‘Corrective
action’ multiple choice table. The following instructions show you how to change the type of object, remove and add
objects, change the content of objects and change the order of objects.
Changing the type of a presentation object
To change the type of a presentation object to be included in the presentation (for example, from a radar graph to a
bar graph):
1
Click on the object to select it. Here, and in later instructions that tell you to select the object, it is
important to click on the object itself, not its contents.
2
Right-click on the object to display a context menu.
3
Choose the required object from the Type submenu.
Removing presentation objects
To remove a presentation object from the Presentation objects list:
1
Click on the object’s icon to select it. You can use Shift+click and Ctrl+click to select several objects if
required.
2
Click Delete.
Or:
Right-click and choose Delete from the context menu.
To remove all the presentation objects from the Presentation objects list:
Click Delete all.
Or:
Right-click in the Presentation objects list and choose Delete All from the context menu.
Analysing and presenting the results of a 360° survey | 453
Adding and duplicating presentation objects
To add a new presentation object to the Presentation objects list:
1
Either, to create an empty presentation object:
In the Available questions list, click outside any questions, question tables or labels to make sure
none of them are selected. See Combining question results to create summaries, page 449, for
more information about labels.
Or, to create a presentation object containing one or more questions, question tables and/or labels:
a
In the Available questions list, click on the first question, question table or label for which you want to
create the presentation object.
b Use Shift+click and/or Ctrl+click to select any other questions, question tables or labels you want to
include in the presentation object.
All the questions, tables and labels must be of the same type: all numeric or multiple-choice, and if
they are multiple choice, they must all have the same answers. Any that do not have the same type as
the highest of them in the Available questions list will be ignored when the new object is created.
2
Click Add.
Or:
Right-click in the Presentation objects list and choose Add from the context menu.
A new table presentation object will be added to the end of the Presentation objects list. If you selected any
questions, tables or labels, they will be included in the new presentation object. If you selected a single question,
table or label, the new presentation object will be named after it, otherwise it will be given a default name: see later
in these instructions for how to rename objects.
To create a copy of an existing presentation object and add it to the end of the Presentation objects list:
1
Click on the object to select it.
2
Right-click on the object to display a context menu.
3
Choose Duplicate.
See earlier in these instructions for how to change the new presentation object to any of the other types of object and
the next instructions for how to change the order of objects in the list.
Changing the order of presentation objects
To move one or more objects up or down the Presentation objects list (objects will be created in the presentation in
the order they appear in the list):
Select and drag the object(s) up or down the list and drop them in the required position.
Renaming presentation objects
The text next to the objects in the Presentation objects box will be used as the display name identifying the object in
the Page Manager and as the title for graphs. If required, you can edit the text in the Presentation objects box, though
454 | Chapter 16: 360° Feedback Surveys
you will also be able to edit it later in the object’s Properties sidebar: it is called the ‘display name’ on the Inspector
tab and the ‘graph title’ on the Graph layout tab.
To edit an object’s name:
1
Click on the object to select it.
2
Right-click on the object to display a context menu.
3
Choose Rename.
The name will become selected and editable.
As an alternative to steps 2 and 3, you can click in the name.
4
Edit the name as required.
Changing the content of presentation objects
To add questions, question tables or labels to a presentation object in the presentation objects list:
1
In the Available questions list, click on the question, table or label that you want to add. You can add
more than one question, table and/or label to the object at the same time by using Shift+click and
Ctrl+click to select them.
If the presentation object already contains any questions, tables and/or labels, you can only add new
contents of the same type (numeric or multiple choice with the same answers). If you select more than one
question, table or label and the selection includes different types, you will only be able to add those with
the same type as the one occurring highest in the Available questions list.
2
Drag the selected items from the Available questions list and drop them into the presentation object.
To move one or more questions, question tables and/or labels from one presentation object to another:
Select the questions, question tables and/or labels and drag and drop them in the other presentation
object.
If the presentation object already contains questions, tables and/or labels, you can only drag in items of the
same type (numeric or multiple choice with the same answers).
To remove questions, question tables or labels from a presentation object:
1
Click in the presentation object on the question, question table or label that you want to remove to select
it.
You can remove more than one question, table and/or label at the same time by using Shift+click and
Ctrl+click to select them. In this way you can delete contents from more than one object at the same
time. You can also add presentation objects themselves to the selection and delete them as well as
contents. In fact, if you Shift+click to extend the selection beyond the contents of a single object, you will
select at least one object, which will be deleted in the next step: if you do not want to delete it, you can
use Ctrl+click to deselect it.
2
Click Delete.
Analysing and presenting the results of a 360° survey | 455
Or:
Right-click and choose Delete from the context menu (do not press or choose Delete All since this deletes
all the presentation objects, not just the selected ones).
Adding and editing labels
When the Presentation Objects page is displayed, the available questions box contains any 360° survey labels that you
have already defined so that you can add them to presentation objects or use them to create new presentation
objects (see Combining question results to create summaries, page 449, for more information about labels,
including how to define them outside the Wizard). However, you can also create new labels directly in presentation
objects in the Presentation objects list.
To create a new label in a presentation object:
1
Click on the object to which you want to add the new label.
2
Right-click on the object to display a context menu.
3
Choose Add label to display the Edit label dialog box:
The Edit label dialog box lists all the questions and question tables that could be added to the selected
object. This means that unless the selected object is empty, the dialog box will only list items with the
same type as the current contents.
4
Tick the questions and/or question tables you want to include in the label.
If Show tables is ticked, you can tick a table to select all the questions in the table, or expand the table(s)
by pressing the + button(s) and select individual questions within the table(s).
If the presentation object is empty, the Edit label dialog box may contain different types of questions and
tables. However, you will only be able to select questions and/or tables of the same type: ticking a
question or table of a different type unticks all existing selections.
5
Edit the Label name from the default to something more meaningful.
6
Press OK to close the dialog box and add the new label to the presentation object.
456 | Chapter 16: 360° Feedback Surveys
When you create a new label directly in a presentation object, it does not appear in the Available
questions list, so you cannot include it directly in a new object when it is created, or add it directly to
existing objects. However, you can duplicate the object containing the label, and the duplicate will
contain the same label. Also, you can move the label between objects by dragging: see the earlier
instructions for how to duplicate and move contents between presentation objects.
To edit a label created in a presentation object (you cannot edit labels created before the Wizard was started):
1
Click on the label to select it.
2
Right-click on the label to display a context menu.
3
Choose Edit label to display the Edit label dialog box again.
4
Tick the questions and/or question tables you want to include in the label; untick any you do not want
included.
5
Edit the Label name if required.
6
Press OK to close the dialog box and confirm the changes.
If you have duplicated an object containing the label so that the label appears more than once, all occurrences of the
label will be changed.
Working with a 360° presentation
When you click Finish in the 360 Degree Analysis Wizard, the 360° presentation will be compiled and added to a
new 360° Presentation form. In most respects you can work with it in the same way as you would any other KeyPoint
presentation. However, there are a few special features, which are covered in the next two sections: Viewing 360°
reports and Printing 360° reports. There are also a number of special features related to editing 360° presentations –
see Editing a 360° presentation, page 458, for details.
Viewing 360° reports
A 360° presentation consists of a report for each of the individuals under review. You choose which report to view
using the 360° Analysis navigation tools in the Toolbar:
You can use the buttons to move between reports in the obvious way, or type in the number of the required report
and press Return to go directly to a specific report.
You can edit the presentation if required – see Editing a 360° presentation, following the next section, for details.
You can edit the presentation when any of the reports is shown – any edits will be applied to the reports on all the
individuals.
Analysing and presenting the results of a 360° survey | 457
Printing 360° reports
You can choose to print the 360° report for a specific person individually, or the reports on everybody being reviewed
together.
To print the report for an individual or all reports:
1
If you want to print the report on an individual only, use the 360° Analysis bar to display the required
report (see the previous section).
2
Select Print (File menu), or click the Print button in the Toolbar.
3
Tick Current person only to print a single report; untick it to print all reports.
4
Make any other settings required in the dialog box.
5
Click the OK button.
Editing a 360° presentation
You can use any of the normal KeyPoint tools and techniques to format and edit a 360° presentation. In particular,
you can add objects such as text, lines, shapes and bitmaps in just the same way as with a normal presentation. You
can also add and edit any type of normal KeyPoint table or graph in very nearly the same way as with a normal
presentation (see the following note).
However, 360° tables and graphs, though similar in many ways, are not quite the same as normal KeyPoint tables and
graphs, so are described later in this section.
There is no difference in the way you add any type of normal table apart from Pivot tables, and the only difference
when you add a normal Pivot table or normal graph is that there is an extra page in the Wizard where you have to
choose between adding a normal or 360° Pivot table or graph. This extra page is also displayed if you use the Wizard
for editing a normal Pivot table or graph on a 360° presentation, and allows you to change it to a 360° table or graph.
On the other hand, editing normal tables and graphs on a 360° presentation using the Properties sidebar is exactly the
same as editing them on a normal presentation.
One other difference between a normal and 360° presentation is that the Properties sidebar for the Presentation form
itself has an additional 360° Analysis page:
You can use this page in the obvious way if you wrongly identified the person and relationship questions when you
created the 360° presentation.
458 | Chapter 16: 360° Feedback Surveys
Adding and editing 360° tables and graphs
The procedures for adding 360° (pivot) tables and graphs have many steps in common, so the following instructions
treat them together.
To add a 360° table or graph to a 360° presentation (you cannot add 360° tables or graphs to normal presentations):
1
Either:
Click the Pivot Table button on the Designer Tools sidebar.
Or:
Click the Graph button on the Designer Tools sidebar.
2
Click on the Presentation form to create an automatically sized table or graph at that position.
3
The Pivot Table or Graph Wizard opens: click Next in the introductory page of the wizard, if it is
displayed.
4
Select 360° Analysis in the 360° Analysis page.
Click Next to continue.
5
If you are adding a table, go straight to the next step.
For a graph, click on the Bar graph, Horizontal bar graph, Line graph or Radar graph button to choose the
type of graph.
Click Next to continue.
6
In the 360° Analysis questions page, the Available questions box lists all the multiple choice and numeric
questions, multiple choice and numeric question tables, and labels. To choose which questions to include
in the table or graph:
a
In the Available questions box, click on the first question, table or label you want to add to select it.
b Click the add question button (or just double-click on the question) – the question will be added to the
Selected questions box.
c
Repeat steps a and b for any other questions you want to include in the table or graph.
When you use the 360 Degree Analysis Wizard to create a presentation, you can only create tables or
graphs containing questions and labels of the same type: all numeric or all multiple choice with the
same possible answers. There is no such restriction when you are adding an individual 360° table or
graph.
If necessary, you can remove a question from the Selected questions box by clicking on it to select it
and then clicking the remove question button, or by double-clicking on the question.
7
The order of the questions in the Selected questions box determines the order in which they will appear in
the table or graph. To change the order of questions:
Select a question and click the move up or move down button.
Analysing and presenting the results of a 360° survey | 459
Or:
Drag the question and drop it in a new position in the list.
8
The Display name column in the Selected questions box shows the text that will appear in the table or
graph to identify the data (for example, as column headings). To change any of the display names, click in
the text and edit it.
9
If you are adding a table, go straight to step 10. If you are adding a graph:
a
Click Next to display the Graph title page.
b Enter a title for the graph.
10
If the display of final pages in Wizards is disabled, click Finish, otherwise, click Next and then Finish.
The new table or graph will be placed on the Presentation form.
You can use the Wizard to edit a 360° table or graph by right-clicking on it and choosing Wizard. The Wizard will go
through the same steps as before so that you can change any settings you require. However, you can perform more
detailed customisation using the Properties sidebar, which you display by right-clicking on the table or graph and
choosing Edit properties.
The pages in the Properties sidebar for a 360° table or graph are very similar to the corresponding pages for normal
tables or graphs. The main differences are:
* there is no Filter page in the 360° table or graph Properties sidebar
* the Questions page in the 360° table Properties sidebar and the Plots page in the 360° graph Properties
sidebar use the same controls as in the Wizard for selecting questions for 360° tables and graphs – see Steps
6–8 in the previous instructions.
There are a number of other very minor differences, but their effect should be clear.
460 | Chapter 16: 360° Feedback Surveys
17
Sharing Data with Other Applications
In this chapter, you will learn about how you can share data between KeyPoint and other applications.
You will learn about:
* Importing data into a KeyPoint survey
* Exporting a survey design or presentation to a Word file
* Exporting data to an SPSS or CSV file
* Copying and pasting a design or presentation object as a picture
* Exporting data to an Excel worksheet and maintain a link to it.
Chapter 17: Sharing Data with Other Applications | 461
Importing data
You can import data into a KeyPoint survey from other KeyPoint surveys or from CSV (comma-separated values) files.
To import a database file in any other format, first convert the database to CSV format in the source application, and
then import it into KeyPoint.
Importing data from another KeyPoint survey
You can only use the procedure described in this section to import data from a KeyPoint survey with the same version
number. If you want to import data from a survey created using an earlier version of KeyPoint, you will need to
convert it to the current version by opening and saving it in the current version (keep a copy of the original if you
want to reopen it in the original KeyPoint version).
To import data from another KeyPoint survey:
1
In the Design workspace, if there is more than one form, select the master form.
2
Select Import (File menu) to open the Import Wizard.
Click Next in the introductory page if it is displayed.
3
Select KeyPoint File from the list of file types. Click Next to continue.
An Open dialog box will be displayed.
4
Browse for the file, select it and click Open.
5
The selected path will be shown in the Wizard page – you can edit it here if required. Click Next to accept
the file selection.
6
The Questions Matching page will be displayed in the Wizard:
Questions marked with # are system questions.
462 | Chapter 17: Sharing Data with Other Applications
When the page is first displayed the Matched questions list will show all the questions in the imported file
with the same name as a question in the current survey.
Question matching is done purely on the basis of the question names, which is not case sensitive.
Questions with the same name but different types will be matched but the data may not be imported
correctly. For example, an ‘Age’ numeric question will not import data correctly into a multiple choice
‘Age’ question asking respondents to choose from a range of age bands.
If any of the automatically matched question pairings are incorrect (for example, different question types),
or if you do not want to import one of the questions that has been automatically matched:
a
Click on the pairing in the Matched questions list to select it.
b Click Remove.
The question pairing will be removed from the Matched questions list and the questions will appear in the
Import file questions and Survey questions lists, along with any questions that were not automatically
matched.
To match questions manually:
a
Click on the imported question that you want to match in the Import file questions list to select it.
b Click on the current survey question that you want it to be matched to in the Survey questions list to
select it.
c
Click Add.
The questions will be removed from the Import file questions and Survey questions lists and will appear as
a pairing in the Matched questions list.
Click Next to accept the question matching.
7
The Questions Types page will be displayed in the Wizard:
Importing data | 463
The page lists all the unmatched questions from the import survey.
To choose whether to import the responses for a question or not:
Click the Import? tick box for the question – ticked questions will be imported.
To change the type of the question when it is imported:
Choose the required type from the Question Type drop-down list for the question.
Note that changing the type of a question may prevent its response data being imported. For example, the
data will be imported correctly if you change the type from ‘Choose one’ to ‘One with other’, but it will
not be imported if you change it to ‘Choose many’.
8
Click Finish to import the survey data.
If you have chosen to import any unmatched questions, new questions of the chosen types will be added at the end
of the design form. The imported responses will be added to the Responses workspace: data from the matched
questions will appear in the questions they match in the original design; data from the unmatched questions will
appear in the new questions at the end of the form.
Importing CSV files
CSV (Comma Separated Values) is a text file format for representing the information in a database. Each line contains
a record, and fields in the record are separated by a standard punctuation mark, usually, but (despite the name) not
always, a comma. CSV files that use the Tab character as their field separator are sometimes called TSV files (Tab
Separated Values). You can import these as CSV files.
Separators in CSV files
464 | Chapter 17: Sharing Data with Other Applications
Separators are punctuation marks that allow the application reading the file to recognise the boundaries between
fields.
In the Separators page of the Import Wizard you can set the following:
* Field separators
* Field delimiters
* Decimal separators
* Memo line separators.
Each line in the file contains the answers to a single completed survey (response).
The field separator is used to separate the answers to each question on each line so that KeyPoint knows where one
answer stops and the next one starts. Commas are usually used as the field separator, but tabs are also used quite
often, and other characters may be used.
Sometimes text fields include punctuation characters. If any of these characters is the same as the field separator, you
need to bracket the text field in field delimiters to prevent the application reading the punctuation character as a field
separator. Quotation marks are the most commonly used field delimiters.
The decimal separator is the character used in decimal numbers. Usually this will be a decimal point. However, if
you’ve chosen a full stop as the field separator, you will need to select a different decimal separator.
The memo line separator is used when you have very long fields that should be broken into separate lines. The memo
line separator character is used to indicate where that break happens.
Importing a CSV file
To import a CSV file into the currently open survey:
1
In the Design workspace, if there is more than one form, select the master form.
2
Select Import (File menu) to open the Import Wizard.
Click Next in the introductory page if it is displayed.
3
Select Text File (CSV) from the list of file types. Click Next to continue. An Open dialog box will be
displayed.
4
Browse for the file, select it and click Open.
5
The selected path will be shown in the Wizard page – you can edit it here if required. Click Next to accept
the file selection.
6
In the Separators page, choose or type in the separators used in the CSV file (see the previous section for
more information on separators). Your choices must correspond exactly to the contents of the CSV file.
Click Next to continue.
7
In the Import Parameters page, you can set additional import options. If the first row of the CSV file
contains question names, select Question names in first row. If the CSV file has numbers rather than text
representing the answer options for multiple choice questions, select Multiple choice answers as score
values. Click Next to continue.
8
If you are importing into a new survey, click Next in the Question Matching page and go to the next Step.
Importing data | 465
If you are importing into a survey that already contains questions, if KeyPoint can match questions in the
import file to questions in the current survey automatically, they will be shown in the ‘Matched questions’
box. If a match is incorrect, select it and click Remove. The separated questions will be added to the
‘Import file questions’ and ‘Survey questions’ boxes.
To match import and survey questions manually, select the question in the CSV file in the ’Import file
questions’ box and the matching question in the existing survey in the ’Survey questions’ box and click
Add.
Click Next to continue.
See Step 6 in the instructions in Importing data from another KeyPoint survey, page 462, for pictures and more information
about using the Question Matching page, and Step 7 in the same section for using the Question Types page in the next Step.
9
In the Question Types page you can modify unmatched import file questions. To prevent KeyPoint from
importing the data for a question, clear the Import tick box next to the question. To change the question
type, select a new question type from the drop-down list next to the question. Click Next to continue.
10
Click Finish to import the data.
If you have chosen to import any unmatched questions, new questions of the chosen types will be added at the end
of the design form. The imported responses will be added to the Responses workspace: data from the matched
questions will appear in the questions they match in the original design; data from the unmatched questions will
appear in the new questions at the end of the form.
Exporting a survey design or presentation to a Word file
You will need Microsoft Word 2000, or later, to open the files produced by the procedure described in this topic.
KeyPoint allows you to export a survey design or presentation to a Word file. This enables you, for example, to edit
and format a presentation, or integrate it into a larger document. You may want to export a survey design to a Word
file to distribute internally for proof reading and comment.
You should not use a Word file exported from a survey design to print copies of the survey for distribution to
respondents. In particular, although the layout of the exported Word document is generally very close to the original
KeyPoint version, it is not always identical, and very small differences may cause problems if you try to scan the results
back into KeyPoint.
To export a survey design or presentation to a Word file:
1
Click on the tab for the survey design or presentation form you want to export to select it.
2
Select Export to Word doc (File menu) to display a standard Windows Save As dialog box.
3
In the Save As dialog box, browse to the location where you want to save the file and type the file name in
the File name box.
4
Click Save to save the file.
The saved file will be opened in Word. All objects in the KeyPoint form will be exported apart from column and
routing lines: questions, text and presentation tables are exported into Word tables; presentation graphs, pictures and
OLE objects are exported as pictures; lines and rectangles will be exported as graphics.
466 | Chapter 17: Sharing Data with Other Applications
In most cases the layout of the exported Word document will be very close to the original KeyPoint version. However,
if the page is very full and has objects close to its edges, the page content may flow onto a new page in Word. If this
happens, try setting the page margins to zero in the KeyPoint document and choose Export to Word doc (File menu)
again.
Exporting responses to an SPSS or CSV file
You can export the KeyPoint responses data to an SPSS or CSV text file for further analysis or presentation in another
application, such as SPSS or a database or spreadsheet (but see Exporting data to Microsoft Excel, page 470, for
exporting response or presentation data directly to an Excel worksheet). You can export all the responses, or only
selected responses.
When you export to a CSV file, only the question names and response data are exported; for SPSS, both the question
definitions and response data are exported to a native SPSS (.sav) file. Note that SPSS does not have exact equivalents
for some KeyPoint features – see the next section, see Conversions when exporting to SPSS, for what these are and
what happens when they are exported.
To export response data:
1
Select the Analysis Grid in the Presentation workspace.
2
If you want to export only selected responses, you can either filter the responses in the Analysis Grid now,
or enter or choose a filter at Step 7 in this procedure. For more information on using filters, see Filters,
page 383.
3
Select Export (File menu) to run the Export Wizard (click Next if the welcome page is displayed).
4
In the Type of Export page, click on a radio button to choose whether to Export to CSV or Export to SPSS.
Click Next to continue.
5
In the Save dialog box, browse to the location where you want to save the file and type the file name in
the File name box. Click Save.
6
In the File Selection page, click Next to accept the path and file name. (Before clicking Next you can edit
the path or file name, or click Browse to choose an alternative.)
7
In the Data page, to choose how you want choice answers to be exported:
a
Choose Codes, Scores or Labels from the drop-down list box.
b If you selected Labels, choose which copy form’s labels to use from the Source Survey Form
drop-down list box.
8
Still in the Data page, click:
* All if you want to export all responses, or
* Selected if you want to export the responses currently selected in the Analysis Grid, or
* Custom selection to enter or select a filter in the next step.
Click Next to continue: go to the next step if you chose Custom selection; otherwise go to Step 10.
Exporting responses to an SPSS or CSV file | 467
9
Either:
* Enter an expression to filter the responses to be exported (see Chapter 18, Using Expressions, for
details).
Or:
* To use the filter saved in a custom view, click Copy Filter to display the Copy Filter dialog box, then
select the required view from the drop-down list box at the top of the dialog box. The Filter Expression
box will show the filter taken from the selected view as an expression. (See Views, page 387, for more
information about custom views.) Click OK to select the expression and return to the Export Wizard.
Click Next to continue.
10
In the Questions page, select the questions you want to export. To select all questions, click All. Click Next
to continue.
If you are exporting to SPSS, go to Step 12; otherwise go to the next step.
11
If you are exporting to CSV, in the Export Separators page:
* Choose the separators for fields, decimals and memo lines, and choose the delimiter for fields – see
Separators in CSV files, page 464, for information about CSV separators and delimiters.
* Choose whether the first row of the CSV file should contain the question names.
* Choose whether to export the answers to multiple choice questions as score values rather than text.
Click Next to continue.
12
Click Finish to export the data.
Conversions when exporting to SPSS
SPSS does not have exact equivalents for some KeyPoint features: this section describes what happens to these when
you export them to SPSS.
KeyPoint
Converted to SPSS
Multiple choice allowing more than one
answer
A single answer multiple choice question for each of the possible answers
in the original question
Ordered choice questions
A numeric question for each of the ordered choice answers
Multiple choice (or ordered choice) with
Other
Other answer is converted into a separate text question
Calculated questions
A text, numeric or date question, depending on the type of answer given
by the calculated question
Question text with line breaks
The question text with line breaks removed
All KeyPoint answer scores will be carried over to the SPSS file.
468 | Chapter 17: Sharing Data with Other Applications
Copying and pasting design or presentation objects as a picture
You can copy a design or presentation object (using Copy (Edit menu)) from a KeyPoint survey design or presentation,
and paste it as a picture into a document created by another application, such as Microsoft Word. However, once an
object has been copied into an external document, it will no longer be automatically updated to show new data.
If the target application allows it, you can paste the object as either a bitmap or as an enhanced metafile. To do this,
select Paste Special (Edit menu) in the target application to display a dialog box giving you the choice of how the
object(s) should be pasted.
Metafile format retains information about the structure of the object, so, for example, if you choose the metafile
option, the target application’s editing features may allow you to edit its text, change the fonts and text styles, move
and reshape lines, and so on.
Saving a presentation as HTML
As an alternative to publishing the presentation on surveyserver directly from KeyPoint (see Publishing a presentation
on the web, page 444), you can save it as an HTML file by choosing Save Presentation as HTML (File menu). You
can then preview the file in a browser, upload it to the web, or send it as an email.
Office Integration
In order to use the Office Integration commands, you must have one of the versions of Excel supplied with Office 97,
Office 2000, Office 2002, Office 2003, Office XP, Office 2007 or Office 2010 installed on your PC. The Office
Integration commands will not work with other versions of Excel.
KeyPoint’s Office Integration feature allows you to export survey result data to Microsoft Excel for further analysis or
formatting.
There are three commands in the Office Integration submenu of the File menu:
* Export to Excel – this launches the Export to Excel Wizard to guide you through the process of selecting the
data to be exported and the destination Excel worksheet. See the next section, Exporting data to Microsoft
Excel
* Update Excel Link – this updates the data exported from the selected object so that it matches the current
values in KeyPoint. See Updating the Excel link (page 472) for details
* Open Excel Link – this opens the Excel worksheet containing the data exported from the selected object. See
Opening an Excel link (page 472) for details.
Copying and pasting design or presentation objects as a picture | 469
Exporting data to Microsoft Excel
You can export data from the Analysis Grid or from a table or graph on a Presentation form. The procedures are the
same in each case, except that there is one extra step when you export data from the Analysis Grid.
Note that when you export a graph with multiple plots or a graph with plots for more than one question in a question
table, only the first plot is exported.
To export data from KeyPoint to Microsoft Excel:
1
If you are exporting data to an existing Excel workbook, make sure that workbook is closed.
2
Either:
To export data from the Analysis Grid, display the Analysis Grid tab.
Or
To export data from a table or graph on a presentation form, display the form and click on the table or
graph to select it. When you export data from a graph, only the raw data used to plot the graph is
exported – if you want a graph in Excel, you will need to apply the Excel graphing functions to the raw
data.
3
Select Export to Excel (Office Integration submenu in the File menu).
The Export to Excel Wizard opens.
4
Click Next in the wizard’s Welcome page if it is displayed (you can choose to skip the introductory steps of
all wizards).
If you are exporting from the Analysis Grid, the Questions page will be displayed – go to Step 5.
For tables and graphs, the Destination page will be displayed immediately – go to Step 6.
5
The Questions page lists all the available questions with a tick box against each:
* Tick the questions for which you want to export the results.
* If you only want to select a few questions, click None to deselect them all, then tick the questions you
want to select.
* Click All if you want to select all the questions.
When you have made your selections, click Next to display the Destination page.
6
The initial state of the settings in the Destination page depends on whether you have previously exported
data to Excel from the Analysis Grid, a table or a graph:
* If you have, the Existing Excel workbook radio button will be selected and the path and filename of
the workbook will be shown in the Workbook name box and the worksheet in the Worksheet name
box (Excel will also be opened with the workbook loaded)
* If you want to export the data to a different workbook, either type the path and filename of the
workbook into the Workbook name box or click the folder button (to the right of the Workbook
name box) to display a file browser dialog box so that you can select the workbook file
* If you want to export the data to a different worksheet, either select an existing worksheet from the
Worksheet name drop-down list box, or click the worksheet button (to the right of the Worksheet
470 | Chapter 17: Sharing Data with Other Applications
name box) to display a dialog box so that you can enter a name for a new worksheet (the new
worksheet will be created in the workbook open in Excel)
* If you want to create a new Excel workbook for the exported data instead of exporting it to the existing
workbook, click on the New Excel workbook radio button
* If you have not previously exported data to Excel from the Analysis Grid, table or graph, the New Excel
workbook radio button will be selected
* If you want to export the data to an existing workbook, click on the Existing Excel workbook radio
button. A file browser dialog box will be displayed – use it to select the workbook file. Then, either
select an existing worksheet from the Worksheet name drop-down list box, or click the worksheet
button (to the right of the Worksheet name box) to display a dialog box so that you can enter a
name for a new worksheet.
7
If you have chosen to create a new workbook, go straight to Step 8.
If you have chosen to export to an existing workbook, Excel will be open with the selected workbook
open at the selected worksheet. By default, the exported data table will be loaded at the top left-hand
corner of the worksheet (cell A1).
To choose where the exported data should be loaded in the worksheet:
a
Select Excel.
b Click in the cell where you want the top left-hand corner of the exported data table – the selected cell
will be shown in the Selected range box in the Destination page.
The new data table will overwrite any existing data in the cells it is loaded into – the other cells in the
worksheet will be unchanged.
8
Still in the Destination page, to choose how you want choice answers to be exported:
a
Choose Codes, Scores or Labels from the drop-down list box.
b If you selected Labels, choose which copy form’s labels to use from the Source Survey Form
drop-down list box.
9
When you have specified the Destination for the data, if you have chosen not to show the final steps in
wizards, click Finish. Otherwise, click Next to display the Finish page and then Finish.
A progress dialog box will be displayed while the data is exported.
10
When the export is complete:
* If you have chosen to export to an existing workbook, there are no further steps, and Excel will show
the newly exported data in the workbook
* If you have chosen to export to a new workbook, a dialog box will be displayed reminding you that
you will need to enter a name for the workbook. Click OK to display a standard Windows Save dialog
box and use it to select a folder and enter a filename for the new workbook.
Office Integration | 471
Excel links
Once you have exported data to Excel, KeyPoint maintains a link between the Analysis Grid, table or graph and the
Excel data.
To view the details of any link to a table or graph:
1
Click on the table or graph to select it.
2
Display the Properties sidebar and click on the Analysis tab.
The Excel Link box on the Analysis tab will show the details of the link.
To change the link from the Analysis Grid, a table or a graph:
Select the object and run the Export to Excel Wizard again (see the previous section, Exporting data to
Microsoft Excel) and either choose to create a new workbook or select a different workbook for the data.
You can export data from the Analysis Grid, and each table or graph, to as many different workbooks as you require.
However, KeyPoint only maintains one link each for the Analysis Grid and each table or graph – this link is to the last
data exported from each object.
Updating the Excel link
The Excel data will become out of date if you receive more responses, so KeyPoint allows you to update the data.
To update the last data exported to Excel from the Analysis Grid, a table or a graph:
1
Make sure that the linked workbook is closed: you should not attempt to update the link to an open Excel
workbook.
2
Either, to update a link from the Analysis Grid:
Display the Analysis Grid tab.
Or, to update a link from a table or graph on a presentation form:
Display the form and click on the table or graph to select it.
3
Select Update Excel Link (Office Integration submenu in the File menu).
Excel will be started up with the linked workbook open and showing the updated data.
Opening an Excel link
To open the worksheet containing the last data exported to Excel from the Analysis Grid, a table or a graph:
1
Either, to open a link from the Analysis Grid:
Display the Analysis Grid tab.
Or, to open a link from a table or graph on a presentation form
Display the form and click on the table or graph to select it.
2
Select Open Excel Link (Office Integration submenu in the File menu).
472 | Chapter 17: Sharing Data with Other Applications
18
Using Expressions
In this chapter, you will learn about the KeyPoint expression language.
You will learn about:
* Using expressions in KeyPoint
* Operators and operands
* Operator precedence
* Type casts
* Functions and arguments.
Chapter 18: Using Expressions | 473
Expressions in KeyPoint
The KeyPoint expression language is a very powerful way to customise your survey design and results.
The language is used in several places in KeyPoint. For example, you can use it to set conditions for question routing
and validation, to write and edit questions with calculated answers, and to organise the data in the Presentation
workspace.
You can build expressions in:
* the Ask If/Valid If tab in the Properties sidebar for all types of question and question table
* the Calculated Question Wizard
* the Answer tab in the Properties sidebar for a calculated question
* the Routing Rules dialog box (displayed when you create a routing line or by double-clicking an existing
routing line in the Design form)
* the Routing Rules tab in the Properties sidebar for a routing line
* the Custom Selection page of most presentation wizards (Quick Analysis Wizard, Topline Results Wizard, all
table wizards, Graph Wizard, Export Wizard)
* the Edit calculation column dialog box for calculation columns in the Analysis Grid (Presentation tab).
You can use an abbreviated form of the expression language in the Analysis Grid. For more information, see
Chapter 14, Analysing Data.
What is an expression?
KeyPoint evaluates expressions to produce a value as a result.
An expression can be:
* A value, which may be:
*
*
*
*
A number – for example: 2.5
A date/time – for example: 19/11/2002
A sequence of characters (string) – for example: 'Smith'
A logical value – true or false
* A question name – for example:
"Enter your date of birth"
Question names evaluate to the answer given to the question in the response.
You identify question names in expressions by enclosing the name between double inverted commas – for
example, "Enter your date of birth". However, if the survey does not have a question name corresponding to
the text between the double inverted commas, KeyPoint treats it as a string value. Text in single inverted
commas – such as 'Smith' – is always treated as a string value.
* An operation made up of an operator (see Operators, next section) with one or more expressions as
‘operands’: for example:
1+2
In this example, the operator is addition (+), and the operands (the values to which the operator is applied)
are 1 and 2.
474 | Chapter 18: Using Expressions
* A function (see Functions, page 486) with 0, 1 or more expressions as ‘arguments’: for example:
Age("Enter your date of birth")
In the example, Age() is the function and "Enter your date of birth" is its argument. It will evaluate to the age of
the respondent, which is calculated from the answer they gave to the "Enter your date of birth" question.
Since function arguments and operator operands are themselves expressions, you can build complex expressions very
easily.
However complex the structure of the expression, the final result of evaluating the expression will be a value. Where
the expression is used as a condition for control or validation (for example, a routing condition or an ask if or valid if
condition) the final result of evaluating the expression should be a logical value: true or false. In other cases, for
example, in calculated questions or calculation columns, the value can be any type (number, date, string or logical).
Building an expression
The Reference part of this chapter (beginning on page 483) provides a complete description of the components
(operators, functions, type casts, etc) you can use to build expressions. This section describes how you actually enter
expressions into KeyPoint.
You enter expressions using the Expression Editor dialog box. You display the Expression Editor dialog box by clicking
a New or Edit button in the relevant sidebar, dialog box or wizard.
The Calculation Editor dialog box is displayed when you create or edit a calculated question. Apart from the name,
this is identical to the Expression Editor dialog box and all the instructions given in this section for using the Expression
Editor dialog box apply equally to using the Calculation Editor dialog box.
Building an expression | 475
The Expression Editor dialog box has two pages:
* Visual page – the Visual page allows you to build expressions by clicking on buttons, selecting items from
menus and drop-down list boxes, and by typing directly into edit boxes:
476 | Chapter 18: Using Expressions
* Advanced page – the Advanced page allows you to build expressions by typing directly into the page and by
selecting items from menus:
You can enter expressions using either the Visual or Advanced page, or use both by clicking on the tabs to switch
between them – the current expression will be converted to the appropriate format when you switch between the
pages.
If you enter an incorrect or incomplete expression in the Advanced page, you will not be able to switch to the Visual
page. On the other hand, if you enter an incorrect or incomplete expression in the Visual page, you will be able to
switch to the Advanced page: for example, you may prefer to use the Visual page to create the overall structure of the
expression with some parts left blank, and then use the Advanced page to fill in the details.
After you have built an expression using either the Visual or Advanced page, you should click the Check expression
button (Check calculation for a calculated question) to confirm that the expression is valid. If KeyPoint does not
understand the expression it will give an error message, otherwise it will show the message ‘Expression correct’.
The message ‘Expression correct’ means that KeyPoint will be able to evaluate the expression to produce a value. It
does not mean that it will necessarily calculate the value you intended. The only way to verify that is to check the
expression carefully and then test it with as many different input values as you can. If you want to see the value of an
expression used for routes, answer if and ask if conditions when you are testing it, you can create a temporary
calculated question with the expression.
Building an expression | 477
Using the Visual expression editor
If you wish, you can enter an expression by typing directly into the expression editor. However, this can be
time-consuming and it is easy to make a mistake. The visual expression editor allows you to enter expressions more
quickly and reliably.
The use of the visual expression editor is very intuitive, so rather than give exhaustive instructions, this section
provides an introduction through a simple example, and then describes some of the more advanced features available
through context menus. Once you have understood the general principles, you should have no problems in creating
your own expressions.
As an example, suppose we have a survey where we want respondents to answer different questions according to
their age and sex. We can achieve this by a set of routing rules. For example, we can use the rule
("Age" >= 21) and ("Sex" = 'Male')
to skip to a question we want to ask male respondents who are 21 or older.
To create this routing rule:
1
Click the routing tool button in the Designer Tools sidebar and drag from the source question to the target
question: the Routing Rules dialog box will be displayed.
2
Click New in the Routing Rules dialog box to open the Expression Editor dialog box. It will open at the
Visual page with an empty expression:
3
If the <Empty> box is not selected click in it to select it – the operator buttons on the right of the dialog
box will become enabled (as in the picture).
478 | Chapter 18: Using Expressions
The Available questions drop-down list box lists all the question names in the survey: for this example, we
will assume it contains a numeric question, Age, and a multiple choice question ‘Sex’.
4
To add the age condition:
a
Click the >= button to add ‘>=’ to the expression. It will appear between two <Empty> boxes:
b Click in the <Empty> box to the right of the ‘>=’ to place an edit cursor in the box and type 21:
c
Click once on the <Empty> box to the left of the ‘>=’ to select it (do not click twice as this will place
a cursor in the box).
d Select Age from the Available questions drop-down list box.
e
Click the Available questions Add button to add the Age question to the expression:
5
Click the >= in the expression to select the whole expression:
6
Click the And button to add ‘and’ to the expression. It will appear between the age condition and an
<Empty> box:
7
To add the sex condition:
a
If it is not already selected, click once on the <Empty> box to the right of the ‘and’ to select it (do not
click twice as this will place a cursor in the box).
b Click the = button to add ‘=’ to the expression. It will appear between two <Empty> boxes:
c
Select Sex from the Available questions drop-down list box.
The Available answers drop-down list box is enabled when a multiple-choice or ordered-choice
question is selected in the Available questions drop-down list box – in this example it contains Male
and Female when Sex is selected.
Building an expression | 479
d Select Male from the Available answers drop-down list box:
e
Click the Available answers Add button to add the answer Male to the expression:
f
Click once on the remaining <Empty> box (to the left of the =) to select it, and click the Available
questions Add button to add the question Sex to the expression:
Note the way each sub-expression is contained in a box to show the order of evaluation: for example,
the sub-expression “Age”>=21 and the sub-expression “Sex”=’Male’ are evaluated first and the
resulting values combined using the logical operator and to give the final result.
8
The expression is now complete – you can click the Check expression button (Check calculation for a
calculated question) to confirm that the expression is valid.
9
Click OK to close the Expression Editor and add the expression to the Routing Rules dialog box:
In this example we started with the age condition, added the and operator, and then filled in the sex condition.
Alternatively, we could have started by adding the and operator with two empty arguments and then filled them in
with the two conditions.
This example has shown you how to create expressions using the buttons and drop-down list boxes in the visual
expression editor. You can also use context menus to add more advanced expressions and to edit existing
expressions. There are two types of context menus in the visual expression editor, left-click and right-click, which are
described in the next two sections.
480 | Chapter 18: Using Expressions
Left-click context menus in the visual expression editor
To change an operator already in an expression:
1
Left-click on the operator in the expression:
A context-menu will be displayed listing all the available operators (see Operators, page 483).
2
Select the required operator from the context menu.
Clicking an operator button in the visual expression editor adds a new operator to the expression: this is equivalent to a right-click
context menu command (see next section) not the left-click operator command, which changes an existing operator.
You can also add a type cast function to an expression using a left-click context menu. Type casts are special functions
(Integer, String, Float, DateTime, Boolean) that take an argument of any type and convert its value to a value of a
specific type (see Type casts, page 485).
To type cast a sub-expression within an expression:
1
If it is not already selected, click on the sub-expression to select it.
2
Left-click again on the subexpression to display the type cast context menu.
If the sub-expression is an operator expression, do not click on the operator itself as this will display the operator context menu. If
the sub-expression is a value or function (see next section), do not click inside the box as this will place an editing cursor in the
box – click on the box outline instead.
3
Choose the required type cast from the list.
To change or remove a type cast from a sub-expression:
1
If it is not already selected, click on the sub-expression to select it.
2
Left-click on the typecast to display the type cast context menu.
3
Select the required new type cast, or (no type cast) to remove the type cast.
Building an expression | 481
Right-click context menu in the visual expression editor
To display the right-click context menu in the visual expression editor:
Right-click at the point in the expression where you want to add the new expression text.
The first command in the context menu is Delete: select this to delete the currently selected subexpression. This is
equivalent to clicking the Delete button.
The rest of the context menu lists:
* Answers – a list of all the answers defined for multiple choice, range multiple choice and ordered choice
questions in the survey.
When you select an Answer, the selected subexpression will be deleted and replaced by the selected answer
as a fixed string value.
* Questions – a list of all the question names in the survey: question names are grouped by question table;
question names not in a table are in the (none) group.
When you select a Question, the selected subexpression will be deleted and replaced by the question name.
For each response, the question name will be evaluated to the answer given to that question in the response.
* Type casts – a list of special functions (Integer, String, Float, DateTime, Boolean) that take an argument of any
type and convert its value to a value of a specific type.
When you select a type cast, the selected subexpression will become the type cast’s argument.
Selecting a type cast from the right-click context menu is equivalent to selecting the same type cast from the
left-click menu.
The left-click type cast menu also allows you to remove the type cast – see previous section.
* Operators – a list of KeyPoint operators.
When you select an operator, the selected subexpression will become one of the operator’s operands.
Selecting an operator from the right-click context menu is equivalent to pressing that operator’s button in the
visual expression editor.
* Functions – a list of KeyPoint’s built-in functions sorted by type (numeric, text, logical, date/time).
When you select a function, KeyPoint adds dummy arguments, for example:
These show you the type of argument you need to insert at that point by replacing the dummy argument with
the real argument.
Using the advanced expression editor
In the advanced expression editor you can build or edit an expression by typing directly into the editor and/or by
selecting items from a context menu.
To display the context menu:
Right-click at the point in the expression where you want to add the new expression text.
482 | Chapter 18: Using Expressions
The advanced expression editor context menu is the same as the right-click context menu in the visual expression
editor (see previous section), except that it does not have a Delete command and the Operators list does not include
the arithmetic operators +, - , *, \, which can be entered by typing the character.
Expressions: reference section
Operators
Operators in KeyPoint are evaluated in a certain order. This is called the precedence of the operators.
For example, in the expression 1+2*3+5, the multiplication operator has a higher precedence than the addition
operator, so 2*3 is evaluated first (giving 6). Operators of the same precedence are evaluated from left to right, so
1+6 is evaluated next (giving 7). Finally, 7+5 is evaluated (giving 12). The value of this expression is therefore 12.
If necessary, you can use brackets to force a different evaluation order. For example, in the expression (1+2)*(3+5)
the expressions 1+2 and 3+5 are evaluated first, and then 3*8 to give 24.
Table of operators and their precedence:
Operator
Symbol
Precedence
Brackets
(, )
1 (highest)
NOT
NOT
2
Multiplication, division, AND
*, /, AND
3
Addition, subtraction, OR
+, -, OR
4
Greater than or equal to, less than or equal to, less than,
greater than, not equal to, equal to
>=, <=, <,
>, <> , =
5
The comparison operators evaluate to the logical values True or False. You can use them to compare dates/times and
strings (ASCII ordering) as well as numbers.
Expressions: reference section | 483
Operands
The following table summarises the type of operands normally used with the different operators (see following
sections for more details).
Table of operators and their operands:
Operator
Type of operands
*, /
numeric
+
numeric, string, string+other type, date+numeric
-
numeric, string, date+numeric
>=, <=, <, >, <>, =
numeric, date, string
AND, OR, NOT
logical
KeyPoint does not restrict you to applying operators to operands of the types shown in the table. For example, it is
possible to add (+) a logical value to a date (if you do this, both operands are converted to numbers, which are then
added to give the result, which is a number). However, the result of applying an operator in this way may be difficult
to interpret, so you are strongly advised to restrict operators to the types of operand given in the table.
KeyPoint will give an error if you apply some operators to operands of the ‘wrong’ type. For example, you will get an error if you
try to add (+) two logical values.
Logical operators
The logical operators OR, AND and NOT operate on logical values and evaluate to True or False.
Example of OR:
("Age"<20) OR ("Age">=30)
The OR operator is True if either of its operands is True, otherwise it is False. In this example, the expression is False
for anyone who is in their twenties, but True otherwise.
Note that the brackets are necessary here (and in the following examples) because logical operators (OR in this case)
have higher precedence than comparison operators (< and >= in this case).
Example of AND:
("Age">=20) AND ("Age"<30)
The AND operator is True if both of its operands are True, otherwise it is False. In this example, the value of the
expression is True for anyone in their twenties, but False otherwise.
484 | Chapter 18: Using Expressions
Example of NOT:
NOT ("Country of birth" = ‘UK’)
The result of the NOT operator is the opposite truth value to the truth value of its operand (NOT True = False; NOT
False = True). In this example, the expression is True for anyone born outside the UK, but False for those born in the
UK.
Using + to append strings
When the operands for the + operator are strings, the result is a string formed by appending the second operand to
the first. For example, the expression 'John '+'Smith' evaluates to the string 'John Smith'.
If only one of the operands is a string, KeyPoint converts the value of the other operand to a string and then performs
the append operation. For example: 3+'2' evaluates to the string '32'; 'this is ' + (2=2) evaluates to 'this is
True' .
Using + and - with dates
You can use the + operator to add a whole number of days to a date. For example, 11/10/02+31 evaluates to the
date 11/11/02.
Similarly, you can use the - operator to subtract a whole number of days from a date. For example, 11/11/02-31
evaluates to the date 11/10/02.
The number added to or subtracted from a date must be a whole number. If it is not, the date will be converted to a
number and the result will be a number rather than a date.
Type casts
Type casts are a special type of function (see next section) that convert the type of its argument into another type.
As an example, remember that when a string is added to an integer, the result is a string (see Using + to append
strings in the previous section). So 1+'5' evaluates to the string '15'. Here we have told KeyPoint to treat 5 as a
string by putting it in quotes. But you can’t do that if the 5 arises as a result of a calculation, or as the answer to a
numeric question: 1+'2+3' evaluates to the string '12+3'; 1+'"Room number"' evaluates to the string '1"Room
number"'.
To get around this problem you can use the type cast String to change an integer result into a string. For example, the
expression 1+String(2+3) evaluates to the string '15', as does the expression 1+String("Room number") if
the answer given to the Room number question is 5.
The other type cast functions can be used in a similar way.
One of the main uses of typecasts is with the If function. The If function returns a text value, but there are occasions
when you would like a conditional expression to return a value with another type, such as an integer. You can
achieve this by using a typecast with an If function. For example, the expression If(true,12,13)+3 evaluates to
the string value '123' since the If function returns the string '12', but the expression
Integer(If(true,12,13))+3 evaluates to the numeric value 15, since the typecast converts the string '12'
returned by the If function to the integer 12.
Expressions: reference section | 485
Functions
Functions are predefined calculations that return a result.
Some functions need an input value in order to return a result. These are called ‘arguments’. Depending on the
function, arguments can be numeric values, dates, strings or question names.
You can use a question name as an argument for any function – KeyPoint evaluates the question name to the answer
given to that question in the response, and that value is then used as the input to the function. However, some
functions require question names as arguments: for example, IsEmpty.
In KeyPoint, functions are grouped by the type of result they return. The groups are (in addition to type casts – see
previous section):
* Numeric
* Text
* Logical
* Date/Time.
The following sections contain tables listing the functions in each group, with for each function, a specification of the
required arguments, a description of what the function calculates and an example of how it is used.
Numeric functions
The numeric functions in KeyPoint include arithmetic functions, such as Abs and Cos. There are also counting,
summation and date functions.
Arithmetic functions
Function
Argument(s)
Description
Example
Abs
num
Returns the absolute value of num
Abs(-5) = 5
Exp
num
Returns num in exponential form to the base e
Exp(50) = 5.1847055285871e21
Frac
num
Returns the fraction part of num
Frac(5.3) = 0.3
Int
num
Returns the integer part of num
Int(5.3) = 5
Int(5.9) = 5
Ln
num
Returns the log of num to the base e
Ln(5) = 1.6094379124341
PI
Returns pi to fourteen decimal places
PI=3.14159265358979
Power
Base; exponent
Returns base to the power of exponent
Power(10;2) = 100
Round
num
Rounds num to the nearest integer
Round(5.6) = 6
Round(5.3) = 5
Sqr
num
Returns num2
Sqr(3)=9
Sqrt
num
Returns the square root of num
Sqrt(100) = 10
Trunc
num
Returns the integer component of num
Trunc(5.3) = 5
486 | Chapter 18: Using Expressions
Trigonometric functions
Trigonometric functions require their arguments to be in radians. To convert degrees to radians, multiply the degree
value by pi and divide by 180.
Function
Argument(s)
Description
Example
Arctan
num
Returns the arctan of num
Arctan(5) = 1.37340076694502
Cos
num
Returns the cosine of num
Cos (0) = 1
Sin
num
Returns the sine of num
Sin(PI/2) = 1
Other functions giving results in numeric format
Function
Argument(s)
Description
Example
Age
birthdayDate;
todate
Returns the difference in whole years
between birthdayDate and toDate
Age(4/1/1972;20/5/1999) = 27
DateTimeDiff
datetime1;
datetime2
Returns a number giving the number of
days (and fractions of a day) that the
first argument is later than the second
DateTimeDiff
(28/4/1952 23:11:27,
15/11/2002 16:23:52)
= 18462.717
Day
dateAnswer
Returns the day value in dateAnswer
Day(20/5/1999) = 20
DayOfYear
dateAnswer
Returns the day value in dateAnswer
relative to the number of days in the
year
DayOfYear(20/5/1999)
= 140
Length
string
Returns the number of characters in
string
Length('Yes') = 3
Month
dateAnswer
Returns the month value in dateAnswer
Month(20/5/1999) = 5
NumNumbers
firstAnswer;
lastAnswer
(see footnote *)
Returns the number of numerical
answers between and including
firstAnswer and lastAnswer
NumNumbers("Q1"; "Q5") = 3
NumScores
firstAnswer;
lastAnswer
(see footnote *)
Returns the number of questions with
scoring answers between and including
firstAnswer and lastAnswer
NumScores("Q1"; "Q2")
=2
questionName;
choiceAnswer
For ordered choice questions, returns
the ranking of the choice indicated by
choiceName. It will not return the rank
for Other answers
Order("Q3";'Best') =1
Returns the number of pages
PageCount= 5
Order
PageCount
* The ordering of questions used for these functions is the order in which they were created, which is also the ordering
used in the Analysis Grid.
Expressions: reference section | 487
Function
Argument(s)
PageNumber
Description
Example
Returns the current page number
PageNumber = 2
Pos
substring; string
Gives the position of substring within
string, by returning the number of the
character in string where substring
begins
Pos('ith';'Smith') = 3
Score
questionName
Returns the score of answer to
questionName (for multiple choice
answers)
Score("Q1") = 2
Returns the sheet number for each
response
SheetNumber=1
SheetNumber
SumNumbers
firstAnswer;
lastAnswer
(see footnote *)
Returns the sum of the numerical
answers between and including
firstAnswer and lastAnswer
SumNumbers("Q1"; "Q5") = 4
SumScores
firstAnswer;
lastAnswer
(see footnote *)
Returns the sum of the scores for each
scoring multiple choice question
between and including firstAnswer and
lastAnswer
SumScores("Q1"; "Q5")
=7
WeekDay
dateAnswer
Returns the day in dateAnswer relative
to its position in the week with Sun=1,
Sat=7
WeekDay(20/5/1999)
=5
WeekOfYear
dateAnswer
Returns the week of the year in which
dateAnswer falls
WeekOfYear(20/5/1999) = 20
WorkingDays
startDate;
endDate
Returns the number of working days
between, but not including, startDate
and endDate. The WorkingDays
function does not take account of
holidays.
WorkingDays(19/5/ 1999;
23/5/1999) = 2
Year
dateAnswer
Returns the year in dateAnswer
Year(20/5/1999) = 1999
* The ordering of questions used for these functions is the order in which they were created, which is also the ordering
used in the Analysis Grid.
488 | Chapter 18: Using Expressions
Text functions
The text functions enable you to manipulate strings and extract month and day names corresponding to values.
Functions giving results in text format:
Function
Argument(s)
Description
Example
Lower
string
Returns string in lower case
Lower('Smith')=
'smith'
Upper
string
Returns string in upper case
Upper('Smith')=
'SMITH'
Returns the name of the assessed person in
a 360 degree feedback survey
AssessedPerson=
'Andrew Smith'
AssessedPerson
Choice
questionName;
value
Returns the text of the choice in an
ordered choice question that was given the
ranking of value
Choice("BestCars";1)=
'Ferrari'
DayName
value
Returns the name of the day
corresponding to the number in value
(Sun=1, Sat=7)
DayName(2)= 'Monday'
Returns the name of the form
FormName='Staff'
FormName
If
condition;
result1; result2
If the condition expression evaluates to
True, result1 is returned, otherwise result2
is returned.
The condition can include question names
and functions; result1 and result2 can be
expressions, text, numbers or dates.
If(Sqr(3)=9;
'Answer is 9';
'Answer is not 9') = 'Answer
is 9'
Left
string;num
Returns the first num characters of string
Left('Smith';2)='Sm'
Mid
string; startNum;
num
Returns num consecutive characters of
string starting with character number
startNum
Mid('Smith';2;2)='mi'
MonthName
value
Returns the name of the month
corresponding to the number in value
(January=1, December=12)
Month(5)='May'
NA
Returns the string ‘Not answered’
NA='Not answered'
ProjectName
Returns the name of the survey
ProjectName= 'mysurvey.kp'
Right
string;num
Returns the last num characters of string
Right('Smith';2)='th'
ShortDayName
value
Returns the abbreviated day name
corresponding to the number in value
(Sun=1, Sat=7)
ShortDayName(4)= 'Wed'
Expressions: reference section | 489
Function
Argument(s)
Description
Example
ShortMonthName
value
Returns the abbreviated month name
corresponding to the number in value
(January=1, December=12)
ShortMonthName(1)= 'Jan'
TranslateValue
question
Returns the label text for the current form
for the answer given to the question
TranslateValue(gender)='ho
mme'
Trim
string
Removes leading and trailing spaces from
string
Trim(' abc ')='abc'
Returns the username set in the Options
dialog box
UserName='JDOE'
UserName
Logical functions
The logical functions return a logic value (True or False). They enable you to get a True or False answer to questions,
such as Does this question have dirty data?
Function
Argument(s)
Description
Example
Between
value;min;max
Returns True if value is between min and max, or
equal to min or max; otherwise False
Between(20;16;25)= True
Includes
value1;value2
Returns True if value2 includes value1; otherwise
False. If value1 and value2 are not strings, they
are converted to strings
Includes('amble';'ramble')=True
IsClean
question
Returns True if question contains no dirty data;
otherwise False
IsClean("Q1")=True
IsDirty
question
Returns True if question contains dirty data;
otherwise False
IsDirty("Q1")=False
IsEmpty
question
If question is empty (question has not been
answered), returns True, otherwise False
IsEmpty("Q1")=False
490 | Chapter 18: Using Expressions
Date/time functions
The date/time functions return a value in date or time format.
Function
Argument(s)
CurrentTime
Description
Example
Returns the current time
11:33:30
Date
d;m;y
Returns a date using the values in d, m and y
Date(20;5;1999)=
20/5/1999
DateValue
value
Returns a date corresponding to value days
from the beginning of the current year
DateValue(5)=6/1/1999
Returns today’s date
21/6/1999
Returns the date corresponding to workdays
working days from startDate; workdays can
be a negative number
WorkDay(20/5/1999;5)=27/5/1999
WorkDay(20/5/1999;-5)=13/5/199
9
Today
WorkDay
startDate;
workdays
Expressions: reference section | 491
492 | Chapter 18: Using Expressions
A
Statistics and Analysis Glossary
This appendix gives brief descriptions of the statistical and analytical terms used in KeyPoint.
Adjusted cumulative percentage (adj. cum. percent.)
A cumulative percentage based on the number of respondents who actually answered the question, rather than the
total number of respondents, including those who did not answer the question.
Adjusted percentage (adj. percentage)
A percentage based on the number of respondents who actually answered the question, rather than the total number
of respondents, including those who did not answer the question.
Area graph
An area graph is similar to a line graph, except that the area underneath the line is filled in.
Average deviation (Avg. dev.)
A measure of dispersion of the data around the mean or median. KeyPoint uses the mean when calculating Average
deviation:
1
I
I
å ABS(x - x )
i
i =1
The larger the average deviation, the more widely spread the data.
Bar graph
A bar graph, is one of the most common types of graph. A bar graph uses a rectangle for each value or category on
the X axis. The height of a rectangle indicates the corresponding Y value for that X value or category.
Box plot
A box plot (which is also sometimes called a box-and-whisker diagram) is a graph providing a concise summary of the
distribution of a set of data. The box plot shows: the median, lower and upper quartiles, smallest and largest values
(excluding outliers), and individual mild and extreme outliers.
Appendix A: Statistics and Analysis Glossary | 493
Chi square
A statistical significance test. Chi square tests whether two categorical variables are independent. The data for the chi
square test is usually arranged in a table including sums for each row and column.
It is defined by:
I
c2 =
J
åå
i =1
(nij -
j =1
ni . * n. j 2
n
ni . * n. j
)
n
where: I is the number of rows in the table; J is the number of columns; nij is the value in the cell located in row i and
column j; ni. is the sum of values in row i; n.j is the sum of values in column j; and n is the sum of all values in the
table.
Contingency coefficient
The contingency coefficient is derived from chi square, and is defined by the formula:
c2
c2 + n
The contingency coefficient falls in the range 0 to 1, but can’t usually be 1.
Compare with Cramer’s V.
Count
The same as frequency.
Cramer’s V
Cramer’s V is derived from chi square, and is defined by the formula:
c2
n
min(I - 1, J - 1)
where: I is the number of rows in the table; J is the number of columns; and n is the sum of all values in the table.
Cramer’s V falls in the range 0 to 1, and can take the value 1.
Compare with contingency coefficient.
Cumulative frequency (cum. frequency)
A frequency distribution where the frequency for each value represents the total frequencies for all values equal to or
less than that value. The final cumulative frequency is equal to the total number of values.
Cumulative percentage (cum. percentage)
A frequency percentage distribution where the percentage frequency for each value represents the total percentage
frequencies for all values equal to or less than that value. The final cumulative percentage frequency is equal to 100%.
494 | Appendix A: Statistics and Analysis Glossary
Dependent variable
In a pair of variables, the dependent variable depends on the other variable, the independent variable. Common
independent variables are age and time.
Donut graph
A graphical representation of a distribution where divisions of a ring (slices) are used to represent the frequencies of
values. Each value is transformed into a proportion of the whole ring.
A Donut graph is, essentially, a pie graph with a hole in the centre.
Expected cell frequency
In the chi square test, the expected cell frequency is the frequency that should appear in a cell if the two variables are
unrelated. It is defined by:
min(n1. , n2.... nI. )* min(n.1 , n.2... n.J )
n
where: I is the number of rows in the table; J is the number of columns; ni. is the sum of values in row i; n.j is the sum
of values in column j; and n is the sum of all values in the table.
Frequency
The number of times a value occurs in a set of data. The frequencies for a set of data are usually displayed in table or
bar graph format.
Frequency distribution
A tabular or graphical representation of all the values in a set of data and their corresponding frequencies.
Geometric mean
A measure of the most typical value in a set of data. If the number of values in the set is I, the geometric mean is
calculated by multiplying all the values together and taking the Ith root of this product:
I
I
Õx
i
i =1
Harmonic mean
A measure of the most typical value in a set of data. If the number of values in the set is I, the harmonic mean is
calculated by summing the inverses of the values (1/value) and then dividing I by this sum:
I
I
å
1
xi
i =1
For example, for the data set 21, 21, 21, 23, 25, 25, 26, 27, 27, the harmonic mean is 24.14.
Appendix A: Statistics and Analysis Glossary | 495
HiLo graph
A type of bar graph. The minimums and maximums for each series are plotted on the graph and a bar is then placed
between each of these to indicate the range.
Horizontal bar graph
A bar graph where the bars are arranged horizontally rather than vertically.
Independent variable
See dependent variable.
Kurtosis
A measure of the curve of a distribution relative to the curve of a normal distribution.
Line graph
In a line graph, the Y axis values corresponding to the values or categories on the X axis are joined together to form a
continuous line.
Lower quartile
The value below which 25% of the values in a set of data fall.
Mean
A measure of the most typical value in a set of data. The mean is calculated by summing all the values and dividing by
the number of values:
x=
1
I
I
åx
i
i =1
See also median and mode.
Mean (%)
The mean expressed as a percentage:
Mean(%) =
Mean - Min
* 100
Max - Min
Median
A measure of the most typical value in a set of data. If a set of data is arranged in order from minimum to maximum,
the median is the mid-point of this sequence. For instance, in the set of data 21, 21, 21, 23, 25, 25, 26, 27, 27, the
median is 25. If the number of values in the set is even, then the median is calculated by adding the two central
values and dividing by two. See also mean and mode.
496 | Appendix A: Statistics and Analysis Glossary
Mode
A measure of the most typical value in a set of data. The mode is the value that occurs most frequently in a set of
data. For instance, in the set of data 21, 21, 21, 23, 25, 25, 26, 27, 27 the mode is 21. See also mean and mode.
P10 - P90
The 10th to the 90th percentiles. P10 is the value below which 10% of the values in a set of data fall, P20 is the value
below which 20% of the values in a set of data fall, and so on.
Phi coefficient
A measure of the correlation between two variables, both of which can take one of only two possible values. It is
based on chi square and defined by:
c2
n
where n is the sum of all values in the table.
Pie graph
A graphical representation of a distribution where divisions of a circle (pie slices) are used to represent the frequencies
of values. Each value is transformed into a proportion of the whole pie.
Point/Scatter graph
A graph where each Y axis value is represented with a point.
A scatter graph is a point graph with the addition of a trend line.
Population
The total group of people you want to measure. An example of a population is all employed adults in the United
Kingdom. See also sample.
Radar graph
A graph where each of the X axis values or categories is represented as a line radiating out from a central point. The
lines are equidistant from each other. The Y axis values are plotted as points on these lines and the points are joined
to each other with lines.
Range
The difference between the minimum and maximum values in a set of data.
Sample
A subset of the population. Instead of measuring all members of the population, a sample is measured. From the
sample you can infer certain statistics about the whole population within a certain confidence level.
Appendix A: Statistics and Analysis Glossary | 497
Sampling distribution
The distribution of a particular statistic assuming an infinite number of samples is taken and the statistic is calculated
for each of these samples.
Skewness
A measure of the asymmetry of a frequency distribution. A distribution is skewed when the values are grouped
asymmetrically around the mean. A distribution with no skewness is a symmetrical distribution.
Standard deviation
A measure of how spread out a set of data is around the mean.
It is defined as the square root of the variance:
VAR
Standard error
A measure of the inaccuracy of the mean value:
VAR
I
In a sampling distribution, the standard deviation.
Upper quartile
The value below which 75% of the values in a set of data fall.
Value
In a set of data, an individual measurement of a particular attribute. For instance, a value for the attribute gender
could be ‘Female’.
Variable
Any attribute that can be measured. See dependent variable.
Variance
A measure of how spread out a set of data is around the mean. It is defined by:
I
å (x - x)
2
i
i =1
I -1
Where there are I data points xi with a mean value of x.
See also standard deviation.
498 | Appendix A: Statistics and Analysis Glossary
X axis
In a graph, the horizontal axis. Conventionally, the independent variable is usually plotted on the X axis.
Y axis
In a graph, the vertical axis. Conventionally, the dependent variable is usually plotted on the Y axis.
Appendix A: Statistics and Analysis Glossary | 499
500 | Appendix A: Statistics and Analysis Glossary
B
Shortcuts
This appendix lists the keyboard shortcuts you can use in KeyPoint.
File menu
Function
Shortcut
Open
Ctrl+O
Save
Ctrl+S
Print
Ctrl+P
Exit
Alt+F4
Edit menu
Function
Shortcut
Undo
Ctrl+Z
Redo
Ctrl+Y
Cut
Ctrl+X
Copy
Ctrl+C
Paste
Ctrl+V
Clear
Del
Select All
Ctrl+A
Find
Ctrl+F
View menu
Function
Shortcut
Frames
Ctrl+R
Full Screen
F9
Appendix B: Shortcuts | 501
Form menu
Function
Shortcut
Show as Email
Ctrl+E
Show as HTML
Ctrl+H
Response menu
Function
Shortcut
New Response
Ctrl+G
Save Response
Ctrl+H
Copy Response
Ctrl+J
Next Response
Ctrl+K
Previous Response
Ctrl+L
Next Question
Tab
Previous Question
Shift+Tab
Tools menu
Function
Shortcut
Spelling
F7
Options
Ctrl+Alt+O
surveyserver menu
Function
Shortcut
Upload survey
Ctrl+U
Upload presentation
Ctrl+U
Web presentation location
Ctrl+W
Web survey location
Ctrl+W
Other shortcuts
Function
Shortcut
Adding object1 to object2
Ctrl+drag object1 onto object2
Cycle through the groups which an object is
part of
Ctrl+click repeatedly
502 | Appendix B: Shortcuts
Function
Shortcut
Entering dirty data in the Responses tab
Ctrl+Plus on numeric keypad
Selecting more than one object
Shift and drag rectangle around objects (all
objects with some part within the rectangle will
be selected)
To select a multichoice answer in a response
Space bar
To add dirty data into a question that has been
routed around
Ctrl+click
Context-sensitive menus – for instance to open
Properties
Right-click
To cancel the action
Esc
Appendix B: Shortcuts | 503
504 | Appendix B: Shortcuts
C
Email Systems
Email systems can use different communication methods to send and receive email messages. The two methods
supported by KeyPoint are the Messaging Application Programming Interface (MAPI) and Internet email protocols. If
your email system allows you to configure the communication method, you should select the latter, as it tends to be
more reliable. Both the LAN and modem connection types allow communication using Internet email protocols.
MAPI
MAPI was designed by Microsoft, and is supported by default in Microsoft email clients. The MAPI functions are
stored in the Mapi.dll and Mapi32.dll files, which you can find in your Windows\System folder (or
Windows\System32 folder if you’re using Windows NT).
Using MAPI, a Windows application can send a message to another Windows application without having to switch to
an external email application. This enables you to send an email message from within an application such as
Microsoft Word using the command Mail Recipient (File®Send To submenu). Word calls functions in the MAPI DLL,
which in turn passes the request to Microsoft Exchange or another Microsoft email client. In MAPI terms, the sender
of the message – Word or KeyPoint, for example – is the MAPI client. The application that receives the message –
Microsoft Exchange, for example – is the MAPI server.
There are two types of MAPI – Simple and Extended. KeyPoint is configured for Simple MAPI (Extended MAPI
includes additional functions).
Not only are there two types of MAPI, there are also different versions of each type. For instance, installing a new
MAPI email program may cause an existing MAPI email program to stop working, because the existing program is
expecting a version of the MAPI DLL that is no longer there once it has been overwritten by the version
accompanying the new program.
KeyPoint can use MAPI to communicate with many Internet email clients, and have them send and receive surveys,
but using an Internet connection directly is more reliable.
Internet email protocols
In Internet terms, email systems consist of email servers and email clients. Users use email clients.
Email clients are responsible for sending email to an email server and retrieving email from the email server. Email
servers are responsible for passing an email message from server to server until it reaches its destination server.
In order to communicate on the Internet, email servers and clients use the Simple Mail Transfer Protocol (SMTP) and
the Post Office Protocol (POP). The most recent version of POP is version 3, so it’s usually called POP3.
SMTP is used when you send email and also to route email between servers. POP3 specifies how your email client
can retrieve email from your email account on the server. When you configure KeyPoint to send and receive email
via the LAN or modem connection types, you need to specify the POP3 server and the SMTP server for your
connection. Outgoing email gets routed to the SMTP server, and incoming email is retrieved from the POP3 server.
When KeyPoint uses Internet protocols, it acts as an email client communicating directly with your Internet Service
Provider (ISP) to send and receive surveys. It does not communicate through your existing email client.
Appendix C: Email Systems | 505
506 | Appendix C: Email Systems
D
Web Accessibility Guidelines
The World Wide Web Consortium (W3C) has created a series of Guidelines for Web accessibility. Each Guideline is
divided into a number of checkpoints, and each checkpoint has been assigned a priority from 1 to 3: priority 1 has
highest priority. Conformance with the Guidelines has three levels:
* Triple-A: all Priority 1, 2 and 3 checkpoints are satisfied
* Double-A: all Priority 1 and 2 checkpoints are satisfied
* A: all Priority 1 checkpoints are satisfied.
KeyPoint supports the creation of Triple-A web surveys.
Conformance with some of the Guidelines depends on the content of your survey, so KeyPoint cannot guarantee that
the Web Accessibility survey it creates from your design will conform with all the Guidelines.
The Guidelines are designed to apply to all types of website and cover many issues that do not apply to KeyPoint – for
example, they cover features that are not included in KeyPoint. This appendix lists the Guidelines and the
checkpoints within each of them that are relevant to KeyPoint Web Accessibility surveys. For each checkpoint, the
appendix describes how KeyPoint ensures that the checkpoint is satisfied, and, in some cases, what you will also need
to do in the design of your survey to ensure that it will be satisfied.
For a complete listing of the Guidelines and all the checkpoints, together with full descriptions and a discussion of the
issues, see the W3C website:
http://www.w3.org/TR/WAI-WEBCONTENT/
The W3C Guidelines
Guideline 1: Provide equivalent alternatives to auditory and visual content
Checkpoints 1.2–1.5 refer to features not used in KeyPoint Web Accessibility surveys.
1.1 Provide a text equivalent for every non-text element [Priority 1]
The only non-text elements in KeyPoint Web Accessibility surveys are images and OLE objects.
To add a text equivalent:
1
Right-click on the image or OLE object and choose Edit properties.
2
Type the required text into the Description box in the General group of properties on the Inspector tab.
The text equivalent will be used in place of the picture or OLE object if the user has disabled the display of images in
their web browser.
Appendix D: Web Accessibility Guidelines | 507
Guideline 2: Don’t rely on colour alone
KeyPoint provides the option to create a web accessibility version with all coloured text shown in black: for
surveyserver, see Customising the appearance and behaviour of a surveyserver form, page 343; for other response
methods, see Setting web survey options, page 308.
2.1 Ensure that all information conveyed with colour is also available without colour, for example from context or
markup [Priority 1]
KeyPoint does not use colour to convey information.
2.2 Ensure that foreground and background colour combinations provide sufficient contrast when viewed by someone
having colour deficits or when viewed on a black and white screen [Priority 2 for images, Priority 3 for text].
You should ensure that the survey design provides sufficient contrast between the colours used.
Guideline 3: Use markup and style sheets and do so properly
Guidelines 3.5–3.7 refer to features not used in KeyPoint Web Accessibility surveys.
3.1 When an appropriate markup language exists, use markup rather than images to convey information [Priority 2]
If you add HTML code to a survey design, you should ensure that you use a suitable markup code.
You can add HTML code to a survey design by entering it into a text object and ticking the Is HTML box in the
object’s Properties sidebar (right-click on the object and choose Edit properties).
3.2 Create documents that validate to published formal grammars [Priority 2]
KeyPoint Web Accessibility surveys pass DTD validation and begin with the following document type declaration:
<!DOCTYPE HTML PUBLIC "-//W3C//DTD HTML 4.01//EN" "http://www.w3.org/TR/html4/strict.dtd">
3.3 Use style sheets to control layout and presentation [Priority 2]
KeyPoint Web Accessibility surveys use style sheets to control layout and presentation.
If you are not using surveyserver, the style sheet can be stored within the HTML file or in a separate file – see Setting
web survey options, page 308.
3.4 Use relative rather than absolute units in markup language attribute values and style sheet property values
[Priority 2]
Only relative units are used in KeyPoint Web Accessibility surveys.
Guideline 4: Clarify natural language usage
Use markup that facilitates pronunciation or interpretation of abbreviated or foreign text. This helps, for example,
speech synthesisers and braille devices to switch automatically to the new language.
508 | Appendix D: Web Accessibility Guidelines
4.1 Clearly identify changes in the natural language of a document's text and any text equivalents (for
example, captions) [Priority 1]
You can set the language by adding HTML code such as <span lang=”pl“></span>, which sets the language to
Polish.
You can add HTML code to a survey design by entering it into a text object and ticking the Is HTML box in the
object’s Properties sidebar (right-click on the object and choose Edit properties).
4.2 Specify the expansion of each abbreviation or acronym in a document where it first occurs [Priority 3]
You can achieve this by adding appropriate custom HTML objects – see previous note.
4.3 Identify the primary natural language of a document [Priority 3]
The primary natural language of the survey is declared in the <html> tags at the beginning of the survey document.
The default is English: <html lang=”en”>.
Guideline 5: Create tables that transform gracefully
KeyPoint does not create tables when it generates Web Accessibility surveys, so this Guideline is not relevant.
Guideline 6: Ensure that pages featuring new technologies transform gracefully
Checkpoints 6.2 and 6.5 refer to features not used in KeyPoint Web Accessibility surveys.
6.1 Organise documents so they may be read without style sheets. For example, when an HTML document is
rendered without associated style sheets, it must still be possible to read the document [Priority 1]
KeyPoint Web Accessibility surveys can be read without the style sheet.
6.3 Ensure that pages are usable when scripts, applets, or other programmatic objects are turned off or not
supported. If this is not possible, provide equivalent information on an alternative accessible page
[Priority 1]
KeyPoint Web Accessibility surveys may use JavaScript – for example, for saving or printing the web response.
However, no essential features required for reading or responding to the survey are dependent on JavaScript, and
continue to work if JavaScript is disabled or unavailable.
6.4 For scripts and applets, ensure that event handlers are input device-independent [Priority 2]
The save and print buttons generate ‘onclick’ events, but these are accessible with a mouse and keyboard in most
browsers. If required, Web Accessibility surveys can be created without save and print buttons: for surveyserver, see
Customising the appearance and behaviour of a surveyserver form, page 343; for other response methods, see
Setting web survey options, page 308.
Appendix D: Web Accessibility Guidelines | 509
Guideline 7: Ensure user control of time-sensitive content changes
None of the features covered in this Guideline are used in KeyPoint Web Accessibility surveys.
Guideline 8: Ensure direct accessibility of embedded user interfaces
None of the features covered in this Guideline are used in KeyPoint Web Accessibility surveys.
Guideline 9: Design for device-independence
Checkpoint 9.1 refers to features not used in KeyPoint Web Accessibility surveys.
9.2 Ensure that any element that has its own interface can be operated in a device-independent manner
[Priority 2]
All elements included in KeyPoint Web Accessibility surveys are standard HTML form controls.
9.3 For scripts, specify logical event handlers rather than device-dependent event handlers [Priority 2]
The save and print buttons generate ‘onclick’ events, but these are accessible with a mouse and keyboard in most
browsers. If required, Web Accessibility surveys can be created without save and print buttons: for surveyserver, see
Customising the appearance and behaviour of a surveyserver form, page 343; for other response methods, see
Setting web survey options, page 308.
9.4 Create a logical tab order through links, form controls, and objects [Priority 3]
KeyPoint automatically creates a logical tab order for objects in Web Accessibility surveys.
9.5 Provide keyboard shortcuts to important links (including those in client-side image maps), form controls,
and groups of form controls [Priority 3]
KeyPoint automatically creates keyboard shortcuts for the Submit, Reset, Save and Print buttons.
Guideline 10: Use interim solutions
Checkpoint 10.3 refers to features not used in KeyPoint Web Accessibility surveys.
10.1 Until user agents allow users to turn off spawned windows, do not cause pop-ups or other windows to
appear and do not change the current window without informing the user [Priority 2]
The only other windows that may be displayed while completing a KeyPoint Web Accessibility survey are standard
browser alert windows.
10.2 Until user agents support explicit associations between labels and form controls, for all form controls
with implicitly associated labels, ensure that the label is properly positioned [Priority 2]
KeyPoint ensures that all labels are correctly positioned when it generates Web Accessibility surveys.
510 | Appendix D: Web Accessibility Guidelines
10.4 Until user agents handle empty controls correctly, include default, place-holding characters in edit
boxes and text areas [Priority 3]
KeyPoint allows you to choose default, place-holding characters for edit boxes and text areas in Web Accessibility
surveys: for surveyserver, see Customising the appearance and behaviour of a surveyserver form, page 343; for
other response methods, see Setting web survey options, page 308.
10.5 Until user agents (including assistive technologies) render adjacent links distinctly, include non-link,
printable characters (surrounded by spaces) between adjacent links [Priority 3]
If you choose to include HTML web links, you should ensure that they are separated by suitable dividing characters
(some older screen readers read lists of consecutive links as one link).
You can add HTML links to a survey design by entering them in a text object and ticking the Is HTML box in the
object’s Properties sidebar (right-click on the object and choose Edit properties).
Guideline 11: Use W3C technologies and Guidelines
11.1 Use W3C technologies when they are available and appropriate for a task and use the latest versions
when supported [Priority 2]
KeyPoint uses HTML 4 and CSS, which are both W3C technologies.
11.2 Avoid deprecated features of W3C technologies [Priority 2]
KeyPoint does not use any deprecated features of W3C technologies.
11.3 Provide information so that users may receive documents according to their preferences (eg language,
content type etc) [Priority 3]
You can produce multiple versions of Web Accessibility surveys with different languages and content.
11.4 If, after best efforts, you cannot create an accessible page, provide a link to an alternative page that
uses W3C technologies, is accessible, has equivalent information (or functionality), and is updated as often
as the inaccessible (original) page [Priority 1]
KeyPoint produces Web Accessibility surveys.
Guideline 12: Provide context and orientation information
Checkpoints 12.1 and 12.2 refer to features not used in KeyPoint Web Accessibility surveys.
12.3 Divide large blocks of information into more manageable groups where natural and appropriate
[Priority 2]
KeyPoint surveys are naturally divided into questions and Web Accessibility surveys use the <fieldset> tags as
recommended by the W3C Guidelines.
Appendix D: Web Accessibility Guidelines | 511
12.4 Associate labels explicitly with their controls [Priority 2]
KeyPoint explicitly associates labels with their controls.
Guideline 13: Provide clear navigation mechanisms
Checkpoints 13.3–13.7 and 13.9–13.10 refer to features not used in KeyPoint Web Accessibility surveys.
13.1 Clearly identify the target of each link [Priority 2]
If you include any links, you should make sure that the target is clearly identified.
You can add HTML links to a survey design by entering them in a text object and ticking the Is HTML box in the
object’s Properties sidebar (right-click on the object and choose Edit properties).
13.2 Provide metadata to add semantic information to pages and sites [Priority 2]
Metadata is included in the Web Accessibility surveys generated by KeyPoint.
13.8 Place distinguishing information at the beginning of headings, paragraphs, lists, etc [Priority 3]
You should place distinguishing information at the beginning of headings, paragraphs, lists, etc.
Guideline 14: Ensure that documents are clear and simple
14.1 Use the clearest and simplest language appropriate for a site’s content [Priority 1]
You should use the clearest and simplest language possible for your survey.
14.2 Supplement text with graphic or auditory presentations where they will facilitate comprehension of the
page [Priority 3]
You can add images and other objects to supplement text.
14.3 Create a style of presentation that is consistent across pages [Priority 3]
You should use a consistent presentation style throughout the survey.
512 | Appendix D: Web Accessibility Guidelines
E
Connecting KeyPoint to an external address book
KeyPoint allows you to use its own internal address book or to connect to an address book held in an external
database. This appendix shows you how to establish the connection between KeyPoint and the external database; see
Choosing which Address Book to use, page 244, for how to choose which address book to use.
Setting up the connection to an external database can be very technical and may require permissions that are not
available to ordinary users. Because of this, this operation should be done by your network/database administrator.
KeyPoint can be connected to any database supporting ODBC, provided it contains at least three columns containing:
* a unique contact ID – this should be an auto-incrementing field
* a Display name
* the email address.
The following description works through an example of connecting to an address book held in a Microsoft SQL Server
database. If you are using another system, or if your SQL Server database is organised differently, the details of the
setup procedure may be different – see the documentation supplied with the ODBC driver for your system for details.
Chapter 5: Connecting KeyPoint to an external address book | 513
An example of creating an ODBC address book in KeyPoint
To create an ODBC address book in KeyPoint:
1
In KeyPoint, select Options (Tools menu) to display the Options dialog box and click on Address Book to
display the Address Book pag:
2
Click New to start the Address Book Setup Wizard.
3
Enter a name for the address book and click Next.
4
Select ODBC driver (ADO).
5
Either:
a
Enter the Connection string directly if you know what it should be.
An example connection string is:
Provider=SQLNCLI.1;Integrated Security=SSPI;Persist Security
Info=False;Initial Catalog=DATABASENAME;Data Source=SERVERNAME
b Click Test Connection to test the connection.
Or:
a
Click Build to start the system Connection Wizard.
b Either, if you have a data link file:
i
Click Use Data Link FIle.
514 | Chapter 5: Connecting KeyPoint to an external address book
ii
Click Browse to display a Windows open dialog box.
iii Use the dialog box to select the data link file.
Otherwise:
i
Click Use Connection String .
ii
Click Build to display the Data Link Properties dialog box.
iii In the Provider tab, select SQL Native Client:
An example of creating an ODBC address book in KeyPoint | 515
iv Click on the Connection tab:
v
Enter the name of the server in the Data Source box.
vi Specify the log on method and details for logging on to the server.
vii Select the address book database from the Enter the initial catalog to use drop-down list box.
viii IClick Test Connection to check the settings.
ix Click OK to return to the system Connection Wizard, and OK again to return to the KeyPoint
Address Book Wizard.
6
Click Next to go to next step.
516 | Chapter 5: Connecting KeyPoint to an external address book
7
Select the table that contains the contact details from the Select contacts source table drop-down list box:
8
Click Next to display the Define Column Mapping page:
The left-hand list box shows the columns in your database table; the right-hand box shows the fields that
will appear in the address book in KeyPoint – you use this page to link the two so that fields in your
database will appear in the linked fields in the address book.
An example of creating an ODBC address book in KeyPoint | 517
9
To map a column in the database to a field in the address book:
a
Click in the Native Name cell for the address book field – the field will become a drop-down list box:
b Choose the required database column from the drop-down list box.
c
Repeat Steps a and b for the fields you want to map:
The ID field should be linked to the auto-increment column in the database.
The Display name field must be linked to a column in the database – it will be used to identify the contact.
See the paragraphs following these instructions for how to use the User ID and Shared mappings.
10
Click Finish to confirm your settings and close the wizard.
See Choosing which Address Book to use, page 244, for how to choose which address book to use.
The User ID and Shared fields are used to implement the Address Book sharing functionality – see Adding a contact
to the KeyPoint Address Book manually, page 245, for more about sharing. In order to use this feature, you will
need to create a numeric field in the database to hold the KeyPoint user identifier and a binary field to hold the share
attribute, and then map KeyPoint’s User ID and Shared fields to these database fields. After you have done this, the
first KeyPoint user to open the address book will be recorded in the database as the owner of the existing contacts in
the database, and by default they will not be shared. This means that if any other KeyPoint user uses the external
database as their address book, they will not have access to these contacts. If you want other users to have access to
some or all of the contacts, you can share them individually (see Editing and removing contacts, page 247) or create
a contact group, add the contacts to the group and then share the group (see Contact groups, page 247).
If you do not create the mapping for User ID, all contacts in the address book will be accessible to all KeyPoint users
using the address book.
518 | Chapter 5: Connecting KeyPoint to an external address book
Index
!
360 Degree Analysis Wizard, 450–457
Adding and duplicating presentation objects, 454
Adding and editing labels, 456–457
Changing the content of presentation objects,
455–456
Changing the order of presentation objects, 454
Changing the type of a presentation object, 453
Removing presentation objects, 453
Renaming presentation objects, 454–455
Using the Presentation Objects page, 452–456
360° feedback surveys, 445–460
Combining question results, 449–450, 456–457
Designing, 448
Result analysis and presentation, 448–460
360° presentations, 448–460
Adding and editing 360° tables and graphs,
459–460
Editing, 458–460
Printing, 458
360° survey labels, 449
A
ASP, 301, 303, 318
Abbreviated expression language, 383–384
Adding pages, 177
Using the Page Manager, 128–130
Adding paper, 177
Adding text, 178
Address Book, 244–248
Adding contacts, 245–246
Connecting to an external database, 513–518
Contact groups, 247–248
Creating an ODBC address book, 514–518
Displaying, 245
Editing addresses, 248
Editing contacts, 247
Importing contacts, 246–247
Linking to questions, 215–216, 238–239
Removing addresses, 248
Removing contacts, 247
Selecting, 244–245
Sharing contacts, 245, 248
Adjusted cumulative percentage, 493
Adjusted percentage, 493
Advanced HTML options, 310–311
Advanced expression editor, 482–483
Advanced tick box styles, 212
Align and Size sidebar, 152, 173–174
Aligning objects, 172–176
Allow only 1 response, 227
Alphabetical, 217
Analyse Rejected Pages, 293
Analysis Grid, 28, 372–387
Analysis Groups
Hiding and showing, 374–375
Moving, 374
Selecting, 374
Analysis columns, 375–380
Animations, 141
Answer formats, 160–166
See also under individual question types
Area graph, 433
Definition, 493
Arithmetic functions, 486
Ask If, 204–205
Asset Library, 233
Adding an item, 231–232
Adding new category, 232
Combining categories, 233
Deleting categories/items, 232
Managing, 232–233
Moving items between categories, 232
Renaming items, 232
Replacing an item, 231–232
Using an item, 117–118, 230–231
Auto Renumber, 220
Auto Size, 172
Auto renumbering, 169, 224
Automatic layout, 172
Automatic save, 140
Average deviation, 493
B
Bar graph, 431
Definition, 493
Barcode labels, 183–184
Barcodes, 180–184
Best fit mode, 425
Bias and error, 95
Borders, 151
Box plot, 435–436
Definition, 493
Buttons
Adding off-page navigation buttons, 311–312,
343–345
Adding on-page navigation buttons, 184–185
Index | 519
C
CSV files
Exporting responses to, 467–468
Importing, 464–466
Separators in, 464–465
Calculated questions
Answer formats, 197
Calculation columns, 381–382
CamSP script, 297, 304
Categories, 397
Cell colour, 427–428
Cell format, 427–428
Charts
See Graphs
Check for KeyPoint updates, 13
Chi square, 494
Closed question
Changing options, 168–169
Entering answers, 260–261
Codes, 168–169, 199–201, 217–218, 373
Colour picker, 405–406
Column lines, 175
Commercial printing, 234–235
Compression, 141
Connecting KeyPoint to an external address book,
513–518
Contact Link tab, 215–216
Contingency coefficient, 494
Cookies, 227
Copy forms, 19–24, 108, 119–120, 122–123
Responses workspace, 258
Copying objects, 190
Copying questions, 170
Count
See Frequency
Cramer’s V, 494
Created, 217
Cross-tabulation tables, 417–418
Multiple rows/columns, 418
Crosstab Table Wizard, 418
Ctrl key, 130
Cumulative frequency, 494
Cumulative percentage, 494
Custom views
See Views
D
Data
Exporting, 467–468
Data Entry Module, 263–264
520 | Index
Installing, 13
Data Entry tools, 252–253
Data Protection Act, 98
Data entry, 249–250
Bureau services, 268
Data sources in presentations, 393–395
Date/time functions, 491–492
Date/time questions, 153, 202
Answer formats, 165–166, 197
Entering answers, 259
Default value for answer, 202
Delete Form, 122
Delete confirmation, 251
Deleting pages
Using the Page Manager, 128–130
Design forms
Background properties, 223–224
Exporting to a Word file, 466–467
Properties, 223–231
Design workspace, 17–18, 24, 148–152
Customising, 141–142
Designer Tools sidebar
In Design workspace, 149–150
In Presentation workspace, 391
Dictionaries, 135–136
Dirty data, 261–263
Cleaning, 262
Editing, 263
Entering, 262
Disable numbers, 223
Distribution tables, 414–417
Showing totals/calculations, 416–417
Donut graph, 433–434
Definition, 495
Downloading responses, 326, 351–352
Duplicate Form, 123
E
Edit Answer, 179
Editing a 360° presentation, 458–460
Editing tables, 424–428
Email Setup Wizard, 298–299
Email protocols, 505–506
Email setup, 298–299
Email survey
Sending, 345–350
Email systems, 505–506
Environment, 100–105
Customising, 136–142
Excel
Exporting to, 469–472
Links to, 472
Opening link, 472
Updating links, 472
Expected cell frequency, 495
Export Wizard, 467–468
Export to Excel Wizard, 470–471
Exporting
Data to CSV, 467–468
Data to SPSS, 467–468
Responses, 467–468
To Excel, 469–472
To Word, 466–467
Expressions, 461–492
See also Abbreviated expression language
Advanced expression editor, 482–483
Building, 475–477, 483
Visual expression editor, 478–482
F
Fast data entry, 251, 257
Fill colour, 151
Filtering responses, 264
Filters, 383–387
Adding, 384
Examples, 384–387
In different rows, 386–387
In same row, 385–387
Multiple, 385–387
Viewing and editing, 387
On calculated questions, 385
On date questions, 385
On multiple choice questions, 385
On number questions, 385
On ordered choice questions, 385
On text questions, 384
Flip, 217
Fonts, 150
Footer, 115, 226
Form background properties, 223
Form properties, 223–231
Format Palette sidebar, 150–152
Forms, 106, 119–133
Copy forms, 119–120
Copying, 123
Creating new, 122–123
Creating new copy form, 119
Deleting, 122
Displaying, 121
Finding text in, 133–134
Renaming, 121–122
Saving, 121
Saving as a template, 110–111
Frequency, 495
Frequency distribution, 495
Full Screen mode, 255–256
Locking, 251, 256
Functions, 486, 491
Arithmetic, 486
Date/time, 491–492
Logical, 490
Numeric, 486–488
Text, 489–490
Trigonometric, 487
G
Geometric mean, 495
Graphs, 406, 429–444
'Other' answers, 400–401
Analysis properties, 403–404
Changing appearance, 443–444
Changing colours, 443–444
Choosing questions, 395–396
Moving and resizing, 443
Properties, 402
Questions on the x axis, 399–400
Sorting answers in, 399
Style, 431–435
Style Library, 405
See also individual types of graph
Grid, 175
Grid Visible, 141
Grouping objects, 176
H
HTML survey
See Web survey
HTML text
Adding, 178, 219
Hardware and software requirements, 8
Harmonic mean, 495
Header, 115, 226
HiLo graph, 435
Definition, 496
I
Icon sizes, 139–140
Import Wizard, 462–466
Importing data, 109
Insert Answer, 178
Index | 521
Inspector tab, 218–220, 229
Installation
System folders, 10–12
Wizard, 9
Installing KeyPoint, 7–13
Installing the KeyPoint Data Entry Module, 13
Instructions
For answering questions, 96
Internet access, 8
Internet email protocols, 505–506
Invalid data
See Dirty data
Invitation Manager, 242–243, 328–330, 352–354
Invitation library, 324–325, 349–350
Invitations, 237–243, 319–325, 345–350
Is HTML, 178, 219–220
K
KeyPoint
Installing, 8–13
Uninstalling, 13–14
Updating, 13
KeyPoint Offline Server Monitor, 361–362
KeyPoint Scanning Module
See Scanning Module
KeyPoint Window, 32
KeyPoint data
Importing, 462–464
KeyPoint support, 5
KeyPoint updates, 13, 138
Keyboard nudging, 176
Keyboard shortcuts, 255, 316, 345, 501–504
Kurtosis, 496
L
Labels, 168–169, 199–201, 217–218, 373
For combining question results, 449–450, 456–457
Labels tab, 217–218
Layout
Automatic, 172
Manual, 172–173
Line
Adding, 179
Properties, 221
Line graph, 432
Definition, 496
Line-ups, 141, 175
List questions
Entering answers, 260–261
Locking graphs and tables, 401
522 | Index
Logical functions, 490
M
MAPI, 505
Mail Server, 303
Maintain picture aspect ratio, 219–220
Managing your surveyserver account, 355–358
Manual Mode–All Objects, 173
Margins, 224
Mark As Unread, 288
Masks, 160–166, 197–198
Special characters, 198
Master forms, 19–24, 108, 119–120, 122
Master pages, 131–133
Mean, 496
Mean (%), 496
Median, 496
Menu Form Navigation, 121, 138
Menu bar, 100–101
Menu questions
Entering answers, 260–261
Merge tables, 171
Microsoft Office, 469–472
See also Excel
Mixed-mode surveys, 48
Mode, 497
Mode system question, 140, 258
Moving objects, 190
Moving questions, 170
Multiple choice questions, 154, 199–201, 217–218
Answer formats, 160–161
Entering answers, 260
N
NORMAL style, 144
Navigation buttons, 184–189
Action, 186–187
Adding, 184–186, 311–312, 343–345
Customising, 187–189
New Copy Form, 119
New Form, 122–123
Number questions, 153, 202
Answer formats, 164, 197
Numeric functions, 486–488
O
ODBC address book
Creating in KeyPoint, 514–518
OLE objects, 189–190
Object formatting, 151–152
Objects
Copying and pasting as a picture, 469
Resizing, moving and copying, 190
Selecting, 127–128, 130
Selecting more than one, 130
Off-page navigation, 254–255
Off-page navigation buttons, 311–312, 343–345
Offline Server, 359–369
Changing, 369
Deleting a survey from, 367
Downloading the responses from, 366
Downloading the survey from, 364–365
Installing, 360–362
Managing surveys in surveyserver, 367–368
Options, 362–363
Uploading the responses to, 365
Uploading the survey to, 363–364
Offline Server Monitor, 361–362
On-page navigation buttons, 184–185
Open question
Adding extra lines, 169
Entering answers, 259
Open question coding assistant, 375–380
Operands, 484–485
Operators, 483–485
Optimise, 112
Options
Changing, 135–142
Options dialog box
Address Book page, 244–245, 514–518
Analysis page, 403–405
Connection page, 300
Designer page, 141–142
Email & Web page, 306–307, 337–338
General page, 138, 140
Responses page, 251–252
Survey page, 140–141
Toolbars page, 139
Web Settings page, 305, 335–337
Ordered choice questions, 154, 199–201, 217–218
Answer formats, 163
Entering answers, 260
P
PDF, 235–237
PDF-XChange
Uninstalling, 13–14
PHP, 301, 303, 318
POP3, 505–506
Page Manager, 123–130
Adding, removing and reordering pages, 128–130
Controlling what it shows, 124–126
Labelling pages, 126–127
Master pages, 131–133
Selecting pages or objects, 127–128
Page Navigator, 254–255
Page by Page, 254–255
Page layout, 131–133
Page setup, 131
Page size, 225
Paper
Adding/removing, 177
Password protect survey, 112
Paste Special, 102
Path names on web, 303
Percentiles, 497
Perl script, 301, 303, 318
Phi coefficient, 497
Picture
Adding, 179–180
Making transparent, 180
Pie graph, 433
Definition, 497
Pivot Table Wizard, 421–424
Pivot tables, 419–424
Plots
Defining, 436–439
Multiple, 440
Point graph, 432
Definition, 497
Popularity analysis, 415–416
Population, 497
Preprinted barcodes, 181–182
Presentation form, 30–32, 390–444
Global properties, 404–405
Properties, 402–403
Presentation options, 403–405
Presentation tables, 412–429
'Other' answers, 400–401
Analysis properties, 403–404
Changing cell colour, 427–428
Changing text colour/style, 427–428
Choosing questions, 395–396
Crosstabs, 417–418
Distribution tables, 414–417
Editing, 424–428
Formatting, 427–428
Moving and resizing, 424–425
Pivot tables, 419–424
Properties, 402
Questions on the x axis, 399–400
Index | 523
Resizing columns/rows, 424–425
Sorting answers in, 399
Splitting, 426
Style Library, 405
Tables, 413
Presentation workspace, 28–32, 372, 446–447
Presentations
Common features, 392–406
Design elements, 406–407
Exporting to a Word file, 466–467
Properties sidebar, 401–403
Publishing on the web, 355, 444, 469
Using selected data, 393–394
Previewing form on surveyserver, 340–342
Printing
Surveys, 237–241
Web surveys, 312, 345
Printing 360° reports, 458
Printing surveys, 234–236
Printing to PDF, 235–237
Program updates, 138
Properties sidebar, 195–232, 401–403
Answer tab, 197
Answers tab, 199–201
Ask If/Valid If tab, 204, 206
Contact Link tab, 215–216
Default Value tab, 202
Displaying, 195
Format tab, 225
Graph Layout tab, 442
HTML, 227–228, 308–311
Header and Footer tabs, 226
Inspector tab, 218–220, 229
Labels tab, 217–218
Line tab, 221
Navigation, 228–229
Non-question objects, 219–222
Number Pattern tab, 203, 222
Plots tab, 436, 440
Presentation tab, 209–213
Question Layout tab, 213–215
Question properties, 195–219
Question tab, 196
Questions tab, 207–209
Regions tab, 427–428
Routing Rules, 222
Series tab, 440–441
Sort tab, 428–429
Total tab, 215
524 | Index
Q
Quartile, 496
Question Table Wizard, 157–159
Question Wizard, 155–157, 168
Question columns
Resizing in Analysis Grid, 374
Question layout, 213–215
Question number
Adding, 190
Disabling, 203, 223
Properties, 203, 222
Question properties, 195–219
Question tables, 207–209
Splitting, 171
Questions
Adding manually, 166–167
Adding to survey, 153–190
Adding with the Wizard, 155–157
Aligning, 172–176
Calculated, 155
Changing answer type, 169
Composing, 94–95
Copying, 170
Editing, 168–170
Hiding and showing, 374–375
Moving, 170
Moving in Analysis Grid, 374
Numbers, 190, 203
Open and closed, 93–94, 154
Ordering, 140
Renumbering, 169
Selecting in Analysis Grid, 374
Types, 153–155
Quick Analysis, 407–411
Quick Analysis Wizard, 408–411
R
Radar graph, 434
Definition, 497
Randomise, 217
Range multiple choice questions, 154–155, 199–201,
217–218
Answer formats, 161–162
Entering answers, 260
Ranges, 396–398
Closed questions, 397–398
Defining, 397–398
Definition, 497
Number questions, 398–399
Text questions, 399
Realign, 172–173
Rectangle
Adding, 179
Regions tab, 427–428
Reject Selected Pages, 286
Removing pages, 177
Using the Page Manager, 128–130
Removing paper, 177
Rename Form, 121–122
Reprocess Scans For Current Form, 292
Resizing objects, 190
Response menu, 254
Response message
Deleting, 327, 352
Response options, 251–252
Responses
Adding new, 261
Cancelling changes, 261
Copying, 265
Defined, 250
Deleting, 266
Editing, 265
Entering, 257–263
Exporting, 467–468
Finding text in, 267
Inputting, 327, 352
Navigating to, 265
In Analysis Grid, 382
In Responses workspace, 258
Previewing printout, 266
Printing, 267
Processing, 325–327, 350–352
Receiving from surveyserver, 350–352
Receiving via Internet, 300–301, 325–327
Saving changes, 261
Sorting in Analysis Grid, 383
Tracking, 241
Viewing in Analysis Grid, 382
Viewing page by page, 254–255
Responses dialog box, 325–327, 350–352
Responses workspace, 25–27, 252–256
Rotate, 217
Routing, 191–194
Adding new route, 191–194
Adjusting path, 194
Editing rules, 194
Properties, 222
Viewing and hiding, 194
Rulers, 175
Units, 140
S
SMTP, 505–506
SPSS files
Exporting data to, 467–468
SSL, 332, 336
Sample, 497
Sampling, 92–96
Sampling distribution, 498
Save Form, 121
Save Presentation as HTML, 469
Scale to fit, 219
Scales, 155
Scanned surveys
Deleting, 283–288
Inputting, 283–288
Previewing, 283–288
Re-inputting, 288
Reviewing, 289–290
Scanning Module, 269–294
Demo version, 270–273
Importing bitmap image files, 282–283
Licence, 270–273
Options, 277–280
Overview, 269–270
Scanning problems, 290–294
Barcode scanning problems, 292–294
Scanning returned surveys, 280–282
Scatter graph, 432
Definition, 497
Scores, 166–167
Secure Socket Layer protocol
See SSL
Select Voice, 257
Selecting pages and objects using the Page Manager,
127–128
Selecting parts of objects, 130
Selecting several objects, 130
Set Page Number, 286
Shadows, 151
Share Group, 248
Shared, 245
Sharing resources, 12
Shift key, 130
Show Number, 212
Show Shadow, 212
Show Text, 212
Show Text Fields, 178
Show as HTML, 316–324, 340–342
Sidebar tabs, 103
Displaying and hiding, 103
Index | 525
Sidebars, 103–105, 149–152
Displaying and hiding, 103–104
Floating, 105
Pinning, 104–105
Style and button size, 105
Skewness, 498
Snap to Grid, 141
Sorting questions in Tables, 428–429
Spellchecker, 134–136
Responses, 267
Split Form, 289–290
Split table
Merging, 171
Splitting a question table, 171
Stacking, 130
Standard deviation, 498
Standard error, 498
Statistics form, 29, 388
Style Library, 143–146
Presentations, 405
Styles, 142–146
Editing, 144–146
Survey, 89–98, 106–118
Carrying out, 91–92, 250–251
Checking completed, 250–251
Checking for use with the Scanning Module,
275–277
Copying, 109–110
Creating from a template, 107–109
Deleting, 112–113
Designing, 152
Designing for use with the Scanning Module,
273–277
Distributing, 233–241, 307–325
Opening, 113–114
Optimising, 112
Password protecting, 112
Previewing, 233–234
Printing, 234–241
Renaming, 110–112
Saving, 110–111
Saving a template, 110–111
Starting new, 106–109, 114–118
Structure, 96–97
Types of, 90–91
Uploading to surveyserver, 338–340
Survey Design Wizard, 114–118
Default starting, 138
Survey Properties, 182
Survey Signature, 182
surveyserver, 300, 331–358
Account details, 355–358
526 | Index
Authenticating, 335–337
Benefits, 333
Collecting messages, 351–352
Individual and group accounts, 333–334
Invitations, 345–350
Managing offline surveys, 367–368
Navigation bar, 344
Navigation buttons, 344
Previewing survey, 340–342
Progress bar, 344
Registering for free trial account, 334–335
Respondents password, 344
Responses, 350–352
Responses folder, 337–338
Security, 332–333, 336
Setting up, 334–337
Short URL, 344
Survey active from/to, 344
Uploading presentations, 354–355
Uploading survey, 338–340
print button, 345
save button, 345
surveyserver account
Managing, 355–358
surveyserver form
Customising, 343–345
System questions, 140
T
Tables, 413
See also Presentation tables
Templates
Saving, 110–111
Using to create a new survey, 107–109
Text
Adding, 178
Adding HTML code, 219
Editing, 168–169
Formatting, 150
Is HTML, 219
Text fields
Displaying, 178–179
Editing, 178–179
Entering, 178–179
Text functions, 489–490
Text masks, 197–198
Text questions, 153, 202
Answer formats, 197–198
Entering answers, 259
Text-to-Speech Mode, 256–257
Tick Position, 213
Toolbar, 101–103
Design workspace, 148–149
Presentation forms, 392
Toolbar options, 139–140
Topline Results, 411–412
Editing, 412
Topline Wizard, 411–412
Total tab, 215
Tracking, 241, 327, 354
Overview, 297–298
Transparent pictures, 180
Trigonometric functions, 487
Type casts, 485
U
URL
Short URL for surveyserver, 344
surveyserver presentation form, 354–355
surveyserver survey form, 339–340
Undo
Number of steps, 140
Uninstalling KeyPoint, 13–14
Uninstalling PDF-XChange, 13–14
Unshare Group, 248
Update notification, 138
Updating graphs and tables, 401
Uploading a survey form, 338–340
Uploading presentations, 354–355, 444
Upper quartile, 498
User Name, 140
User file locations, 10–12
V
Valid If, 204–206
Validate for Web Accessibility, 313
Value, 498
Variables
Definition, 498
Independent/dependent
Definition, 495
Variance, 498
Views, 387–388
Deleting, 388
Resetting default, 388
Saving, 388
Selecting, 388
Visual expression editor, 478–482
W
Web Setup Wizard, 302–304
Web accessibility survey, 308, 312–316, 341–342,
344
Guidelines, 507–512
Invitation, 347, 349
Validating, 313, 342
Web presentation location, 355, 444
Web server
Using CamSP script, 304
Using your own, 303–304, 316–324
requirements, 301–302
Web setup, 300–306
Web survey
Advanced HTML options, 310–311
Collecting messages, 326, 351–352
File locations, 316–324
Files saved, 318
Invitations, 319–325, 345–350
Overview, 296–297
Previewing, 316–324
Promoting, 319–325, 345–350
Publishing, 316–324
Saving, 316–324
Settings, 227–228
Text version, 341, 344
Uploading, 318–319
Web survey location, 339–340
Web survey page sizes, 225
Wizards
360 Degree Analysis, 450–457
Crosstab, 418
Email Setup, 298–299
Export, 467–468
Export to Excel, 470–471
Import, 462–466
Installation, 9
Invitations, 237–241
Pivot, 421–424
Question, 155–157, 168
Question Table, 157–159
Quick Analysis, 408–411
Survey Design, 106–107
Topline, 411–412
Web Setup, 302–304
Word file
Exporting to, 466–467
X
X and Y co-ordinates, 176
Index | 527
X axis, 499
XML, 332
Z
Zoom, 103
Y
Y axis, 499–500
528 | Index