1
Fountain Troubleshooting Guide Fountain Beverage Dispensing Equipment 250 Old Ballwin Road w St. Louis, Missouri 63021-4800 Tel: 636.256.7777 w Fax: 636.527.4313 [email protected] w www.multiplex-beverage.com In accordance with our policy of continuous product development and improvement, this information is subject to change at any time without notice. 00218012 Revision C (KAK) 1 November, 2001 Multiplex Company, Inc. Fountain Troubleshooting Guide Table of Contents Caution: To Avoid Serious Injury ..................................................................................... 1 Foreword ................................................................................................................. 2 Problem Cross Reference Guide ..................................................................................... 3 Troubleshooting Guide ................................................................................................ 4 Section 1: CO2 Gas System ......................................................................................... 4 Loss of CO2 ........................................................................................................ 4 Flat drinks (lack of carbonation in carbonated water) .................................................... 5 Section 2: Carbonated Water System ............................................................................ 7 Flat drinks ........................................................................................................ 7 No carbonated water at any of the dispensing valves ..................................................... 9 Carbonator pump and motor will not cycle off (possibly noisy pump) ............................. 11 Section 3: Circulating System ................................................................................... 14 Warm drinks .................................................................................................... 14 Section 4: Compressed Air System ............................................................................. 16 No syrup ........................................................................................................ 16 Section 5: Dispensing Valve and Tower ........................................................................ 19 No syrup or insufficient syrup in finished drink .......................................................... 19 No carbonated water or insufficient carbonated water in finished drink ............................ 20 No water or insufficient water in finished drinks ........................................................ 21 Section 6: Electrical System .................................................................................... 24 Section 7: Refrigeration System ................................................................................ 25 Warm drinks (carbonated water temperature over 40°F [5°C]) ....................................... 25 No carbonated water at any of the dispensing valves ................................................... 27 Section 8: Syrup System ......................................................................................... 28 Section 9: Water Booster System ............................................................................... 30 Low or no water pressure at noncarbonated beverages ................................................. 30 Section 10: Water Filter System ................................................................................ 32 When the Brix is Off ........................................................................................... 33 Maintenance Schedule ............................................................................................... Periodic maintenance for soft drink equipment (listed by major components) ........................ Dispensing stations ............................................................................................ Daily (365 times per year) ................................................................................ Beverage conduits ............................................................................................. Every 4 months (3 times per year) ...................................................................... Air compressor ................................................................................................. Monthly (12 times per year) .............................................................................. Every 4 months (3 times per year) ...................................................................... Refrigeration unit ............................................................................................. Every 4 months (3 times per year) ...................................................................... Water filters .................................................................................................... Every 4 months (3 times per year) ...................................................................... Syrup supply .................................................................................................... Daily (365 times per year) ................................................................................ Every 4 months (3 times per year) ...................................................................... CO2 gas supply ................................................................................................. Every 4 months (3 times per year) ...................................................................... Periodic maintenance for soft drink equipment (listed by scheduled frequency) ...................... Daily (365 times per year) ................................................................................... Every 4 months (3 times per year) .......................................................................... 35 35 35 35 35 35 35 35 35 35 35 35 35 36 36 36 36 36 37 37 37 Cleaning and Sanitizing the Dispensing Valves and Product Lines ............................................ Maintenance schedule ........................................................................................... Cleaning equipment and supplies .............................................................................. Cleaning and sanitizing procedure ............................................................................. Cleaning the dispensing valves .............................................................................. Cleaning the product lines ................................................................................... Pressurizing the product lines ........................................................................... 38 38 38 39 39 39 39 00218012 Revision C (KAK) 1 November, 2001 Multiplex Company, Inc. Fountain Troubleshooting Guide Caution: To Avoid Serious Injury Important: Read the following warnings before beginning an installation. Failure to do so may result in possible death or serious injury. DO Adhere to all National and Local Plumbing and Electrical Safety Codes. DO Turn off incoming electrical service switches when servicing, installing, or repairing equipment. DO Check that all flare fittings on the carbonation tank(s) are tight. This check should be performed with a wrench to ensure a quality seal. DO Inspect pressure on Regulators before starting up equipment. DO Protect eyes when working around refrigerants. DO Use caution when handling metal surface edges of all equipment. DO Handle CO2 cylinders and gauges with care. Secure cylinders properly against abrasion. DO Store CO2 cylinder(s) in well ventilated areas. DO NOT Throw or drop a CO2 cylinder. Secure the cylinder(s) in an upright position with a chain. DO NOT Connect the CO2 cylinder(s) directly to the product container. Doing so will result in an explosion causing possible death or injury. Best to connect the CO2 cylinder(s) to a regulator(s). DO NOT Store CO2 cylinders in temperature above 125°F (51.7°C) near furnaces, radiator or sources of heat. DO NOT Release CO2 gas from old cylinder. DO NOT Touch Refrigeration lines inside units, some may exceed temperatures of 200°F (93.3°C). Notice: Water pipe connections and fixtures directly connected to a potable water supply shall be sized, installed and maintained in accordance with Federal, State, and Local codes. 00218012 Revision C (KAK) 1 November, 2001 1 Multiplex Company, Inc. Fountain Troubleshooting Guide Foreword This Troubleshooting Guide has been developed to assist you in determining what the Probable Cause for any particular Problem you may experience with your Multiplex Beverage System could be. It then advises of the proper Corrective Action to be taken to remedy that Problem. Because of the ever present danger from electrical shock, and the existence of high pressure water and gas on the system, it is strongly recommended that only qualified service personnel perform actual repairs. To use this guide you should first recognize the Problem. Once this has been accomplished, you should refer to the Problem Cross Reference Guide, which will direct you to the troubleshooting section or sections which may be responsible for that particular Problem. Under each of the sections, Section 1: CO2 Gas System, Section 2: Carbonated Water System, Section 3: Circulating System, Section 4: Compressed Air System, Section 5: Dispensing valve and tower, Section 6: Electrical System, Section 7: Refrigeration System, Section 8: Syrup System, Section 9: Water Booster System, and Section 10: Water Filter System, youll first find the Problem listed in bold type starting on the left margin. It will be followed by three headings also in bold type and each with its own column. The first is a Qualifier which is designed to quickly qualify or eliminate the Probable Causes listed to the right and below the qualifying statement. Example: Under Section 7: Refrigeration System, youll find three Qualifiers for the same problem, Warm drinks. Carbonated Water Temperature over 40°F (5°C). Each asking you to determine the status of the Refrigeration Compressor and Ice Bank before proceeding to the second column Probable Causes. Not all problems have Qualifiers, but for those that do, first examine each one listed below the Problem before continuing through Probable Causes. The third heading, Corrective Action found on the right margin, will direct you in determining if the Probable Cause is actually responsible for the problem and what should be done to remedy the problem. On occasion, youll find Note and Caution statements which have been included to make special references to items which frequently are misunderstood or ignored. This guide is intended to assist you in locating the cause of a problem. It is not, however, to be considered a service and repair manual in that Multiplex models vary in design. It has been written to encompass all model Refrigeration Units. Some differences from model to model will become obvious and it will be required of the reader to apply this guide to each unit. Of main concern, is on Dual Carbonating and Circulating Systems you must consider there are two separate Carbonating and Circulating Systems. 2 00218012 Revision C (KAK) 1 November, 2001 Multiplex Company, Inc. Fountain Troubleshooting Guide X X X X R X X R Water Filter Water Booster Syrup Refrigeration Electrical X X R Dispenser X X X Compress Air Circulating No carbonated water Carbon particles in drink Flat drinks No or insufficient non-carbonated water Warm drinks No or insufficient syrup Peculiar taste carbonated water Peculiar taste non--carbonated water Peculiar taste syrup Carb and booster pump noisy Air compressor operates excessively Loss of CO2 gas Drinks too sweet Too much syrup Too much carbonated water Too much non-carbonated water Foaming Booster pump/motor wont cycle off Booster pump/motor wont cycle on Excessive Carbonation Low pressure CO2 alarm wont cycle on Low pressure CO2 alarm wont cycle off Water found in primary regulator Booster pump/motor wont cycle off Booster pump/motor wont cycle on Product dripping from nozzle Valves will not activate Valves will not shut off Unit totally inoperative Carbonated CO2 Problem Cross Reference Guide X X X X R X X X R X X X X R R X R R R X R X X X X R R R X R R X X X X X X X X X X X X X - Specific problem listed in section R - Problem refer to from section with X 00218012 Revision C (KAK) 1 November, 2001 3 Multiplex Company, Inc. Fountain Troubleshooting Guide Troubleshooting Guide WARNING: Inspection, testing, and repair of electrical equipment should be performed only by qualified service personnel. The unit should be unplugged when servicing, except when electrical tests are required. DANGER: Use extreme care during electrical circuit tests. Live circuits may be exposed. Section 1: CO2 Gas System On units not equipped with Air Pump, check all Probable Causes listed below. Qualifier If leak occurs while Change-over valve is positioned on Air, follow the Probable Causes (for units equipped with Air Pump). If leak occurs only while Change-over valve is positioned on CO2, refer to Troubleshooting Section 8: Syrup System. 4 Probable Cause Loss of CO2 Corrective Action CO2 Tank leaking. Use a soap solution around CO2 Tank valve Stem to locate leaks. If leaks are present, bubbles will appear. If valve Stem leaks at Tank, replace CO2 Tank. CO2 Washer damaged or missing. Use a soap solution around Primary Regulator Coupling Nut and CO2 Tank Stem. If bubbles appear, remove Regulator and replace CO2 Washer found inside Nut. Secure Regulator to Tank and check for leaks. Primary Regulator Diaphragm leaking. Use a soap solution around Primary Regulator Adjustment Screw in Bonnet. If bubbles appear, diaphragm is leading. Replace Primary Regulator. Ruptured Line Assembly or leaks at connections. Use a soap solution around all connections. If bubbles appear, tighten loose connections carefully. A to B Change-over Valve leaking. Use a soap solution around A and B CO2 Tank Change-over Valve, tighten if bubbles appear at Connections to stop leaks. CO2 Low Pressure Switch leaking. Use a soap solution around Low Pressure CO2 Switch. If bubbles appear at pipe, tighten Connection. If bubbles appear at Terminal end of Switch - replace Switch. CO2 Check valve leaking. Use a soap solution around Check valve. If bubbles appear, tighten Connection to stop leaks. Back Flow Preventer stuck open. Use a soap solution around Back Flow Preventer. Tighten if bubbles appear at connection. If bubbles appear at Vent Hole on underside of Back Flow Preventer, clean out or replace Back Flow Preventer valve and corresponding Water Check valve. Carbonator Tank Relief valve leaking. Use a soap solution around Relief valve. If bubbles appear, replace Relief valve. Gas leak at the syrup system. Refer to Troubleshooting Section 8: Syrup System under No syrup or insufficient syrup in finished drink. 00218012 Revision C (KAK) 1 November, 2001 Multiplex Company, Inc. Fountain Troubleshooting Guide Troubleshooting Guide WARNING: Inspection, testing, and repair of electrical equipment should be performed only by qualified service personnel. The unit should be unplugged when servicing, except when electrical tests are required. DANGER: Use extreme care during electrical circuit tests. Live circuits may be exposed. Section 1: CO2 Gas System (continued) Qualifier Probable Cause Corrective Action Flat drinks (lack of carbonation in carbonated water) CO2 Supply exhausted (CO2 Tank is functionally empty if pressure reads less than 500 psi [34.5 bar]). Verify CO2 Tank pressure is a minimum of 500 psi (34.5 bar) on the Primary Pressure Regulator Gauge marked 0-2000 psi. Replace tank if necessary. Primary Regulator out of adjustment or inoperative. Verify CO2 Primary Regulators are set at 90 psi (6.3 kg/cm2). Adjust if necessary. If Regulator will not stay in adjustment, replace Regulator. A and B CO2 Tank Changeover Valve incorrectly positioned. If A and B CO2 Tank Change-over Valve is positioned on an empty Tank or halfway between A and B operating positions, CO2 is not supplied to Carbonators. Insure valve handler is in the operating position. Malfunction of the Refrigeration System. Refer to Troubleshooting Section 7: Refrigeration System under Warm drinks. Water Filter restricted. Refer to Troubleshooting Section 10: Water Filter System under Peculiar taste. Malfunction of the Carbonated Water System. Refer to Troubleshooting Section 2: Carbonated Water System under Flat drinks. Excessive carbonation (foaming). Primary Regulators set too high. Verify CO2 Primary Regulators are set at 90 psi (6.3 kg/cm2). Adjust if necessary. If Regulator will not stay in adjustment, replace regulator. Replace. Low Pressure CO2 Warning light or buzzer does not come on. Warning lamp or buzzer burned out. Transformer inoperative. When CO 2 Tank is empty and CO 2 warning lamp(s) or buzzer fail, verify voltage across Transformer. If no voltage, replace Transformer. Pressure Switch defective. If CO2 Warning lamps or buzzer and transformer are operative. Pressure Switch is defective and must be replaced. Primary Regulator (less than 500 psi [34.5 bar]). CO 2 Supply adequate (greater than 500 psi [34.5 bar]). 00218012 Revision C (KAK) 1 November, 2001 5 Multiplex Company, Inc. Fountain Troubleshooting Guide Troubleshooting Guide WARNING: Inspection, testing, and repair of electrical equipment should be performed only by qualified service personnel. The unit should be unplugged when servicing, except when electrical tests are required. DANGER: Use extreme care during electrical circuit tests. Live circuits may be exposed. Section 1: CO2 Gas System (continued) Qualifier Probable Cause Corrective Action Flat drinks (lack of carbonation in carbonated water) (continued) Low Pressure CO2 Warning light or buzzer does not go off. Water found in CO 2 Regulator and lines. 6 Leaks on system. If leaks exist on CO2 System, not enough pressure is maintained to allow Pressure Switch to cut off CO2 Warning light or buzzer. Use a soap solution to located possible leaks. Tighten connections carefully. Primary Regulator out of adjustment. Check CO2 supply. The Primary Regulators must be set at 90 psi (6.3 kg/cm2). Adjust if necessary. If regulator will not stay in adjustment, replace regulator. Pressure Switch inoperative. Carefully disconnect one wire from the CO2 Pressure Switch, if CO2 Warning Lamps go out, the CO2 Pressure Switch is defective and should be replaced. Carefully disconnect one wire from the CO2 Pressure Switch, if CO2 Warning Lamps go out, the CO2 Pressure Switch is defective and should be replaced. CO2 Check Valve defective. Turn CO2 off at CO2 Tank valve. Remove top Cover from Remote Refrigeration Unit. Locate CO2 Check valve on top of Carbonator Tank. Remove CO2 line on Inlet side of Check Valve. If CO2 is present, escaping from Carbonator Tank, clean out or replace Check valve. 00218012 Revision C (KAK) 1 November, 2001 Multiplex Company, Inc. Fountain Troubleshooting Guide Troubleshooting Guide WARNING: Inspection, testing, and repair of electrical equipment should be performed only by qualified service personnel. The unit should be unplugged when servicing, except when electrical tests are required. DANGER: Use extreme care during electrical circuit tests. Live circuits may be exposed. Section 2: Carbonated Water System Qualifier Probable Cause Corrective Action Flat drinks Malfunctioning of Refrigeration System. Beverages at dispensing tower are above 40°F (5°C). Malfunctioning of Circulating System. Beverages at dispensing tower are below 40°F (5°C). Refer to Troubleshooting Section 7: Refrigeration System under Warm drinks. Refer to Troubleshooting Section 3: Circulating System under Warm drinks. CO2 supply exhausted. Verify CO2 Tank pressure is a minimum of 500 psi (35 kg/cm 2) on Primary Pressure Regulator Gauge marked 0-2000 psi. Switch to full tank if necessary. Insure CO2 Shut-off Valves to Carbonators are both in the on position. Refer to Troubleshooting Section 1: CO2 Gas System under Flat drinks. Primary CO2 Regulator out of adjustment or inoperative. Verify CO2 Primary Regulators are set at 90 psi (6.3 kg/cm2). Adjust if necessary if Regulator will not stay in adjustment replace Regulator. Water Regulator incorrectly adjusted or inoperative. Verify Filtered Water Pressure Gauge registers 55 psi (3.9 kg/cm2), if higher than 55 psi, flooding of Carbonator will occur. To adjust, loosen Locknut, turn Adjustment Screw clockwise to increase, counterclockwise to decrease. If regulator will not respond to adjustments, replace regulator. Improper water treatment. Verify By-pass handle is in the filter operating position. Insure Filter Cartridge is still effective, if necessary replace Cartridge. Refer to Troubleshooting Section 10: Water Filter System. Carbonator Pump worn (Brass pump). Dispense Carbonated Water while listening for carbonator pump and motor to cycle on at Refrigeration Unit. Pumps should operated between 6 to 12 seconds before cycling off. If operating time exceeds 30 seconds carbonator pump is worn, replace Pump. Pressure Relief Valve is leaking. Remove top cover from Remote Refrigeration Unit. Dispense Carbonated Water until carbonator Pumps and Motor cycle on. Observe Pressure Relief Valves on carbonator Tank. If water is observed escaping from either, replace leaking Relief valve. Note: Do not confuse the Water Bath Make-up valve for the carbonator Tank Relief valves. 00218012 Revision C (KAK) 1 November, 2001 7 Multiplex Company, Inc. Fountain Troubleshooting Guide Troubleshooting Guide WARNING: Inspection, testing, and repair of electrical equipment should be performed only by qualified service personnel. The unit should be unplugged when servicing, except when electrical tests are required. DANGER: Use extreme care during electrical circuit tests. Live circuits may be exposed. Section 2: Carbonated Water System (continued) Qualifier Probable Cause Corrective Action Flat drinks (continued) Beverages at Dispensing Tower are below 40°F (5°C). (continued) 8 Back Flow Preventer. Remove top cover from Remote Refrigeration Unit. Use a soap solution around Back Flow Preventer. If bubbles appear at Vent Hole or underside of Back Flow Preventer, clean or replace Back Flow Preventer and corresponding Water Check valve carbonator Tank. Double Check valve (water) stuck open. With top cover from Remote Refrigeration Unit removed and carbonator Pump Switch and Water turned off, loosen water supply line at inlet side of Double Check valve Assembly. If CO2 gas escapes from Check valve, it must be cleaned or replaced. 00218012 Revision C (KAK) 1 November, 2001 Multiplex Company, Inc. Fountain Troubleshooting Guide Troubleshooting Guide WARNING: Inspection, testing, and repair of electrical equipment should be performed only by qualified service personnel. The unit should be unplugged when servicing, except when electrical tests are required. DANGER: Use extreme care during electrical circuit tests. Live circuits may be exposed. Section 2: Carbonated Water System (continued) Qualifier Probable Cause Corrective Action No carbonated water at any of the dispensing valves No CO 2 gas or water present at dispensing valves. CO2 gas is present at dispensing valves but no water. Malfunction of Refrigeration System. Refer to Troubleshooting Section 7: Refrigeration System under No carbonated water at any of the dispensing valves (freeze up). Malfunction of Circulating System. Refer to Troubleshooting Section 3: Circulating System under No carbonated water at any of the dispensing valves. No power to carbonator. Verify toggle switch for Carbonator is in the on position and Main Power Supply is on. Water supply restricted to carbonator pump. Verify water to unit by observing Filtered Water Pressure Gauge. It should register 55 psi (3.9 kg/cm2). To adjust, loosen Locknut, turn Adjustment Screw clockwise to increase, counterclockwise to decrease. If regulator will not respond to adjustments, replace regulator. Examine Water Shut-off Valve(s) to Carbonator and insure they are in the on position. Water Filter restricted. Place Filter By-pass Valve into the Filter Bypass position. Replace Cartridge Filter. Reposition valve handle to operating position. Water Inlet clogged. strainer Remove Filter Screen from Inlet Strainer in carbonator Pump (Brass), flush with water to clean and reassemble. Liquid Level Control defective. Push Toggle Switch for carbonator and circulator to the off position. Shut off Main Power Supply unit. Remove electrical Access Panel from unit. Locate liquid level control. Using a pair of insulated needle nose pliers, carefully remove the white wire from the terminal marked H and the black wire from the terminal marked L on the Liquid Level Control Board. Position safely to side. Turn on Main Power Supply. Push carbonator Switch to the on position. If carbonator pump and motor do not cycle on immediately, that Liquid Level Control is defective. Replace. Electrode Assembly defective. If Liquid Level Control is operating, test the Electrode Assembly, refer to Probable Cause Liquid Level Control Defective. Verify wire leads are dry and that they are not touching. If not, replace Electrode. 00218012 Revision C (KAK) 1 November, 2001 9 Multiplex Company, Inc. Fountain Troubleshooting Guide Troubleshooting Guide WARNING: Inspection, testing, and repair of electrical equipment should be performed only by qualified service personnel. The unit should be unplugged when servicing, except when electrical tests are required. DANGER: Use extreme care during electrical circuit tests. Live circuits may be exposed. Section 2: Carbonated Water System (continued) Qualifier Probable Cause Corrective Action No carbonated water at any of the dispensing valves (continued) CO2 gas is present at Dispensing Valves but no water. (continued) 10 Carbonator Pump worn (Brass pump). Dispense Carbonated Water while listening for carbonator pump and motor to cycle on at Refrigeration Unit. Pumps should operate between 6 to 12 seconds before cycling off. If operating time exceeds 30 seconds, carbonator Pumps is worn, replace Pump. Motor defective. If Motor will not operate, verify voltage across Motor Terminals with voltmeter. If voltage reads 110 to 120 VAC, the Motor or Pump is defective. Loosen the Coupling Clamp with a flatblade screwdriver and disengage Pump from Motor. If Motor still will not operate with Pump disengaged, Motor is defective. Replace. Carbonator Pump frozen. Loosen the Coupling Clamp with a flat-blade screwdriver and disengage Pump from Motor. By hand, turn the Coupling Key in back of Pump. If pump shaft will not spin freely, Pump is defective and must be replaced. 00218012 Revision C (KAK) 1 November, 2001 Multiplex Company, Inc. Fountain Troubleshooting Guide Troubleshooting Guide WARNING: Inspection, testing, and repair of electrical equipment should be performed only by qualified service personnel. The unit should be unplugged when servicing, except when electrical tests are required. DANGER: Use extreme care during electrical circuit tests. Live circuits may be exposed. Section 2: Carbonated Water System (continued) Qualifier Probable Cause Corrective Action Carbonator pump and motor will not cycle off (possibly noisy pump) Little or no carbonated Primary CO2 Regulator ad- Verify CO2 Primary Regulators are set at 90 psi water at dispensing justed at extremely high (6.3 kg/cm2). Adjust if necessary. If regulator will not star in adjustment, replace regulator. valve. pressure. Water supply to Carbonator Pump shut-off or restricted. Verify water to unit by observing Filtered Water Pressure Gauge. It should register 55 psi (3.9 kg/cm2). Examine Water Shut-off Valves to carbonator and insure they are in the on position. Examine Pump Strainer for restriction. Clean if necessary. Water Filter restricted. Place Filter By-pass valve into the Filter Bypass position. If carbonator pump and motor immediately cycle off, Filter Cartridge is restricted. Replace Cartridge. Back Flow Preventer or Double Check Valve. Examine Filter Water Pressure Gauge. If it registers 90 psi (6.3 kg/cm2) CO2 gas is passing from the carbonator tank and through the Back Flow Preventer or Double Check Valve, preventing water from entering pump. Clean or replace Back Flow Preventer/Double Check Valve. Carbonator Pump worn. Remove top cover from Remote Refrigeration Unit. Locate Toggle Relief Valve on Carbonator Tank and lift lever to allow CO2 gas to escape from Tank for 30 seconds. If during this time Carbonator Pump cycles off, pump is worn and should be replaced. Coupling Key defective. Loosen the Coupling Clamp with a flat-blade screwdriver and disengage Pump from Motor. Examine Coupling Key in Pump. If defective, replace. 00218012 Revision C (KAK) 1 November, 2001 11 Multiplex Company, Inc. Fountain Troubleshooting Guide Troubleshooting Guide WARNING: Inspection, testing, and repair of electrical equipment should be performed only by qualified service personnel. The unit should be unplugged when servicing, except when electrical tests are required. DANGER: Use extreme care during electrical circuit tests. Live circuits may be exposed. Section 2: Carbonated Water System (continued) Qualifier Probable Cause Corrective Action Carbonator pump and motor will not cycle off (possibly noisy pump) (continued) Carbonated Water at Liquid Level Control defec- Shut off main power supply to unit and push dispensing valve. tive. Toggle Switch for Carbonator and Circulator to the off position. Remove Electrical Access Panel from Refrigeration Unit and locate Liquid Level Control. Strip a 1 1/2" (3.8 cm) piece of solid strand wire of insulation to use as a jumper. Turn main power supply unit on to unit. With a pair of insulated pliers, jump across Terminals marked G, H and L on Liquid Level Control. Simultaneously, while pushing corresponding Toggle Switch to carbonator to the on position. If carbonator pump and motor continue to operate after Liquid Level Control Jumper Wire is in place, Liquid Level Control is defective, replace. Electrode defective. Examine wire leads to insure no breaks in connections. Remove and clean Electrode with find sand paper and reinstall. Note: Reversing Electrode Wire Leads on either electrode or Liquid Level Control will cause erratic operation of carbonator Motor. Refer to Wiring Diagram. Peculiar taste in carbonated water only. Water filter contaminated. Refer to Troubleshooting Section 10: Water Filter System under Peculiar taste. Back Flow Preventer Valve leaking or Double Check Valve leaking. Push Toggle Switch for carbonator to the off position. Turn Water Shut-off Valve to carbonator to the off position. Remove tope cover from Remote Refrigeration Unit. Carefully disconnect water line on the outlet side of the carbonator pump. If water or CO2 is observed continually escaping from line, Back Flow Preventer/Double Check Valve is leaking. Disassemble, clean, and replace if necessary. Caution: Carbonated water must never be allowed to flow through materials other than plastic or stainless steel. (Copper, zinc or galvanized material is non-acceptable.) Carbonated water flowing through materials other than plastic or stainless. 12 Trace carbonated water flow through system. Insure no foreign materials are present. Replace non-acceptable material if found. 00218012 Revision C (KAK) 1 November, 2001 Multiplex Company, Inc. Fountain Troubleshooting Guide Troubleshooting Guide WARNING: Inspection, testing, and repair of electrical equipment should be performed only by qualified service personnel. The unit should be unplugged when servicing, except when electrical tests are required. DANGER: Use extreme care during electrical circuit tests. Live circuits may be exposed. Section 2: Carbonated Water System (continued) Qualifier Probable Cause Corrective Action Carbonator pump and motor will not cycle off (possibly noisy pump) (continued) Carbon particles in fur- Malfunction of Water Fil- Refer to Troubleshooting Section 10: Water nished drink. ter. Filter System under Carbon particles in finished drinks. Carbonator Motor cycles on and off in short cycles. Defective Carbonator Pump. Remove top cover from Refrigeration Unit. Loosen Coupling Clamp with a flat-blade screwdriver and disengage pump from motor. Turn the Coupling Key by hand, in back of pump. If pump shaft does not turn freely and/or Carbon is found in pump, carbon veins are defective. Replace pump. Defective Circulating Pump. Refer to Troubleshooting Section 3: Circulating System under Carbon particles in finished drinks. Electrode Assembly incorrectly wired or defective. Examine wiring diagram found on Refrigeration Unit. Verify Electrode wiring leads are on proper terminals of both Electrode and Liquid Level Control. If problem still occurs, replace electrode. 00218012 Revision C (KAK) 1 November, 2001 13 Multiplex Company, Inc. Fountain Troubleshooting Guide Troubleshooting Guide WARNING: Inspection, testing, and repair of electrical equipment should be performed only by qualified service personnel. The unit should be unplugged when servicing, except when electrical tests are required. DANGER: Use extreme care during electrical circuit tests. Live circuits may be exposed. Section 3: Circulating System Qualifier Probable Cause Corrective Action Warm drinks Drinks warm throughout the day, warm all the time. Malfunction of Refrigeration System. Refer to Troubleshooting Section 7: Refrigeration System under Warm drinks (carbonated water temperature over 40°F [5°C]). Drinks warm during periods of low demand, much colder during periods of high demand. No power to Circulating Motor. Verify Switch to Circulating Motor is in the on position and Main Power Supply is on. Carbon Particles in finished drink. Motor defective. Using a flat-blade screwdriver, loosen the Coupling Clamp and disengage Pump from Motor. If Motor will not operate, verify voltage across Motor Terminal with voltmeter. If voltage reads from 110 to 120 VAC, the Motor is defective and should be replaced. Circulating Pump defective (stainless steel). Dispense approximately 1 gallon of carbonated water at dispensing valves. If temperature of carbonated water drops, Circulating pump is not operating. Examine Coupling Key found between Pump and Motor Shaft. If coupling key is defective, replace. If key is operational, Circulating pump is defective, replace. Malfunction of Water Filter. Refer to Troubleshooting Section 10: Water Filter System under Carbon particles in finished drinks. Malfunction of Carbonated Water System. Refer to Troubleshooting Section 2: Carbonated Water System under Carbon particles in finished drinks. Circulating Pump defective (Stainless Steel). Remove top cover from Refrigeration Unit. Loosen Coupling Clamp with a flat-blade screwdriver and disengage Pump from Motor. Turn Pump shaft with screwdriver. If Pump does not turn freely and/or carbon is found in Pump, carbon veins in pump are defective. Replace Circulating Pump. No CO 2 gas or water present at dispensing valve. 14 00218012 Revision C (KAK) 1 November, 2001 Multiplex Company, Inc. Fountain Troubleshooting Guide Troubleshooting Guide WARNING: Inspection, testing, and repair of electrical equipment should be performed only by qualified service personnel. The unit should be unplugged when servicing, except when electrical tests are required. DANGER: Use extreme care during electrical circuit tests. Live circuits may be exposed. Section 3: Circulating System (continued) Qualifier Probable Cause Corrective Action Warm drinks (continued) CO2 gas is present at dispensing valves but no carbonated water. Malfunction of Refrigeration System. Refer to Troubleshooting Section 7: Refrigeration System under No carbonated water at dispensing valve (freeze up). Particles obstructing flow through Circulating Circuit (In-line Strainer). Remove top cover from Remote Refrigeration. Push toggle switch to carbonator and circulator to the off position. Lift lever on Toggle Relief valve at top of carbonator Tank until pressure is completely released. Remove In-line Strainer Screen. Flush with clean water and reassemble. Malfunction of Carbonating System. If CO2 gas is present at the Dispensing Valves and there is no water, the problem is in the Carbonated Water System. Refer to Troubleshooting Section 2: Carbonated Water System. 00218012 Revision C (KAK) 1 November, 2001 15 Multiplex Company, Inc. Fountain Troubleshooting Guide Troubleshooting Guide WARNING: Inspection, testing, and repair of electrical equipment should be performed only by qualified service personnel. The unit should be unplugged when servicing, except when electrical tests are required. DANGER: Use extreme care during electrical circuit tests. Live circuits may be exposed. Section 4: Compressed Air System Until repairs can be made on Compressed Air System, place Air/CO2 Change-over Valve in the CO2 Operating position. Qualifier Air Compressor will not cycle on and Air Pressure Gauge registers 0 psi. Air Compressor cycles on and off and Air Pressure Gauge readings range between 70 psi (4.9 kg/cm2) to 90 psi (6.3 kg/cm2). 16 Probable Cause No syrup Corrective Action No power to Air Compressor. Verify Toggle Switch to Air Compressor is in the on position and main power supply is on. Pressure Switch defective. Remove Pressure Switch Cover and use a voltmeter across Switch to determine whether open or closed. If in open position, replace switch. Motor defective. Verify voltage across Motor with a voltmeter, if Motor/Pump assembly will not operate, it is defective and should be replaced. Pump frozen. Same as above for Motor defective. Air/CO2 Change-over Valve placed in incorrect position. Place Air/CO2 Change-over Valve to the Air or CO2 operating position. Malfunction of Syrup System. Refer to Troubleshooting Section 8: Syrup System, under No syrup. Malfunction of Refrigeration System. Refer to Troubleshooting Section 7: Refrigeration System, under No carbonated water at dispensing valves (freeze up). Note: If lever is positioned between Air and CO2 the gas supply is shut off to syrup system. 00218012 Revision C (KAK) 1 November, 2001 Multiplex Company, Inc. Fountain Troubleshooting Guide Troubleshooting Guide WARNING: Inspection, testing, and repair of electrical equipment should be performed only by qualified service personnel. The unit should be unplugged when servicing, except when electrical tests are required. DANGER: Use extreme care during electrical circuit tests. Live circuits may be exposed. Section 4: Compressed Air System (continued) Qualifier Probable Cause Corrective Action No syrup (continued) Air Compressor operates excessively. Leak at Shake Machine, Orange Juice Dispenser or other optional equipment. Turn air supply to Shake Machine to off position. If Air Compressor cuts out and maintains pressure, leak is at Shake Machine or Orange Juice Dispenser. Refer to manufacturers manual for Troubleshooting. Leak at Compressed Air System. Use a soap solution around all connections starting from the Air Motor/Pump assembly to the Low and Medium Pressure Syrup Regulators. If bubbles appear, tighten loose connections carefully. Automatic Drain or Petcock leaking. Place drain line for bottom of Automatic Drain or Petcock in cup of water. If air bubbles appear, Automatic Drain or Petcock is leaking. Clean and/or replace as necessary. Air leak in syrup system. Refer to Troubleshooting Section 8: Syrup System under No syrup, air leak at syrup system. Restricted Germicidal Filter on Air Compressor. Replace Germicidal Filter. Note: This Filter is not designed to be cleaned, but must be replaced when exhausted. Water in Air Accumulator Tank. Verify Automatic Drain is operating. If inoperative or defective, replace. If unit is not equipped with Automatic Drain use Petcock to remove water from tank. Motor/Pump Assembly inoperative. If Motor/Pump assembly operate without building up to 90 psi (6.3 kg/cm2) as needed to cycle off. Pump Assembly is defective and must be replaced. Pressure Switch improperly adjusted or defective. Observe Air Pressure Gauge to insure proper cycle on at 70 psi (4.9 kg/cm2) and cycle off at 90 psi (6.3 kg/cm2) settings. Refer to instructions found under Switch cover for adjusting. If Switch will not respond to adjustment, replace switch. Check valve defective. While Air Compressor is in the off cycle, use a soap solution around Head Gasket on Motor/ Pump Assembly. If bubbles appear, replace Check valve located on the Air Accumulator Tank. 00218012 Revision C (KAK) 1 November, 2001 17 Multiplex Company, Inc. Fountain Troubleshooting Guide Troubleshooting Guide WARNING: Inspection, testing, and repair of electrical equipment should be performed only by qualified service personnel. The unit should be unplugged when servicing, except when electrical tests are required. DANGER: Use extreme care during electrical circuit tests. Live circuits may be exposed. Section 4: Compressed Air System (continued) Qualifier Probable Cause Corrective Action No syrup (continued) Peculiar taste in finished product. 18 Contaminated Germicidal Filter on Air Compressor. Replace Germicidal Filter. Water in Air Accumulator Tank. Drain trapped water from tank by removing Drain Line from top of Automatic Drain. Disassemble and clean Automatic Drain. If unit is not equipped with automatic drain, use petcock to remove water from tank. Water Filter contaminated. Refer to Troubleshooting Section 10: Water Filter System under Peculiar taste. Note: This filter is not designed to be cleaned, but must be replaced when exhausted. 00218012 Revision C (KAK) 1 November, 2001 Multiplex Company, Inc. Fountain Troubleshooting Guide Troubleshooting Guide WARNING: Inspection, testing, and repair of electrical equipment should be performed only by qualified service personnel. The unit should be unplugged when servicing, except when electrical tests are required. DANGER: Use extreme care during electrical circuit tests. Live circuits may be exposed. Section 5: Dispensing Valve and Tower Qualifier Probable Cause All corresponding valves dispensing no syrup. Malfunction of syrup system. Refer to Troubleshooting Section 8: Syrup System under No syrup or insufficient syrup in finished drink. Corrective Action No syrup at only one dispensing valve. Syrup Shut-off Valve closed or partially closed. Remove top cover from Dispensing valve or Tower. Locate Syrup Shut-off Valve on right hand side of Dispensing valve. Verify shut-off is turned fully open. Mounting Block restricted. Remove Dispensing valve from Mounting Block. Place cup over Syrup outlet on Mounting Block and carefully open Syrup Shut-off Valve. If little or no syrup is present, Mounting Block is restricted. Remove and clean mounting block. Replace if necessary. No syrup or insufficient syrup in finished drink No carbonated water at half or all dispensing valves. Flow Control our of adjustment or inoperative. Readjust Flow Control to proper Brix. If no response, clean Syrup Flow Control. Replace if necessary. Valve Port restricted. Clean Syrup valve Port Assembly. Seat swollen. Replace Syrup Seat. Solenoid Coil defective. Replace Syrup Solenoid Coil. Malfunction of Carbonated Water System. Refer to Troubleshooting Section 2: Carbonated Water System under No carbonated water at any of the dispensing valves. 00218012 Revision C (KAK) 1 November, 2001 19 Multiplex Company, Inc. Fountain Troubleshooting Guide Troubleshooting Guide WARNING: Inspection, testing, and repair of electrical equipment should be performed only by qualified service personnel. The unit should be unplugged when servicing, except when electrical tests are required. DANGER: Use extreme care during electrical circuit tests. Live circuits may be exposed. Section 5: Dispensing Valve and Tower (continued) Qualifier Probable Cause Corrective Action No carbonated water or insufficient carbonated water in finished drink No Carbonated Water only at one dispensing valve. 20 Carbonated water Shut-off Valve closed or partially closed. Remove top cover from Dispensing valve or Tower. Locate Carbonated Water Shut-off Valve on left hand side of Dispensing valve. Verify Shut-off Valve is turned fully open. Mounting Block restricted. Remove Dispensing valve from Mounting Block. Place cup over Carbonated Water outlet on Mounting Block and carefully open Carbonated Water Shut-off Valve. If little or no Carbonated Water is present, Mounting Block is restricted. Remove and clean mounting block. Replace if necessary. Flow Control our of adjustment or inoperative. Readjust Flow Control to proper Brix (5 oz in 4 seconds Standard valve, 10 oz in 4 seconds Fast Flow valve). If no response, clean Carbonated Water Flow Control. Replace if necessary. Valve Port restricted. Clean Carbonated Water valve Port Assembly. Seat swollen. Replace Carbonated Water Seat. Solenoid Coil defective. Replace Carbonated Water Solenoid Coil. Carbonated Water Switch defective (black). Replaced Carbonated Water Switch. 00218012 Revision C (KAK) 1 November, 2001 Multiplex Company, Inc. Fountain Troubleshooting Guide Troubleshooting Guide WARNING: Inspection, testing, and repair of electrical equipment should be performed only by qualified service personnel. The unit should be unplugged when servicing, except when electrical tests are required. DANGER: Use extreme care during electrical circuit tests. Live circuits may be exposed. Section 5: Dispensing Valve and Tower (continued) Qualifier Probable Cause Corrective Action No water or insufficient water in finished drinks All valves dispensing noncarbonated drinks no water. Water Shut-off Valve closed or partially closed. Problem occurs at only one dispensing valve. Refer to Troubleshooting Section 9: Water Booster System under Low or No Water Pressure at Noncarbonated Beverages. Refer to this section on No carbonated water at only one dispensing valve in the dispensing valve. Too much Syrup, Carbonated Water or Water in finished drink. Problem occurs at only one dispensing valve. Syrup, carbonated water, or noncarbonated water flow control out of adjustment or inoperative. Readjust appropriate Flow Control. If Flow Control does not respond to adjustment, clean Flow Control. Replace if necessary. Carbonated Water Flow rates: (5 oz in 4 seconds Standard valve, 10 oz in 4 seconds Fast Flow valve). Too much syrup in finished drink. All valves dispensing same flavortoo much syrup. Malfunction of syrup system. Refer to Troubleshooting Section 8: Syrup System under Drinks too sweet. Too much water in finished drink. All valves dispensing noncarbonated drink too much water. Malfunction of water Booster system. Refer to Troubleshooting Section 9: Water Booster System under Qualifier: Pump and motor cycles on and off excessively. Syrup or Carbonated Water or Water dripping from Nozzle. Valve port scarred. Disassemble appropriate Syrup or Water Assembly. Examine valve Port for scars or nicks. Replace if necessary. Armature Spring or Retaining Ring broken. Disassemble appropriate Syrup or Water Assembly. Examine Armature, Spring and Retainer Ring. If damaged, replace. Seat scarred or obstructed. Disassemble appropriate Syrup or Water Assembly. Examine Seat, if scarred, replace. If foreign material is found in Assembly, remove, reassemble. Transformer inoperative. Verify wire leads from Transformer have solid connections. Switch low voltage lead from Transformer supplying power to left and right hand side of Tower. If Valves operate and the other three do not, Transformer is defective. Replace. Dispensing towers on and off Toggle defective. If after switching Leads, the three valves still do not operate, the on and off Toggle Switch is defective. Valves will not activate when Selection Panel pressed. Problem occurs at two (2) or three (3) consecutive Valves on one (1) tower. 00218012 Revision C (KAK) 1 November, 2001 21 Multiplex Company, Inc. Fountain Troubleshooting Guide Troubleshooting Guide WARNING: Inspection, testing, and repair of electrical equipment should be performed only by qualified service personnel. The unit should be unplugged when servicing, except when electrical tests are required. DANGER: Use extreme care during electrical circuit tests. Live circuits may be exposed. Section 5: Dispensing Valve and Tower (continued) Qualifier Probable Cause Corrective Action No water or insufficient water in finished drinks (continued) Problem occurs at all valves on one (1) dispensing tower. No power to transformer or transformer defective. Verify power with a voltmeter at wall outlet. Verify power across low voltage leads on transformer. If 24 volts are present on and off Toggle Switch is defective. Replace. Problem occurs at only one (1) dispensing valve. Dispensing towers on and off is Switch defective. Verify Main Power Supply and power at Transformer Leads replace on and off Switch if operative. Poor connection on valve Wire Harness. Trace wiring on defective valve and reconnect any loose wires. Clean and reconnect any corroded connections. Portion Control Timer inoperative. Replace the problem valve Portion Control Timer with a known Operative Timer. If valve then operates, Portion Control Timer was defective. Replace. Selection Switch inoperative. Replace defective Portion Control Timer with operative Timer. If Valves still will not activate, Selection Panel is defective. Replace Selection Switch. Poor connection at Contact Clips on Selection Panel (with Portion Control Timer). Examine Contact Clips on Selection Panel and insure proper contact between Portion Control Timer and Contact Clips. Moisture on Portion Control Timer or Contact Clips. Remove top cover from Dispensing Tower. Remove all moisture from Portion Control Timer and Contacts. Portion Control Timer Adjustment Screw turned beyond control limit. Turn Portion Control Adjustment Screws on defective valve counterclockwise 10 complete turns. If valve shuts off when selection is pressed, readjust for proper portions. Valve will not shut off. Note: Several revolutions may be necessary to bring control back into range. 22 Portion Control Timer defective. Verify above probables are not the problem. Push on/off Switch for Dispensing Tower to the off position. If valve ceases to dispense when pushed to on position, Portion Control Timer is defective. Replace. Selection Panel defective. Push on/off Switch for dispensing tower to the off position. If valve ceases and then continues to dispense when switch is pushed in on position, Selection Panel is defective. Replace. 00218012 Revision C (KAK) 1 November, 2001 Multiplex Company, Inc. Fountain Troubleshooting Guide Troubleshooting Guide WARNING: Inspection, testing, and repair of electrical equipment should be performed only by qualified service personnel. The unit should be unplugged when servicing, except when electrical tests are required. DANGER: Use extreme care during electrical circuit tests. Live circuits may be exposed. Section 5: Dispensing Valve and Tower (continued) Qualifier Probable Cause Corrective Action No water or insufficient water in finished drinks (continued) Foaming of finished products. Nozzles, Syrup Tube Diffusers dirty. Remove and clean Nozzle Assemblies and reassemble. Warm drinks. Refer to Troubleshooting Section 7: Refrigeration System under Warm drinks. Incorrect pressure on syrup. Verify pressure supplied to sugar base products is at 60 psi (4.2 kg/cm2). Adjust Medium Pressure Regulator if necessary. Verify pressure supplied to diet product is at 15 psi (1.1 kg/cm2). Adjust Low Pressure Regulator if necessary. Note: Insure the Low Pressure Supply Line has not mistakenly been switched for a Medium Pressure Supply Line on the diet tank. Unit totally inoperative; all electrical switches in the on position. Change-over Valve Medium or Low Pressure is in the wrong position. Verify valve Medium to Low Pressure is in the Low Pressure position for diet products. Air or CO2 gas in syrup line. Replace empty Syrup Tank. Dispense Syrup from valve until consistent flow is achieved and product stabilizes. If evidence of air is still entering line, replace Liquid Disconnect which is allowing air to be drawn into syrup supply. Flake ice. Only cube ice should be used for carbonated beverages. Improper adjustment of valve. Insure carbonated water flow is properly set (5 oz. in 4 seconds standard valve, 10 oz in 4 seconds Fast Flow valve). Insure Brix is properly set. Adjust as necessary. Power failure, all power to system is off, or Fuse/ Circuit Breaker is open. Check Circuit Breaker. Reset. Examine Time Delay, replace if necessary. 00218012 Revision C (KAK) 1 November, 2001 23 Multiplex Company, Inc. Fountain Troubleshooting Guide Troubleshooting Guide WARNING: Inspection, testing, and repair of electrical equipment should be performed only by qualified service personnel. The unit should be unplugged when servicing, except when electrical tests are required. DANGER: Use extreme care during electrical circuit tests. Live circuits may be exposed. Section 6: Electrical System Qualifier Fuse/Circuit Breaker is open. Probable Cause Short Circuit or overload within unit. Corrective Action Push Toggle Switches labeled carbonator and circulator to the off position. Push the Toggle Switches for Booster Pump, Air Compressor, Agitator and Refrigeration to the off position. Replace fuse(s) and reset circuit breaker. Push the Toggle Switches on in the following sequence as labeled below, to locate short or overload within unit, waiting momentarily between steps. *Agitator *Refrigeration *Carbonator A and/or B *Circulator A and/or B (after carbonator Motor Cycles off) *Booster Pump *Air Compressor. Push the Agitator Toggle Switch in the on position. If the fuse/circuit breaker opens, the trouble is in the Agitator Motor Circuit. This Circuit must be checked for shorts and/or overload. If the fuse/circuit breaker does not open after running about 1 minute, the problem is not in the Agitator Motor Circuit. Push the Refrigeration Toggle Switch in the on position. If the fuses/circuit breaker opens, the trouble is in the Refrigeration Circuit. Refer to wiring diagram for possible faulty components. Push the carbonator Toggle Switch A to the on position. Draw Carbonated Water from the Dispensing valve until Pump cycles. If the fuse/circuit breaker opens, the trouble is in the carbonator Circuit. Refer to wiring diagram for possible faulty components. Push the carbonator Toggle Switch B to the on position. Follow procedure above for carbonator A. Push the Circulator Toggle Switch A to the on position. If fuse/circuit breaker opens, the trouble is in the Circulator Circuit. Refer to wiring diagram for possible faulty components. Push the Circulator Toggle Switch B to the on position. Follow procedure above for Circulator A. Push the Booster Pump Toggle Switch to the on position (allow unit to cycle). If fuse/circuit breaker opens, the trouble is in the Booster Pump Circuit. Refer to wiring diagram for possible faulty components. Push the Air Compressor Toggle Switch to the on position. (Allow unit to cycle). If fuse/ circuit breaker opens, the trouble is in the Air Compressor Circuit. Refer to wiring diagram for possible faulty components. Important Note: Worn out Circuit Breakers or low voltage are frequently responsible for shorts and overloads. Contact service agent to examine possible defective Circuit Breakers or low voltage. 24 00218012 Revision C (KAK) 1 November, 2001 Multiplex Company, Inc. Fountain Troubleshooting Guide Troubleshooting Guide WARNING: Inspection, testing, and repair of electrical equipment should be performed only by qualified service personnel. The unit should be unplugged when servicing, except when electrical tests are required. DANGER: Use extreme care during electrical circuit tests. Live circuits may be exposed. Section 7: Refrigeration System Until repairs can be made on unit with no Ice Bank, push Refrigeration and Agitator Switch to the off position and ice down Bath using ice from Ice Maker. Qualifier Probable Cause Corrective Action Warm drinks (carbonated water temperature over 40°F [5°C]) Compressor operates but no ice present at water bath. Water Bath Feeder Valve inoperative (not enough water in bath). Remove tope cover from Remote Refrigeration Unit. Verify if water level is considerably below Stand Pipe. If so, Water Make-Up valve is inoperative. Remove, disassemble and clean out valve. Replace, refill Bath and allow carbonator to cycle while inspecting valve to insure proper operation. Replace if necessary. Water leak inside bath. Remove top cover from Remote Refrigeration Unit. Inspect Water Bath at Stand Pipe. If considerable water is observed running over and out the drain, there is a water leak inside Bath. The leak causes the Ice Bank to melt as fast as its formed. Drain Bath to located the leak, repair and refill bath. Fan or Motor inoperative (air cooled units). Examine Fan and Motor on Air Cooled Units at Condenser. If either are found to be inoperative while compressor is running, replace inoperative fan or motor. Caution: Inoperative Fan and Motor can cause short cycling of compressor. Compressor operates but no ice present at water bath. Condenser restricted. For Air Cooled Units, clean the Condenser removing all dust and lint. On Water Cooled Units: Using a thermometer verify temperature at water discharge line. If operating outside of the 95°F (35°C) to 105°F (41°C) range, adjust Water Modulating valve, replace. Caution: Restricted Condenser can cause short cycling of compressor. Excessively warm room. Lack of Refrigerant Charge. Defective Expansion valve. 00218012 Revision C (KAK) 1 November, 2001 Verify the Refrigeration Unit is operating in a well ventilated area and that there are no obstructions blocking Condenser. If so, remove obstructions if inoperative. Examine Sight Glass. If bubbles appear while compressor is operating system is low on charge. Refer to Serial Plate for proper refrigeration charge. If no bubbles appear in Sight Glass then examine suction line, frost on the suction line is a sign of defective Expansion valve. Replace if inoperative. 25 Multiplex Company, Inc. Fountain Troubleshooting Guide Troubleshooting Guide WARNING: Inspection, testing, and repair of electrical equipment should be performed only by qualified service personnel. The unit should be unplugged when servicing, except when electrical tests are required. DANGER: Use extreme care during electrical circuit tests. Live circuits may be exposed. Section 7: Refrigeration System (continued) Qualifier Probable Cause Corrective Action Warm drinks (carbonated water temperature over 40°F [5°C]) (continued) Compressor operates with Ice present at water bath. Defective Agitator Motor Assembly. Remove top cover from Remote Refrigeration Unit. Examine the Agitator Motor Assembly, insure propeller is secured to Agitator and that the Agitator Switch is in the on position, allowing the water in Bath to be agitated across the cooling coils. If Motor or Propeller is inoperative, replace. Malfunctioning of Circulating System. If ice is present on Evaporator Coil and Agitator Motor Assembly is operating the Refrigeration System is functioning. However, the Circulating System may not be functioning. Refer to Troubleshooting Section 3: Circulating System. Caution: Always make certain that proper line voltage is present. Compressor wont operate and no ice at water bath. 26 Defective Switch. Check to insure Refrigeration Switch is in the on position. Fuse/Circuit open. Breaker Locate Circuit Breaker box and identify proper breaker for Remote Refrigeration Unit. Insure it is in the on position by switching off and then on again. If breaker will not reset, refer to Troubleshooting Section 6: Electrical System. Time Delay Fuse burned out. Inspect Time Delay Fuses at the wall quick shutoff panel. One of the fuses may be burned out causing half the unit to shut down. If this is suspected replace all of the fuses. Defective High Pressure Control. Examine High Pressure Control to insure wire leads are securely attached to terminals. If trouble is suspected with control, replace. Defective Ice Bank Control. Remove Electrical Access Panel and using a voltmeter across the Ice Bank Control, verify control is in the closed position. If control is found to be in the open position, that Control should be replaced. Defective Contactor. Remove Electrical Access Panel. Use a voltmeter across Contactor Coil. If current exists across Coil, and Contactor remains open, Contactor is defective. Replace. Defective Relay or Defective Capacitor or Defective Overload. Examine Relay/Capacitor/Overload to insure wire leads are securely attached to terminals. Replace any faulty components. Defective compressor. If after checking each of the above items, you still experience problems, test compressor for possible defects or grounding. 00218012 Revision C (KAK) 1 November, 2001 Multiplex Company, Inc. Fountain Troubleshooting Guide Troubleshooting Guide WARNING: Inspection, testing, and repair of electrical equipment should be performed only by qualified service personnel. The unit should be unplugged when servicing, except when electrical tests are required. DANGER: Use extreme care during electrical circuit tests. Live circuits may be exposed. Section 7: Refrigeration System (continued) Qualifier Probable Cause Corrective Action No carbonated water at any of the dispensing valves CO2 gas is present at dispensing valves but no Carbonated Water. Malfunctioning of Carbonating System. In a freeze up situation, push Refrigeration and Agitator Toggle Switches to the off position. Drain water from Bath. Pour lukewarm (never hot) water over the Product Coils until thawed. Ice down Water Bath using ice from Ice Maker until further repairs can be made. No CO 2 Gas or water present at dispensing valve. On units equipped with the Red Refrigeration Warning Light. If CO2 gas is present at the Dispensing Valves and there is no water, the problem is in the Carbonated Water System. Refer to Troubleshooting Section 2: Carbonated Water System. Defective Agitator. Examine the Agitator Motor Assembly. Insure Propeller is operating and secured to Agitator and that the Agitator Toggle Switch is in the on position. If Motor is inoperative, replace. Defective Ice Bank Control. Remove Electrical Access Panel. Use a voltmeter across the Ice Bank Control. Verify Control is in the open position. If Control is stuck in the closed position, the unit will freeze up. Replace Control if necessary. If unit builds and Ice Bank to the point of extending into stainless steel coils, the Ice Bank Control must be replaced. Defective Contactor. Use a voltmeter across Contactor Coil. If no current is present across Coil, but Contactor remains closed, Contactor is defective. Replace defective Contactor. Defective Primary Ice Bank Control. When the Refrigeration Warning Light illuminates, the Primary Ice Bank Control is defective and should be replaced. The Secondary Control operates the Compressor until the Primary Control is replaced. Refrigeration Warning Light cycles on and off with Compressor. 00218012 Revision C (KAK) 1 November, 2001 Note: When the Refrigeration Compressor cycles on, Warning Light will turn off. When the Compressor cycles off the light will illuminate. 27 Multiplex Company, Inc. Fountain Troubleshooting Guide Troubleshooting Guide WARNING: Inspection, testing, and repair of electrical equipment should be performed only by qualified service personnel. The unit should be unplugged when servicing, except when electrical tests are required. DANGER: Use extreme care during electrical circuit tests. Live circuits may be exposed. Section 8: Syrup System Qualifier No syrup of insufficient syrup in finished drink. Probable Cause Syrup Tank is empty. Corrective Action Replace Syrup tank and purge air out of Dispensing Valves affected, until steady syrup supply is dispensed. Kinked Syrup lines. Examine all exposed Syrup Lines and relieve any sharp bends or kinks. Note: Observe all independent lines from Syrup Tank to Filters for kinks or bends. Correct as needed. 28 Low Pressure Regulator inoperative. Low Pressure Regulator controls the pressure to diet beverages. Verify pressure is set at 15 psi (1.1 kg/cm2). To increase, adjust clockwise, to decrease, adjust counterclockwise. If regulator does not respond, repair or replace regulator. Medium Pressure Regulator inoperative. Medium Regulator controls the pressure applied to the sugar based beverages. Verify pressure is set at 60 psi (4.2 kg/cm2). To increase, adjust clockwise. To decrease, adjust counterclockwise. If regulator does not respond, repair or replace regulator. Check Relief valve restricted. Disengage Gas Quick Disconnect on suspected restricted flavor at Syrup Tank. Depress Poppet valve on bottom side of Gas Disconnect. If a low or poor pressure supply is apparent, replace Check Relief valve. Gas/Syrup Tank Plug Valves inoperative. Replace Syrup Tank. If this solves the problem, tag defective tank so bottler can make necessary repairs. (It is extremely rare to have inoperative Tank Plug Valves.) Quick Disconnects (Gas or Syrup) not fully engaged on Syrup Tank. Disengage Quick Disconnects on one Tank at a time. Rinse and clean with warm water. Lubricate the O-ring on the Syrup Tank Plug with water. Reattach the Quick Disconnects to the appropriate Syrup Tank Plug. Gas Quick Disconnects are gray or have two key slots. Syrup Quick Disconnects are black or have three key slots. Quick Disconnect Valves or Tank Jumper inoperative. Gas Quick Disconnects: Open the Relief valve on the top of the syrup tank lid. If the Gas Quick Disconnect is opening properly, pressure should continue to bleed from the Gas Relief valve. If not, replace Gas Quick Disconnect. Syrup Quick Disconnects: Open the Dispensing valve (Syrup Side only) for appropriate flavor. Dispensing syrup for at least 10 seconds. If CO2/Air pockets appear in syrup, replace Syrup Quick Disconnect. If syrup flow is inadequate or fluctuates during 10 seconds of flow, replace Syrup Quick Disconnects. 00218012 Revision C (KAK) 1 November, 2001 Multiplex Company, Inc. Fountain Troubleshooting Guide Troubleshooting Guide WARNING: Inspection, testing, and repair of electrical equipment should be performed only by qualified service personnel. The unit should be unplugged when servicing, except when electrical tests are required. DANGER: Use extreme care during electrical circuit tests. Live circuits may be exposed. Section 8: Syrup System (continued) Qualifier Probable Cause No syrup of insufficient Syrup in finished drink. (continued) Gas leak at Syrup System. Use a soap solution around all connections, starting from the Low and Medium Pressure Regulators to the base of the Syrup Tank Plugs, observe Quick Disconnects, Tank Cap and Gasket, Tank Plugs and Syrup Tank O-rings for leaks. Repair and replace if necessary. Syrup Filter restricted. Disengage Syrup Quick Disconnect from the appropriate Syrup Tank. Relieve pressure at the corresponding Dispensing valve. Remove the Screw clamp and the Filter Screen. Wash the Filter Screen with warm water and reassemble. Frozen Syrup Coil. Refer to Troubleshooting Section 7: Refrigeration System under No carbonated water at any of the dispensing valves (Freeze up). Dispensing valve inoperative. Refer to Troubleshooting Section 5: Dispensing Valve and Tower under No syrup or insufficient syrup. Low Pressure Regulator inoperative. Verify Low Pressure Regulator set at 15 psi (1.1 kg/cm2). Adjust Regulator if necessary. If Regulator will not respond, repair or replace Regulator. Medium Pressure Regulator inoperative. Verify Medium Pressure Regulator set at 60 psi (4.2 kg/cm2). Adjust Regulator if necessary. If Regulator will not respond, repair or replace Regulator. Dispensing valve inoperative. Refer to Troubleshooting Section 5: Dispensing Valve and Tower under Too much syrup in finished drink. Contaminated Syrup. Replace tank and sanitize the system. Drinks too sweet. Peculiar taste. 00218012 Revision C (KAK) 1 November, 2001 Corrective Action 29 Multiplex Company, Inc. Fountain Troubleshooting Guide Troubleshooting Guide WARNING: Inspection, testing, and repair of electrical equipment should be performed only by qualified service personnel. The unit should be unplugged when servicing, except when electrical tests are required. DANGER: Use extreme care during electrical circuit tests. Live circuits may be exposed. Section 9: Water Booster System Qualifier Probable Cause Corrective Action Low or no water pressure at noncarbonated beverages Water Booster will not No power to Water Booster Verify Toggle Switch for Booster Pump is in cycle on. Both the Pump. the on position and main power supply is pressurized filter water on. and filtered water pressure register 55 psi Pressure Switch defective. Remove Pressure Switch Cover and use a volt(3.8 bar). meter across terminals to determine whether open or closed. If in the open position, replace Switch. Motor defective. If Motor will not operate, verify voltage across Motor Terminals with a voltmeter. If voltage reads from 110 to 120 VAC, the Motor is defective and should be replaced. Pump frozen. Loosen the Coupling Clamp with a flat-blade screwdriver and disengage pump from Motor. Turn the Coupling key by hand, in back of pump. If pump shaft will not spin freely, Pump is defective and must be replaced. Water Booster cycles on and off and pressurized Filtered Water Gauged readings range between 65 psi (4.6 kg/cm2) to 85 psi (6.0 kg/cm2). Water supply shut-off after Booster System. Examine Shut-off Valve to Plain Water to Unit and Water to Coffee Machine and insure both are in the on position. Frozen Water Coil. Refer to Troubleshooting Section 7: Refrigeration System under No carbonated water at any of the dispensing valves (freeze up). Pump and Motor will not cycle off. Water supply to Booster Pump shut off. Examine the Shut-off Valve to Booster Pump and insure valve is in the on position. Restricted Water Filter. Observe Filter Water Pressure Gauge. If pressure drops total of 40 psi (2.8 bar) or more when pump cycles on. Replace filter. Leak on Booster System Pump Strainer obstructed. Locate water leaks on system and repair. Remove Pump Strainer at Brass Booster Pump, flush screen with water to clean. Reassemble and position in place. Replace screen if necessary. Pump Coupling Key defective. Using a flat-blade screwdriver, loosen Coupling Clamp and disengage Pump from Motor. Examine Coupling Key, if rounded off on either end, replace. Pump defective. Examine Pressurized Filter Water Pressure Gauge. If Pump and Motor continue to operate but fail to build up to 85 psi (6.0 kg/cm2) in order to cut off, pump is defective. Replace Pump. Pressure Switch improperly adjusted or defective. Observe Pressurized Filtered Water Pressure Gauge to insure proper cycle on at 65 psi (4.6 kg/cm 2 ) and cycle off at 85 psi (6.0 kg/cm2). Refer to instructions found under Switch Cover for adjusting. If Switch does not respond to adjustment, replace switch. 30 00218012 Revision C (KAK) 1 November, 2001 Multiplex Company, Inc. Fountain Troubleshooting Guide Troubleshooting Guide WARNING: Inspection, testing, and repair of electrical equipment should be performed only by qualified service personnel. The unit should be unplugged when servicing, except when electrical tests are required. DANGER: Use extreme care during electrical circuit tests. Live circuits may be exposed. Section 9: Water Booster System (continued) Qualifier Probable Cause Corrective Action Low or no water pressure at noncarbonated beverages (continued) Pump and Motor cycles on and off excessively. Leak on Booster System. Locate water leaks on system and repair. Check valve defective. Observe Filtered Water Pressure Gauge. If pressure rises and drops with Pressurized Filtered Water Gauge, the Water Inlet Check valve on Pump is defective. Replace Check valve. Pressure Switch improperly adjusted or defective. Observe Pressurized Filtered Water Pressure Gauge to insure proper cycle on at 65 psi (4.6 kg/cm 2 ) and cycle off at 85 psi (6.0 kg/cm2). Refer to instructions found under Switch Cover for adjusting. If Switch will not respond to adjustment, replace switch. Accumulator Tank pressure set improperly. Push Toggle Switch and Water Shut-off Valve to Booster Pump to the off position. Activate Plain Water button until water flow ceases. Using a tire gauge verify a 60 psi (4.2 kg/cm2) charge on Tank. Recharge if necessary. Note: When charging Accumulator Tank, only AIR should be used. Peculiar taste in Noncarbonated beverages. Accumulator Tank bladder ruptured. Repeat procedures above. If water is found inside Air Chamber when verifying pressure charge, bladder is ruptured. Replace Accumulator Tank. Motor overheating. Using a flat-blade screwdriver, loosen Coupling Clamp and disengage Pump from Motor. Turn Coupling Key by hand, in back of Pump. If Coupling Key is difficult to turn, it may cause defective Motor to overheat. Replace Motor if necessary. Water Filter contaminated. Replace Filter. Refer to Troubleshooting Section 10: Water Filter under Peculiar taste. Accumulator Tank bladder ruptured. Replace Accumulator Tank. Refer to Pump and Motor Cycle on and off excessively Accumulator Tank bladder ruptured. Malfunction of Carbonated Water System. Refer to Troubleshooting Section 2: Carbonated Water System under Peculiar taste, Probable Cause: Back Flow Preventer leaking. 00218012 Revision C (KAK) 1 November, 2001 31 Multiplex Company, Inc. Fountain Troubleshooting Guide Troubleshooting Guide WARNING: Inspection, testing, and repair of electrical equipment should be performed only by qualified service personnel. The unit should be unplugged when servicing, except when electrical tests are required. DANGER: Use extreme care during electrical circuit tests. Live circuits may be exposed. Section 10: Water Filter System Until repairs can be made on the Water Filter, place valve handle into filter By-pass position. Qualifier Probable Cause Carbon particles in finished drink. Water By-pass valve is not in the filtering position. Verify By-pass valve handle is in the Filter operating position. If particles continue to appear, filter must be serviced. Defective or damaged seal on Filter Cartridge. Verify O-rings are not twisted or nicked. Verify Cartridge is solid and free of cracks. Replace if necessary. Filter Cartridge installed without Inlet Seal. Remove Cartridge from Canister. Clean Canister Lid and Shell assembly. Replace with new Filter Cartridge, making sure to remove Water Inlet Seal. Defective Pump. carbonator Refer to Troubleshooting Section 2: Carbonated Water System. Defective Pump. Circulating Refer to Troubleshooting Section 3: Circulating System. Carbonator and Water Booster Pump extremely noisy. Peculiar taste. 32 Corrective Action Restricted Water Filter. Observe Filter Water Pressure Gauge. If pressure drops at total of 40 psi (2.8 bar) or more when pump cycles on, replace filter. Filter Cartridge installed without removing Water Inlet Seal. Removed Cartridge from Canister. Clean Canister Lid and Shell Assembly. Install new Filter Cartridge, making sure to remove Cartridge Inlet Seal. Water supply to Filer restricted. Verify water supply is turned on to unit. Refer to Troubleshooting Section 2: Carbonated Water System and Section 9: Water Booster System for additional solutions. Water Filter contaminated. Place Filter valve into Filter By-pass position. Replace Filter and reposition valve handle to filter operating position. 00218012 Revision C (KAK) 1 November, 2001 Multiplex Company, Inc. Fountain Troubleshooting Guide Troubleshooting Guide WARNING: Inspection, testing, and repair of electrical equipment should be performed only by qualified service personnel. The unit should be unplugged when servicing, except when electrical tests are required. DANGER: Use extreme care during electrical circuit tests. Live circuits may be exposed. When the Brix is Off Air Compressor Bag-In-Box Usage Medium Syrup Pressure 70 psi (4.8 bar) On 90 psi (6.2 bar) Off Filtered Water Pressure Pressurized Filtered Water Pressure (Water Booster) 60 psi (4.1 bar) Syrup Tanks Usage Low Syrup Pressure Medium Syrup Pressure 15 psi (1.0 bar) 60 psi (4.1 bar) CO2 High Pressure 90 psi (6.2 bar) Drink Temperature Below 39°F (3.9°C) 65 psi (4.5 bar) On 85 psi (5.9 bar) Off 00218165 (Revision A) 00218012 Revision C (KAK) 1 November, 2001 33 Multiplex Company, Inc. Fountain Troubleshooting Guide Troubleshooting Guide WARNING: Inspection, testing, and repair of electrical equipment should be performed only by qualified service personnel. The unit should be unplugged when servicing, except when electrical tests are required. DANGER: Use extreme care during electrical circuit tests. Live circuits may be exposed. When the Brix is Off (continued) Problem Drink too warm. Probable Cause Refrigeration off. switch Solution Turn on refrigeration switch. Condenser dirty. Have condenser cleaned. Condenser obstructed. Remove any objects blocking the air flow in or out of the unit. Circulator switch off. Turn on circulator switch and allow time for drinks to cool. Note: If service is required, you can continue to dispense cold drinks by completing following this procedure. 1. Turn off the compressor switch and agitator switch. 2. Drain the water from the water bath. Reinstall the grey plastic over-flow pipe. 3. Fill water bath with ice from the ice machine. 4. Monitor frequently. Refill as needed. Not enough carbonation. CO2 Shut-off Valve off. Open Shut-off Valve. CO2 cylinder empty. Switch over to a new cylinder and dispense carbonated water until carbonation returns. Product foaming. Dirty or sanitizer soaked. Clean or replace nozzles. Warm drinks. See Drink too warm under Problem above. Empty syrup container. Replace syrup container. Air Compressor is off. Turn on and plug-in the Air Compressor. Change-over valve centered. Position switch totally on either air or CO2. No carbonated water dispensed. Carbonator turned off. Turn on carbonator switch. Water supply turned off. Turn on water to the system. Product has an off taste. Dirty nozzles. Clean or replace nozzles. Out of date syrup. Replace with fresh syrup. Saturated water filters. Replace water filters. No syrup dispensed. 34 00218165 (Revision A) 00218012 Revision C (KAK) 1 November, 2001 Multiplex Company, Inc. Fountain Troubleshooting Guide Maintenance Schedule This section provides a list of periodic maintenance tasks and the scheduled frequency required to ensure the proper operation of your Multiplex dispensing equipment. To ensure quality beverages, prevent down-time, and reduce costs, these tasks must be performed as indicated. Periodic maintenance for soft drink equipment (listed by major components) Dispensing stations Daily (365 times per year) w Take temperature of finished drinks. Pour off the first and take the temperature of the second drink. The proper temperature of drinks must be 40°F (4°C) or less. w Remove nozzles and diffusers from each dispensing valve. Clean with soap and warm water (not hot). Rinse with carbonated water and reinstall. w Flush all dispenser drains. Pour hot water down drains at closing. Beverage conduits Every 4 months (3 times per year) w Inspect beverage conduits for damage. Re-insulate and seal any uninsulated areas. w Inspect floor chases and seal any open chase ends. Air compressor Monthly (12 times per year) w Drain condensate water from air compressor tank. Every 4 months (3 times per year) w Inspect air compressor filter and replace if clogged. Air filter must be replaced every 6 months. w Inspect air compressor to verify cut-in at 70 psi (4.8 bar) and cut-out at 90 psi (6.3 bar). Adjust pressure switch if necessary. w Inspect system for air leaks and repair as required. Refrigeration unit Every 4 months (3 times per year) w Clean the refrigeration unit air-cooled condenser using a vacuum cleaner. If equipped with watercooled condenser, verify the water discharge temperature is at 105°F (41°C). Adjust water modulating valve if necessary. w Inspect water bath to verify water level is at the top of stand pipe. If below, add water and repair water makeup device. If excessive amount of water is flowing over stand pipe, locate leak within bath and repair. w Inspect ice bank within the water bath to verify proper size ice bank and clarity. Look for uniform, 2" to 4" thick ice bank. w Drain, clean, and refill water bath. w Inspect agitator motor and ensure proper operation. w Inspect the circulating motor/pump assembly. Clean strainer and oil motor. w Inspect the carbonating motor/pump assembly. Clean strainer and oil motor. w Inspect entire system for leaks and repair as required. Water filters Every 4 months (3 times per year) w Verify that incoming water pressure is not less than 40 psi (2.8 bar) or greater than 60 psi (4.1 bar). If equipped with a water regulator, verify proper setting of 55 psi (3.8 bar). Adjust if necessary. w If pressure is low, inspect water filter cartridges to ensure they are able to supply adequate water pressure under normal system flow. Replace if unable to provide minimum 20 psi (1.4 bar) under load. 00218012 Revision C (KAK) 1 November, 2001 35 Multiplex Company, Inc. Fountain Troubleshooting Guide Maintenance Schedule (continued) Periodic maintenance for soft drink equipment (listed by major components) (continued) Syrup supply Daily (365 times per year) w Clean general area of syrup hookup with soap and warm water. Rinse off all soap. Every 4 months (3 times per year) w Inspect syrup lines for proper flavor identification labels. Replace labels if necessary. w Disconnect syrup containers. Clean connector with soap and warm water. Rinse with plain water and reconnect to syrup containers. CO2 gas supply Every 4 months (3 times per year) w Inspect pressure setting at CO2 high pressure regulator. Verify proper 90 psi (6.3 bar) pressure setting. Adjust if necessary. w Inspect pressure setting at syrup pressure regulators. Verify proper pressure setting. Adjust if necessary. w Inspect system for CO2 leaks, repair as required. 36 00218012 Revision C (KAK) 1 November, 2001 Multiplex Company, Inc. Fountain Troubleshooting Guide Maintenance Schedule (continued) Periodic maintenance for soft drink equipment (listed by scheduled frequency) Daily (365 times per year) w Take temperature of finished drinks. Pour off the first and take the temperature of the second drink. The proper temperature of drinks must be 40°F (4°C) or less. w Remove nozzles and diffusers from each dispensing valve. Clean with soap and warm water (not hot). Rinse with carbonated water and re-install. w Flush all dispenser drains. Pour hot water down drains at closing. w Clean general area of syrup hookup with soap and warm water. Rinse off all soap. Every 4 months (3 times per year) w Using Brix cup and syrup separator, check for proper carbonated water flows (standard flow: 5 oz. in 4 seconds, fast flow: 10 oz. in 4 seconds) and syrup to water ratios at each dispensing station. Adjust as required. w Inspect beverage conduits for damage. Re-insulate and seal any uninsulated areas. Inspect floor chases and seal any open chase ends. w Inspect air compressor filter and replace if clogged. Air filter must be replaced every six months. w Inspect air compressor to verify cut-in at 70 psi (4.8 bar) and cut-out at 90 psi (6.3 bar). Adjust pressure switch if necessary. w Inspect system for air leaks. Repair as required. w Clean the refrigeration unit air-cooled condenser using a vacuum cleaner. If equipped with watercooled condenser, verify the water discharge temperature is at 105°F (41°C). Adjust water modulating valve if necessary. w Inspect water bath to verify water level is at the top of stand pipe. If below, add water and repair water makeup device. If excessive amount of water is flowing over stand pipe, locate leak within bath and repair. w Inspect ice bank within the water bath to verify proper size ice bank and clarity. Look for uniform, 2" to 4" thick ice bank. w Drain, clean, and refill water bath. w Inspect agitator motor and ensure proper operation. w Inspect the circulating motor/pump assembly. Clean strainer and oil motor. w Inspect the carbonating motor/pump assembly. Clean strainer and oil motor. w Inspect entire system for leaks and repair as required. w Verify that incoming water pressure is not less than 40 psi (2.8 bar) or greater than 60 psi (4.1 bar). If equipped with a water regulator, verify proper setting of 55 psi (3.8 bar). Adjust if necessary. w If pressure is low, inspect water filter cartridges to ensure they are able to supply adequate water pressure under normal system flow. Replace if unable to provide minimum 20 psi (1.4 bar) under load. w Inspect syrup lines for proper flavor identification labels, replace labels if necessary. w Disconnect syrup containers, clean connector with soap and warm water, rinse with plain water and reconnect to syrup containers. w Inspect pressure setting at CO2 high pressure regulators. Verify proper 90 psi pressure setting. Adjust if necessary. w Inspect pressure setting at syrup pressure regulators. Verify proper pressure setting. Adjust if necessary. w Inspect system for CO2 leaks. Repair as required. 00218012 Revision C (KAK) 1 November, 2001 37 Multiplex Company, Inc. Fountain Troubleshooting Guide Cleaning and Sanitizing the Dispensing Valves and Product Lines Maintenance schedule Everyday Dispensing Valves Everyday Drip pan and drain hose Everyday Quick disconnects Weekly Outside, dispenser cabinet Every 3 months Syrup circuits Every 6 months Condenser Every 3 months Water bath Every 6 months Air purifier filter (if equipped) Cleaning equipment and supplies w Recommended cleaner: A.C. Fergusson Company #3391 or any caustic-base (low sudsing, non-perfumed, easily rinsed) detergent solution which provides a minimum 2% sodium hydroxide. The solution should be prepared in accordance with the manufacturer's instructions. Solution temperature should be between 90°F (32°C) to 110°F (43°C). Temperatures in excess of this can cause internal damage to the dispensing valve components. w Recommended sanitizer: A.C. Fergusson Company SuperChlor or any sanitizer which provided a minimum of 120 parts per million (120 milligrams per liter) of available chlorine. Solution temperature should be between 90°F (32°C) to 110°F (43°C). Temperatures in excess of this can cause internal damage to the dispensing valve components. 38 Remove nozzles and diffusers and soak in mild detergent cleaning solution. Scrub parts with small bristle brush taking care to clean small crevices and O-ring grooves. Turn off power to dispensing valves. Scrub exterior surfaces, including bottom splash area and actuator lever, with cleaning solution. Reassemble diffusers and nozzles. Wipe dry exterior surfaces before turning on power. Wash with mild detergent. Rinse with clean water. Wash with mild detergent. Rinse with potable water. Wash with clean water and mild detergent. Wipe dry. Sanitize each syrup circuit. See Cleaning and Sanitizing Procedure. Vacuum fins or use soft bristle brush (scrub brush). Drain, melt ice and clean using detergent and brush; rinse with potable water. Do not use water over 140°F (60°C). Replace. w Two five gallon (figals) syrup tanks and fittings, cleaned and sanitized (one for cleaner; one for sanitizer). w Containers for cleaner and sanitizer solutions w Clean, non-abrasive cloths w Bucket w Small Brush w Extra Nozzles w Extra Jumpers EI684708 (Revision B) 00218012 Revision C (KAK) 1 November, 2001 Multiplex Company, Inc. Fountain Troubleshooting Guide Cleaning and Sanitizing the Dispensing Valves and Product Lines (continued) Cleaning and sanitizing procedure Note: Cleaning and sanitizing is not required for potable water circuits. Potable water lines should remain connected and operational during the cleaning and sanitizing procedures for syrup circuits. Caution: It is required that the Carbonated Water Lines should remain connected and operational during cleaning and sanitizing of the syrup circuits. Sanitizing of the valve without the Carbonated Water side operation may leave bacteria in the nozzle, diffuser, and syrup tube. Cleaning the dispensing valves 1. Disconnect each syrup container from its product line. Remove product from the lines by purging with clean warm tap water until syrup has been fully purged from the product lines and valves. 2. Clean all lines and fittings with cleaning solution and rinse with clean, room temperature water to remove all traces of residual product. Cleaning the product lines 1. To clean each valve product line, attach the valve product lines to the pressure tank containing the cleaning solution. Make sure each line is completely filled. Pressurize the lines by pulsing the valves. Pressurizing the product lines a. For 15 seconds turn dispensing valve on, off, and then immediately on again for 15 cycles. b. Allow the valve to remain flowing for 3 minutes. c. Repeat pulsing and flowing the valves again until all cleaning solution has been used. 2. Flush the cleaning solution from the lines with clean water after a minimum of 3 minutes, by pulsing the valves as described above. 3. Remove the nozzles and the diffuser assemblies from the valves. Clean with cleaning solution. Agitate the assemblies to assure assemblies are clean. Place them in a container of sanitizing solution for 15 minutes. Wearing sanitary gloves, remove the nozzles and diffuser assemblies from the sanitizing solution. Drain each until dry and reassemble to the valves. 4. Attach each valve product line to the pressure tank containing the sanitizing solution. Be sure all connections are cleaned and sanitized before connecting to each product line. 5. Pressurize and fill the lines with sanitizing solution. Make sure lines are completely filled. Allow the sanitizing solution to flow through each valve while activating the valves for 15 cycles (as described in Pressurizing the product lines). a. Leave valves off and allow to stand pressurized for 30 minutes. b. Activate the valves for two (2) cycles (as described in Pressurizing the product lines). Flush remaining sanitizer continuously through the valves. 6. Reconnect the syrup containers to their respective circuits. Prepare the unit for operation. 7. Draw drinks to refill lines and flush the sanitizing solution from the dispenser. Taste the beverage to verify that there is no off-taste (chlorine). Caution: Do not allow cleaning and sanitizing solutions to remain in syrup systems longer than recommended contact time. Exceeding contact time will result in damage to valve components. EI684708 (Revision B) 00218012 Revision C (KAK) 1 November, 2001 39 250 Old Ballwin Road w St. Louis, Missouri 63021-4800 Tel: 636.256.7777 w Fax: 636.527.4313 [email protected] w www.multiplex-beverage.com In accordance with our policy of continuous product development and improvement, this information is subject to change at any time without notice. 00218012 Revision C (KAK) 1 November, 2001


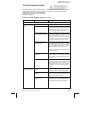
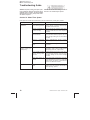
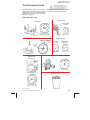


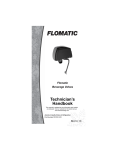
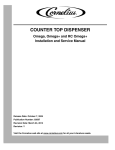
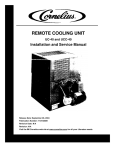
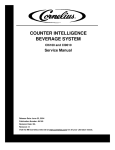


![Installation and Service Manual [ 000760 ]](http://vs1.manualzilla.com/store/data/006033913_1-538733b631fdf0b746407031ace8c980-150x150.png)