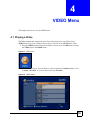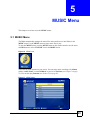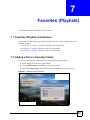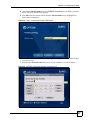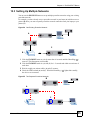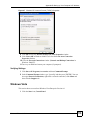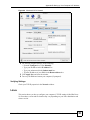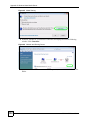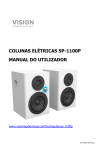
1
DMA-1100P
Digital Media Adapter
User’s Guide
Version 1.00
11/2007
Edition 1
www.zyxel.com
About This User's Guide
About This User's Guide
Intended Audience
This manual is intended for people who want to use and configure the DMA-1100P. You
should have at least basic computer usage knowledge.
Related Documentation
• Quick Start Guide
The Quick Start Guide is designed to help you get up and running right away. It contains
information on setting up your network and configuring for Internet access.
• Supporting Disk
Refer to the included CD for software and support documents.
• ZyXEL Web Site
Please refer to www.zyxel.com for additional support documentation and product
certifications.
User Guide Feedback
Help us help you. Send all User Guide-related comments, questions or suggestions for
improvement to the following address, or use e-mail instead. Thank you!
The Technical Writing Team,
ZyXEL Communications Corp.,
6 Innovation Road II,
Science-Based Industrial Park,
Hsinchu, 300, Taiwan.
E-mail: [email protected]
DMA-1100P User’s Guide
3
Document Conventions
Document Conventions
Warnings and Notes
These are how warnings and notes are shown in this User’s Guide.
1
"
Warnings tell you about things that could harm you or your device.
Notes tell you other important information (for example, other things you may
need to configure or helpful tips) or recommendations.
Syntax Conventions
• The DMA-1100P may be referred to as the “DMA”, the “device”, the “system” or the
“product” in this User’s Guide. Distinctions are made were needed.
• Product labels, screen names, field labels and field choices are all in bold font.
• A key stroke is denoted by square brackets and uppercase text, for example, [ENTER]
means the “enter” or “return” key on your keyboard.
• “Enter” means for you to type one or more characters and then press the [ENTER] key.
“Select” or “choose” means for you to use one of the predefined choices.
• A right angle bracket ( > ) within a screen name denotes a mouse click. For example,
Maintenance > Log > Log Setting means you first click Maintenance in the navigation
panel, then the Log sub menu and finally the Log Setting tab to get to that screen.
• Units of measurement may denote the “metric” value or the “scientific” value. For
example, “k” for kilo may denote “1000” or “1024”, “M” for mega may denote “1000000”
or “1048576” and so on.
4
DMA-1100P User’s Guide
Document Conventions
Icons Used in Figures
Figures in this User’s Guide may use the following generic icons. The DMA icon is not an
exact representation of your device.
DMA
DMA with Remote Control
Notebook computer
Computer
Television (TV)
USB Memory Stick
Server
Firewall
Switch
Router
Powerline
DMA-1100P User’s Guide
5
Safety Warnings
Safety Warnings
1
For your safety, be sure to read and follow all warning notices and instructions.
• Do NOT use this product near water, for example, in a wet basement or near a swimming
pool.
• Do NOT expose your device to dampness, dust or corrosive liquids.
• Do NOT store things on the device.
• Do NOT install, use, or service this device during a thunderstorm. There is a remote risk
of electric shock from lightning.
• Connect ONLY suitable accessories to the device.
• Do NOT open the device or unit. Opening or removing covers can expose you to
dangerous high voltage points or other risks. ONLY qualified service personnel should
service or disassemble this device. Please contact your vendor for further information.
• Make sure to connect the cables to the correct ports.
• Place connecting cables carefully so that no one will step on them or stumble over them.
• Always disconnect all cables from this device before servicing or disassembling.
• Use ONLY an appropriate power adaptor or cord for your device. Connect it to the right
supply voltage (for example, 110V AC in North America or 230V AC in Europe).
• Do NOT allow anything to rest on the power adaptor or cord and do NOT place the
product where anyone can walk on the power adaptor or cord.
• Do NOT use the device if the power adaptor or cord is damaged as it might cause
electrocution.
• If the power adaptor or cord is damaged, remove it from the device and the power source.
• Do NOT attempt to repair the power adaptor or cord. Contact your local vendor to order a
new one.
• Do not use the device outside, and make sure all the connections are indoors. There is a
remote risk of electric shock from lightning.
• If you wall mount your device, make sure that no electrical lines, gas or water pipes will
be damaged.
This product is recyclable. Dispose of it properly.
6
DMA-1100P User’s Guide
Safety Warnings
DMA-1100P User’s Guide
7
Safety Warnings
8
DMA-1100P User’s Guide
Contents Overview
Contents Overview
Introduction ............................................................................................................................ 21
Introducing the DMA .................................................................................................................. 23
Hardware ................................................................................................................................... 25
Using the DMA ....................................................................................................................... 29
DMA Menus ............................................................................................................................... 31
VIDEO Menu ............................................................................................................................. 39
MUSIC Menu ............................................................................................................................. 43
PHOTO Menu ............................................................................................................................ 49
Favorites (Playlists) ................................................................................................................... 53
SERVER Menu .......................................................................................................................... 57
USB Menu ................................................................................................................................. 61
DMA Setup and Troubleshooting ......................................................................................... 63
Configuring the DMA ................................................................................................................. 65
Media Server Software .............................................................................................................. 81
The ENCRYPT Button ............................................................................................................... 83
Troubleshooting ......................................................................................................................... 87
Appendices and Index ........................................................................................................... 95
DMA-1100P User’s Guide
9
Contents Overview
10
DMA-1100P User’s Guide
Table of Contents
Table of Contents
About This User's Guide .......................................................................................................... 3
Document Conventions............................................................................................................ 4
Safety Warnings........................................................................................................................ 6
Contents Overview ................................................................................................................... 9
Table of Contents.................................................................................................................... 11
List of Figures ......................................................................................................................... 15
List of Tables........................................................................................................................... 19
Part I: Introduction................................................................................. 21
Chapter 1
Introducing the DMA............................................................................................................... 23
1.1 Overview .............................................................................................................................. 23
1.1.1 Play Movies, Music or Photos on Your TV ................................................................. 23
1.1.2 Play Files from Your Computer or on USB ................................................................. 23
1.1.3 Connect your DMA to Your Home (Powerline) Network ............................................. 24
1.1.4 Use the Remote Control to Select From the On-Screen Menu .................................. 24
Chapter 2
Hardware.................................................................................................................................. 25
2.1 Overview .............................................................................................................................. 25
2.2 Using the Remote Control ................................................................................................... 25
2.3 LEDs .................................................................................................................................... 27
Part II: Using the DMA ........................................................................... 29
Chapter 3
DMA Menus ............................................................................................................................. 31
3.1 Menus Overview .................................................................................................................. 31
3.2 Menu Navigation .................................................................................................................. 32
3.3 VIDEO, MUSIC and PHOTO Menus ................................................................................... 33
DMA-1100P User’s Guide
11
Table of Contents
3.4 VIDEO, MUSIC and PHOTO File Folders ........................................................................... 34
3.5 The TOOL Button ................................................................................................................ 34
3.5.1 VIDEO, MUSIC and PHOTO Menus: TOOL .............................................................. 35
3.5.2 Using the TOOL Menu From a File Album ................................................................. 35
3.5.3 Keyboard Input ........................................................................................................... 36
Chapter 4
VIDEO Menu ............................................................................................................................ 39
4.1 Playing a Video .................................................................................................................... 39
4.1.1 A-B ............................................................................................................................. 41
4.1.2 Using the TOOL Menu During Video Playback .......................................................... 41
Chapter 5
MUSIC Menu ............................................................................................................................ 43
5.1 MUSIC Menu ....................................................................................................................... 43
5.1.1 Using the TOOL Menu While Playing Music .............................................................. 44
5.2 Podcast (RSS) ..................................................................................................................... 45
5.3 Podcast Menu ...................................................................................................................... 45
5.3.1 Importing Podcasts .................................................................................................... 46
5.3.2 Adding Podcasts ........................................................................................................ 46
Chapter 6
PHOTO Menu........................................................................................................................... 49
6.1 PHOTO Menu ...................................................................................................................... 49
6.2 Organizing Your Photos ....................................................................................................... 50
6.3 Slideshow ............................................................................................................................ 50
6.3.1 Configuring Slideshow Settings ................................................................................. 51
Chapter 7
Favorites (Playlists) ................................................................................................................ 53
7.1 Favorites (Playlists) Introduction .......................................................................................... 53
7.2 Adding a File to a Favorites Folder ...................................................................................... 53
7.3 Editing a Favorites Folder .................................................................................................... 54
7.3.1 Changing the Name of a Favorite Folder ................................................................... 54
7.3.2 Changing the Contents of a Favorites Folder ............................................................ 55
7.4 Favorites Playback .............................................................................................................. 55
Chapter 8
SERVER Menu......................................................................................................................... 57
8.1 Accessing the SERVER Menu ............................................................................................. 57
8.2 SERVER Menu .................................................................................................................... 57
Chapter 9
USB Menu ................................................................................................................................ 61
12
DMA-1100P User’s Guide
Table of Contents
9.1 USB Menu ........................................................................................................................... 61
Part III: DMA Setup and Troubleshooting ............................................ 63
Chapter 10
Configuring the DMA .............................................................................................................. 65
10.1 Accessing the OPTION Menu ............................................................................................ 65
10.2 HomePlug Settings ............................................................................................................ 66
10.2.1 Connecting to a Single Computer with HomePlug ................................................... 66
10.2.2 Connecting to a Wired Home Network with Powerline ............................................. 68
10.3 Network Settings ............................................................................................................... 68
10.3.1 DNS Server Address ................................................................................................ 69
10.3.2 MAC Address ........................................................................................................... 69
10.4 Network Settings Menu ..................................................................................................... 69
10.5 Wired LAN Settings ........................................................................................................... 69
10.6 Video Modes ...................................................................................................................... 71
10.7 TV Settings ........................................................................................................................ 71
10.8 Audio Settings ................................................................................................................... 72
10.8.1 Audio Formats .......................................................................................................... 73
10.9 Language Settings ............................................................................................................. 74
10.10 Settings For Ease of Use ................................................................................................. 75
10.11 Reset Settings .................................................................................................................. 75
10.12 Registration Code ............................................................................................................ 76
10.13 Software Update .............................................................................................................. 77
10.14 Device Information ........................................................................................................... 78
10.15 Screen Saver ................................................................................................................... 79
Chapter 11
Media Server Software ........................................................................................................... 81
11.1 Media Server Introduction .................................................................................................. 81
11.2 Media Server Tool .............................................................................................................. 81
11.3 Configuring the Media Server Software ............................................................................. 82
11.4 Windows Media Connect Server ........................................................................................ 82
Chapter 12
The ENCRYPT Button .............................................................................................................83
12.1 ENCRYPT Button Overview .............................................................................................. 83
12.2 Set Up a HomePlug AV Network with ENCRYPT .............................................................. 83
12.3 Setting Up Multiple Networks ............................................................................................ 85
Chapter 13
Troubleshooting...................................................................................................................... 87
DMA-1100P User’s Guide
13
Table of Contents
13.1 Power, Hardware Connections, and LEDs ........................................................................ 87
13.2 DMA Usage ....................................................................................................................... 88
13.3 Powerline Problems ........................................................................................................... 91
13.4 ENCRYPT Button Problems .............................................................................................. 92
Part IV: Appendices and Index ............................................................. 95
Appendix A Product Specifications......................................................................................... 97
Appendix B Setting up Your Computer’s IP Address............................................................ 107
Appendix C Windows Vista Media Server ............................................................................ 129
Appendix D Open Software Announcements ....................................................................... 137
Appendix E Legal Information .............................................................................................. 183
Appendix F Customer Support ............................................................................................. 187
Index....................................................................................................................................... 193
14
DMA-1100P User’s Guide
List of Figures
List of Figures
Figure 1 DMA with USB ......................................................................................................................... 23
Figure 2 Connect the DMA to Your Home Powerline Network ............................................................... 24
Figure 3 Remote Control ........................................................................................................................ 26
Figure 4 LEDs ......................................................................................................................................... 27
Figure 5 HOME Menu ............................................................................................................................. 31
Figure 6 Main Menu Description ............................................................................................................. 33
Figure 7 File Folder Menu Description ................................................................................................... 34
Figure 8 VIDEO: TOOL > Change View ................................................................................................ 35
Figure 9 VIDEO > File Album: TOOL ..................................................................................................... 35
Figure 10 Keyboard Input ....................................................................................................................... 36
Figure 11 VIDEO Icon ............................................................................................................................. 39
Figure 12 VIDEO Menu .......................................................................................................................... 39
Figure 13 VIDEO > All Videos ................................................................................................................ 40
Figure 14 VIDEO Playback Information Example ................................................................................... 40
Figure 15 VIDEO > All Videos > File: TOOL .......................................................................................... 41
Figure 16 MUSIC Icon ............................................................................................................................ 43
Figure 17 MUSIC Menu .......................................................................................................................... 43
Figure 18 MUSIC > Album > File: TOOL ................................................................................................ 44
Figure 19 RSS Feed Icon ....................................................................................................................... 45
Figure 20 MUSIC > Podcast: TOOL ....................................................................................................... 45
Figure 21 MUSIC > Podcast: TOOL: Add Podcast ................................................................................ 47
Figure 22 MUSIC > Podcast: TOOL: Add Podcast: Keyboard Input. .................................................... 47
Figure 23 PHOTO Icon ........................................................................................................................... 49
Figure 24 PHOTO Menu ......................................................................................................................... 49
Figure 25 PHOTO > Album: TOOL ......................................................................................................... 50
Figure 26 PHOTO > Album > File: TOOL ............................................................................................... 51
Figure 27 Adding a Favorite Example. ................................................................................................... 53
Figure 28 Favorites: TOOL Menu ........................................................................................................... 54
Figure 29 Favorites > Favorite folder: TOOL Menu ................................................................................ 55
Figure 30 SERVER Icon ......................................................................................................................... 57
Figure 31 SERVER Menu > Server ....................................................................................................... 58
Figure 32 SERVER Menu ....................................................................................................................... 58
Figure 33 SERVER > User Files ........................................................................................................... 59
Figure 34 USB Icon ................................................................................................................................ 61
Figure 35 OPTION Icon .......................................................................................................................... 65
Figure 36 OPTION Menu ........................................................................................................................ 65
Figure 37 Connect Directly to a Computer with Powerline .................................................................... 66
Figure 38 Option > Homeplug Settings: NMK Setup .............................................................................. 67
DMA-1100P User’s Guide
15
List of Figures
Figure 39 OPTION > Homeplug Settings: Keyboard Input .................................................................... 67
Figure 40 Connect to a Computer on Your Home (wired) Network ....................................................... 68
Figure 41 OPTION > Network Settings ................................................................................................. 69
Figure 42 OPTION > Network Settings > Wired LAN Settings .............................................................. 70
Figure 43 OPTION > TV Settings .......................................................................................................... 71
Figure 44 OPTION > Audio Output Settings .......................................................................................... 72
Figure 45 OPTION > Language Settings ............................................................................................... 74
Figure 46 OPTION > Settings for Ease of Use ...................................................................................... 75
Figure 47 OPTION > Reset Settings ..................................................................................................... 76
Figure 48 OPTION > DivX Registration Code. ....................................................................................... 77
Figure 49 OPTION > Software Update .................................................................................................. 78
Figure 50 OPTION > Device Information ............................................................................................... 79
Figure 51 Media Server Tool Icon ......................................................................................................... 82
Figure 52 ENCRYPT Connection Procedure ......................................................................................... 84
Figure 53 Adding More Powerline Adapters to Your Network ............................................................... 84
Figure 54 One Existing Powerline Network ........................................................................................... 85
Figure 55 Two Separate Powerline Networks ....................................................................................... 85
Figure 56 Wall-mounting Example ........................................................................................................ 104
Figure 57 Masonry Plug and M4 Tap Screw ......................................................................................... 104
Figure 58 WIndows 95/98/Me: Network: Configuration ........................................................................ 108
Figure 59 Windows 95/98/Me: TCP/IP Properties: IP Address ............................................................ 109
Figure 60 Windows 95/98/Me: TCP/IP Properties: DNS Configuration .................................................110
Figure 61 Windows XP: Start Menu .......................................................................................................111
Figure 62 Windows XP: Control Panel ..................................................................................................111
Figure 63 Windows XP: Control Panel: Network Connections: Properties ............................................112
Figure 64 Windows XP: Local Area Connection Properties ..................................................................112
Figure 65 Windows XP: Internet Protocol (TCP/IP) Properties .............................................................113
Figure 66 Windows XP: Advanced TCP/IP Properties ..........................................................................114
Figure 67 Windows XP: Internet Protocol (TCP/IP) Properties .............................................................115
Figure 68 Windows Vista: Start Menu ....................................................................................................116
Figure 69 Windows Vista: Control Panel ...............................................................................................116
Figure 70 Windows Vista: Network And Internet ...................................................................................116
Figure 71 Windows Vista: Network and Sharing Center ........................................................................116
Figure 72 Windows Vista: Network and Sharing Center ........................................................................117
Figure 73 Windows Vista: Local Area Connection Properties ...............................................................117
Figure 74 Windows Vista: Internet Protocol Version 4 (TCP/IPv4) Properties ......................................118
Figure 75 Windows Vista: Advanced TCP/IP Properties .......................................................................119
Figure 76 Windows Vista: Internet Protocol Version 4 (TCP/IPv4) Properties ..................................... 120
Figure 77 Macintosh OS 8/9: Apple Menu ............................................................................................ 121
Figure 78 Macintosh OS 8/9: TCP/IP ................................................................................................... 121
Figure 79 Macintosh OS X: Apple Menu .............................................................................................. 122
Figure 80 Macintosh OS X: Network .................................................................................................... 123
Figure 81 Red Hat 9.0: KDE: Network Configuration: Devices ........................................................... 124
16
DMA-1100P User’s Guide
List of Figures
Figure 82 Red Hat 9.0: KDE: Ethernet Device: General
.................................................................... 124
Figure 83 Red Hat 9.0: KDE: Network Configuration: DNS ................................................................. 125
Figure 84 Red Hat 9.0: KDE: Network Configuration: Activate
.......................................................... 125
Figure 85 Red Hat 9.0: Dynamic IP Address Setting in ifconfig-eth0 ................................................. 126
Figure 86 Red Hat 9.0: Static IP Address Setting in ifconfig-eth0
Figure 87 Red Hat 9.0: DNS Settings in resolv.conf
Figure 88 Red Hat 9.0: Restart Ethernet Card
..................................................... 126
.......................................................................... 126
................................................................................... 126
Figure 89 Red Hat 9.0: Checking TCP/IP Properties
......................................................................... 127
Figure 90 DMA with Windows Vista Computer .................................................................................... 129
Figure 91 Start WIndows Media Player ................................................................................................ 130
Figure 92 Start WIndows Media Player ................................................................................................ 131
Figure 93 WIndows Media Player Tools> Options ................................................................................ 131
Figure 94 Library ................................................................................................................................. 131
Figure 95 Media Sharing ...................................................................................................................... 132
Figure 96 Network and Sharing Center ................................................................................................ 132
Figure 97 Set Network Location: Customize network settings ............................................................. 133
Figure 98 Set Network Location: Successfully set network settings .................................................... 133
Figure 99 Network ................................................................................................................................ 134
Figure 100 Media Sharing .................................................................................................................... 134
Figure 101 Media Sharing: Select DMA ............................................................................................... 135
Figure 102 Library ............................................................................................................................... 135
Figure 103 Add To Library .................................................................................................................... 136
Figure 104 Add To Library > Advanced ................................................................................................ 136
Figure 105 Add To Library Search ........................................................................................................ 136
DMA-1100P User’s Guide
17
List of Figures
18
DMA-1100P User’s Guide
List of Tables
List of Tables
Table 1 LEDs ......................................................................................................................................... 27
Table 2 Menus Summary ....................................................................................................................... 31
Table 3 Main Menu Description ............................................................................................................. 33
Table 4 File Folder Menu Description .................................................................................................... 34
Table 5 VIDEO > File Album: TOOL ...................................................................................................... 36
Table 6 Keyboard Input .......................................................................................................................... 37
Table 7 VIDEO Playback Information .................................................................................................... 41
Table 8 VIDEO > All Videos > File: TOOL Menu ................................................................................... 42
Table 9 MUSIC > Album > File: TOOL Menu ........................................................................................ 44
Table 10 MUSIC > Podcast: TOOL Menu .............................................................................................. 45
Table 11 PHOTO > Album > File: TOOL ................................................................................................ 51
Table 12 Favorite > TOOL Menu ........................................................................................................... 54
Table 13 Favorites > Favorite folder: TOOL Menu ................................................................................ 55
Table 14 OPTION > Network Settings ................................................................................................... 70
Table 15 OPTION > TV Settings ............................................................................................................ 71
Table 16 OPTION > Audio Output Settings ........................................................................................... 72
Table 17 OPTION > Language Settings ................................................................................................ 74
Table 18 OPTION > Settings for Ease of Use ....................................................................................... 75
Table 19 OPTION > Reset Settings ....................................................................................................... 76
Table 20 OPTION > Software Update ................................................................................................... 78
Table 21 OPTION > Device Information ................................................................................................ 79
Table 22 Hardware Specifications ......................................................................................................... 97
Table 23 Software Specifications ........................................................................................................... 98
Table 24 Standards Supported .............................................................................................................. 98
Table 25 MPEG PS Video File Specifications ........................................................................................ 99
Table 26 MPEG-2 TS/TTS Video File Specifications ........................................................................... 100
Table 27 WMV Video File Specifications ............................................................................................. 100
Table 28 AVI Video File Specifications ................................................................................................. 100
Table 29 MPEG4 Video File Specifications ......................................................................................... 101
Table 30 DVR-MS Video File Specifications ........................................................................................ 101
Table 31 IFO Video File Specifications ................................................................................................ 101
Table 32 Music File Specifications ....................................................................................................... 102
Table 33 Photo File Specifications ....................................................................................................... 103
Table 34 Ethernet Cable Pin Assignments .......................................................................................... 105
DMA-1100P User’s Guide
19
List of Tables
20
DMA-1100P User’s Guide
P ART I
Introduction
Introducing the DMA (23)
Hardware (25)
21
22
CHAPTER
1
Introducing the DMA
This chapter introduces the main applications and features of the DMA. See the Quick Start
Guide for instructions on connecting the DMA.
1.1 Overview
The DMA lets you play DVD-quality movie, music and photo files on your television from
your computer, USB memory stick or other file storage device. You can connect the DMA to
your computer directly or to multiple computers on your home network. The DMA is
HomePlug compatible, so you can also connect your DMA to other devices with a HomePlug
connection using standard home electrical wiring. After you connect to your computer or other
file storage device, select the files you want to play from the DMA menu that appears on your
TV screen using the remote control included with the DMA.
1.1.1 Play Movies, Music or Photos on Your TV
The DMA supports a large number of file formats (see Appendix A on page 99 for a list of
supported file formats). It also supports HDMI (High Definition Multimedia Interface) for
high quality digital video and audio output.
1.1.2 Play Files from Your Computer or on USB
Use standard LAN (Ethernet) cables to connect the DMA directly to your computer or file
storage device, such as ZyXEL’s NSA-220 network storage appliance. See the Quick Start
Guide to install the included media server software on Windows XP computers to use them as
media servers.
The DMA can also play media files stored on a USB device like a memory stick or hard drive.
Figure 1
DMA with USB
DMA-1100P User’s Guide
23
Chapter 1 Introducing the DMA
1.1.3 Connect your DMA to Your Home (Powerline) Network
You can connect the DMA to your wired home network to access multiple computers and file
storage devices. See Chapter 10 on page 68 for information on wired network settings.
You can use the DMA’s powerline feature to connect your DMA to your home computer or
file storage device on your home powerline network using the electrical wiring you have in
your house. The DMA is HomePlug AV compatible, providing high speed data transfer rates
over the range of an average house. See Appendix A on page 97 for speeds and range currently
supported.
The figure below shows the DMA connected to a home computer and file storage device on a
home powerline network.
Figure 2 Connect the DMA to Your Home Powerline Network
1.1.4 Use the Remote Control to Select From the On-Screen Menu
Use the remote control that came in the package to make selections from the DMA menu that
appears on your television screen. The remote control lets you easily browse and play your
digital content files and configure the DMA’s settings.
24
DMA-1100P User’s Guide
CHAPTER
2
Hardware
2.1 Overview
This chapter describes the DMA’s hardware: the remote control and the LEDs (lights).
2.2 Using the Remote Control
Use the remote control to navigate the menus, play files and configure the DMA. The
following figure describes the function of each button on the remote control.
Point the remote control at the front of the DMA.
DMA-1100P User’s Guide
25
Chapter 2 Hardware
Figure 3 Remote Control
Power switches between on
and standby.
PAGE up/down scroll up or
down a list to the previous or
next page.
AUDIO switches audio output
between left, right and stereo
speakers.
A-B lets you select start and
stop times to repeat an
interval.
REPEAT keeps playing the
file.
INFO displays details about
the file playing.
SERVER opens a menu
where you select a media
server.
ROTATE turns a photo 90°
clockwise.
SHUFFLE plays your playlist
(favorites) files in random
order.
OPTION opens the menu
where you configure the
DMA’s settings.
"
26
HOME returns to the main
menu.
MUTE turns off the sound.
VOLUME up/down adjusts
the volume.
Use the OK, BACK and
arrow buttons to go through
the menus, select options
and play your files.
TOOL opens the TOOL menu
for additional options.
These buttons perform the
previous, play, next, reverse,
stop, fast forward, skip, pause
and slow motion functions
during file playback.
PHOTO opens a menu of
picture files to view.
VIDEO opens a menu of
video files to play.
MUSIC opens a menu of
music files to play.
USB opens a menu of files on
your USB device.
You cannot use the SERVER, OPTION, PHOTO, MUSIC or VIDEO buttons
while a dialog box, popup screen or TOOL menu is displayed.
DMA-1100P User’s Guide
Chapter 2 Hardware
2.3 LEDs
The LEDs (lights) tell you about the current status of the DMA.
Figure 4 LEDs
The following table describes the DMA LEDs.
Table 1 LEDs
LED
COLOR
STATUS
DESCRIPTION
POWER
Green
On
The DMA is receiving power and in operation mode
(on).
Red
On
The DMA is receiving power and in standby mode (off).
Off
The DMA is not receiving power.
Blinking
The DMA is playing a file.
Off
The DMA is not playing a file.
On
The DMA has a successful Ethernet connection.
Blinking
The DMA is sending/receiving data on this port.
Off
The DMA does not have a connection on this port.
On
The DMA has a USB stick (or hard drive) connected.
Off
The DMA does not have a USB stick connected.
On
The DMA has a powerline connection with a HomePlug
AV compatible device.
Blinking
The DMA is sending/receiving data on its powerline
connection.
Off
The DMA does not have a powerline connection with a
HomePlug AV compatible device.
PLAY
LAN
USB
HomePlug
DMA-1100P User’s Guide
Blue
Green
Green
Green
27
Chapter 2 Hardware
28
DMA-1100P User’s Guide
P ART II
Using the DMA
DMA Menus (31)
VIDEO Menu (39)
MUSIC Menu (43)
PHOTO Menu (49)
Favorites (Playlists) (53)
SERVER Menu (57)
USB Menu (61)
29
30
CHAPTER
3
DMA Menus
This chapter introduces the DMA’s menus and how to navigate them.
3.1 Menus Overview
The DMA uses menus that display on your television screen. The HOME menu is the first
menu you see when you turn on the DMA.
Figure 5 HOME Menu
This table describes the HOME menu.
Table 2 Menus Summary
MENU
DESCRIPTION
This menu shows video files on the media server you are accessing. Video files on a
USB stick that you add to a favorites folder also display here. See Chapter 4 on page 39
for details.
This menu shows music files on the media server you are accessing. Music files on a
USB stick that you add to a favorites folder also display here. See Chapter 5 on page 43
for details.
DMA-1100P User’s Guide
31
Chapter 3 DMA Menus
Table 2 Menus Summary
MENU
DESCRIPTION
This menu shows photos on the media server you are accessing. Photos on a USB stick
that you add to a favorites folder also display here. See Chapter 6 on page 49 for
details.
Select a media server with content files that you want to play. See Chapter 8 on page 57
for details.
This menu displays the files on an attached USB device. See Chapter 9 on page 61 for
details.
Use this menu to change the DMA’s settings. See Chapter 10 on page 65 for details.
This is the number of media servers the DMA has detected. If it is two or more, use the
SERVER menu to select the one you want to use. See Section 8.2 on page 57 for
details.
3.2 Menu Navigation
Use the remote control’s OK, BACK and arrow buttons to go through the menus, configure
the DMA and play your files.
"
32
Use the remote control’s arrow and OK buttons to select fields and field
options.
DMA-1100P User’s Guide
Chapter 3 DMA Menus
3.3 VIDEO, MUSIC and PHOTO Menus
The VIDEO, MUSIC and PHOTO menus work in a similar way. (The specific features of the
VIDEO, MUSIC and PHOTO menus are described in the VIDEO, MUSIC and PHOTO
chapters in this User’s Guide.) The VIDEO menu is shown below as an example.
Figure 6 Main Menu Description
A
B
C
This table describes the main VIDEO, MUSIC and PHOTO menus.
Table 3 Main Menu Description
AREA
DESCRIPTION
A
This is a list of the file folders. The currently selected item is white. The arrows show that
you can move up or down in the menu.
The DMA categorizes files into album, artist and genre folders according to the
information stored in your files. Files may not appear in the proper folders if they have
missing, incorrect or incomplete information.
Album - Search for videos, music or photos by album (VIDEO, MUSIC and PHOTO
folders).
Artist - Search for music by artist (MUSIC folder only).
Genre - Search for videos or music by genre (VIDEO and MUSIC folders).
All Music / All Videos / All Photos - All of the menu’s files display here.
Favorites - This section contains folders of the files you have marked as favorites. You
can use a favorites folder to have the DMA play the entire list of files (this is also known
as a playlist).
B
This shows which remote control buttons to use in the menu. For example, in this menu,
use the remote control’s arrow and OK buttons to select a folder to see the files sorted
by that criteria. Or use the BACK button to go up in the menu structure (return to the
HOME screen).
C
This displays the number of the selected menu item followed by the total number of
items. In this example menu, the first of four items is selected.
DMA-1100P User’s Guide
33
Chapter 3 DMA Menus
3.4 VIDEO, MUSIC and PHOTO File Folders
This section describes a file folder menu of videos, music or photos.
Select a folder (or sub-folder, if that is where your files are) in the VIDEO, MUSIC or
PHOTO menus and click OK to reach a list of files. The file folder menu displays.
The VIDEO > All Videos menu is shown as an example. The MUSIC and PHOTO menu file
folders work the same way.
Figure 7 File Folder Menu Description
B
A
This table describes a VIDEO file folder menu. MUSIC and PHOTO file folders have similar
features.
Table 4 File Folder Menu Description
AREA
DESCRIPTION
A
Details about the currently selected file.
TITLE - The name of the file.
ARTIST - The name of the artist (MUSIC folder only).
ALBUM - Which album the file belongs to.
DATE - The date the file was created (or last modified).
DURATION - The play time of the file in hours:minutes:seconds.
SERVER - The name of the media server where the file is located.
B
This is a list of files in your file folder.
3.5 The TOOL Button
Use the TOOL button on your remote to set how you view files in the VIDEO, MUSIC and
PHOTO menus and file folders. See the VIDEO, MUSIC and PHOTO sections for
information on using the TOOL button while playing back files.
34
DMA-1100P User’s Guide
Chapter 3 DMA Menus
3.5.1 VIDEO, MUSIC and PHOTO Menus: TOOL
In the VIDEO, MUSIC or PHOTO menus, select TOOL > Change View to view files as a
list and/or as thumbnails.
Figure 8 VIDEO: TOOL > Change View
3.5.2 Using the TOOL Menu From a File Album
In a VIDEO, MUSIC or PHOTO album, use the remote’s TOOL button to set up file
options.
Figure 9 VIDEO > File Album: TOOL
DMA-1100P User’s Guide
35
Chapter 3 DMA Menus
The following table describes the options in this menu.
Table 5 VIDEO > File Album: TOOL
LABEL
DESCRIPTION
Add Favorite
Use this to add the photo to a favorite photos list.
Note: After adding to or editing a favorites list, use the remote
control’s Power button to turn the DMA off and then back on
to save your change.
Change View
Use this to select how the files display in the favorites menu. You can have them
display as a List, Thumbnails, or a List with Thumbnails.
Sorting
Use sorting to set whether the files display in ascending or descending order
according to TITLE, GENRE, DATE,.
Filtering
Use the filter to search for files by title (or part of a title). After you select this
option and select OK, the on-screen keyboard displays (see Figure 10 on page
36). Use the on-screen keyboard to specify up to 16 characters of text that you
want to search for in the file titles.
Continuous
Playback
This option is for VIDEO folders only. Select this option to replay the file without
stopping.
Slideshow
Settings
Use this to configure how the slideshow changes from one photo file to the next
and how long it displays each photo file. You can choose slide transition effects
such as Auto, Fade to White, Fade to Black and None. You can set the viewing
time for each photo from three seconds to one minute.
Detailed
Information
Select this option to view detailed information about the highlighted file. Not
available for music files in the file folder.
View Current
Slideshow Music
You can play music while you navigate the DMA’s menus and play photo files or
slideshows. When a music file is playing, you can use this option to go to the
music file that is playing.
Back
Use this to exit the menu.
3.5.3 Keyboard Input
When you use the Change Name option, you use an on-screen keyboard to edit the name.
Figure 10 Keyboard Input
36
DMA-1100P User’s Guide
Chapter 3 DMA Menus
The following table describes the options in this menu.
Table 6 Keyboard Input
TOOL MENU
DESCRIPTION
Favorite Name
This is the playlist name that you are editing. Use the fields below to edit the name
in this field.
Number
Select this to change the text input mode to numbers. A check mark displays next
to the selected input mode.
Lower
Select this to change the text input mode to lower-case letters. A check mark
displays next to the selected input mode.
Upper
Select this to change the text input mode to upper-case letters. A check mark
displays next to the selected input mode.
Symbol
Select this to change the text input mode to symbols. A check mark displays next
to the selected input mode.
Text Input
Characters
Select characters from the center section of the screen to display in the name
field.
Delete
Select this option and press OK to back space (delete individual characters from
the name starting on the right). Press the OK button once for each character you
want to delete.
Clear
Select this option to delete the whole name.
Space
Select this option and press OK to add a space in the name. Press the OK button
once for each space you want to add.
OK
Select this to save your changes back to the DMA.
CANCEL
Select this to exit this screen without saving your changes.
DMA-1100P User’s Guide
37
Chapter 3 DMA Menus
38
DMA-1100P User’s Guide
CHAPTER
4
VIDEO Menu
This chapter shows how to use the VIDEO menu.
4.1 Playing a Video
The DMA automatically arranges the video files on the media server into folders in the
VIDEO menu. Here is an example of how to play a video file in the All Videos file folder.
1 Press the VIDEO button on the remote control or use the arrow and OK buttons to select
the VIDEO icon in the HOME menu.
Figure 11 VIDEO Icon
2 The Video menu opens. You can choose a video according to the Album (folder) it is in,
its Genre, All Videos, or you can choose from your Favorites.
Figure 12 VIDEO Menu
DMA-1100P User’s Guide
39
Chapter 4 VIDEO Menu
3 Use the remote control’s arrow and OK buttons to select the All Videos folder. A list
of videos appears.
Figure 13 VIDEO > All Videos
4 Use the remote’s arrow and OK buttons to select and play a video file.
• During playback, use the remote control’s buttons for fast forward, reverse and pause.
• Press the remote control’s INFO button to display information on the screen as shown
in the following figure.
Figure 14 VIDEO Playback Information Example
A
40
B
C D E
DMA-1100P User’s Guide
Chapter 4 VIDEO Menu
The following table describes the information you can display during video playback.
Table 7 VIDEO Playback Information
AREA
DESCRIPTION
A
Current function.
B
Elapsed time.
C
Audio (Left, Right or Stereo).
D
The A-B function lets you repeat a certain section of a video or music file. This can be
useful for language learners wanting to repeat a particular word or phrase. See Section
4.1.1 on page 41 for an example.
E
Repeat - Keep playing (looping) the file.
4.1.1 A-B
The following example use the A-B function to set the DMA to keep repeating a section of the
video starting at ten seconds into the video and ending at 30 seconds into the video.
1
2
3
4
Play a video or music file.
Press A-B at 0:10. The “A-” part of the A-B icon on the screen lights up.
Press A-B at 0:30. The rest of the A-B icon on the screen lights up.
The video or music repeats playing from A to B (0:10 to 0:30).
4.1.2 Using the TOOL Menu During Video Playback
While a video file is playing, press the remote control’s TOOL button to open the TOOL
menu.
Figure 15 VIDEO > All Videos > File: TOOL
DMA-1100P User’s Guide
41
Chapter 4 VIDEO Menu
The following table describes the options in this menu.
Table 8 VIDEO > All Videos > File: TOOL Menu
LABEL
DESCRIPTION
Add Favorite
Use this to add the video to a favorite videos list (which you can use as a playlist).
Note: After adding to or editing a favorites list, use the remote
control’s Power button to turn the DMA off and back on to
save your change.
42
Time Search
Select this to skip to a specific time in the video. After you select this, use the
arrow and OK buttons to select the HOUR and MINUTES input boxes. Then press
numbers and the OK button to enter the start time. Then use the arrow and OK
buttons to select OK.
Back
Use this to exit the menu.
DMA-1100P User’s Guide
CHAPTER
5
MUSIC Menu
This chapter covers how to use the MUSIC menus.
5.1 MUSIC Menu
The DMA automatically arranges the music files on the media server into folders in the
MUSIC menu. Use the MUSIC menu to select music files to play.
To open the MUSIC menu, press the MUSIC button on the remote control or use the arrow
and OK buttons to select the MUSIC icon in the HOME screen.
Figure 16 MUSIC Icon
The following menu appears on your screen. You can select music according to its Album
(folder), Artist, Genre, or from All Music or your list of Favorites (see Chapter 7 on page
53). You can also play Podcasts (see Section 5.2 on page 45).
Figure 17 MUSIC Menu
DMA-1100P User’s Guide
43
Chapter 5 MUSIC Menu
Playing music files is similar to playing video files (see Section 4.1 on page 39 for an example
of how to play a video file).
You can also play music files while you use the DMA’s menus or play photo files or
slideshows (use the TOOL menu and the View Current Slideshow Music option to identify a
music file that is playing).
5.1.1 Using the TOOL Menu While Playing Music
You can also use the TOOL button to make adjustments while playing music.
Figure 18 MUSIC > Album > File: TOOL
The following table describes the options available.
Table 9 MUSIC > Album > File: TOOL Menu
LABEL
DESCRIPTION
Add Favorite
Use this to add the song to a favorite songs list (which you can use as a playlist).
Note: After adding to or editing a favorites list, use the remote
control’s Power button to turn the DMA off and back on to
save your change.
44
Time Search
Select this to skip to a specific time in the song.
1. Use the OK button to highlight the minute box and/or the seconds box.
2. Then use the remote control to enter the time in the box you have highlighted.
3. Press the OK button on your remote control to set the start time you have
entered.
4. Then use the arrow and OK buttons to select OK in the screen.
Auto Volume
Control Strength
Select the music playback volume. Options are None, Small, Moderate and
Strong.
Back
Use this to exit the menu.
DMA-1100P User’s Guide
Chapter 5 MUSIC Menu
5.2 Podcast (RSS)
Podcasting is a way of publishing frequently updated audio files on the Internet. You use an
aggregator (also called a reader) to subscribe to podcasts. Subscribe to a podcast and you can
access new audio files as they are added. You usually play the content on your computer or a
portable music player like an iPod.
At the time of writing, the DMA servers as a reader for audio podcasts that use Really Simple
Syndication (RSS 2.0) and iTunes RSS feeds. Websites with an RSS feed usually display an
RSS icon (shown next). Add the podcast’s URL in the DMA’s Podcast menu to be able to
play the feed’s audio files.
Figure 19 RSS Feed Icon
5.3 Podcast Menu
Go to the Podcast menu within the MUSIC menu and press the remote control’s TOOL
button to open the TOOL menu. Use this menu to configure podcast and slideshow
settings.
Figure 20 MUSIC > Podcast: TOOL
The following table describes the items related to podcast settings.
Table 10 MUSIC > Podcast: TOOL Menu
TOOL MENU
DESCRIPTION
Import
You can use your computer to import a podcast URL information from your USB
memory stick. See Section 5.3.1 on page 46 for details.
Add Podcast
Use this to add the URL of an RSS feed that you want to listen to. See Section
5.3.2 on page 46 for details.
DMA-1100P User’s Guide
45
Chapter 5 MUSIC Menu
Table 10 MUSIC > Podcast: TOOL Menu
TOOL MENU
DESCRIPTION
Change Podcast
Do the following to edit a podcast URL entry.
1. Select a podcast URL entry in the MUSIC menu.
2. Open the TOOL menu.
3. Select Change Podcast to edit the podcast URL entry from the DMA.
Delete Podcast
Do the following to remove a podcast URL entry.
1. Select a podcast entry in the MUSIC menu.
2. Open the TOOL menu.
3. Select Delete Podcast to remove the podcast entry from the DMA.
Slideshow
Settings
Use this to configure how the slideshow changes from one photo file to the next
and how long it displays each photo file. You can choose slide transition effects
such as Auto, Fade to White, Fade to Black and None. You can set the viewing
time for each photo from three seconds to one minute.
View Current
Slideshow Music
You can play music while you navigate the DMA’s menus and play photo files or
slideshows. When a music file is playing, you can use this option to go to the
music file that is playing.
Back
Use this to exit the menu.
5.3.1 Importing Podcasts
You can import a song list from the iTunes Podcast website. You must have the iTunes
program installed on your computer to do this.
1 Go to the iTunes Podcast website and select a song list.
2 Export the song list in opml format.
3 Copy the exported file onto a USB stick. Use the root (top) level, in the USB stick. Do
not put the file in a folder.
4 Insert the USB stick into the DMA.
5 Press the remote control’s TOOL button to open the TOOLS menu.
6 Select Import.
5.3.2 Adding Podcasts
You can also add a podcast by setting the DMA to play a podcast directly from an URL.
1 From MUSIC > Podcast > TOOL select Add Podcast. The following screen appears.
46
DMA-1100P User’s Guide
Chapter 5 MUSIC Menu
Figure 21 MUSIC > Podcast: TOOL: Add Podcast
Use arrows to make sure the URL field is highlighted, then press OK on your remote. use the
following screen to input the correct URL for your podcast.
Figure 22 MUSIC > Podcast: TOOL: Add Podcast: Keyboard Input.
See Section 3.5.3 on page 36 for information on how to use the on-screen keyboard.
DMA-1100P User’s Guide
47
Chapter 5 MUSIC Menu
48
DMA-1100P User’s Guide
CHAPTER
6
PHOTO Menu
This chapter explains how to use the PHOTO menu.
6.1 PHOTO Menu
The DMA automatically arranges the photo files on the media server into folders in the
PHOTO menu. Use the PHOTO menu to select photo files to view.
To open the PHOTO menu, press the PHOTO button on the remote control or use the arrow
and OK buttons to select the PHOTO icon in the HOME screen.
Figure 23 PHOTO Icon
The following menu appears on your screen.
Figure 24 PHOTO Menu
DMA-1100P User’s Guide
49
Chapter 6 PHOTO Menu
6.2 Organizing Your Photos
The DMA automatically organizes your files by album according to their filenames and the
folders in which they are stored.
• You can use your computer to arrange your photo files in folders to make them easier to
browse.
• You can also use the TOOL menu to add photo files to favorites folders in the DMA to
make them easier to find (see Section 7.4 on page 55 for details).
• You can use the TOOL menu from within an album to change the way you view photo
files.
• Use Change View to view photos as a list and/or as thumbnails.
• Use Sorting to specify how files are ordered. You can order them according to title
and date, in ascending or descending order.
• Use Filter to search for a file name.
Figure 25 PHOTO > Album: TOOL
6.3 Slideshow
Start a slideshow from within a PHOTO album (you may have to click through your folders
more than once to reach your photos) by using the arrow buttons to choose a photo and then
pressing the Play button. The photos display in clockwise order starting from the selected
photo.
• During a slideshow, use the Previous, Play, Next, Stop, and Pause buttons to control the
file playback.
• Press the ROTATE or Fast Forward button to rotate a photo 90 degrees clockwise.
• Use the Reverse button to rotate the photo 90 degrees counter-clockwise.
50
DMA-1100P User’s Guide
Chapter 6 PHOTO Menu
6.3.1 Configuring Slideshow Settings
During a slideshow, or in a photo album, press the remote’s TOOL button to open the TOOL
menu to configure the slideshow’s settings.
Figure 26 PHOTO > Album > File: TOOL
The following table describes the options in this menu.
Table 11 PHOTO > Album > File: TOOL
LABEL
DESCRIPTION
Add Favorite
Use this to add the photo to a favorite photos list.
Note: After adding to or editing a favorites list, use the remote
control’s Power button to turn the DMA off and back on to
save your change.
Slideshow Music
Settings
Select this to choose a music playlist (favorites list) to play during the slideshow.
Slideshow
Settings
Use this to set how the slideshow changes from one photo file to the next and how
long it displays each photo file. You can choose slide transition effects such as
Auto, Fade to White, Fade to Black and None. You can set the viewing time for
each photo from three seconds to one minute.
Back
Use this to exit the menu.
DMA-1100P User’s Guide
51
Chapter 6 PHOTO Menu
52
DMA-1100P User’s Guide
CHAPTER
7
Favorites (Playlists)
This chapter introduces the DMA’s favorites feature.
7.1 Favorites (Playlists) Introduction
You can have the DMA play video, music and photo files in a favorites folder. This is also
known as a playlist.
• See Section 7.2 on page 53 for how to add files to favorites folders.
• See Section 7.3 on page 54 for how to edit a favorites folder.
• See Section 7.4 on page 55 for how to play a favorites folder.
7.2 Adding a File to a Favorites Folder
You can add video, music or photo files to favorites folders during playback.
1 While playing a file press the TOOL button.
2 Select Add Favorite and click OK on your remote control.
3 Select a Favorite group to add your file to and click OK on the on-screen menu.
Figure 27 Adding a Favorite Example.
DMA-1100P User’s Guide
53
Chapter 7 Favorites (Playlists)
7.3 Editing a Favorites Folder
You can edit a favorites folder from within Favorites or from within the favorites folder you
wish to edit.
7.3.1 Changing the Name of a Favorite Folder
From Favorites you can use the TOOL button to edit a playlist name.
1 From within Favorites, press the remote’s TOOL button to open the TOOL menu.
2 Select Change Name.
3 The Change Name screen appears. Select the highlighted name field and click OK on
your remote control.
4 Use the Keyboard Input screen to input a new name for your favorites folder.
Figure 28 Favorites: TOOL Menu
The following table describes the options in this menu.
Table 12 Favorite > TOOL Menu
54
TOOL MENU
DESCRIPTION
Change View
Use this to select how the files display in the favorites menu. You can have them
display as a list, thumbnails, or a list with thumbnails.
Change Name
Use this to change the name of the currently selected playlist. After you select
Change Name, select the folder’s name and press OK to use an on-screen
keyboard to edit the name. See Section 3.5.3 on page 36 for how to use the
software keyboard. You can enter up to 21 characters.
Slideshow
Settings
Use this to configure how a slideshow changes from one photo file to the next and
how long it displays each photo file.
View Current
Slideshow Music
You can play music while you navigate the DMA’s menus and play photo files or
slideshows. When a music file is playing, you can use this option to go to the
music file that is playing.
Back
Use this to exit the menu.
DMA-1100P User’s Guide
Chapter 7 Favorites (Playlists)
7.3.2 Changing the Contents of a Favorites Folder
You can also move and remove files from a favorites folder.
In Favorites, open a favorites folder and click the TOOL button to display the following
screen.
Figure 29 Favorites > Favorite folder: TOOL Menu
The following table describes the options in this menu.
Table 13 Favorites > Favorite folder: TOOL Menu
TOOL MENU
DESCRIPTION
Change View
Use this to select how the files display in the favorites menu. You can have them
display as a list, thumbnails, or a list with thumbnails.
Move
Use this to move a file from a source location to a destination location.
Remove from
Favorites
Use this to delete the currently selected file from the playlist.
Slideshow
Settings
Use this to configure how a slideshow changes from one photo file to the next and
how long it displays each photo file.
Detailed
Information
Use this to view details about the currently selected file.
View Current
Slideshow Music
You can play music while you navigate the DMA’s menus and play photo files or
slideshows. When a music file is playing, you can use this option to go to the
music file that is playing.
Back
Use this to exit the menu.
7.4 Favorites Playback
In the Favorites folder, select a favorites folder (playlist) and press OK to go to that list.
• Press Play to start playing the play list.
• Select a file and press OK to play the individual file.
DMA-1100P User’s Guide
55
Chapter 7 Favorites (Playlists)
56
DMA-1100P User’s Guide
CHAPTER
8
SERVER Menu
This chapter covers how to use the SERVER menu.
8.1 Accessing the SERVER Menu
If you have content files stored on more than one media server, use the SERVER menu to
select the one you want to use.
To open the SERVER menu:
• Press the SERVER button on the remote control.
or
• From the HOME menu, use the remote control’s arrow and OK buttons to select the
SERVER icon.
Figure 30 SERVER Icon
8.2 SERVER Menu
After you are in the SERVER menu, use the remote control’s arrow and OK buttons to select
the media server you want to use.
DMA-1100P User’s Guide
57
Chapter 8 SERVER Menu
Figure 31 SERVER Menu > Server
After successfully connecting to a media server, the following screen displays.
Figure 32 SERVER Menu
Use the remote control to navigate to the files you want to play (or use the main menus to do
so).
You can click on User Files to display the shared folders on your computer.
58
DMA-1100P User’s Guide
Chapter 8 SERVER Menu
Figure 33 SERVER > User Files
DMA-1100P User’s Guide
59
Chapter 8 SERVER Menu
60
DMA-1100P User’s Guide
CHAPTER
9
USB Menu
This chapter covers how to use the USB menu.
9.1 USB Menu
Use the USB menu to browse the contents stored on a USB device connected to the DMA such
as a USB memory stick or USB hard drive.
To open the USB menu:
• Press the USB button on the remote control.
or
• Use the arrow and OK buttons to select the USB icon in the HOME menu.
Figure 34 USB Icon
The USB menu displays your USB devices. Select a USB device to browse through its folders
for files to play. The USB device’s folders and files may just display automatically if this is the
same USB device that the DMA last accessed.
DMA-1100P User’s Guide
61
Chapter 9 USB Menu
62
DMA-1100P User’s Guide
P ART III
DMA Setup and
Troubleshooting
Configuring the DMA (65)
Media Server Software (81)
The ENCRYPT Button (83)
Troubleshooting (87)
63
64
CHAPTER
10
Configuring the DMA
This chapter explains how you use the remote control to configure the DMA.
10.1 Accessing the OPTION Menu
Use the OPTION menu to configure the DMA.
Figure 35 OPTION Icon
1 To open the OPTION menu, press the OPTION button on the remote control or use the
arrow and OK buttons to select the OPTION icon in the HOME screen.
Figure 36 OPTION Menu
DMA-1100P User’s Guide
65
Chapter 10 Configuring the DMA
2 Use the remote’s arrow and OK buttons to select an option sub-menu to configure.
10.2 HomePlug Settings
You can use your existing home electrical wiring to connect the DMA to a computer (or file
storage device) directly, through your wired home network, or through a powerline HomePlug
AV network.
"
Powerline refers to the wiring you can use to connect devices such as your
computer on a network. HomePlug refers to the network standards which are
used for this kind of networking. The DMA uses HomePlug AV, which is one
kind of HomePlug standard used for powerline networks.
10.2.1 Connecting to a Single Computer with HomePlug
Follow the instructions below to connect your DMA to a single computer (or other file storage
device) with powerline.
1 Connect your DMA directly to a power outlet.
2 You will need to use a powerline adapter such as ZyXEL’s PLA-400 (A) to connect your
computer to a power outlet.
Figure 37 Connect Directly to a Computer with Powerline
A
3 Set a new Network name on your powerline adapter. This is also known as the network
password, NMK or Network Membership Key. Follow the instructions that came with
your ZyXEL powerline adapter on setting the Network name.
66
DMA-1100P User’s Guide
Chapter 10 Configuring the DMA
4 Then change Network name the Go to OPTION > Powerline on your DMA’s onscreen
menu. The screen shown below displays.
5 Click OK with your remote control when the Network name field is highlighted, as
shown in the screen below.
Figure 38 Option > Homeplug Settings: NMK Setup
6 The Keyboard Input screen appears. See Figure 10 on page 36 for instructions on how
to use this screen.
7 Enter the same Network name that you set on your computer’s powerline adapter.
Figure 39 OPTION > Homeplug Settings: Keyboard Input
DMA-1100P User’s Guide
67
Chapter 10 Configuring the DMA
"
HomePlugAV is the default Network name. For better security choose a
secure password for your powerline connection.
10.2.2 Connecting to a Wired Home Network with Powerline
You can also connect your DMA to your home wired network.
1 Connect your DMA directly to a power outlet.
2 Connect the router on your network (A) to a powerline adapter such as ZyXEL’s PLA400 (B) using an Ethernet cable.
If your router already has a powerline feature, you can connect your router directly to a
power outlet without using a powerline adapter.
3 Follow the instructions given above for setting the Network name on both your router’s
powerline adapter and your DMA.
Figure 40 Connect to a Computer on Your Home (wired) Network
A
A
B
10.3 Network Settings
The DMA needs an IP address to communicate with the media servers on your network. The
DMA can get an IP address automatically if you have a device on your network that gives
them out. Or you can assign the DMA a static (fixed) IP address.
68
DMA-1100P User’s Guide
Chapter 10 Configuring the DMA
10.3.1 DNS Server Address
A DNS (Domain Name System) server maps domain names (like www.zyxel.com) to their
corresponding IP addresses (204.217.0.2 in the case of www.zyxel.com). This lets you use
domain names to access web sites without having to know their IP addresses. The DMA can
receive the IP address of a DNS server automatically (along with the DMA’s own IP address).
You can also manually enter a DNS server IP address in the DMA.
10.3.2 MAC Address
Every Ethernet device has a unique MAC (Media Access Control) address. The MAC address
is assigned at the factory and consists of six pairs of hexadecimal characters, for example,
00:A0:C5:00:00:02.
10.4 Network Settings Menu
Use this menu to configure your DMA’s settings for connecting to your wired Ethernet
network.
Select OPTION > Network Settings to open the following menu.
Figure 41 OPTION > Network Settings
10.5 Wired LAN Settings
Use this menu to configure the DMA’s wired LAN settings.
DMA-1100P User’s Guide
69
Chapter 10 Configuring the DMA
Figure 42 OPTION > Network Settings > Wired LAN Settings
The following table describes the fields in this menu.
Table 14 OPTION > Network Settings
70
LABEL
DESCRIPTION
Get IP Address
Use the arrow and OK buttons to select this field. Then use the arrow and OK
buttons to select an option.
Select YES to have the DMA get IP address information automatically.
If no IP address information is assigned, the DMA uses Auto-IP to assign itself an
IP address and subnet mask. For example, you could connect the DMA directly to
your media server computer. If the computer is also set to get an IP address
automatically, the computer and the DMA will choose addresses for themselves
and be able to communicate.
Select NO if you want to assign the DMA a static (fixed) IP address.
IP Address
Enter the IP address in this field if you selected NO in the Get IP Address field.
Subnet Mask
Enter the IP subnet mask in this field if you selected NO in the Get IP Address
field.
Default gateway
Enter the gateway IP address in this field if you selected NO in the Get IP Address
field.
DNS server
Enter the DNS server IP address (if your ISP gave you one) in this field if you
selected NO in the Get IP Address field.
MAC Address
This field displays the MAC address of the DMA. The MAC (Media Access Control)
or Ethernet address on a LAN (Local Area Network) is unique to your computer (six
pairs of hexadecimal notation).
A network interface card such as an Ethernet adapter has a hardwired address that
is assigned at the factory. This address follows an industry standard that ensures
no other adapter has a similar address.
OK
Select this to save your changes back to the DMA.
CANCEL
Select this to exit this screen without saving your changes.
DMA-1100P User’s Guide
Chapter 10 Configuring the DMA
10.6 Video Modes
The DMA supports 480i, 480p, 720p and 1080i video modes. 720p and 1080i are high
definition television modes. 480i is used with most standard definition televisions. The
number (“1080” for instance) stands for the number of lines of vertical resolution. The letter
“i” stands for interlaced scan. The letter “p” stands for progressive scan. Progressive scan
provides higher picture quality than interlaced but requires twice the bandwidth.
10.7 TV Settings
Use this menu to configure the video output that the DMA sends to your television.
Select OPTION > TV Settings to open the following menu.
Figure 43 OPTION > TV Settings
The following table describes the fields in this menu.
Table 15 OPTION > TV Settings
LABEL
DESCRIPTION
Output Type
Select Digital if your television accepts digital input.
Select Analog if your television only accepts analog input.
Screen Size
Select 16:9 if your television supports the 16:9 format (widescreen).
Select 4:3 if your television supports the 4:3 format (traditional television).
Resolution
Select a video mode. Use the highest number that your television supports.
Select from 480i, 480p, 720p and 1080i.
You can also select Auto when the Output Type is set to Digital.
OK
Select this to save your changes back to the DMA.
CANCEL
Select this to exit this screen without saving your changes.
DMA-1100P User’s Guide
71
Chapter 10 Configuring the DMA
10.8 Audio Settings
"
The DMA only provides 2 channel (stereo) output. When the DMA plays 5.1
channel files, it downmixes the analog or digital input and provides 2 channel
(stereo) analog or digital output.
Use this menu to configure the DMA’s audio output for music playback. You can turn the S/
PDIF connector’s output (the DMA’s digital output) on or off for individual audio formats.
The analog output is always on. You can also select how much volume smoothing you want
during audio file playback.
See Section 10.8.1 on page 73 for details on the individual audio formats.
Select OPTION > Audio Output Settings to open the following menu.
Figure 44 OPTION > Audio Output Settings
The following table describes the fields in this menu.
Table 16 OPTION > Audio Output Settings
72
LABEL
DESCRIPTION
Analog Output
The DMA sends two channel (also called left and right or stereo) audio output
through the LEFT and RIGHT audio connectors for music files.
S/PDIF Output
Use this column to turn the S/PDIF connector’s output (the DMA’s digital output) on
or off for individual audio formats.
AAC
Select whether or not the DMA sends digital audio output through the S/PDIF audio
connector for AAC music files.
Select LPCM to turn on the channel digital output (also called left and right or
stereo) for AAC music files.
Select OFF to turn off the digital output for AAC music files.
DMA-1100P User’s Guide
Chapter 10 Configuring the DMA
Table 16 OPTION > Audio Output Settings (continued)
LABEL
DESCRIPTION
Dolby Digital
Select whether or not the DMA sends digital audio output through the S/PDIF audio
connector for Dolby Digital music files.
Select LPCM to turn on the channel digital output (also called left and right or
stereo) for Dolby Digital music files.
Select OFF to turn off the digital output for Dolby Digital music files.
WMA
Select whether or not the DMA sends digital audio output through the S/PDIF audio
connector for WMA music files.
Select LPCM to turn on the channel digital output (also called left and right or
stereo) for WMA music files.
Select OFF to turn off the digital output for WMA music files.
Auto Volume
Control Strength
Automatic volume control averages the volume during music playback to help
smooth out the sound level. Select the amount of volume smoothing you want for
music playback.
None provides no volume smoothing.
Small provides a low degree of volume smoothing.
Moderate provides some volume smoothing.
Strong provides the greatest degree of volume smoothing.
OK
Select this to save your changes back to the DMA.
CANCEL
Select this to exit this screen without saving your changes.
10.8.1 Audio Formats
This section provides background information on audio formats mentioned in the previous
section.
10.8.1.1 S/PDIF
S/PDIF (Sony/Philips Digital Interface Format) is also IEC 958 type II, part of IEC-60958. S/
PDIF is a collection of low-level protocol and hardware specifications for carrying digital
audio signals between devices and stereo equipment.
10.8.1.2 AAC
AAC (Advanced Audio Coding) is a standardized digital audio compression method. Sony,
AT&T, Dolby, Nokia, Fraunhofer (FhG) and other companies cooperated to develop AAC to
provide improved performance compared to MP3 (MPEG-1 Audio Layer 3). Various products
including Apple’s iTunes and iPod, the Sony PlayStation 3 and many cell phones support
AAC playback. AAC has been promoted as the successor to MP3 although at the time of
writing, MP3 still remains popular. AAC is also known as MPEG-4 AAC because it is
included in the Moving Pictures Experts Group (MPEG) MPEG-4 standard.
10.8.1.3 Dolby Digital
Dolby Digital is one of several audio compression technologies (codecs) produced by Dolby
Laboratories.
Dolby Digital (also called AC-3) is the most common version. It contains up to six discrete
channels of sound. Five channels for normal-range speakers (right front, center, left front,
right rear and left rear) and one channel for the subwoofer. This is often abbreviated as 5.1.
The Dolby Digital format also supports mono and stereo usage.
DMA-1100P User’s Guide
73
Chapter 10 Configuring the DMA
Dolby Digital is also known as DD, DD 5.1, Dolby Surround AC-3 Digital, Dolby Stereo
Digital, Dolby SR-Digital, SR-D, Adaptive Transform Coder 3, AC-3, Audio Codec 3,
Advanced Codec 3, Acoustic Coder 3, ATSC A/52, and ATSC A/52 Rev. B.
10.8.1.4 WMA
WMA (Windows Media Audio) is Microsoft’s proprietary audio compression format.
Although WMA has not been nearly as popular as MP3, WMA Pro is part of Microsoft's
Windows Media framework and is positioned as a competitor to AAC. Many consumer
devices and media players support the playback of WMA files.
10.8.1.5 LPCM
LPCM (Linear Pulse Code Modulation is a method for digitally encoding audio information.
In LPCM an audio waveform is represented by a sequence of amplitude values recorded at a
sequence of times. LPCM most commonly supports two audio channels (stereo).
10.9 Language Settings
Use this menu to select the language that the DMA menus use.
Select OPTION > Language Settings to open the following menu.
Figure 45 OPTION > Language Settings
The following table describes the fields in this menu.
Table 17 OPTION > Language Settings
74
LABEL
DESCRIPTION
Language
Settings
Select the language that you want the DMA menus to use.
A check mark appears next to the current display language.
OK
Select this to save your changes back to the DMA.
CANCEL
Select this to exit this screen without saving your changes.
DMA-1100P User’s Guide
Chapter 10 Configuring the DMA
10.10 Settings For Ease of Use
Use this menu to configure settings that control the DMA’s operation.
Select OPTION > Settings for Ease of Use to open the following menu.
Figure 46 OPTION > Settings for Ease of Use
The following table describes the fields in this menu.
Table 18 OPTION > Settings for Ease of Use
LABEL
DESCRIPTION
Connect to last
accessed server
automatically
When the DMA starts up, this option has it automatically connect to the media
server that you last used.
A check mark appears next to the option if it is selected.
Connect to single
server/USB
automatically
When the DMA starts up, this option has it automatically connect to the media
server or USB device that you last used.
A check mark appears next to the option if it is selected.
Resume last
screen from
standby
If you were playing a file when you turned off the DMA, this option has the DMA
automatically continue playback from where you left off when you turn the DMA
back on.
A check mark appears next to the option if it is selected.
Sound effect
Set how loud you want the DMA to beep when you press buttons on the remote
control.
OK
Select this to save your changes back to the DMA.
CANCEL
Select this to exit this screen without saving your changes.
10.11 Reset Settings
Use this menu to set the DMA back to the factory default settings.
DMA-1100P User’s Guide
75
Chapter 10 Configuring the DMA
V
You will lose all of your changes when you reset to the default settings.
Select OPTION > Reset Settings to open the following menu.
Figure 47 OPTION > Reset Settings
The following table describes the fields in this menu.
Table 19 OPTION > Reset Settings
LABEL
DESCRIPTION
RESET
Select this to restore all of the DMA’s settings to the factory defaults.
CANCEL
Select this to exit this screen without saving your changes.
10.12 Registration Code
Use this menu to display information about the DivX VOD Registration Code
76
DMA-1100P User’s Guide
Chapter 10 Configuring the DMA
Figure 48 OPTION > DivX Registration Code.
10.13 Software Update
Use this menu to upload new software to the DMA.
1
Only use software for your device’s specific model. Refer to the label on the
bottom of your DMA.
Select OPTION > Software Update to open the following menu.
DMA-1100P User’s Guide
77
Chapter 10 Configuring the DMA
Figure 49 OPTION > Software Update
The following table describes the fields in this menu.
Table 20 OPTION > Software Update
LABEL
DESCRIPTION
Update over
Internet
Select this option and follow the on-screen instructions to have the DMA check for
and download new software from a server. The DMA must be connected to the
Internet in order to do this.
A check mark appears next to the option if it is selected.
Update from USB Select this option and follow the on-screen instructions to have the DMA download
new software from a USB stick. You must first download the software file, unzip it
and put the folder on a USB stick. Find software at www.zyxel.com in a file that
(usually) uses the system model name with a .bin extension, for example, "DMA1100P.bin".
A check mark appears next to the option if it is selected.
1
OK
Select this to save your changes back to the DMA.
CANCEL
Select this to exit this screen without saving your changes.
Do not turn off the DMA while software upload is in progress!
The upload process may take up to two minutes. After a successful upload, the system will
reboot. See Section 10.14 on page 78 for how to check the software version to know if the new
software upload was successful.
10.14 Device Information
Use this menu to display information about the DMA.
Select OPTION > Device Information to open the following menu.
78
DMA-1100P User’s Guide
Chapter 10 Configuring the DMA
Figure 50 OPTION > Device Information
The following table describes the fields in this menu.
Table 21 OPTION > Device Information
LABEL
DESCRIPTION
Device Name
This is the name of the series to which your device belongs.
Version
This is the version of the software currently on the DMA. See Section 10.13 on
page 77 for how to update software when there is a new version.
Wired LAN MAC
Address
This field displays the MAC address of the DMA’s wired Ethernet interface.
OK
Select this to exit this screen.
10.15 Screen Saver
The DMA automatically displays a screen saver when it is on and you are not using it. Press
any button on the remote control to return to the normal screens.
DMA-1100P User’s Guide
79
Chapter 10 Configuring the DMA
80
DMA-1100P User’s Guide
CHAPTER
11
Media Server Software
This chapter introduces the media server software included on the CD.
11.1 Media Server Introduction
The DMA can play files on DLNA (Digital Living Network Alliance) compliant media
servers. The DLNA is a group of leading personal computer and electronics companies that
works to make products compatible and able to work in a home network in order to make
digital living easy and seamless. The group’s members include Nokia, Intel, Microsoft, Sony,
Motorola, Philips, Samsung, Matsushita, and Hewlett-Packard.
Install the included DLNA-compliant media server software on your Windows XP computers
to let the DMA play files stored on the computers.
• The software requires Windows XP.
• If you do not have Windows XP or do not want to install software, you can put your files
on a USB stick. The USB stick connects directly to the DMA without need of the media
server software
• You must install the media server software on each computer that you will use to share
files with the DMA.
• See the Quick Start Guide for how to install the media server software and the requirement
details.
The NSA-220 network storage appliance is also a media server.
11.2 Media Server Tool
Use the media server tool to configure the media server settings. Do one of the following to
start the media server tool.
• Click Start > All Programs > DigiOn > DiXiM Media Server Tool.
• Double-click the DiXiM icon in the system tray (see the following figure).
DMA-1100P User’s Guide
81
Chapter 11 Media Server Software
Figure 51 Media Server Tool Icon
11.3 Configuring the Media Server Software
Refer to the Quick Start Guide and the help (Start > All Programs > DigiOn > Help) for
details on how to configure and use the media server software.
11.4 Windows Media Connect Server
Windows Media Digital Rights Management (DRM) restricts the playback of protected files
to computers which have a license key. To play a media file protected by Windows Media
DRM:
1 Play the file on the same computer you use as your media server. This unlocks the file.
2 Use Windows Media Connect, which is included in Windows Media Player 11 (or
higher), as your media server.
82
DMA-1100P User’s Guide
CHAPTER
12
The ENCRYPT Button
Use the ENCRYPT button to automatically set up a secure powerline connection between
your powerline devices.
12.1 ENCRYPT Button Overview
The ENCRYPT button allows you to set up a secure powerline connection with other
HomePlug AV compliant powerline devices which also support the ENCRYPT feature. No
other powerline setting changes are required to connect.
You can use the ENCRYPT button to:
• set up a new powerline network
• add a powerline device to the network
• separate an existing powerline network into multiple networks
12.2 Set Up a HomePlug AV Network with ENCRYPT
You can connect a number of devices on a powerline network, but you can use the ENCRYPT
button on only two devices at a time. The DMA and PLA-400 v2 are shown below as
examples.
1 Place a powerline device close to another powerline device so you have time to set up
each one. After you set up the first powerline device, you have 120 seconds to set up the
second powerline device.
2 You can disconnect them from your computer or modem (or other networking
equipment) if you need to move them close to each other, but the powerline devices
need to be plugged into power outlets.
3 Press the ENCRYPT button at the rear of your powerline device for more than 10
seconds until the HomePlug ( ) turns off. This resets the network name to a random
value and removes your device from any network it may belong to.
4 Press the ENCRYPT button at the rear of your powerline device for 1~2 seconds.
DMA-1100P User’s Guide
83
Chapter 12 The ENCRYPT Button
Figure 52 ENCRYPT Connection Procedure
press 2 seconds
press 2 seconds
within 2
minutes
5 Repeat step 4 in this section for the other powerline device you wish to connect. This
must be done within 120 seconds of pressing the ENCRYPT button on the DMA.Wait
for about one minute while your powerline devices connect.
V
If the HomePlug ( ) lights on both powerline devices do not light up, the
powerline devices are not connected. Repeat steps 4 and 5 in this section. If
that doesn’t work, see Section 13.3 on page 91 for suggestions.
6 To add more powerline devices to your network, press the ENCRYPT button on device
C (shown below) for more than 10 seconds until the HomePlug ( ) turns off.
7 Then repeat steps 4 and 5 in this section using any powerline device (A or B) you have
connected using ENCRYPT and the powerline device you want to connect (C). You
must use the ENCRYPT button on both devices.
Figure 53 Adding More Powerline Adapters to Your Network
B
A
A OR B
C
8 If you disconnected your computer or modem (or any other networking product
connected to your powerline device) in step 1 of this section, you can now reconnect
them.
This sets up your powerline network between your powerline devices.
84
DMA-1100P User’s Guide
Chapter 12 The ENCRYPT Button
12.3 Setting Up Multiple Networks
You can use the ENCRYPT button to set up multiple powerline networks using your existing
powerline network.
For example, you have already set up a powerline network in your home (A) which accesses a
printer (B). Now you want a separate powerline network connection from your laptop to your
printer (C).
Figure 54 One Existing Powerline Network
A
C
B
1 Click the ENCRYPT button on (A) for more than 10 seconds until the HomePlug ( )
turns off. This disconnects (A) from (B).
2 Click the ENCRYPT button on (A) and (C) for 1~2 seconds and within two minutes of
each other.
3 Wait for roughly one minute while (A) and (C) connect.
4 Check the LEDs on both (A) and (C). When the HomePlug ( ) lights shine steadily,
the devices are connected.
Figure 55 Two Separate Powerline Networks
B
A
C
DMA-1100P User’s Guide
85
Chapter 12 The ENCRYPT Button
Congratulations. You now have two separate powerline networks as shown above.
V
86
If the HomePlug ( ) lights on both powerline devices do not light up, the
powerline devices are not connected. Repeat the connection process, making
certain you press the ENCRYPT buttons for the correct time and within two
minutes of each other. If that does not work see Section 13.3 on page 91 for
suggestions.
DMA-1100P User’s Guide
CHAPTER
13
Troubleshooting
This chapter offers some suggestions to solve problems you might encounter. The potential
problems are divided into the following categories.
• Power, Hardware Connections, and LEDs
• DMA Usage
• Powerline Problems
13.1 Power, Hardware Connections, and LEDs
V
None of the LEDs turn on.
1 Make sure the DMA is turned on.
2 Make sure you are using the power adaptor or cord included with the DMA.
3 Make sure the power adaptor or cord is connected to the DMA and plugged in to an
appropriate power source. Make sure the power source is turned on.
4 Turn the DMA off and on using the power switch on the rear panel (instead of the Power
button on the remote control).
5 If the problem continues, contact the vendor.
V
One of the LEDs does not behave as expected.
1 Make sure you understand the normal behavior of the LED (see Section 2.3 on page 27).
2 Check the hardware connections. See the Quick Start Guide and Section 13.1 on page
87.
3 Inspect your cables for damage. Contact the vendor to replace any damaged cables.
4 Turn the DMA off and on using the power switch on the rear panel (instead of the Power
button on the remote control).
5 If the problem continues, contact the vendor.
DMA-1100P User’s Guide
87
Chapter 13 Troubleshooting
13.2 DMA Usage
V
I cannot see the DMA menus on the television screen.
1 Check the hardware connections, and make sure the LEDs are behaving as expected. See
the Quick Start Guide and Section 13.1 on page 87.
2 Make sure your television is set to display the DMA’s input. If you used an HDMI
connection between the television and the DMA, make sure the television input is set to
HDMI.
3 Turn the DMA off and on using the power switch on the rear panel (instead of the Power
button on the remote control).
4 If the problem continues, contact the vendor.
V
I cannot see or access the media server folders on the television screen.
1 If the server icon in the bottom right of the screen has a 0, try turning the DMA off and
on using the power switch on the rear panel (instead of the Power button on the remote
control).
2 Check the hardware connections, and make sure the LEDs are behaving as expected. See
the Quick Start Guide and Section 13.1 on page 87.
3 Make sure the media server computer is on and has an IP address in the same subnet as
the DMA. (If you know that there are routers between your computer and the DMA, skip
this step.)
4 Check the media server program’s Published Folder and Security settings. If you have
to change these settings, turn the DMA off and on again afterwards.
5 Check the security settings of any software firewalls on the media server computer.
Make sure that any software firewalls on the media server computer are configured to
allow the DMA to access the media server. See the The DMA cannot access the media
server. If you have to change any firewall settings, turn the DMA off and on again
afterwards.
V
The DMA cannot access the media server.
Make sure that any software firewalls on the media server computers are configured to allow
the DMA to access the media server.
The media server installation wizard can automatically configure the Windows XP firewall.
See the media server help (Start > All Programs > DigiOn > Help) for instructions on how to
manually configure the Windows XP firewall.
88
DMA-1100P User’s Guide
Chapter 13 Troubleshooting
You need to configure any other software firewalls (like ZoneAlarm for example). Your
software firewall may automatically prompt you when it detects the DMA’s access attempts
and give you the option to allow or deny access.
Use the following information to manually configure your software firewall’s settings if the
firewall does not automatically prompt you to allow or deny access.
APPLICATION
PROGRAM FILE FUNCTION
NAME
DiXiM Media
Server
dmsf.exeA
PORT
NO.
PROTOC
OL
DiXiM SSDPB Discovery
1900
UDP
DiXiM Media Server Device
30000
TCP
DiXiM Media Server HTTP
30001
TCP
A. This file will be installed into the C:\Program Files\DigiOn\DiXiM Media Server folder by default during
the installation.
B. The DMA uses SSDP (Simple Service Discovery Protocol) to find the media server.
V
The number of items in a list does not match the number of files in a media
server folder.
1 Files with unsupported formats or codecs may not display in the list. See Appendix A on
page 99 for details on the supported file formats and codecs.
2 You may have Windows Media Center (WMC) and the DiXiM media server on the
same computer and be sharing out the same folder. Either uninstall one of the media
servers or set them to share out different folders.
V
Some of the files in my media server folder do not display in the list on the
DMA.
Files with unsupported formats or codecs may not display in the list. See Appendix A on page
99 for details on the supported file formats and codecs.
V
Some of the files in my DMA’s list do not play or do not play properly.
• Files with unsupported formats or codecs may not play or may not play properly. See
Appendix A on page 99 for details on the supported file formats and codecs.
• Files which are digitally protected may not be playable. For files that have Windows
Media Digital Rights Management (DRM) protection, first play the file on the same
computer you use as your media server. This unlocks the file. Then use Windows Media
Connect, which is included in Windows Media Player 11 (or higher), as your media
server.
DMA-1100P User’s Guide
89
Chapter 13 Troubleshooting
V
Some of my photo files do not display thumbnails.
Some files do not support thumbnails and thus will not display them.
V
I cannot see the files on my USB device.
1 Make sure you have the USB device properly connected to the USB port. See the Quick
Start Guide for details.
2 Files with unsupported formats or codecs may not play or may not play properly. See
Section on page 99 for details on the supported file formats and codecs.
3 Turn the DMA off and on using the power switch on the rear panel (instead of the Power
button on the remote control)
4 Try using a different USB stick.
V
The A-B function does not work on some files.
Some files do not have time tags and cannot support the A-B function.
V
My favorites settings were not saved.
After adding to or editing a favorites list, press the remote’s Power button to make the DMA
enter standby mode to save your change. Then press the Power button again to return to
operation mode.
V
I connected the DMA to two televisions but it only displays on one.
The DMA only provides output through one connection at a time (either the HDMI connection
or the S-Video connection). Not both at the same time.
V
The DMA menu display does not fill my television screen.
Check the DMA’s video output settings (see Section 10.7 on page 71).
90
DMA-1100P User’s Guide
Chapter 13 Troubleshooting
V
The content playback does not fill my television screen.
1 Check the DMA’s video output settings (see Section 10.7 on page 71).
2 The content may be a different format from your television. For example, a 4:3 format
video file will not fill the width of a 16:9 (widescreen) format television.
V
The audio on my 5.1 channel speakers does not sound right or I only hear
audio from my rear left and right speakers.
When the DMA plays 5.1 channel files, it downmixes the analog or digital input and provides
2-channel (stereo) analog or digital output.
• On some 5.1 channel audio systems will only play on the rear left and right speakers.
• Some 5.1 channel audio systems can simulate the 2 channels to 5.1 channels, but the
sound will not be as good as with original 5.1 channel output.
13.3 Powerline Problems
V
The HomePlug LED does not turn on.
1 Use the PLA-4xx Series Configuration Utility to detect all other ZyXEL HomePlug
AV-compliant devices on your powerline network. Make sure that the network password
is the same on all of your powerline adapters. Download the Utility from the ZyXEL
website.
2 Check the DAK and MAC address for all powerline adapters are typed correctly.
3 Make sure that all your powerline adapters are HomePlug AV compliant. Check the
package it came in or ask your vendor. This DMA can not detect earlier versions of
HomePlug powerline adapters such as HomePlug 1.0 or 1.0.1. (Although they can
coexist on the same electrical wiring without interfering with each other.)
4 Make sure that the powerline adapters on your network are all on the same electrical
wiring. Connect another powerline adapter into an outlet close to your DMA’s power
outlet. They are probably now on the same electrical wiring. Check the Link
LED. If
it now lights up your powerline adapter was probably previously on separate electrical
wiring. Ask an electrician for more information on the electrical wiring in your building.
5 If your powerline network is using coaxial cable, check all powerline adapters are on the
same coaxial cable.
6 If your powerline network is using electrical wiring (not coaxial cable), check you do not
have a power meter between powerline adapters. Powerline signals cannot pass this.
DMA-1100P User’s Guide
91
Chapter 13 Troubleshooting
V
The signal on my powerline network is weak.
1 Your powerline adapters may be connected to electrical surge protectors. Connect them
to standard power outlets.
2 Your powerline adapters may be located close to large appliances such as refrigerators or
air-conditioners that cause interference with the powerline signal. Move the adapters
further away from such appliances to reduce interference.
3 Your powerline adapters may be placed close to electrical devices such as electrical
insect-killers which produce radio waves. These may interfere with the powerline
signals. Move the adapters further away from such electrical devices.
4 Your wiring may be old and/or low quality or with a long wiring path.
13.4 ENCRYPT Button Problems
This section applies only to DMAs with the ENCRYPT button.
V
The HomePlug light is already on, but I haven’t pressed the ENCRYPT button
yet.
Your device has already connected to another powerline device. Press the ENCRYPT button
for more than 10 seconds to release the connection.
V
The HomePlug light does not turn on.
• Ensure you have pressed the ENCRYPT button on both devices.
• Wait for about a minute while the devices set up a connection.
• If that does not work, try again with both devices connected to a power strip next to each
other. If they now connect, then the devices were not on the same electrical circuit before.
V
The POWER lights on both devices finished blinking, but only one device’s
HomePlug light is on.
One device may have connected to a third powerline device. To check device A is connected
to device B and not another device, disconnect device B from its power source. Device A’s
HomePlug ( ) light will turn off if the connection is with Device B. Press the ENCRYPT
button on both devices for more than 10 seconds, then try to reconnect, pressing the
ENCRYPT button for less than 3 seconds on both devices.
92
DMA-1100P User’s Guide
Chapter 13 Troubleshooting
V
I pressed the ENCRYPT button for more than 10 seconds, but the HomePlug
light is still on.
The HomePlug light is on, indicating it is still connected to another powerline device. Try
again, pressing the ENCRYPT button for more than 10 seconds.
DMA-1100P User’s Guide
93
Chapter 13 Troubleshooting
94
DMA-1100P User’s Guide
P ART IV
Appendices and
Index
Product Specifications (97)
Setting up Your Computer’s IP Address (107)
Windows Vista Media Server (129)
Open Software Announcements (137)
Legal Information (183)
Customer Support (187)
Index (193)
95
96
APPENDIX
A
Product Specifications
General Specifications
The following tables summarize the DMA’s hardware and software features.
Table 22 Hardware Specifications
Dimensions
244 mm (W) x 165.44 mm (D) x 38.8 mm (H)
Device Weight
0.597 kg
Power Specification
100 - 240 V AC, 50/60 Hz
Ethernet Port
Auto-negotiating: 10 Mbps or 100 Mbps in either half-duplex or full-duplex
mode.
Powerline Port
1 x 200 Mbps Powerline port compliant with HomePlug AV standard
Television Connectors
HDMI
Composite Video RCA connector
Left/Right Video RCA connectors
S/PDIF coaxial RCA connector
Remote Control
Recommended operating range up to 5 m.
Point the remote control at the front of the DMA at an angle of no less than
30 degrees.
USB Port
USB version 2.0, type A
Operation Environment
Temperature: 5º C ~ 45º C
Humidity: 5% ~ 85% RH (Noncondensing)
Storage Environment
Temperature: 0º C ~ 65º C
Humidity: 5% ~ 95% RH (Noncondensing)
Distance between the
centers of the holes (for
wall mounting) on the
device’s back.
137 mm
Recommended type of
M4 Tap Screw, see Figure 57 on page 104.
screws for wall-mounting
Certifications
DMA-1100P User’s Guide
Safety: CSA C22.2 No 60950-1, UL60950-1, EN60950-1
EMC: EN55022 Class B (1988), FCC Part 15 (Class B)
97
Appendix A Product Specifications
Table 23 Software Specifications
FEATURE
DESCRIPTION
Default IP Address
DHCP client. If no DHCP server is found, the DMA uses Auto-IP to
choose an IP address in the 169.254.X.X subnet (where X is a number
from 1 to 254).
Default Subnet Mask
DHCP client by default. If no DHCP server is found, the subnet mask
defaults to 255.255.255.0 (24 bits).
Device Management
Make selections and configure settings on a (television) screen using the
remote control.
Use the PLA-4xx Series Configuration Utility to configure the DMA
powerline settings.
Software Upgrade
Upload new software (when available) from the ZyXEL website.
Or download the new software from the ZyXEL website and use a USB
stick to put it on the DMA.
Note: Only upload software for your specific model!
Configuration Reset
The DMA provides an option for restoring the default settings.
DHCP (Dynamic Host
Configuration Protocol)
Client
The DMA can receive IP addresses, an IP default gateway and DNS
servers via DHCP.
Universal Plug and Play
(UPnP)
A UPnP-enabled device can dynamically join a network, obtain an IP
address and convey its capabilities to other devices on the network.
Media Sharing
DLNA compliant client.
Favorites (Playlist)
Set up lists of files to play.
Audio Input Formats
Supported
Dolby Digital, DVD-Audio, MPEG-1 and MPEG-2 Layers I, II and
III(MP3), MPEG-2 BC multi-channel Layers I, II and III, MPEG-2 and
MPEG-4 AAC-LC, WMA9. See page 99 for details.
Podcast RSS Feeds
Supported
RSS 2.0 and iTunes RSS
Video Input Formats
Supported
MPEG-1, MPEG-2 MP@ML, MPEG-4 simple and advanced simple
profile, MPEG-4 AVI files and WMV version 9. See page 99 for details.
Photo Input Formats
Supported
TIFF, PNG, GIF, BMP, JPEG, and JPEG2000. See page 99 for details.
Video Output Formats
Digital, analog
4:3, 16:9
480i, 480p, 720p and 1080i
Audio Output Formats
two channel (stereo)
The following list, which is not exhaustive, illustrates the standards supported in the DMA.
Table 24 Standards Supported
98
STANDARD
DESCRIPTION
DLNA v1 Client
The DLNA (Digital Living Network Alliance) group of personal computer
and electronics companies works to make products compatible and able
to work in a home network in order to make digital living easy and
seamless.
HDMI
HDMI (High Definition Multimedia Interface) is an interface that allows
high quality, all-digital video and audio streams.
DMA-1100P User’s Guide
Appendix A Product Specifications
Table 24 Standards Supported (continued)
STANDARD
DESCRIPTION
USB 2.0
USB (Universal Serial Bus) version 2.0 allows for interfacing devices with
data transfers rates of up to 480 Mbps.
HomePlug AV
The HomePlug AV standard specifies how network devices communicate
using standard electrical wiring.
It supports a data transfer rate of up to 200Mbps.
Data is encrypted using 128-bit AES (Advanced Encryption Standard).
HomePlug AV compatible devices co-exist with HomePlug 1.0 devices but
do not detect each other.
The range of a HomePlug AV network is 300 meters/984 feet in optimal
conditions.
HomePlug AV is compatible with all OSs.
The maximum number of powerline devices on a single network is 64.
Windows Media Digital
Rights Management
(DRM)
This Windows standard restricts the playback of protected media to
computers holding a license key for the media file.
Supported Content Formats and Codecs
The following describes the details about the files that the DMA can play. Files with
specifications lower or higher than the listed ranges may not play or may not play properly.
For the media server software included on the CD, refer to the help (Start > All Programs >
DigiOn > Help) for a list of file formats that the media server software can play.
Video File Formats Supported
Table 25 MPEG PS Video File Specifications
Extensions
mpg
mpeg
mpe
m2p
Video Stream
MPEG-1, MPEG-2
Profile Level: up to MP@HL
Resolution: Maximum 1920 x 1080
Bit rate: VBR/CBR, Maximum 15 Mbps
Audio Stream
MPEG-1/2 Layer-II
Sample Frequency: Maximum 48 kHz
Channels: Maximum 2 Channels
Bit rate: VBR/CBR, Maximum 384 kbps
LPCM
Sample Frequency: Maximum 48 kHz
Bits per sample: Maximum 16 bit
Channels: Maximum 2 Channels
AC3
Sample Frequency: Maximum 48 kHz
Channels: Maximum 6 Channels
Bit rate: Maximum 640 kbps
DMA-1100P User’s Guide
99
Appendix A Product Specifications
Table 26 MPEG-2 TS/TTS Video File Specifications
Extensions
The DMA supports the playback of mpeg, mpg, and mpe MPEG-2 TS
and TTS video files. The DMA cannot play MPEG-2 TTS files from a
USB device. The DMA can play MPEG-2 TTS files shared on a media
server that supports them (although the included media server software
does not support them).
Video Stream
MPEG-2
Profile Level: up to MP@HL
Resolution: Maximum 1920 x 1080
Bit rate: VBR/CBR, Maximum 25 Mbps
Audio Stream
MPEG-1/2 Layer-II
Sample Frequency: Maximum 48 kHz
Channels: Maximum 2 Channels
Bit rate: VBR/CBR, Maximum 448 kbps
AC3
Sample Frequency: Maximum 48 kHz
Channels: Maximum 6 Channels
Bit rate: Maximum 448 kbps
MPEG-2/4 AAC LC
Sample Frequency: Maximum 48 kHz
Channels: Maximum 6 Channels
Bit rate: VBR/CBR, Maximum 384 kbps
Table 27 WMV Video File Specifications
Extensions
asf
wmv
Video Stream
WMV9
Profile Level: up to MP@HL
Resolution: Maximum 1920 x 1080
Bit rate: VBR/CBR, Maximum 10 Mbps
Audio Stream
WMA8
Sample Frequency: Maximum 48 kHz
Channels: Maximum 2 Channels
Bit rate: Maximum 320 kbps
WMA9, WMA9 Professional (WMA Lossless and Voice formats are not
supported.)
Sample Frequency: Maximum 48 kHz
Channels: Maximum 6 Channels
Bit rate: VBR/CBR, Maximum 768 kbps
Notes
Combination of WMV HD and WMA Pro may result in frames being
dropped.
Depending on some WMV HD contents, noise may be generated in the
audio signal when starting playback or during the seek operation.
Contents with a Complex decoder complexity are not supported.
Table 28 AVI Video File Specifications
Extensions
100
avi
DMA-1100P User’s Guide
Appendix A Product Specifications
Table 28 AVI Video File Specifications
Video Stream
XviD, 3ivx
Resolution: Maximum 1280 x 720
Audio Stream
MPEG-1/2 Layer-III
Sample Frequency: Maximum 48 kHz
Channels: Maximum 2 Channels
Bit rate: VBR/CBR, Maximum 320 kbps
AC3
Sample Frequency: Maximum 48 kHz
Channels: Maximum 6 Channels
Bit rate: Maximum 640 kbps
Table 29 MPEG4 Video File Specifications
Extensions
mp4
Video Stream
MPEG-4 ASP
Resolution: Maximum 1920 x 1080
Bit rate: VBR/CBR, Maximum 5 mbps
Audio Stream
MPEG-4 AAC LC
Sample Frequency: Maximum 48 kHz
Channels: Maximum 6 Channels
Bit rate: Maximum 448 kbps
Table 30 DVR-MS Video File Specifications
Supports content recorded by Windows Media Center Edition 2005. The DMA cannot play DVR-MS
files from a USB device. The DMA can play DVR-MS files shared by the included media server
software.
Table 31 IFO Video File Specifications
Supports IFO defined by DLNA 1.0 Errata. The DMA cannot play IFO files from a USB device. The
DMA can play IFO files shared on a media server that supports them (although the included media
server software does not support them).
DMA-1100P User’s Guide
101
Appendix A Product Specifications
Music File Formats Supported
Table 32 Music File Specifications
102
TYPE
EXTENSIONS
DETAILS
MP3
mp3
Audio Stream: MPEG-1/2 Layer-III
Sample Frequency: Maximum 48 kHz
Channels: Maximum 2 Channels
Bit rate: VBR/CBR, Maximum 320 kbps
ID3 tag: ID3 version 1.x, 2.2, 2.3, 2.4 tags
MP3 file ID3 tags provide information like the title, name of the artist,
album name, and track number. The USB browse screens can retrieve
and display English language ID3 tag information. The retrieval and
display of non-English language tag information is not supported.
LPCM
lpcm
The DMA cannot play LPCM files from a USB device. The DMA can
play LPCM files shared on a media server that supports them. The
included media server software does not share LPCM files by default.
To share LPCM files, you would need to add a published file type using
“lpcm” as the file extension and “audio/L16” as the MIME-TYPE.
Audio Stream: LPCM
Sample Frequency: Min. 8 kHz, Maximum 64 kHz
Bits per sample: Maximum 16 bit
Channels: Maximum 2 Channels
WAV
wav
Audio Stream: PCM
Sample Frequency: Min. 8 kHz, Maximum 64 kHz
Bits per sample: Maximum 16 bit
Channels: Maximum 2 Channels
WMA
asf
wma
Audio Stream: WMA8
Sample Frequency: Maximum 48 kHz
Channels: Maximum 2 Channels
Bit rate: Maximum 320 kbps
Audio Stream: WMA9, WMA9 Professional (Contents with a Complex
decoder complexity are not supported. )
Sample Frequency: Maximum 48 kHz
Channels: Maximum 6 Channels
Bit rate: VBR/CBR, Maximum 768 kbps
With EM8620, L2 profile WMA content must meet the following
conditions.
Bit rate: 48 kbps ~ 192 kbps
Sample Rate: 32 kHz ~ 48 kHz
Ogg
ogg
Audio Stream: Vorbis
Sample Frequency: Maximum 48 kHz
Channels: Maximum 2 Channels
Bit rate: ABR/CBR, Maximum 496 kbps
M4A
m4a
Audio Stream: MPEG-2/4 AAC LC
Sample Frequency: Maximum 48 kHz
Channels: Maximum 5.1 Channels
Bit rate: CBR/VBR, Maximum 640 kbps
DMA-1100P User’s Guide
Appendix A Product Specifications
Photo File Formats Supported
Table 33 Photo File Specifications
TYPE
EXTENSIONS
DETAILS
JPEG
jpg
jpeg
Maximum Resolution: 67174416 pixels (8196 × 8196)
When displaying JPEG images that meet the conditions below, the max
resolution is 67108864 pixels (8192 x 8192.) It may get smaller when
the following conditions are not met.
Color Space: YCbCr
Not progressive mode
The format is YUV420, YUV422 or YUV444
When a JPEG image’s color space is RGB or grayscale, the max
resolution is 983040 pixels (1280 x 768).
BMP
bmp
Maximum Resolution: Unlimited
PNG
png
Maximum Resolution: 2097152 pixels (2048 × 1024)
Although transparent PNG files can be played, they will be displayed as
non-transparent images.
TIFF
tif
tiff
Maximum Resolution: 2097152 pixels (2048 × 1024)
Compression: No compression, ZIP, LZW, Packbits, Huffman RLE,
CCITT Fax 3, CCITT Fax 4
GIF
gif
Maximum Resolution: 2097152 pixels (2048 × 1024)
Animation GIF formats are not supported.
Wall-mounting Instructions
Complete the following steps to hang your DMA on a wall.
"
See Table 22 on page 97 for the size of screws to use and how far apart to place
them.
1 Select a high position on a sturdy wall that is free of obstructions.
2 Drill two holes for the screws. The distance between the centers of the holes is listed in
the product specifications appendix.
1
Be careful to avoid damaging pipes or cables located inside the wall when
drilling holes for the screws.
3 Do not insert the screws all the way into the wall. Leave a small gap of about 0.5 cm
between the heads of the screws and the wall.
4 Make sure the screws are snugly fastened to the wall. They need to hold the weight of
the DMA with the connection cables.
DMA-1100P User’s Guide
103
Appendix A Product Specifications
5 Align the holes on the back of the DMA with the screws on the wall. Hang the DMA on
the screws.
Figure 56 Wall-mounting Example
The following are dimensions of an M4 tap screw and masonry plug used for wall mounting.
All measurements are in millimeters (mm).
Figure 57 Masonry Plug and M4 Tap Screw
104
DMA-1100P User’s Guide
Appendix A Product Specifications
Cable Pin Assignments
Table 34 Ethernet Cable Pin Assignments
LAN ETHERNET CABLE PIN LAYOUT
Straight-through
(Switch)
(Adapter)
1 IRD +
1 OTD
+
2 IRD -
2 OTD -
3 OTD
+
3 IRD +
6 OTD -
6 IRD -
DMA-1100P User’s Guide
105
Appendix A Product Specifications
106
DMA-1100P User’s Guide
APPENDIX
B
Setting up Your Computer’s IP
Address
All computers must have a 10M or 100M Ethernet adapter card and TCP/IP installed.
Windows 95/98/Me/NT/2000/XP, Macintosh OS 7 and later operating systems and all
versions of UNIX/LINUX include the software components you need to install and use TCP/
IP on your computer. Windows 3.1 requires the purchase of a third-party TCP/IP application
package.
TCP/IP should already be installed on computers using Windows NT/2000/XP, Macintosh OS
7 and later operating systems.
After the appropriate TCP/IP components are installed, configure the TCP/IP settings in order
to "communicate" with your network.
If you manually assign IP information instead of using dynamic assignment, make sure that
your computers have IP addresses that place them in the same subnet as the DMA’s LAN port.
Windows 95/98/Me
Click Start, Settings, Control Panel and double-click the Network icon to open the Network
window.
DMA-1100P User’s Guide
107
Appendix B Setting up Your Computer’s IP Address
Figure 58 WIndows 95/98/Me: Network: Configuration
Installing Components
The Network window Configuration tab displays a list of installed components. You need a
network adapter, the TCP/IP protocol and Client for Microsoft Networks.
If you need the adapter:
1 In the Network window, click Add.
2 Select Adapter and then click Add.
3 Select the manufacturer and model of your network adapter and then click OK.
If you need TCP/IP:
1
2
3
4
In the Network window, click Add.
Select Protocol and then click Add.
Select Microsoft from the list of manufacturers.
Select TCP/IP from the list of network protocols and then click OK.
If you need Client for Microsoft Networks:
1
2
3
4
Click Add.
Select Client and then click Add.
Select Microsoft from the list of manufacturers.
Select Client for Microsoft Networks from the list of network clients and then click
OK.
5 Restart your computer so the changes you made take effect.
108
DMA-1100P User’s Guide
Appendix B Setting up Your Computer’s IP Address
Configuring
1 In the Network window Configuration tab, select your network adapter's TCP/IP entry
and click Properties
2 Click the IP Address tab.
• If your IP address is dynamic, select Obtain an IP address automatically.
• If you have a static IP address, select Specify an IP address and type your
information into the IP Address and Subnet Mask fields.
Figure 59 Windows 95/98/Me: TCP/IP Properties: IP Address
3 Click the DNS Configuration tab.
• If you do not know your DNS information, select Disable DNS.
• If you know your DNS information, select Enable DNS and type the information in
the fields below (you may not need to fill them all in).
DMA-1100P User’s Guide
109
Appendix B Setting up Your Computer’s IP Address
Figure 60 Windows 95/98/Me: TCP/IP Properties: DNS Configuration
4 Click the Gateway tab.
• If you do not know your gateway’s IP address, remove previously installed gateways.
• If you have a gateway IP address, type it in the New gateway field and click Add.
5 Click OK to save and close the TCP/IP Properties window.
6 Click OK to close the Network window. Insert the Windows CD if prompted.
7 Turn on your DMA and restart your computer when prompted.
Verifying Settings
1 Click Start and then Run.
2 In the Run window, type "winipcfg" and then click OK to open the IP Configuration
window.
3 Select your network adapter. You should see your computer's IP address, subnet mask
and default gateway.
Windows 2000/NT/XP
The following example figures use the default Windows XP GUI theme.
1 Click start (Start in Windows 2000/NT), Settings, Control Panel.
110
DMA-1100P User’s Guide
Appendix B Setting up Your Computer’s IP Address
Figure 61 Windows XP: Start Menu
2 In the Control Panel, double-click Network Connections (Network and Dial-up
Connections in Windows 2000/NT).
Figure 62 Windows XP: Control Panel
3 Right-click Local Area Connection and then click Properties.
DMA-1100P User’s Guide
111
Appendix B Setting up Your Computer’s IP Address
Figure 63 Windows XP: Control Panel: Network Connections: Properties
4 Select Internet Protocol (TCP/IP) (under the General tab in Win XP) and then click
Properties.
Figure 64 Windows XP: Local Area Connection Properties
5 The Internet Protocol TCP/IP Properties window opens (the General tab in
Windows XP).
• If you have a dynamic IP address click Obtain an IP address automatically.
• If you have a static IP address click Use the following IP Address and fill in the IP
address, Subnet mask, and Default gateway fields.
• Click Advanced.
112
DMA-1100P User’s Guide
Appendix B Setting up Your Computer’s IP Address
Figure 65 Windows XP: Internet Protocol (TCP/IP) Properties
6
If you do not know your gateway's IP address, remove any previously installed
gateways in the IP Settings tab and click OK.
Do one or more of the following if you want to configure additional IP addresses:
• In the IP Settings tab, in IP addresses, click Add.
• In TCP/IP Address, type an IP address in IP address and a subnet mask in Subnet
mask, and then click Add.
• Repeat the above two steps for each IP address you want to add.
• Configure additional default gateways in the IP Settings tab by clicking Add in
Default gateways.
• In TCP/IP Gateway Address, type the IP address of the default gateway in Gateway.
To manually configure a default metric (the number of transmission hops), clear the
Automatic metric check box and type a metric in Metric.
• Click Add.
• Repeat the previous three steps for each default gateway you want to add.
• Click OK when finished.
DMA-1100P User’s Guide
113
Appendix B Setting up Your Computer’s IP Address
Figure 66 Windows XP: Advanced TCP/IP Properties
7 In the Internet Protocol TCP/IP Properties window (the General tab in Windows
XP):
• Click Obtain DNS server address automatically if you do not know your DNS
server IP address(es).
• If you know your DNS server IP address(es), click Use the following DNS server
addresses, and type them in the Preferred DNS server and Alternate DNS server
fields.
If you have previously configured DNS servers, click Advanced and then the DNS
tab to order them.
114
DMA-1100P User’s Guide
Appendix B Setting up Your Computer’s IP Address
Figure 67 Windows XP: Internet Protocol (TCP/IP) Properties
8 Click OK to close the Internet Protocol (TCP/IP) Properties window.
9 Click Close (OK in Windows 2000/NT) to close the Local Area Connection
Properties window.
10 Close the Network Connections window (Network and Dial-up Connections in
Windows 2000/NT).
11 Turn on your DMA and restart your computer (if prompted).
Verifying Settings
1 Click Start, All Programs, Accessories and then Command Prompt.
2 In the Command Prompt window, type "ipconfig" and then press [ENTER]. You can
also open Network Connections, right-click a network connection, click Status and
then click the Support tab.
Windows Vista
This section shows screens from Windows Vista Enterprise Version 6.0.
1 Click the Start icon, Control Panel.
DMA-1100P User’s Guide
115
Appendix B Setting up Your Computer’s IP Address
Figure 68 Windows Vista: Start Menu
2 In the Control Panel, double-click Network and Internet.
Figure 69 Windows Vista: Control Panel
3 Click Network and Sharing Center.
Figure 70 Windows Vista: Network And Internet
4 Click Manage network connections.
Figure 71 Windows Vista: Network and Sharing Center
116
DMA-1100P User’s Guide
Appendix B Setting up Your Computer’s IP Address
5 Right-click Local Area Connection and then click Properties.
"
During this procedure, click Continue whenever Windows displays a screen
saying that it needs your permission to continue.
Figure 72 Windows Vista: Network and Sharing Center
6 Select Internet Protocol Version 4 (TCP/IPv4) and click Properties.
Figure 73 Windows Vista: Local Area Connection Properties
DMA-1100P User’s Guide
117
Appendix B Setting up Your Computer’s IP Address
7 The Internet Protocol Version 4 (TCP/IPv4) Properties window opens (the General
tab).
• If you have a dynamic IP address click Obtain an IP address automatically.
• If you have a static IP address click Use the following IP address and fill in the IP
address, Subnet mask, and Default gateway fields.
• Click Advanced.
Figure 74 Windows Vista: Internet Protocol Version 4 (TCP/IPv4) Properties
8
If you do not know your gateway's IP address, remove any previously installed
gateways in the IP Settings tab and click OK.
Do one or more of the following if you want to configure additional IP addresses:
• In the IP Settings tab, in IP addresses, click Add.
• In TCP/IP Address, type an IP address in IP address and a subnet mask in Subnet
mask, and then click Add.
• Repeat the above two steps for each IP address you want to add.
• Configure additional default gateways in the IP Settings tab by clicking Add in
Default gateways.
• In TCP/IP Gateway Address, type the IP address of the default gateway in Gateway.
To manually configure a default metric (the number of transmission hops), clear the
Automatic metric check box and type a metric in Metric.
• Click Add.
• Repeat the previous three steps for each default gateway you want to add.
• Click OK when finished.
118
DMA-1100P User’s Guide
Appendix B Setting up Your Computer’s IP Address
Figure 75 Windows Vista: Advanced TCP/IP Properties
9 In the Internet Protocol Version 4 (TCP/IPv4) Properties window, (the General tab):
• Click Obtain DNS server address automatically if you do not know your DNS
server IP address(es).
• If you know your DNS server IP address(es), click Use the following DNS server
addresses, and type them in the Preferred DNS server and Alternate DNS server
fields.
If you have previously configured DNS servers, click Advanced and then the DNS
tab to order them.
DMA-1100P User’s Guide
119
Appendix B Setting up Your Computer’s IP Address
Figure 76 Windows Vista: Internet Protocol Version 4 (TCP/IPv4) Properties
10 Click OK to close the Internet Protocol Version 4 (TCP/IPv4) Properties window.
11 Click Close to close the Local Area Connection Properties window.
12 Close the Network Connections window.
13 Turn on your DMA and restart your computer (if prompted).
Verifying Settings
1 Click Start, All Programs, Accessories and then Command Prompt.
2 In the Command Prompt window, type "ipconfig" and then press [ENTER]. You can
also open Network Connections, right-click a network connection, click Status and
then click the Support tab.
Macintosh OS 8/9
1 Click the Apple menu, Control Panel and double-click TCP/IP to open the TCP/IP
Control Panel.
120
DMA-1100P User’s Guide
Appendix B Setting up Your Computer’s IP Address
Figure 77 Macintosh OS 8/9: Apple Menu
2 Select Ethernet built-in from the Connect via list.
Figure 78 Macintosh OS 8/9: TCP/IP
3 For dynamically assigned settings, select Using DHCP Server from the Configure: list.
4 For statically assigned settings, do the following:
• From the Configure box, select Manually.
DMA-1100P User’s Guide
121
Appendix B Setting up Your Computer’s IP Address
• Type your IP address in the IP Address box.
• Type your subnet mask in the Subnet mask box.
• Type the IP address of your DMA in the Router address box.
5 Close the TCP/IP Control Panel.
6 Click Save if prompted, to save changes to your configuration.
7 Turn on your DMA and restart your computer (if prompted).
Verifying Settings
Check your TCP/IP properties in the TCP/IP Control Panel window.
Macintosh OS X
1 Click the Apple menu, and click System Preferences to open the System Preferences
window.
Figure 79 Macintosh OS X: Apple Menu
2 Click Network in the icon bar.
• Select Automatic from the Location list.
• Select Built-in Ethernet from the Show list.
• Click the TCP/IP tab.
3 For dynamically assigned settings, select Using DHCP from the Configure list.
122
DMA-1100P User’s Guide
Appendix B Setting up Your Computer’s IP Address
Figure 80 Macintosh OS X: Network
4 For statically assigned settings, do the following:
• From the Configure box, select Manually.
• Type your IP address in the IP Address box.
• Type your subnet mask in the Subnet mask box.
• Type the IP address of your DMA in the Router address box.
5 Click Apply Now and close the window.
6 Turn on your DMA and restart your computer (if prompted).
Verifying Settings
Check your TCP/IP properties in the Network window.
Linux
This section shows you how to configure your computer’s TCP/IP settings in Red Hat Linux
9.0. Procedure, screens and file location may vary depending on your Linux distribution and
release version.
DMA-1100P User’s Guide
123
Appendix B Setting up Your Computer’s IP Address
"
Make sure you are logged in as the root administrator.
Using the K Desktop Environment (KDE)
Follow the steps below to configure your computer IP address using the KDE.
1 Click the Red Hat button (located on the bottom left corner), select System Setting and
click Network.
Figure 81 Red Hat 9.0: KDE: Network Configuration: Devices
2 Double-click on the profile of the network card you wish to configure. The Ethernet
Device General screen displays as shown.
Figure 82 Red Hat 9.0: KDE: Ethernet Device: General
124
DMA-1100P User’s Guide
Appendix B Setting up Your Computer’s IP Address
• If you have a dynamic IP address, click Automatically obtain IP address settings
with and select dhcp from the drop down list.
• If you have a static IP address, click Statically set IP Addresses and fill in the
Address, Subnet mask, and Default Gateway Address fields.
3 Click OK to save the changes and close the Ethernet Device General screen.
4 If you know your DNS server IP address(es), click the DNS tab in the Network
Configuration screen. Enter the DNS server information in the fields provided.
Figure 83 Red Hat 9.0: KDE: Network Configuration: DNS
5 Click the Devices tab.
6 Click the Activate button to apply the changes. The following screen displays. Click Yes
to save the changes in all screens.
Figure 84 Red Hat 9.0: KDE: Network Configuration: Activate
7 After the network card restart process is complete, make sure the Status is Active in the
Network Configuration screen.
Using Configuration Files
Follow the steps below to edit the network configuration files and set your computer IP
address.
1 Assuming that you have only one network card on the computer, locate the ifconfigeth0 configuration file (where eth0 is the name of the Ethernet card). Open the
configuration file with any plain text editor.
• If you have a dynamic IP address, enter dhcp in the BOOTPROTO= field. The
following figure shows an example.
DMA-1100P User’s Guide
125
Appendix B Setting up Your Computer’s IP Address
Figure 85 Red Hat 9.0: Dynamic IP Address Setting in ifconfig-eth0
DEVICE=eth0
ONBOOT=yes
BOOTPROTO=dhcp
USERCTL=no
PEERDNS=yes
TYPE=Ethernet
• If you have a static IP address, enter static in the BOOTPROTO= field. Type
IPADDR= followed by the IP address (in dotted decimal notation) and type NETMASK=
followed by the subnet mask. The following example shows an example where the
static IP address is 192.168.1.10 and the subnet mask is 255.255.255.0.
Figure 86 Red Hat 9.0: Static IP Address Setting in ifconfig-eth0
DEVICE=eth0
ONBOOT=yes
BOOTPROTO=static
IPADDR=192.168.1.10
NETMASK=255.255.255.0
USERCTL=no
PEERDNS=yes
TYPE=Ethernet
2 If you know your DNS server IP address(es), enter the DNS server information in the
resolv.conf file in the /etc directory. The following figure shows an example
where two DNS server IP addresses are specified.
Figure 87 Red Hat 9.0: DNS Settings in resolv.conf
nameserver 172.23.5.1
nameserver 172.23.5.2
3 After you edit and save the configuration files, you must restart the network card. Enter
./network restart in the /etc/rc.d/init.d directory. The following figure
shows an example.
Figure 88 Red Hat 9.0: Restart Ethernet Card
[root@localhost init.d]# network restart
Shutting down interface eth0:
Shutting down loopback interface:
Setting network parameters:
Bringing up loopback interface:
Bringing up interface eth0:
126
[OK]
[OK]
[OK]
[OK]
[OK]
DMA-1100P User’s Guide
Appendix B Setting up Your Computer’s IP Address
Verifying Settings
Enter ifconfig in a terminal screen to check your TCP/IP properties.
Figure 89 Red Hat 9.0: Checking TCP/IP Properties
[root@localhost]# ifconfig
eth0
Link encap:Ethernet HWaddr 00:50:BA:72:5B:44
inet addr:172.23.19.129 Bcast:172.23.19.255 Mask:255.255.255.0
UP BROADCAST RUNNING MULTICAST MTU:1500 Metric:1
RX packets:717 errors:0 dropped:0 overruns:0 frame:0
TX packets:13 errors:0 dropped:0 overruns:0 carrier:0
collisions:0 txqueuelen:100
RX bytes:730412 (713.2 Kb) TX bytes:1570 (1.5 Kb)
Interrupt:10 Base address:0x1000
[root@localhost]#
DMA-1100P User’s Guide
127
Appendix B Setting up Your Computer’s IP Address
128
DMA-1100P User’s Guide
APPENDIX
C
Windows Vista Media Server
"
This appendix is provided for your information only. The DMA is not Vista
certified.
Playing Media Files From Your Windows Vista Computer
This appendix covers using the media server included in Windows Vista to let the DMA play
media files on the computer. This way you do not need to install media server software. In the
following figure, the DMA and your Windows Vista computer (A) are both connected to your
home network.
Figure 90
DMA with Windows Vista Computer
A
DMA
This appendix walks you through the following tasks:
•
•
•
•
Starting the Windows Media Player
Setting Your Computer to Trust Your Network
Setting Your Computer to Share Files With the DMA
Selecting Files to Share
Complete the sections in sequence. The DMA and the computer must be on the same home
network (private LAN). This appendix shows screens from Windows Vista Enterprise Version
6.0.
Starting the Windows Media Player Network Sharing Service
If you are using Windows Vista, do the following to turn on the Windows Media Player.
DMA-1100P User’s Guide
129
Appendix C Windows Vista Media Server
1 Follow the Quick Start Guide Instructions to connect the DMA to your computer.
2 Right-click the Computer icon and click Manage.
"
During this procedure, click Continue whenever Windows displays a screen
saying that it needs your permission to continue.
3 In the following screen, click Services and Applications > Services > Windows Media
Player Network Sharing Service > Start.
Figure 91 Start WIndows Media Player
Setting Your Computer to Trust Your Network
The DMA and your computer are both on your home network, so you use this section to
configure your computer to treat the network connection as a trusted private network. Make
sure the DMA has a network connection to your computer before using this section.
1 Click the Windows Media Player icon in the system tray.
130
DMA-1100P User’s Guide
Appendix C Windows Vista Media Server
Figure 92 Start WIndows Media Player
2 Right-click in the menu bar and click Tools > Options.
Figure 93 WIndows Media Player Tools> Options
3 In the Library tab, click Configure Sharing.
Figure 94 Library
4 Click Networking.
DMA-1100P User’s Guide
131
Appendix C Windows Vista Media Server
Figure 95 Media Sharing
5 Windows searches for your network connections and displays them in the following
window. Click Customize.
Figure 96 Network and Sharing Center
6 Select Private and click Next to have the computer trust the network connection to the
DMA.
132
DMA-1100P User’s Guide
Appendix C Windows Vista Media Server
Figure 97 Set Network Location: Customize network settings
Setting Your Computer to Share Files With the DMA
This section covers how to set Windows Media Player to allow the DMA to play media files.
1 Click View computers and devices on the network.
Figure 98 Set Network Location: Successfully set network settings
2 Right-click the DMA icon and click Open Media Sharing.
DMA-1100P User’s Guide
133
Appendix C Windows Vista Media Server
Figure 99 Network
3 Select Share my media and click OK.
Figure 100 Media Sharing
4 Identify the device that the computer should share media files with. Select the DMA icon
and click Allow > OK.
134
DMA-1100P User’s Guide
Appendix C Windows Vista Media Server
Figure 101 Media Sharing: Select DMA
Selecting Files to Share
This section covers how to select the media files that the DMA is allowed to play.
1 In the Library tab, click Monitor Folders.
Figure 102 Library
2 Click Advanced Options.
DMA-1100P User’s Guide
135
Appendix C Windows Vista Media Server
Figure 103 Add To Library
3 Select the folders to share and click OK when you are done.
Figure 104 Add To Library > Advanced
4 Click OK after the computer finds the files to share.
Figure 105 Add To Library Search
136
DMA-1100P User’s Guide
APPENDIX
D
Open Software Announcements
Notice
Information herein is subject to change without notice. Companies, names, and data used in
examples herein are fictitious unless otherwise noted. No part may be reproduced or
transmitted in any form or by any means, electronic or mechanical, for any purpose, except the
express written permission of ZyXEL Communications Corporation.
This DMA-1100P product included Third Party Software with the license conditions as
specified below.
DiXiM DMA application is proprietary of DigiOn except:
Below GPL modules by GUN General Public License.
*busybox 1.0.0
original:
busybox-1.00.tar.bz2
patch:
busybox-1.00+autoip.060915.patch
*uCLinux 2.4.22
original:
linux-2.4.22.tar.bz2
uClinux-2.4.22-uc0.diff.bz2
patch:
linux-2.4.22-patches.tar.bz2
Sigma SDK provided by Sigma Designs covering below third party license
MRUA Package
DMA-1100P User’s Guide
137
Appendix D Open Software Announcements
Software included in the MRUA package is proprietary Sigma Designs except:
Jpeg library:
All the files in MRUA_src/rmlibjpeg/src/libjpeg Custom license
Png library:
All the files in MRUA_src/rmlibpng/src/libpng Custom license
Gif library:
All the files in MRUA_src/rmlibungif/src/libungi Custom license
http library:
MRUA_src/rmlibhttp/src/common.c
MRUA_src/rmlibhttp/src/http.c
Custom license
Vera.ttf:
MRUA_src/samples/Vera.ttf
bin/Vera.ttf
Custom license
VeraMono.ttf:
File located in MRUA_src/samples/VeraMono.ttf File located in bin/VeraMono.ttf
Custom license
UPnP Library:
MRUA_src/rmupnp/upnp_stack/_MediaServerControlPointStack/MmsCp.h MRUA_src/
rmupnp/upnp_stack/_MediaServerControlPointStack/MmsCp.c MRUA_src/rmupnp/
upnp_stack/_Utility/MyString.c
MRUA_src/rmupnp/upnp_stack/_Utility/MyString.h
MRUA_src/rmupnp/upnp_stack/_ControlPointCoreStack/ILibSSDPClient.c
MRUA_src/rmupnp/upnp_stack/_ControlPointCoreStack/ILibParsers.c
MRUA_src/rmupnp/upnp_stack/_ControlPointCoreStack/ILibWebClient.h
MRUA_src/rmupnp/upnp_stack/_ControlPointCoreStack/MSCP_ControlPoint.c
MRUA_src/rmupnp/upnp_stack/_ControlPointCoreStack/ILibParsers.h
MRUA_src/rmupnp/upnp_stack/_ControlPointCoreStack/ILibWebServer.c
MRUA_src/rmupnp/upnp_stack/_ControlPointCoreStack/ILibWebServer.h
MRUA_src/rmupnp/upnp_stack/_ControlPointCoreStack/ILibSSDPClient.h
MRUA_src/rmupnp/upnp_stack/_ControlPointCoreStack/UPnPControlPointStructs.h
MRUA_src/rmupnp/upnp_stack/_ControlPointCoreStack/BrowseOnly-Posix.upnpsg
MRUA_src/rmupnp/upnp_stack/_ControlPointCoreStack/ILibAsyncServerSocket.h
MRUA_src/rmupnp/upnp_stack/_ControlPointCoreStack/ILibWebClient.c
MRUA_src/rmupnp/upnp_stack/_ControlPointCoreStack/ILibAsyncSocket.h
MRUA_src/rmupnp/upnp_stack/_ControlPointCoreStack/ILibAsyncSocket.c
MRUA_src/rmupnp/upnp_stack/_ControlPointCoreStack/ILibAsyncServerSocket.c
MRUA_src/rmupnp/upnp_stack/_ControlPointCoreStack/MSCP_ControlPoint.h
Intel license
Mambolfb (Linux Frame Buffer Driver):
em86xxfb-2_6.c
138
DMA-1100P User’s Guide
Appendix D Open Software Announcements
vfb.c
GPL License (see ARMUtils package)
JPEG License
LEGAL ISSUES
In plain English:
1. We don't promise that this software works. (But if you find any bugs,
please let us know!)
2. You can use this software for whatever you want. You don't have to pay us.
3. You may not pretend that you wrote this software. If you use it in a
program, you must acknowledge somewhere in your documentation that
you've used the IJG code.
In legalese:
The authors make NO WARRANTY or representation, either express or implied, with respect
to this software, its quality, accuracy, merchantability, or fitness for a particular purpose. This
software is provided "AS IS", and you, its user, assume the entire risk as to its quality and
accuracy.
This software is copyright (C) 1991-1998, Thomas G. Lane. All Rights Reserved except as
specified below.
Permission is hereby granted to use, copy, modify, and distribute this
software (or portions thereof) for any purpose, without fee, subject to these conditions:
(1) If any part of the source code for this software is distributed, then this README file must
be included, with this copyright and no-warranty notice unaltered; and any additions,
deletions, or changes to the original files must be clearly indicated in accompanying
documentation.
(2) If only executable code is distributed, then the accompanying
documentation must state that "this software is based in part on the work of the Independent
JPEG Group".
(3) Permission for use of this software is granted only if the user accepts full responsibility for
any undesirable consequences; the authors accept NO LIABILITY for damages of any kind.
These conditions apply to any software derived from or based on the IJG code, not just to the
unmodified library. If you use our work, you ought to
acknowledge us.
Permission is NOT granted for the use of any IJG author's name or company name in
advertising or publicity relating to this software or products derived from it. This software may
be referred to only as "the Independent JPEG Group's
software".
We specifically permit and encourage the use of this software as the basis of commercial
products, provided that all warranty or liability claims are assumed by the product vendor.
DMA-1100P User’s Guide
139
Appendix D Open Software Announcements
PNG License
* libpng version 1.2.5 - October 3, 2002
* Copyright (c) 1998-2002 Glenn Randers-Pehrson
* (Version 0.96 Copyright (c) 1996, 1997 Andreas Dilger)
* (Version 0.88 Copyright (c) 1995, 1996 Guy Eric Schalnat, Group 42, Inc.)
*
* Authors and maintainers:
* libpng versions 0.71, May 1995, through 0.88, January 1996: Guy Schalnat
* libpng versions 0.89c, June 1996, through 0.96, May 1997: Andreas Dilger
* libpng versions 0.97, January 1998, through 1.2.5 - October 3, 2002: Glenn
* See also "Contributing Authors", below.
*
* Note about libpng version numbers:
*
* Due to various miscommunications, unforeseen code incompatibilities
* and occasional factors outside the authors' control, version numbering
* on the library has not always been consistent and straightforward.
* The following table summarizes matters since version 0.89c, which was
* the first widely used release:
*
* source png.h png.h shared-lib
* version string int version
*
* 0.89c "1.0 beta 3" 0.89 89 1.0.89
* 0.90 "1.0 beta 4" 0.90 90 0.90 [should have been 2.0.90]
* 0.95 "1.0 beta 5" 0.95 95 0.95 [should have been 2.0.95]
* 0.96 "1.0 beta 6" 0.96 96 0.96 [should have been 2.0.96]
* 0.97b "1.00.97 beta 7" 1.00.97 97 1.0.1 [should have been 2.0.97]
* 0.97c 0.97 97 2.0.97
* 0.98 0.98 98 2.0.98
* 0.99 0.99 98 2.0.99
* 0.99a-m 0.99 99 2.0.99
* 1.00 1.00 100 2.1.0 [100 should be 10000]
* 1.0.0 (from here on, the 100 2.1.0 [100 should be 10000]
* 1.0.1 png.h string is 10001 2.1.0
* 1.0.1a-e identical to the 10002 from here on, the shared library
140
DMA-1100P User’s Guide
Appendix D Open Software Announcements
* 1.0.2 source version) 10002 is 2.V where V is the source code
* 1.0.2a-b 10003 version, except as noted.
* 1.0.3 10003
* 1.0.3a-d 10004
* 1.0.4 10004
* 1.0.4a-f 10005
* 1.0.5 (+ 2 patches) 10005
* 1.0.5a-d 10006
* 1.0.5e-r 10100 (not source compatible)
* 1.0.5s-v 10006 (not binary compatible)
* 1.0.6 (+ 3 patches) 10006 (still binary incompatible)
* 1.0.6d-f 10007 (still binary incompatible)
* 1.0.6g 10007
* 1.0.6h 10007 10.6h (testing xy.z so-numbering)
* 1.0.6i 10007 10.6i
* 1.0.6j 10007 2.1.0.6j (incompatible with 1.0.0)
* 1.0.7beta11-14 DLLNUM 10007 2.1.0.7beta11-14 (binary compatible)
* 1.0.7beta15-18 1 10007 2.1.0.7beta15-18 (binary compatible)
* 1.0.7rc1-2 1 10007 2.1.0.7rc1-2 (binary compatible)
* 1.0.7 1 10007 (still compatible)
* 1.0.8beta1-4 1 10008 2.1.0.8beta1-4
* 1.0.8rc1 1 10008 2.1.0.8rc1
* 1.0.8 1 10008 2.1.0.8
* 1.0.9beta1-6 1 10009 2.1.0.9beta1-6
* 1.0.9rc1 1 10009 2.1.0.9rc1
* 1.0.9beta7-10 1 10009 2.1.0.9beta7-10
* 1.0.9rc2 1 10009 2.1.0.9rc2
* 1.0.9 1 10009 2.1.0.9
* 1.0.10beta1 1 10010 2.1.0.10beta1
* 1.0.10rc1 1 10010 2.1.0.10rc1
* 1.0.10 1 10010 2.1.0.10
* 1.0.11beta1-3 1 10011 2.1.0.11beta1-3
* 1.0.11rc1 1 10011 2.1.0.11rc1
* 1.0.11 1 10011 2.1.0.11
* 1.0.12beta1-2 2 10012 2.1.0.12beta1-2
* 1.0.12rc1 2 10012 2.1.0.12rc1
DMA-1100P User’s Guide
141
Appendix D Open Software Announcements
* 1.0.12 2 10012 2.1.0.12
* 1.1.0a-f - 10100 2.1.1.0a-f (branch abandoned)
* 1.2.0beta1-2 2 10200 2.1.2.0beta1-2
* 1.2.0beta3-5 3 10200 3.1.2.0beta3-5
* 1.2.0rc1 3 10200 3.1.2.0rc1
* 1.2.0 3 10200 3.1.2.0
* 1.2.1beta1-4 3 10201 3.1.2.1beta1-4
* 1.2.1rc1-2 3 10201 3.1.2.1rc1-2
* 1.2.1 3 10201 3.1.2.1
* 1.2.2beta1-6 12 10202 12.so.0.1.2.2beta1-6
* 1.0.13beta1 10 10013 10.so.0.1.0.13beta1
* 1.0.13rc1 10 10013 10.so.0.1.0.13rc1
* 1.2.2rc1 12 10202 12.so.0.1.2.2rc1
* 1.0.13 10 10013 10.so.0.1.0.13
* 1.2.2 12 10202 12.so.0.1.2.2
* 1.2.3rc1-6 12 10203 12.so.0.1.2.3rc1-6
* 1.2.3 12 10203 12.so.0.1.2.3
* 1.2.4beta1-3 13 10204 12.so.0.1.2.4beta1-3
* 1.0.14rc1 13 10014 10.so.0.1.0.14rc1
* 1.2.4rc1 13 10204 12.so.0.1.2.4rc1
* 1.0.14 10 10014 10.so.0.1.0.14
* 1.2.4 13 10204 12.so.0.1.2.4
* 1.2.5beta1-2 13 10205 12.so.0.1.2.5beta1-2
* 1.0.15rc1-3 10 10015 10.so.0.1.0.15rc1-3
* 1.2.5rc1-3 13 10205 12.so.0.1.2.5rc1-3
* 1.0.15 10 10015 10.so.0.1.0.15
* 1.2.5 13 10205 12.so.0.1.2.5
*
* Henceforth the source version will match the shared-library major
* and minor numbers; the shared-library major version number will be
* used for changes in backward compatibility, as it is intended. The
* PNG_LIBPNG_VER macro, which is not used within libpng but is available
* for applications, is an unsigned integer of the form xyyzz corresponding
* to the source version x.y.z (leading zeros in y and z). Beta versions
* were given the previous public release number plus a letter, until
* version 1.0.6j; from then on they were given the upcoming public
142
DMA-1100P User’s Guide
Appendix D Open Software Announcements
* release number plus "betaNN" or "rcN".
*
* Binary incompatibility exists only when applications make direct access
* to the info_ptr or png_ptr members through png.h, and the compiled
* application is loaded with a different version of the library.
*
* DLLNUM will change each time there are forward or backward changes
* in binary compatibility (e.g., when a new feature is added).
*
* See libpng.txt or libpng.3 for more information. The PNG specification
* is available as RFC 2083 <ftp://ftp.uu.net/graphics/png/documents/>
* and as a W3C Recommendation <http://www.w3.org/TR/REC.png.html>
*/
/*
* COPYRIGHT NOTICE, DISCLAIMER, and LICENSE:
*
* If you modify libpng you may insert additional notices immediately following
* this sentence.
*
* libpng versions 1.0.7, July 1, 2000, through 1.2.5, October 3, 2002, are
* Copyright (c) 2000-2002 Glenn Randers-Pehrson, and are
* distributed according to the same disclaimer and license as libpng-1.0.6
* with the following individuals added to the list of Contributing Authors
*
* Simon-Pierre Cadieux
* Eric S. Raymond
* Gilles Vollant
*
* and with the following additions to the disclaimer:
*
* There is no warranty against interference with your enjoyment of the
* library or against infringement. There is no warranty that our
* efforts or the library will fulfill any of your particular purposes
* or needs. This library is provided with all faults, and the entire
* risk of satisfactory quality, performance, accuracy, and effort is with
* the user.
DMA-1100P User’s Guide
143
Appendix D Open Software Announcements
*
* libpng versions 0.97, January 1998, through 1.0.6, March 20, 2000, are
* Copyright (c) 1998, 1999, 2000 Glenn Randers-Pehrson
* Distributed according to the same disclaimer and license as libpng-0.96,
* with the following individuals added to the list of Contributing Authors:
*
* Tom Lane
* Glenn Randers-Pehrson
* Willem van Schaik
*
* libpng versions 0.89, June 1996, through 0.96, May 1997, are
* Copyright (c) 1996, 1997 Andreas Dilger
* Distributed according to the same disclaimer and license as libpng-0.88,
* with the following individuals added to the list of Contributing Authors:
*
* John Bowler
* Kevin Bracey
* Sam Bushell
* Magnus Holmgren
* Greg Roelofs
* Tom Tanner
*
* libpng versions 0.5, May 1995, through 0.88, January 1996, are
* Copyright (c) 1995, 1996 Guy Eric Schalnat, Group 42, Inc.
*
* For the purposes of this copyright and license, "Contributing Authors"
* is defined as the following set of individuals:
*
* Andreas Dilger
* Dave Martindale
* Guy Eric Schalnat
* Paul Schmidt
* Tim Wegner
*
* The PNG Reference Library is supplied "AS IS". The Contributing Authors
* and Group 42, Inc. disclaim all warranties, expressed or implied,
144
DMA-1100P User’s Guide
Appendix D Open Software Announcements
* including, without limitation, the warranties of merchantability and of
* fitness for any purpose. The Contributing Authors and Group 42, Inc.
* assume no liability for direct, indirect, incidental, special, exemplary,
* or consequential damages, which may result from the use of the PNG
* Reference Library, even if advised of the possibility of such damage.
*
* Permission is hereby granted to use, copy, modify, and distribute this * source code, or
portions hereof, for any purpose, without fee, subject * to the following restrictions:
*
* 1. The origin of this source code must not be misrepresented.
*
* 2. Altered versions must be plainly marked as such and
* must not be misrepresented as being the original source.
*
* 3. This Copyright notice may not be removed or altered from * any source or altered source
distribution.
*
* The Contributing Authors and Group 42, Inc. specifically permit, without * fee, and
encourage the use of this source code as a component to
* supporting the PNG file format in commercial products. If you use this * source code in a
product, acknowledgment is not required but would be
* appreciated.
*/
/*
* A "png_get_copyright" function is available, for convenient use in "about" * boxes and the
like:
*
* printf("%s",png_get_copyright(NULL));
*
* Also, the PNG logo (in PNG format, of course) is supplied in the
* files "pngbar.png" and "pngbar.jpg (88x31) and "pngnow.png" (98x31).
*/
/*
* Libpng is OSI Certified Open Source Software. OSI Certified is a
* certification mark of the Open Source Initiative.
*/
/*
* The contributing authors would like to thank all those who helped * with testing, bug fixes,
and patience. This wouldn't have been * possible without all of you.
*
DMA-1100P User’s Guide
145
Appendix D Open Software Announcements
* Thanks to Frank J. T. Wojcik for helping with the documentation.
*/
/*
* Y2K compliance in libpng:
* =========================
*
* October 3, 2002
*
* Since the PNG Development group is an ad-hoc body, we can't make
* an official declaration.
*
* This is your unofficial assurance that libpng from version 0.71 and
* upward through 1.2.5 are Y2K compliant. It is my belief that earlier
* versions were also Y2K compliant.
*
* Libpng only has three year fields. One is a 2-byte unsigned integer
* that will hold years up to 65535. The other two hold the date in text
* format, and will hold years up to 9999.
*
* The integer is
* "png_uint_16 year" in png_time_struct.
*
* The strings are
* "png_charp time_buffer" in png_struct and
* "near_time_buffer", which is a local character string in png.c.
*
* There are seven time-related functions:
* png.c: png_convert_to_rfc_1123() in png.c
* (formerly png_convert_to_rfc_1152() in error)
* png_convert_from_struct_tm() in pngwrite.c, called in pngwrite.c
* png_convert_from_time_t() in pngwrite.c
* png_get_tIME() in pngget.c
* png_handle_tIME() in pngrutil.c, called in pngread.c
* png_set_tIME() in pngset.c
* png_write_tIME() in pngwutil.c, called in pngwrite.c
*
* All handle dates properly in a Y2K environment. The
146
DMA-1100P User’s Guide
Appendix D Open Software Announcements
* png_convert_from_time_t() function calls gmtime() to convert from system
* clock time, which returns (year - 1900), which we properly convert to
* the full 4-digit year. There is a possibility that applications using
* libpng are not passing 4-digit years into the png_convert_to_rfc_1123()
* function, or that they are incorrectly passing only a 2-digit year
* instead of "year - 1900" into the png_convert_from_struct_tm() function,
* but this is not under our control. The libpng documentation has always
* stated that it works with 4-digit years, and the APIs have been
* documented as such.
*
* The tIME chunk itself is also Y2K compliant. It uses a 2-byte unsigned
* integer to hold the year, and can hold years as large as 65535.
*
* zlib, upon which libpng depends, is also Y2K compliant. It contains
* no date-related code.
*
* Glenn Randers-Pehrson
* libpng maintainer
* PNG Development Group
*/
GIF License
The GIFLIB distribution is Copyright (c) 1997 Eric S. Raymond
Permission is hereby granted, free of charge, to any person obtaining a copy of this software
and associated documentation files (the "Software"), to deal in the Software without
restriction, including without limitation the rights to use, copy, modify, merge, publish,
distribute, sublicense, and/or sell copies of the Software, and to permit persons to whom the
Software is furnished to do so, subject to the following conditions:
The above copyright notice and this permission notice shall be included in all copies or
substantial portions of the Software.
THE SOFTWARE IS PROVIDED "AS IS", WITHOUT WARRANTY OF ANY KIND,
EXPRESS OR
IMPLIED, INCLUDING BUT NOT LIMITED TO THE WARRANTIES OF
MERCHANTABILITY,
FITNESS FOR A PARTICULAR PURPOSE AND NONINFRINGEMENT. IN NO EVENT
SHALL THE
AUTHORS OR COPYRIGHT HOLDERS BE LIABLE FOR ANY CLAIM, DAMAGES OR
OTHER
LIABILITY, WHETHER IN AN ACTION OF CONTRACT, TORT OR OTHERWISE,
DMA-1100P User’s Guide
147
Appendix D Open Software Announcements
ARISING FROM,
OUT OF OR IN CONNECTION WITH THE SOFTWARE OR THE USE OR OTHER
DEALINGS IN
THE SOFTWARE.
libHTTP License
/** Copyright (c) 2000-2004 Dag-Erling Coïdan Smørgrav * All rights reserved.
*
* Redistribution and use in source and binary forms, with or without * modification, are
permitted provided that the following conditions * are met:
* 1. Redistributions of source code must retain the above copyright
* notice, this list of conditions and the following disclaimer
* in this position and unchanged.
* 2. Redistributions in binary form must reproduce the above copyright
* notice, this list of conditions and the following disclaimer in the
* documentation and/or other materials provided with the distribution.
* 3. The name of the author may not be used to endorse or promote products
* derived from this software without specific prior written permission.
*
* THIS SOFTWARE IS PROVIDED BY THE AUTHOR ``AS IS'' AND ANY EXPRESS OR
* IMPLIED WARRANTIES, INCLUDING, BUT NOT LIMITED TO, THE IMPLIED
WARRANTIES
* OF MERCHANTABILITY AND FITNESS FOR A PARTICULAR PURPOSE ARE
DISCLAIMED.
* IN NO EVENT SHALL THE AUTHOR BE LIABLE FOR ANY DIRECT, INDIRECT,
* INCIDENTAL, SPECIAL, EXEMPLARY, OR CONSEQUENTIAL DAMAGES
(INCLUDING, BUT
* NOT LIMITED TO, PROCUREMENT OF SUBSTITUTE GOODS OR SERVICES; LOSS
OF USE,
* DATA, OR PROFITS; OR BUSINESS INTERRUPTION) HOWEVER CAUSED AND
ON ANY
* THEORY OF LIABILITY, WHETHER IN CONTRACT, STRICT LIABILITY, OR TORT
* (INCLUDING NEGLIGENCE OR OTHERWISE) ARISING IN ANY WAY OUT OF THE
USE OF
* THIS SOFTWARE, EVEN IF ADVISED OF THE POSSIBILITY OF SUCH DAMAGE.
*/
/*
* The following copyright applies to the base64 code:
*
*-
148
DMA-1100P User’s Guide
Appendix D Open Software Announcements
* Copyright 1997 Massachusetts Institute of Technology
*
* Permission to use, copy, modify, and distribute this software and
* its documentation for any purpose and without fee is hereby
* granted, provided that both the above copyright notice and this
* permission notice appear in all copies, that both the above
* copyright notice and this permission notice appear in all
* supporting documentation, and that the name of M.I.T. not be used
* in advertising or publicity pertaining to distribution of the
* software without specific, written prior permission. M.I.T. makes
* no representations about the suitability of this software for any
* purpose. It is provided "as is" without express or implied
* warranty.
*
* THIS SOFTWARE IS PROVIDED BY M.I.T. ``AS IS''. M.I.T. DISCLAIMS
* ALL EXPRESS OR IMPLIED WARRANTIES WITH REGARD TO THIS SOFTWARE,
* INCLUDING, BUT NOT LIMITED TO, THE IMPLIED WARRANTIES OF
* MERCHANTABILITY AND FITNESS FOR A PARTICULAR PURPOSE. IN NO
EVENT
* SHALL M.I.T. BE LIABLE FOR ANY DIRECT, INDIRECT, INCIDENTAL,
* SPECIAL, EXEMPLARY, OR CONSEQUENTIAL DAMAGES (INCLUDING, BUT
NOT
* LIMITED TO, PROCUREMENT OF SUBSTITUTE GOODS OR SERVICES; LOSS OF
* USE, DATA, OR PROFITS; OR BUSINESS INTERRUPTION) HOWEVER CAUSED
AND
* ON ANY THEORY OF LIABILITY, WHETHER IN CONTRACT, STRICT LIABILITY,
* OR TORT (INCLUDING NEGLIGENCE OR OTHERWISE) ARISING IN ANY WAY
OUT
* OF THE USE OF THIS SOFTWARE, EVEN IF ADVISED OF THE POSSIBILITY OF
* SUCH DAMAGE.
*/
Vera.ttf License
{Copyright (c) 2003 by Bitstream, Inc. All Rights Reserved.Bitstream Vera
SansBitstreamVeraSans-RomanRelease 1.10Copyright (c) 2003 by Bitstream, Inc. All Rights
Reserved.
Bitstream Vera is a trademark of Bitstream, Inc.
DMA-1100P User’s Guide
149
Appendix D Open Software Announcements
Permission is hereby granted, free of charge, to any person obtaining a copy of
the fonts accompanying this license ("Fonts") and associated documentation
files (the "Font Software"), to reproduce and distribute the Font Software,
including without limitation the rights to use, copy, merge, publish,
distribute, and/or sell copies of the Font Software, and to permit persons to
whom the Font Software is furnished to do so, subject to the following
conditions:
The above copyright and trademark notices and this permission notice shall be included in all
copies of one or more of the Font Software typefaces.
The Font Software may be modified, altered, or added to, and in particular the designs of
glyphs or characters in the Fonts may be modified and additional glyphs or characters may be
added to the Fonts, only if the fonts are renamed to names not containing either the words
"Bitstream" or the word "Vera".
This License becomes null and void to the extent applicable to Fonts or Font
Software that has been modified and is distributed under the "Bitstream Vera"
names.
The Font Software may be sold as part of a larger software package but no copy of one or
more of the Font Software typefaces may be sold by itself.
THE FONT SOFTWARE IS PROVIDED "AS IS", WITHOUT WARRANTY OF ANY
KIND, EXPRESS OR IMPLIED, INCLUDING BUT NOT LIMITED TO ANY
WARRANTIES OF MERCHANTABILITY, FITNESS FOR A PARTICULAR PURPOSE
AND NONINFRINGEMENT OF COPYRIGHT, PATENT, TRADEMARK, OR OTHER
RIGHT. IN NO EVENT SHALL BITSTREAM OR THE GNOME FOUNDATION BE
LIABLE FOR ANY CLAIM, DAMAGES OR OTHER LIABILITY, INCLUDING ANY
GENERAL, SPECIAL, INDIRECT, INCIDENTAL, OR CONSEQUENTIAL DAMAGES,
WHETHER IN AN ACTION OF CONTRACT, TORT OR OTHERWISE, ARISING FROM,
OUT OF THE USE OR INABILITY TO USE THE FONT SOFTWARE OR FROM OTHER
DEALINGS IN THE FONT SOFTWARE.
Except as contained in this notice, the names of Gnome, the Gnome Foundation, and Bitstream
Inc., shall not be used in advertising or otherwise to promote the sale, use or other dealings in
this Font Software without prior written authorization from the Gnome Foundation or
Bitstream Inc., respectively. For further information, contact: fonts at gnome dot org.http://
www.bitstream.com_
VeraMono.ttf License
-Copyright (c) 2003 by Bitstream, Inc. All Rights Reserved.Bitstream Vera Sans
MonoBitstreamVeraSansMono-RomanRelease 1.10Copyright (c) 2003 by Bitstream,
Inc.
All Rights Reserved.
Bitstream Vera is a trademark of Bitstream, Inc.
150
DMA-1100P User’s Guide
Appendix D Open Software Announcements
Permission is hereby granted, free of charge, to any person obtaining a copy of
the fonts accompanying this license ("Fonts") and associated documentation
files (the "Font Software"), to reproduce and distribute the Font Software,
including without limitation the rights to use, copy, merge, publish,
distribute, and/or sell copies of the Font Software, and to permit persons to
whom the Font Software is furnished to do so, subject to the following
conditions:
The above copyright and trademark notices and this permission notice shall be included in all
copies of one or more of the Font Software typefaces.
The Font Software may be modified, altered, or added to, and in particular the designs of
glyphs or characters in the Fonts may be modified and additional glyphs or characters may be
added to the Fonts, only if the fonts are renamed to names not containing either the words
"Bitstream" or the word "Vera".
This License becomes null and void to the extent applicable to Fonts or Font
Software that has been modified and is distributed under the "Bitstream Vera"
names.
The Font Software may be sold as part of a larger software package but no copy of one or
more of the Font Software typefaces may be sold by itself.
THE FONT SOFTWARE IS PROVIDED "AS IS", WITHOUT WARRANTY OF ANY
KIND, EXPRESS OR IMPLIED, INCLUDING BUT NOT LIMITED TO ANY
WARRANTIES OF MERCHANTABILITY, FITNESS FOR A PARTICULAR PURPOSE
AND NONINFRINGEMENT OF COPYRIGHT, PATENT, TRADEMARK, OR OTHER
RIGHT. IN NO EVENT SHALL BITSTREAM OR THE GNOME FOUNDATION BE
LIABLE FOR ANY CLAIM, DAMAGES OR OTHER LIABILITY, INCLUDING ANY
GENERAL, SPECIAL, INDIRECT, INCIDENTAL, OR CONSEQUENTIAL DAMAGES,
WHETHER IN AN ACTION OF CONTRACT, TORT OR OTHERWISE, ARISING FROM,
OUT OF THE USE OR INABILITY TO USE THE FONT SOFTWARE OR FROM OTHER
DEALINGS IN THE FONT SOFTWARE.
Except as contained in this notice, the names of Gnome, the Gnome Foundation, and Bitstream
Inc., shall not be used in advertising or otherwise to promote the sale, use or other dealings in
this Font Software without prior written authorization from the Gnome Foundation or
Bitstream Inc., respectively. For further information, contact: fonts at gnome dot org.http://
www.bitstream.com_
Intel license (UPnP Library)
INTEL SOFTWARE SOURCE CODE LICENSE AGREEMENT IMPORTANT - READ
BEFORE COPYING, INSTALLING OR USING.
Do not use or load this software and any associated materials
(collectively, the "Software") until you have carefully read the following terms and conditions.
By loading or using the Software, you agree to the terms of this Agreement. If you do not wish
to so agree, do not install or use the Software.
DEFINITIONS. "Licensed Product" means UPnP Forum compliant software
developed by Licensee that incorporates the Intel Software in whole or
in part, in source code or object code form, within Licensee's product
offering.
DMA-1100P User’s Guide
151
Appendix D Open Software Announcements
LICENSE. Subject to the terms and conditions of this Agreement, Intel hereby grants to
Licensee under Intel's copyrights in the Intel Software as delivered a nonexclusive,
nontransferable, non
sub-licensable worldwide, perpetual (subject to revocation for material breach of this license
grant), royalty free license to copy, modify and create derivative works of the source code of
the Intel Software solely for the purpose of developing Licensed Products.
OWNERSHIP OF SOFTWARE AND COPYRIGHTS. Title to all copies of the
Software remains with Intel or its suppliers. The Software is
copyrighted and protected by the laws of the United States and other
countries, and international treaty provisions. You may not remove any
copyright notices from the Software. Intel may make changes to the
Software, or to items referenced therein, at any time without notice,
but is not obligated to support or update the Software. Except as
otherwise expressly provided, Intel grants no express or implied right
under Intel patents, copyrights, trademarks, or other intellectual
property rights. You may transfer the Software only if the recipient
agrees to be fully bound by these terms and if you retain no copies of
the Software.
ATTRIBUTION. Licensee shall provide reasonable attribution to Intel in any software that it
creates using the Intel Source or Object Code providing under this Agreement. In the case of
source code, Licensee agrees that Intel headers shall not be modified. Licensed Products shall
display "Portions Copyright ?2004 Intel Corporation" in "About" boxes or provide such
similar attribution.
LIMITED MEDIA WARRANTY. If the Software has been delivered by Intel on physical
media, Intel warrants the media to be free from material physical defects for a period of ninety
days after delivery by Intel. If such a defect is found, return the media to Intel for replacement
or alternate delivery of the Software as Intel may select.
EXCLUSION OF OTHER WARRANTIES. EXCEPT AS PROVIDED ABOVE, THE
SOFTWARE IS PROVIDED "AS IS" WITHOUT ANY EXPRESS OR IMPLIED
WARRANTY OF ANY KIND INCLUDING WARRANTIES OF MERCHANTABILITY,
NONINFRINGEMENT, OR FITNESS FOR A PARTICULAR PURPOSE. Intel does not
warrant or assume responsibility for the accuracy or completeness of any information, text,
graphics, links or other items contained within the Software.
LIMITATION OF LIABILITY. IN NO EVENT SHALL INTEL OR ITS SUPPLIERS BE
LIABLE FOR ANY DAMAGES WHATSOEVER (INCLUDING, WITHOUT
LIMITATION, LOST PROFITS, BUSINESS INTERRUPTION, OR LOST
INFORMATION) ARISING OUT OF THE USE OF OR INABILITY TO USE THE
SOFTWARE, EVEN IF INTEL HAS BEEN
ADVISED OF THE POSSIBILITY OF SUCH DAMAGES. SOME JURISDICTIONS
PROHIBIT EXCLUSION OR LIMITATION OF LIABILITY FOR IMPLIED
WARRANTIES OR CONSEQUENTIAL OR INCIDENTAL DAMAGES, SO THE ABOVE
LIMITATION MAY NOT APPLY TO YOU. YOU MAY ALSO HAVE OTHER LEGAL
RIGHTS THAT VARY FROM JURISDICTION TO JURISDICTION.
TERMINATION OF THIS AGREEMENT. Intel may terminate this Agreement at
any time if you violate its terms. Upon termination, you will
immediately destroy the Software or return all copies of the Software
to Intel.
152
DMA-1100P User’s Guide
Appendix D Open Software Announcements
APPLICABLE LAWS. Claims arising under this Agreement shall be governed
by the laws of Deleware, excluding its principles of conflict of laws
and the United Nations Convention on Contracts for the Sale of Goods.
You may not export the Software in violation of applicable export laws
and regulations. Intel is not obligated under any other agreements
unless they are in writing and signed by an authorized representative
of Intel.
Curacao Package
Software included in the Curacao package is proprietary Sigma Designs except:
Tinyxml library:
Custom license
/*
www.sourceforge.net/projects/tinyxml Original file by Yves Berquin.
This software is provided 'as-is', without any express or implied warranty. In no event will the
authors be held liable for any damages arising from the use of this software.
Permission is granted to anyone to use this software for any purpose, including commercial
applications, and to alter it and redistribute it freely, subject to the following restrictions:
1. The origin of this software must not be misrepresented; you must not claim that you wrote
the original software. If you use this software in a product, an acknowledgment in the product
documentation would be appreciated but is not required.
2. Altered source versions must be plainly marked as such, and must not be misrepresented as
being the original software.
3. This notice may not be removed or altered from any source distribution.
*/
ARMUTILS Package
Software included with the ARM utilities package (as inferred from the list of Makefiles):
binutils:
binutils-2.11.2
GPL
ftp://sources.redhat.com/pub/binutils/releases
busybox:
DMA-1100P User’s Guide
153
Appendix D Open Software Announcements
busybox-1.00-pre3 and busybox-1.00
GPL
http://www.busybox.net/downloads
ccache:
ccache-2.3
GPL
http://ccache.samba.org/ftp/ccache/
cdrtools:
cdrtools-2.00.3
GPL
http://www.fokus.gmd.de/research/cc/glone/employees/jo erg.schilling/private/cdrecord.html
elf2flt:
elf2flt-20020214 and elf2flt-20030314
GPL
http://www.uclinux.org/pub/uClinux/utilities/
gcc:
gcc-2.95.3
GPL
http://gcc.gnu.org
ext2root:
genext2fs-1.3
GPL
http://packages.debian.org/unstable/admin/genext2fs
genromfs:
genromfs-0.5.1
GPL
http://www.uclinux.org/pub/uClinux/utilities/
linux:
linux-2.4.22
GPL
http://www.kernel.org/pub/linux/kernel/v2.4
154
DMA-1100P User’s Guide
Appendix D Open Software Announcements
uClinux-2.4.22-uc0
GPL
http://www.uclinux.org/pub/uClinux/uClinux-2.4.x
microwin:
microwindows-src-snapshot-013004
MPL (Mozilla Public License) -OR- GPL ftp://ftp.microwindows.org/pub/microwindows
madwifi:
madwifi-cvs20040331
Dual license:
a) Custom license - source redistribution OK - see
- OR b) GPL
http://madwifi.org/pub/linux/snapshot/tars
mtd:
mtd-20040901
GPL
ftp://ftp.uk.linux.org/pub/people/dwmw2/mtd/cvs
ncurses:
ncurses-5.2
GPL
http://ftp.gnu.org/pub/gnu/ncurses
openssl:
openssl-0.9.7d
Dual license:
a) OpenSSL license
- AND b) SSLeay license
The resulting license is a copyleft free software license (cf http://www.gnu.org/licenses/
license-list.html#OpenSSL)
http://www.openssl.org/source
prism54:
DMA-1100P User’s Guide
155
Appendix D Open Software Announcements
prism54-cvs20040318
GPL
http://prism54.org/pub/linux/snapshot/tars Software issue at http://www.prism54.org/software/
STLport:
STLport-4.5.3
Custom license - source redistribution OK - see
http://www.stlport.org/archive
tinylogin:
tinylogin-1.4
GPL -AND- Shadow utilities license (BSD-style) -PLUS- derived work from code licensed
under the Eindhoven University of Technology license
http://tinylogin.busybox.net/downloads
uclibc:
uClibc-0.9.21 and uClibc-0.9.26
LGPL
http://www.uclibc.org/downloads
udhcp:
udhcp-0.9.8
GPL
http://udhcp.busybox.net/downloads/
wtools:
wireless_tools.26
GPL
http://pcmcia-cs.sourceforge.net/ftp/contrib/
A copy of the GPL is always available at
http://www.gnu.org/licenses/gpl.html
A copy of the LGPL is always available at
http://www.gnu.org/copyleft/lesser.html
156
DMA-1100P User’s Guide
Appendix D Open Software Announcements
A copy of the MPL is always available at http://www.mozilla.org/MPL/
GNU GENERAL PUBLIC LICENSE
Version 2, June 1991
Copyright (C) 1989, 1991 Free Software Foundation, Inc.
59 Temple Place, Suite 330, Boston, MA 02111-1307 USA
Everyone is permitted to copy and distribute verbatim copies
of this license document, but changing it is not allowed.
Preamble
The licenses for most software are designed to take away your
freedom to share and change it. By contrast, the GNU General Public
License is intended to guarantee your freedom to share and change free
software--to make sure the software is free for all its users. This
General Public License applies to most of the Free Software
Foundation's software and to any other program whose authors commit to
using it. (Some other Free Software Foundation software is covered by
the GNU Library General Public License instead.) You can apply it to
your programs, too.
When we speak of free software, we are referring to freedom, not price. Our General Public
Licenses are designed to make sure that you have the freedom to distribute copies of free
software (and charge for this service if you wish), that you receive source code or can get it if
you want it, that you can change the software or use pieces of it in new free programs; and that
you know you can do these things.
To protect your rights, we need to make restrictions that forbid anyone to deny you these rights
or to ask you to surrender the rights. These restrictions translate to certain responsibilities for
you if you distribute copies of the software, or if you modify it.
For example, if you distribute copies of such a program, whether
gratis or for a fee, you must give the recipients all the rights that
you have. You must make sure that they, too, receive or can get the
source code. And you must show them these terms so they know their
rights.
We protect your rights with two steps: (1) copyright the software, and
(2) offer you this license which gives you legal permission to copy, distribute and/or modify
the software.
Also, for each author's protection and ours, we want to make certain that everyone understands
that there is no warranty for this free
software. If the software is modified by someone else and passed on, we want its recipients to
know that what they have is not the original, so that any problems introduced by others will
not reflect on the original authors' reputations.
DMA-1100P User’s Guide
157
Appendix D Open Software Announcements
Finally, any free program is threatened constantly by software patents. We wish to avoid the
danger that redistributors of a free program will individually obtain patent licenses, in effect
making the program proprietary. To prevent this, we have made it clear that any patent must
be licensed for everyone's free use or not licensed at all.
The precise terms and conditions for copying, distribution and modification follow.
GNU GENERAL PUBLIC LICENSE
TERMS AND CONDITIONS FOR COPYING, DISTRIBUTION AND MODIFICATION
0. This License applies to any program or other work which contains a notice placed by the
copyright holder saying it may be distributed under the terms of this General Public License.
The "Program", below, refers to any such program or work, and a "work based on the
Program" means either the Program or any derivative work under copyright law: that is to say,
a work containing the Program or a portion of it, either verbatim or with modifications and/or
translated into another language. (Hereinafter, translation is included without limitation in the
term "modification".) Each licensee is addressed as "you".
Activities other than copying, distribution and modification are not covered by this License;
they are outside its scope. The act of running the Program is not restricted, and the output from
the Program is covered only if its contents constitute a work based on the
Program (independent of having been made by running the Program). Whether that is true
depends on what the Program does.
1. You may copy and distribute verbatim copies of the Program's
source code as you receive it, in any medium, provided that you
conspicuously and appropriately publish on each copy an appropriate
copyright notice and disclaimer of warranty; keep intact all the
notices that refer to this License and to the absence of any warranty; and give any other
recipients of the Program a copy of this License
along with the Program.
You may charge a fee for the physical act of transferring a copy, and you may at your option
offer warranty protection in exchange for a fee.
2. You may modify your copy or copies of the Program or any portion of it, thus forming a
work based on the Program, and copy and distribute such modifications or work under the
terms of Section 1 above, provided that you also meet all of these conditions:
a) You must cause the modified files to carry prominent notices stating that you changed the
files and the date of any change.
b) You must cause any work that you distribute or publish, that in whole or in part contains or
is derived from the Program or any part thereof, to be licensed as a whole at no charge to all
third parties under the terms of this License.
c) If the modified program normally reads commands interactively
when run, you must cause it, when started running for such
interactive use in the most ordinary way, to print or display an
announcement including an appropriate copyright notice and a
notice that there is no warranty (or else, saying that you provide
a warranty) and that users may redistribute the program under
158
DMA-1100P User’s Guide
Appendix D Open Software Announcements
these conditions, and telling the user how to view a copy of this
License. (Exception: if the Program itself is interactive but
does not normally print such an announcement, your work based on
the Program is not required to print an announcement.)
These requirements apply to the modified work as a whole. If
identifiable sections of that work are not derived from the Program, and can be reasonably
considered independent and separate works in themselves, then this License, and its terms, do
not apply to those sections when you distribute them as separate works. But when you
distribute the same sections as part of a whole which is a work based on the Program, the
distribution of the whole must be on the terms of this License, whose permissions for other
licensees extend to the
entire whole, and thus to each and every part regardless of who wrote it.
Thus, it is not the intent of this section to claim rights or contest your rights to work written
entirely by you; rather, the intent is to exercise the right to control the distribution of derivative
or collective works based on the Program.
In addition, mere aggregation of another work not based on the Program with the Program (or
with a work based on the Program) on a volume of a storage or distribution medium does not
bring the other work under the scope of this License.
3. You may copy and distribute the Program (or a work based on it, under Section 2) in object
code or executable form under the terms of Sections 1 and 2 above provided that you also do
one of the following:
a) Accompany it with the complete corresponding machine-readable source code, which must
be distributed under the terms of Sections 1 and 2 above on a medium customarily used for
software interchange; or,
b) Accompany it with a written offer, valid for at least three
years, to give any third party, for a charge no more than your cost of physically performing
source distribution, a complete machine-readable copy of the corresponding source code, to be
distributed under the terms of Sections 1 and 2 above on a medium customarily used for
software interchange; or,
c) Accompany it with the information you received as to the offer to distribute corresponding
source code. (This alternative is allowed only for noncommercial distribution and only if you
received the program in object code or executable form with such an offer, in accord with
Subsection b above.)
The source code for a work means the preferred form of the work for
making modifications to it. For an executable work, complete source code means all the
source code for all modules it contains, plus any associated interface definition files, plus the
scripts used to
control compilation and installation of the executable. However, as a special exception, the
source code distributed need not include
anything that is normally distributed (in either source or binary
form) with the major components (compiler, kernel, and so on) of the operating system on
which the executable runs, unless that component itself accompanies the executable.
If distribution of executable or object code is made by offering access to copy from a
designated place, then offering equivalent access to copy the source code from the same place
counts as distribution of the source code, even though third parties are not compelled to copy
the source along with the object code.
DMA-1100P User’s Guide
159
Appendix D Open Software Announcements
4. You may not copy, modify, sublicense, or distribute the Program except as expressly
provided under this License. Any attempt
otherwise to copy, modify, sublicense or distribute the Program is
void, and will automatically terminate your rights under this License. However, parties who
have received copies, or rights, from you under this License will not have their licenses
terminated so long as such parties remain in full compliance.
5. You are not required to accept this License, since you have not signed it. However, nothing
else grants you permission to modify or distribute the Program or its derivative works. These
actions are prohibited by law if you do not accept this License. Therefore, by modifying or
distributing the Program (or any work based on the
Program), you indicate your acceptance of this License to do so, and all its terms and
conditions for copying, distributing or modifying the Program or works based on it.
6. Each time you redistribute the Program (or any work based on the
Program), the recipient automatically receives a license from the
original licensor to copy, distribute or modify the Program subject to
these terms and conditions. You may not impose any further
restrictions on the recipients' exercise of the rights granted herein.
You are not responsible for enforcing compliance by third parties to
this License.
7. If, as a consequence of a court judgment or allegation of patent infringement or for any
other reason (not limited to patent issues), conditions are imposed on you (whether by court
order, agreement or otherwise) that contradict the conditions of this License, they do not
excuse you from the conditions of this License. If you cannot
distribute so as to satisfy simultaneously your obligations under this License and any other
pertinent obligations, then as a consequence you may not distribute the Program at all. For
example, if a patent
license would not permit royalty-free redistribution of the Program by all those who receive
copies directly or indirectly through you, then the only way you could satisfy both it and this
License would be to refrain entirely from distribution of the Program.
If any portion of this section is held invalid or unenforceable under any particular
circumstance, the balance of the section is intended to apply and the section as a whole is
intended to apply in other
circumstances.
It is not the purpose of this section to induce you to infringe any
patents or other property right claims or to contest validity of any
such claims; this section has the sole purpose of protecting the
integrity of the free software distribution system, which is
implemented by public license practices. Many people have made
generous contributions to the wide range of software distributed
through that system in reliance on consistent application of that
system; it is up to the author/donor to decide if he or she is willing
to distribute software through any other system and a licensee cannot
impose that choice.
This section is intended to make thoroughly clear what is believed to be a consequence of the
rest of this License.
160
DMA-1100P User’s Guide
Appendix D Open Software Announcements
8. If the distribution and/or use of the Program is restricted in certain countries either by
patents or by copyrighted interfaces, the original copyright holder who places the Program
under this License may add an explicit geographical distribution limitation excluding those
countries, so that distribution is permitted only in or among countries not thus excluded. In
such case, this License incorporates the limitation as if written in the body of this License.
9. The Free Software Foundation may publish revised and/or new versions of the General
Public License from time to time. Such new versions will be similar in spirit to the present
version, but may differ in detail to address new problems or concerns.
Each version is given a distinguishing version number. If the Program
specifies a version number of this License which applies to it and "any
later version", you have the option of following the terms and conditions
either of that version or of any later version published by the Free
Software Foundation. If the Program does not specify a version number of
this License, you may choose any version ever published by the Free Software
Foundation.
10. If you wish to incorporate parts of the Program into other free programs whose distribution
conditions are different, write to the author to ask for permission. For software which is
copyrighted by the Free Software Foundation, write to the Free Software Foundation; we
sometimes make exceptions for this. Our decision will be guided by the two goals of
preserving the free status of all derivatives of our free software and of promoting the sharing
and reuse of software generally.
NO WARRANTY
11. BECAUSE THE PROGRAM IS LICENSED FREE OF CHARGE, THERE IS NO
WARRANTY FOR THE PROGRAM, TO THE EXTENT PERMITTED BY APPLICABLE
LAW. EXCEPT WHEN
OTHERWISE STATED IN WRITING THE COPYRIGHT HOLDERS AND/OR OTHER
PARTIES
PROVIDE THE PROGRAM "AS IS" WITHOUT WARRANTY OF ANY KIND, EITHER
EXPRESSED OR IMPLIED, INCLUDING, BUT NOT LIMITED TO, THE IMPLIED
WARRANTIES OF
MERCHANTABILITY AND FITNESS FOR A PARTICULAR PURPOSE. THE ENTIRE
RISK AS TO THE QUALITY AND PERFORMANCE OF THE PROGRAM IS WITH YOU.
SHOULD THE
PROGRAM PROVE DEFECTIVE, YOU ASSUME THE COST OF ALL NECESSARY
SERVICING,
REPAIR OR CORRECTION.
12. IN NO EVENT UNLESS REQUIRED BY APPLICABLE LAW OR AGREED TO IN
WRITING WILL ANY COPYRIGHT HOLDER, OR ANY OTHER PARTY WHO MAY
MODIFY AND/OR
REDISTRIBUTE THE PROGRAM AS PERMITTED ABOVE, BE LIABLE TO YOU FOR
DAMAGES, INCLUDING ANY GENERAL, SPECIAL, INCIDENTAL OR
CONSEQUENTIAL DAMAGES ARISING OUT OF THE USE OR INABILITY TO USE
THE PROGRAM (INCLUDING BUT NOT LIMITED TO LOSS OF DATA OR DATA
BEING RENDERED INACCURATE OR LOSSES SUSTAINED BY
DMA-1100P User’s Guide
161
Appendix D Open Software Announcements
YOU OR THIRD PARTIES OR A FAILURE OF THE PROGRAM TO OPERATE WITH
ANY OTHER PROGRAMS), EVEN IF SUCH HOLDER OR OTHER PARTY HAS BEEN
ADVISED OF THE
POSSIBILITY OF SUCH DAMAGES.
END OF TERMS AND CONDITIONS
How to Apply These Terms to Your New Programs
If you develop a new program, and you want it to be of the greatest possible use to the public,
the best way to achieve this is to make it free software which everyone can redistribute and
change under these terms.
To do so, attach the following notices to the program. It is safest to attach them to the start of
each source file to most effectively convey the exclusion of warranty; and each file should
have at least the "copyright" line and a pointer to where the full notice is found.
<one line to give the program's name and a brief idea of what it does.> Copyright (C) <year>
<name of author>
This program is free software; you can redistribute it and/or modify it under the terms of the
GNU General Public License as published by the Free Software Foundation; either version 2
of the License, or (at your option) any later version.
This program is distributed in the hope that it will be useful, but WITHOUT ANY
WARRANTY; without even the implied warranty of MERCHANTABILITY or FITNESS
FOR A PARTICULAR PURPOSE. See the GNU General Public License for more details.
You should have received a copy of the GNU General Public License
along with this program; if not, write to the Free Software
Foundation, Inc., 59 Temple Place, Suite 330, Boston, MA 02111-1307 USA
Also add information on how to contact you by electronic and paper mail. If the program is
interactive, make it output a short notice like this when it starts in an interactive mode:
Gnomovision version 69, Copyright (C) year name of author
Gnomovision comes with ABSOLUTELY NO WARRANTY; for details type `show w'. This
is free software, and you are welcome to redistribute it
under certain conditions; type `show c' for details.
The hypothetical commands `show w' and `show c' should show the appropriate parts of the
General Public License. Of course, the commands you use may be called something other than
`show w' and `show c'; they could even be mouse-clicks or menu items--whatever suits your
program.
You should also get your employer (if you work as a programmer) or your school, if any, to
sign a "copyright disclaimer" for the program, if necessary. Here is a sample; alter the names:
Yoyodyne, Inc., hereby disclaims all copyright interest in the program `Gnomovision' (which
makes passes at compilers) written by James Hacker.
<signature of Ty Coon>, 1 April 1989
Ty Coon, President of Vice
This General Public License does not permit incorporating your program into proprietary
programs. If your program is a subroutine library, you may consider it more useful to permit
linking proprietary applications with the library. If this is what you want to do, use the GNU
Library General Public License instead of this License.
162
DMA-1100P User’s Guide
Appendix D Open Software Announcements
GNU LESSER GENERAL PUBLIC LICENSE
Version 2.1, February 1999
Copyright (C) 1991, 1999 Free Software Foundation, Inc.
59 Temple Place, Suite 330, Boston, MA 02111-1307 USA
Everyone is permitted to copy and distribute verbatim copies of this license document, but
changing it is not allowed.
[This is the first released version of the Lesser GPL. It also counts as the successor of the GNU
Library Public License, version 2, hence the version number 2.1.]
Preamble
The licenses for most software are designed to take away your freedom to share and change it.
By contrast, the GNU General Public Licenses are intended to guarantee your freedom to
share and change free software--to make sure the software is free for all its users.
This license, the Lesser General Public License, applies to some specially designated software
packages--typically libraries--of the Free Software Foundation and other authors who decide
to use it. You can use it too, but we suggest you first think carefully about whether this license
or the ordinary General Public License is the better strategy to use in any particular case, based
on the explanations below.
When we speak of free software, we are referring to freedom of use,
not price. Our General Public Licenses are designed to make sure that
you have the freedom to distribute copies of free software (and charge
for this service if you wish); that you receive source code or can get
it if you want it; that you can change the software and use pieces of
it in new free programs; and that you are informed that you can do
these things.
To protect your rights, we need to make restrictions that forbid distributors to deny you these
rights or to ask you to surrender these rights. These restrictions translate to certain
responsibilities for you if you distribute copies of the library or if you modify it.
For example, if you distribute copies of the library, whether gratis or for a fee, you must give
the recipients all the rights that we gave you. You must make sure that they, too, receive or can
get the source code. If you link other code with the library, you must provide complete object
files to the recipients, so that they can relink them with the library after making changes to the
library and recompiling it. And you must show them these terms so they know their rights.
We protect your rights with a two-step method: (1) we copyright the library, and (2) we offer
you this license, which gives you legal permission to copy, distribute and/or modify the
library.
To protect each distributor, we want to make it very clear that
there is no warranty for the free library. Also, if the library is modified by someone else and
passed on, the recipients should know
that what they have is not the original version, so that the original author's reputation will not
be affected by problems that might be
introduced by others.
DMA-1100P User’s Guide
163
Appendix D Open Software Announcements
Finally, software patents pose a constant threat to the existence of any free program. We wish
to make sure that a company cannot effectively restrict the users of a free program by
obtaining a restrictive license from a patent holder. Therefore, we insist that any patent license
obtained for a version of the library must be consistent with the full freedom of use specified
in this license.
Most GNU software, including some libraries, is covered by the ordinary GNU General Public
License. This license, the GNU Lesser General Public License, applies to certain designated
libraries, and is quite different from the ordinary General Public License. We use this license
for certain libraries in order to permit linking those
libraries into non-free programs.
When a program is linked with a library, whether statically or using
a shared library, the combination of the two is legally speaking a
combined work, a derivative of the original library. The ordinary
General Public License therefore permits such linking only if the
entire combination fits its criteria of freedom. The Lesser General
Public License permits more lax criteria for linking other code with
the library.
We call this license the "Lesser" General Public License because it does Less to protect the
user's freedom than the ordinary General
Public License. It also provides other free software developers Less of an advantage over
competing non-free programs. These disadvantages are the reason we use the ordinary General
Public License for many
libraries. However, the Lesser license provides advantages in certain special circumstances.
For example, on rare occasions, there may be a special need to
encourage the widest possible use of a certain library, so that it becomes a de-facto standard.
To achieve this, non-free programs must be
allowed to use the library. A more frequent case is that a free
library does the same job as widely used non-free libraries. In this case, there is little to gain by
limiting the free library to free
software only, so we use the Lesser General Public License.
In other cases, permission to use a particular library in non-free
programs enables a greater number of people to use a large body of
free software. For example, permission to use the GNU C Library in
non-free programs enables many more people to use the whole GNU
operating system, as well as its variant, the GNU/Linux operating
system.
Although the Lesser General Public License is Less protective of the users' freedom, it does
ensure that the user of a program that is linked with the Library has the freedom and the
wherewithal to run that program using a modified version of the Library.
The precise terms and conditions for copying, distribution and modification follow. Pay close
attention to the difference between a "work based on the library" and a "work that uses the
library". The former contains code derived from the library, whereas the latter must be
combined with the library in order to run.
GNU LESSER GENERAL PUBLIC LICENSE
TERMS AND CONDITIONS FOR COPYING, DISTRIBUTION AND MODIFICATION
164
DMA-1100P User’s Guide
Appendix D Open Software Announcements
0. This License Agreement applies to any software library or other program which contains a
notice placed by the copyright holder or other authorized party saying it may be distributed
under the terms of this Lesser General Public License (also called "this License"). Each
licensee is addressed as "you".
A "library" means a collection of software functions and/or data prepared so as to be
conveniently linked with application programs (which use some of those functions and data)
to form executables.
The "Library", below, refers to any such software library or work which has been distributed
under these terms. A "work based on the Library" means either the Library or any derivative
work under
copyright law: that is to say, a work containing the Library or a
portion of it, either verbatim or with modifications and/or translated straightforwardly into
another language. (Hereinafter, translation is included without limitation in the term
"modification".)
"Source code" for a work means the preferred form of the work for making modifications to it.
For a library, complete source code means all the source code for all modules it contains, plus
any associated interface definition files, plus the scripts used to control compilation and
installation of the library.
Activities other than copying, distribution and modification are not covered by this License;
they are outside its scope. The act of running a program using the Library is not restricted, and
output from such a program is covered only if its contents constitute a work based on the
Library (independent of the use of the Library in a tool for writing it). Whether that is true
depends on what the Library does and what the program that uses the Library does.
1. You may copy and distribute verbatim copies of the Library's
complete source code as you receive it, in any medium, provided that
you conspicuously and appropriately publish on each copy an
appropriate copyright notice and disclaimer of warranty; keep intact
all the notices that refer to this License and to the absence of any
warranty; and distribute a copy of this License along with the
Library.
You may charge a fee for the physical act of transferring a copy,
and you may at your option offer warranty protection in exchange for a
fee.
2. You may modify your copy or copies of the Library or any portion of it, thus forming a
work based on the Library, and copy and distribute such modifications or work under the
terms of Section 1 above, provided that you also meet all of these conditions:
a) The modified work must itself be a software library. b) You must cause the files modified to
carry prominent notices stating that you changed the files and the date of any change.
c) You must cause the whole of the work to be licensed at no charge to all third parties under
the terms of this License.
d) If a facility in the modified Library refers to a function or a table of data to be supplied by
an application program that uses the facility, other than as an argument passed when the
facility is invoked, then you must make a good faith effort to ensure that, in the event an
application does not supply such function or
table, the facility still operates, and performs whatever part of its purpose remains meaningful.
DMA-1100P User’s Guide
165
Appendix D Open Software Announcements
(For example, a function in a library to compute square roots has
a purpose that is entirely well-defined independent of the
application. Therefore, Subsection 2d requires that any
application-supplied function or table used by this function must
be optional: if the application does not supply it, the square
root function must still compute square roots.)
These requirements apply to the modified work as a whole. If
identifiable sections of that work are not derived from the Library,
and can be reasonably considered independent and separate works in
themselves, then this License, and its terms, do not apply to those
sections when you distribute them as separate works. But when you
distribute the same sections as part of a whole which is a work based
on the Library, the distribution of the whole must be on the terms of
this License, whose permissions for other licensees extend to the
entire whole, and thus to each and every part regardless of who wrote
it.
Thus, it is not the intent of this section to claim rights or contest your rights to work written
entirely by you; rather, the intent is to exercise the right to control the distribution of derivative
or collective works based on the Library.
In addition, mere aggregation of another work not based on the Library with the Library (or
with a work based on the Library) on a volume of a storage or distribution medium does not
bring the other work under the scope of this License.
3. You may opt to apply the terms of the ordinary GNU General Public License instead of this
License to a given copy of the Library. To do this, you must alter all the notices that refer to
this License, so that they refer to the ordinary GNU General Public License, version 2,
instead of to this License. (If a newer version than version 2 of the
ordinary GNU General Public License has appeared, then you can specify that version instead
if you wish.) Do not make any other change in these notices.
Once this change is made in a given copy, it is irreversible for that copy, so the ordinary GNU
General Public License applies to all subsequent copies and derivative works made from that
copy.
This option is useful when you wish to copy part of the code of the Library into a program that
is not a library.
4. You may copy and distribute the Library (or a portion or
derivative of it, under Section 2) in object code or executable form under the terms of Sections
1 and 2 above provided that you accompany it with the complete corresponding machinereadable source code, which must be distributed under the terms of Sections 1 and 2 above on
a medium customarily used for software interchange.
If distribution of object code is made by offering access to copy from a designated place, then
offering equivalent access to copy the source code from the same place satisfies the
requirement to distribute the source code, even though third parties are not compelled to copy
the source along with the object code.
166
DMA-1100P User’s Guide
Appendix D Open Software Announcements
5. A program that contains no derivative of any portion of the Library, but is designed to work
with the Library by being compiled or linked with it, is called a "work that uses the Library".
Such a work, in isolation, is not a derivative work of the Library, and therefore falls outside the
scope of this License.
However, linking a "work that uses the Library" with the Library creates an executable that is
a derivative of the Library (because it contains portions of the Library), rather than a "work
that uses the library". The executable is therefore covered by this License. Section 6 states
terms for distribution of such executables.
When a "work that uses the Library" uses material from a header file that is part of the Library,
the object code for the work may be a derivative work of the Library even though the source
code is not. Whether this is true is especially significant if the work can be linked without the
Library, or if the work is itself a library. The threshold for this to be true is not precisely
defined by law.
If such an object file uses only numerical parameters, data
structure layouts and accessors, and small macros and small inline functions (ten lines or less
in length), then the use of the object file is unrestricted, regardless of whether it is legally a
derivative work. (Executables containing this object code plus portions of the Library will still
fall under Section 6.)
Otherwise, if the work is a derivative of the Library, you may distribute the object code for the
work under the terms of Section 6. Any executables containing that work also fall under
Section 6, whether or not they are linked directly with the Library itself.
6. As an exception to the Sections above, you may also combine or link a "work that uses the
Library" with the Library to produce a work containing portions of the Library, and distribute
that work under terms of your choice, provided that the terms permit
modification of the work for the customer's own use and reverse engineering for debugging
such modifications.
You must give prominent notice with each copy of the work that the
Library is used in it and that the Library and its use are covered by
this License. You must supply a copy of this License. If the work
during execution displays copyright notices, you must include the
copyright notice for the Library among them, as well as a reference
directing the user to the copy of this License. Also, you must do one
of these things:
a) Accompany the work with the complete corresponding
machine-readable source code for the Library including whatever
changes were used in the work (which must be distributed under
Sections 1 and 2 above); and, if the work is an executable linked with the Library, with the
complete machine-readable "work that
uses the Library", as object code and/or source code, so that the user can modify the Library
and then relink to produce a modified executable containing the modified Library. (It is
understood
that the user who changes the contents of definitions files in the Library will not necessarily be
able to recompile the application to use the modified definitions.)
DMA-1100P User’s Guide
167
Appendix D Open Software Announcements
b) Use a suitable shared library mechanism for linking with the Library. A suitable mechanism
is one that (1) uses at run time a copy of the library already present on the user's computer
system, rather than copying library functions into the executable, and (2) will operate properly
with a modified version of the library, if the user installs one, as long as the modified version
is
interface-compatible with the version that the work was made with.
c) Accompany the work with a written offer, valid for at least three years, to give the same
user the materials specified in Subsection 6a, above, for a charge no more than the cost of
performing this distribution.
d) If distribution of the work is made by offering access to copy from a designated place, offer
equivalent access to copy the above specified materials from the same place.
e) Verify that the user has already received a copy of these
materials or that you have already sent this user a copy.
For an executable, the required form of the "work that uses the
Library" must include any data and utility programs needed for
reproducing the executable from it. However, as a special exception,
the materials to be distributed need not include anything that is
normally distributed (in either source or binary form) with the major
components (compiler, kernel, and so on) of the operating system on
which the executable runs, unless that component itself accompanies
the executable.
It may happen that this requirement contradicts the license
restrictions of other proprietary libraries that do not normally
accompany the operating system. Such a contradiction means you cannot
use both them and the Library together in an executable that you
distribute.
7. You may place library facilities that are a work based on the Library side-by-side in a single
library together with other library facilities not covered by this License, and distribute such a
combined library, provided that the separate distribution of the work based on the Library and
of the other library facilities is otherwise
permitted, and provided that you do these two things:
a) Accompany the combined library with a copy of the same work based on the Library,
uncombined with any other library
facilities. This must be distributed under the terms of the Sections above.
b) Give prominent notice with the combined library of the fact
that part of it is a work based on the Library, and explaining
where to find the accompanying uncombined form of the same work.
8. You may not copy, modify, sublicense, link with, or distribute the Library except as
expressly provided under this License. Any attempt otherwise to copy, modify, sublicense,
link with, or
distribute the Library is void, and will automatically terminate your rights under this License.
However, parties who have received copies, or rights, from you under this License will not
have their licenses terminated so long as such parties remain in full compliance.
9. You are not required to accept this License, since you have not signed it. However, nothing
else grants you permission to modify or
168
DMA-1100P User’s Guide
Appendix D Open Software Announcements
distribute the Library or its derivative works. These actions are prohibited by law if you do not
accept this License. Therefore, by modifying or distributing the Library (or any work based on
the Library), you indicate your acceptance of this License to do so, and all its terms and
conditions for copying, distributing or modifying the Library or works based on it.
10. Each time you redistribute the Library (or any work based on the
Library), the recipient automatically receives a license from the
original licensor to copy, distribute, link with or modify the Library
subject to these terms and conditions. You may not impose any further
restrictions on the recipients' exercise of the rights granted herein.
You are not responsible for enforcing compliance by third parties with
this License.
11. If, as a consequence of a court judgment or allegation of patent infringement or for any
other reason (not limited to patent issues), conditions are imposed on you (whether by court
order, agreement or otherwise) that contradict the conditions of this License, they do not
excuse you from the conditions of this License. If you cannot
distribute so as to satisfy simultaneously your obligations under this License and any other
pertinent obligations, then as a consequence you may not distribute the Library at all. For
example, if a patent
license would not permit royalty-free redistribution of the Library by all those who receive
copies directly or indirectly through you, then the only way you could satisfy both it and this
License would be to refrain entirely from distribution of the Library.
If any portion of this section is held invalid or unenforceable under any particular
circumstance, the balance of the section is intended to apply, and the section as a whole is
intended to apply in other circumstances.
It is not the purpose of this section to induce you to infringe any
patents or other property right claims or to contest validity of any
such claims; this section has the sole purpose of protecting the
integrity of the free software distribution system which is
implemented by public license practices. Many people have made
generous contributions to the wide range of software distributed
through that system in reliance on consistent application of that
system; it is up to the author/donor to decide if he or she is willing
to distribute software through any other system and a licensee cannot
impose that choice.
This section is intended to make thoroughly clear what is believed to be a consequence of the
rest of this License.
12. If the distribution and/or use of the Library is restricted in
certain countries either by patents or by copyrighted interfaces, the
original copyright holder who places the Library under this License may add an explicit
geographical distribution limitation excluding those countries, so that distribution is permitted
only in or among countries not thus
excluded. In such case, this License incorporates the limitation as if written in the body of this
License.
13. The Free Software Foundation may publish revised and/or new versions of the Lesser
General Public License from time to time. Such new versions will be similar in spirit to the
present version, but may differ in detail to address new problems or concerns.
DMA-1100P User’s Guide
169
Appendix D Open Software Announcements
Each version is given a distinguishing version number. If the Library specifies a version
number of this License which applies to it and
"any later version", you have the option of following the terms and conditions either of that
version or of any later version published by the Free Software Foundation. If the Library does
not specify a
license version number, you may choose any version ever published by the Free Software
Foundation.
14. If you wish to incorporate parts of the Library into other free programs whose distribution
conditions are incompatible with these, write to the author to ask for permission. For software
which is copyrighted by the Free Software Foundation, write to the Free Software Foundation;
we sometimes make exceptions for this. Our decision will be guided by the two goals of
preserving the free status of all derivatives of our free software and of promoting the sharing
and reuse of software generally.
NO WARRANTY
15. BECAUSE THE LIBRARY IS LICENSED FREE OF CHARGE, THERE IS NO
WARRANTY FOR THE LIBRARY, TO THE EXTENT PERMITTED BY APPLICABLE
LAW. EXCEPT WHEN OTHERWISE STATED IN WRITING THE COPYRIGHT
HOLDERS AND/OR OTHER PARTIES PROVIDE THE LIBRARY "AS IS" WITHOUT
WARRANTY OF ANY KIND, EITHER EXPRESSED OR IMPLIED, INCLUDING, BUT
NOT LIMITED TO, THE IMPLIED WARRANTIES OF MERCHANTABILITY AND
FITNESS FOR A PARTICULAR PURPOSE. THE ENTIRE RISK AS TO THE QUALITY
AND PERFORMANCE OF THE LIBRARY IS WITH YOU. SHOULD THE LIBRARY
PROVE DEFECTIVE, YOU ASSUME THE COST OF ALL NECESSARY SERVICING,
REPAIR OR CORRECTION.
16. IN NO EVENT UNLESS REQUIRED BY APPLICABLE LAW OR AGREED TO IN
WRITING WILL ANY COPYRIGHT HOLDER, OR ANY OTHER PARTY WHO MAY
MODIFY
AND/OR REDISTRIBUTE THE LIBRARY AS PERMITTED ABOVE, BE LIABLE TO
YOU
FOR DAMAGES, INCLUDING ANY GENERAL, SPECIAL, INCIDENTAL OR
CONSEQUENTIAL DAMAGES ARISING OUT OF THE USE OR INABILITY TO USE
THE
LIBRARY (INCLUDING BUT NOT LIMITED TO LOSS OF DATA OR DATA BEING
RENDERED INACCURATE OR LOSSES SUSTAINED BY YOU OR THIRD PARTIES
OR A
FAILURE OF THE LIBRARY TO OPERATE WITH ANY OTHER SOFTWARE), EVEN
IF
SUCH HOLDER OR OTHER PARTY HAS BEEN ADVISED OF THE POSSIBILITY OF
SUCH
DAMAGES.
END OF TERMS AND CONDITIONS
How to Apply These Terms to Your New Libraries
If you develop a new library, and you want it to be of the greatest
possible use to the public, we recommend making it free software that
everyone can redistribute and change. You can do so by permitting
redistribution under these terms (or, alternatively, under the terms of the ordinary General
Public License).
170
DMA-1100P User’s Guide
Appendix D Open Software Announcements
To apply these terms, attach the following notices to the library. It is safest to attach them to
the start of each source file to most effectively convey the exclusion of warranty; and each file
should have at least the "copyright" line and a pointer to where the full notice is found.
<one line to give the library's name and a brief idea of what it does.> Copyright (C) <year>
<name of author>
This library is free software; you can redistribute it and/or modify it under the terms of the
GNU Lesser General Public License as published by the Free Software Foundation; either
version 2.1 of the License, or (at your option) any later version.
This library is distributed in the hope that it will be useful, but WITHOUT ANY
WARRANTY; without even the implied warranty of MERCHANTABILITY or FITNESS
FOR A PARTICULAR PURPOSE. See the GNU Lesser General Public License for more
details.
You should have received a copy of the GNU Lesser General Public
License along with this library; if not, write to the Free Software
Foundation, Inc., 59 Temple Place, Suite 330, Boston, MA 02111-1307 USA
Also add information on how to contact you by electronic and paper mail. You should also get
your employer (if you work as a programmer) or your school, if any, to sign a "copyright
disclaimer" for the library, if necessary. Here is a sample; alter the names:
Yoyodyne, Inc., hereby disclaims all copyright interest in the
library `Frob' (a library for tweaking knobs) written by James Random Hacker.
<signature of Ty Coon>, 1 April 1990
Ty Coon, President of Vice
That's all there is to it!
STLPort License
* README file for STLport 4.5 *
**
*
This directory contains STLport-4.5 release. What's inside :
README - this file
INSTALL - installation instructions
stlport - main STLport include directory
src - source and makefiles for iostreams implementation
lib - installation directory for STLport library (if you use STLport
iostreams only)
test/regression - regression test, using wrapper iostreams
test/eh - exception handling test using STLport iostreams
DMA-1100P User’s Guide
171
Appendix D Open Software Announcements
etc - miscellanous files (ChangeLog, TODO, scripts, etc.)
GETTING STLPORT
To download the latest version of STLport, please be sure to visit http://www.stlport.com/
download.html
LEGALESE
This software is being distributed under the following terms :
*
*
* Copyright (c) 1994
* Hewlett-Packard Company
*
* Copyright (c) 1996-1999
* Silicon Graphics Computer Systems, Inc.
*
* Copyright (c) 1997
* Moscow Center for SPARC Technology
*
* Copyright (c) 1999, 2000, 2001
* Boris Fomitchev
*
* This material is provided "as is", with absolutely no warranty expressed * or implied. Any
use is at your own risk.
*
* Permission to use or copy this software for any purpose is hereby granted
* without fee, provided the above notices are retained on all copies.
* Permission to modify the code and to distribute modified code is granted,
* provided the above notices are retained, and a notice that the code was
* modified is included with the above copyright notice.
*
Madwifi License
All files contained in this distribution are covered by the following copyright unless explicitly
identified otherwise.
/** Copyright (c) 2002-2004 Sam Leffler, Errno Consulting * All rights reserved.
*
* Redistribution and use in source and binary forms, with or without * modification, are
permitted provided that the following conditions * are met:
* 1. Redistributions of source code must retain the above copyright
172
DMA-1100P User’s Guide
Appendix D Open Software Announcements
* notice, this list of conditions and the following disclaimer,
* without modification.
* 2. Redistributions in binary form must reproduce at minimum a disclaimer
* similar to the "NO WARRANTY" disclaimer below ("Disclaimer") and any
* redistribution must be conditioned upon including a substantially
* similar Disclaimer requirement for further binary redistribution.
* 3. Neither the names of the above-listed copyright holders nor the names
* of any contributors may be used to endorse or promote products derived
* from this software without specific prior written permission.
*
* Alternatively, this software may be distributed under the terms of the * GNU General Public
License ("GPL") version 2 as published by the Free * Software Foundation.
*
* NO WARRANTY
* THIS SOFTWARE IS PROVIDED BY THE COPYRIGHT HOLDERS AND
CONTRIBUTORS
* ``AS IS'' AND ANY EXPRESS OR IMPLIED WARRANTIES, INCLUDING, BUT NOT
* LIMITED TO, THE IMPLIED WARRANTIES OF NONINFRINGEMENT,
MERCHANTIBILITY
* AND FITNESS FOR A PARTICULAR PURPOSE ARE DISCLAIMED. IN NO EVENT
SHALL
* THE COPYRIGHT HOLDERS OR CONTRIBUTORS BE LIABLE FOR SPECIAL,
EXEMPLARY,
* OR CONSEQUENTIAL DAMAGES (INCLUDING, BUT NOT LIMITED TO,
PROCUREMENT OF
* SUBSTITUTE GOODS OR SERVICES; LOSS OF USE, DATA, OR PROFITS; OR
BUSINESS * INTERRUPTION) HOWEVER CAUSED AND ON ANY THEORY OF
LIABILITY, WHETHER
* IN CONTRACT, STRICT LIABILITY, OR TORT (INCLUDING NEGLIGENCE OR
OTHERWISE) * ARISING IN ANY WAY OUT OF THE USE OF THIS SOFTWARE,
EVEN IF ADVISED OF
* THE POSSIBILITY OF SUCH DAMAGES.
*
* $Id: COPYRIGHT,v 1.4 2004/01/13 18:05:41 samleffler Exp $
*/
Microwindows License
The Microwindows, Nano-X, and BOGL software are licensed under the MPL, as specified
below. Alternatively, the software can be converted to the GNU General Public License,
Version 2.
/*
DMA-1100P User’s Guide
173
Appendix D Open Software Announcements
* The contents of this file are subject to the Mozilla Public License * Version 1.1 (the
"License"); you may not use this file except in * compliance with the License. You may obtain
a copy of the License at * http://www.mozilla.org/MPL/
*
* Software distributed under the License is distributed on an "AS IS" * basis, WITHOUT
WARRANTY OF ANY KIND, either express or implied. See the * License for the specific
language governing rights and limitations
* under the License.
*
* The Original Code is Microwindows.
*
* The Initial Developer of the Original Code is Greg Haerr.
* Portions created by Greg Haerr are Copyright (C) 1999, 2000, 2001, 2002, 2003 * Greg
Haerr <[email protected]>. All Rights Reserved.
*
* Contributor(s):
*
* Alternatively, the contents of this file may be used under the terms
* of the GNU General Public license (the "[GNU] License"), in which case the * provisions of
[GNU] License are applicable instead of those
* above. If you wish to allow use of your version of this file only
* under the terms of the [GNU] License and not to allow others to use
* your version of this file under the MPL, indicate your decision by
* deleting the provisions above and replace them with the notice and
* other provisions required by the [GNU] License. If you do not delete
* the provisions above, a recipient may use your version of this file
* under either the MPL or the [GNU] License.
*/
/*
* Portions contributed by Koninklijke Philips Electronics N.V.
* These portions are Copyright 2002 Koninklijke Philips Electronics
* N.V. All Rights Reserved. These portions are licensed under the
* terms of the Mozilla Public License, version 1.1, or, at your
* option, the GNU General Public License version 2.0. Please see
* the file "ChangeLog" for documentation regarding these
* contributions.
*/
OpenSSL License
174
DMA-1100P User’s Guide
Appendix D Open Software Announcements
Copyright (c) 1998-2000 The OpenSSL Project. All rights reserved. Redistribution and use in
source and binary forms, with or without modification, are permitted provided that the
following conditions are met:
1. Redistributions of source code must retain the above
copyright notice, this list of conditions and the following
disclaimer.
2. Redistributions in binary form must reproduce the above
copyright notice, this list of conditions and the following
disclaimer in the documentation and/or other materials provided
with the distribution.
3. All advertising materials mentioning features or use of this software must
display the following acknowledgment: This product includes software
developed by the OpenSSL Project for use in the OpenSSL Toolkit.
(http://www.openssl.org)
4. The names "OpenSSL Toolkit" and "OpenSSL Project" must not be used to
endorse or promote products derived from this software without prior written
permission. For written permission, please contact openssl
[email protected]
5. Products derived from this software may not be called
"OpenSSL" nor may "OpenSSL" appear in their names without prior
written permission of the OpenSSL Project.
6. Redistributions of any form whatsoever must retain the following
acknowledgment: "This product includes software developed by the OpenSSL
Project for use in the OpenSSL Toolkit (http://www.openssl.org)"
THIS SOFTWARE IS PROVIDED BY THE OpenSSL PROJECT ``AS IS'' AND ANY EXPRESSED OR
IMPLIED WARRANTIES, INCLUDING, BUT NOT LIMITED TO, THE IMPLIED WARRANTIES OF
MERCHANTABILITY AND FITNESS FOR A PARTICULAR PURPOSE ARE DISCLAIMED. IN NO EVENT
SHALL THE OpenSSL PROJECT OR ITS CONTRIBUTORS BE LIABLE FOR ANY DIRECT,
INDIRECT, INCIDENTAL, SPECIAL, EXEMPLARY, OR CONSEQUENTIAL DAMAGES (INCLUDING,
BUT NOT LIMITED TO, PROCUREMENT OF SUBSTITUTE GOODS OR SERVICES; LOSS OF USE,
DATA, OR PROFITS; OR BUSINESS INTERRUPTION) HOWEVER CAUSED AND ON ANY THEORY OF
LIABILITY, WHETHER IN CONTRACT, STRICT LIABILITY, OR TORT (INCLUDING NEGLIGENCE OR
OTHERWISE) ARISING IN ANY WAY OUT OF THE USE OF THIS SOFTWARE, EVEN IF
ADVISED OF THE POSSIBILITY OF SUCH DAMAGE. This product includes cryptographic software written
by Eric Young ([email protected]). This product includes software written by Tim Hudson
([email protected]).
SSLeay license
DMA-1100P User’s Guide
175
Appendix D Open Software Announcements
Copyright (C) 1995-1998 Eric Young ([email protected]) All rights
reserved.This package is an SSL implementation written by Eric Young
([email protected]). The implementation was written so as to conform with Netscapes SSL. This library is
free for commercial and non-commercial use as long as the following conditions are aheared to. The following
conditions apply to all code found in this distribution, be it the RC4, RSA, lhash, DES, etc., code; not just the SSL
code. The SSL documentation included with this
distribution is covered by the same copyright terms except that the holder is Tim Hudson ([email protected]).
Copyright remains Eric Young's, and as such any Copyright notices in the code are not to be
removed. If this package is used in a product, Eric Young should be given attribution as the
author of the parts of the library used. This can be in the form of a textual message at program
startup or in documentation (online or textual) provided with the package. Redistribution and
use in source and
binary forms, with or without modification, are permitted provided that the
following conditions are met:
1. Redistributions of source code must retain the copyright
notice, this list of conditions and the following disclaimer.
2. Redistributions in binary form must reproduce the above
copyright notice, this list of conditions and the following
disclaimer in the documentation and/or other materials provided
with the distribution.
3. All advertising materials mentioning features or use of this software must
display the following acknowledgement: "This product includes
cryptographic software written by Eric Young ([email protected])". The
word 'cryptographic' can be left out if the rouines from the library being
used are not cryptographic related :-).
4. If you include any Windows specific code (or a derivative
thereof) from the apps directory (application code) you must
include an acknowledgement: "This product includes software
written by Tim Hudson
([email protected])"
THIS SOFTWARE IS PROVIDED BY ERIC YOUNG ``AS IS'' AND ANY EXPRESS OR
IMPLIED
WARRANTIES, INCLUDING, BUT NOT LIMITED TO, THE IMPLIED WARRANTIES
OF
MERCHANTABILITY AND FITNESS FOR A PARTICULAR PURPOSE ARE
DISCLAIMED. IN NO EVENT
SHALL THE AUTHOR OR CONTRIBUTORS BE LIABLE FOR ANY DIRECT,
INDIRECT, INCIDENTAL,
SPECIAL, EXEMPLARY, OR CONSEQUENTIAL DAMAGES (INCLUDING, BUT NOT
LIMITED TO,
PROCUREMENT OF SUBSTITUTE GOODS OR SERVICES; LOSS OF USE, DATA, OR
PROFITS; OR
BUSINESS INTERRUPTION) HOWEVER CAUSED AND ON ANY THEORY OF
LIABILITY, WHETHER IN
CONTRACT, STRICT LIABILITY, OR TORT (INCLUDING NEGLIGENCE OR
OTHERWISE) ARISING
IN ANY WAY OUT OF THE USE OF THIS SOFTWARE, EVEN IF ADVISED OF THE
176
DMA-1100P User’s Guide
Appendix D Open Software Announcements
POSSIBILITY
OF SUCH DAMAGE.The licence and distribution terms for any publically available
version or derivative of this code cannot be changed. i.e. this code cannot
simply be copied and put under another distribution licence [including the GNU
Public Licence.
Sash License
/*
* Copyright (c) 2004 by David I. Bell
* Permission is granted to use, distribute, or modify this source,
* provided that this copyright notice remains intact.
*
*/
The shadow utilities license
This software is copyright 1988 - 1994, Julianne Frances Haugh. All rights reserved.
Redistribution and use in source and binary forms, with or without modification, are permitted
provided that the following conditions are met:
1. Redistributions of source code must retain the above copyright
notice, this list of conditions and the following disclaimer.
2. Redistributions in binary form must reproduce the above copyright
notice, this list of conditions and the following disclaimer in the
documentation and/or other materials provided with the distribution.
3. Neither the name of Julianne F. Haugh nor the names of its contributors
may be used to endorse or promote products derived from this software
without specific prior written permission.
THIS SOFTWARE IS PROVIDED BY JULIE HAUGH AND CONTRIBUTORS ``AS IS''
AND
ANY EXPRESS OR IMPLIED WARRANTIES, INCLUDING, BUT NOT LIMITED TO,
THE
IMPLIED WARRANTIES OF MERCHANTABILITY AND FITNESS FOR A
PARTICULAR PURPOSE
ARE DISCLAIMED. IN NO EVENT SHALL JULIE HAUGH OR CONTRIBUTORS BE
LIABLE
FOR ANY DIRECT, INDIRECT, INCIDENTAL, SPECIAL, EXEMPLARY, OR
CONSEQUENTIAL
DAMAGES (INCLUDING, BUT NOT LIMITED TO, PROCUREMENT OF SUBSTITUTE
GOODS
OR SERVICES; LOSS OF USE, DATA, OR PROFITS; OR BUSINESS INTERRUPTION)
HOWEVER CAUSED AND ON ANY THEORY OF LIABILITY, WHETHER IN
CONTRACT, STRICT
DMA-1100P User’s Guide
177
Appendix D Open Software Announcements
LIABILITY, OR TORT (INCLUDING NEGLIGENCE OR OTHERWISE) ARISING IN
ANY WAY
OUT OF THE USE OF THIS SOFTWARE, EVEN IF ADVISED OF THE POSSIBILITY OF
SUCH DAMAGE.
This source code is currently archived on ftp.uu.net in the
comp.sources.misc portion of the USENET archives. You may also contact the author,
Julianne F. Haugh, at <[email protected]> if you have any questions regarding this
package.
THIS SOFTWARE IS BEING DISTRIBUTED AS-IS. THE AUTHORS DISCLAIM ALL
LIABILITY FOR ANY CONSEQUENCES OF USE. THE USER IS SOLELY
RESPONSIBLE FOR THE MAINTENANCE OF THIS SOFTWARE PACKAGE. THE
AUTHORS ARE UNDER NO OBLIGATION TO PROVIDE MODIFICATIONS OR
IMPROVEMENTS. THE USER IS
ENCOURAGED TO TAKE ANY AND ALL STEPS NEEDED TO PROTECT AGAINST
ACCIDENTAL LOSS OF INFORMATION OR MACHINE RESOURCES.
Special thanks are due to Chip Rosenthal for his fine testing efforts; to Steve Simmons for his
work in porting this code to BSD; and to Bill Kennedy for his contributions of LaserJet printer
time and energies.
Also, thanks for Dennis L. Mumaugh for the initial shadow password
information and to Tony Walton ([email protected]) for the System V Release 4
changes. Effort in porting to SunOS has been contributed
by Dr. Michael Newberry ([email protected]) and Micheal J. Miller, Jr.
([email protected]). Effort in porting to AT&T UNIX System V Release 4 has been
provided by Andrew Herbert ([email protected]).
Special thanks to Marek Michalkiewicz ([email protected]) for taking over
the Linux port of this software.
/***
* Copyright 1995 by Wietse Venema. All rights reserved. Individual files
* may be covered by other copyrights (as noted in the file itself.)
*
* This material was originally written and compiled by Wietse Venema at * Eindhoven
University of Technology, The Netherlands, in 1990, 1991, * 1992, 1993, 1994 and 1995.
*
* Redistribution and use in source and binary forms are permitted
* provided that this entire copyright notice is duplicated in all such * copies.
*
* This software is provided "as is" and without any expressed or implied * warranties,
including, without limitation, the implied warranties of * merchantibility and fitness for any
particular purpose.
***/
This software is copyright 1988 - 1994, Julianne Frances Haugh. All rights reserved.
178
DMA-1100P User’s Guide
Appendix D Open Software Announcements
NOTE: Some components of the DMA-1100P incorporate source code covered under GPL or
GPL like licenses. To obtain the source code covered under those Licenses, please contact
ZyXEL Communications Corporation at: ZyXEL Technical Support.
End-User License Agreement for “DMA-1100P”
WARNING: ZyXEL Communications Corp. IS WILLING TO LICENSE THE ENCLOSED
SOFTWARE TO YOU ONLY UPON THE CONDITION THAT YOU ACCEPT ALL OF
THE TERMS CONTAINED IN THIS LICENSE AGREEMENT. PLEASE READ THE
TERMS CAREFULLY BEFORE COMPLETING THE INSTALLATION PROCESS AS
INSTALLING THE SOFTWARE WILL INDICATE YOUR ASSENT TO THEM. IF YOU
DO NOT AGREE TO THESE TERMS, THEN ZyXEL, INC. IS UNWILLING TO LICENSE
THE SOFTWARE TO YOU, IN WHICH EVENT YOU SHOULD RETURN THE
UNINSTALLED SOFTWARE AND PACKAGING TO THE PLACE FROM WHICH IT
WAS ACQUIRED, AND YOUR MONEY WILL BE REFUNDED.
1.Grant of License for Personal Use
ZyXEL Communications Corp. ("ZyXEL") grants you a non-exclusive, non-sublicense, nontransferable license to use the program with which this license is distributed (the "Software"),
including any documentation files accompanying the Software ("Documentation"), for
internal business use only, for up to the number of users specified in sales order and invoice.
You have the right to make one backup copy of the Software and Documentation solely for
archival, back-up or disaster recovery purposes. You shall not exceed the scope of the license
granted hereunder. Any rights not expressly granted by ZyXEL to you are reserved by
ZyXEL, and all implied licenses are disclaimed.
2.Ownership
You have no ownership rights in the Software. Rather, you have a license to use the Software
as long as this License Agreement remains in full force and effect. Ownership of the
Software, Documentation and all intellectual property rights therein shall remain at all times
with ZyXEL. Any other use of the Software by any other entity is strictly forbidden and is a
violation of this License Agreement.
3.Copyright
The Software and Documentation contain material that is protected by United States
Copyright Law and trade secret law, and by international treaty provisions. All rights not
granted to you herein are expressly reserved by ZyXEL. You may not remove any proprietary
notice of ZyXEL or any of its licensors from any copy of the Software or Documentation.
4.Restrictions
DMA-1100P User’s Guide
179
Appendix D Open Software Announcements
You may not publish, display, disclose, sell, rent, lease, modify, store, loan, distribute, or
create derivative works of the Software, or any part thereof. You may not assign, sublicense,
convey or otherwise transfer, pledge as security or otherwise encumber the rights and licenses
granted hereunder with respect to the Software. You may not copy, reverse engineer,
decompile, reverse compile, translate, adapt, or disassemble the Software, or any part thereof,
nor shall you attempt to create the source code from the object code for the Software. You
may not market, co-brand, private label or otherwise permit third parties to link to the
Software, or any part thereof. You may not use the Software, or any part thereof, in the
operation of a service bureau or for the benefit of any other person or entity. You may not
cause, assist or permit any third party to do any of the foregoing.
5.Confidentiality
You acknowledge that the Software contains proprietary trade secrets of ZyXEL and you
hereby agree to maintain the confidentiality of the Software using at least as great a degree of
care as you use to maintain the confidentiality of your own most confidential information.
You agree to reasonably communicate the terms and conditions of this License Agreement to
those persons employed by you who come into contact with the Software, and to use
reasonable best efforts to ensure their compliance with such terms and conditions, including,
without limitation, not knowingly permitting such persons to use any portion of the Software
for the purpose of deriving the source code of the Software.
6.No Warranty
THE SOFTWARE IS PROVIDED "AS IS." TO THE MAXIMUM EXTENT PERMITTED
BY LAW, ZyXEL DISCLAIMS ALL WARRANTIES OF ANY KIND, EITHER
EXPRESSED OR IMPLIED, INCLUDING, WITHOUT LIMITATION, IMPLIED
WARRANTIES OF MERCHANTABILITY AND FITNESS FOR A PARTICULAR
PURPOSE. ZyXEL DOES NOT WARRANT THAT THE FUNCTIONS CONTAINED IN
THE SOFTWARE WILL MEET ANY REQUIREMENTS OR NEEDS YOU MAY HAVE,
OR THAT THE SOFTWARE WILL OPERATE ERROR FREE, OR IN AN
UNINTERUPTED FASHION, OR THAT ANY DEFECTS OR ERRORS IN THE
SOFTWARE WILL BE CORRECTED, OR THAT THE SOFTWARE IS COMPATIBLE
WITH ANY PARTICULAR PLATFORM. SOME JURISDICTIONS DO NOT ALLOW
THE WAIVER OR EXCLUSION OF IMPLIED WARRANTIES SO THEY MAY NOT
APPLY TO YOU. IF THIS EXCLUSION IS HELD TO BE UNENFORCEABLE BY A
COURT OF COMPETENT JURISDICTION, THEN ALL EXPRESS AND IMPLIED
WARRANTIES SHALL BE LIMITED IN DURATION TO A PERIOD OF THIRTY (30)
DAYS FROM THE DATE OF PURCHASE OF THE SOFTWARE, AND NO
WARRANTIES SHALL APPLY AFTER THAT PERIOD.
7.Limitation of Liability
IN NO EVENT WILL ZyXEL BE LIABLE TO YOU OR ANY THIRD PARTY FOR ANY
INCIDENTAL OR CONSEQUENTIAL DAMAGES (INCLUDING, WITHOUT
LIMITATION, INDIRECT, SPECIAL, PUNITIVE, OR EXEMPLARY DAMAGES FOR
LOSS OF BUSINESS, LOSS OF PROFITS, BUSINESS INTERRUPTION, OR LOSS OF
BUSINESS INFORMATION) ARISING OUT OF THE USE OF OR INABILITY TO USE
THE PROGRAM, OR FOR ANY CLAIM BY ANY OTHER PARTY, EVEN IF ZyXEL
180
DMA-1100P User’s Guide
Appendix D Open Software Announcements
HAS BEEN ADVISED OF THE POSSIBILITY OF SUCH DAMAGES. ZyXEL'S
AGGREGATE LIABILITY WITH RESPECT TO ITS OBLIGATIONS UNDER THIS
AGREEMENT OR OTHERWISE WITH RESPECT TO THE SOFTWARE AND
DOCUMENTATION OR OTHERWISE SHALL BE EQUAL TO THE PURCHASE PRICE,
BUT SHALL IN NO EVENT EXCEED $1,000. BECAUSE SOME STATES/COUNTRIES
DO NOT ALLOW THE EXCLUSION OR LIMITATION OF LIABILITY FOR
CONSEQUENTIAL OR INCIDENTAL DAMAGES, THE ABOVE LIMITATION MAY
NOT APPLY TO YOU.
8.Export Restrictions
THIS LICENSE AGREEMENT IS EXPRESSLY MADE SUBJECT TO ANY
APPLICABLE LAWS, REGULATIONS, ORDERS, OR OTHER RESTRICTIONS ON
THE EXPORT OF THE SOFTWARE OR INFORMATION ABOUT SUCH SOFTWARE
WHICH MAY BE IMPOSED FROM TIME TO TIME. YOU SHALL NOT EXPORT THE
SOFTWARE, DOCUMENTATION OR INFORMATION ABOUT THE SOFTWARE AND
DOCUMENTATION WITHOUT COMPLYING WITH SUCH LAWS, REGULATIONS,
ORDERS, OR OTHER RESTRICTIONS. YOU AGREE TO INDEMNIFY ZyXEL
AGAINST ALL CLAIMS, LOSSES, DAMAGES, LIABILITIES, COSTS AND EXPENSES,
INCLUDING REASONABLE ATTORNEYS' FEES, TO THE EXTENT SUCH CLAIMS
ARISE OUT OF ANY BREACH OF THIS SECTION 8.
9.Audit Rights
ZyXEL SHALL HAVE THE RIGHT, AT ITS OWN EXPENSE, UPON REASONABLE
PRIOR NOTICE, TO PERIODICALLY INSPECT AND AUDIT YOUR RECORDS TO
ENSURE YOUR COMPLIANCE WITH THE TERMS AND CONDITIONS OF THIS
LICENSE AGREEMENT.
10.Termination
This License Agreement is effective until it is terminated. You may terminate this License
Agreement at any time by destroying or returning to ZyXEL all copies of the Software and
Documentation in your possession or under your control. ZyXEL may terminate this License
Agreement for any reason, including, but not limited to, if ZyXEL finds that you have violated
any of the terms of this License Agreement. Upon notification of termination, you agree to
destroy or return to ZyXEL all copies of the Software and Documentation and to certify in
writing that all known copies, including backup copies, have been destroyed. All provisions
relating to confidentiality, proprietary rights, and non-disclosure shall survive the termination
of this Software License Agreement.
12.General
This License Agreement shall be construed, interpreted and governed by the laws of Republic
of China without regard to conflicts of laws provisions thereof. The exclusive forum for any
disputes arising out of or relating to this License Agreement shall be an appropriate court or
Commercial Arbitration Association sitting in ROC, Taiwan. This License Agreement shall
constitute the entire Agreement between the parties hereto. This License Agreement, the
rights granted hereunder, the Software and Documentation shall not be assigned by you
DMA-1100P User’s Guide
181
Appendix D Open Software Announcements
without the prior written consent of ZyXEL. Any waiver or modification of this License
Agreement shall only be effective if it is in writing and signed by both parties hereto. If any
part of this License Agreement is found invalid or unenforceable by a court of competent
jurisdiction, the remainder of this License Agreement shall be interpreted so as to reasonably
effect the intention of the parties.
182
DMA-1100P User’s Guide
APPENDIX
E
Legal Information
Copyright
Copyright © 2007 by ZyXEL Communications Corporation.
The contents of this publication may not be reproduced in any part or as a whole, transcribed,
stored in a retrieval system, translated into any language, or transmitted in any form or by any
means, electronic, mechanical, magnetic, optical, chemical, photocopying, manual, or
otherwise, without the prior written permission of ZyXEL Communications Corporation.
Published by ZyXEL Communications Corporation. All rights reserved.
Disclaimer
ZyXEL does not assume any liability arising out of the application or use of any products, or
software described herein. Neither does it convey any license under its patent rights nor the
patent rights of others. ZyXEL further reserves the right to make changes in any products
described herein without notice. This publication is subject to change without notice.
Trademarks
ZyNOS (ZyXEL Network Operating System) is a registered trademark of ZyXEL
Communications, Inc. Other trademarks mentioned in this publication are used for
identification purposes only and may be properties of their respective owners.
Dolby
“Dolby” and the double-D symbol are trademarks of Dolby Laboratories.
Manufactured under license from Dolby Laboratories.
Certifications
Federal Communications Commission (FCC) Interference Statement
The device complies with Part 15 of FCC rules. Operation is subject to the following two
conditions:
DMA-1100P User’s Guide
183
Appendix E Legal Information
• This device may not cause harmful interference.
• This device must accept any interference received, including interference that may cause
undesired operations.
This device has been tested and found to comply with the limits for a Class B digital device
pursuant to Part 15 of the FCC Rules. These limits are designed to provide reasonable
protection against harmful interference in a residential installation. This device generates,
uses, and can radiate radio frequency energy, and if not installed and used in accordance with
the instructions, may cause harmful interference to radio communications. However, there is
no guarantee that interference will not occur in a particular installation.
If this device does cause harmful interference to radio/television reception, which can be
determined by turning the device off and on, the user is encouraged to try to correct the
interference by one or more of the following measures:
1 Reorient or relocate the receiving antenna.
2 Increase the separation between the equipment and the receiver.
3 Connect the equipment into an outlet on a circuit different from that to which the
receiver is connected.
4 Consult the dealer or an experienced radio/TV technician for help.
Notices
Changes or modifications not expressly approved by the party responsible for compliance
could void the user's authority to operate the equipment.
This Class B digital apparatus complies with Canadian ICES-003.
Cet appareil numérique de la classe B est conforme à la norme NMB-003 du Canada.
Viewing Certifications
1 Go to http://www.zyxel.com.
2 Select your product on the ZyXEL home page to go to that product's page.
3 Select the certification you wish to view from this page.
ZyXEL Limited Warranty
ZyXEL warrants to the original end user (purchaser) that this product is free from any defects
in materials or workmanship for a period of up to two years from the date of purchase. During
the warranty period, and upon proof of purchase, should the product have indications of failure
due to faulty workmanship and/or materials, ZyXEL will, at its discretion, repair or replace the
defective products or components without charge for either parts or labor, and to whatever
extent it shall deem necessary to restore the product or components to proper operating
condition. Any replacement will consist of a new or re-manufactured functionally equivalent
product of equal or higher value, and will be solely at the discretion of ZyXEL. This warranty
shall not apply if the product has been modified, misused, tampered with, damaged by an act
of God, or subjected to abnormal working conditions.
184
DMA-1100P User’s Guide
Appendix E Legal Information
Note
Repair or replacement, as provided under this warranty, is the exclusive remedy of the
purchaser. This warranty is in lieu of all other warranties, express or implied, including any
implied warranty of merchantability or fitness for a particular use or purpose. ZyXEL shall in
no event be held liable for indirect or consequential damages of any kind to the purchaser.
To obtain the services of this warranty, contact ZyXEL's Service Center for your Return
Material Authorization number (RMA). Products must be returned Postage Prepaid. It is
recommended that the unit be insured when shipped. Any returned products without proof of
purchase or those with an out-dated warranty will be repaired or replaced (at the discretion of
ZyXEL) and the customer will be billed for parts and labor. All repaired or replaced products
will be shipped by ZyXEL to the corresponding return address, Postage Paid. This warranty
gives you specific legal rights, and you may also have other rights that vary from country to
country.
Registration
Register your product online to receive e-mail notices of software upgrades and information at
www.zyxel.com for global products, or at www.us.zyxel.com for North American products.
DMA-1100P User’s Guide
185
Appendix E Legal Information
186
DMA-1100P User’s Guide
APPENDIX
F
Customer Support
Please have the following information ready when you contact customer support.
Required Information
•
•
•
•
Product model and serial number.
Warranty Information.
Date that you received your device.
Brief description of the problem and the steps you took to solve it.
“+” is the (prefix) number you dial to make an international telephone call.
Corporate Headquarters (Worldwide)
•
•
•
•
•
•
•
Support E-mail: [email protected]
Sales E-mail: [email protected]
Telephone: +886-3-578-3942
Fax: +886-3-578-2439
Web: www.zyxel.com, www.europe.zyxel.com
FTP: ftp.zyxel.com, ftp.europe.zyxel.com
Regular Mail: ZyXEL Communications Corp., 6 Innovation Road II, Science Park,
Hsinchu 300, Taiwan
Costa Rica
•
•
•
•
•
•
•
Support E-mail: [email protected]
Sales E-mail: [email protected]
Telephone: +506-2017878
Fax: +506-2015098
Web: www.zyxel.co.cr
FTP: ftp.zyxel.co.cr
Regular Mail: ZyXEL Costa Rica, Plaza Roble Escazú, Etapa El Patio, Tercer Piso, San
José, Costa Rica
Czech Republic
•
•
•
•
E-mail: [email protected]
Telephone: +420-241-091-350
Fax: +420-241-091-359
Web: www.zyxel.cz
DMA-1100P User’s Guide
187
Appendix F Customer Support
• Regular Mail: ZyXEL Communications, Czech s.r.o., Modranská 621, 143 01 Praha 4 Modrany, Ceská Republika
Denmark
•
•
•
•
•
•
Support E-mail: [email protected]
Sales E-mail: [email protected]
Telephone: +45-39-55-07-00
Fax: +45-39-55-07-07
Web: www.zyxel.dk
Regular Mail: ZyXEL Communications A/S, Columbusvej, 2860 Soeborg, Denmark
Finland
•
•
•
•
•
•
Support E-mail: [email protected]
Sales E-mail: [email protected]
Telephone: +358-9-4780-8411
Fax: +358-9-4780-8448
Web: www.zyxel.fi
Regular Mail: ZyXEL Communications Oy, Malminkaari 10, 00700 Helsinki, Finland
France
•
•
•
•
•
E-mail: [email protected]
Telephone: +33-4-72-52-97-97
Fax: +33-4-72-52-19-20
Web: www.zyxel.fr
Regular Mail: ZyXEL France, 1 rue des Vergers, Bat. 1 / C, 69760 Limonest, France
Germany
•
•
•
•
•
•
Support E-mail: [email protected]
Sales E-mail: [email protected]
Telephone: +49-2405-6909-69
Fax: +49-2405-6909-99
Web: www.zyxel.de
Regular Mail: ZyXEL Deutschland GmbH., Adenauerstr. 20/A2 D-52146, Wuerselen,
Germany
Hungary
•
•
•
•
•
•
188
Support E-mail: [email protected]
Sales E-mail: [email protected]
Telephone: +36-1-3361649
Fax: +36-1-3259100
Web: www.zyxel.hu
Regular Mail: ZyXEL Hungary, 48, Zoldlomb Str., H-1025, Budapest, Hungary
DMA-1100P User’s Guide
Appendix F Customer Support
India
•
•
•
•
•
•
Support E-mail: [email protected]
Sales E-mail: [email protected]
Telephone: +91-11-30888144 to +91-11-30888153
Fax: +91-11-30888149, +91-11-26810715
Web: http://www.zyxel.in
Regular Mail: India - ZyXEL Technology India Pvt Ltd., II-Floor, F2/9 Okhla Phase -1,
New Delhi 110020, India
Japan
•
•
•
•
•
•
Support E-mail: [email protected]
Sales E-mail: [email protected]
Telephone: +81-3-6847-3700
Fax: +81-3-6847-3705
Web: www.zyxel.co.jp
Regular Mail: ZyXEL Japan, 3F, Office T&U, 1-10-10 Higashi-Gotanda, Shinagawa-ku,
Tokyo 141-0022, Japan
Kazakhstan
•
•
•
•
•
•
Support: http://zyxel.kz/support
Sales E-mail: [email protected]
Telephone: +7-3272-590-698
Fax: +7-3272-590-689
Web: www.zyxel.kz
Regular Mail: ZyXEL Kazakhstan, 43 Dostyk Ave., Office 414, Dostyk Business Centre,
050010 Almaty, Republic of Kazakhstan
Malaysia
•
•
•
•
•
•
Support E-mail: [email protected]
Sales E-mail: [email protected]
Telephone: +603-8076-9933
Fax: +603-8076-9833
Web: http://www.zyxel.com.my
Regular Mail: ZyXEL Malaysia Sdn Bhd., 1-02 & 1-03, Jalan Kenari 17F, Bandar
Puchong Jaya, 47100 Puchong, Selangor Darul Ehsan, Malaysia
North America
•
•
•
•
•
•
Support E-mail: [email protected]
Support Telephone: +1-800-978-7222
Sales E-mail: [email protected]
Sales Telephone: +1-714-632-0882
Fax: +1-714-632-0858
Web: www.zyxel.com
DMA-1100P User’s Guide
189
Appendix F Customer Support
• Regular Mail: ZyXEL Communications Inc., 1130 N. Miller St., Anaheim, CA 928062001, U.S.A.
Norway
•
•
•
•
•
•
Support E-mail: [email protected]
Sales E-mail: [email protected]
Telephone: +47-22-80-61-80
Fax: +47-22-80-61-81
Web: www.zyxel.no
Regular Mail: ZyXEL Communications A/S, Nils Hansens vei 13, 0667 Oslo, Norway
Poland
•
•
•
•
•
E-mail: [email protected]
Telephone: +48-22-333 8250
Fax: +48-22-333 8251
Web: www.pl.zyxel.com
Regular Mail: ZyXEL Communications, ul. Okrzei 1A, 03-715 Warszawa, Poland
Russia
•
•
•
•
•
•
Support: http://zyxel.ru/support
Sales E-mail: [email protected]
Telephone: +7-095-542-89-29
Fax: +7-095-542-89-25
Web: www.zyxel.ru
Regular Mail: ZyXEL Russia, Ostrovityanova 37a Str., Moscow 117279, Russia
Singapore
•
•
•
•
•
•
Support E-mail: [email protected]
Sales E-mail: [email protected]
Telephone: +65-6899-6678
Fax: +65-6899-8887
Web: http://www.zyxel.com.sg
Regular Mail: ZyXEL Singapore Pte Ltd., No. 2 International Business Park, The Strategy
#03-28, Singapore 609930
Spain
•
•
•
•
•
•
190
Support E-mail: [email protected]
Sales E-mail: [email protected]
Telephone: +34-902-195-420
Fax: +34-913-005-345
Web: www.zyxel.es
Regular Mail: ZyXEL Communications, Arte, 21 5ª planta, 28033 Madrid, Spain
DMA-1100P User’s Guide
Appendix F Customer Support
Sweden
•
•
•
•
•
•
Support E-mail: [email protected]
Sales E-mail: [email protected]
Telephone: +46-31-744-7700
Fax: +46-31-744-7701
Web: www.zyxel.se
Regular Mail: ZyXEL Communications A/S, Sjöporten 4, 41764 Göteborg, Sweden
Thailand
•
•
•
•
•
•
Support E-mail: [email protected]
Sales E-mail: [email protected]
Telephone: +662-831-5315
Fax: +662-831-5395
Web: http://www.zyxel.co.th
Regular Mail: ZyXEL Thailand Co., Ltd., 1/1 Moo 2, Ratchaphruk Road, Bangrak-Noi,
Muang, Nonthaburi 11000, Thailand.
Ukraine
•
•
•
•
•
•
Support E-mail: [email protected]
Sales E-mail: [email protected]
Telephone: +380-44-247-69-78
Fax: +380-44-494-49-32
Web: www.ua.zyxel.com
Regular Mail: ZyXEL Ukraine, 13, Pimonenko Str., Kiev 04050, Ukraine
United Kingdom
•
•
•
•
•
•
•
Support E-mail: [email protected]
Sales E-mail: [email protected]
Telephone: +44-1344-303044, 08707-555779 (UK only)
Fax: +44-1344-303034
Web: www.zyxel.co.uk
FTP: ftp.zyxel.co.uk
Regular Mail: ZyXEL Communications UK Ltd., 11 The Courtyard, Eastern Road,
Bracknell, Berkshire RG12 2XB, United Kingdom (UK)
DMA-1100P User’s Guide
191
Appendix F Customer Support
192
DMA-1100P User’s Guide
Index
Index
Numerics
arrow 26
AUDIO 26
BACK 26
Fast Forward 26, 50
HOME 26
INFO 26
MUSIC 26, 43
MUTE 26
Next 26, 50
OK 26
OPTION 26
PAGE up/down 26
Pause 26, 50
PHOTO 26, 49
Play 26, 50
Power 26, 42, 44
REPEAT 26
Reverse 26, 50
ROTATE 26, 50
SERVER 26
SHUFFLE 26
Skip 26
Slow motion 26
Stop 26, 50
TOOL 26, 41
USB 26, 61
VIDEO 26, 39
VOLUME 26
1080i 71
16 by 9 format 71
2 channel (stereo) 72
4 by 3 format 71
480i 71
480p 71
5.1 channel 72, 91
720p 71
A
AAC 72, 73
A-B button 26, 41
A-B function 41, 90
AC-3 73, 74
Acoustic Coder 3 74
Advanced Audio Coding, See AAC 73
Advanced Codec 3 74
album 50
analog input 71
analog output 72
application 23, 129
arrow buttons 26
ascending sort order 36
ATSC A/52 74
ATSC A/52 Rev. B 74
audio 91
2 channel 72
channels 73
AUDIO button 26
Audio Codec 3 74
audio output 26
auto volume control 73
C
certifications 183
notices 184
viewing 184
channels 26
audio 73
codecs 99
contact information 187
copyright 183
current function 40
customer support 187
B
D
BACK button 26
button 26, 50
A-B 26, 41
DMA-1100P User’s Guide
DD 5.1 74
193
Index
DD, 74
default settings 75
descending sort order 36
device name 79
dialog box 26
digital input 71
Digital Living Network Alliance, See DLNA 81, 98
digital output 72
dimensions 97
disclaimer 183
display information 78
display photos 50
DLNA 81, 98
DNS server
address assignment 69
Dolby Digital 73
Dolby Laboratories 73
Dolby SR-Digital 74
Dolby Stereo Digital 74
Dolby Surround AC-3 Digital 74
Domain Name System. See DNS.
down button 26
down VOLUME button 26
E
ease of use 75
elapsed time 41
F
factory defaults 75
Fast Forward button 26, 50
favorite 26, 36, 37, 42, 44, 51, 53, 54, 55
favorites 90
FCC interference statement 183
file
organization 50
search 36
filter 36
firmware
upload 78
version 79
formats supported 99
function 40
A-B 41
current 40
194
H
HDMI 90, 98
HDTV 71
High Definition Multimedia Interface, See HDMI 98
High Definition Television, See HDTV 71
HOME button 26
HOME menu 39, 43, 49, 61, 65
home networks 81, 98
humidity, operation and storage 97
I
i 71
icon
A-B 41
MUSIC 43
OPTION 65
PHOTO 49
USB 61
VIDEO 39
IEC 958 type II 73
IEC-60958 73
INFO button 26
information 78
inputting
lower-case letters 37
numbers 37
upper-case letters 37
inputting symbols 37
inputting text 36
interlaced scan 71
interval repeat 26, 41
K
keyboard 36
L
language settings 74
languages 74
LEDs 27
troubleshooting 87
left output 26
DMA-1100P User’s Guide
Index
letters 37
inputting 37
lights 27
lines of vertical resolution 71
loop 26
M
button 26
icon 65
menu 65
organization
of photos 50
output type 71
P
MAC address 69, 79
Media Access Control. See MAC address.
media server 81, 98
access 88
configuration 82
software 81, 98
tool 81
menu 31
item number 33
MUSIC 43
navigation 31
OPTION 65
PHOTO 49
TOOL 41
USB 61
video playback TOOL 41
Moving Pictures Experts Group, See MPEG 73
MPEG 73
MPEG-4 AAC 73
MUSIC
button 26, 43
icon 43
menu 43
music
play 44
MUTE button 26
PAGE buttons 26
Pause button 26, 50
PHOTO
button 26, 49
icon 49
menu 49
photo 26, 50
display 50
organization 50
rotation 26, 50
play
music 44
photos 50
video file 39
Play button 26, 50
playback menu 41
playlist 36, 37, 42, 44, 51, 53, 54, 55
popup screen 26
Power button 26, 42, 44
power specification 97
Previous button 26, 50
problems 87
product registration 185
progressive scan 71
N
R
network settings 69
Next button 26, 50
number
menu item 33
random play 26
rear left speaker 91
rear right speaker 91
registration
product 185
related documentation 3
remote control 39, 41, 61
REPEAT button 26
repeat interval 26, 41
reset 75
resolution 71
Reverse button 26, 50
O
OK button 26
on-screen keyboard 36
OPTION
DMA-1100P User’s Guide
195
Index
right output 26
ROTATE button 26, 50
S
S/PDIF 73
safety warnings 6
scan
interlaced 71
progressive 71
screen
resolution 71
size 71
screen saver 79
screws 103
search 36, 42, 44
for files 36
for time 42, 44
SERVER
button 26
Settings For Ease of Use 75
SHUFFLE button 26
Skip button 26
slideshow 50
Slow motion button 26
software
upload 77
software update 77
Sony/Philips Digital Interface Format, See S/PDIF 73
sort order 36
speakers 26, 91
SR-D, Adaptive Transform Coder 3 74
standard definition 71
stereo 72
stereo output 26
Stop button 26, 50
supported
codecs 99
formats 99
S-Video 90
symbols 37
inputting 37
syntax conventions 4
digital input 71
high definition 71
standard definition 71
two 90
temperature, operation and storage 97
text input 36
lower-case letters 37
numbers 37
symbols 37
upper-case letters 37
time 41
elapsed 41
search 42, 44
TOOL
button 26
menu 26
TOOL button 41
TOOL menu 26, 41
trademarks 183
troubleshooting 87
5.1 channel speakers 91
A-B function 90
DMA usage 88
favorites 90
files 89
files not in proper folders 33
files on USB devices 90
LEDs 87
media server access 88
number of files 89
thumbnails 90
TV display 88, 90
U
up VOLUME button 26
up/down buttons 26
updating software 77
uploading software 77
USB
button 26, 61
device 23
for firmware upload 78
icon 61
LED 27
menu 61
troubleshooting 90
T
V
television 71
analog input 71
196
version 79
DMA-1100P User’s Guide
Index
firmware 79
VIDEO
button 39
icon 39
video
playback 39
playback TOOL menu 41
VIDEO button 26
video modes 71
VOLUME button 26
volume control 73
W
warranty 184
note 185
weight 97
widescreen format 71
Windows Media Audio, See WMA 74
Windows Media Center 89
wired LAN
MAC address 79
settings 69
WMA 74
DMA-1100P User’s Guide
197
Index
198
DMA-1100P User’s Guide