1
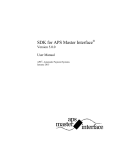
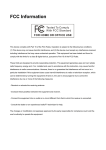
Digital Photo Bank
USER MANUAL
1.Installing Hard drive
The storage device of the Portable Digital Camera Storage Device (PDCSD) is an internal 2.5 Inch
laptop hard drive. Therefore, when you purchase a new PDCSD, you should install a hard drive
in It unless the hard drive has already been Installed. After Initial Installation, it is not necessary to
re-open the cover unless you want to exchange current hard drive.
Hard drive installation process:
1.) Unscrew the screws on the back cover of the PDCSD
2.) When you open the cover, there is a socket with 44 holes on the top of circuit board. Facing the
side of hard drive with trademark/label, insert the 44pin Interface on the socket of the PDCSD.
Normally, a laptop hard drive has two separate pin outputs, one group with 44 pins stand output,
another group with 4-6 pins. The two different groups of pins have been divided and should not be
mixed.
3.) The 4-6 pins on the hard drive should be configured as Master mode (some hard drives name
this as DEVICE mode). The mode selection is normally explained on one side of hard drive with
the trademark/label. In general, the default mode of a new hard drive is Master mode - If you are
unsure about the setup, please contact hard drive provider. When the hard drive correctly Installed,
it should fit well on insulated protection pad, which is on the top of the circuit board.
4.) Replace cover and screw it tight
Note: If the laptop hard disk is newly purchased, it must be
formatted. (see 'Formatting Hard drive').
2. Performing copy transfers from any memory card to hard drive
2.1 Press "power' button to turn on the machine - the top right corner of the PDCSD's LCD will
display 'HD' sign after two second. It shows that Hard drive has been correctly installed. Below
that, 'XX GB' displays the remaining space of the hard drive. The sign on the bottom corner shows
the battery capacity
2.2. Insert the memory card that you want to copy. Please insert the memory card into the
corresponding Interface of the PDCSD. When the memory card is correctly placed, the type of
card will displayed on the top left corner of LCD, such as, 'CF', 'SM', 'SD', 'MS' etc. On the bottom
left of LCD, It shows used space of the memory card.
Note:
"CF"= Compactflash card type
"SM"= Smartmedia
"SD"= Secure Digital
"S"= Memory Stick
2.3.Press'Copy' button, the PDCSD will automatically transfer all the files of memory card to the
internal hard disk. On the LCD screen, the percentage of transferred flies will be displayed. The
lights on the device will flash showing that data transfer Is in progress.
Notes:
1.The transferring process is complete when the percentage of transferred files on LCD reaches
100%. After transfer, the files on memory card will still remain. If it is required to be empty, this
may be performed on the digital camera.
2.When two memory cards are inserted into PDCSD at the same time, the 'CF’ type of memory
card will be prioritized. The other type of memory card will be recognized by the PDCSD
thereafter.
3.The PDCSD will create a new folder on hard disk to save newly transferred files each time the
'Copy' button is pressed. Therefore, no matter the contents in memory card are the same or not, the
PDCSD will not overwrite previous files.
4.When file transferring is completed, please press 'Power' button to turn the PDCSD off.
Otherwise, the machine will automatically switch off after one minute. During file transferring
process, the PDCSD cannot be switched off even when the 'Power' button is pressed. This
prevents accidental damage to hard disk. If It Is required to terminate the transferring process,
please take the memory card out. After a few seconds, the LCD screen will indicate card misread,
and a 'X' sign will appear among the memory card on the LCD.
If customer want to continue transferring, please press 'Power' button restart the machine and It
will start the transferring process.
3. Connecting PDCSD to PC
After transferring, the files from the memory cards will be stored on the Internal hard disk of
PDCSD. If you want to copy transfer files from PDCSD to PC, the procedure is as follows:
3.1 .Ensure the computer Is working properly. Connect the PDCSD with PC using the provided
USB cable. If the PC uses Windows ME/Windows XP/Windows 2000 SP4, the PDCSD driver
does not need to be installed. If the PC operation system is either Windows 98 or Windows 2000
without SP4, if it is necessary to Install the PDCSD driver for your computer to recognize PDCSD.
The details of Installing driver can be found In 'Driver Installing Instruction' book.
3.2. Press'Power' button of PDCSD, the USB sign will show at the bottom of LCD screen, It
confirms that the PDCSD is correctly connected with PC.
3.3. In the PC, double click 'My Computer' you will see two 'removable drive'. In addition, there
are several new hard disk partitions (the number of partition depends on the number of your
PDCSD hard disk partition). Two of the removable drives correspond to the two PDCSD slots (CF
slot and 4 In 1 slot). The new hard disk partition(s) is the notebook hard disk partition of PDCSD.
3.4.Once the PDCSD Is connected with PC, it recognized as a card reader/writer and a removable
USB hard disk it can be operated as a normal hard disk of your PC. The files on memory card can
be transferred to computer hard disk, and vice versa. The files can be transferred between memory
card/hard disk of PDCSD and PC hard disk.
After finish operating, either remove USB cable or press 'Power' button of PDCSD to disconnect
with the PC. Please note if the USB sign on the LCD screen is still flashing, this indicates that data
transferring between PC and PDCSD is still in process. Please do not press 'Power' button or
disconnect USB cable, otherwise data transfer may be incomplete.
4 .Recharging Battery
The PDCSD has an internal rechargble battery and a supplied mains charger. In addition, when the
PDCSD is connected to a computer via USB, the battery can be automatically charged when the
computer is on. During recharging the indication light on the left side of PDCSD appears red; the
light will turn Into green when battery is fully charged.
After charging is complete, the internal charging control system will automatically stop charging;
It will not harm the battery even though the charger or USB cable is still connected.
Copying directory
The system will build a CARDS directory in the first FAT/FAT32 partition during copying (If this
directory is existent and it needn't build again), according to the type of the memory card for
copying it builds a new subdirectory, all files in memory card (including all directory structures)
will be copied to this subdirectory.
Naming rules for subdirectory is: 2 letters+ 4 digits, the front two letters indicate the type of
Memory card, described as below:
CF---CF card or Microdrive mini hard disk
SM---SM card
SD---SD card or MMC card
MS--- MS card or MS Pro card
The latter four digits 0001-9999 is the serial numbers with increasing by degrees, any type will
increase by degrees automatically, the system will produce the largest serial number automatically
when it is copied, After the customer send the photo to the computer, you can delete the directory
under CARDS directory freely.
Prompt on error
PBOTOBANK supports nice rectify errors and easy operation, any prompt will display on the
LCD, that help the customer judge the type of malfunction and troubleshooting, explain prompt on
error as below:
1 .Appear "X" in the middle of hard disk Identifier, illustrated as below:
And the content will display "OOGB", meanwhile the built-in hard disk for Digital Camera
Partner Is full, and connect digital camera partner to the computer, then the files In the built-in
hard disk for Digital camera partner should be copied to the computer, at the same time delete and
vacate some space.
2.Appear "X" in the middle of hard disk Identifier, but don't display the content "OOGB", that
indicates Digital Camera Partner don't identify the hard disk correctly. Maybe the hard disk has
some malfunction or the hard disk haven't been divided and formatted. The new hard disk must be
connected to the computer and divided and formatted before using, then formatted as FAT32 or
FAT (FAT16), If the customer formats a certain partition as NTFS, thus the system appears prompt
on error as described.
Though Digital Camera Partner Is connected to PC and taken as mobile hard disk memory for
along time, the content In digital card couldn't copy to Digital Camera partner.
3.Appear " X " symbol on the digital card identifier, illustrated as below:
It Indicates maybe the card couldn't use due to compatibility, or the card have damaged by Itself,
please contact the dealer for digital card or manufacturer for this unit.
Meanwhile, Digital card appears prompt on error during copying, or appear shutdown (maybe the
card goes wrong or the card Is unplugged), please shut down after appear error sign, and restart
copying after It powers on.
1. Digital Camera Partner sometimes appears "X" prompt symbol, at the same time the LCD will
display the error code, correlative error code and corresponding malfunction type is described as
the table:
Appearing "X" on the left of memory card symbol indicates error memory card.
Appearing "X" on the right of hard disk symbol indicates error hard disk.
0--- Unplug Digital card
1--- The card or hard disk isn't formatted.
2,3--- Ready for read Card Is wrong.
4--- Overtime for read card Is wrong.
5--- The other error for read card
6--- Finish for read card Is wrong
7---The process of reading card is wrong
12,13---- Ready for writing in hard disk Is wrong.
13---The process of writing in the hard disk Is wrong.
14---overtime error for writing in hard disk
15---The other error for writing in hard disk
22,23----Ready for reading in hard disk Is wrong
24---Overtime error for reading in hard disk
25--- The other error for reading in hard disk
26--- Finish for read in hard disk Is wrong
27--- The process of reading In the hard disk is wrong.
89,90,91----Start-up for the hard disk or CF Is wrong
After appear prompt on error as above, please power off and restart, it can continue to use.
Installing driving program:
It is not needed to install the driving program of Windows Me, Windows XF Windows 2000 SP3+,
Mac OS 10, Linux 2.4. When this unit connects to computer through USB port and powers on, the
computer can recognize digital camera and Install its driving program automatically.
Mac 8.6-9.x: driver under Drivers\MacOs 8.6-9.x path.
Windows98: It will appear to prompt on "New hard disk is found" , after connecting to the
computer, then follow direction on screen "Install soft disk drive or CD-Rom" which containing
device drive, Installation is completed by the way of \Drivers\Windows 98.
Windows2000: As for uninstalled SP3 and service of higher edition Including Wlndows2000,
Computer can not tell several card, It need upgrading.
Click ‘cancel’ in the “New hardware found’ wizard, then Run Setup.exe from the CD-ROM.
Partitioning and Formatting the Hard Disc
The hard disk can not be used without partitioning and formatting, partition and format should be
operated on the computer, Its operating way is exactly same with USB. If the hard disk is not
partitioned, you only can see two removable disk icons meaning two card groove under "My
computer" , can not see hard disk without partition.
Under Windows98/me, partition can used with Fdisk, it can partition after selecting removable
hard disc. It partition and format as FAT or FAT32
Under Windows2000/xp, right click on "My computer", select "Manage" , and select "disk
management" , you can see hard disk In computer as well as USB hard disk, and It can partition
and format the hard disk with correct way.
But using Portable Digital Storage, only copy to FAT or FAT32 partitions during coping by offline,
so recommend to customer that firstly divide the largest main partition with less than 32GB during
partition, then format the partition as FAT32, If the hard disk has spare space, please build the
other partition at random. Firstly dividing into partition not more than 32GB, because Windows
can' t format the partition with over 32GB as FAT32(the partition with over 32GB is formatted as
NTFS, copying by offline don' t support NTFS ),to provide the largest space for copying by off
line, general speaking, the hard disk with less than 32GB can build directly single partition as
FAT32, if the content of the hard disk Is more than 32GB, please select and build a FAT32
partition with 32GB, the spare space can be used in other function.
Customer can select the special partition tool using non-Windows by iself, for example Partition
Magic will format the hrd disk with the large content as FAT32 partition with 32GB.